Cookie Text in Photoshop
For this tutorial, we are using some cookie images to create the texture, a fun background and Burly from Font Bundles.
1 - Open the image you want to use as background.
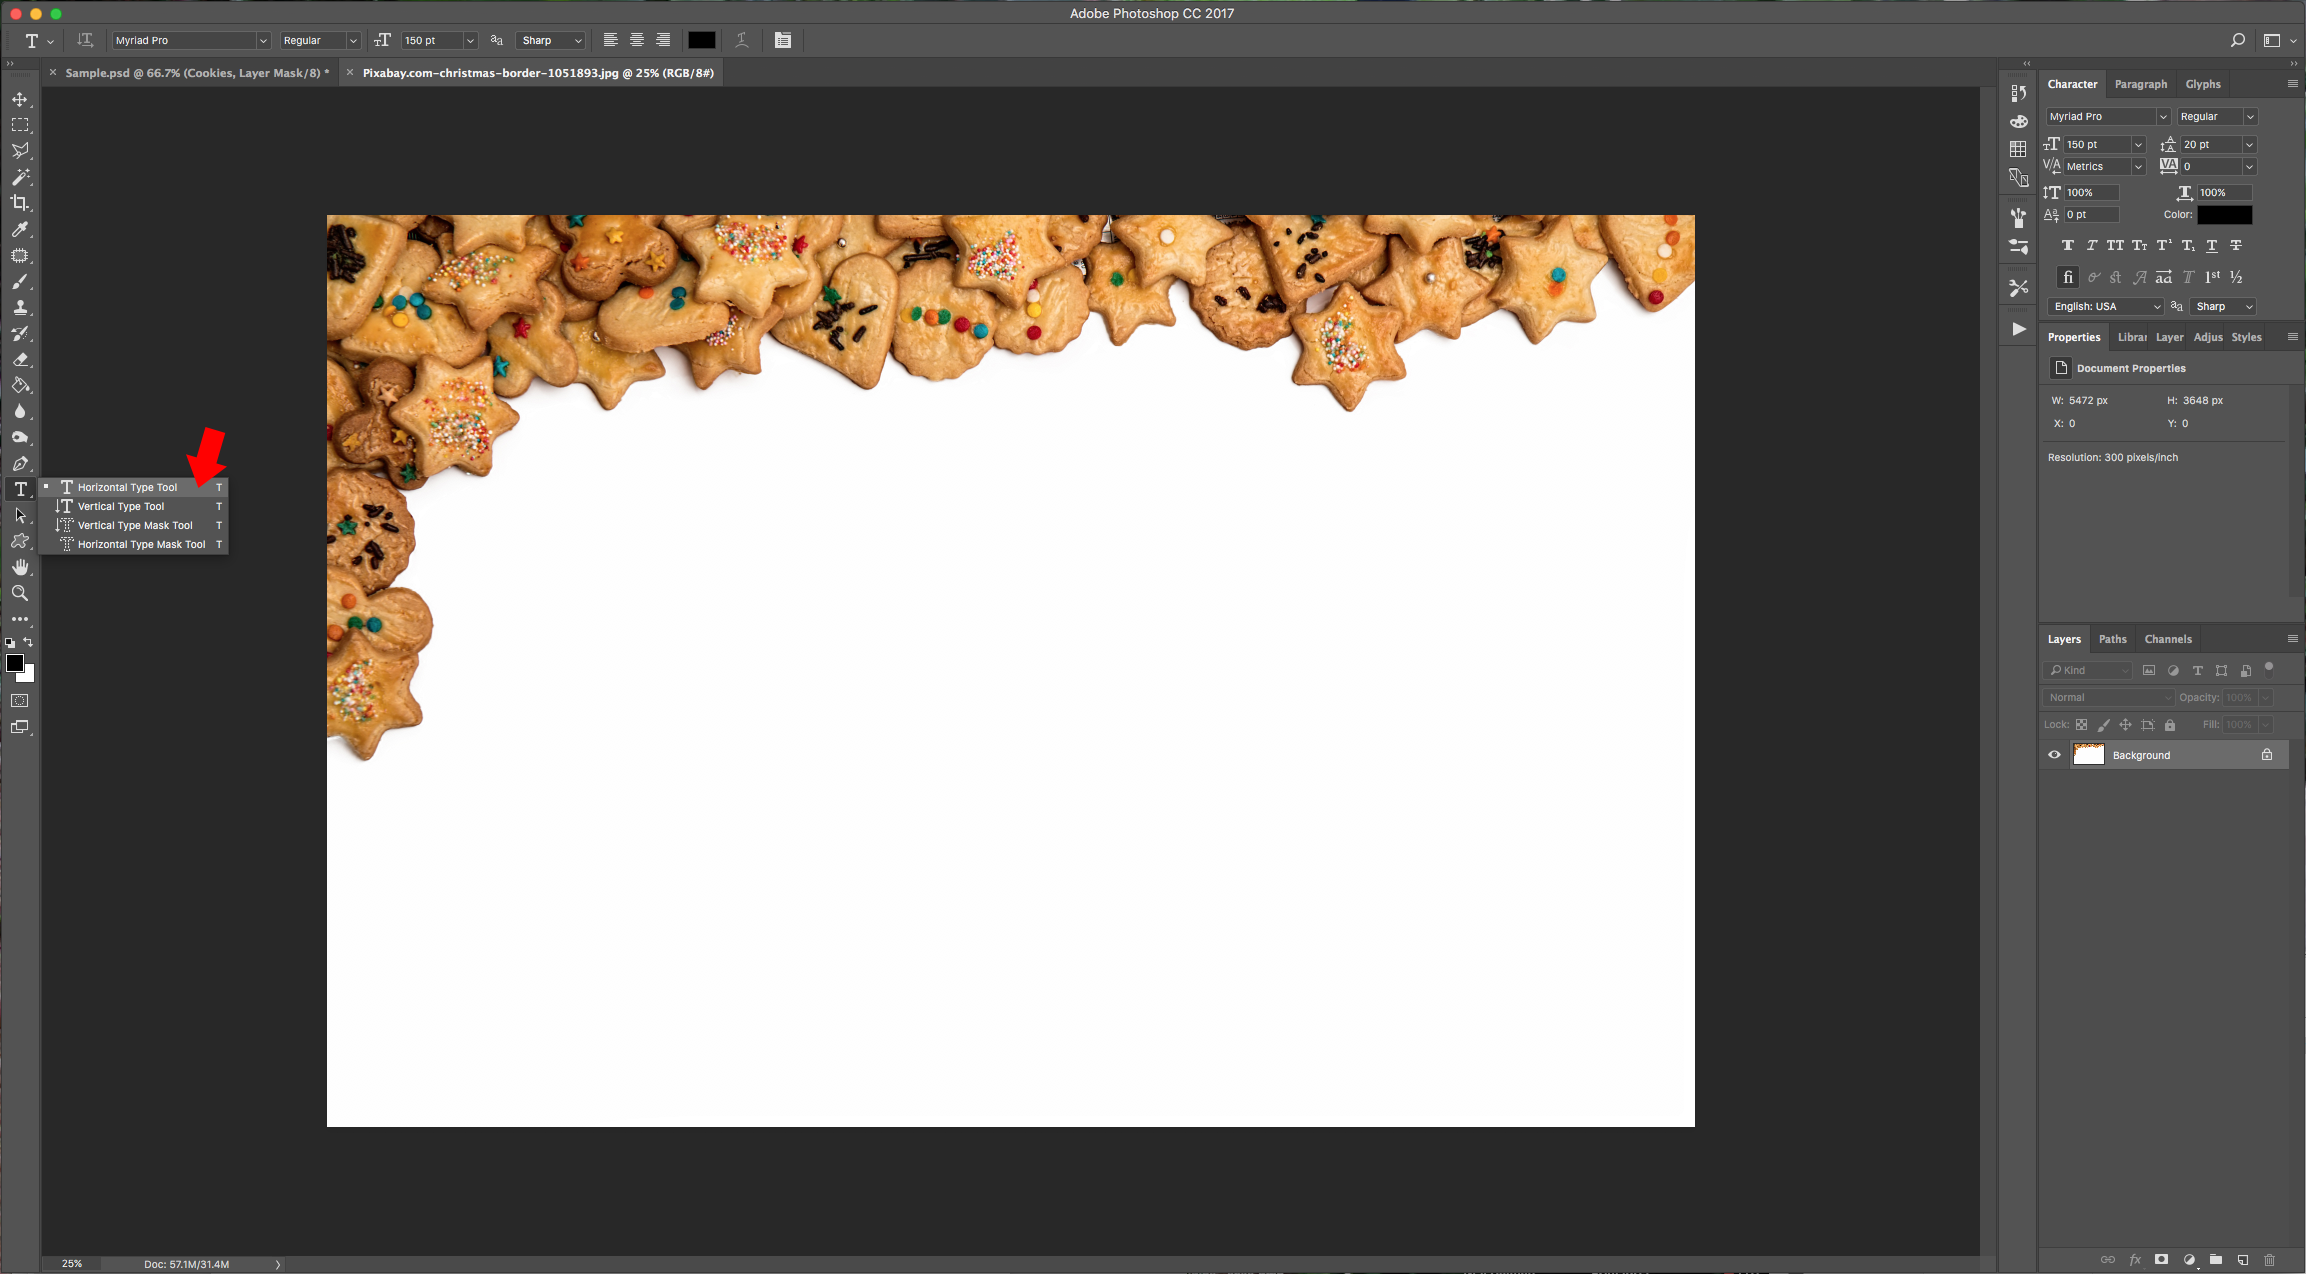
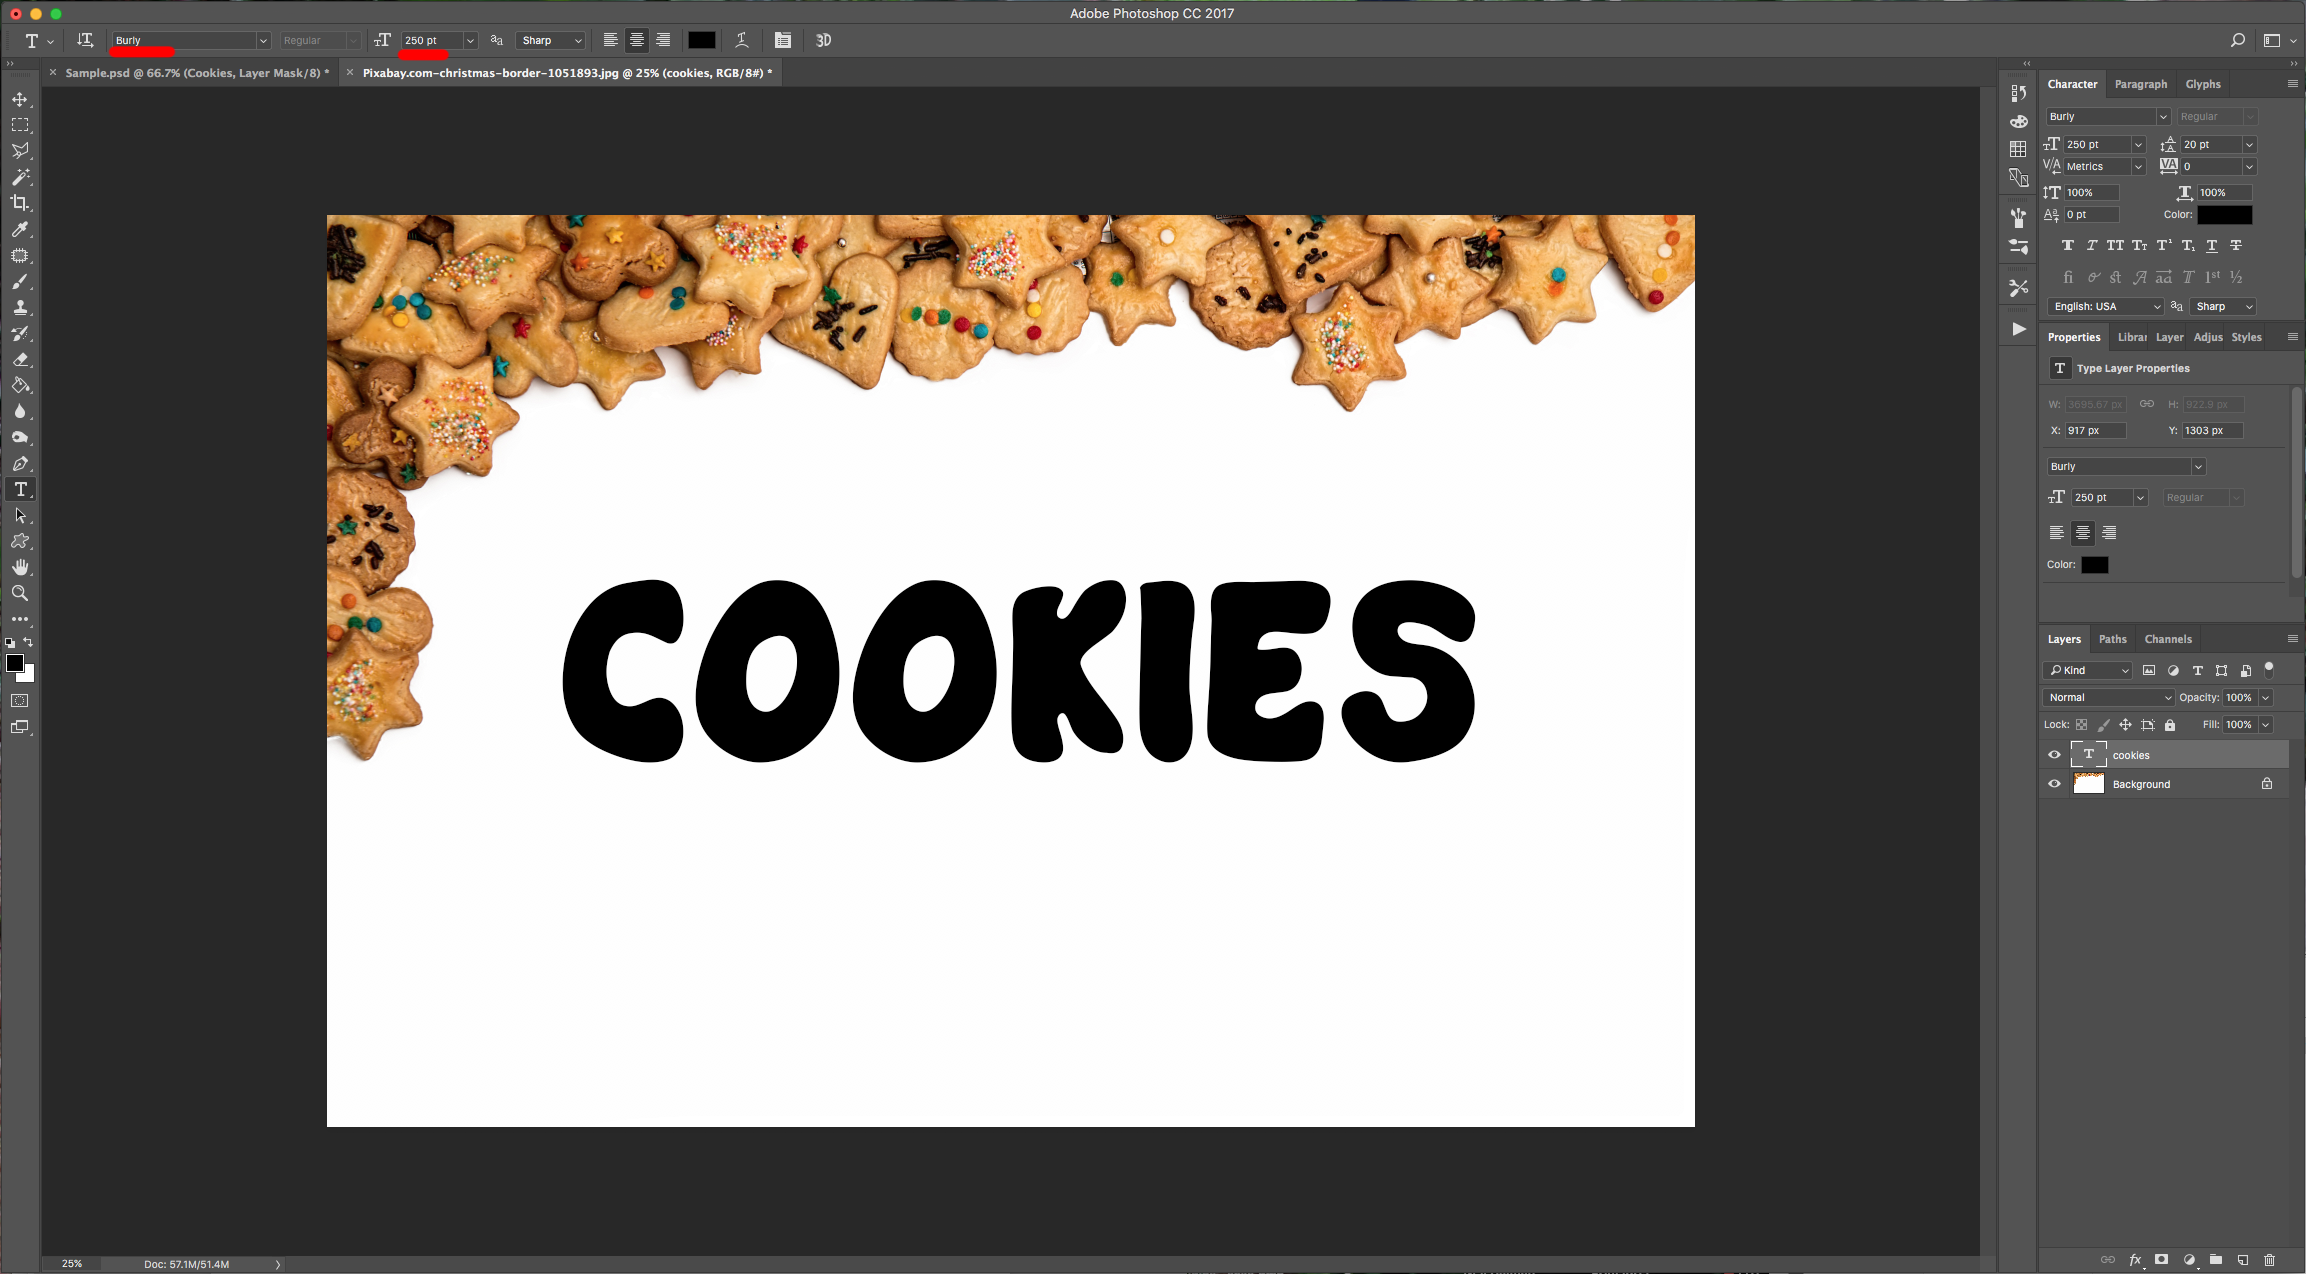
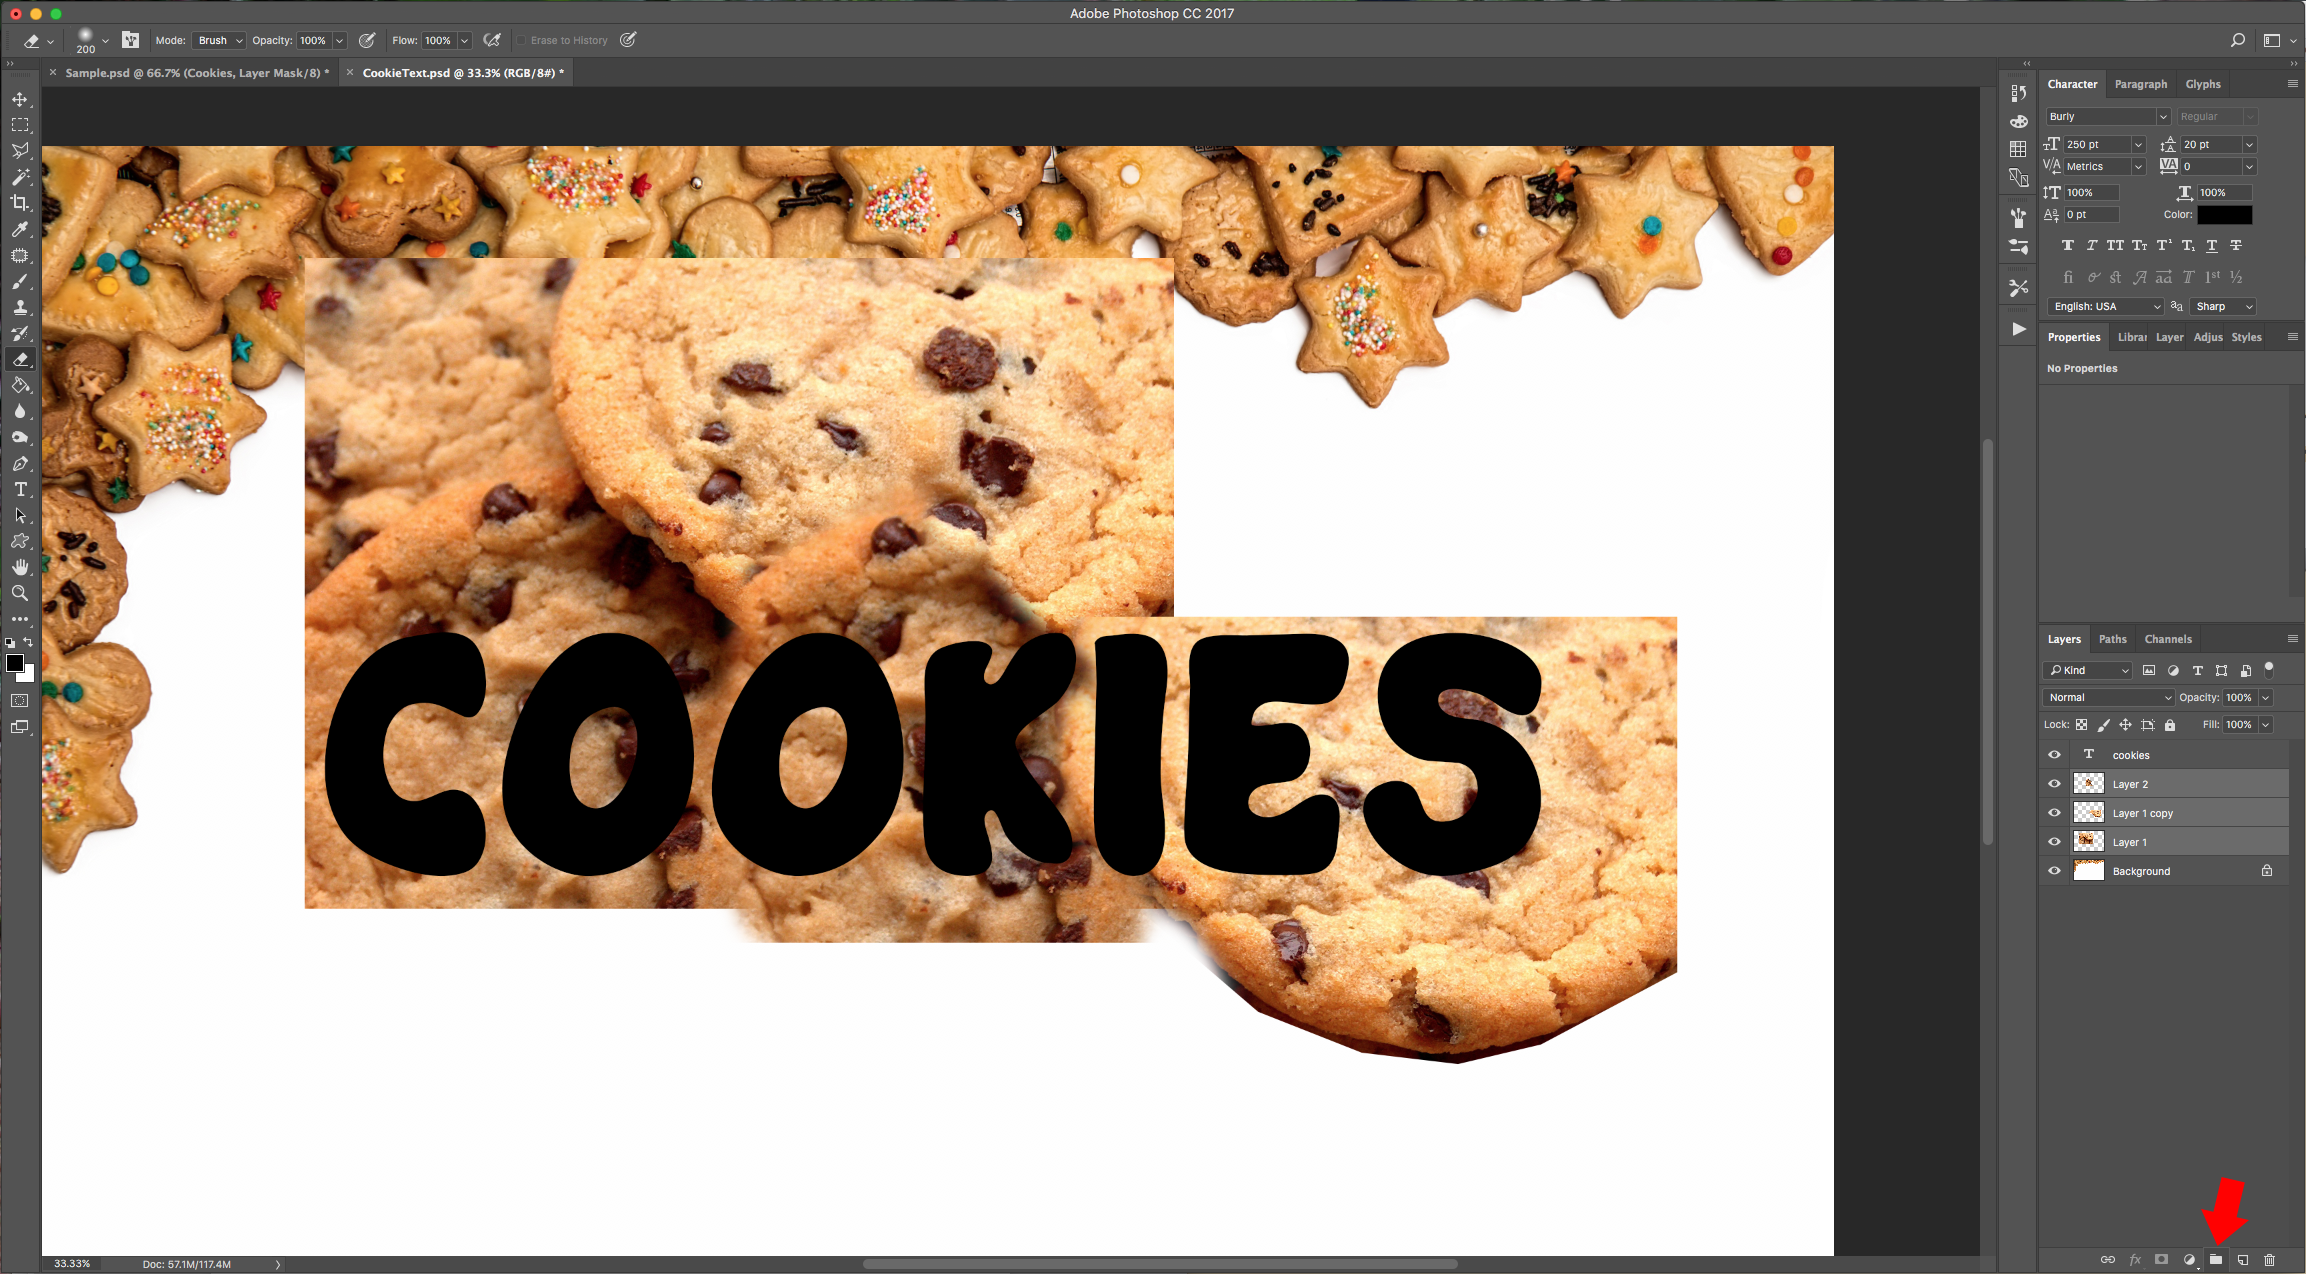
2 - Select the “Type Tool” (T) and type your text. Choose the font you want (we used Burly) and let the foreground color as black.
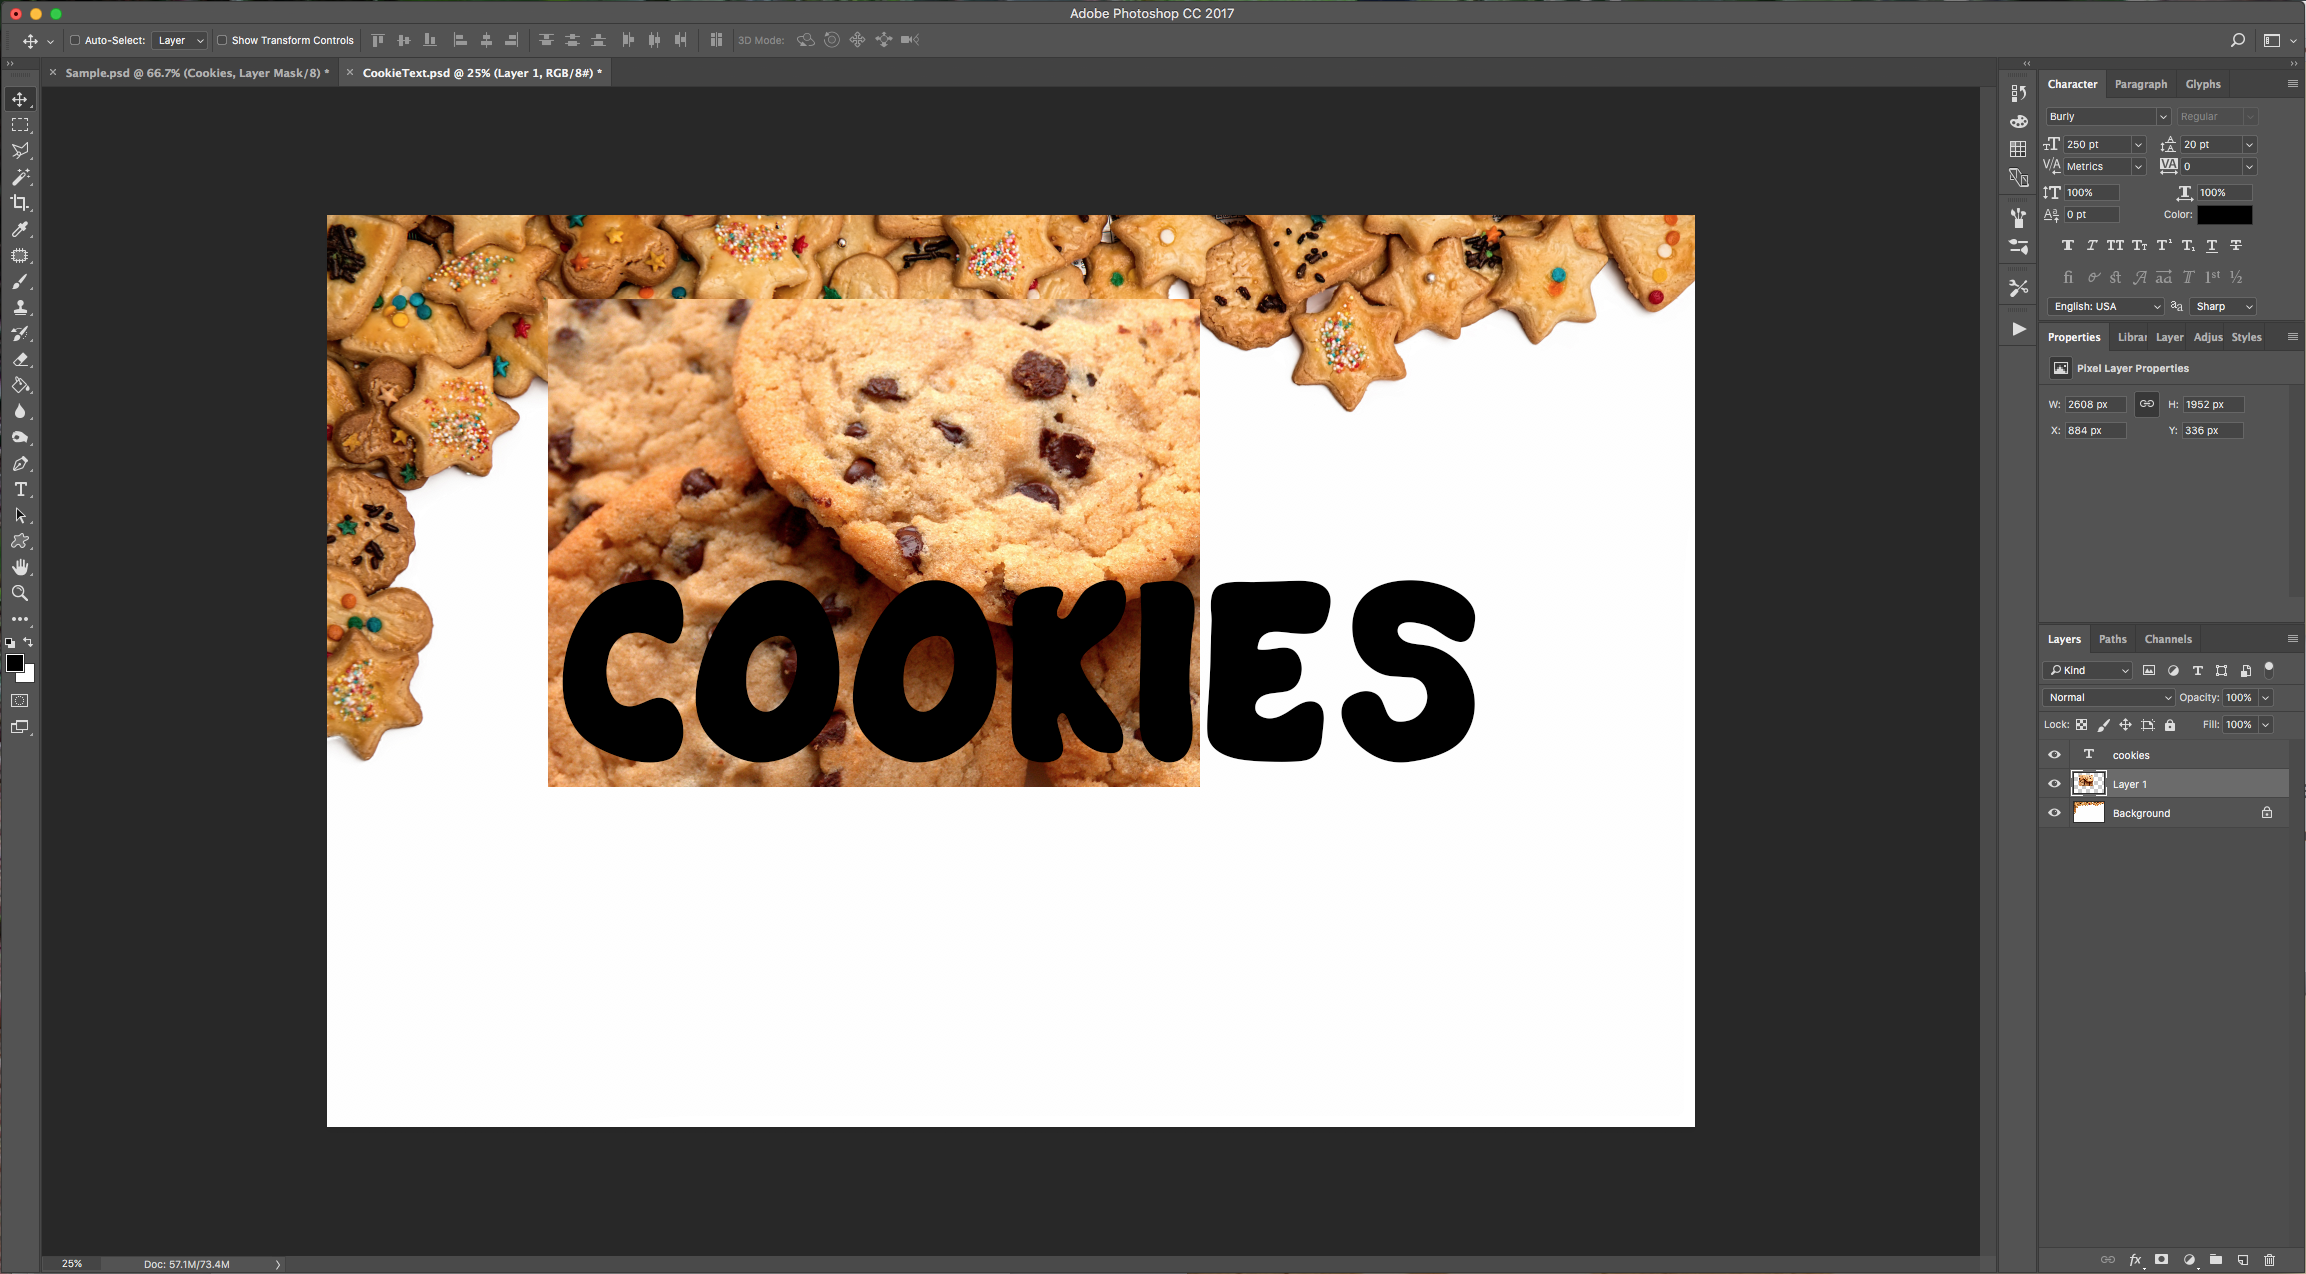
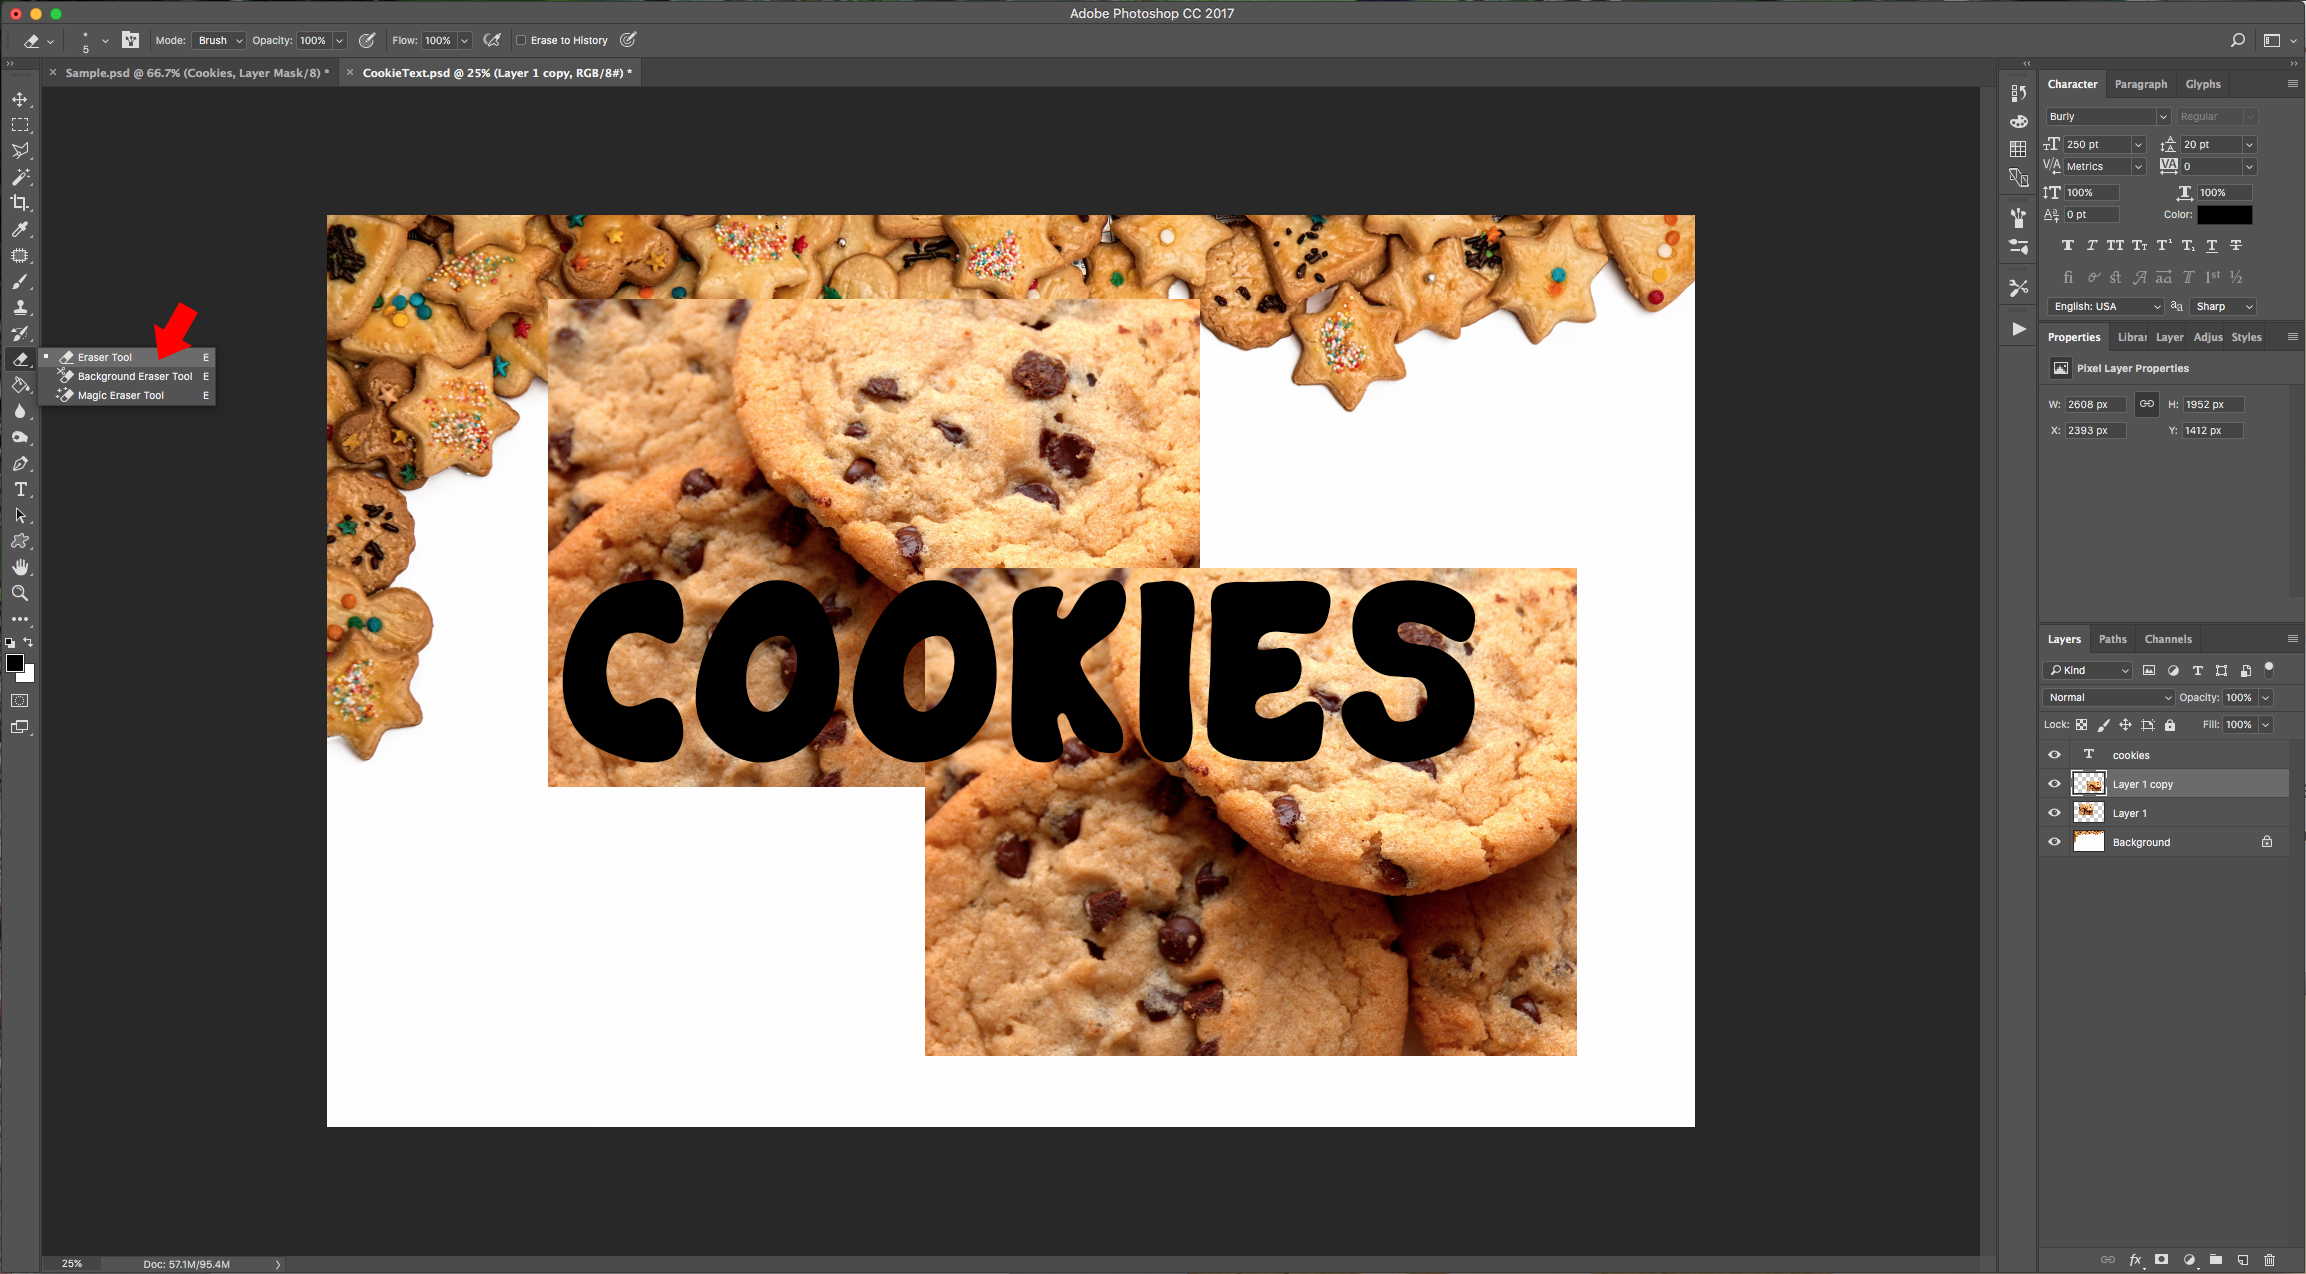
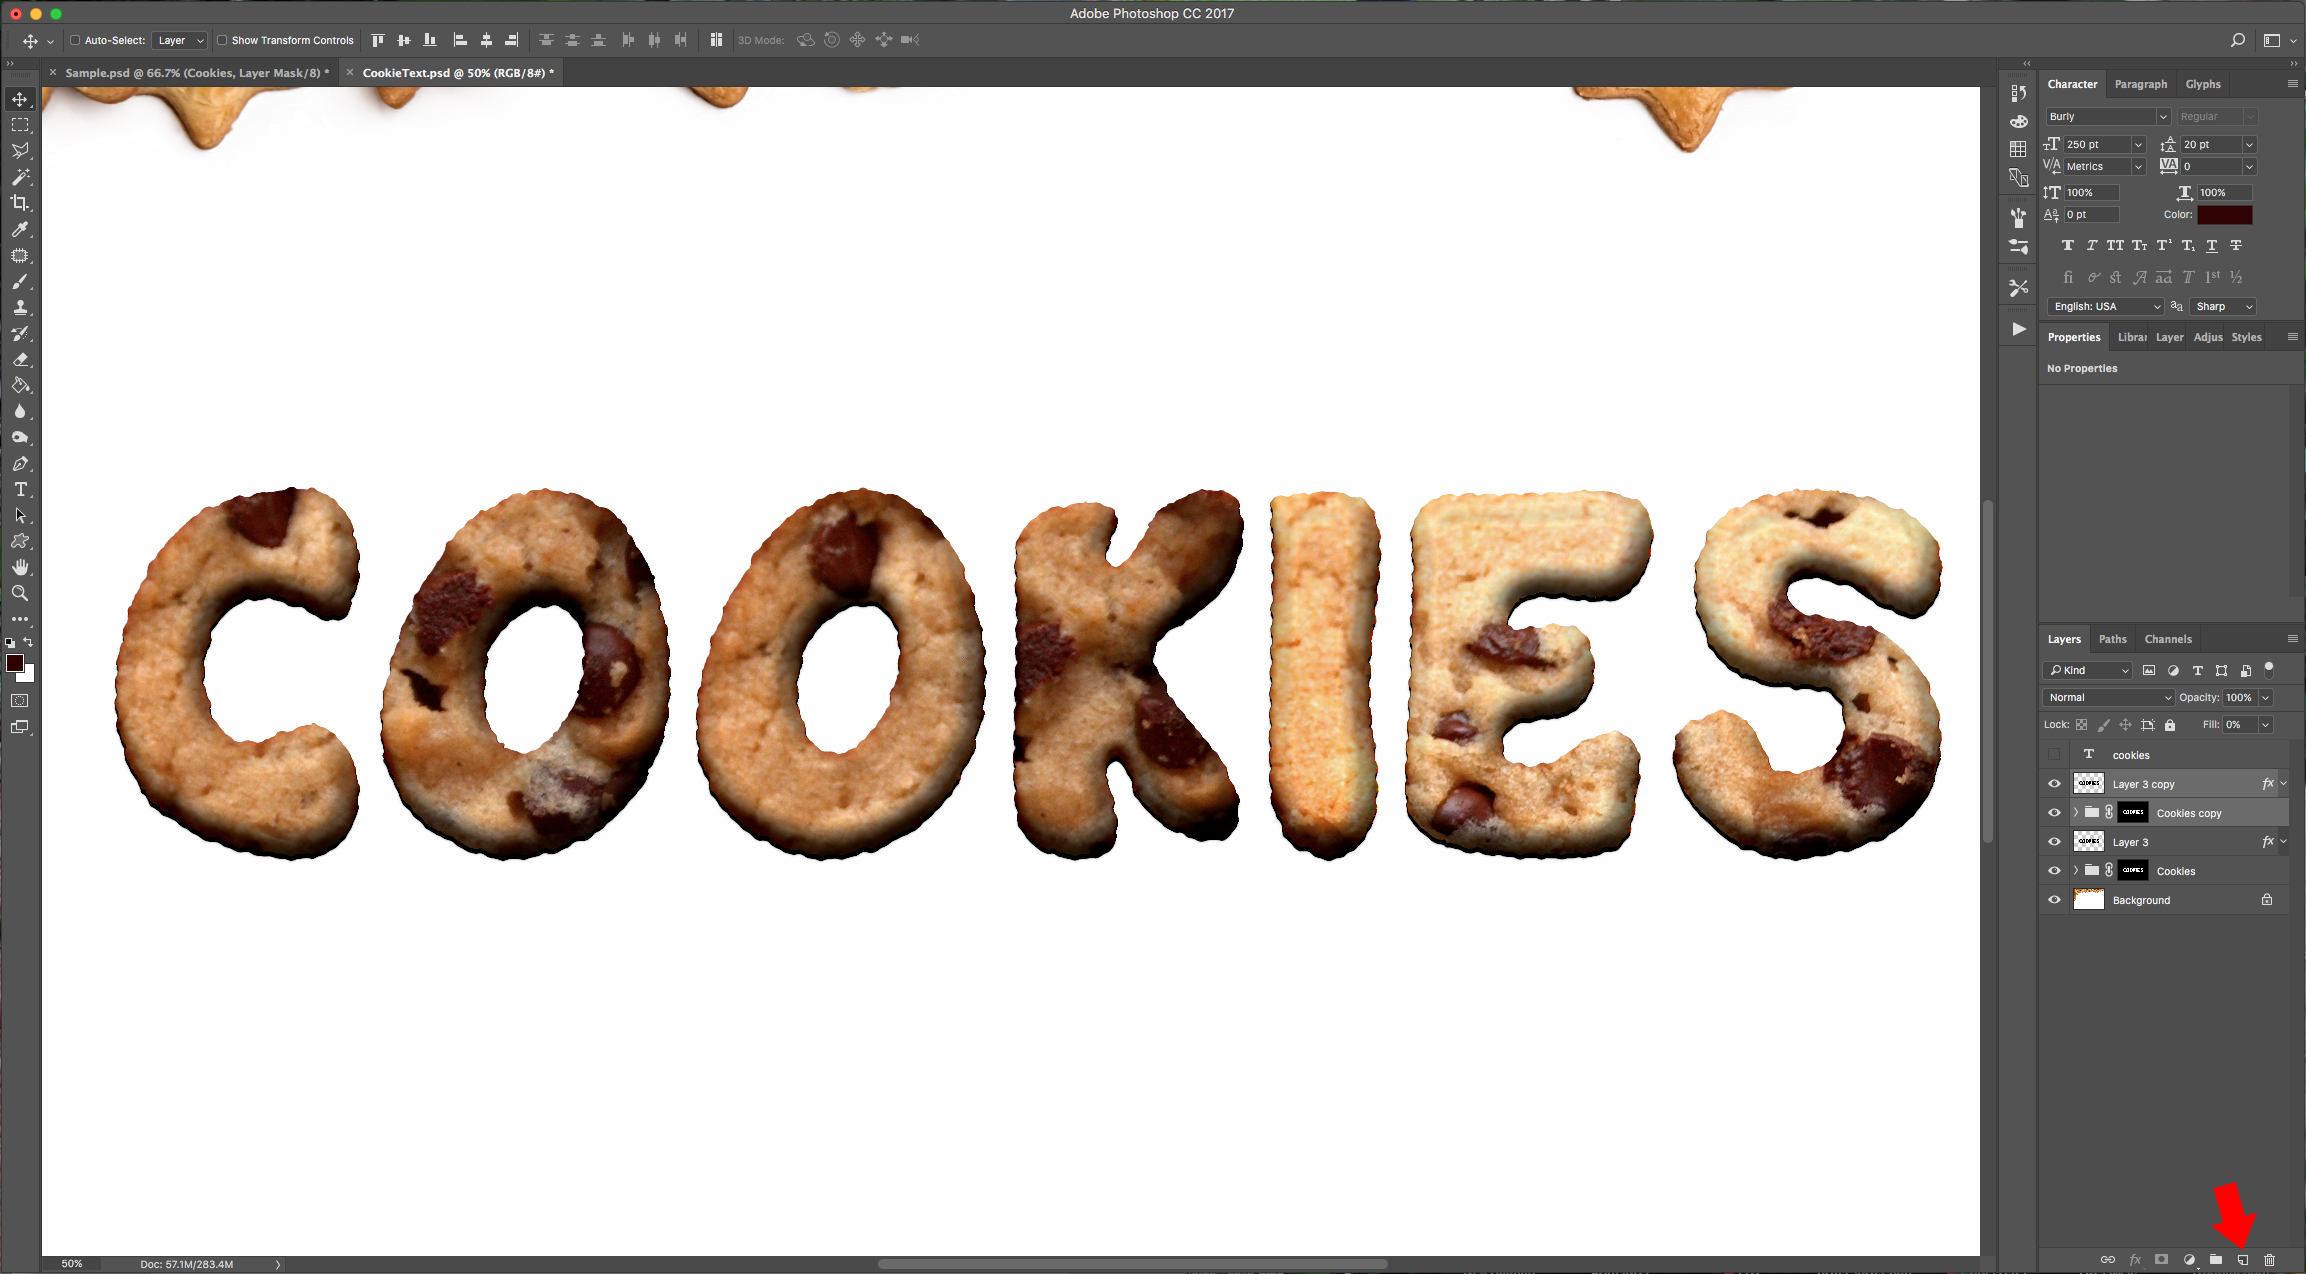
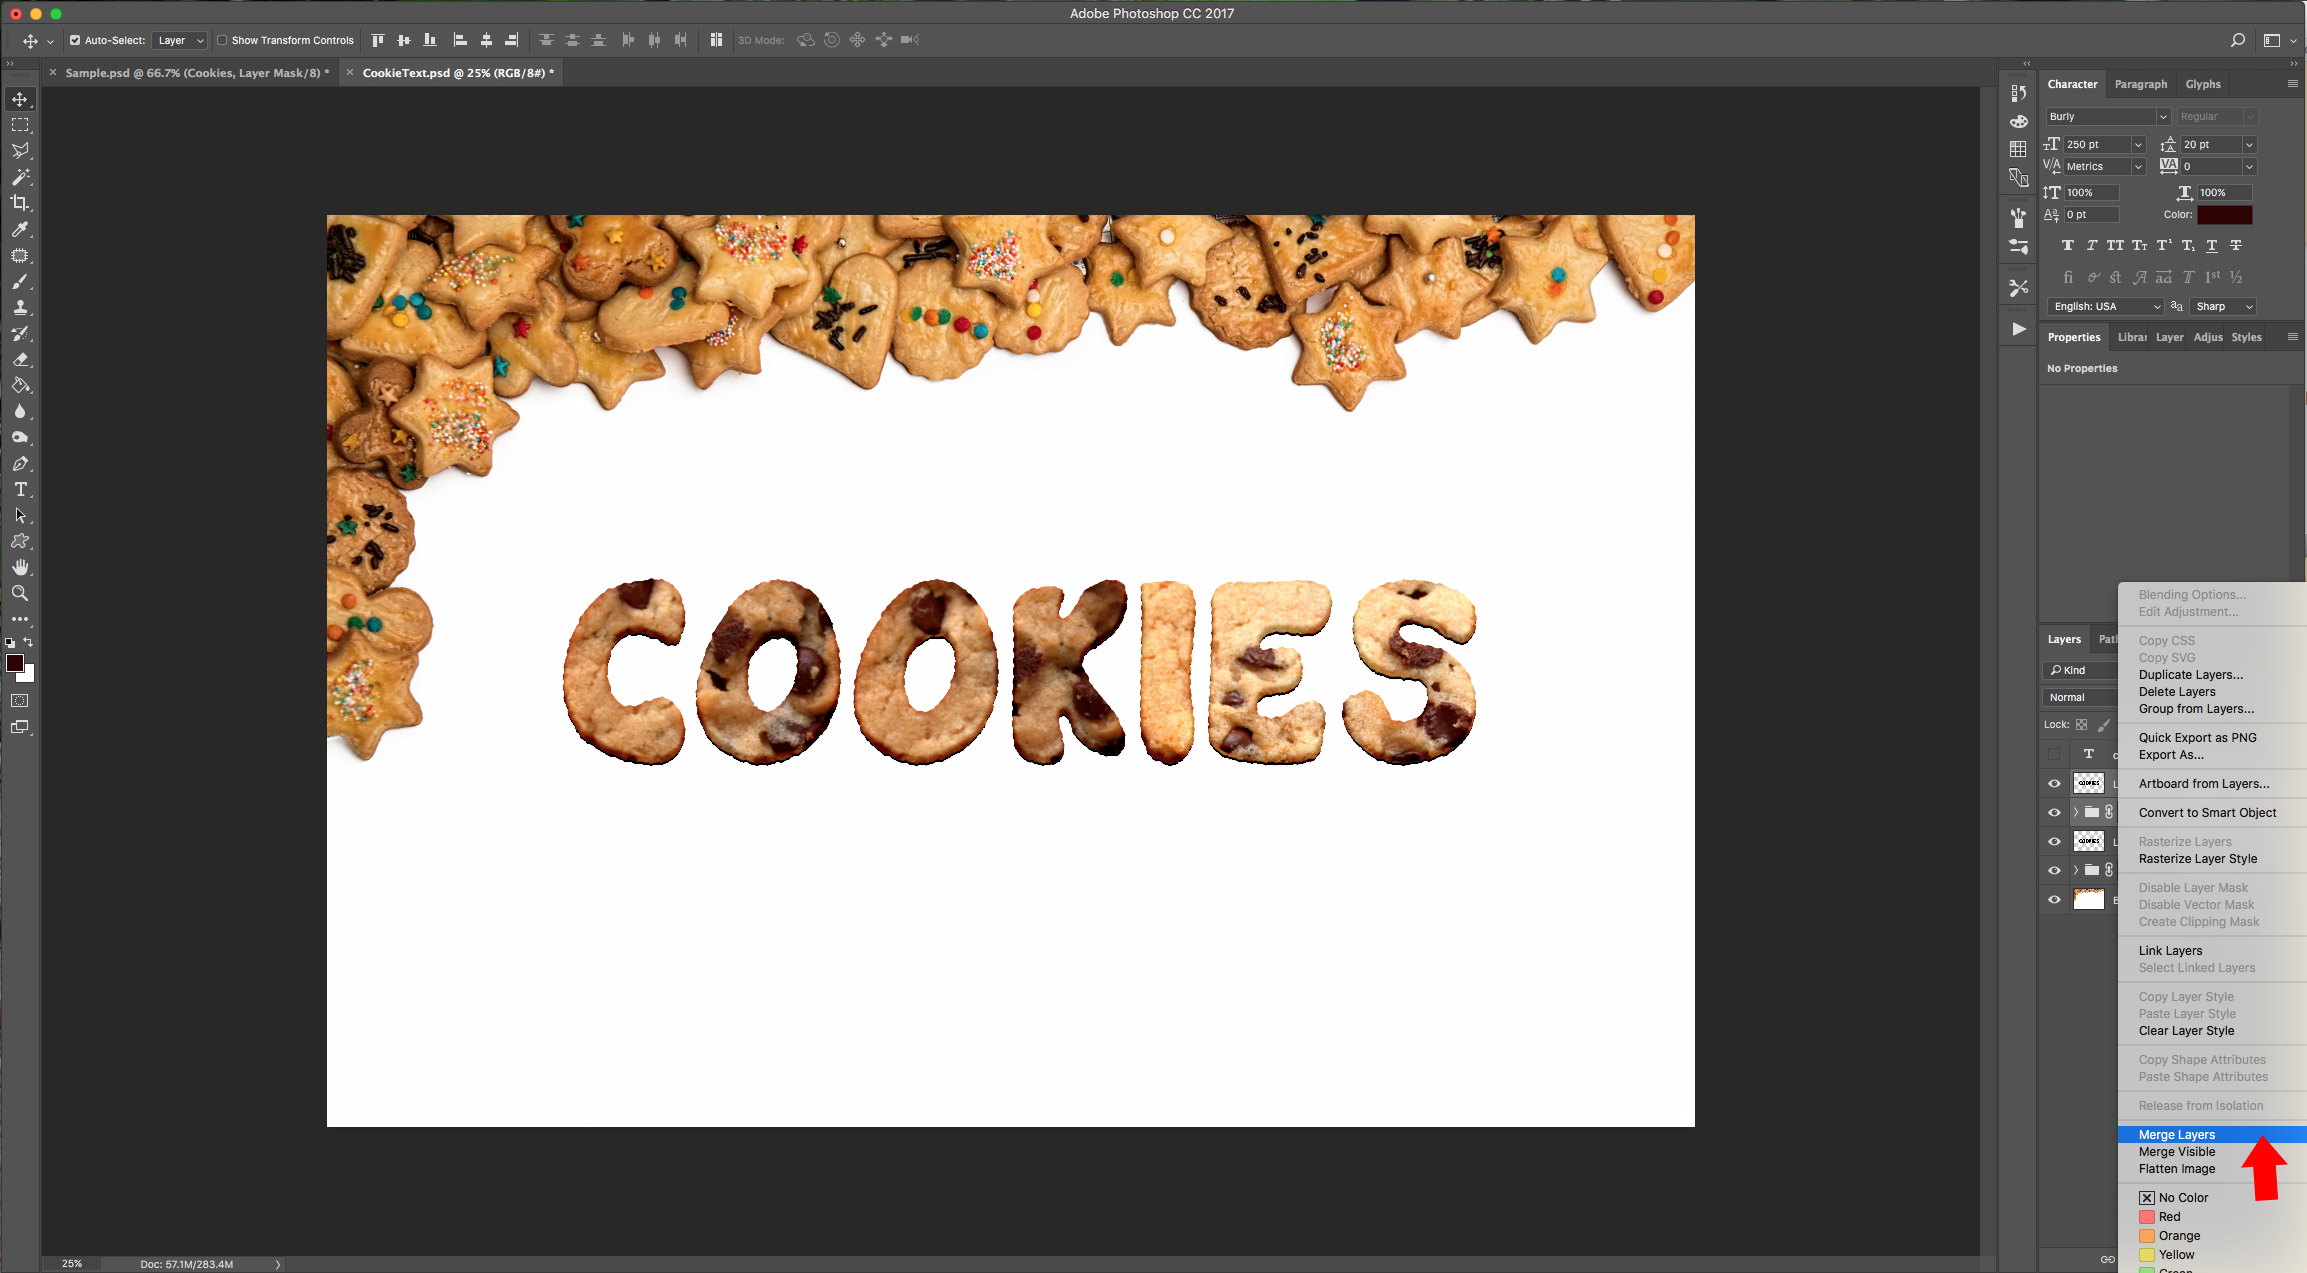
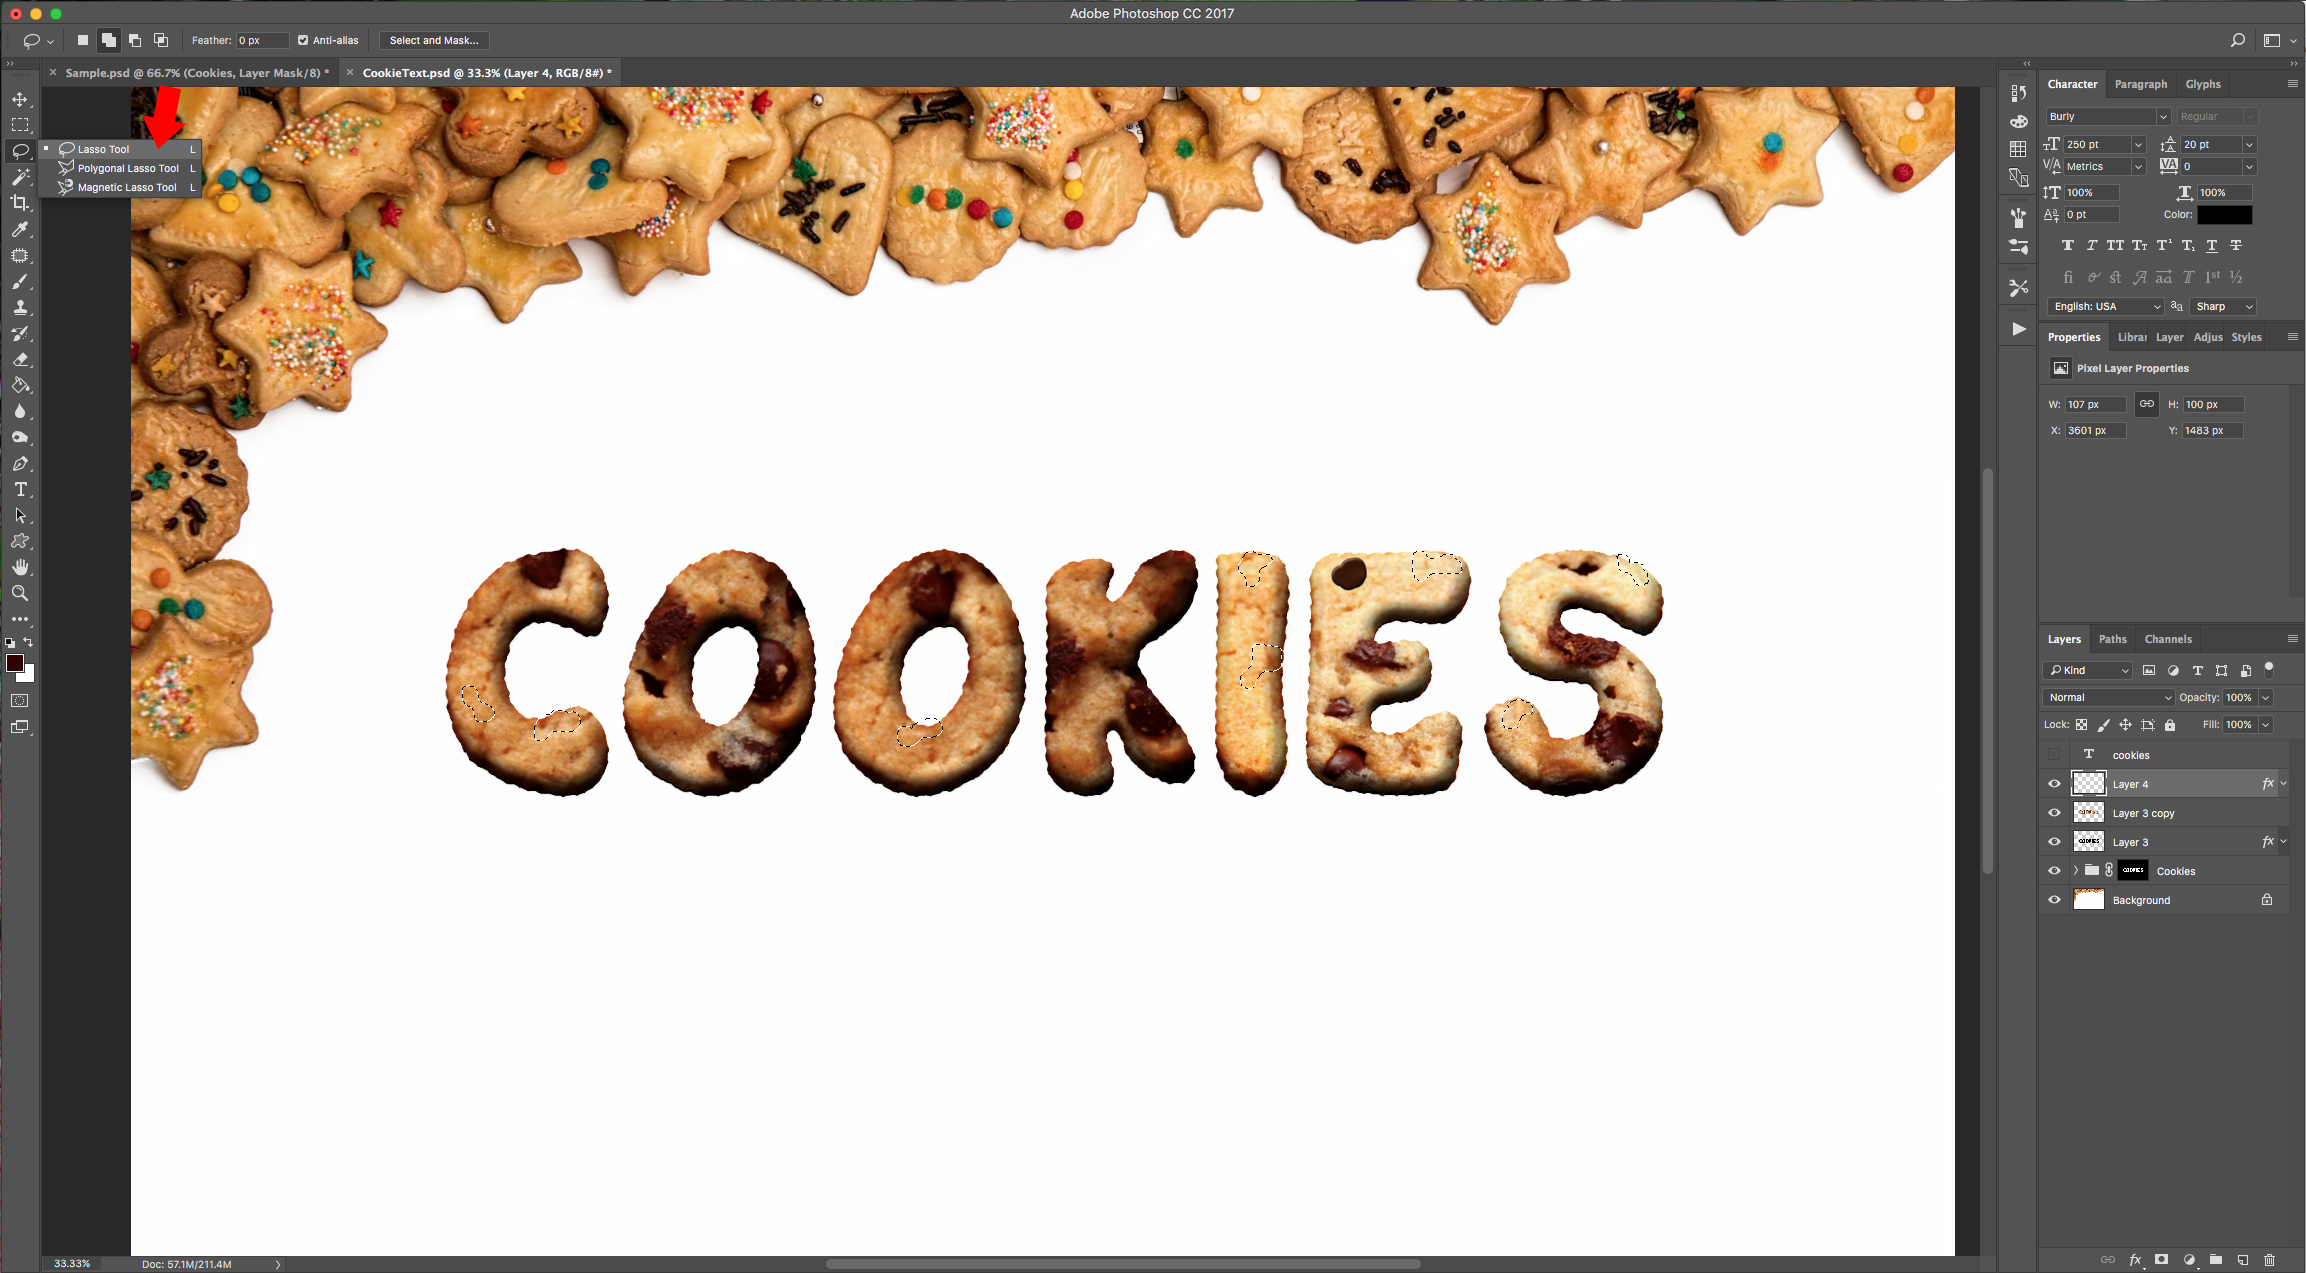
3 - Open the image you want to use as texture, remove the background with the “Magic Wand Tool” (W) if there is any and cover the entire text with cookies. You can duplicate the cookies layer and erase some portions using the “Eraser Tool” (E) if it’s necessary. You can also use the “Lasso Tool” (L) to select some portions of your image and move them around. Then, group them together in a Folder by clicking on the “Create New Folder” button at the bottom of the “Layers” menu.
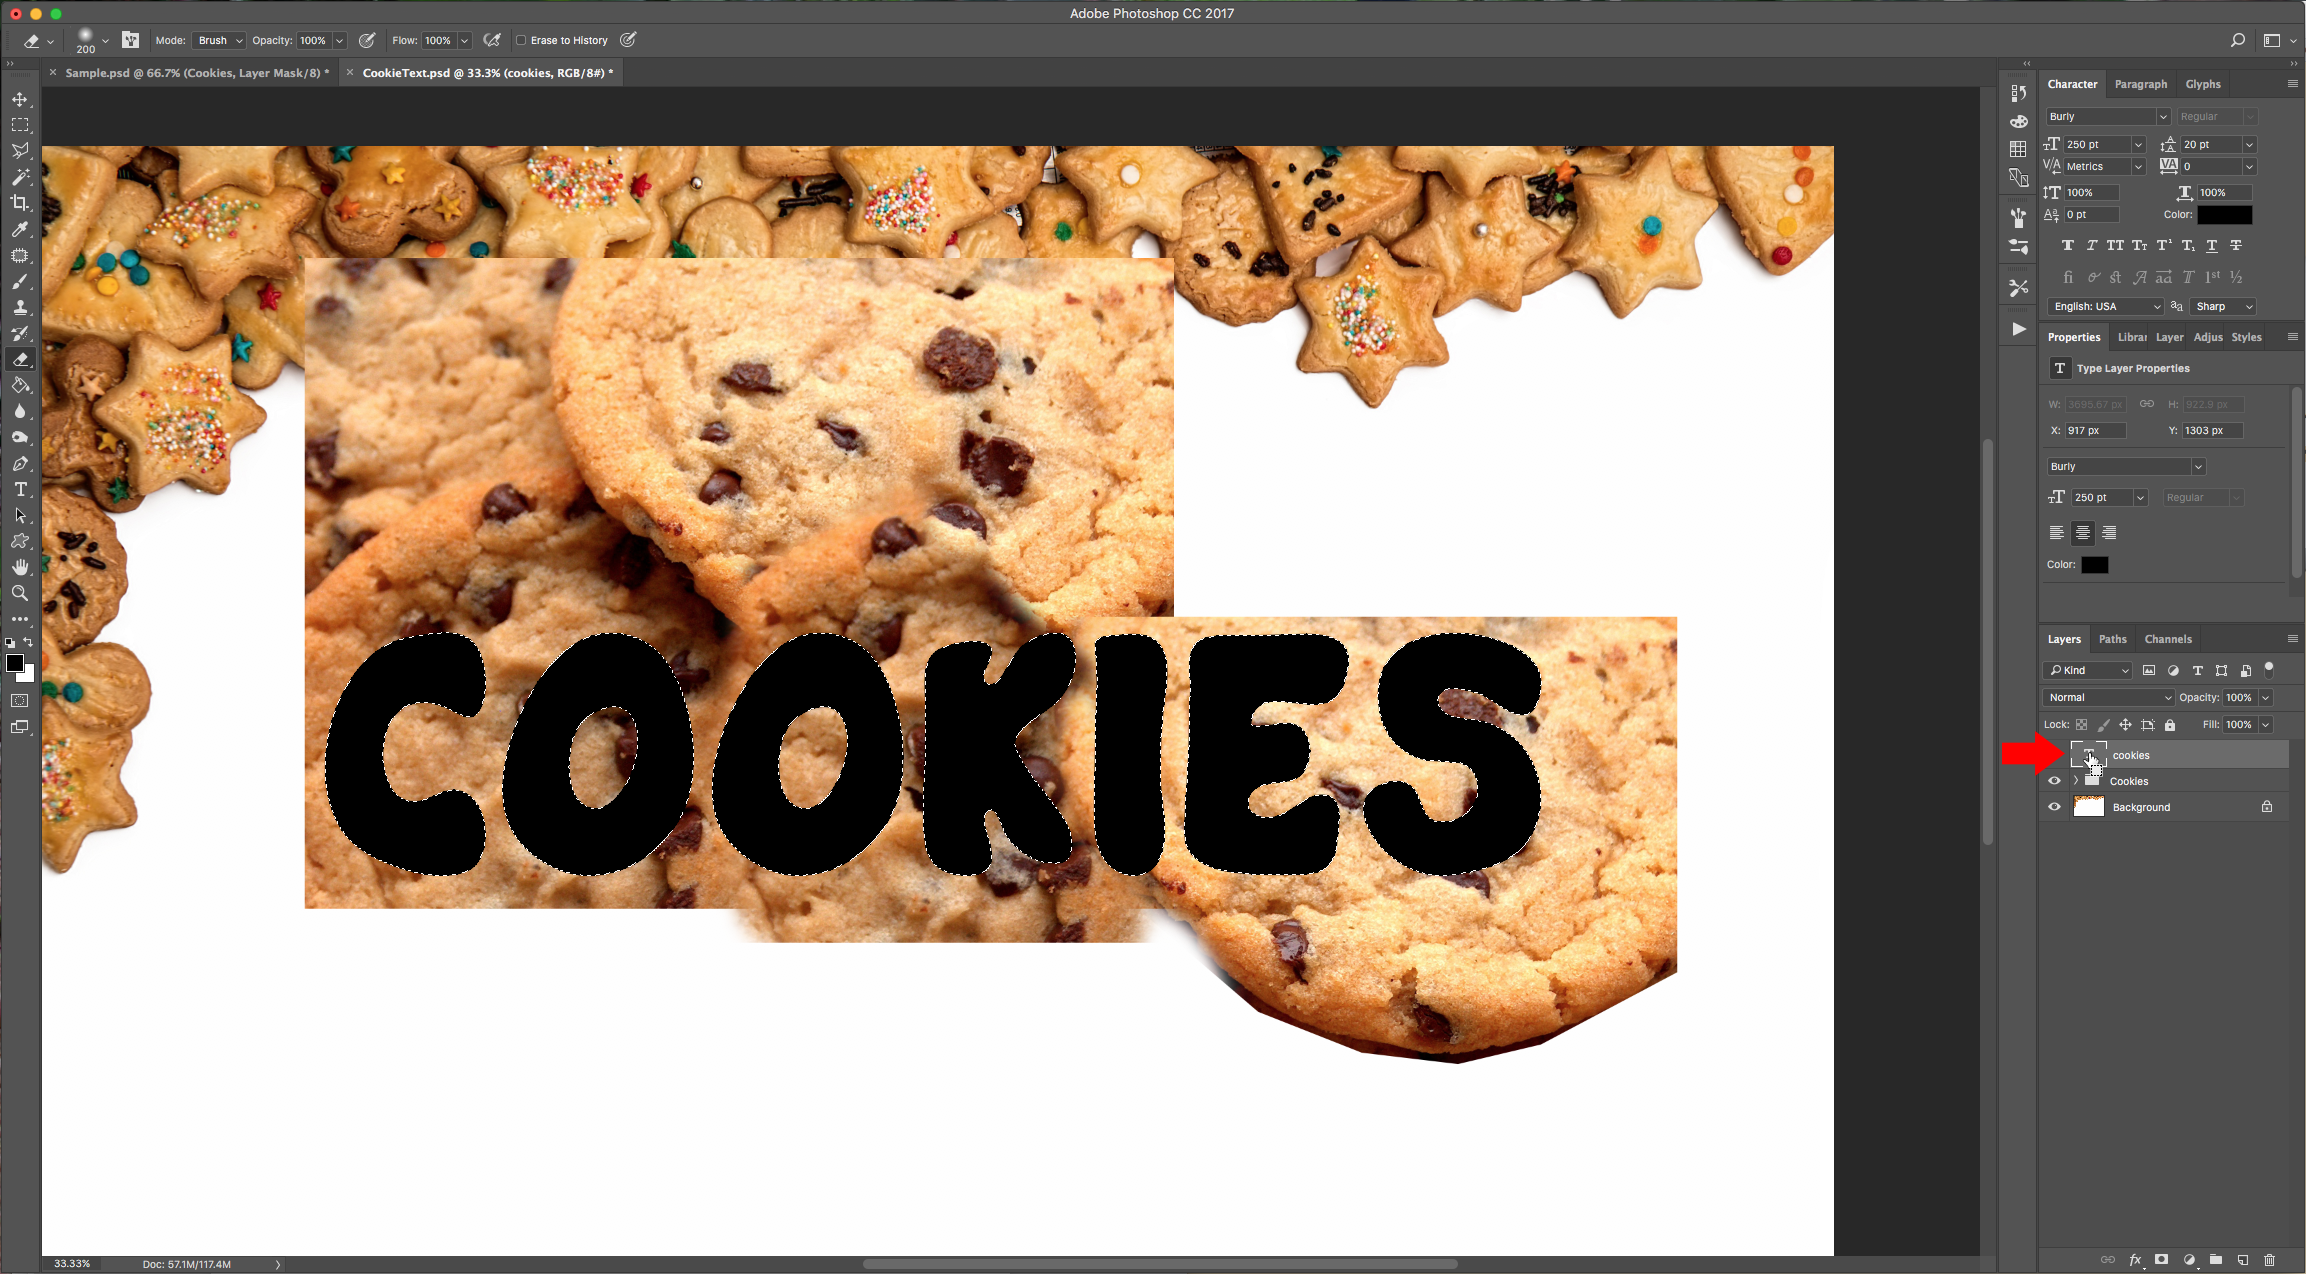
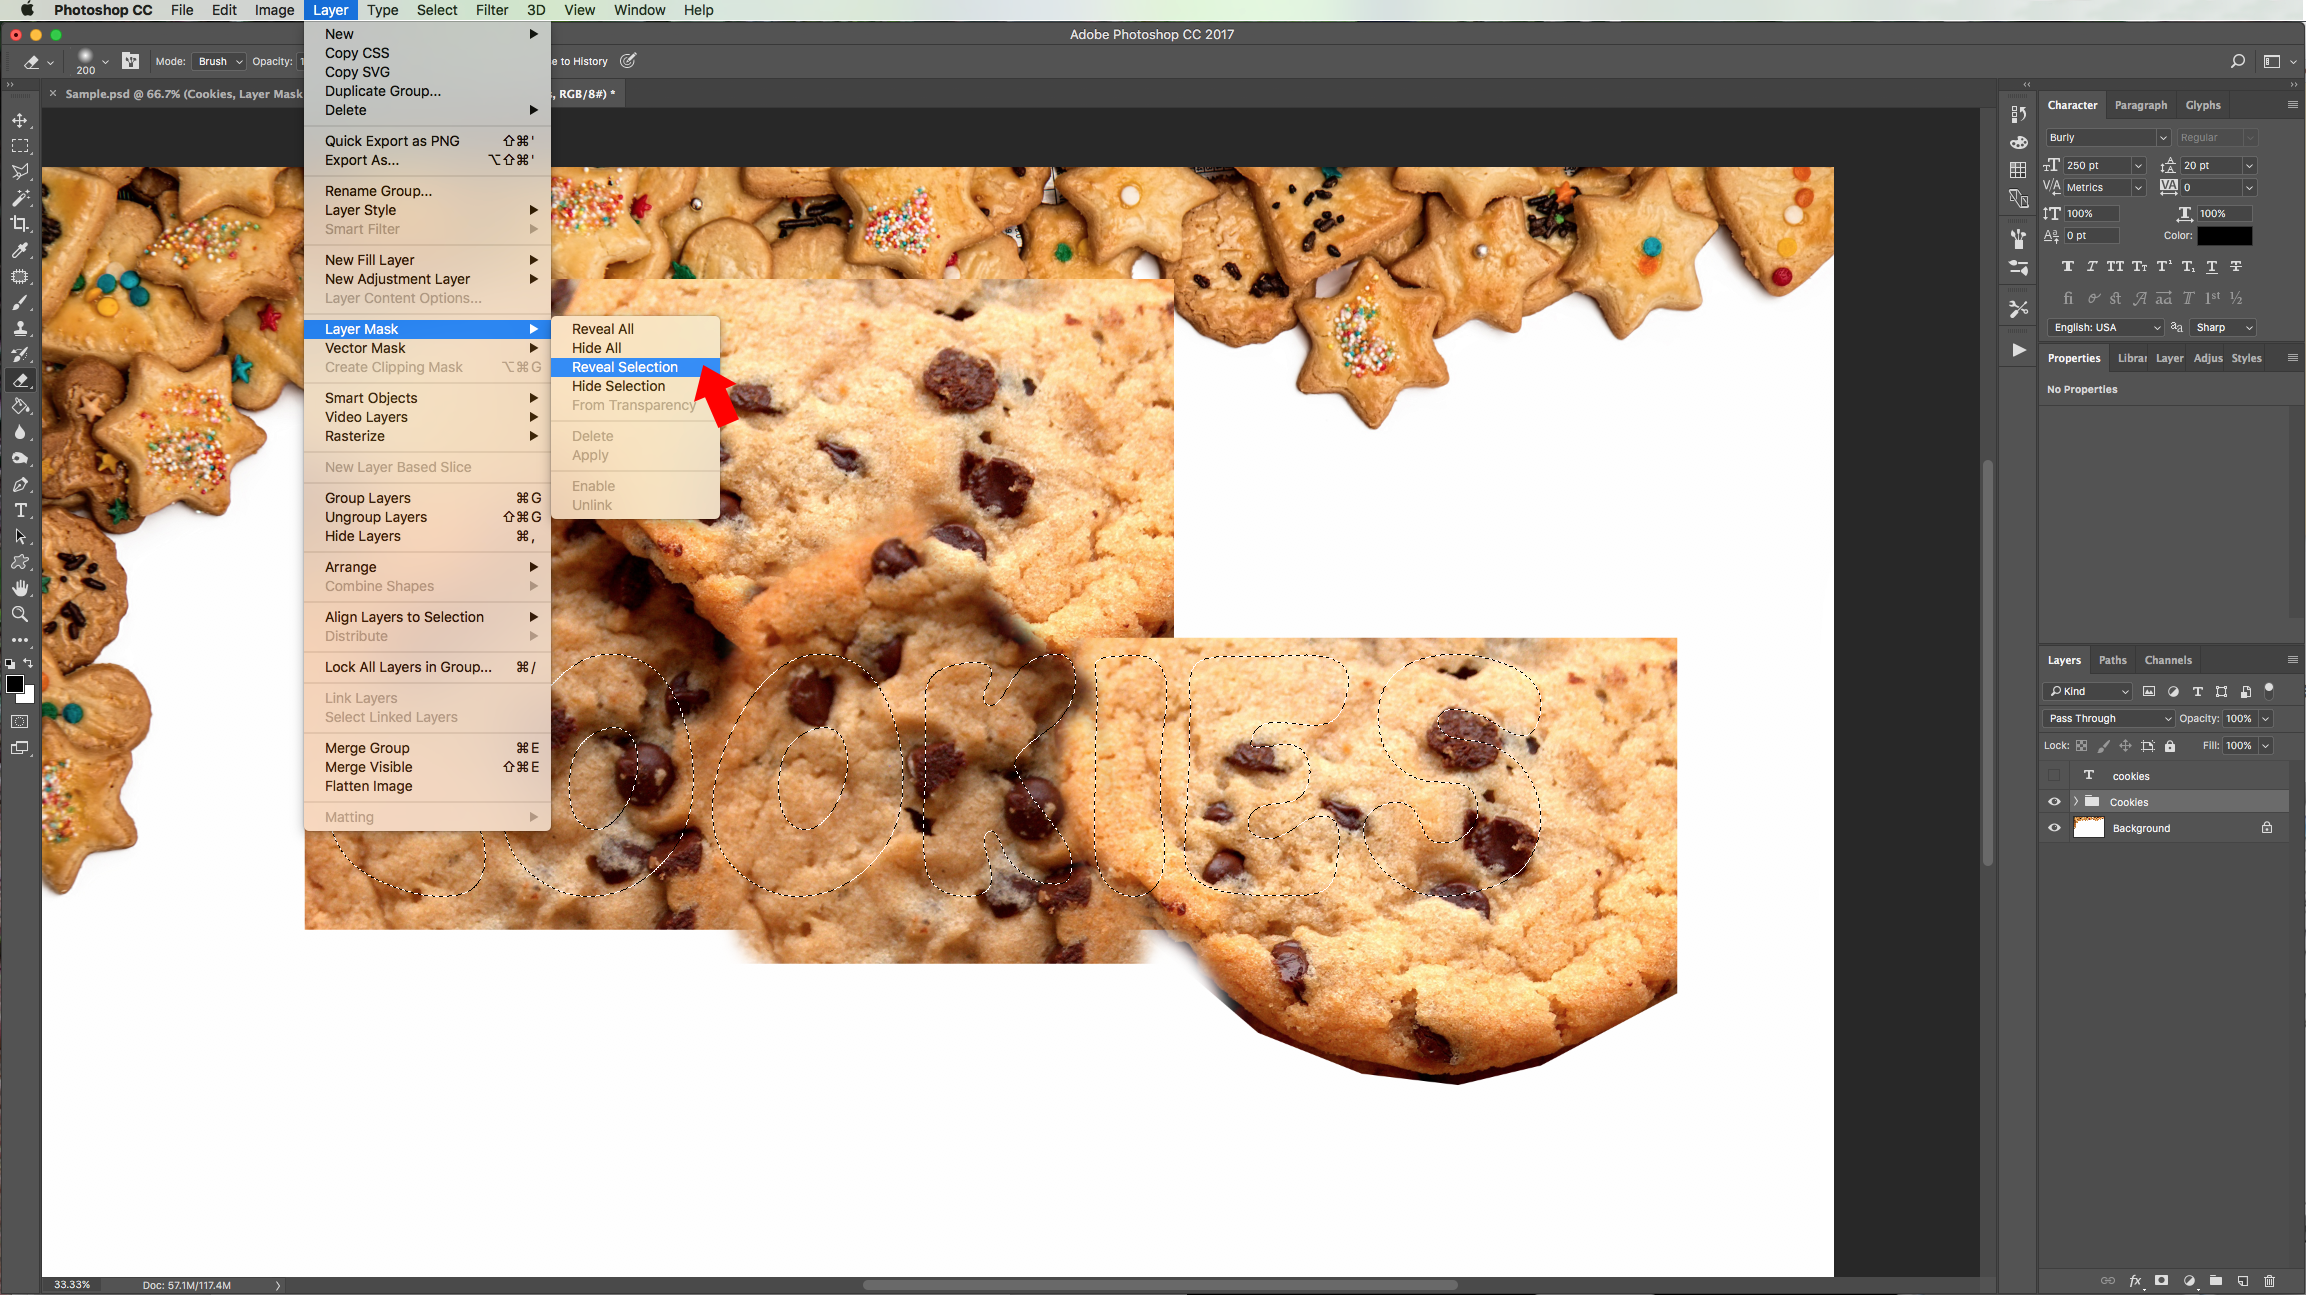
4 - Click on top of the text thumbnail while holding the Command/Control key to make a selection of the text, then hide it by clicking on the little eye icon to the left of your layer. Select the folder that holds the textures and go to Layers > Layer Mask > Reveal Selection.

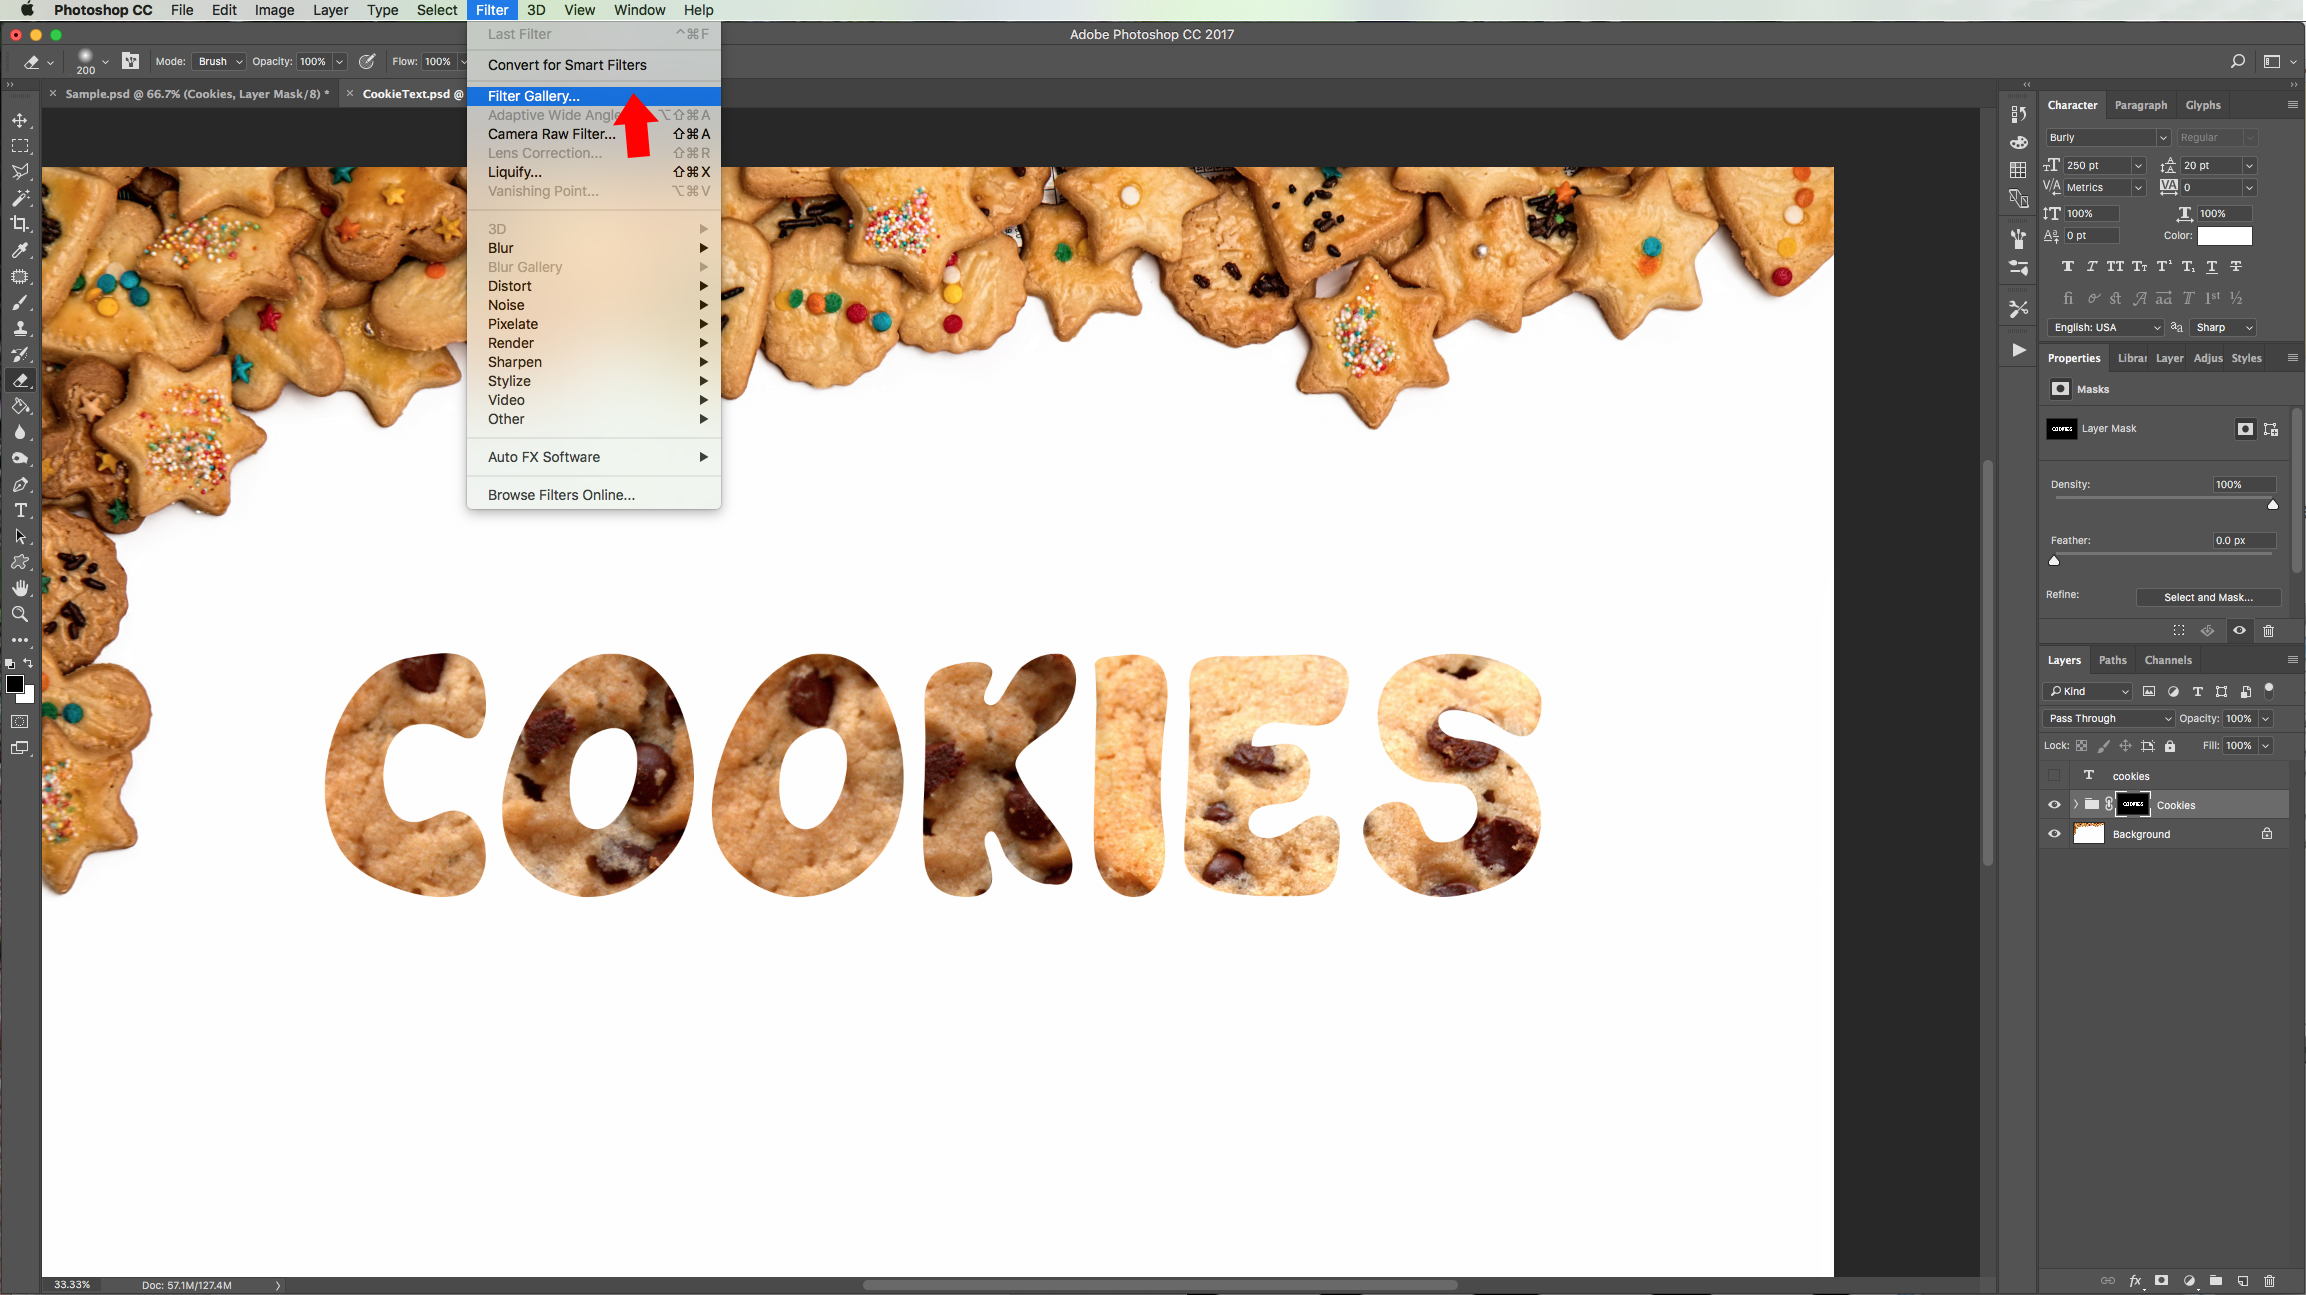
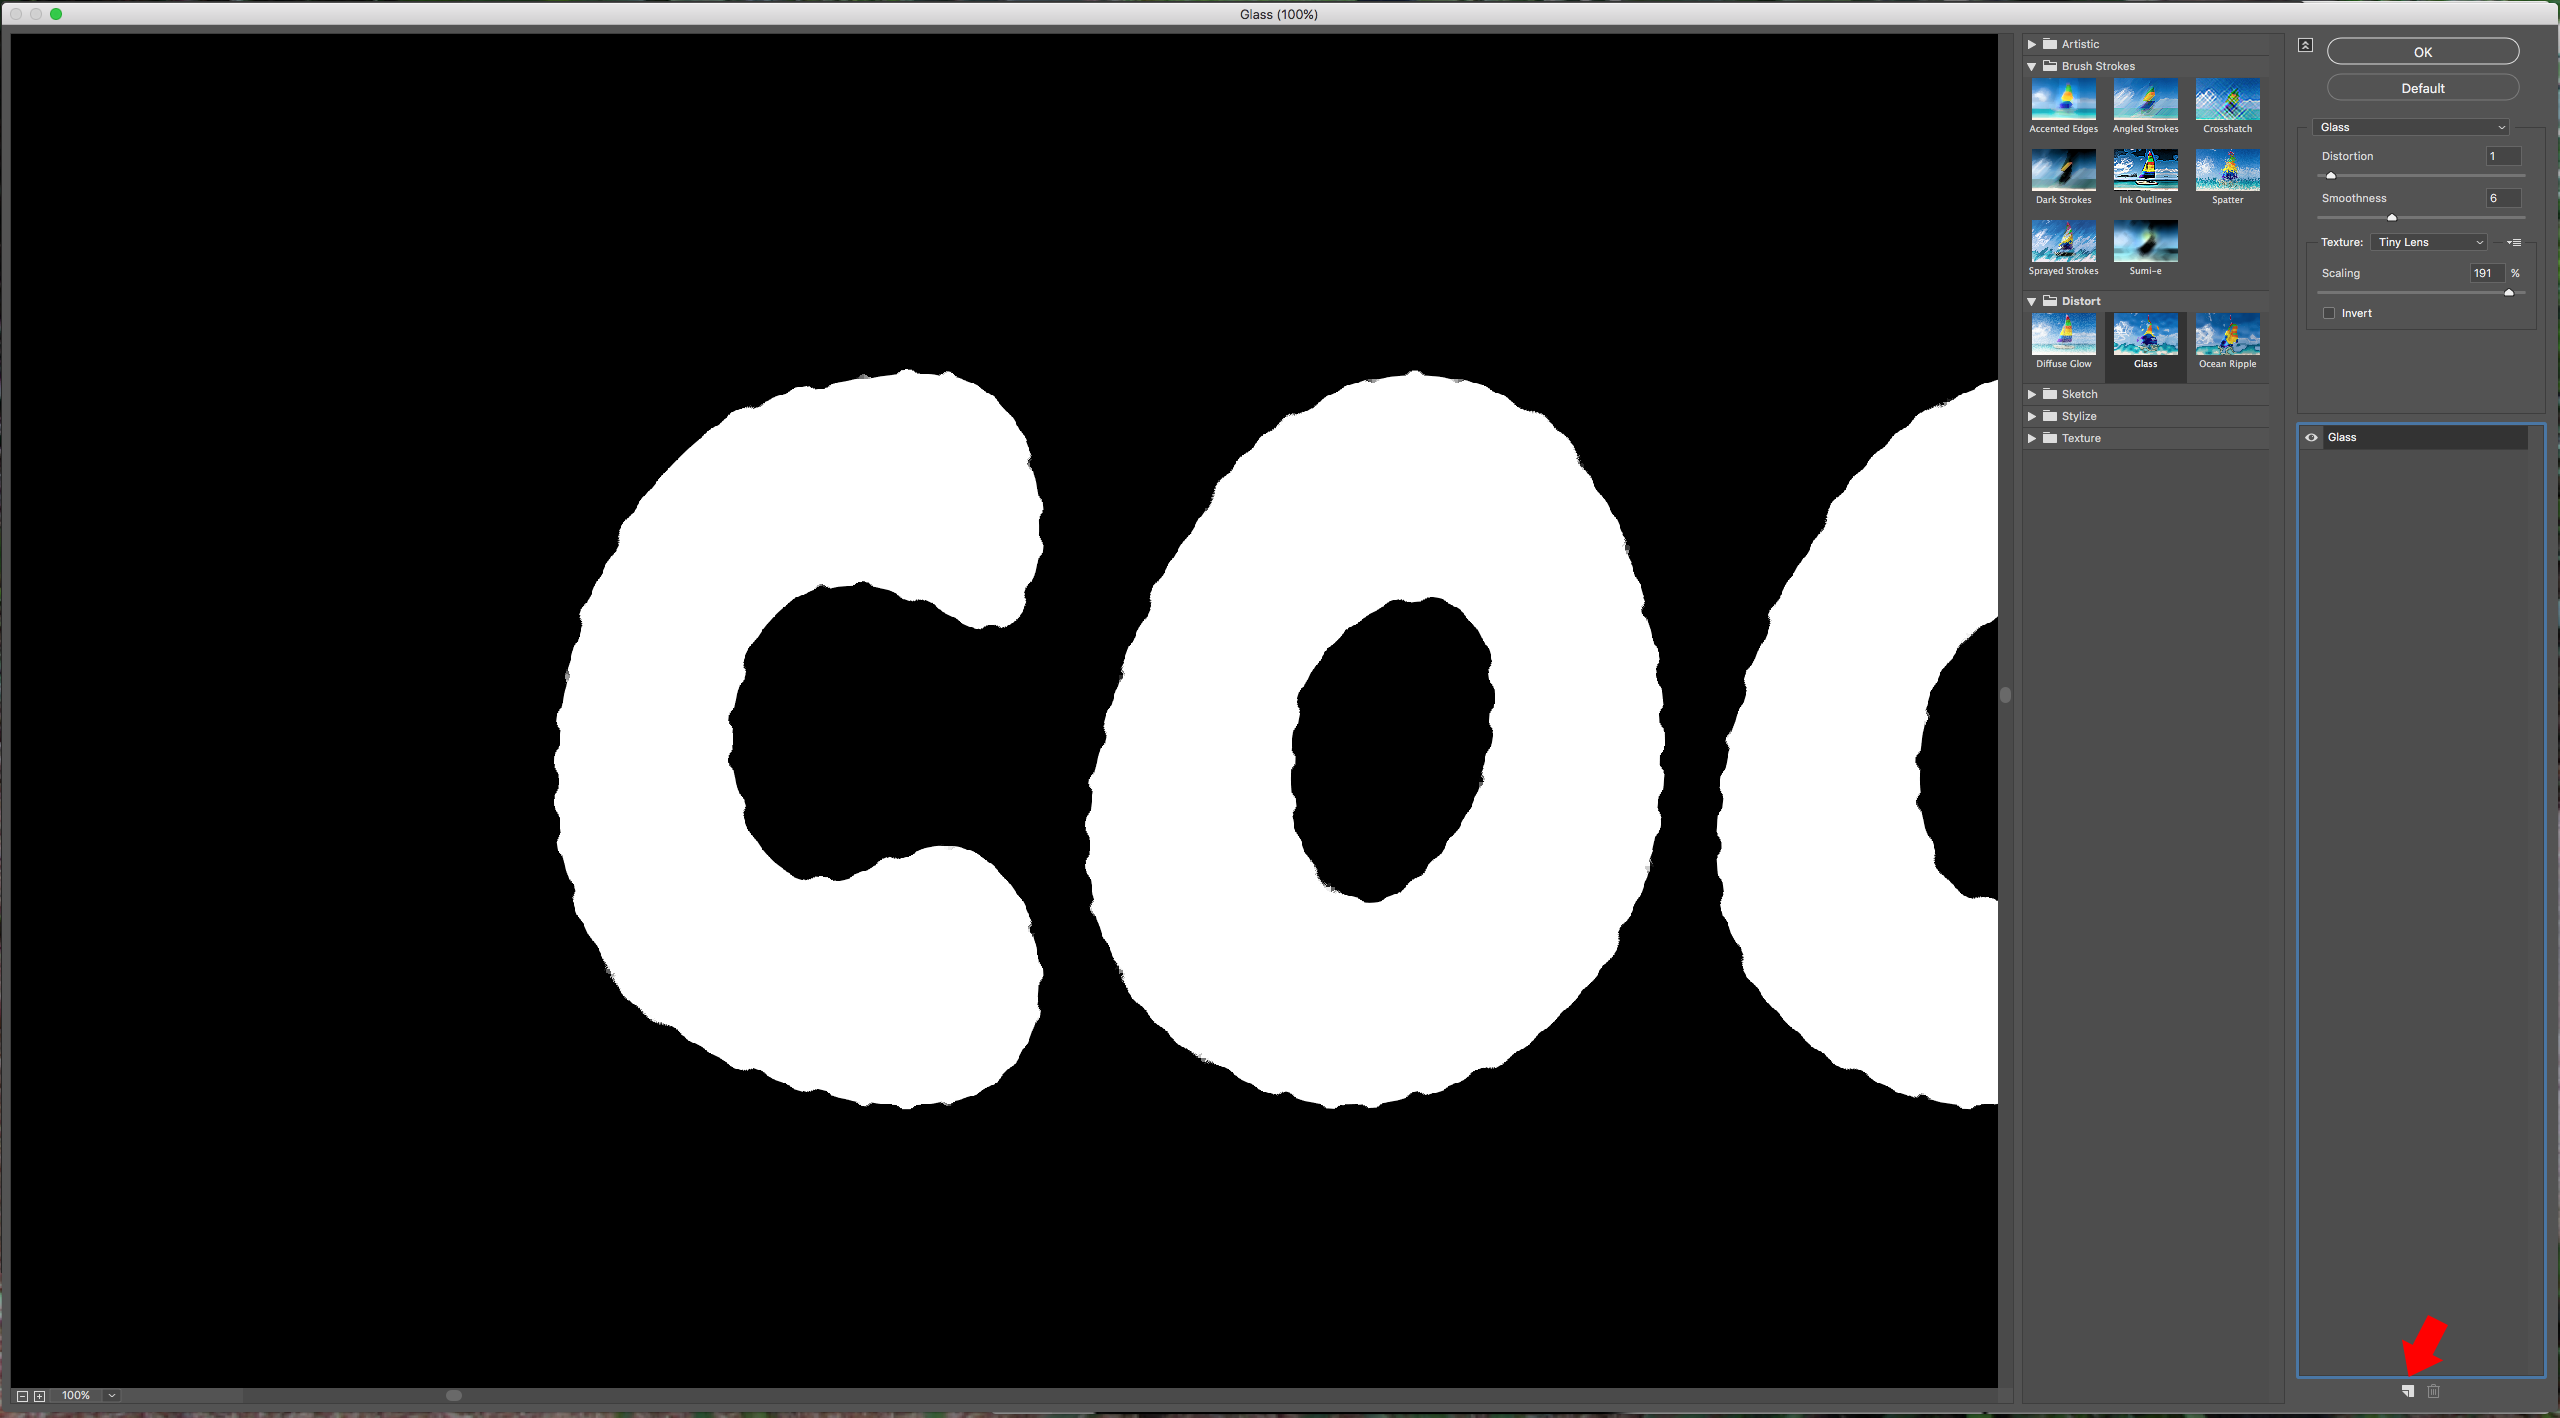
5 - Select the mask thumbnail and go to Filter > Filter Gallery > Distort > Glass and apply the following values:
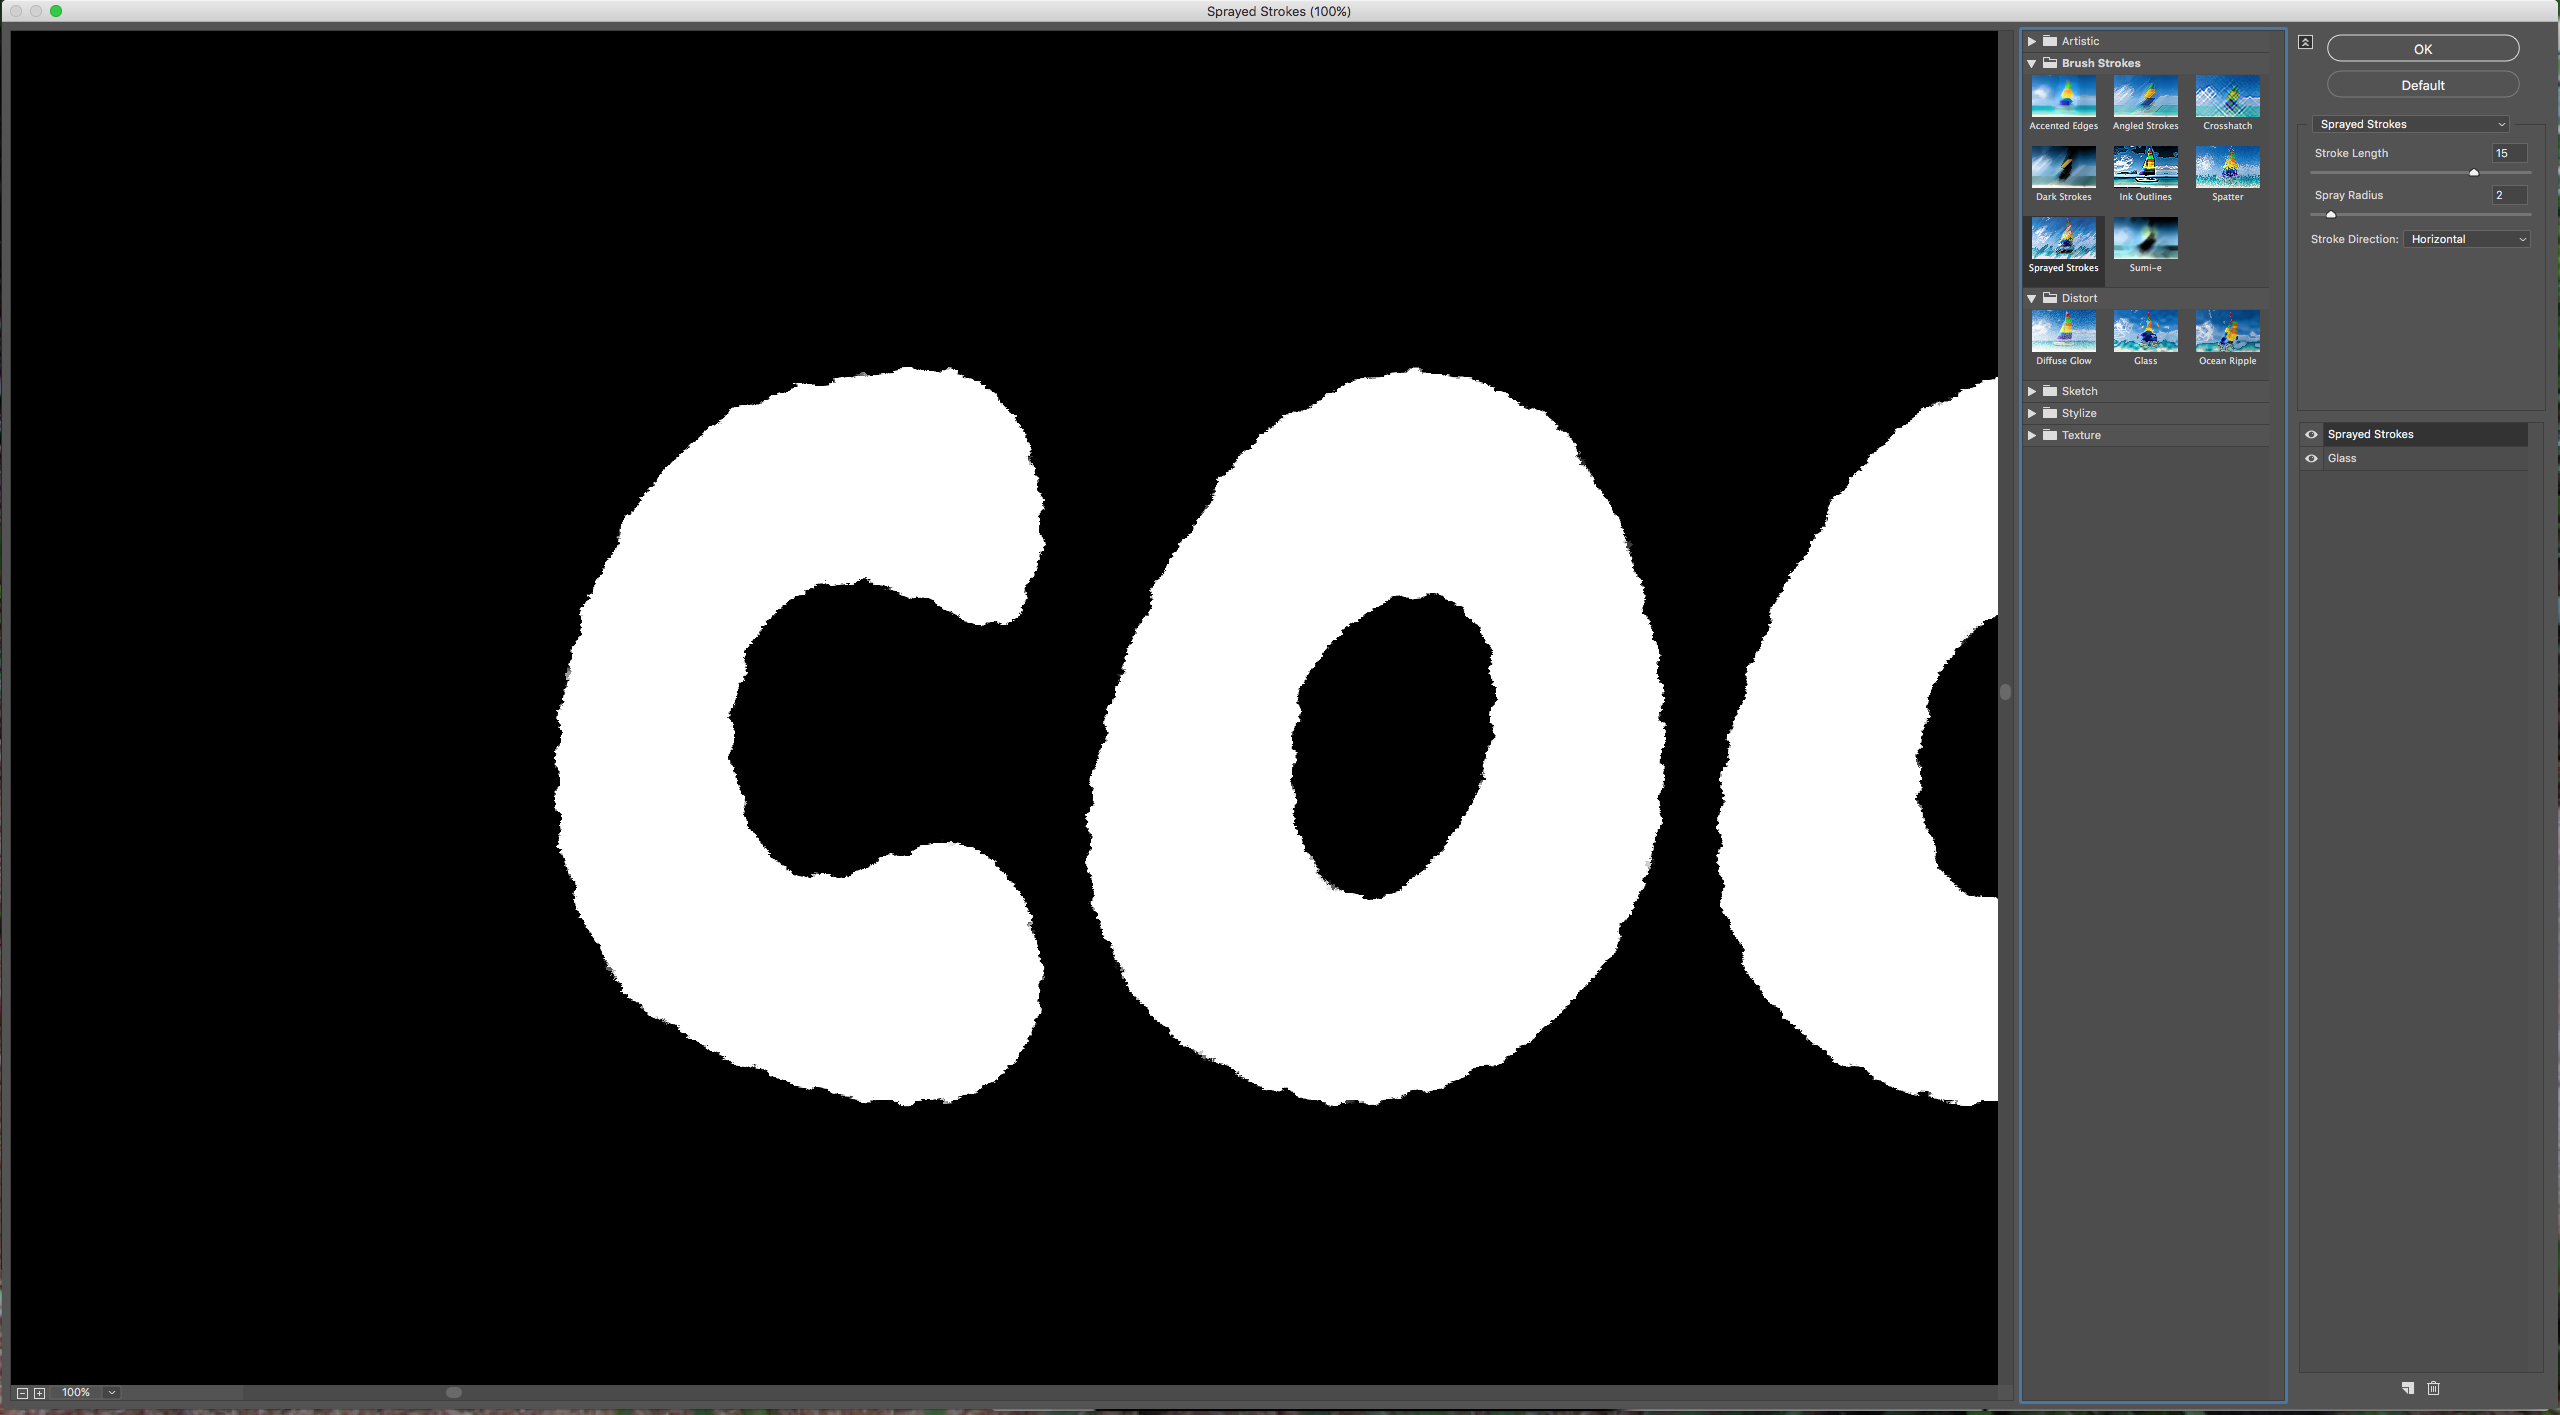
Then click on the “New Effect Layer” button at the bottom of the menu and apply the following values for Brush Strokes > Sprayed Strokes:
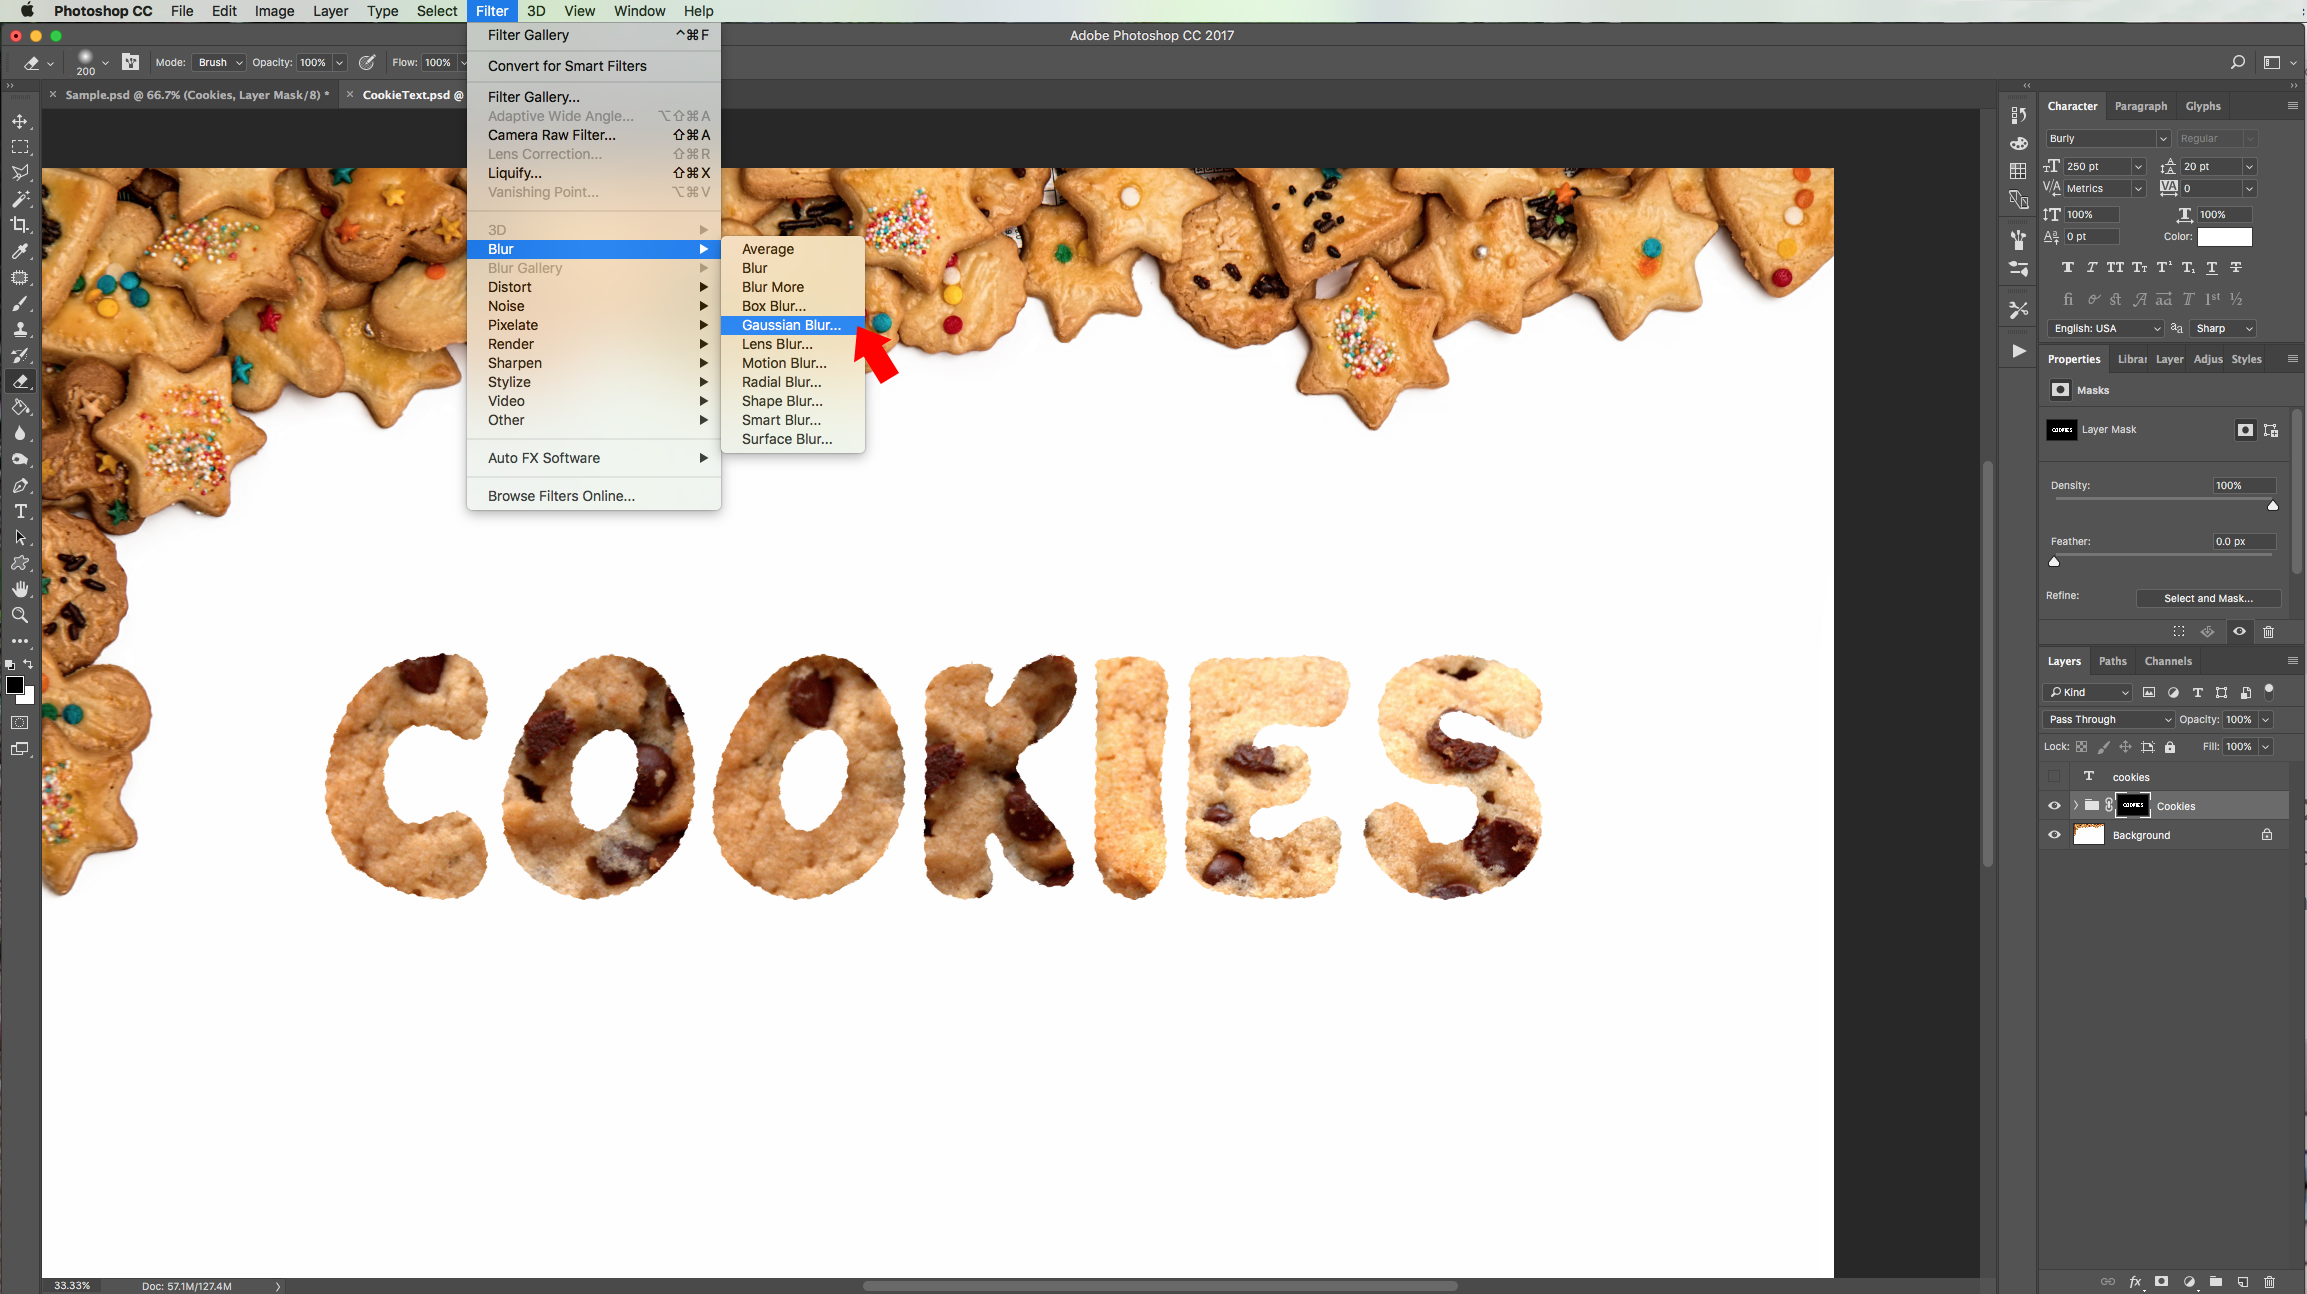
6 - Still with your mask selected go to Filter > Blur > Gaussian Blur and use a “Radius” of 2.0 pixels:
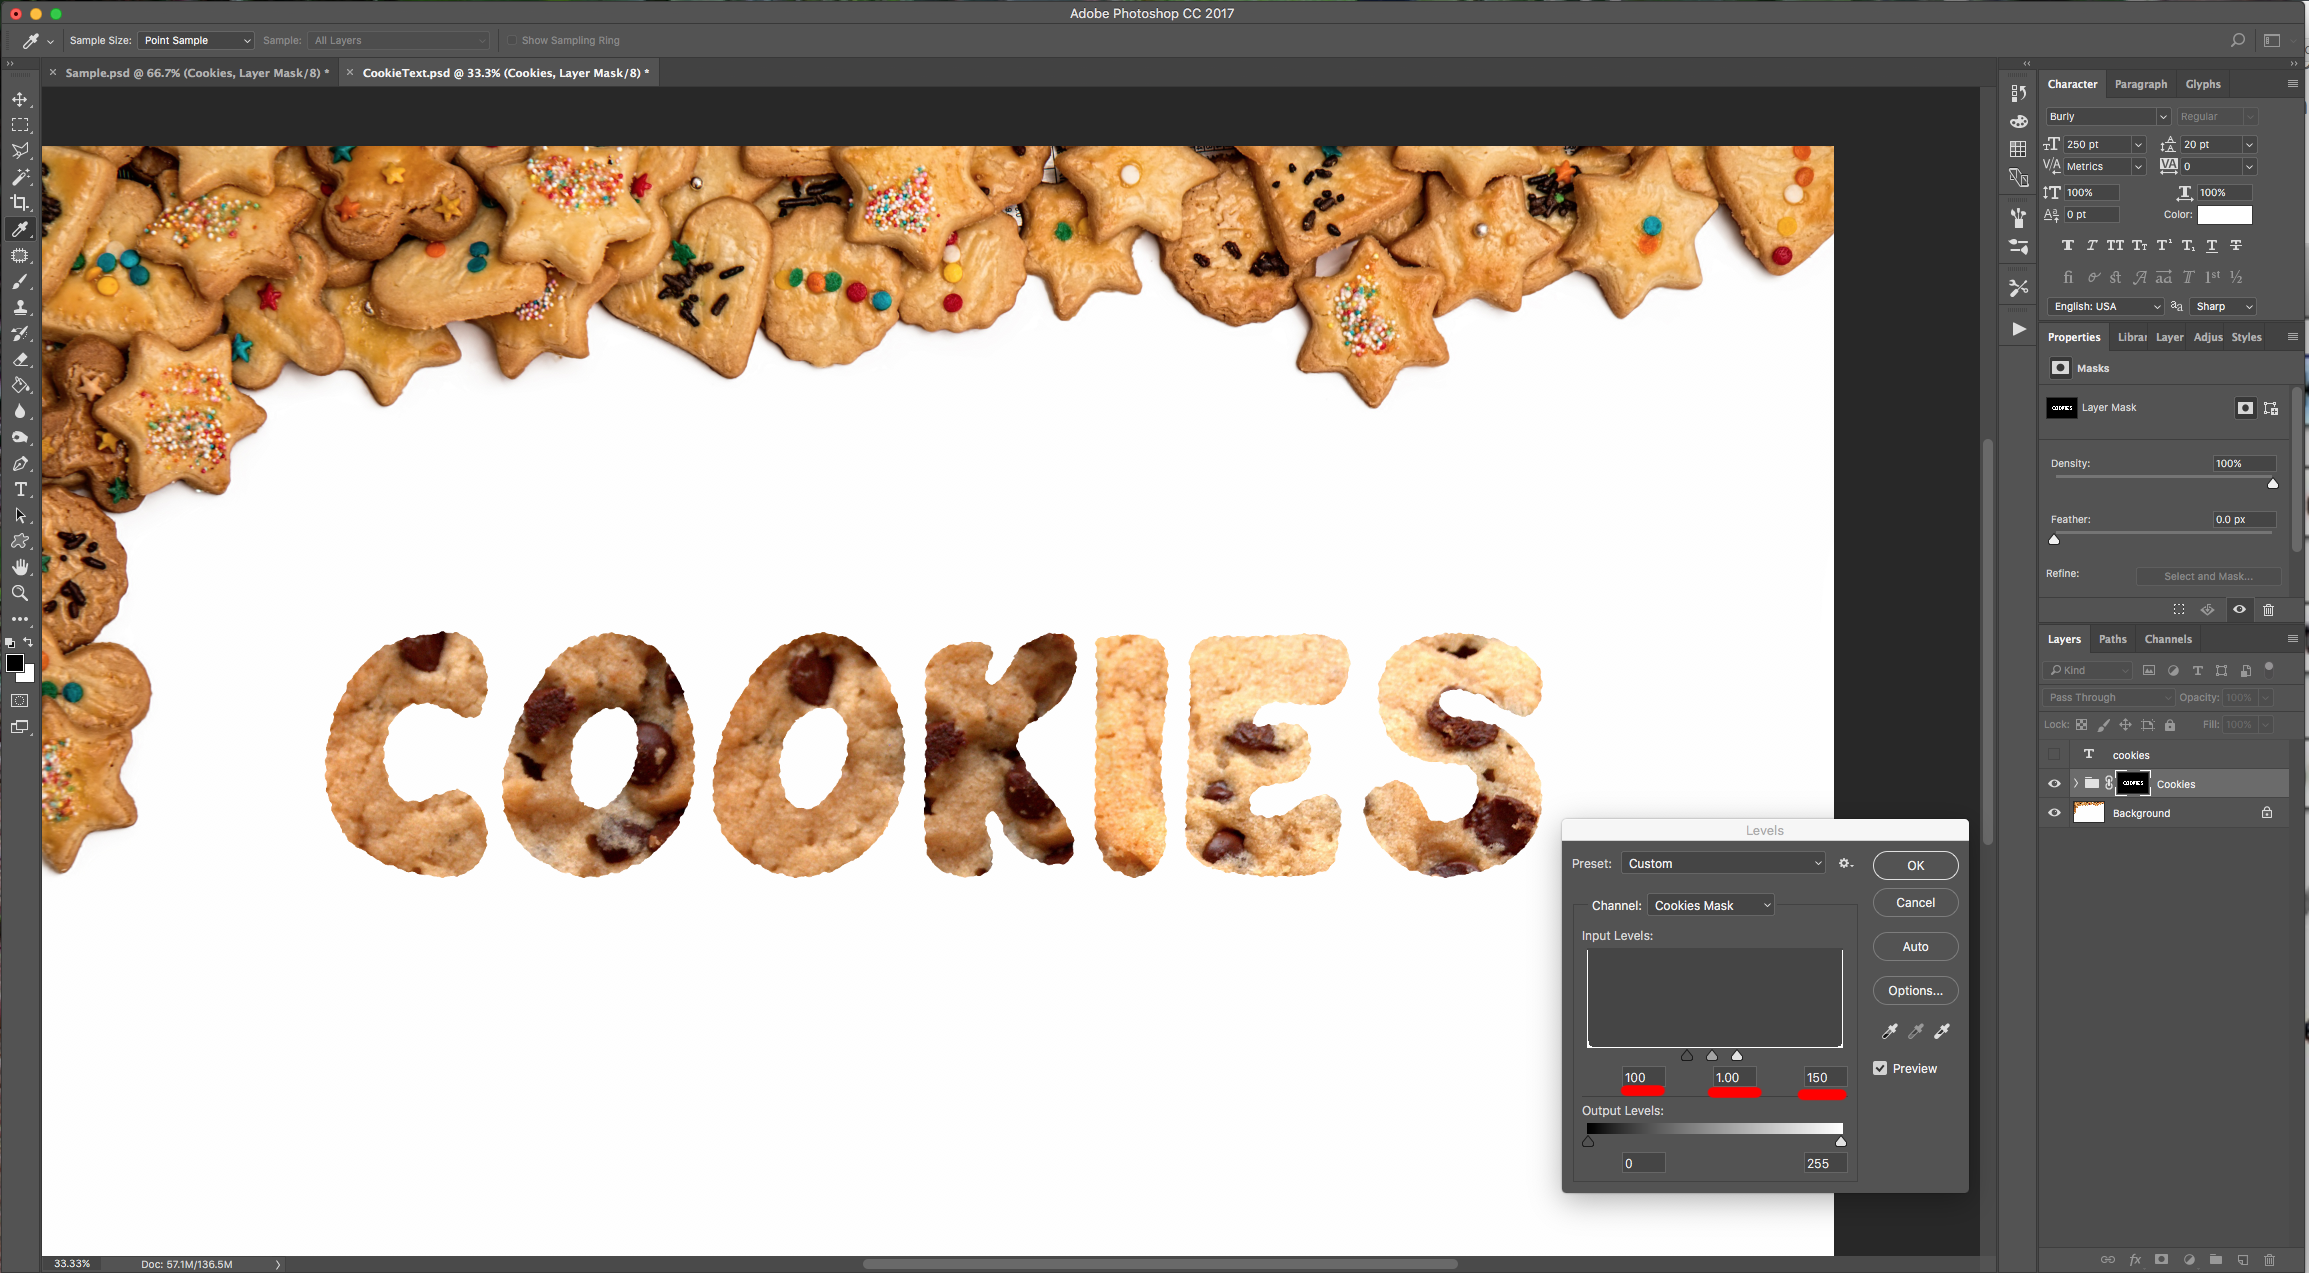
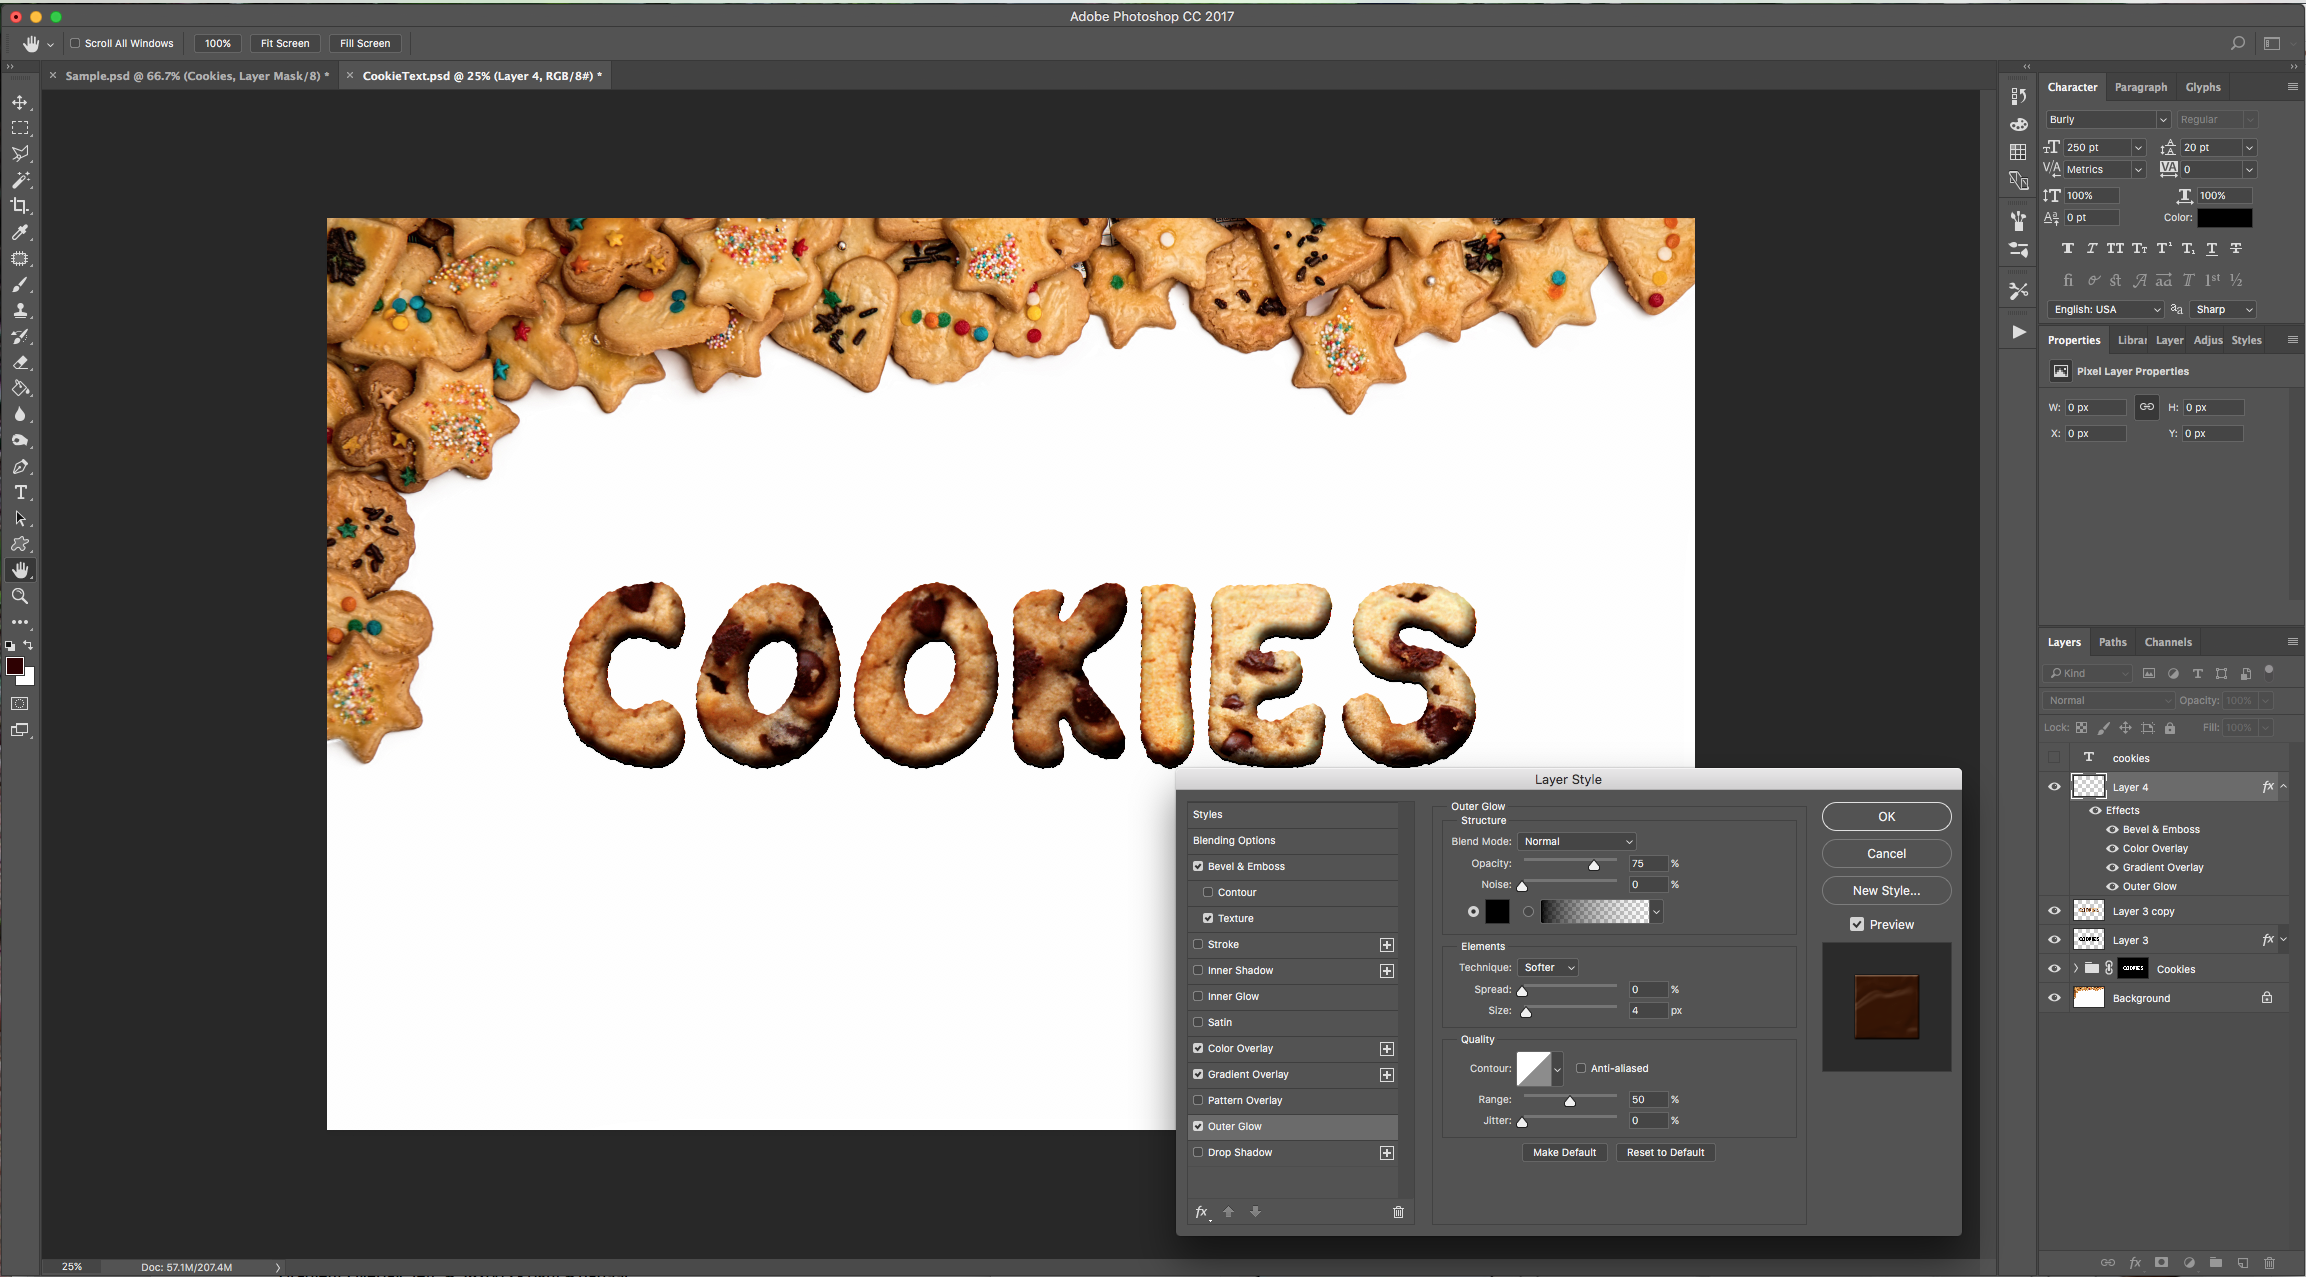
7 - Still selecting your mask click Command/Control +L to open the “Levels” dialogue and change the values to 100, 1.00 and 150.
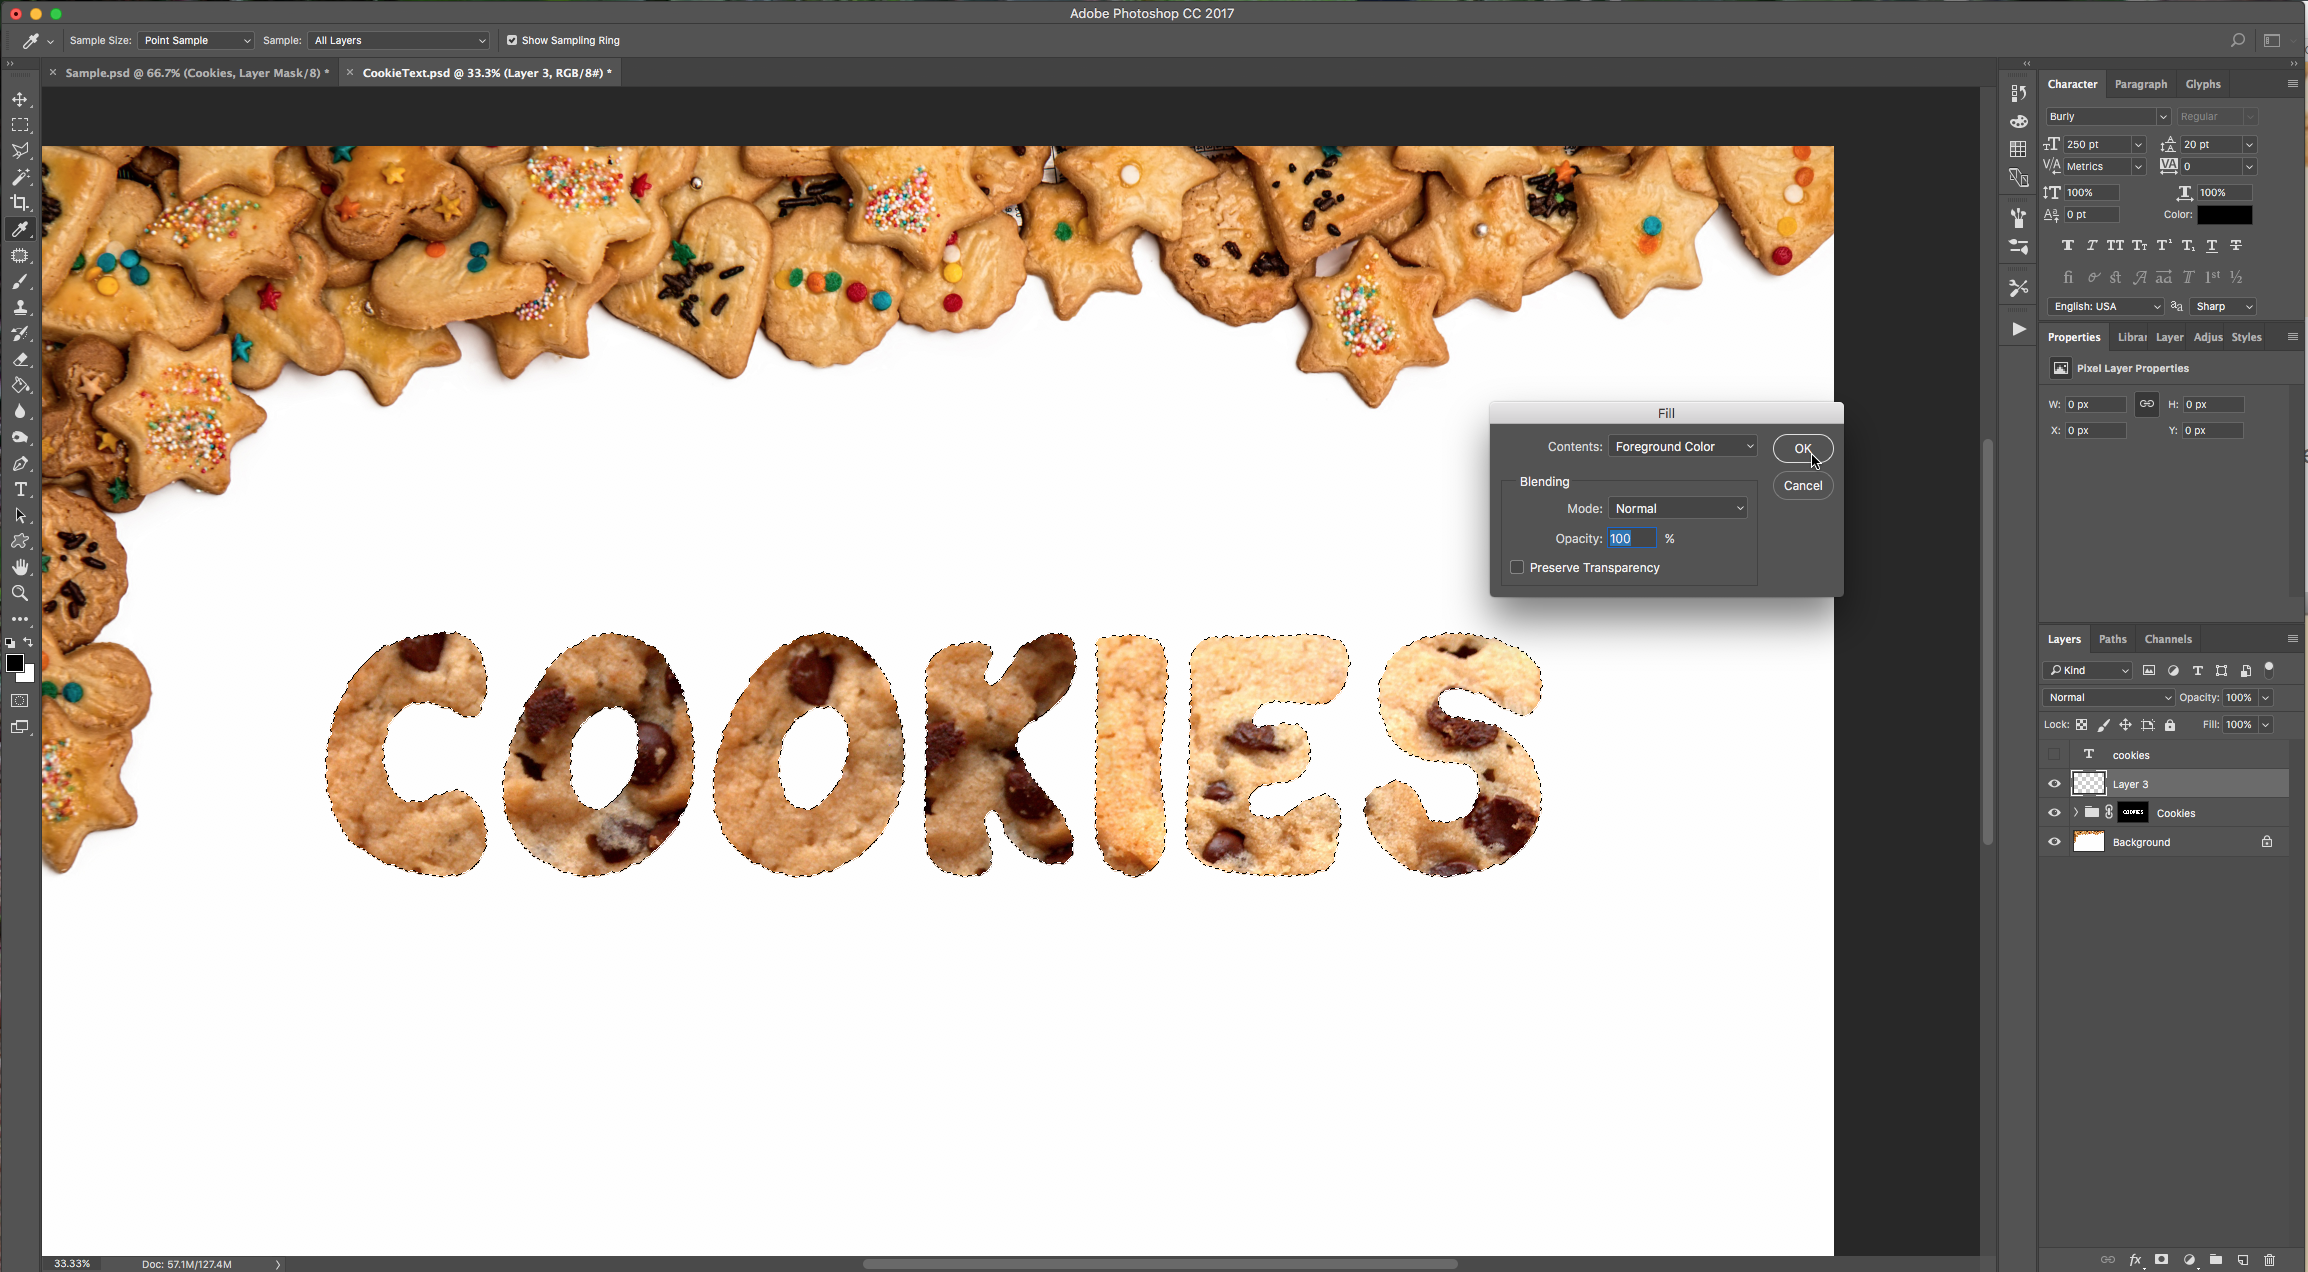
8 - Create a selection of the layer mask (with the irregular edges) and then create a “New Layer” by clicking on the “Create New Layer” button at the bottom of the “Layers” menu. Fill (Shift + F5) it with any color.

9 - Double-click on your new layer to invoke the “Layer Styles” menu and apply the following:
Blending Options: Fill Opacity 0%
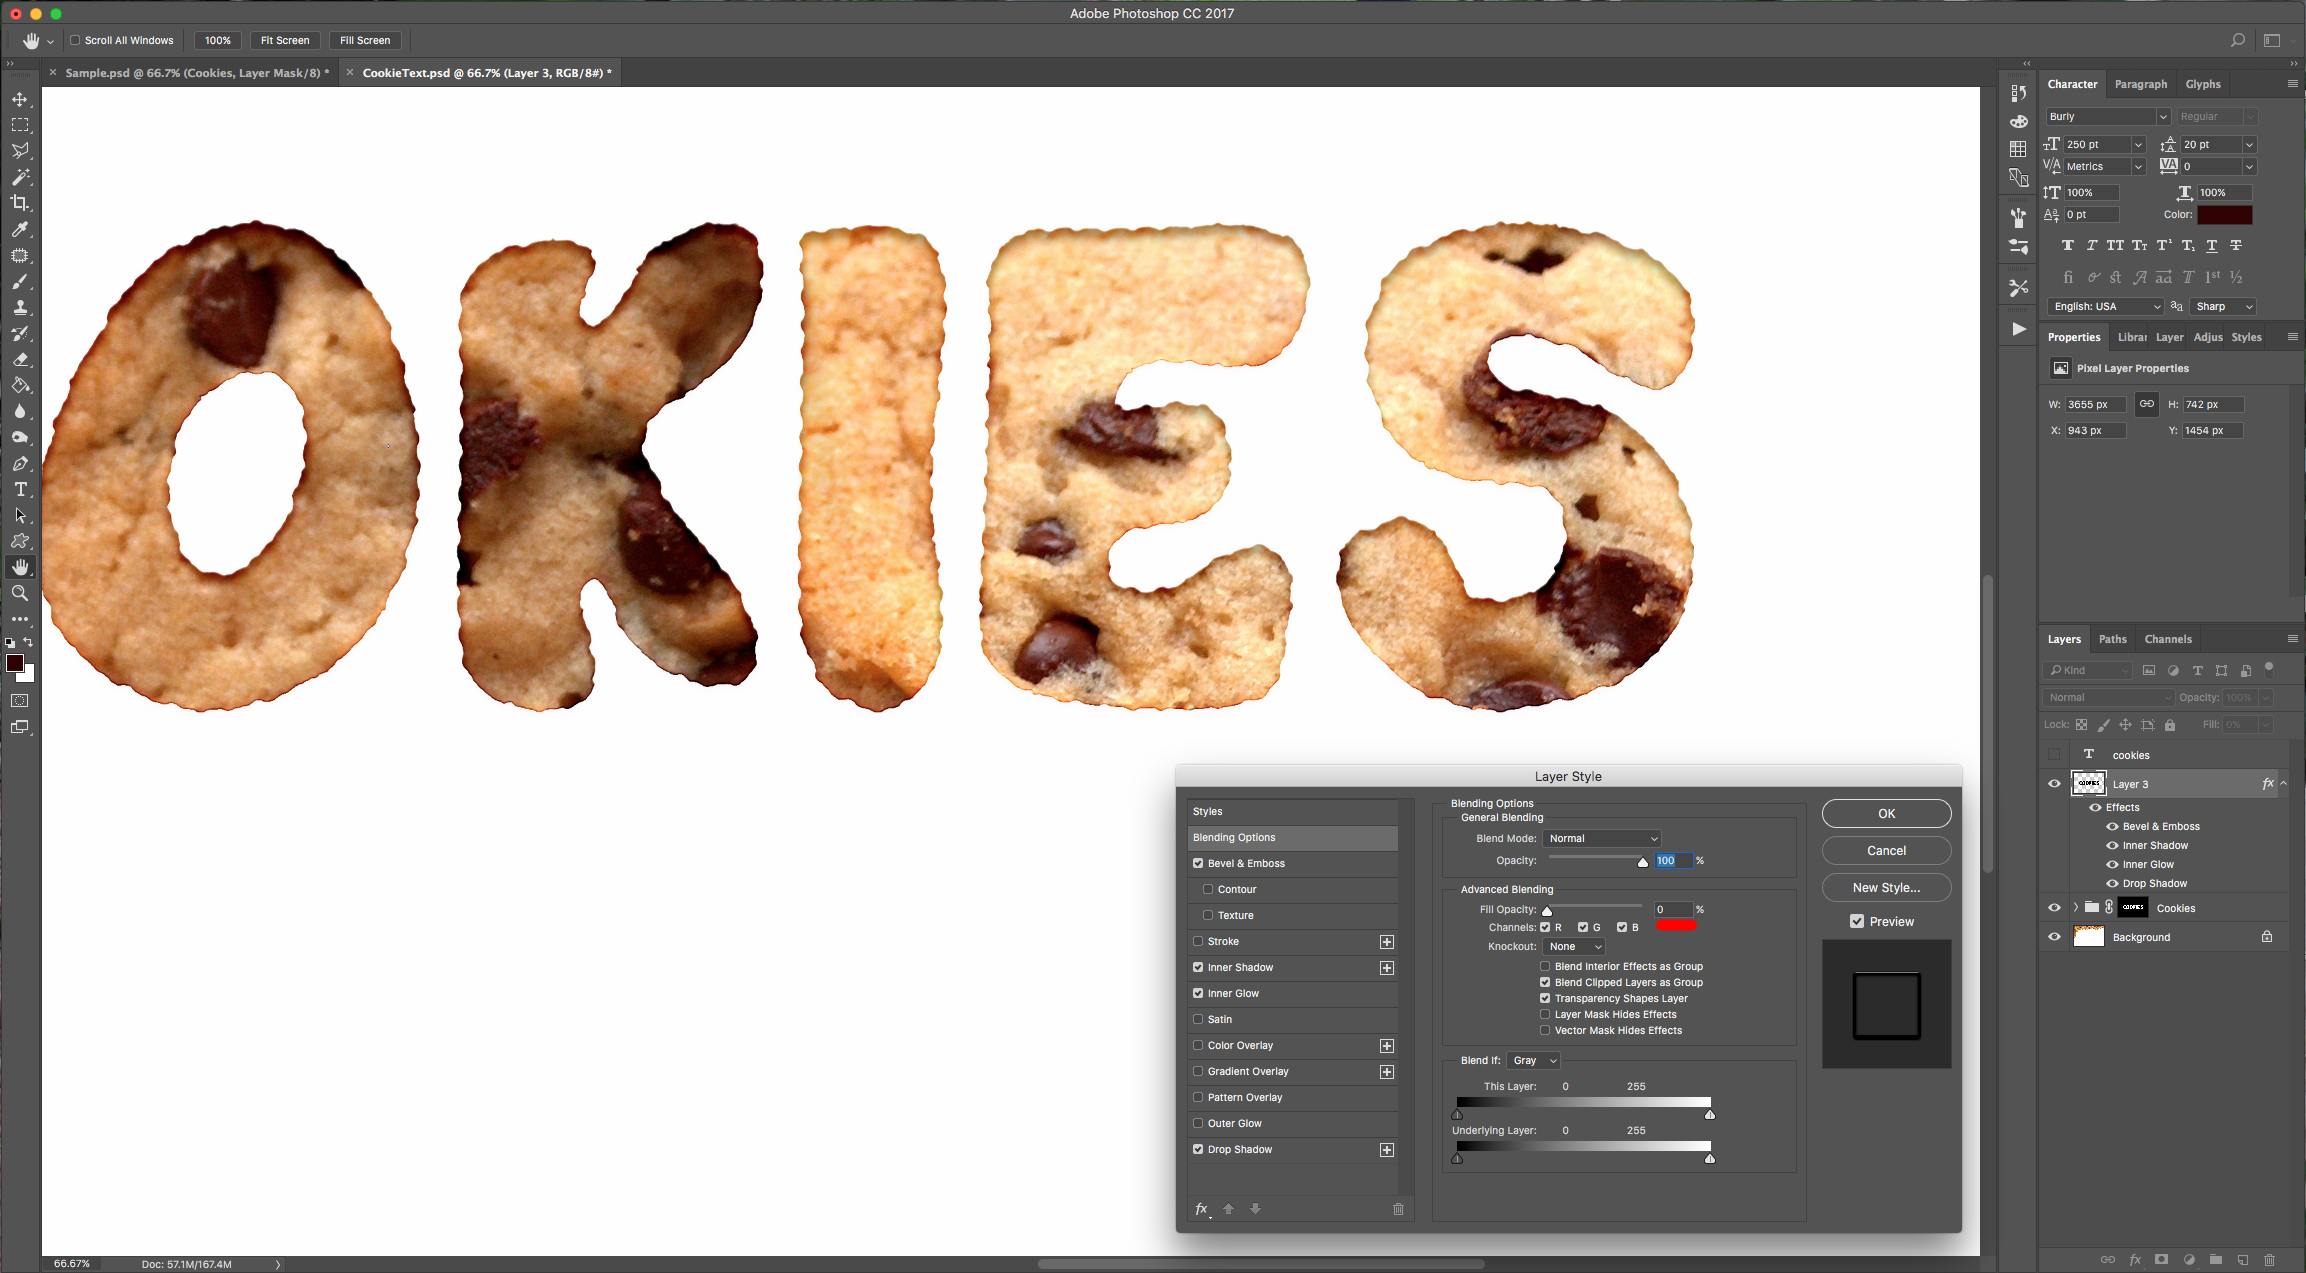
Bevel & Emboss: Highlight color # fde5ad, Shadow color: # 4d1608
Inner Shadow: # 270600

Inner Glow: # 785655

Drop Shadow:

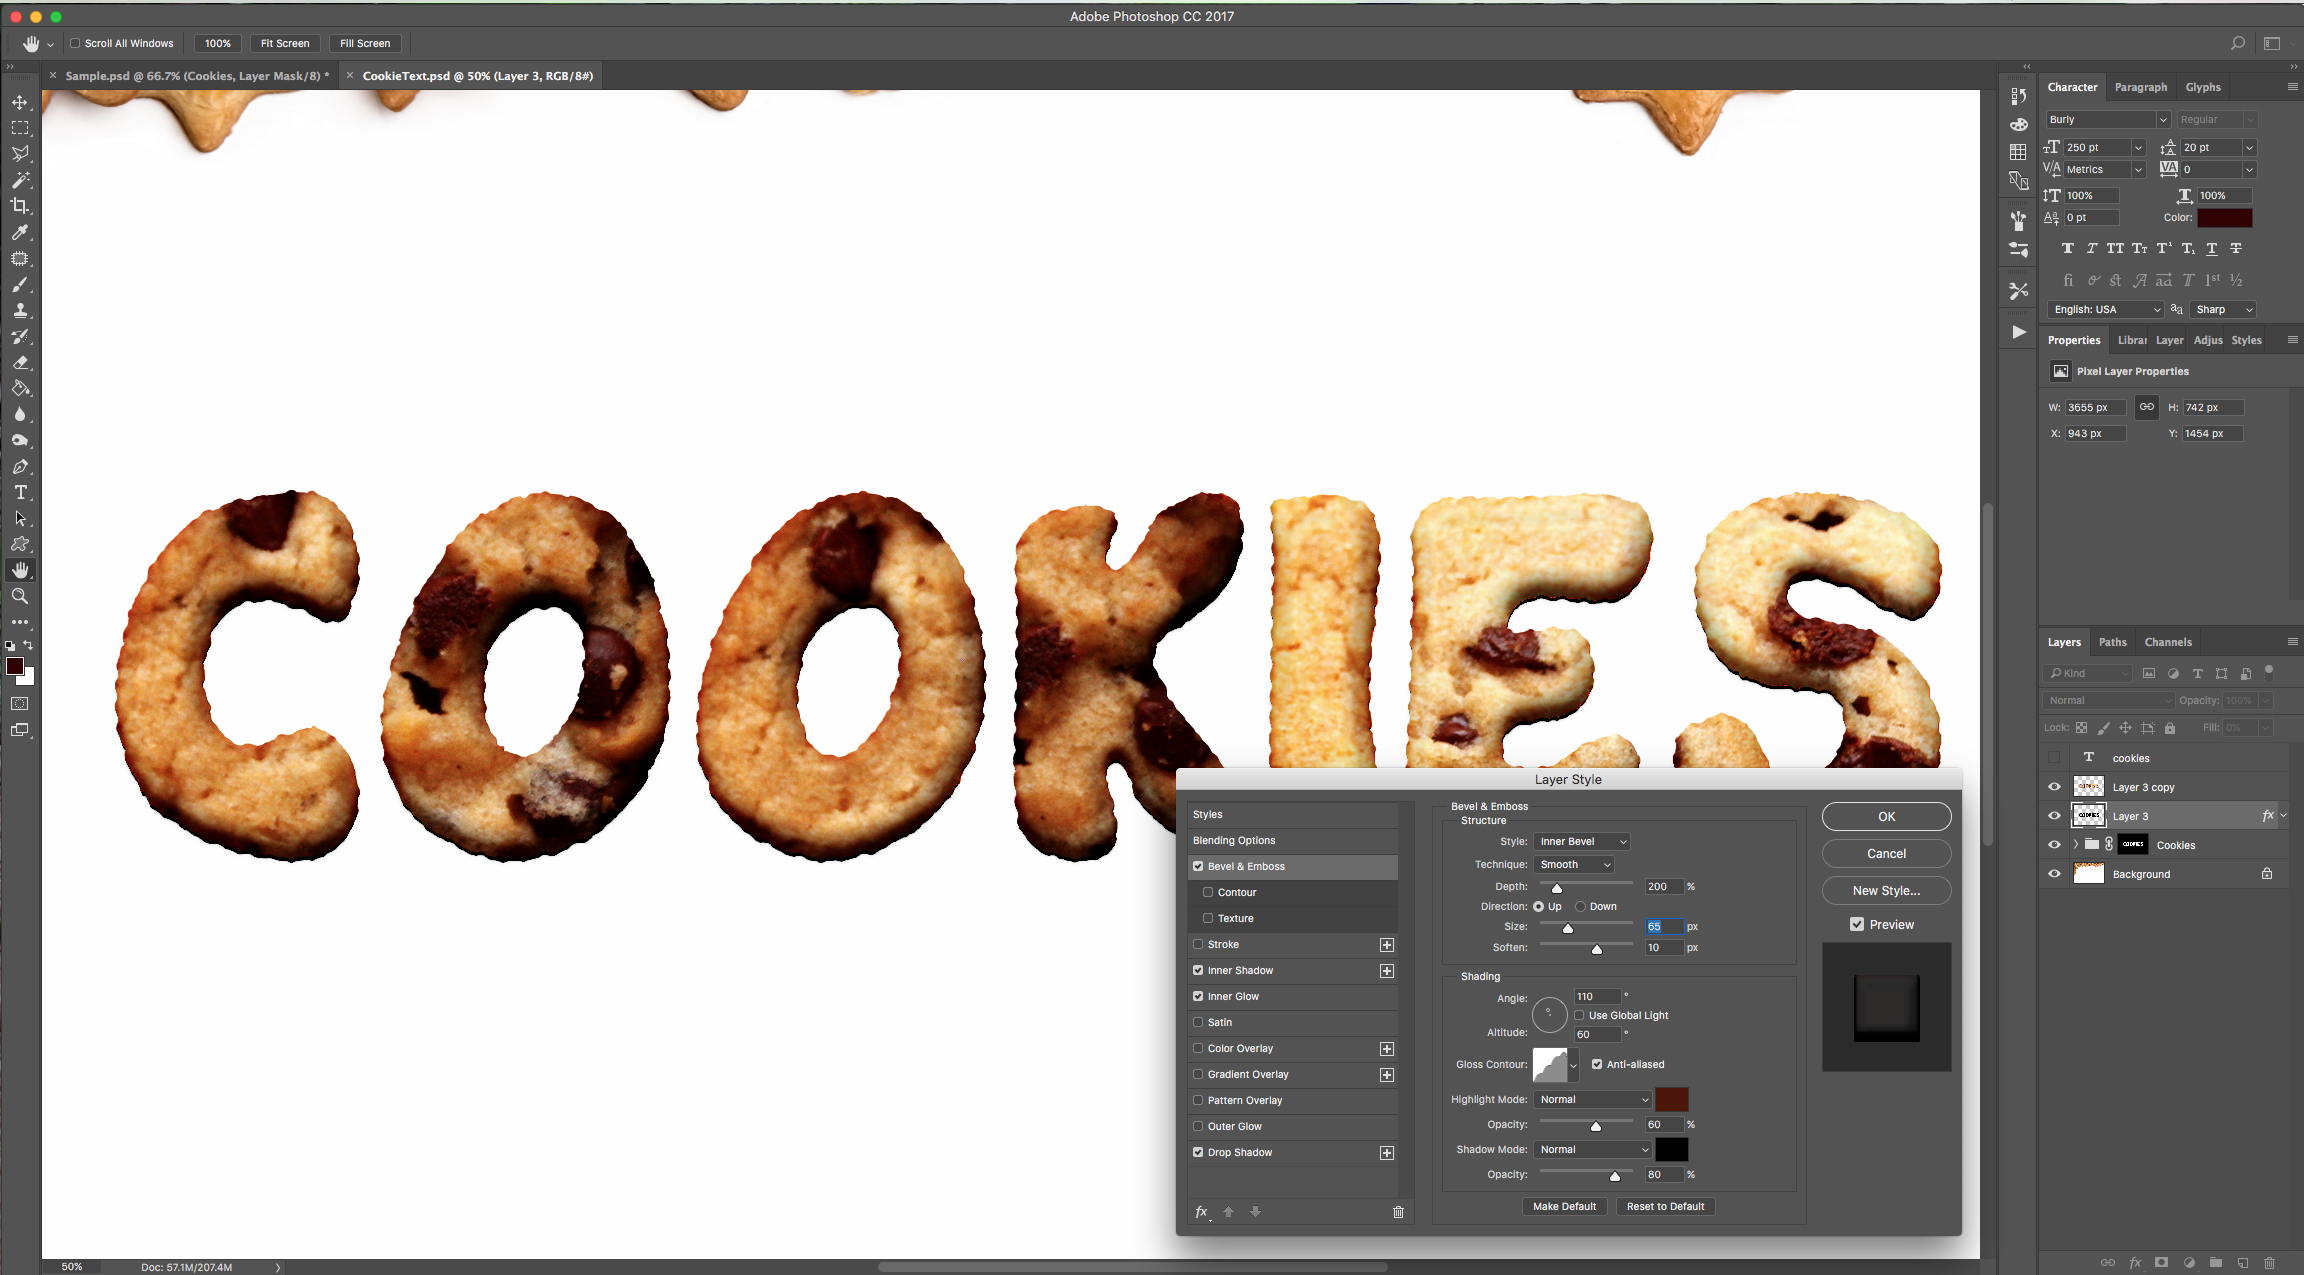
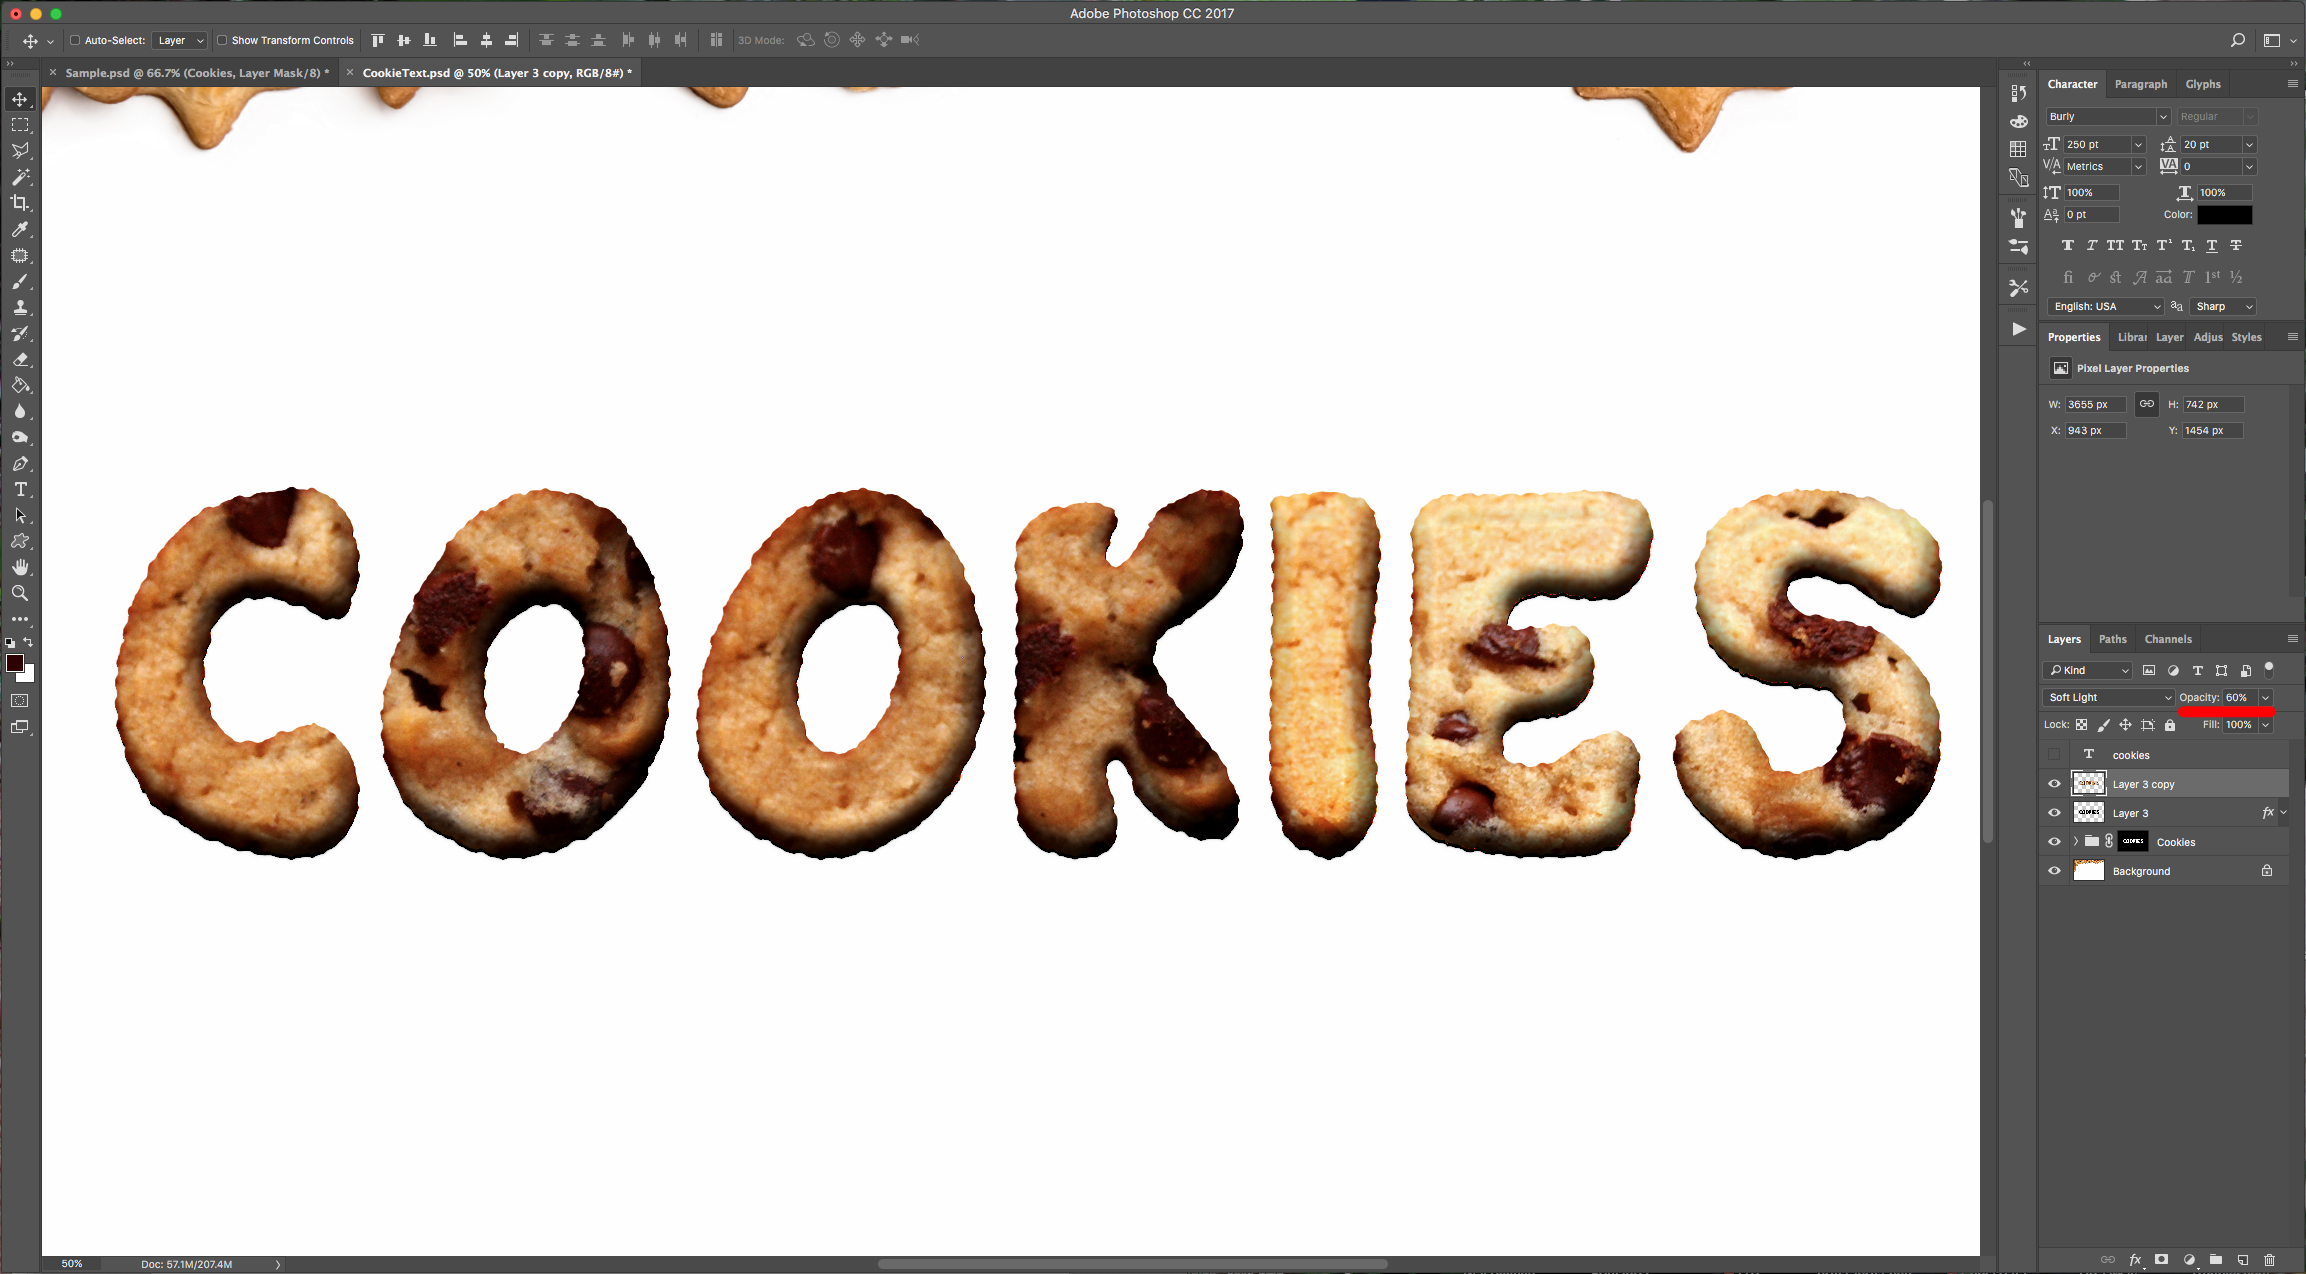
10 - Select this layer and the folder with the textures, duplicate them by dragging their layer thumbnails onto the “Create New Layer” button at the bottom of the “Layers” menu. Disable the “Drop Shadow” in your duplicate, then merge them (right-click on top of the thumbnails and select “Merge Layers”), change the “Bend Mode” to “Soft Light” and lower the “Opacity” to 60%.
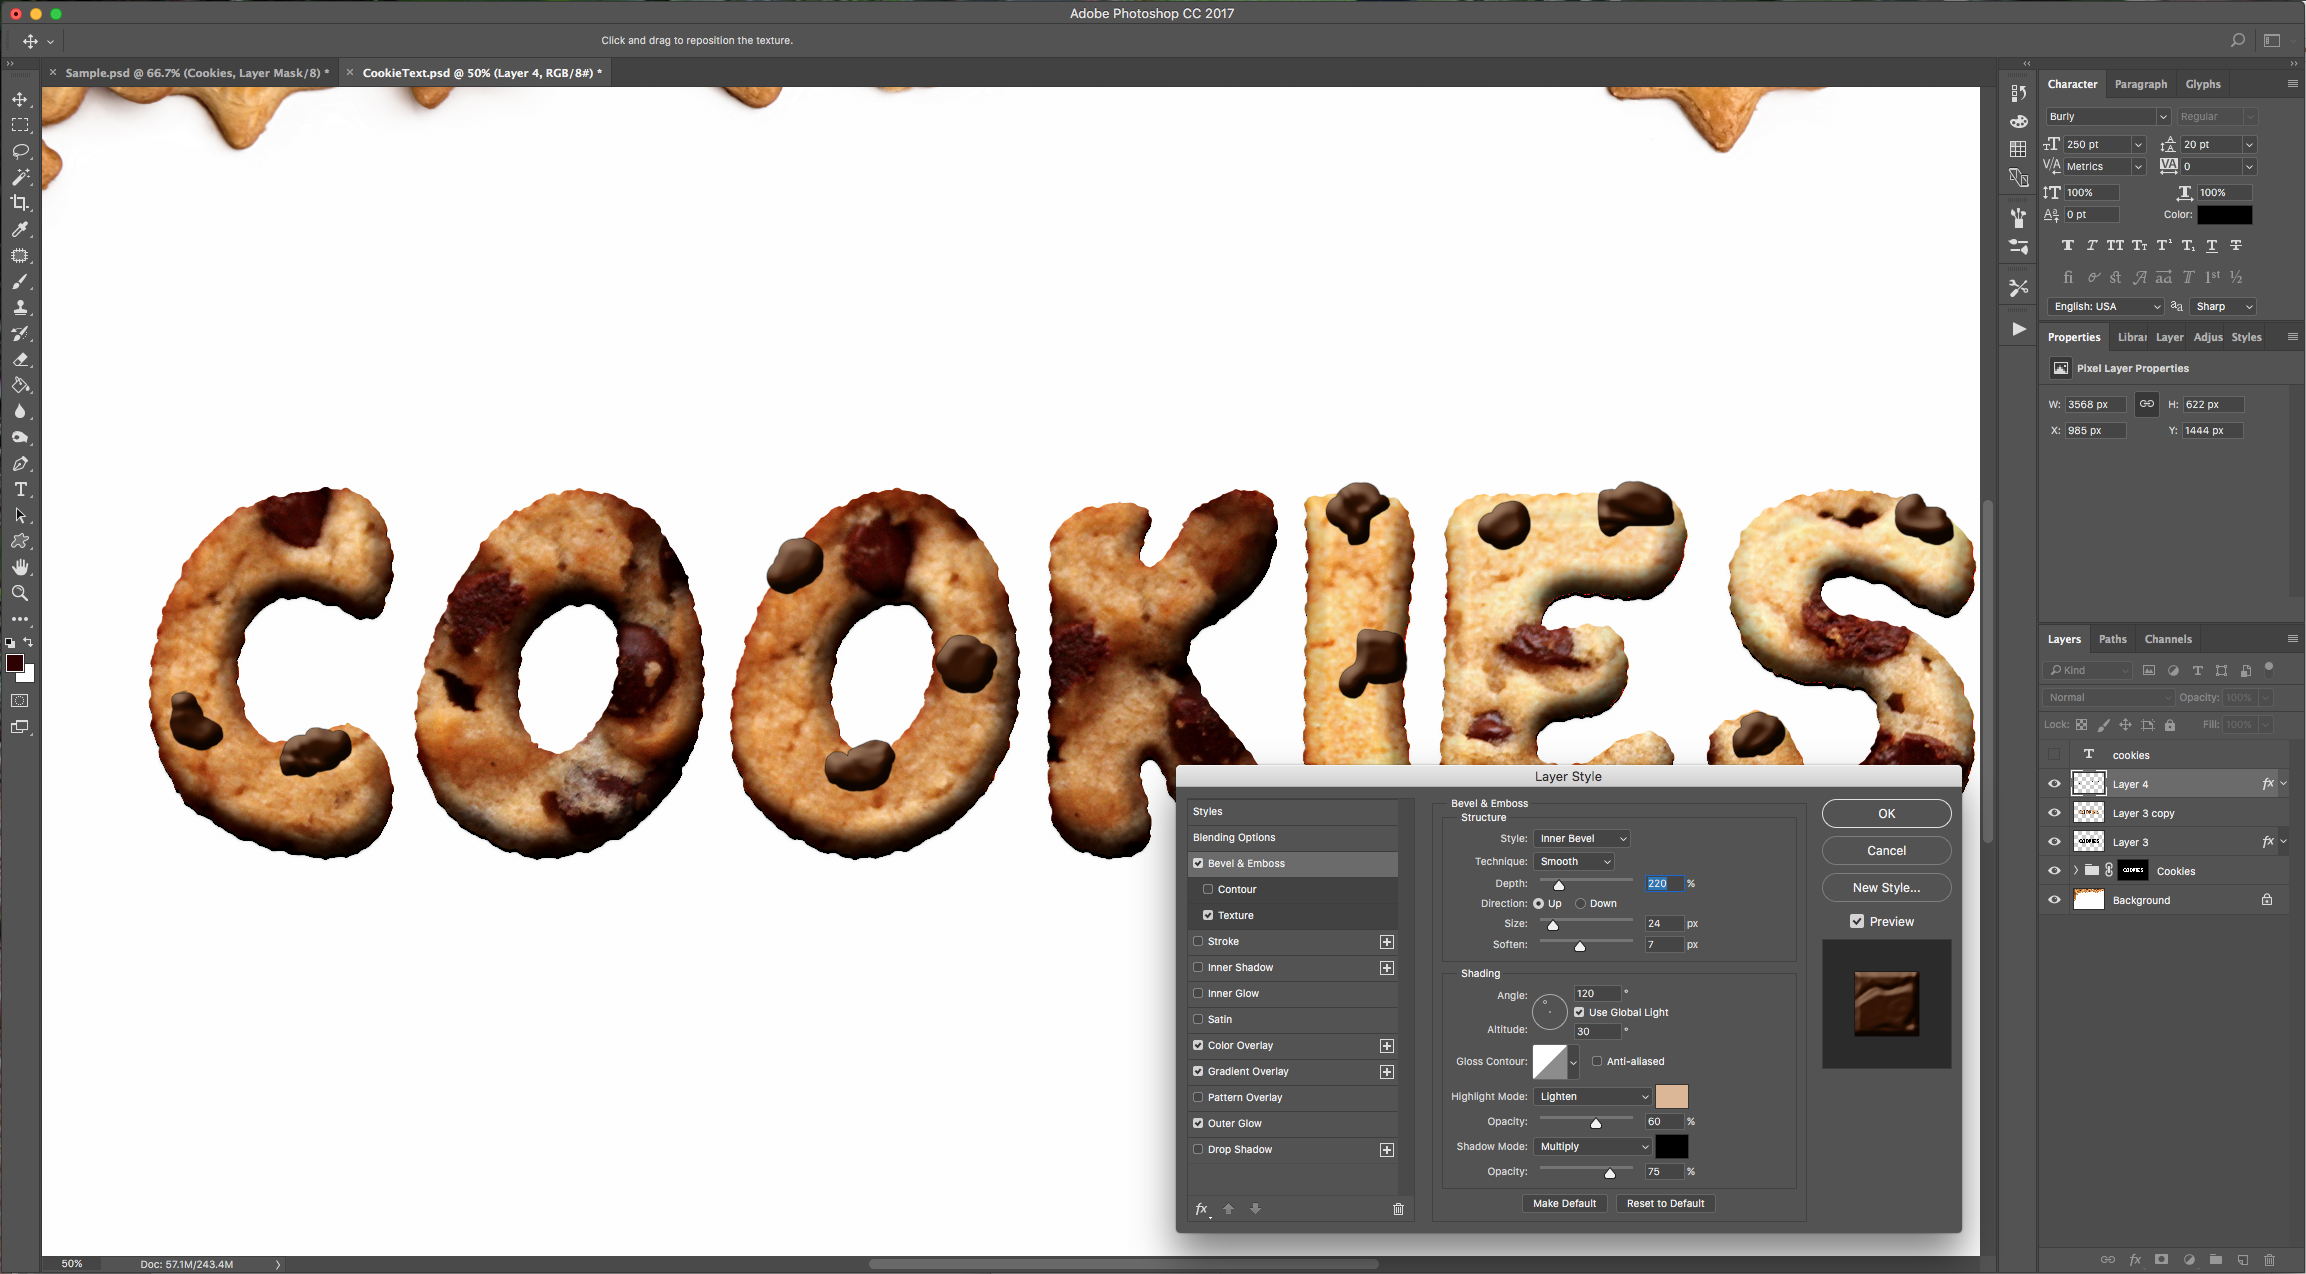
11 - Create a “New Layer” and place it on top. Double-click on the layer and apply the following “Layer Styles”:
Bevel & Emboss: Highlight color: # dcb795, Shadow color: # 000000
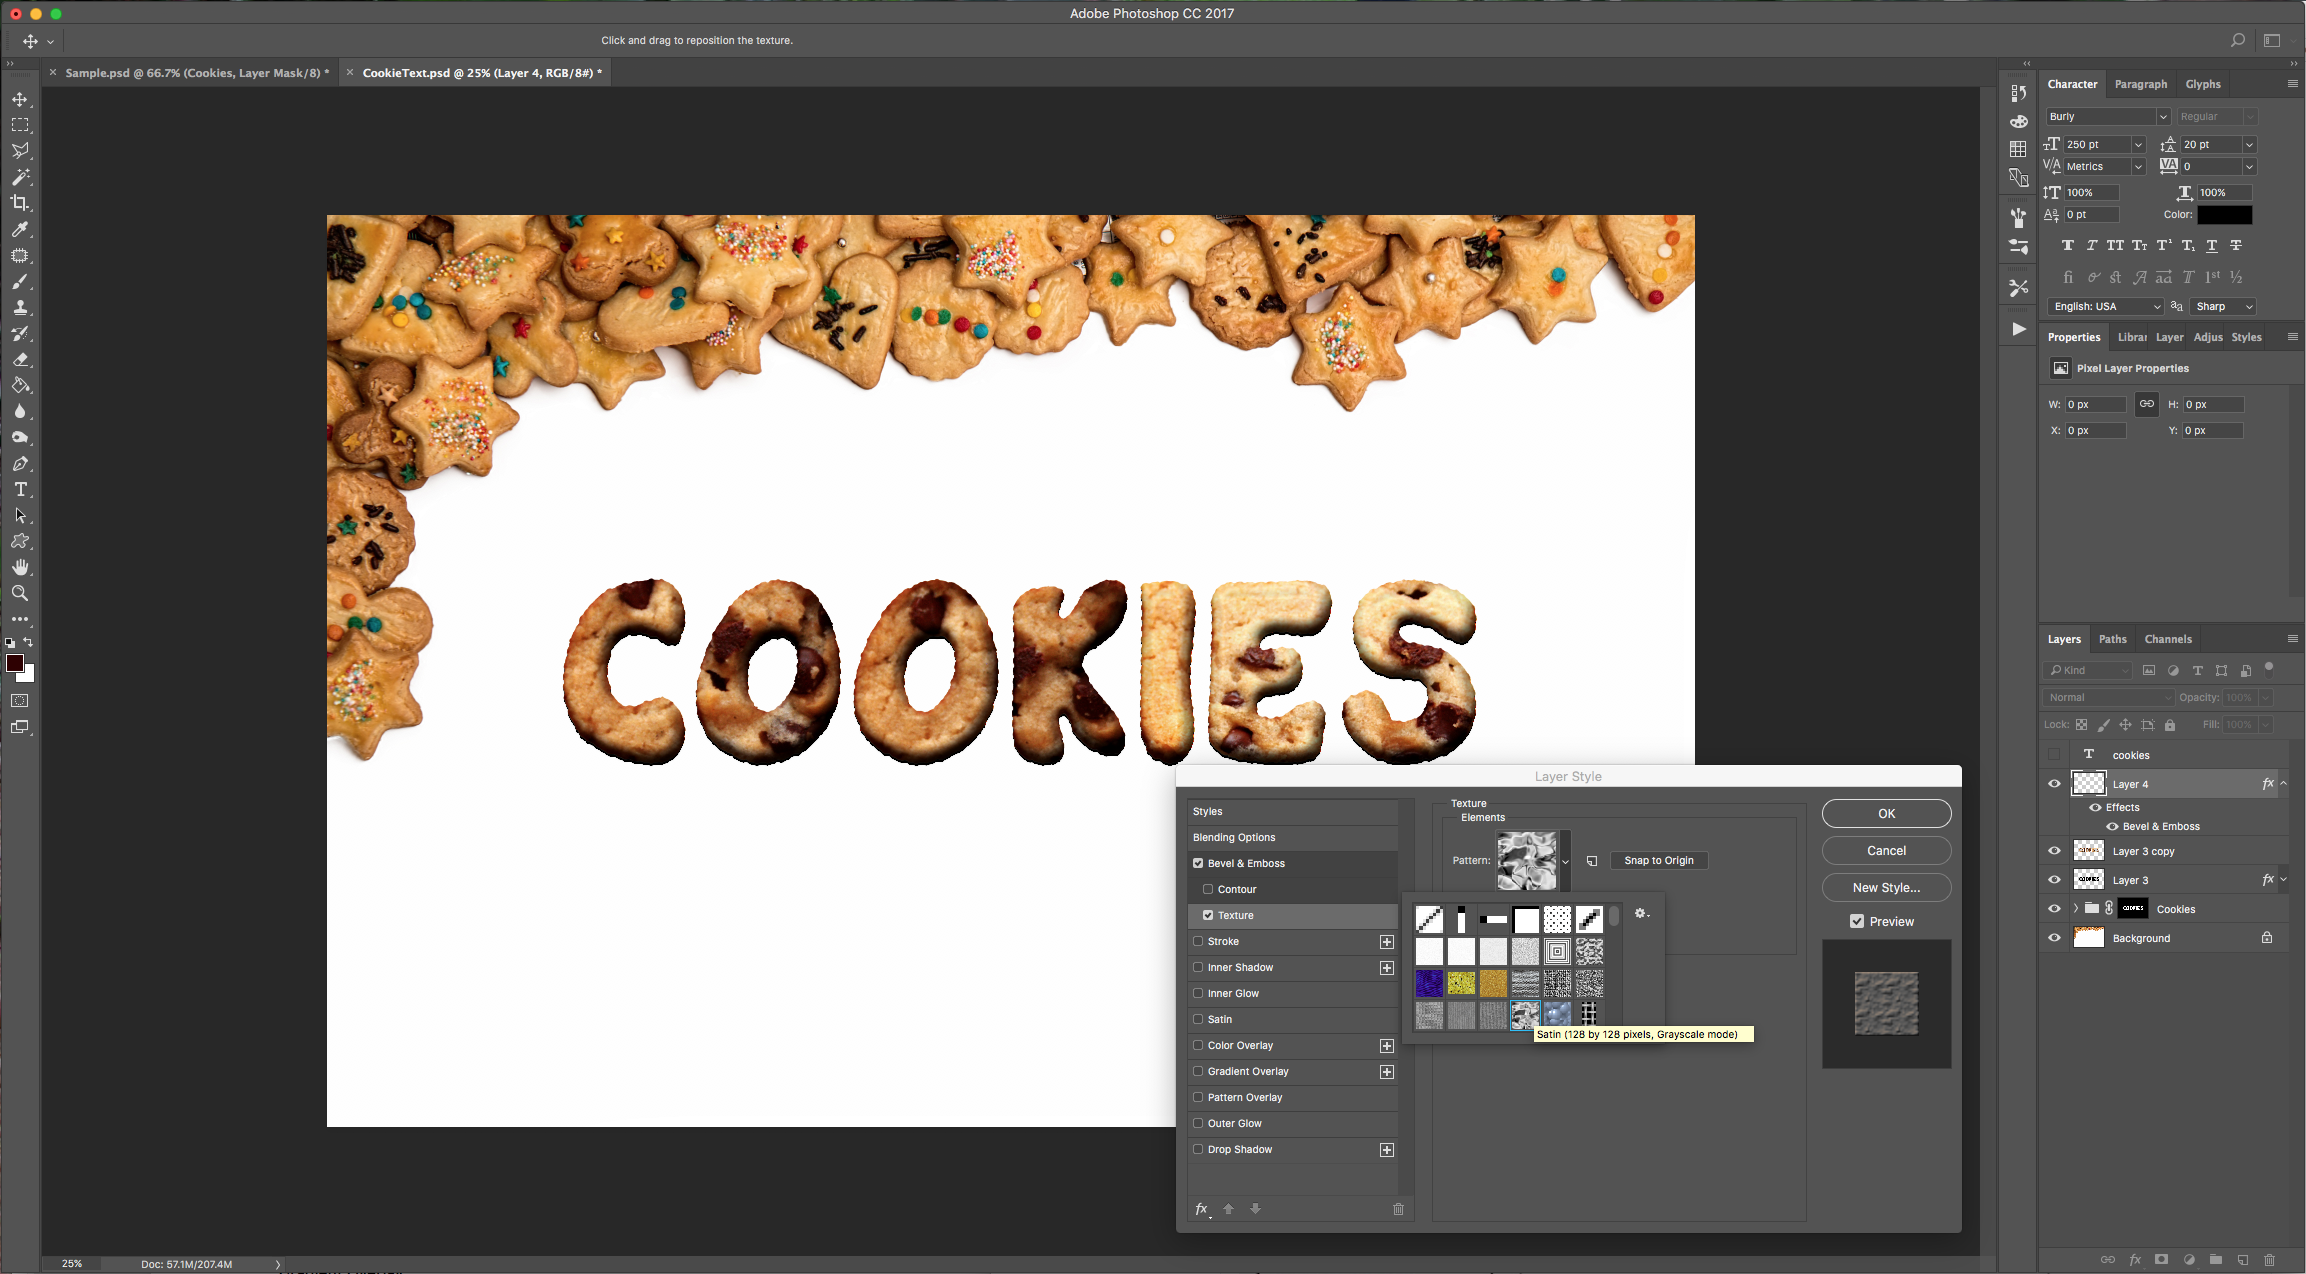
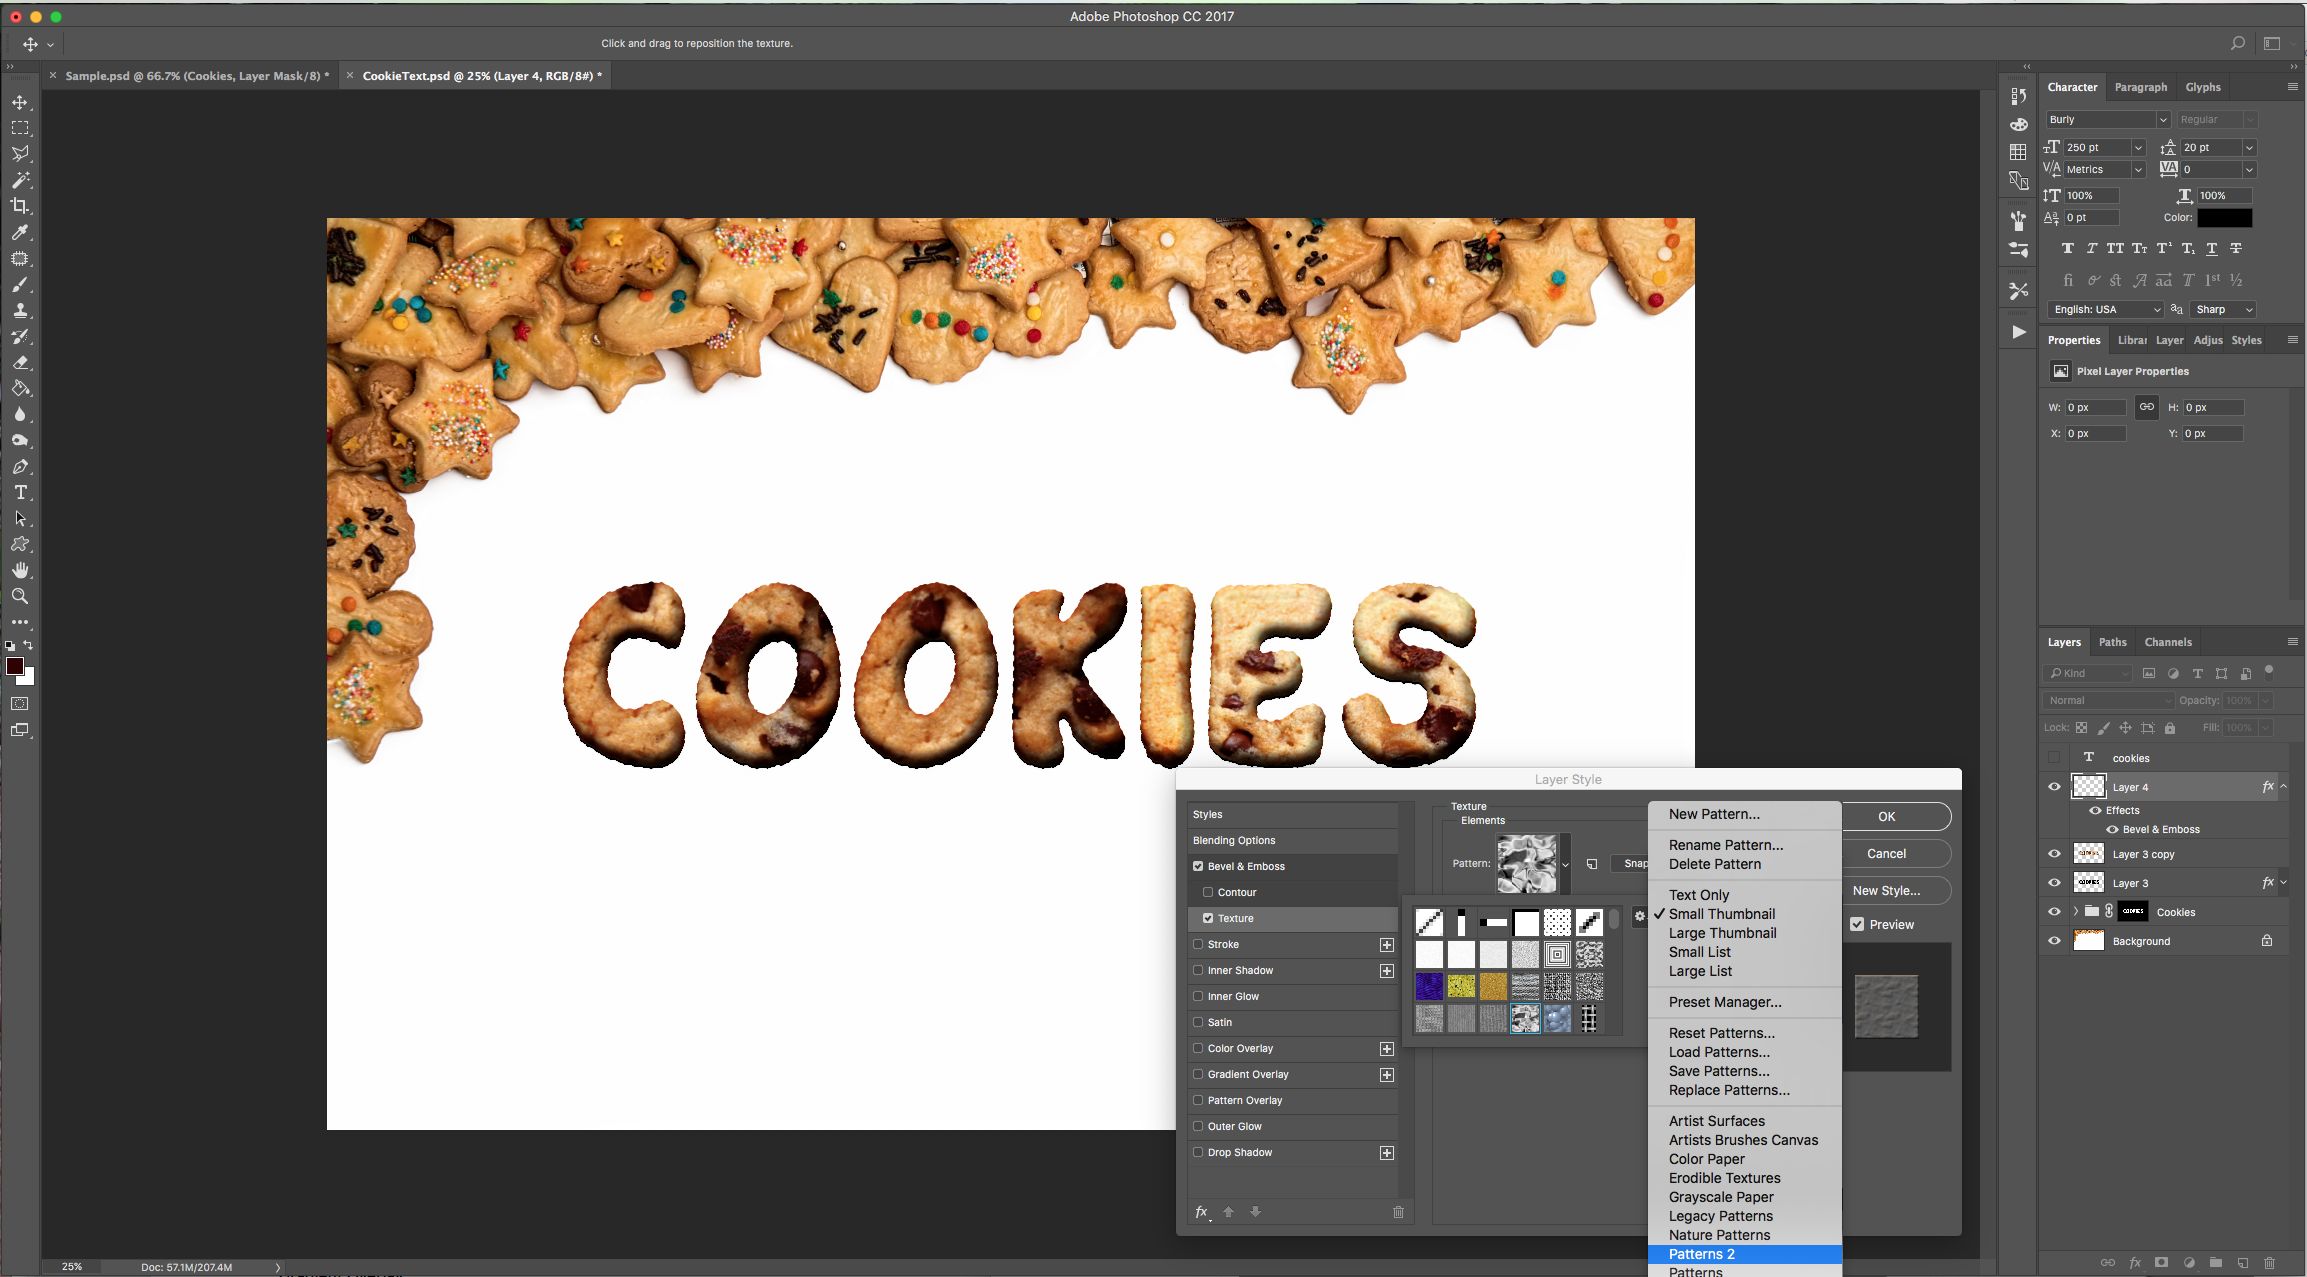
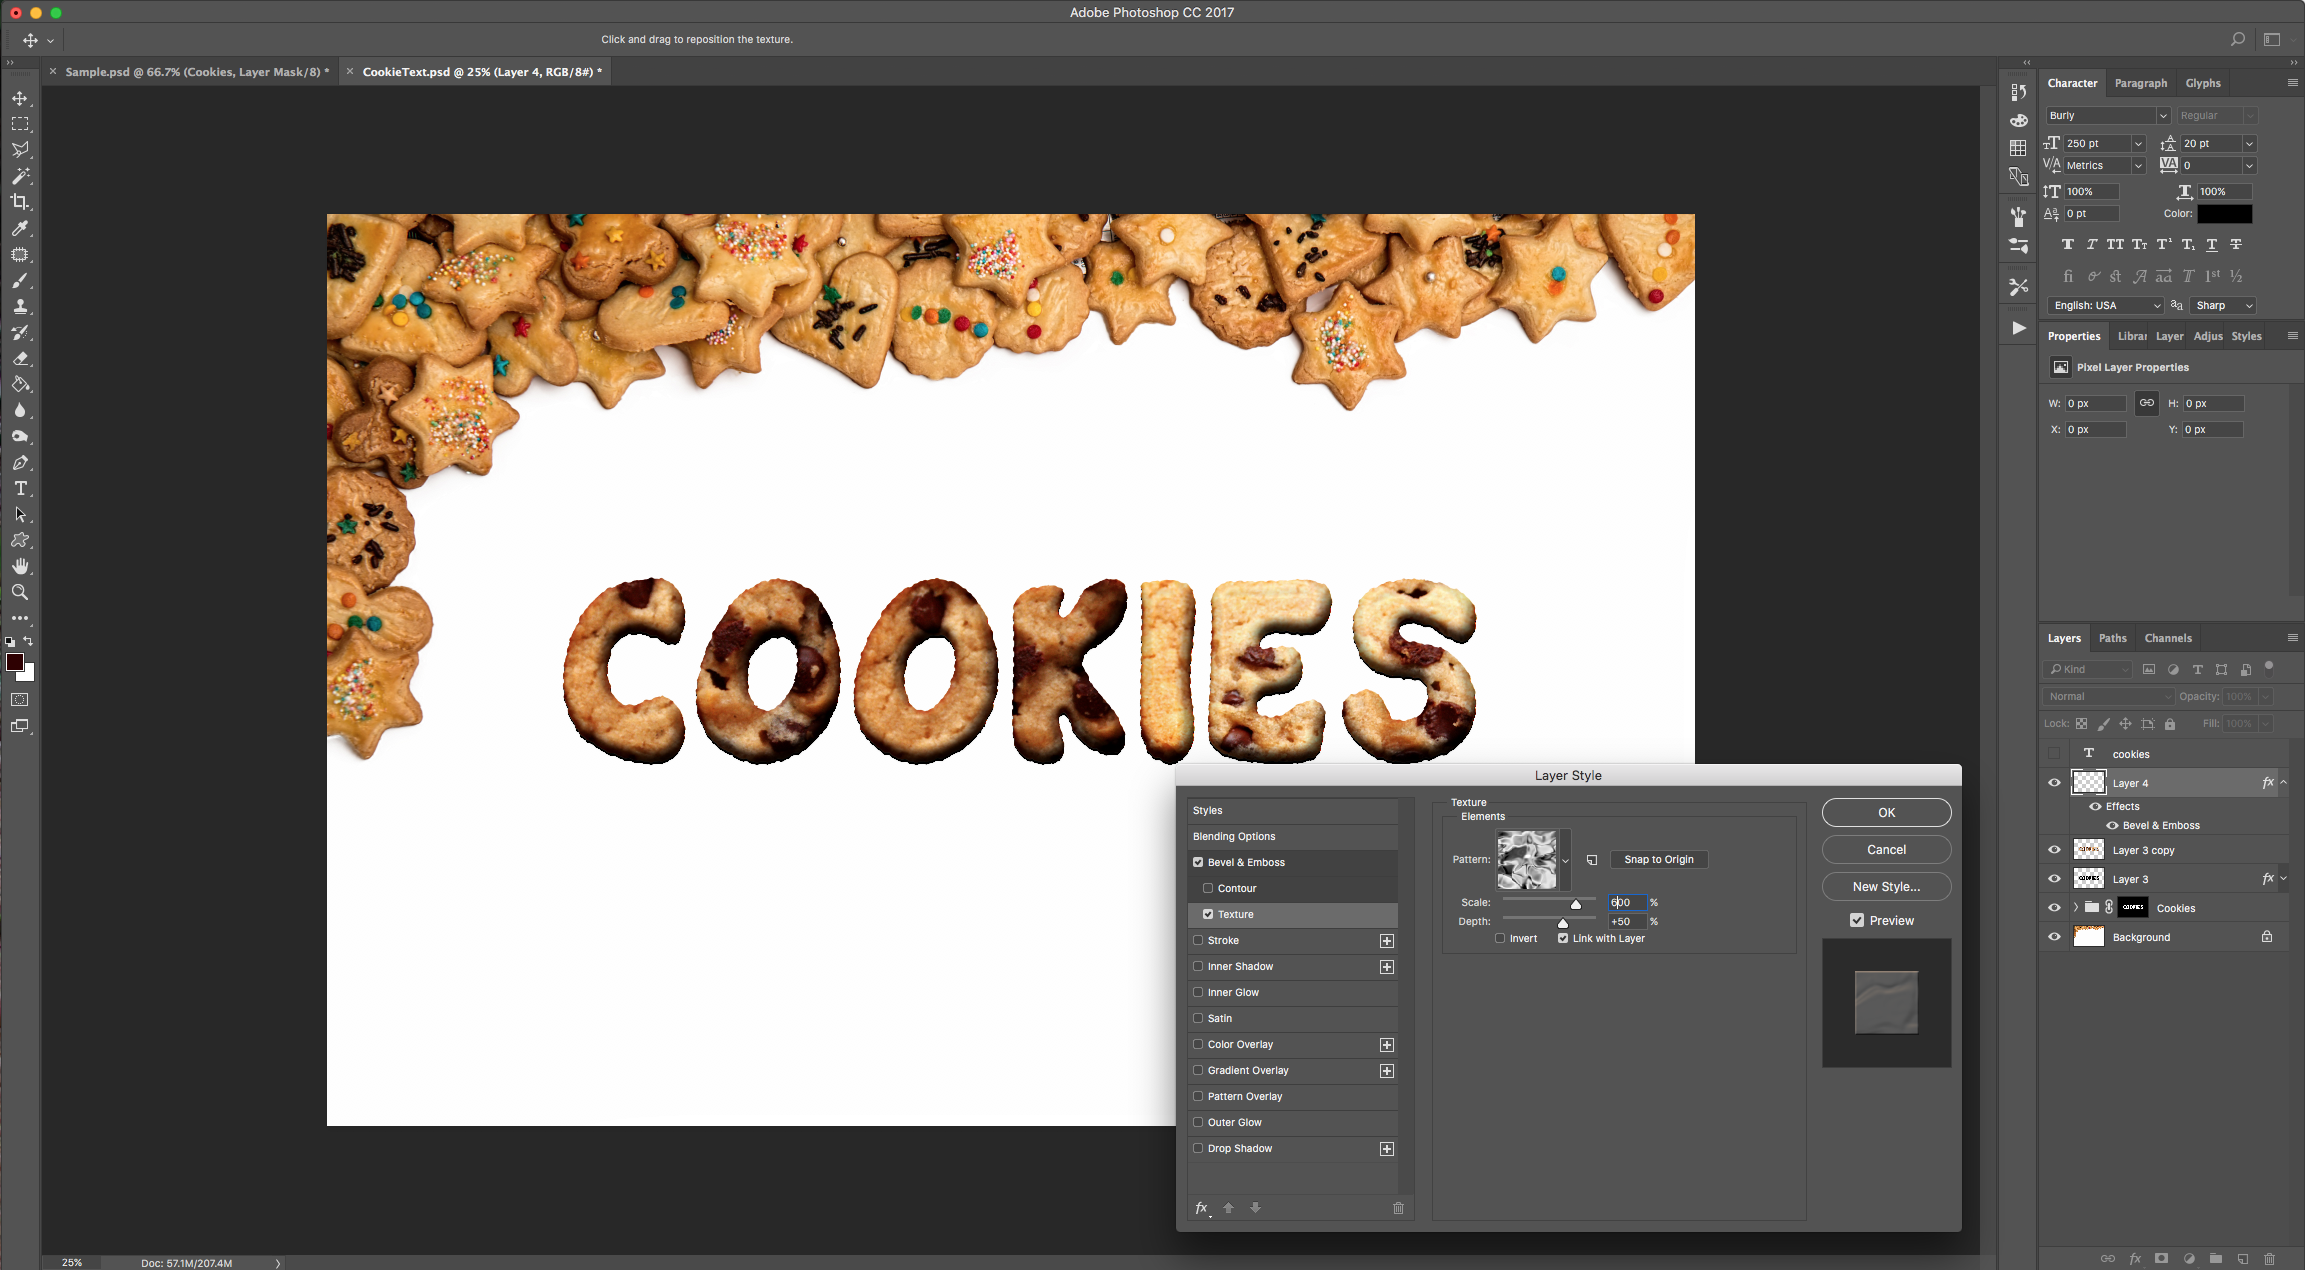
Texture:
Color Overlay:

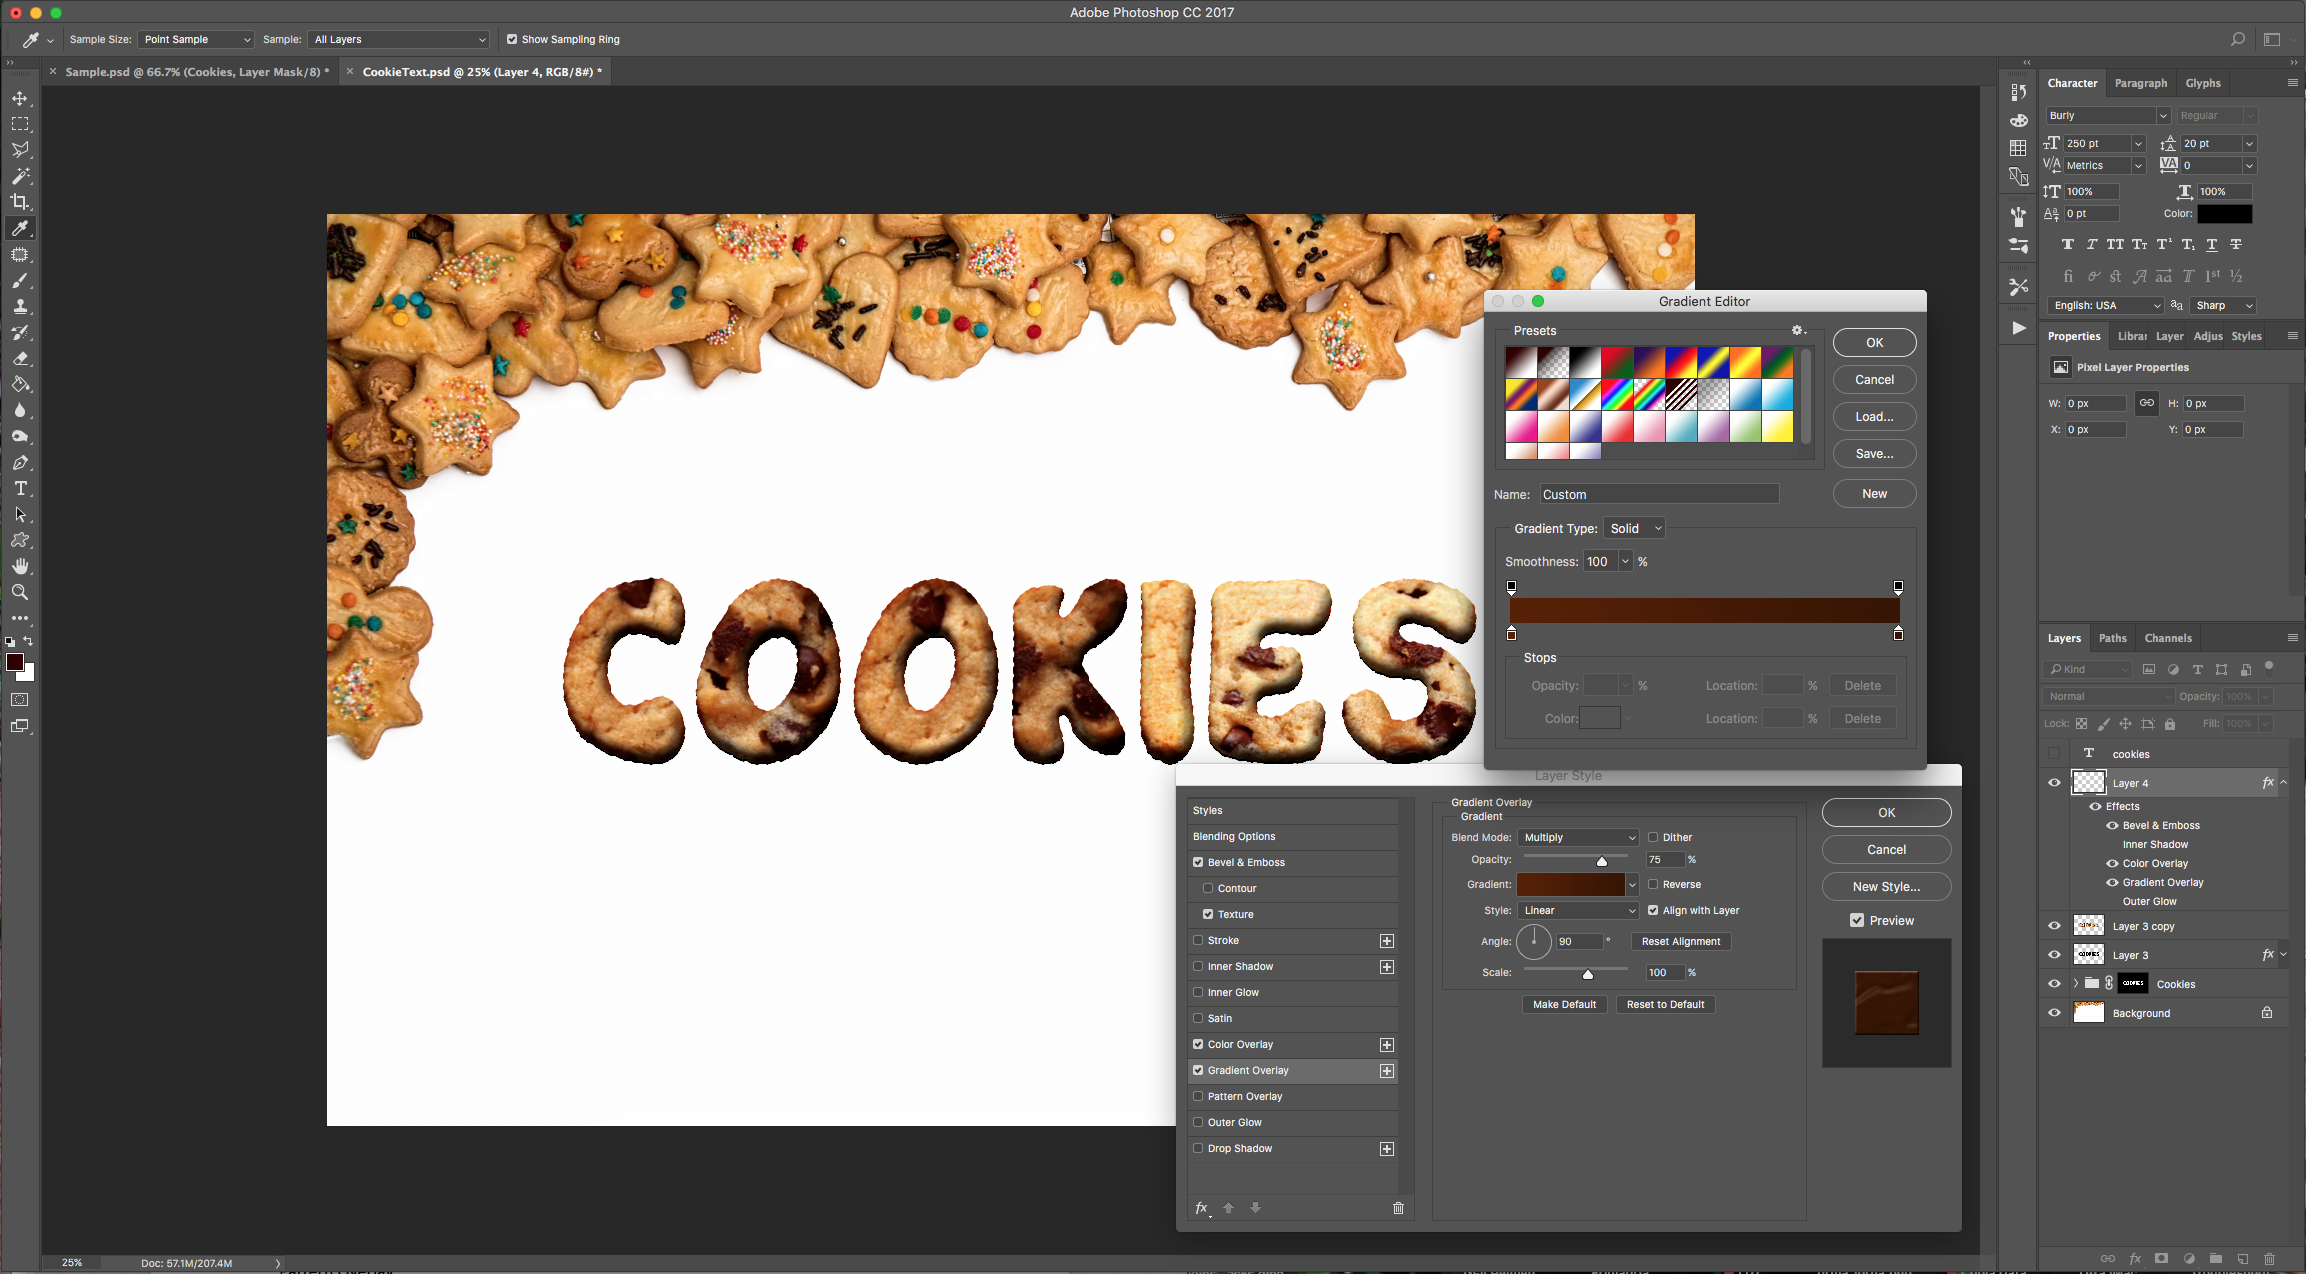
Gradient Overlay: left: # 582003 - right # dab99c
Outer Glow: #000000
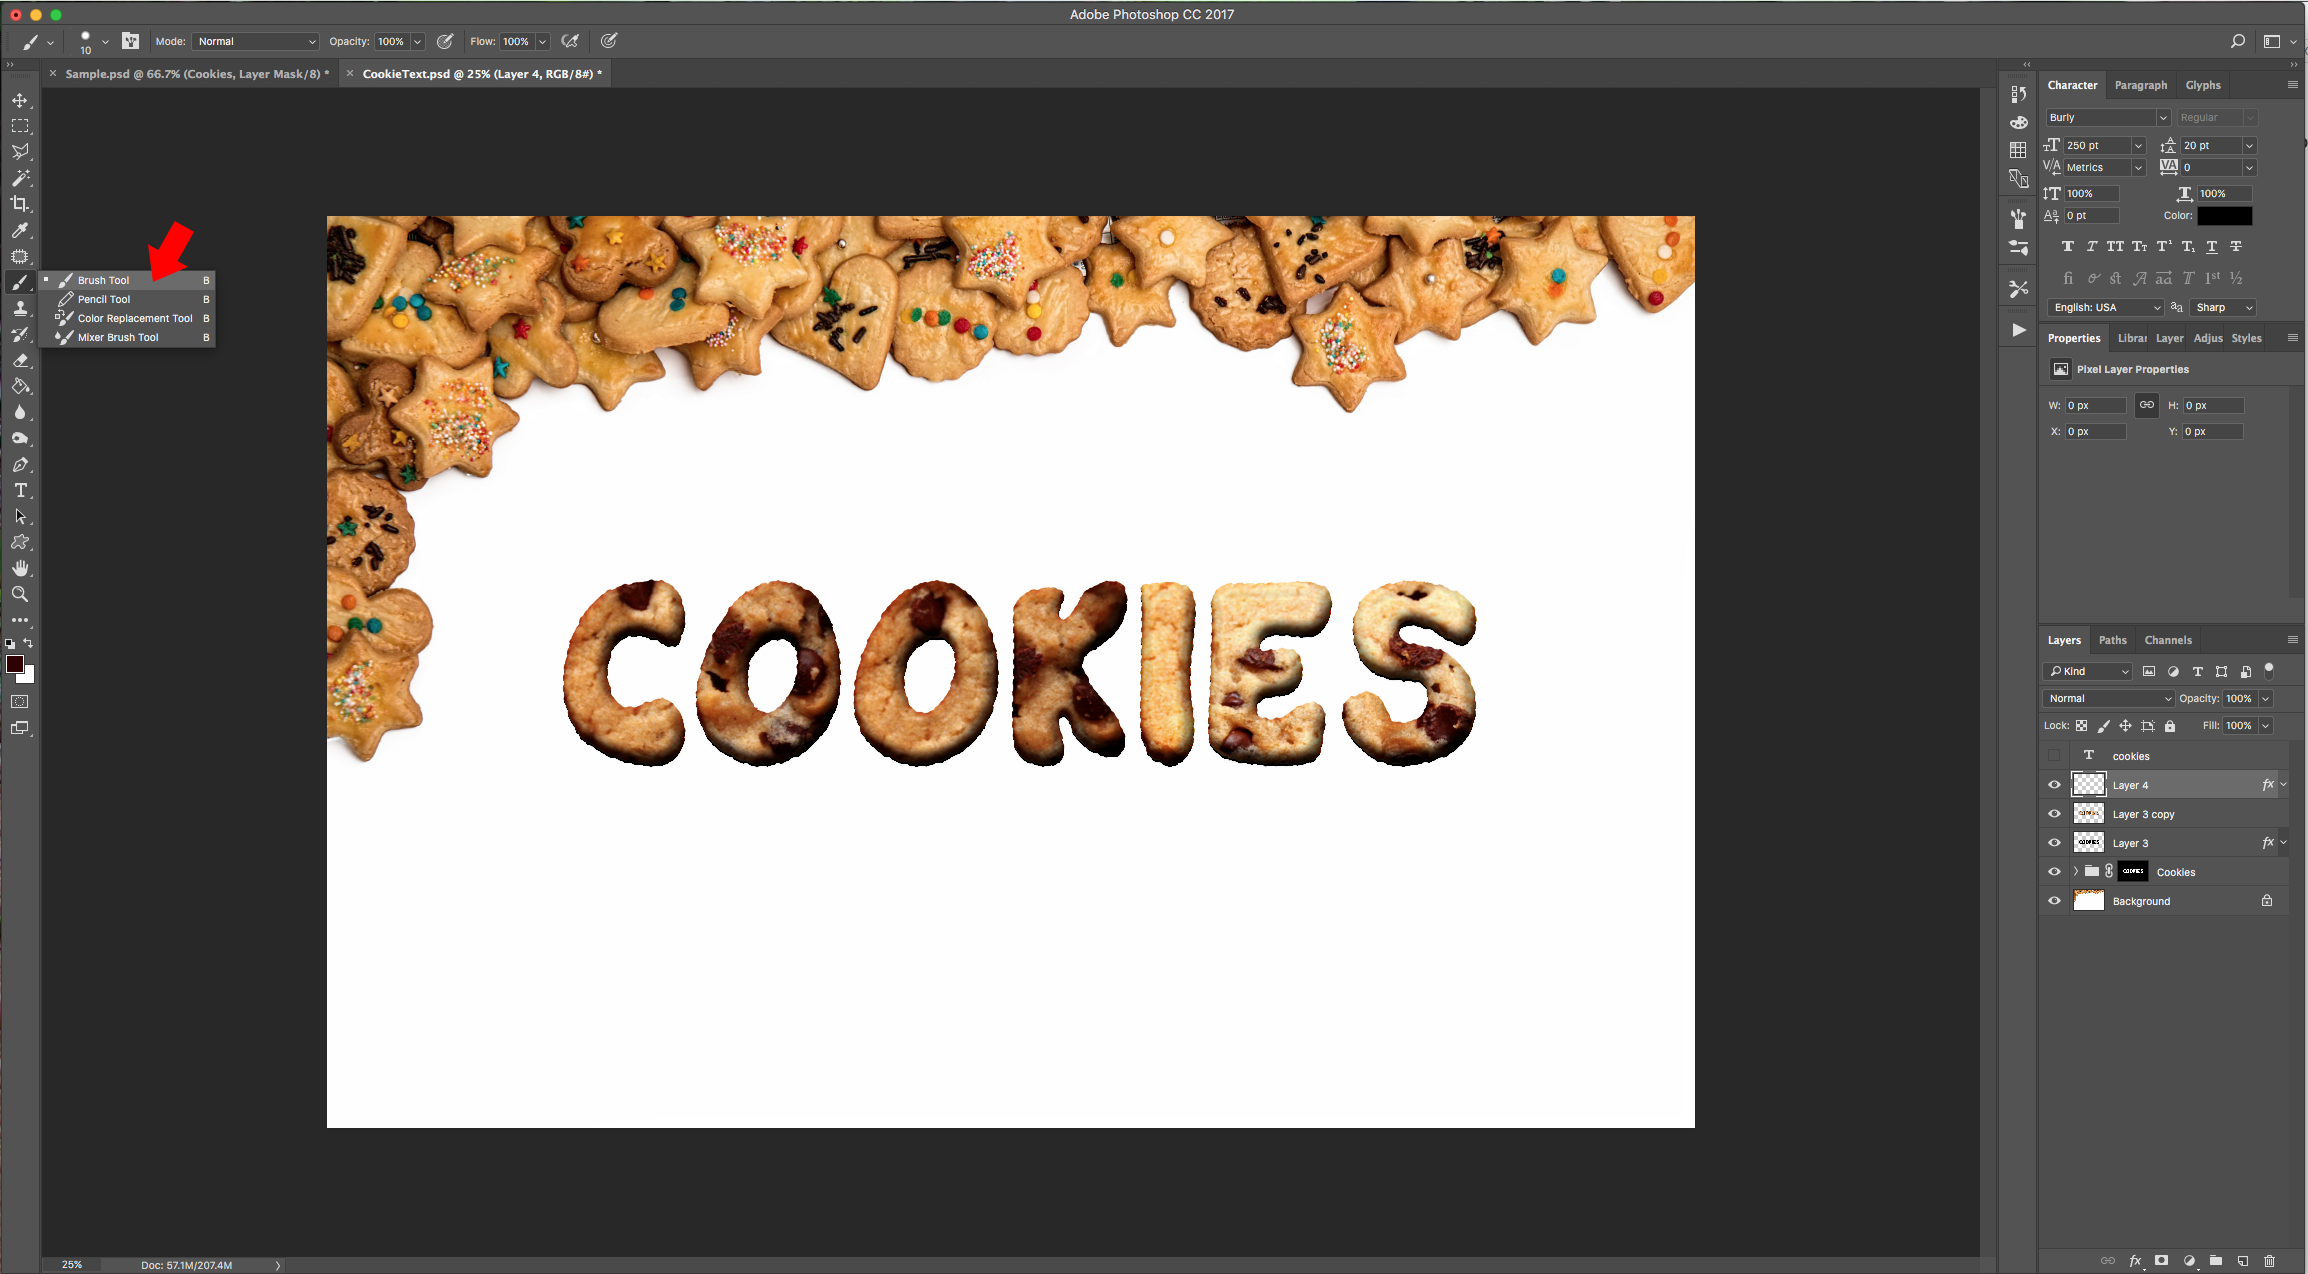
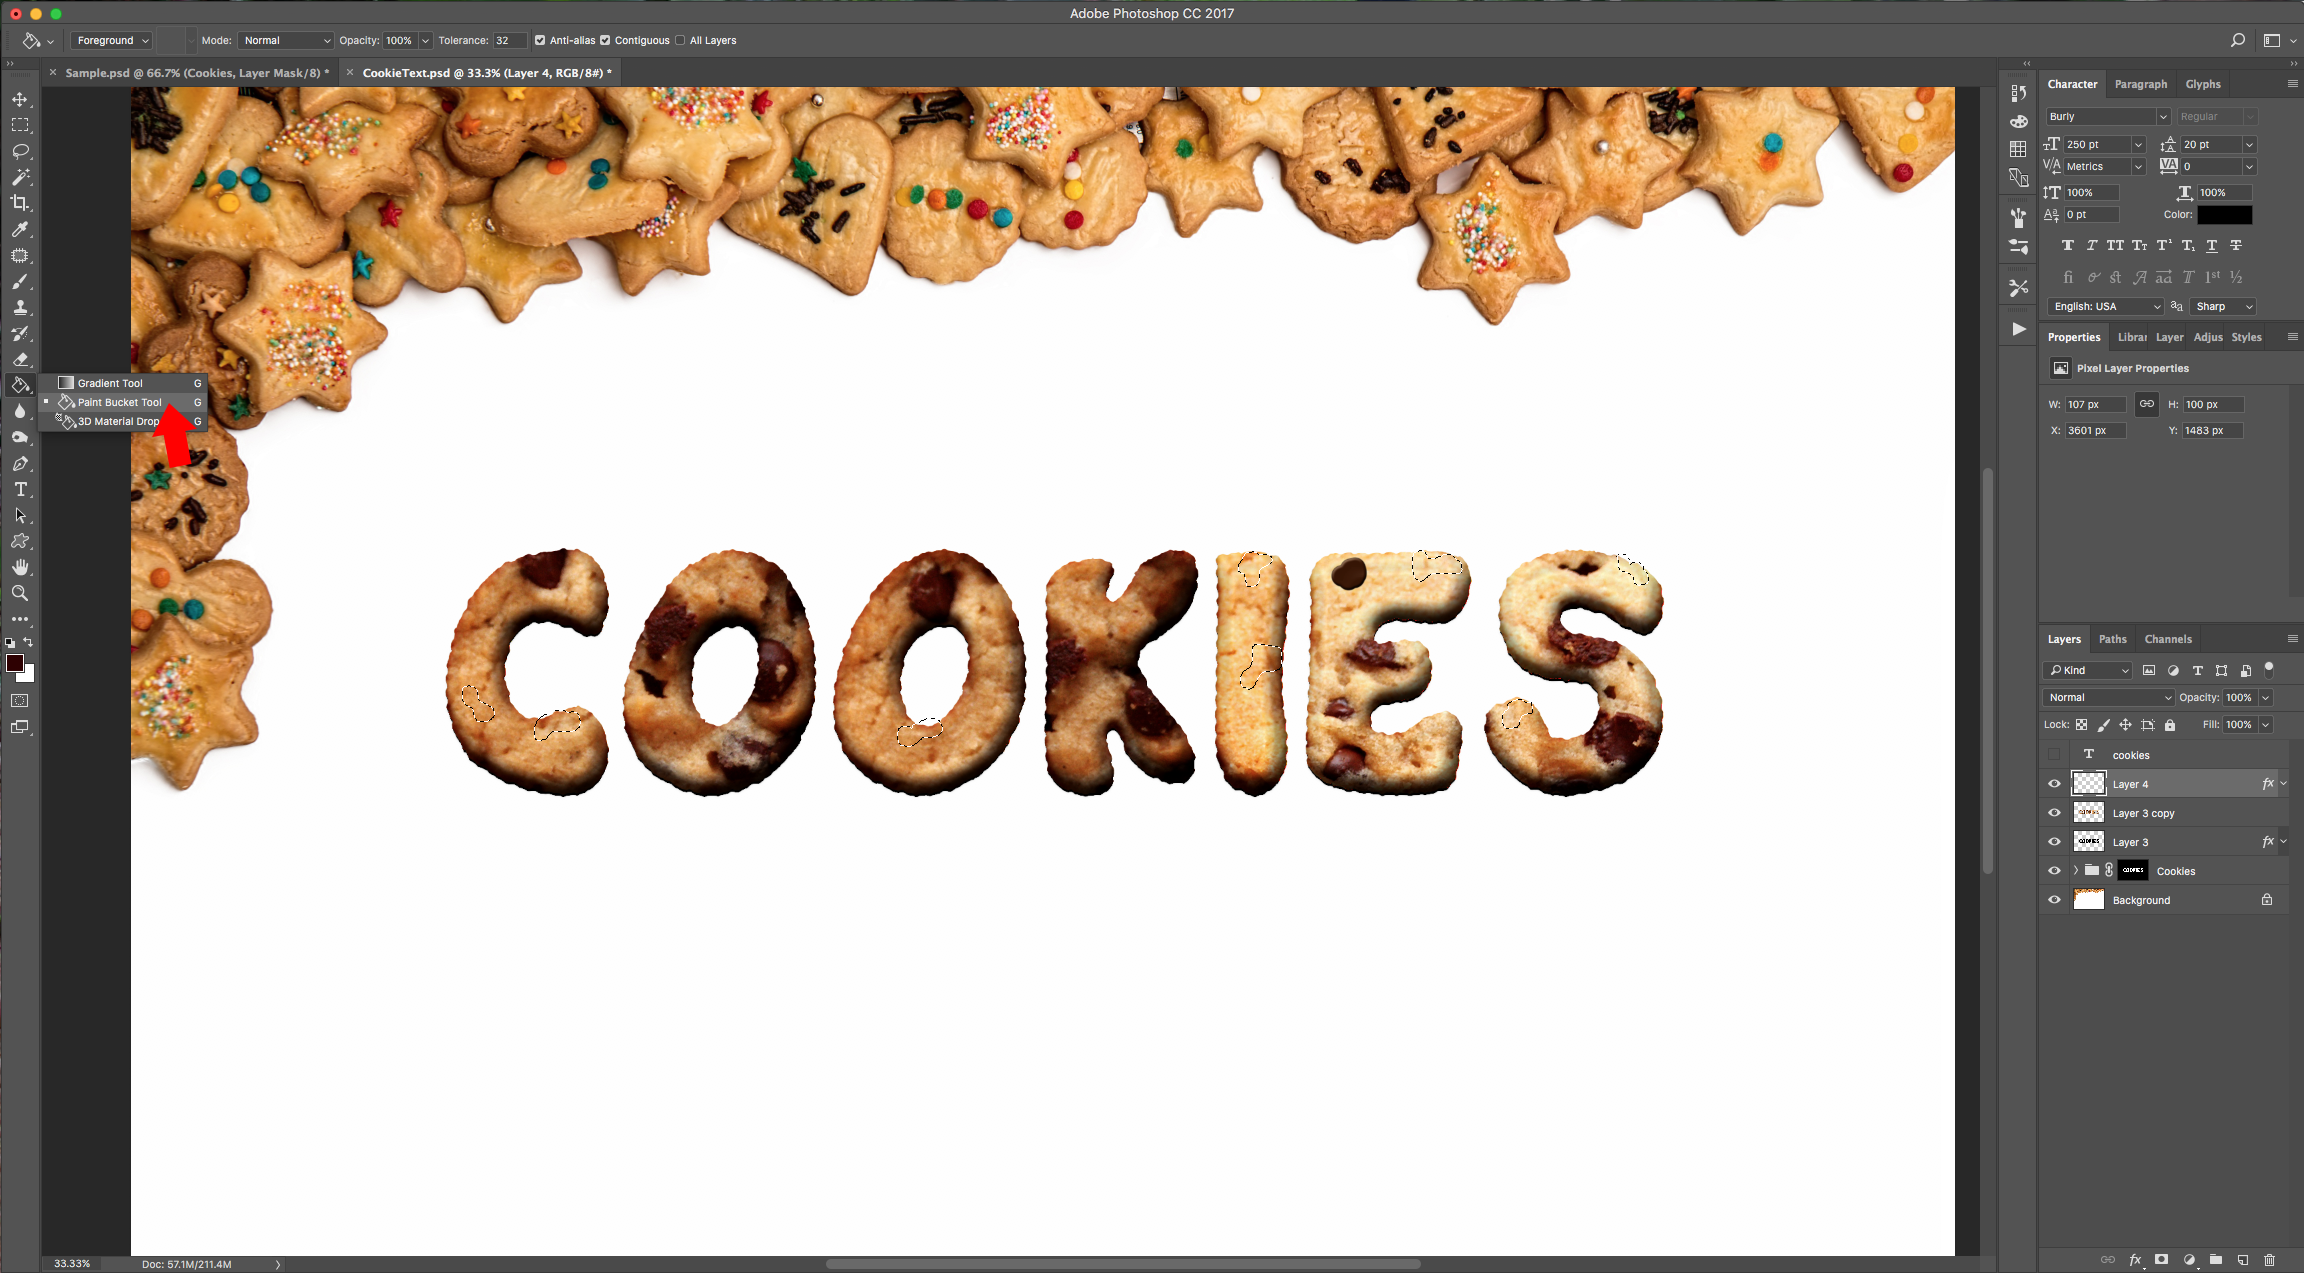
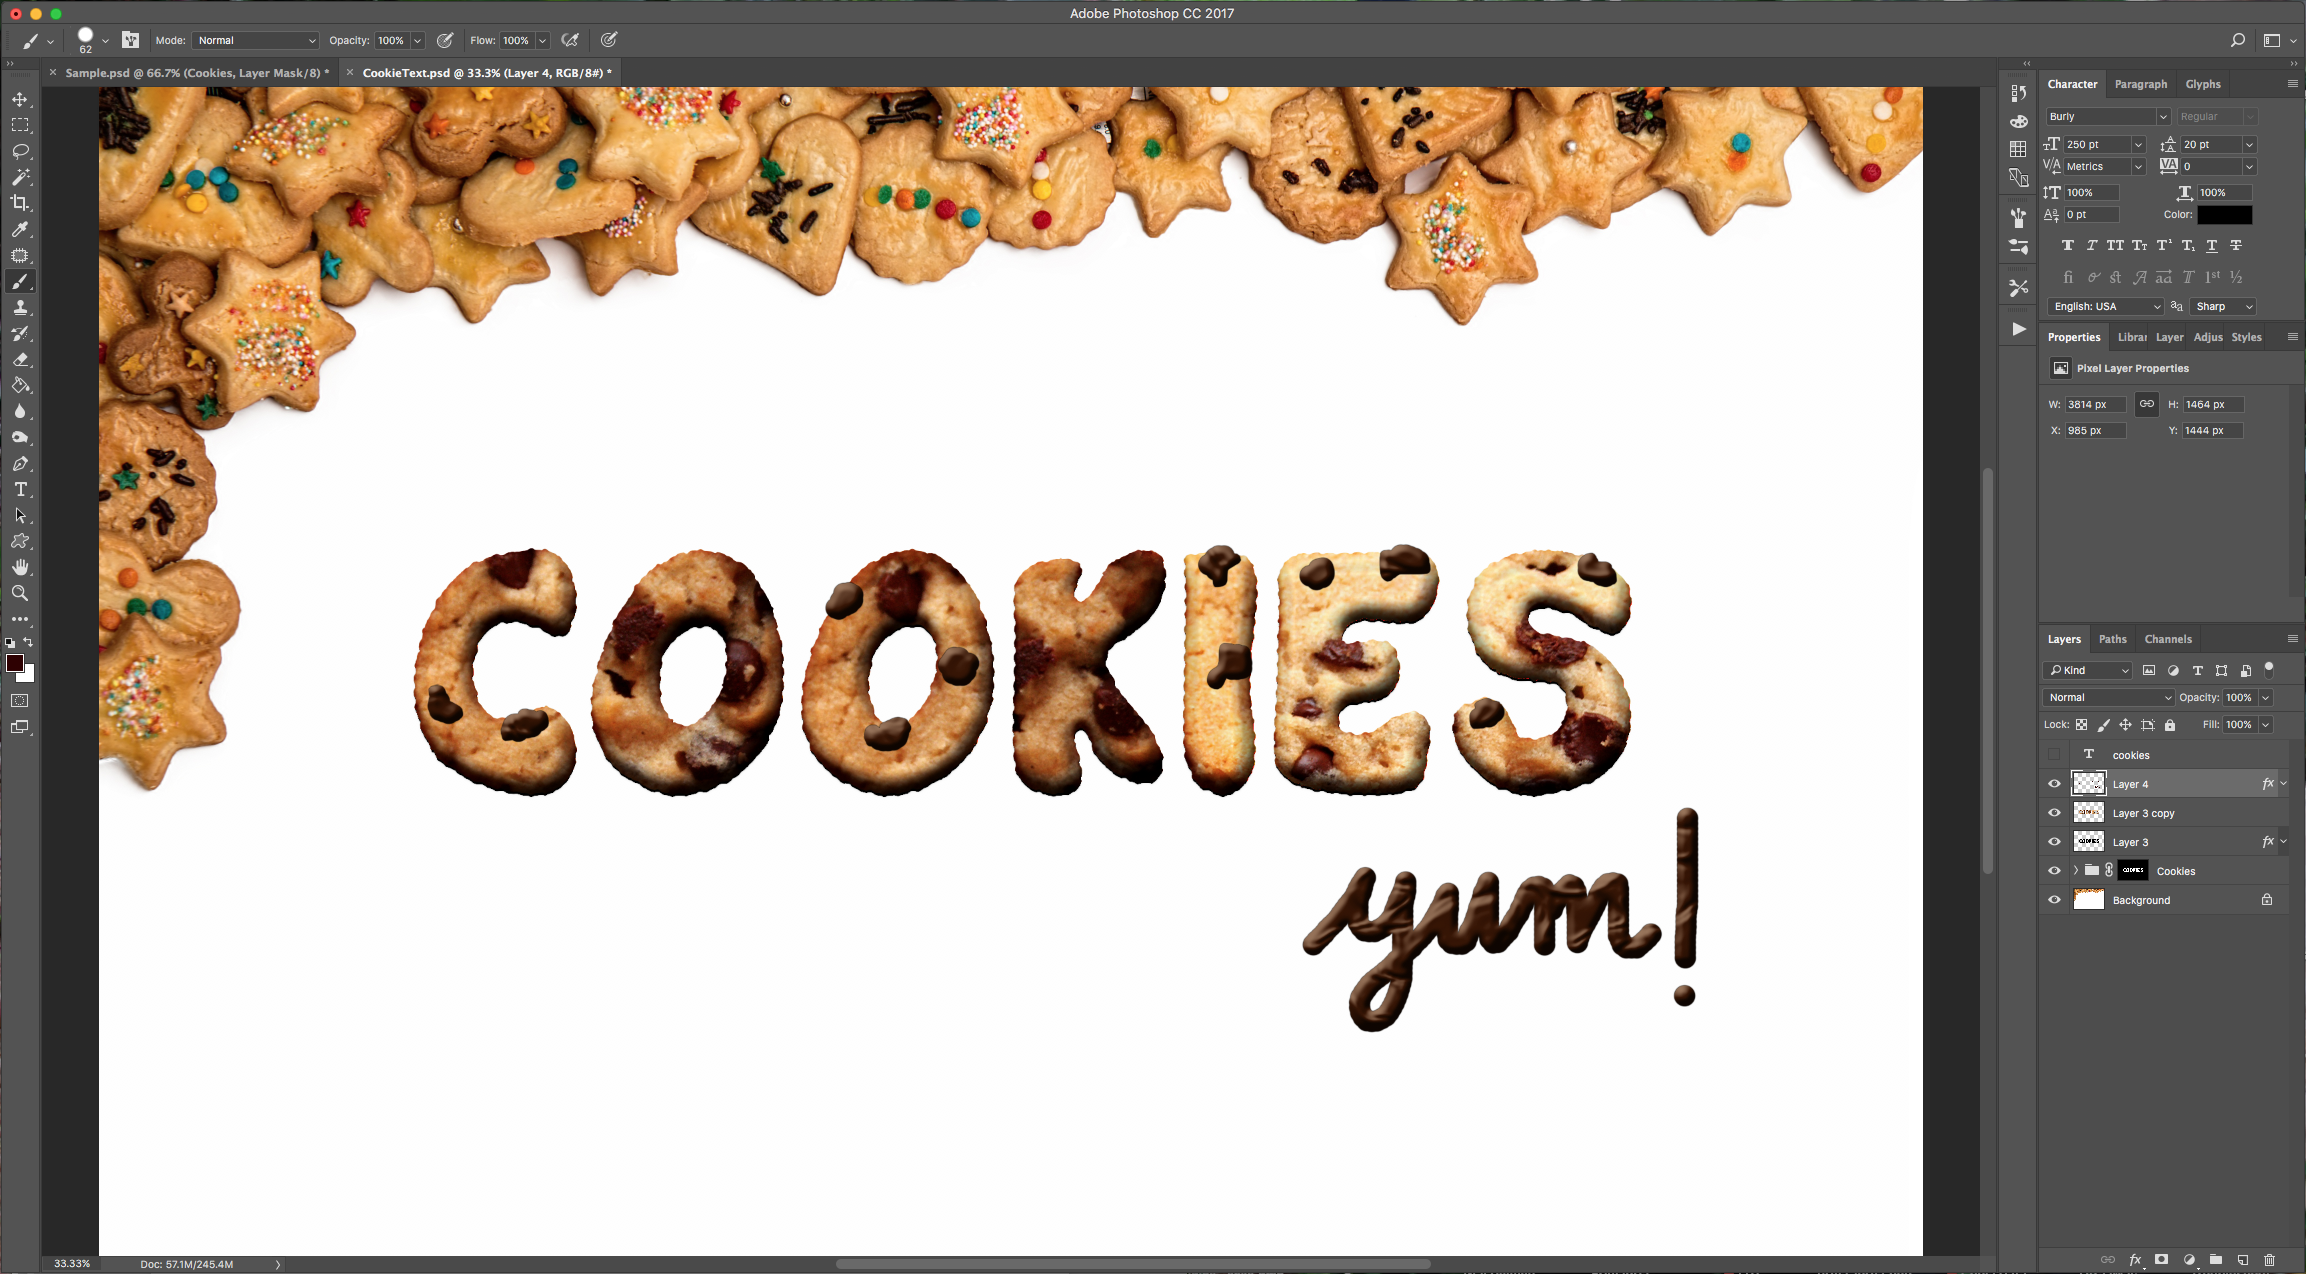
12 - Select the “Brush Tool” (B) with a 100% “Hardness” and a “Size” of about 50 pixels and draw some more chocolate chips. You can also use the “Lasso Tool” (L) to create some shapes and the fill them with the “Bucket Tool” (B).
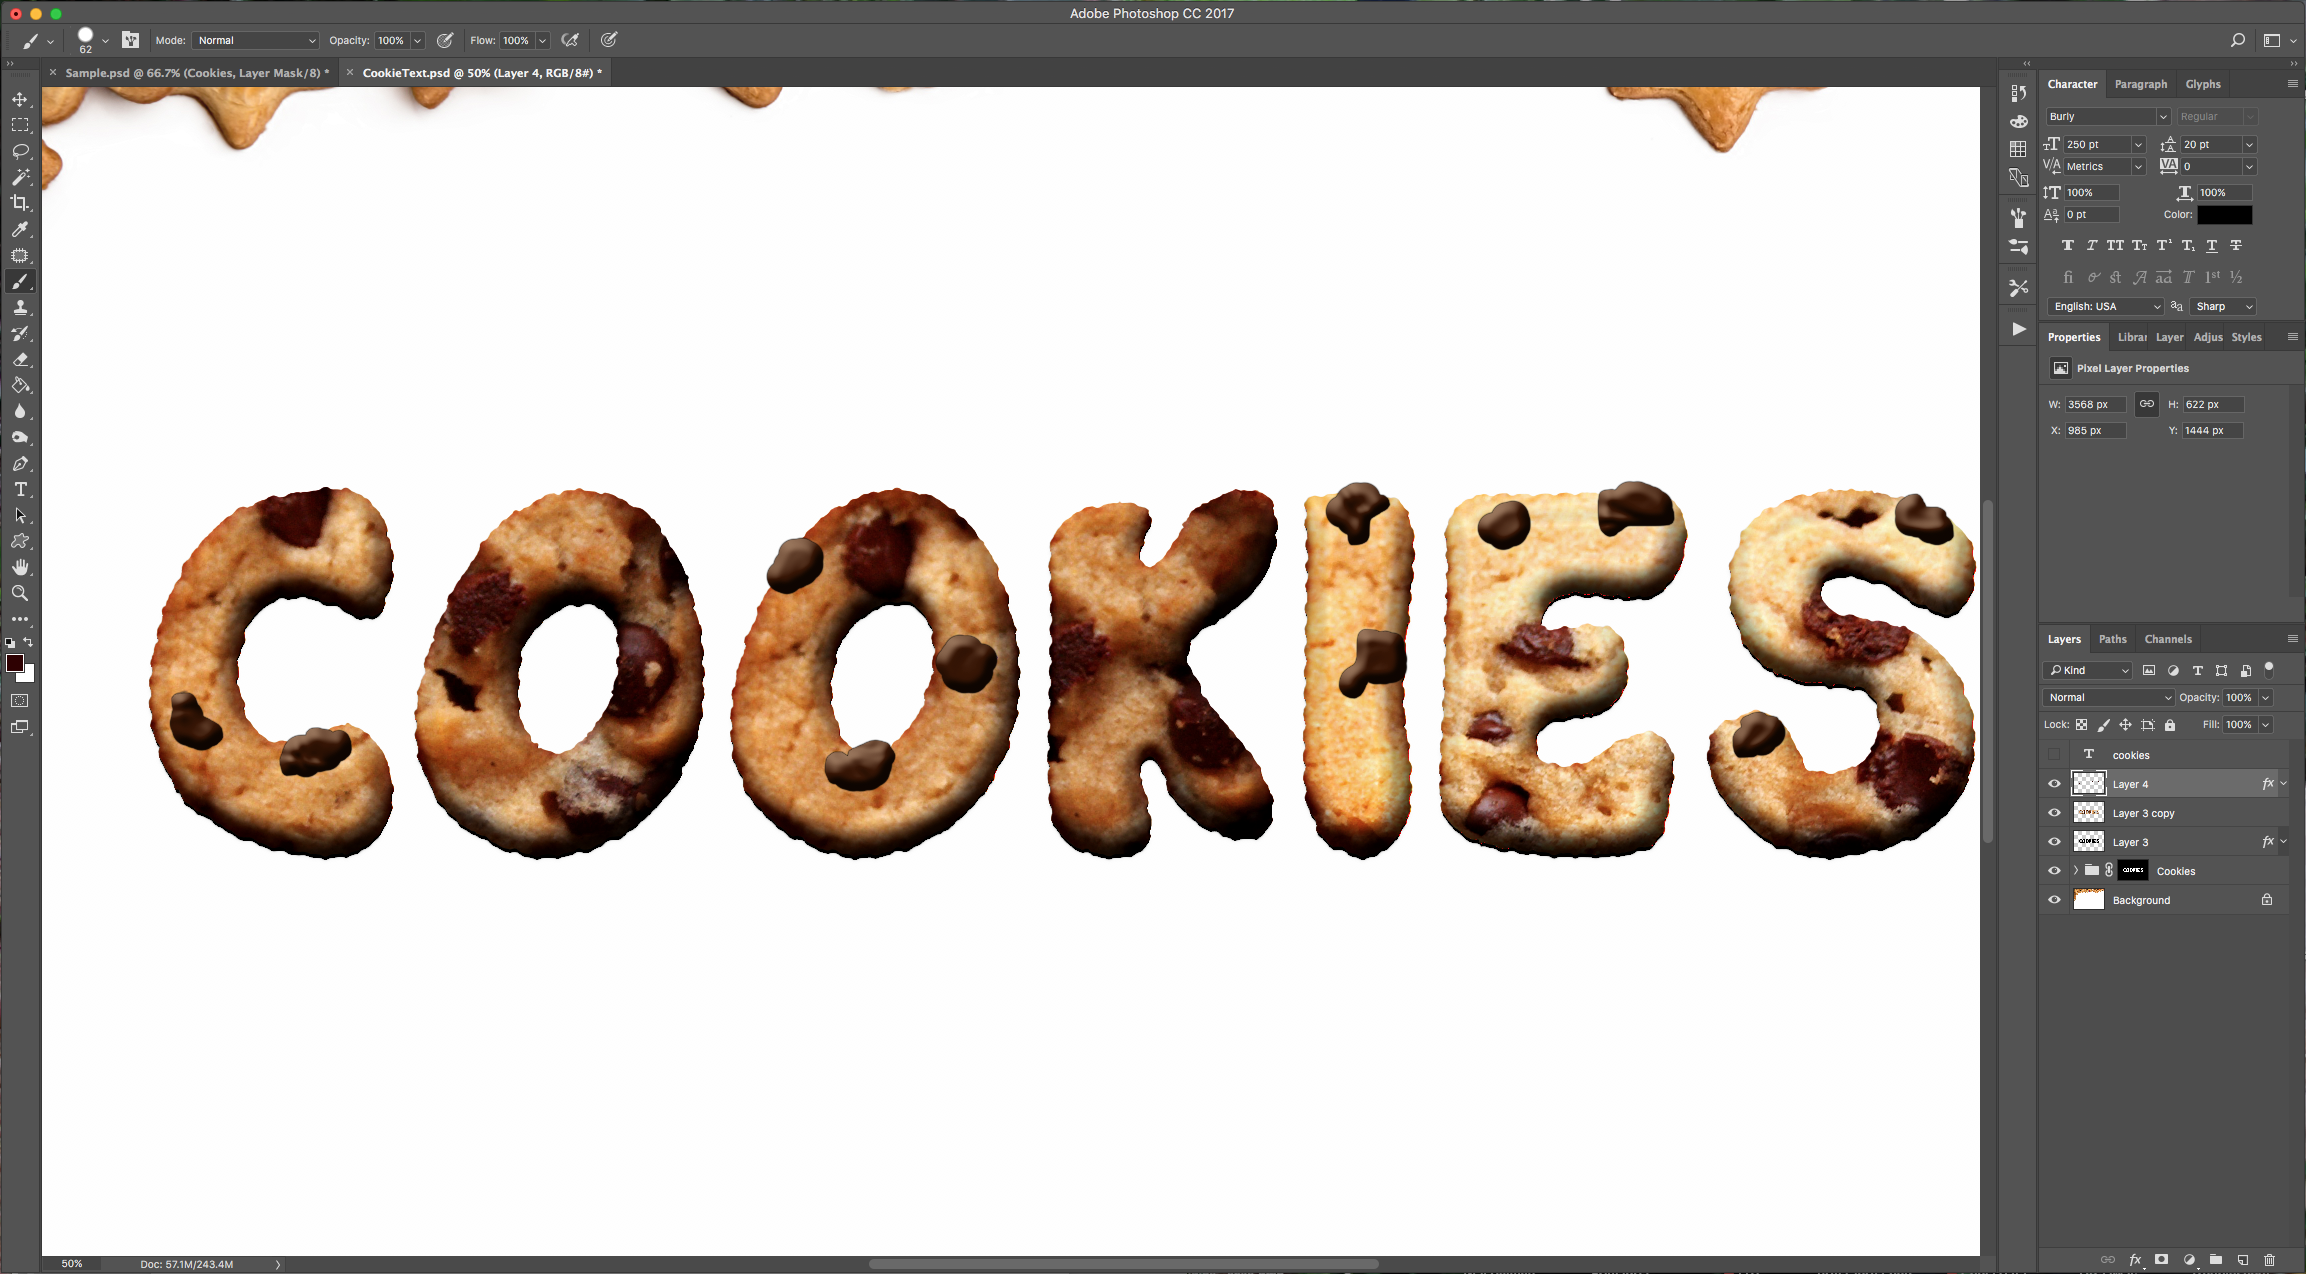
13 - Your text should look like this:
1 - Open the image you want to use as background.
2 - Select the “Type Tool” (T) and type your text. Choose the font you want (we used Burly) and let the foreground color as black.
3 - Open the image you want to use as texture, remove the background with the “Magic Wand Tool” (W) if there is any and cover the entire text with cookies. You can duplicate the cookies layer and erase some portions using the “Eraser Tool” (E) if it’s necessary. You can also use the “Lasso Tool” (L) to select some portions of your image and move them around. Then, group them together in a Folder by clicking on the “Create New Folder” button at the bottom of the “Layers” menu.
4 - Click on top of the text thumbnail while holding the Command/Control key to make a selection of the text, then hide it by clicking on the little eye icon to the left of your layer. Select the folder that holds the textures and go to Layers > Layer Mask > Reveal Selection.
5 - Select the mask thumbnail and go to Filter > Filter Gallery > Distort > Glass and apply the following values:
Then click on the “New Effect Layer” button at the bottom of the menu and apply the following values for Brush Strokes > Sprayed Strokes:
6 - Still with your mask selected go to Filter > Blur > Gaussian Blur and use a “Radius” of 2.0 pixels:
7 - Still selecting your mask click Command/Control +L to open the “Levels” dialogue and change the values to 100, 1.00 and 150.
8 - Create a selection of the layer mask (with the irregular edges) and then create a “New Layer” by clicking on the “Create New Layer” button at the bottom of the “Layers” menu. Fill (Shift + F5) it with any color.
9 - Double-click on your new layer to invoke the “Layer Styles” menu and apply the following:
Blending Options: Fill Opacity 0%
Bevel & Emboss: Highlight color # fde5ad, Shadow color: # 4d1608
Inner Shadow: # 270600
Inner Glow: # 785655
Drop Shadow:
10 - Select this layer and the folder with the textures, duplicate them by dragging their layer thumbnails onto the “Create New Layer” button at the bottom of the “Layers” menu. Disable the “Drop Shadow” in your duplicate, then merge them (right-click on top of the thumbnails and select “Merge Layers”), change the “Bend Mode” to “Soft Light” and lower the “Opacity” to 60%.
11 - Create a “New Layer” and place it on top. Double-click on the layer and apply the following “Layer Styles”:
Bevel & Emboss: Highlight color: # dcb795, Shadow color: # 000000
Texture:
Color Overlay:
Gradient Overlay: left: # 582003 - right # dab99c
Outer Glow: #000000
12 - Select the “Brush Tool” (B) with a 100% “Hardness” and a “Size” of about 50 pixels and draw some more chocolate chips. You can also use the “Lasso Tool” (L) to create some shapes and the fill them with the “Bucket Tool” (B).
13 - Your text should look like this:
by @lornacane


