
How to Make an Easy Duotone in Photoshop
Learn how to create duotones in this Photoshop tutorial to make cool photos you can display anywhere
Today, you will learn how to create a duotone effect in Photoshop using two different methods. The first method will use some adjustment layers and two Solid Color fill layers, and the second method will use a Gradient Map adjustment layer.

For this tutorial, you will need an image or a portrait. The picture of a surfer that we used in this tutorial is from the Plus Hub on Design Bundles. If you’re not a Plus Member yet and are interested, we have a free 30-day trial of the Gold Plus Membership available for you today!
Duotone Using Solid Color Fill Layers
Step 1 - Add a Black & White Adjustment Layer if Needed
With your image open in Photoshop, click on the Black & White adjustment layer icon in the Adjustments panel if your photo is colored.

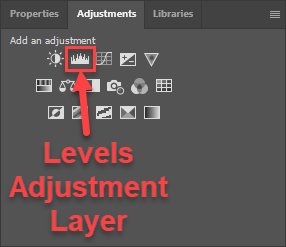
Step 2 - Add a Levels Adjustment Layer
Next, click on the Levels adjustment layer icon in the Adjustments panel.
Adjust the levers in the Properties panel for the Levels layer to create more contrast in the image if needed.

Step 3 - Add a Solid Color Fill Layer
Click on the small black and white circle icon at the bottom of the Layers panel and choose Solid Color from the list.

In the Color Picker dialog, choose a color. This color will affect the lighter areas in the image. We picked #fa9b13.

Change the Blending Mode of the Color Fill 1 layer to Multiply.

Step 4 - Add a Second Solid Color Fill Layer
Add a second Solid Color fill layer and pick a different color. This color will affect the darker areas of the image. We picked #320a5f.

Change Color Fill 2’s Blending Mode to Lighten. The duotone image result of the first method is shown below.

Step 5 - Modify Adjustment Layers if Needed
At this point, you can still adjust the adjustment layers’ settings and color fill layers’ settings if needed. For instance, you can select the Levels layer and move the levers again if you’d like.

Duotone Using a Gradient Map Adjustment Layer
Step 1 - Add a Gradient Map Adjustment Layer
Click the black and white circle icon in the Layers panel to add a Gradient Map adjustment layer.

Step 2 - Pick Gradient Map Colors
In the Properties panel, click the gradient bar to open the Gradient Editor dialog. In the Gradient Editor dialog, click the left color icon below the gradient bar and select the color that will affect the darker areas of the image. Then click the right color icon and pick the color that will affect the lighter areas of the image.

We used the colors #050e52 and #fa456b.

You can use #7a0b0b and #ffdc3b for another duotone color combination.

Following is another color combination: #0e3463 and #c868ff.

Using a duotone effect to create some awesome images in Photoshop is that simple! Decide which method you’d like to use to make some stunning images for yourself.


