
How to Make a GIF in Photoshop
In this tutorial we will walk you through the steps on creating a GIF in Photoshop. By using the timeline window, you can quickly create animations.
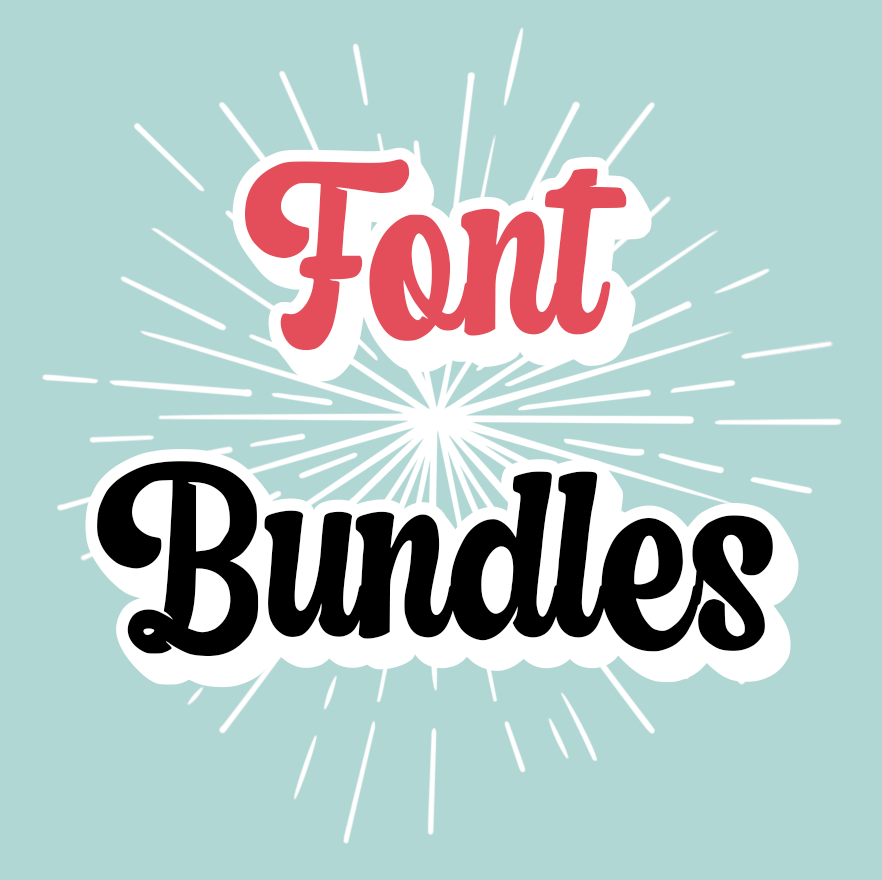
For this tutorial, we are using Last Dream which is a layered font, as well as fireworks clipart and a sunset color palette.
In Photoshop, create a new document. Size it to fit your needs, but keep in mind that if you are going to use it on Instagram, it is better to make it square.
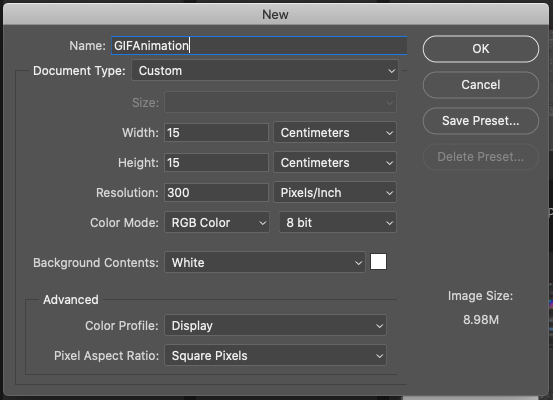
Ours was 15 x 15 cm @300 dpi.

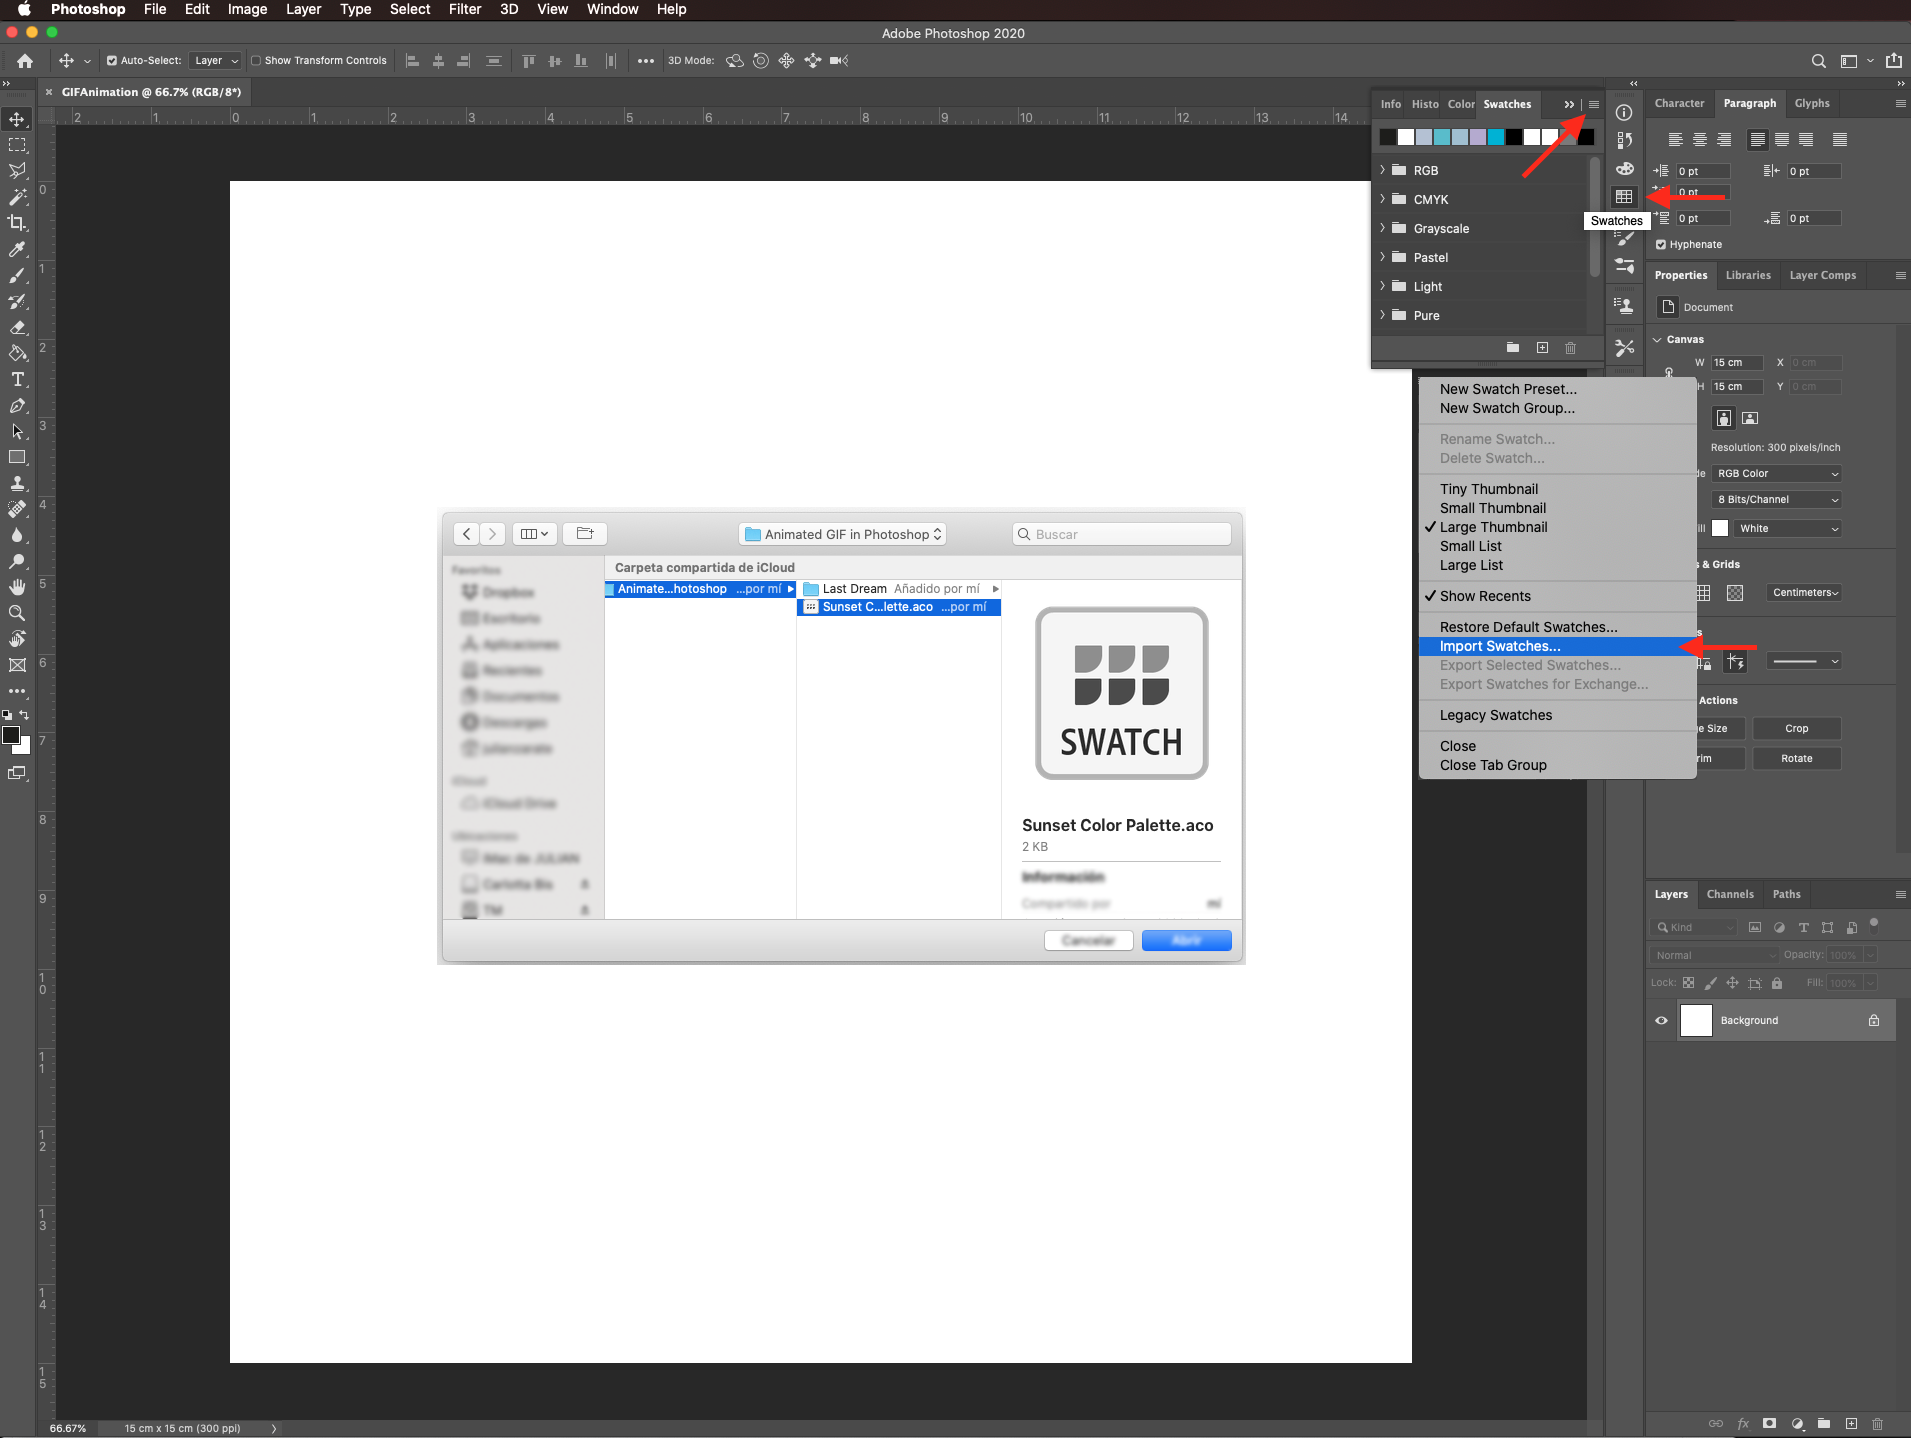
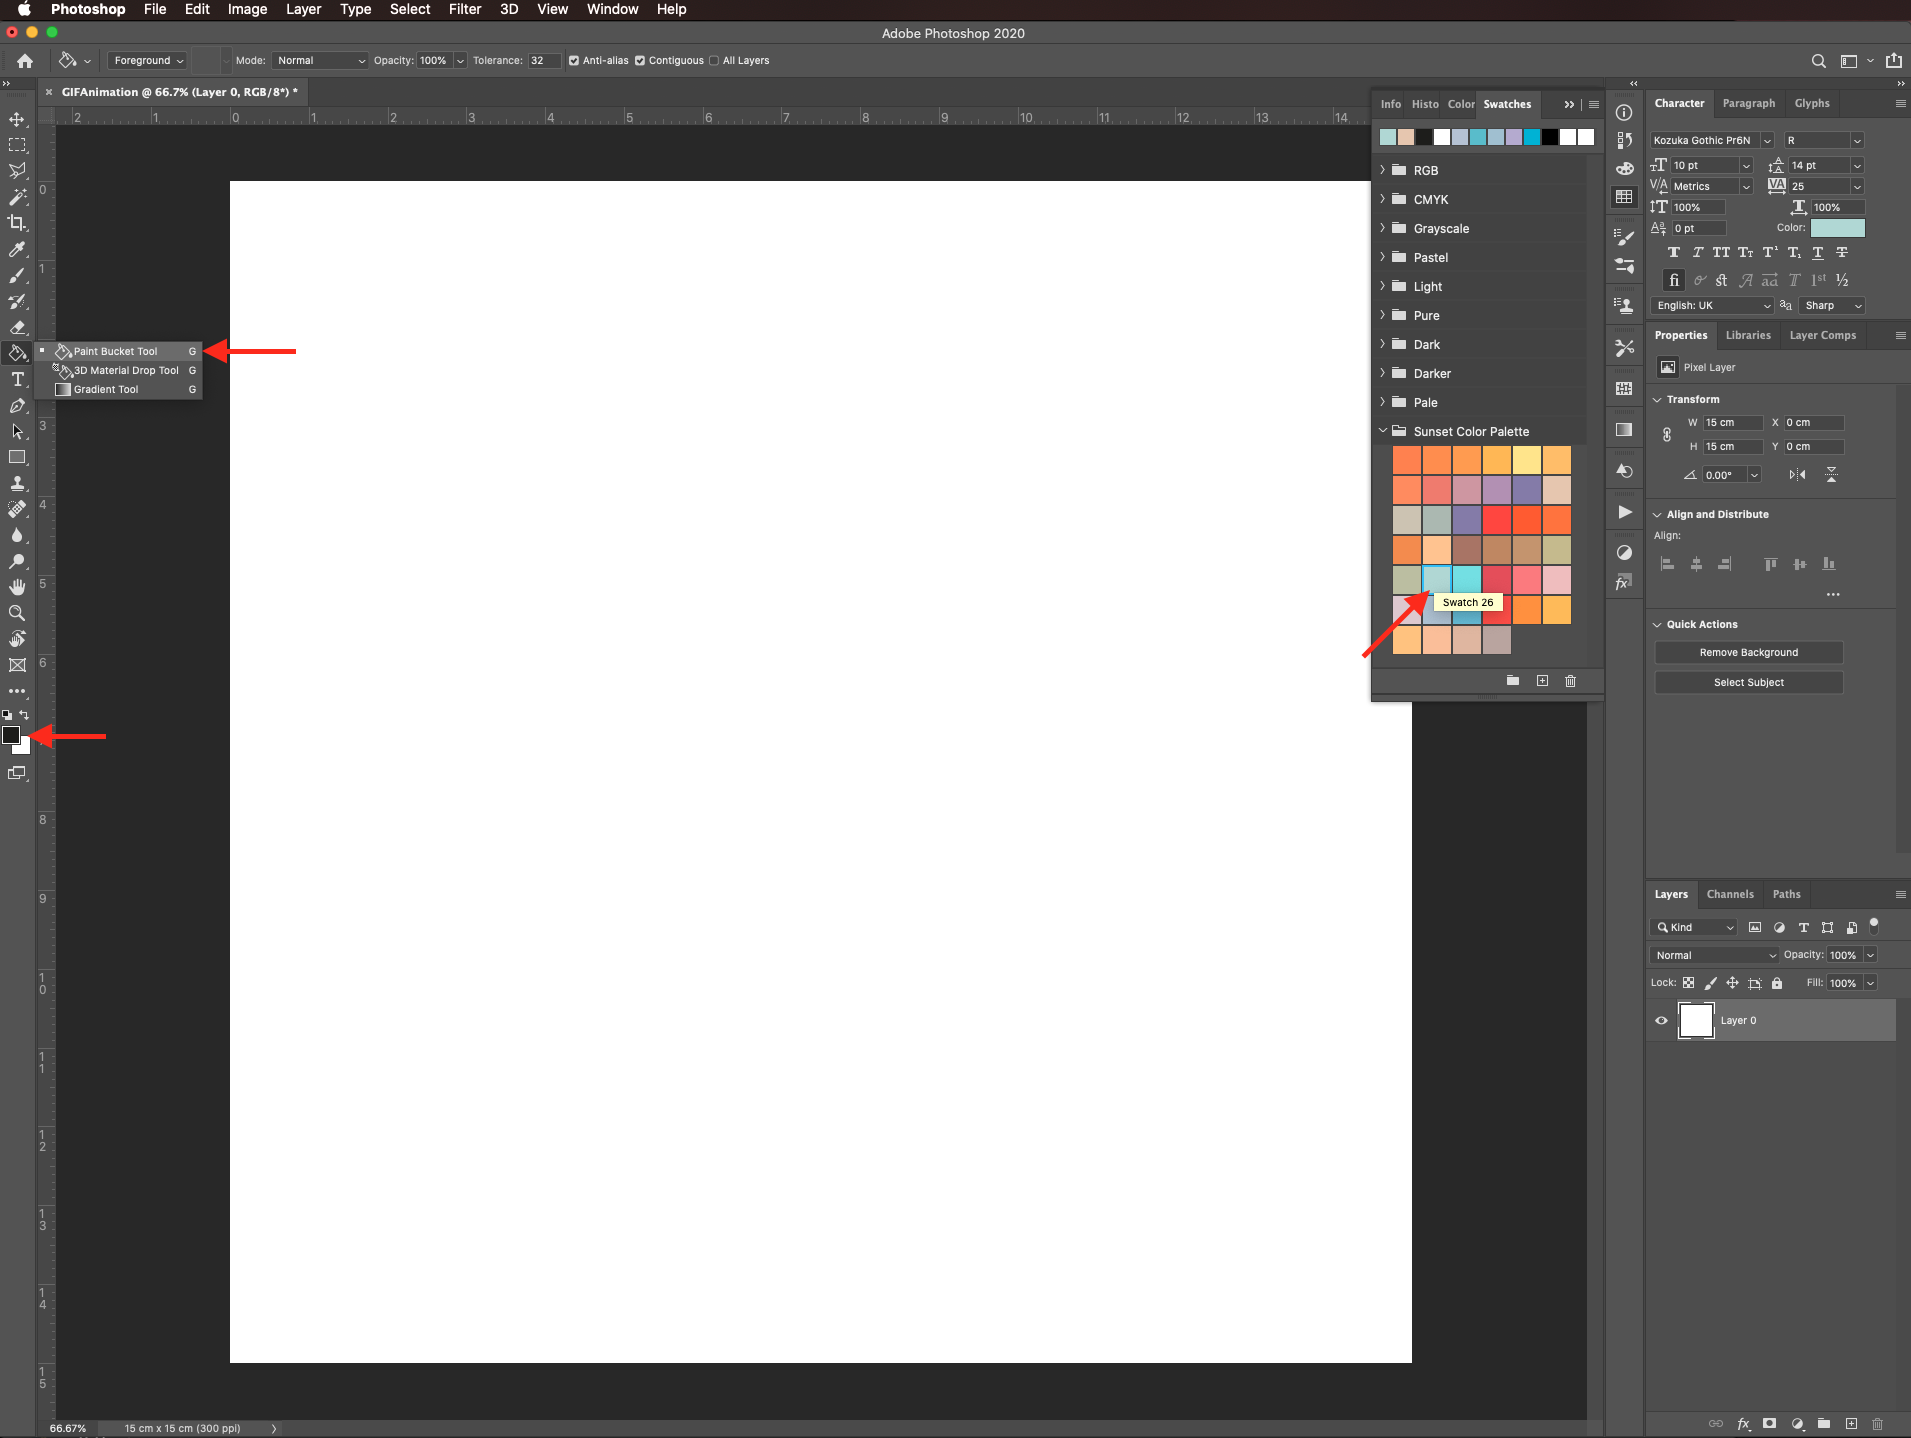
We will be using a color palette. To bring it into Photoshop, click on the small menu on the top right side of the Swatches panel and choose import swatches. Navigate to the location where the color palette file is stored and select it.
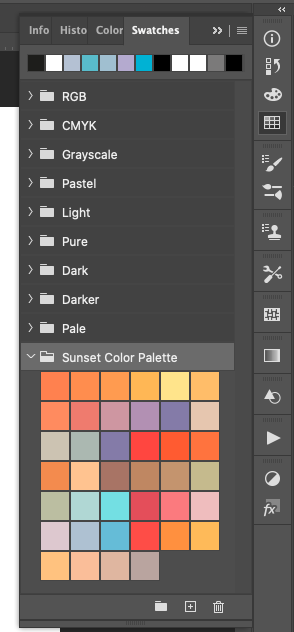
Now, it should appear as a folder inside the Swatches panel.
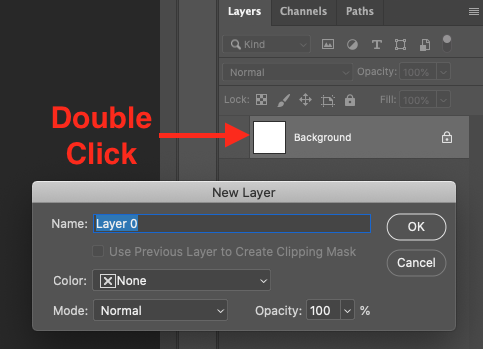
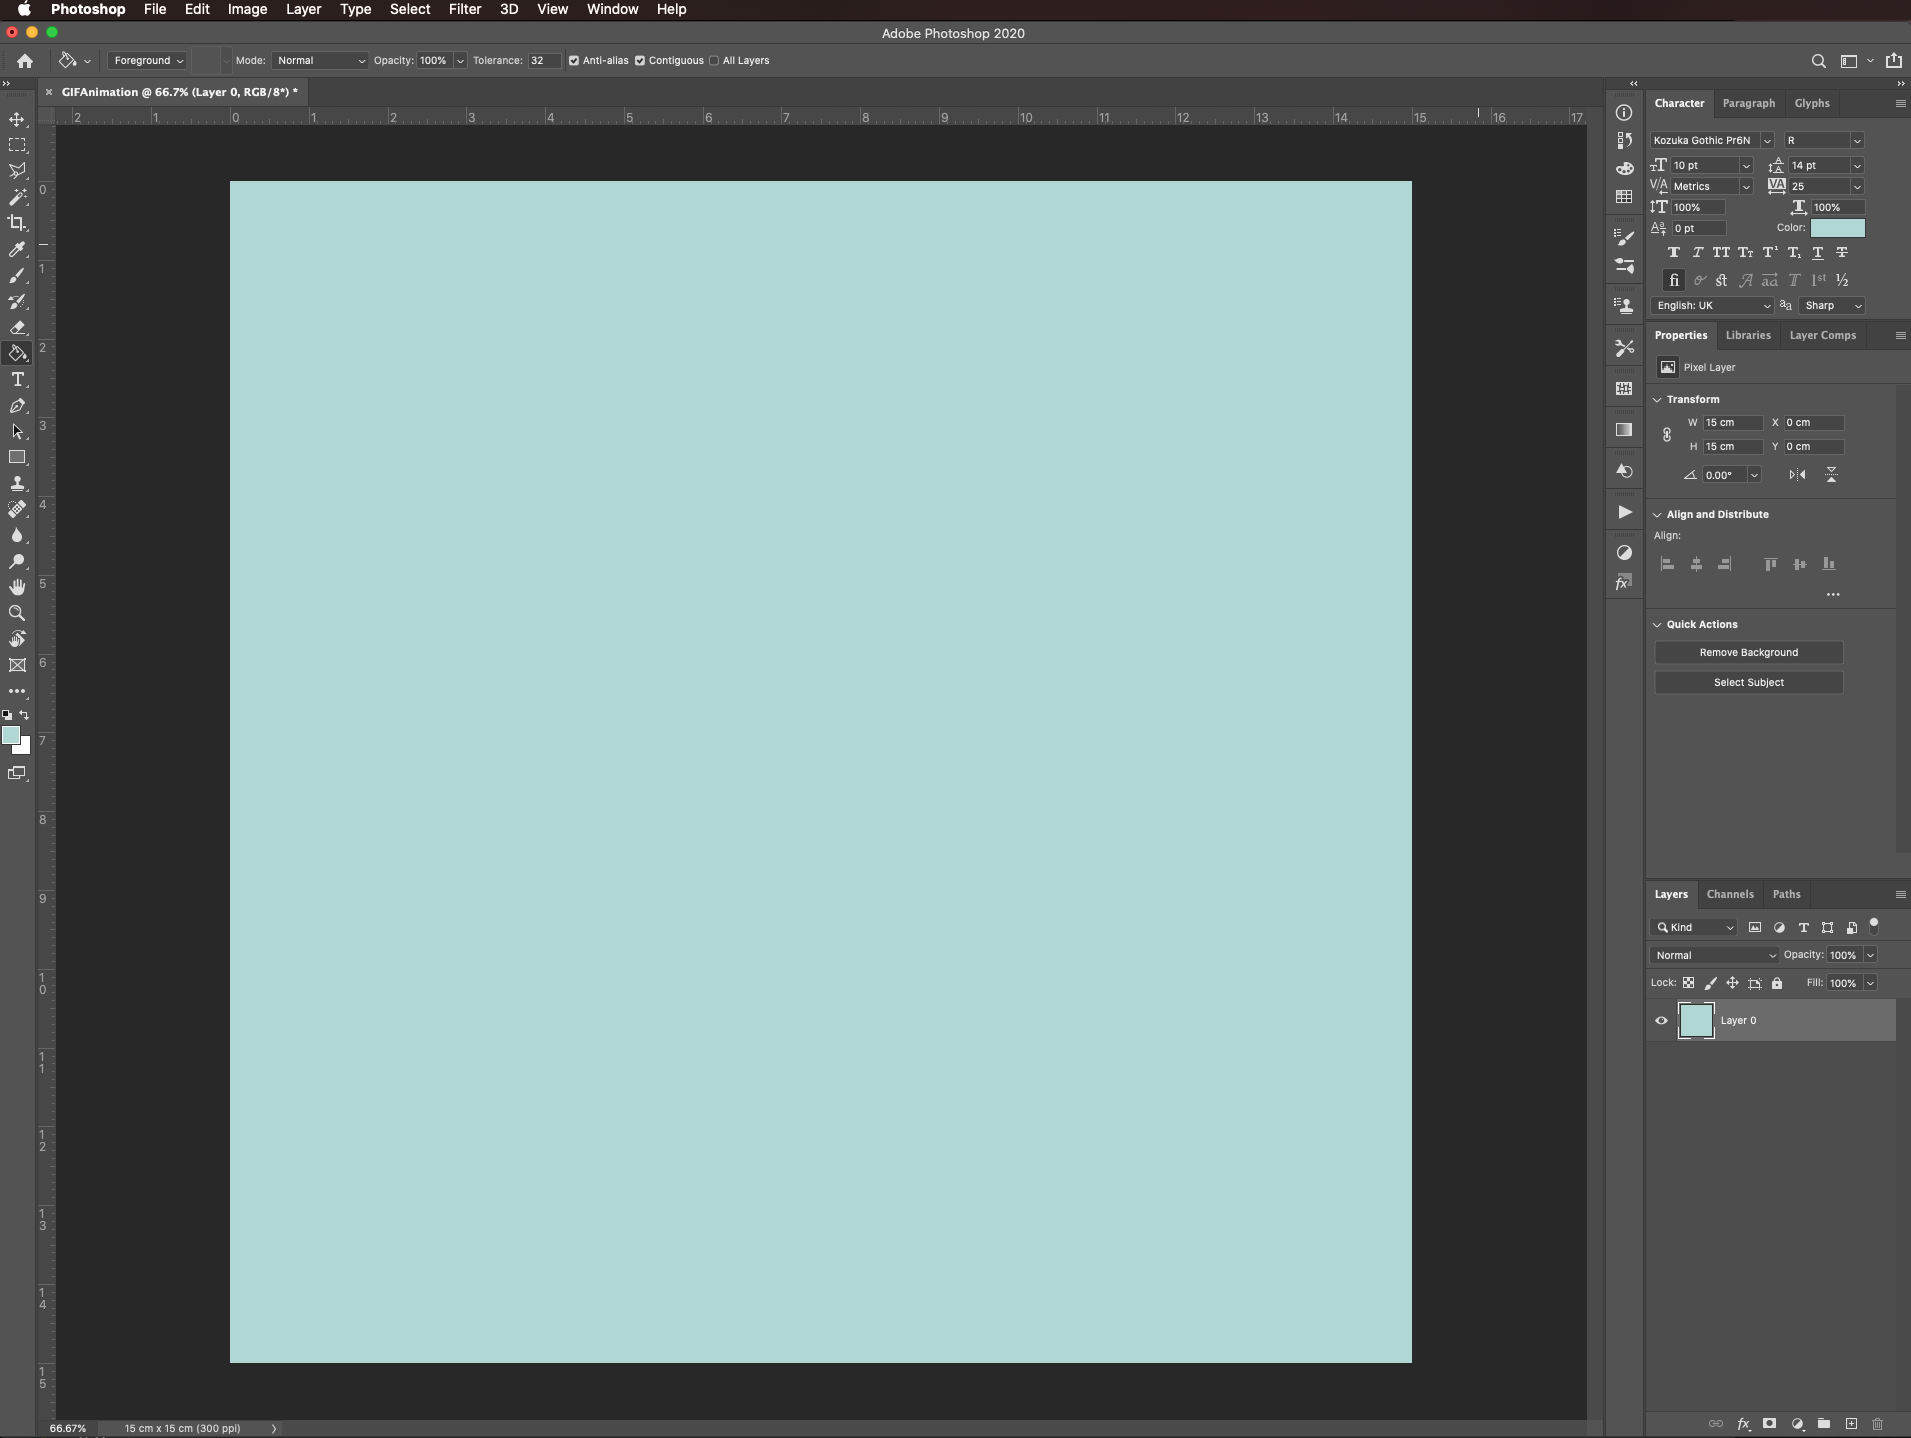
To unlock the background layer, double-click on top of its thumbnail and click OK on the pop-up window.
Select one of the colors as foreground and with the Paint bucket tool (G).
Click on top of the background layer to color it.
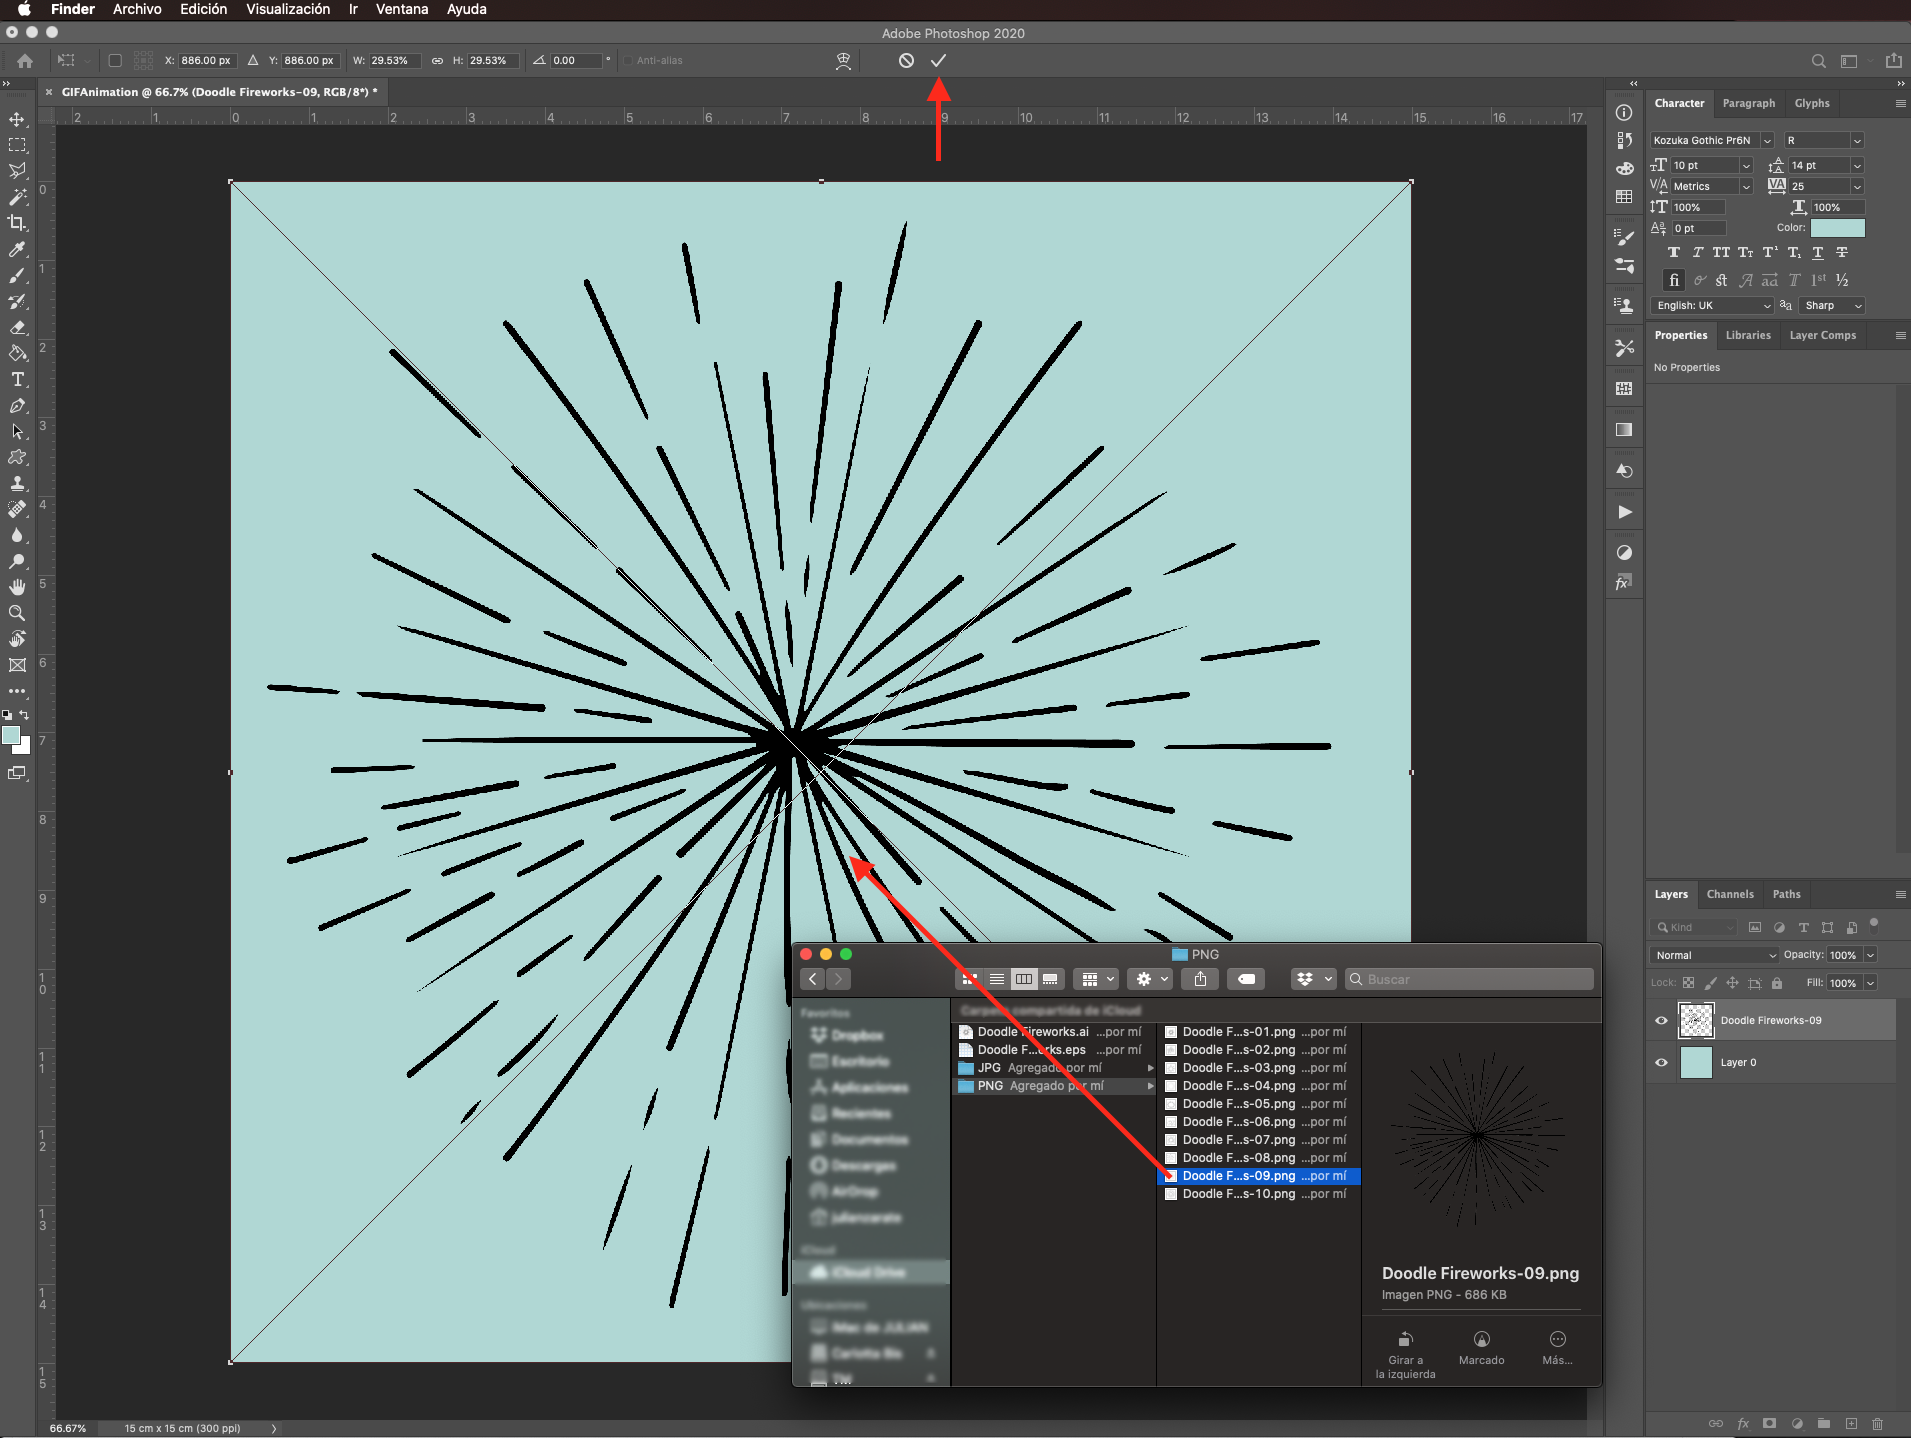
Step 4: Add a decorative clip art element
To add a clip art element to your design, just drag the file onto your canvas, resize it if needed and, click enter (or the small checkmark on the top menu) to commit the changes.
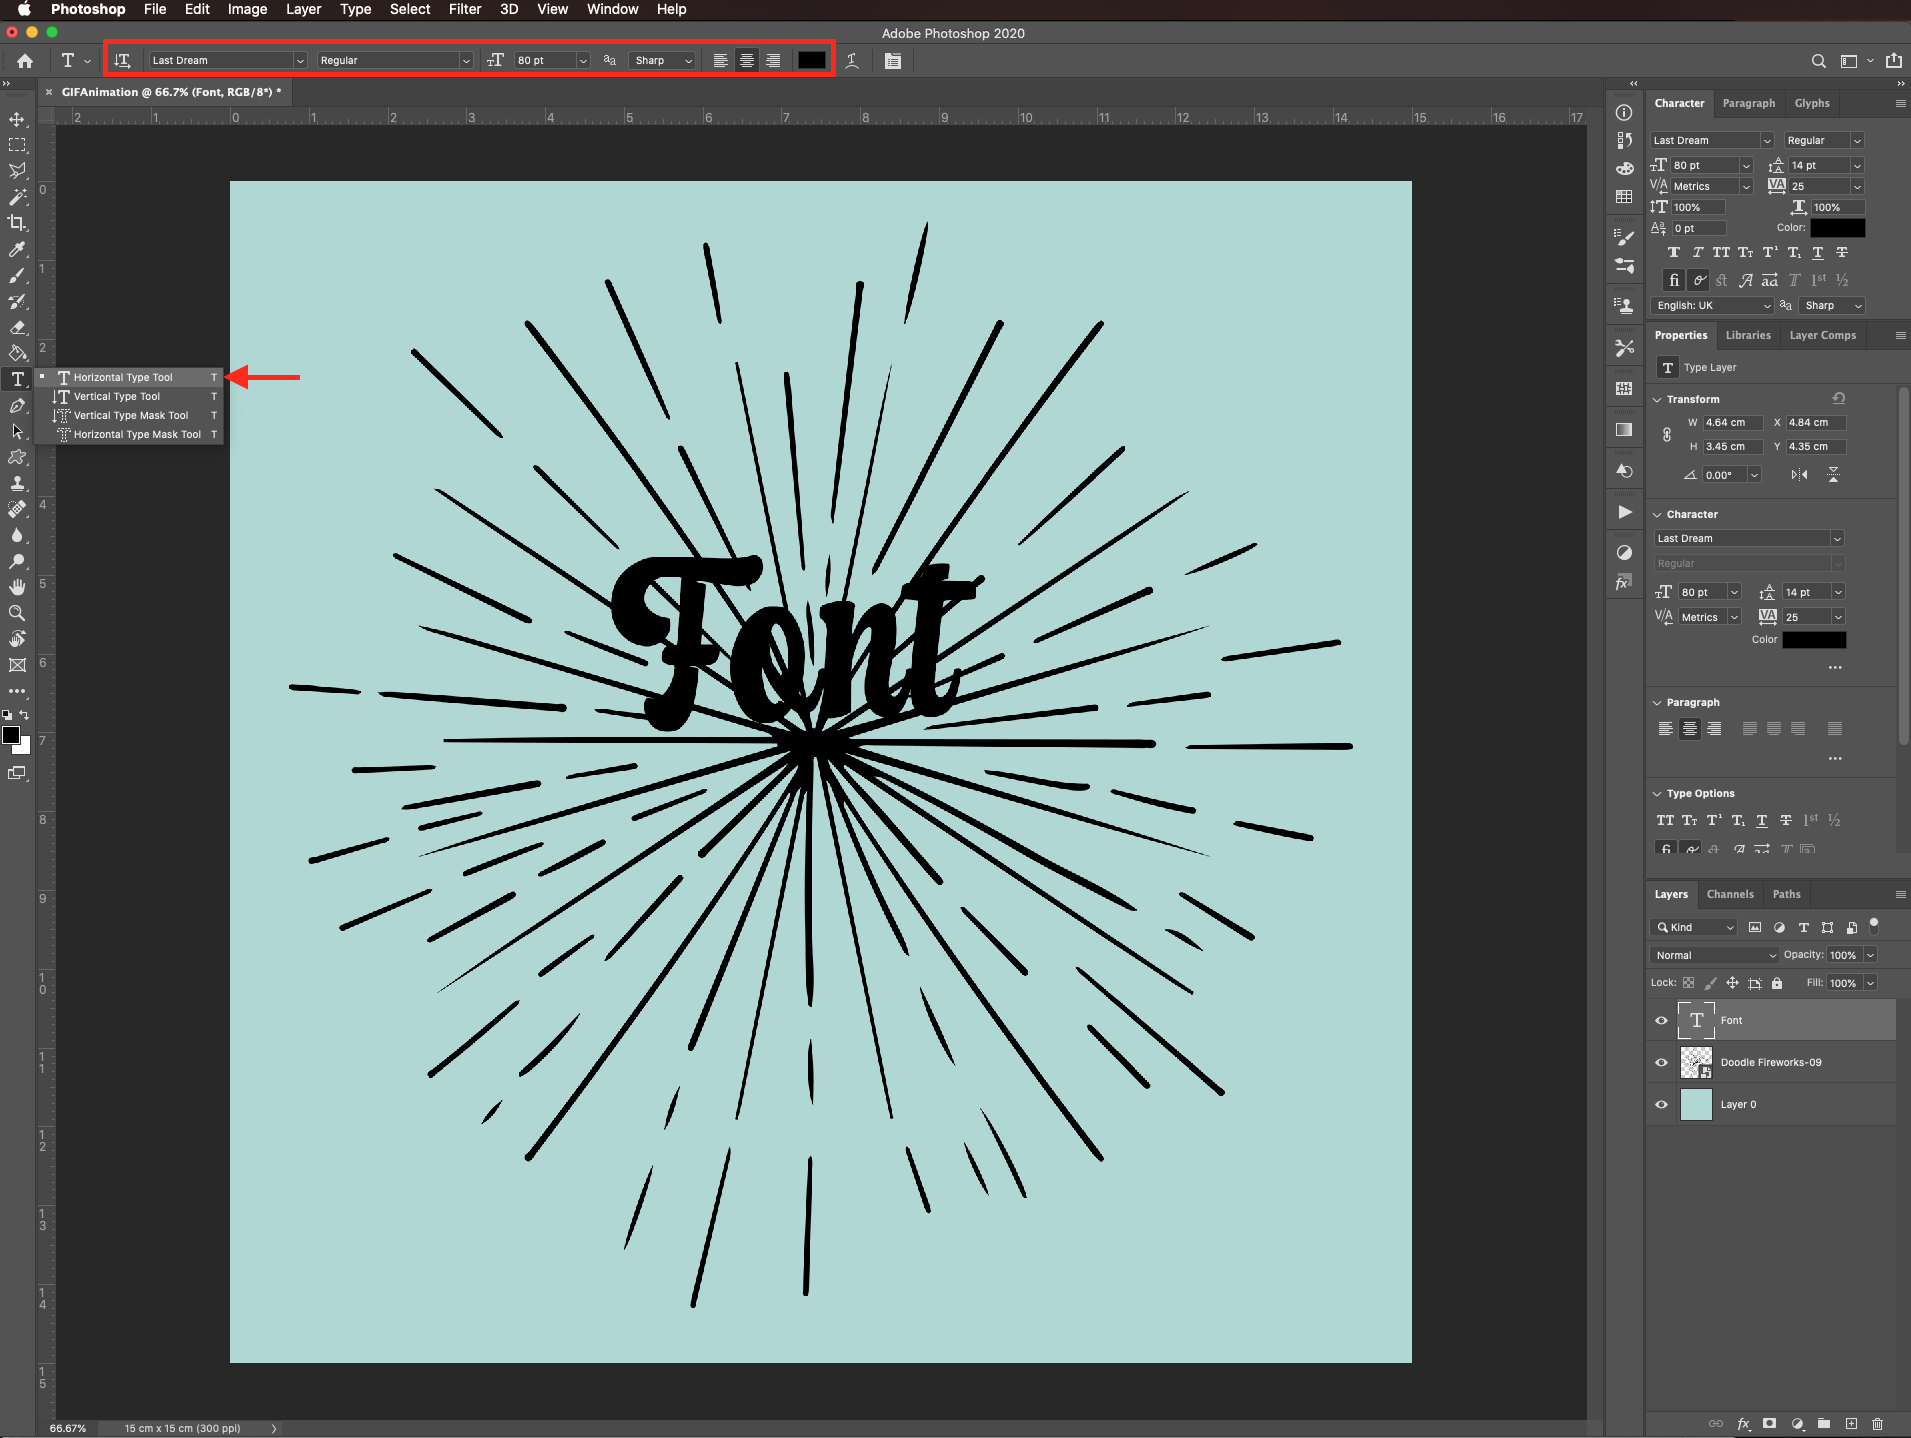
With the Type tool (T) selected, click on the canvas, choose the font, size, and alignment you prefer (we used Last Dream with an 80 pt size and center alignment).
If you have one, add the second line of text. We chose to keep our text in separate layers.

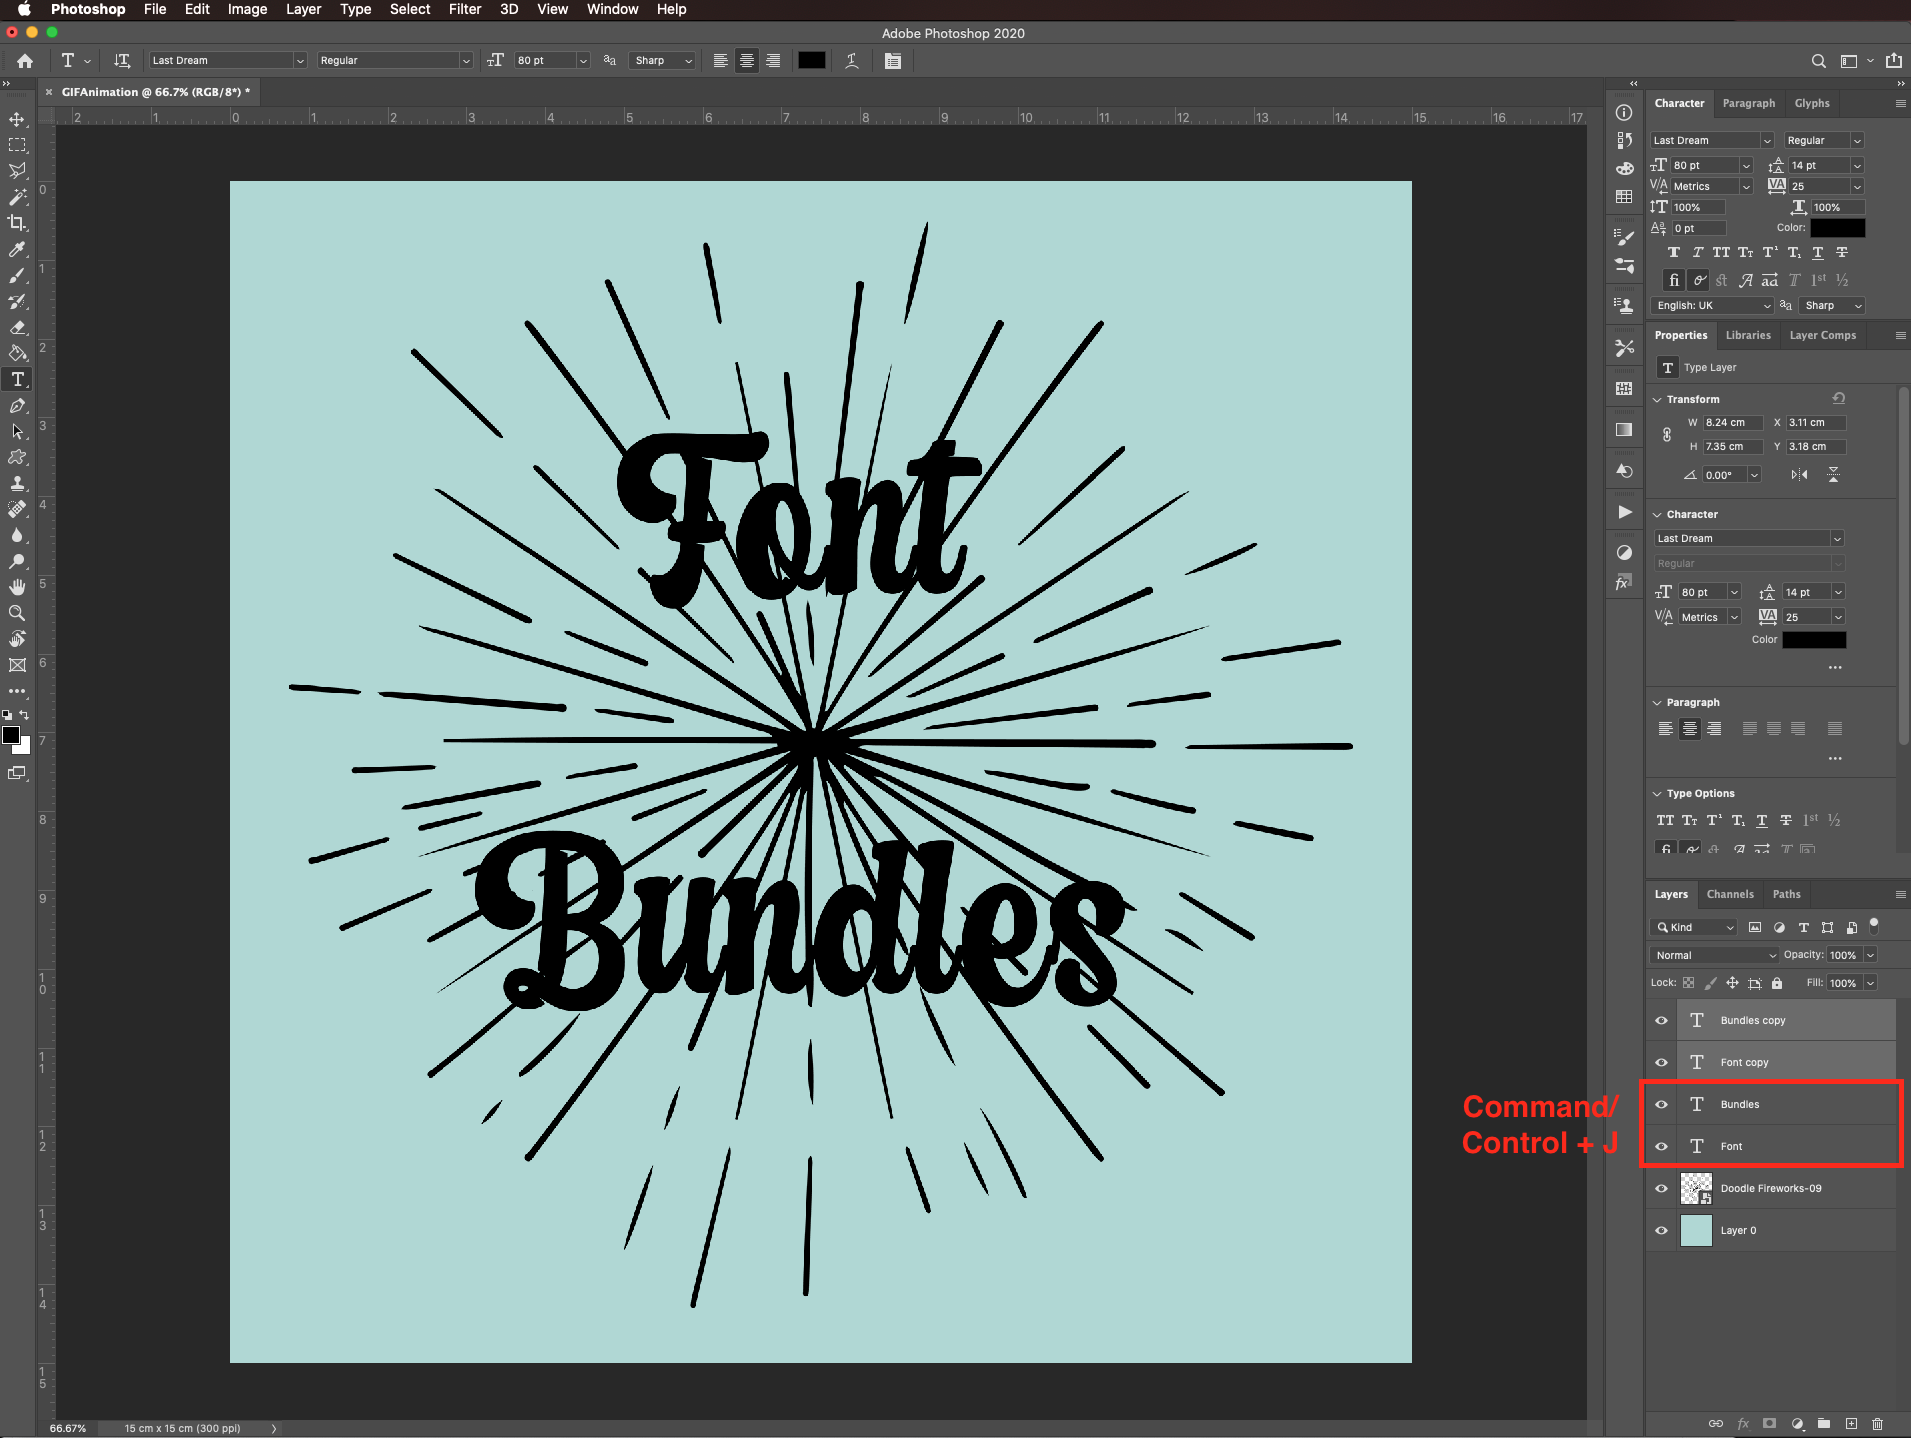
Since our font is layered, we duplicated our text layers (command/control + J).
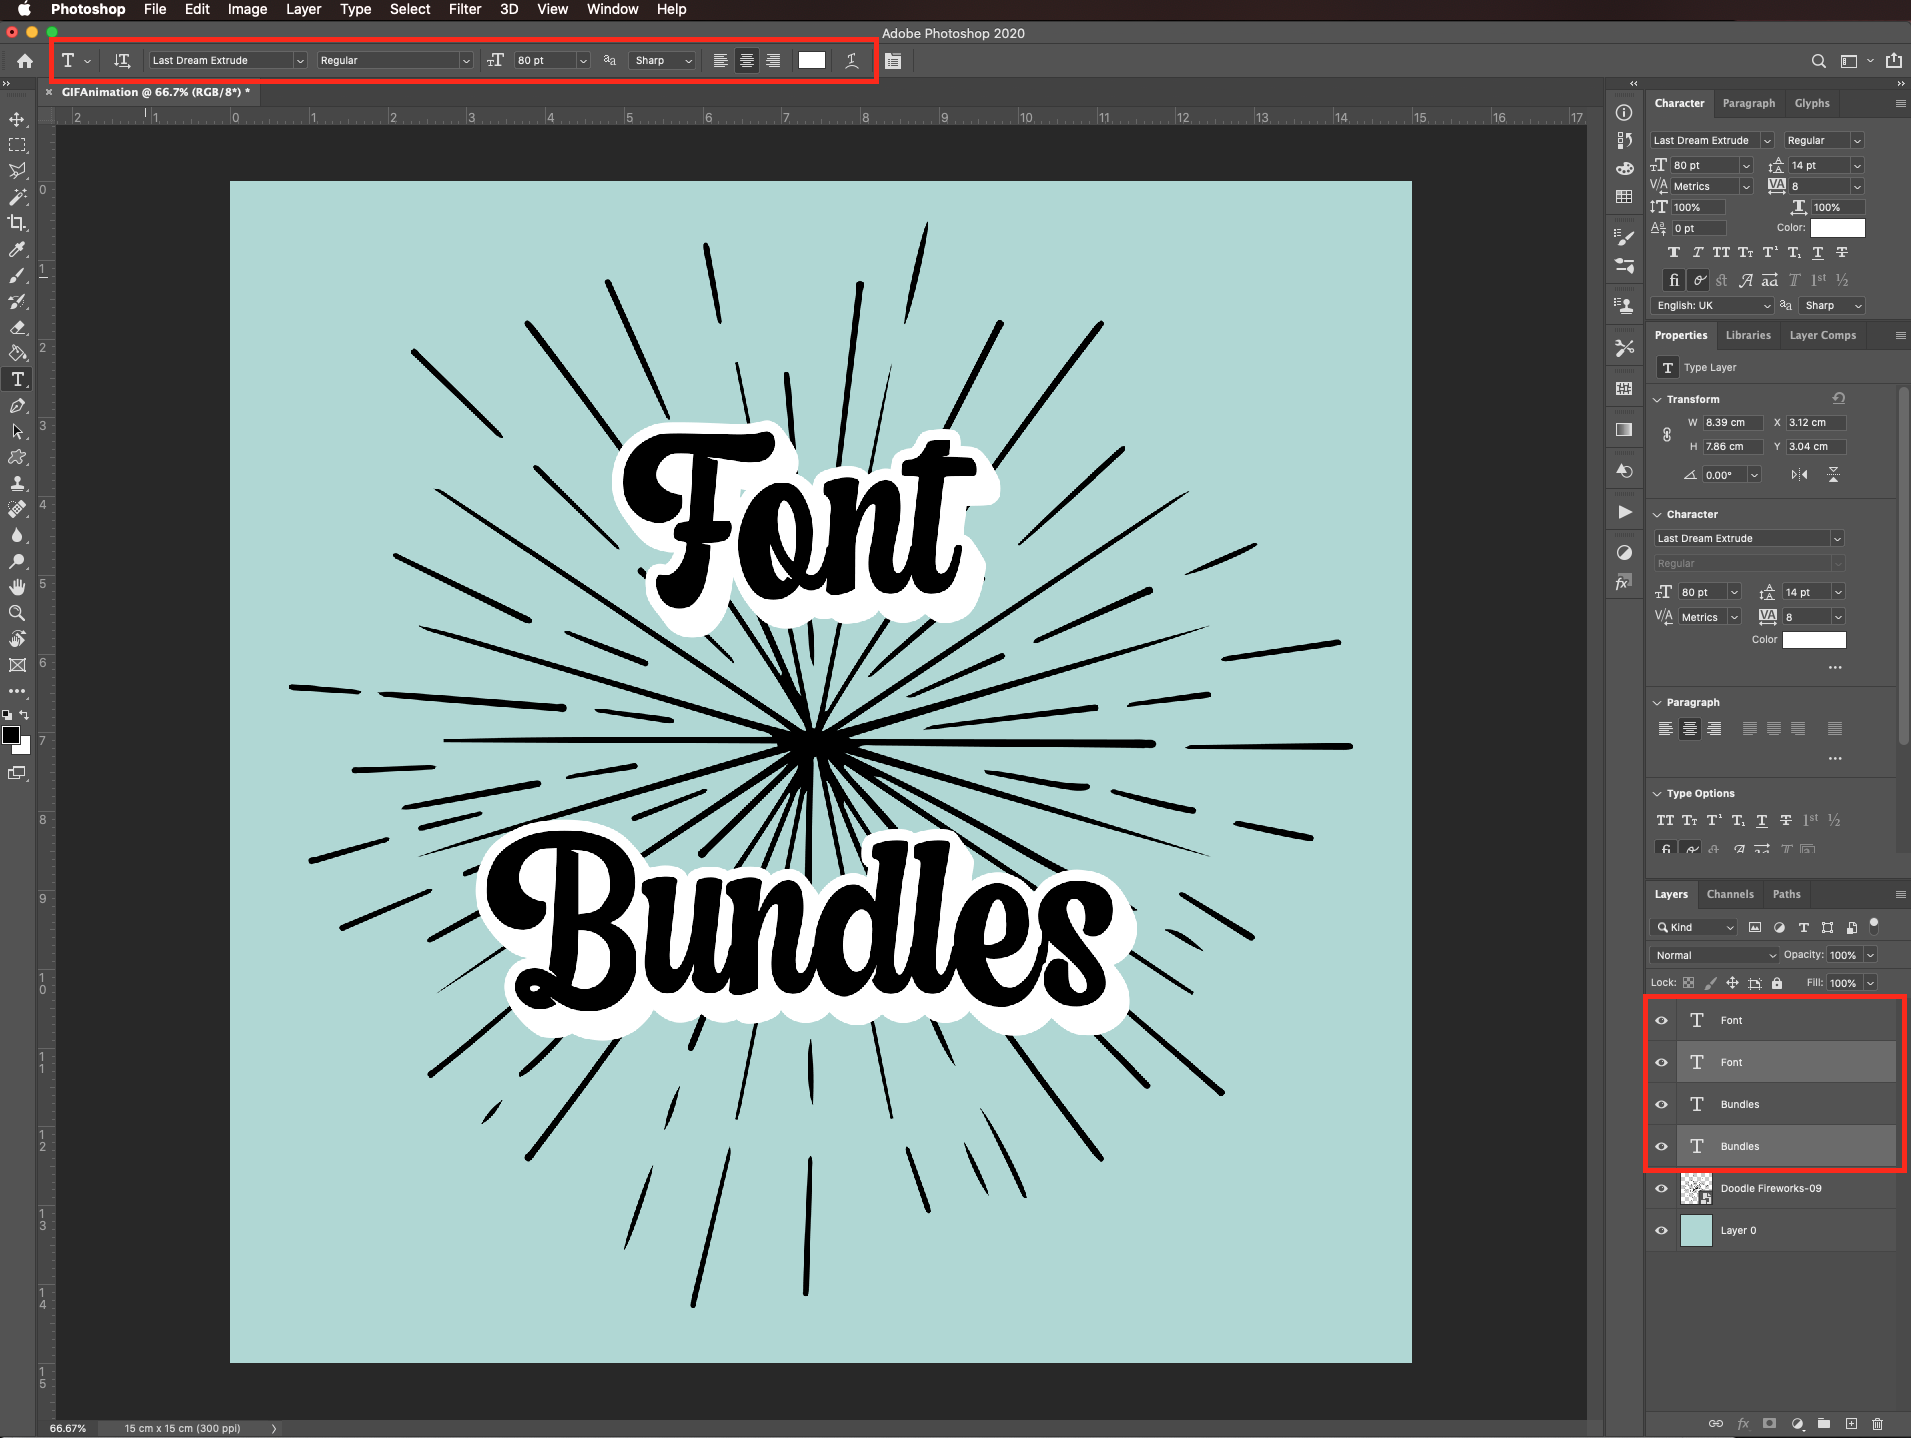
Next we changed the font (Last Dream Extruded) and font color.
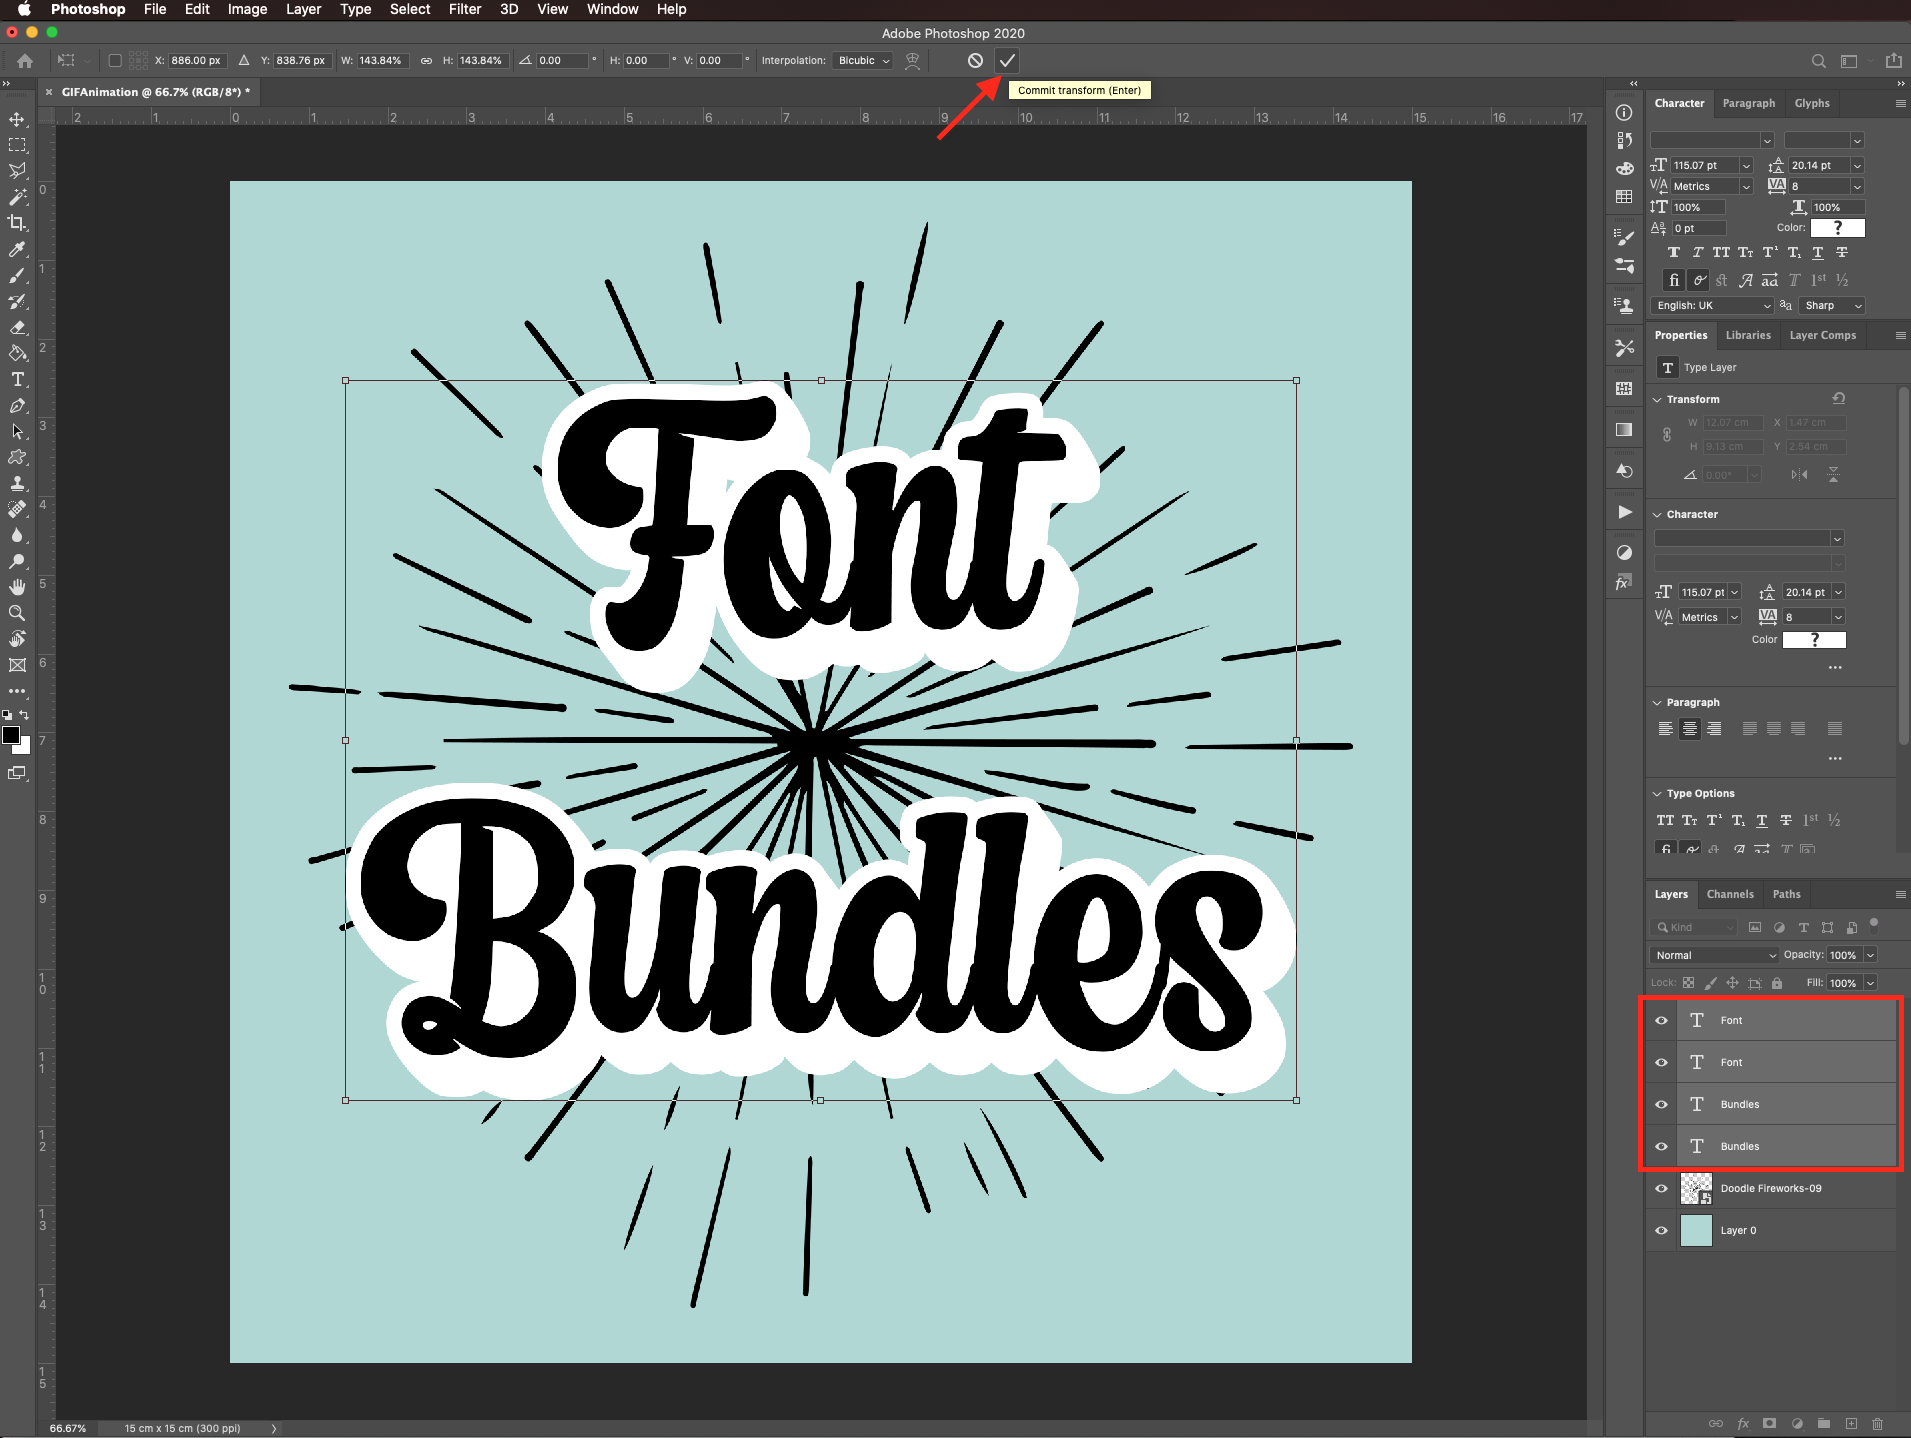
Check if you need to change the placement and/or size of your text.
You can use the Free transform tool (T) for that and, click enter (or the small checkmark on the top menu) to commit the changes. We also repositioned the layer so the words and font types are in order.
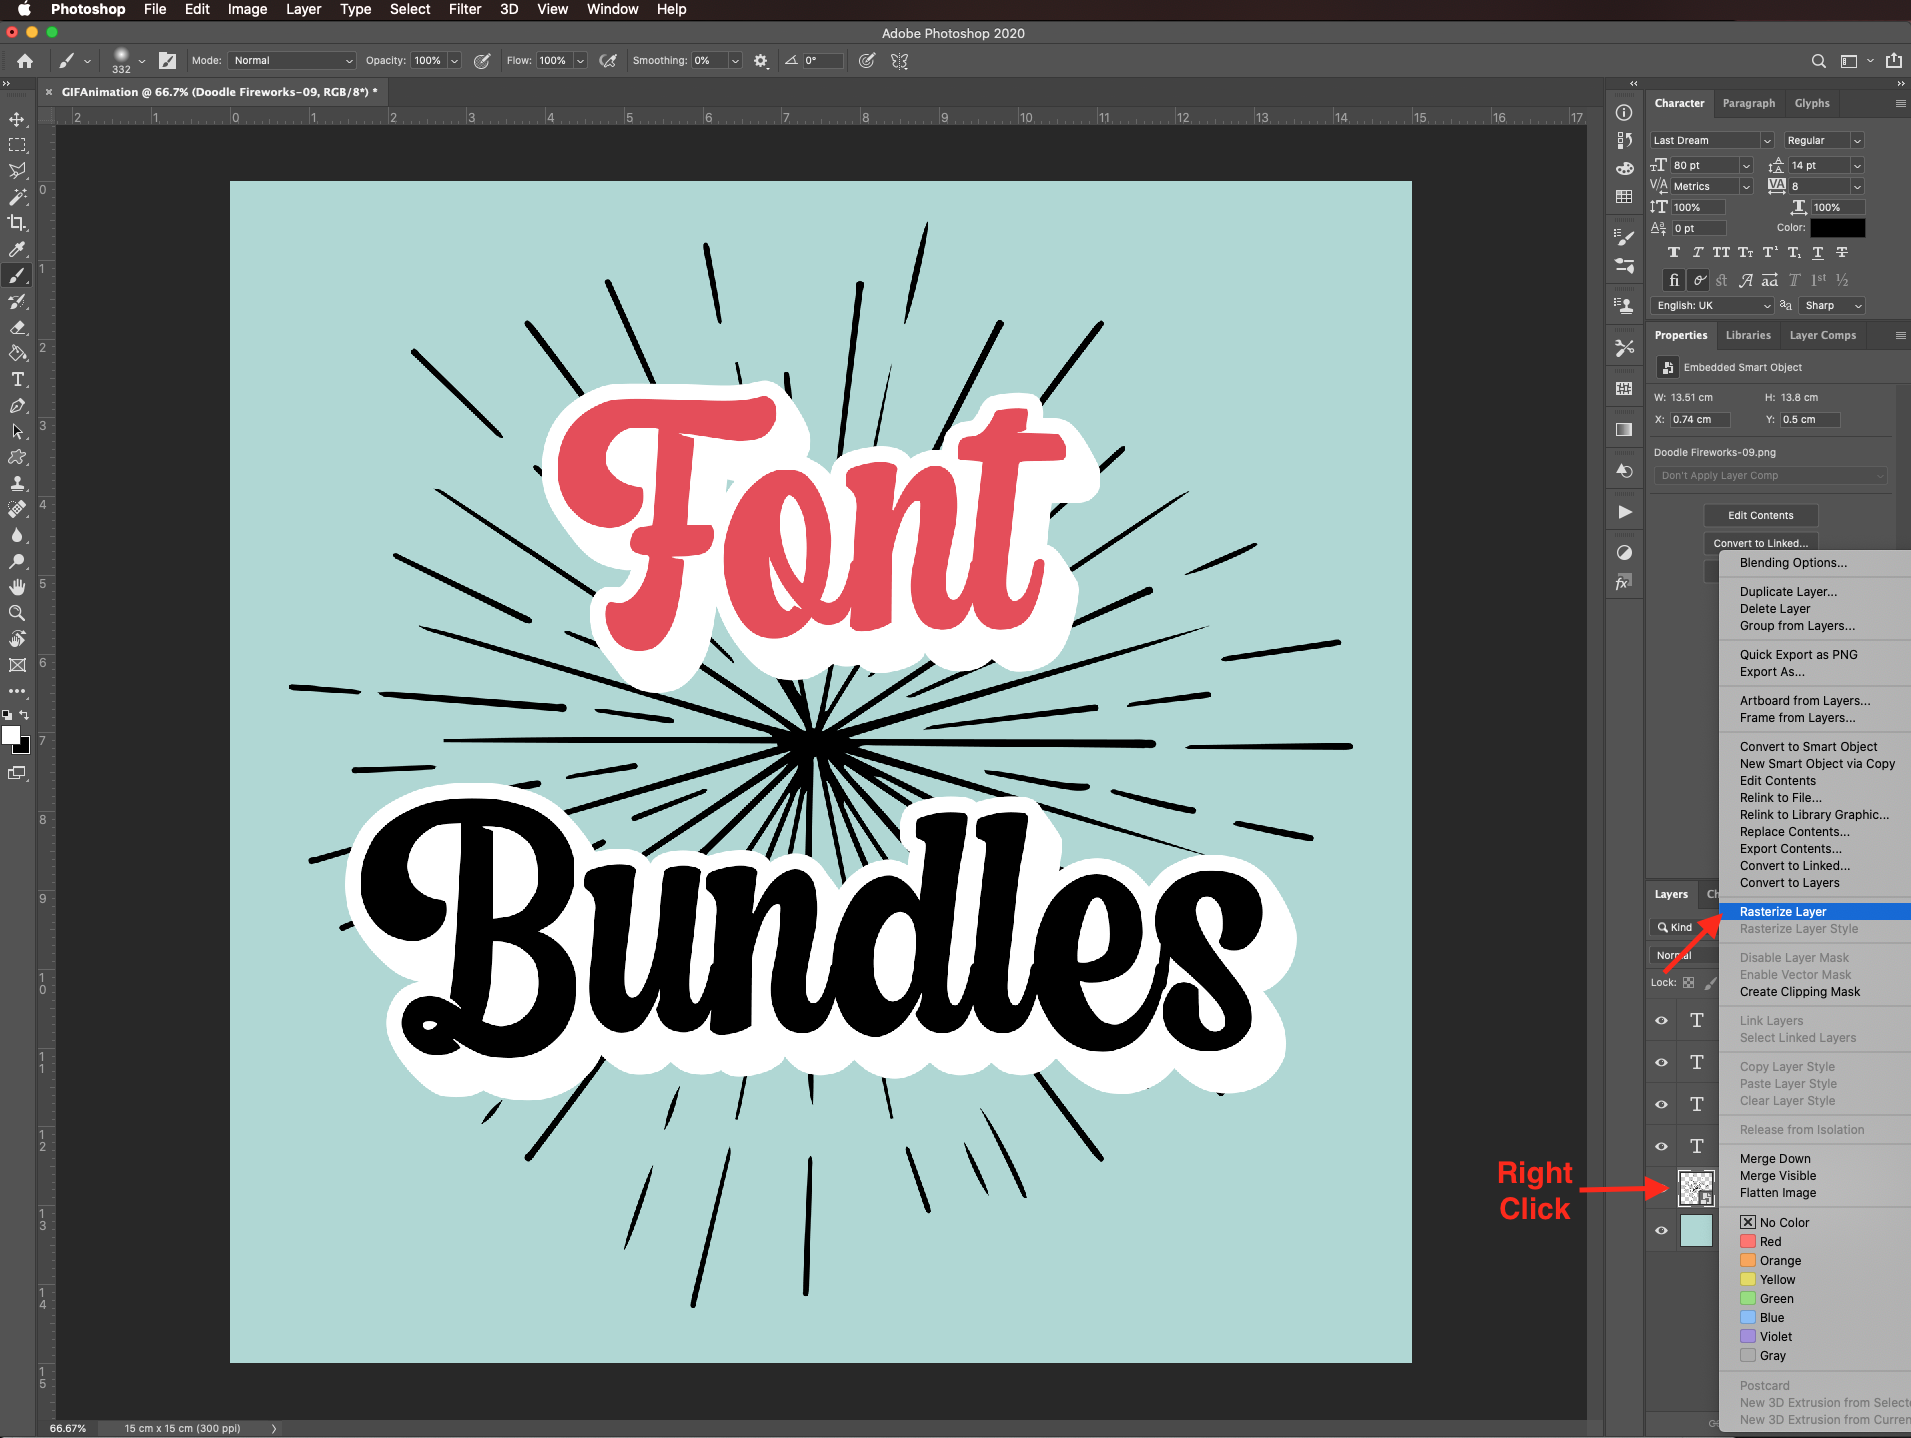
To change the color of the clip art element, right-click on top of its thumbnail and choose rasterize layer.
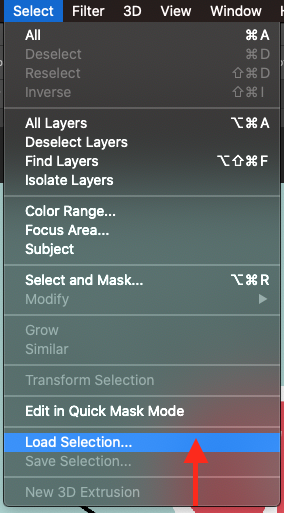
Go to Select > Load selection.
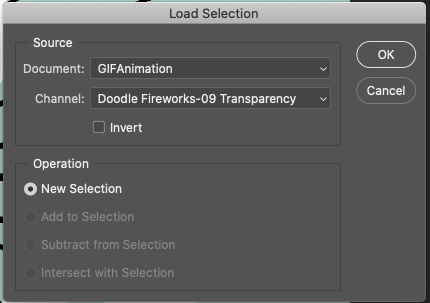
Choose the correct layer in the pop-up window, and click OK.
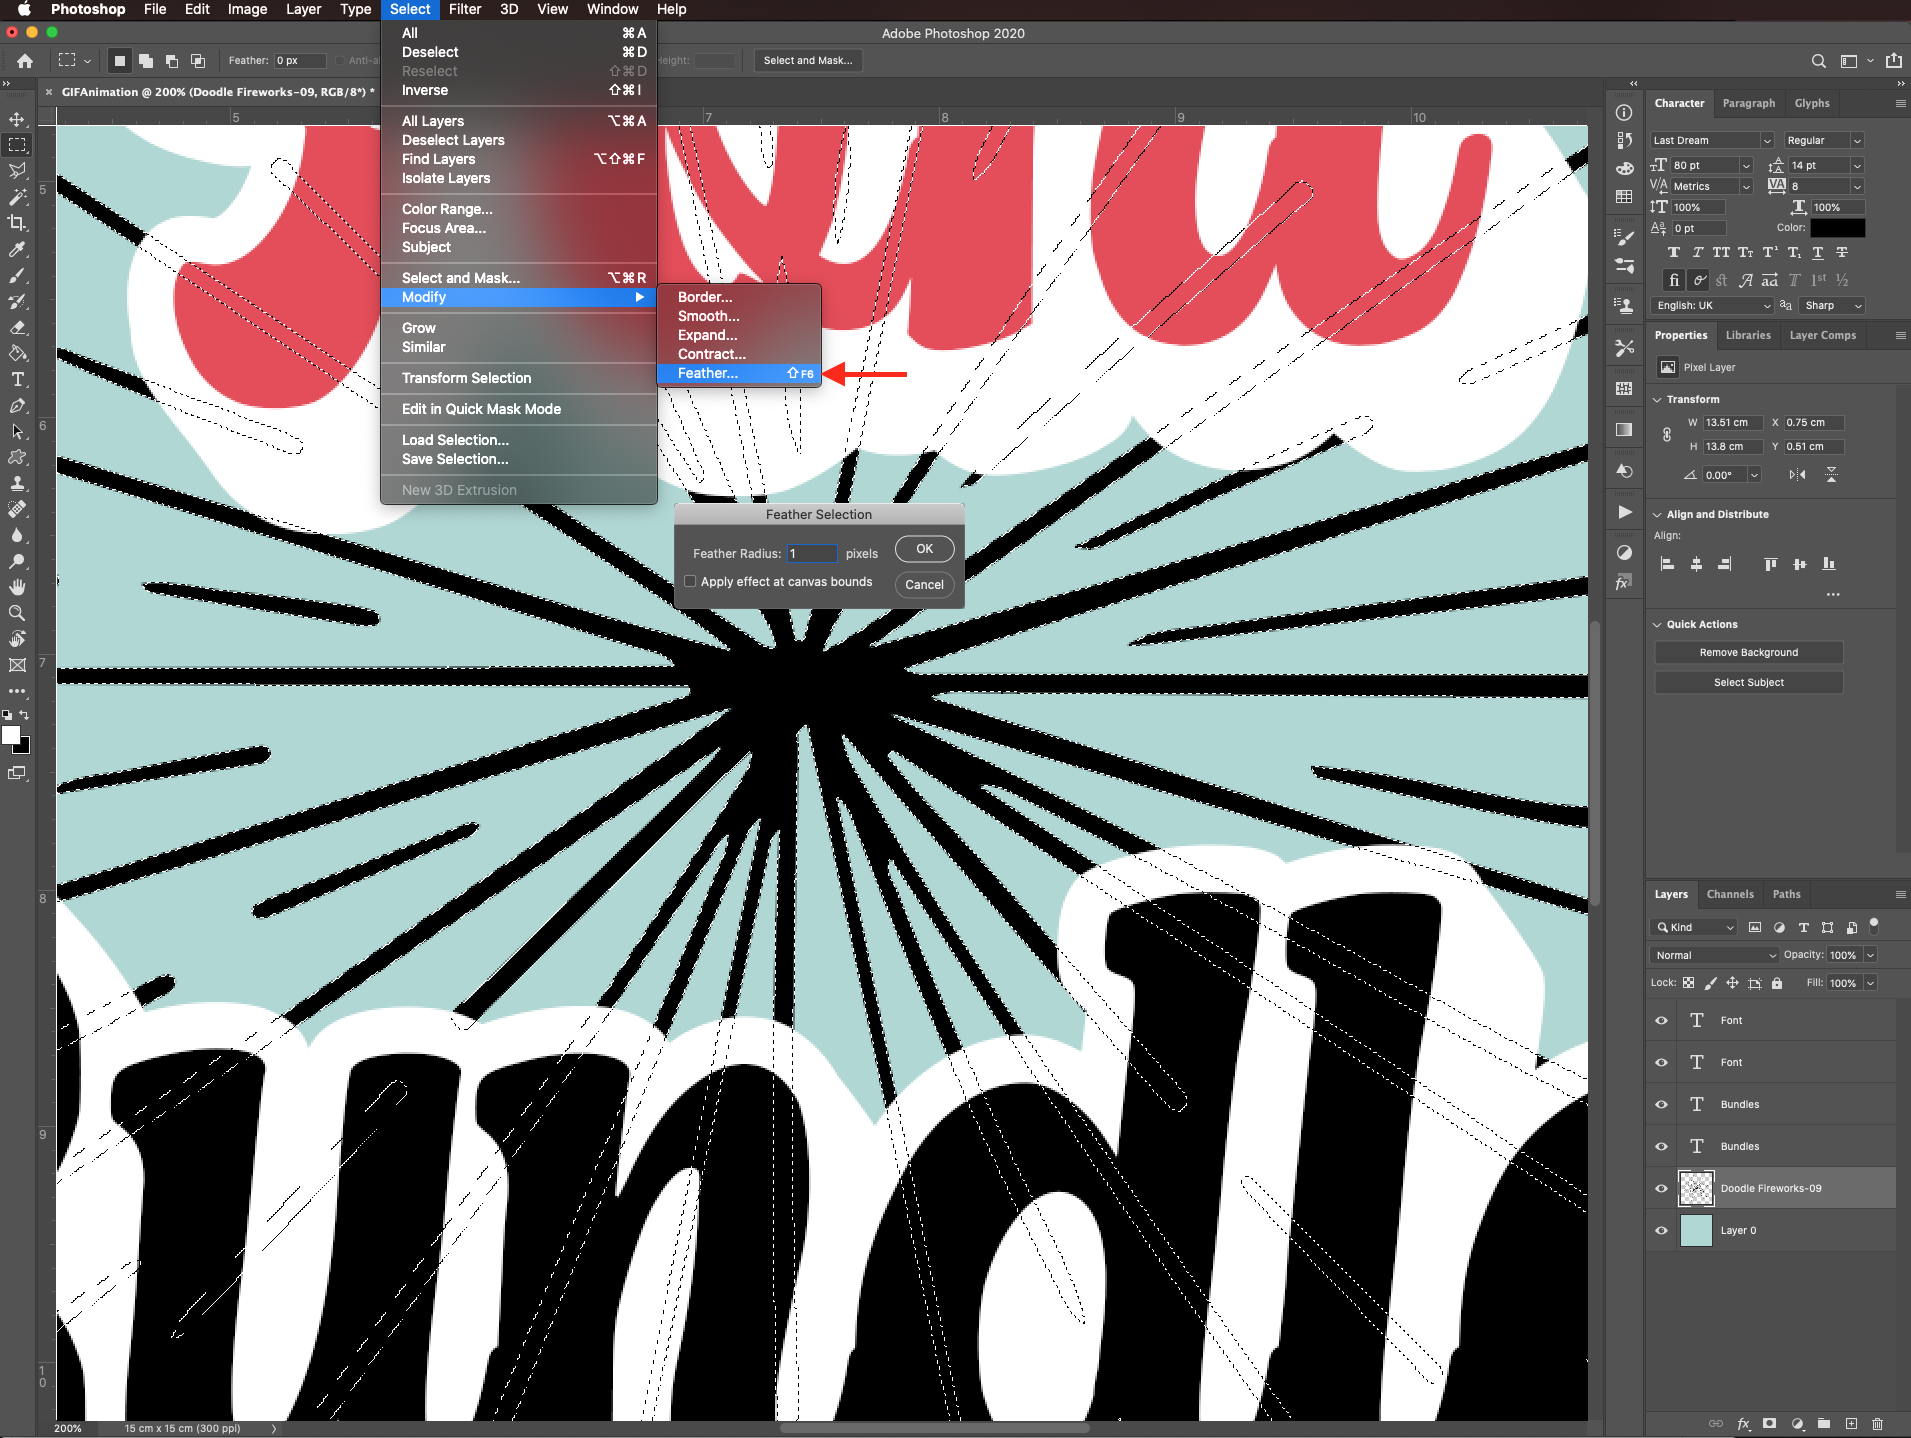
Go to Select > Modify > Feather and choose a 1 pixel feather radius.
Use whatever tool you prefer (paint bucket, paintbrush, etc.) to recolor the selected element.
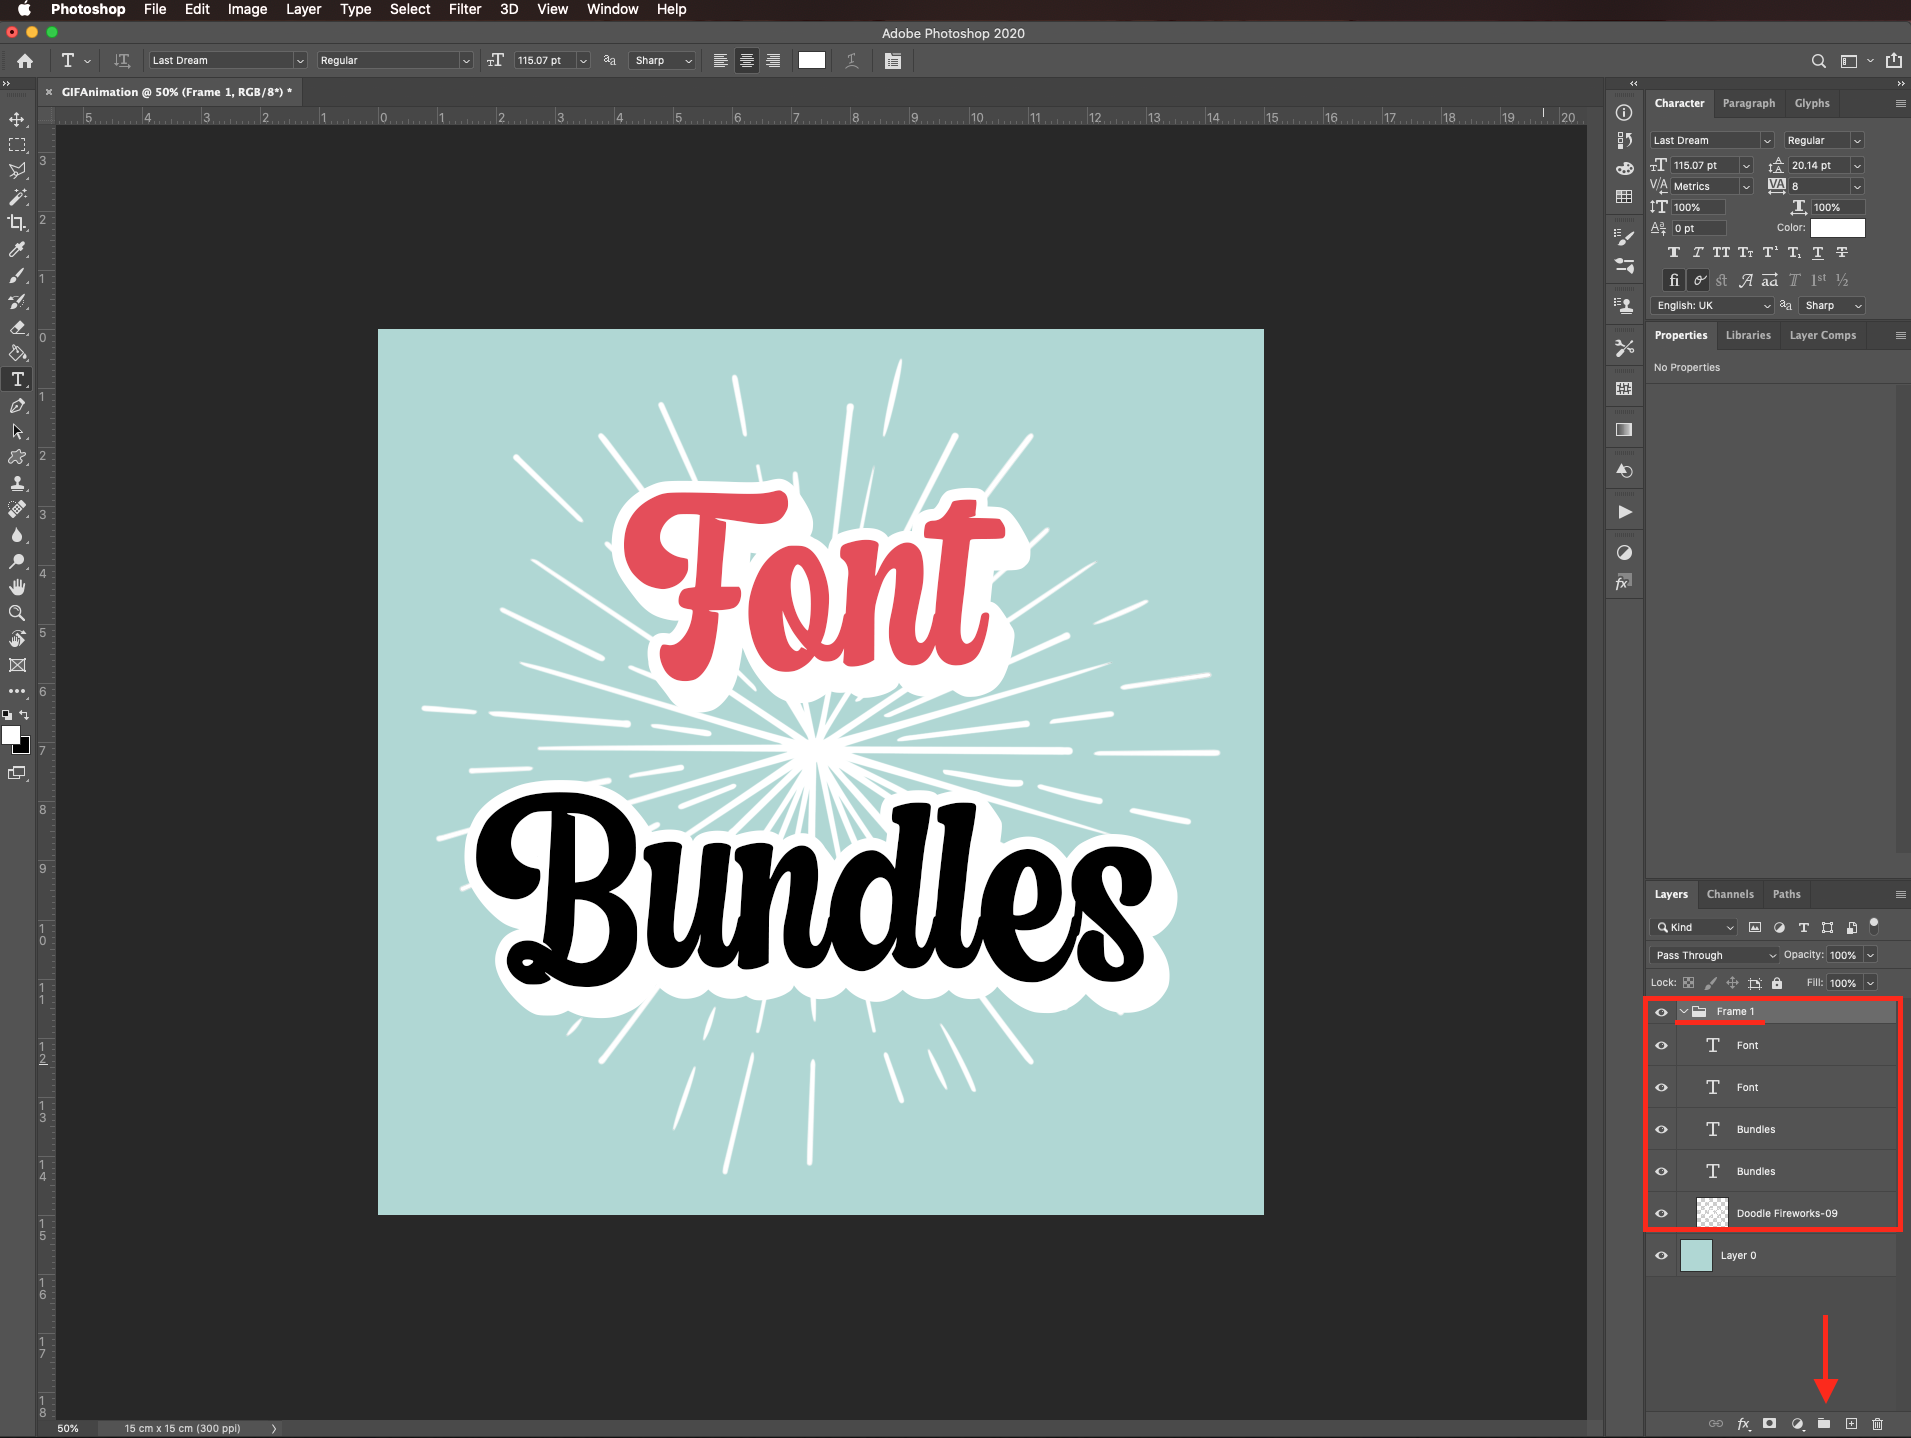
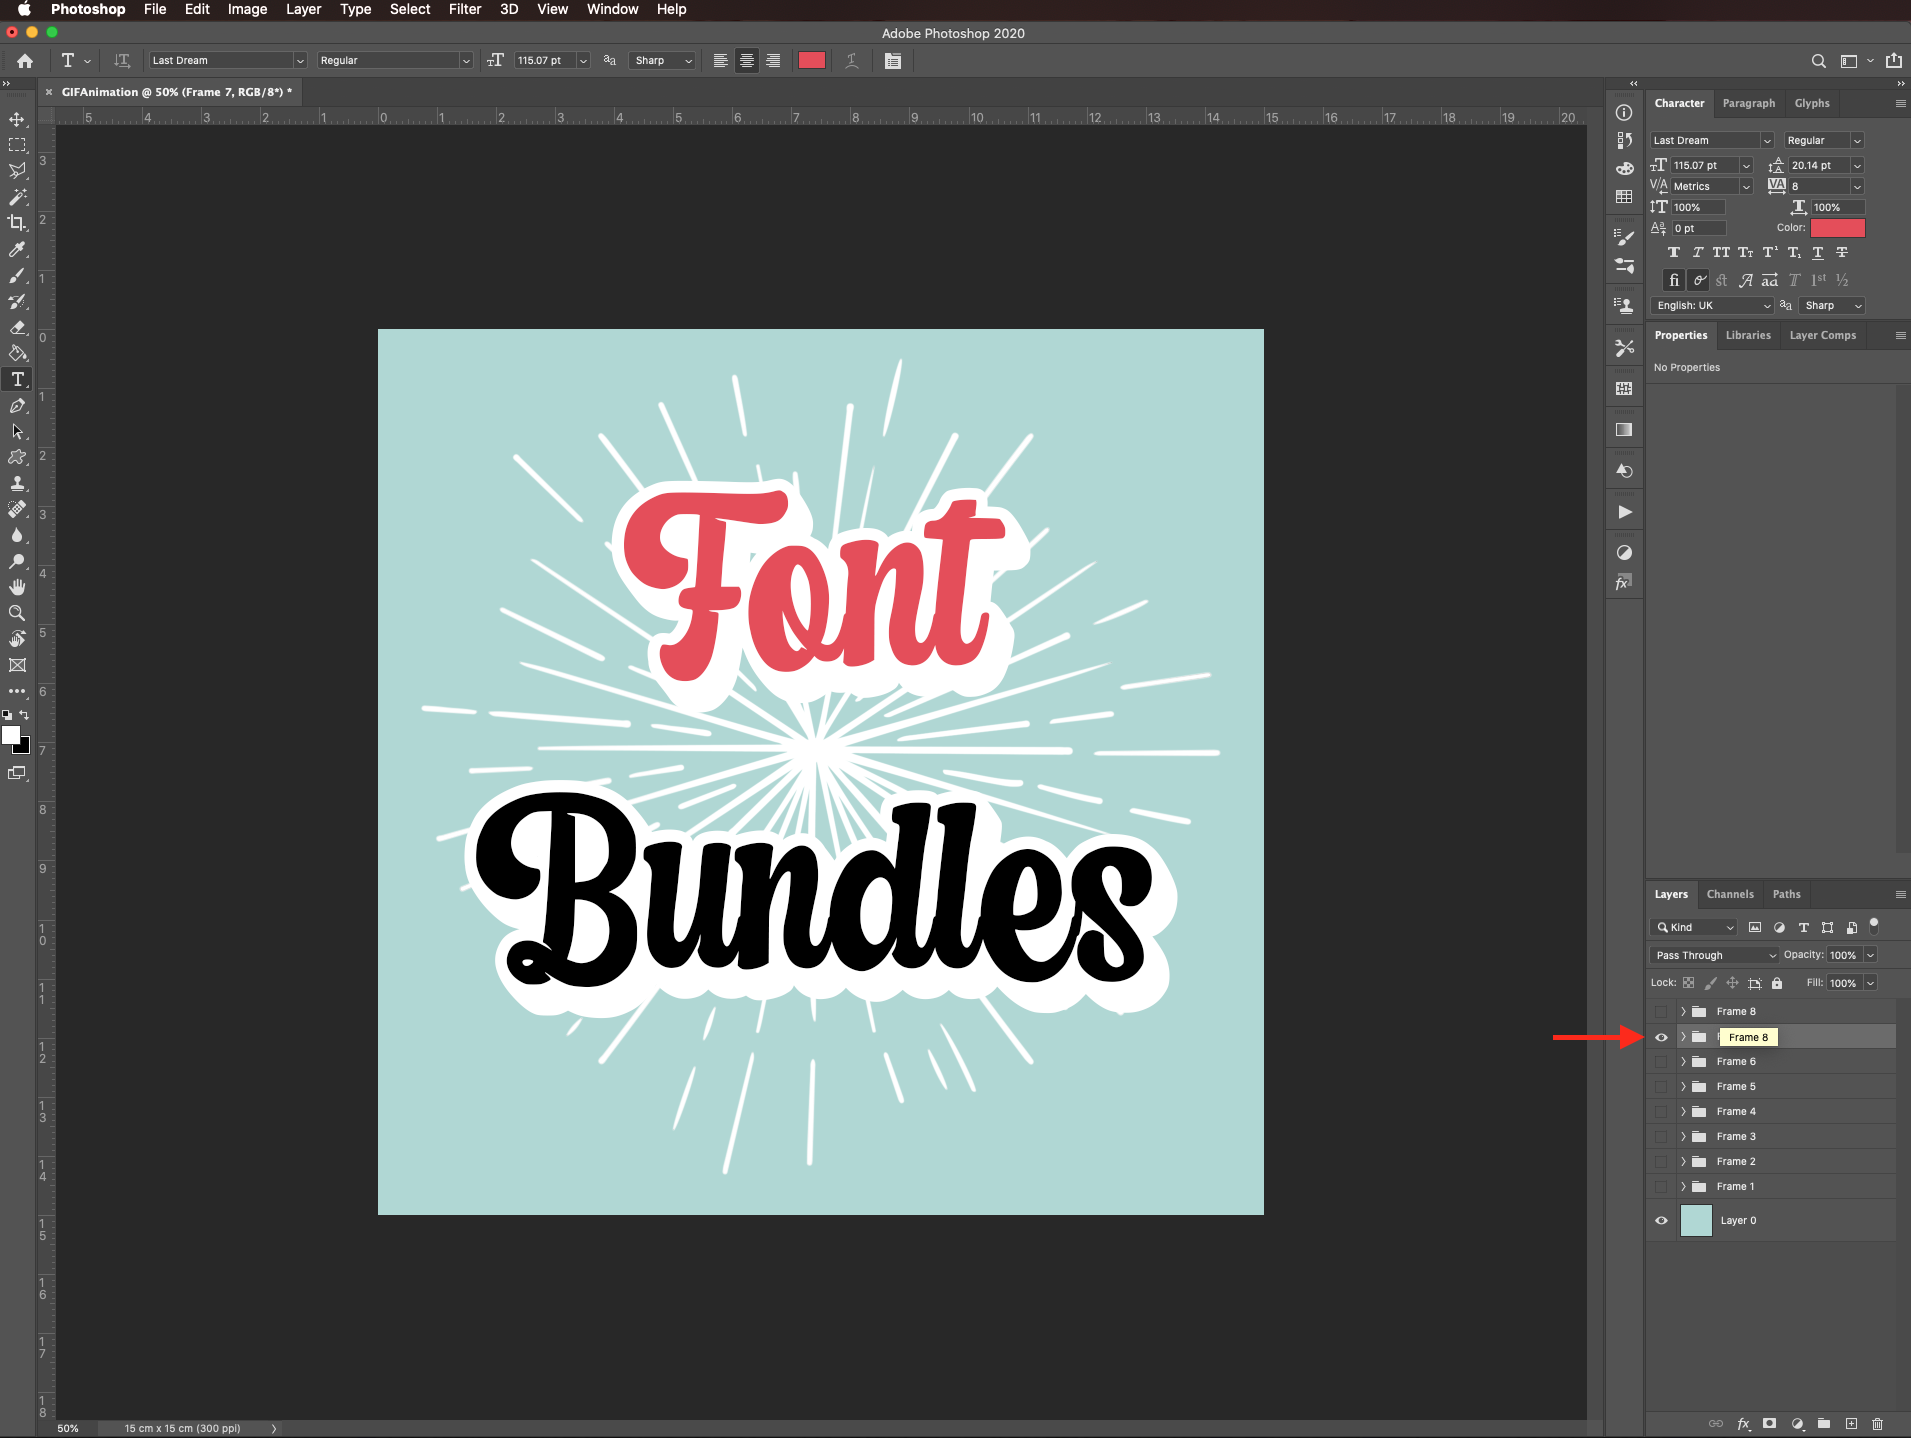
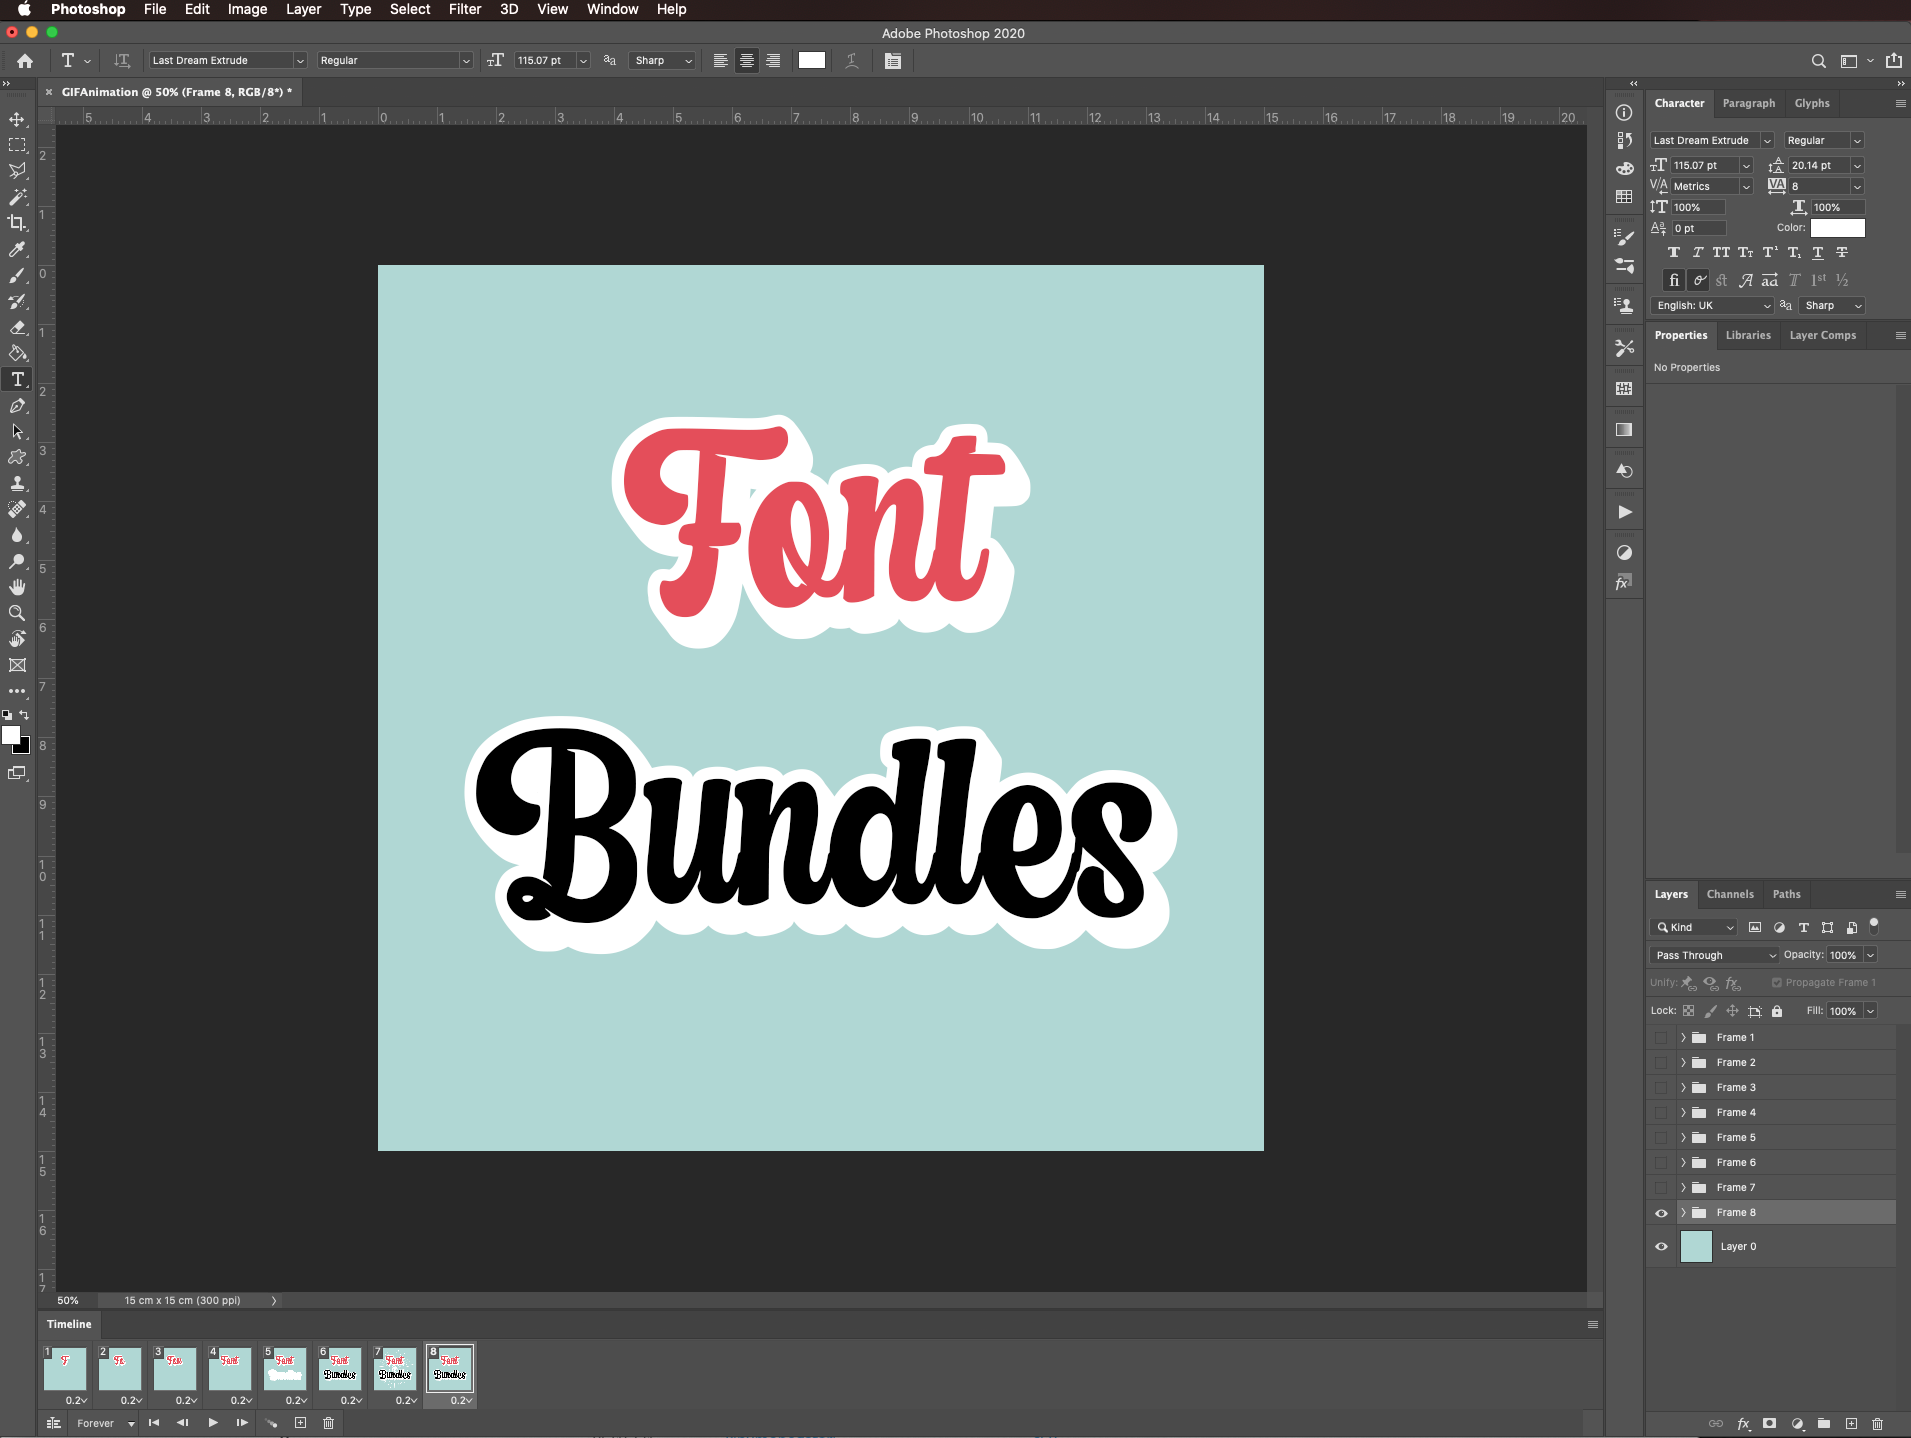
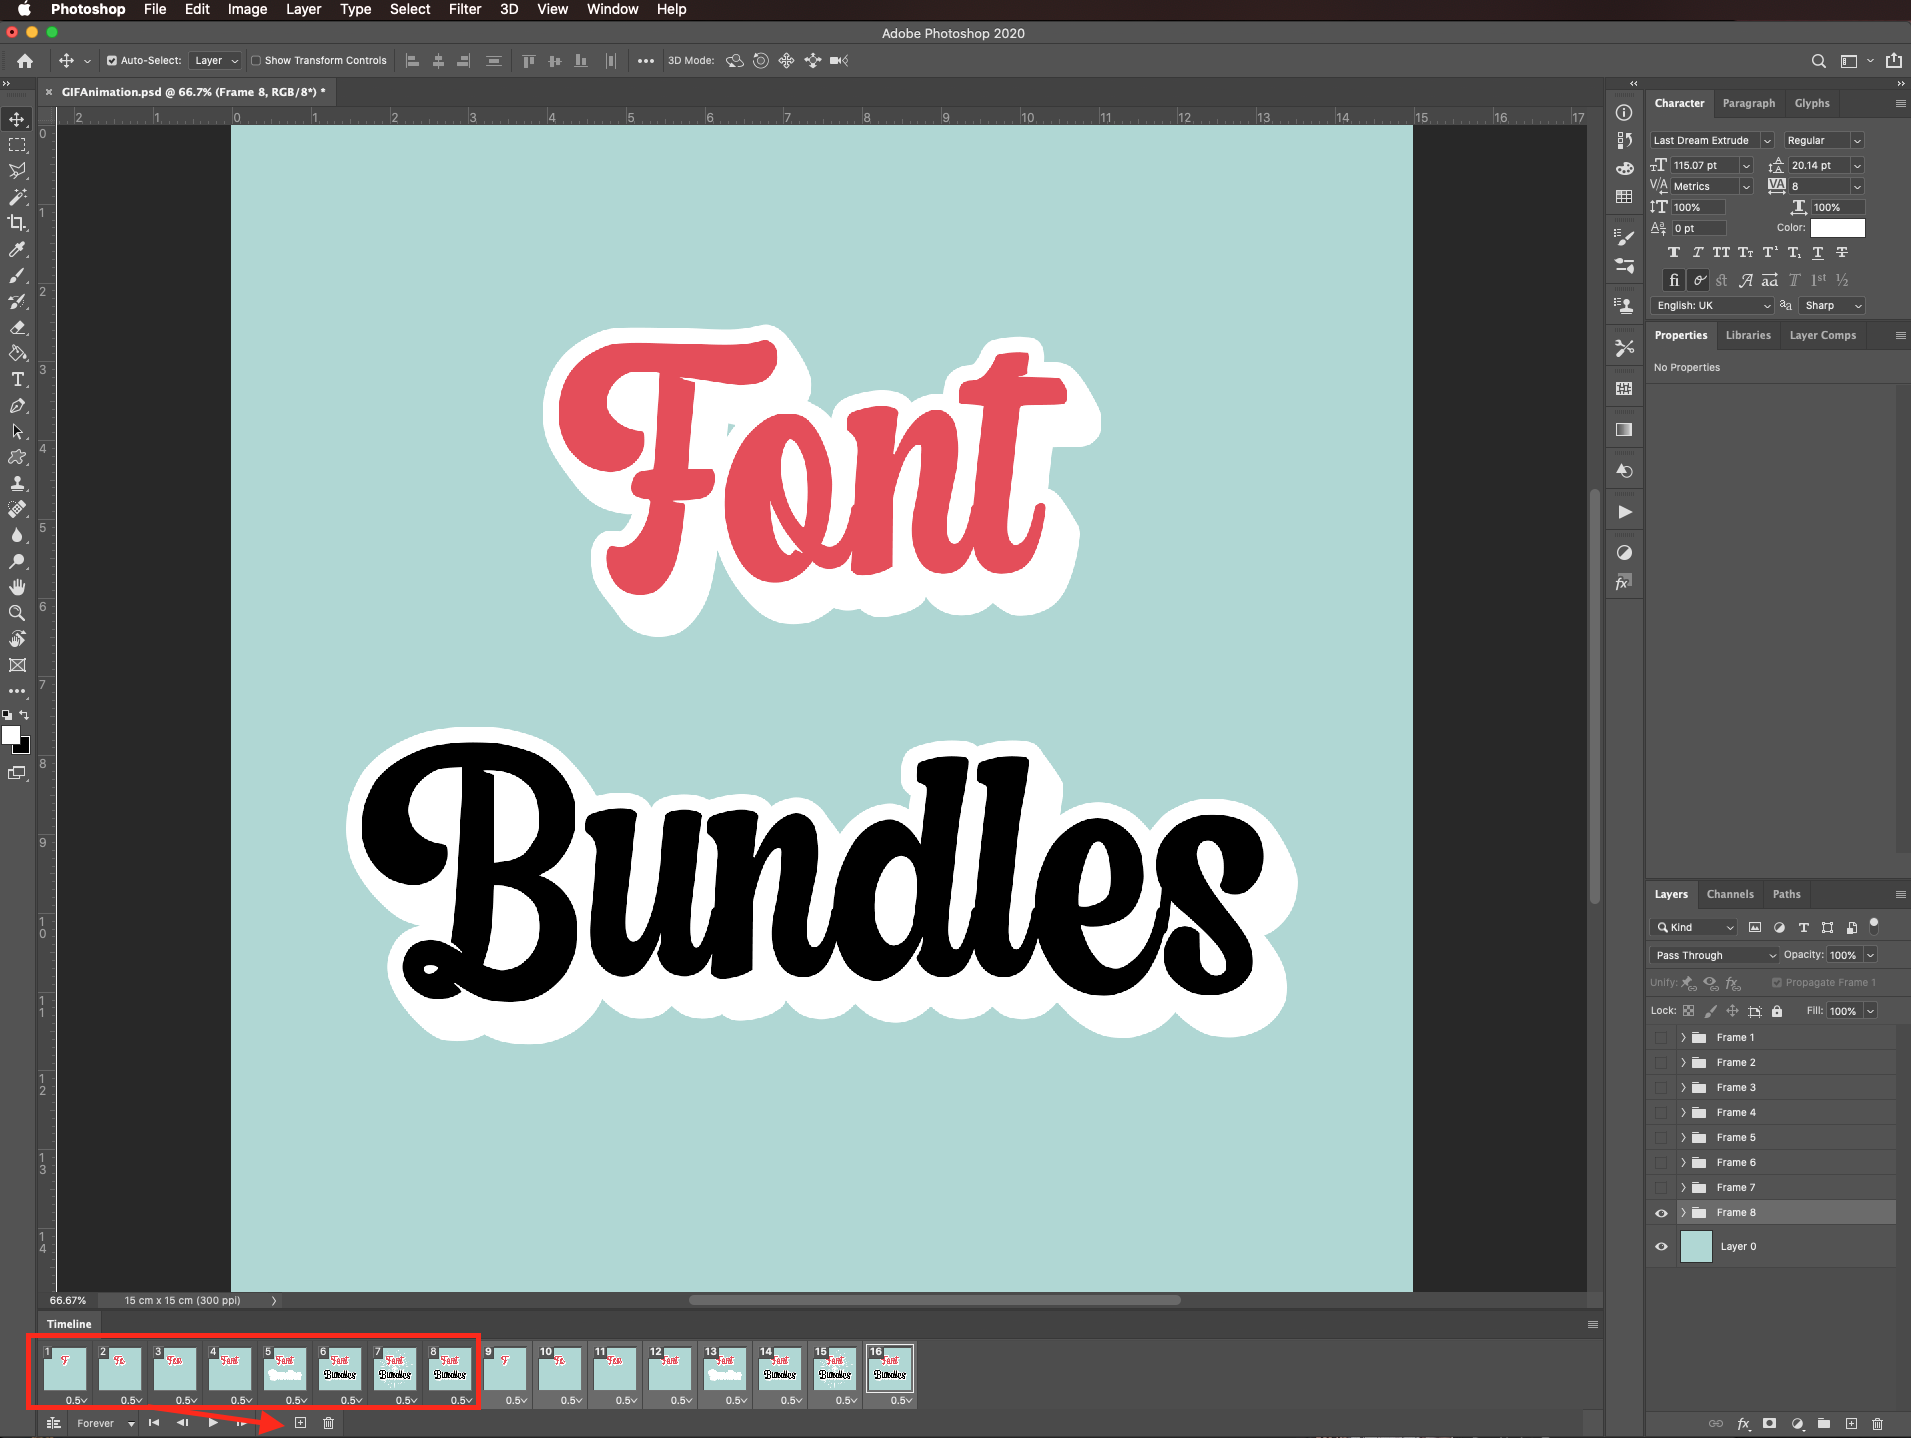
Select all the elements you want to include in your frames and group them together by dragging their thumbnails onto the folder icon at the bottom of the Layers panel. Rename the group Frame 1.
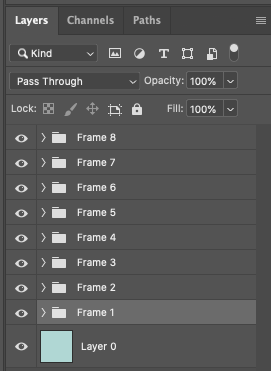
Create as many duplicates of the frame 1 folder as you may need for the animation (we made 7 copies).
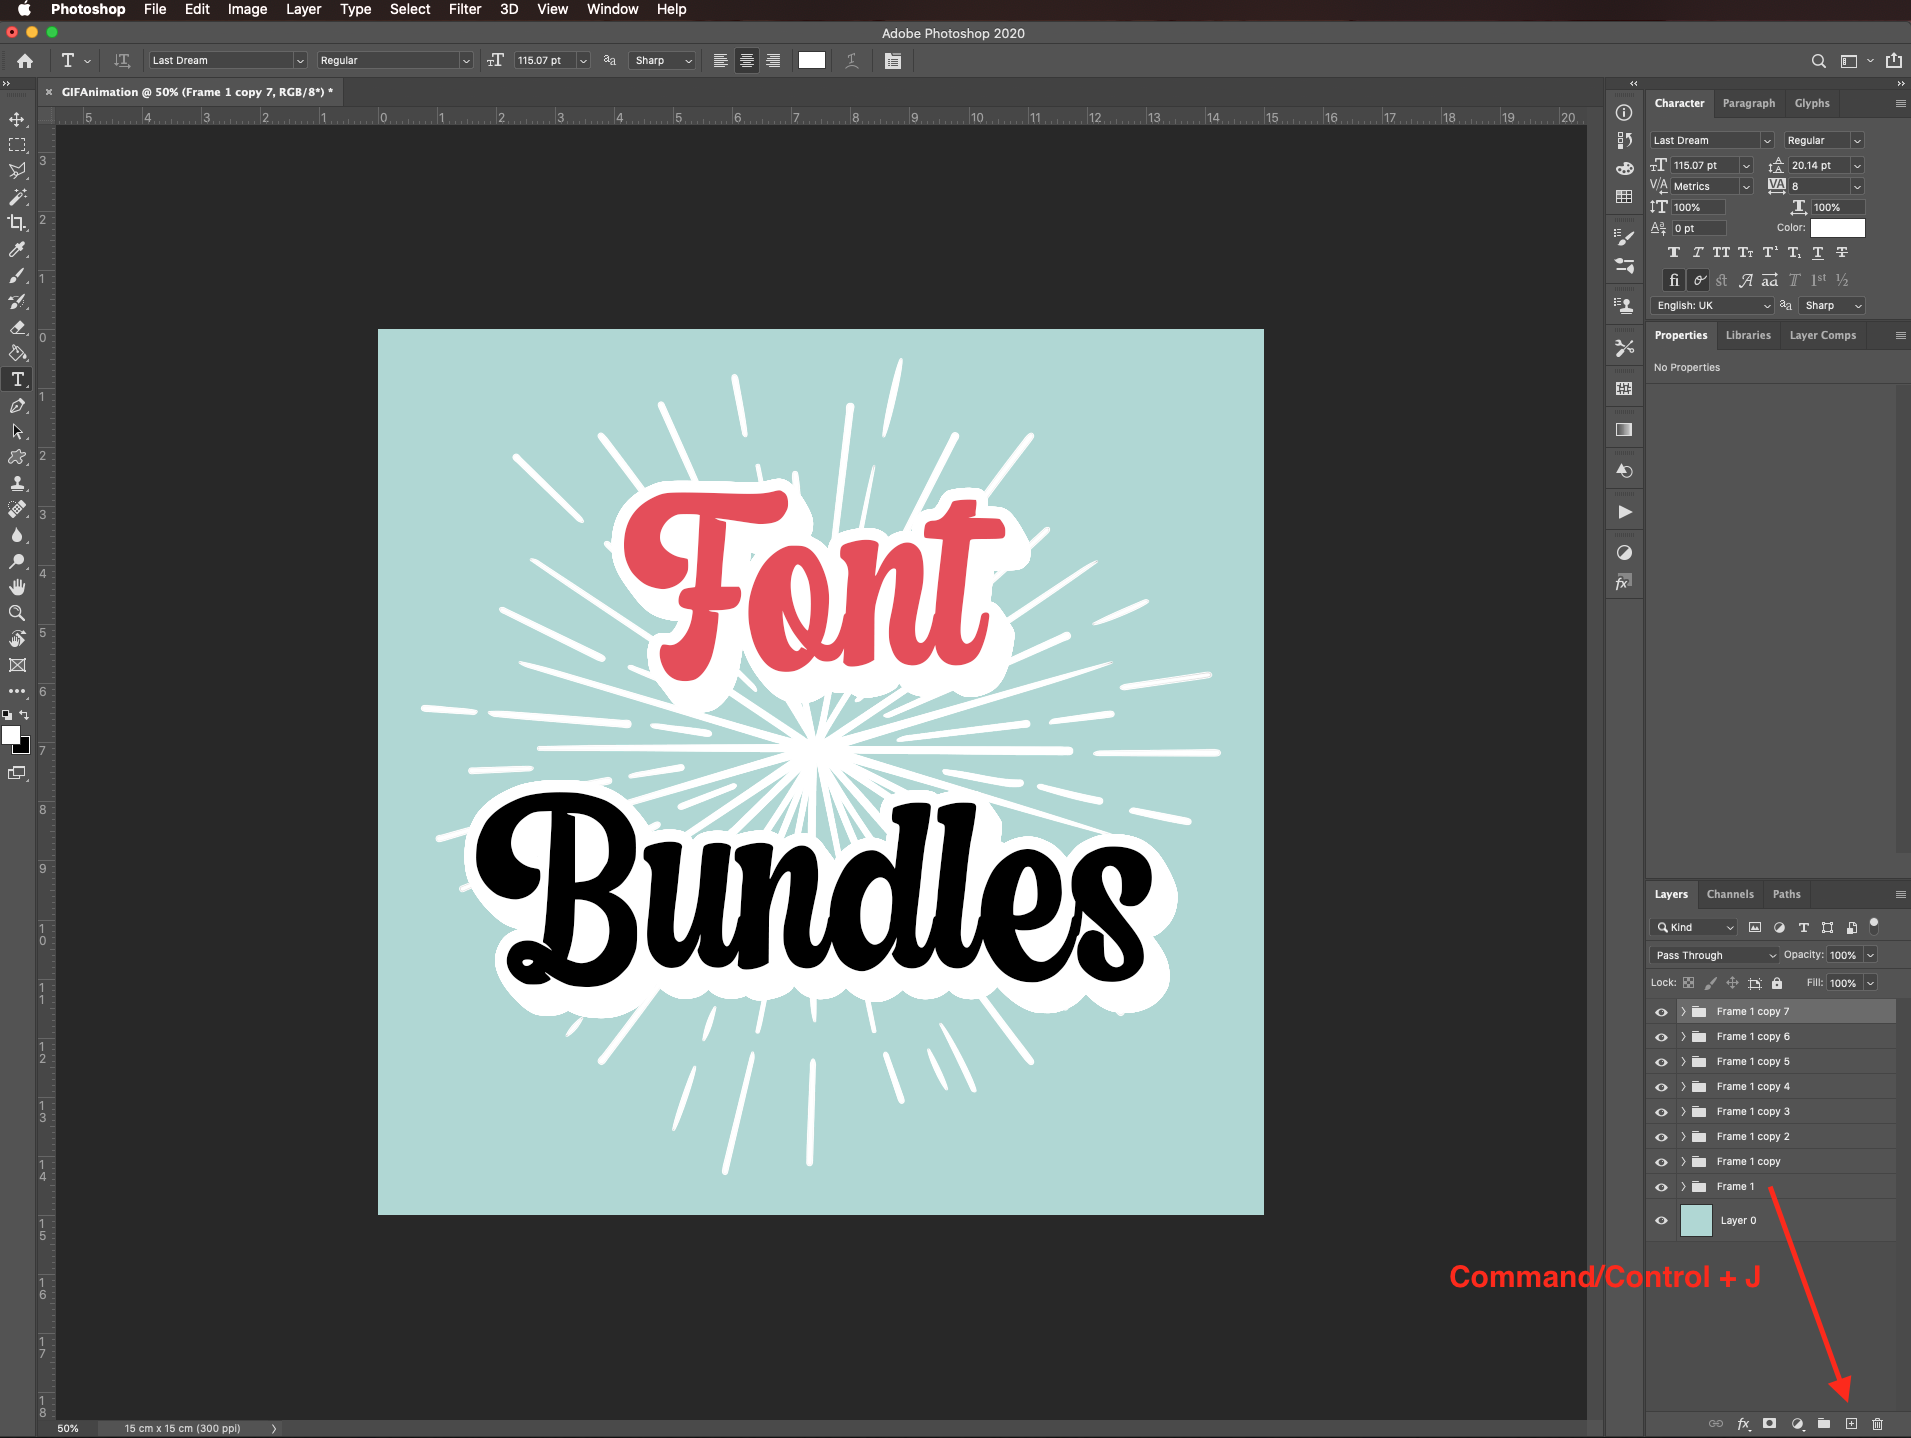
Rename them properly.
Now, in each frame folder hide/delete, change, move and/or recolor the elements you want to change during your animation.
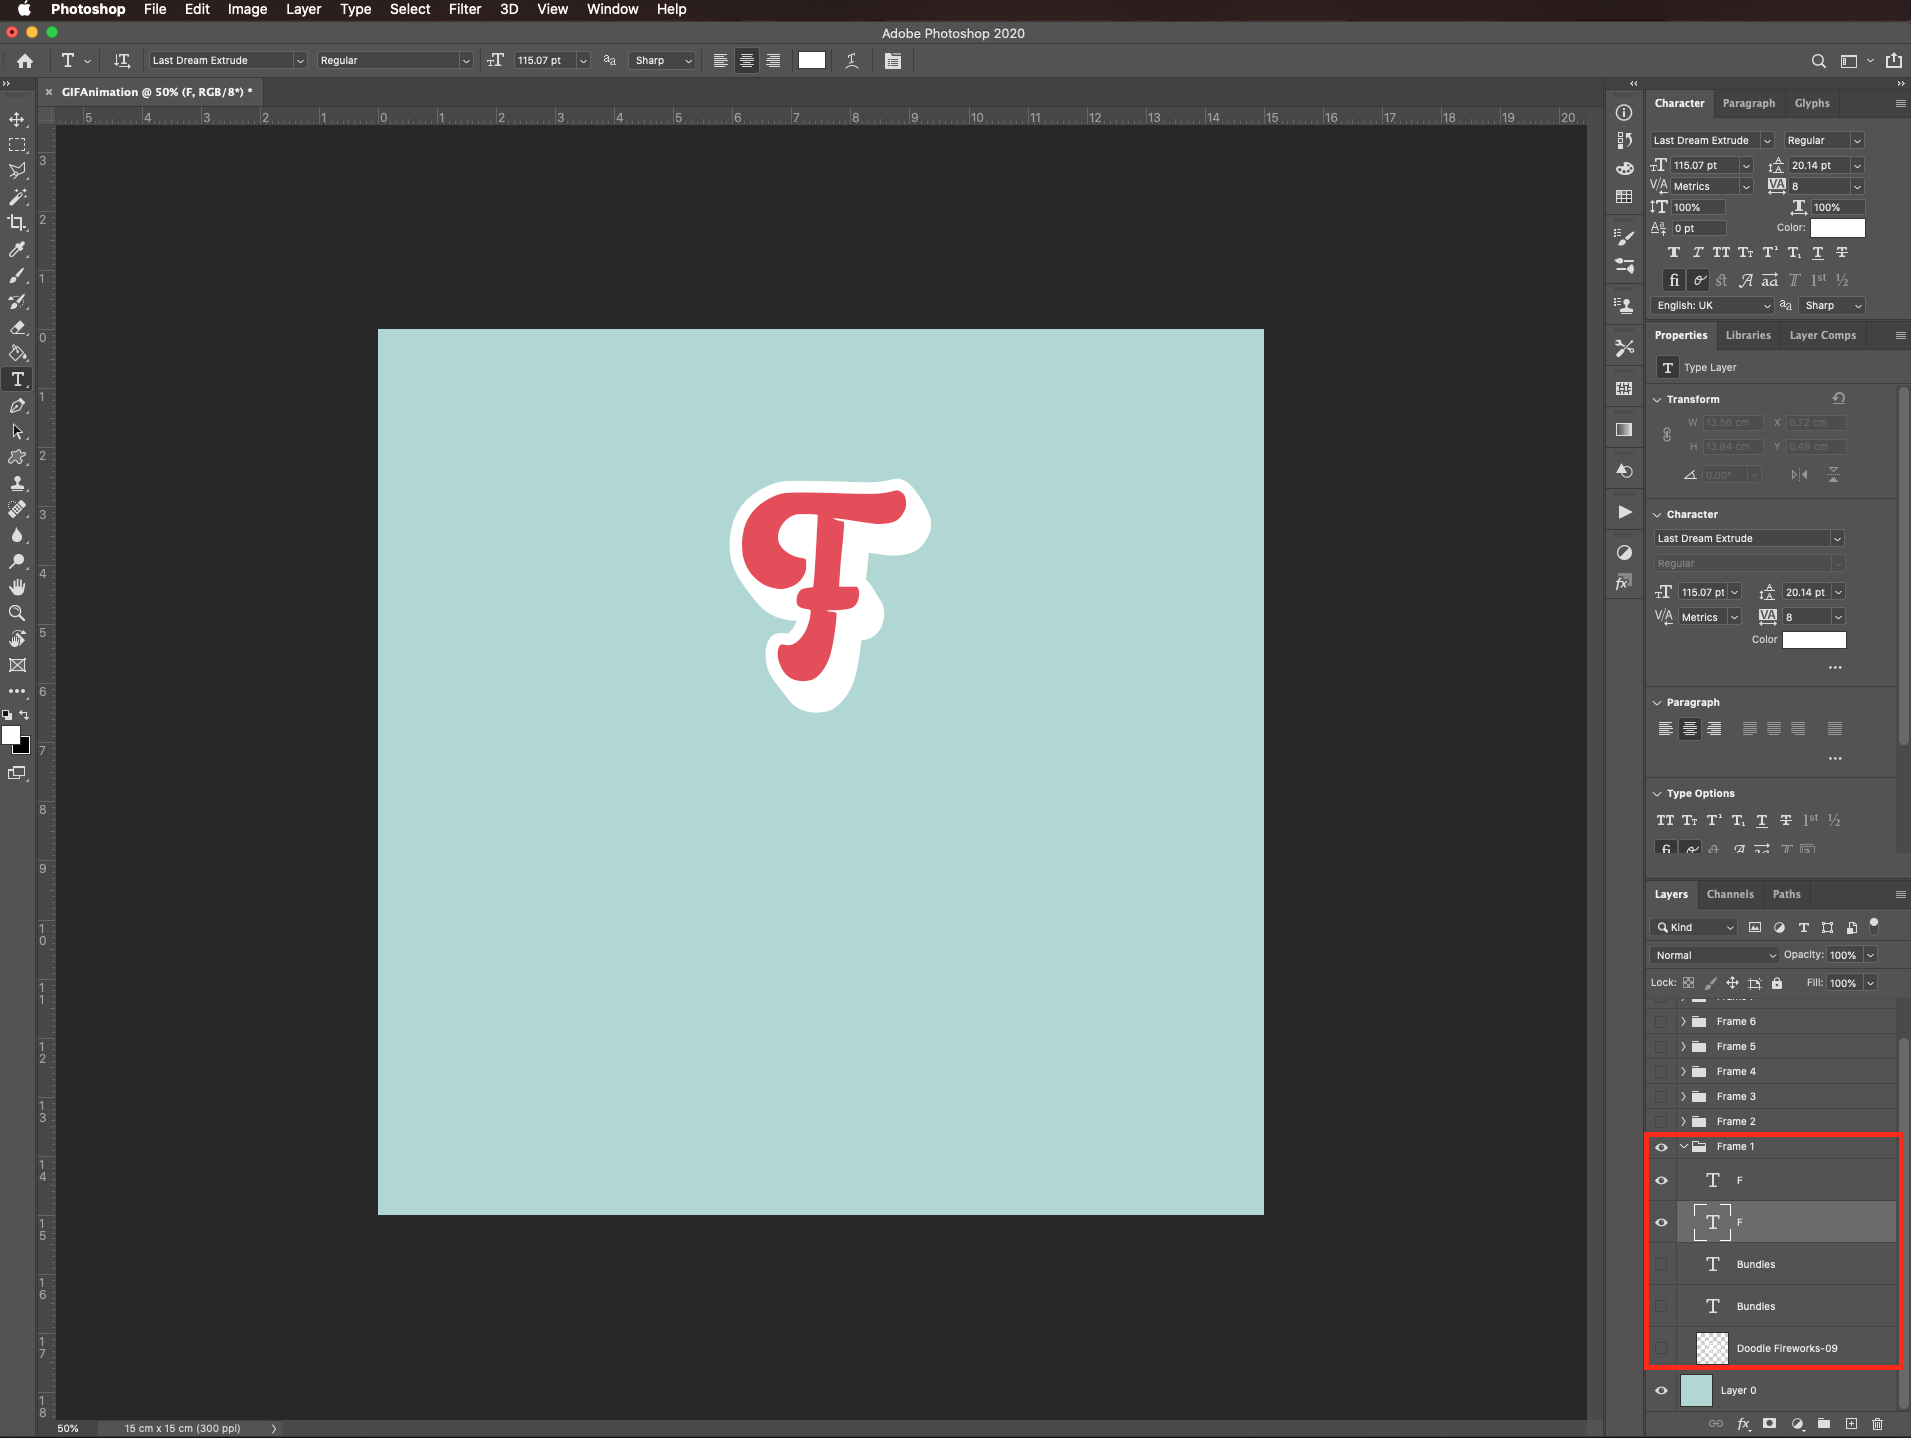
For example, we made the first word (Fonts) appear letter by letter in the first 4 frames.
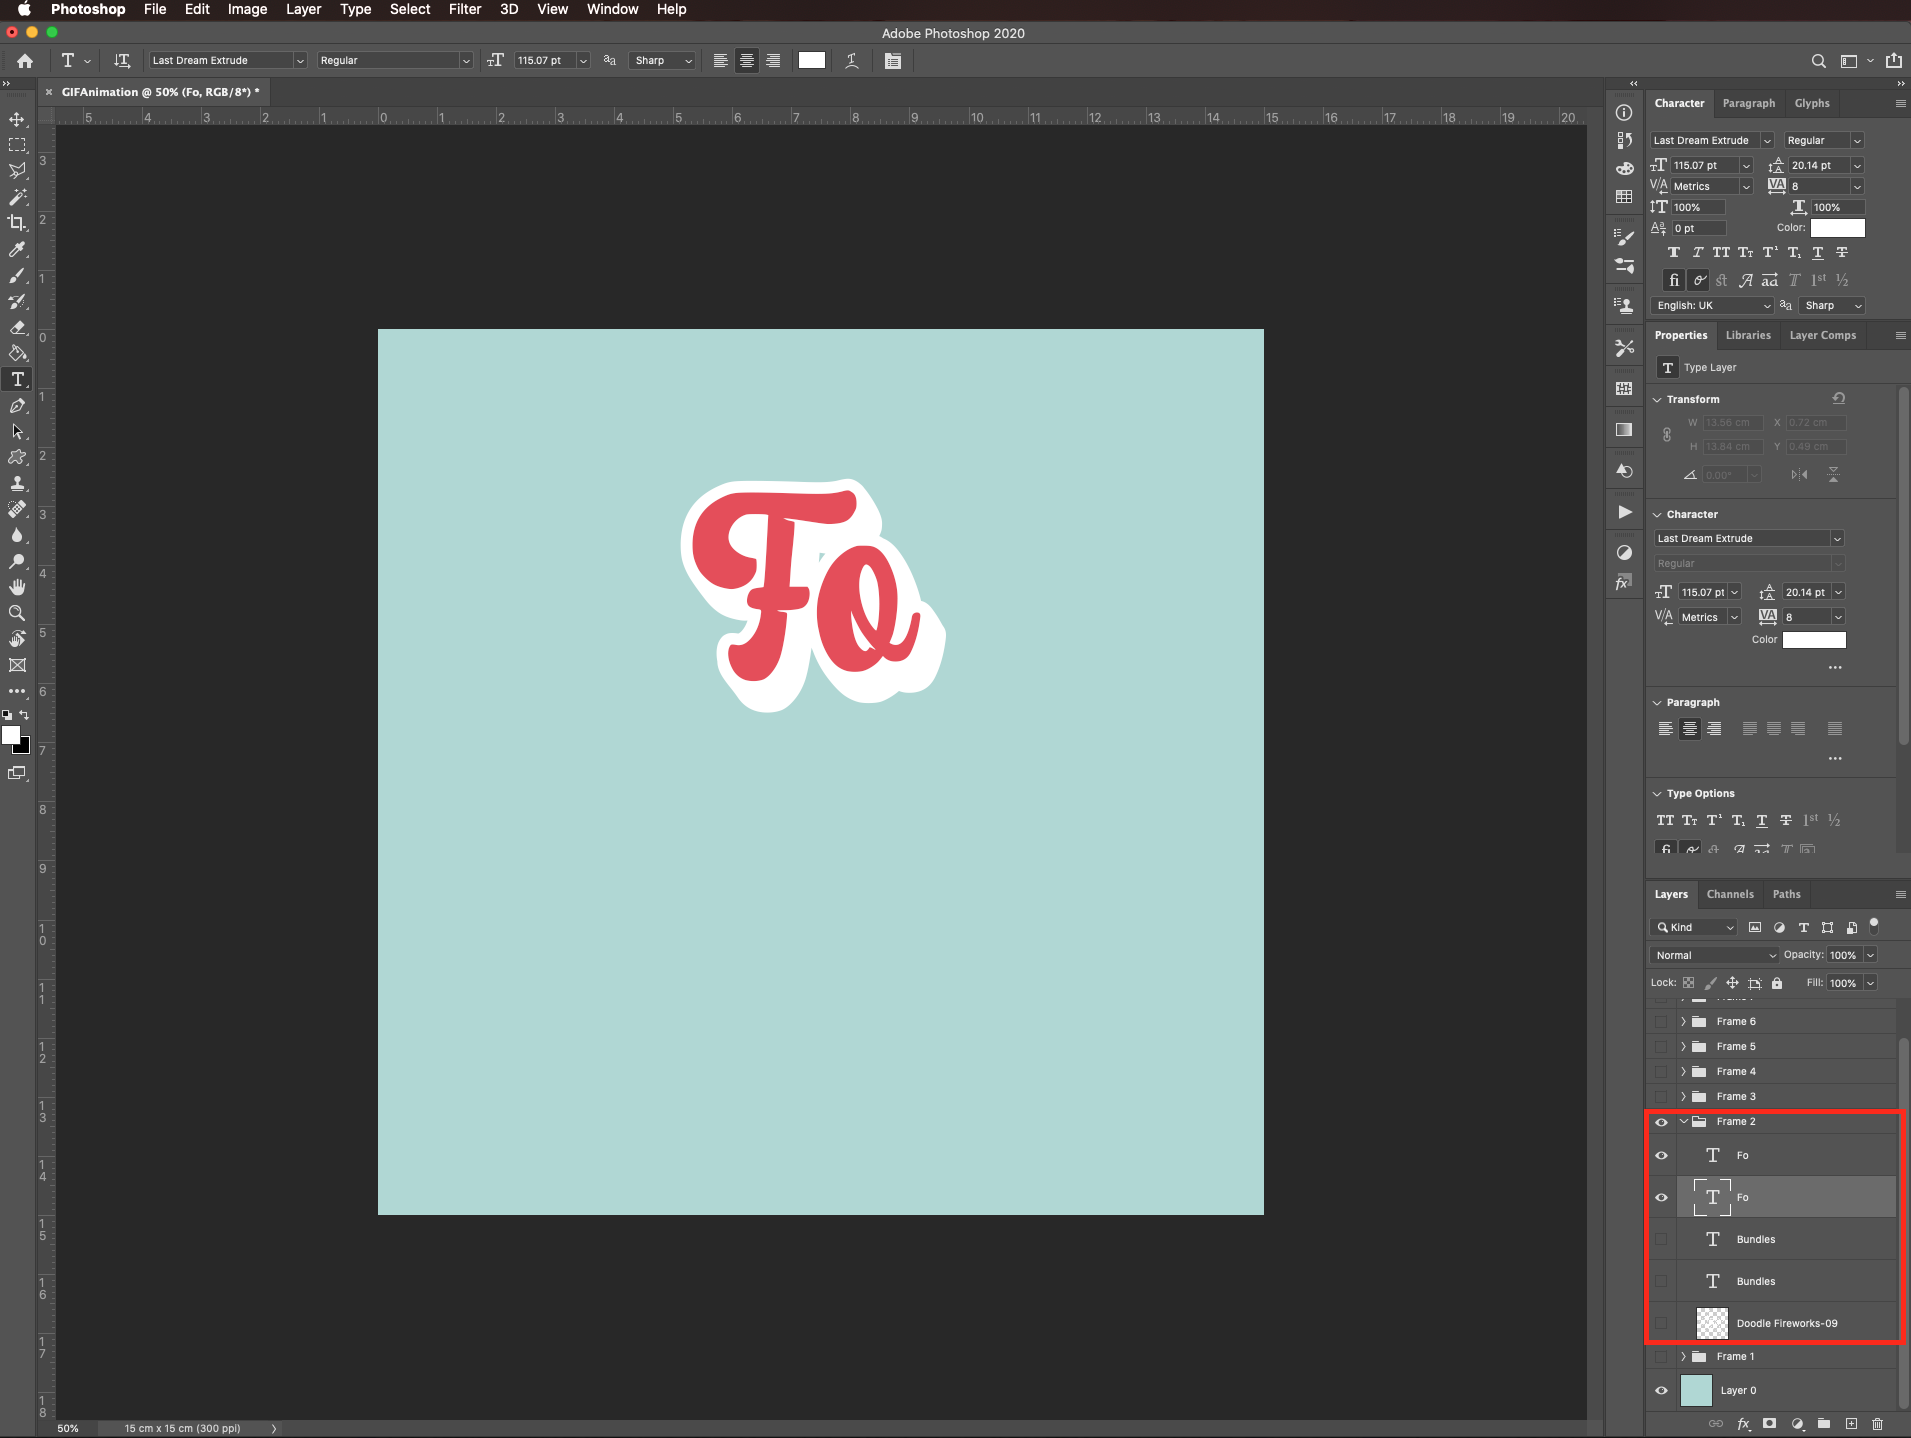

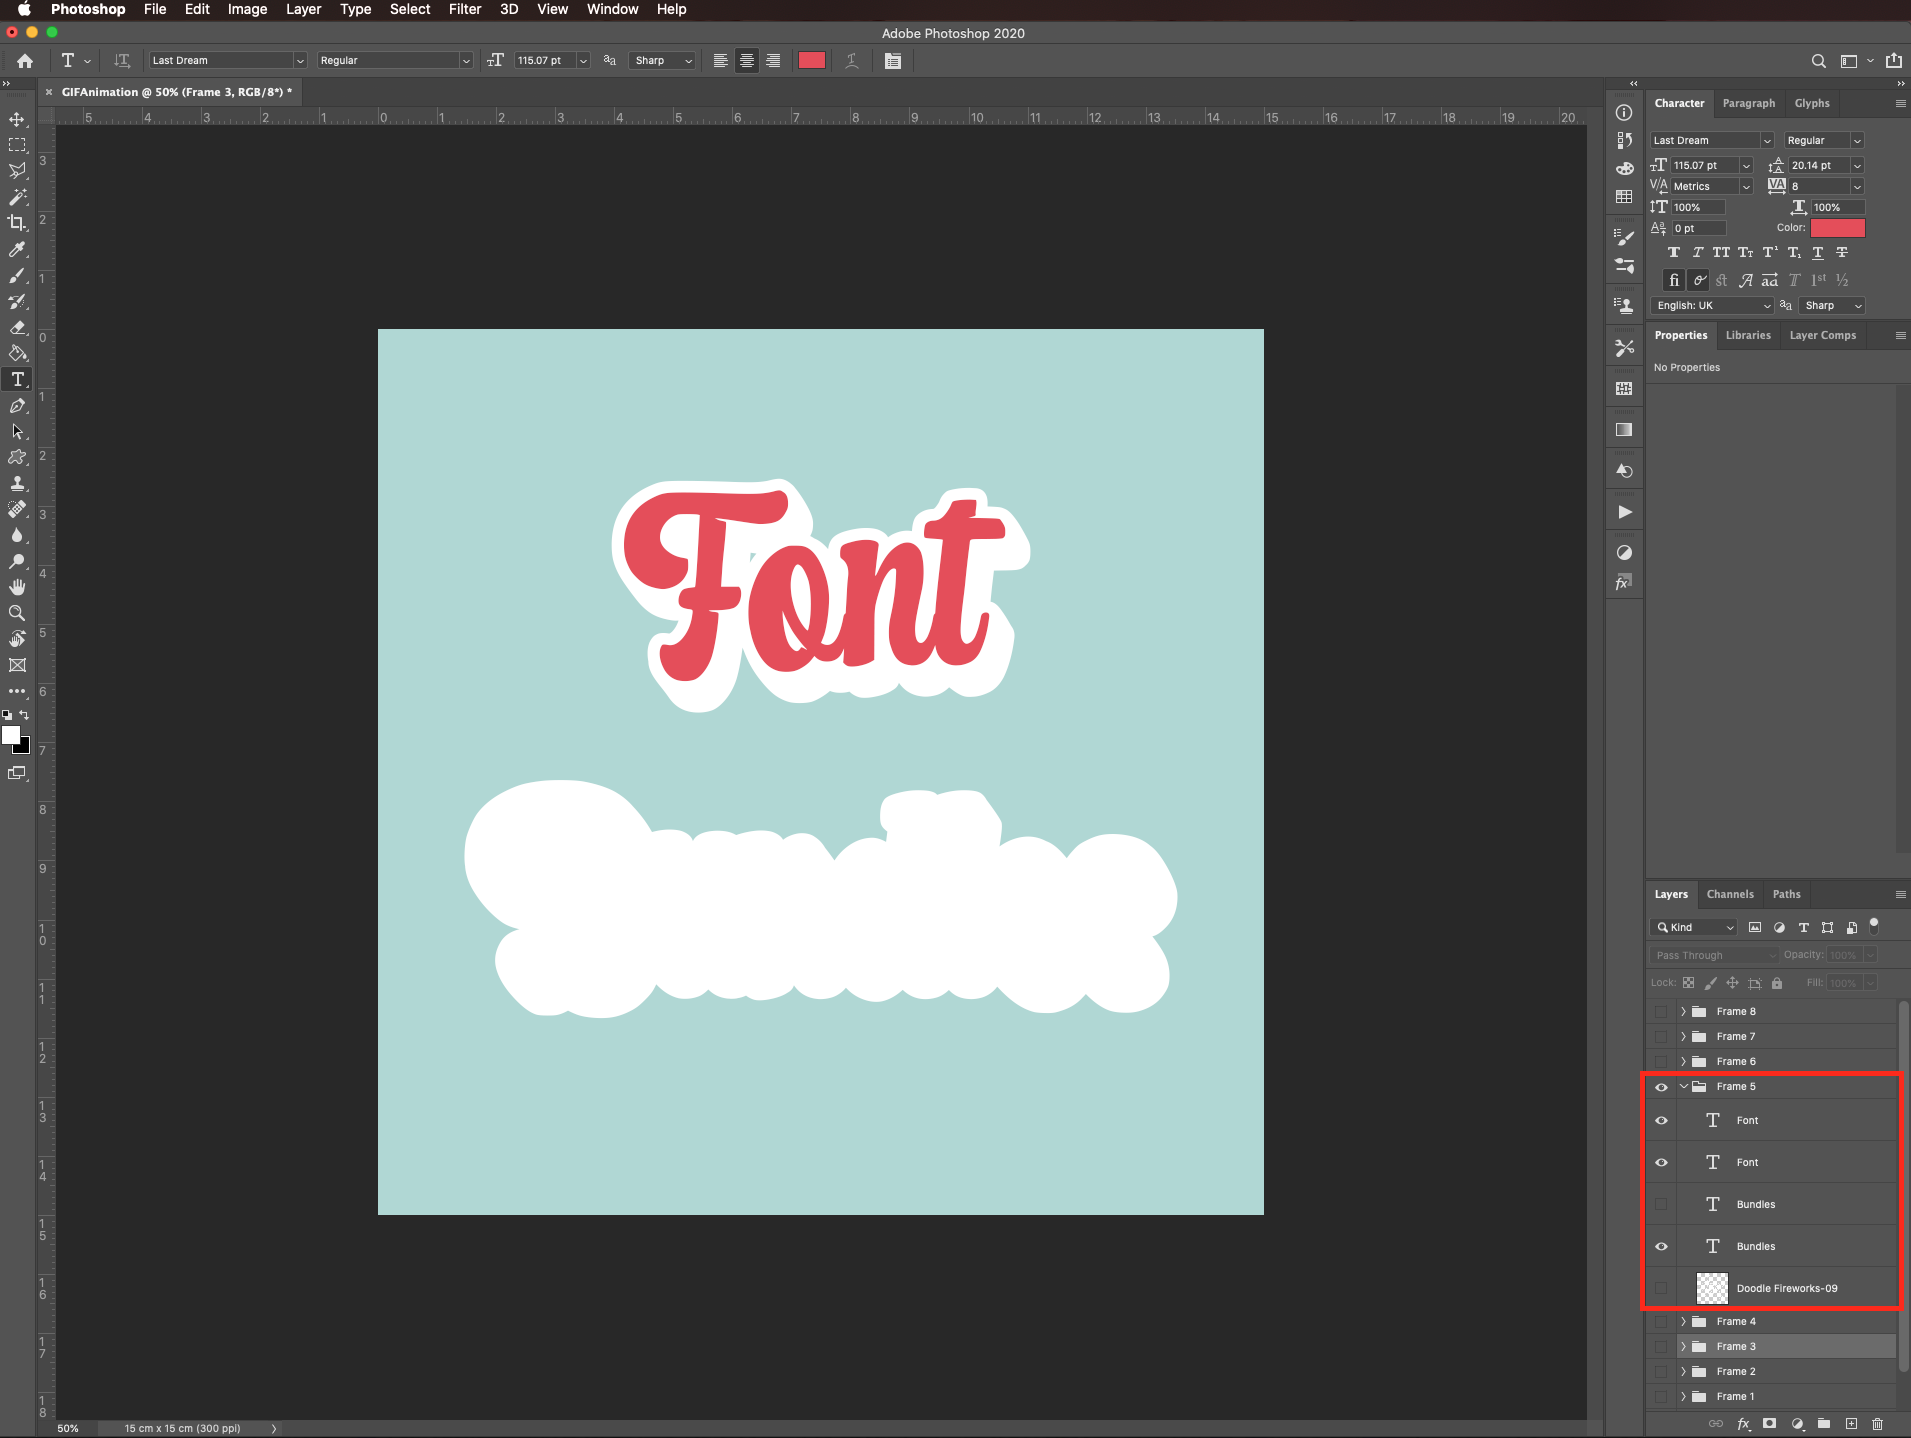
Next, with the second word (Bundles), we first made background text appear in frame 5.
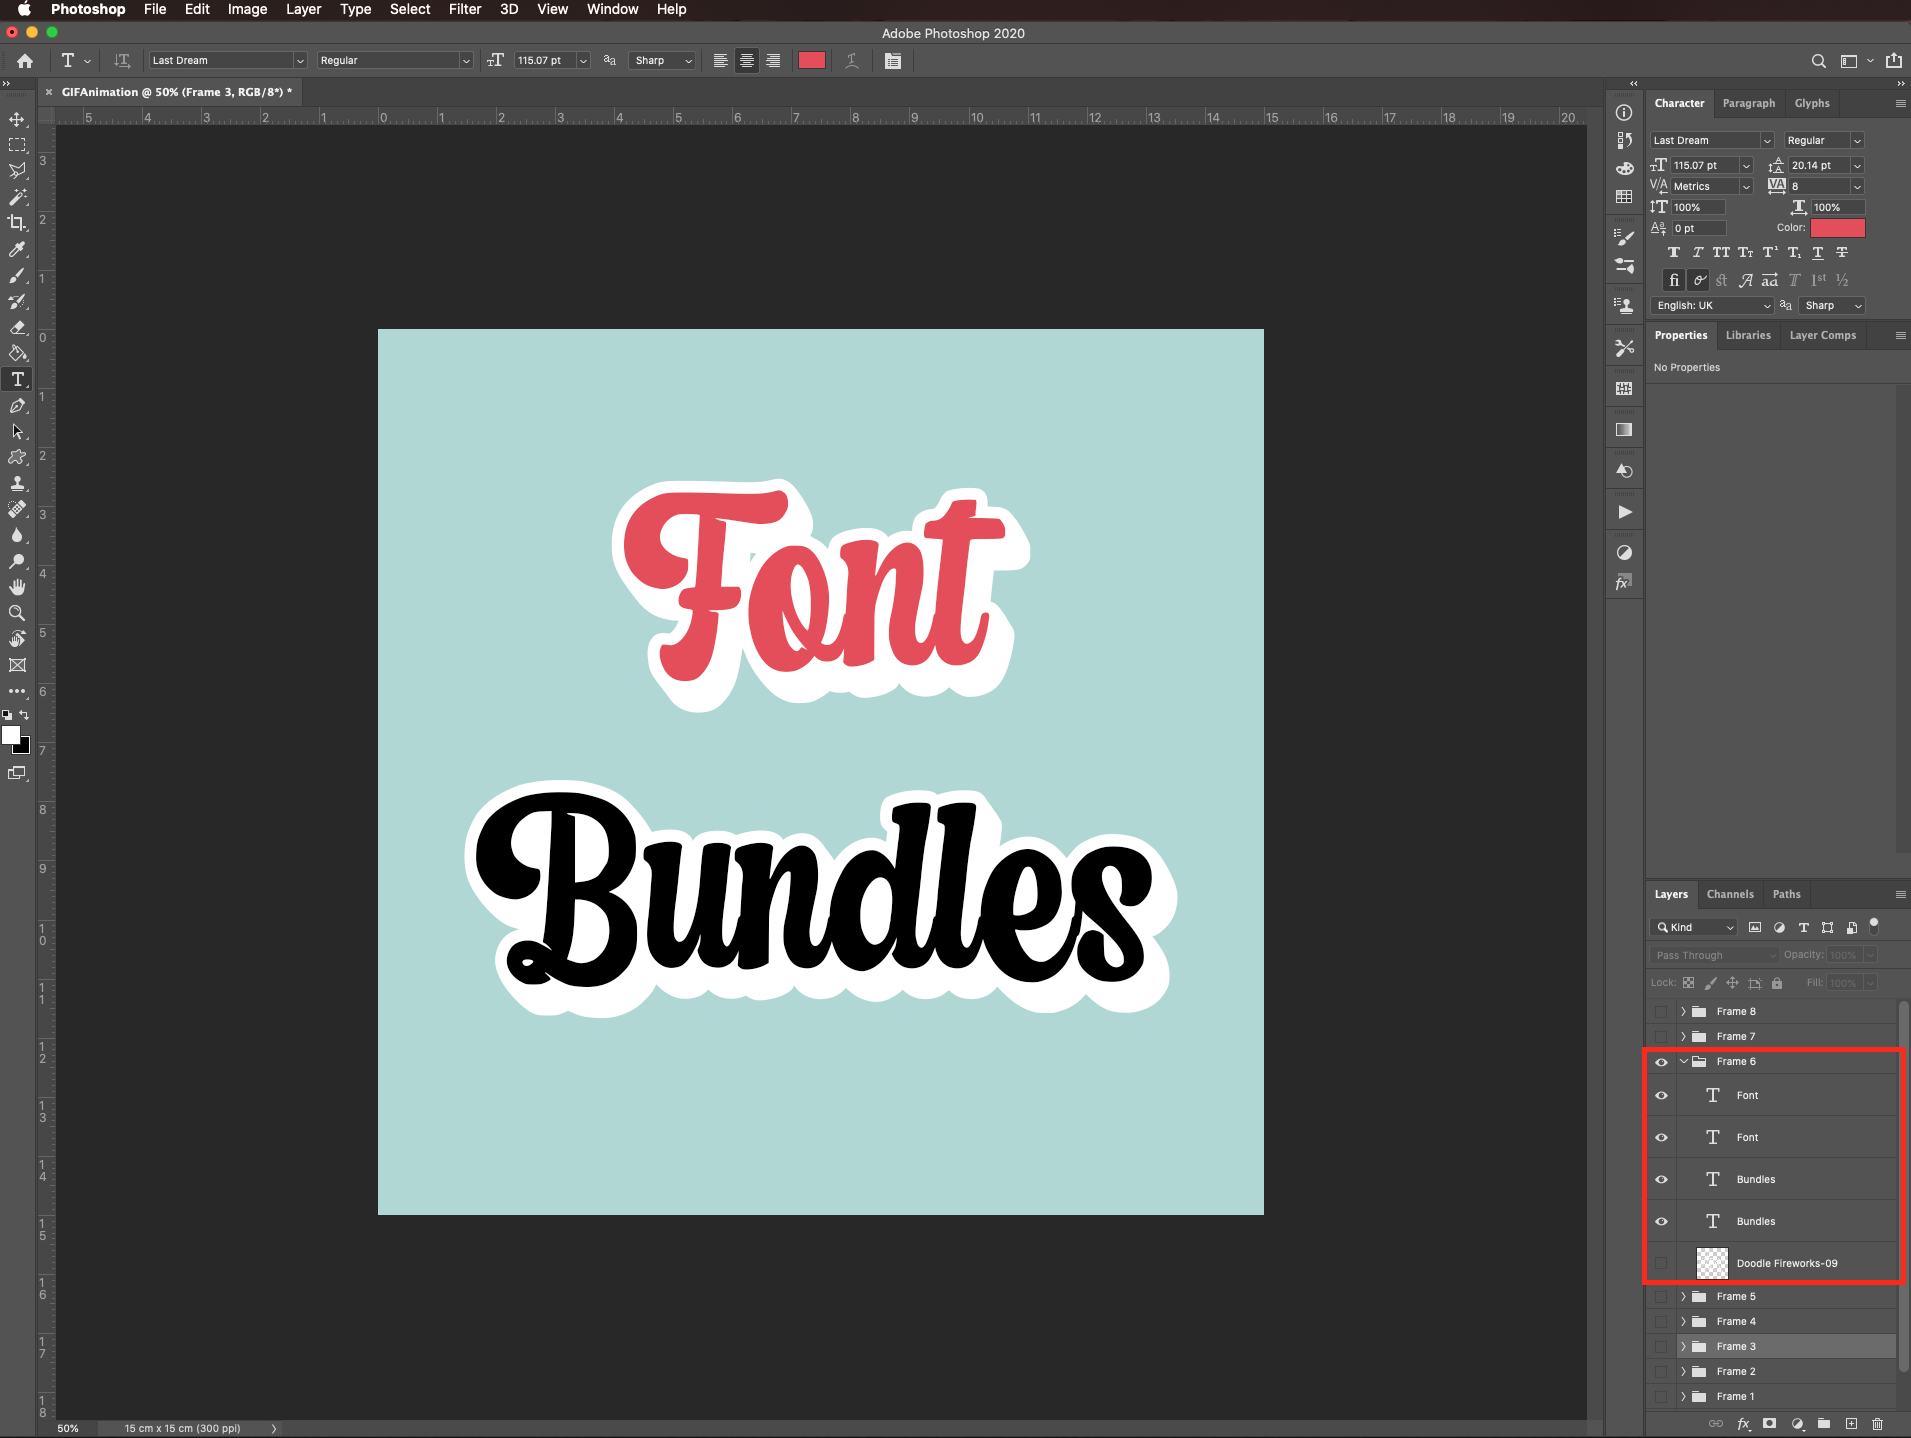
And the foreground text in frame 6.
In frame 7, we left all the elements out.
And finally, in frame 8 we hid the clip-art.
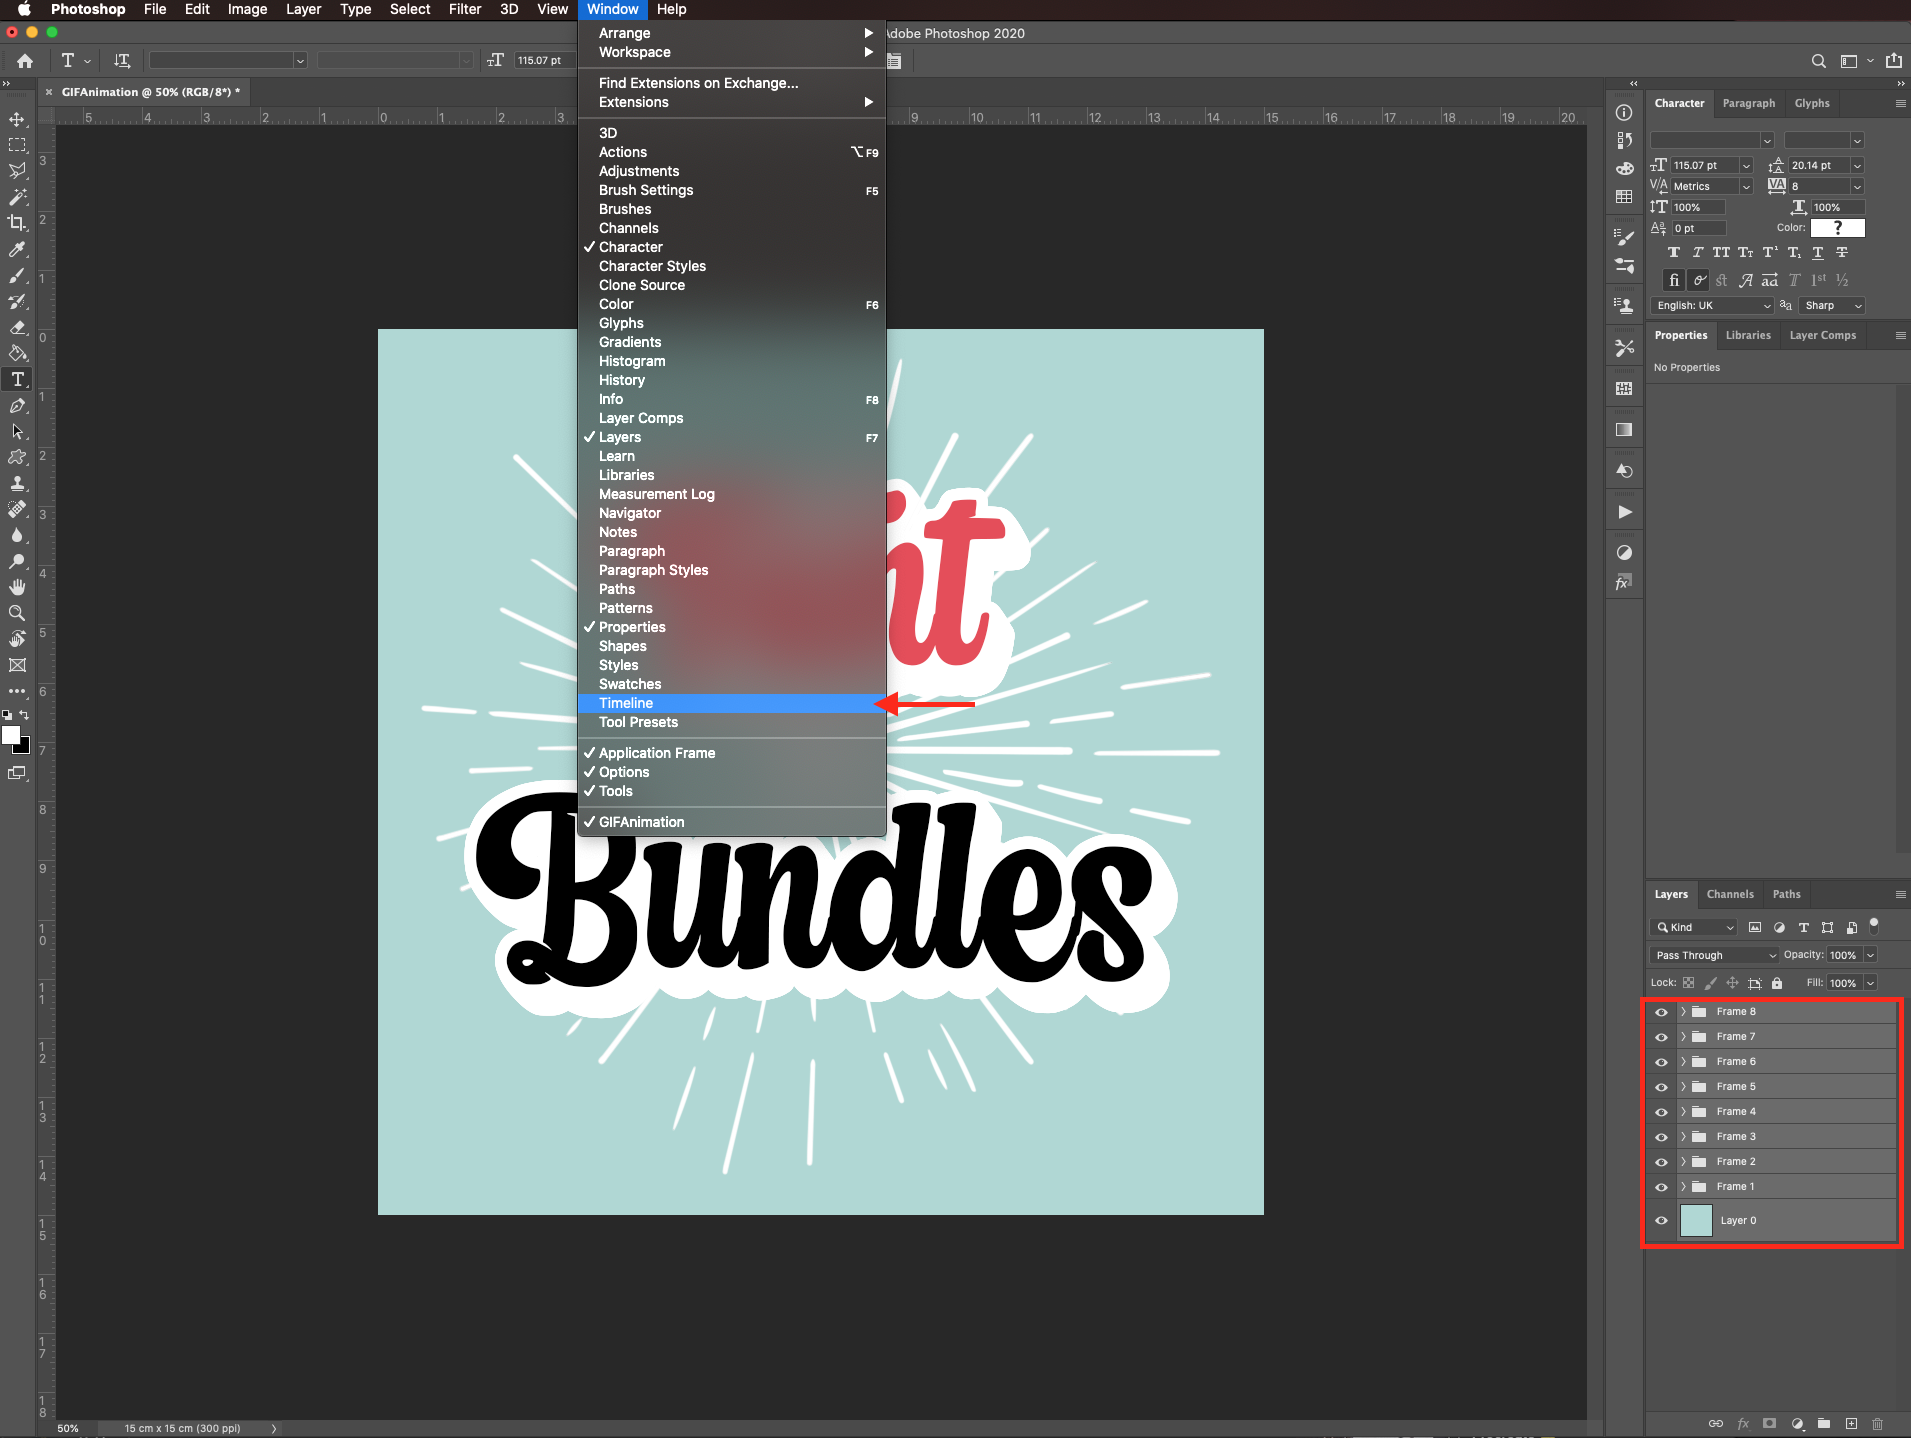
Go to Window > Timeline.
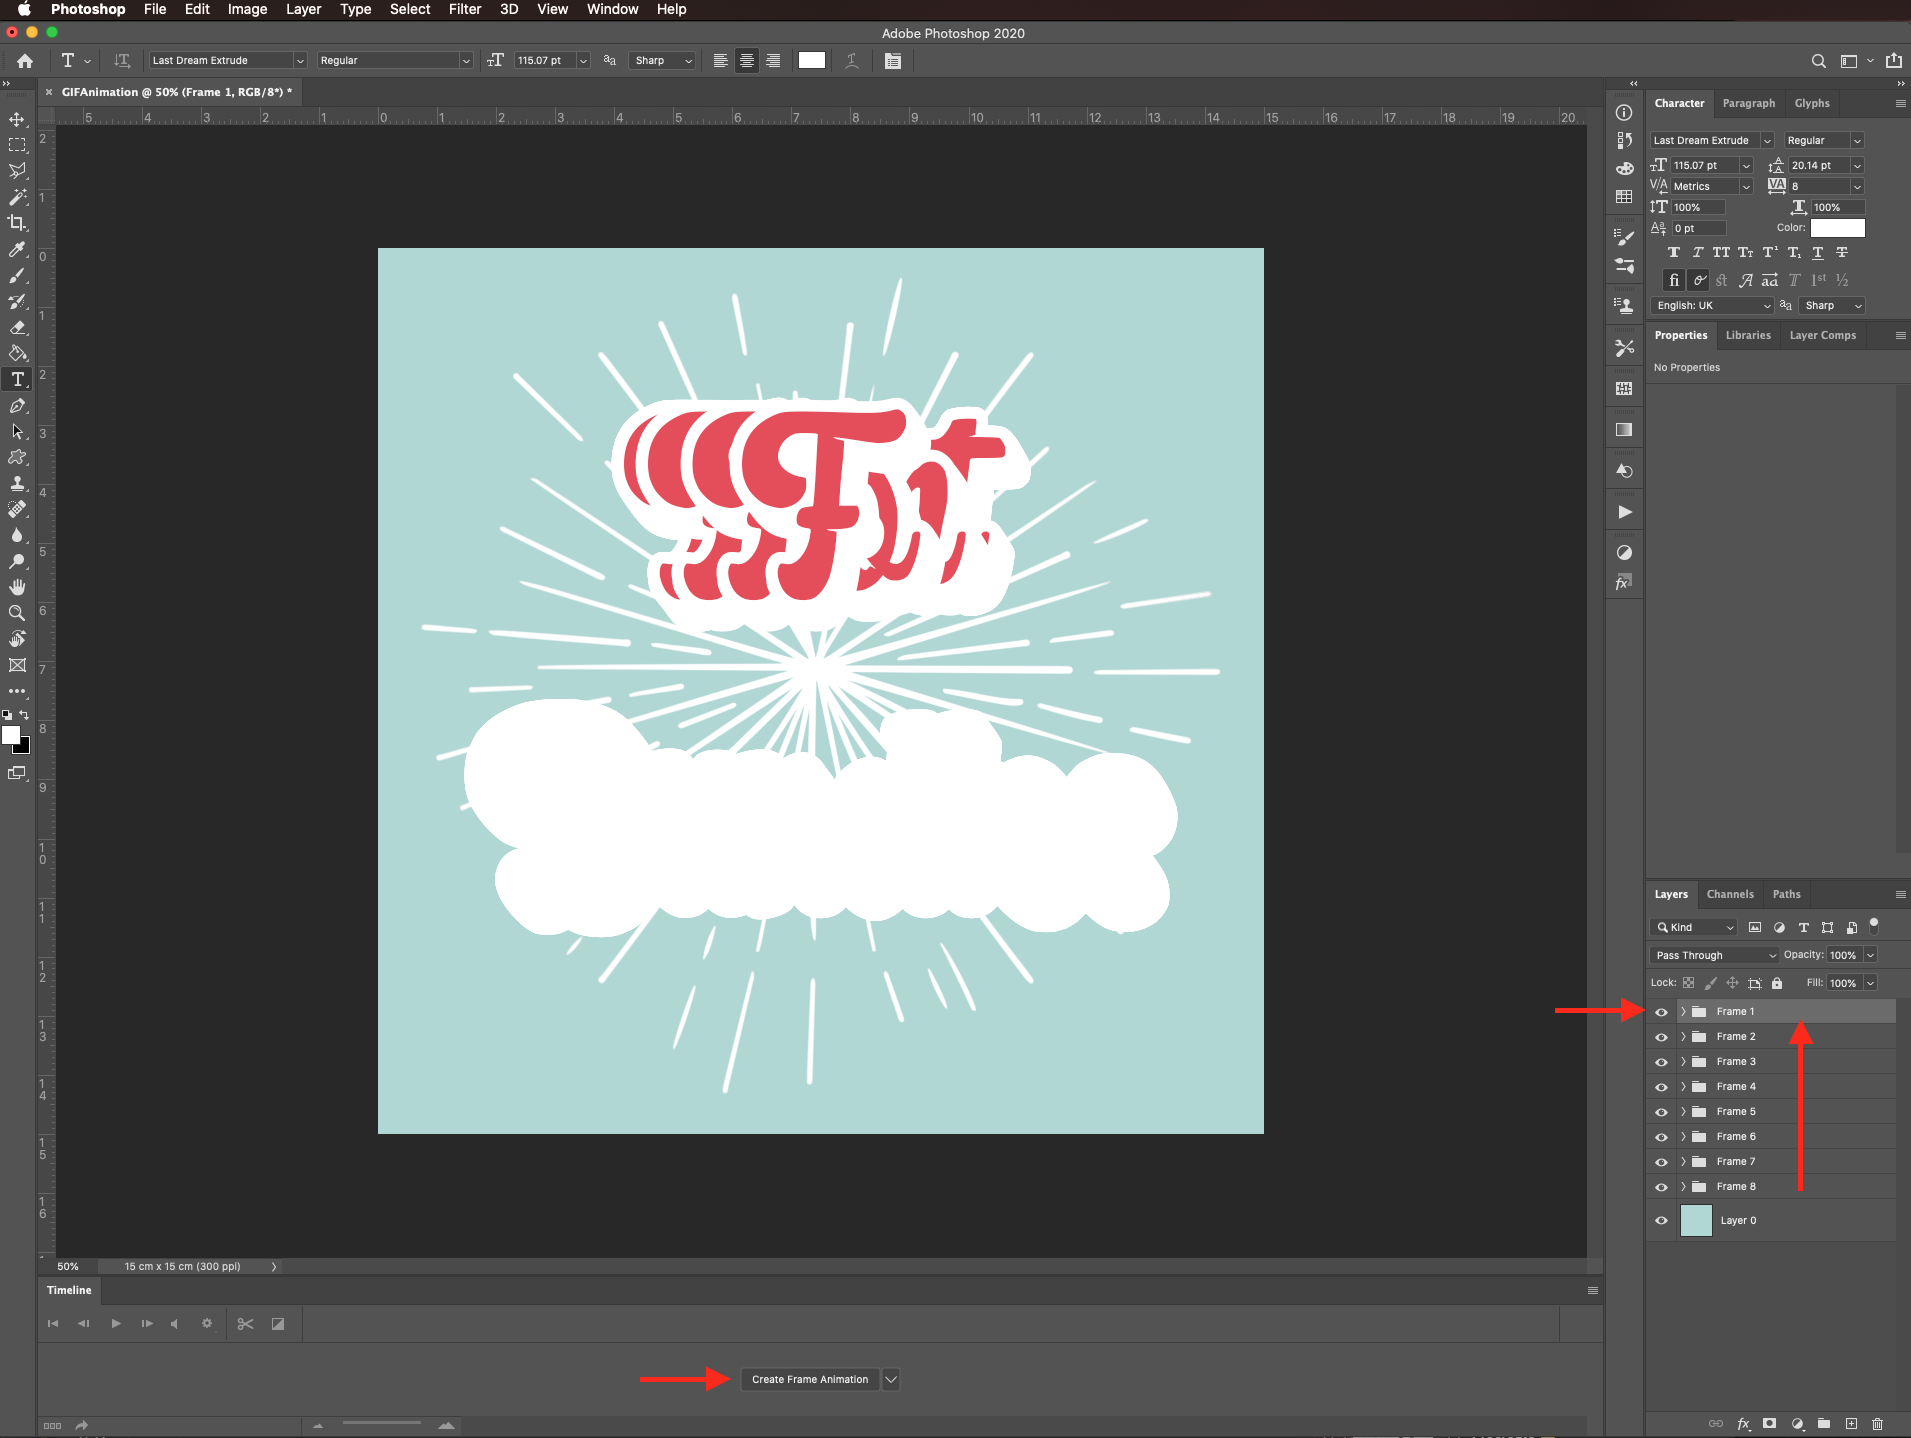
When the Timeline panel is open, make sure that the create frame animation is selected in the center button.

Reorder the frame folders if needed (frame 1 on top and frame 8 at the bottom). Select your frames and click the create frame animation button.
You will have a small tile in the timeline panel, make sure that just the frame 1 folder is visible (small eye icon). Change the delay value to 0.2 seconds or more (small arrow on the bottom right of the tile). Then, drag the tile to the small square with a + sign to duplicate it and make the frame 2 folder visible this time.
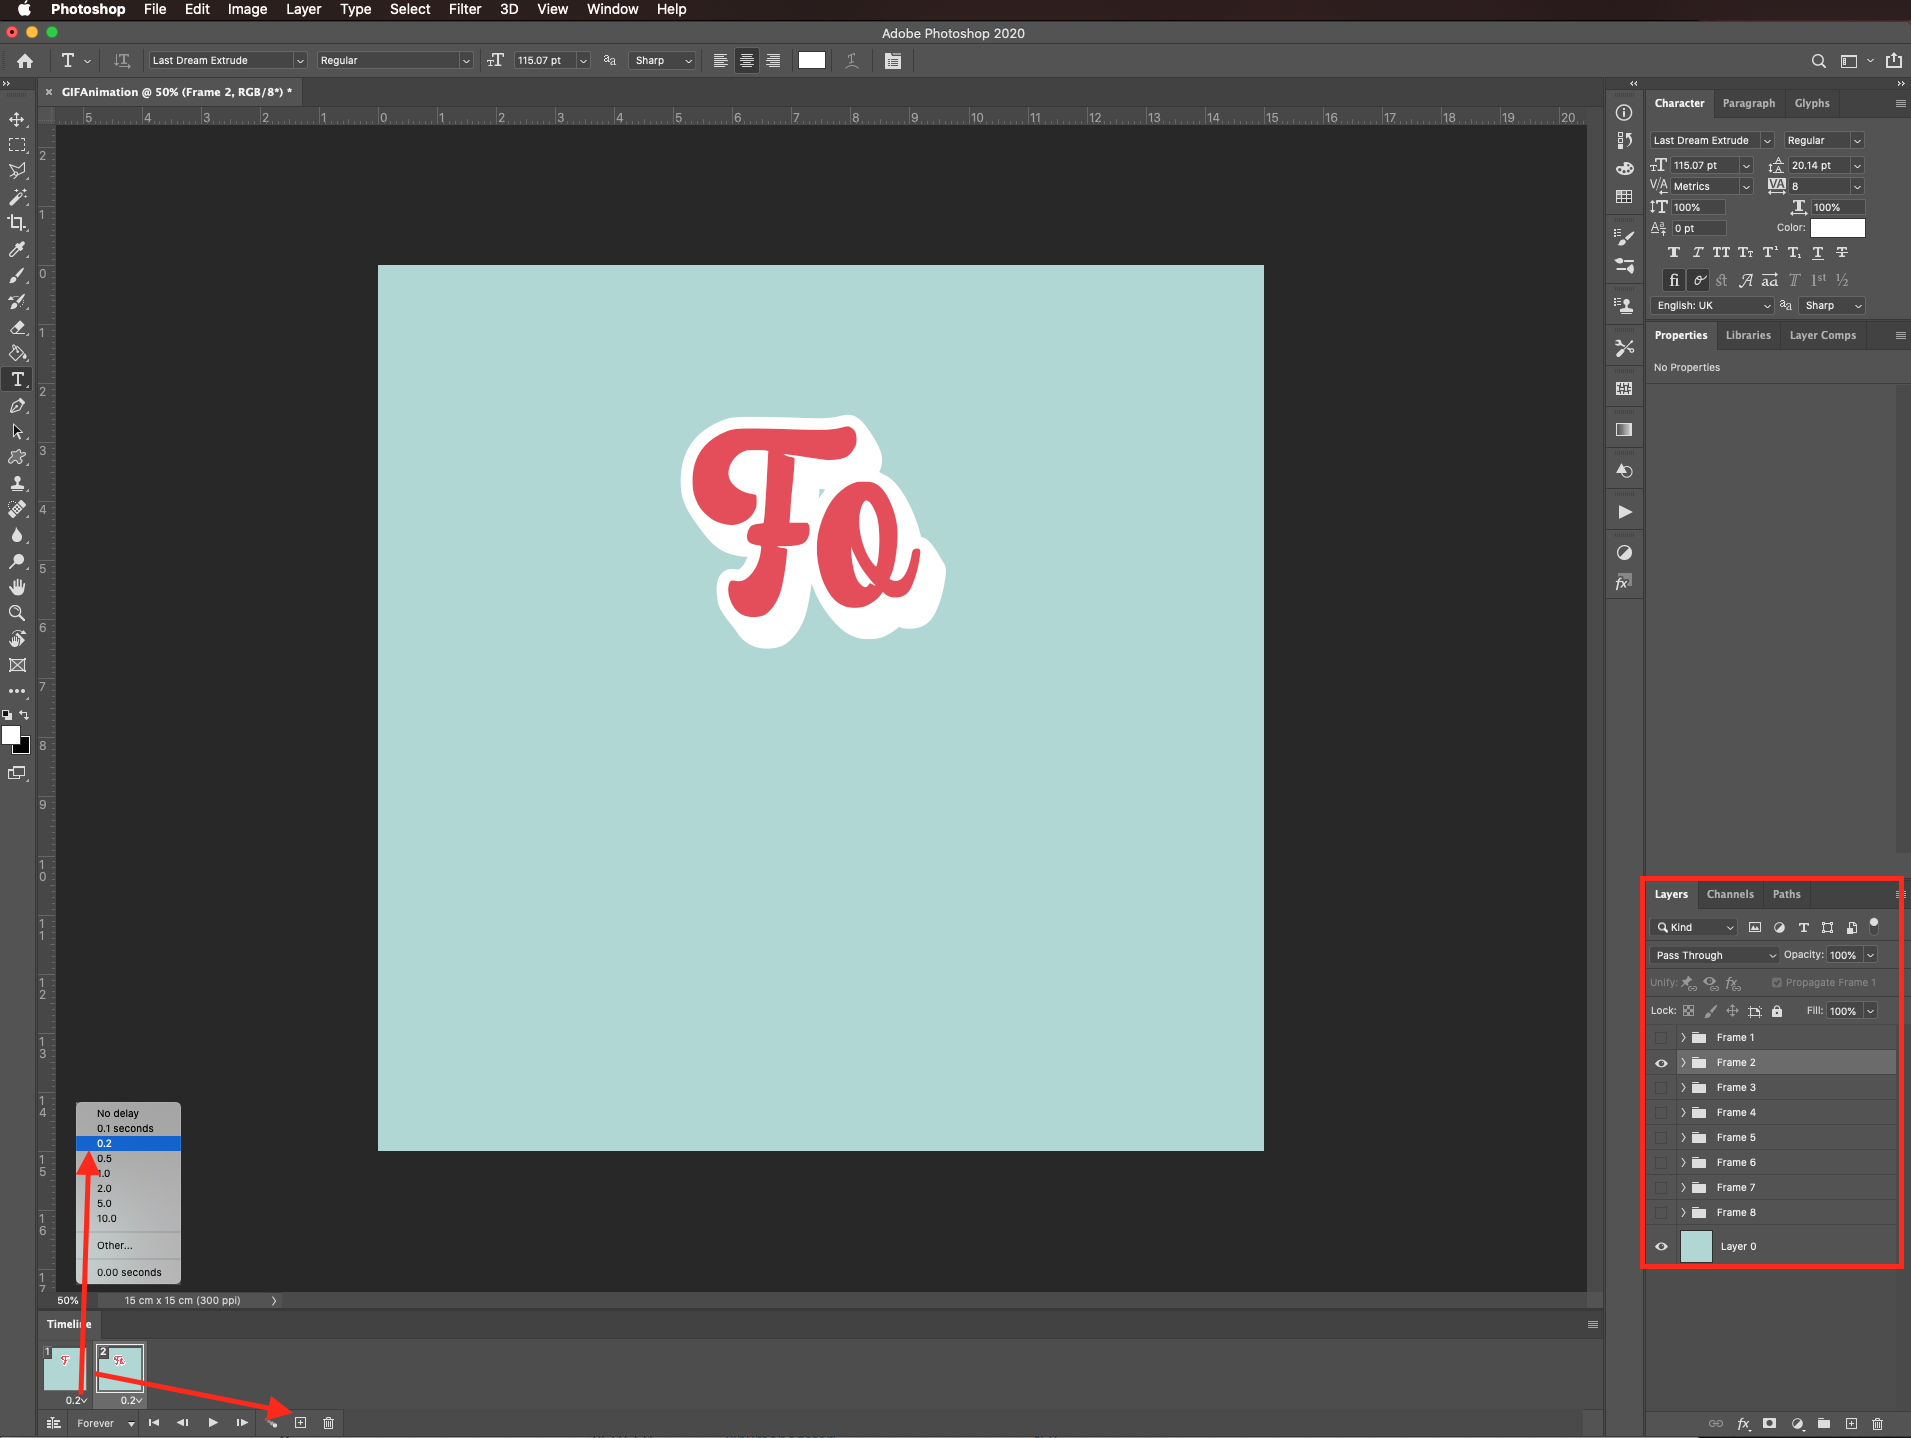
Repeat this with the rest of the frame folder. You should end up with 8 frame tiles. Remember to change the visibility of the correct folder for each tile.
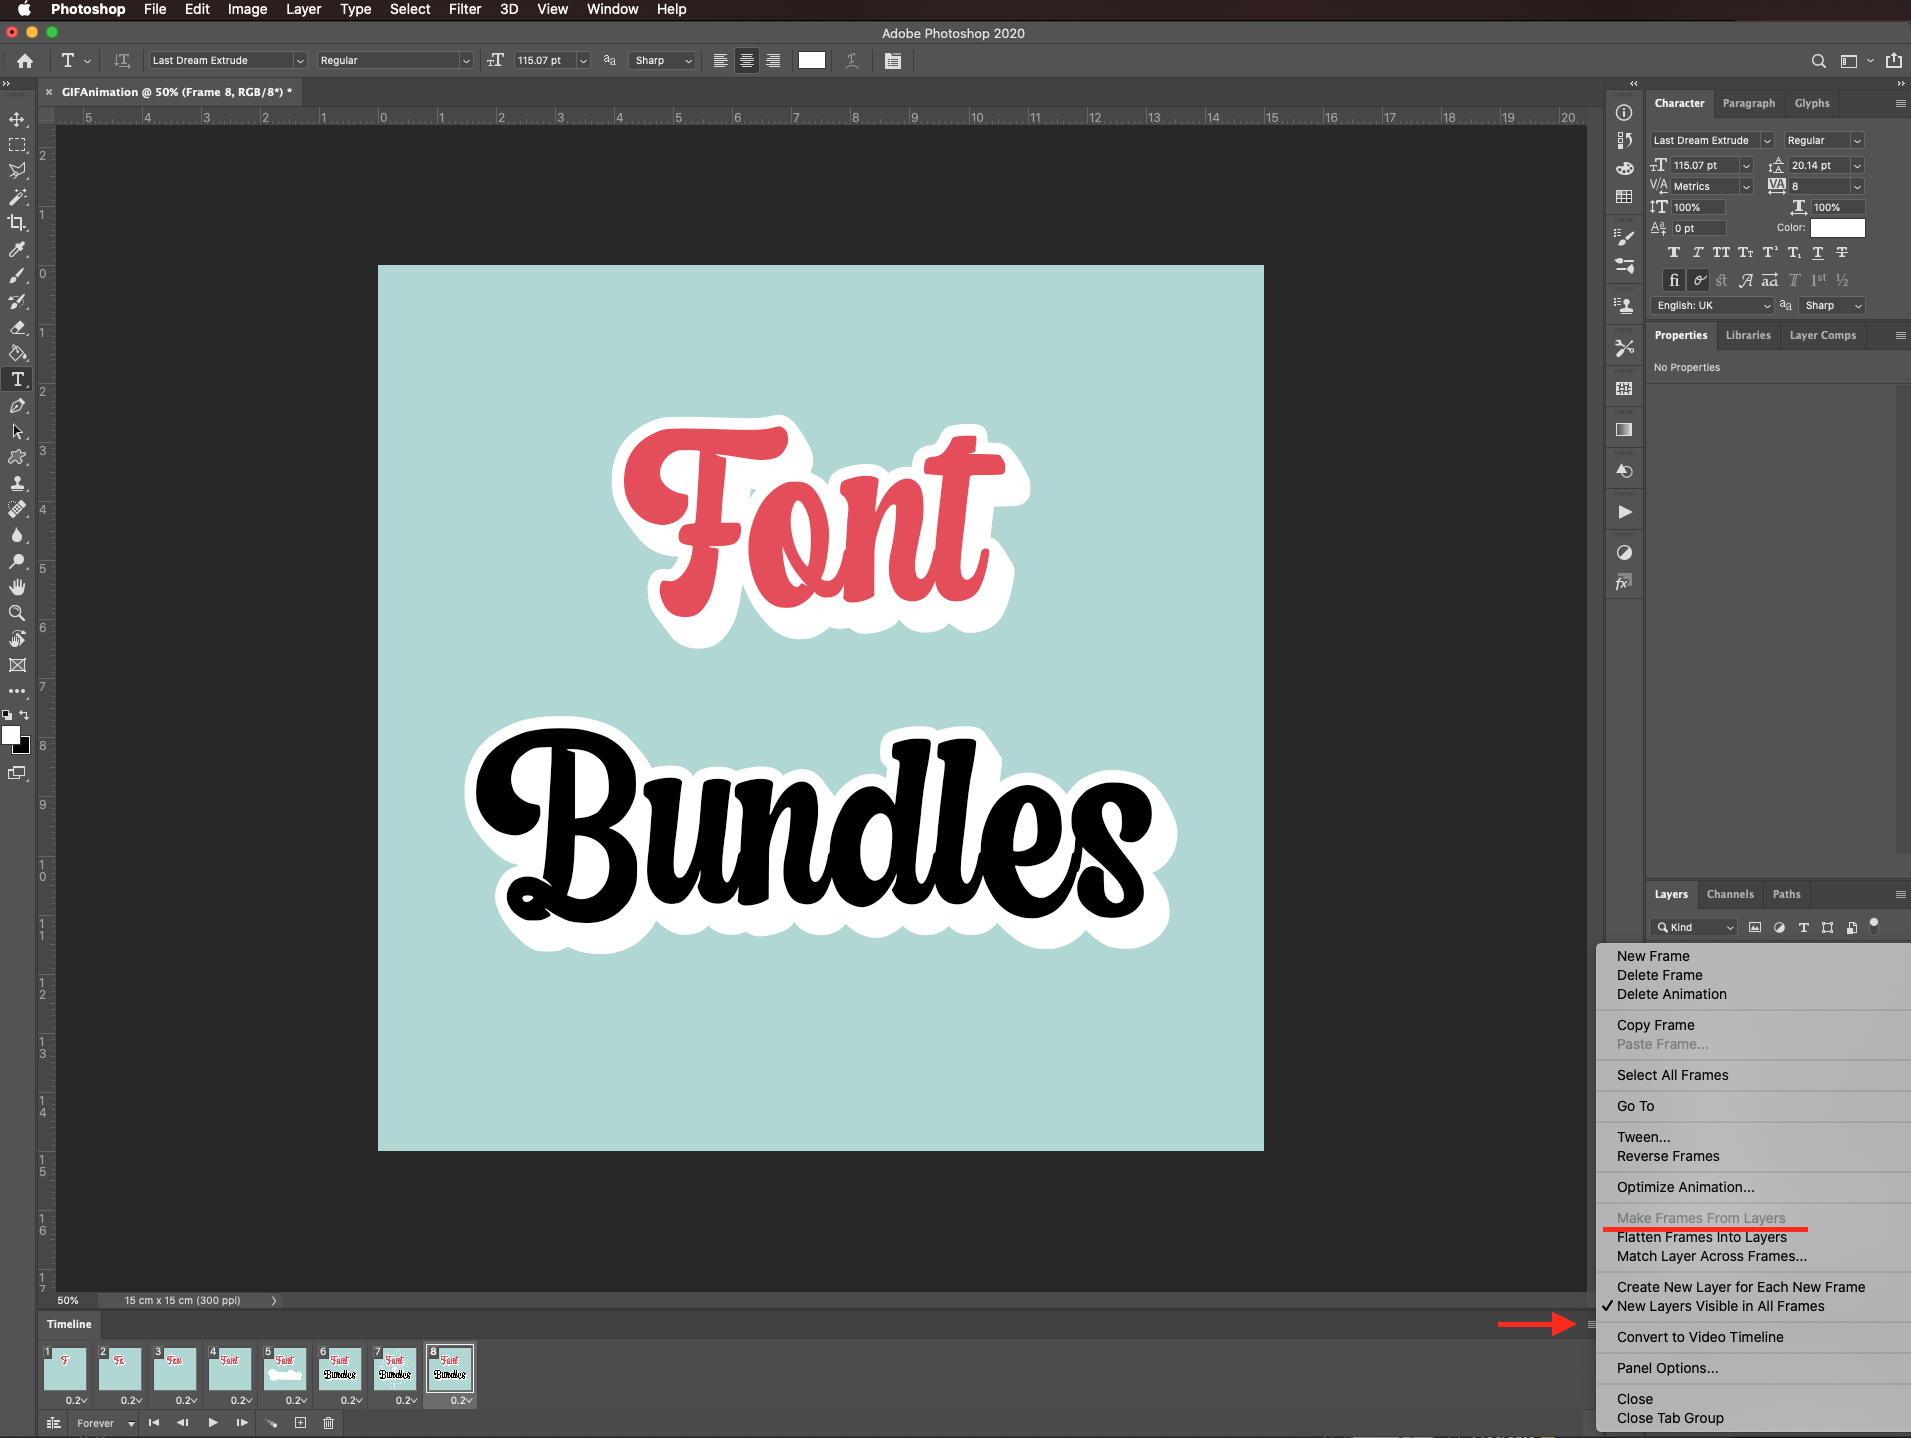
If you want (and don’t plan to edit your folder content any further) you can flatten them and then, instead of manually creating the frame tiles, click on the small menu on the right side of the Timeline panel and choose Make frames from layers.
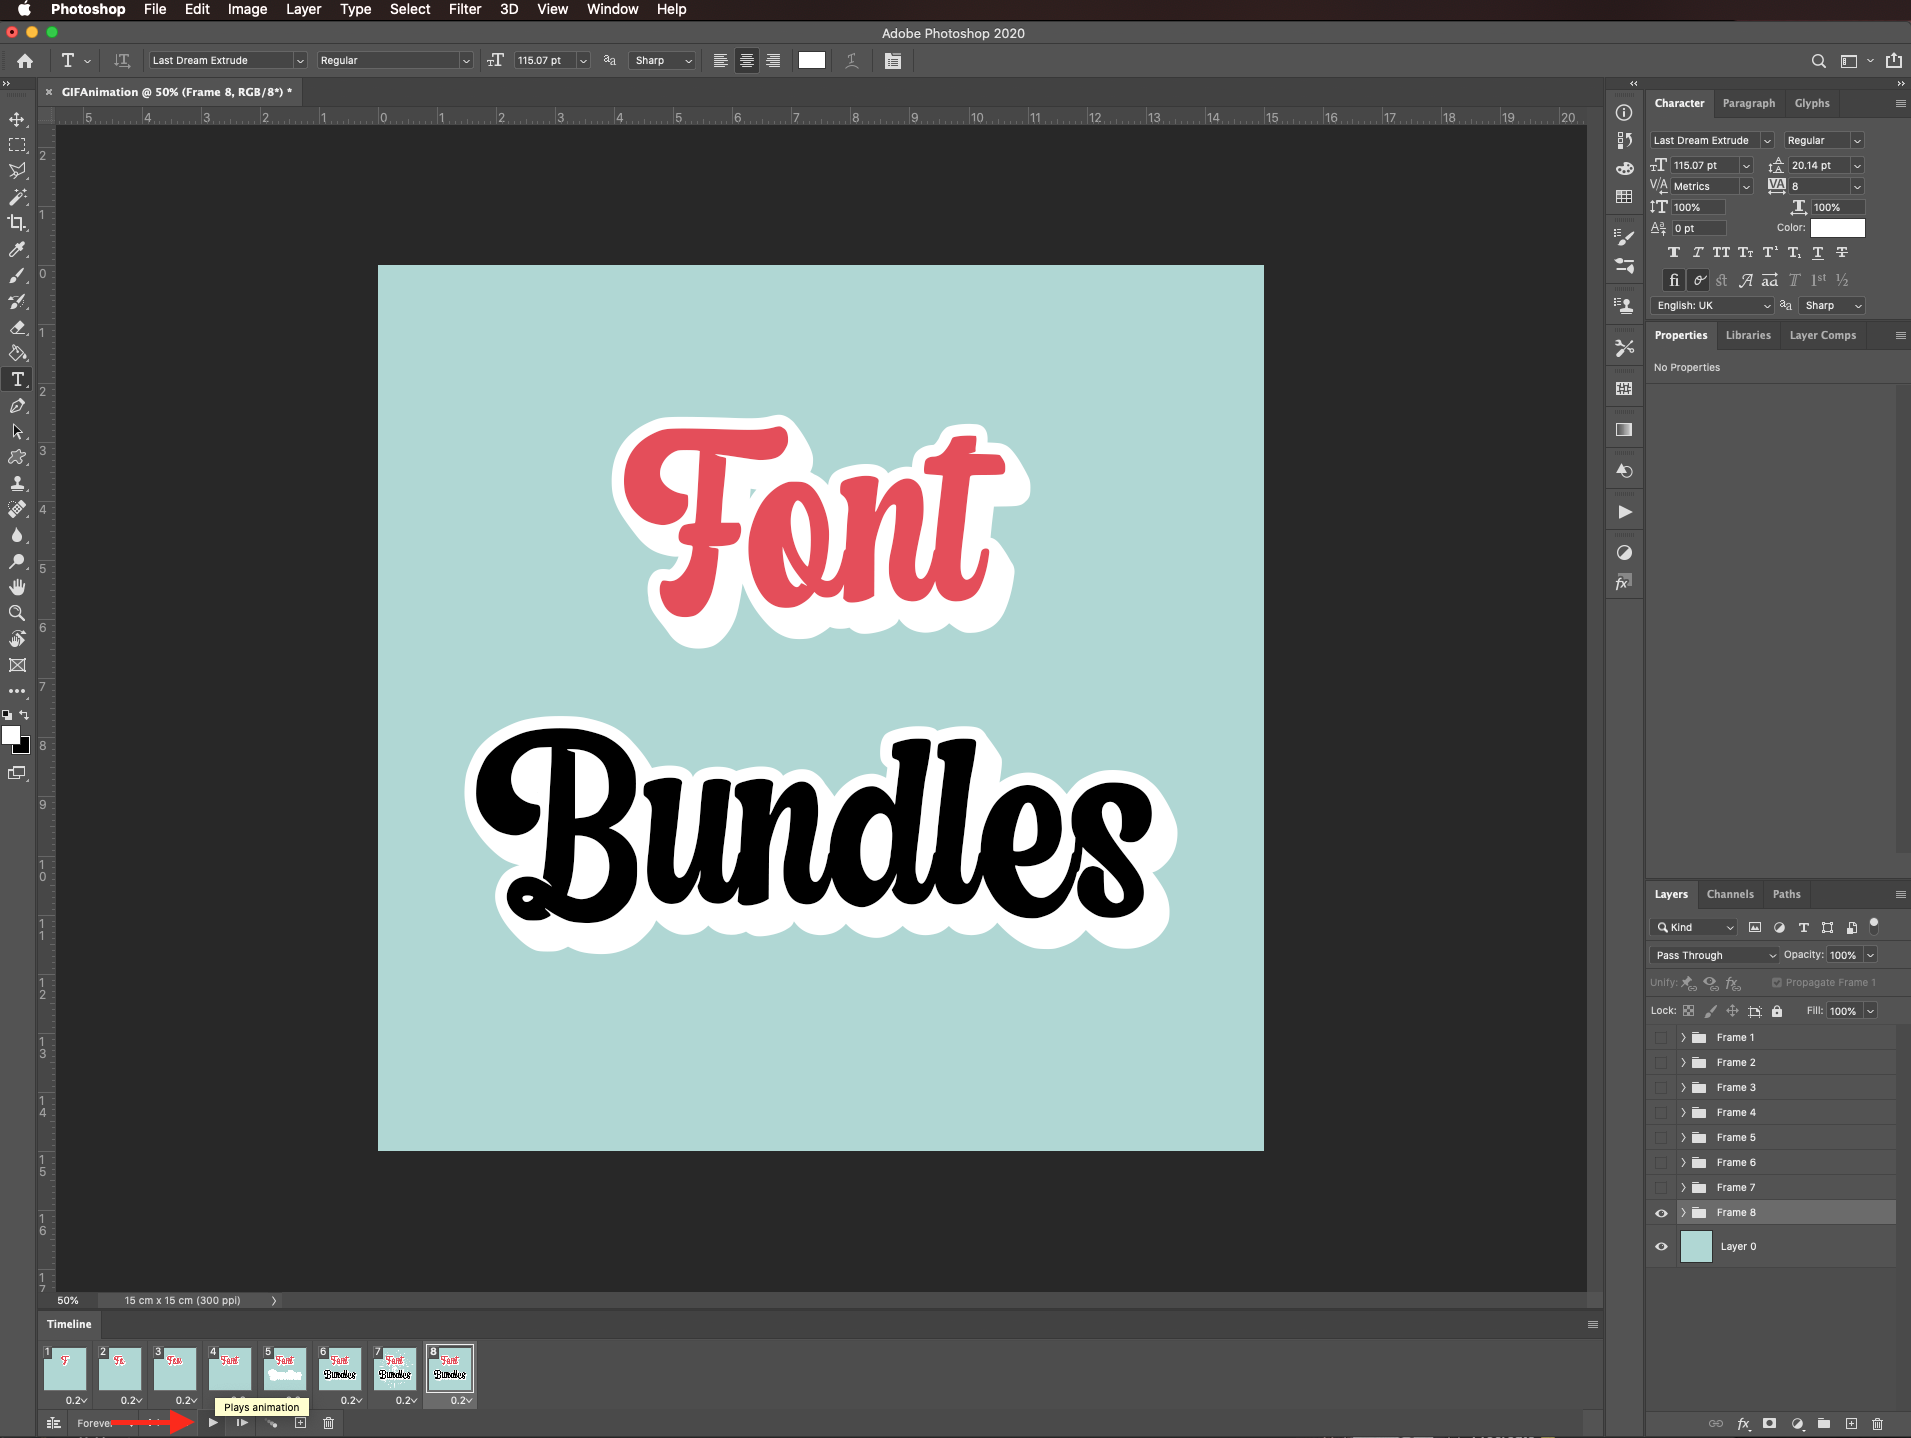
Once you are happy with your frames, click play to test the animation. If you need, make changes and test again.
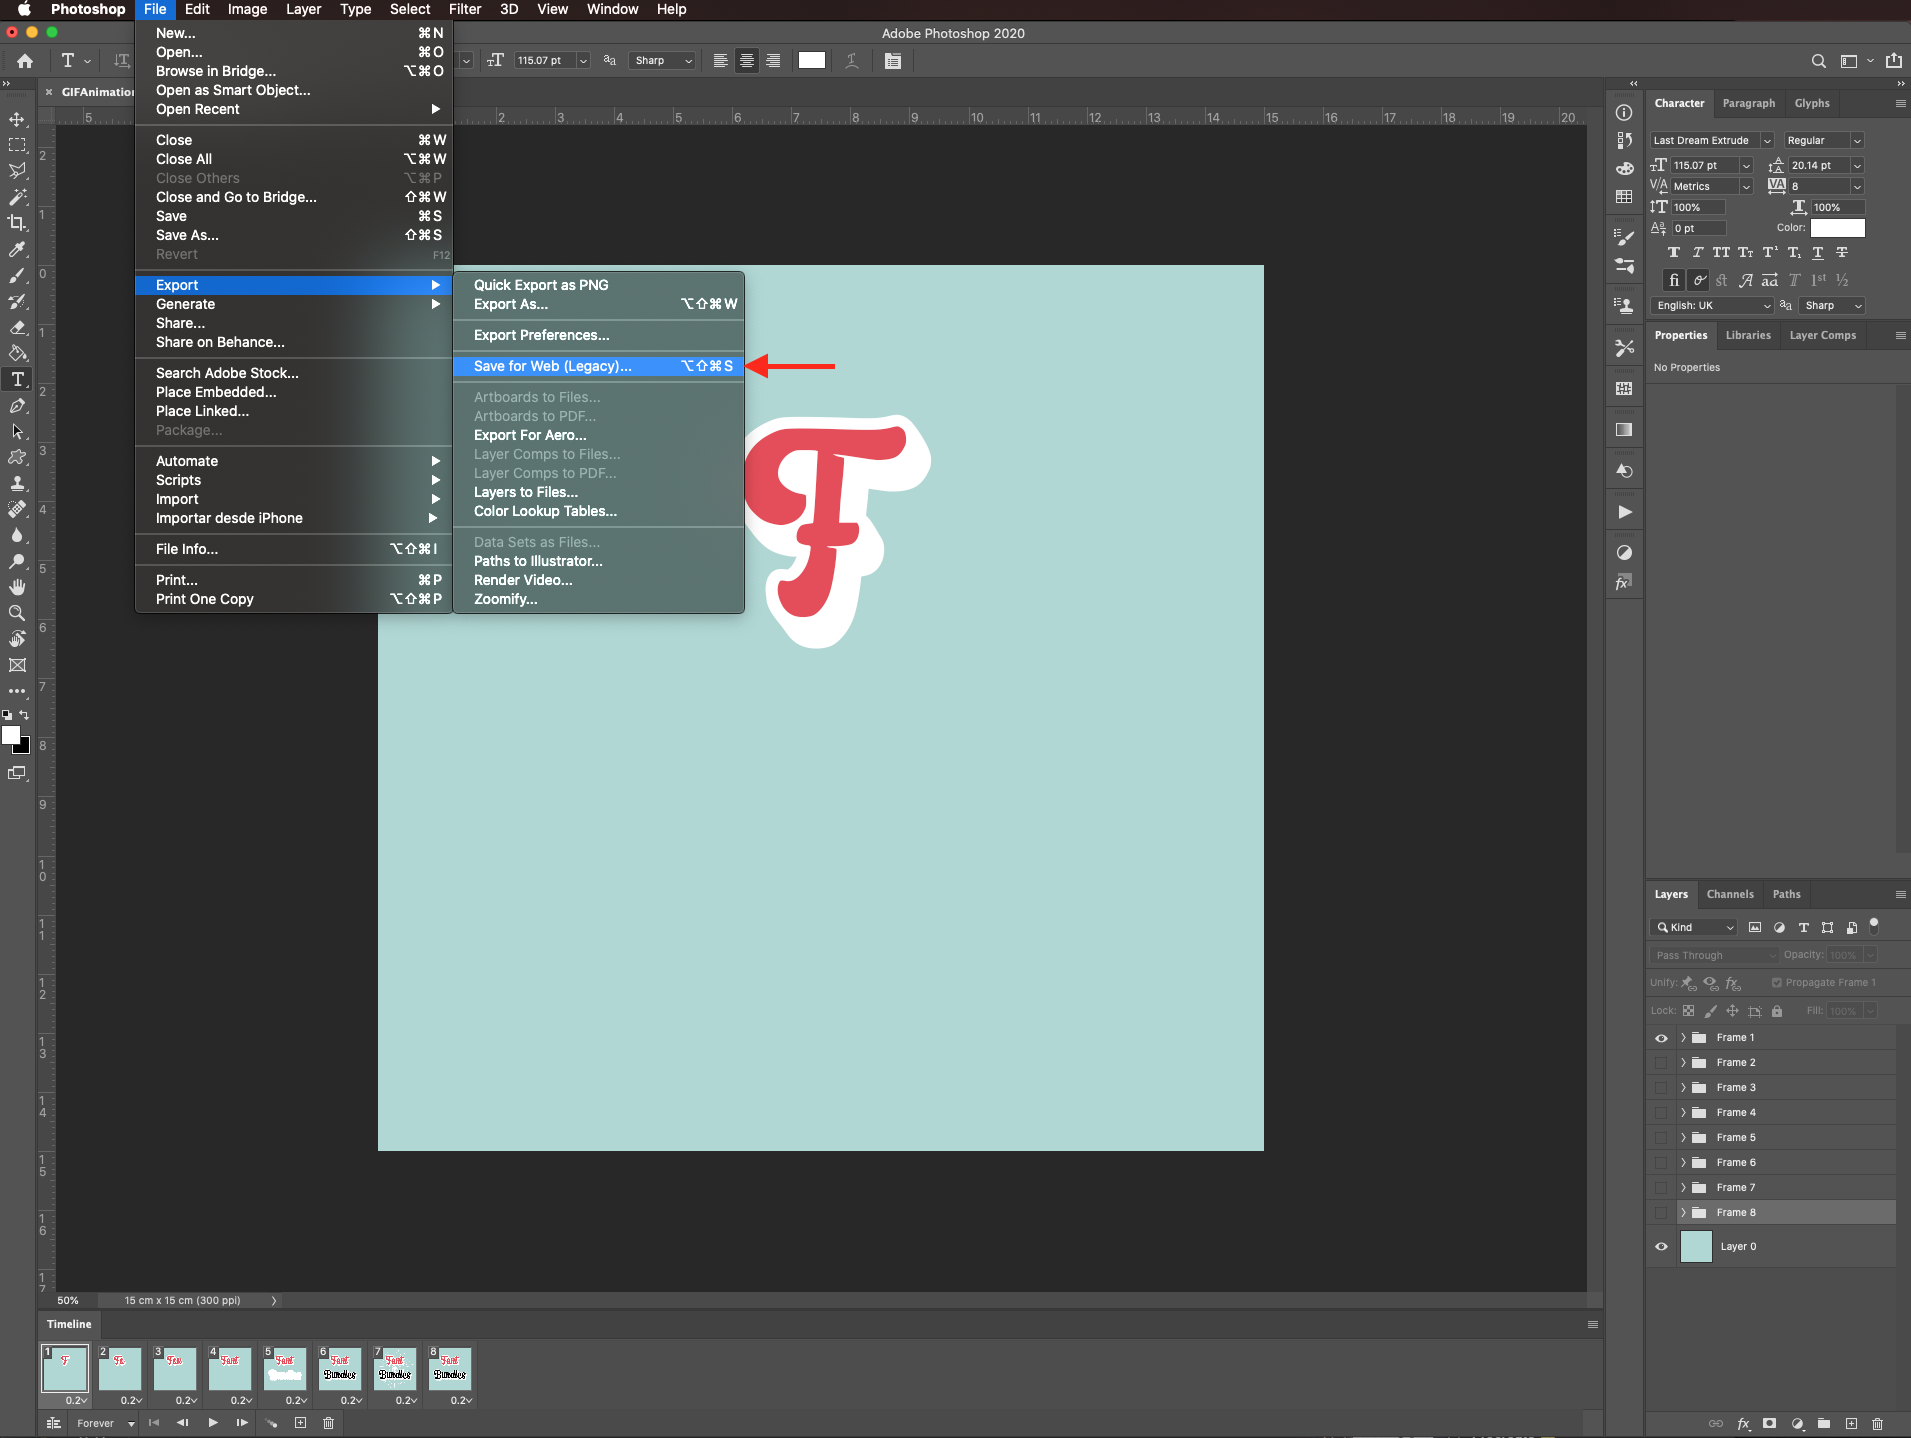
Once you are happy with your animation, go to File > Export > Save for web (legacy). If you have an older version of Photoshop, this option may be found under Save as.
Choose one of the larger GIF settings as the preset and make sure the resulting image won’t be too heavy checking the size on the bottom left side of the window. You can also adjust the image size.
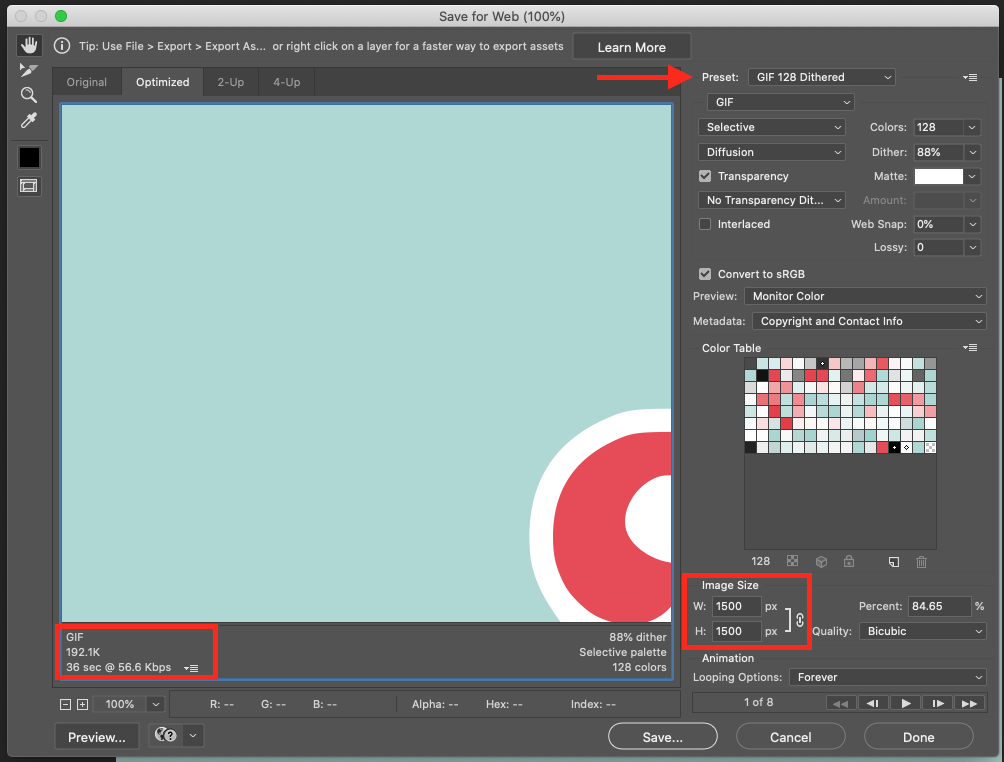
If you plan to use the animation in WordPress, remember to make it the exact size you want it to be or you may end up just seeing the first frame.
To share your GIF on Instagram, make sure it is at least five seconds long. If it’s shorter, just make some copies of your animations until you reach the desired length.
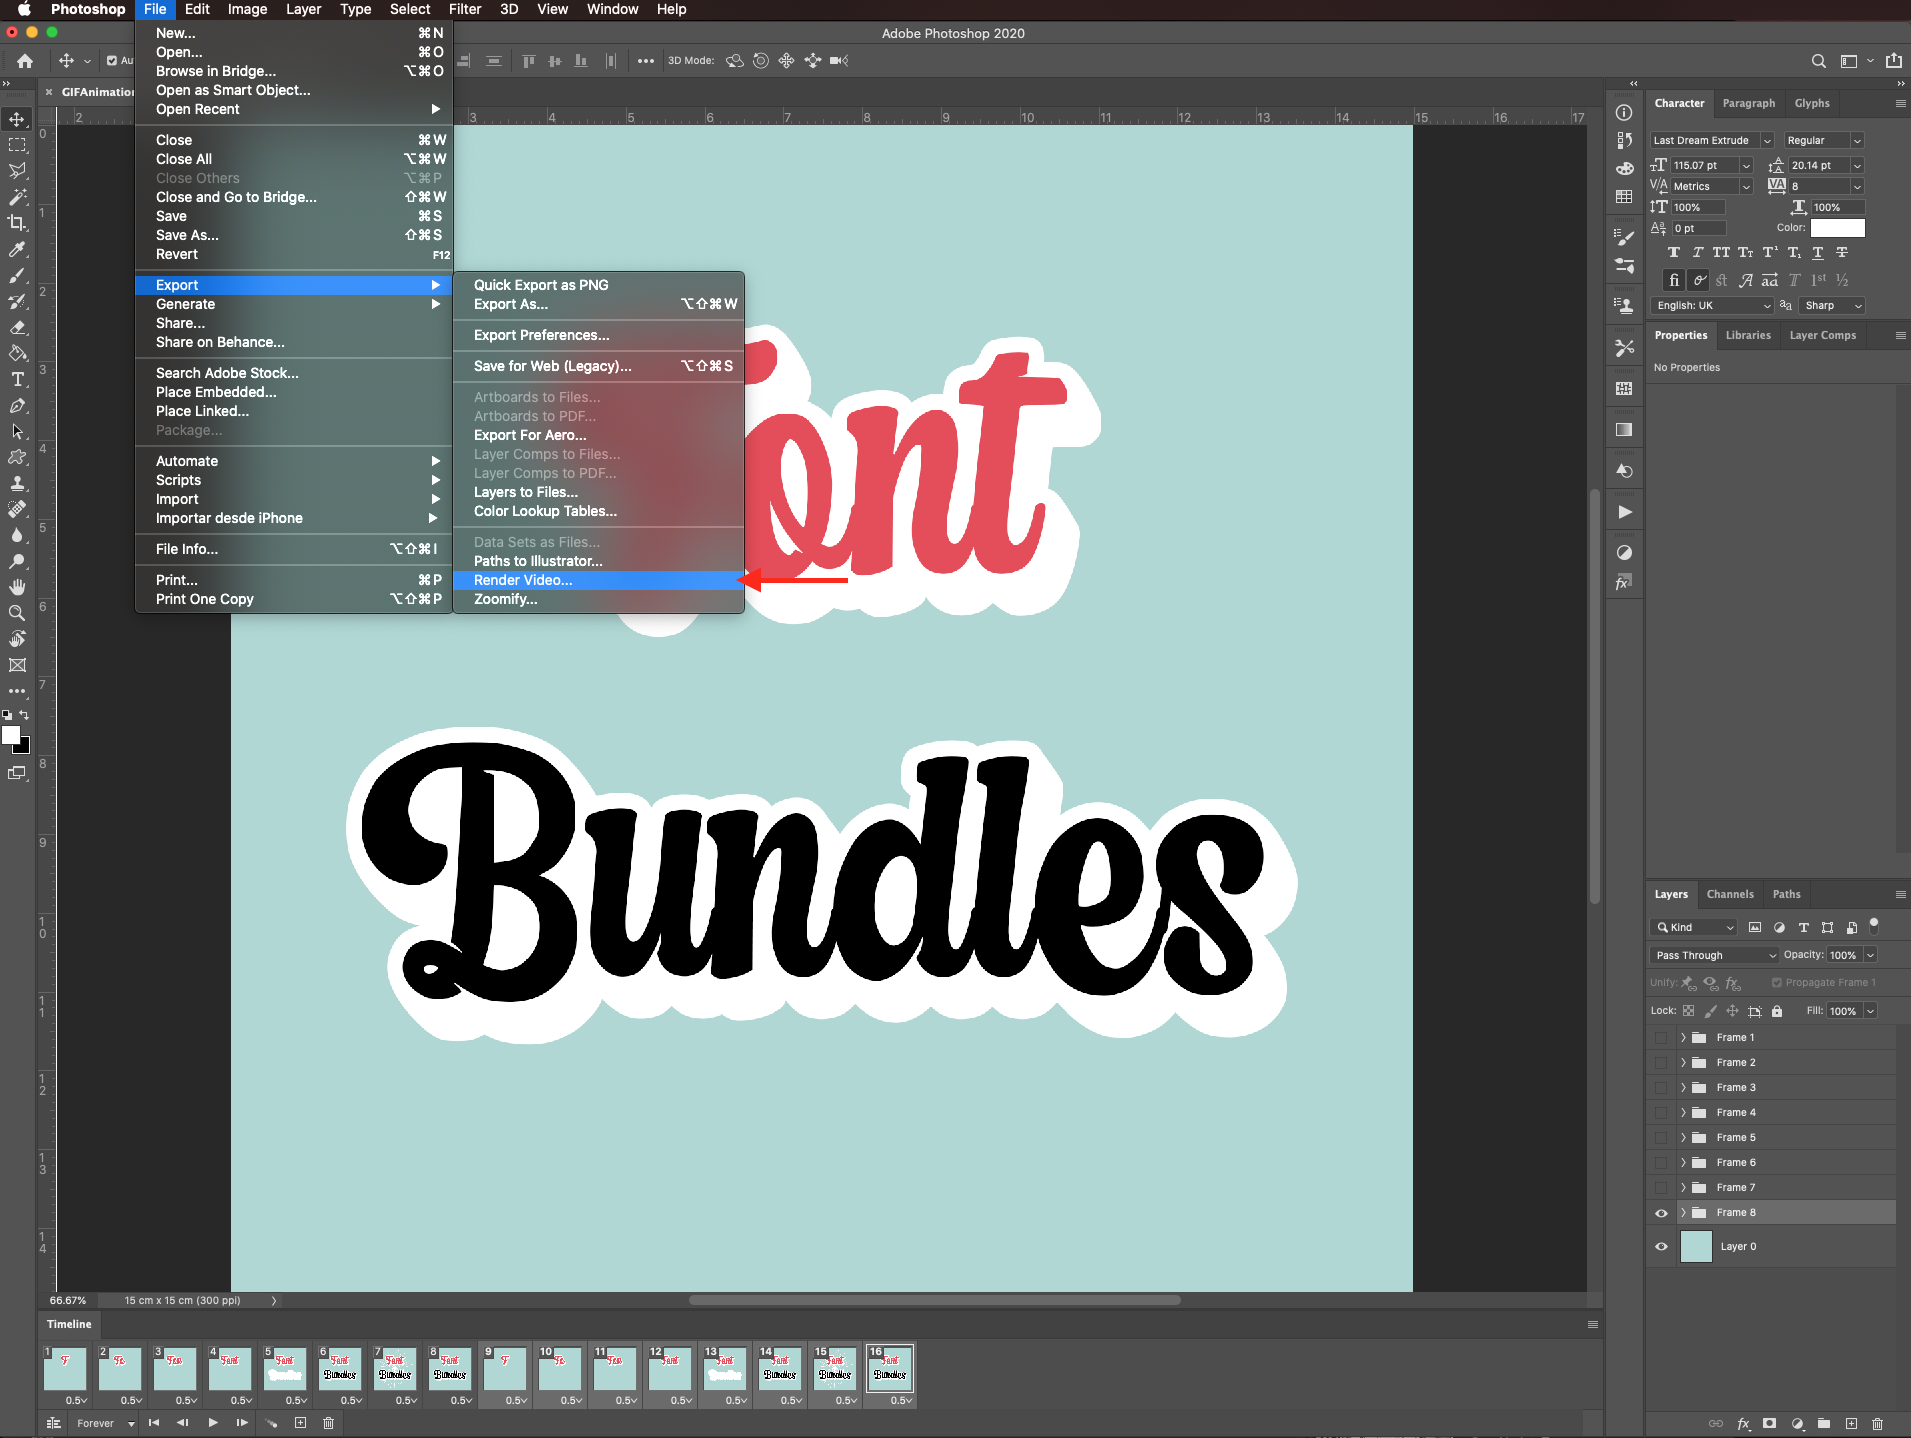
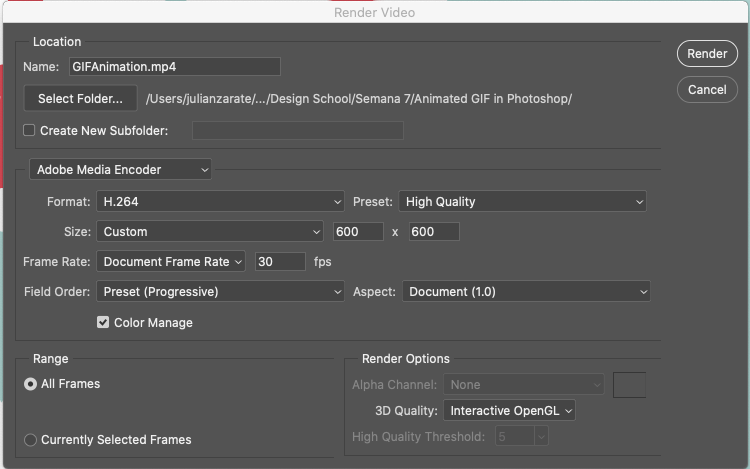
If your animation ends up being too large for the GIF format you can save it as an mp4 video file. Just go to Export > Render video.
Adjust the settings and save it.
Here’s our GIF.

To test it, drag it to a browser window and check it out.
If you liked this tutorial, make sure to check out how to content aware crop and how to change the color of an object in Photoshop.
For this tutorial, we are using Last Dream which is a layered font, as well as fireworks clipart and a sunset color palette.
Step 1: Create your document
In Photoshop, create a new document. Size it to fit your needs, but keep in mind that if you are going to use it on Instagram, it is better to make it square.
Ours was 15 x 15 cm @300 dpi.
Step 2: Import the color palette
We will be using a color palette. To bring it into Photoshop, click on the small menu on the top right side of the Swatches panel and choose import swatches. Navigate to the location where the color palette file is stored and select it.
Now, it should appear as a folder inside the Swatches panel.
Step 3: Add the background color
To unlock the background layer, double-click on top of its thumbnail and click OK on the pop-up window.
Select one of the colors as foreground and with the Paint bucket tool (G).
Click on top of the background layer to color it.
Step 4: Add a decorative clip art element
To add a clip art element to your design, just drag the file onto your canvas, resize it if needed and, click enter (or the small checkmark on the top menu) to commit the changes.
Step 5: Add your text
With the Type tool (T) selected, click on the canvas, choose the font, size, and alignment you prefer (we used Last Dream with an 80 pt size and center alignment).
If you have one, add the second line of text. We chose to keep our text in separate layers.
Since our font is layered, we duplicated our text layers (command/control + J).
Next we changed the font (Last Dream Extruded) and font color.
Step 6: Add the final details and changes to your design
Fix the text
Check if you need to change the placement and/or size of your text.
You can use the Free transform tool (T) for that and, click enter (or the small checkmark on the top menu) to commit the changes. We also repositioned the layer so the words and font types are in order.
Fix the graphic elements
To change the color of the clip art element, right-click on top of its thumbnail and choose rasterize layer.
Go to Select > Load selection.
Choose the correct layer in the pop-up window, and click OK.
Go to Select > Modify > Feather and choose a 1 pixel feather radius.
Use whatever tool you prefer (paint bucket, paintbrush, etc.) to recolor the selected element.
Step 7: Prepare the frames
Select all the elements you want to include in your frames and group them together by dragging their thumbnails onto the folder icon at the bottom of the Layers panel. Rename the group Frame 1.
Create as many duplicates of the frame 1 folder as you may need for the animation (we made 7 copies).
Rename them properly.
Now, in each frame folder hide/delete, change, move and/or recolor the elements you want to change during your animation.
For example, we made the first word (Fonts) appear letter by letter in the first 4 frames.
Next, with the second word (Bundles), we first made background text appear in frame 5.
And the foreground text in frame 6.
In frame 7, we left all the elements out.
And finally, in frame 8 we hid the clip-art.
Step 8: Create the animation
Go to Window > Timeline.
When the Timeline panel is open, make sure that the create frame animation is selected in the center button.
Reorder the frame folders if needed (frame 1 on top and frame 8 at the bottom). Select your frames and click the create frame animation button.
You will have a small tile in the timeline panel, make sure that just the frame 1 folder is visible (small eye icon). Change the delay value to 0.2 seconds or more (small arrow on the bottom right of the tile). Then, drag the tile to the small square with a + sign to duplicate it and make the frame 2 folder visible this time.
Repeat this with the rest of the frame folder. You should end up with 8 frame tiles. Remember to change the visibility of the correct folder for each tile.
If you want (and don’t plan to edit your folder content any further) you can flatten them and then, instead of manually creating the frame tiles, click on the small menu on the right side of the Timeline panel and choose Make frames from layers.
Step 9: Test the animation
Once you are happy with your frames, click play to test the animation. If you need, make changes and test again.
Step 10: Save your animation as a GIF
Once you are happy with your animation, go to File > Export > Save for web (legacy). If you have an older version of Photoshop, this option may be found under Save as.
Choose one of the larger GIF settings as the preset and make sure the resulting image won’t be too heavy checking the size on the bottom left side of the window. You can also adjust the image size.
If you plan to use the animation in WordPress, remember to make it the exact size you want it to be or you may end up just seeing the first frame.
To share your GIF on Instagram, make sure it is at least five seconds long. If it’s shorter, just make some copies of your animations until you reach the desired length.
Save as mp4 instead
If your animation ends up being too large for the GIF format you can save it as an mp4 video file. Just go to Export > Render video.
Adjust the settings and save it.
Here’s our GIF.
To test it, drag it to a browser window and check it out.
If you liked this tutorial, make sure to check out how to content aware crop and how to change the color of an object in Photoshop.


