Frosted Glass Candy Filled Ornament Text in Photoshop
For this tutorial, we are going to use some winter themed image and one with an outlined branch for our background, some candy texture to fill our text. We will also need a very fat font (we used the Chubby free typeface from Andrea Prina).
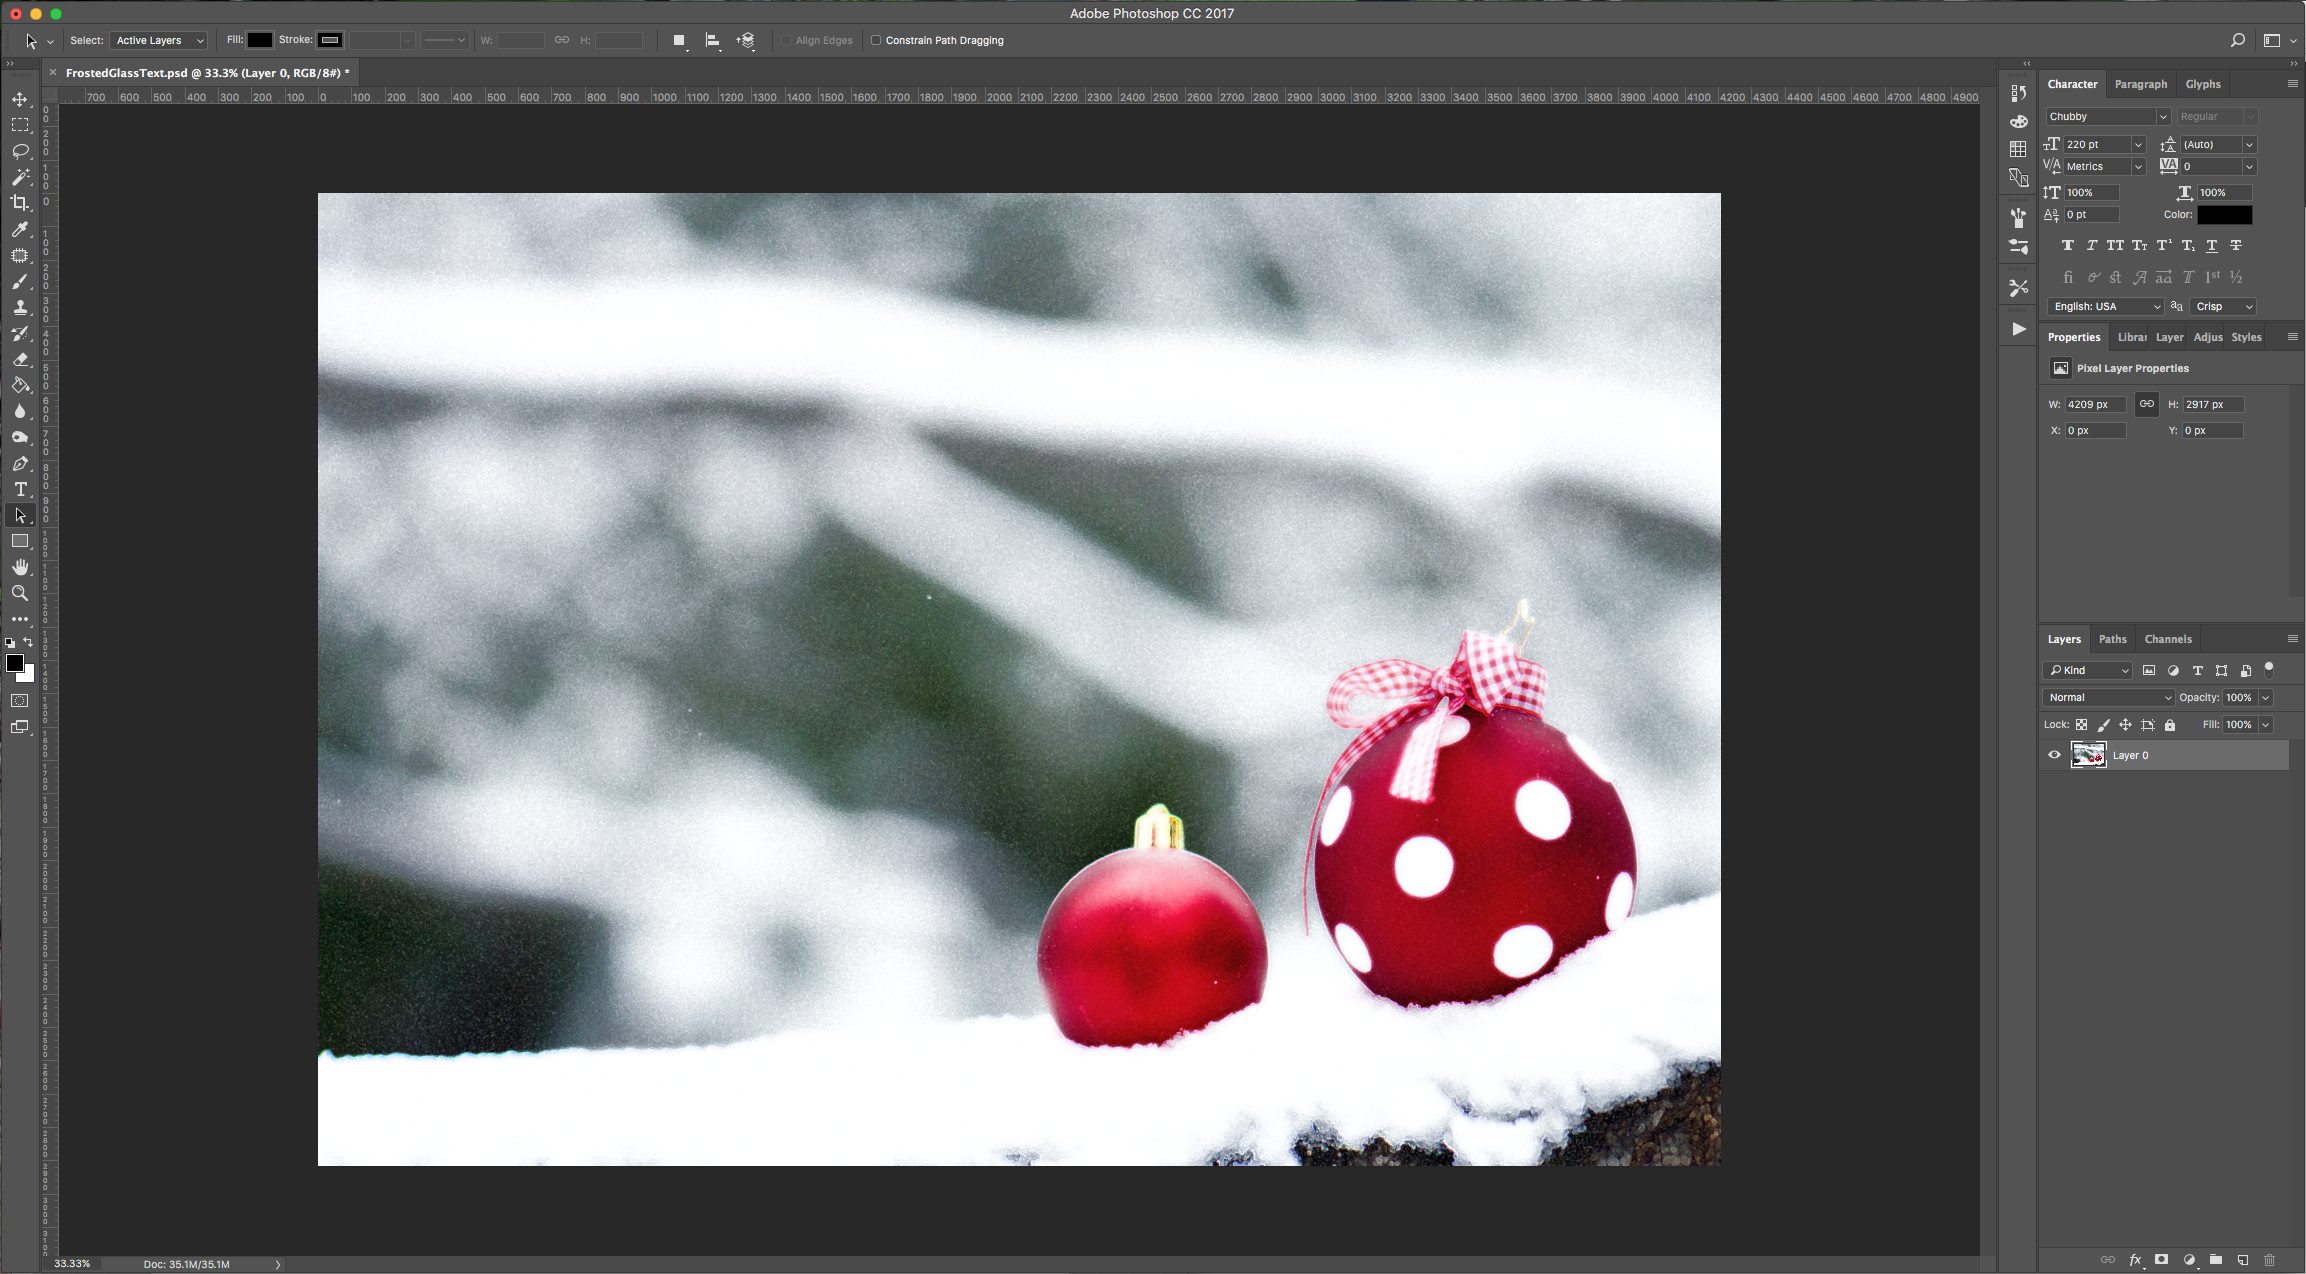
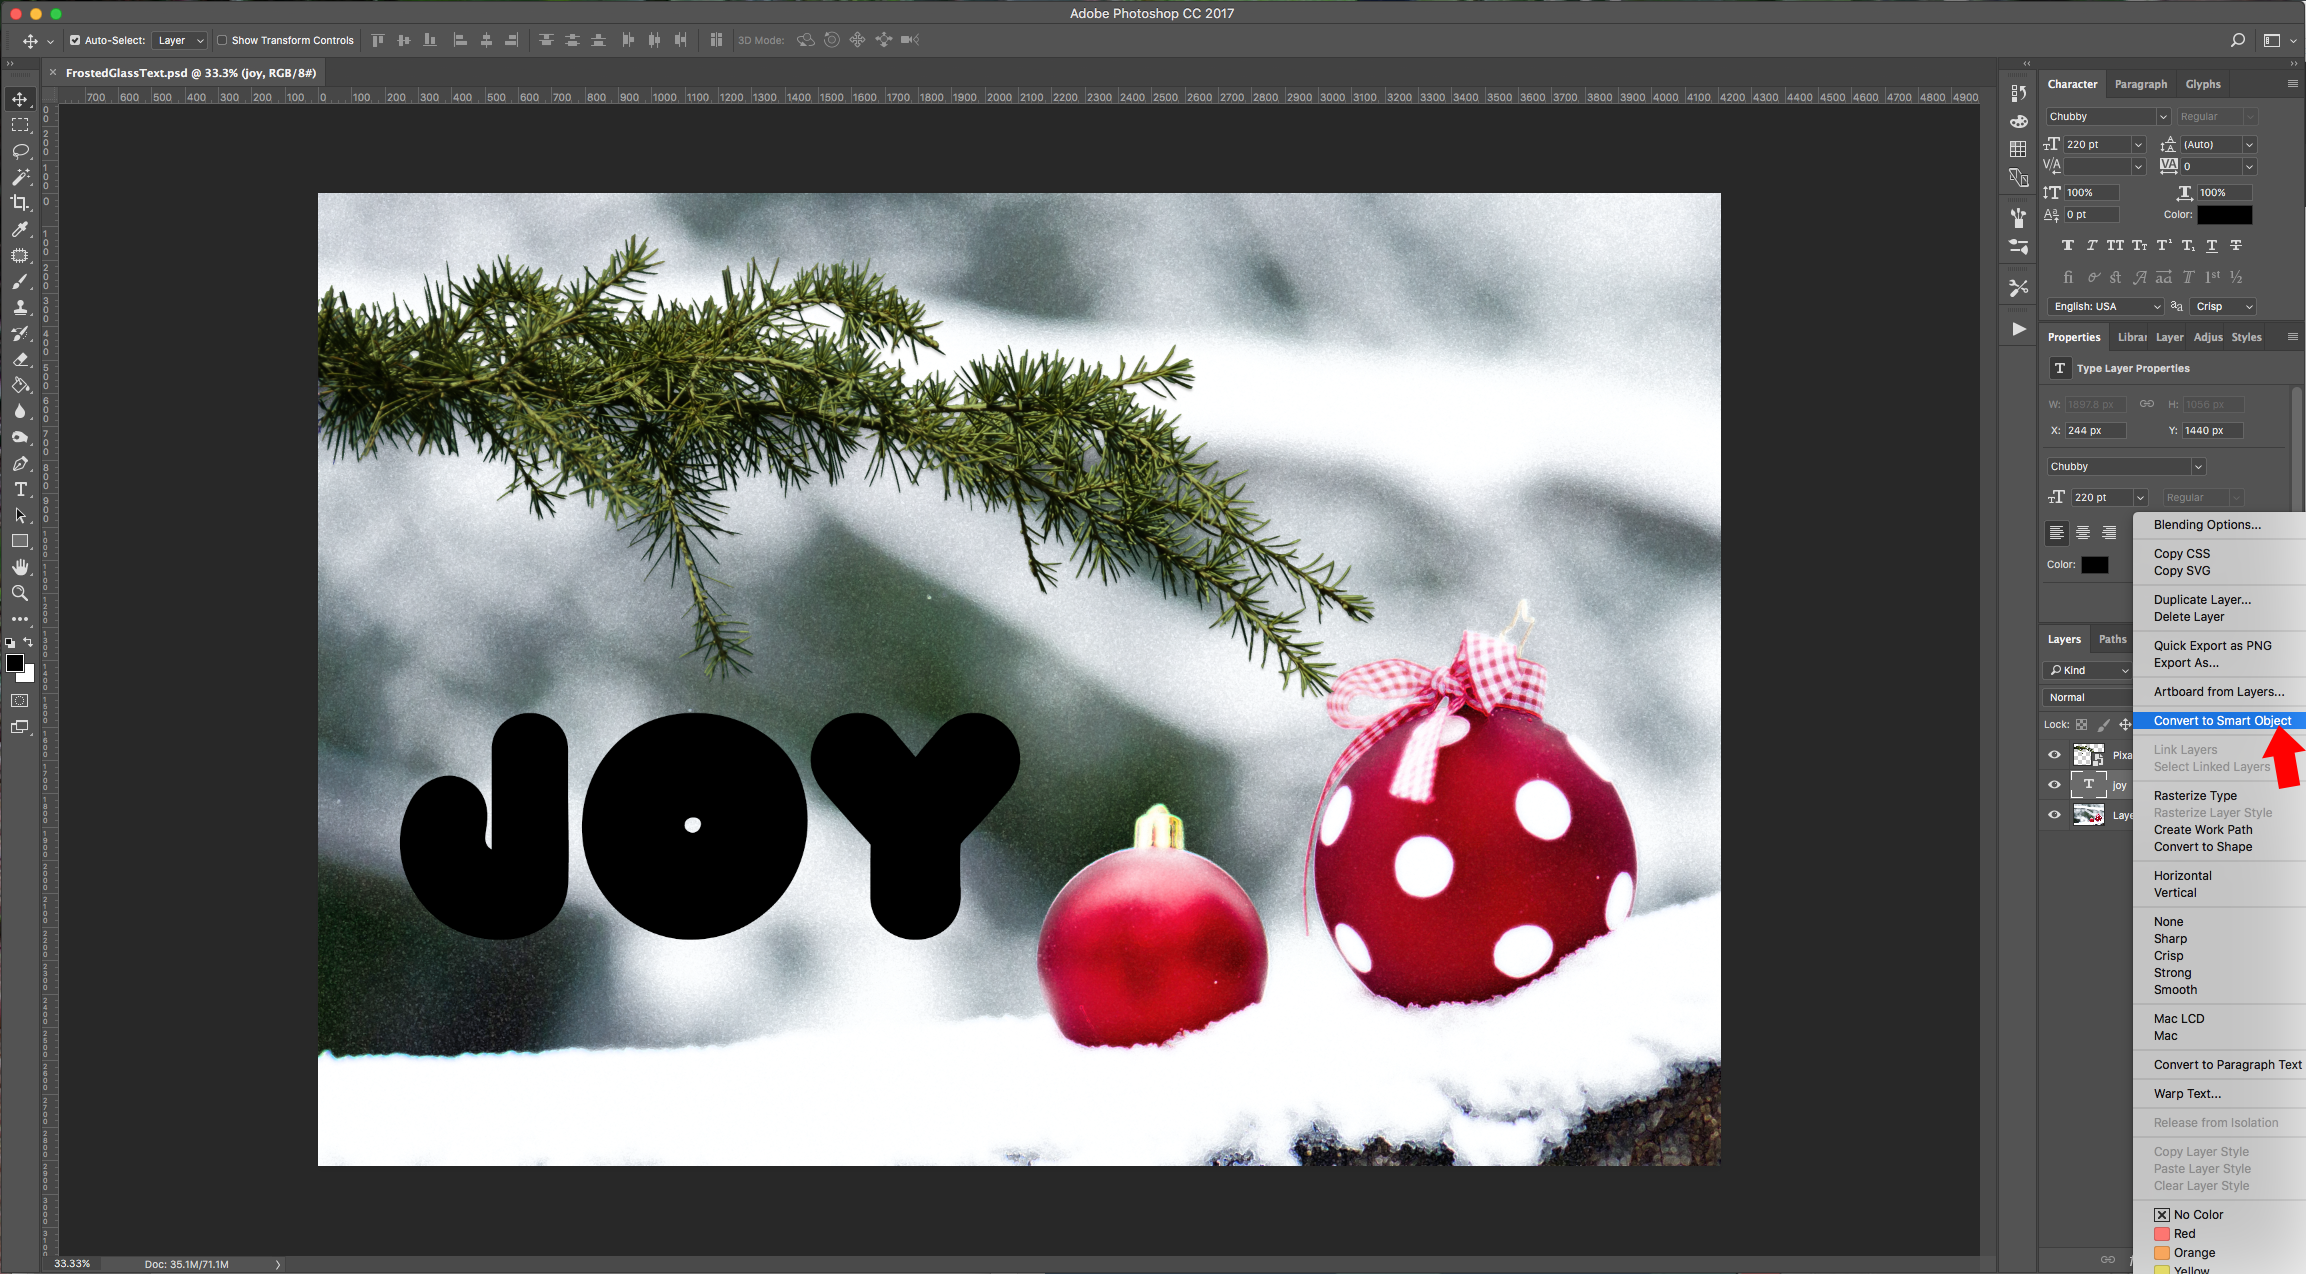
1 - Open your background image, (we pasted the outlined branch into our document and added a basic “Drop Shadow” by using the default values in the “Layer Styles” dialog. Then type your text using the “Type Tool” (T), use a size the fits your artwork and you can use any color.


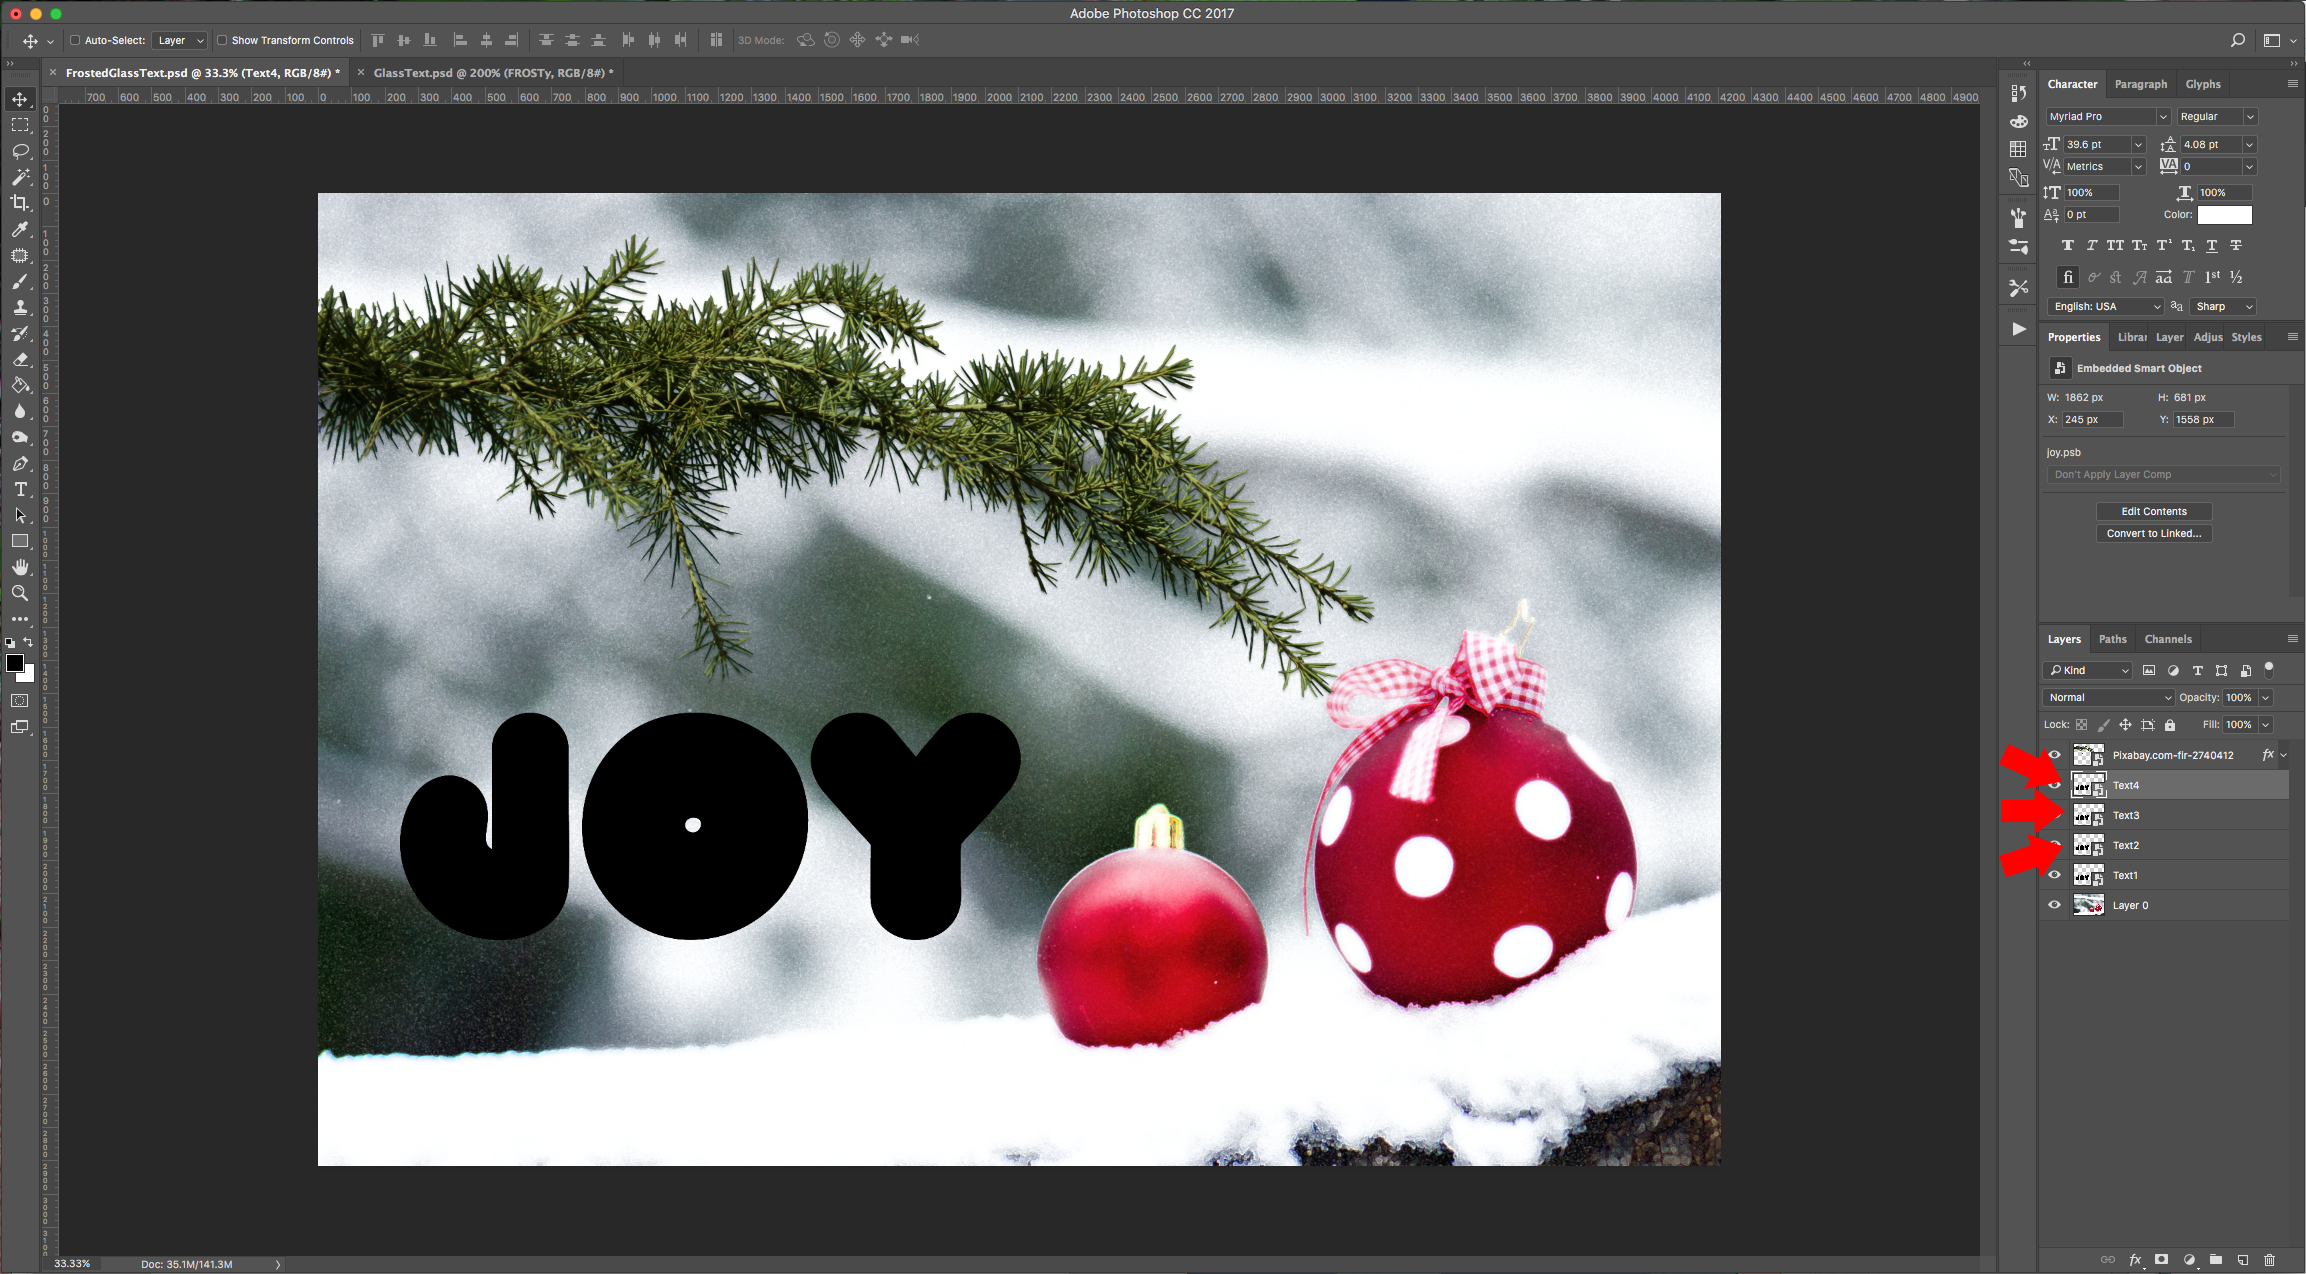
2 - Right-click on the type layer and convert it to a “Smart Object” and name it “Text1”. Make 3 duplicates (Command/Control + J) and name them: “Text2”, “Text3” and “Text4”.
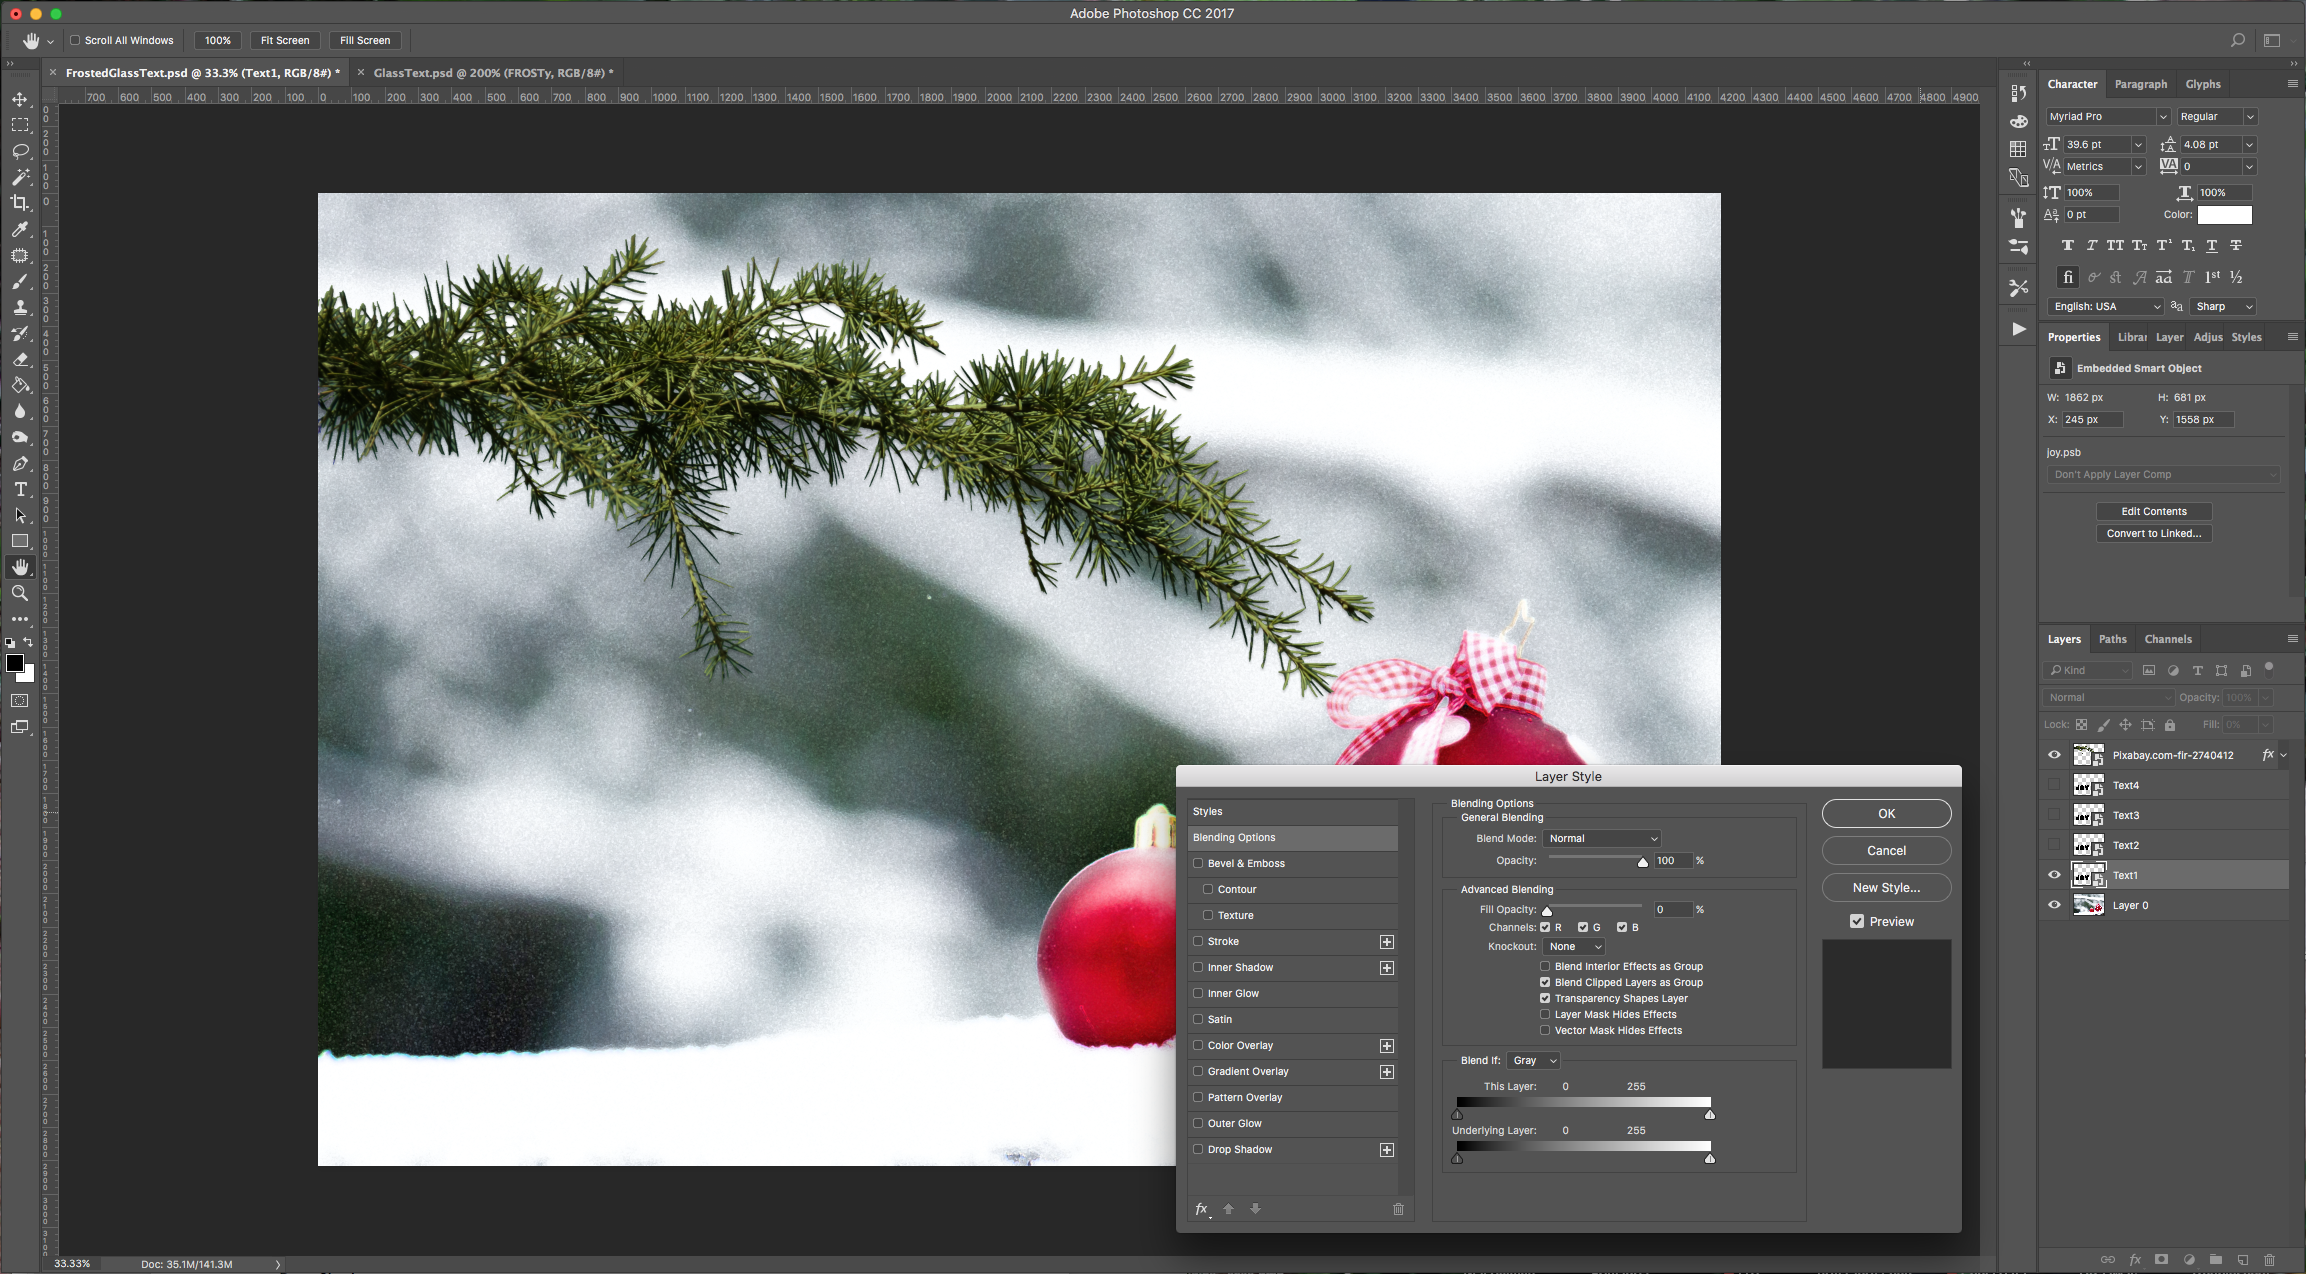
3 - Double-click on “Text1” and apply the following “Layer Styles”: (you can turn off the other layers clicking on the little eye icon to the left of the layer’s thumbnail to check out your work)
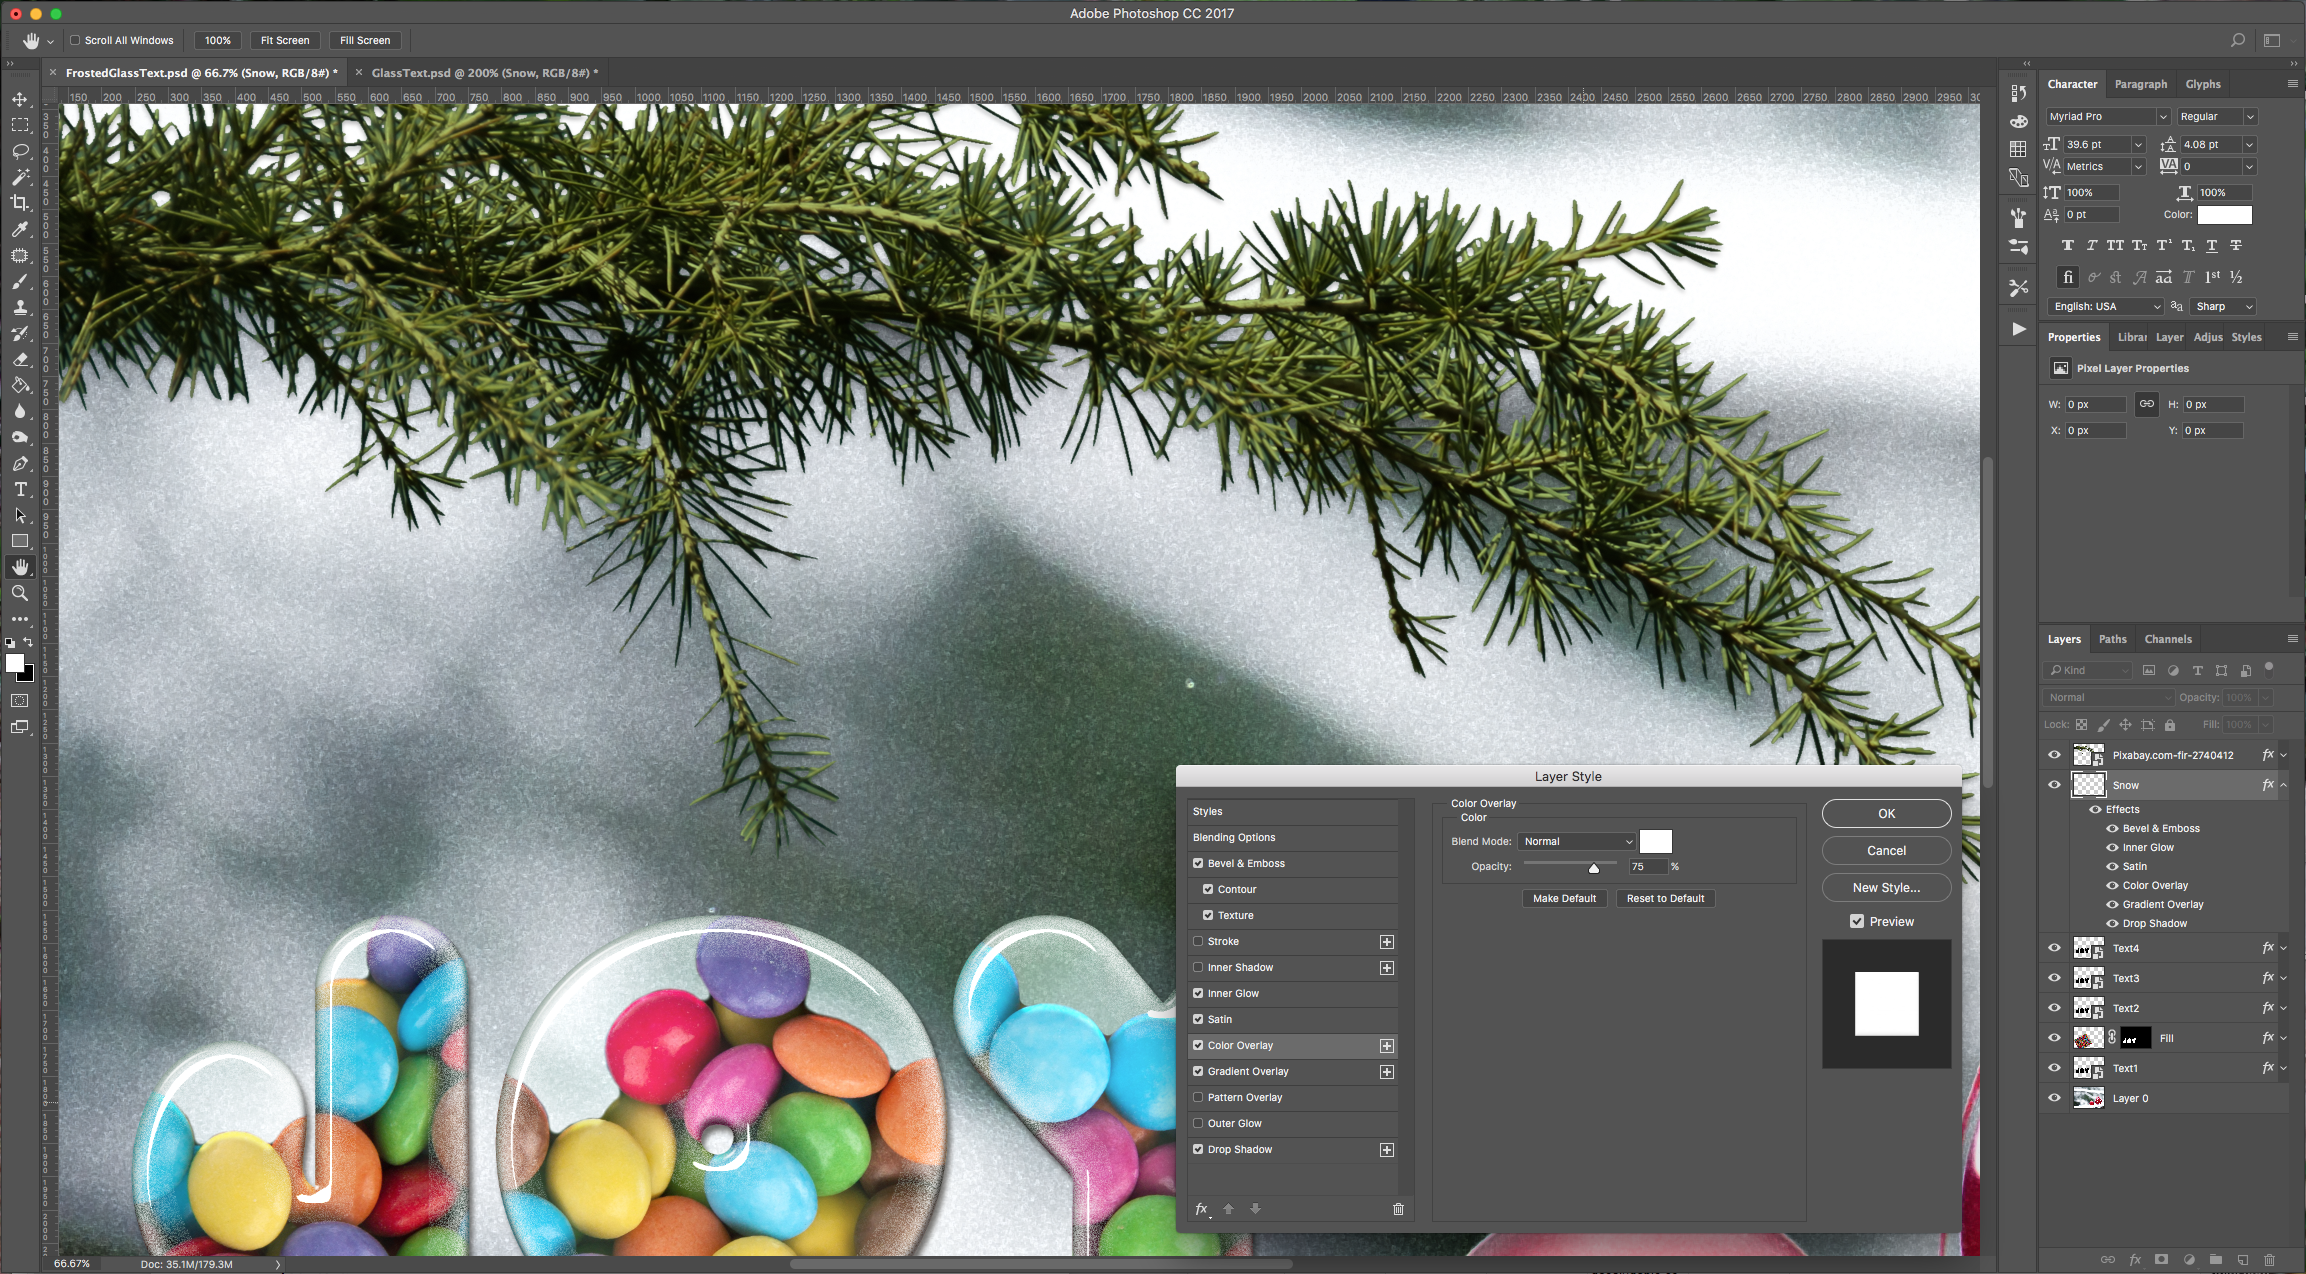
Color Overlay: (#ffffff)

Drop Shadow: (#4b4741)

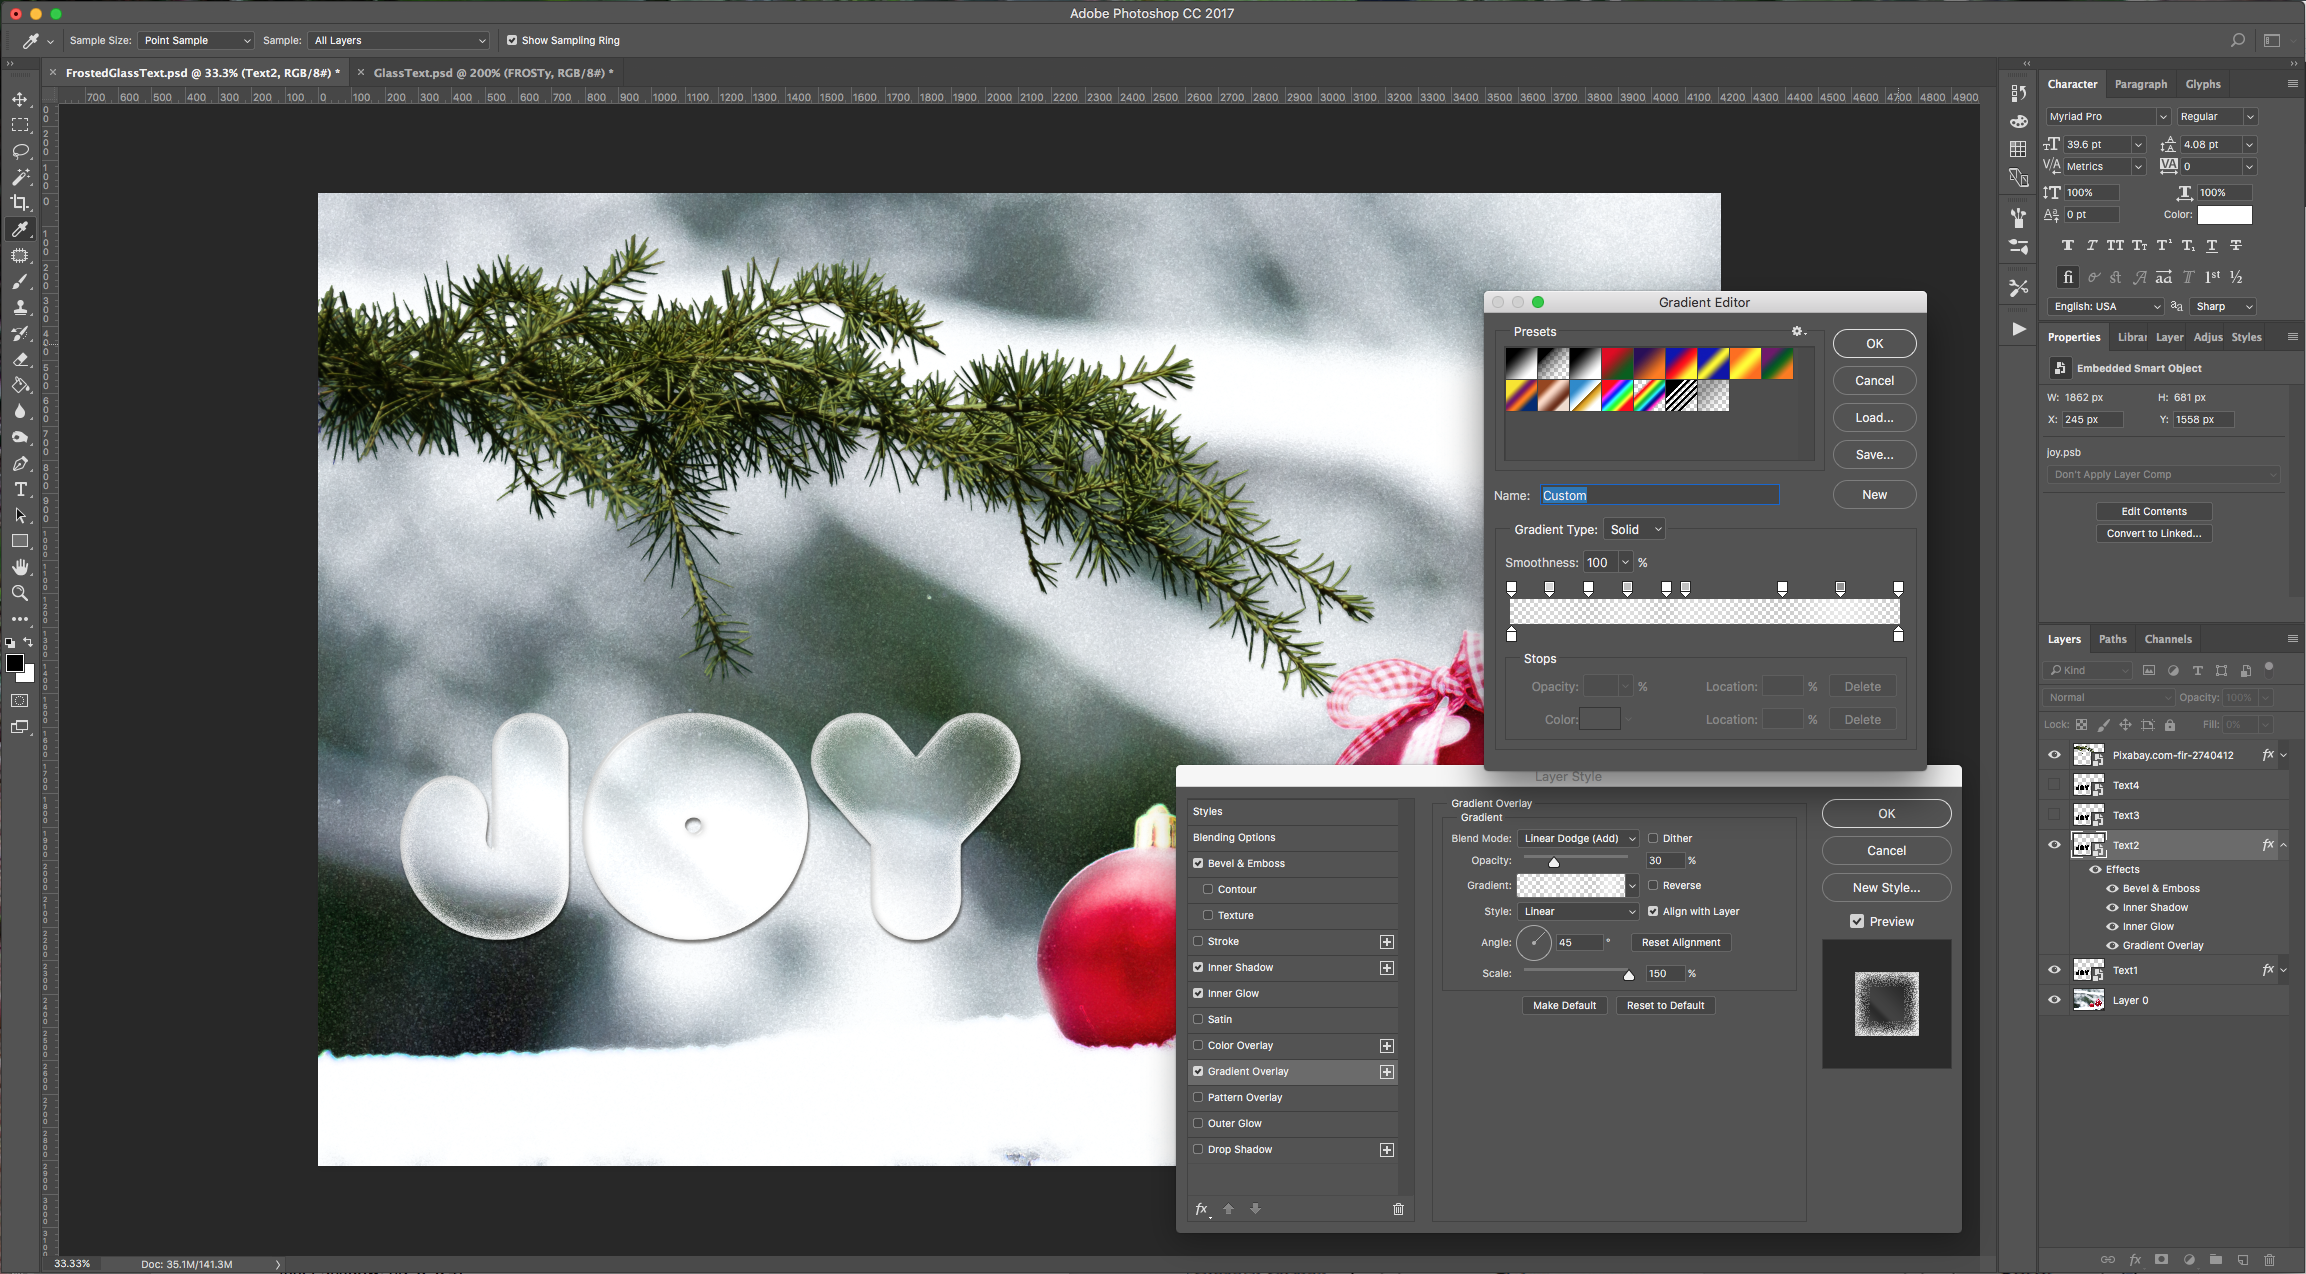
4 - Now, do the same on “Text2” and apply the following values:

Bevel & Emboss:

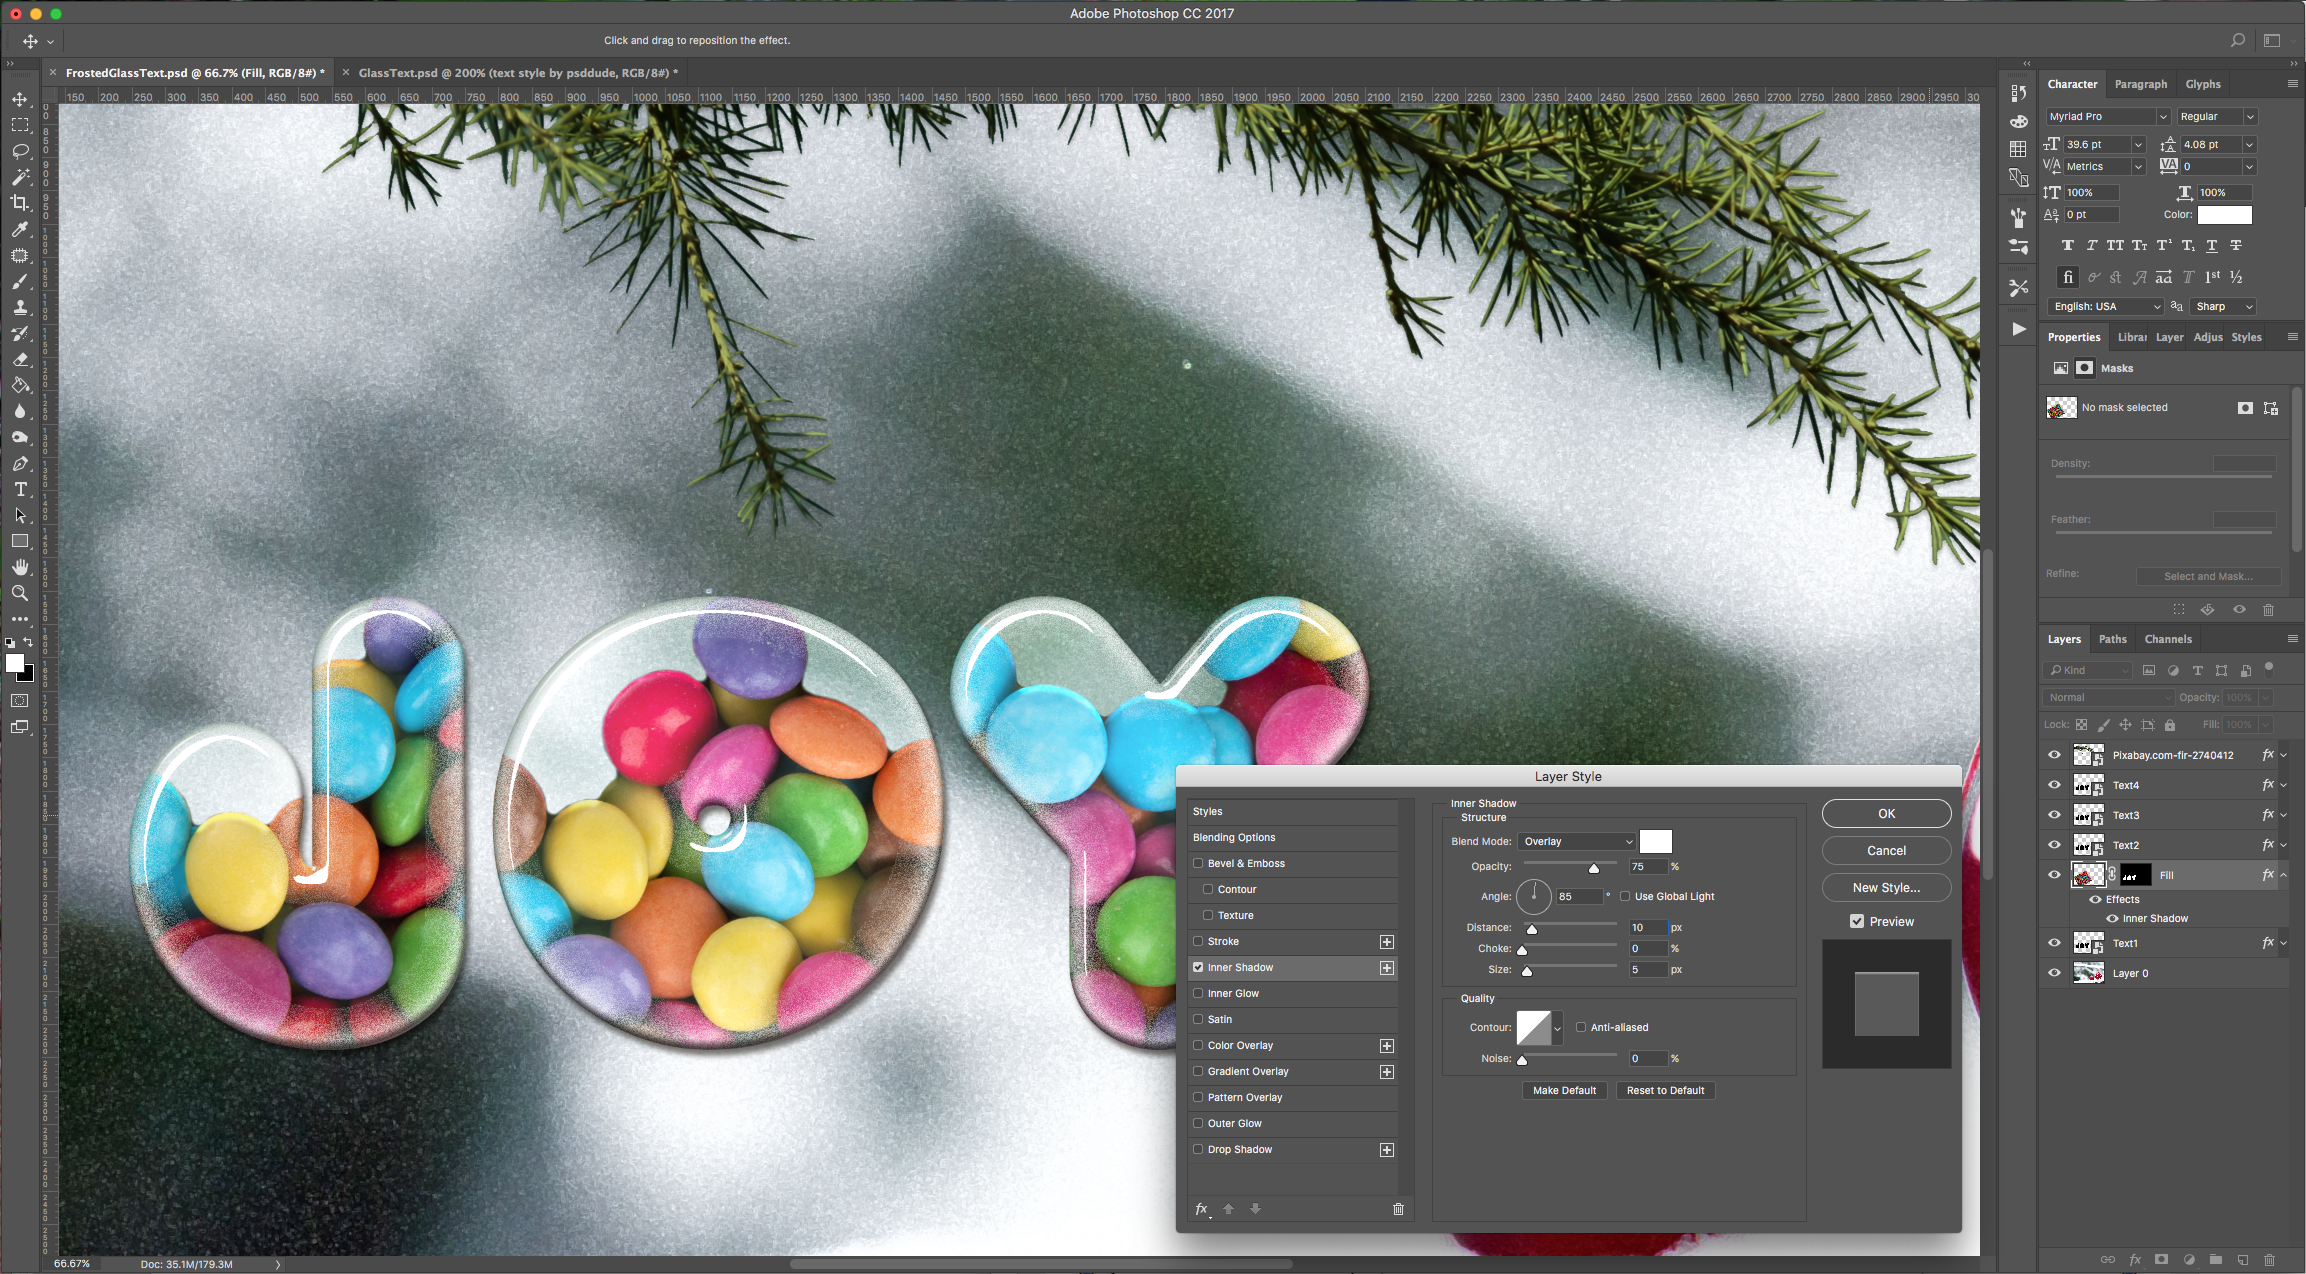
Inner Shadow: (#292924)

Inner Glow: (#ffffff)

Gradient Overlay: (#ffffff) (From left to right: Opacity 0 - Location 0, Opacity 20 - Location 10, Opacity 0 - Location 20, Opacity 30 - Location 30, Opacity 0 - Location 40, Opacity 30 - Location 45, Opacity 0 - Location 70, Opacity 50 - Location 85, Opacity 0 - Location 100

5 - Now, for “Text3”:

Bevel & Emboss:

Contour:

Inner Shadow: (#170f0f)

Color Overlay: (#a4f8d5) (use a color out of your background)

6 - And, for “Text4”:

Inner Shadow: (#000000)

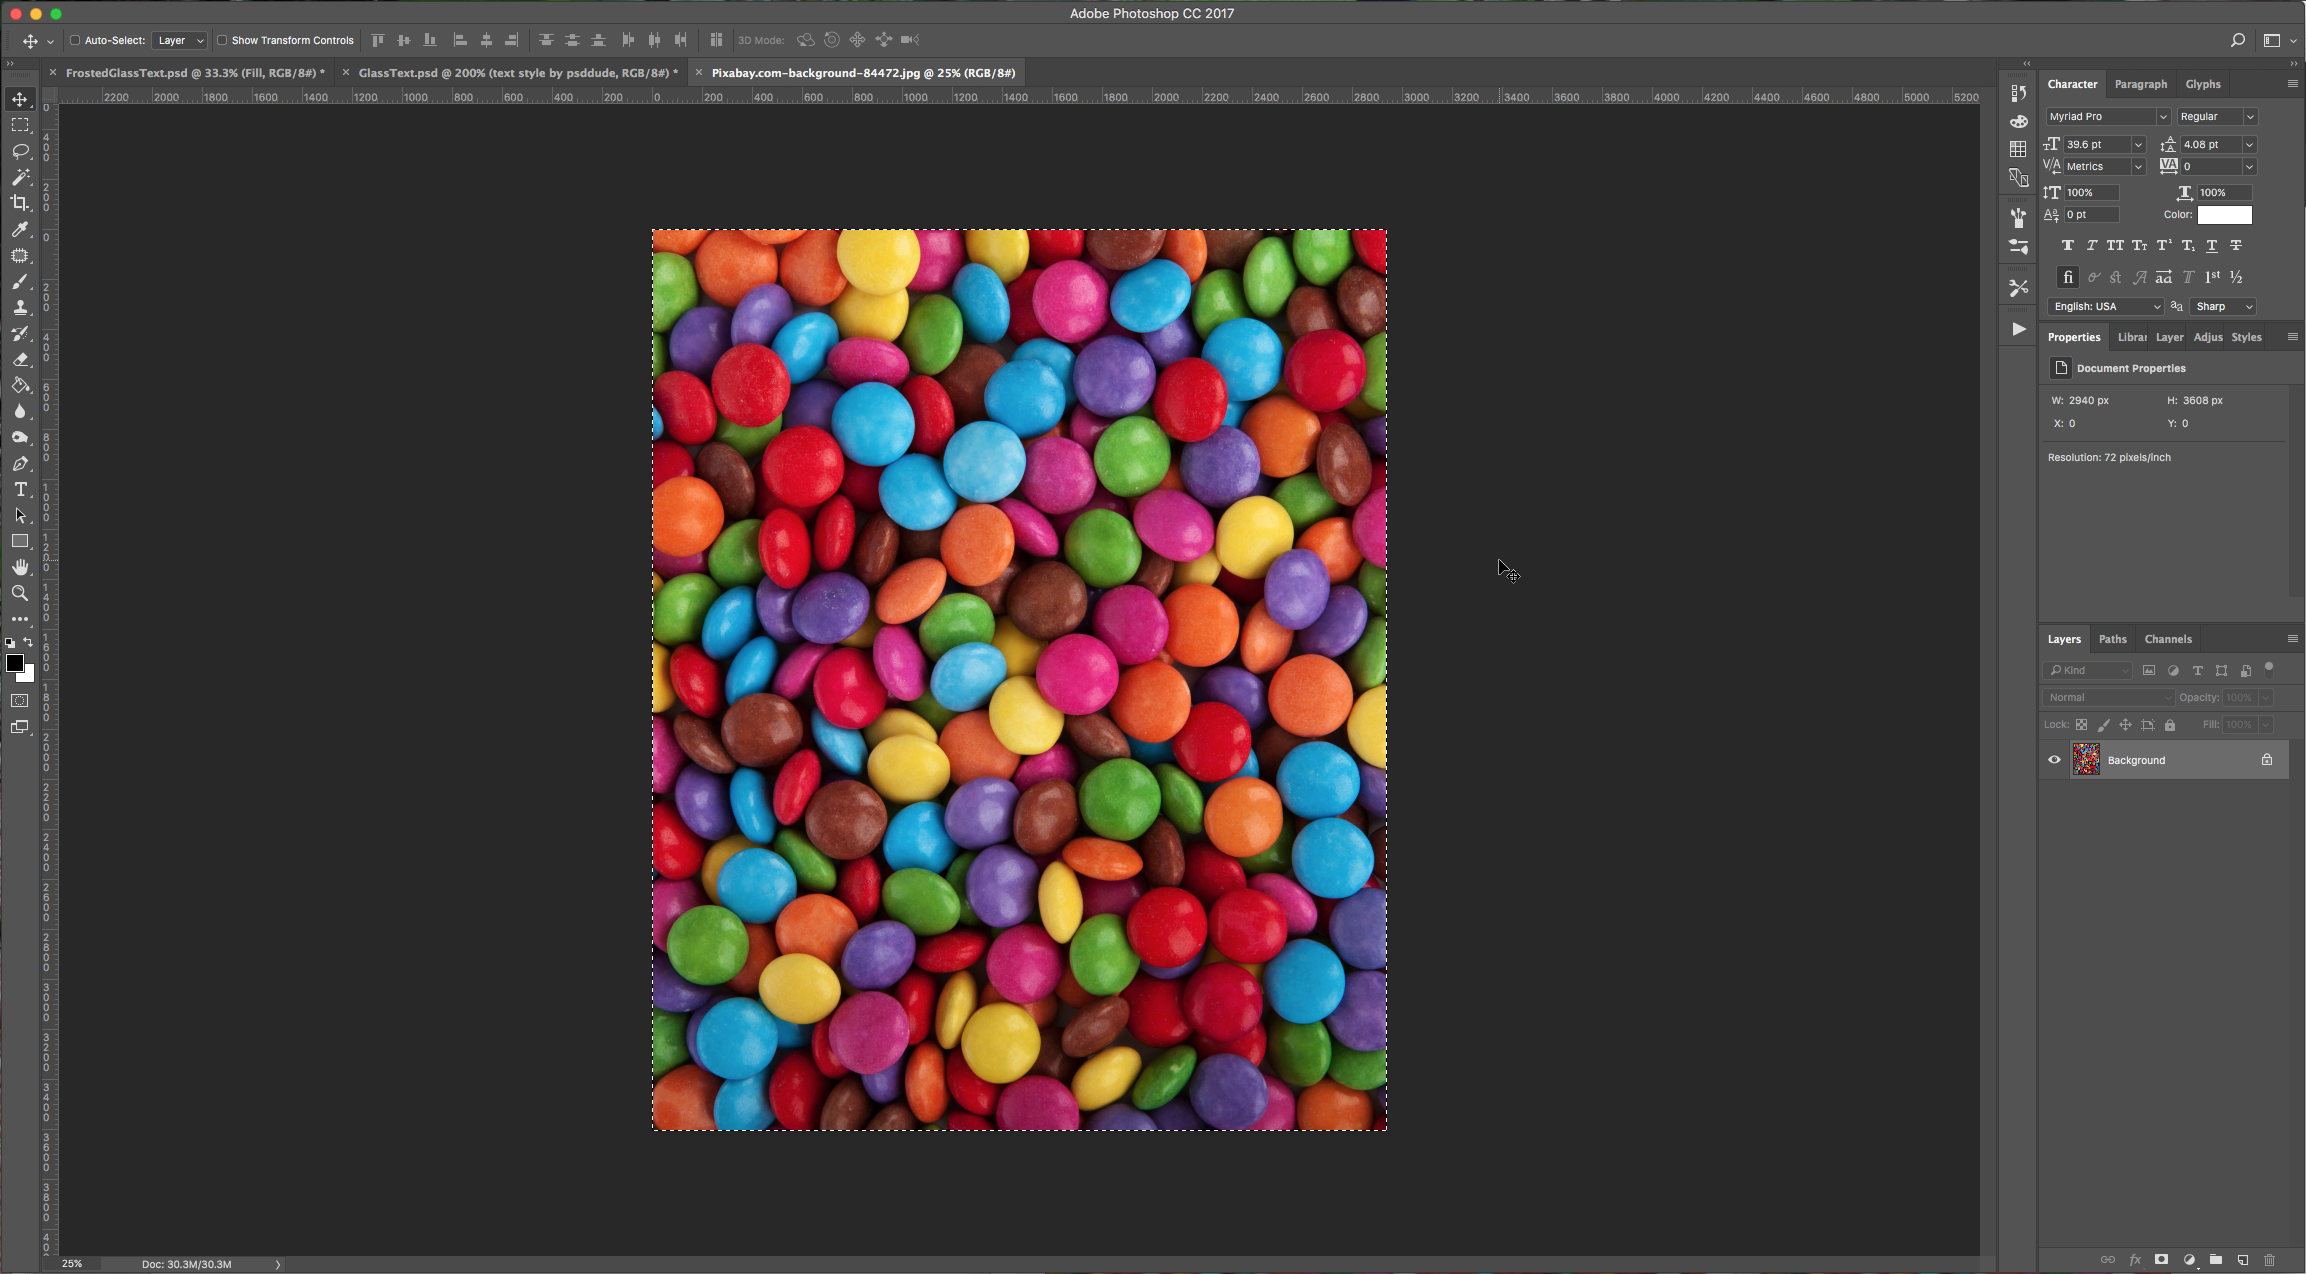
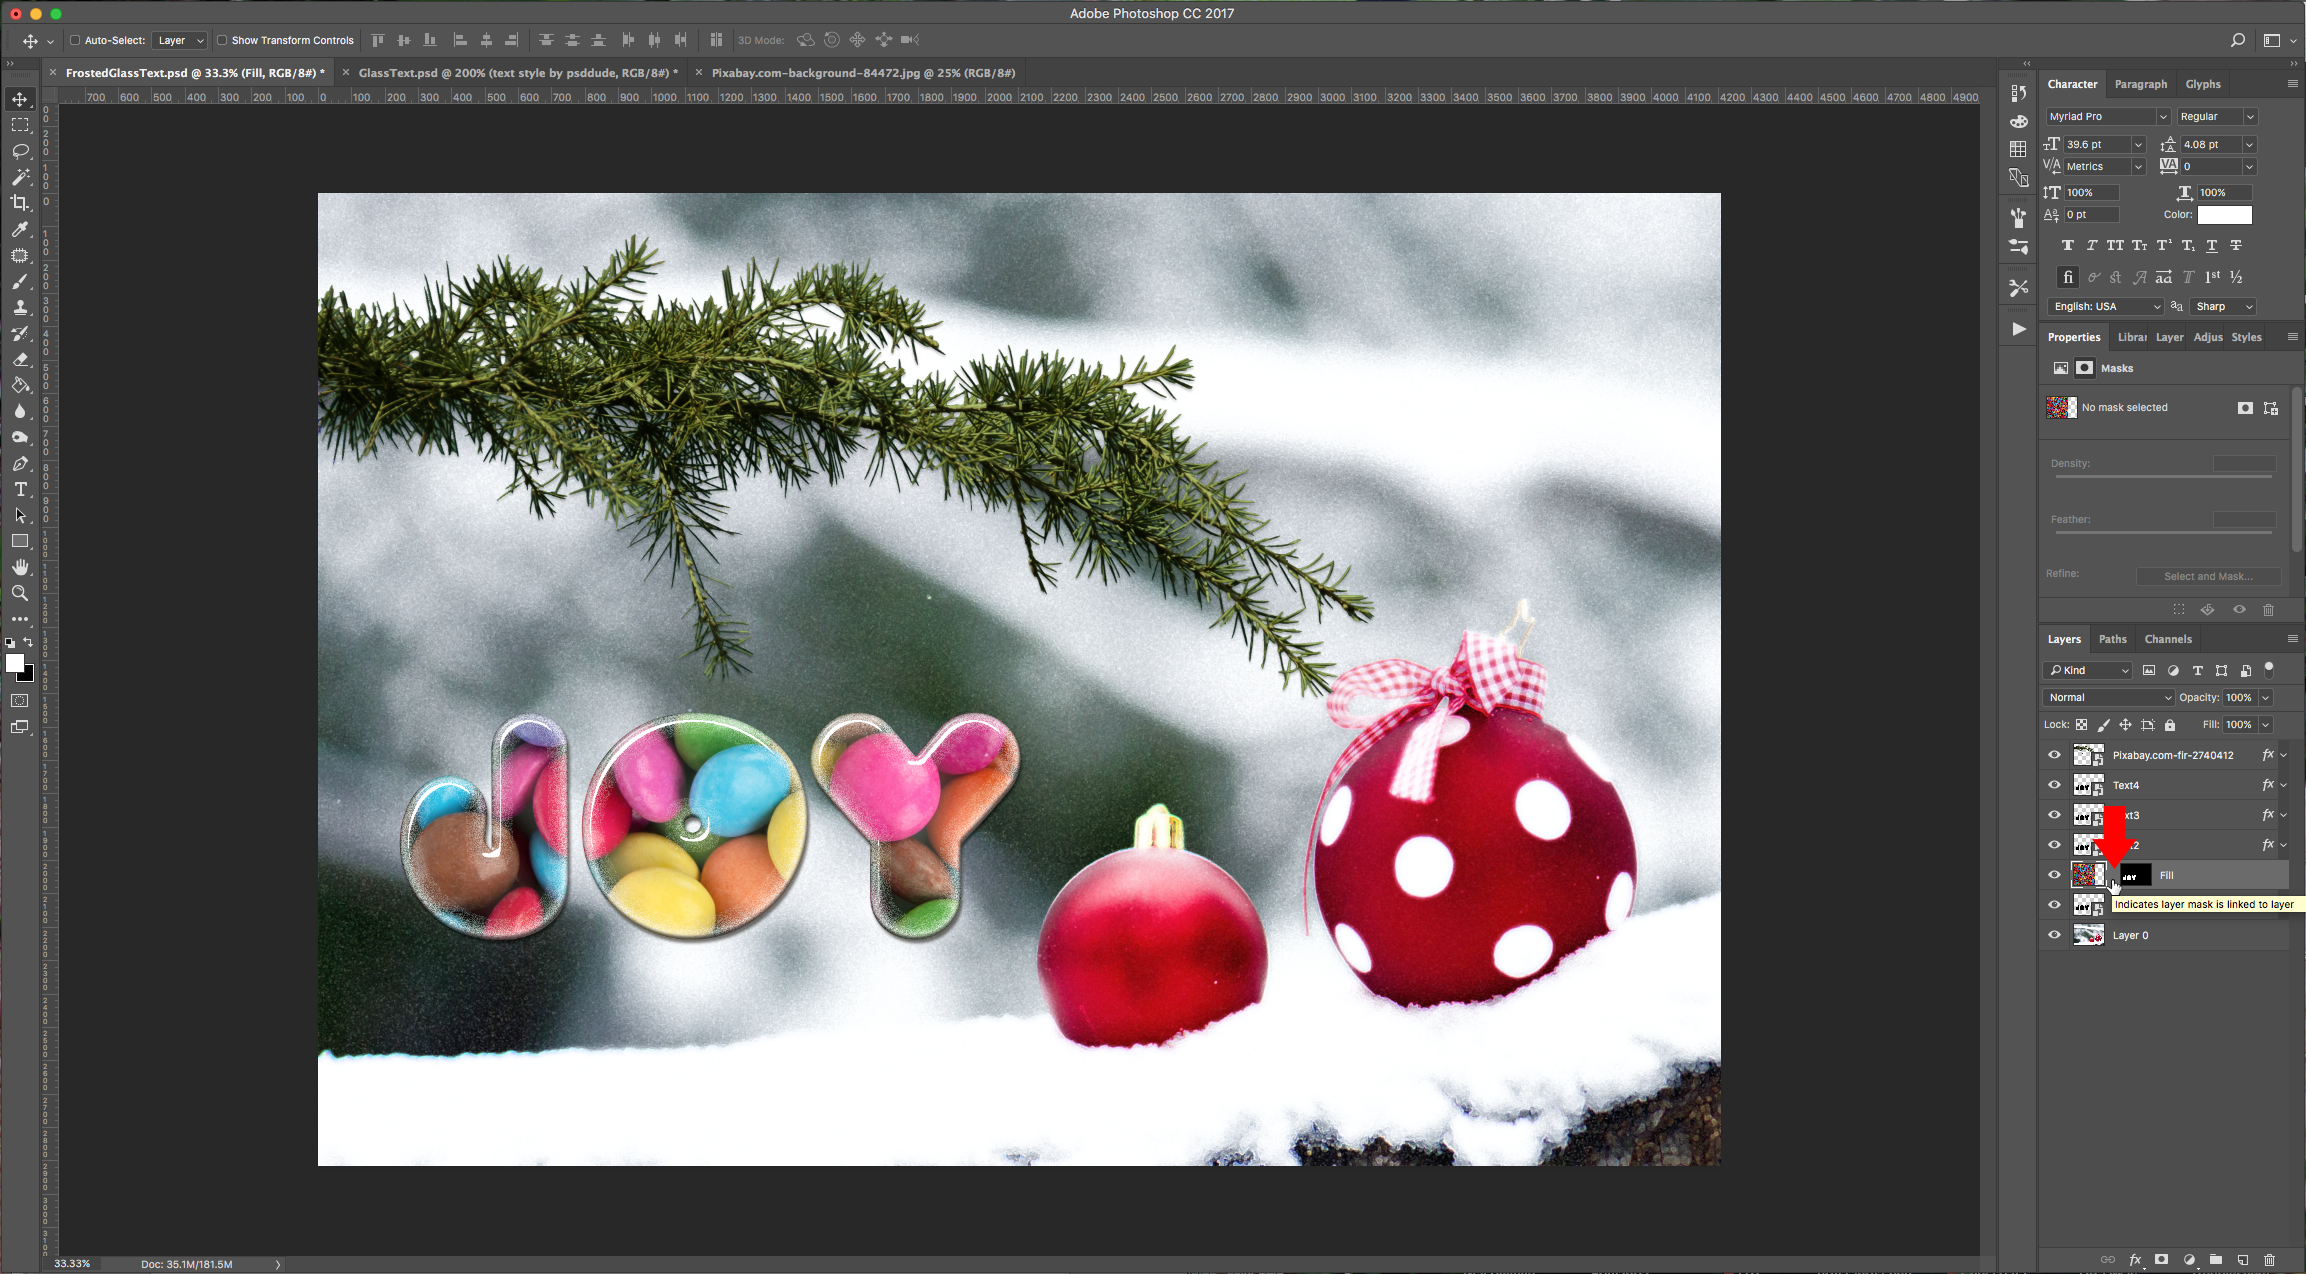
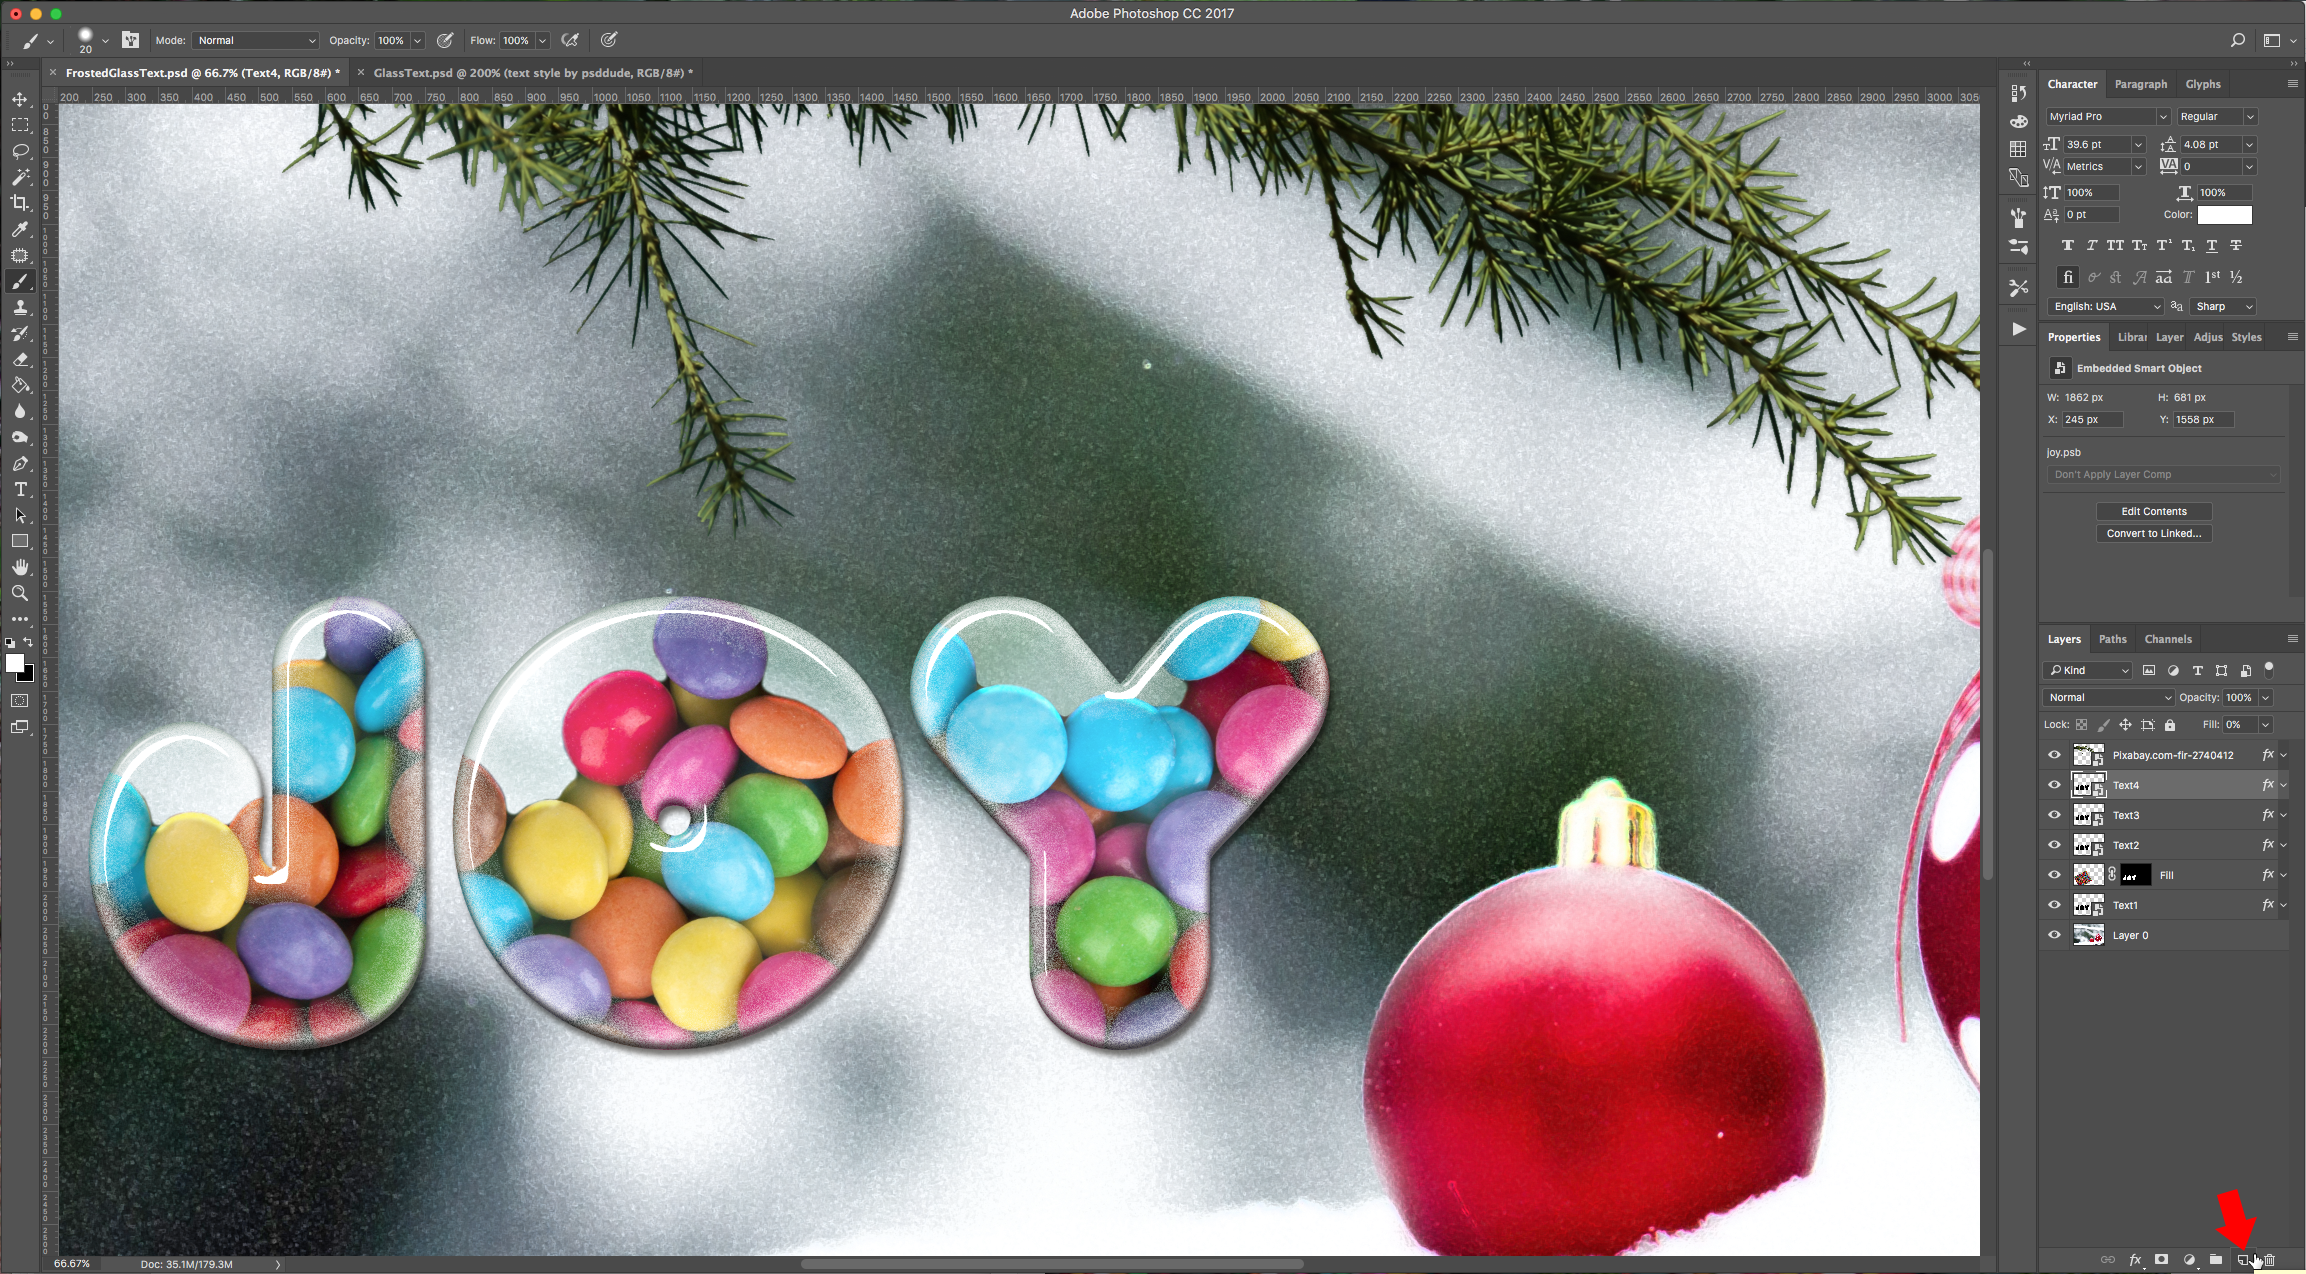
7 - Create a “New Layer” just on top of “Text1” and name it “Fill”, then open the candy texture image, select all (Command/Control + A) and then paste it (Command/Control + V) into your “Fill” Layer. Select your first text layer and Command/Control-click on the thumbnail to make a selection of your text. Then go back to the “Fill” layer, and click on the “Add Vector Mask” button at the bottom of the “Layers” Menu.
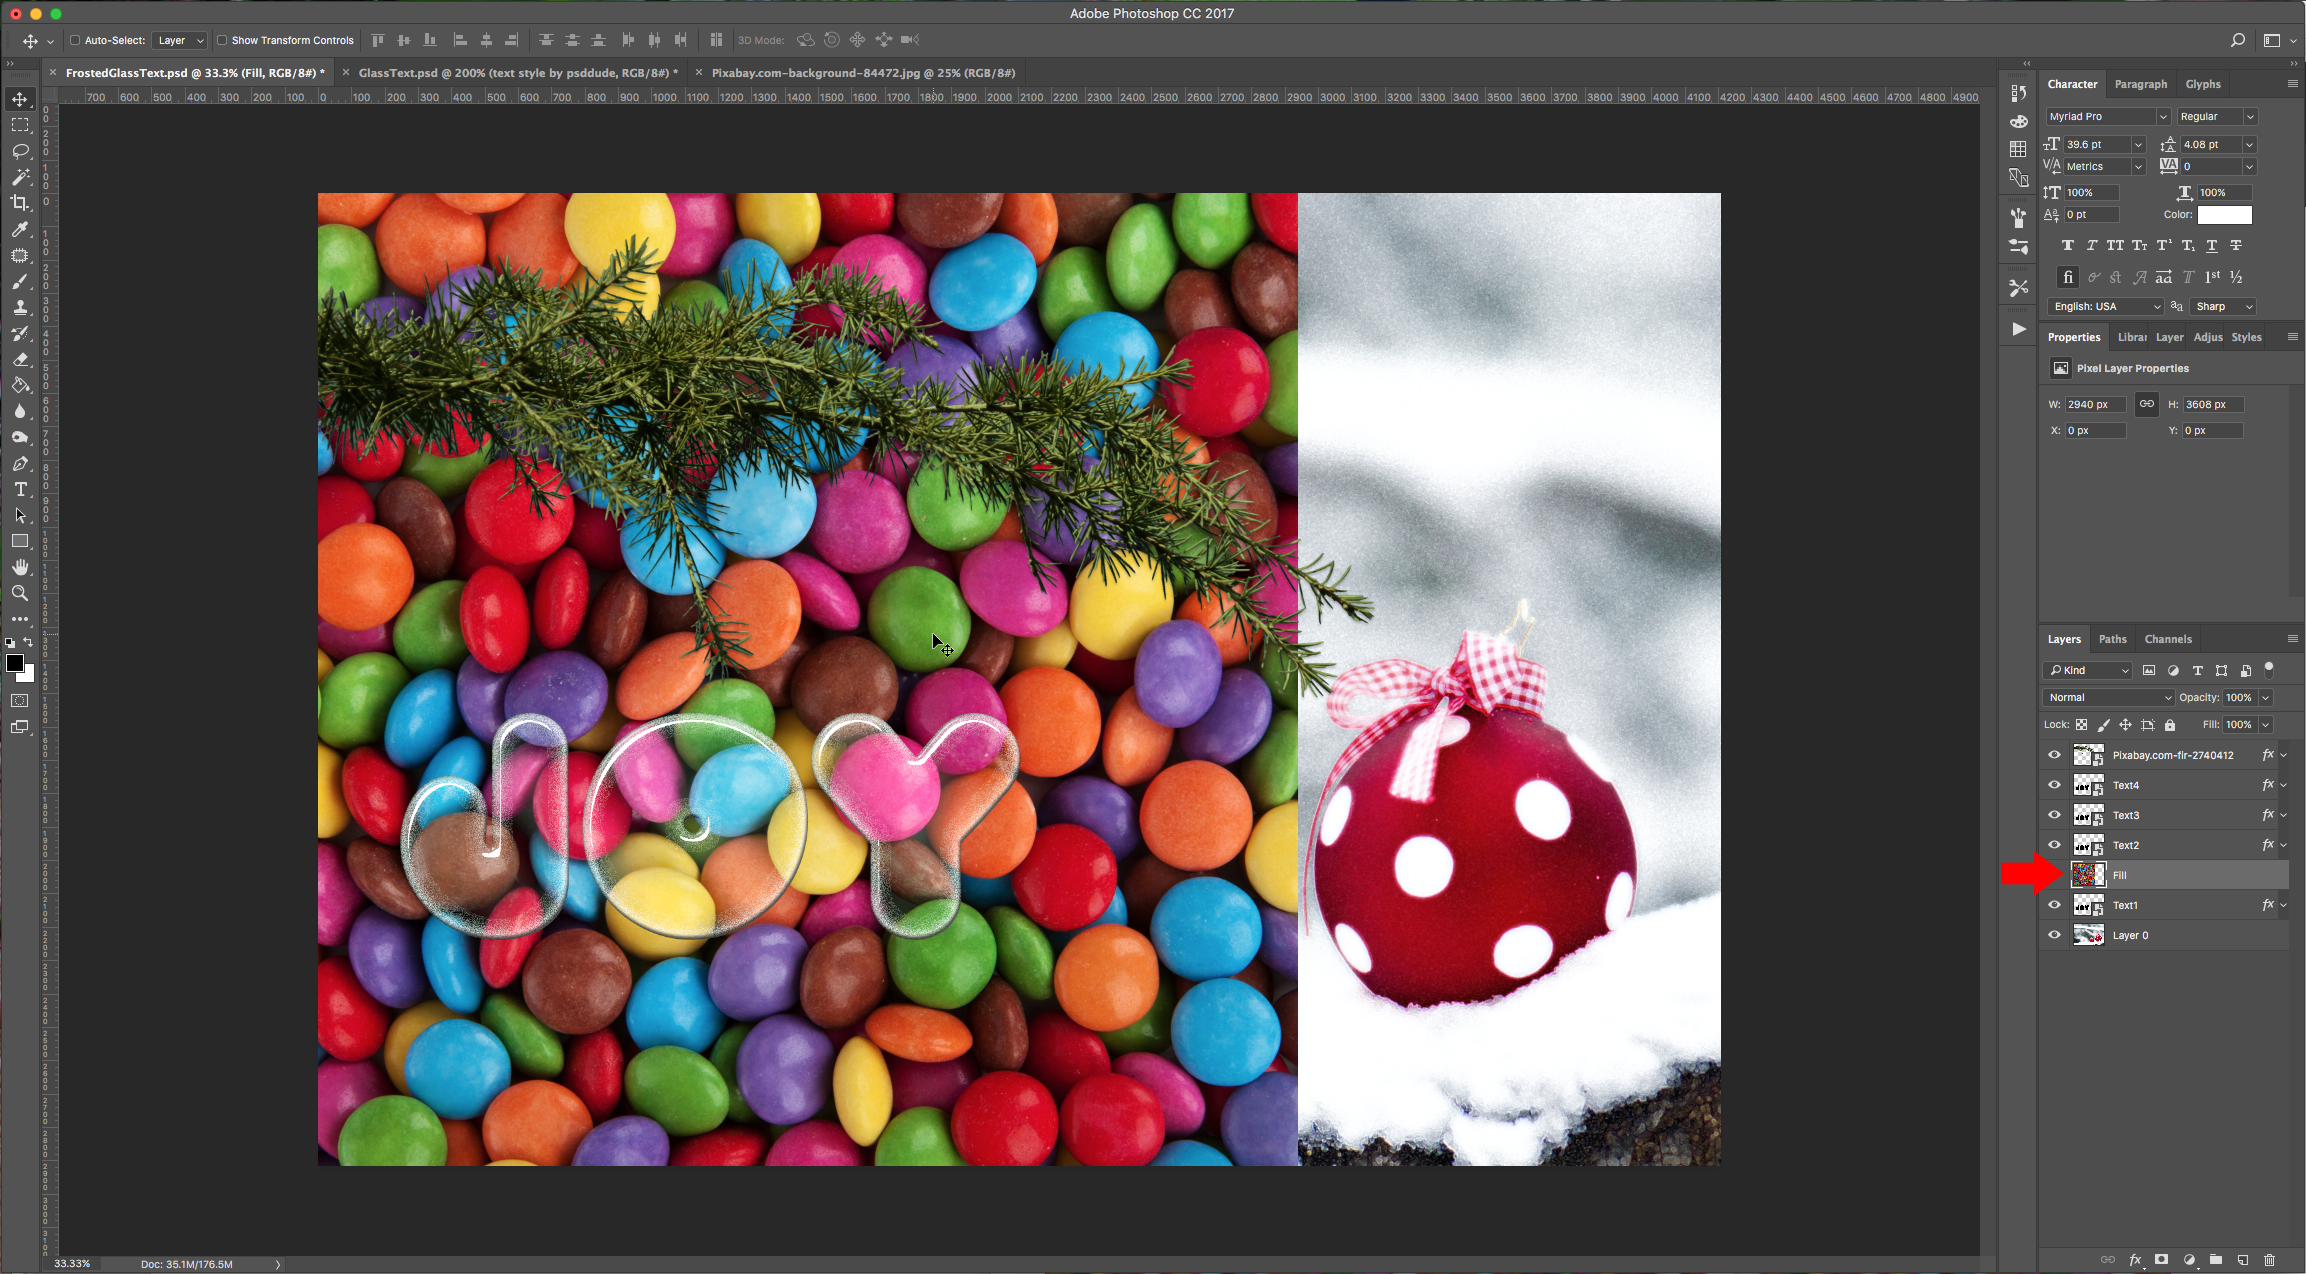
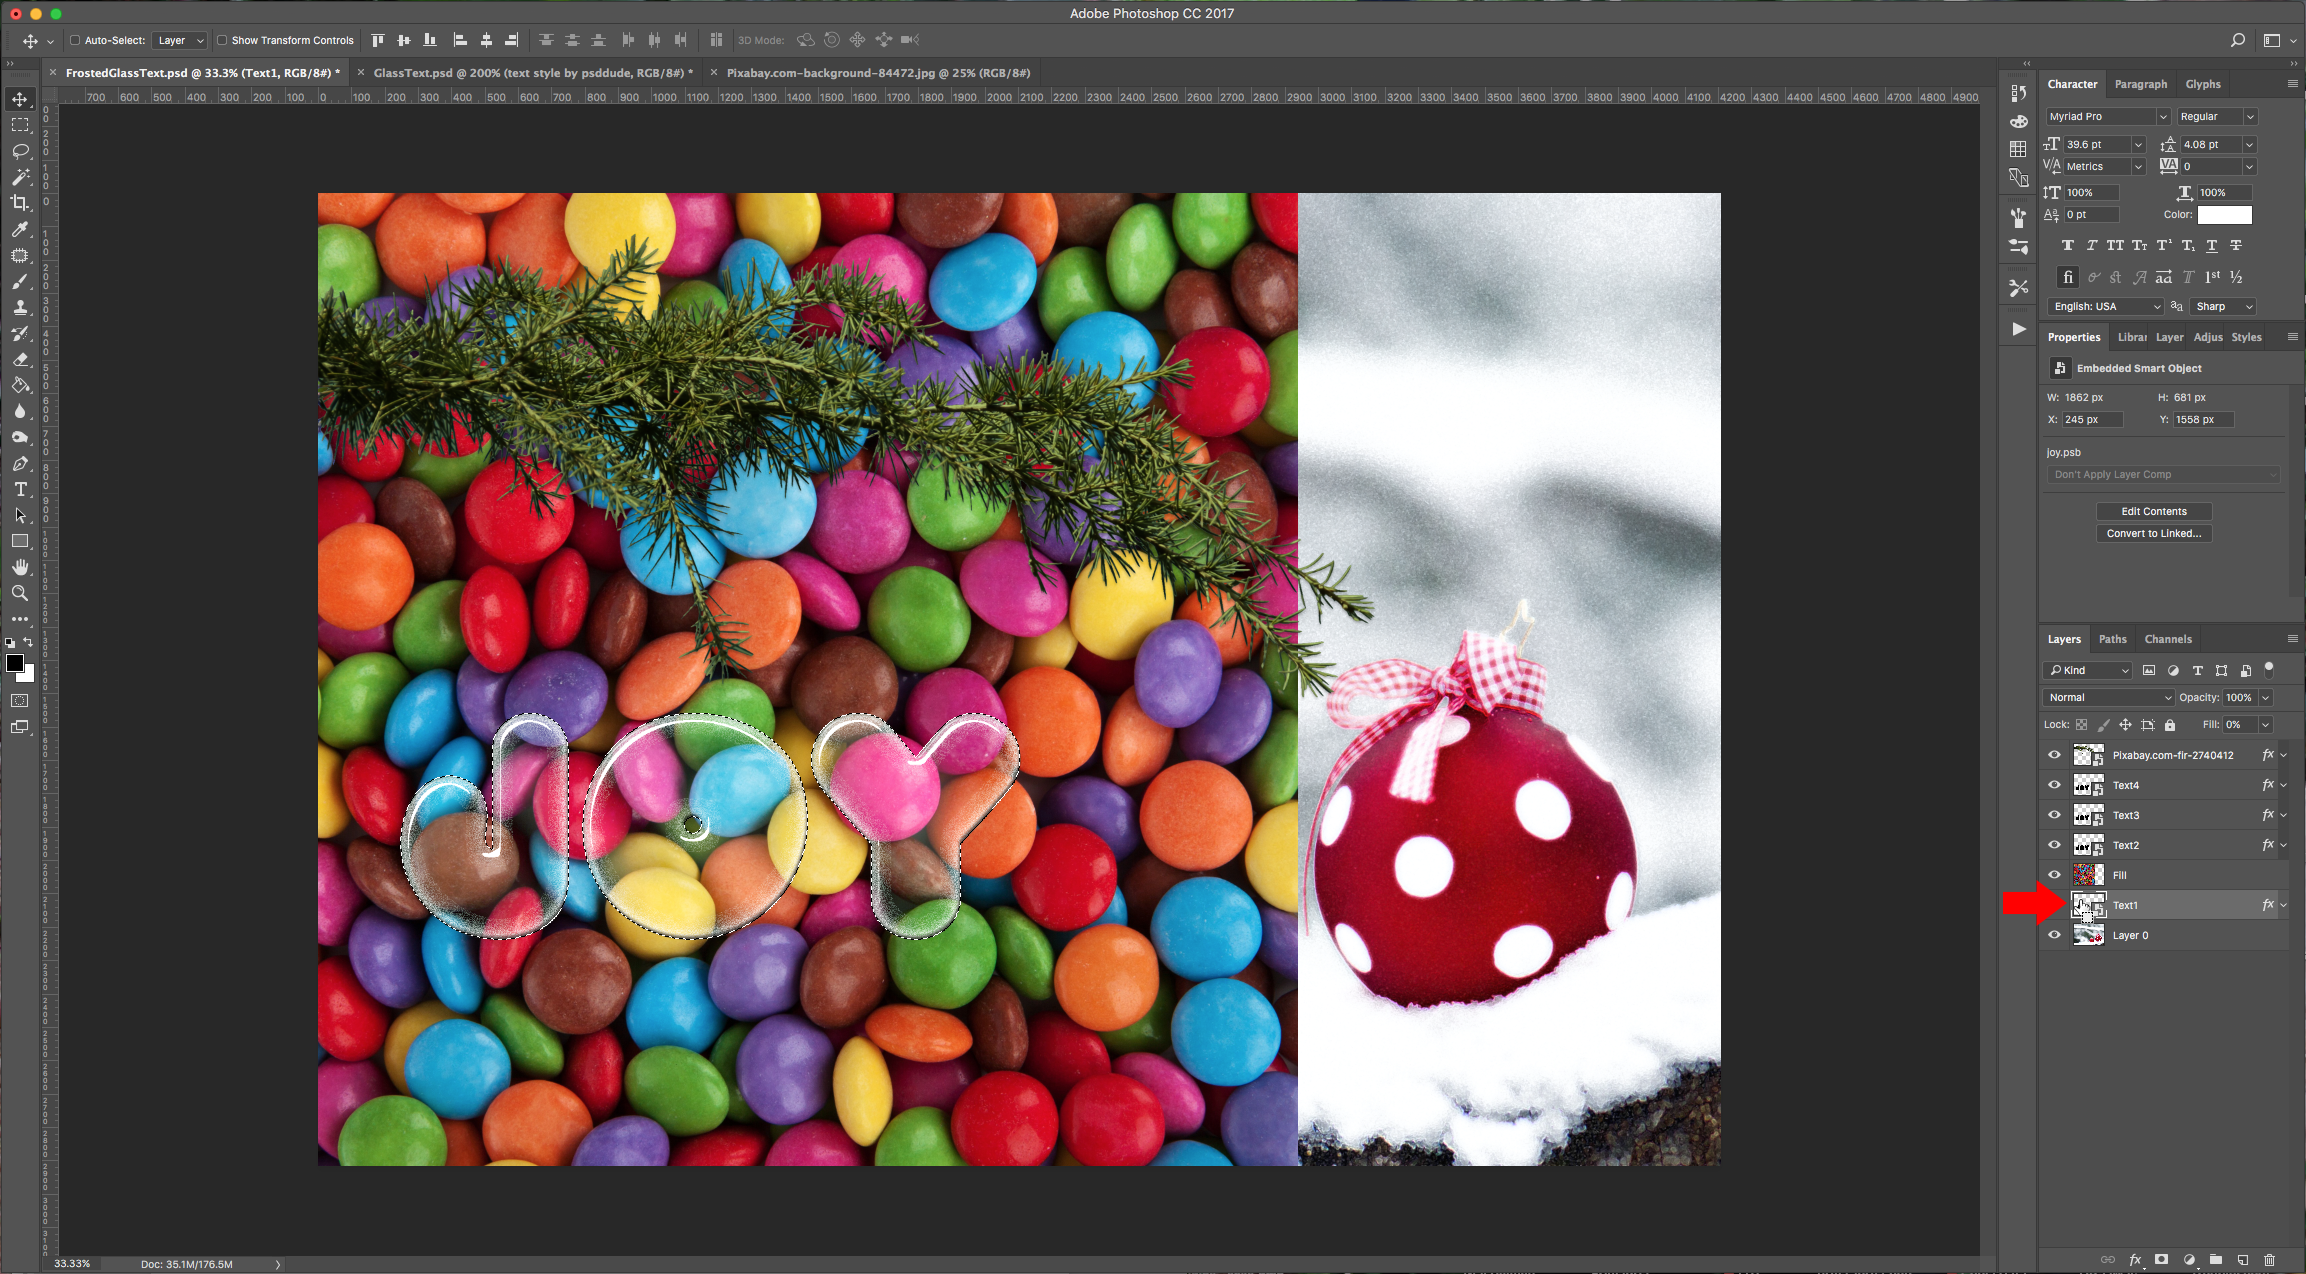

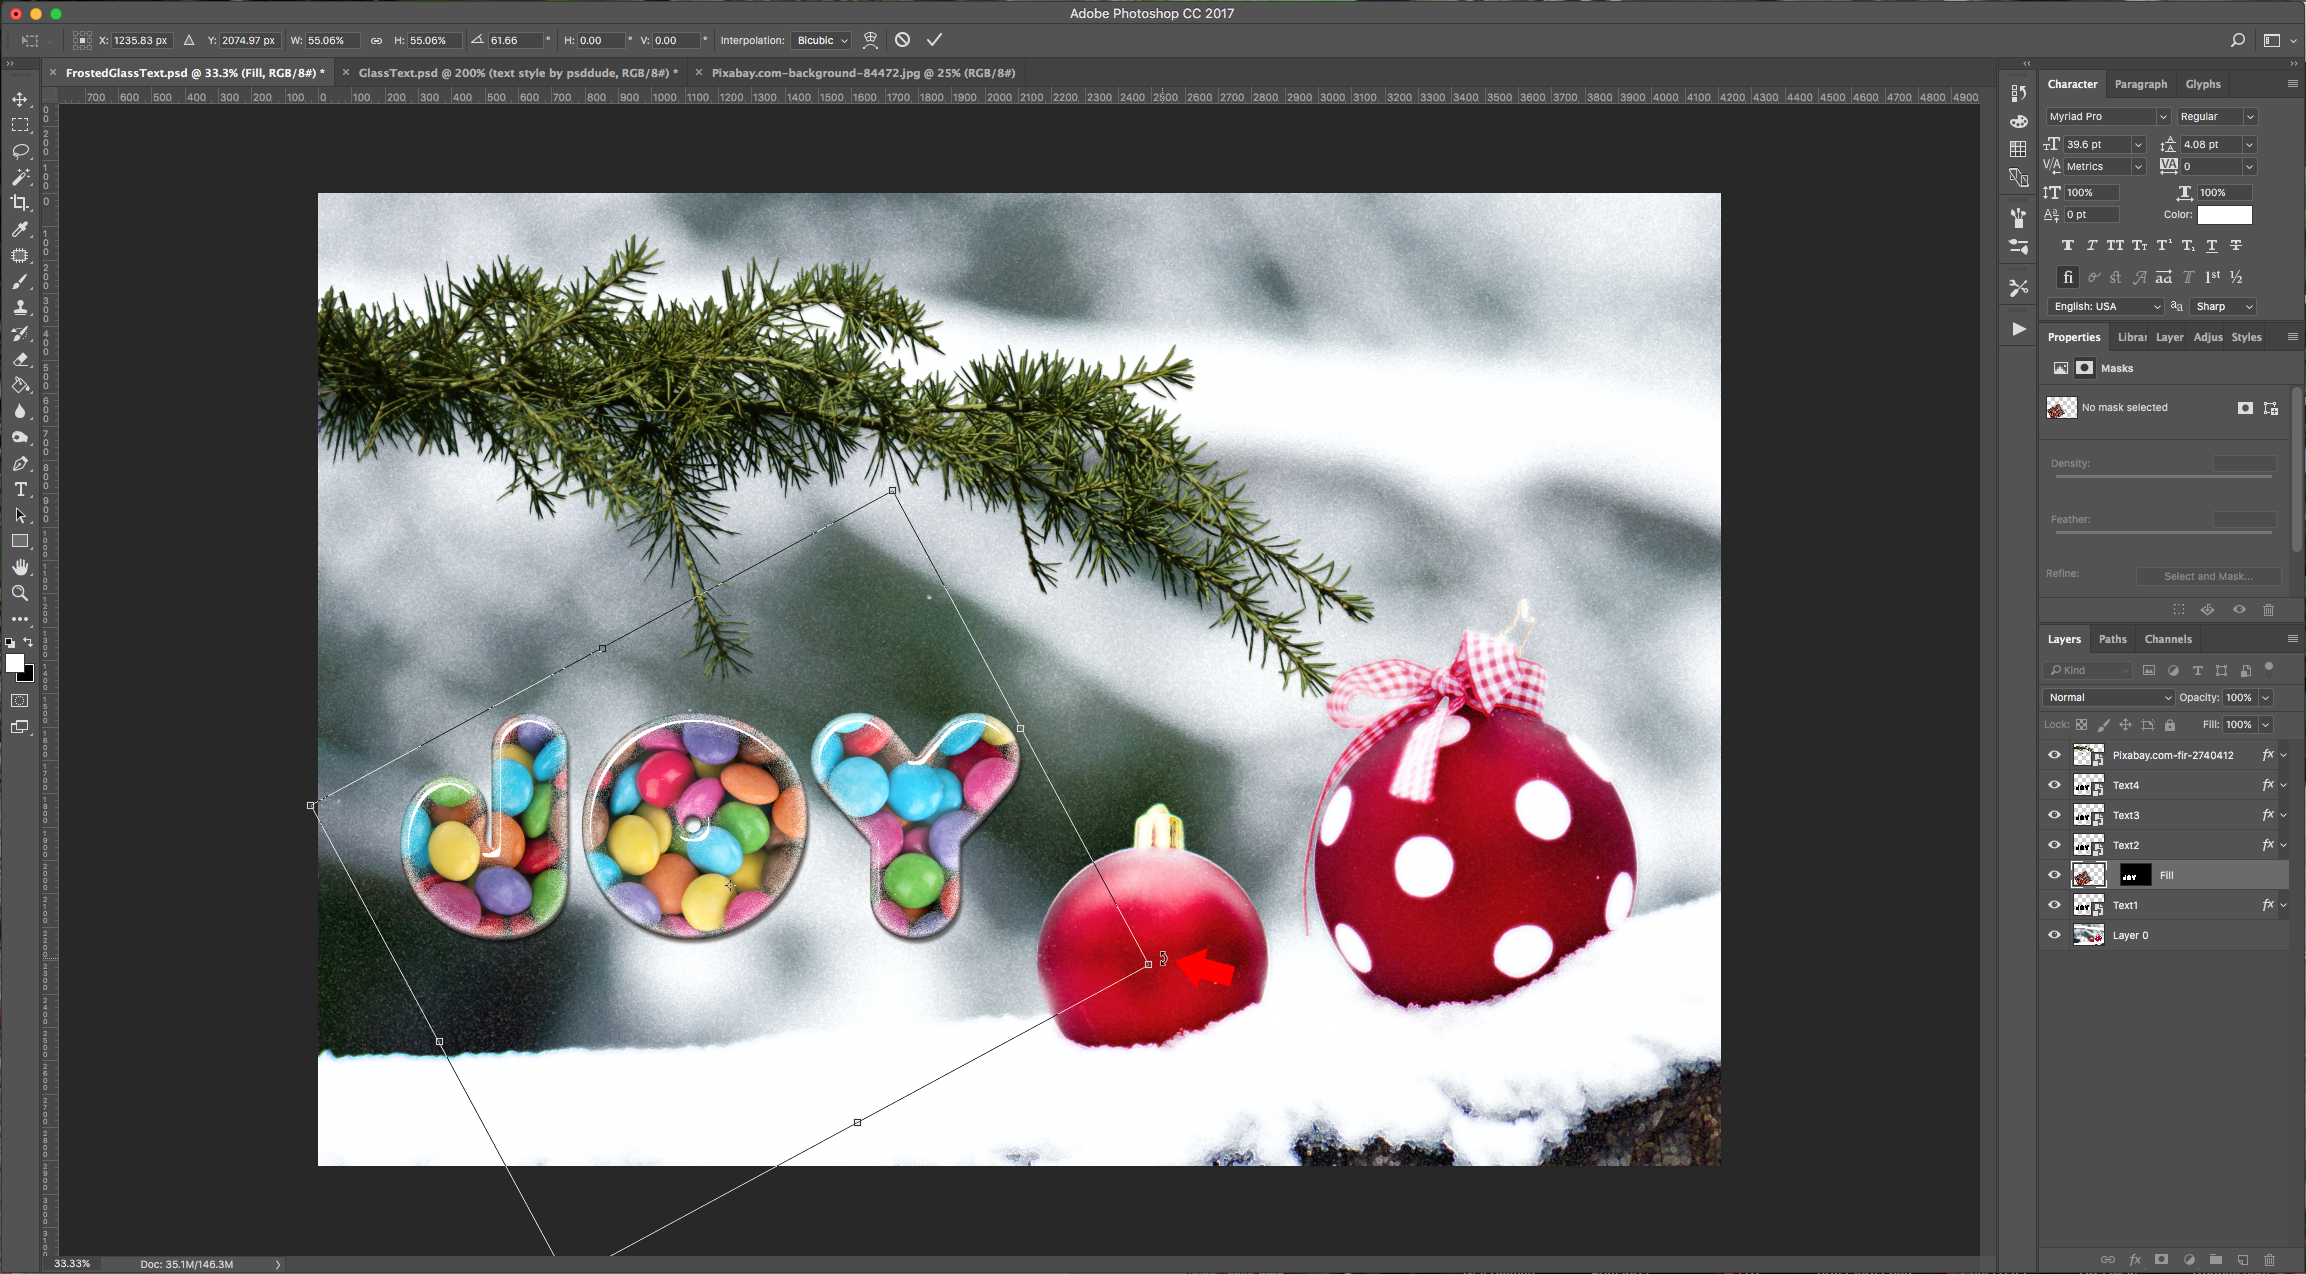
8 - Unlink your layer’s mask by clicking on the small chain icon between the image and the mask thumbnails, then click on the image thumbnail and hit Command/Control + T to resize your image in case it is too big in proportions. When you are happy hit “Return/Enter” (you can re-link the image and mask now if you want).
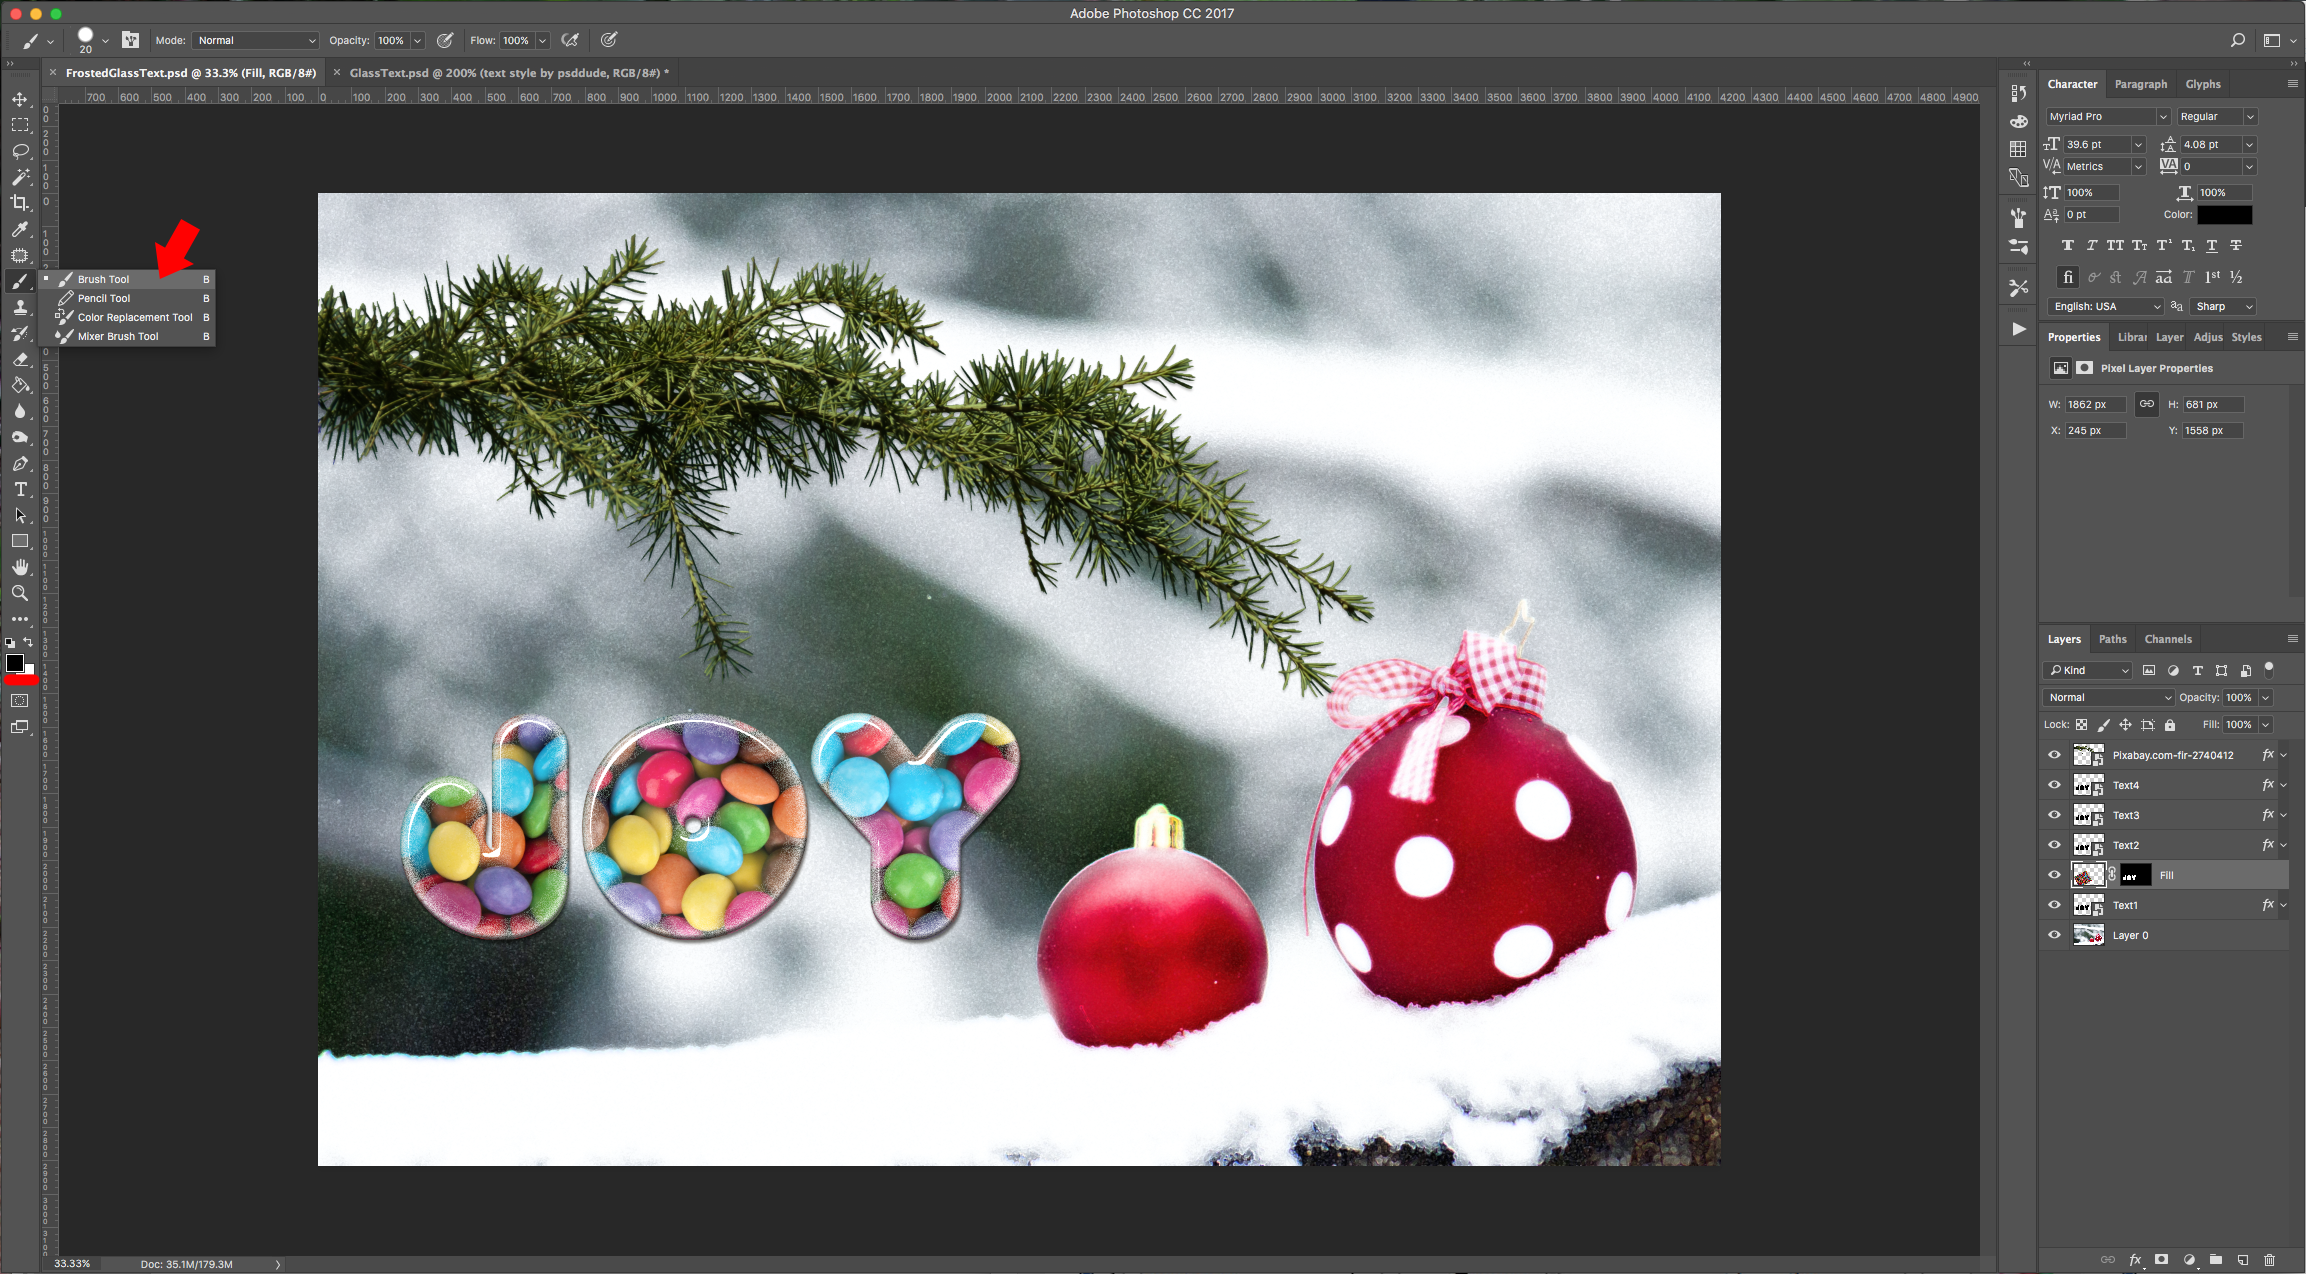
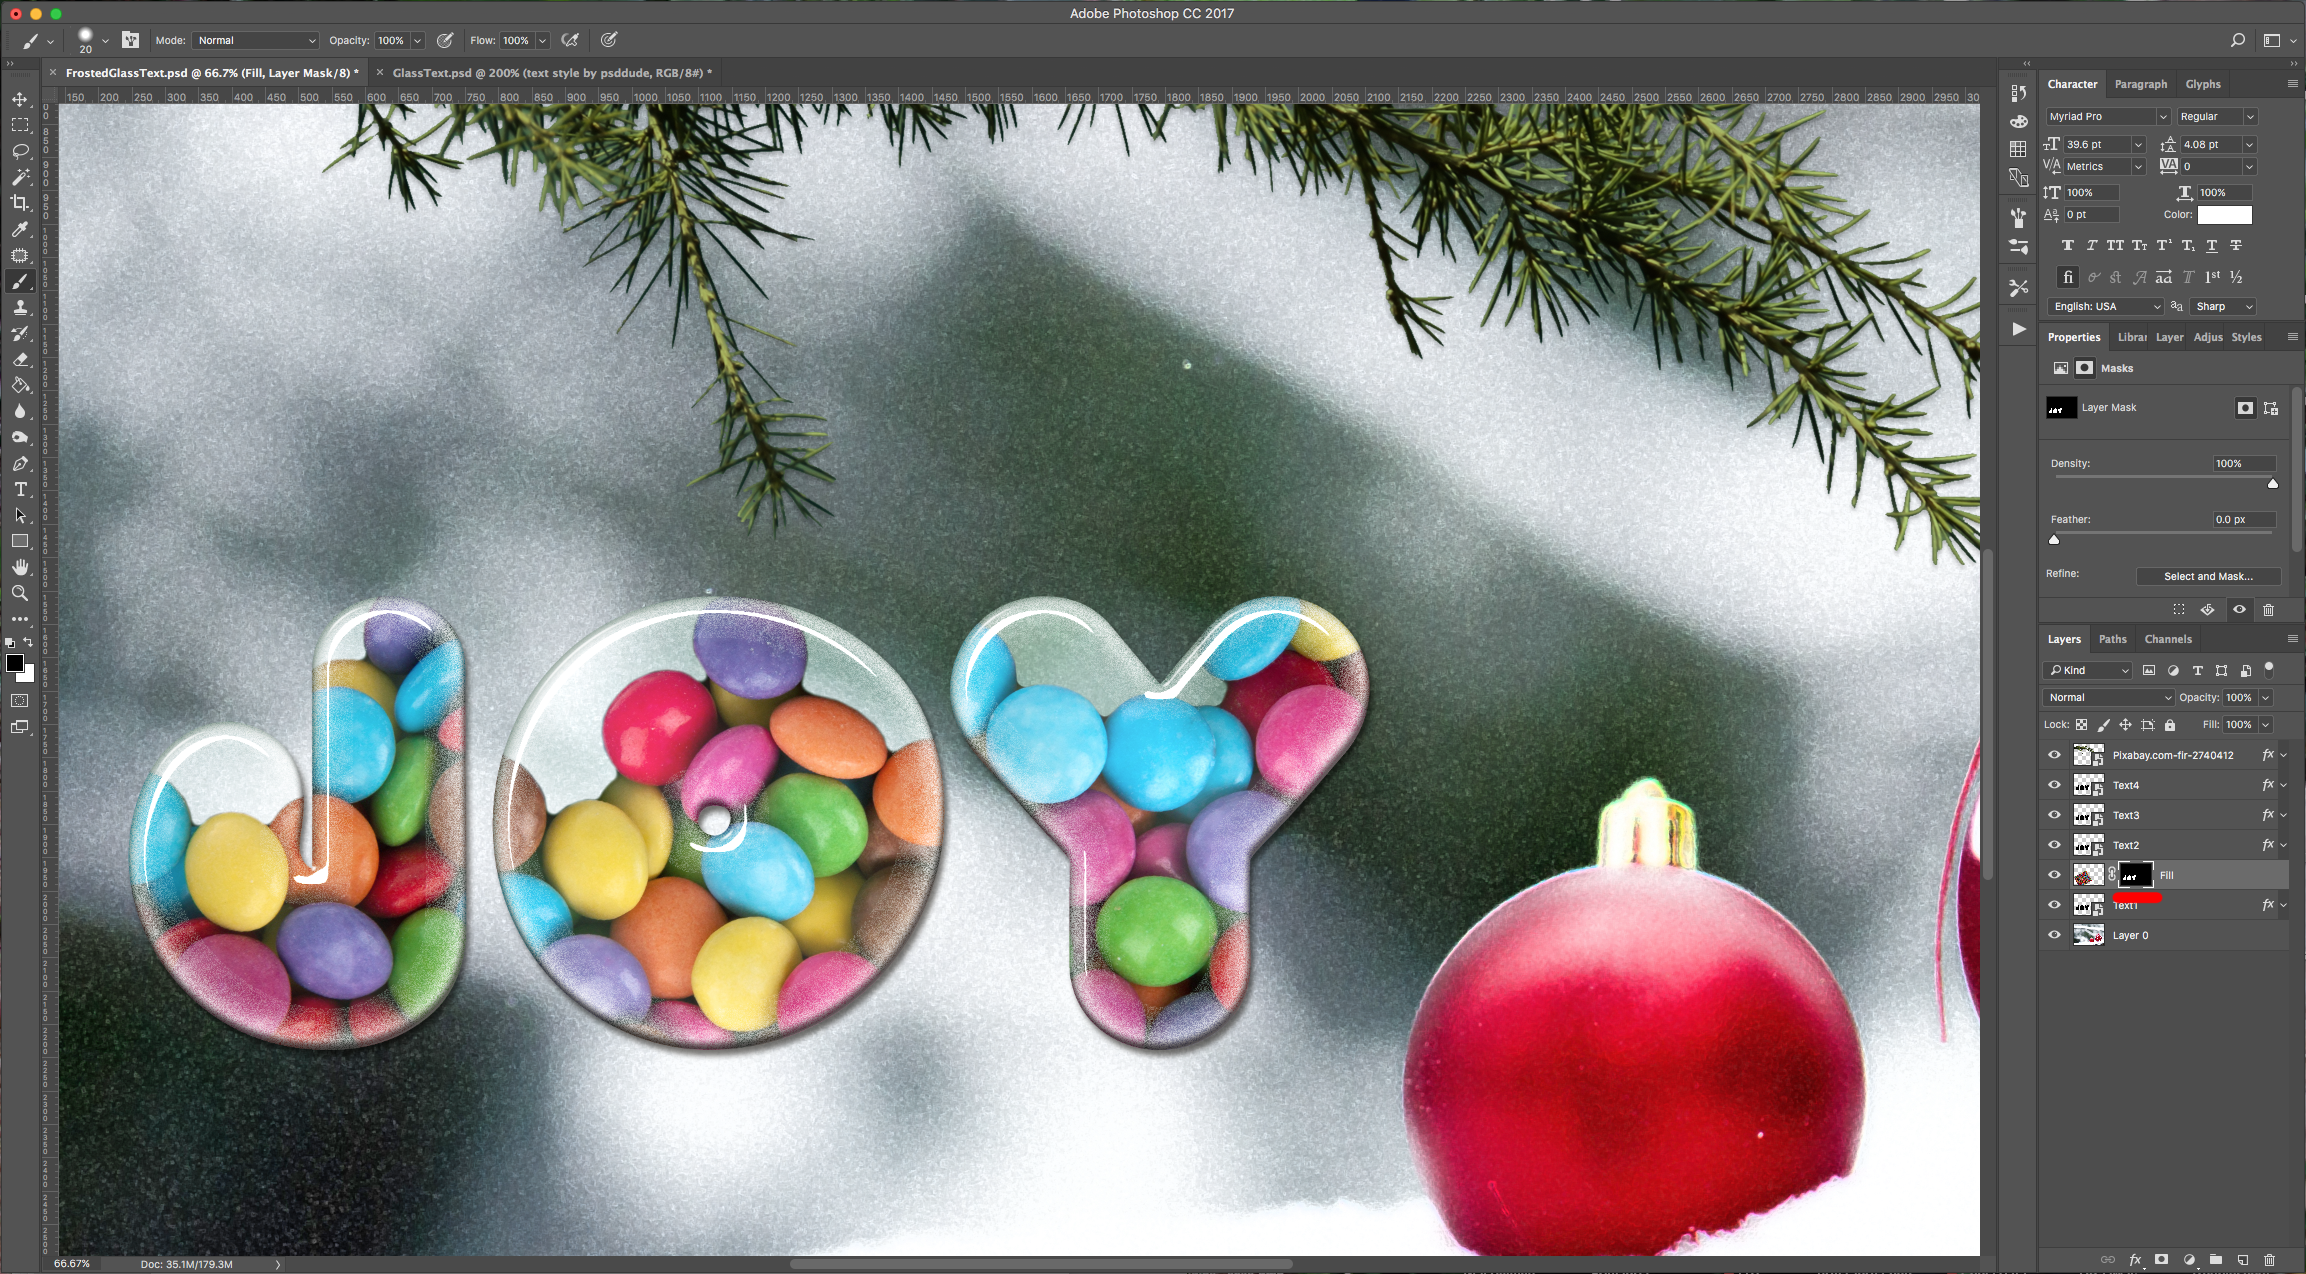
9 - Make sure your “Layer Mask” thumbnail is selected and that your “Foreground” color is Black and select the “Brush Tool” (B) and with a hard brush “hide” some of the candy. You can change the “Size” and “Hardness” of the brush to get better results, and if you made a mistake, just change the “Foreground” color to white and fix it.
10 - Double-click on the “Fill” layer and apply the following:
Inner Shadow: (#ffffff)
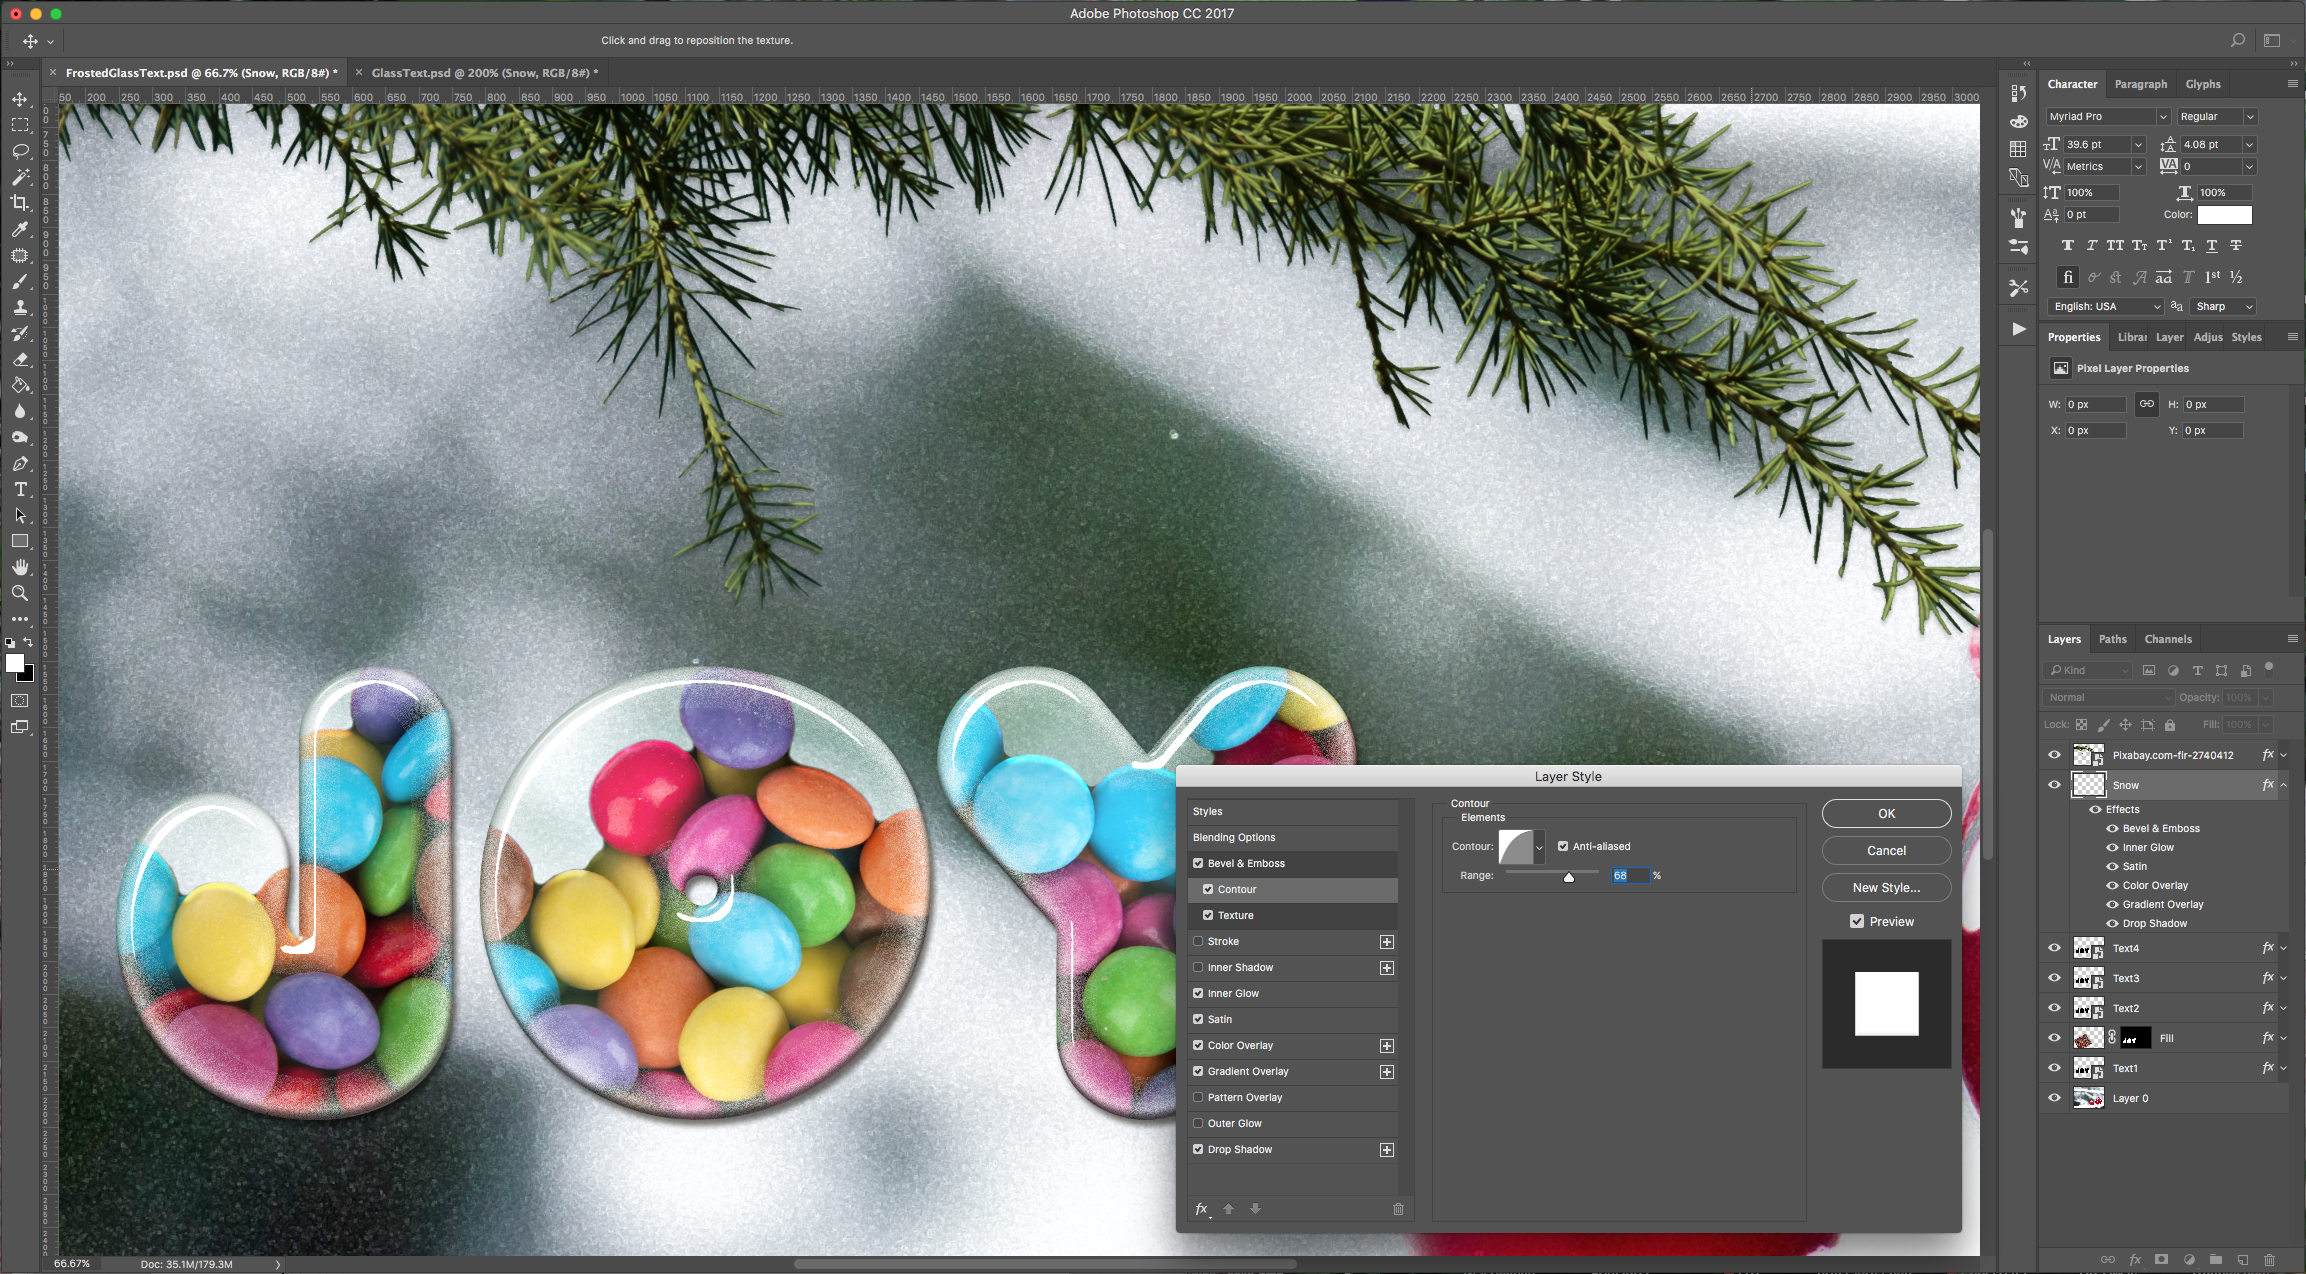
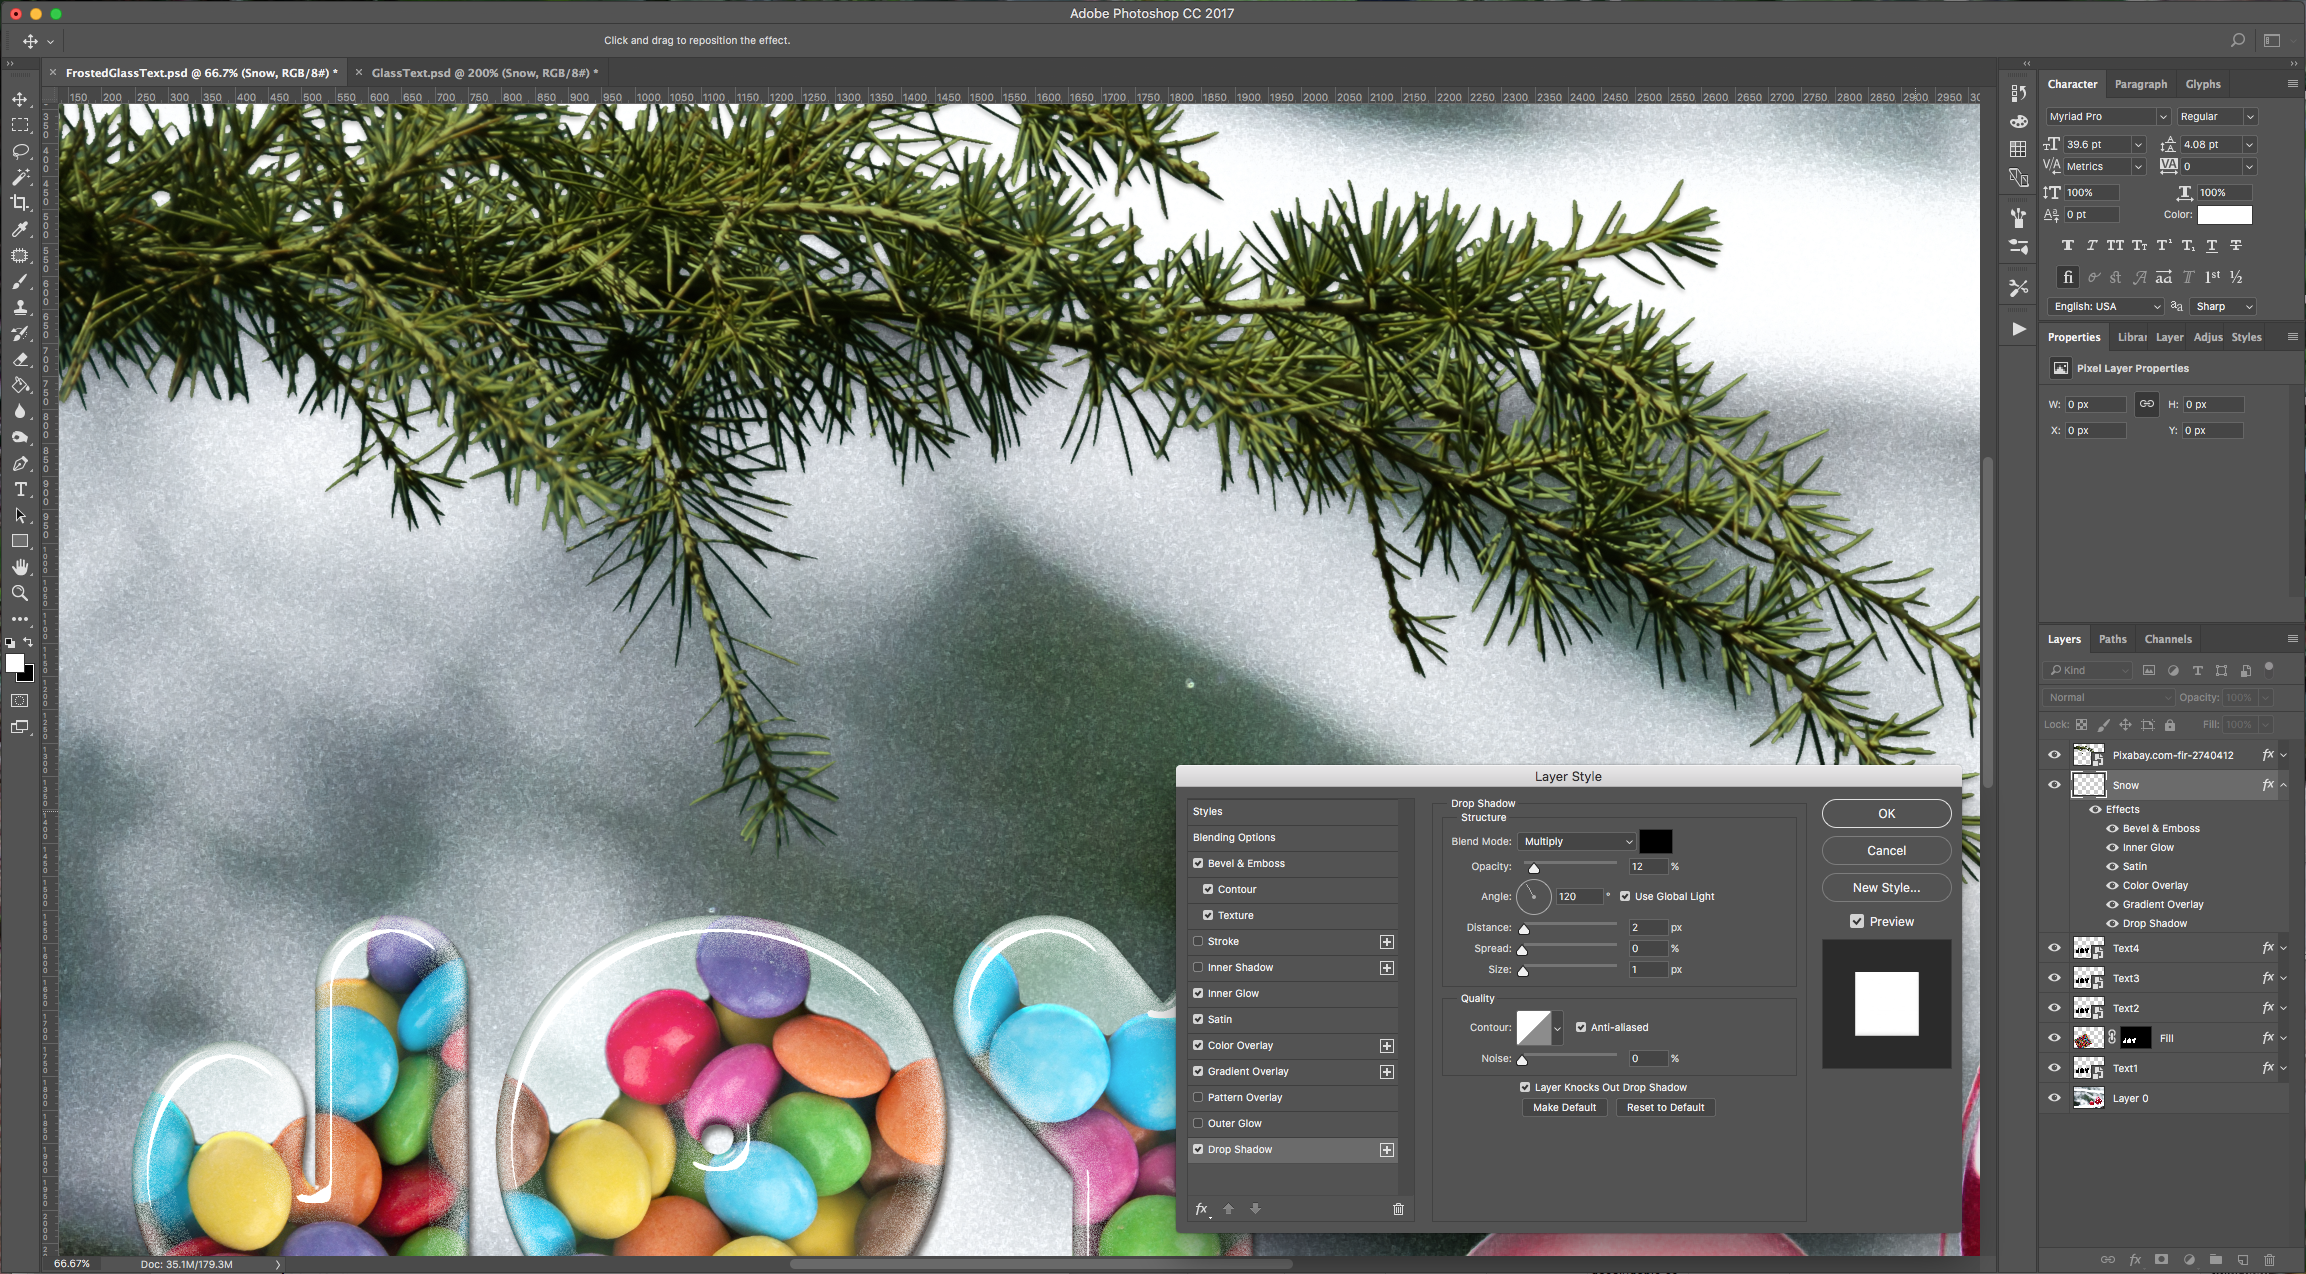
11 - Create s “New Layer” on top of the “Text” ones, name it “Snow” and apply the following “Layer Styles”:
Bevel & Emboss:
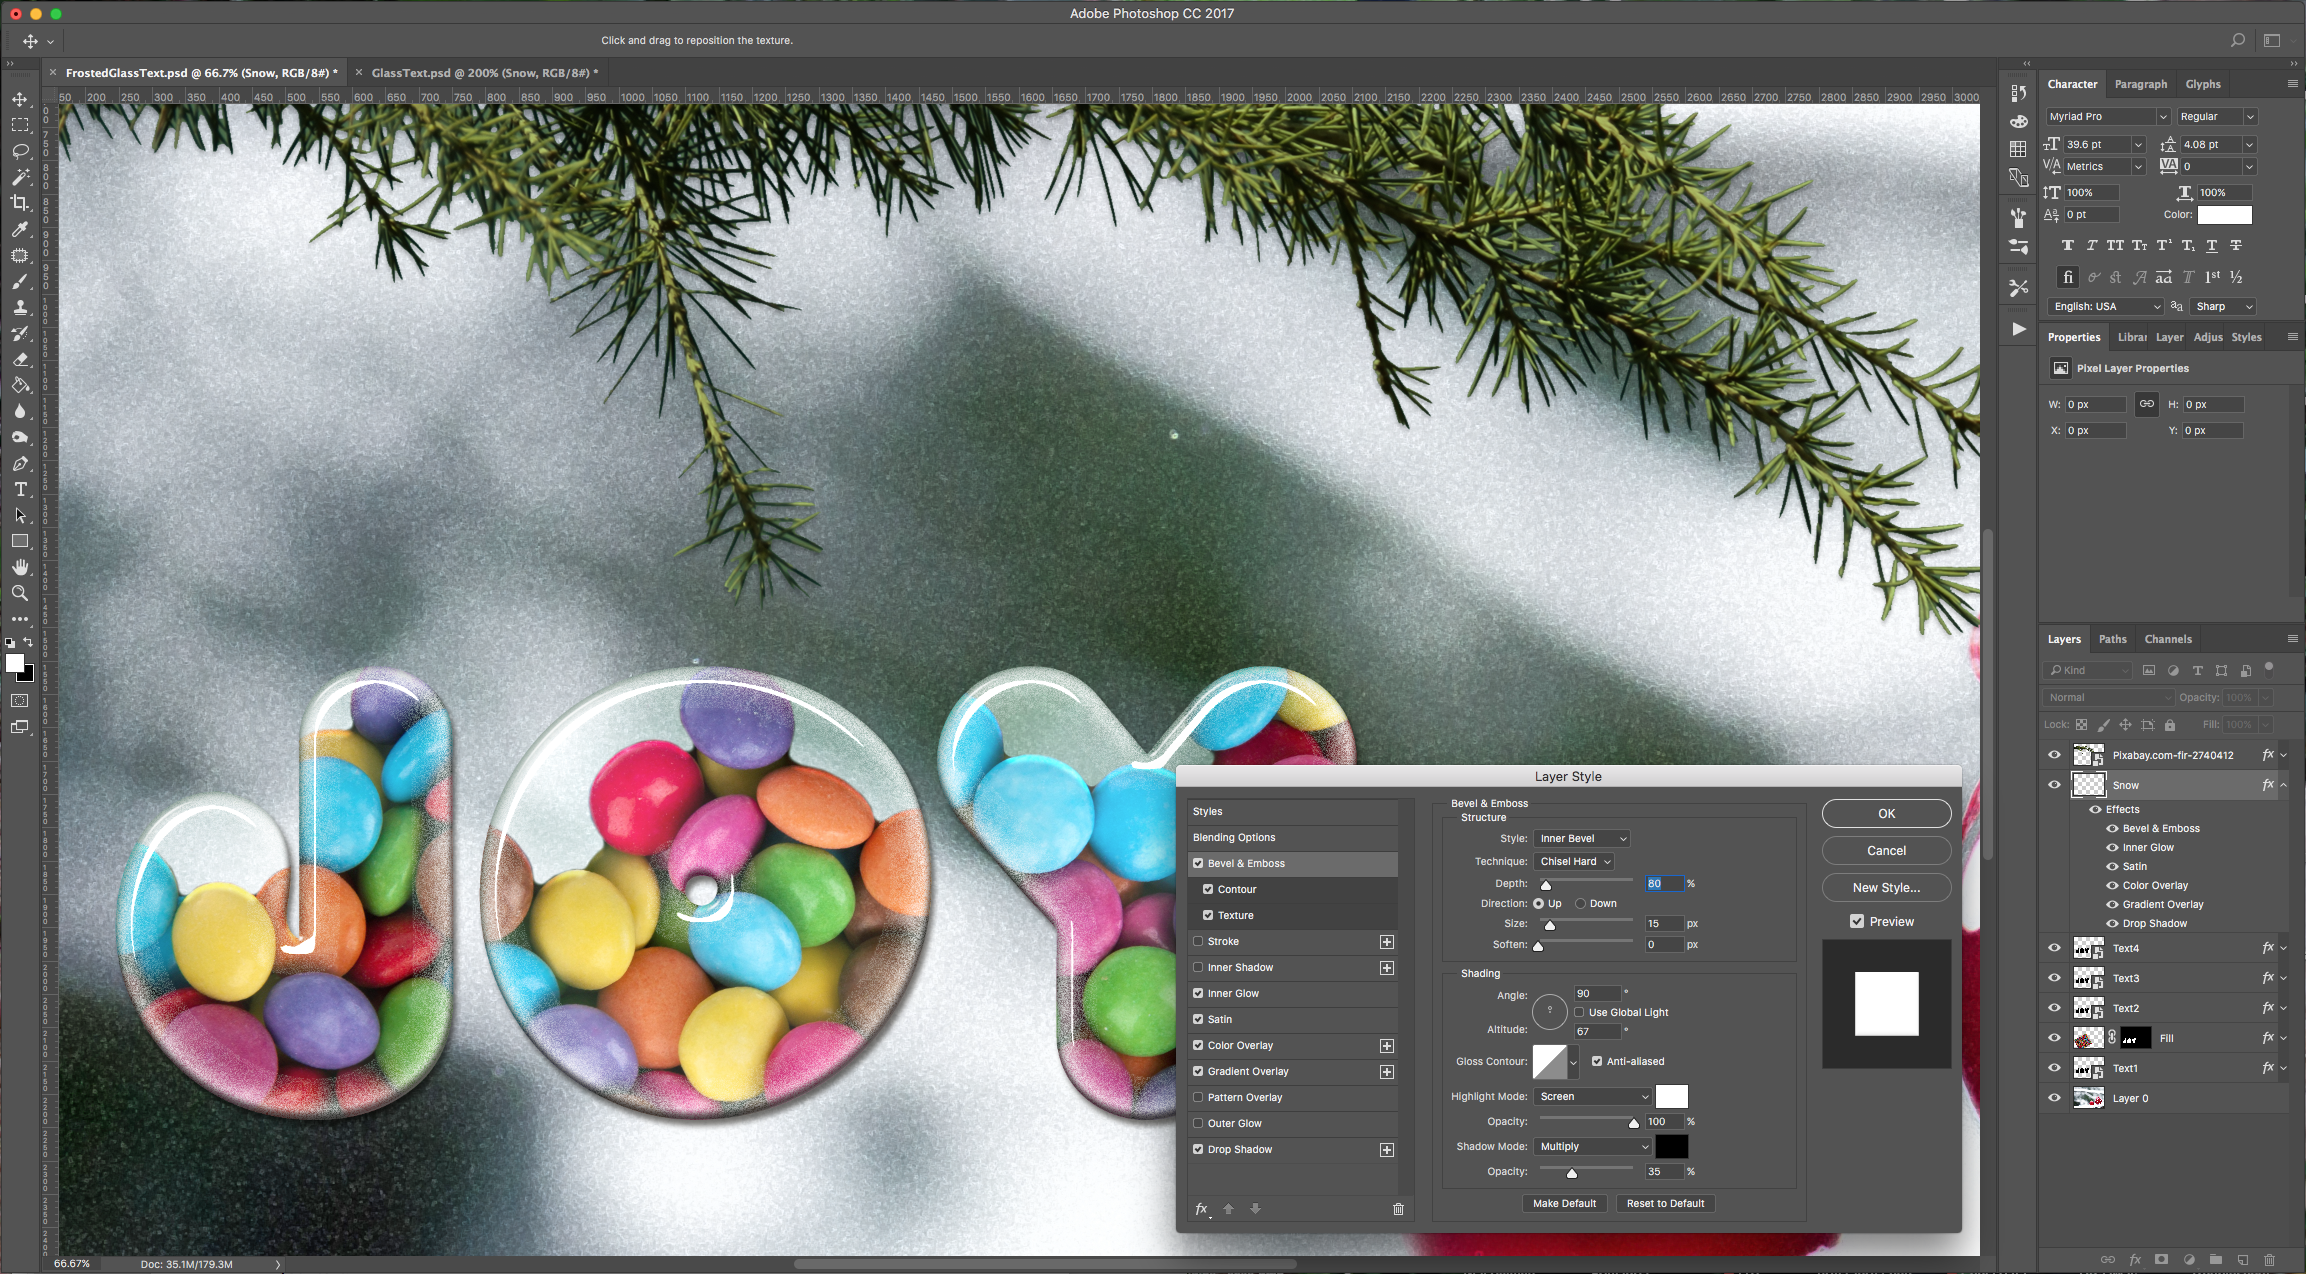
Contour:
Texture:

Inner Glow: (#999999)

Satin: (#ffffff)

Color Overlay: (#ffffff)
Gradient Overlay: from #ffffff to #d3d3d3

Drop Shadow: (#000000)
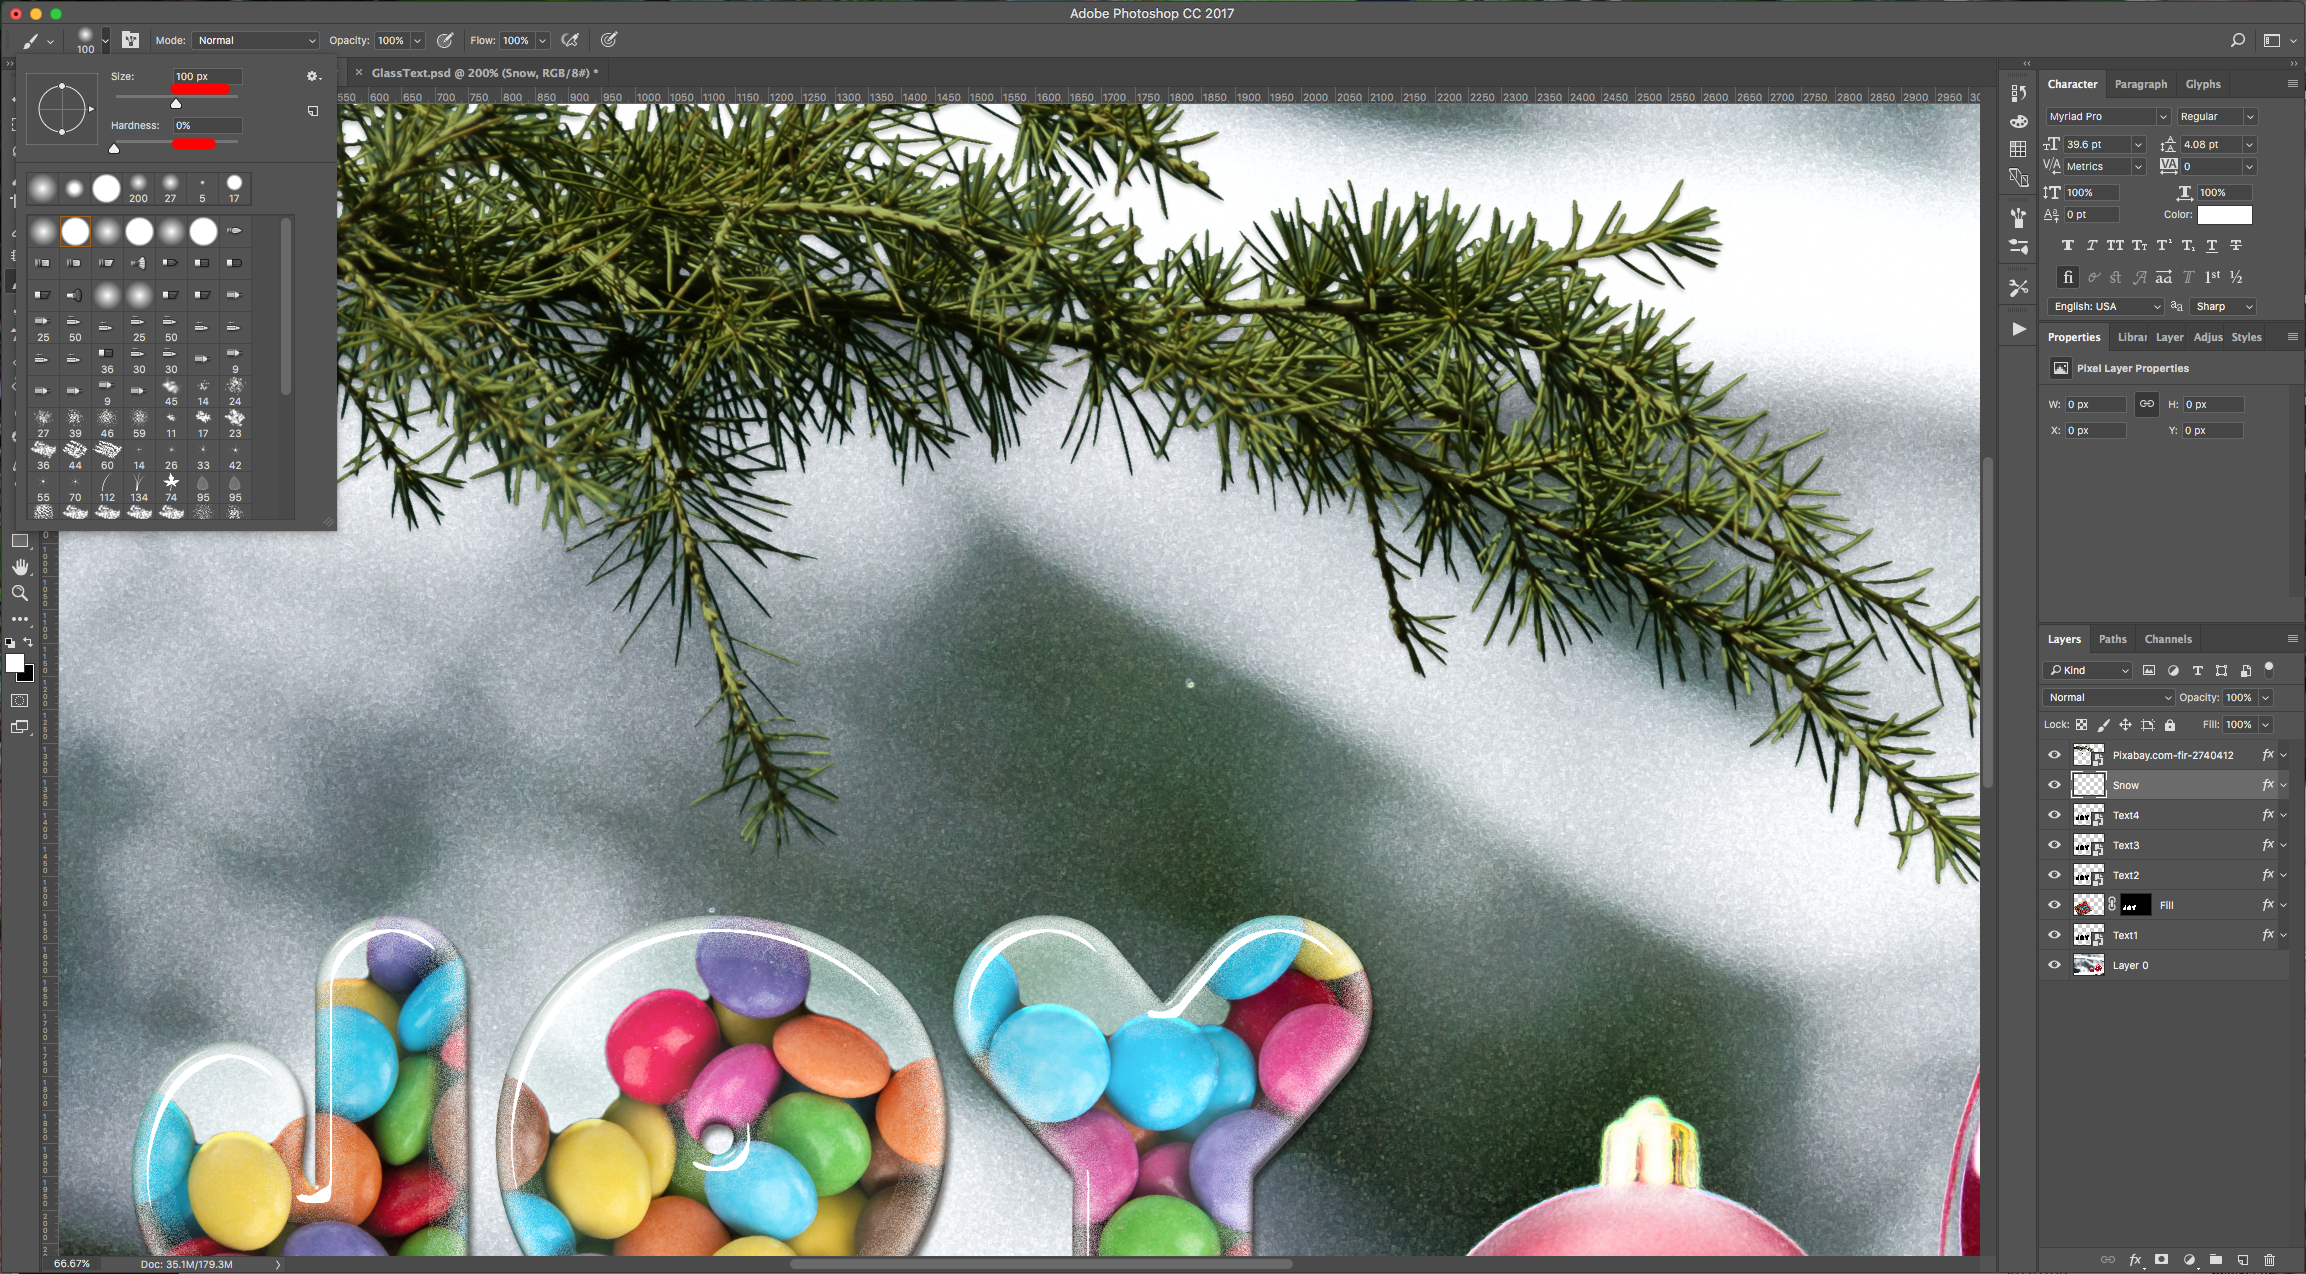
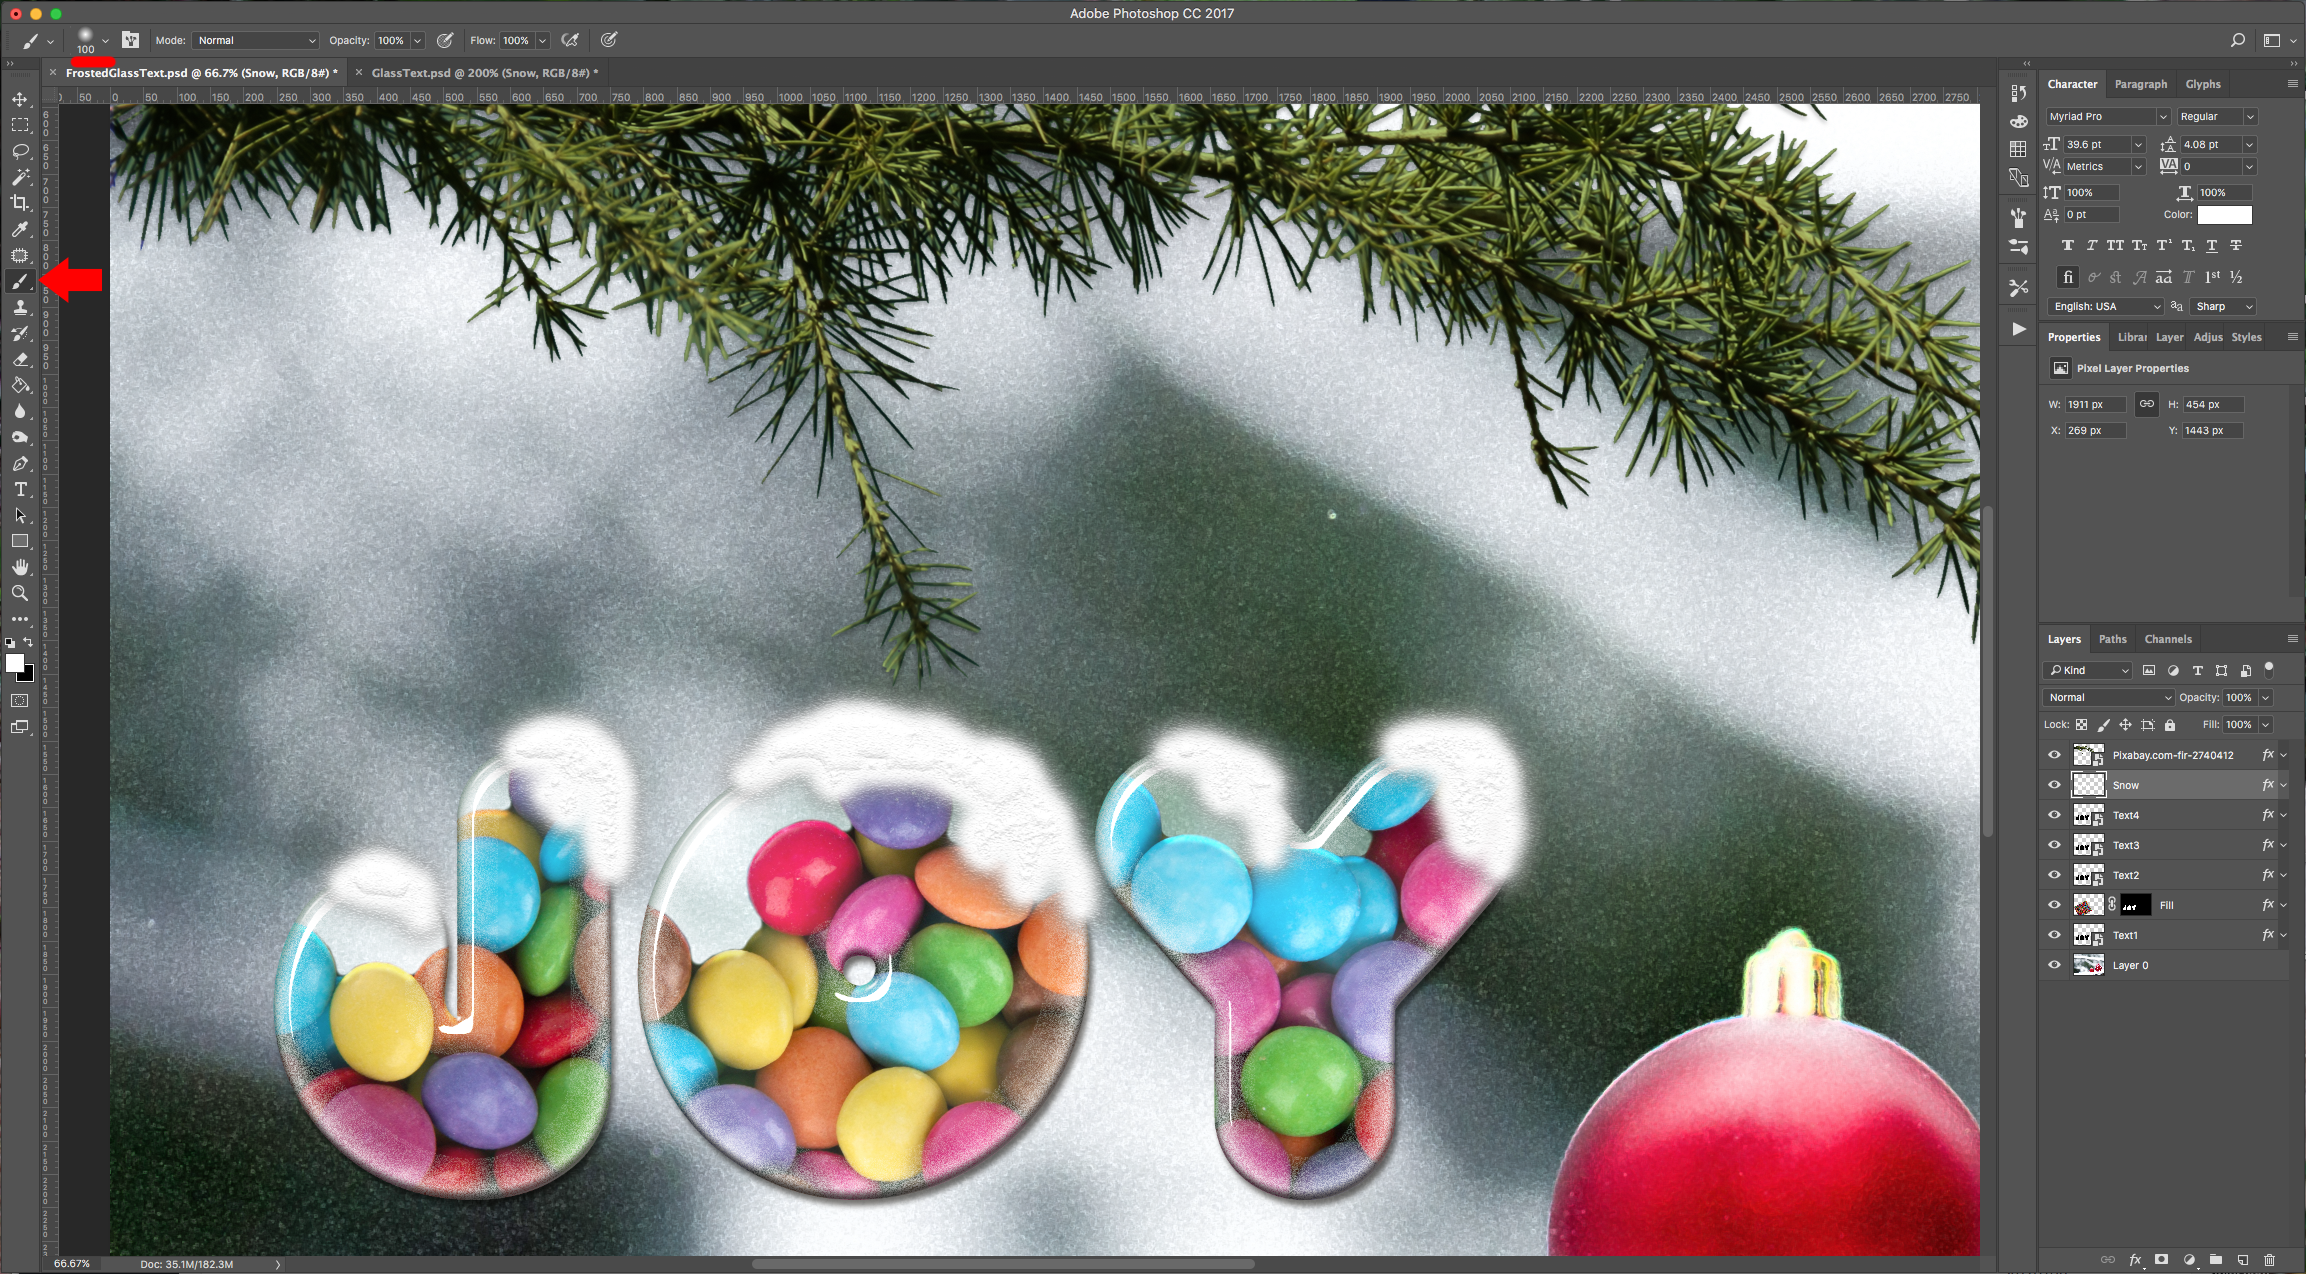
12 - Then, select the “Brush Tool” (B) and with a soft brush “paint” some snow on top of your text.
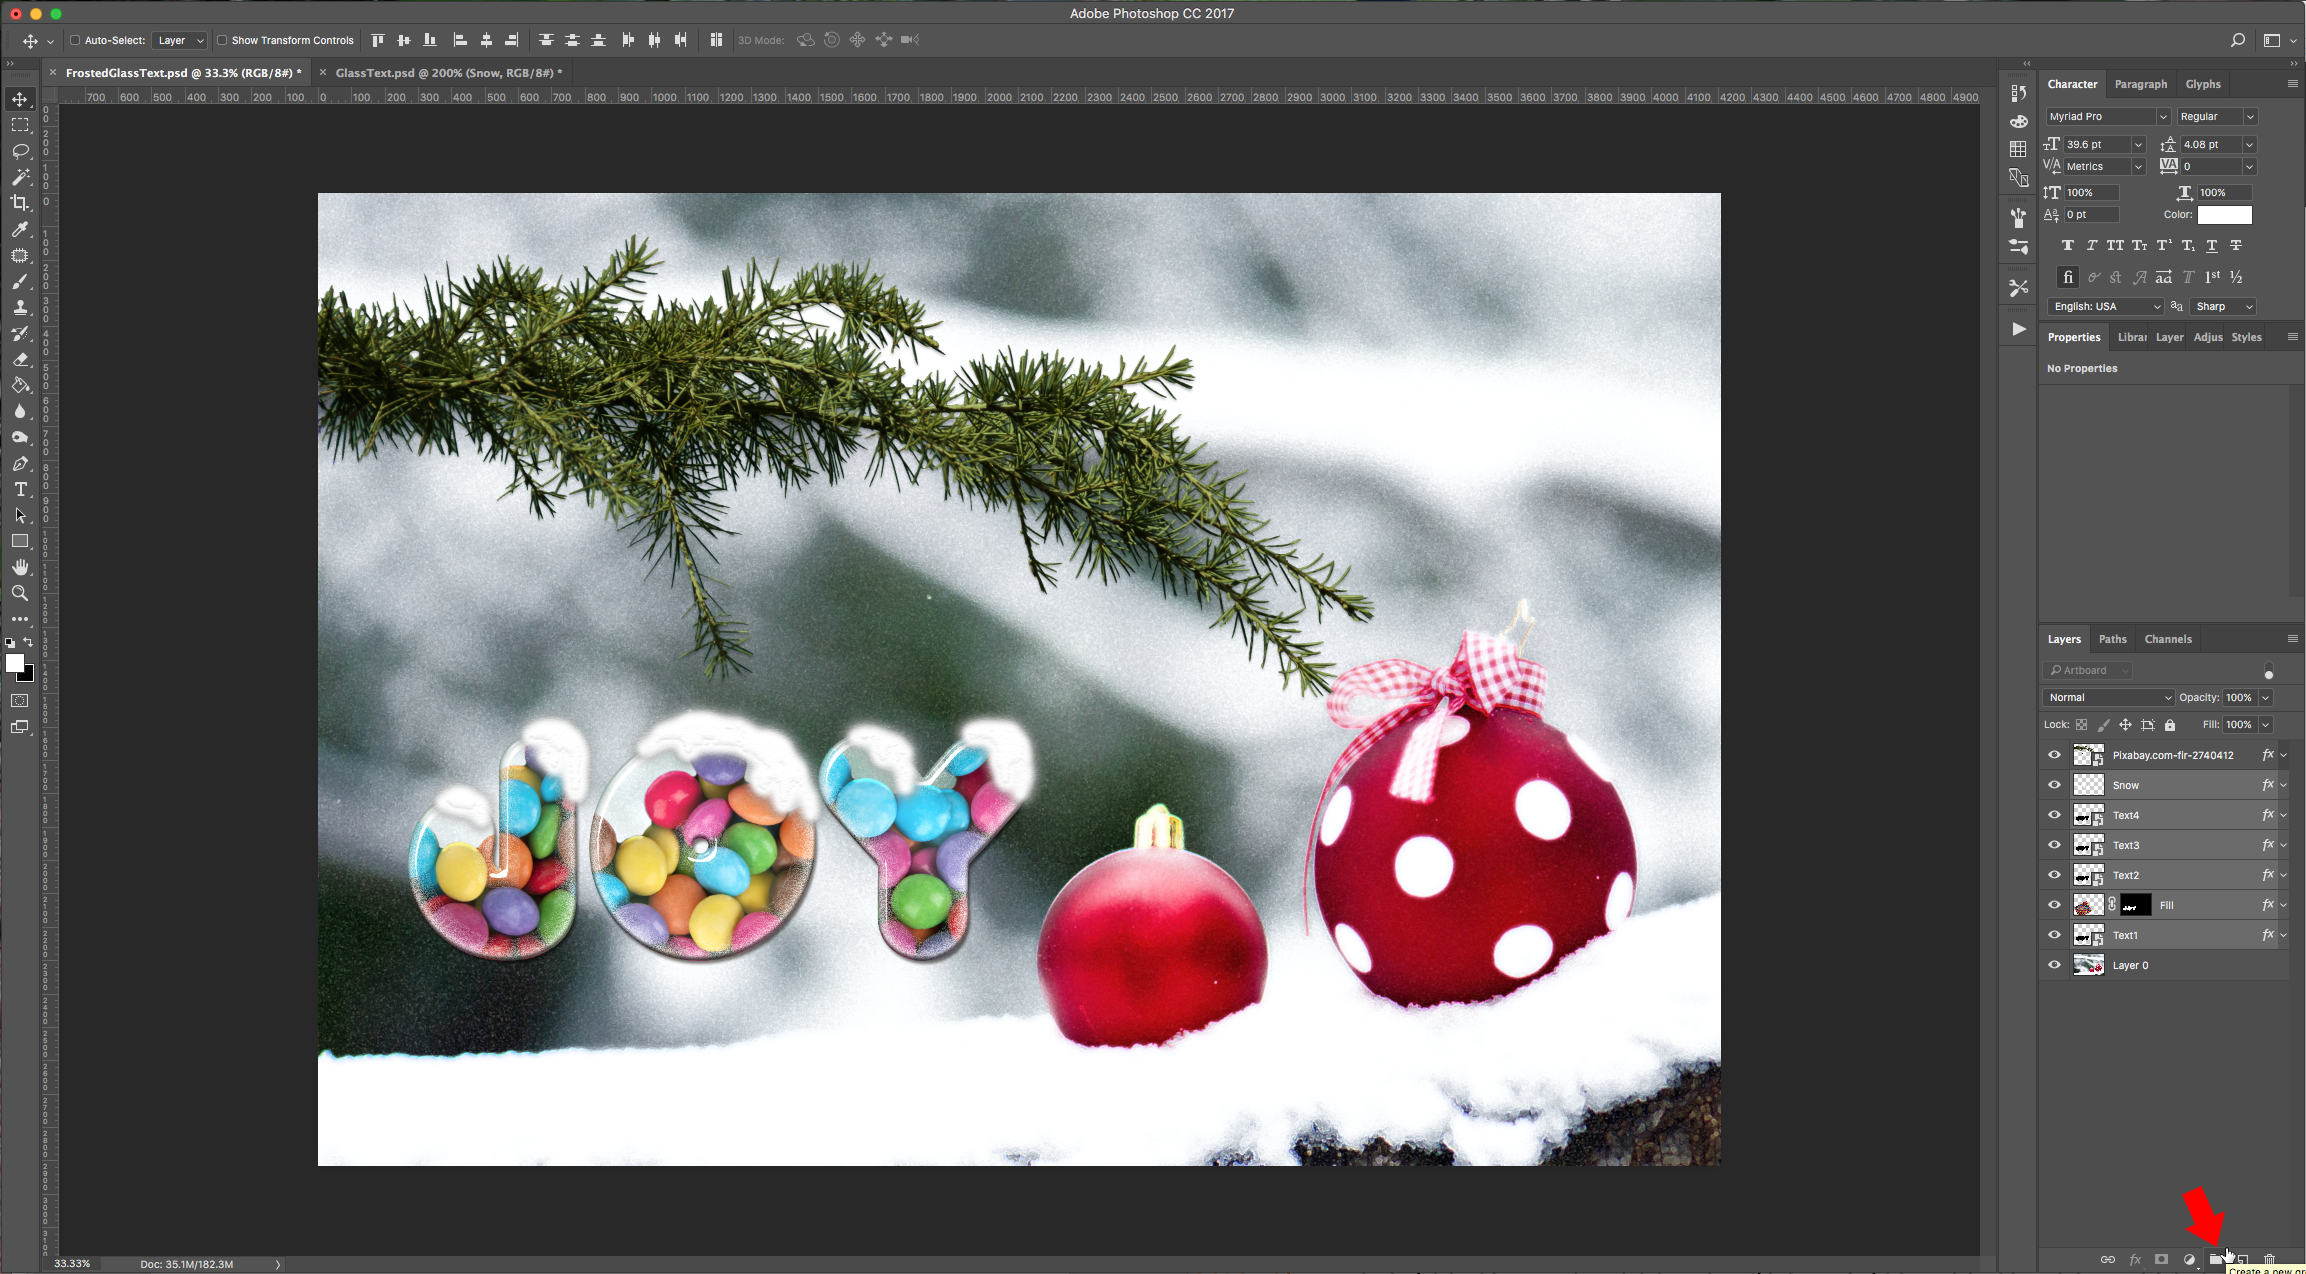
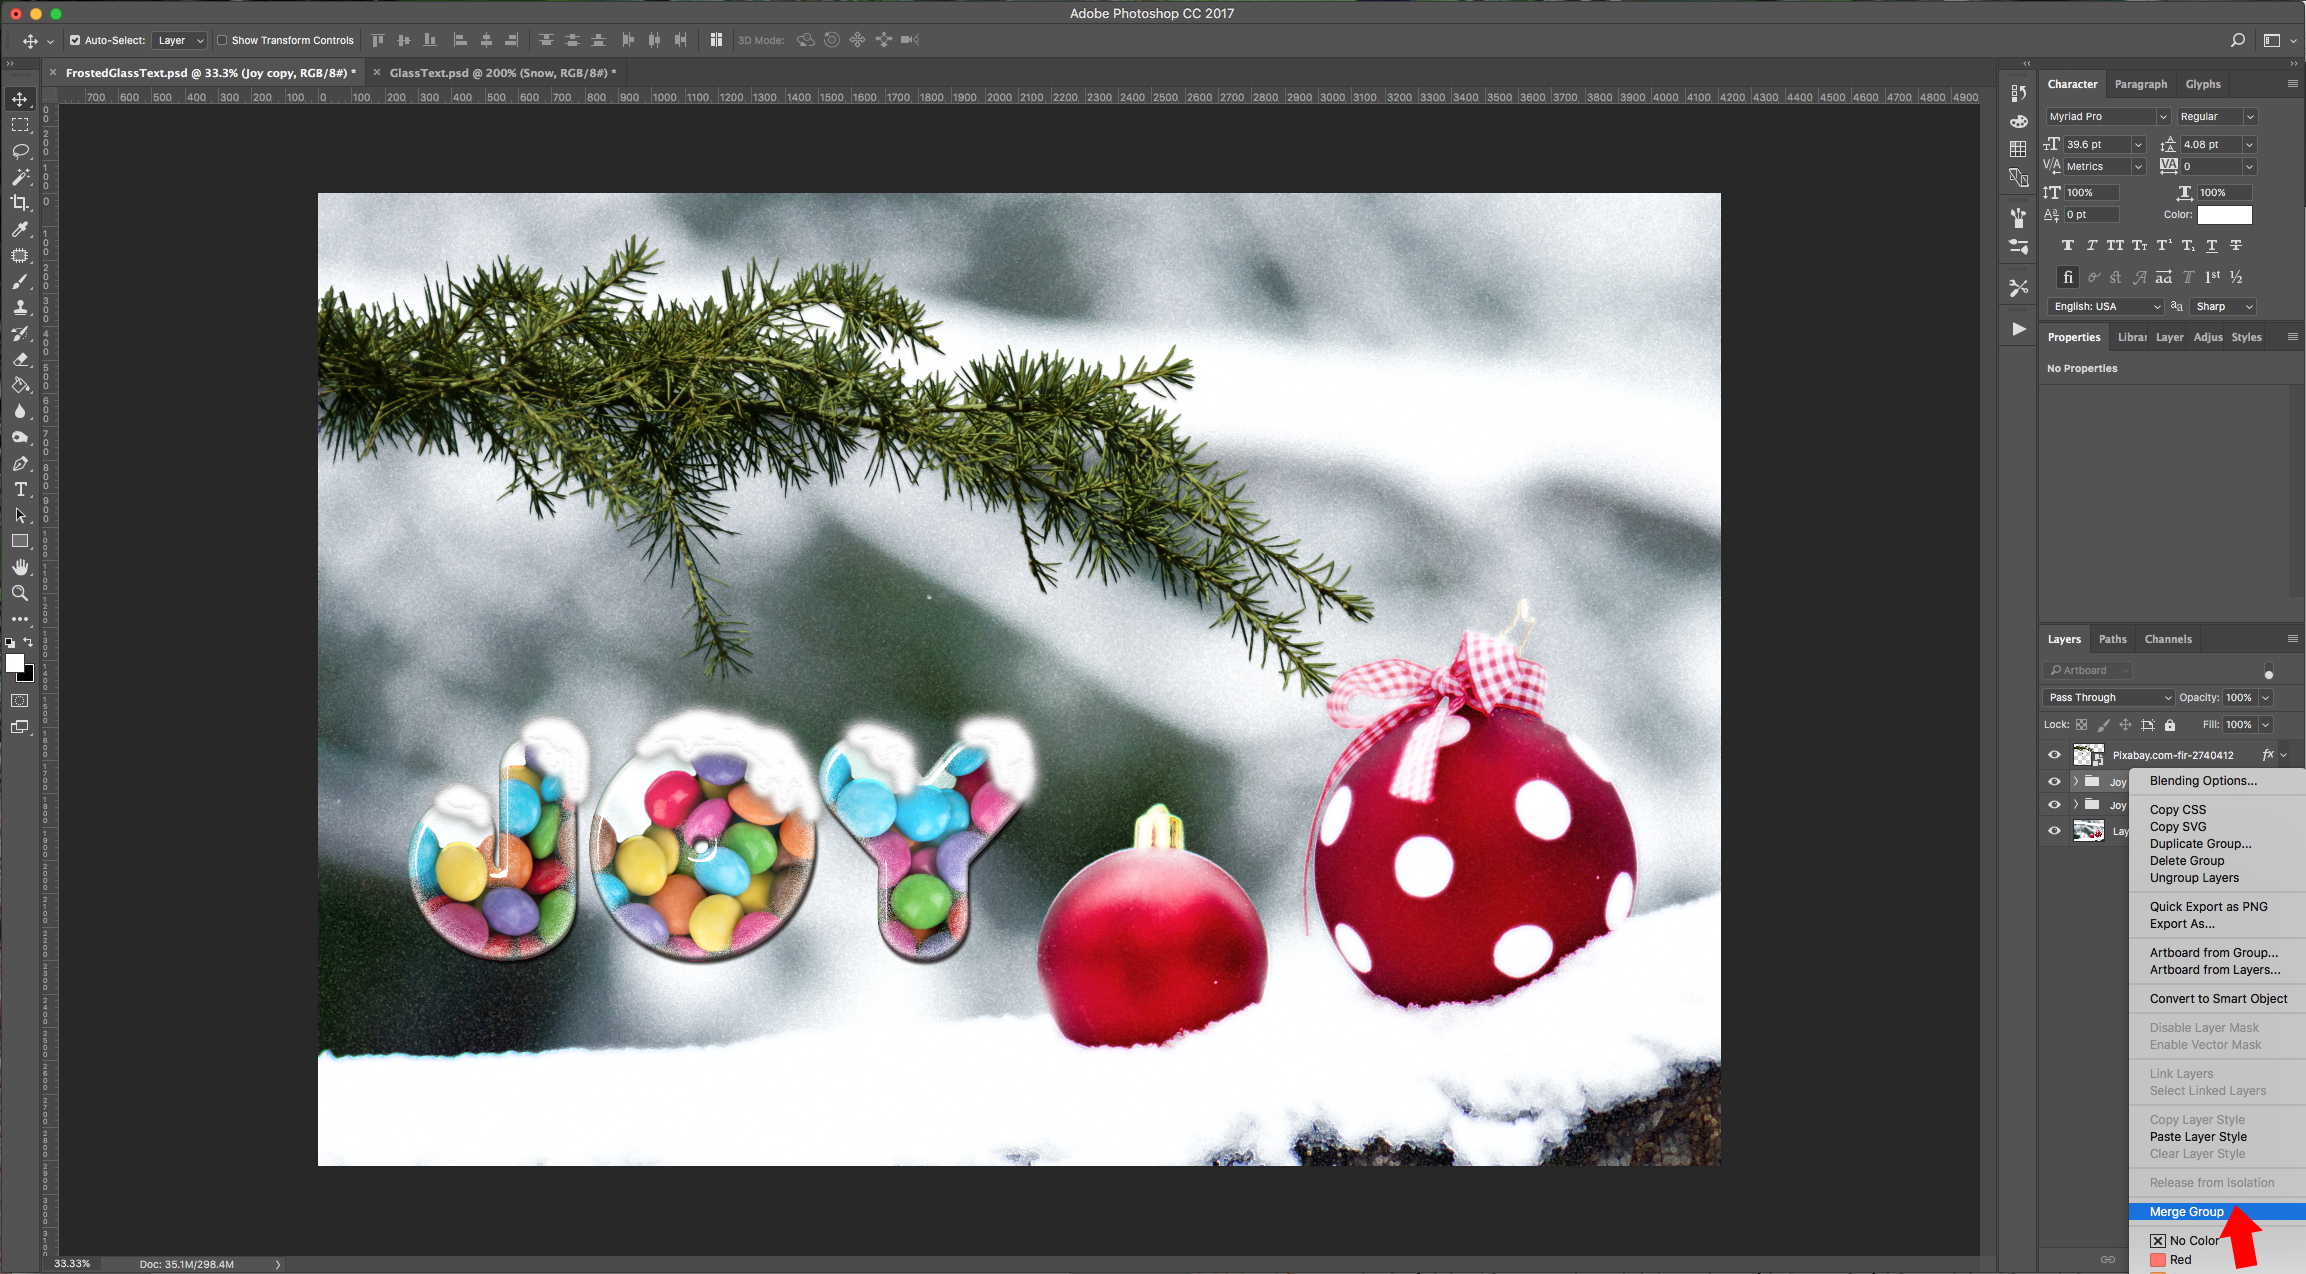
13 - In order to place each letter in a different position you will need to “Flatten” the layers first. Select all your “Text”, “Fill”, and “Snow” layers and click on the little folder icon at the bottom of the “Layers” menu. Then duplicate it (Command/Control + J) and hide it. Select the duplicate and right-click on it, then choose “Merge Group”.
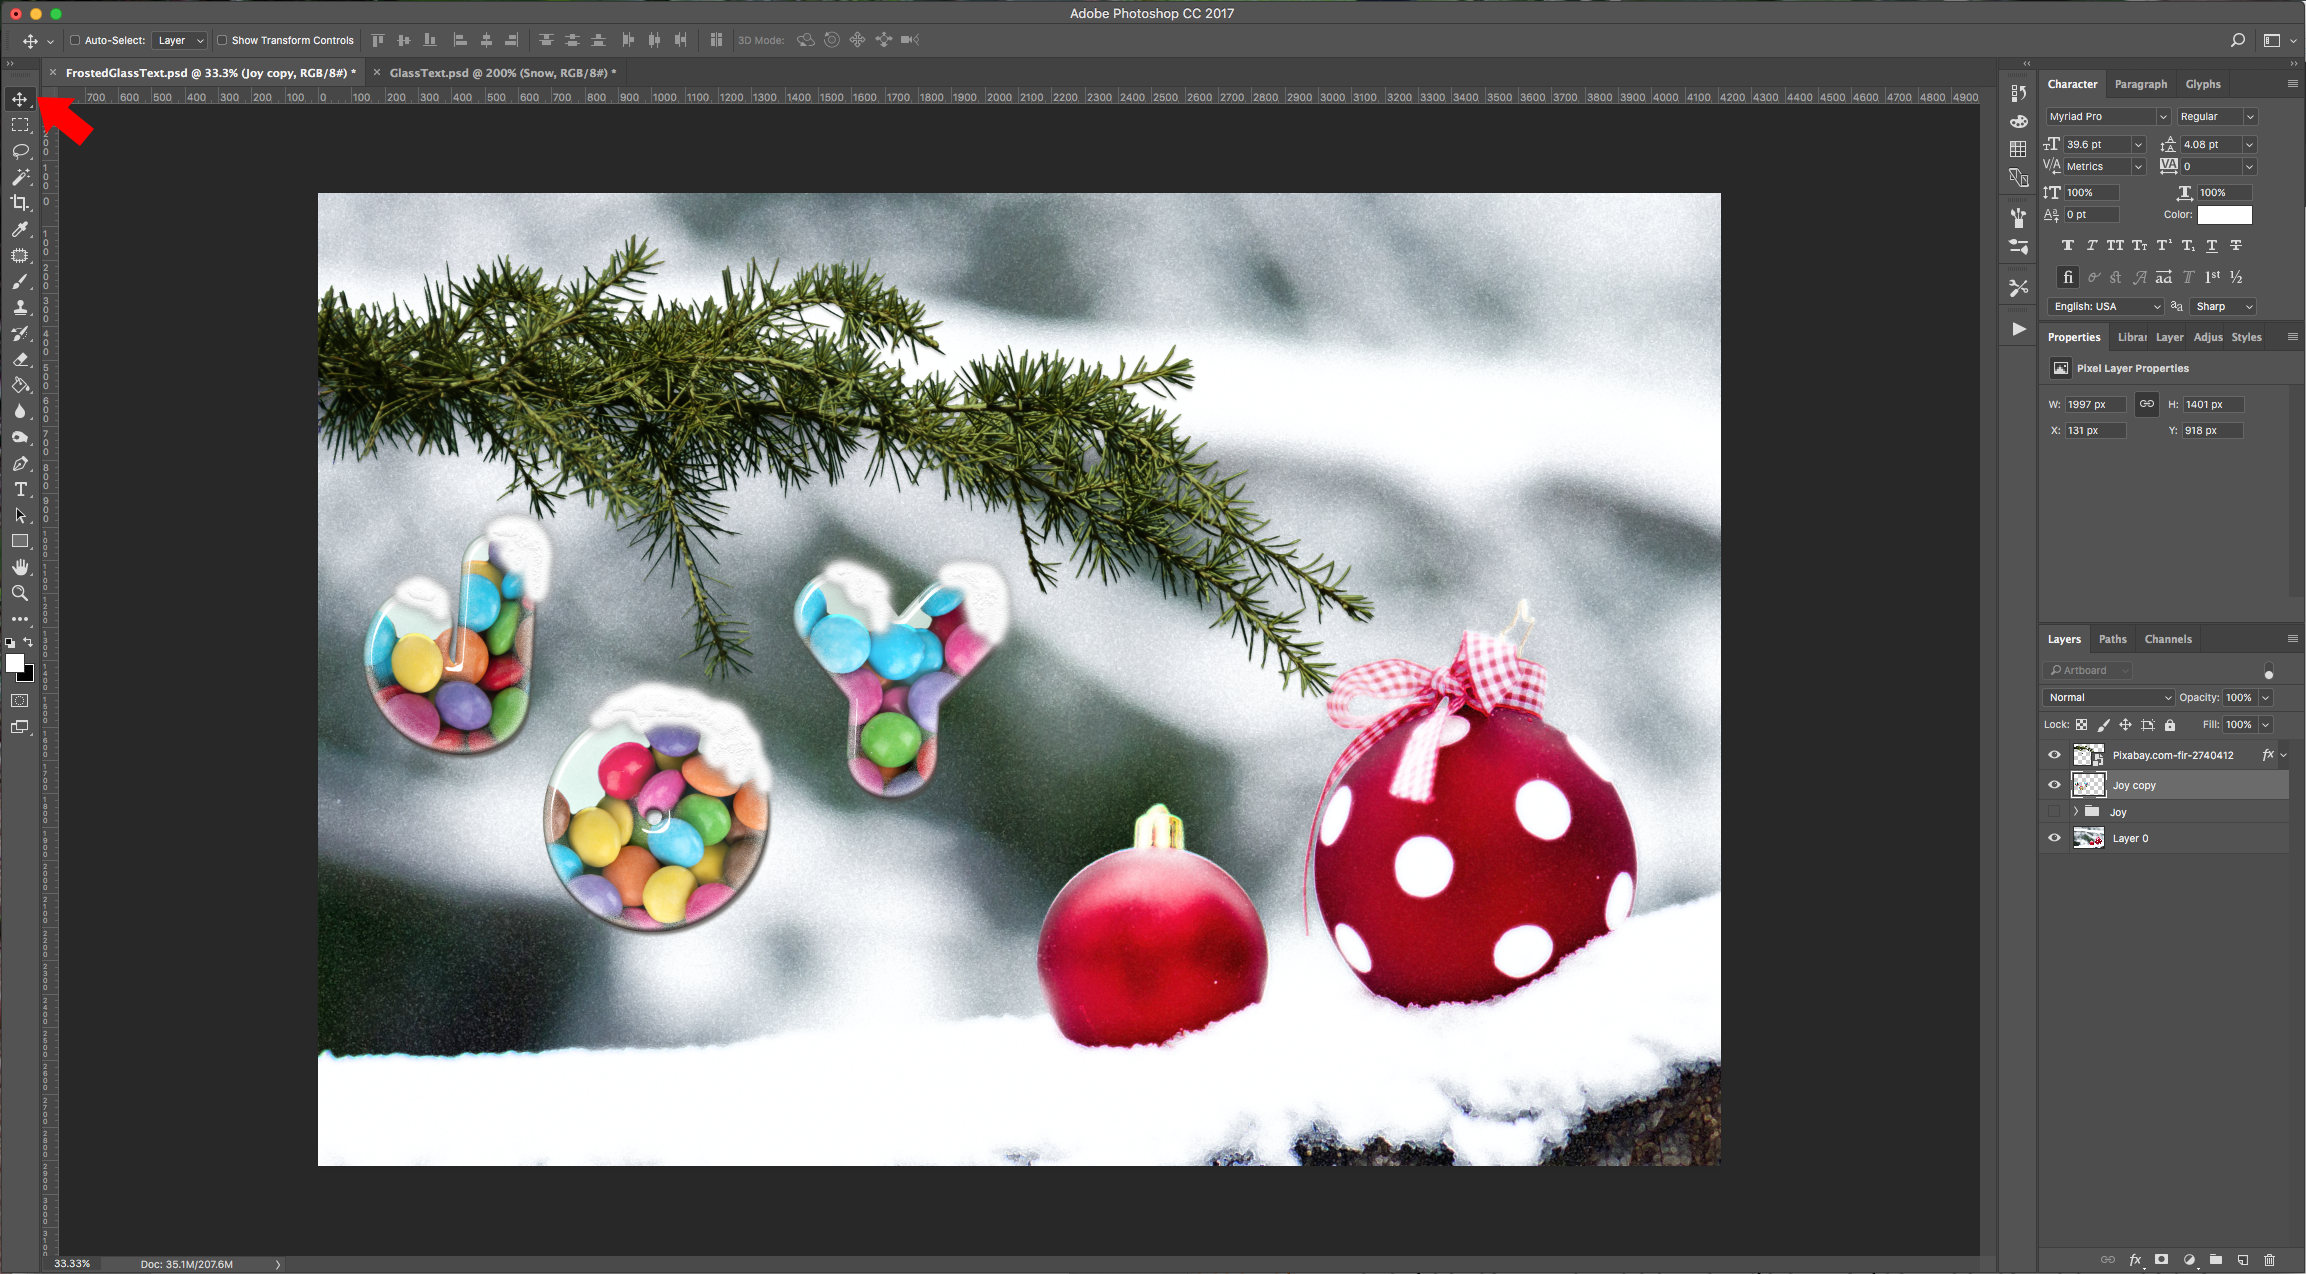
14 - Now you can use your “Lasso Tool” (L) to select each letter and place it to your liking.

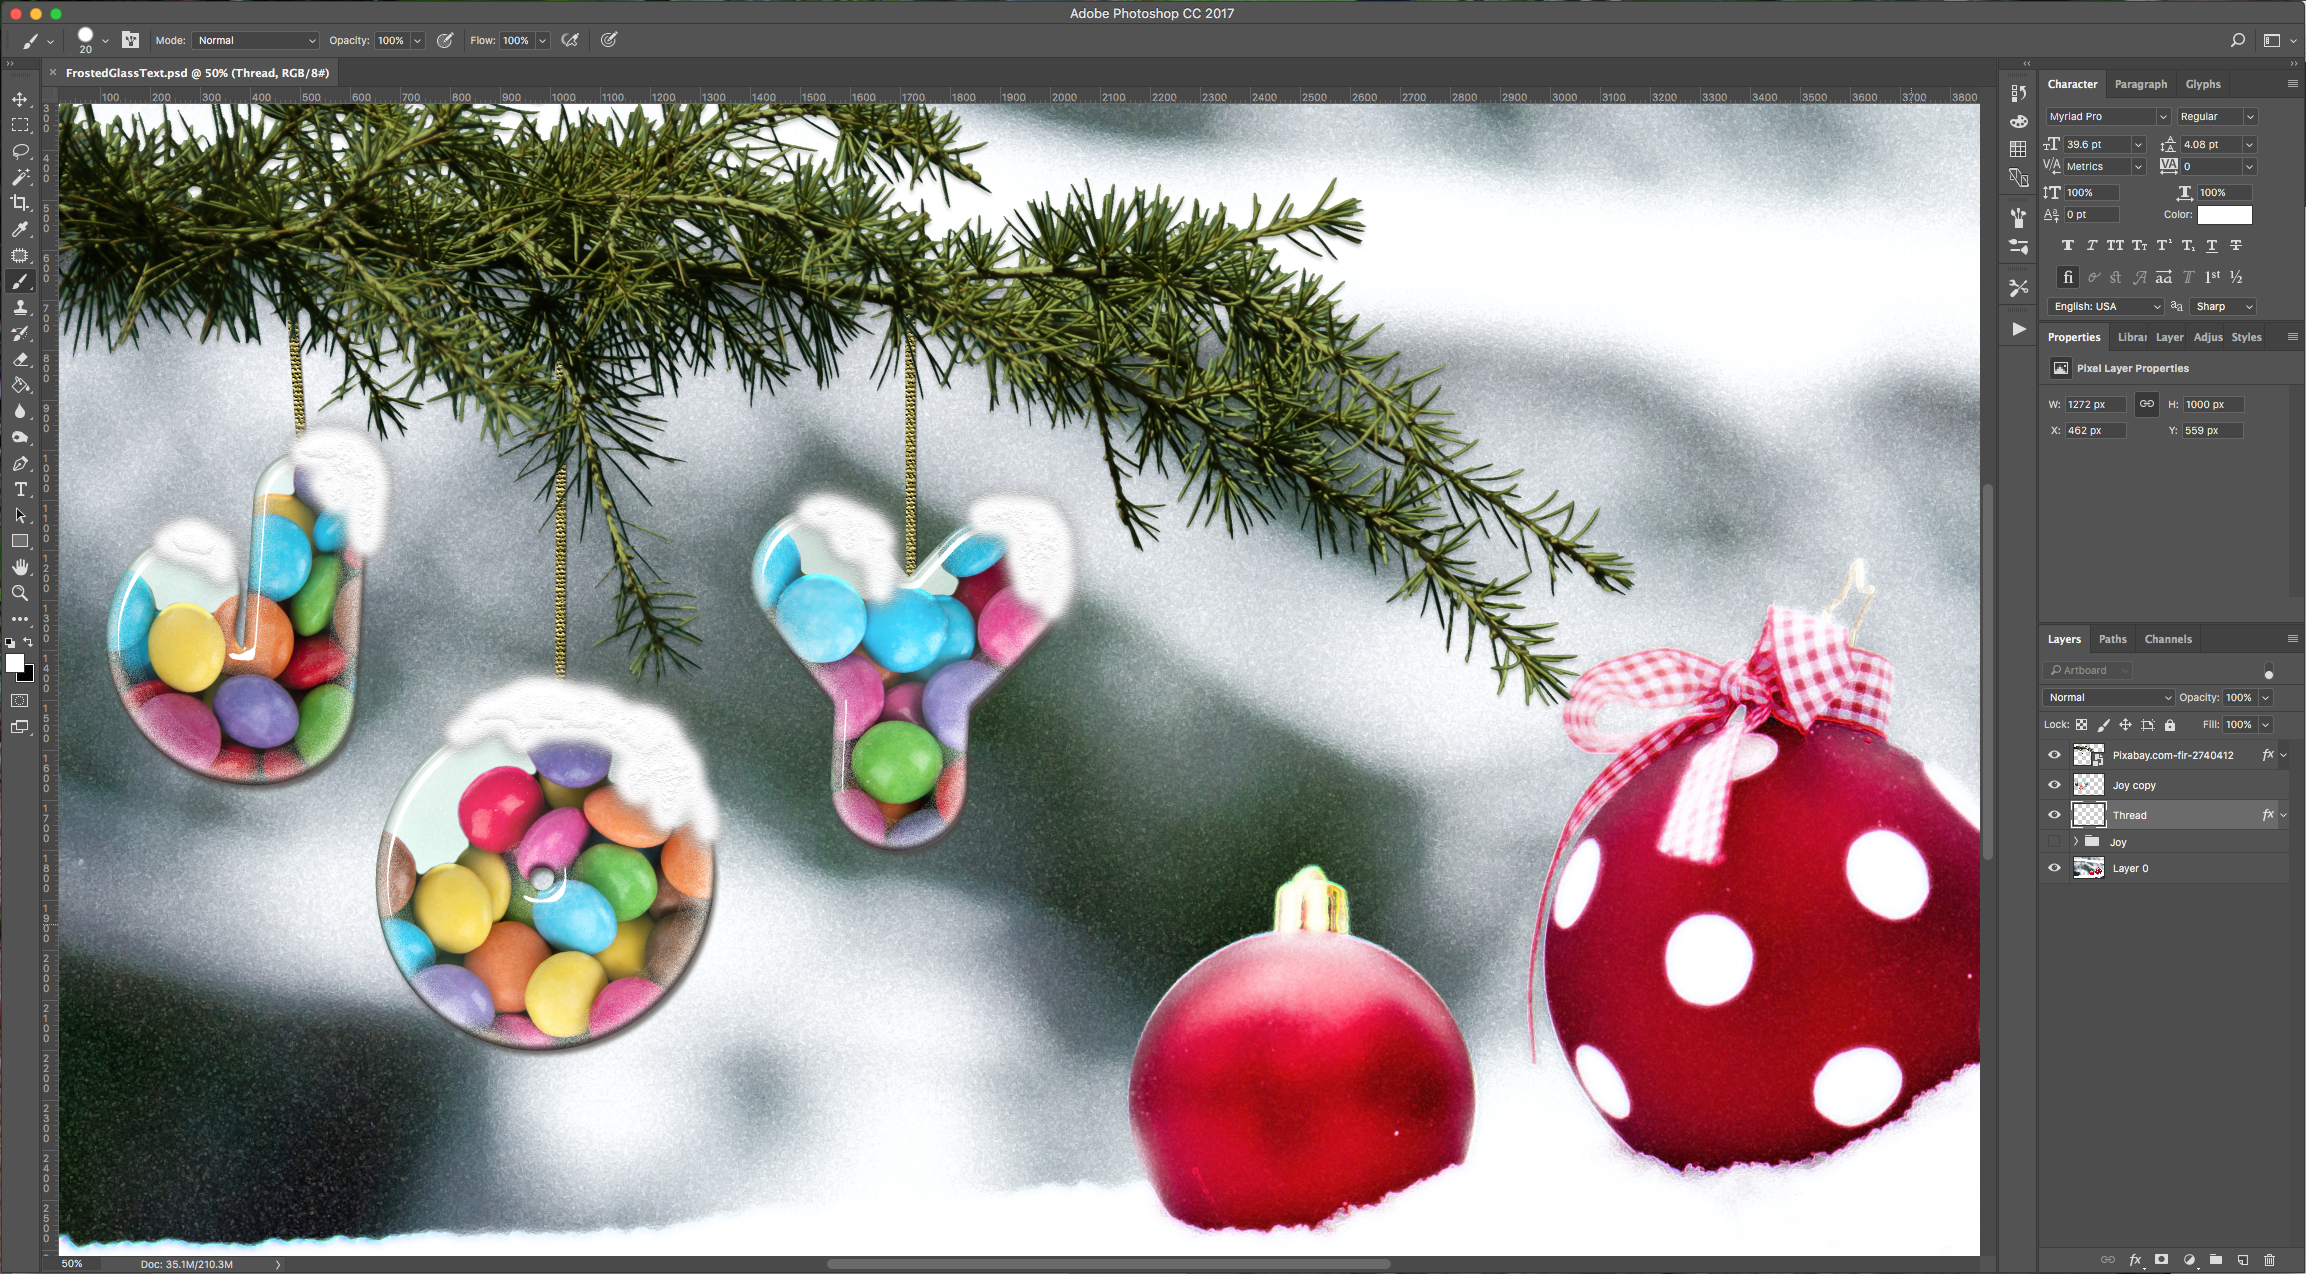
Then add a “New Layer”, place it under your letters, and choose a hard brush to draw some lines from the branch to the letters. Then apply the following “Layer Styles”:

Bevel & Emboss: (#000000)

Texture:
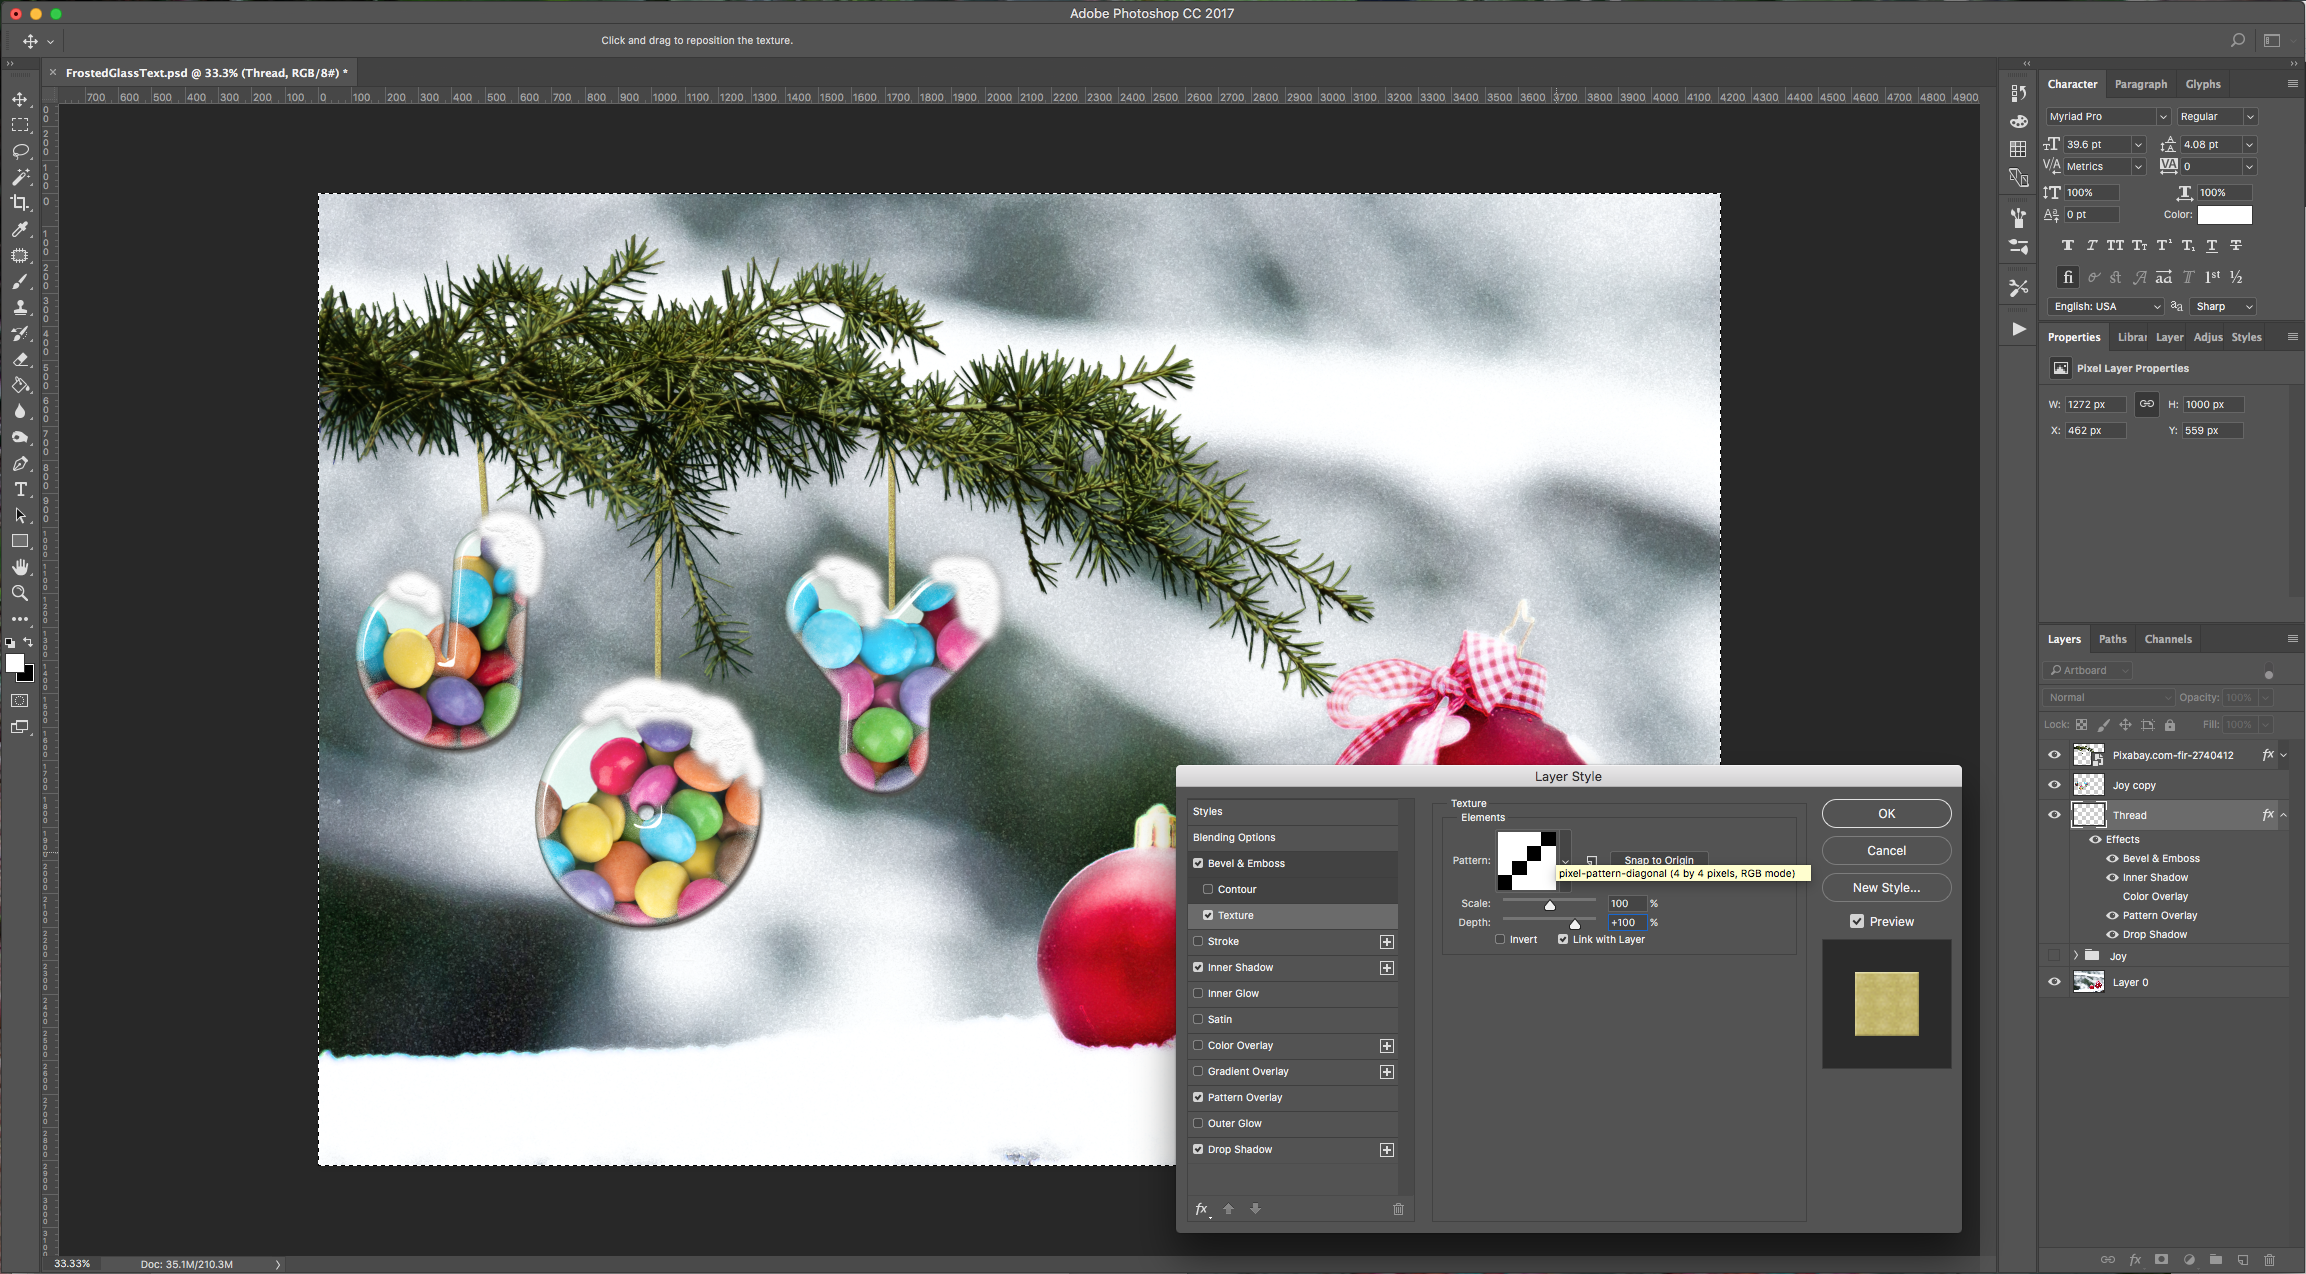
Inner Shadow: (#000000)

Color Overlay: (#dbc12e)

Pattern Overlay:
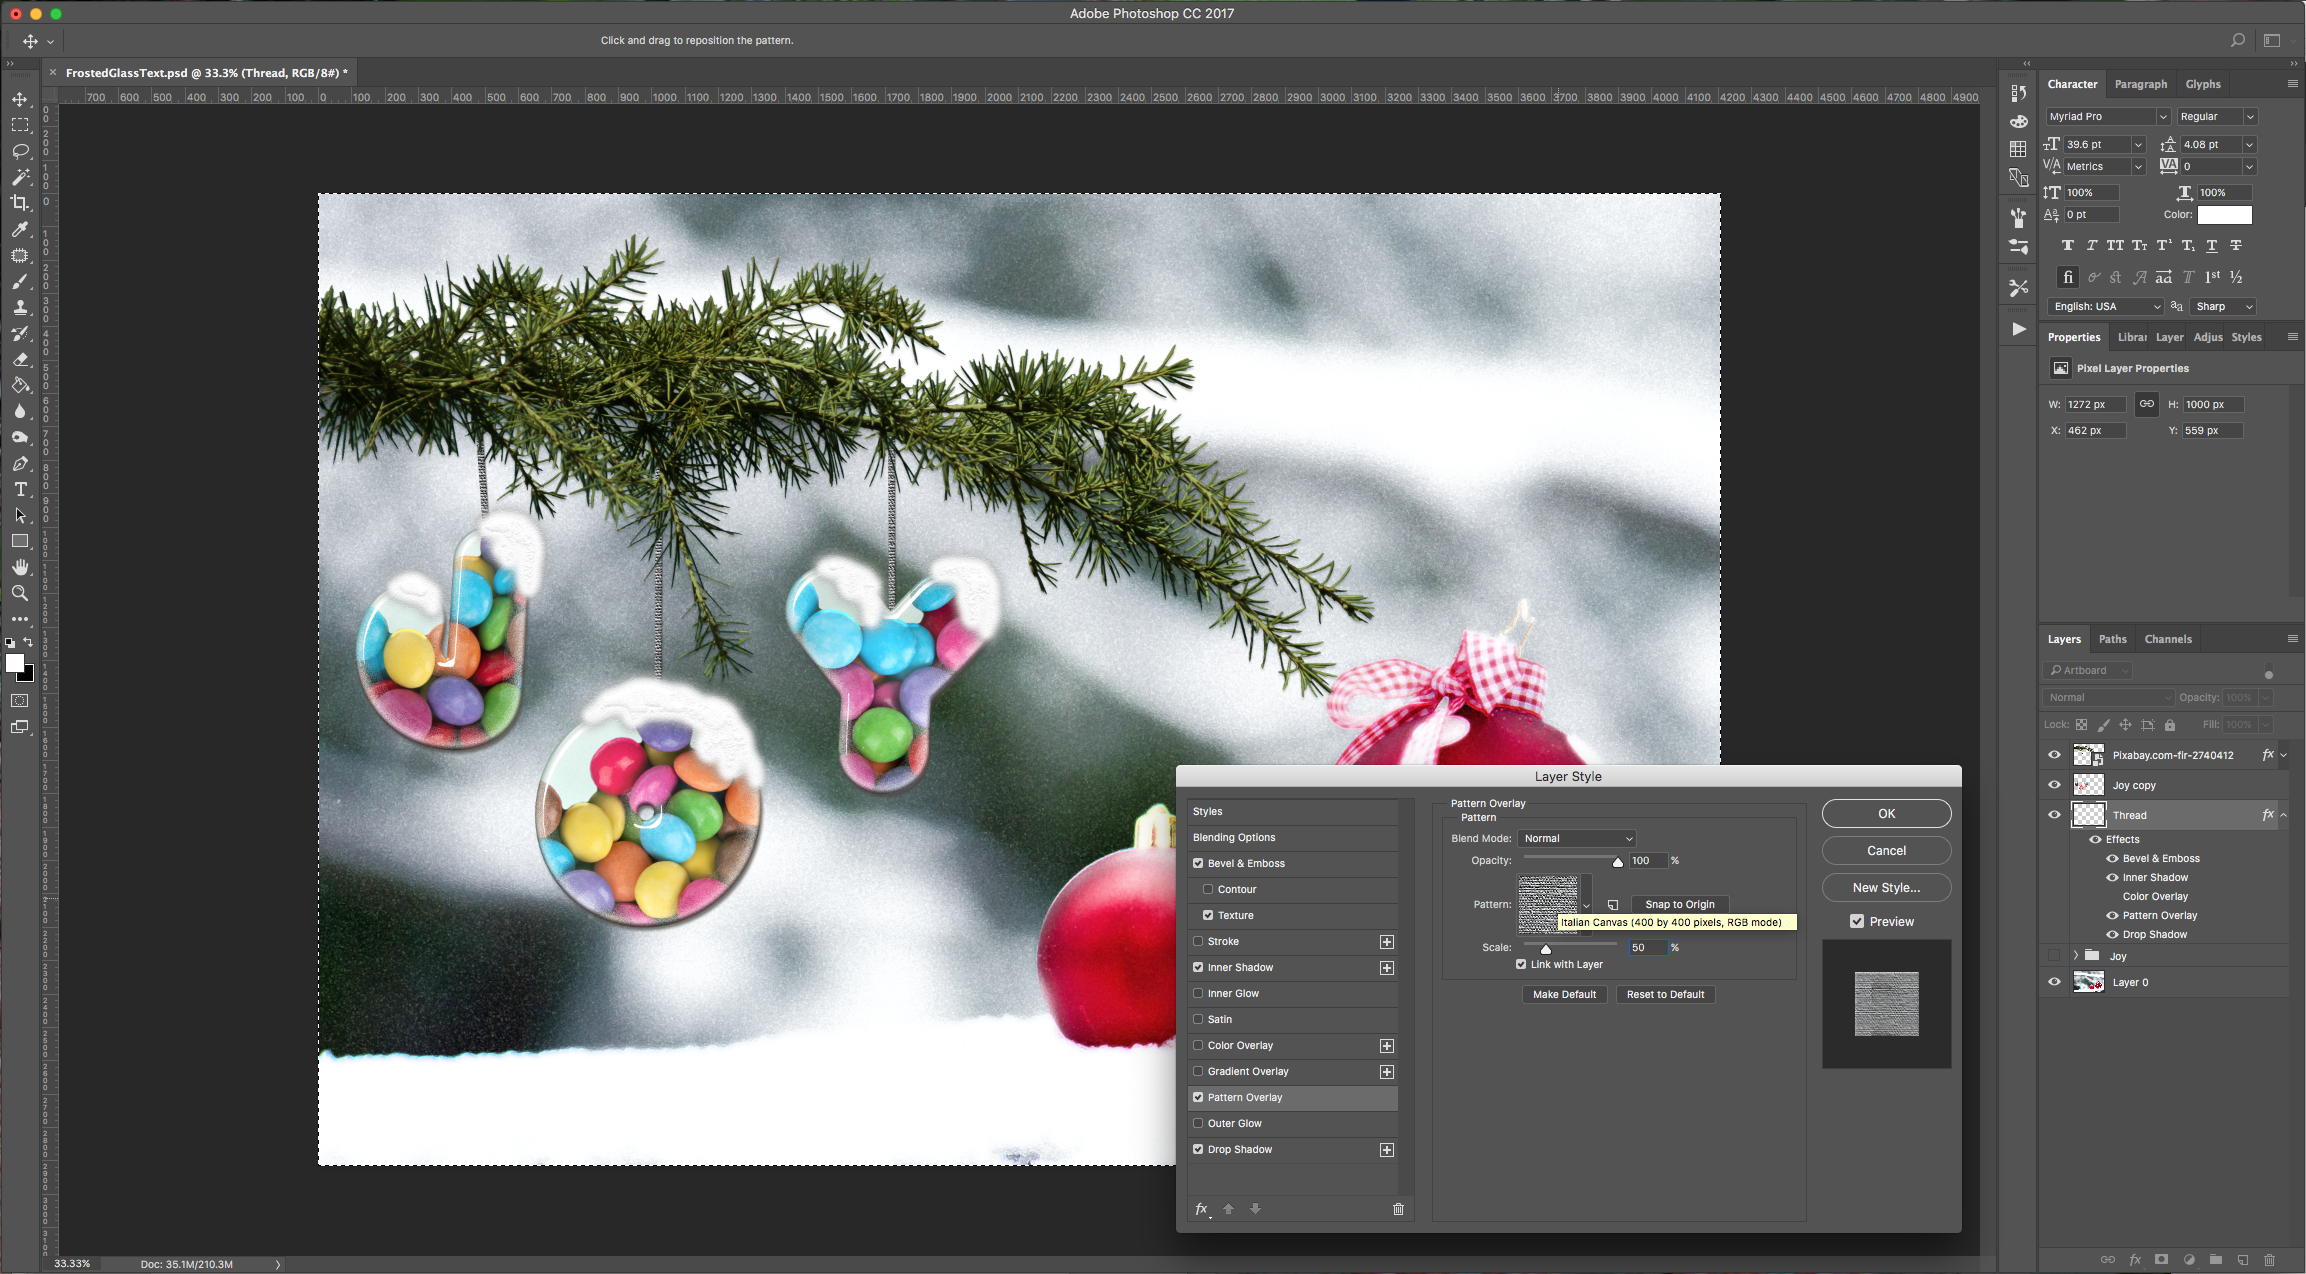
Drop Shadow: (#000000)

15 - Check your work:
1 - Open your background image, (we pasted the outlined branch into our document and added a basic “Drop Shadow” by using the default values in the “Layer Styles” dialog. Then type your text using the “Type Tool” (T), use a size the fits your artwork and you can use any color.
2 - Right-click on the type layer and convert it to a “Smart Object” and name it “Text1”. Make 3 duplicates (Command/Control + J) and name them: “Text2”, “Text3” and “Text4”.
3 - Double-click on “Text1” and apply the following “Layer Styles”: (you can turn off the other layers clicking on the little eye icon to the left of the layer’s thumbnail to check out your work)
Color Overlay: (#ffffff)
Drop Shadow: (#4b4741)
4 - Now, do the same on “Text2” and apply the following values:
Bevel & Emboss:
Inner Shadow: (#292924)
Inner Glow: (#ffffff)
Gradient Overlay: (#ffffff) (From left to right: Opacity 0 - Location 0, Opacity 20 - Location 10, Opacity 0 - Location 20, Opacity 30 - Location 30, Opacity 0 - Location 40, Opacity 30 - Location 45, Opacity 0 - Location 70, Opacity 50 - Location 85, Opacity 0 - Location 100
5 - Now, for “Text3”:
Bevel & Emboss:
Contour:
Inner Shadow: (#170f0f)
Color Overlay: (#a4f8d5) (use a color out of your background)
6 - And, for “Text4”:
Inner Shadow: (#000000)
7 - Create a “New Layer” just on top of “Text1” and name it “Fill”, then open the candy texture image, select all (Command/Control + A) and then paste it (Command/Control + V) into your “Fill” Layer. Select your first text layer and Command/Control-click on the thumbnail to make a selection of your text. Then go back to the “Fill” layer, and click on the “Add Vector Mask” button at the bottom of the “Layers” Menu.
8 - Unlink your layer’s mask by clicking on the small chain icon between the image and the mask thumbnails, then click on the image thumbnail and hit Command/Control + T to resize your image in case it is too big in proportions. When you are happy hit “Return/Enter” (you can re-link the image and mask now if you want).
9 - Make sure your “Layer Mask” thumbnail is selected and that your “Foreground” color is Black and select the “Brush Tool” (B) and with a hard brush “hide” some of the candy. You can change the “Size” and “Hardness” of the brush to get better results, and if you made a mistake, just change the “Foreground” color to white and fix it.
10 - Double-click on the “Fill” layer and apply the following:
Inner Shadow: (#ffffff)
11 - Create s “New Layer” on top of the “Text” ones, name it “Snow” and apply the following “Layer Styles”:
Bevel & Emboss:
Contour:
Texture:
Inner Glow: (#999999)
Satin: (#ffffff)
Color Overlay: (#ffffff)
Gradient Overlay: from #ffffff to #d3d3d3
Drop Shadow: (#000000)
12 - Then, select the “Brush Tool” (B) and with a soft brush “paint” some snow on top of your text.
13 - In order to place each letter in a different position you will need to “Flatten” the layers first. Select all your “Text”, “Fill”, and “Snow” layers and click on the little folder icon at the bottom of the “Layers” menu. Then duplicate it (Command/Control + J) and hide it. Select the duplicate and right-click on it, then choose “Merge Group”.
14 - Now you can use your “Lasso Tool” (L) to select each letter and place it to your liking.
Then add a “New Layer”, place it under your letters, and choose a hard brush to draw some lines from the branch to the letters. Then apply the following “Layer Styles”:
Bevel & Emboss: (#000000)
Texture:
Inner Shadow: (#000000)
Color Overlay: (#dbc12e)
Pattern Overlay:
Drop Shadow: (#000000)
15 - Check your work:
by @lornacane


