
How to Add Glitter to Images in Photoshop
Learn how to add glitter to your images in Photoshop with this tutorial.
In today’s tutorial, we are going to learn how to add glitter to your digital images with the help of Photoshop. This is a really fun way to add sparkle to your photos and make them unique. They will make splendid gifts for your friends and family or a cool memento from an important occasion!

We will use some digital glitter papers and the image of some people launching confetti both from the Plus Hub. You can also pick something else from our variety of digital scrapbooking papers and our photos of people collection to play around with this effect.
Step 1 - Import the Glitter Texture
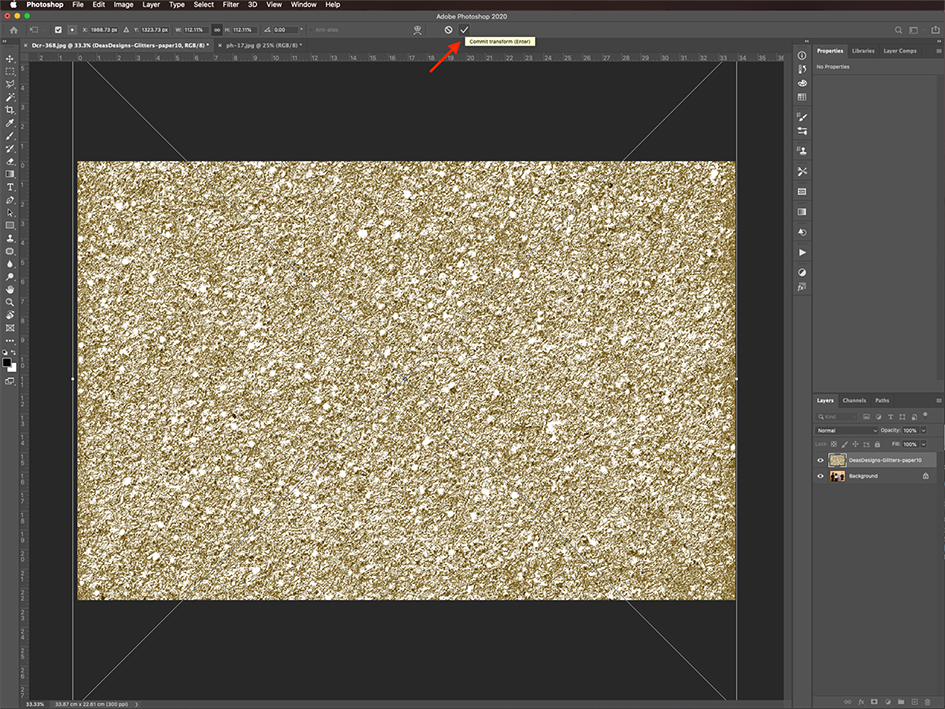
First, open your image in Photoshop, and drag your glitter texture onto the canvas. When the import box pops up select Smart Object.

Step 2 - Resize the Glitter Texture
Resize and/or rotate the glitter texture to fit your document if needed. After you are done, hit Enter or click the checkmark on the top menu.
Step 3 - Change the Texture Blending Mode
Now, we need to change the Blending Mode of the glitter texture so it looks good on top of the background image. Depending on the color of the background, you may need to use a different mode. In this case, we used Hard Light.
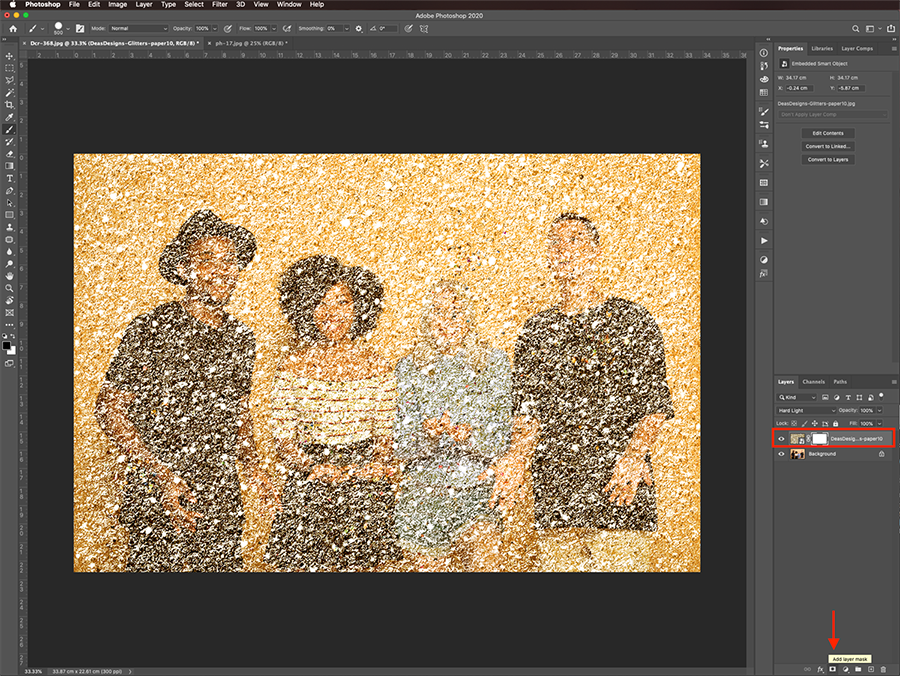
Step 4 - Add a Layer Mask to the Glitter Layer
We want to remove the glitter texture from the main subject of the image. To do it, click on the thumbnail, and go to Select > Focus Area and play around with the settings to make your selection.
Or, you can use any other method you prefer to select your subject such as theMagic Wand or the Quick Selection tool.

Step 5 - Remove the Glitter Texture from Your Subject
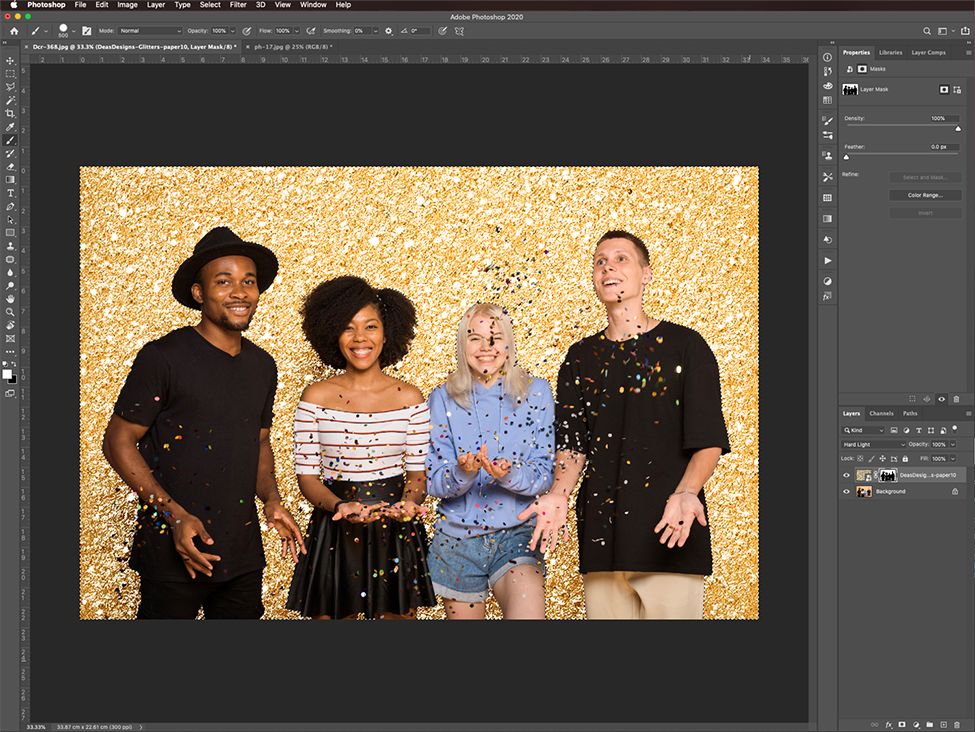
Now, we can use a large and hard brush to paint the selected areas with black on the Mask thumbnail and remove them from the glitter texture layer.

Fix the Masked Areas if Needed
If you notice that your subject is not properly outlined and that certain areas of the mask need to be adjusted, just Swap (X) the Foreground and Background colors in the Toolbar and use white to bring out hidden areas and black to hide them.

Now, your glitter texture should cover only the background.
Step 6 - Adjust the Glitter Layer Appearance
If the glitter texture is too strong, you may want to lower its Opacity a bit. We changed ours to 80%.

Step 7 - Add More Shine with a Second Glitter Layer
To add a bit of sparkle to the whole background image, select another glitter texture and bring it onto your document. Place the texture on top, then change its Blending Mode to one that suits your needs. We used Divide with ours and a 30% Opacity value.
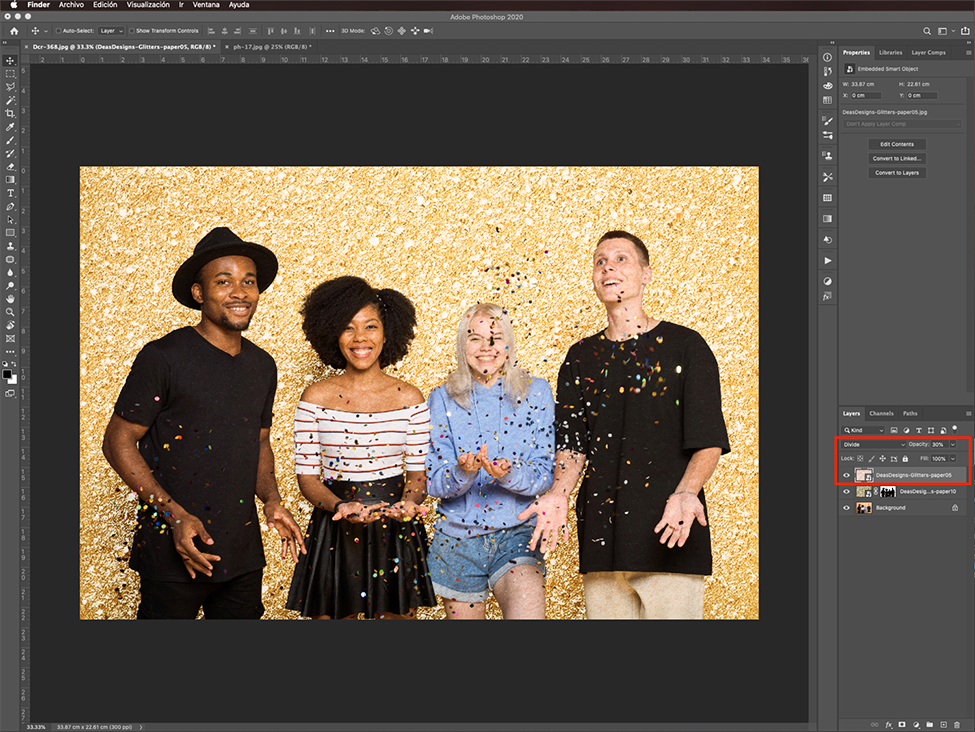
That’s it, you added some nice shine to your image in no time!
Next up, check out our other Photoshop tutorials on making a peeling sticker effect, creating an animated GIF, and changing the color of objects.


