How to Create Your Own Single Line Designs in Canvas Workspace to use with the Foil Quill
*CM900 model used.
1- Open canvas workspace. You can start your own design by either importing an SVG to alter or import a image to trace.
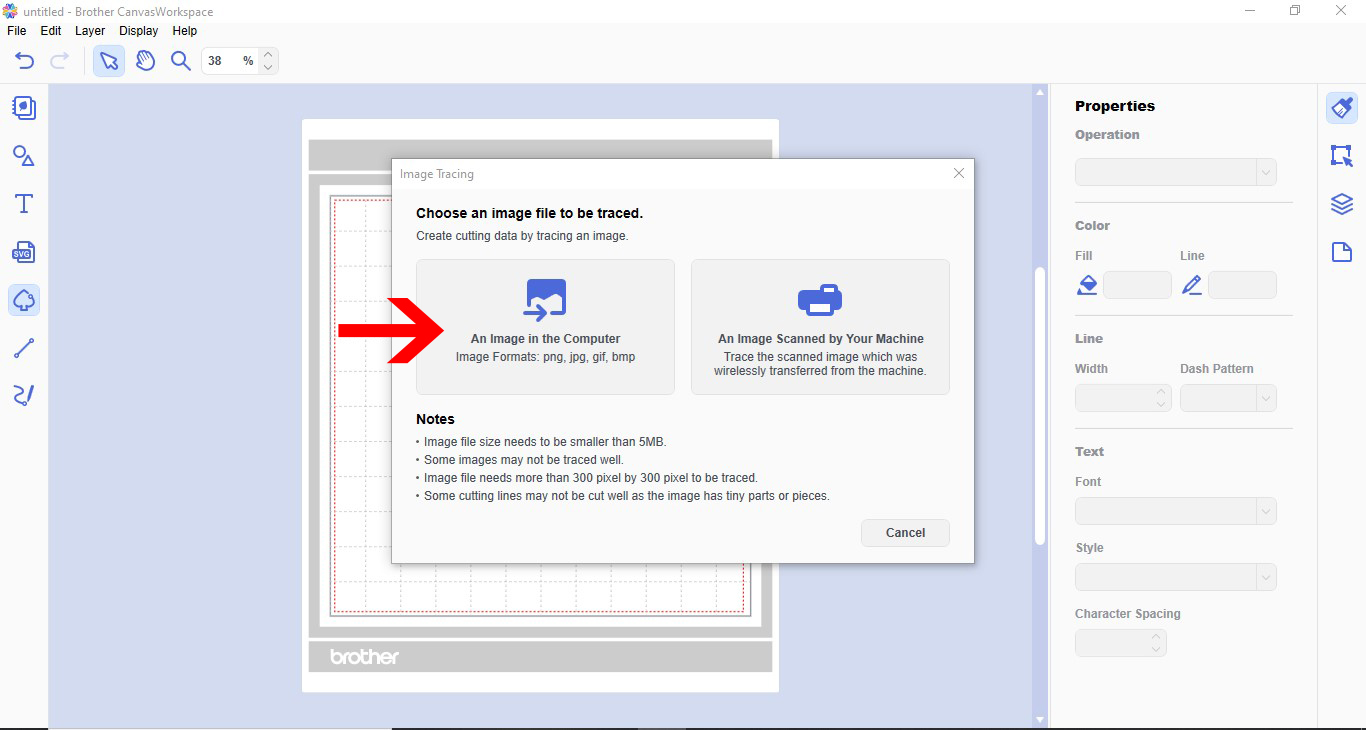
2- For this design I will be using an image to trace. Click the image tracing icon.
3- A new window will appear. you can import via the PC or USB. I will import an image via the PC.
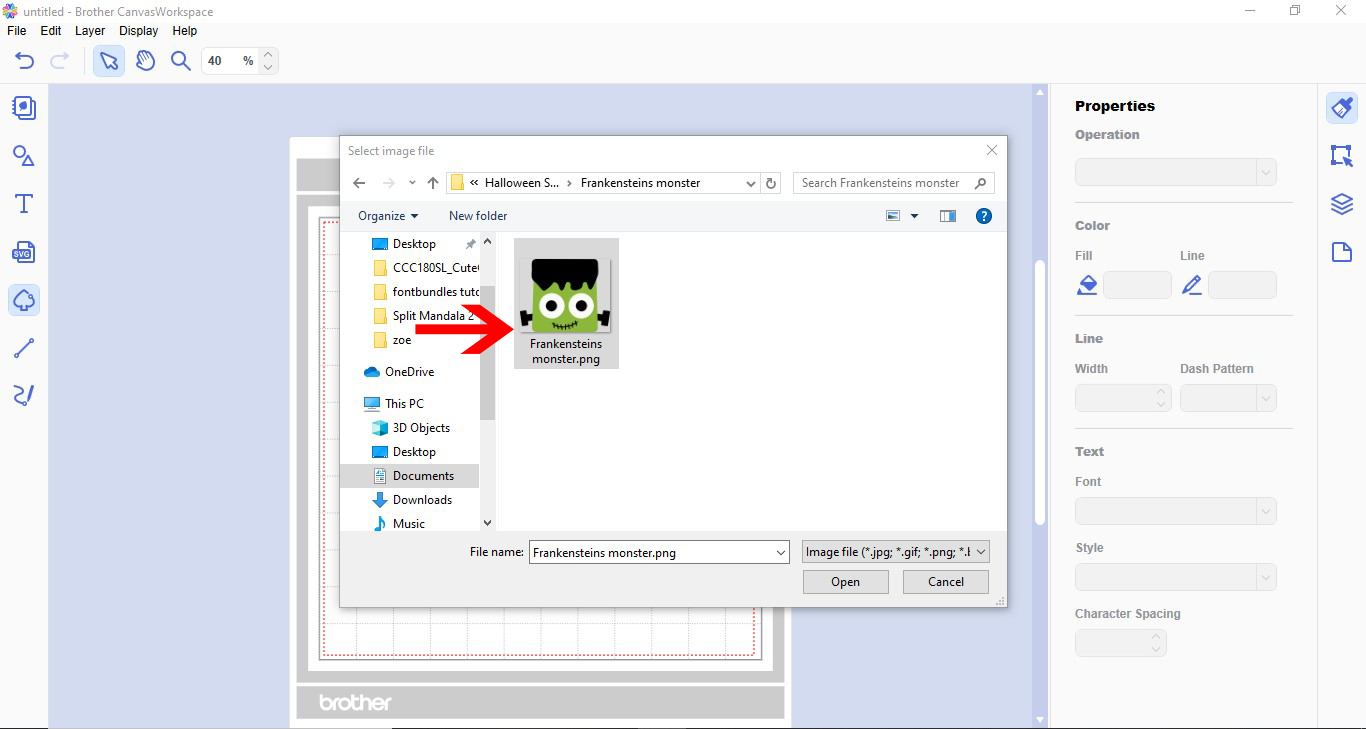
4- Select your design. I am using an image from the Halloween and Fall Mini Bundle.
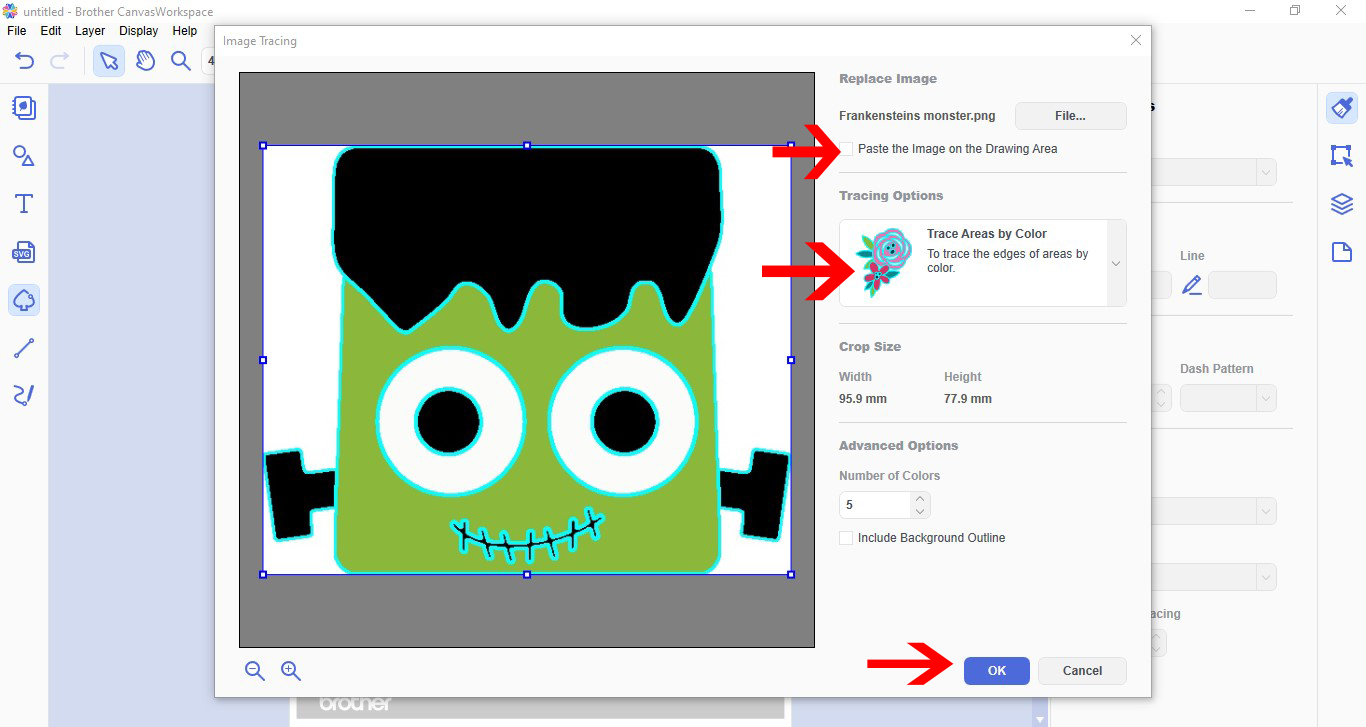
5- In the trace screen, your image will appear. Uncheck paste the image to the drawing area box. Next select trace by color. Change the number of colors if you need too. Once you are happy with the trace, click OK.
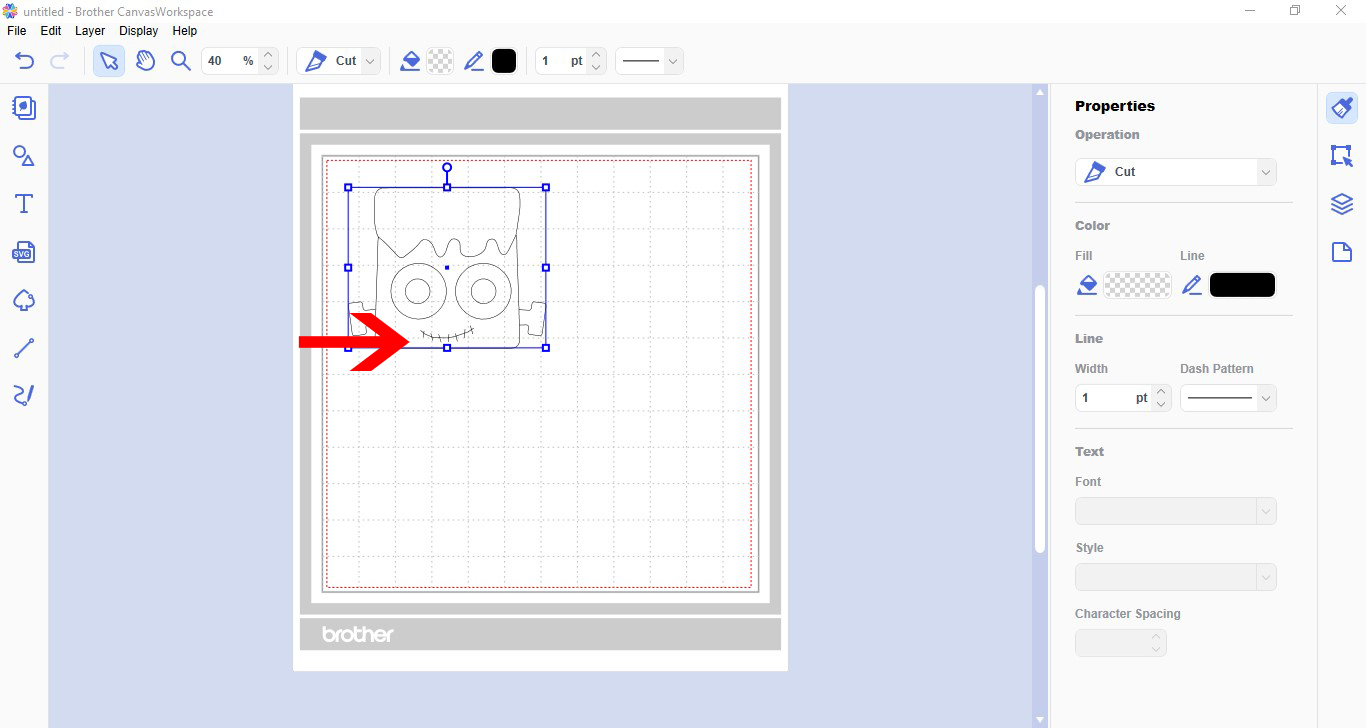
6- Your image will appear on your workspace.
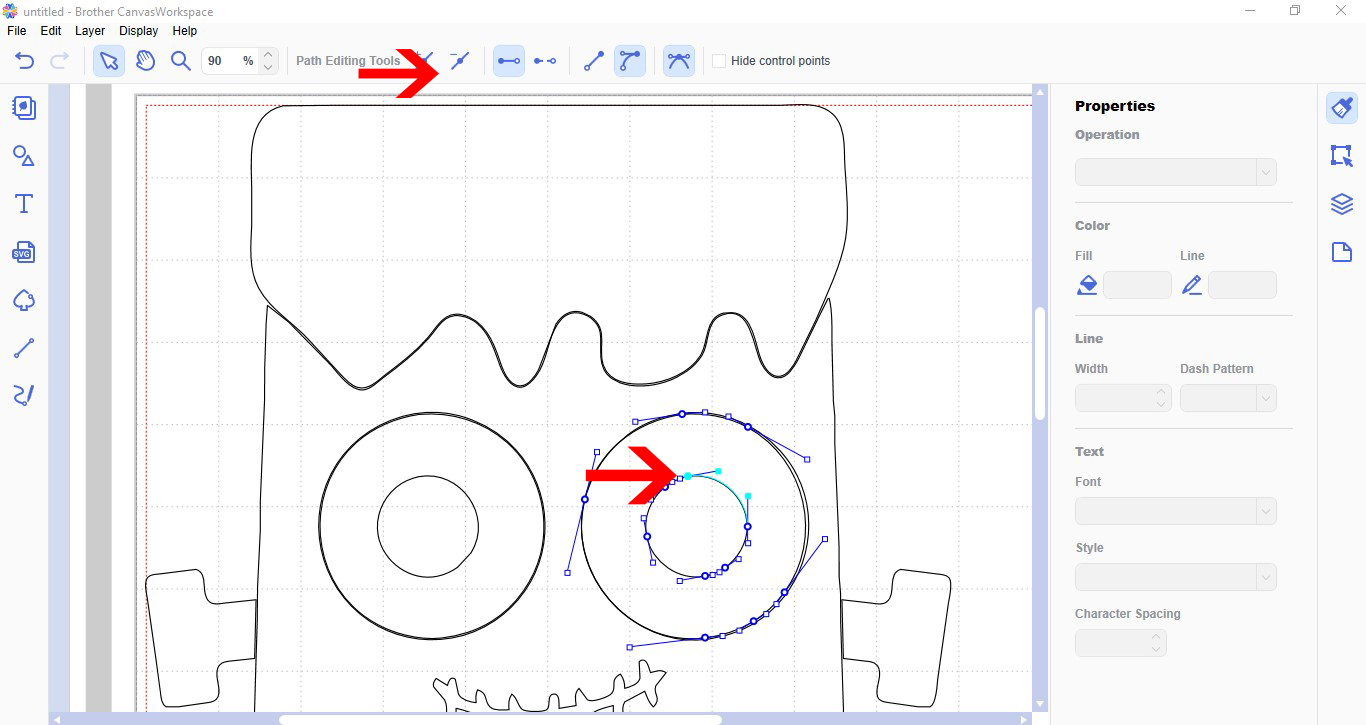
7- Remove any excess lines. some parts will be traced twice, these can be easily moved away and deleted.
8- Double click on parts that you need to remove lines. All the edit points (nodes) will appear. Select one you want to remove. Next, in the top toolbar, click the minus point icon. This will remove the edit point. Repeat until you have removed all the edit points of the line you want to not be there.
9- Repeat the process to other parts of the design you want to remove. The idea is you only want a single line in your design so when you foil it appears it has be drawn.
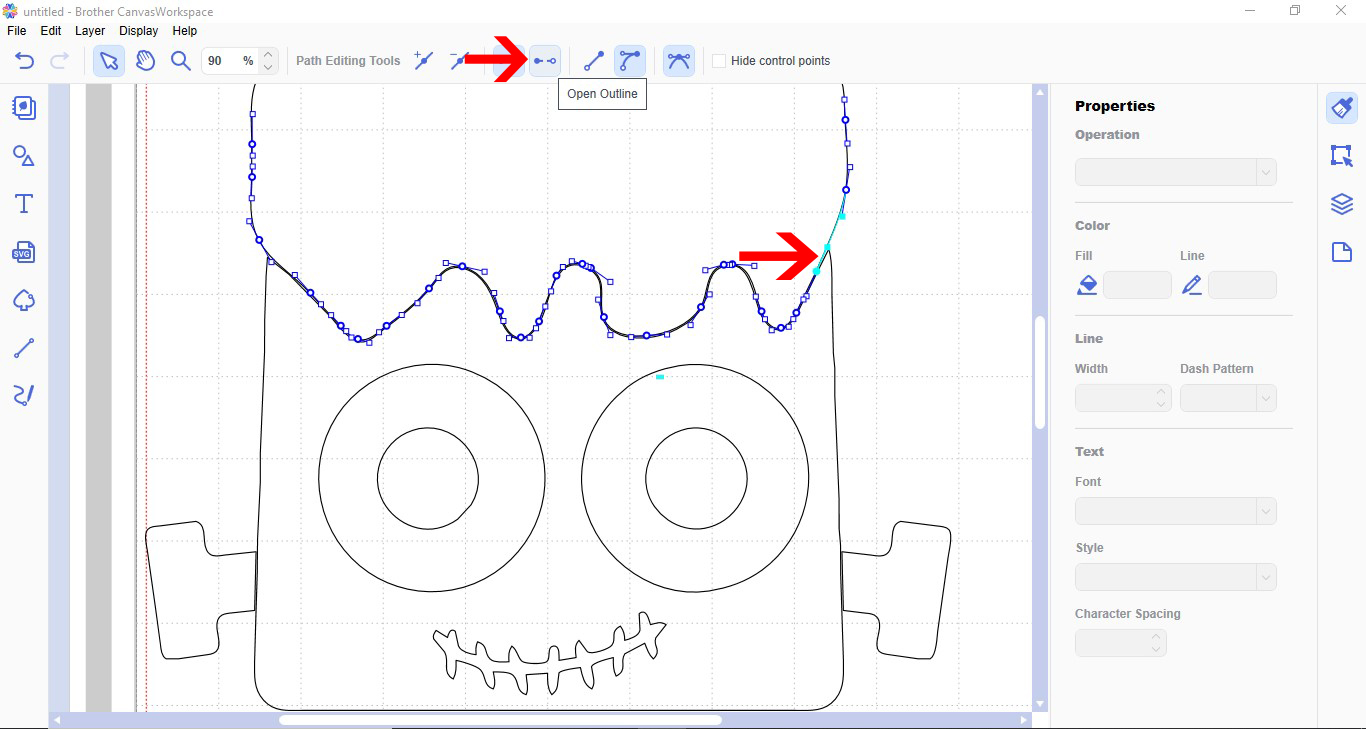
10- Some parts of your design may overlap. To rectify this click on part of the design where this occurs. In the top toolbar select the open outline icon. This will split the line.
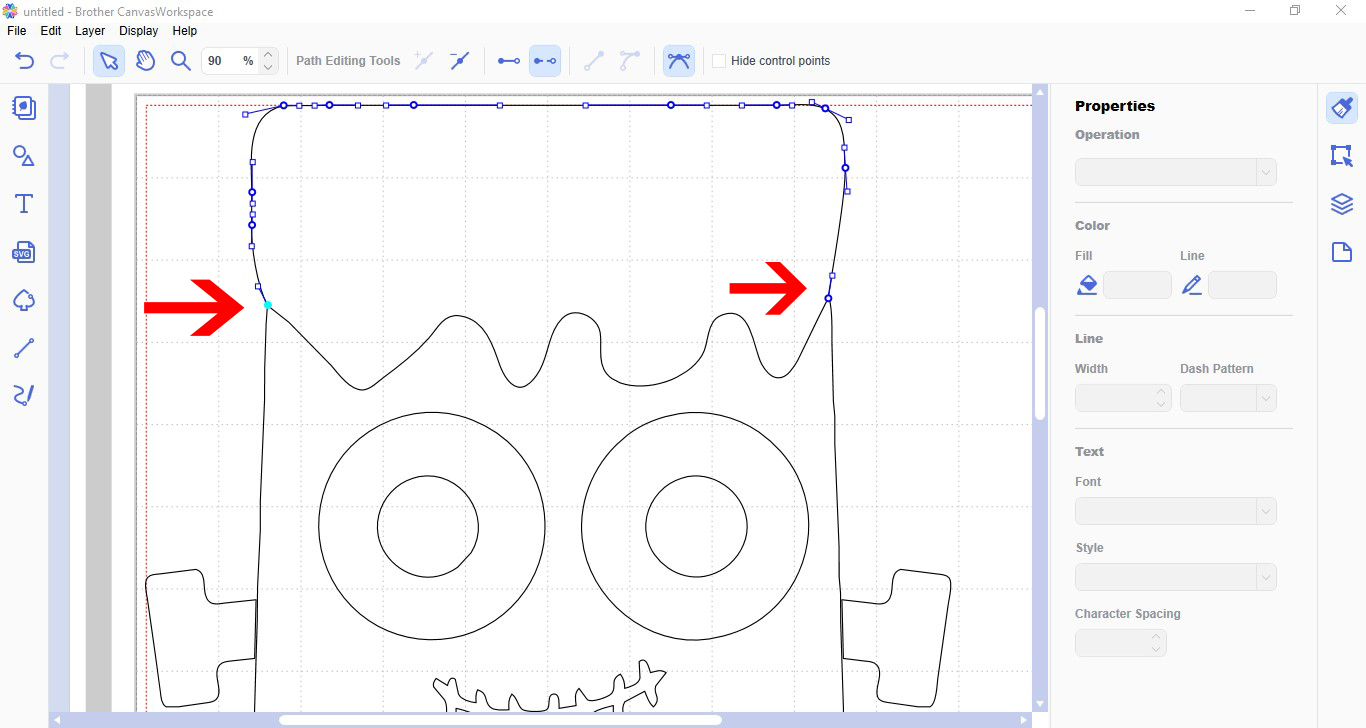
11- Remove the edit points till the line that overlapped is gone.
12- Click and drag the open line back to the original position and join back to the rest of the design.
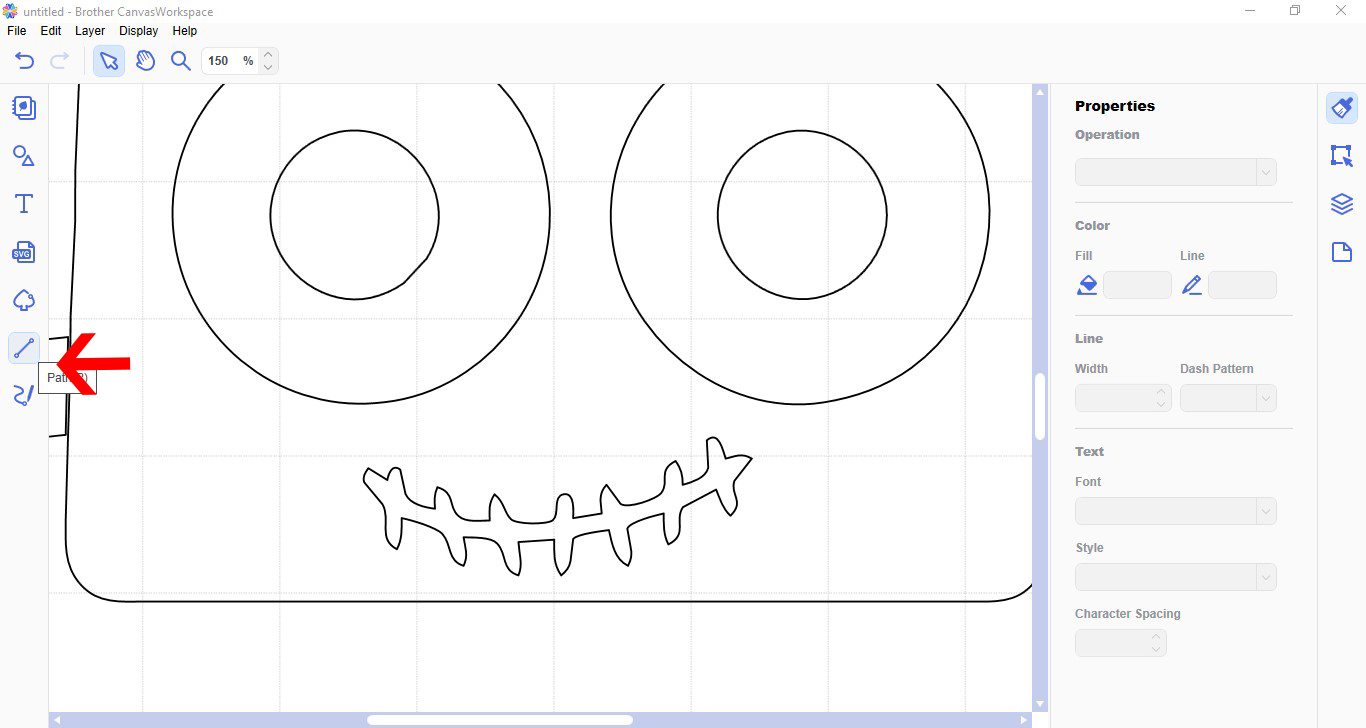
13- Some of your design cannot have parts removed without it looking odd. You will need to draw your own line to replace it. Click on the path tool.
14- Draw the design to replace the part you cannot alter. Delete the part not needed. Your single line drawing is now completed. you can add single lined text, or add more images to alter. Save and either send via wireless to your machine, or save on a USB.
1- Open canvas workspace. You can start your own design by either importing an SVG to alter or import a image to trace.

2- For this design I will be using an image to trace. Click the image tracing icon.

3- A new window will appear. you can import via the PC or USB. I will import an image via the PC.
4- Select your design. I am using an image from the Halloween and Fall Mini Bundle.
5- In the trace screen, your image will appear. Uncheck paste the image to the drawing area box. Next select trace by color. Change the number of colors if you need too. Once you are happy with the trace, click OK.
6- Your image will appear on your workspace.

7- Remove any excess lines. some parts will be traced twice, these can be easily moved away and deleted.

8- Double click on parts that you need to remove lines. All the edit points (nodes) will appear. Select one you want to remove. Next, in the top toolbar, click the minus point icon. This will remove the edit point. Repeat until you have removed all the edit points of the line you want to not be there.
9- Repeat the process to other parts of the design you want to remove. The idea is you only want a single line in your design so when you foil it appears it has be drawn.

10- Some parts of your design may overlap. To rectify this click on part of the design where this occurs. In the top toolbar select the open outline icon. This will split the line.
11- Remove the edit points till the line that overlapped is gone.

12- Click and drag the open line back to the original position and join back to the rest of the design.
13- Some of your design cannot have parts removed without it looking odd. You will need to draw your own line to replace it. Click on the path tool.
14- Draw the design to replace the part you cannot alter. Delete the part not needed. Your single line drawing is now completed. you can add single lined text, or add more images to alter. Save and either send via wireless to your machine, or save on a USB.