
How to Use a Foil Quill File in Canvas Workspace
*CM900 model used.
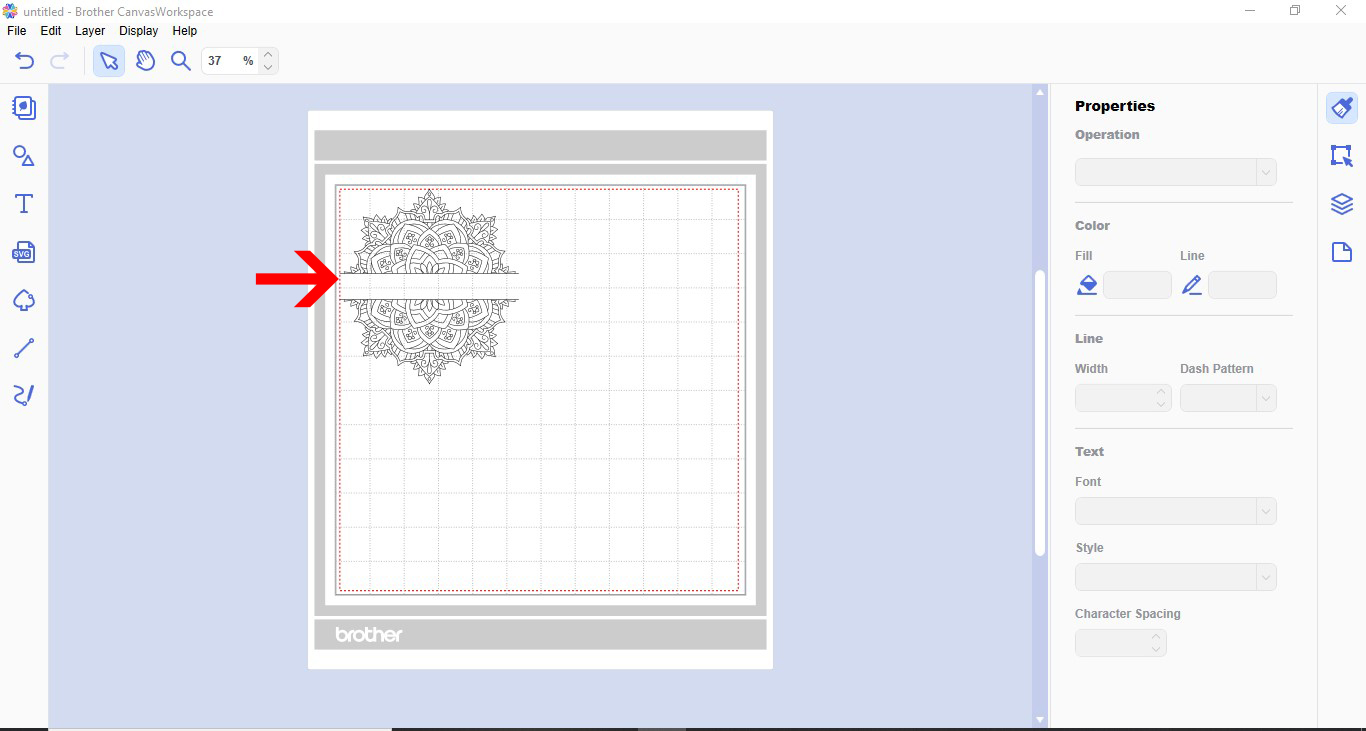
1- Open canvas workspace. Click on the SVG icon.
Most foil quill files will be in SVG format.
2- Select your foil quill design. I am using Split Mandala File by Karen J - Graphic Design.
3- Your design will appear in the workspace.
4- With some designs they may need to be grouped so the many little parts do not move and can also be foiled together as one design. With all the design selected, right click and group.
5- Note with a single line file each black line will be drawn. If you were to cut this file you would end up with lots of little pieces not a design.
6- Go to file then transfer FCM file via the internet to send the design to your Scan and cut machine.
If you do not have a wireless model you can save via USB or use a transfer cable to send to your machine.
7- When the file has transferred a window will pop up to let you know.
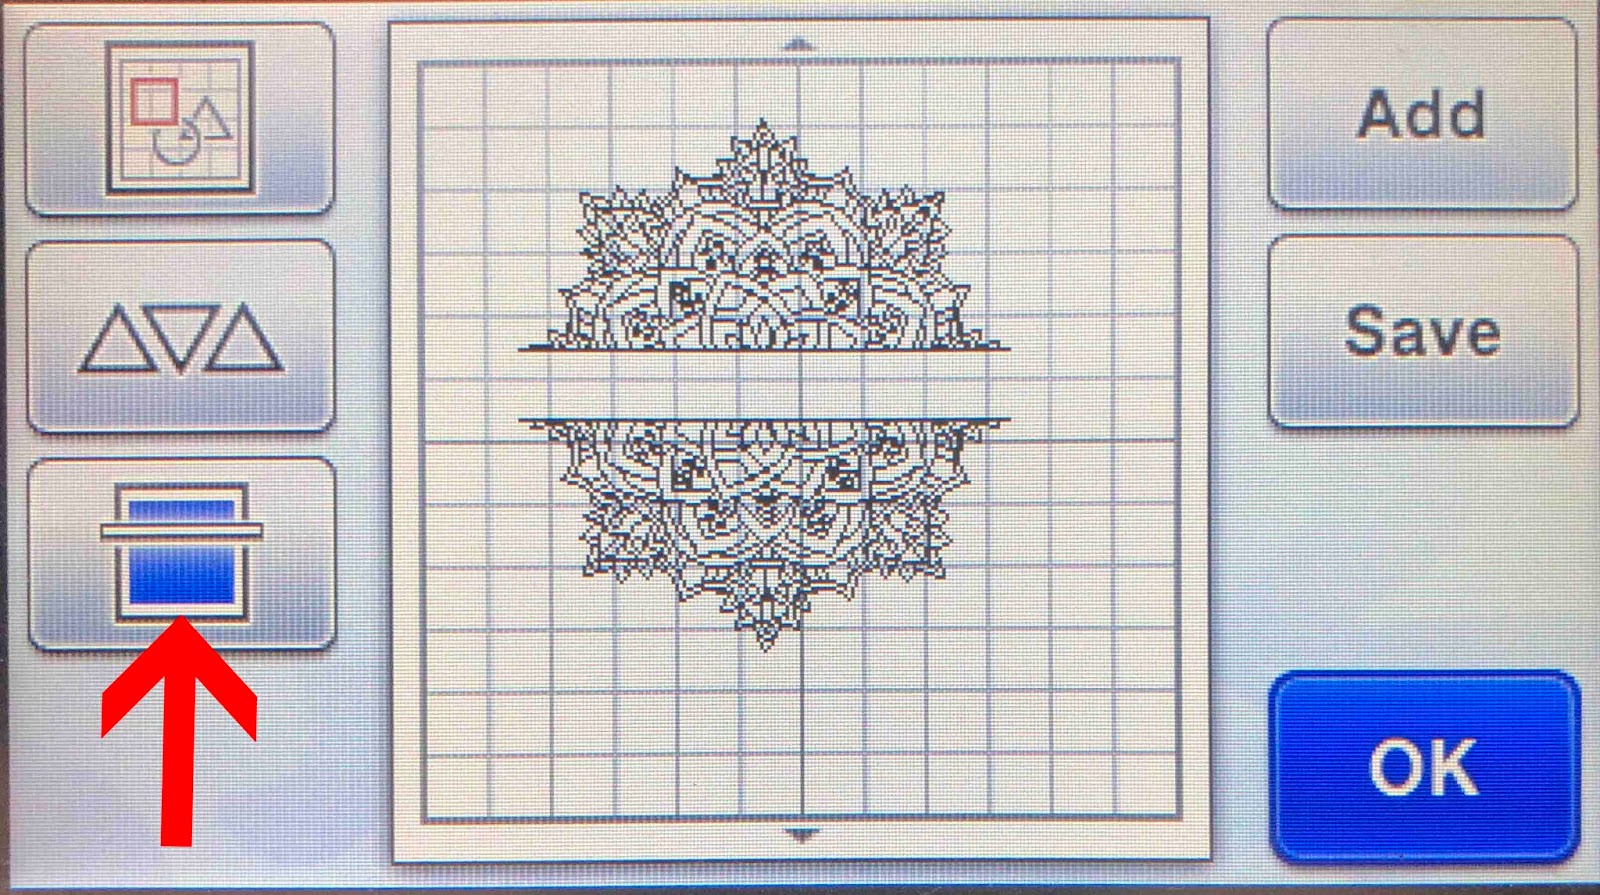
8- On the scan and cut screen click pattern.
9- Click the transfer icon.
10- Your design will appear in your workspace. Click on the scan icon to scan the media on your mat. This will help you make sure the design is accurately places on your media.
11- Resize and move the design over the scanned media. Click OK.
12- Click the draw icon. If the design disappears the design may be too small to use the draw function. Change the cut settings to the same as the draw settings and use the cut icon to draw. This will allow you to still draw the image. I am using a speed of 3 and pressure of 0 on the cardstock.
13- Place your preheated quill into your machine and click on the start icon.
14- Your design will be foiled.
1- Open canvas workspace. Click on the SVG icon.
Most foil quill files will be in SVG format.

2- Select your foil quill design. I am using Split Mandala File by Karen J - Graphic Design.

3- Your design will appear in the workspace.
4- With some designs they may need to be grouped so the many little parts do not move and can also be foiled together as one design. With all the design selected, right click and group.

5- Note with a single line file each black line will be drawn. If you were to cut this file you would end up with lots of little pieces not a design.

6- Go to file then transfer FCM file via the internet to send the design to your Scan and cut machine.
If you do not have a wireless model you can save via USB or use a transfer cable to send to your machine.

7- When the file has transferred a window will pop up to let you know.

8- On the scan and cut screen click pattern.

9- Click the transfer icon.

10- Your design will appear in your workspace. Click on the scan icon to scan the media on your mat. This will help you make sure the design is accurately places on your media.
11- Resize and move the design over the scanned media. Click OK.

12- Click the draw icon. If the design disappears the design may be too small to use the draw function. Change the cut settings to the same as the draw settings and use the cut icon to draw. This will allow you to still draw the image. I am using a speed of 3 and pressure of 0 on the cardstock.

13- Place your preheated quill into your machine and click on the start icon.

14- Your design will be foiled.


