
How to Make Seamless Instagram Carousel in Affinity Designer
Instagram Carousels are posts that allow you to upload up to 10 images or videos on the same post. You can combine photos, videos, GIFS, and it can be viewed by swiping to the left. With this type of format, you have the opportunity to create interesting content that is great for advertising your products or to convey your message in an attractive way.
In this tutorial, we will be using Strombom and Otherway fonts, and some abstract blue patterns from the Plus Hub. However, you can choose some gradient backgrounds, modern serif fonts, and many other graphics from Design Bundles to aid your design.
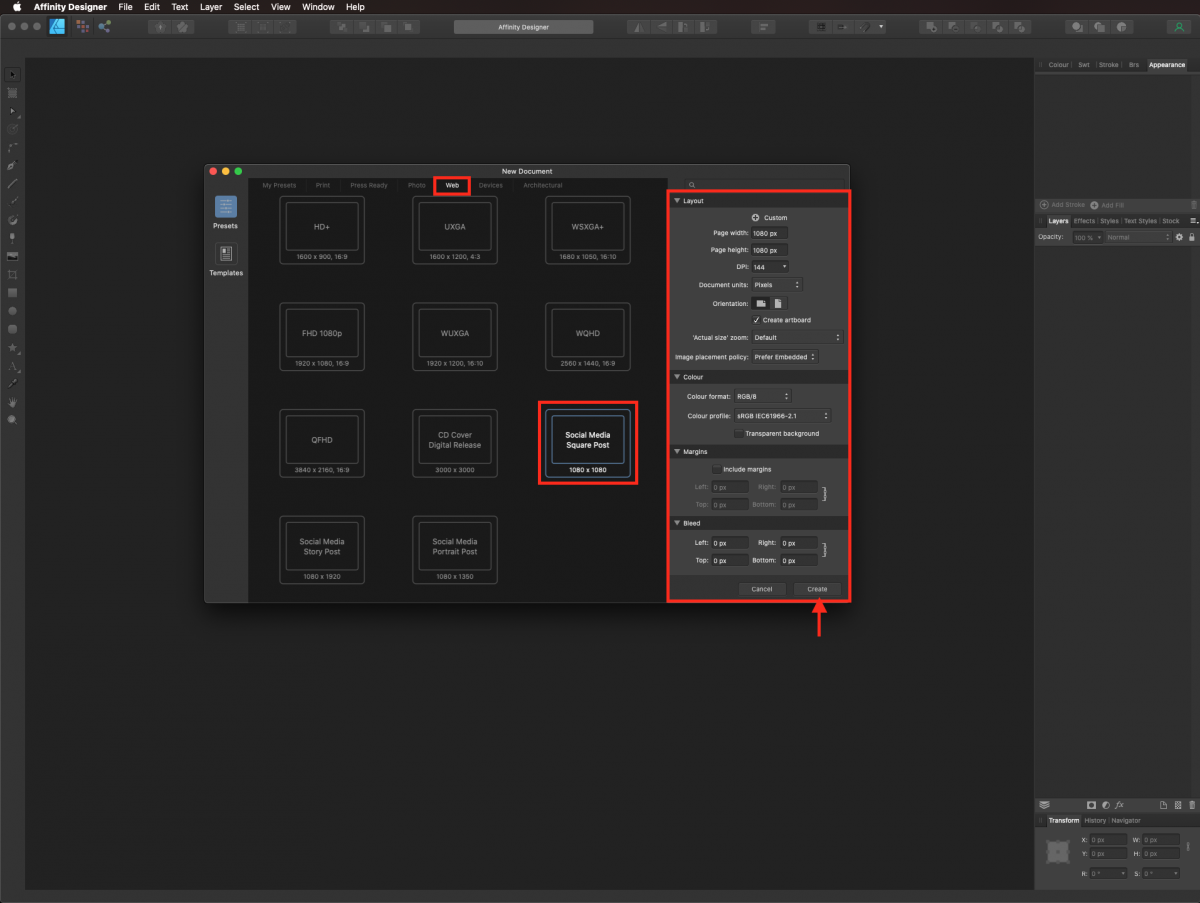
There are a couple of sizes for Instagram carousel posts, square (1080 x 1080 px) and portrait (1080 x 1350 px). We are going to use square one for this tutorial. If you choose portrait, remember to keep the information you want to be viewed on your front page within the 1080 x 1080 square because it won’t be visible.
Create a New Document, click on the Web presets, and scroll down. The last presets are the ones for social media. Choose the size you want to use. In the Layout panel, keep the default settings and check the Create Artboard box.
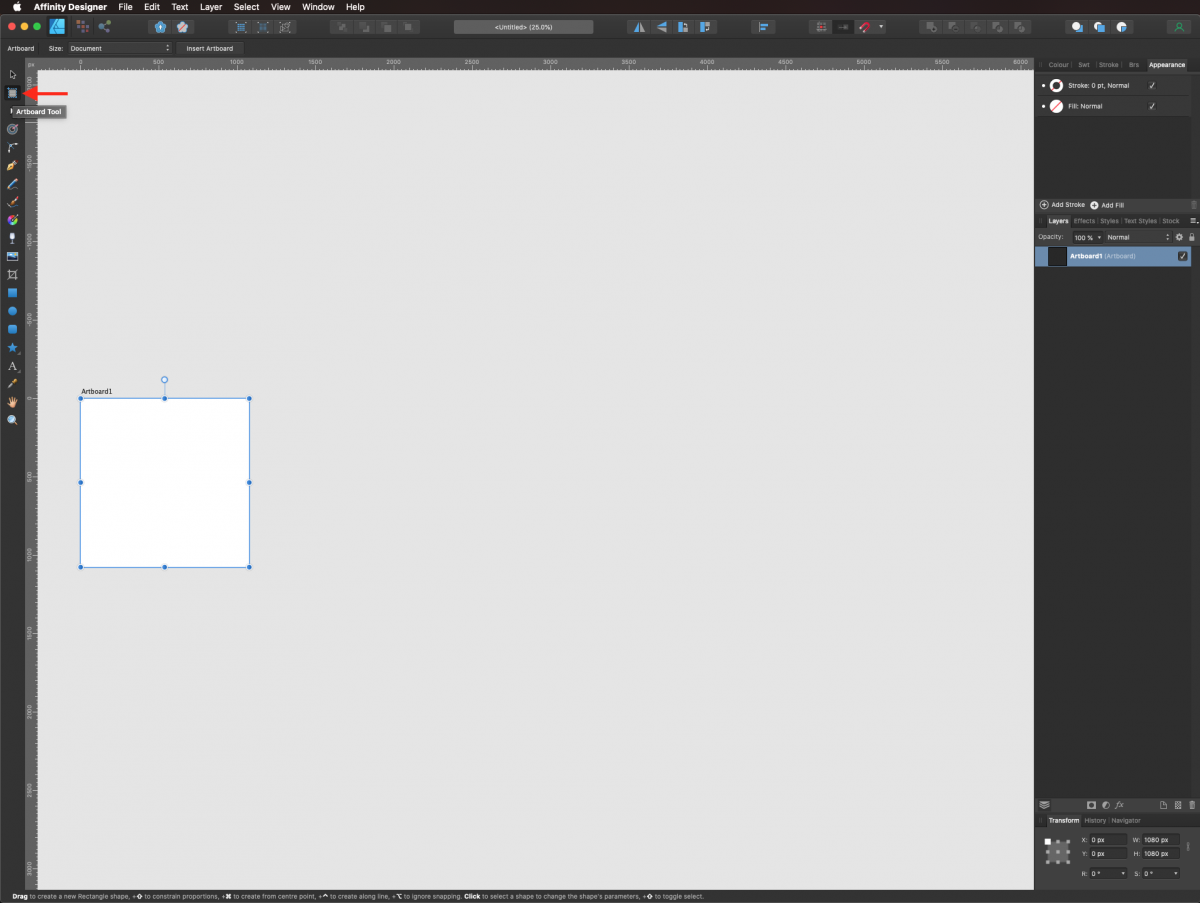
To add more artboards to your document, first select the Artboard tool.
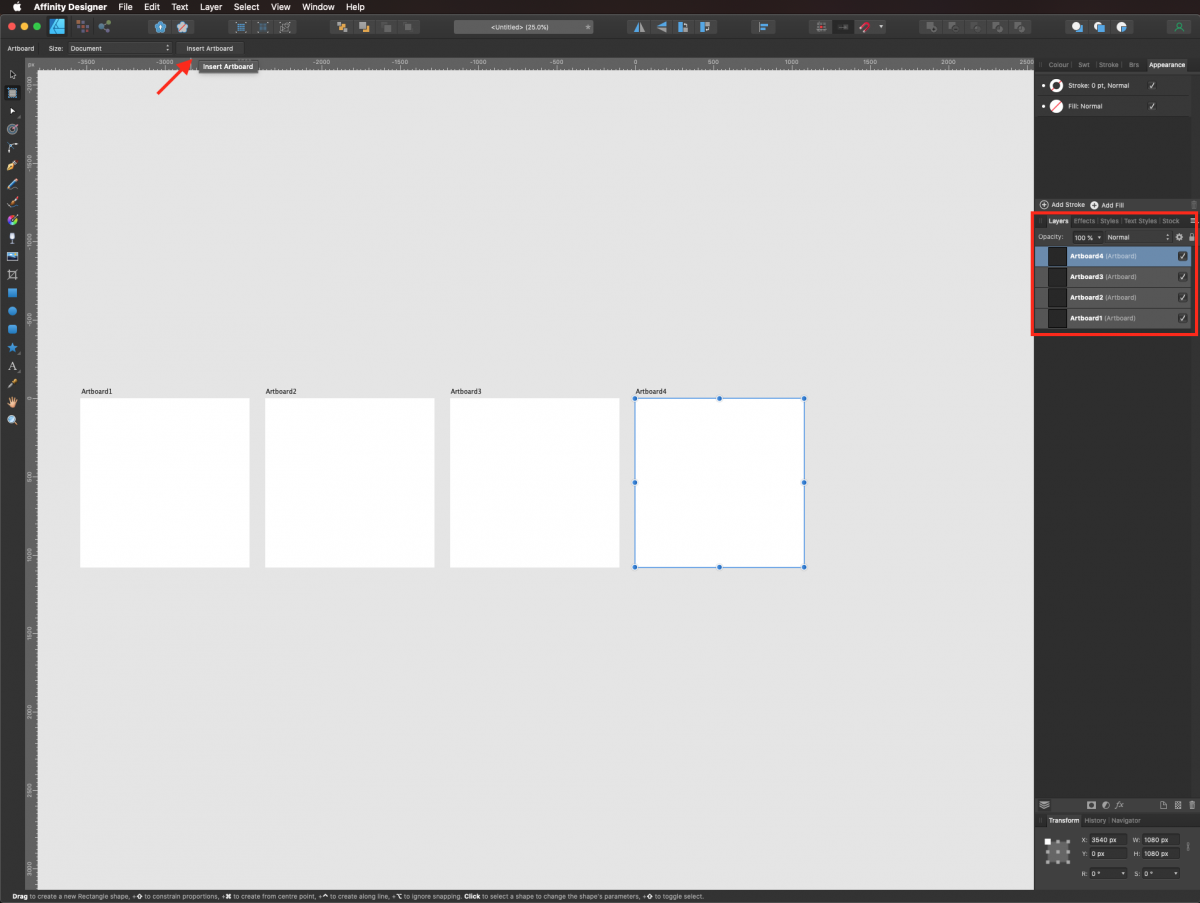
Then, click on the Insert Artboard button to create as many instances of the artboard as needed (up to 10).
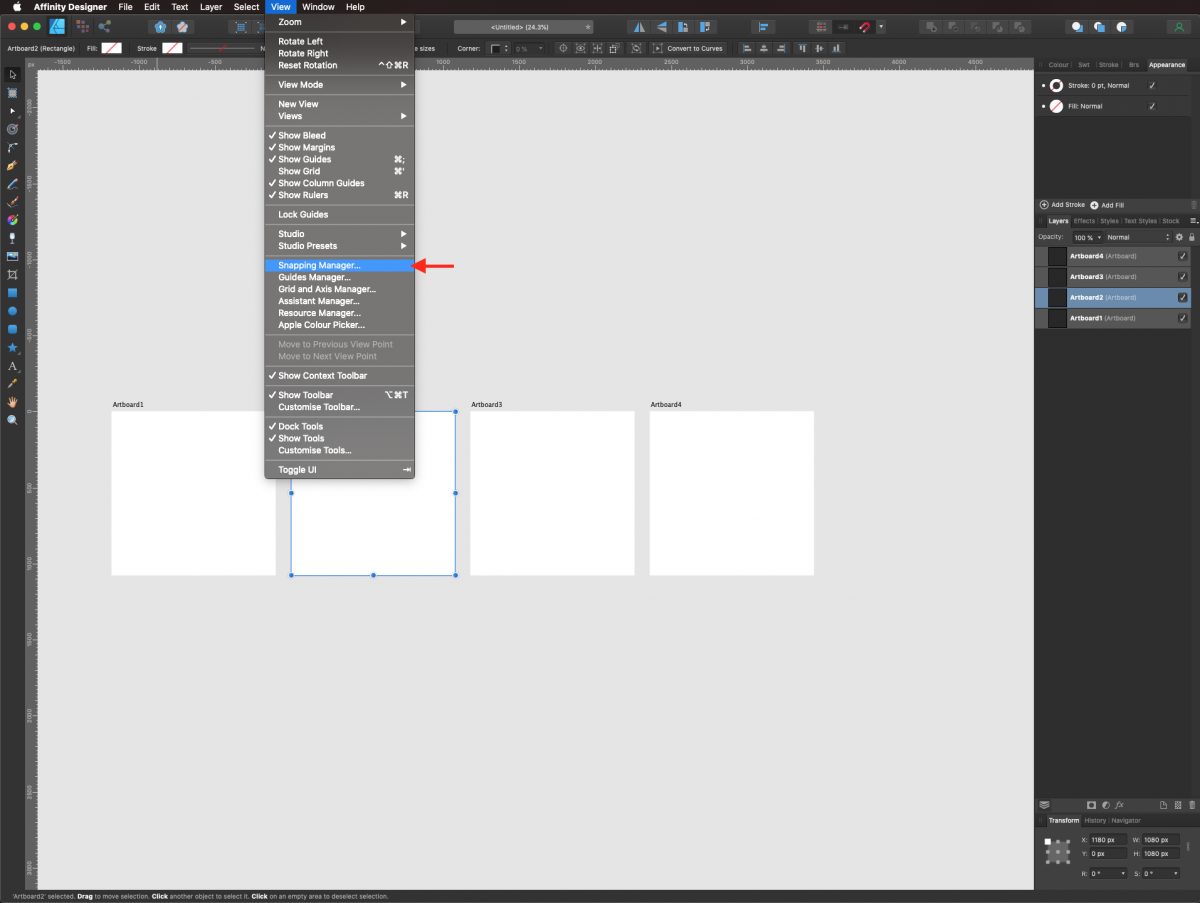
Make sure that the snapping is enabled by opening the Snapping Manager in the View menu.
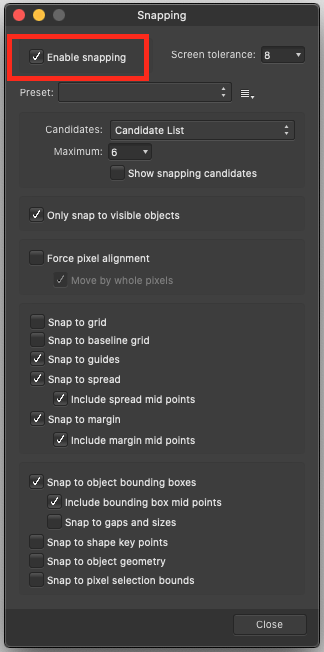
Inside the snapping window, you need to check the Enable snapping box.
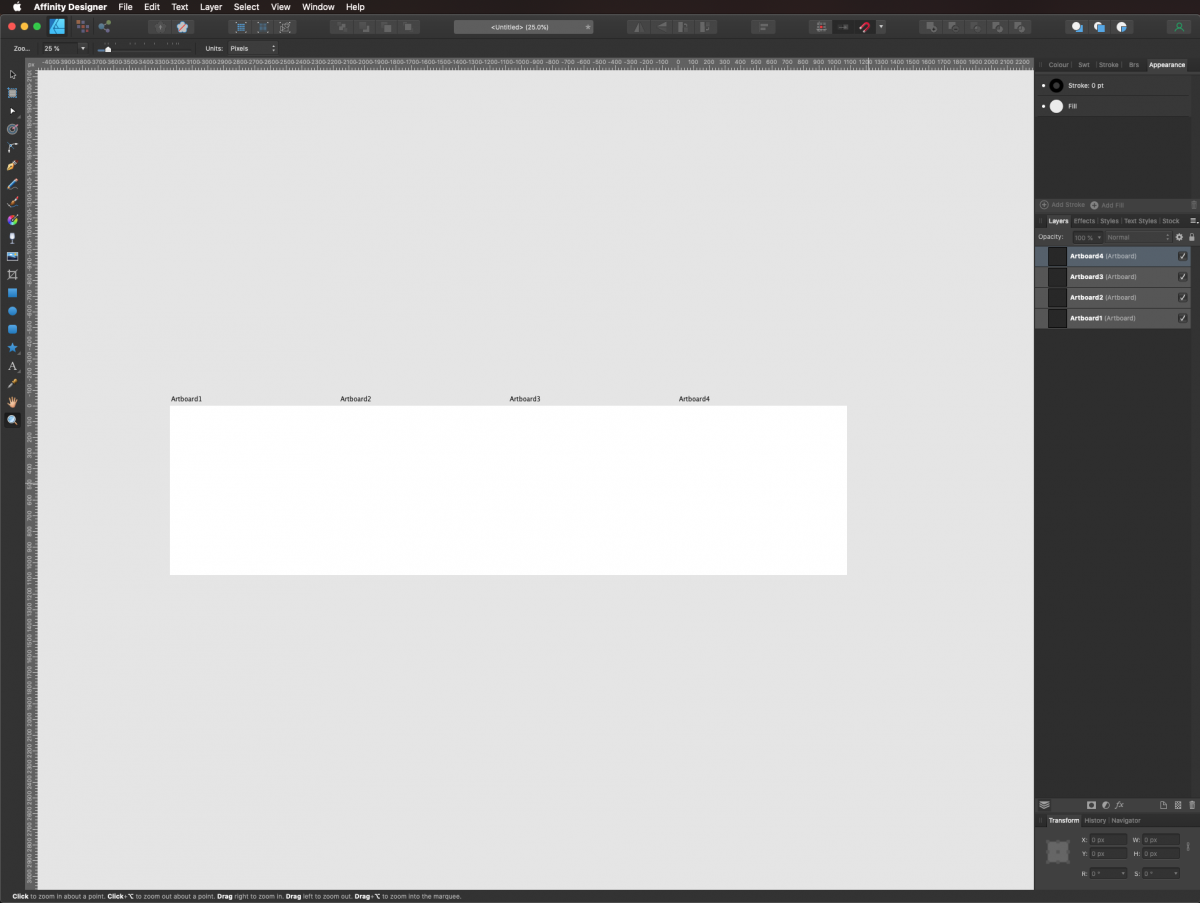
Then, drag the second artboard slightly to the left until it touches the first one and repeat this action with the rest of them so that they are all aligned and look like a single one.
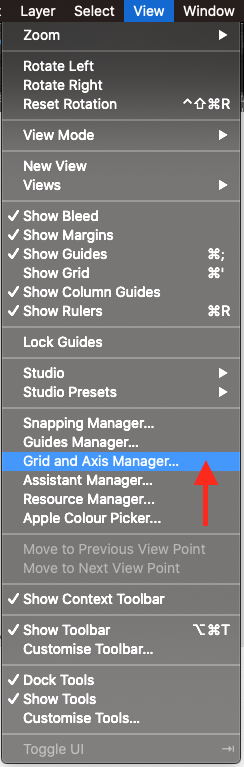
To have a visual guide for the placement of your design assets is a good idea to enable the Grid on your artboards. Head to the View menu and choose Grid and Axis Manager.
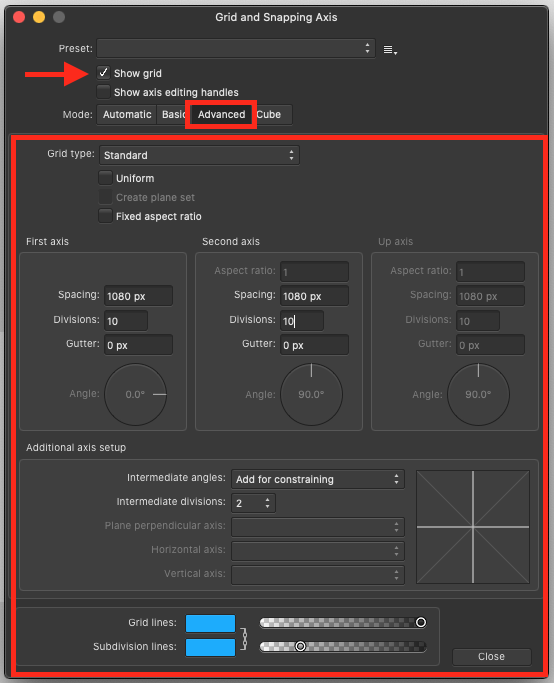
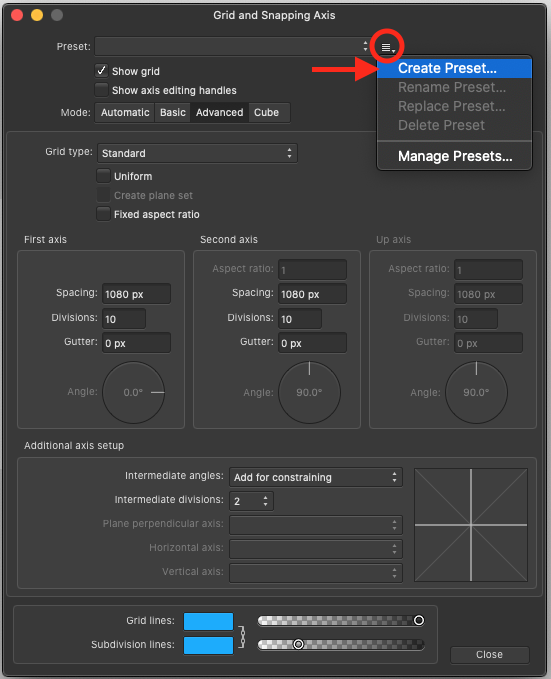
In the manager window, check the Show Grid box and click the Advanced tab to show more options. In the First axis window, input a Spacing of 1080 px (like your artboard) and 10 Divisions. Do the same with the Second axis. At the bottom of the panel, you can adjust the Grid and Subdivision lines color and opacity to your liking (we used a light blue as color and increased the grid opacity to 100%).
To use these settings in the future, click on the small hamburger menu on the top right side and choose Create Preset.
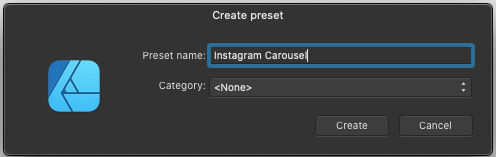
Choose a name for your preset and click Create in the popup window to save it.
Open the Grid and Snapping Axis manager for each one of the artboards and choose your new preset.

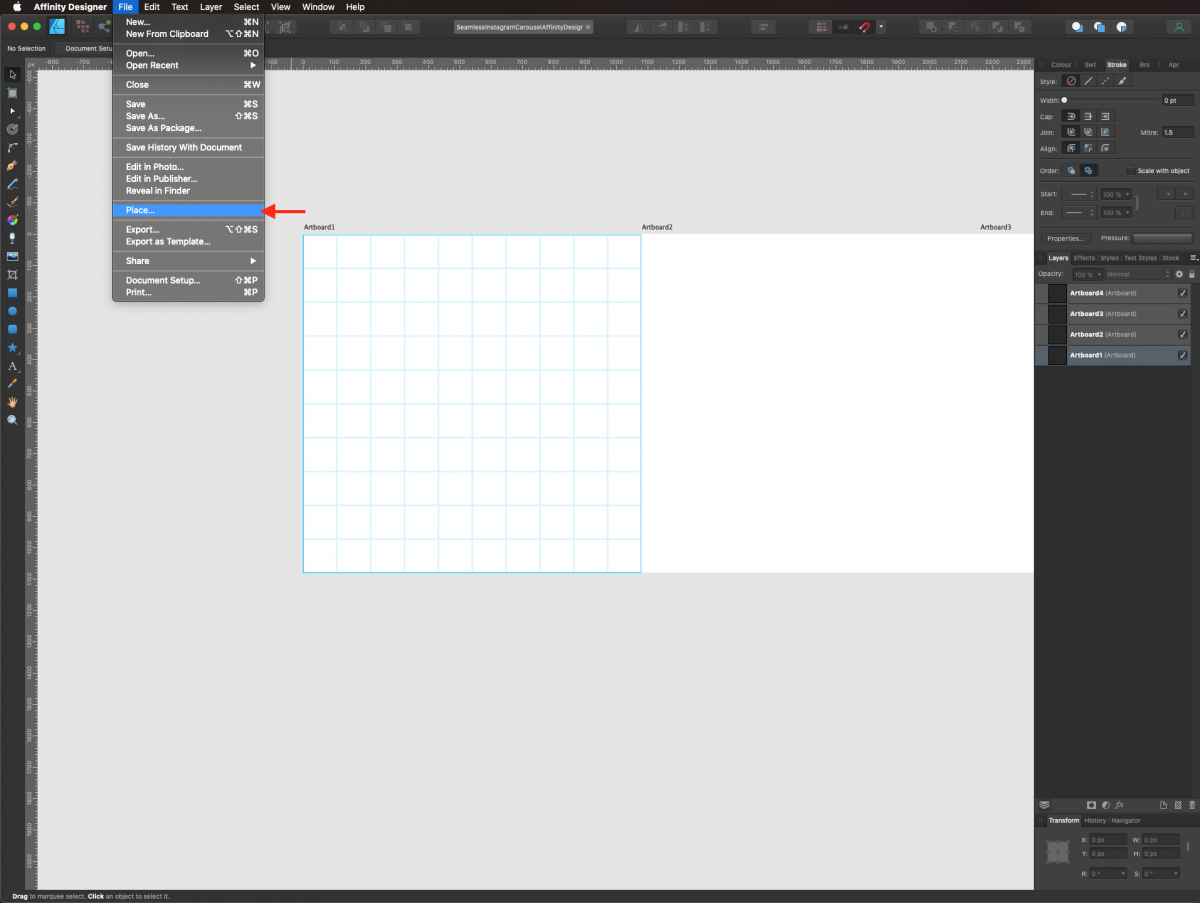
For the background, we chose a pattern, to bring it into your document go to File > Place.
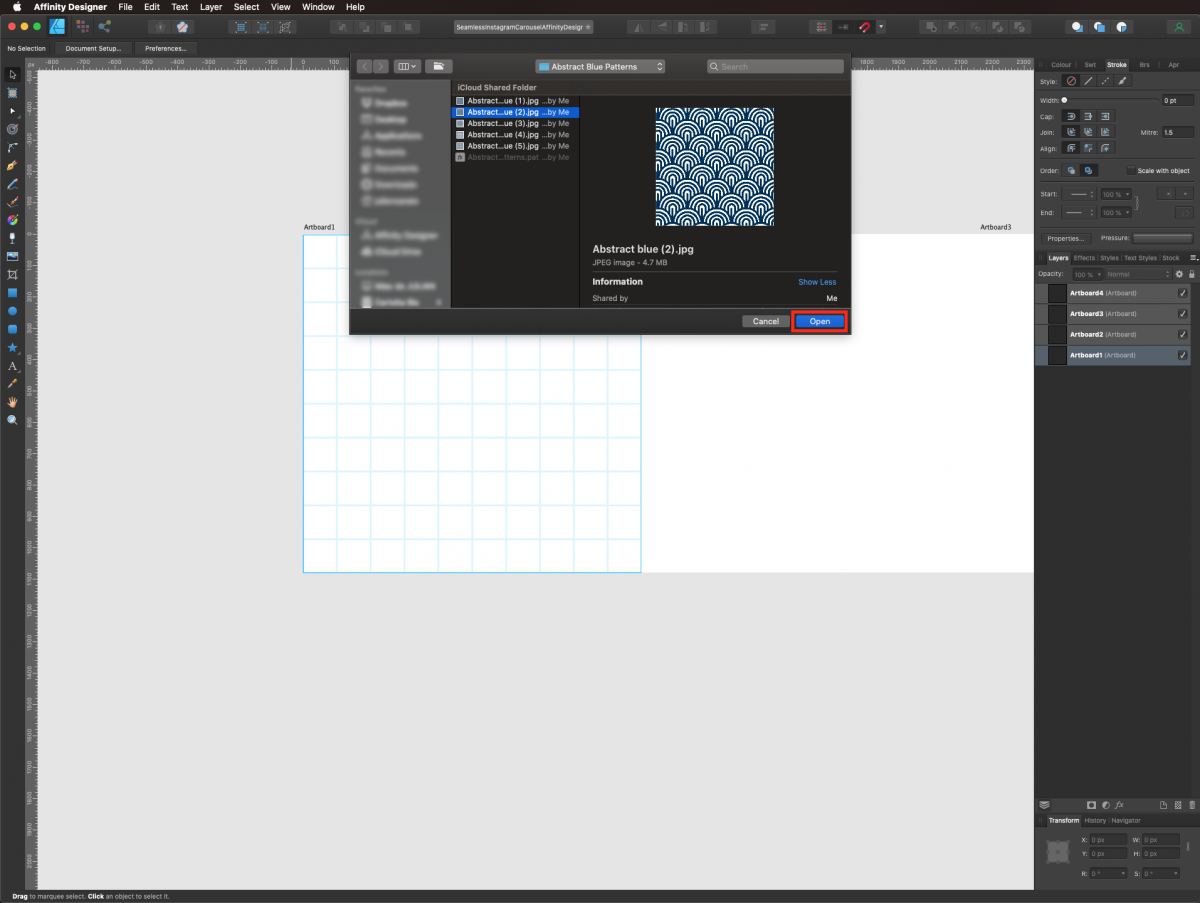
Navigate to where your files are saved, select them and click Open. Since the .pat files won’t work on Affinity Designer you need to use the .jpg tiles instead.
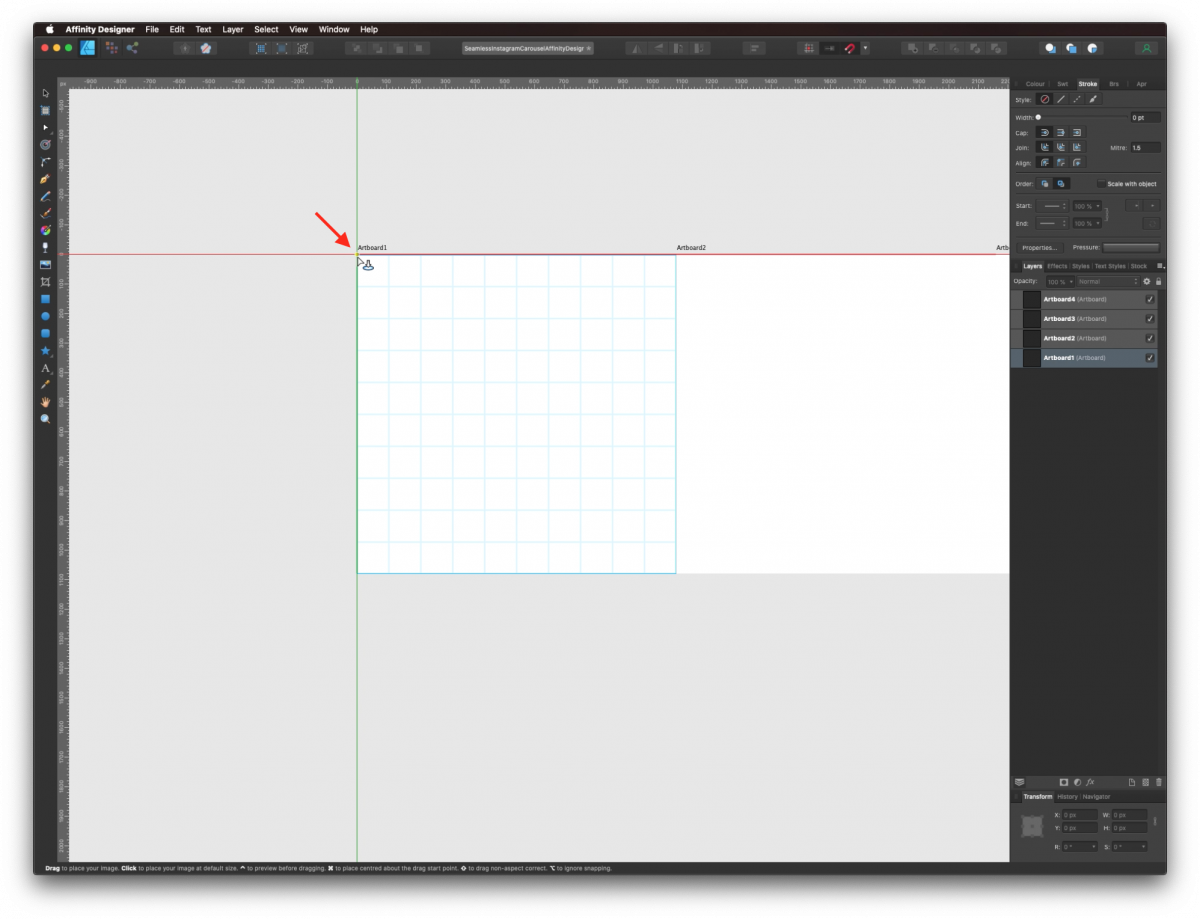
Your cursor will transform into a white arrow pointing down to a small blue oval, place it on the top left corner of the artboard and click.
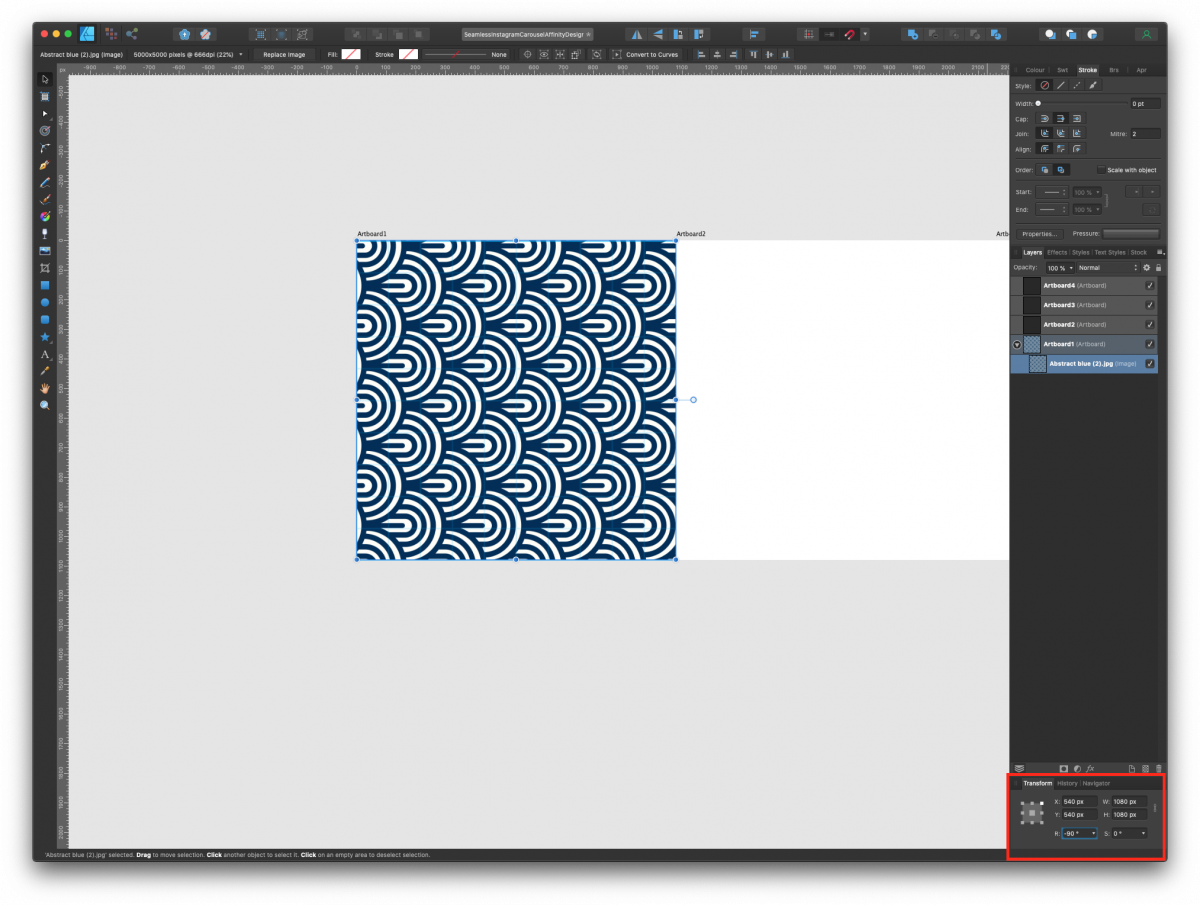
To resize the pattern tile, head to the Transform panel and make the Width and Height 1080 px. We also rotated our tile to a -90º angle.
If you want to create the pattern from scratch, you can check our tutorial on how to Make a Seamless Pattern in Affinity Designer.
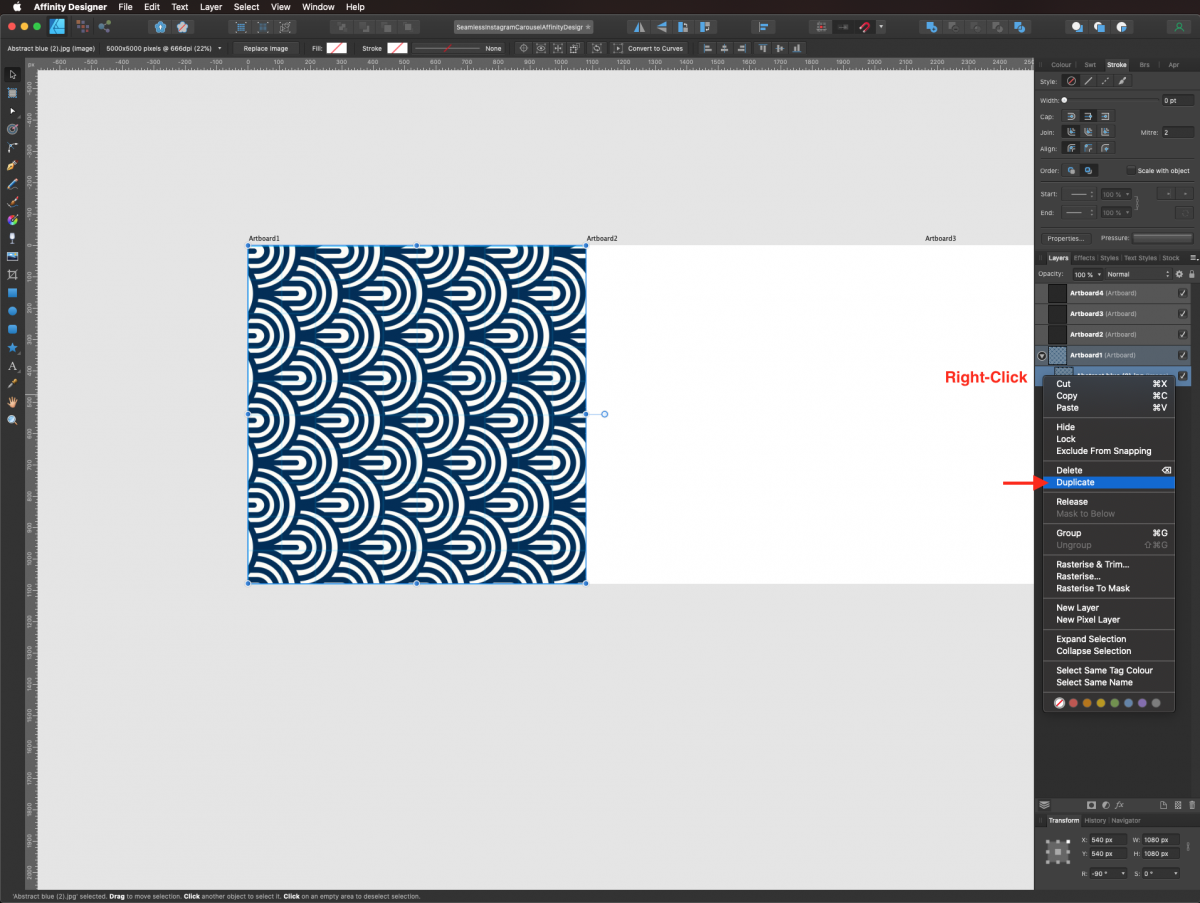
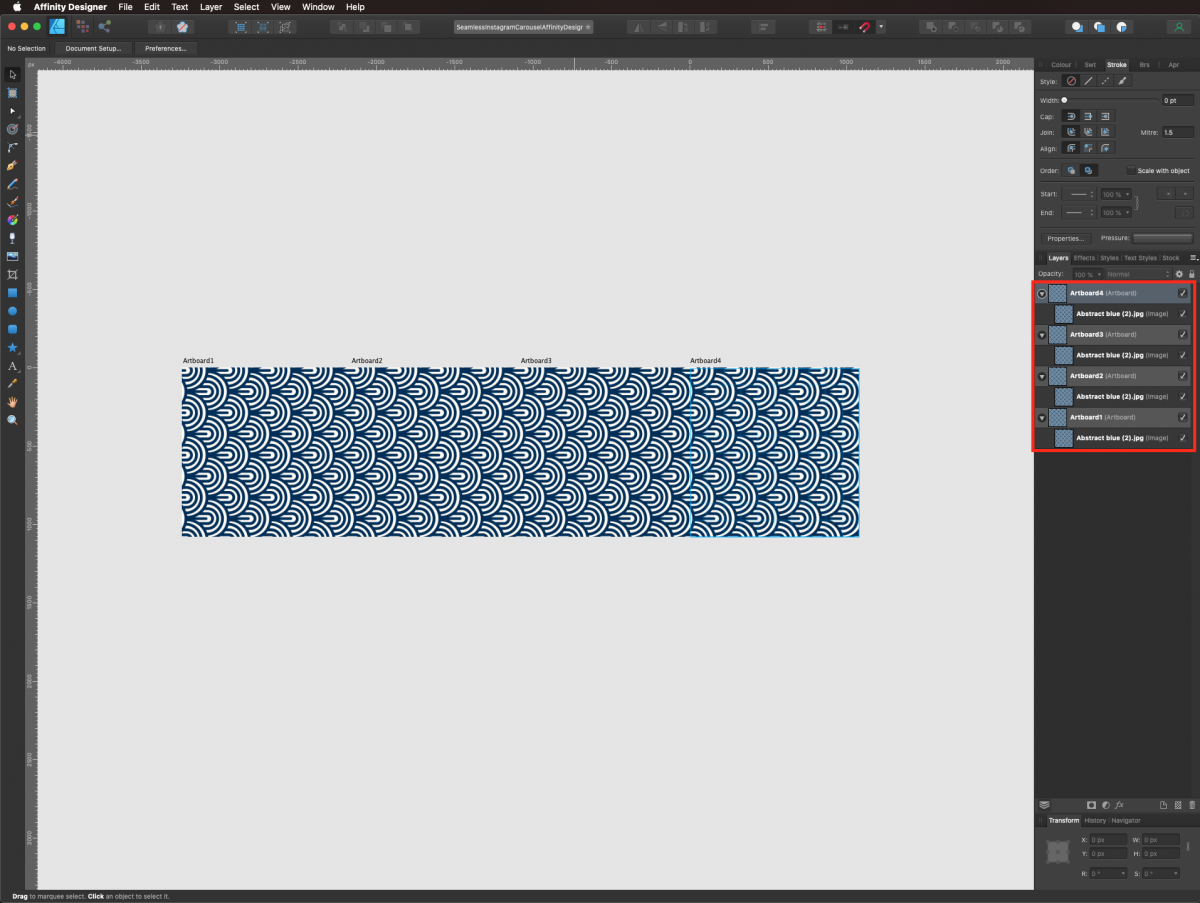
To add the pattern to the rest of your artboards, right-click on top of its thumbnail in the Layers panel and choose Duplicate.
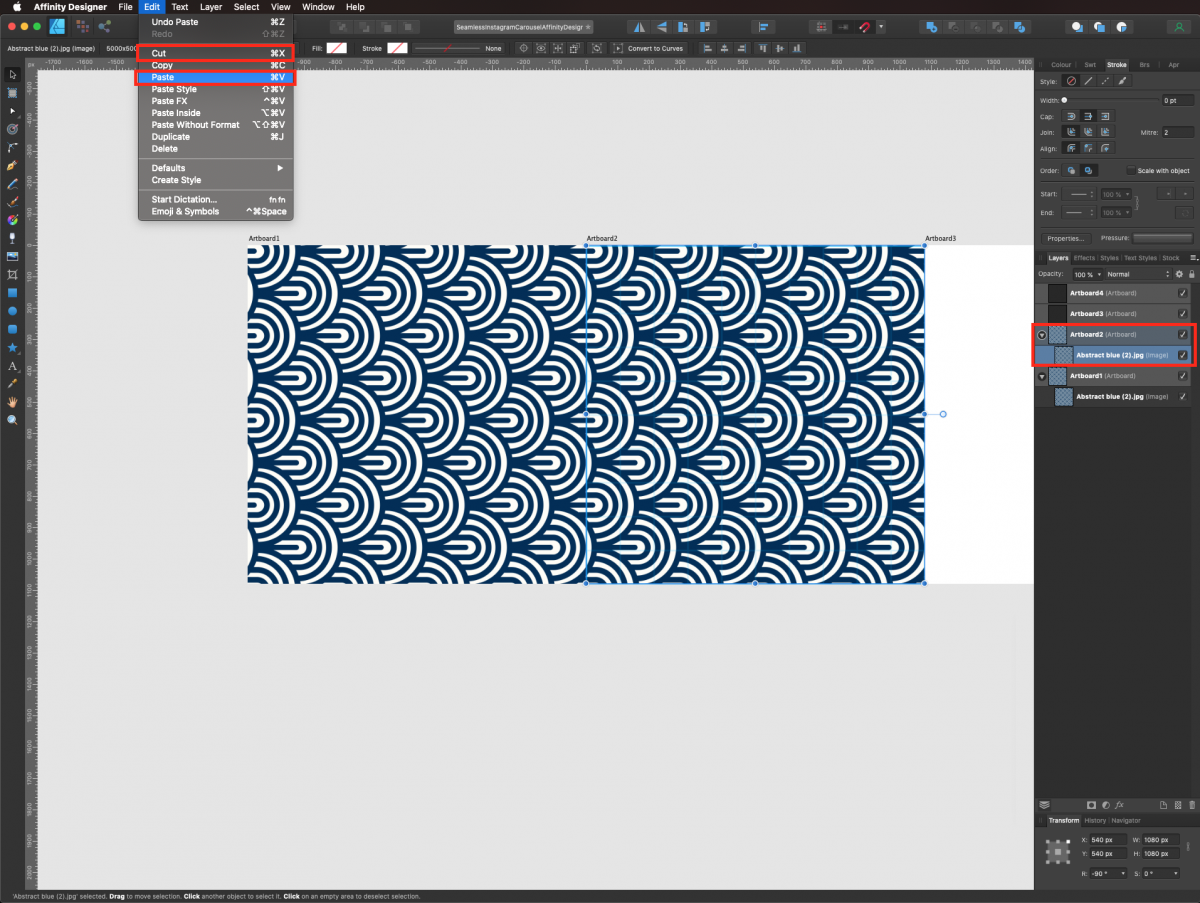
You can Cut (Command/Control + X) and Paste /Command/Control + V) the duplicate in the other artboard, or just drag its thumbnail on the Layers panel making sure it is placed correctly.
Repeat this with all the artboards you want to add the pattern to.
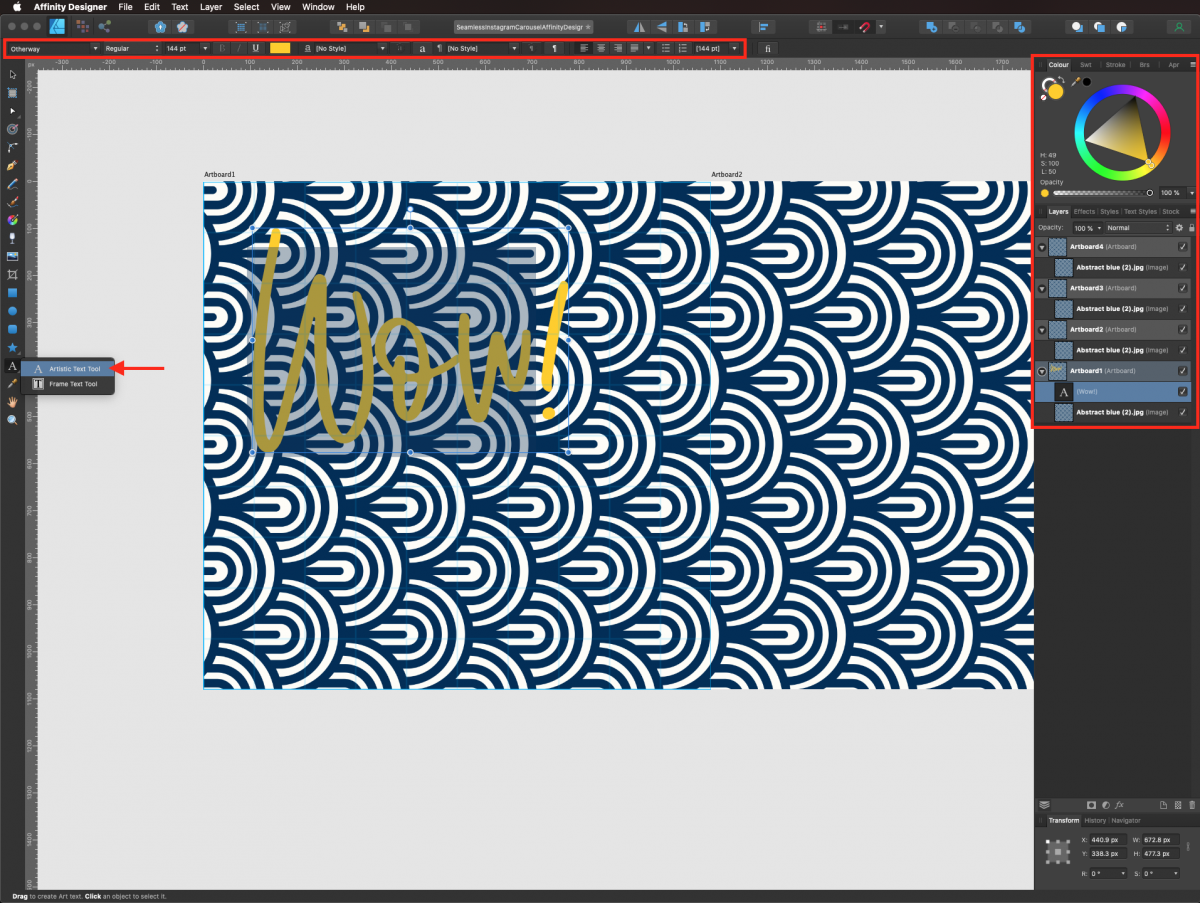
Select the Artistic Text tool, choose your font, size, alignment, and color and type what you want (ours was Otherway font with a size of 144 pt, aligned left, and filled with a bright yellow).
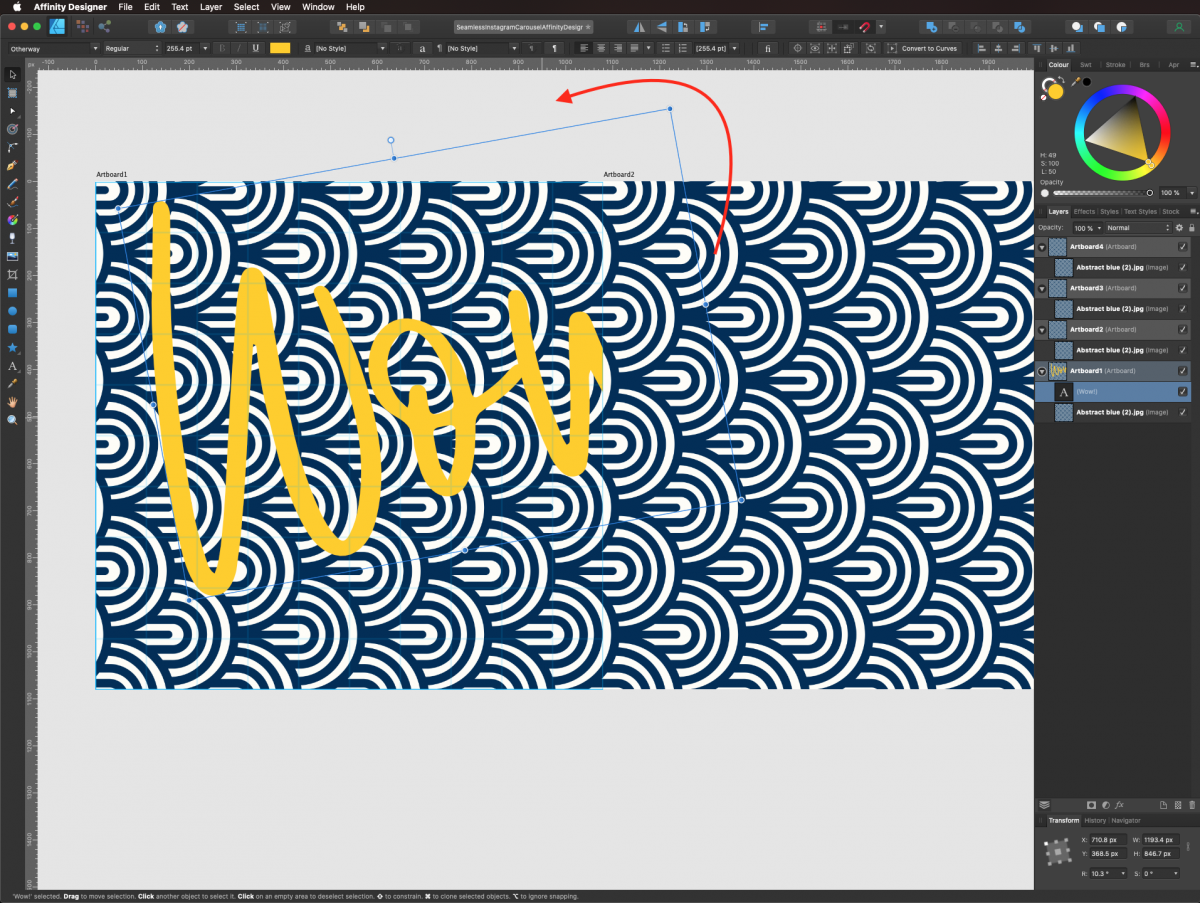
Give the text a slight rotation(we used a 10.3º angle) and maybe resize it so a portion of it sits in the next artboard. The portion of the text that sits on the second artboard won’t be visible.
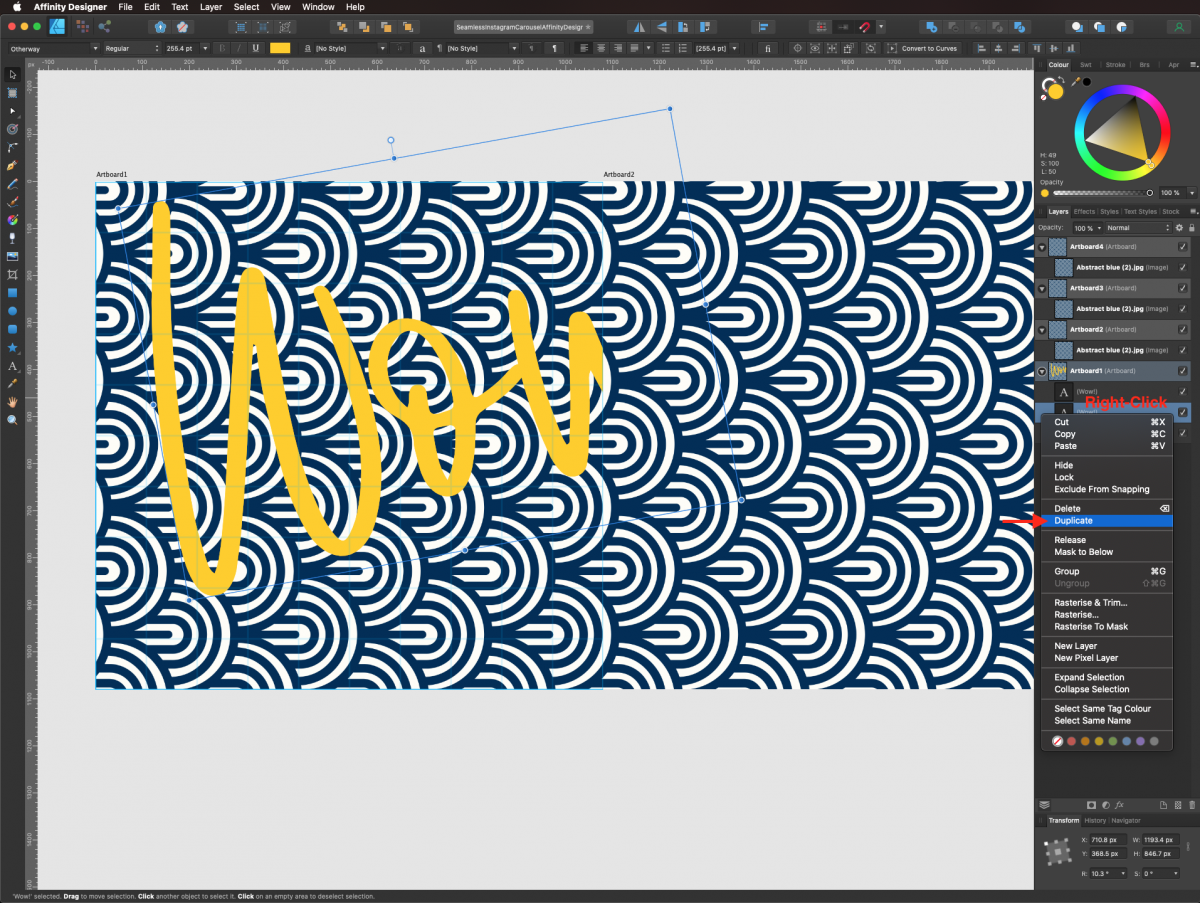
In order to make the whole text show create a duplicate of the text layer.
Drag its thumbnail to the second artboard and make sure the duplicate text is placed correctly within the artboard so you can see it (on top of the background pattern tile).
To add some depth to the text, select both instances (from both artboards), head to the Effects panel, and check the Outer Shadow box to open the settings window. We used black as Fill color, a 50% Opacity, 1.1 px Radius, 6.4 px Offset, and a 315º Angle.
To fill all the artboards and finish the carousel, we need to create more design elements and add more text.
First, let’s create a white frame with the Rounded Rectangle tool (M). Fill it with white and place it in the remaining portion of the second artboard.
Then, add some text on top of the frame. We used the Strombom font filled with the same blue from the background pattern (use the Eyedropper tool to select it). To make it thicker we added an Outline effect with a 3 px Radius, and 100% Opacity in the Effects panel.
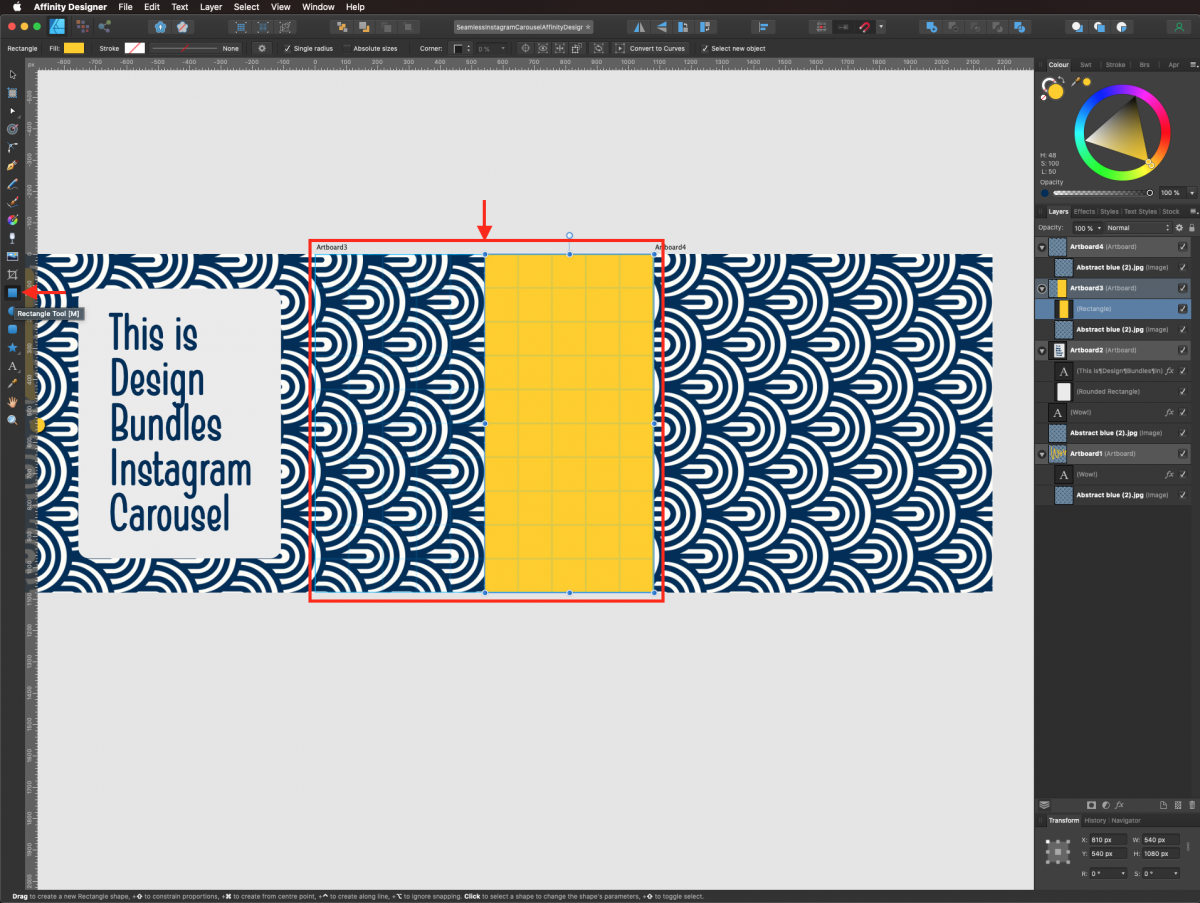
Now, let’s add some contrast by changing the color of some of the background pattern tiles. Create a rectangle on top of the portion of the background you want to change making sure it is placed on top of the pattern layer and fill it with the same bright yellow used for some of the text.
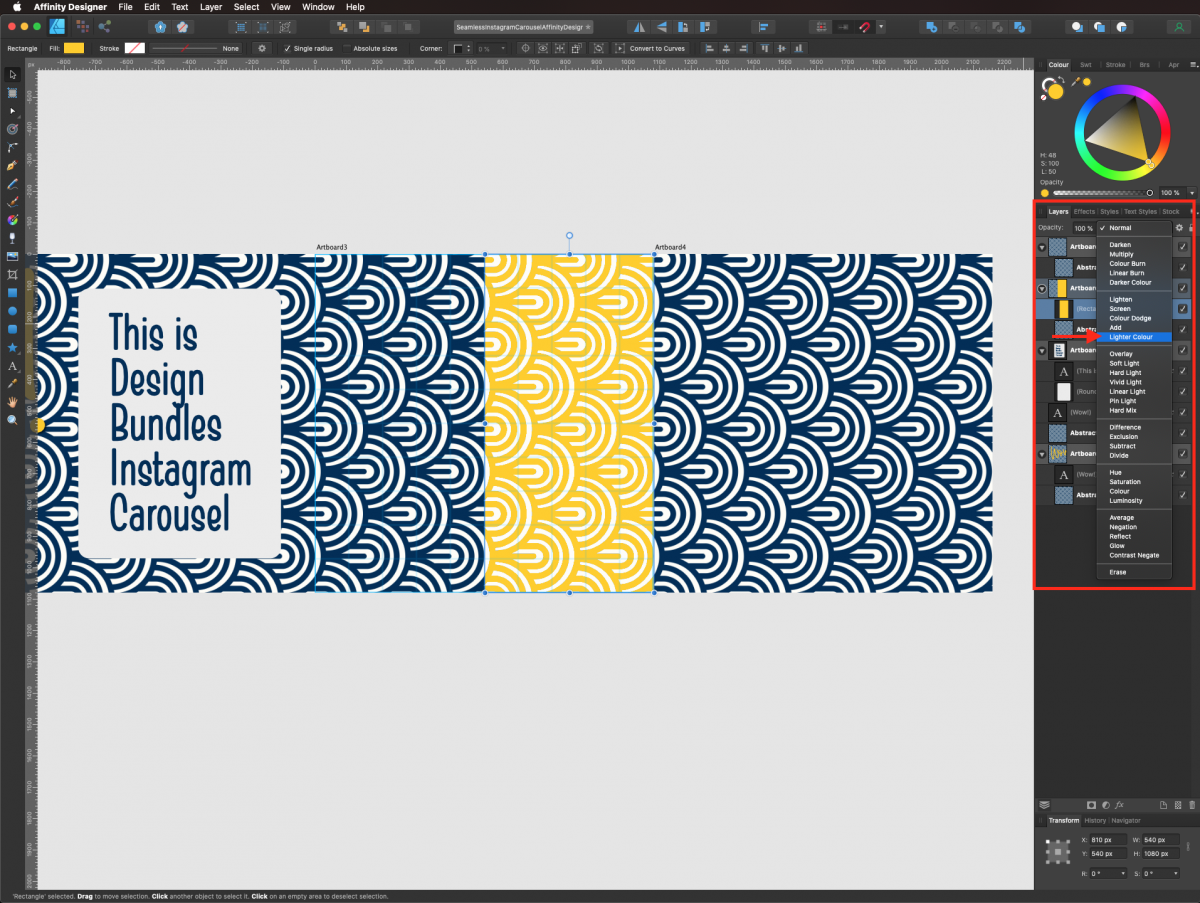
Then, change its Blending Mode to Lighter Color.
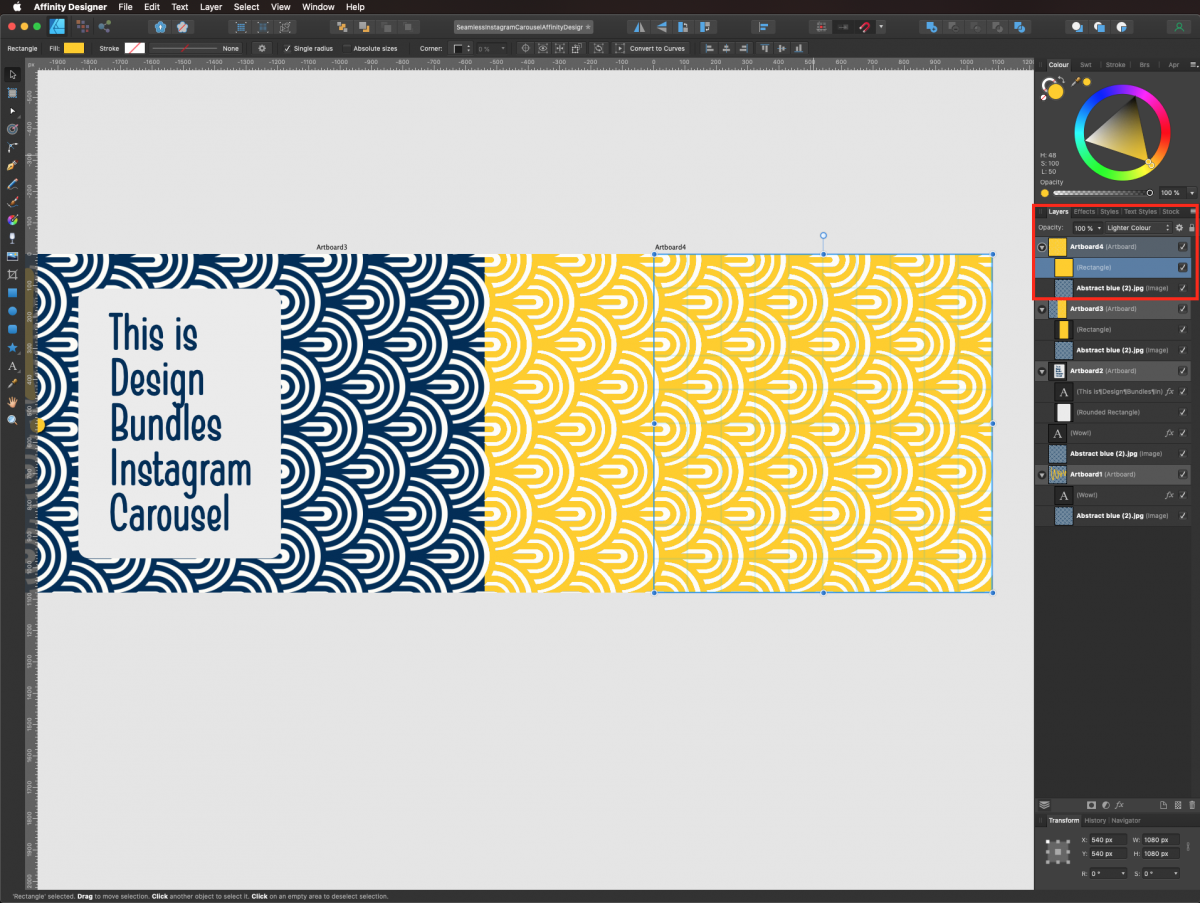
To replicate this with other artboards, make a copy of the yellow rectangle, paste it on the desired artboard and resize it or reposition it to suit your needs.
Keep adding text and other elements to complete your carousel design.
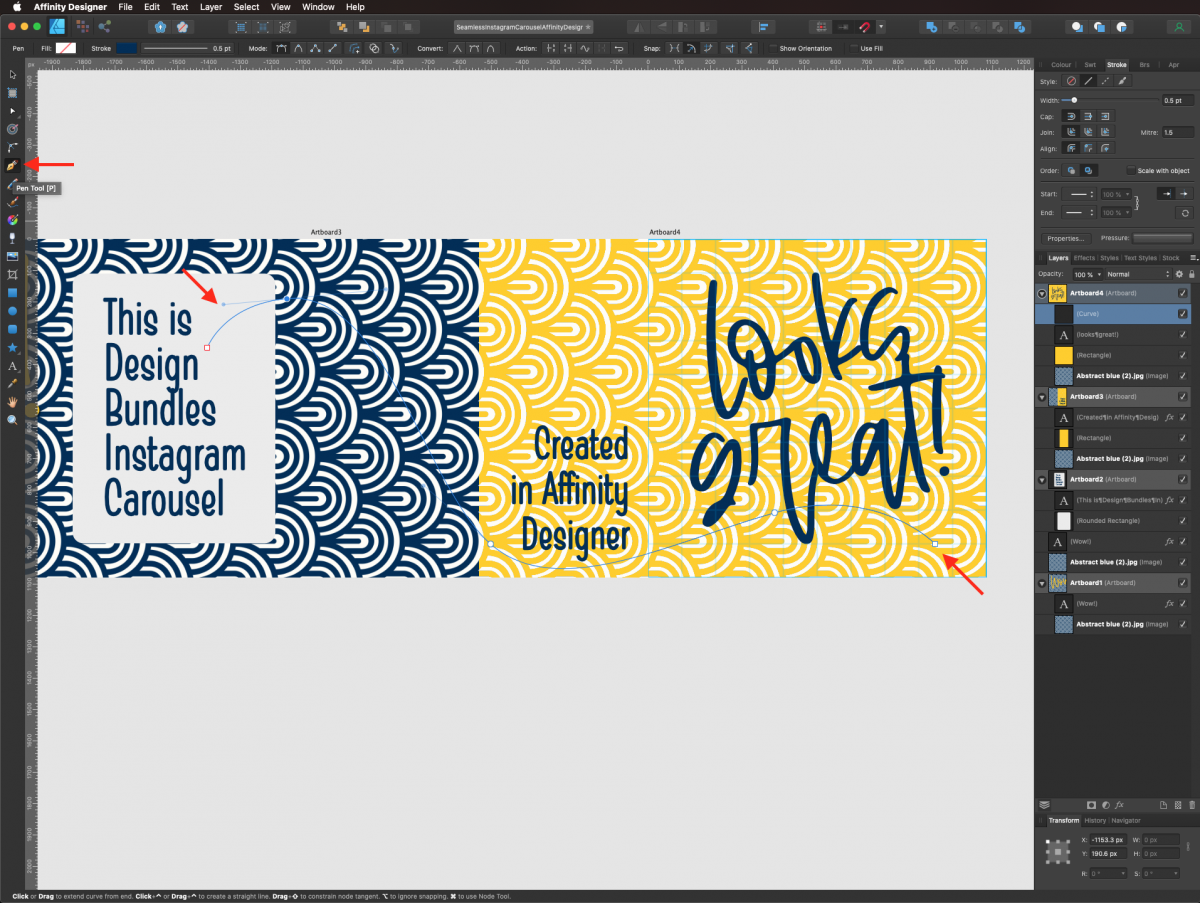
If you want to add some elements that start in one artboard and end in another one as we did with the text, just create the element. We used the Pen tool (P) and made an undulating path that started close to some text in the last artboard and ended close to more text on the other artboard.
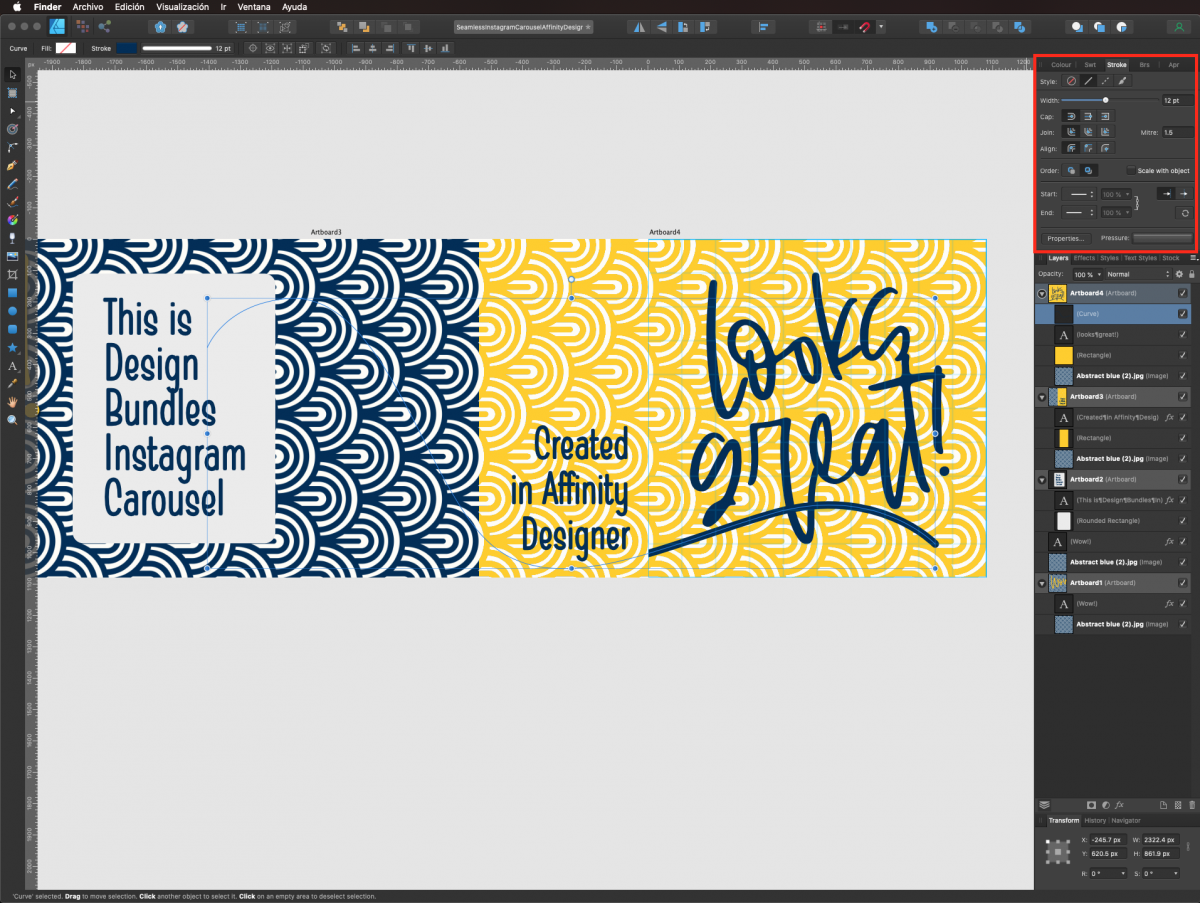
Add some color and thickness to the path in the Stroke panel. Ours was filled with the same blue used in the patterns and text, with a 12 pt Width and rounded Caps.
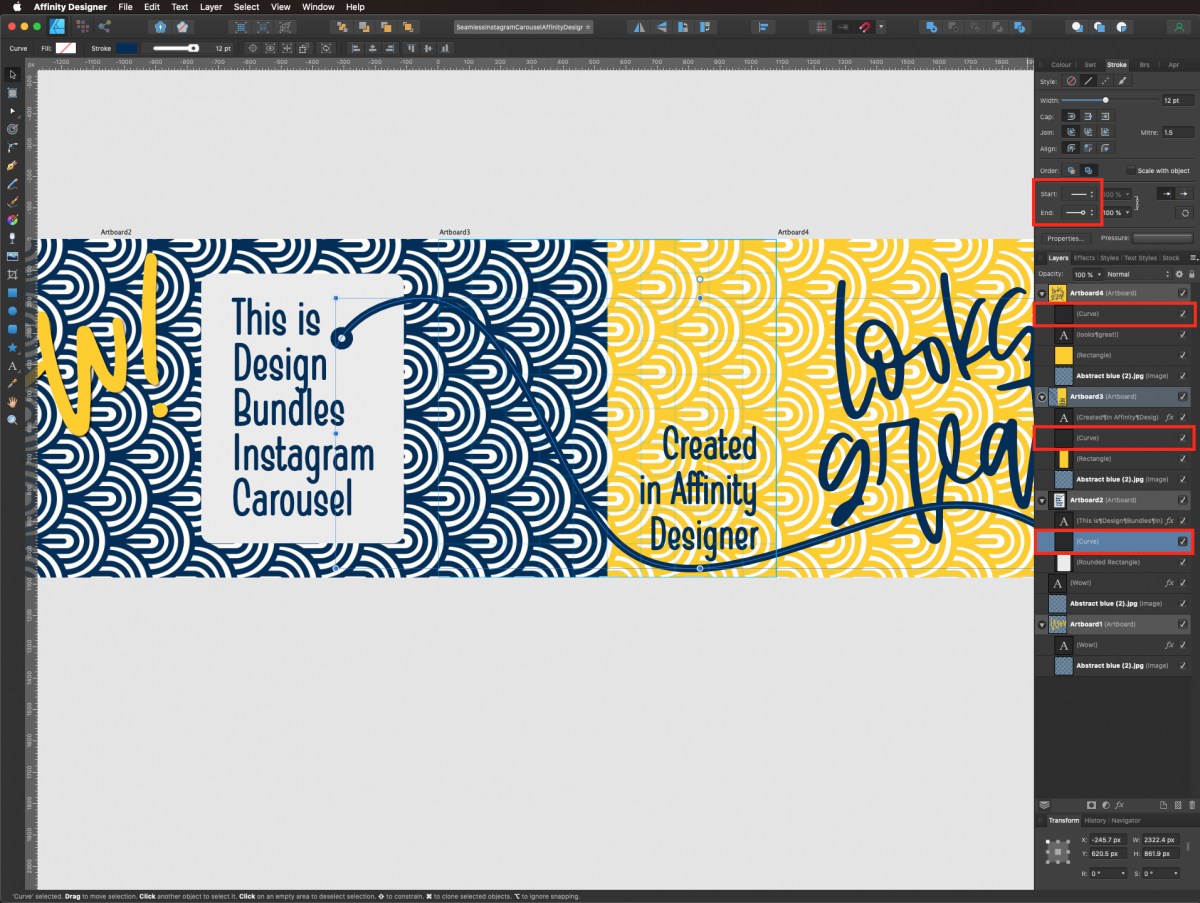
Duplicate the path and place the duplicate on the other artboard (remember to place the layer in the correct position on top of the background layer or it won’t show). We added a rounded End to de Stroke on this instance of the path.
Create other paths to complement your overall design if you want.
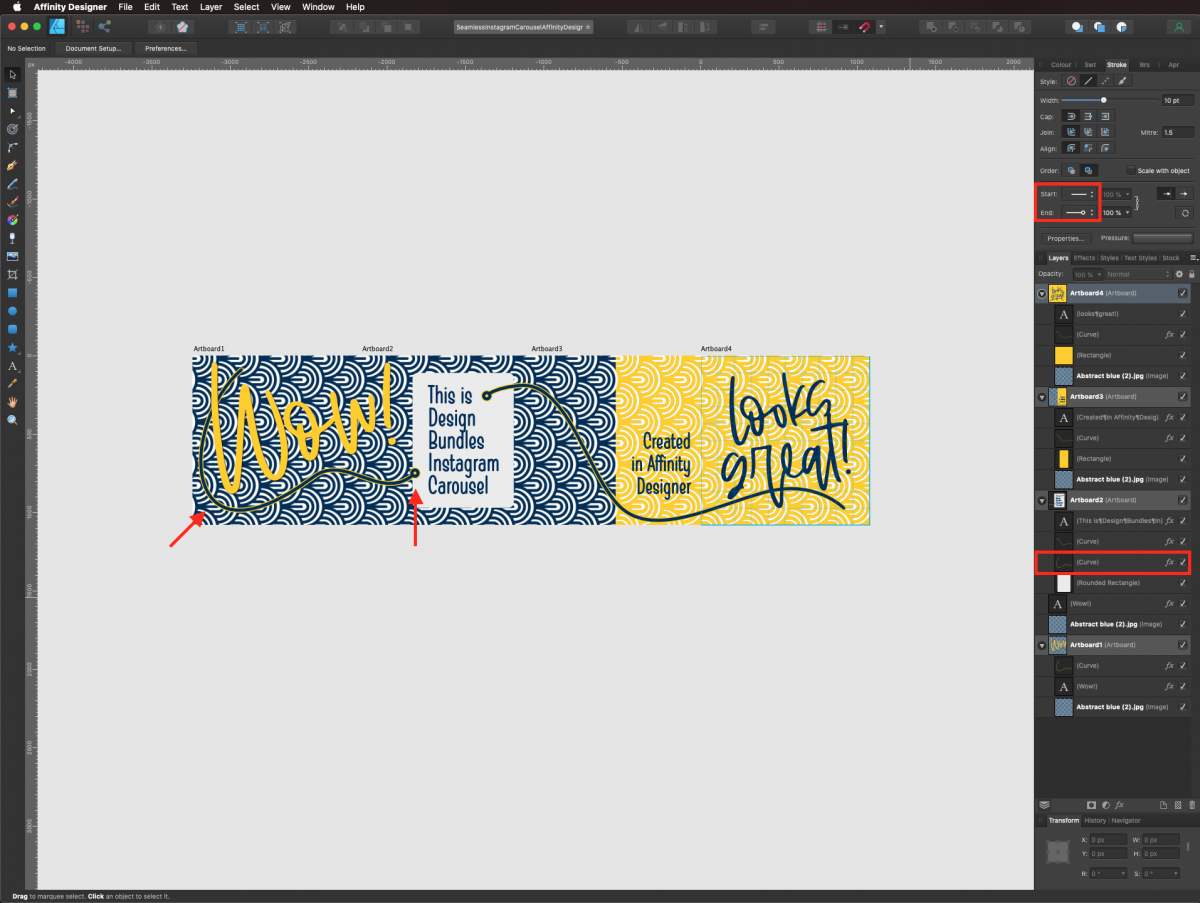
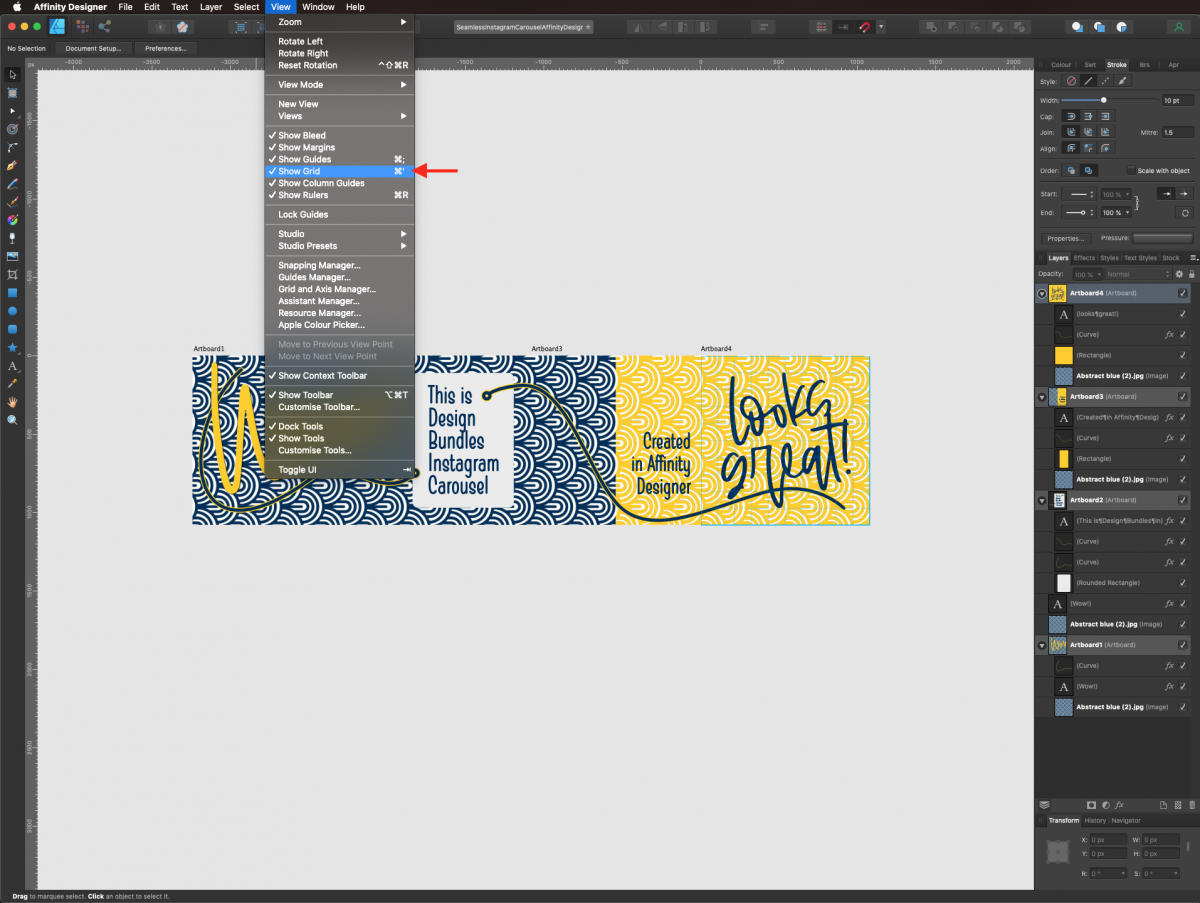
To check out your artwork, you may want to disable the Grid. Go to View > Show Grid (Command/Control + ‘).
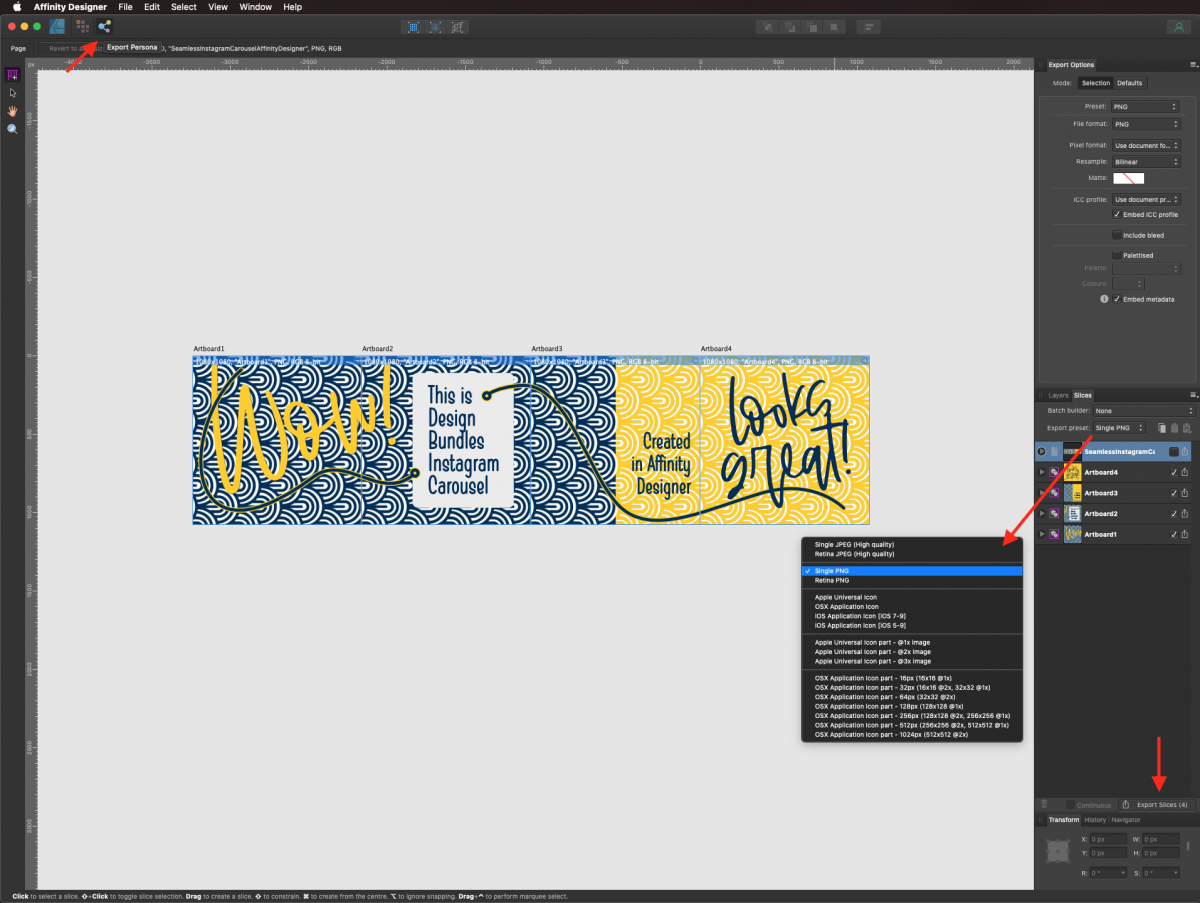
Once you are happy with your design, click on Export Persona on the top menu. In the Slices panel, you should see all your artboards, choose the desired export preset from the drop-down menu, and then click on the Export Slices button at the bottom right corner of the panel.
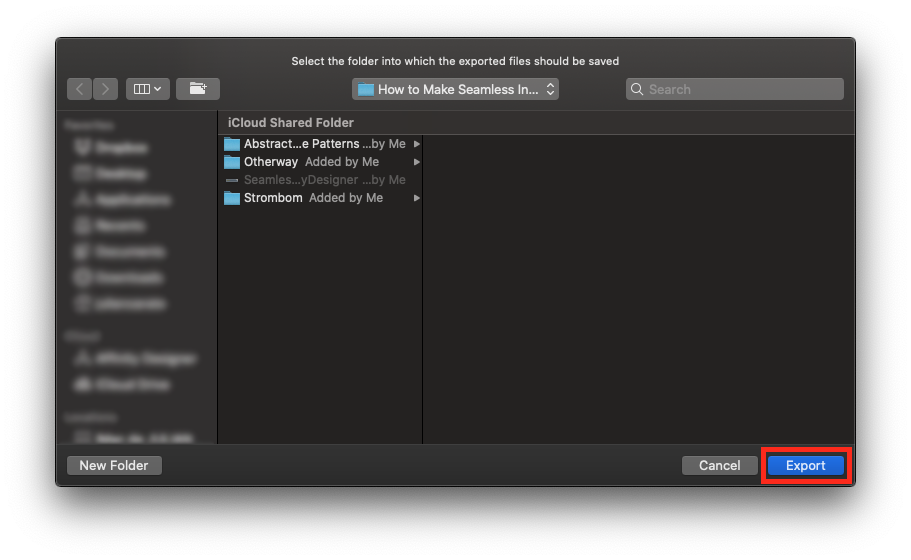
In the popup window, select the location you want to save your images and click Export.
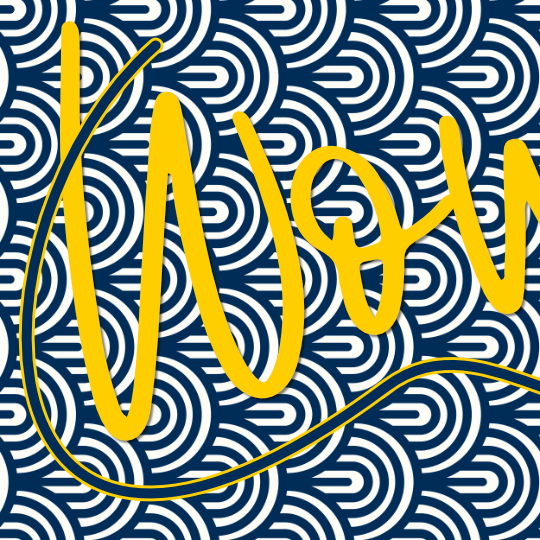
The resulting exported files should be similar to these.
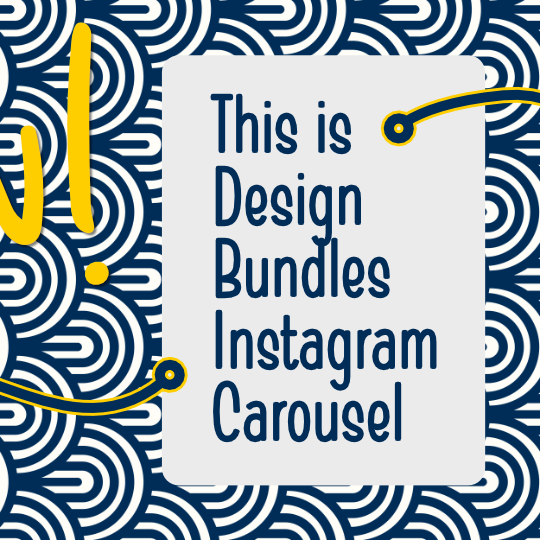
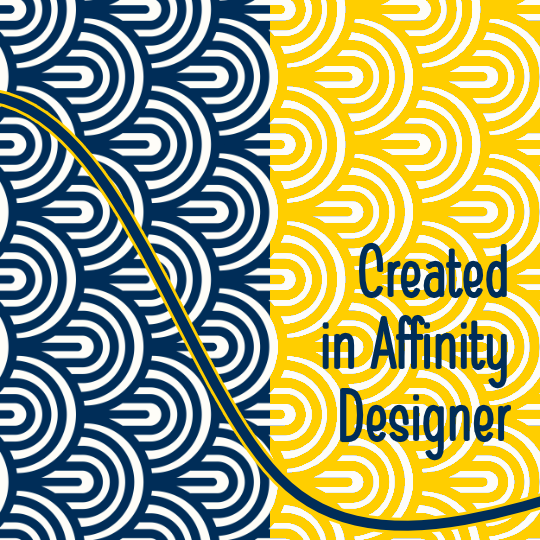

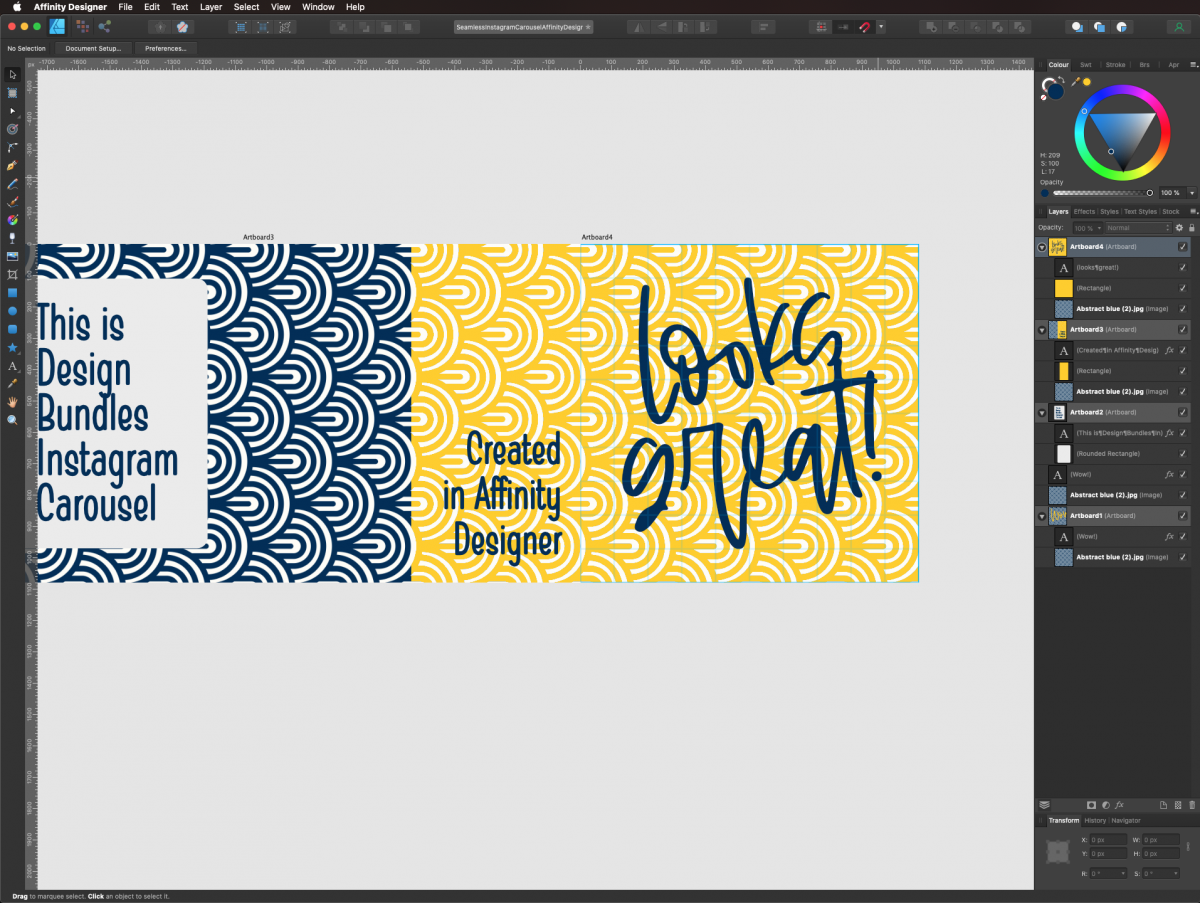
And here’s how our finished Instagram Carousel looks.

We have tons of great Affinity Designer tutorials, make sure you don’t miss our guides on how to make a flat character, and how to use color palettes in Affinity Designer.
We also have a tutorial on making a seamless carousel in Adobe Illustrator if that is your preferred program.
In this tutorial, we will be using Strombom and Otherway fonts, and some abstract blue patterns from the Plus Hub. However, you can choose some gradient backgrounds, modern serif fonts, and many other graphics from Design Bundles to aid your design.
Step 1 - Create your Artboards
There are a couple of sizes for Instagram carousel posts, square (1080 x 1080 px) and portrait (1080 x 1350 px). We are going to use square one for this tutorial. If you choose portrait, remember to keep the information you want to be viewed on your front page within the 1080 x 1080 square because it won’t be visible.
Create a New Document, click on the Web presets, and scroll down. The last presets are the ones for social media. Choose the size you want to use. In the Layout panel, keep the default settings and check the Create Artboard box.
To add more artboards to your document, first select the Artboard tool.
Then, click on the Insert Artboard button to create as many instances of the artboard as needed (up to 10).
Make sure that the snapping is enabled by opening the Snapping Manager in the View menu.
Inside the snapping window, you need to check the Enable snapping box.
Then, drag the second artboard slightly to the left until it touches the first one and repeat this action with the rest of them so that they are all aligned and look like a single one.
Step 2 - Enable the Grid
To have a visual guide for the placement of your design assets is a good idea to enable the Grid on your artboards. Head to the View menu and choose Grid and Axis Manager.
In the manager window, check the Show Grid box and click the Advanced tab to show more options. In the First axis window, input a Spacing of 1080 px (like your artboard) and 10 Divisions. Do the same with the Second axis. At the bottom of the panel, you can adjust the Grid and Subdivision lines color and opacity to your liking (we used a light blue as color and increased the grid opacity to 100%).
To use these settings in the future, click on the small hamburger menu on the top right side and choose Create Preset.
Choose a name for your preset and click Create in the popup window to save it.
Open the Grid and Snapping Axis manager for each one of the artboards and choose your new preset.
Step 3 - Place the background Pattern
For the background, we chose a pattern, to bring it into your document go to File > Place.
Navigate to where your files are saved, select them and click Open. Since the .pat files won’t work on Affinity Designer you need to use the .jpg tiles instead.
Your cursor will transform into a white arrow pointing down to a small blue oval, place it on the top left corner of the artboard and click.
To resize the pattern tile, head to the Transform panel and make the Width and Height 1080 px. We also rotated our tile to a -90º angle.
If you want to create the pattern from scratch, you can check our tutorial on how to Make a Seamless Pattern in Affinity Designer.
To add the pattern to the rest of your artboards, right-click on top of its thumbnail in the Layers panel and choose Duplicate.
You can Cut (Command/Control + X) and Paste /Command/Control + V) the duplicate in the other artboard, or just drag its thumbnail on the Layers panel making sure it is placed correctly.
Repeat this with all the artboards you want to add the pattern to.
Step 4 - Add text to the Carousel
Select the Artistic Text tool, choose your font, size, alignment, and color and type what you want (ours was Otherway font with a size of 144 pt, aligned left, and filled with a bright yellow).
Step 5 - Make design elements encompass multiple artboards
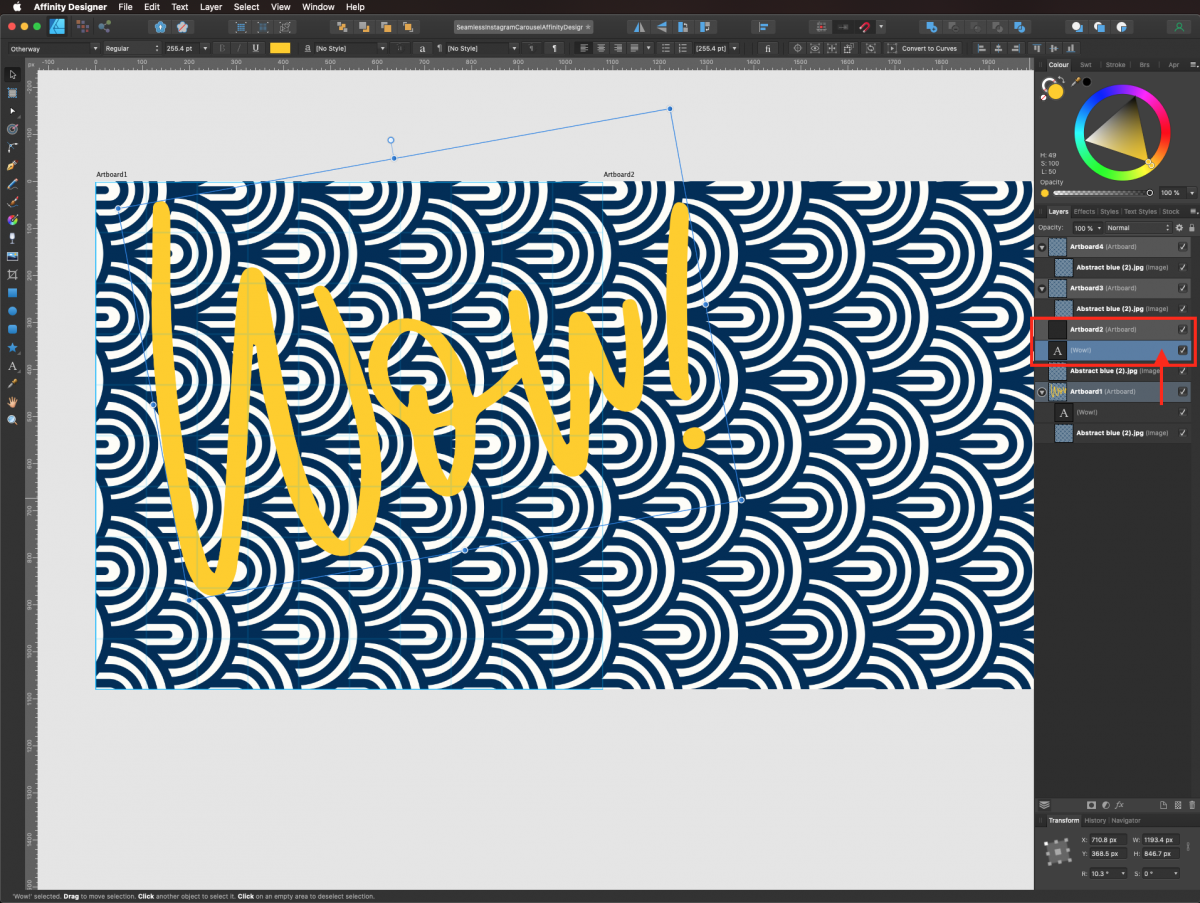
Give the text a slight rotation(we used a 10.3º angle) and maybe resize it so a portion of it sits in the next artboard. The portion of the text that sits on the second artboard won’t be visible.
In order to make the whole text show create a duplicate of the text layer.
Drag its thumbnail to the second artboard and make sure the duplicate text is placed correctly within the artboard so you can see it (on top of the background pattern tile).
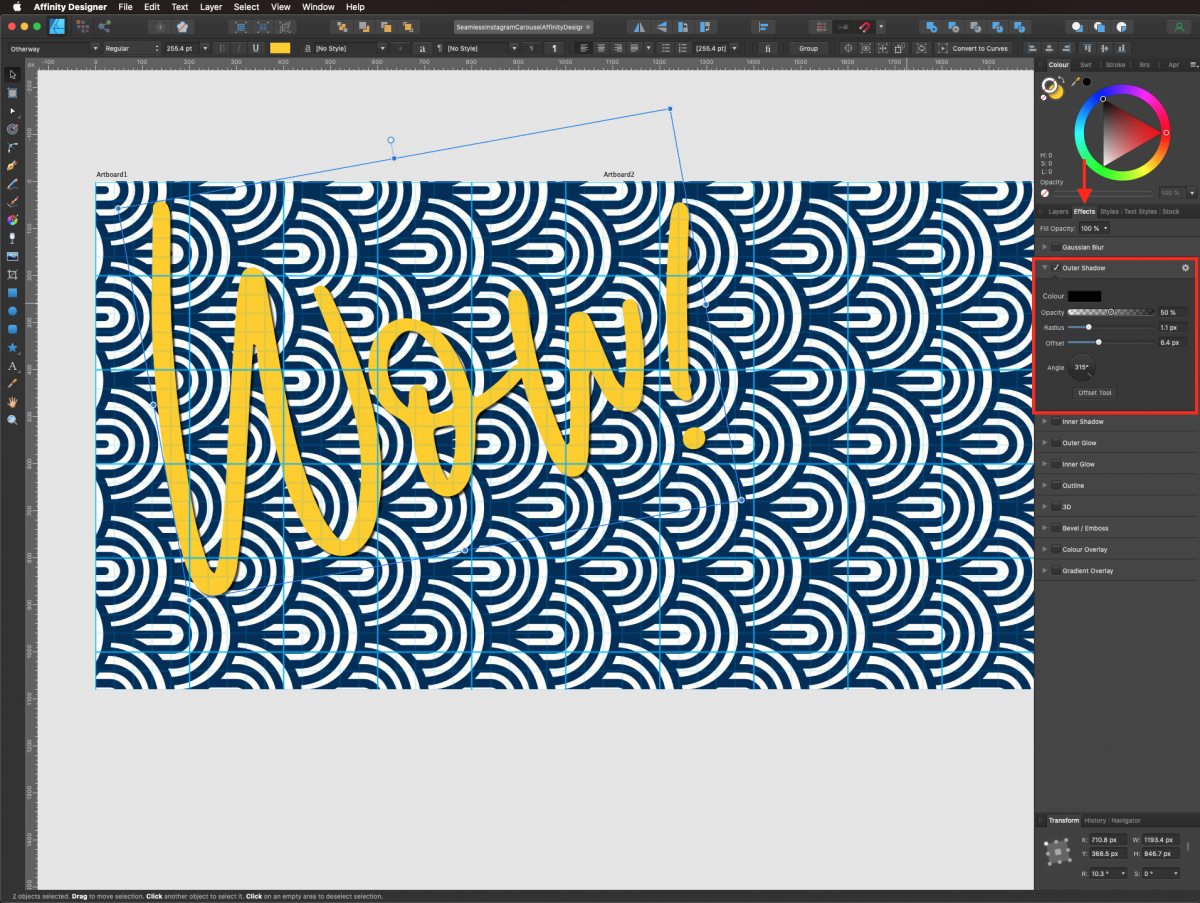
To add some depth to the text, select both instances (from both artboards), head to the Effects panel, and check the Outer Shadow box to open the settings window. We used black as Fill color, a 50% Opacity, 1.1 px Radius, 6.4 px Offset, and a 315º Angle.
Step 6 - Add more design elements
To fill all the artboards and finish the carousel, we need to create more design elements and add more text.
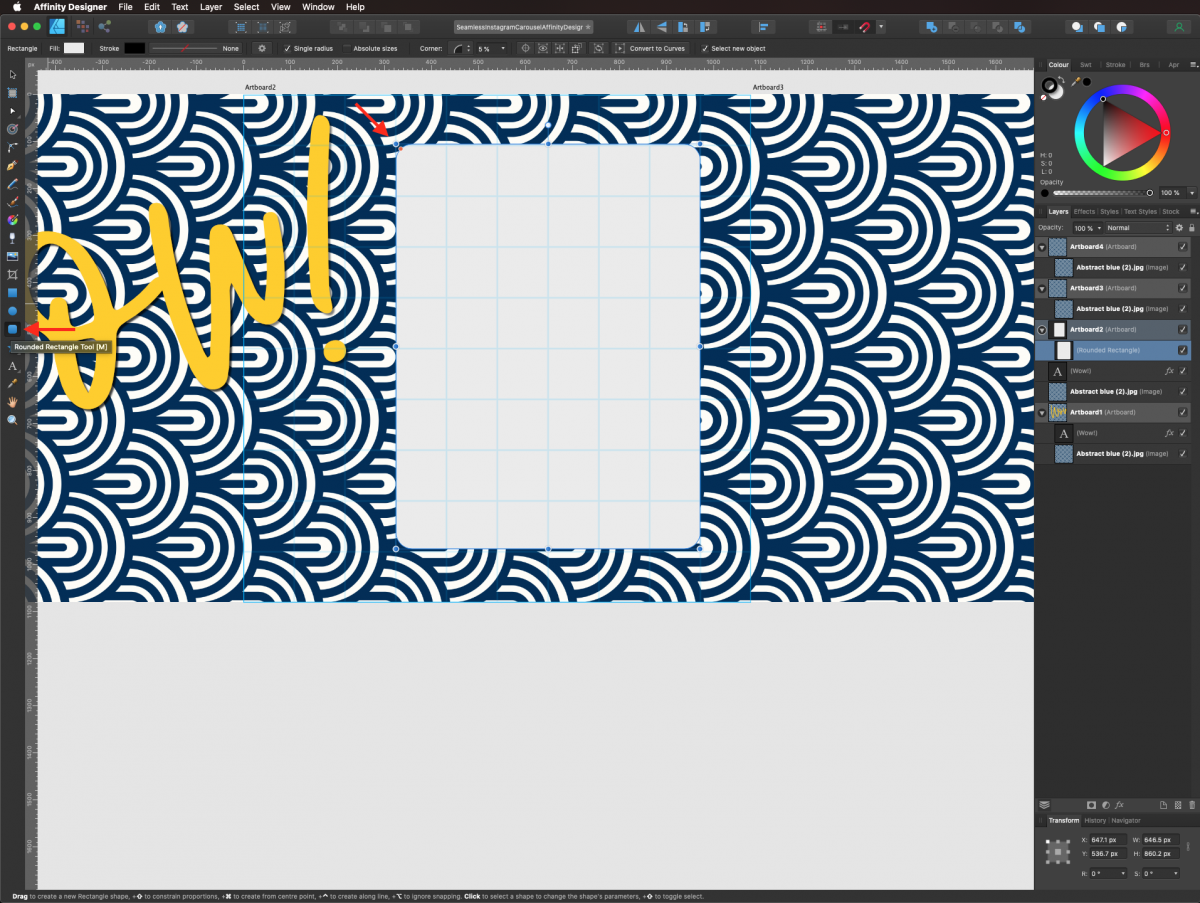
First, let’s create a white frame with the Rounded Rectangle tool (M). Fill it with white and place it in the remaining portion of the second artboard.
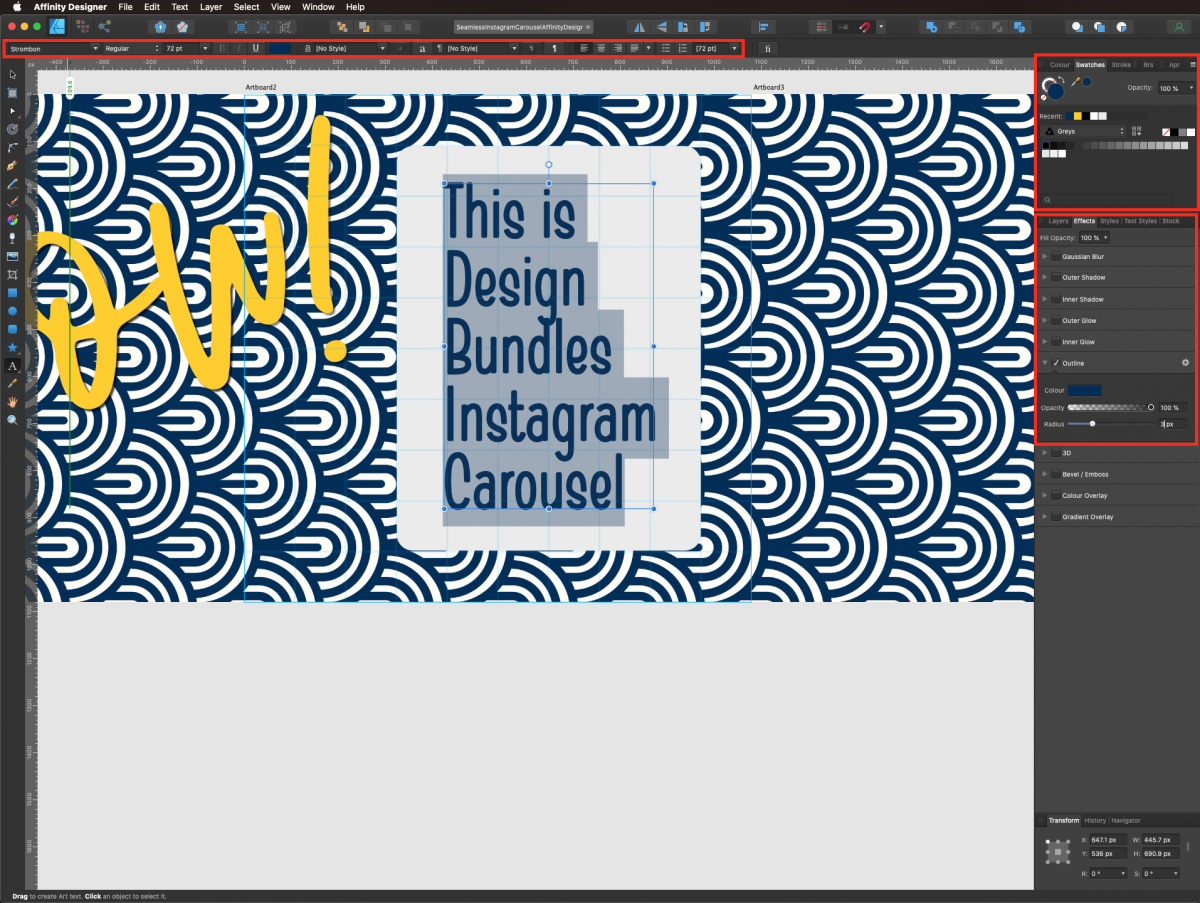
Then, add some text on top of the frame. We used the Strombom font filled with the same blue from the background pattern (use the Eyedropper tool to select it). To make it thicker we added an Outline effect with a 3 px Radius, and 100% Opacity in the Effects panel.
Now, let’s add some contrast by changing the color of some of the background pattern tiles. Create a rectangle on top of the portion of the background you want to change making sure it is placed on top of the pattern layer and fill it with the same bright yellow used for some of the text.
Then, change its Blending Mode to Lighter Color.
To replicate this with other artboards, make a copy of the yellow rectangle, paste it on the desired artboard and resize it or reposition it to suit your needs.
Keep adding text and other elements to complete your carousel design.
If you want to add some elements that start in one artboard and end in another one as we did with the text, just create the element. We used the Pen tool (P) and made an undulating path that started close to some text in the last artboard and ended close to more text on the other artboard.
Add some color and thickness to the path in the Stroke panel. Ours was filled with the same blue used in the patterns and text, with a 12 pt Width and rounded Caps.
Duplicate the path and place the duplicate on the other artboard (remember to place the layer in the correct position on top of the background layer or it won’t show). We added a rounded End to de Stroke on this instance of the path.
Create other paths to complement your overall design if you want.
To check out your artwork, you may want to disable the Grid. Go to View > Show Grid (Command/Control + ‘).
Step 7 - Export the Artboards
Once you are happy with your design, click on Export Persona on the top menu. In the Slices panel, you should see all your artboards, choose the desired export preset from the drop-down menu, and then click on the Export Slices button at the bottom right corner of the panel.
In the popup window, select the location you want to save your images and click Export.
The resulting exported files should be similar to these.
And here’s how our finished Instagram Carousel looks.
We have tons of great Affinity Designer tutorials, make sure you don’t miss our guides on how to make a flat character, and how to use color palettes in Affinity Designer.
We also have a tutorial on making a seamless carousel in Adobe Illustrator if that is your preferred program.


