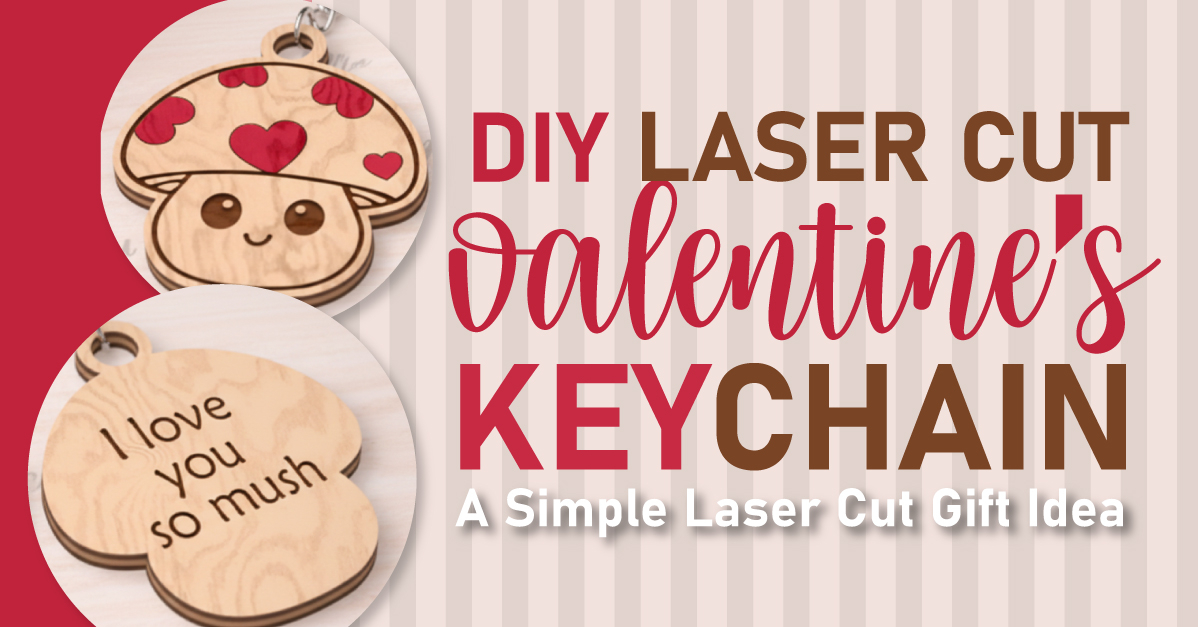
How to Turn Your Artwork Into DTF or UV DTF Prints: A Complete Guide
Your artwork, now in DTF & UV DTF!
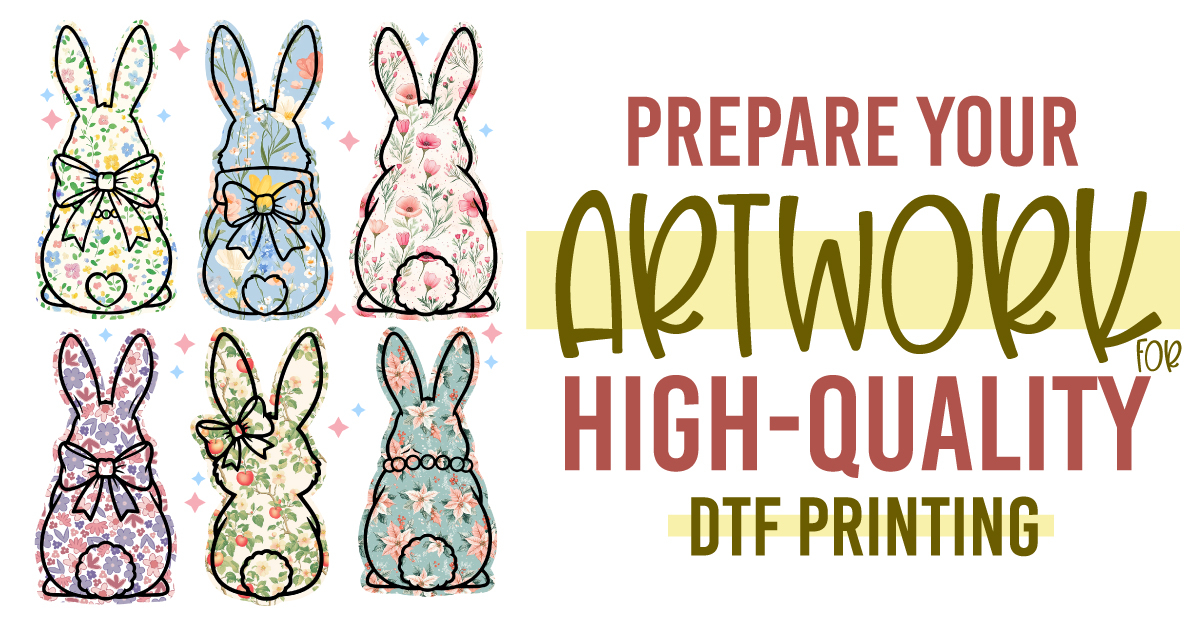
Crafters and artists everywhere are discovering the magic of transforming their own artwork into DTF (Direct-to-Film) or UV DTF (Ultra-Violet Direct-to-Film) prints. These printing methods allow you to take digital or hand-drawn art and apply it beautifully to tumblers, mugs, shirts, keychains, and countless other surfaces.
Lately, we’ve been getting many questions about this process, how to digitize artwork, prepare it for printing, check resolution, and upload it correctly to dtfprinter.com. So, in this detailed guide (part one of a two-part series), we’ll walk through the entire process of taking a physical piece of art and turning it into a print-ready UV DTF transfer.
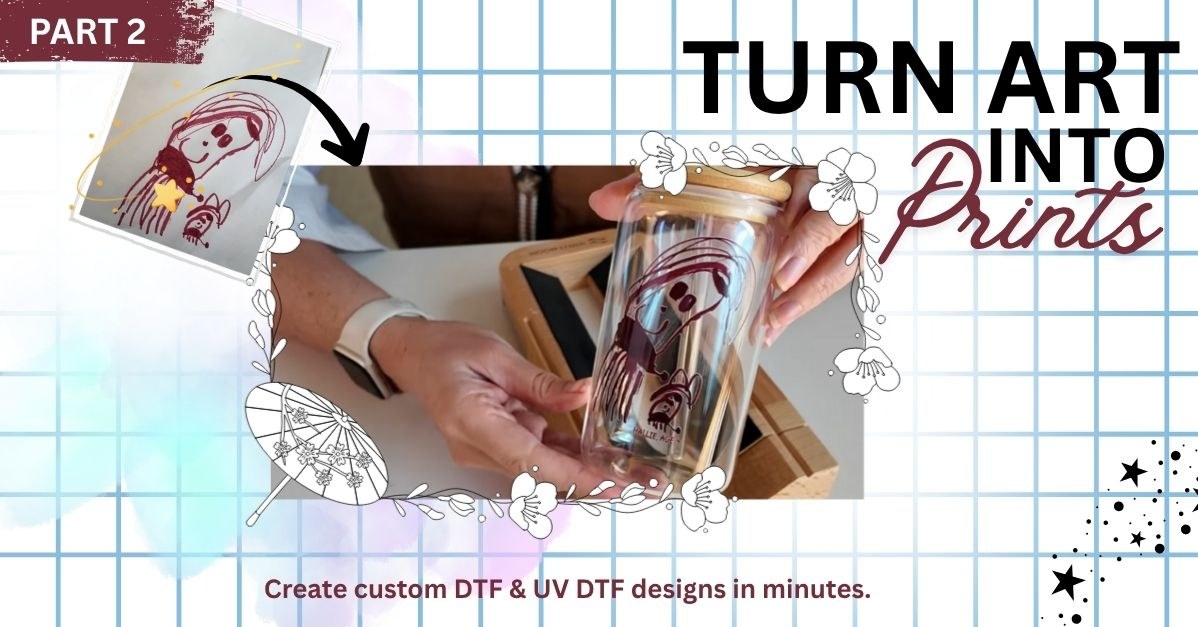
In part two, we’ll show you how to apply that UV DTF to a tumbler and bring your art to life.
How to Turn Your Artwork Into DTF or UV DTF Prints Part 2
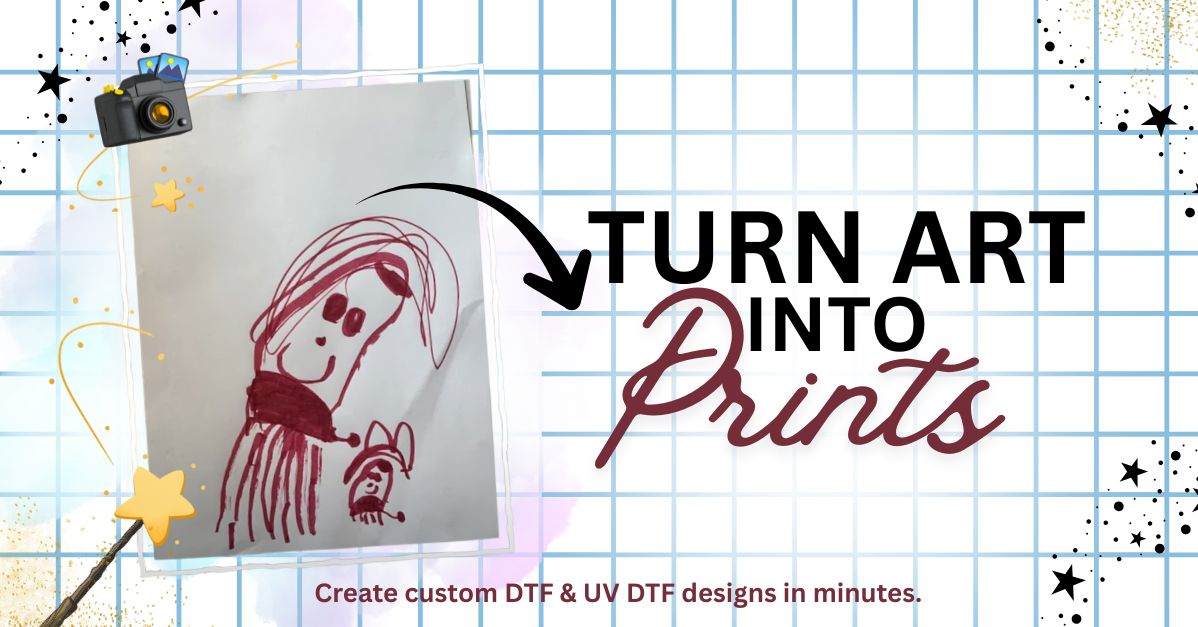
For this project, we’re doing something extra special. We’ll be using a piece of artwork created by my 4-year-old daughter. She’s currently in her “cat phase”, and while I’m allergic to cats, she loves them and draws them constantly. One of her drawings features both of us as cats: I’m apparently the one with ten thousand legs, and she’s the adorable smaller cat beside me.

Our goal: to turn this drawing into a UV DTF transfer that can be applied to a tumbler as a permanent keepsake.
Step 1: Photographing Your Artwork
- If you’re starting with a physical drawing, the first step is to capture it digitally.
- Lay the artwork on a flat surface and smooth out any wrinkles.
- Try to photograph it from directly above, keeping the camera parallel to the page.
- Use a well-lit, neutral background, ideally white, to prevent unwanted color reflections.
If the paper is creased, you can tape it gently to the table or hold it flat with your hand. The goal is to have a clean, evenly lit image that focuses only on the artwork itself.
Once you’re satisfied with your photo, transfer it to your computer using email, or a file-sharing service.
Step 2: Converting Your Image File
If you’re using an iPhone or Android, your image might save in HEIC format (the default Apple / Android image format).
Before uploading it to any design tool, open it in Preview (on Mac) or your preferred photo viewer, then export it as a PNG or JPEG.
We recommend PNG for best results, it retains higher quality and supports transparency, which is ideal for DTF and UV DTF work.
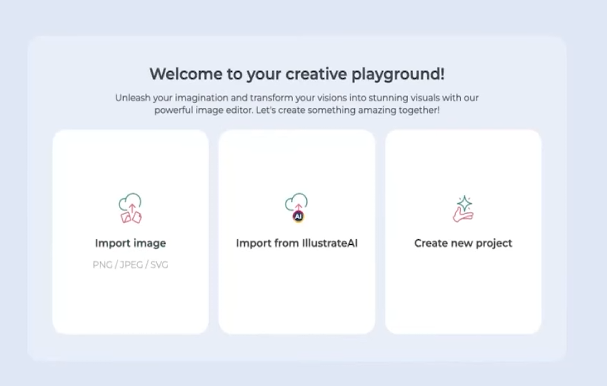
Step 3: Accessing Craft Designer
Now it’s time to digitize the artwork. For this, we’ll use Craft Designer, part of the Design Bundles Plus Membership suite of creative tools.
If you don’t have a membership yet, this is a perfect time to try it. Craft Designer, Illustrate AI, and millions of design files are available exclusively to Plus members. You can start a free trial or join the Unlimited Plan, which gives full access to every creative tool:
To open Craft Designer directly, visit:
Step 4: Importing Your Artwork
Once inside Craft Designer:
Click Import Image.
Choose your saved photo (the drawing you just converted to PNG or JPEG).
Select Pixel Mode.
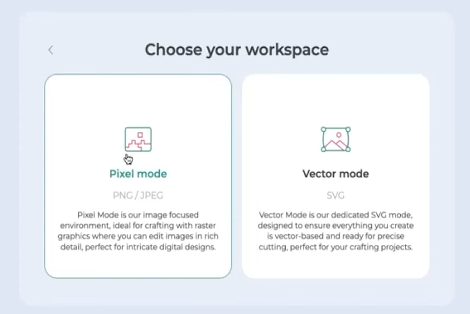
Here’s why:
Pixel Mode is for raster-based projects (like DTF, UV DTF, stickers, or sublimation). These are single-layer, full-color designs that print exactly as they appear.
Vector Mode, on the other hand, is used for cuttable files like SVGs, ideal for vinyl, laser cutting, or multi-layer projects.
Since UV DTF and DTF prints rely on full-color artwork, Pixel Mode is the correct choice.
Step 5: Removing the Background
Your artwork likely sits on a white sheet of paper, so the next step is to remove the background.
On the left-hand toolbar, select Remove BG (Background).
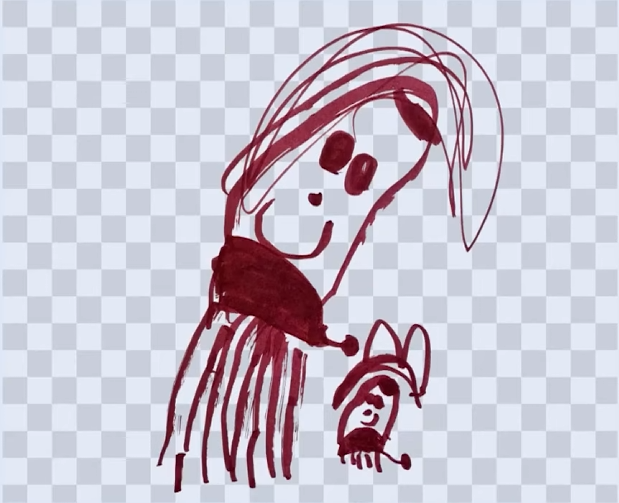
Within seconds, Craft Designer’s smart background remover isolates your artwork and eliminates the paper behind it. The result: a clean, transparent version of your drawing, ready to use for printing.
If needed, you can refine edges, erase small artifacts, or re-crop the image to perfect it.
👉 Click Here for a Full Background Removal Tutorial Using Craft Designer
Step 6: Adding Text or Personal Details
Before downloading your final image, consider adding text or elements.
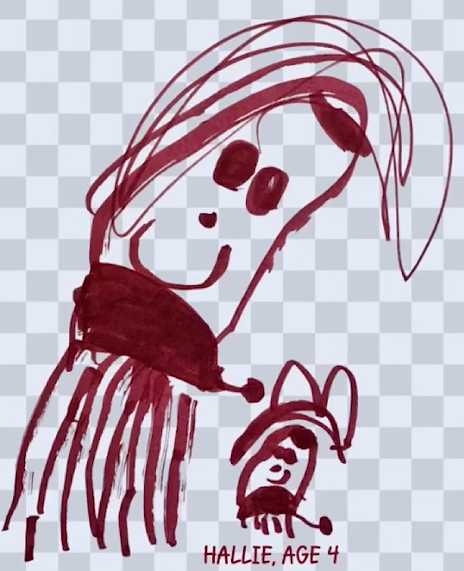
Craft Designer includes a library of beautiful embedded fonts from the Plus Library, allowing you to choose from a range of professional, decorative, and playful typefaces. You can:
- Change font color
- Add outlines or shadows
- Bend or curve text
You can also turn your artwork into a sticker-style graphic by adding a soft outline around it for extra dimension.
Step 7: Downloading Your File
When your design is complete, click Download and give your file a descriptive name.
Always download as a PNG file (not JPEG). PNG preserves transparency and detail without compression artifacts.
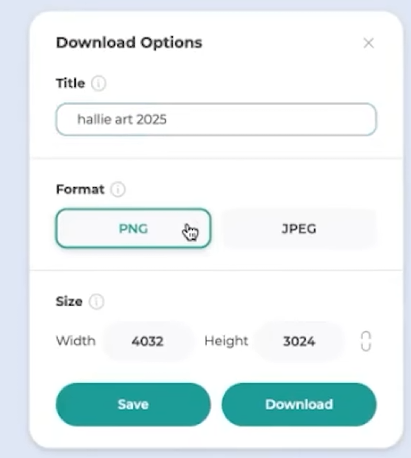
For print clarity, choose the maximum size setting (typically 3600 x 3600 pixels performs best). This ensures your artwork maintains high resolution when resized for different projects, from tumblers to mugs.
Step 8: Uploading to dtfprinter.com
Now it’s time to turn your digital design into a real product!
and click Create Prints.
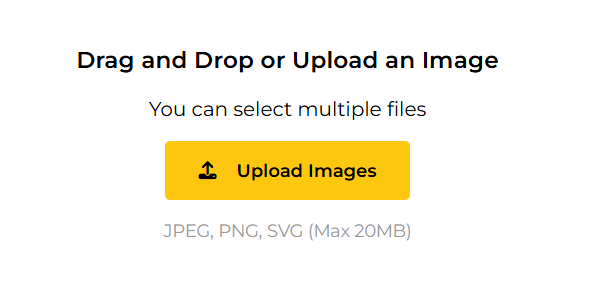
From here, you can upload your file in two ways - Drag and Drop the artwork you just downloaded from Craft Designer. Or, if you’re using a design from the Plus Library, download it from your account and drop it into the upload window.
The site automatically optimizes your file for printing, ensuring perfect color and clarity.
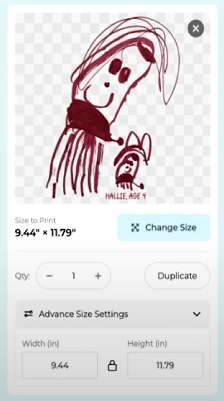
Step 9: Adjusting Print Size
Once your file is uploaded, you can customize the size and placement directly on the site.
Click Change Size to select from preset options for popular projects, such as:
- Tumbler decals
- Magnets
- Nameplates
- Cutting boards
- Mugs
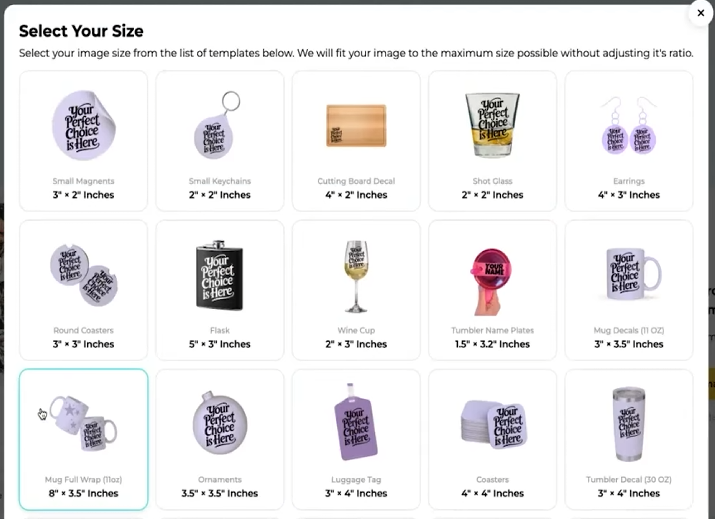
Or, use Advanced Size Settings to manually enter your desired dimensions. For example, if you want your design to be 5 inches wide, just type “5” and the height will adjust automatically to maintain proportions.
Step 10: Choosing Ready-to-Print Bundles
If you don’t want to design from scratch, dtfprinter.com also offers pre-made DTF and UV DTF bundles, available anytime, not just during special events.
You can Access Pre-Made Bundles from here:
Step 11: Placing Your Order
Once you’re happy with your file and size selection, click Get Price.
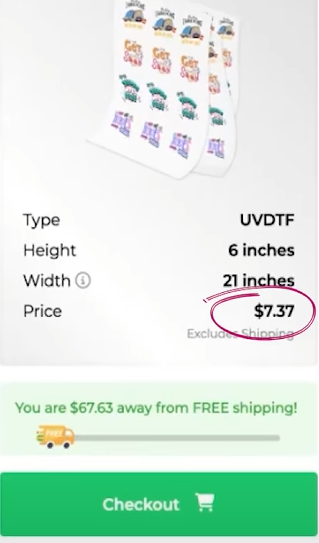
For example, the cost of our tumbler design was $7.37 before shipping, a great deal!
Add it to your cart, check out, and your custom-printed UV DTF sheet will be delivered right to your door in just a few days.
What’s Next
That’s it for part one of our two-part tutorial! You’ve successfully digitized, cleaned, optimized, and ordered your artwork as a UV DTF print.
🎥 Watch the Full Tutorial Video...
Final Thoughts
Turning personal artwork, especially something as meaningful as your child’s drawing. With the help of Craft Designer and dtfprinter.com, the process is easy enough for beginners yet professional enough for advanced creators.