Time Saving Tip: Recolor Artwork Tool
The recolor tool is a great time-saving tool. It enables you to change colors across all your artwork without having to edit them individually. In this tutorial we will show you the Recolor Artwork Tool.
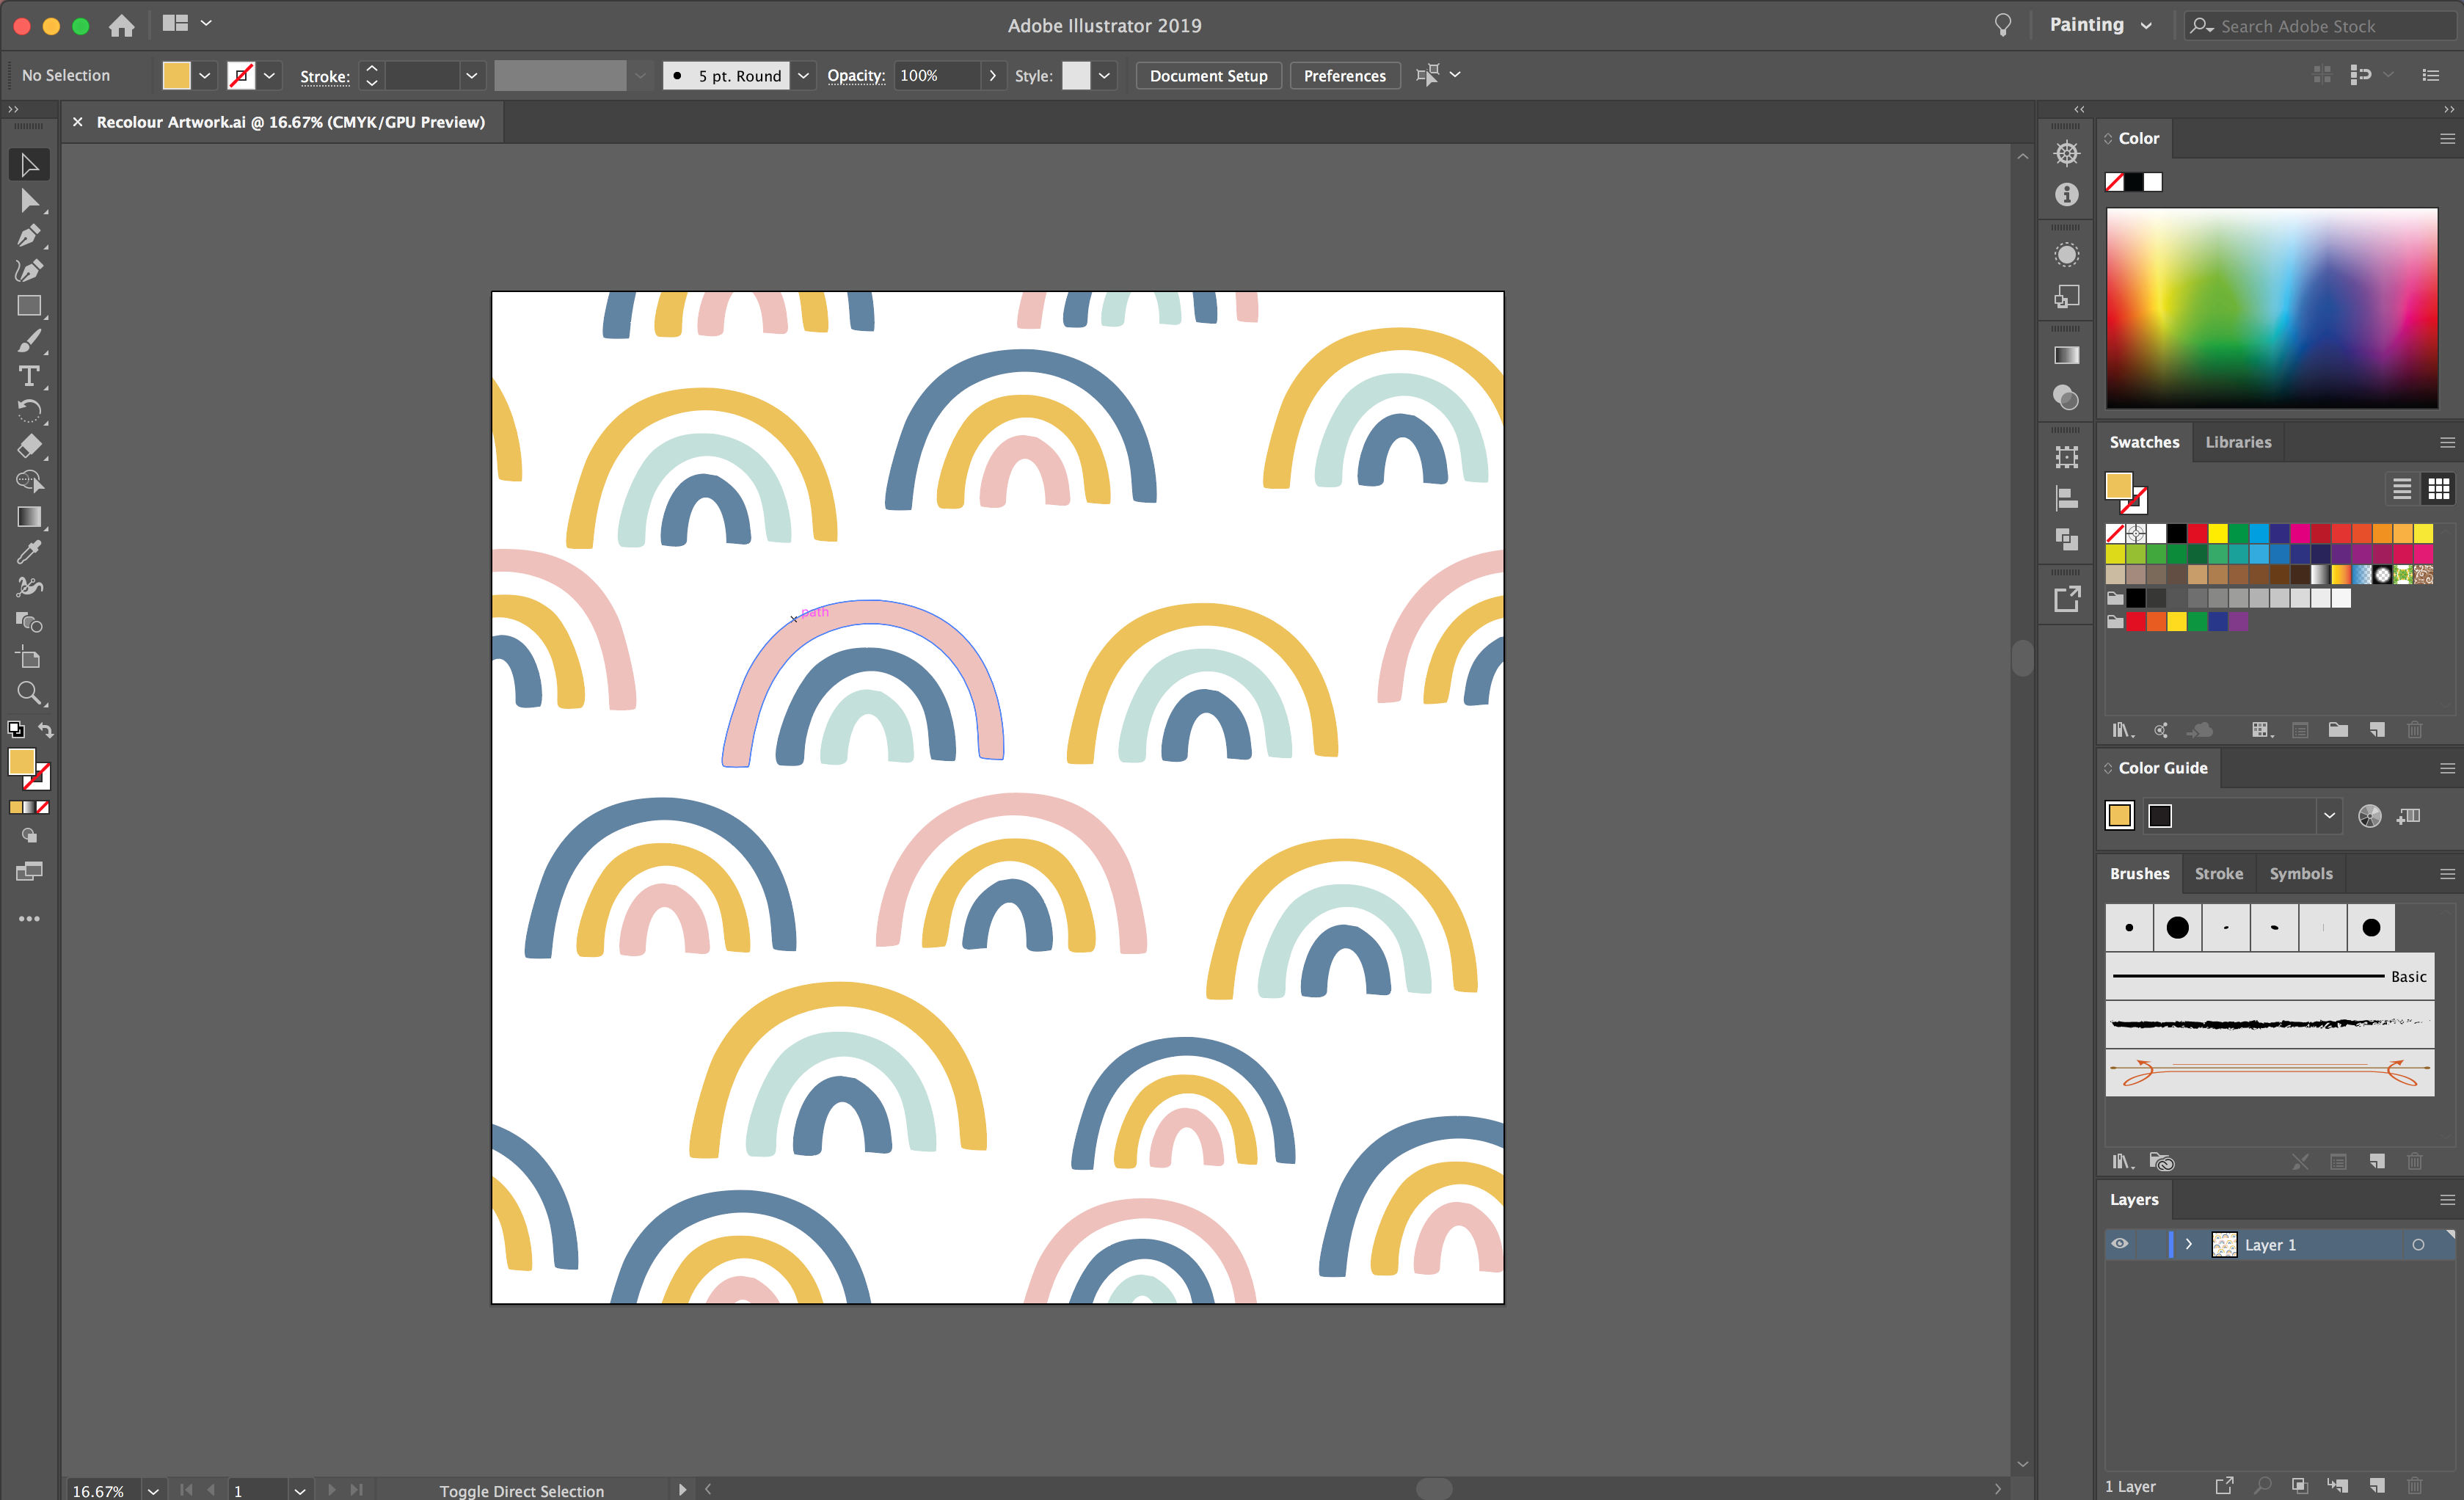
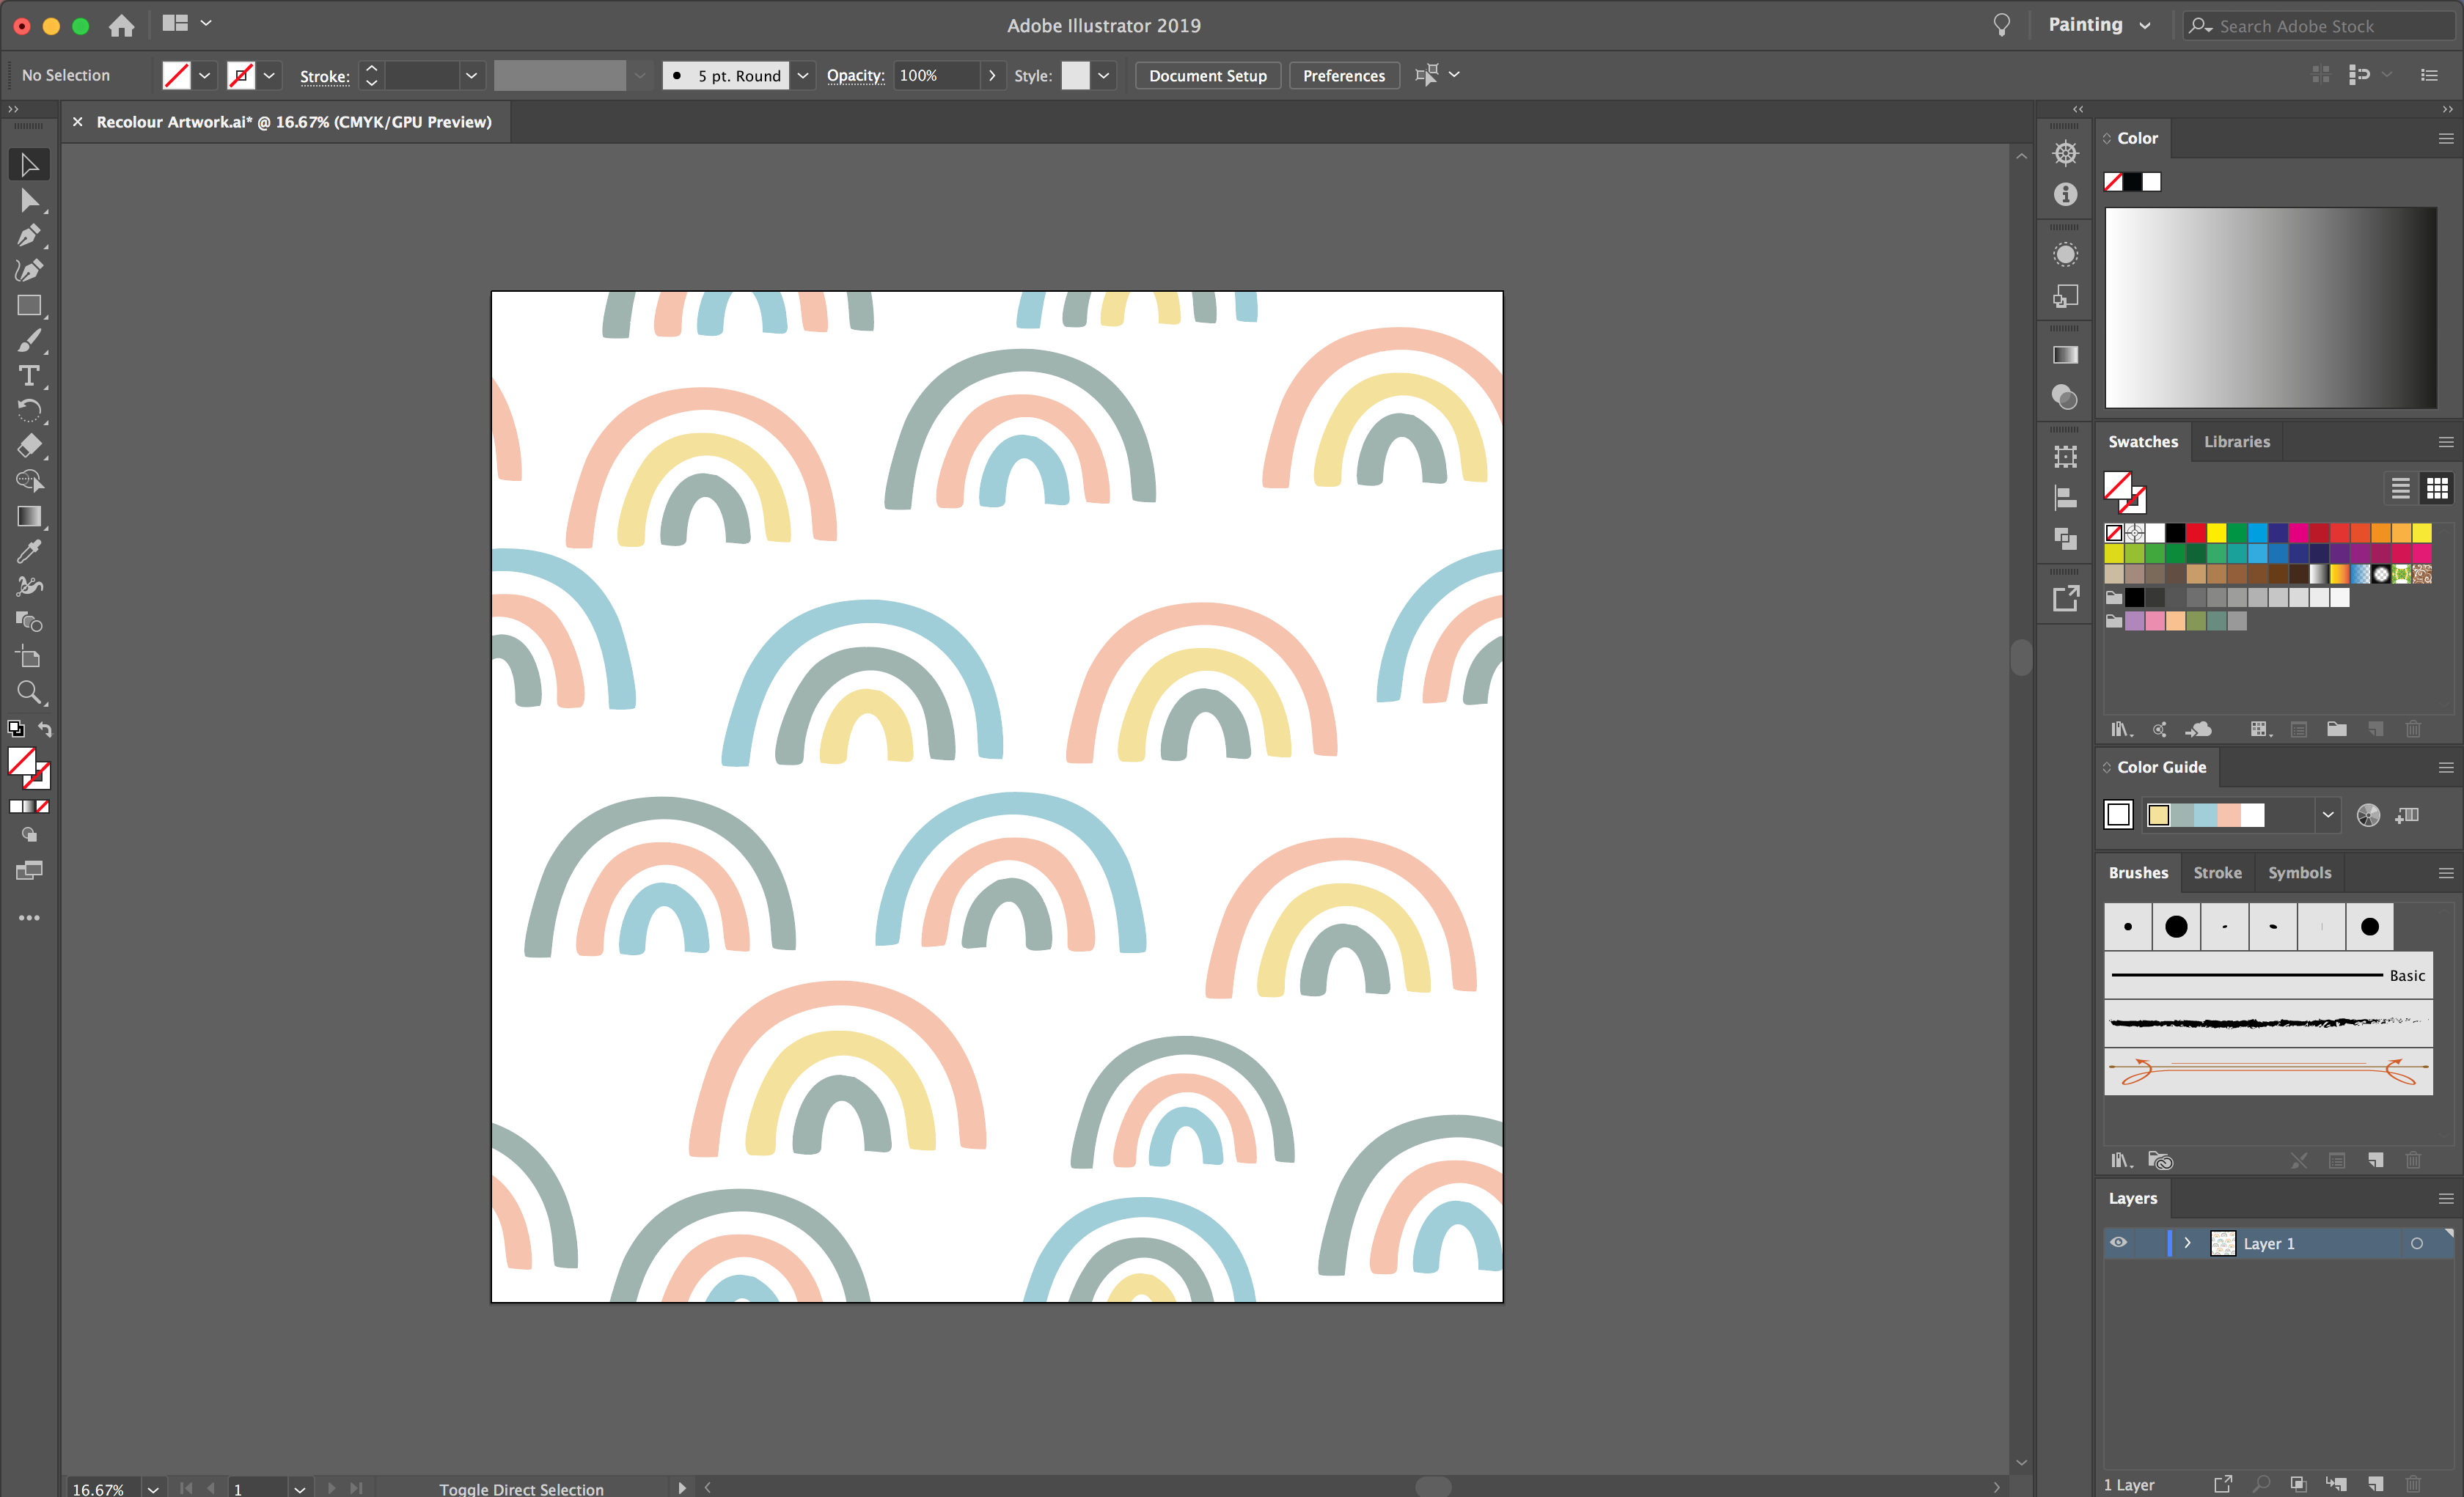
Start by creating or opening your design in Illustrator, I am using this pastel rainbow pattern from DesignBundles.
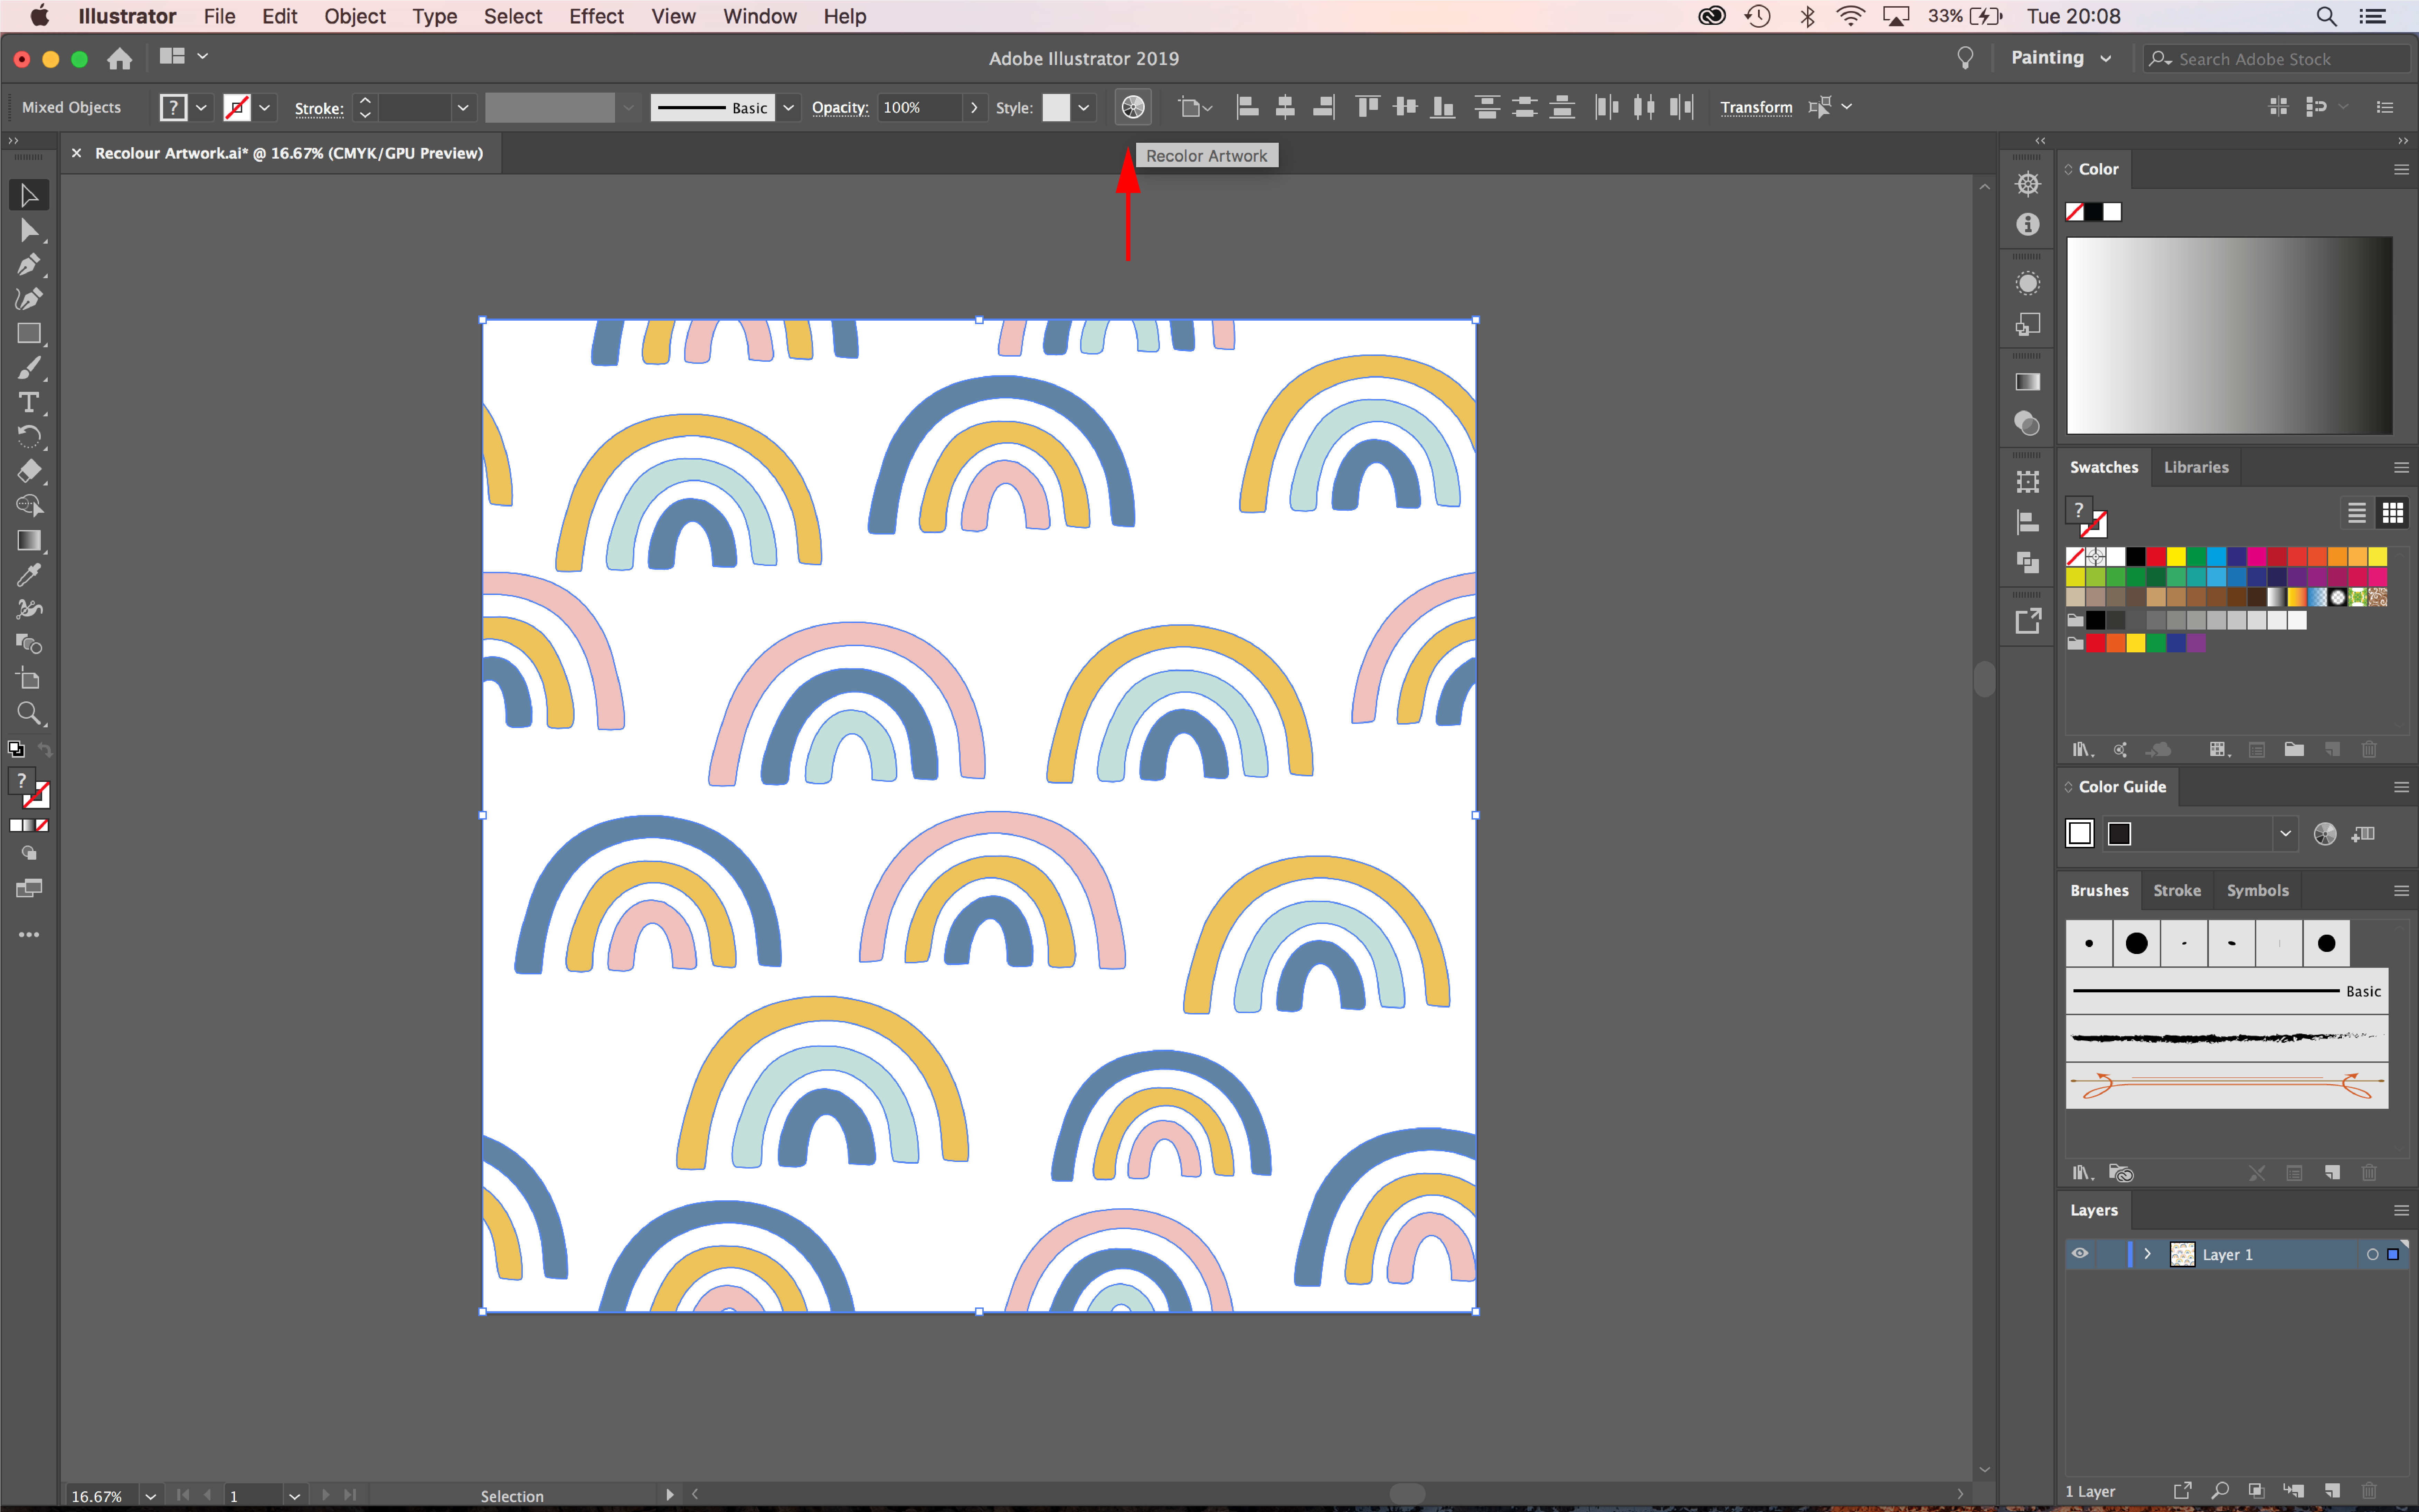
Highlight all your artwork that you would like to recolor. Once you have done this, select the Recolor Artwork tool found in the top toolbar.
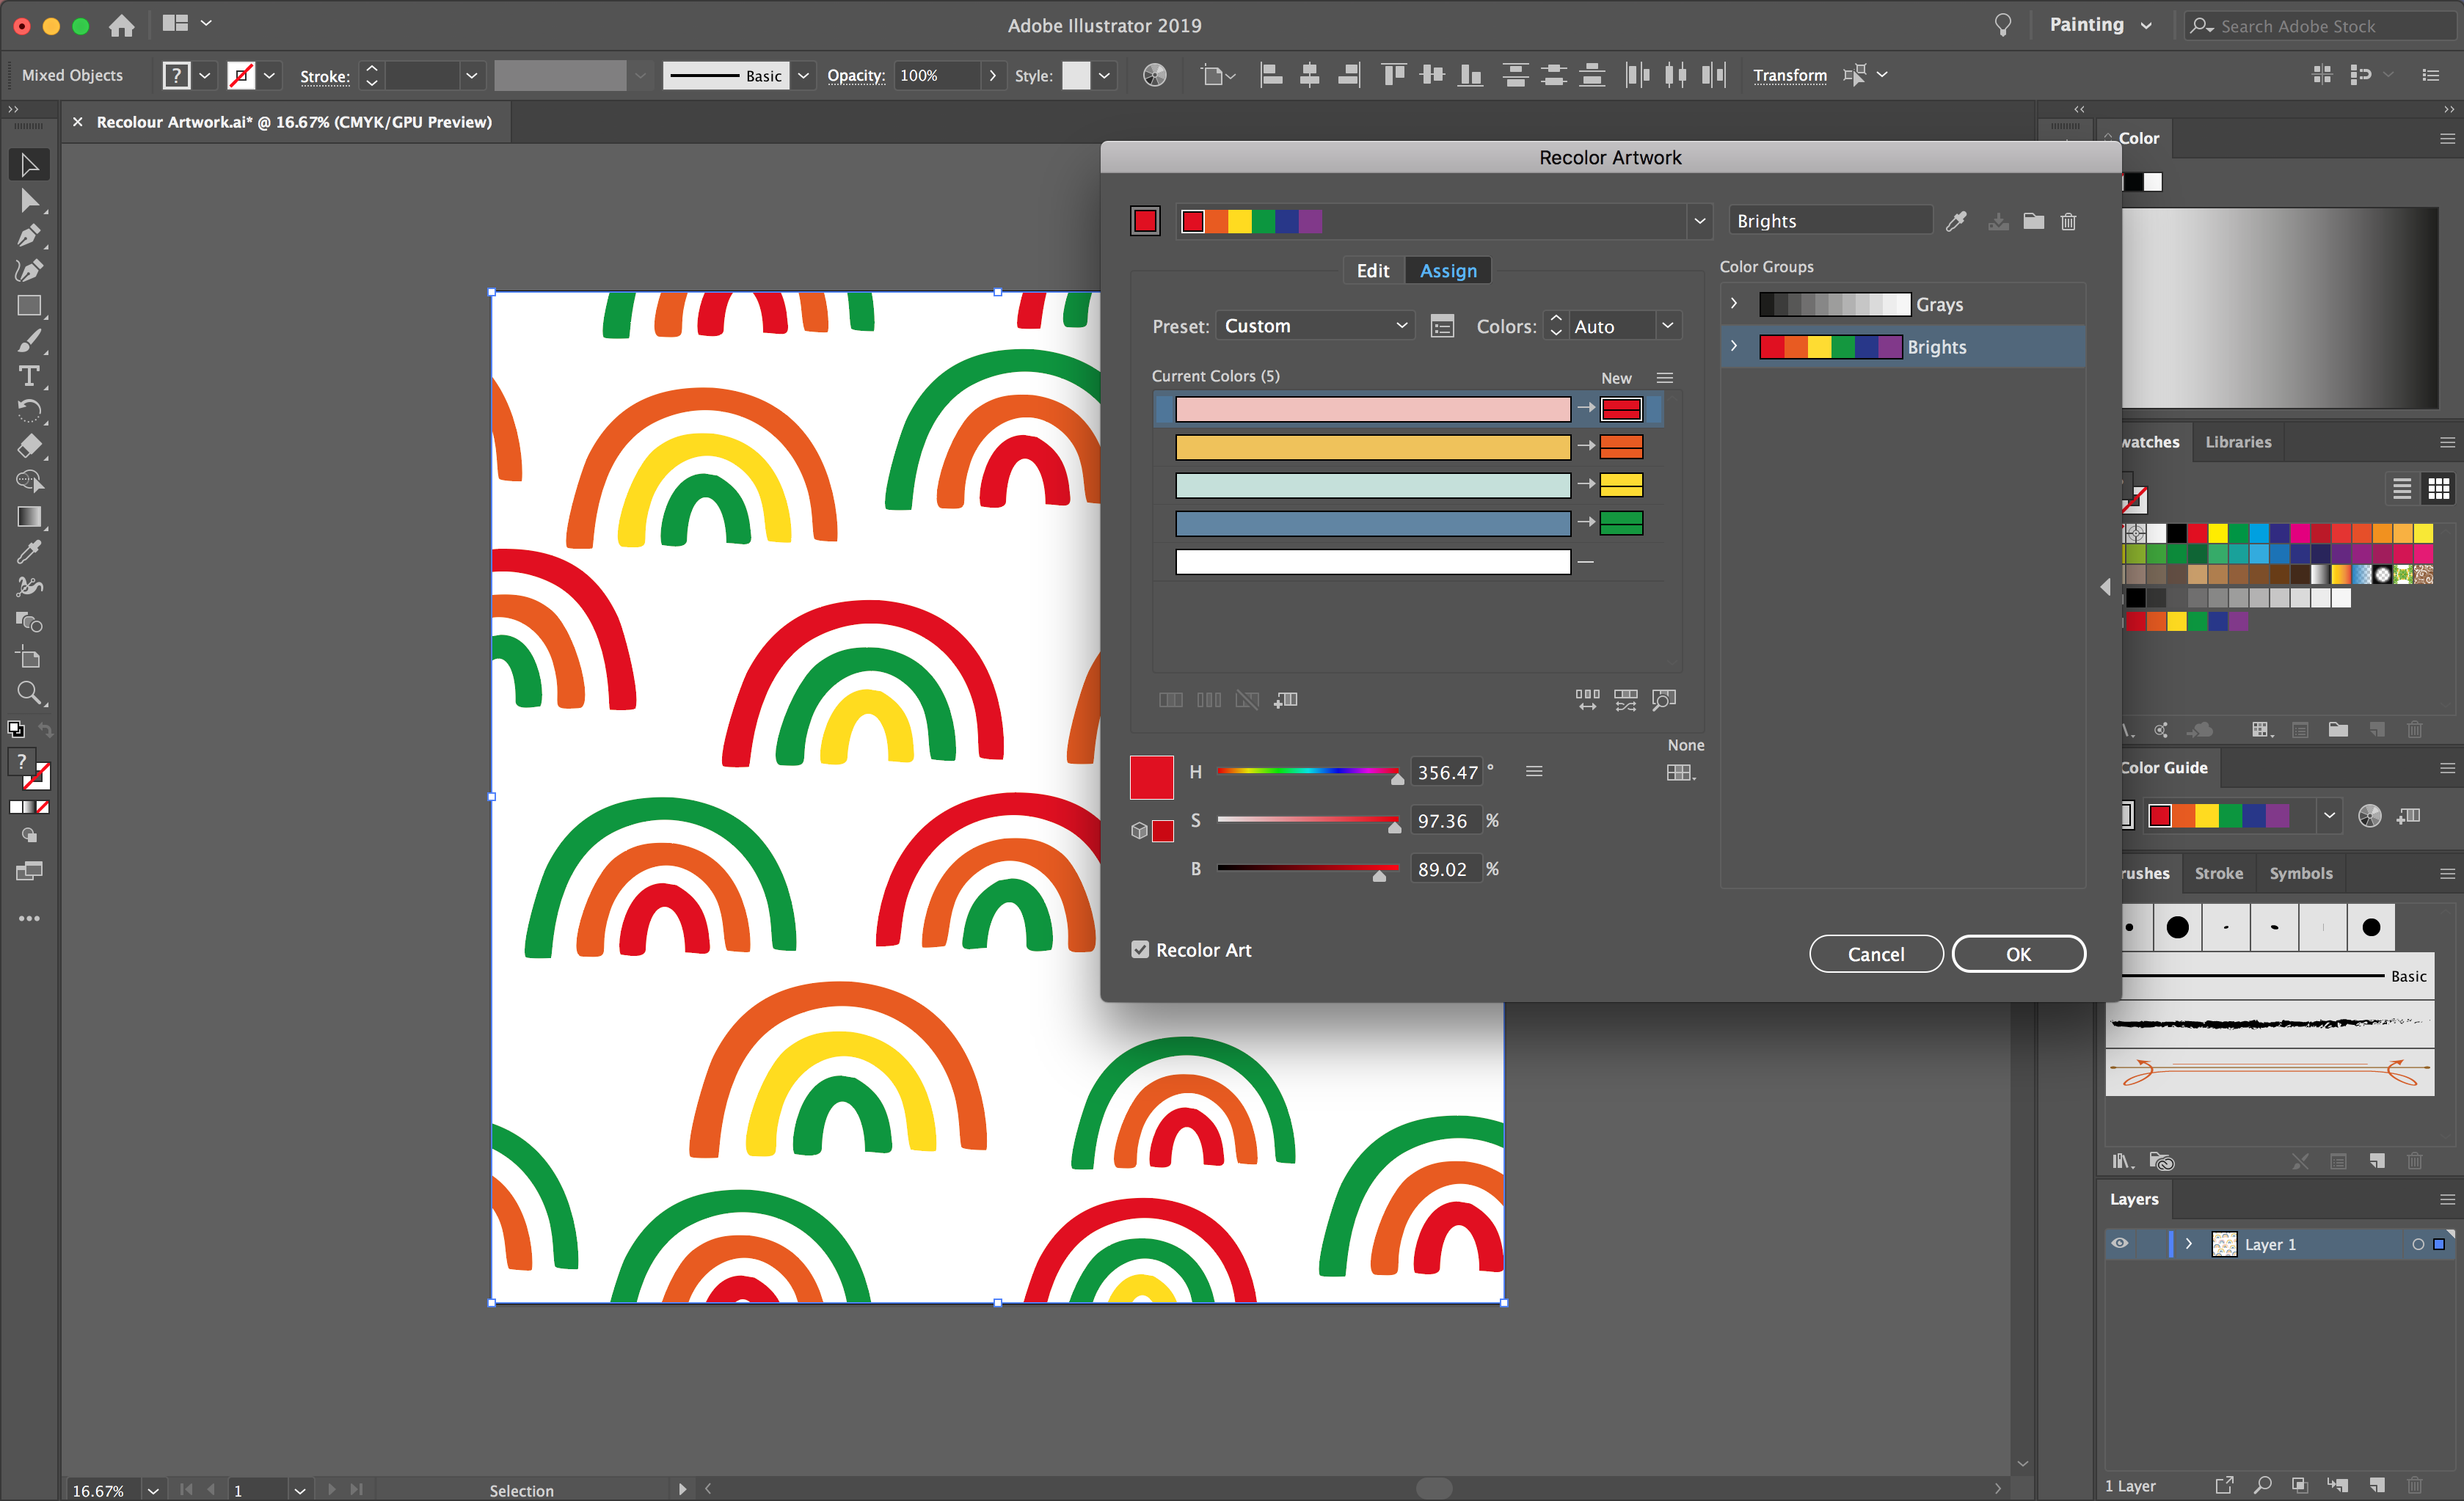
Within the Recolor Artwork options, you have various means of adjusting colors. If you have any preloaded Color Groups in your Swatches, you can simply apply these by selecting them on the right hand side of the options panel. This will automatically apply to your existing colors, you can also drag and drop the new colors to your desired current colors.
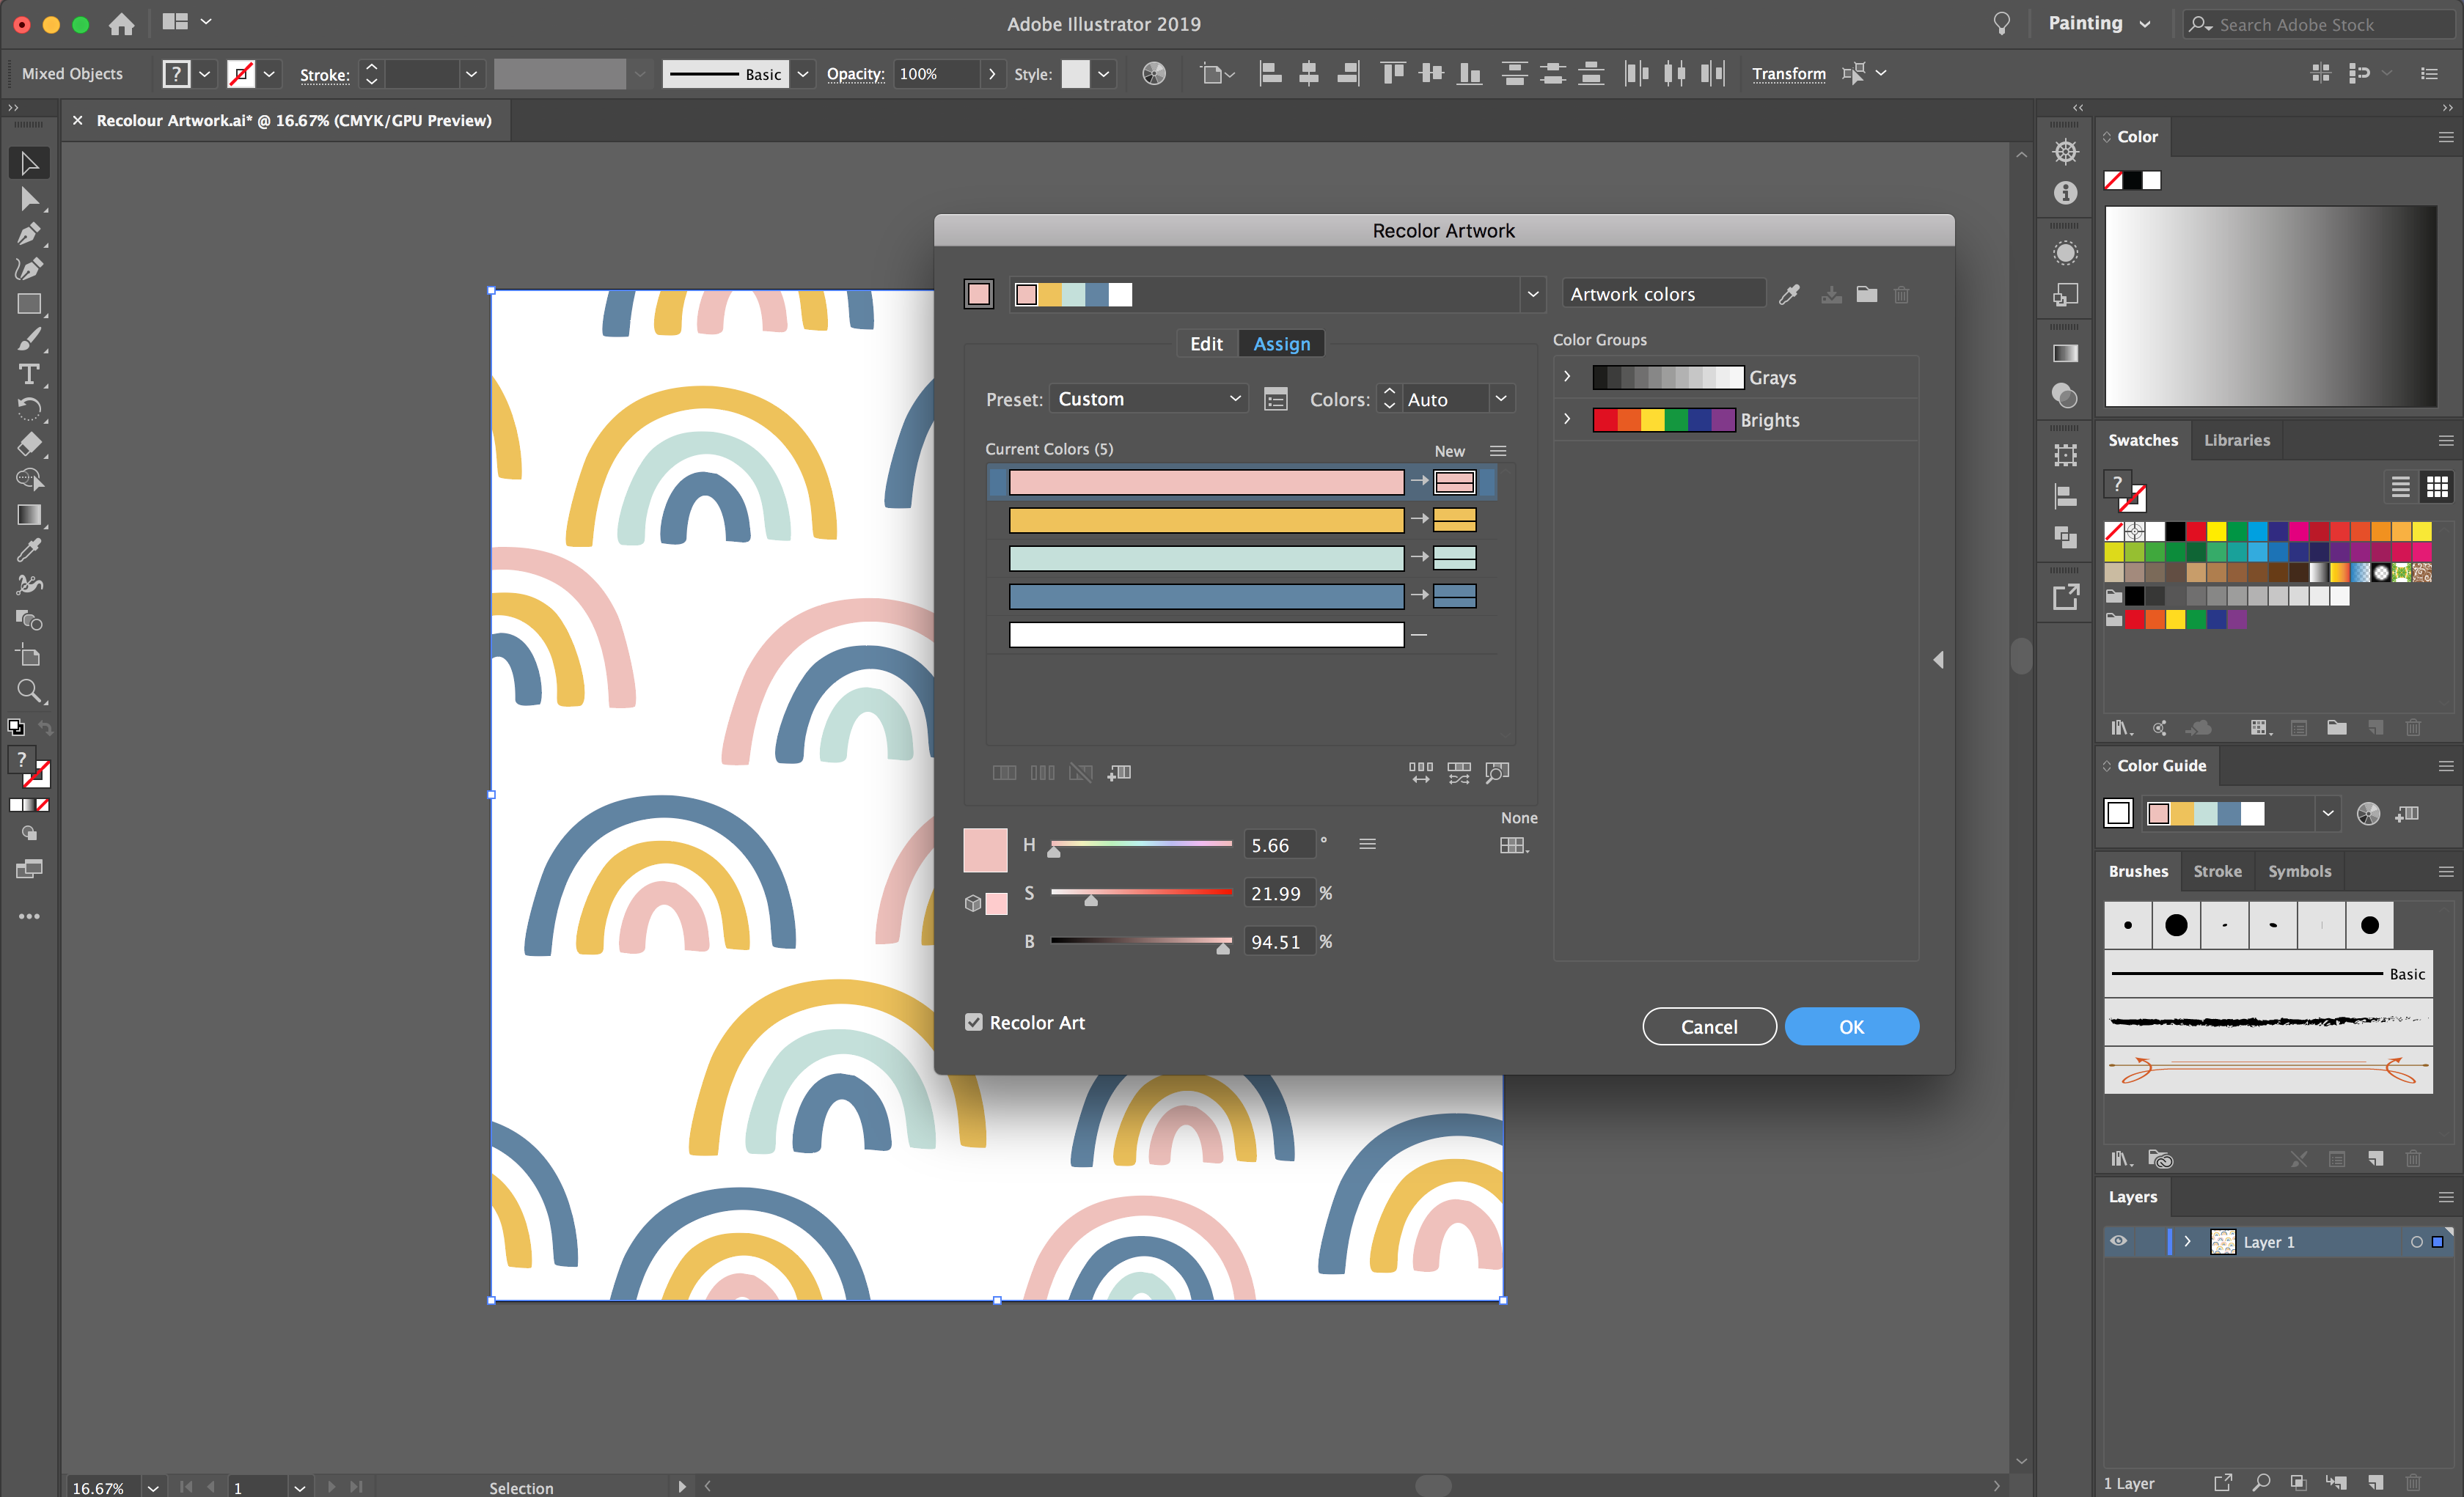
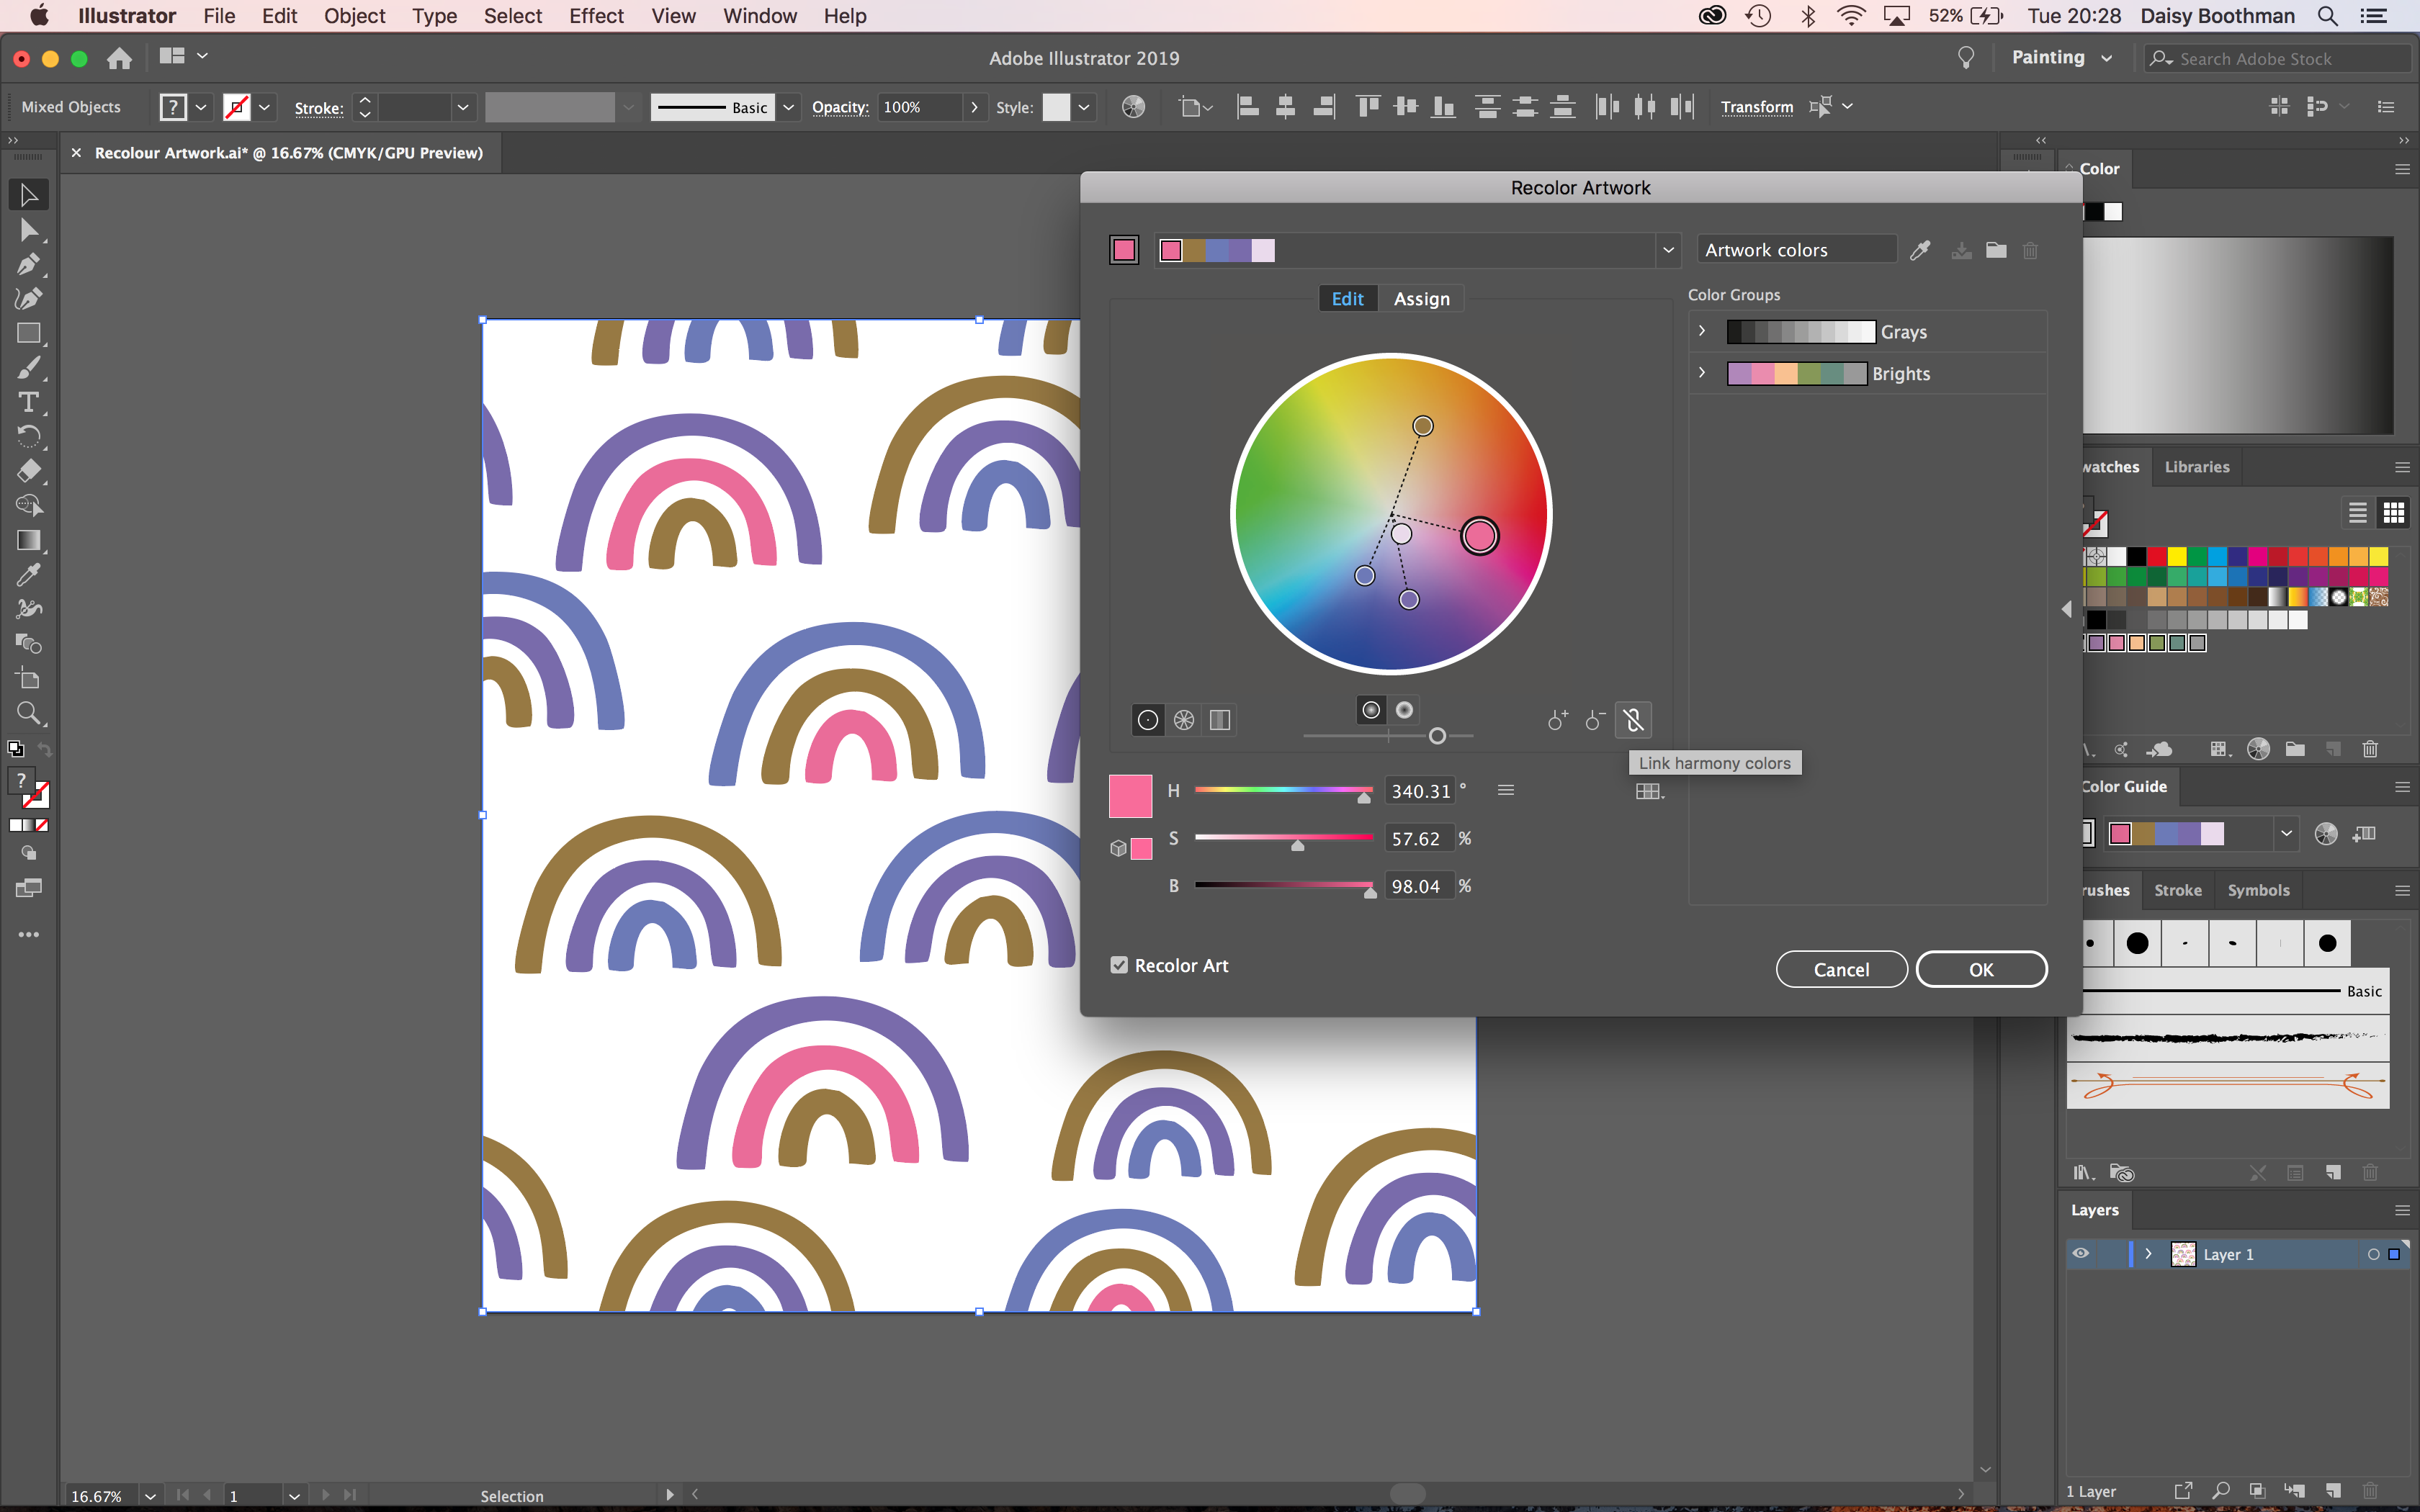
You also have the option to go to the Edit tab within the options where you can use the color wheel to individually change each color. If you want to keep the same harmony, you can select the linking tool icon to link the harmony colors.
When you are happy with your colors, select OK. You can now save your new design!
This tool makes it easy to create a variety of the same design for selling as bundles or creating different options for a client to choose from. It’s an easy tool that you can definitely benefit from knowing about!
We hope you enjoyed this time saving tip. We have more excellent Illustrator tutorials such as creating a ribbon banner, loading and saving color swatches and how to make a triangle.
Step 1 - Open your vector art file
Start by creating or opening your design in Illustrator, I am using this pastel rainbow pattern from DesignBundles.
Step 2 - Recolor artwork tool
Highlight all your artwork that you would like to recolor. Once you have done this, select the Recolor Artwork tool found in the top toolbar.
Step 3 - Recolor artwork options
Within the Recolor Artwork options, you have various means of adjusting colors. If you have any preloaded Color Groups in your Swatches, you can simply apply these by selecting them on the right hand side of the options panel. This will automatically apply to your existing colors, you can also drag and drop the new colors to your desired current colors.
Step 4 - Edit your colors
You also have the option to go to the Edit tab within the options where you can use the color wheel to individually change each color. If you want to keep the same harmony, you can select the linking tool icon to link the harmony colors.
When you are happy with your colors, select OK. You can now save your new design!
This tool makes it easy to create a variety of the same design for selling as bundles or creating different options for a client to choose from. It’s an easy tool that you can definitely benefit from knowing about!
We hope you enjoyed this time saving tip. We have more excellent Illustrator tutorials such as creating a ribbon banner, loading and saving color swatches and how to make a triangle.


