
How to Load and Save Color Swatches in Illustrator
Swatch Libraries are a group of preset colors and thematic libraries. Illustrator swatch (and pattern) libraries are saved as .ai or as ASE files. You can get color swatches from Design Bundles, or you can create your own based on artwork and/or images and save them for further use.
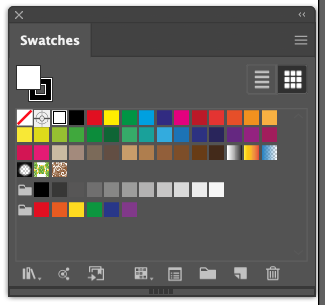
To install them, first make sure that the Swatches Panel (Windows > Swatches) is open.

Click on the Brush Libraries Menu (small bookcase icon) at the bottom left of the panel and choose Other Library to navigate to where you saved your files.
Or click on the flyout menu on the top right corner of the panel and go to Open Swatch Library. You can also select one of the ones included with Illustrator.

The ones already included, are located in the Swatches folder inside the Presets that came with Illustrator.
After you open them, the swatches will appear in individual Swatches Panels (not in the main one).
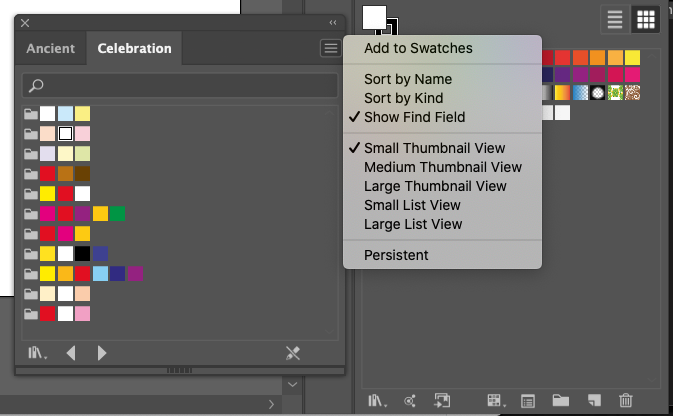
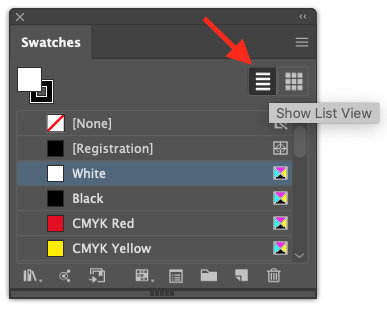
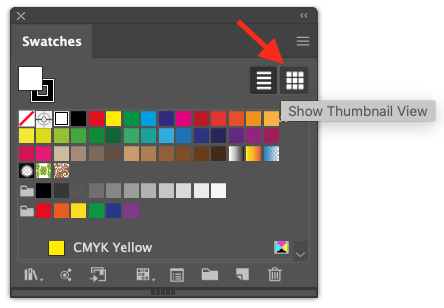
To view and/or sort them by name, click on the icon on the top-right corner of the panel, or choose List View from the drop down menu.
You can import swatches from another document too by using the same method but selecting the desired document instead.
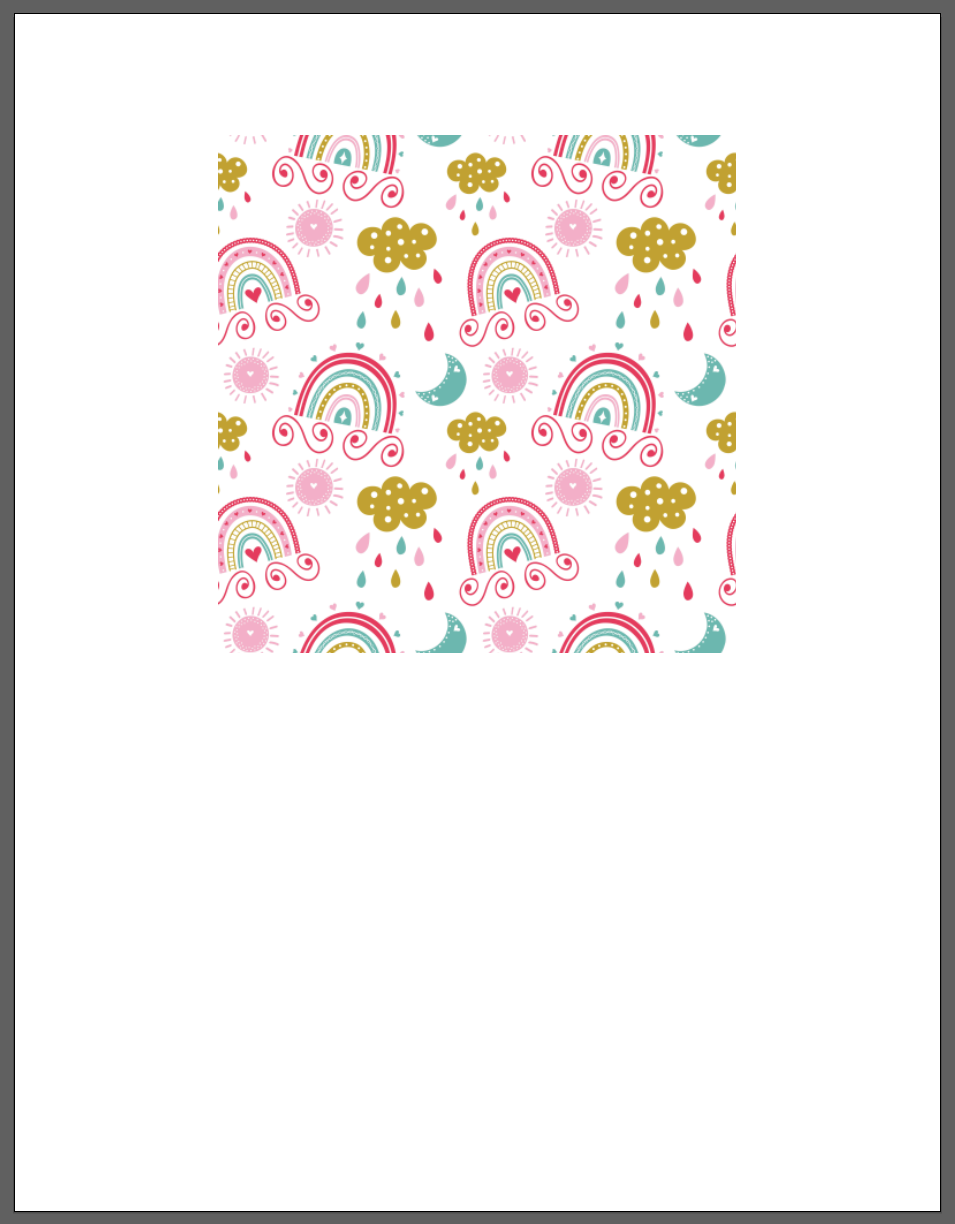
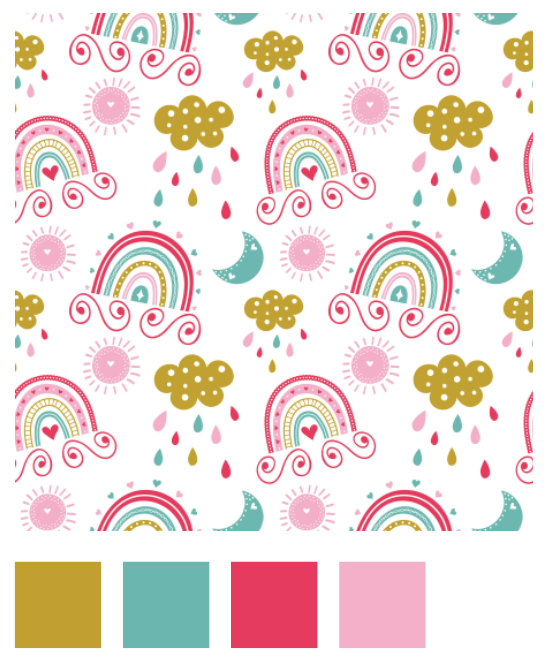
In this section we are using this Rainbow Pattern to pick out our colors.
Open the image you want to use or place it inside your document.
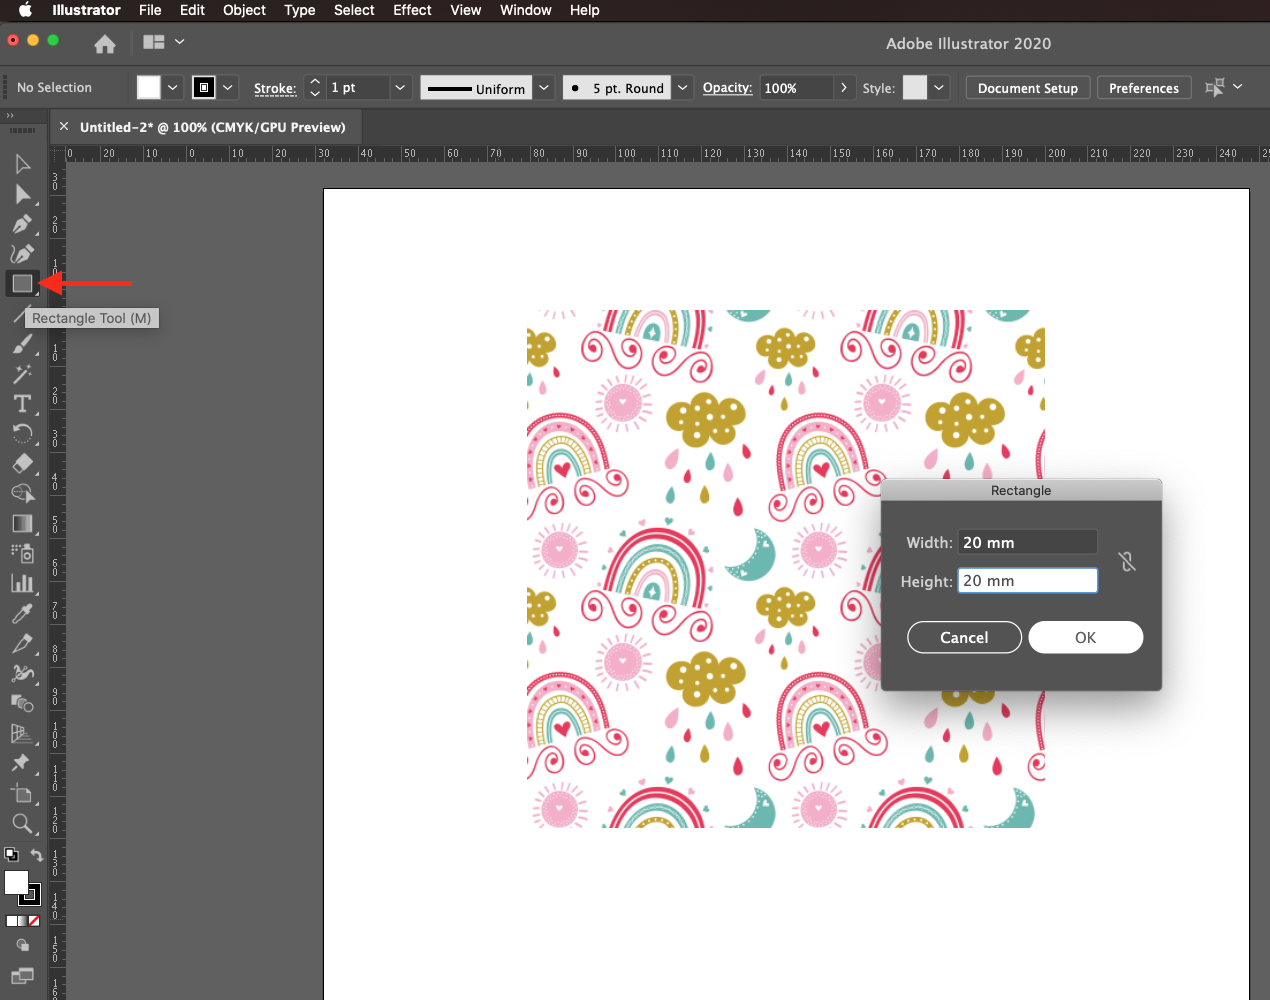
With the Rectangle Tool (R) create a small square (20 x 20 mm).
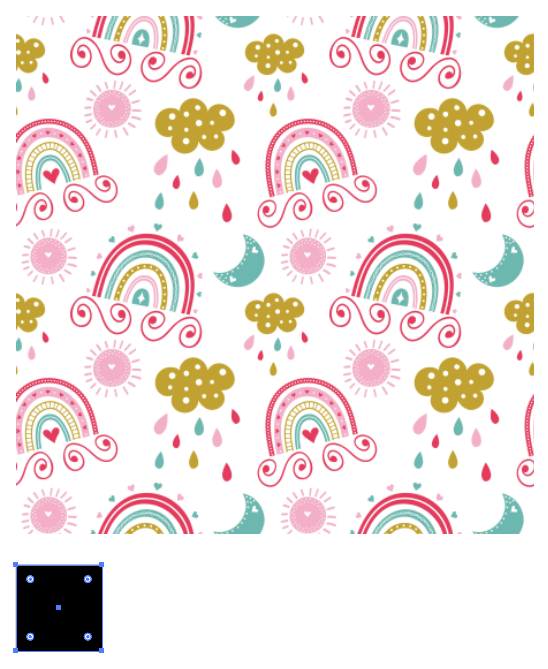
Make a duplicate by selecting it and dragging it to a side while holding the Shift and Option/Alt keys. Repeat as many times as needed.
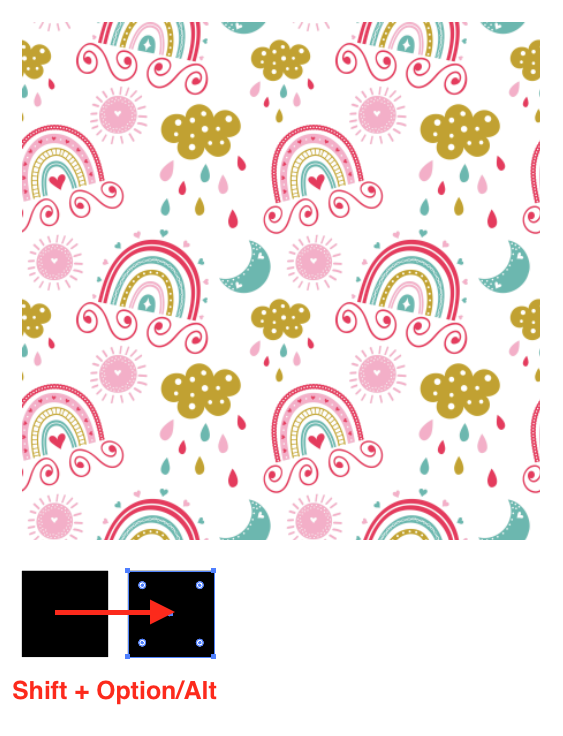
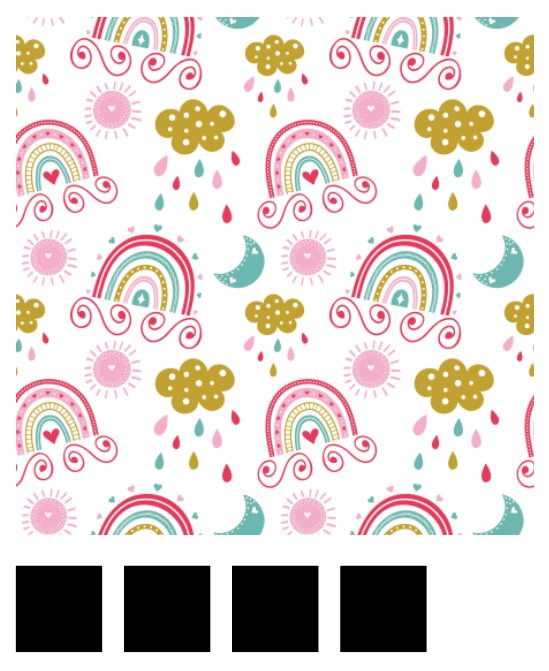
Make sure that one of the squares is selected and use the Eyedropper Tool (I) to click on the image and pick the desired color.
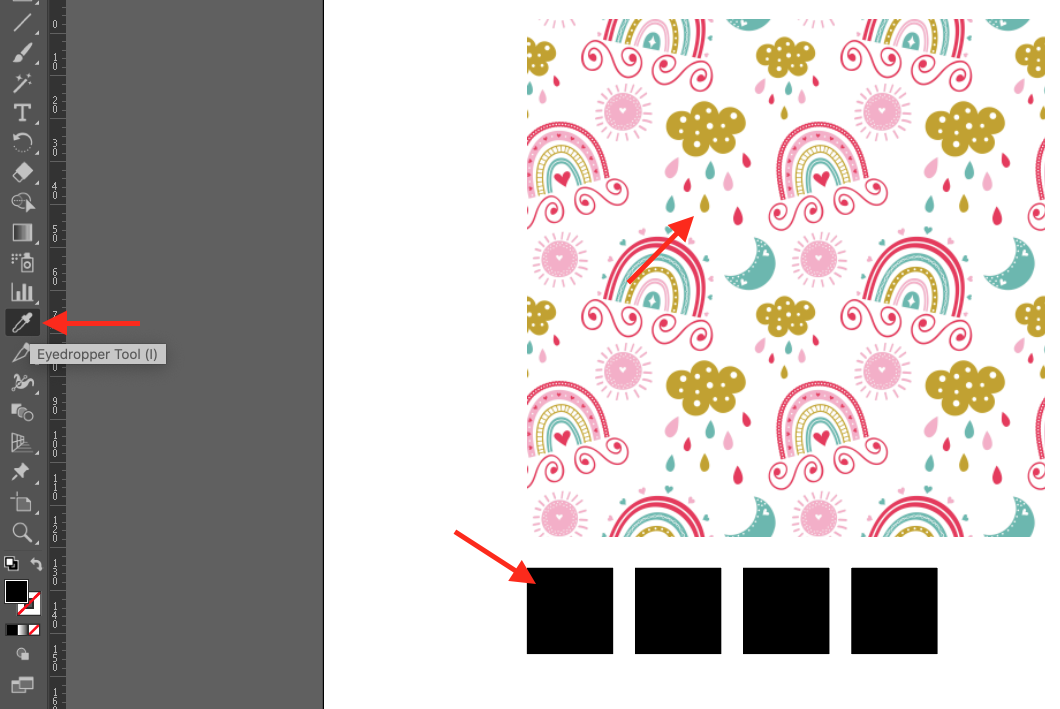

Repeat this for the remaining squares/colors.
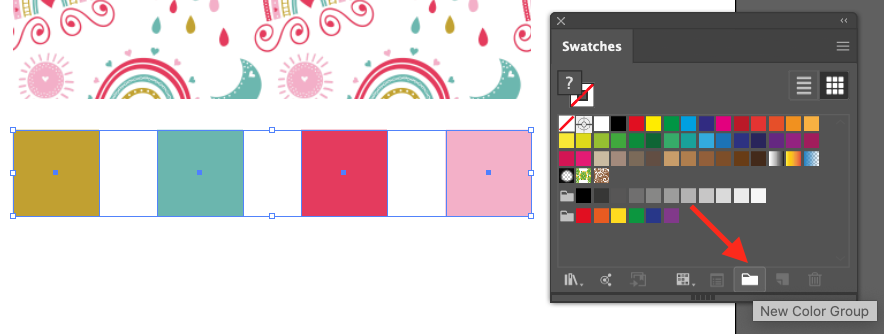
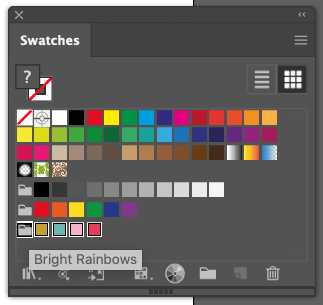
You can group color swatches (but not patterns and gradients) together in Color Groups. To move the swatches into a group, just drag individual color swatches into an already created group or, select several swatches and click the New Color Group button .
.
Or, click on the flyout menu on the top right corner of the panel and go to New Color Group.
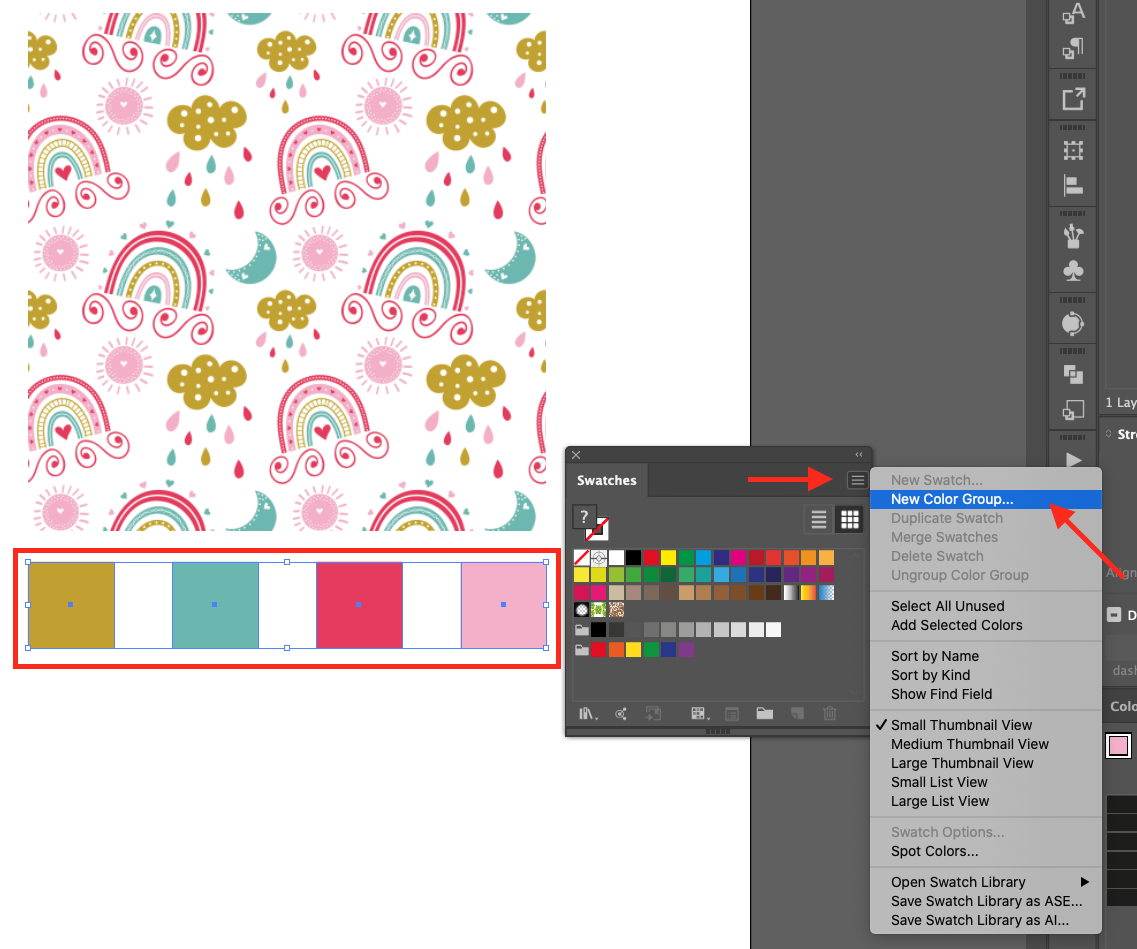
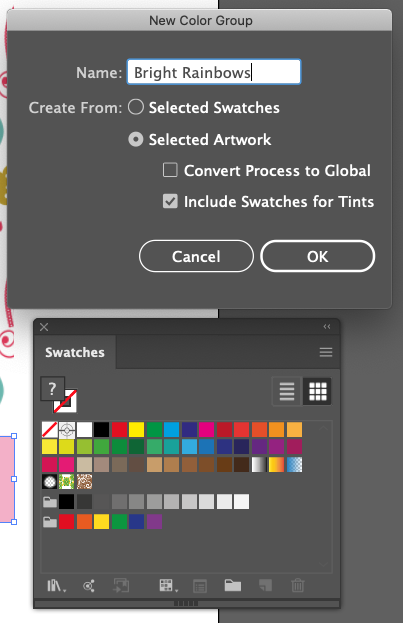
Give your group a name and click the Selected Artwork button.
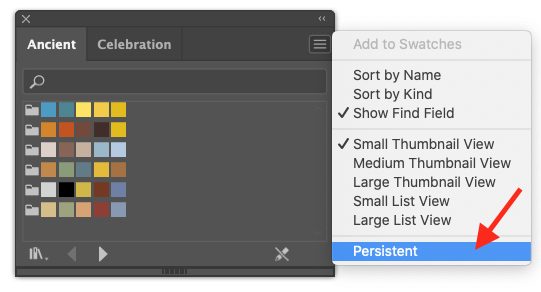
To avoid re-uploading your swatches every time you restart Illustrator, choose Persistent from the drop-down menu.
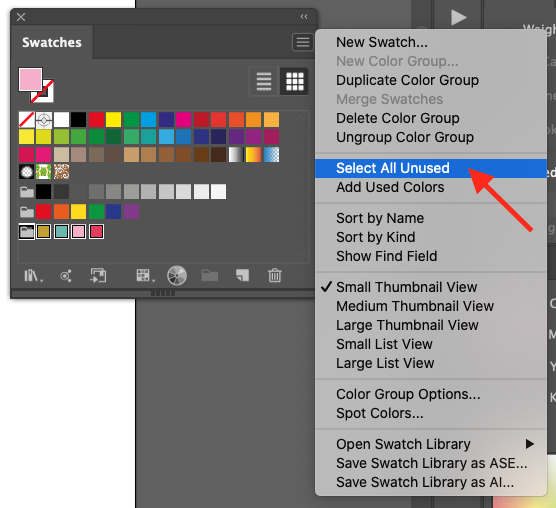
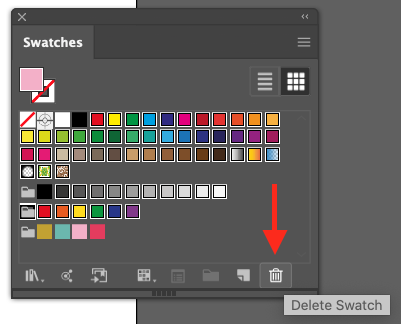
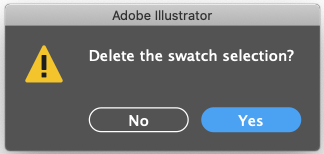
First, to get rid of the unused swatches, in the drop-down menu on the top right corner of the panel and go to Select All Unused.
Then, delete them by clicking on the small Trash Can icon on the bottom right corner.
You can save your swatches in a couple of ways. To save them as an .ai file, just click on the Brush Libraries Menu (small bookcase icon) at the bottom left of the panel and choose Save Swatches.
Or click on the drop-down menu on the top right corner of the panel and go to Save Swatch Library as ASE or as AI.
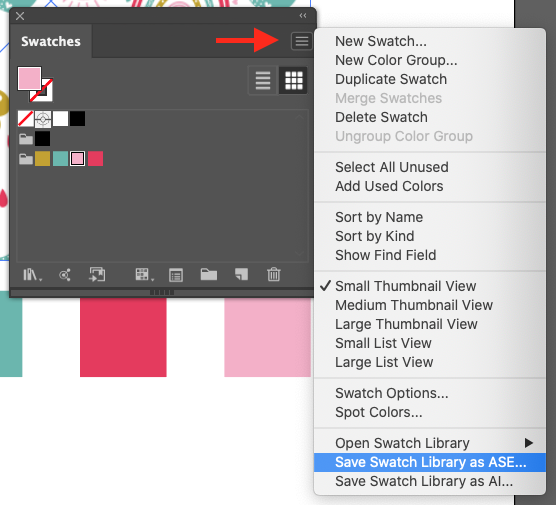
Saving your swatches as an ASE (Adobe Swatch Exchange) file will let you open them in any other Adobe Creative Cloud program. The only disadvantage is that you can’t save tints, gradients or patterns in this type of library.
If you liked this tutorial, check out the rest of our Illustrator Tutorials. You can also browse our cute clipart to get inspired for your next project.
Load Color Swatches
Step 1: Open the Swatches Panel
To install them, first make sure that the Swatches Panel (Windows > Swatches) is open.
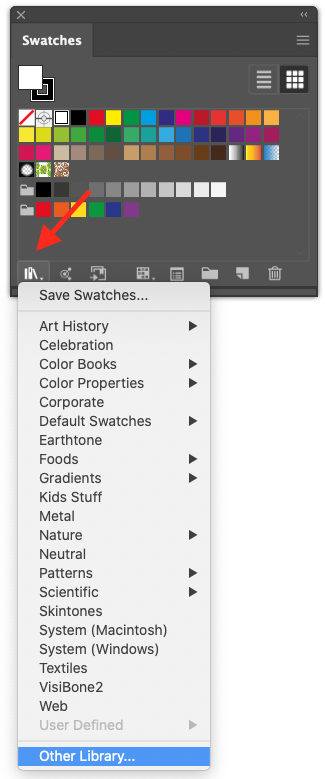
Step 2: Locate and load your swatches
Click on the Brush Libraries Menu (small bookcase icon) at the bottom left of the panel and choose Other Library to navigate to where you saved your files.
Or click on the flyout menu on the top right corner of the panel and go to Open Swatch Library. You can also select one of the ones included with Illustrator.
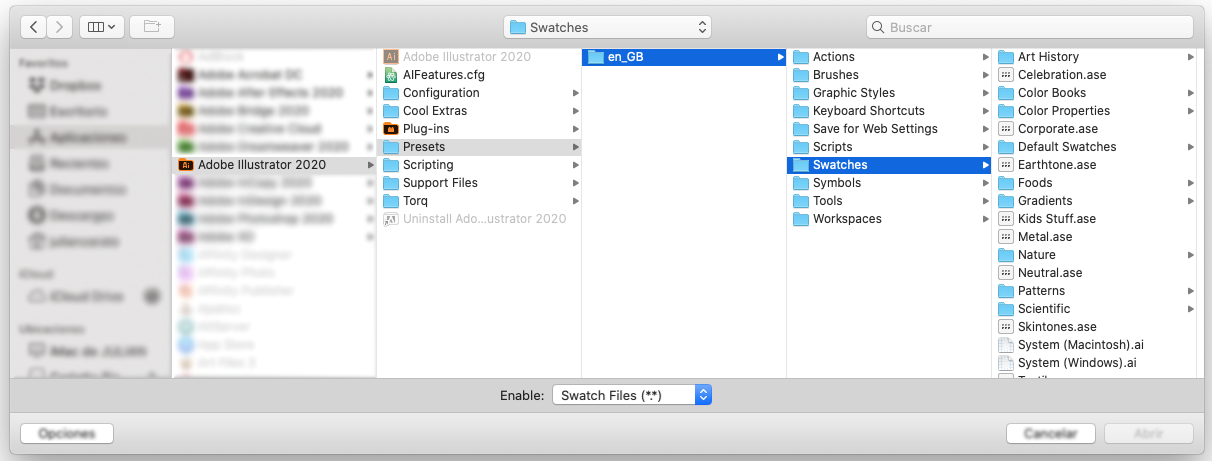
The ones already included, are located in the Swatches folder inside the Presets that came with Illustrator.
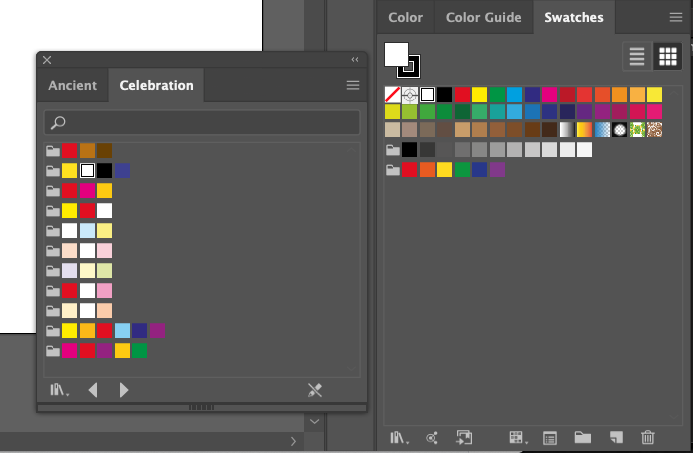
After you open them, the swatches will appear in individual Swatches Panels (not in the main one).
To view and/or sort them by name, click on the icon on the top-right corner of the panel, or choose List View from the drop down menu.
You can import swatches from another document too by using the same method but selecting the desired document instead.
Create Color Swatches from an Image
In this section we are using this Rainbow Pattern to pick out our colors.
Step 1: Import or place your image
Open the image you want to use or place it inside your document.
Step 2: Create the swatch samples
With the Rectangle Tool (R) create a small square (20 x 20 mm).
Make a duplicate by selecting it and dragging it to a side while holding the Shift and Option/Alt keys. Repeat as many times as needed.
Step 3: Add color to the swatch samples
Make sure that one of the squares is selected and use the Eyedropper Tool (I) to click on the image and pick the desired color.
Repeat this for the remaining squares/colors.
Step 4: Group swatches
You can group color swatches (but not patterns and gradients) together in Color Groups. To move the swatches into a group, just drag individual color swatches into an already created group or, select several swatches and click the New Color Group button
Or, click on the flyout menu on the top right corner of the panel and go to New Color Group.
Give your group a name and click the Selected Artwork button.
To avoid re-uploading your swatches every time you restart Illustrator, choose Persistent from the drop-down menu.
Step 5: Delete unwanted swatches
First, to get rid of the unused swatches, in the drop-down menu on the top right corner of the panel and go to Select All Unused.
Then, delete them by clicking on the small Trash Can icon on the bottom right corner.
Save your Swatch library
You can save your swatches in a couple of ways. To save them as an .ai file, just click on the Brush Libraries Menu (small bookcase icon) at the bottom left of the panel and choose Save Swatches.

Or click on the drop-down menu on the top right corner of the panel and go to Save Swatch Library as ASE or as AI.
Saving your swatches as an ASE (Adobe Swatch Exchange) file will let you open them in any other Adobe Creative Cloud program. The only disadvantage is that you can’t save tints, gradients or patterns in this type of library.
If you liked this tutorial, check out the rest of our Illustrator Tutorials. You can also browse our cute clipart to get inspired for your next project.


