- By Kia Lor
- 5 Mins
- Beginner
- Font Tutorials
How to Use SVG Color Fonts in Illustrator
Learn how to use SVG color fonts in Illustrator in this beginner friendly tutorial.
Have you ever heard of SVG fonts? Today, we’ll tell you a little bit about SVG fonts and how to use them in Illustrator. SVG fonts, also known as color fonts, are a fairly new kind of OpenType format. They can currently be used in applications such as Illustrator, Photoshop, Affinity Designer, and a few others.

Like the examples below, a glyph or character can contain several colors, patterns, or transparencies. Many people think SVG fonts work like SVG cut files, but they don’t.

Step 1 - Install Your SVG Font
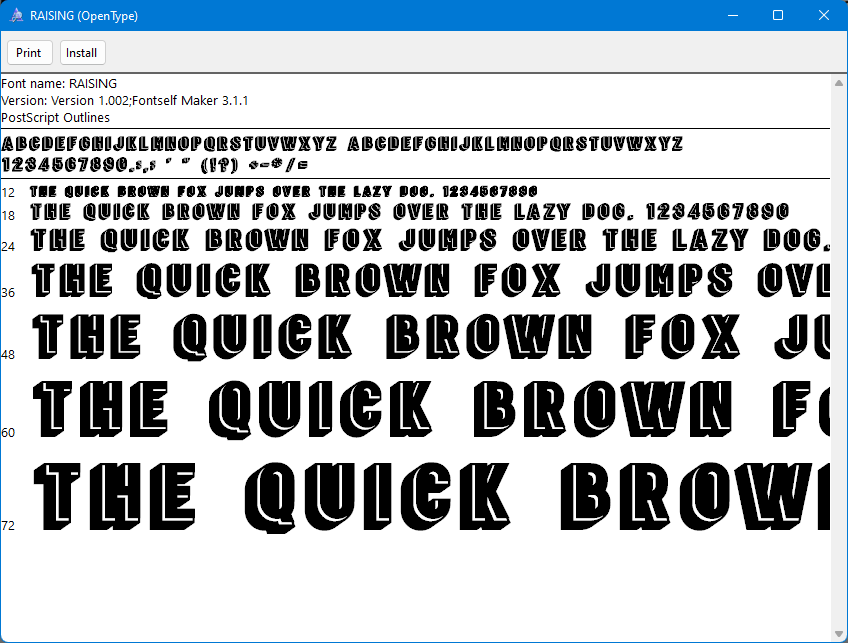
Downloading and installing an SVG font is done the same way as any other font, so you can look at our guide on how to install fonts if needed. You’ll notice that when you open an SVG font file, the font is shown in solid black even if it actually has color. See our example below of the two-color SVG font, Raising.

We’ll be using a simple SVG font called Ultrasound for the rest of this tutorial. Now let’s get into using our SVG font in Illustrator.
Step 2 - Add Text
Select the Type Tool
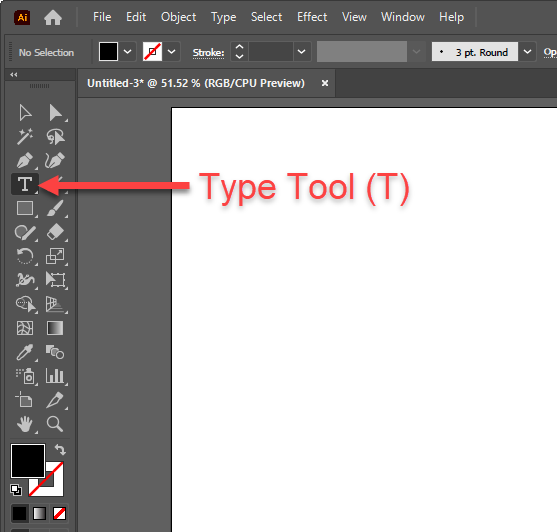
Select the Type Tool (T) from the left toolbar with a document open in Illustrator.

Edit Font Options
You can edit the font settings in the Control panel at the top, or open the Character panel (Window > Type > Character) for even more settings such as leading, kerning, etc.

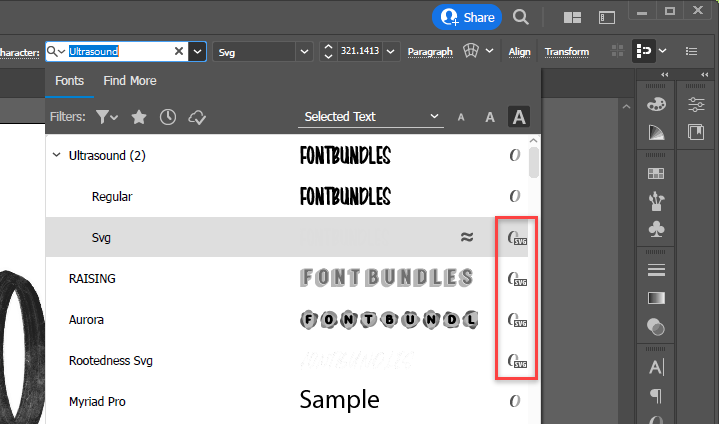
When selecting your font, notice that all SVG fonts are labeled in the list with the following icon.

Type Your Text
Click on the artboard and enter your text. You can see in the following image that the text appears to have been written with an actual marker. This is what makes SVG fonts so amazing.

Step 3 - Change the Color of the Text
When using SVG fonts, you can't simply change the text color by changing its fill. We’ll show you how to change the color of your text when using SVG fonts in Illustrator.
Create a Transparent Rasterized Layer
Select your text and go to Object > Rasterize.

In the Rasterize dialog, select Transparent and click OK.

Change the Color of the Rasterized Layer
With the rasterized layer selected, click on Edit > Edit Colors > Adjust Color Balance.

In the Adjust Colors dialog, click the Preview checkbox to see the color changes in real-time. Then move the sliders until you get the color you want. Press OK when you’re happy with the results.

We hope this tutorial helped you get more comfortable with using SVG fonts as they can open the door to many more opportunities and options for you!
6 Related Font Tutorials
1- Open SCAL4. Click on the Trace icon.2- The Trace Image window will appear. Click on Choose an image.3- Select your file. I am using pineapple SVG monograms from Design Bundles.4- Your file will appear in the preview window.5- In the drop-down box, select Color layers. ...
Ensure that your file has been downloaded and unzipped to use.1- Select your file.2- Open the SVG file you require.3- Once your file is open select Object in the top toolbar, and select " Ungroup" this will separate your SVG files once.4- Go to Object again and ...
Advanced Color Settings in Silhouette Studio makes it easier to create custom colors. HEX or RGB codes are used for adding more colors to the color palette. This is useful for matching up colors in designs or test printing. In this tutorial you will learn how to use the Advanced ...
Color Harmony is a simple but very effective tool in Procreate that helps you as an artist to quickly compose harmonious color palette schemes. This is a great way to create color palettes for each project that you take on. We have a full in-depth guide on creating and using ...
AnyFont is an application on the iPhone and iOS devices that allows you to quickly and easily add fonts to your iOS device with little effort.It is also seamlessly integrated with Fontbundles.net for super easy and accessible font downloads and installation.In today's tutorial we will be explaining ...
If you want to learn how to use an SVG file in Affinity Designer, then this tutorial is just for you. A SVG file usually contains individual pieces of the design, each on their own layer. We will show you how to access and use these layers in order to ...

 All your Font Needs


