Setting Up a Multi Color Foiling SVG File in SCAL4 to Use in Cricut Design Space
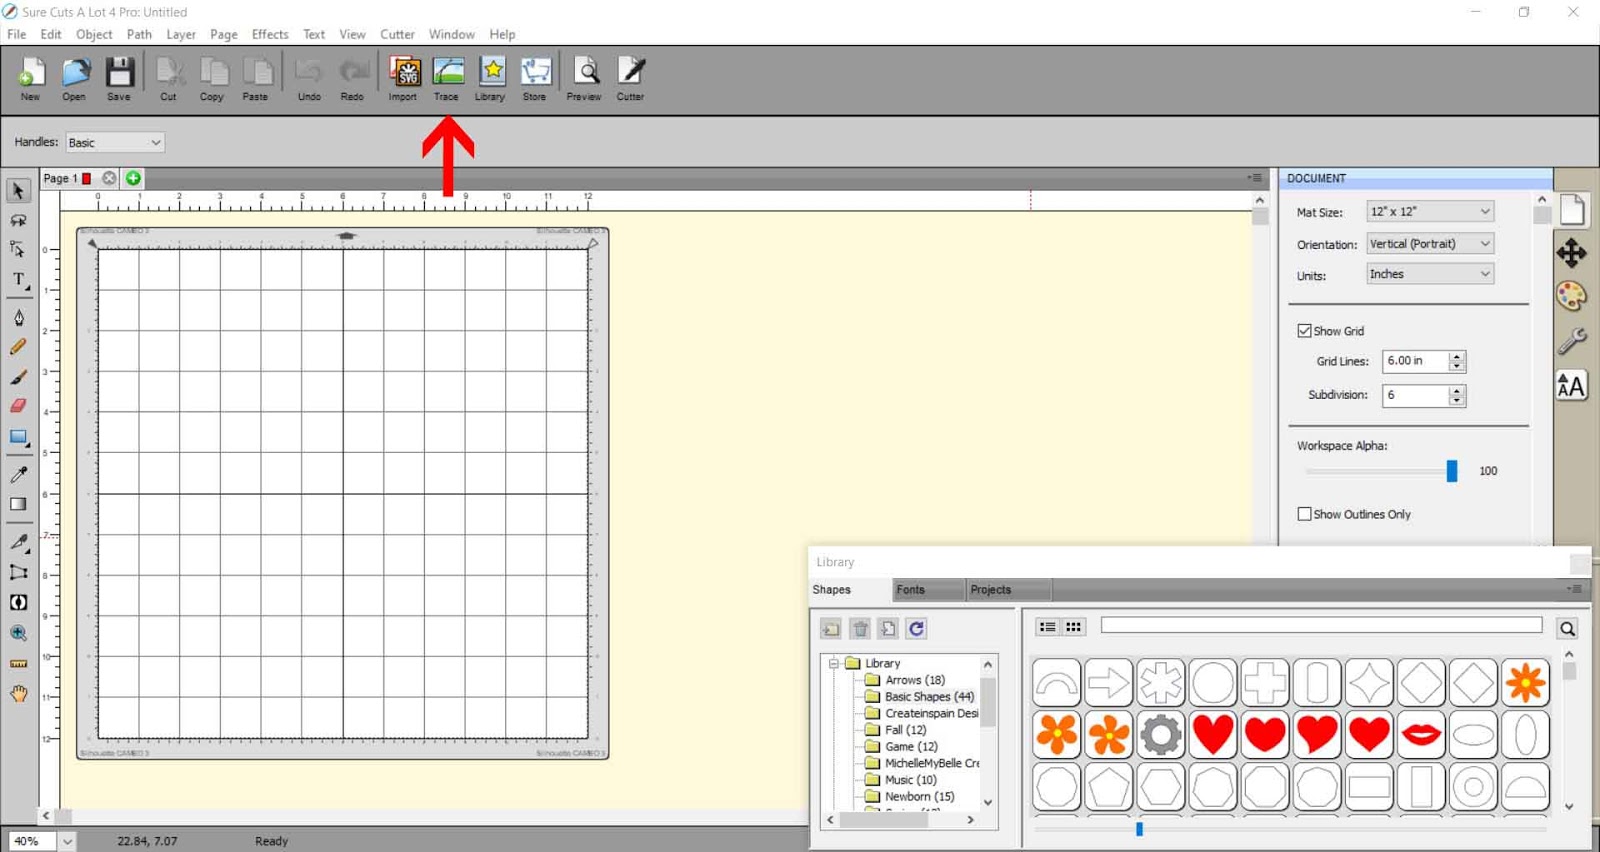
1- Open SCAL4. Click on the Trace icon.
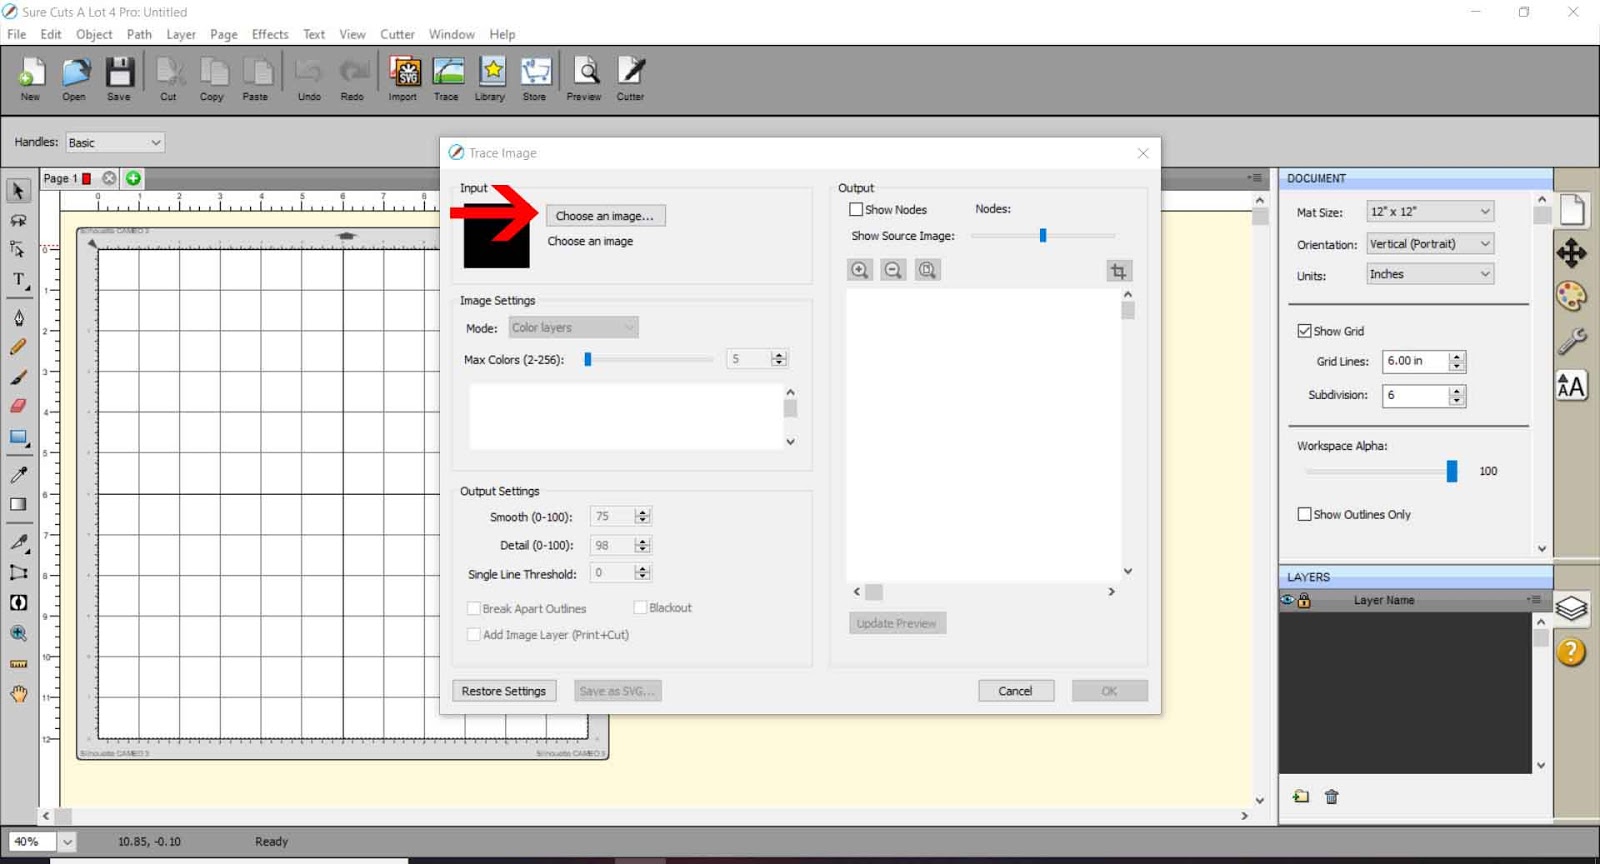
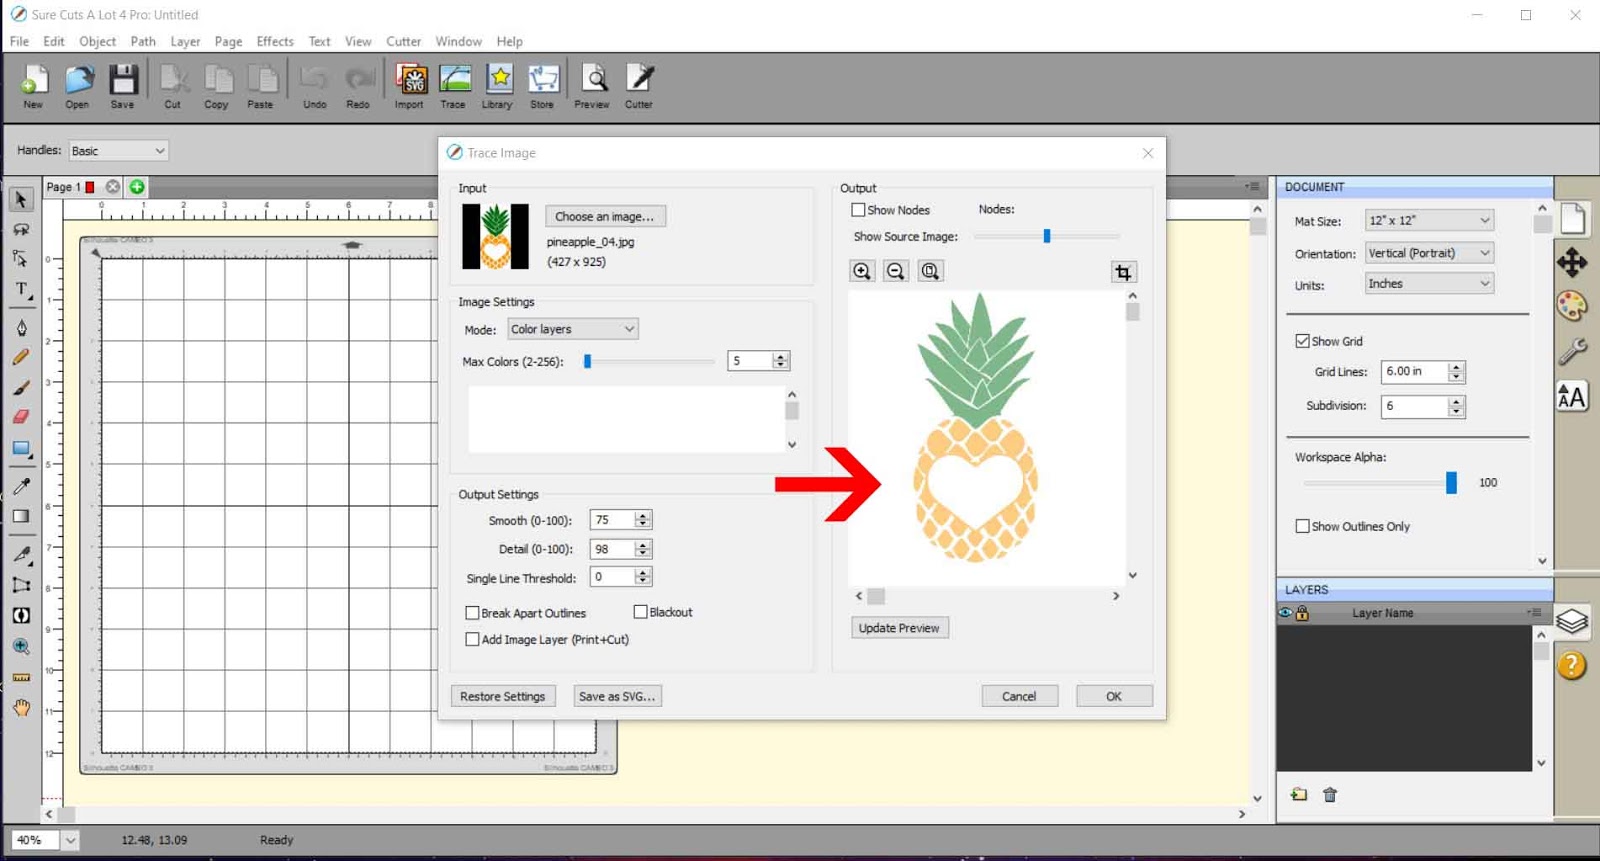
2- The Trace Image window will appear. Click on Choose an image.
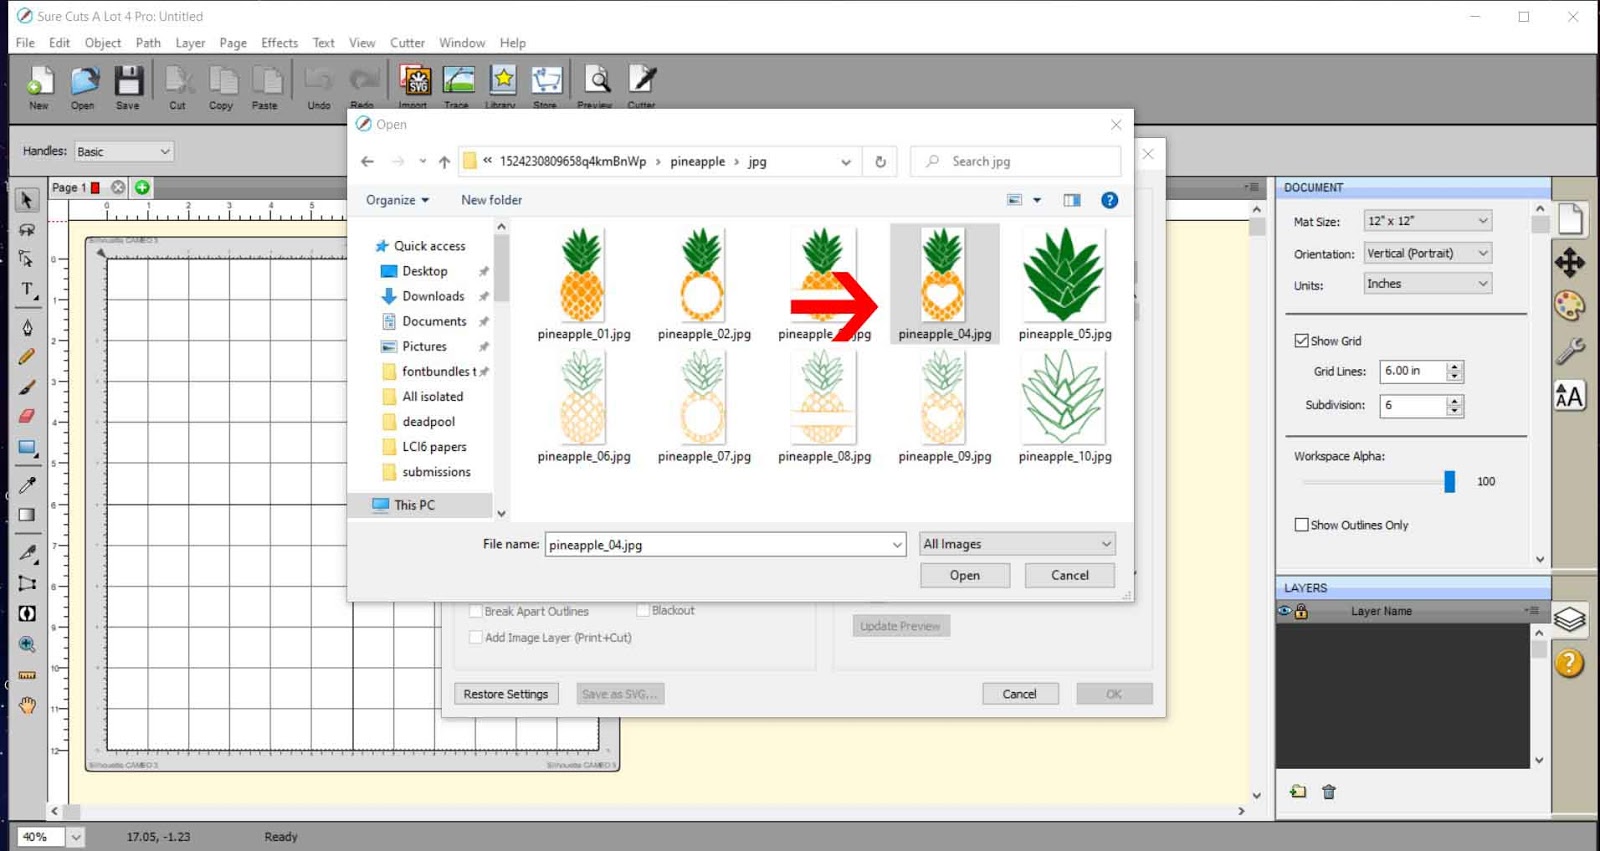
3- Select your file. I am using pineapple SVG monograms from Design Bundles.
4- Your file will appear in the preview window.
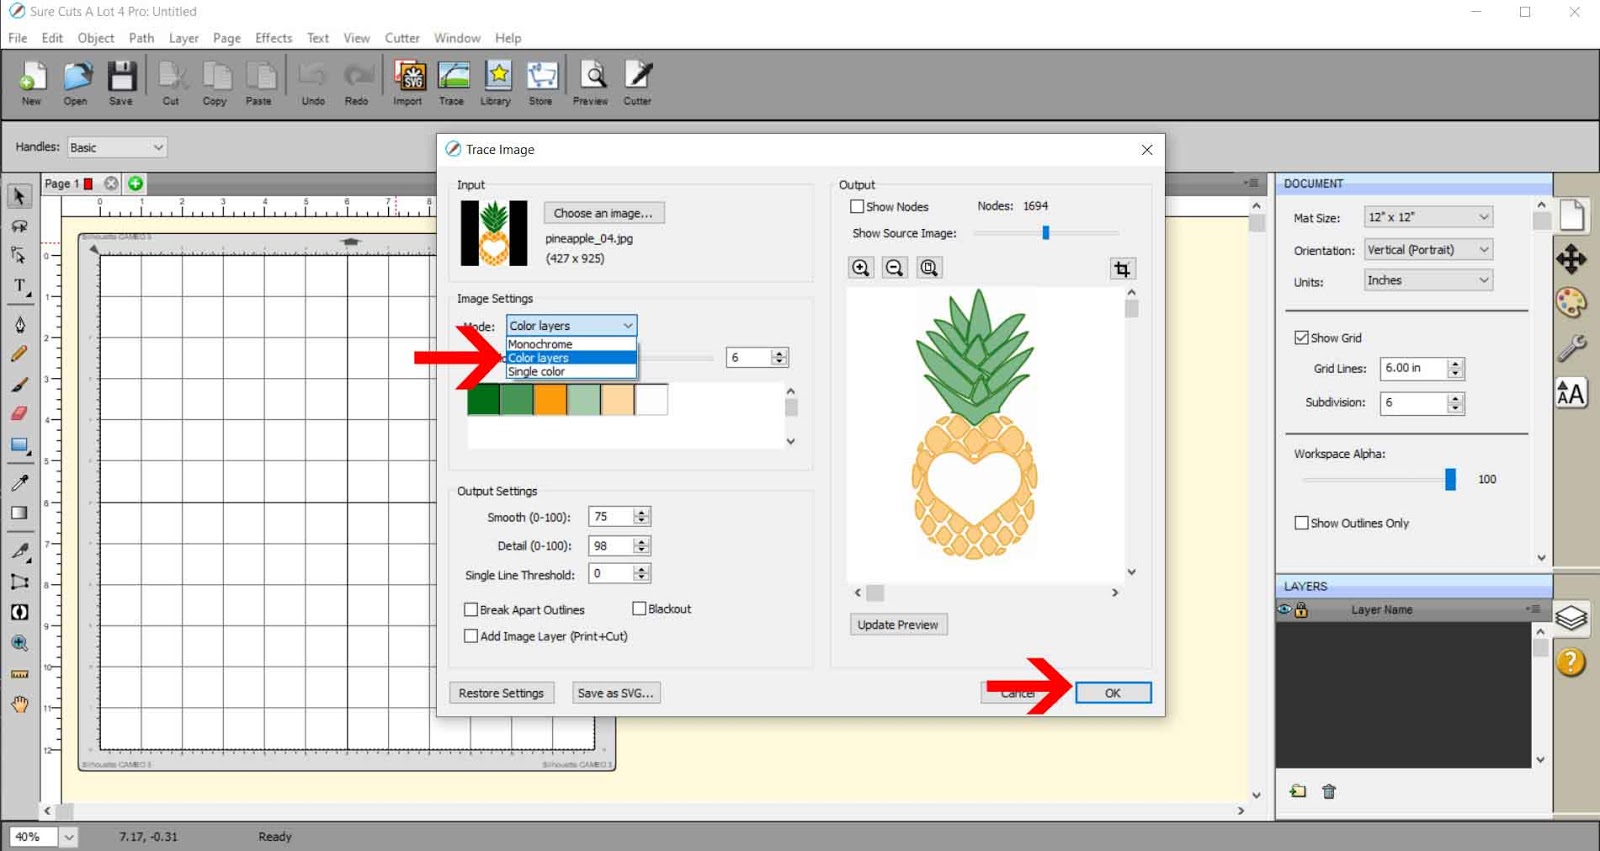
5- In the drop-down box, select Color layers. Make sure the number of colors exceeds the actual number of colors on the design. Once all the design is traced in separate colors, click OK.
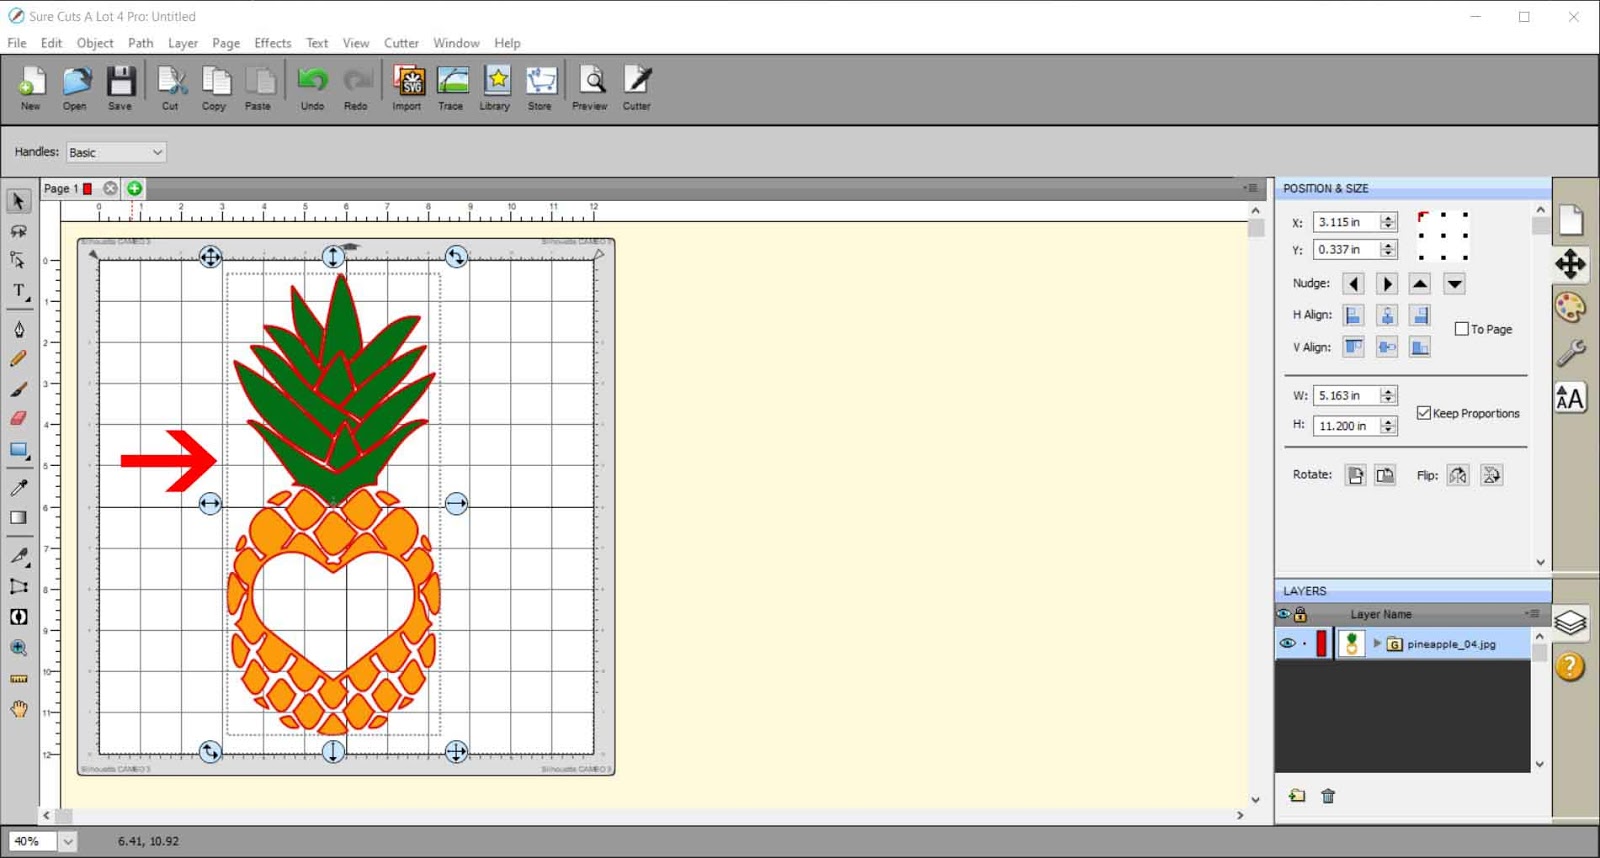
6- Your design will appear in your workspace.
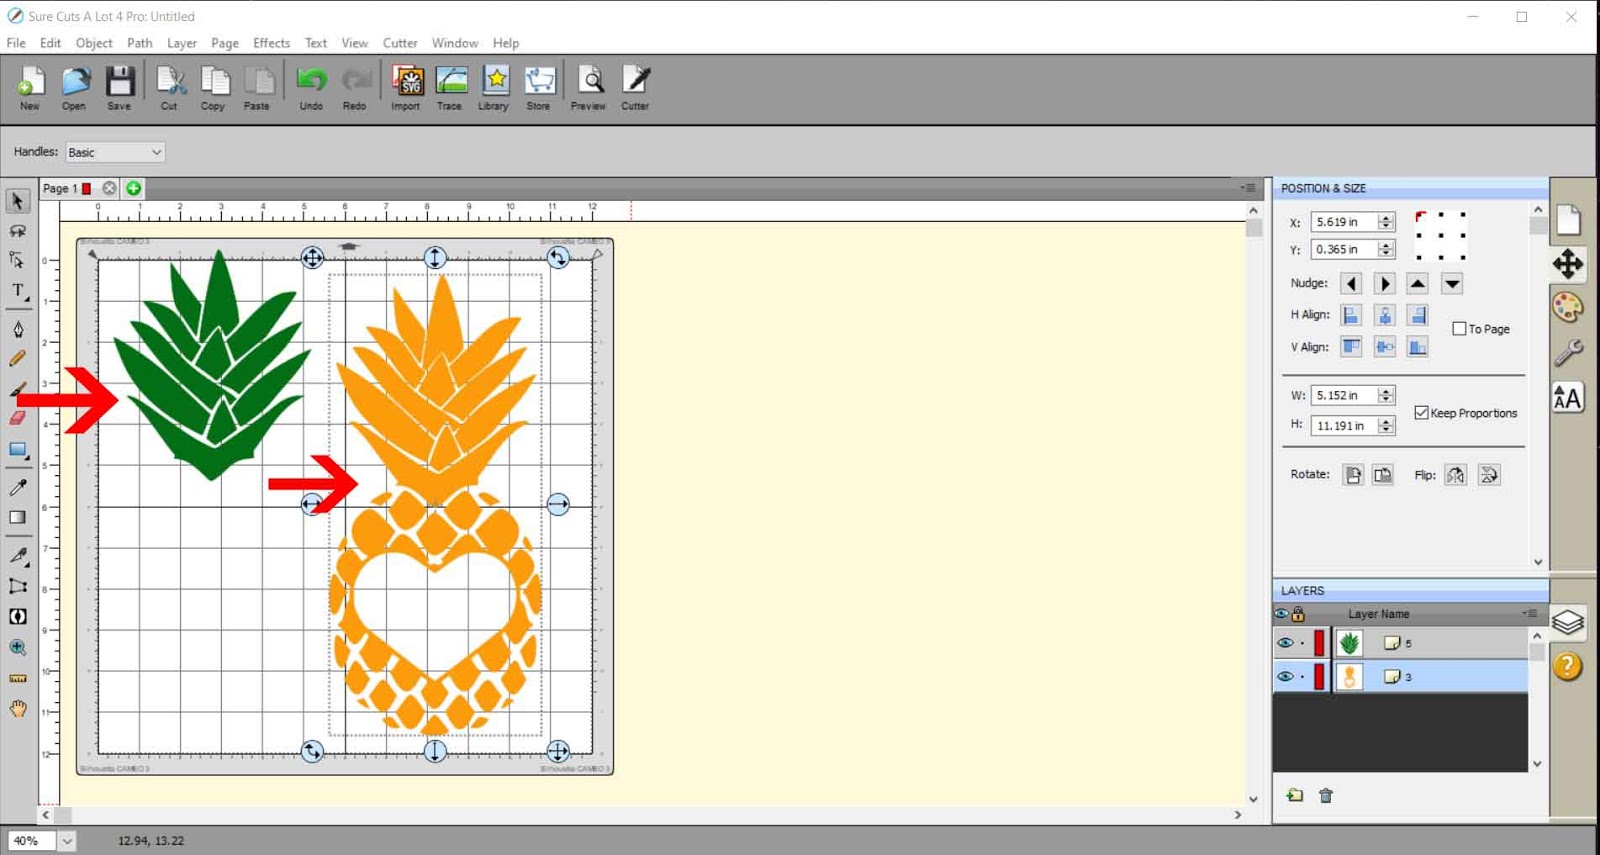
7- Separate the different parts of your design.
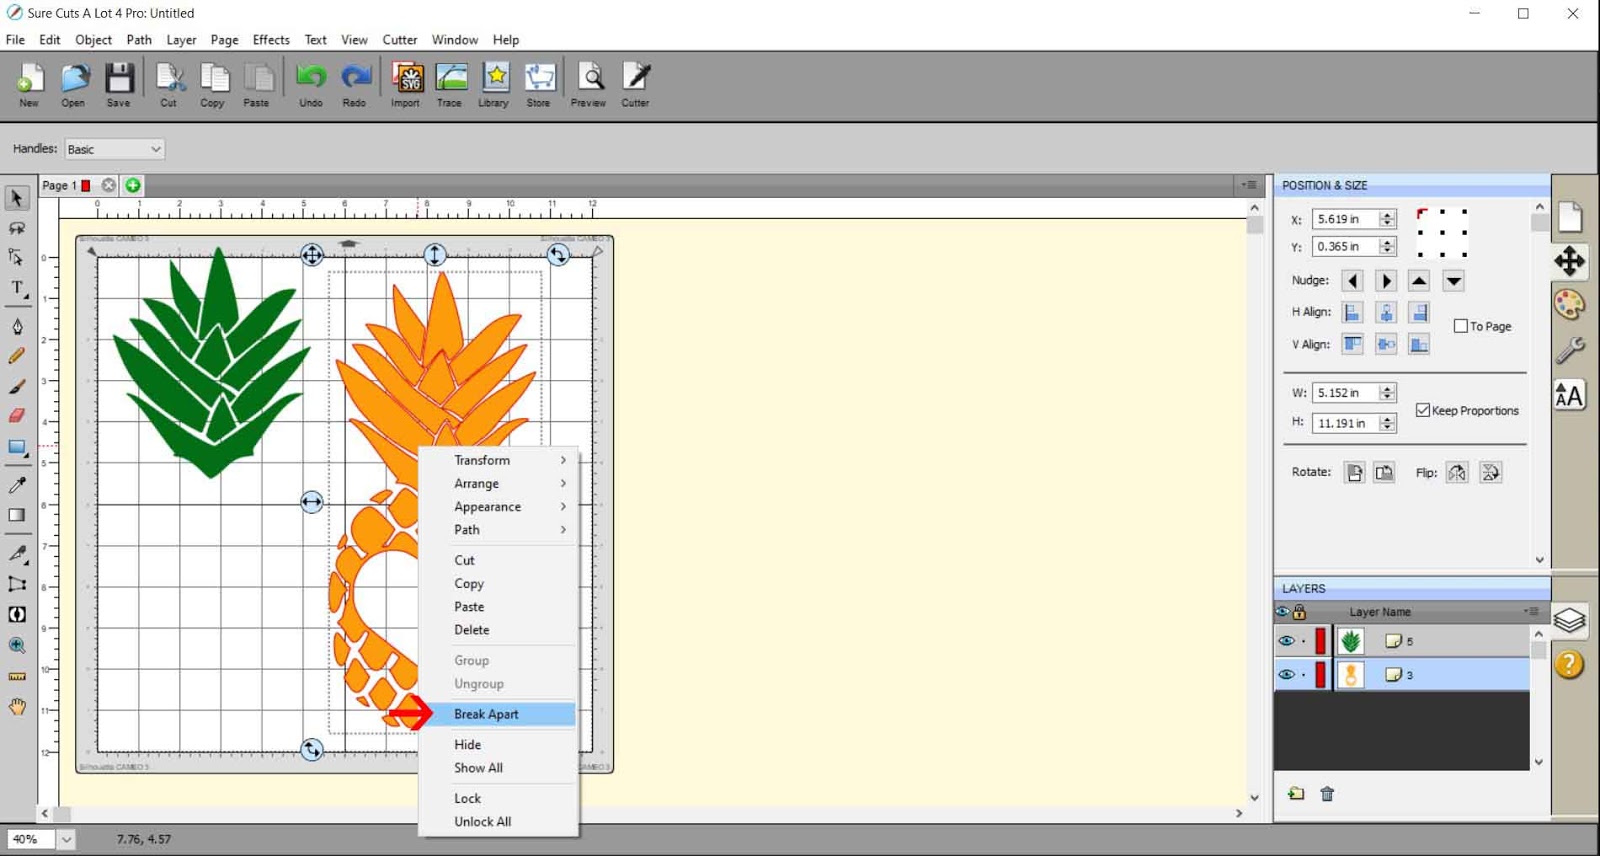
8- With some designs, you may need to manually separate parts of the design. If you need to do this, right-click on the design and then select break apart.
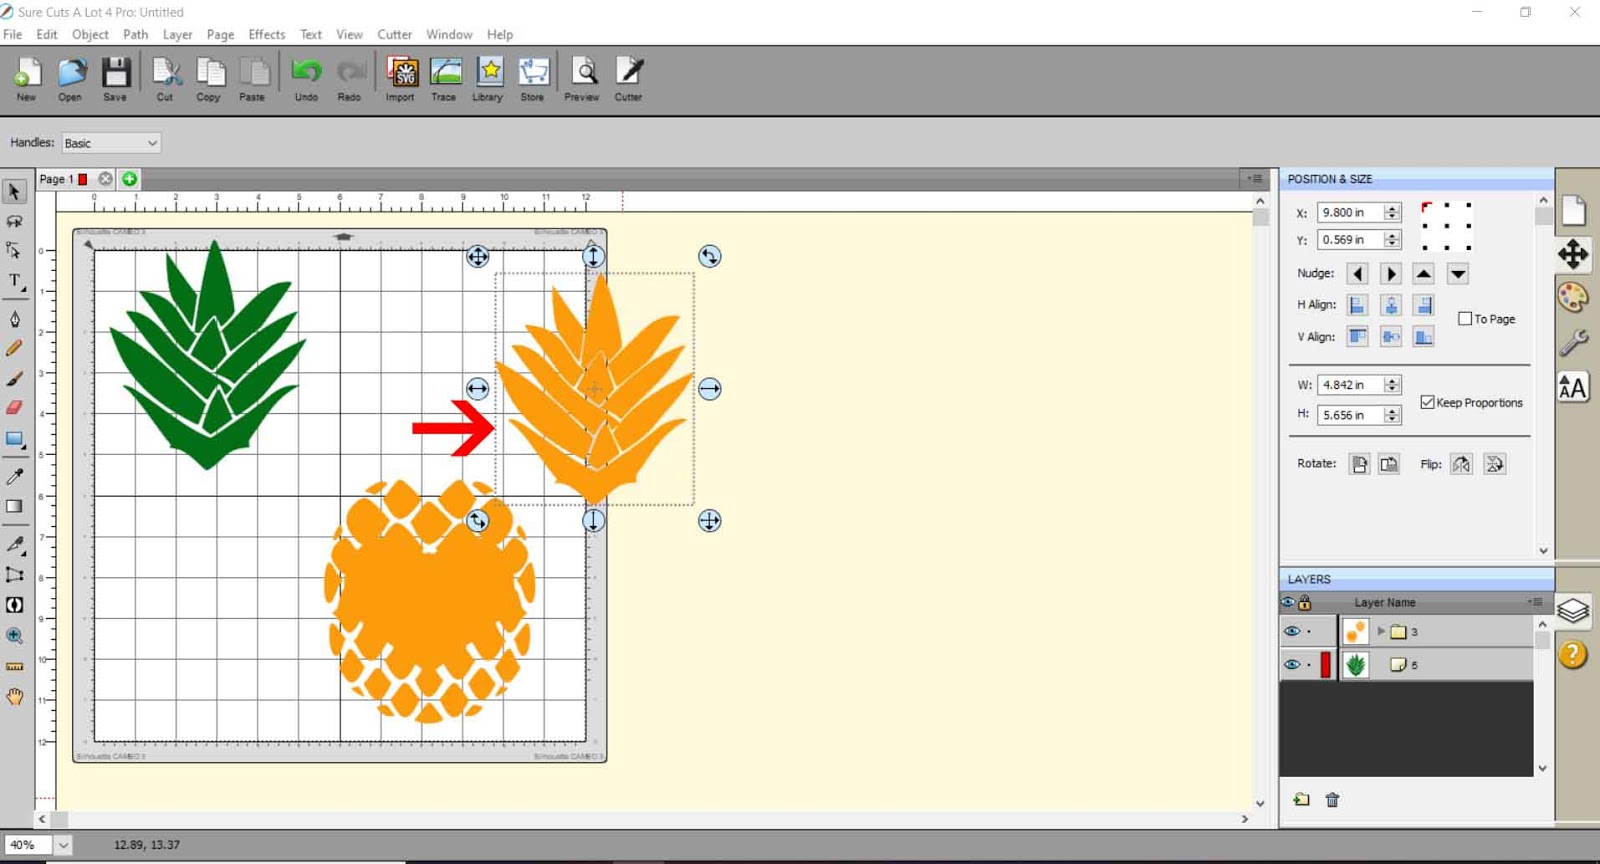
9- Select the bits you do not need and remove them from the rest of your design.
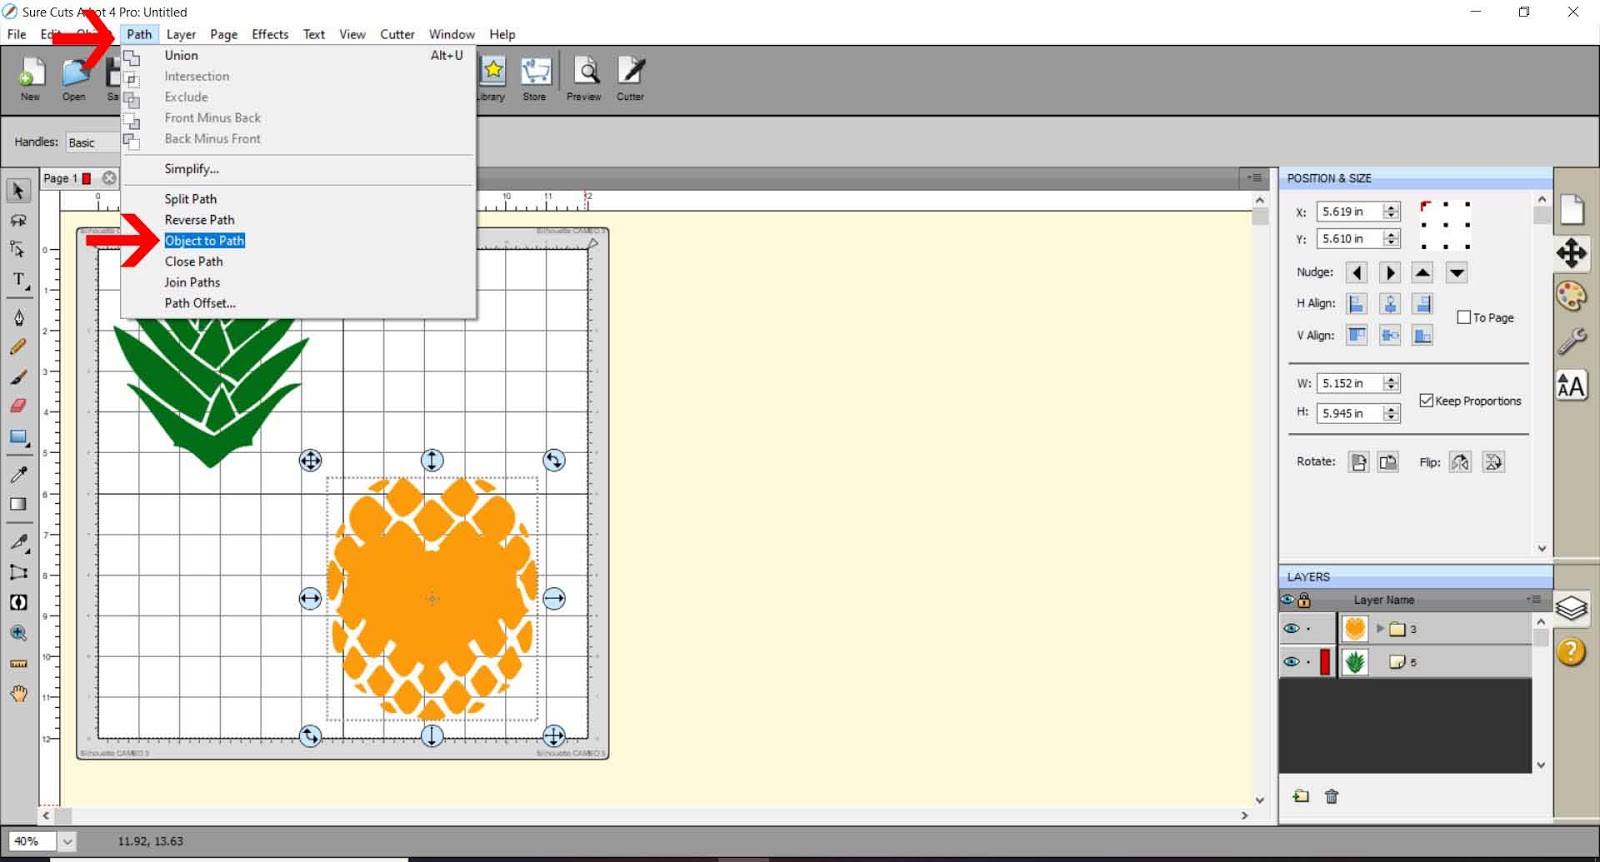
10- Select all of the rest of the parts you need and go to Path > Object to Path.
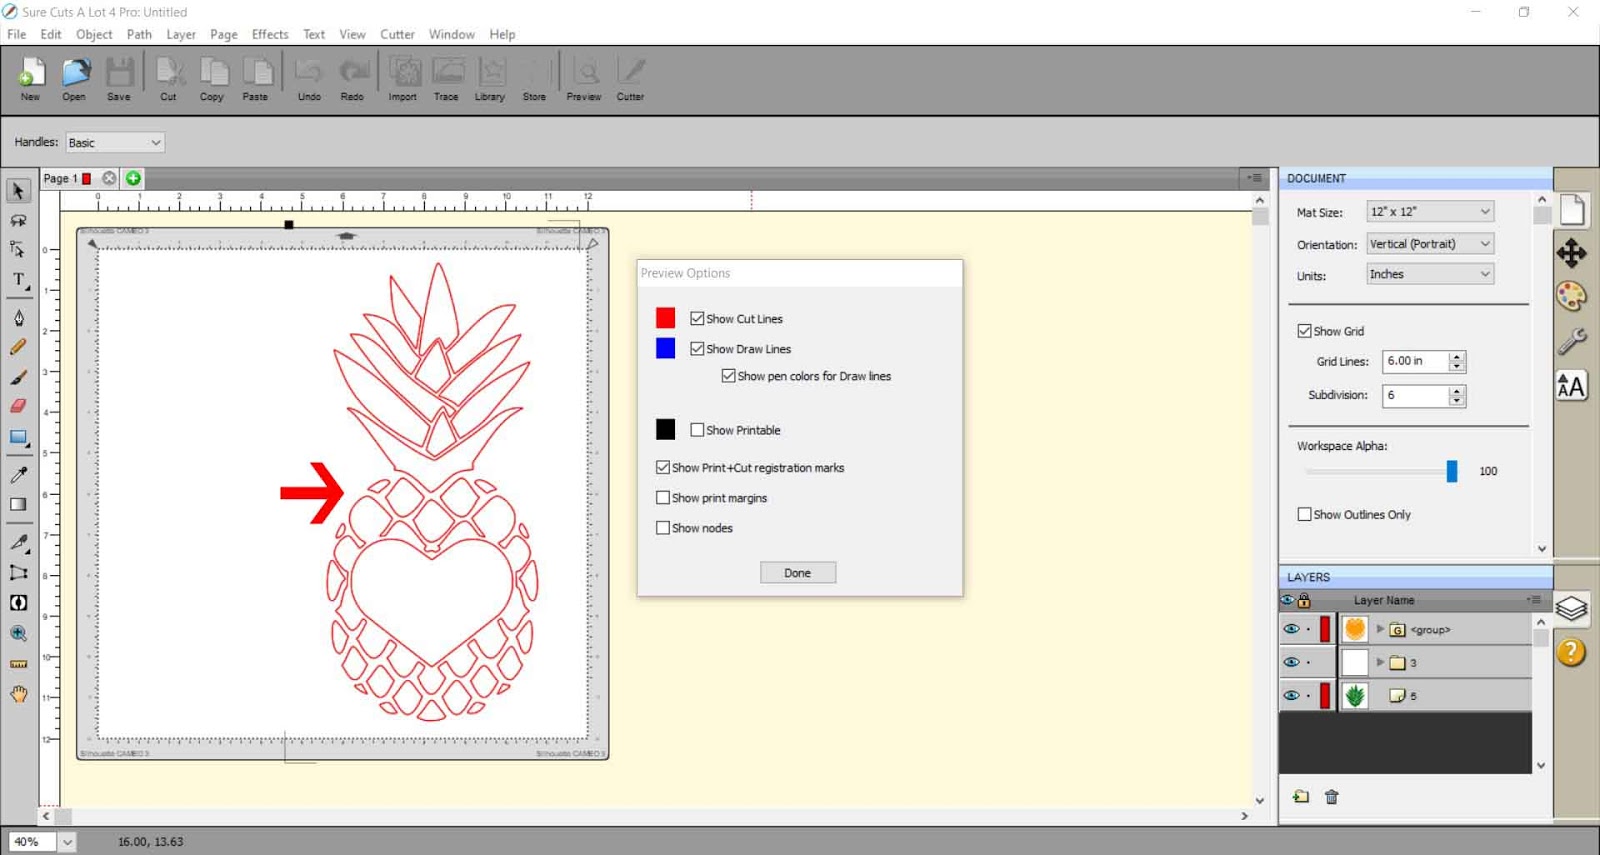
11- When you select preview, you can see that the lines are all there to be foiled.
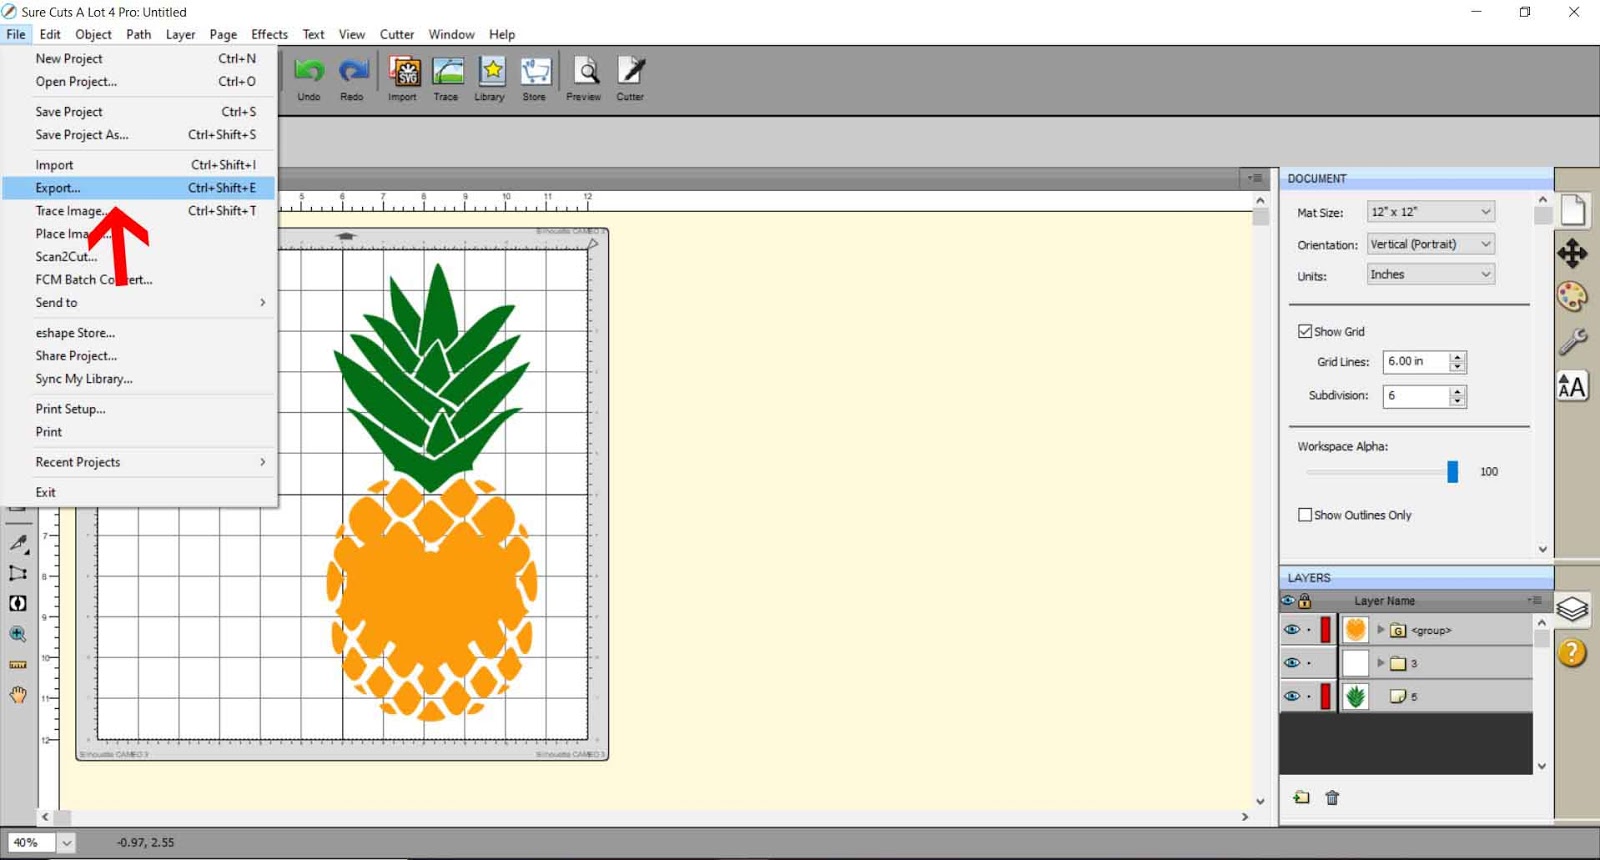
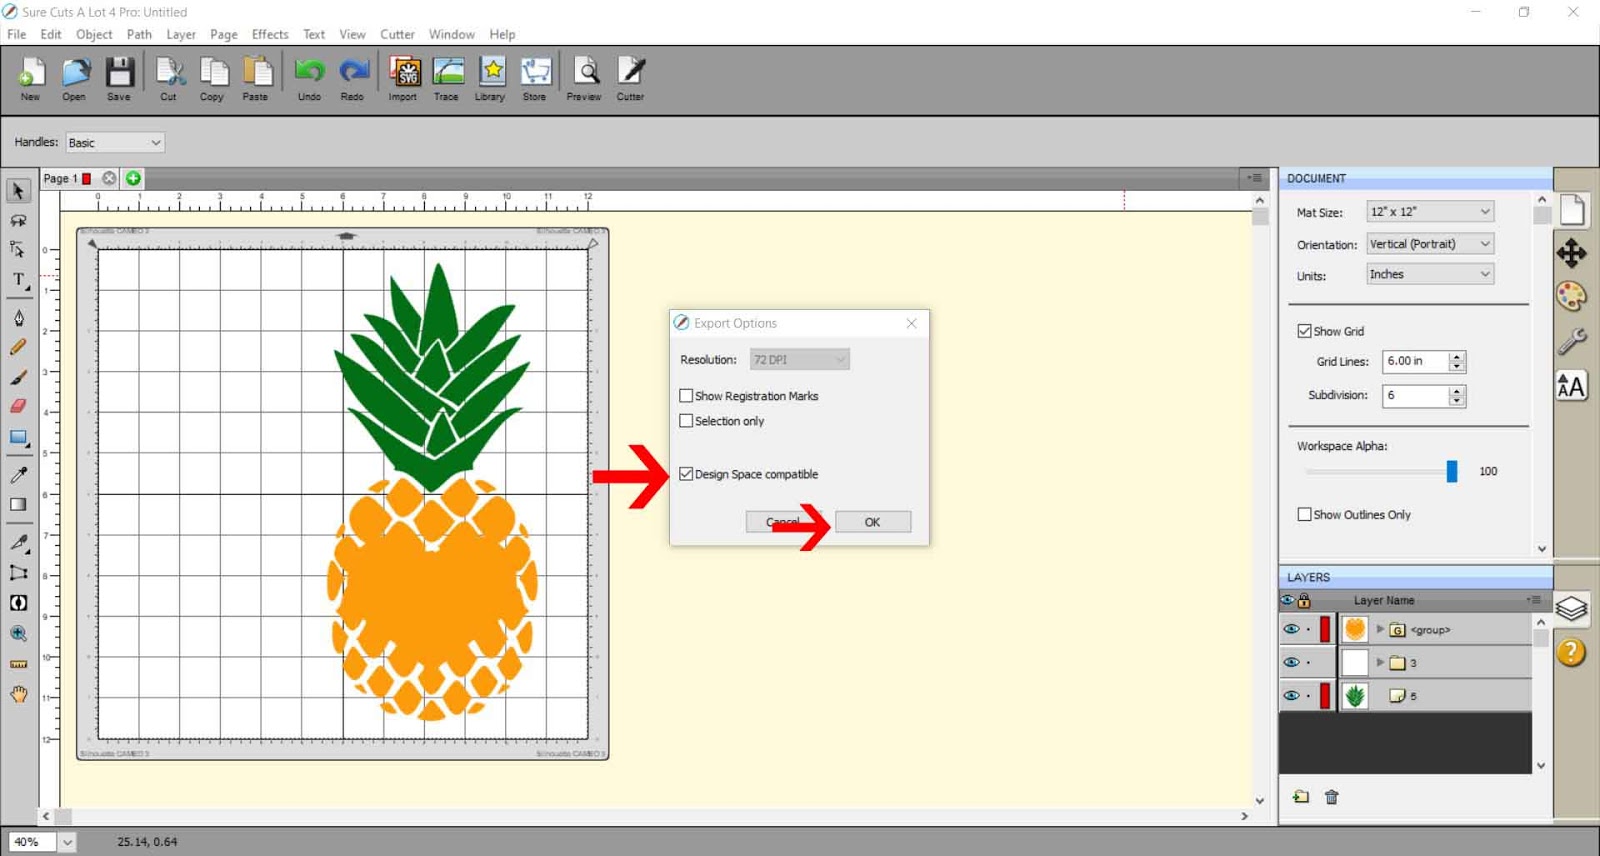
12- Go to File > Export to save as an SVG.
13- Make sure you save at 72 dpi and select the Design Space compatible box if you are using Cricut Design Space to foil with.
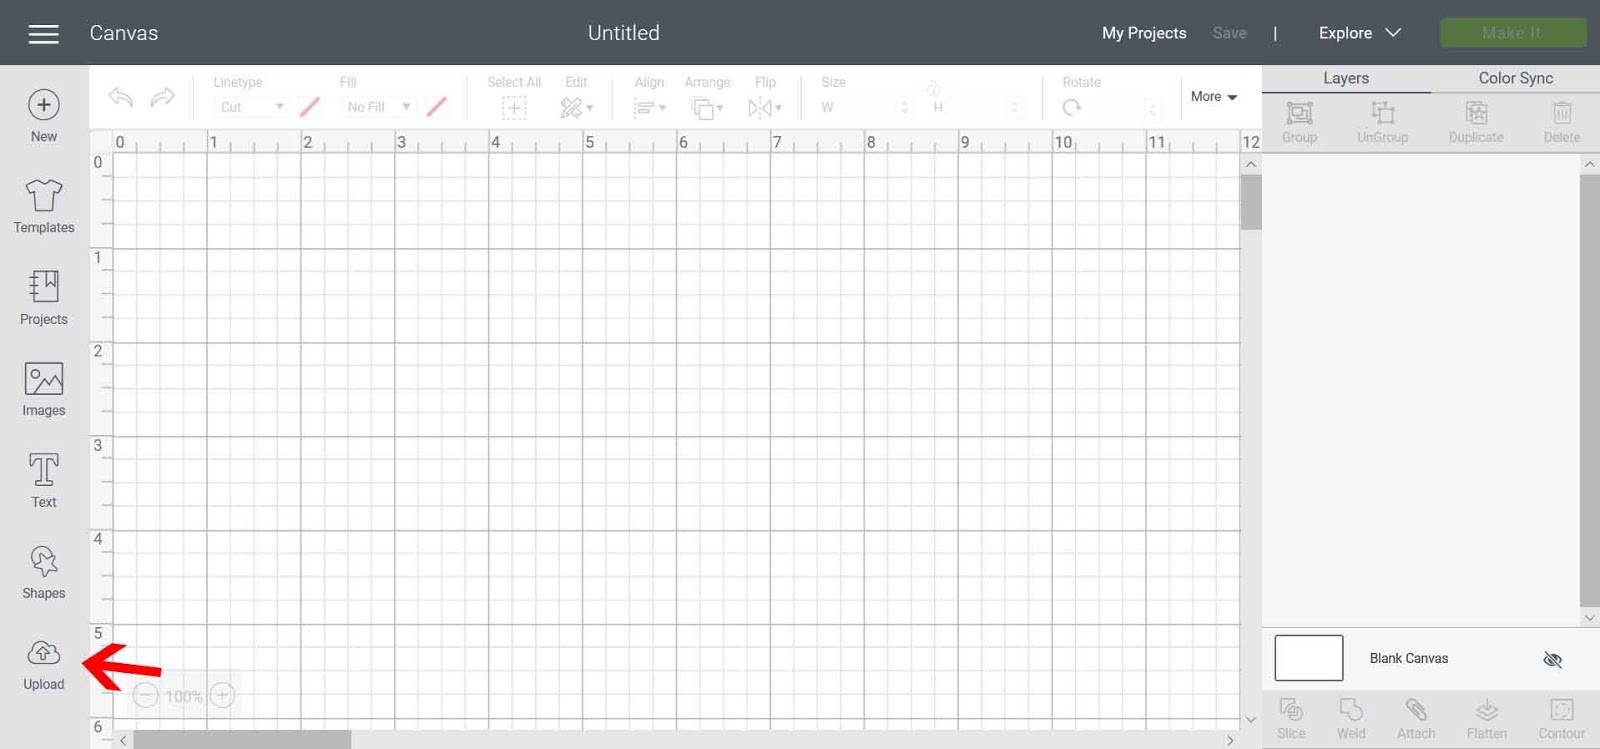
14- When using Cricut Design Space to foil, open the design space area. Click on Upload.
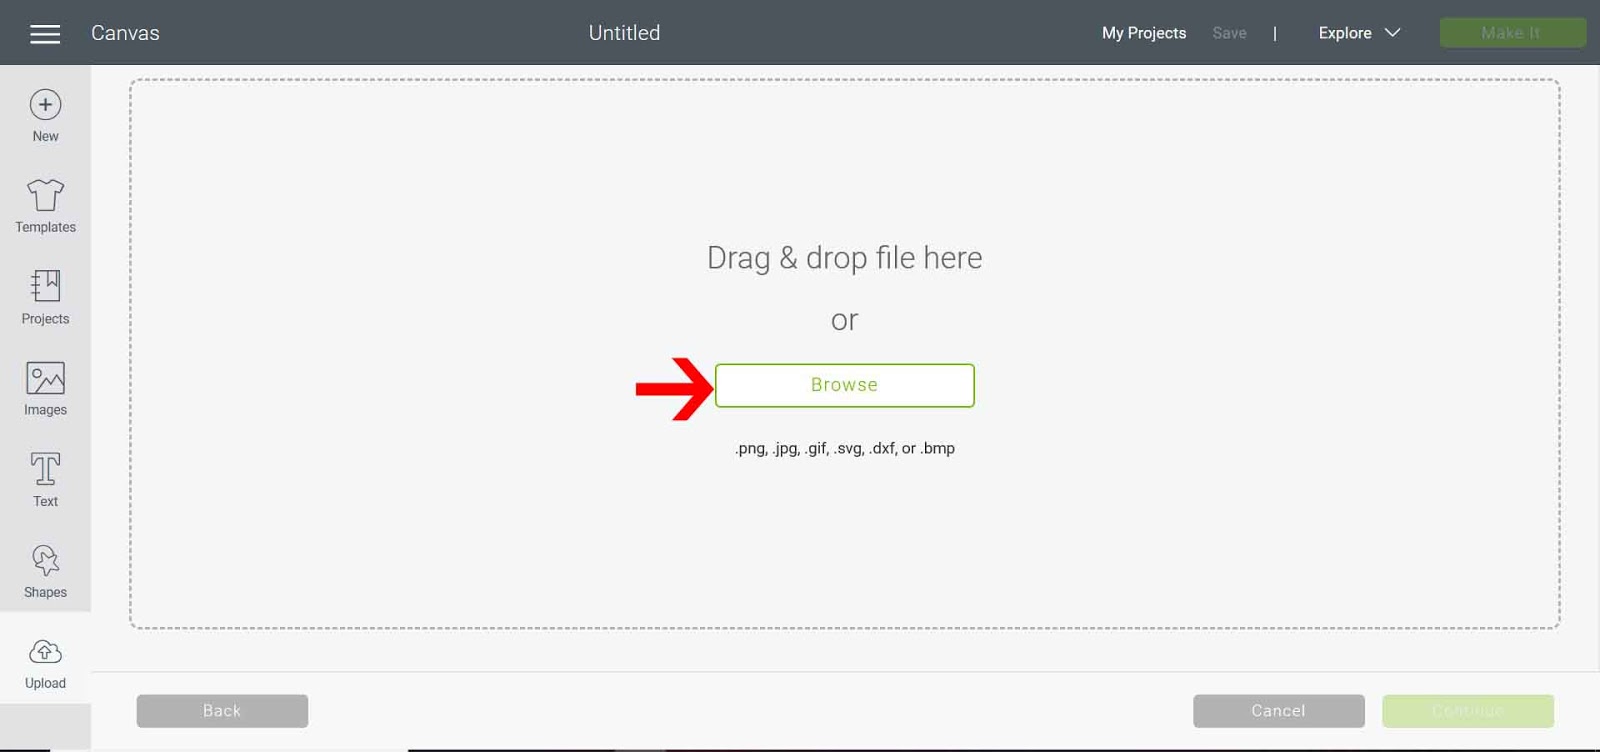
15- Then click the Browse button.
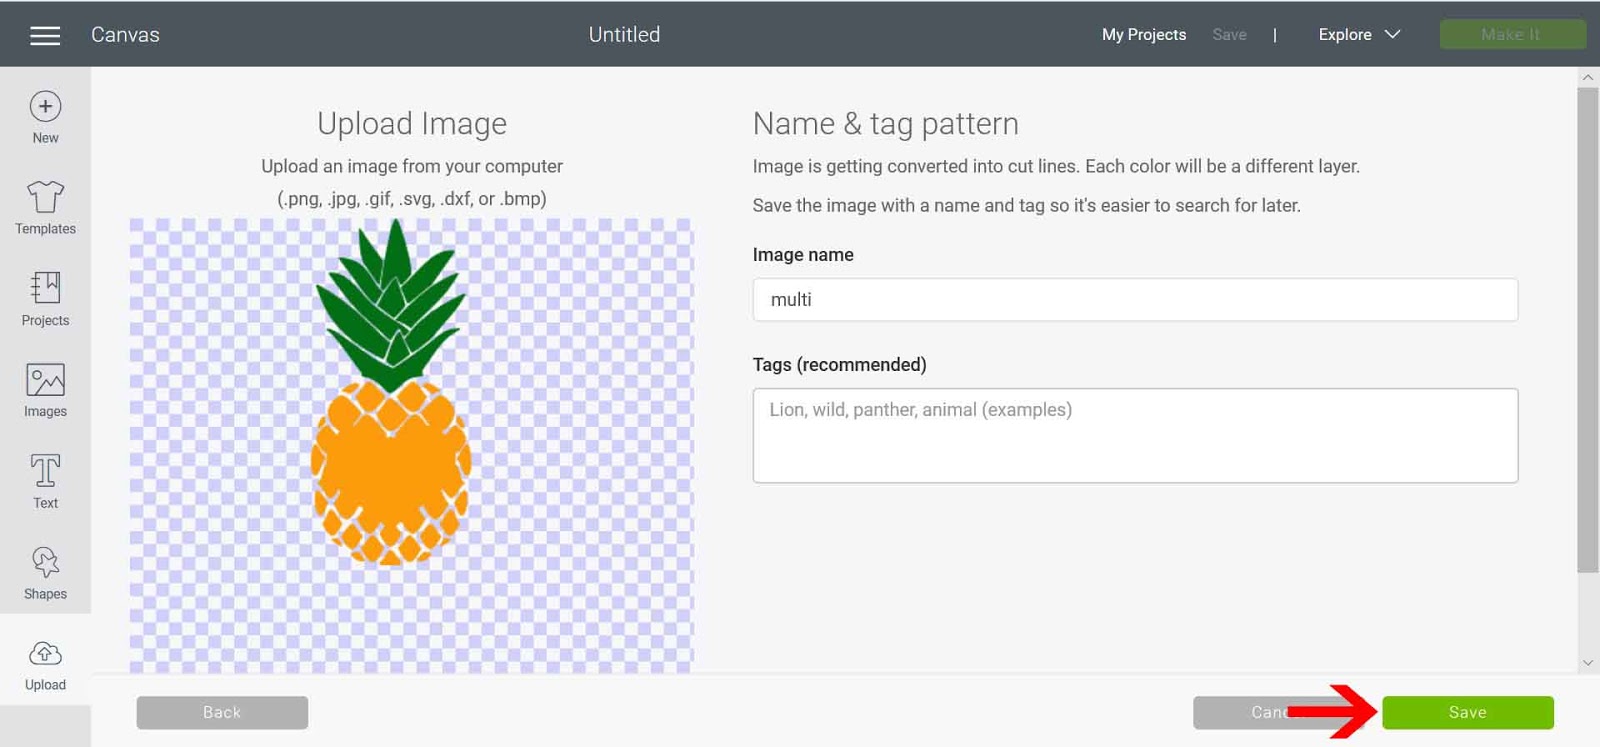
16- Save the SVG file.
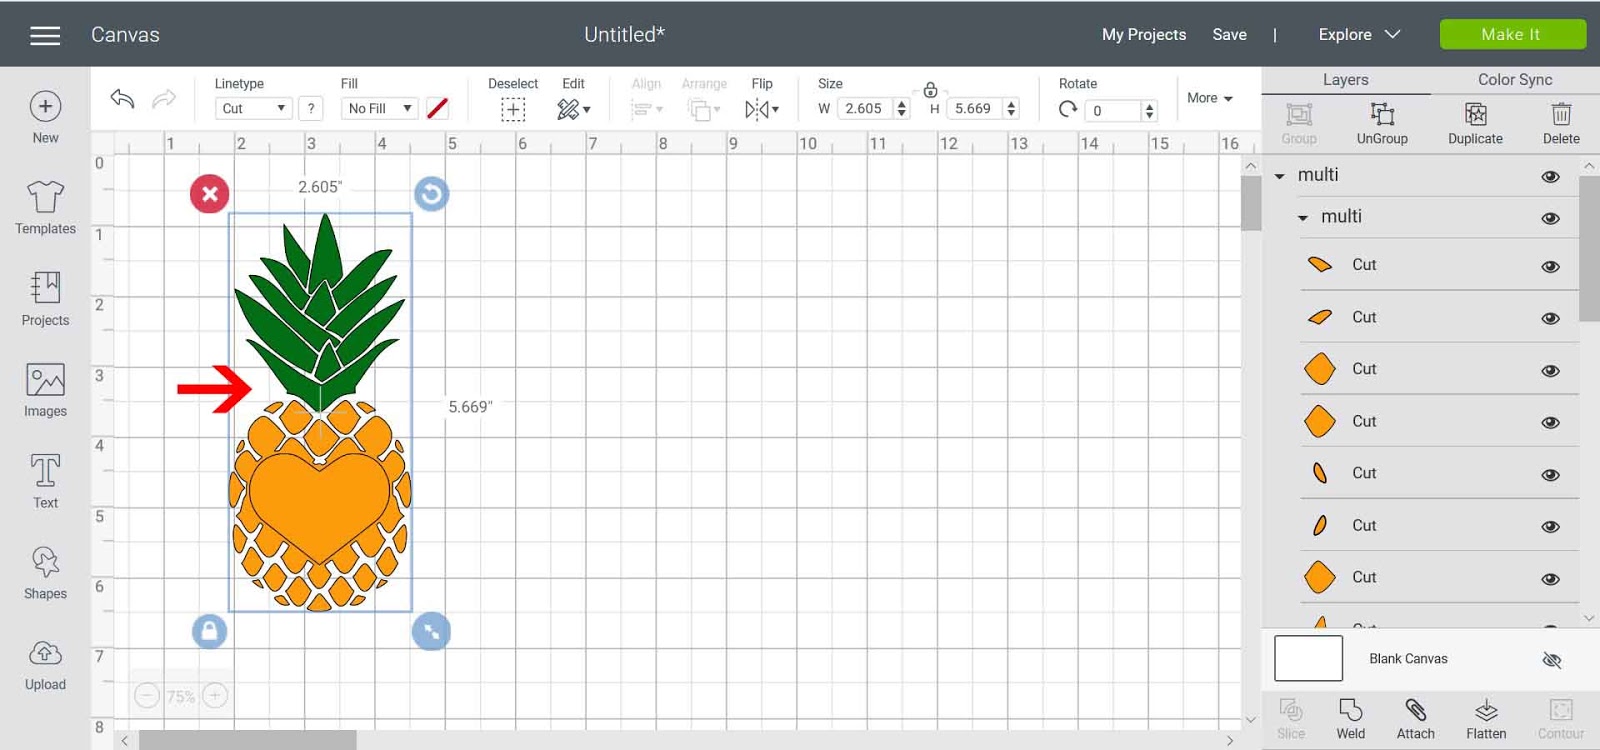
17- Insert the file into your workspace.
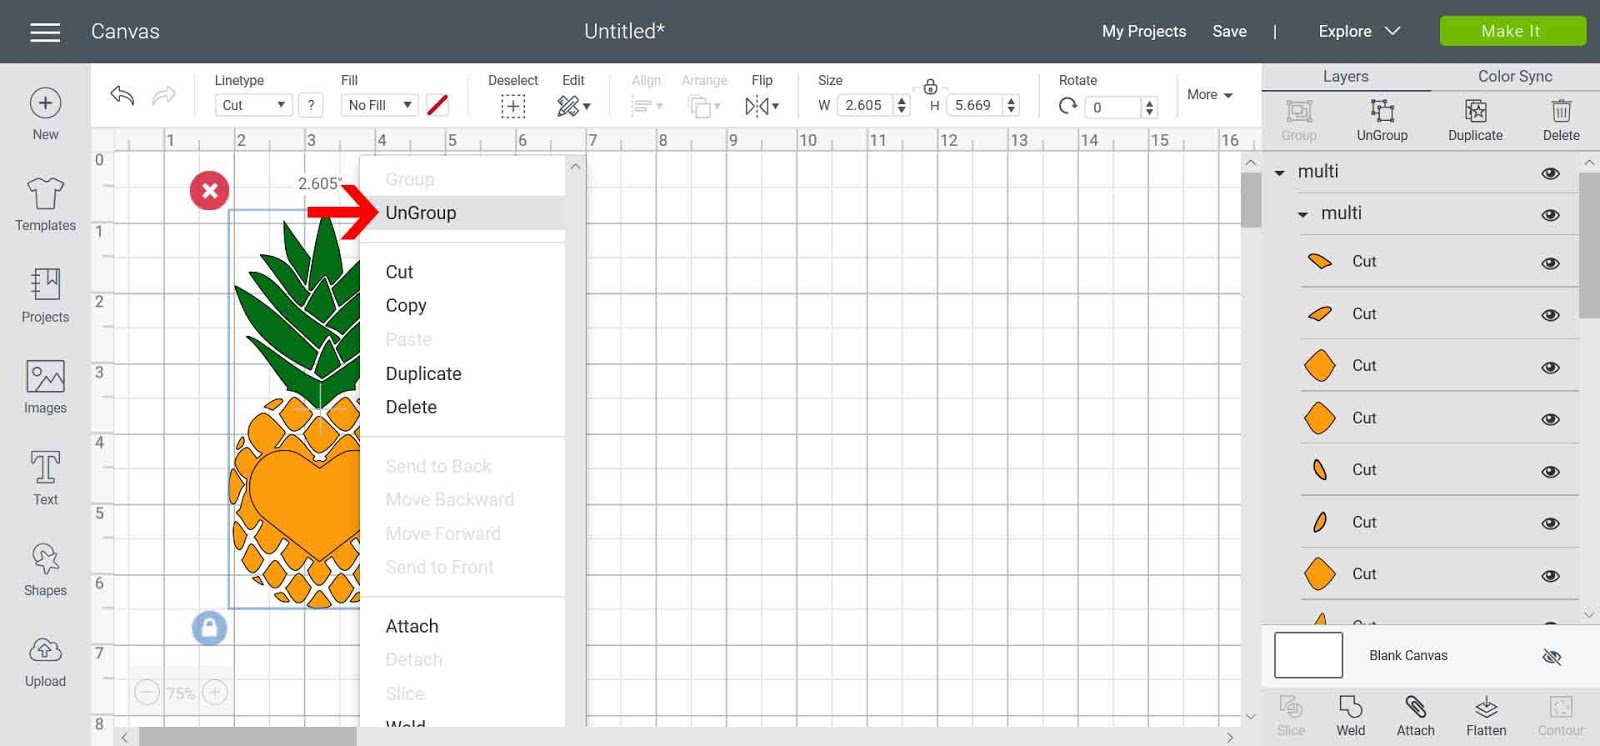
18- Right-click and ungroup the design.
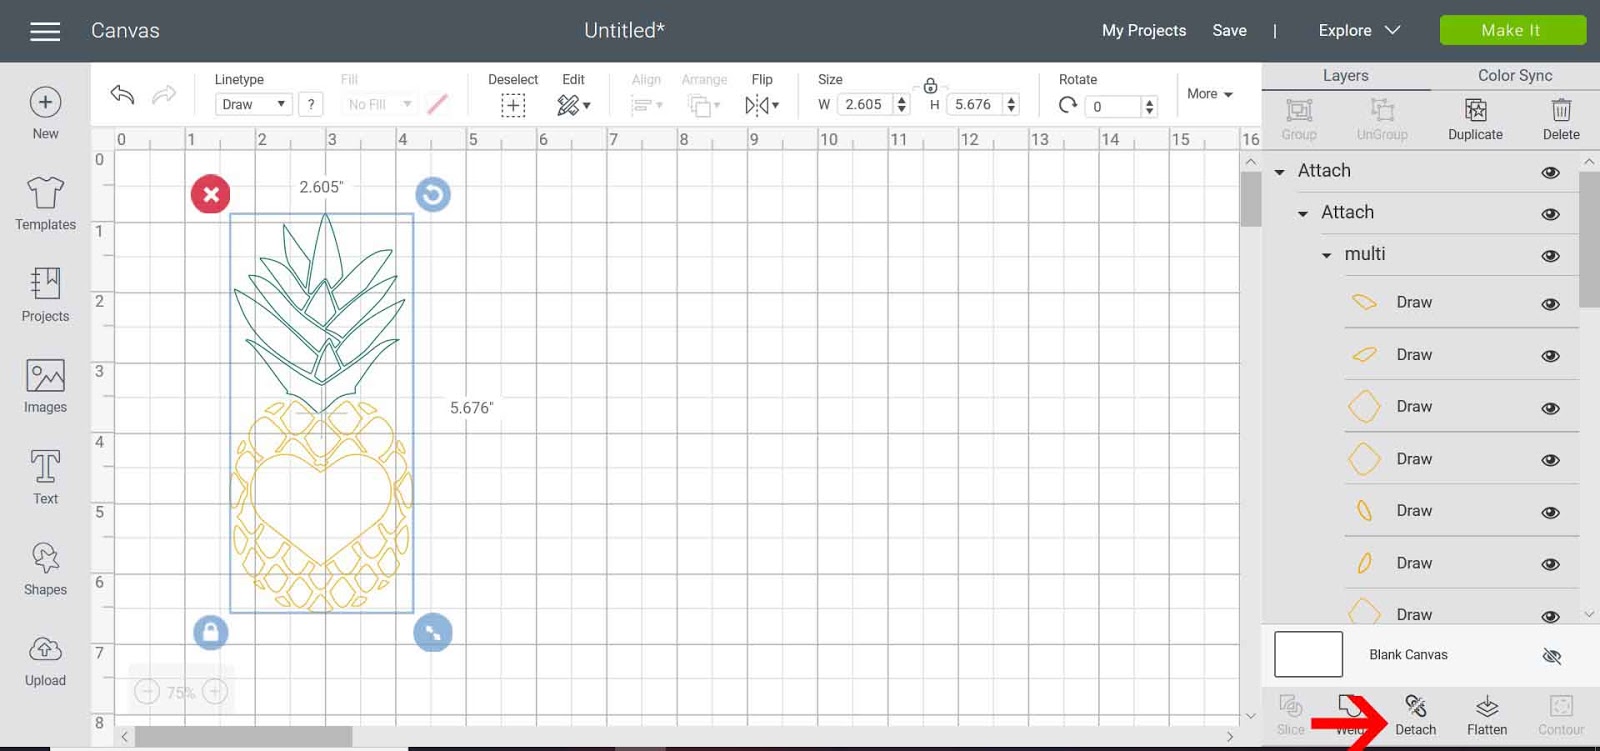
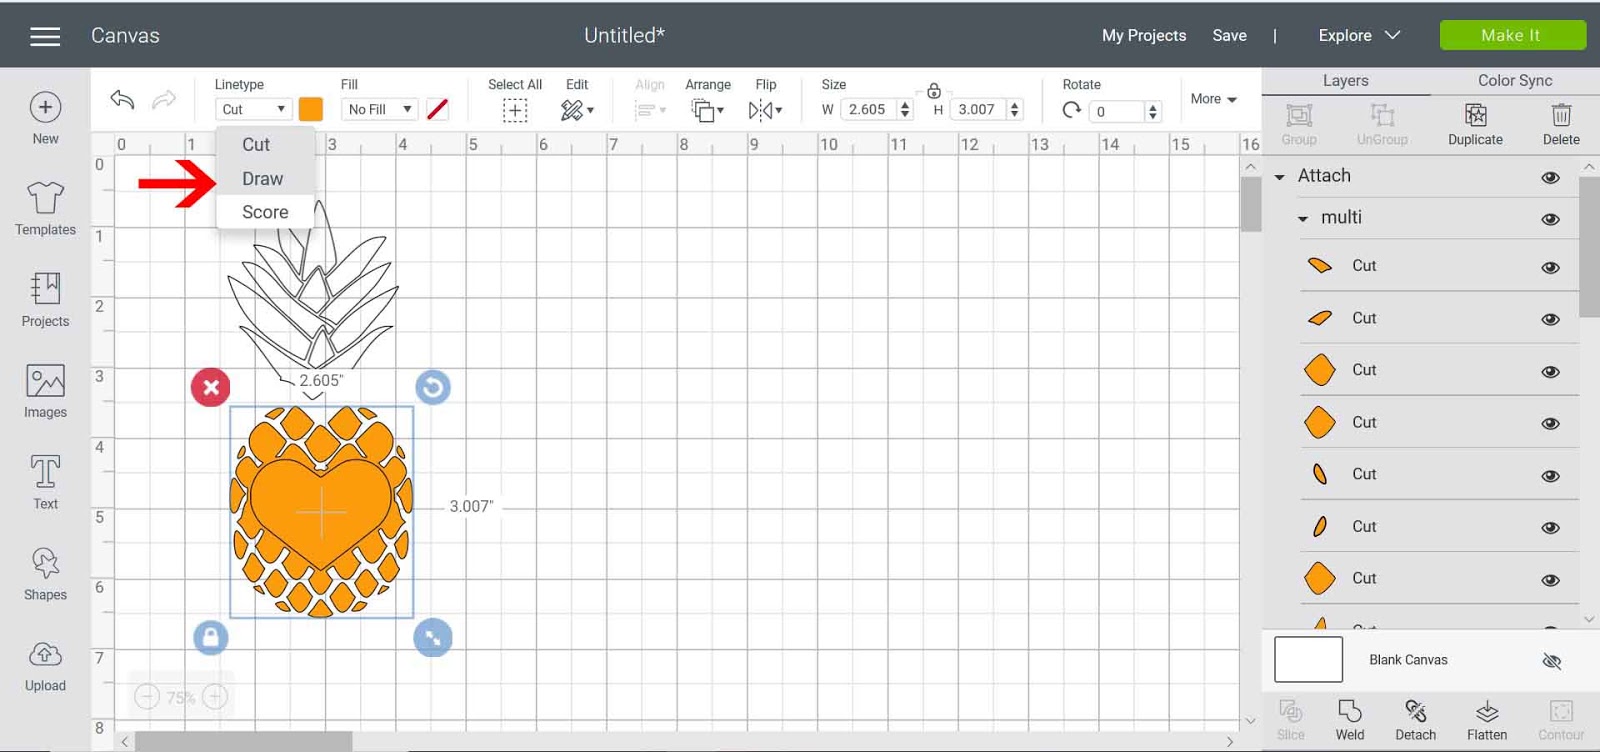
19- Select each part of the file separately, go to the Linetype drop-down box, and click draw. Then adjust the line color, so each different selection to foil is a different color. This will make it easier to foil.
20- Select the design and click attach. This will make sure that the design will stay in place when you go to foil.
2- The Trace Image window will appear. Click on Choose an image.
3- Select your file. I am using pineapple SVG monograms from Design Bundles.
4- Your file will appear in the preview window.
5- In the drop-down box, select Color layers. Make sure the number of colors exceeds the actual number of colors on the design. Once all the design is traced in separate colors, click OK.
6- Your design will appear in your workspace.
7- Separate the different parts of your design.
8- With some designs, you may need to manually separate parts of the design. If you need to do this, right-click on the design and then select break apart.
9- Select the bits you do not need and remove them from the rest of your design.
10- Select all of the rest of the parts you need and go to Path > Object to Path.
11- When you select preview, you can see that the lines are all there to be foiled.
12- Go to File > Export to save as an SVG.
13- Make sure you save at 72 dpi and select the Design Space compatible box if you are using Cricut Design Space to foil with.
14- When using Cricut Design Space to foil, open the design space area. Click on Upload.
15- Then click the Browse button.
16- Save the SVG file.
17- Insert the file into your workspace.
18- Right-click and ungroup the design.
19- Select each part of the file separately, go to the Linetype drop-down box, and click draw. Then adjust the line color, so each different selection to foil is a different color. This will make it easier to foil.
20- Select the design and click attach. This will make sure that the design will stay in place when you go to foil.