
How to Use Layer Masks in Procreate to Intertwine Text
You can easily create cool text effects in Procreate, such as intertwined text, by using layer masks. You can use this text effect when creating designs for logos, posters, greeting cards, etc.
In this tutorial, we will be discussing how to use layer masks. Similar to clipping masks, using layer masks is another non-destructive method.
Today we will be using a monoline script font called Goldwind and an all caps modern sans serif font.
Before we start, we will first add the fonts to Procreate.
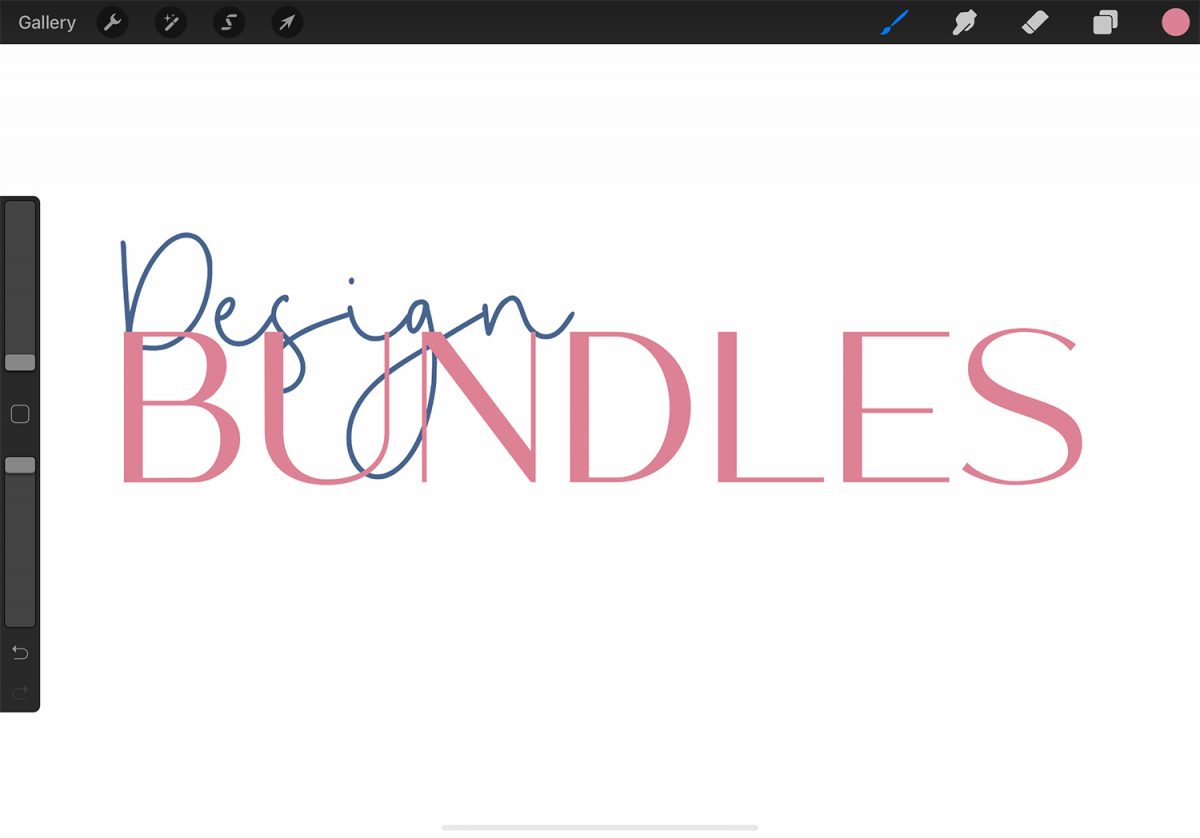
Pick a color and add your text to the canvas. We chose the color #4f648b and typed "Design" with the font Goldwind.

Then, select another color and add your second text. We chose #d08796 and typed "Bundles" with the regular Melody Southern font.
Resize, move, and align both text layers to your liking. We have a tutorial on how to edit text in Procreate if needed.
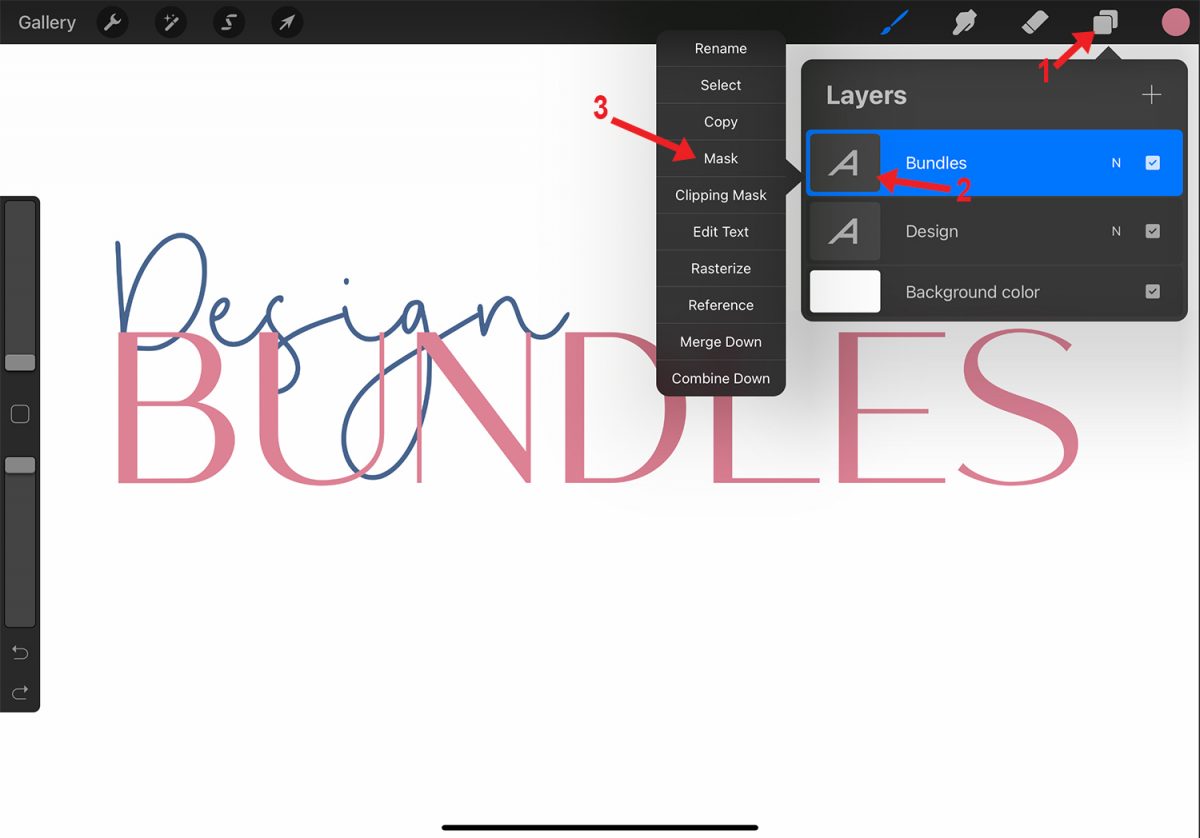
In the Layers panel, select the top layer. Tap the layer's thumbnail and choose Mask.
When using layer masks, you will have to remember "white reveals, black conceals." If you use a shade of gray, the opacity will vary.
The image below compares the use of white (#000000), black (#ffffff), and 60% gray. If you forget how layer masks work, look at the layer mask's thumbnail in the Layers panel.

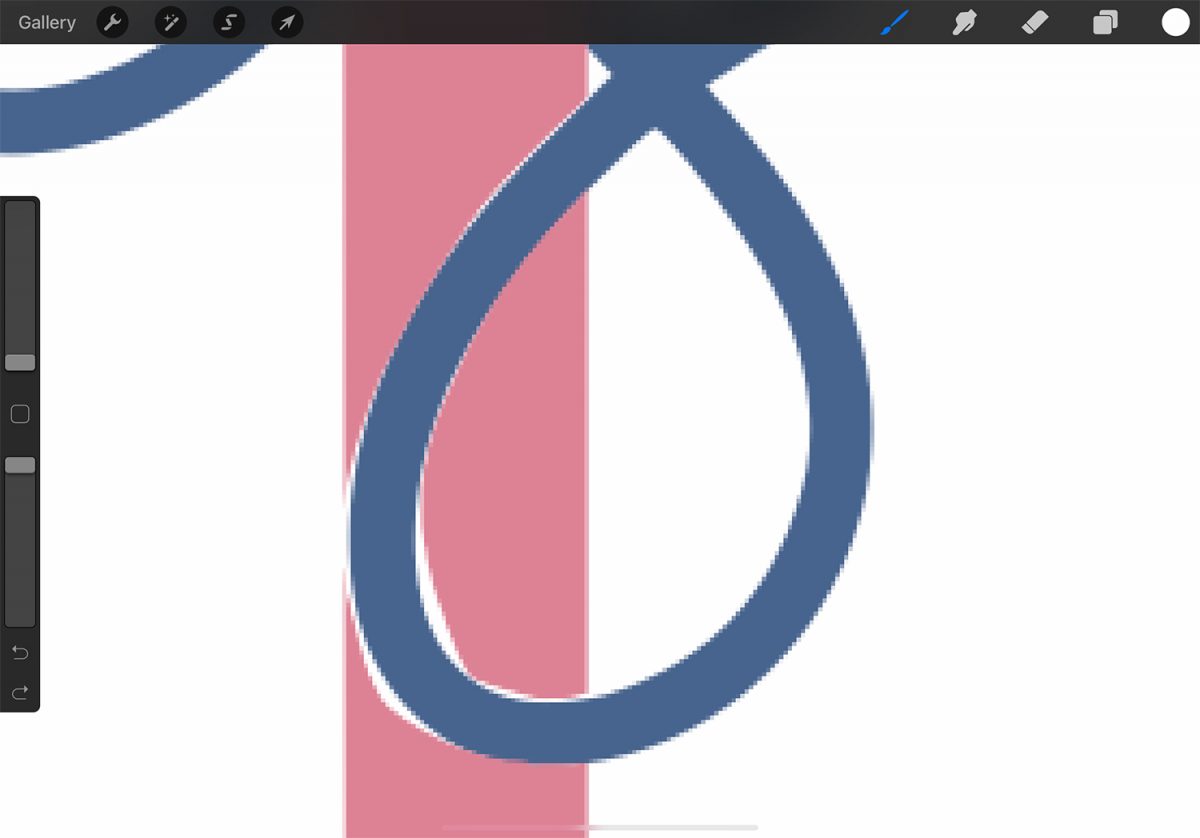
Make sure the layer mask is selected in the Layers panel, and pick the color black. Zoom in if needed. Draw over the parts you want to conceal.
A trick you can follow to make creating this text effect easier is to first conceal more than needed. Then go back in with white to reveal more of the masked layer when you can actually see the edges of the layer underneath.
In the following image, the area we concealed is relatively large. First, we concealed more than needed of the Bundles layer (pink text). Once we could see the edges of the Design layer (blue text), we went back in and revealed more of the pink text.
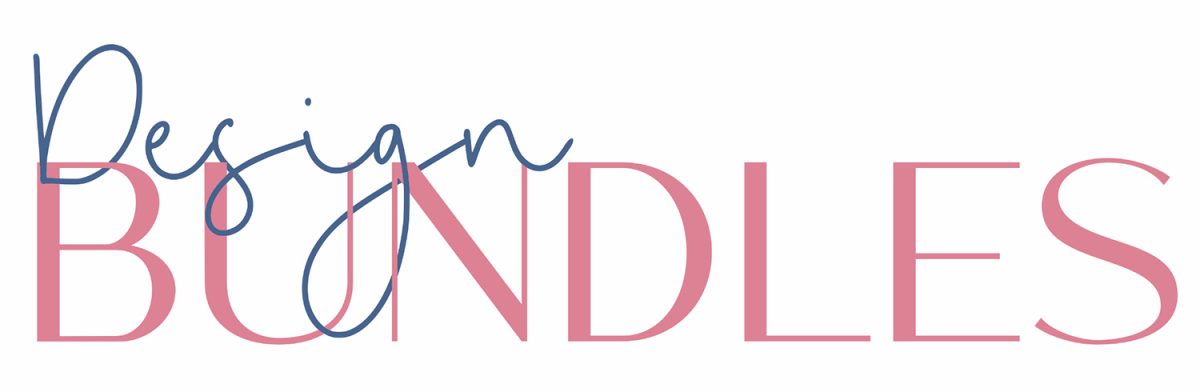
Once you are done, you will have a fun text effect like the image below, where one text is intertwined with another.
To learn how to create other text effects in Procreate, take a look at our tutorial on how to curve text and how to create a neon text effect.
In this tutorial, we will be discussing how to use layer masks. Similar to clipping masks, using layer masks is another non-destructive method.
Today we will be using a monoline script font called Goldwind and an all caps modern sans serif font.
Step 1 - Add Two Text Objects
Before we start, we will first add the fonts to Procreate.
Pick a color and add your text to the canvas. We chose the color #4f648b and typed "Design" with the font Goldwind.
Then, select another color and add your second text. We chose #d08796 and typed "Bundles" with the regular Melody Southern font.
Resize, move, and align both text layers to your liking. We have a tutorial on how to edit text in Procreate if needed.
Step 2 - Apply Layer Mask to Top Text Layer
In the Layers panel, select the top layer. Tap the layer's thumbnail and choose Mask.
When using layer masks, you will have to remember "white reveals, black conceals." If you use a shade of gray, the opacity will vary.
The image below compares the use of white (#000000), black (#ffffff), and 60% gray. If you forget how layer masks work, look at the layer mask's thumbnail in the Layers panel.
Make sure the layer mask is selected in the Layers panel, and pick the color black. Zoom in if needed. Draw over the parts you want to conceal.
A trick you can follow to make creating this text effect easier is to first conceal more than needed. Then go back in with white to reveal more of the masked layer when you can actually see the edges of the layer underneath.
In the following image, the area we concealed is relatively large. First, we concealed more than needed of the Bundles layer (pink text). Once we could see the edges of the Design layer (blue text), we went back in and revealed more of the pink text.
Once you are done, you will have a fun text effect like the image below, where one text is intertwined with another.
To learn how to create other text effects in Procreate, take a look at our tutorial on how to curve text and how to create a neon text effect.


