
How to Create a Photoshop Oil Paint Filter
Photos can be enhanced with a beautiful oil effect in Photoshop. The technique can be used to create an elegant paint style with just about any photo. In this tutorial, we will show you how to create a Photoshop Oil paint filter.
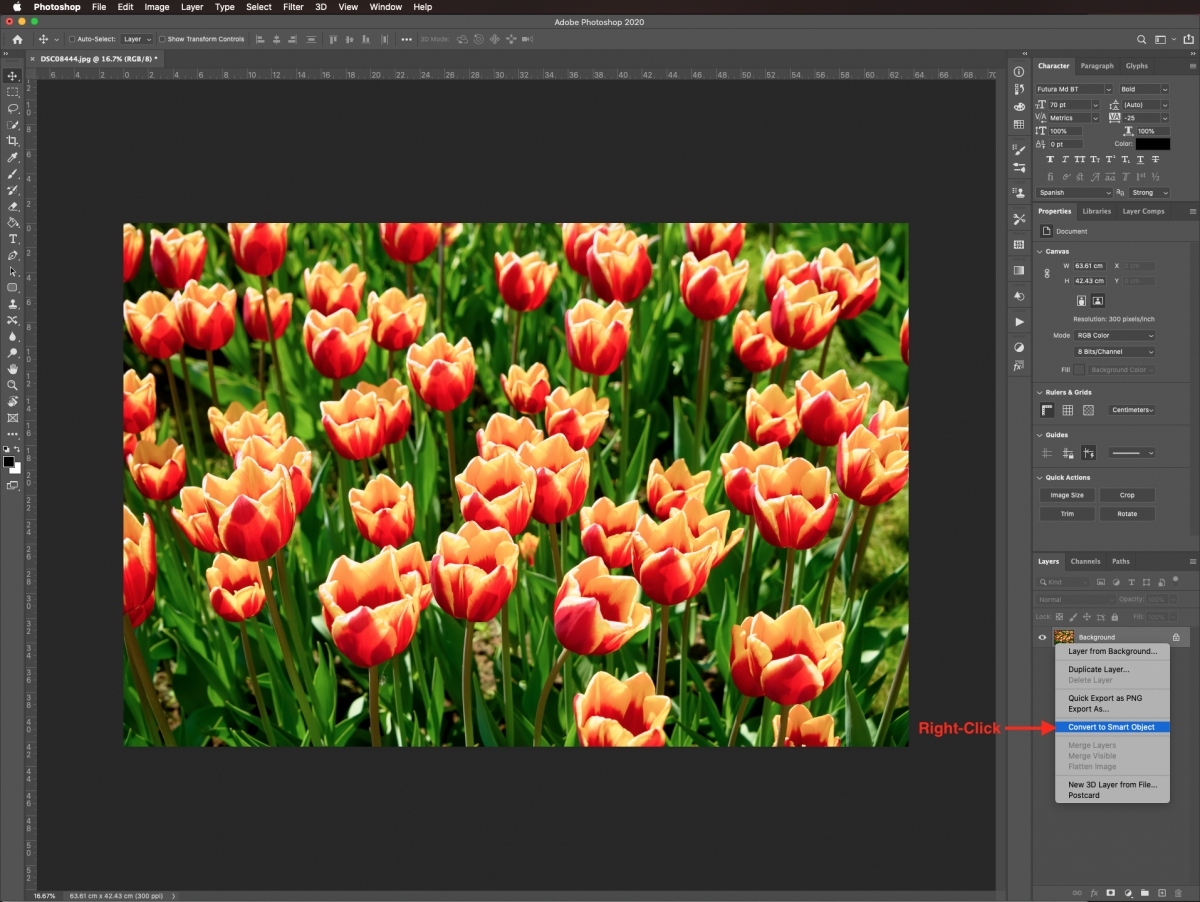
Once in Photoshop, open your image. I am using a tulip field photo for this tutorial. Next, double click on the image thumbnail in the Layers panel and select Convert to Smart Object. This will preserve it in case you want to reverse or modify any changes.
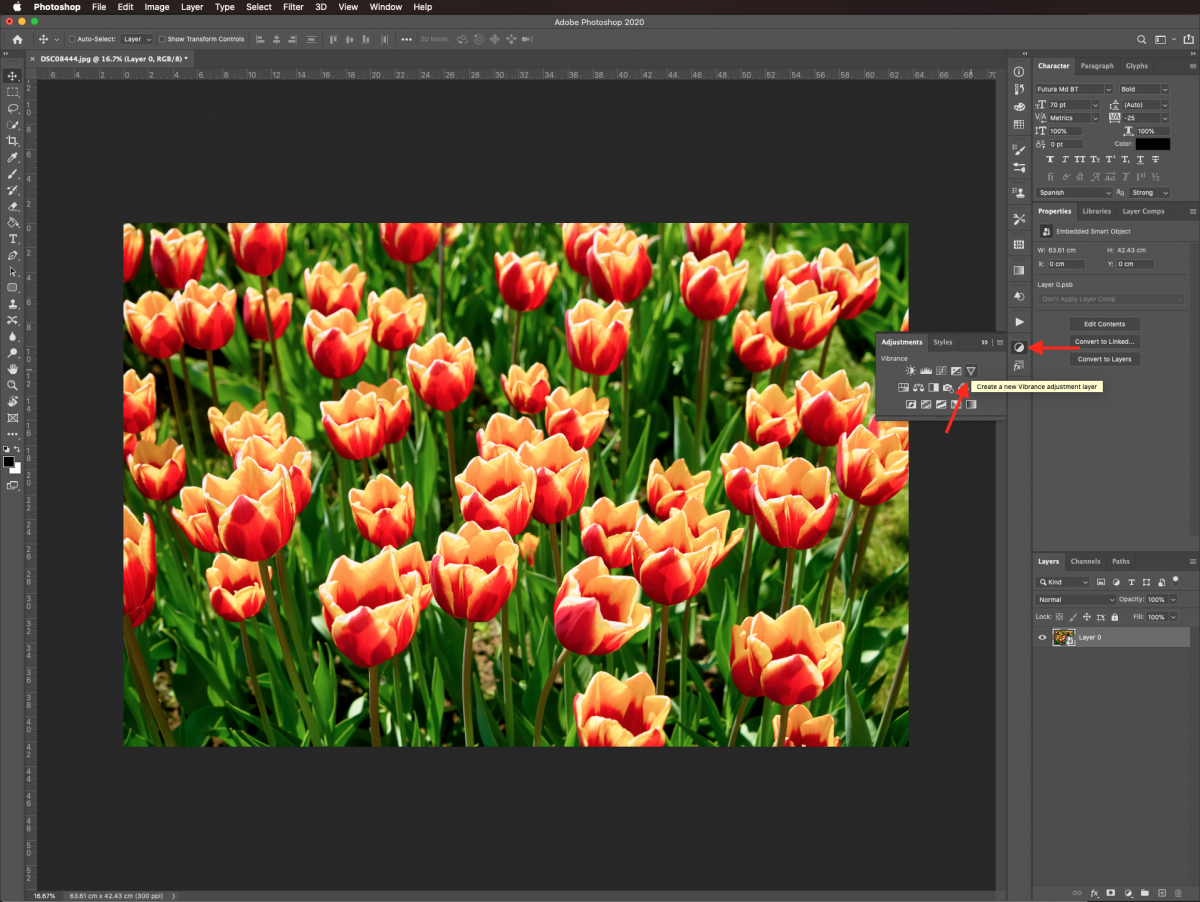
To make your image pop a bit more, head to the Adjustments Panel and create a new Vibrance Adjustment layer.
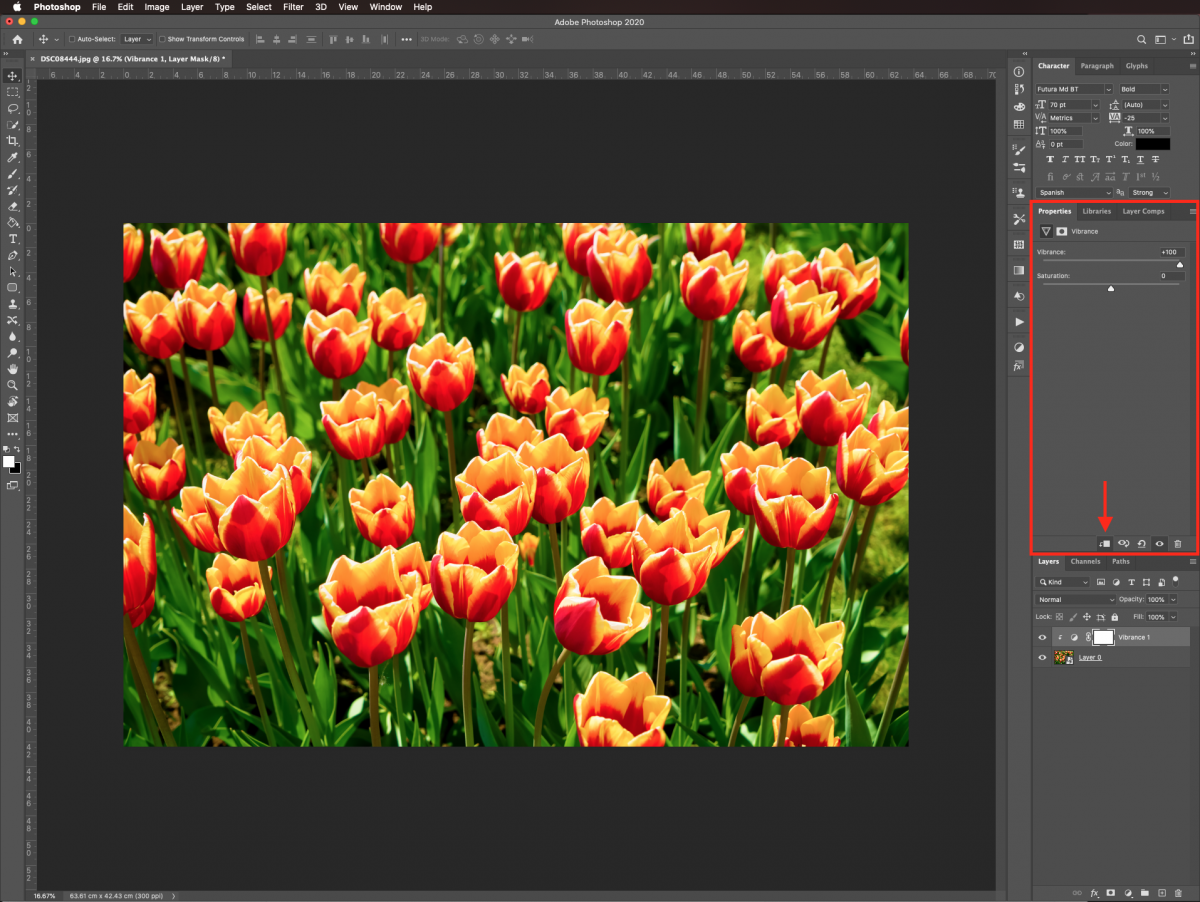
Move the Vibrance lever all the way to the right. Don’t forget to clip your layer to your smart object by clicking on the button at the bottom of the Properties panel.
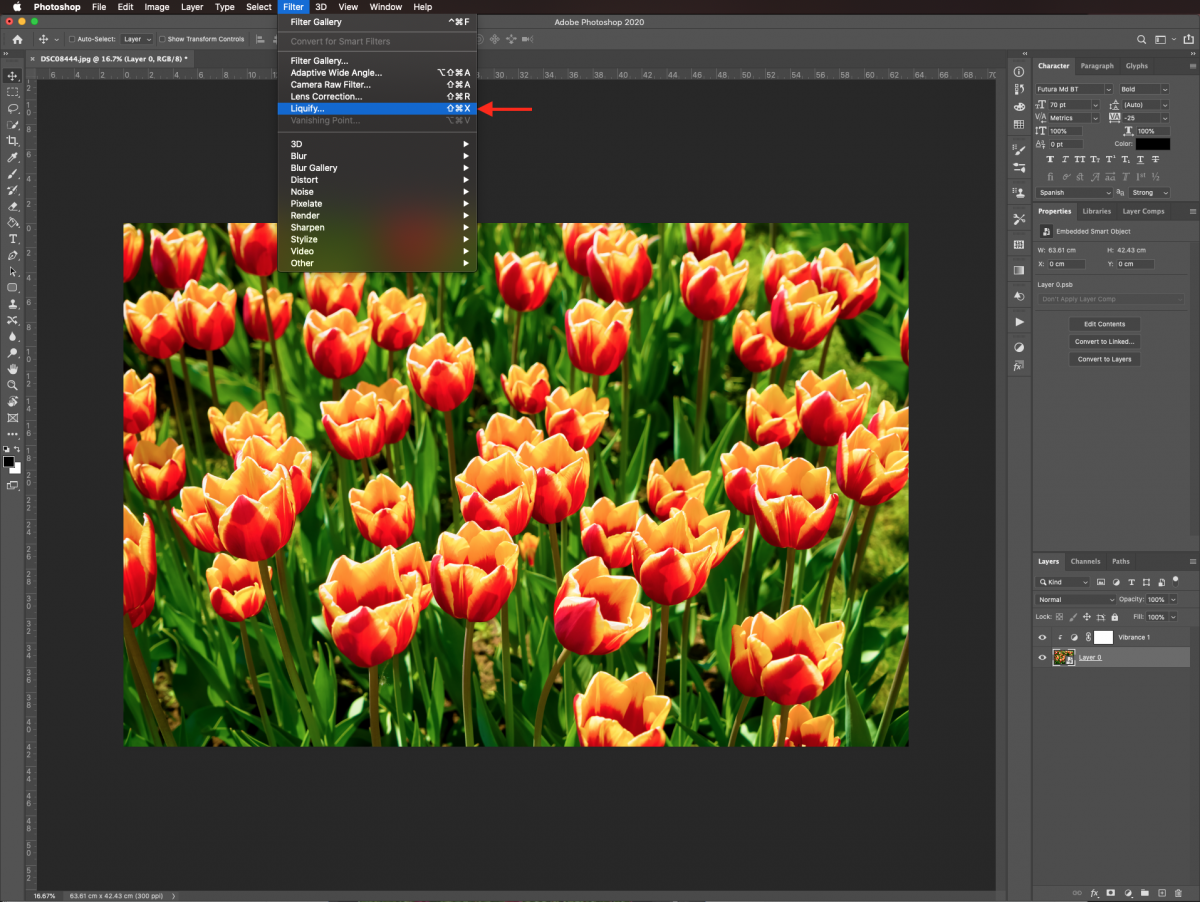
To start creating the effect we will add a wide variety of filters. First, select your smart object layer and go to Filter > Liquify (Shift + Command/Control + X).
You can use the different tools and brush sizes to work on your image until you are satisfied.
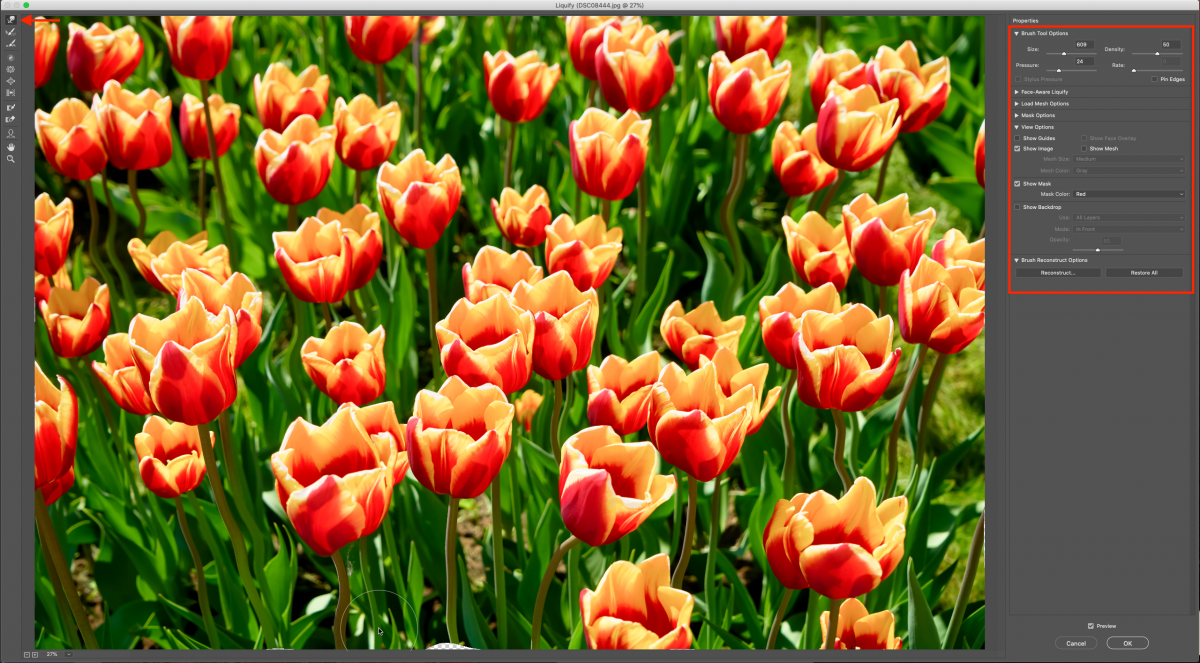
Once you are done editing the Liquify Filter, click Ok.

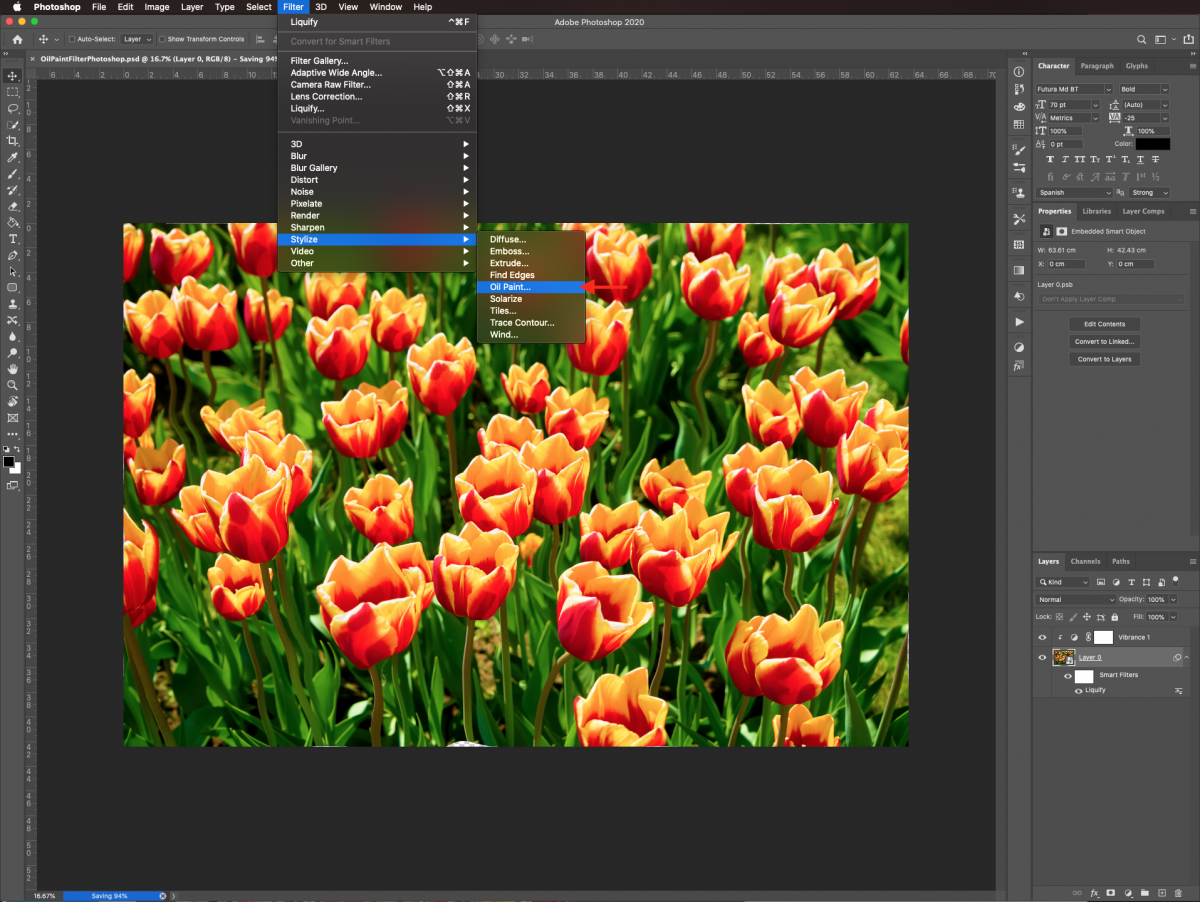
Next, we will apply another filter to add to the overall look. Go to Filter > Stylize > Oil Paint.
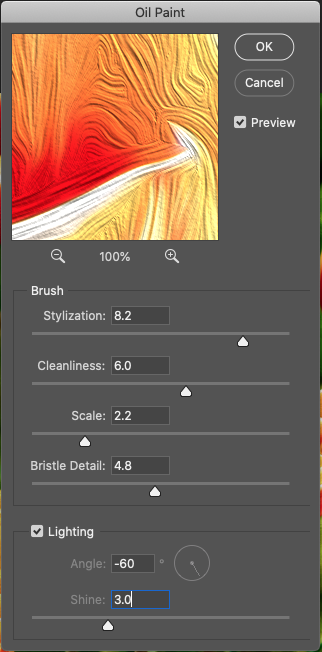
I used the following values: Stylization 8.2, Cleanliness 6.0, Scale 2.2, Bristle Detail 4.8, Lighting box checked, Angle -60º, Shine 3.0). But you can adjust them as per your requirements.
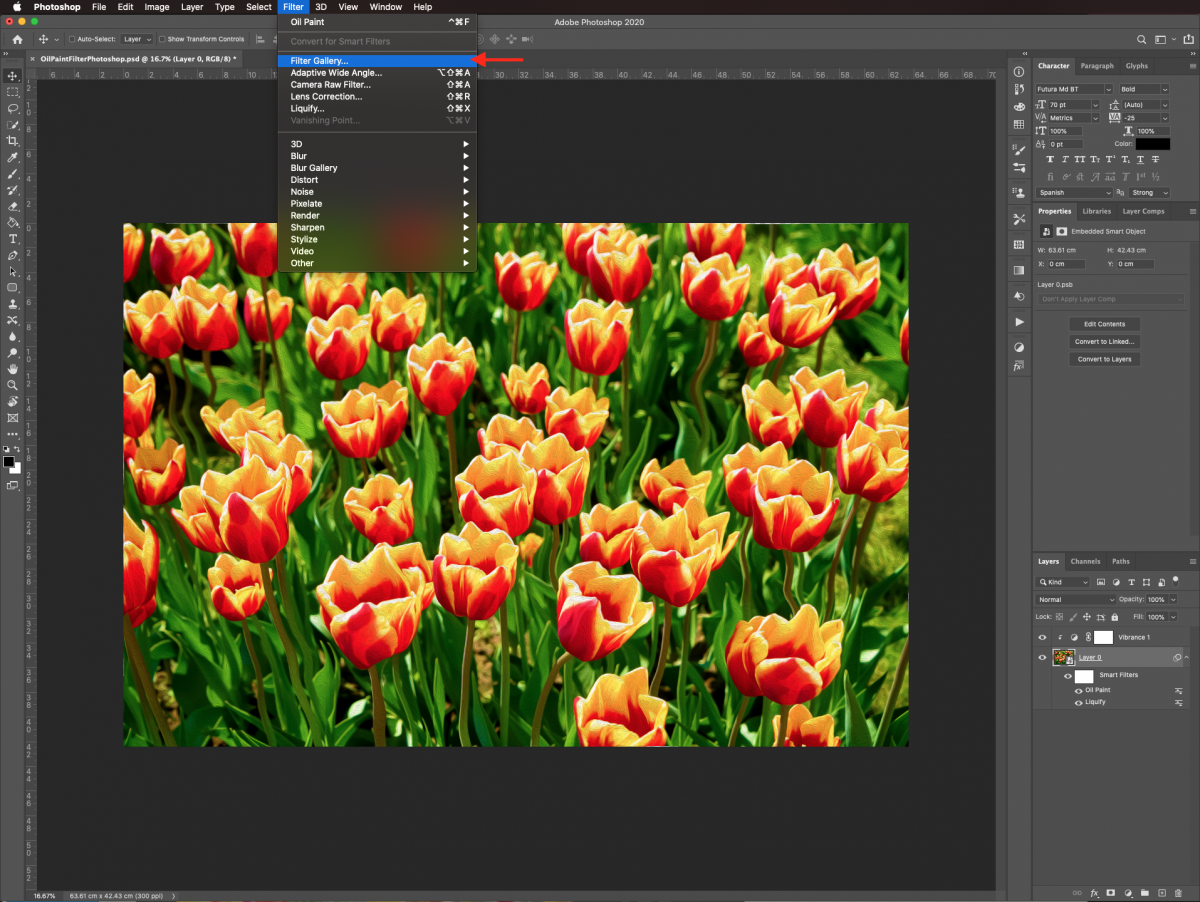
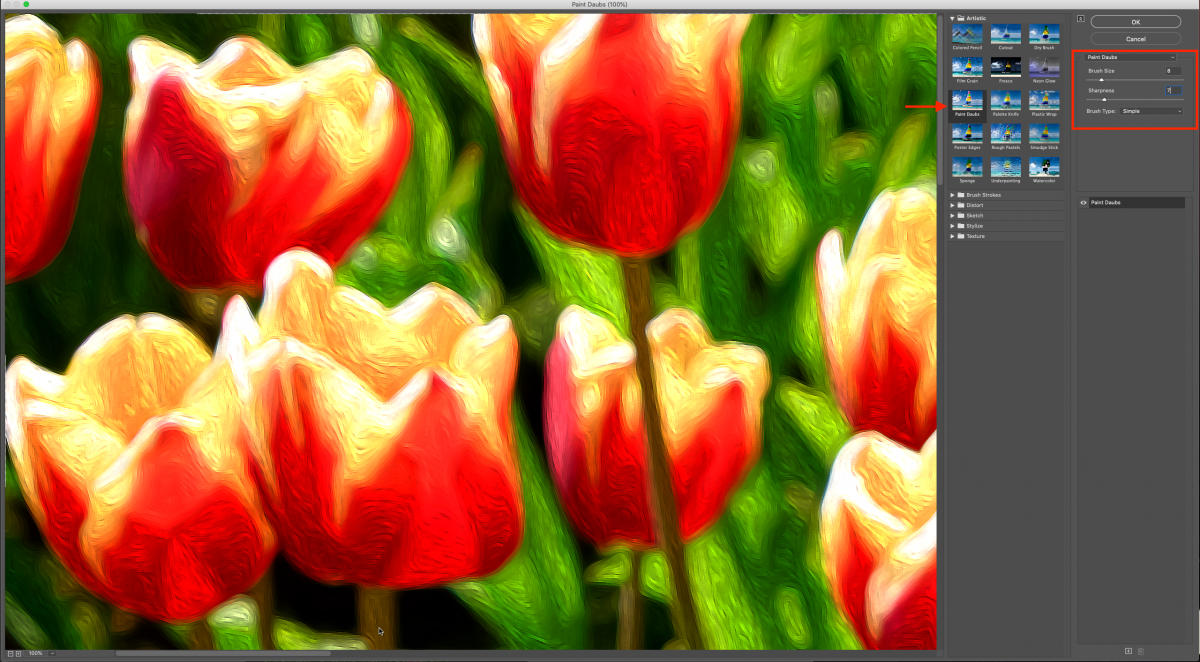
Next, we are going to add more filters using the Filter Gallery. Go to Filter > Filter Gallery > Artistic > Paint Daubs.
I used the following values: Brush Size 8, Sharpness 7, Brush Type Simple.
Click on the New Effect Layer button at the bottom and add Plastic Wrap with the following values: Highlight Strength 5, Detail 3, Smoothness 3. Then click Ok.

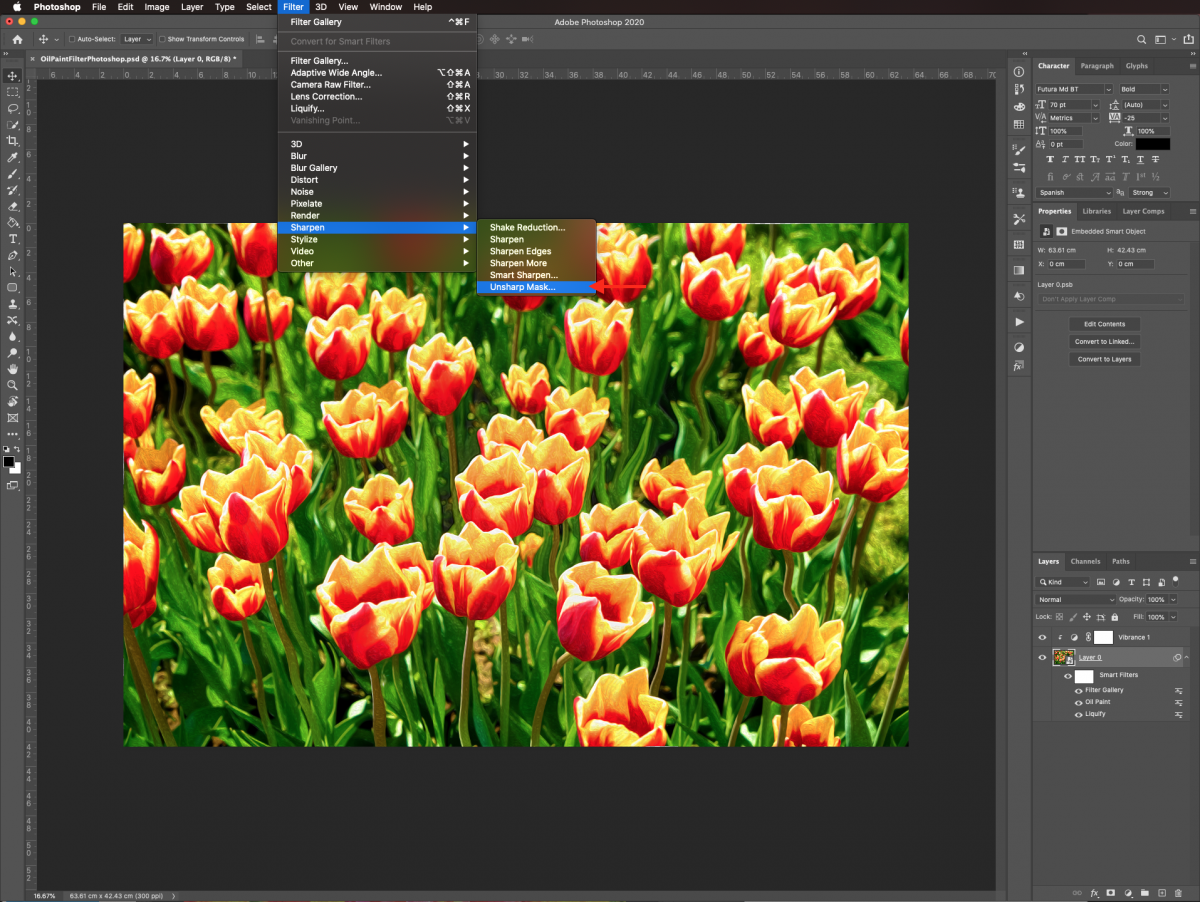
Finally, to make the image look crispier, go to Filter > Sharpen > Unsharp Mask.
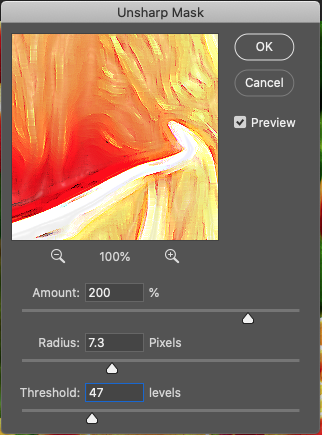
The following values were used: Amount 200%, Radius 7.3 pixels, Threshold 47 levels.
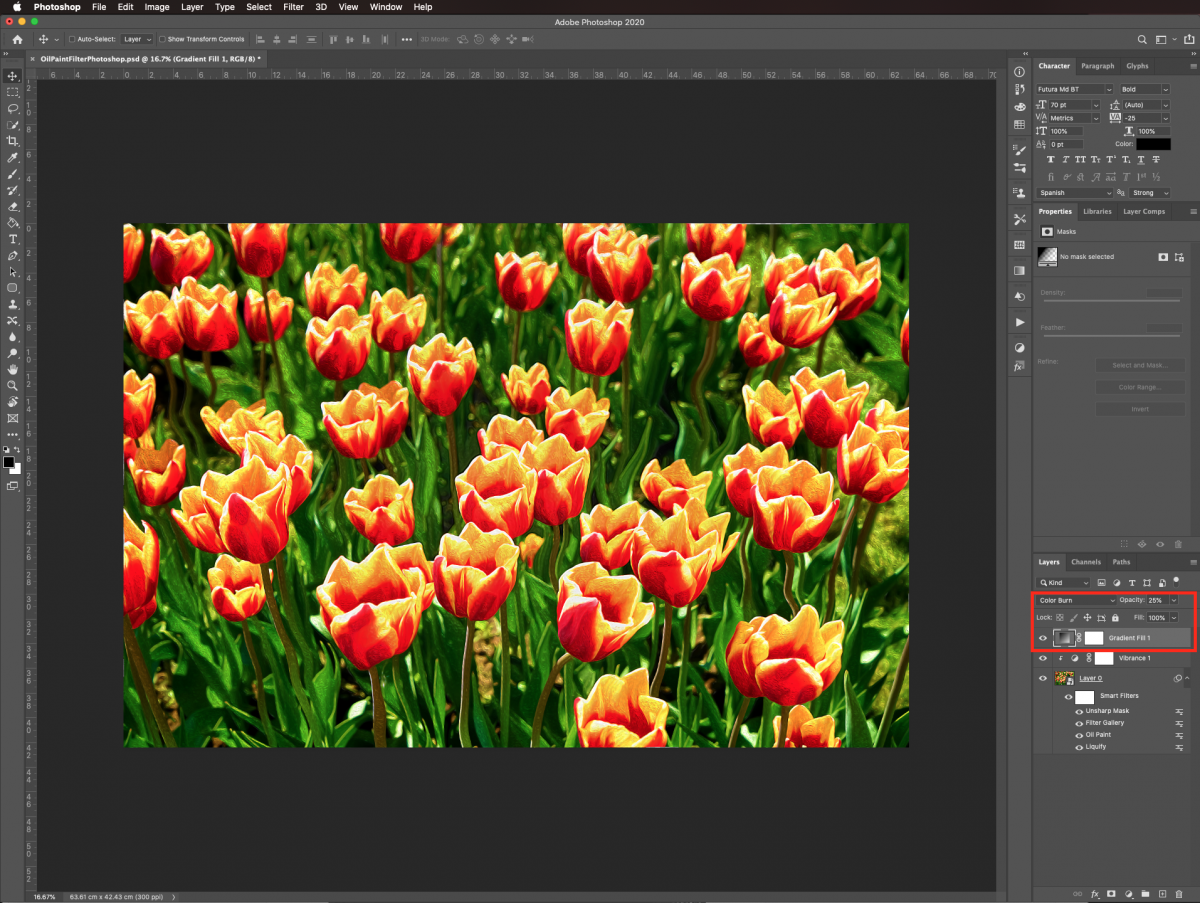
A Gradient Fill can be used to give the photo more depth. Create a new Gradient Fill layer on top of everything by clicking on the small black and white circle icon at the bottom of the Layers panel.
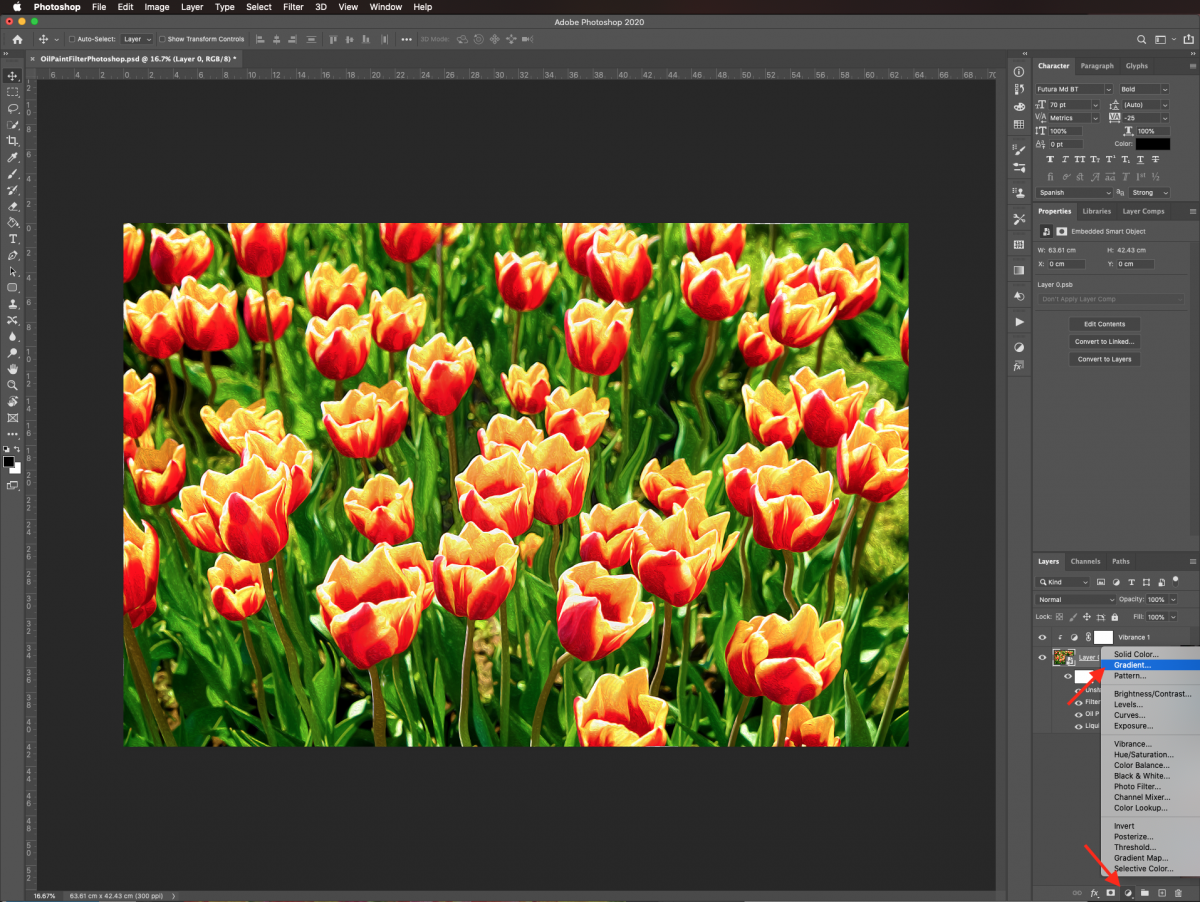
Use a black to transparent, Radial gradient with a 90° angle, 199% Scale, and check the Reverse and Align with layer boxes.

Change the Blending Mode of the gradient fill layer to Color Burn and lower the Opacity to 25%.
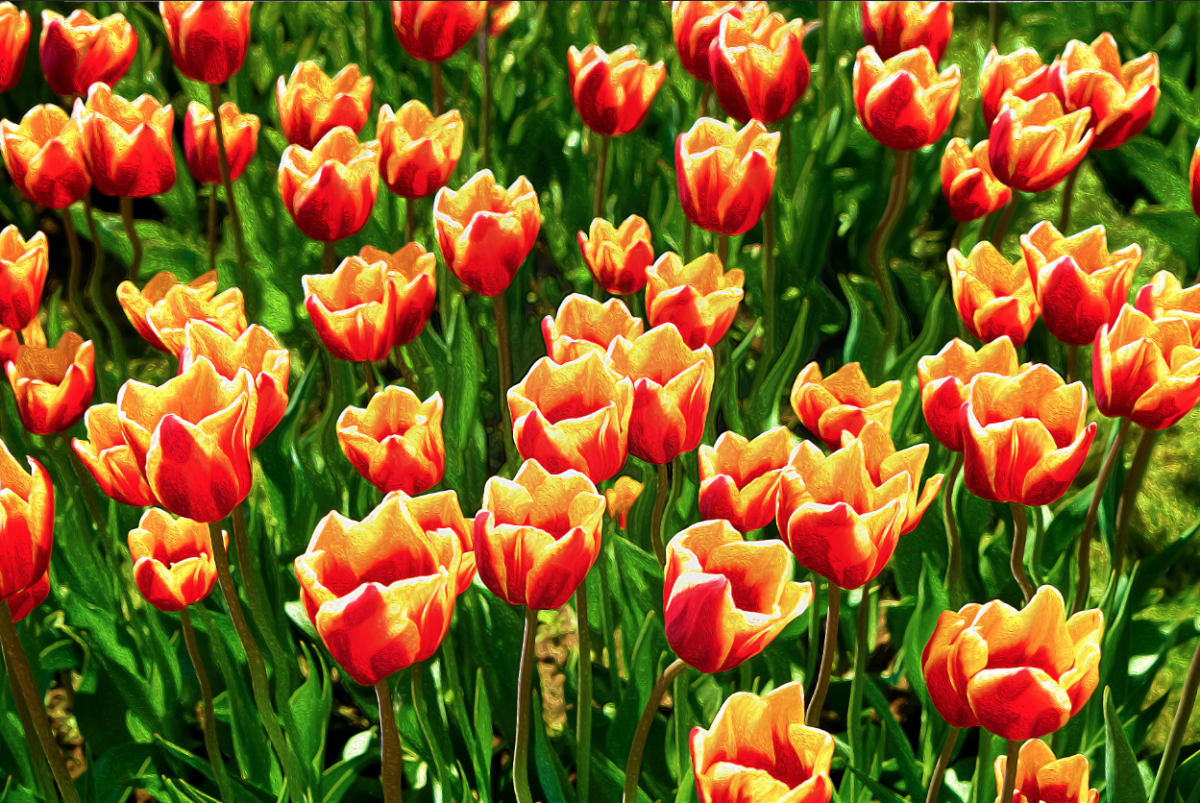
The final result should look something like the image below.
If you liked this tutorial make sure to check out our other Photoshop tutorials like adding smoke to a photo and making a GIF in Photoshop.
Step 1 - Convert image to Smart Object
Once in Photoshop, open your image. I am using a tulip field photo for this tutorial. Next, double click on the image thumbnail in the Layers panel and select Convert to Smart Object. This will preserve it in case you want to reverse or modify any changes.
Step 2 - Add a Vibrance Adjustment Layer
To make your image pop a bit more, head to the Adjustments Panel and create a new Vibrance Adjustment layer.
Move the Vibrance lever all the way to the right. Don’t forget to clip your layer to your smart object by clicking on the button at the bottom of the Properties panel.
Step 3 - Apply a Liquify Filter
To start creating the effect we will add a wide variety of filters. First, select your smart object layer and go to Filter > Liquify (Shift + Command/Control + X).
You can use the different tools and brush sizes to work on your image until you are satisfied.
Once you are done editing the Liquify Filter, click Ok.
Step 4 - Apply an Oil Paint Filter
Next, we will apply another filter to add to the overall look. Go to Filter > Stylize > Oil Paint.
I used the following values: Stylization 8.2, Cleanliness 6.0, Scale 2.2, Bristle Detail 4.8, Lighting box checked, Angle -60º, Shine 3.0). But you can adjust them as per your requirements.
Step 5 - Apply some filters from the Filter Gallery
Next, we are going to add more filters using the Filter Gallery. Go to Filter > Filter Gallery > Artistic > Paint Daubs.
I used the following values: Brush Size 8, Sharpness 7, Brush Type Simple.
Click on the New Effect Layer button at the bottom and add Plastic Wrap with the following values: Highlight Strength 5, Detail 3, Smoothness 3. Then click Ok.
Step 6 - Apply an Unsharp Mask Filter and Gradient Filter
Finally, to make the image look crispier, go to Filter > Sharpen > Unsharp Mask.
The following values were used: Amount 200%, Radius 7.3 pixels, Threshold 47 levels.
A Gradient Fill can be used to give the photo more depth. Create a new Gradient Fill layer on top of everything by clicking on the small black and white circle icon at the bottom of the Layers panel.
Use a black to transparent, Radial gradient with a 90° angle, 199% Scale, and check the Reverse and Align with layer boxes.
Change the Blending Mode of the gradient fill layer to Color Burn and lower the Opacity to 25%.
The final result should look something like the image below.
If you liked this tutorial make sure to check out our other Photoshop tutorials like adding smoke to a photo and making a GIF in Photoshop.


