Spaghetti Text in Photoshop
For this tutorial, we will use a “Background” Image with a dish or plate.
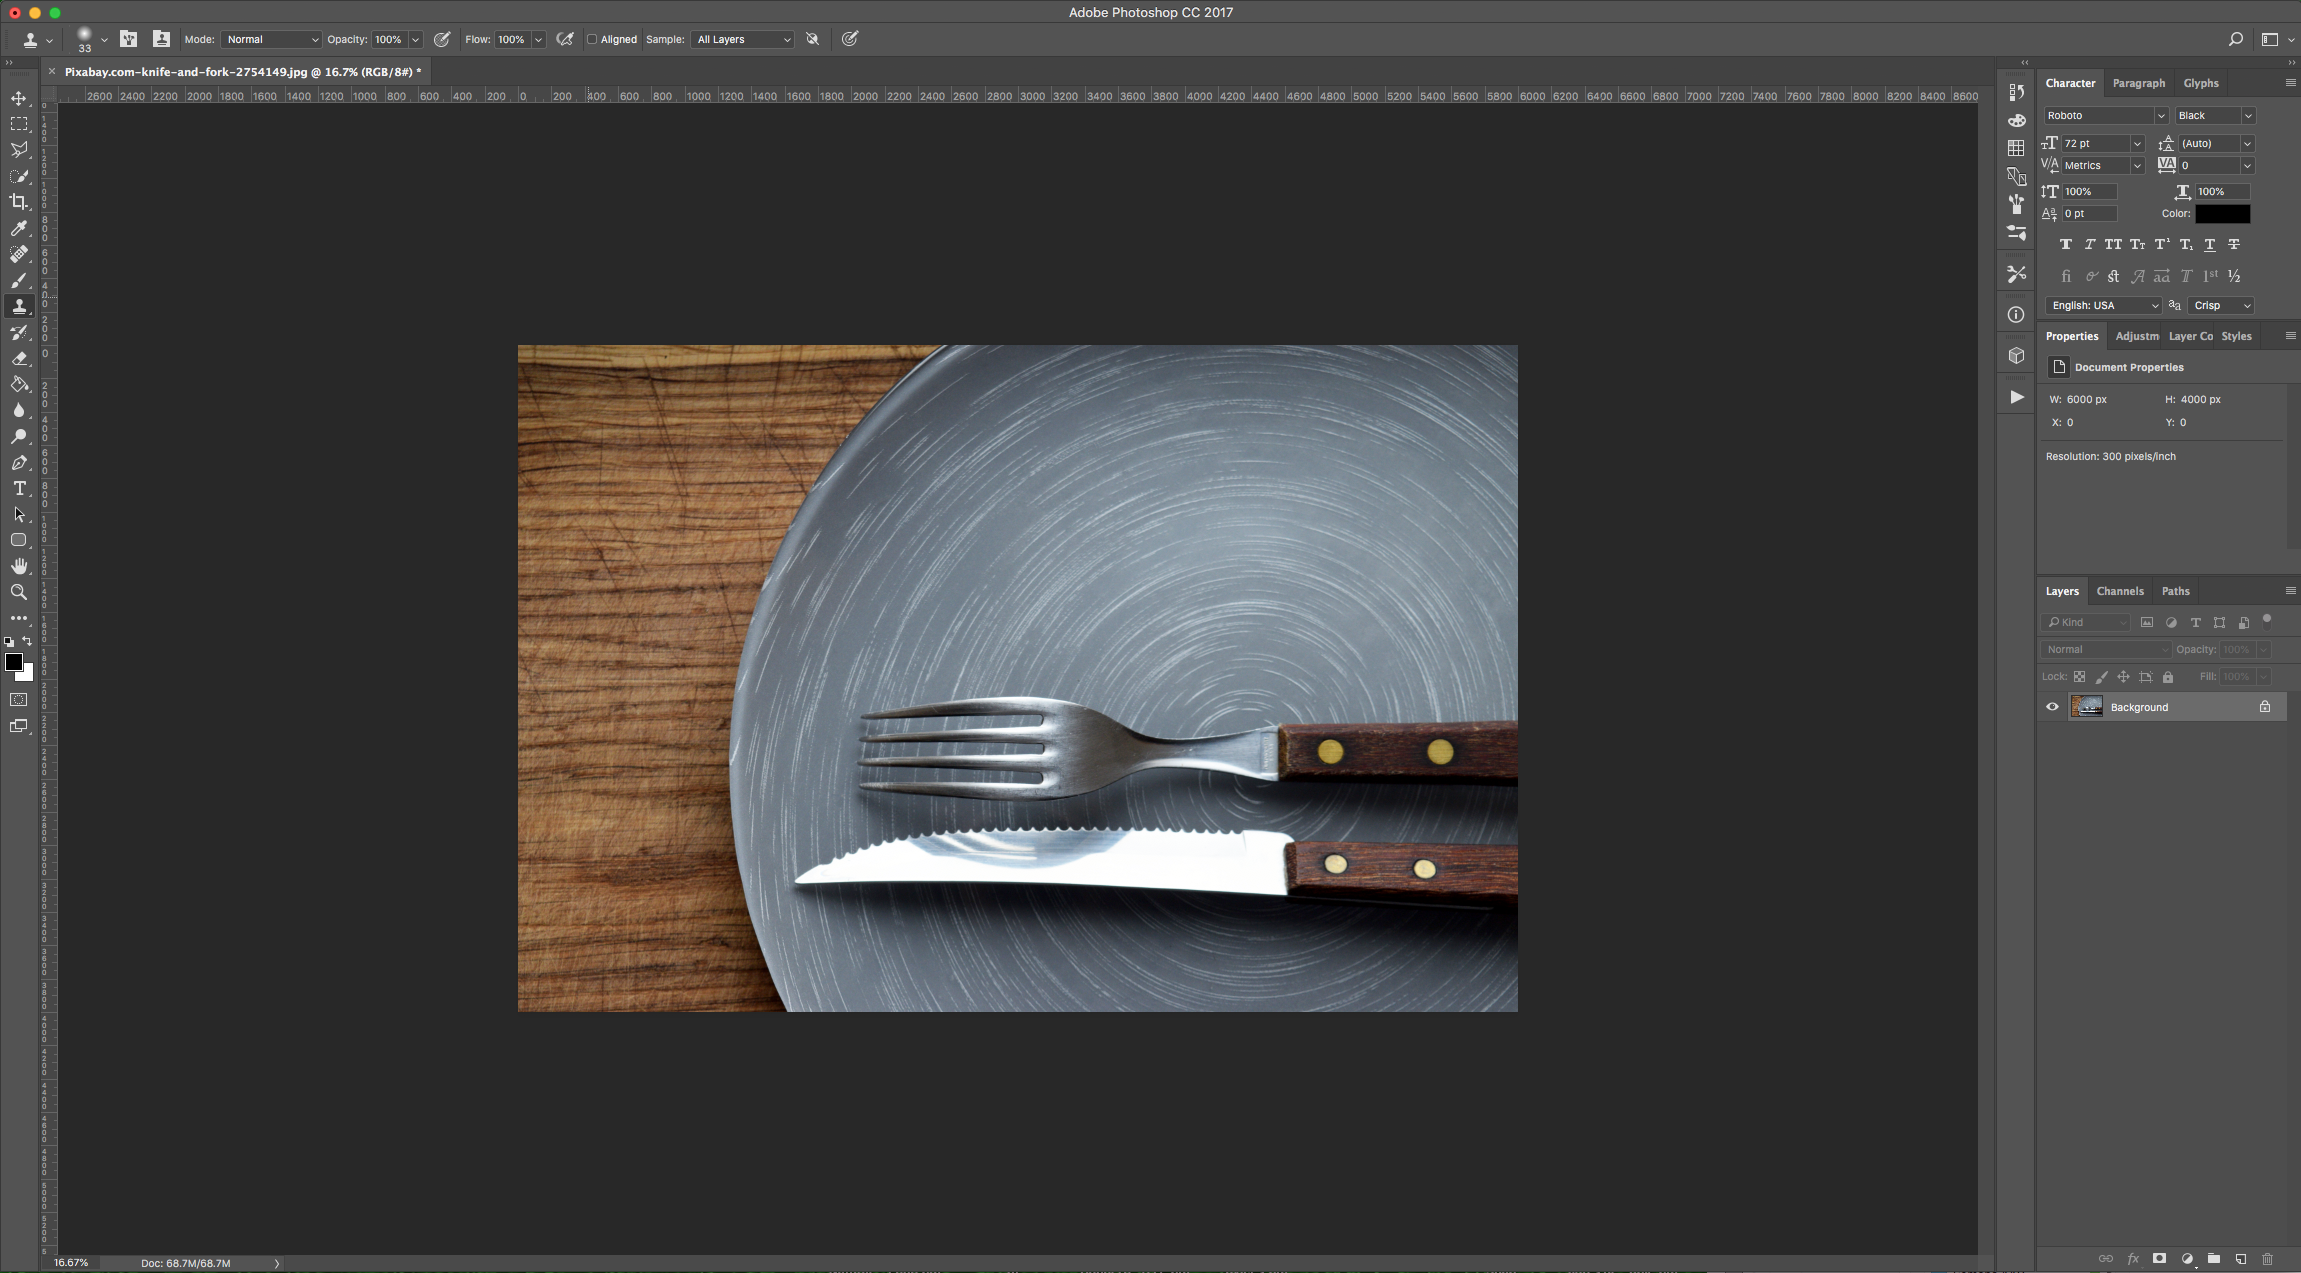
1 - In Photoshop, open the image you wish to use as “Background” (we used the image of a plate).
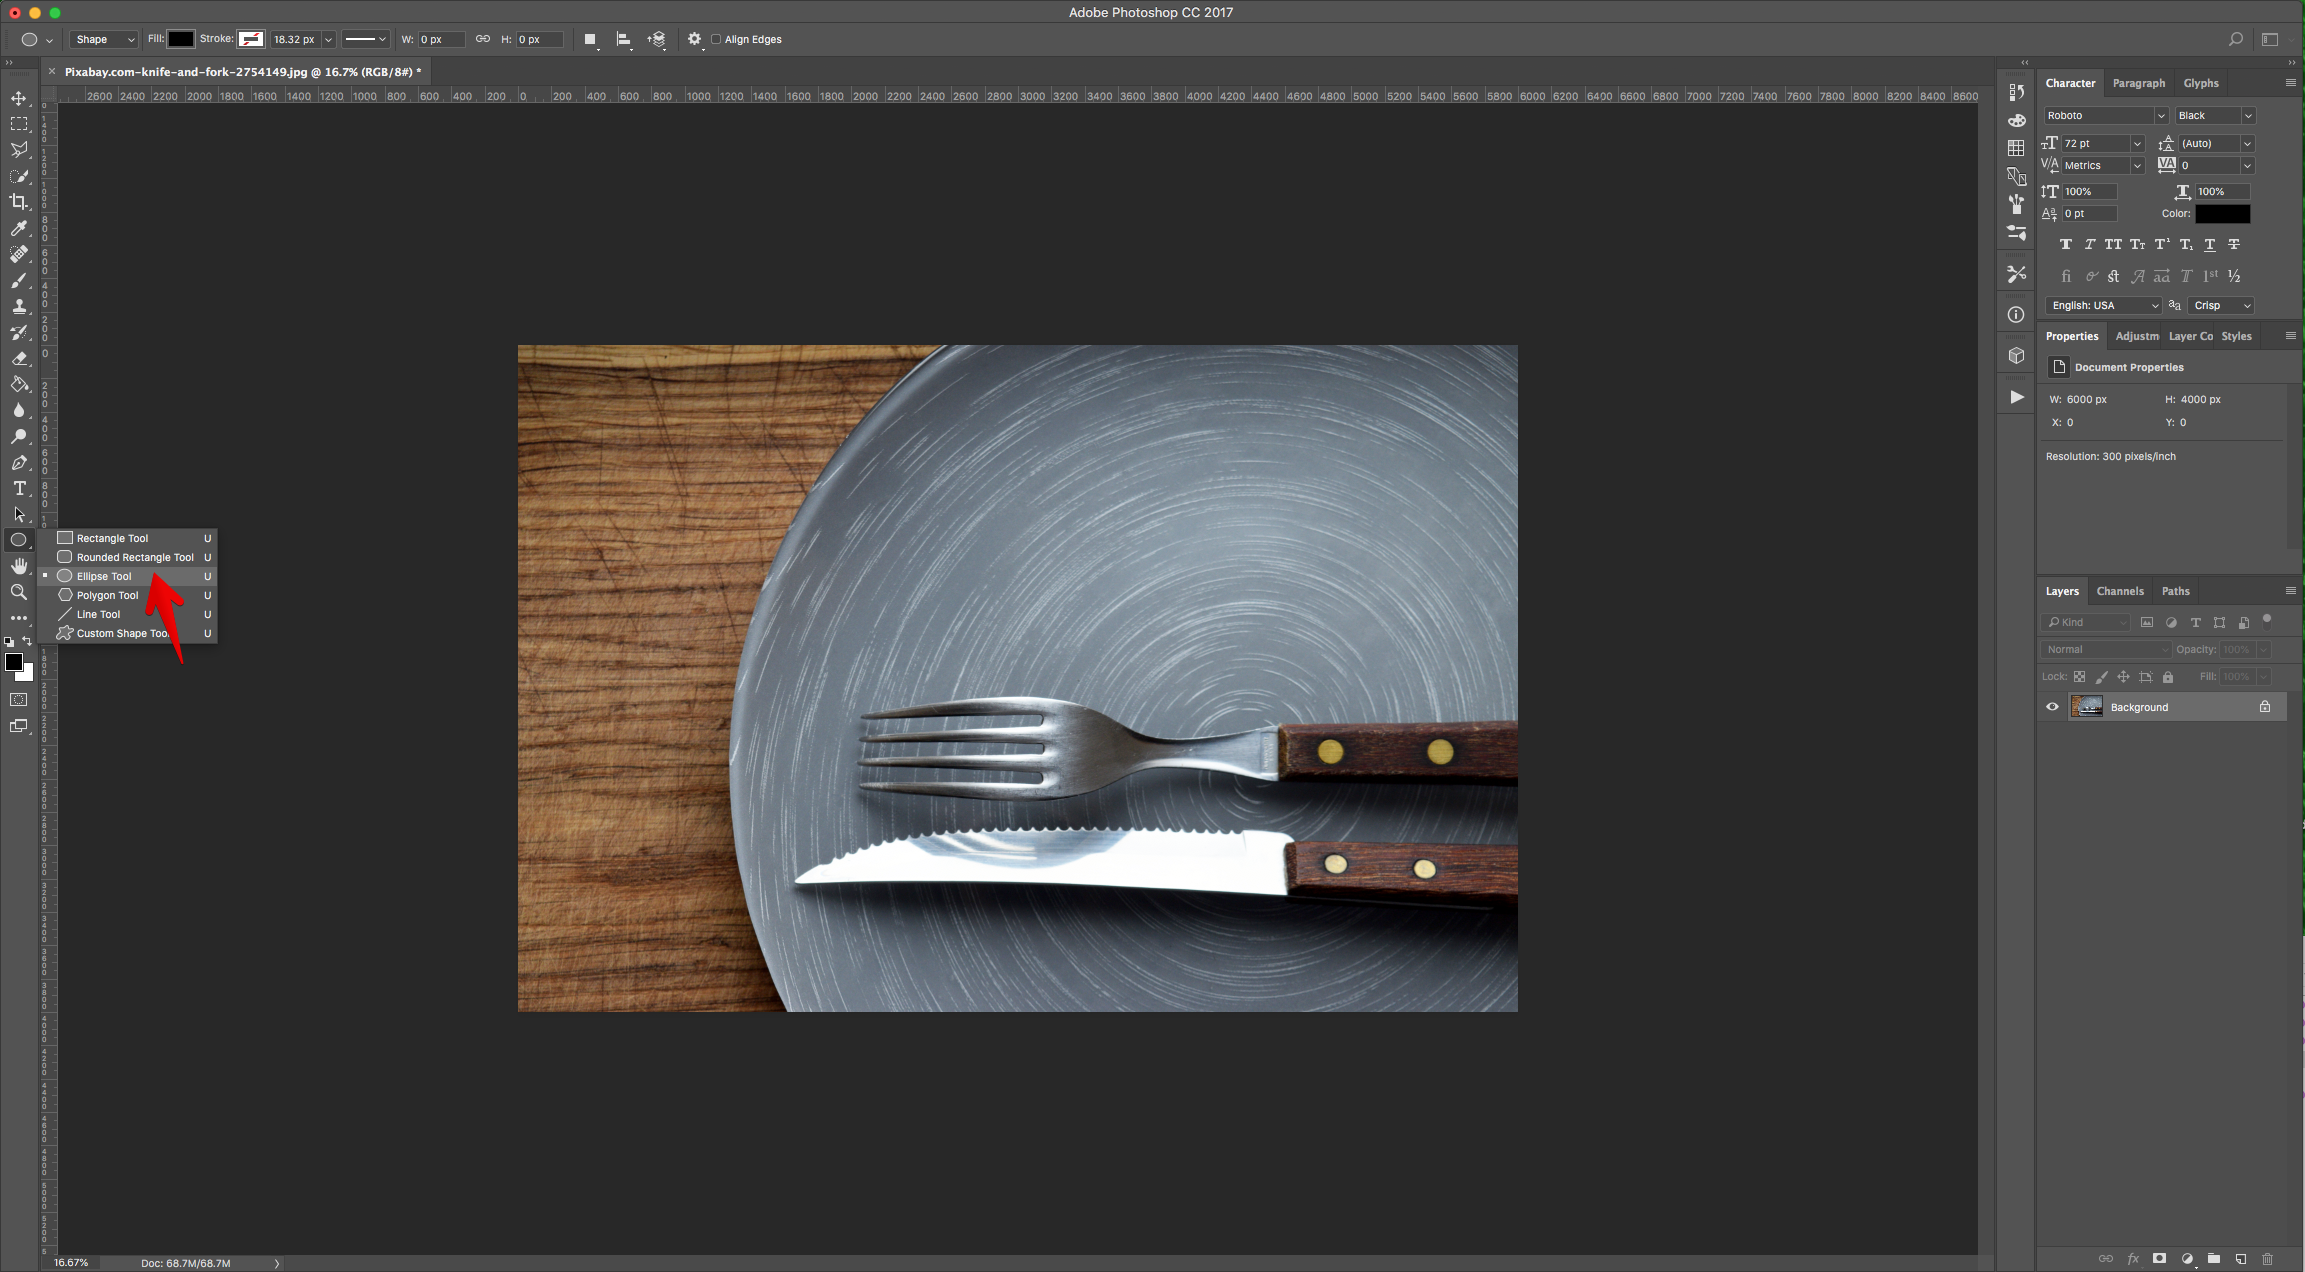
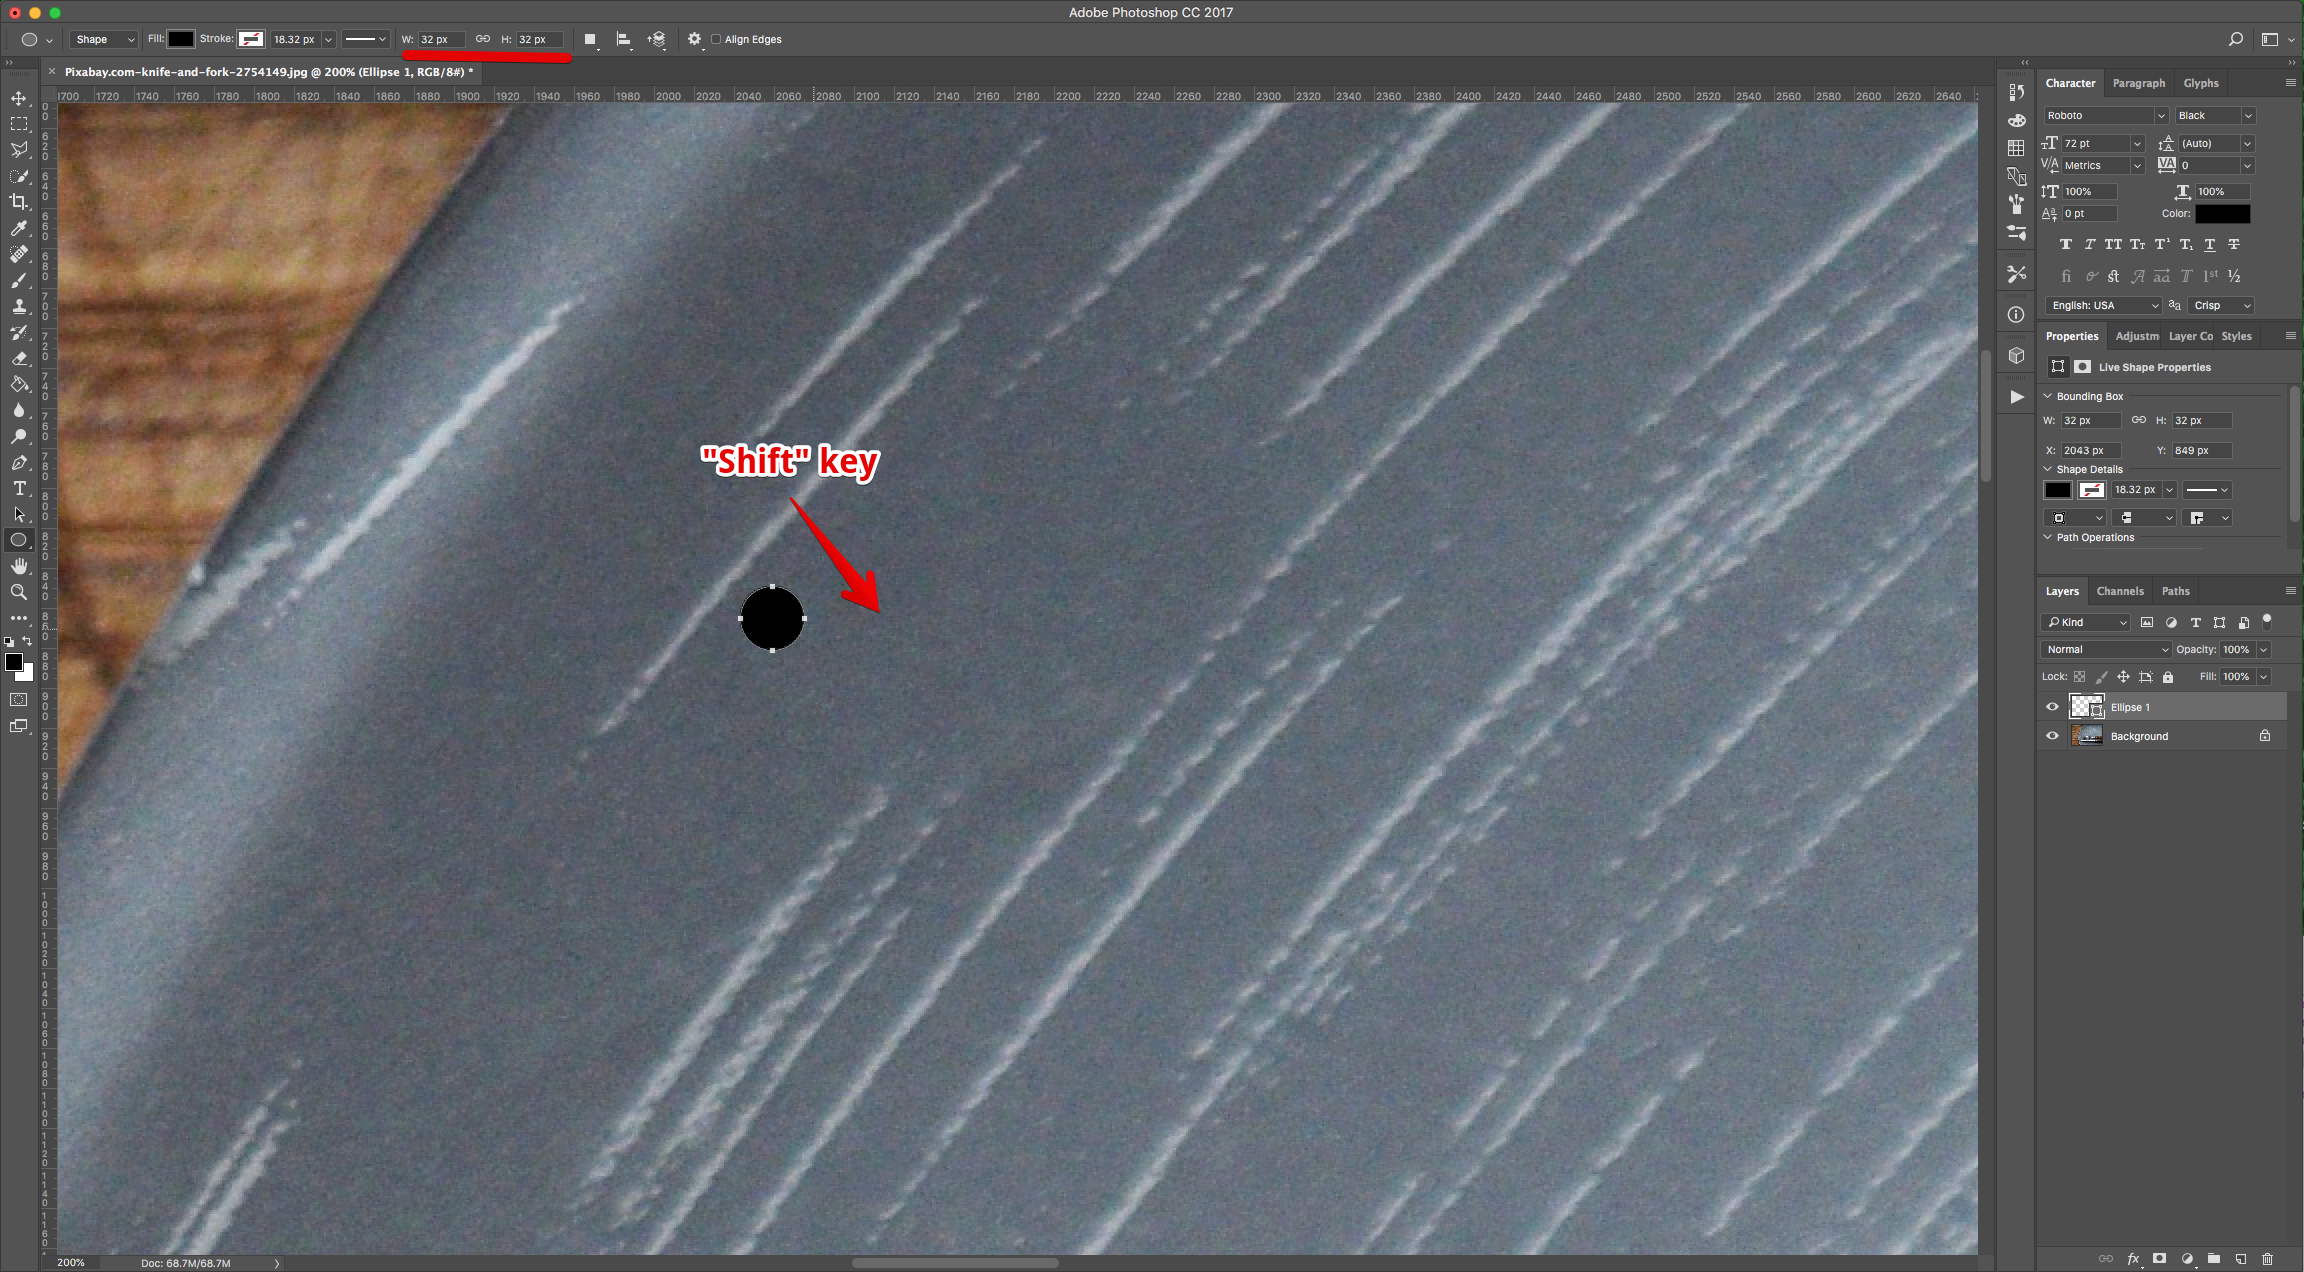
2 - Choose the “Ellipse Tool” (U), use Black (Foreground) as “Fill” color and hold the “Shift” key while dragging diagonally inside your “Canvas” to create a “Circle”. Give it about 30 px in “Width” and “Height”. Create other “Circles” close to each other with a similar “Radius”.

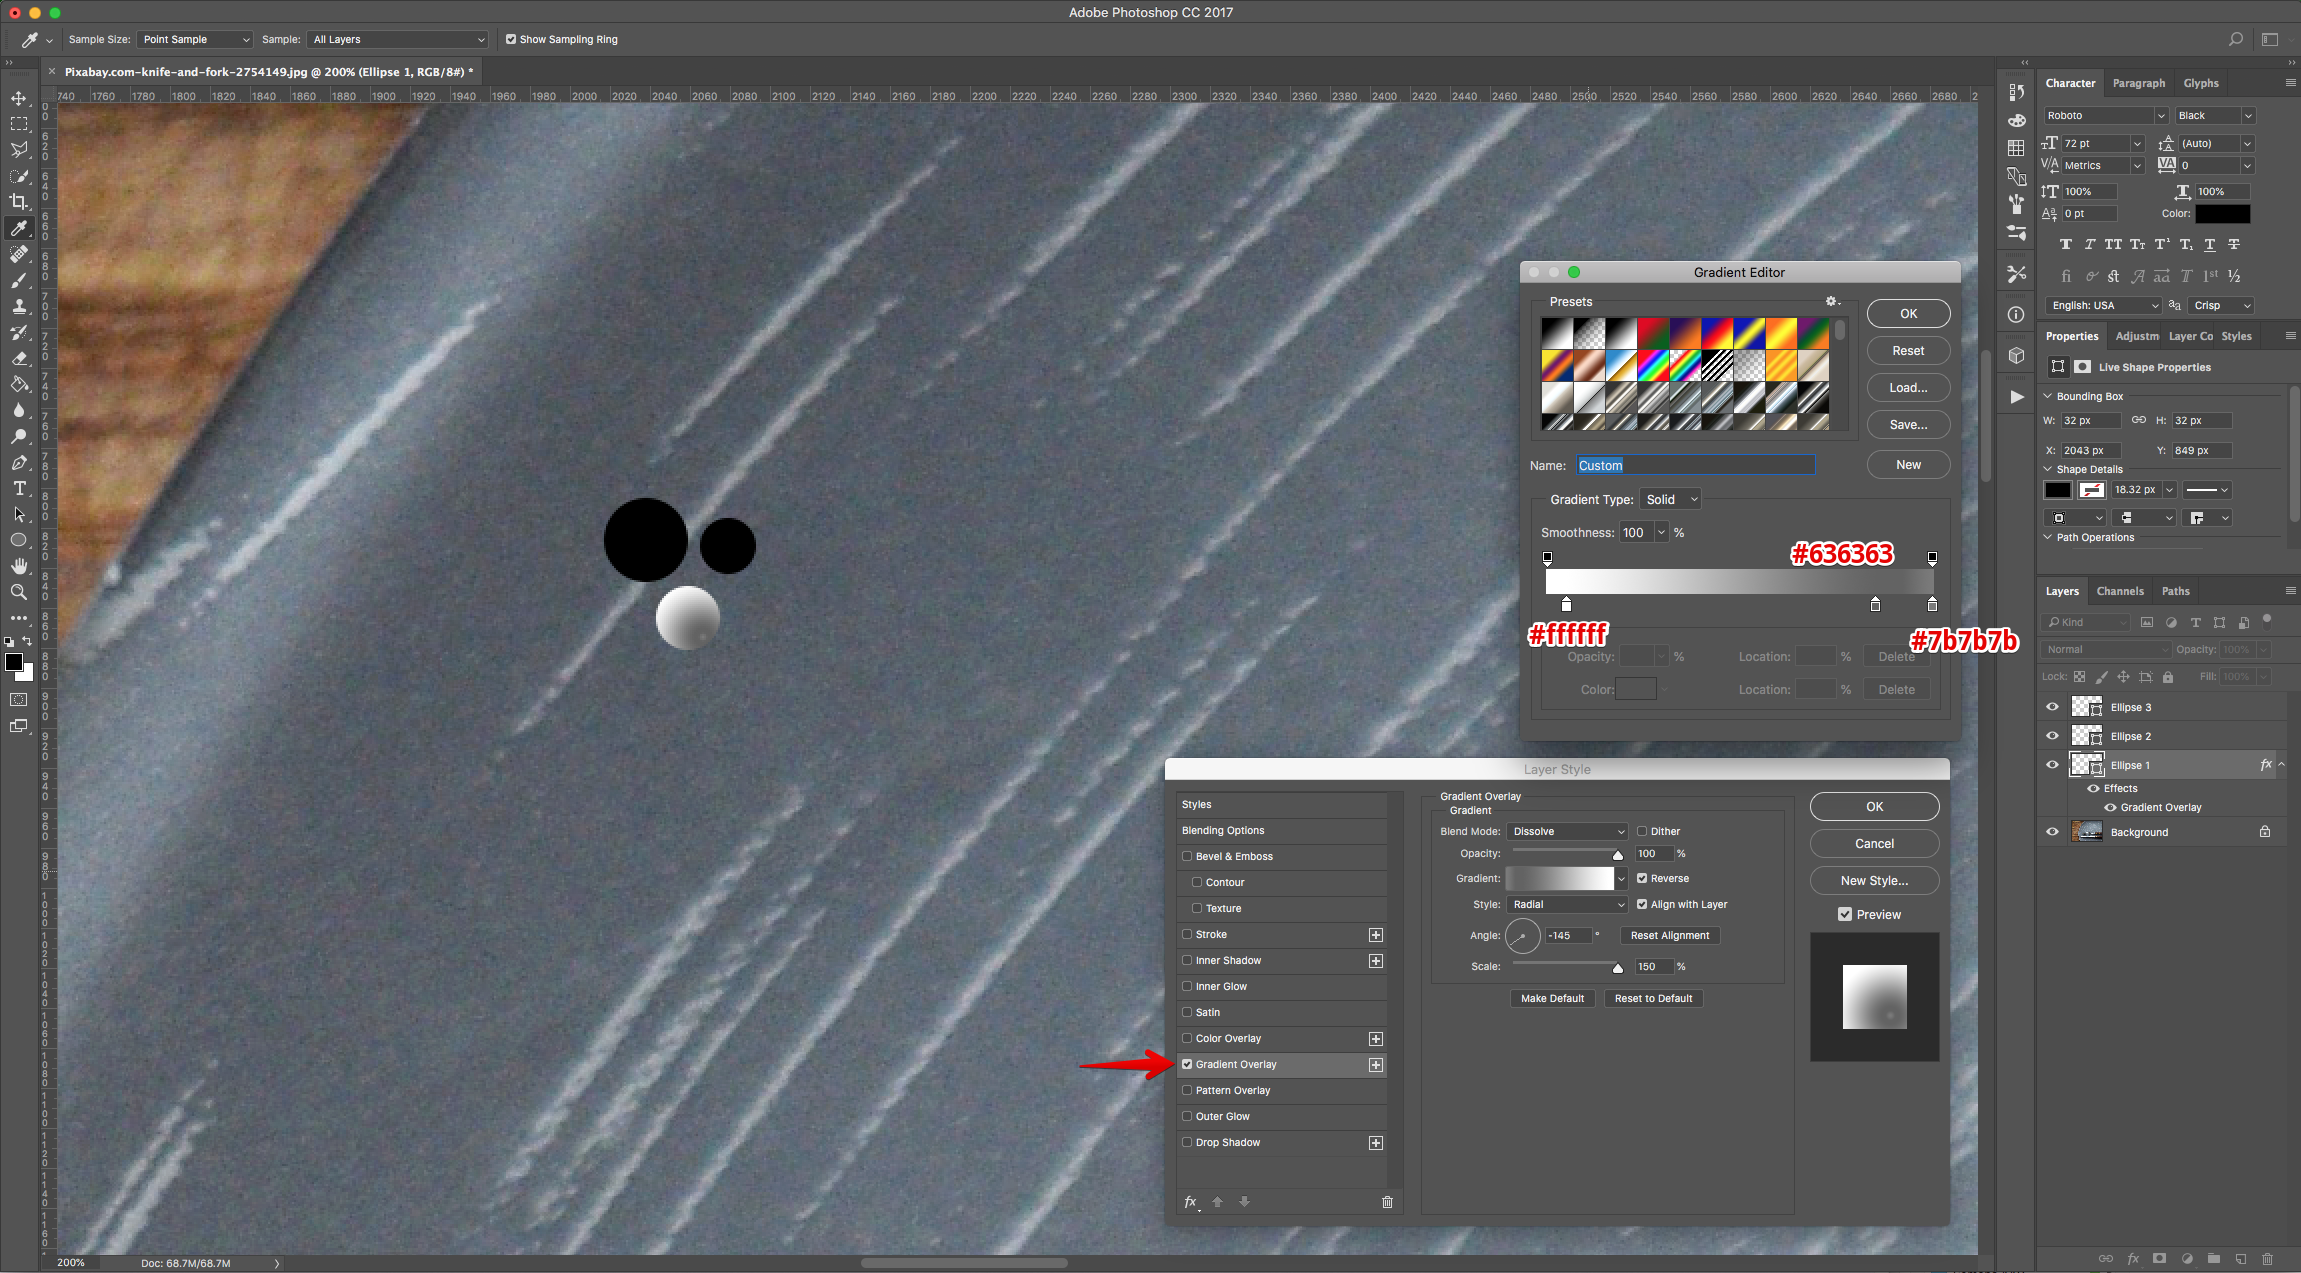
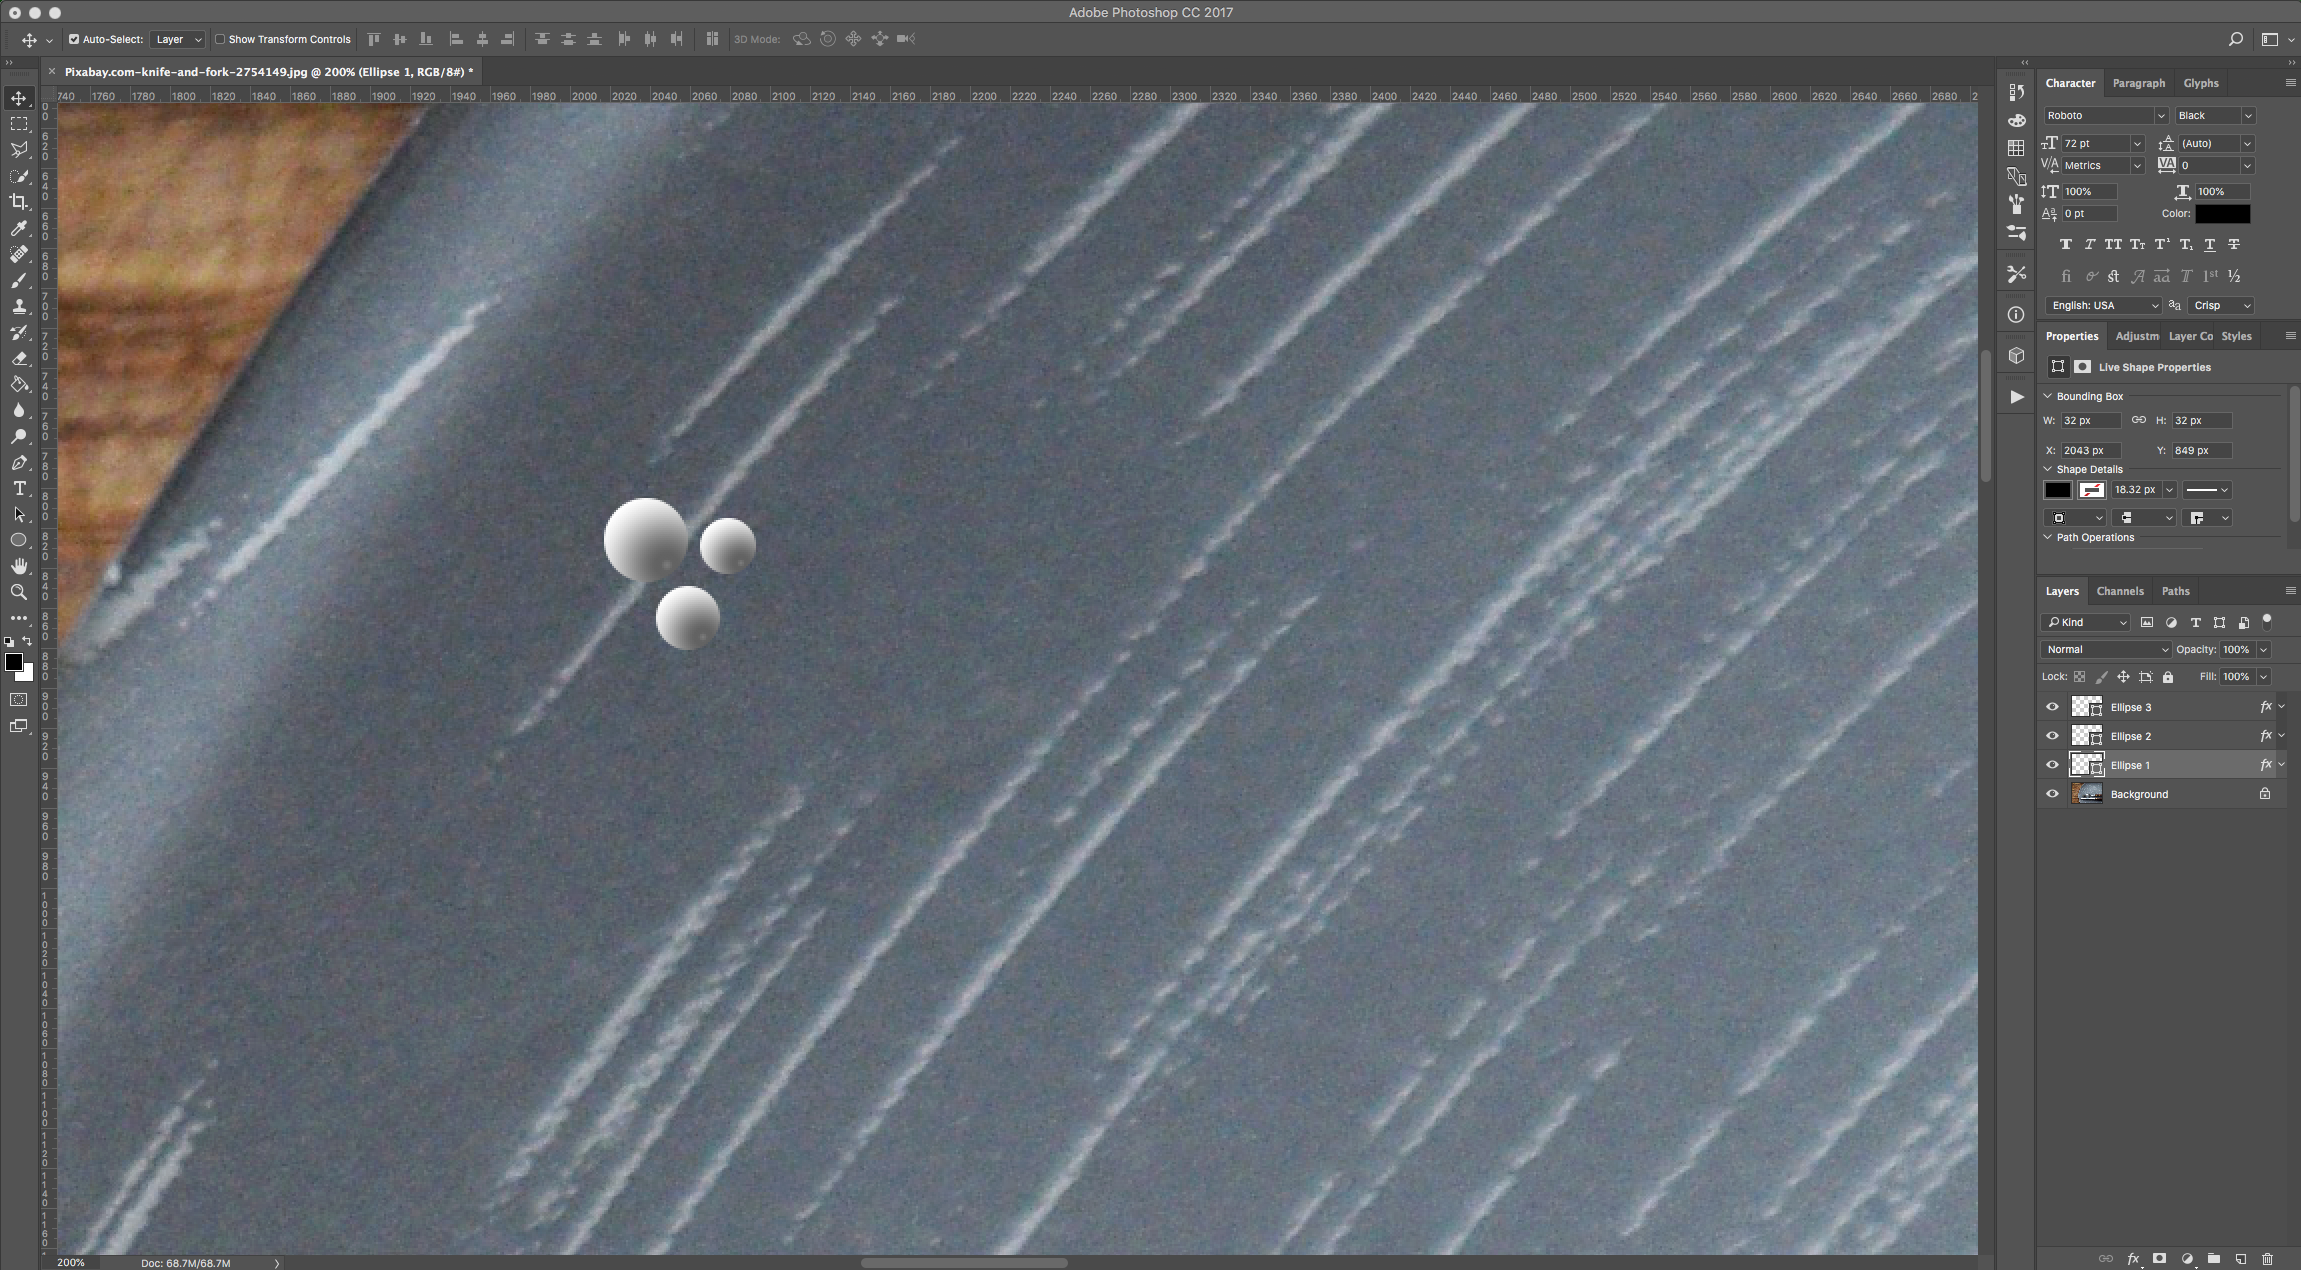
3 - Double-click on one of the “Circles” Thumbnail and apply the following “Layer Styles”:
Gradient Overlay: (1: Location: 5%, #ffffff- 2: Location: 85%, #636363 - 3: Location: 100%, #7b7b7b)
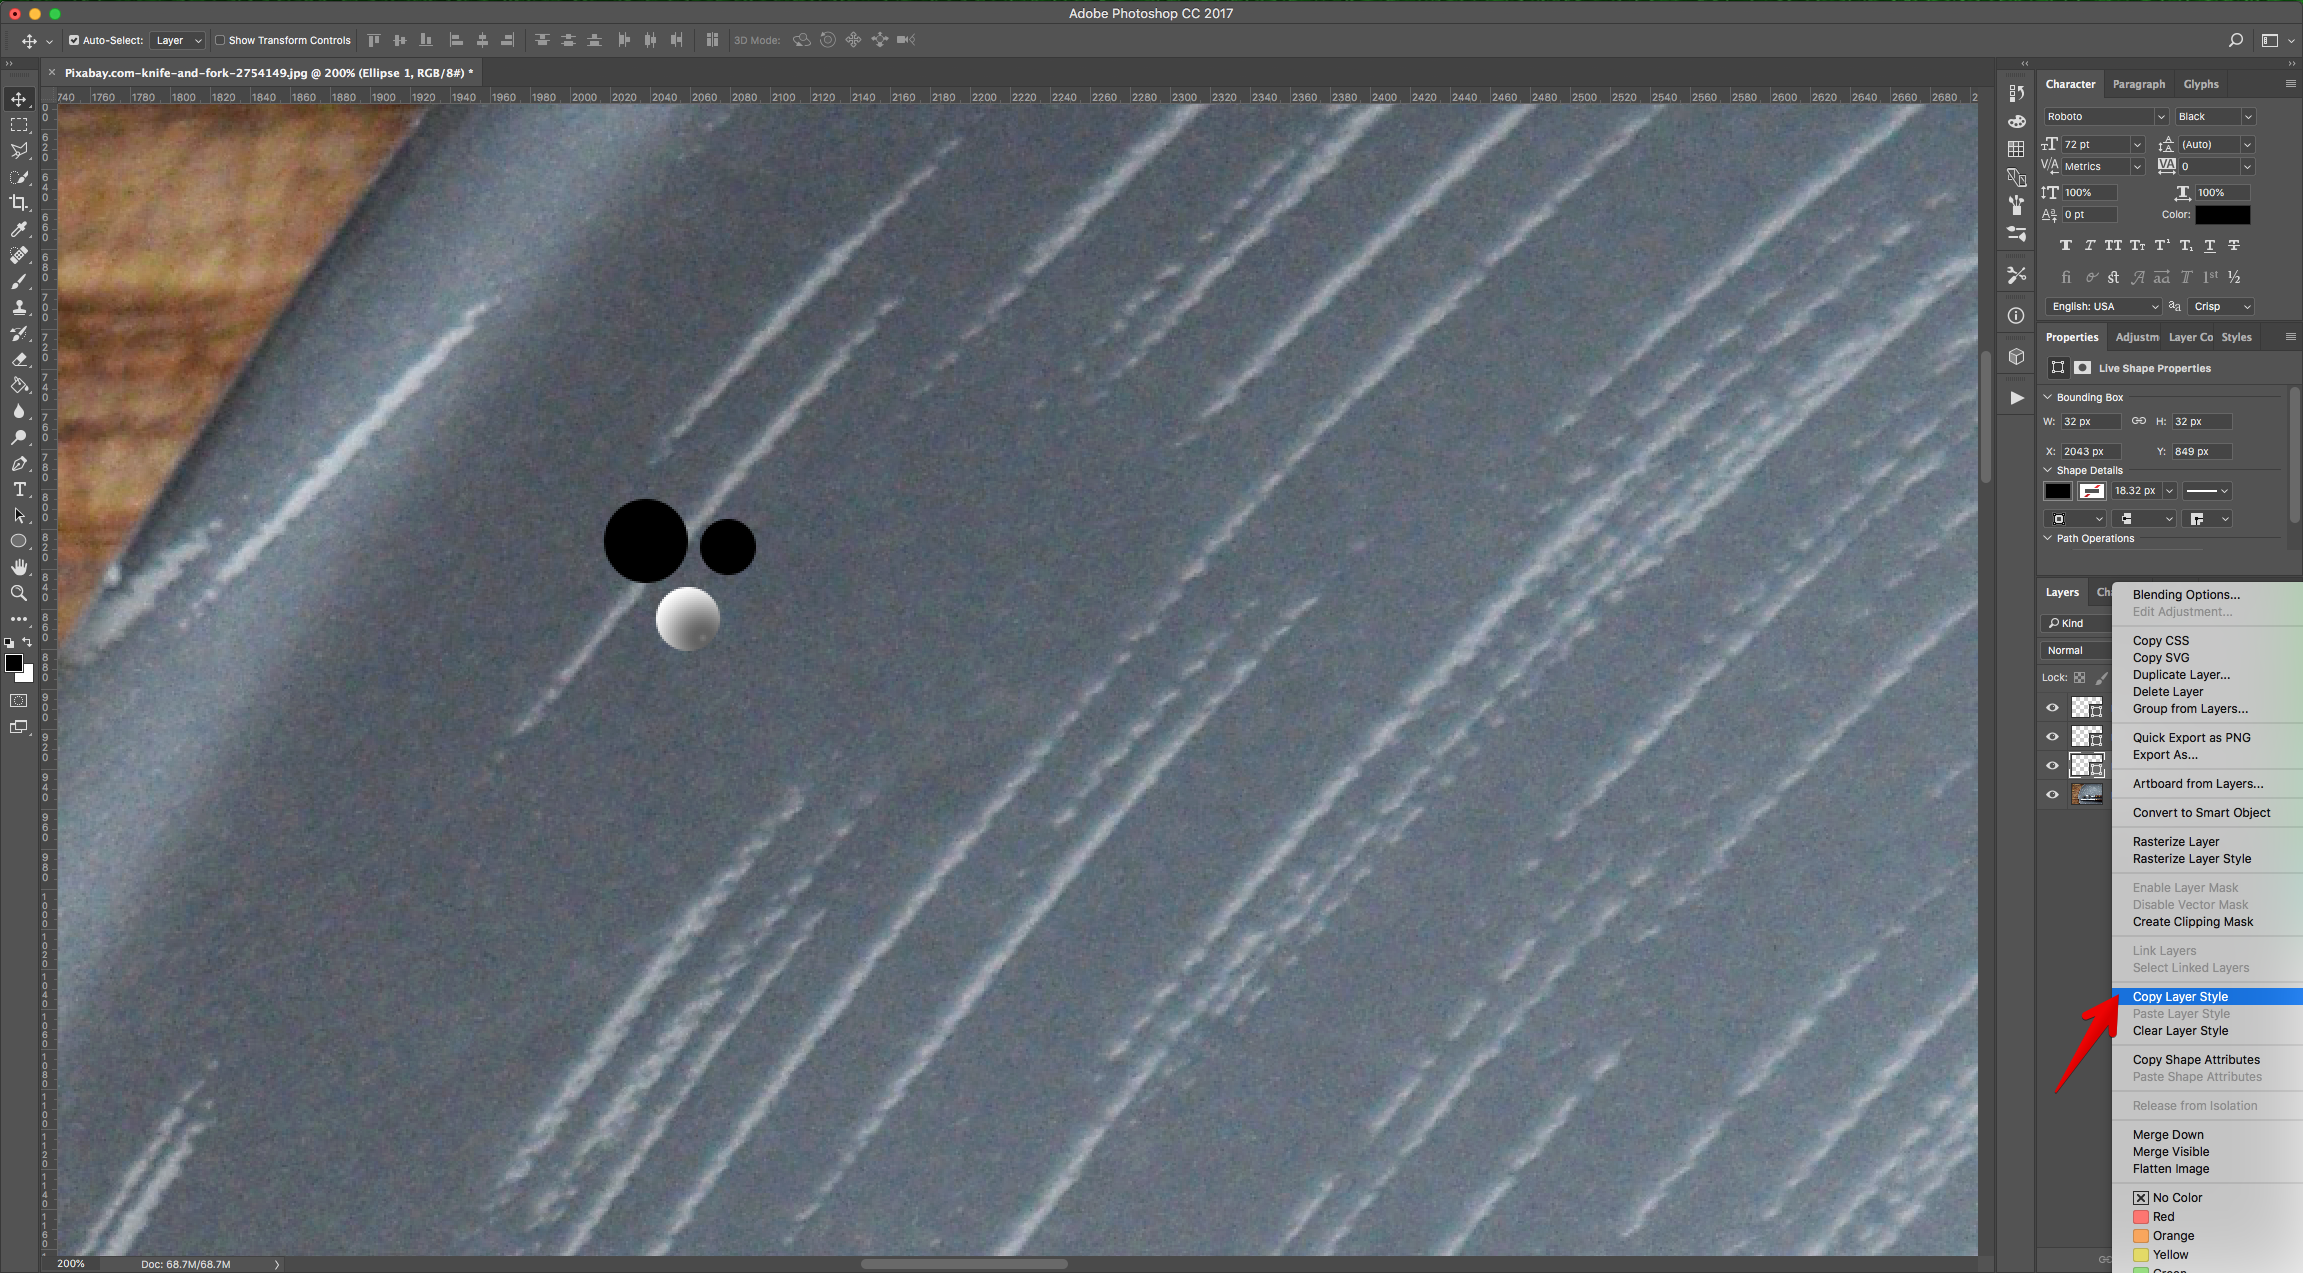
4 - Right-click on top of its Thumbnail and choose “Copy Layer Style”. Then select the other “Circles” (“Shift” key) and choose “Paste Layer Style”.

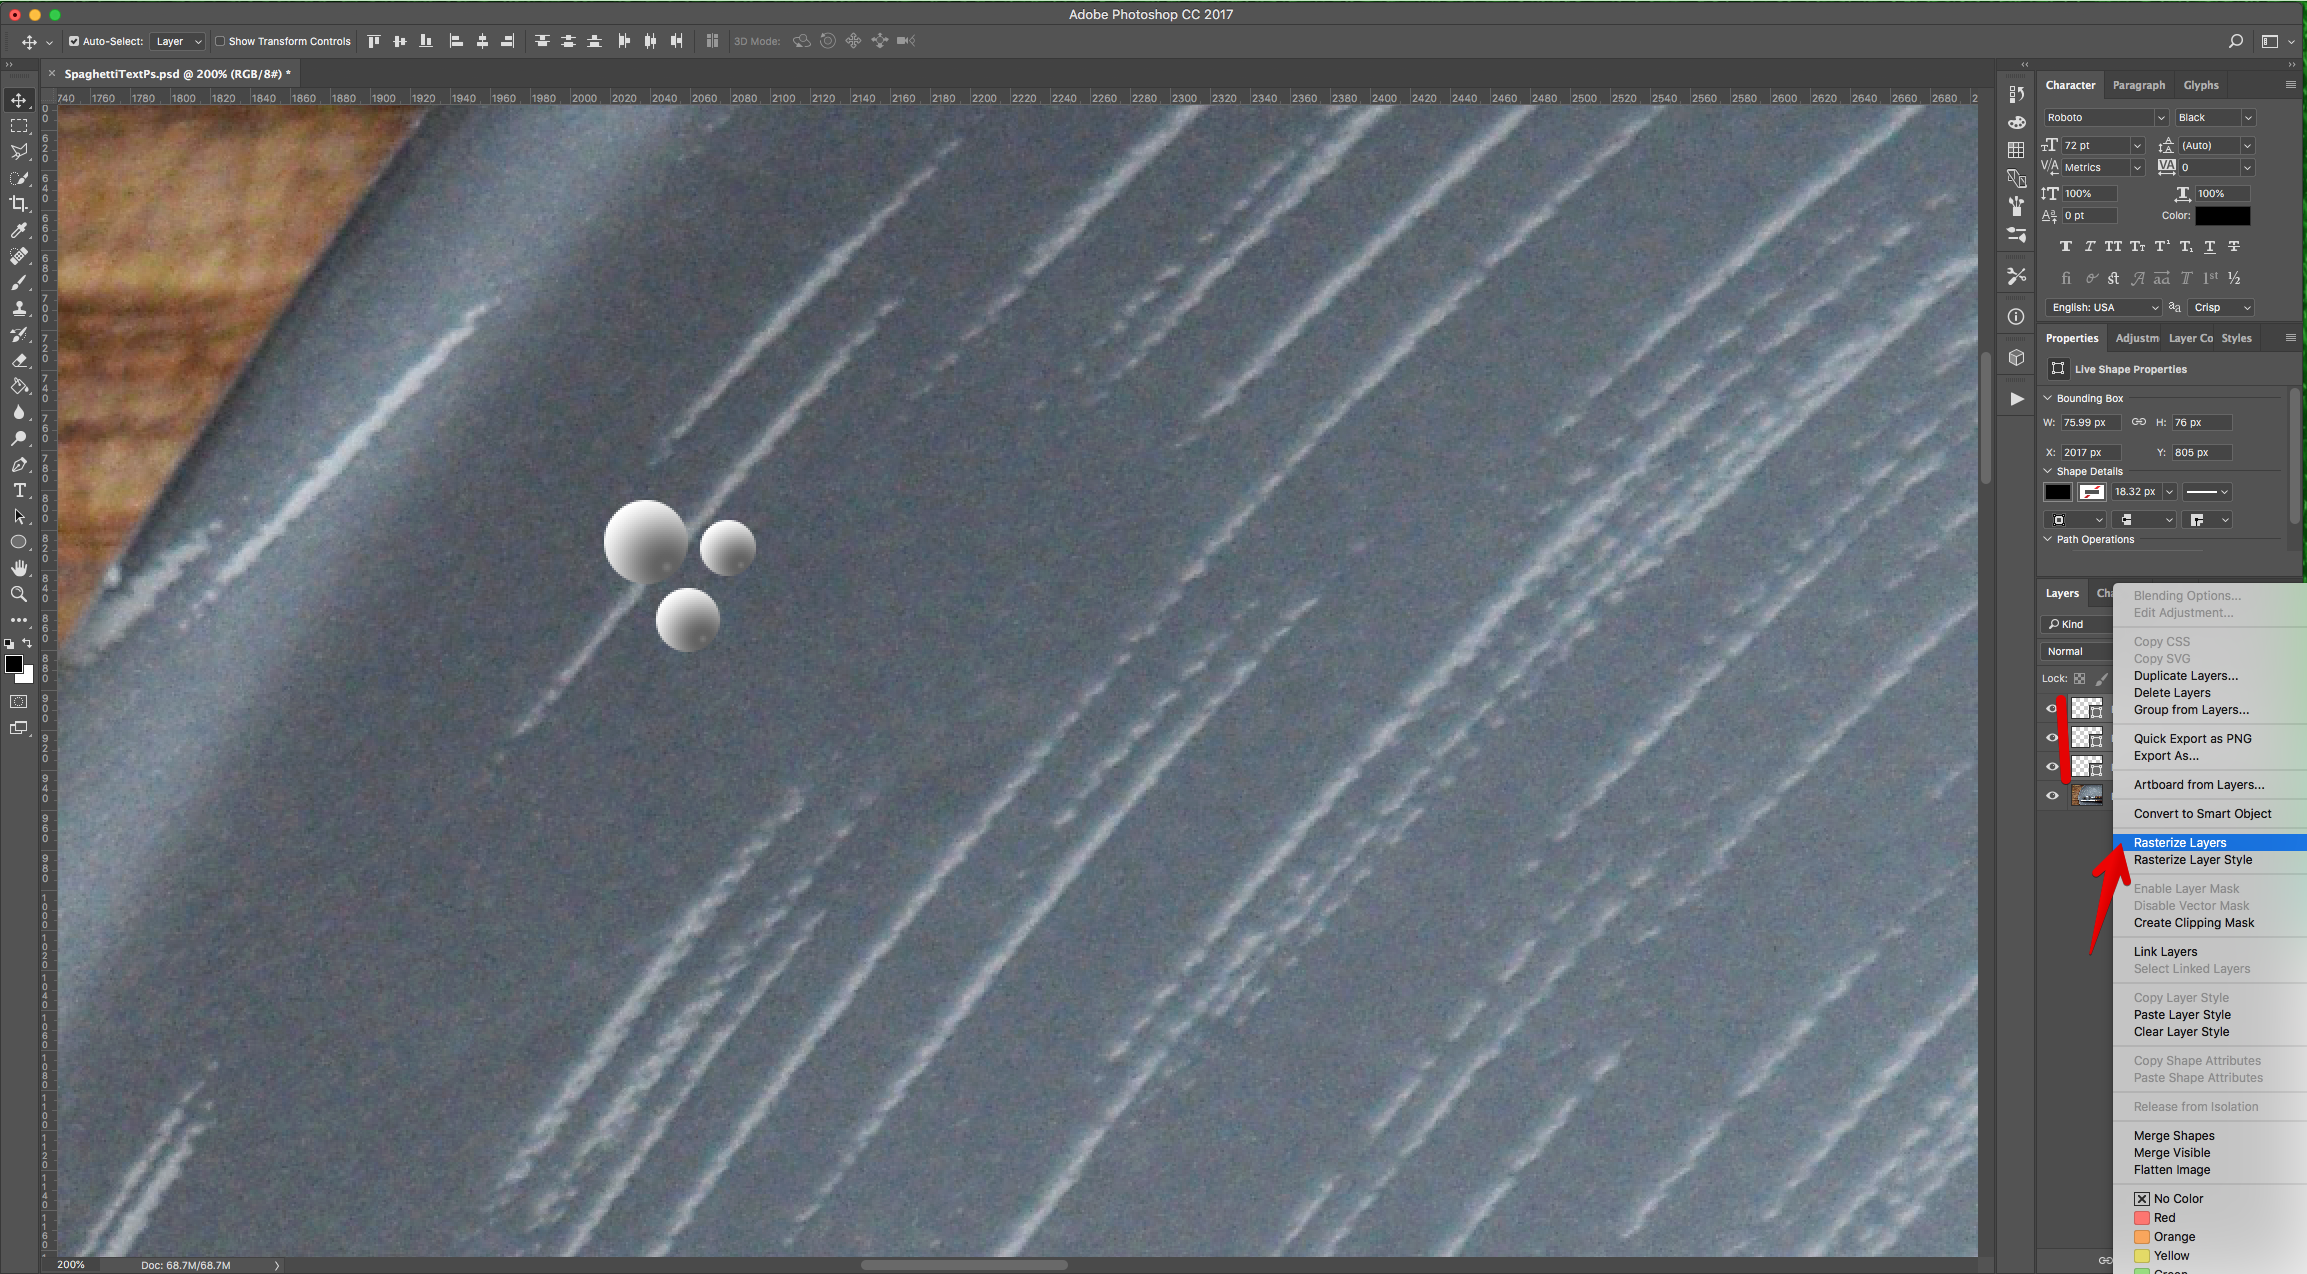
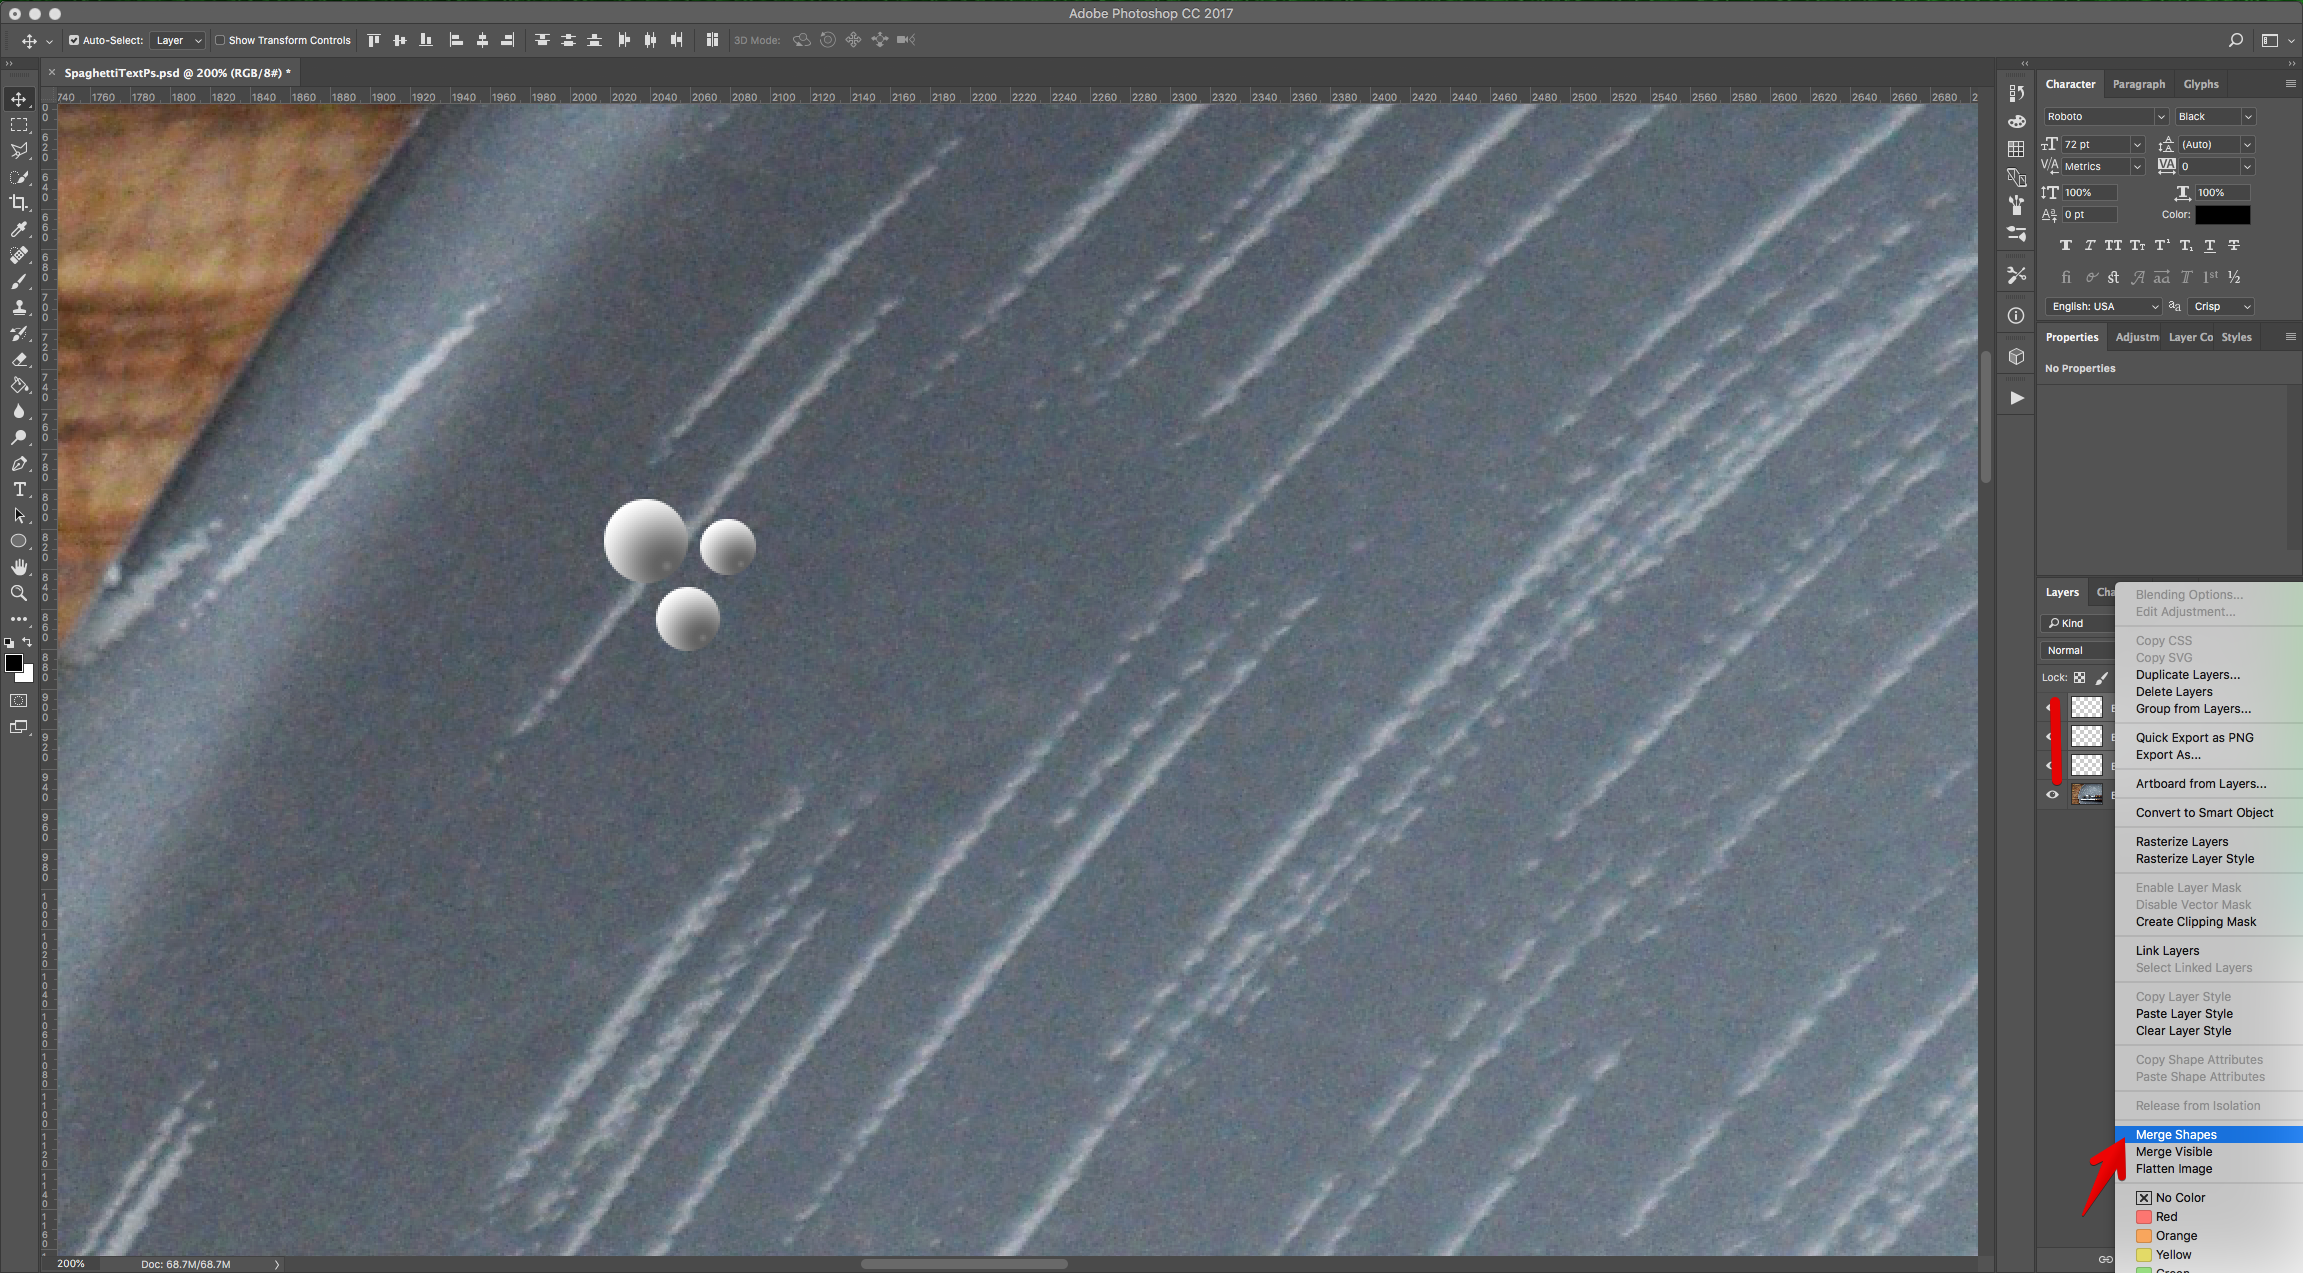
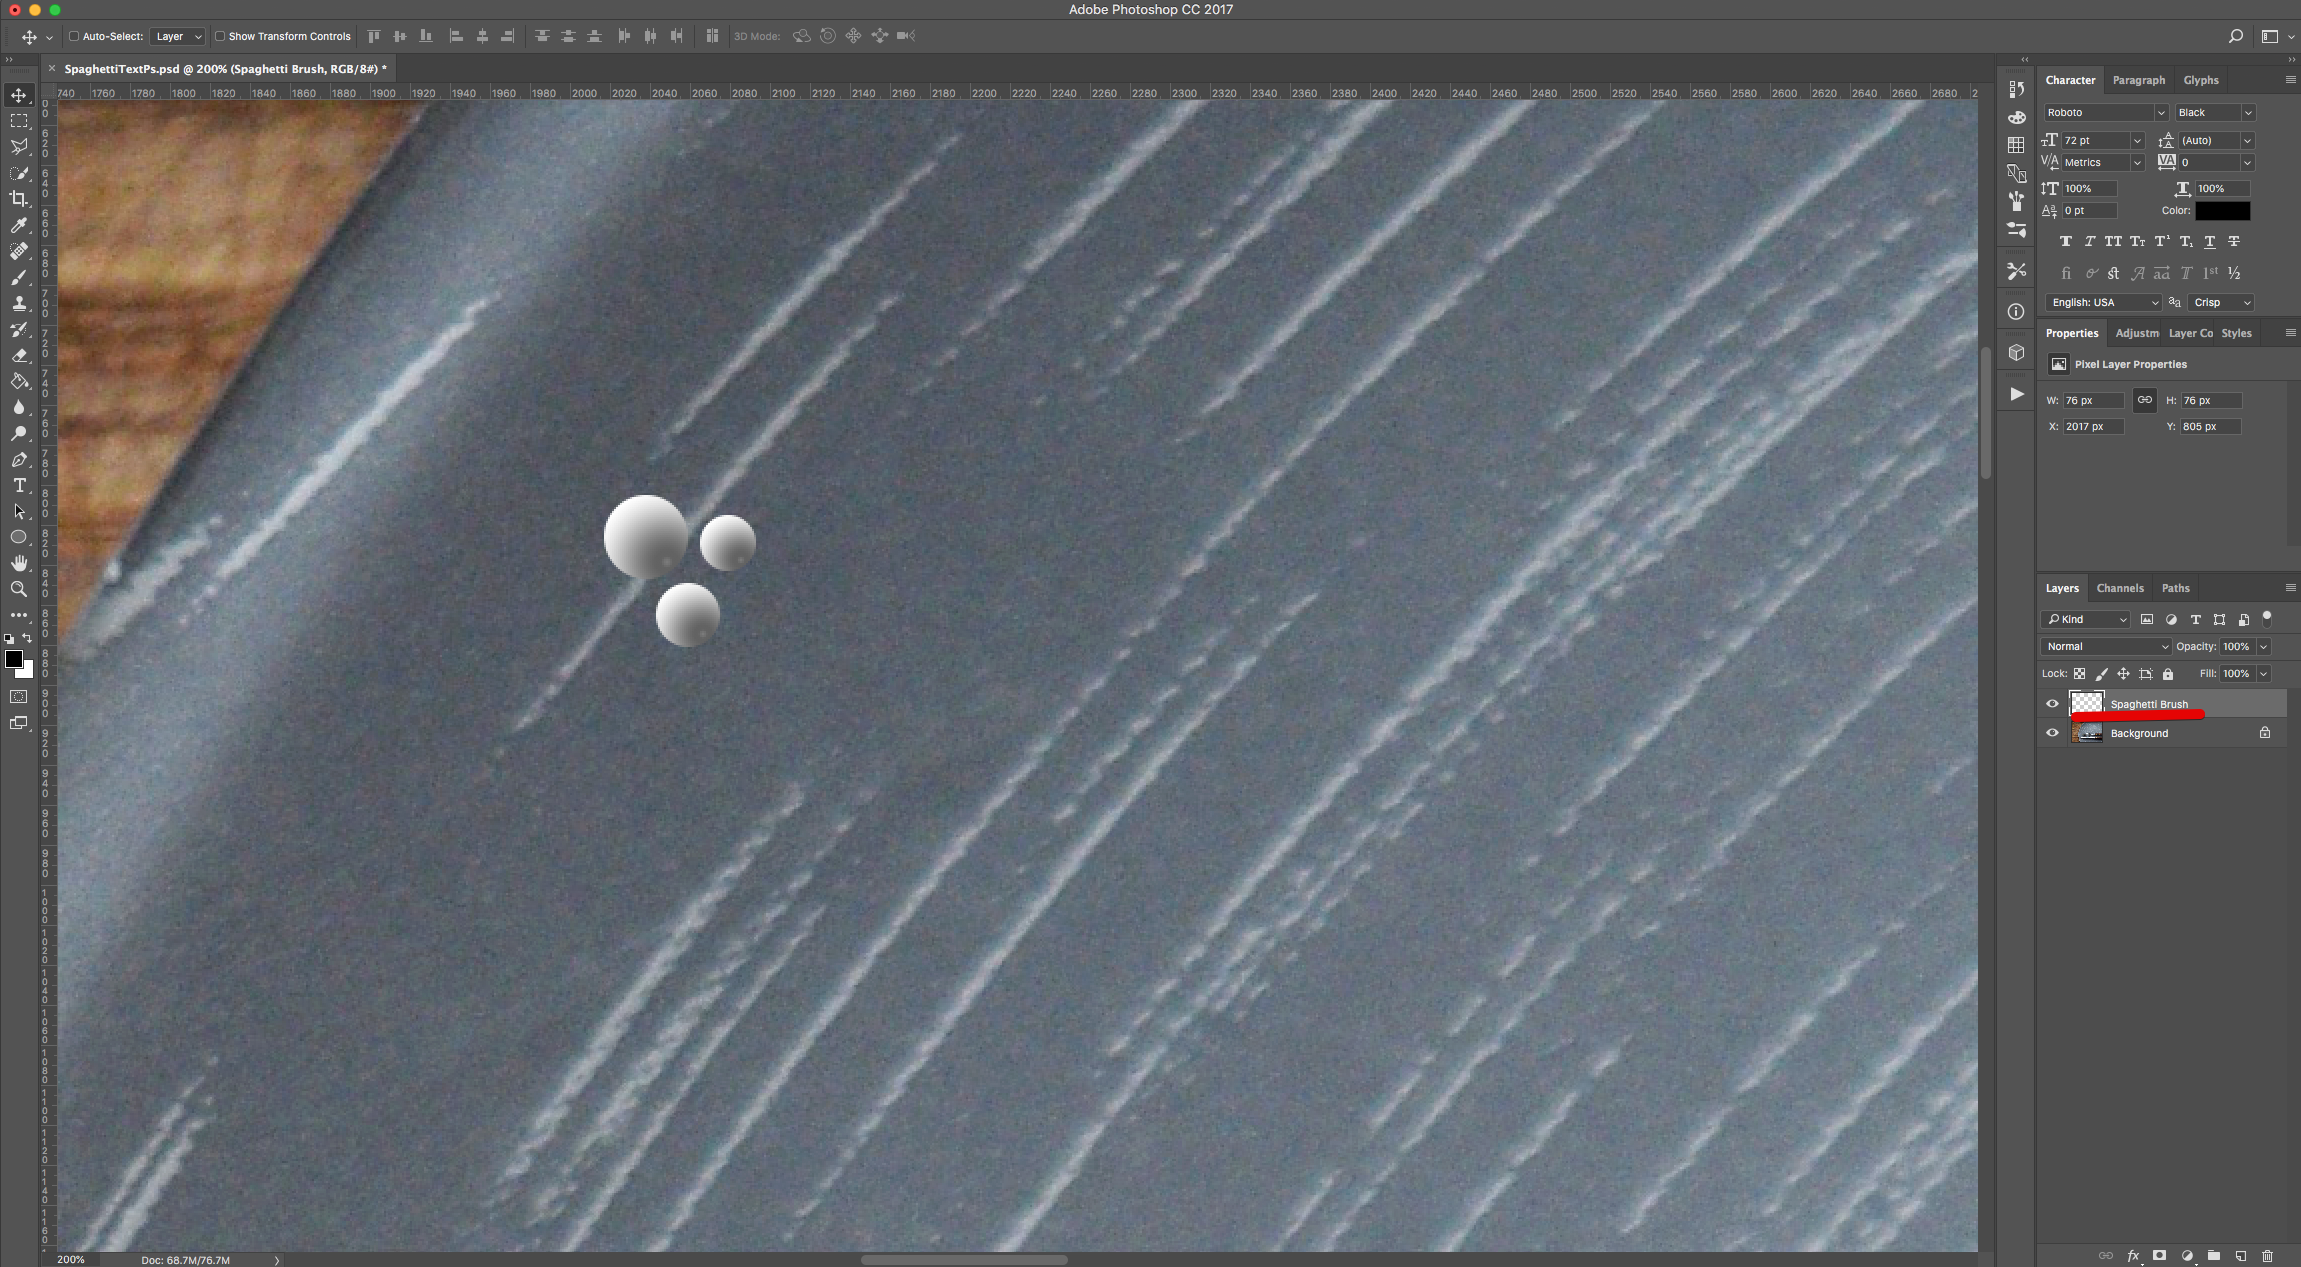
5 - Select all the “Circles”, right-click on top of their Thumbnails and choose “Rasterize Layers”. Then, “Merge Shapes” and name the resulting Layer “Spaghetti Brush”.
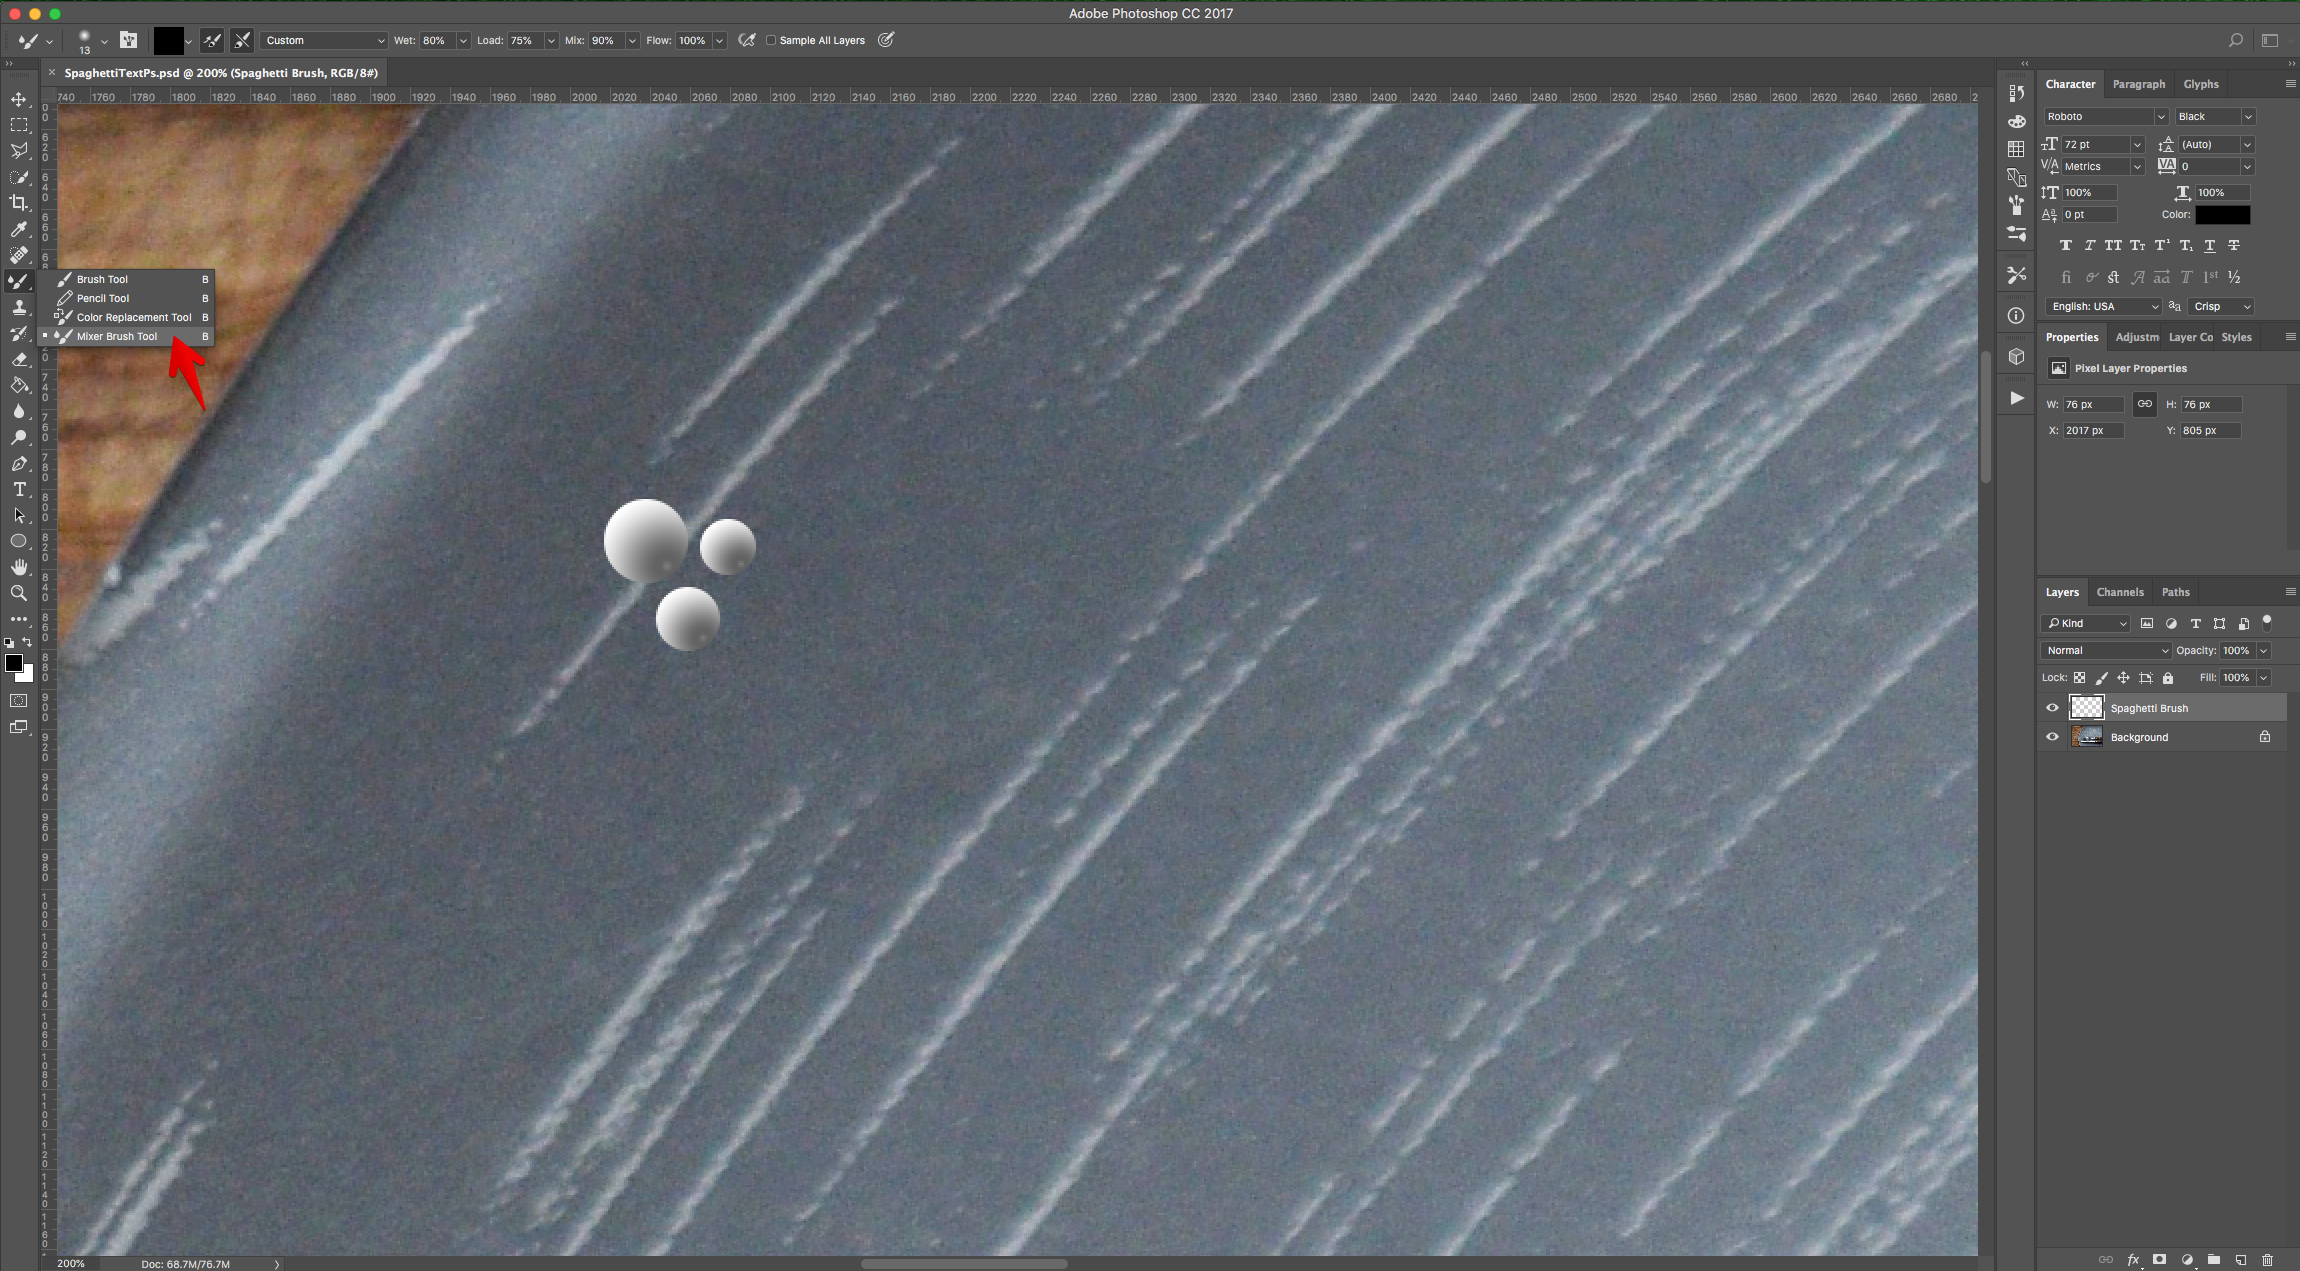
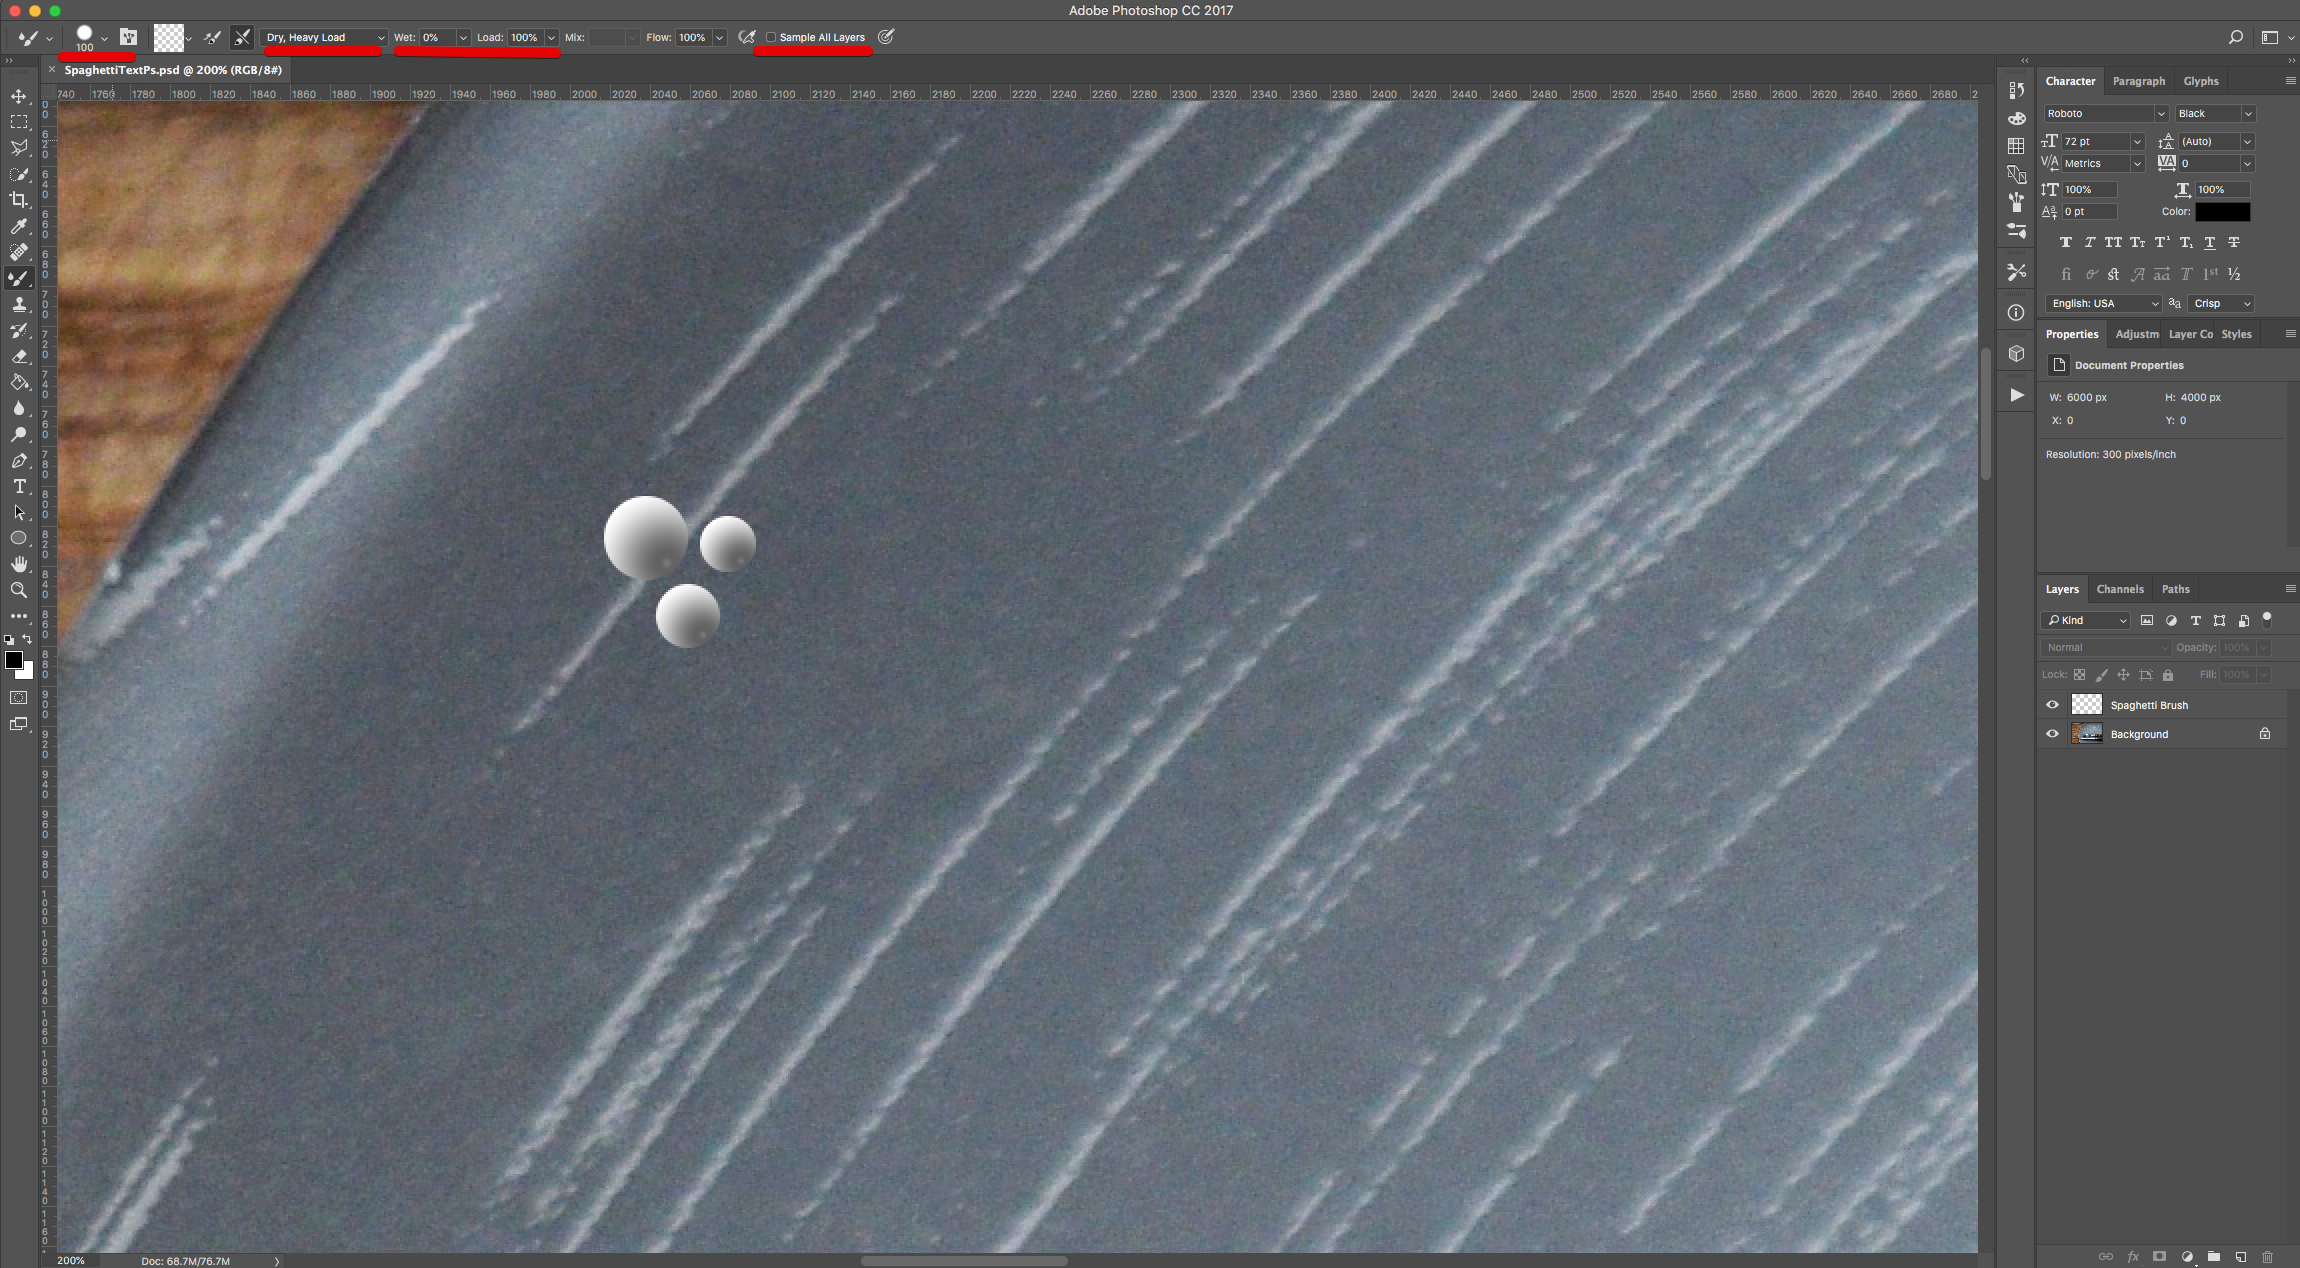
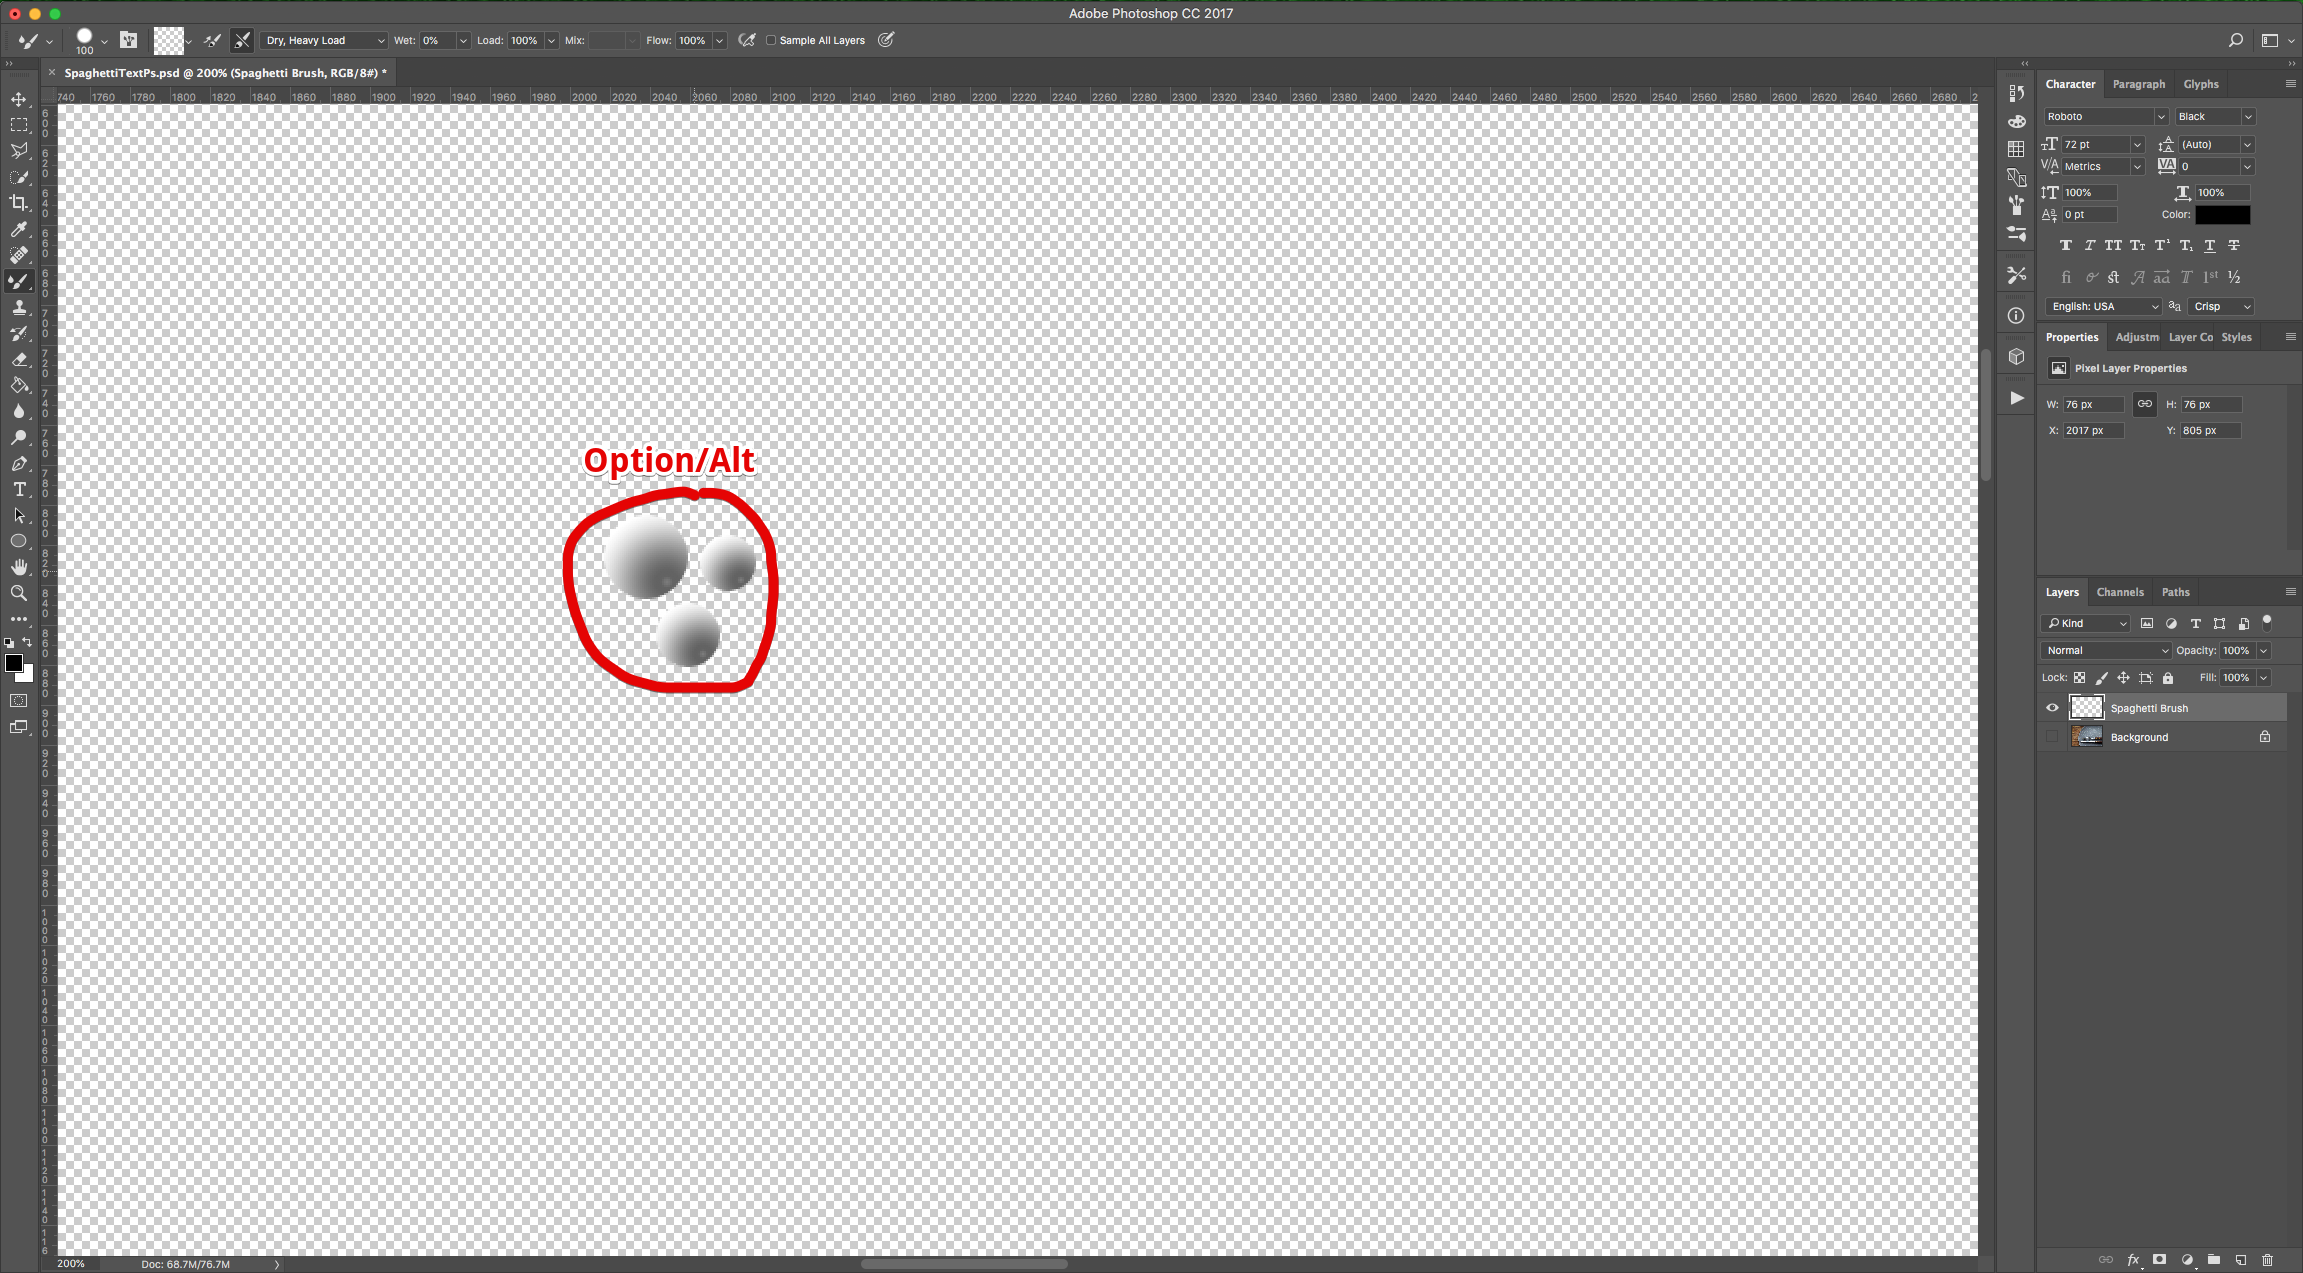
6 - Select the “Mixer Brush Tool” (U), choose a 100px, select “Load the brush after each stroke”, “Dry, Heavy Load”, 0% “Wet”, 100% “Load” and “Flow” and uncheck the “Sample All Layers” box.
7 - “Hide” the “Background” Layer by clicking on the small eye on the left side of its Thumbnail and Option/Alt-click on top of the “Circles” to select them as your “Brush”. Make sure that you see the sample brush in the Top Menu.
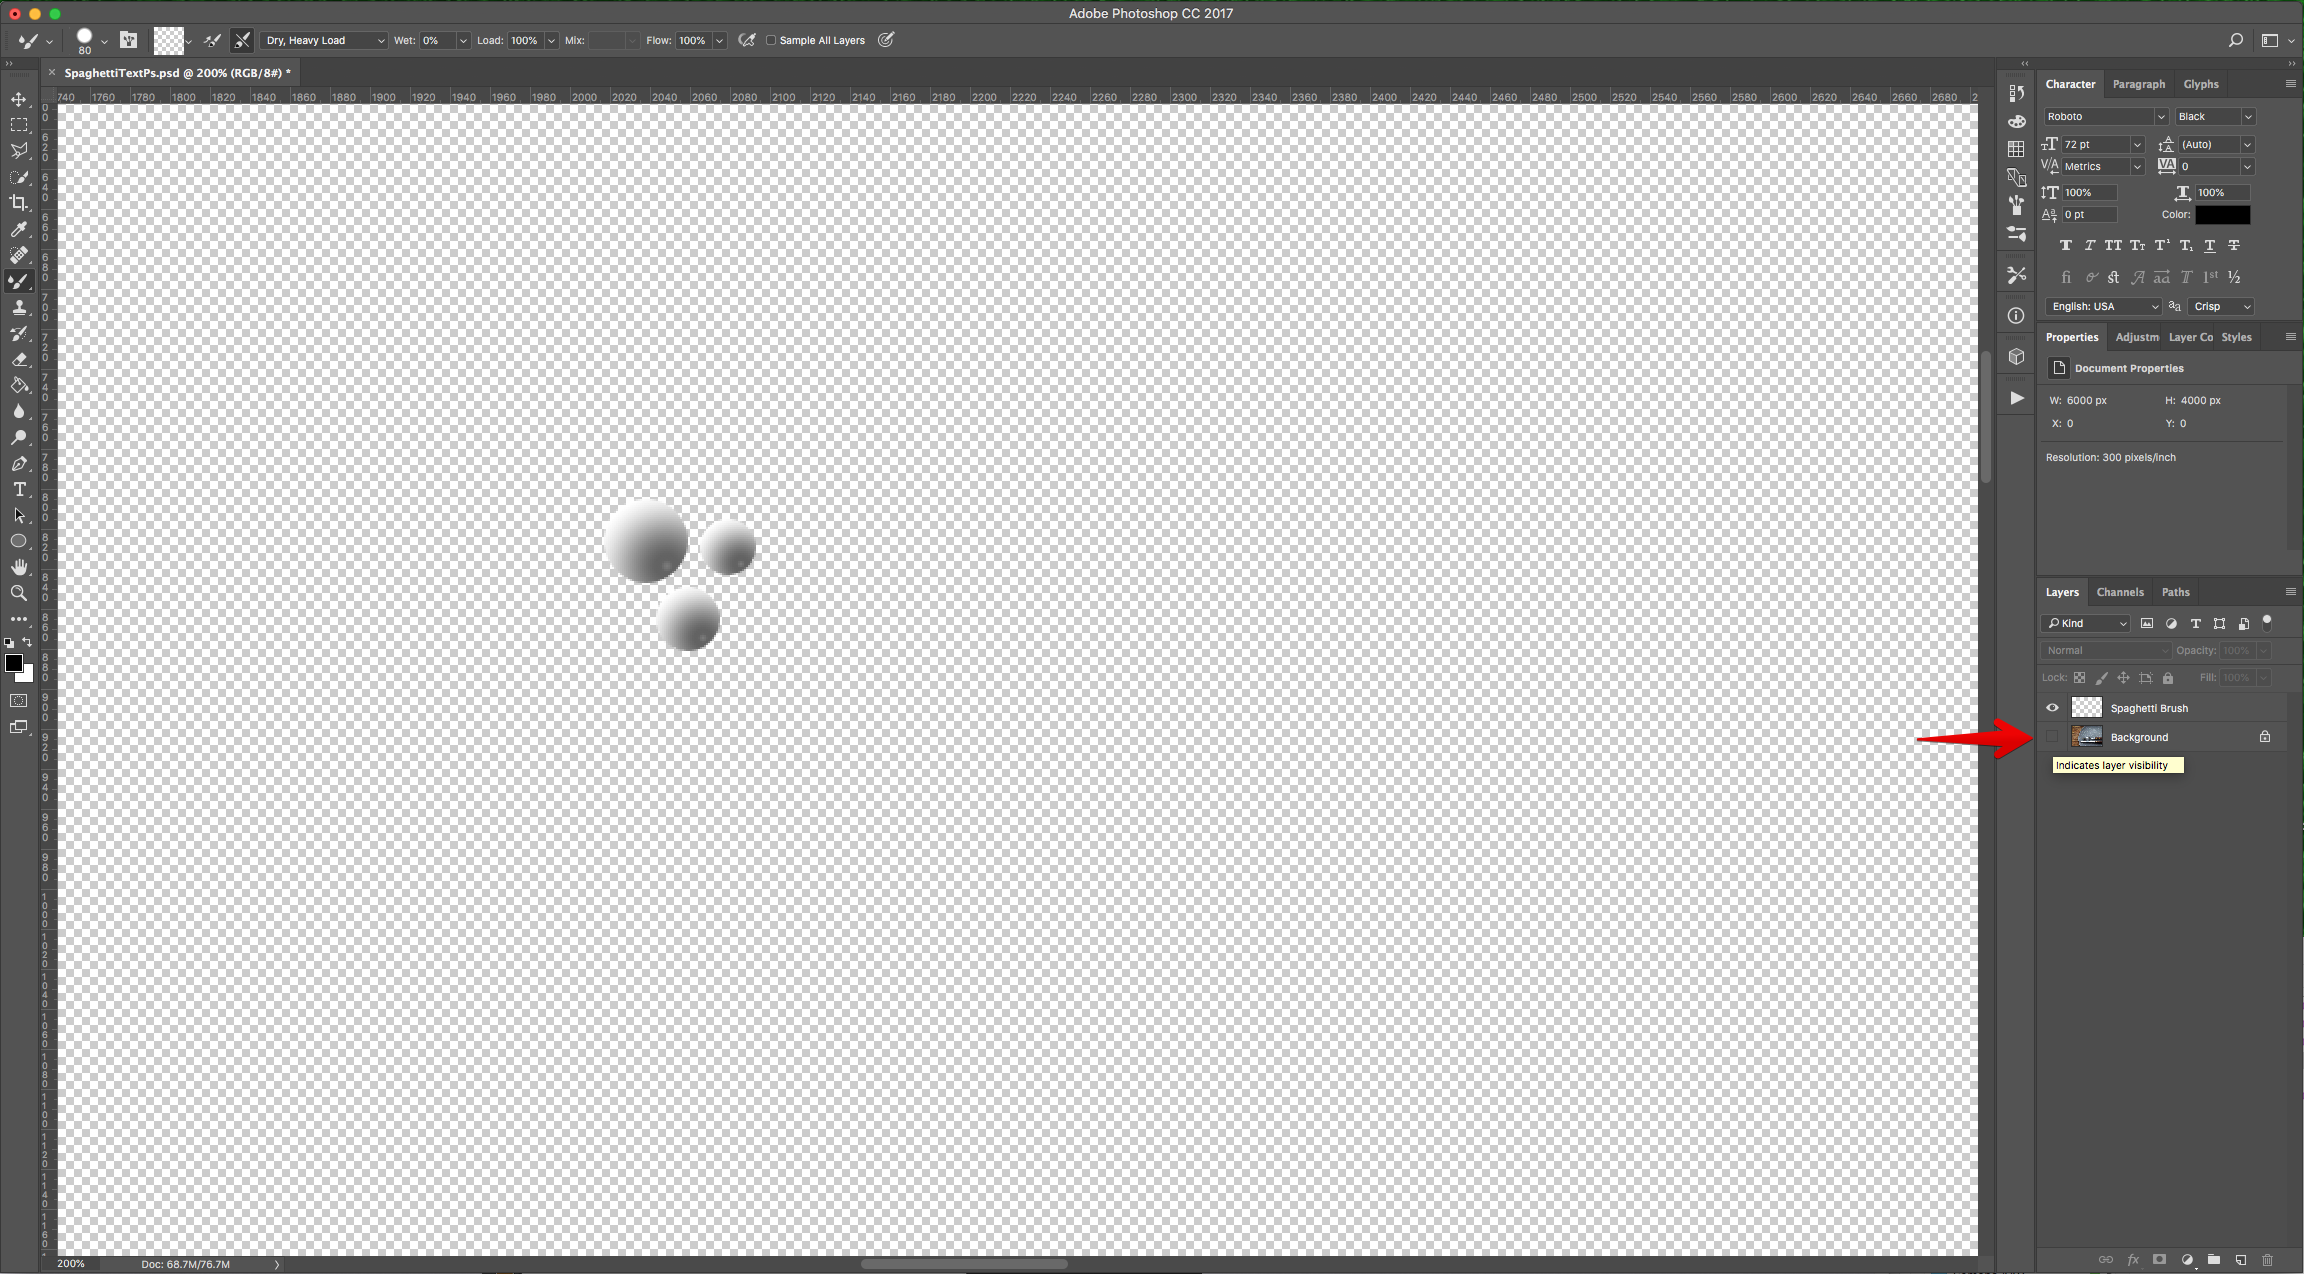
8 - Now, make the “Background” Layer visible again and “Hide” the “Brush” Layer.

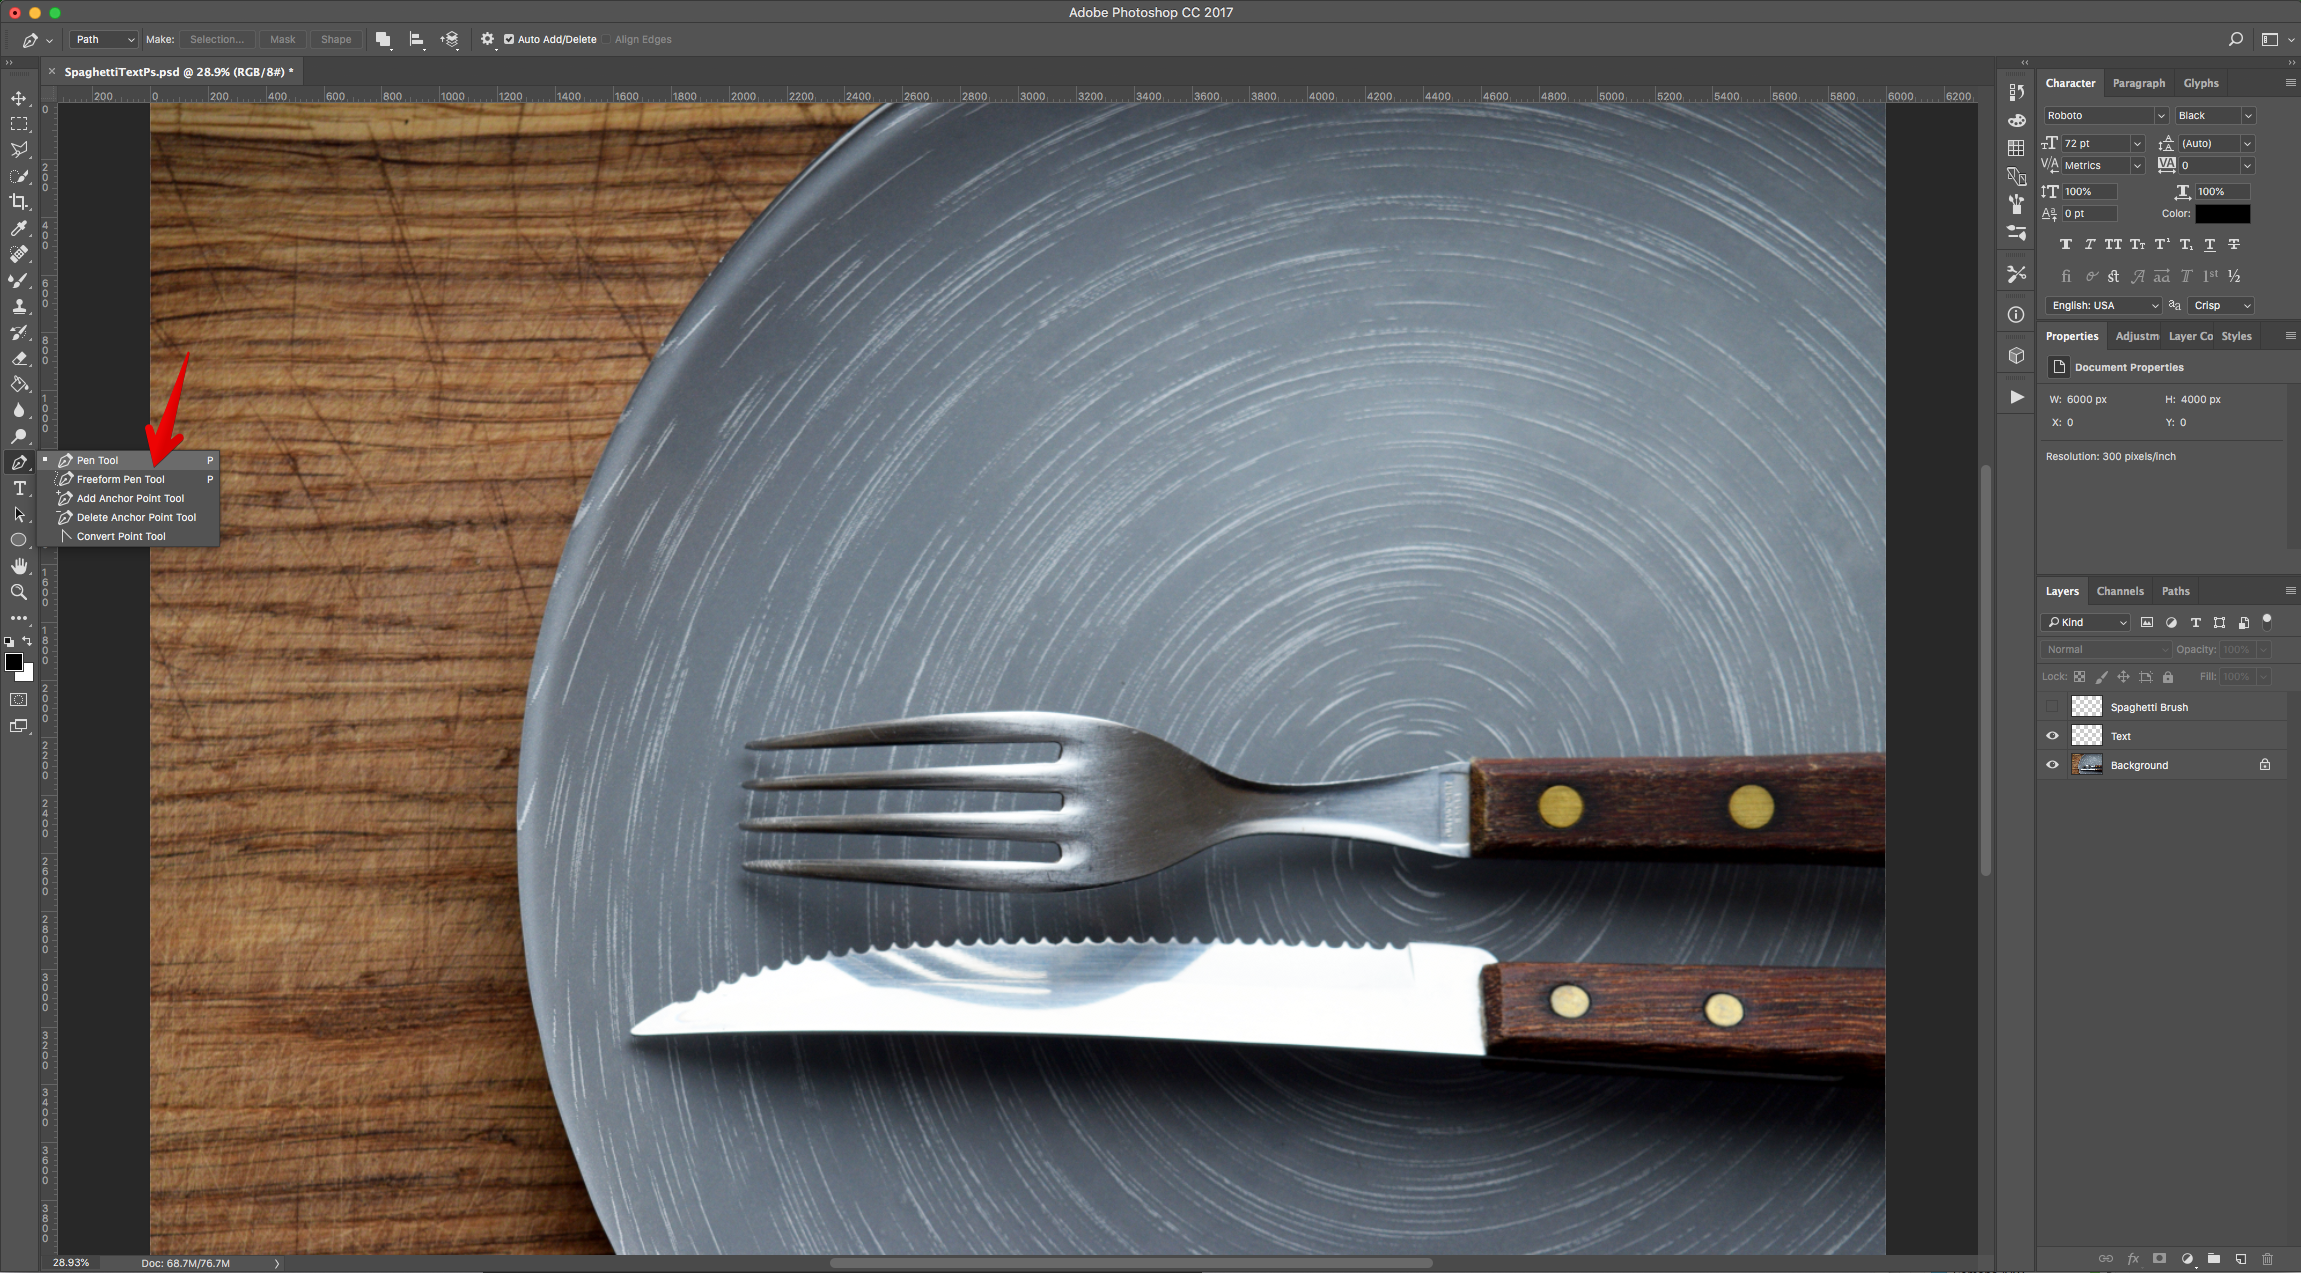
9 - Create a New Layer on top by clicking the “Create New Layer” button at the bottom of the “Layers” Panel and name it “Text”.

10 - Select the “Pen Tool” (P) and draw your “Text” or “Shape”.

11 - Use the “Direct Selection Tool” (A) to click on an individual “Anchor Point” and fix the shape if needed.
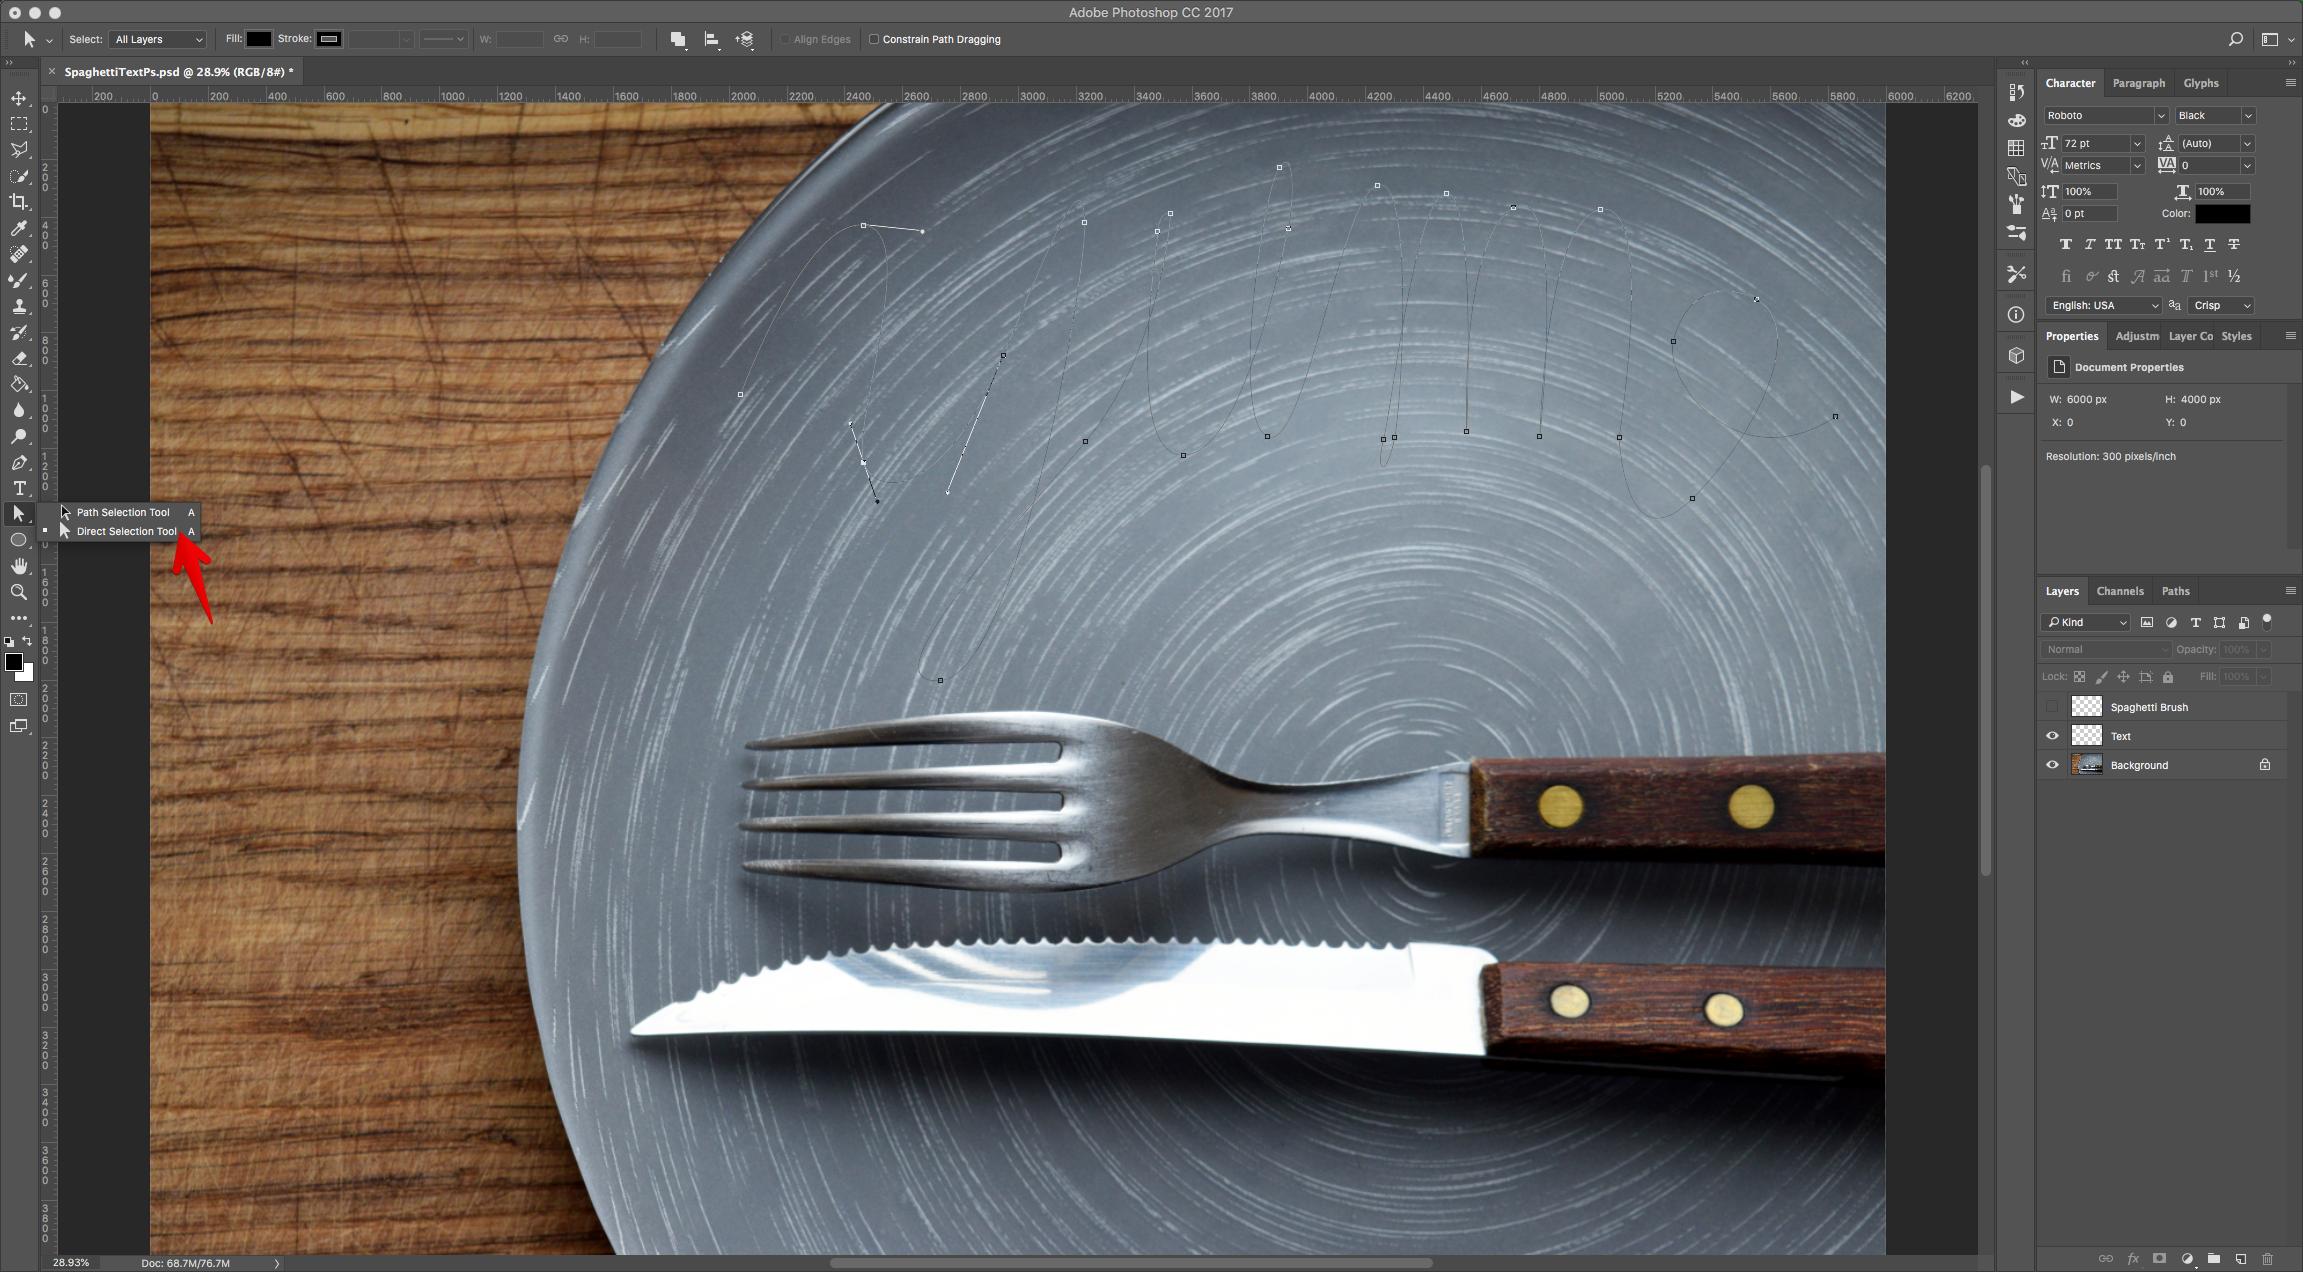
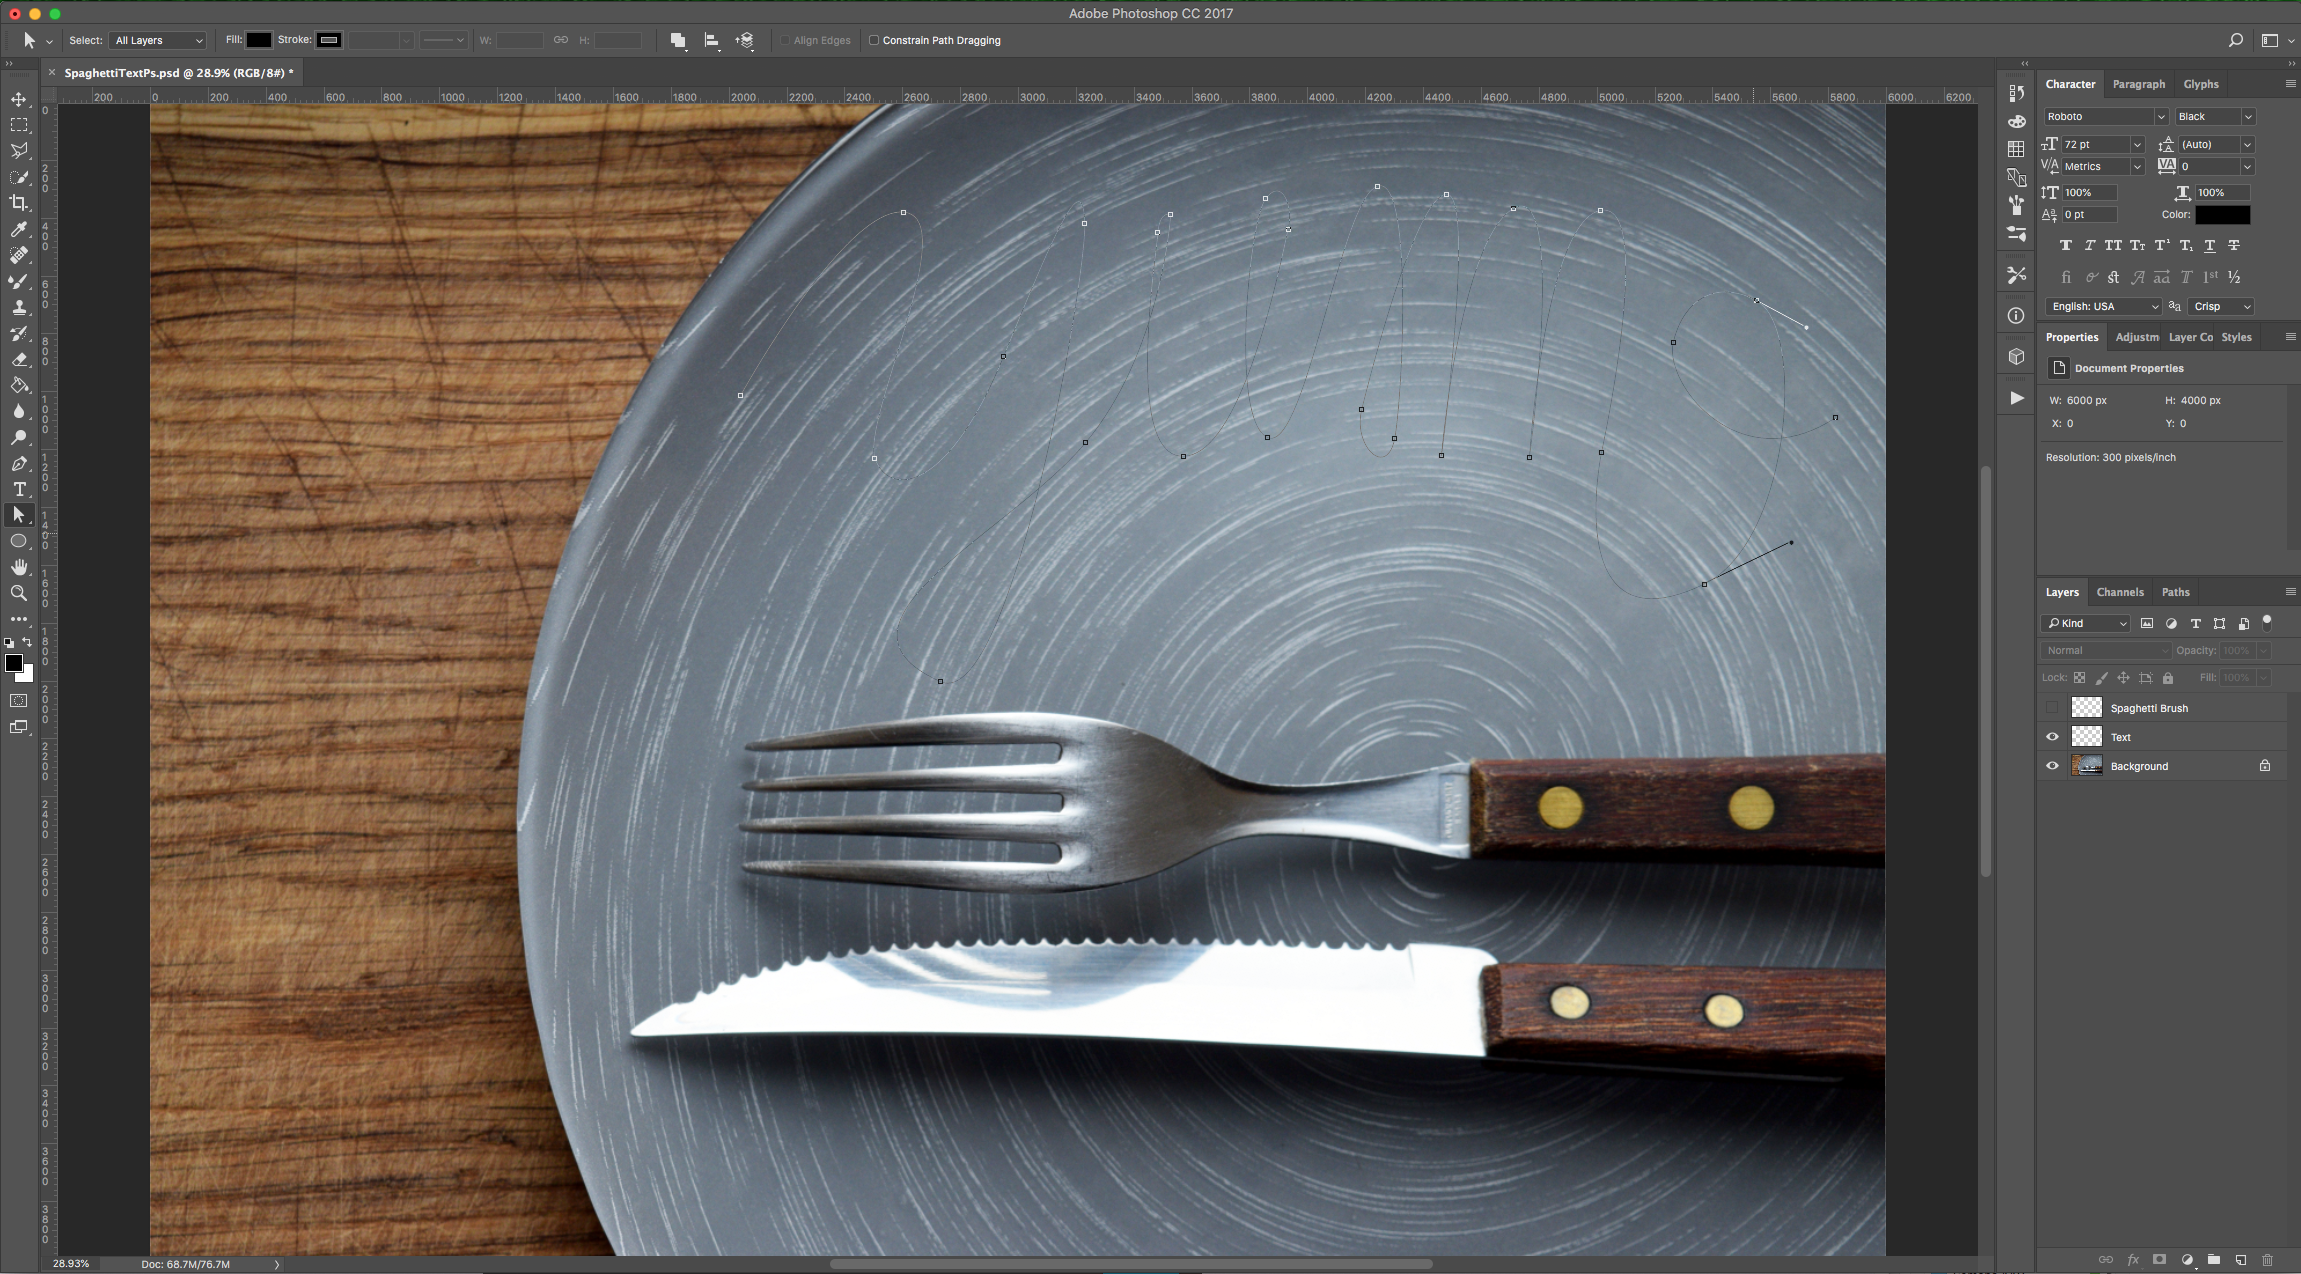
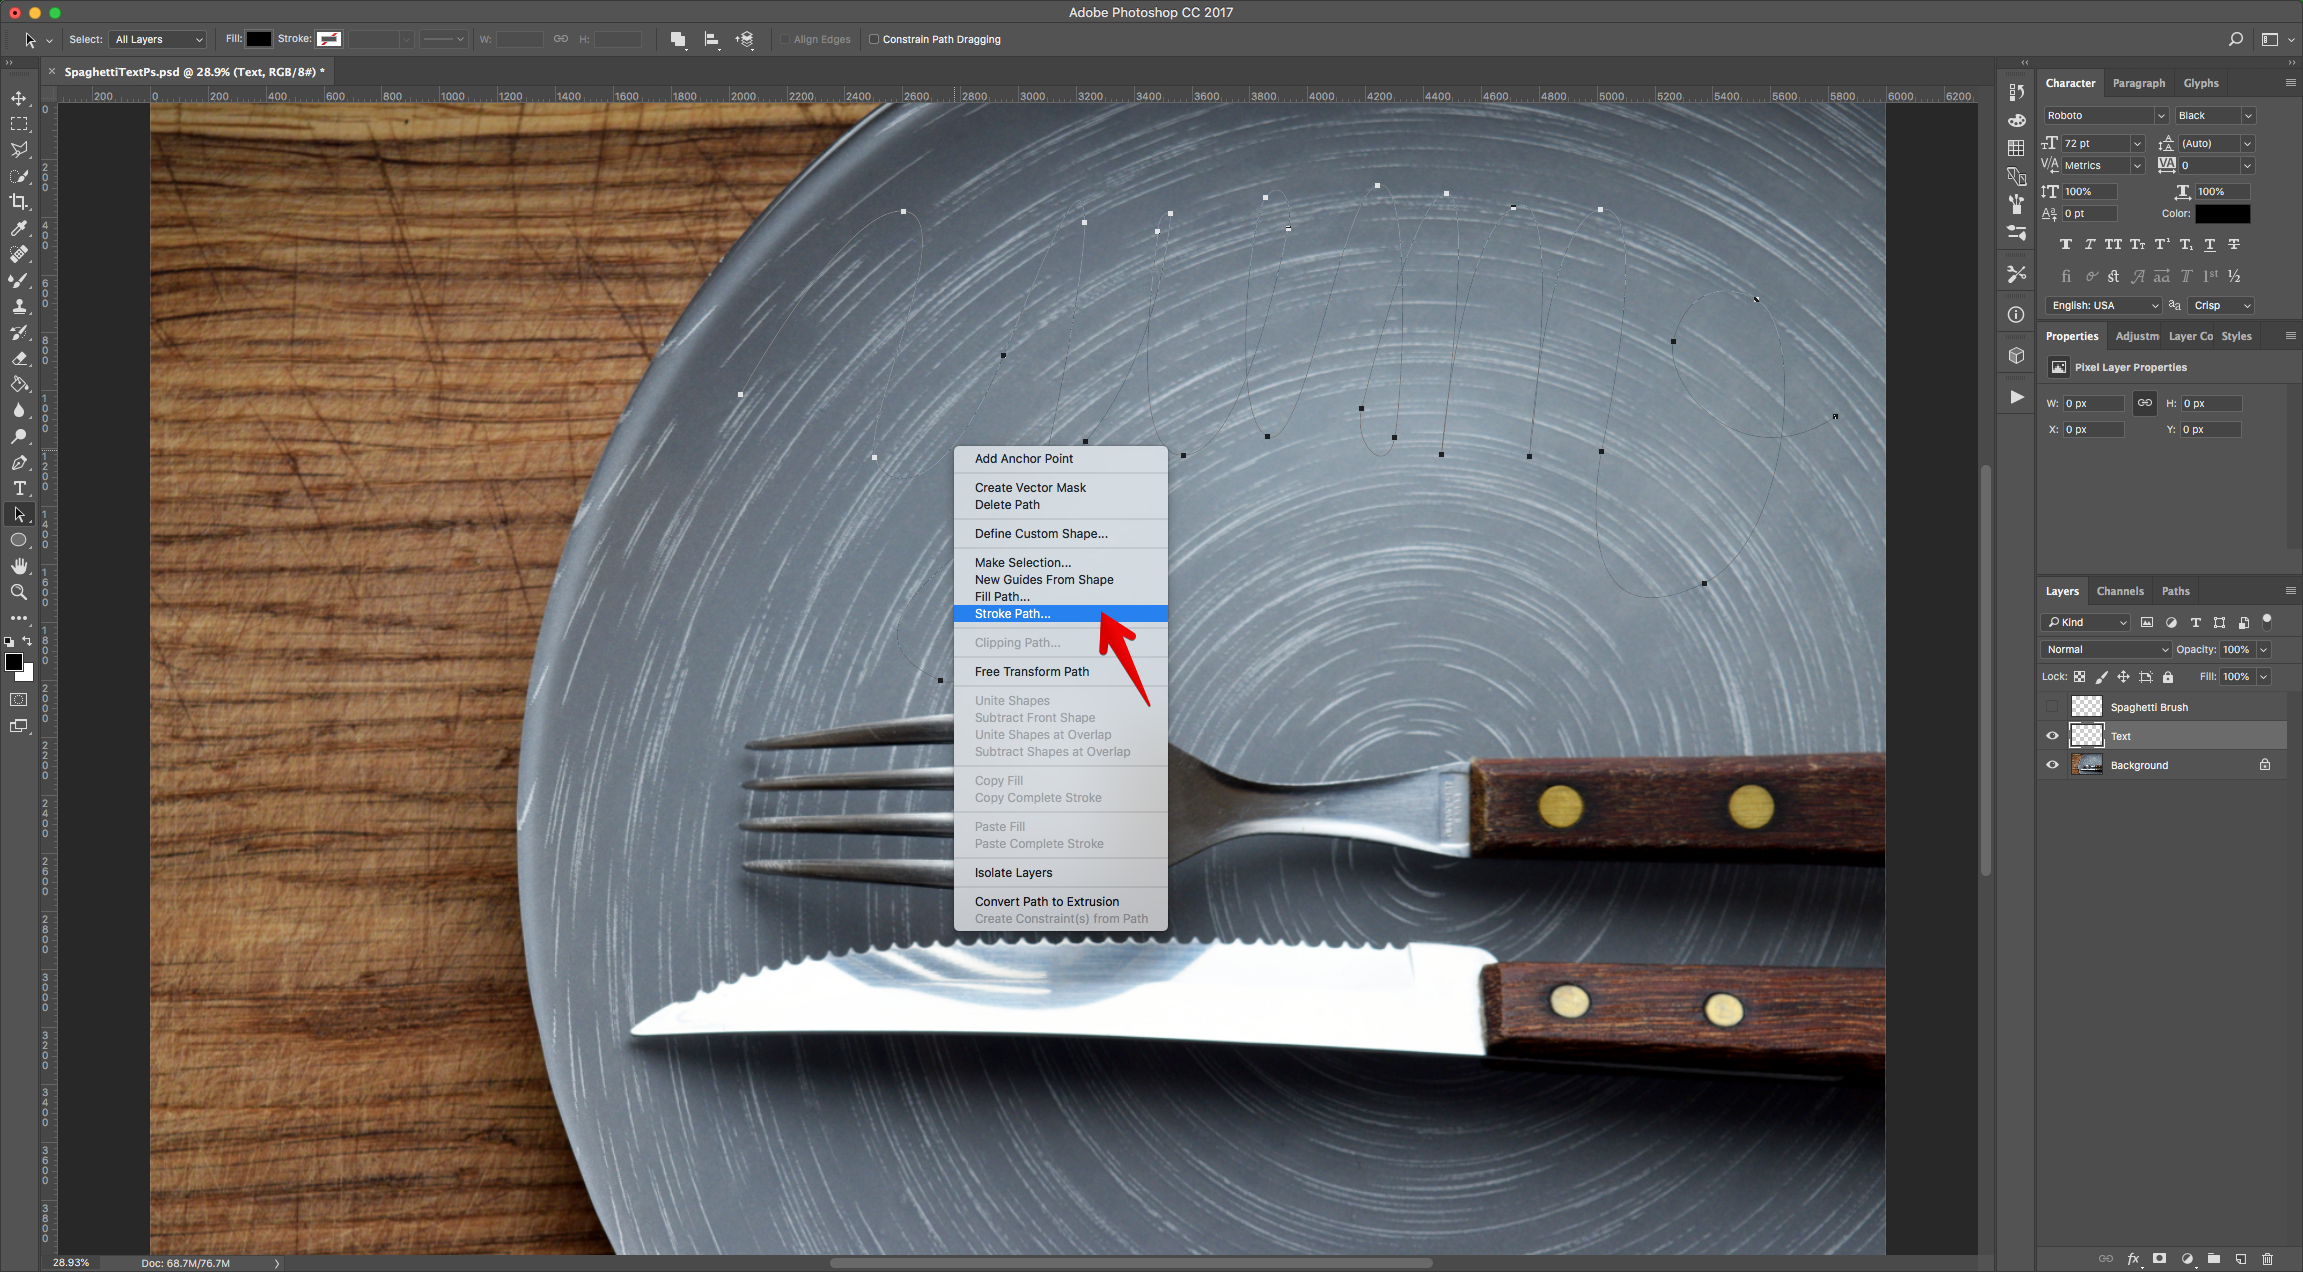
12 - Now, use the “Path Selection Tool” (A) to select the entire “Path”.

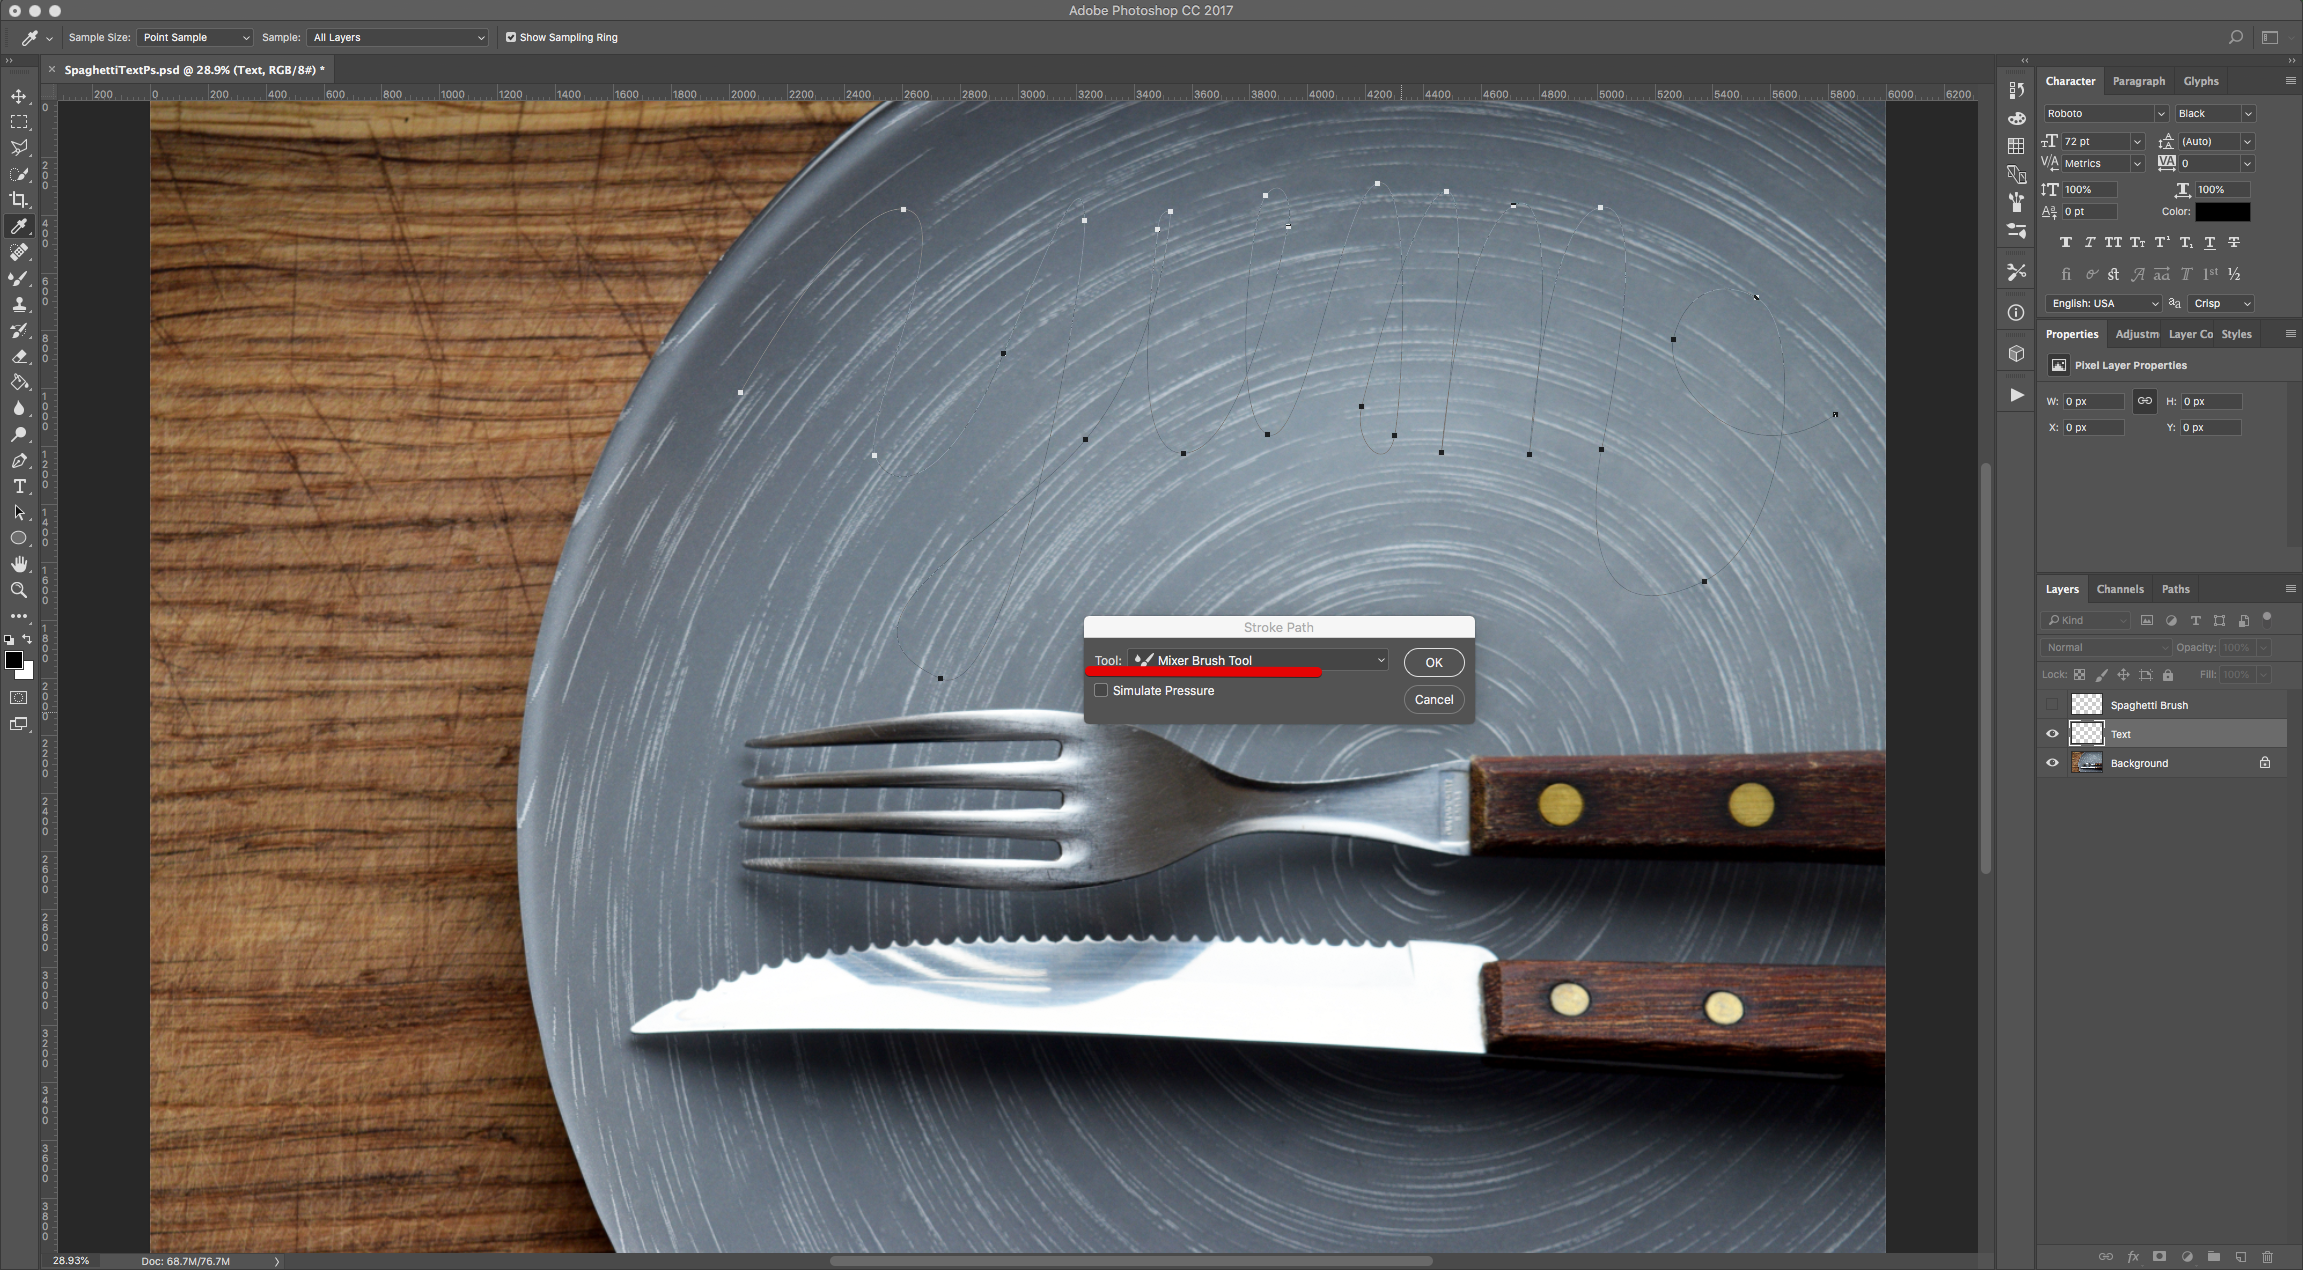
13 - Right-click on top, choose “Stroke Path” and then “Mixer Brush Tool” as “Tool”. Click “OK”.

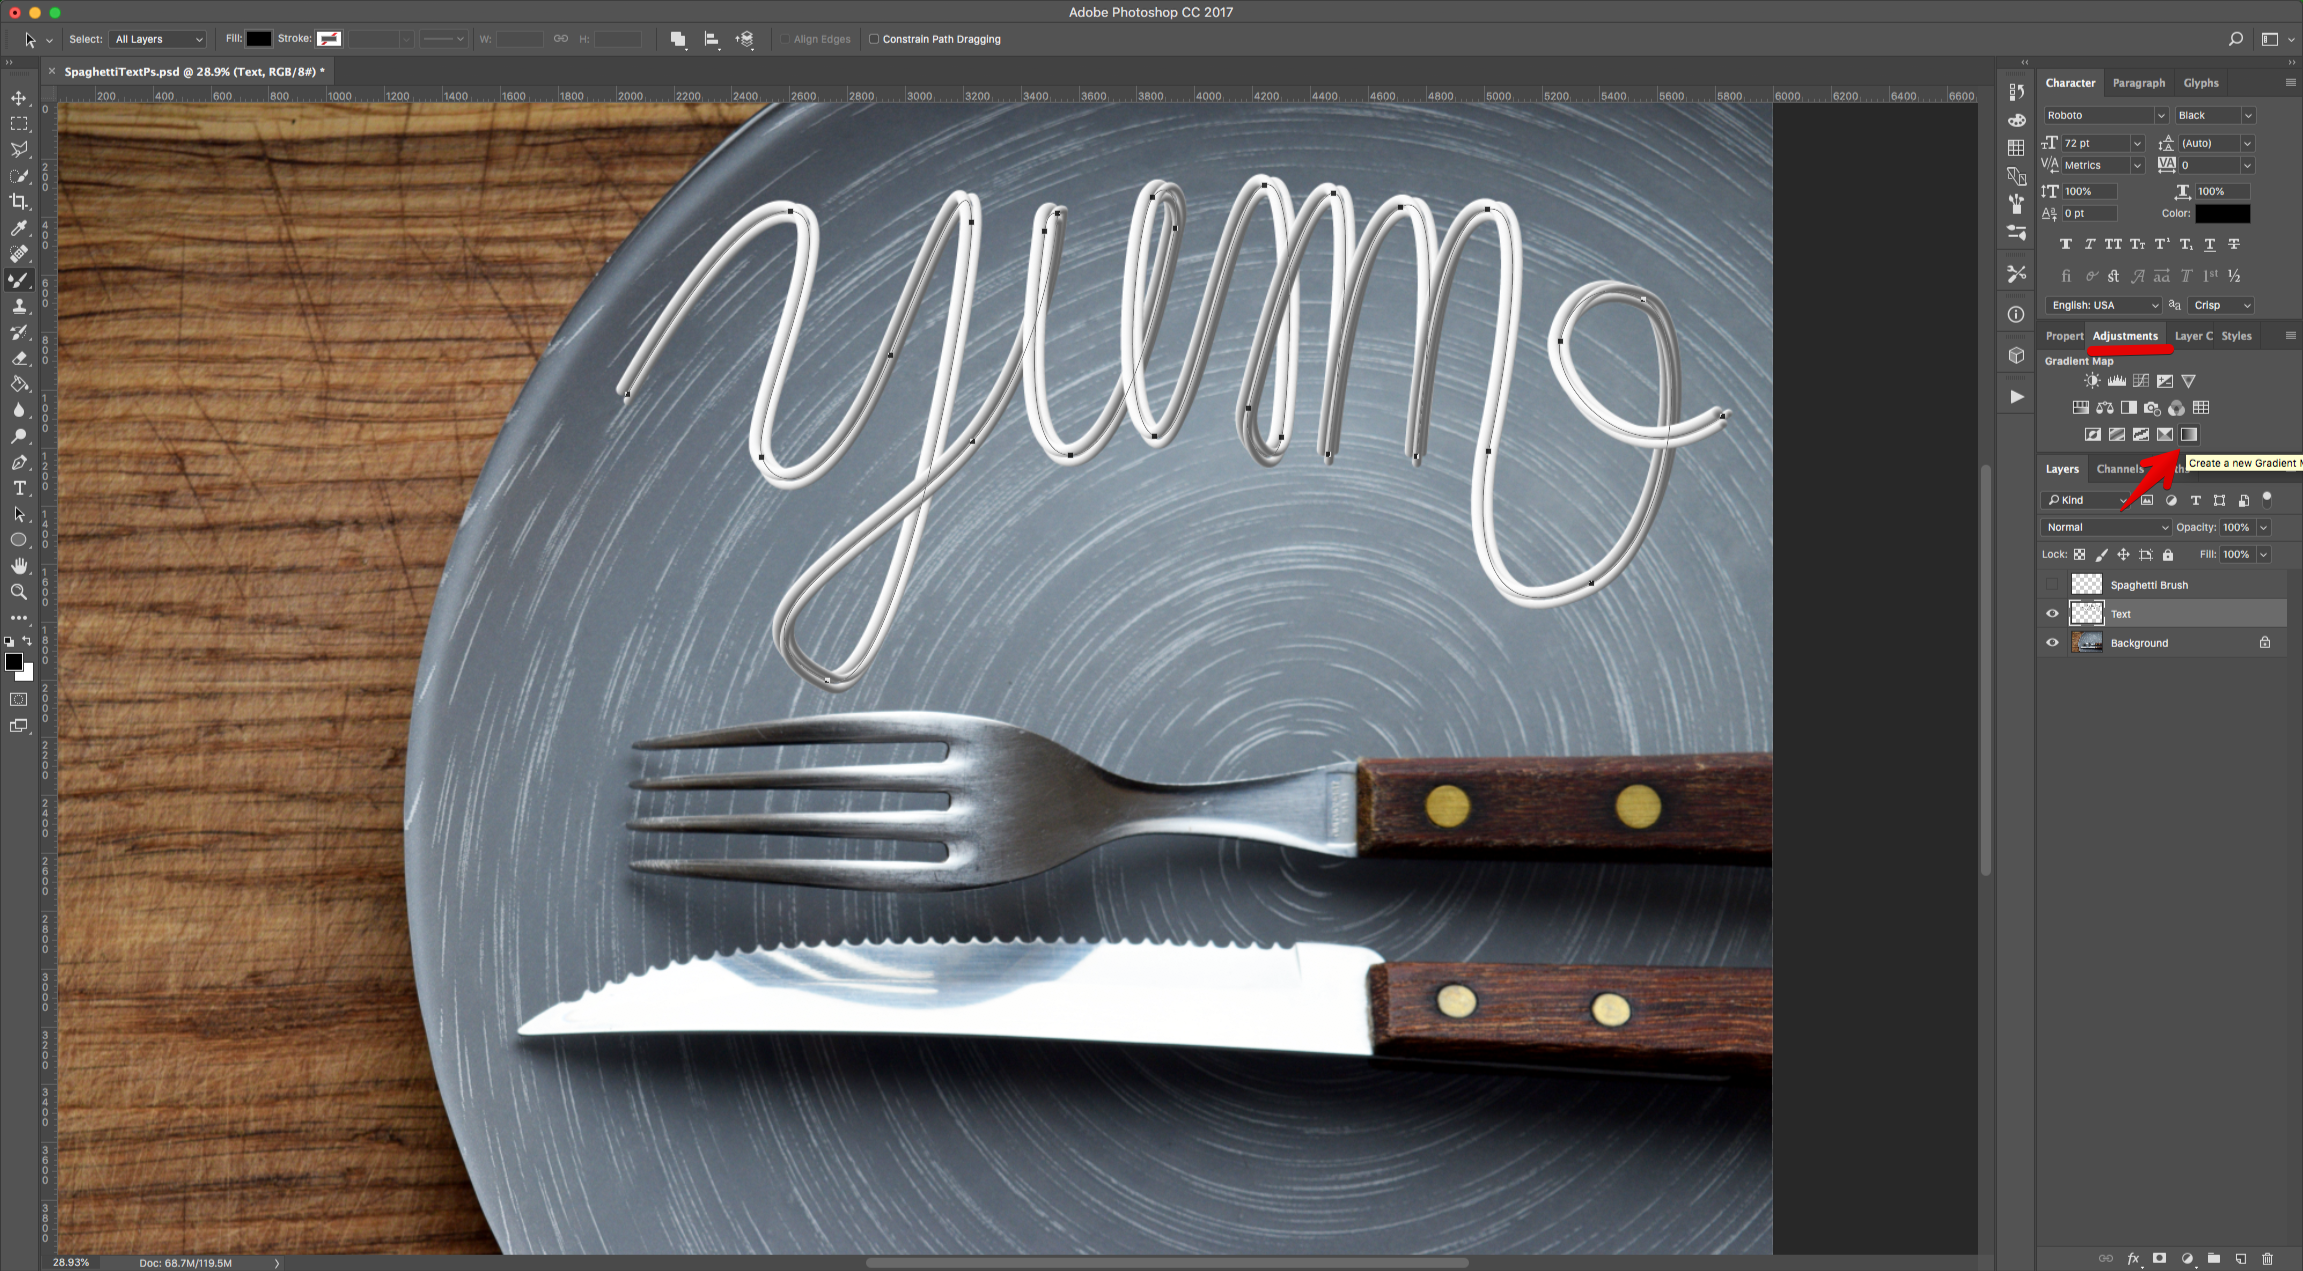
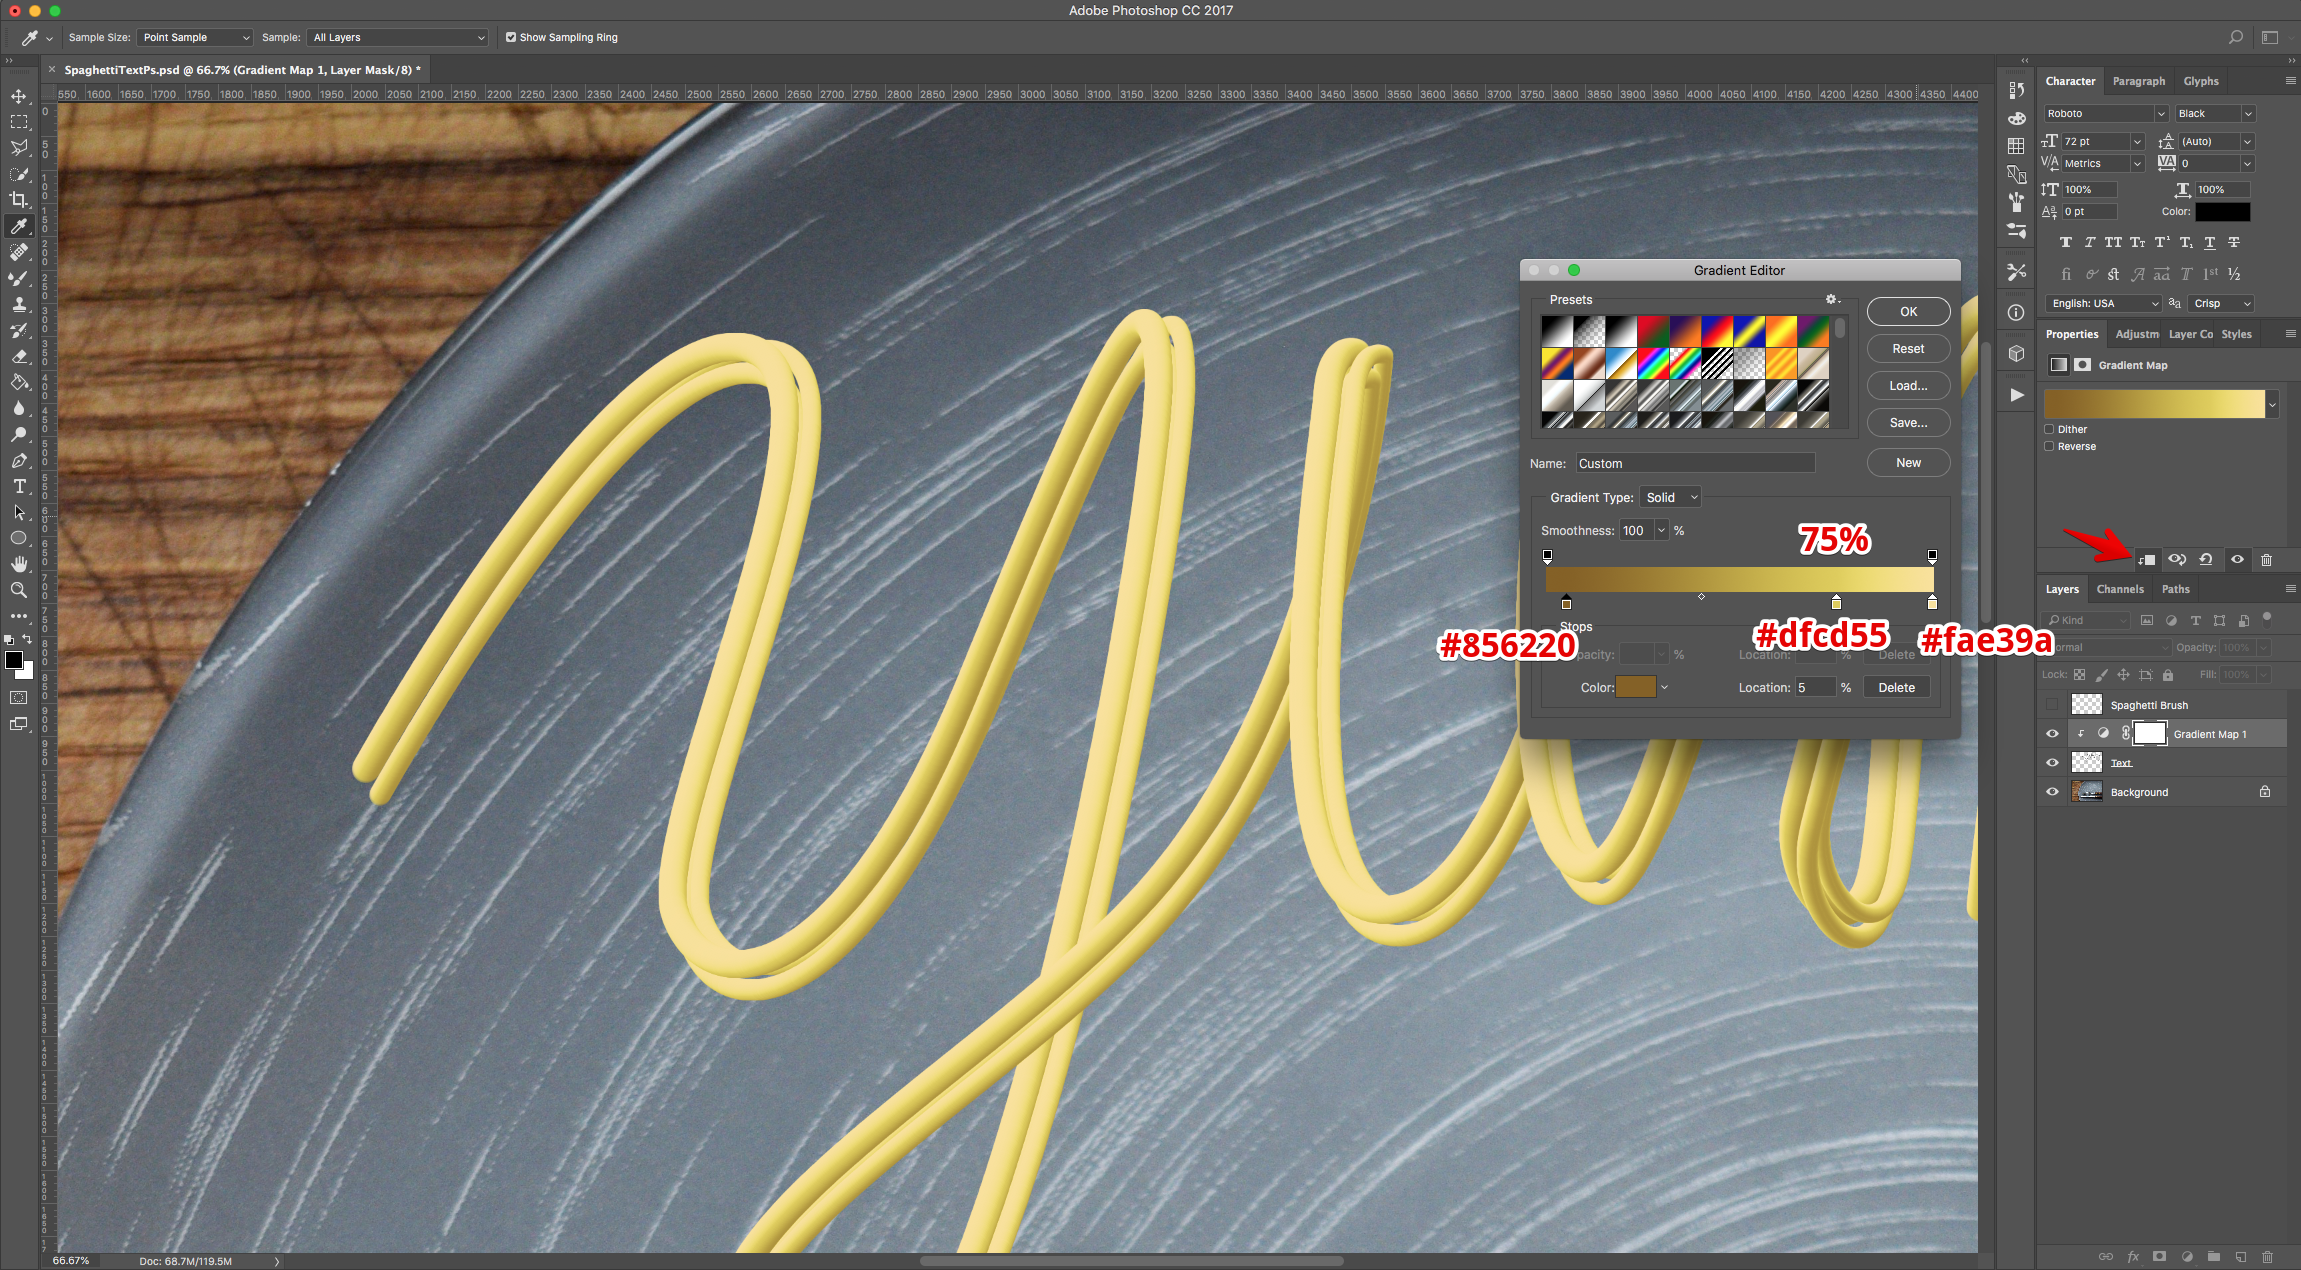
14 - Create a “New Gradient Map” Adjustment Layer on top of the “Text” Layer and clip it to it (click on the small icon at the bottom of the “Properties Panel”. Double-click on the Gradient and input the following (1: Location: 5%, #856220 - 2: Location: 75%, #dfcd55 - 3: Location: 100%, #fae39a)
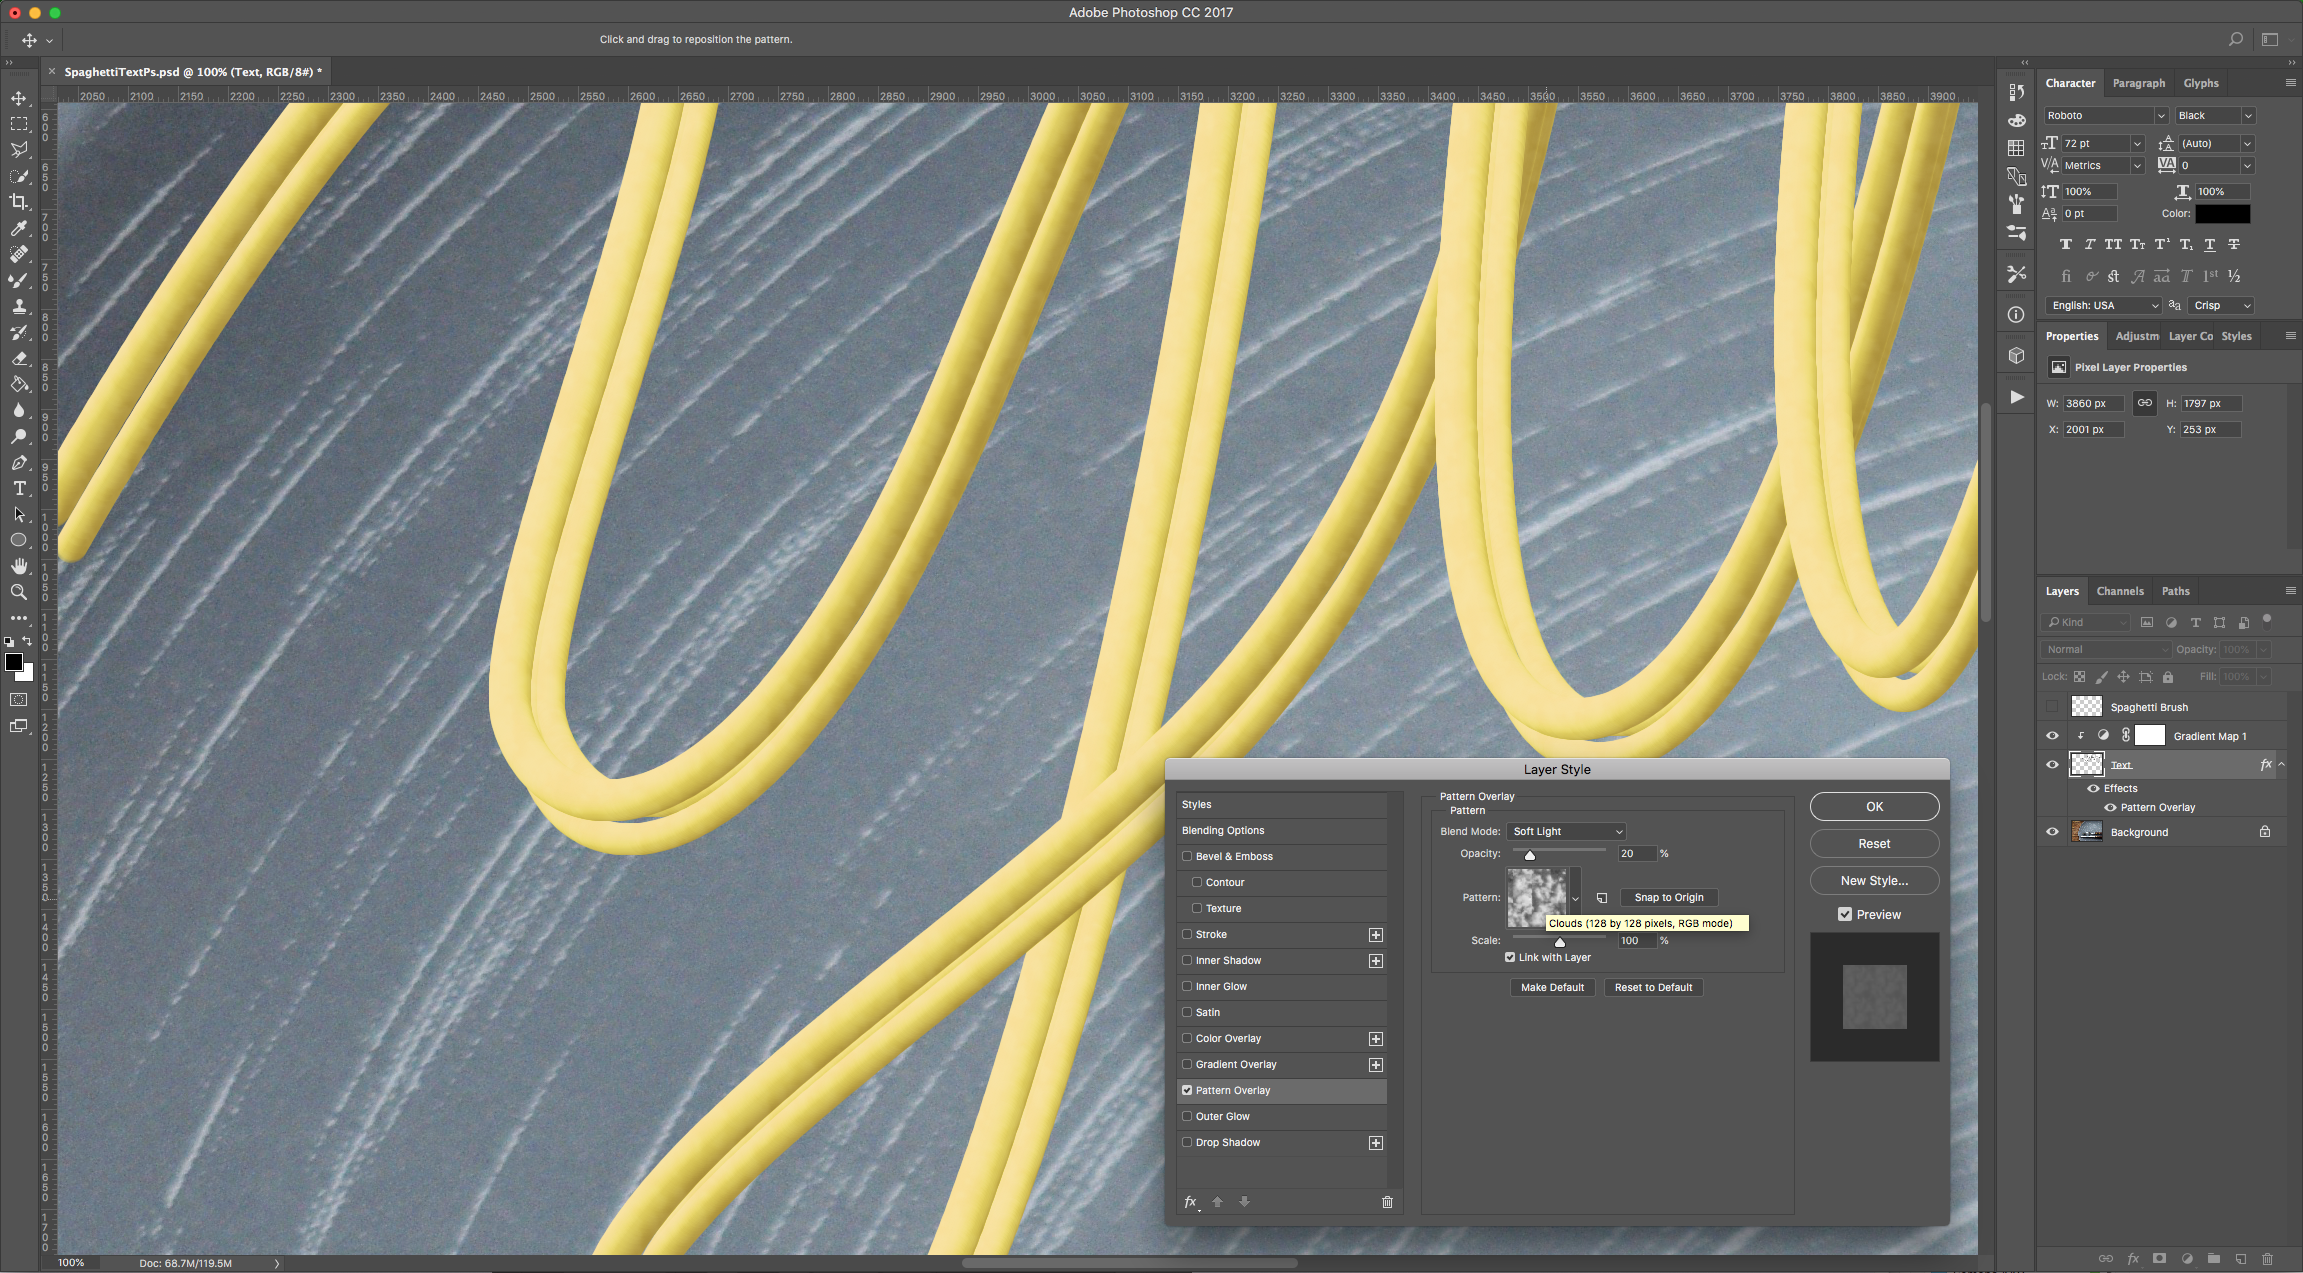
15 - Double-click on one of the “Text” Thumbnail and apply the following “Layer Styles”:
Pattern Overlay: (Clouds)
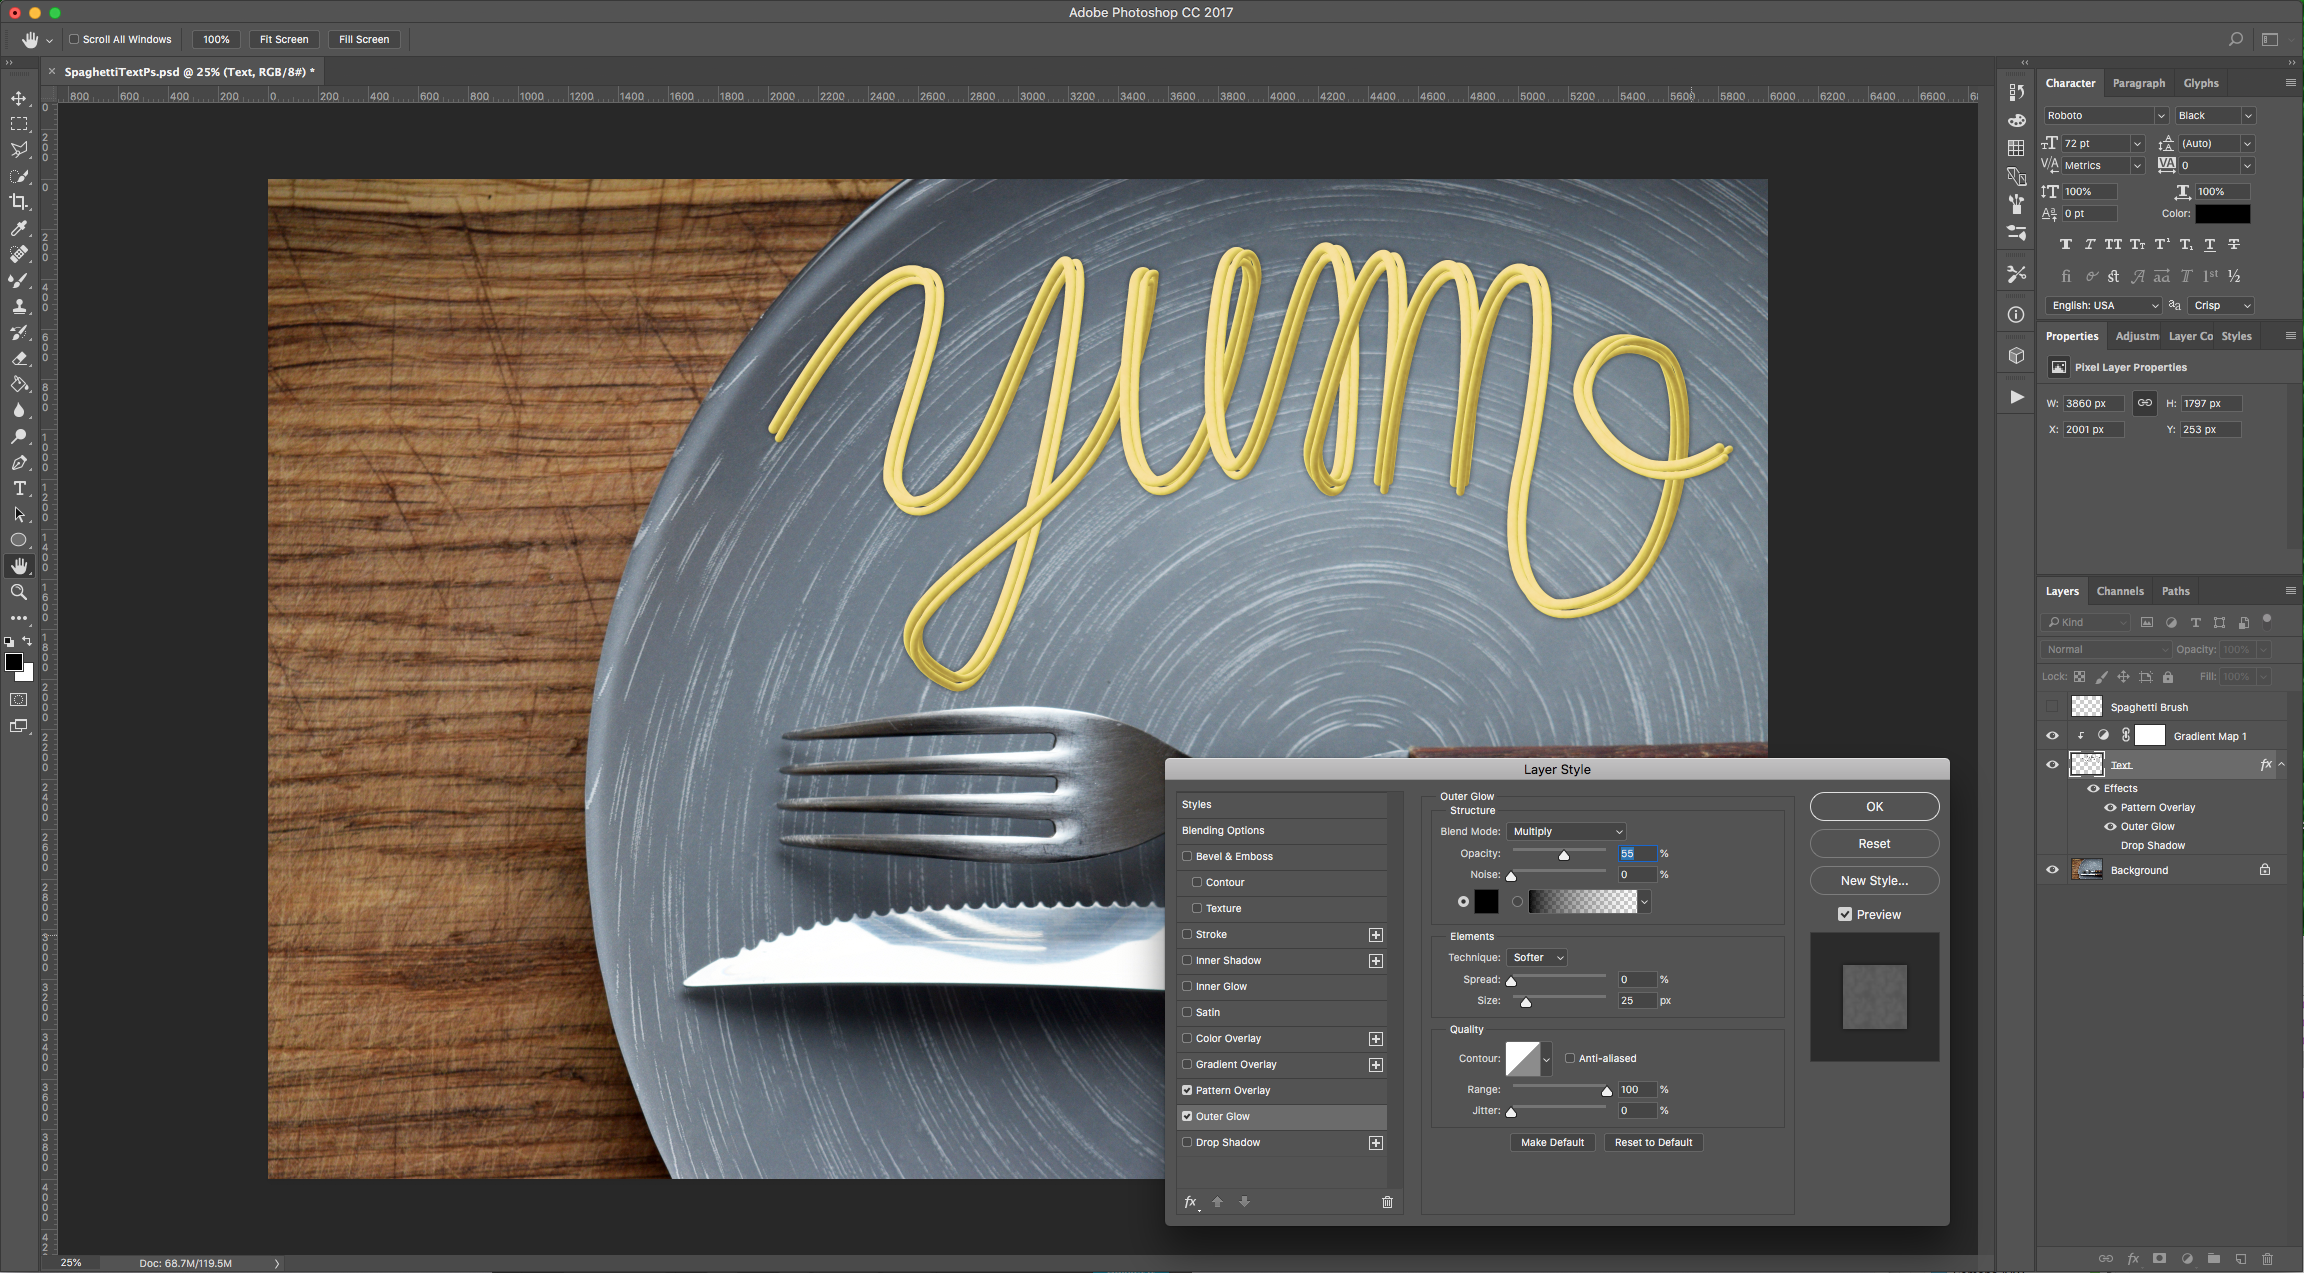
Outer Glow: (#000000)
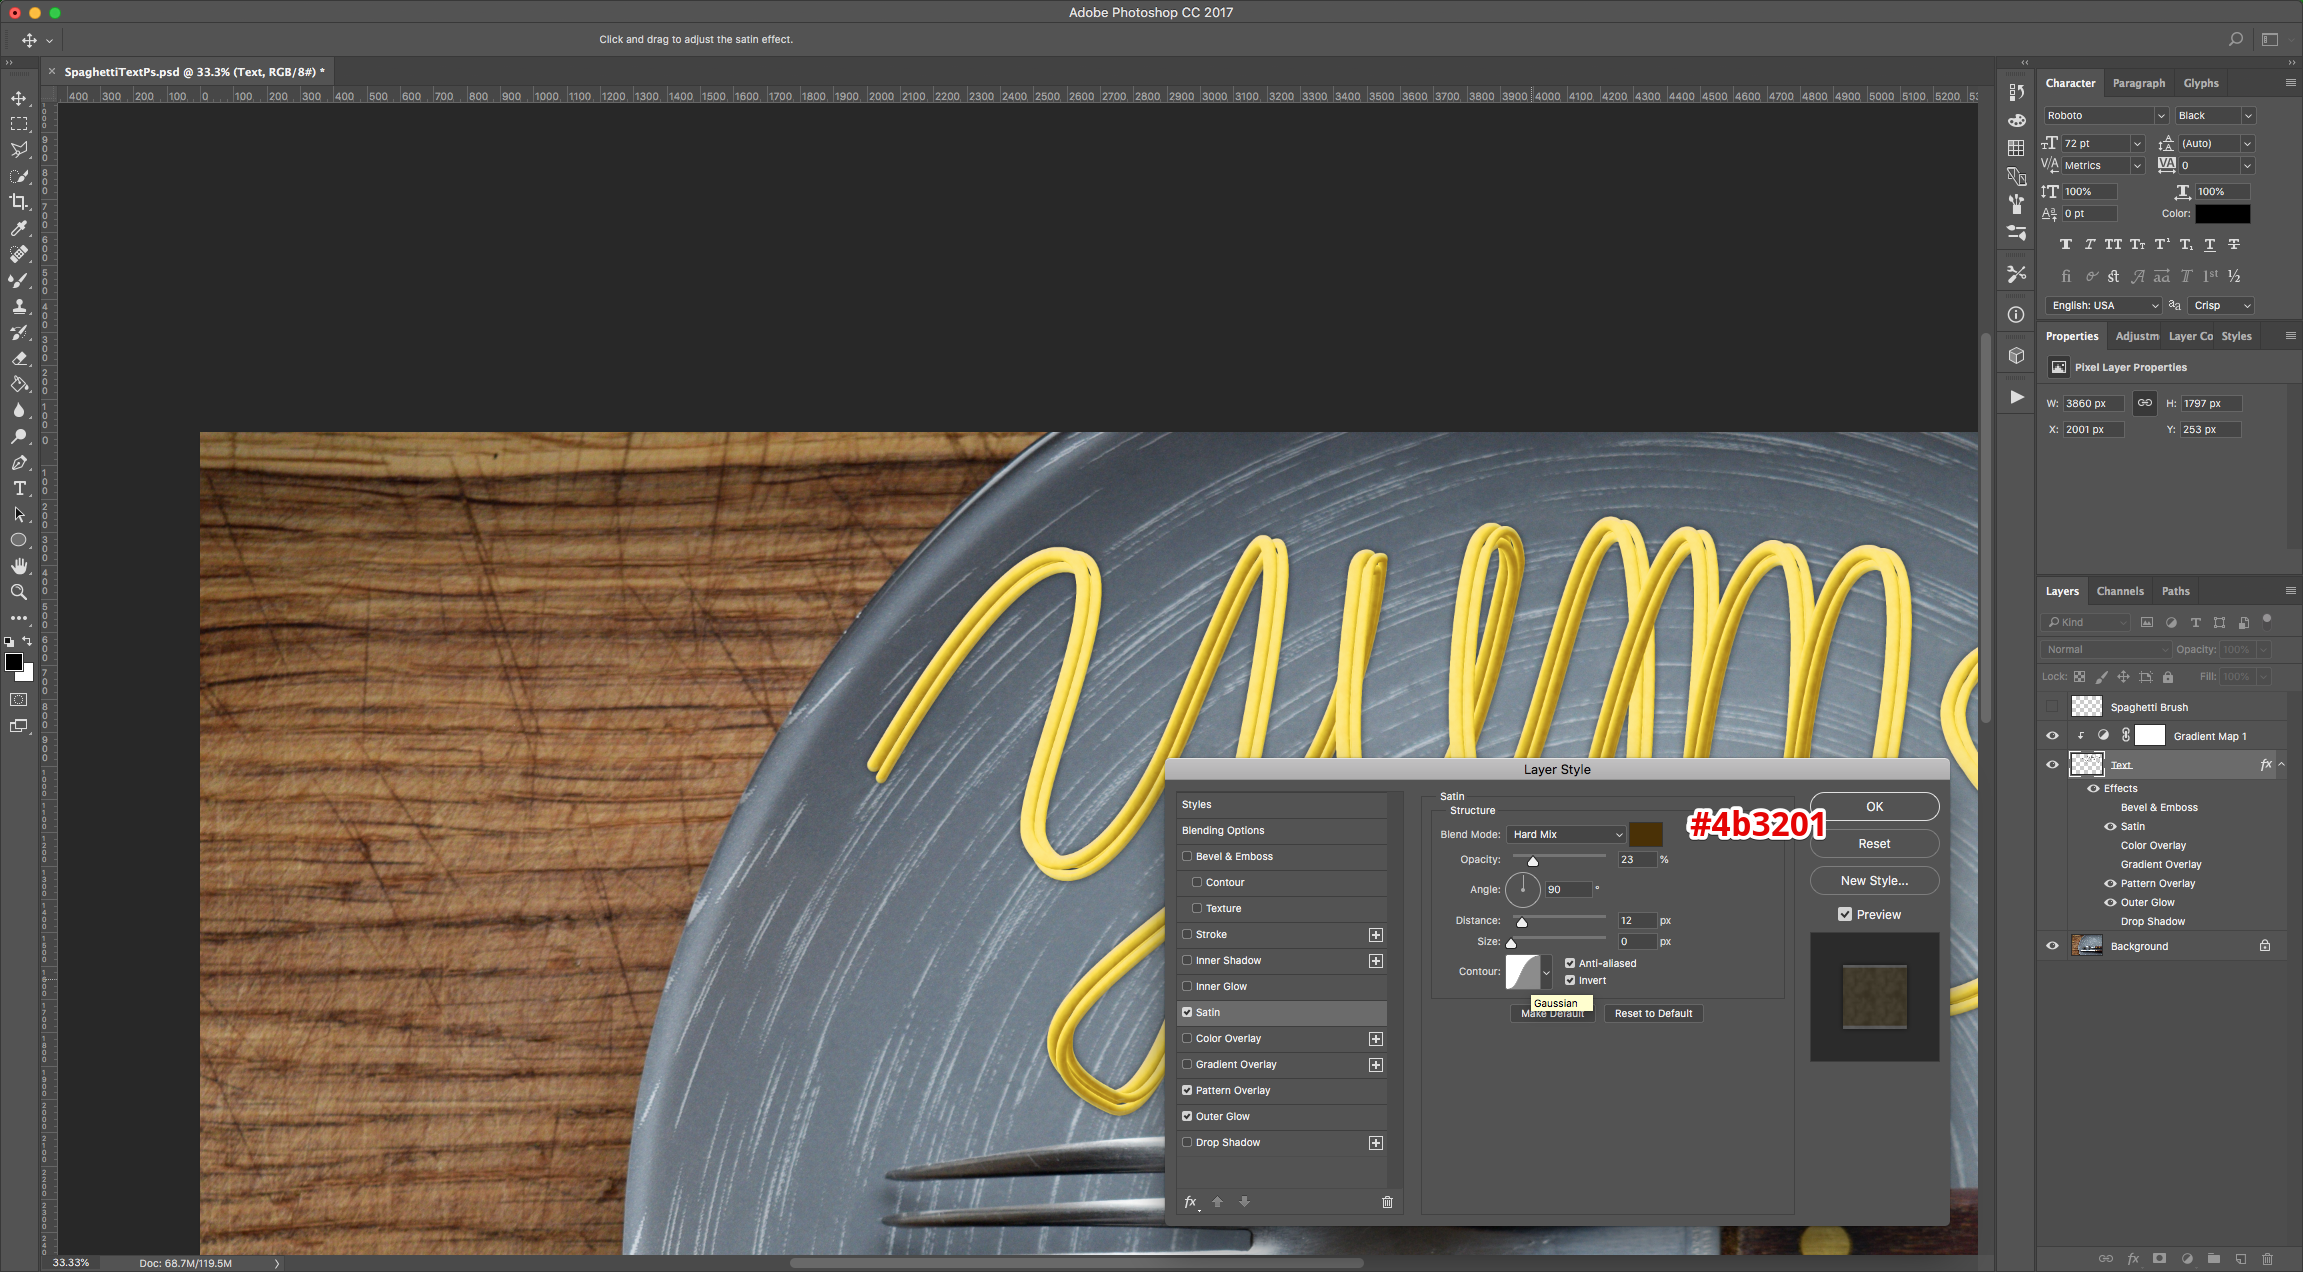
Satin: (#4b3201)
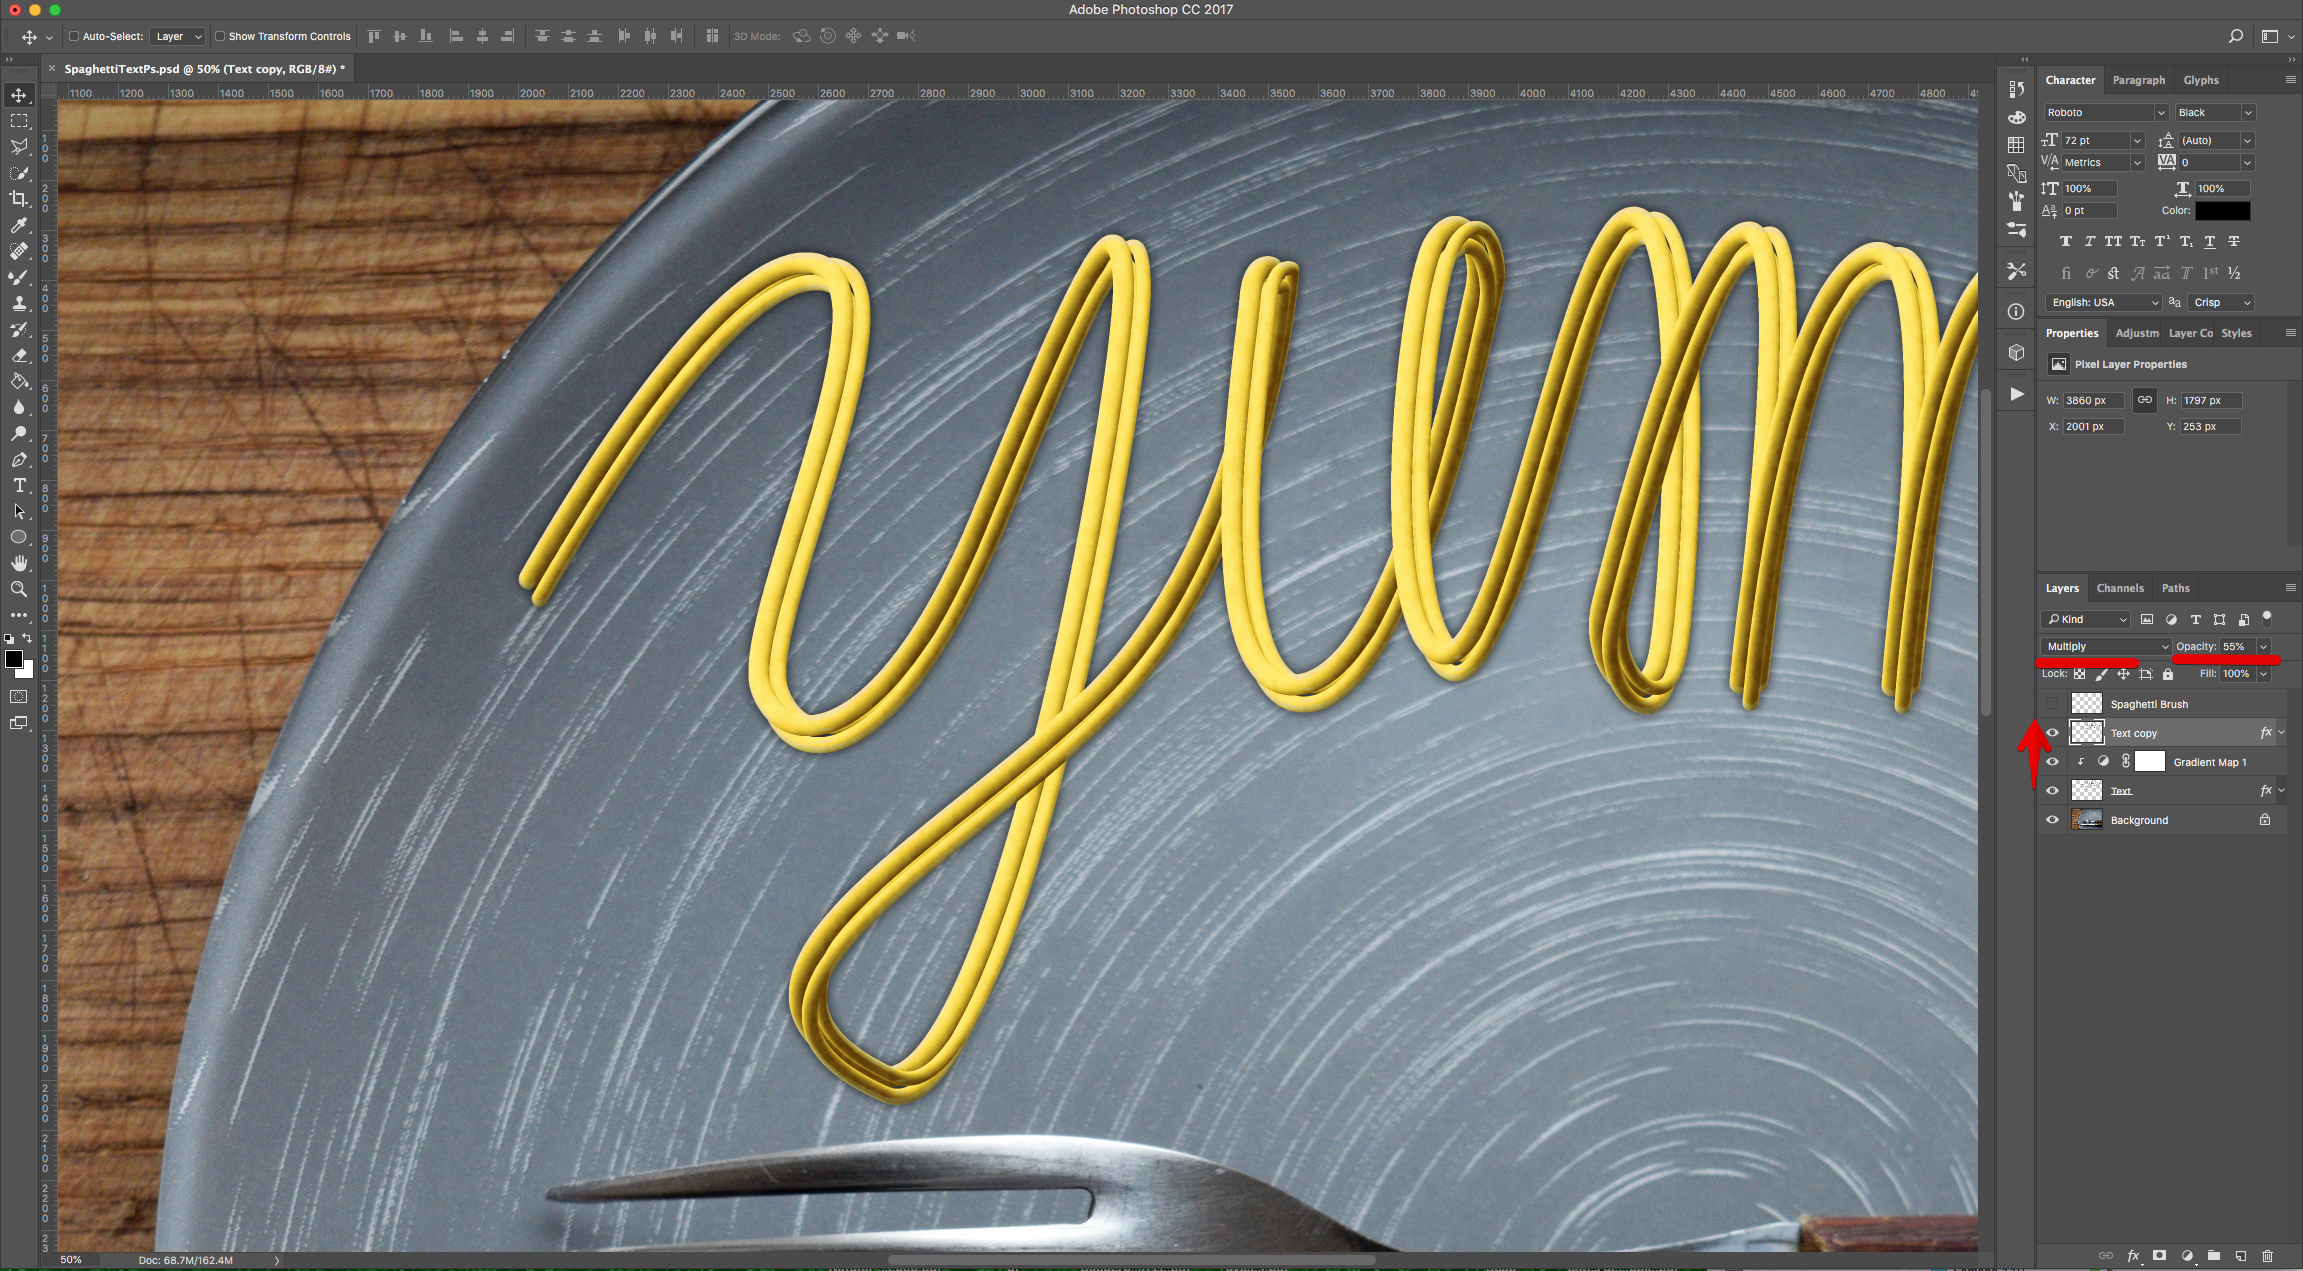
16 - Duplicate the “Text” Layer (Command/Control + J).
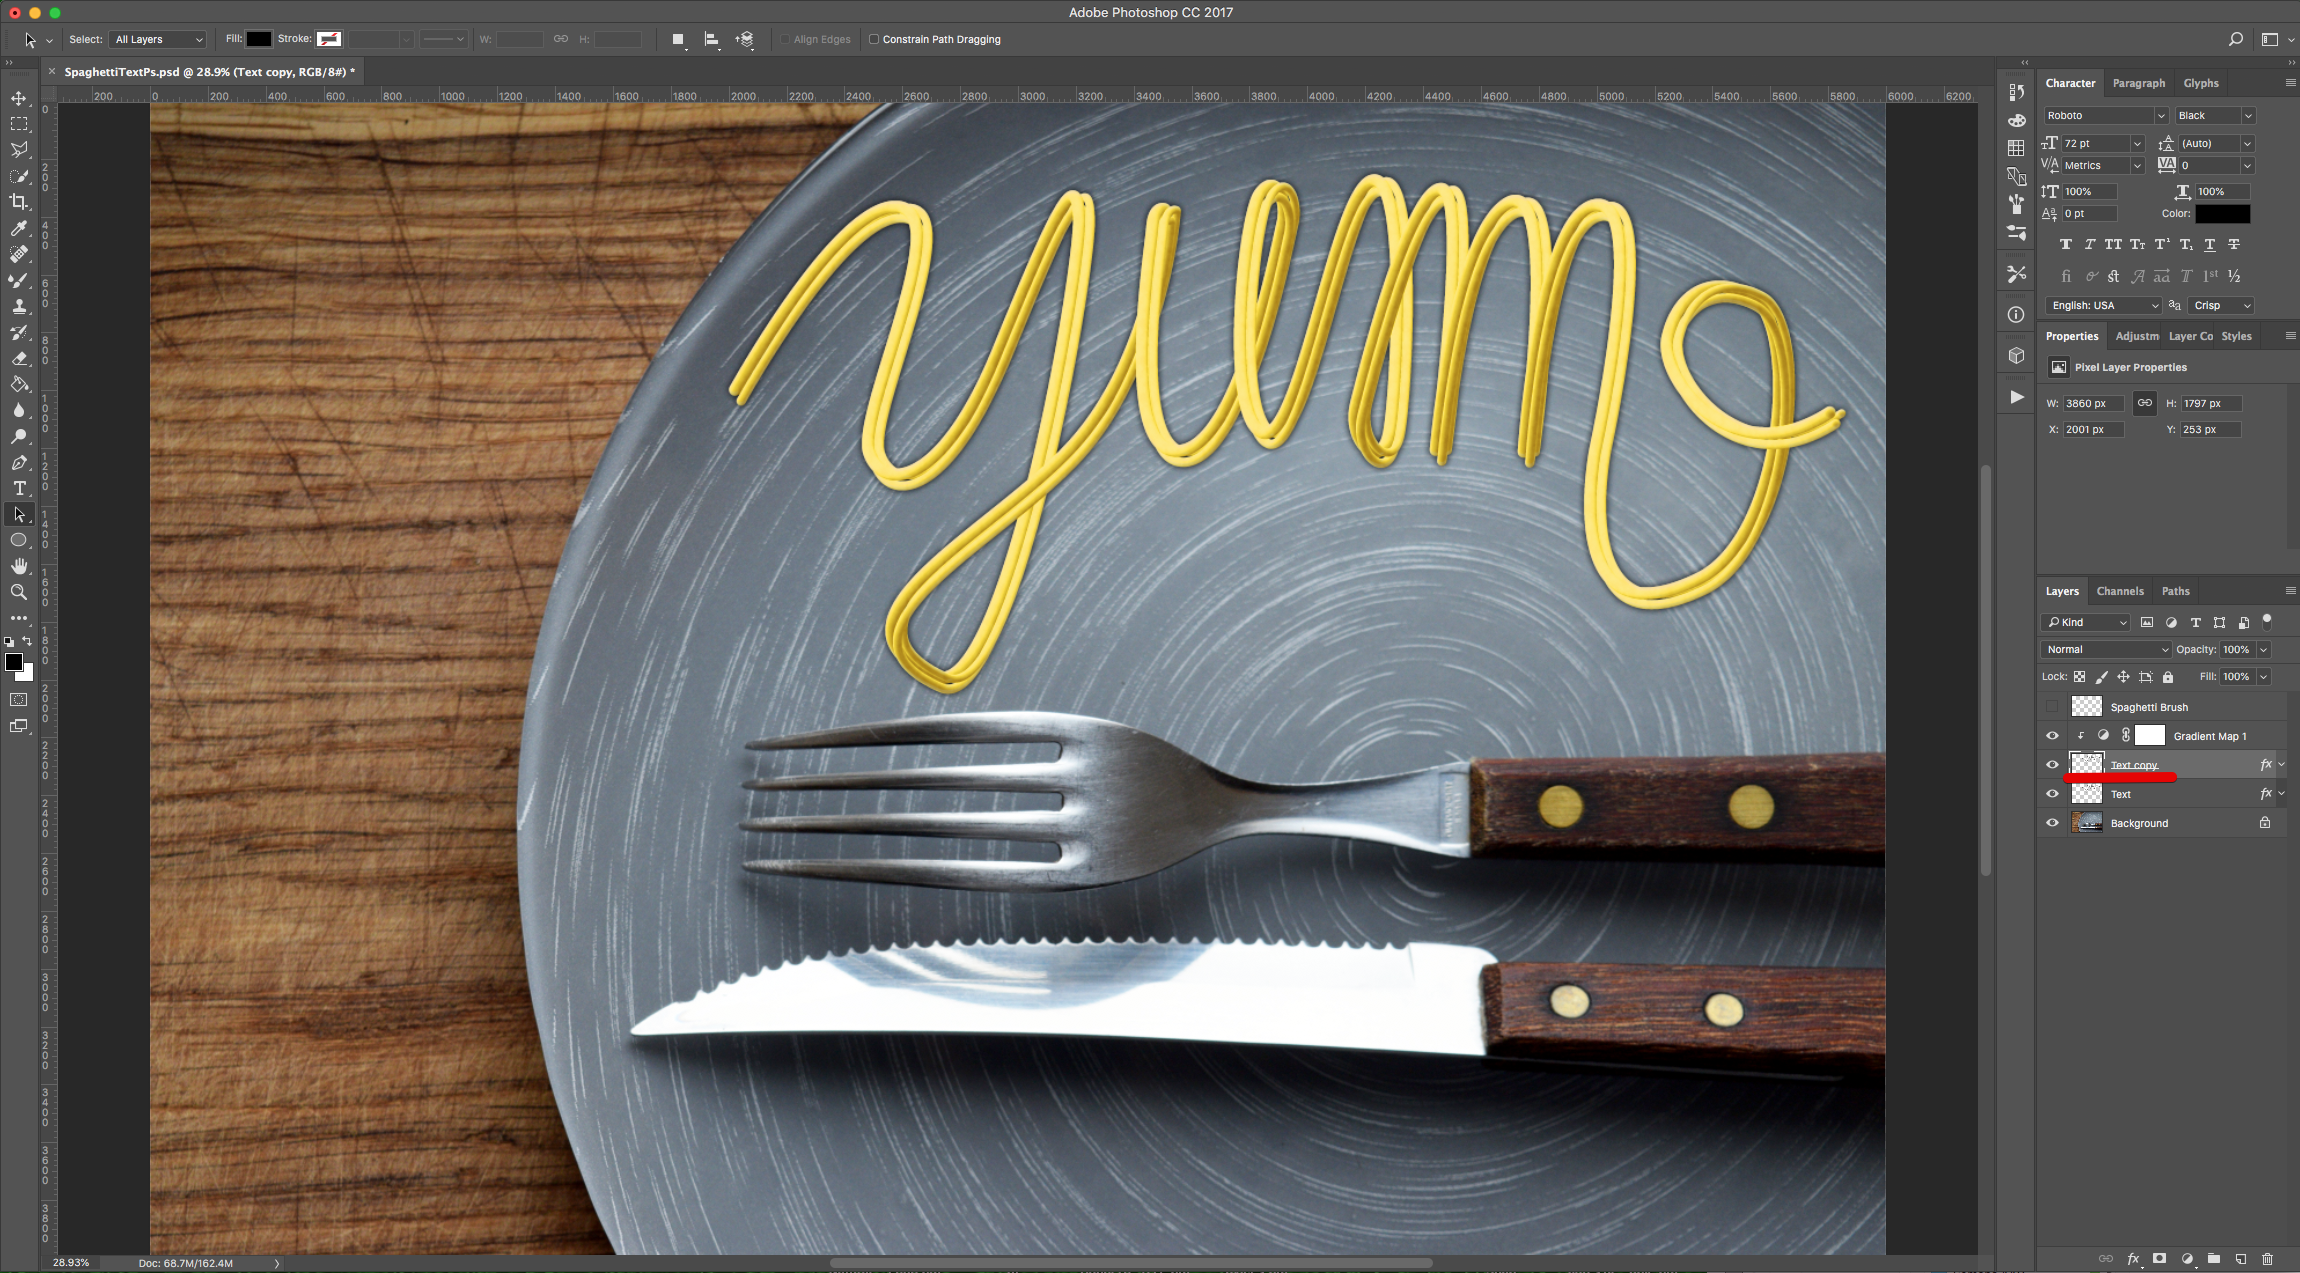
17 - Move the “Duplicate” on top of the “Gradient Map” Layer, change its “Blending Mode” to “Multiply” and “Opacity” to 55%.
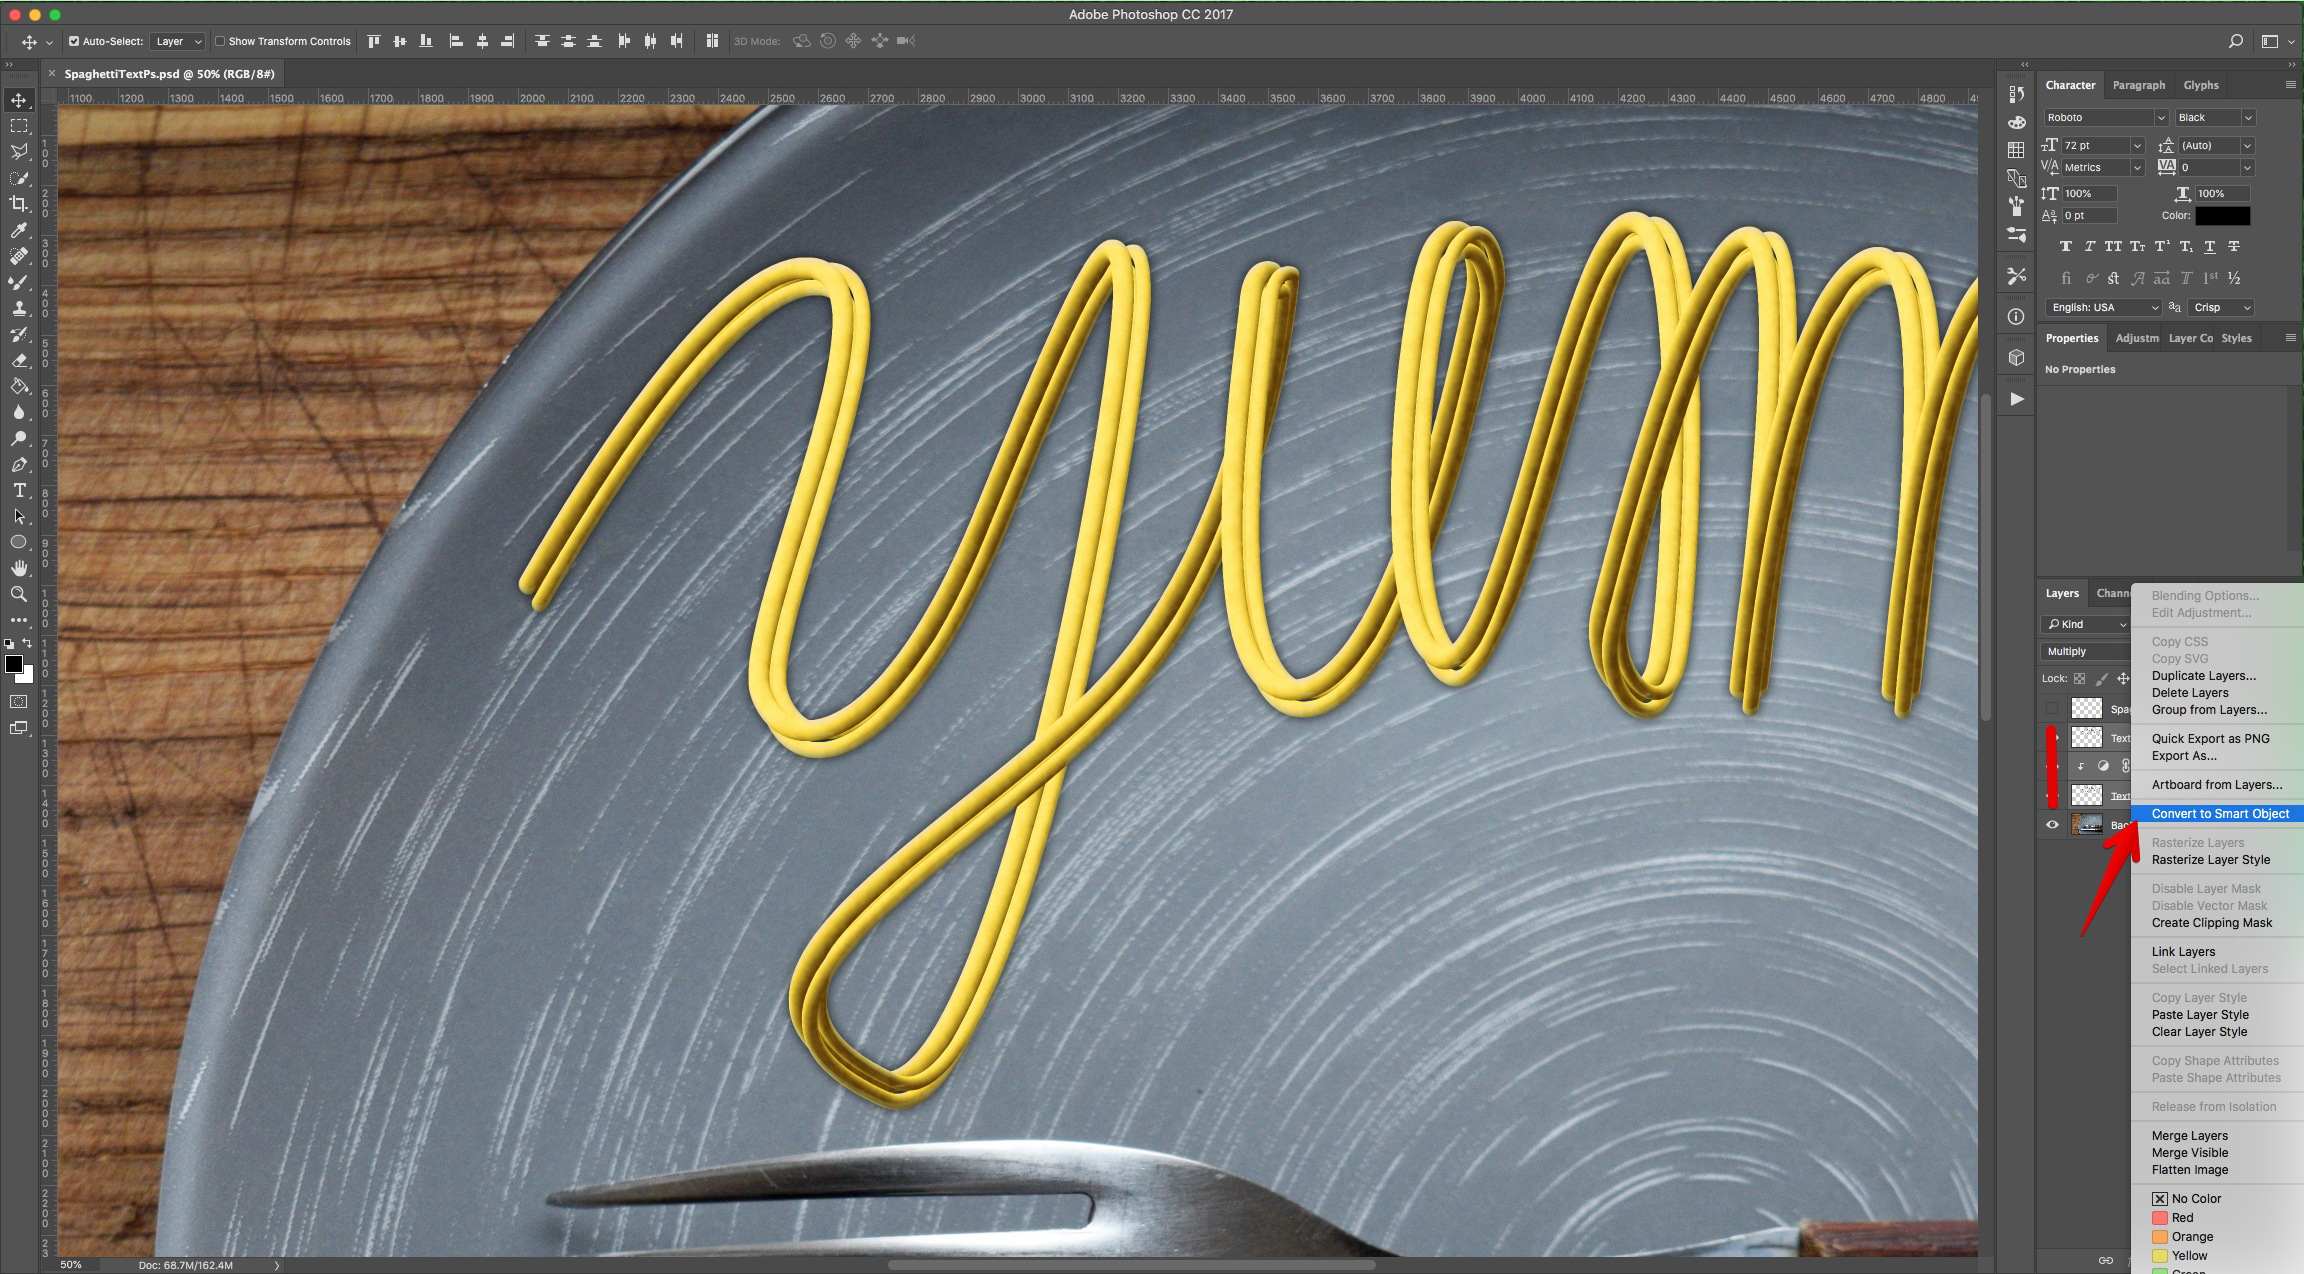
18 - Select the 3 Layers (“Shift” key), right-click on top and choose “Convert to Smart Object”.
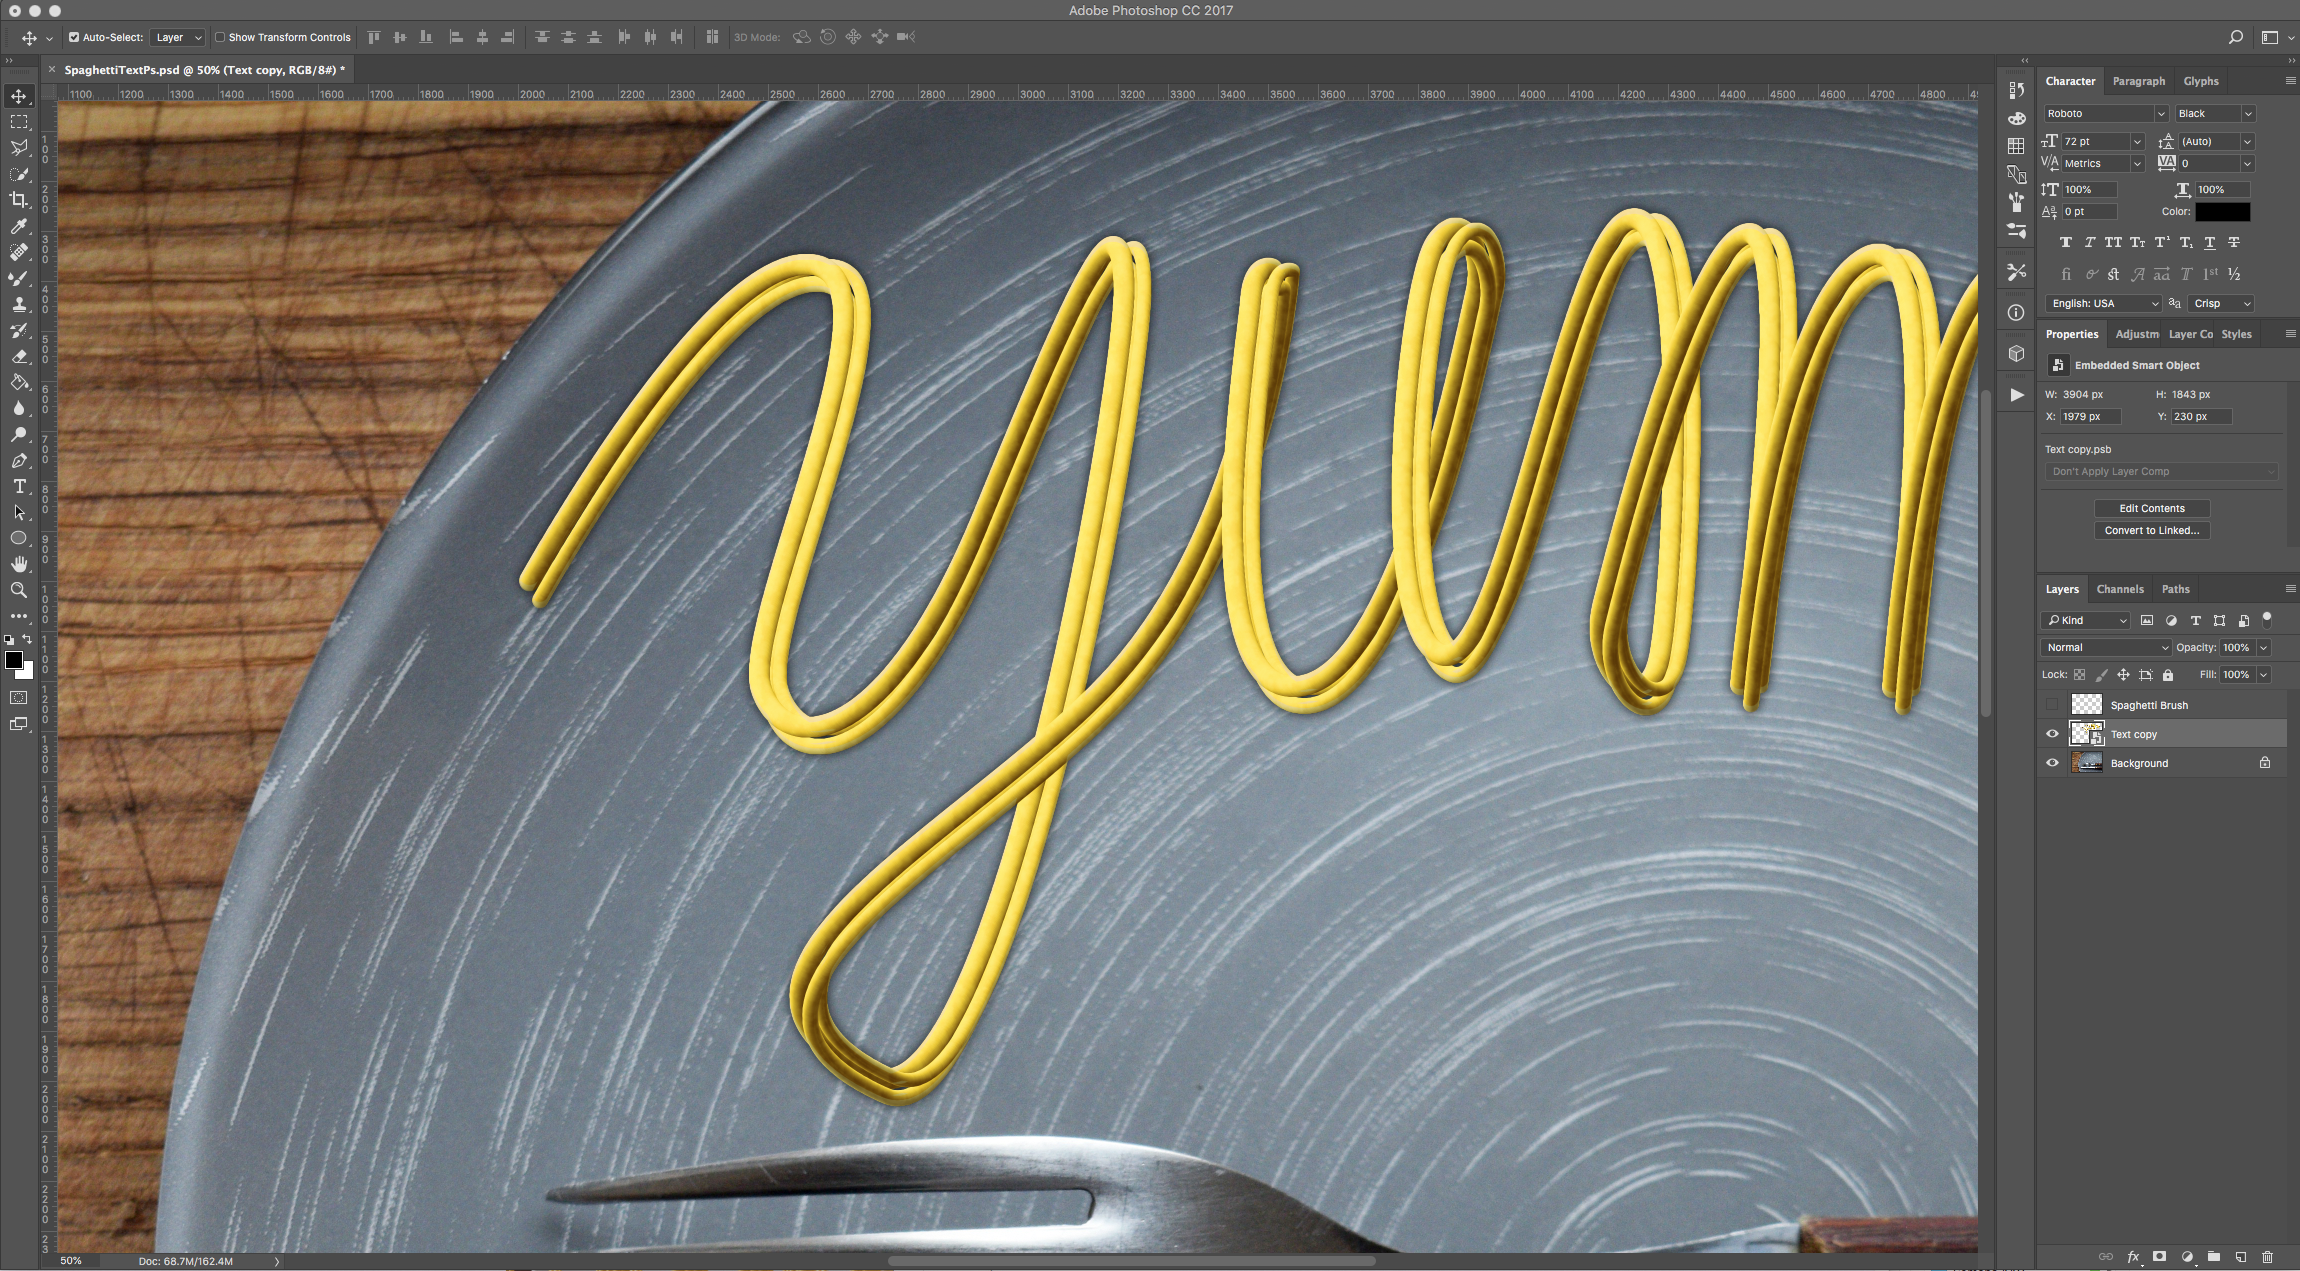
19 - Duplicate the “Smart Object” (Command/Control + J).
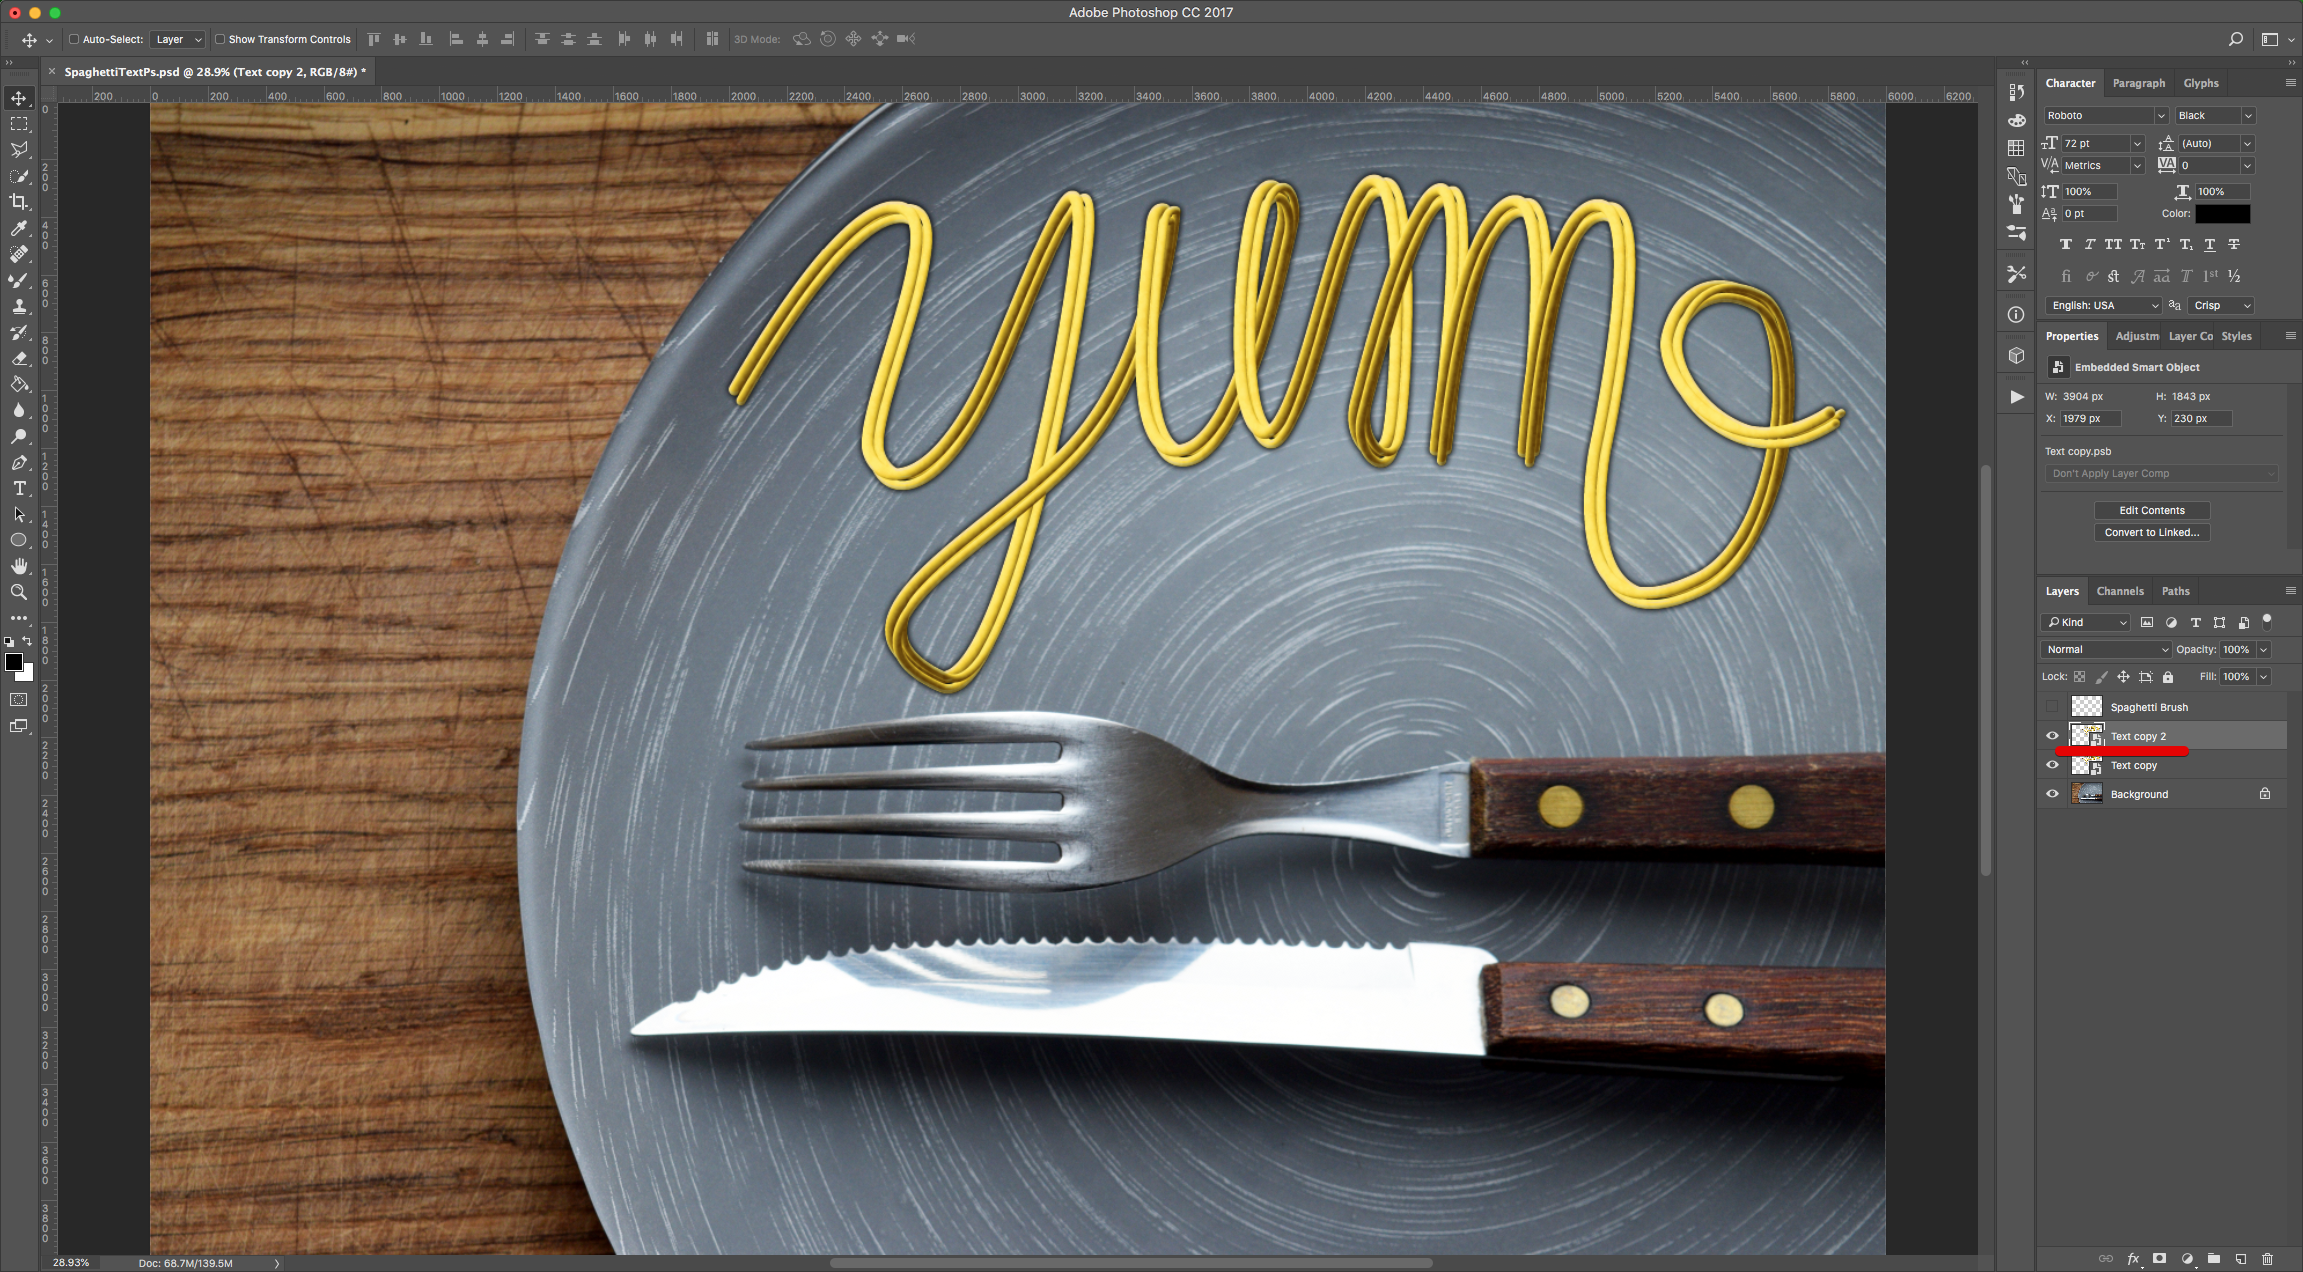
20 - Use “Free Transform” (Command/Control + T) to slightly distort and/or rotate the “Duplicate” to give the text a bit more depth. Once you are done, click “Enter” or the small “Check Mark” on the Top Menu to “Commit” the Transformation.

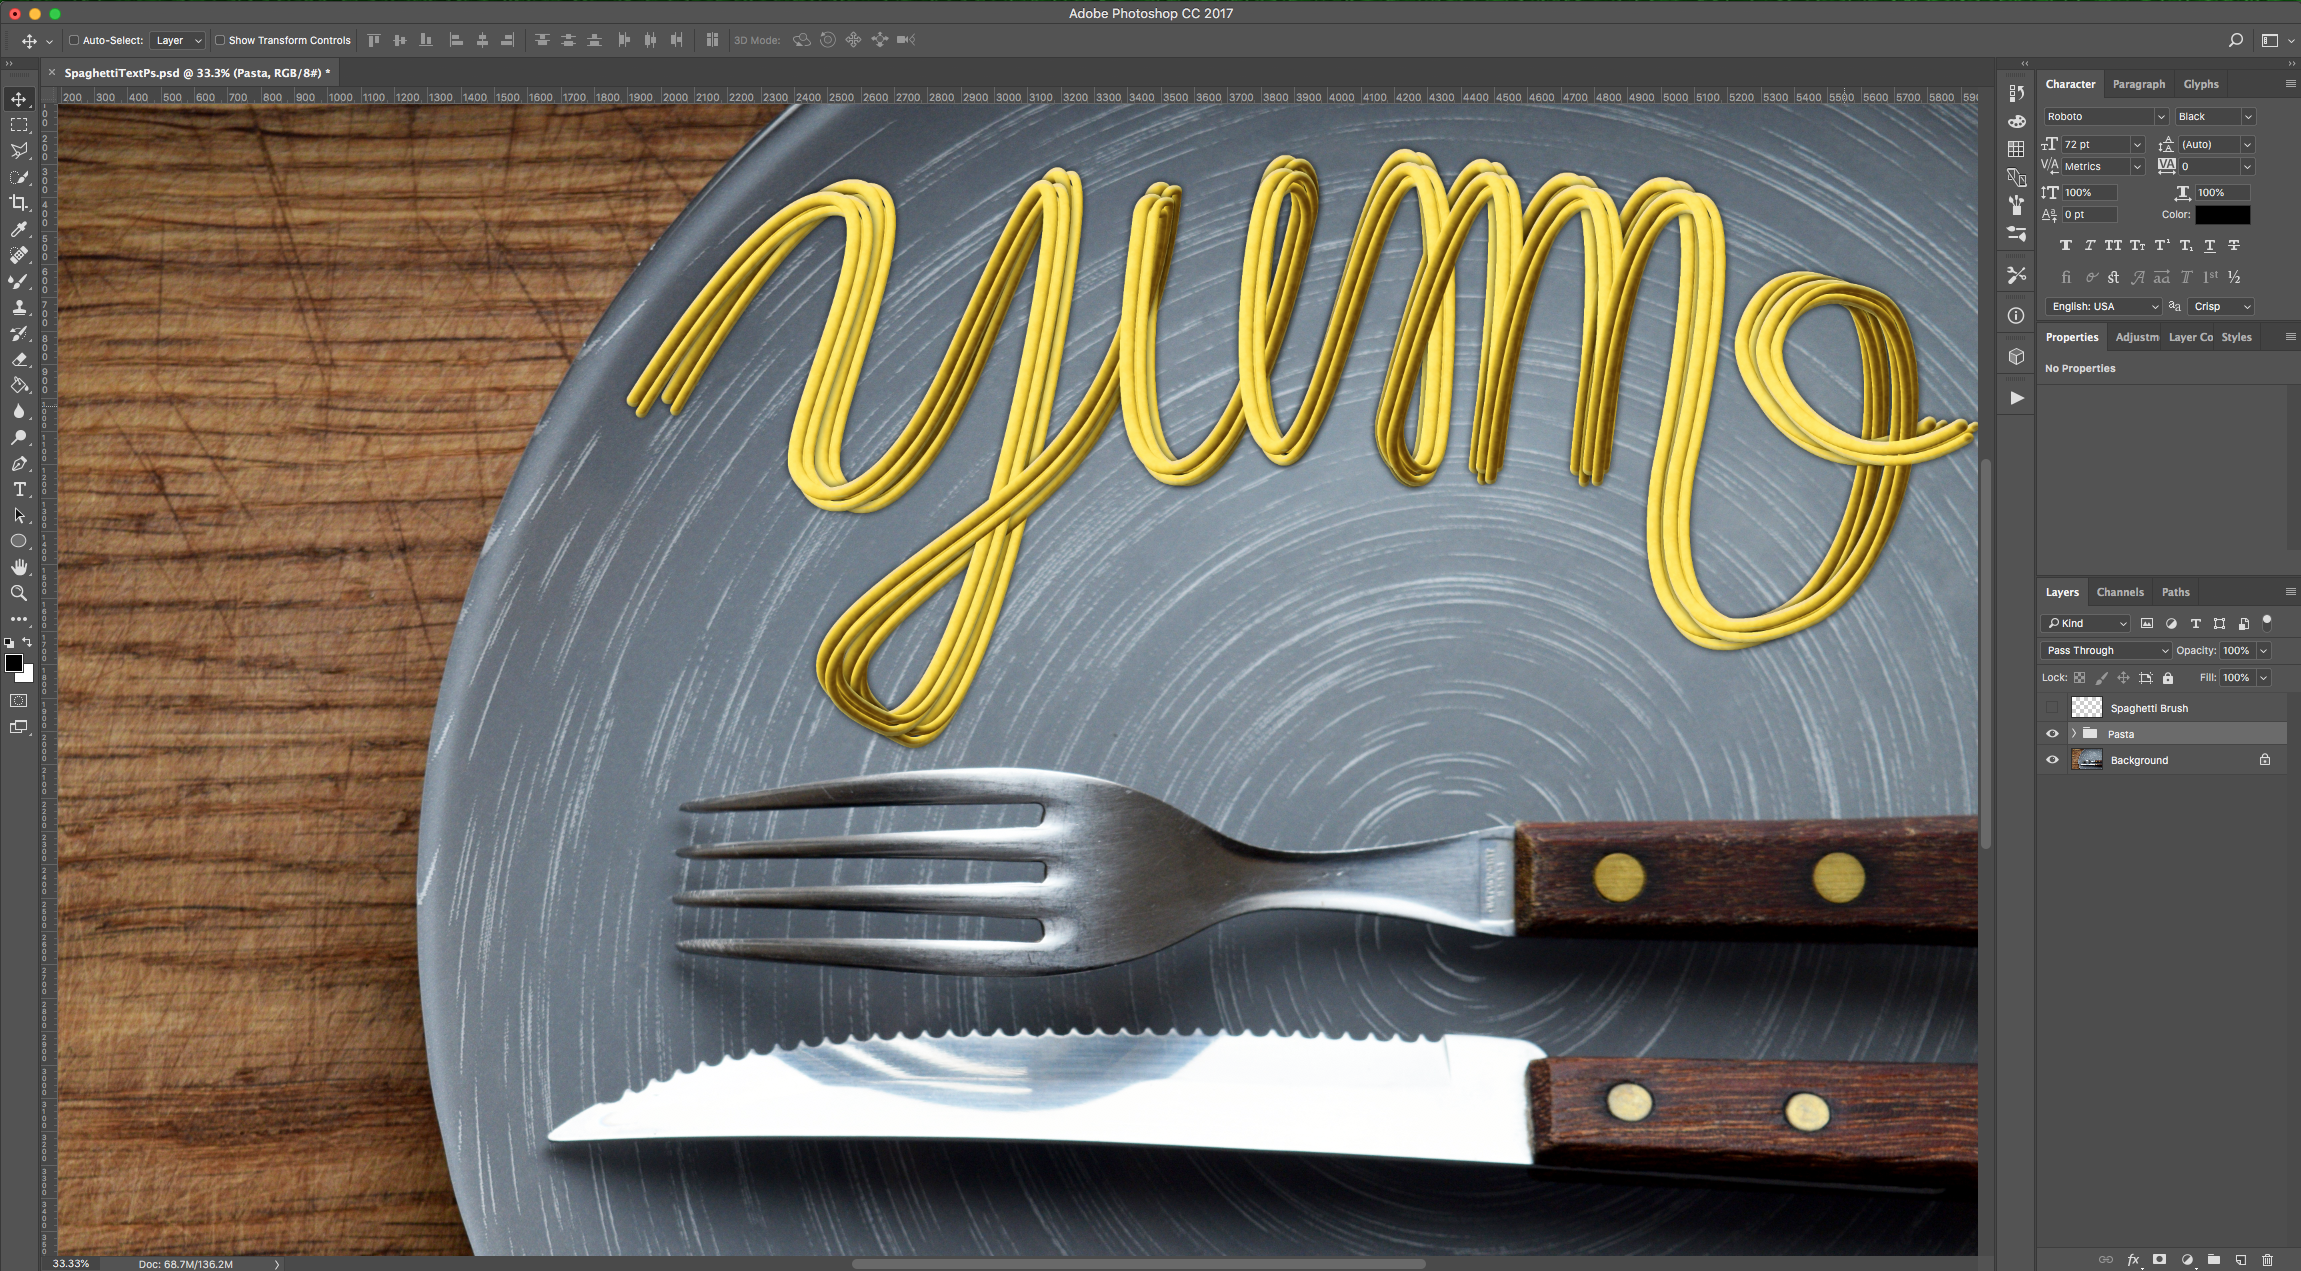
21 - Select both “Smart Objects” (“Shift” key) and “Group” them together by clicking on the small Folder icon at the bottom of the “Layers Panel”. Name the group “Pasta”.
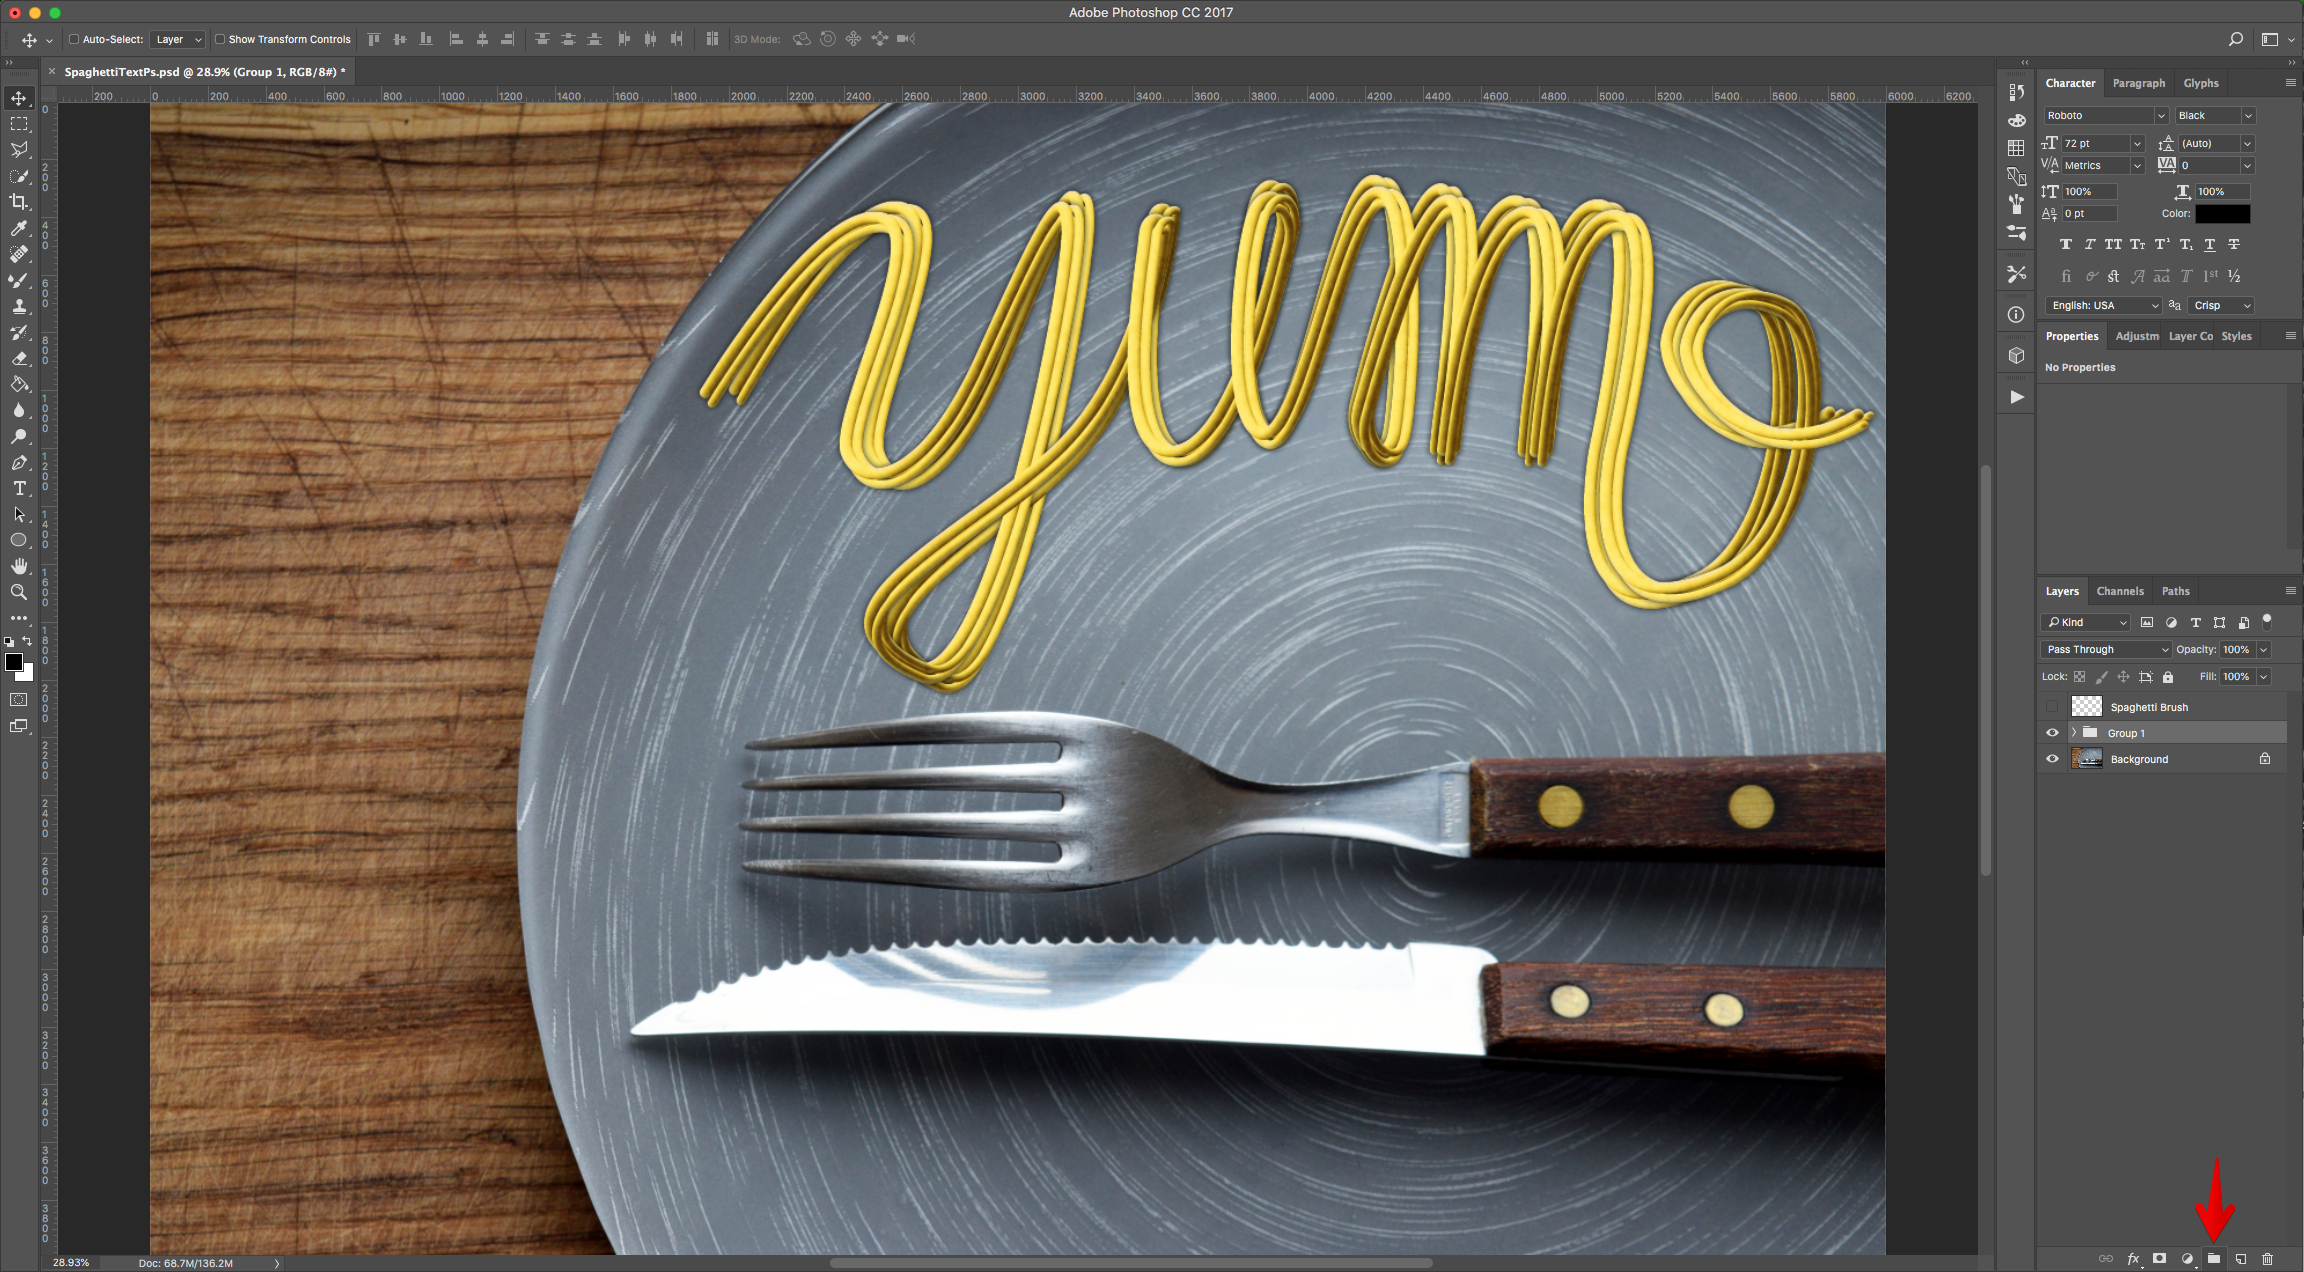
22 - Check out your Artwork!
1 - In Photoshop, open the image you wish to use as “Background” (we used the image of a plate).
2 - Choose the “Ellipse Tool” (U), use Black (Foreground) as “Fill” color and hold the “Shift” key while dragging diagonally inside your “Canvas” to create a “Circle”. Give it about 30 px in “Width” and “Height”. Create other “Circles” close to each other with a similar “Radius”.
3 - Double-click on one of the “Circles” Thumbnail and apply the following “Layer Styles”:
Gradient Overlay: (1: Location: 5%, #ffffff- 2: Location: 85%, #636363 - 3: Location: 100%, #7b7b7b)
4 - Right-click on top of its Thumbnail and choose “Copy Layer Style”. Then select the other “Circles” (“Shift” key) and choose “Paste Layer Style”.
5 - Select all the “Circles”, right-click on top of their Thumbnails and choose “Rasterize Layers”. Then, “Merge Shapes” and name the resulting Layer “Spaghetti Brush”.
6 - Select the “Mixer Brush Tool” (U), choose a 100px, select “Load the brush after each stroke”, “Dry, Heavy Load”, 0% “Wet”, 100% “Load” and “Flow” and uncheck the “Sample All Layers” box.
7 - “Hide” the “Background” Layer by clicking on the small eye on the left side of its Thumbnail and Option/Alt-click on top of the “Circles” to select them as your “Brush”. Make sure that you see the sample brush in the Top Menu.
8 - Now, make the “Background” Layer visible again and “Hide” the “Brush” Layer.
9 - Create a New Layer on top by clicking the “Create New Layer” button at the bottom of the “Layers” Panel and name it “Text”.
10 - Select the “Pen Tool” (P) and draw your “Text” or “Shape”.
11 - Use the “Direct Selection Tool” (A) to click on an individual “Anchor Point” and fix the shape if needed.
12 - Now, use the “Path Selection Tool” (A) to select the entire “Path”.
13 - Right-click on top, choose “Stroke Path” and then “Mixer Brush Tool” as “Tool”. Click “OK”.
14 - Create a “New Gradient Map” Adjustment Layer on top of the “Text” Layer and clip it to it (click on the small icon at the bottom of the “Properties Panel”. Double-click on the Gradient and input the following (1: Location: 5%, #856220 - 2: Location: 75%, #dfcd55 - 3: Location: 100%, #fae39a)
15 - Double-click on one of the “Text” Thumbnail and apply the following “Layer Styles”:
Pattern Overlay: (Clouds)
Outer Glow: (#000000)
Satin: (#4b3201)
16 - Duplicate the “Text” Layer (Command/Control + J).
17 - Move the “Duplicate” on top of the “Gradient Map” Layer, change its “Blending Mode” to “Multiply” and “Opacity” to 55%.
18 - Select the 3 Layers (“Shift” key), right-click on top and choose “Convert to Smart Object”.
19 - Duplicate the “Smart Object” (Command/Control + J).
20 - Use “Free Transform” (Command/Control + T) to slightly distort and/or rotate the “Duplicate” to give the text a bit more depth. Once you are done, click “Enter” or the small “Check Mark” on the Top Menu to “Commit” the Transformation.
21 - Select both “Smart Objects” (“Shift” key) and “Group” them together by clicking on the small Folder icon at the bottom of the “Layers Panel”. Name the group “Pasta”.
22 - Check out your Artwork!
by @lornacane


