Text on Milk Bottle Photoshop
For this Tutorial, we are using the image of glass bottles, some images of milk to add to the bottles. Nickainley Free Font from Seniors and Firefly Free Font from seancoadydesign.
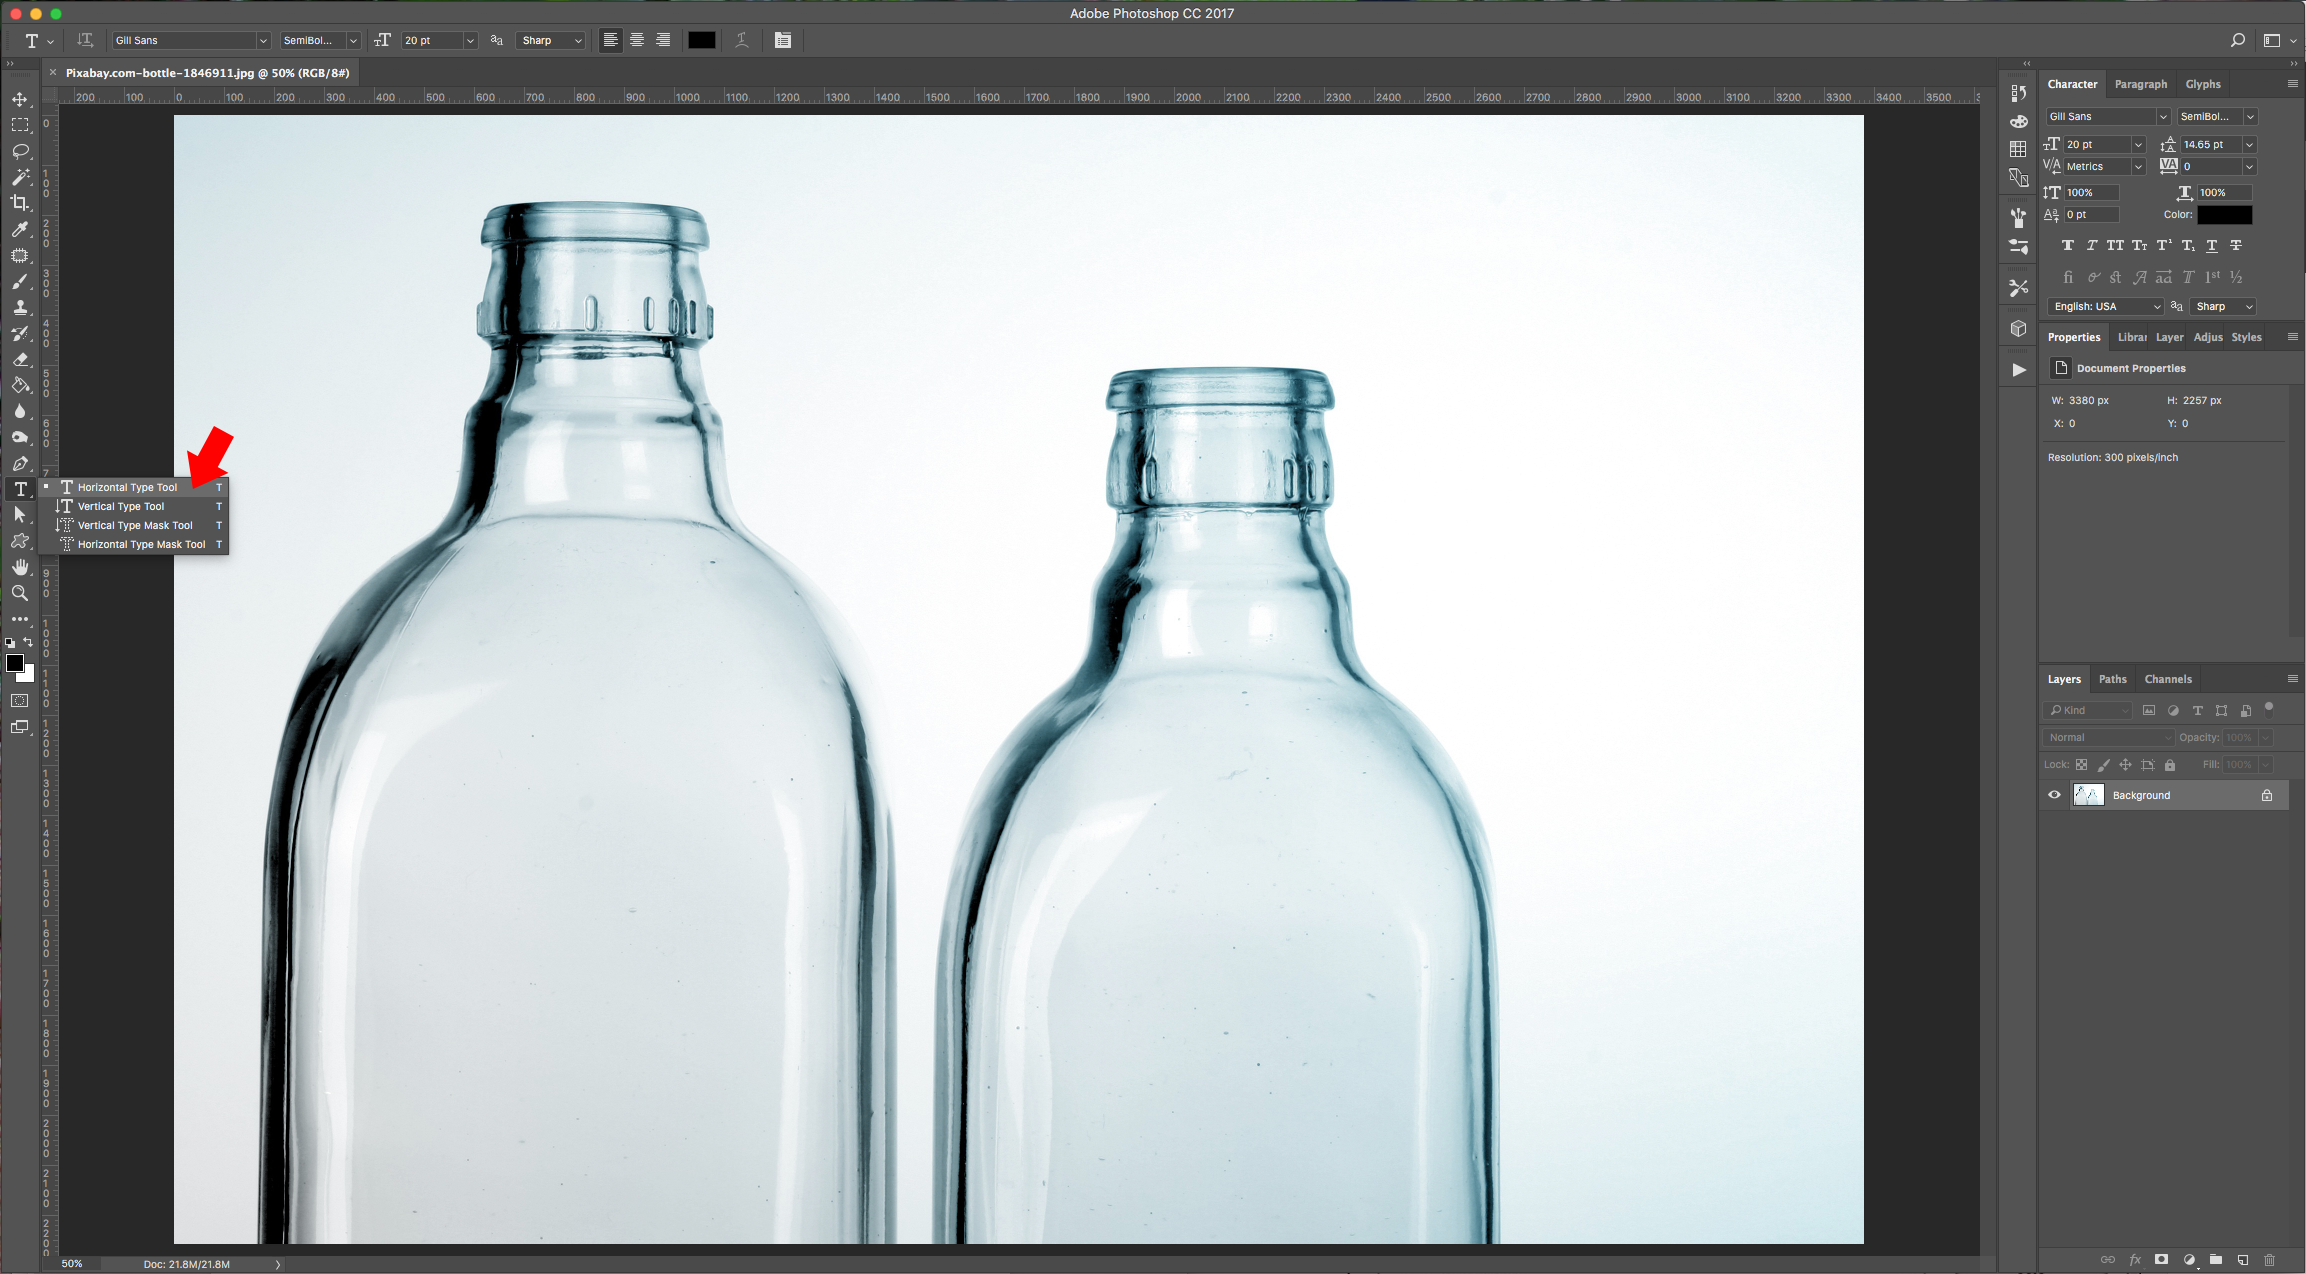
1 - In Photoshop, open the image you chose.

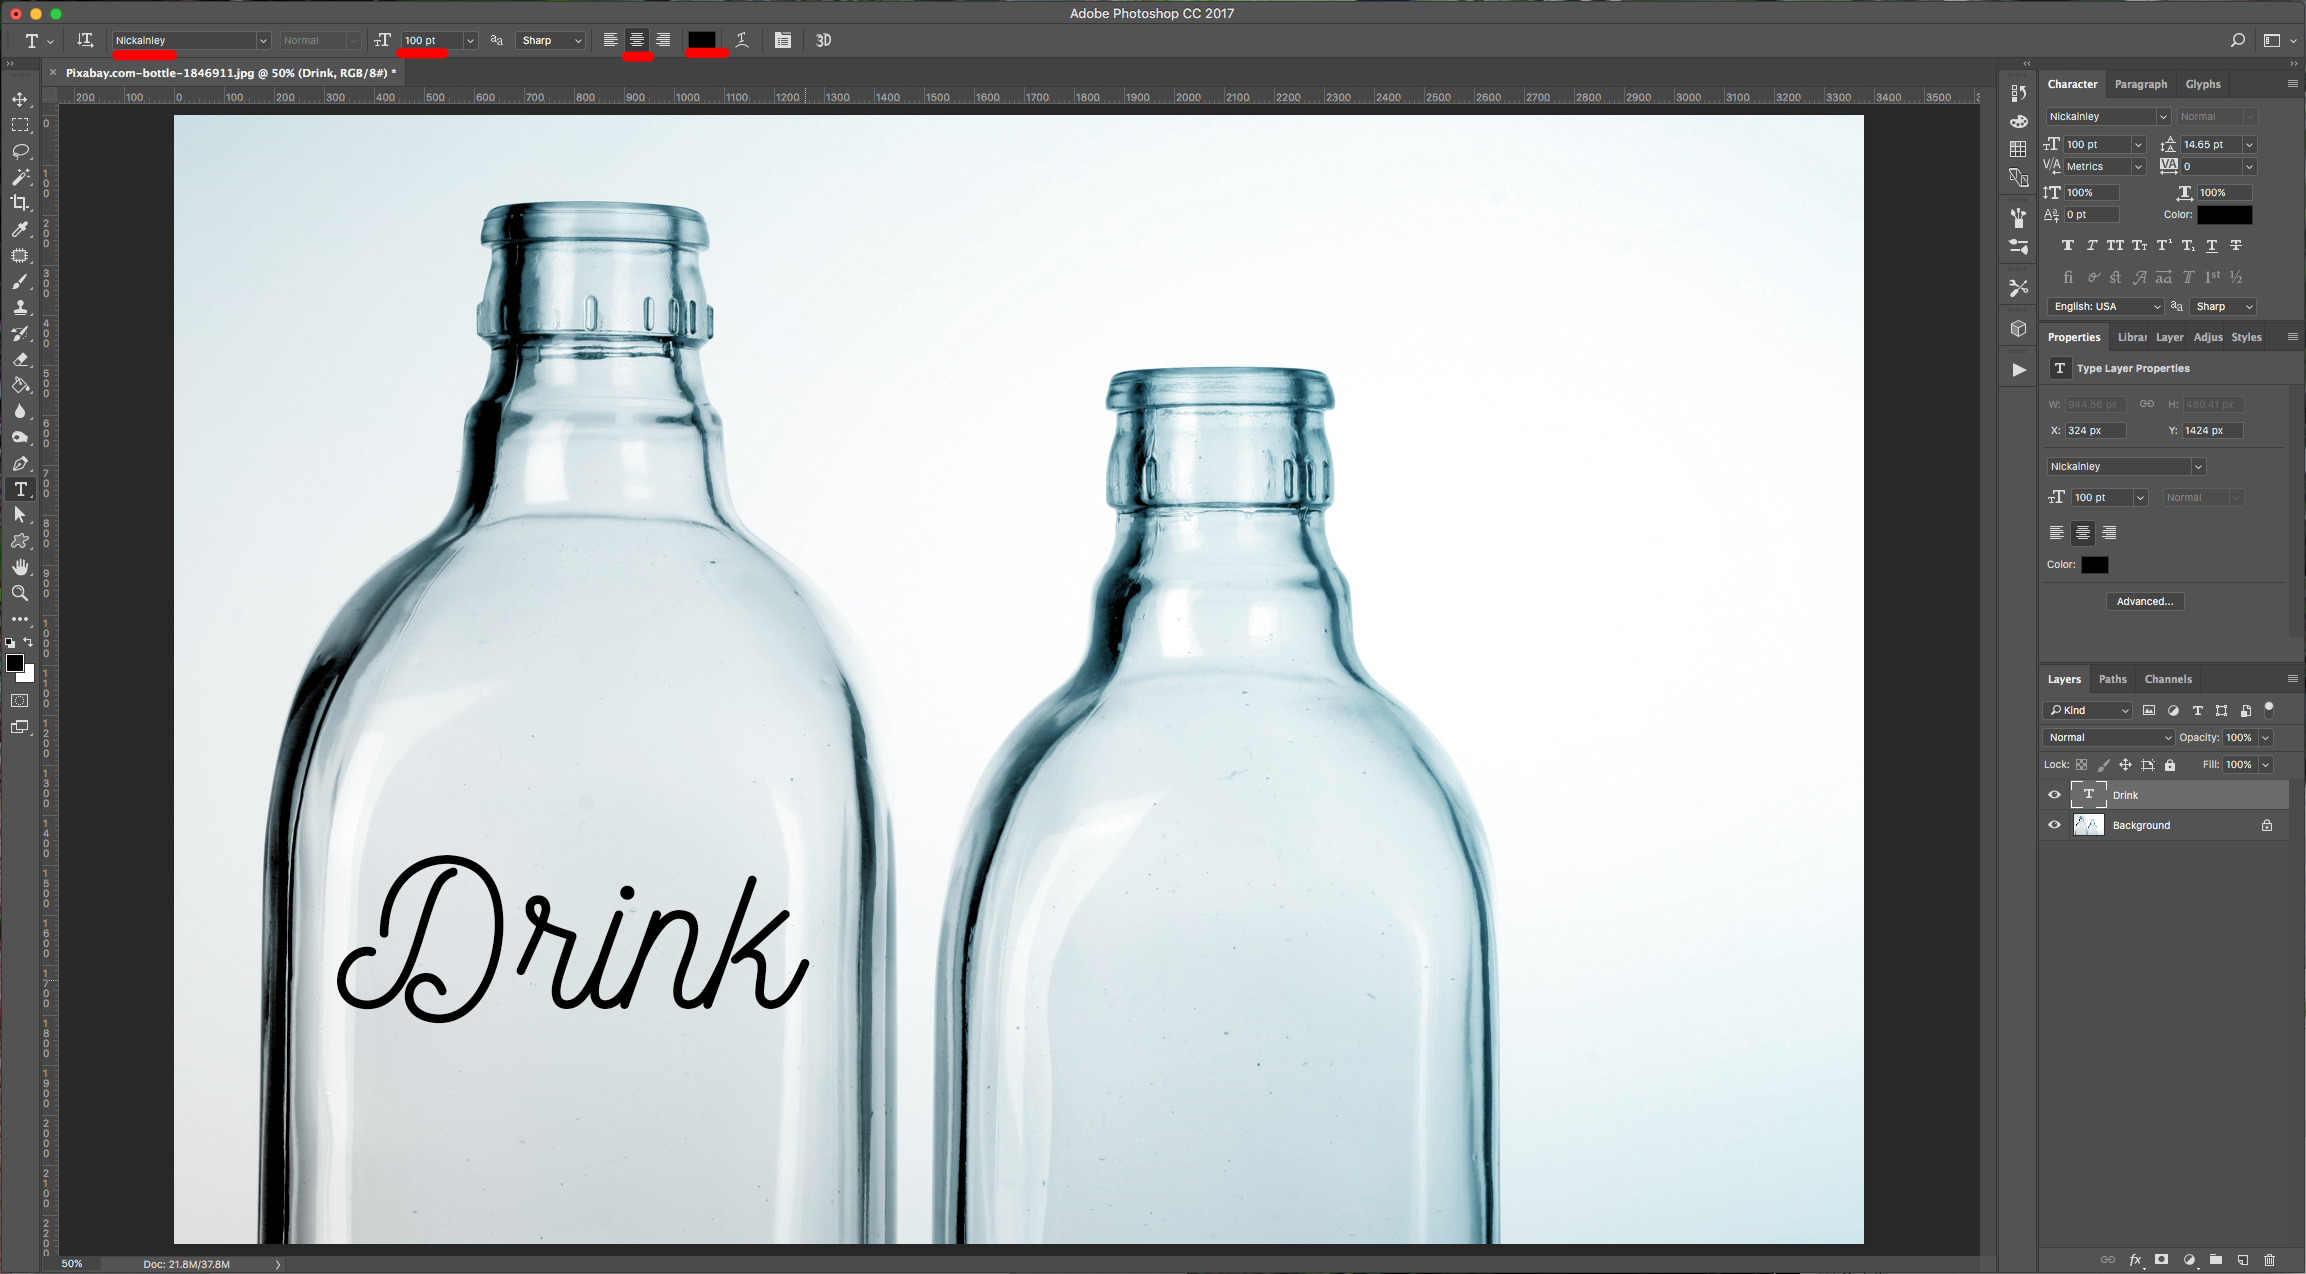
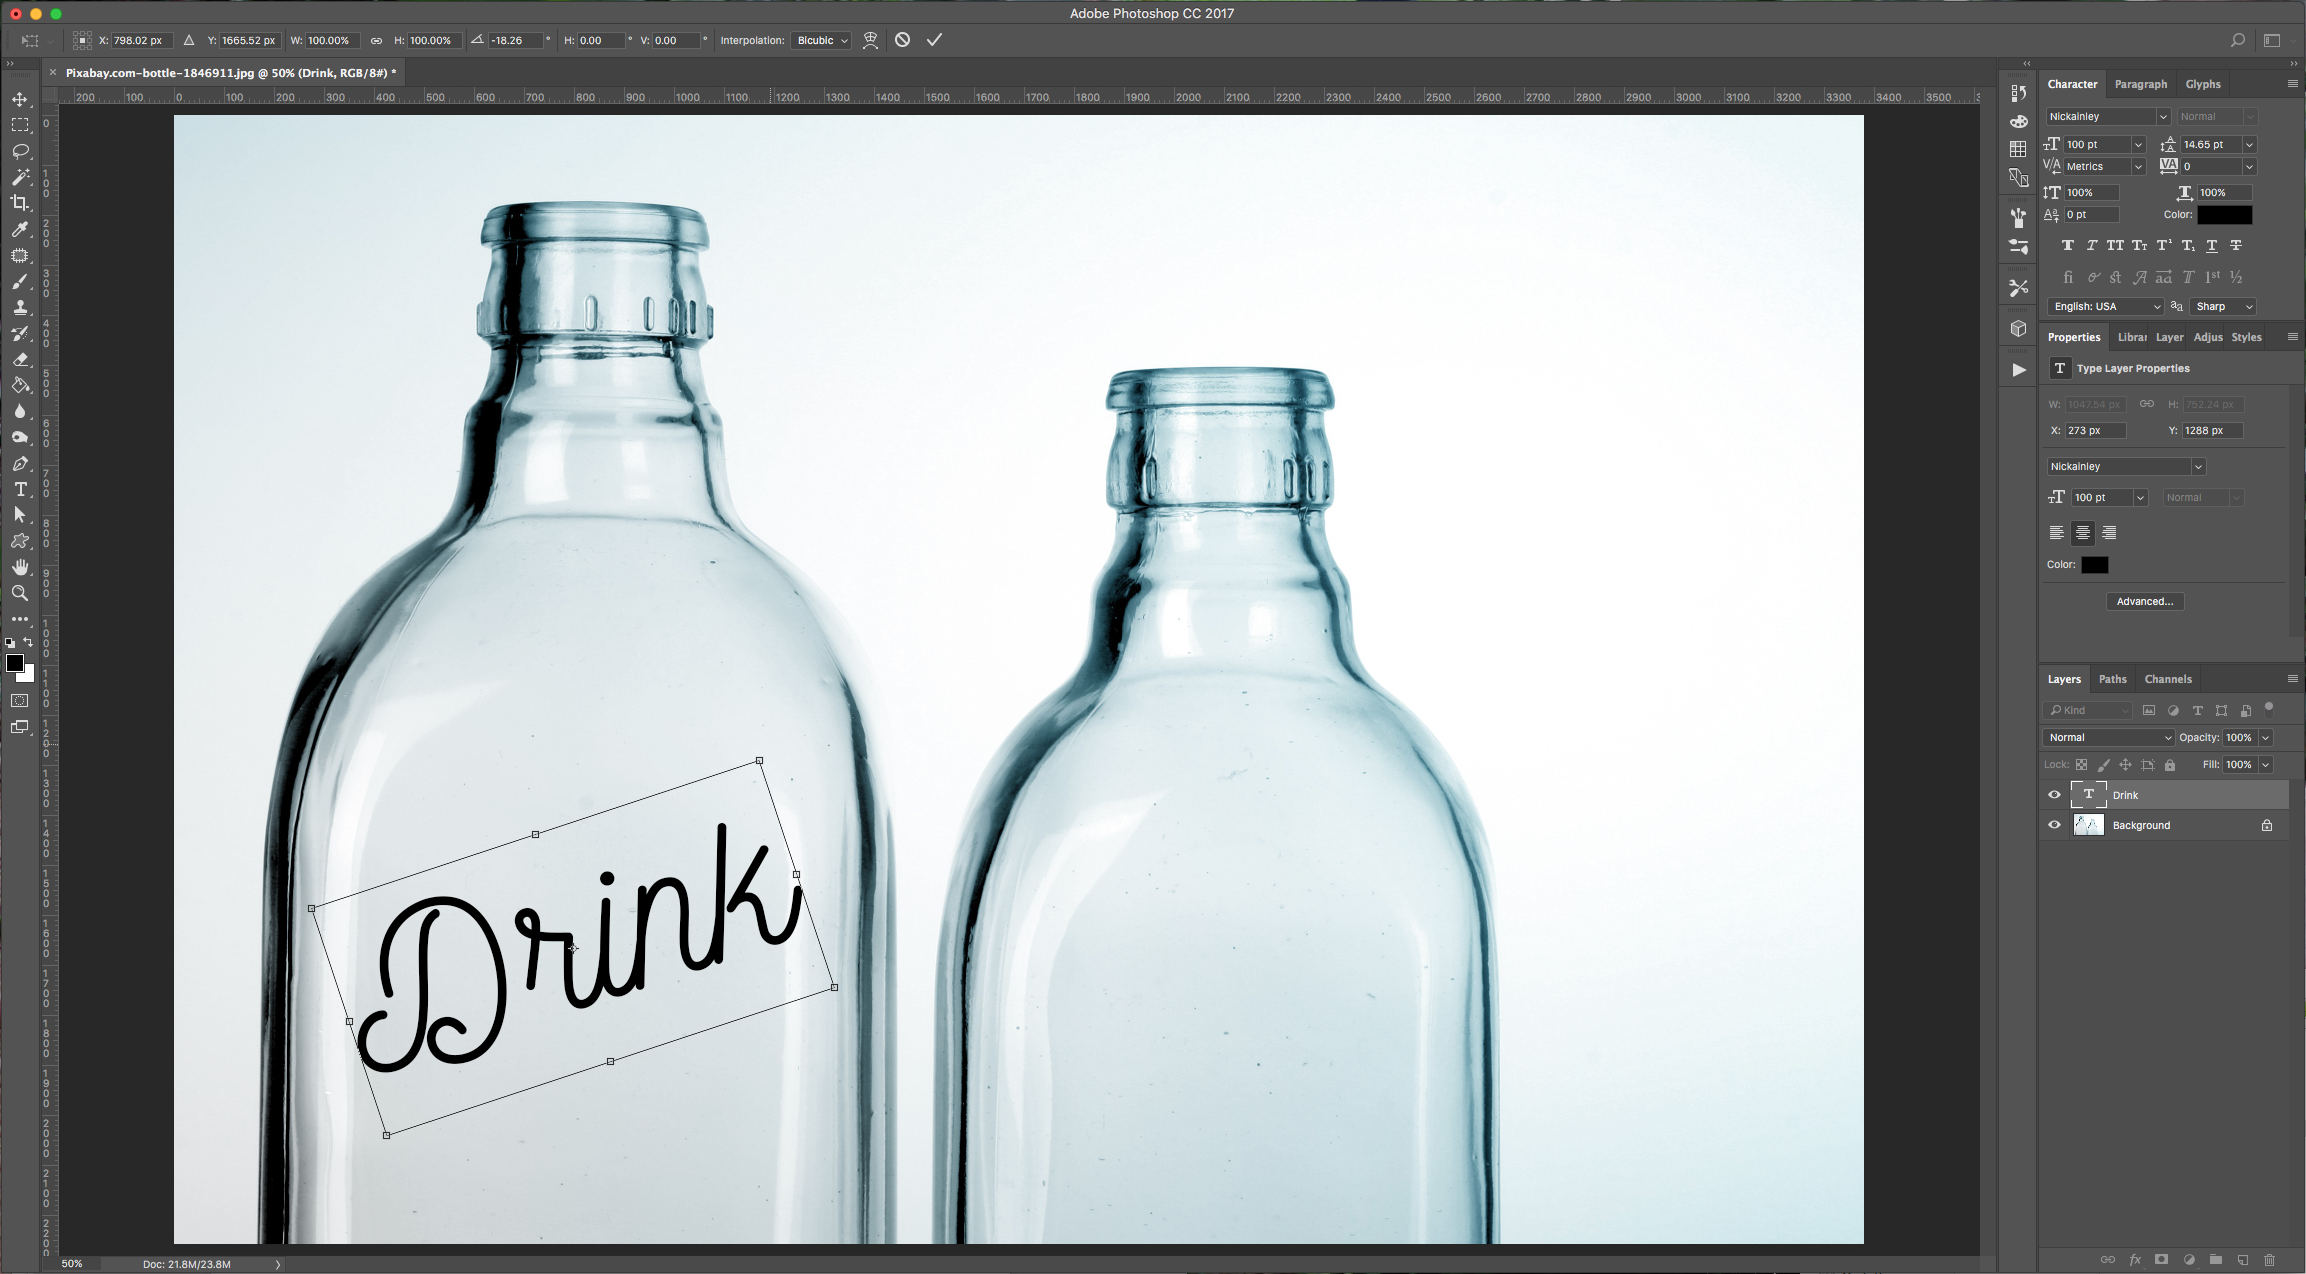
2 - Using the “Type Tool” (T) type your text. This effect works better with a thin font, so take this into account when choosing one for your artwork (we are using Nickainley). The size depends on your image. We are rotating our text a bit with the “Transform” Option (Command/Control + T).
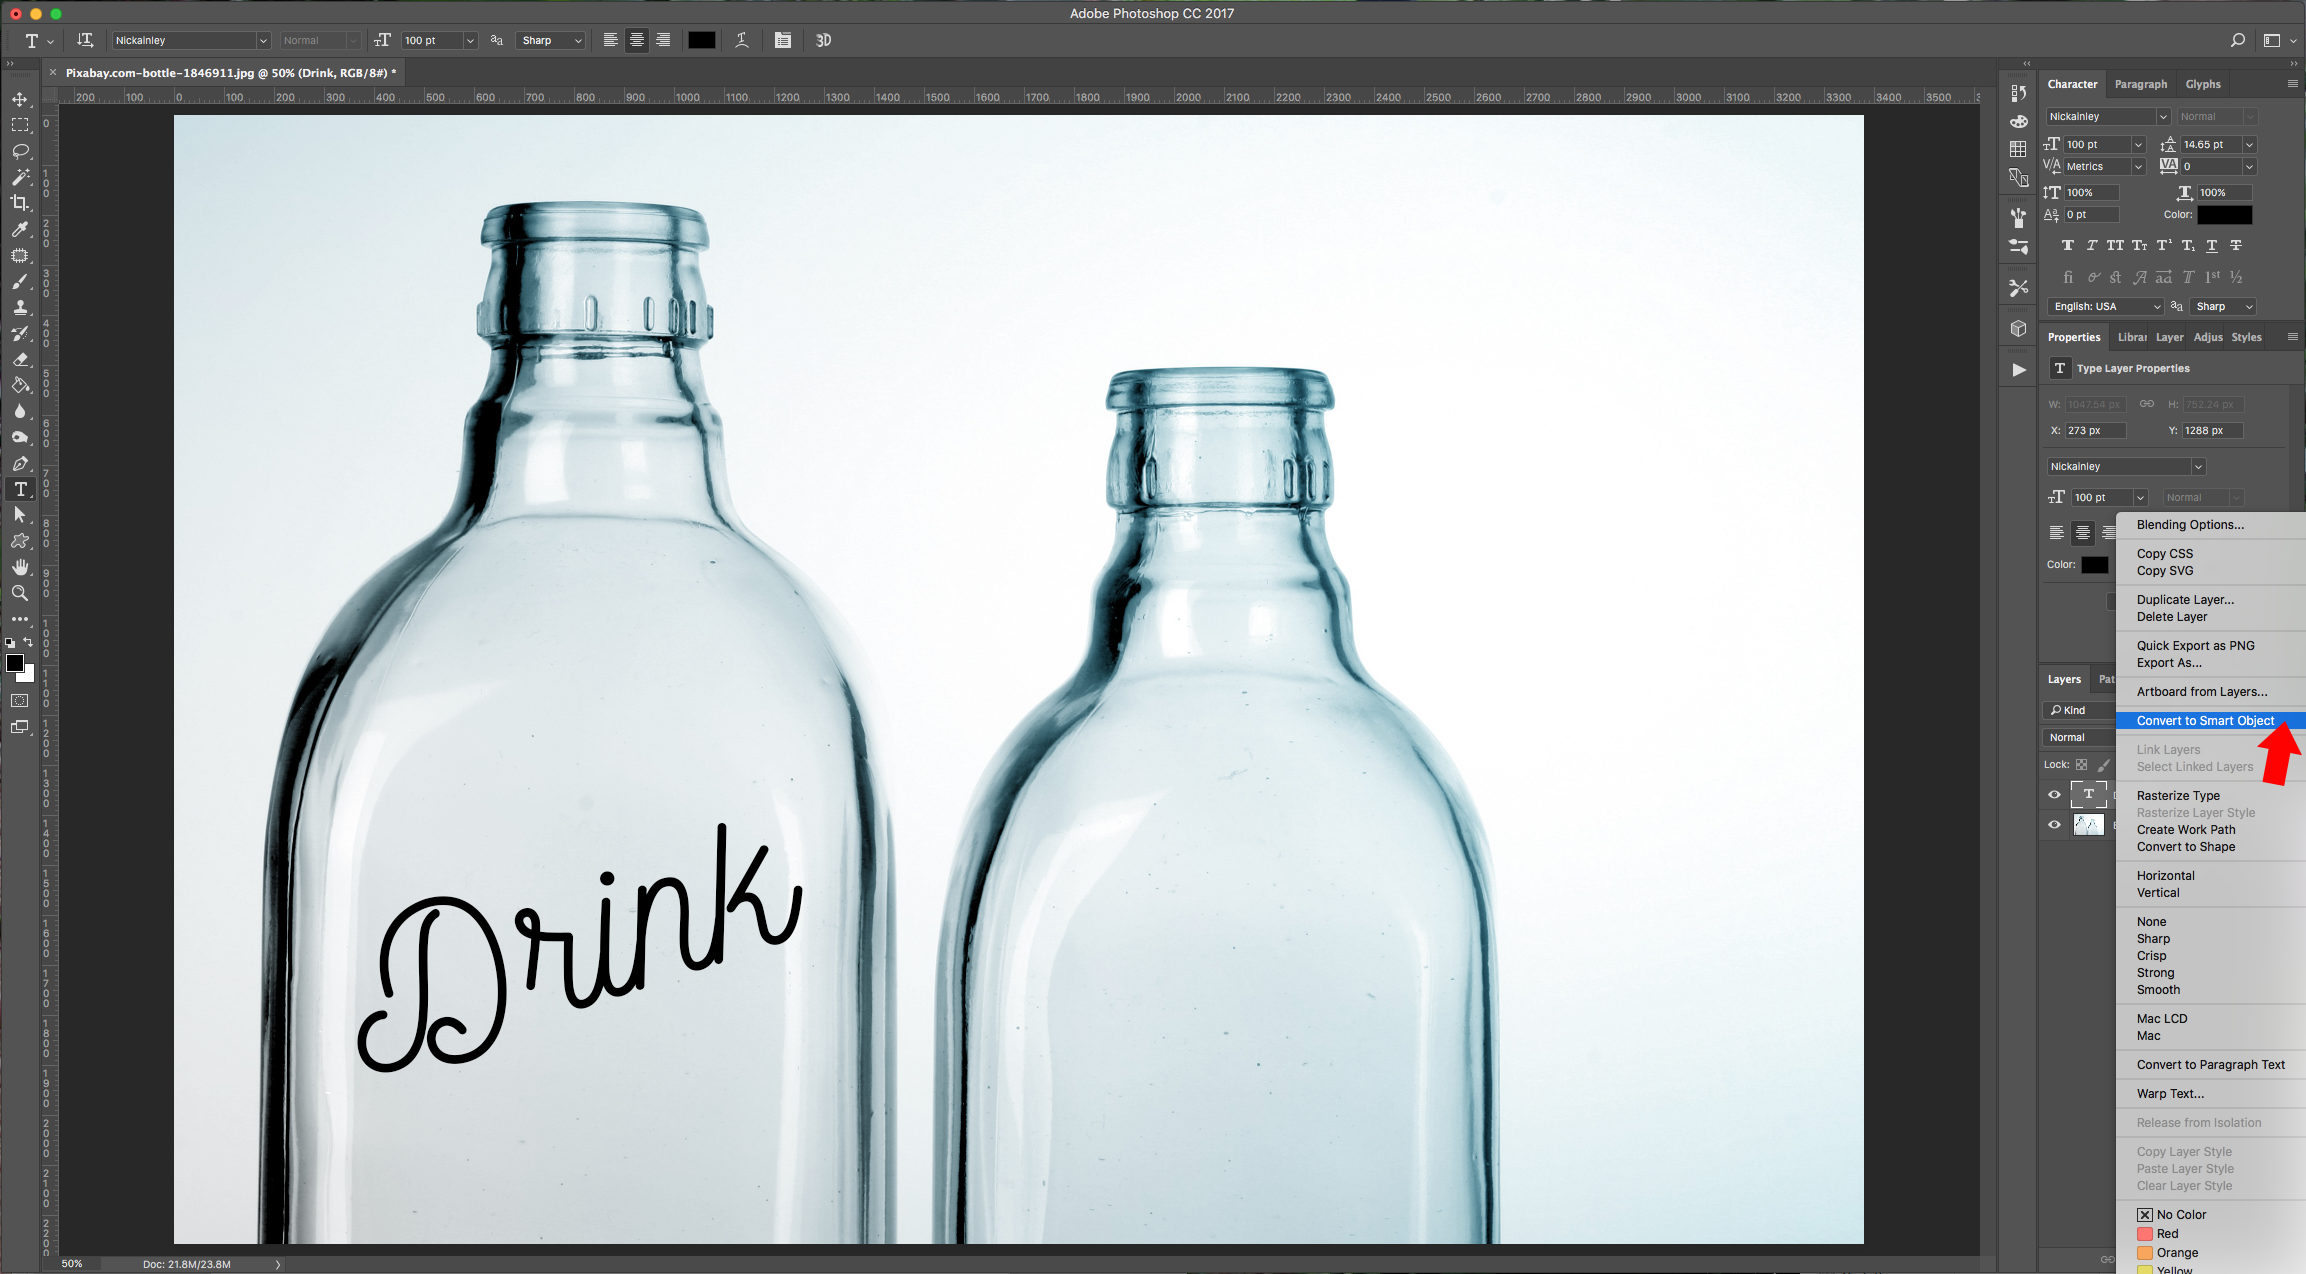
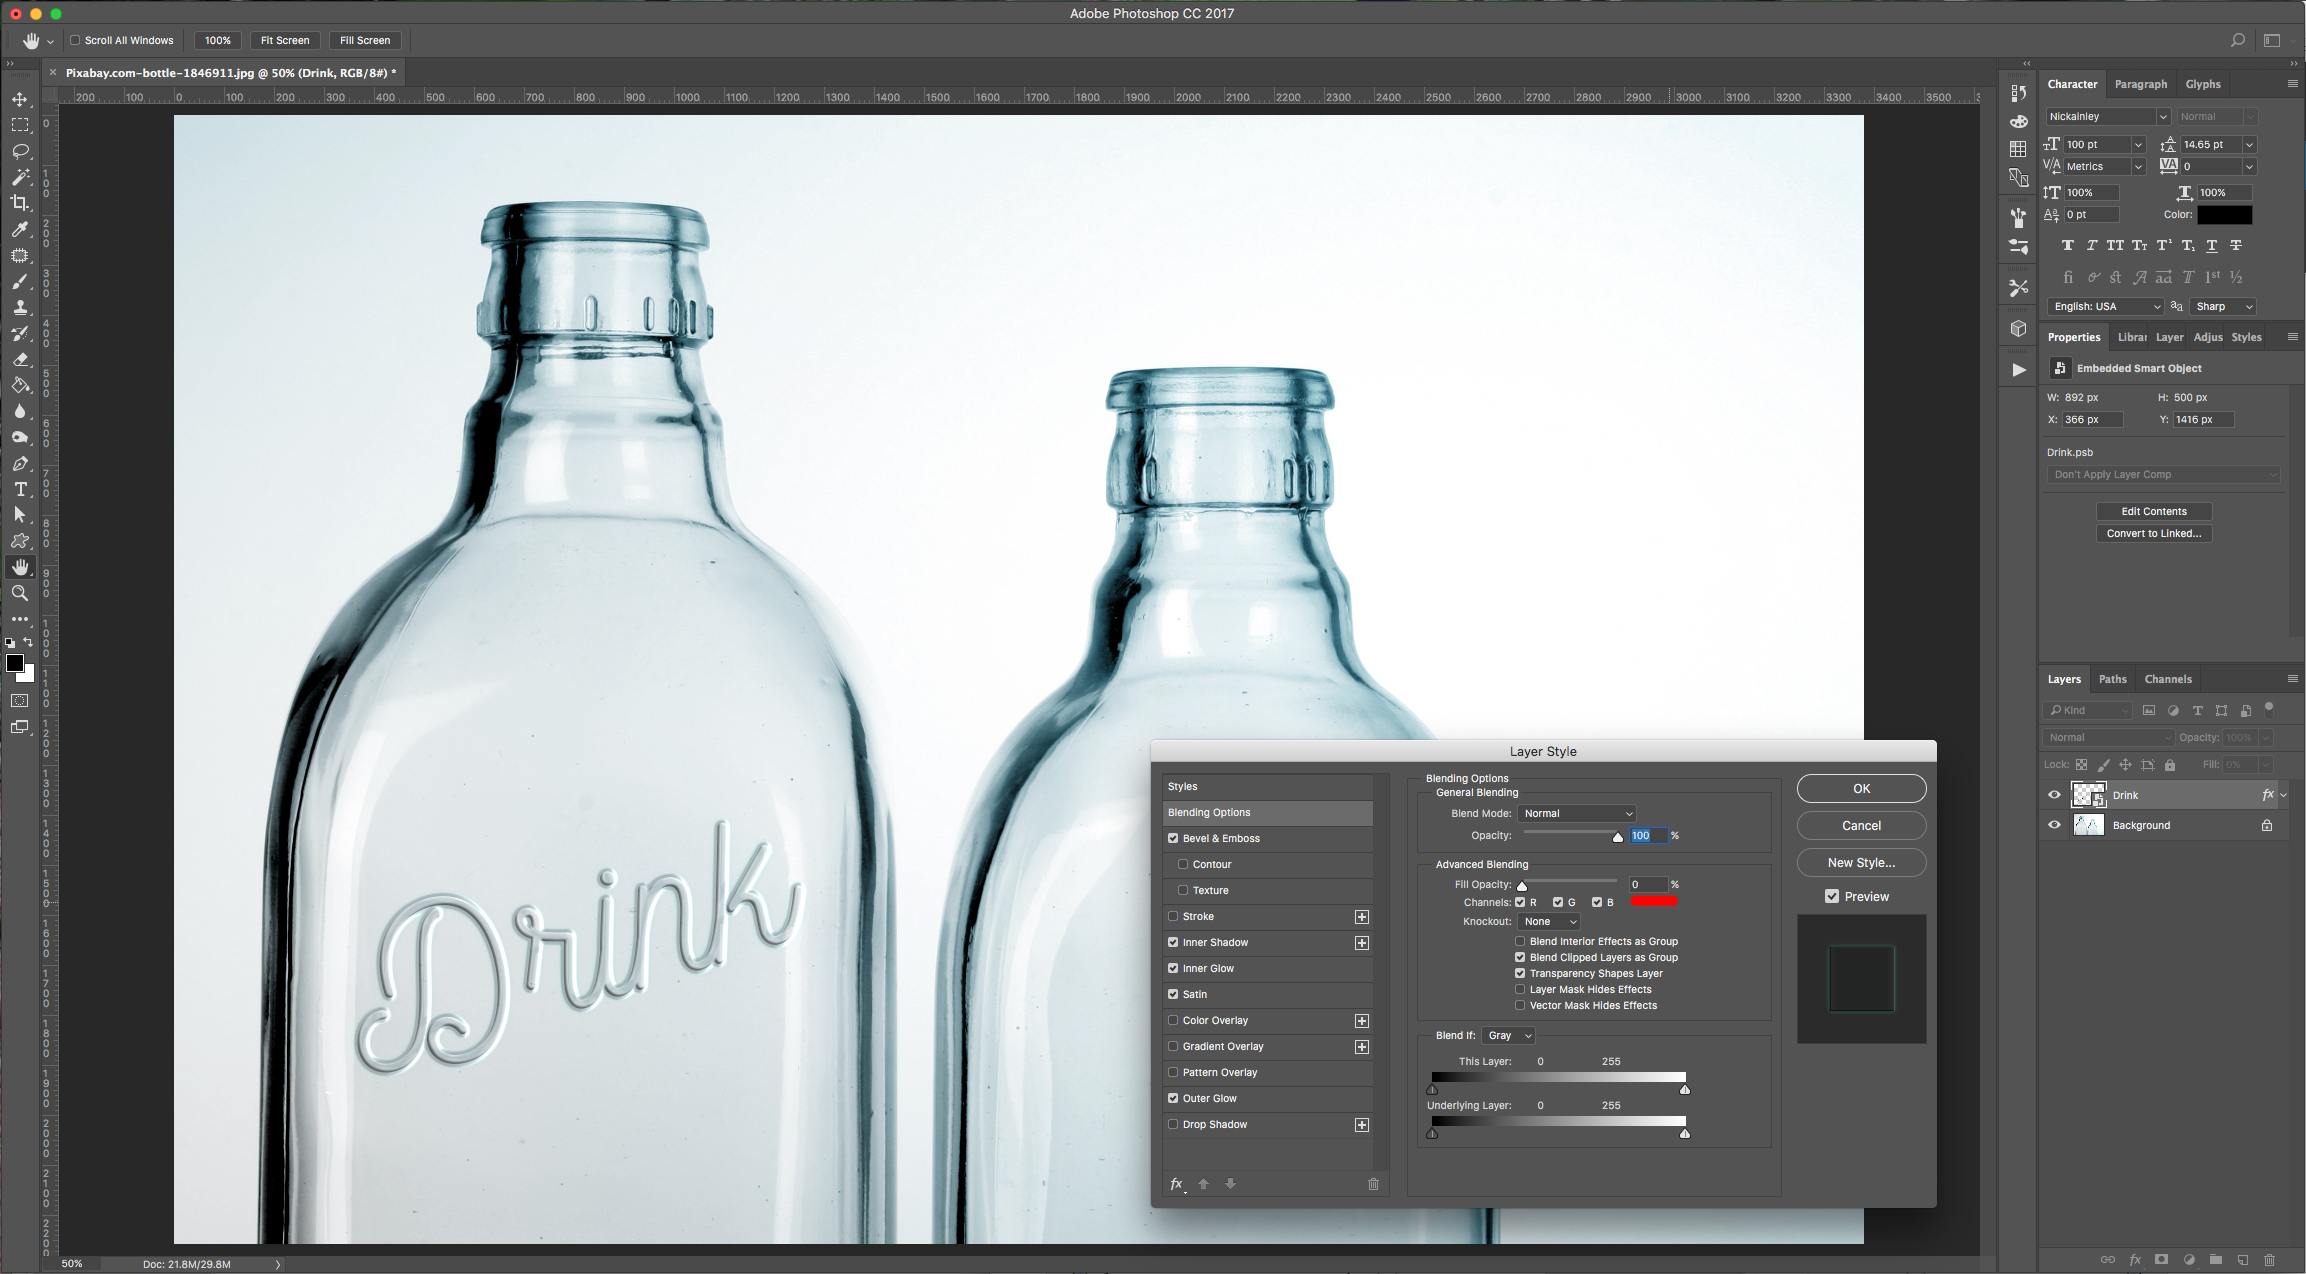
3 - Once you are happy with your text, right-click on its thumbnail and choose “Convert to Smart Object”, then double click on it to apply the following “Layer Styles”:
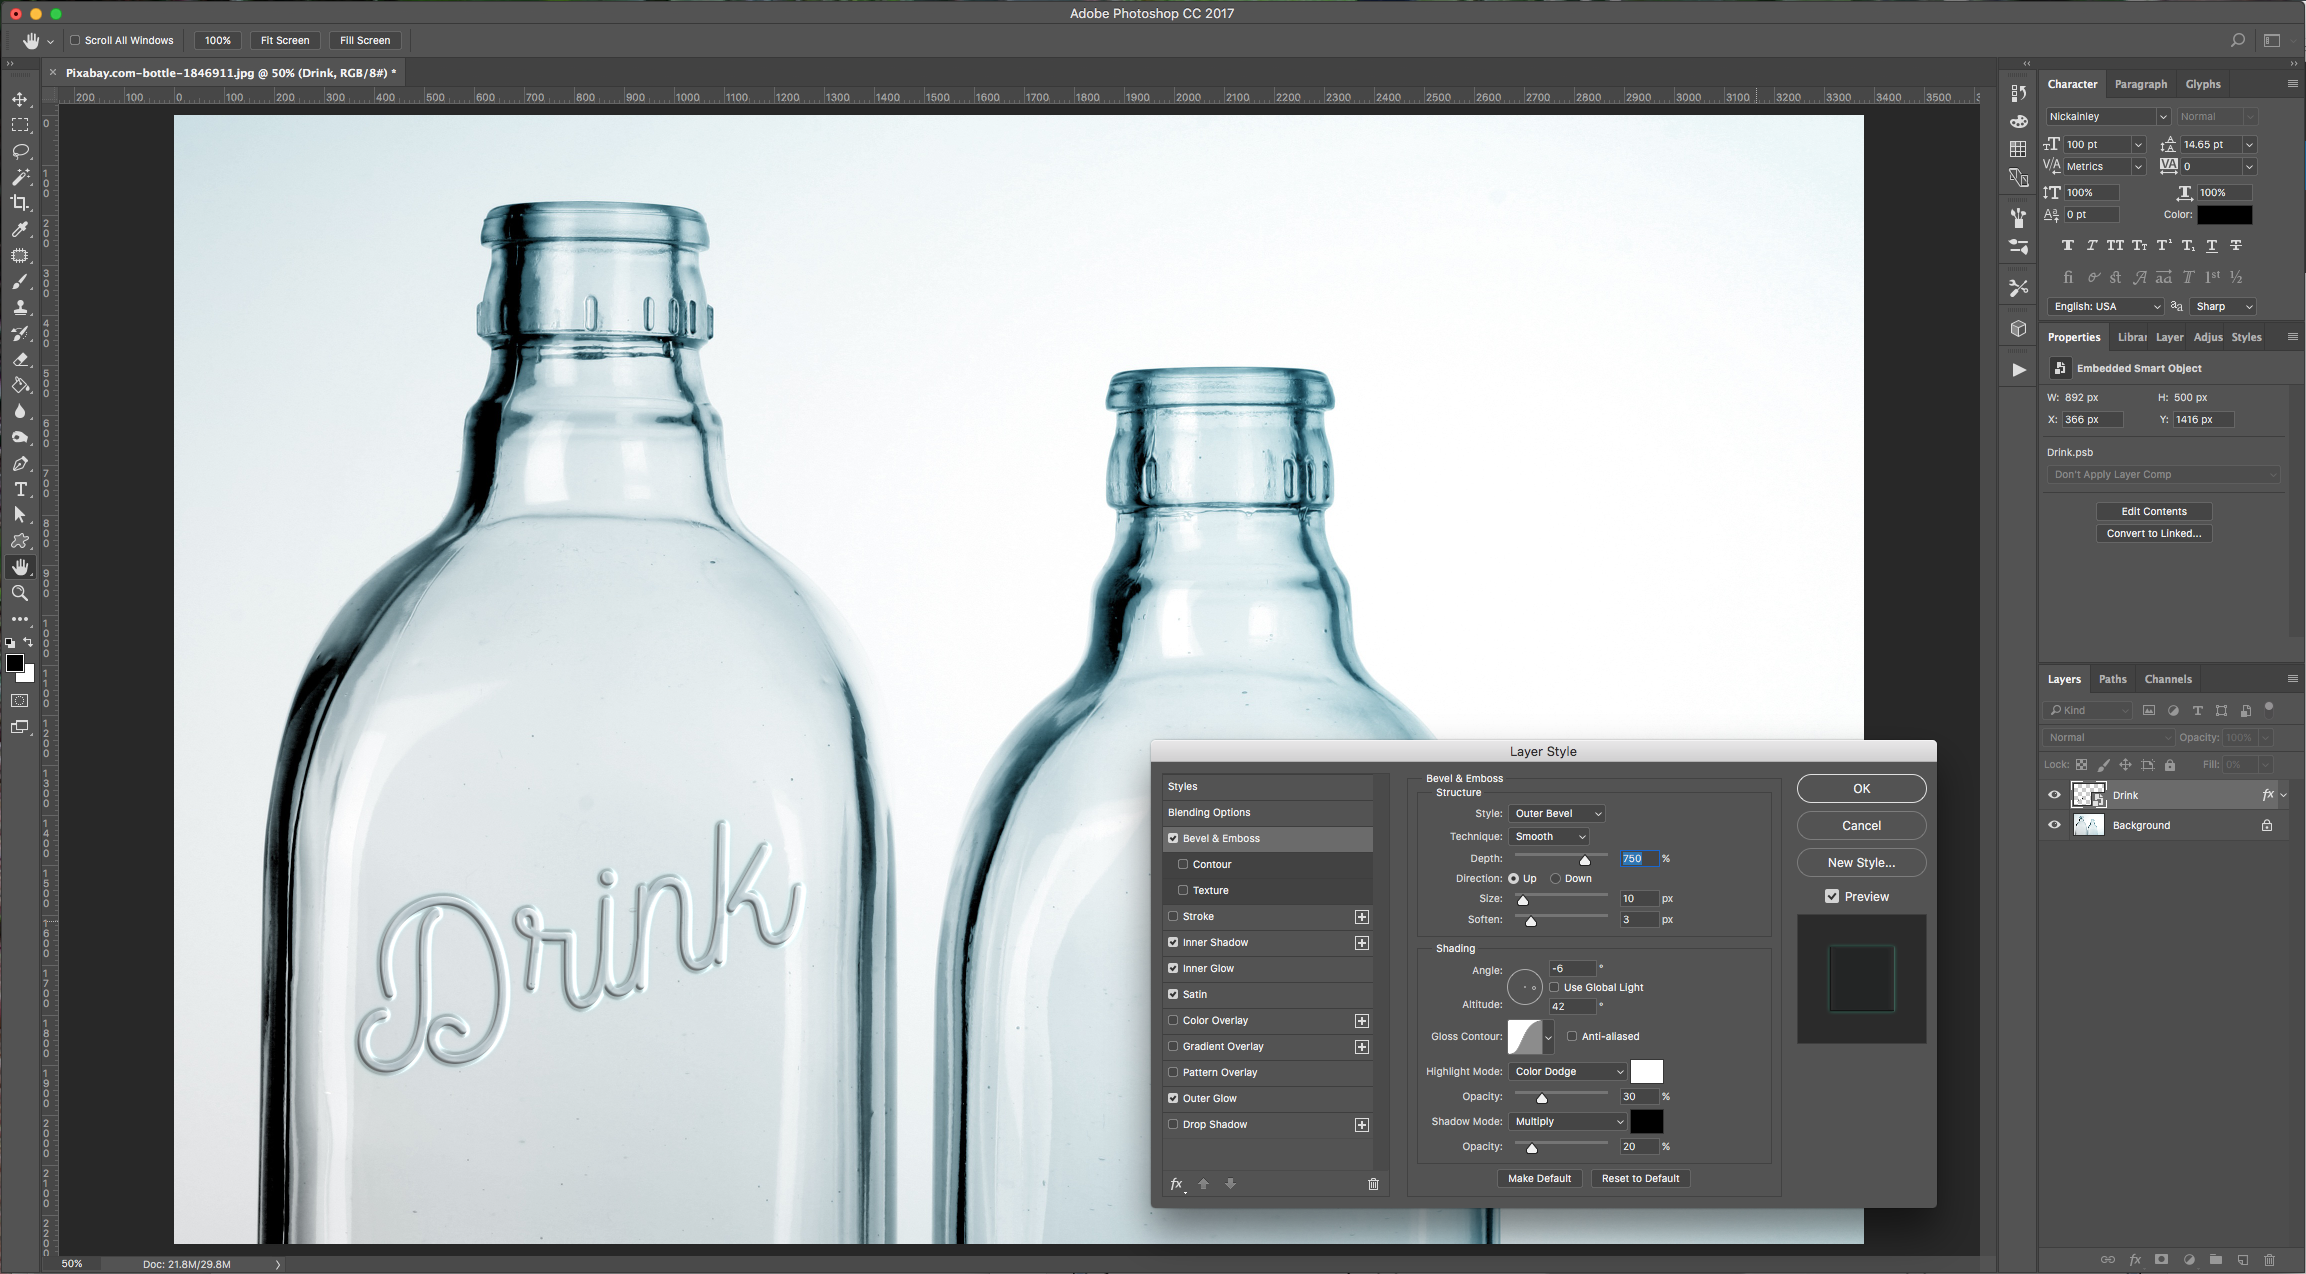
Bevel & Emboss:
Inner Shadow:

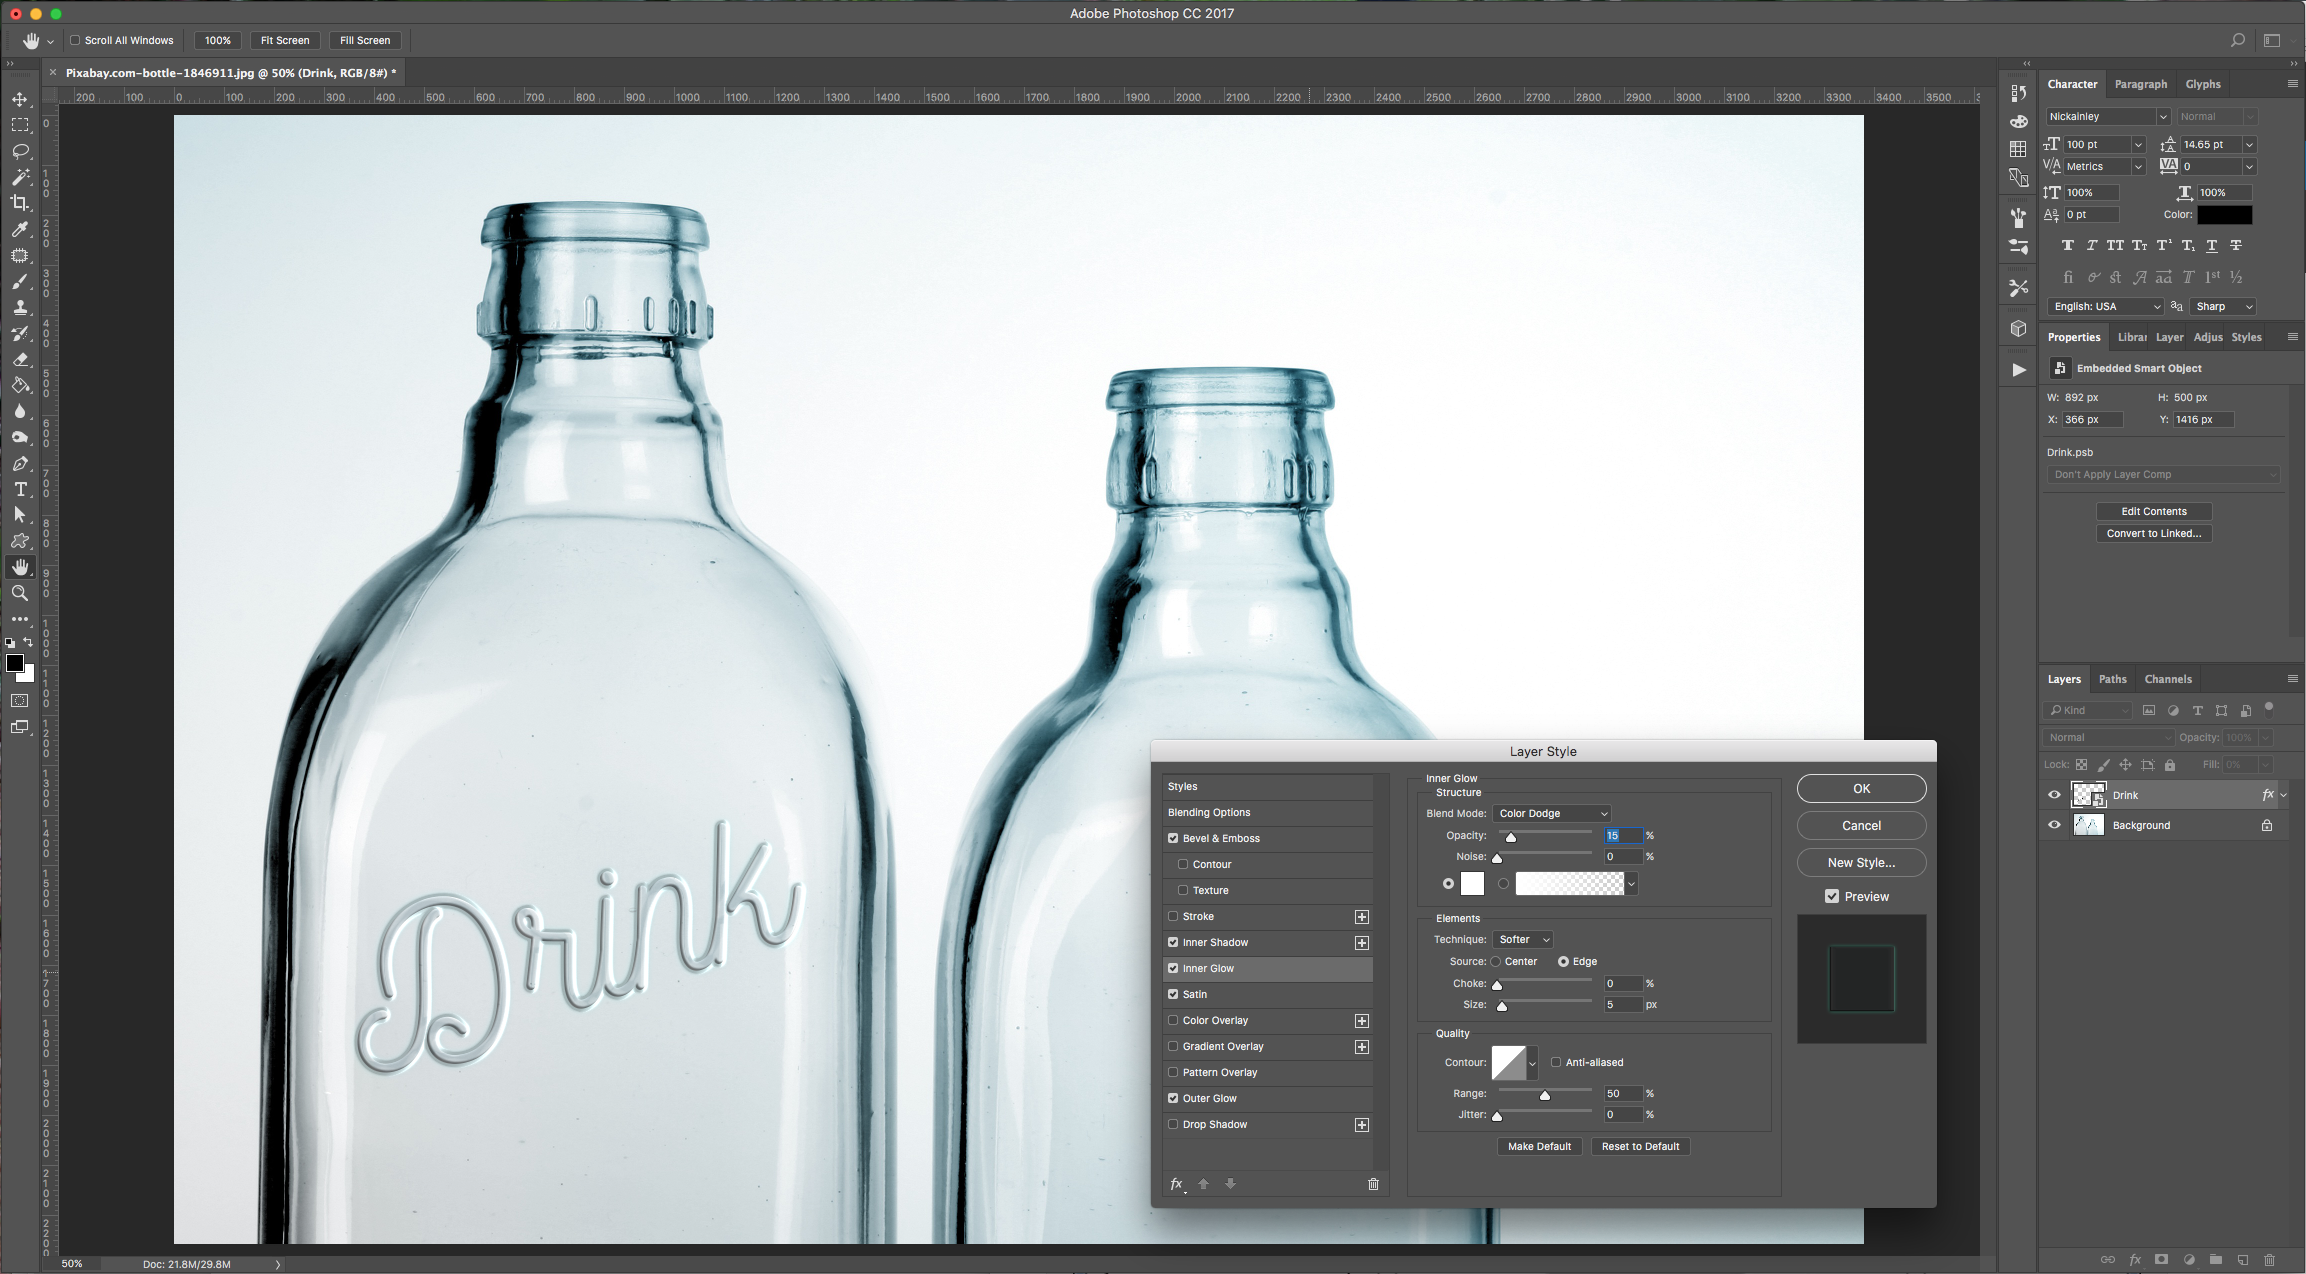
Inner Glow:
Satin: (color #43717e)

Outer Glow: (color #5ab9af)

The values and colors used will depend on your font and the colors of your background image. And the Angles on the position of your text.
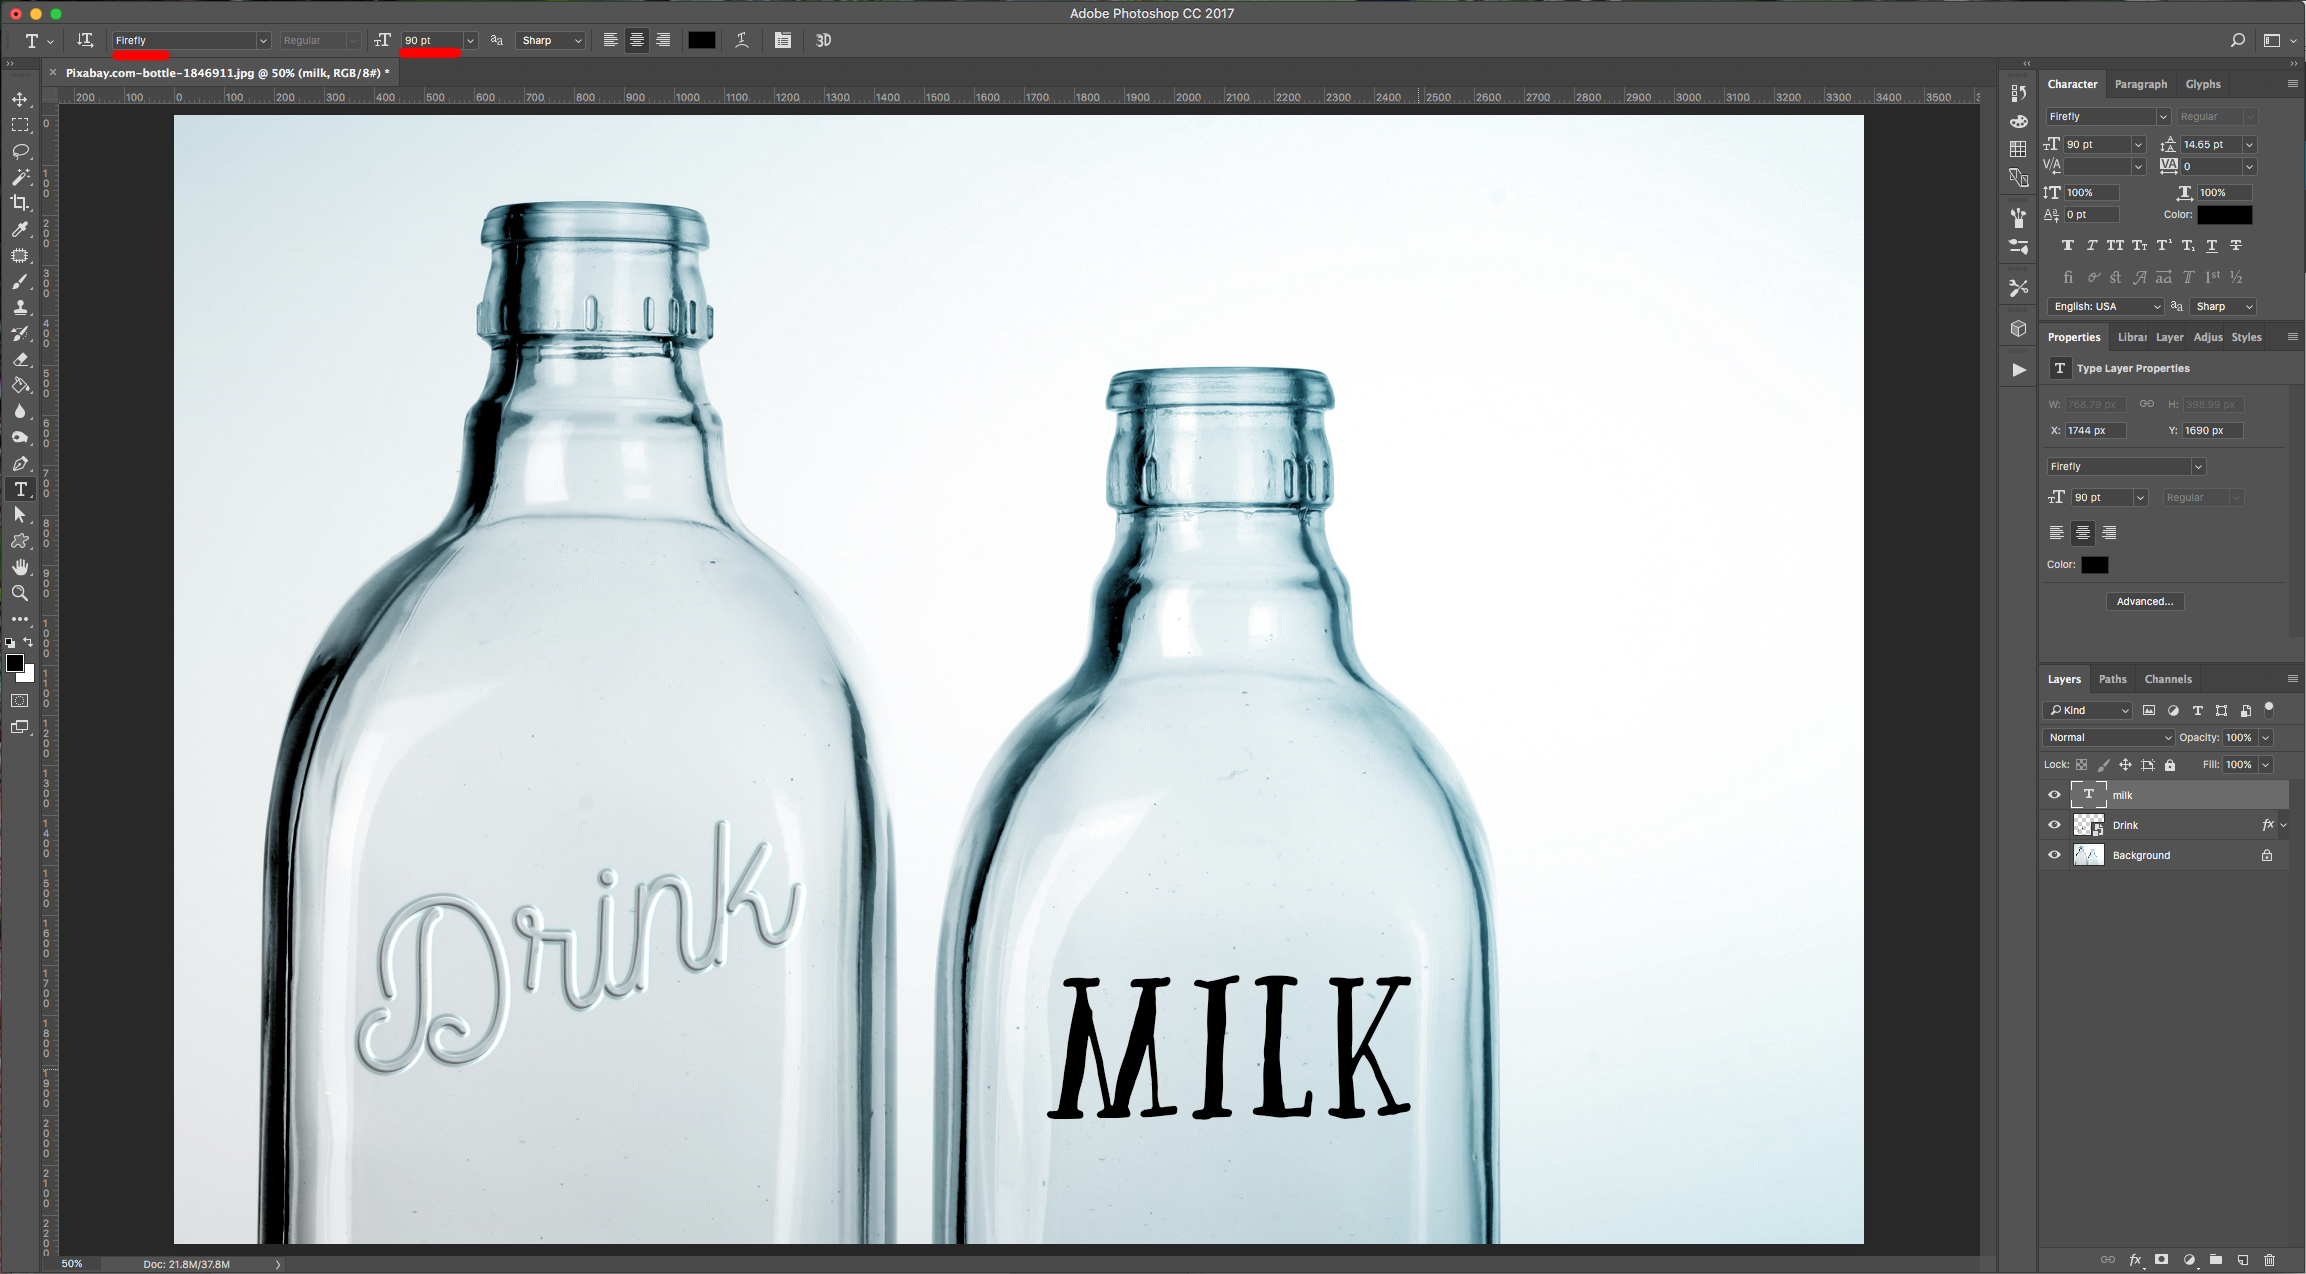
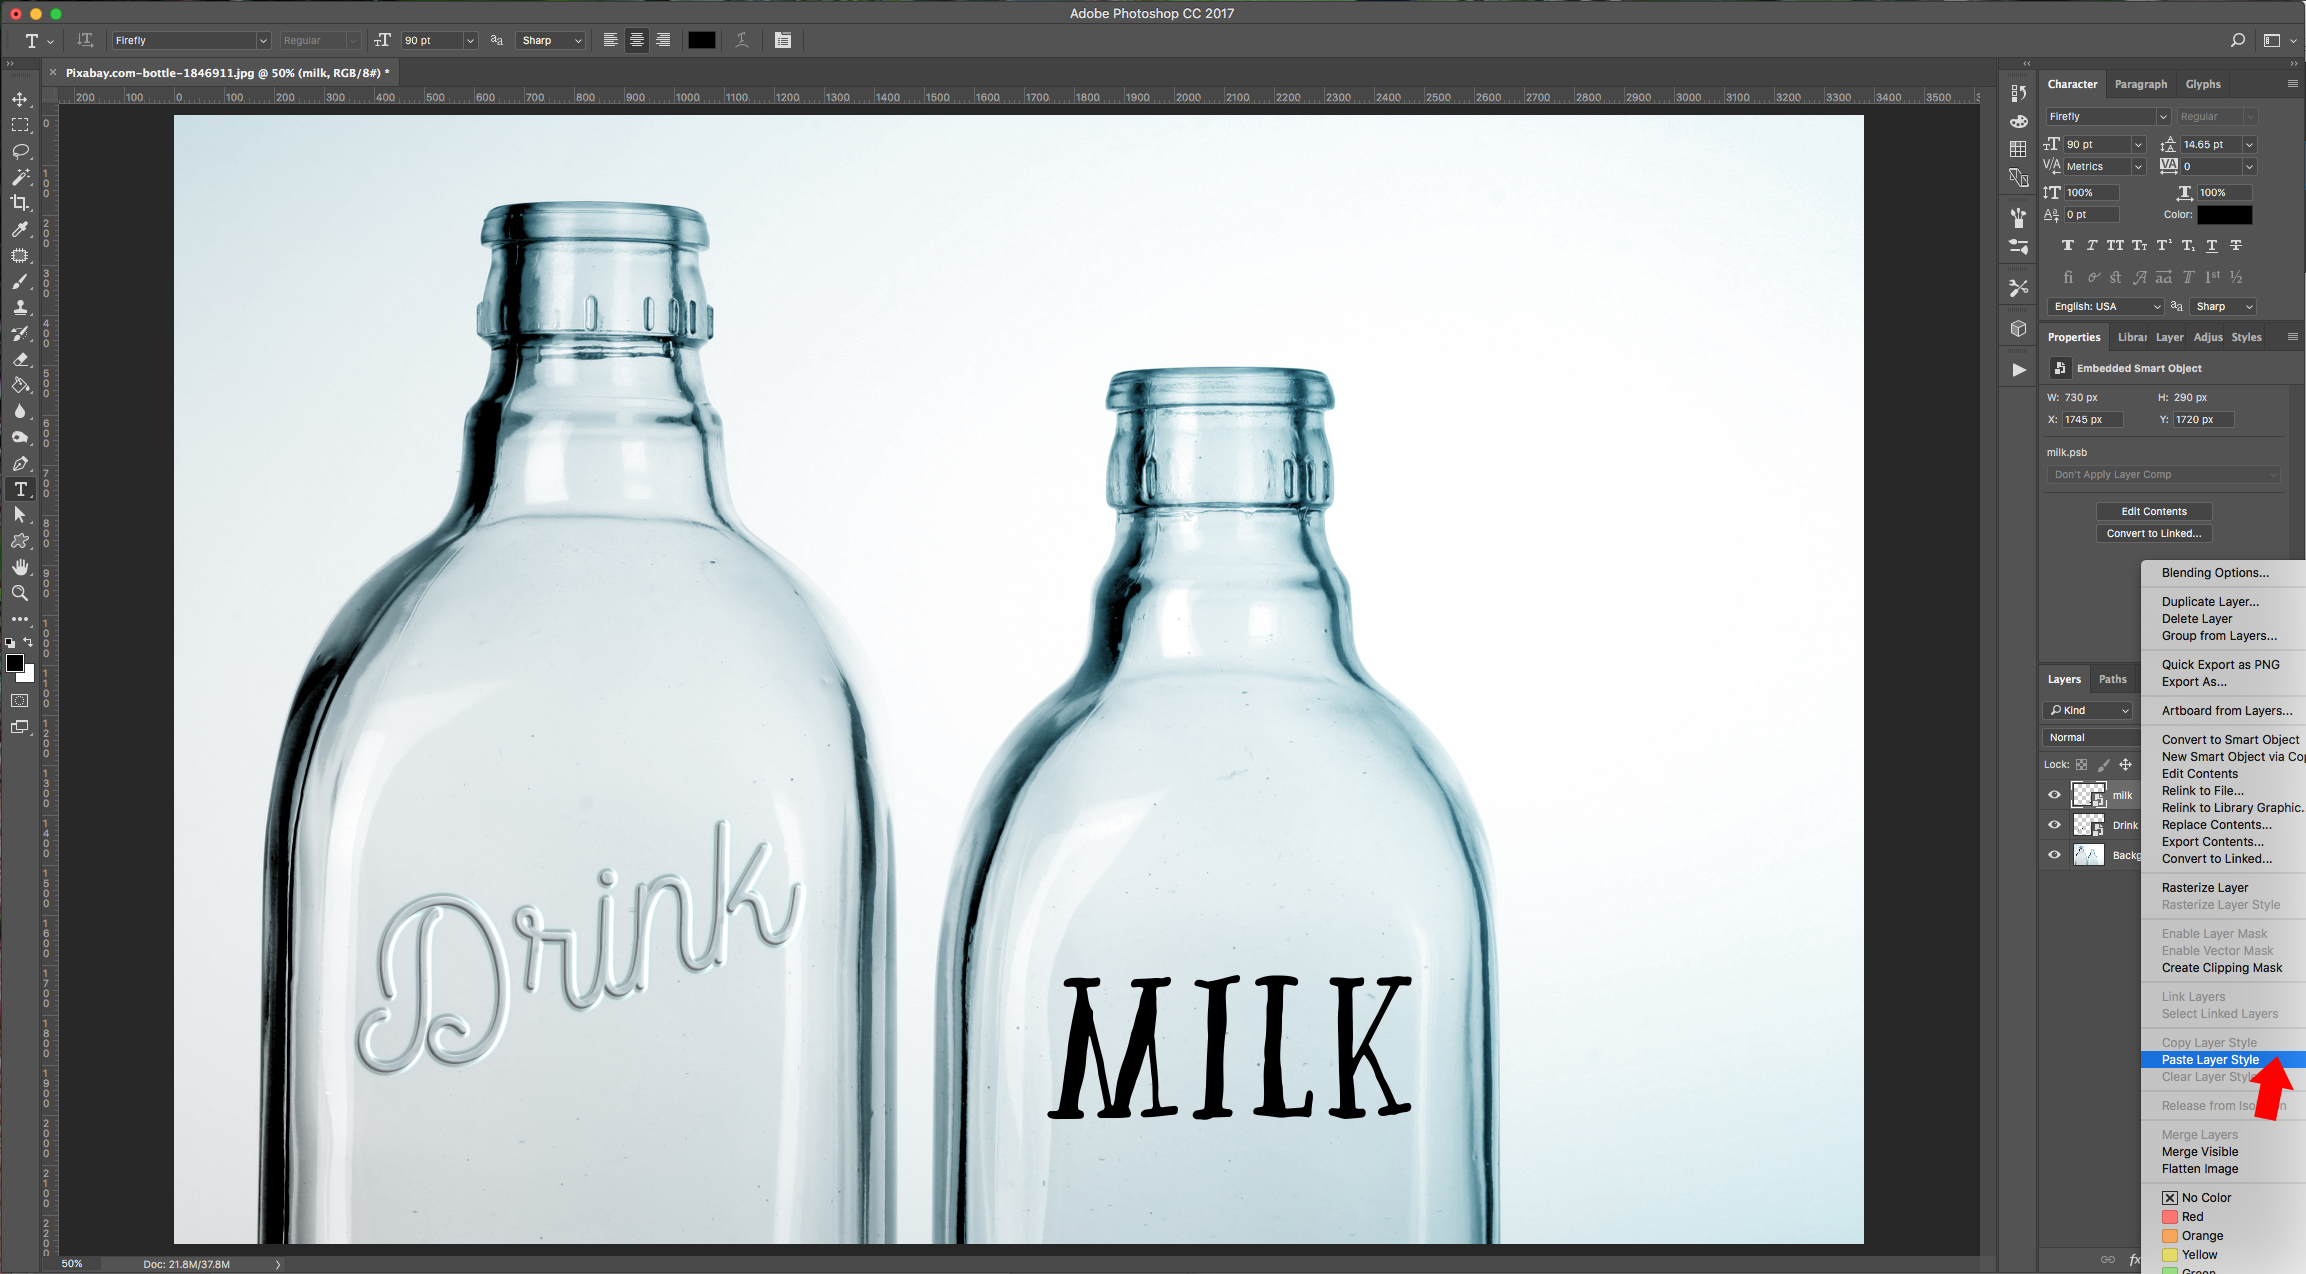
4 - Now, we are adding some text to our second bottle. Again, select your “Type Tool” (T) and type your text. We are using a second font (Firefly), so the size will have to change accordingly.
5 - Convert this layer into a “Smart Object” too, right click on your first text layer and “Copy Layer Style”, then on the new text layer and “Paste Layer Style”. If you think you need to tweak the “Layer Styles” settings a bit, double-click on the layer thumbnail and play around with the values.


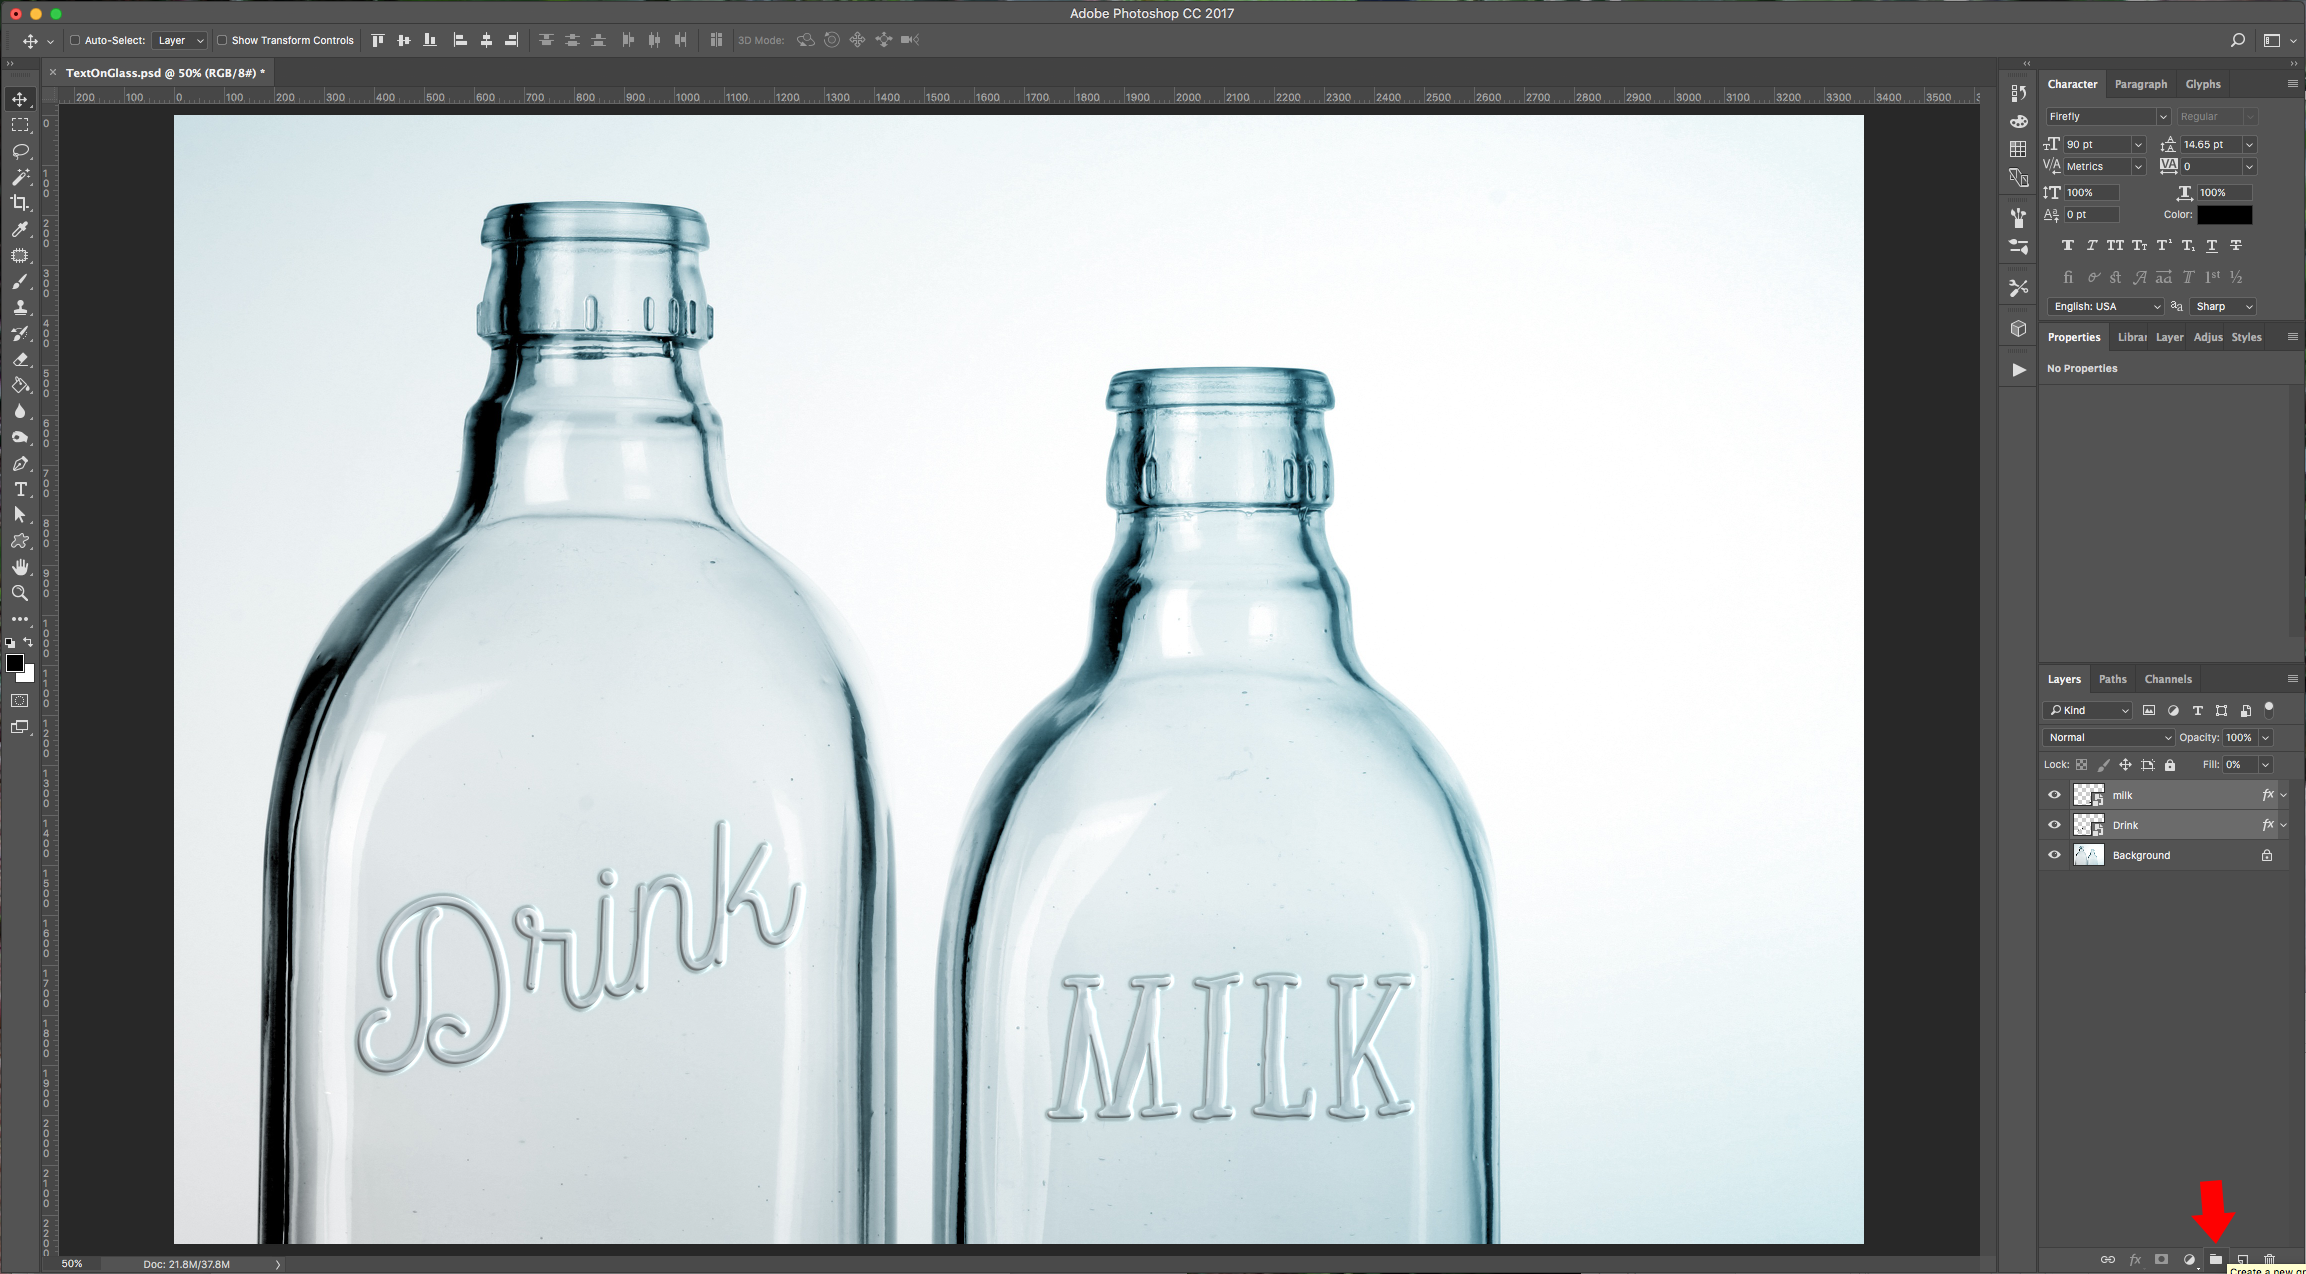
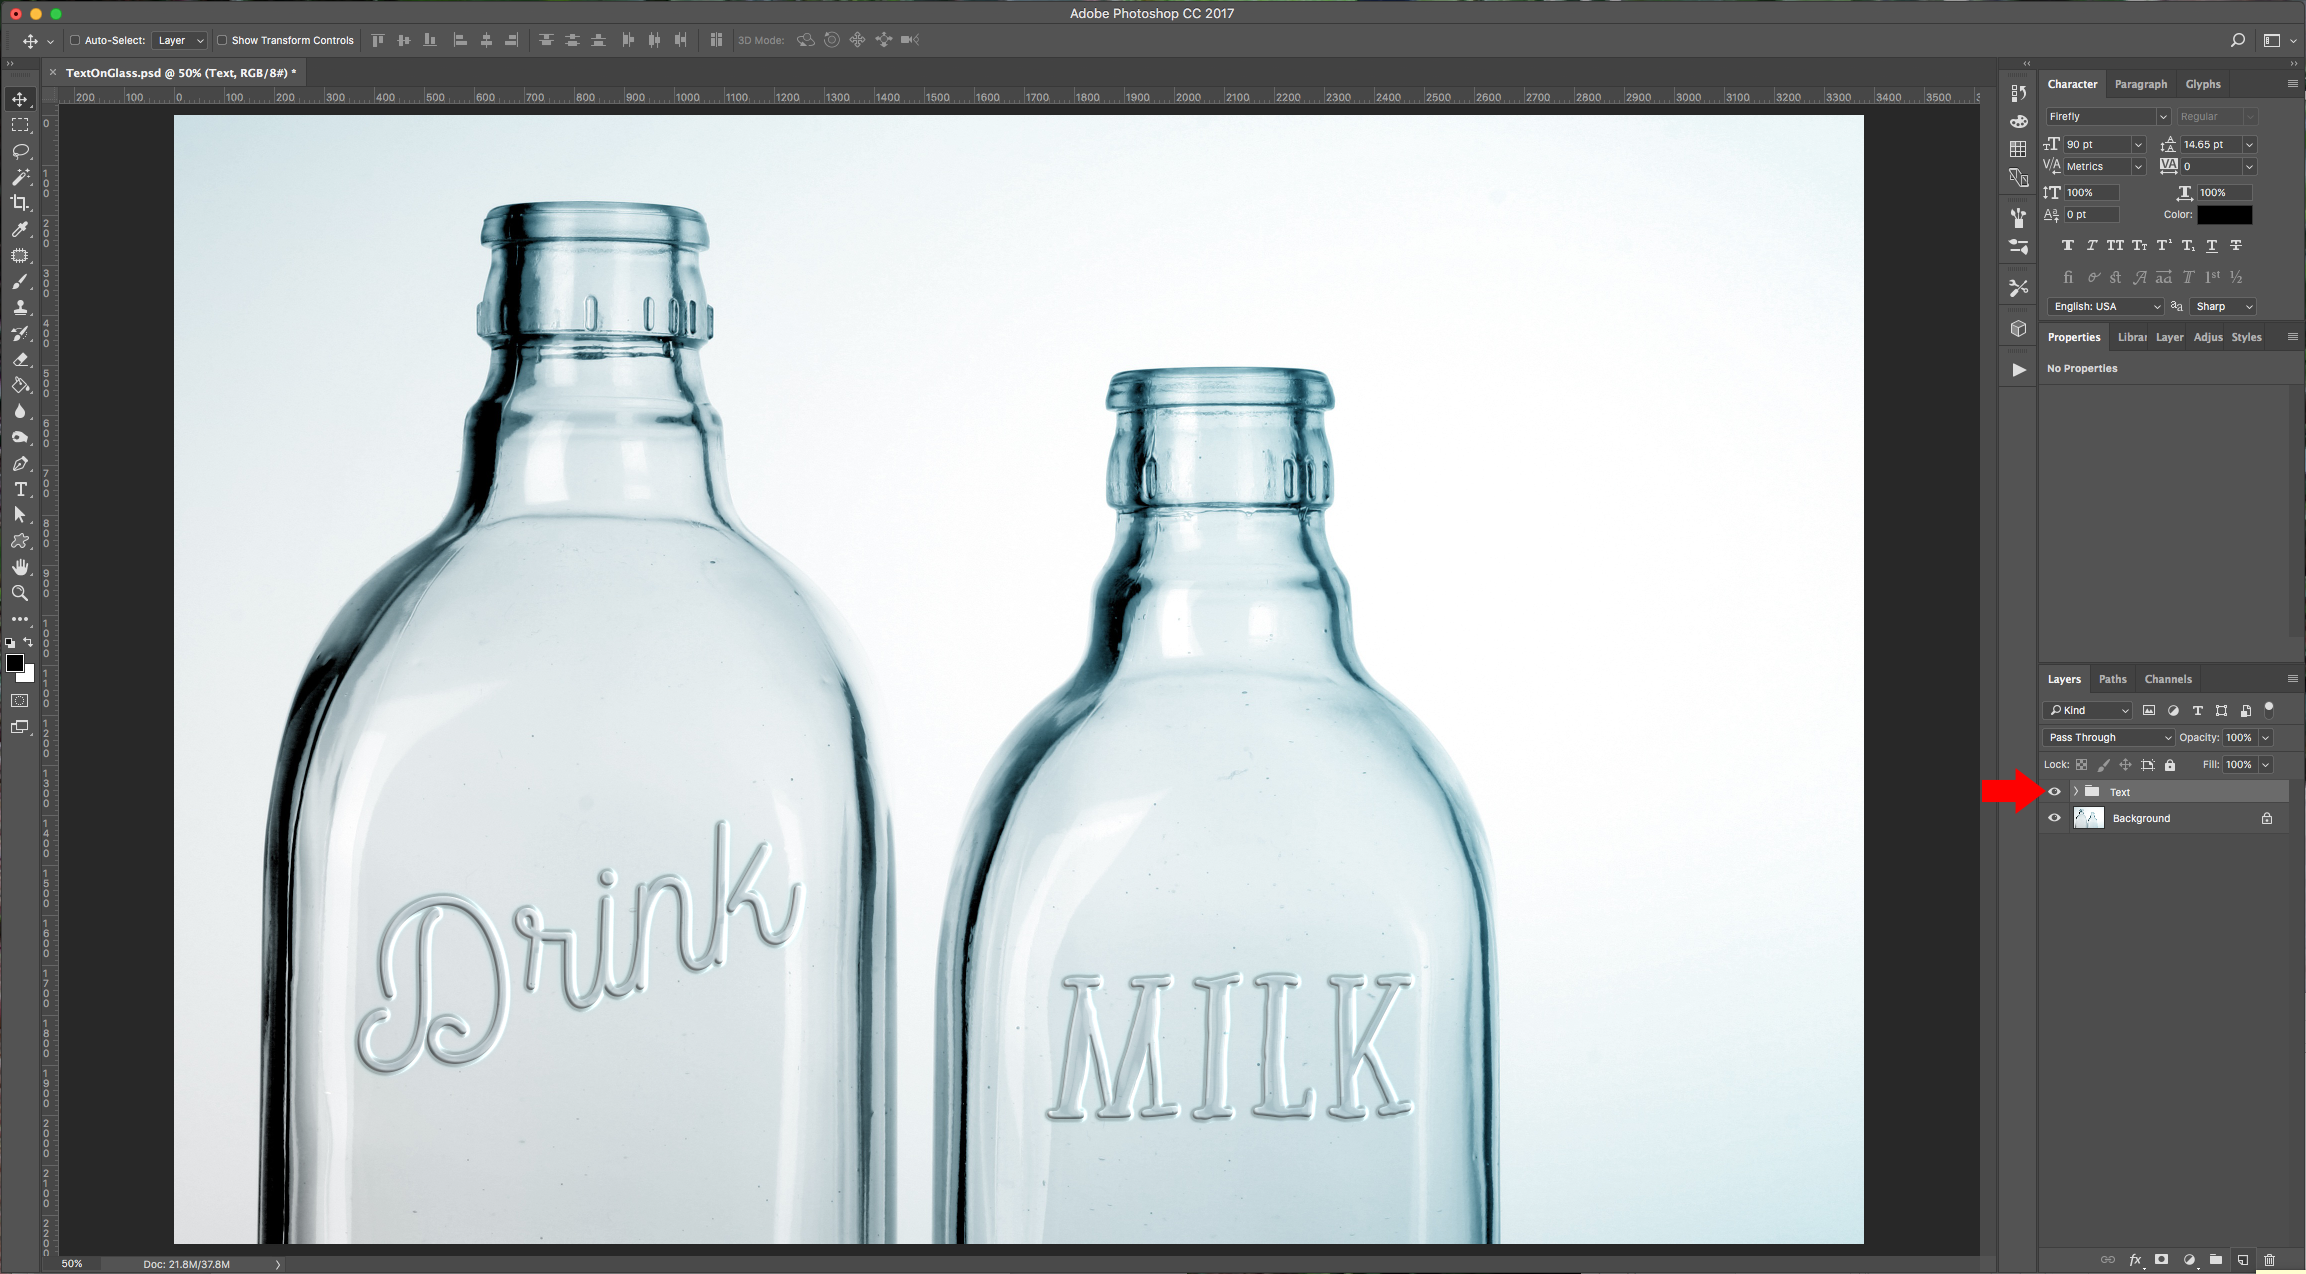
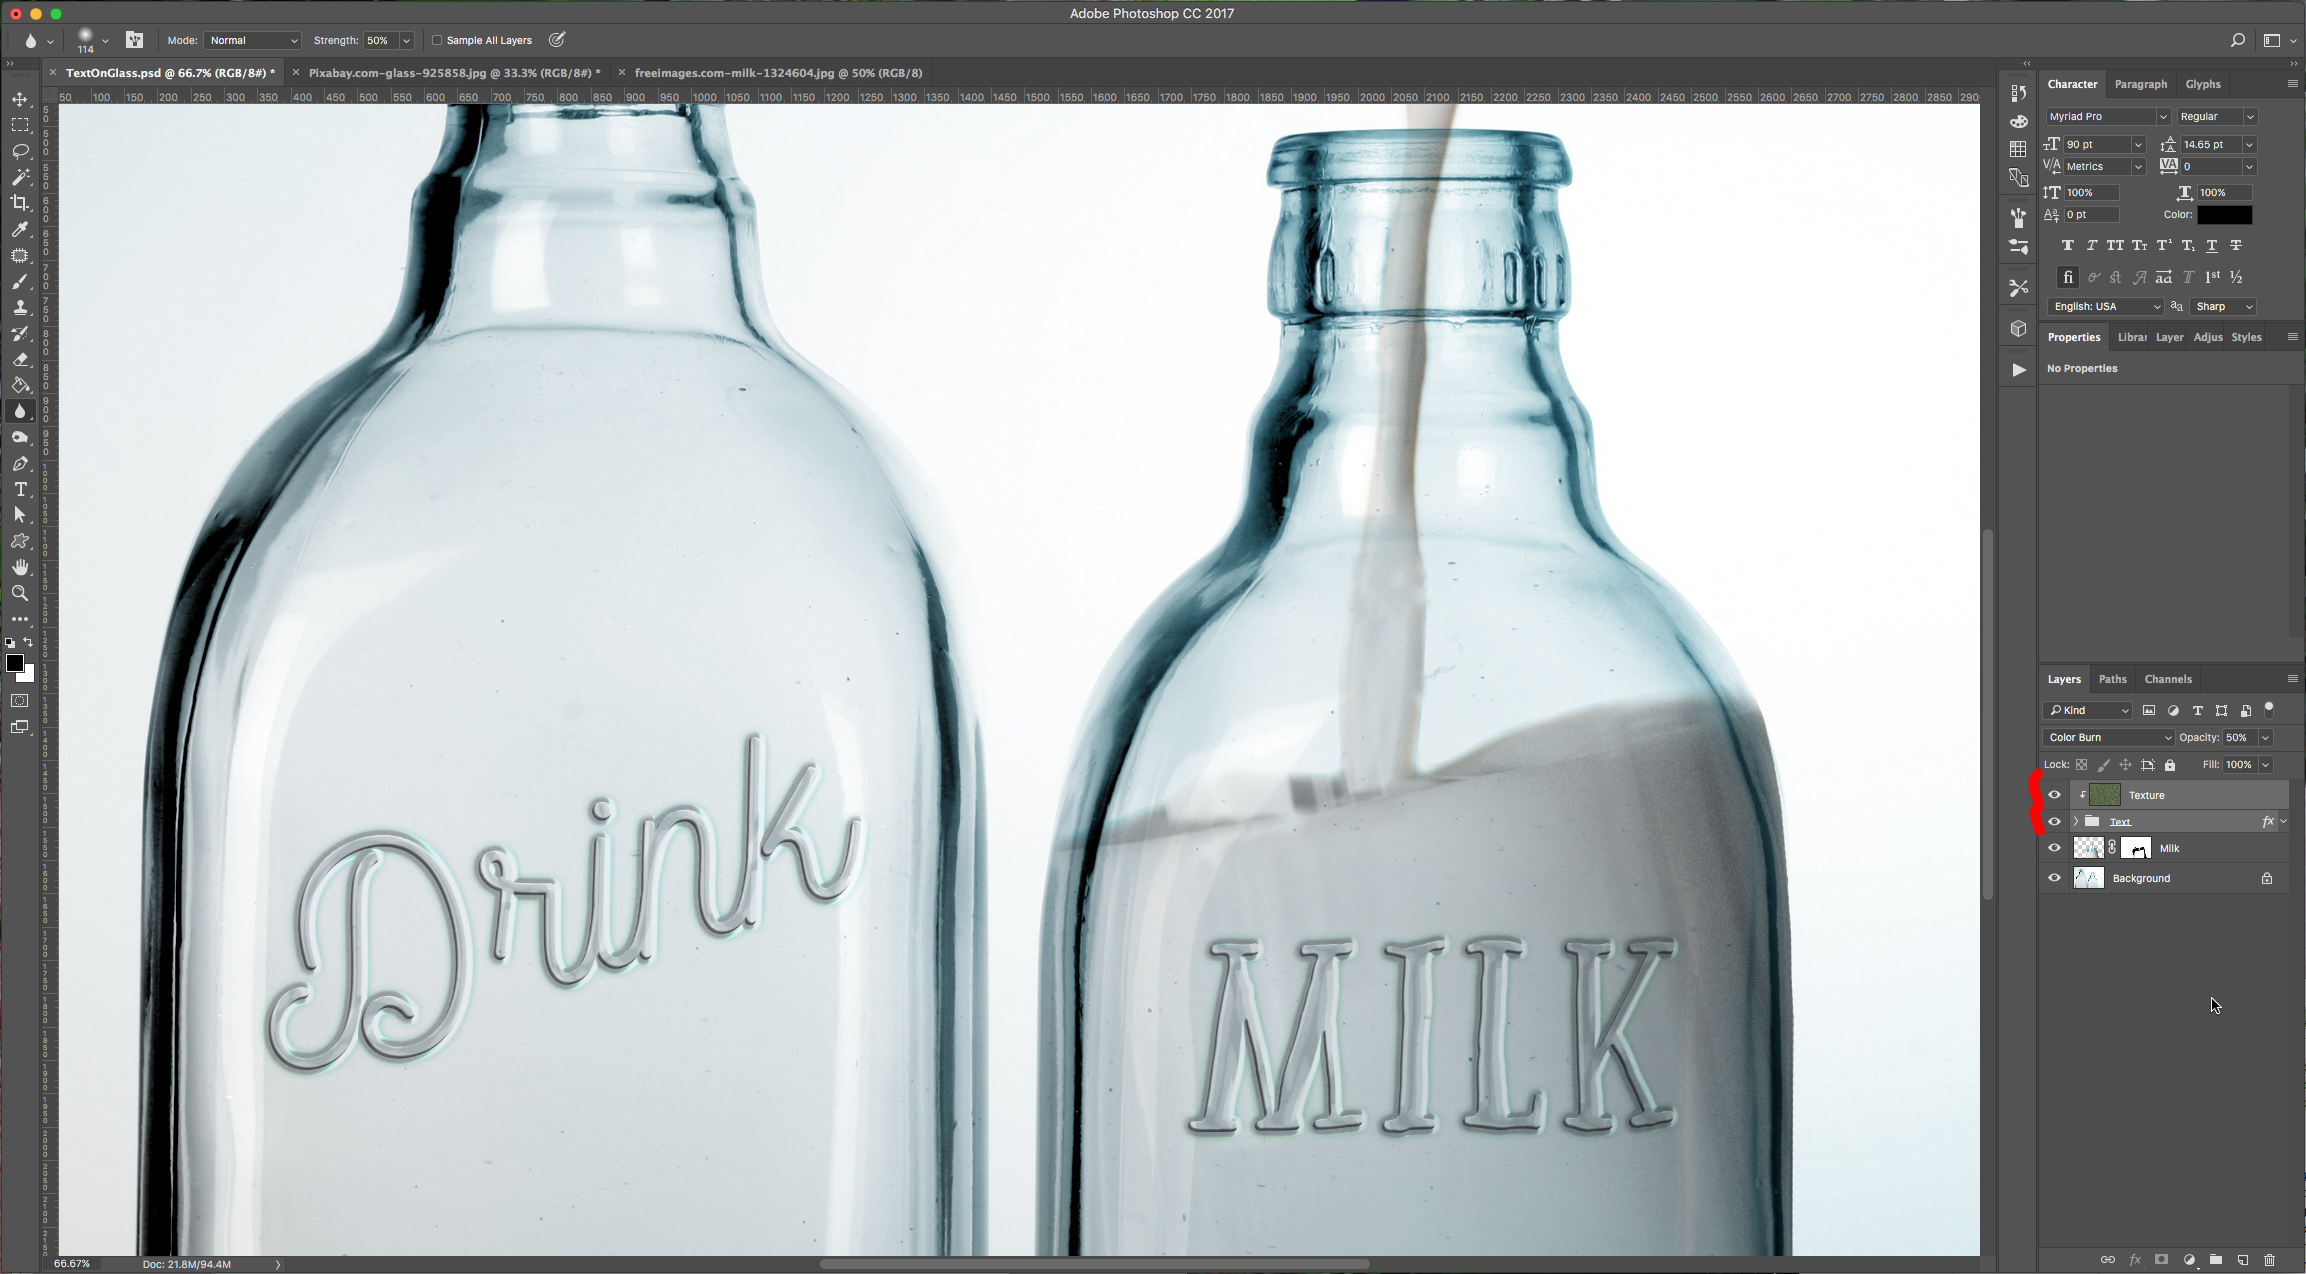
6 - Select your text layers and click on the little folder button at the bottom of the “Layers” Panel to group them together. To add a little more texture to the text layer, create a “New Layer” on top of the ones that contain the text. Do this, by clicking on the button at the bottom of the “Layers” Panel.
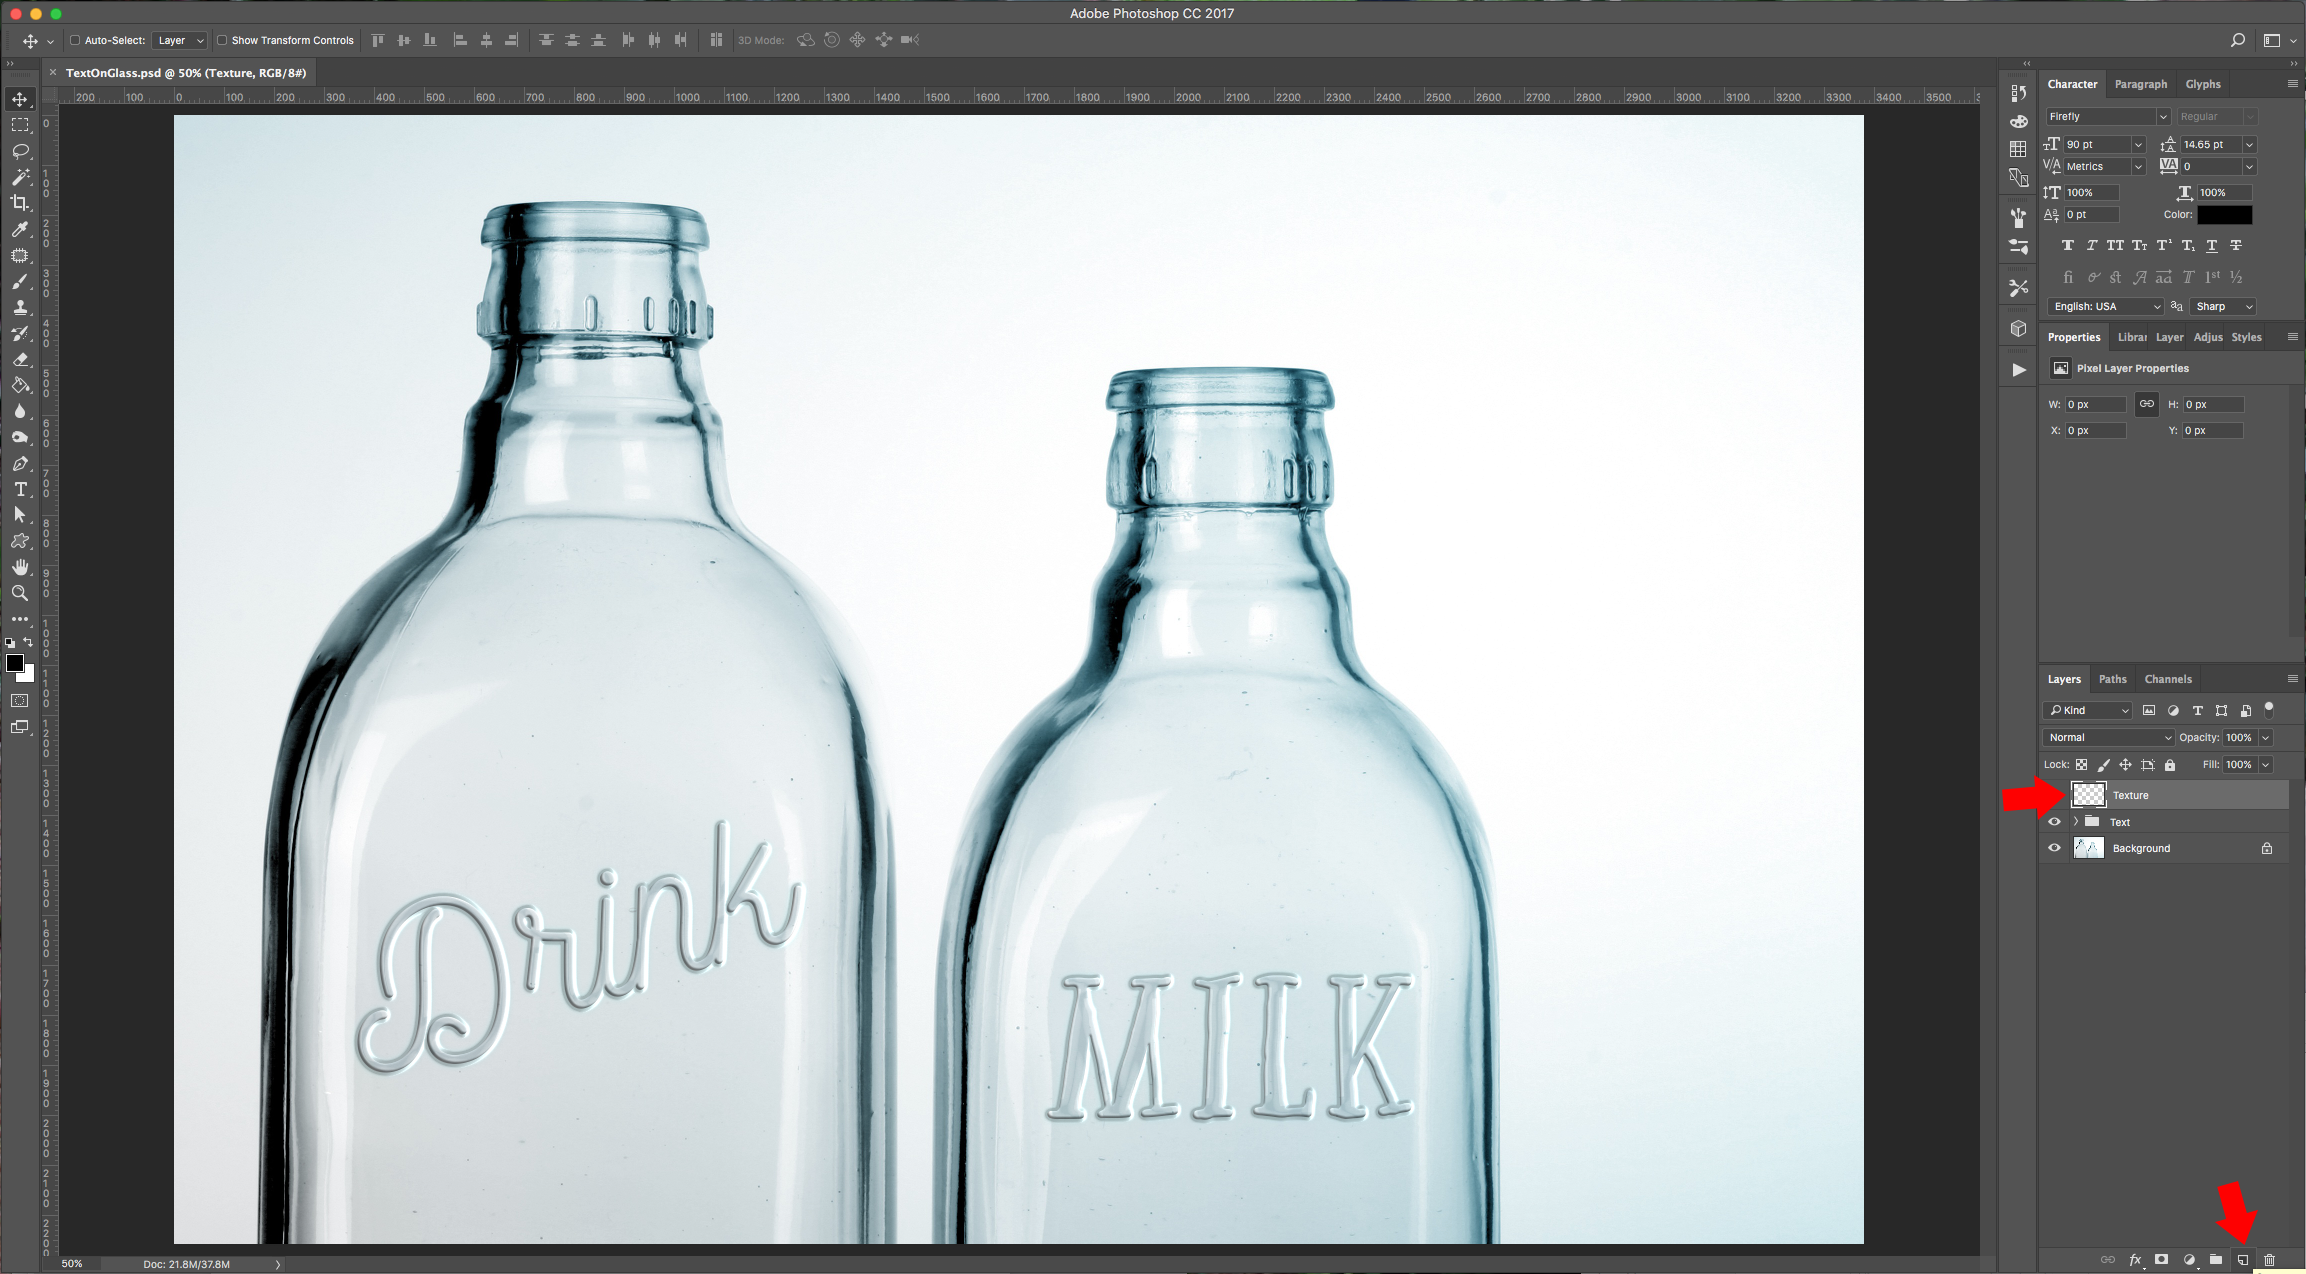
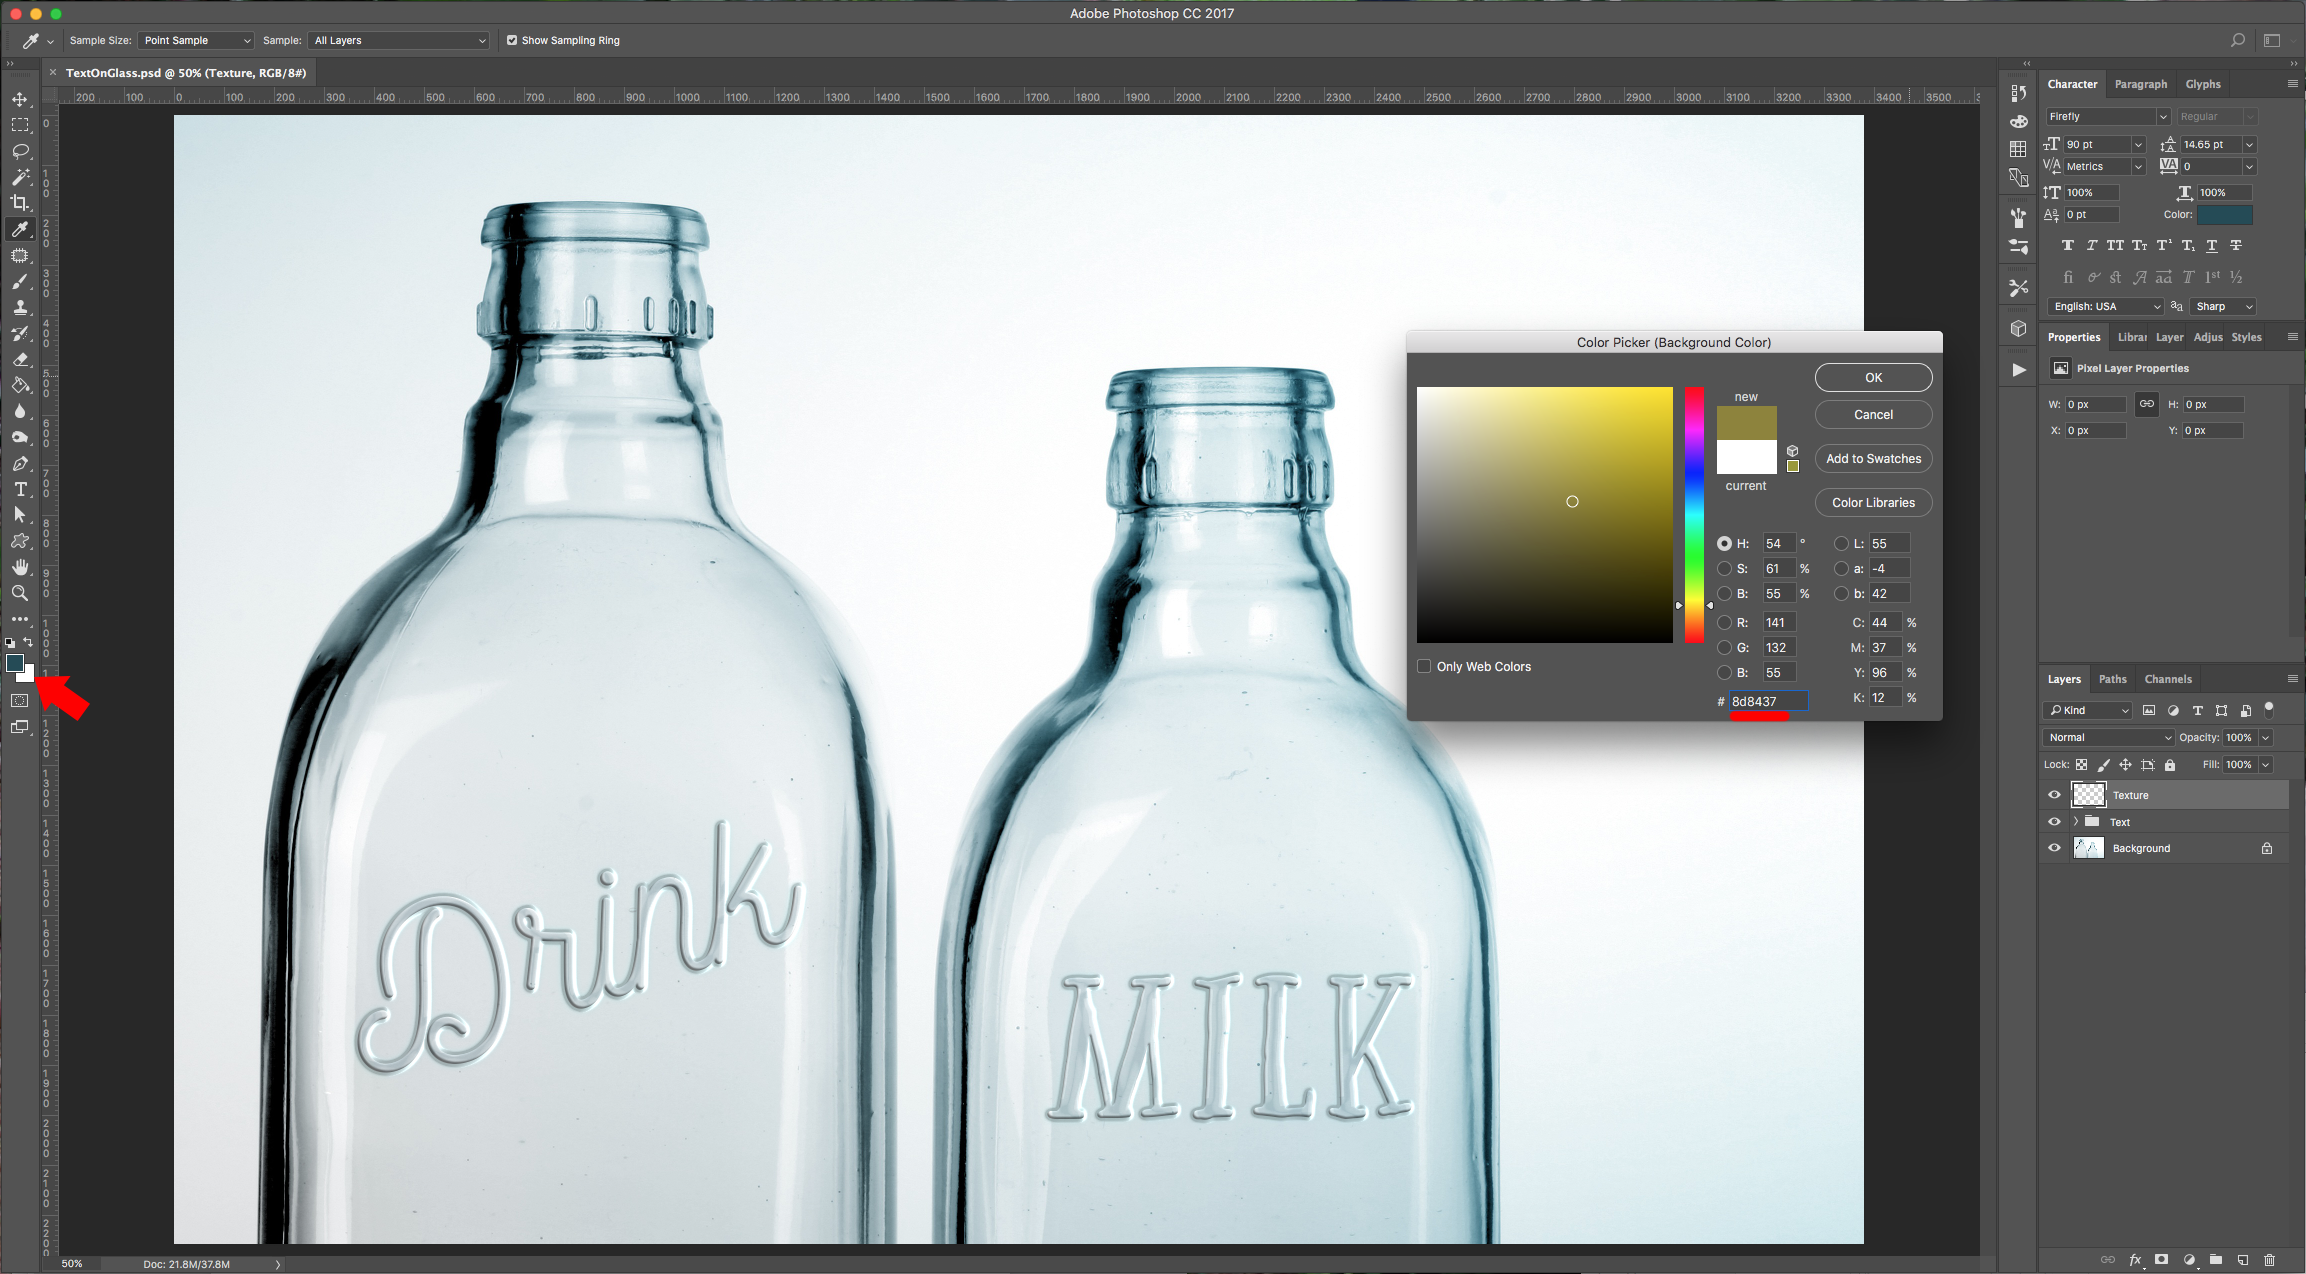
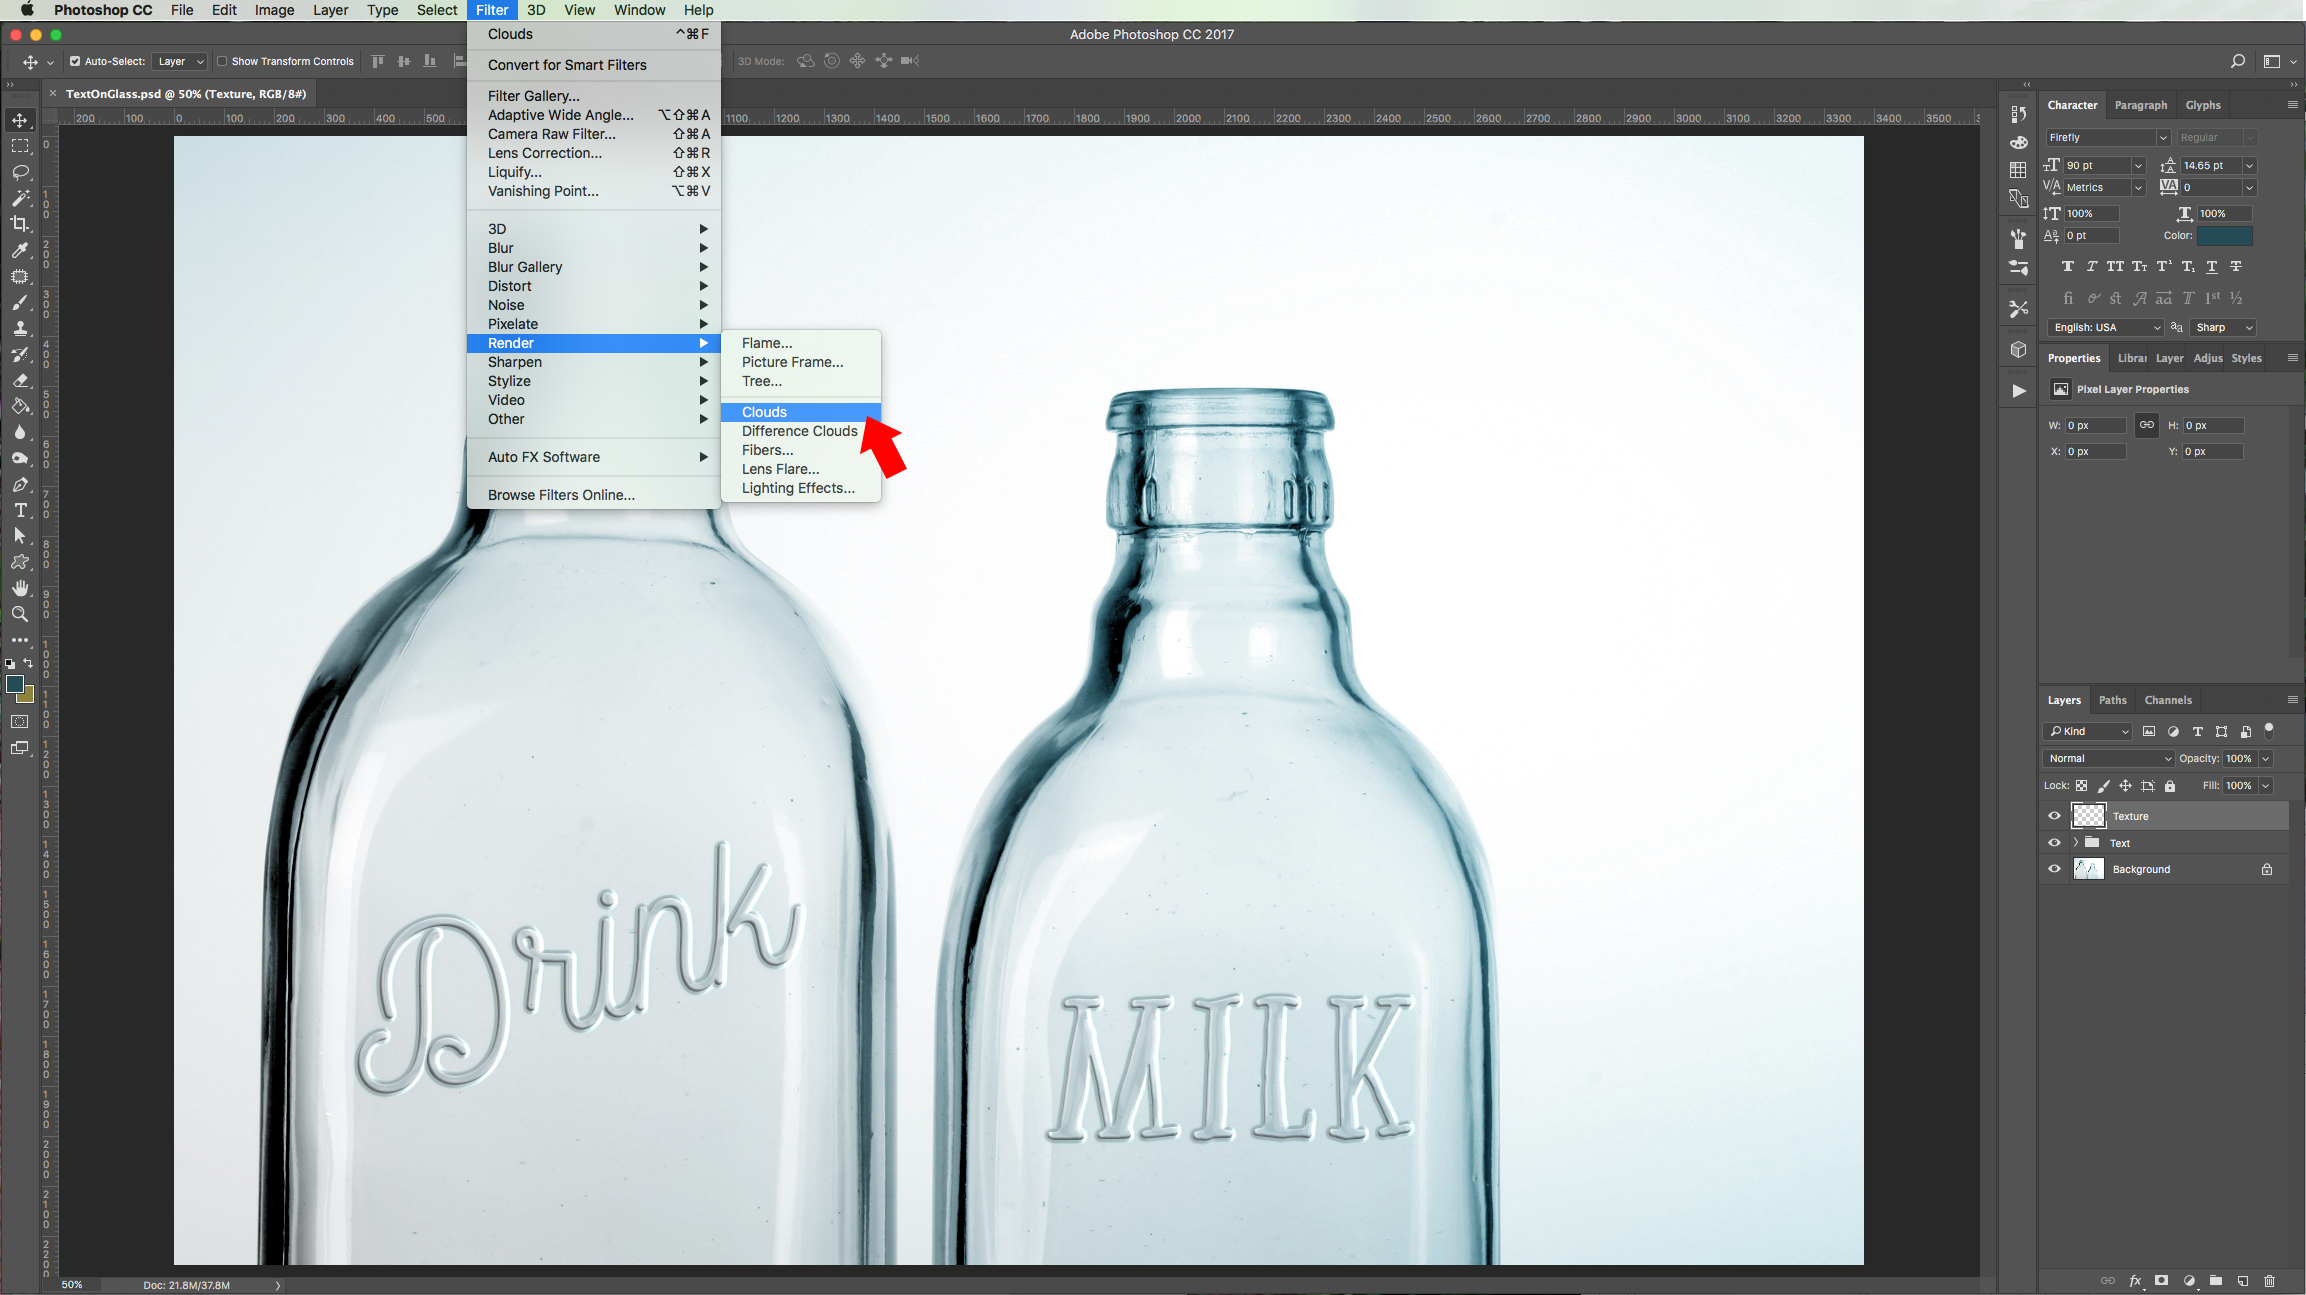
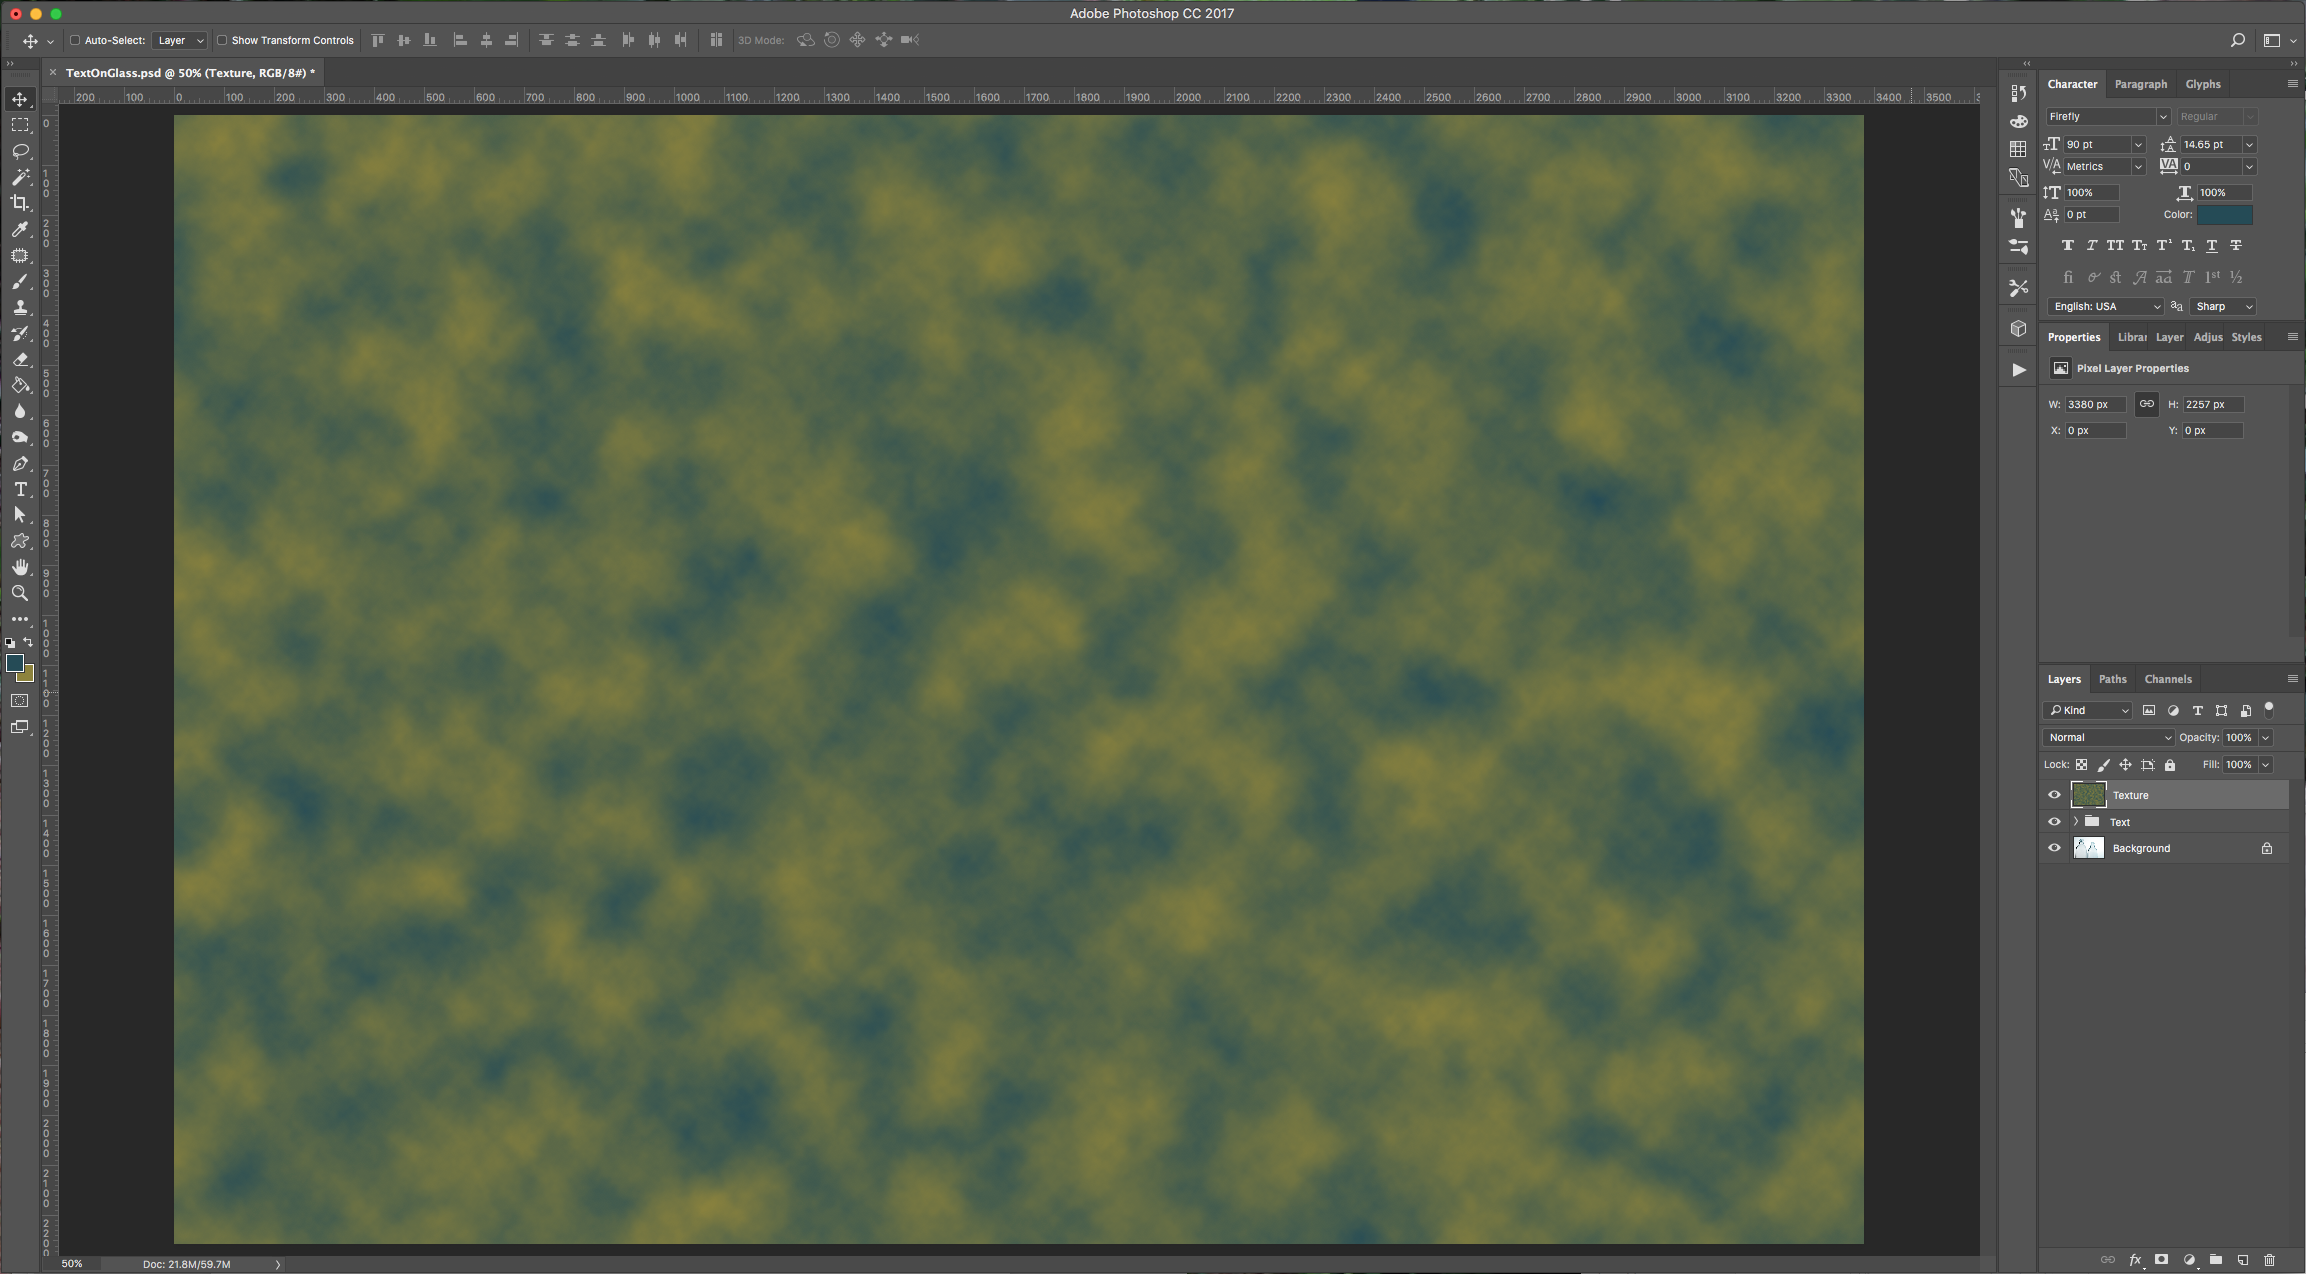
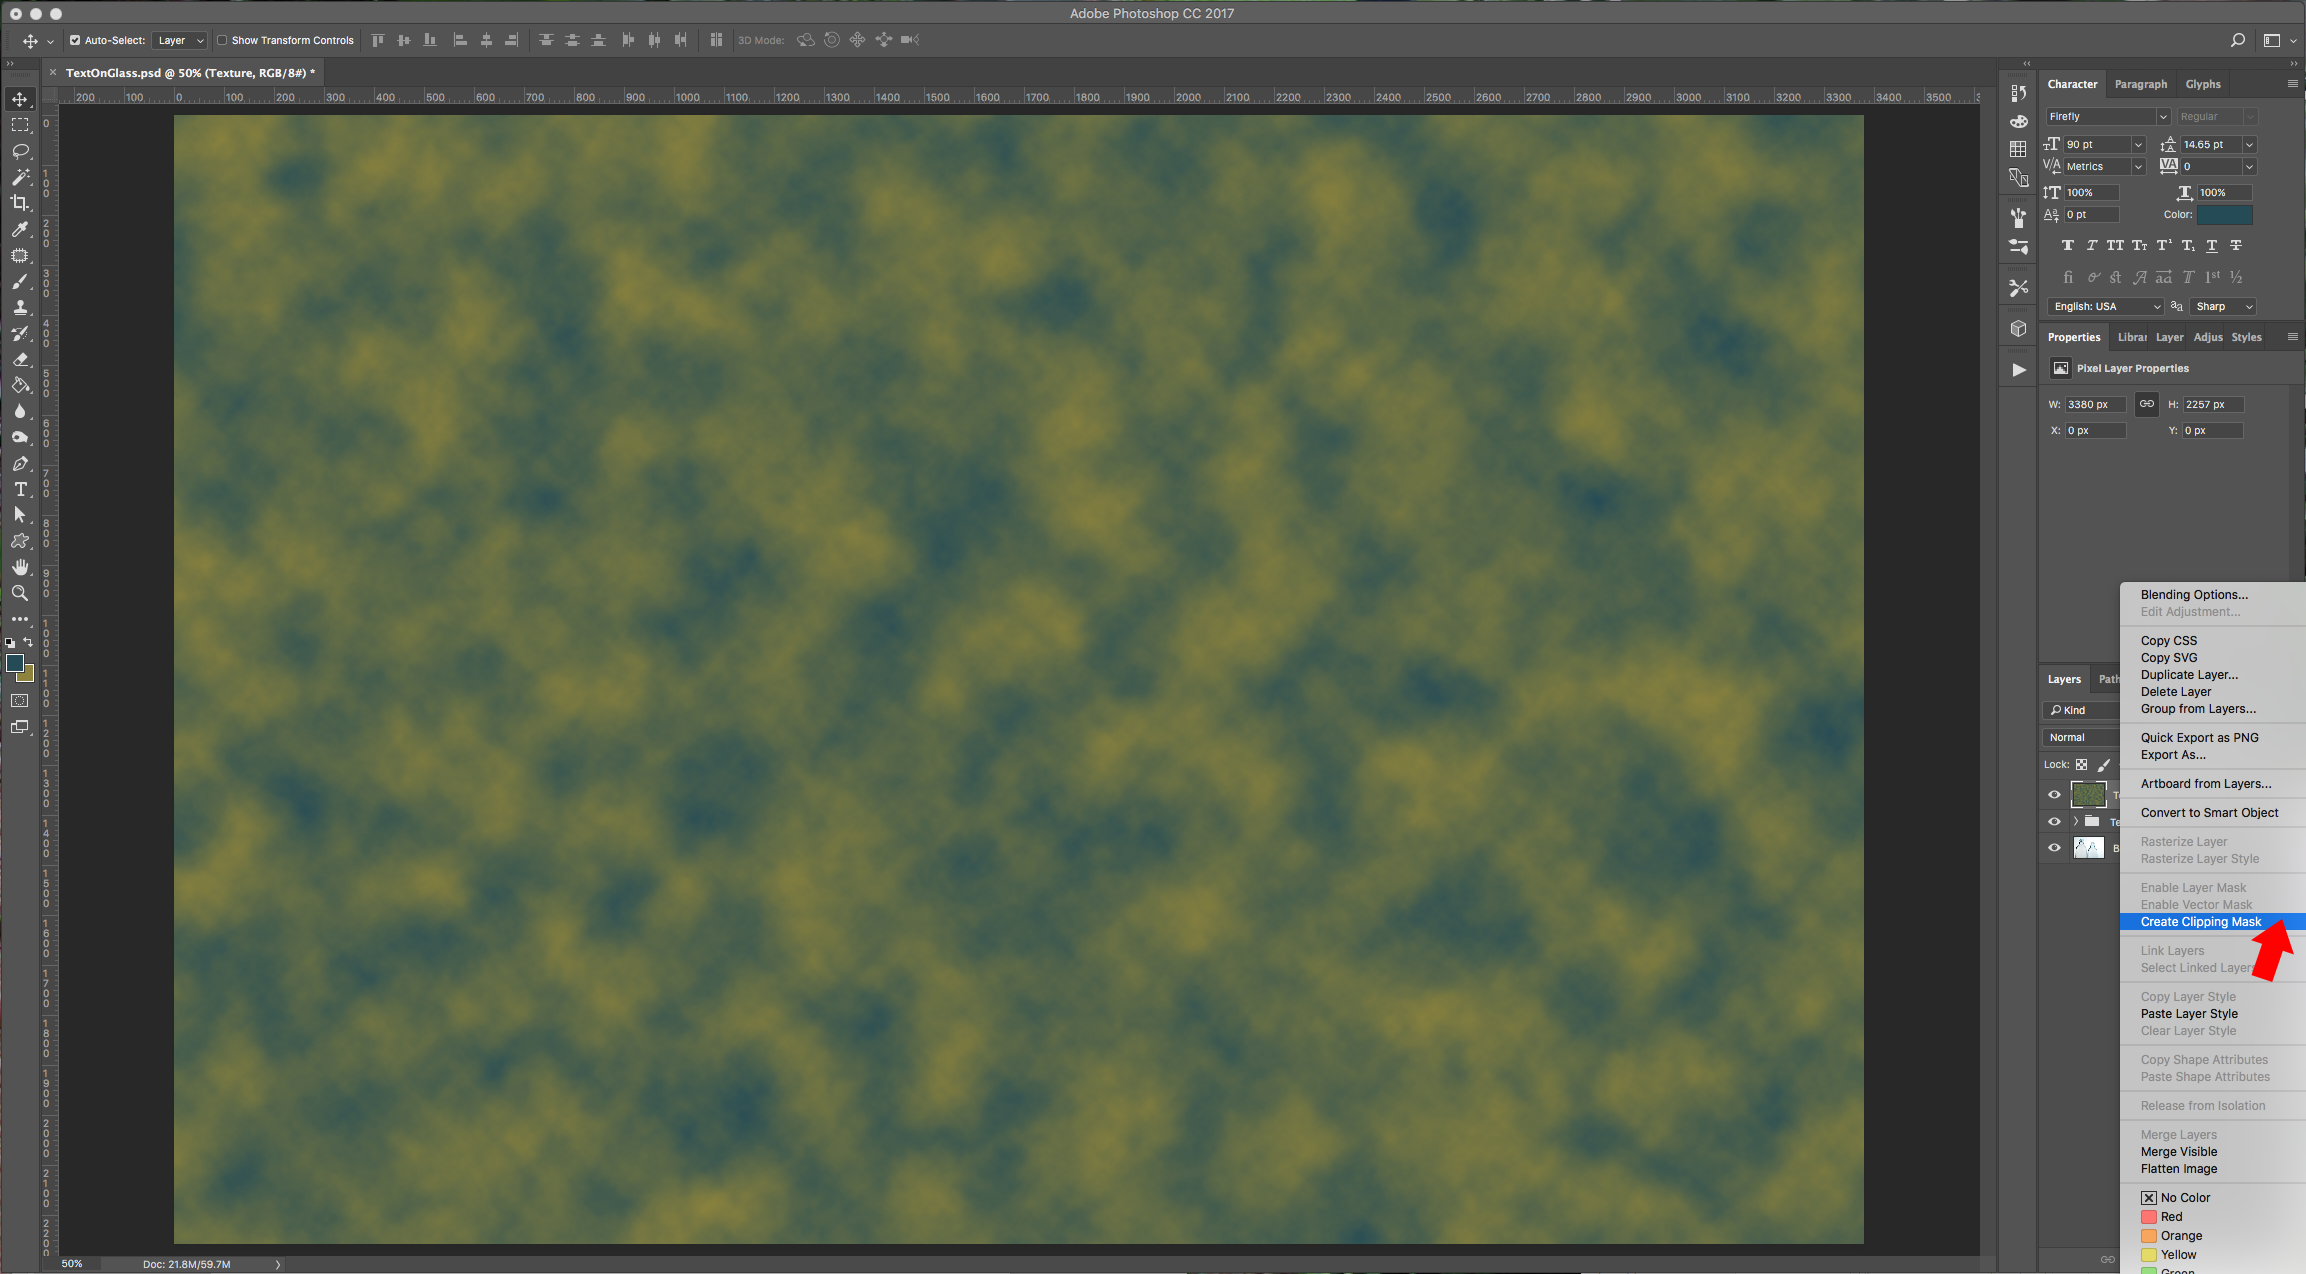
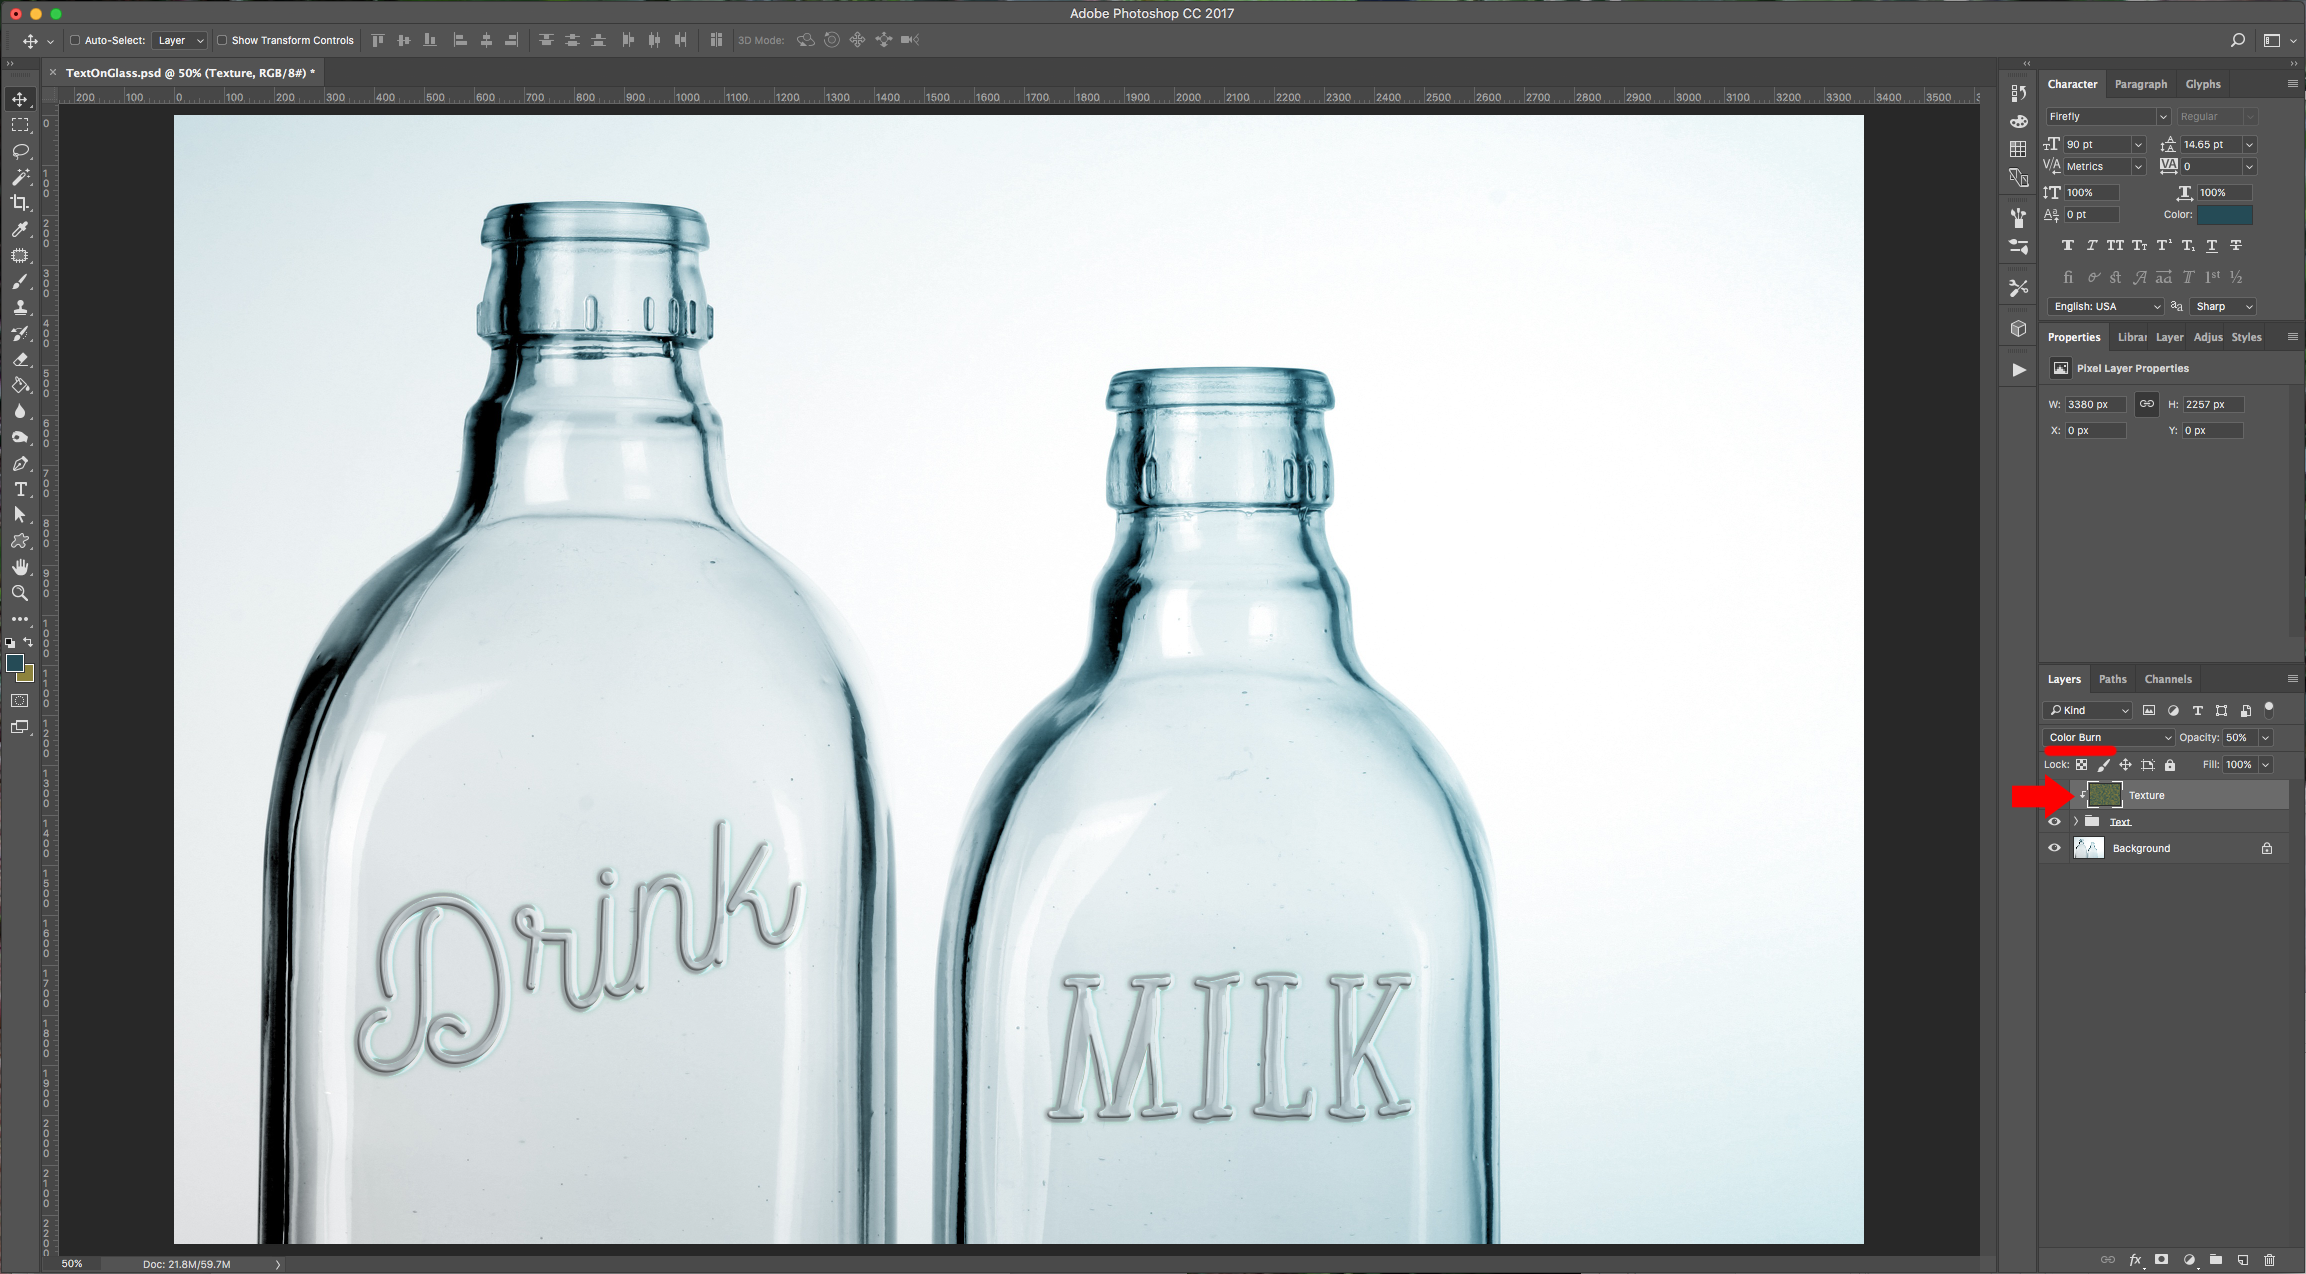
7 - Change your “Foreground” color to #234b57 and your “Background” color to #8d8437 and go to Filter > Render Clouds. Right-click on the “Texture” layer and select “Create Clipping Mask”. Change the “Blending Mode” to “Color Burn” and lower the “Opacity”.

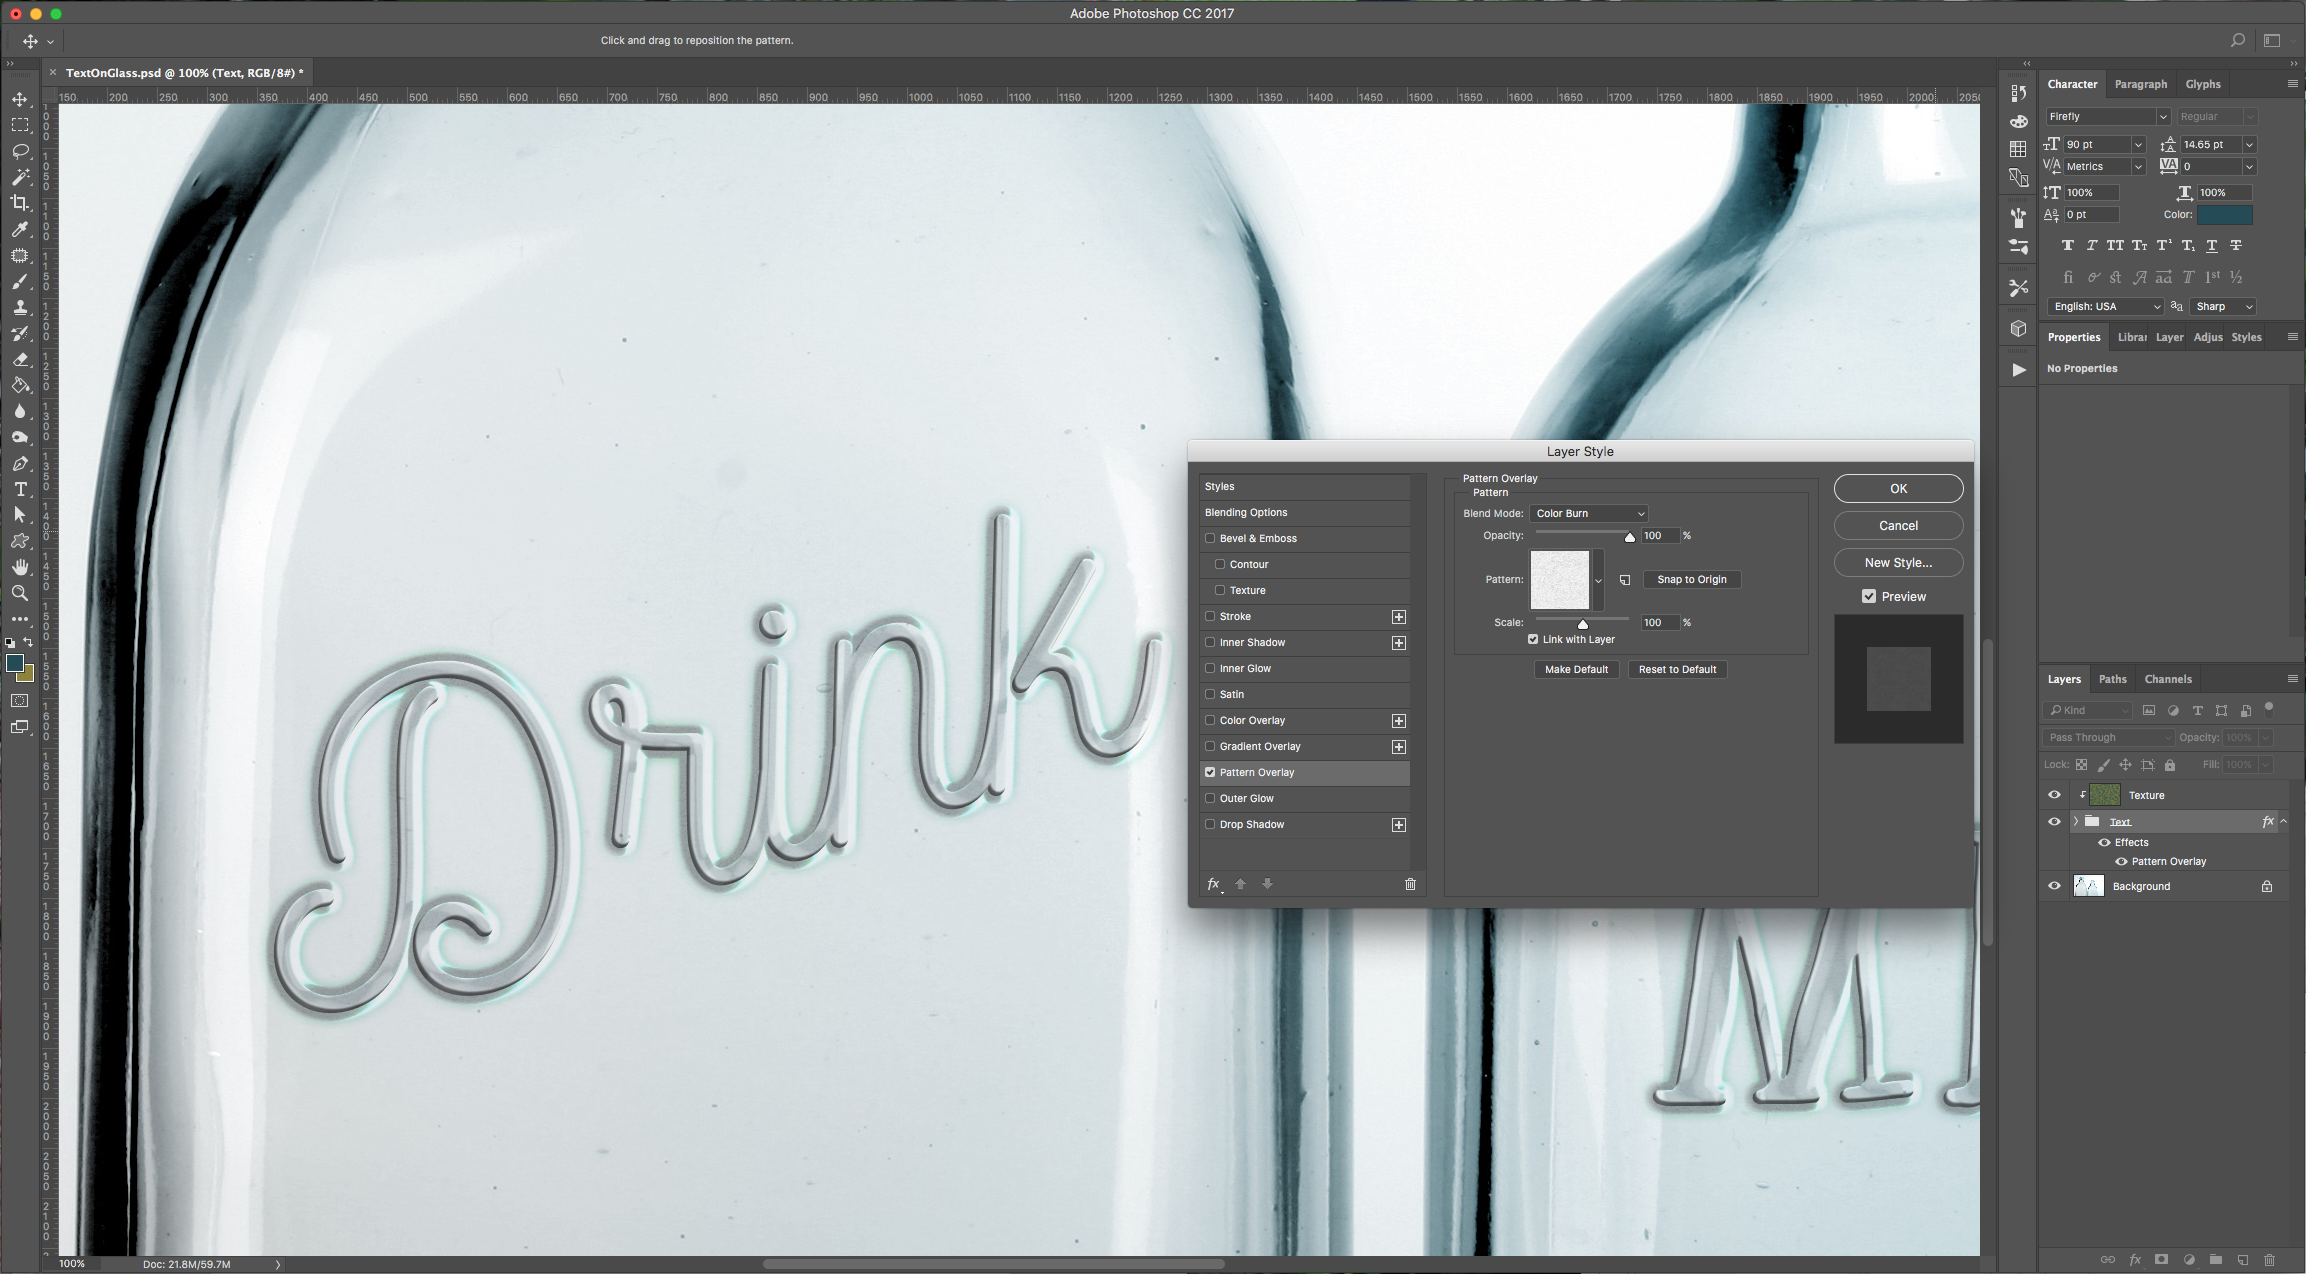
8 - Double-click on the “Text” Folder and apply the following “Pattern Overlay” values:
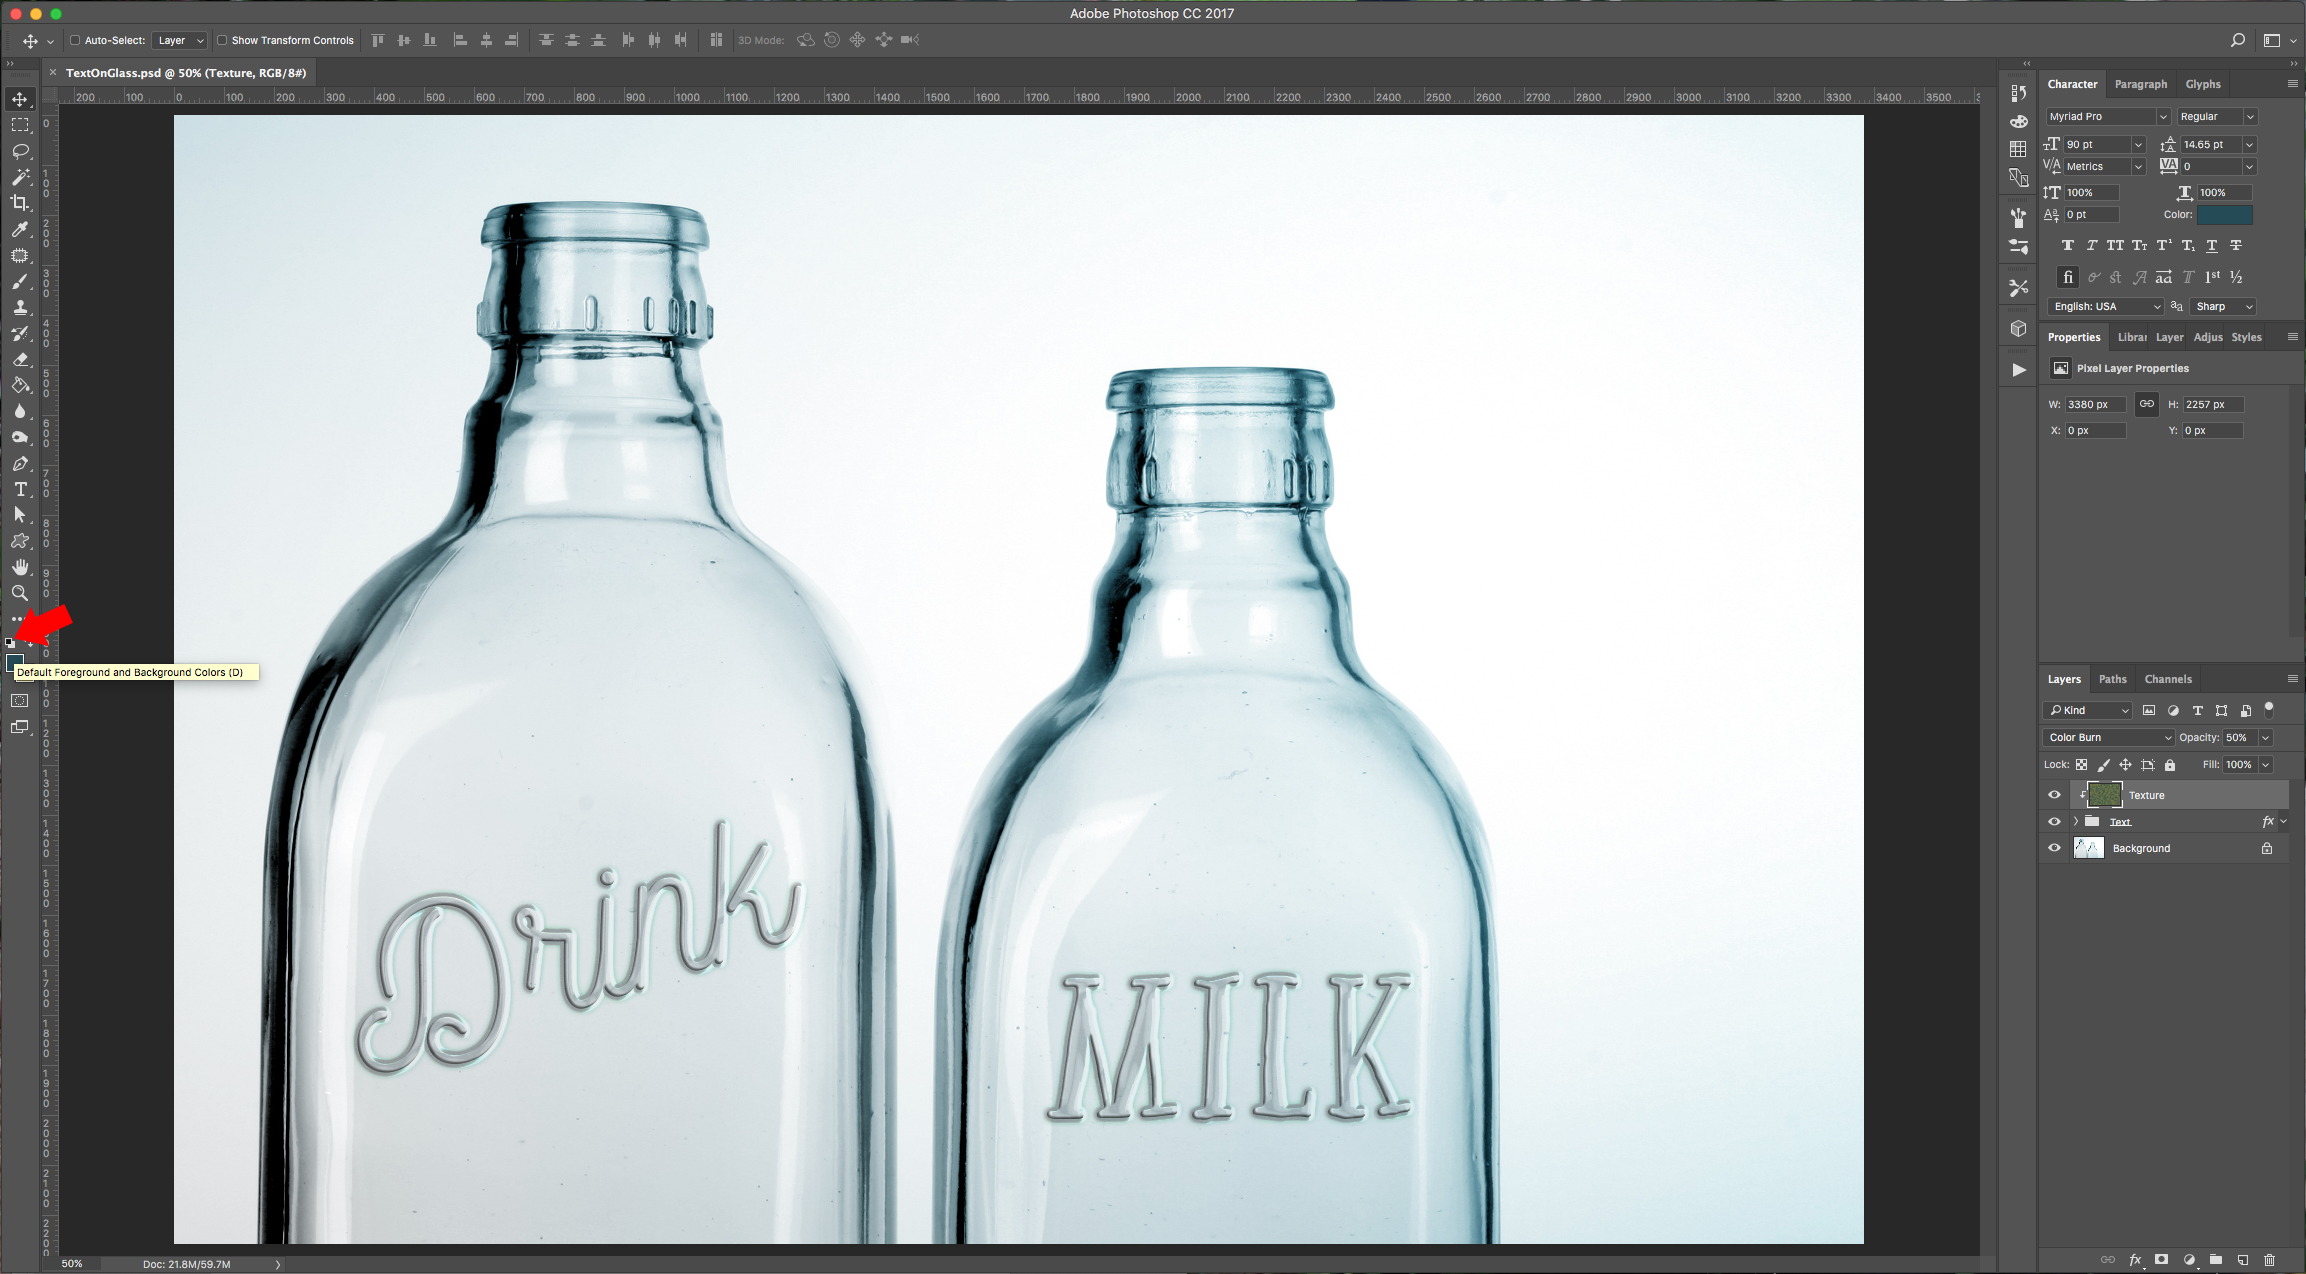
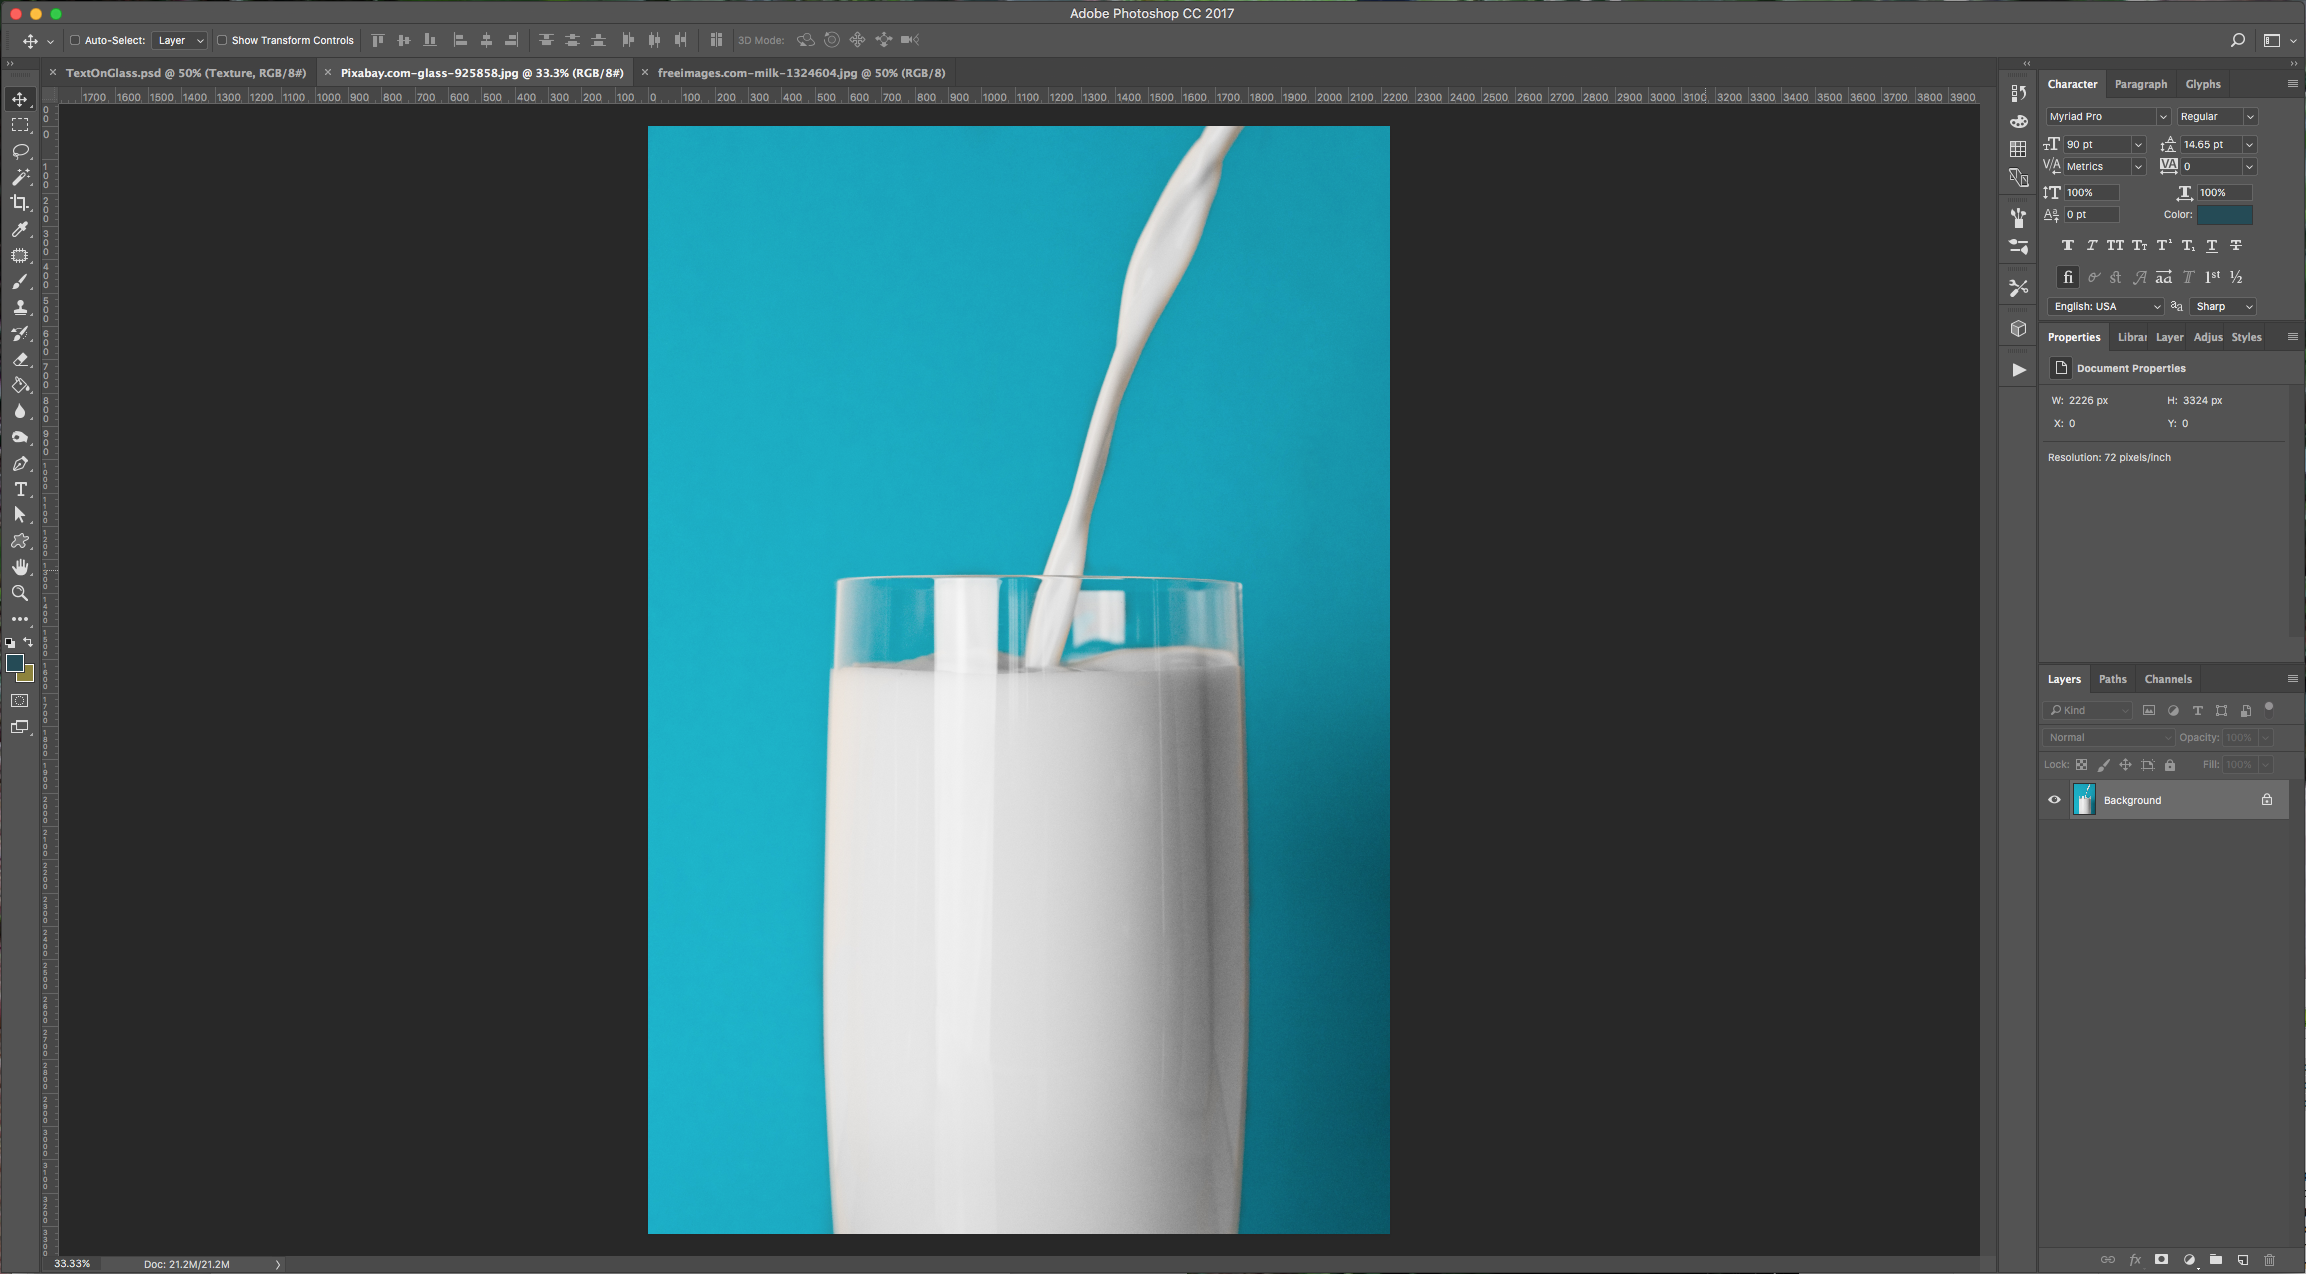
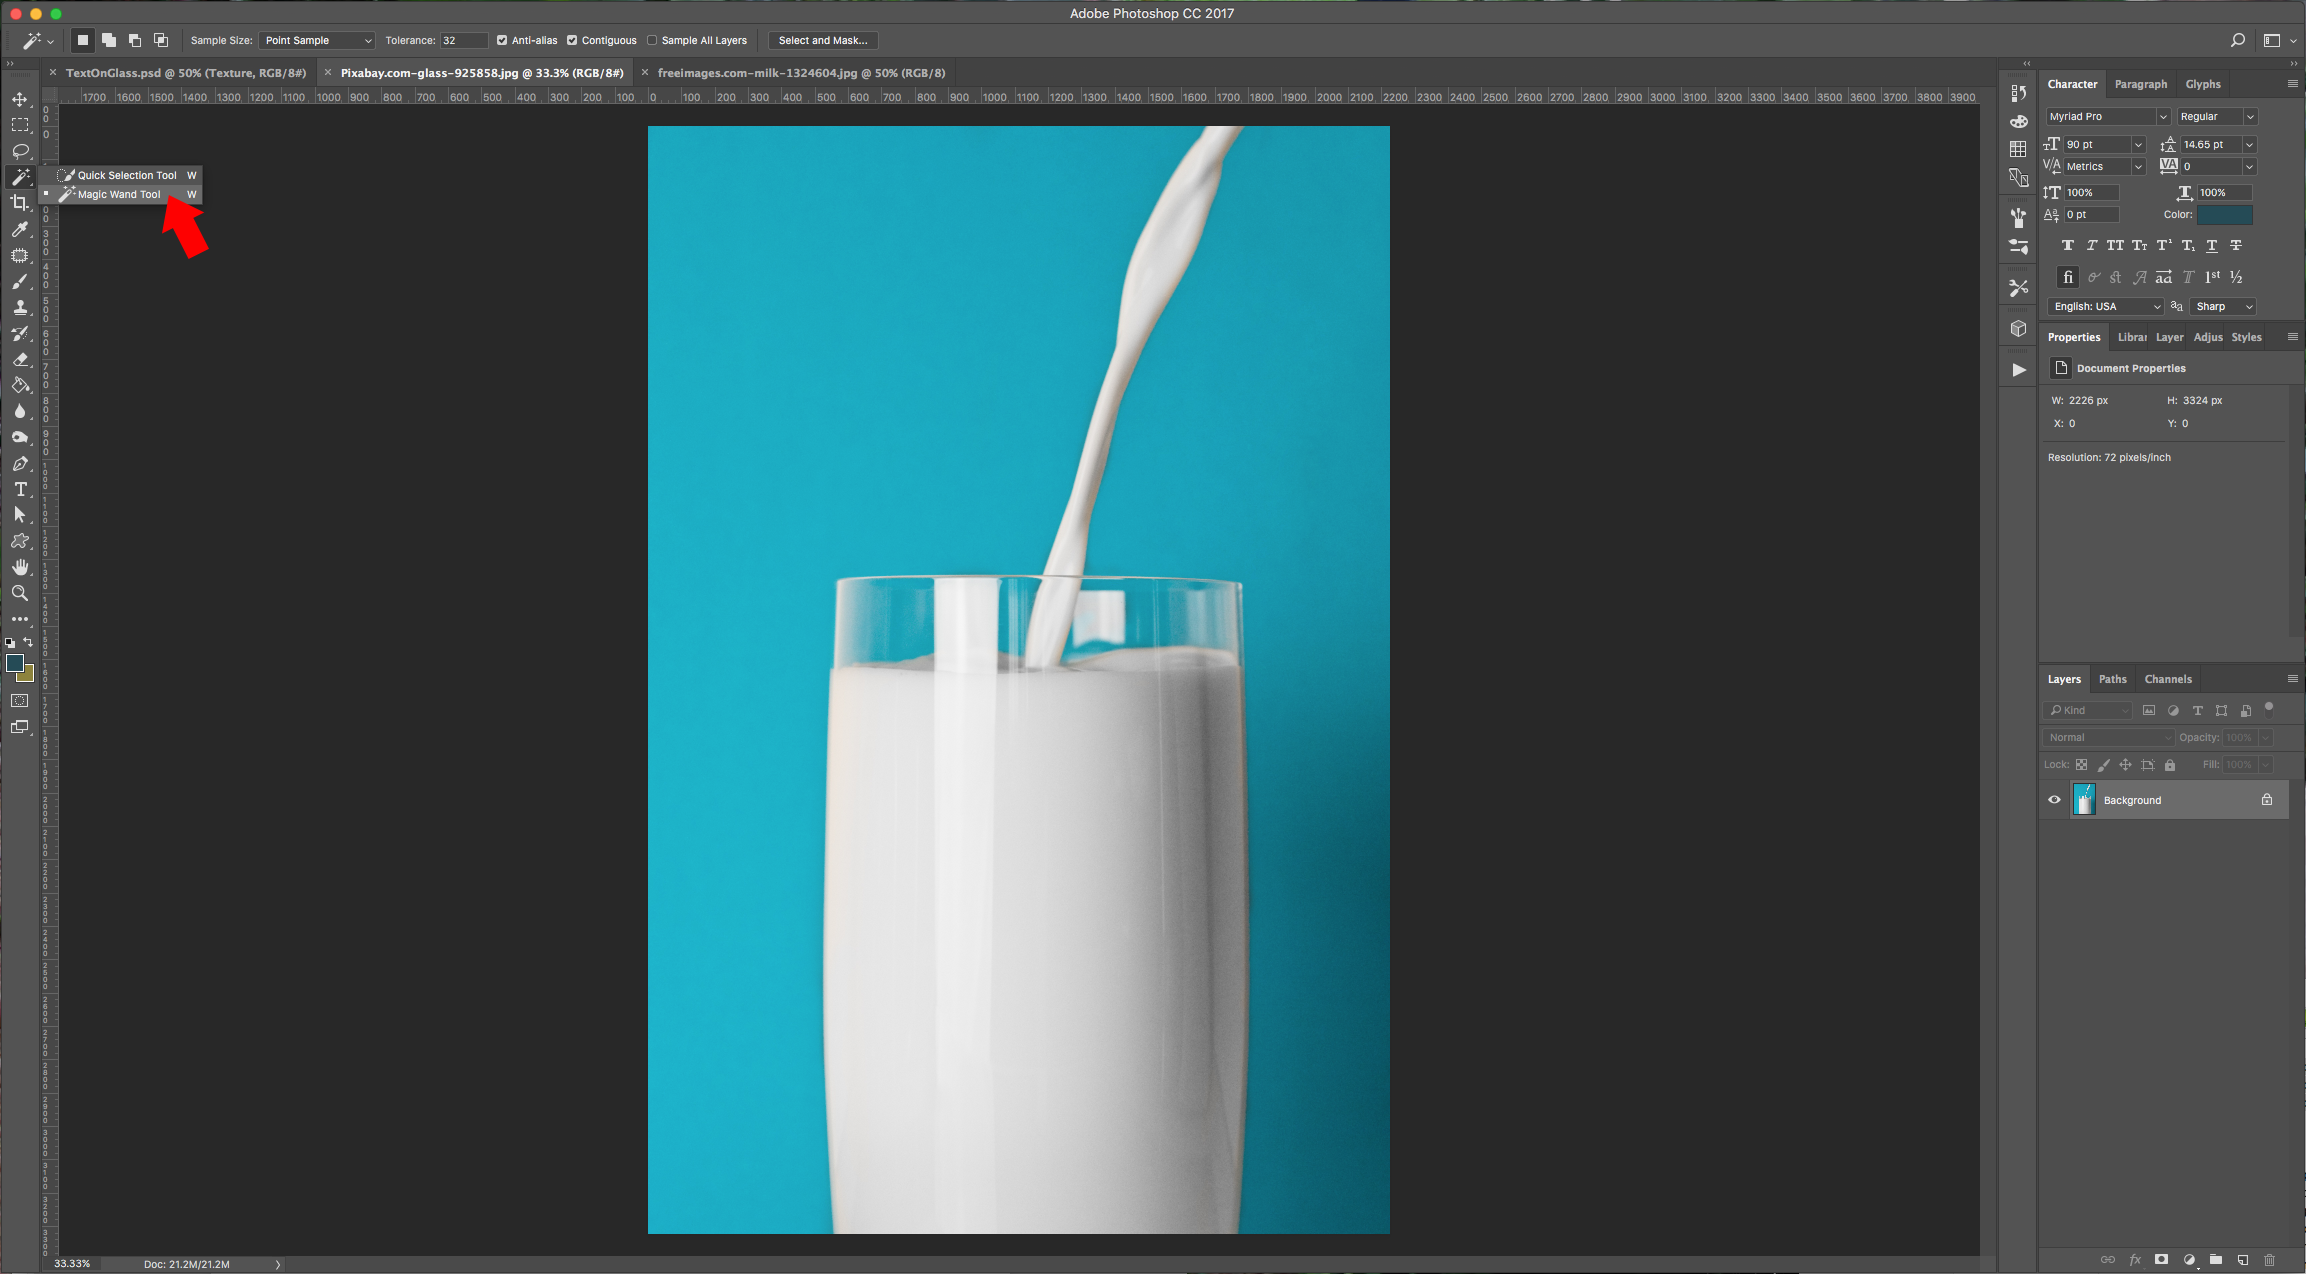
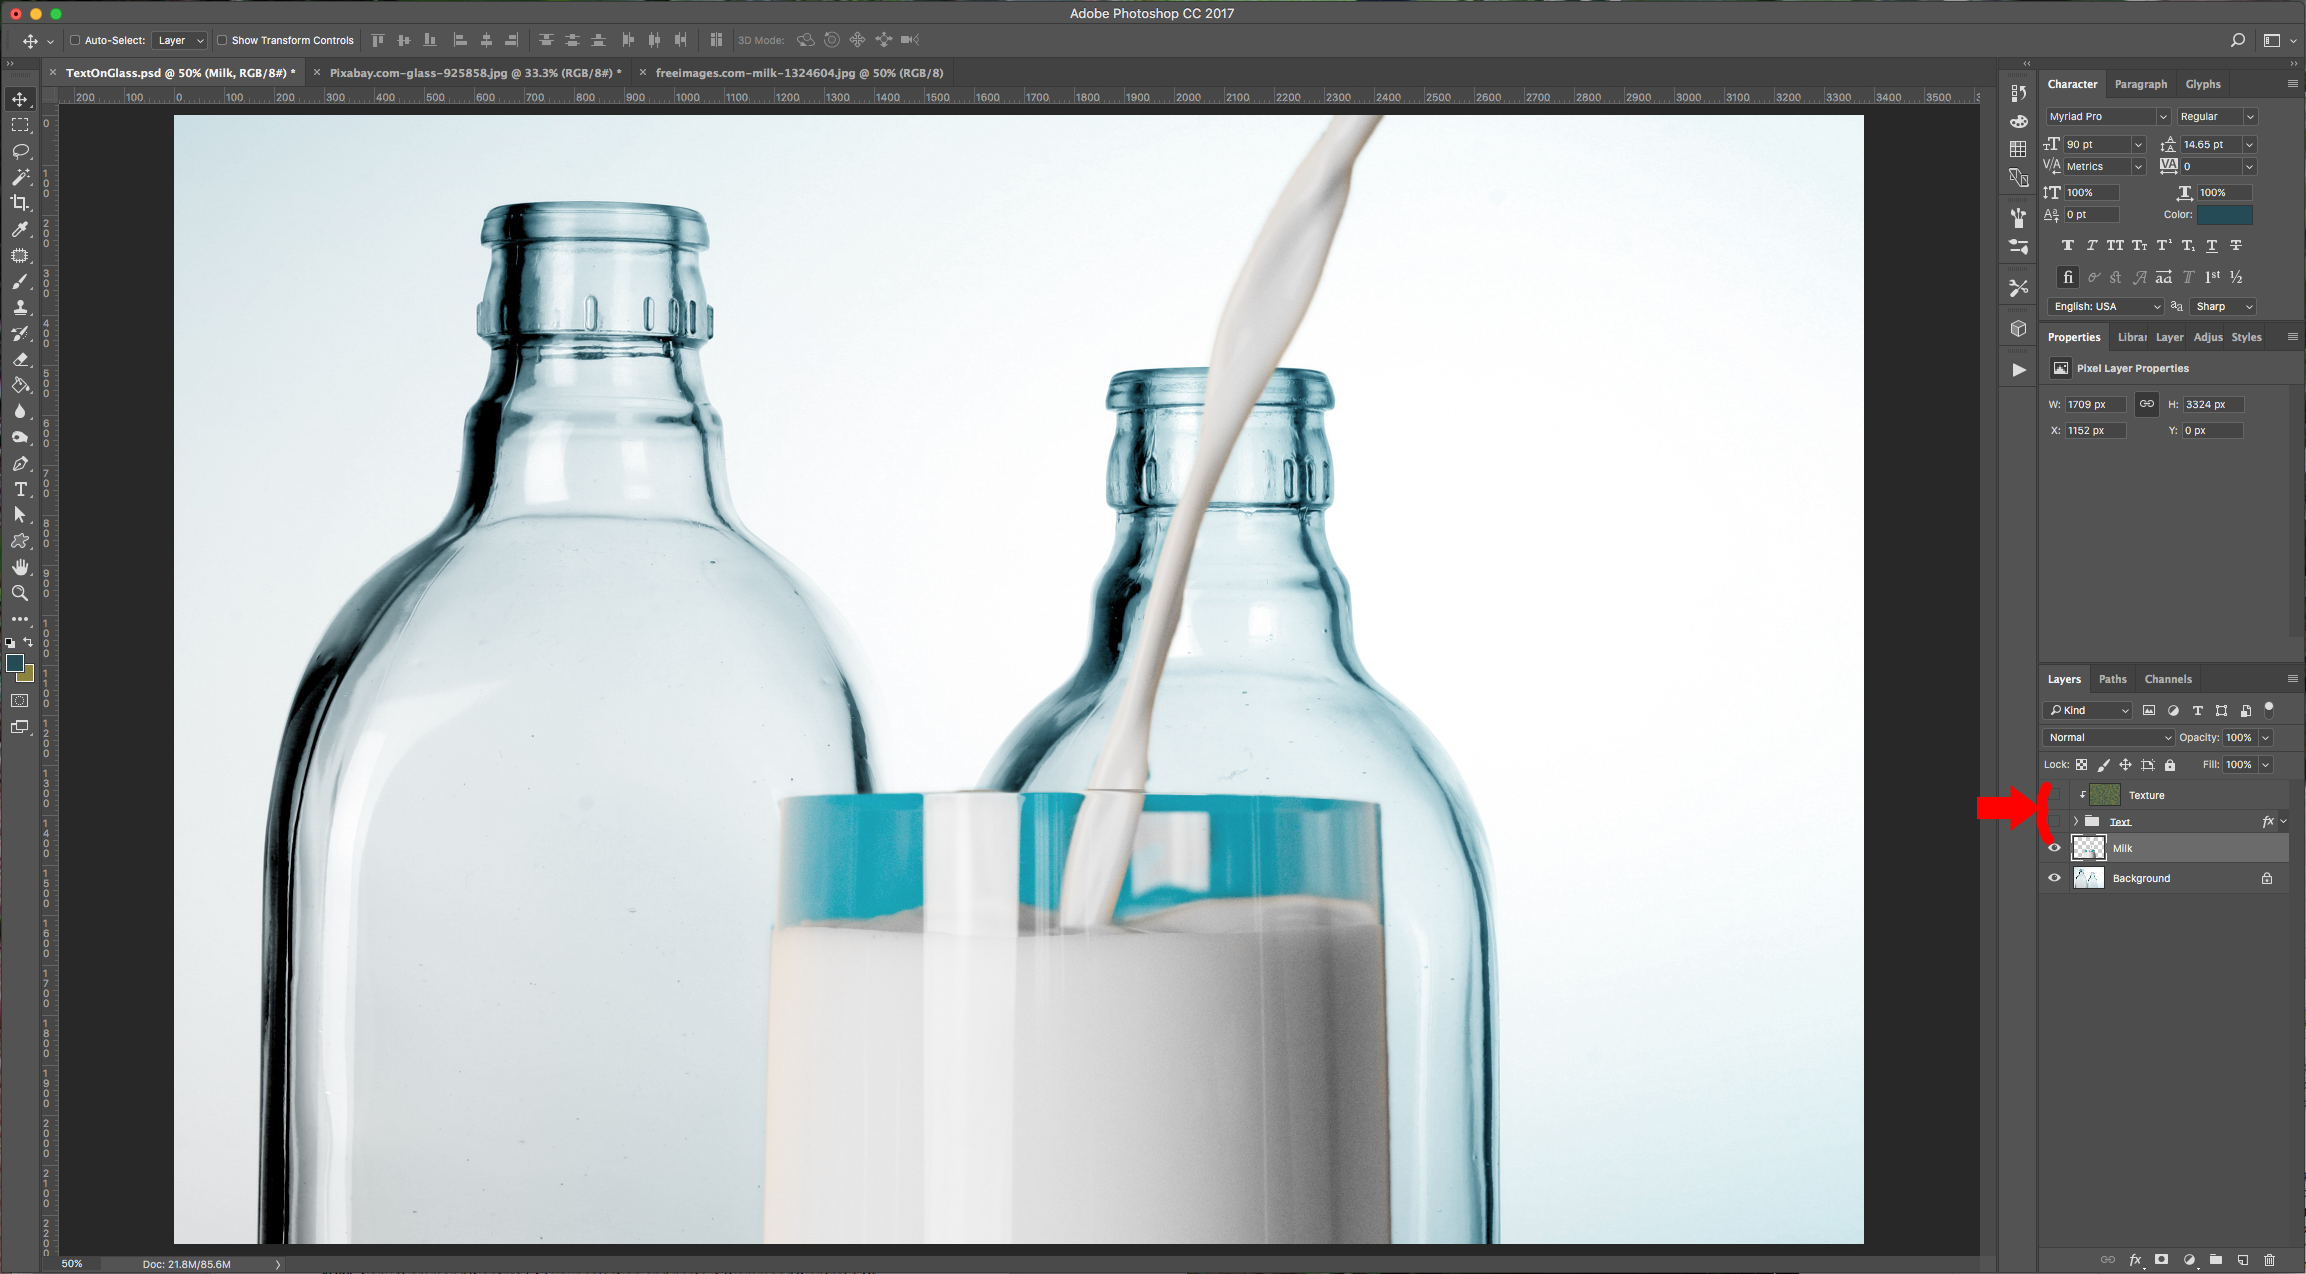
9 - Reset your “Foreground” and “Background” color to default by clicking on the little icon placed on top (left) of the color thumbs. Then open the image or images of milk you want to incorporate to your artwork.
10 - Select the “Magic Wand Tool” (W) and select parts of the background to isolate the parts of the image you want to keep (depending on your image you may want to select the image and not the background). Click on other parts while holding the “Shift” key to add to your selection. Once you are happy click Shift + Command/Control + I to invert your selection (if you selected the parts you want to use you don’t need to do this). You can use the “Polygonal Lasso Tool” (L) or any other tool you like to create the selection if you prefer.

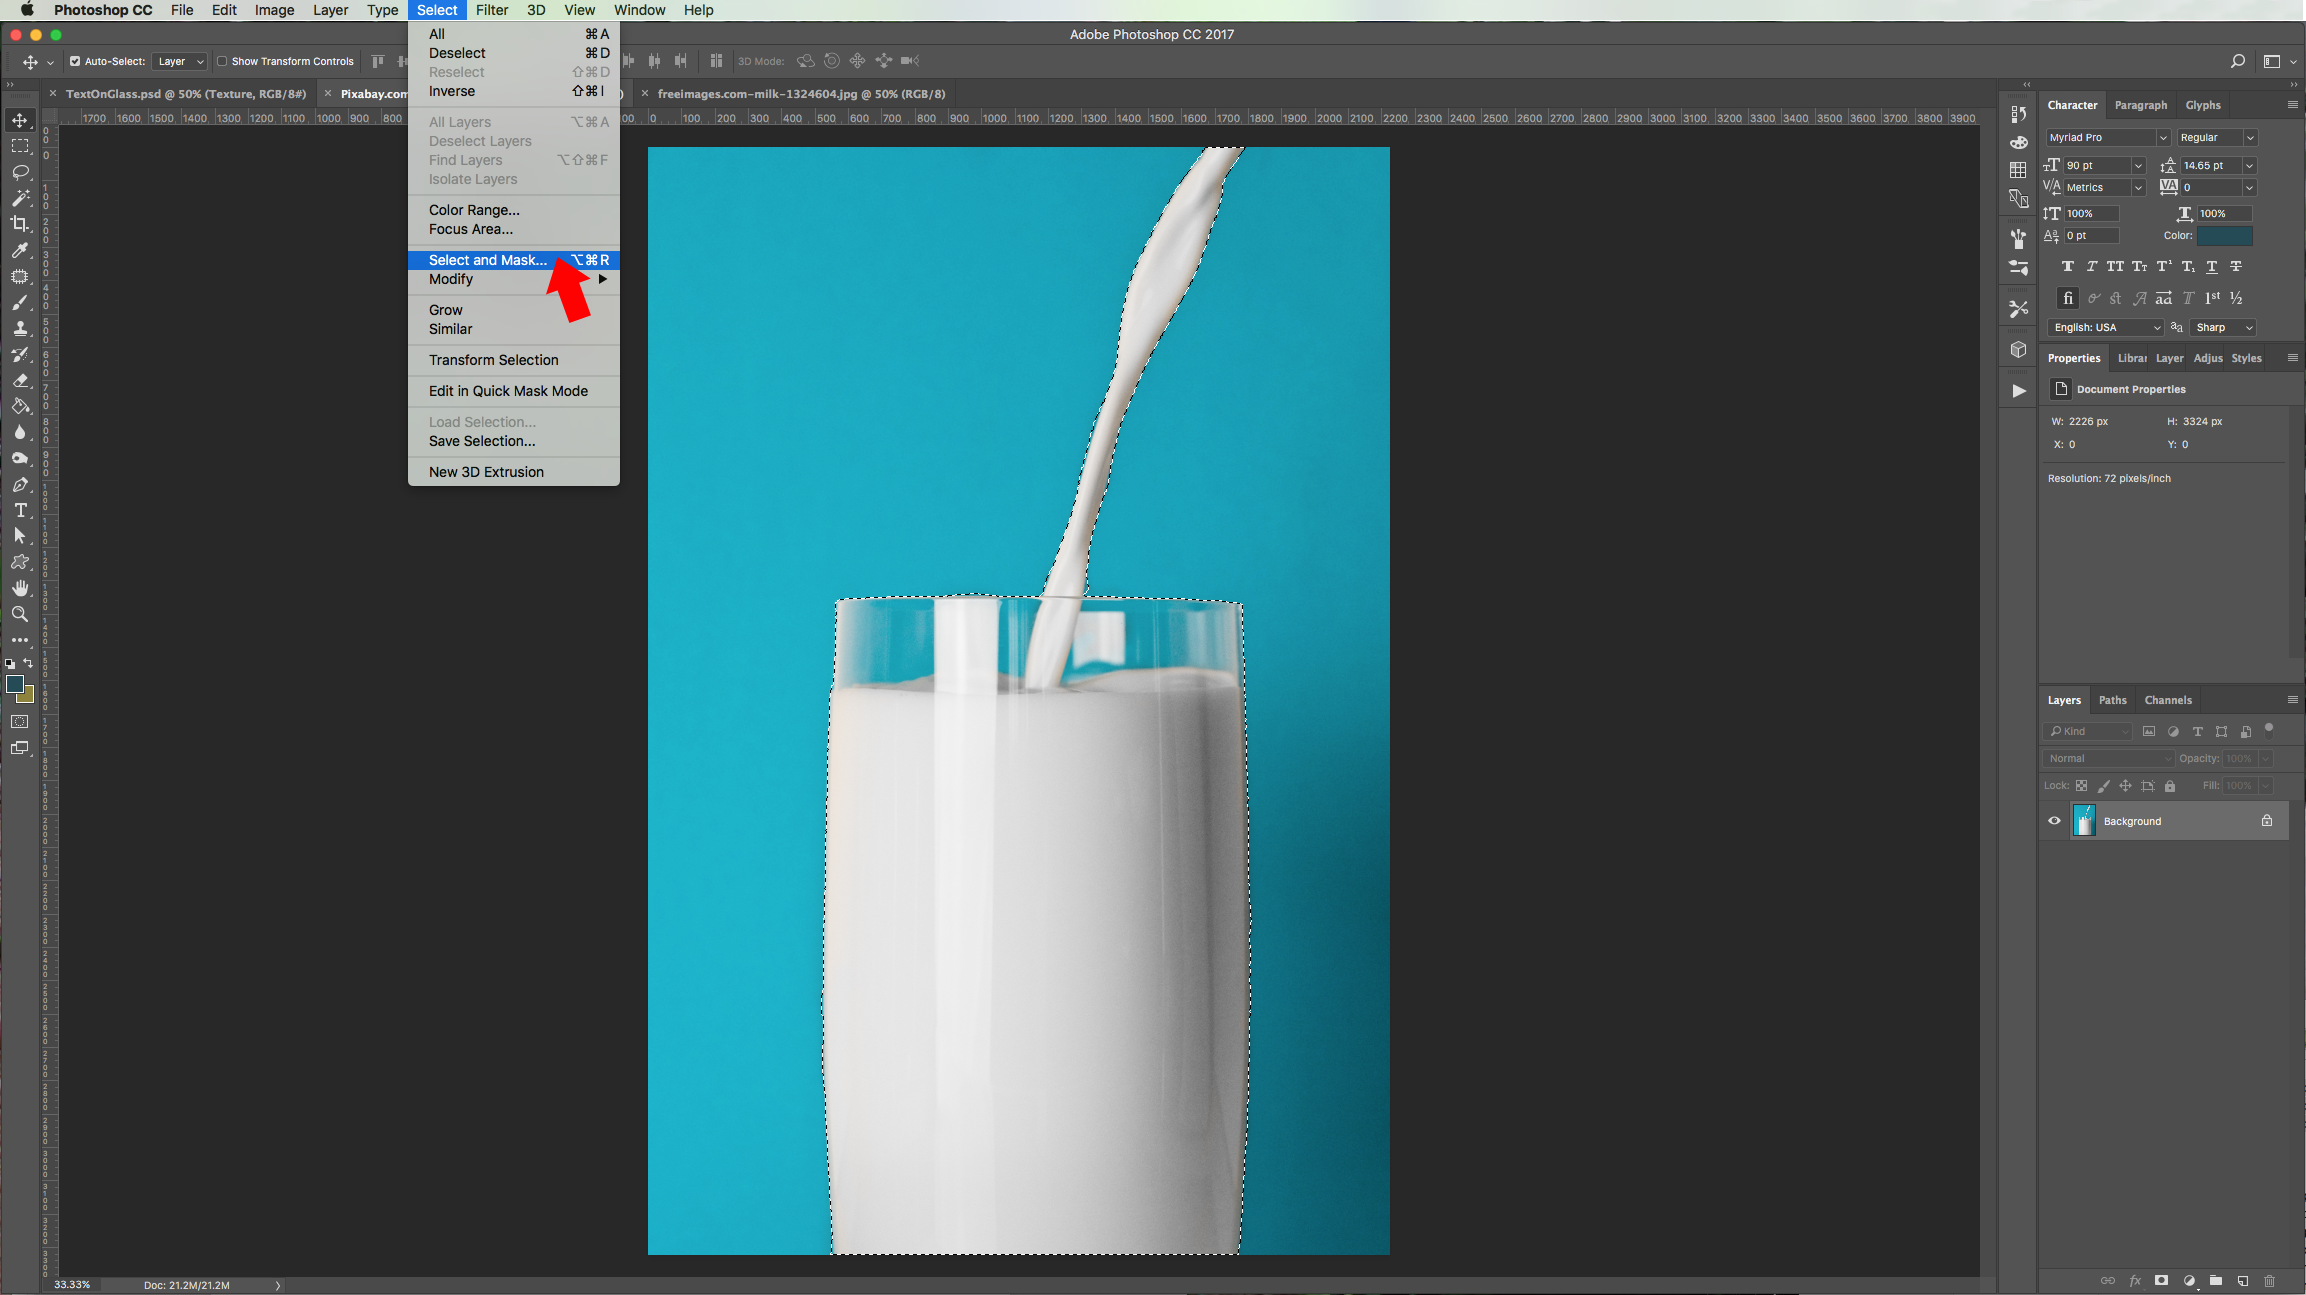
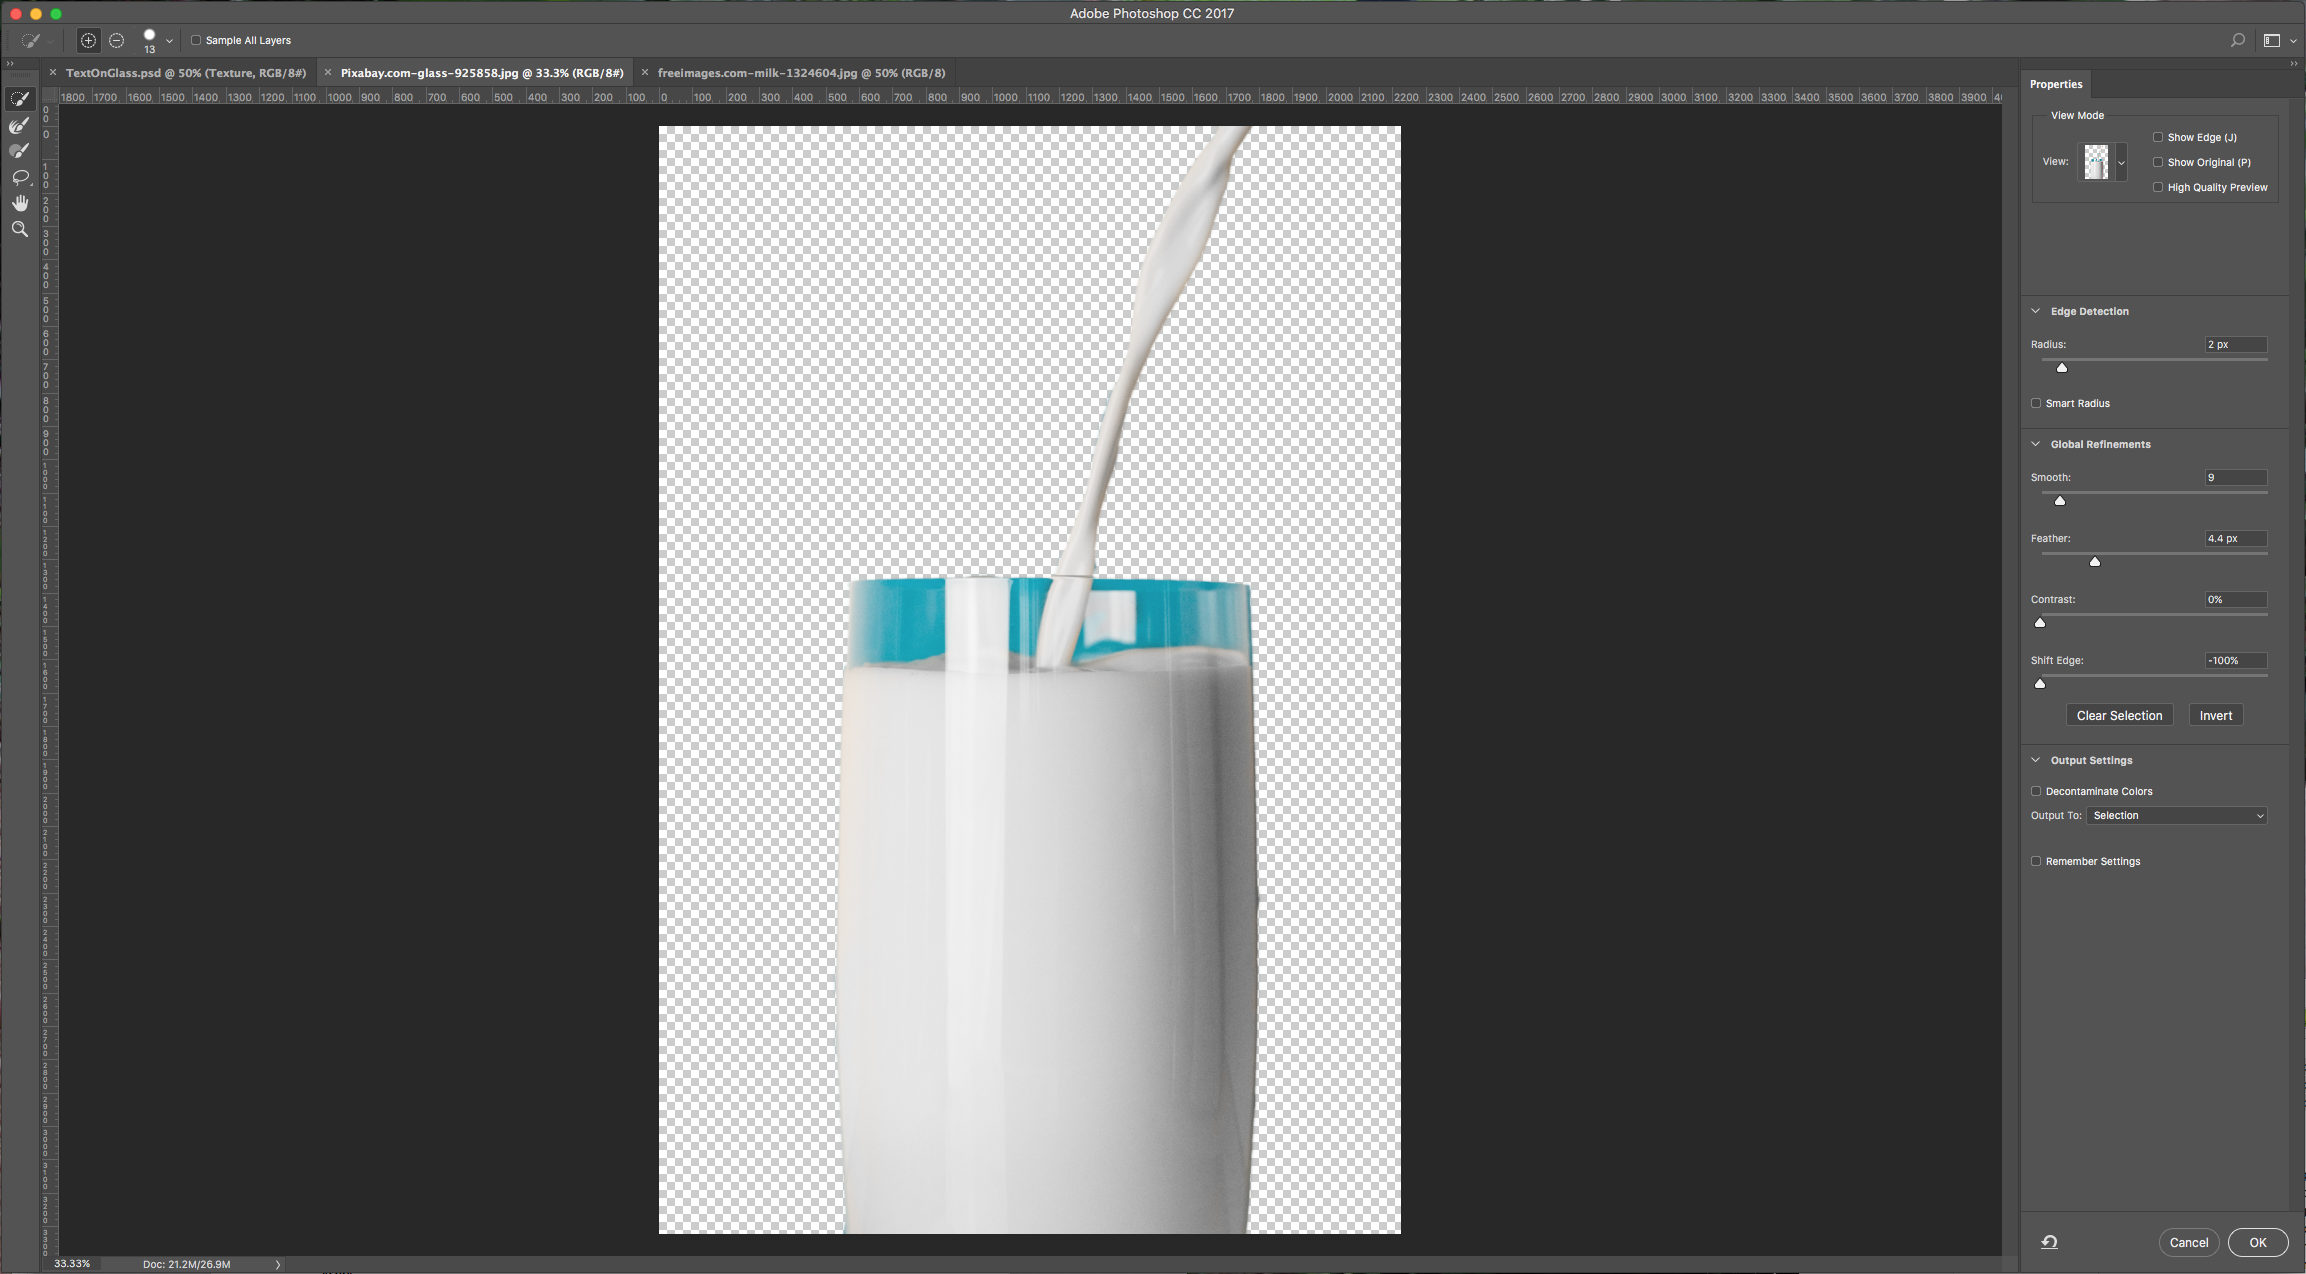
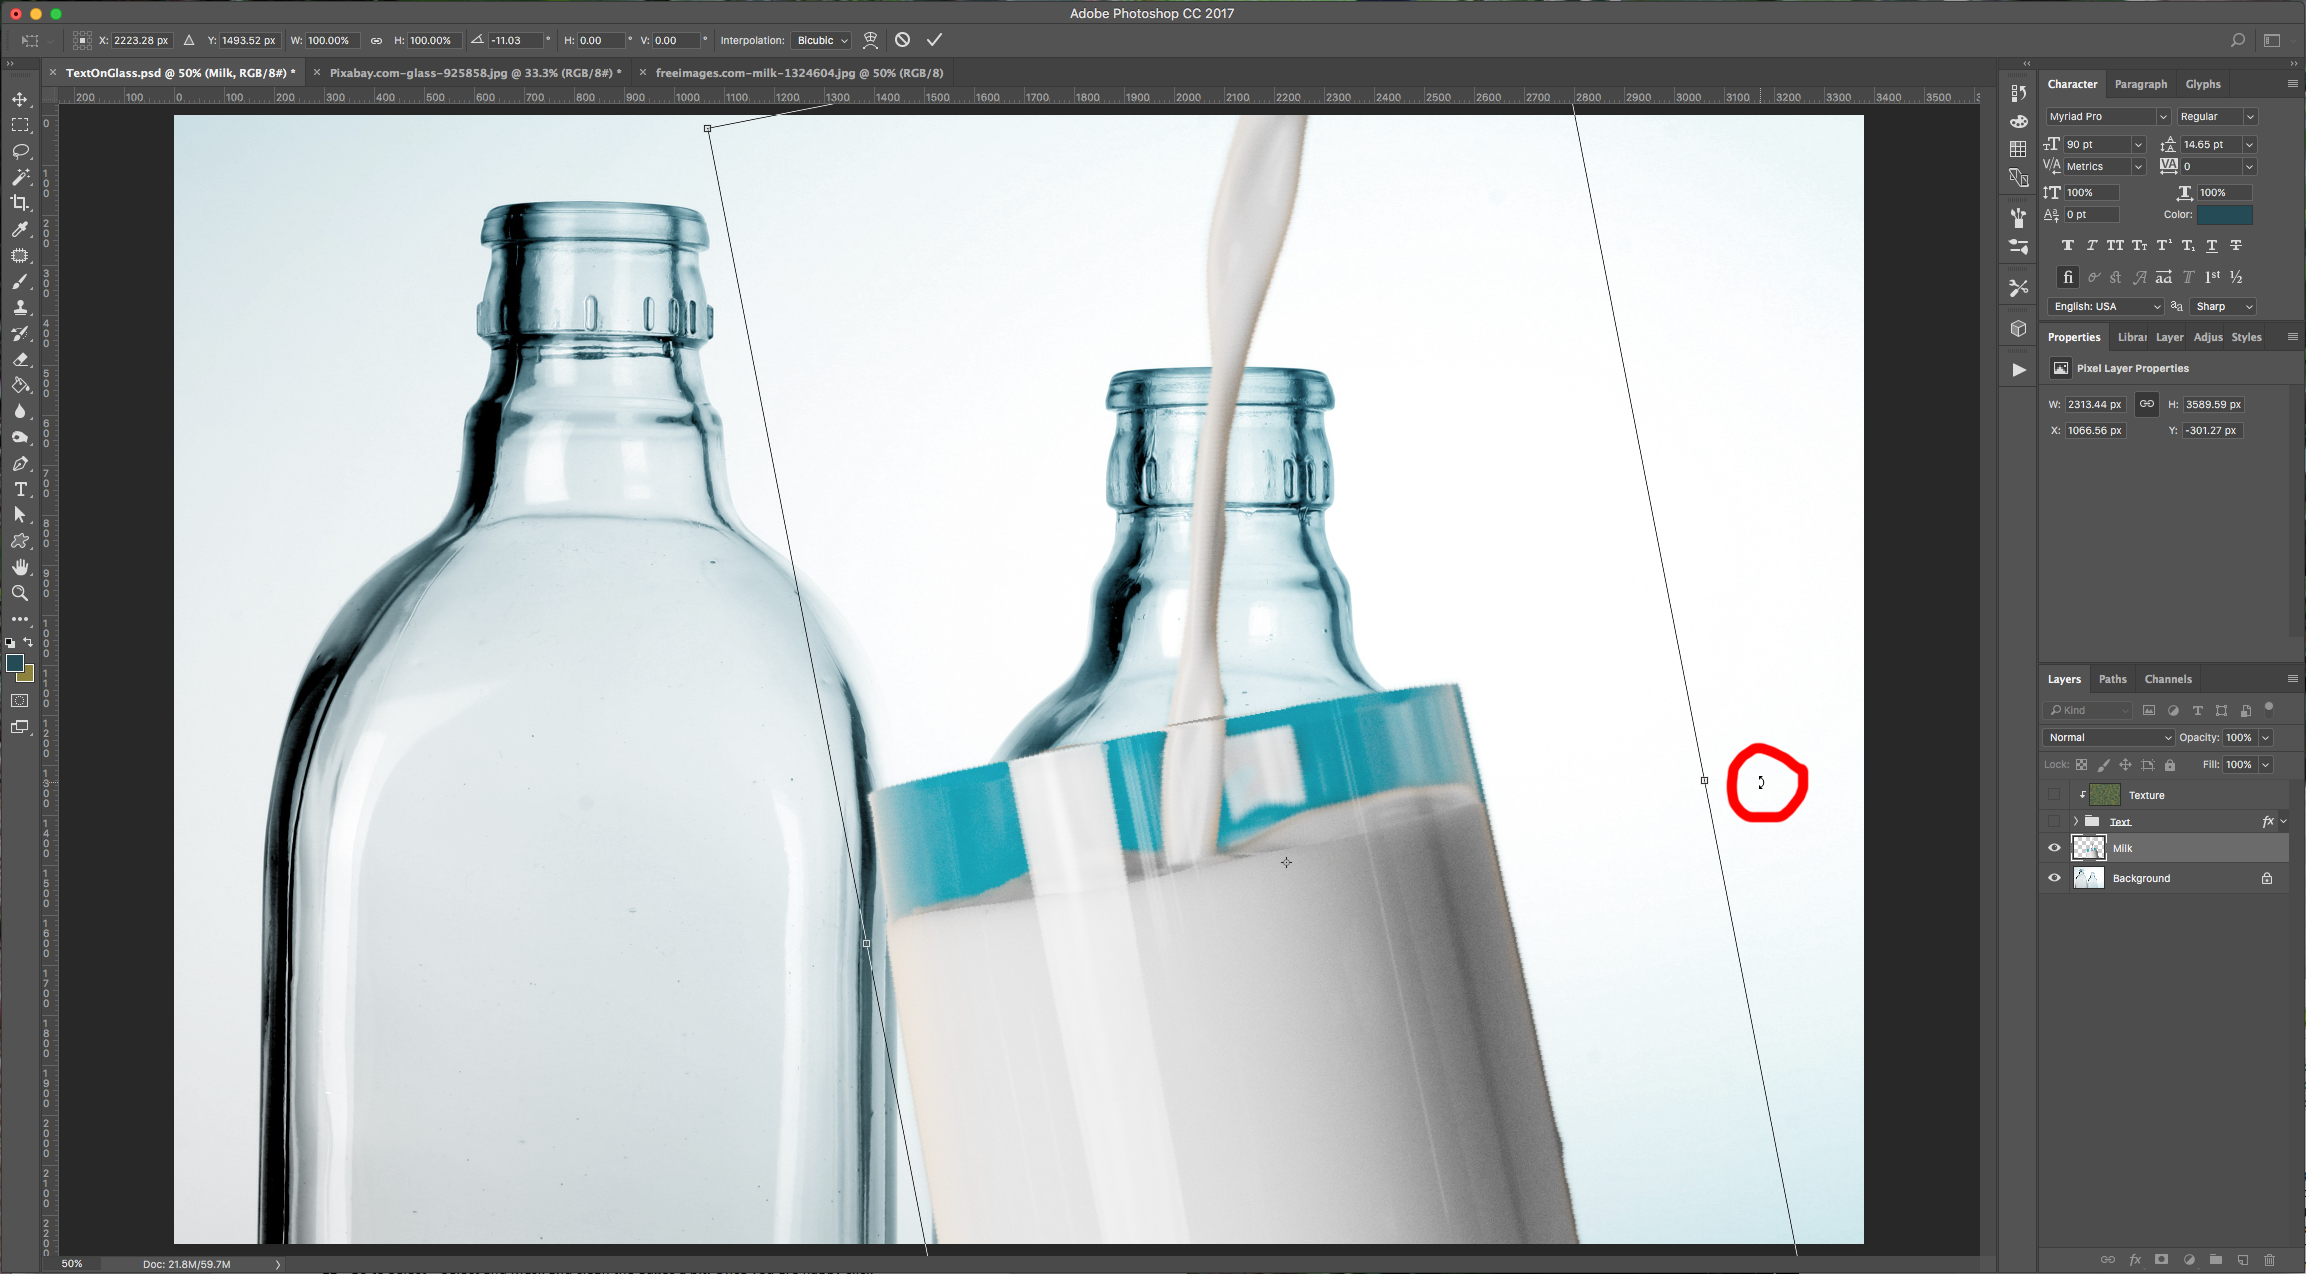
11 - Go to Select > Select and Mask and clean the edges a bit. Once you are happy click “OK”. Copy (Command/Control + C) your selection and paste it (Command/Control + V) into your bottles document. Turn Off your “Text” and “Texture” layers for now (click on the little eye icon to the left of the thumbnails). Using the “Transform” function (Command/Control + T).
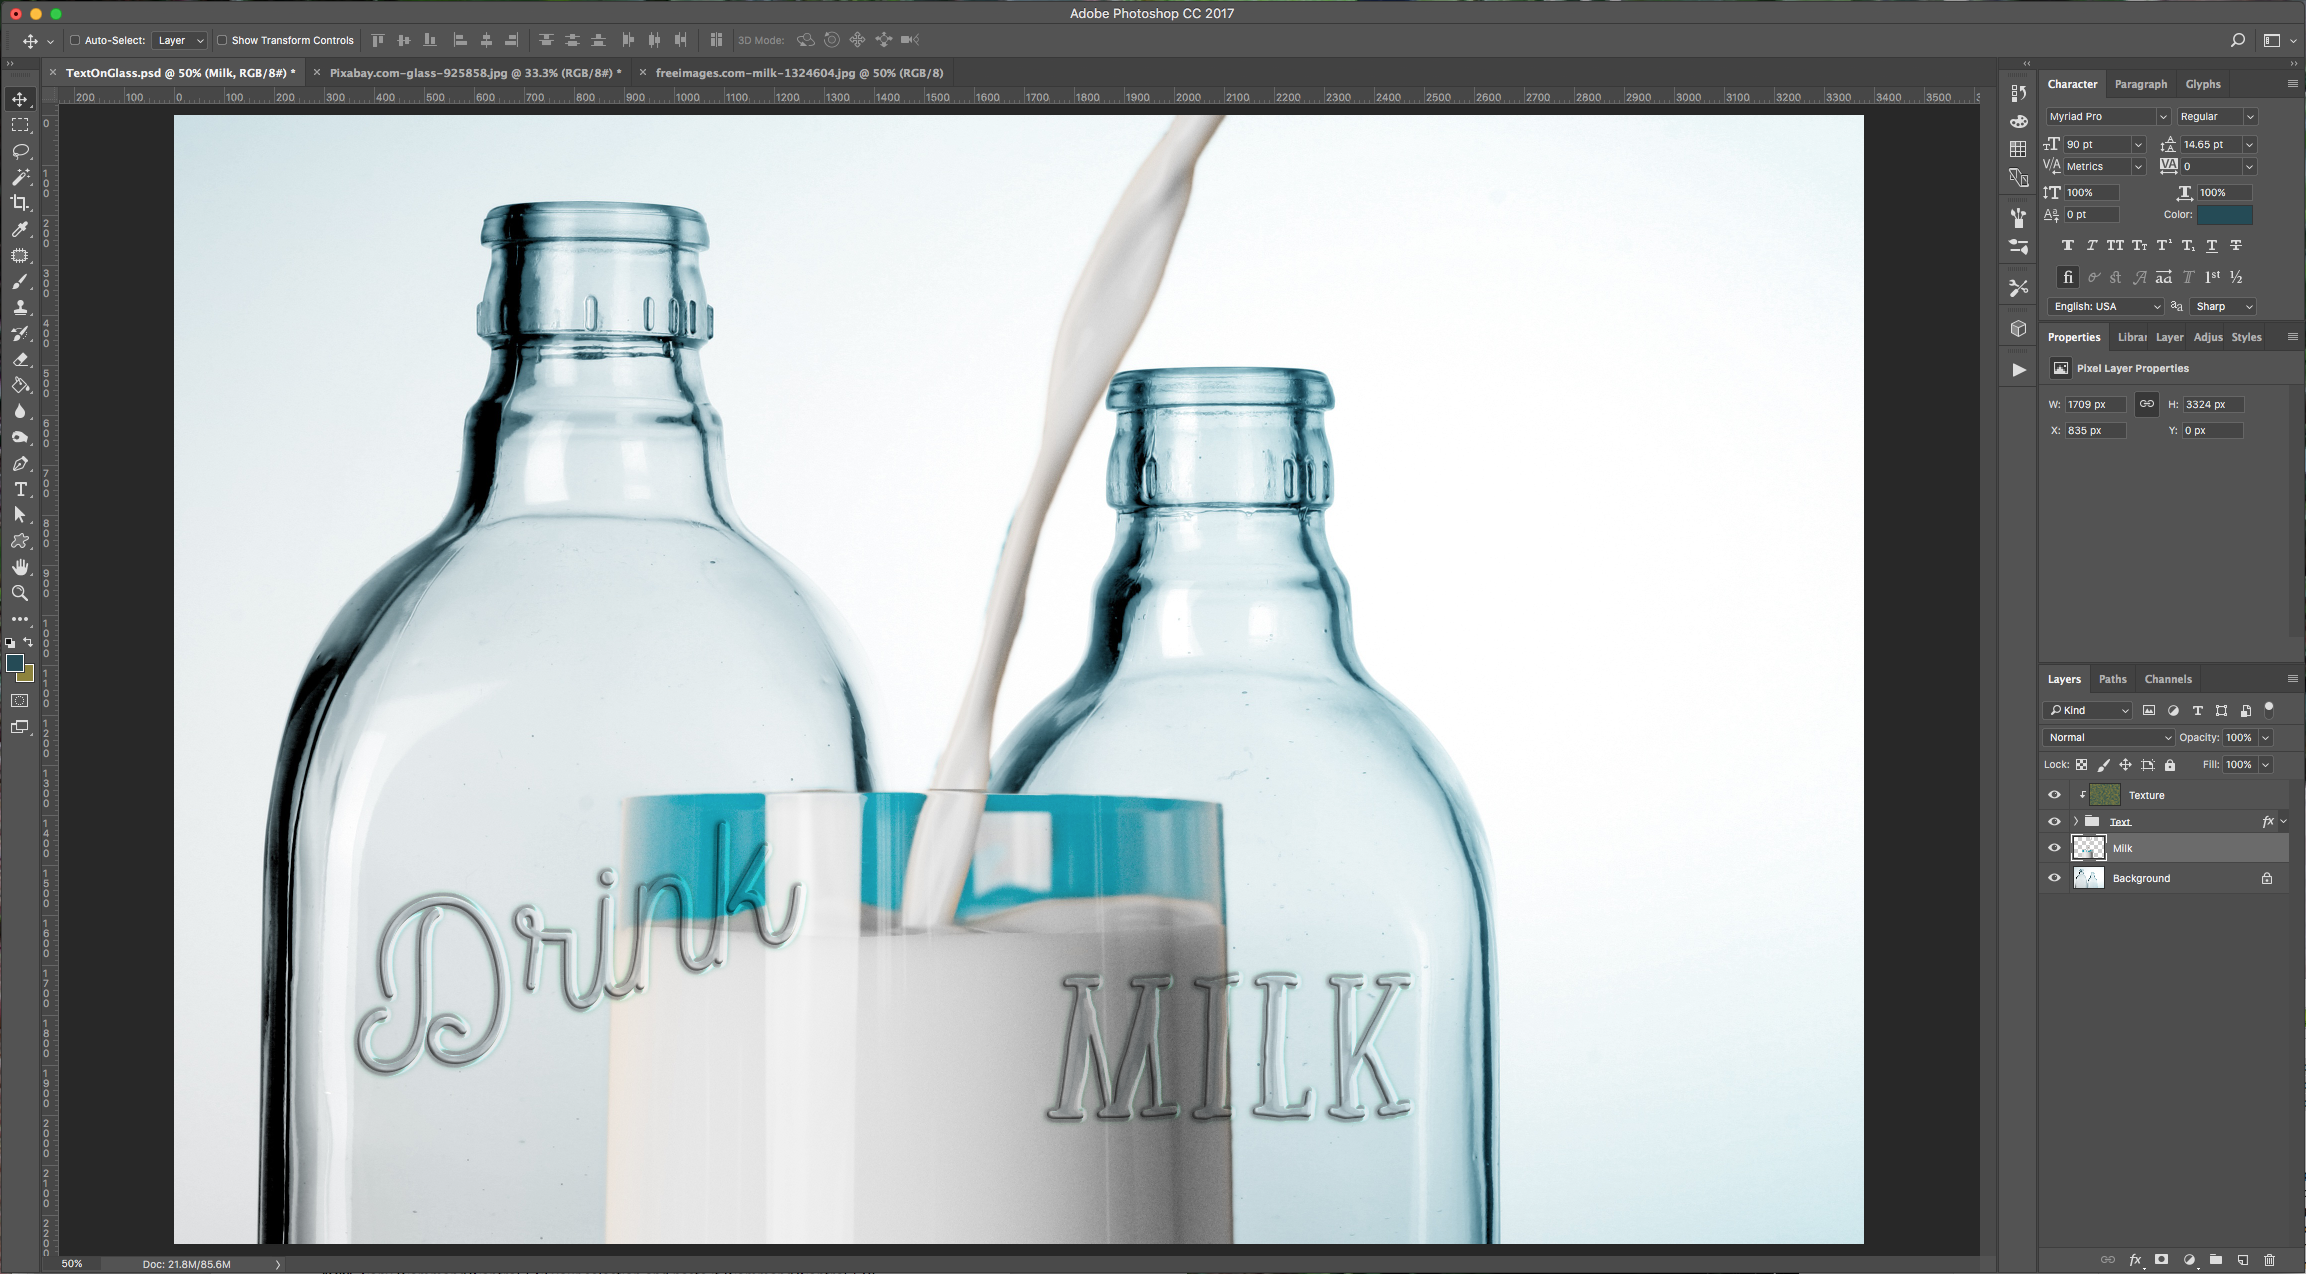
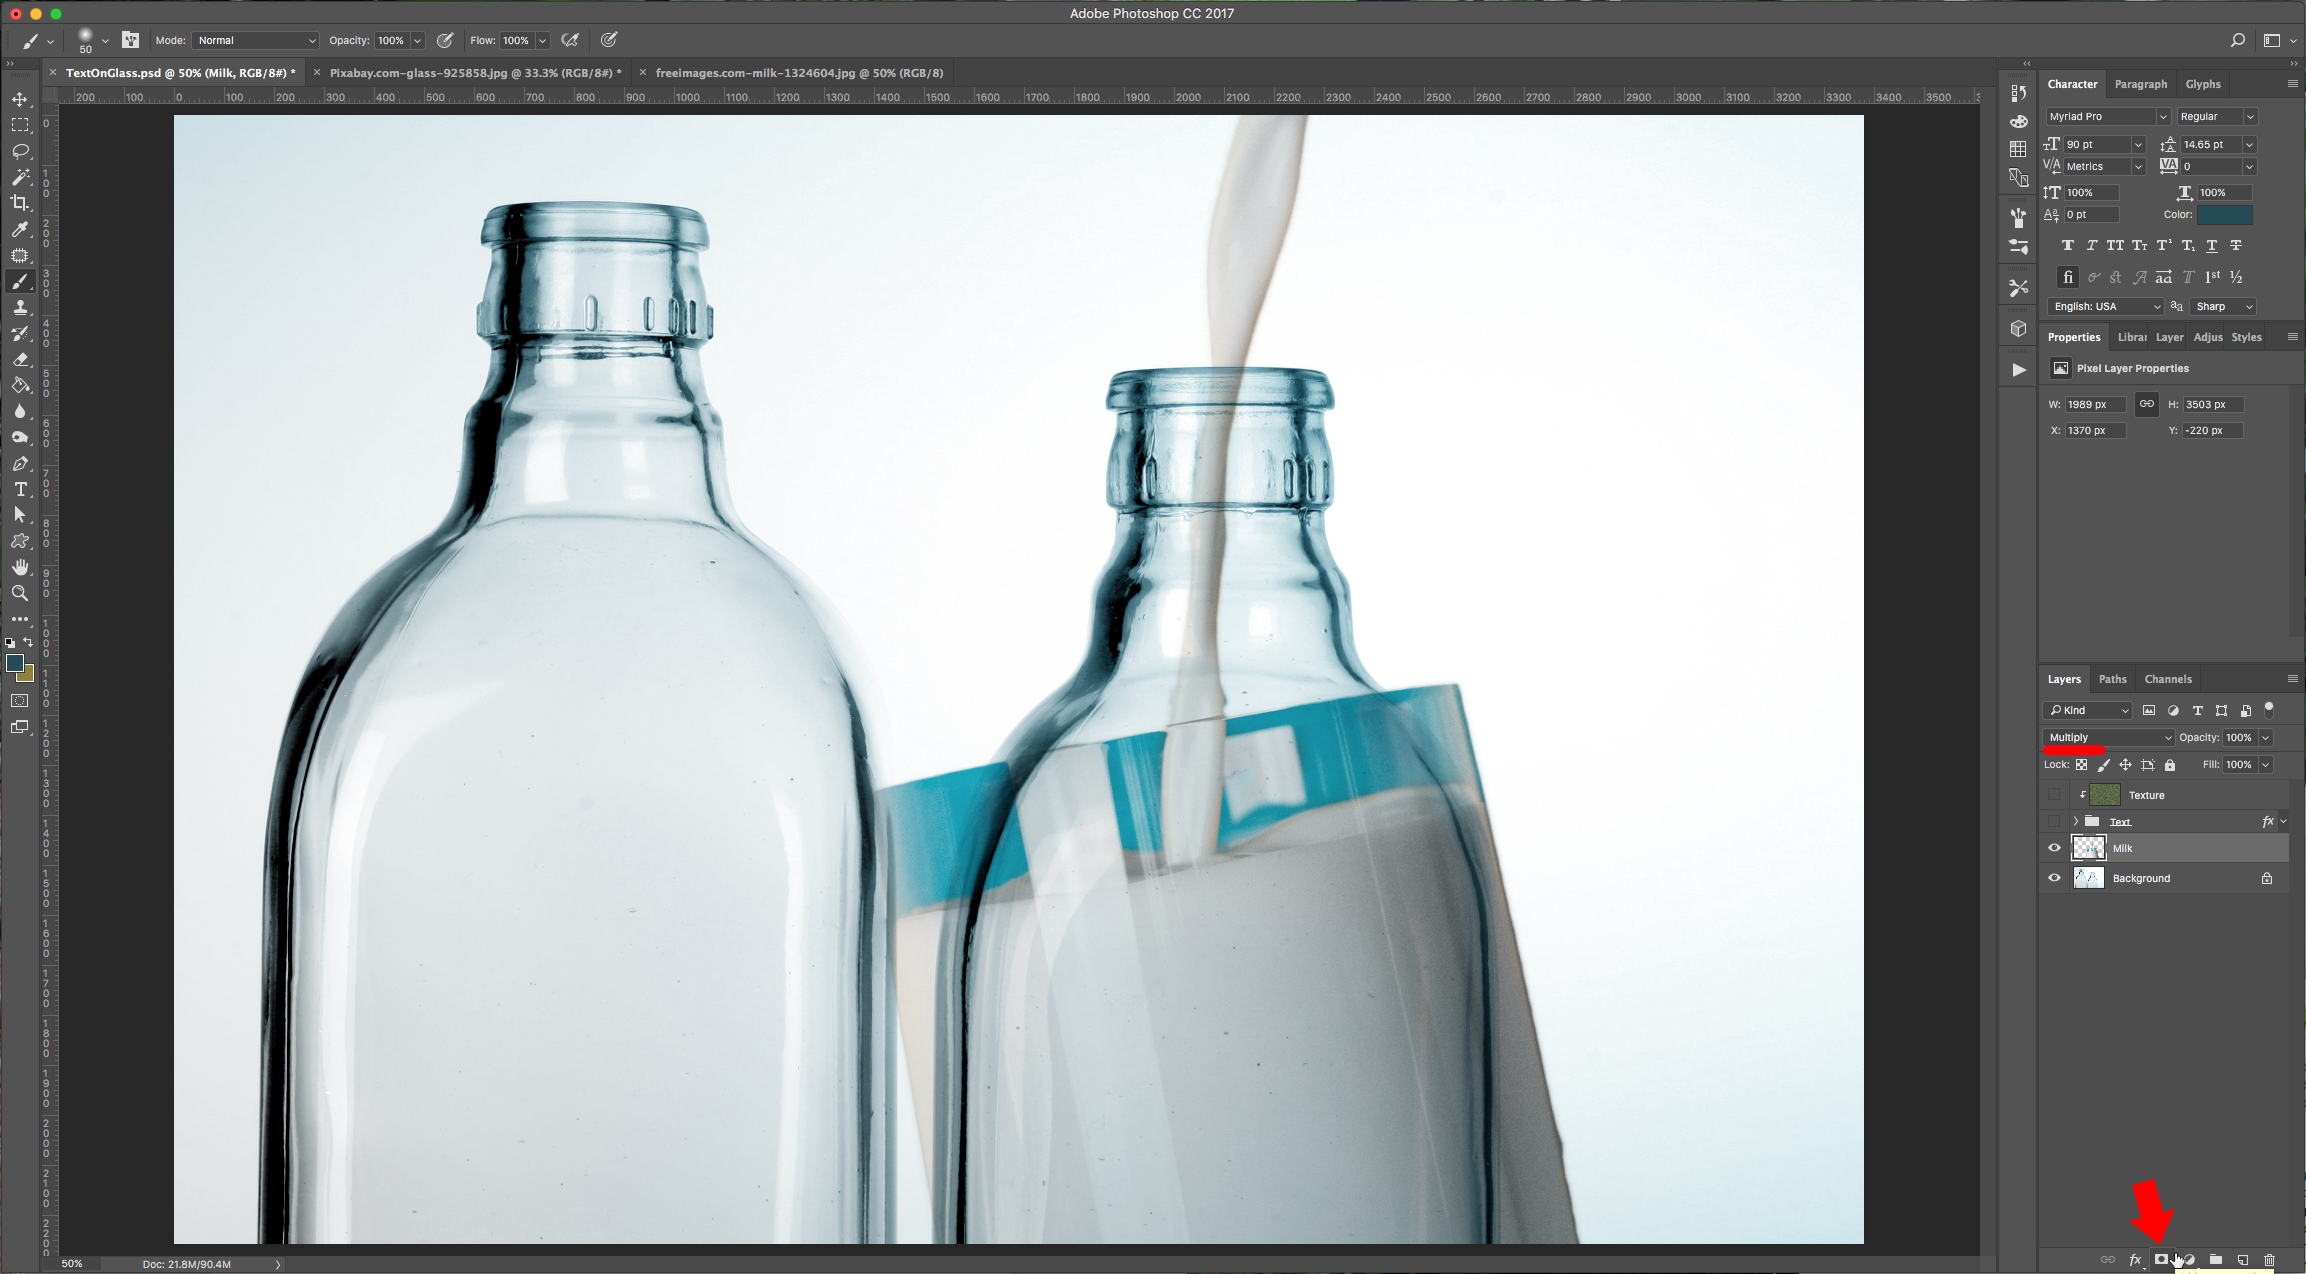
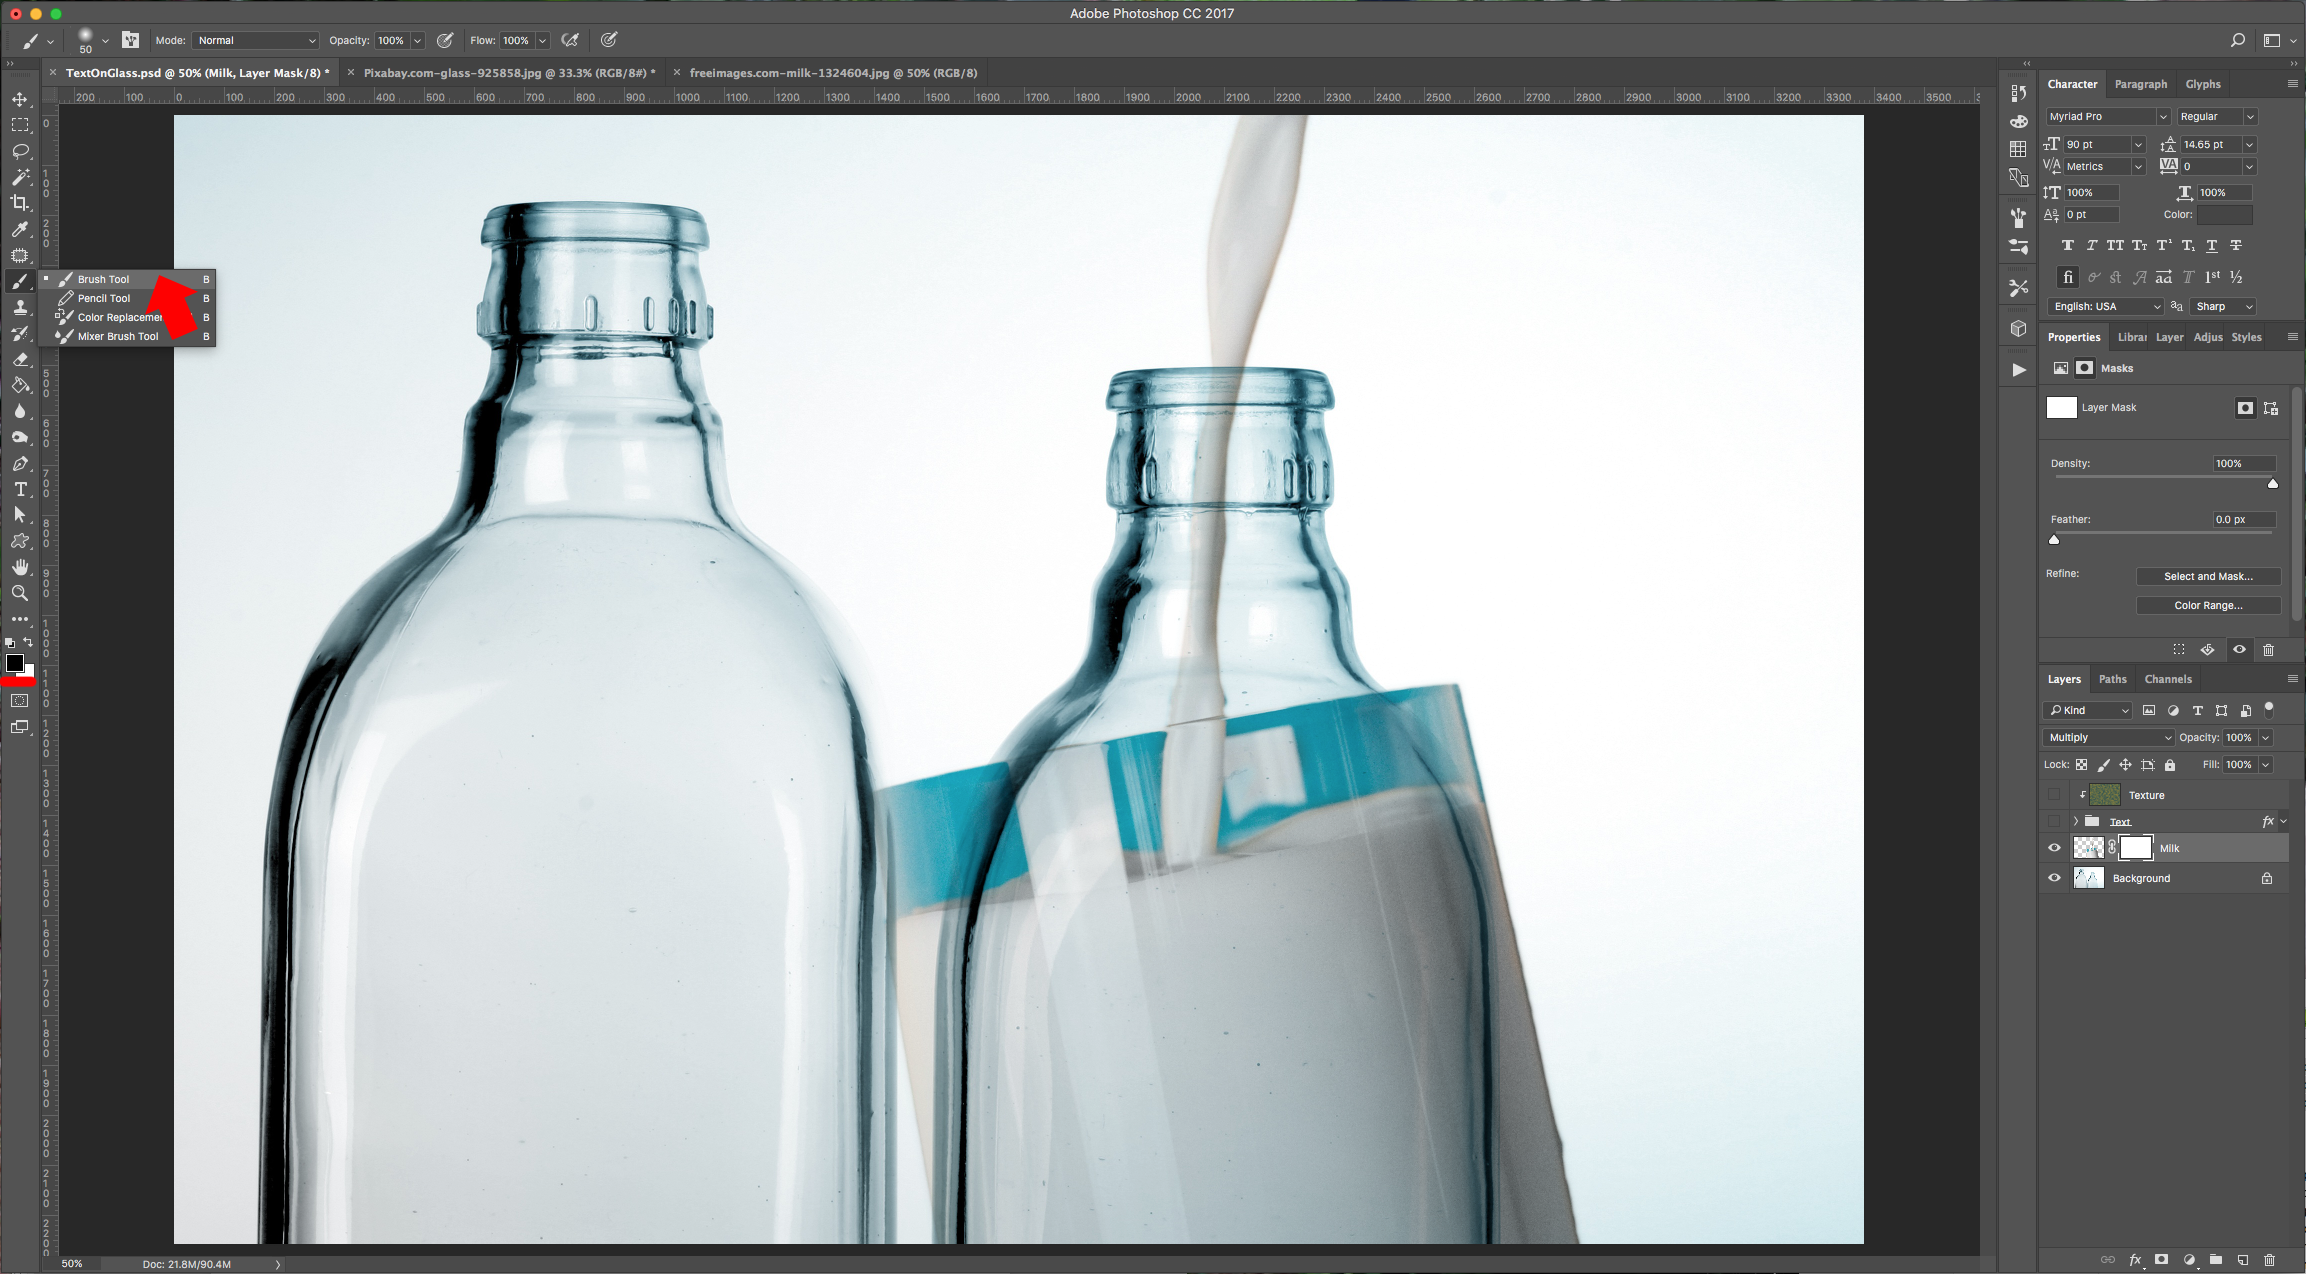
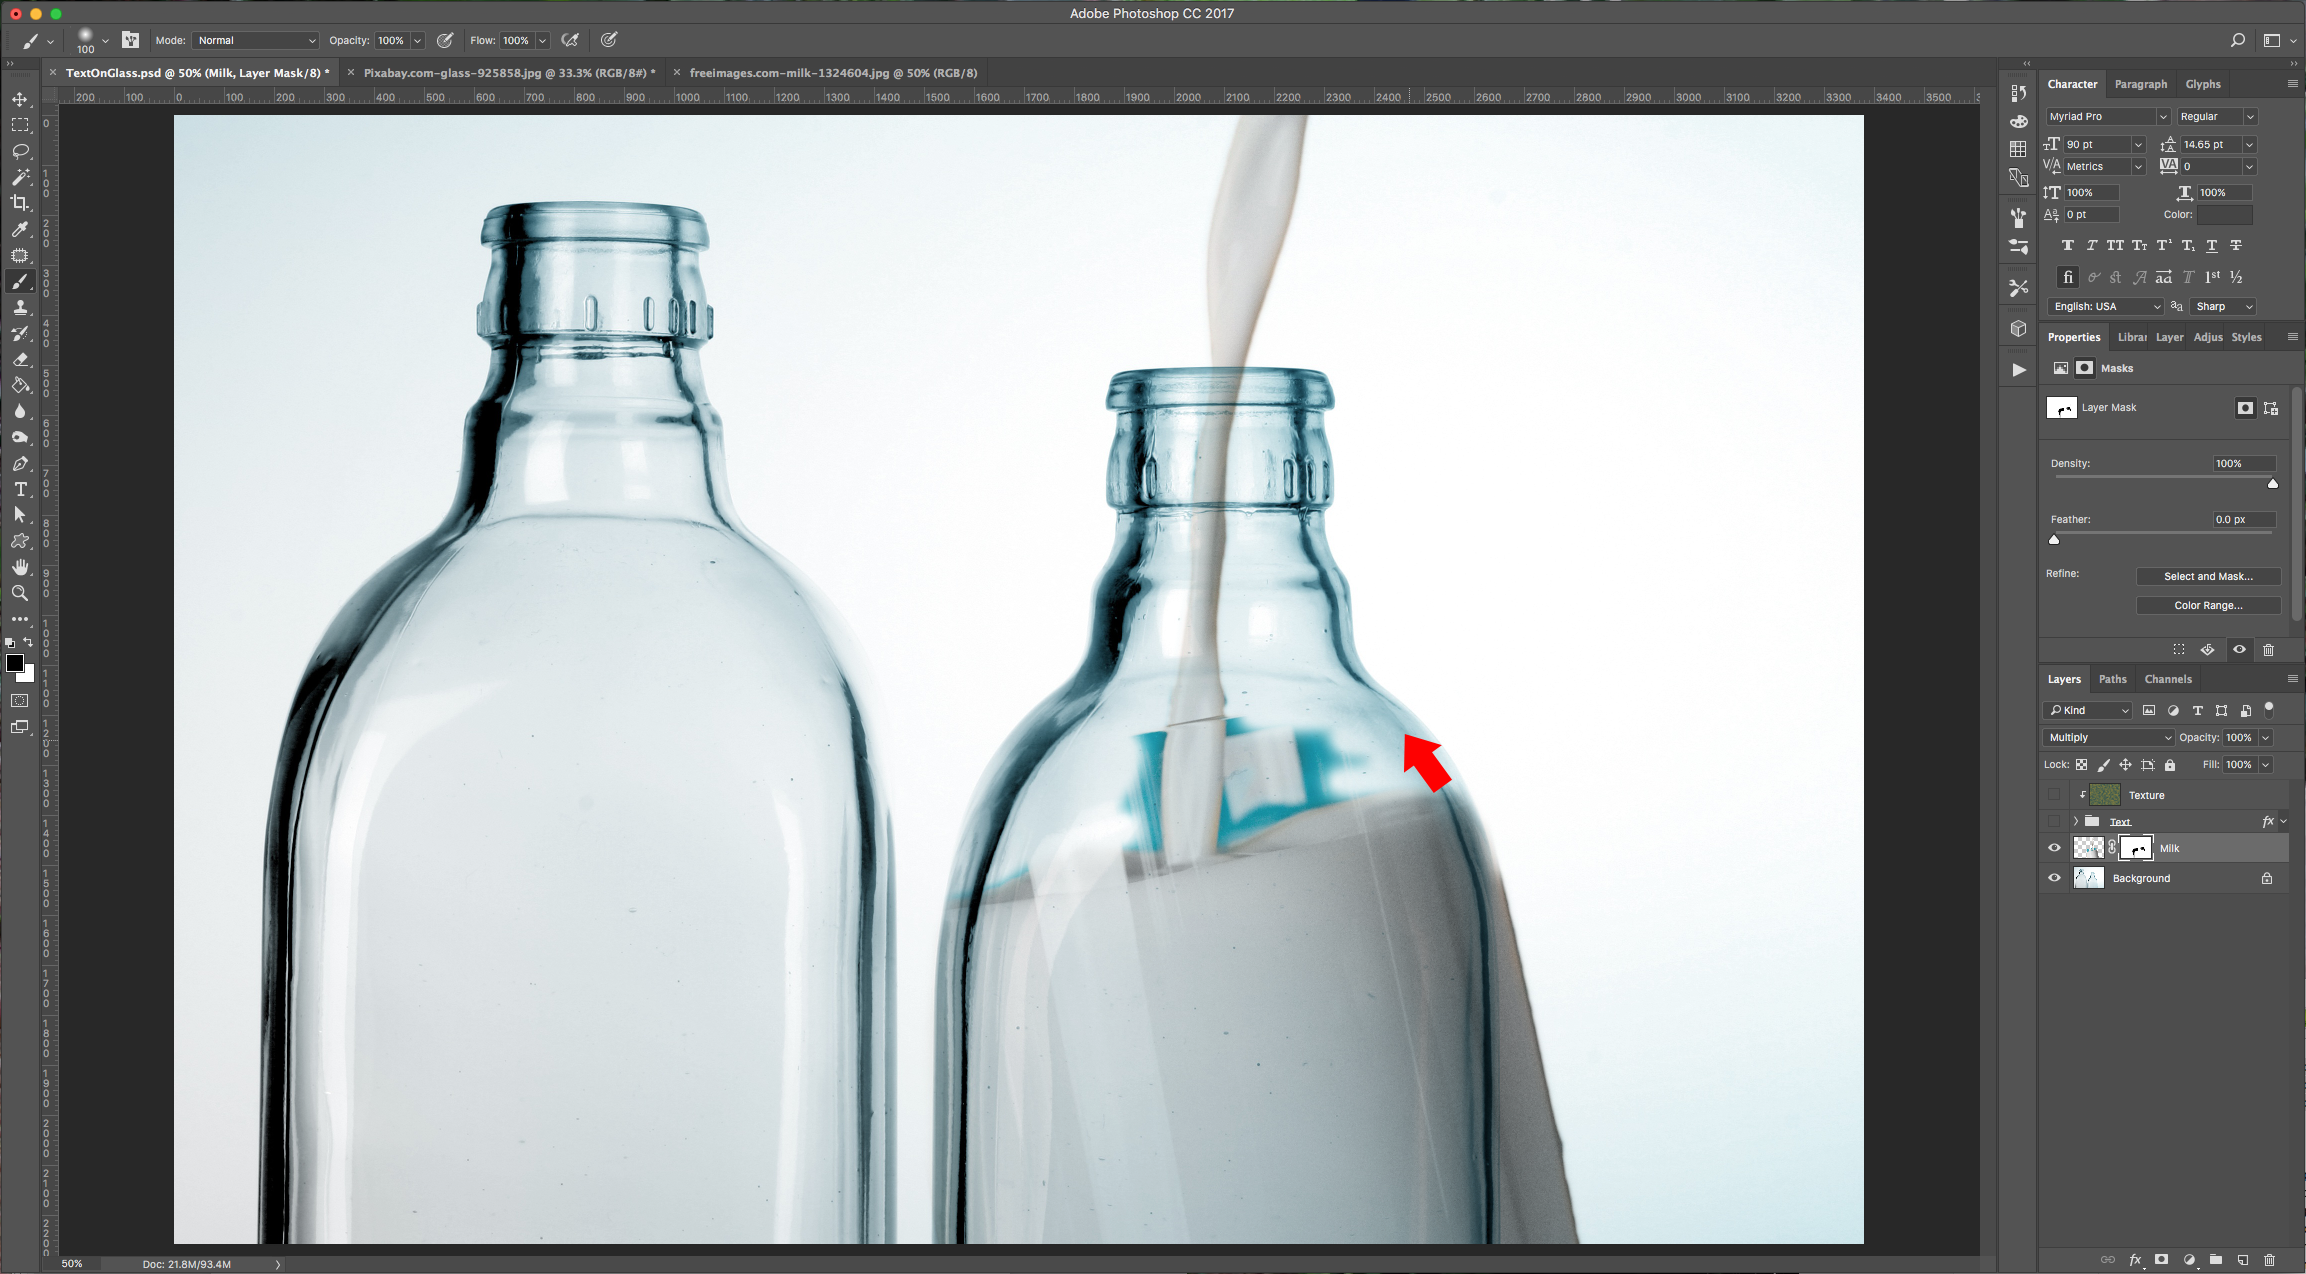
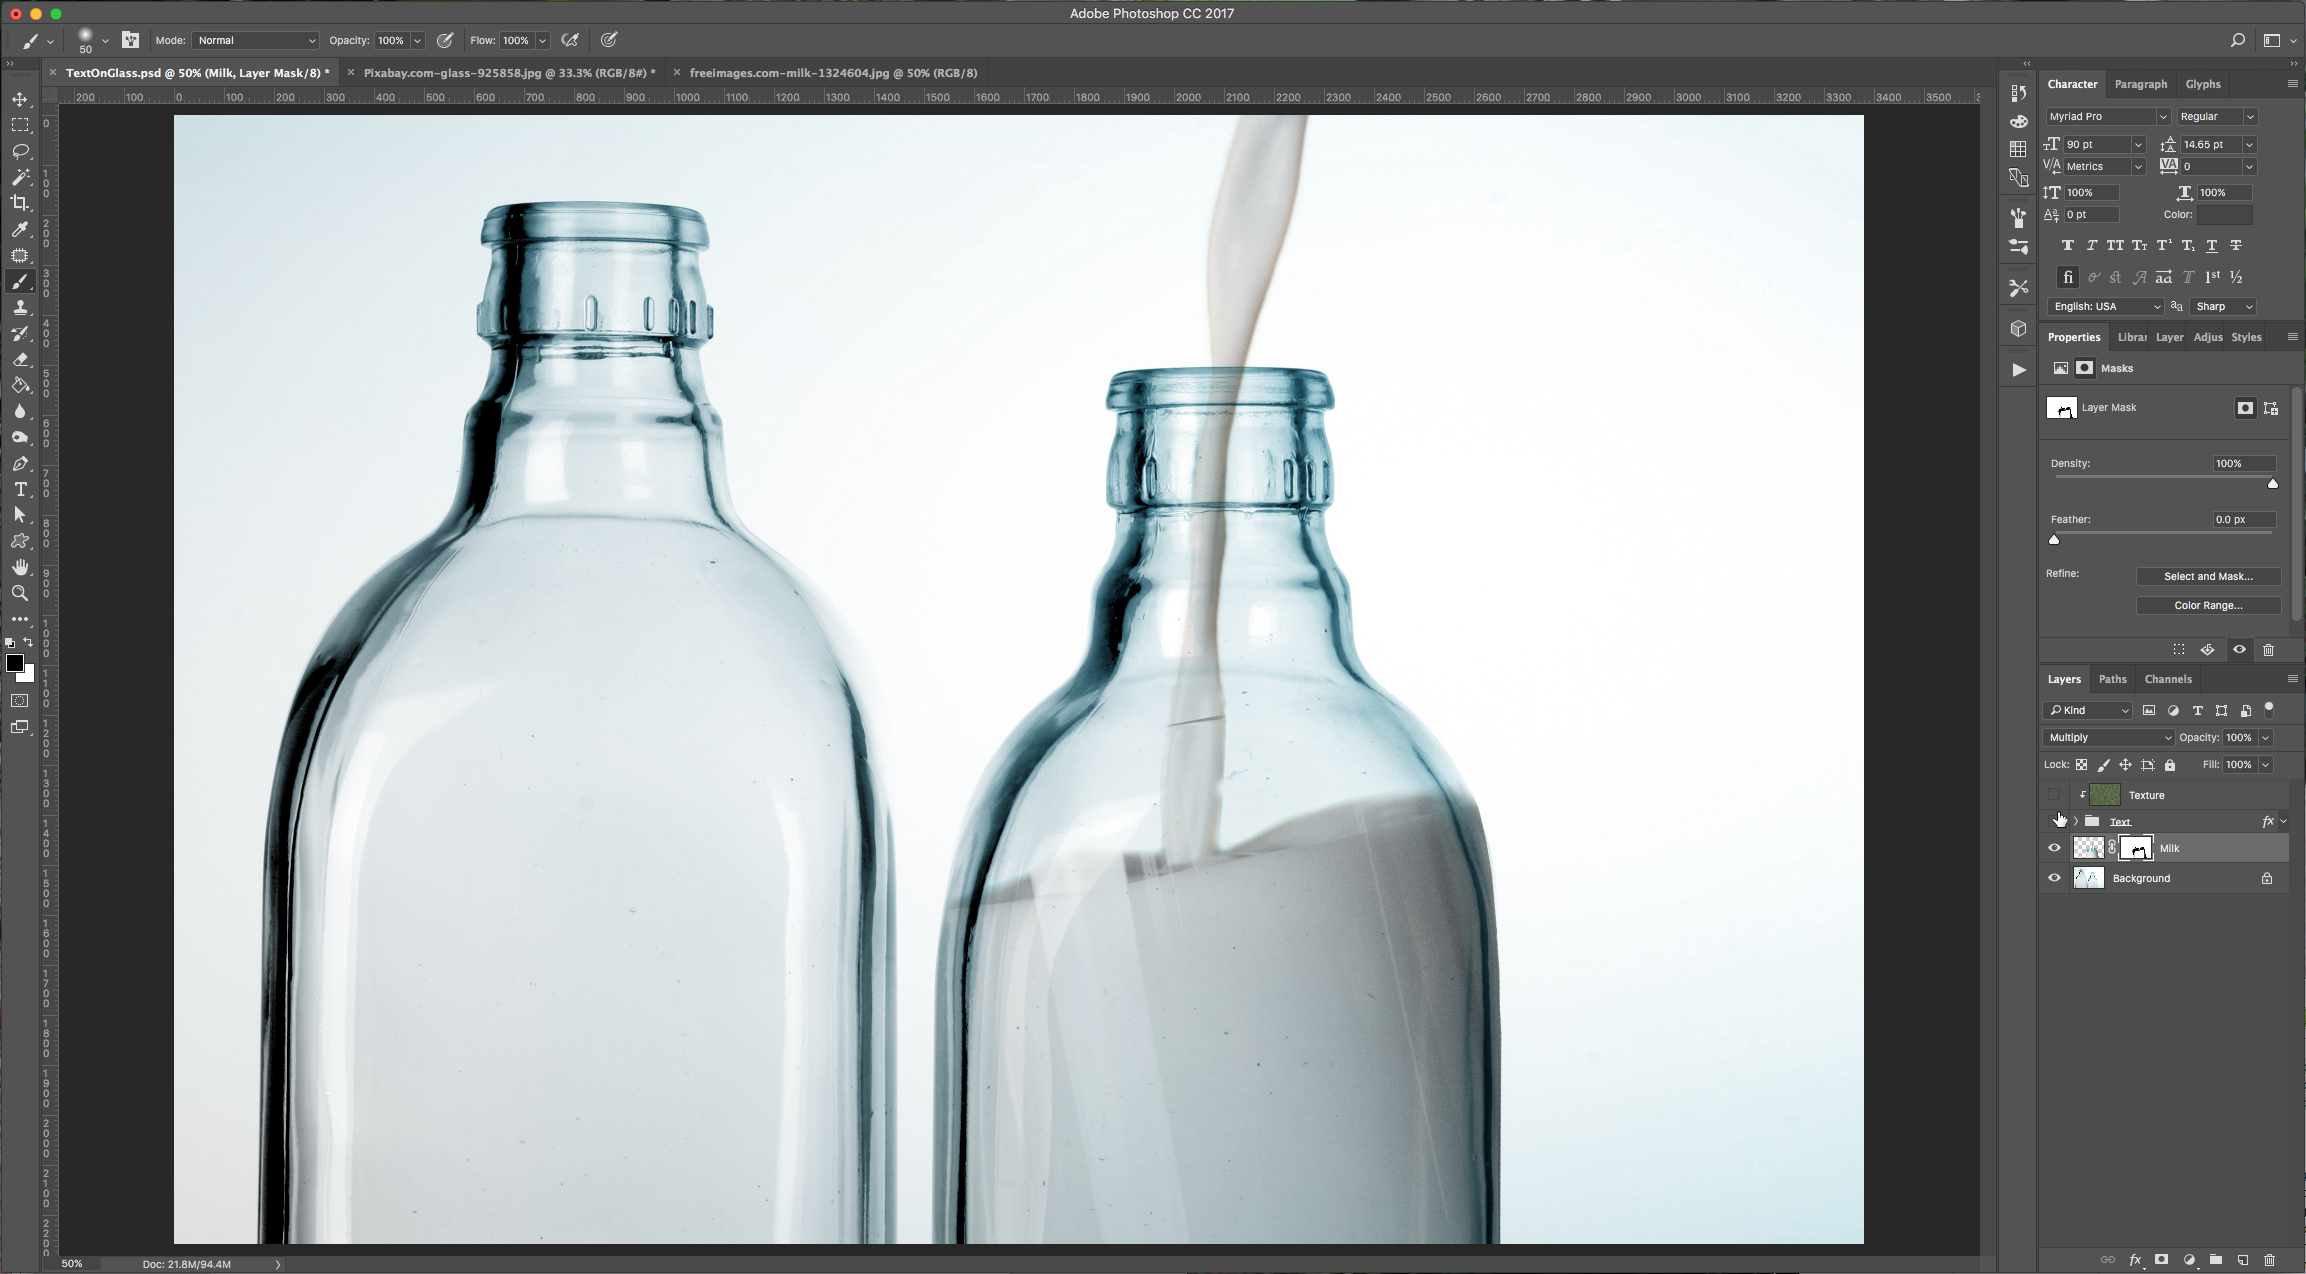
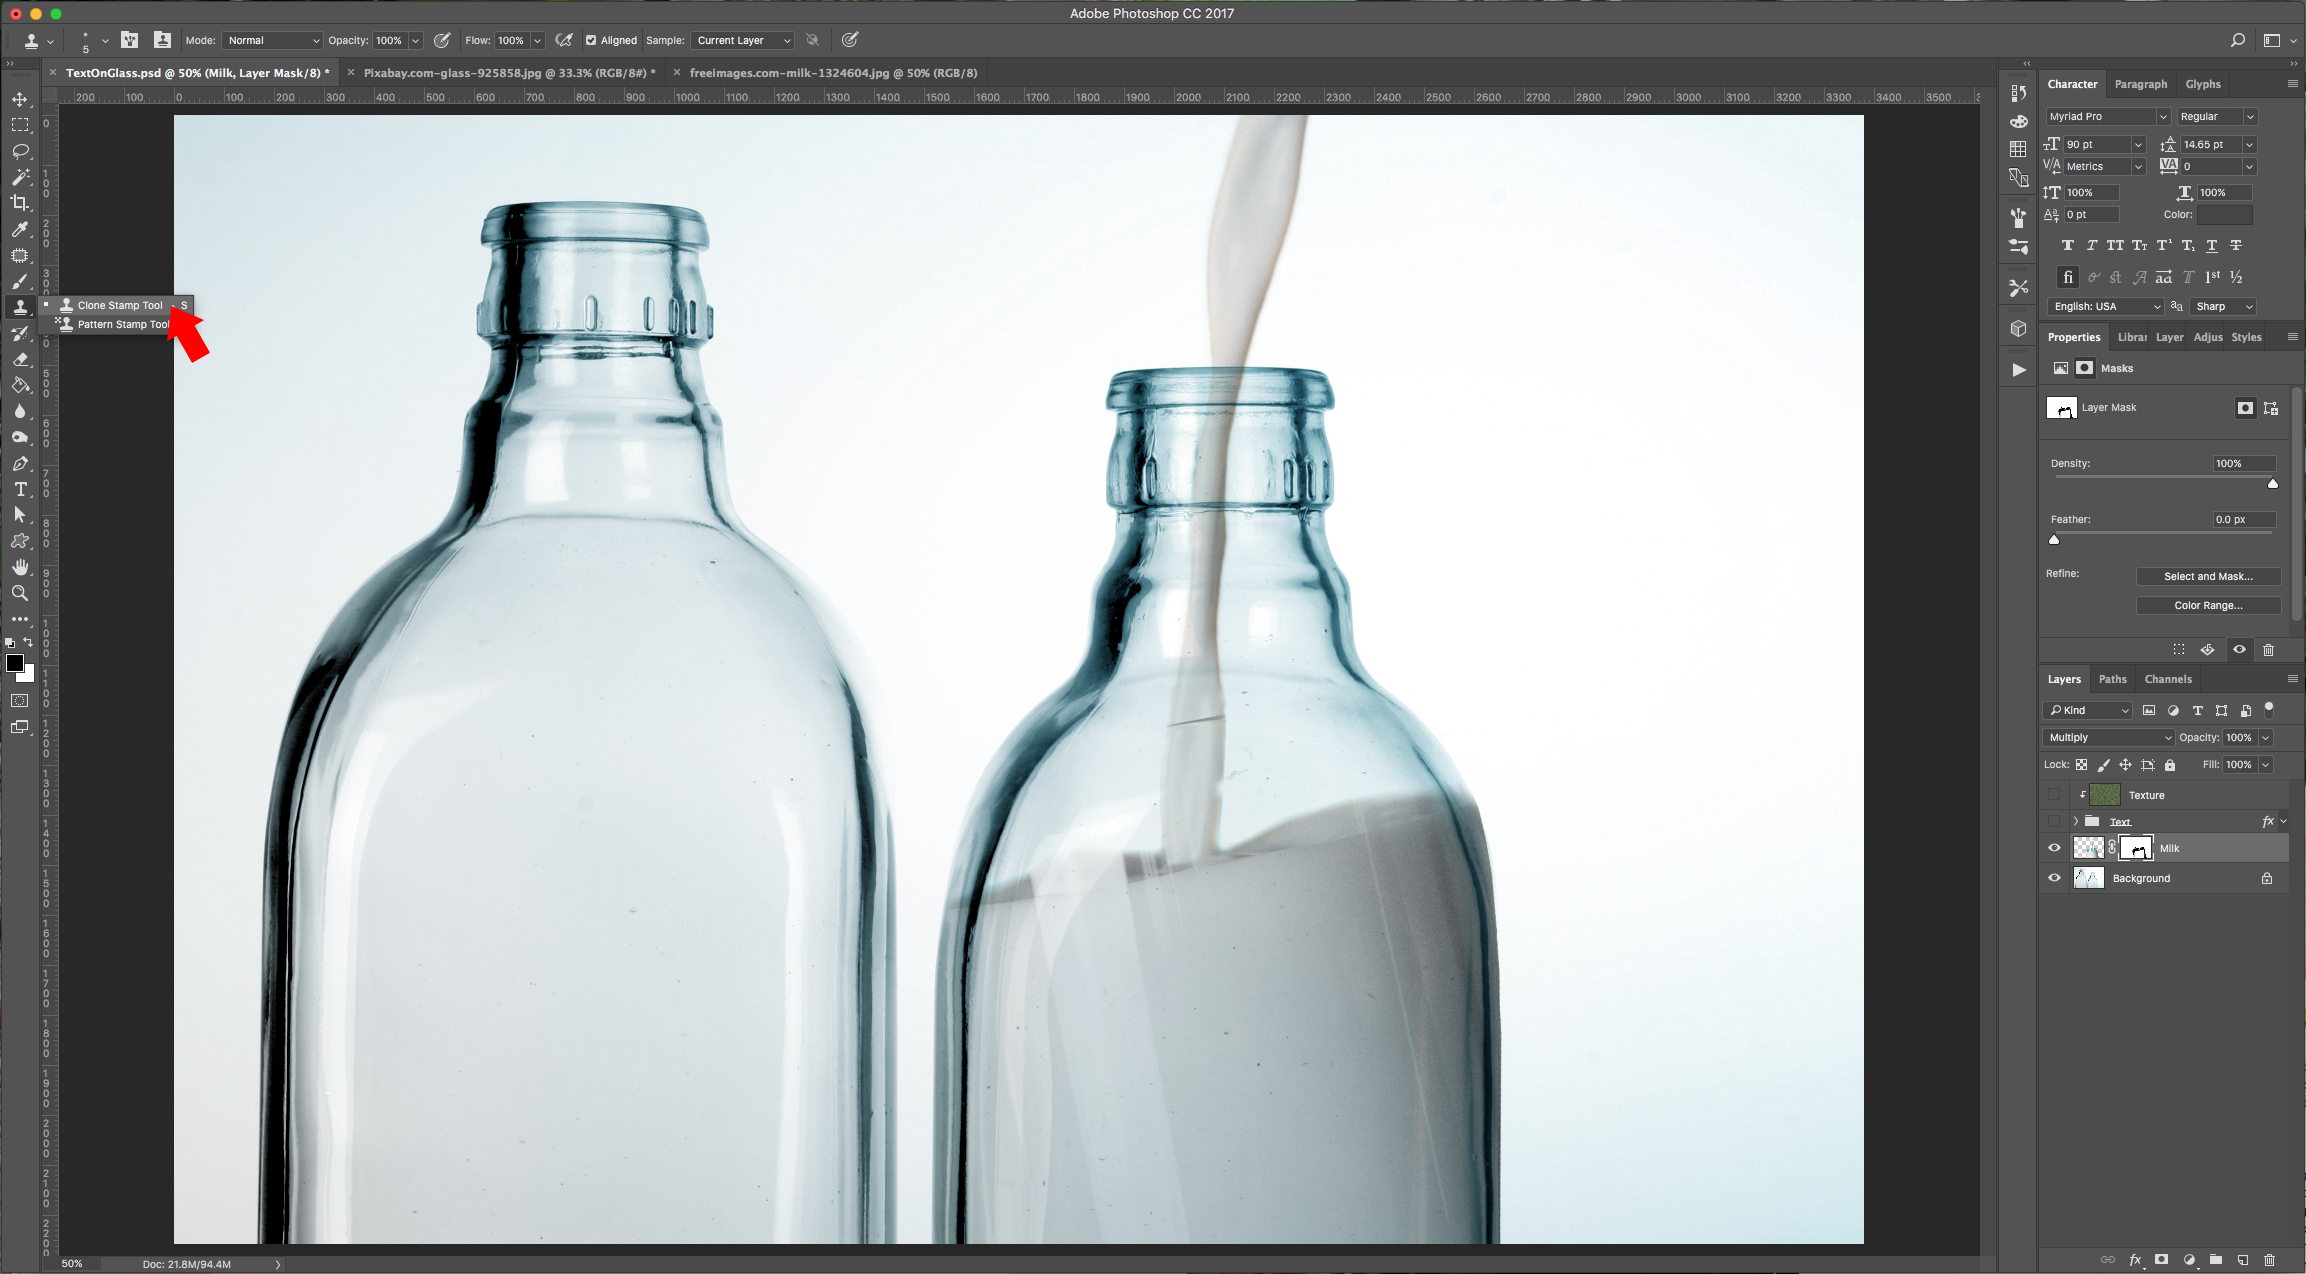
12 - Change the layer’s “Blending Options” to “Multiply”. Click on the “Add Layer Mask” button at the bottom of the “Layers” panel and then, select the “Brush Tool” (B) and choose a soft brush (0% Hardness) and making sure your “Foreground” color is black “erase” the parts of the image you don’t need. Change the “Hardness” and “Size” of your brush as needed. Use the “Clone Stamp Tool” (S) to fix your image in case there are parts that need it. Turn on your “Text” and “Texture” Layers to check your artwork.
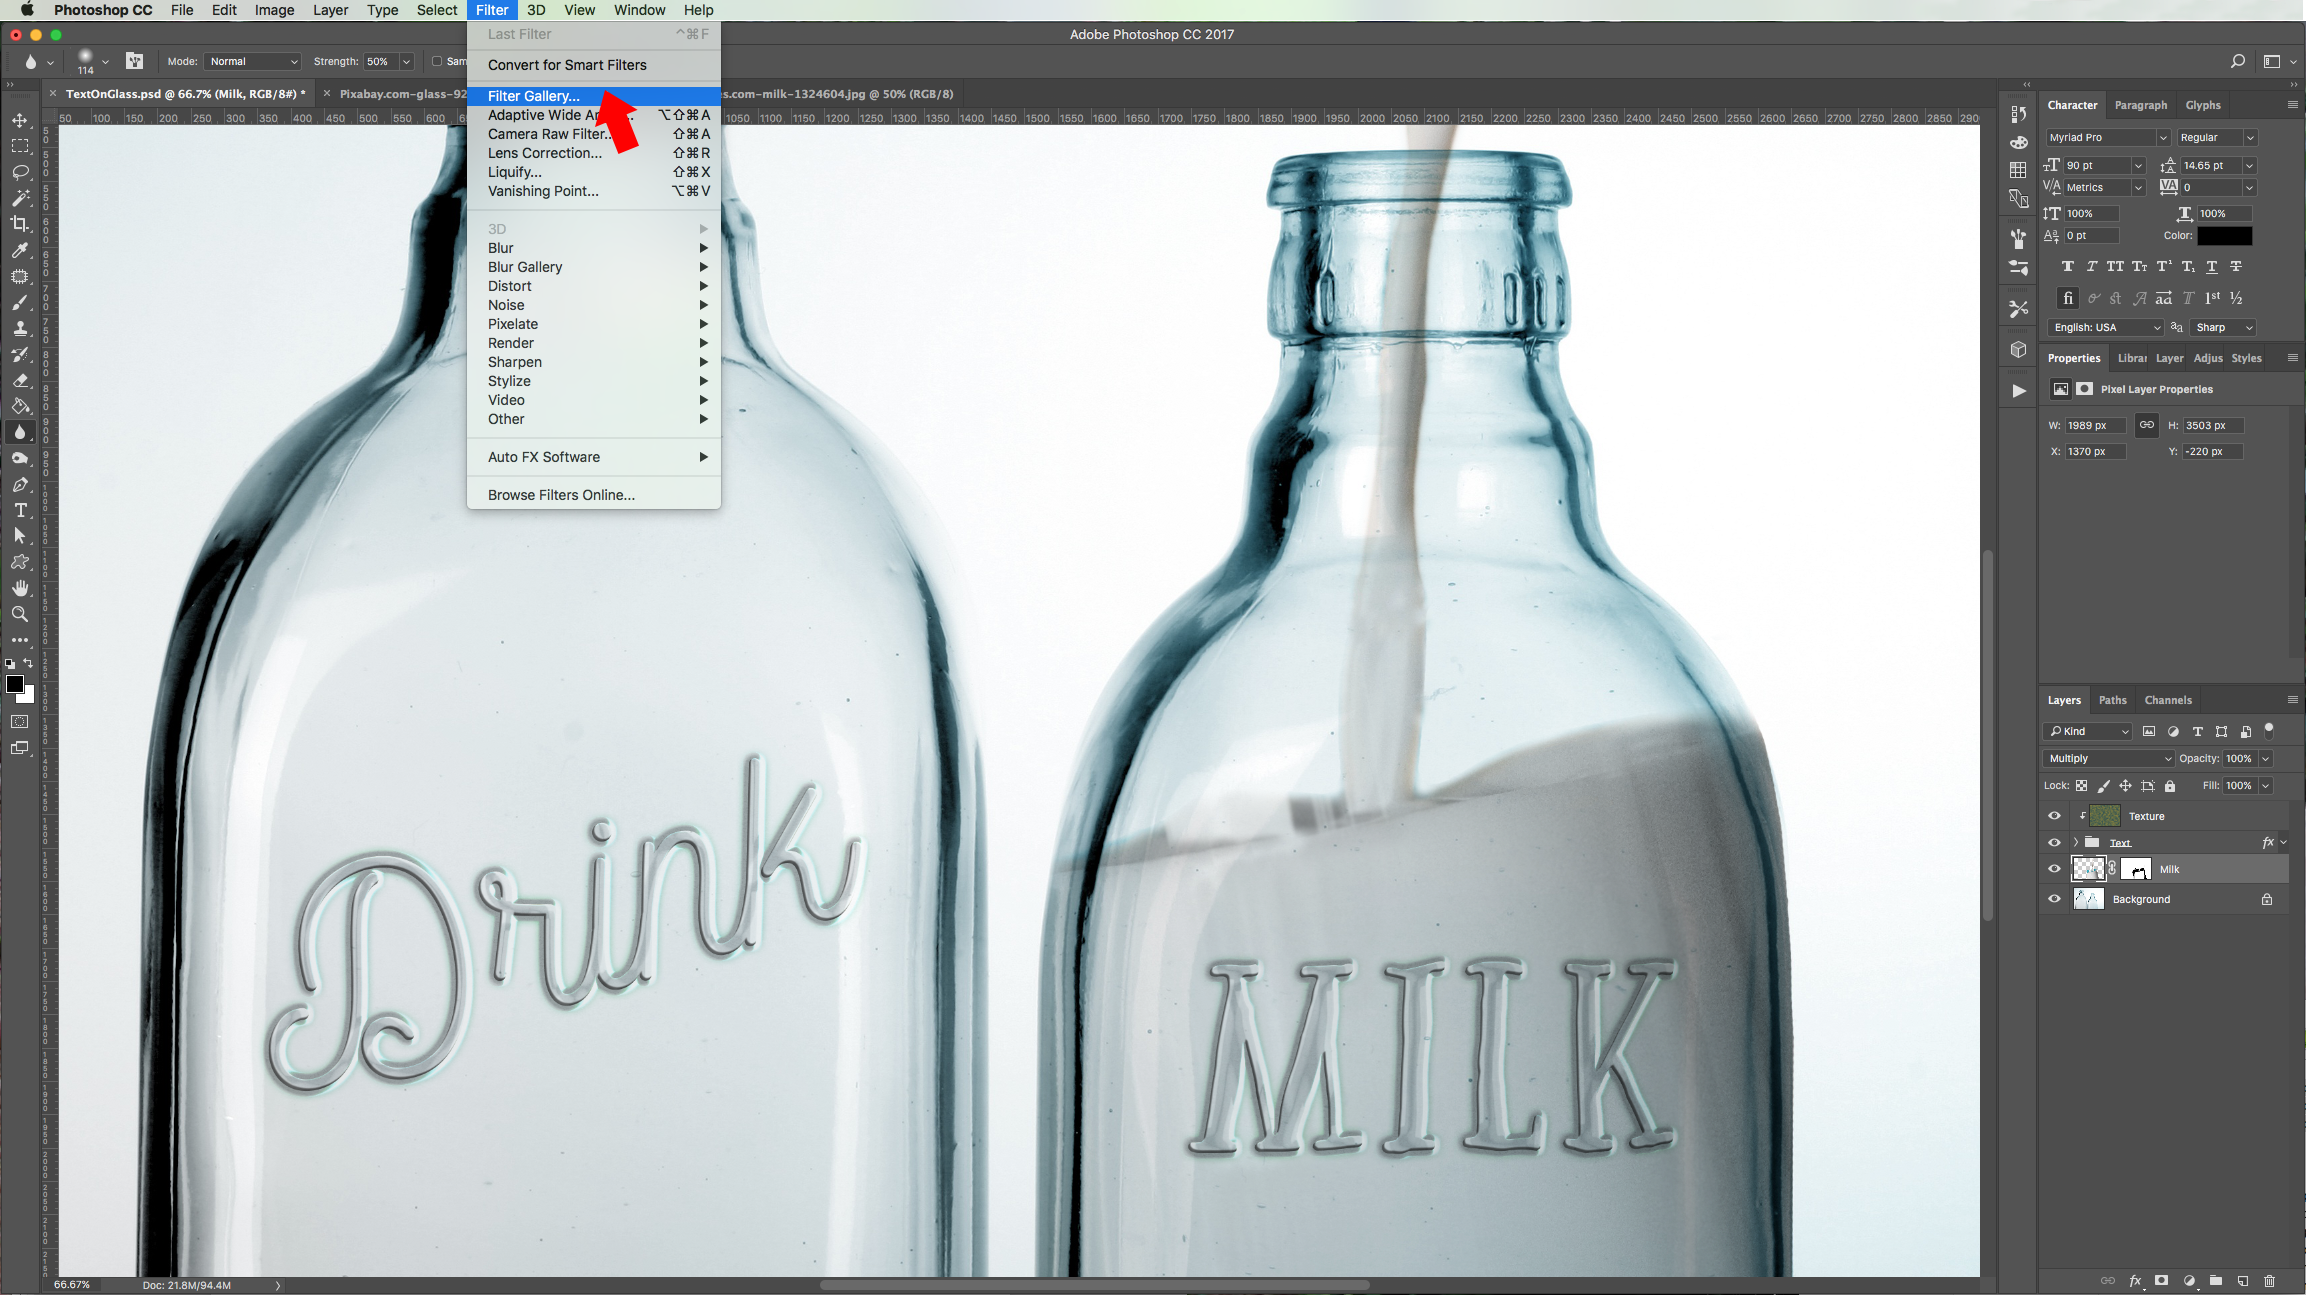
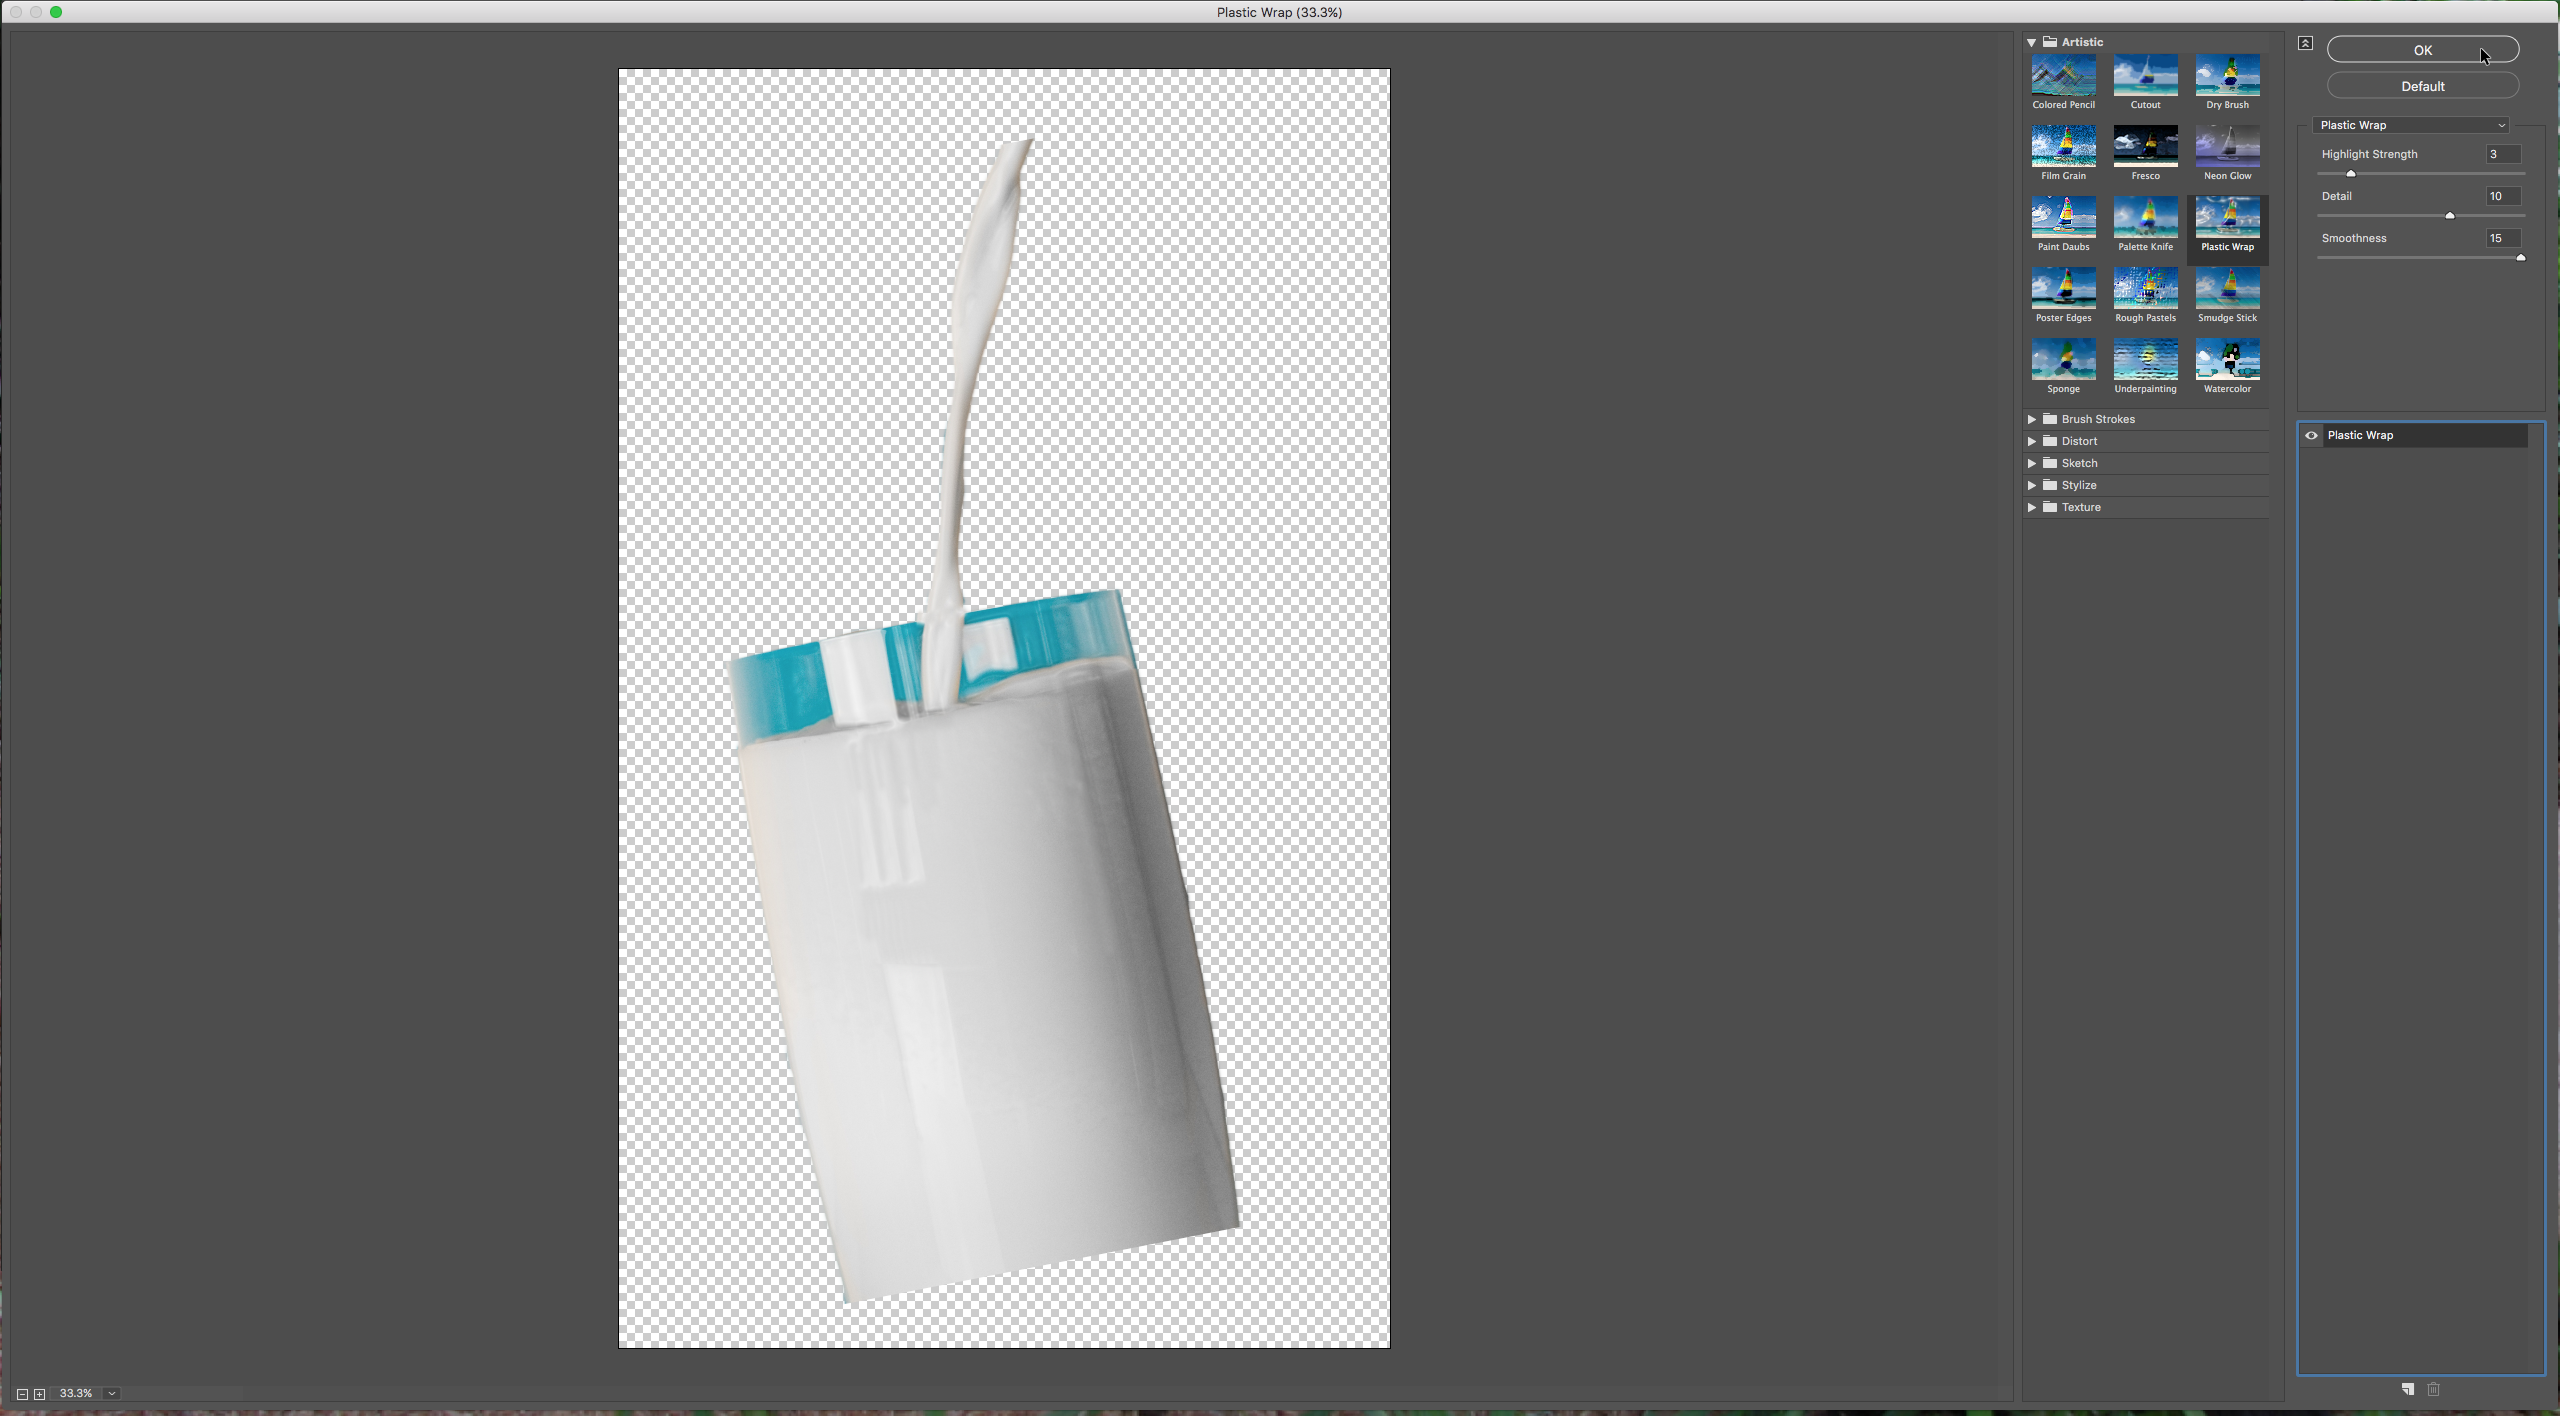
13 - Select your “Milk” image thumbnail, go to Filter > Filter Gallery and apply the following values to the “Plastic Wrap” filter:
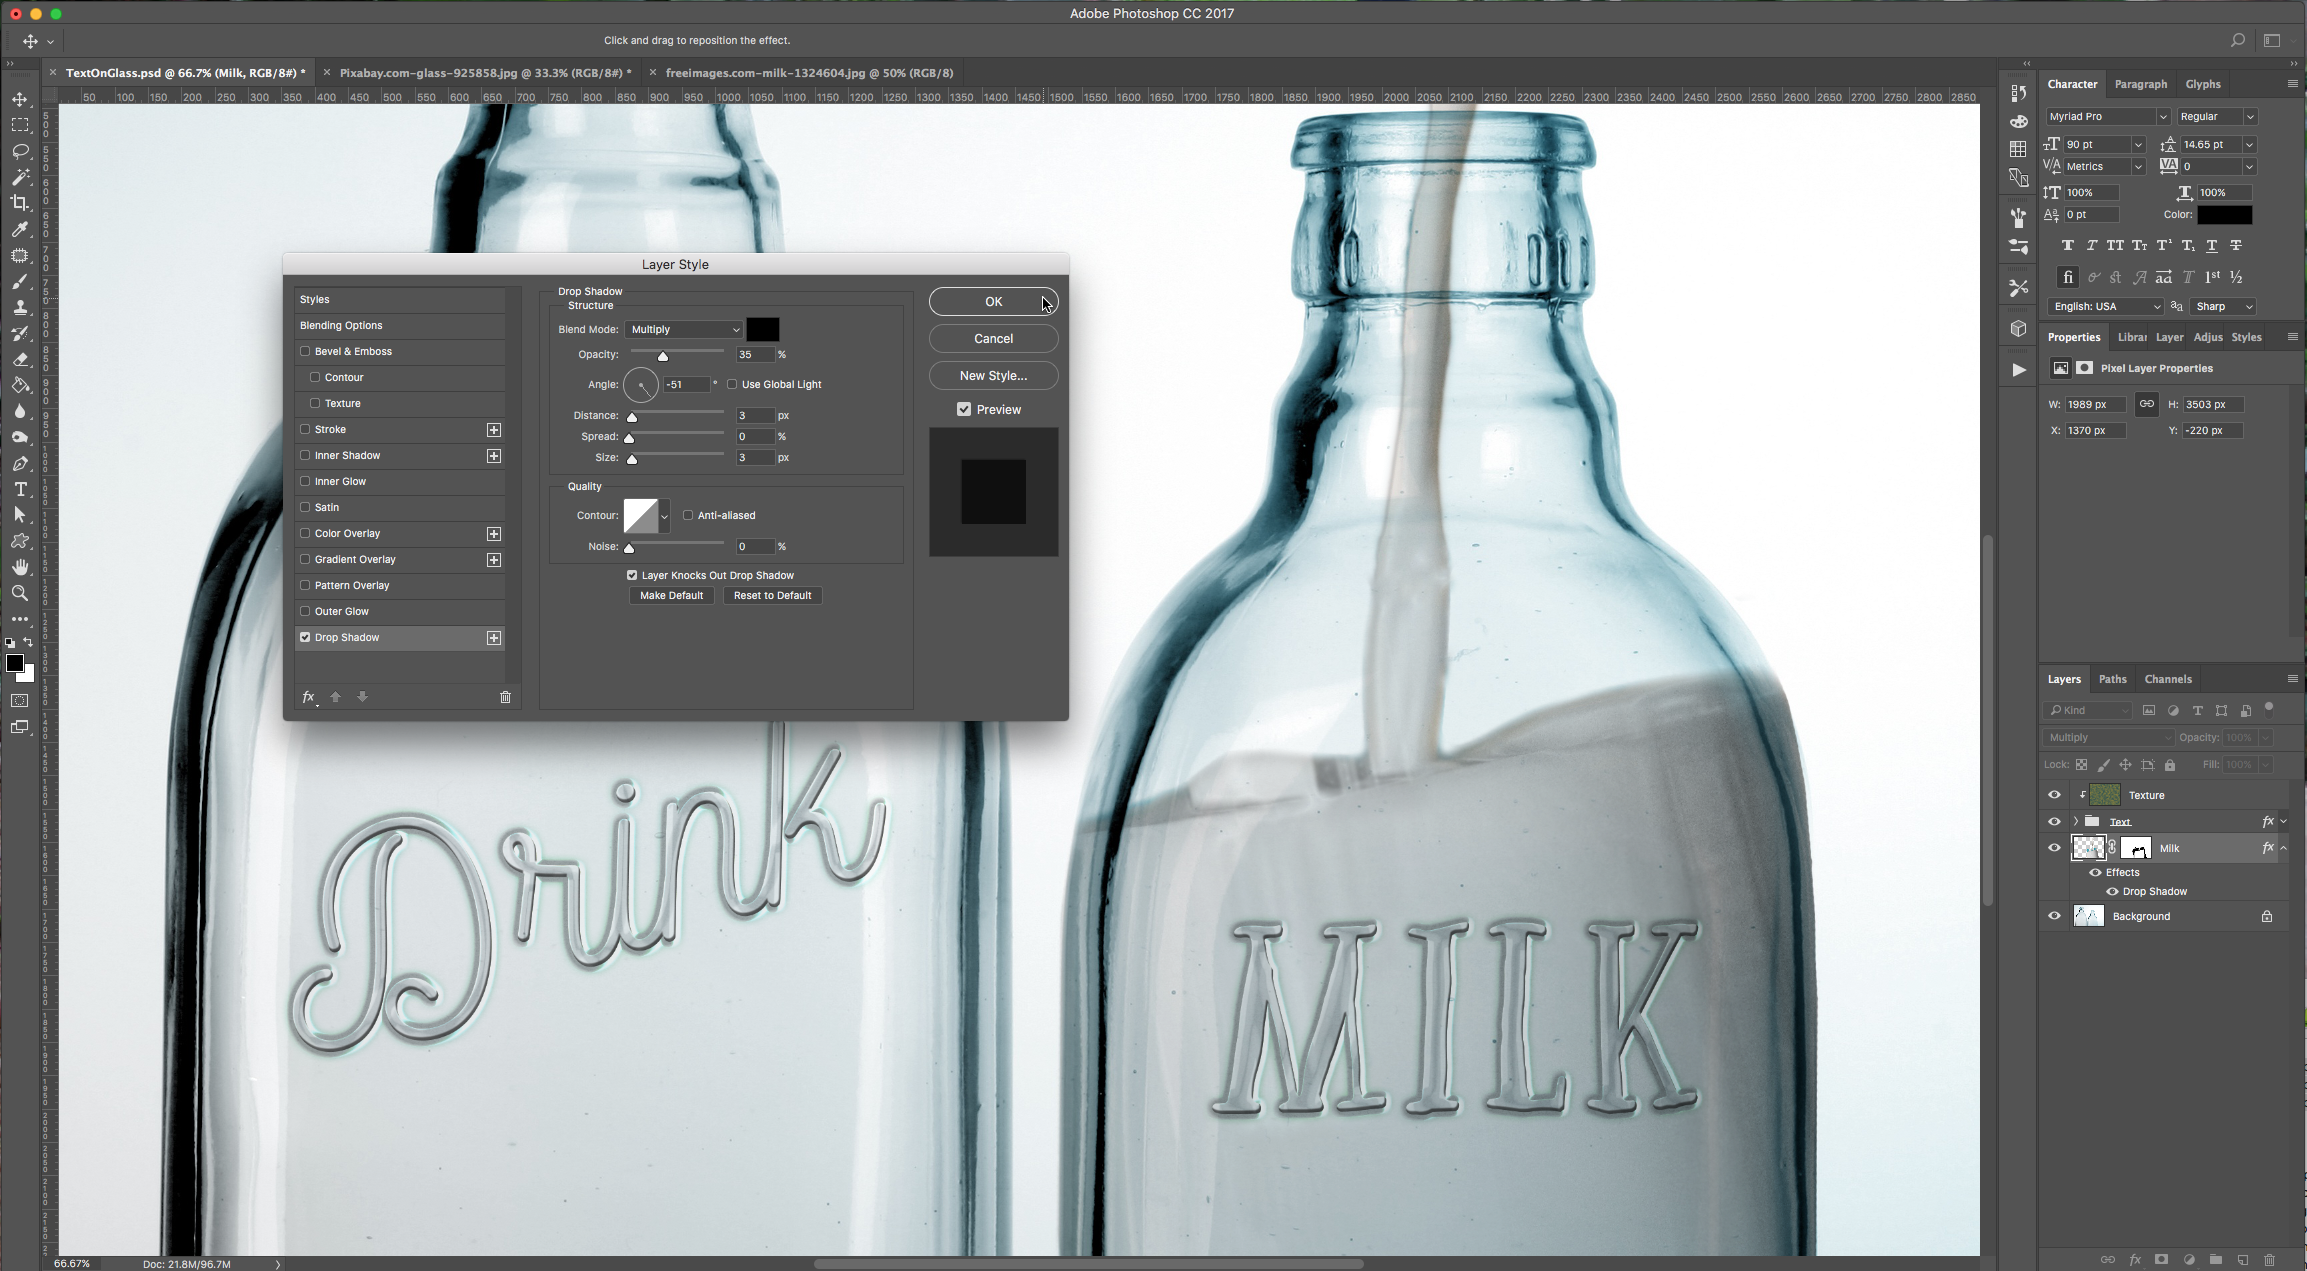
14 - Double-click on your “Milk” thumbnail and apply a “Drop Shadow” with the following values:
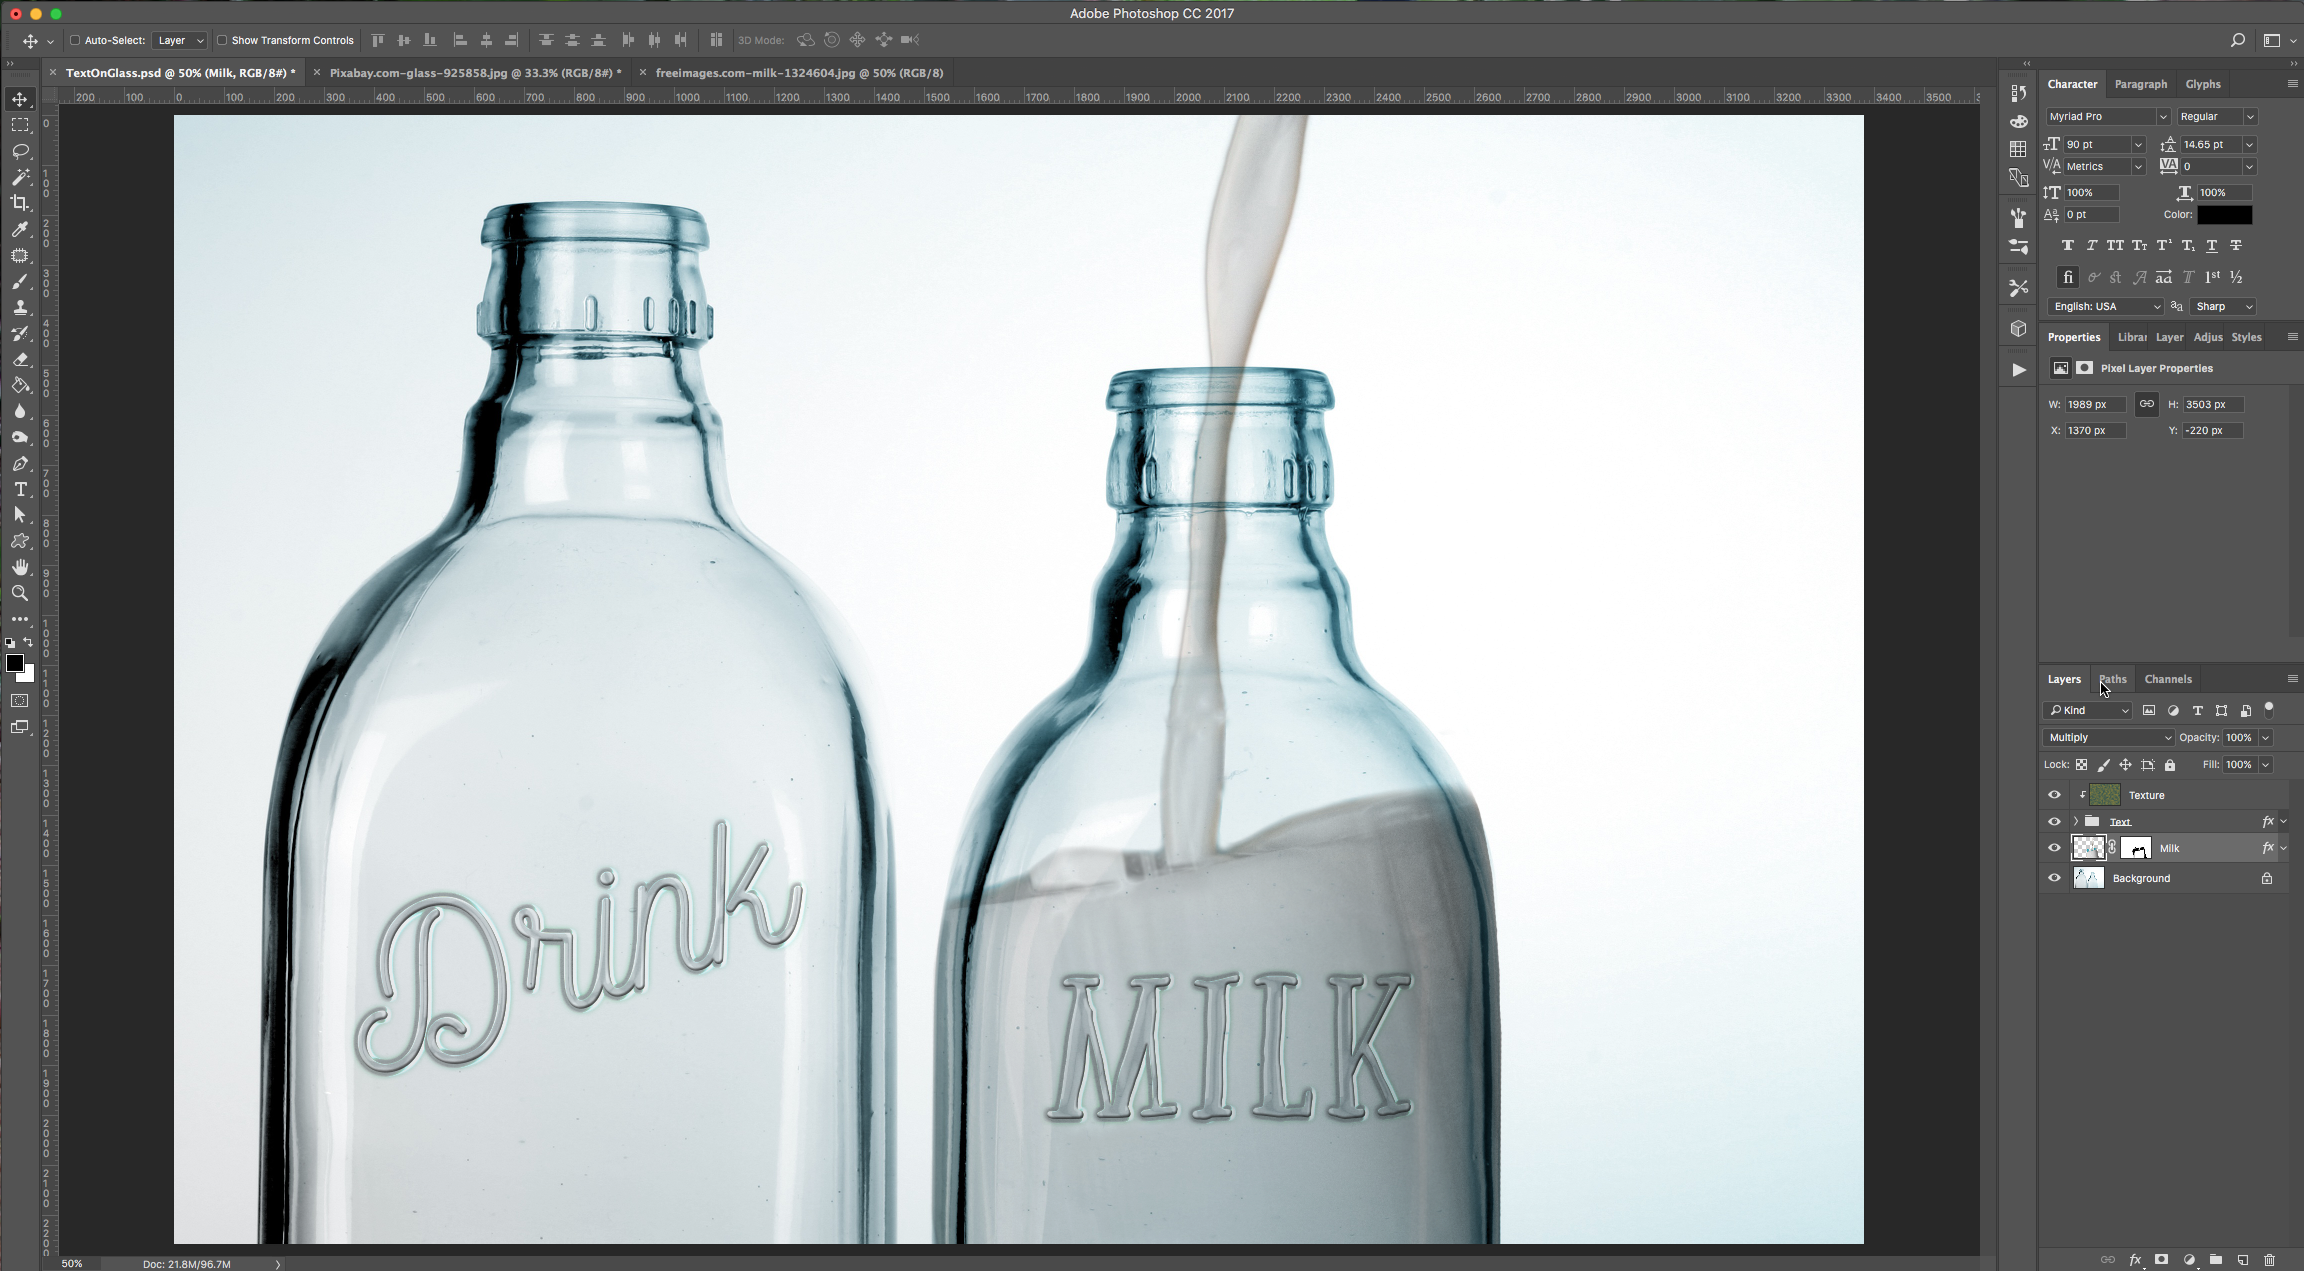
15 - Check out your artwork:
1 - In Photoshop, open the image you chose.
2 - Using the “Type Tool” (T) type your text. This effect works better with a thin font, so take this into account when choosing one for your artwork (we are using Nickainley). The size depends on your image. We are rotating our text a bit with the “Transform” Option (Command/Control + T).
3 - Once you are happy with your text, right-click on its thumbnail and choose “Convert to Smart Object”, then double click on it to apply the following “Layer Styles”:
Bevel & Emboss:
Inner Shadow:
Inner Glow:
Satin: (color #43717e)
Outer Glow: (color #5ab9af)
The values and colors used will depend on your font and the colors of your background image. And the Angles on the position of your text.
4 - Now, we are adding some text to our second bottle. Again, select your “Type Tool” (T) and type your text. We are using a second font (Firefly), so the size will have to change accordingly.
5 - Convert this layer into a “Smart Object” too, right click on your first text layer and “Copy Layer Style”, then on the new text layer and “Paste Layer Style”. If you think you need to tweak the “Layer Styles” settings a bit, double-click on the layer thumbnail and play around with the values.
6 - Select your text layers and click on the little folder button at the bottom of the “Layers” Panel to group them together. To add a little more texture to the text layer, create a “New Layer” on top of the ones that contain the text. Do this, by clicking on the button at the bottom of the “Layers” Panel.
7 - Change your “Foreground” color to #234b57 and your “Background” color to #8d8437 and go to Filter > Render Clouds. Right-click on the “Texture” layer and select “Create Clipping Mask”. Change the “Blending Mode” to “Color Burn” and lower the “Opacity”.
8 - Double-click on the “Text” Folder and apply the following “Pattern Overlay” values:
9 - Reset your “Foreground” and “Background” color to default by clicking on the little icon placed on top (left) of the color thumbs. Then open the image or images of milk you want to incorporate to your artwork.
10 - Select the “Magic Wand Tool” (W) and select parts of the background to isolate the parts of the image you want to keep (depending on your image you may want to select the image and not the background). Click on other parts while holding the “Shift” key to add to your selection. Once you are happy click Shift + Command/Control + I to invert your selection (if you selected the parts you want to use you don’t need to do this). You can use the “Polygonal Lasso Tool” (L) or any other tool you like to create the selection if you prefer.
11 - Go to Select > Select and Mask and clean the edges a bit. Once you are happy click “OK”. Copy (Command/Control + C) your selection and paste it (Command/Control + V) into your bottles document. Turn Off your “Text” and “Texture” layers for now (click on the little eye icon to the left of the thumbnails). Using the “Transform” function (Command/Control + T).
12 - Change the layer’s “Blending Options” to “Multiply”. Click on the “Add Layer Mask” button at the bottom of the “Layers” panel and then, select the “Brush Tool” (B) and choose a soft brush (0% Hardness) and making sure your “Foreground” color is black “erase” the parts of the image you don’t need. Change the “Hardness” and “Size” of your brush as needed. Use the “Clone Stamp Tool” (S) to fix your image in case there are parts that need it. Turn on your “Text” and “Texture” Layers to check your artwork.
13 - Select your “Milk” image thumbnail, go to Filter > Filter Gallery and apply the following values to the “Plastic Wrap” filter:
14 - Double-click on your “Milk” thumbnail and apply a “Drop Shadow” with the following values:
15 - Check out your artwork:
by @lornacane


