
How to install the Foil quill in a Silhouette Cameo
*Silhouette Cameo 3 used. Technique is the same for all silhouette models.
1- Open the lid of your silhouette machine. We need to remove the cut blade so we can insert the foil quill. Unlock the cut tool.
2- Remove the cutting tool. leave the holder unlocked.
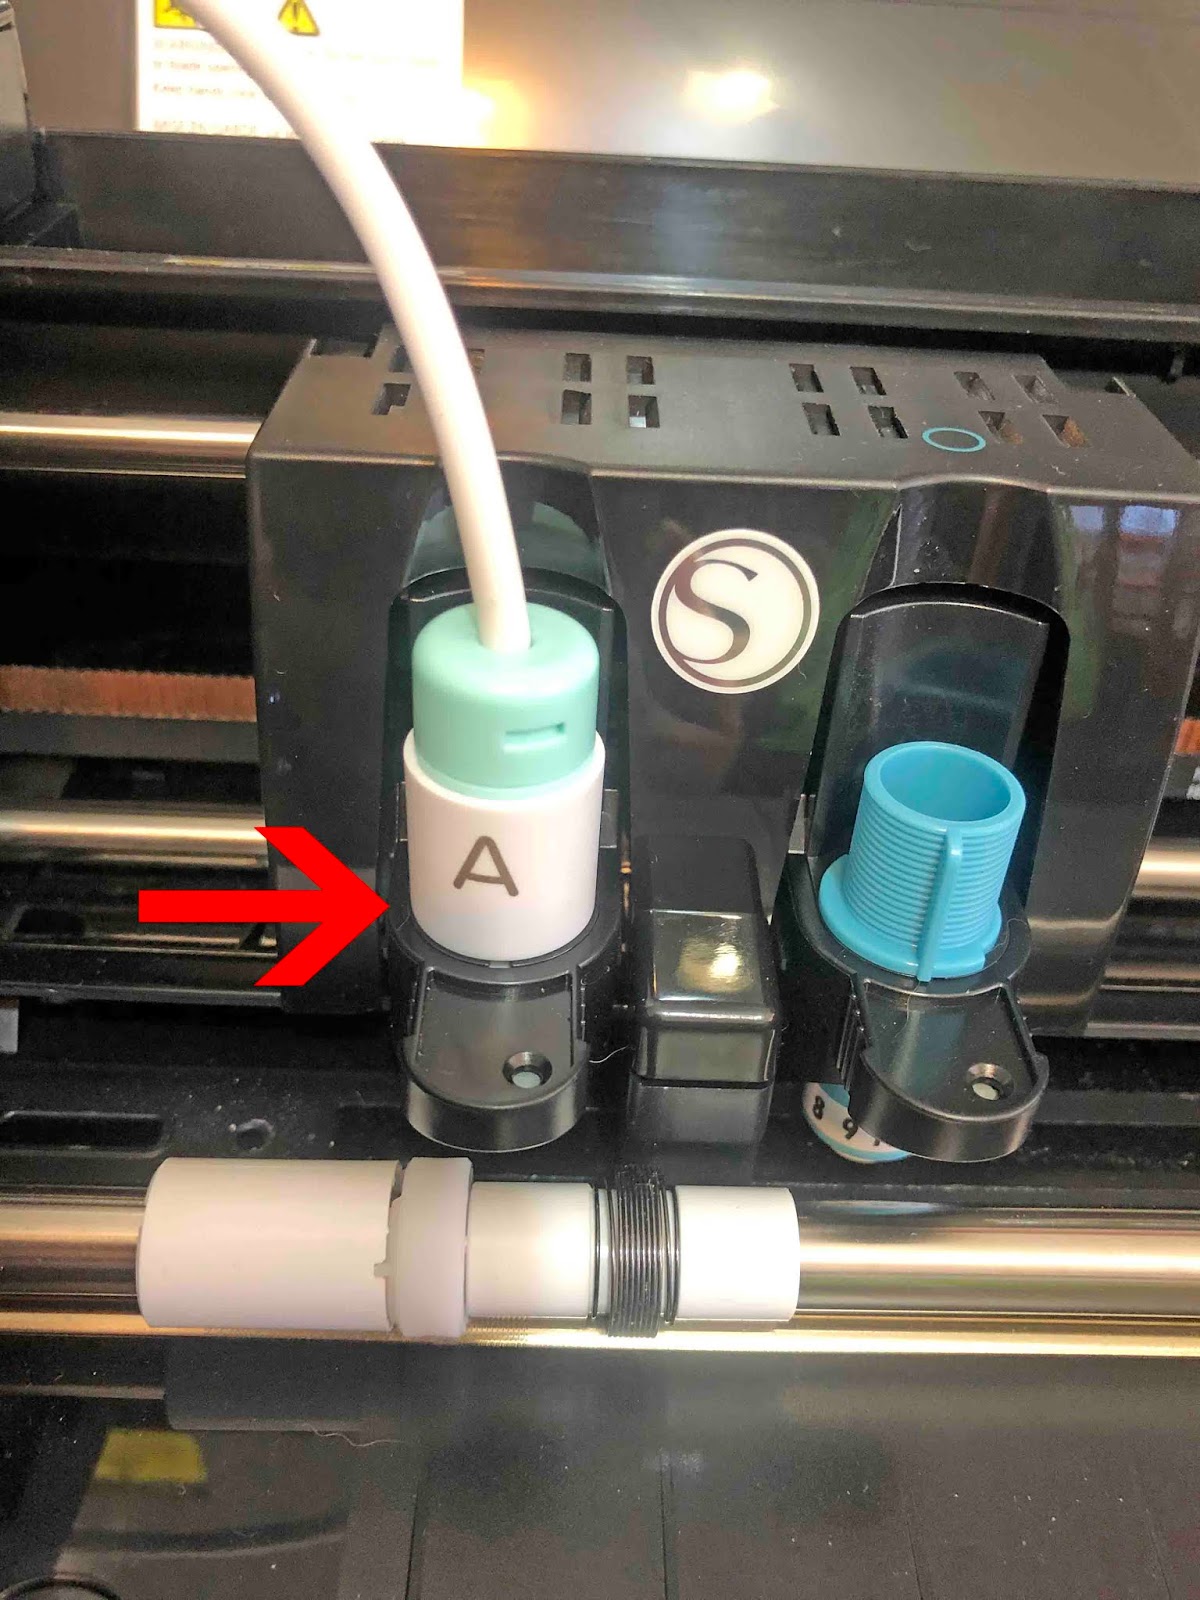
3- Place the "A" adapter onto the foil quill. This adapter is clearly labeled "A". Make sure it is screwed on all the way. Next place the foil quill into the blade holder. It will be a tight fit. slowly push in. Once in all the way lock in.
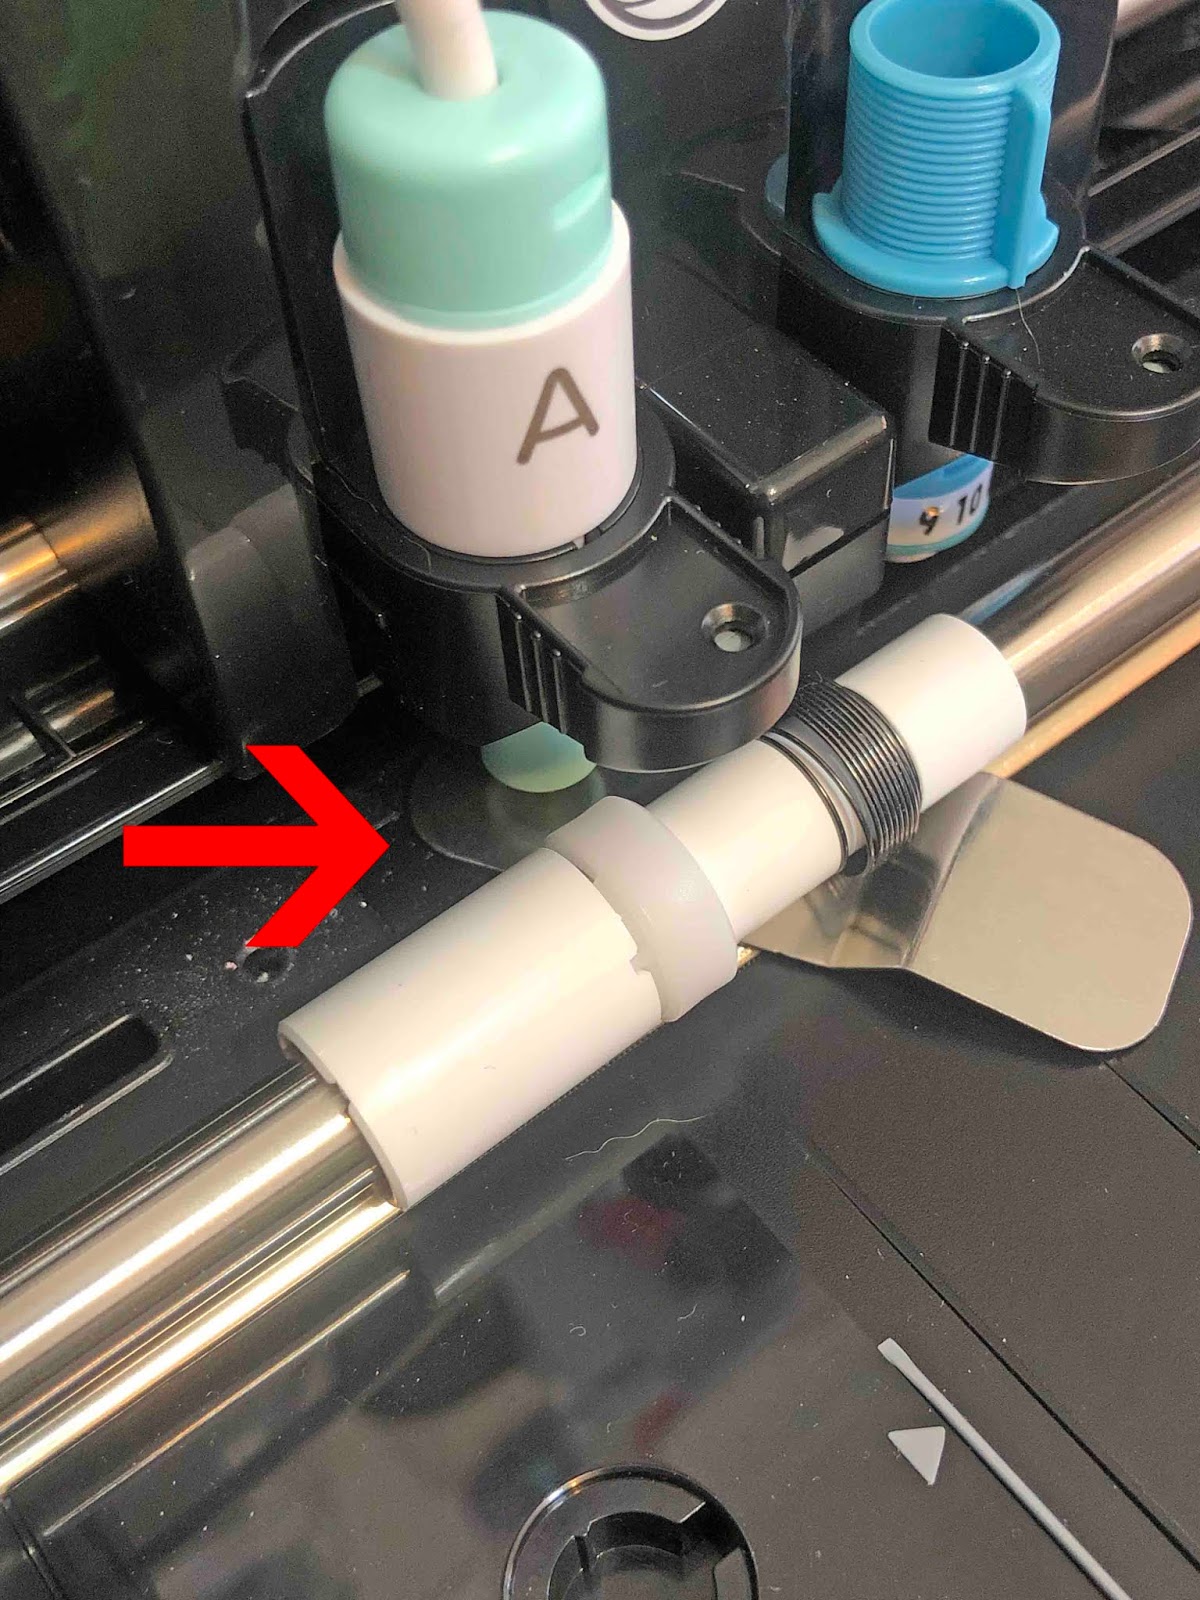
4- You will have received a small metal plate with your tool. Carefully place this under the foil quill. Making sure that it is exactly under the actual heated part of the quill so it does not melt your mat.
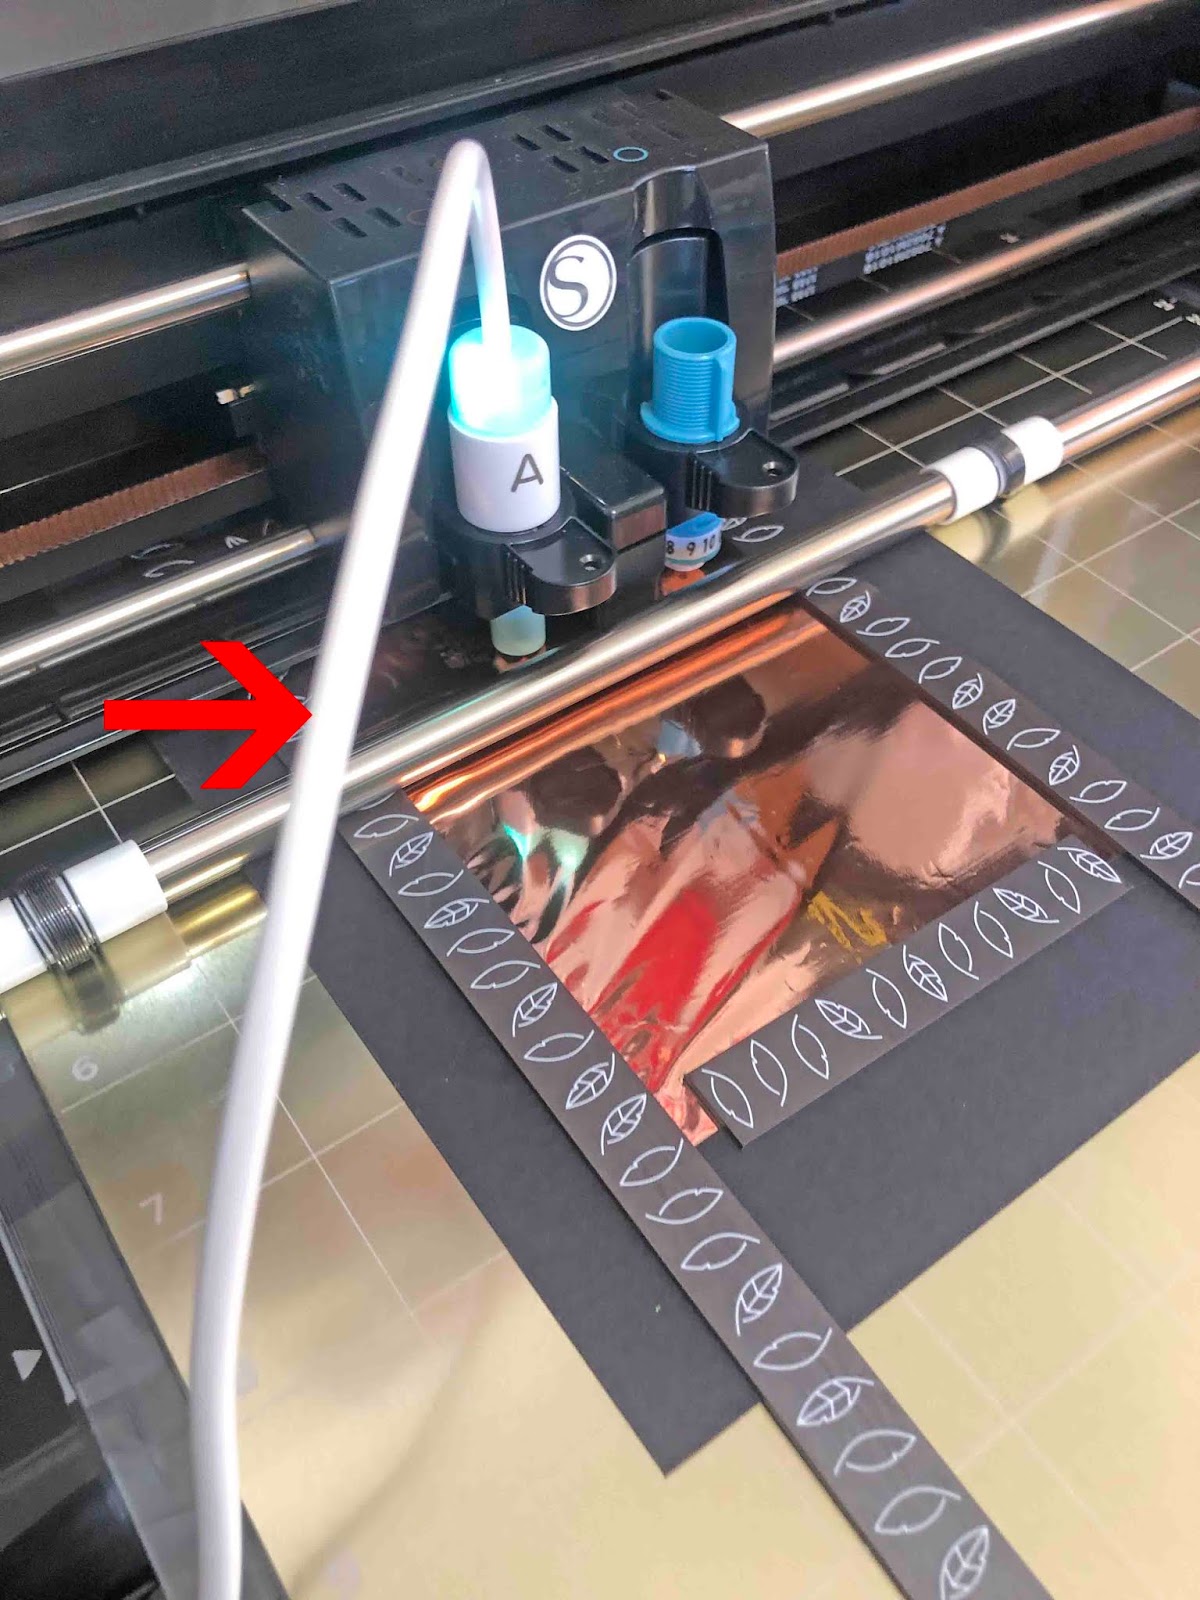
5- Plug the USB end of the foil quill into a power pack. The light on the foil quill will light up.
6- You can now design and send to your cameo. The quill will draw on top of your foil. You can hold the foil onto your media using tape, or a magnetic mat as being used in this image.
7- Once you have finished your design,unload. Make sure you place the metal mat back under the foil quill if it is still heating.
1- Open the lid of your silhouette machine. We need to remove the cut blade so we can insert the foil quill. Unlock the cut tool.
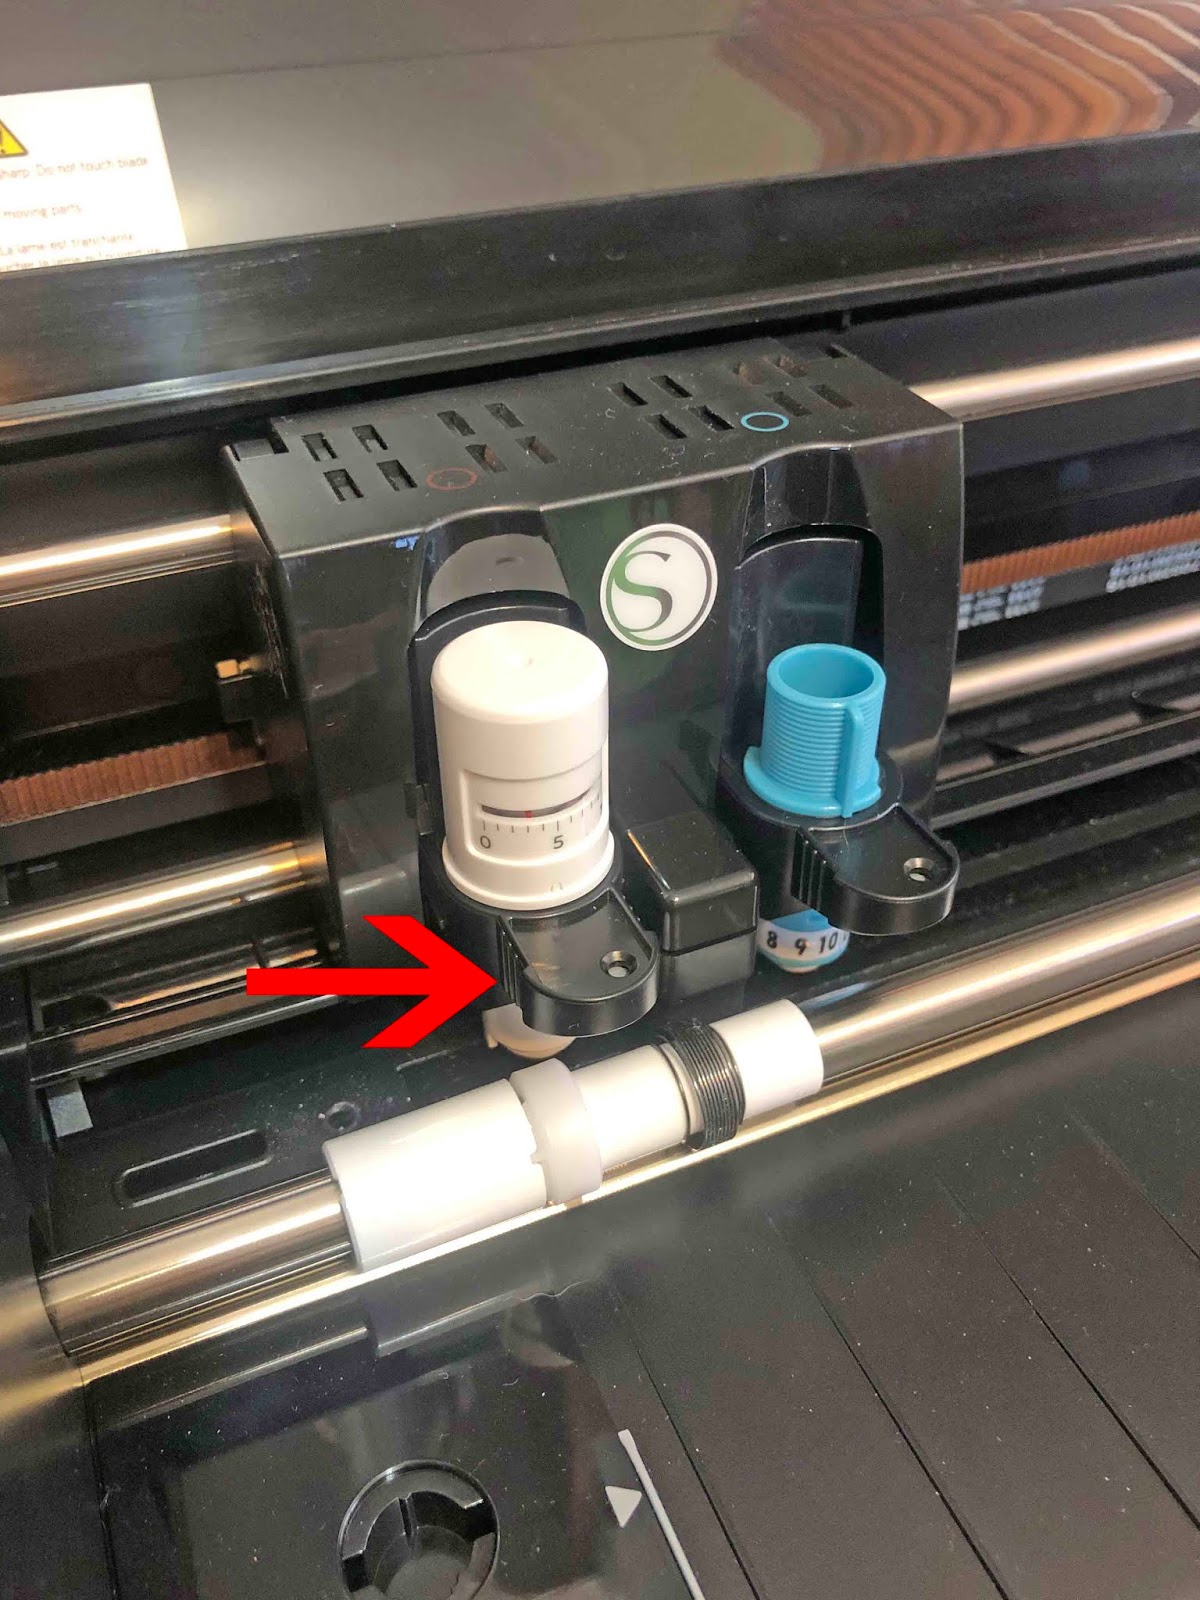
2- Remove the cutting tool. leave the holder unlocked.

3- Place the "A" adapter onto the foil quill. This adapter is clearly labeled "A". Make sure it is screwed on all the way. Next place the foil quill into the blade holder. It will be a tight fit. slowly push in. Once in all the way lock in.
4- You will have received a small metal plate with your tool. Carefully place this under the foil quill. Making sure that it is exactly under the actual heated part of the quill so it does not melt your mat.
5- Plug the USB end of the foil quill into a power pack. The light on the foil quill will light up.

6- You can now design and send to your cameo. The quill will draw on top of your foil. You can hold the foil onto your media using tape, or a magnetic mat as being used in this image.
7- Once you have finished your design,unload. Make sure you place the metal mat back under the foil quill if it is still heating.


