
Autumn Colors in Photoshop
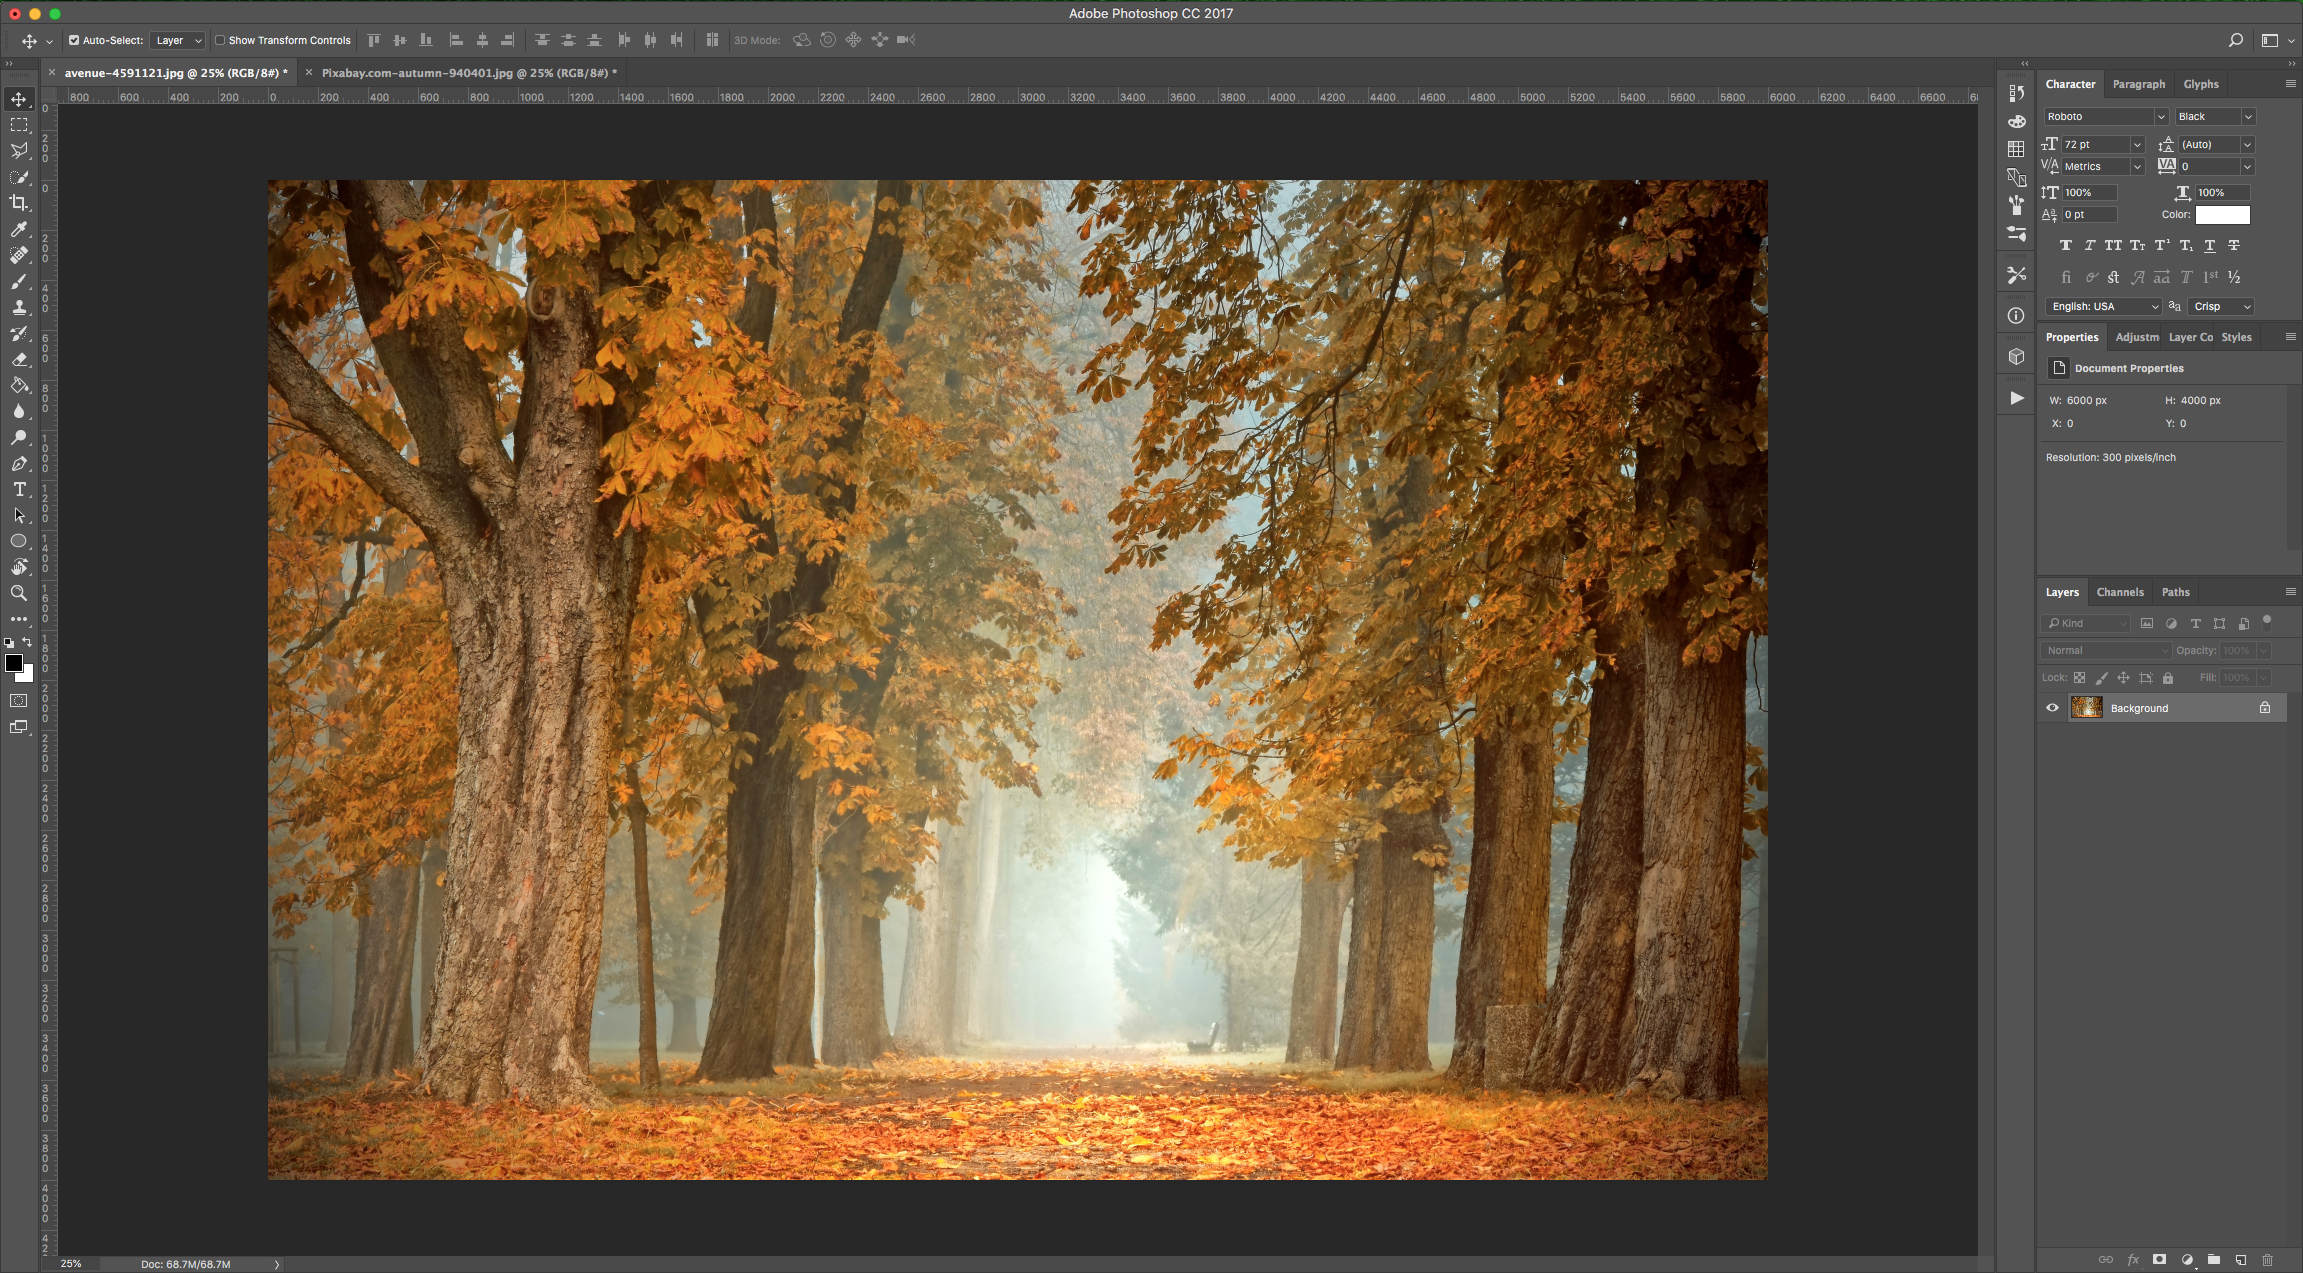
For this tutorial, we will use an Image of some trees or leaves with autumnal colors.
1 - In Photoshop, open the image you wish to use apply the “Effect” to.
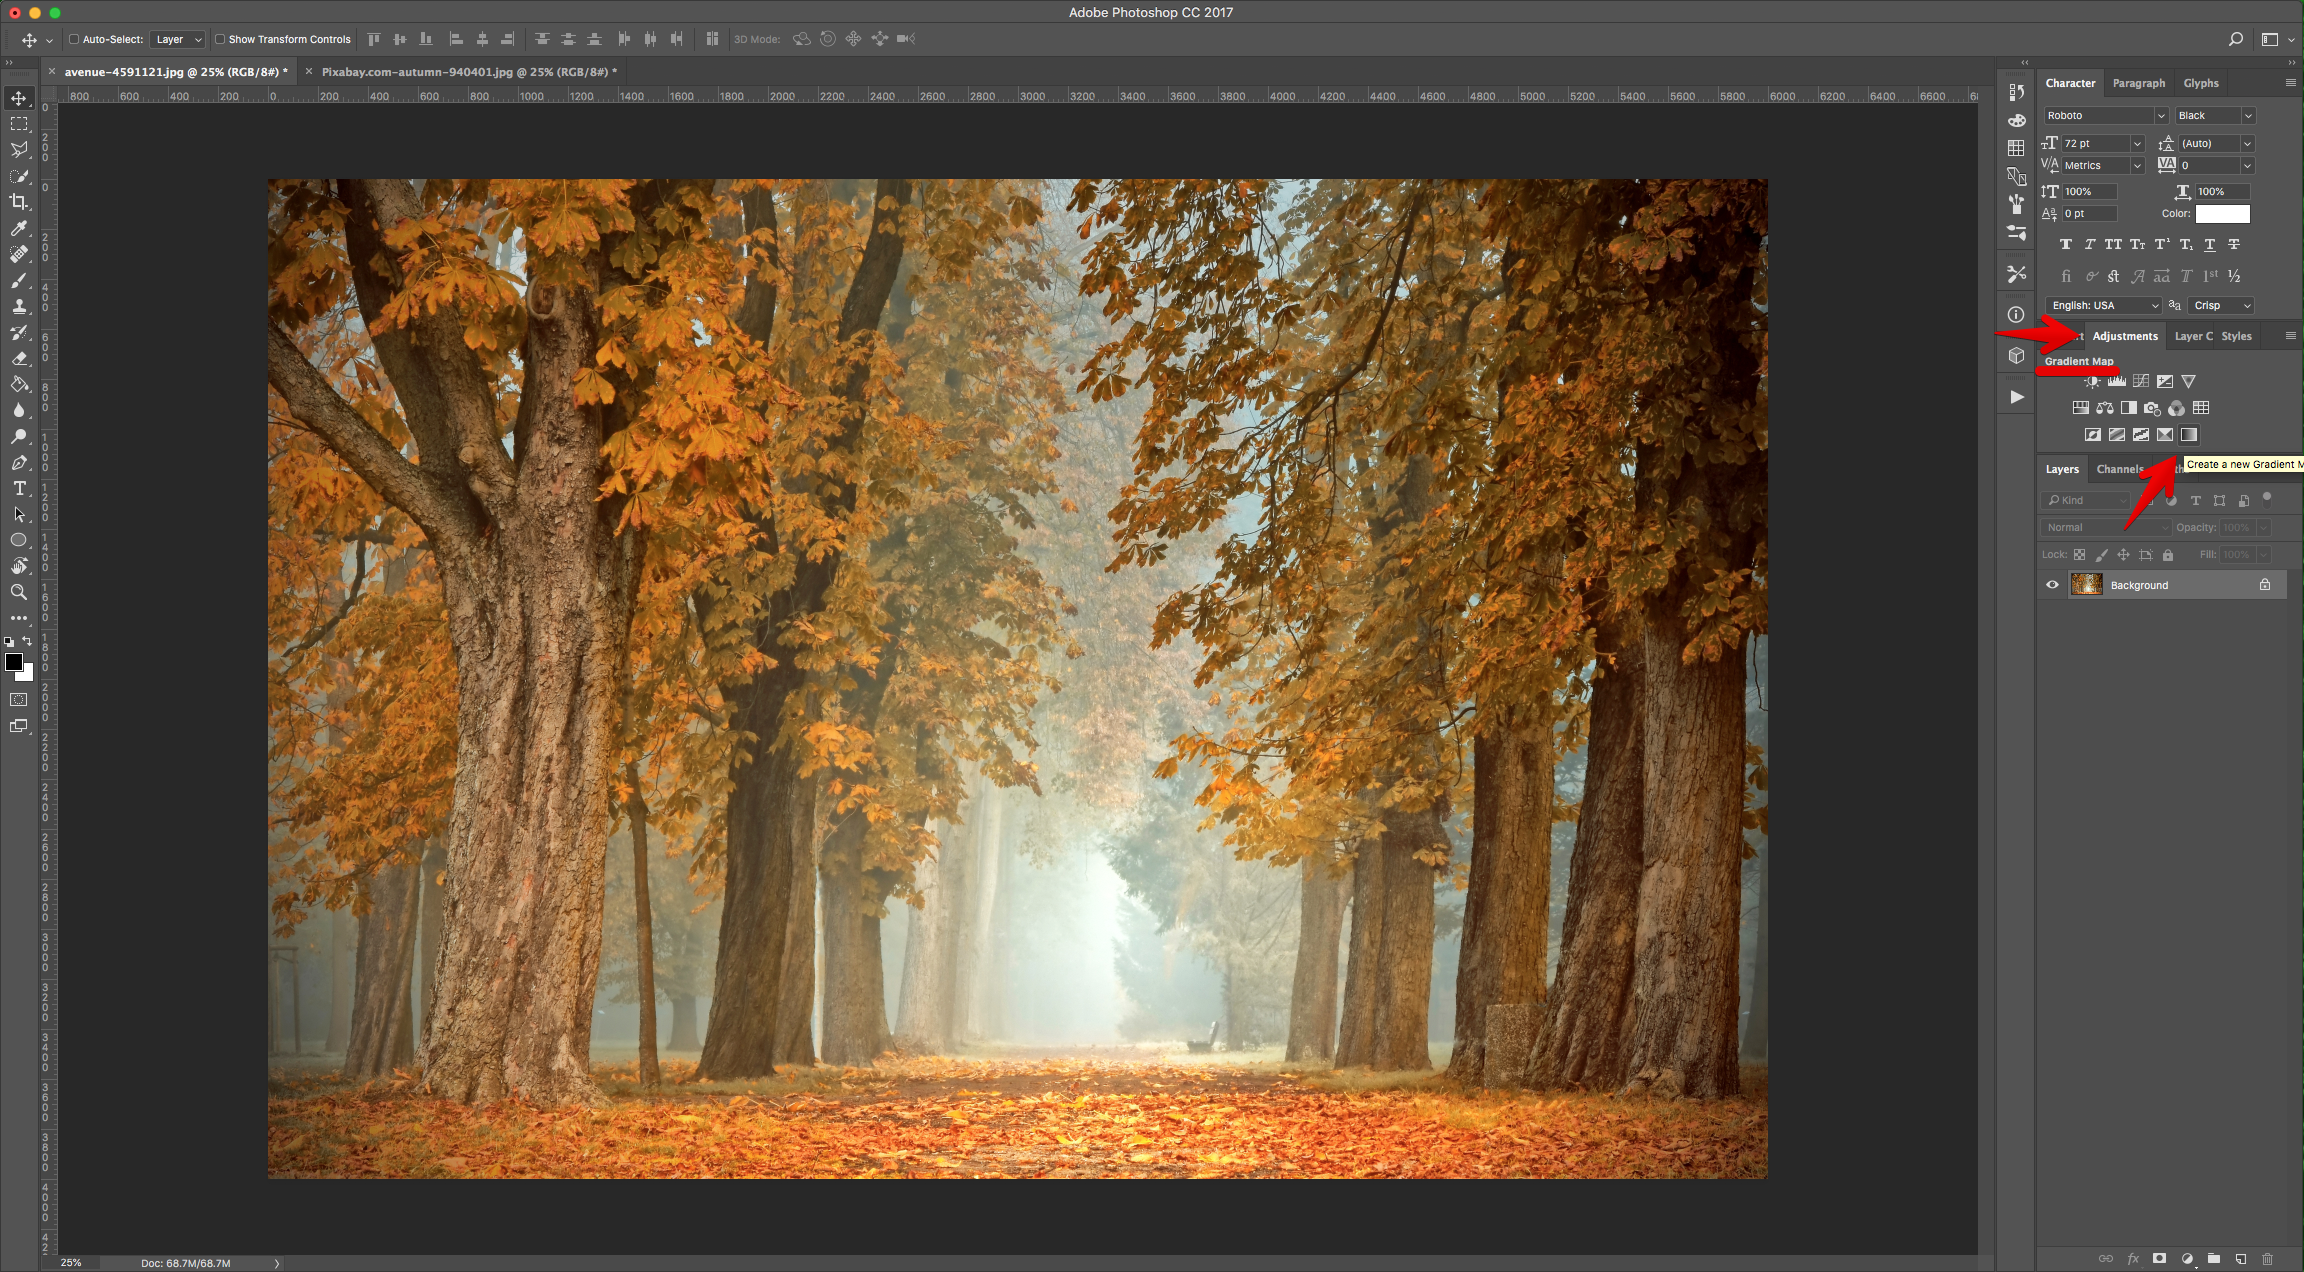
2 - Go to the “Adjustments Panel” and create a “New Gradient Map” Adjustment Layer.
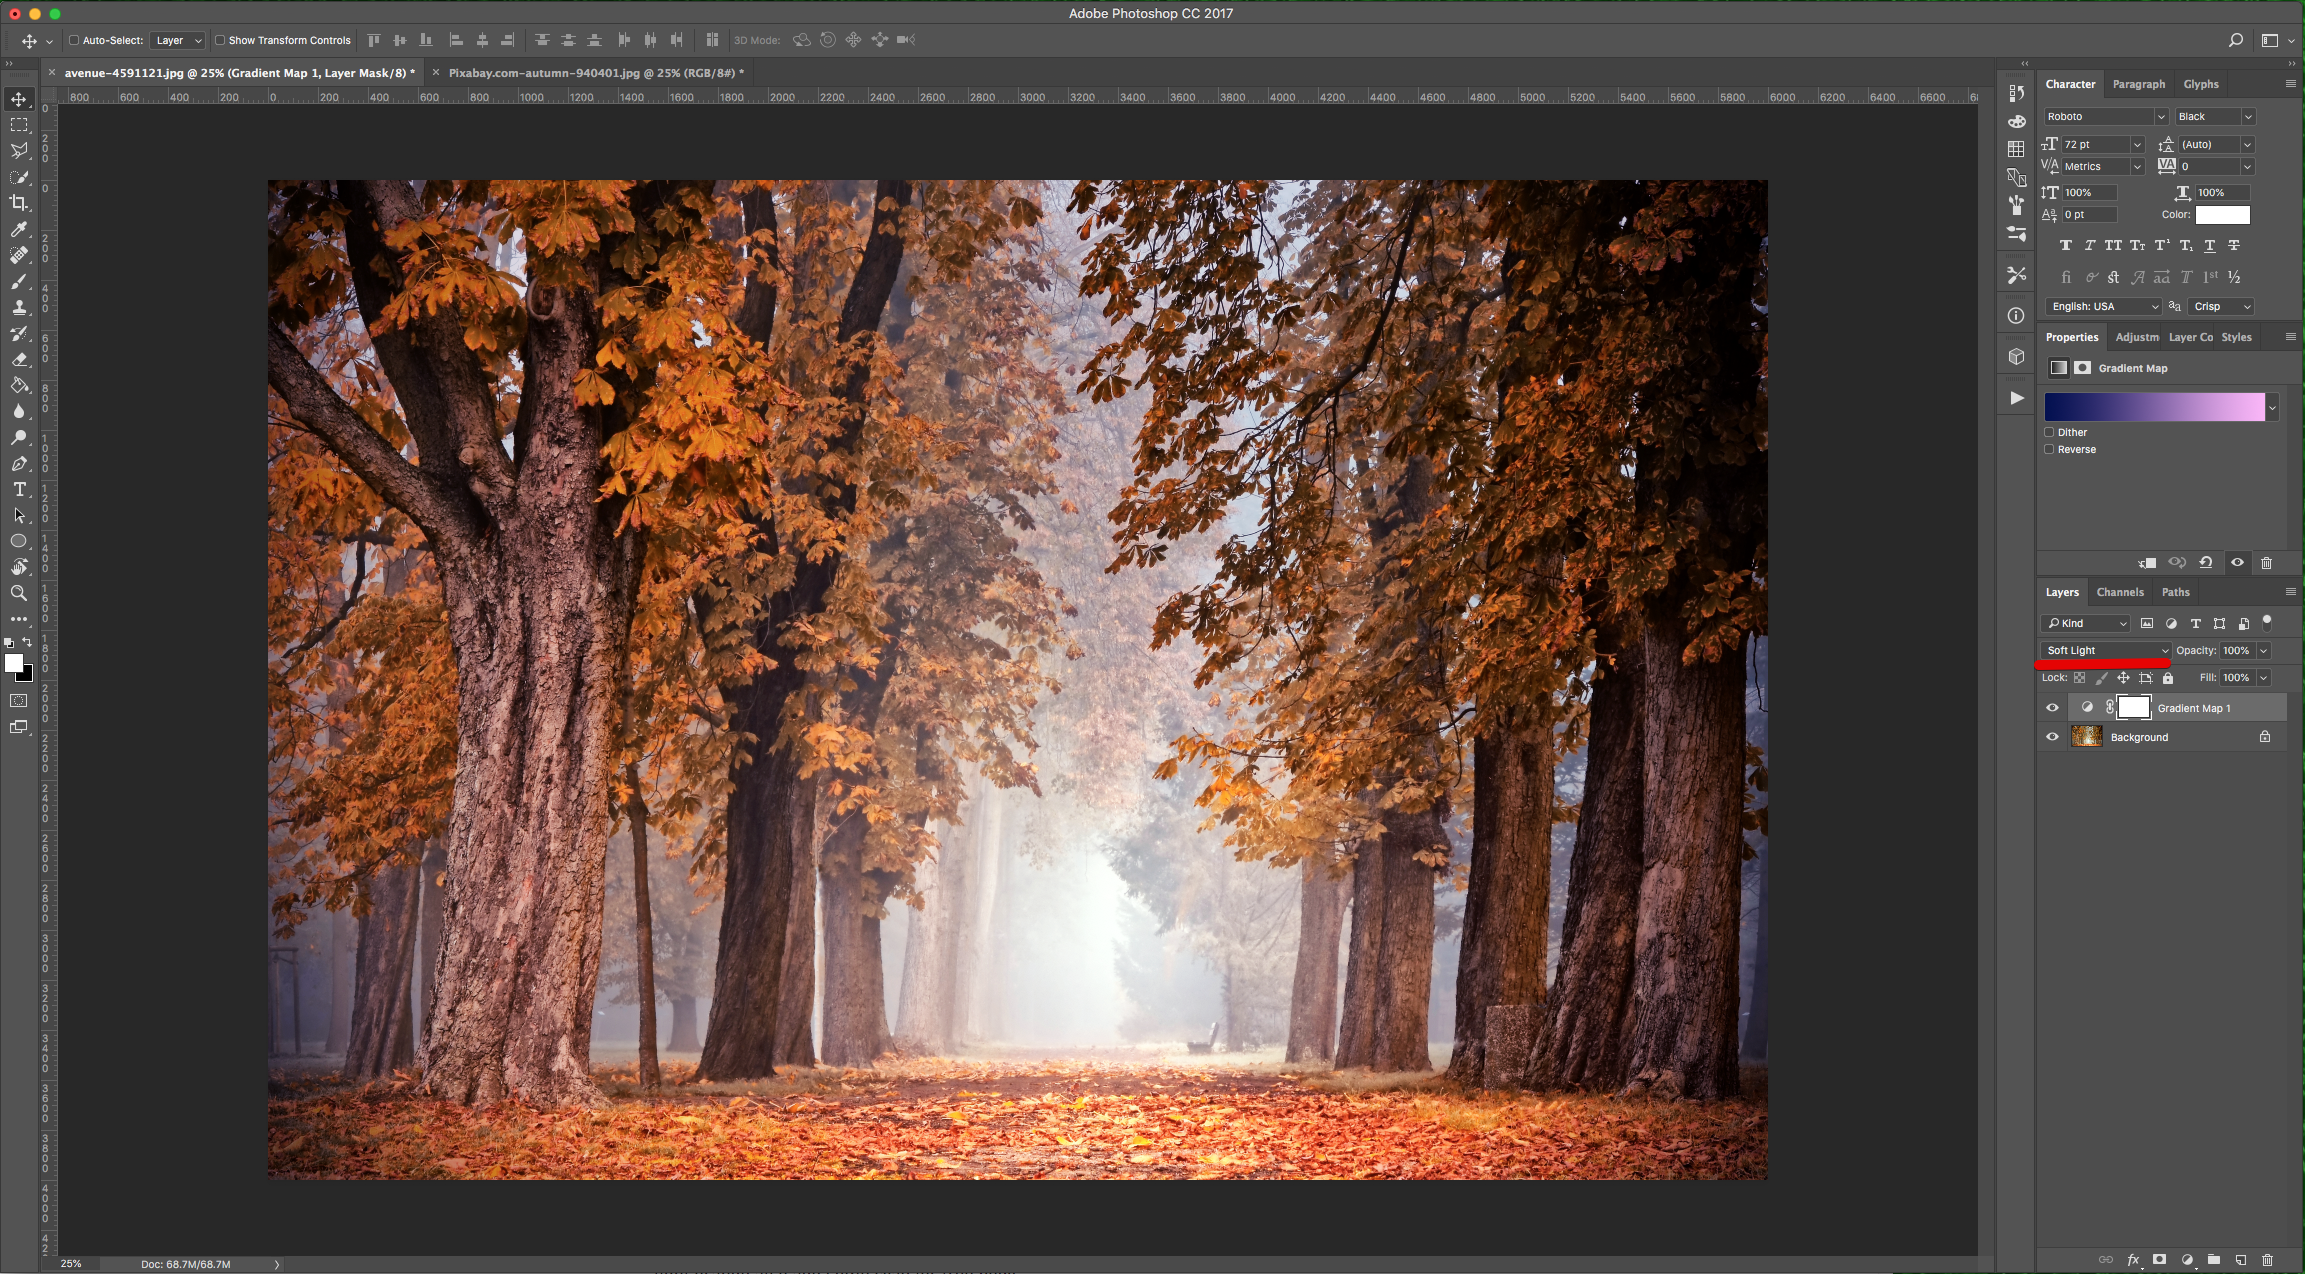
3 - Double-click on the Gradient and use #020c52 @ 0% (Location) and #fbb4fa @ 100% (Location).

4 - Change the “Blending Mode” of the “Gradient Map” layer to “Soft Light”.
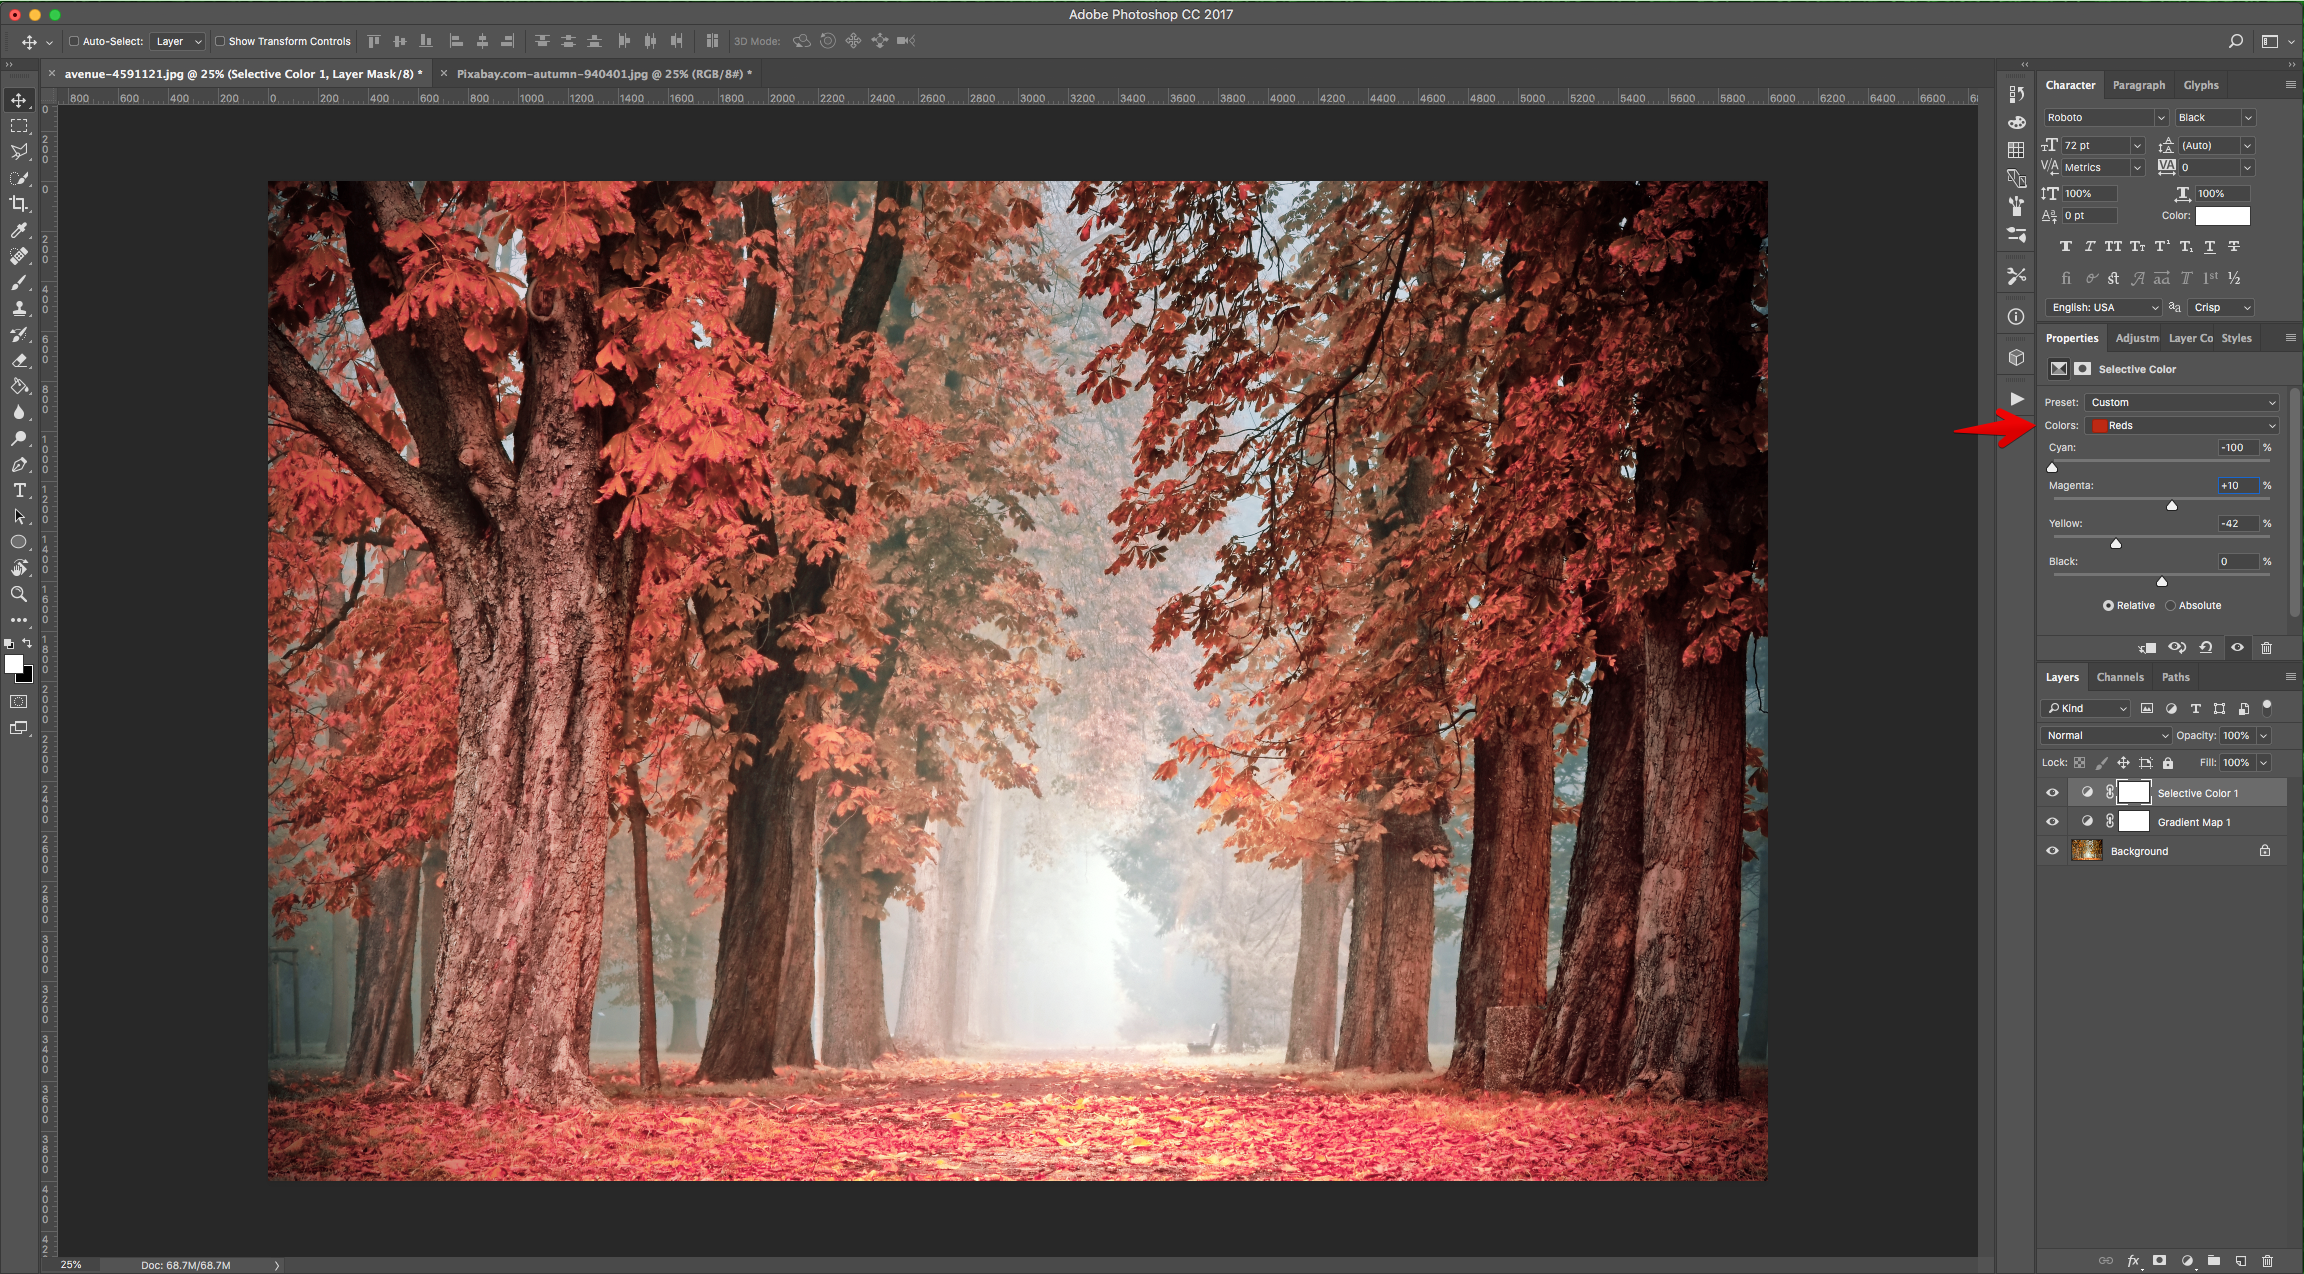
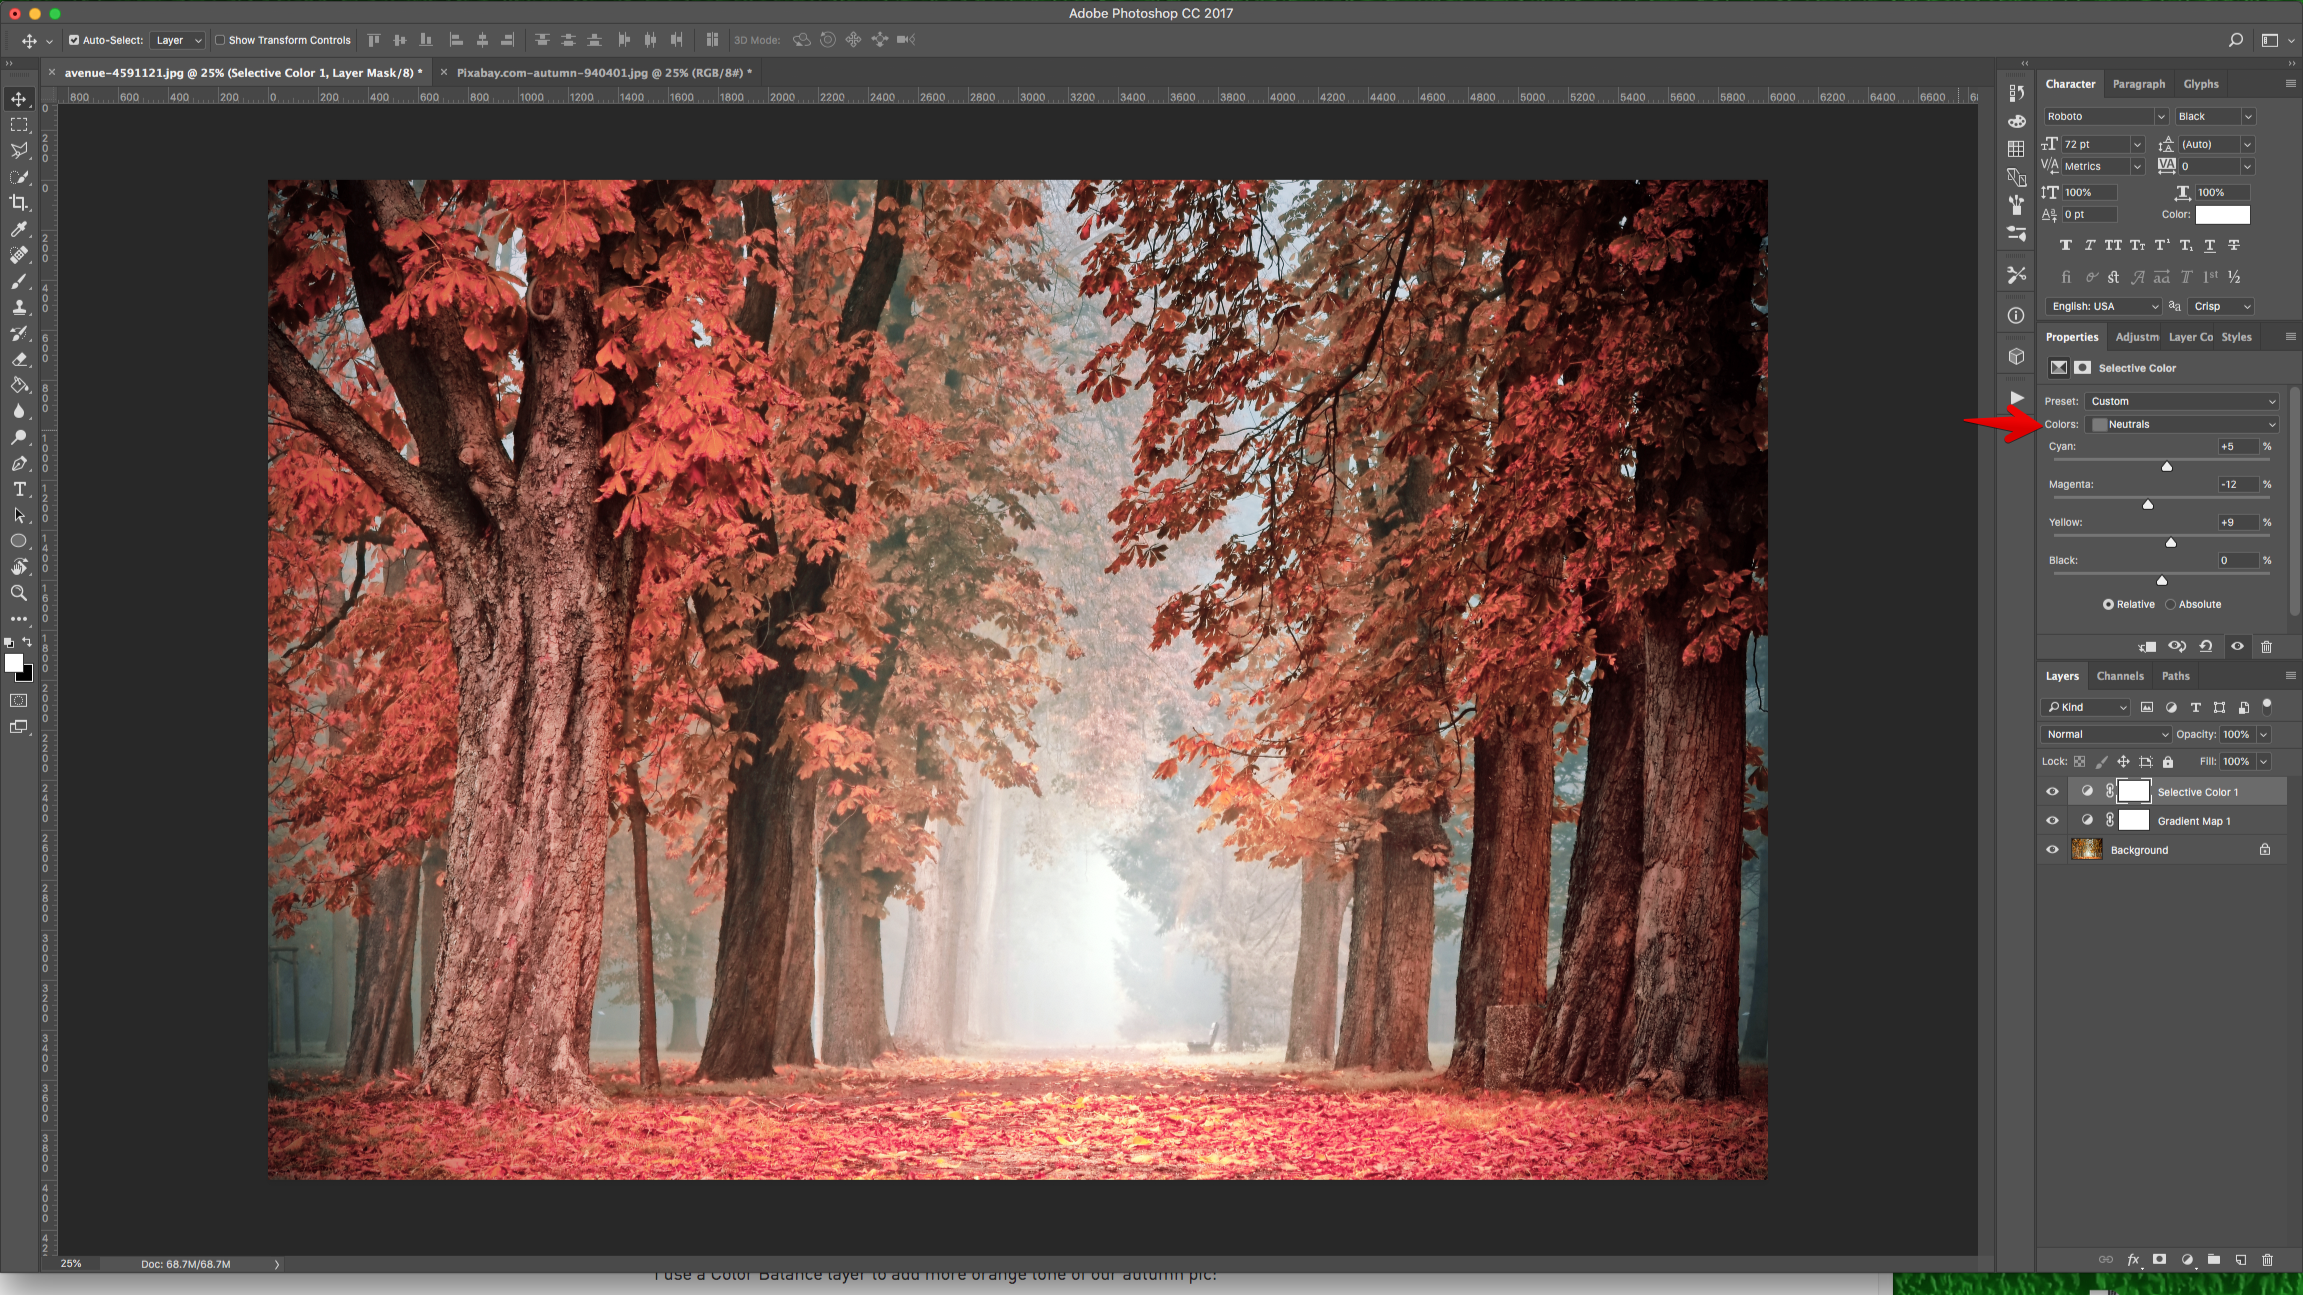
5 - Go to the “Adjustments Panel” and create a “Selective Color” Adjustment Layer.

6 - Choose “Reds” and lower the “Cyan” completely (or almost), the “Yellow” to about 40% and increase the “Magenta” around 10. Then, choose “Yellows”, lower the “Cyan” and “Yellow” increase the “Magenta”. Finally, choose the “Neutrals” and increase the “Cyan” and “Yellow” and lower the “Magenta” a bit. The values to use are going to depend on your image.

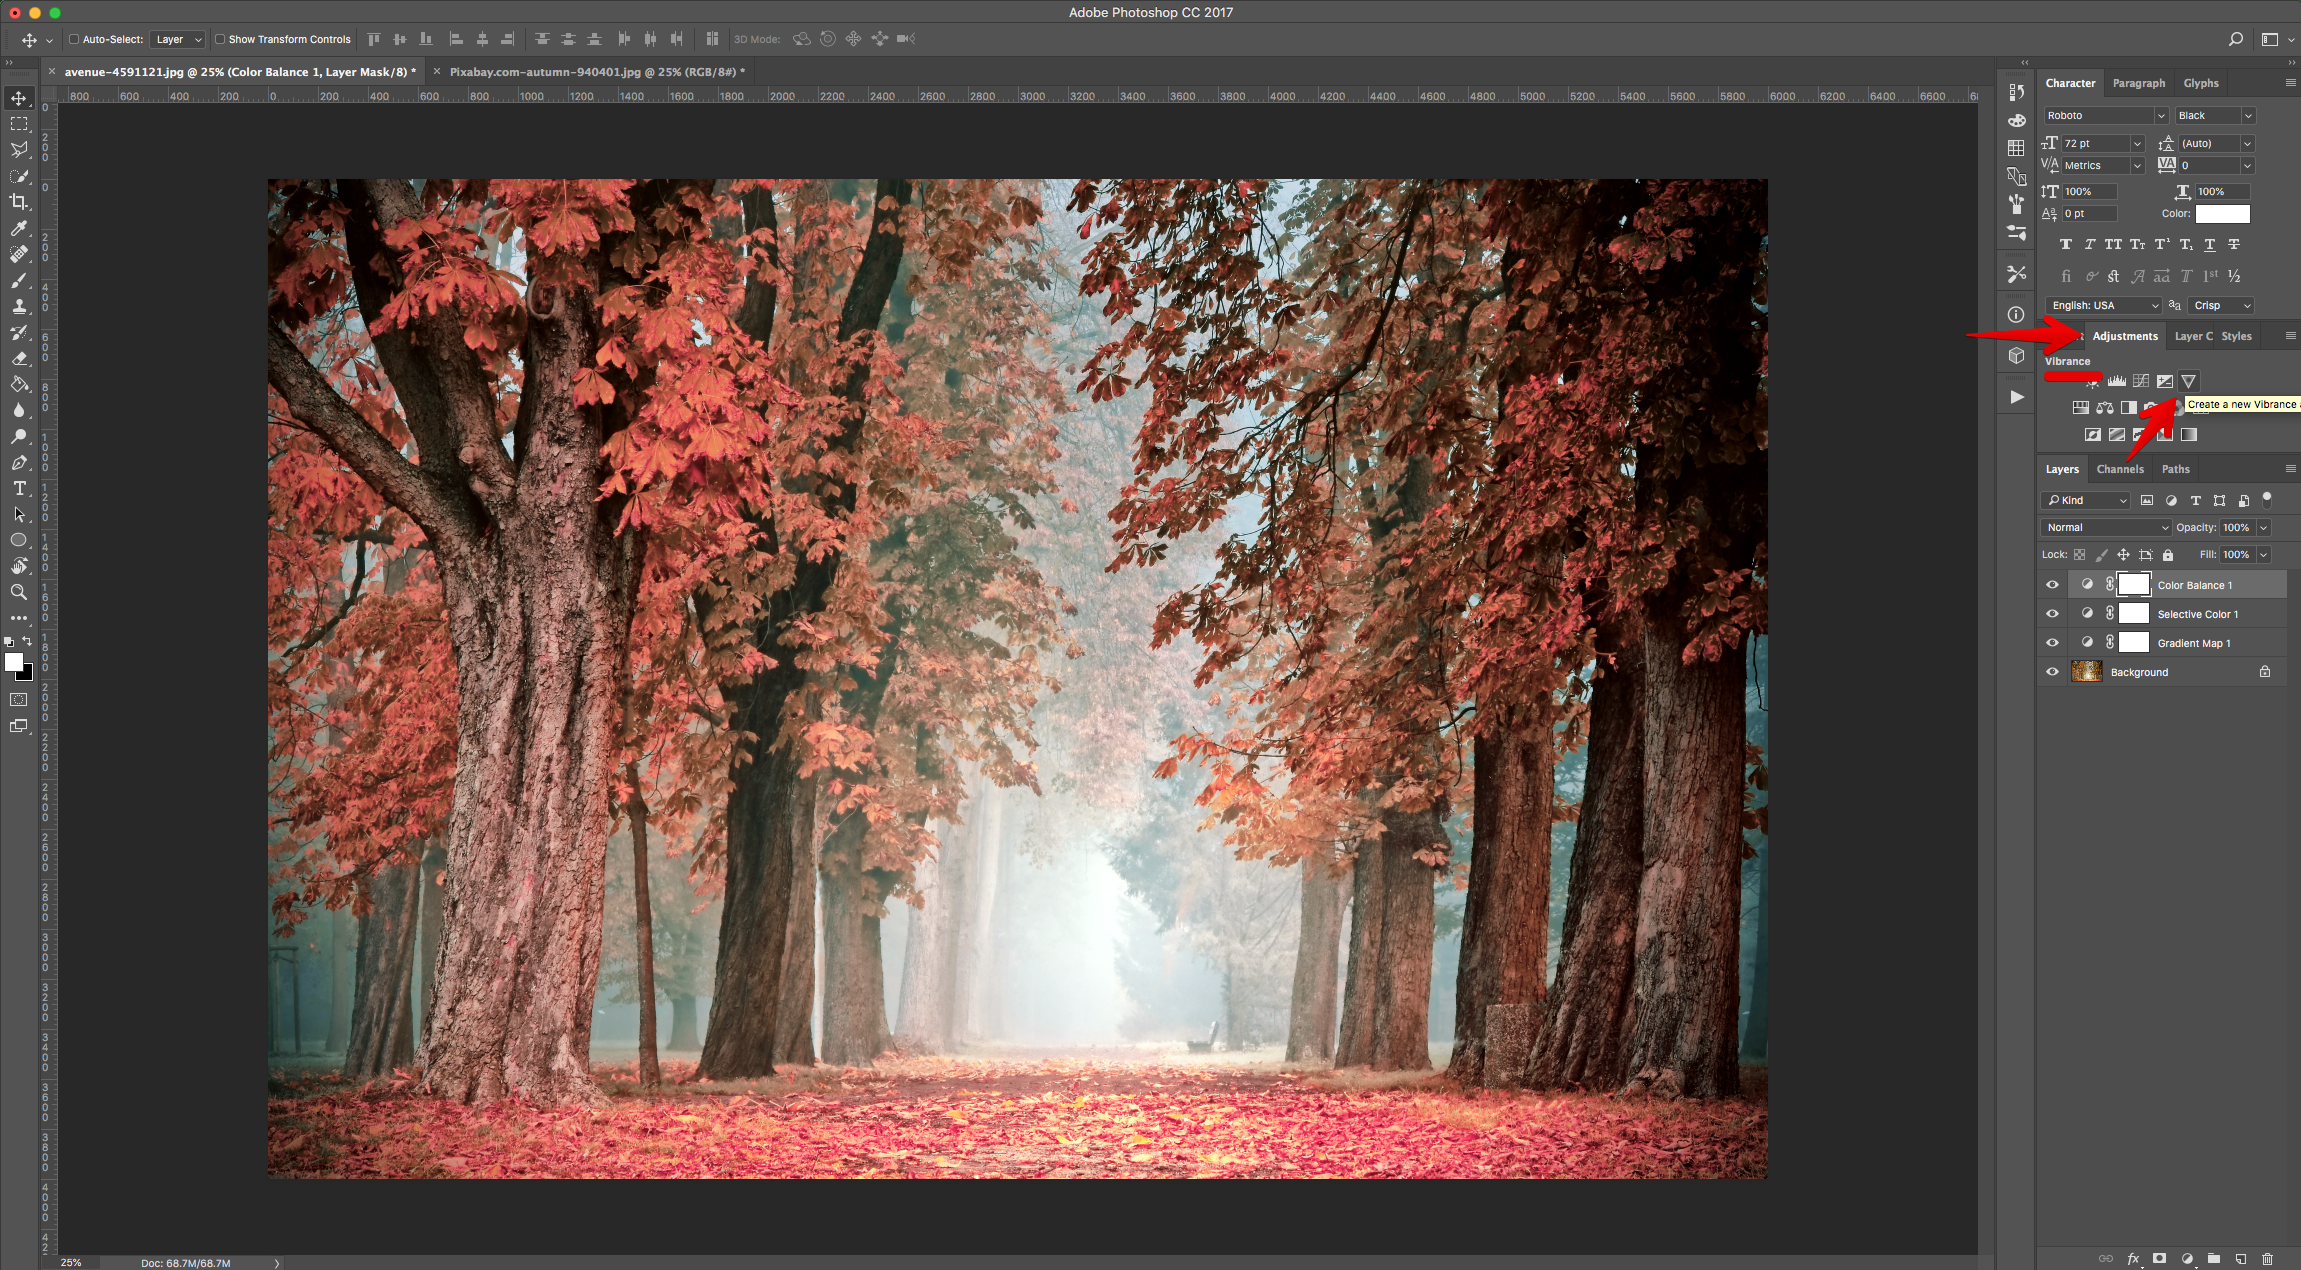
7 - Go to the “Adjustments Panel” and create a “Color Balance” Adjustment Layer.

8 - Choose “Shadows” and move the first lever towards the “Red” side a bit and the last one towards the “Yellow” a bit. Then, choose “Midtones”, and move the levers towards the “Cyan”, “Green” and “Blue” sides a bit. Finally, with the “Highlights”, move the levers towards the “Red”, “Green” and “Blue” sides a bit. The values to use are going to depend on your image.


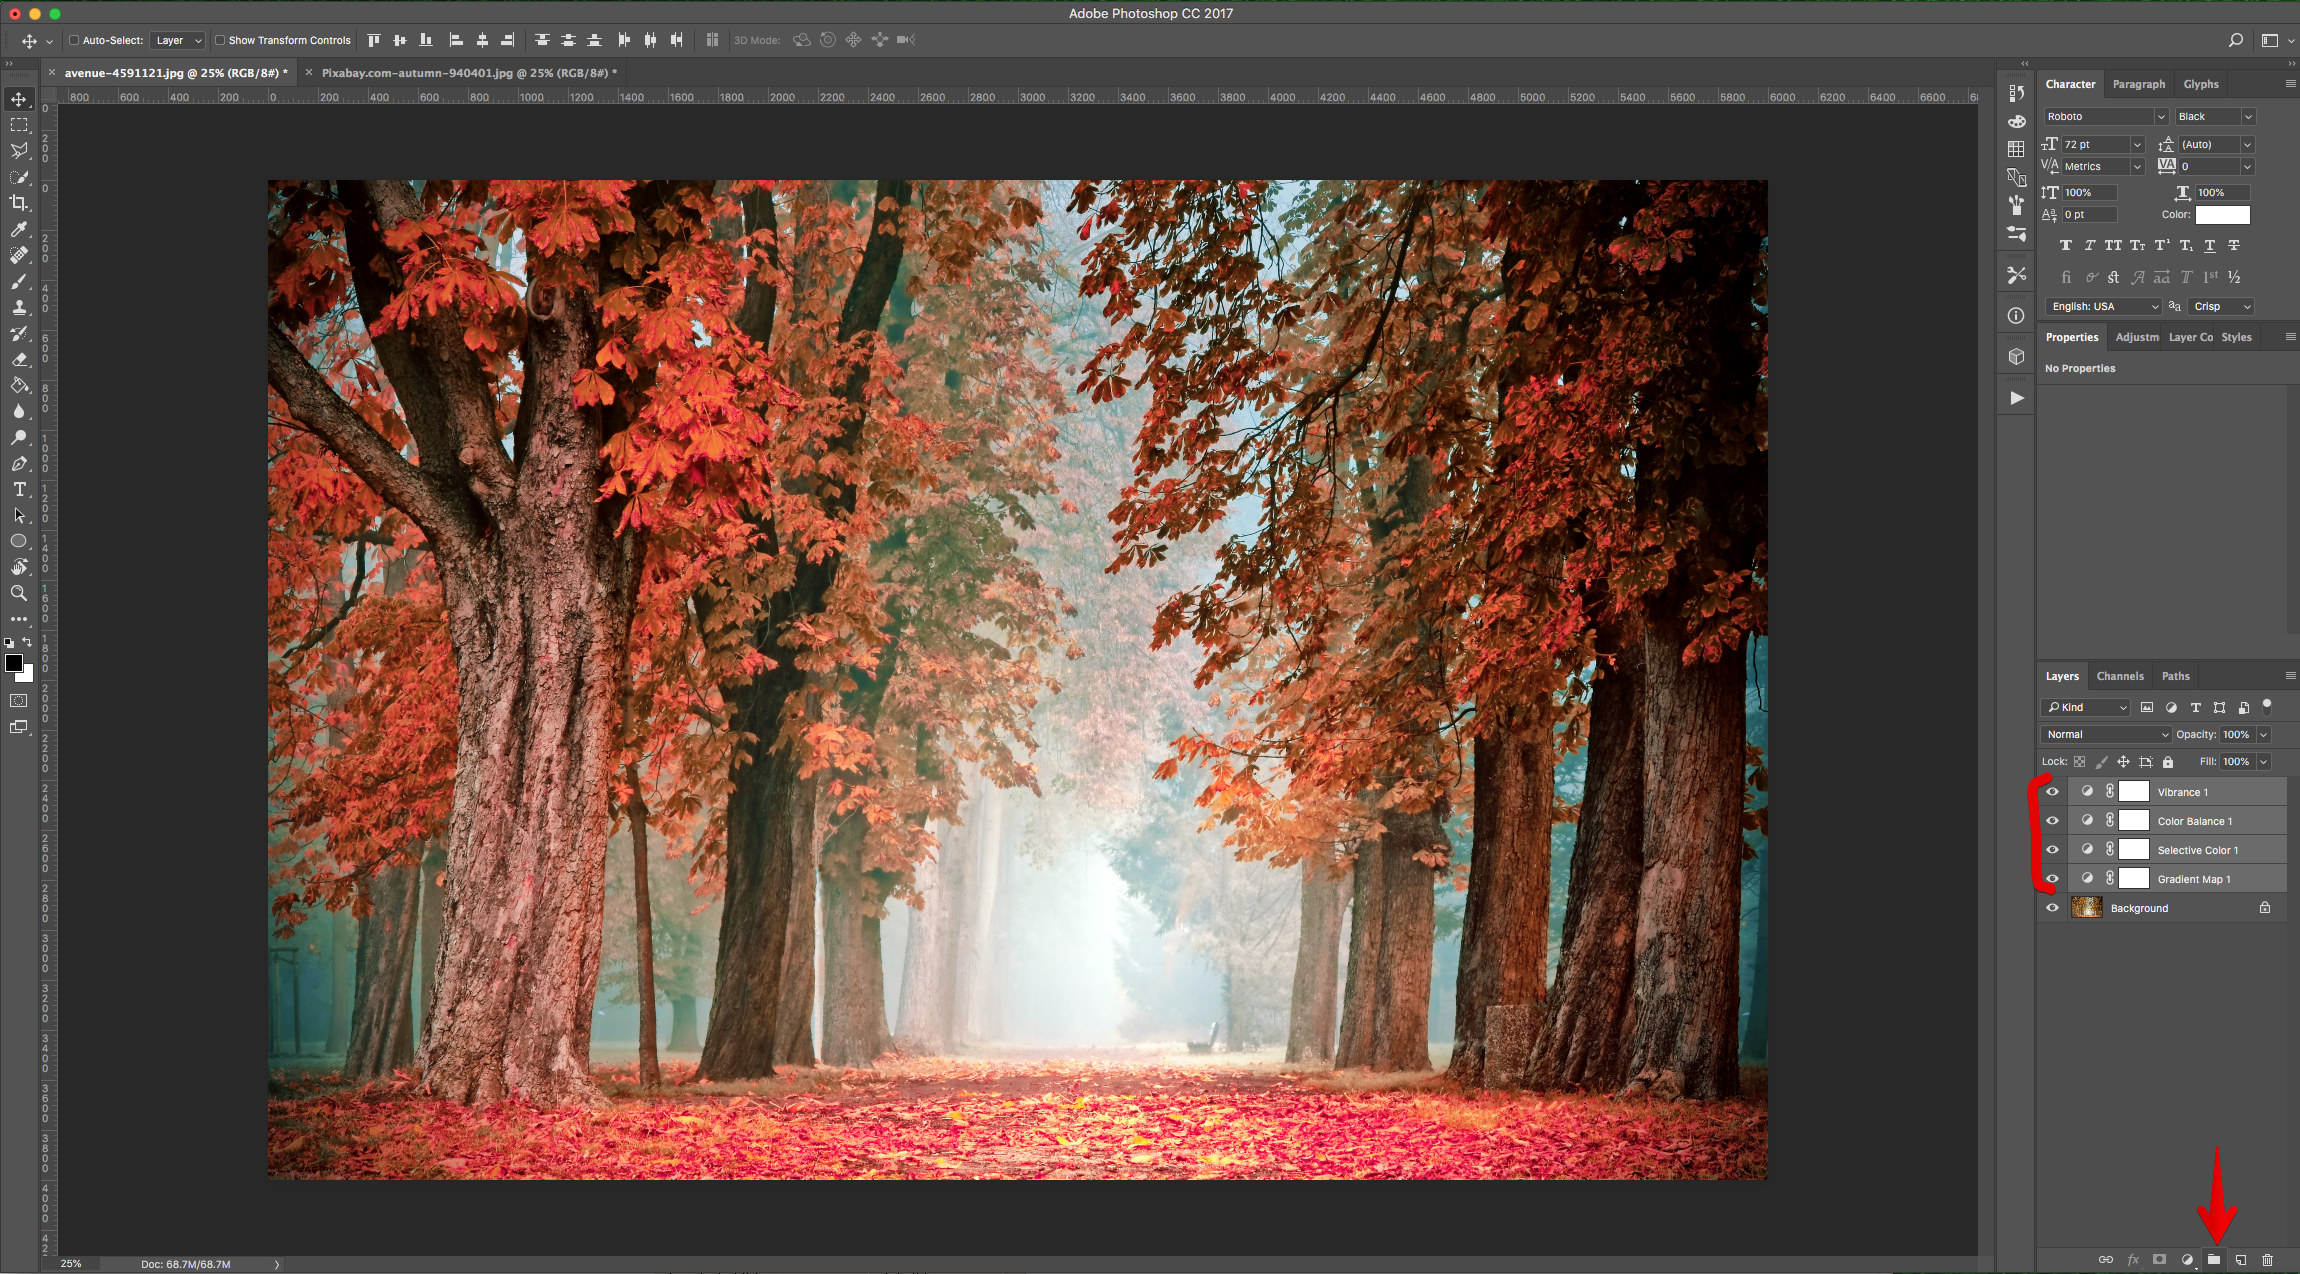
9 - Go to the “Adjustments Panel” and create a “Vibrance” Adjustment Layer. Increase the “Vibrance” and “Saturation” values to make the colors pop a bit more.

10 - Select all the “Adjustment Layers” (“Shift” key) and “Group” them together by clicking on the small Folder icon at the bottom of the “Layers Panel”. Name the group “Orange”.
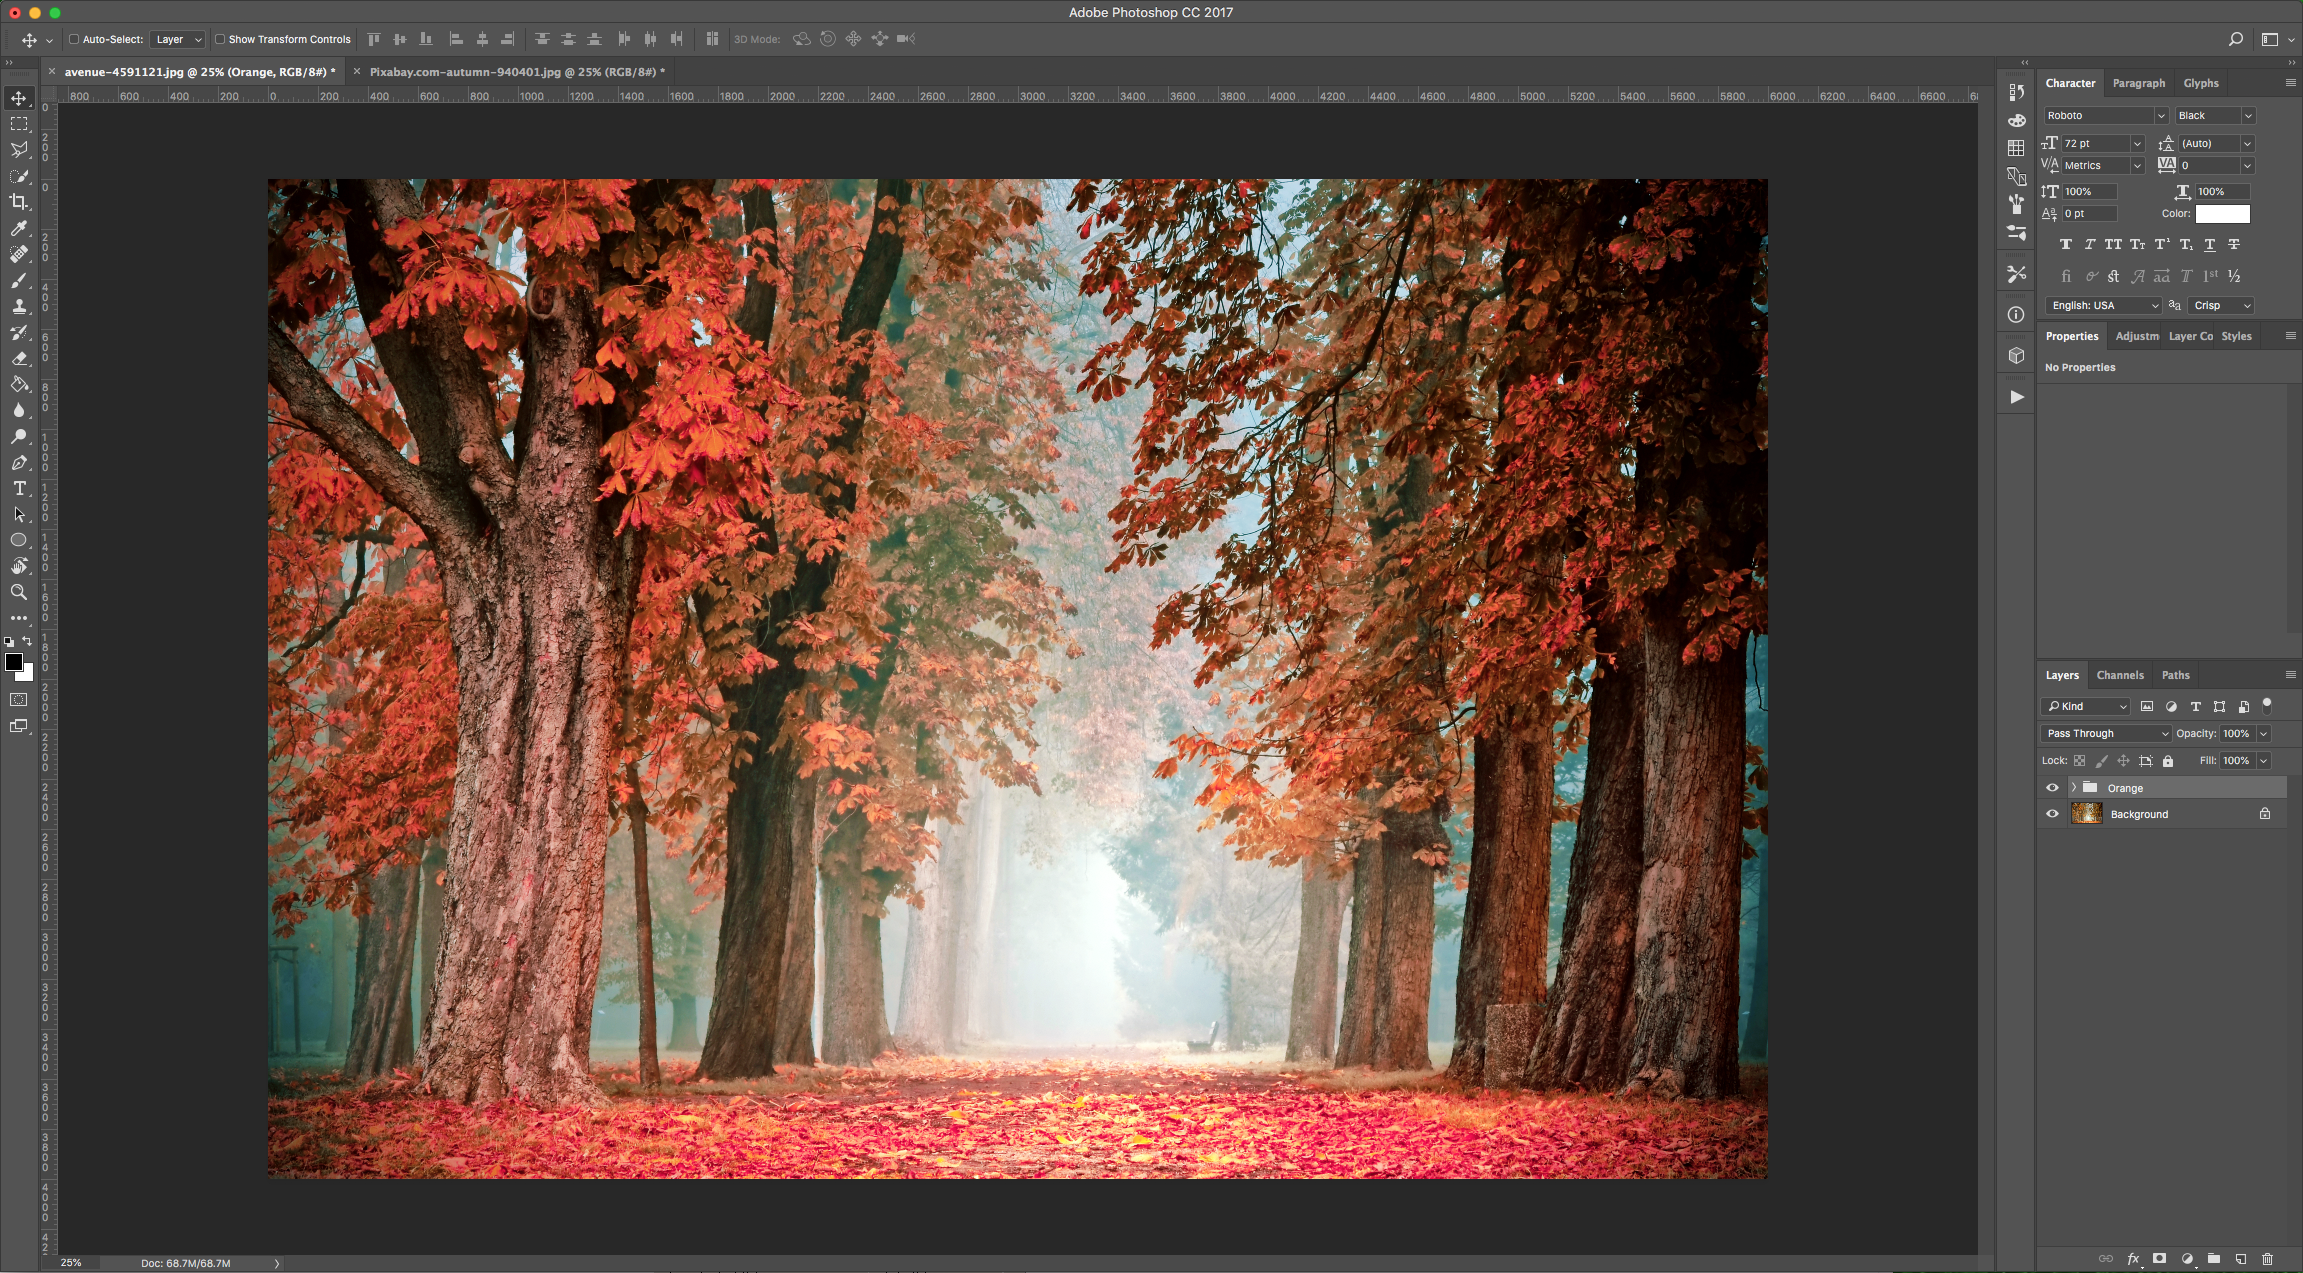
11 - Hide the “Orange” group by clicking on the small eye icon on the left side of its Thumbnail.

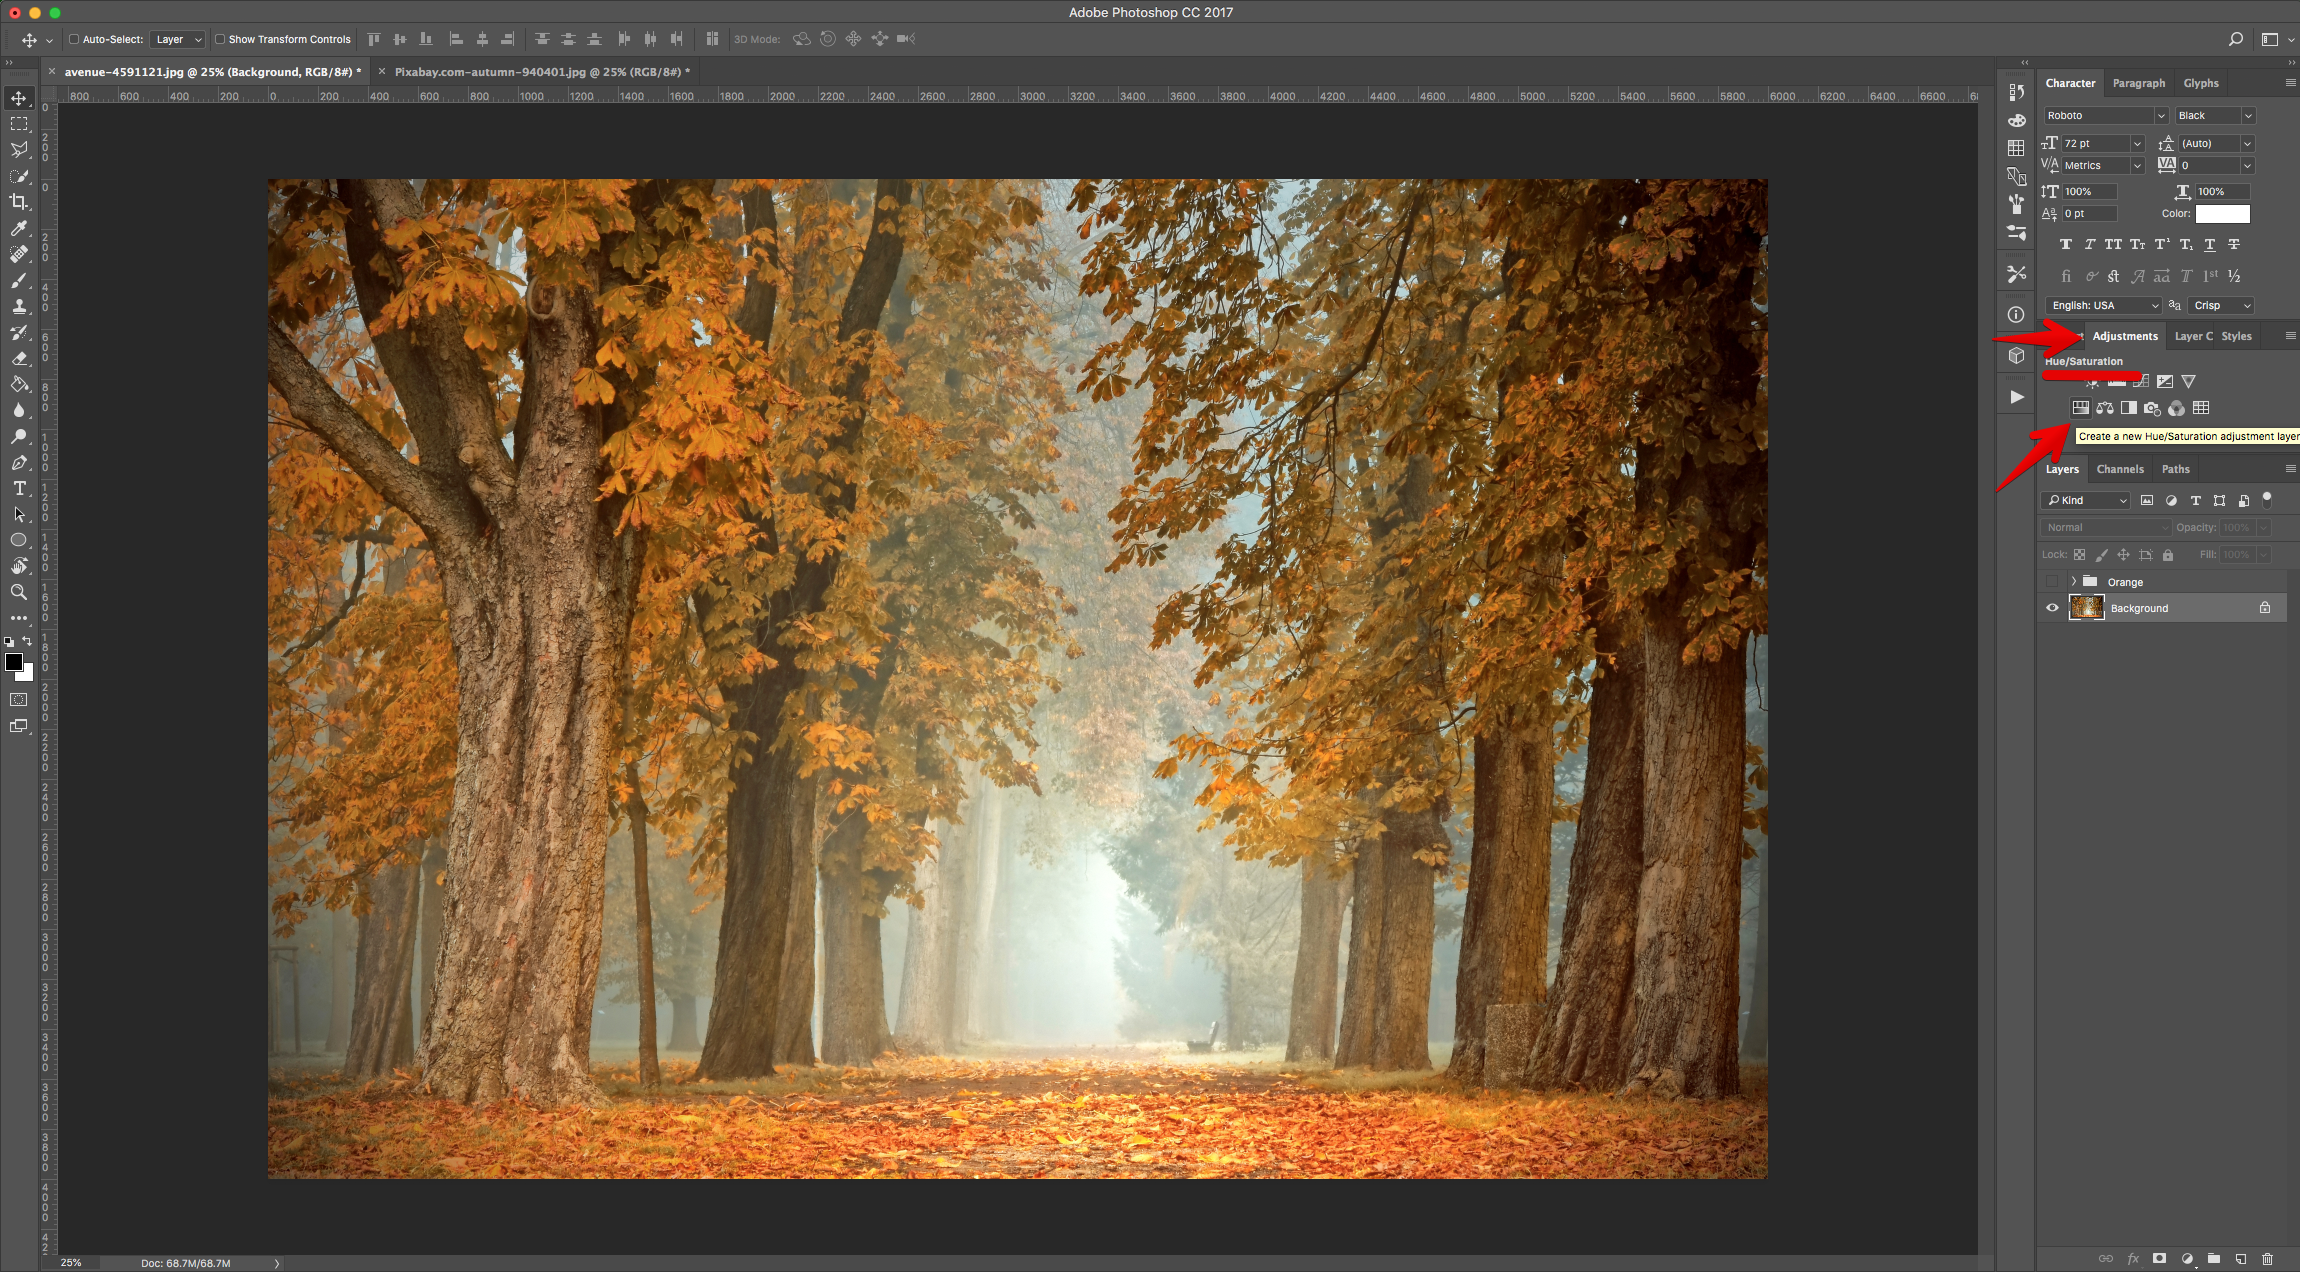
12 - Go to the “Adjustments Panel” and create a “New Hue/Saturation” Adjustment Layer.
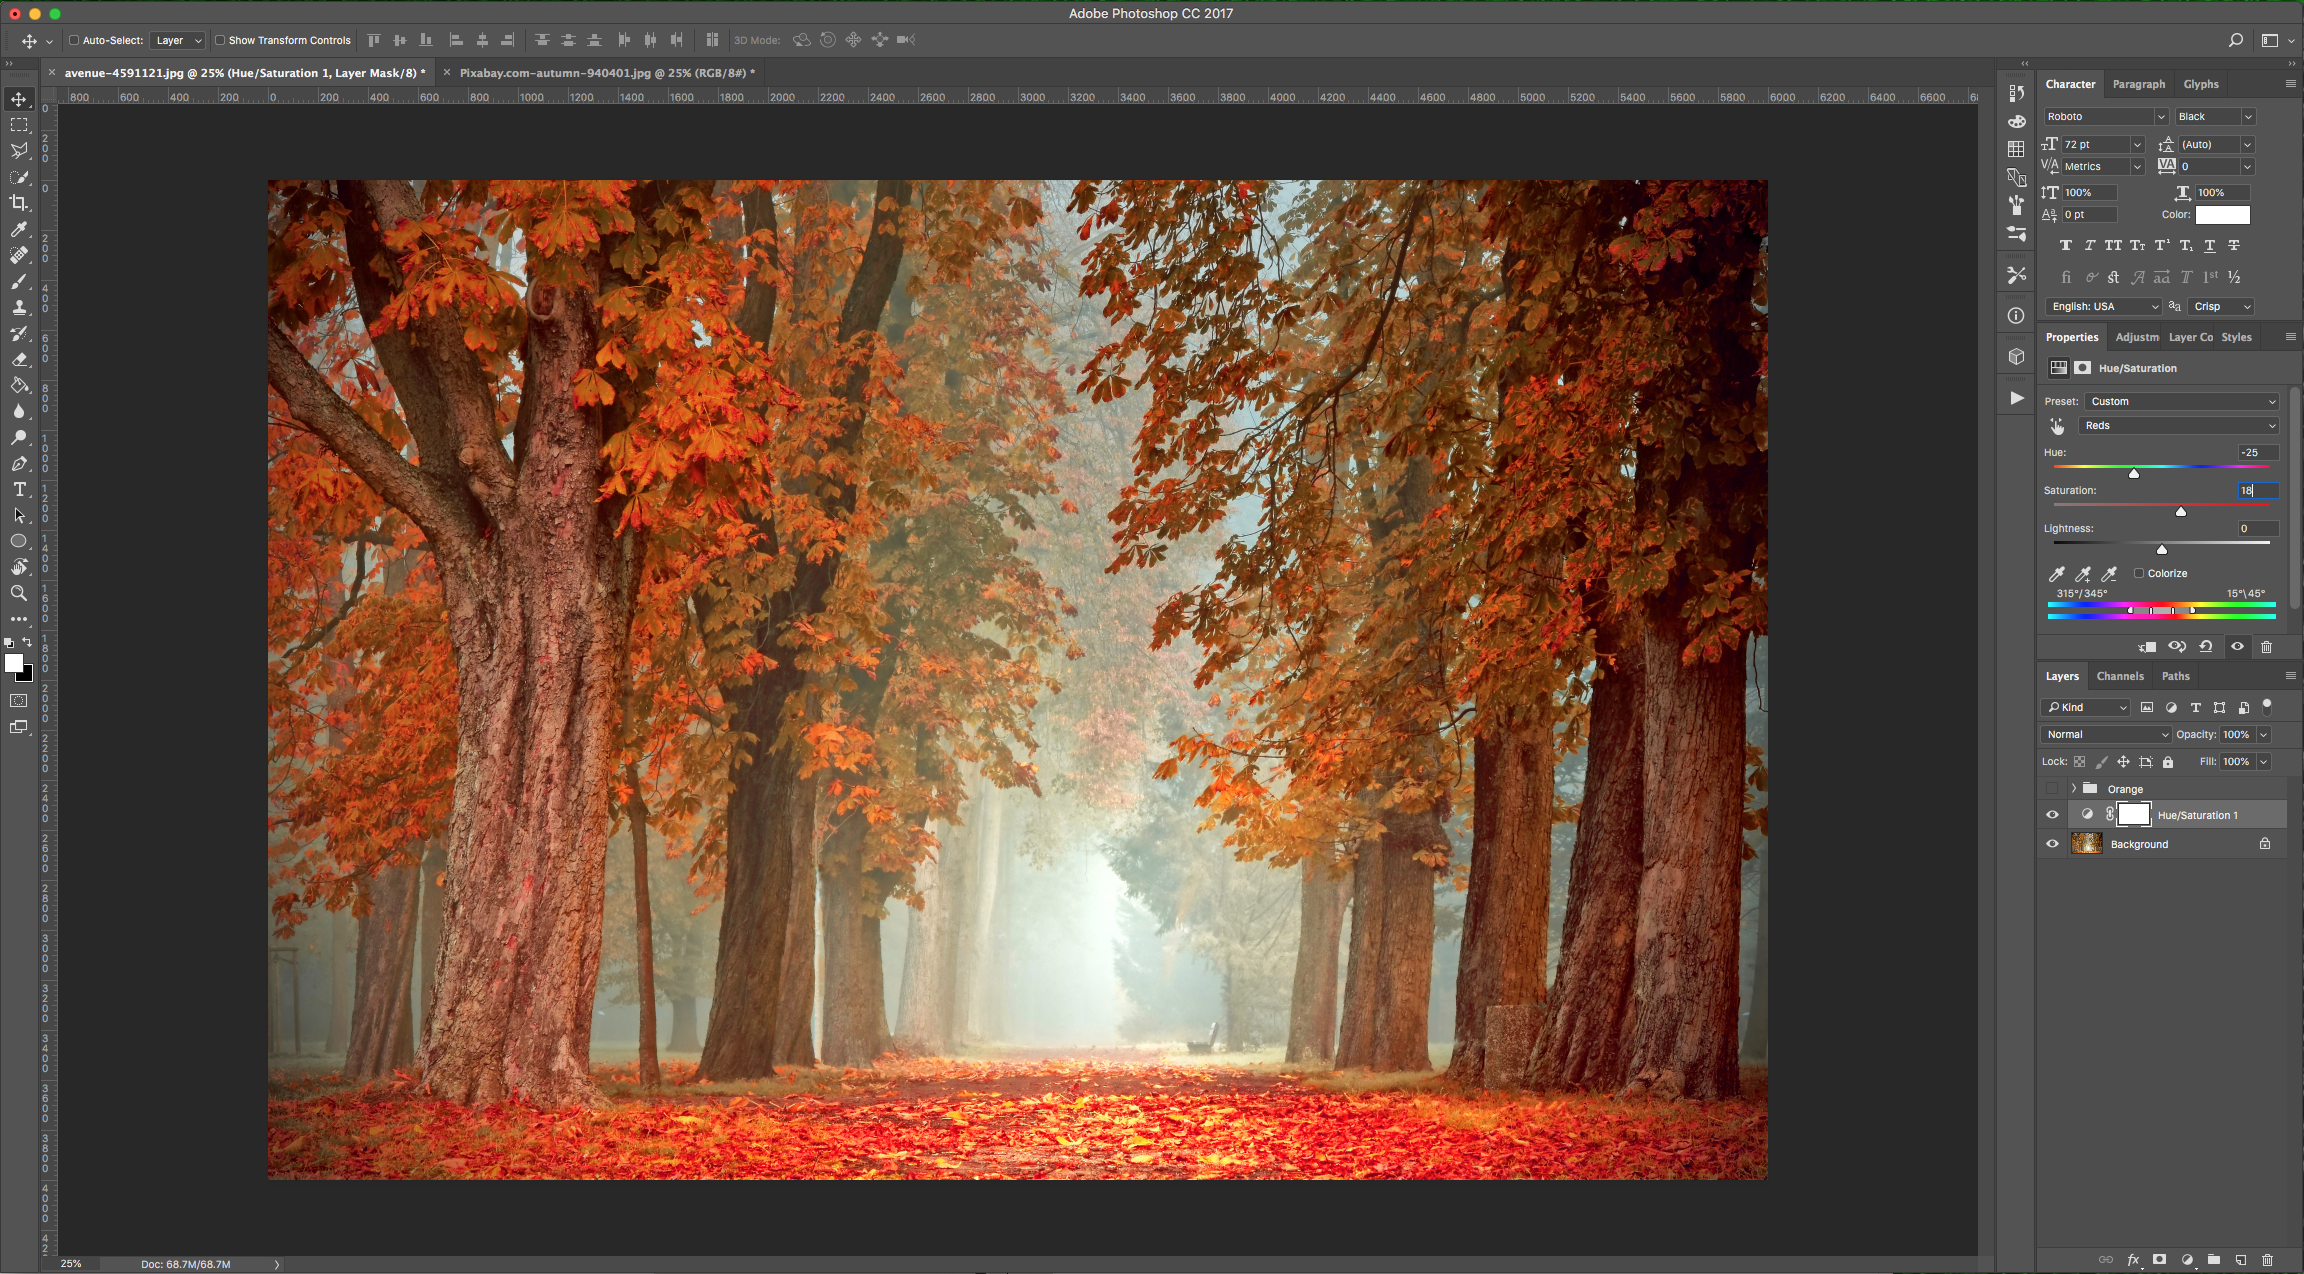
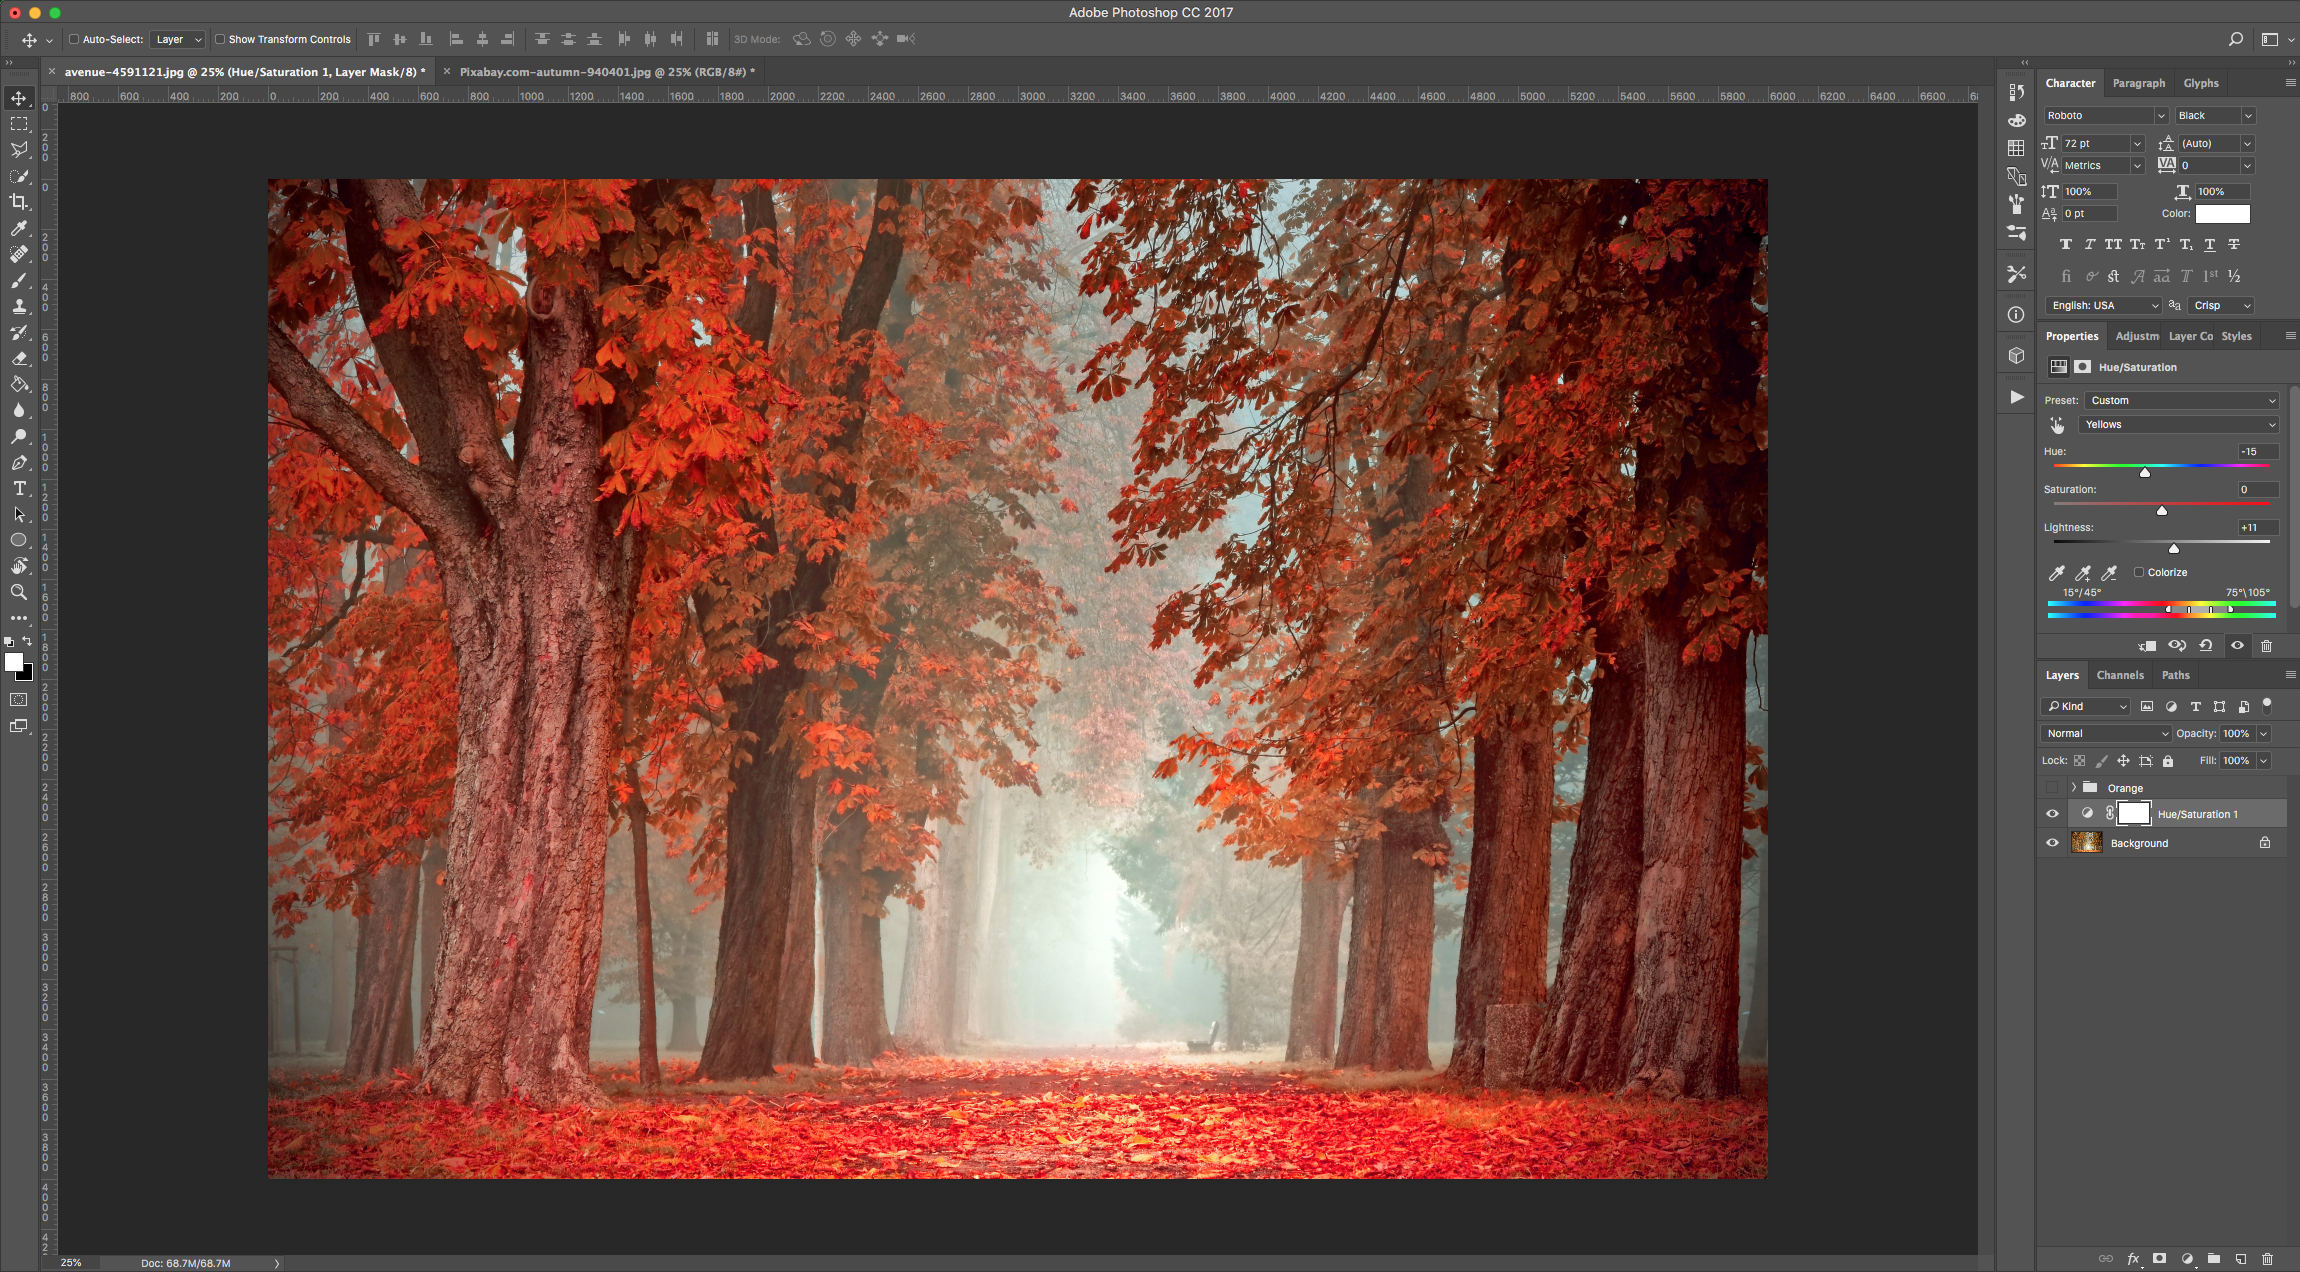
13 - Choose “Reds” and lower the “Hue” to about -25 and increase the “Saturation” to 18, and in the “Yellows” lower the “Hue” to about -15 and increase the “Lightness” to 11. The values to use are going to depend on your image.
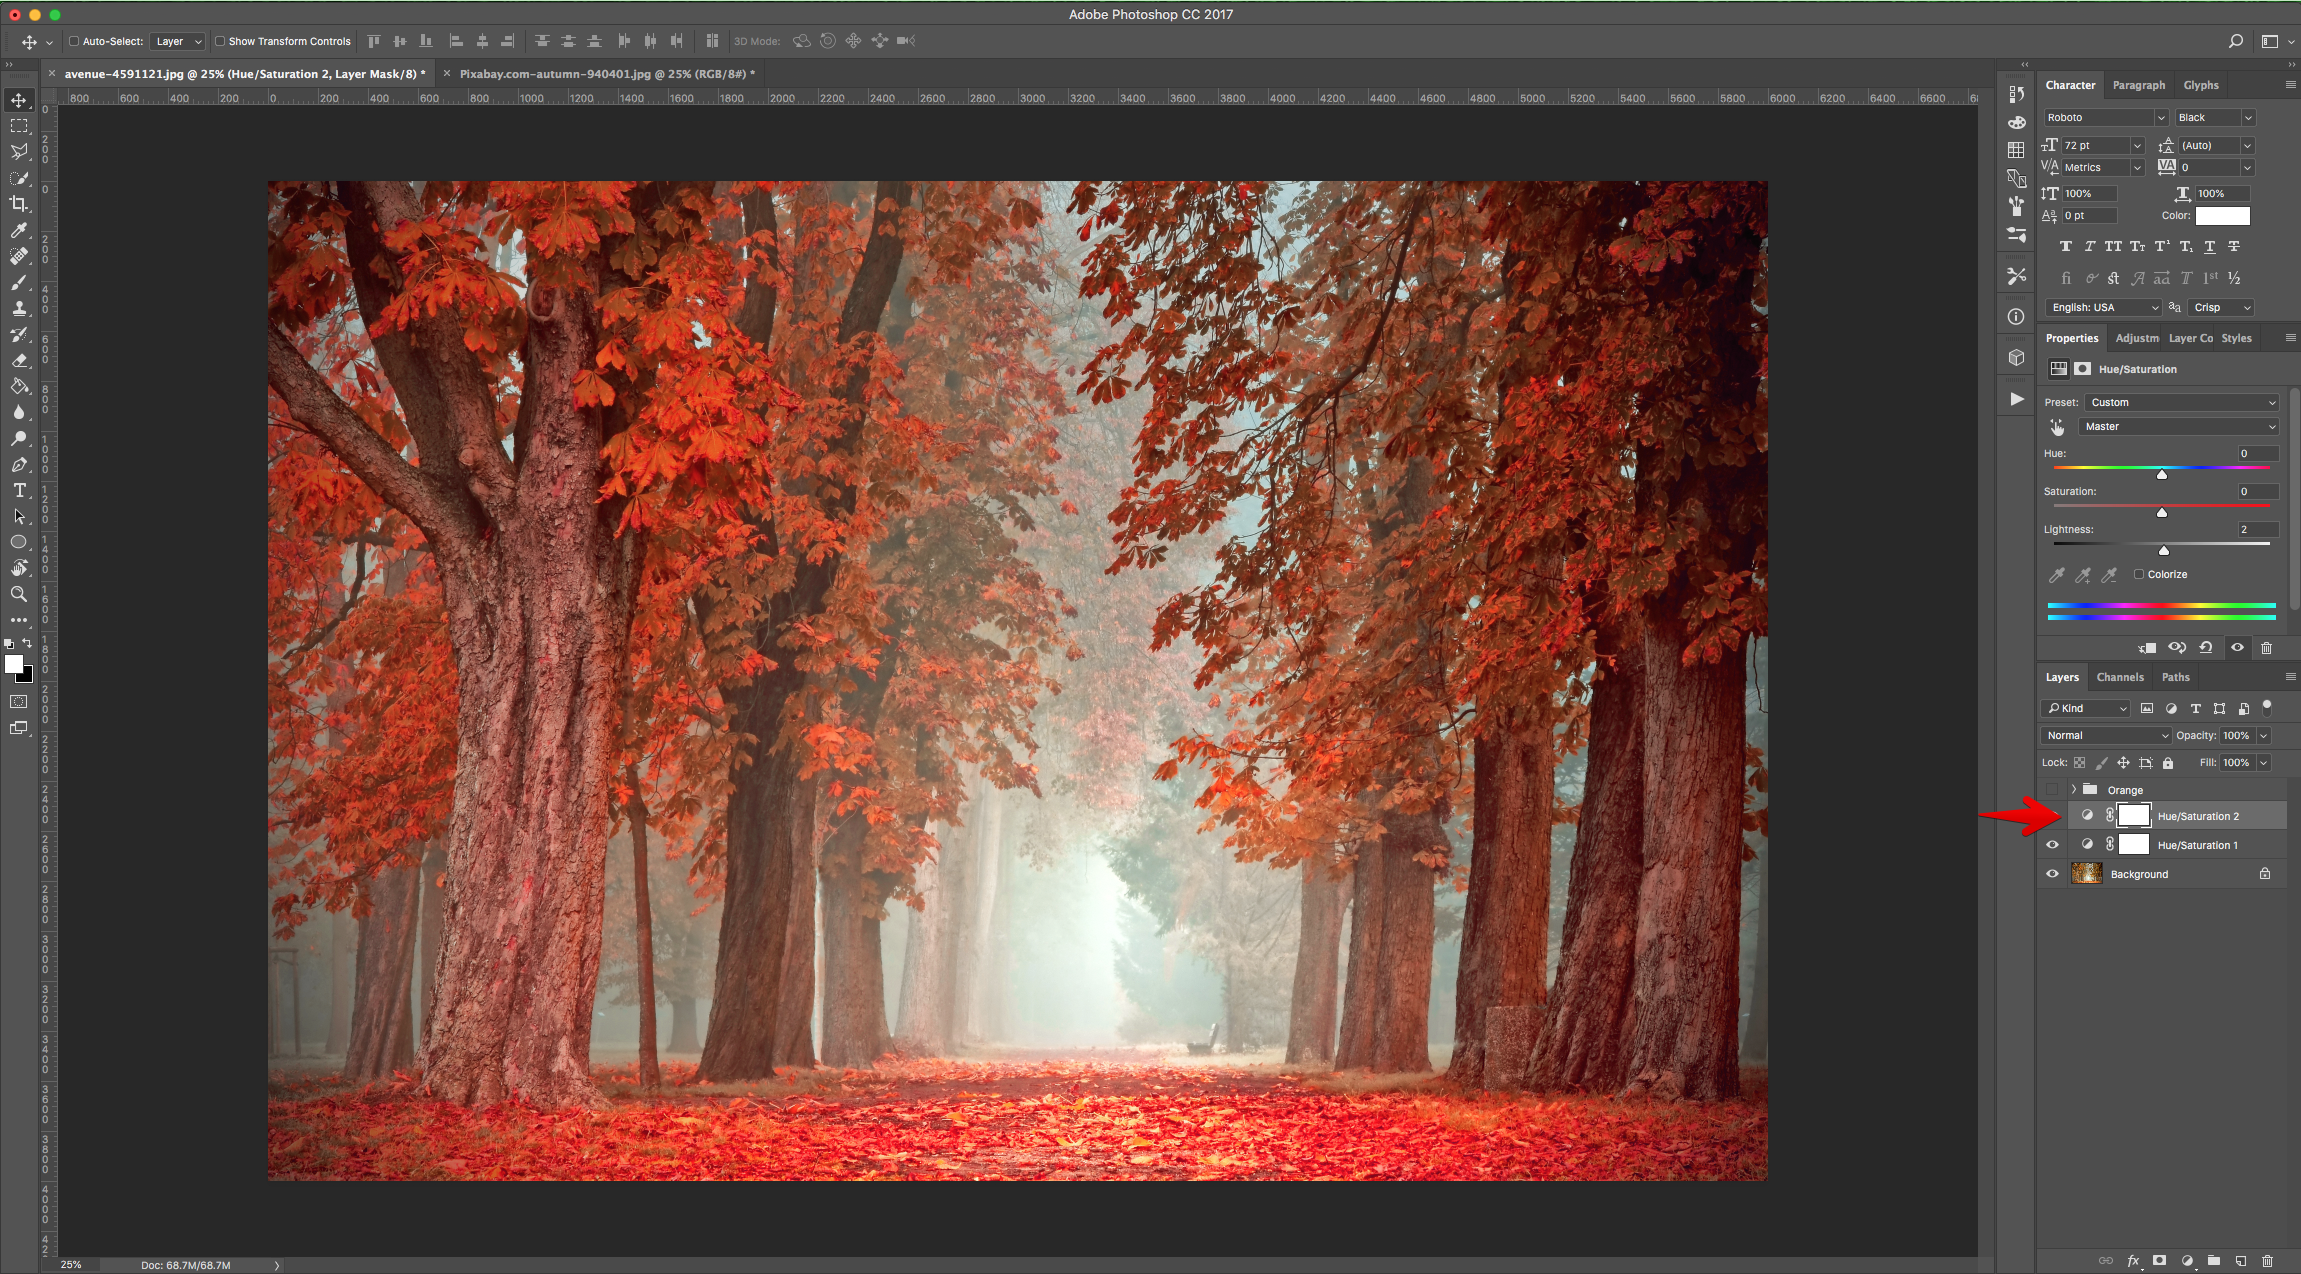
14 - Duplicate the “Hue/Saturation Adjustment Layer” (Command/Control + J). Increase the “Lightness” of the “Master” a couple of points and change the “Reds” “Hue” value to about -3 and the “Saturation” to 1.

15 - Select all the new “Adjustment Layers” (“Shift” key) and “Group” them together. Name the group “Red”.
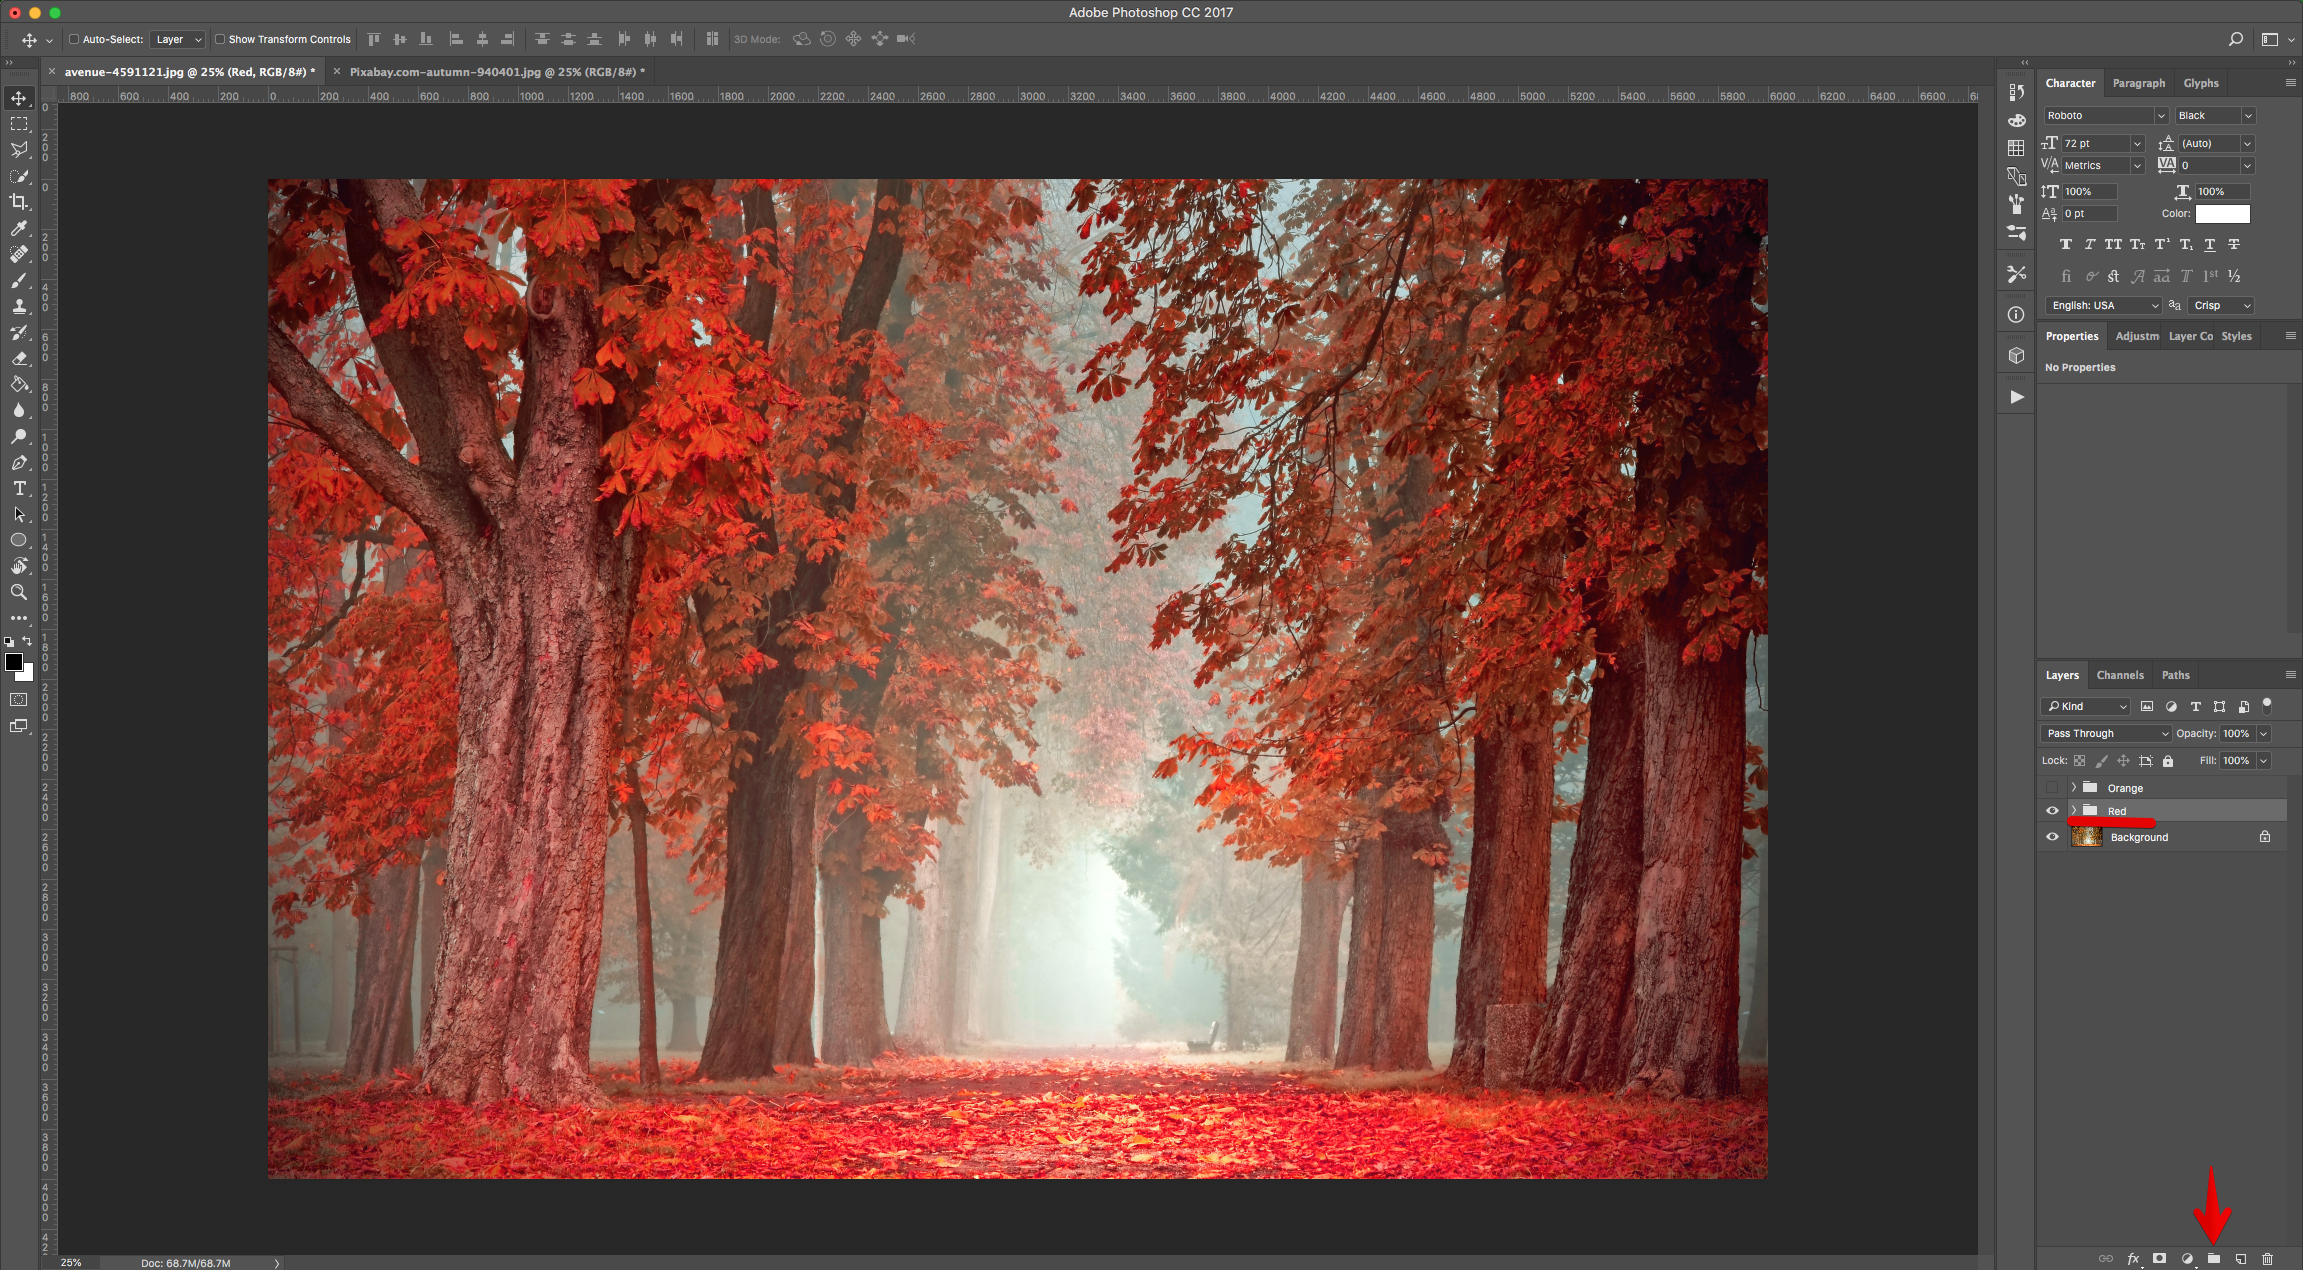
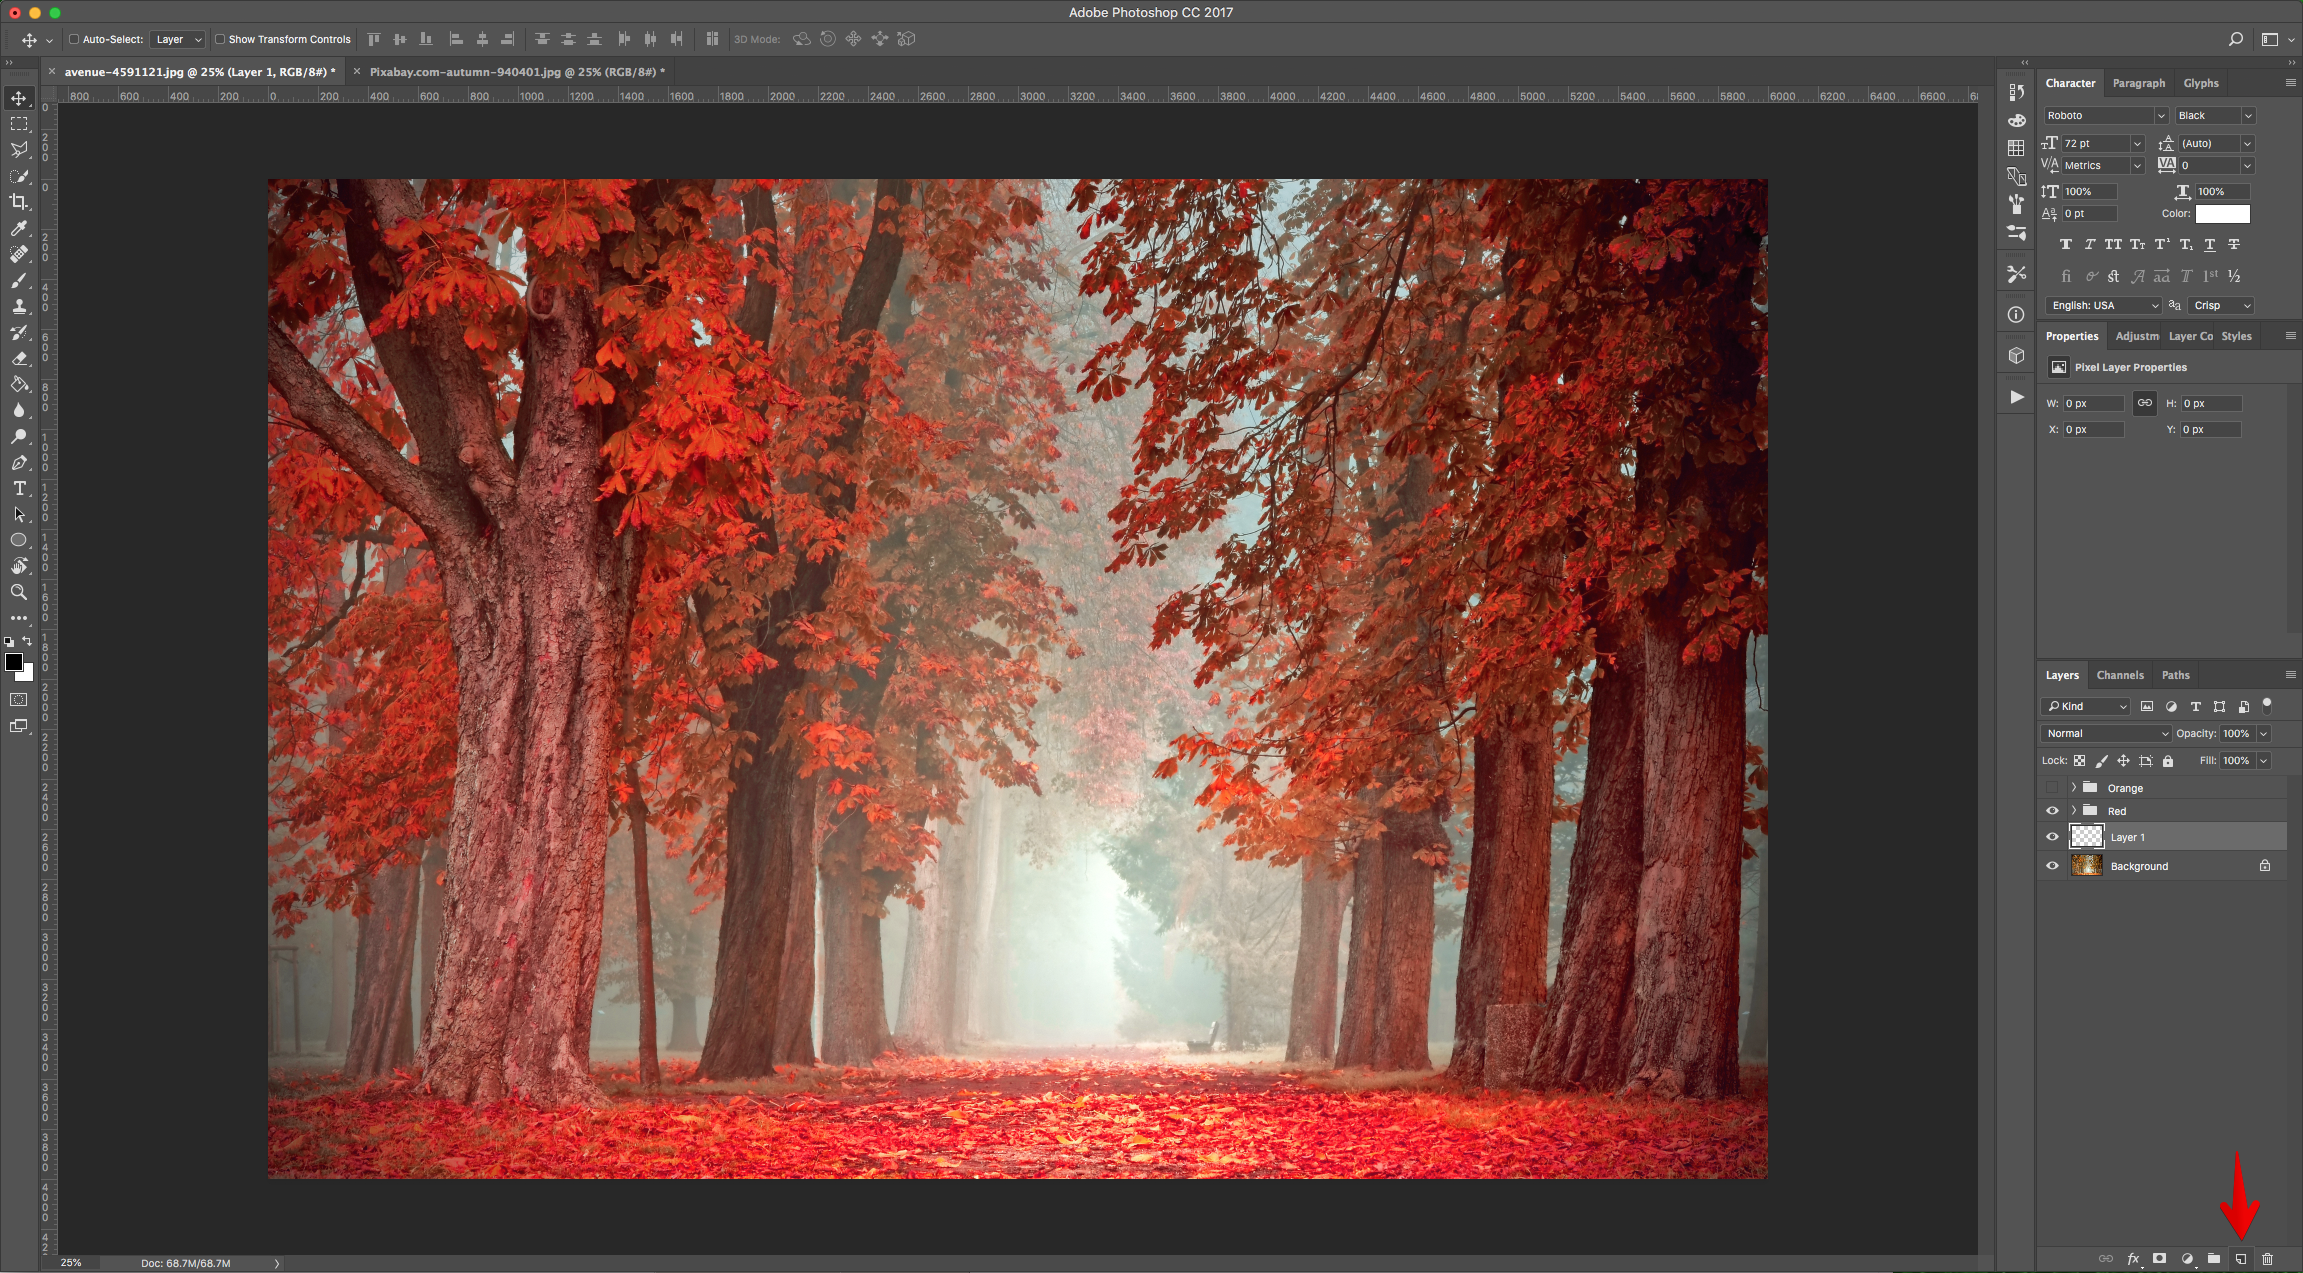
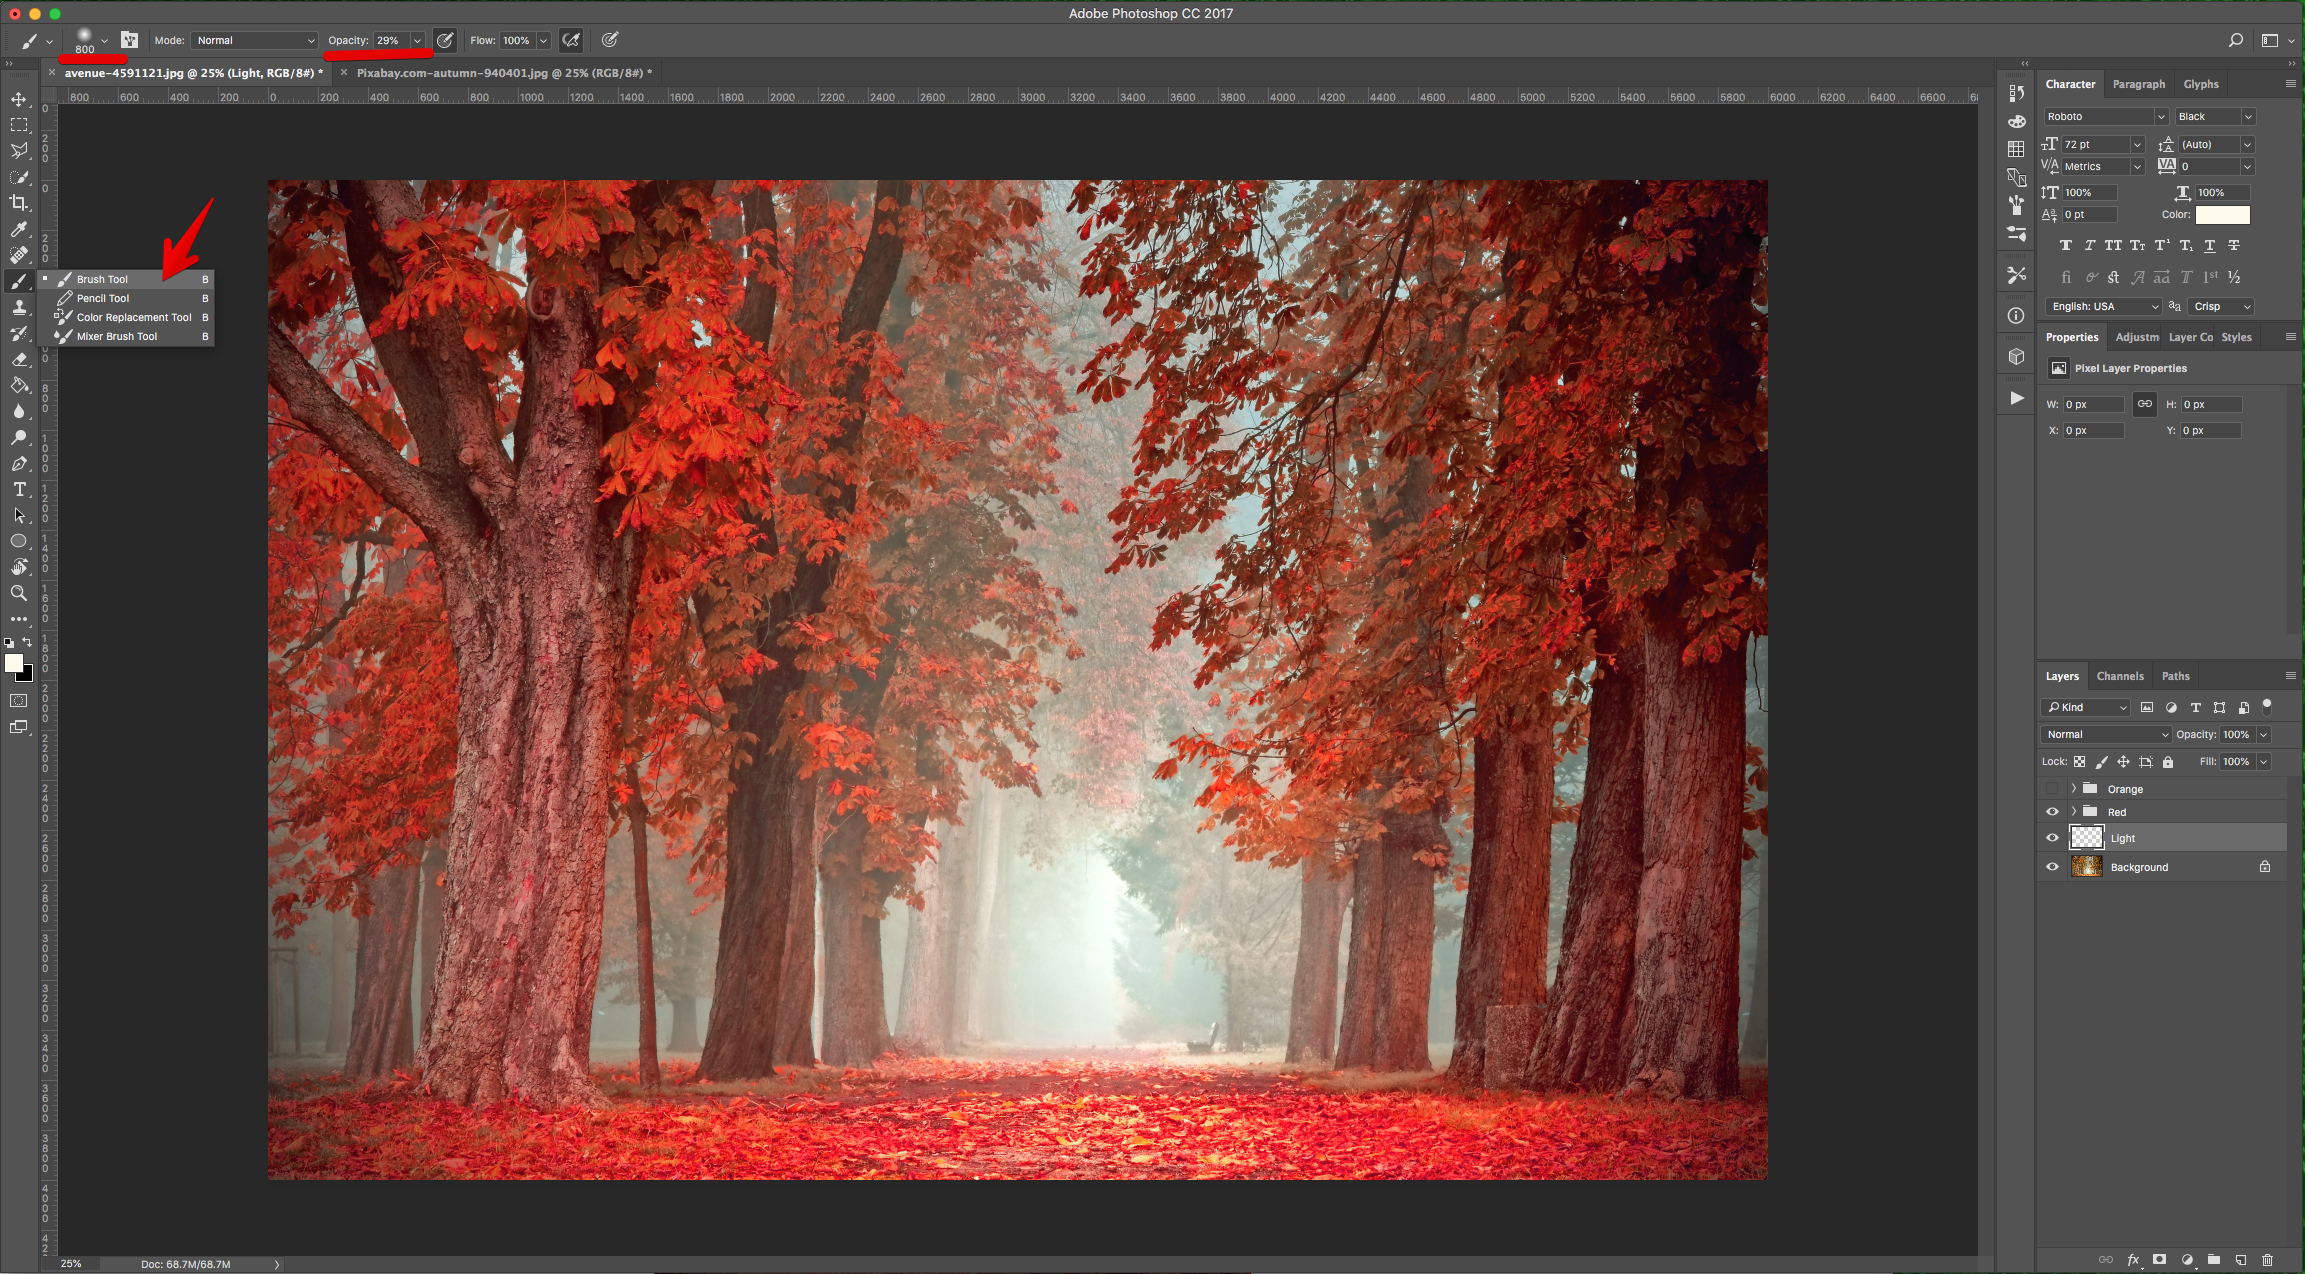
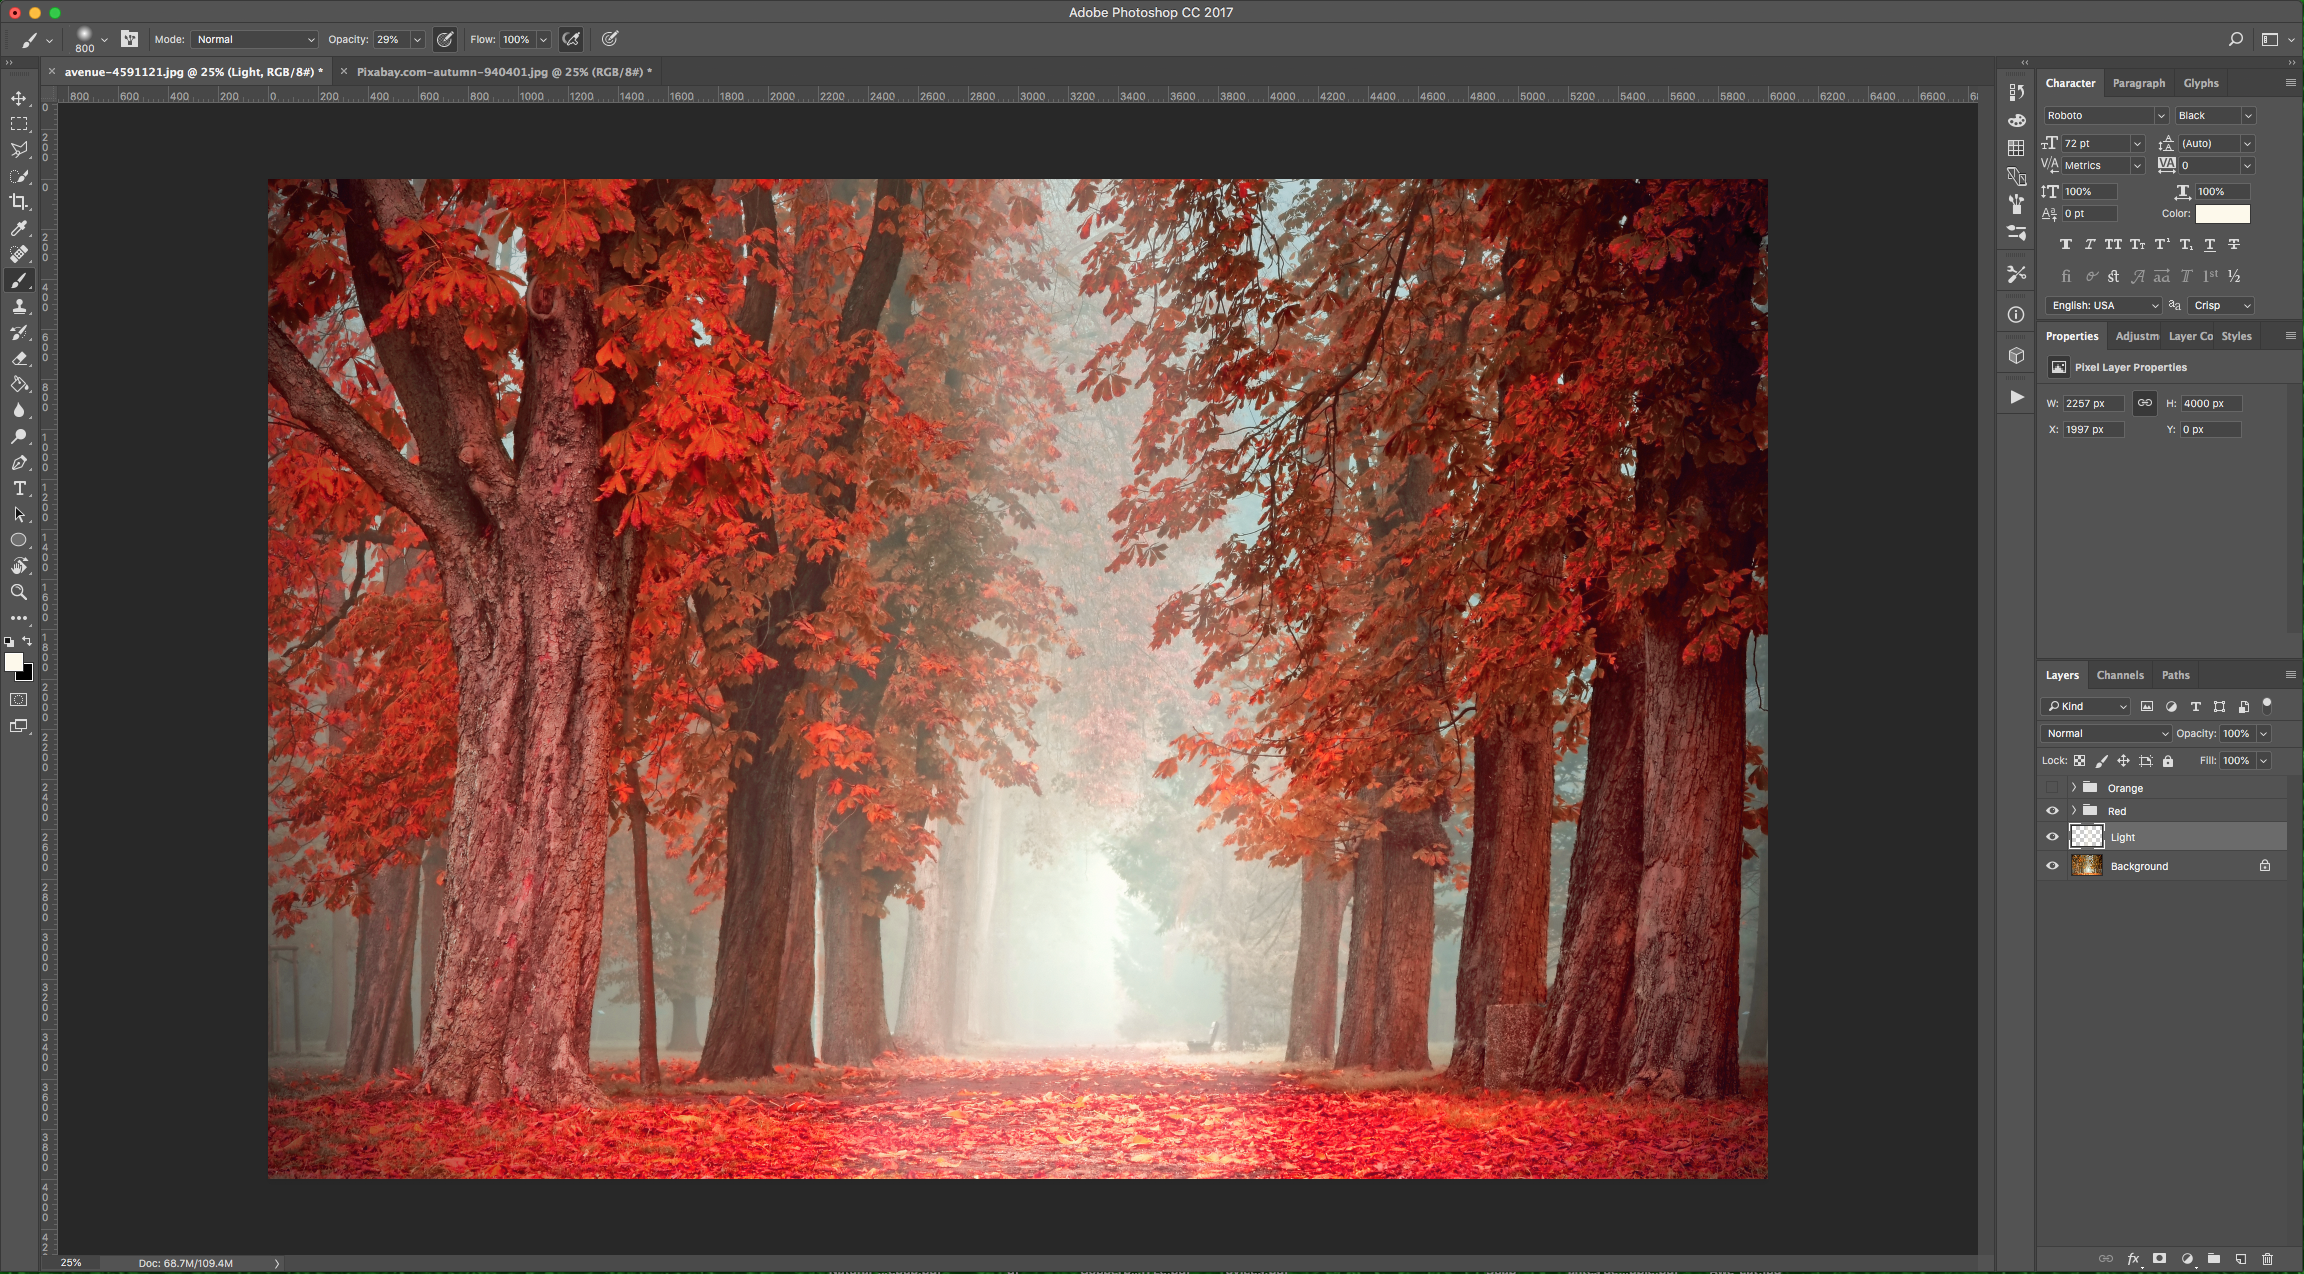
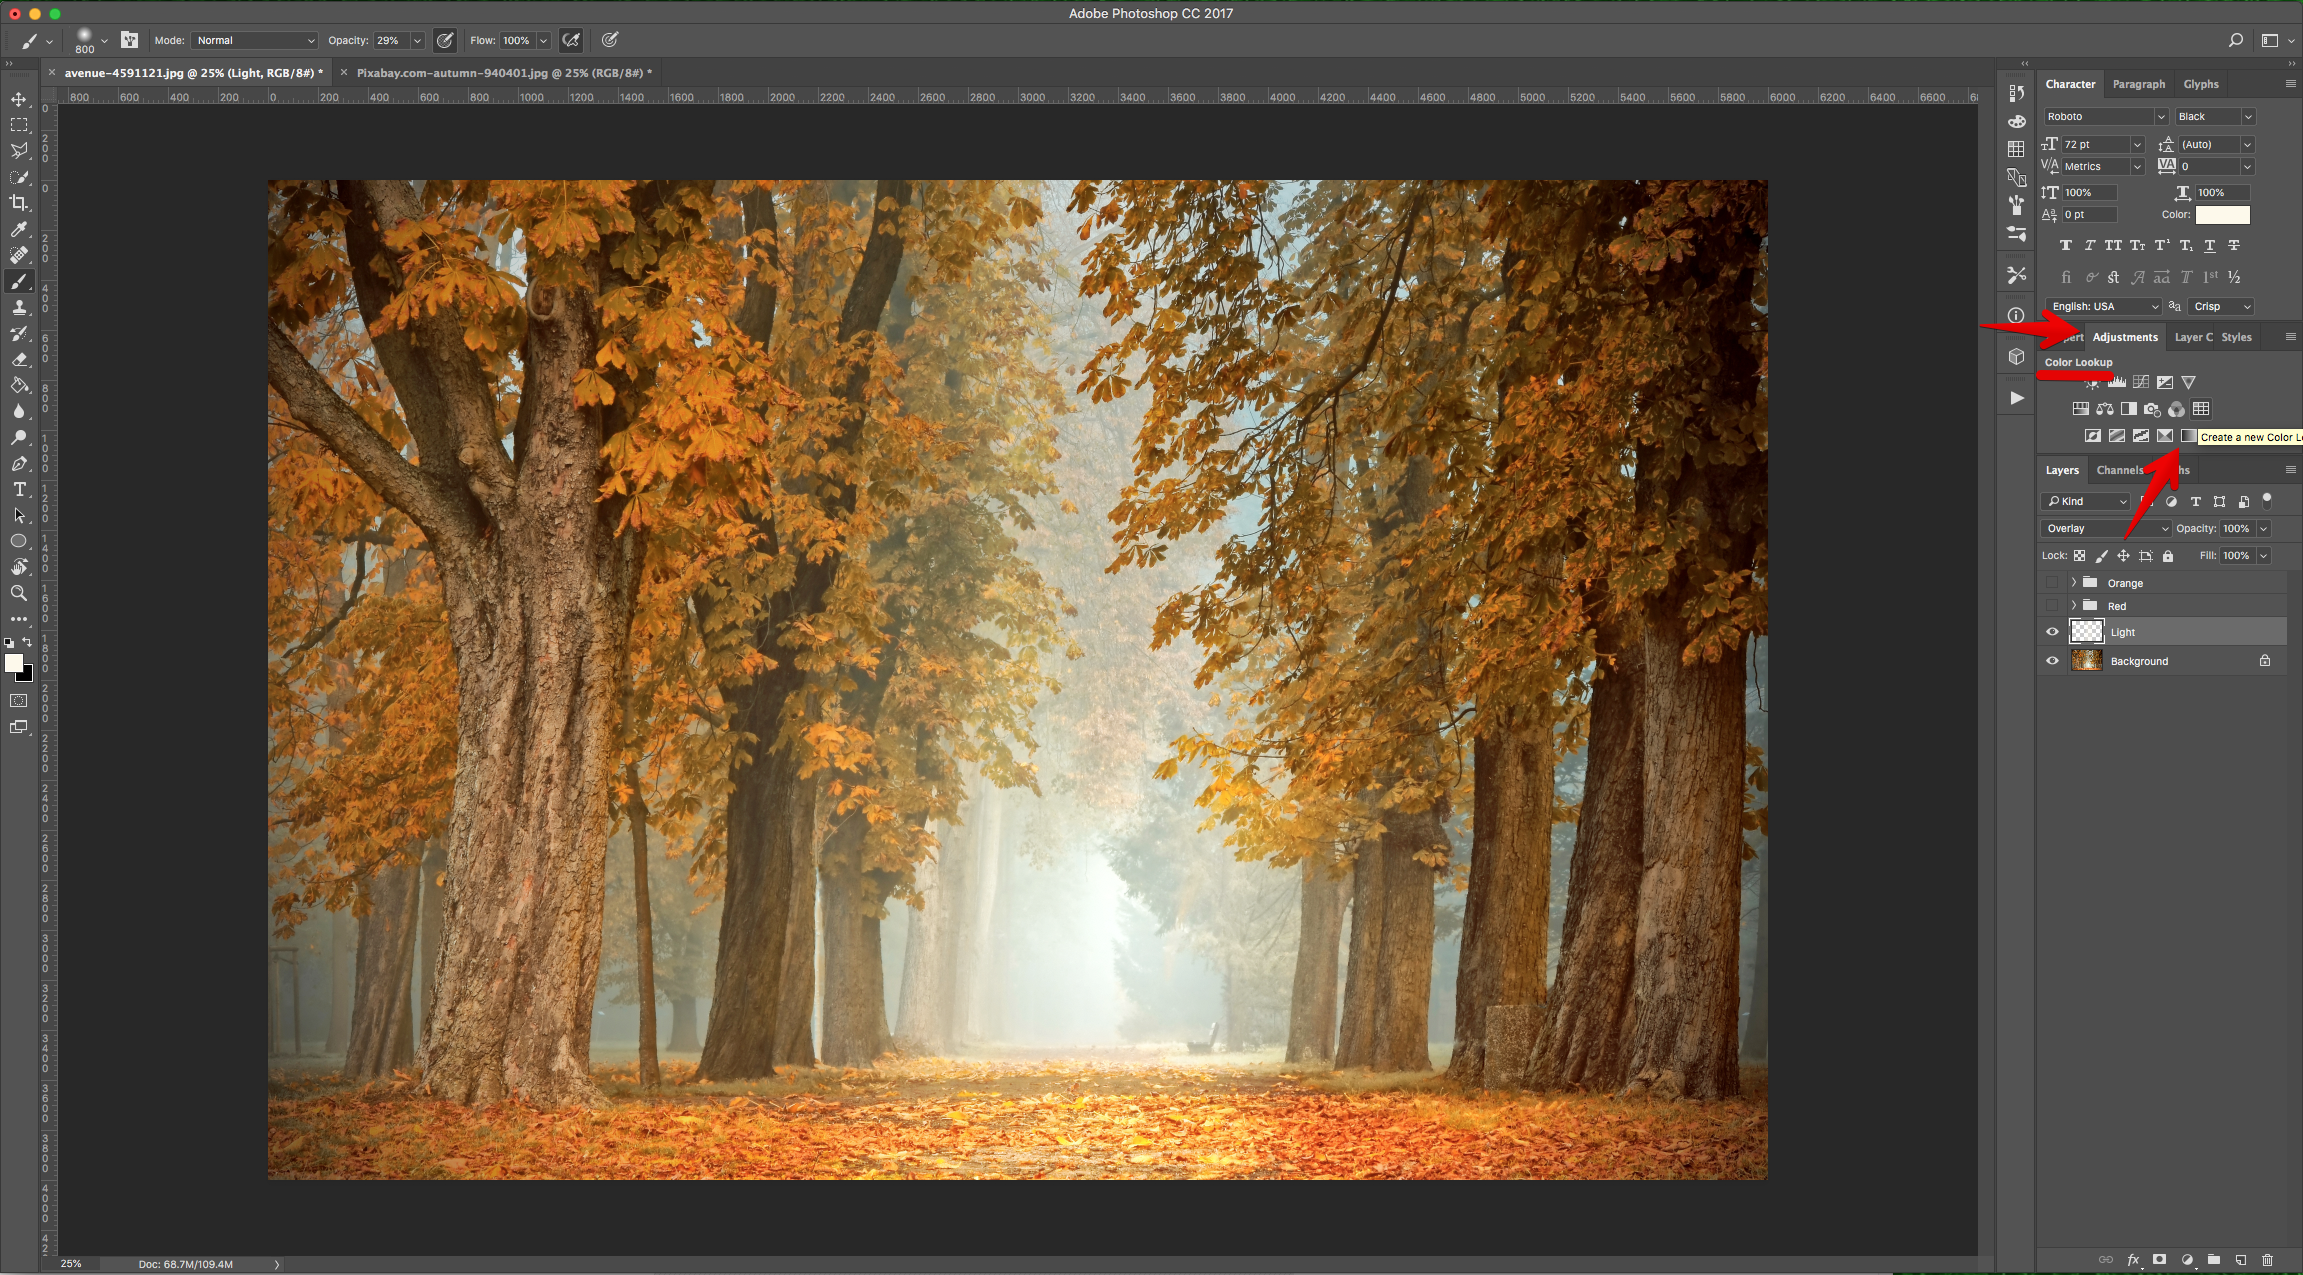
16 - Hide the “Red” group too. Create a “New Layer” by clicking on the small button at the bottom of the “Layers Panel” and make sure it’s placed on top of the “Background” Layer.
17 - Select the “Brush Tool” (B)and choose a Large and soft brush (800 pt and 0% “Hardness”) with 29% “Opacity”. Change the “Foreground” color to # df9ea and paint some “Light” where needed.
18 - Change the “Blending Mode” of the Layer to “Overlay”.

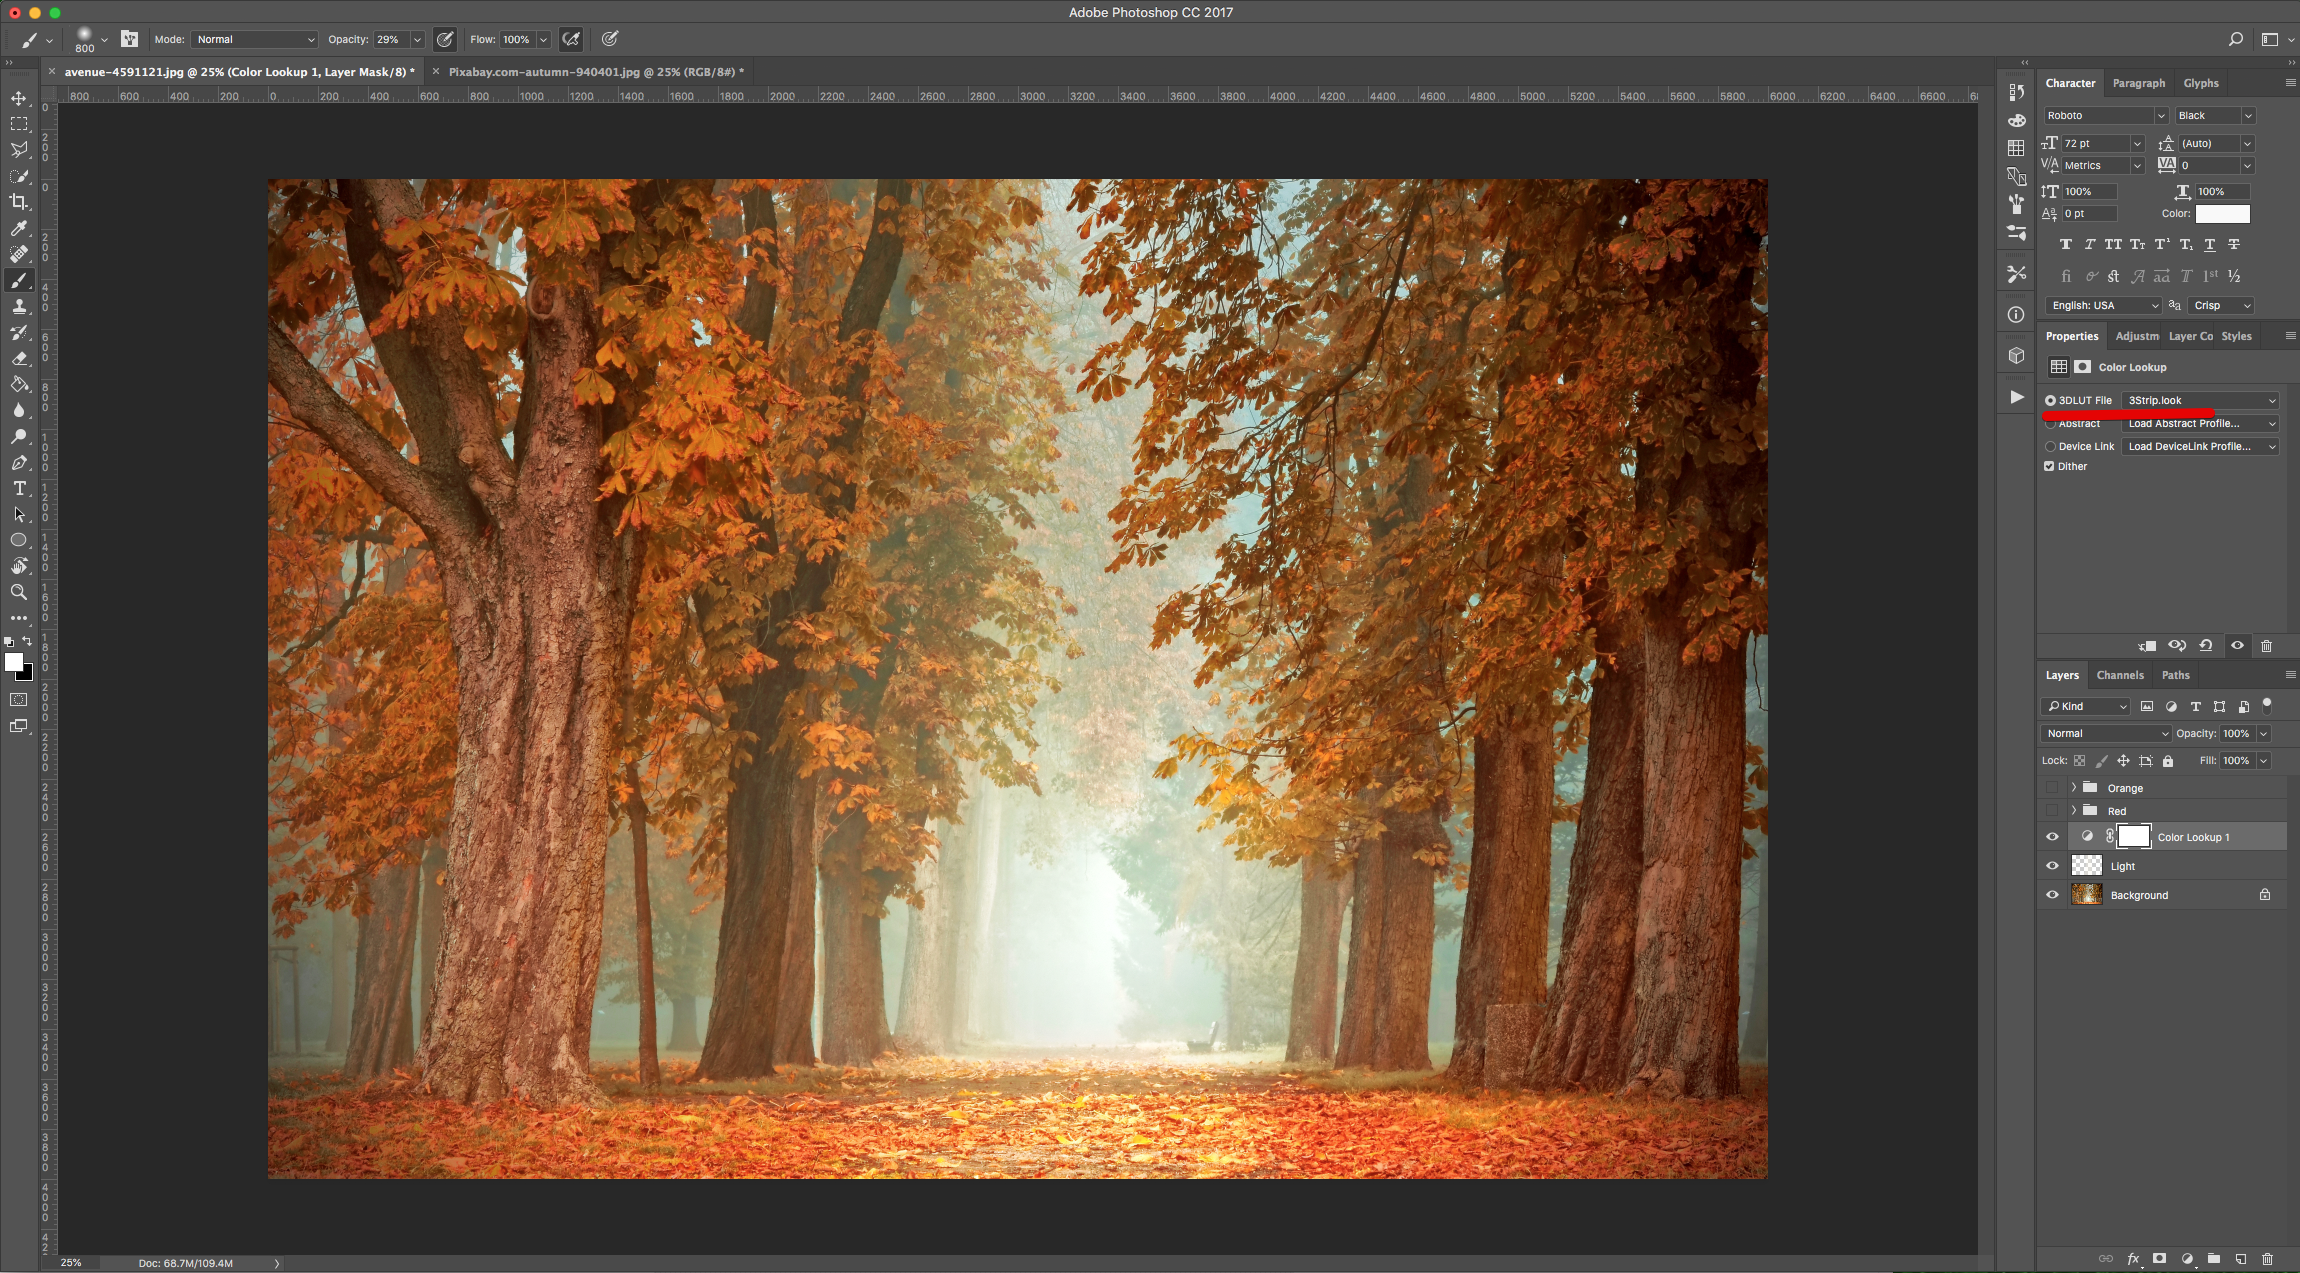
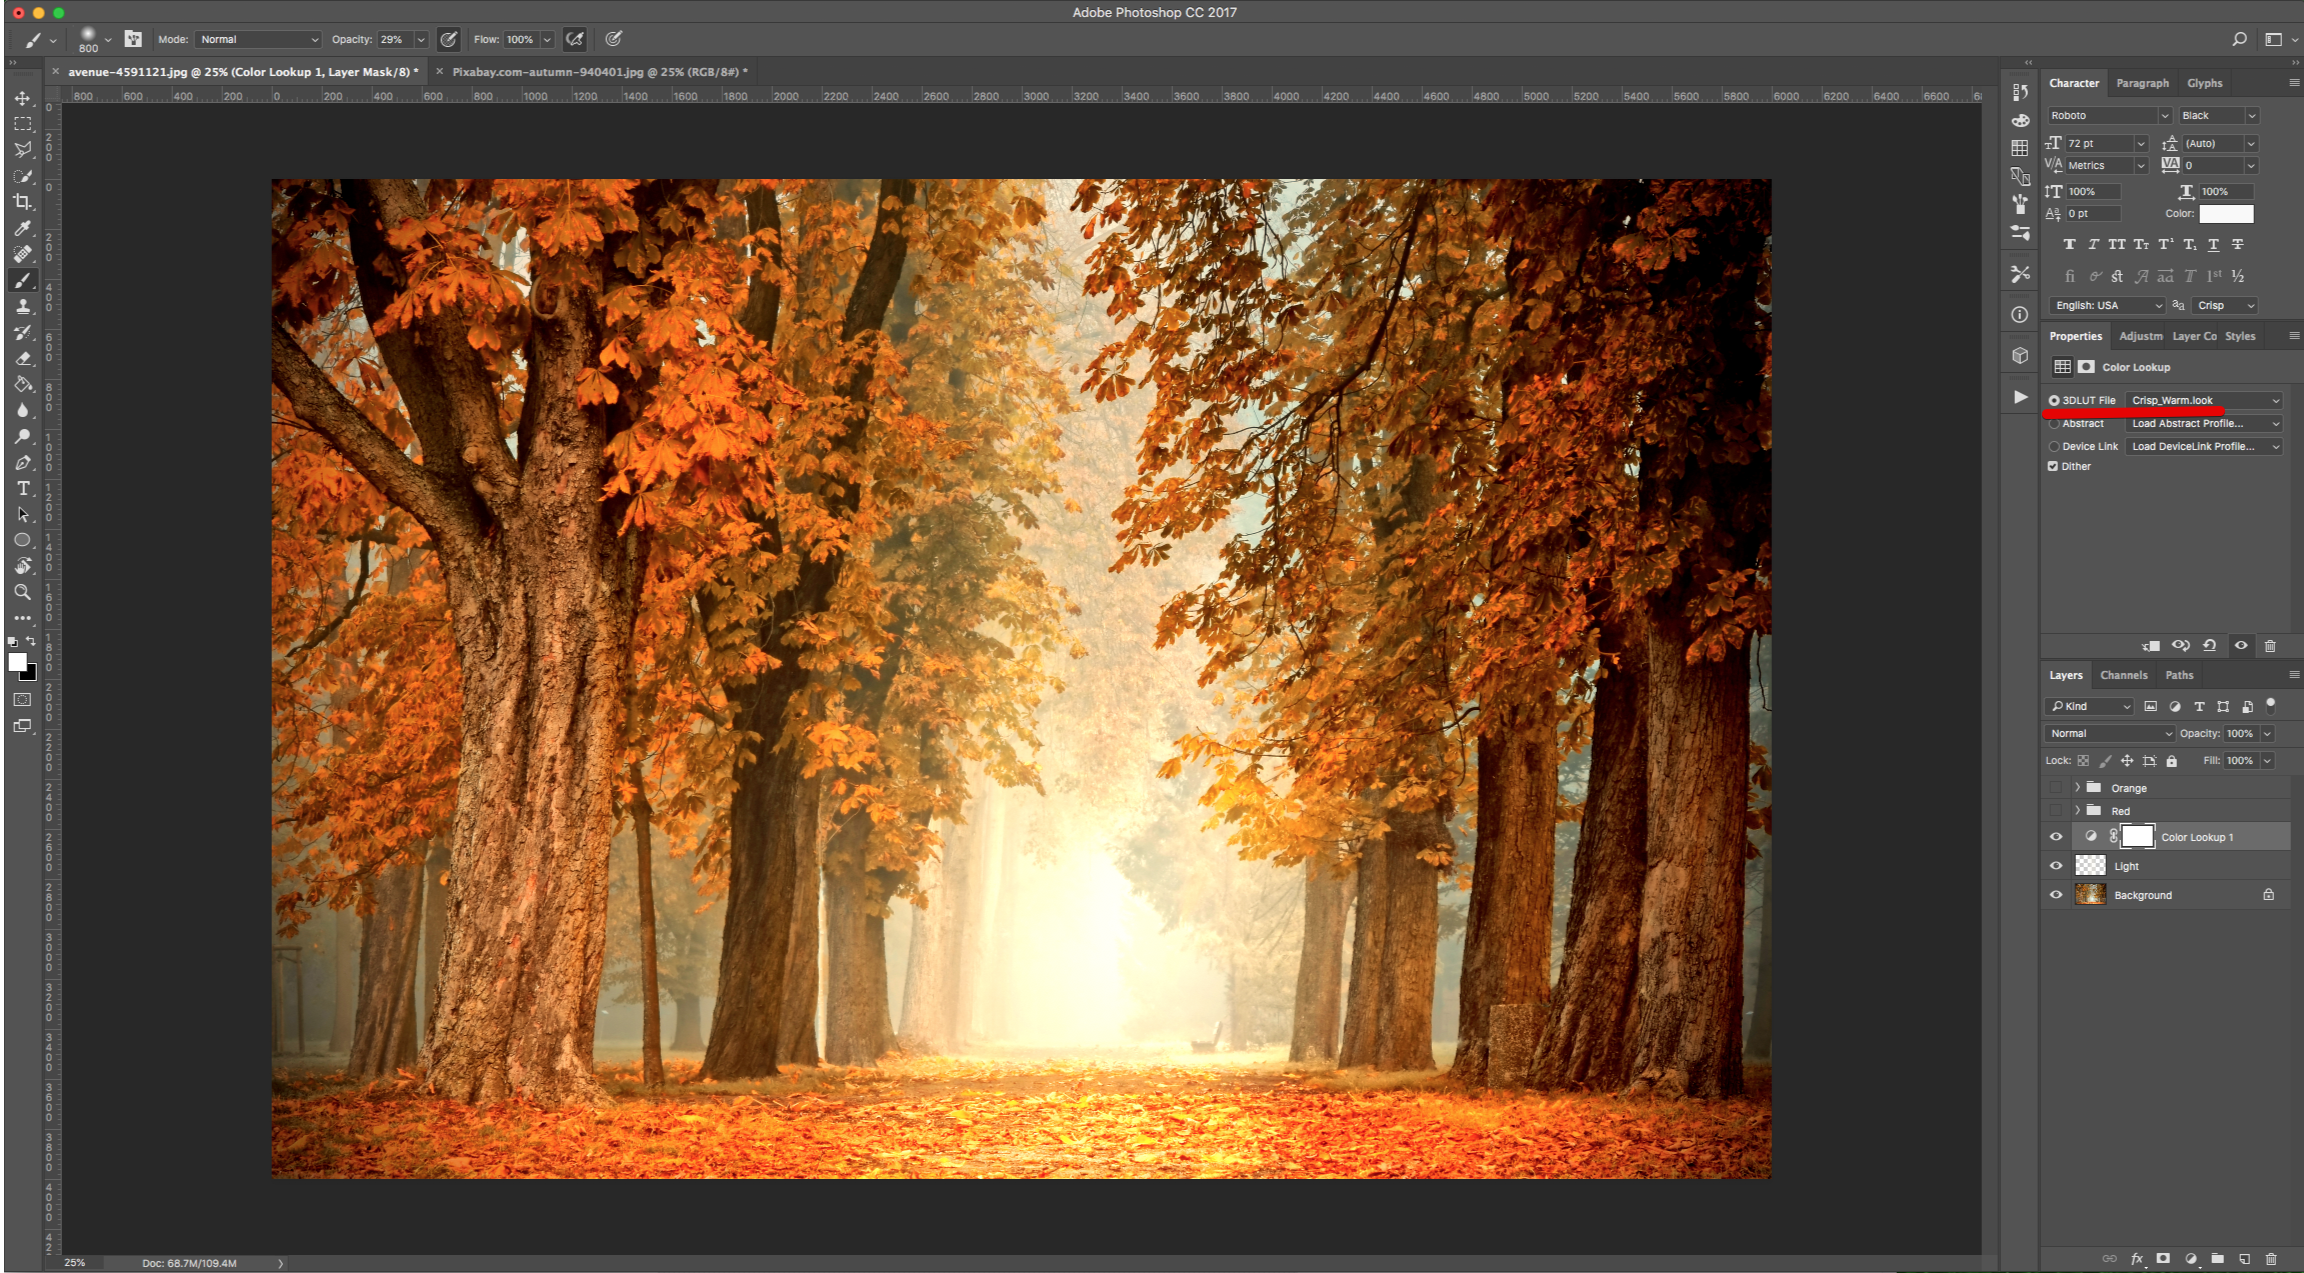
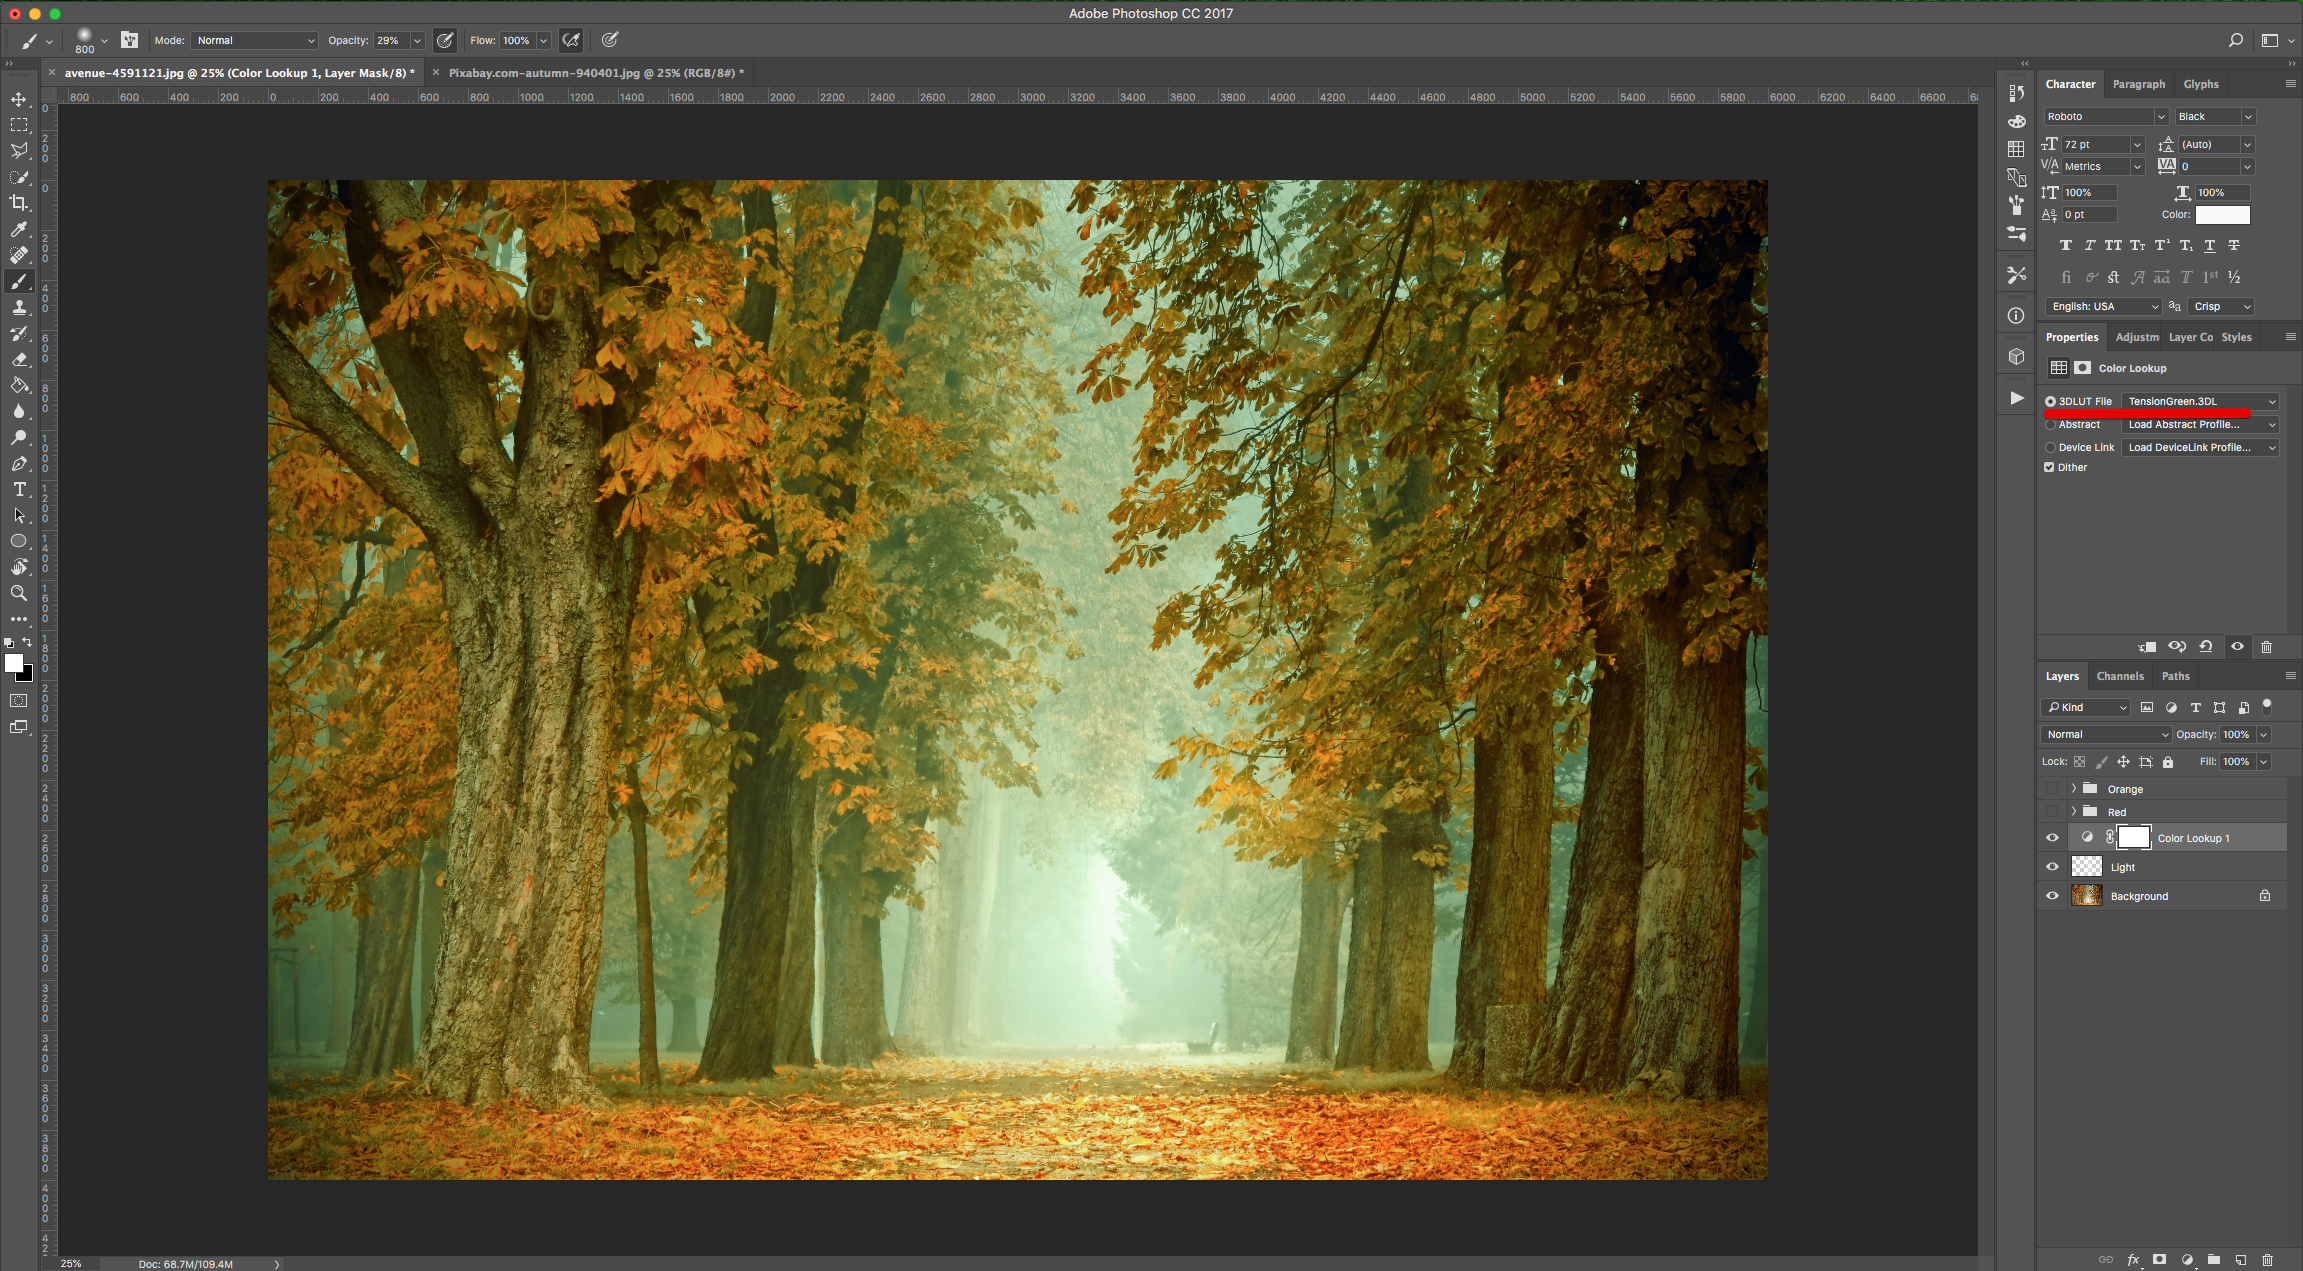
19 - With that layer still selected, go to the “Adjustments Panel” and create a “New Color Lookup” Adjustment Layer.
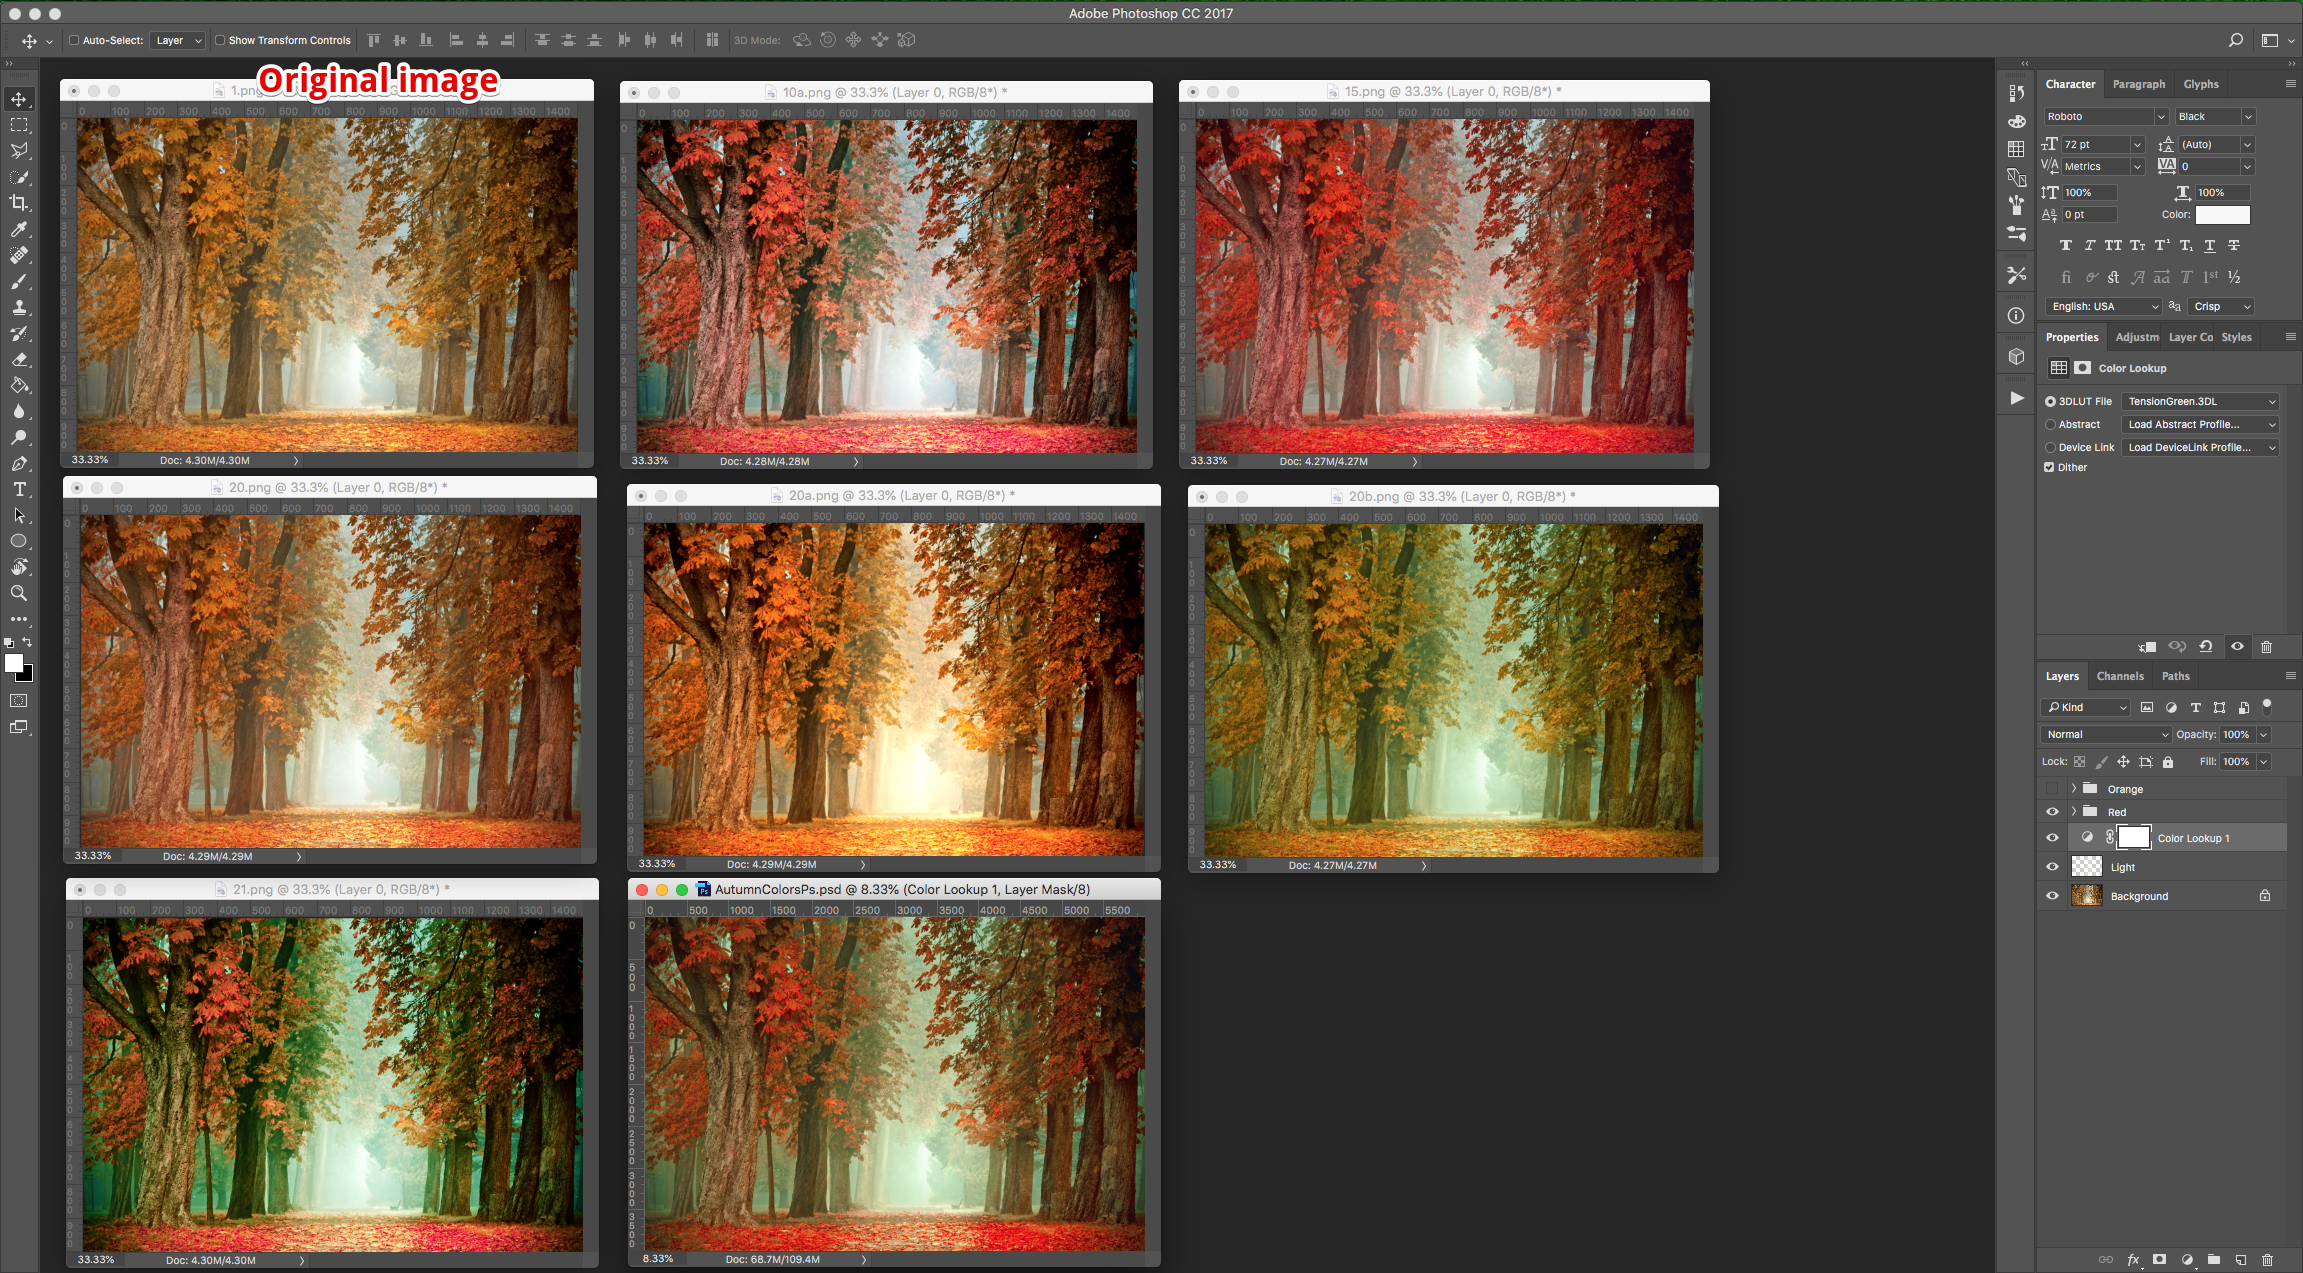
20 - You can choose between different “3DLUT File” presets. We used “3Strip.look”, “Crisp_Warm.look” and “TensionGreen.3DL”.
21 - You can also combine this “Adjustment Layer” with one of the previously created groups.
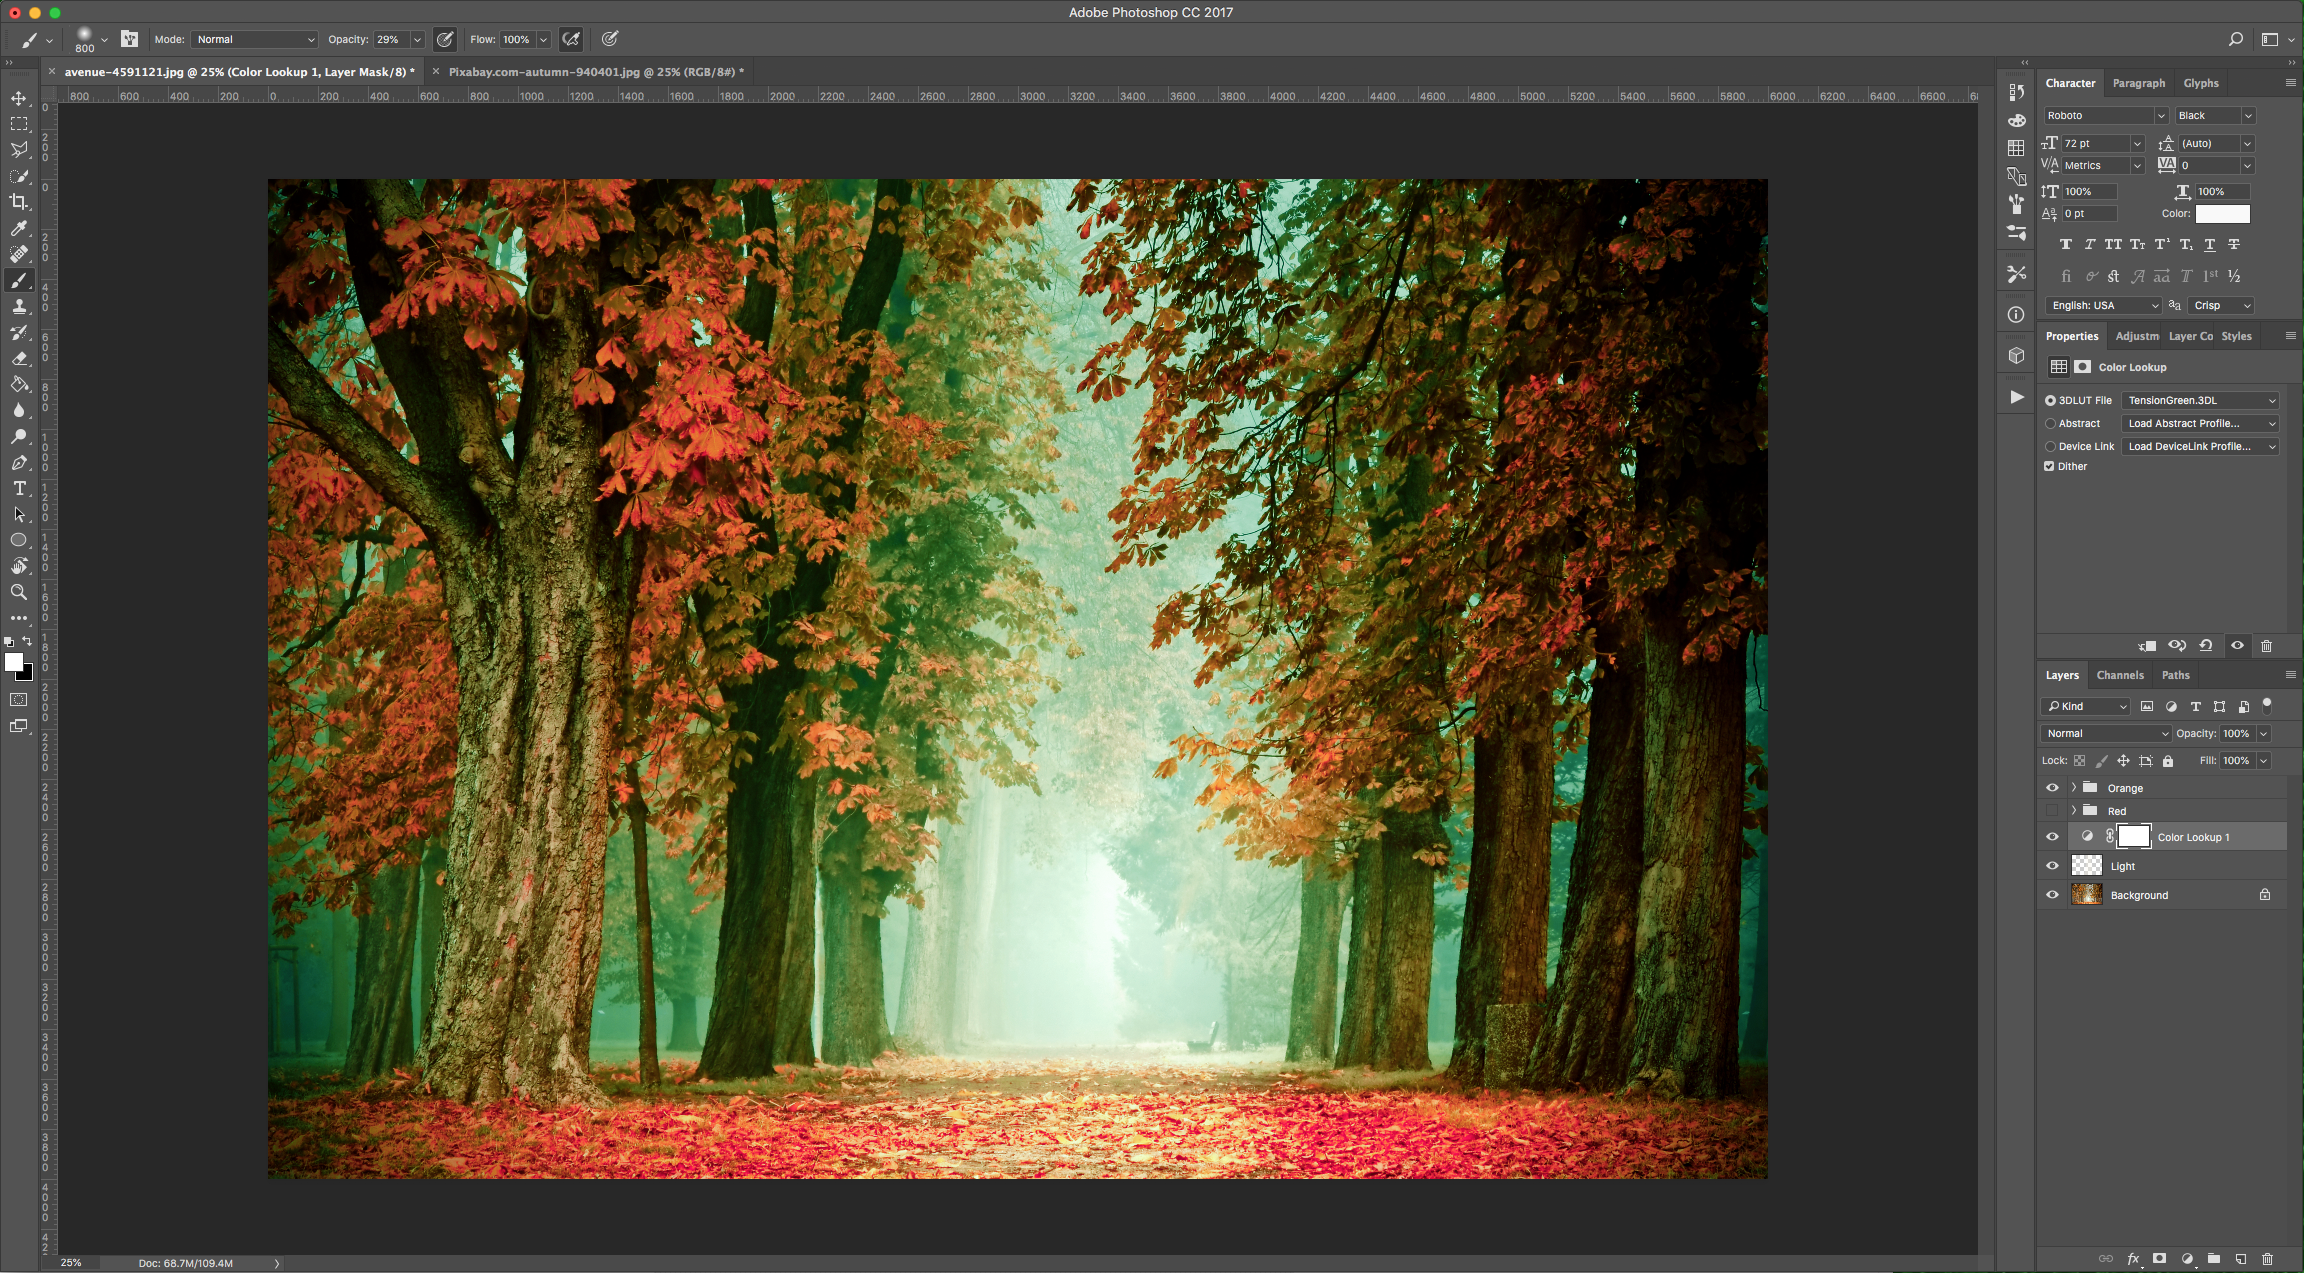
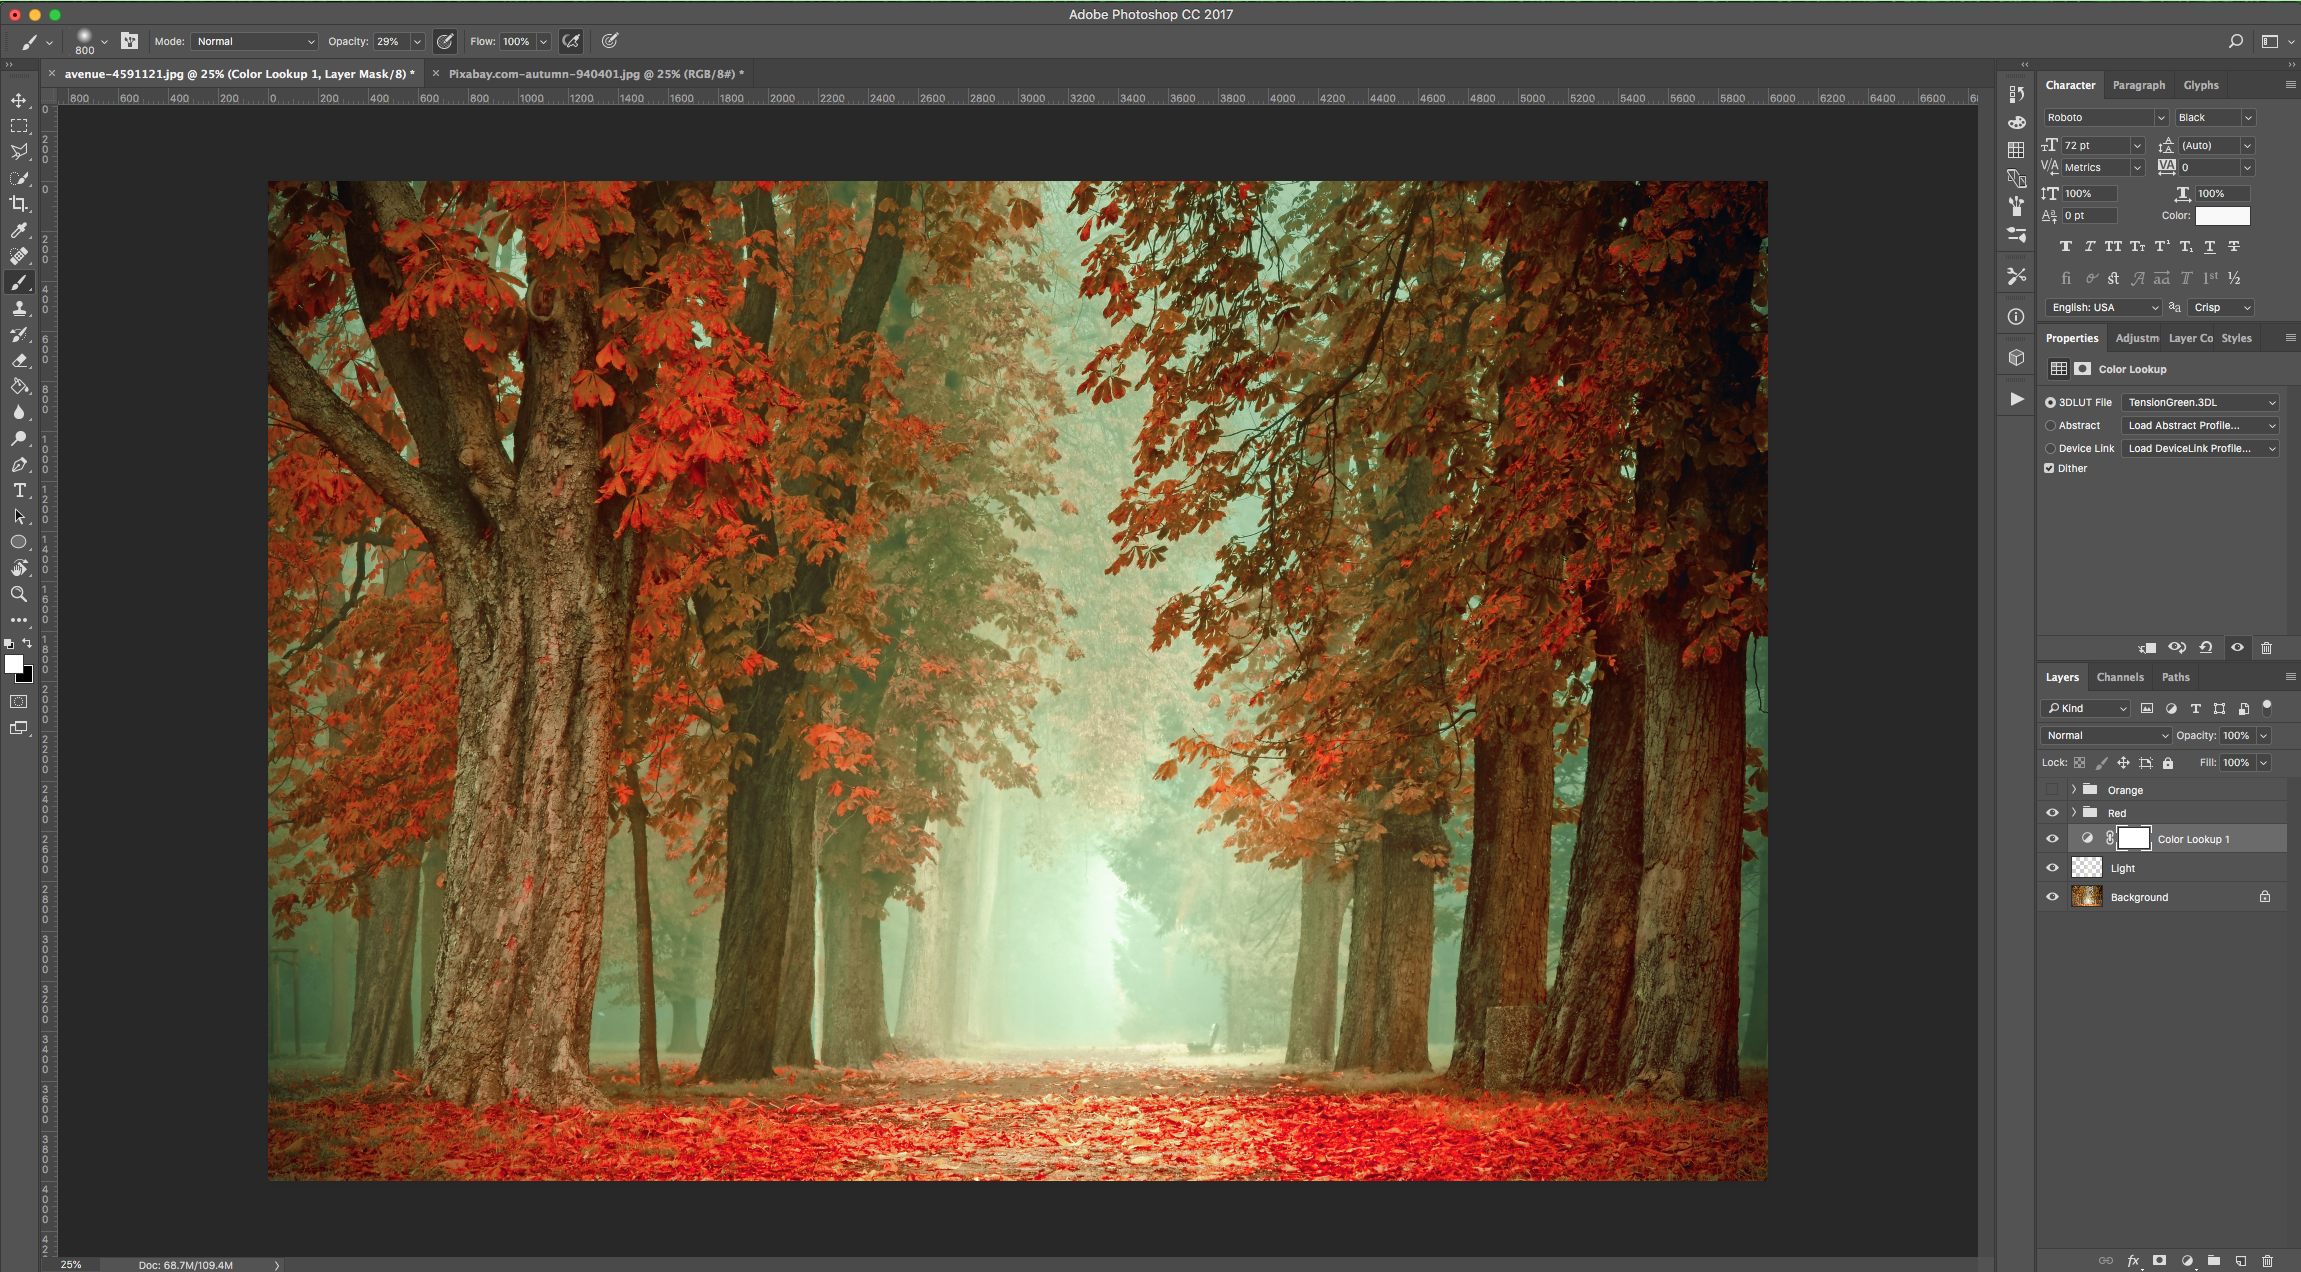
22 - Check out the various autumn looks!
1 - In Photoshop, open the image you wish to use apply the “Effect” to.
2 - Go to the “Adjustments Panel” and create a “New Gradient Map” Adjustment Layer.
3 - Double-click on the Gradient and use #020c52 @ 0% (Location) and #fbb4fa @ 100% (Location).
4 - Change the “Blending Mode” of the “Gradient Map” layer to “Soft Light”.
5 - Go to the “Adjustments Panel” and create a “Selective Color” Adjustment Layer.
6 - Choose “Reds” and lower the “Cyan” completely (or almost), the “Yellow” to about 40% and increase the “Magenta” around 10. Then, choose “Yellows”, lower the “Cyan” and “Yellow” increase the “Magenta”. Finally, choose the “Neutrals” and increase the “Cyan” and “Yellow” and lower the “Magenta” a bit. The values to use are going to depend on your image.
7 - Go to the “Adjustments Panel” and create a “Color Balance” Adjustment Layer.
8 - Choose “Shadows” and move the first lever towards the “Red” side a bit and the last one towards the “Yellow” a bit. Then, choose “Midtones”, and move the levers towards the “Cyan”, “Green” and “Blue” sides a bit. Finally, with the “Highlights”, move the levers towards the “Red”, “Green” and “Blue” sides a bit. The values to use are going to depend on your image.
9 - Go to the “Adjustments Panel” and create a “Vibrance” Adjustment Layer. Increase the “Vibrance” and “Saturation” values to make the colors pop a bit more.
10 - Select all the “Adjustment Layers” (“Shift” key) and “Group” them together by clicking on the small Folder icon at the bottom of the “Layers Panel”. Name the group “Orange”.
11 - Hide the “Orange” group by clicking on the small eye icon on the left side of its Thumbnail.
12 - Go to the “Adjustments Panel” and create a “New Hue/Saturation” Adjustment Layer.
13 - Choose “Reds” and lower the “Hue” to about -25 and increase the “Saturation” to 18, and in the “Yellows” lower the “Hue” to about -15 and increase the “Lightness” to 11. The values to use are going to depend on your image.
14 - Duplicate the “Hue/Saturation Adjustment Layer” (Command/Control + J). Increase the “Lightness” of the “Master” a couple of points and change the “Reds” “Hue” value to about -3 and the “Saturation” to 1.
15 - Select all the new “Adjustment Layers” (“Shift” key) and “Group” them together. Name the group “Red”.
16 - Hide the “Red” group too. Create a “New Layer” by clicking on the small button at the bottom of the “Layers Panel” and make sure it’s placed on top of the “Background” Layer.
17 - Select the “Brush Tool” (B)and choose a Large and soft brush (800 pt and 0% “Hardness”) with 29% “Opacity”. Change the “Foreground” color to # df9ea and paint some “Light” where needed.
18 - Change the “Blending Mode” of the Layer to “Overlay”.
19 - With that layer still selected, go to the “Adjustments Panel” and create a “New Color Lookup” Adjustment Layer.
20 - You can choose between different “3DLUT File” presets. We used “3Strip.look”, “Crisp_Warm.look” and “TensionGreen.3DL”.
21 - You can also combine this “Adjustment Layer” with one of the previously created groups.
22 - Check out the various autumn looks!
by @lornacane


