Bevel Text Effect on Marble Texture Illustrator
For this Tutorial, we are using Wask New Free Font from Vasilis Skandalos.
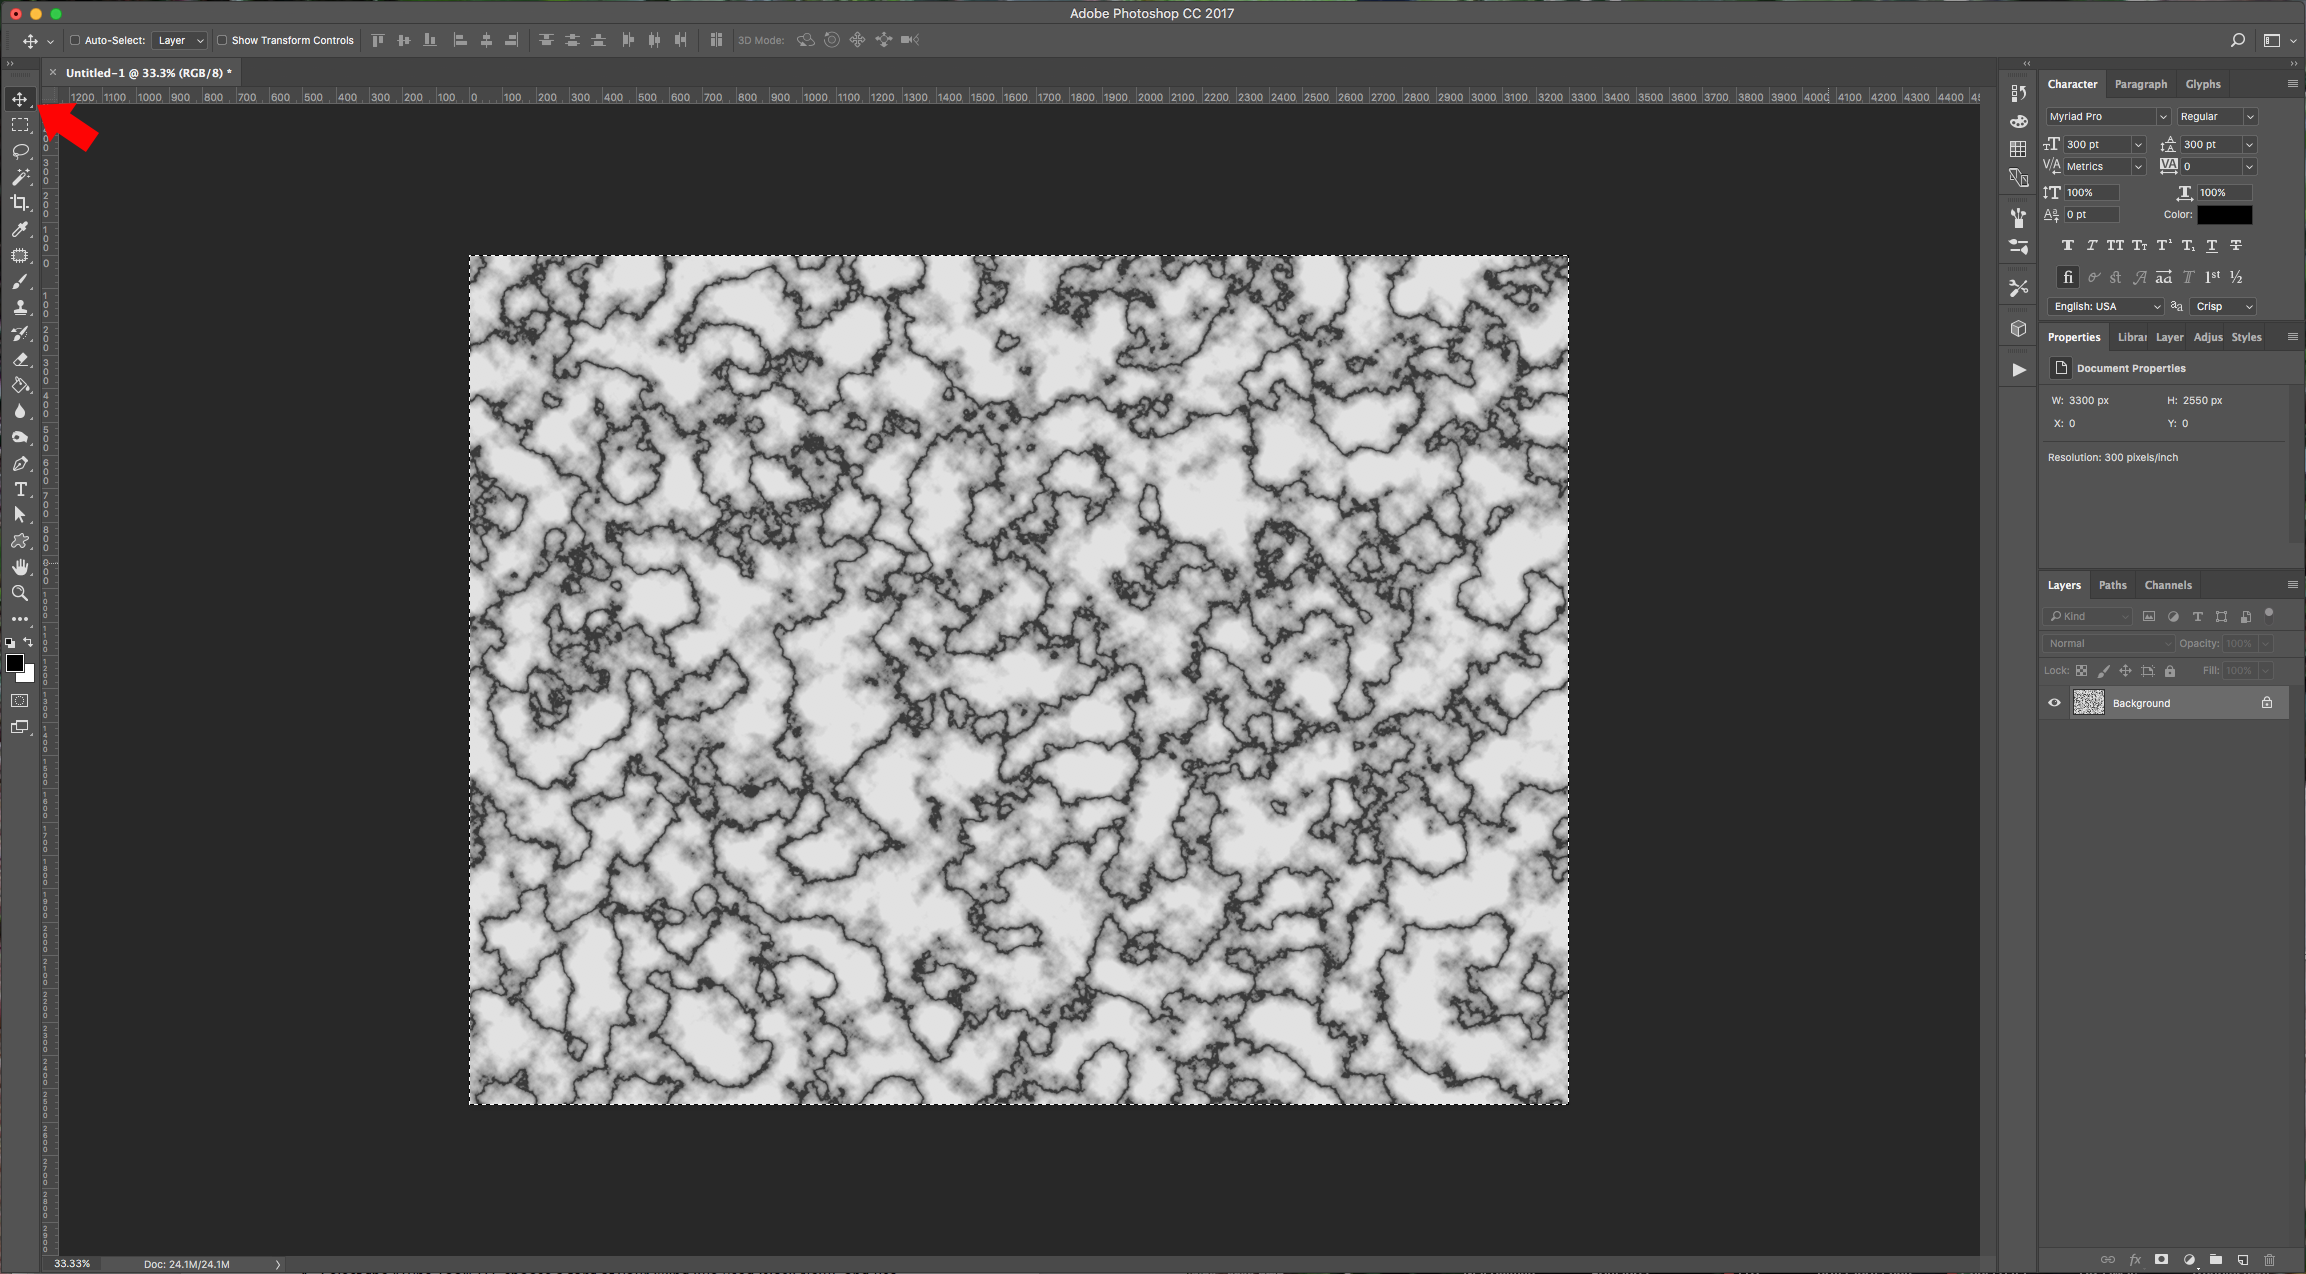
We will need to start in Photoshop to create a part of the Marble texture used as background.
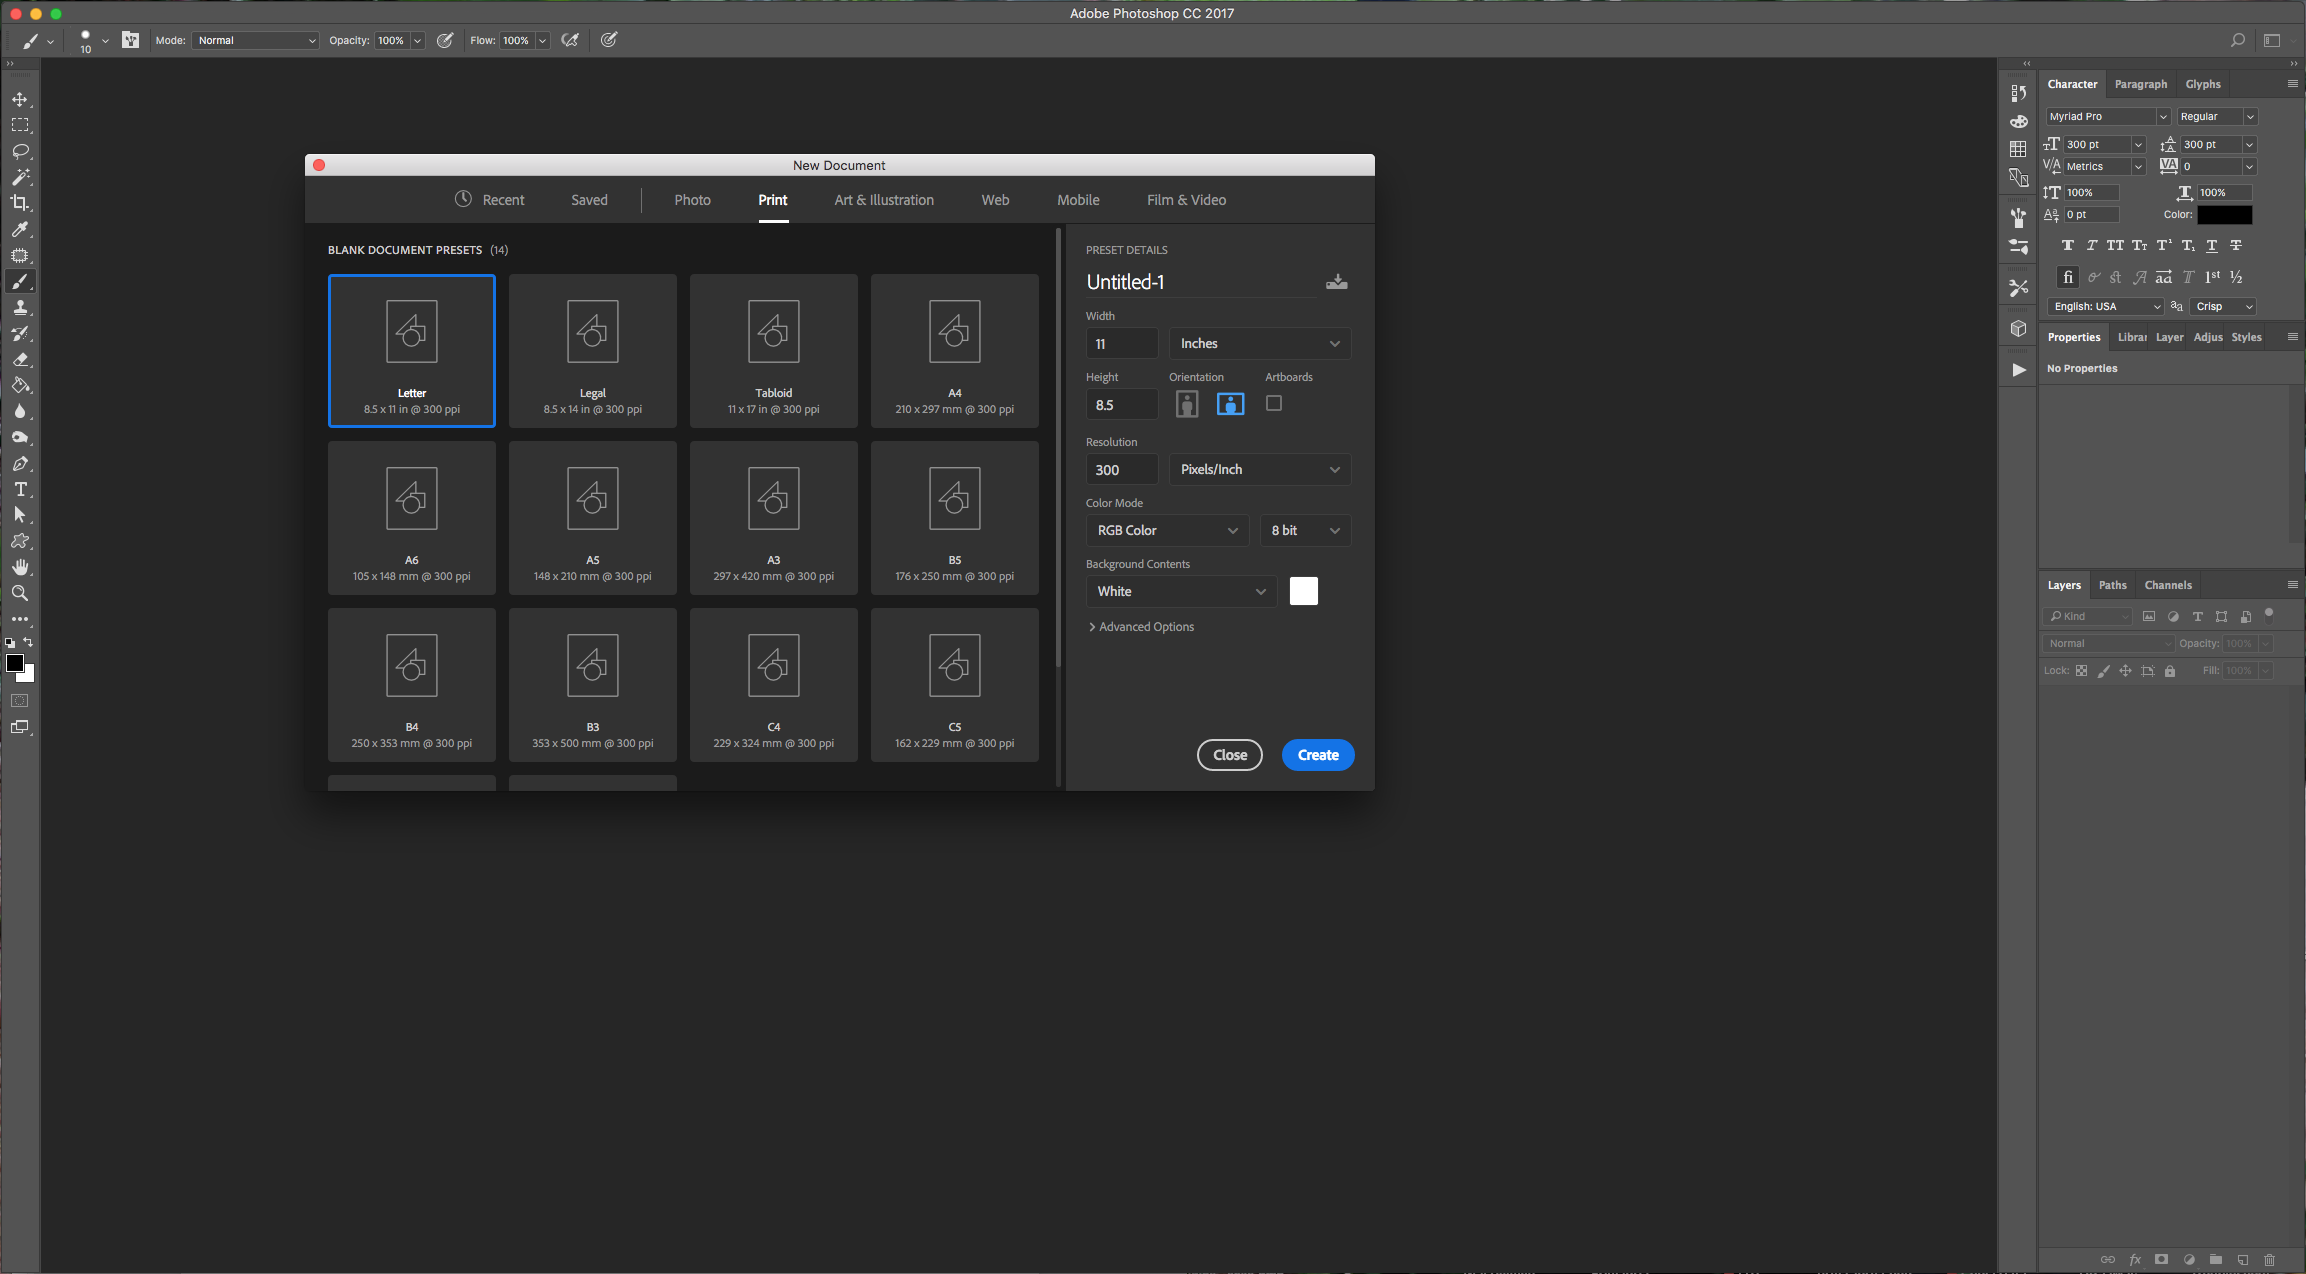
1 - First, in Photoshop, create a “New Document” and make it as big as your Illustrator file will be.
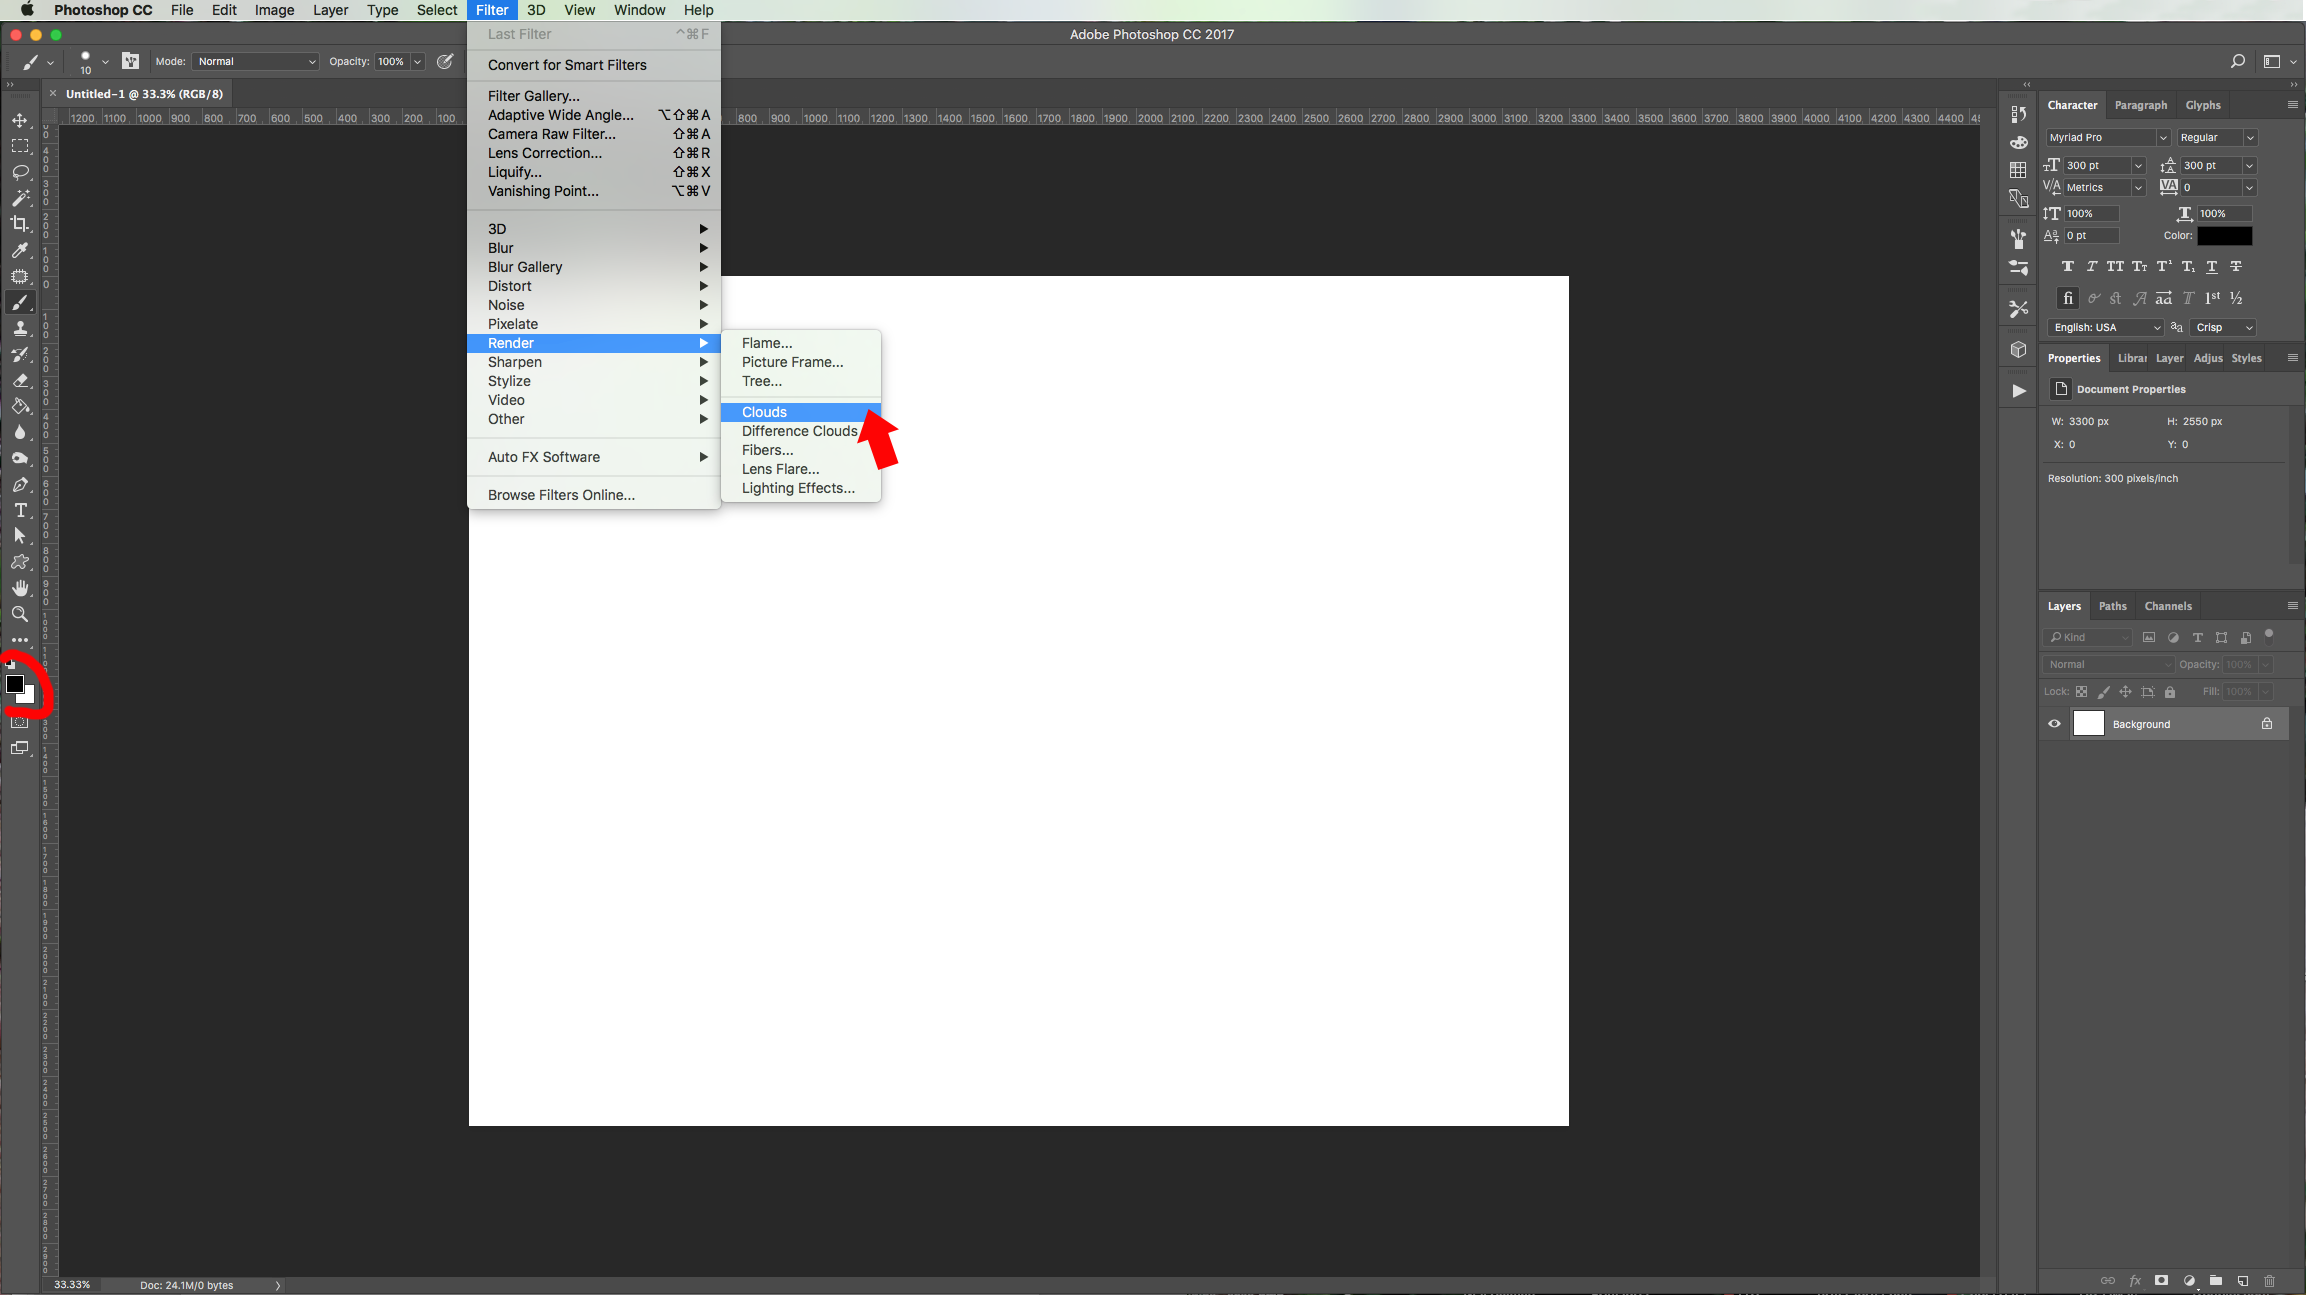
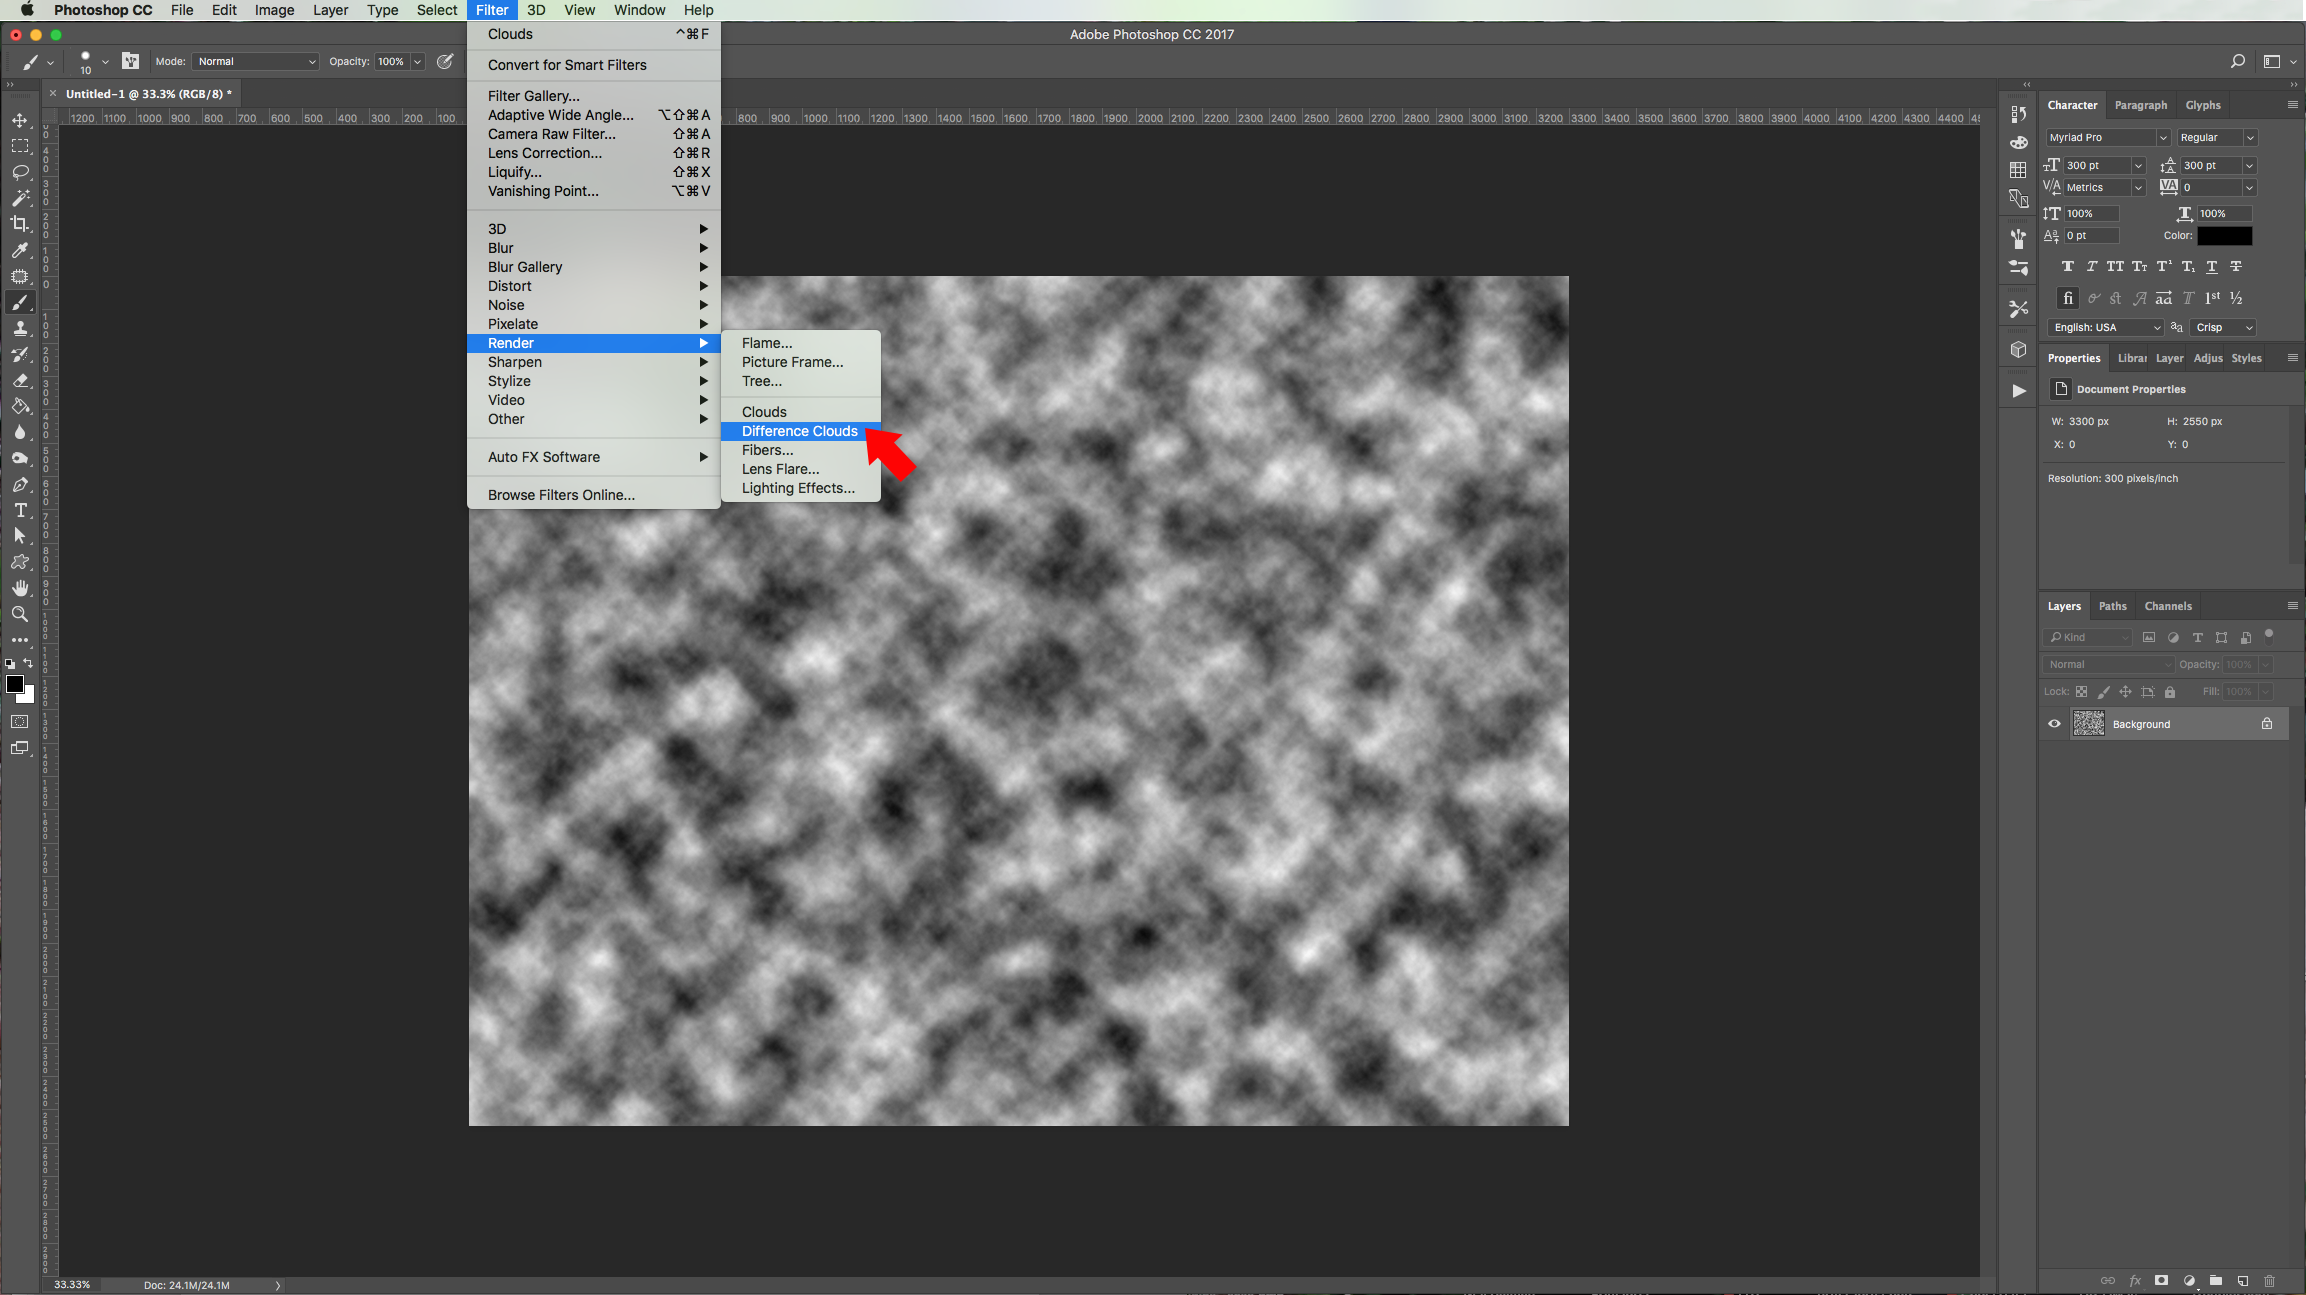
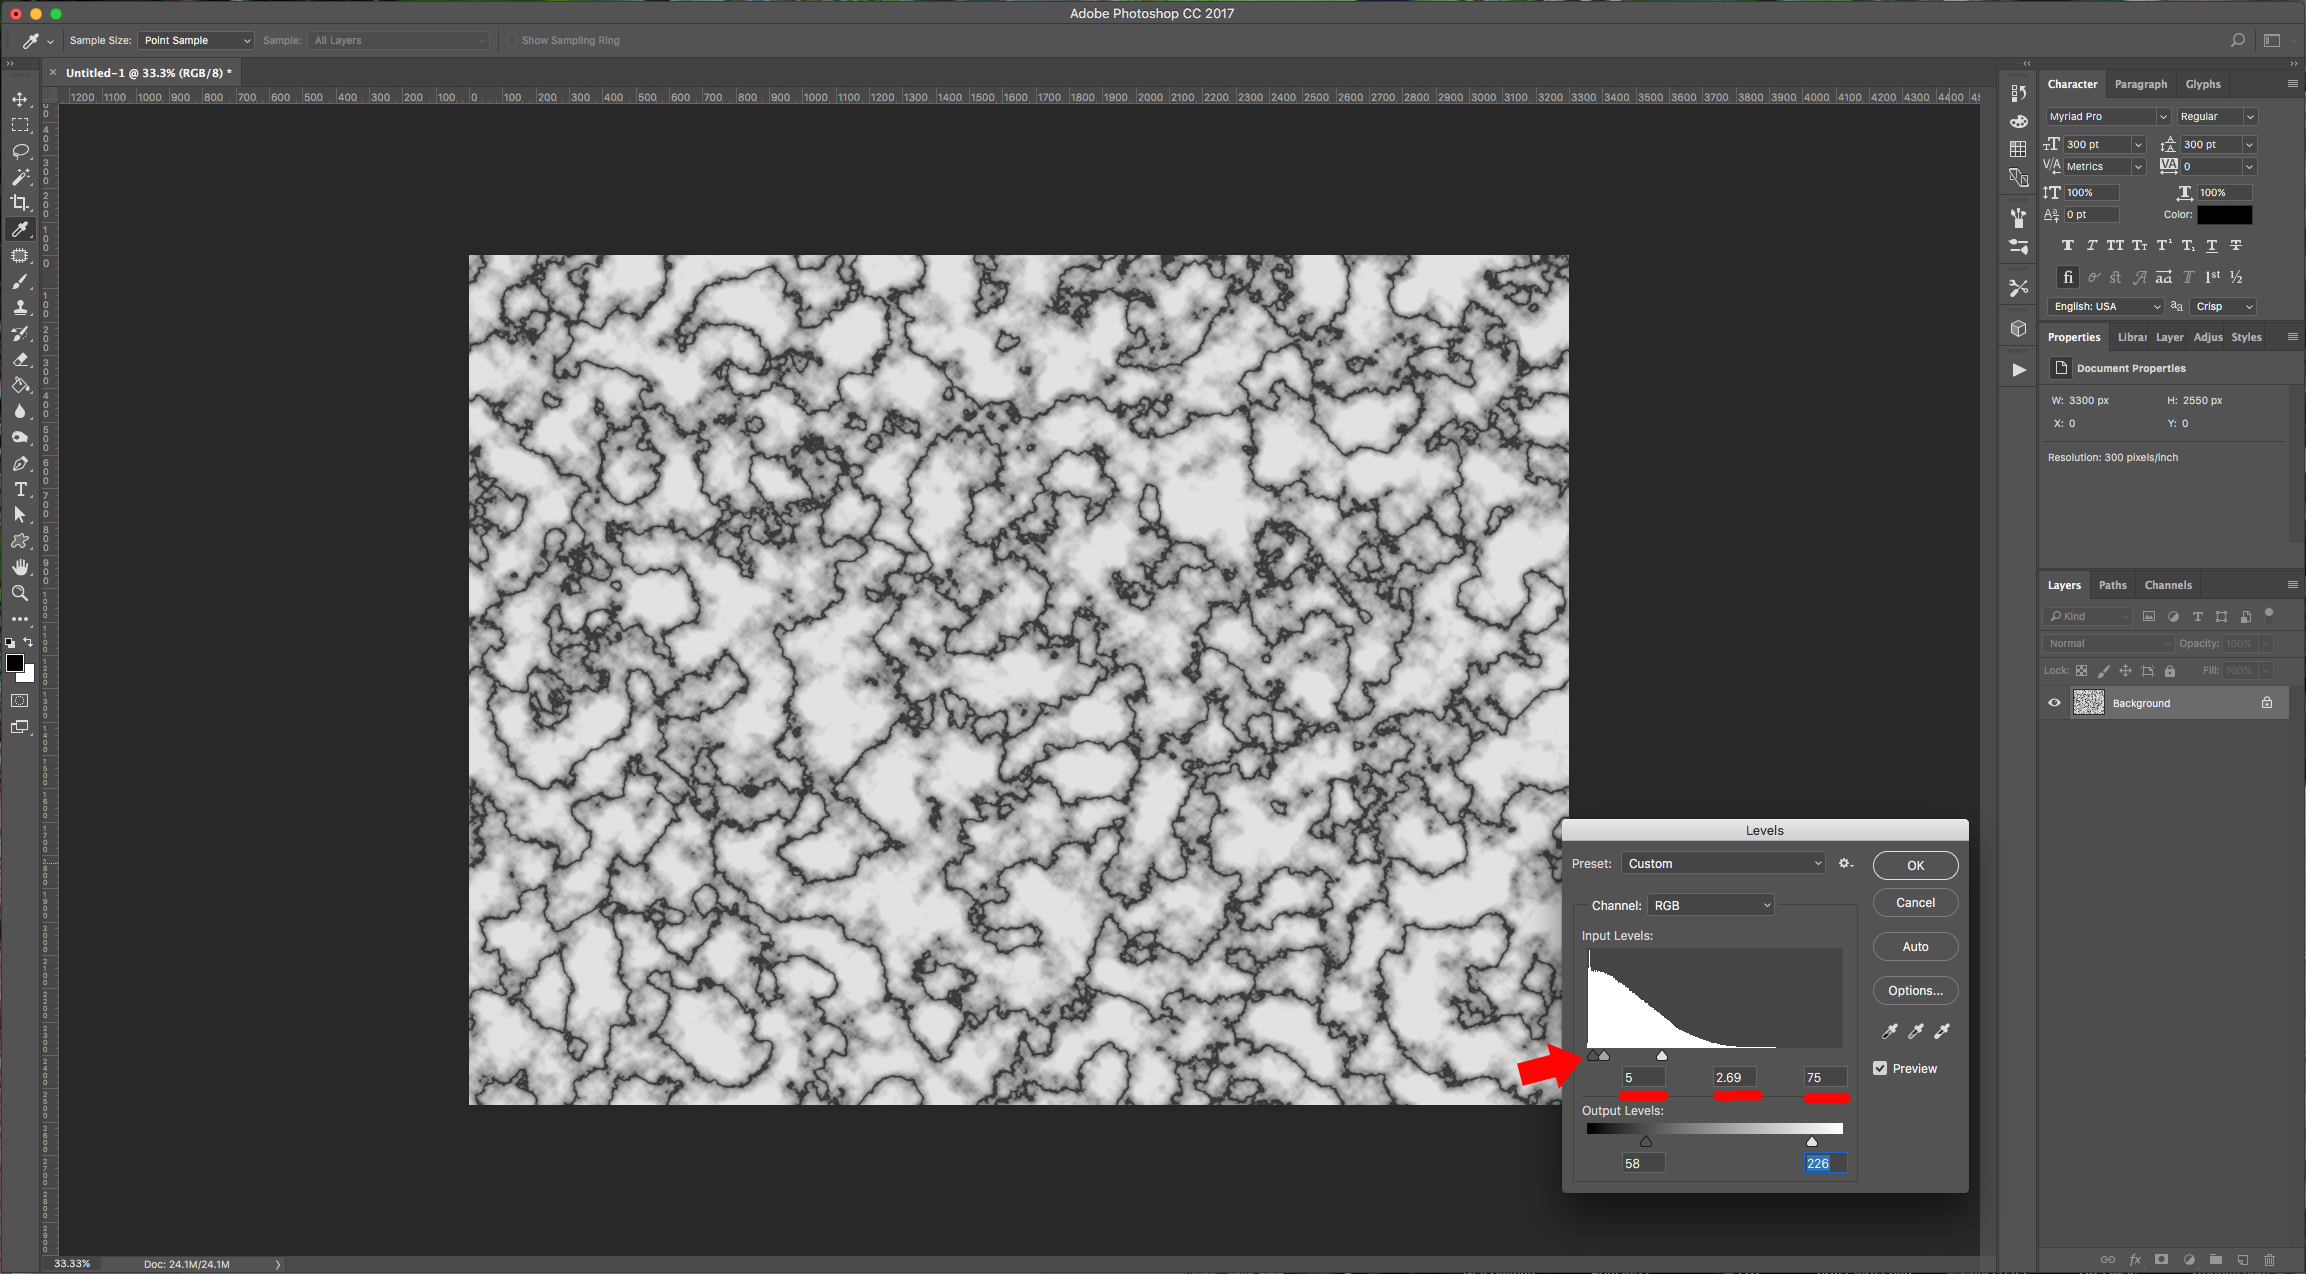
2 - Go to Filter > Render > Clouds, then to Filter > Render > Difference Clouds. Now, play around with the “Levels” (Command/Control + L) to get the “Marble” effect. Once you are happy, select your image (Command/Control + A), then copy your selection (Command/Control + C). Don’t forget to save your Photoshop file for later usage.
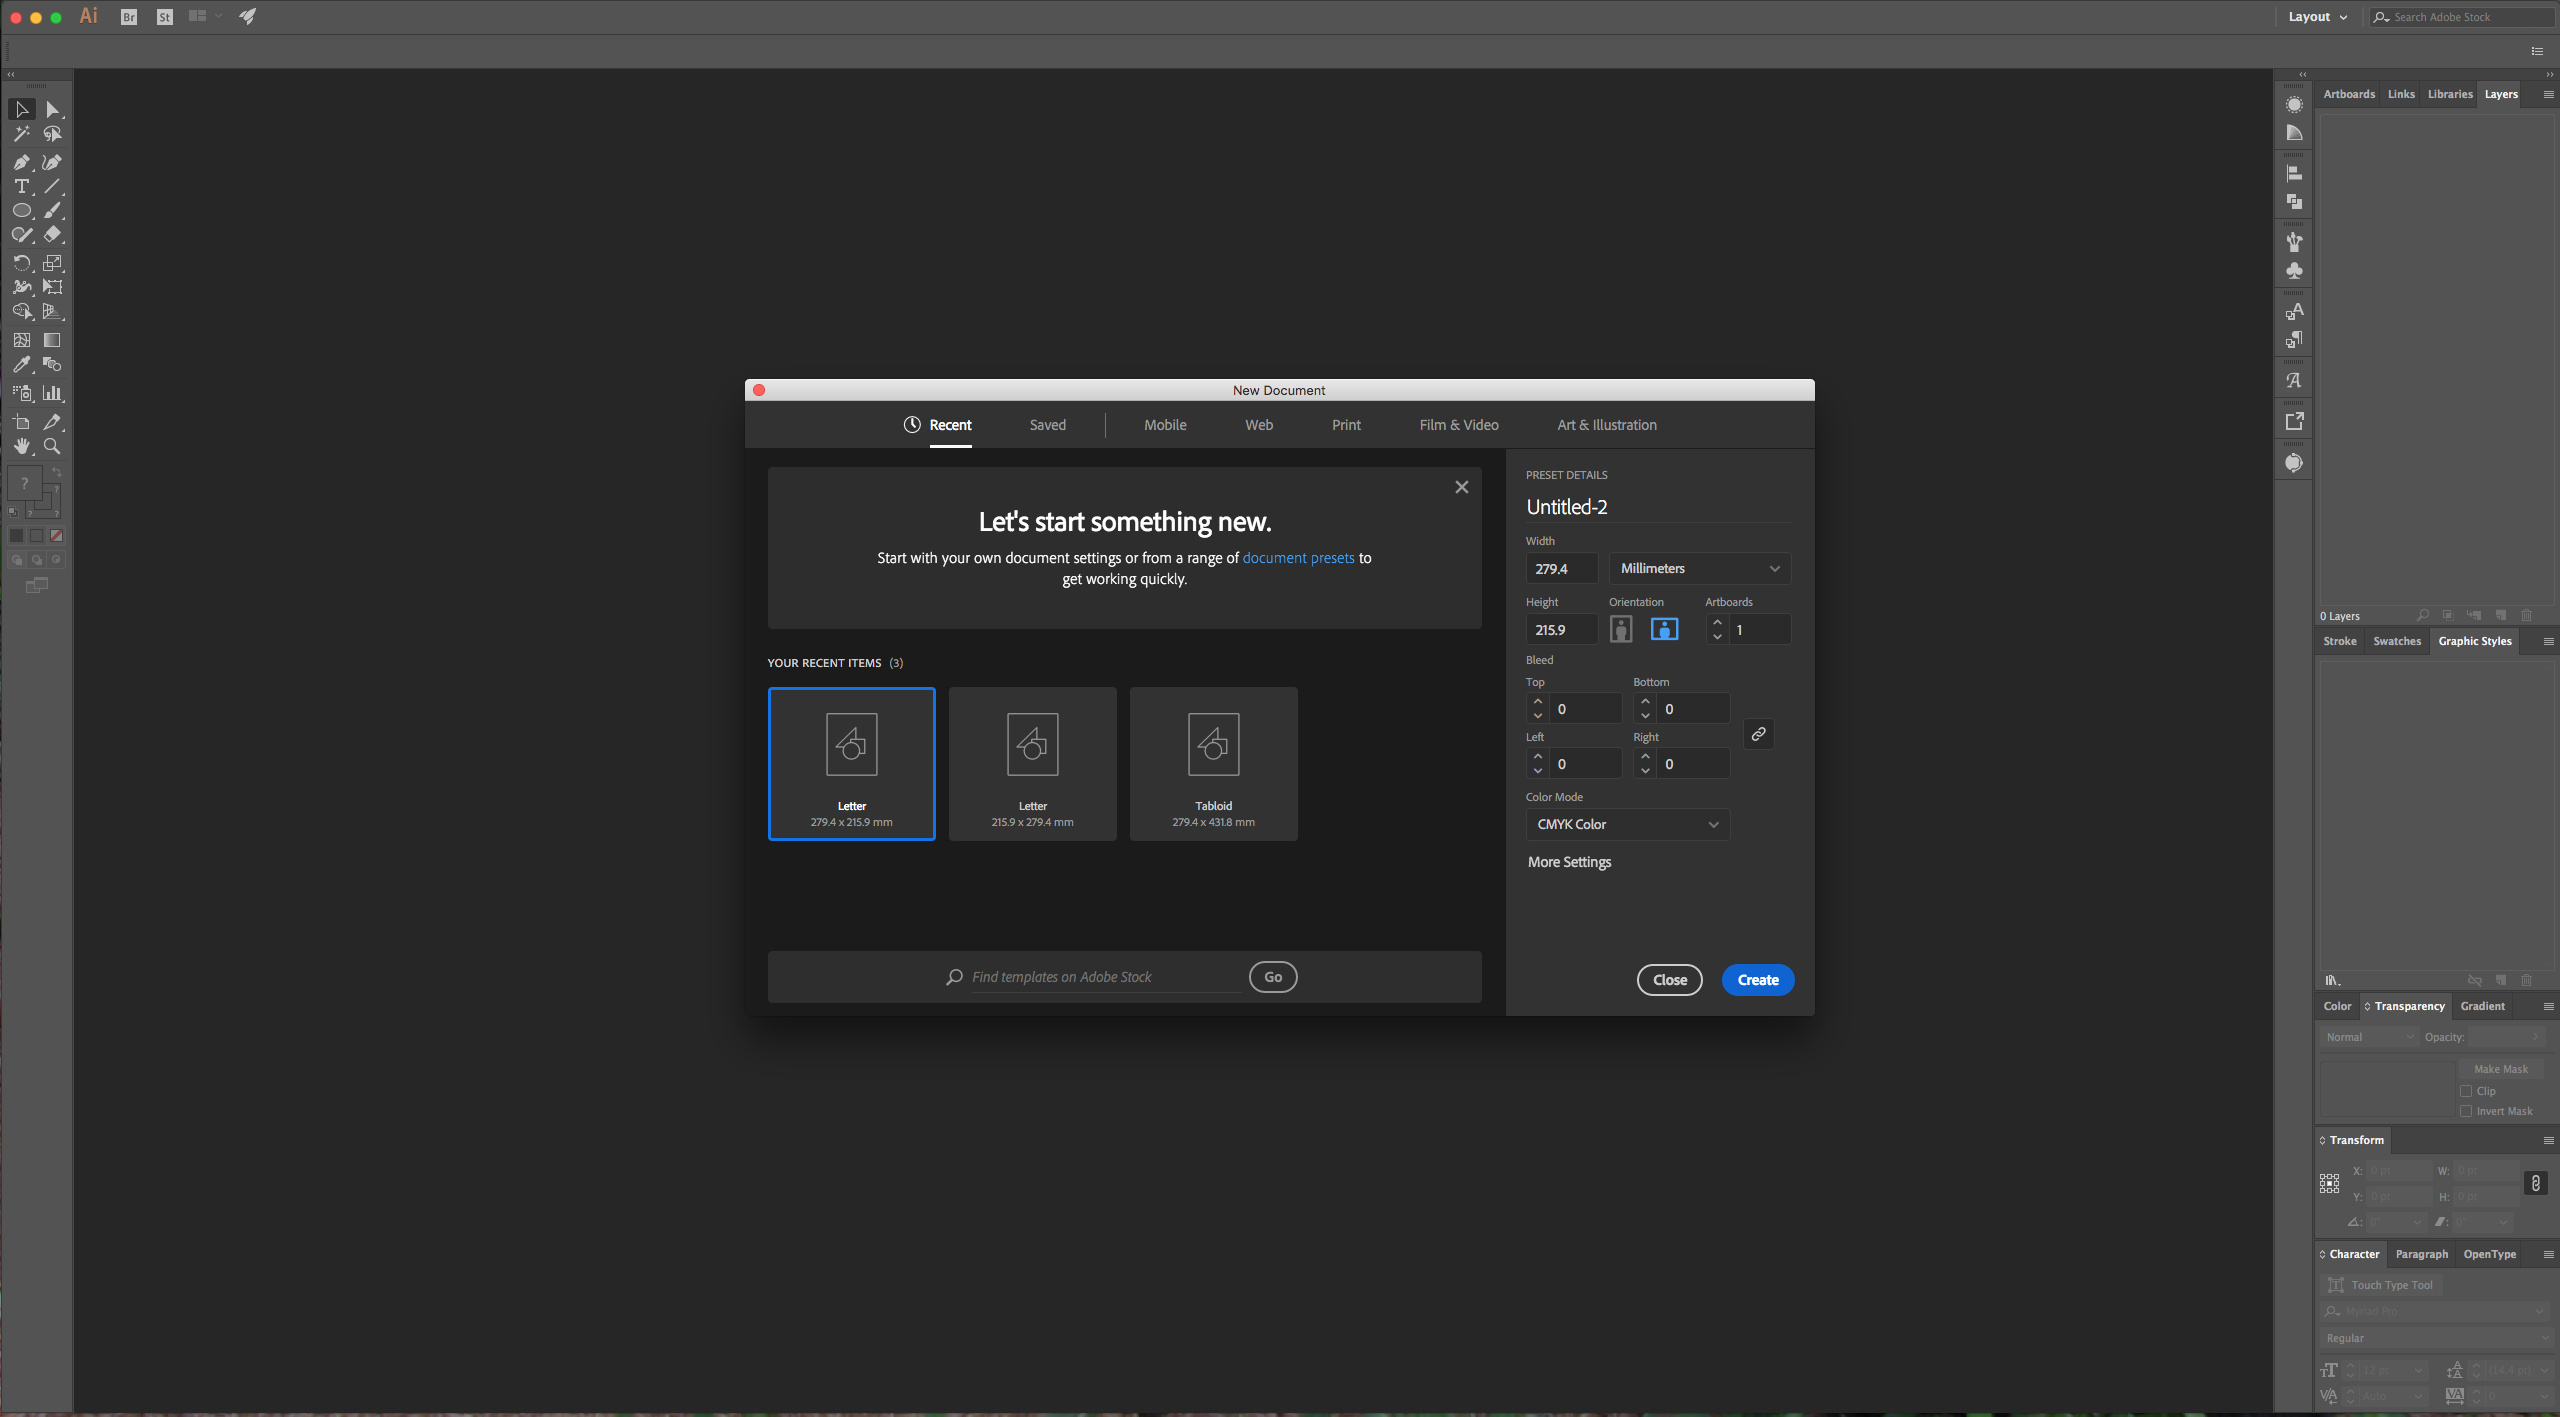
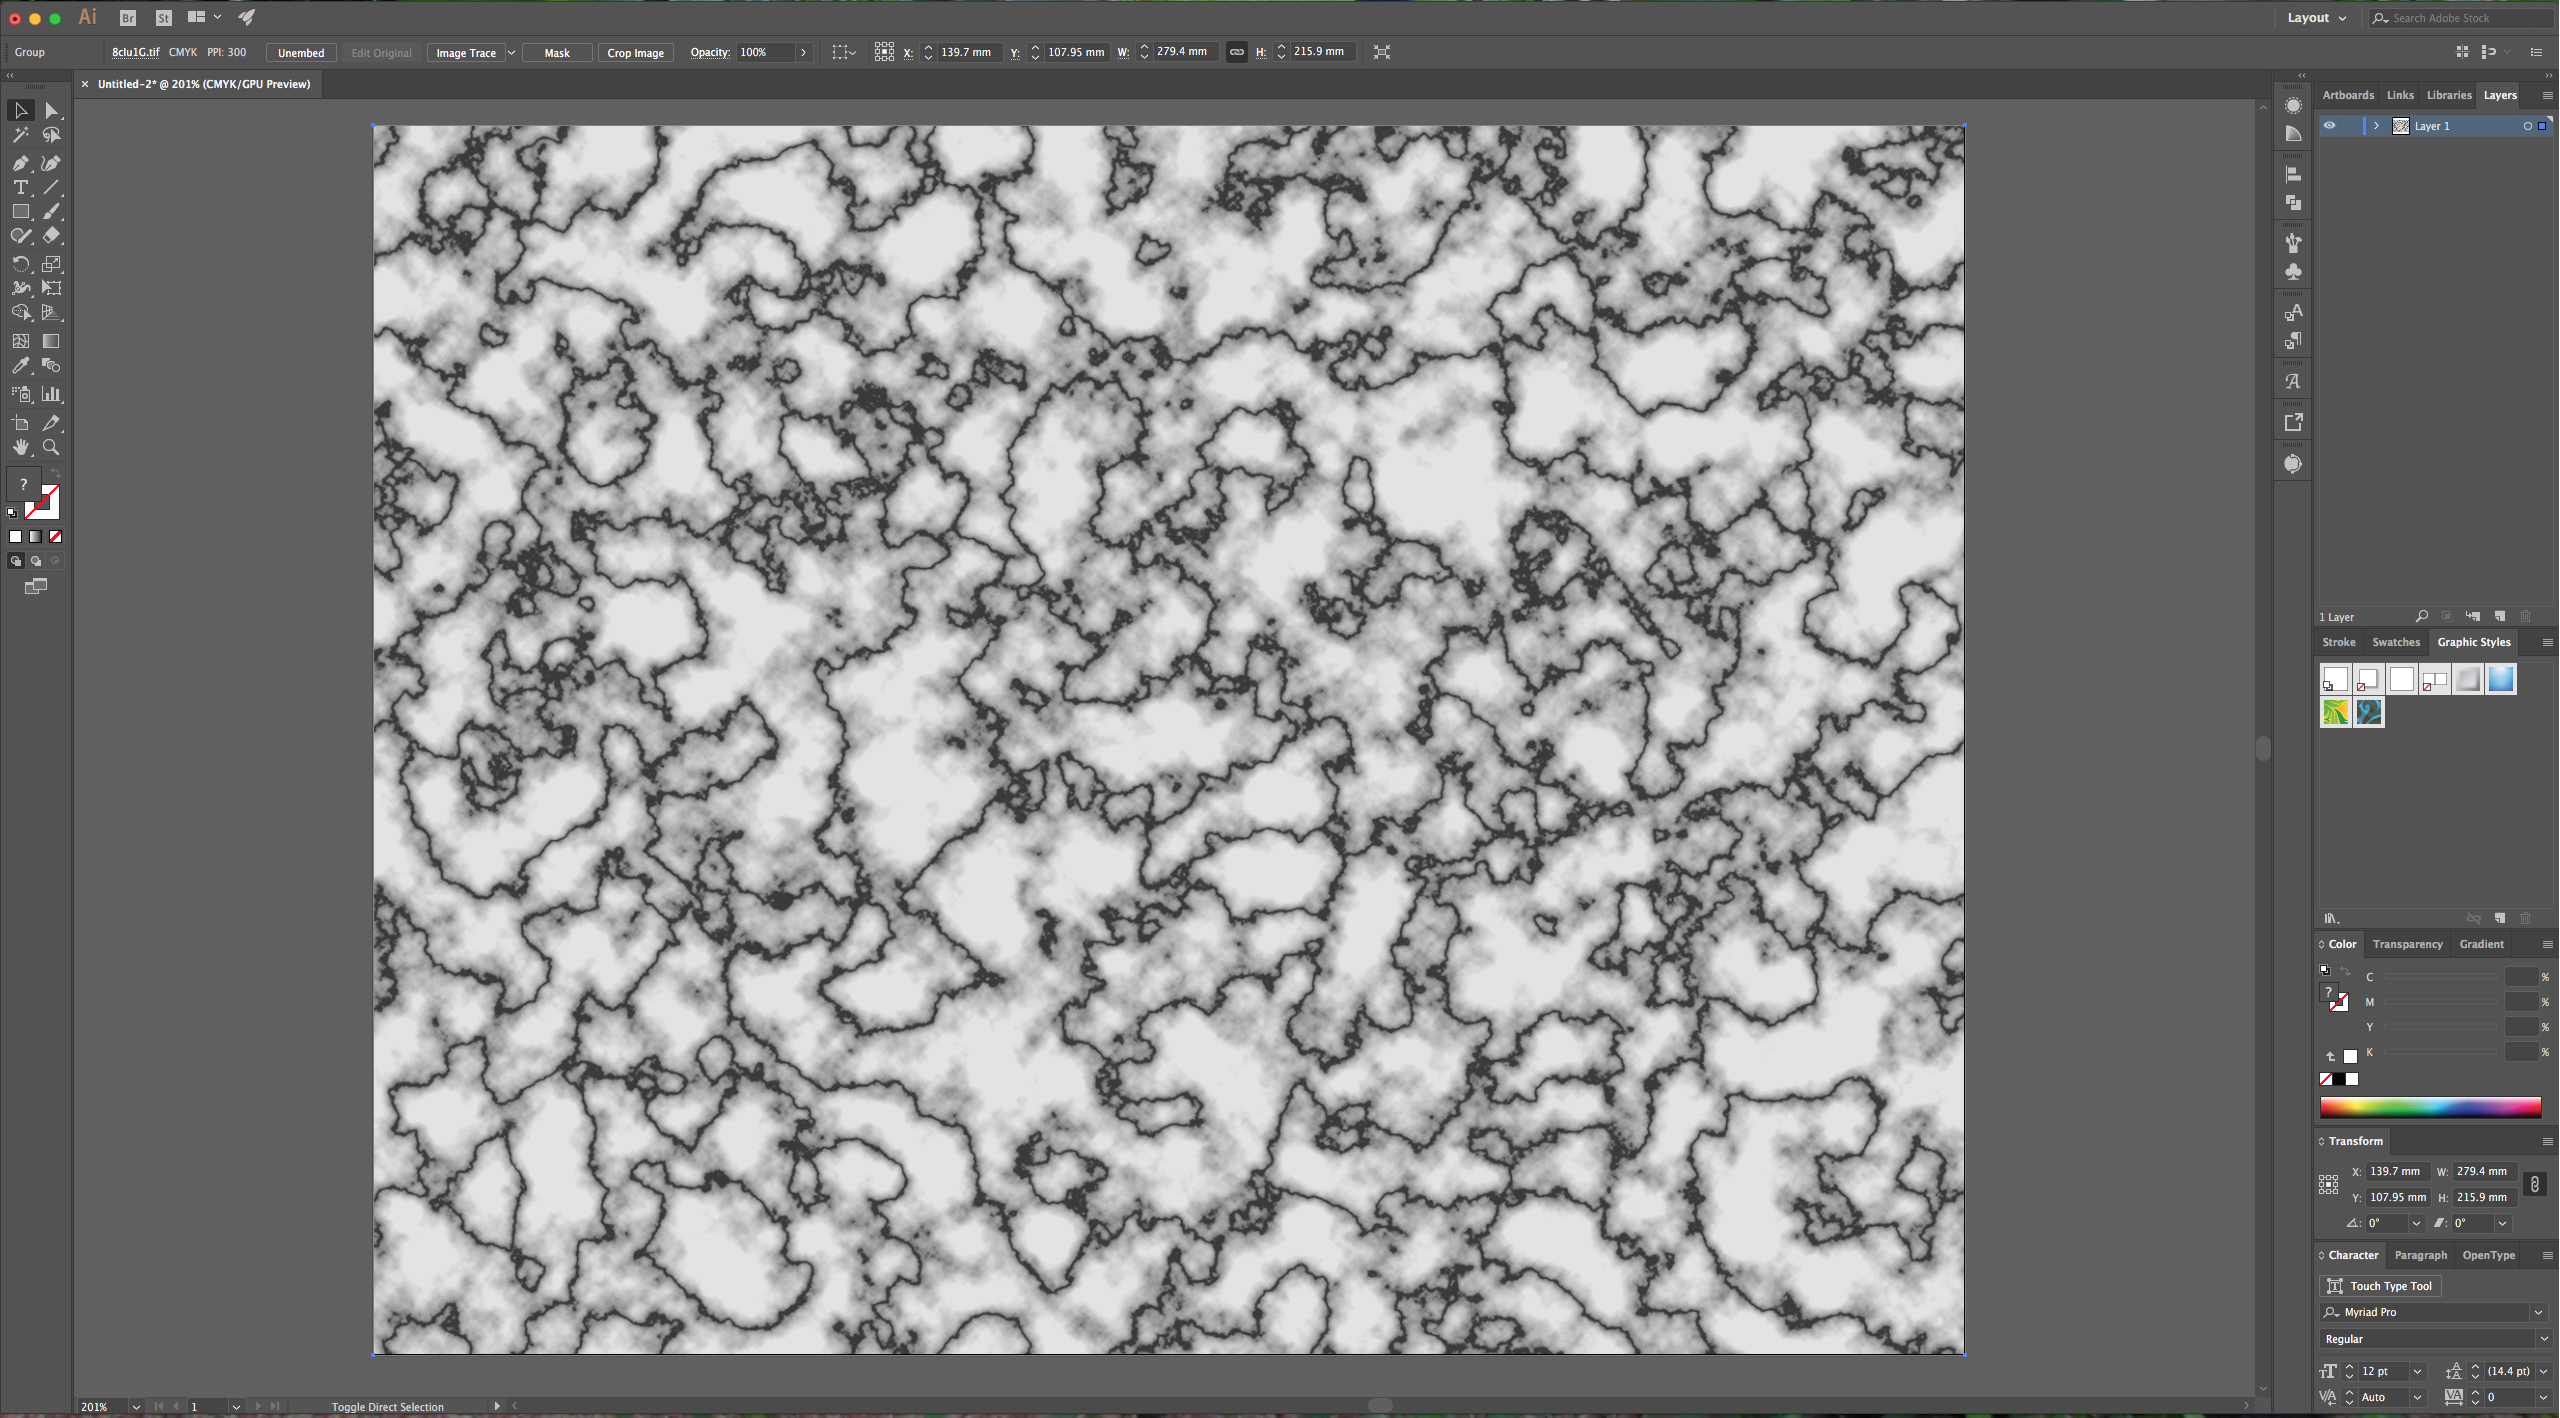
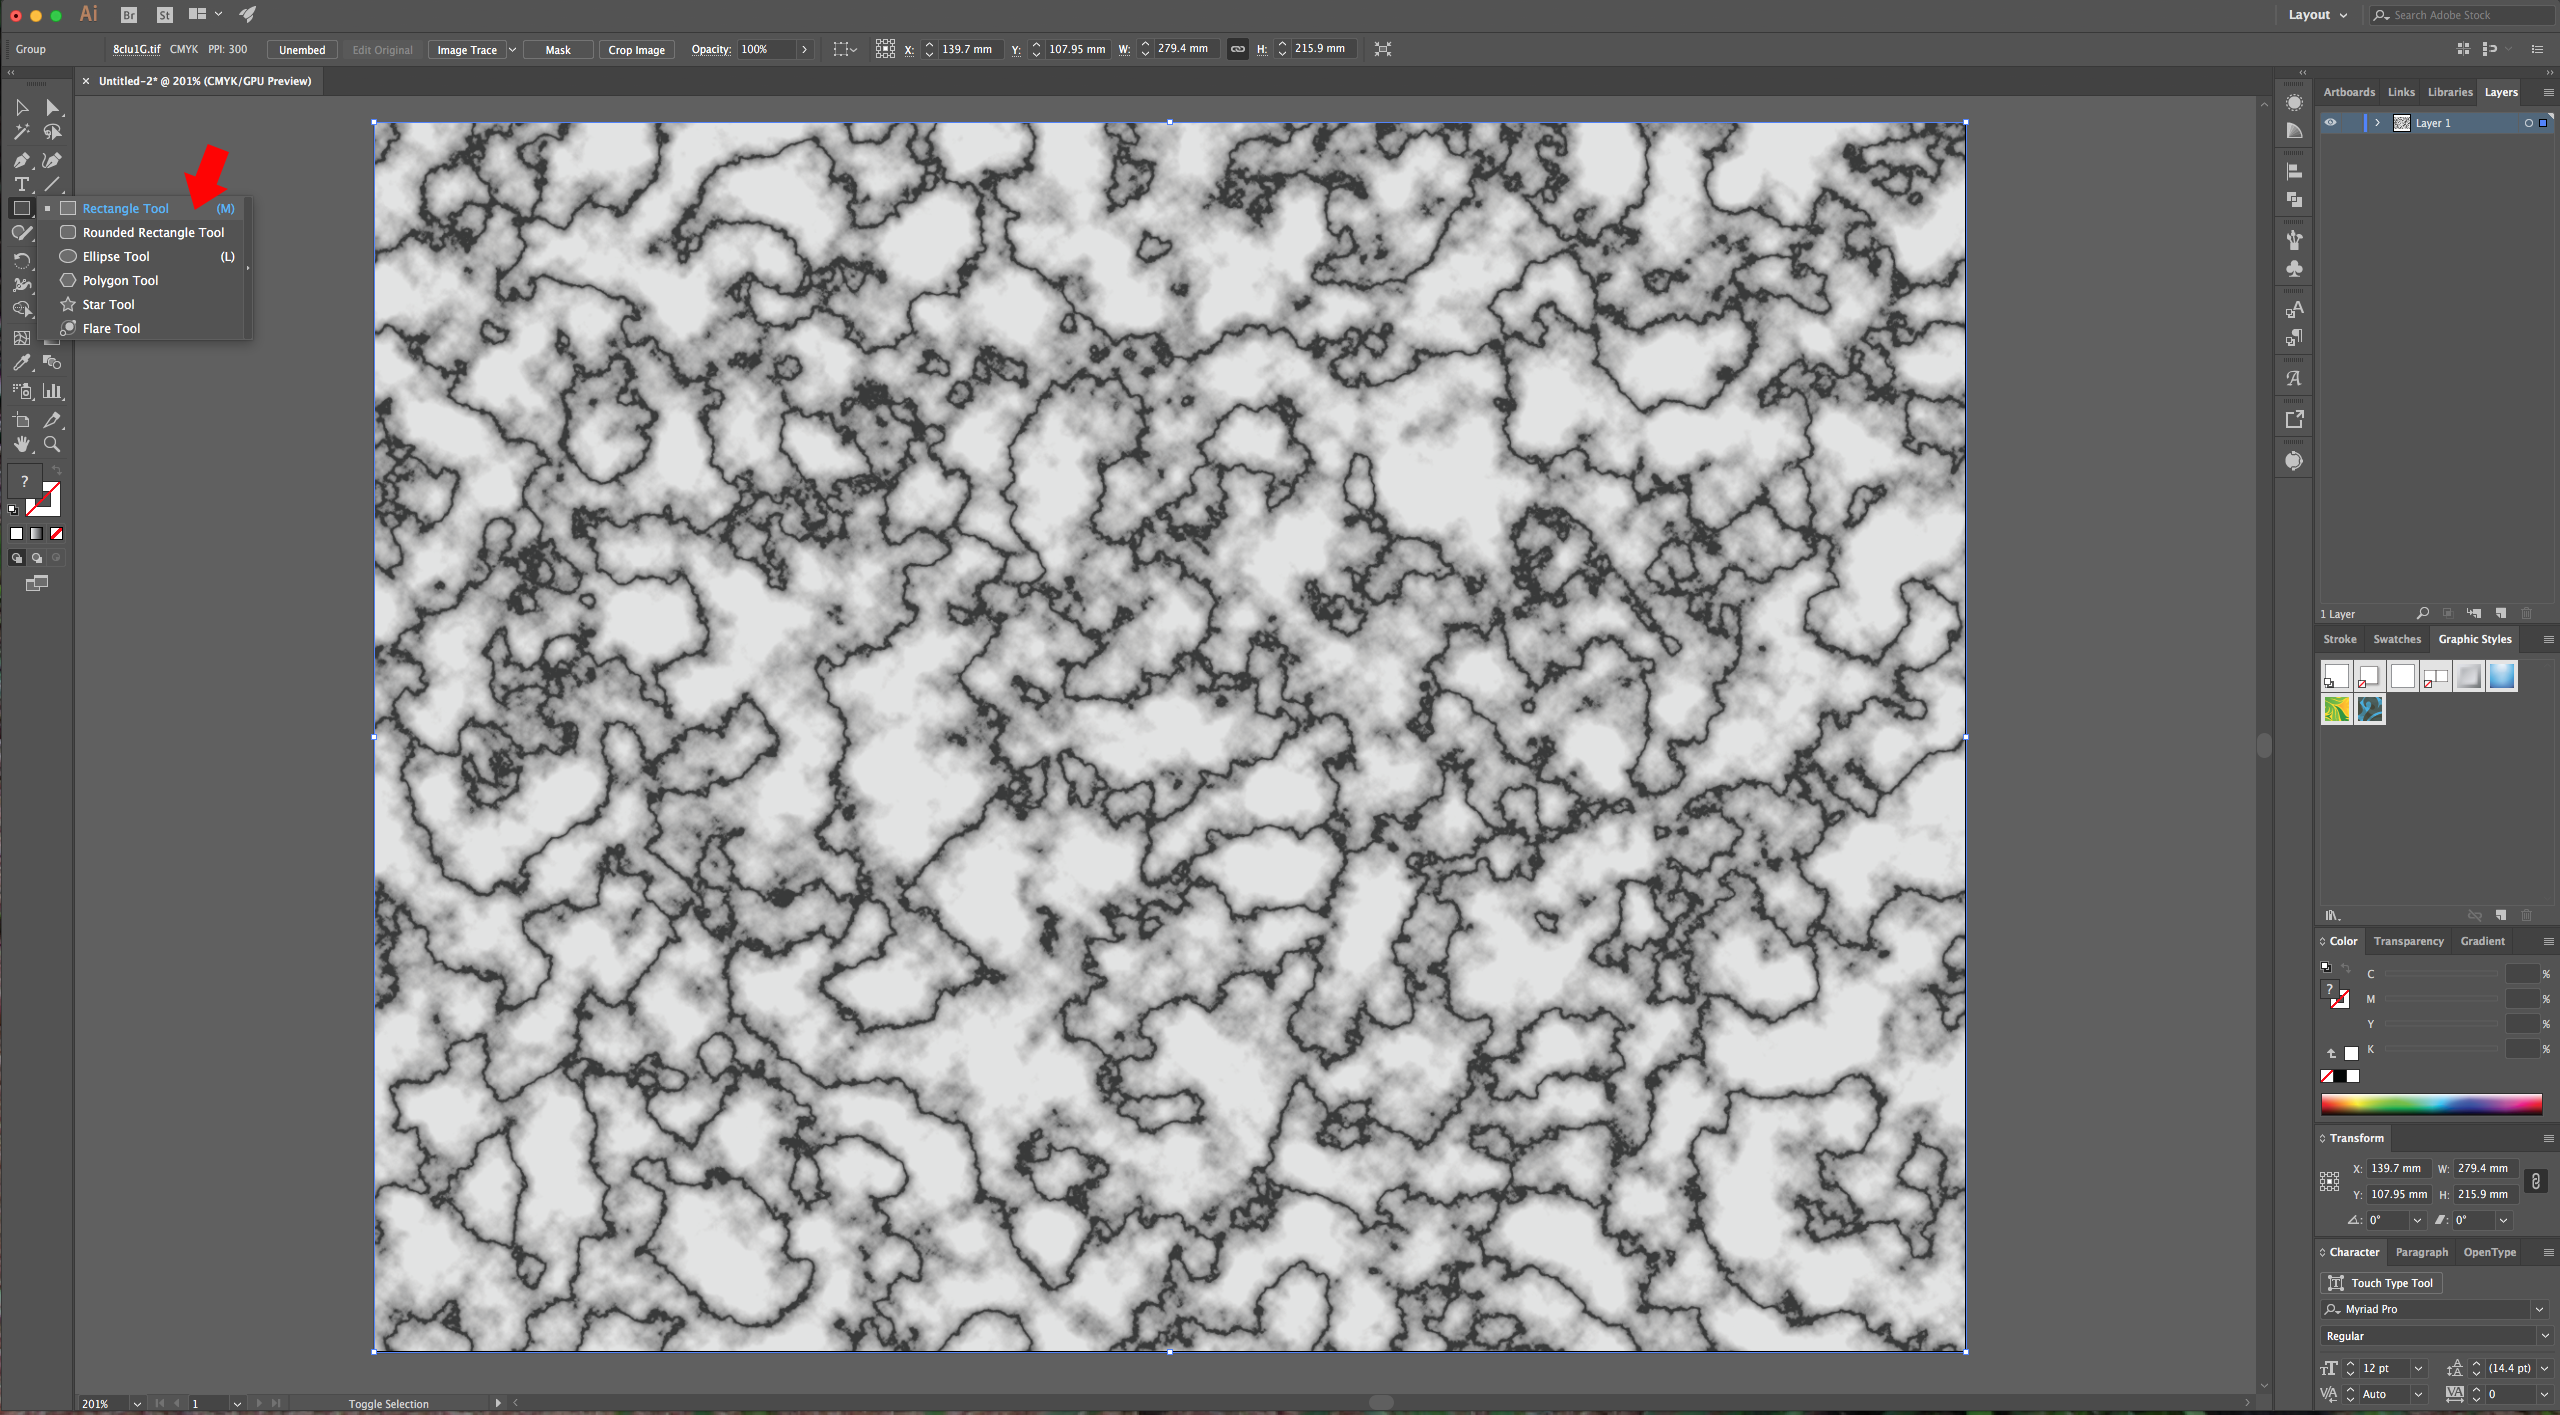
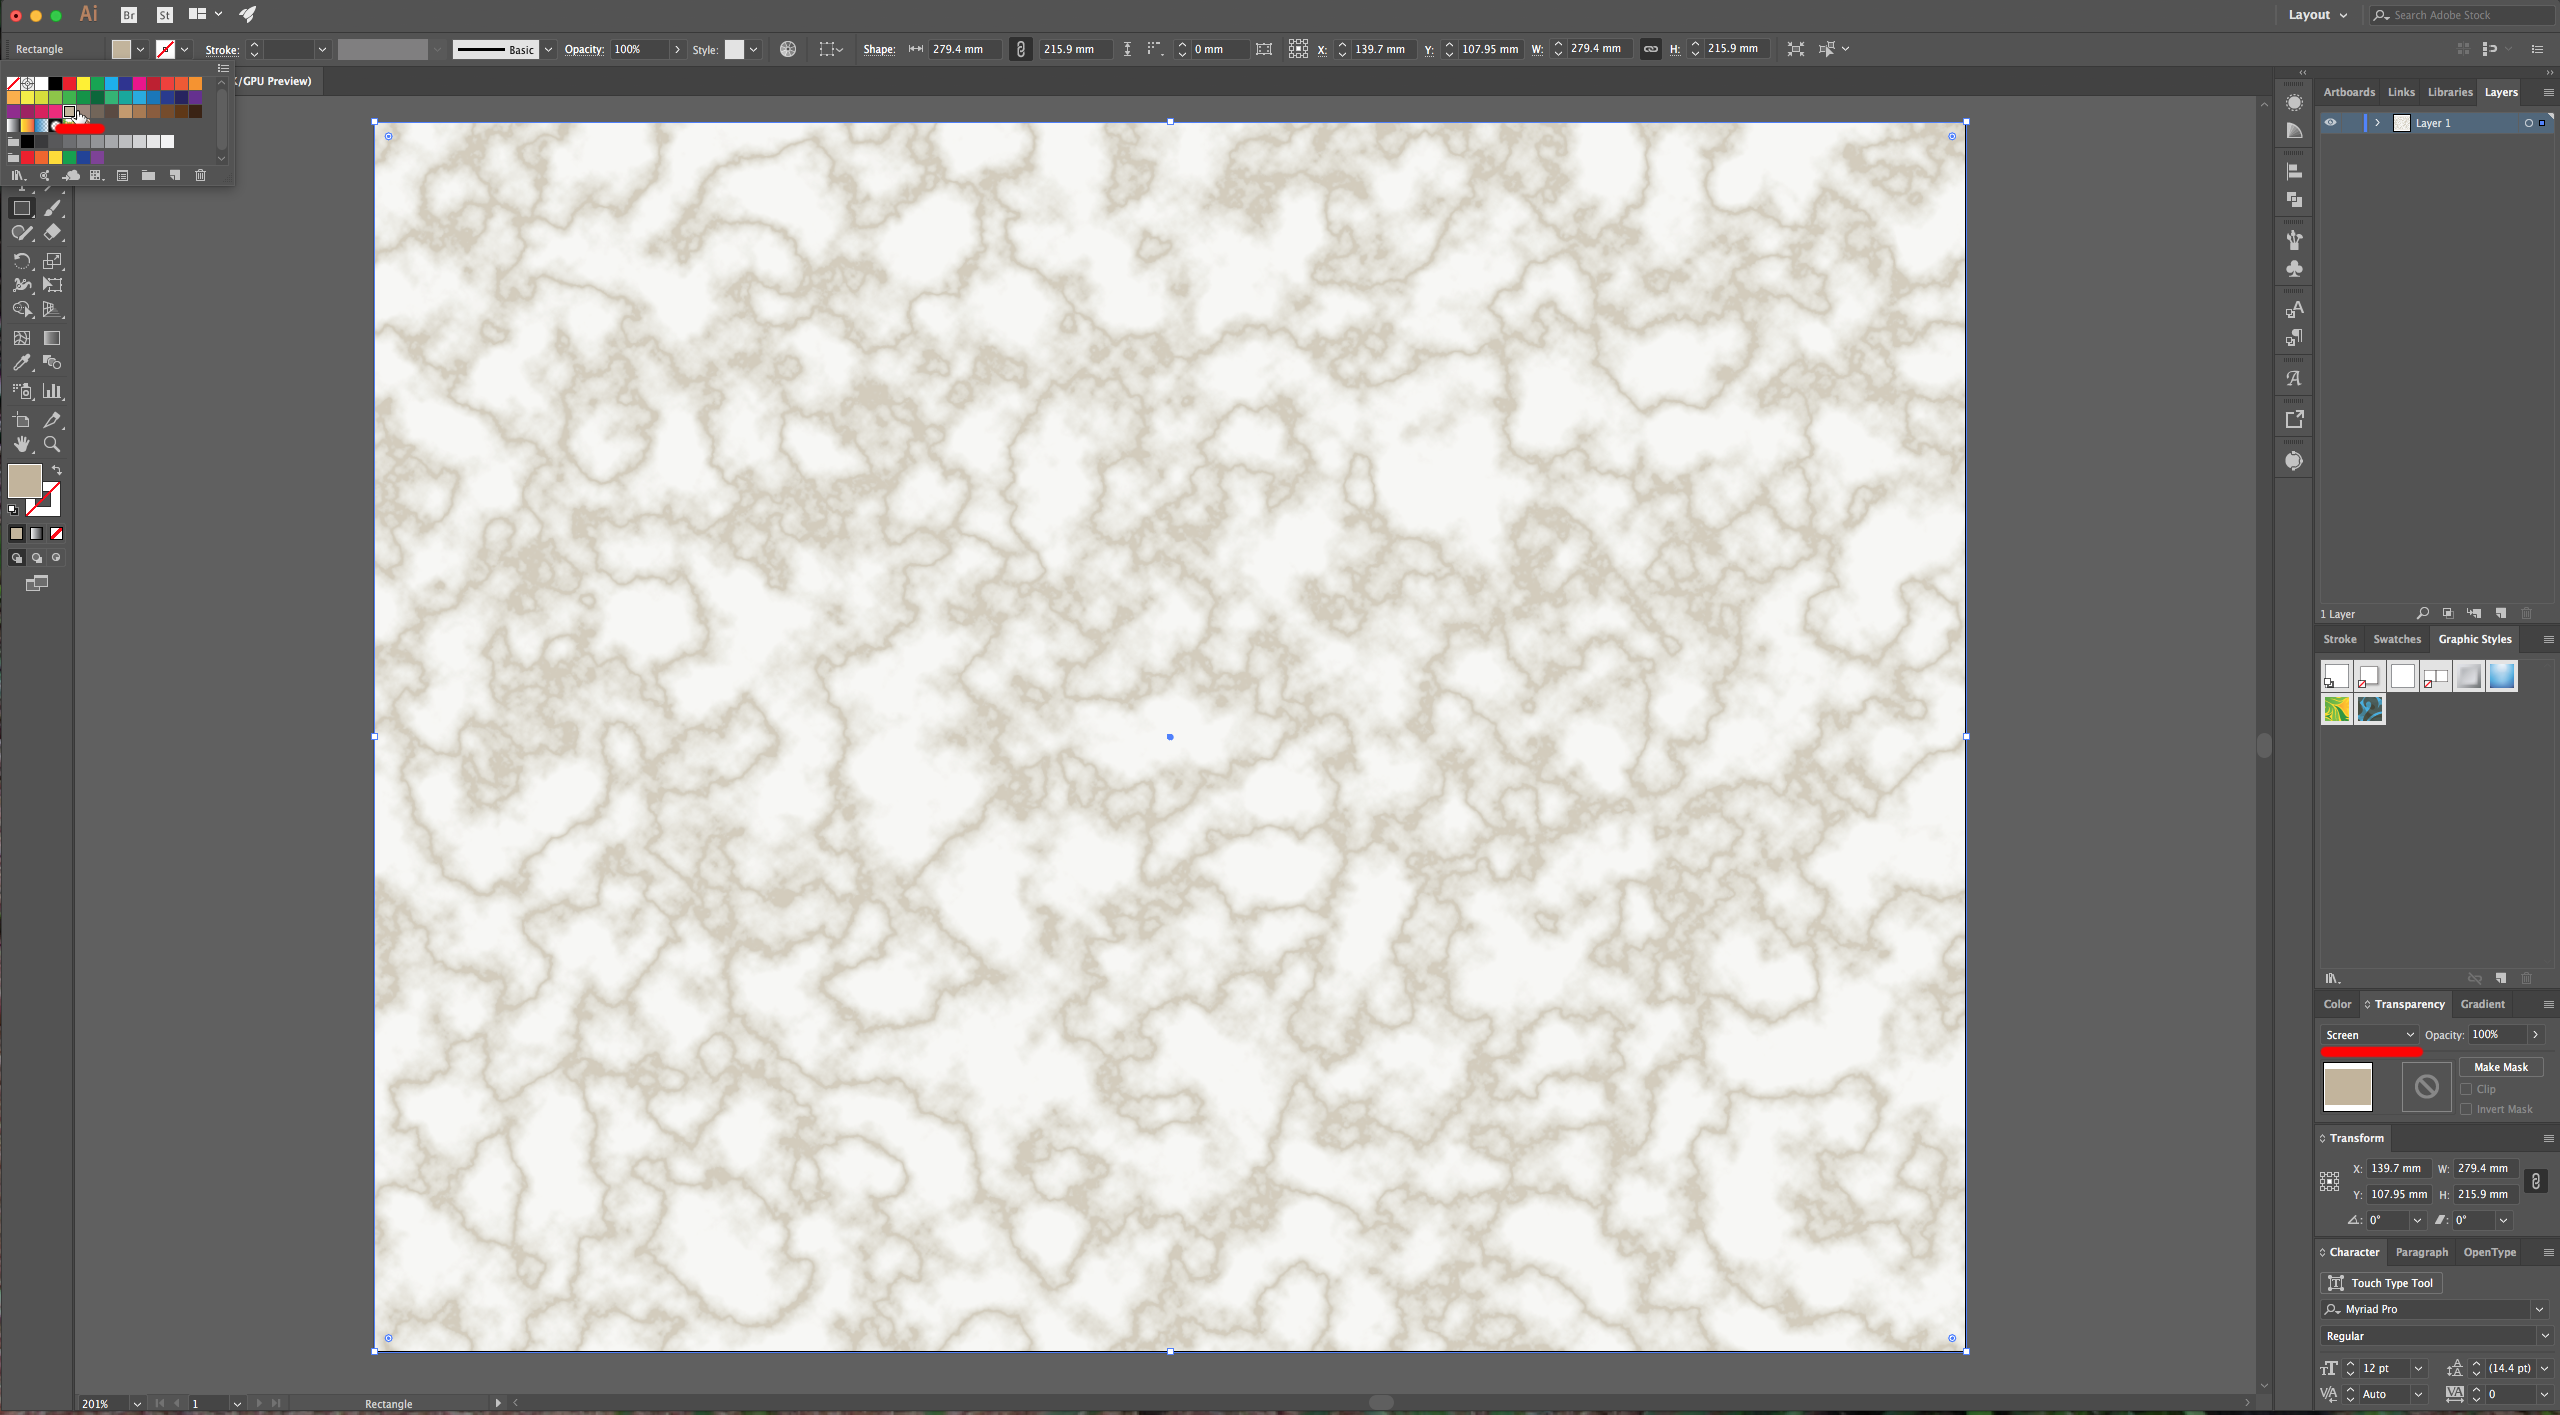
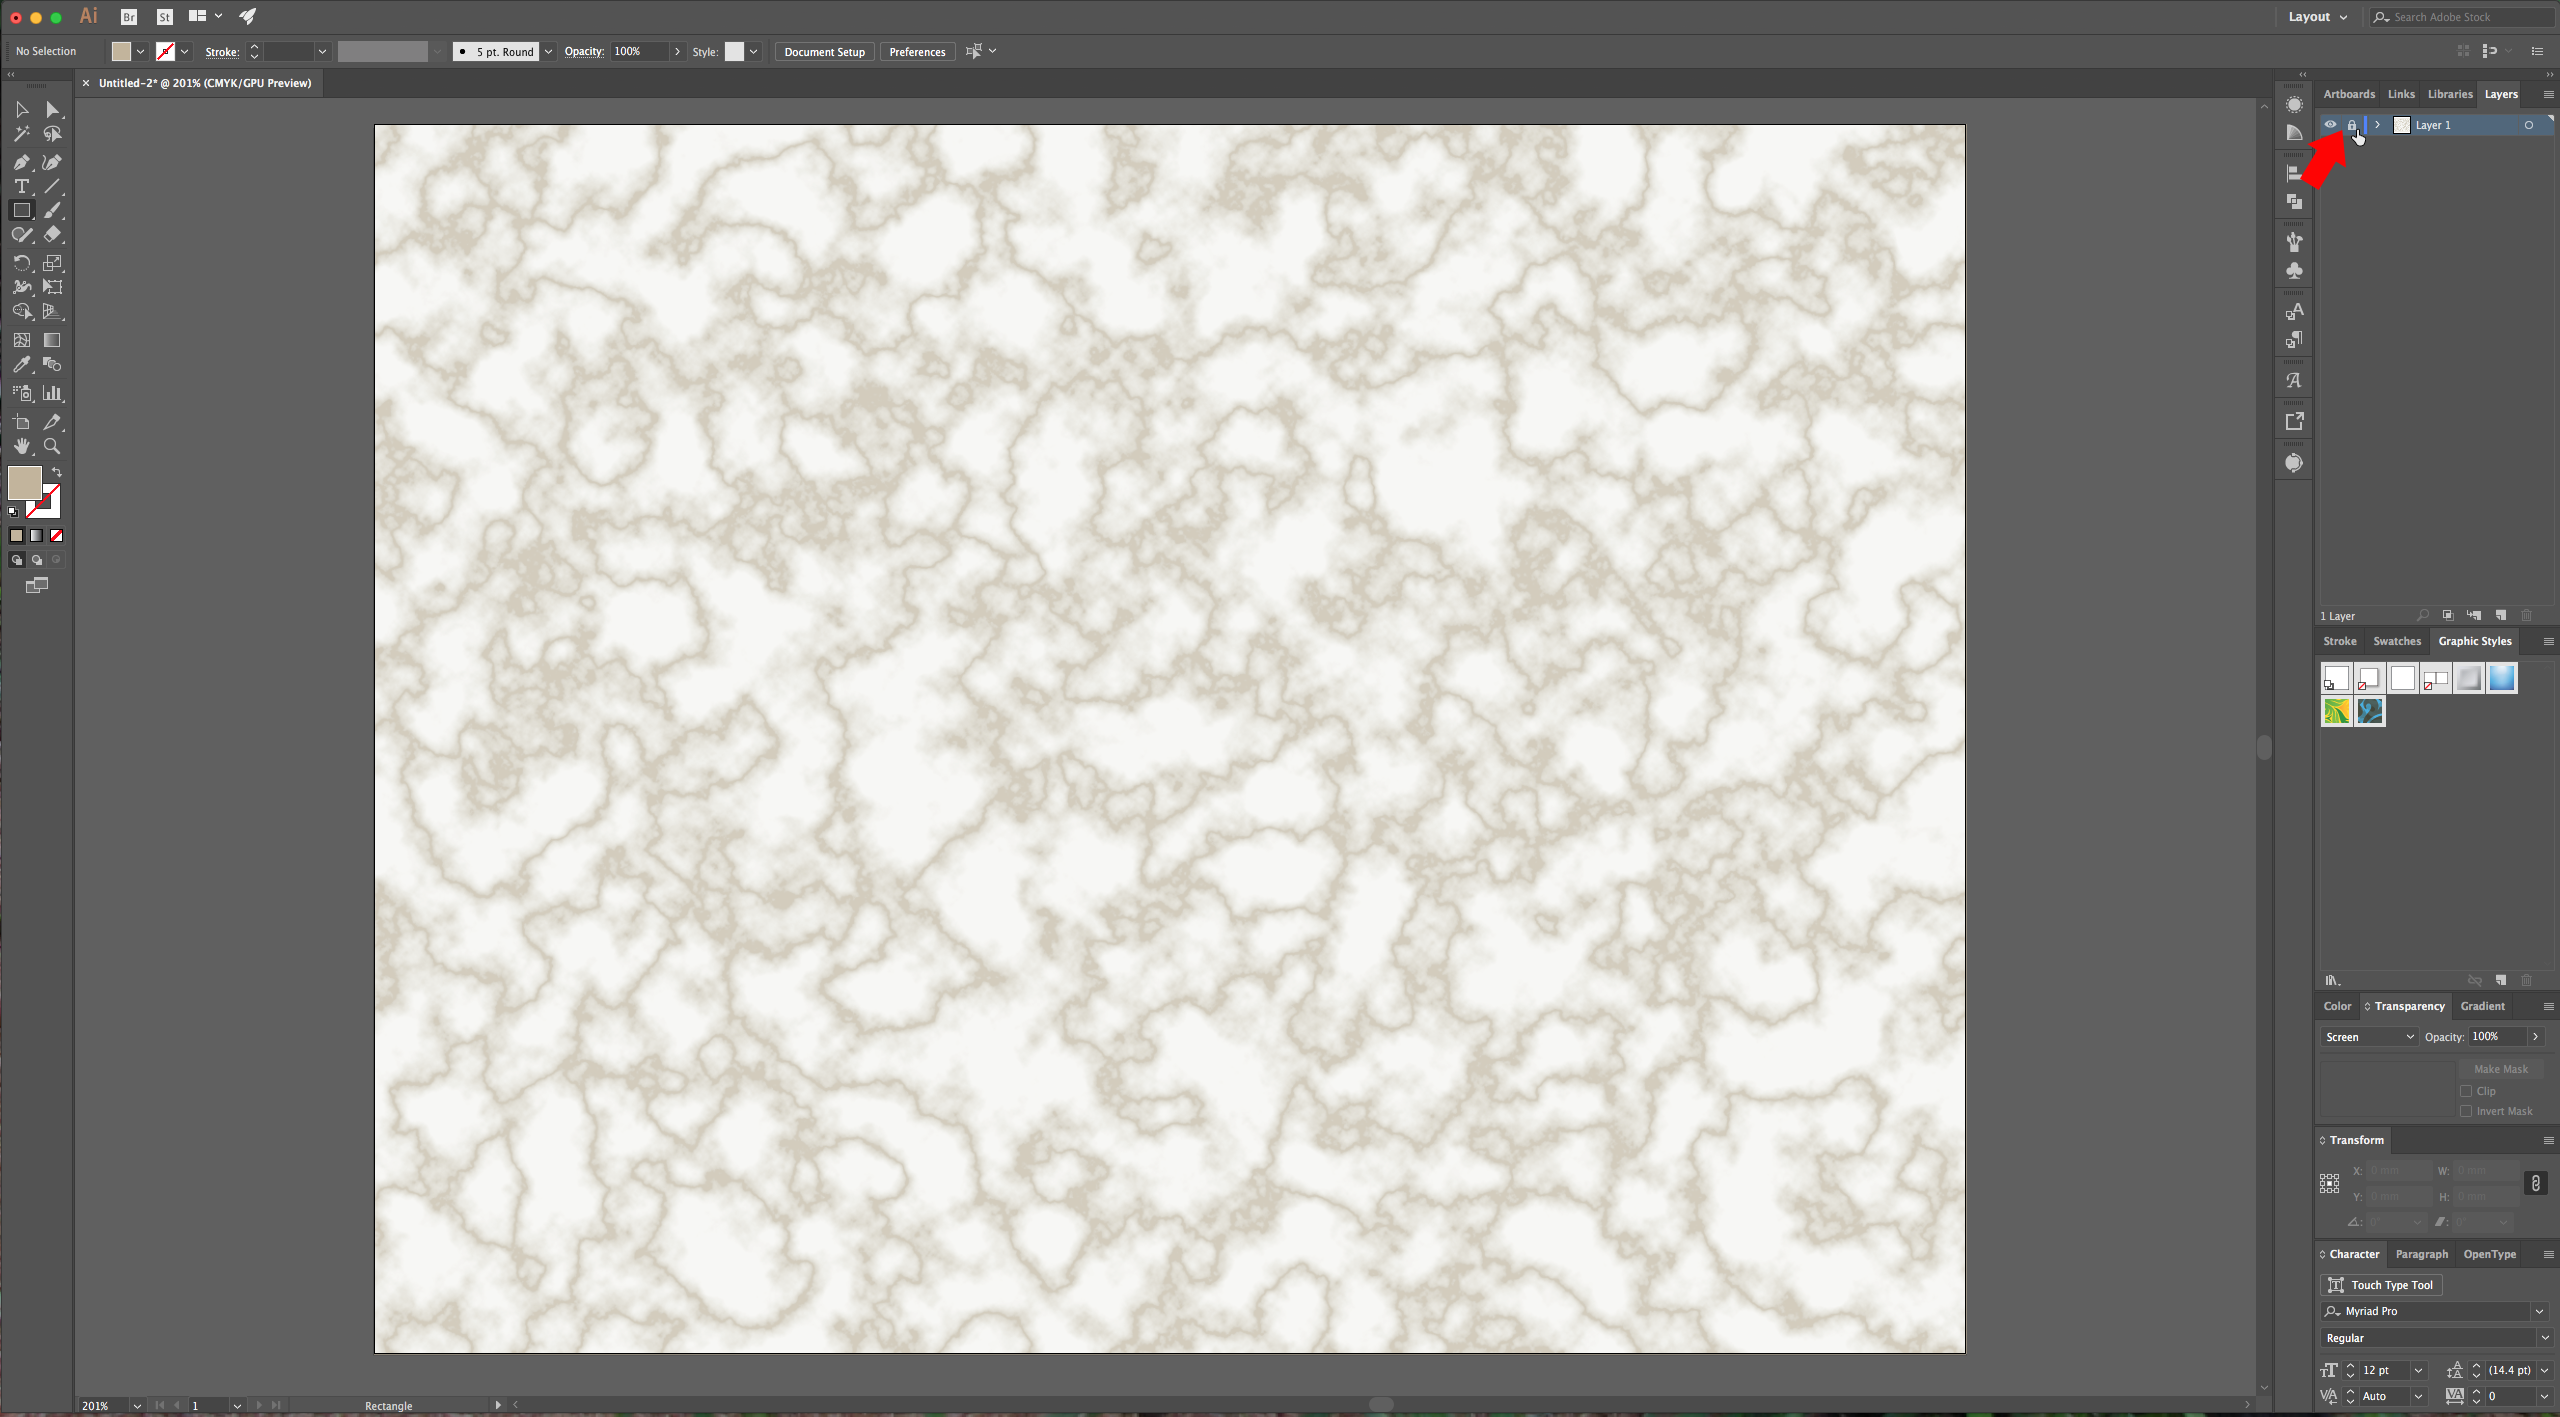
3 - In Illustrator, create a “New Document”. Paste (Command/Control + P) your “Marble” texture. Position it on your Illustrator document. Select the “Rectangle Tool” (M) and drag from top left to bottom right of your document to draw a rectangle covering your texture, fill it with a color you like and change the “Layer Style” in the “Transparency” window to color your “Marble” (we used “Screen”). (You can skip the last part if you want to keep the texture without color). Then, lock the layer that contains your “Background” by clicking on the spot left of the thumbnail to show the little lock icon and, create a “New Layer” by clicking on the button at the bottom of the “Layers” window.
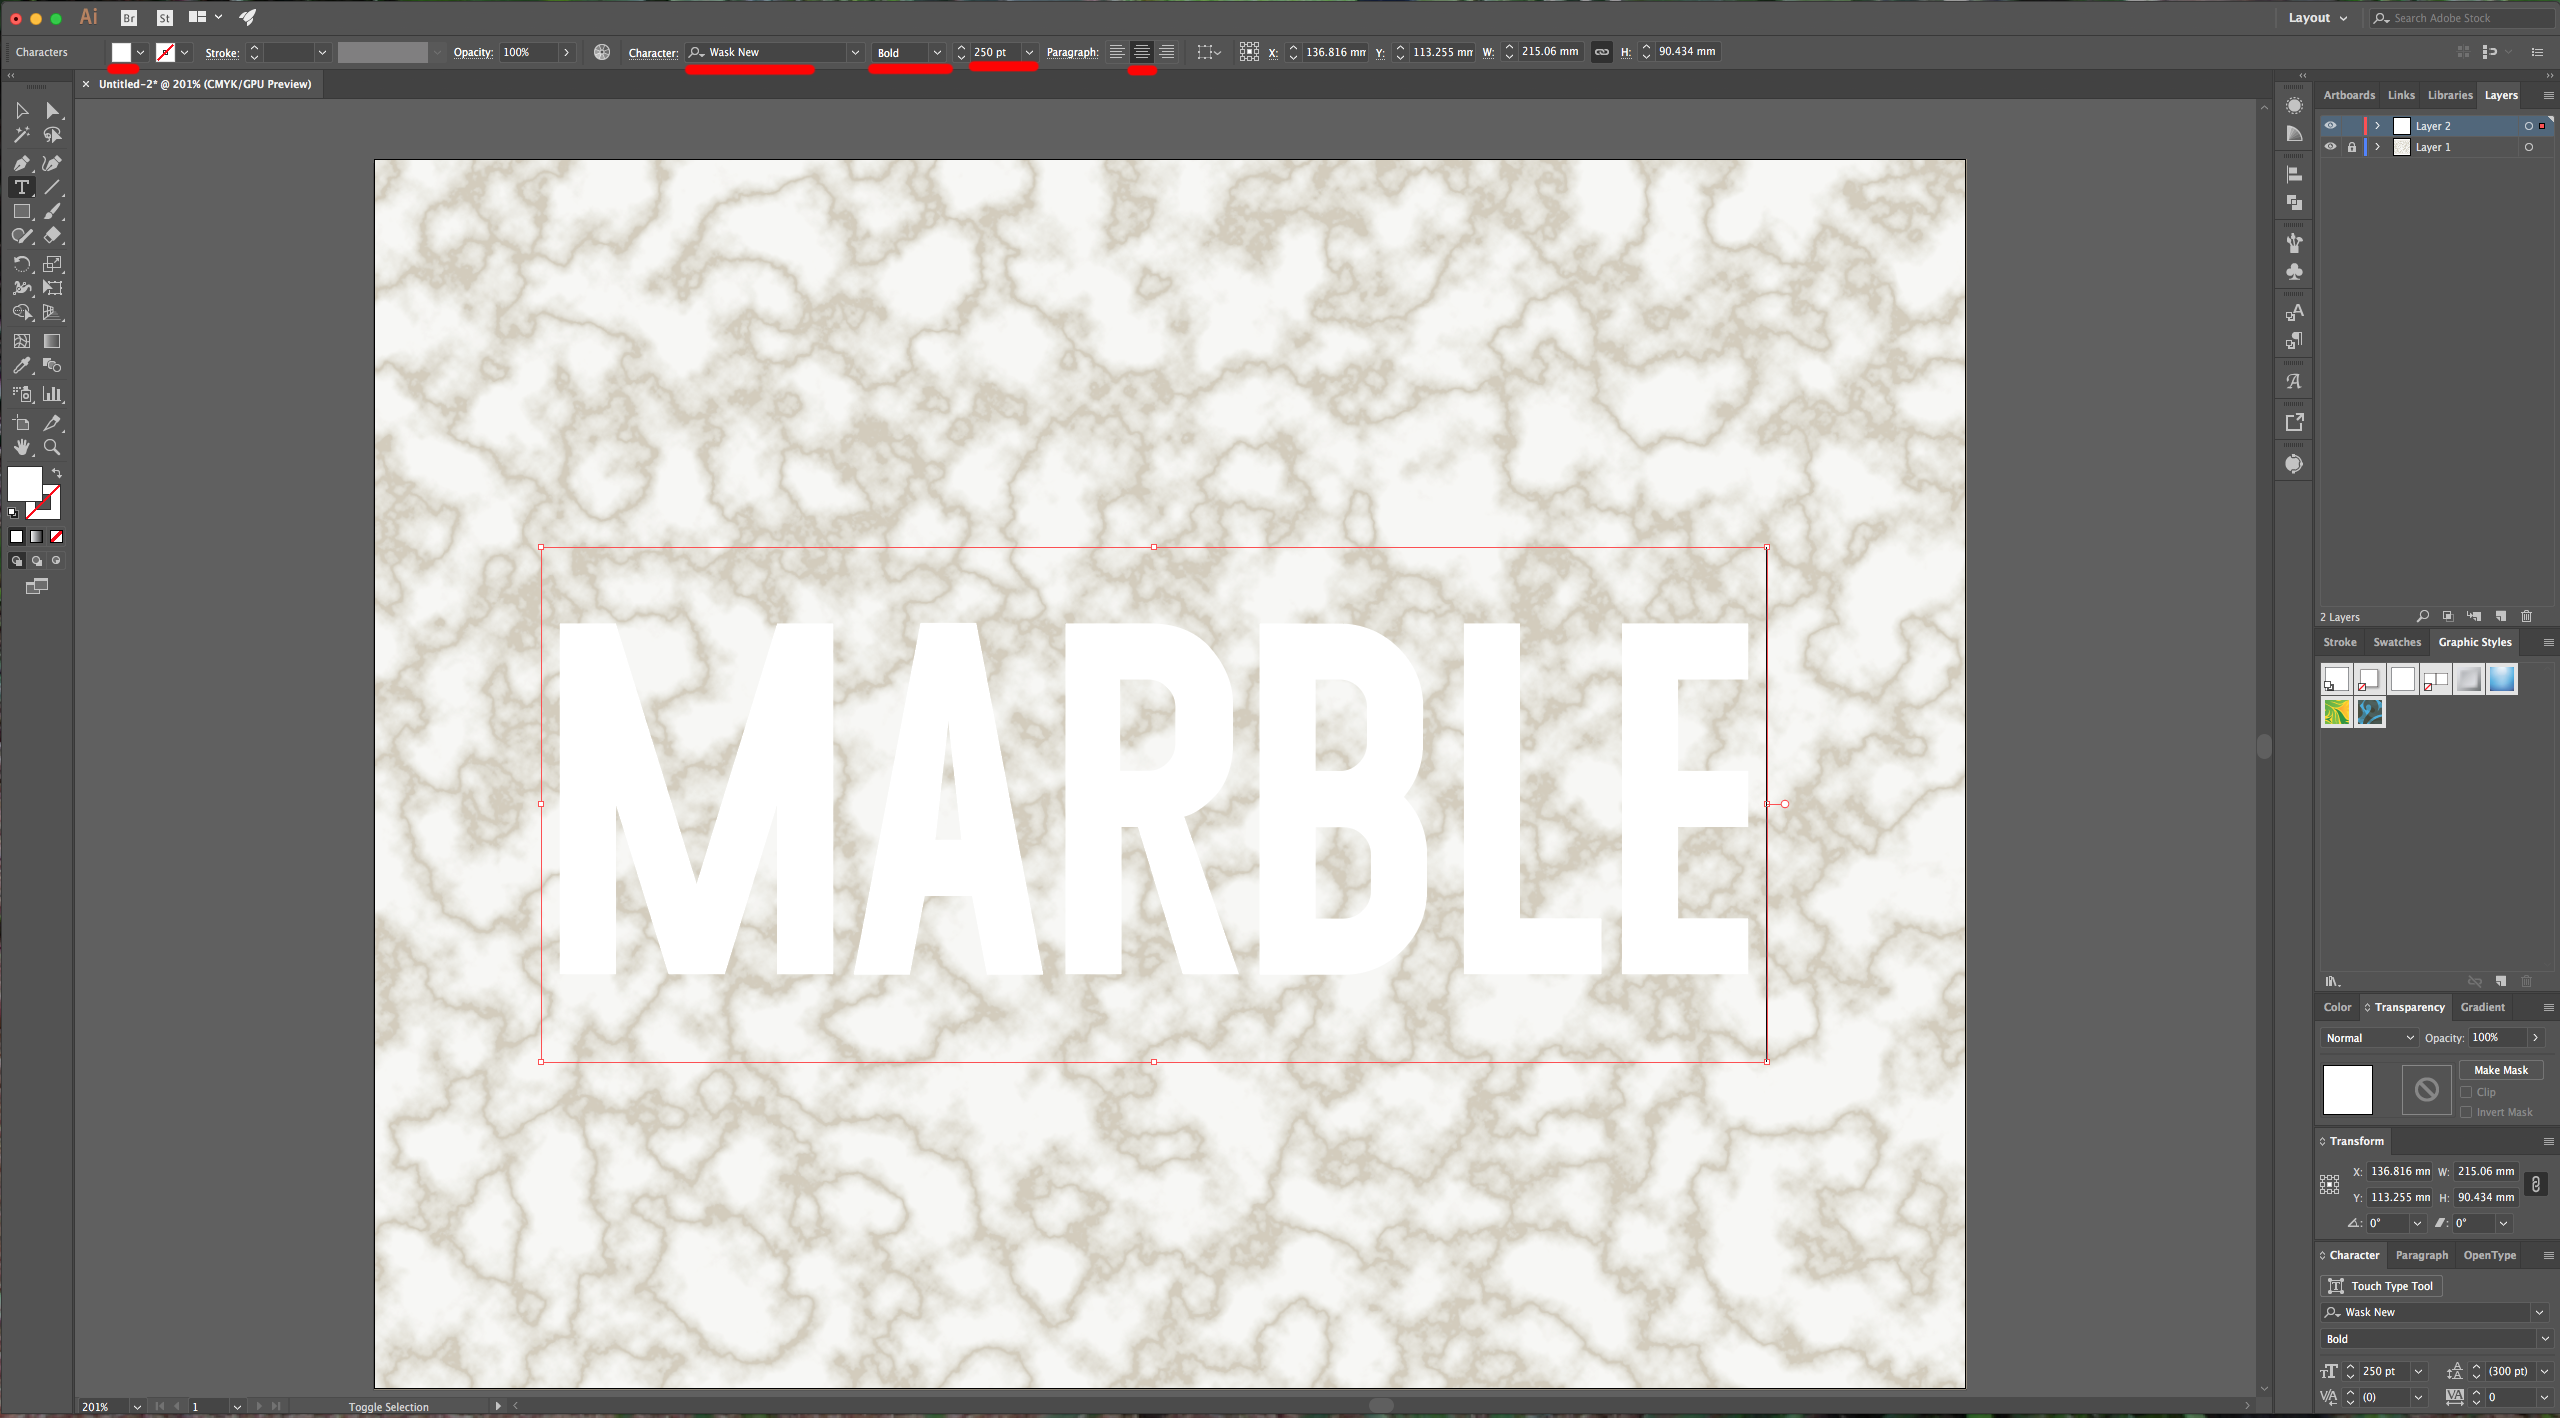
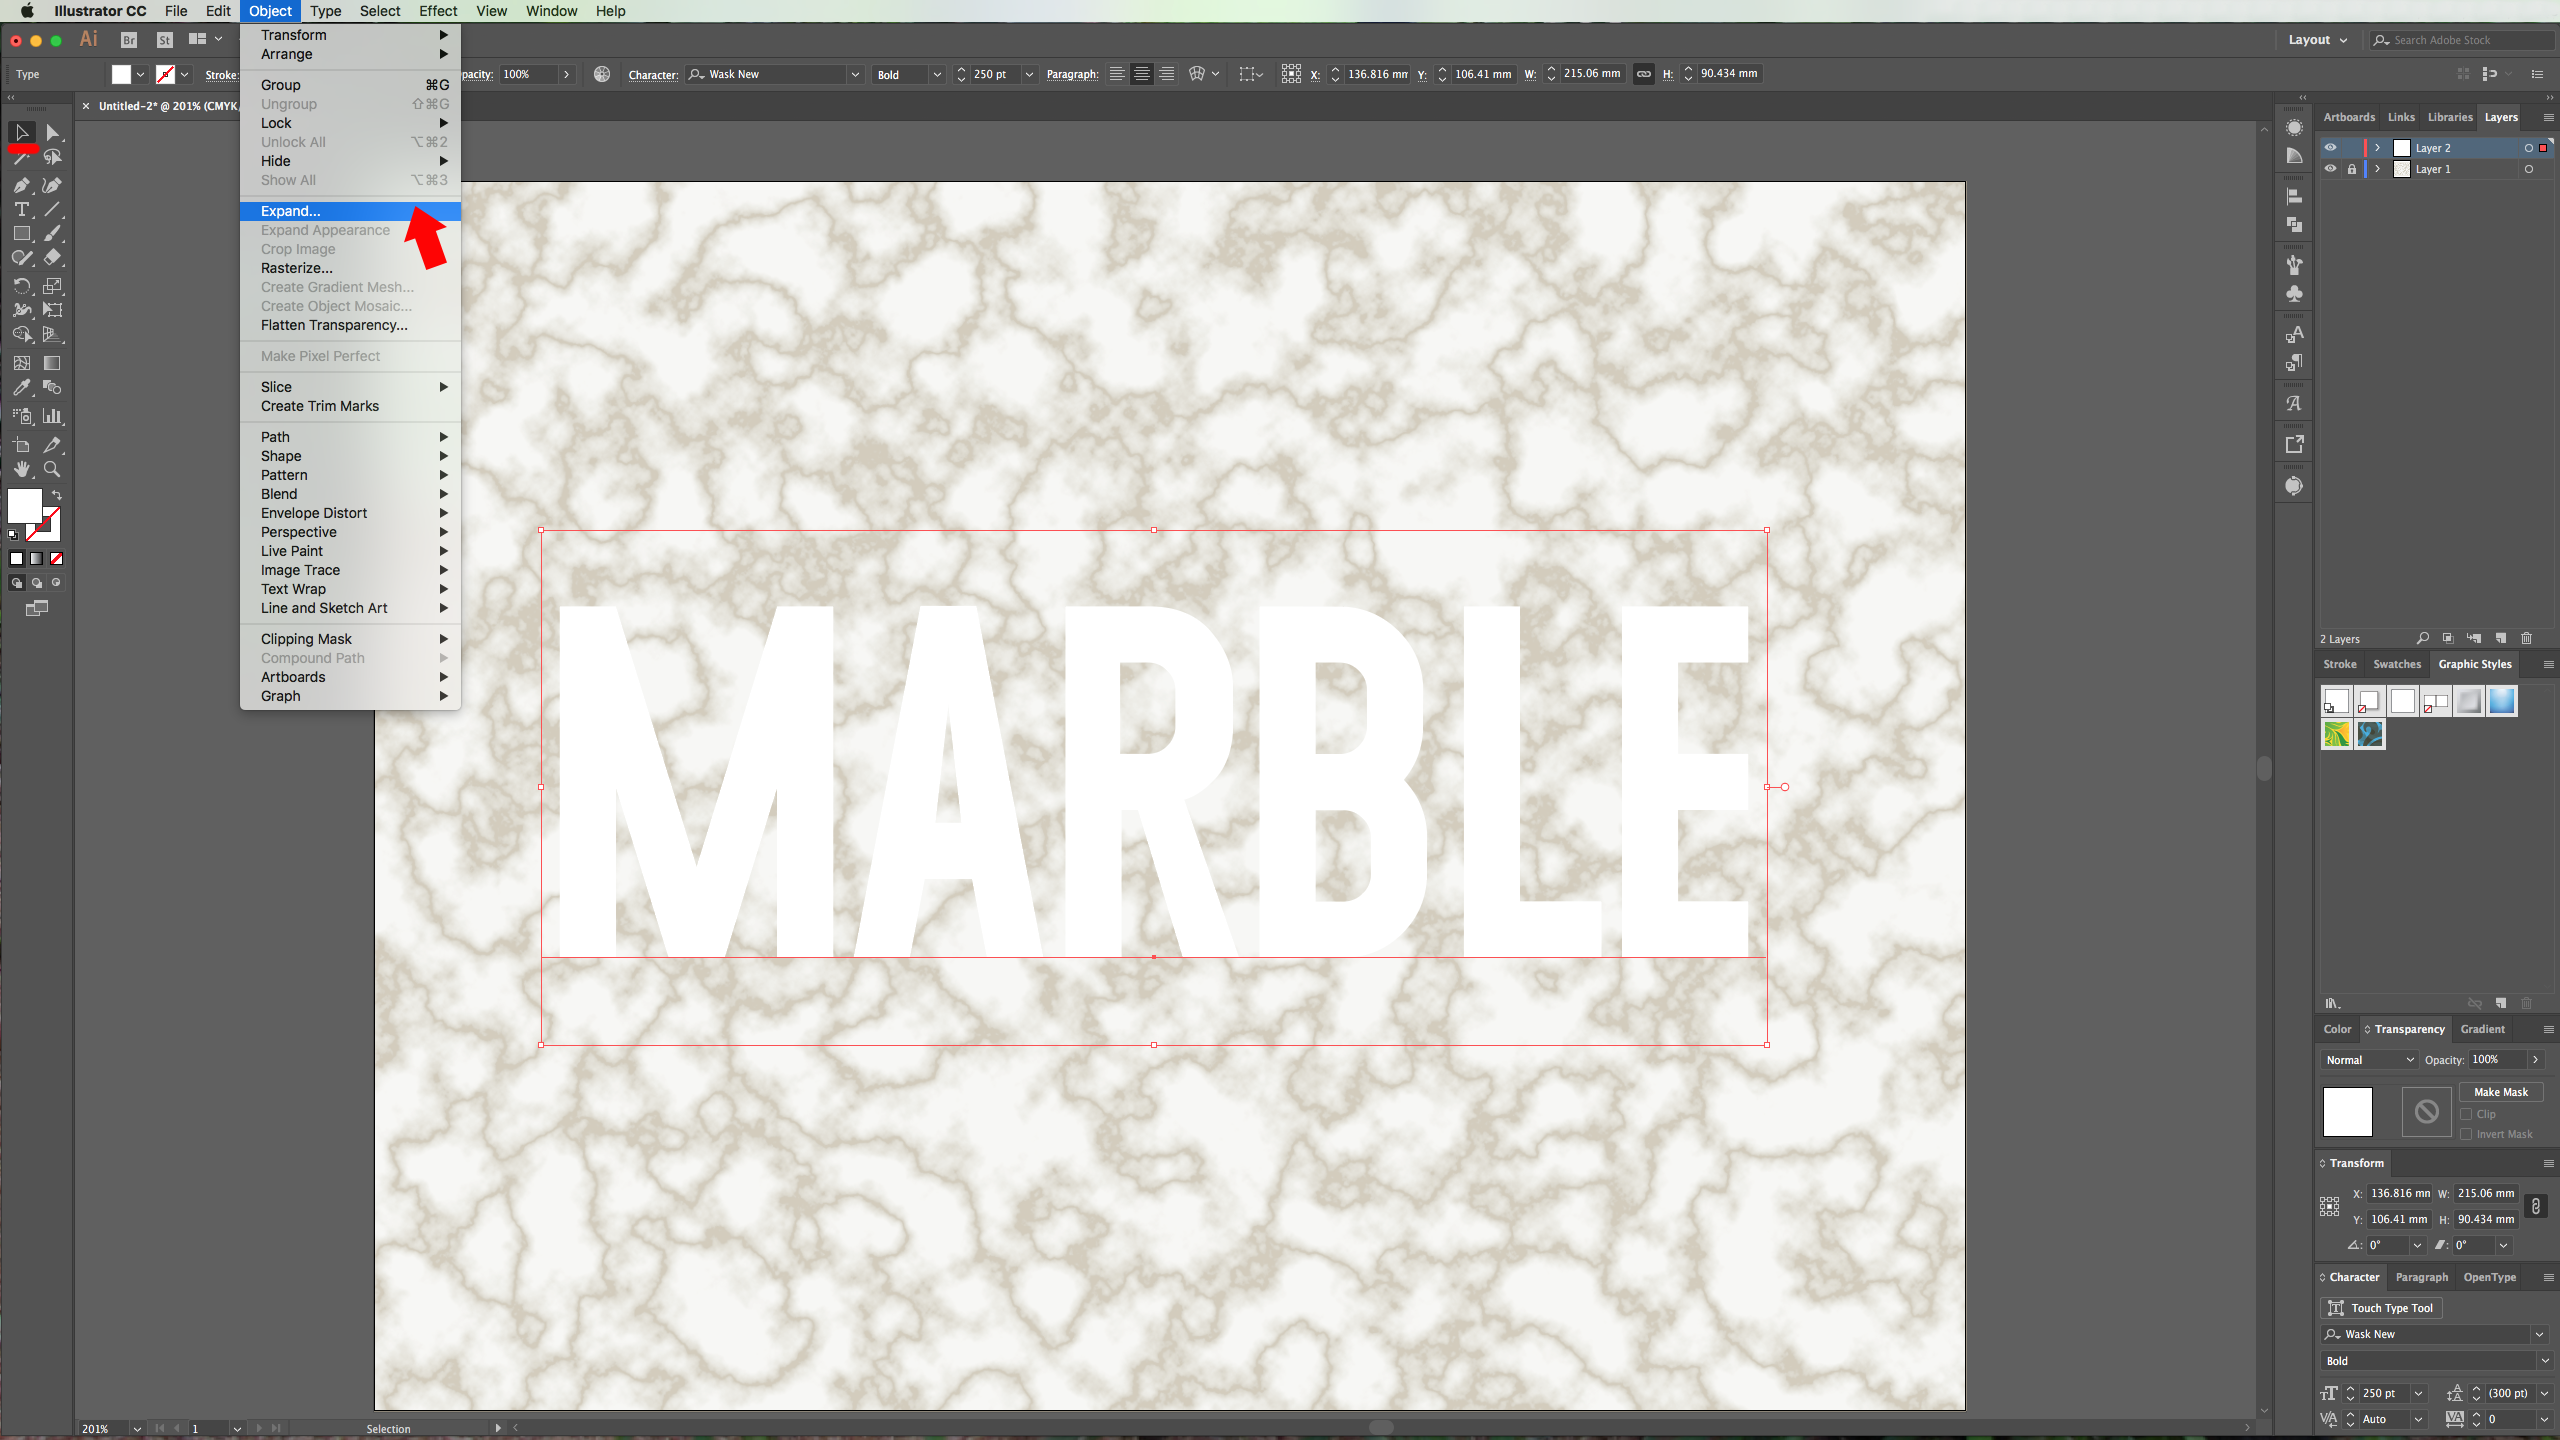
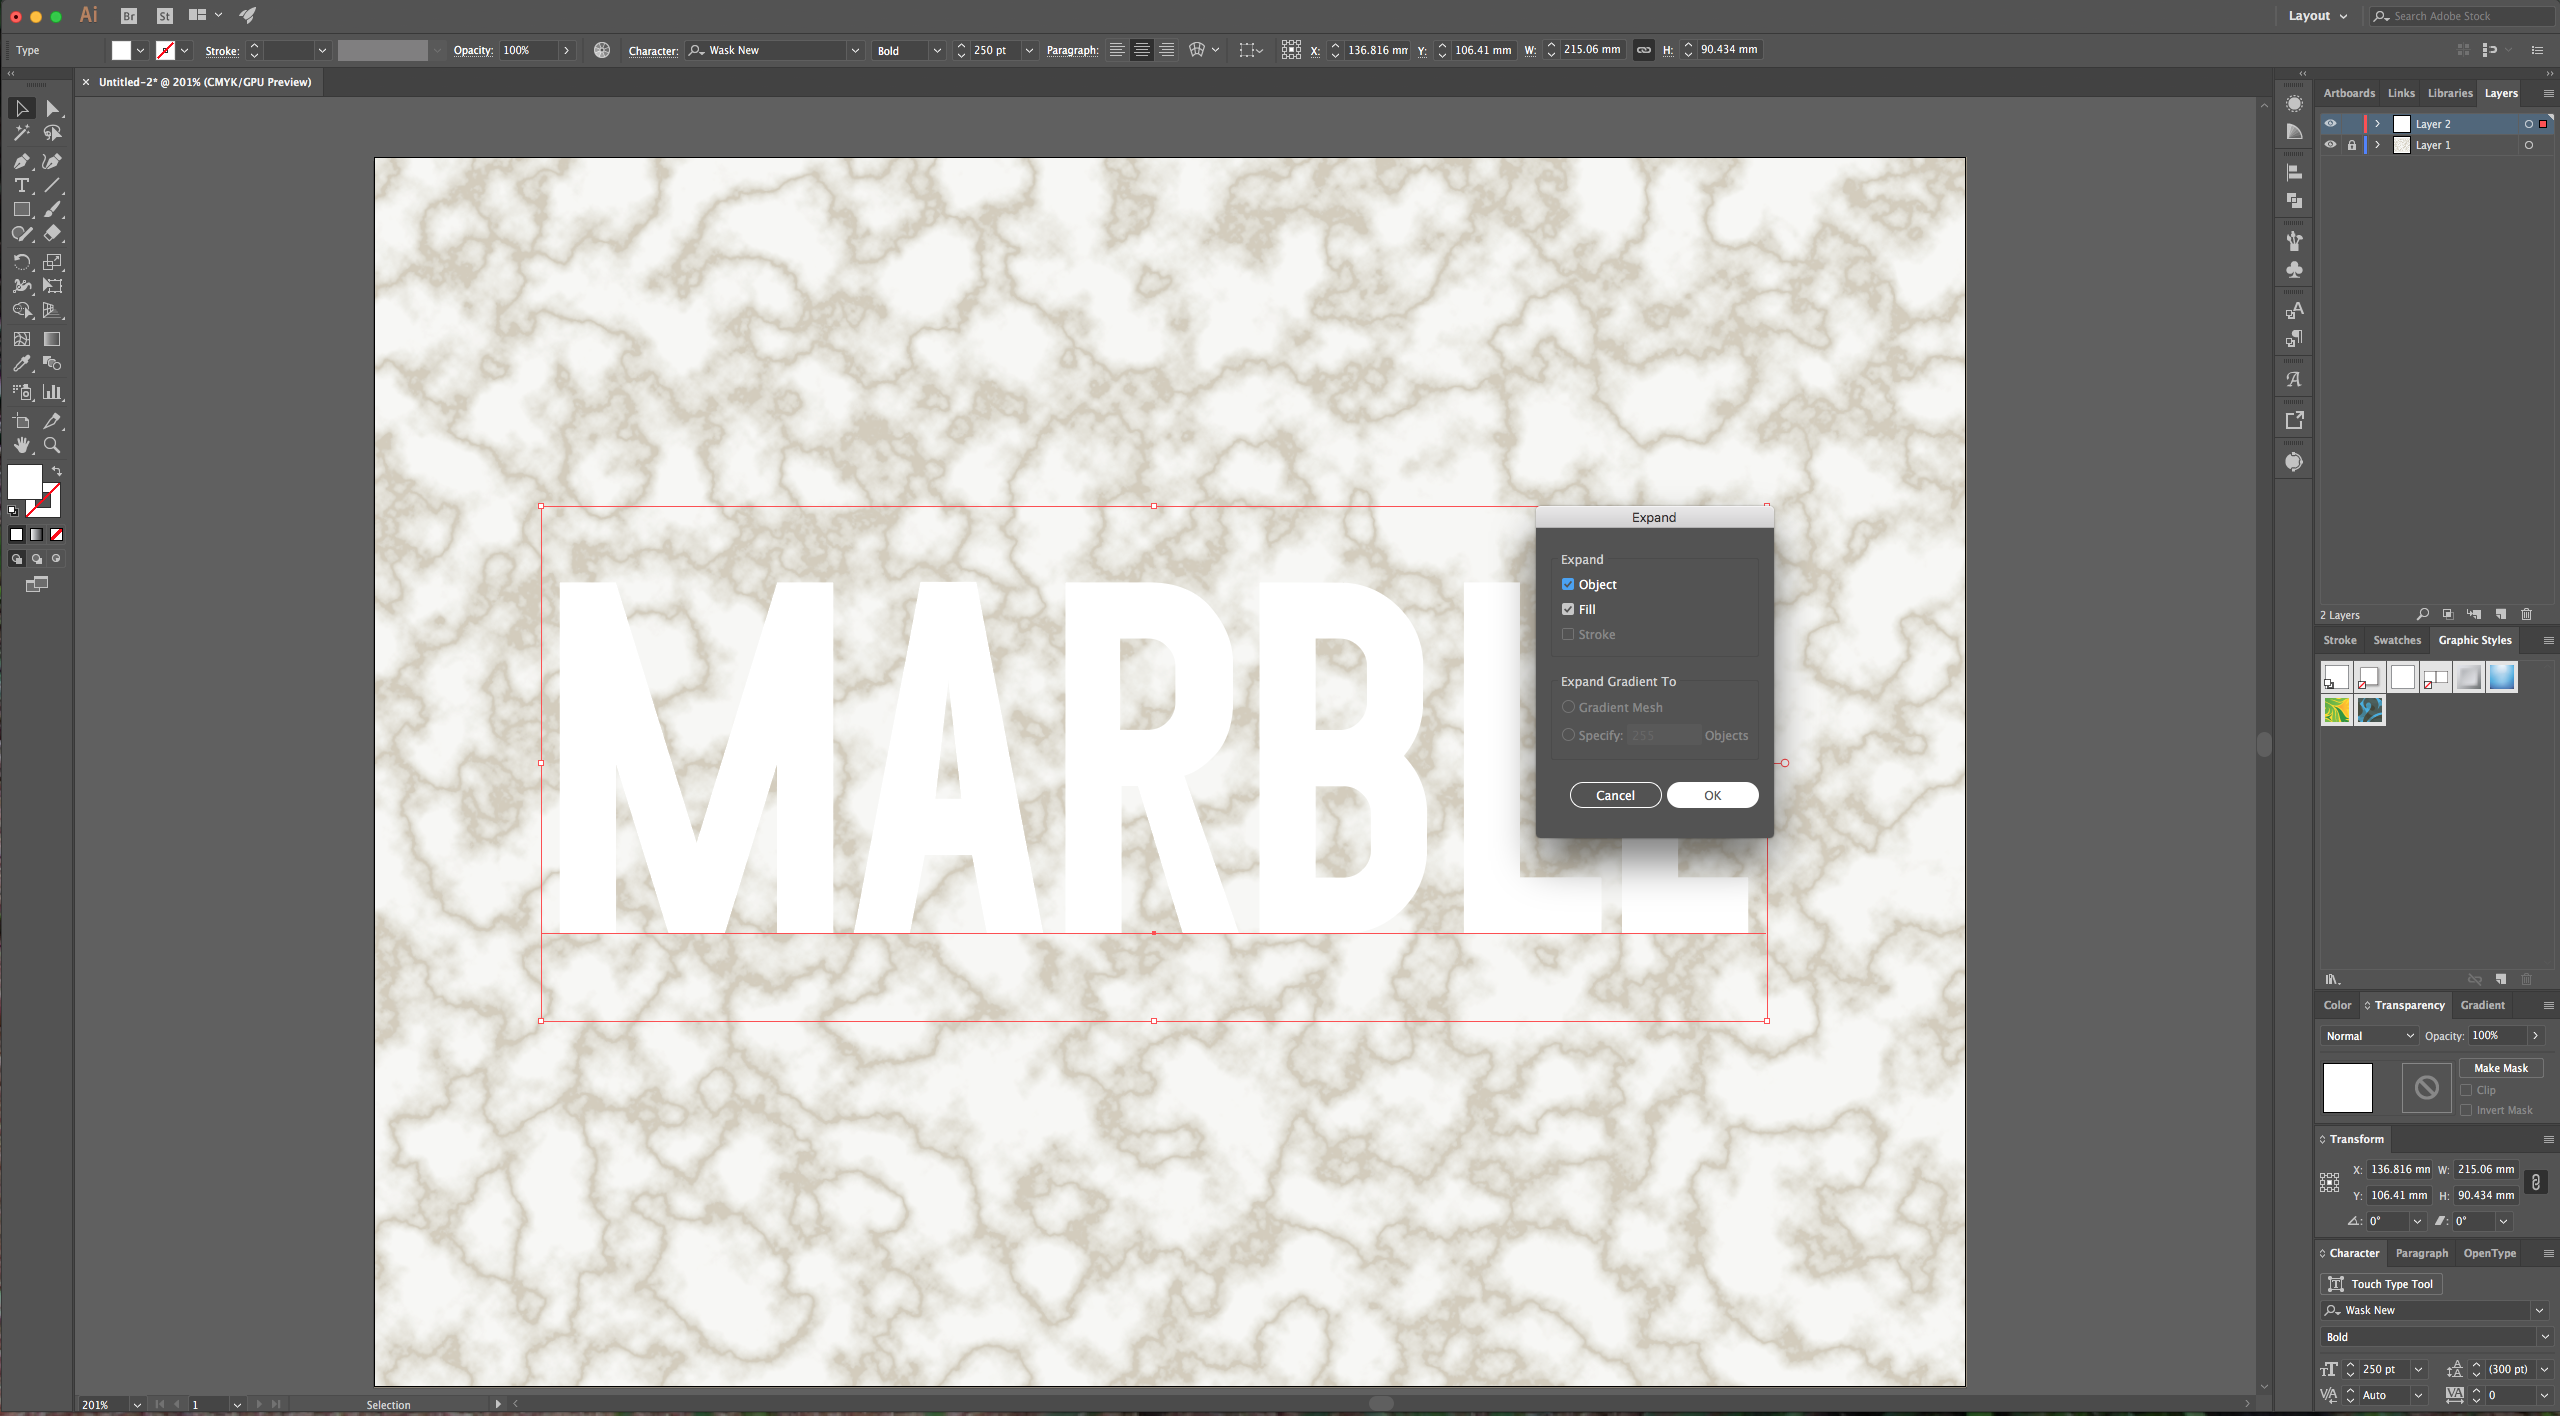
4 - Select the “Type Tool” (T), choose a font of your liking (we used Wask New Bold), and use white as “Fill” color. Select your text with the “Selection Tool” and go to Object > Expand, check the “Object” and “Fill” boxes and hit OK. Then “Ungroup” your text to separate each letter (Shift + Command/Control + G).

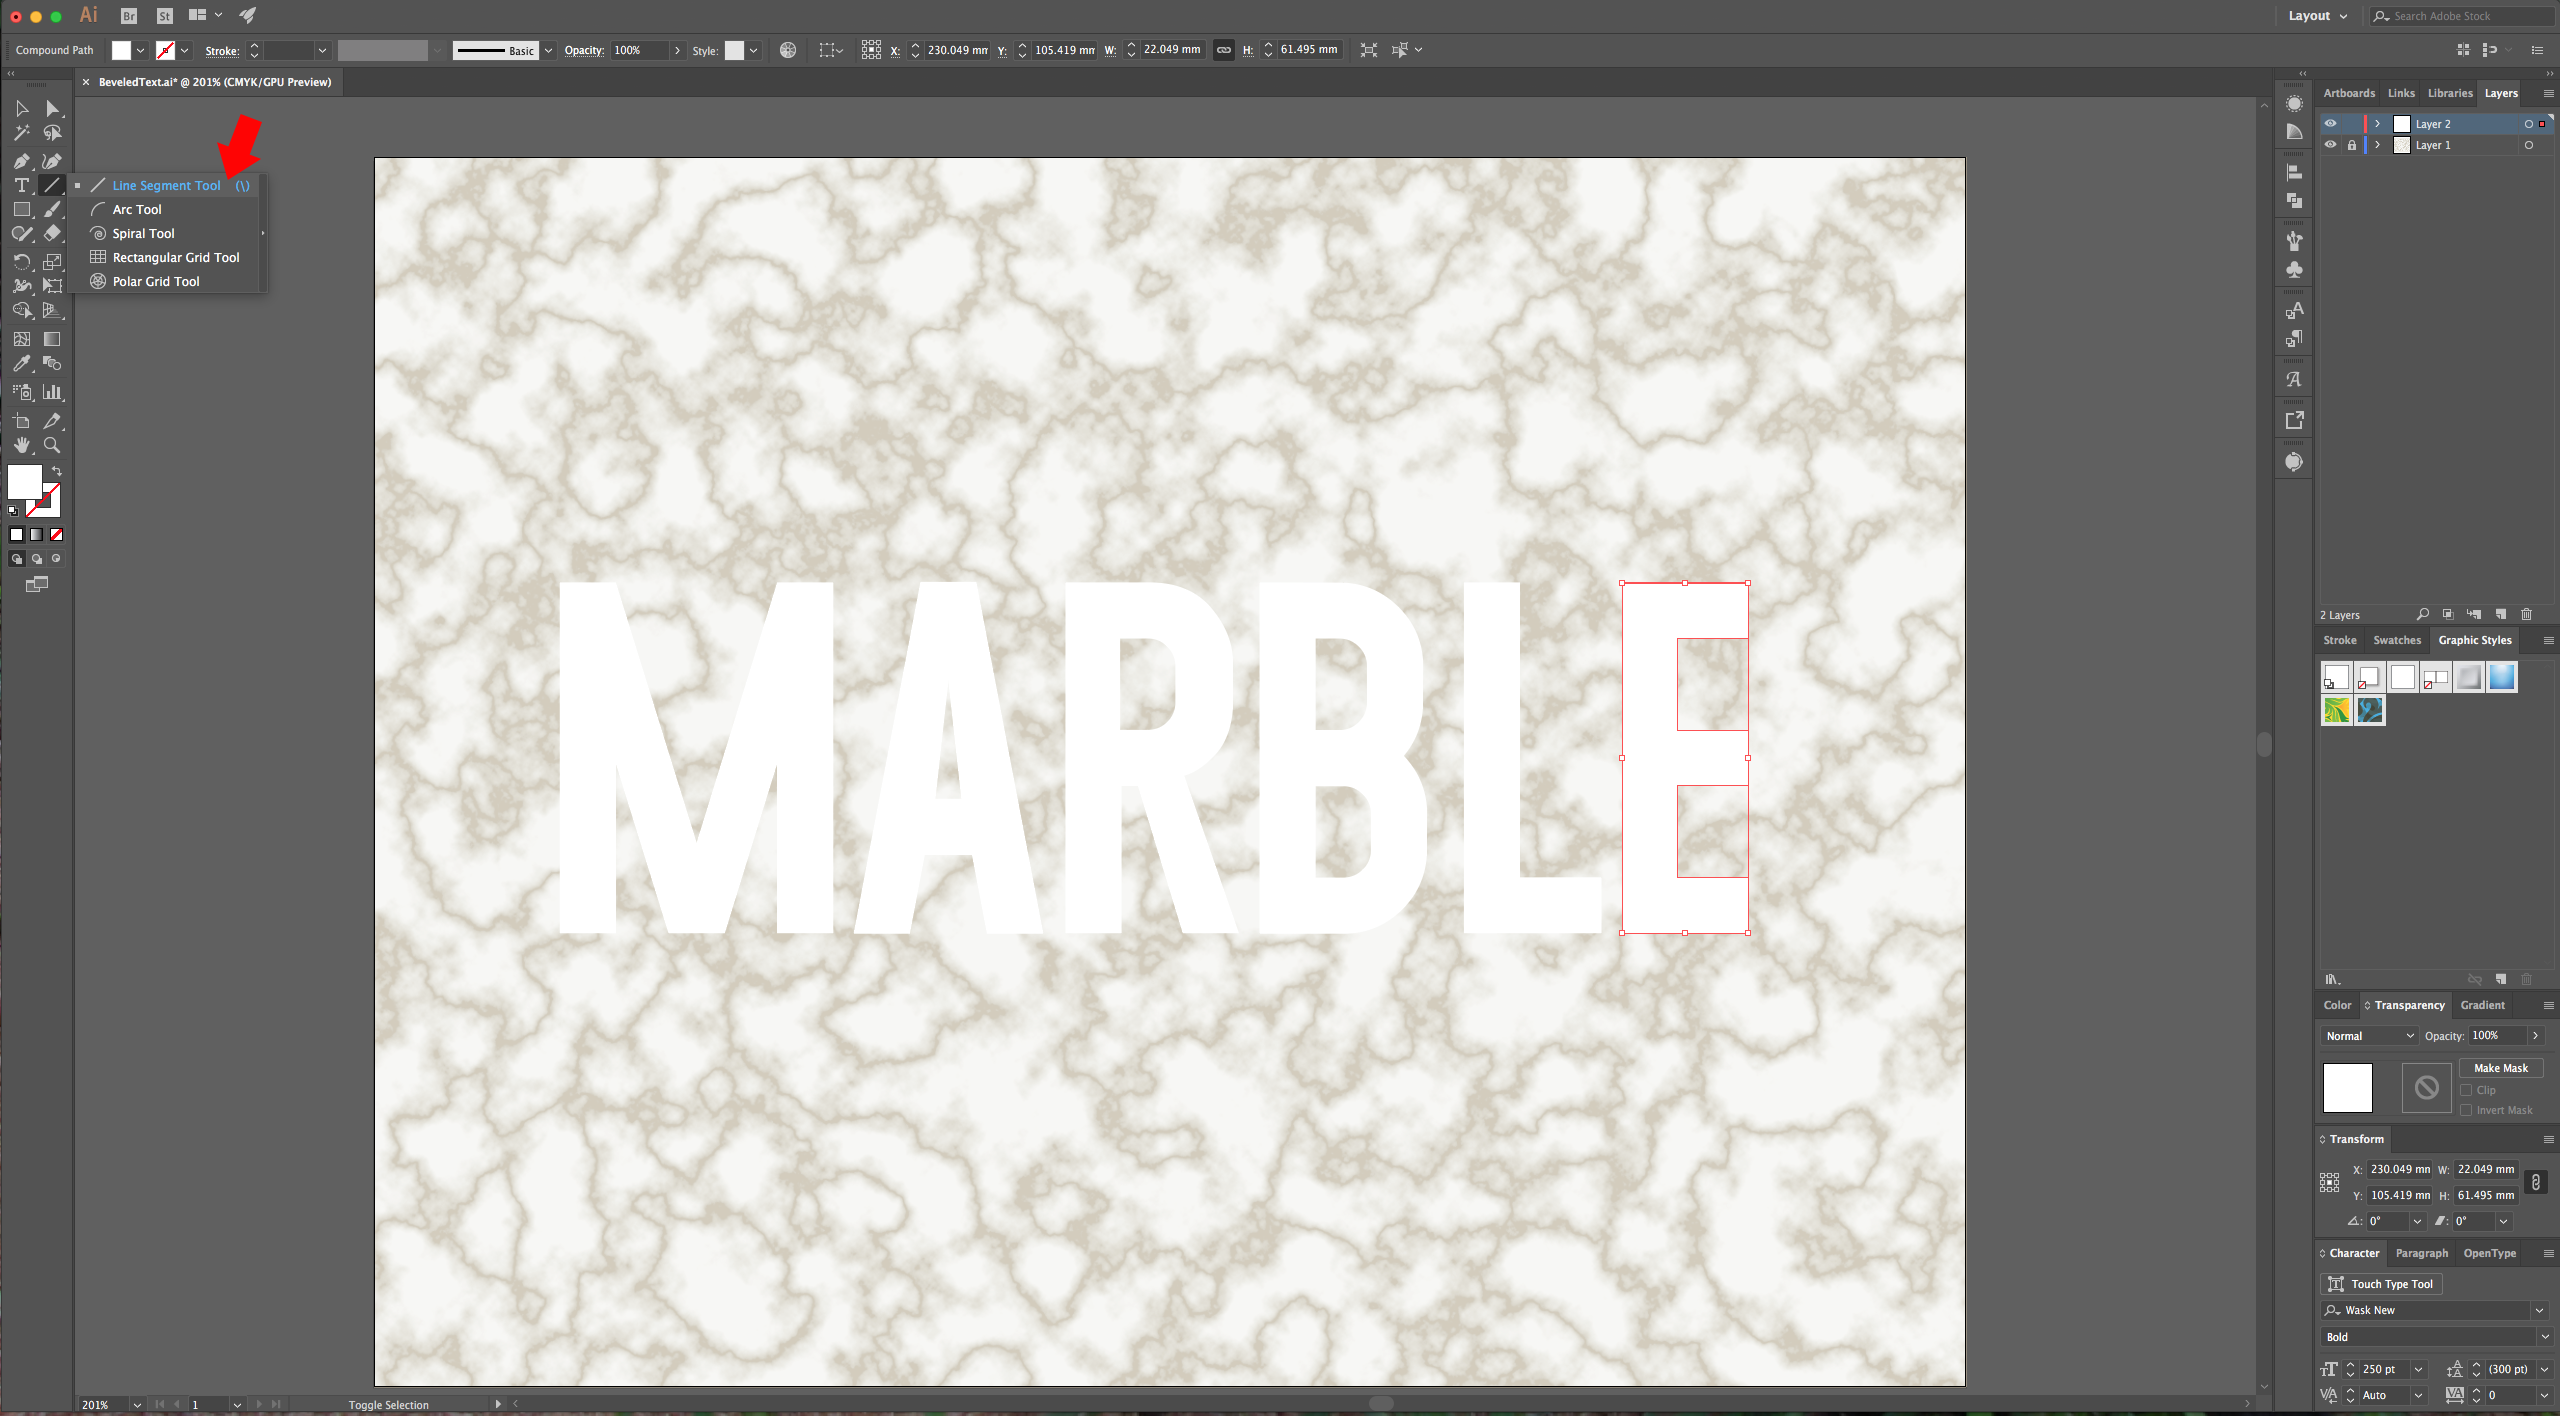
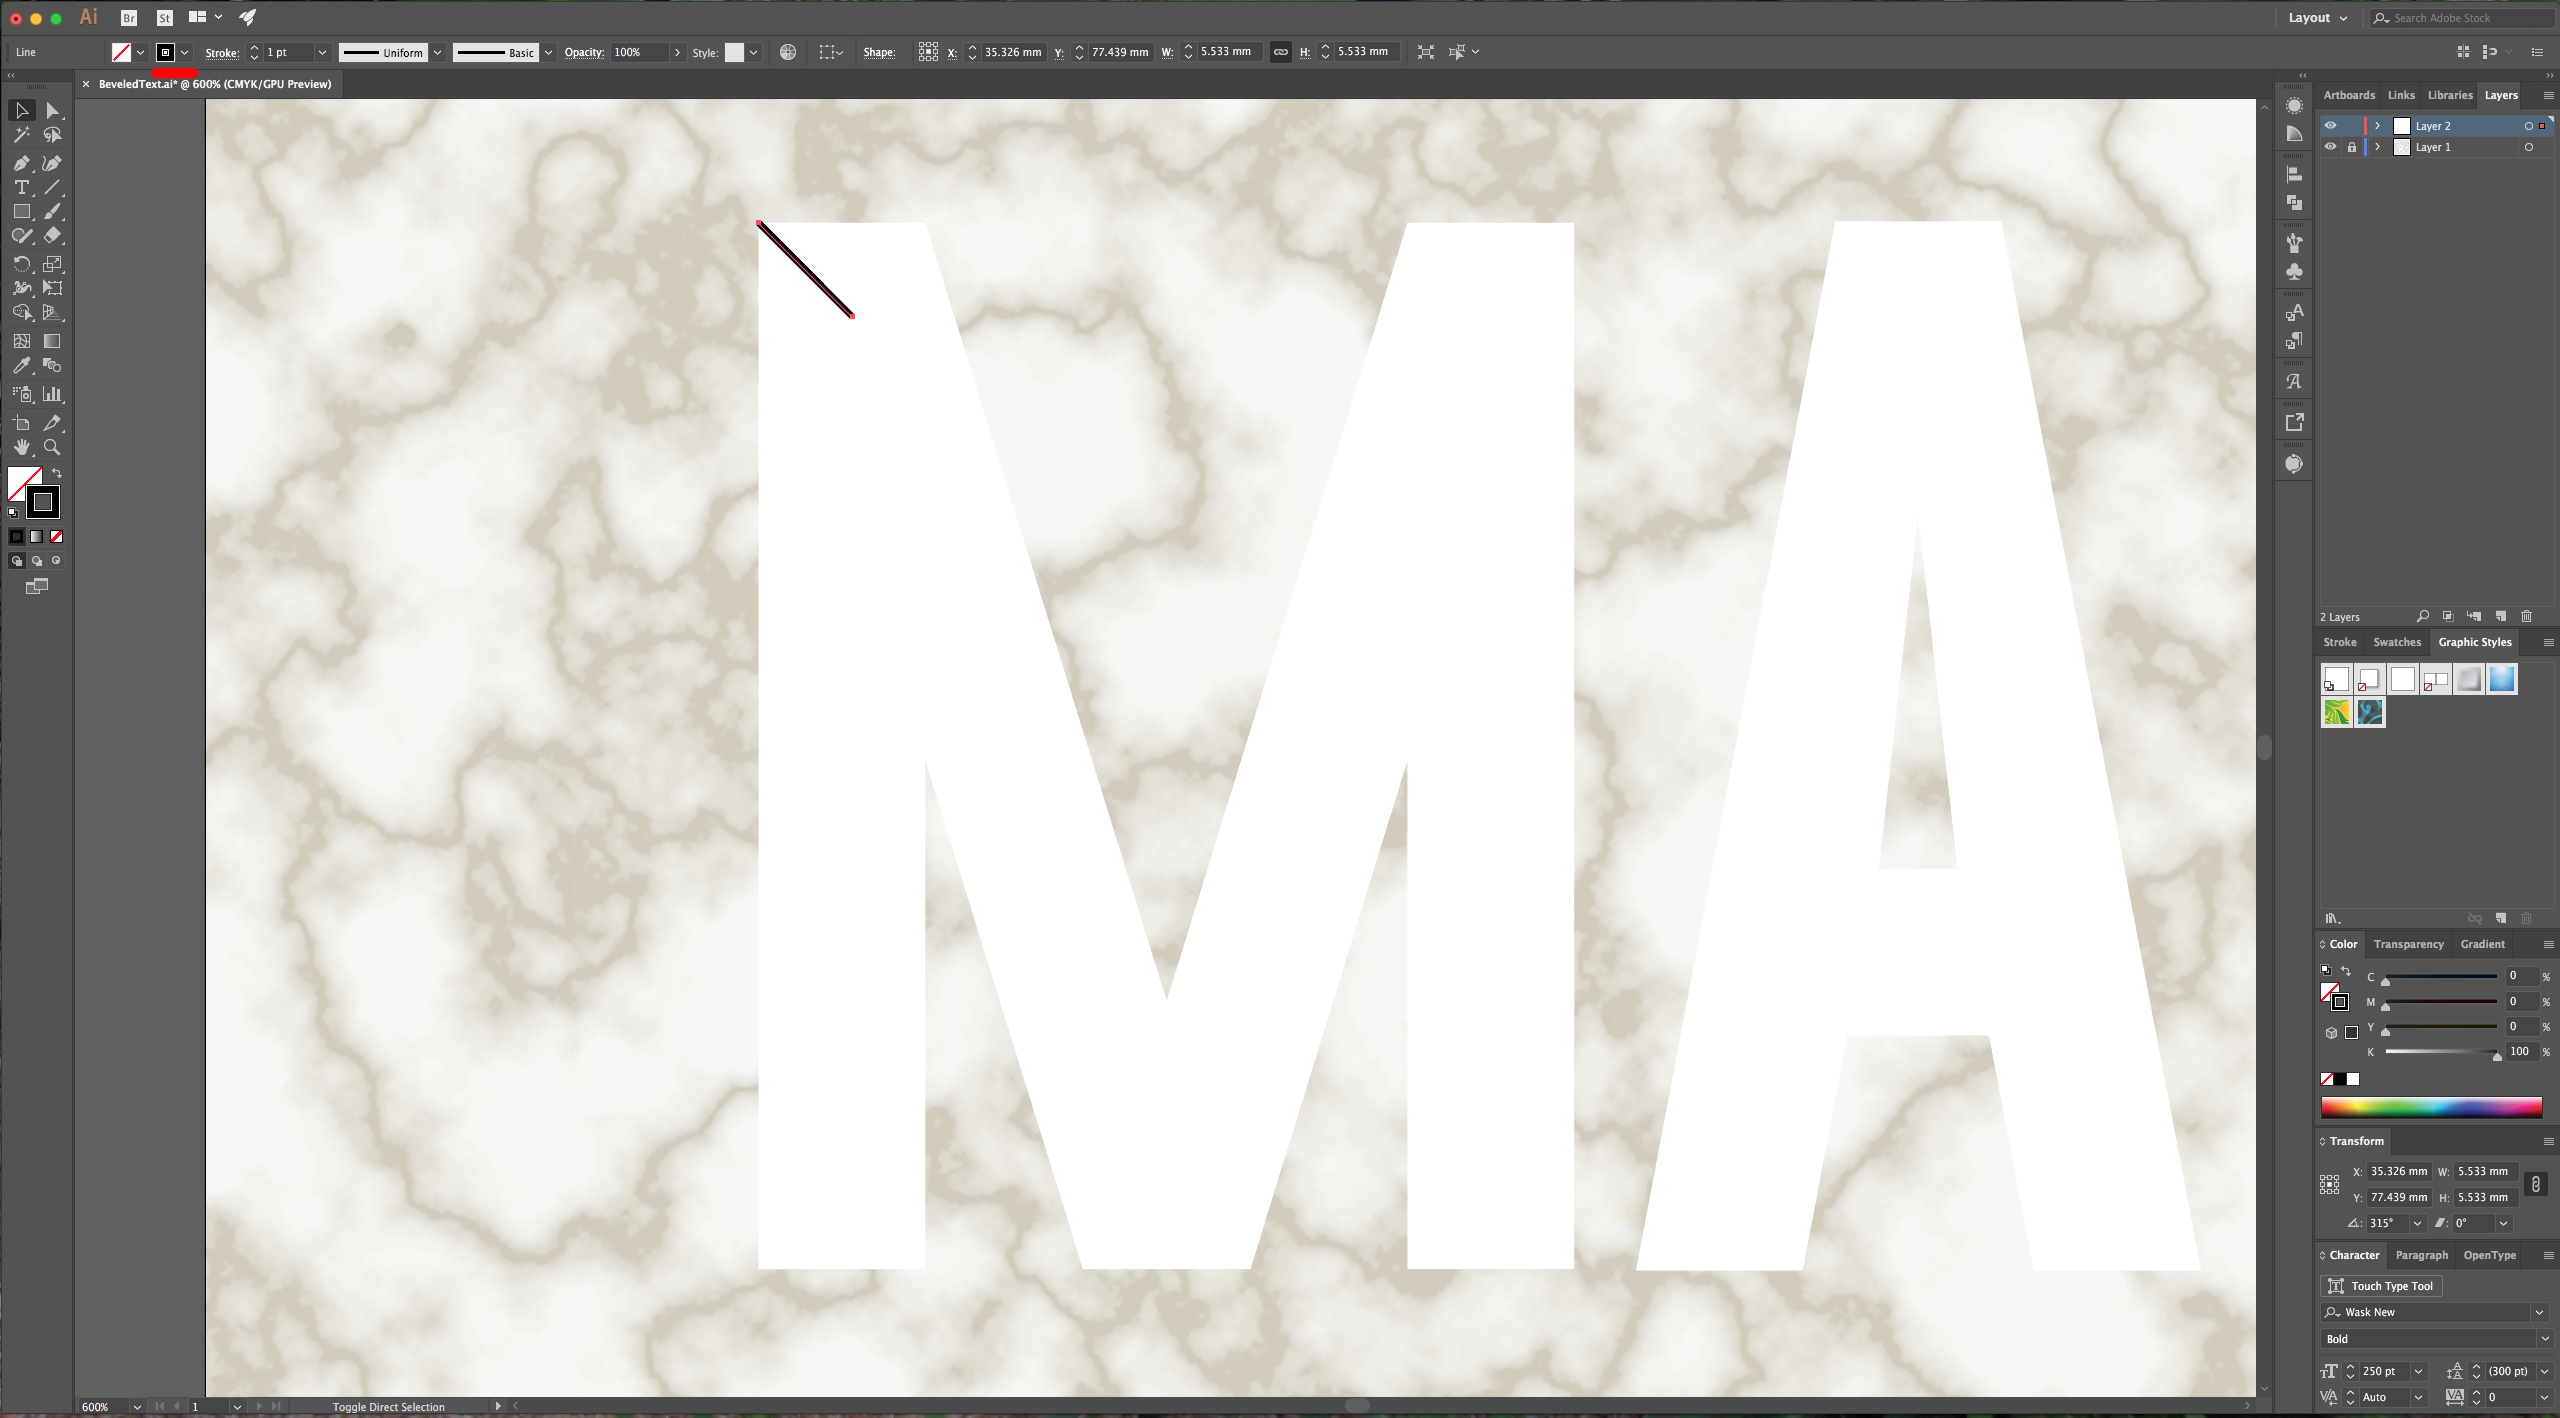
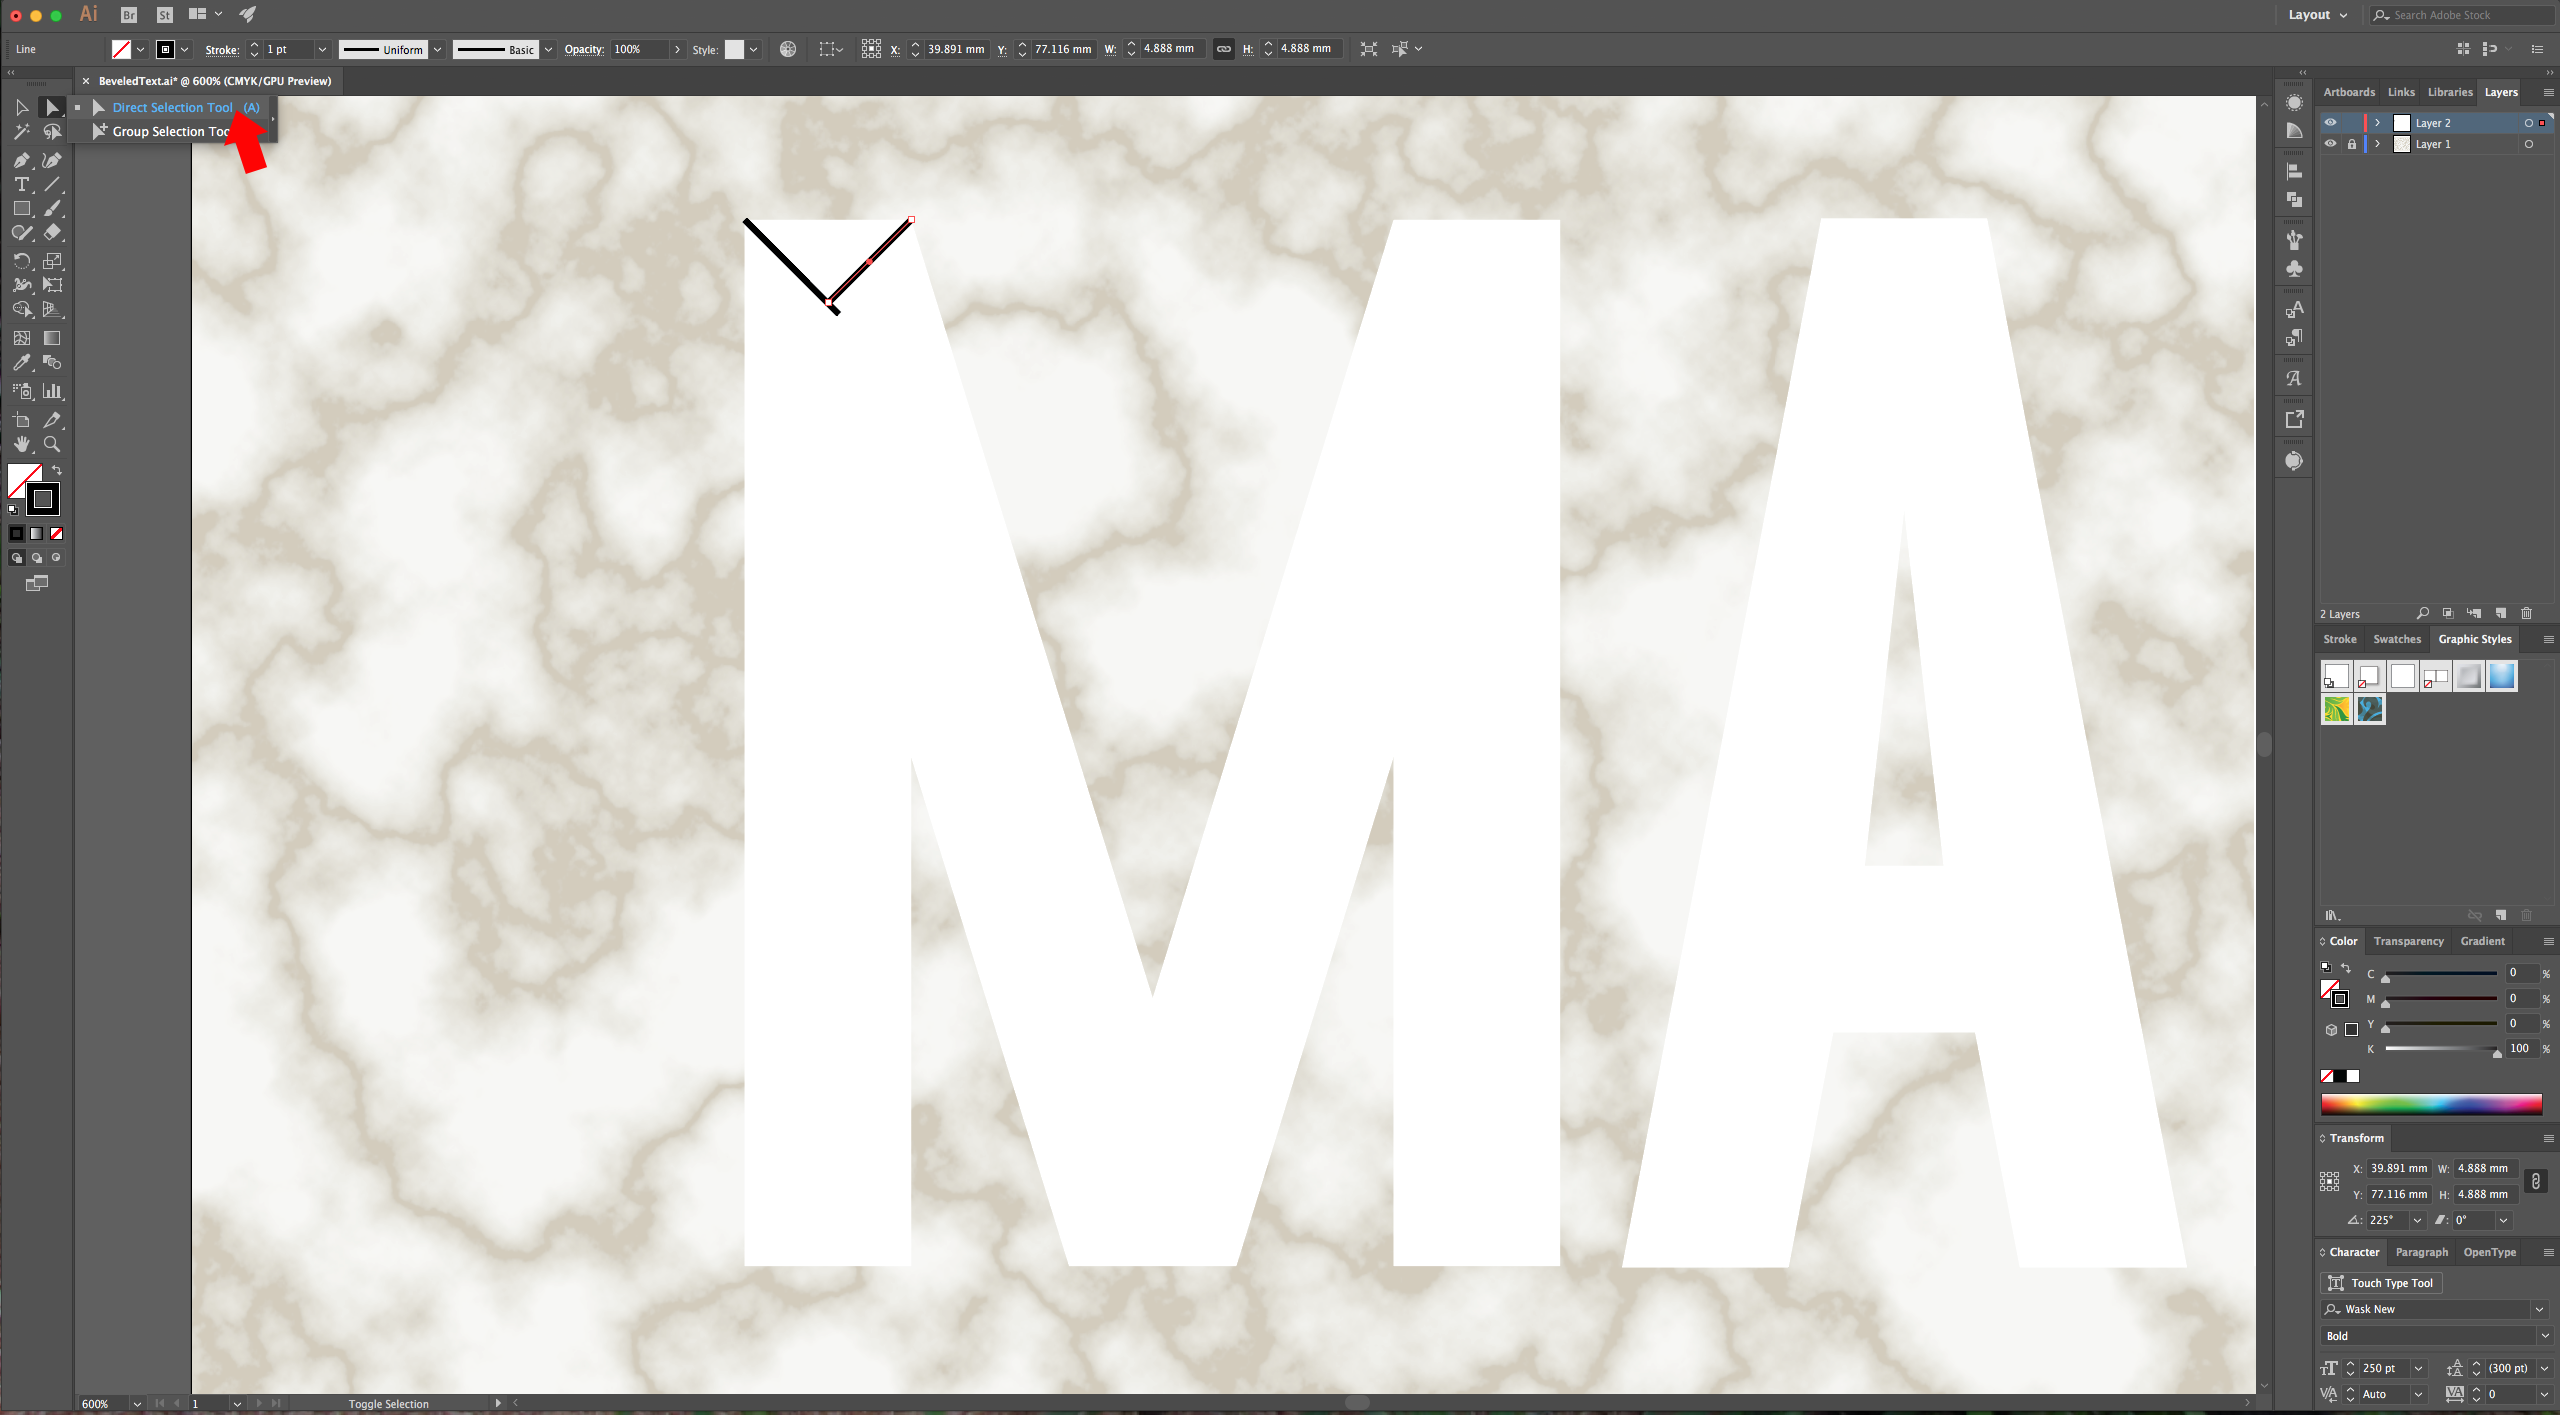
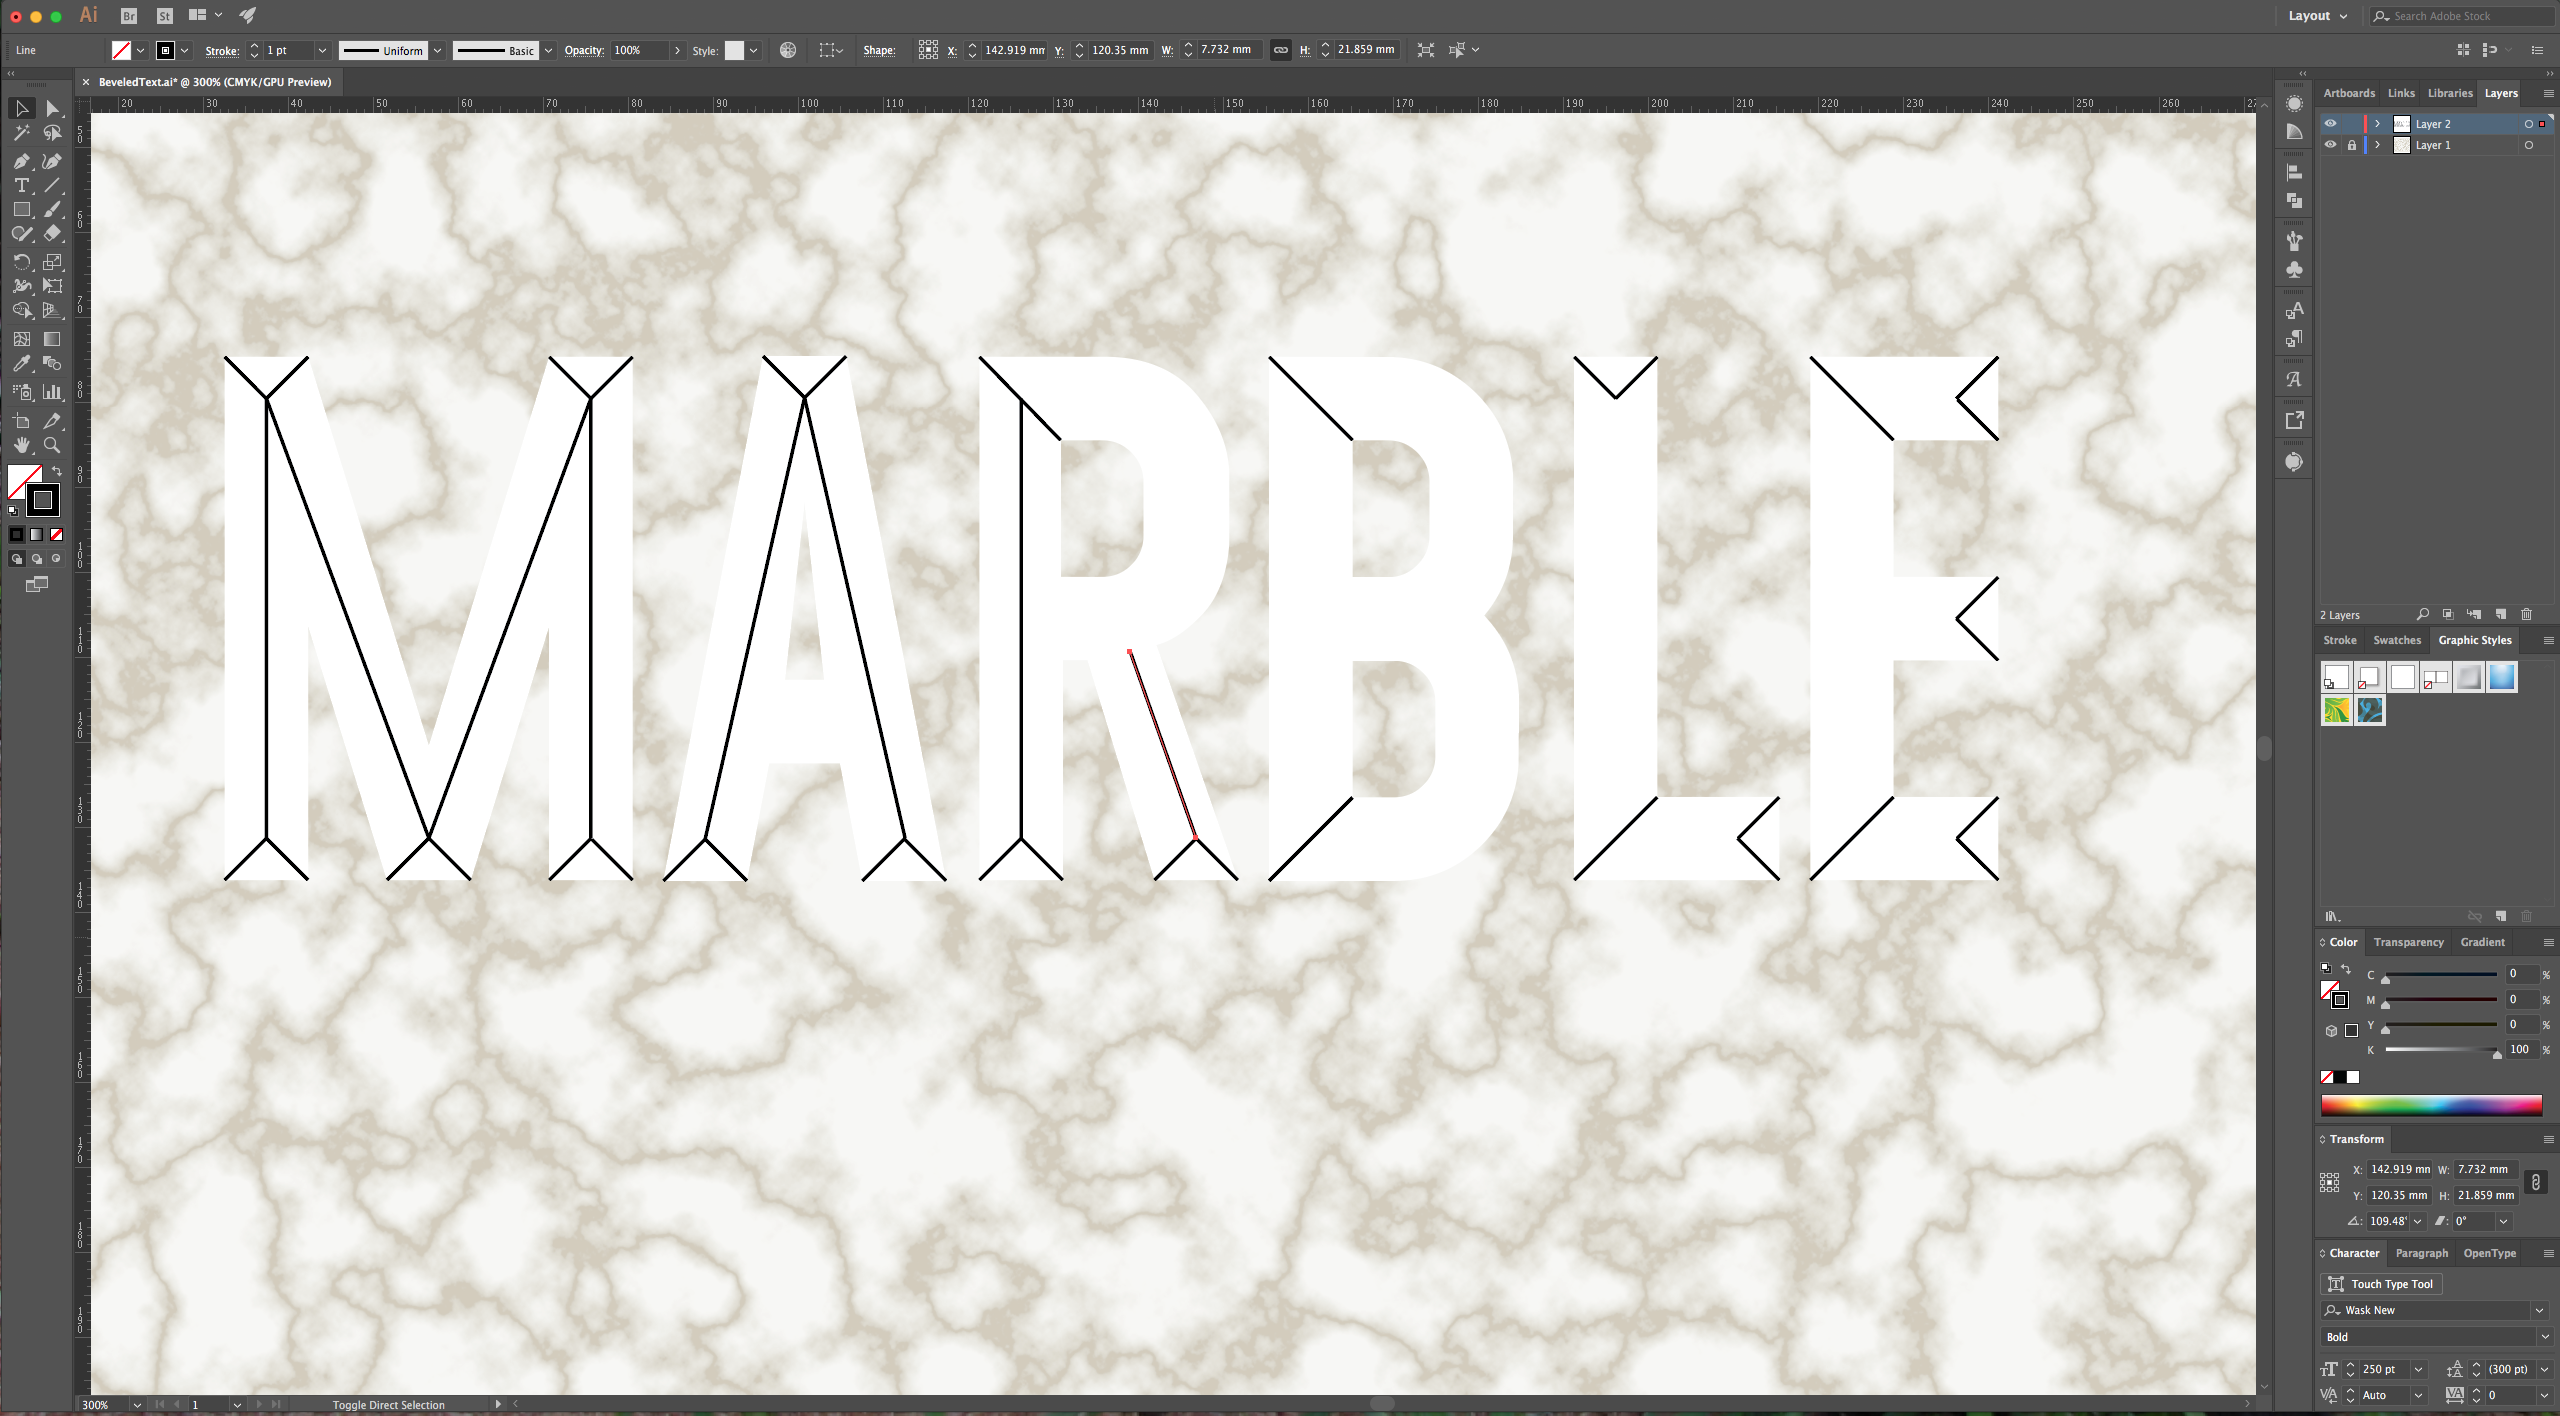
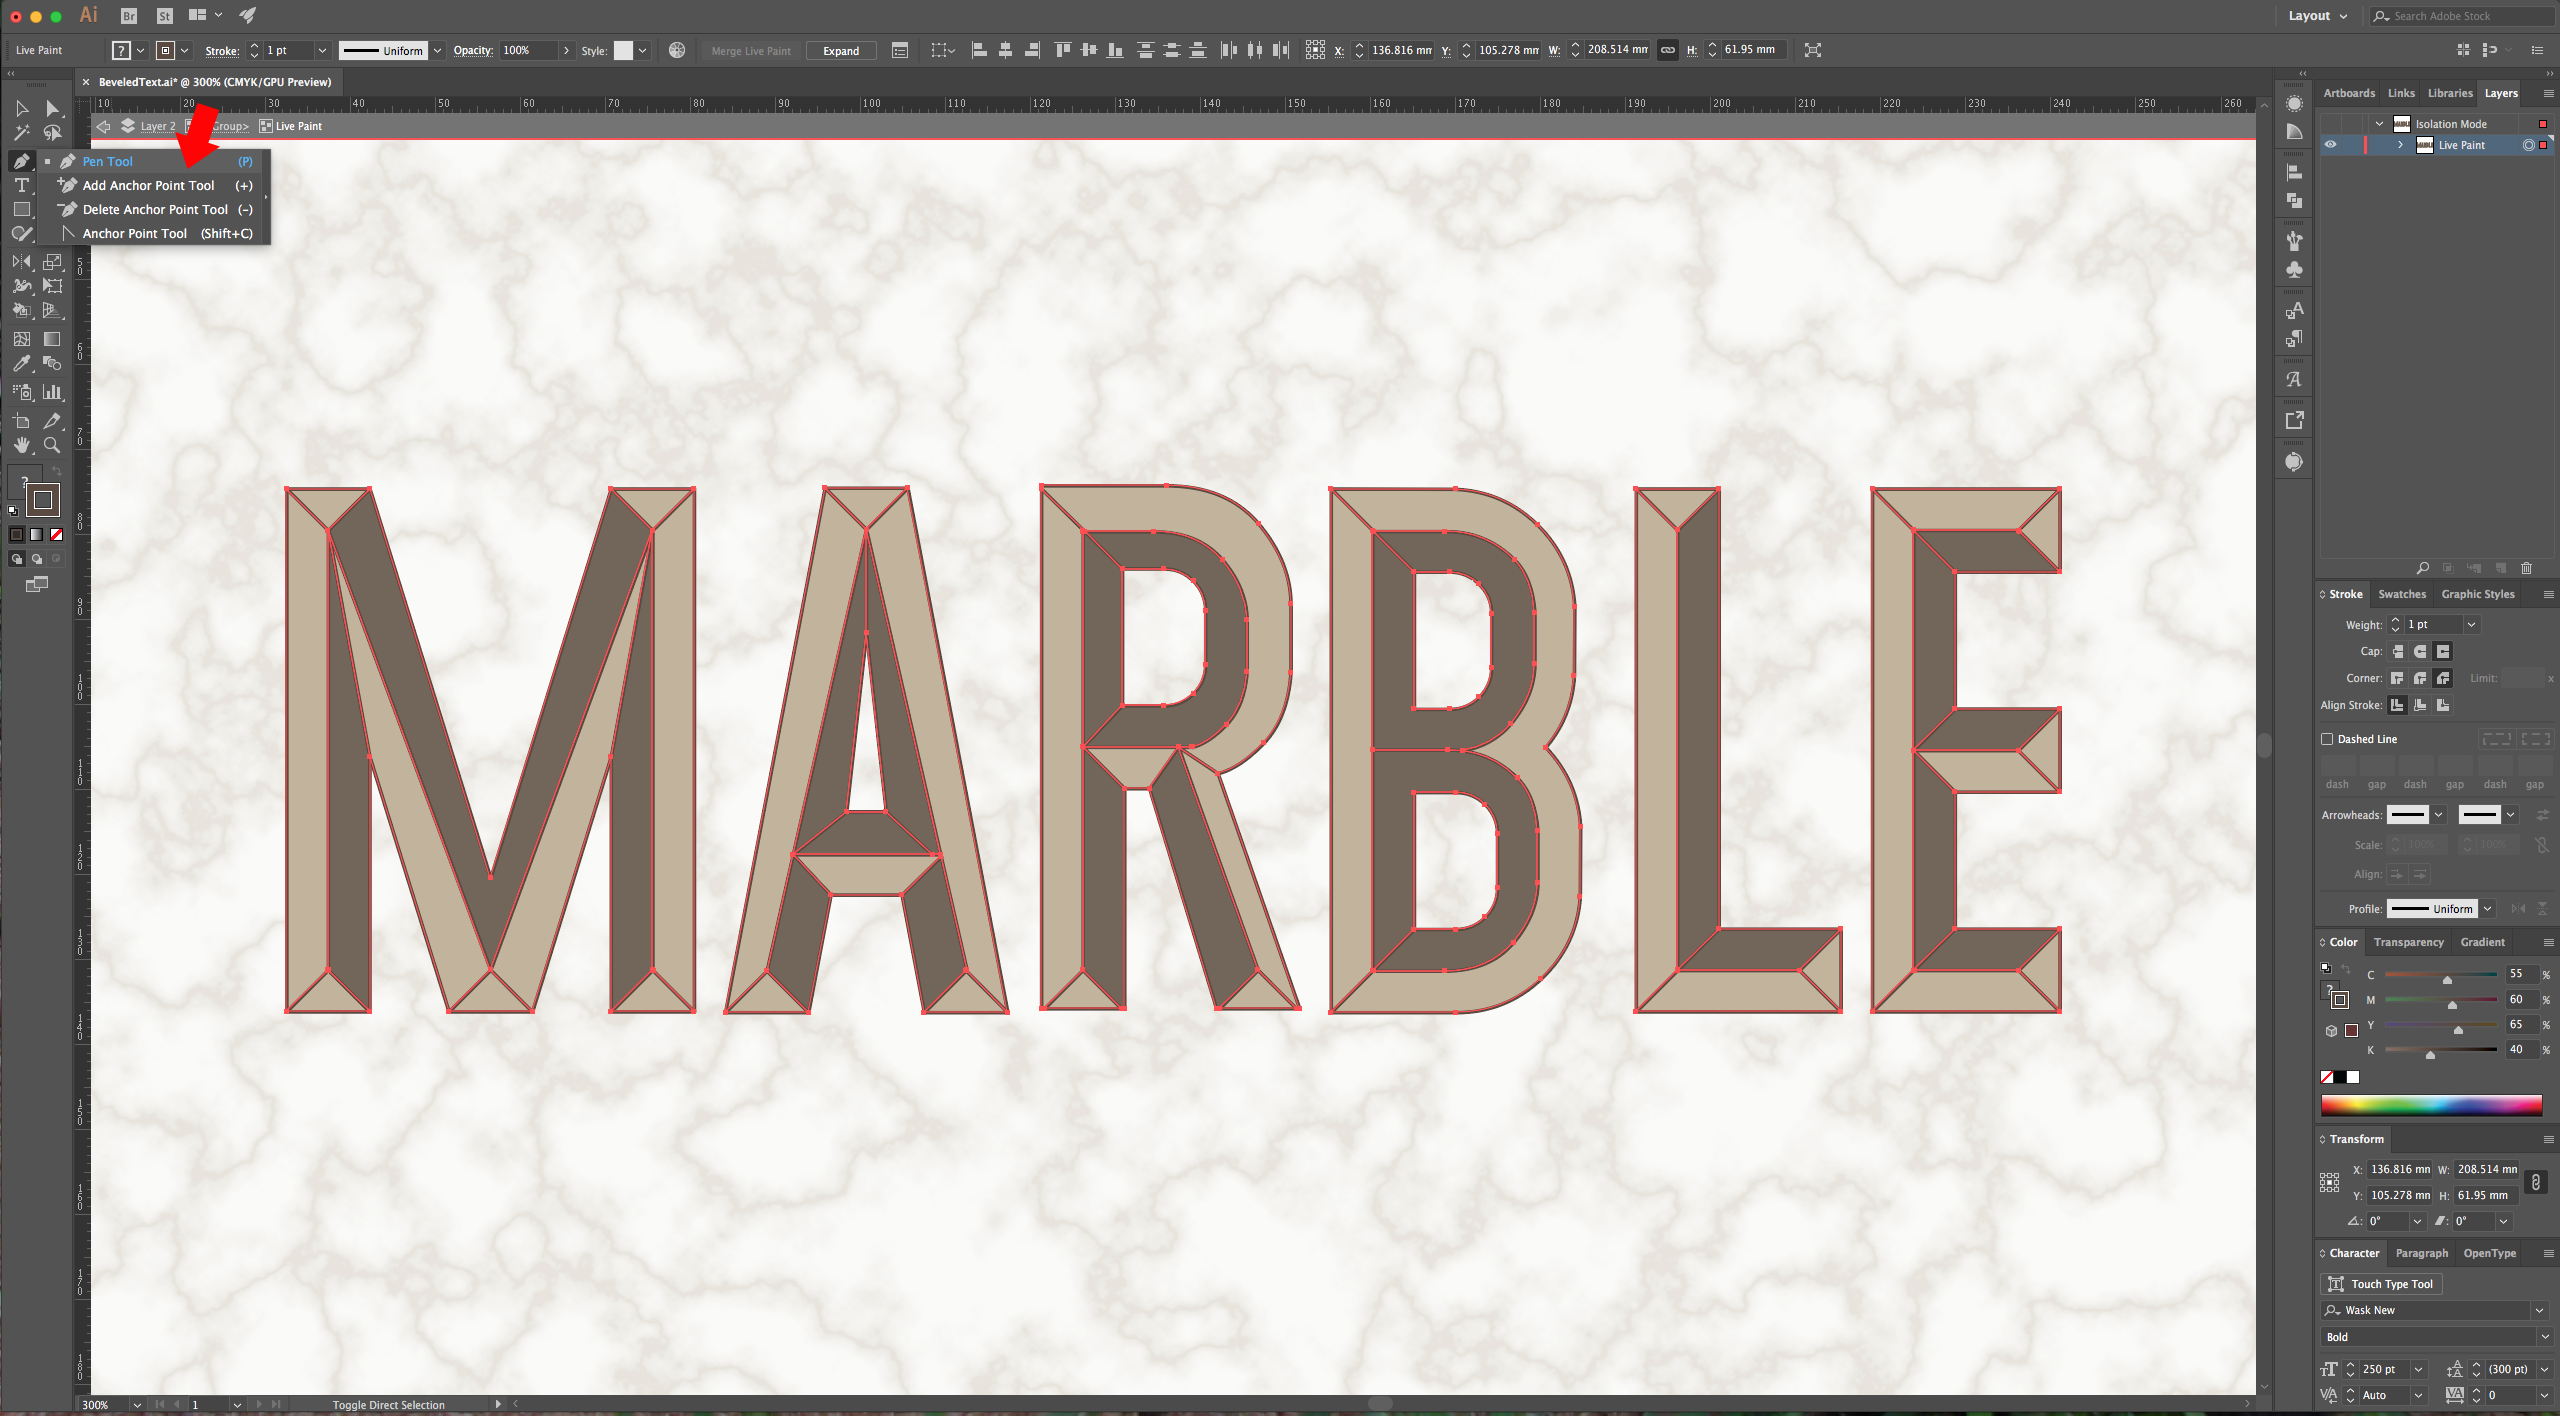
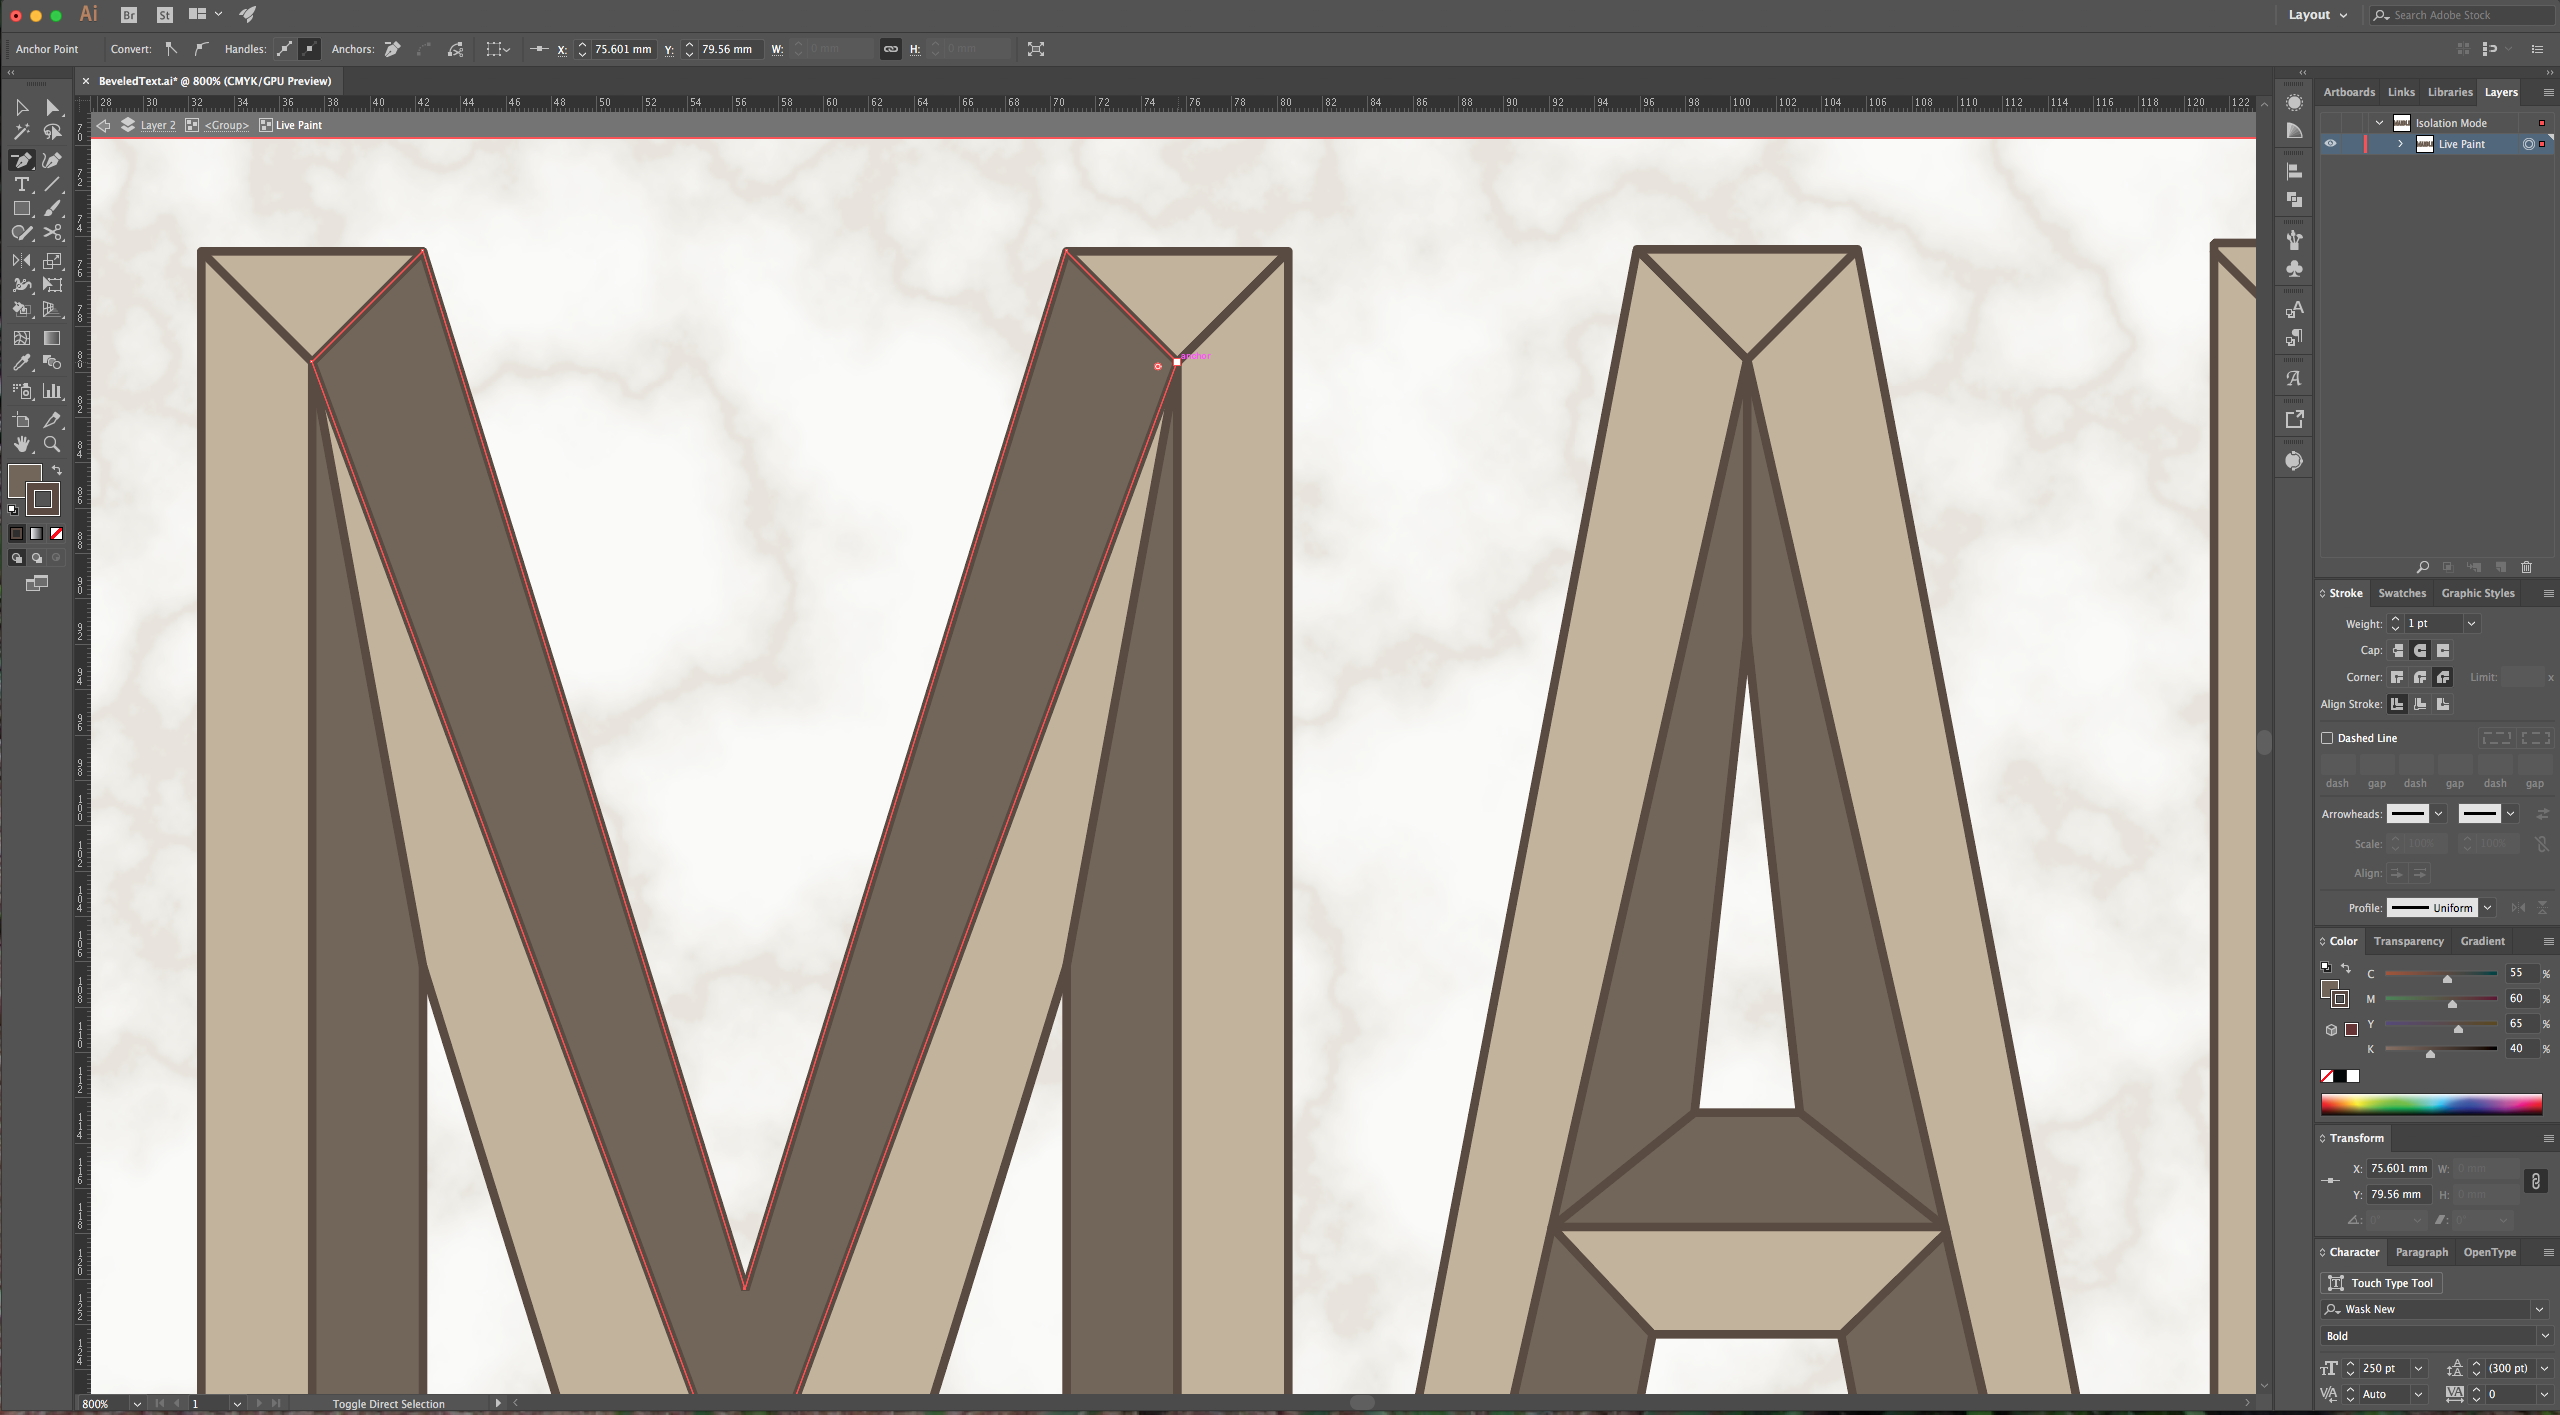
5 - Make sure your “Smart Guides” (Command/Control + U) are on because this will help you find the “Intersection” points and other stuff. Select the “Line Segment Tool” (L), give the “Stroke” a contrasting color so you can see your work and make the “Fill” “None” for now. To make the “Corners” hold the “Shift” key and draw a line from one side of the letter to about the center of it’s with (this will draw the line in a 45° angle). Finish the line and start again from the other side (or a little bit away from your finish point). Hold the “Shift” key again and draw a second line that intersects with the first one. (It’s ok if the lines don’t end in the same spot since we are fixing this in the next step).
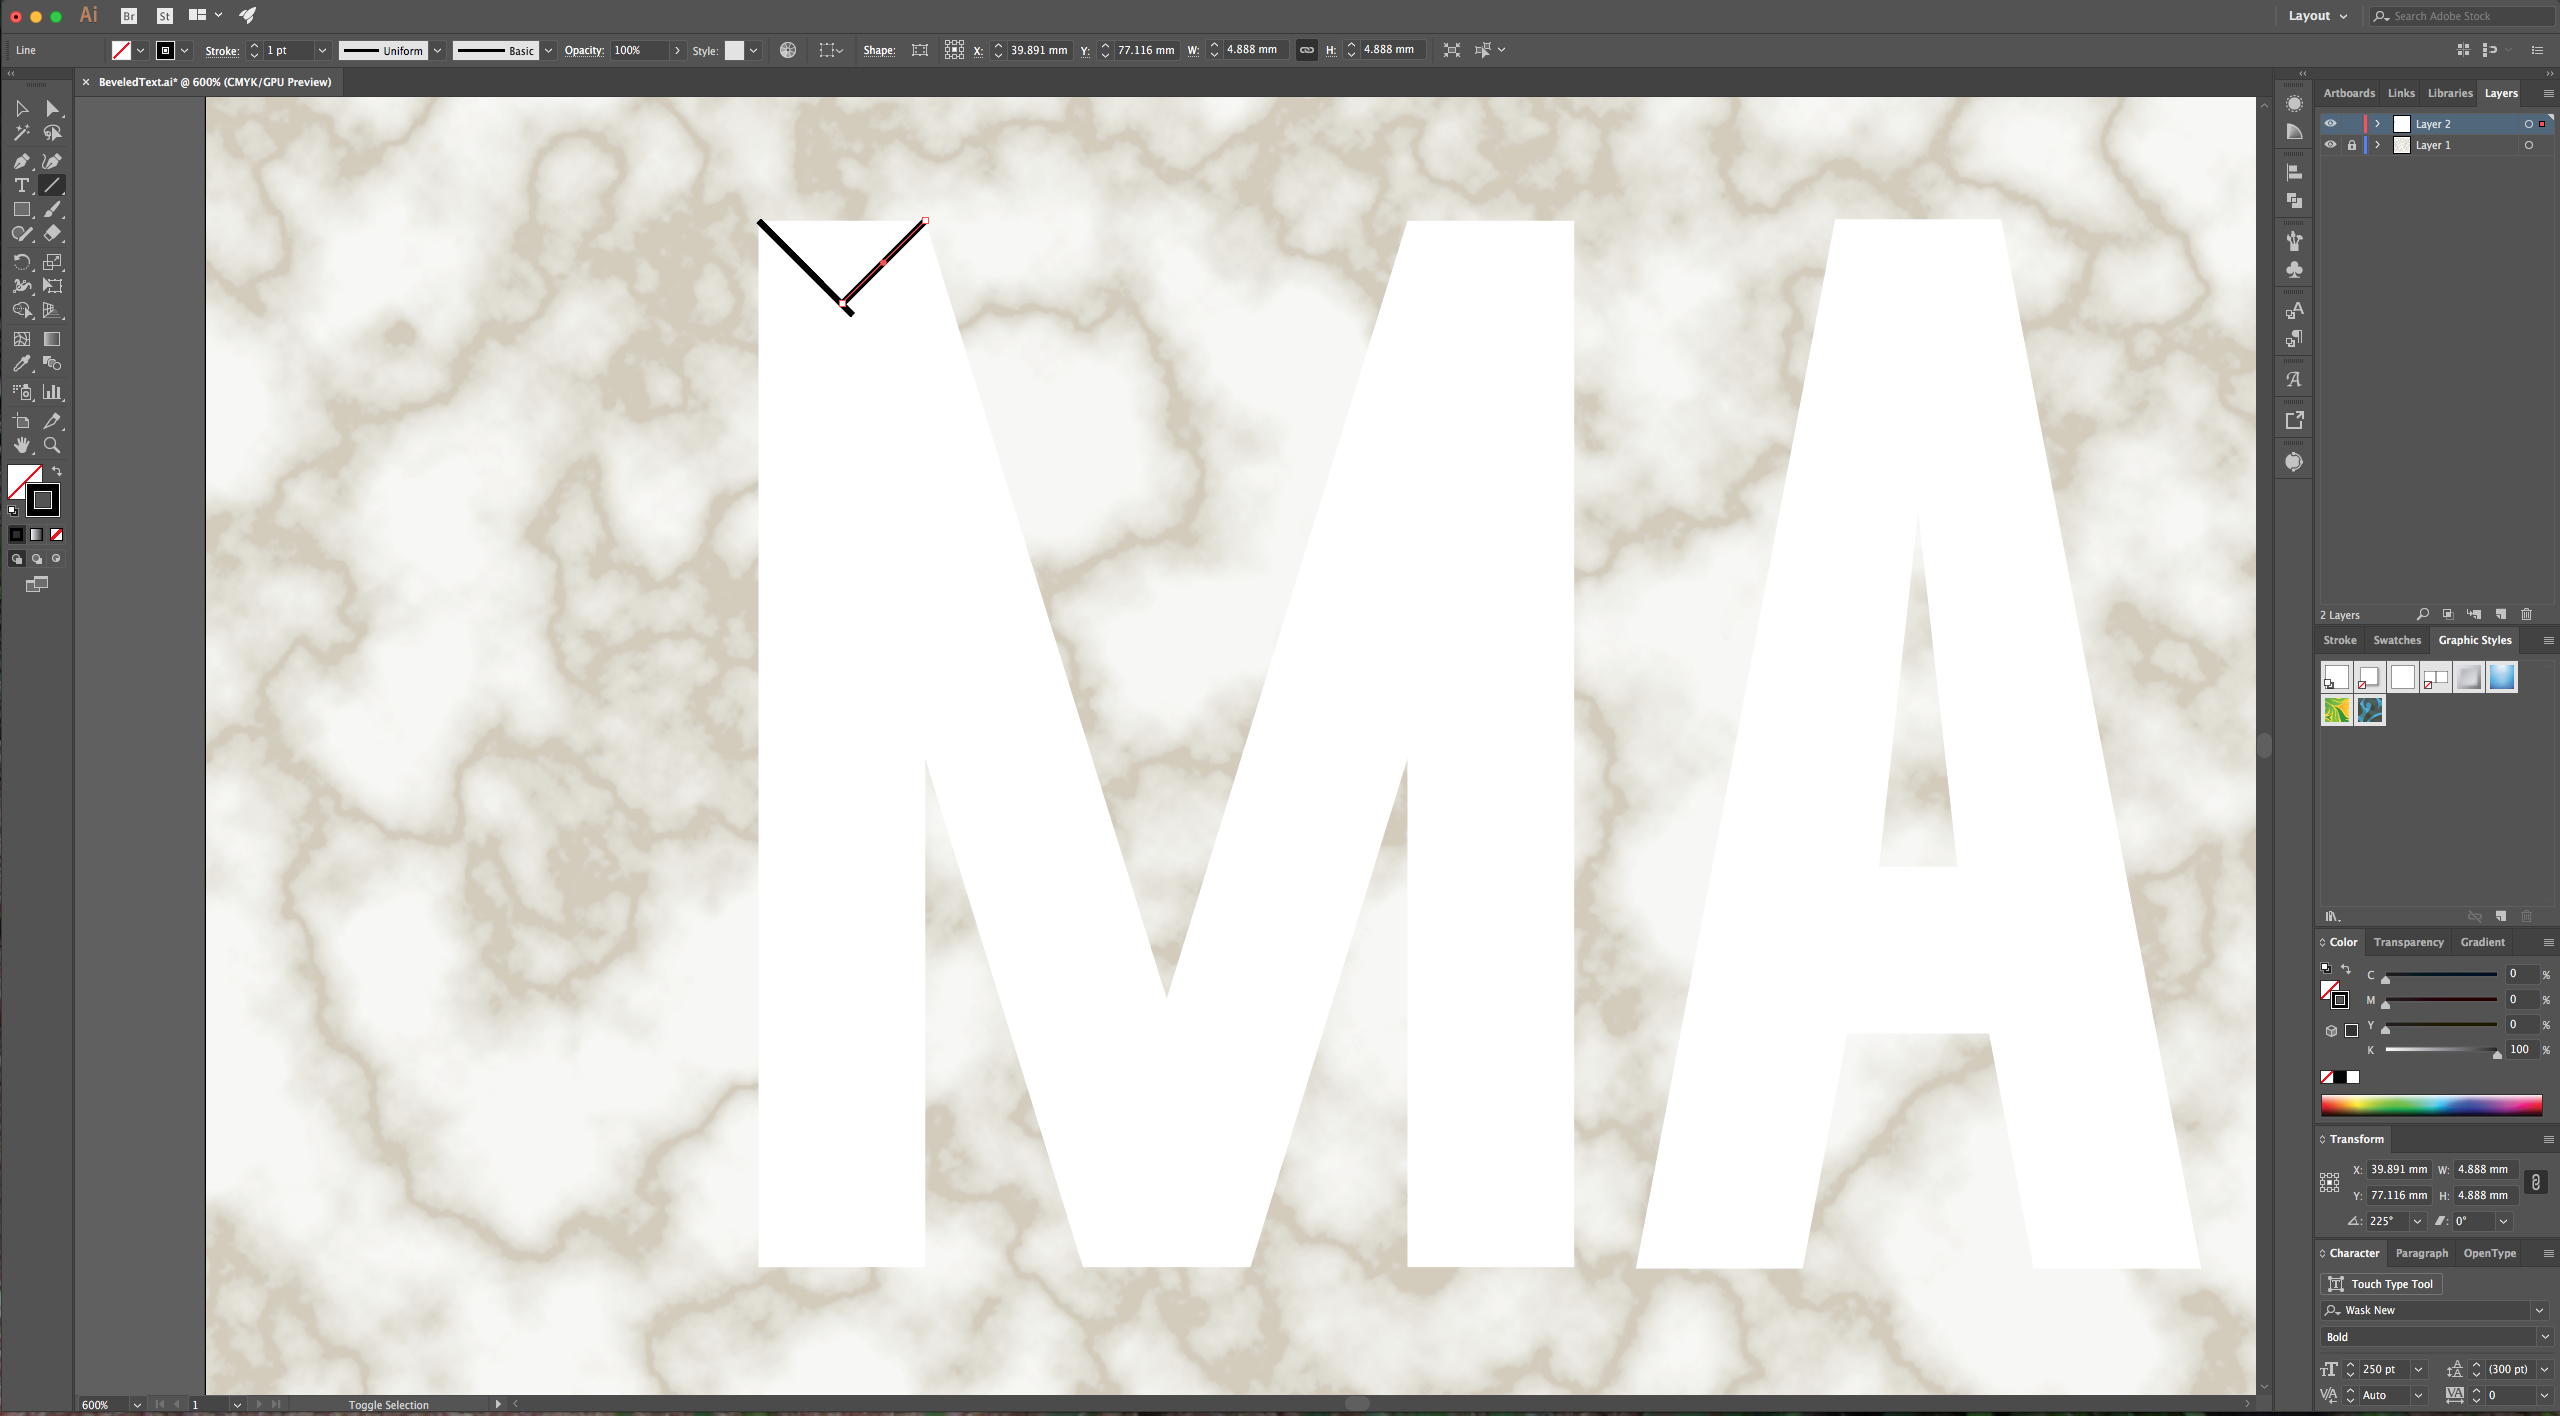
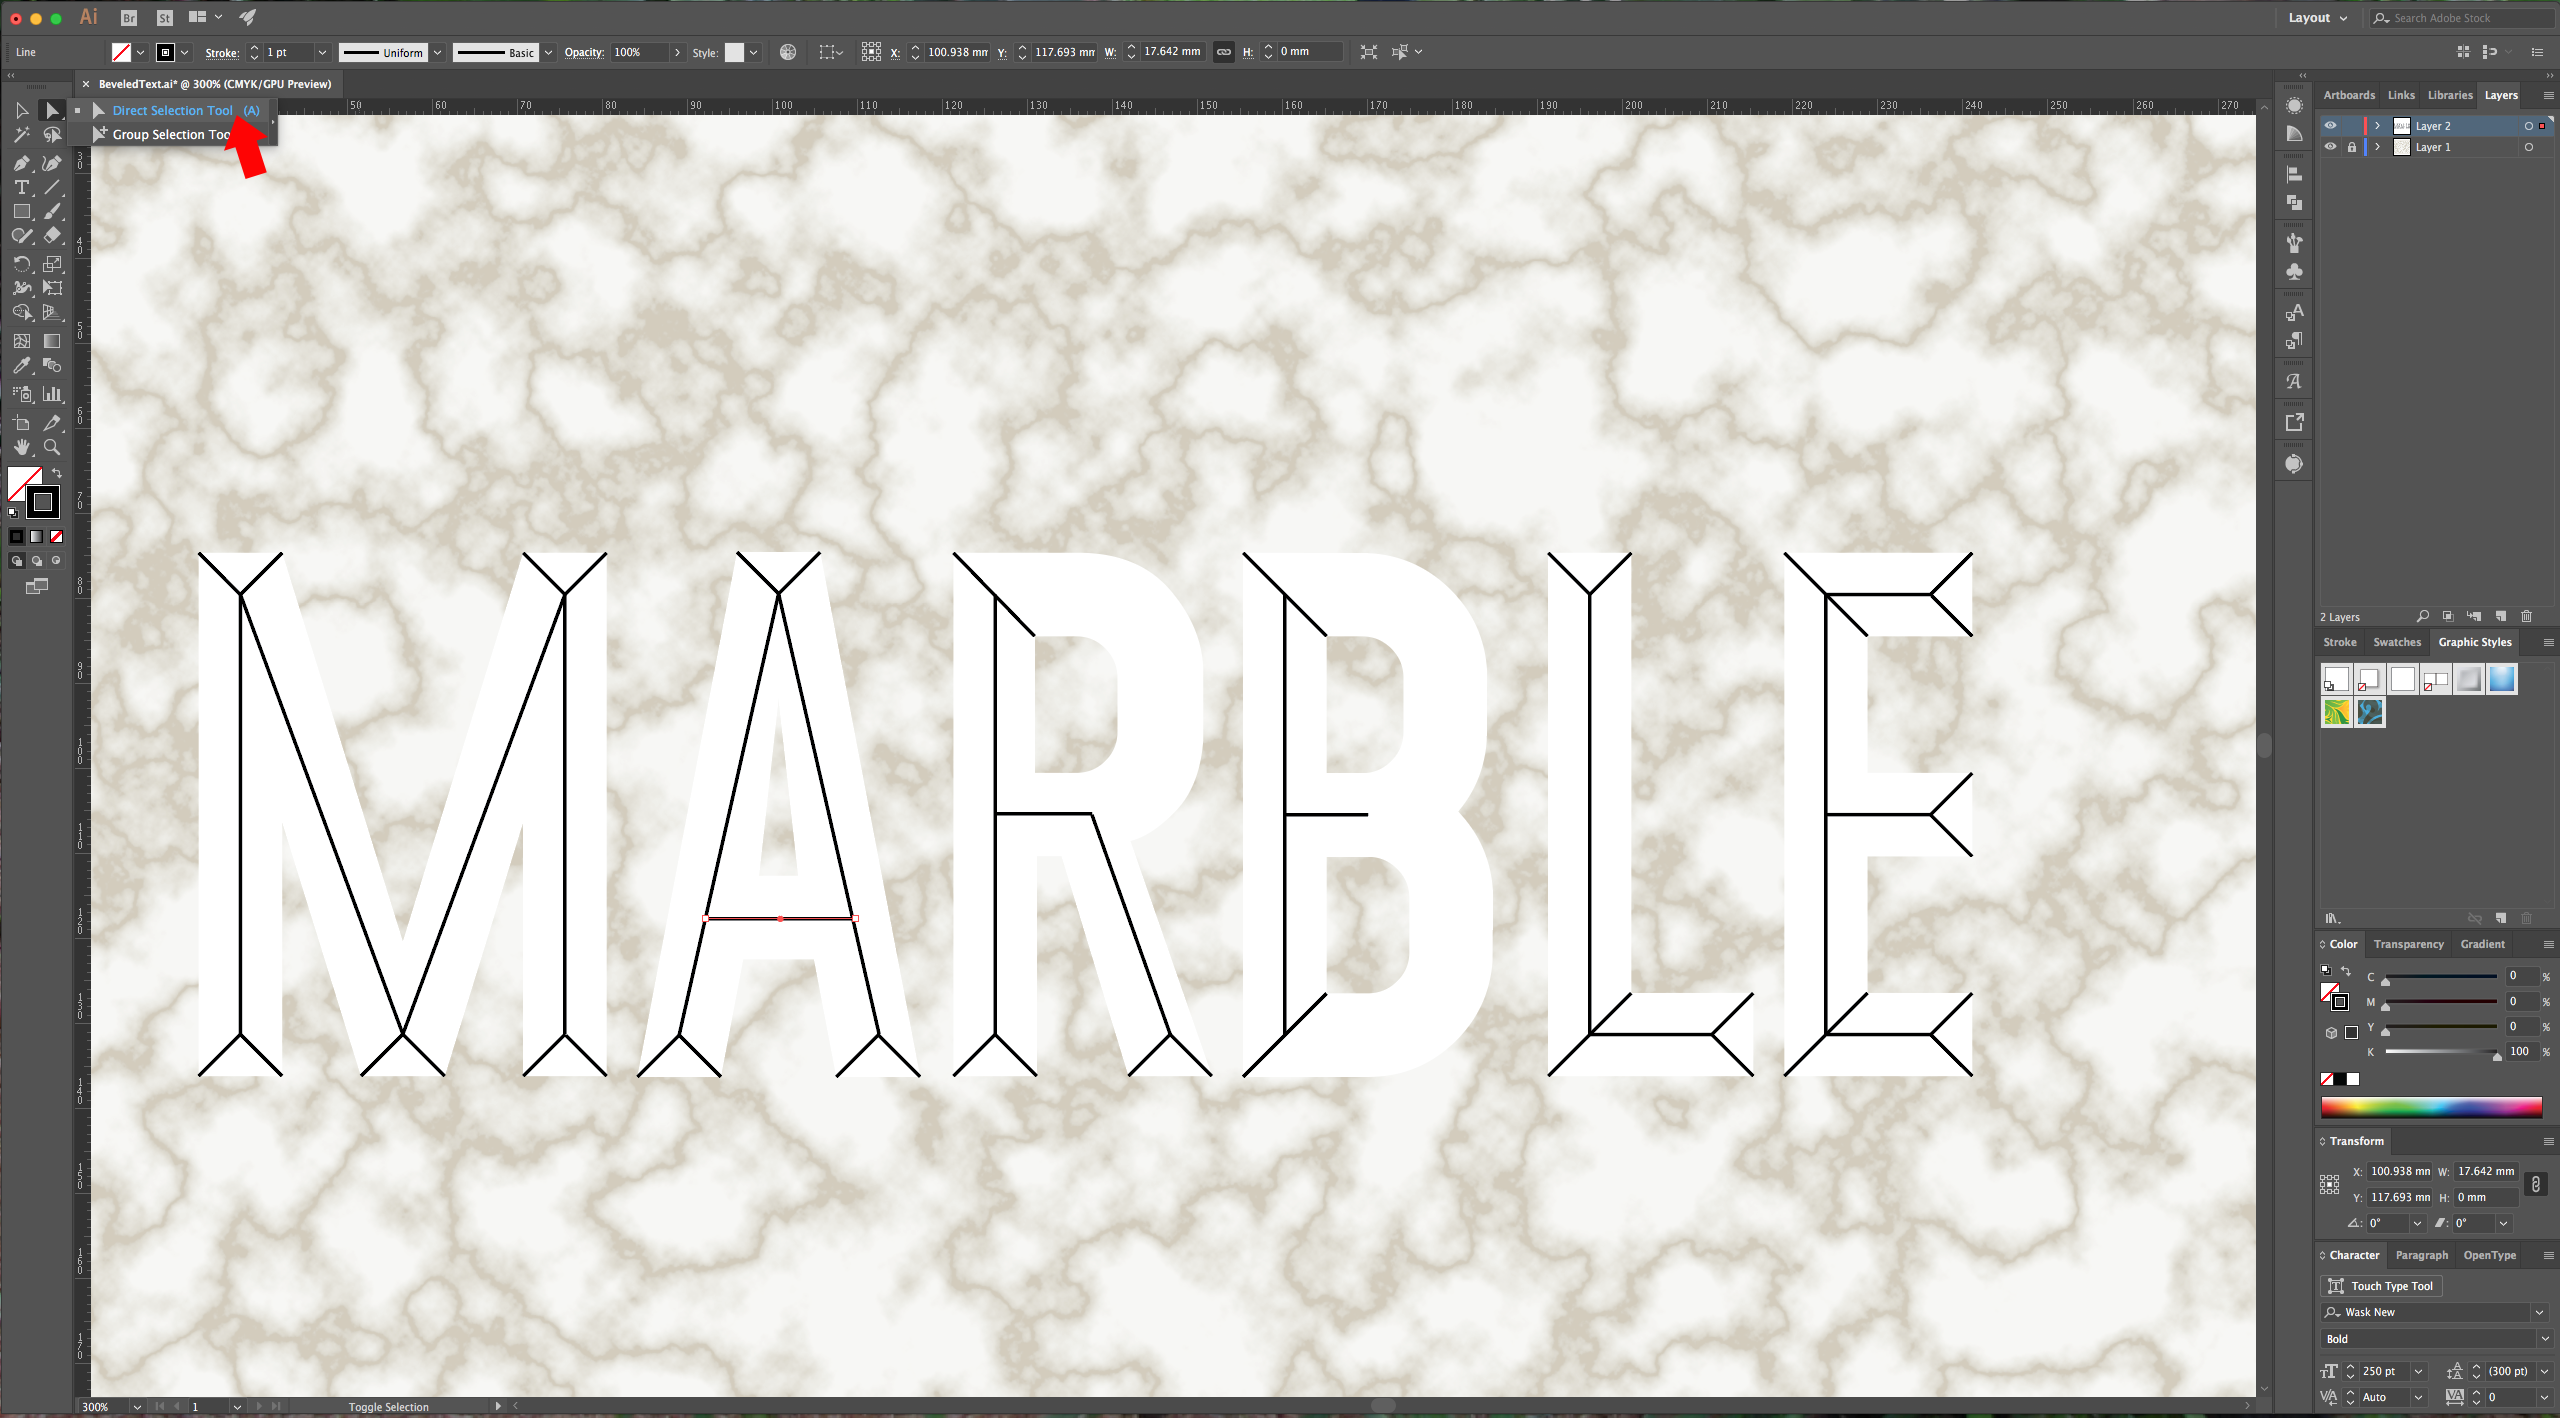
6 - Use the “Direct Selection Tool” (A) and while holding the “Shift” key, move the end of the line to shorten or elongate it and make it intersect with the other line. You should have a formed a triangle at the end of your letter. Repeat this with all your letters. Check your text, and in the other places where the letters have corners, draw a line the goes from the outside to the inside.

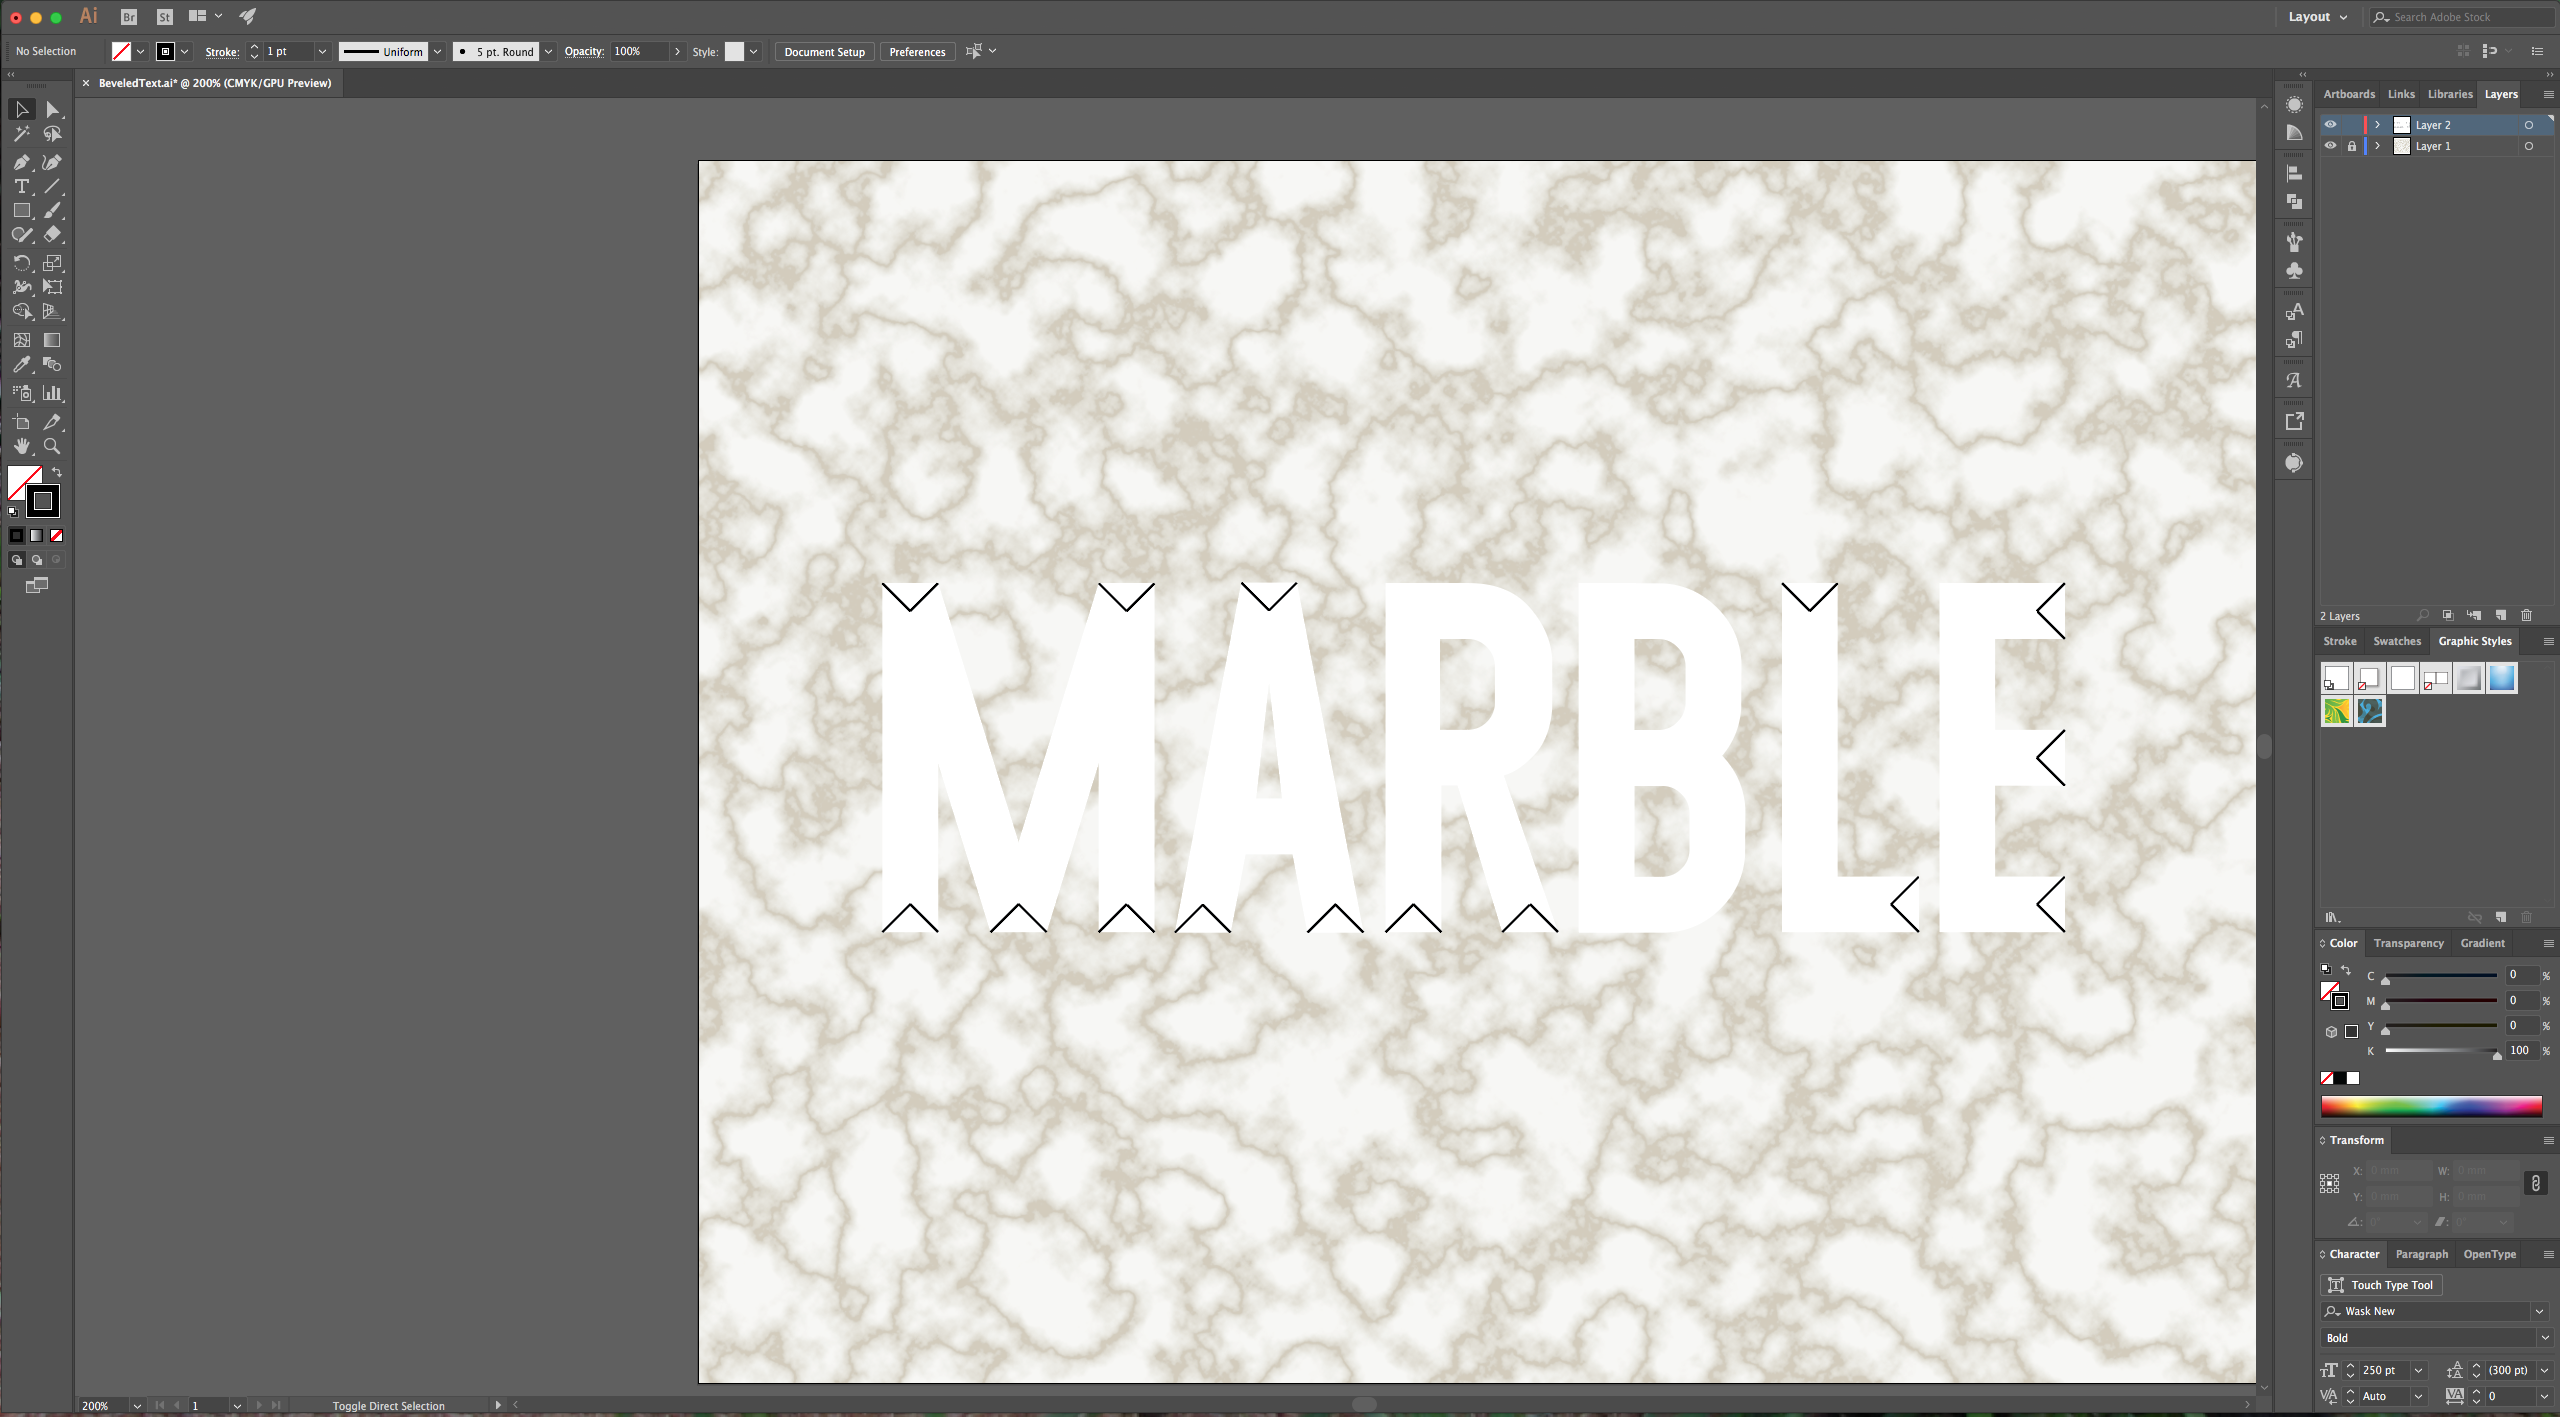
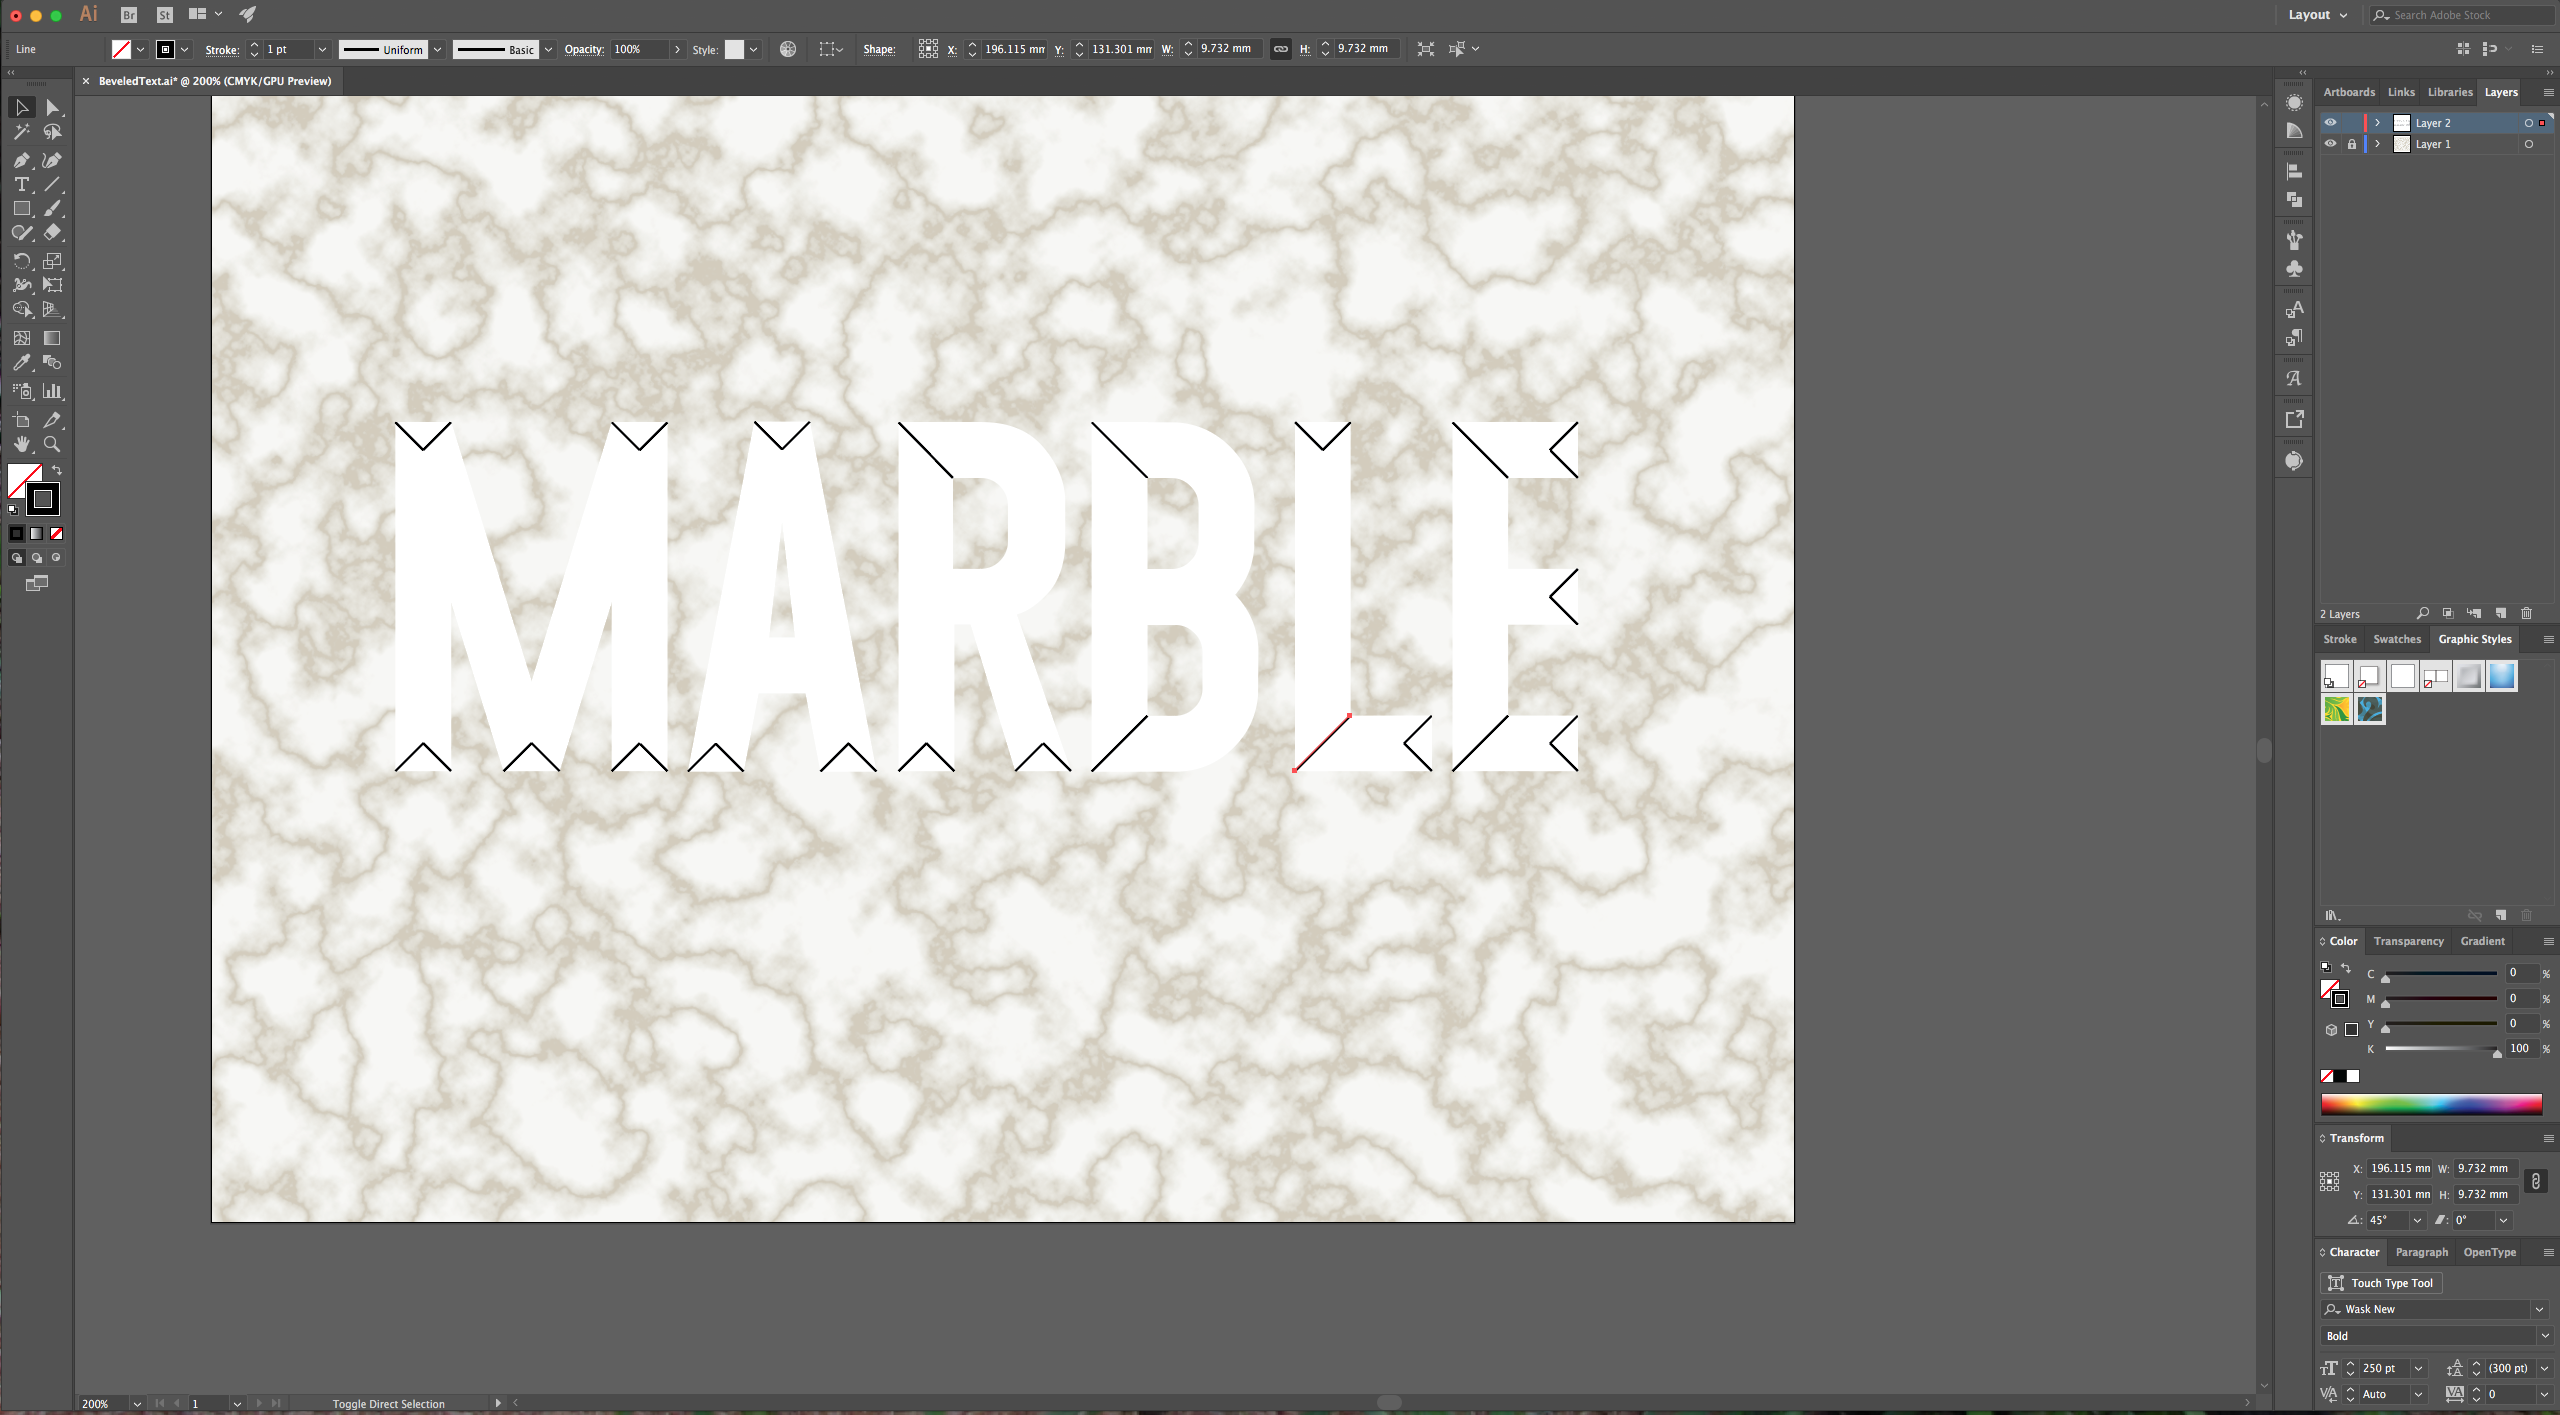
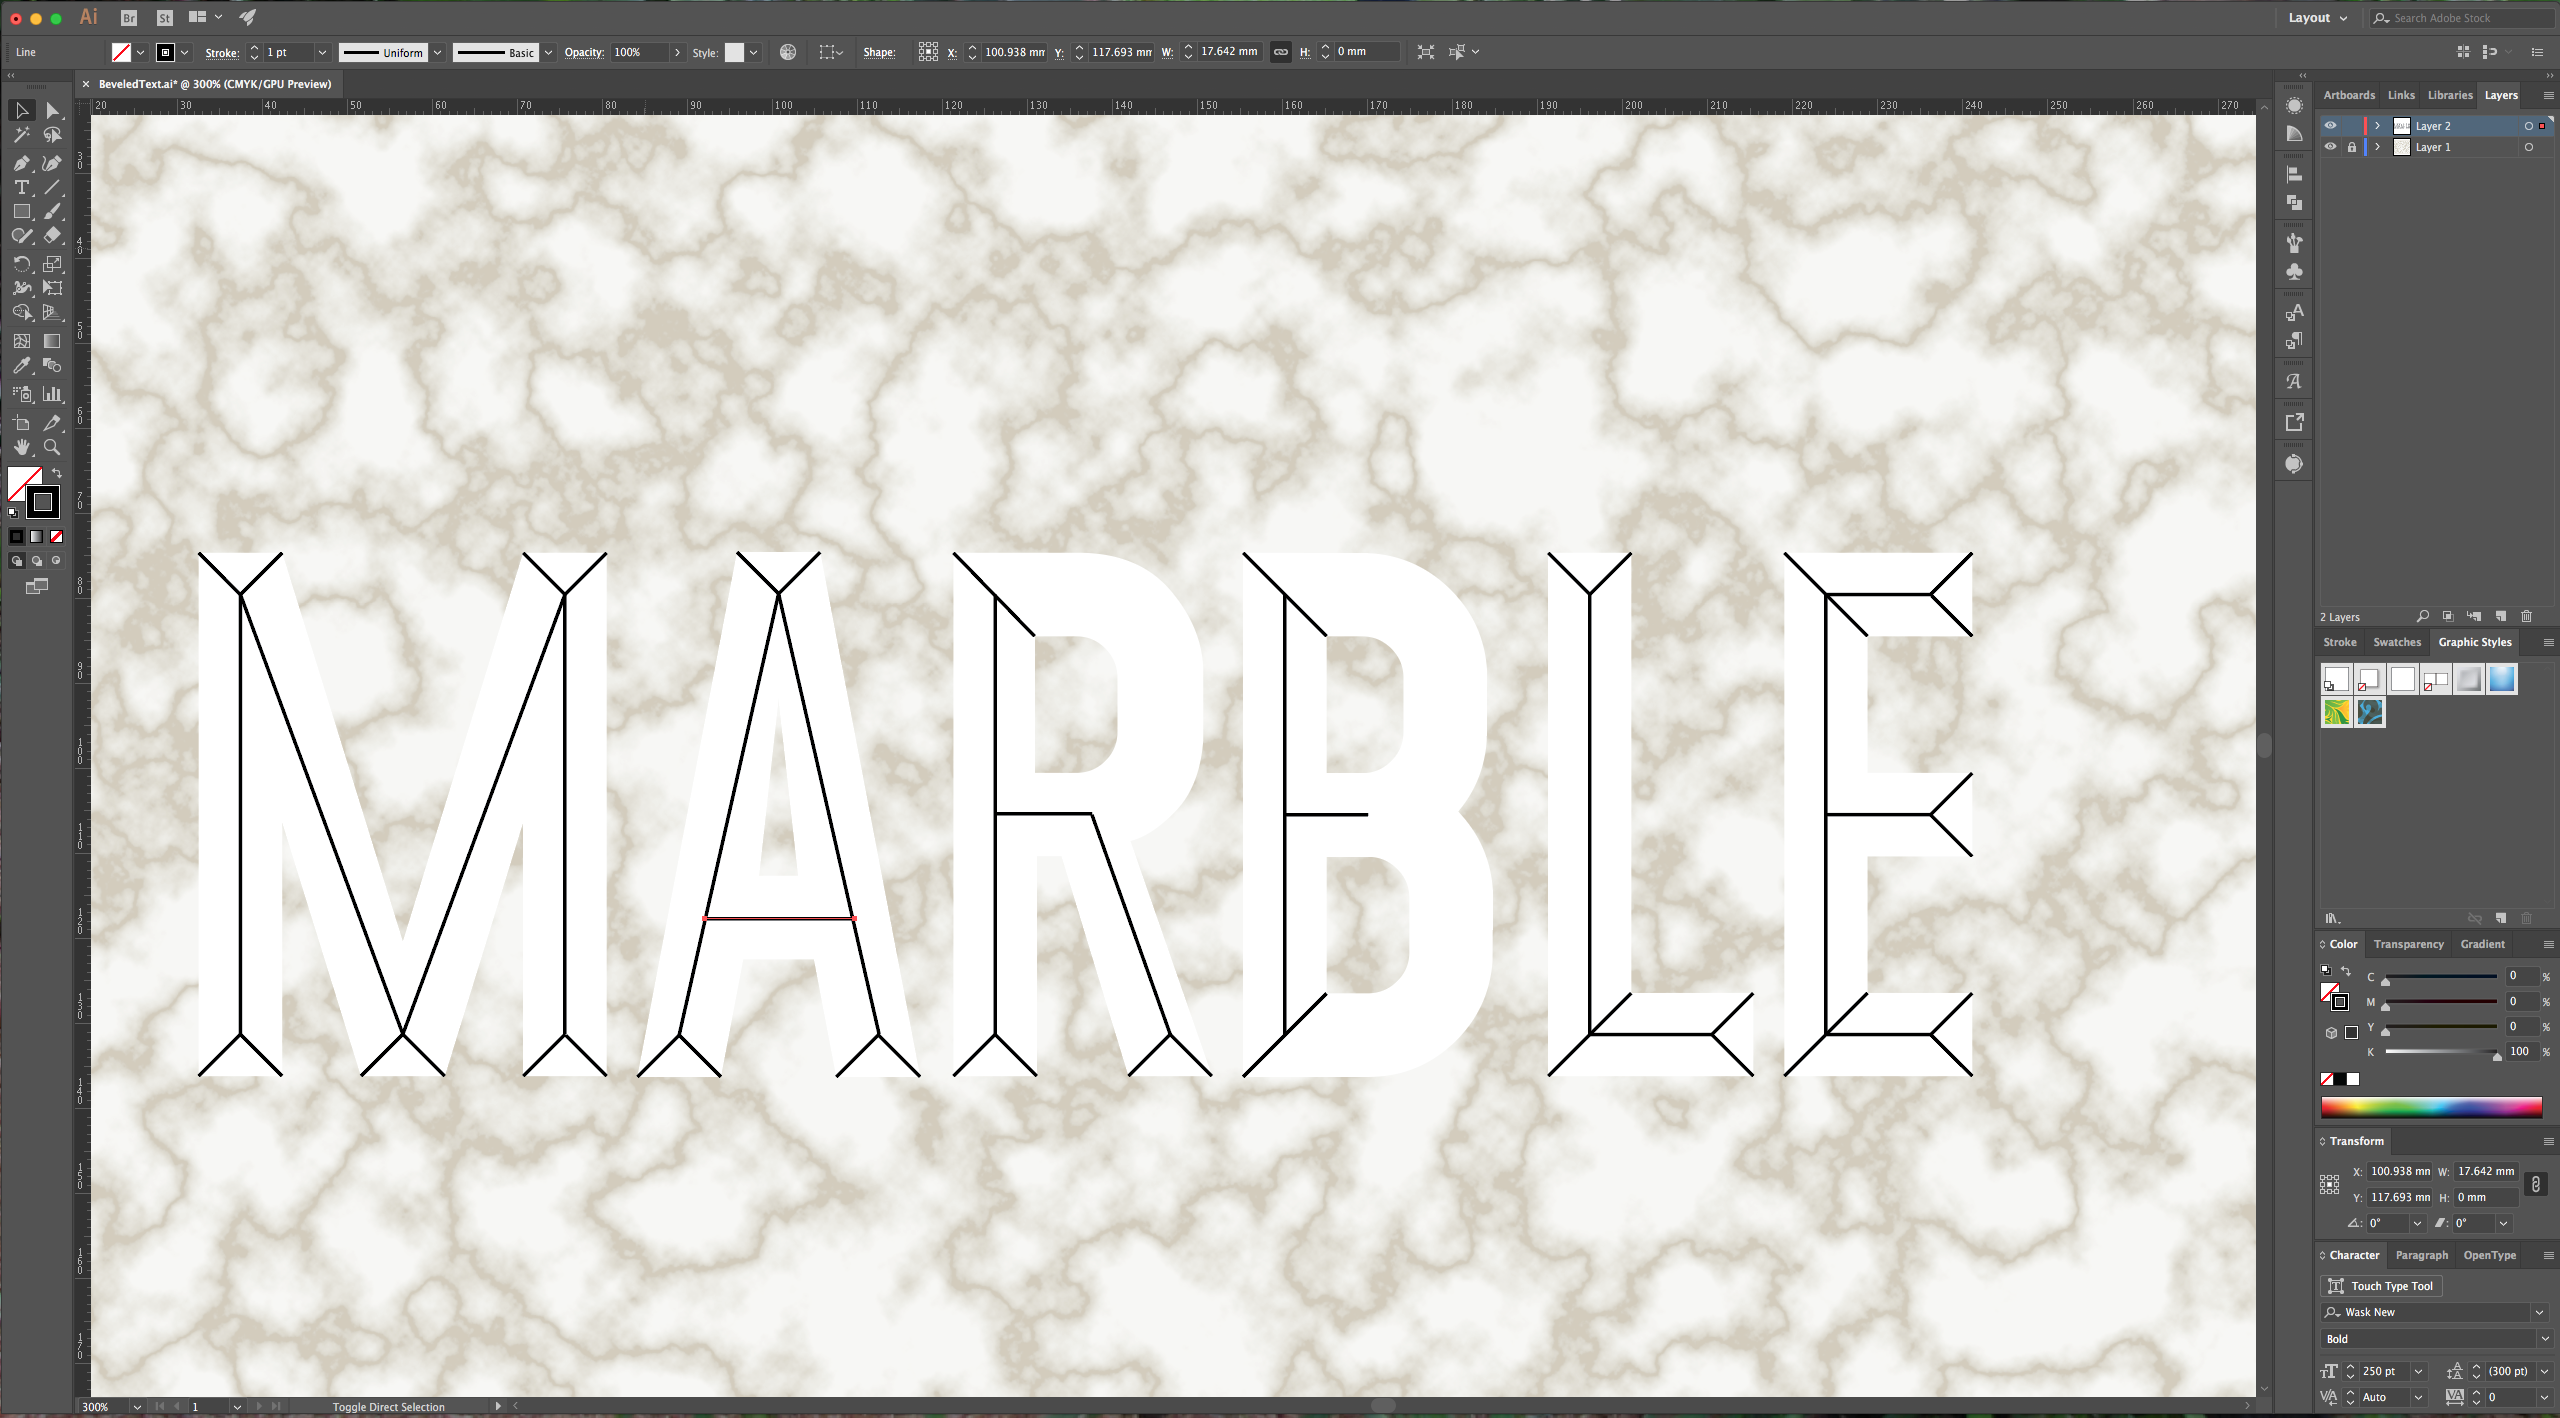
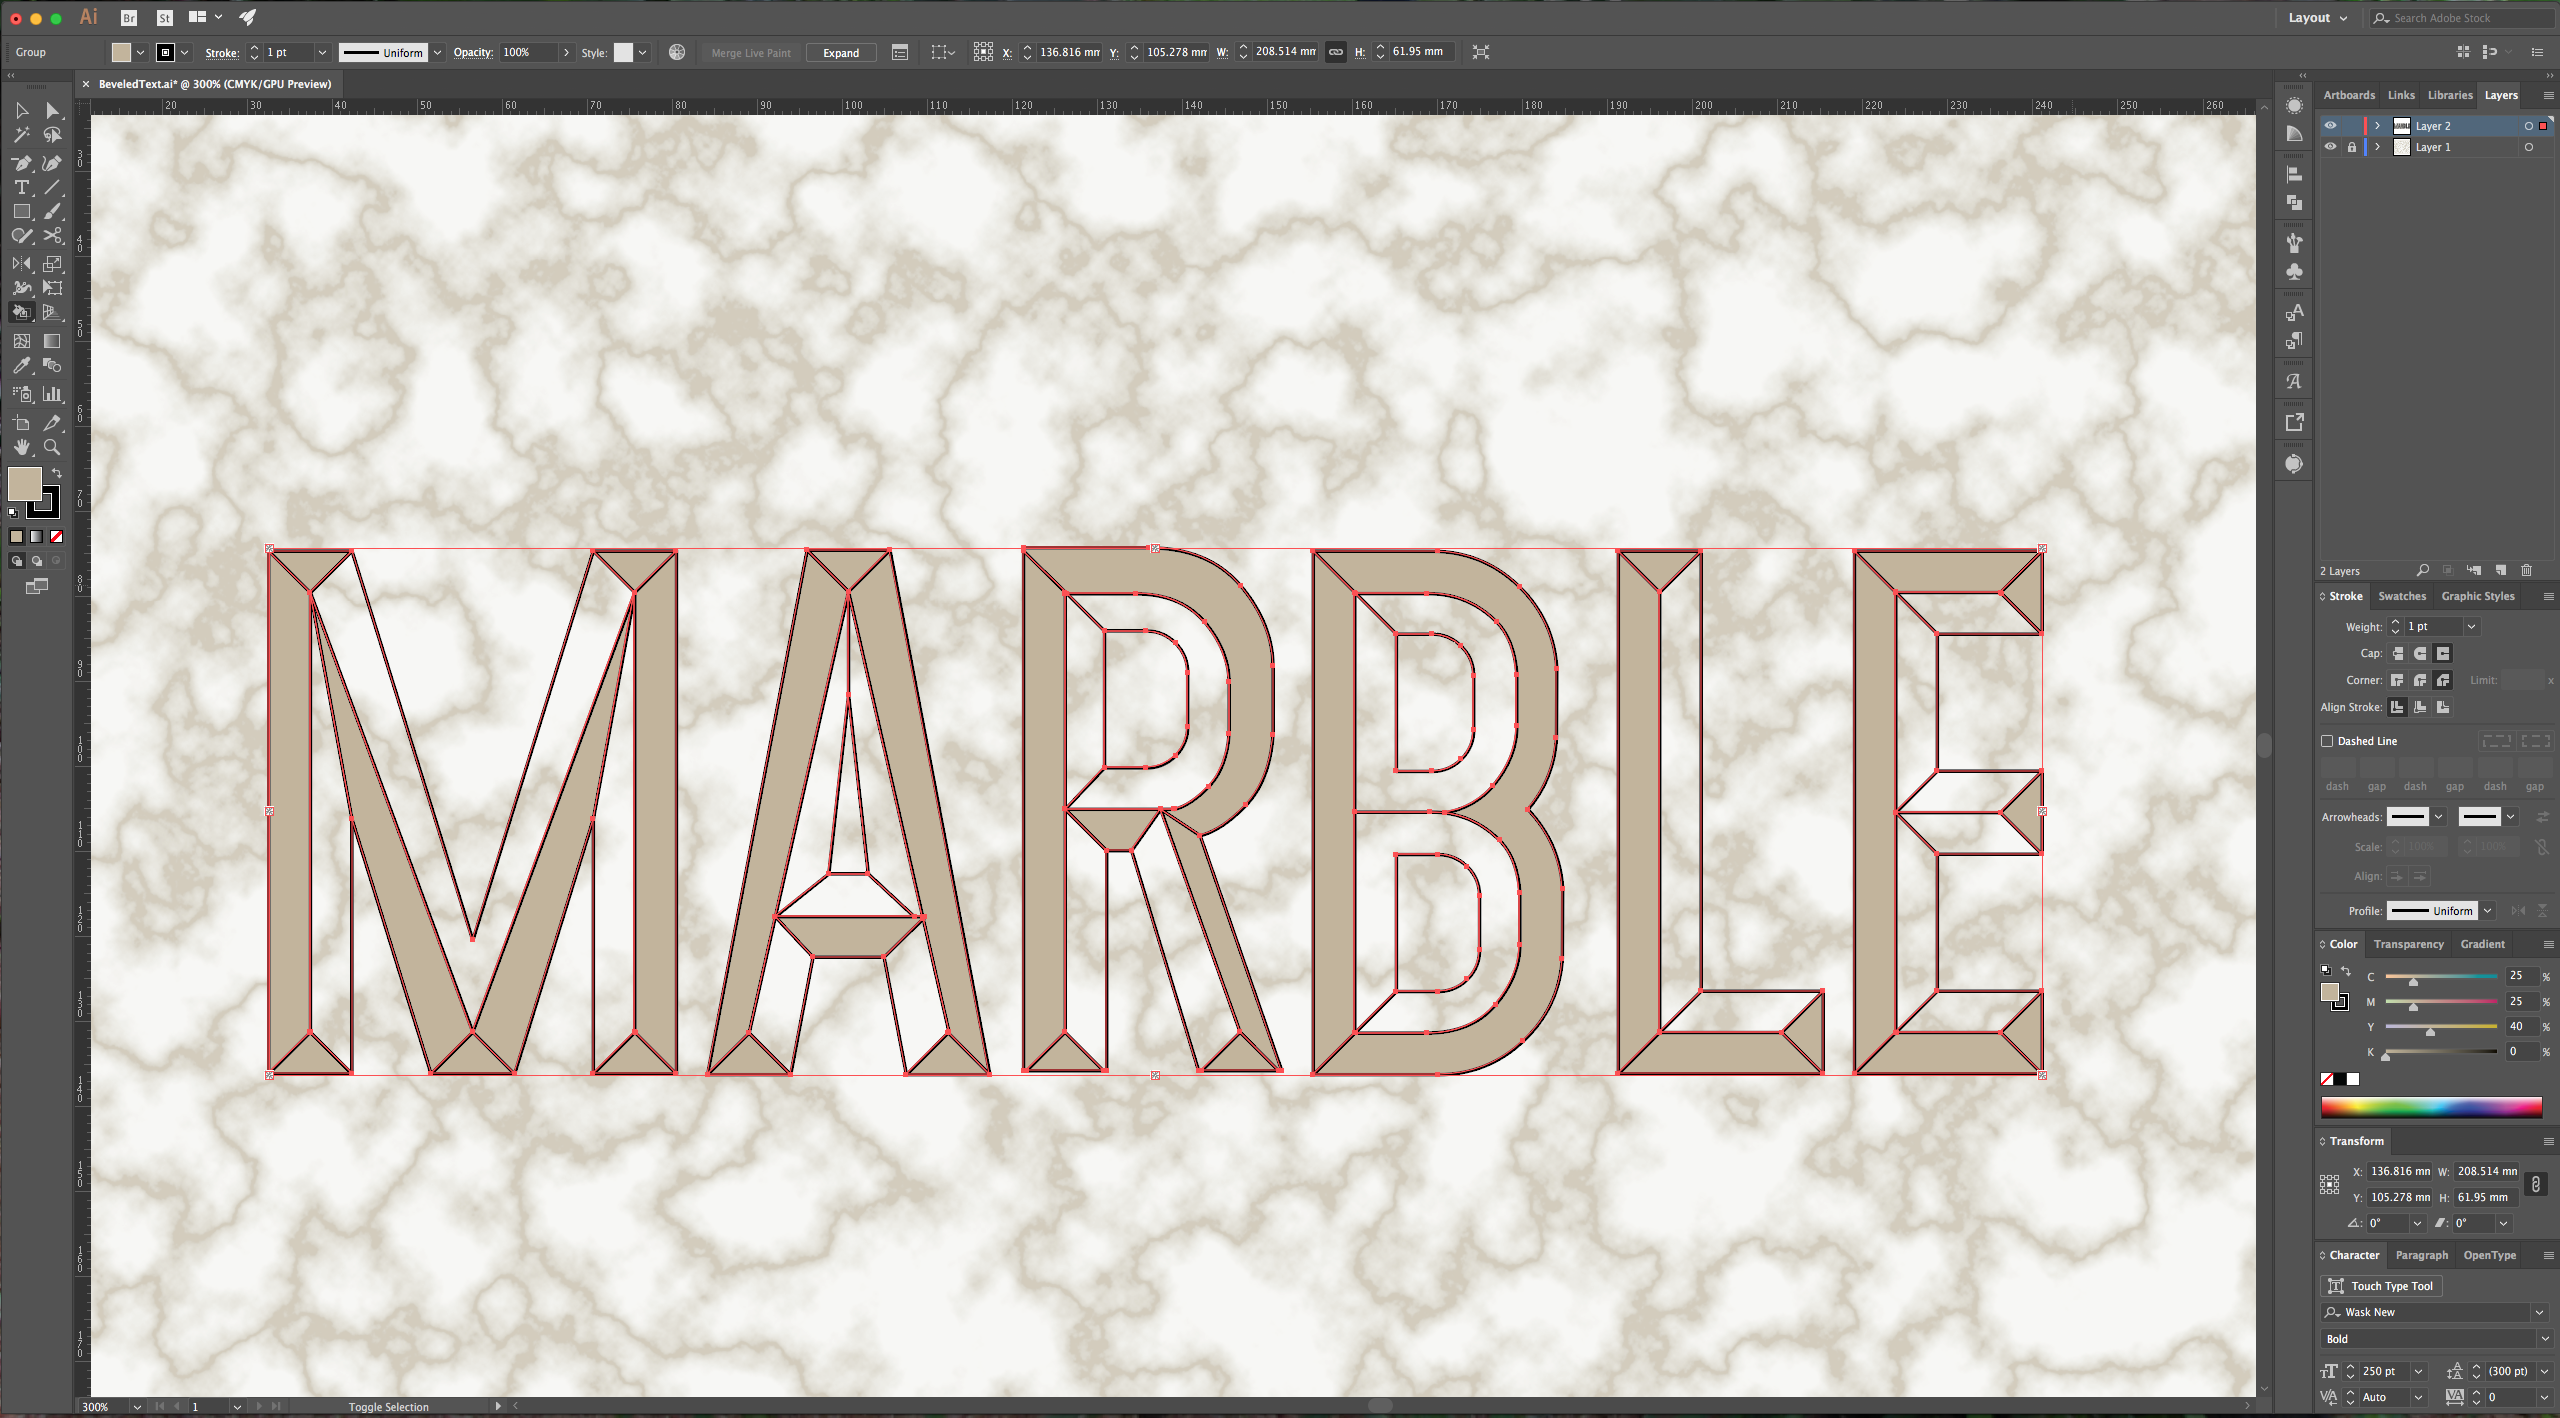
7 - Now, let’s make the center line (the one the in the center of each letter). For the straight letters, draw a line from the “Top” of one of the corner rectangles (hold the “Shift” key) to the next “turning” point, release and start a bit away (or start from the opposite side) to reset and get to the next corner. In some places, you will need to use an approximate angle for your line (like with the “R”).
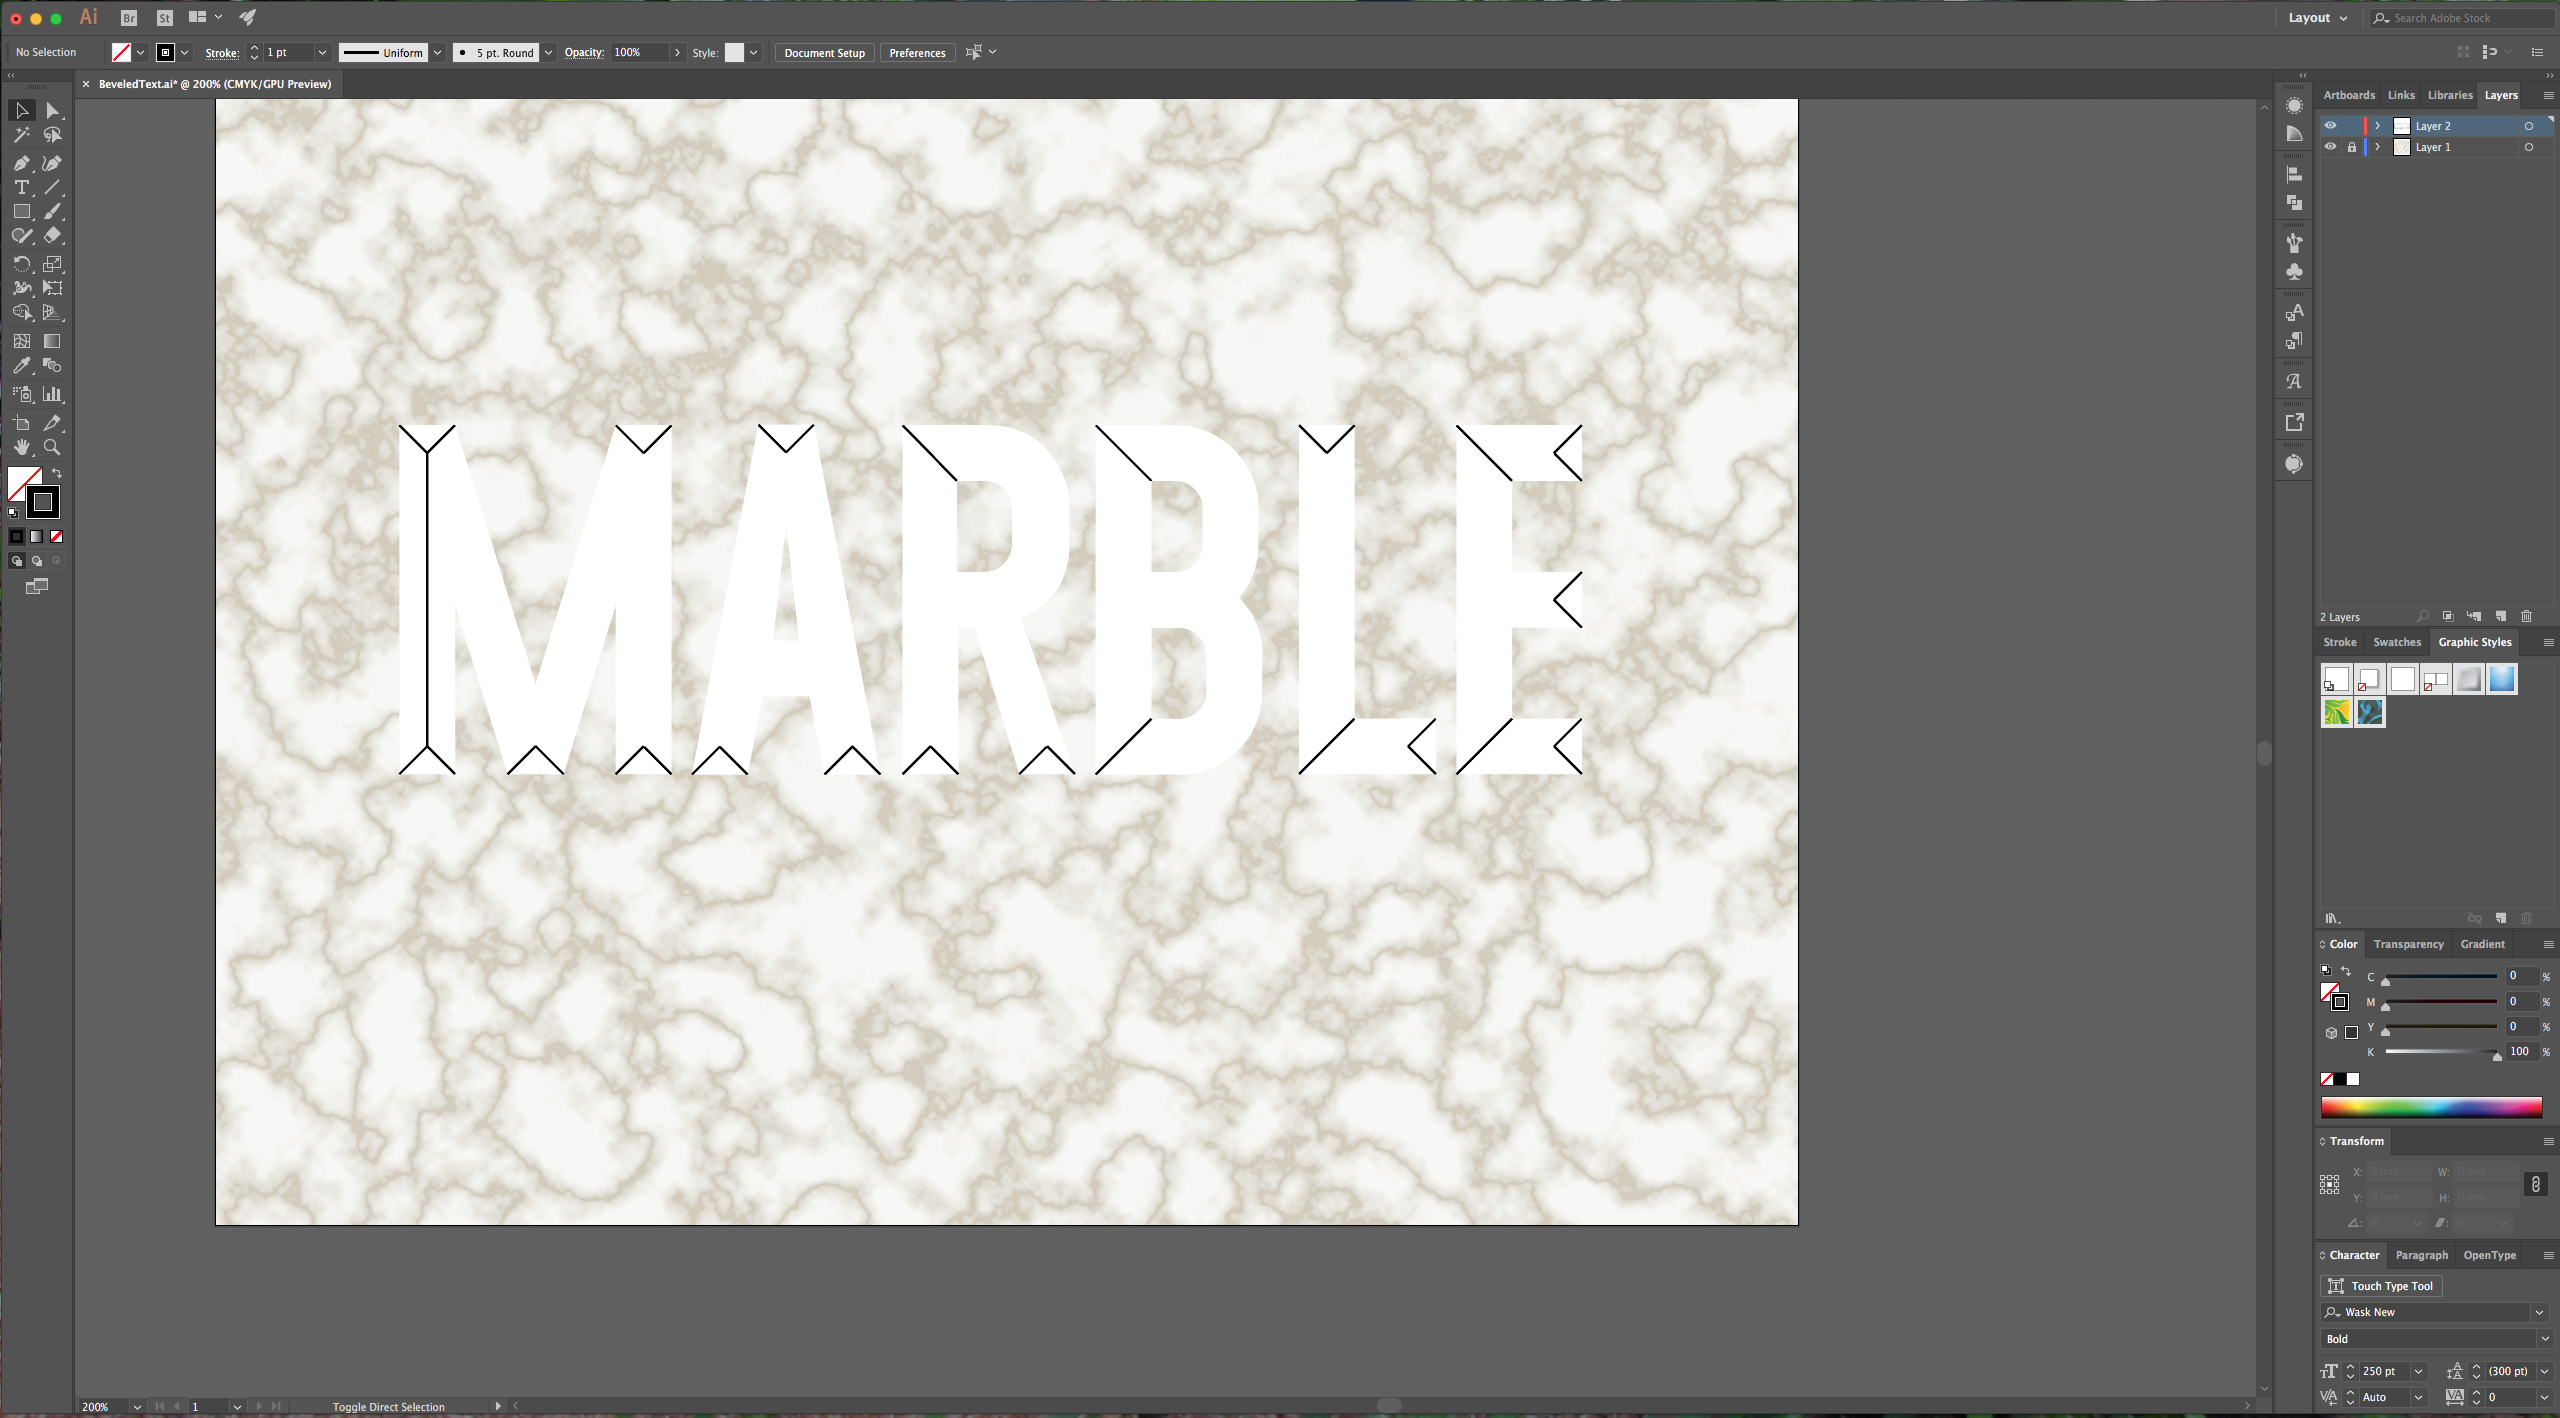
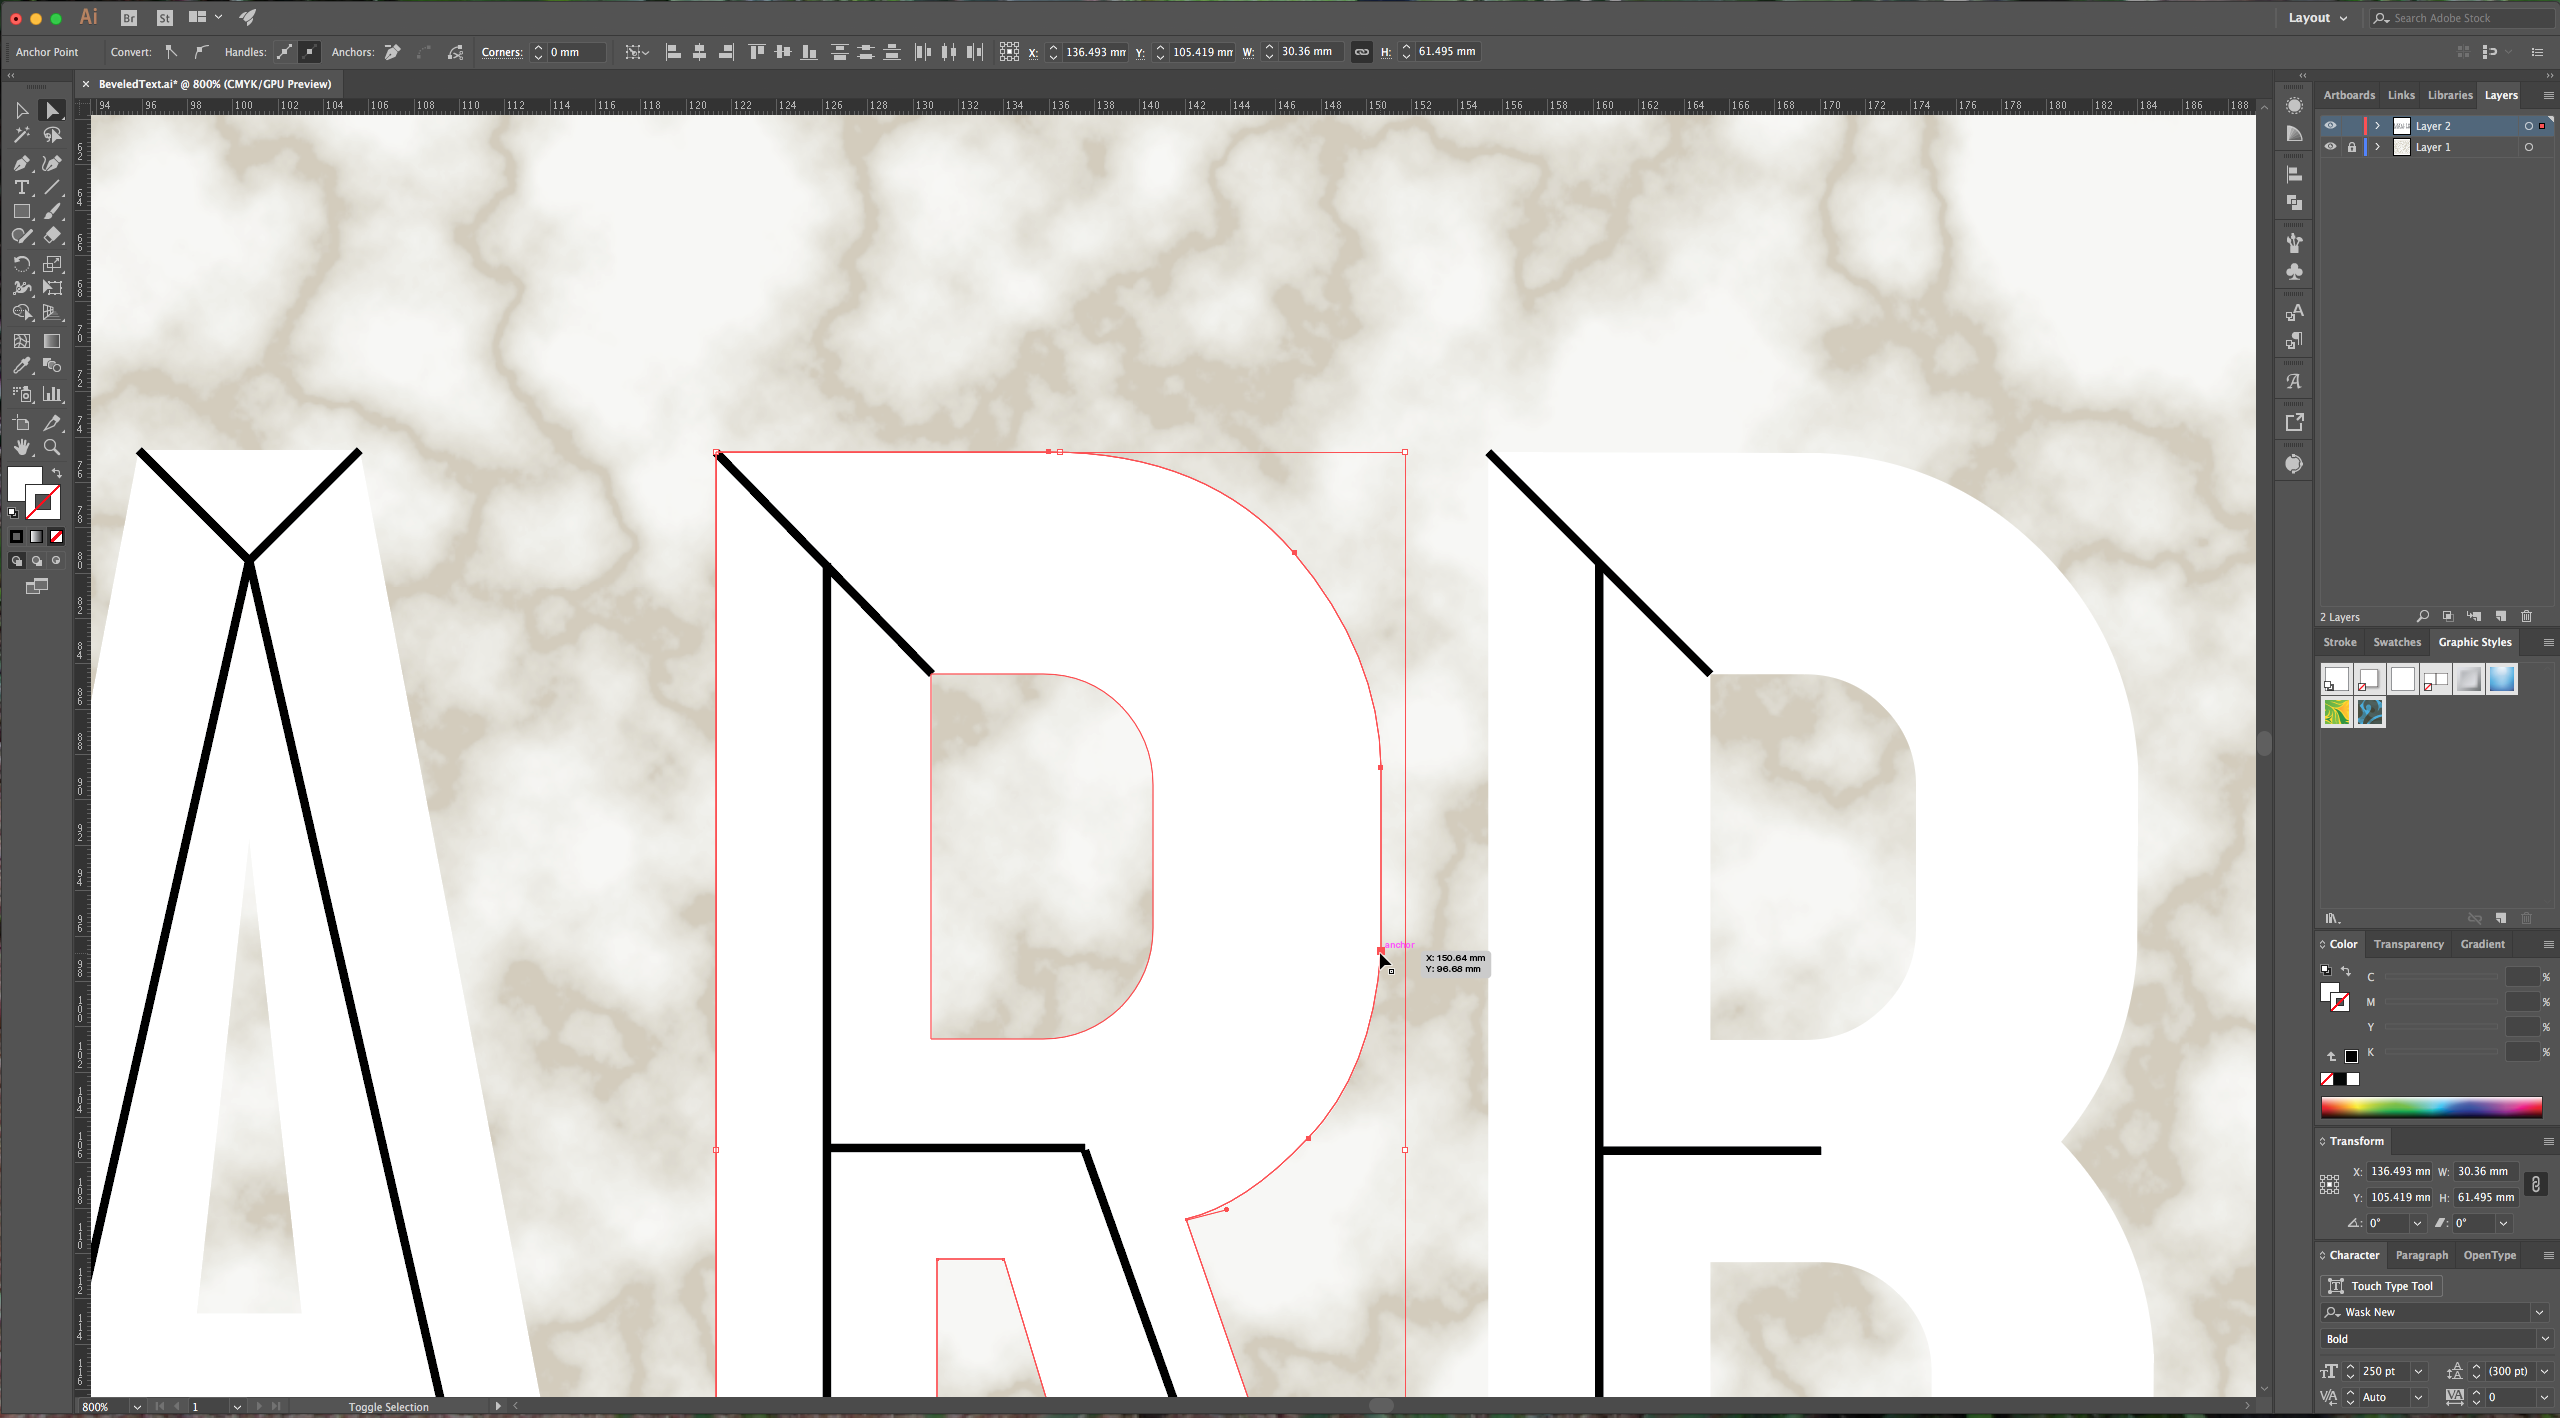
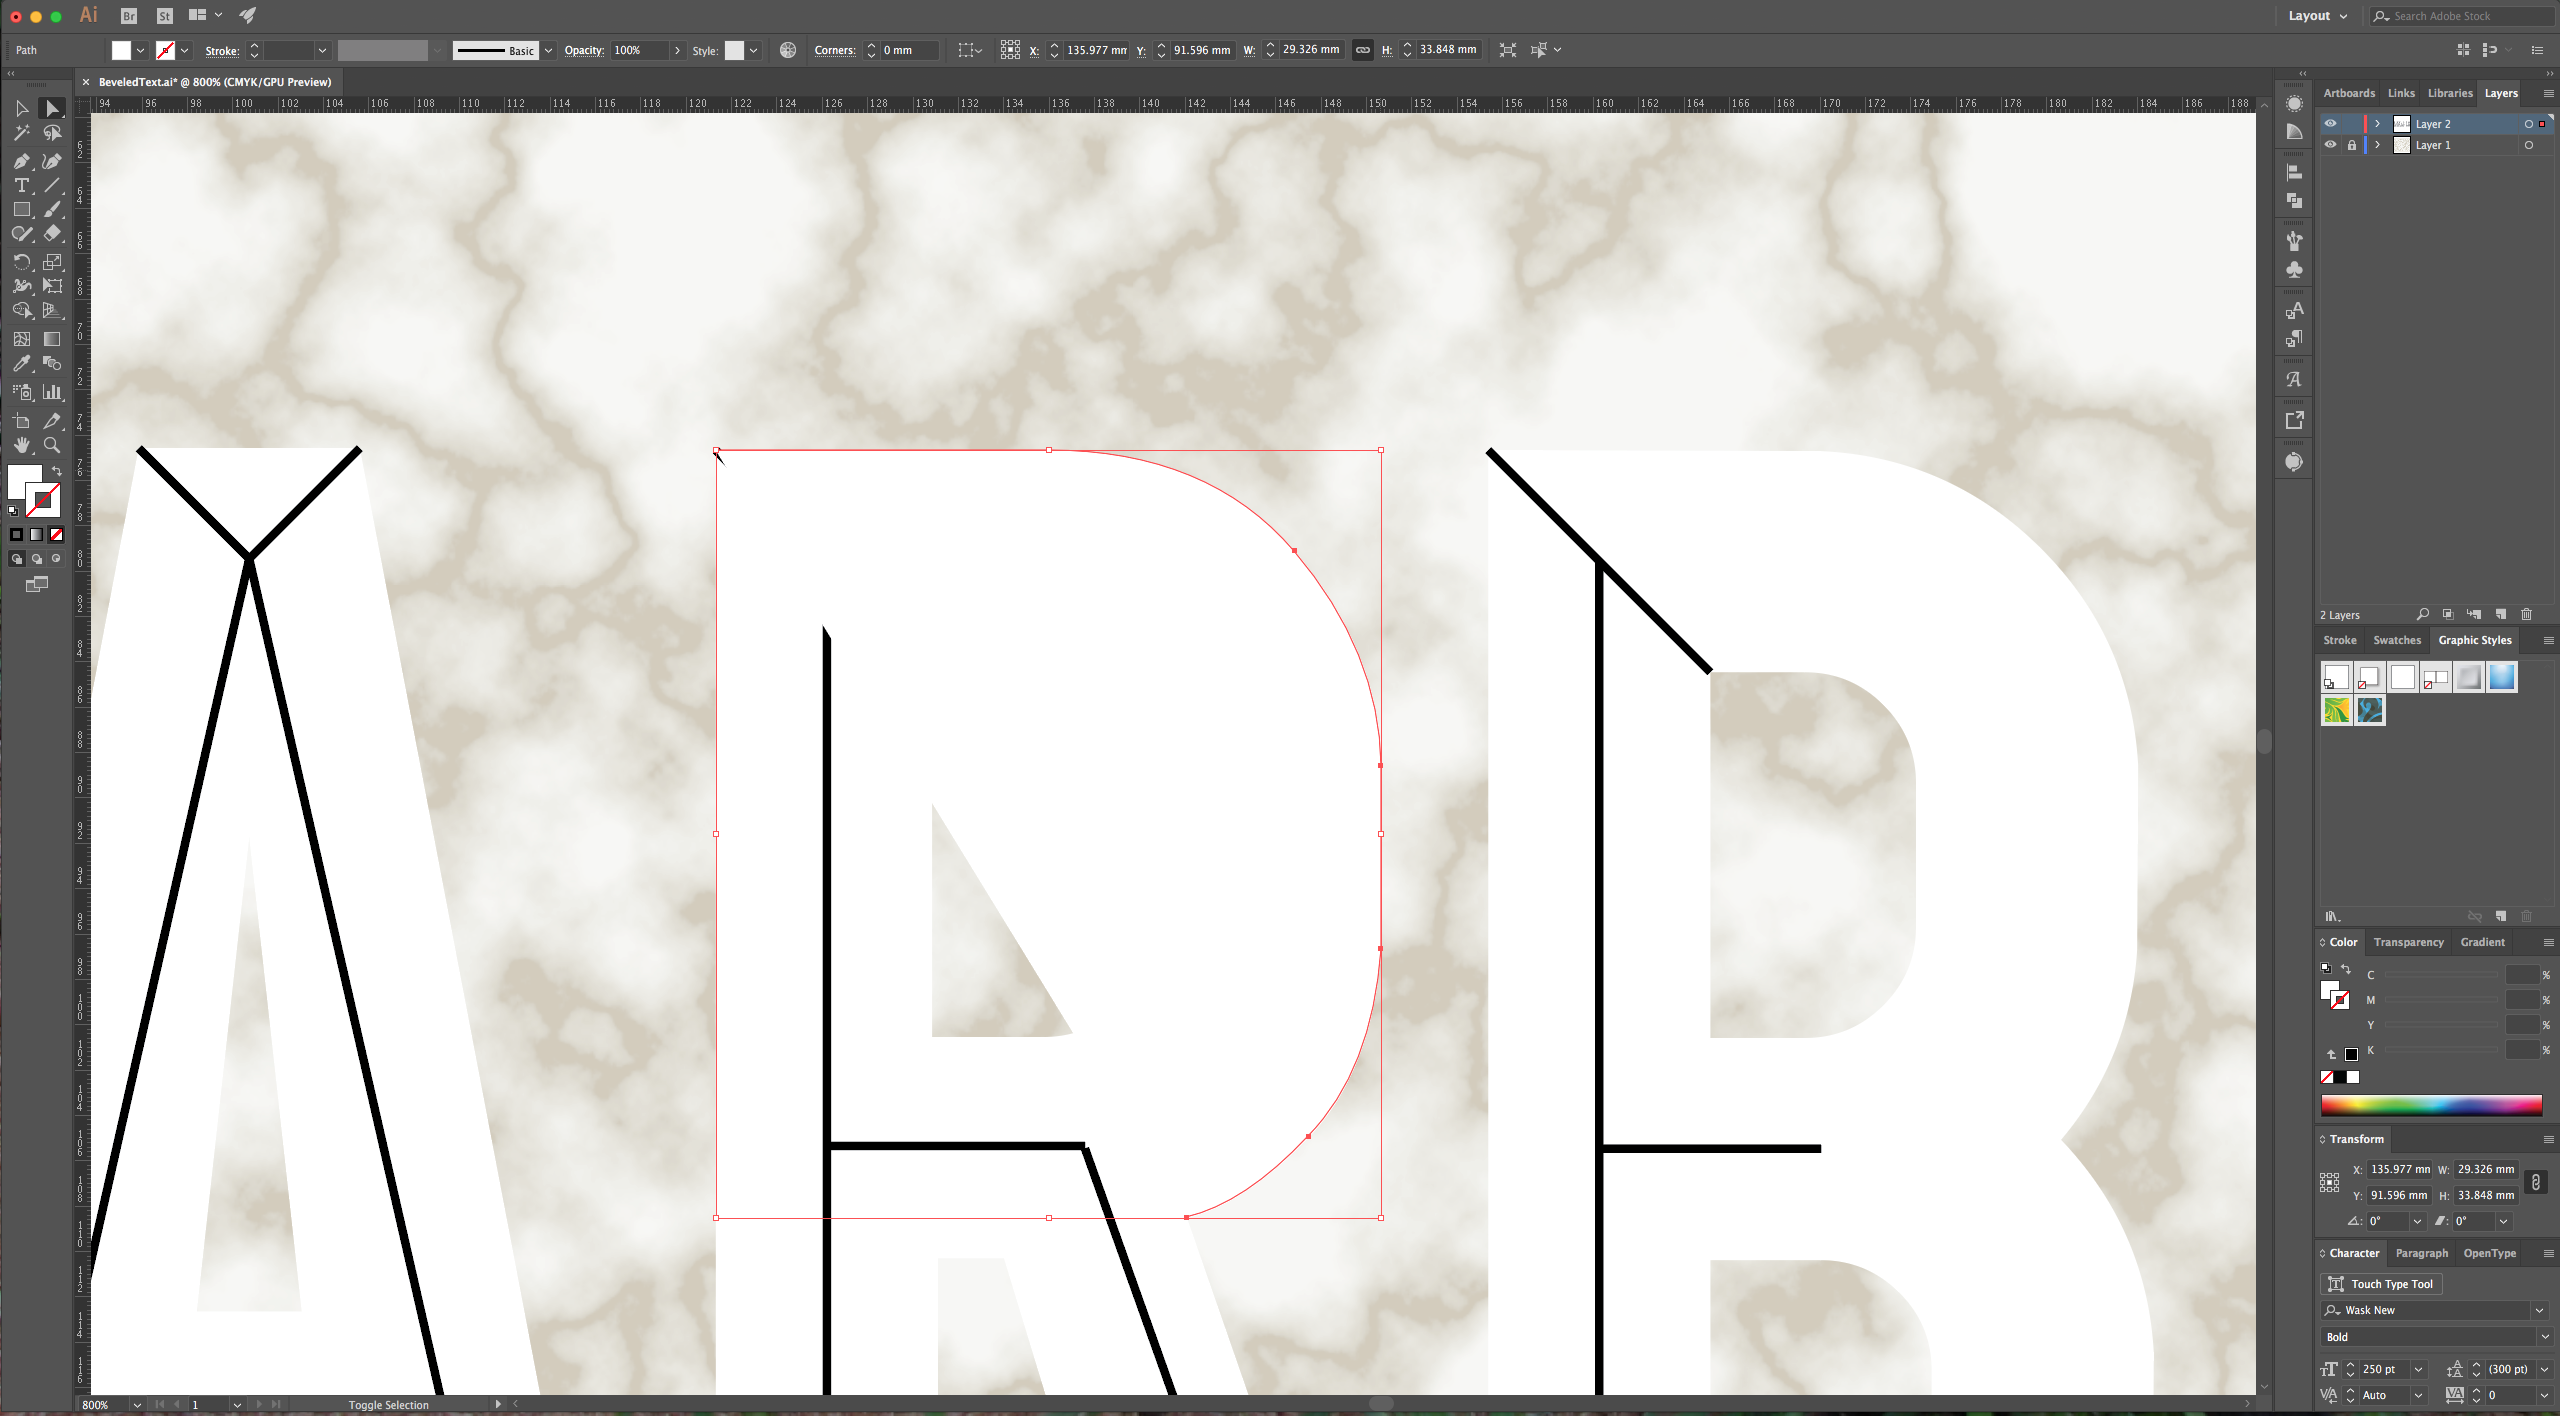
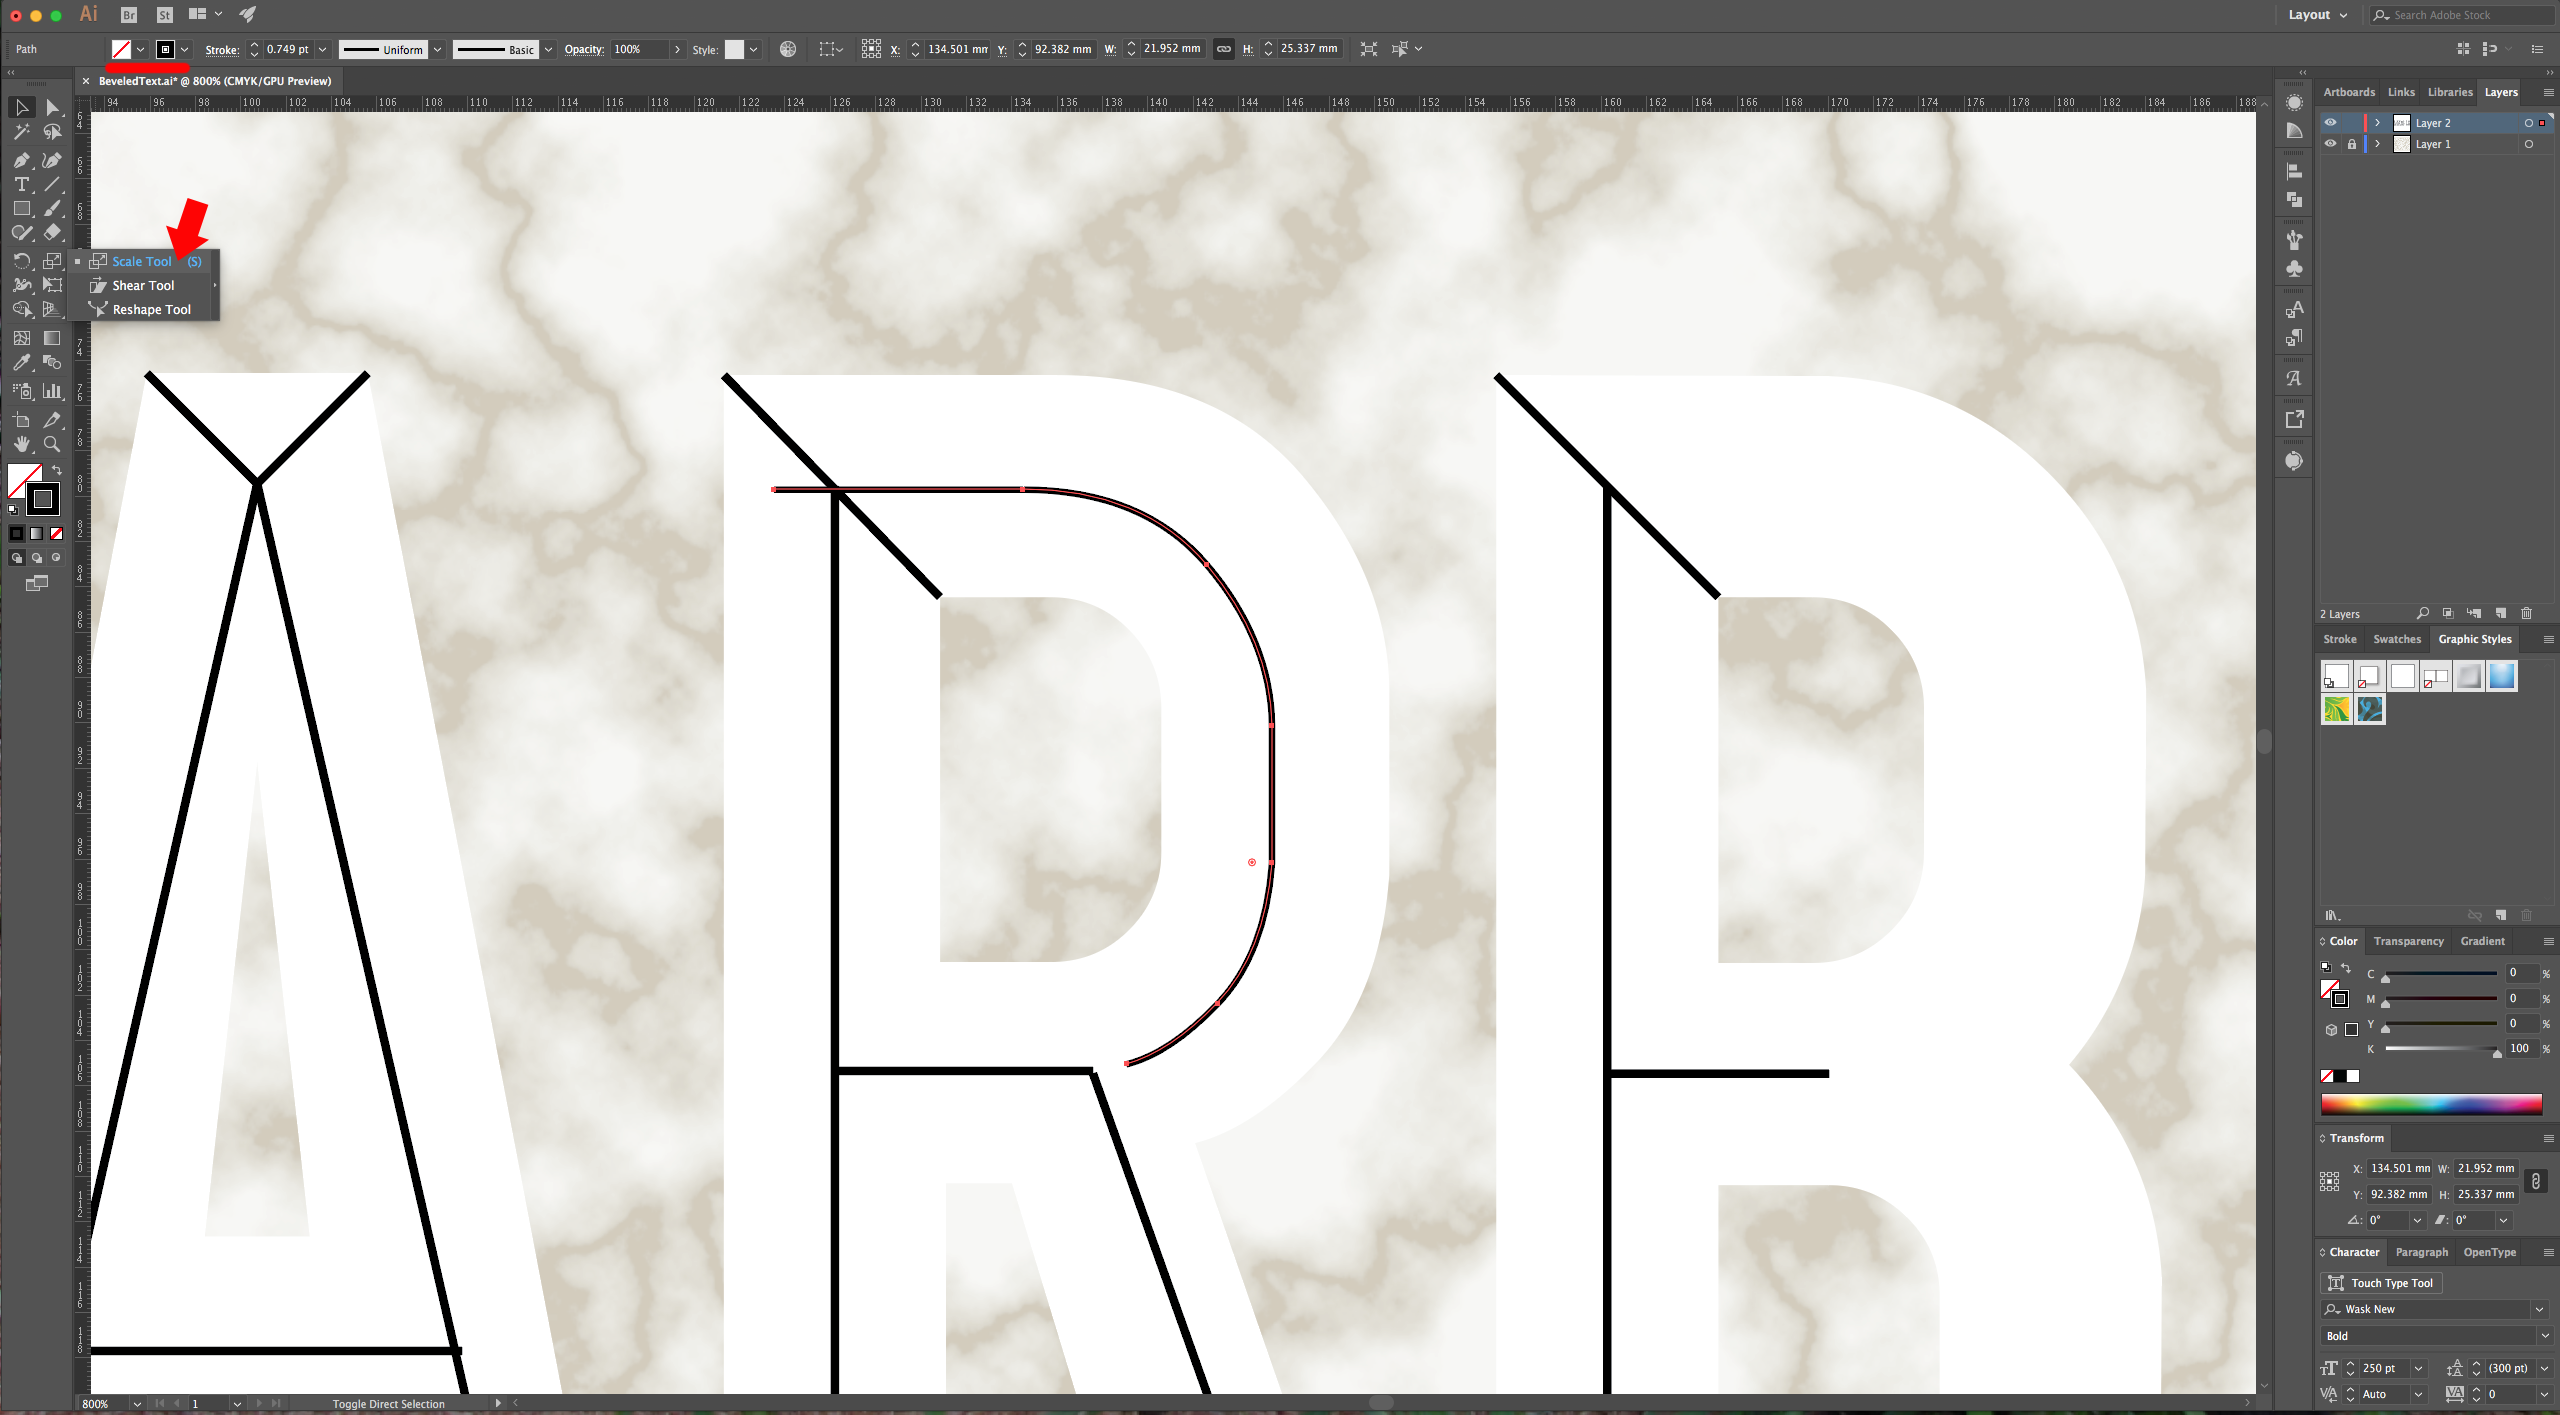
8 - For the rounded letters we will use the “Direct Selection Tool” (A) to select the “Anchor Points” we want to use. To do this, click on the letter you want to work on to select it, then click on the “Point” you want to choose and make sure is selected (it should be filled with color”. Hold the “Shift” key to select another “Anchor Point” and keep the one you already selected. Do this with all the points that form the “curve”. Then copy and paste your selection (Command/Control + C and Command/Control + V). Your pasted path will only have the white “Fill” and “No Stroke”, so change it to “No Fill” and black “Stroke”. Position the path in the center of the letter and use the “Scale Tool” (S) and scale it to fit your letter. Then, fix the ends to make them overlap with your other center paths. Repeat this for the other letters. You may need to tweak some of the paths to get the curves right.

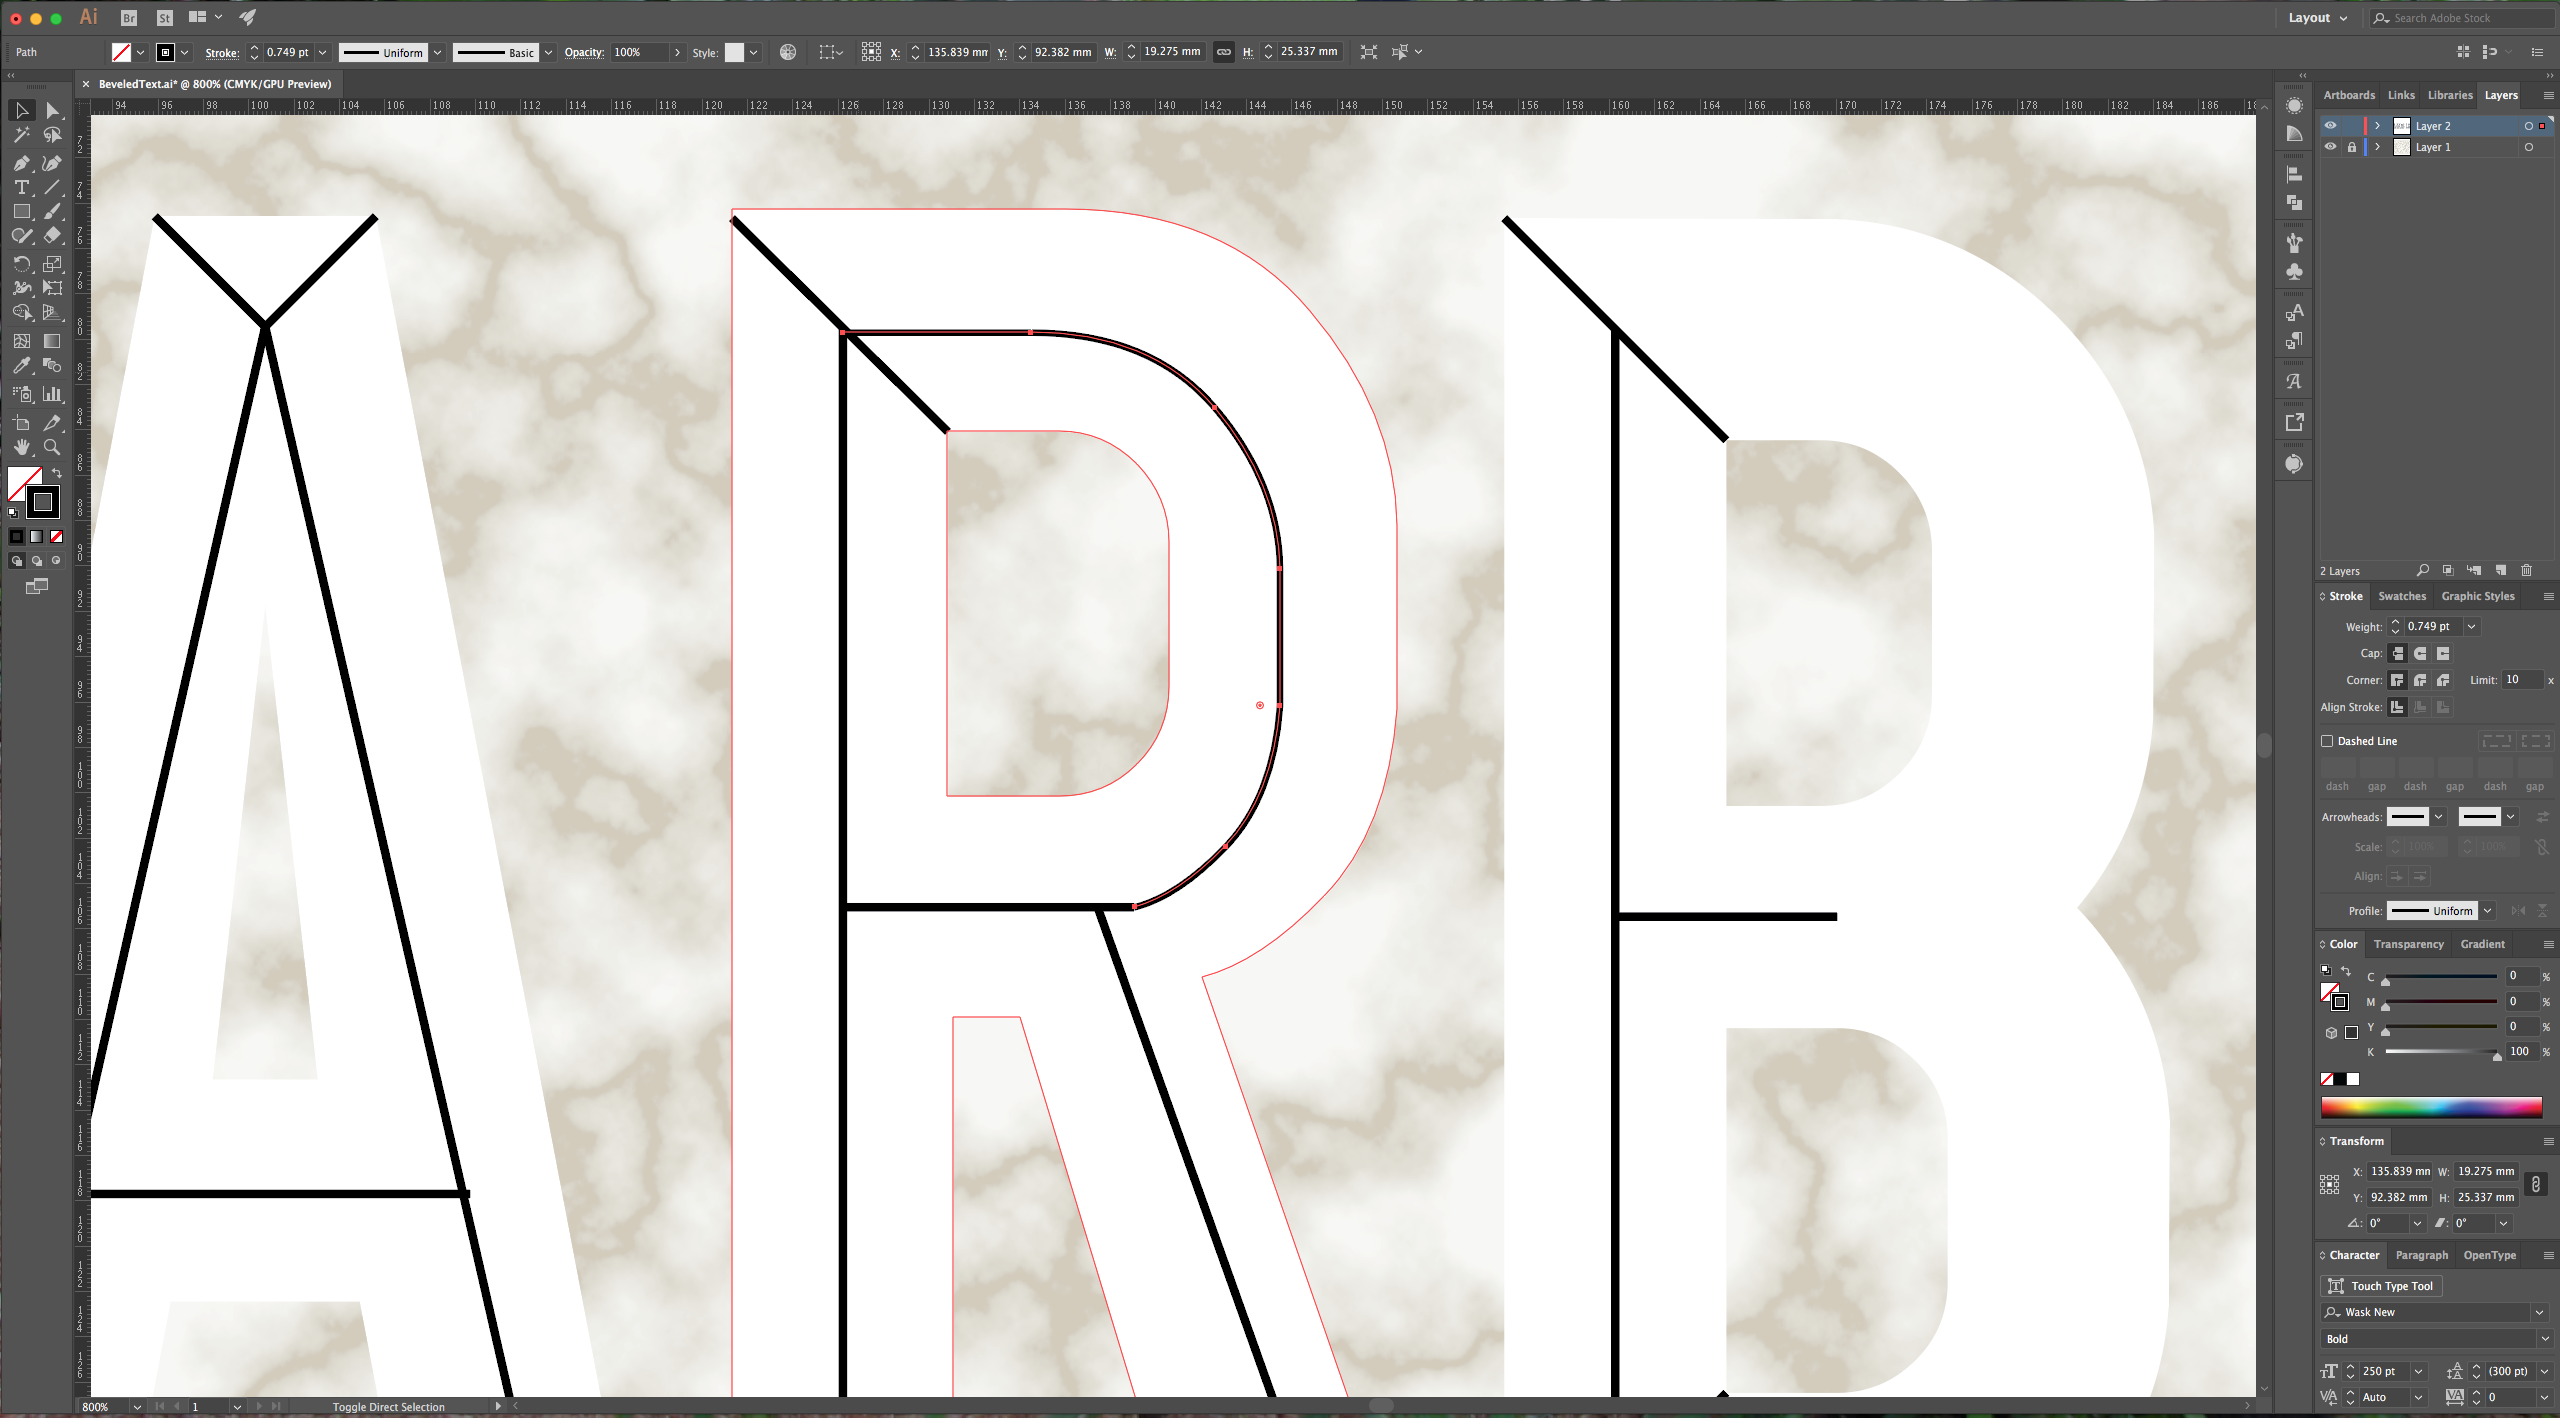

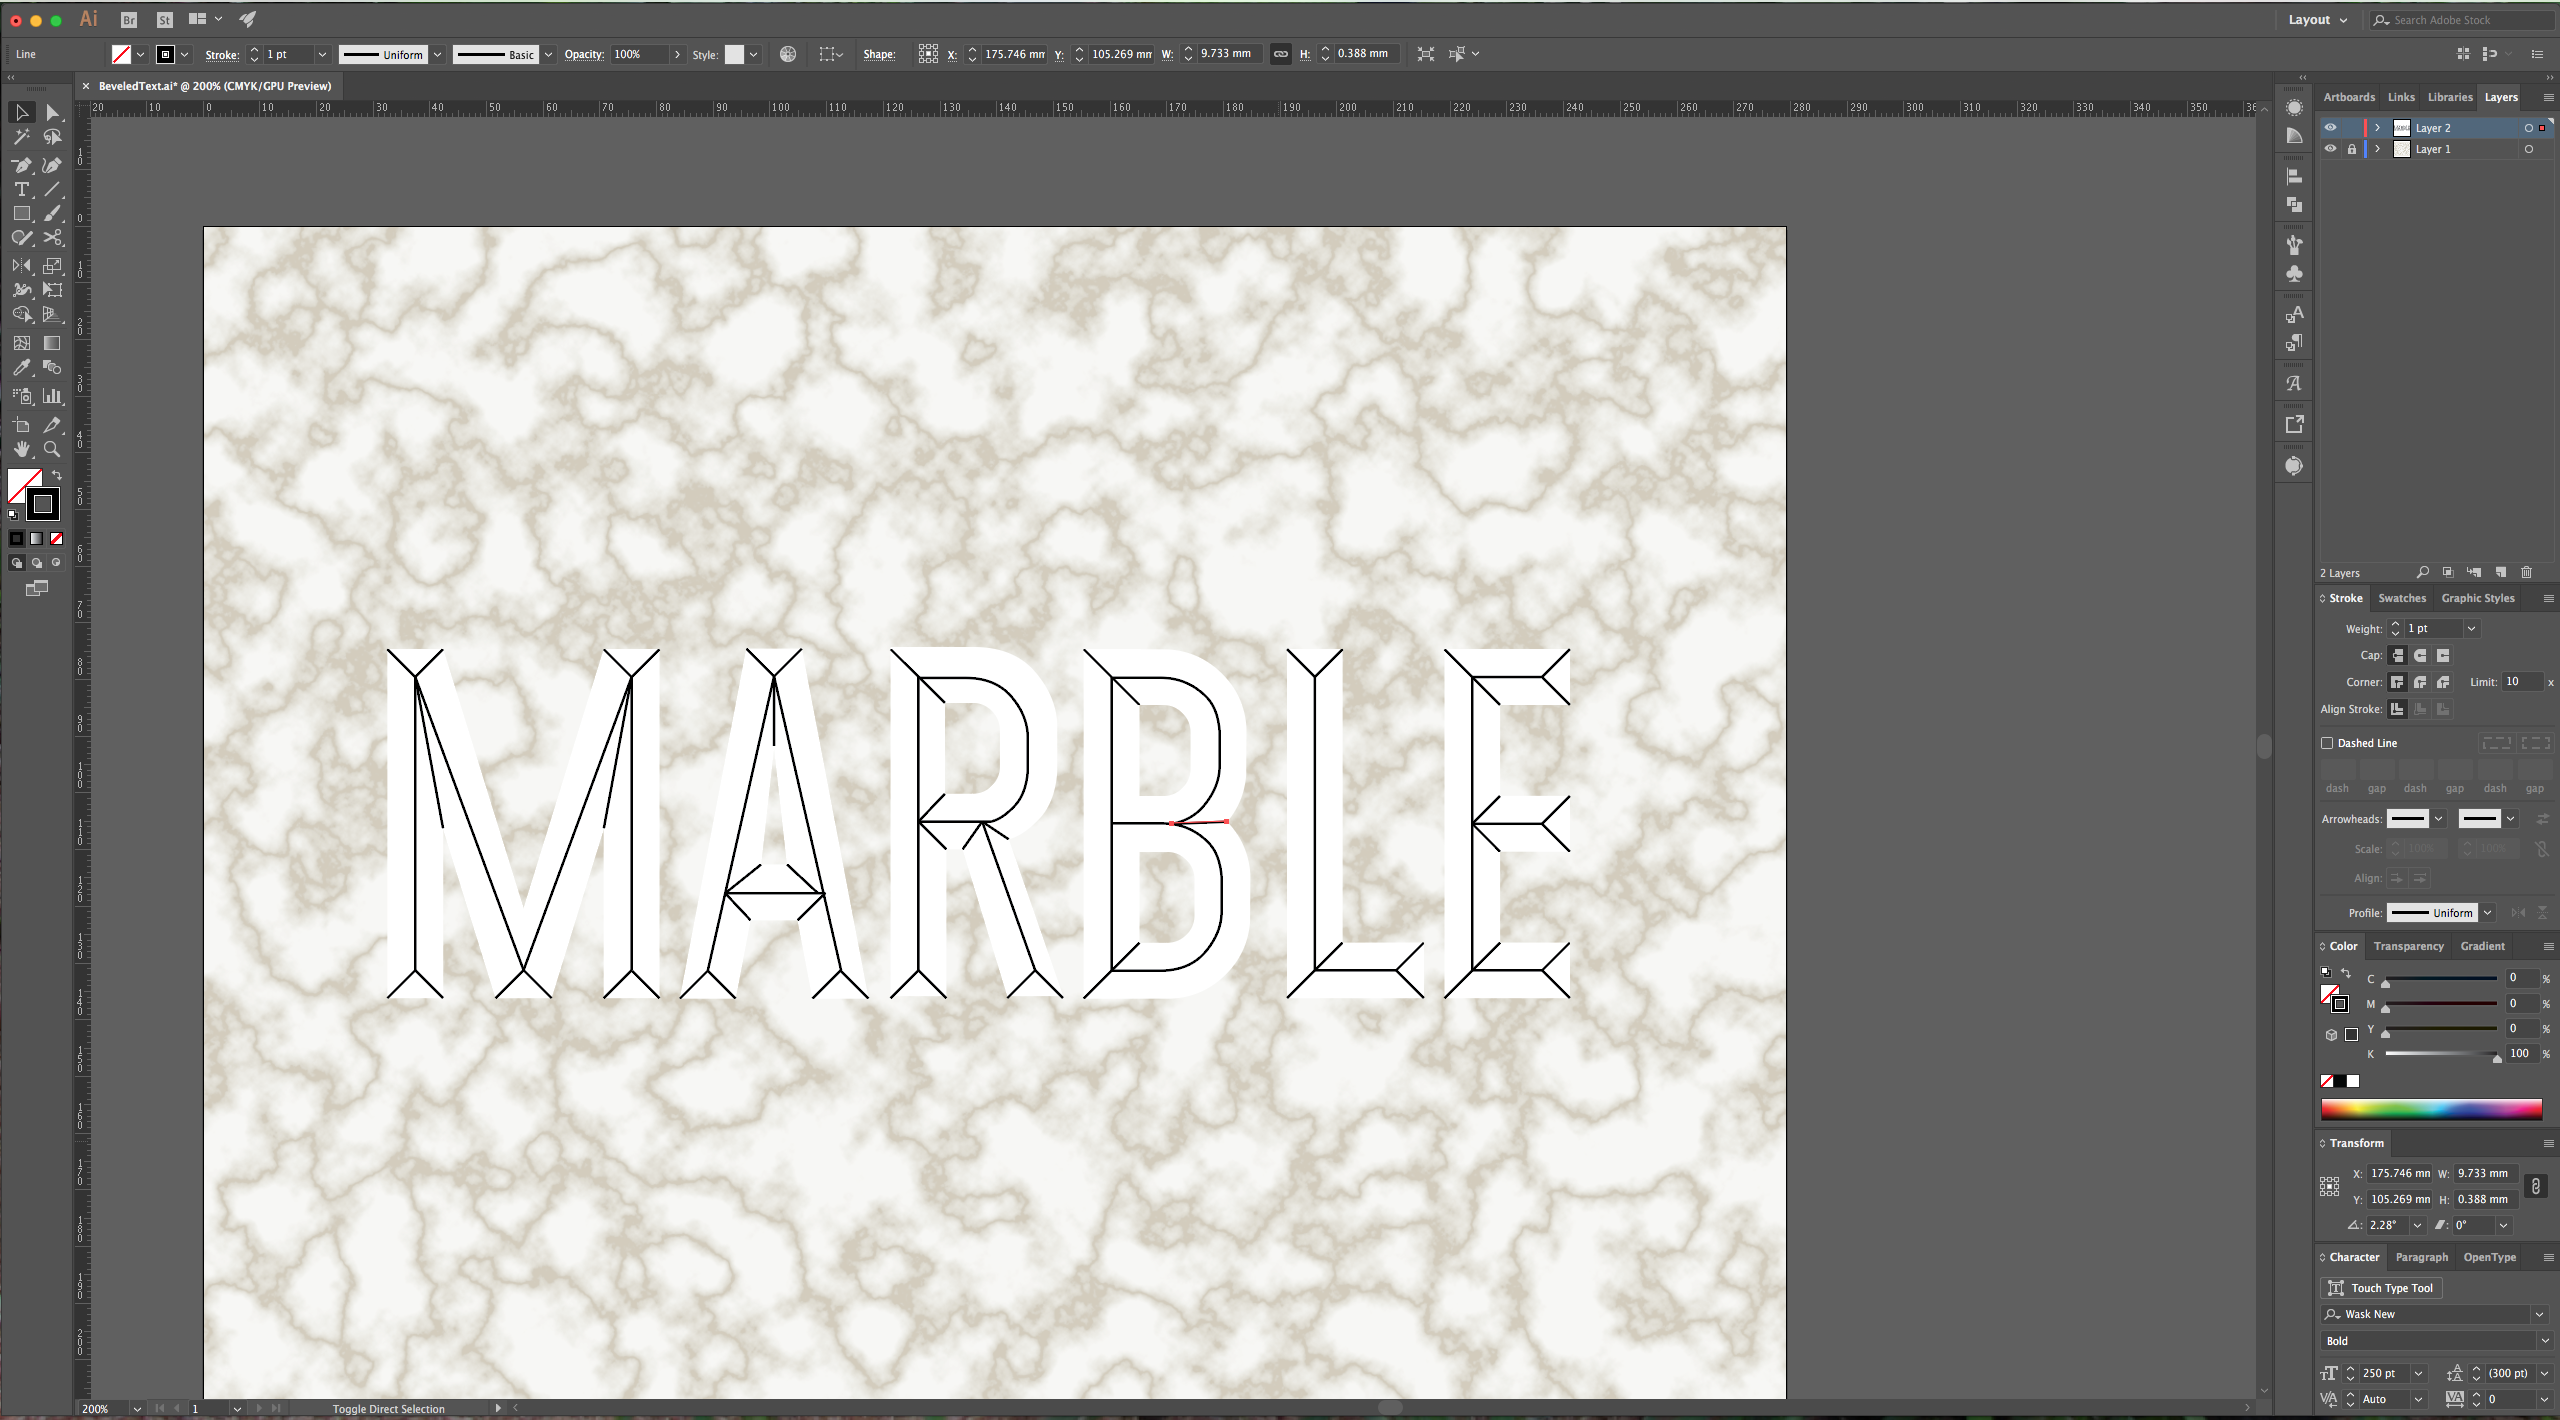
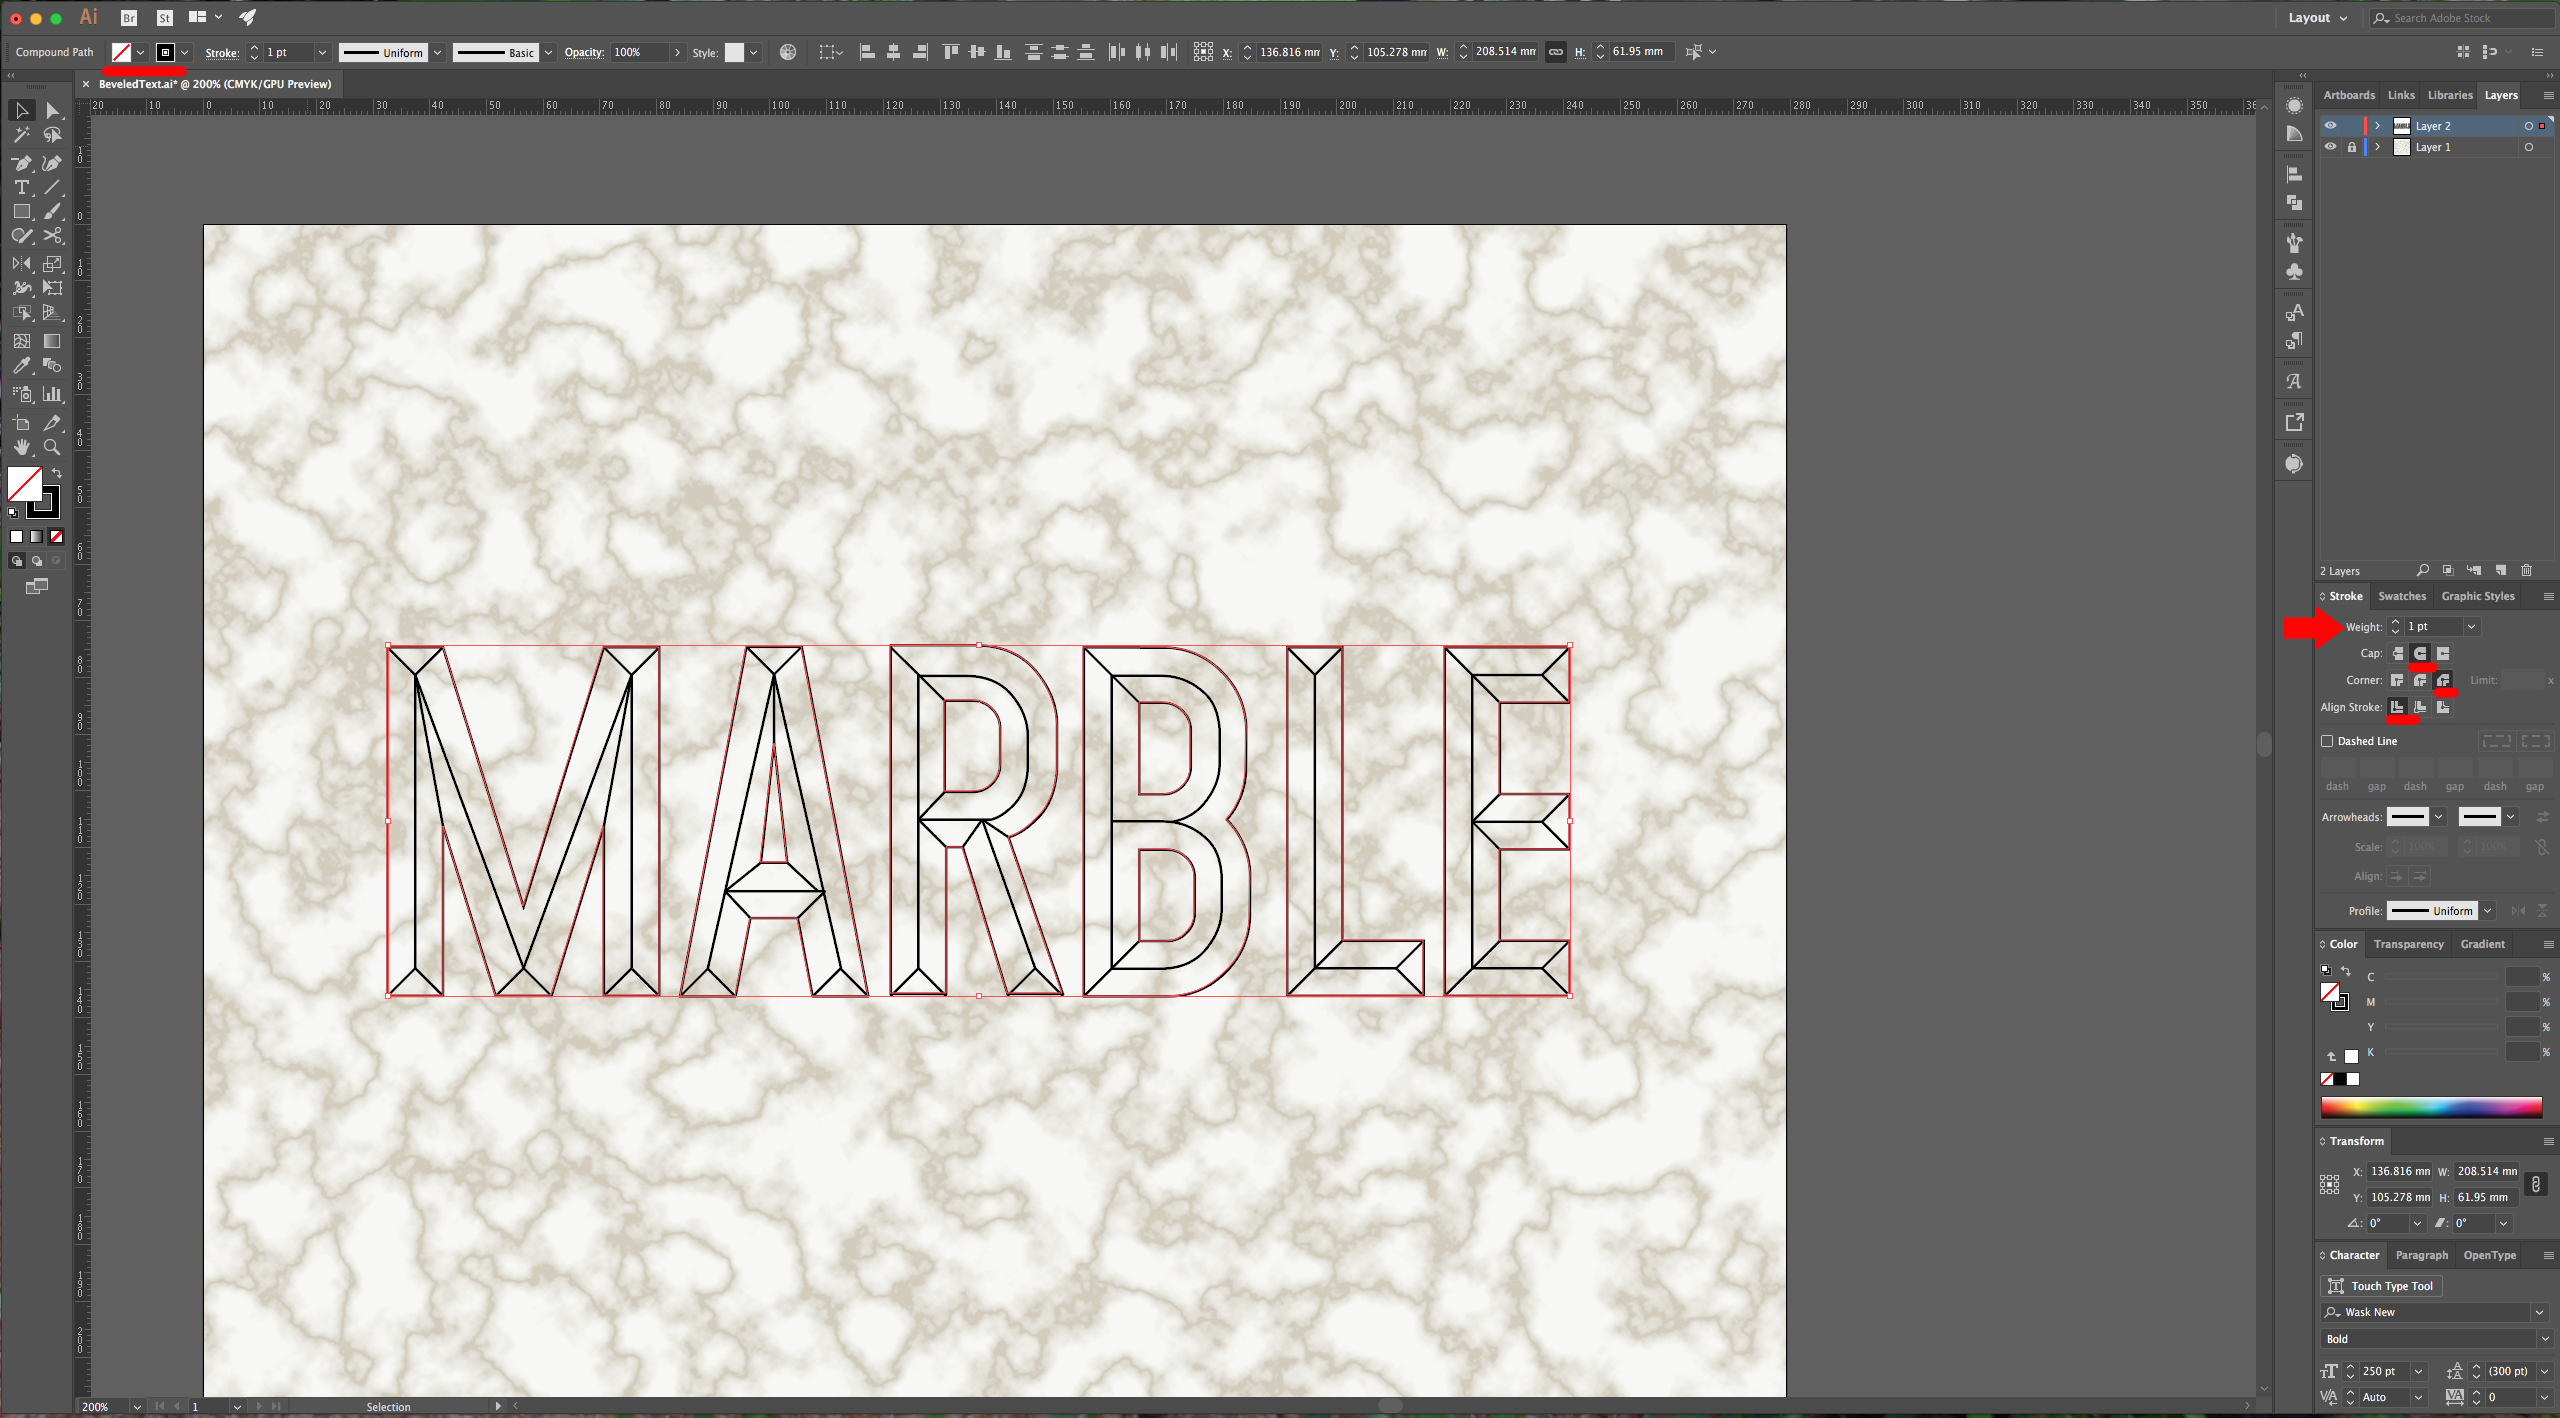
9 - Check your text again and add more lines if it seems that they are missing. Select all your “Paths” and make sure the strokes are the same size. If not, go to the “Stroke” window and give them a “Weight” (we used 1 point).
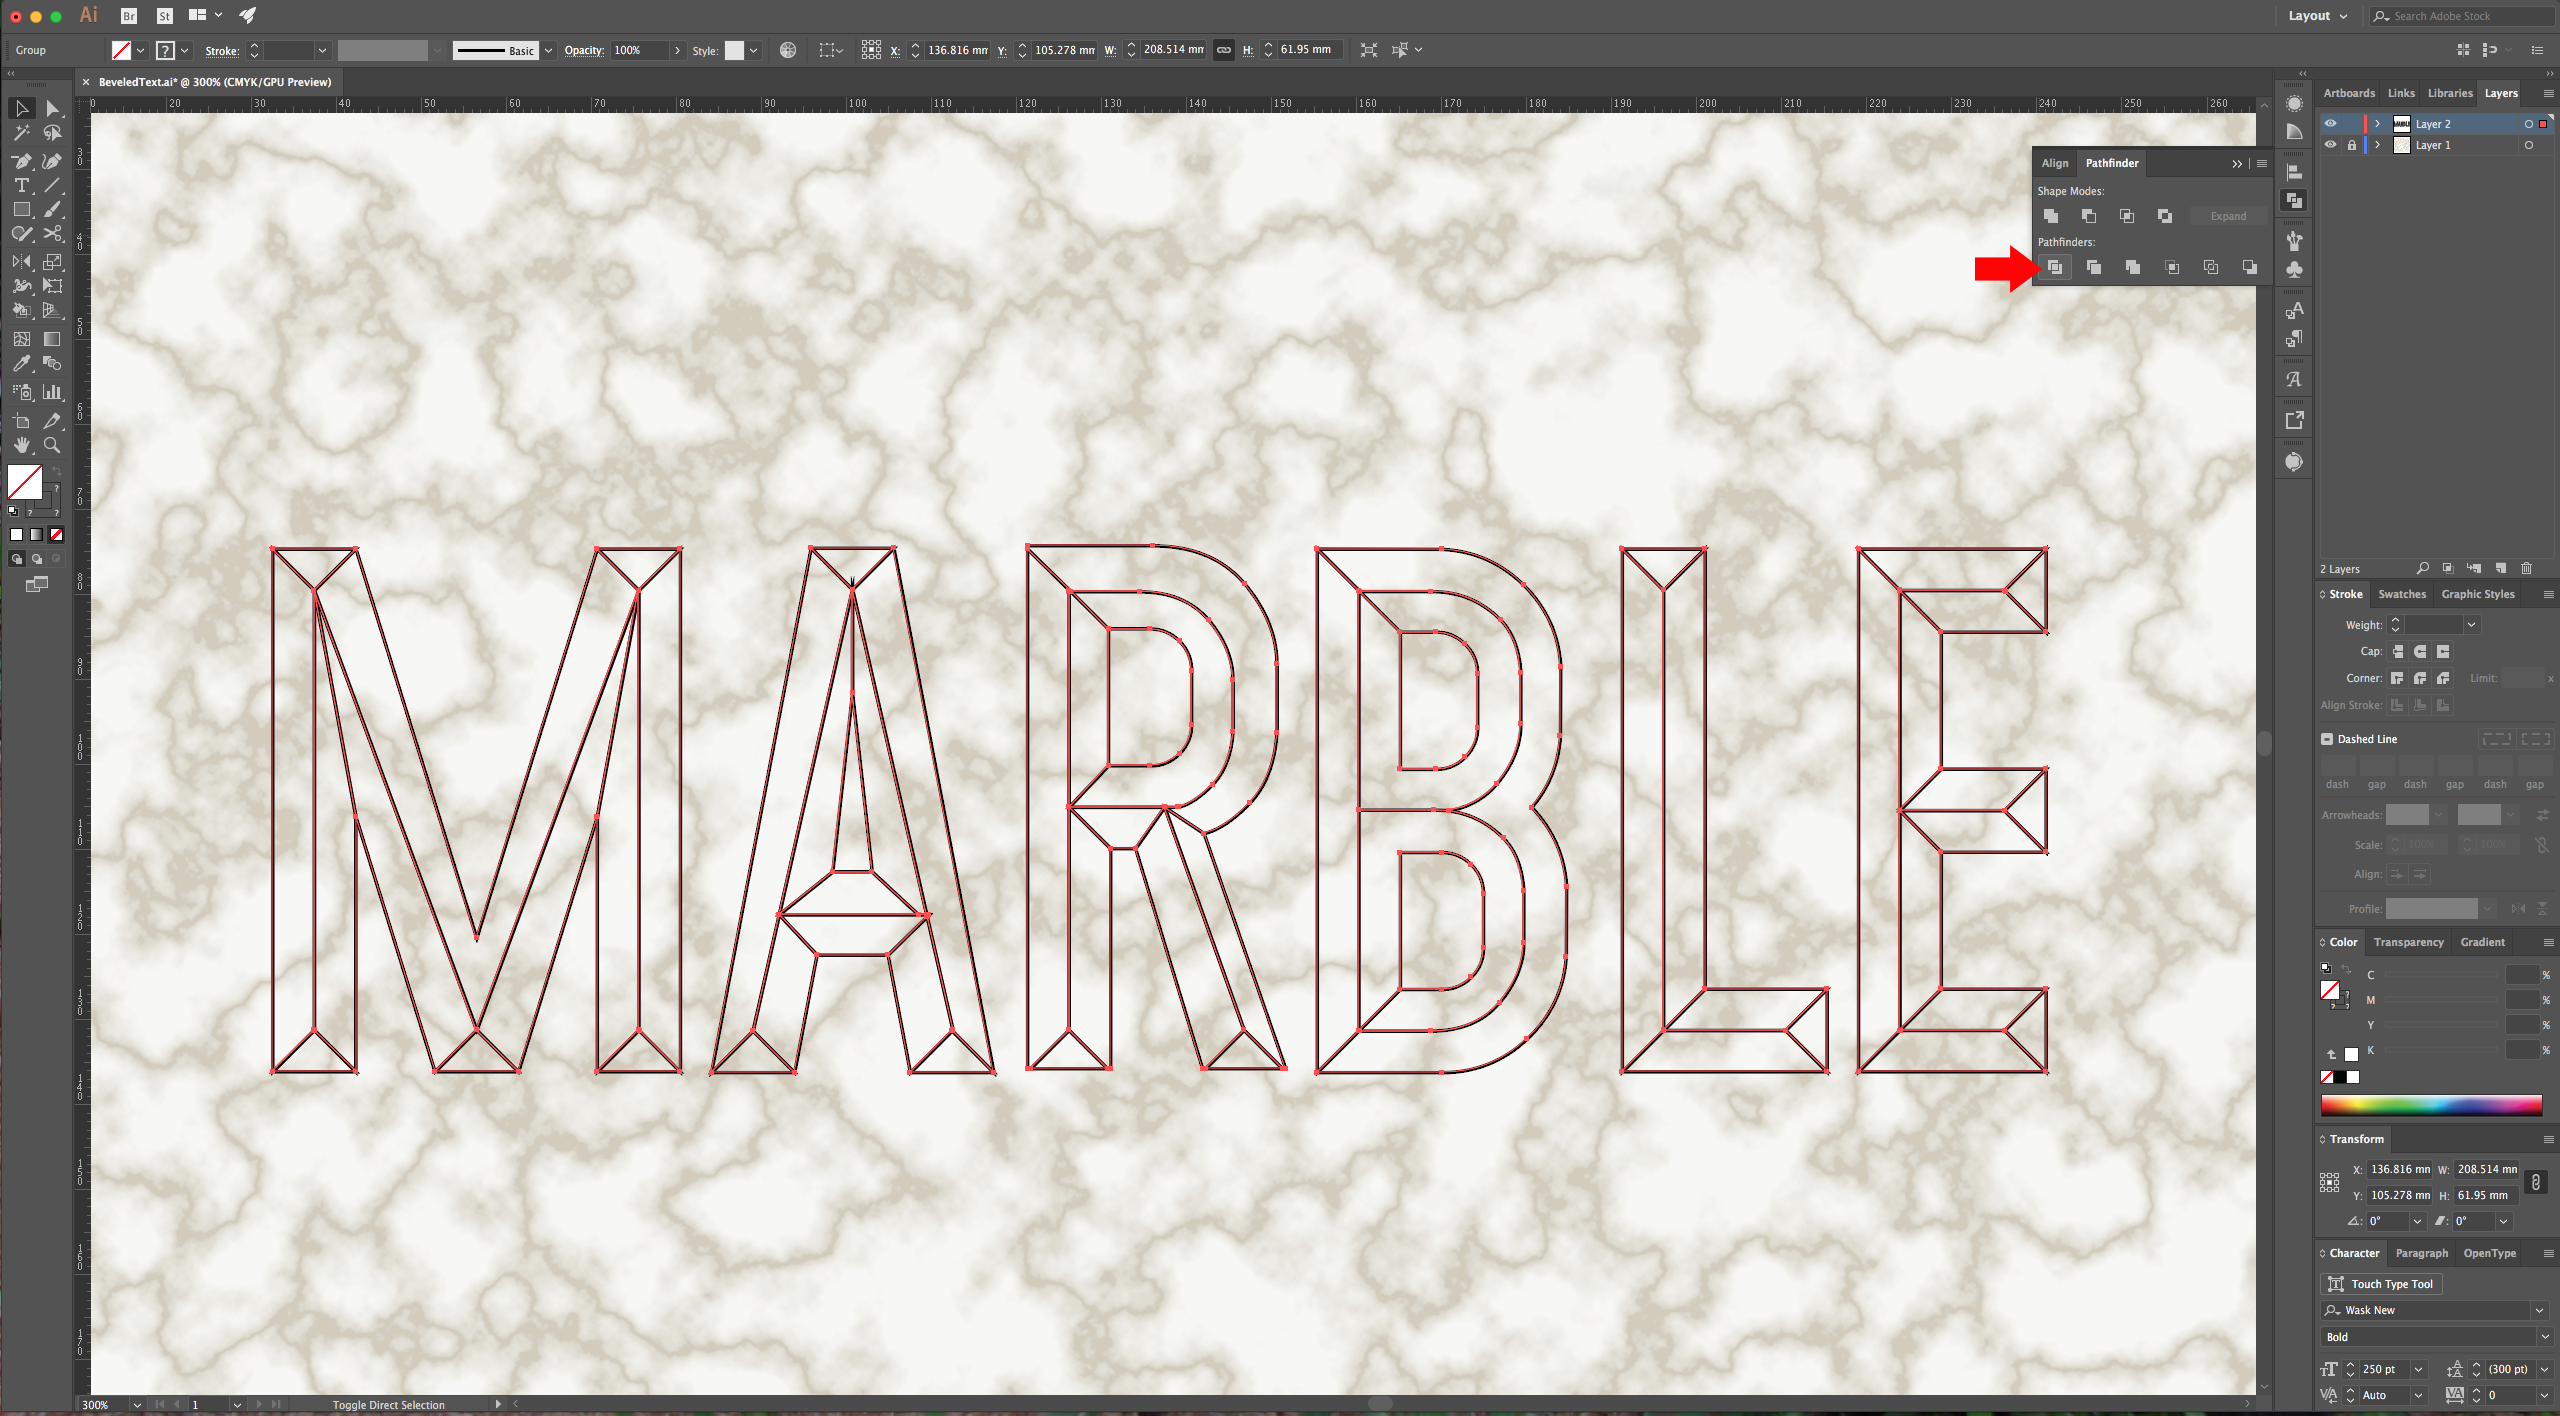
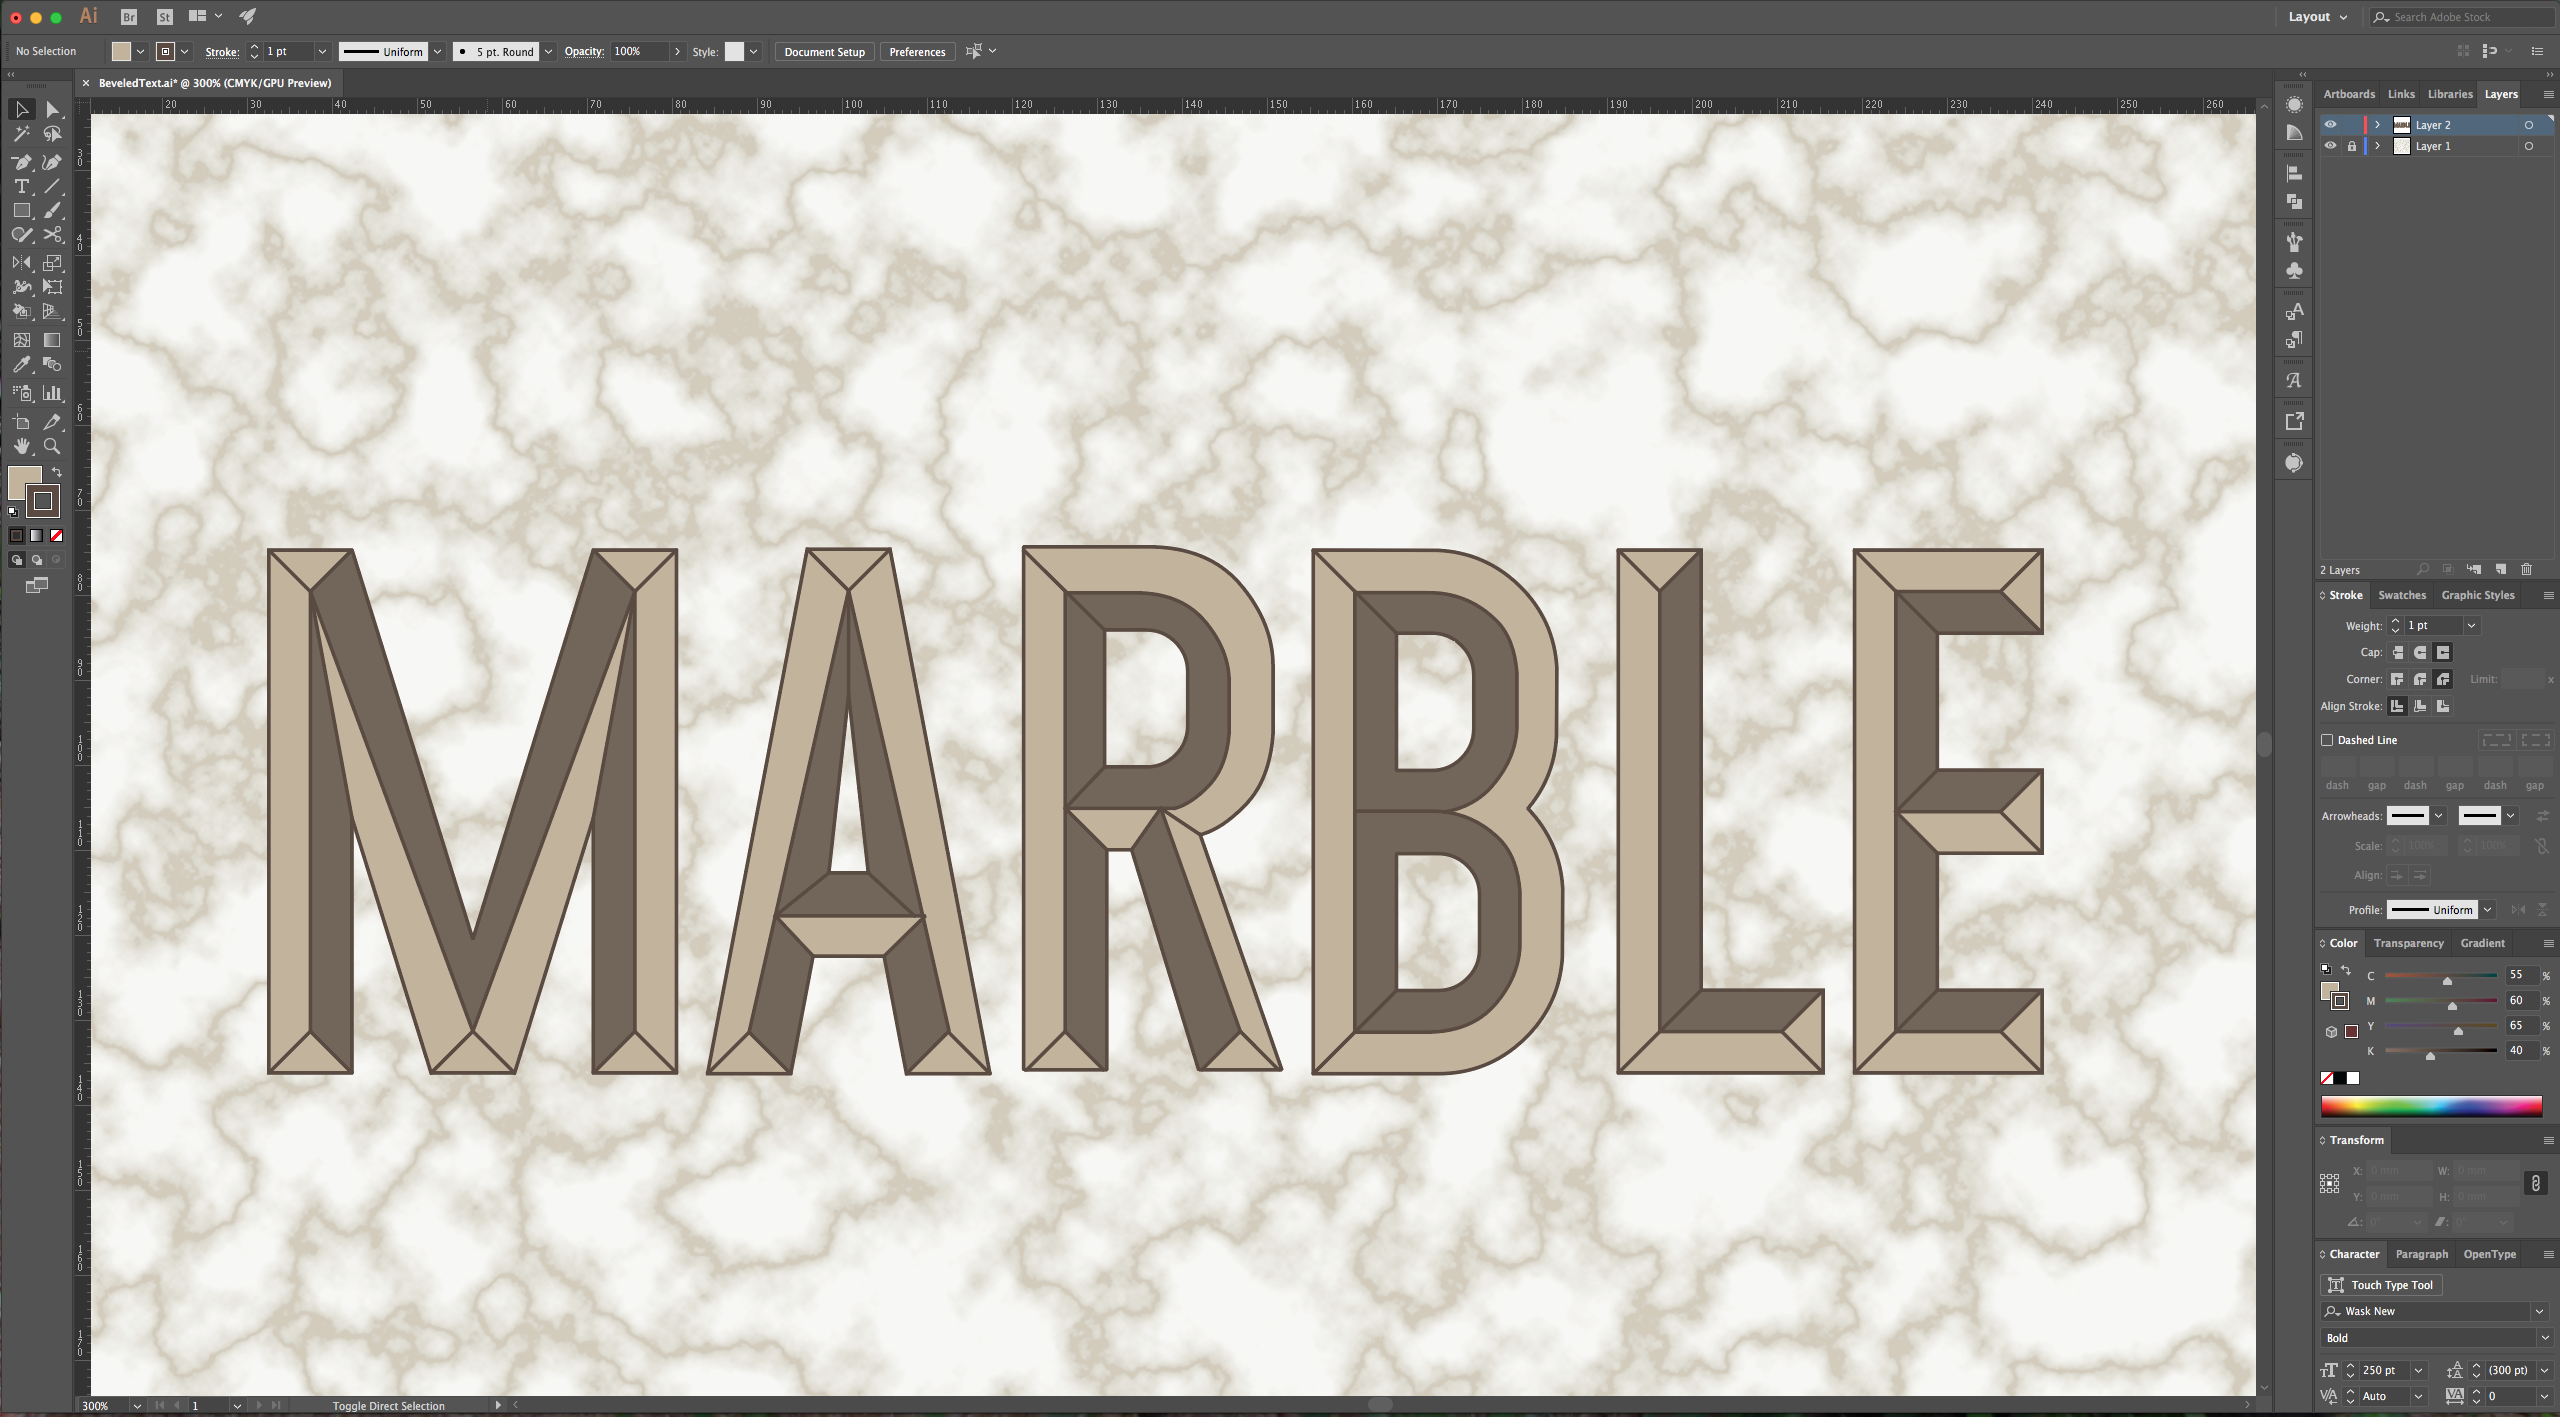
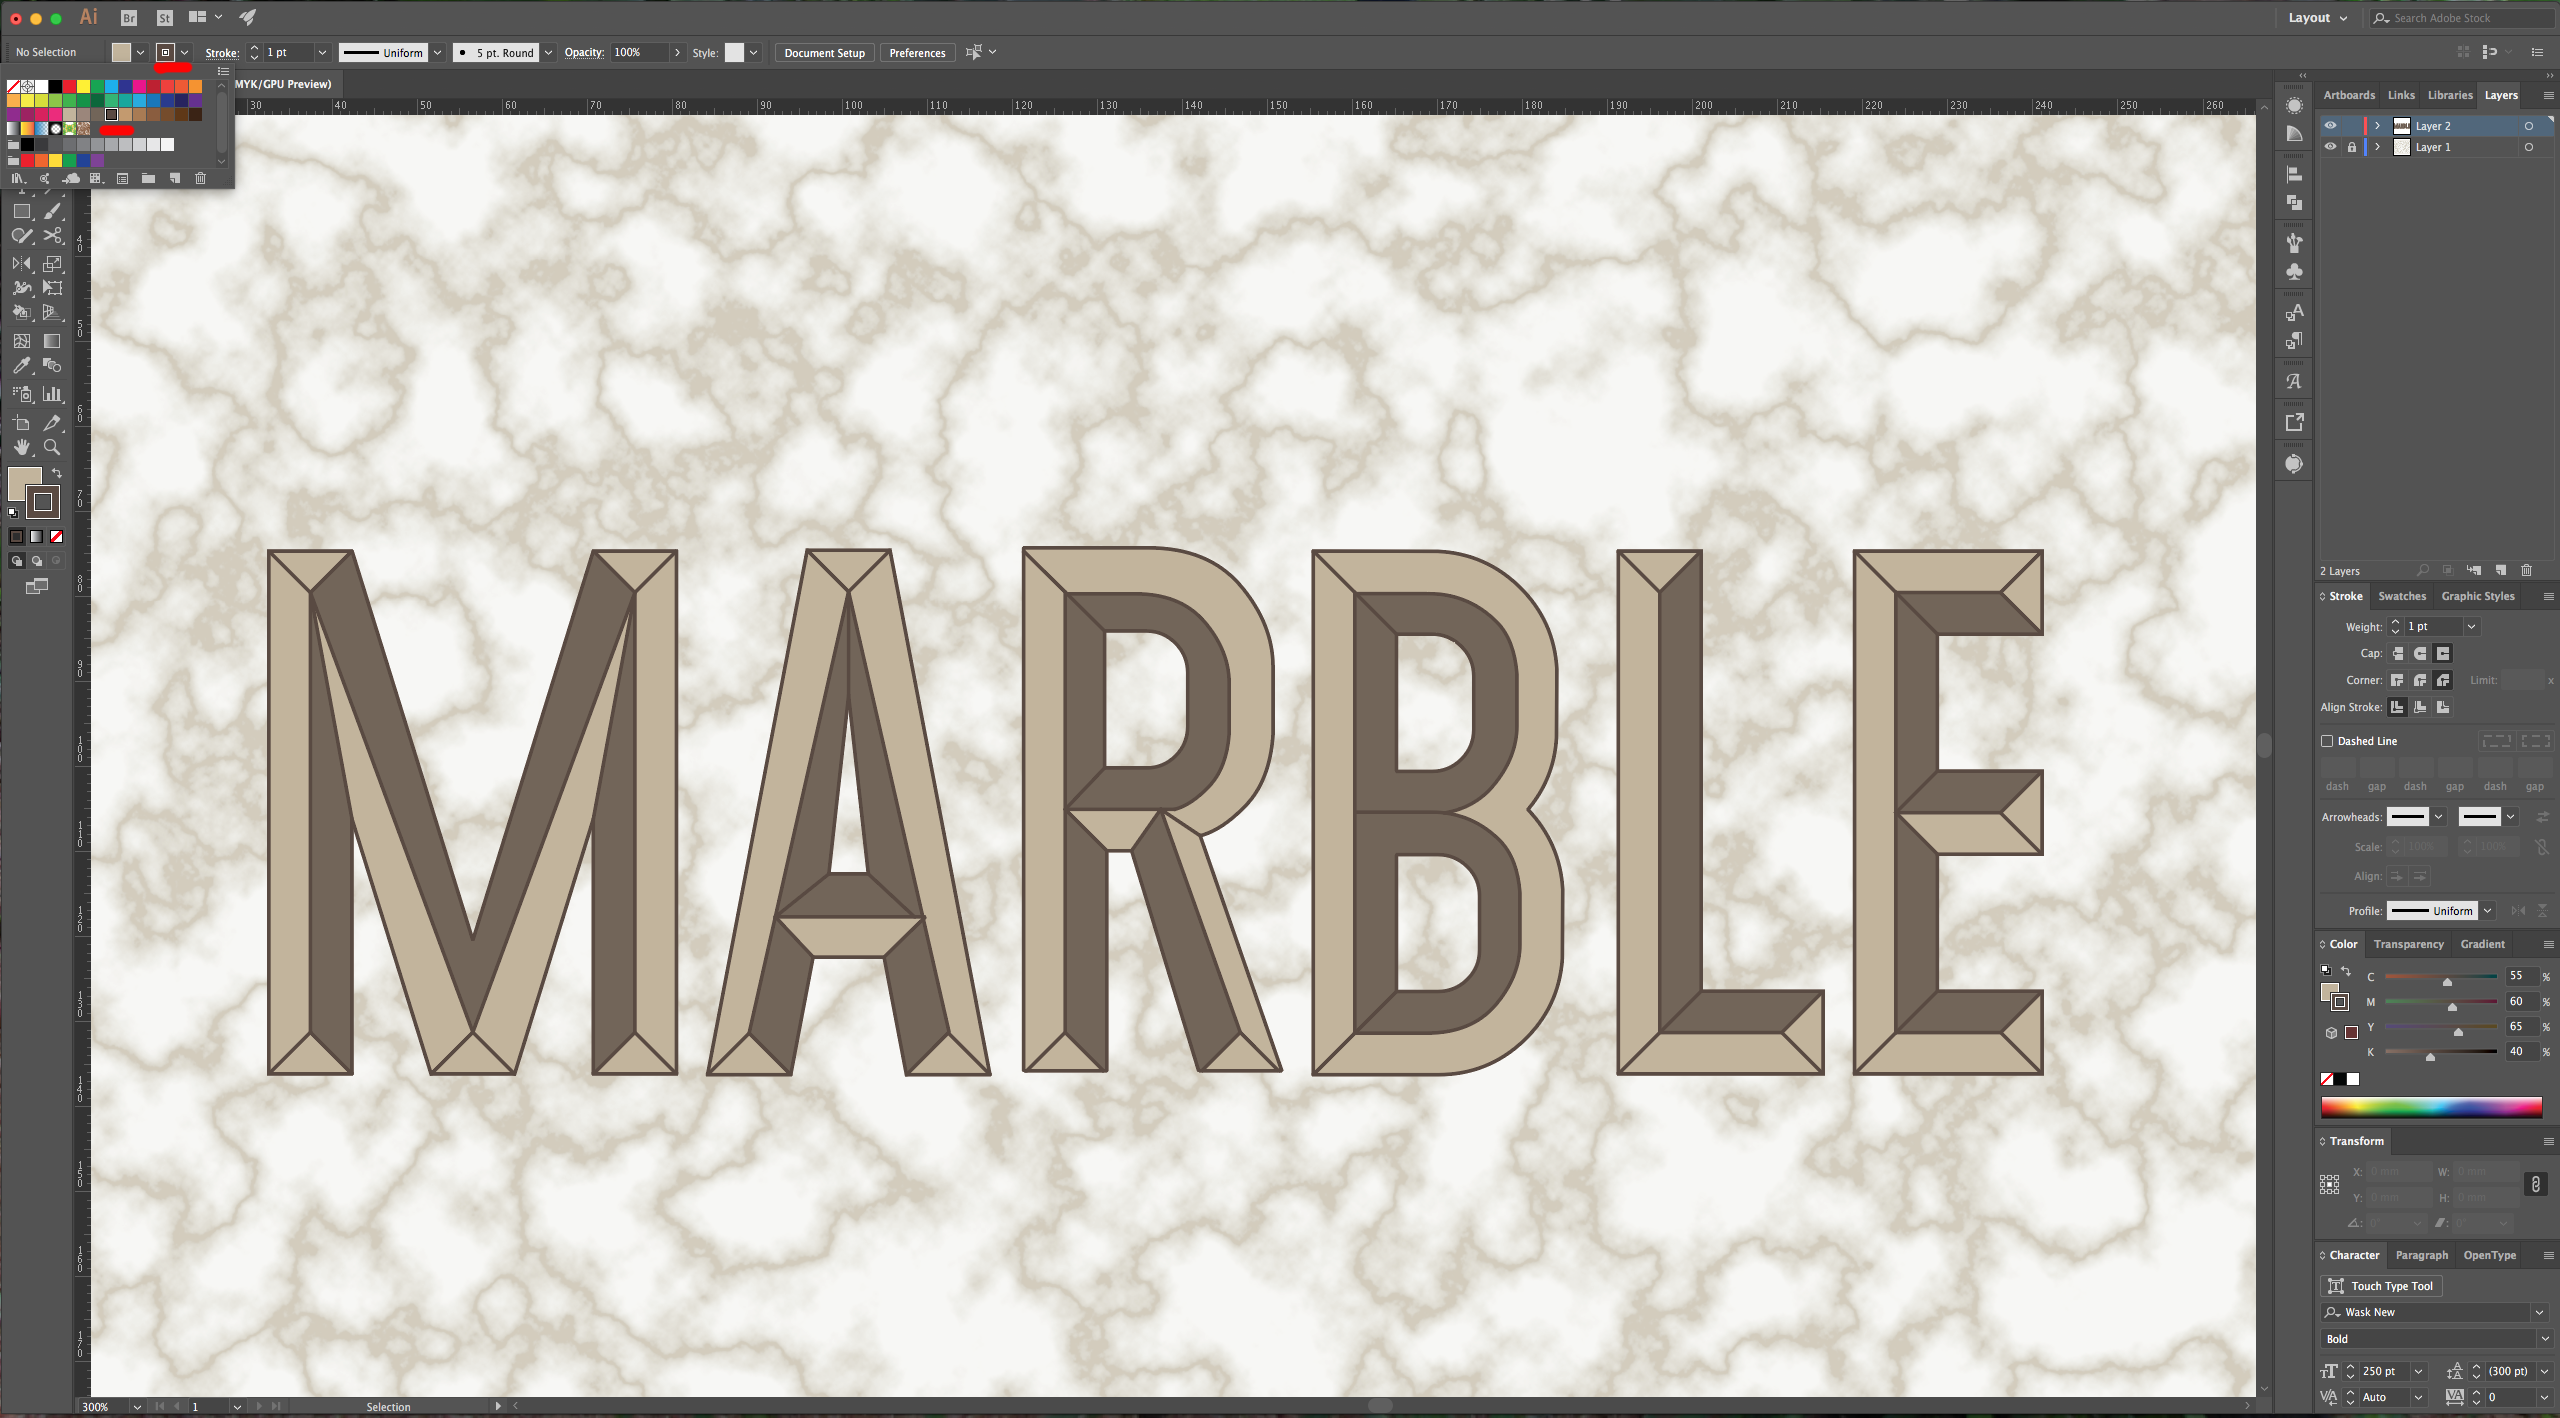
10 - Select your text and change the “Fill” to “None” and make the “Stroke” black. Select all your paths and in the “Pathfinder” window use the “Divide” option. Keep your selection and in the “Stroke” window choose “Rounded Cap” in the “Cap” option and “Bevel Join” in the “Corner” option.
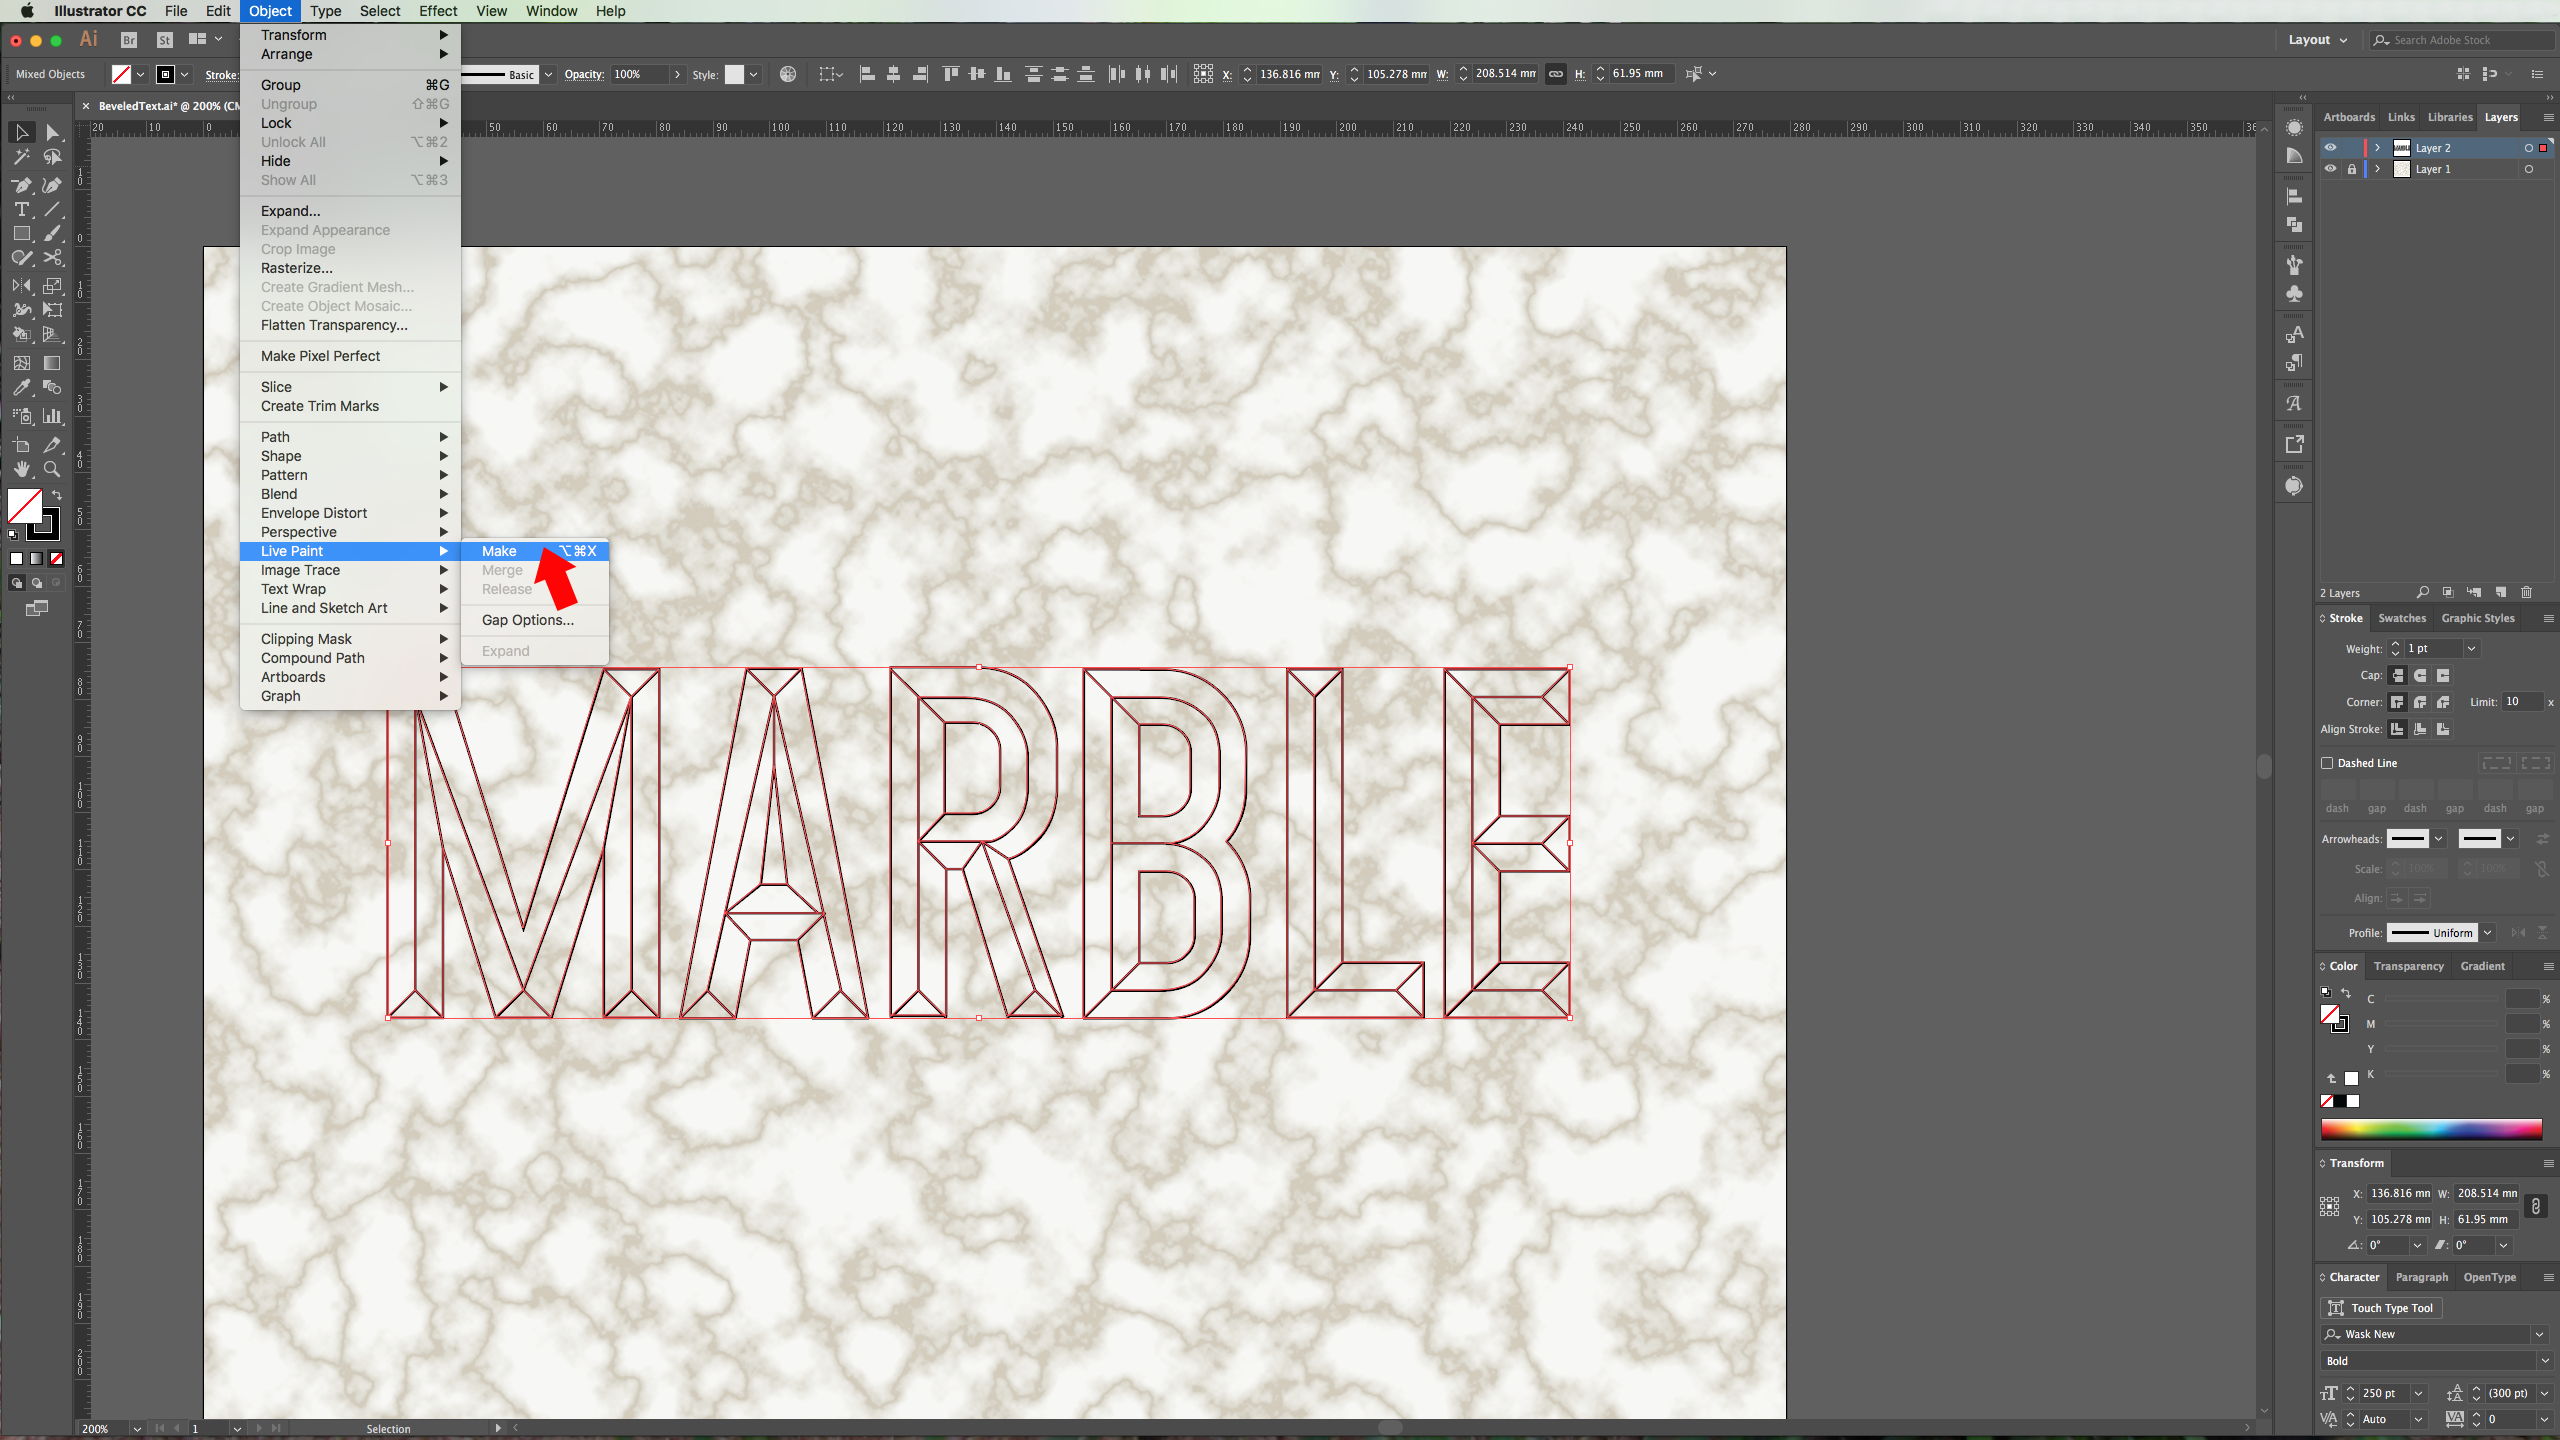
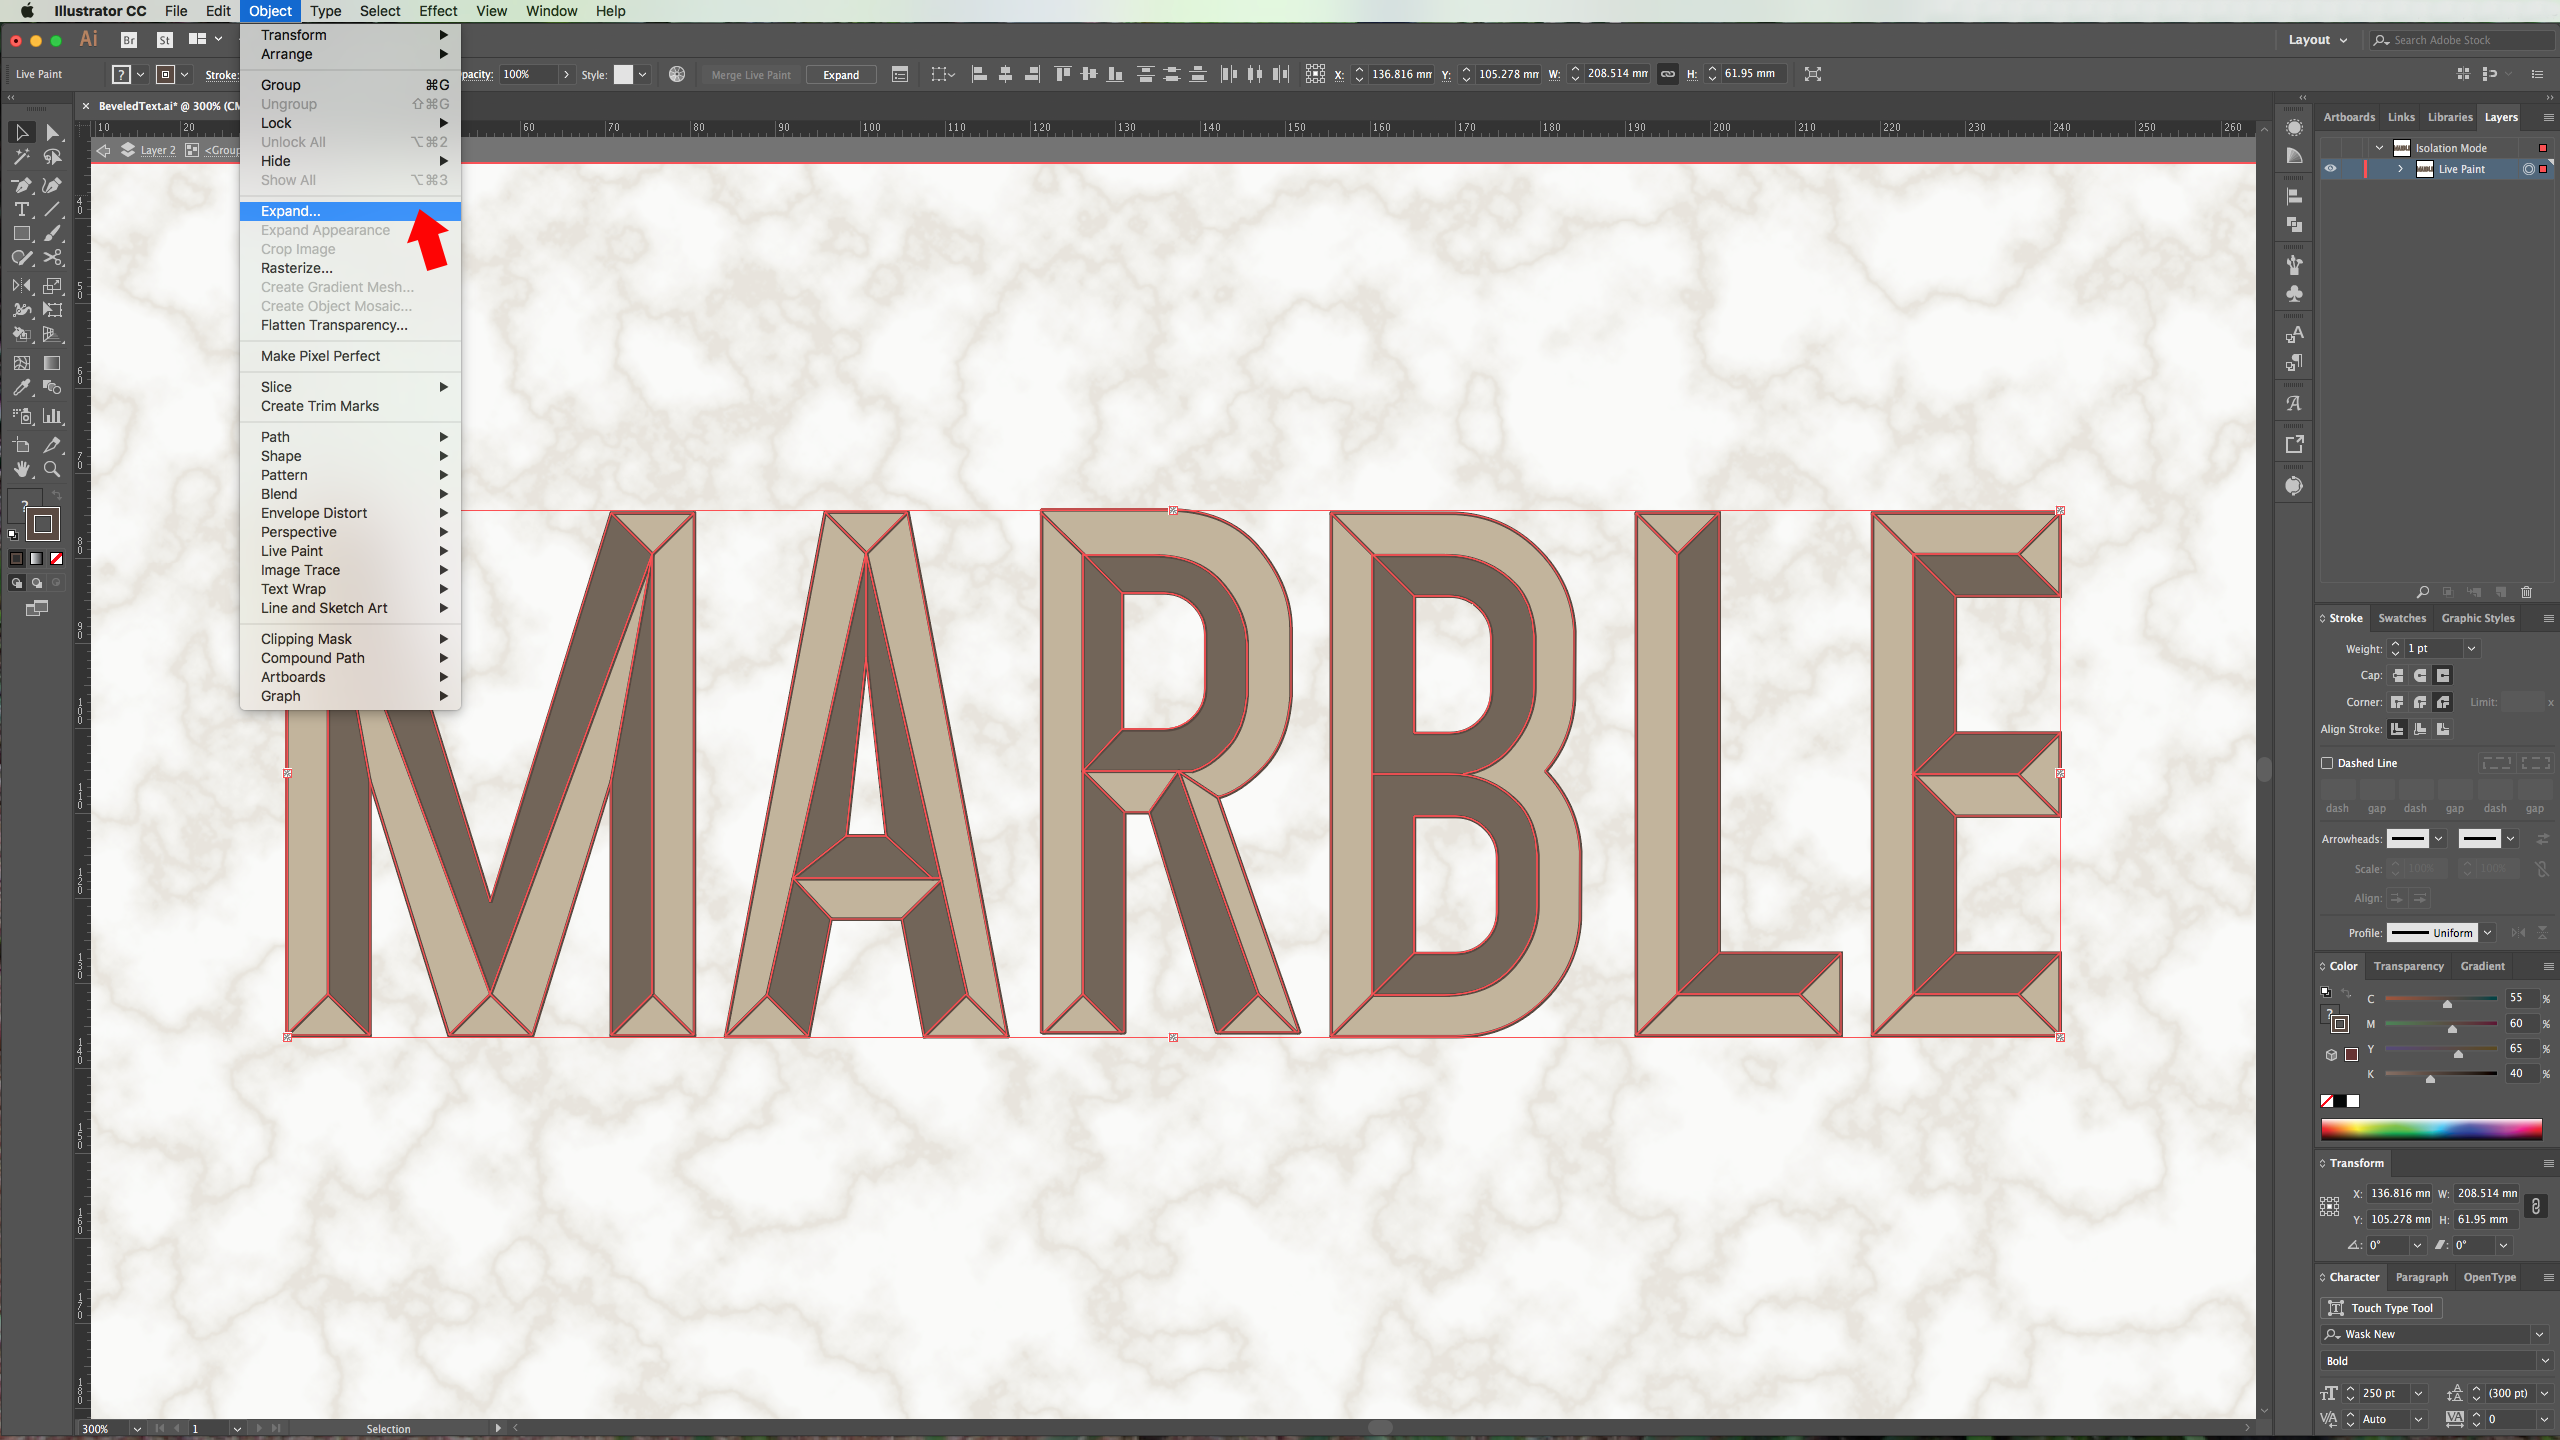
11 - Then, go to Objet > Live Paint > Make (Option/Alt + Command/Control + X) and then select the “Live Paint Bucket” (K) from the “Toolbar”. Three small squares will appear on top of your cursor, use the left and right arrows to navigate and choose a color from the “Colors” panel to be used as “Fill” for some of the portions of your text. The color you choose should be the one in the center square. Fill all the portions that will be the “Light” area with a lighter color.

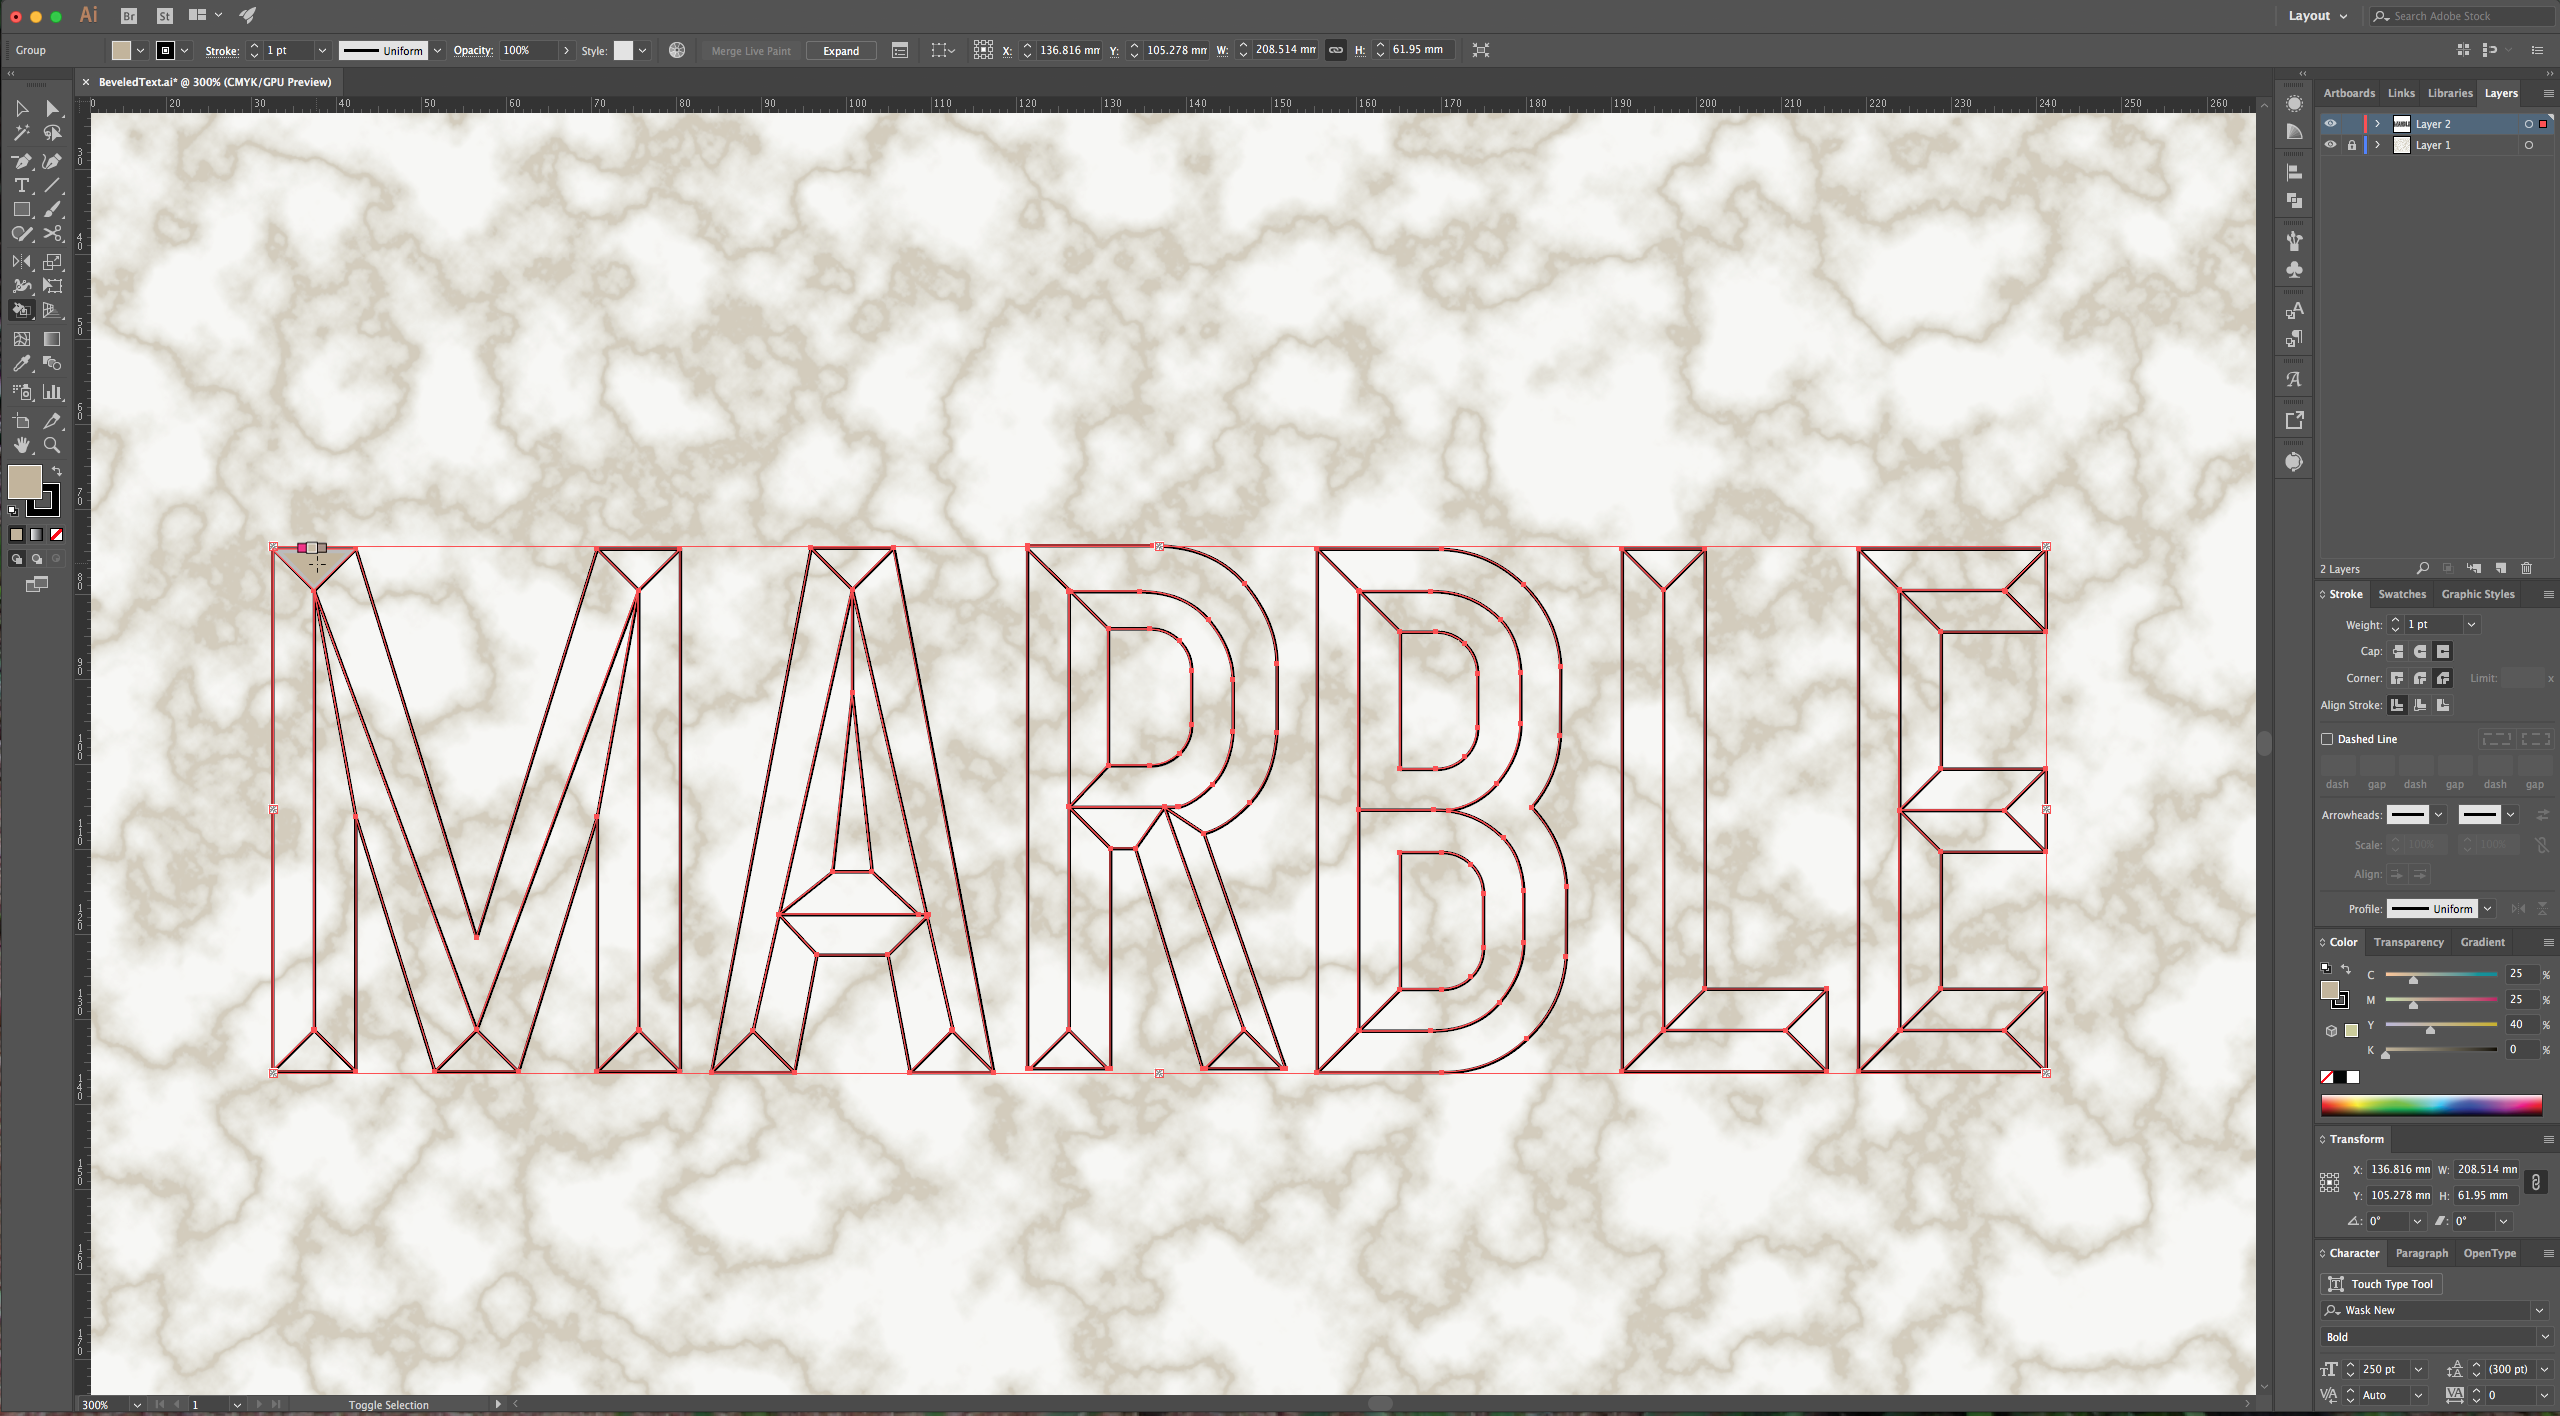
12 - Select a second color for the “Shadow” area. If you want to change the color of a portion, just select the color you want to use and apply it. Select all your paths and give the “Stroke” a darker shade of the ones used for the “Fill”.
13 - Once you are done, you can go to Object > Expand. You can also “fix” some of the errors in the overlapping of the different portions of the letters with the “Direct selection Tool” (A) and the different options of the “Pen Tool” (P) to add or delete “Anchor Points” in case you need to do so.
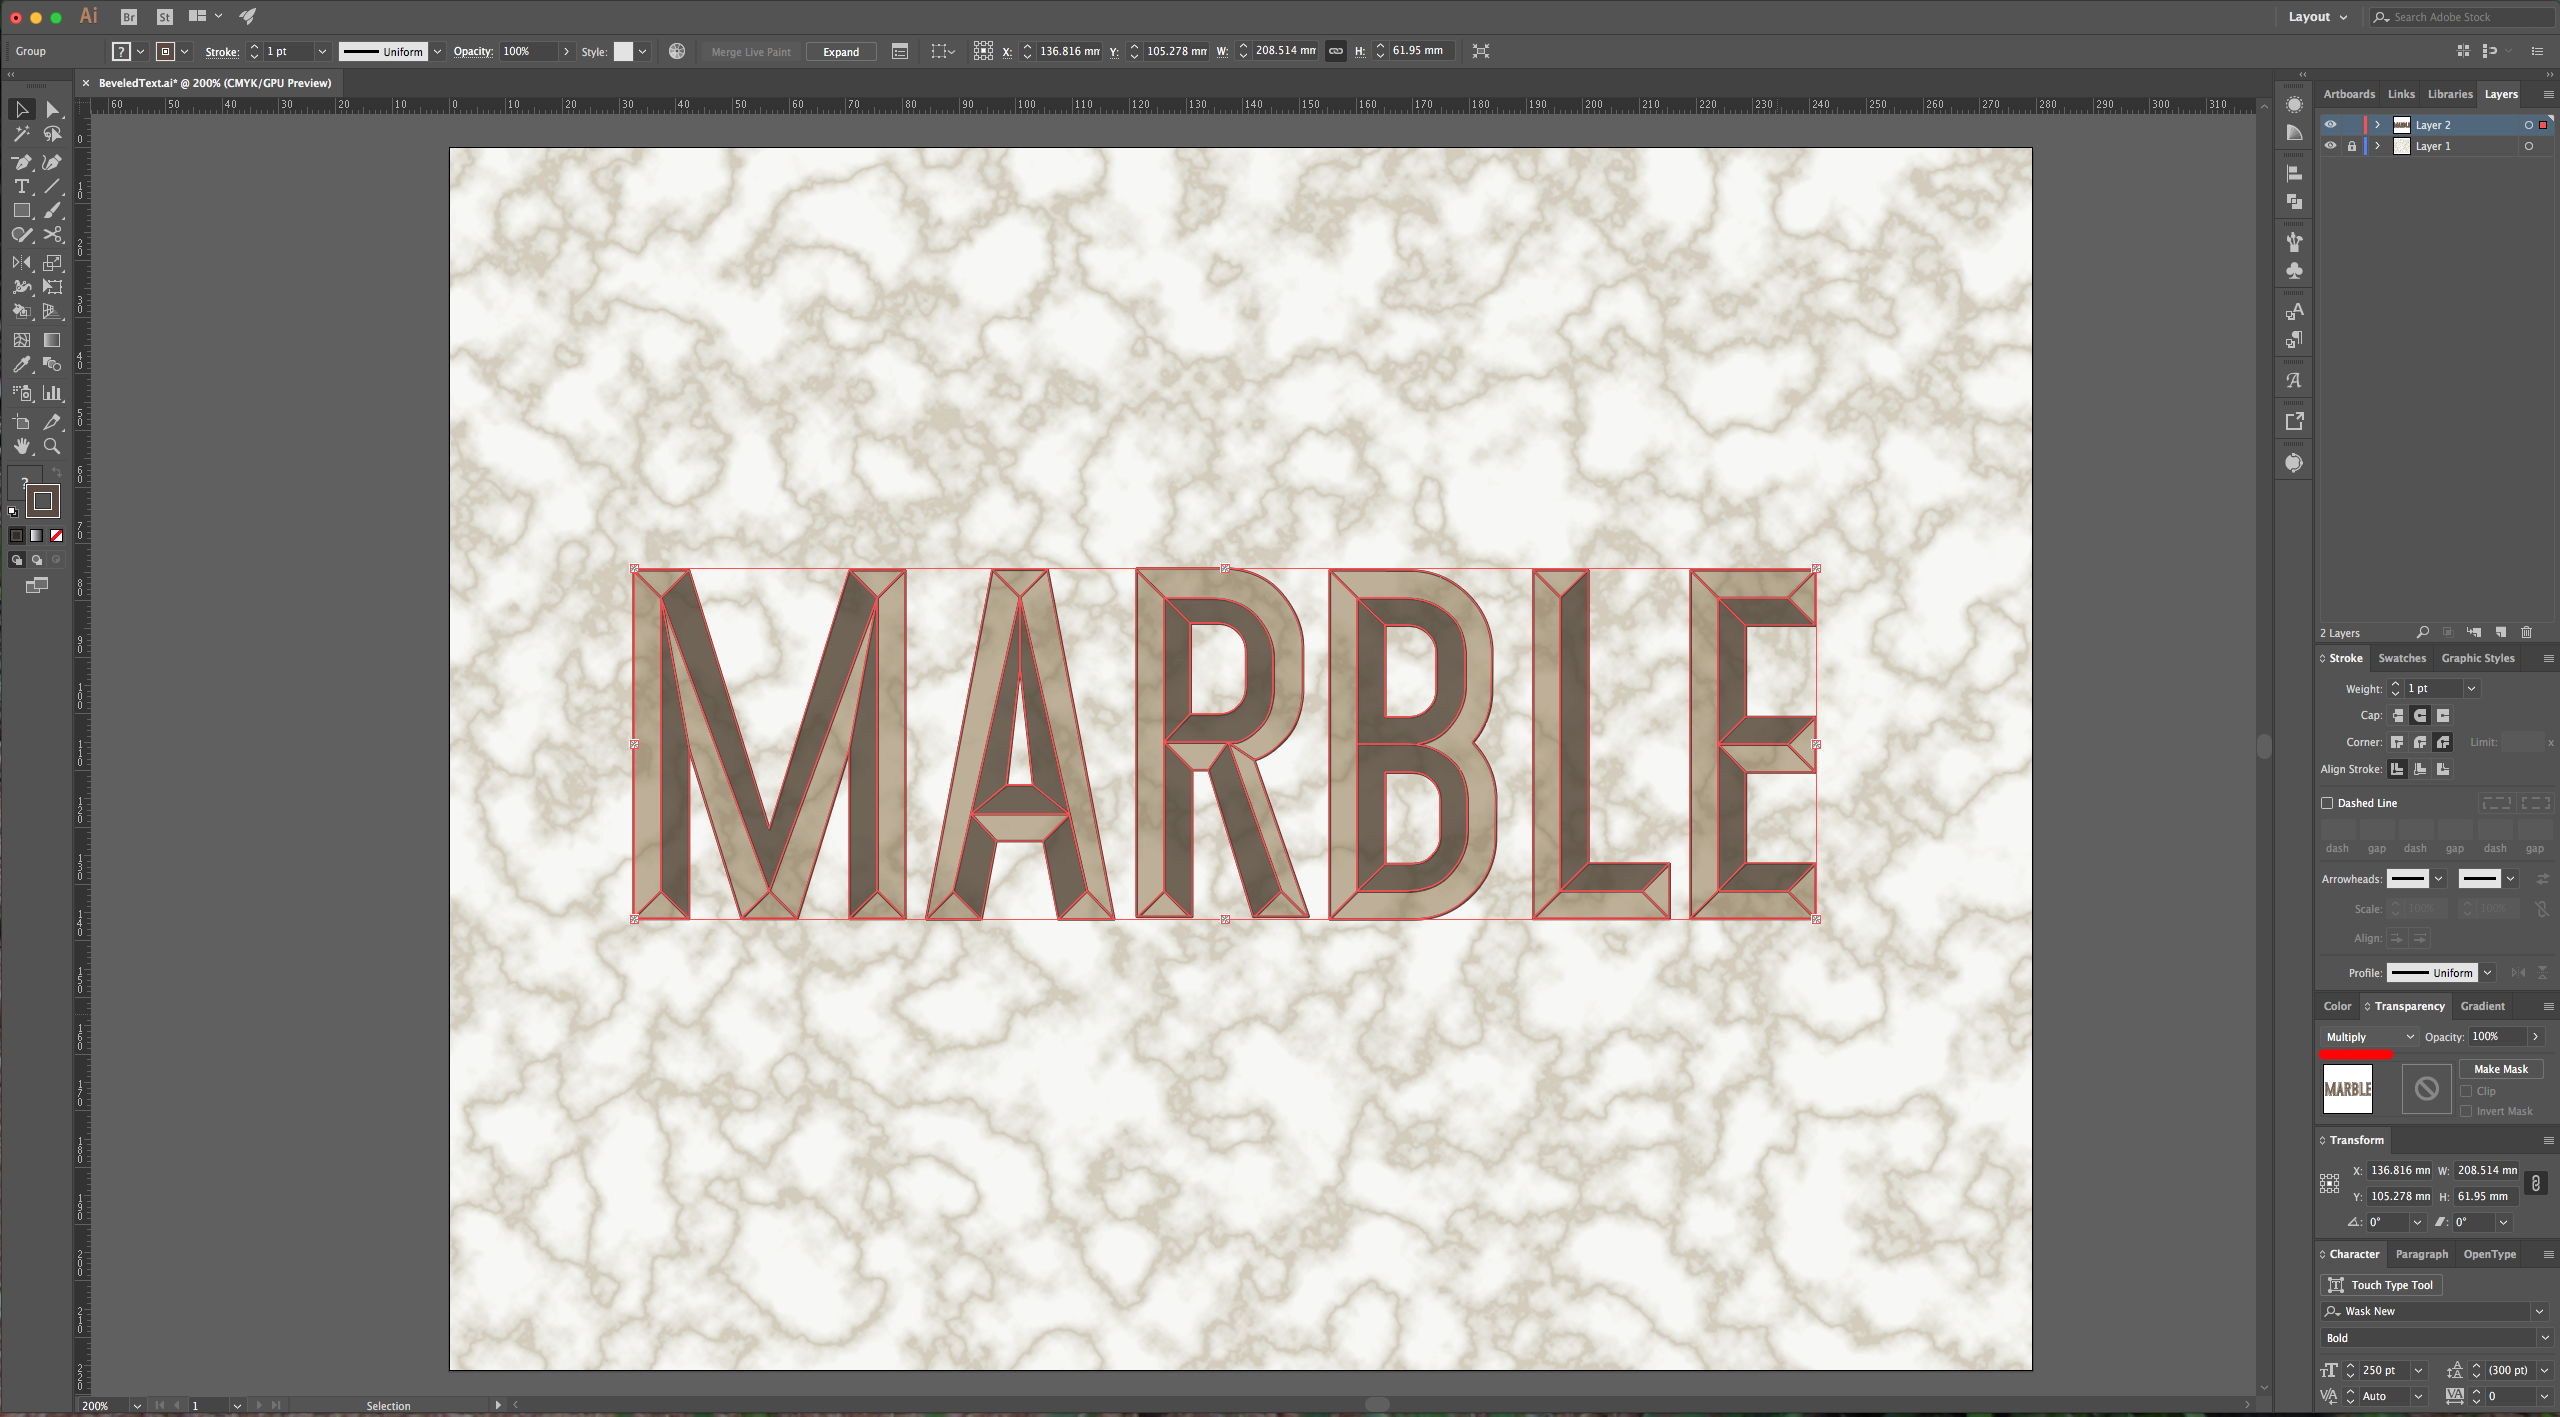
14 - Select your text and change the “Layer Style” to “Multiply” in the “Transparency” window.
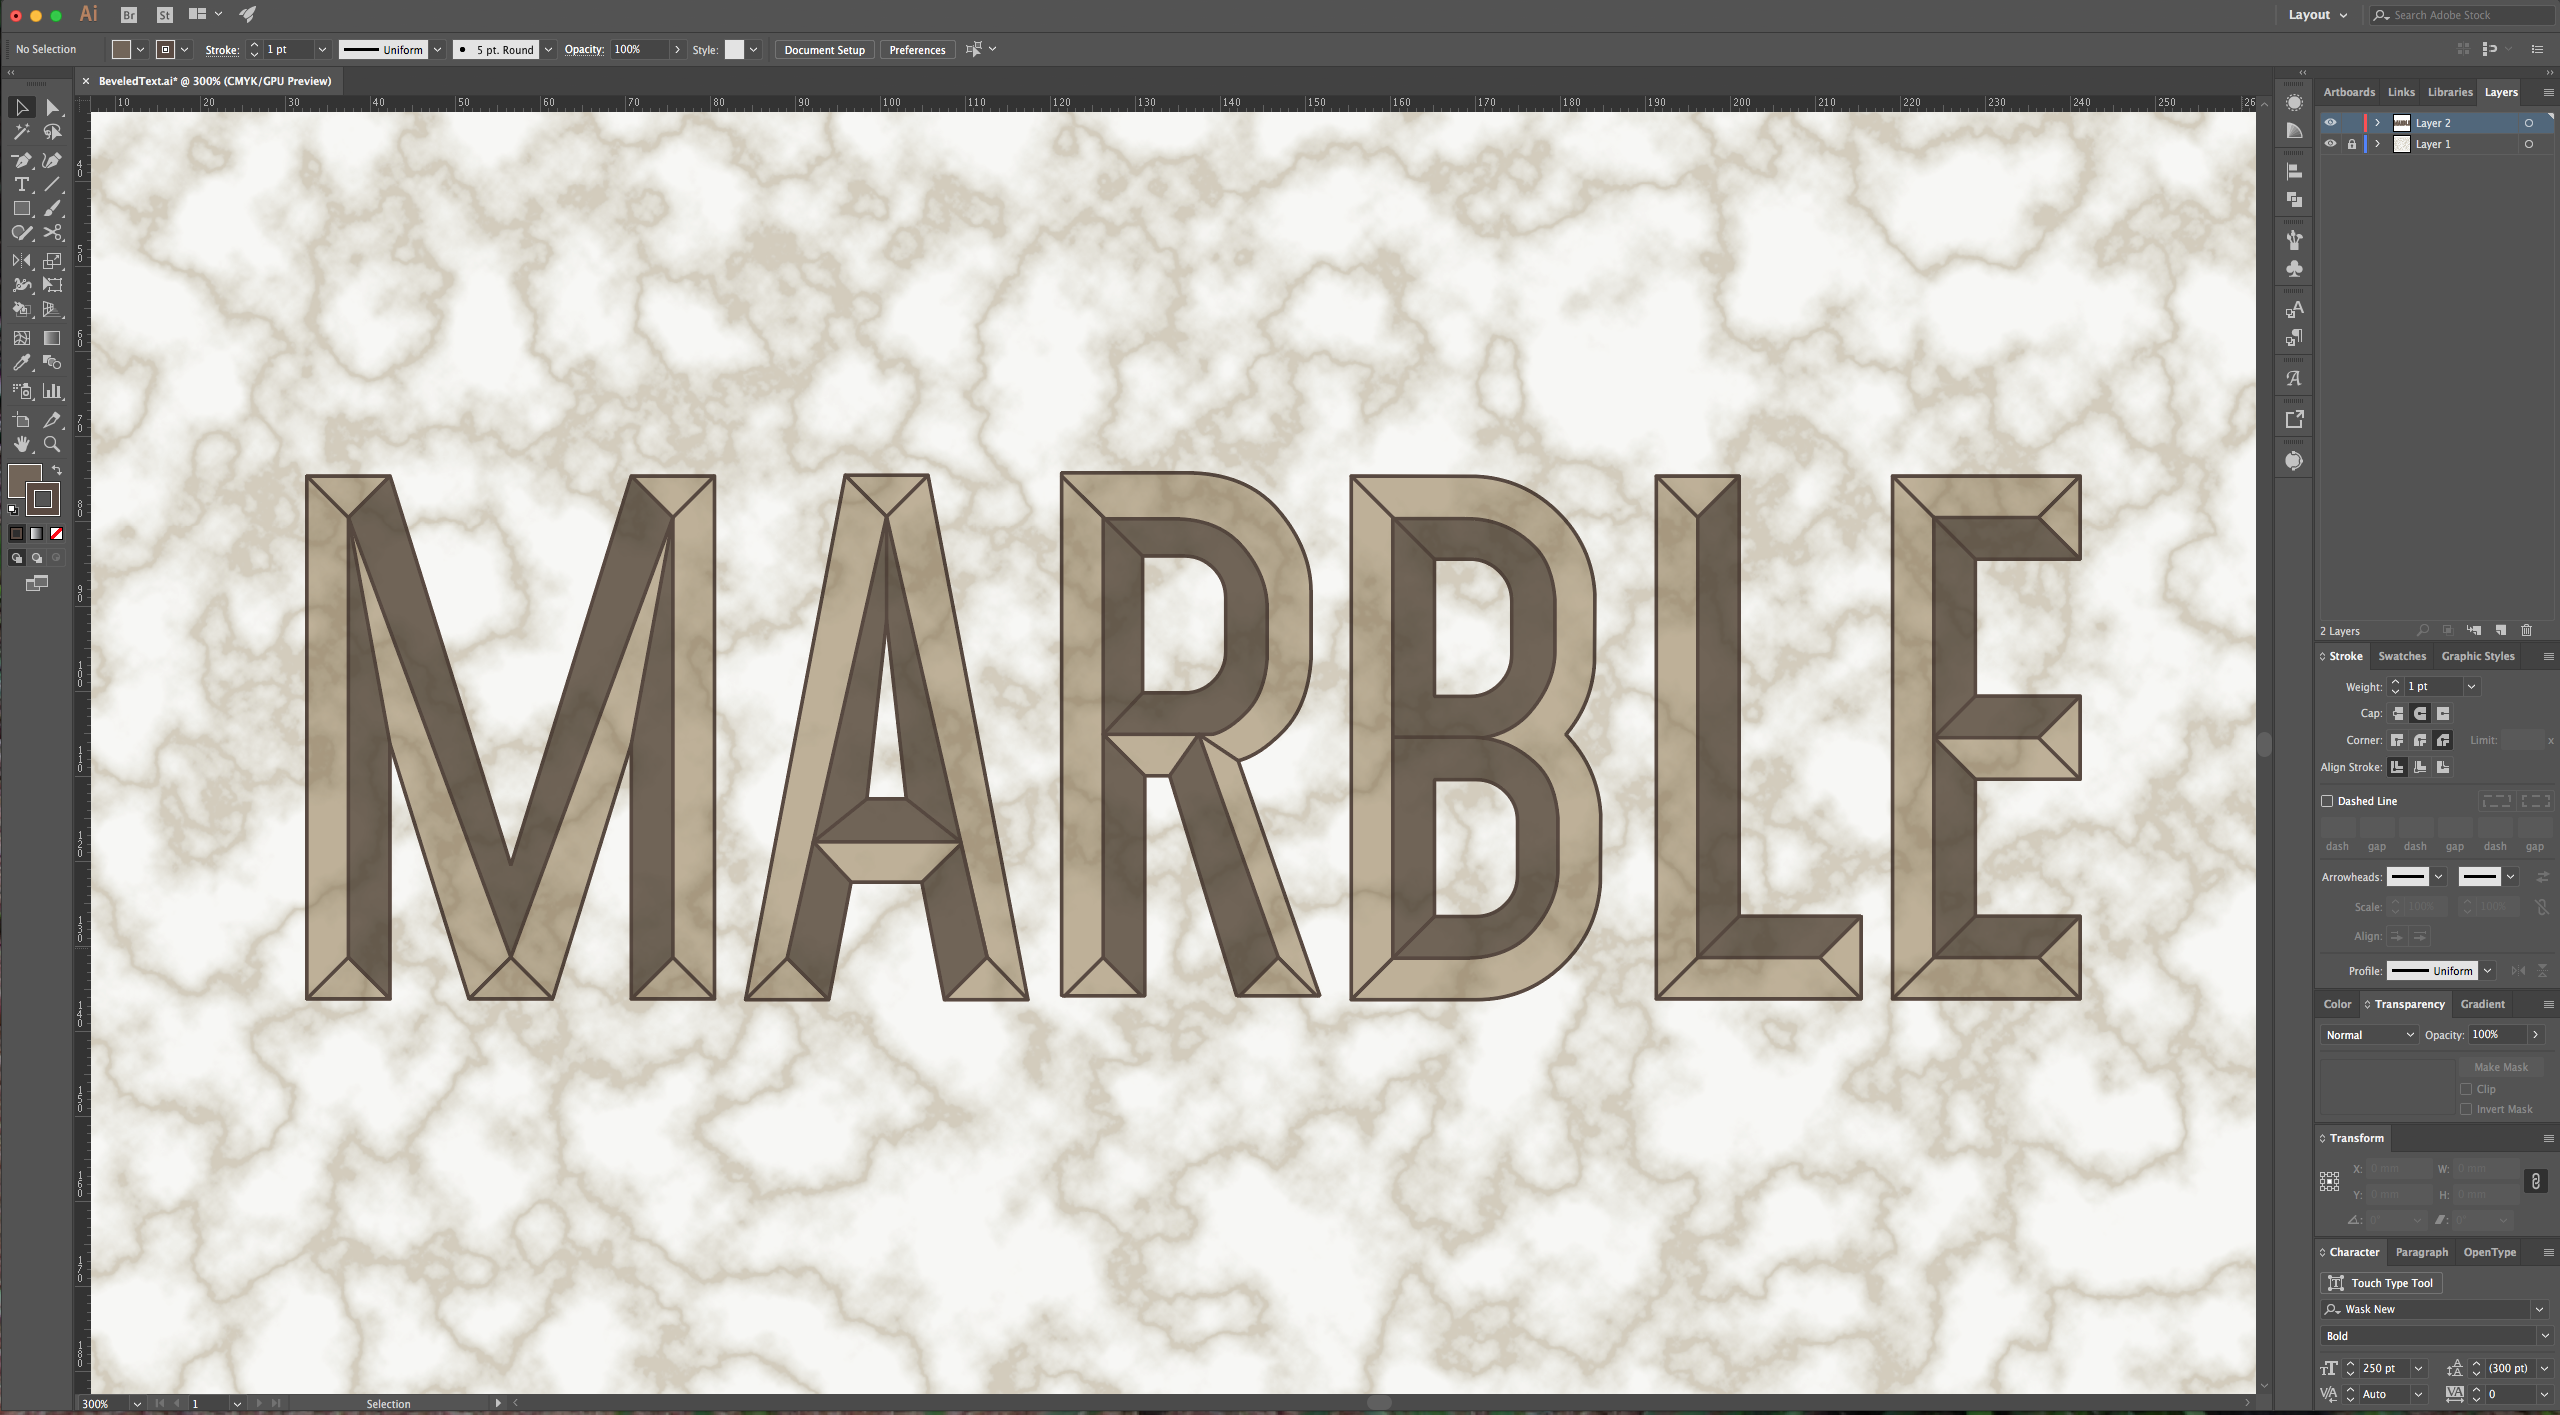
15 - Check your text.
We will need to start in Photoshop to create a part of the Marble texture used as background.
1 - First, in Photoshop, create a “New Document” and make it as big as your Illustrator file will be.
2 - Go to Filter > Render > Clouds, then to Filter > Render > Difference Clouds. Now, play around with the “Levels” (Command/Control + L) to get the “Marble” effect. Once you are happy, select your image (Command/Control + A), then copy your selection (Command/Control + C). Don’t forget to save your Photoshop file for later usage.
3 - In Illustrator, create a “New Document”. Paste (Command/Control + P) your “Marble” texture. Position it on your Illustrator document. Select the “Rectangle Tool” (M) and drag from top left to bottom right of your document to draw a rectangle covering your texture, fill it with a color you like and change the “Layer Style” in the “Transparency” window to color your “Marble” (we used “Screen”). (You can skip the last part if you want to keep the texture without color). Then, lock the layer that contains your “Background” by clicking on the spot left of the thumbnail to show the little lock icon and, create a “New Layer” by clicking on the button at the bottom of the “Layers” window.
4 - Select the “Type Tool” (T), choose a font of your liking (we used Wask New Bold), and use white as “Fill” color. Select your text with the “Selection Tool” and go to Object > Expand, check the “Object” and “Fill” boxes and hit OK. Then “Ungroup” your text to separate each letter (Shift + Command/Control + G).
5 - Make sure your “Smart Guides” (Command/Control + U) are on because this will help you find the “Intersection” points and other stuff. Select the “Line Segment Tool” (L), give the “Stroke” a contrasting color so you can see your work and make the “Fill” “None” for now. To make the “Corners” hold the “Shift” key and draw a line from one side of the letter to about the center of it’s with (this will draw the line in a 45° angle). Finish the line and start again from the other side (or a little bit away from your finish point). Hold the “Shift” key again and draw a second line that intersects with the first one. (It’s ok if the lines don’t end in the same spot since we are fixing this in the next step).
6 - Use the “Direct Selection Tool” (A) and while holding the “Shift” key, move the end of the line to shorten or elongate it and make it intersect with the other line. You should have a formed a triangle at the end of your letter. Repeat this with all your letters. Check your text, and in the other places where the letters have corners, draw a line the goes from the outside to the inside.
7 - Now, let’s make the center line (the one the in the center of each letter). For the straight letters, draw a line from the “Top” of one of the corner rectangles (hold the “Shift” key) to the next “turning” point, release and start a bit away (or start from the opposite side) to reset and get to the next corner. In some places, you will need to use an approximate angle for your line (like with the “R”).
8 - For the rounded letters we will use the “Direct Selection Tool” (A) to select the “Anchor Points” we want to use. To do this, click on the letter you want to work on to select it, then click on the “Point” you want to choose and make sure is selected (it should be filled with color”. Hold the “Shift” key to select another “Anchor Point” and keep the one you already selected. Do this with all the points that form the “curve”. Then copy and paste your selection (Command/Control + C and Command/Control + V). Your pasted path will only have the white “Fill” and “No Stroke”, so change it to “No Fill” and black “Stroke”. Position the path in the center of the letter and use the “Scale Tool” (S) and scale it to fit your letter. Then, fix the ends to make them overlap with your other center paths. Repeat this for the other letters. You may need to tweak some of the paths to get the curves right.
9 - Check your text again and add more lines if it seems that they are missing. Select all your “Paths” and make sure the strokes are the same size. If not, go to the “Stroke” window and give them a “Weight” (we used 1 point).
10 - Select your text and change the “Fill” to “None” and make the “Stroke” black. Select all your paths and in the “Pathfinder” window use the “Divide” option. Keep your selection and in the “Stroke” window choose “Rounded Cap” in the “Cap” option and “Bevel Join” in the “Corner” option.
11 - Then, go to Objet > Live Paint > Make (Option/Alt + Command/Control + X) and then select the “Live Paint Bucket” (K) from the “Toolbar”. Three small squares will appear on top of your cursor, use the left and right arrows to navigate and choose a color from the “Colors” panel to be used as “Fill” for some of the portions of your text. The color you choose should be the one in the center square. Fill all the portions that will be the “Light” area with a lighter color.
12 - Select a second color for the “Shadow” area. If you want to change the color of a portion, just select the color you want to use and apply it. Select all your paths and give the “Stroke” a darker shade of the ones used for the “Fill”.
13 - Once you are done, you can go to Object > Expand. You can also “fix” some of the errors in the overlapping of the different portions of the letters with the “Direct selection Tool” (A) and the different options of the “Pen Tool” (P) to add or delete “Anchor Points” in case you need to do so.
14 - Select your text and change the “Layer Style” to “Multiply” in the “Transparency” window.
15 - Check your text.
by @lornacane


