Chocolate Text in Photoshop
For this Tutorial, we will use an image of crumpled paper as a texture for our background. We will also use the Free Font Cupcakia by Tabita's shop.
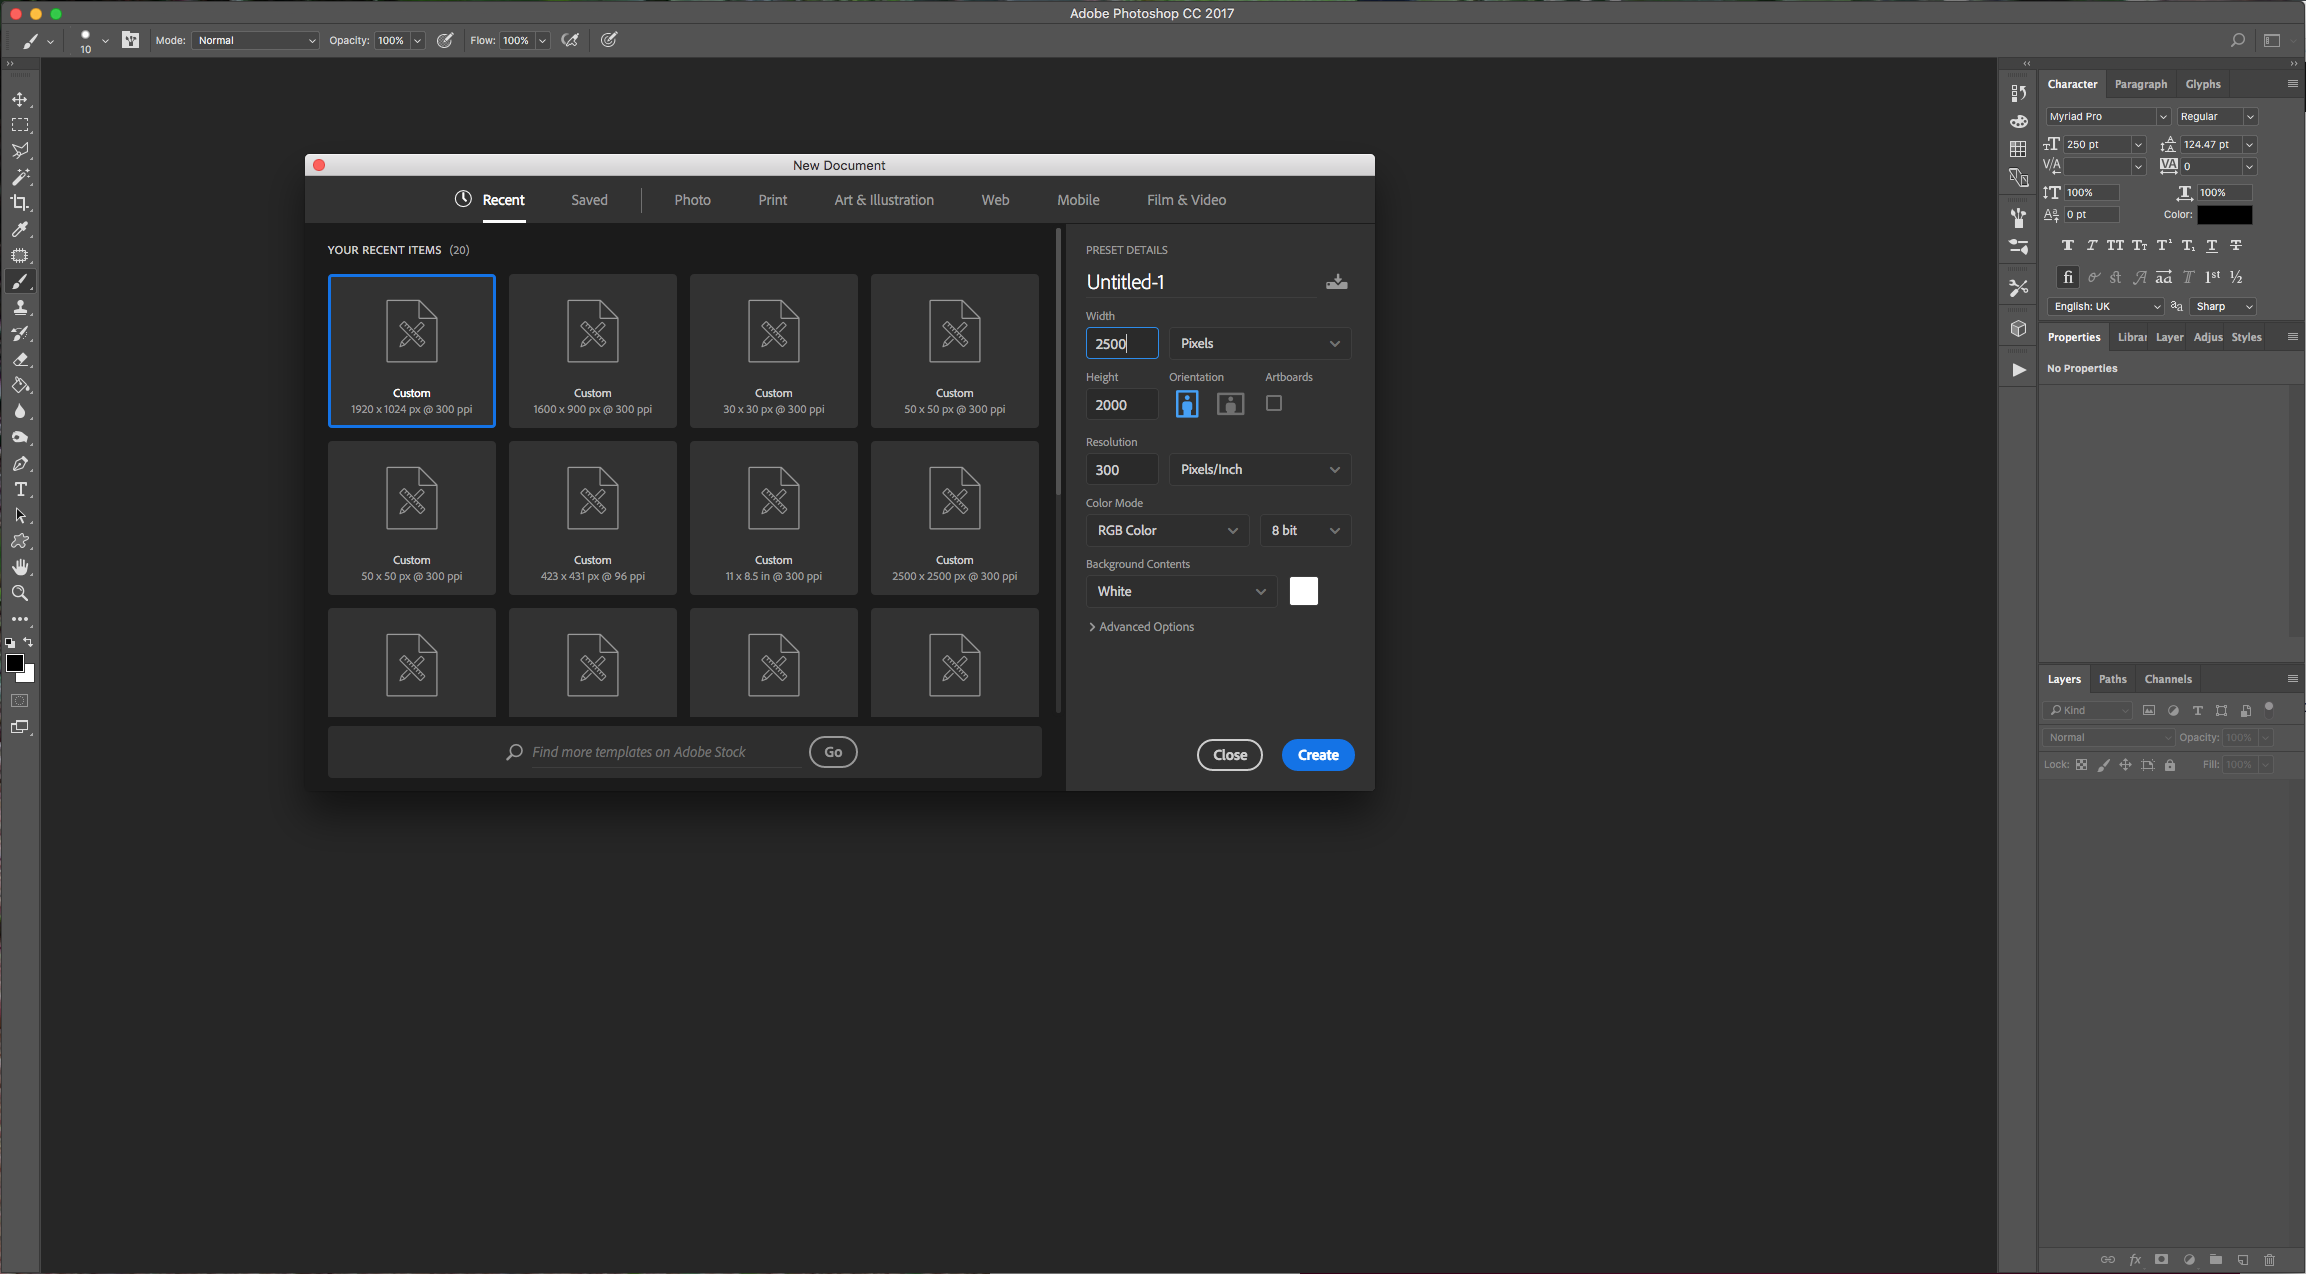
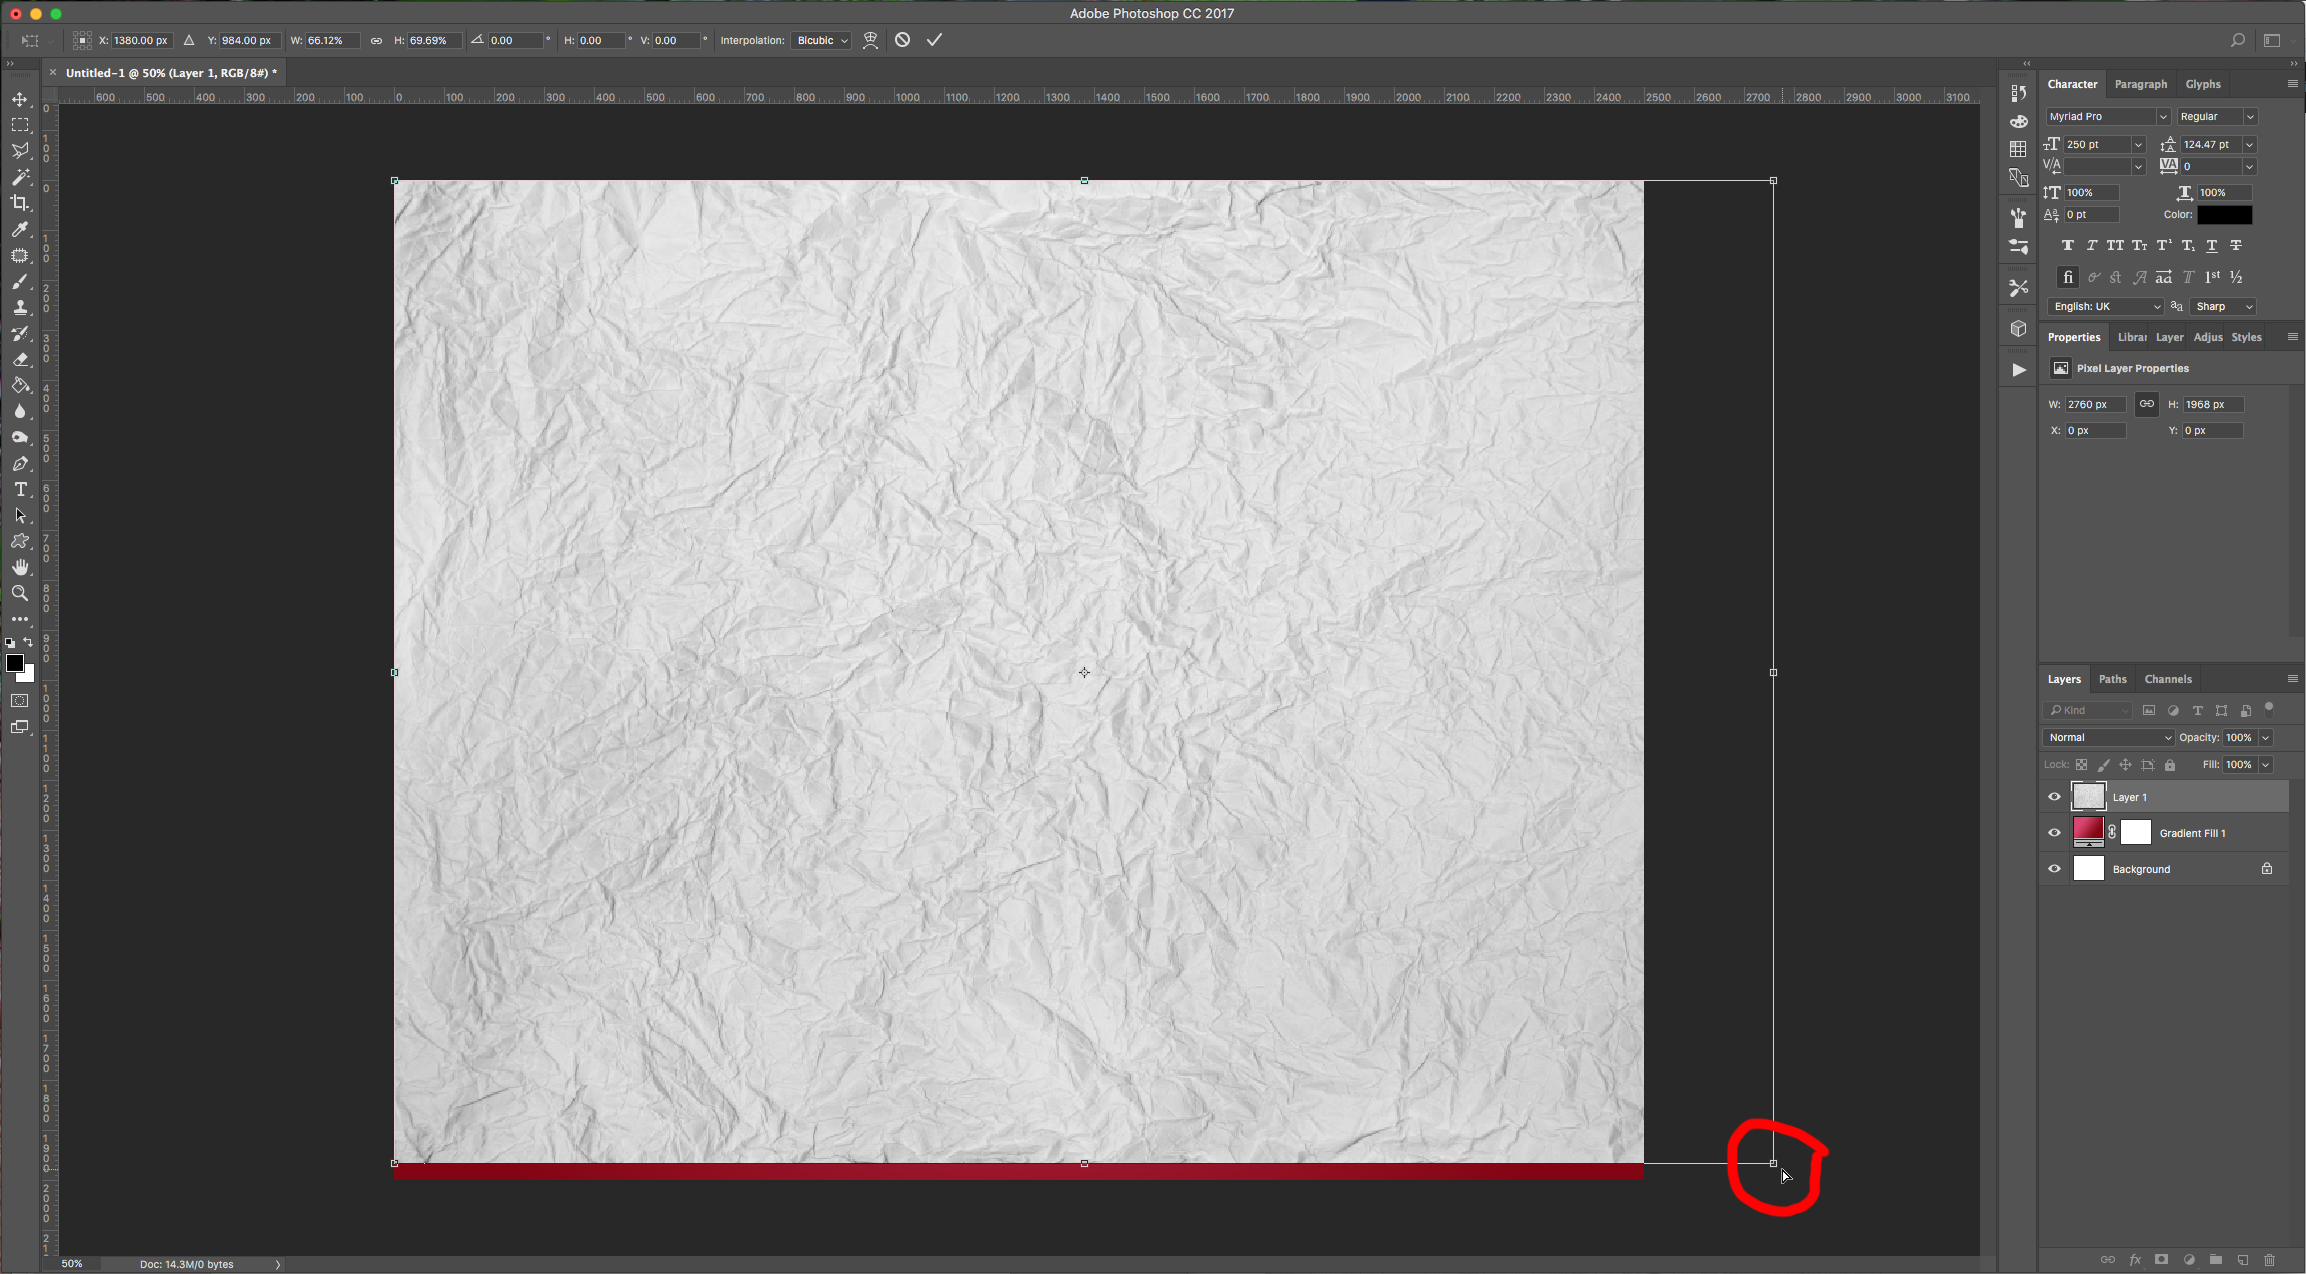
1 - Create a “New Document” in Photoshop. We made ours 2500 x 2000 Pixels, 300 Dpi.
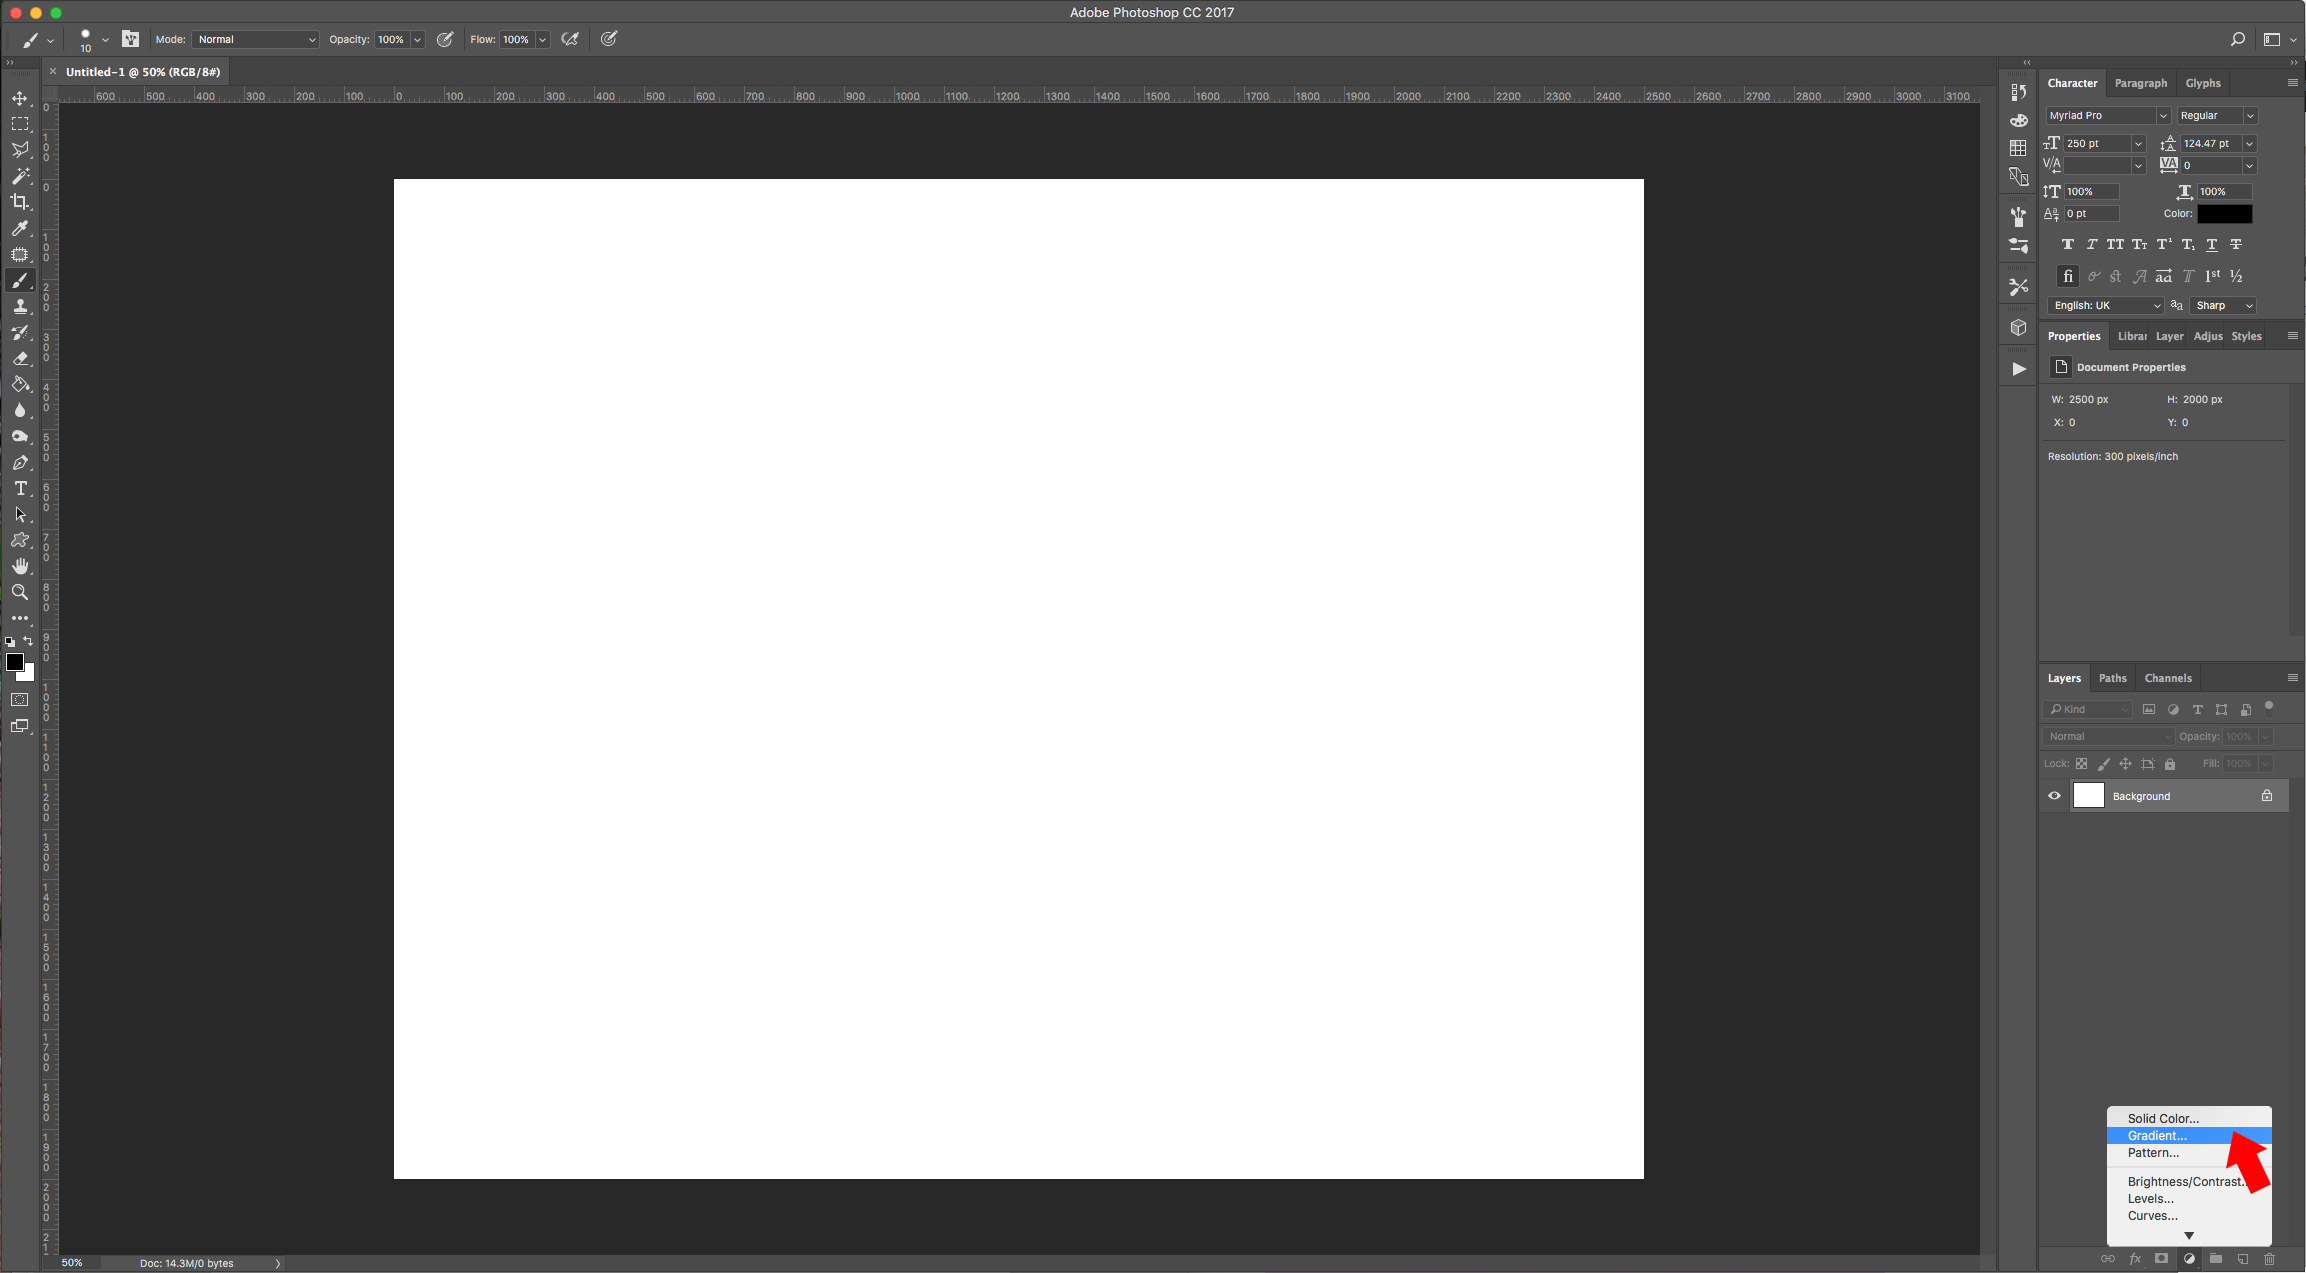
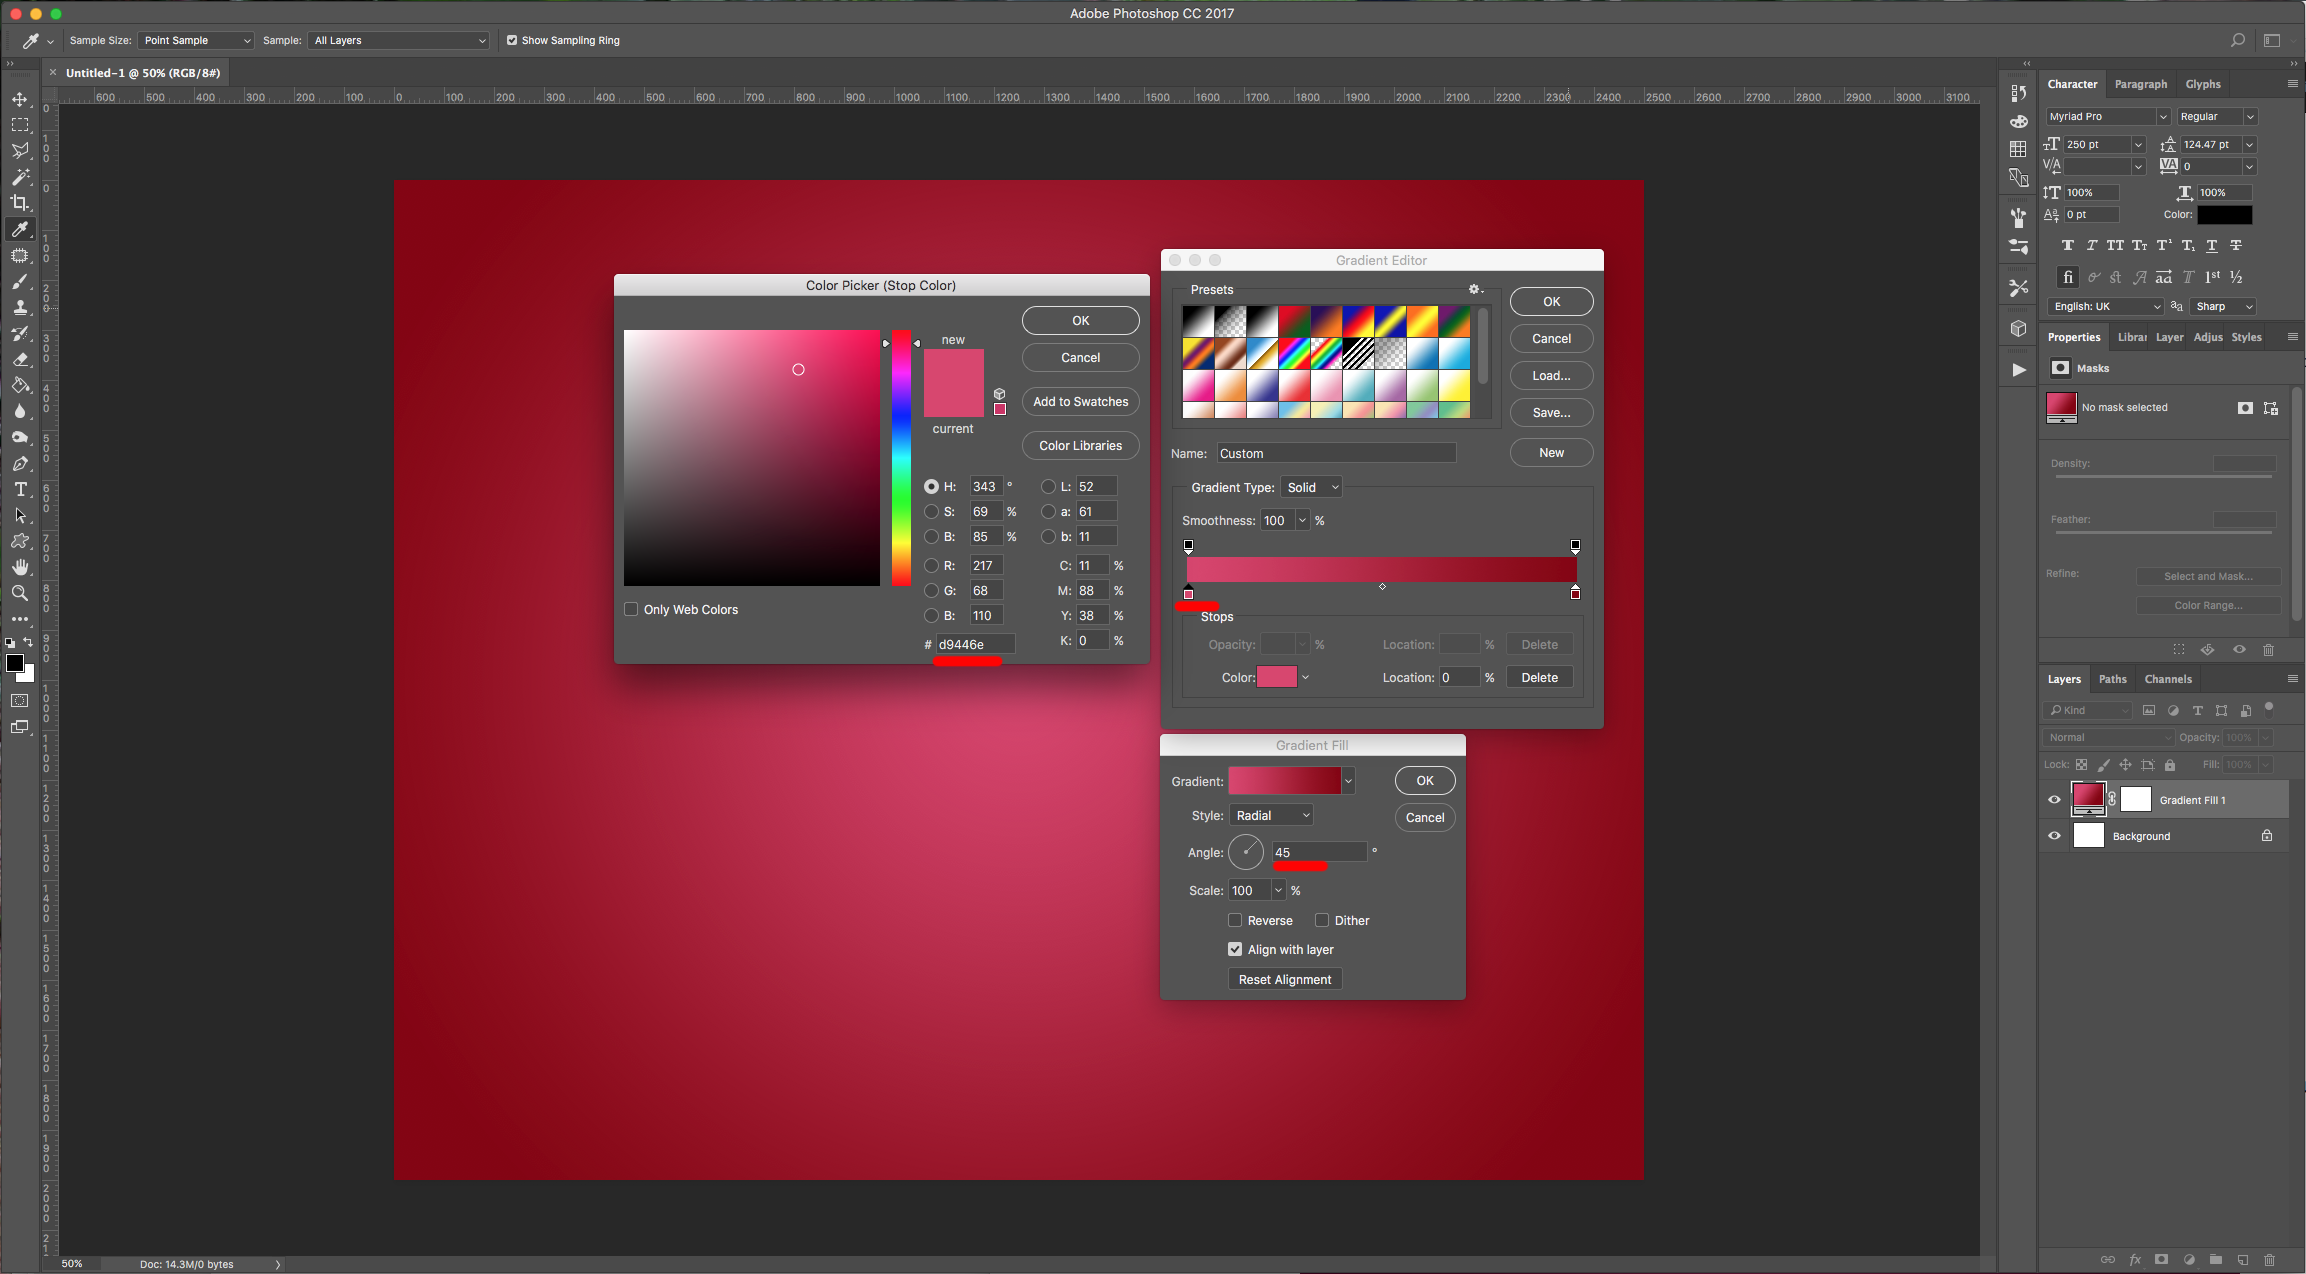
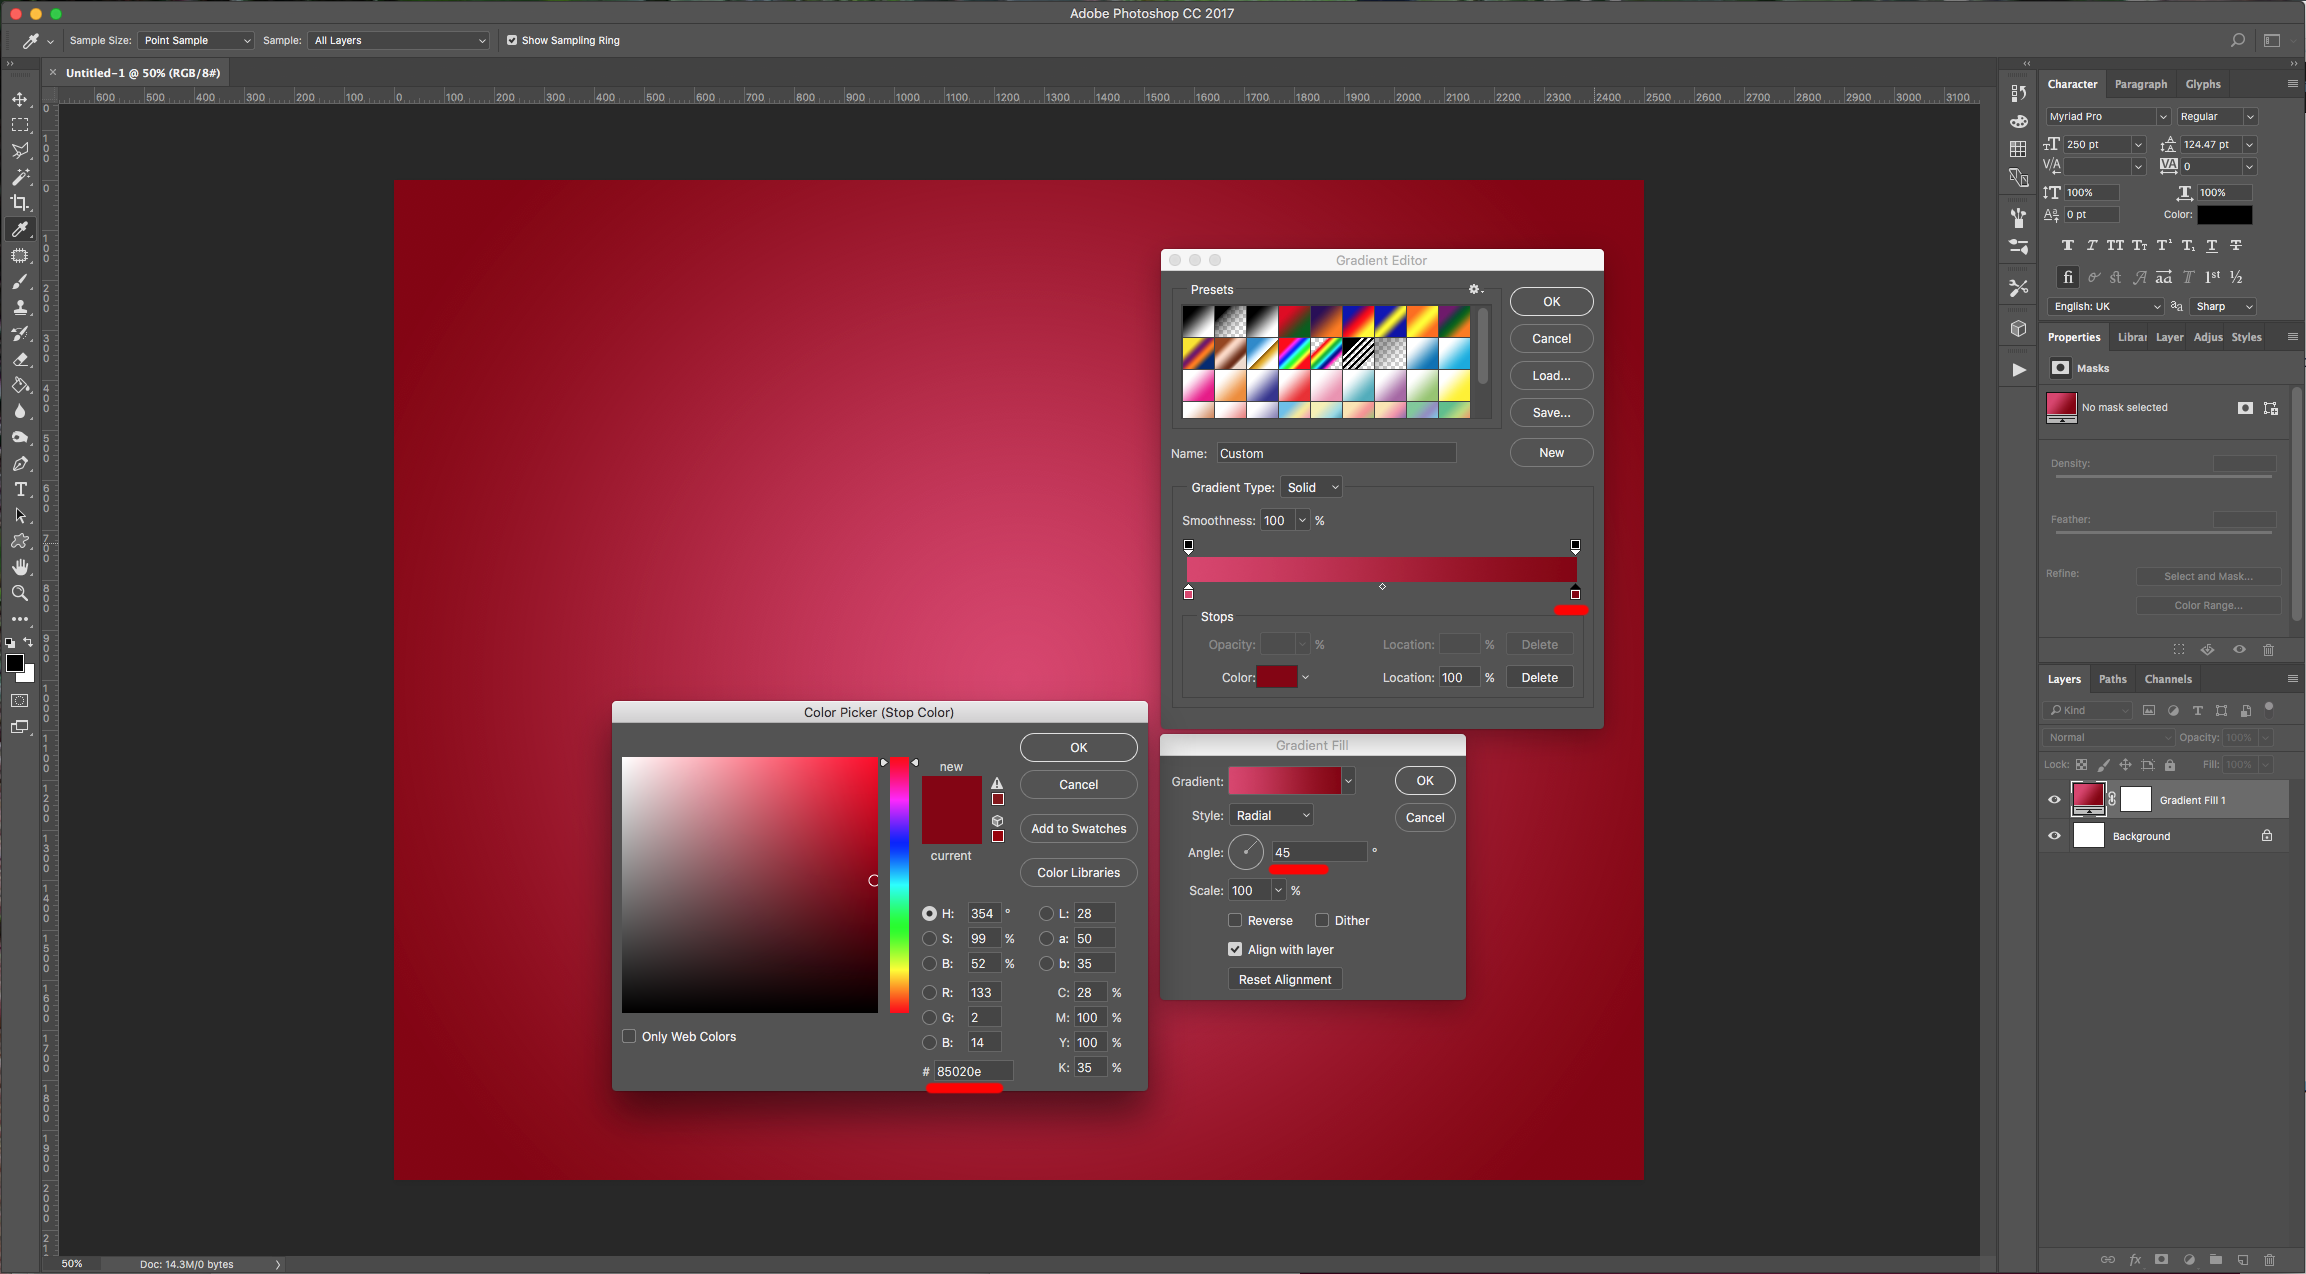
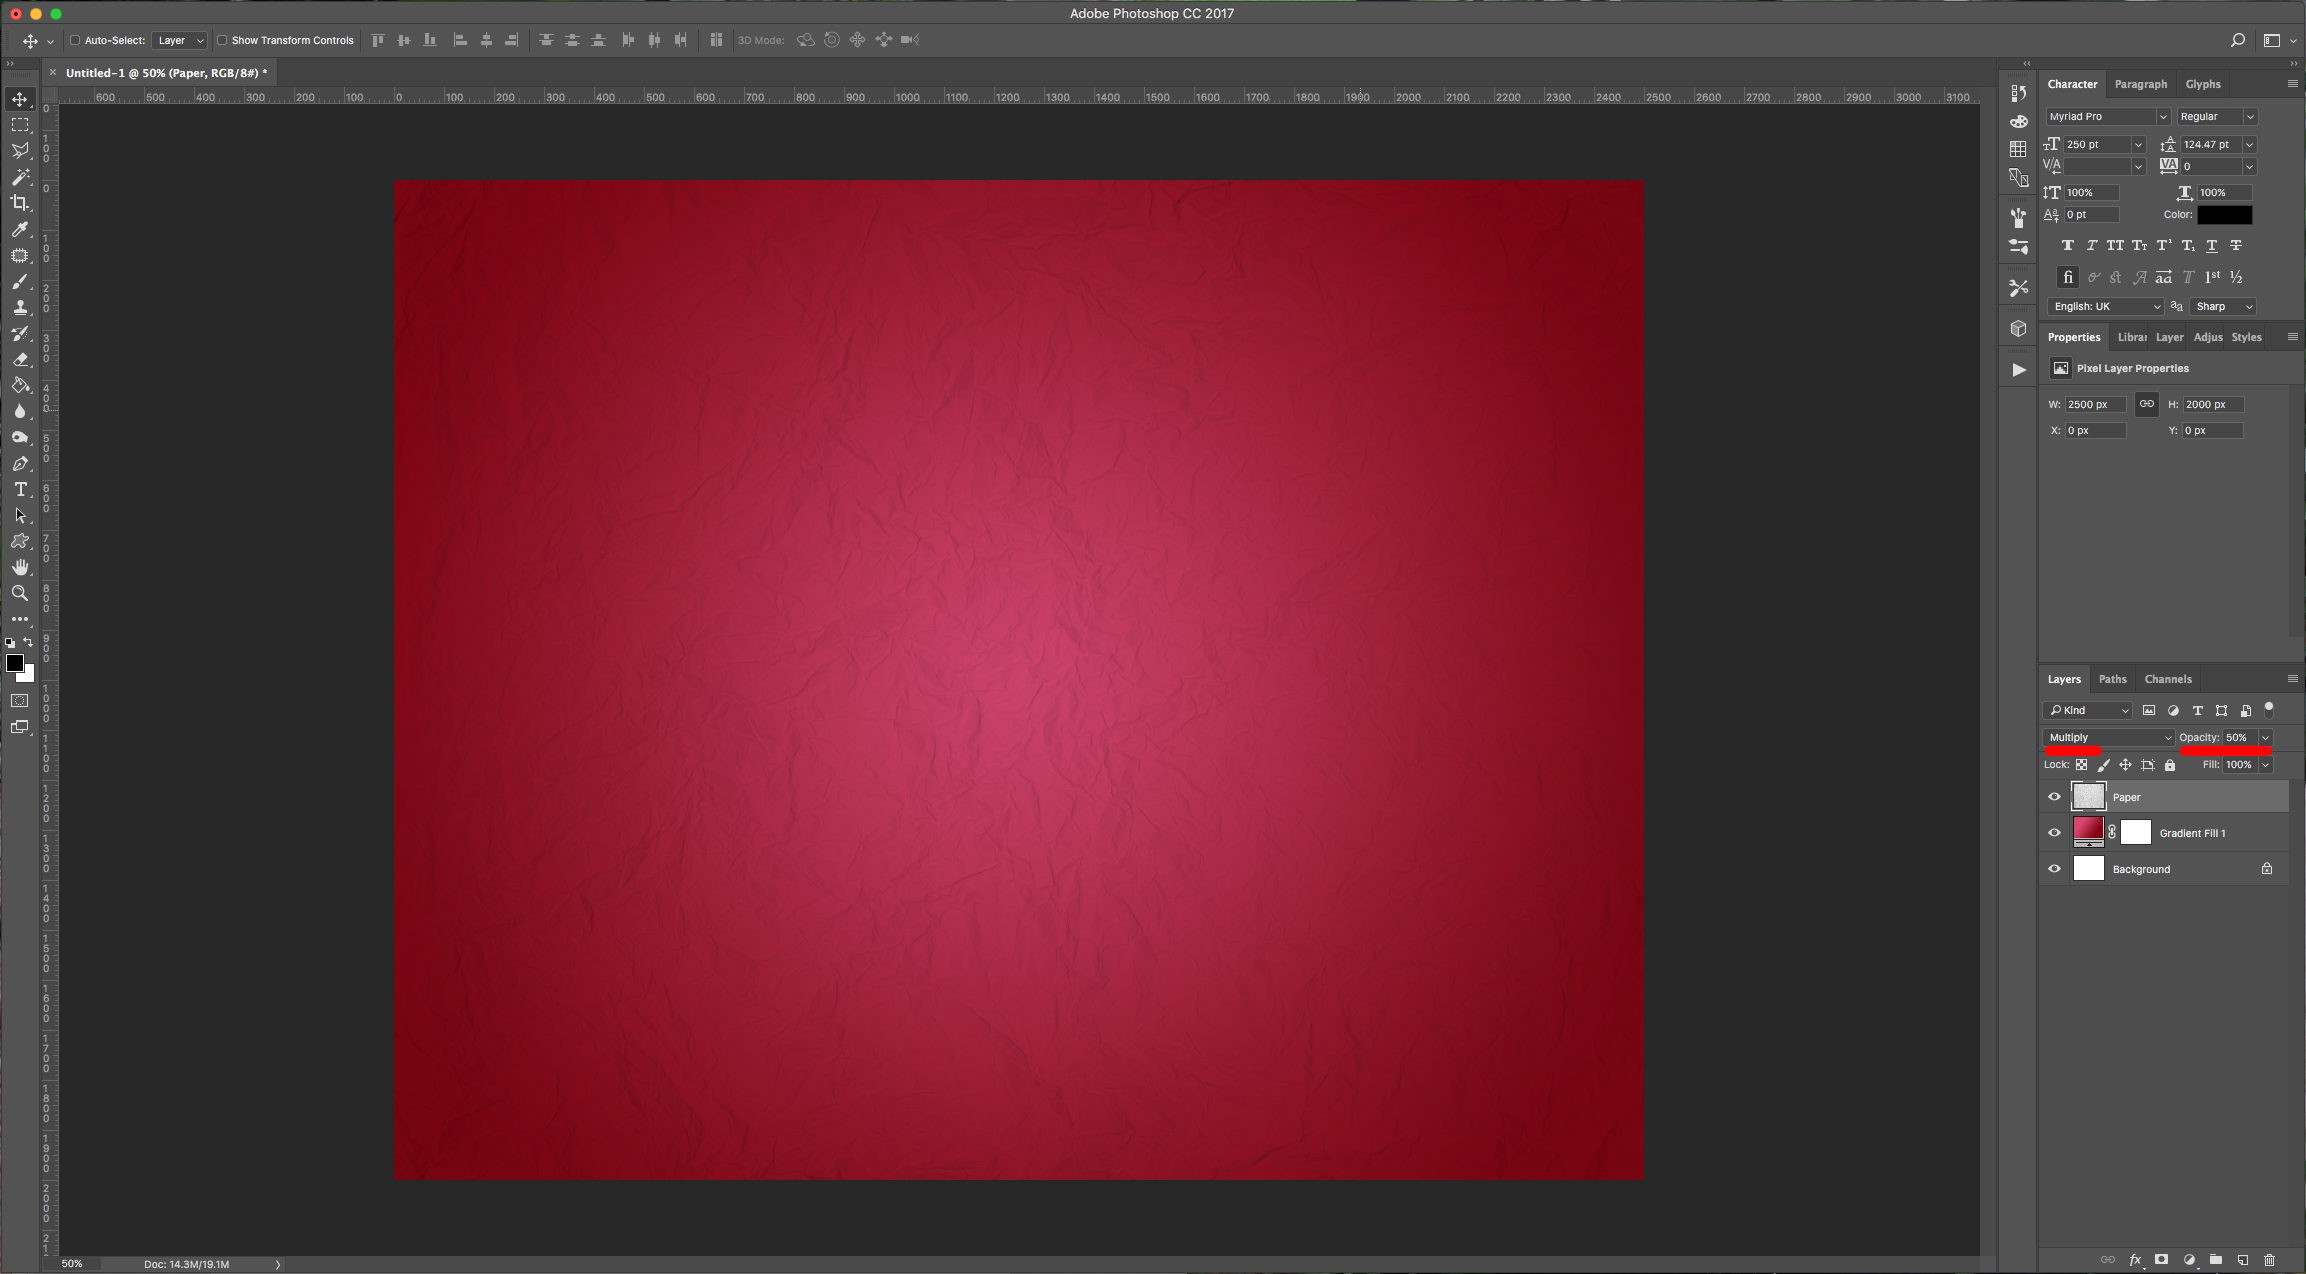
2 - Click on the “Create New Fill or Adjustment Layer” button at the bottom of the “Layers” Panel and create a new “Gradient Fill” Layer. Make it “Radial” with a 45° Angle. We used the colors #d9446e and #85020e.
3 - Open the image you chose to use as Background Texture, drag it (or Paste it) into your document and resize it if needed using the “Free Transform” Tool” (Command/Control + T). Once you are happy, click “Enter”, then change the “Blending Mode” to “Multiply” and the “Opacity” to 50%.
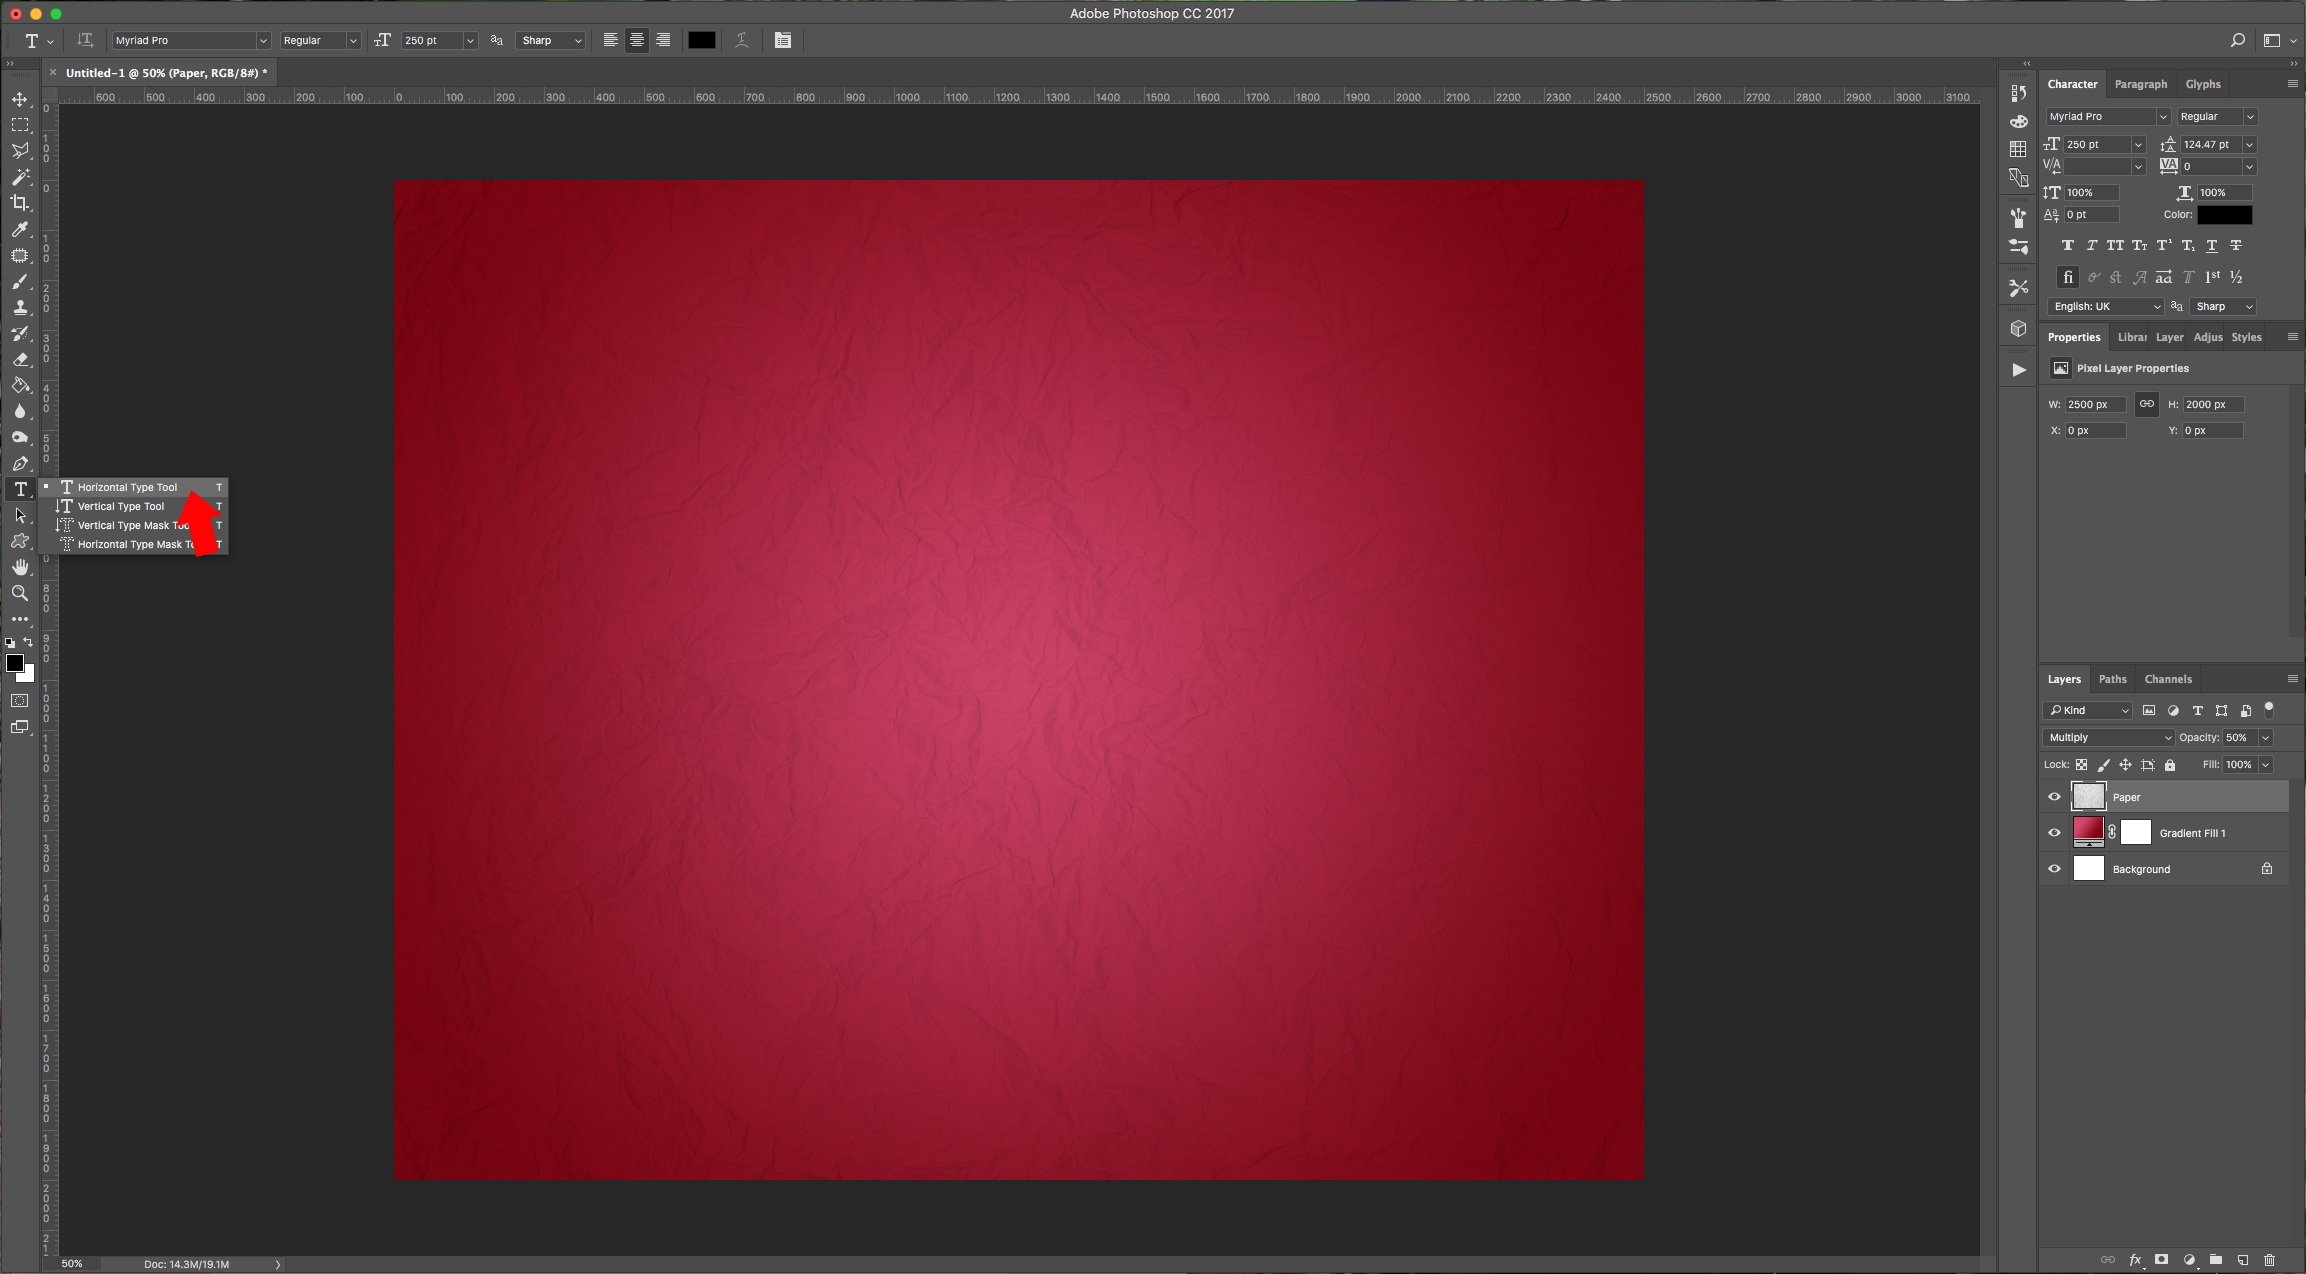
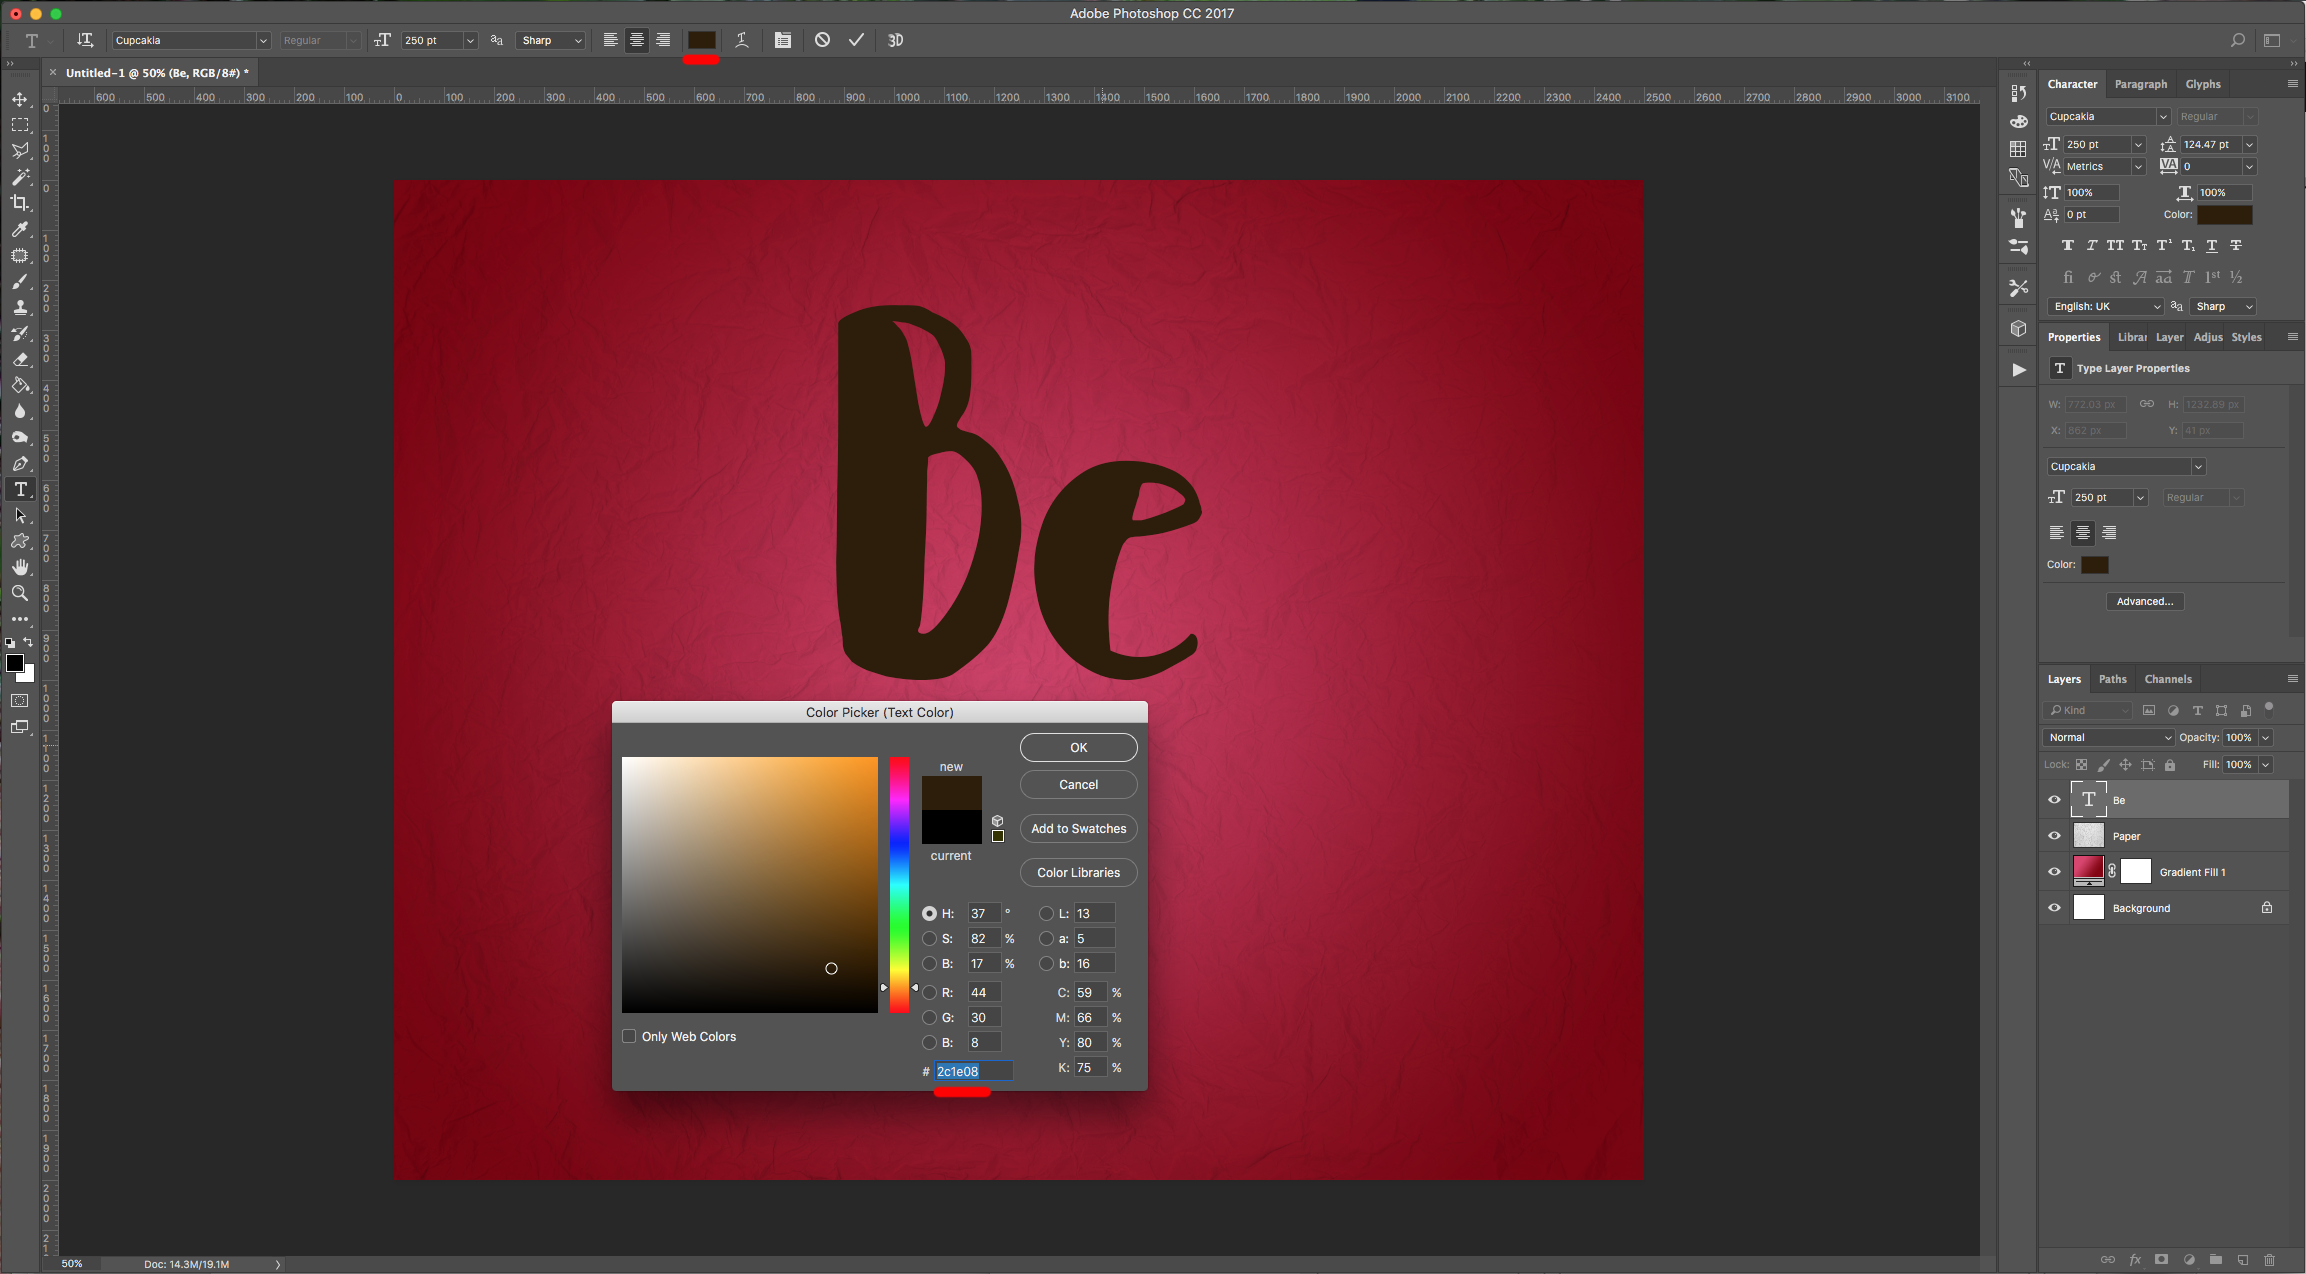
4 - Select the “Type Tool” (T), choose your font (we used Cupcakia) and type your text use #2c1e08 as “Fill” color.

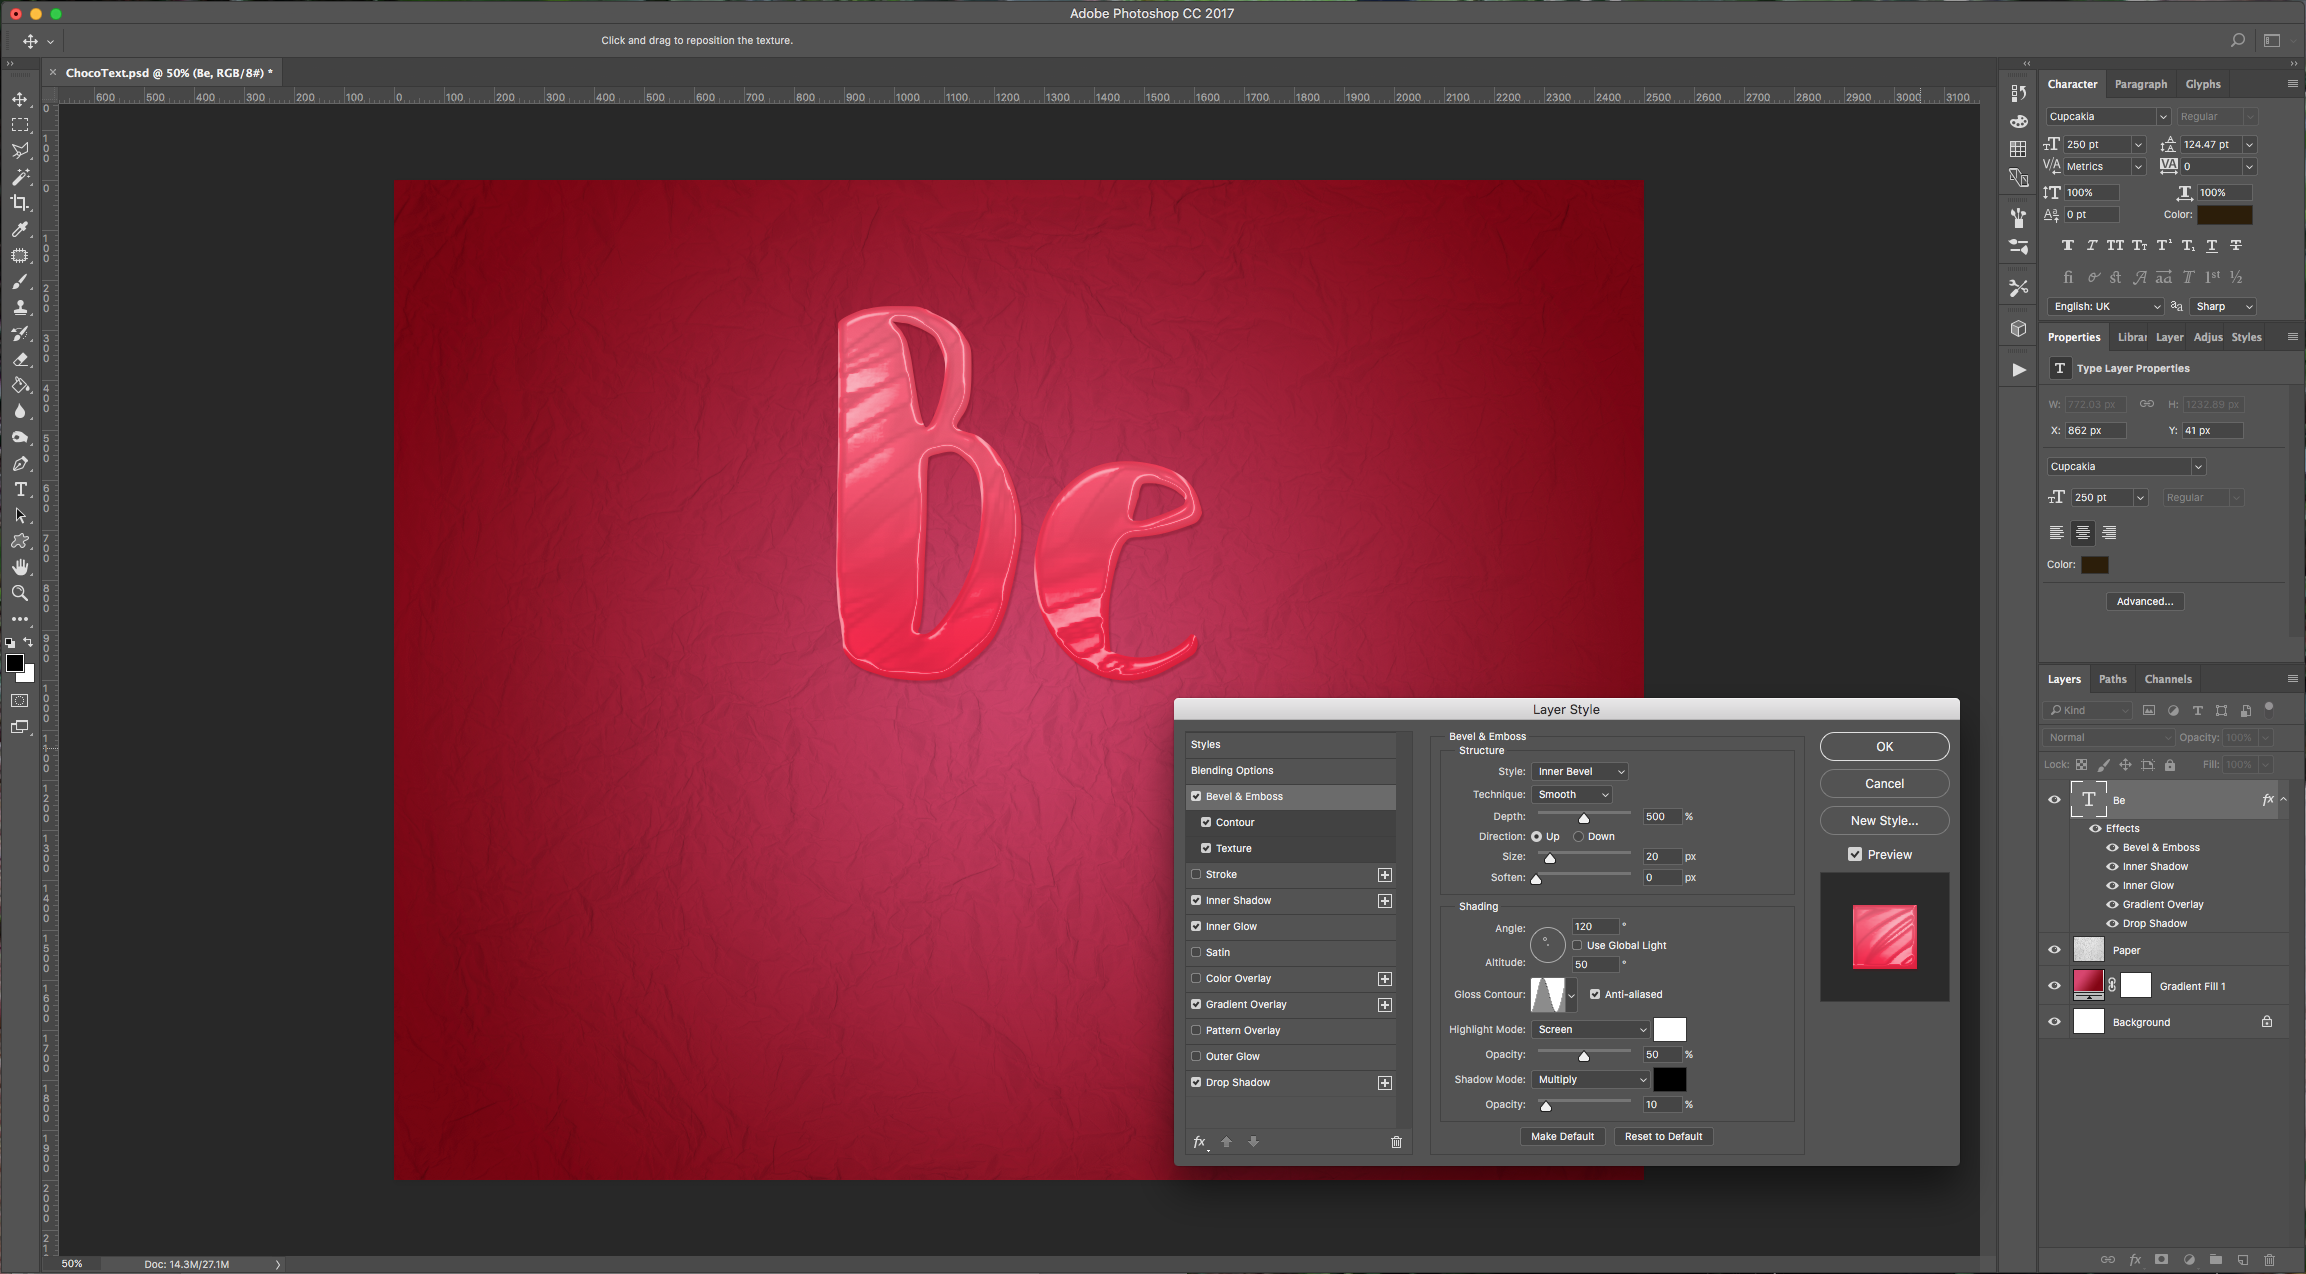
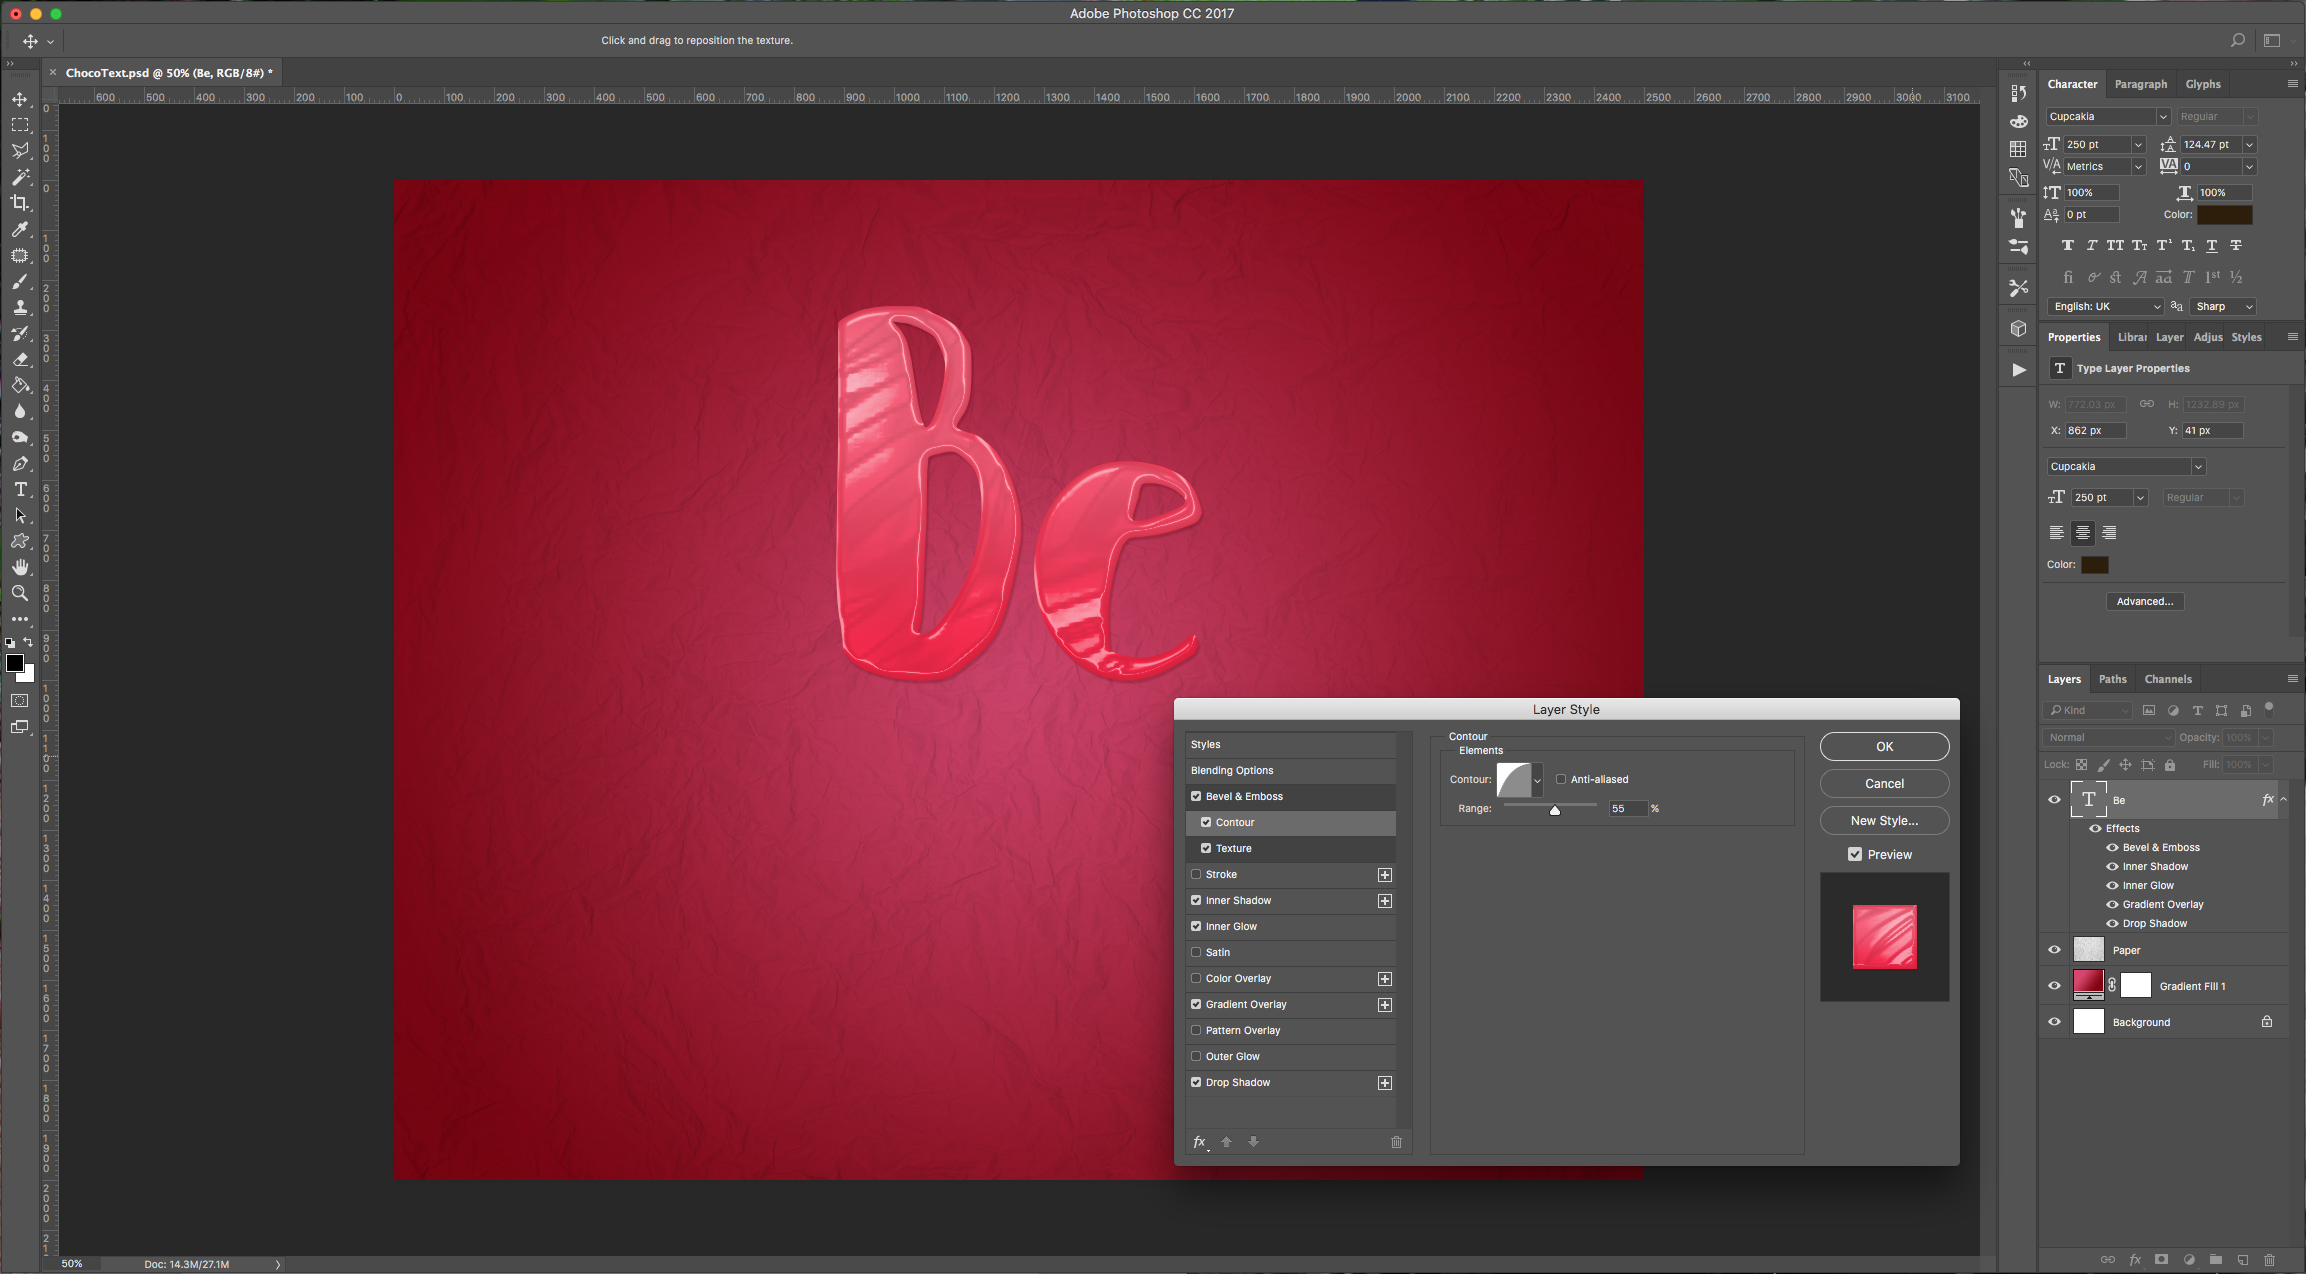
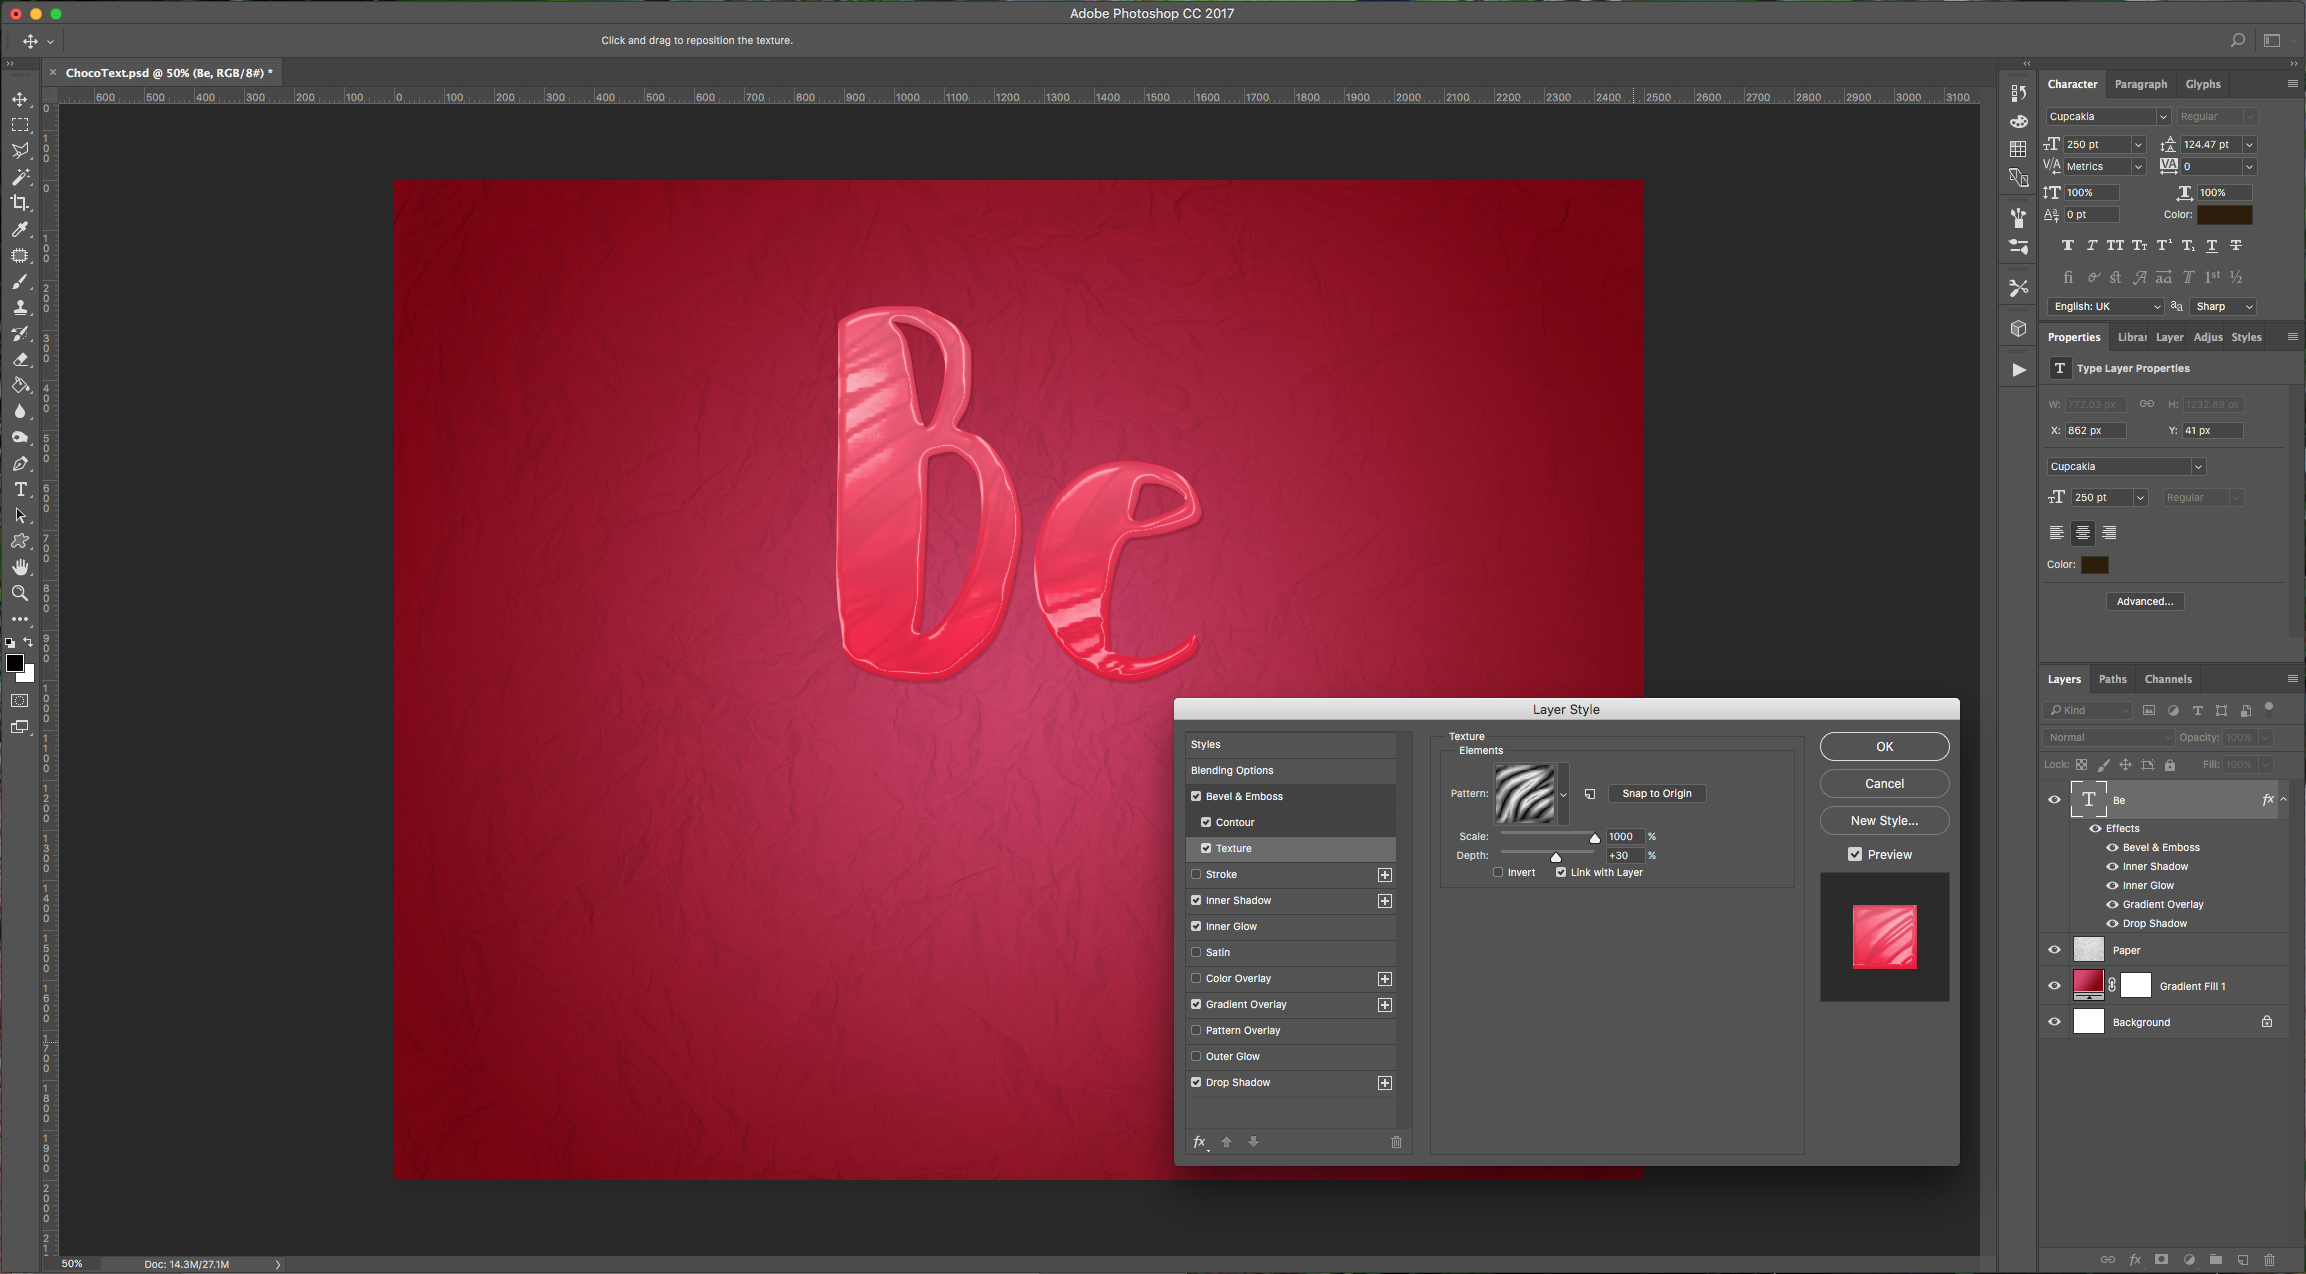
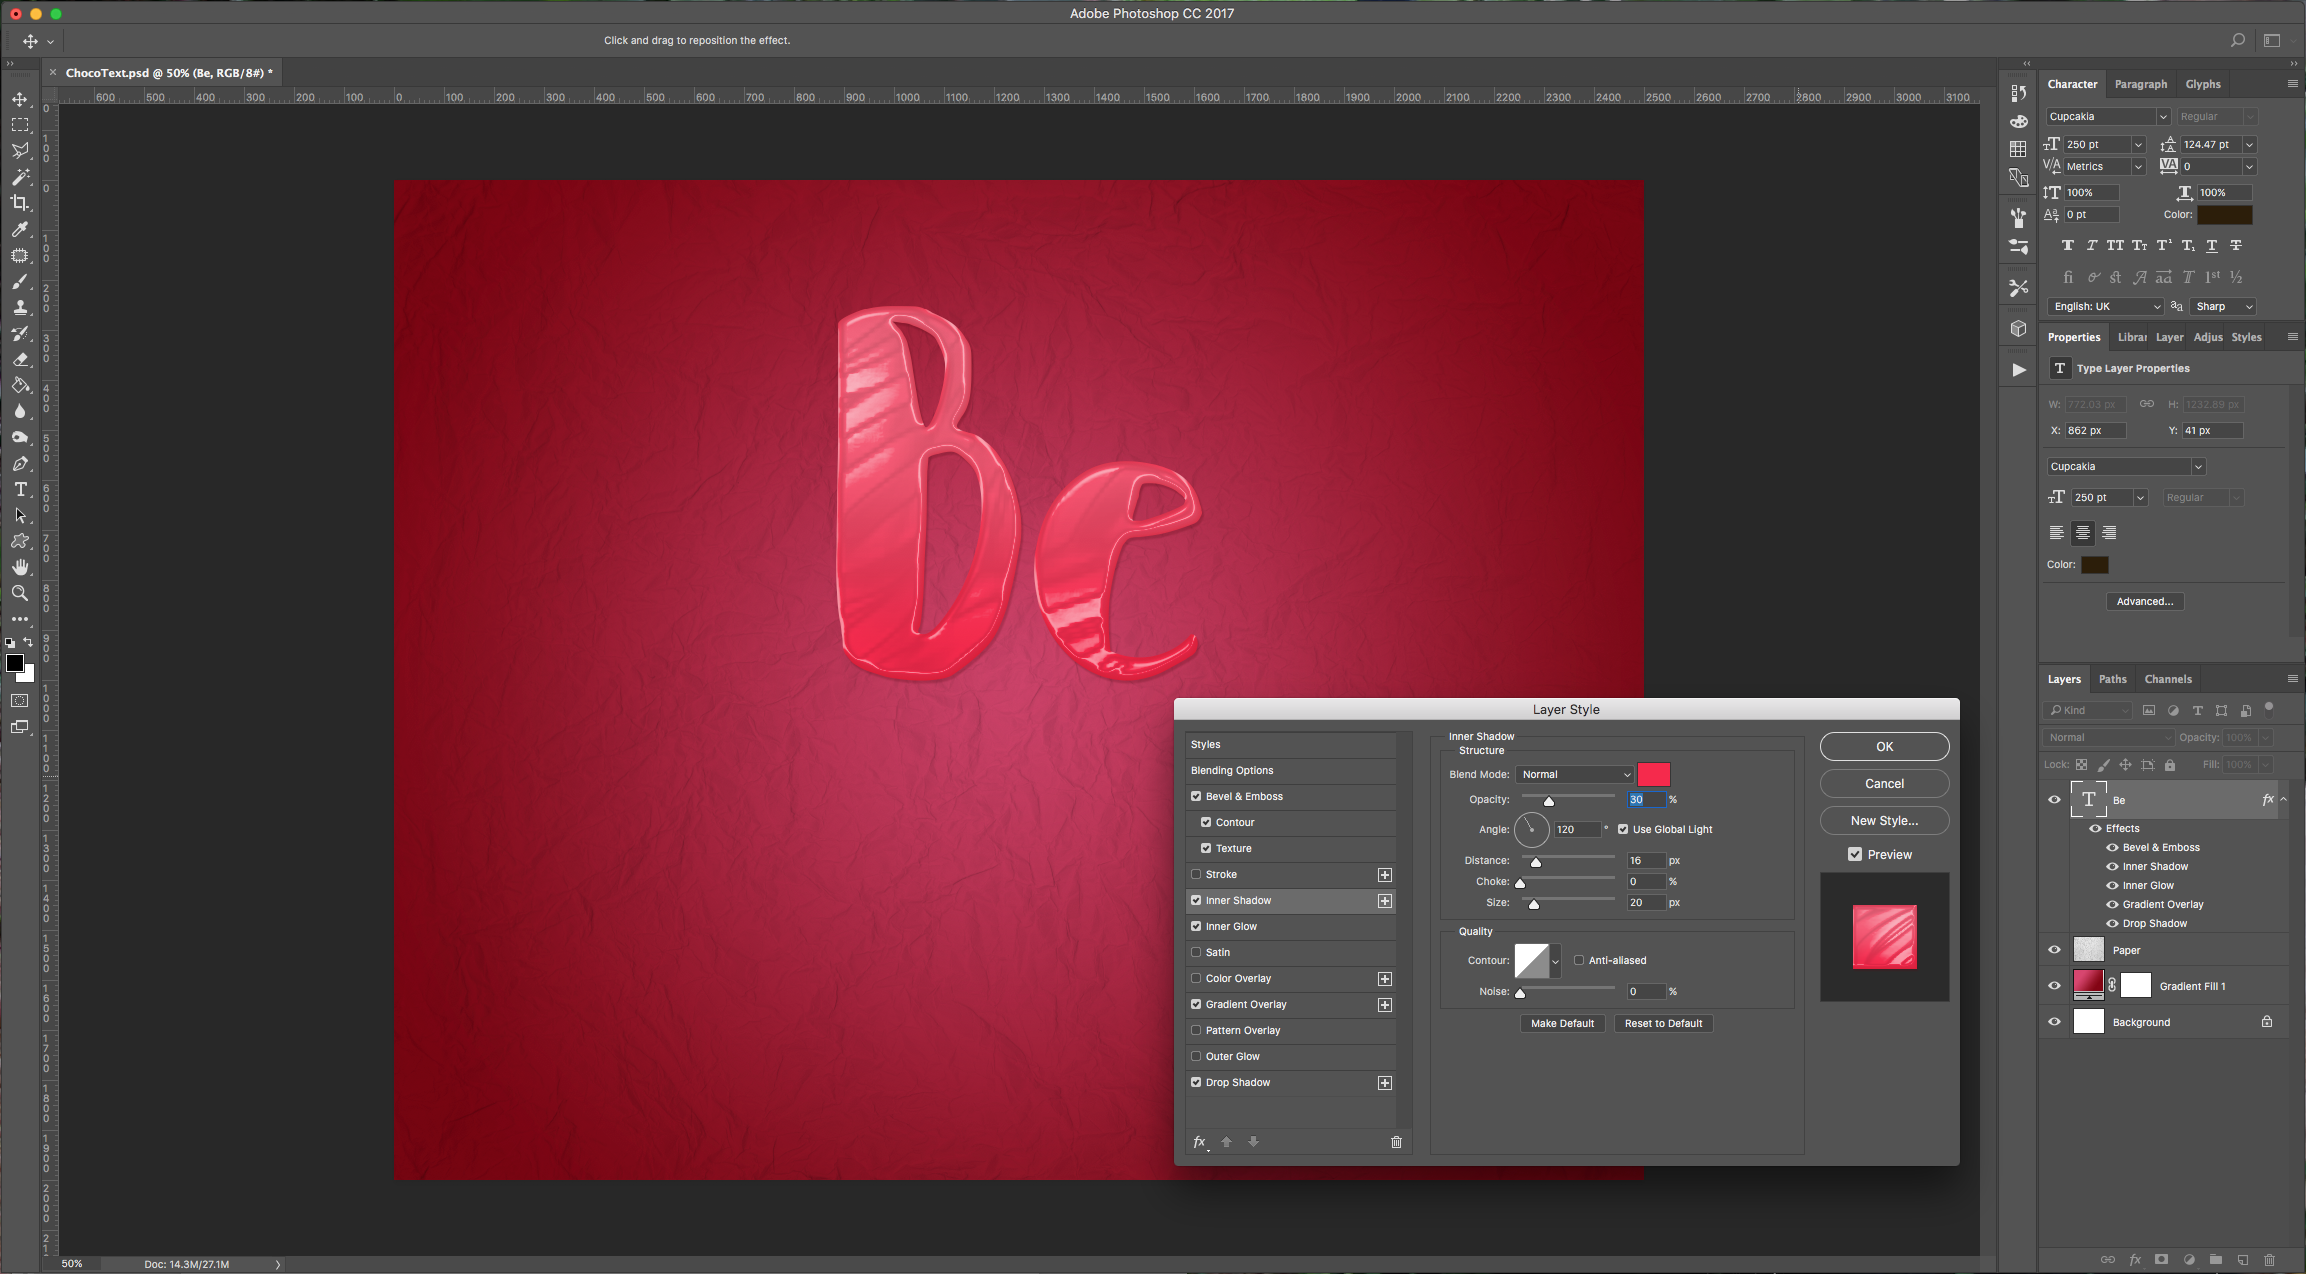
5 - Double-click on your text layer and apply the following “Layer Styles”:
Bevel & Emboss: (Gloss Contour: Ring)
Contour: (Contour: Half Round)
Texture: (Pattern: Zebra 64 x 64 Pixels, Grayscale Mode)
Inner Shadow: (#f82548)
Inner Glow: (#f82548)
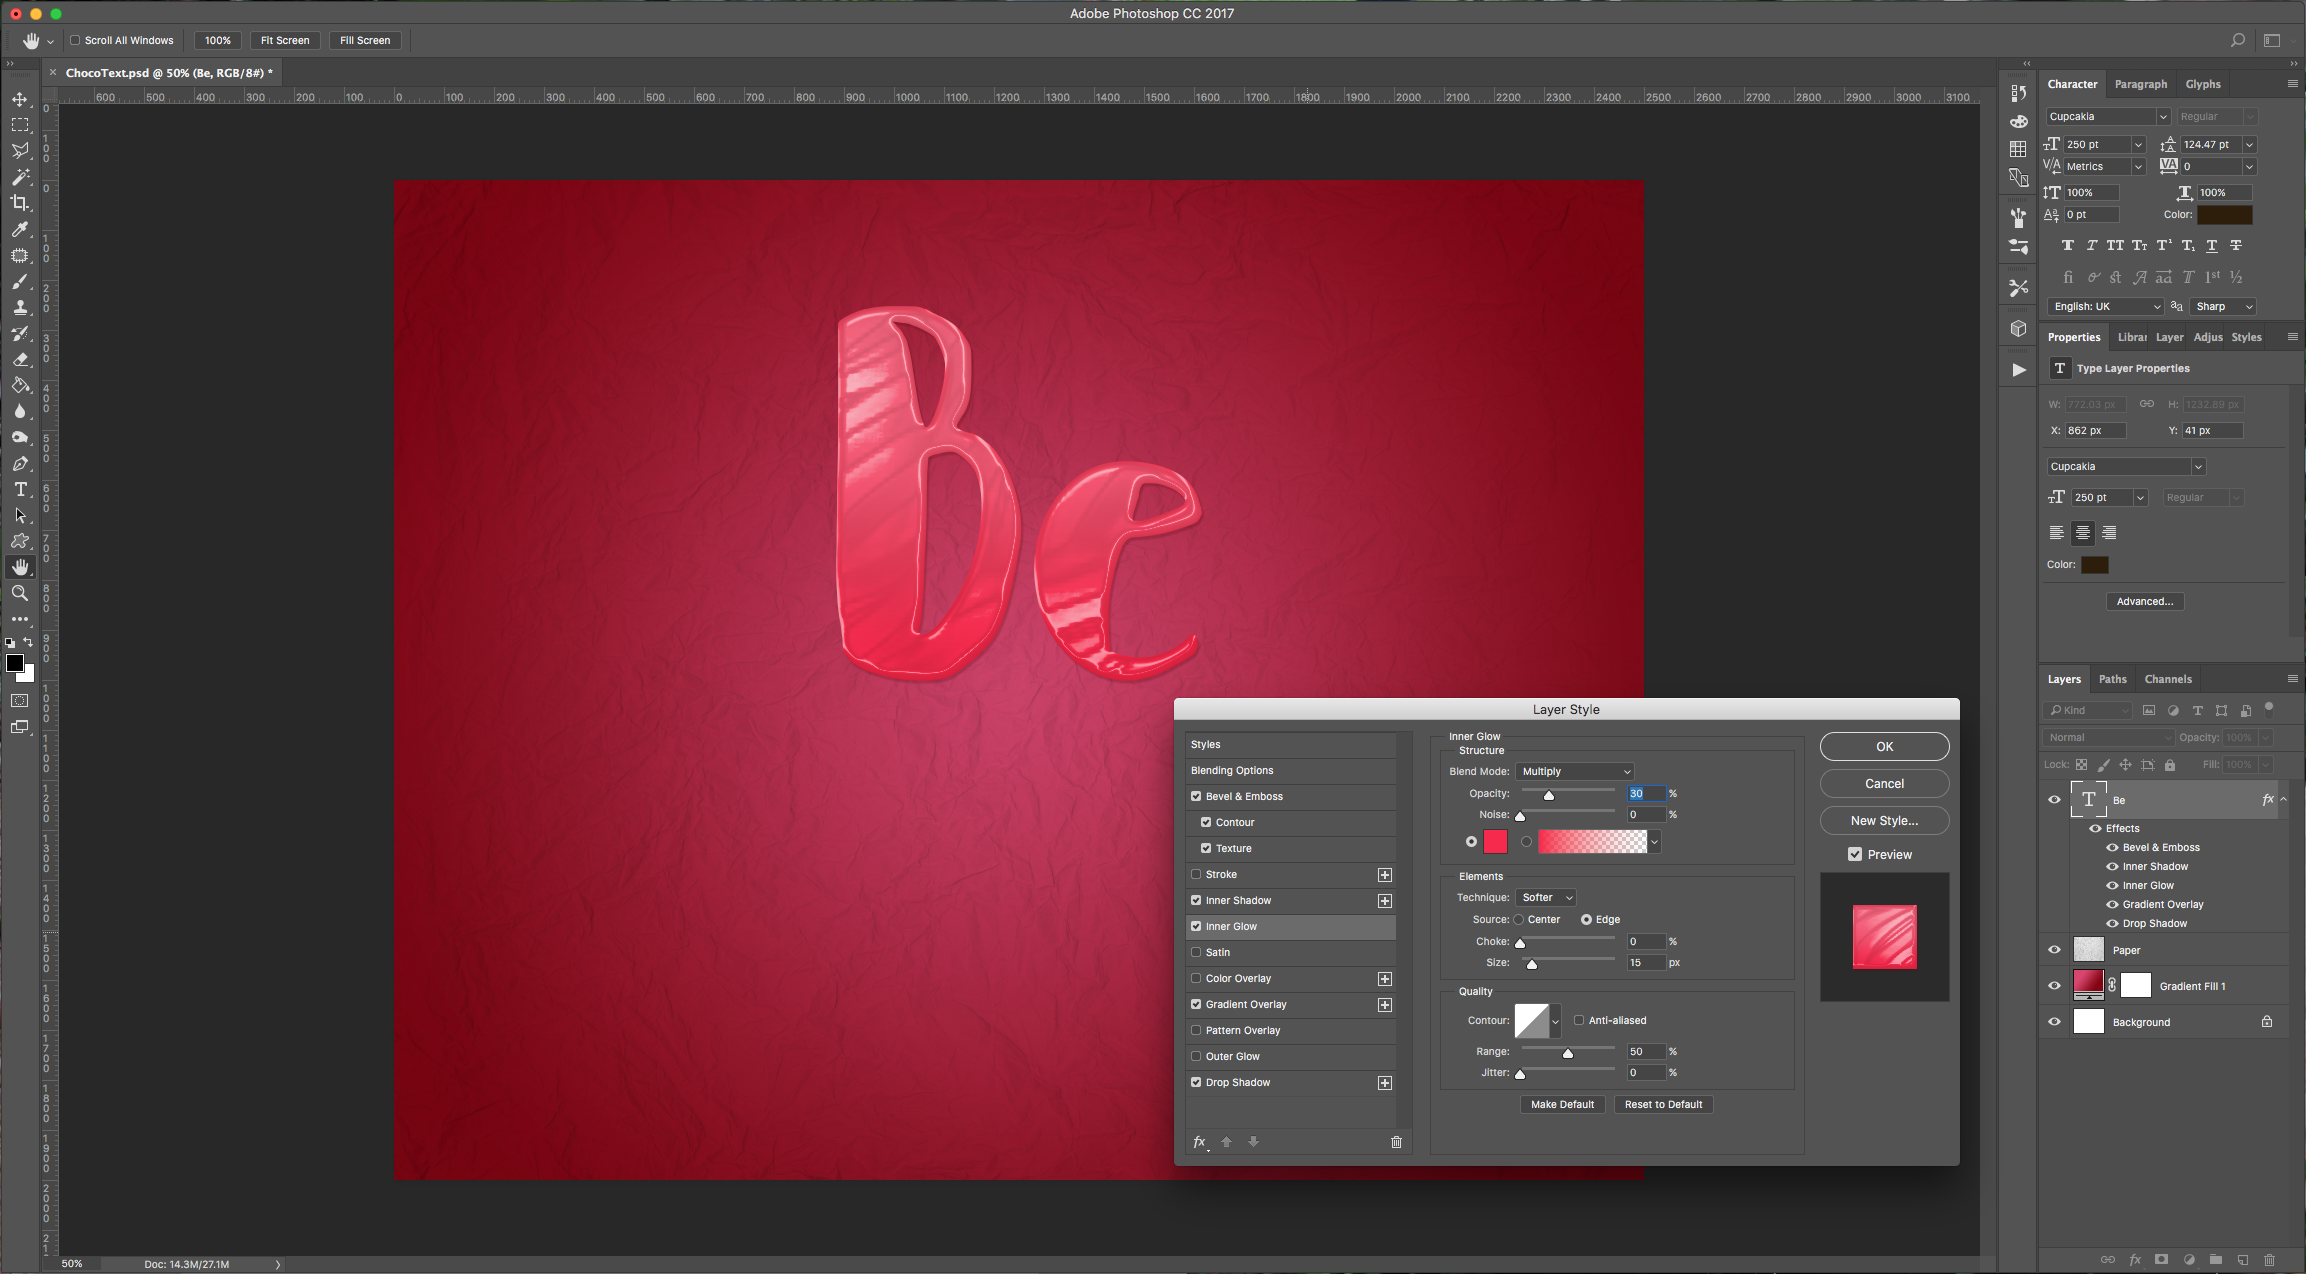
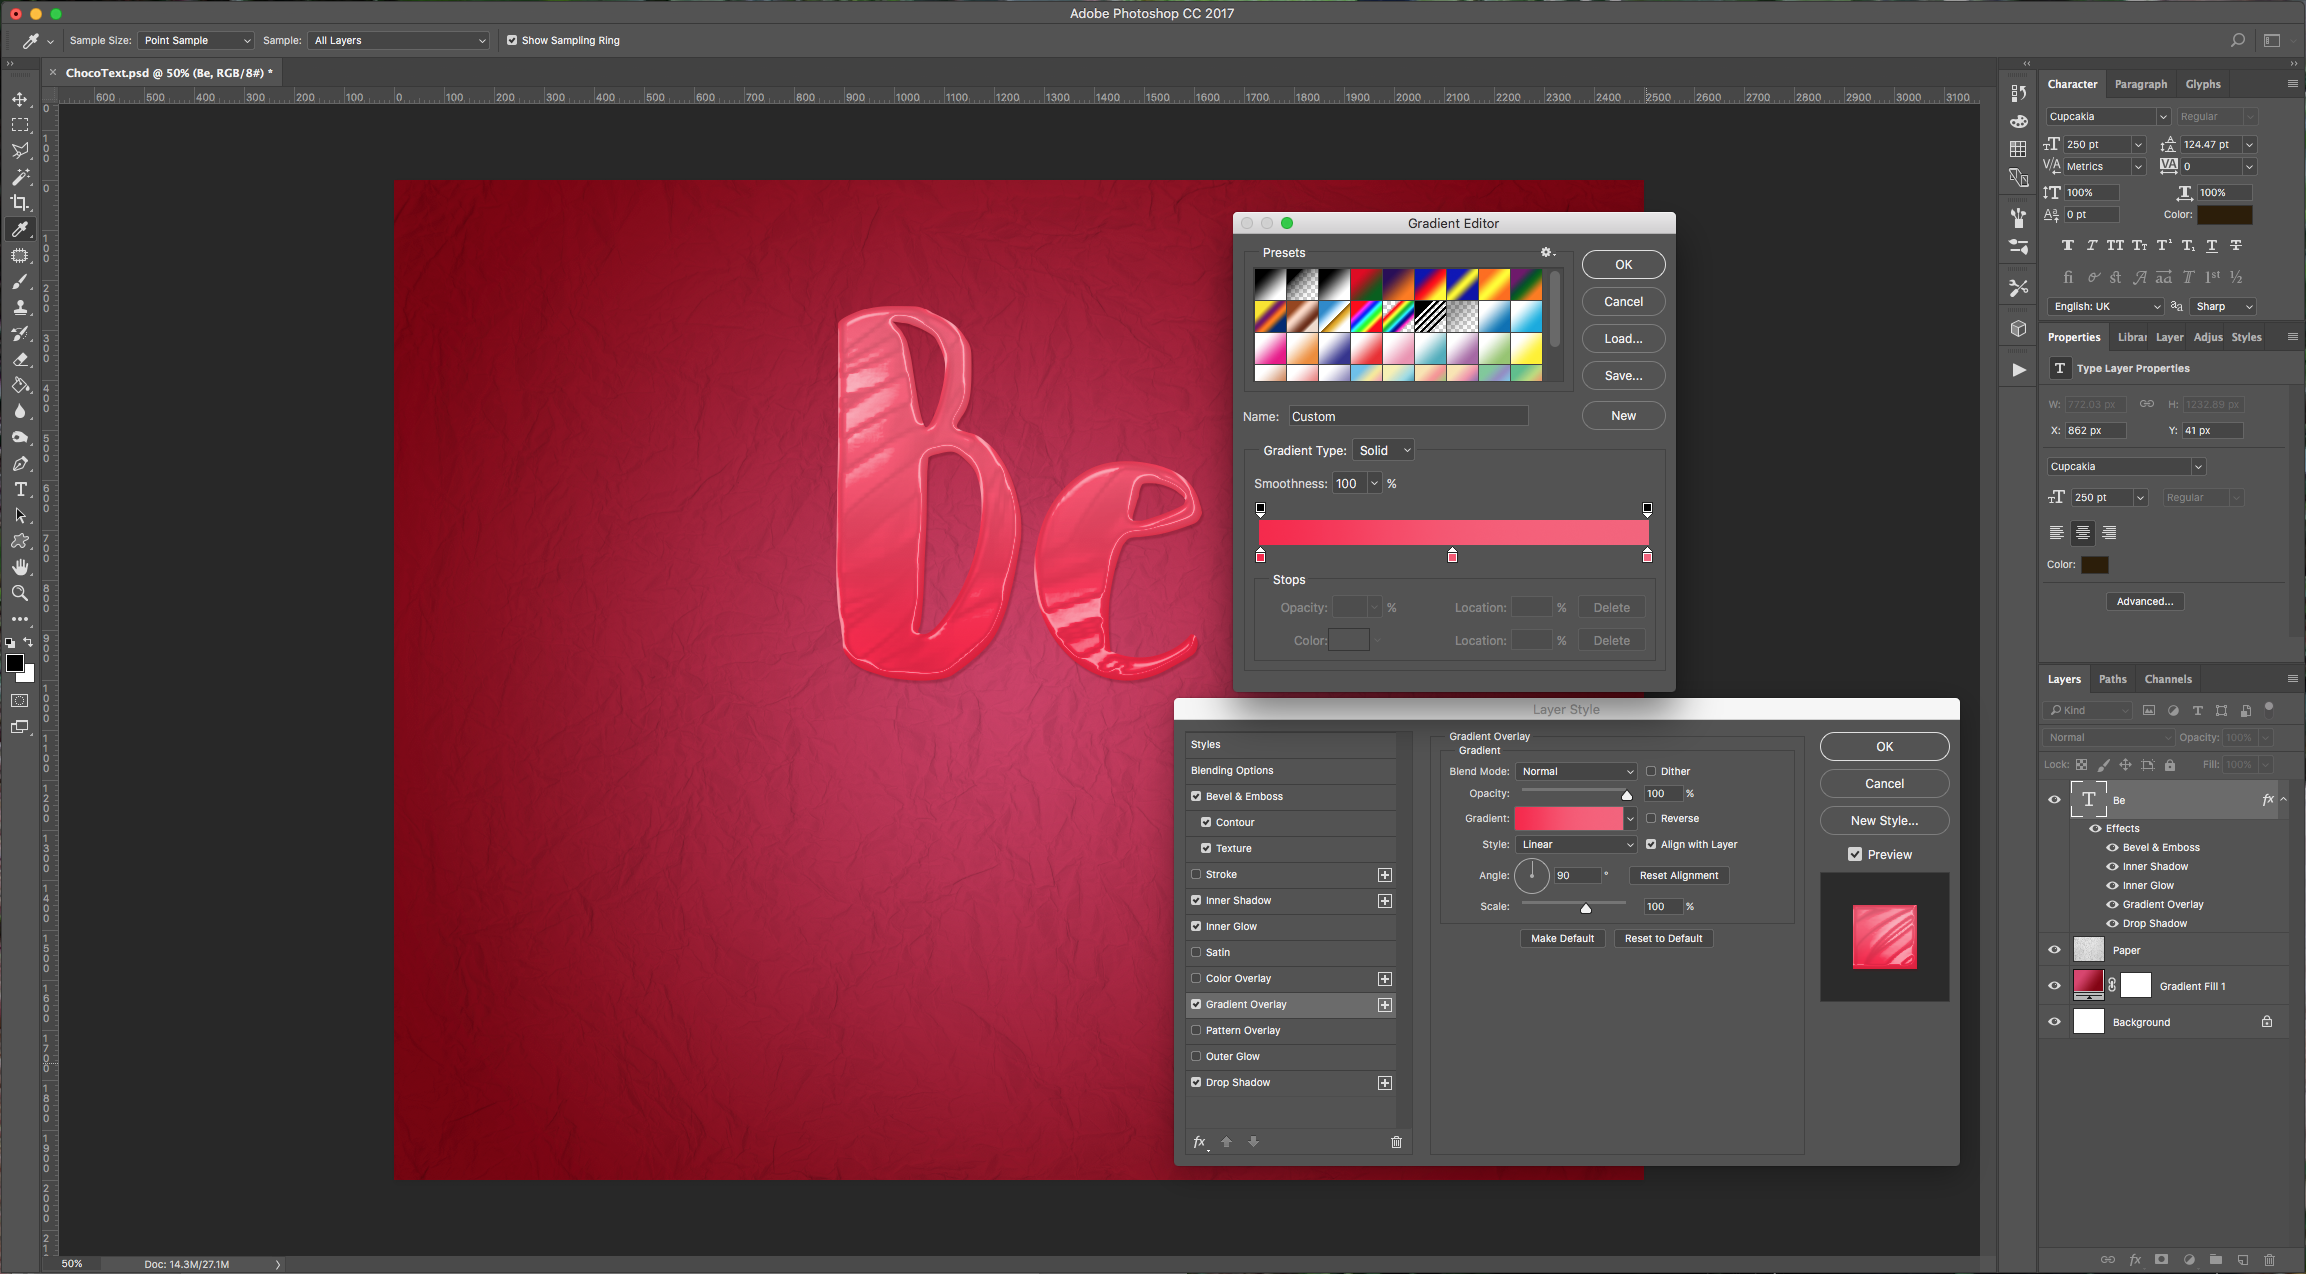
Gradient Overlay: (#f82548, #f85772 and #f4637b)
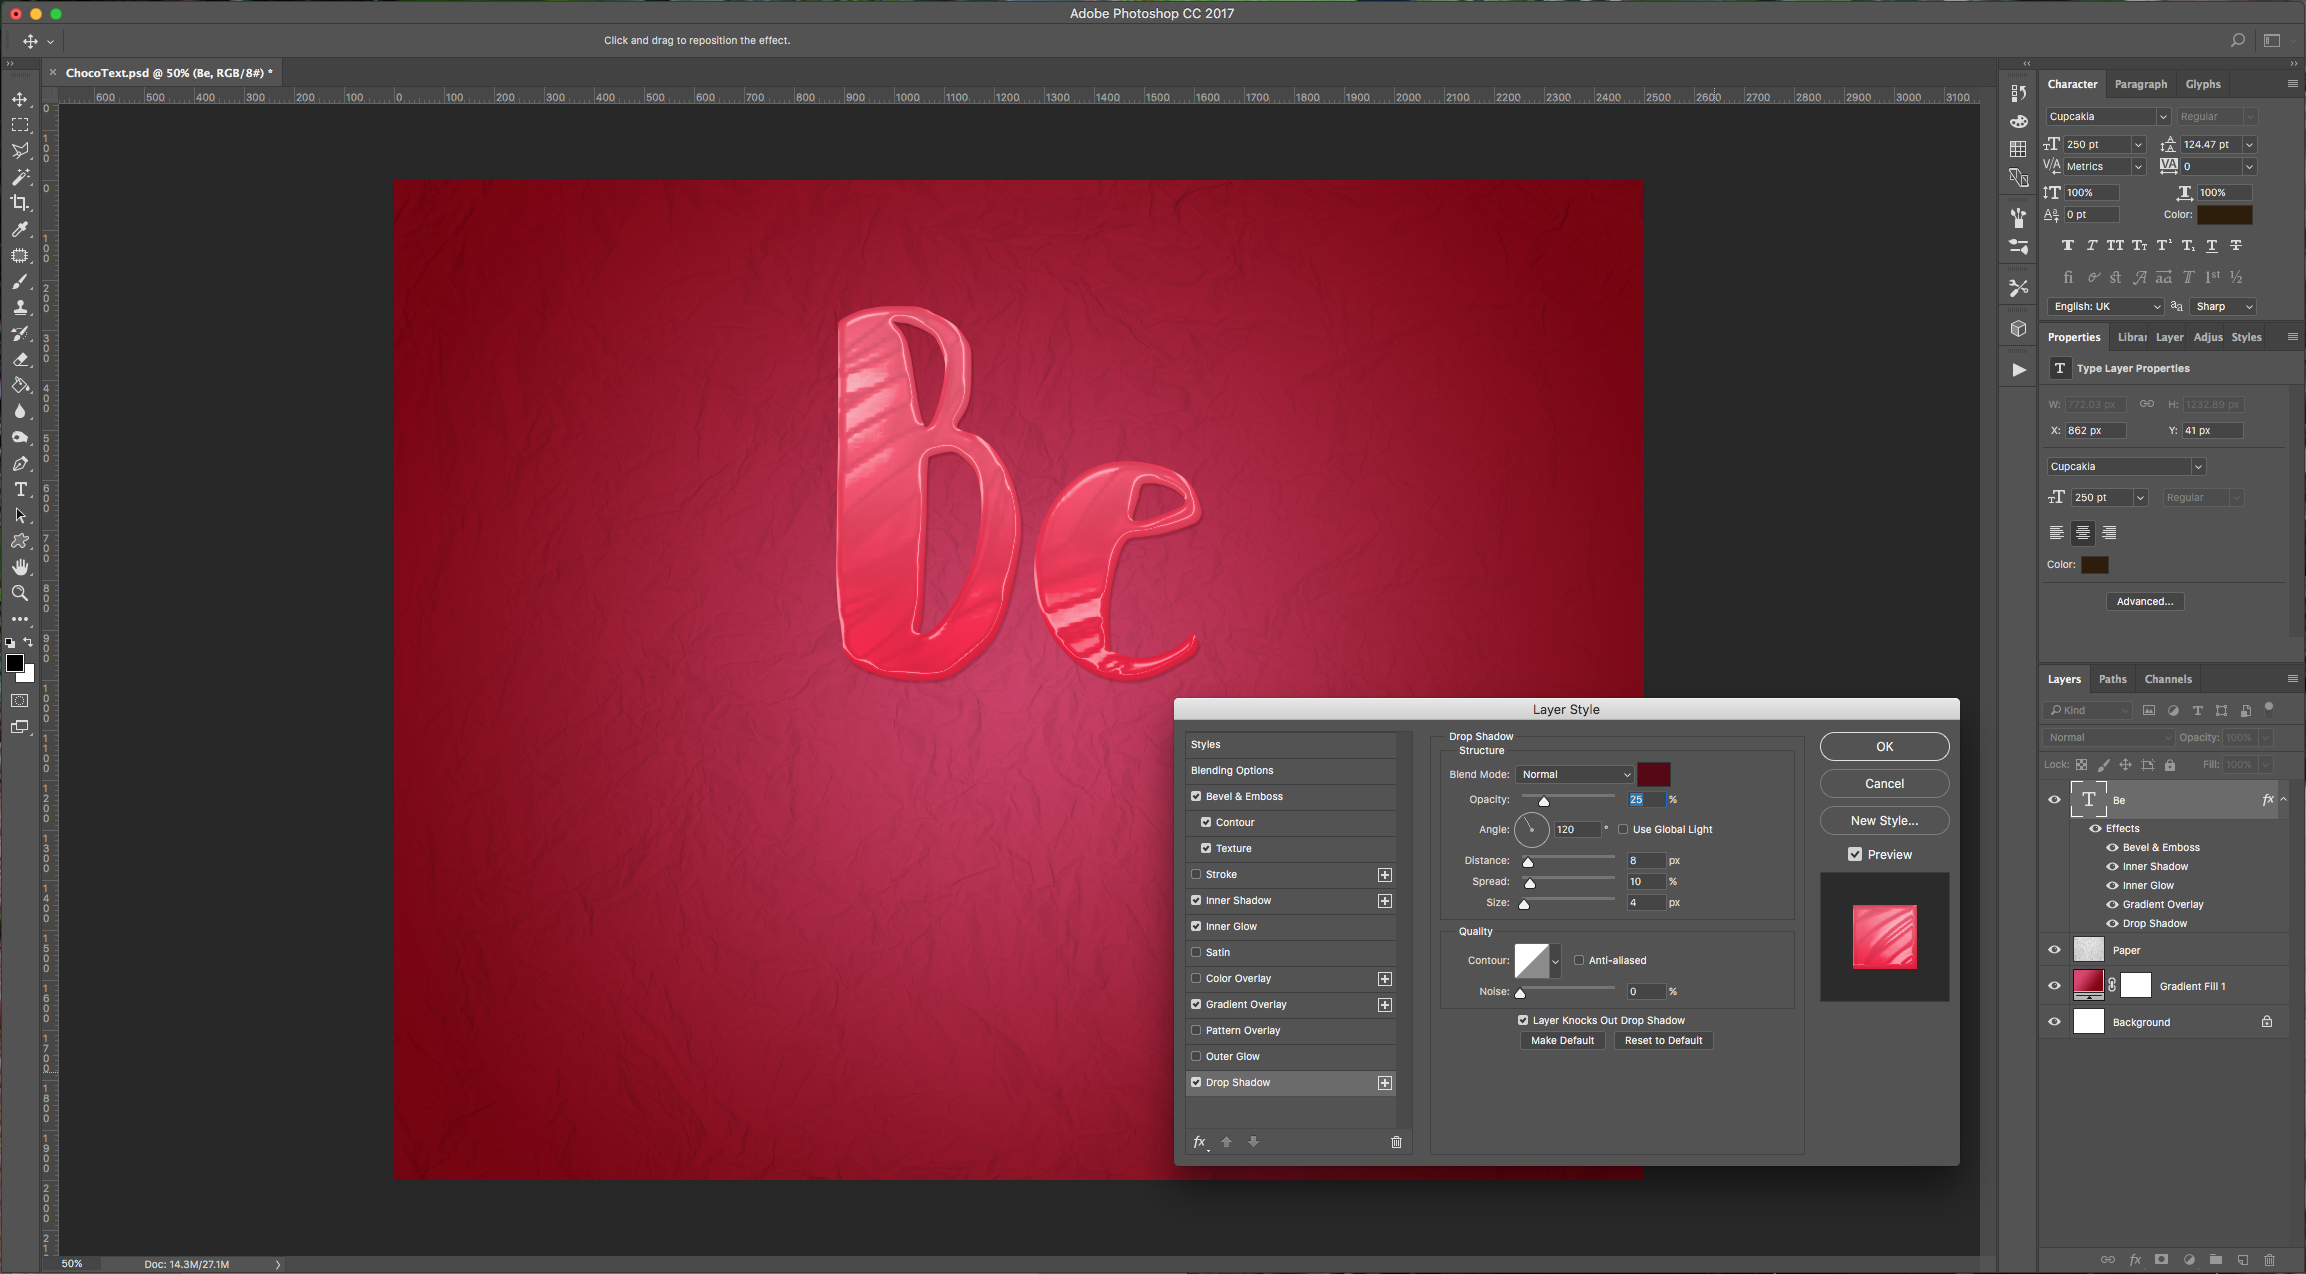
Drop Shadow: (#560613)
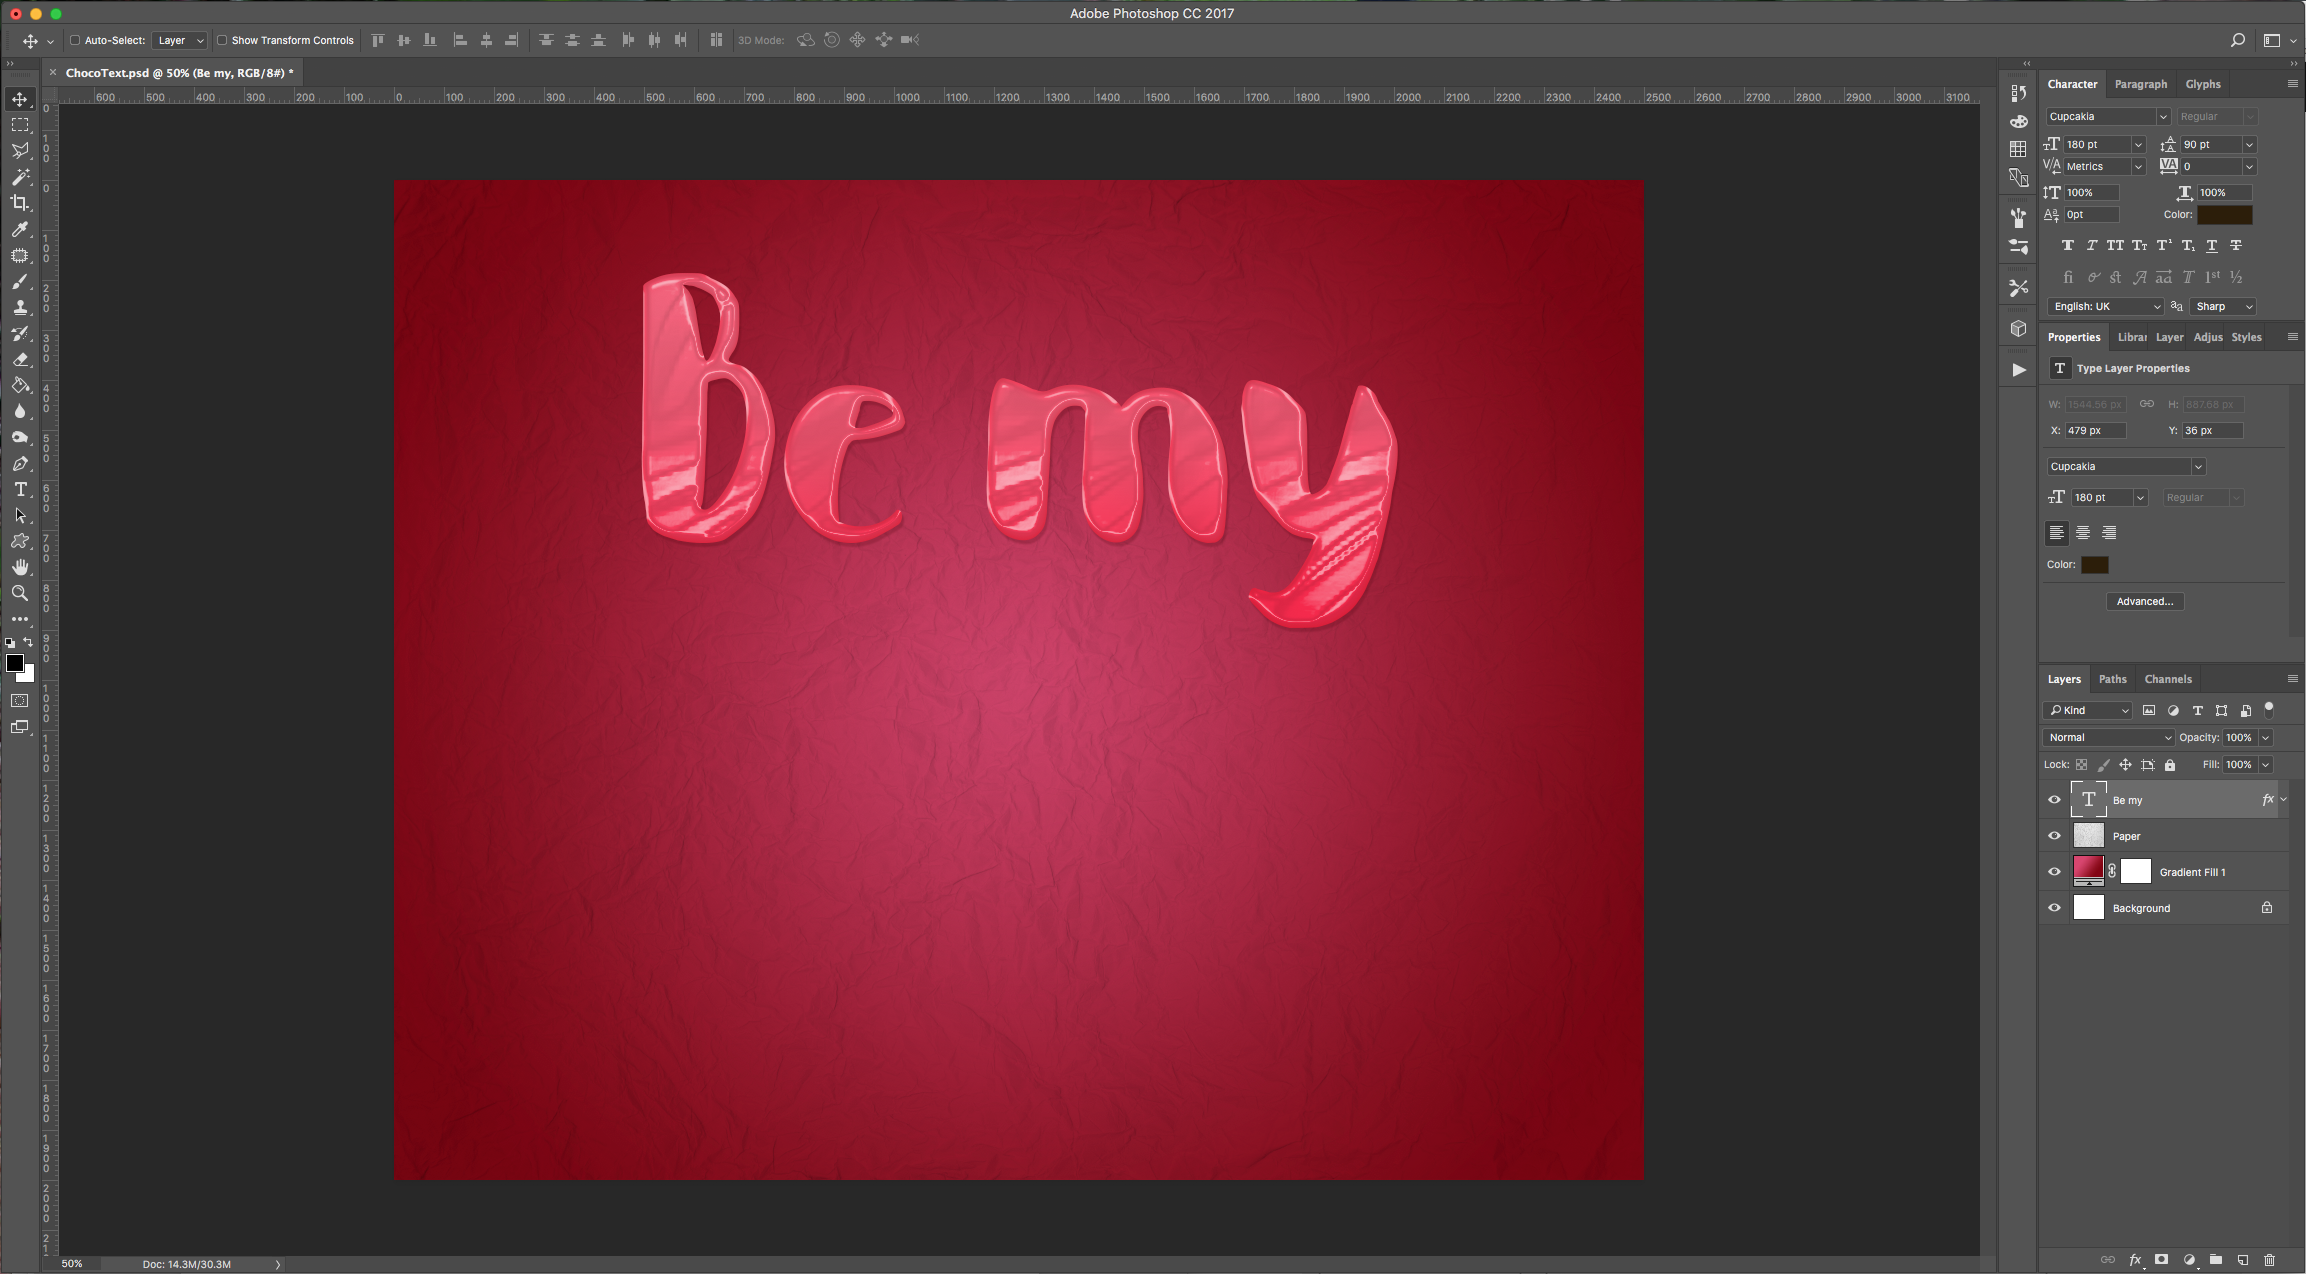
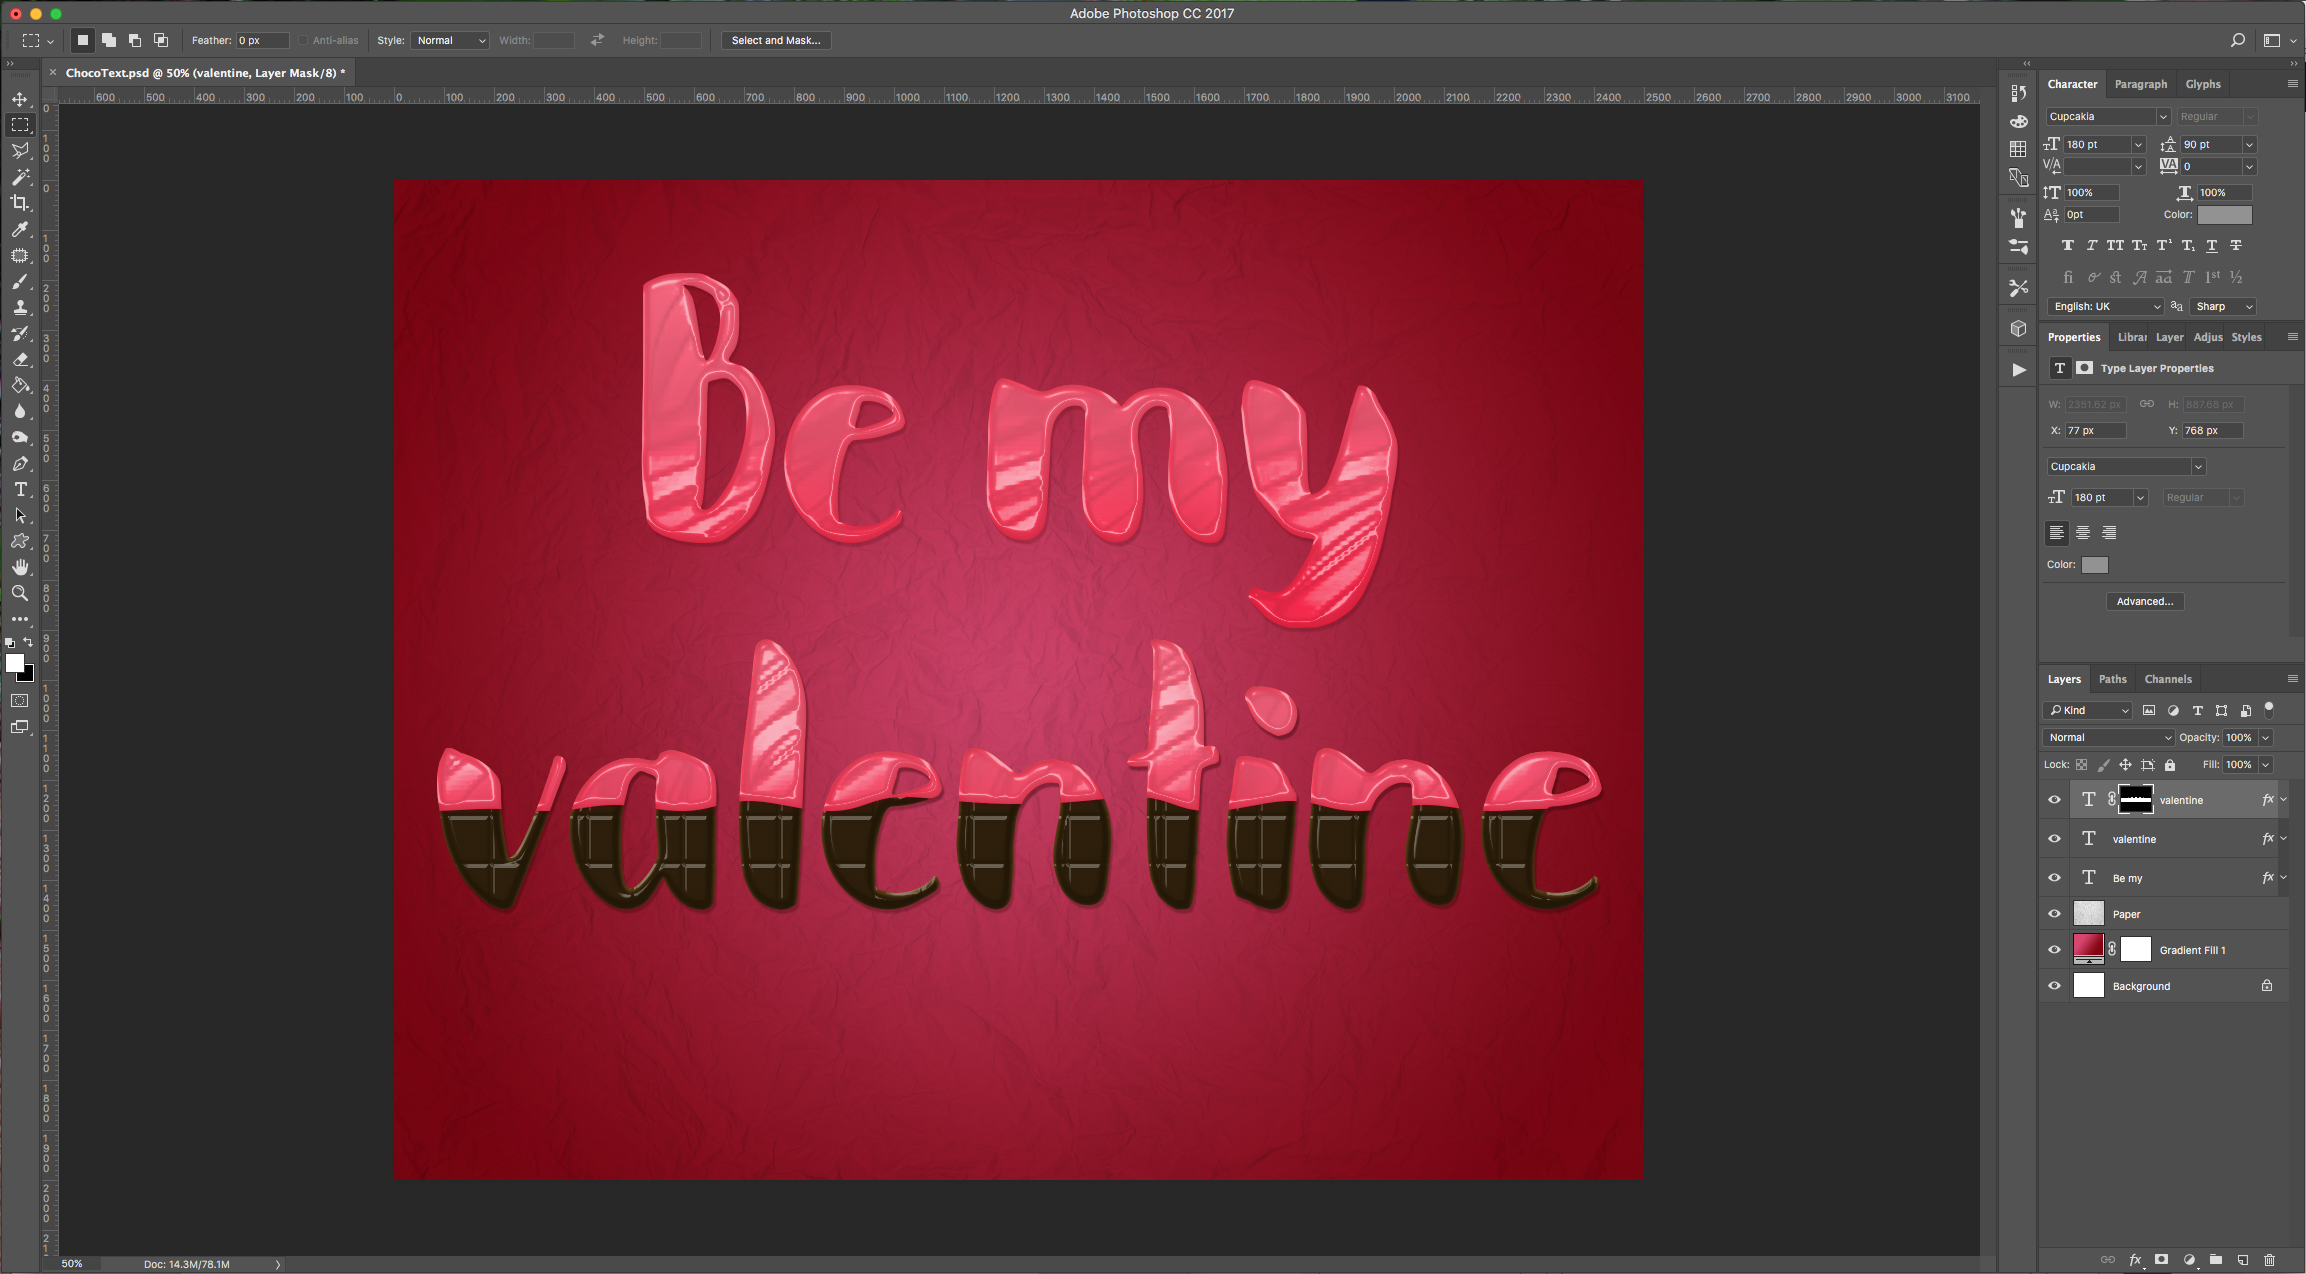
We added more text to this layer and reduced the size to 180 Pixels.
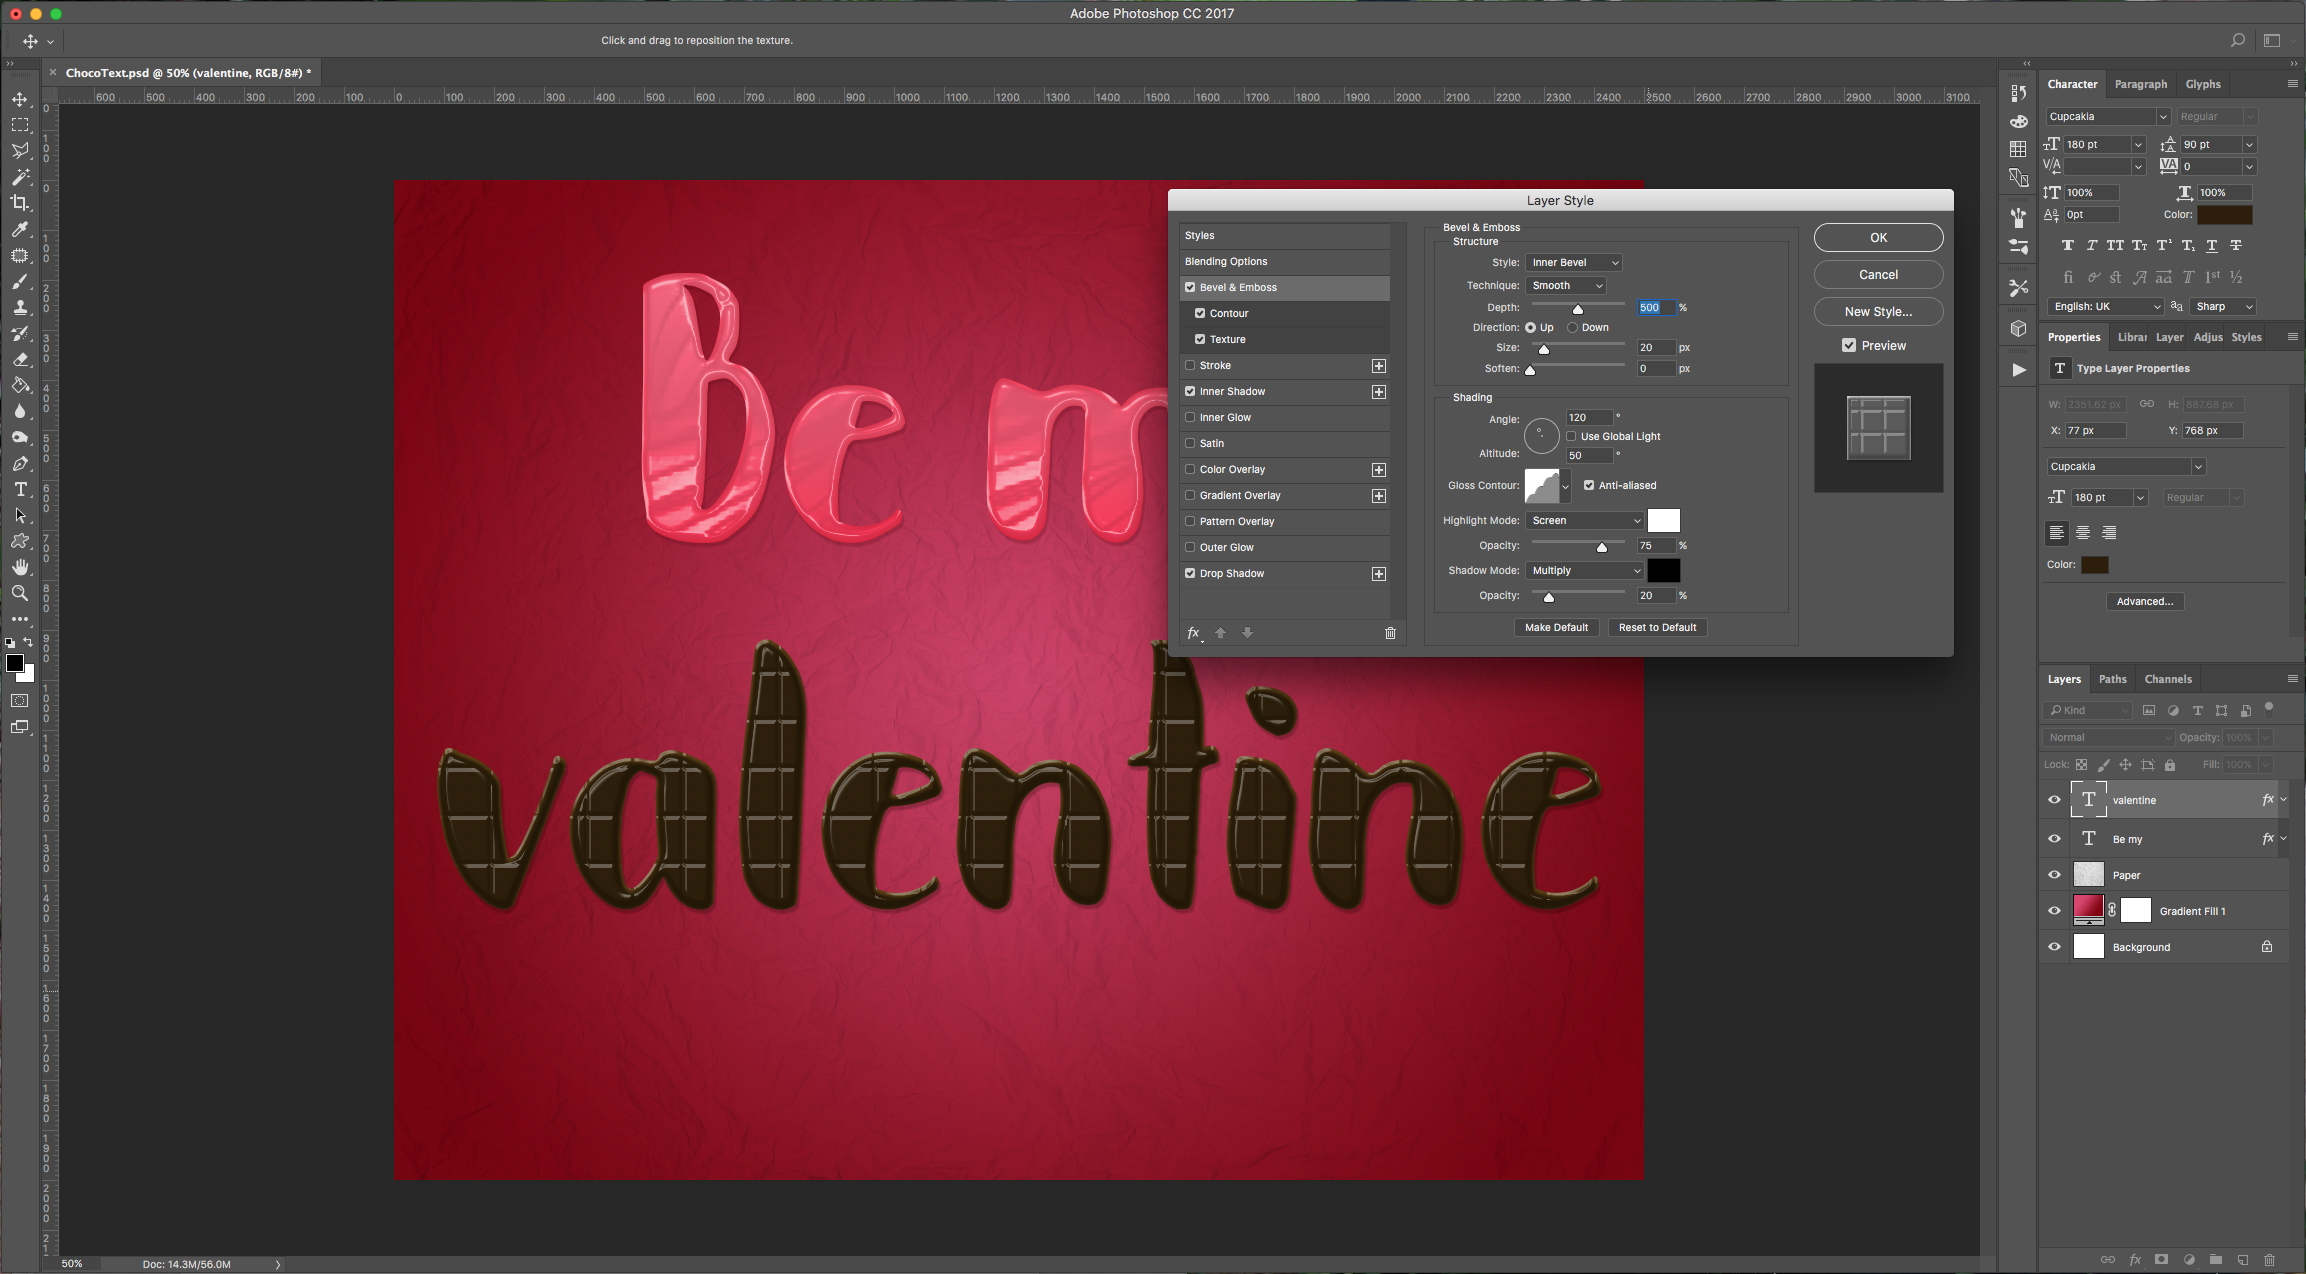
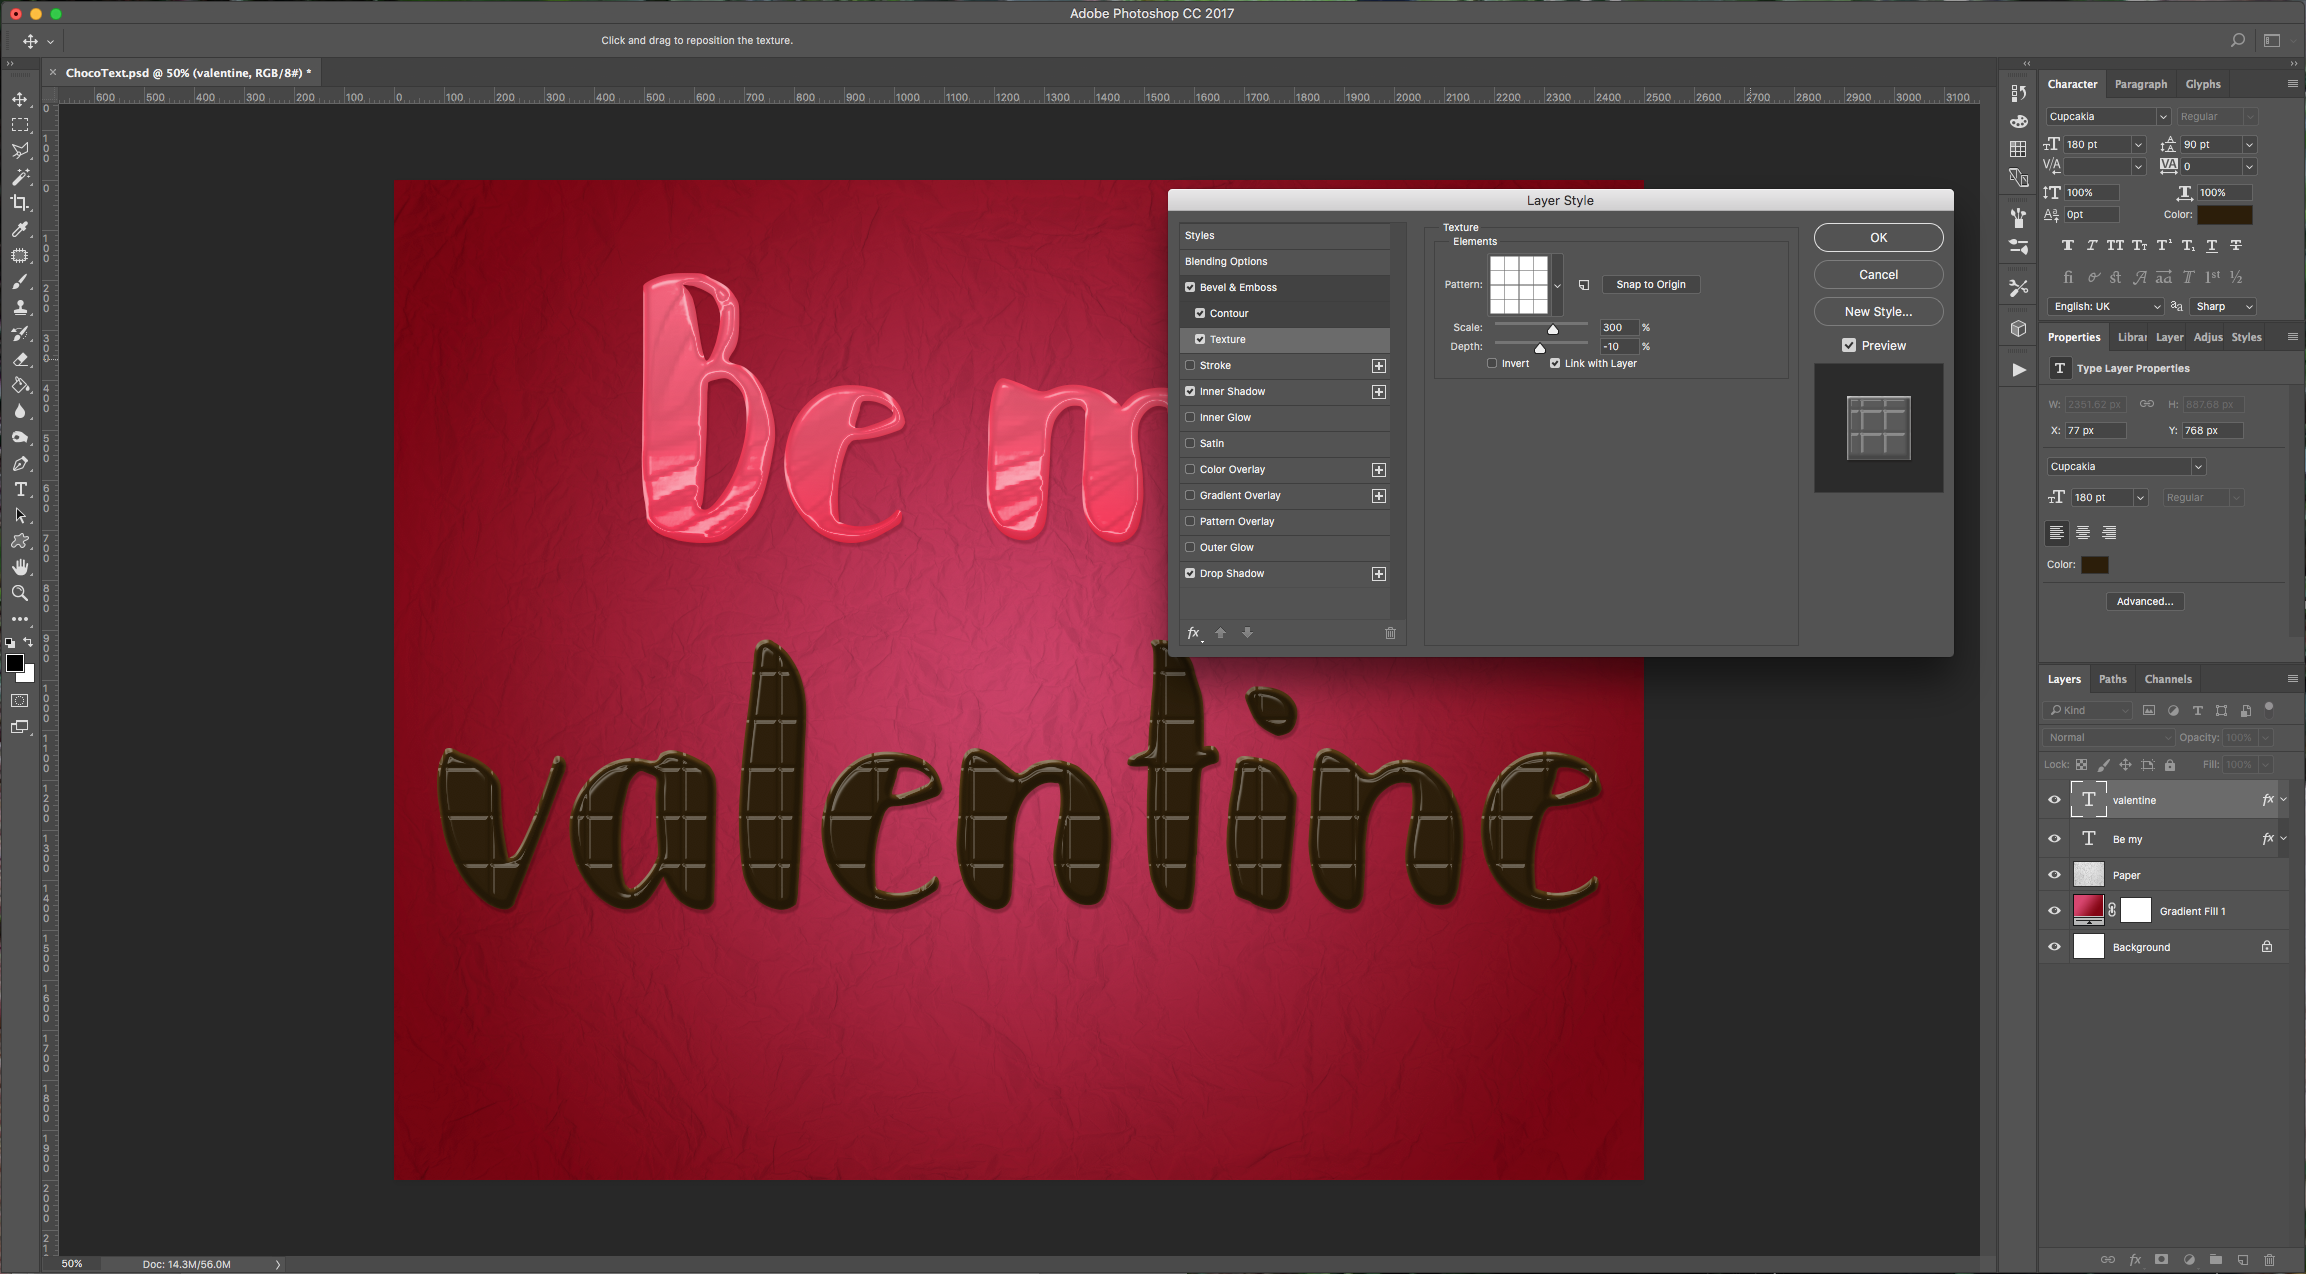
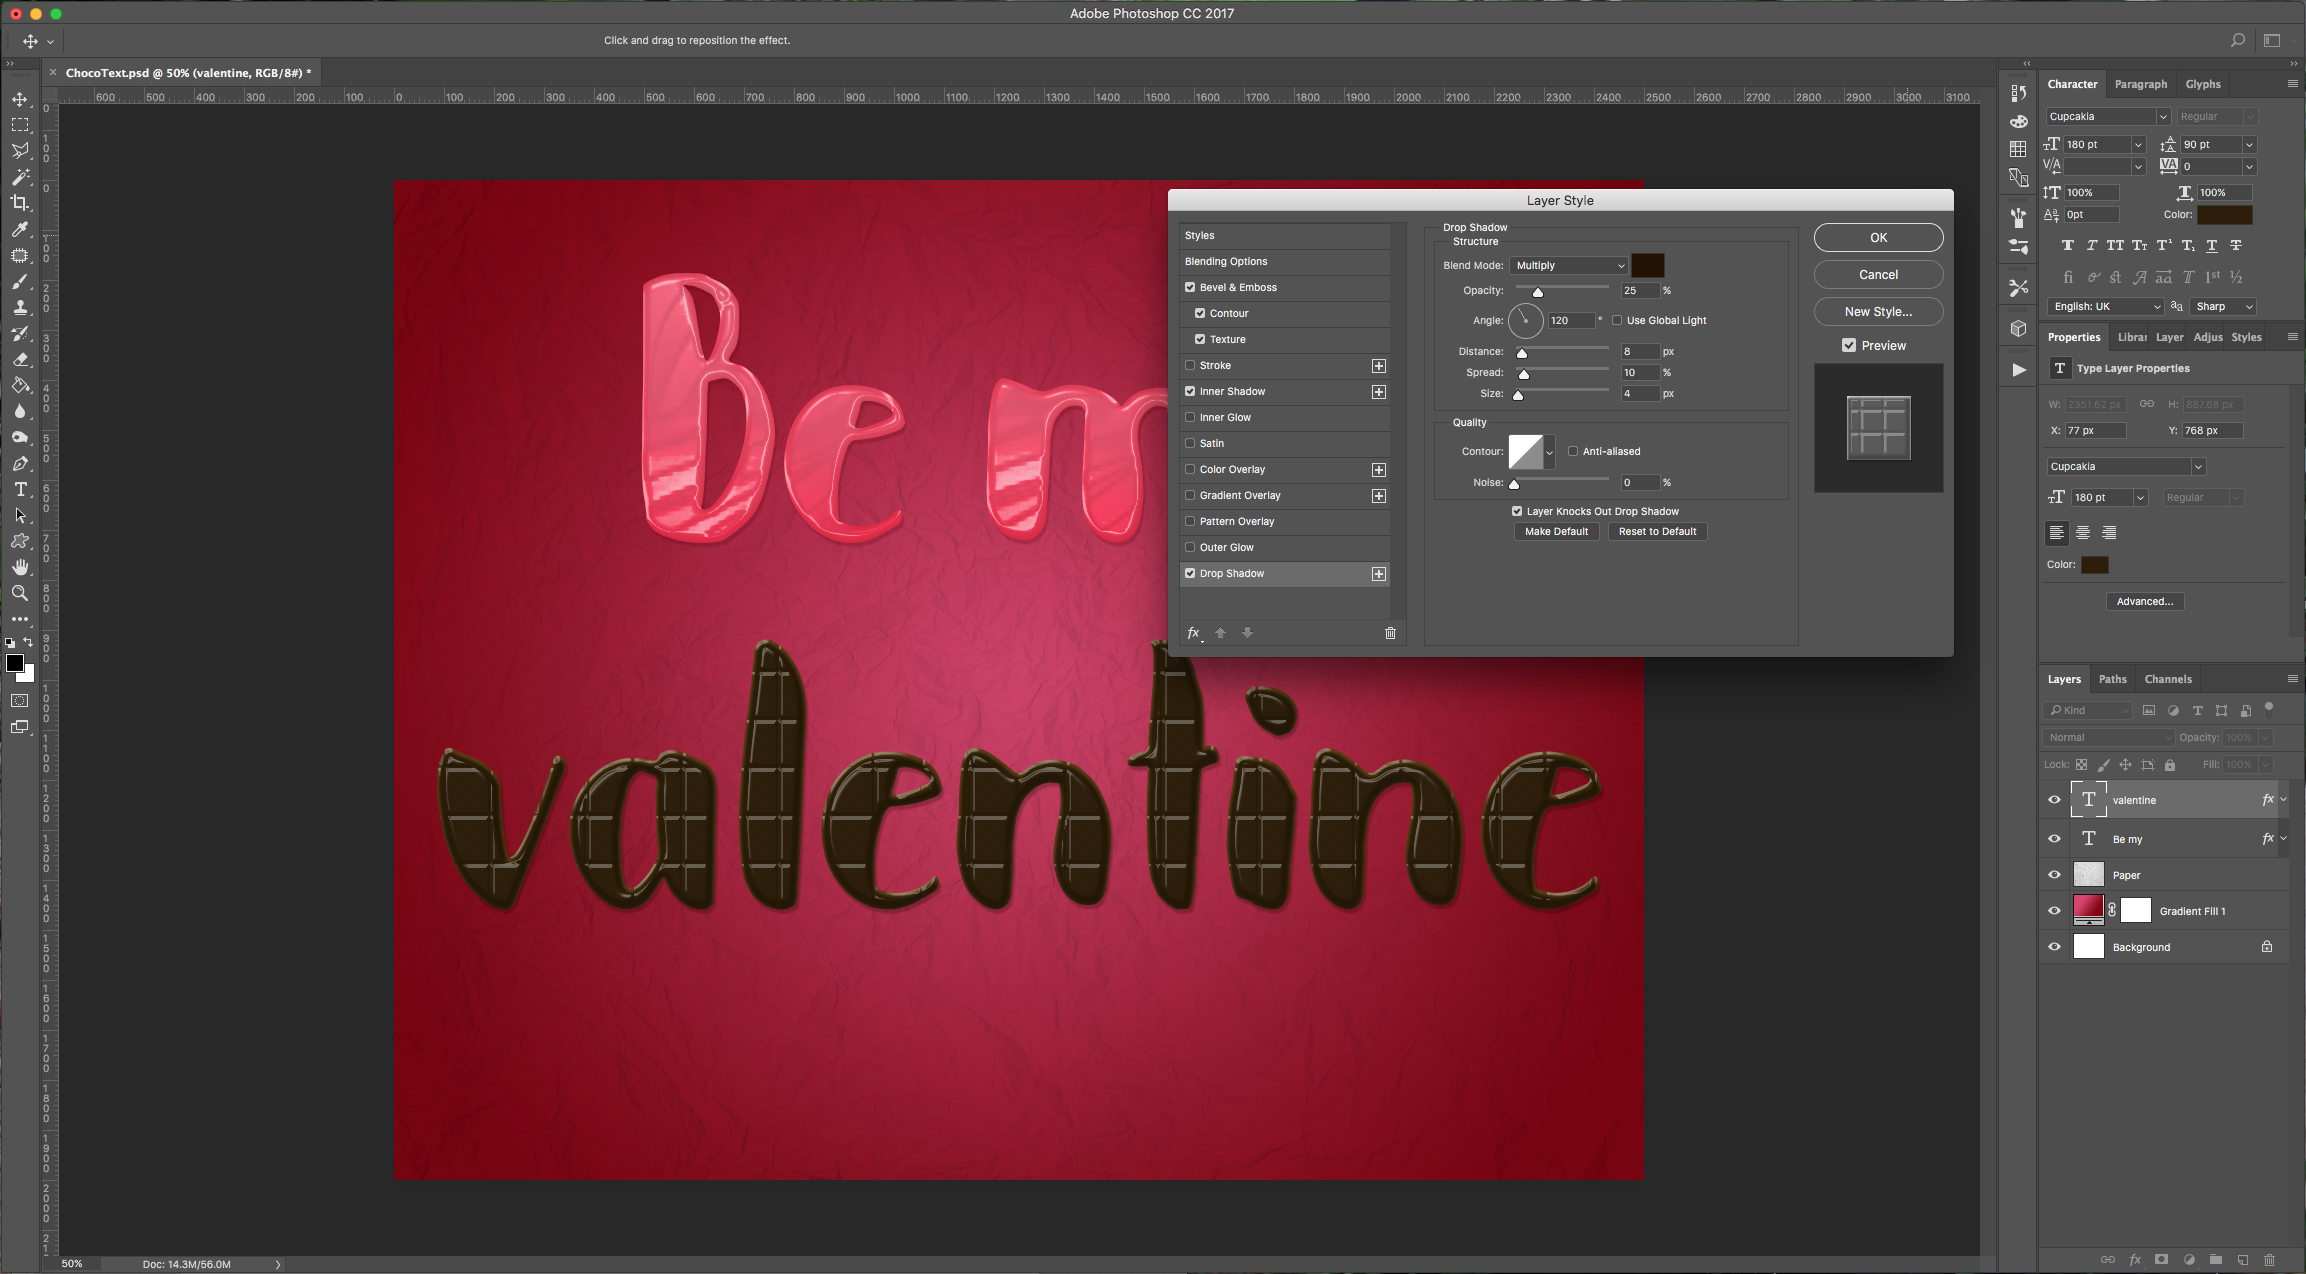
6 - Type a second line of text creating another layer (keep the Font, Fill Color and Size from the previous one) and apply the following “Layer Styles” to this one:
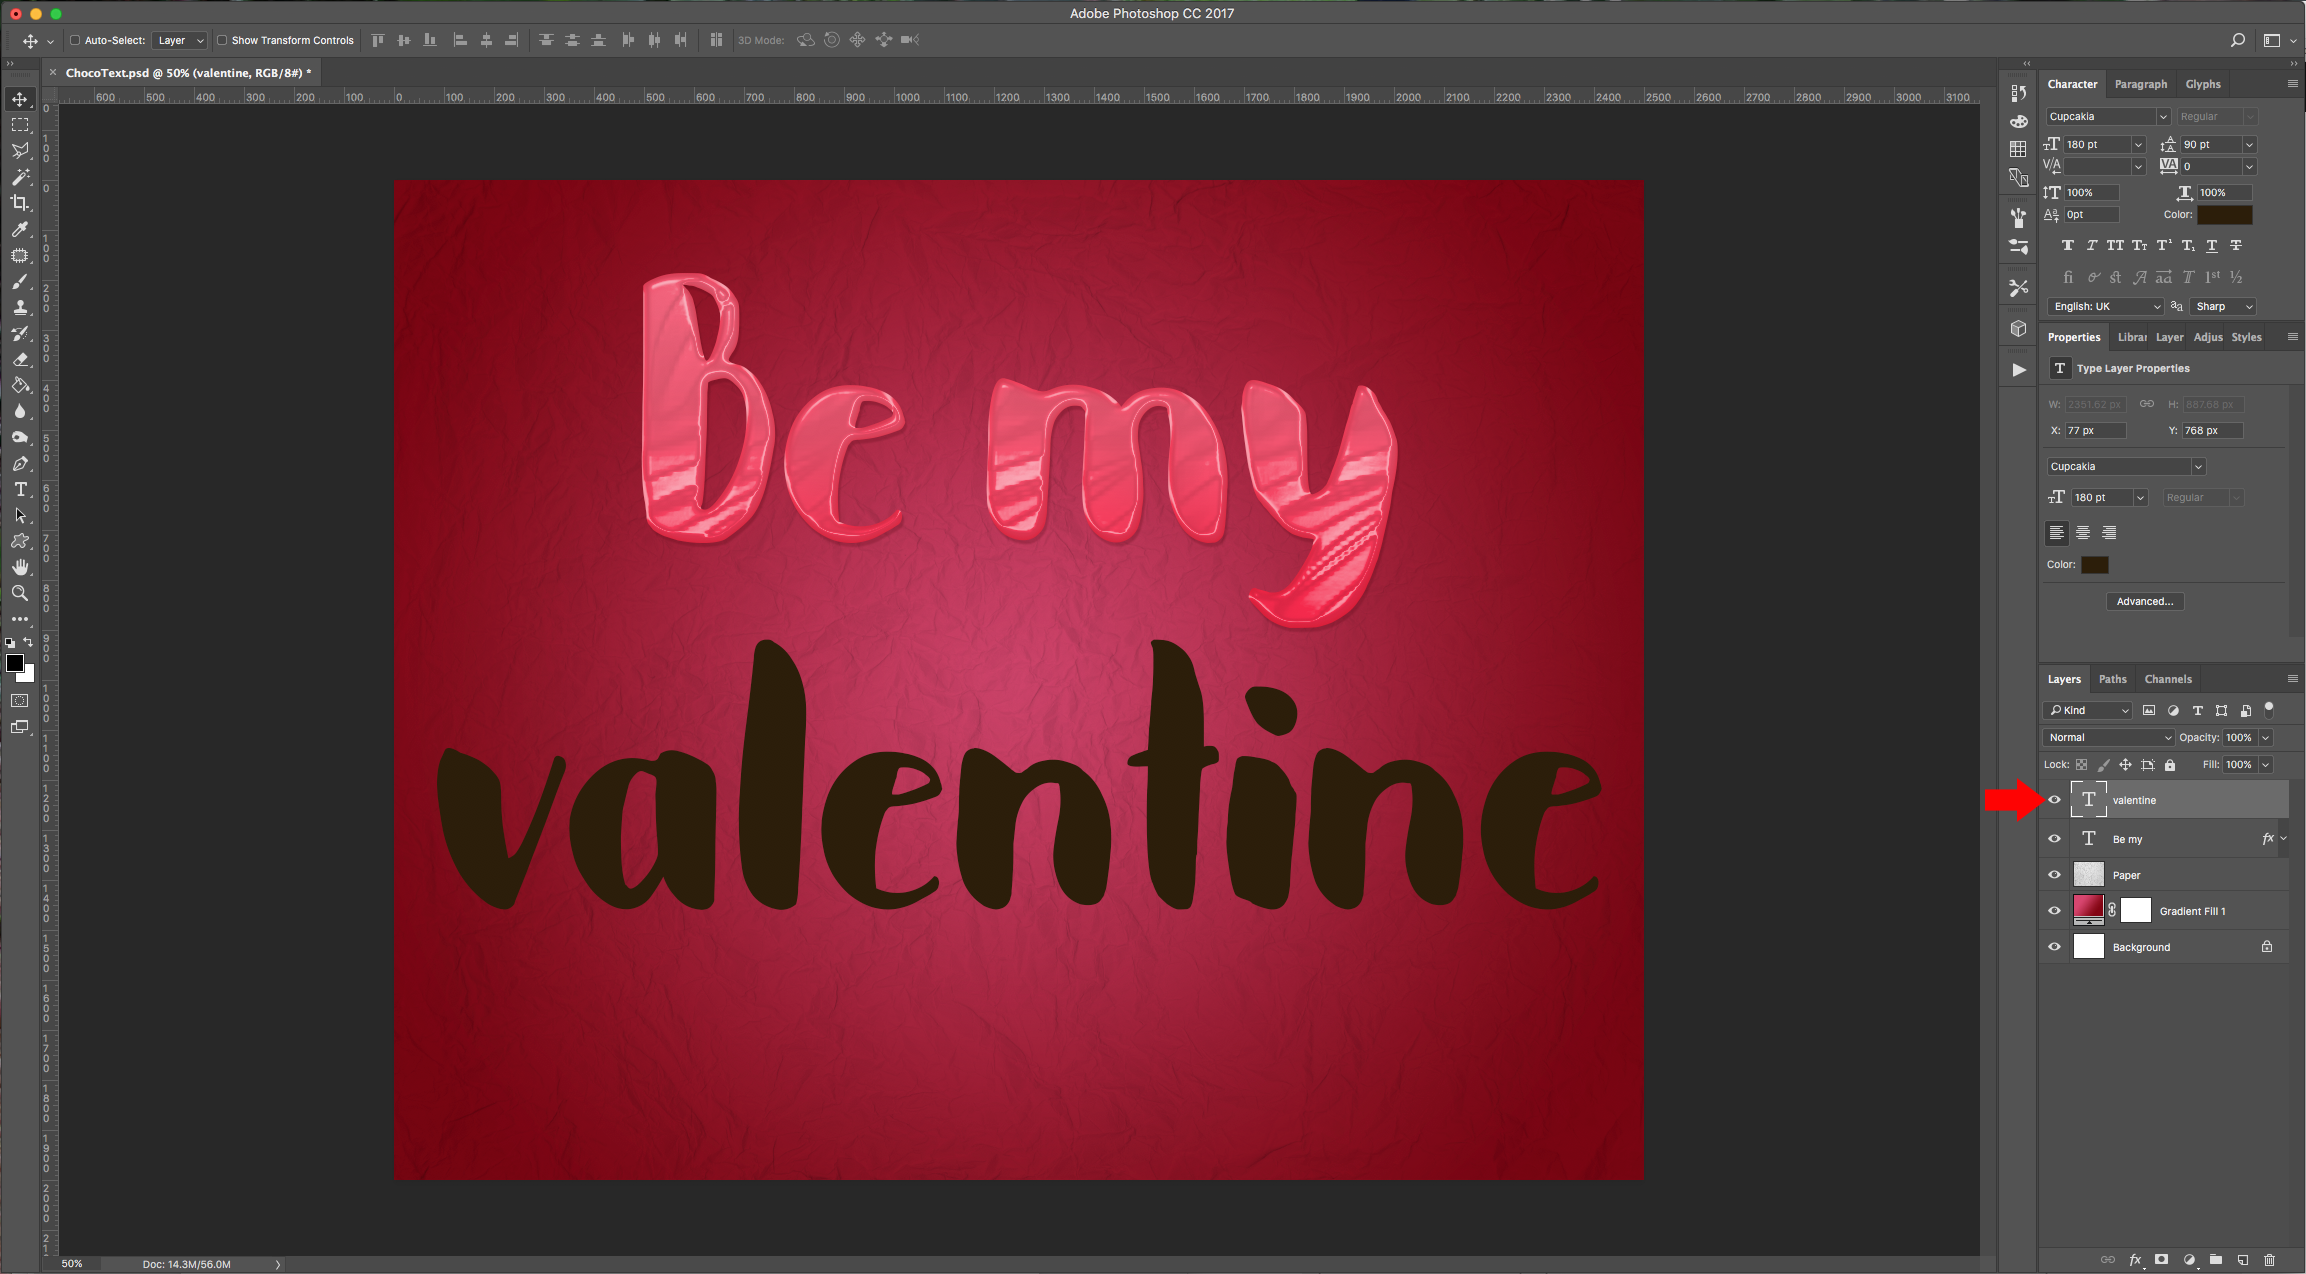
Bevel & Emboss: (Gloss Contour: Rounded Steps)
Contour: (Contour: Gaussian)

Texture: (Tiles-Smooth: Zebra 128 x 128 Pixels, Grayscale Mode)

Inner Shadow: (#ffffff)

Drop Shadow: (#231103)
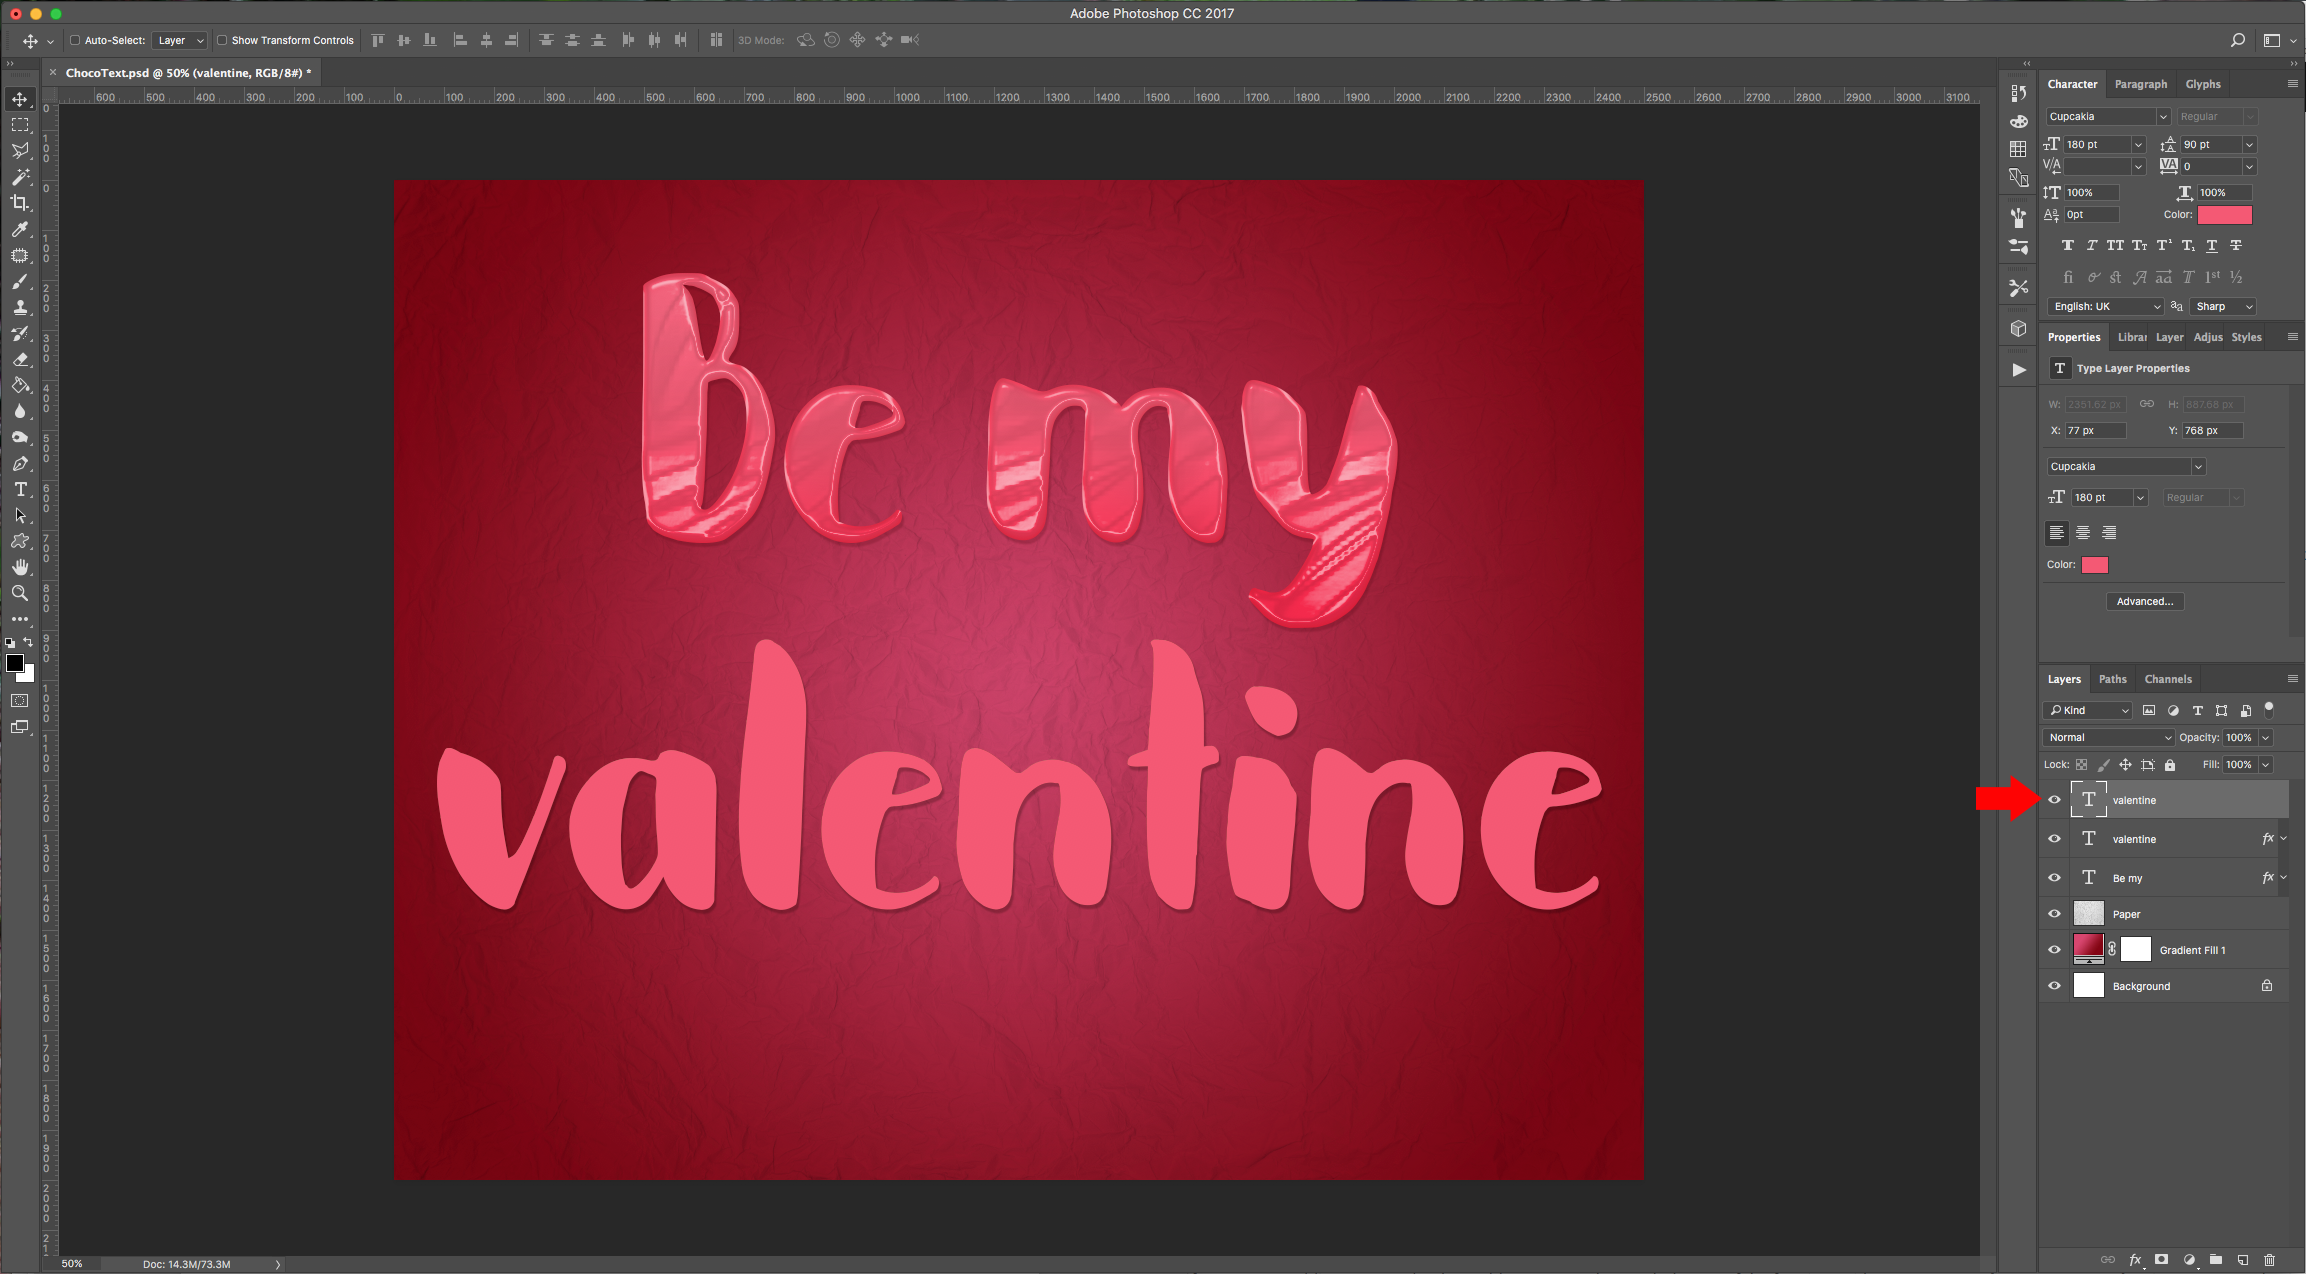
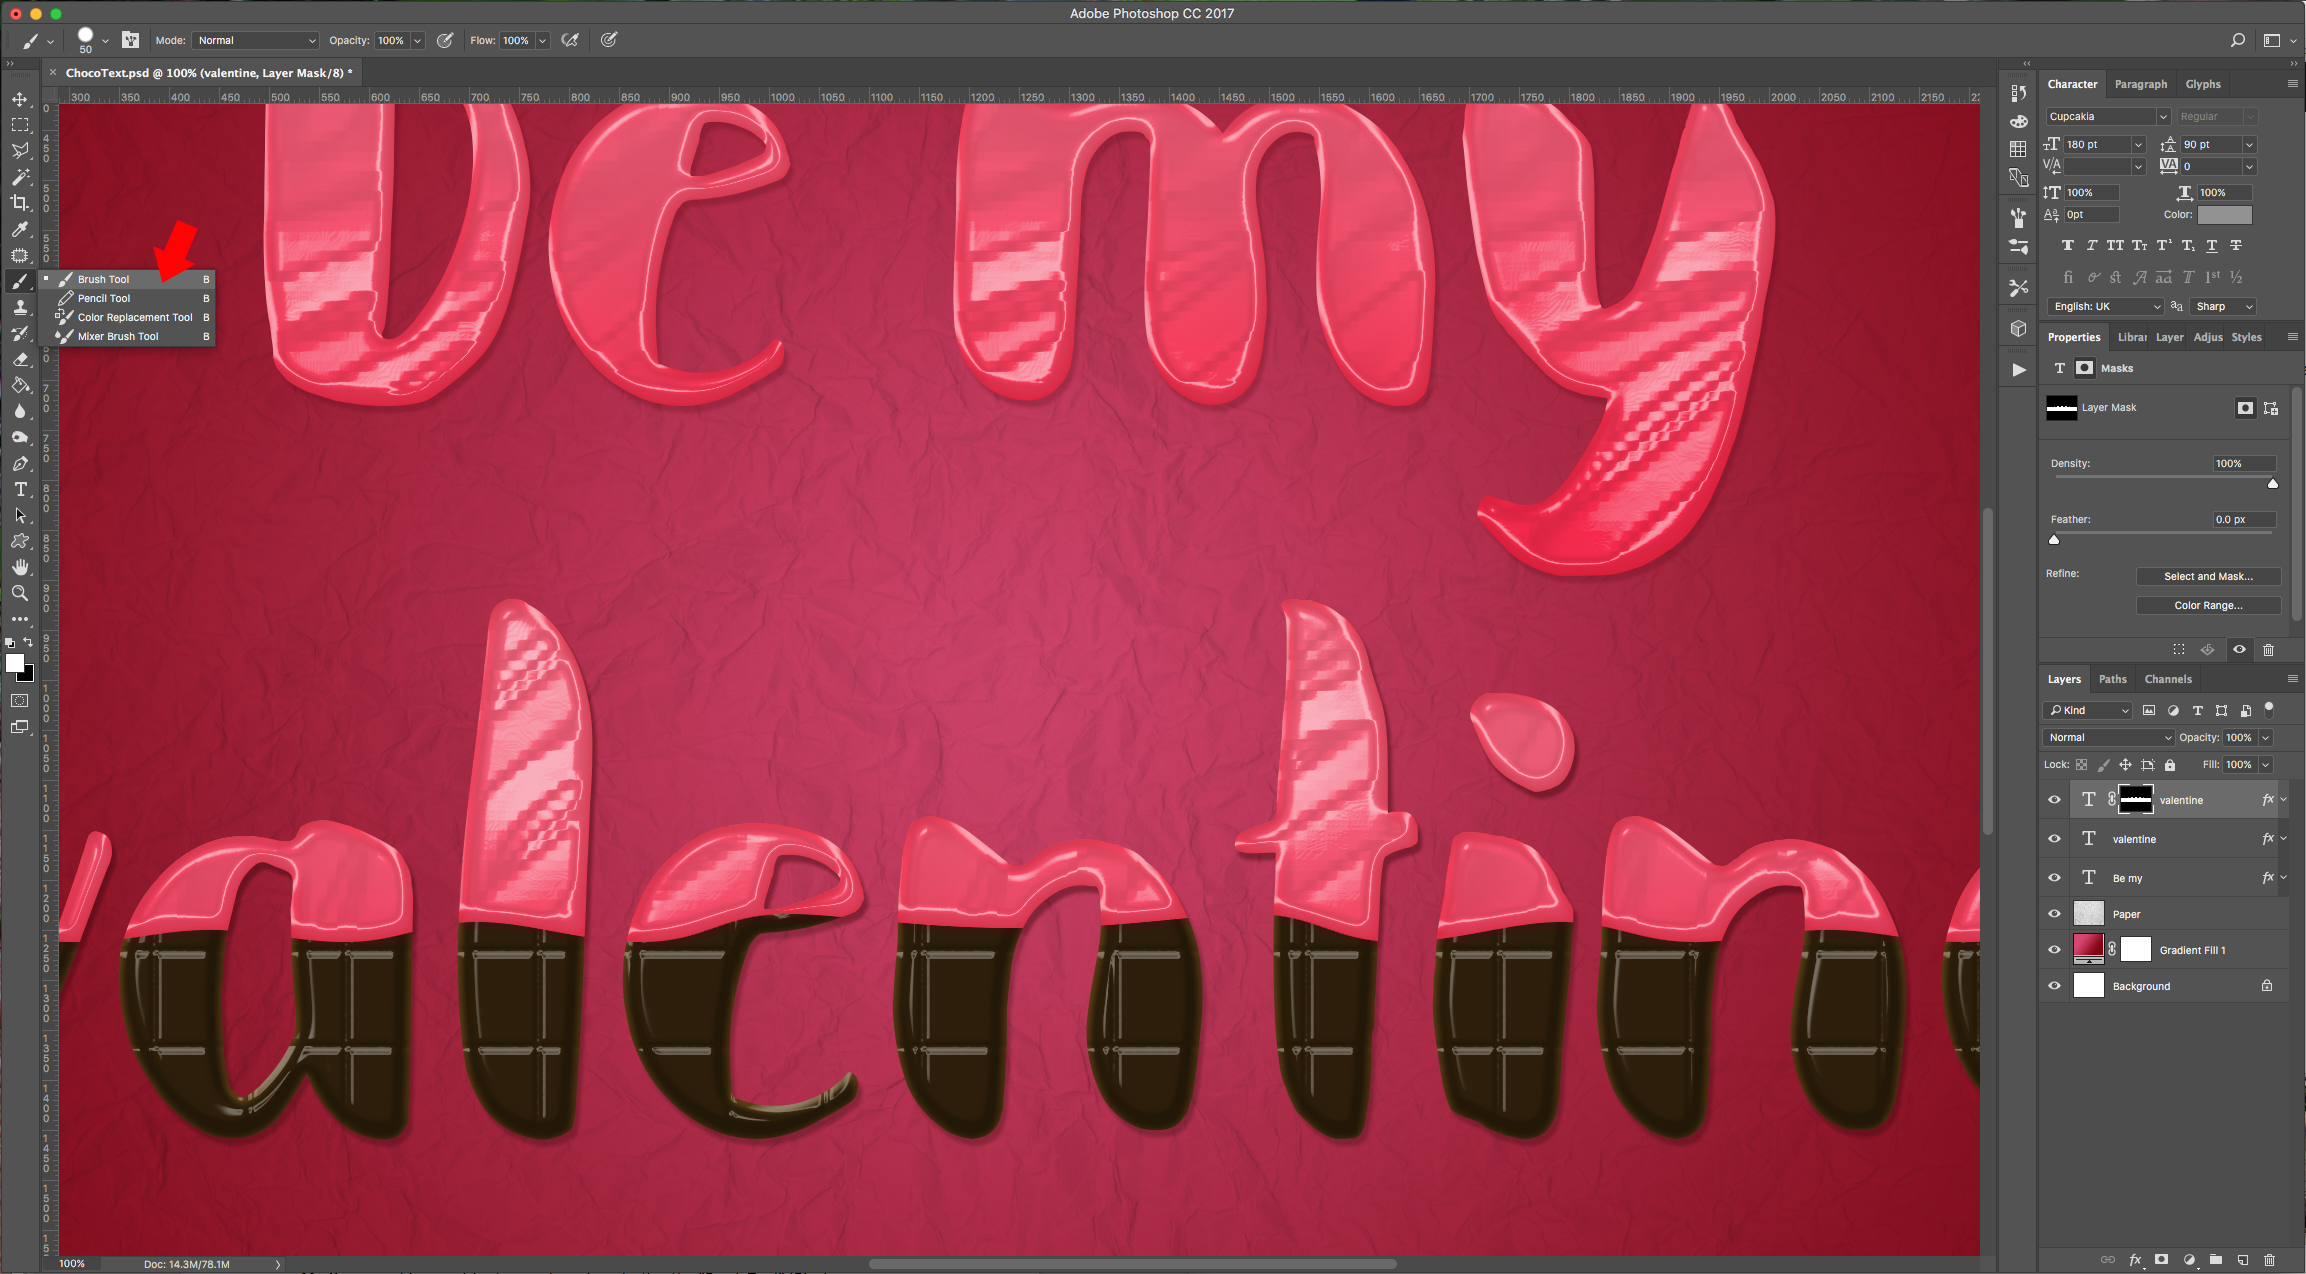
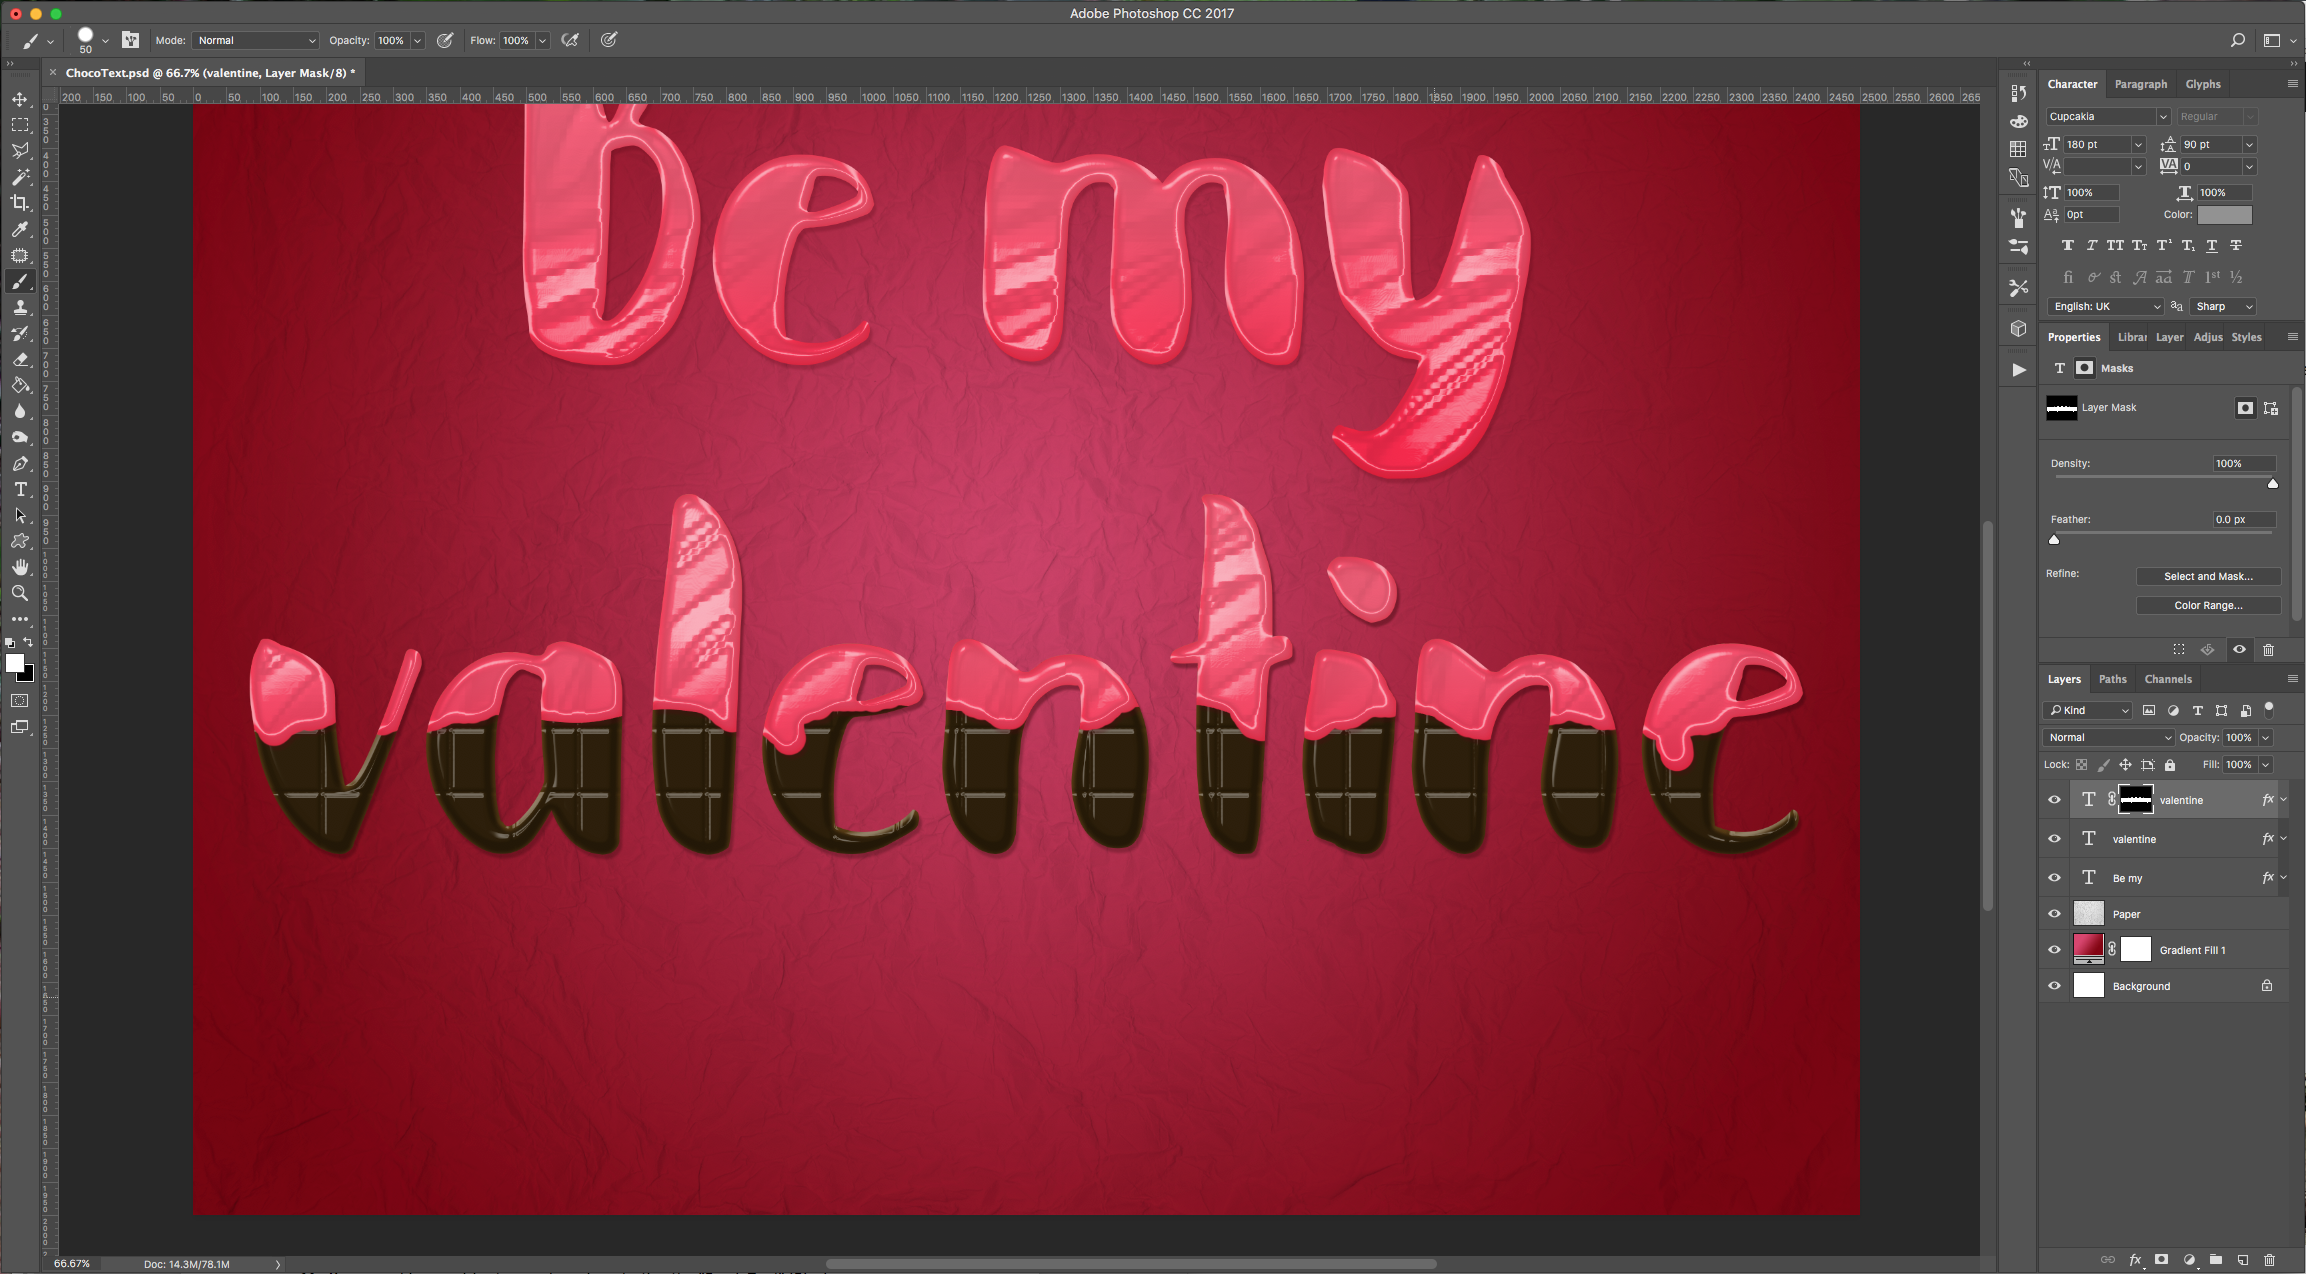
7 - Duplicate your text layer (Command/Control + J) and delete all the “Layer Styles” (just drag them to the little “Trash Can” icon at the bottom of the “Layers” Panel.
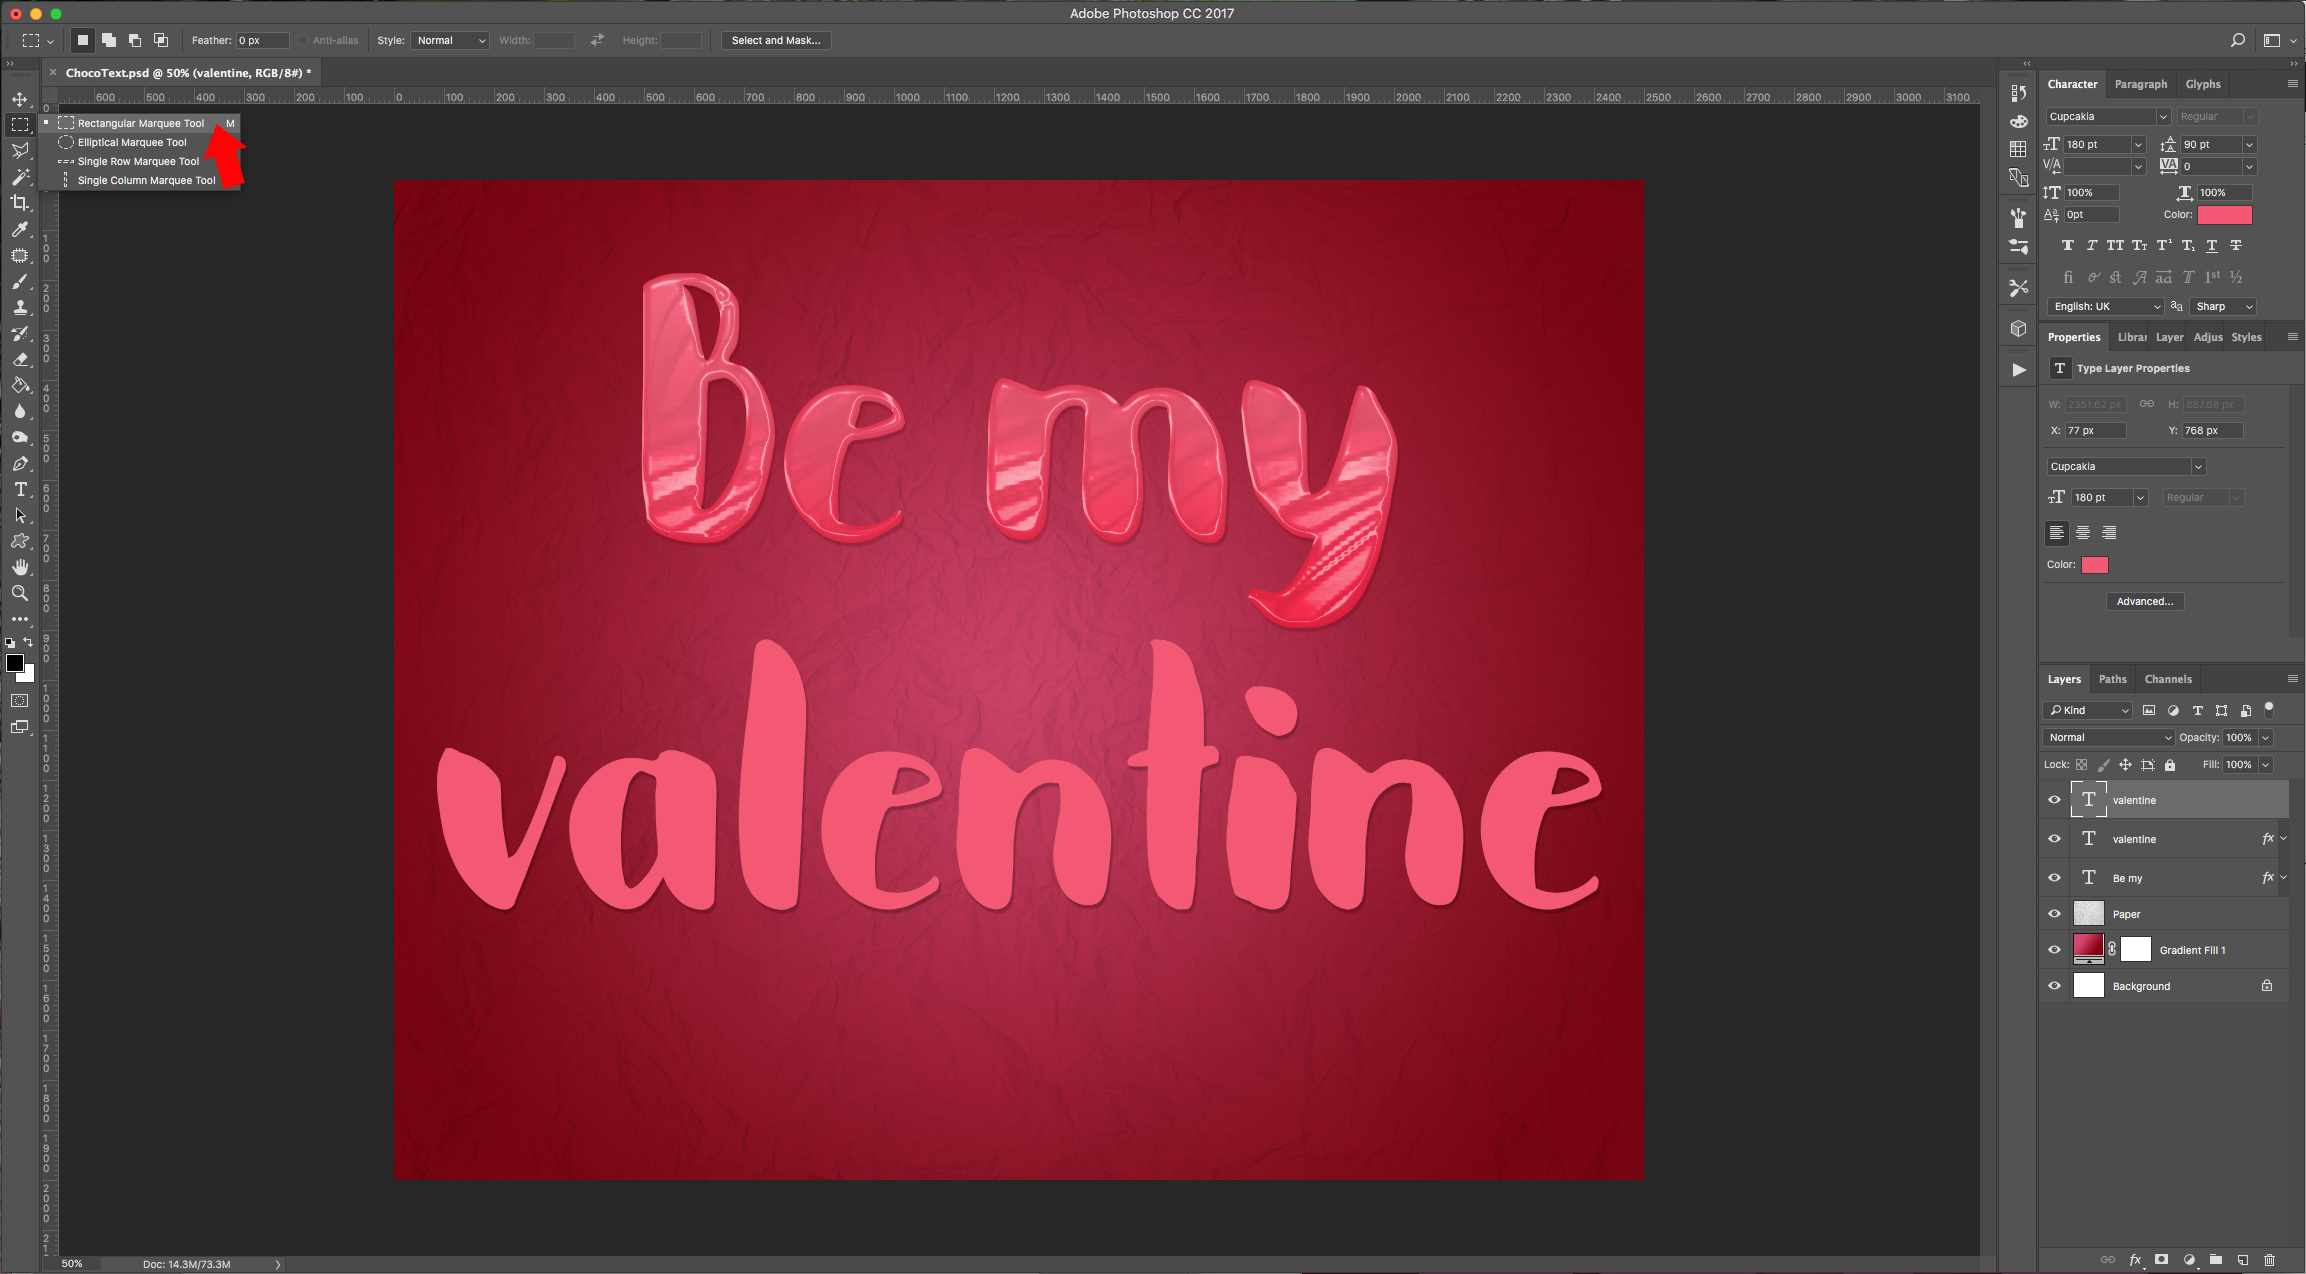
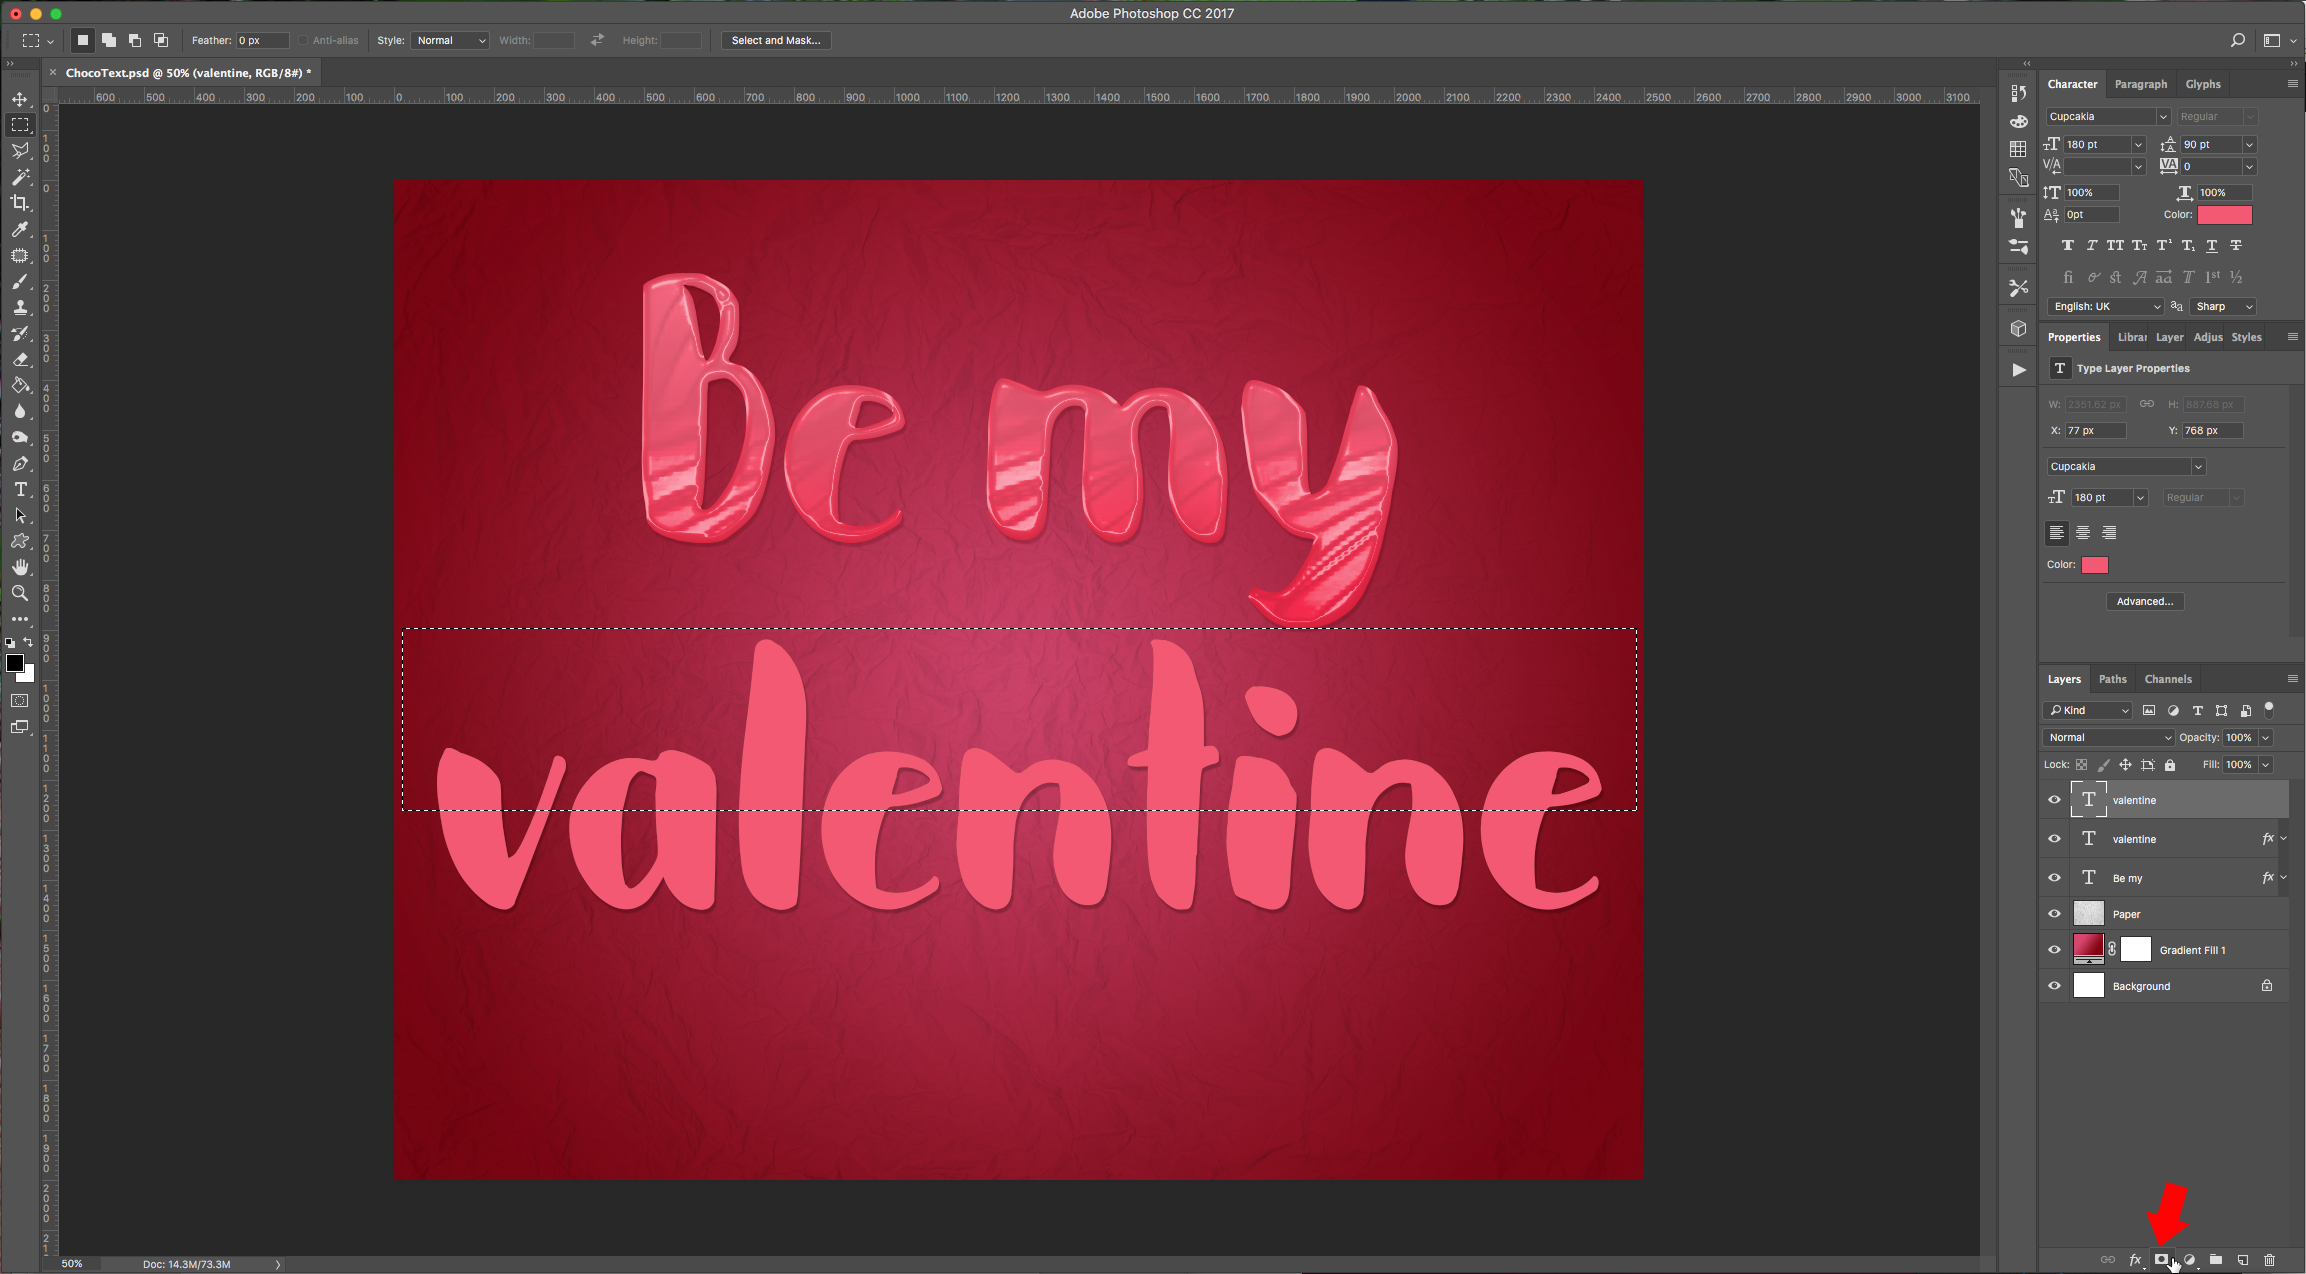
8 - Change the “Fill” color to #f85772. Select the “Rectangular Marquee Tool” (M) and draw a rectangle covering the top part of your text, then click on the “Add Layer Mask” button at the bottom of the “Layers” Panel to mask your text.


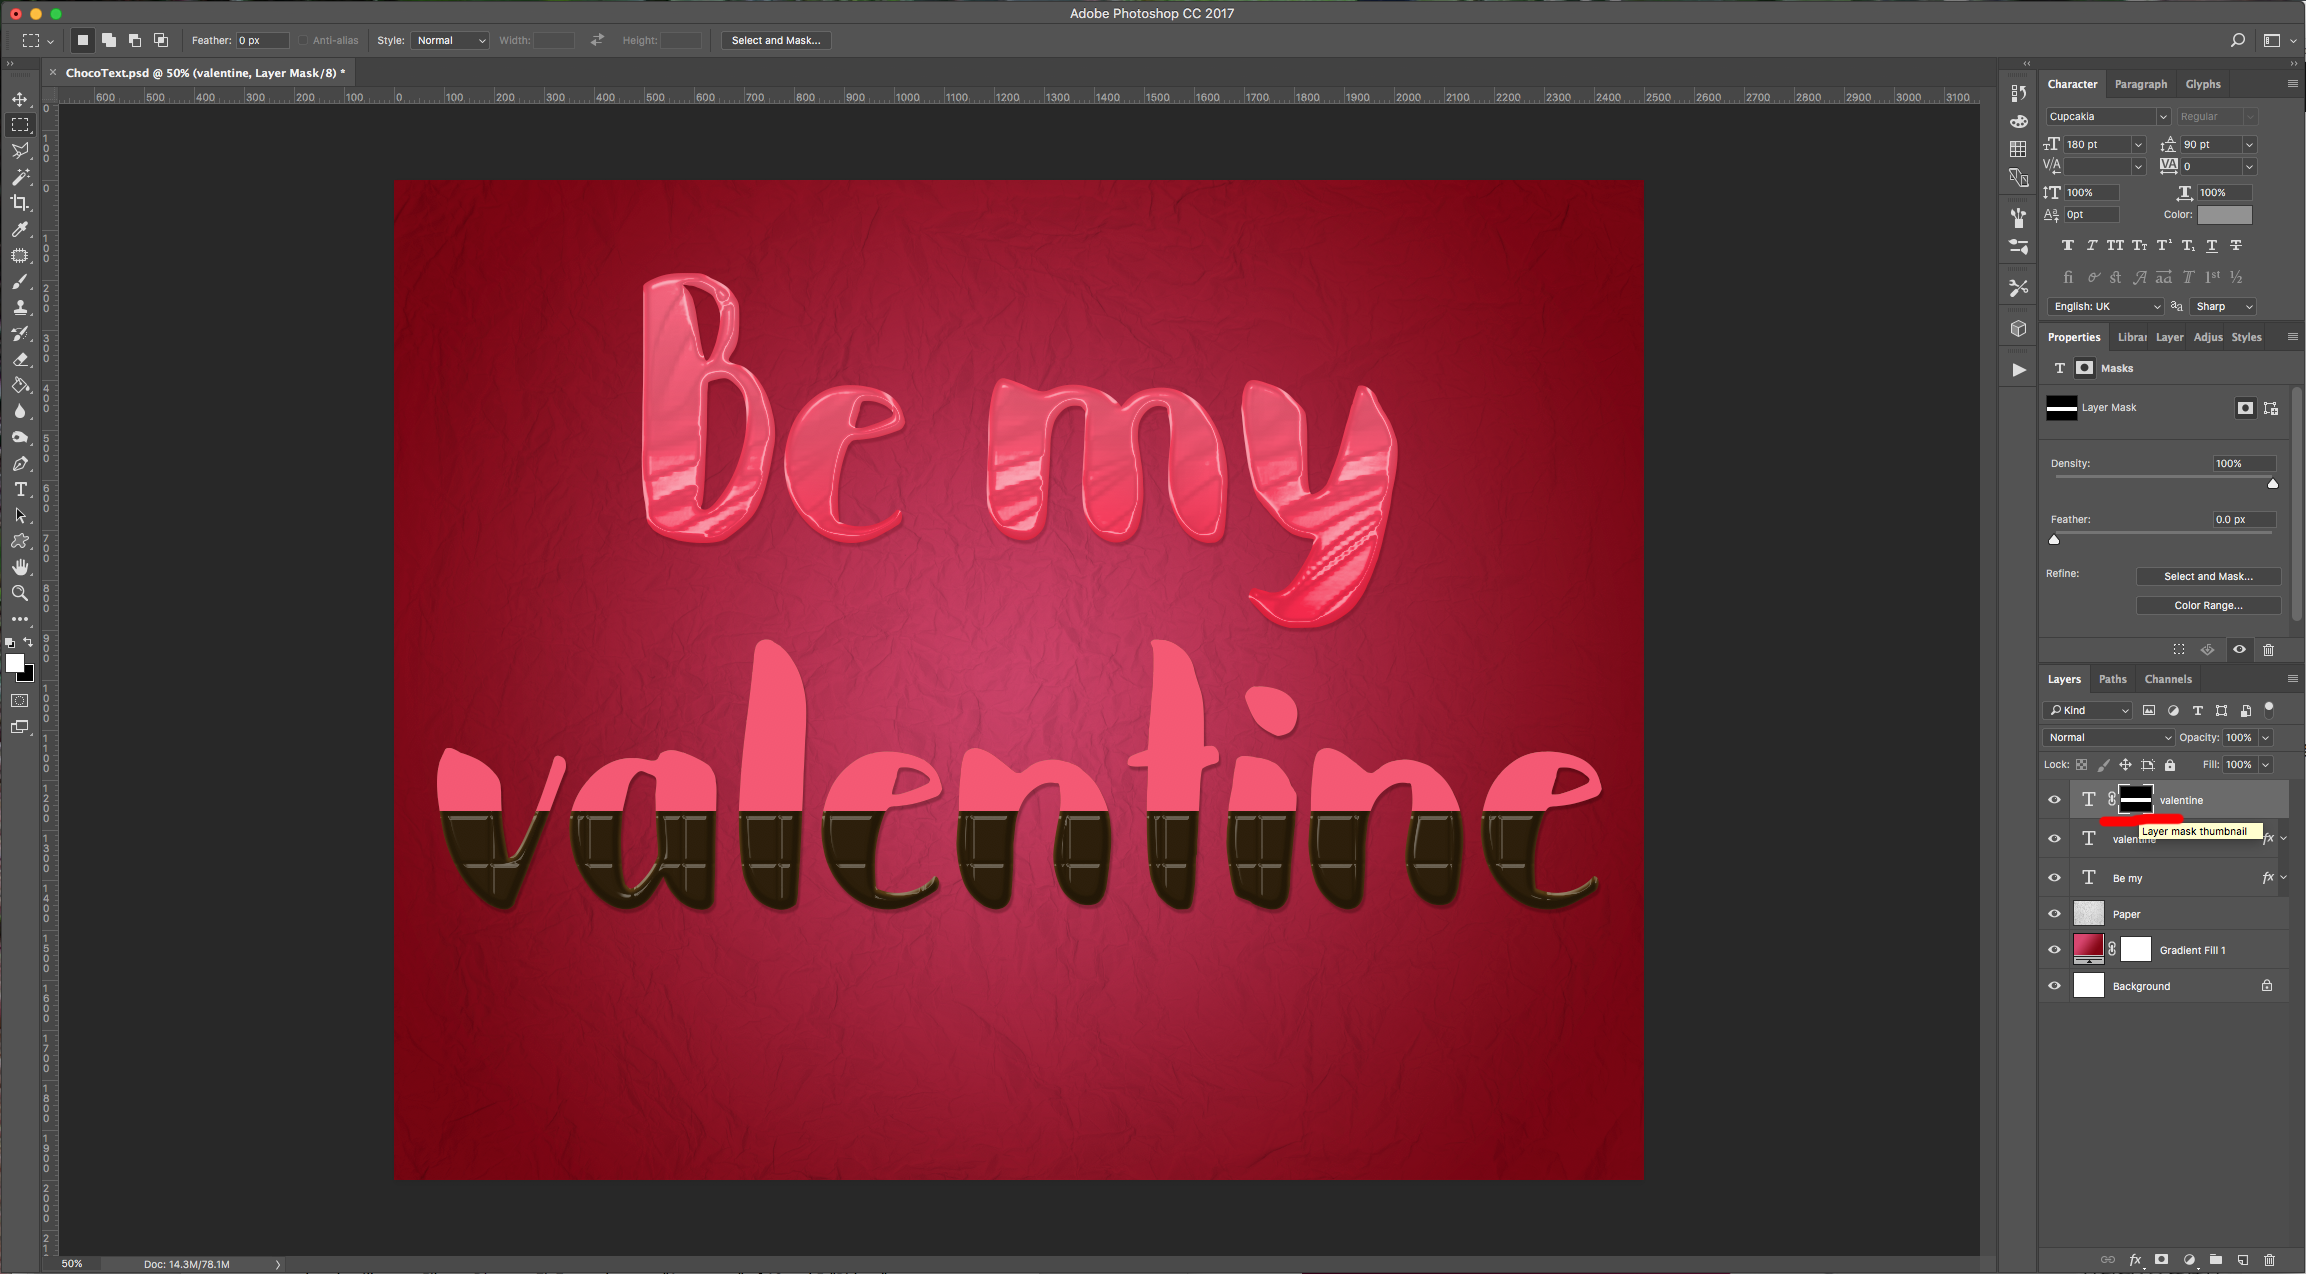
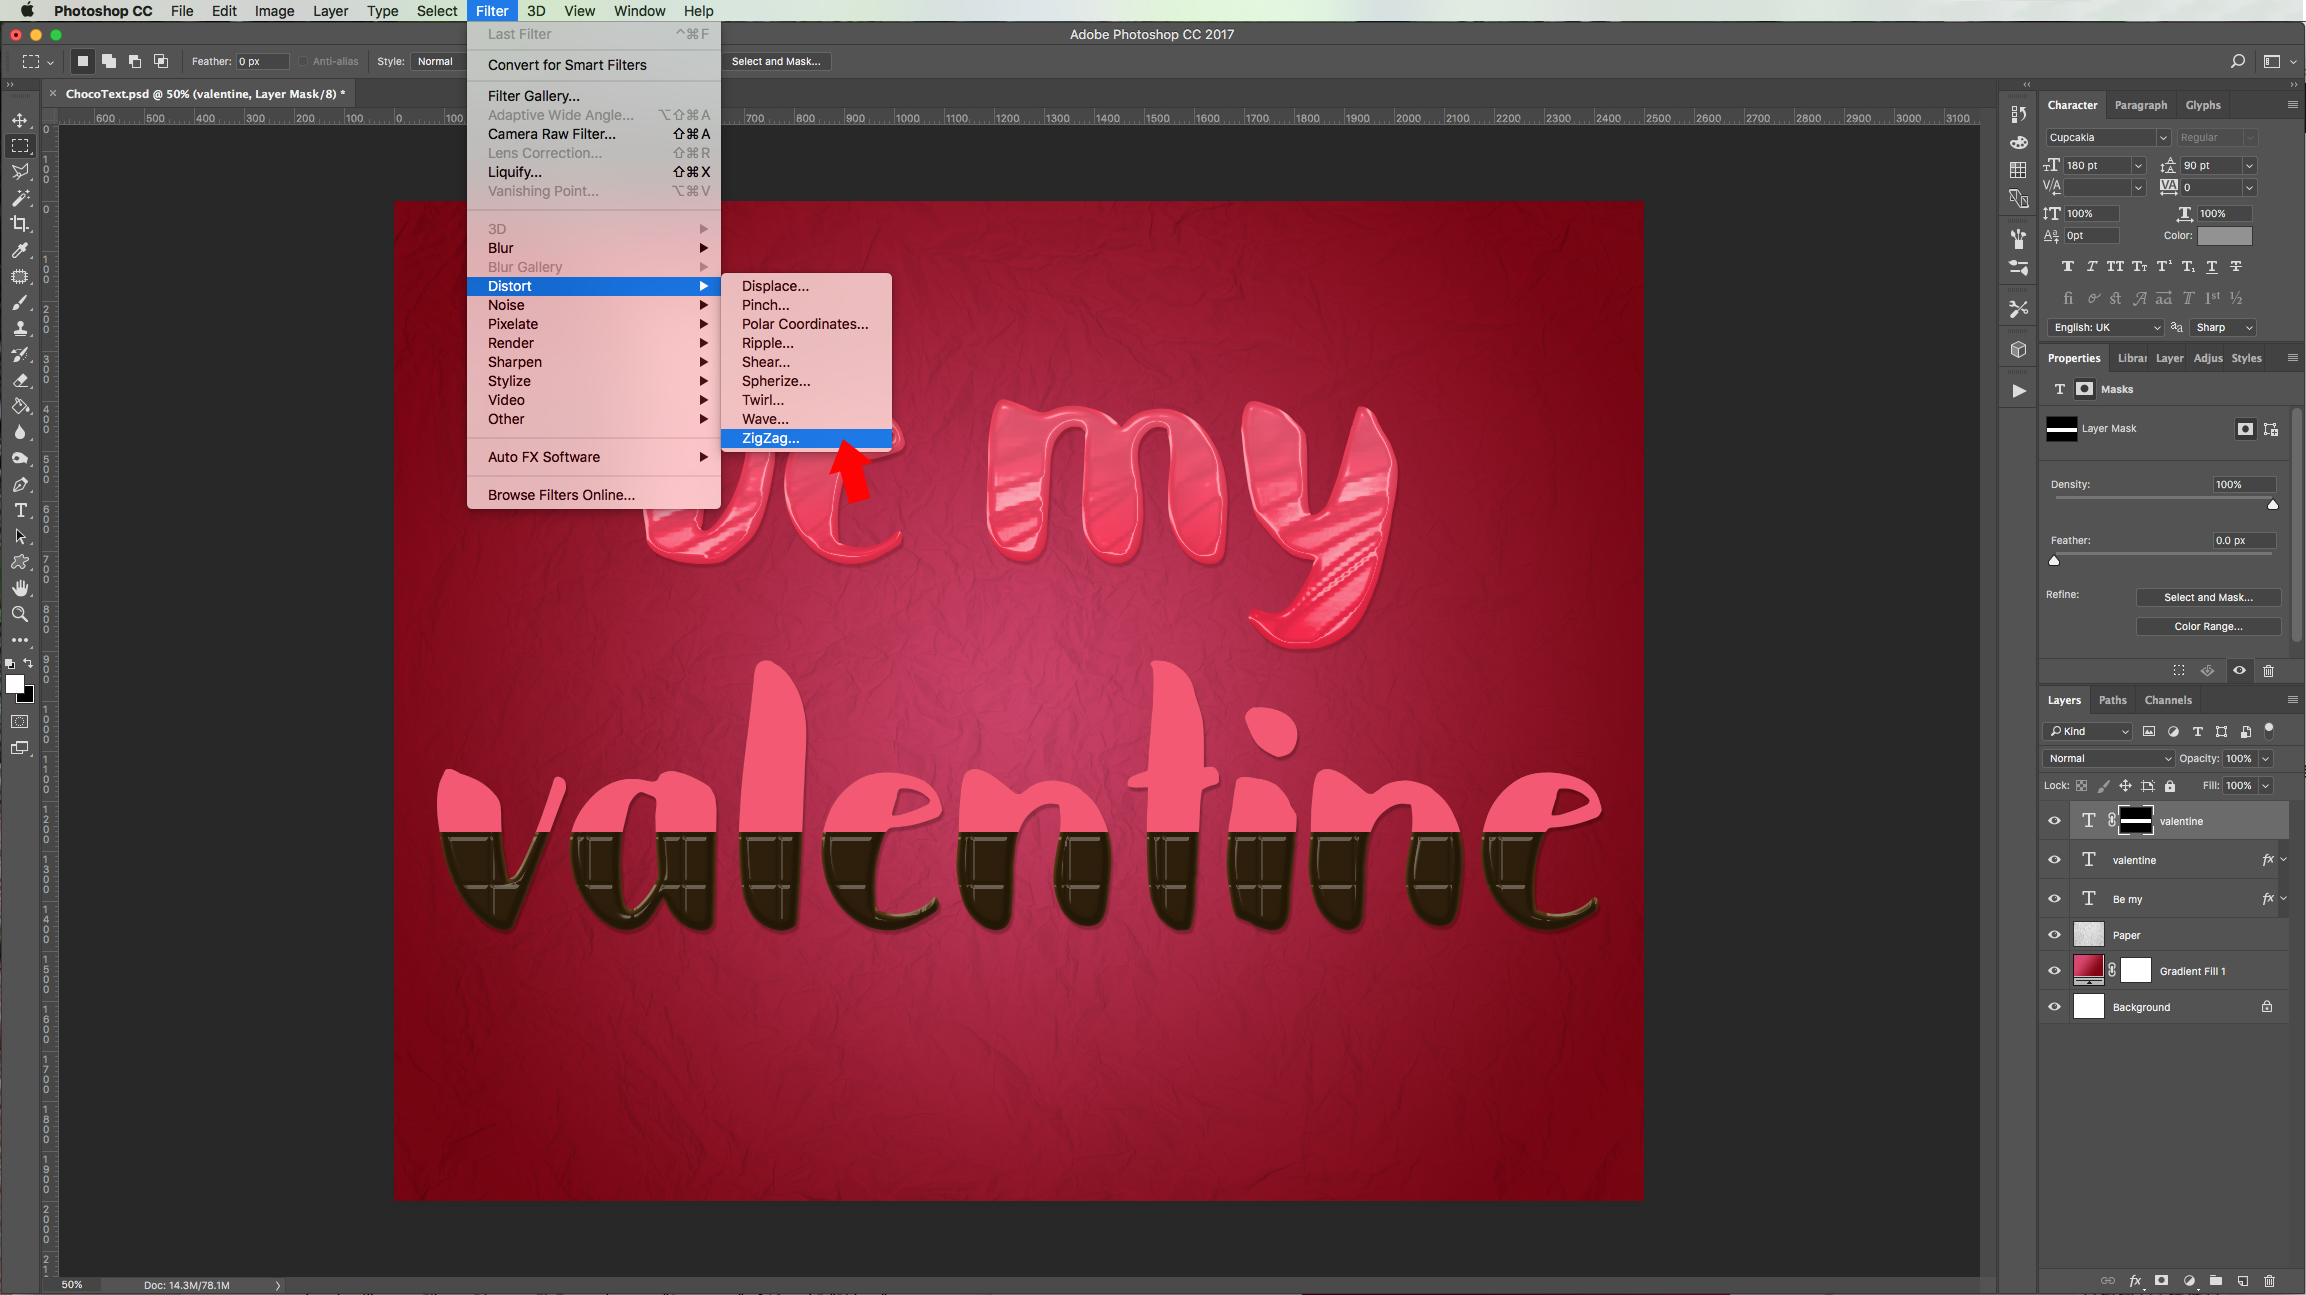
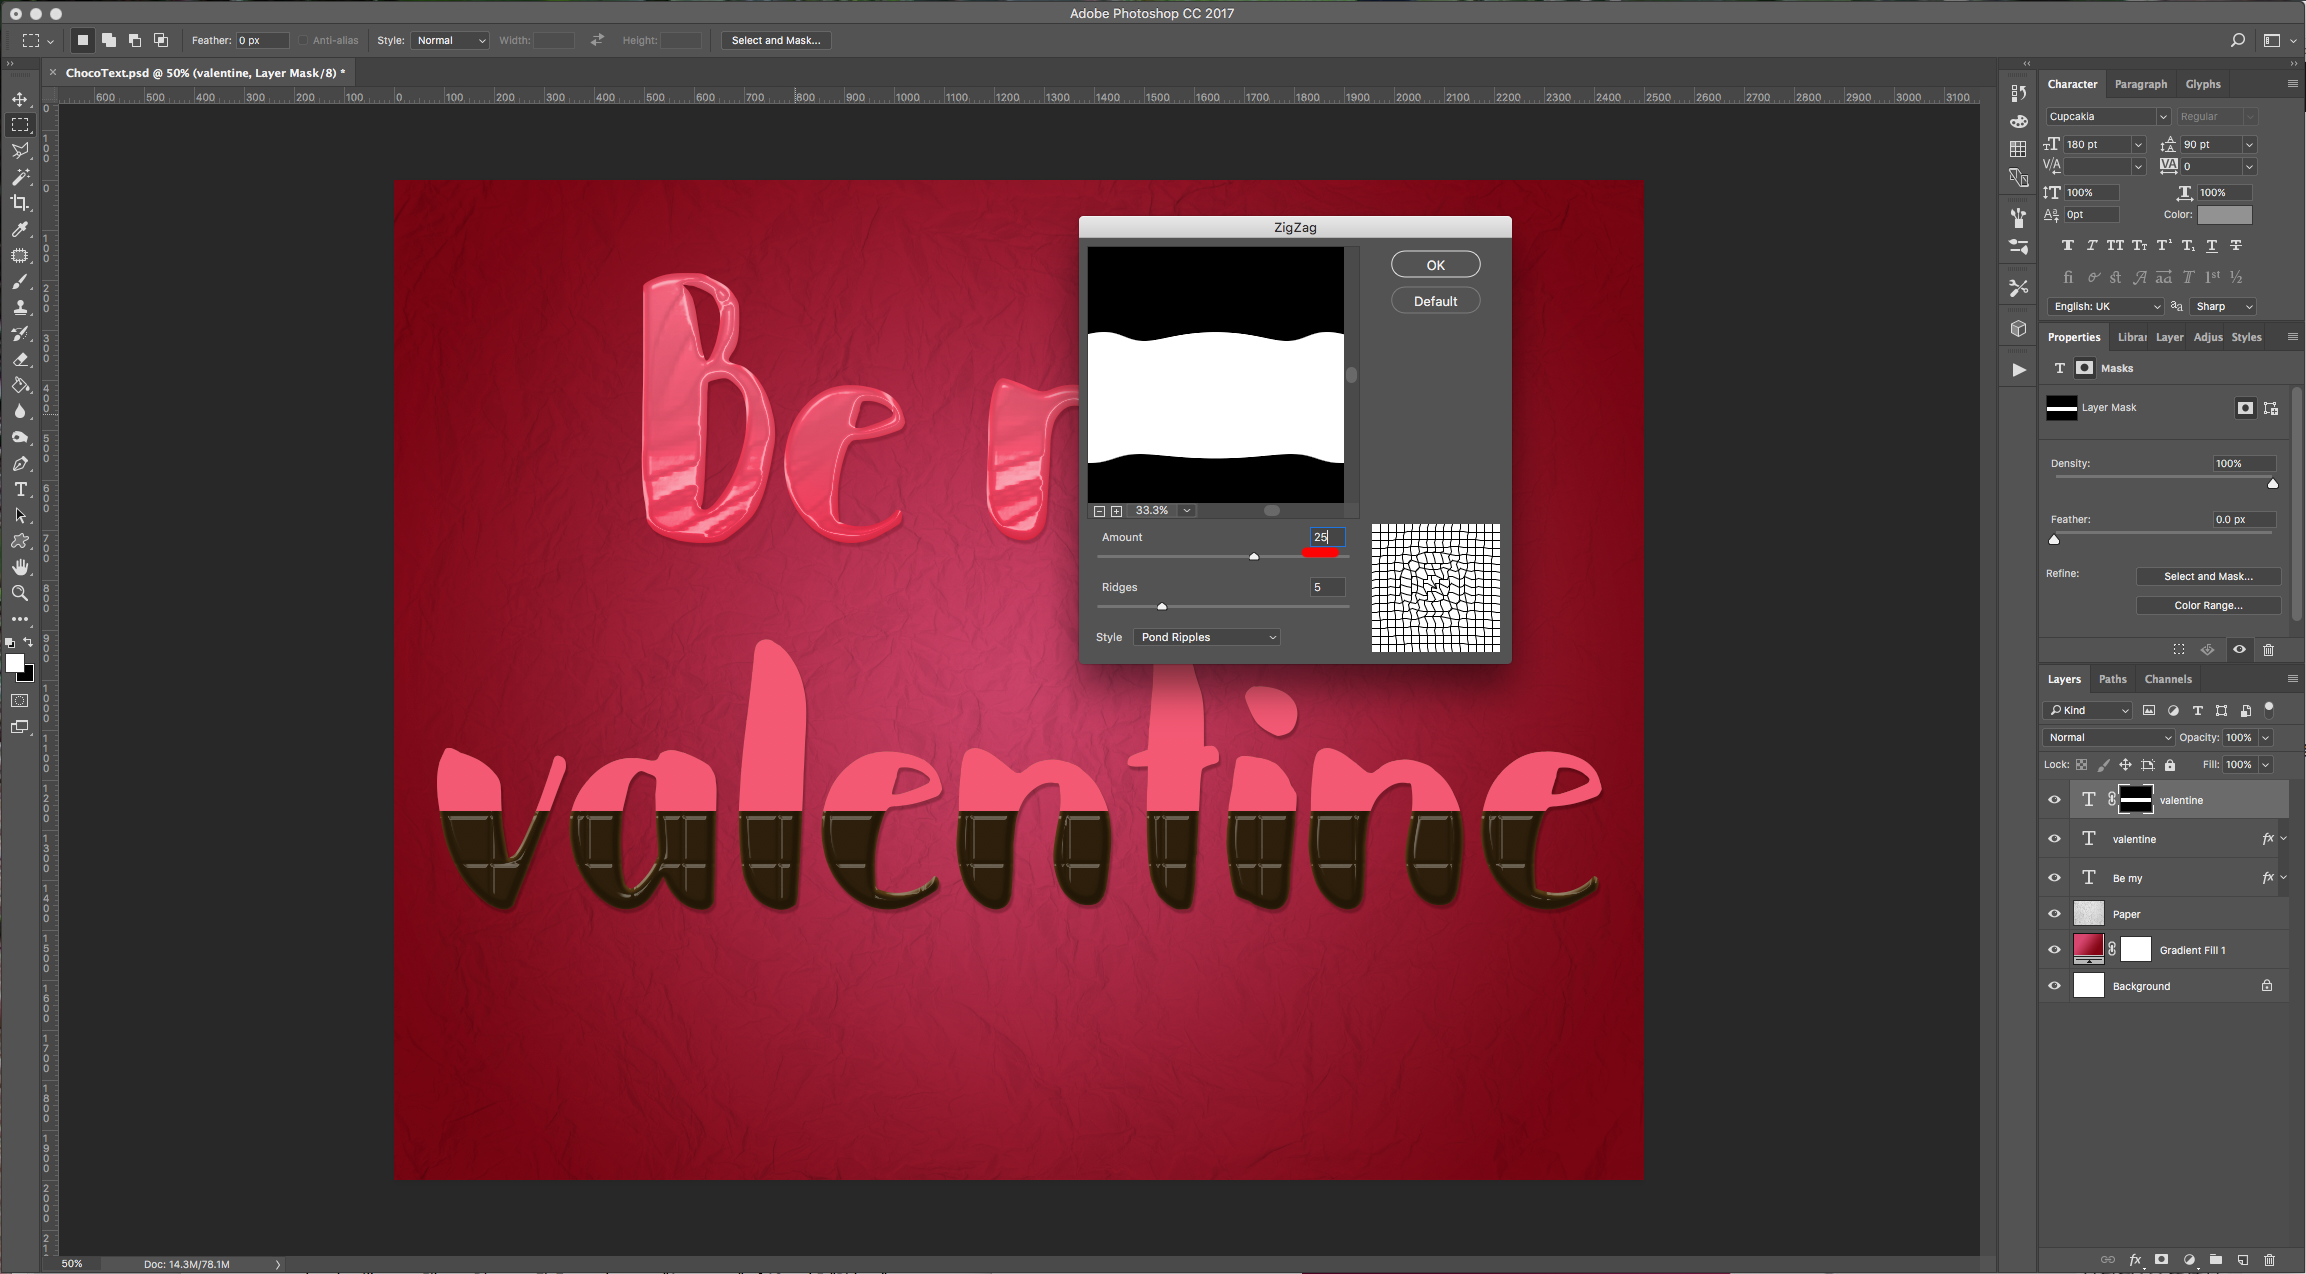
9 - Making sure the “Mask” is selected (there should be a white box around the mask thumbnail), go to Filter > Distort > ZigZag and use an “Amount” of 25 and 5 “Ridges”. Use “Pond Ripples” as “Style”.

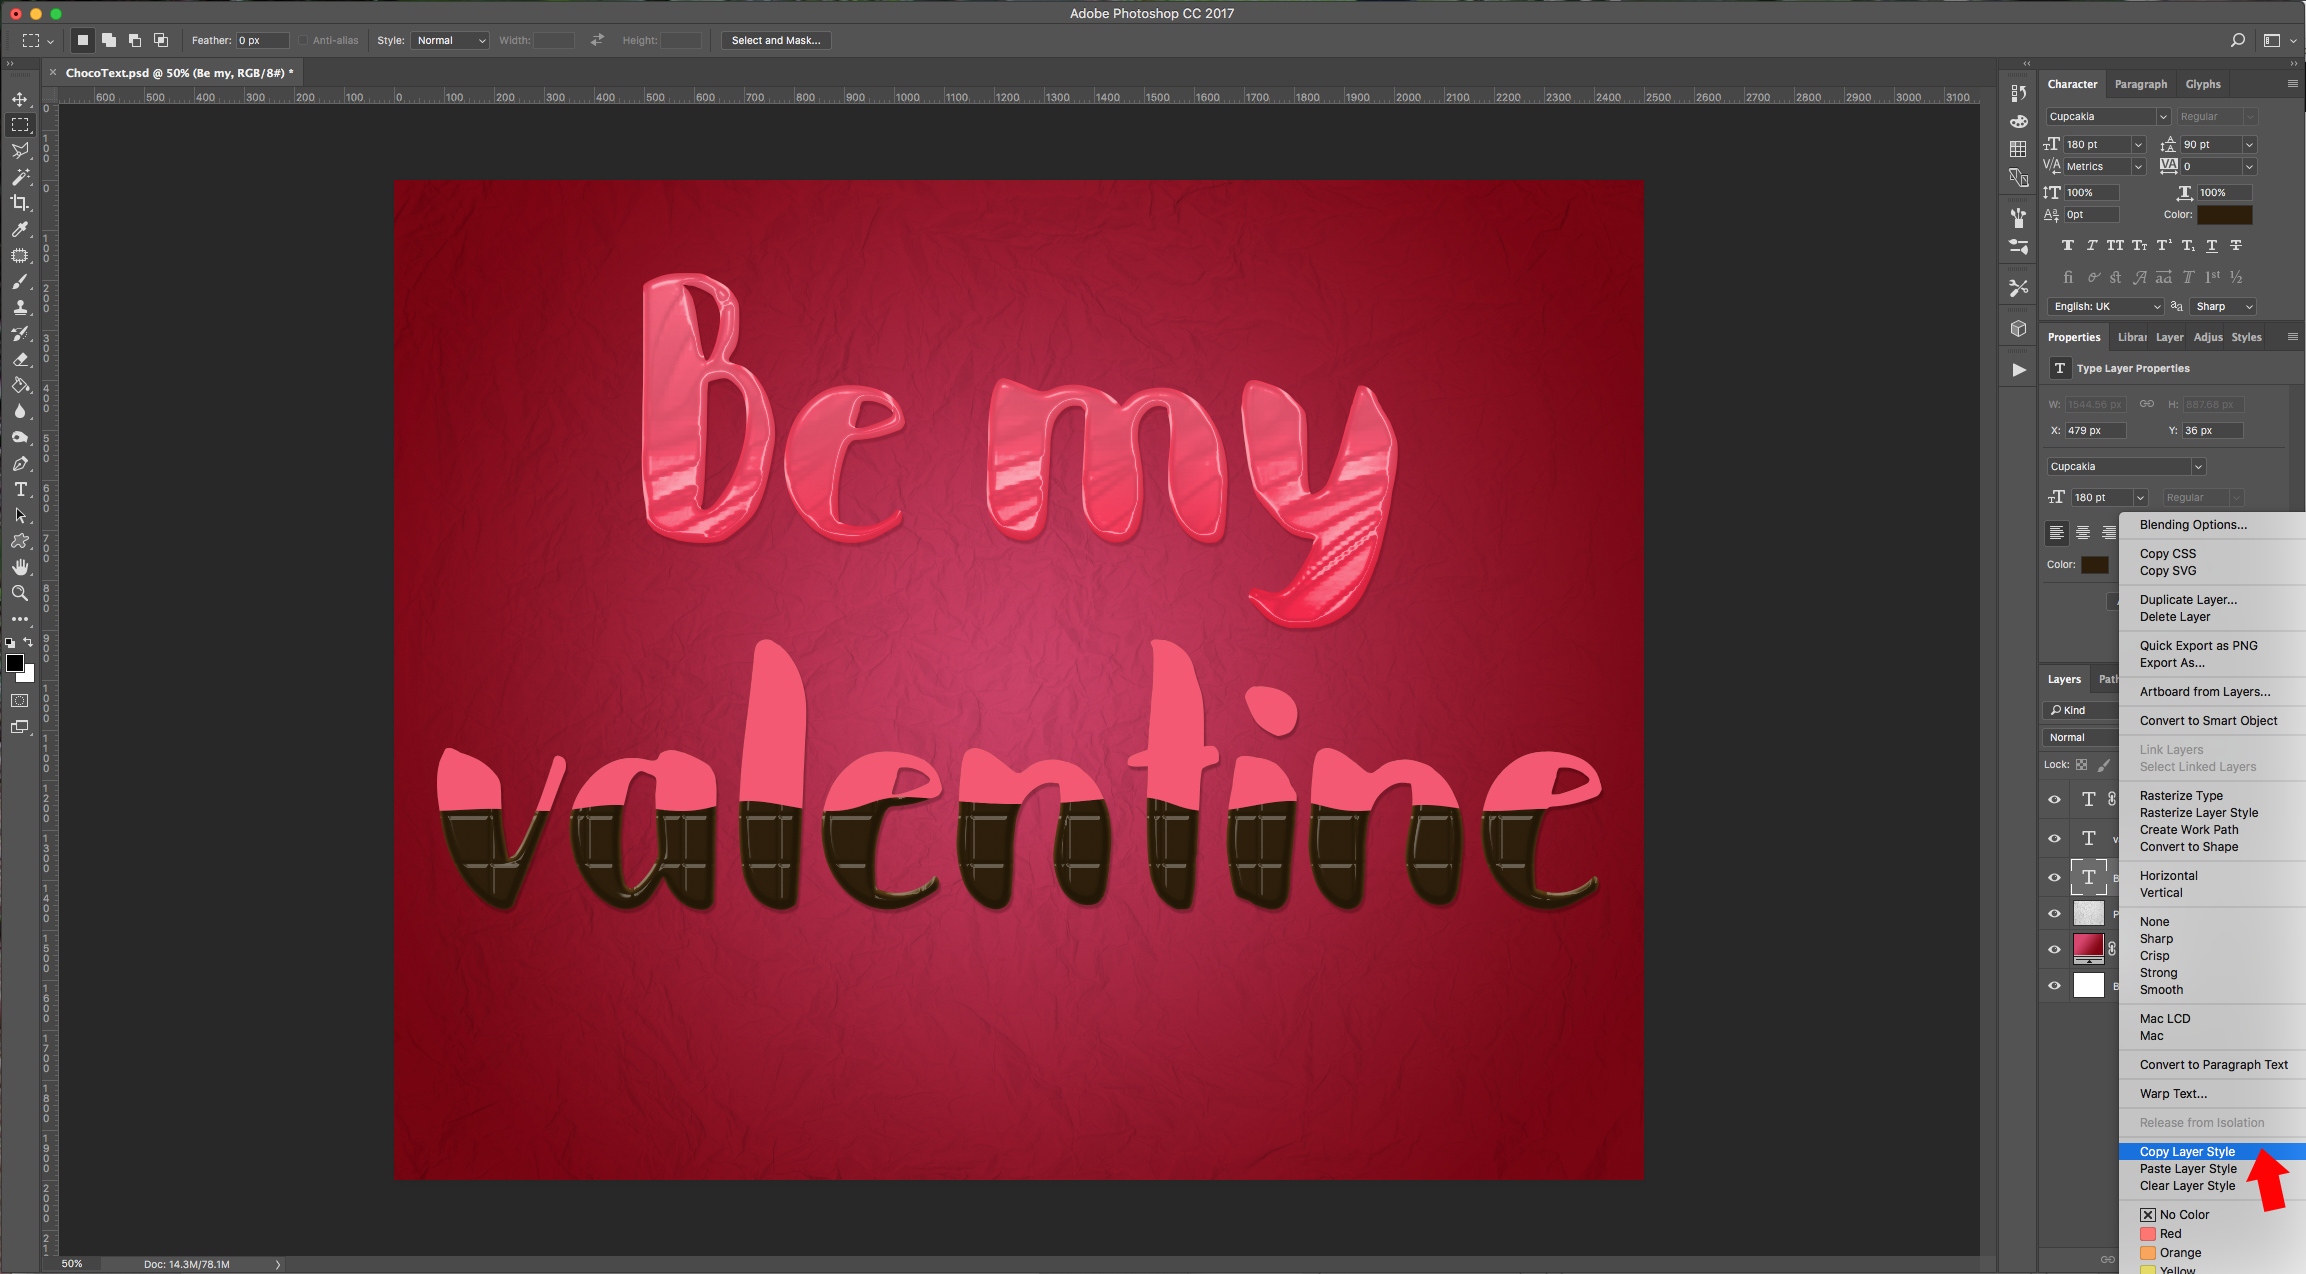
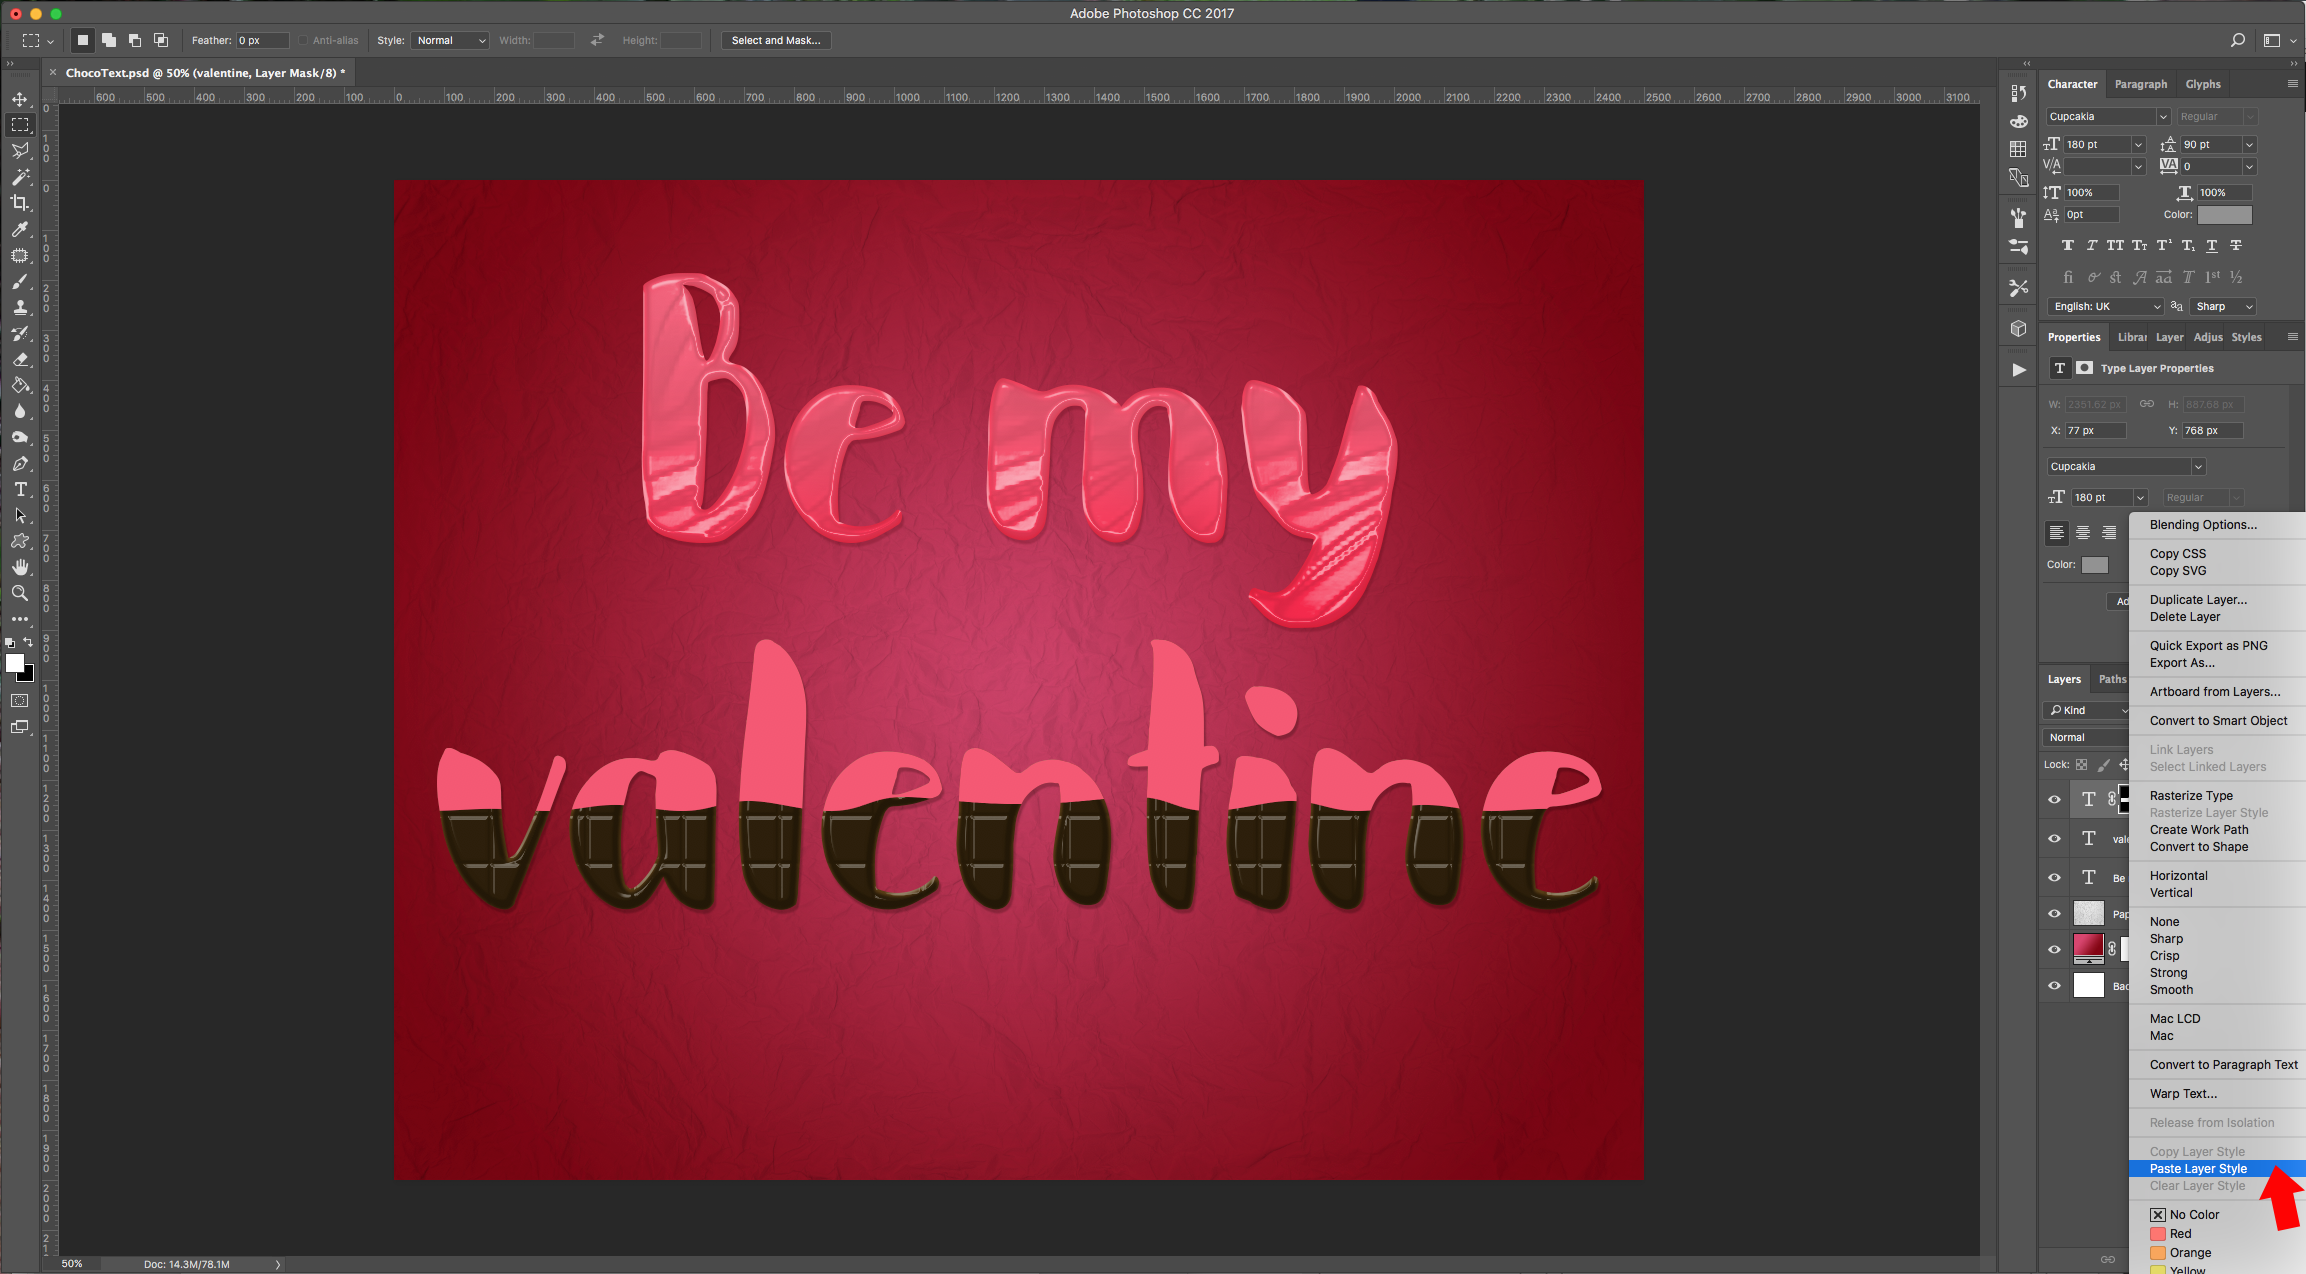
10 - Right-click on your first text layer (Be my) and “Copy Layer Style”, the right-click on your masked text layer and “Paste Layer Style”.
11 - You can add some drips to your layer by selecting the “Brush Tool” (B), choose a medium sized brush (about 50 Pixels), make sure the “Hardness” is set to 100%, that you “Foreground” color is black and that your “Mask” is selected and paint some drops.
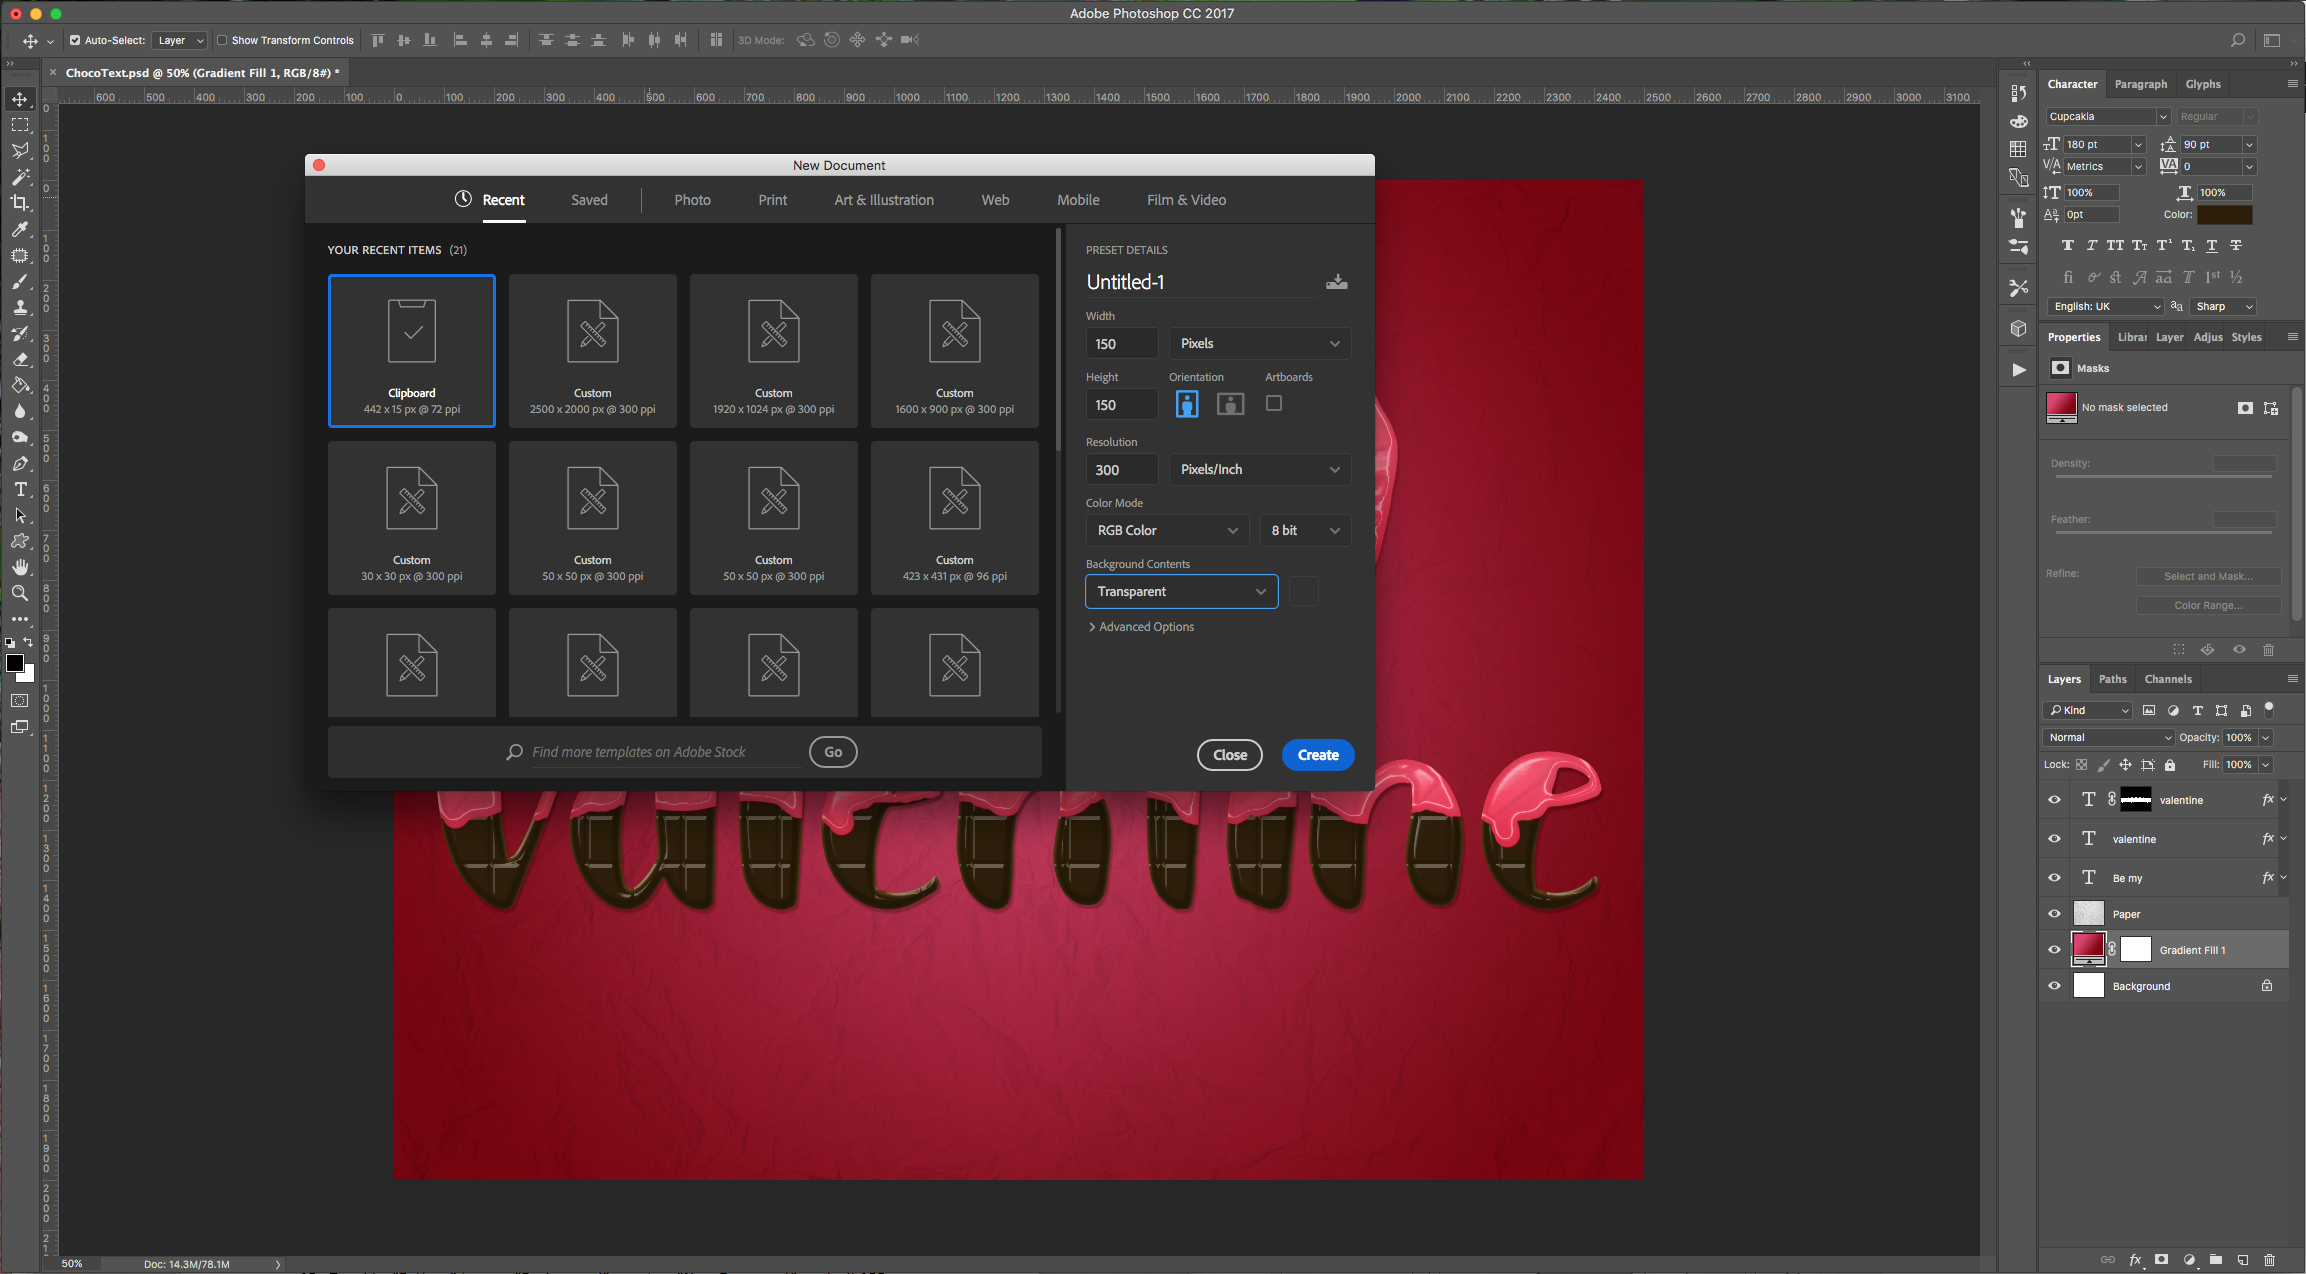
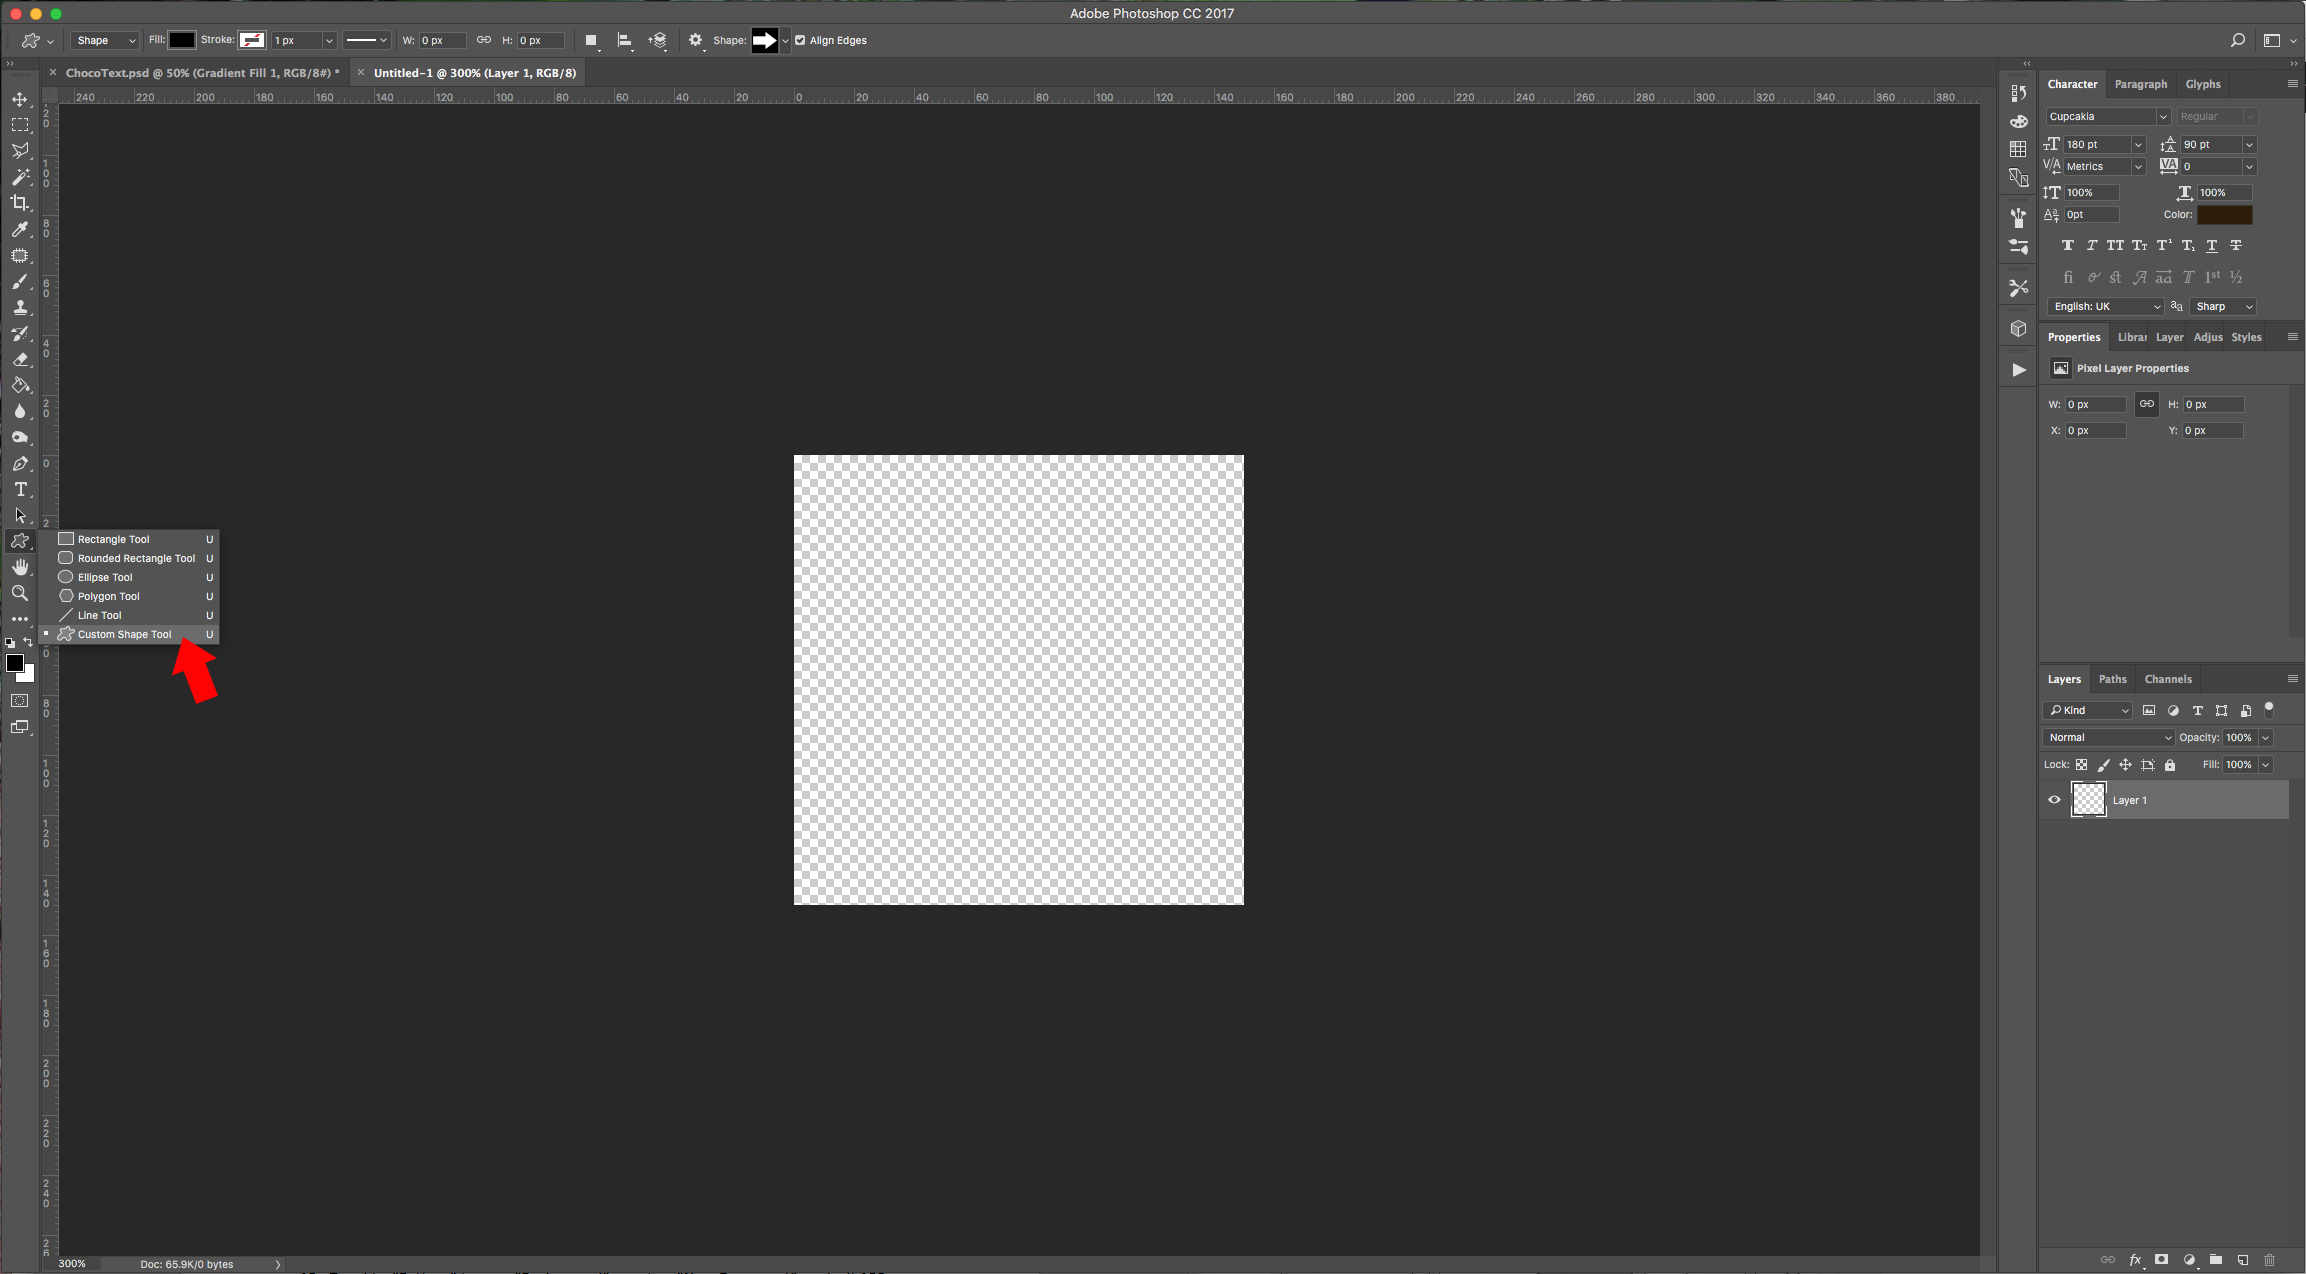
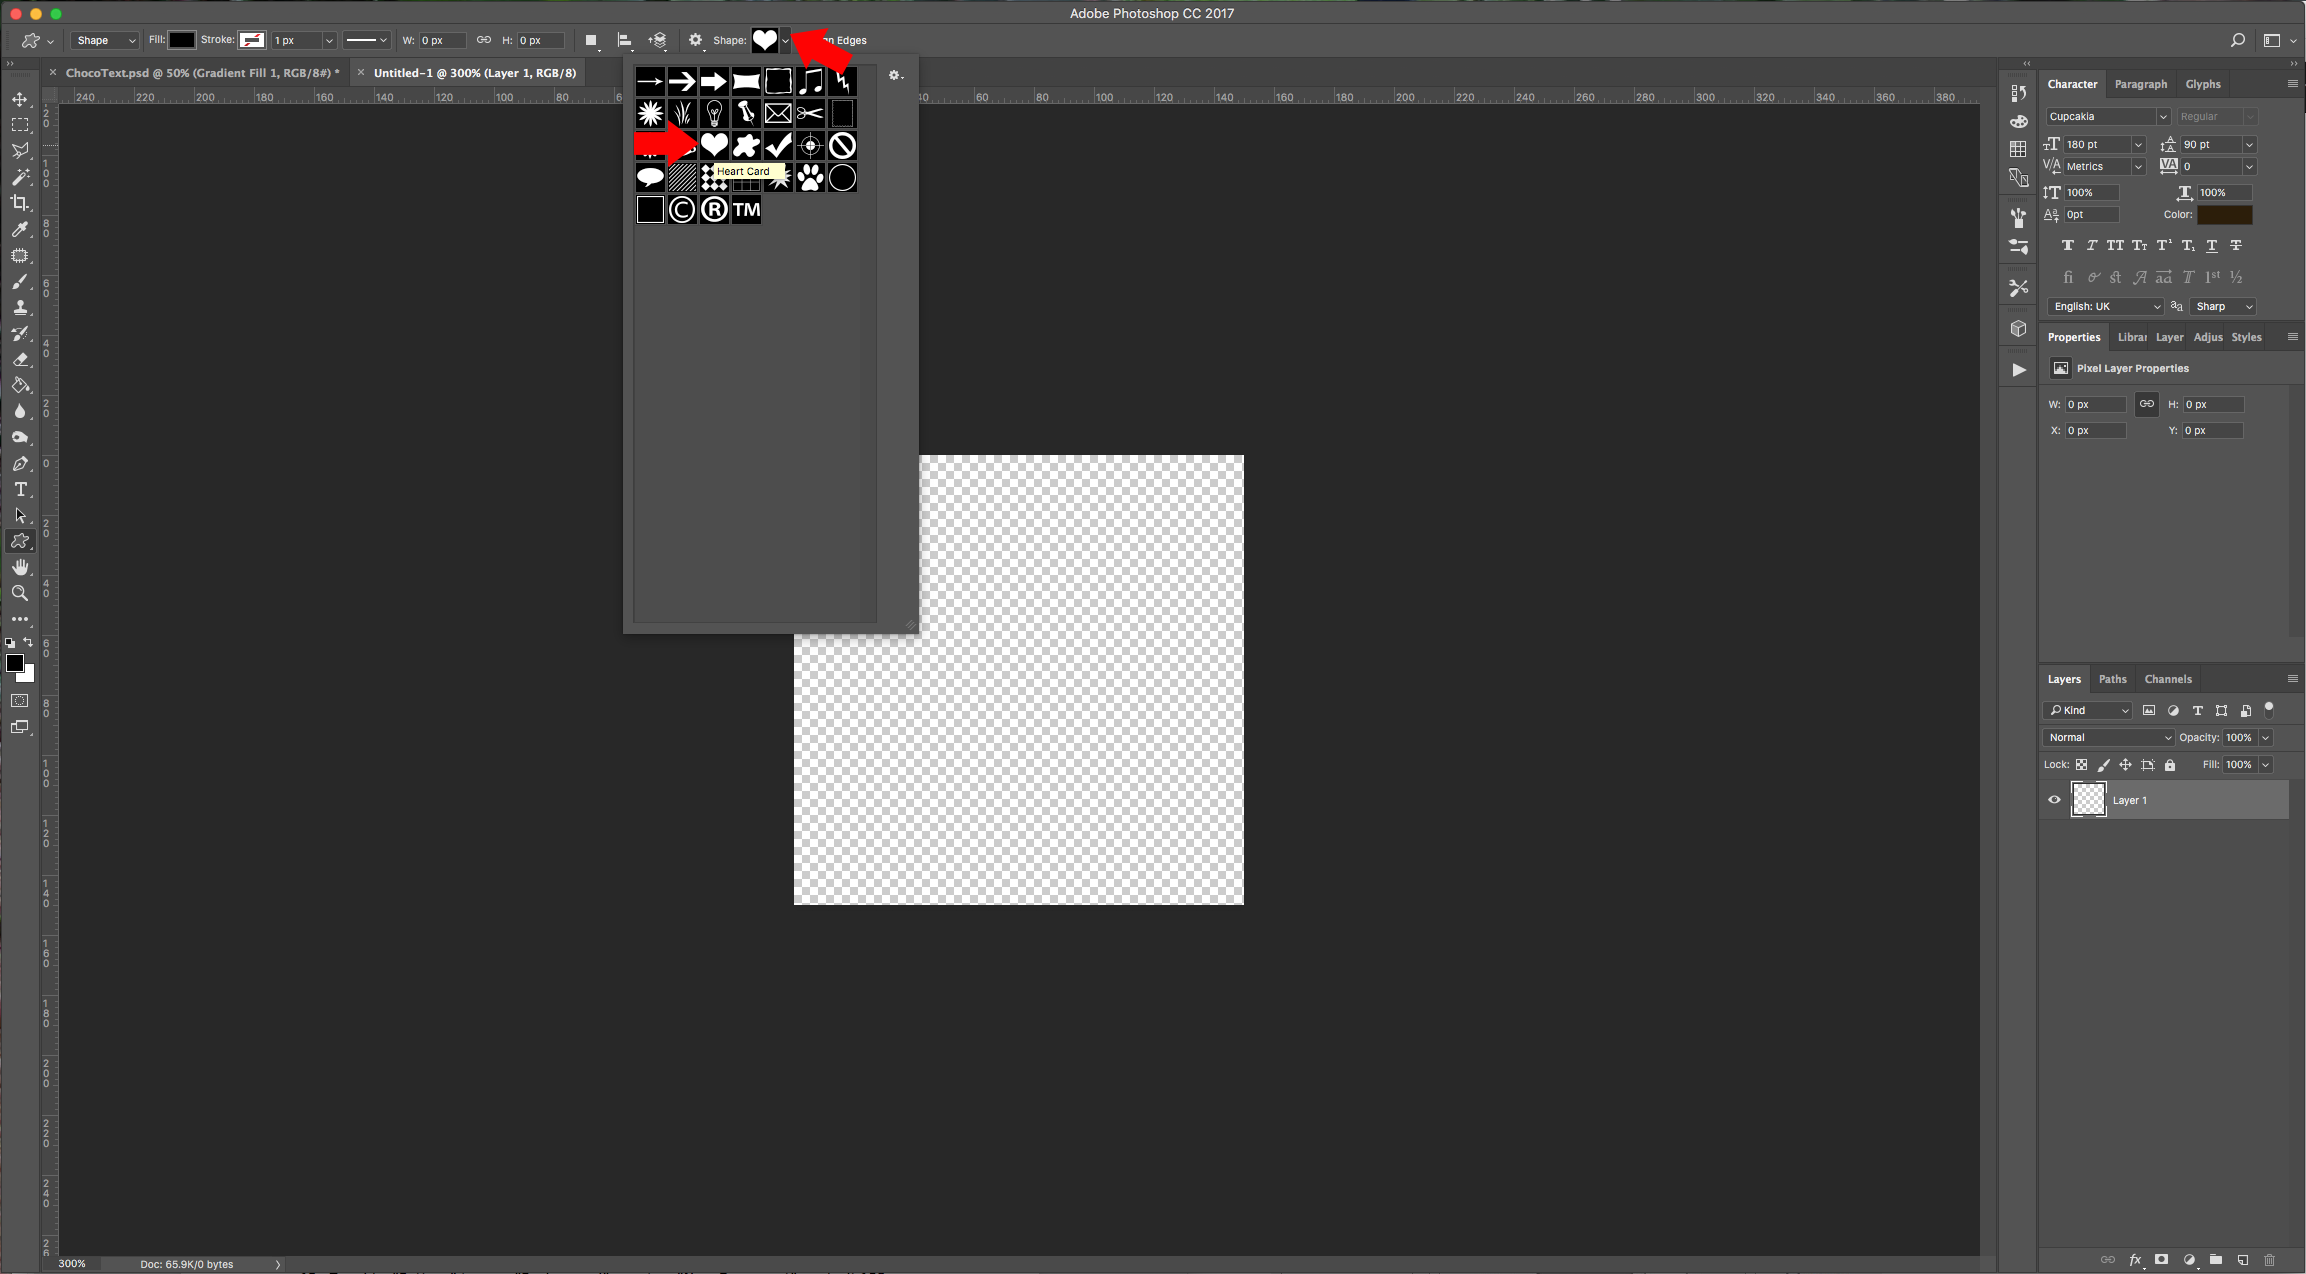
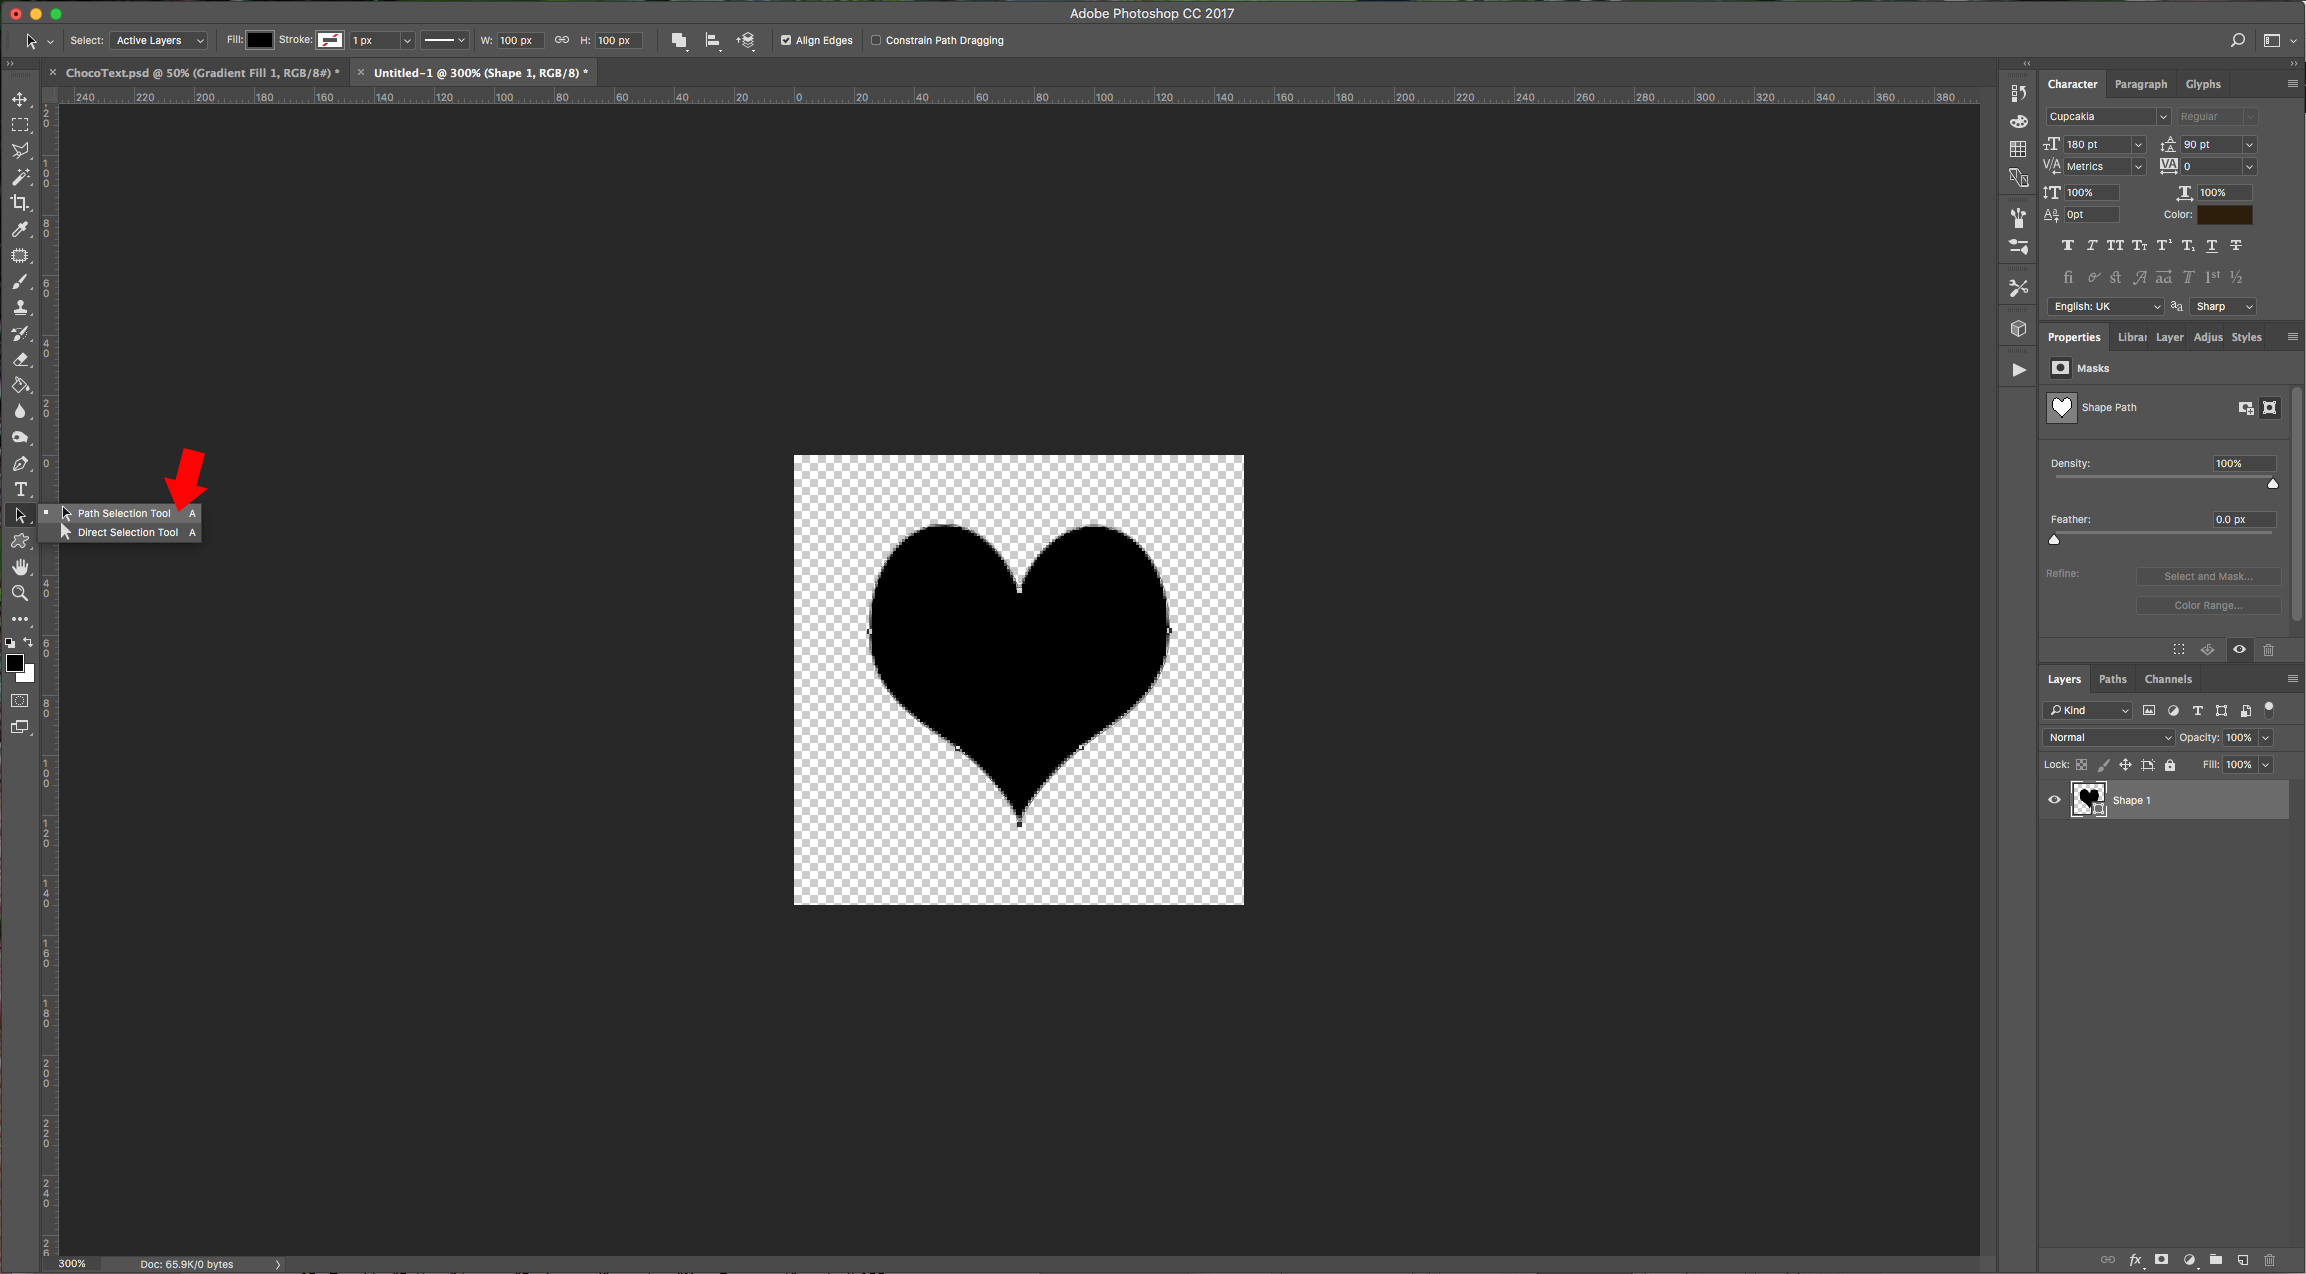
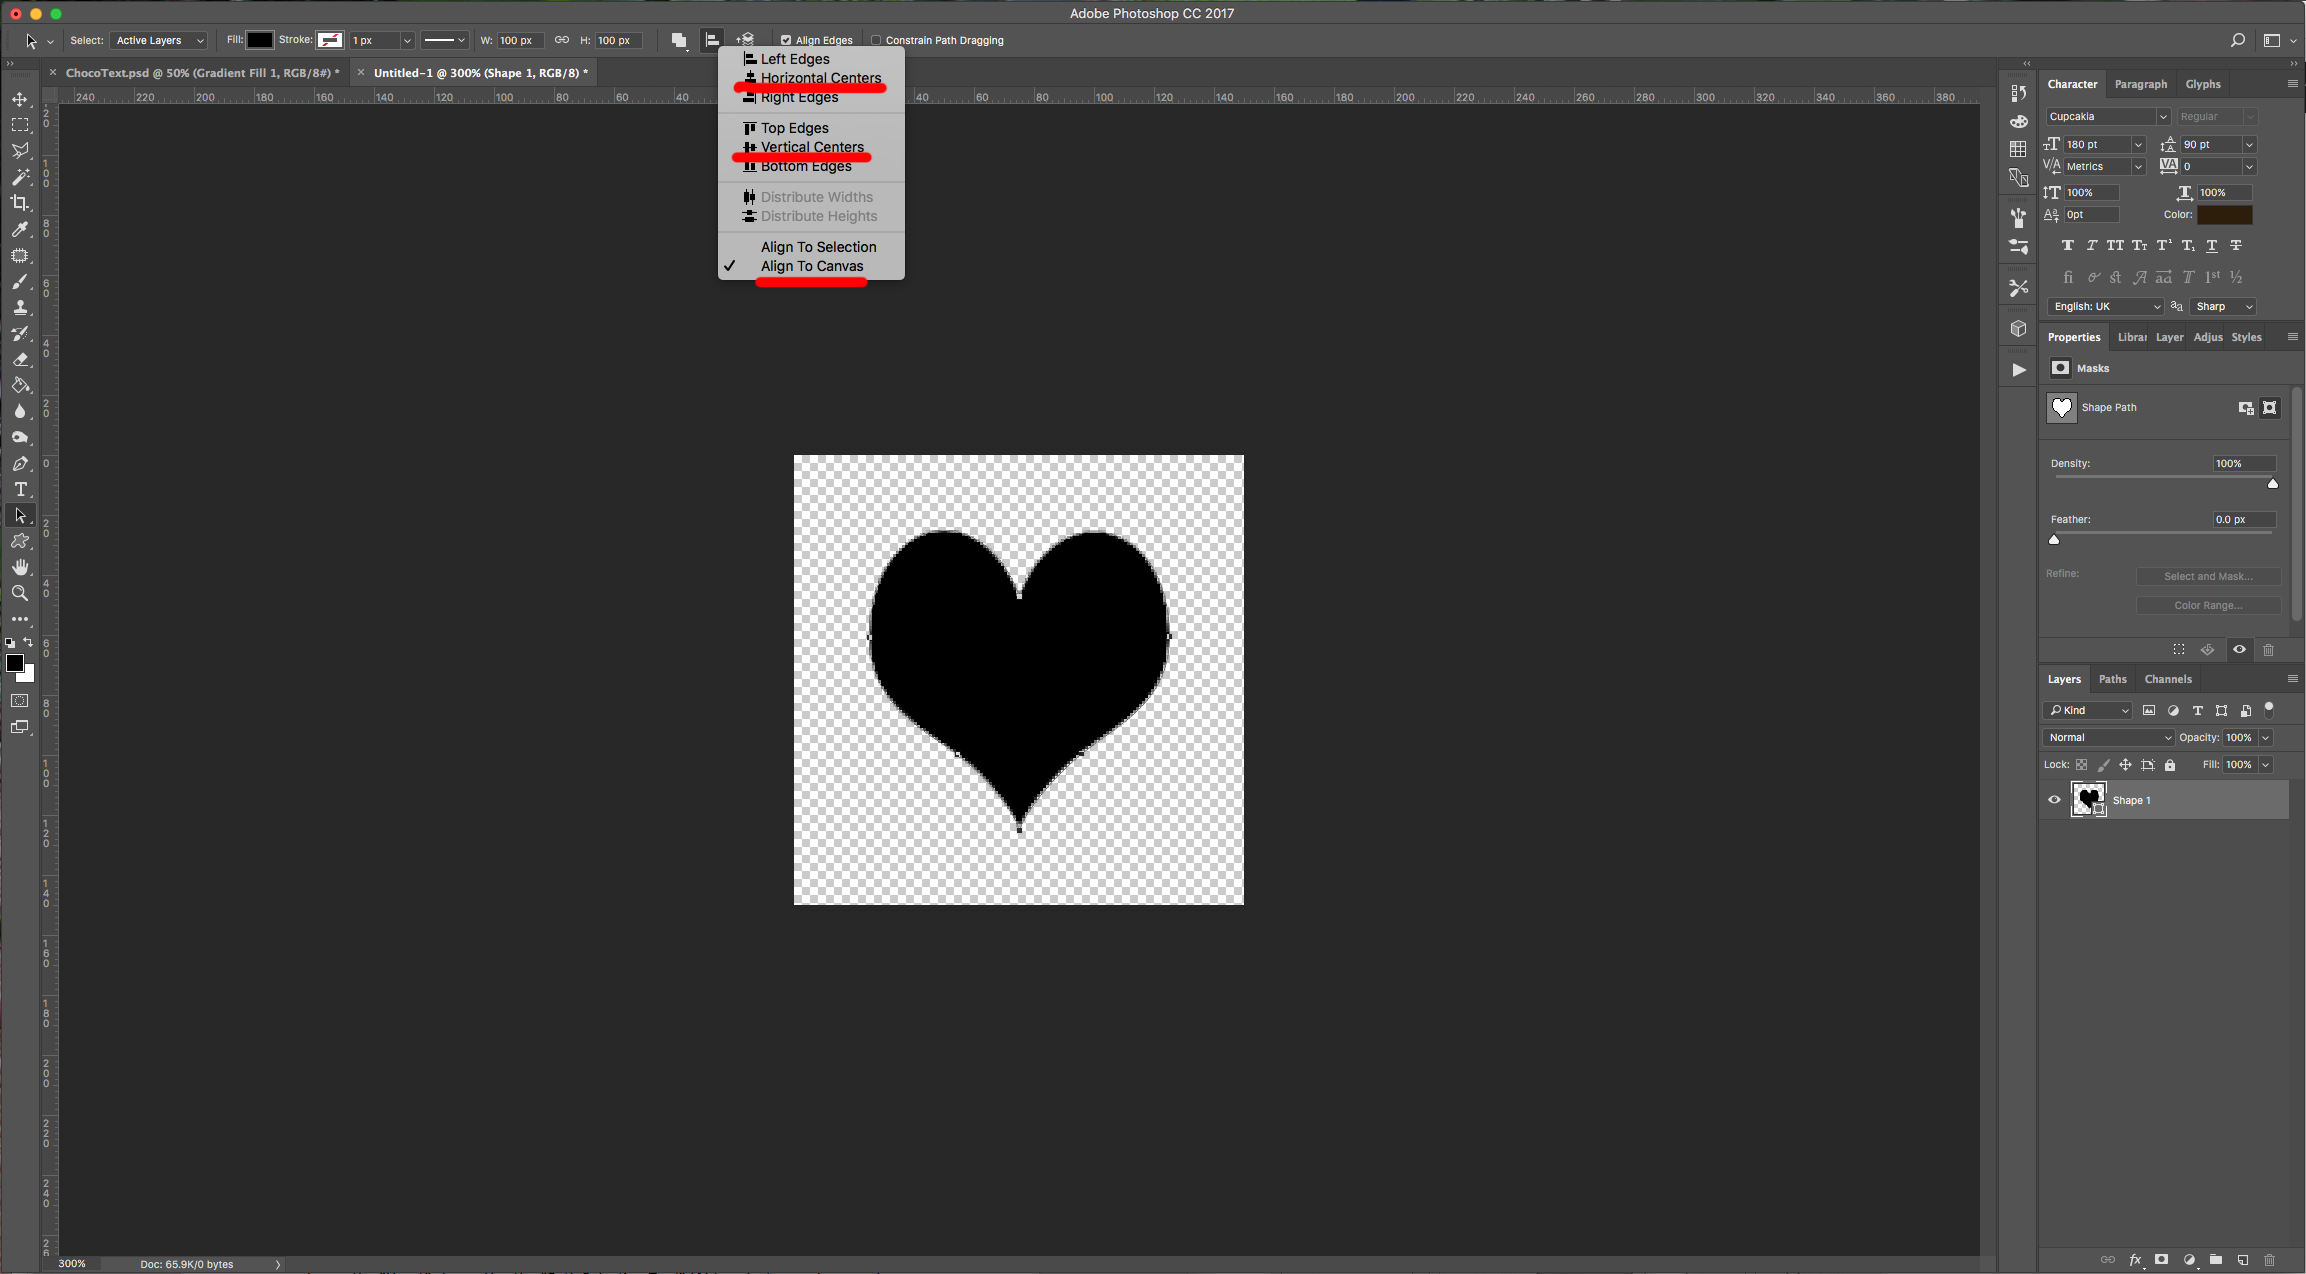
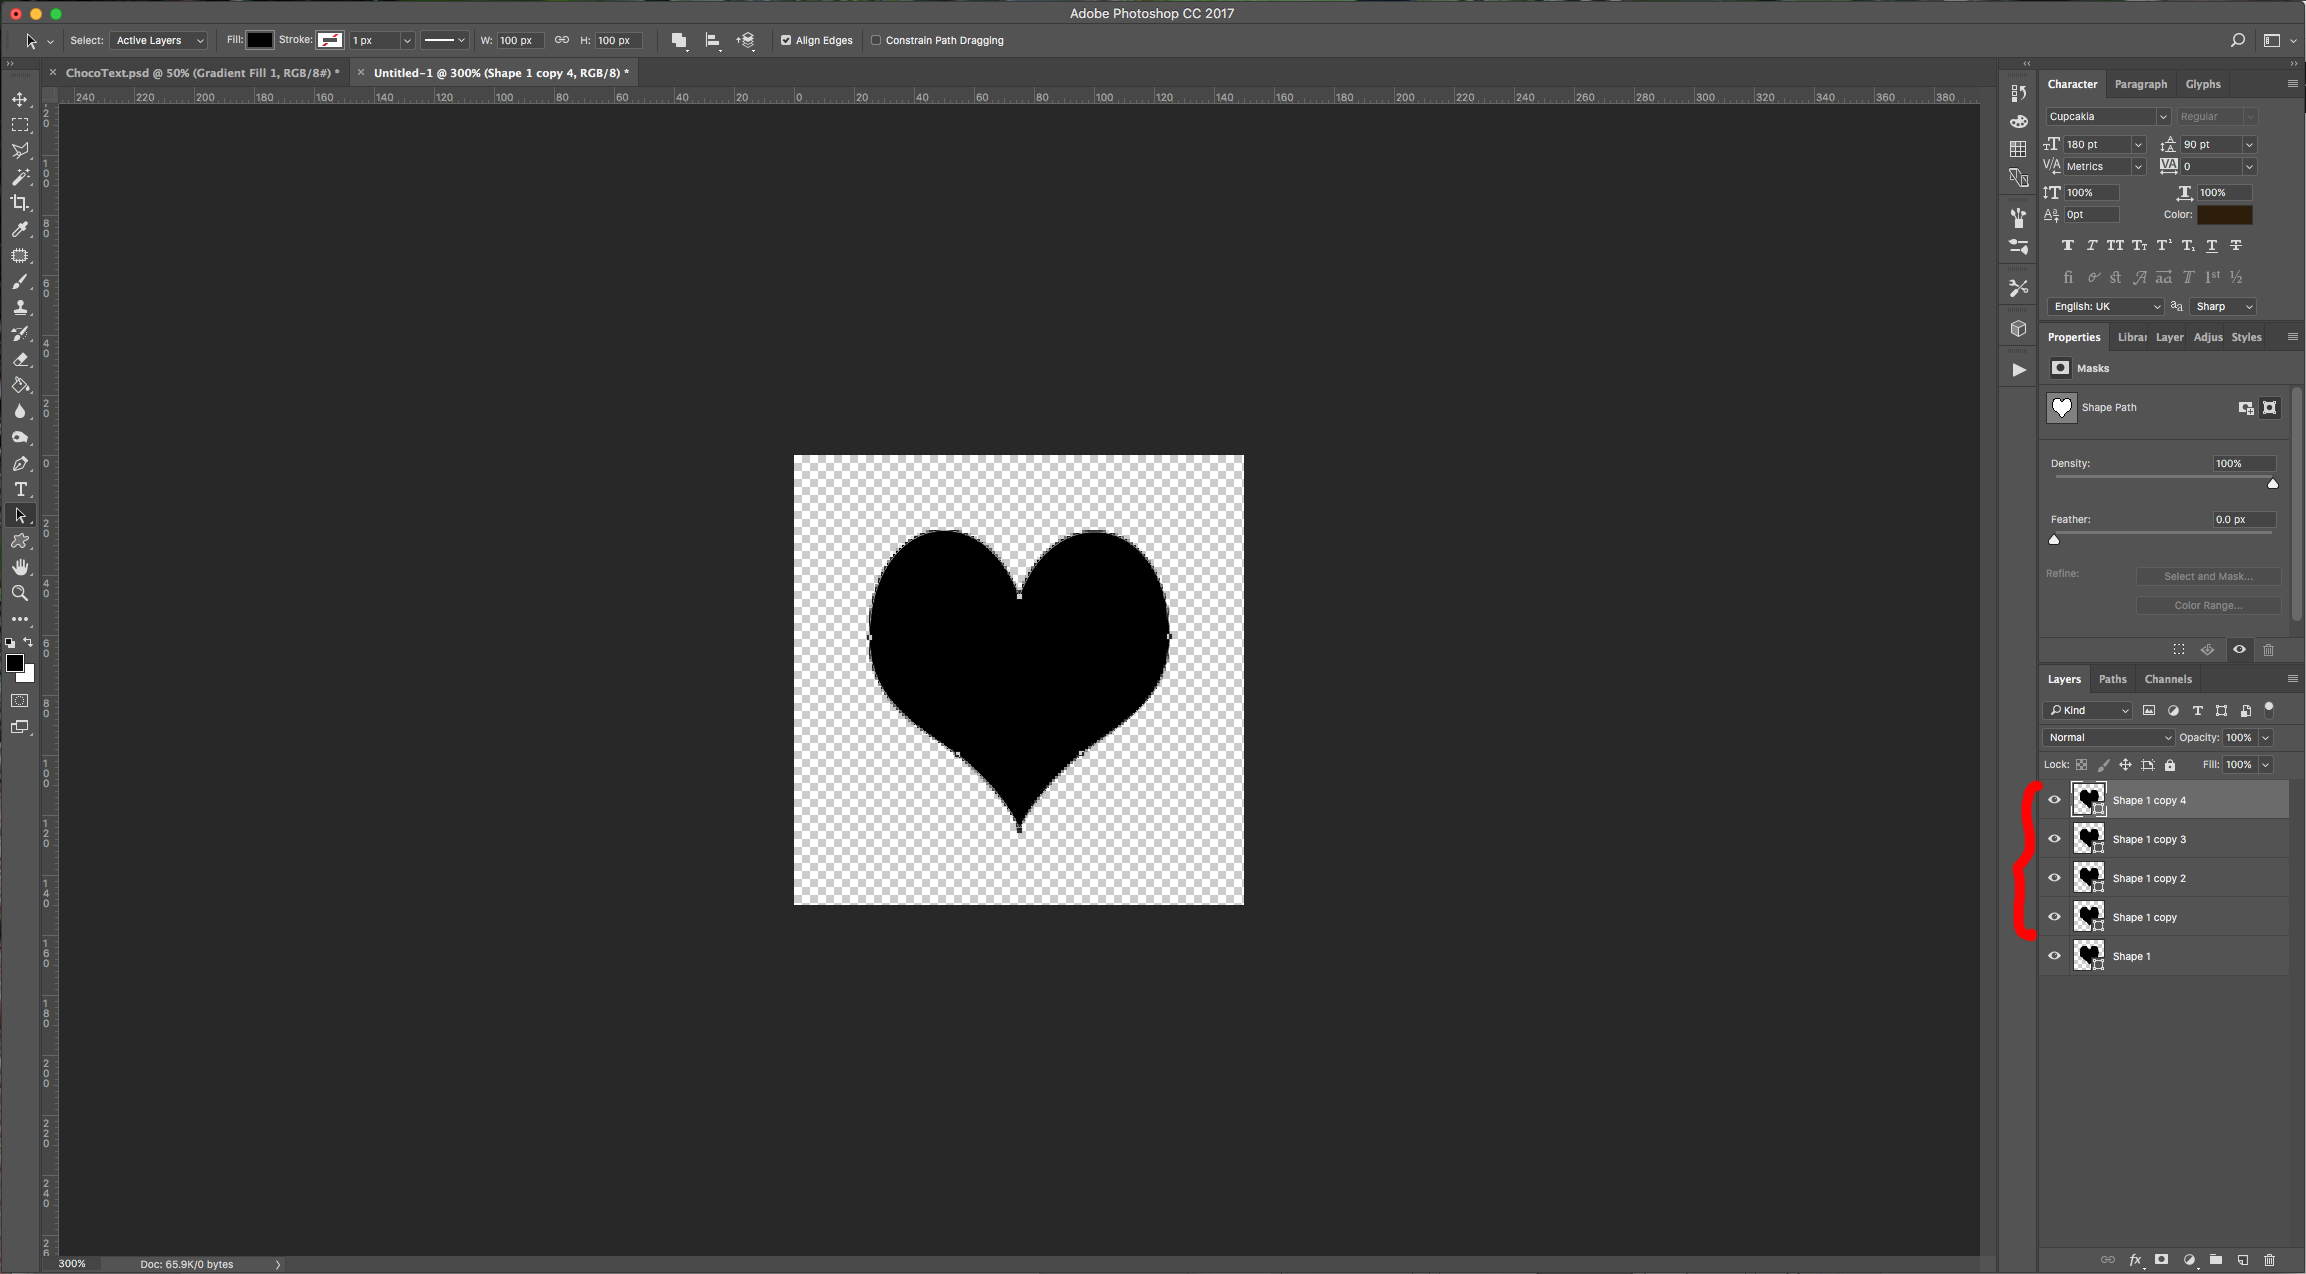
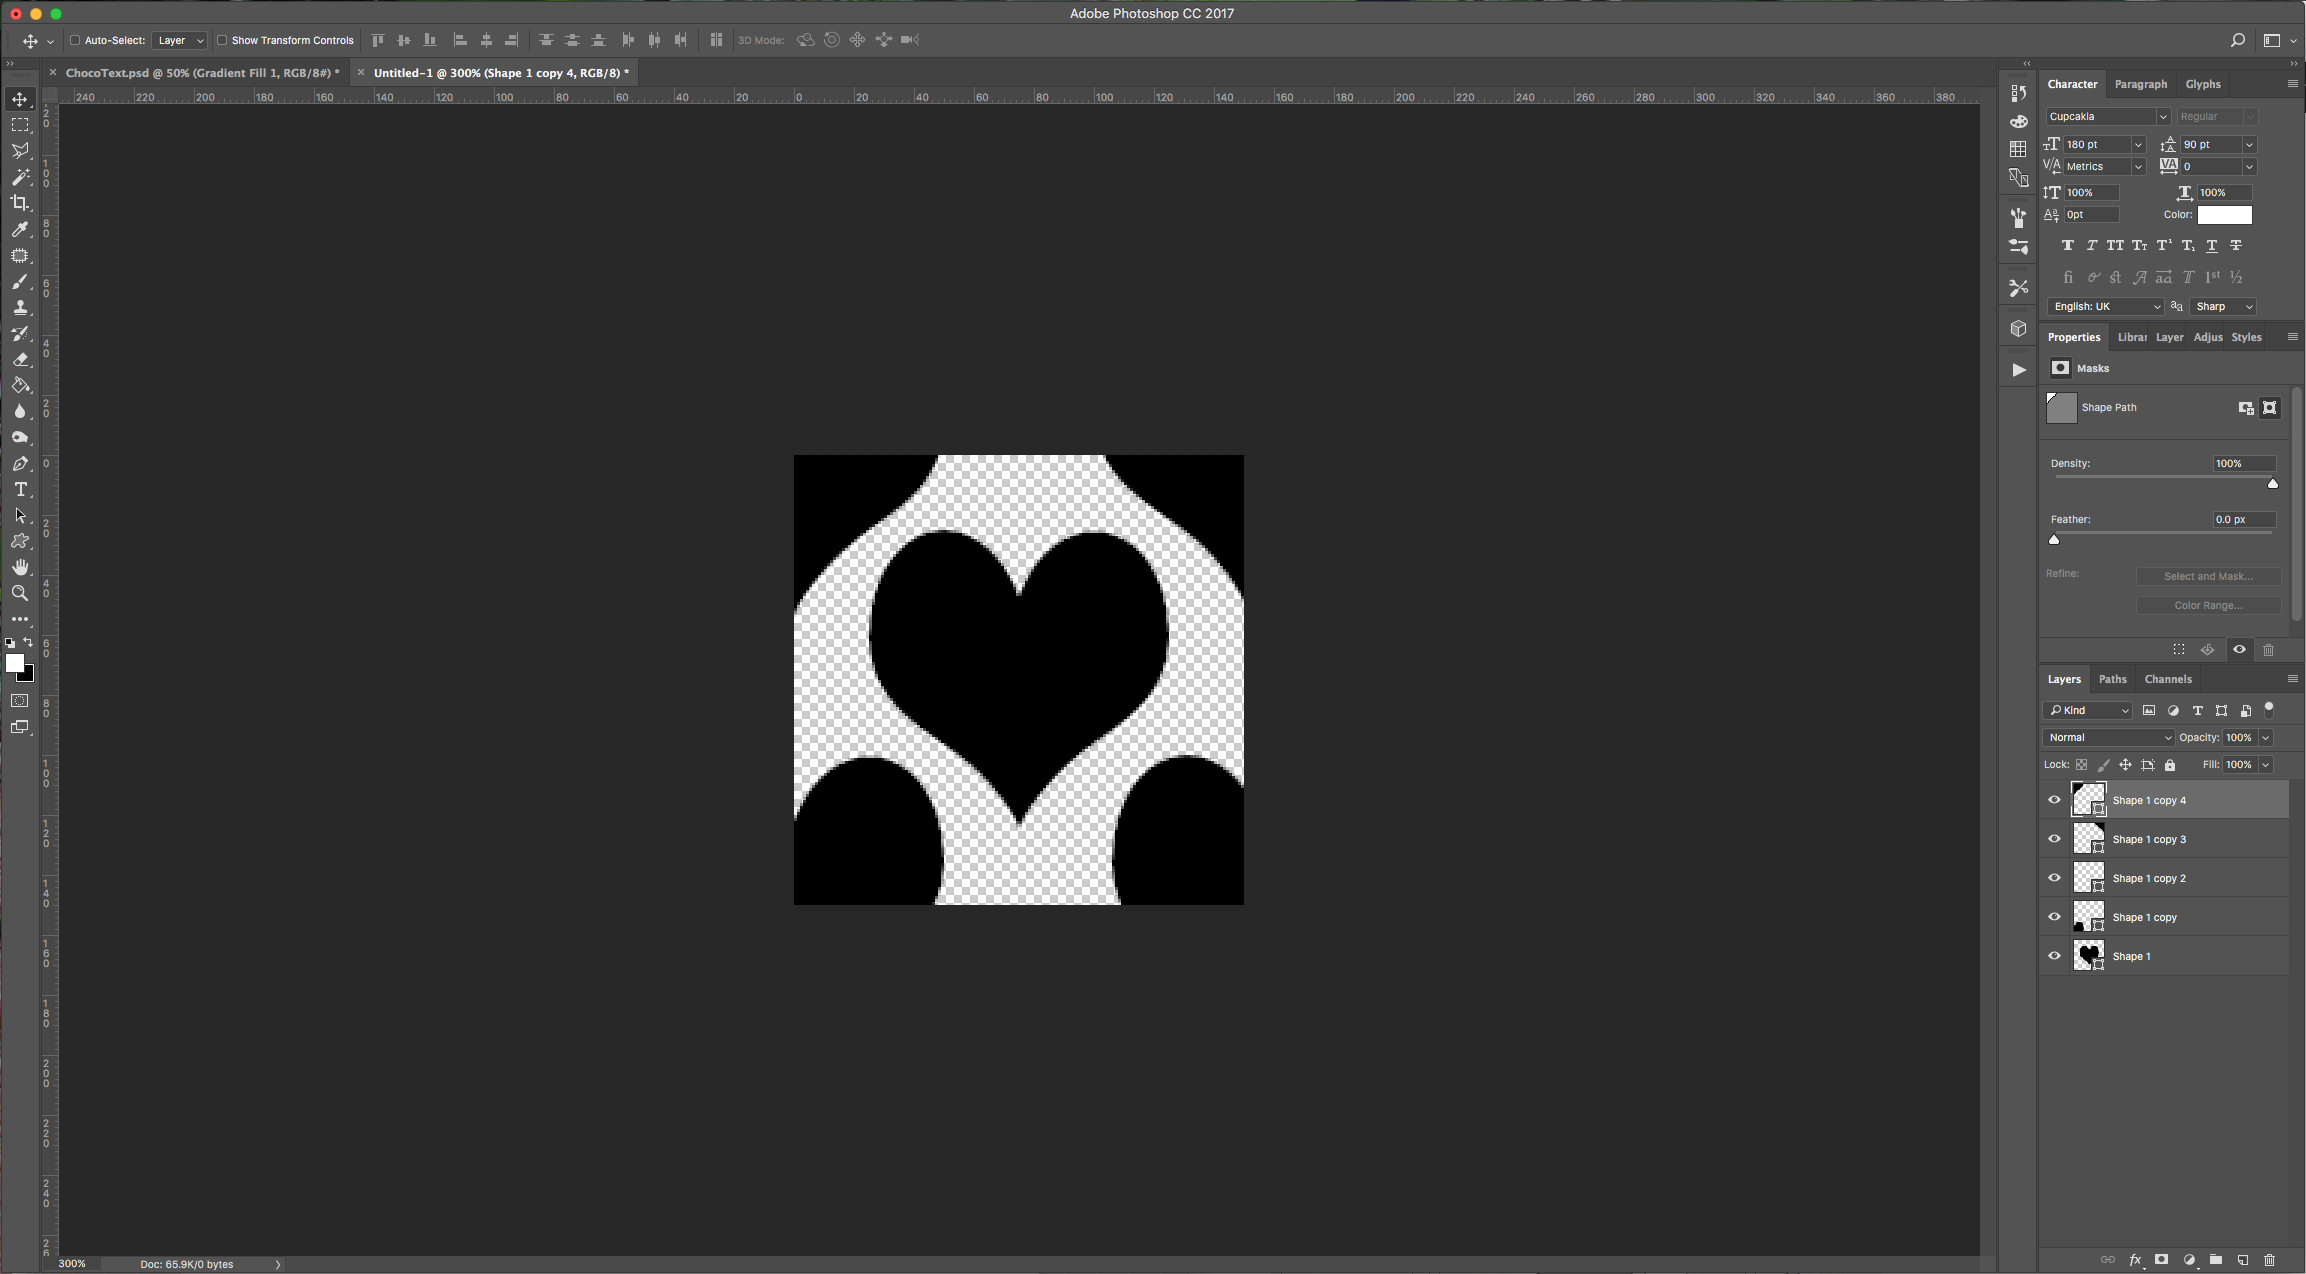
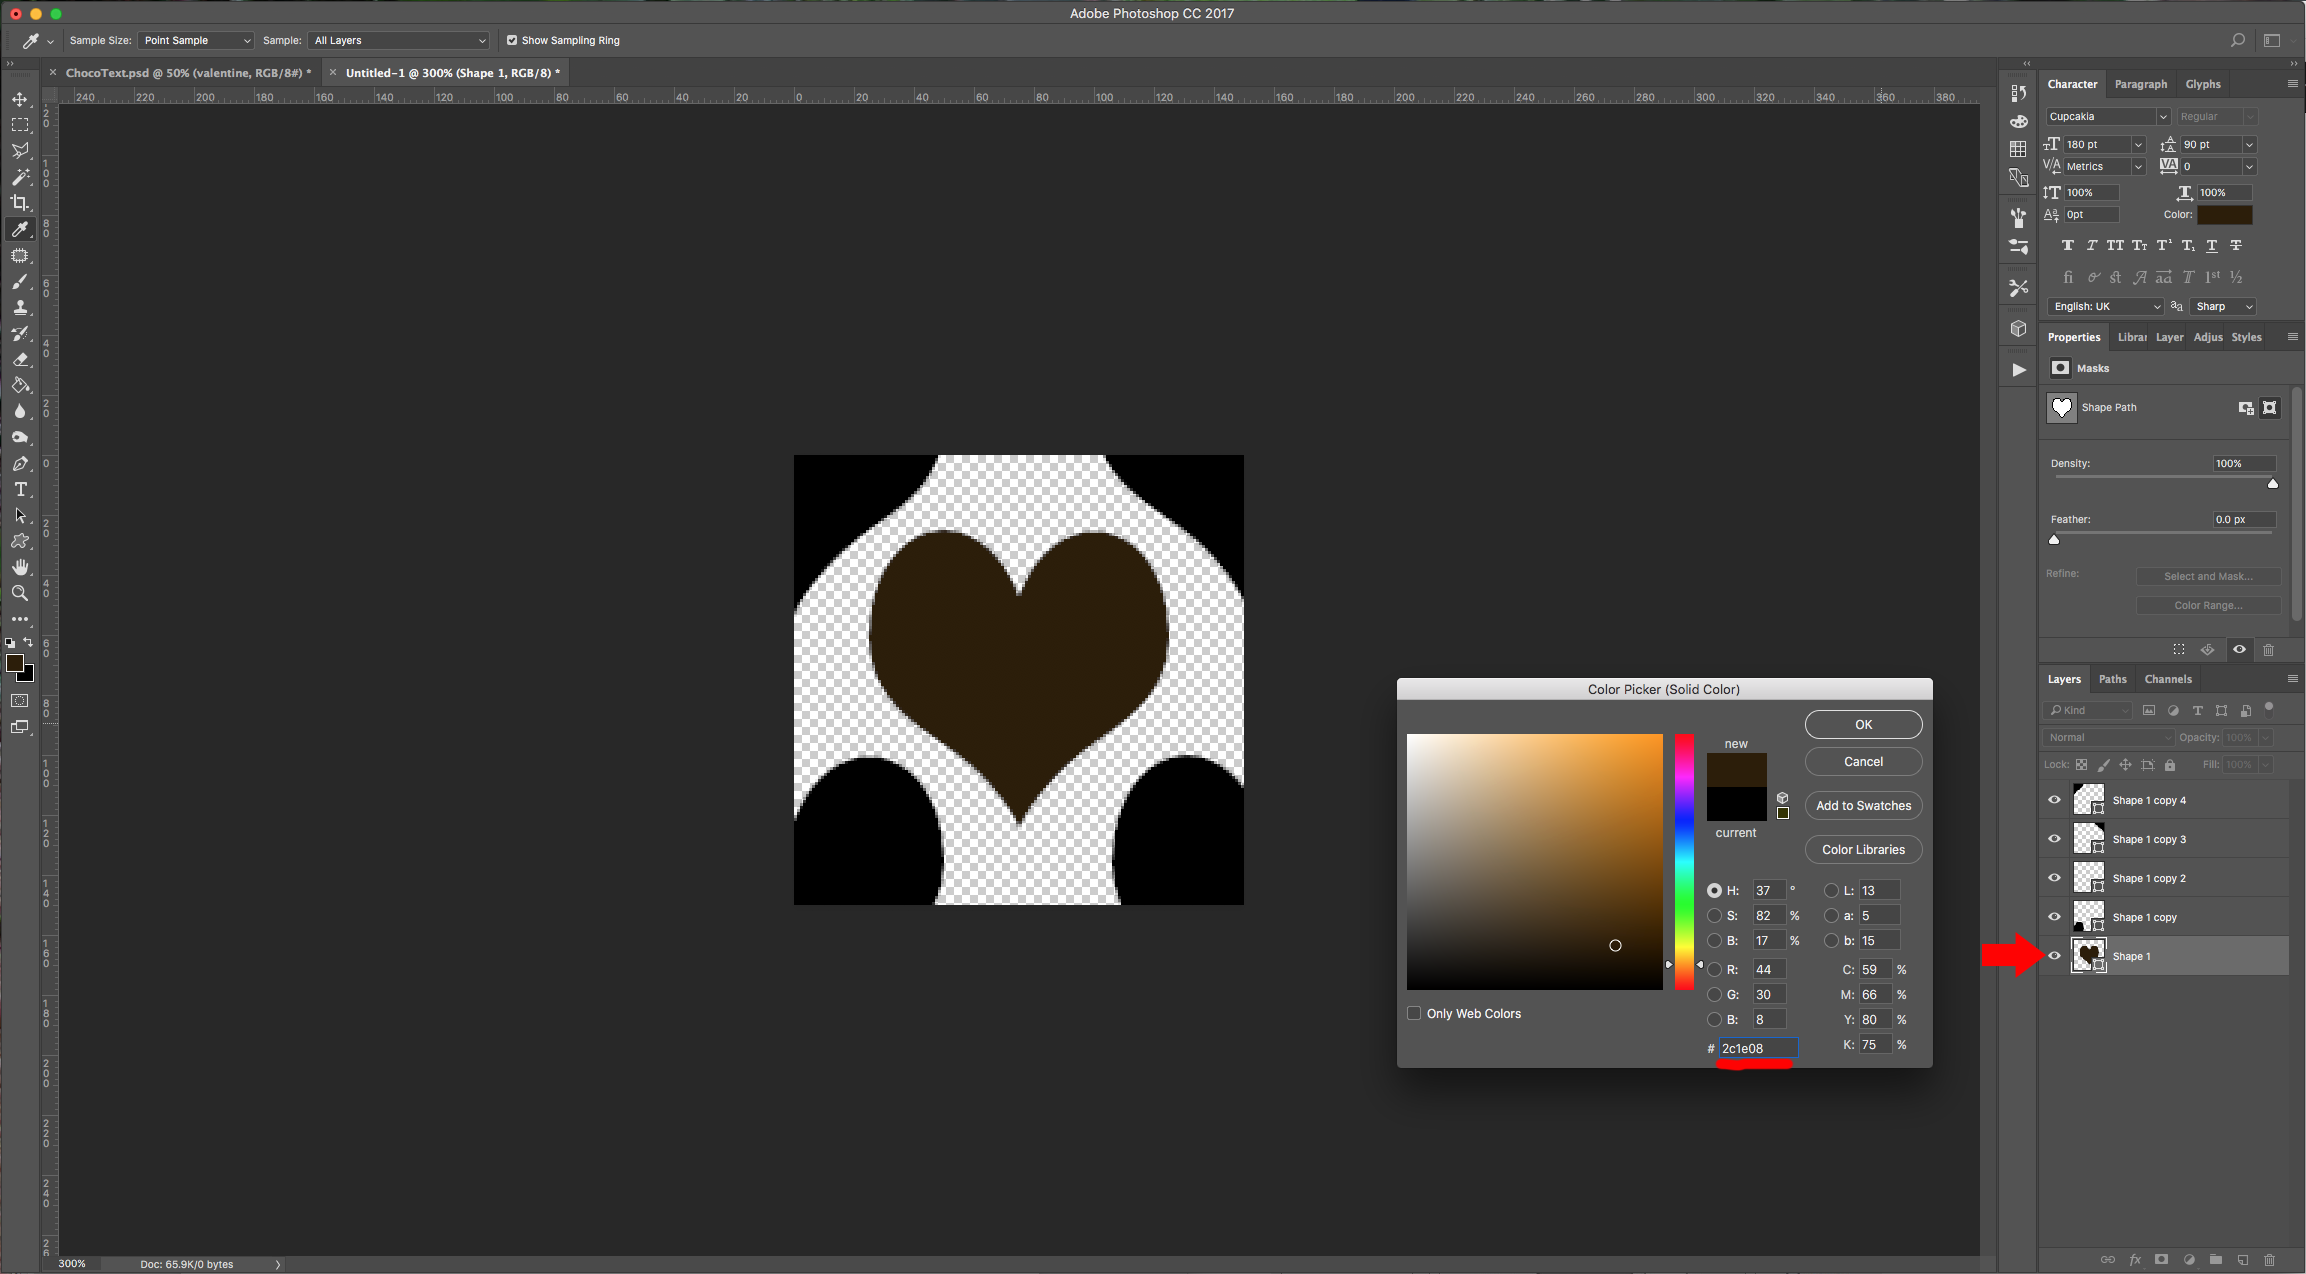
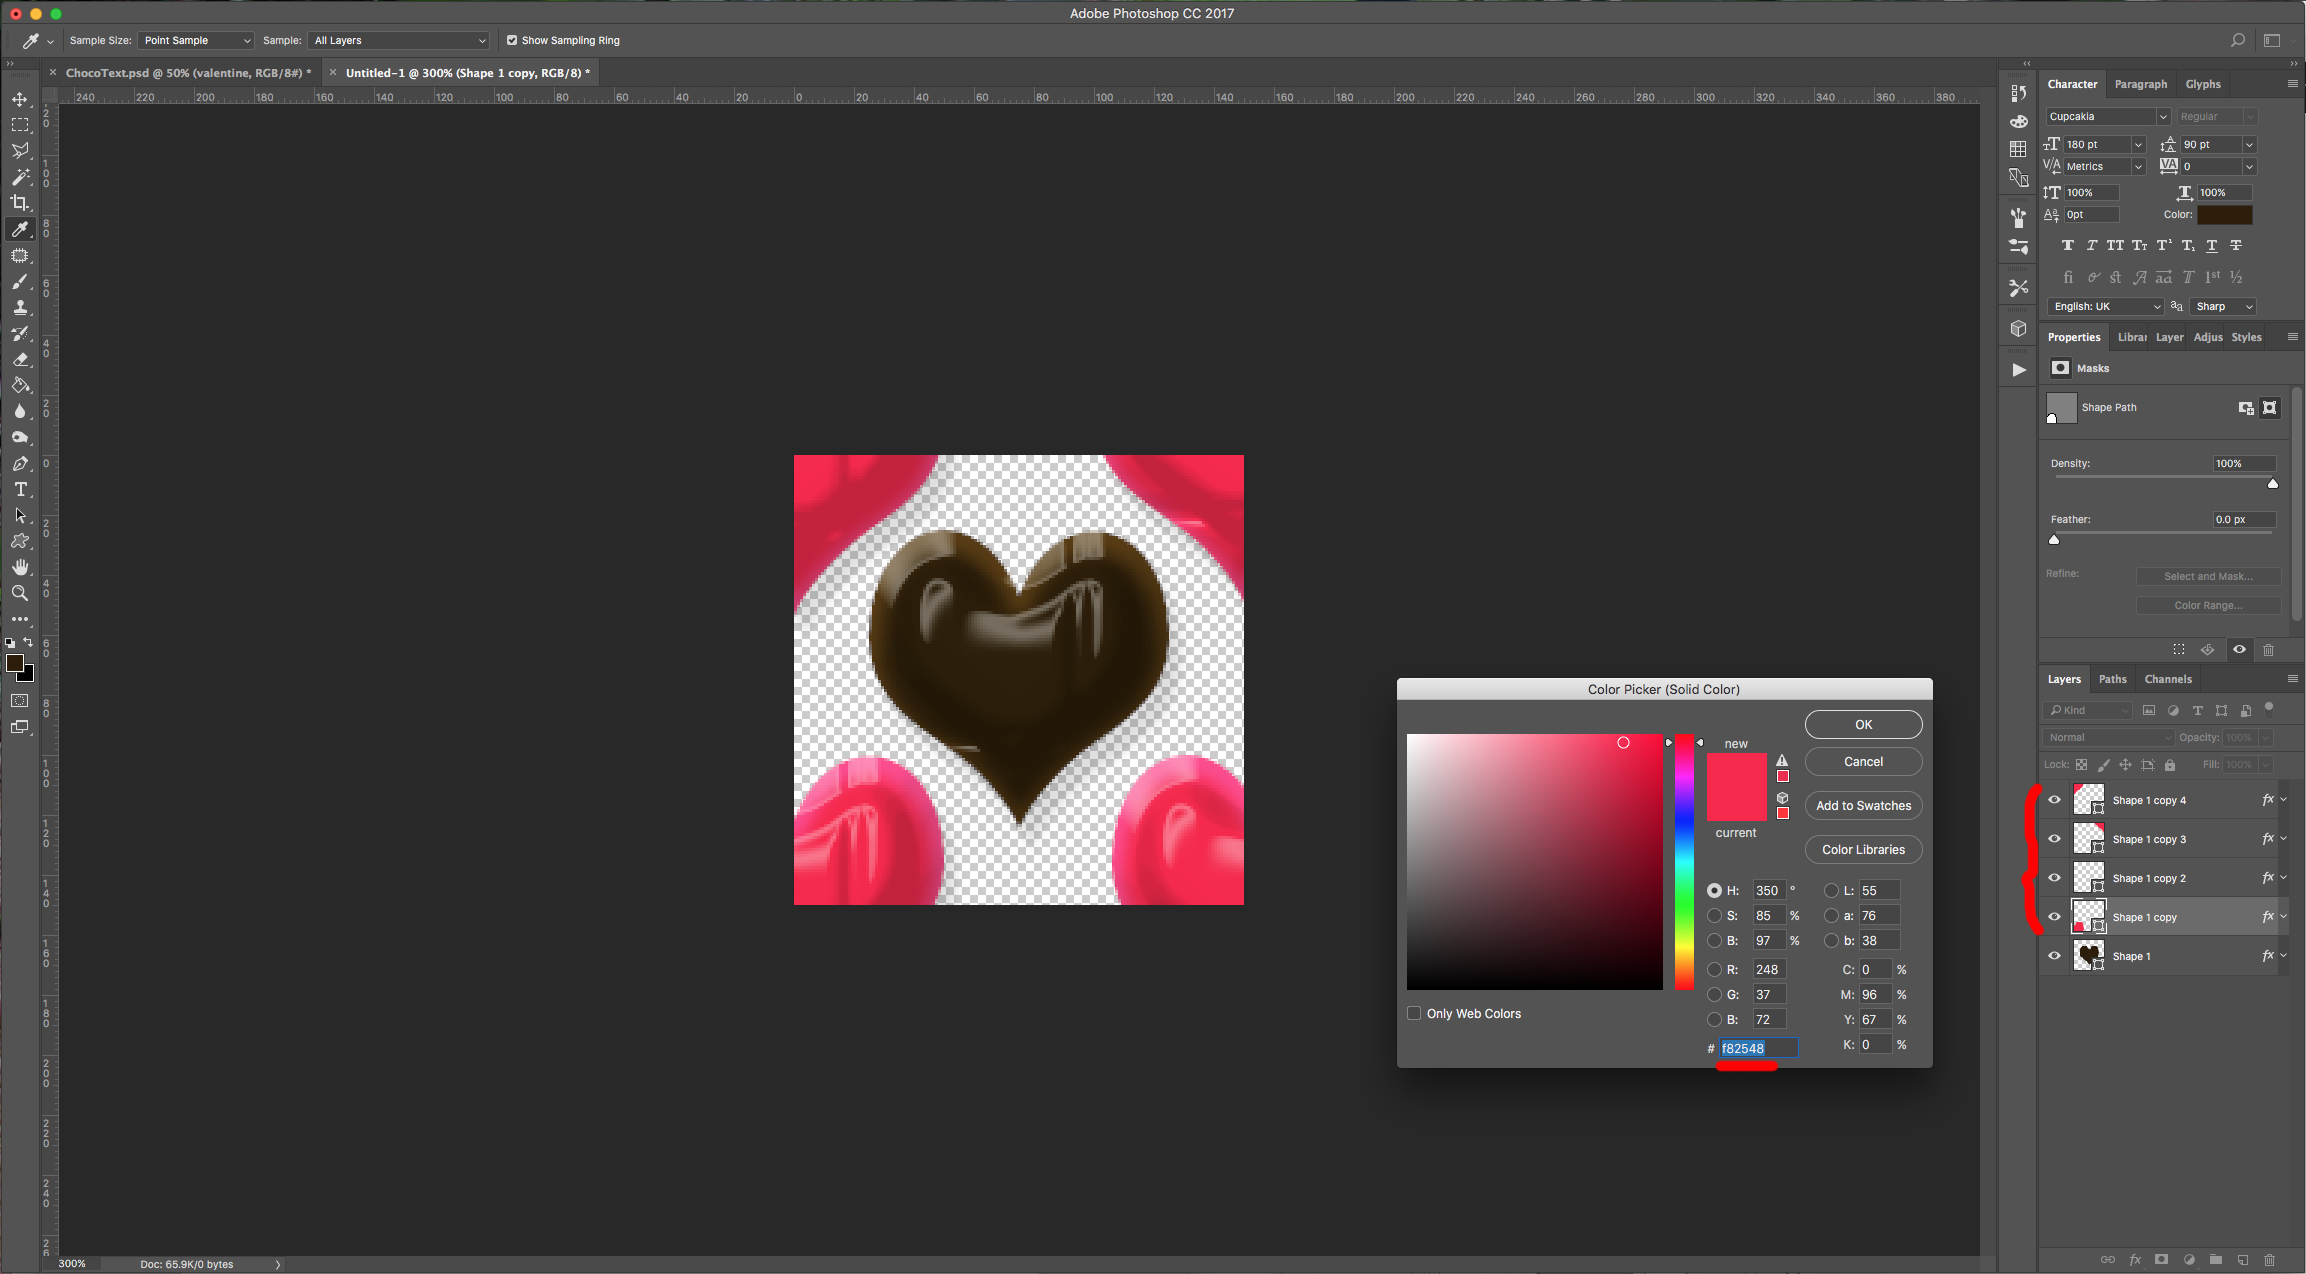
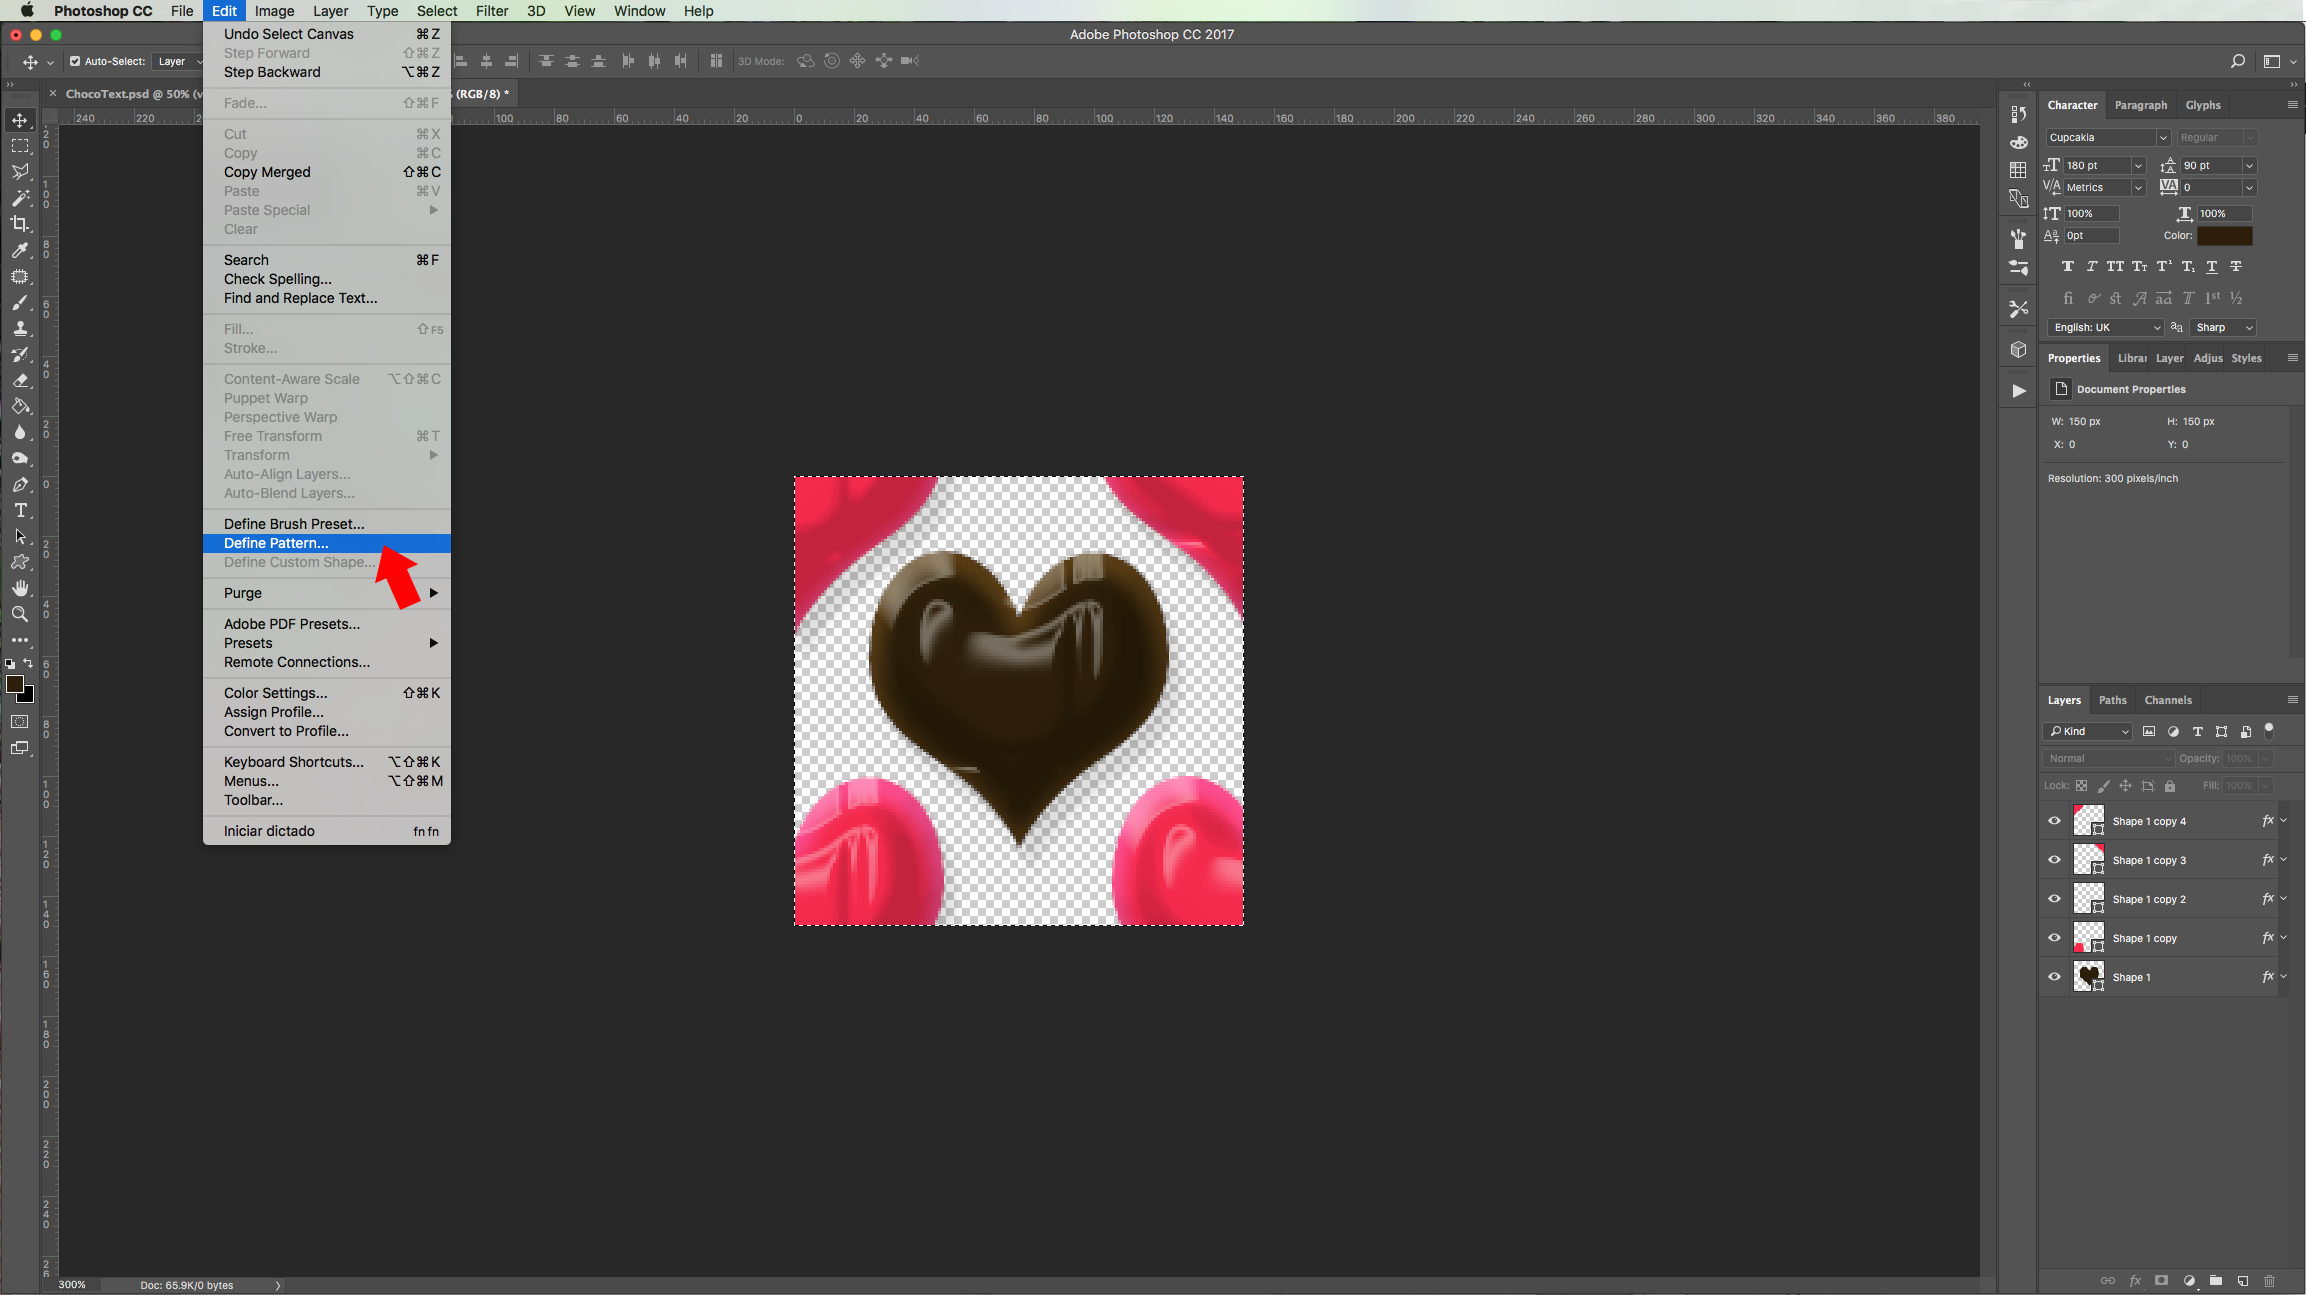
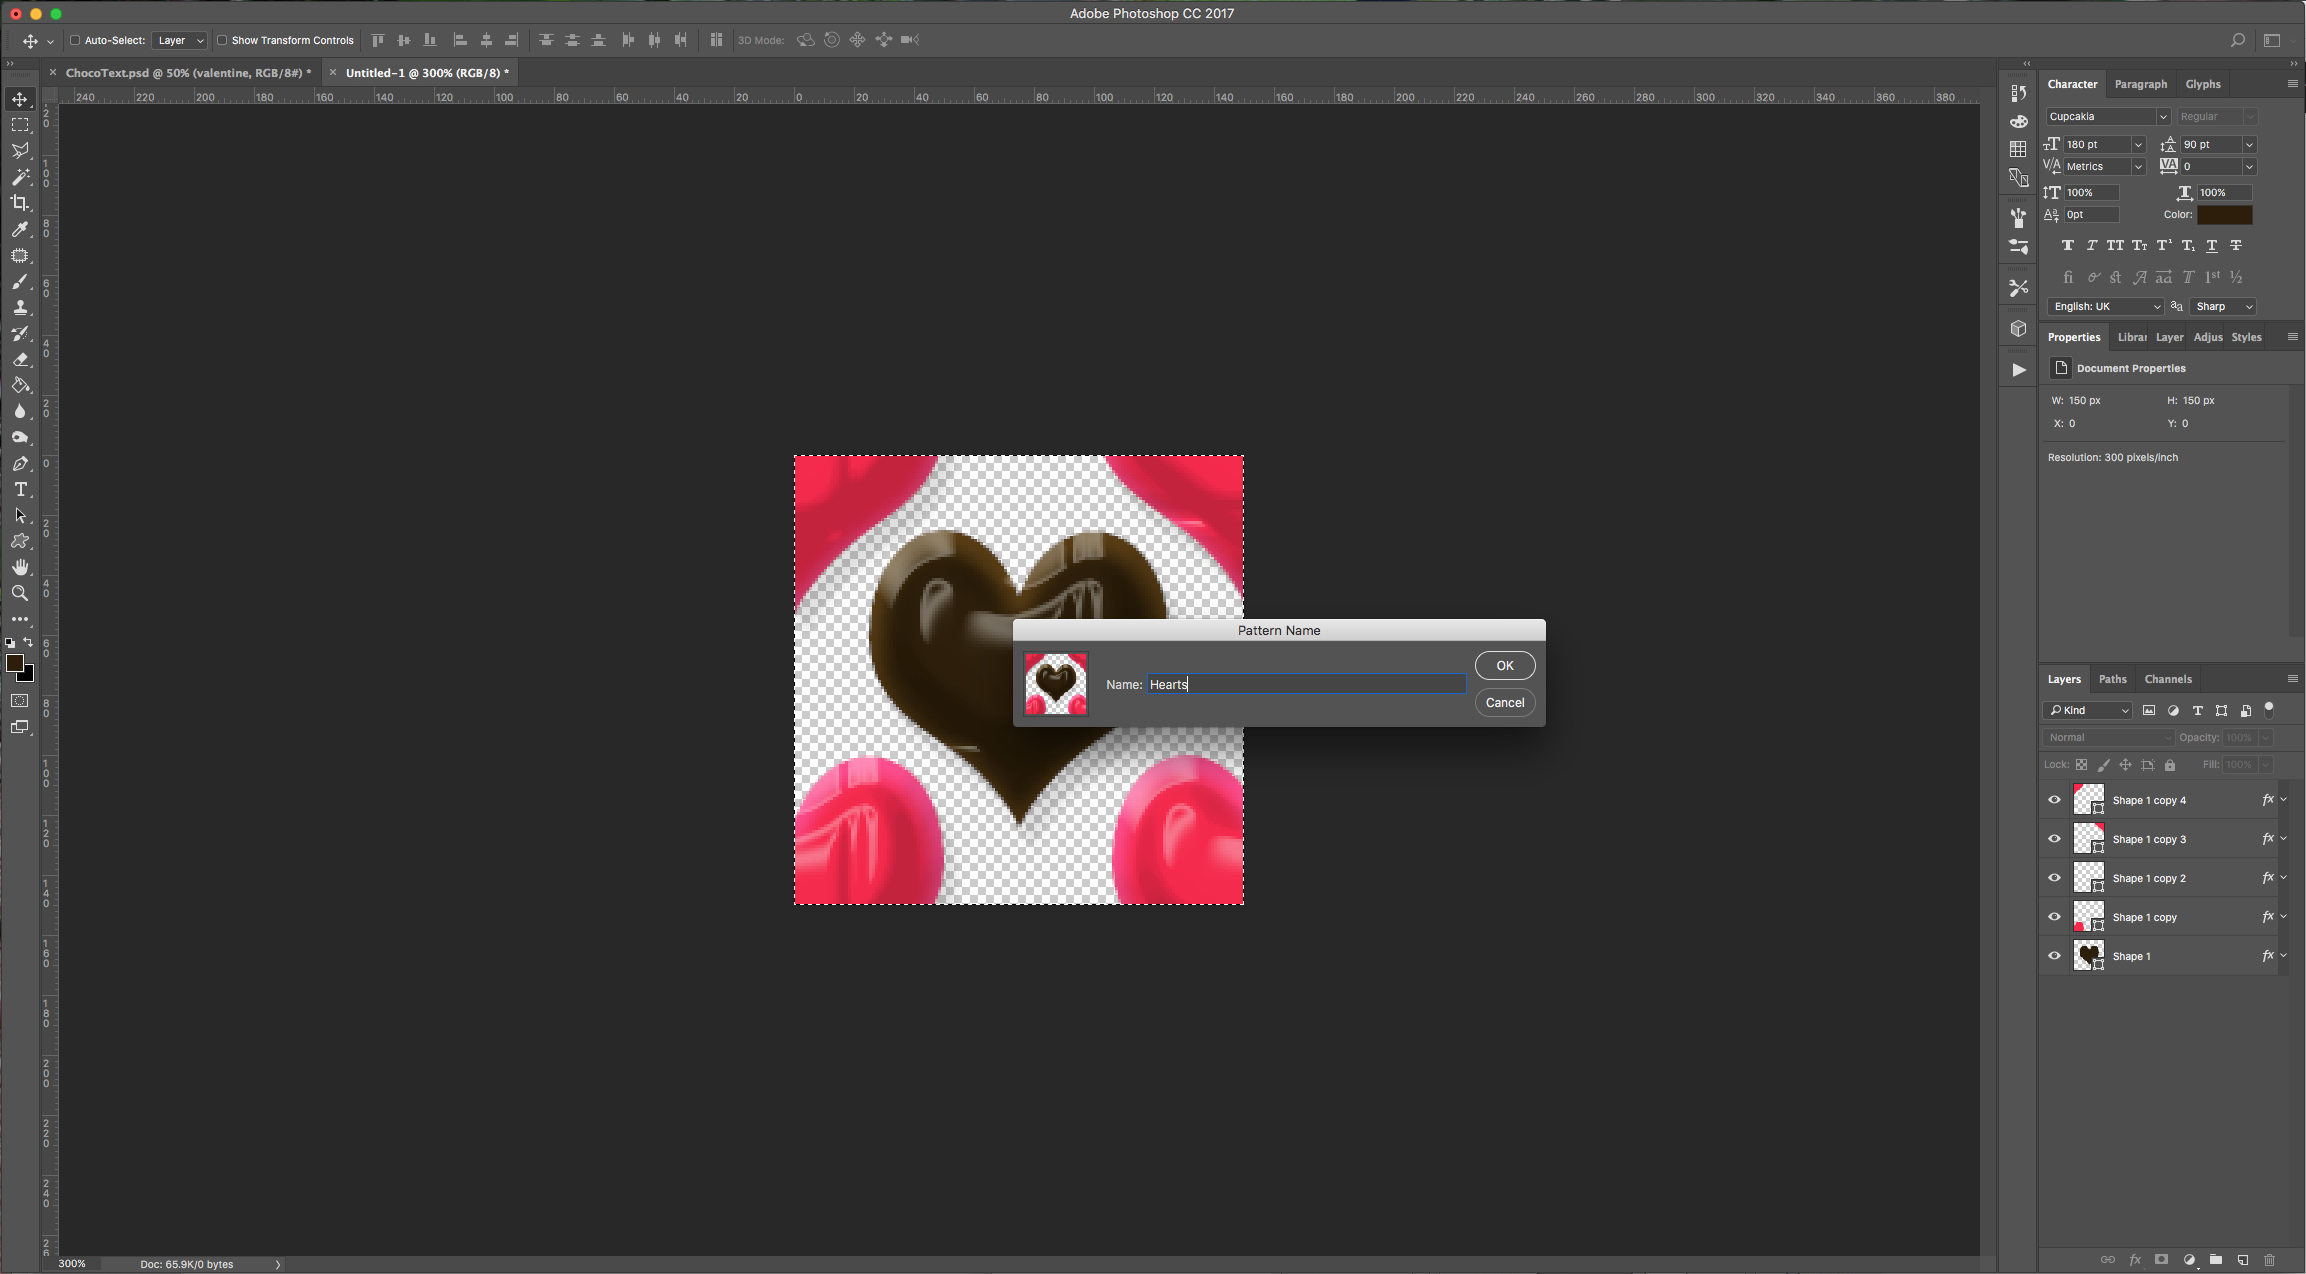
12 - To add a “Pattern” to your “Background”, create a “New Document”, make it 150 x 150 Pixels with a “Transparent” Background. Select the “Custom Shape Tool” (U) and choose the “Heart” shape. Use the “Path Selection Tool” (A) to select your shape and make it 100 x 100 Pixels in size and place it in the center of your document. Duplicate your shape 4 times and place one duplicate in each corner making sure the center of the shape is positioned on the corner (you will see just a quarter of your shape and the rest should be outside of the canvas). Double-click on the “Shape” thumbnail to change the “Fill” color to #2c1e08, then “Copy” your second Text (the one that looks like chocolate) “Layer Style” and “Paste” it in your “Heart” Shape. Do the same with the corner shapes but use #f82548 as “Fill” color. Select everything (Command/Control + A) and go to Edit > Define Pattern, mane your Pattern ad click “OK”.
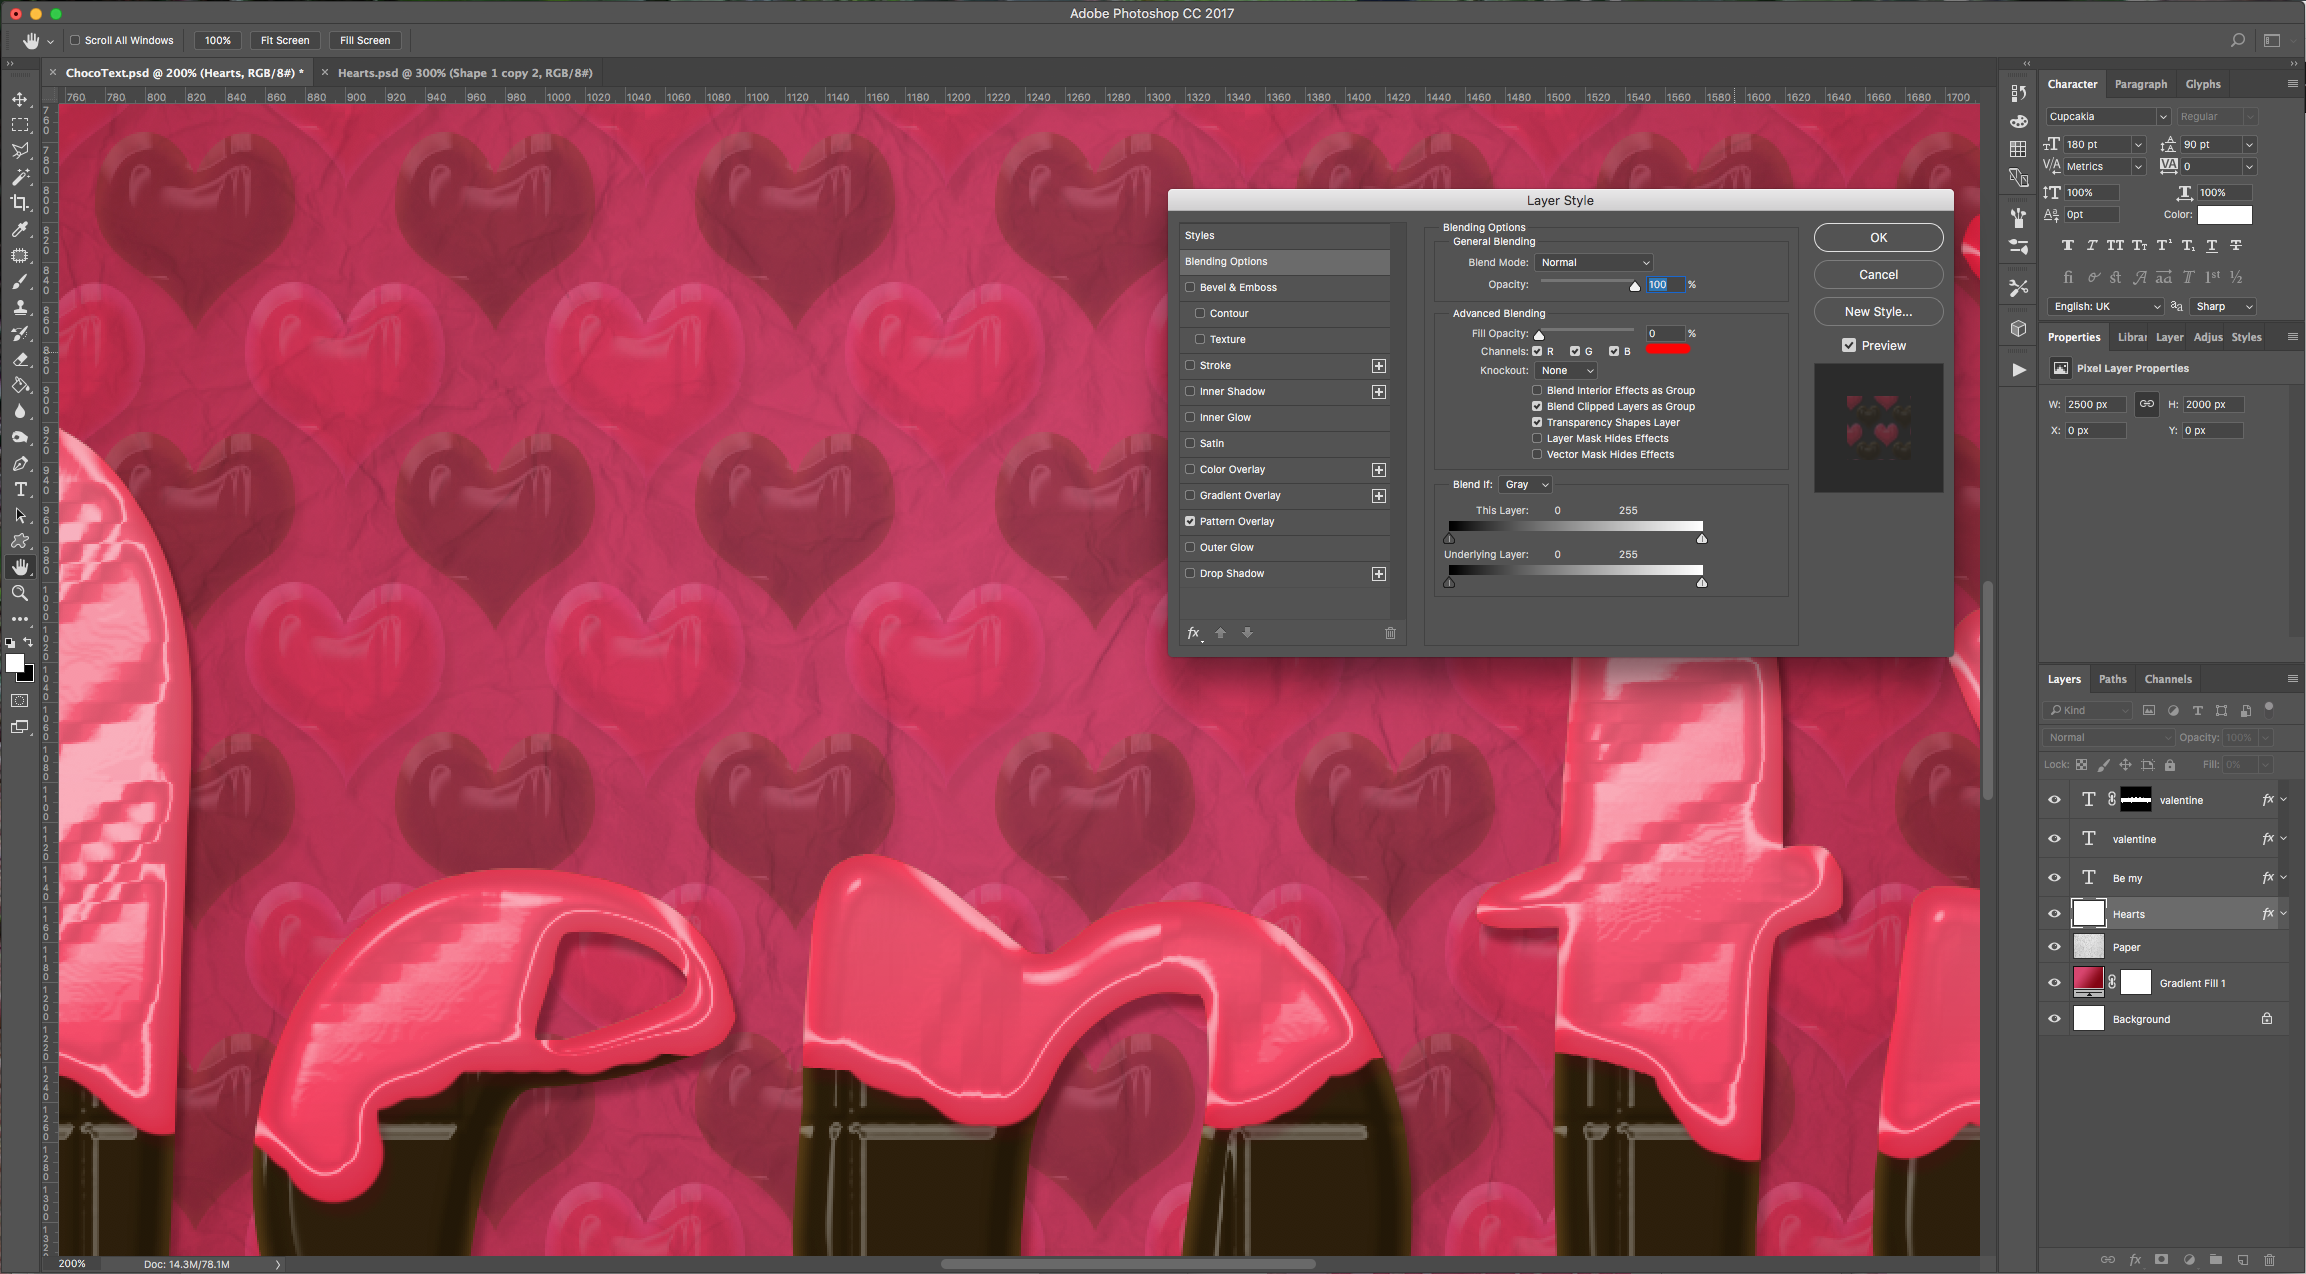
13 - Back in your Artwork, create a “New Layer” by clicking on the small button at the bottom of the “Layers” Panel, place it on top of the “Paper” Layer. Fill it with 100% White and double-click on its thumbnail to apply the following “Layer Styles”:
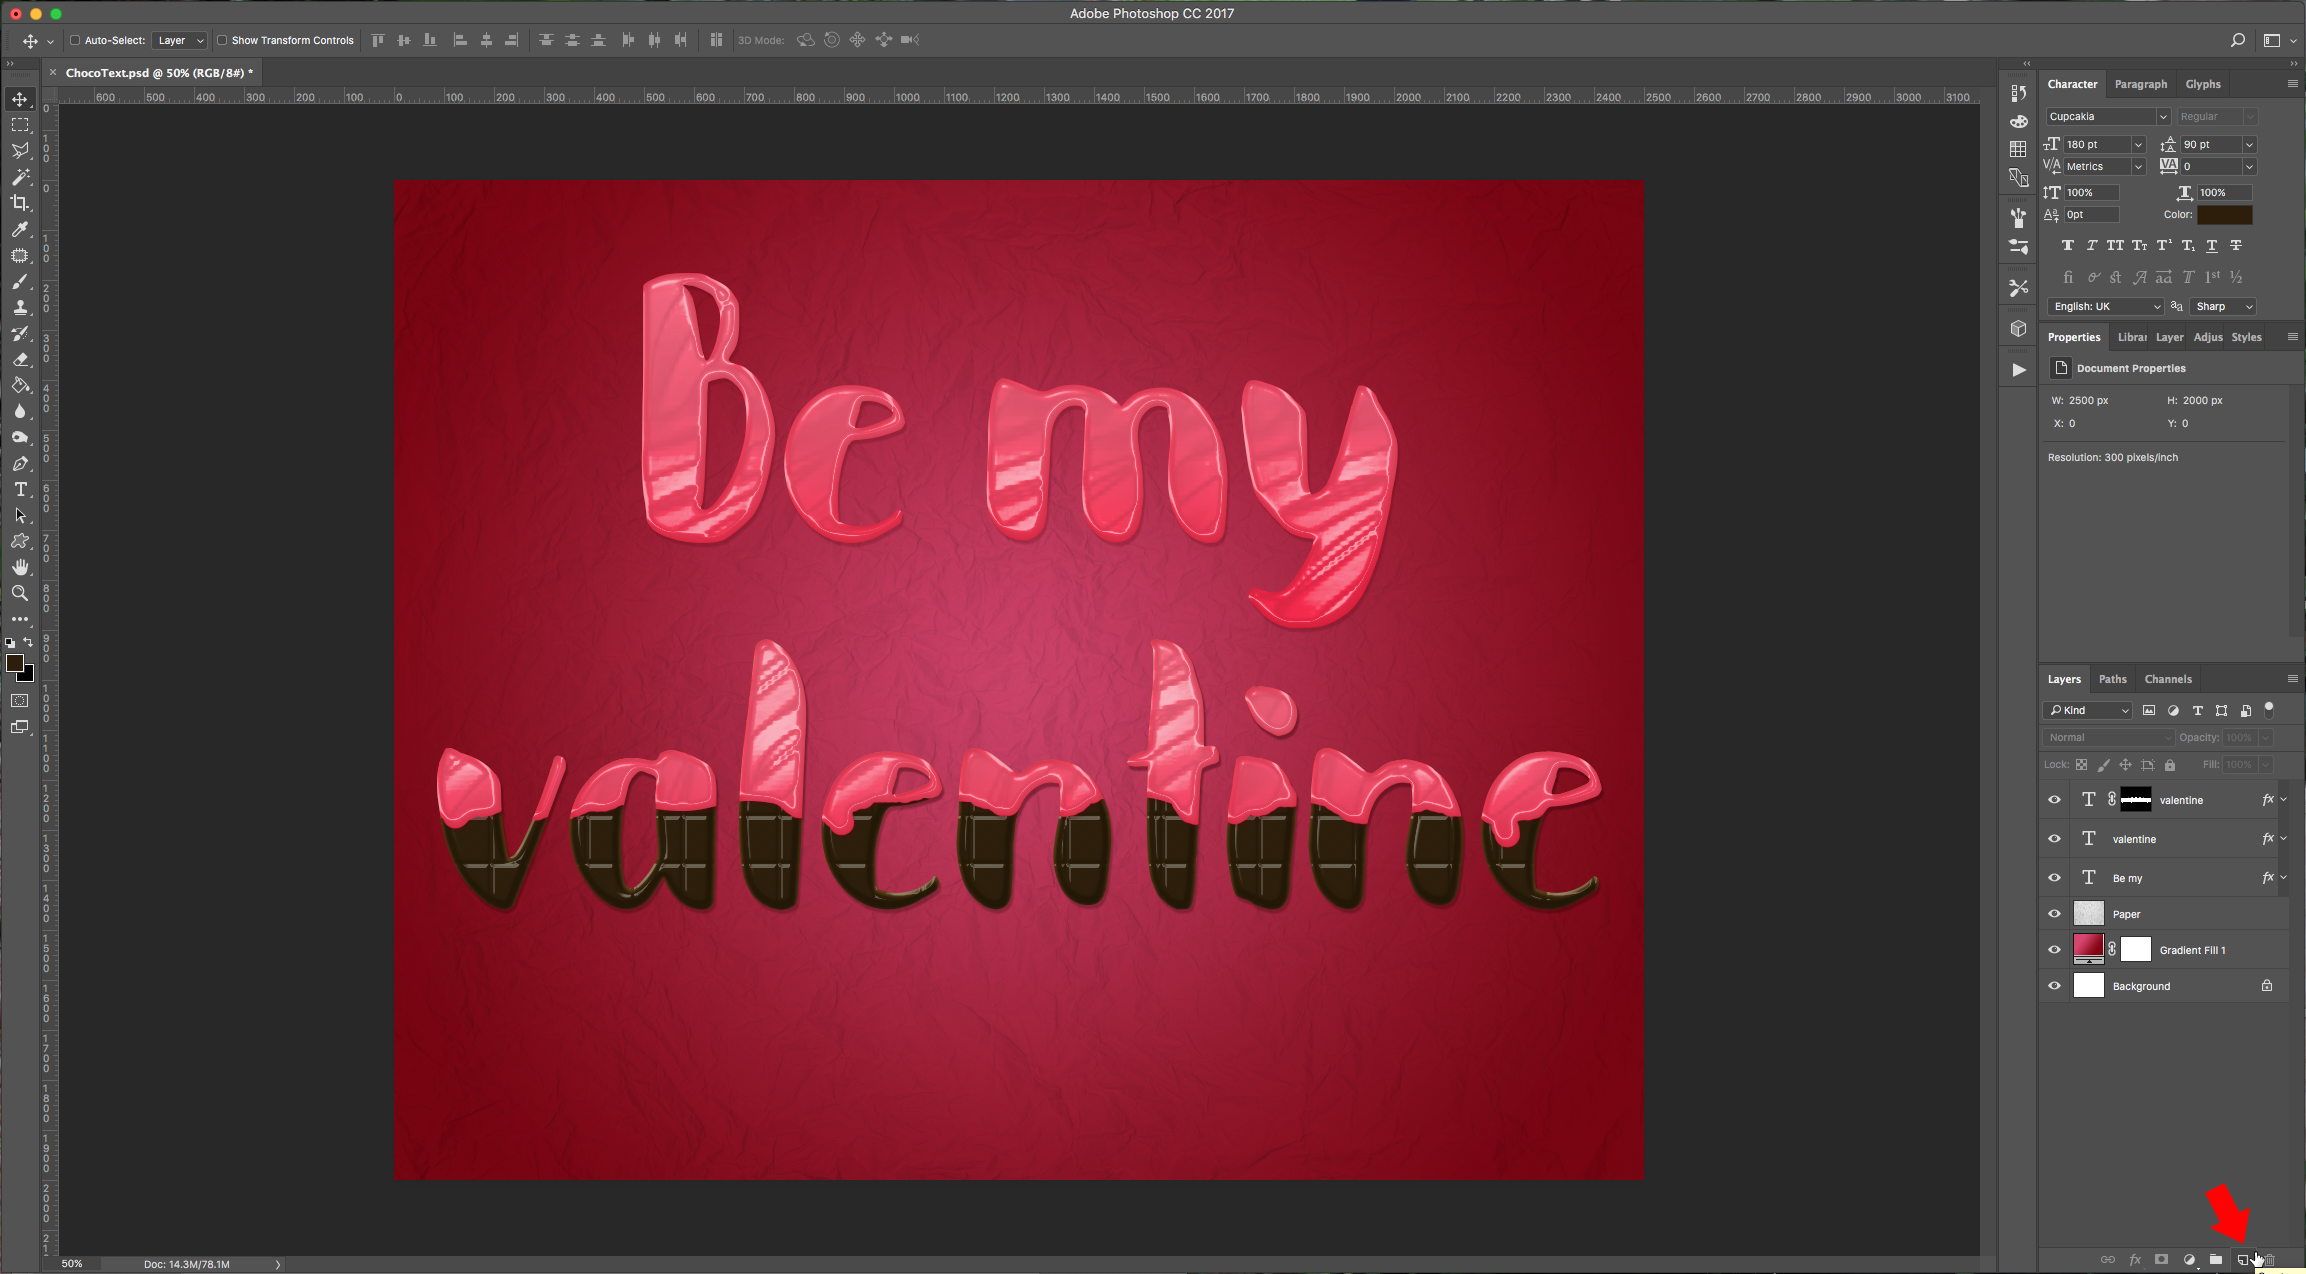
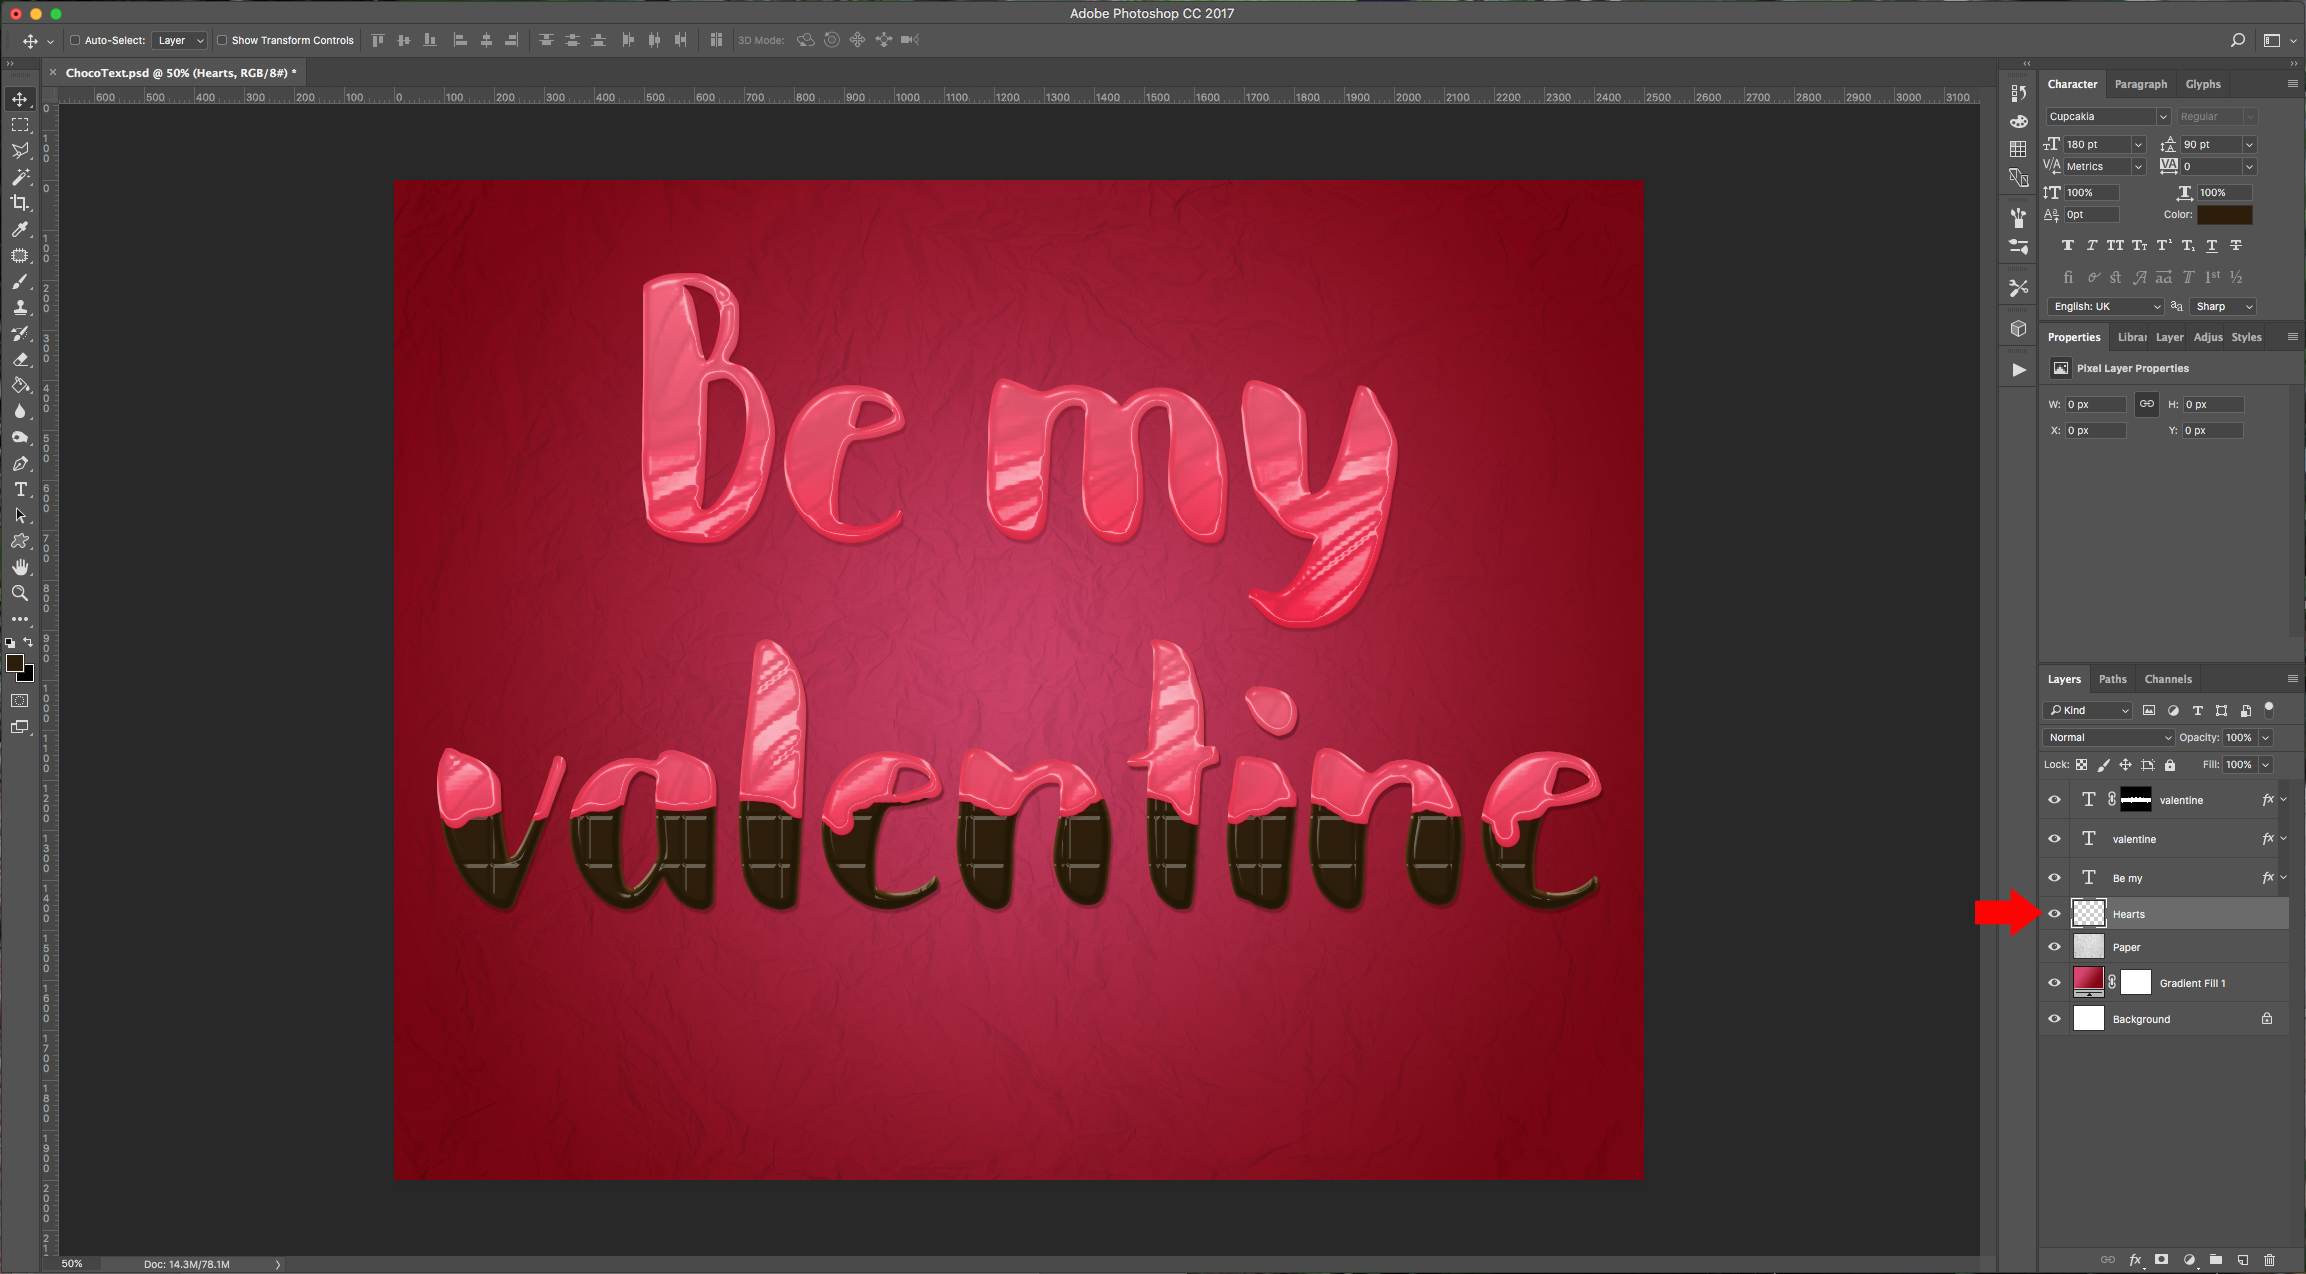
Blending Options:
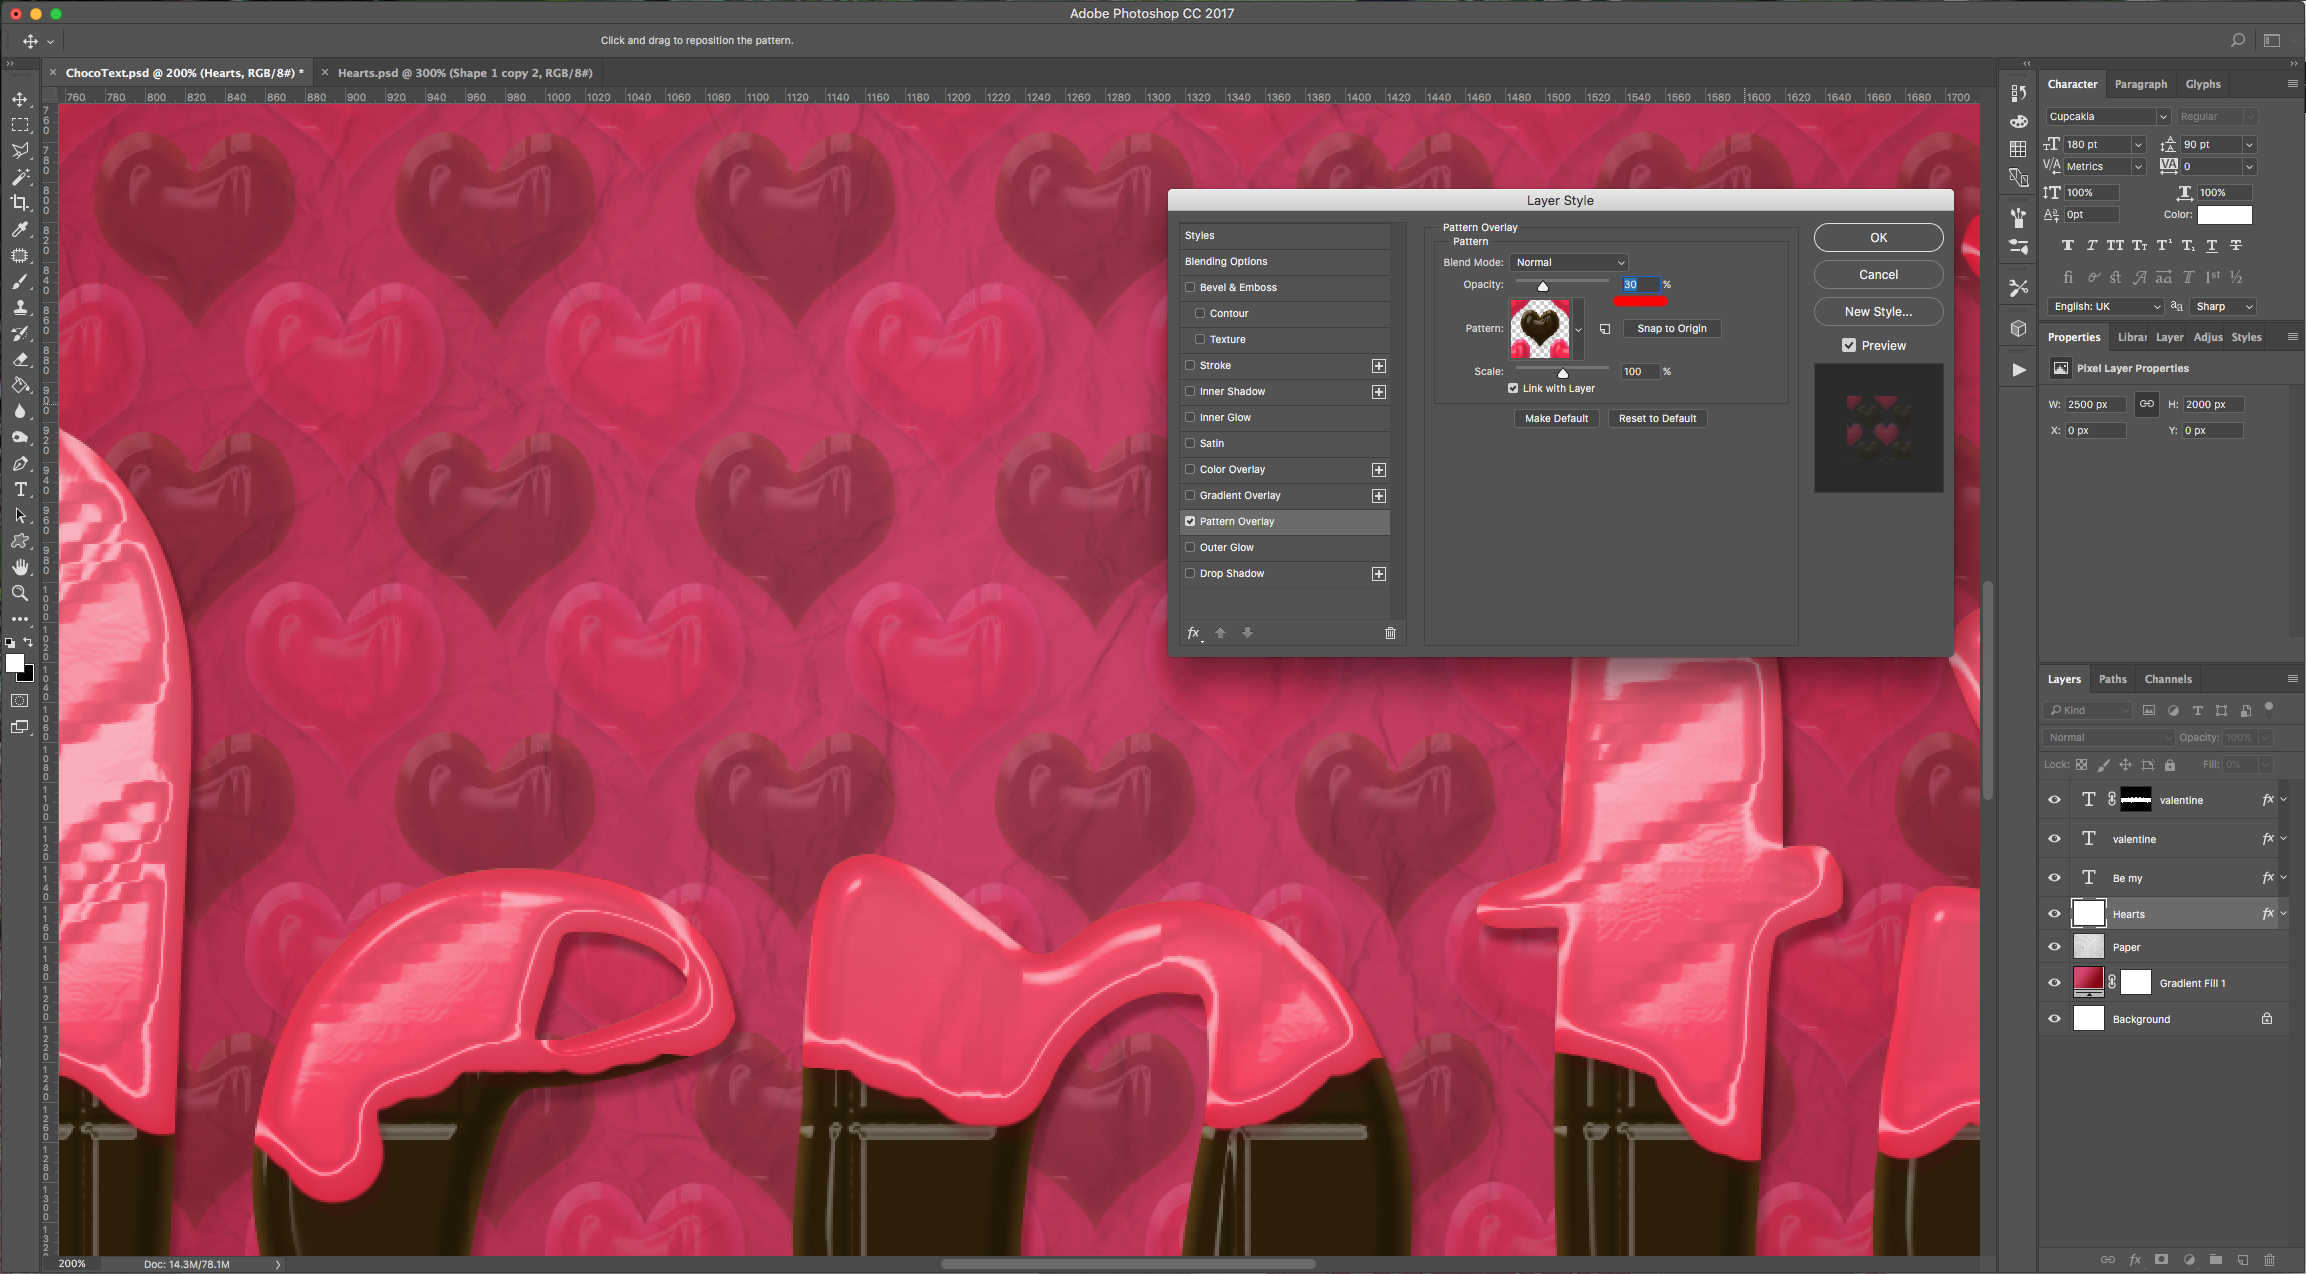
Pattern Overlay:
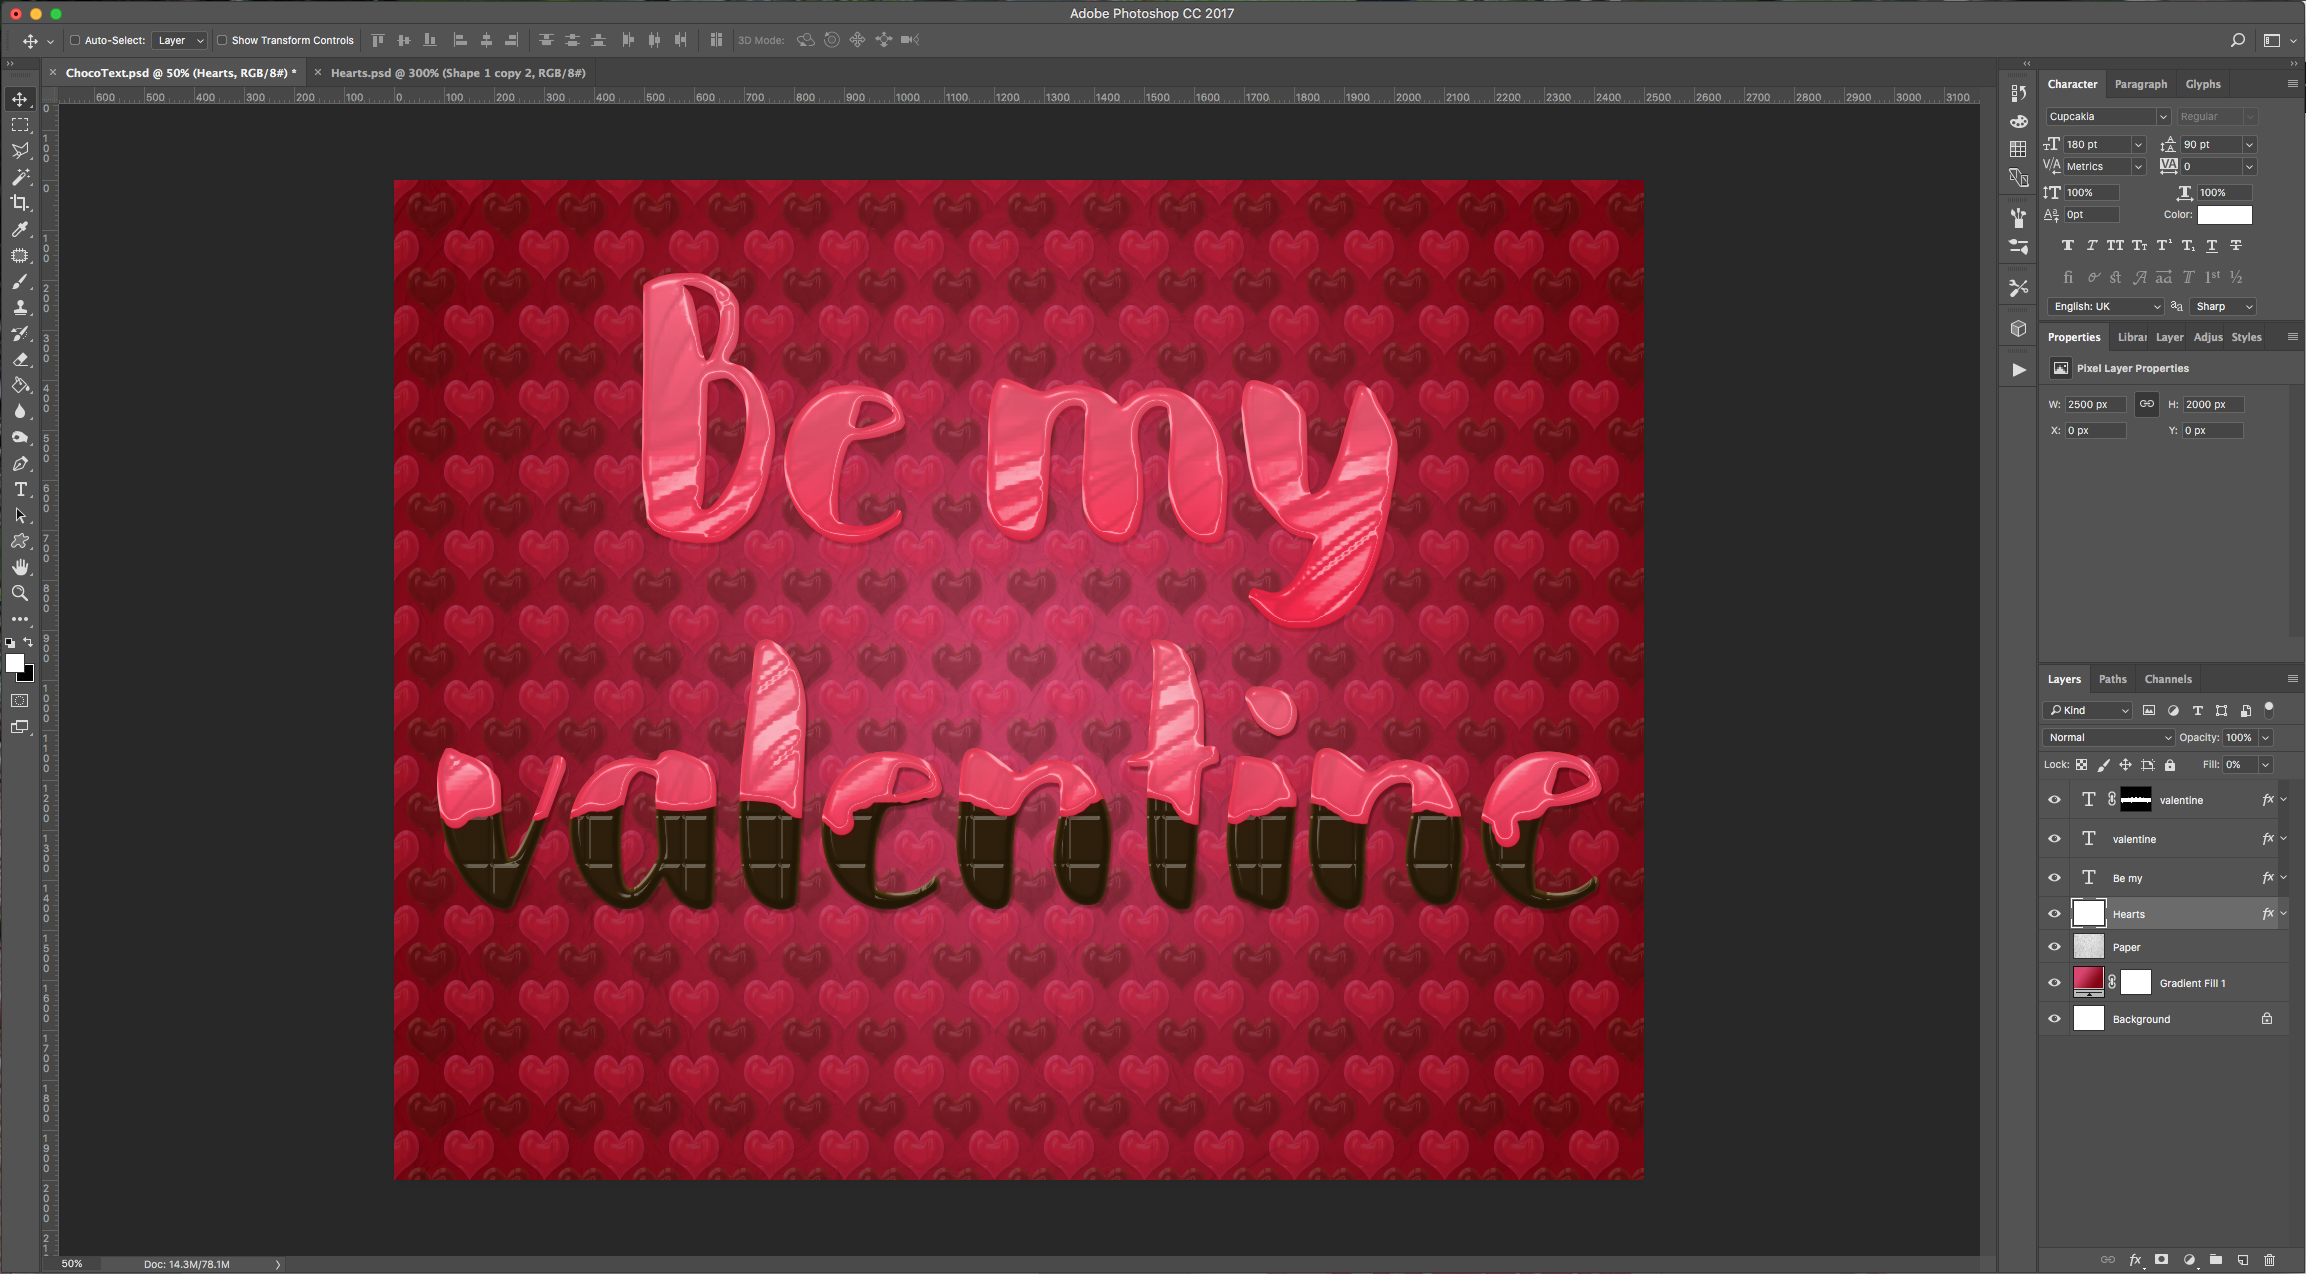
14 - Your Artwork should look like this:
1 - Create a “New Document” in Photoshop. We made ours 2500 x 2000 Pixels, 300 Dpi.
2 - Click on the “Create New Fill or Adjustment Layer” button at the bottom of the “Layers” Panel and create a new “Gradient Fill” Layer. Make it “Radial” with a 45° Angle. We used the colors #d9446e and #85020e.
3 - Open the image you chose to use as Background Texture, drag it (or Paste it) into your document and resize it if needed using the “Free Transform” Tool” (Command/Control + T). Once you are happy, click “Enter”, then change the “Blending Mode” to “Multiply” and the “Opacity” to 50%.
4 - Select the “Type Tool” (T), choose your font (we used Cupcakia) and type your text use #2c1e08 as “Fill” color.
5 - Double-click on your text layer and apply the following “Layer Styles”:
Bevel & Emboss: (Gloss Contour: Ring)
Contour: (Contour: Half Round)
Texture: (Pattern: Zebra 64 x 64 Pixels, Grayscale Mode)
Inner Shadow: (#f82548)
Inner Glow: (#f82548)
Gradient Overlay: (#f82548, #f85772 and #f4637b)
Drop Shadow: (#560613)
We added more text to this layer and reduced the size to 180 Pixels.
6 - Type a second line of text creating another layer (keep the Font, Fill Color and Size from the previous one) and apply the following “Layer Styles” to this one:
Bevel & Emboss: (Gloss Contour: Rounded Steps)
Contour: (Contour: Gaussian)
Texture: (Tiles-Smooth: Zebra 128 x 128 Pixels, Grayscale Mode)
Inner Shadow: (#ffffff)
Drop Shadow: (#231103)
7 - Duplicate your text layer (Command/Control + J) and delete all the “Layer Styles” (just drag them to the little “Trash Can” icon at the bottom of the “Layers” Panel.
8 - Change the “Fill” color to #f85772. Select the “Rectangular Marquee Tool” (M) and draw a rectangle covering the top part of your text, then click on the “Add Layer Mask” button at the bottom of the “Layers” Panel to mask your text.
9 - Making sure the “Mask” is selected (there should be a white box around the mask thumbnail), go to Filter > Distort > ZigZag and use an “Amount” of 25 and 5 “Ridges”. Use “Pond Ripples” as “Style”.
10 - Right-click on your first text layer (Be my) and “Copy Layer Style”, the right-click on your masked text layer and “Paste Layer Style”.
11 - You can add some drips to your layer by selecting the “Brush Tool” (B), choose a medium sized brush (about 50 Pixels), make sure the “Hardness” is set to 100%, that you “Foreground” color is black and that your “Mask” is selected and paint some drops.
12 - To add a “Pattern” to your “Background”, create a “New Document”, make it 150 x 150 Pixels with a “Transparent” Background. Select the “Custom Shape Tool” (U) and choose the “Heart” shape. Use the “Path Selection Tool” (A) to select your shape and make it 100 x 100 Pixels in size and place it in the center of your document. Duplicate your shape 4 times and place one duplicate in each corner making sure the center of the shape is positioned on the corner (you will see just a quarter of your shape and the rest should be outside of the canvas). Double-click on the “Shape” thumbnail to change the “Fill” color to #2c1e08, then “Copy” your second Text (the one that looks like chocolate) “Layer Style” and “Paste” it in your “Heart” Shape. Do the same with the corner shapes but use #f82548 as “Fill” color. Select everything (Command/Control + A) and go to Edit > Define Pattern, mane your Pattern ad click “OK”.
13 - Back in your Artwork, create a “New Layer” by clicking on the small button at the bottom of the “Layers” Panel, place it on top of the “Paper” Layer. Fill it with 100% White and double-click on its thumbnail to apply the following “Layer Styles”:
Blending Options:
Pattern Overlay:
14 - Your Artwork should look like this:
by @lornacane


