Chocolate Text with Waffle Background in Illustrator
For this Tutorial, we will use the Free Font Zesty Orange from Fontbundles.net (https://fontbundles.net/free-font-of-the-week-zesty-orange).
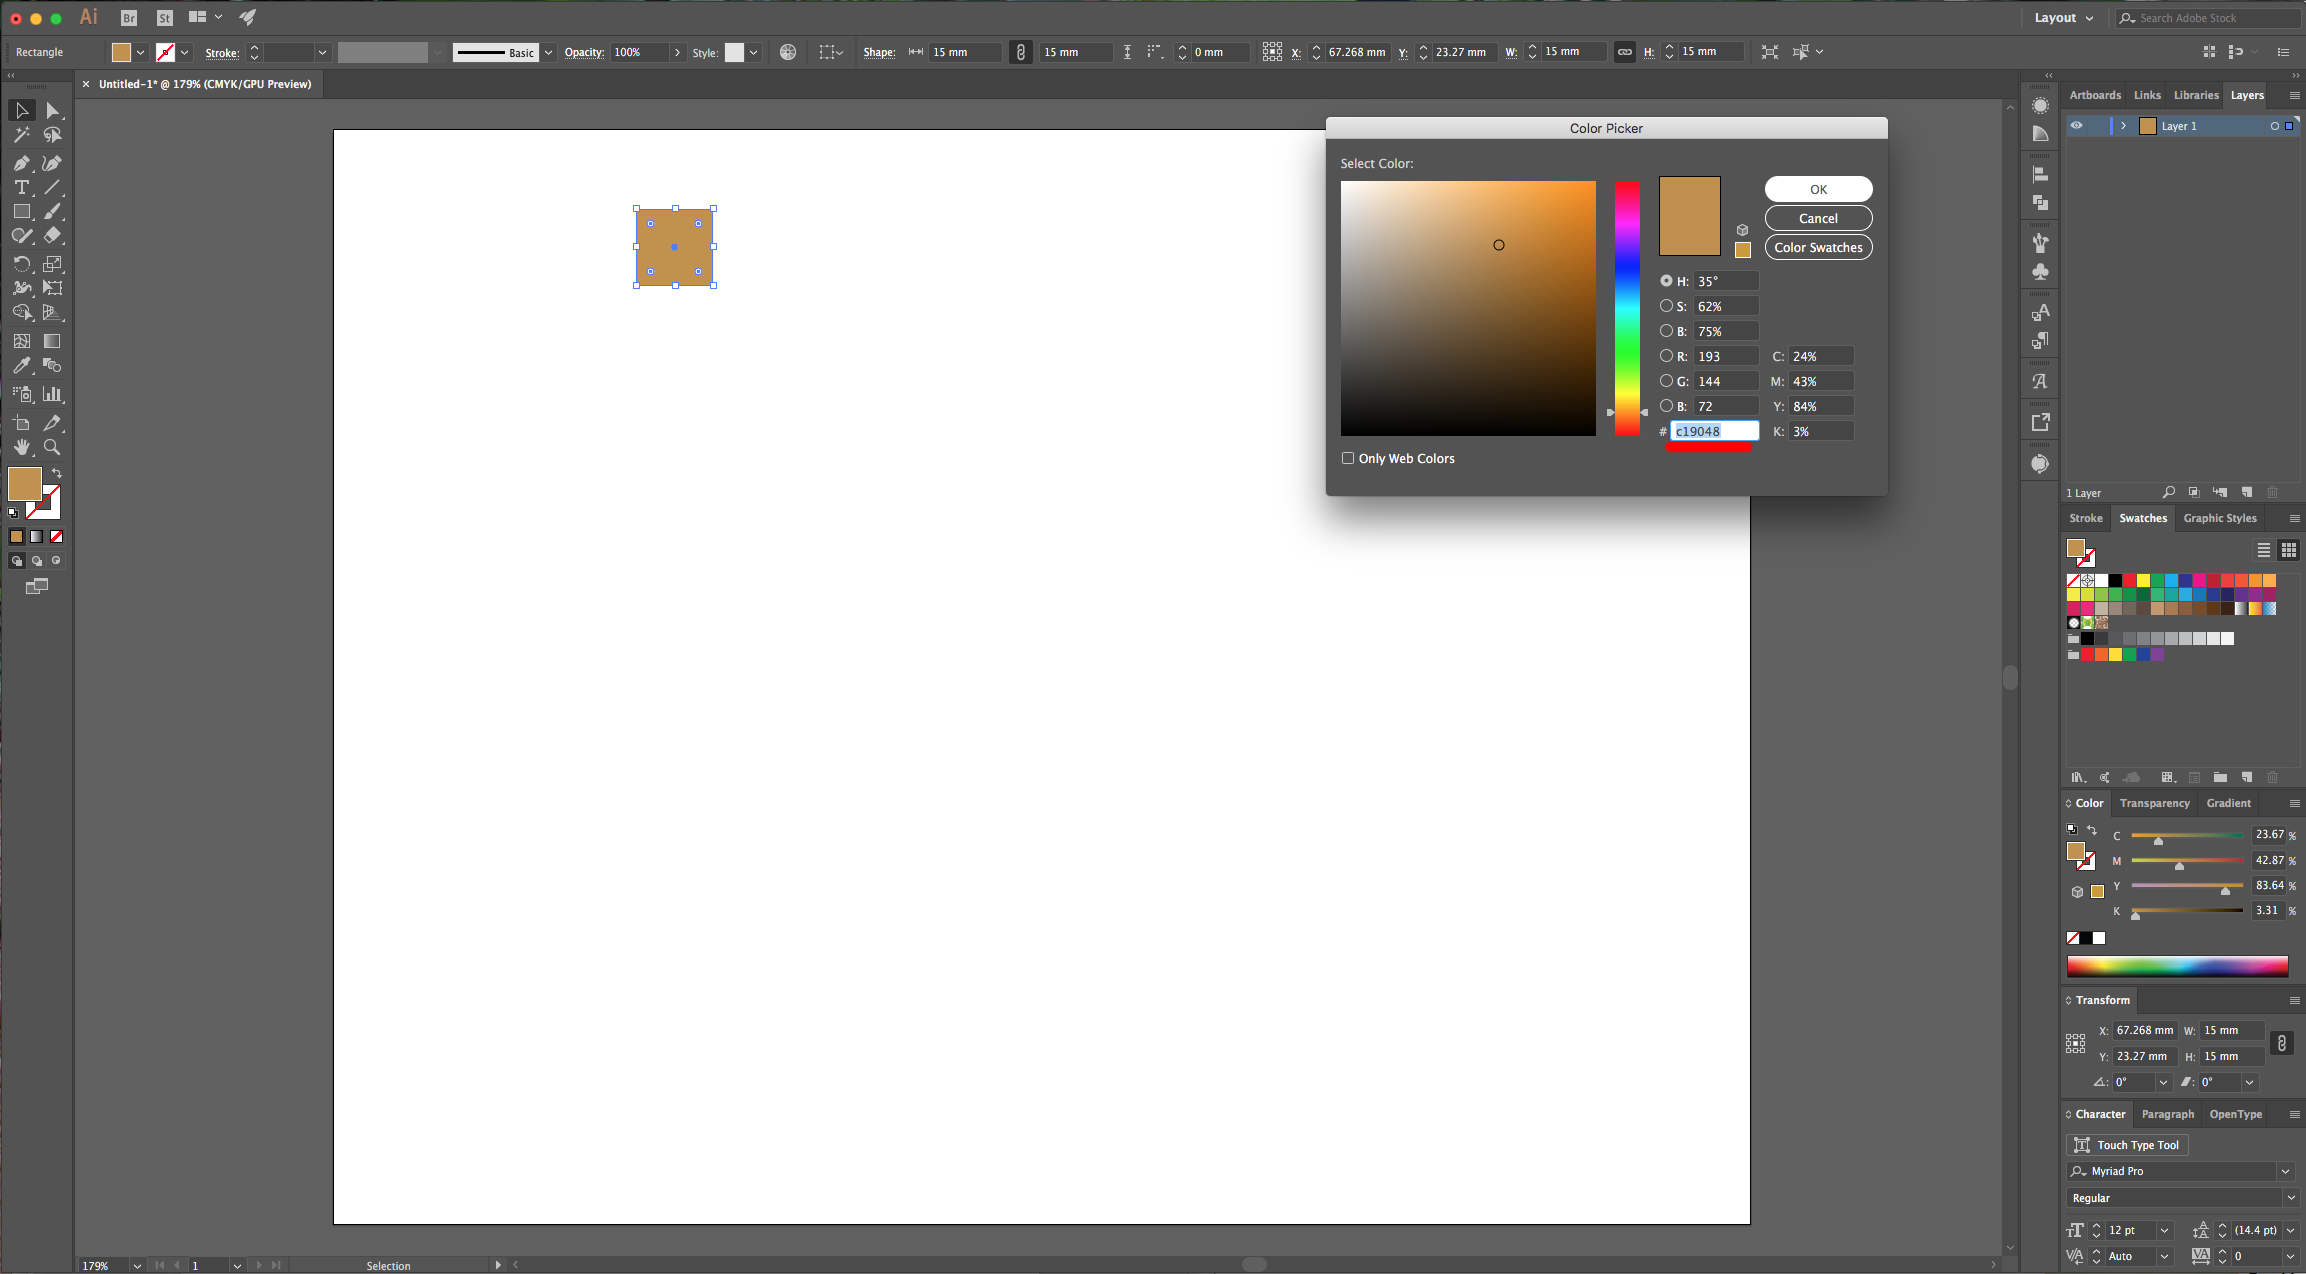
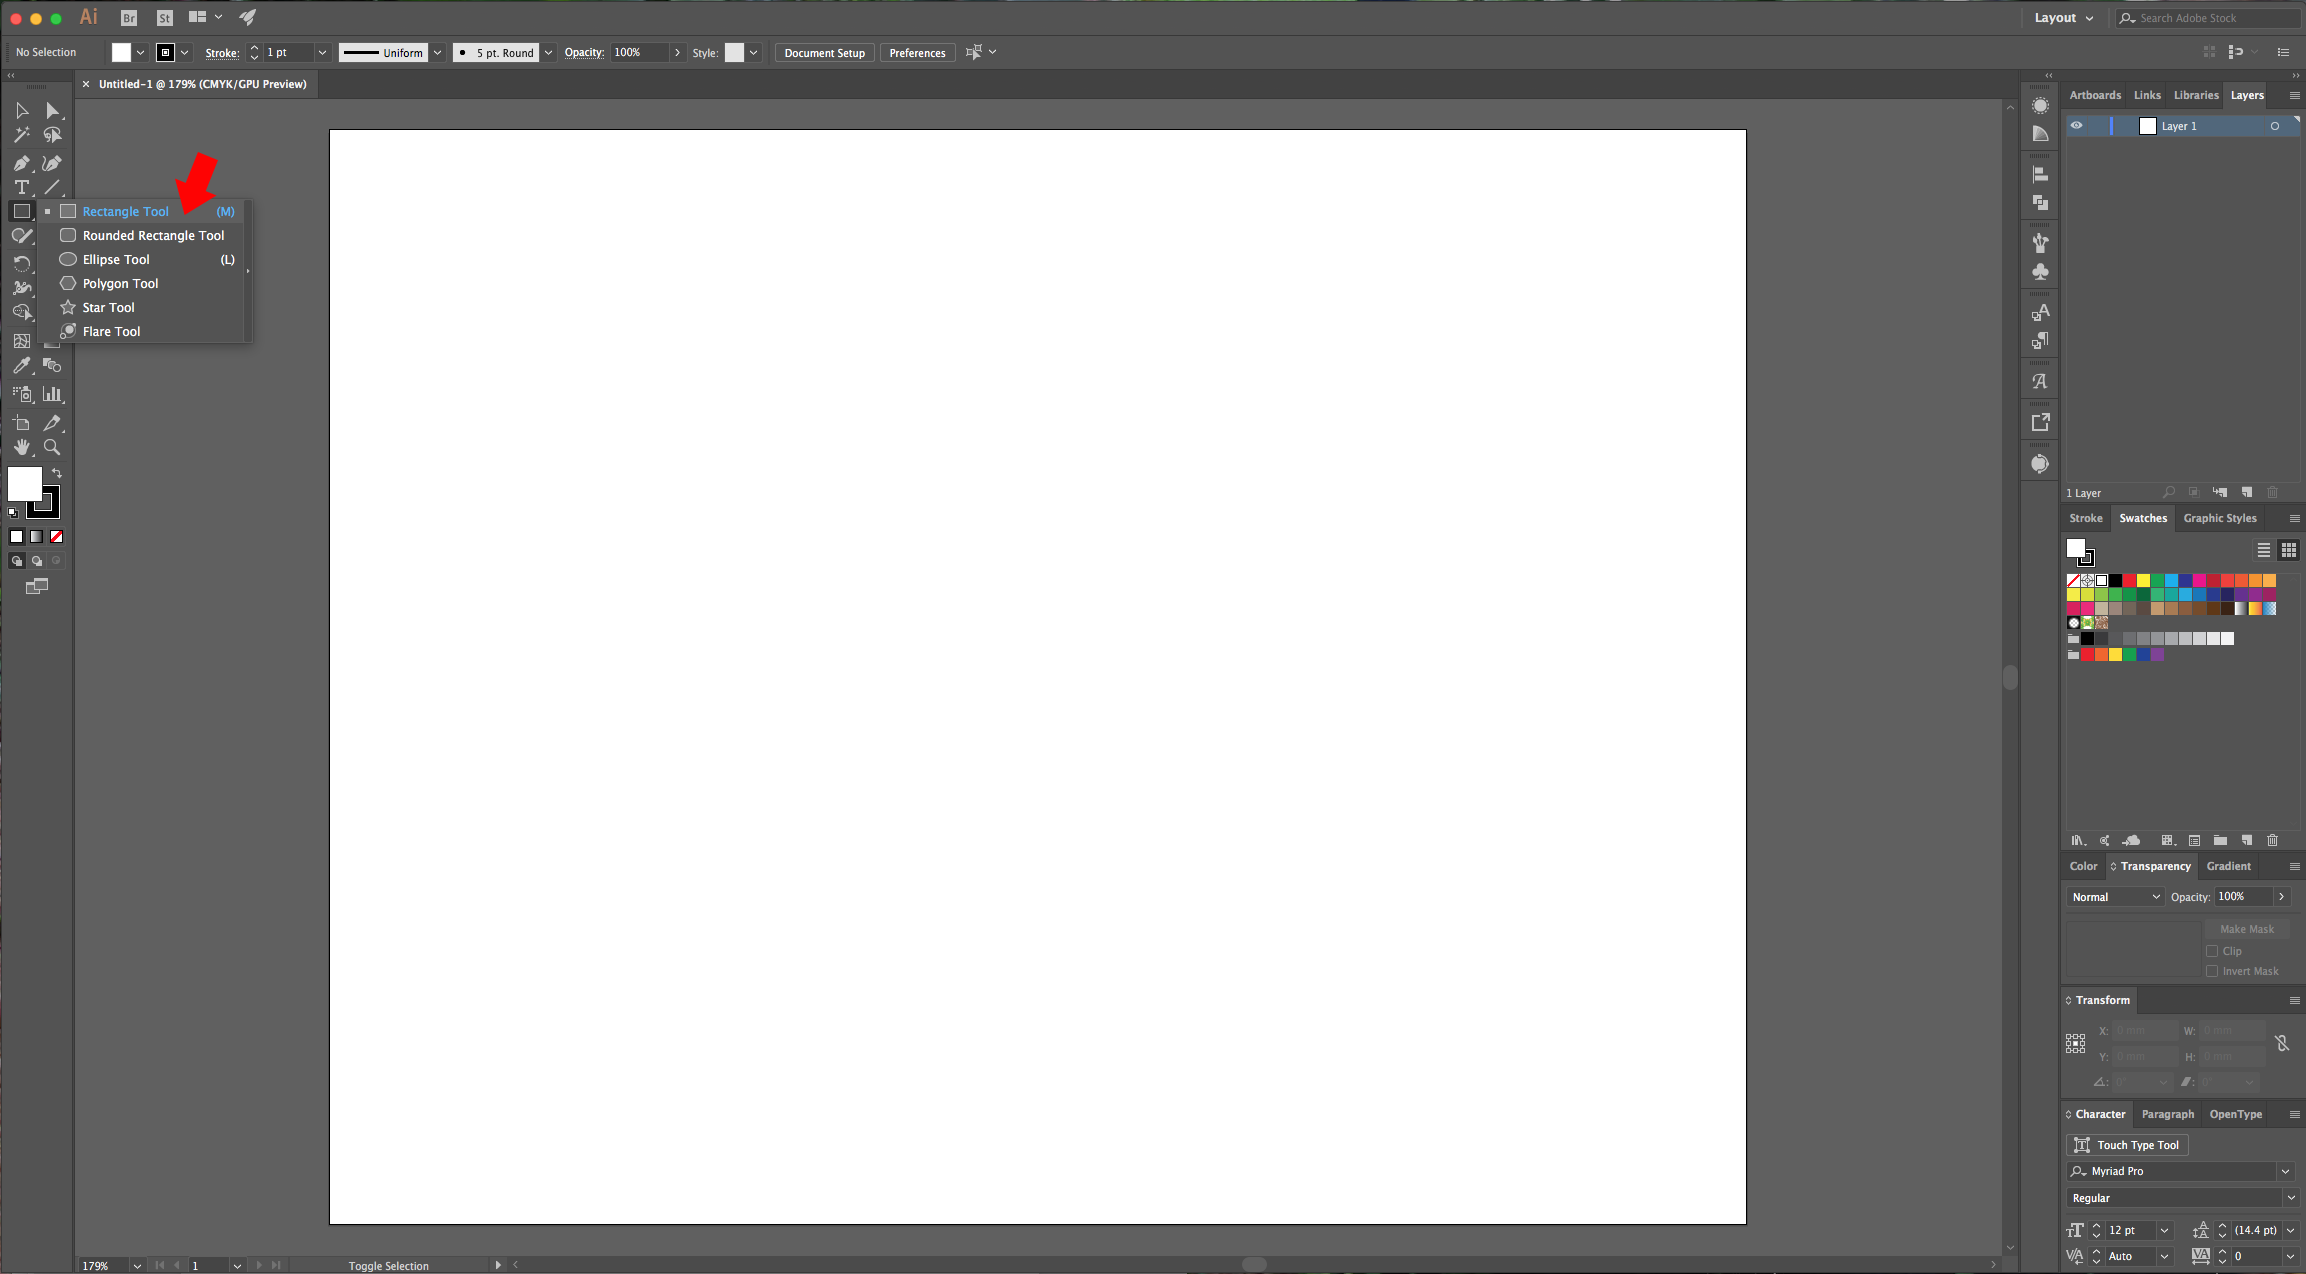
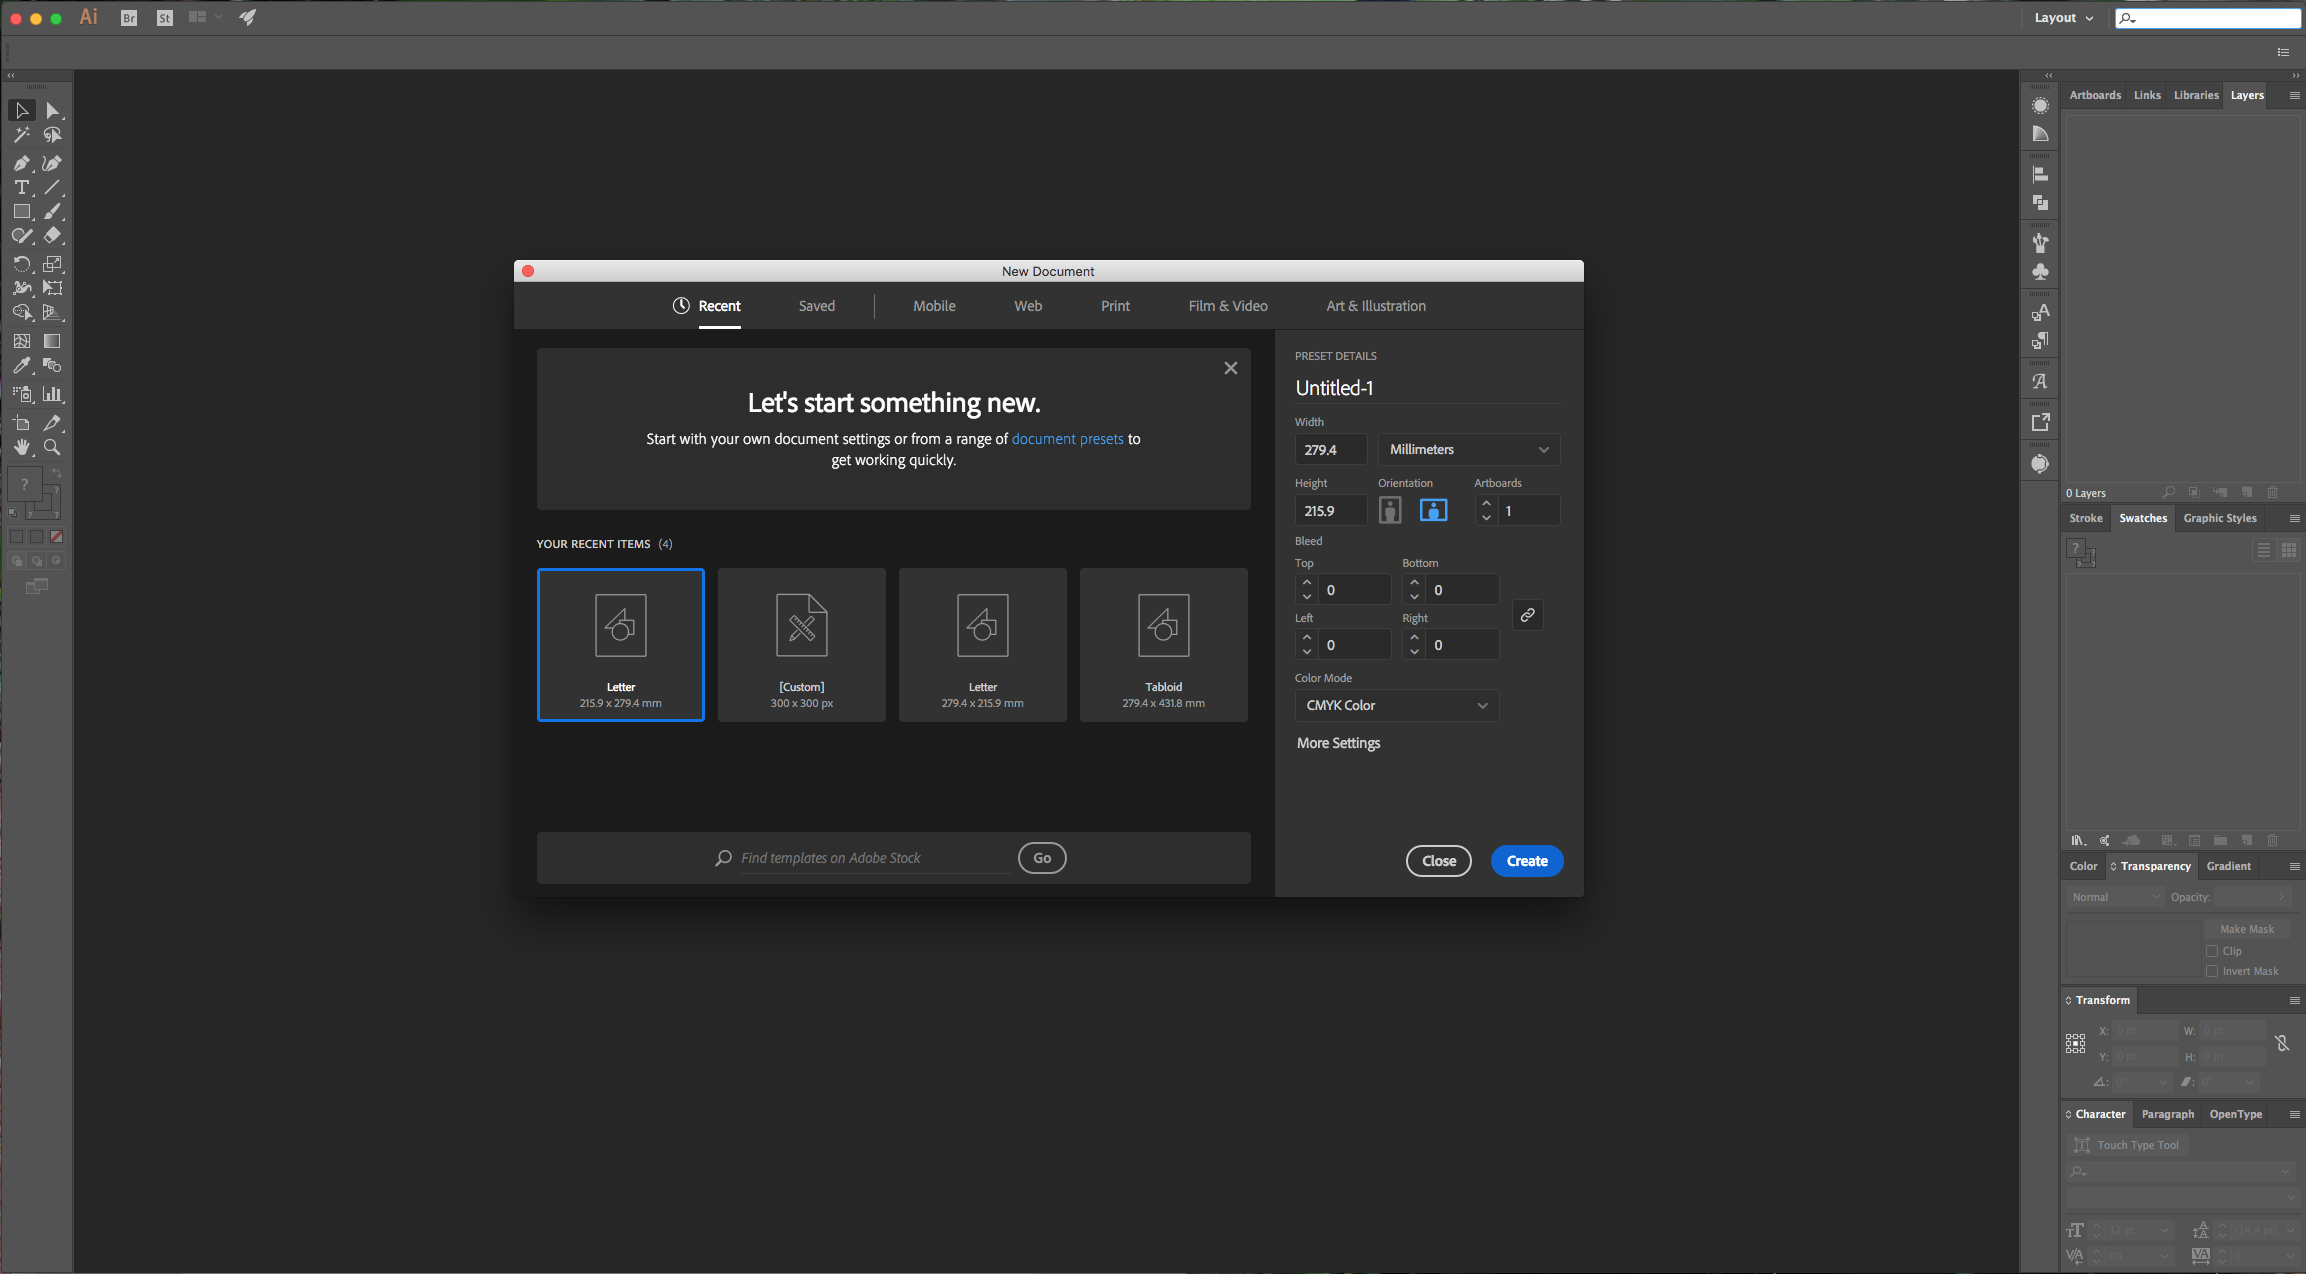
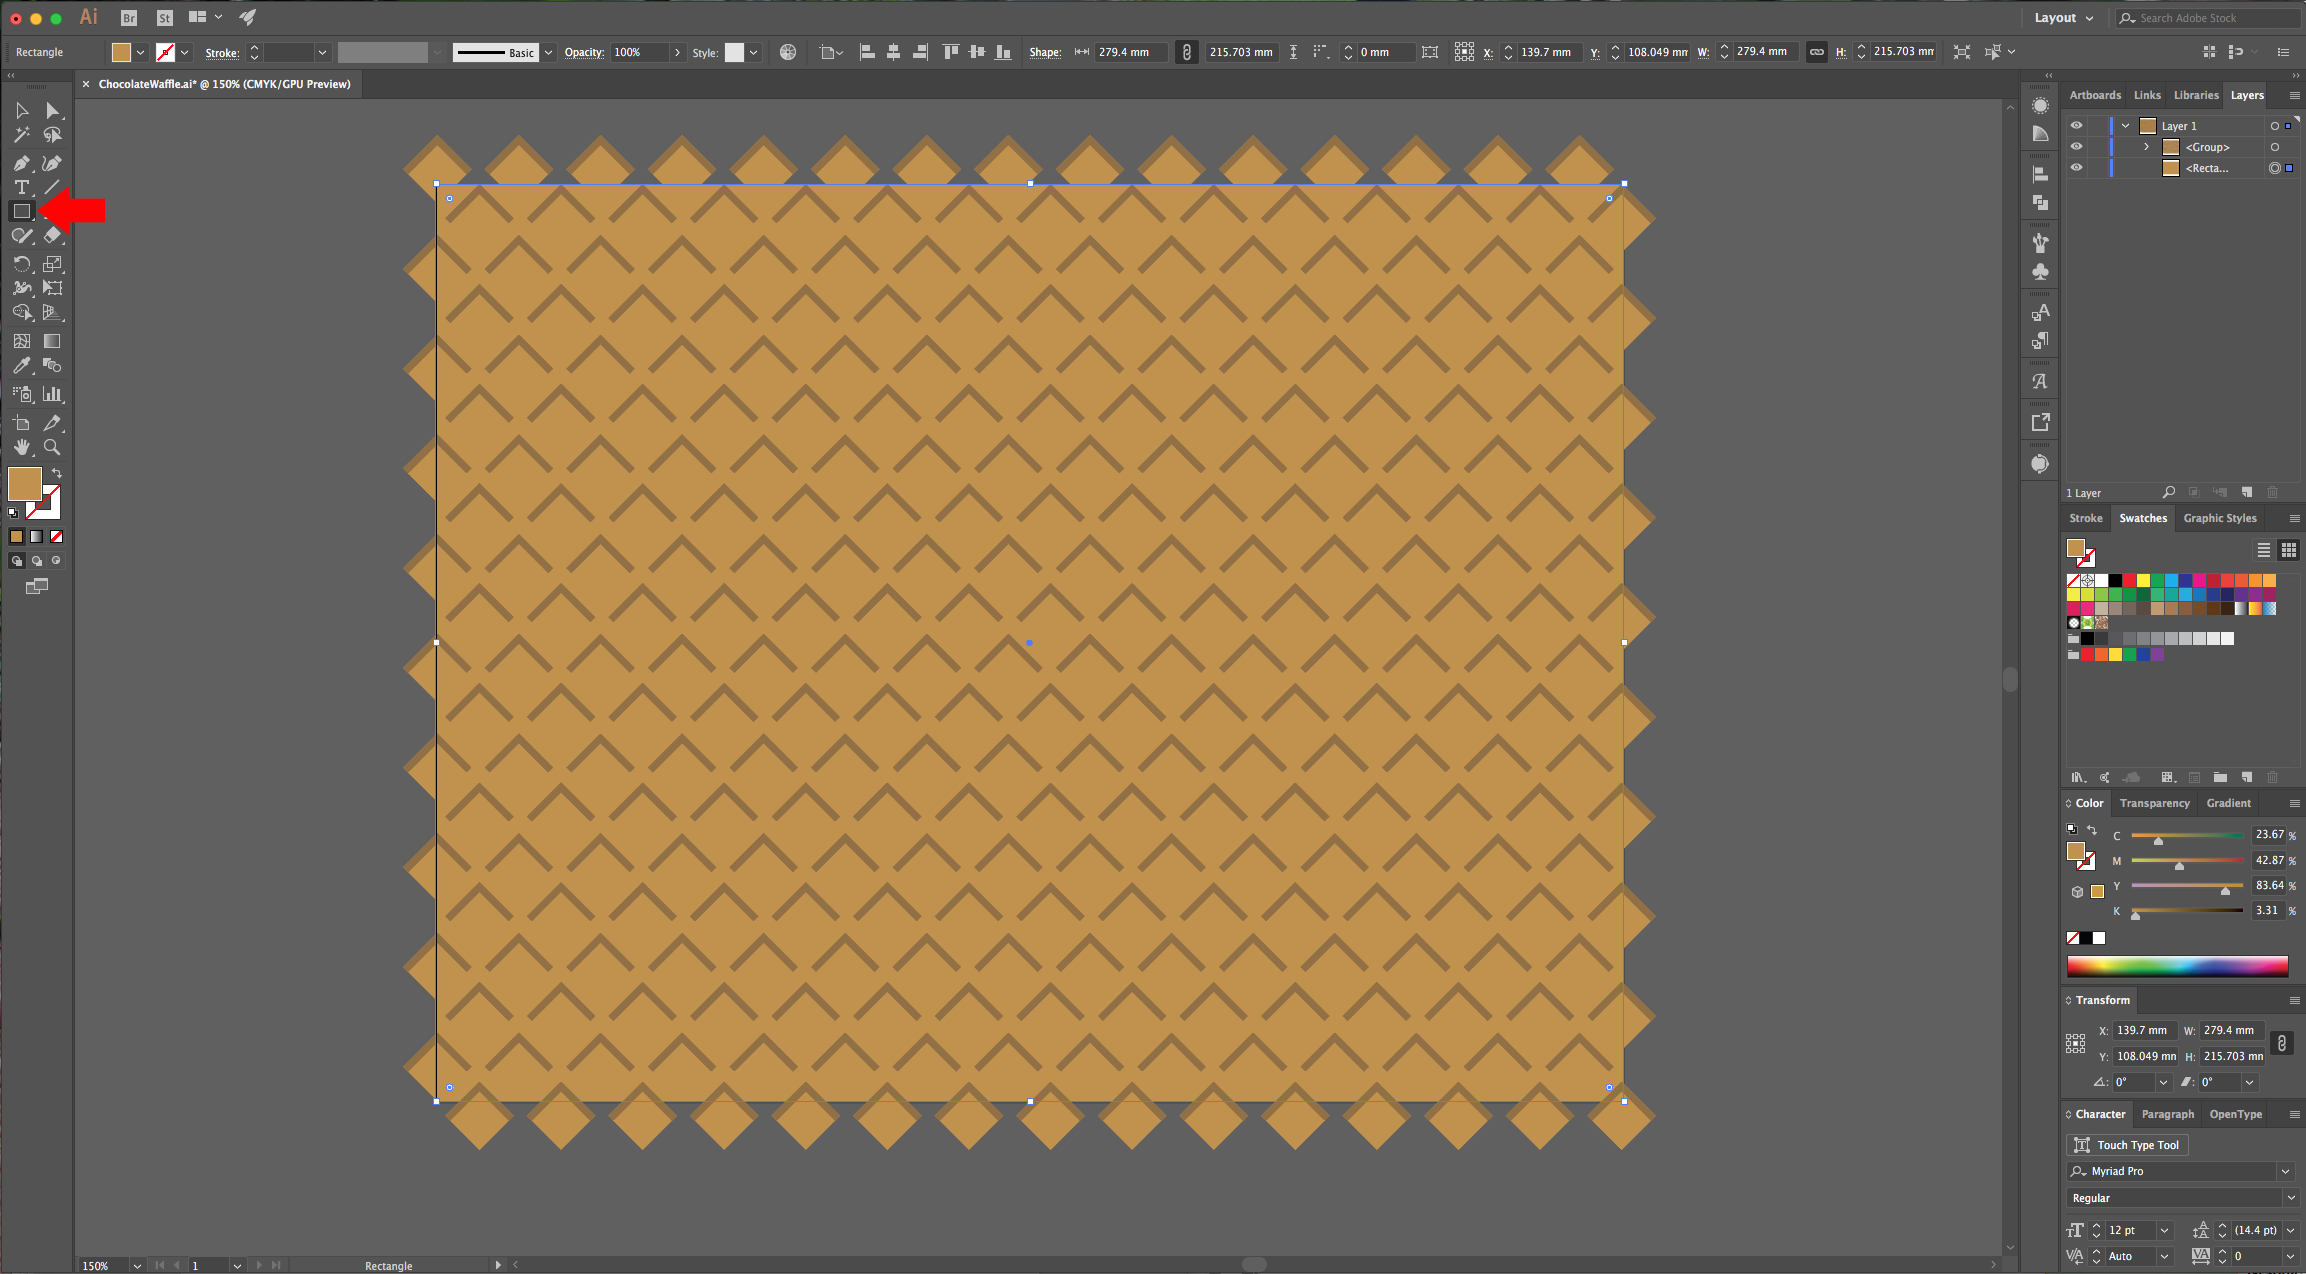
1 - First, create a “New Document”. Select the “Rectangle Tool” (M) and while holding the “Shift” key drag from top-left to bottom-right to drag a square. Make it 15 x 15 mm and fill it with a medium brown/orange color (we used #c19048).
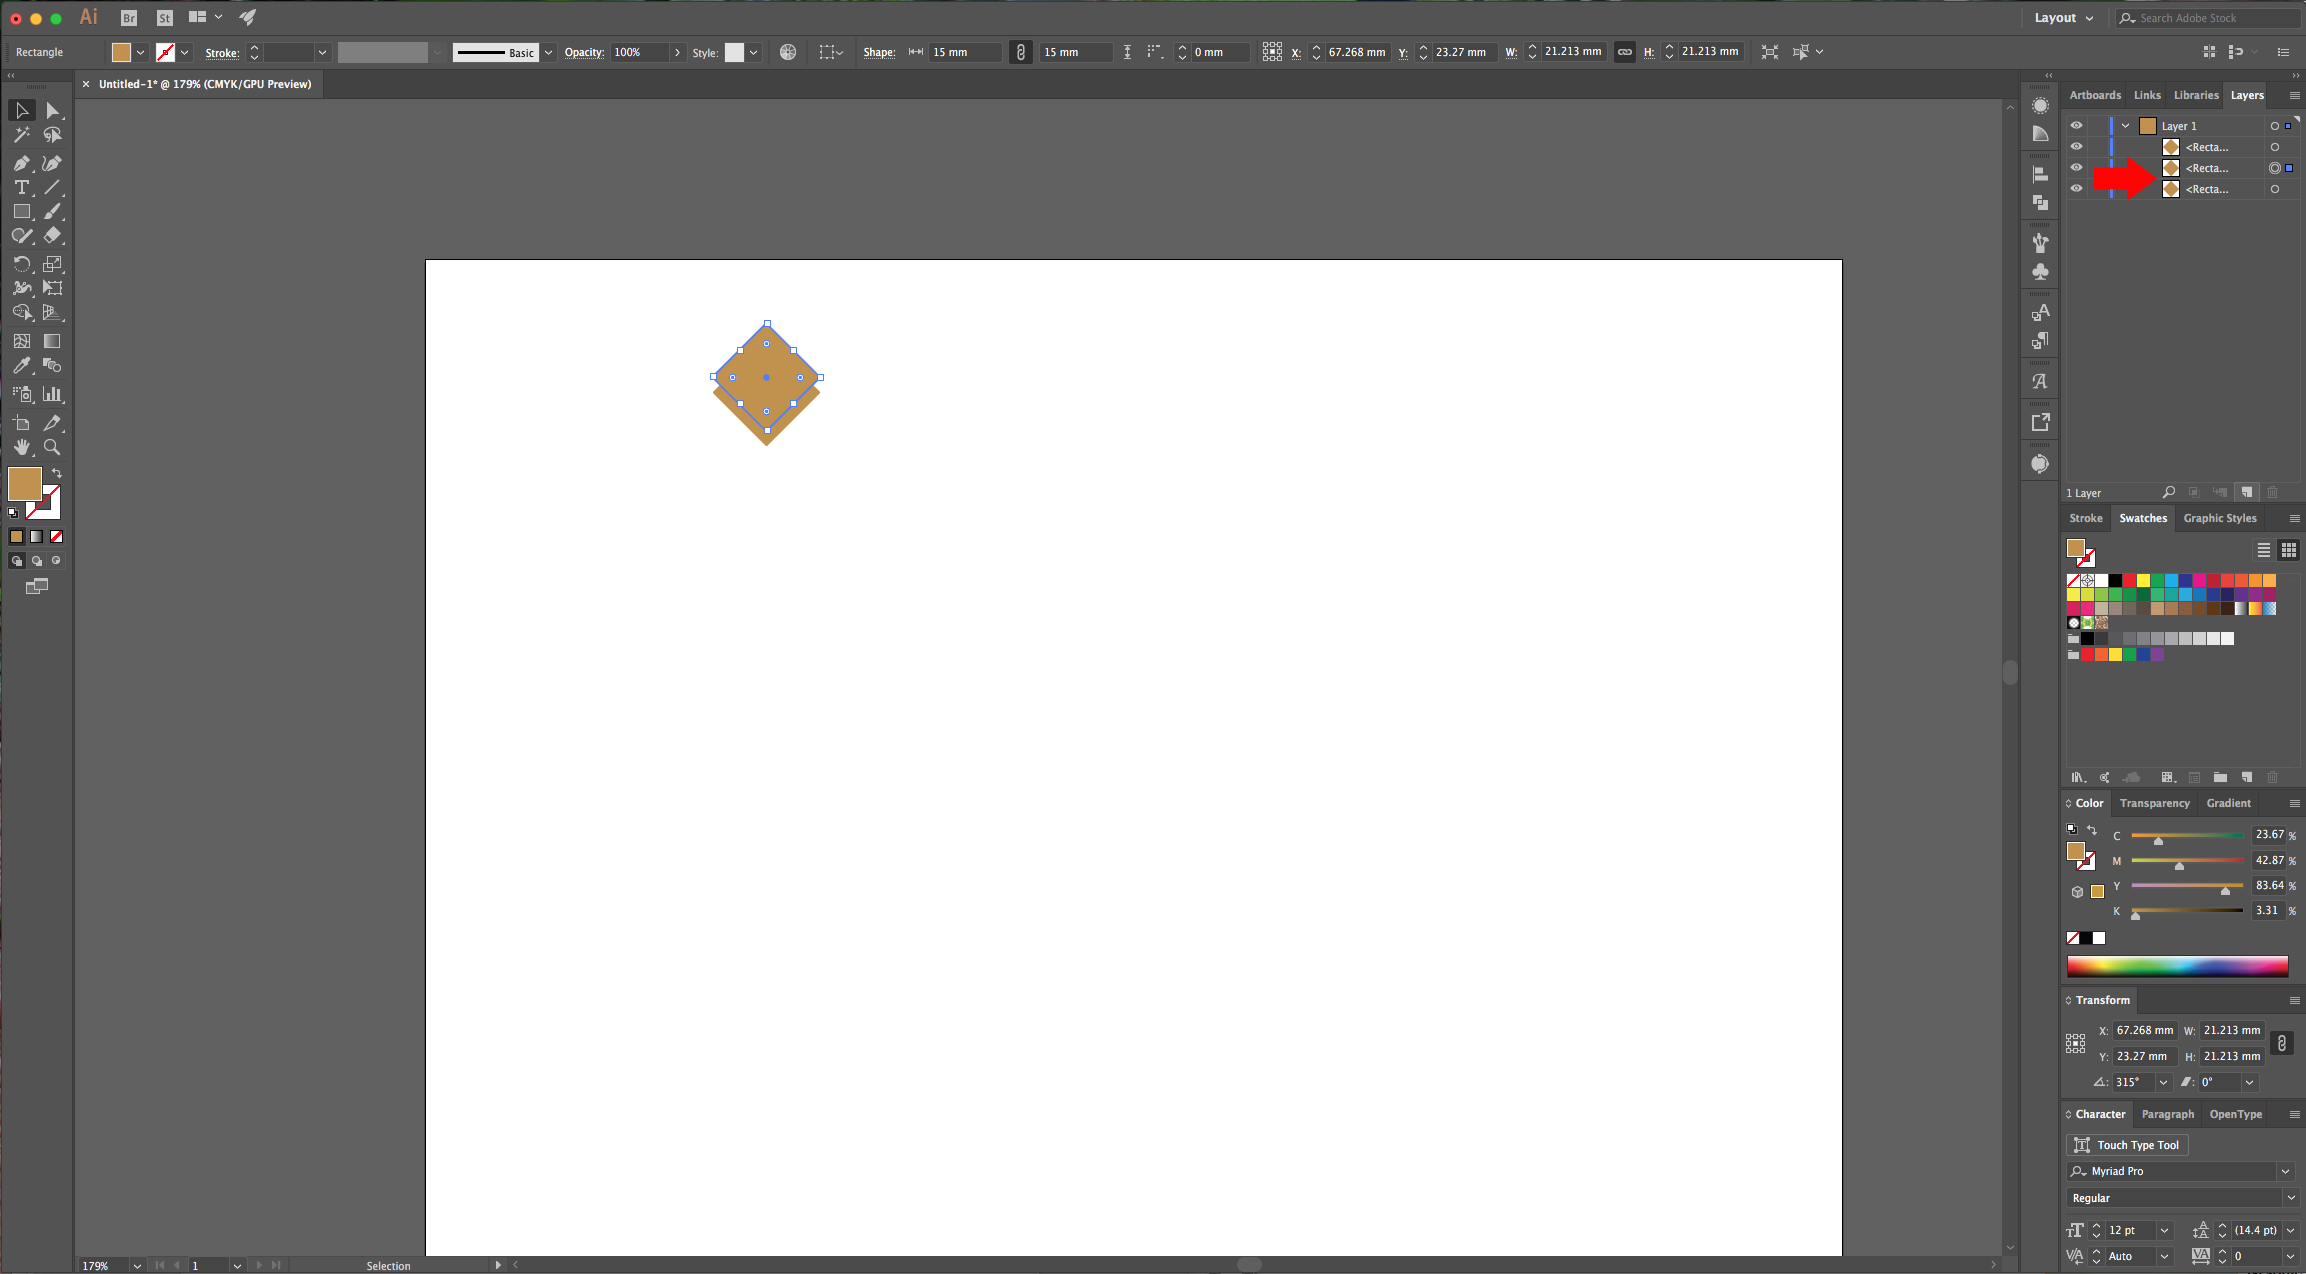
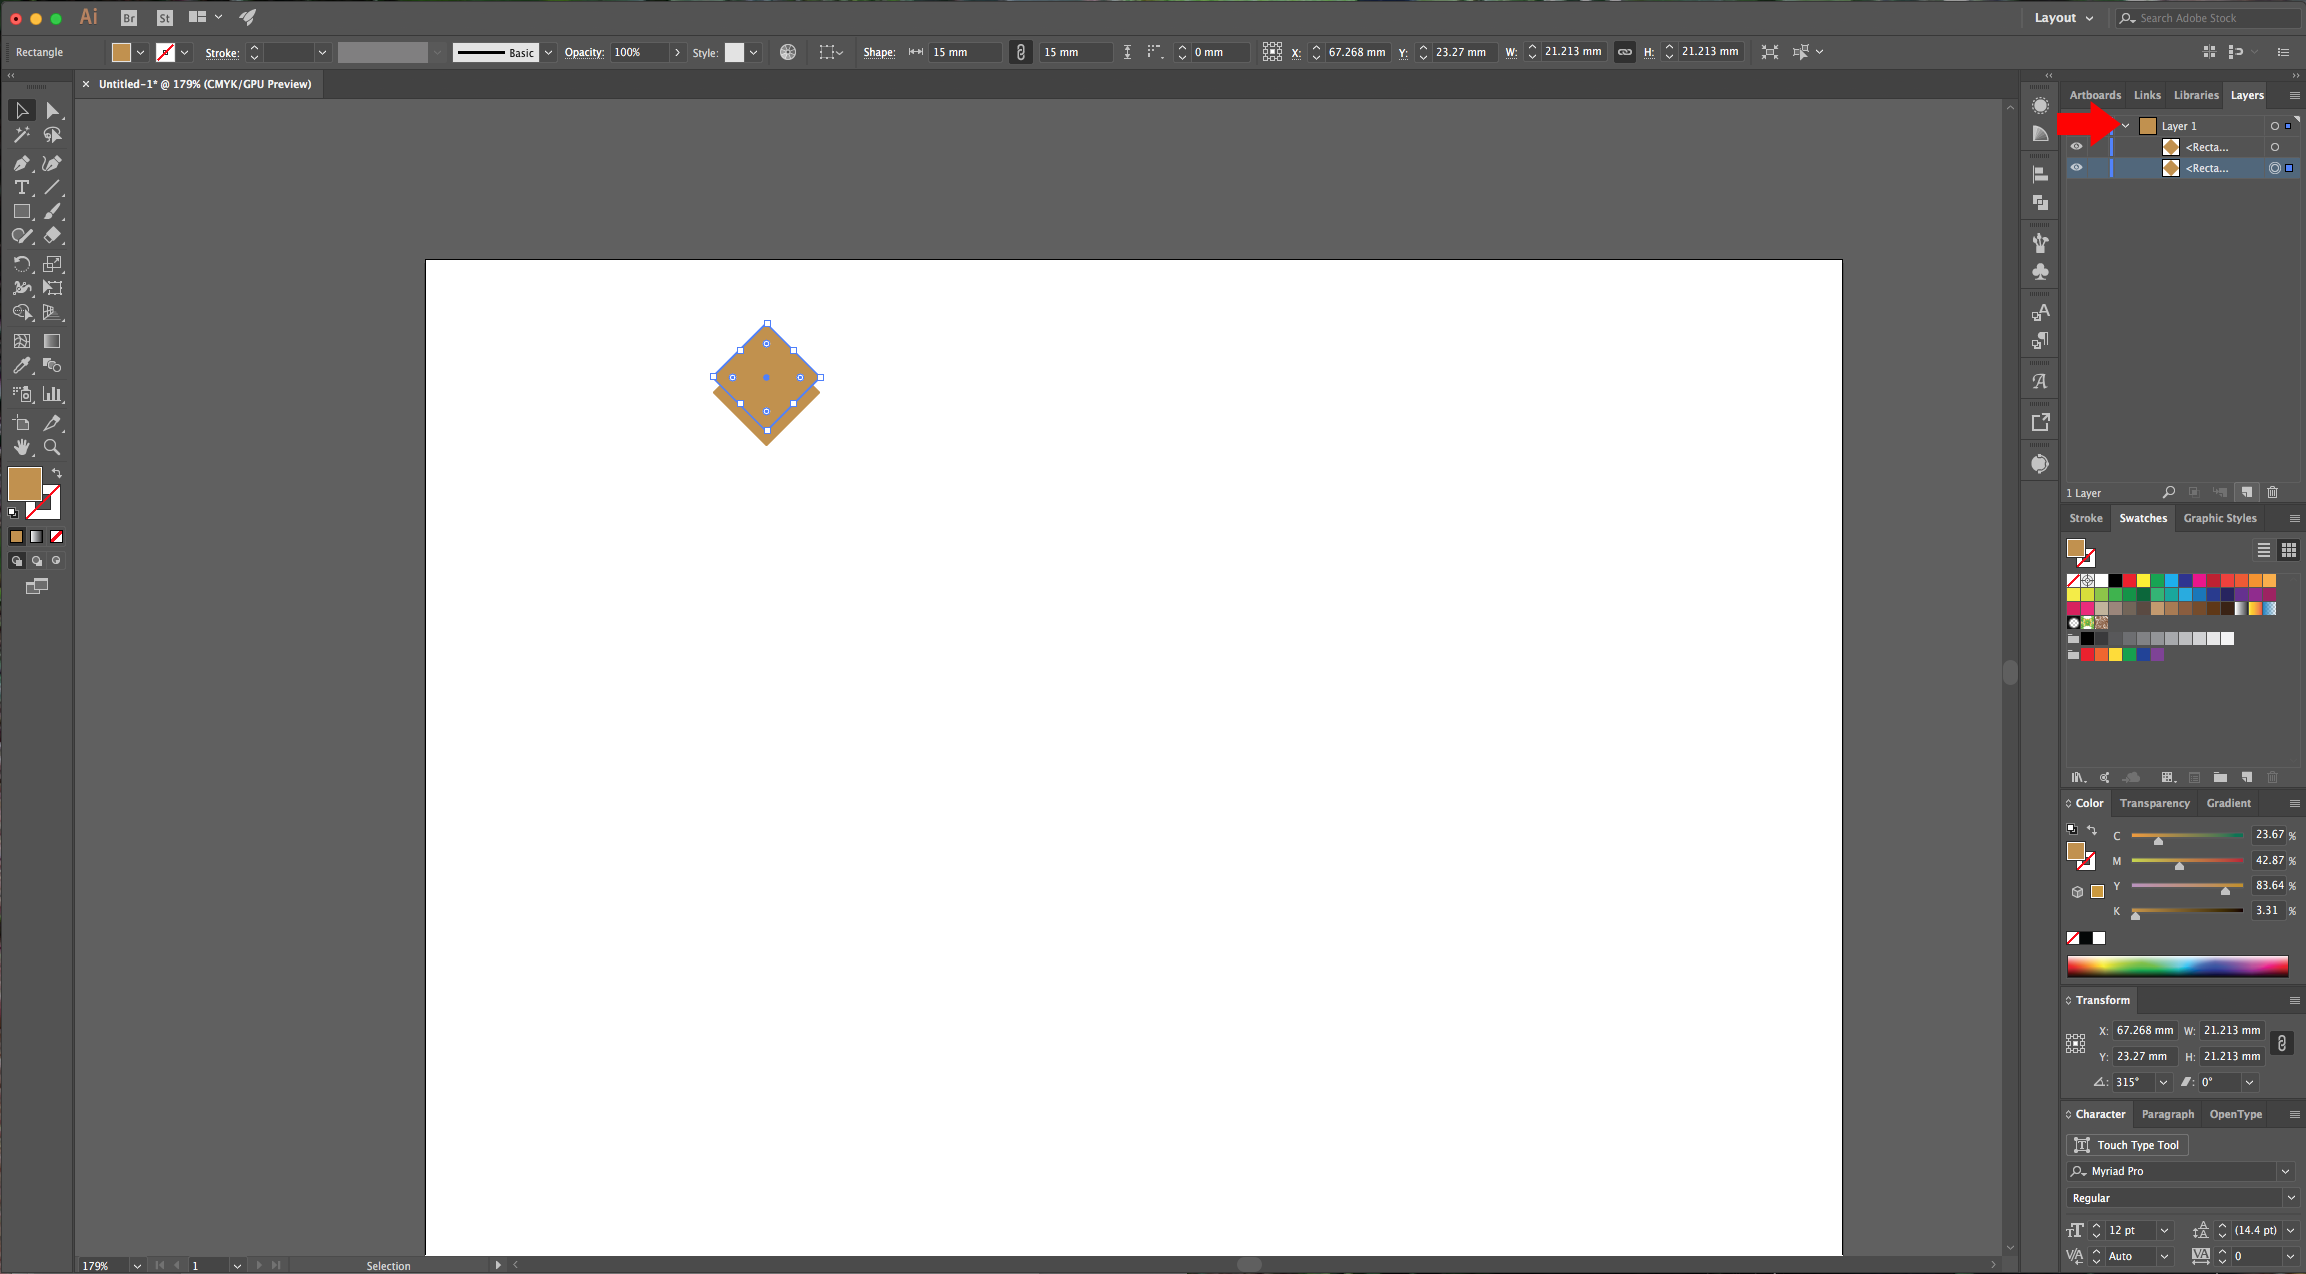
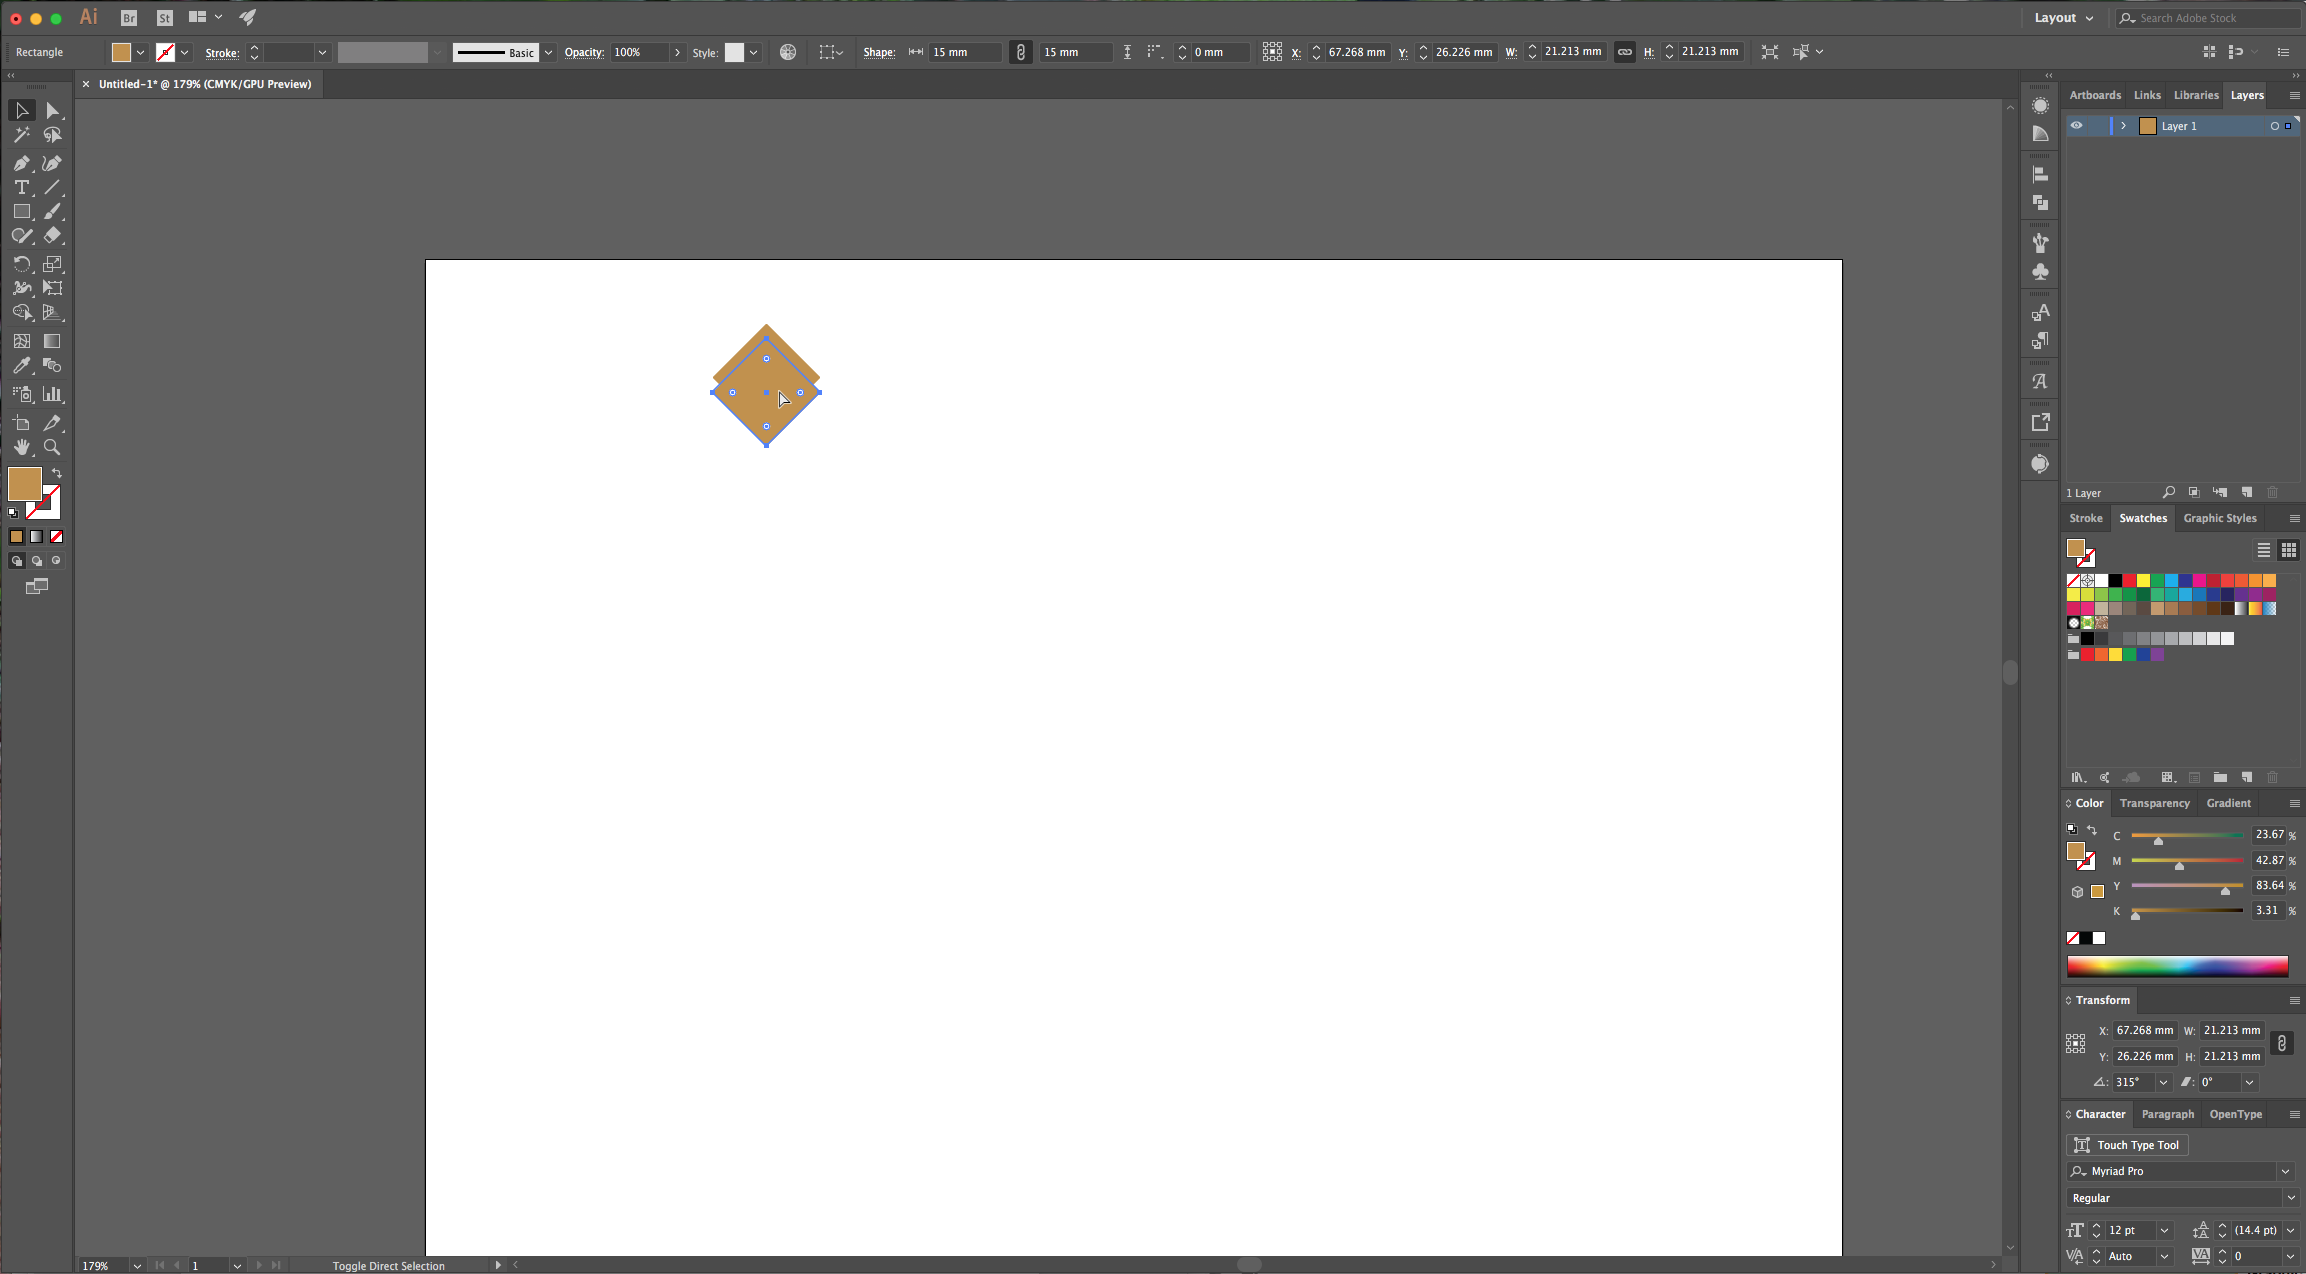
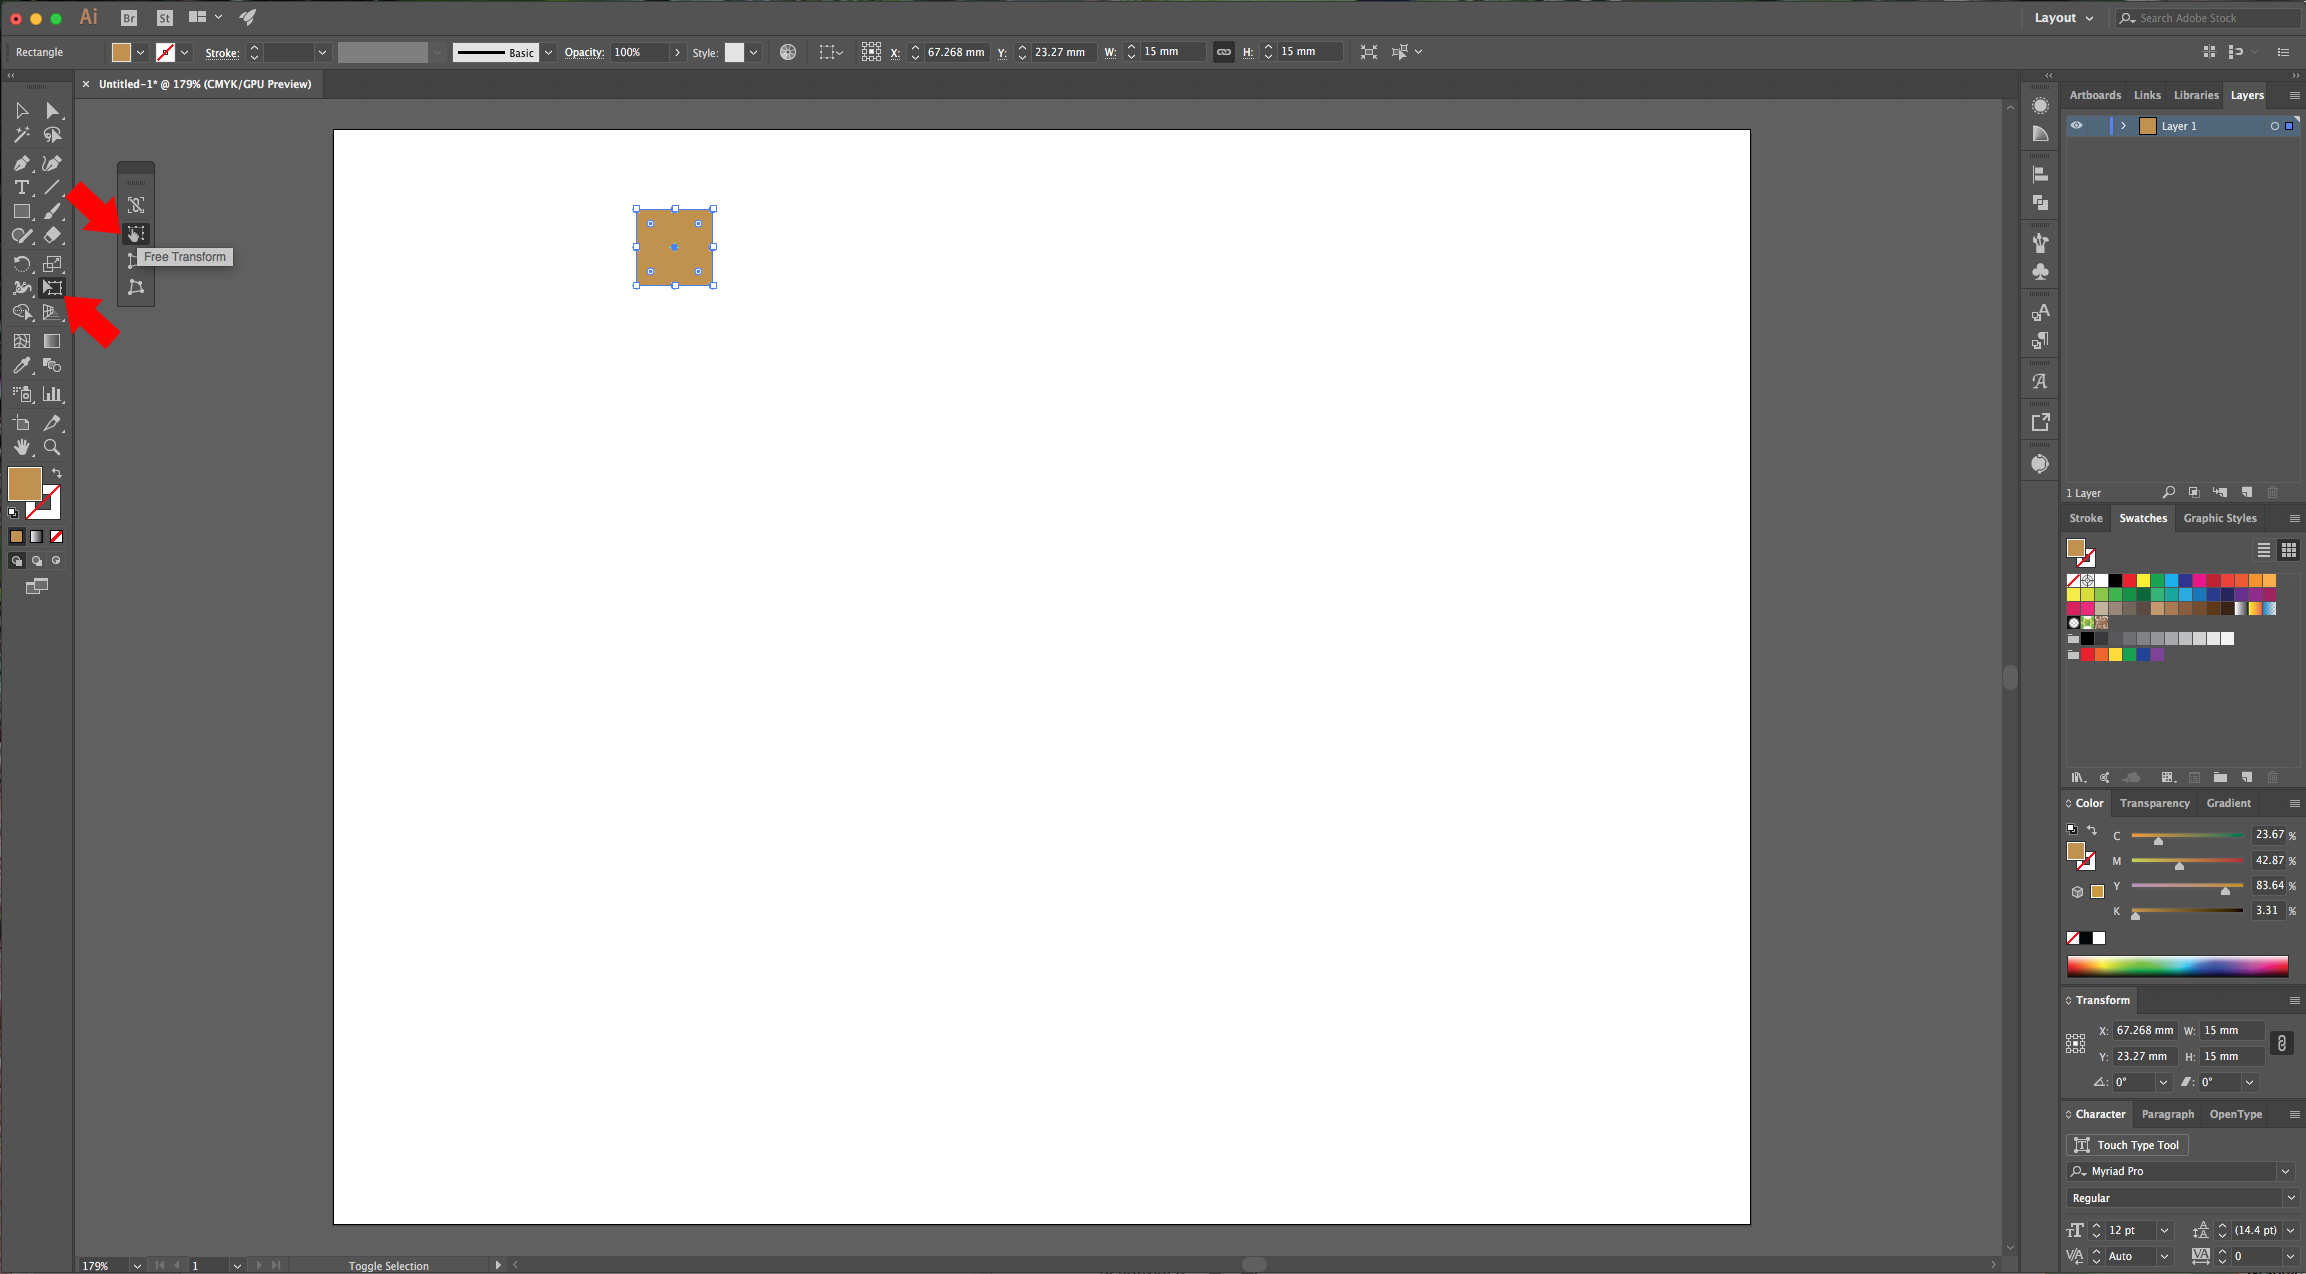
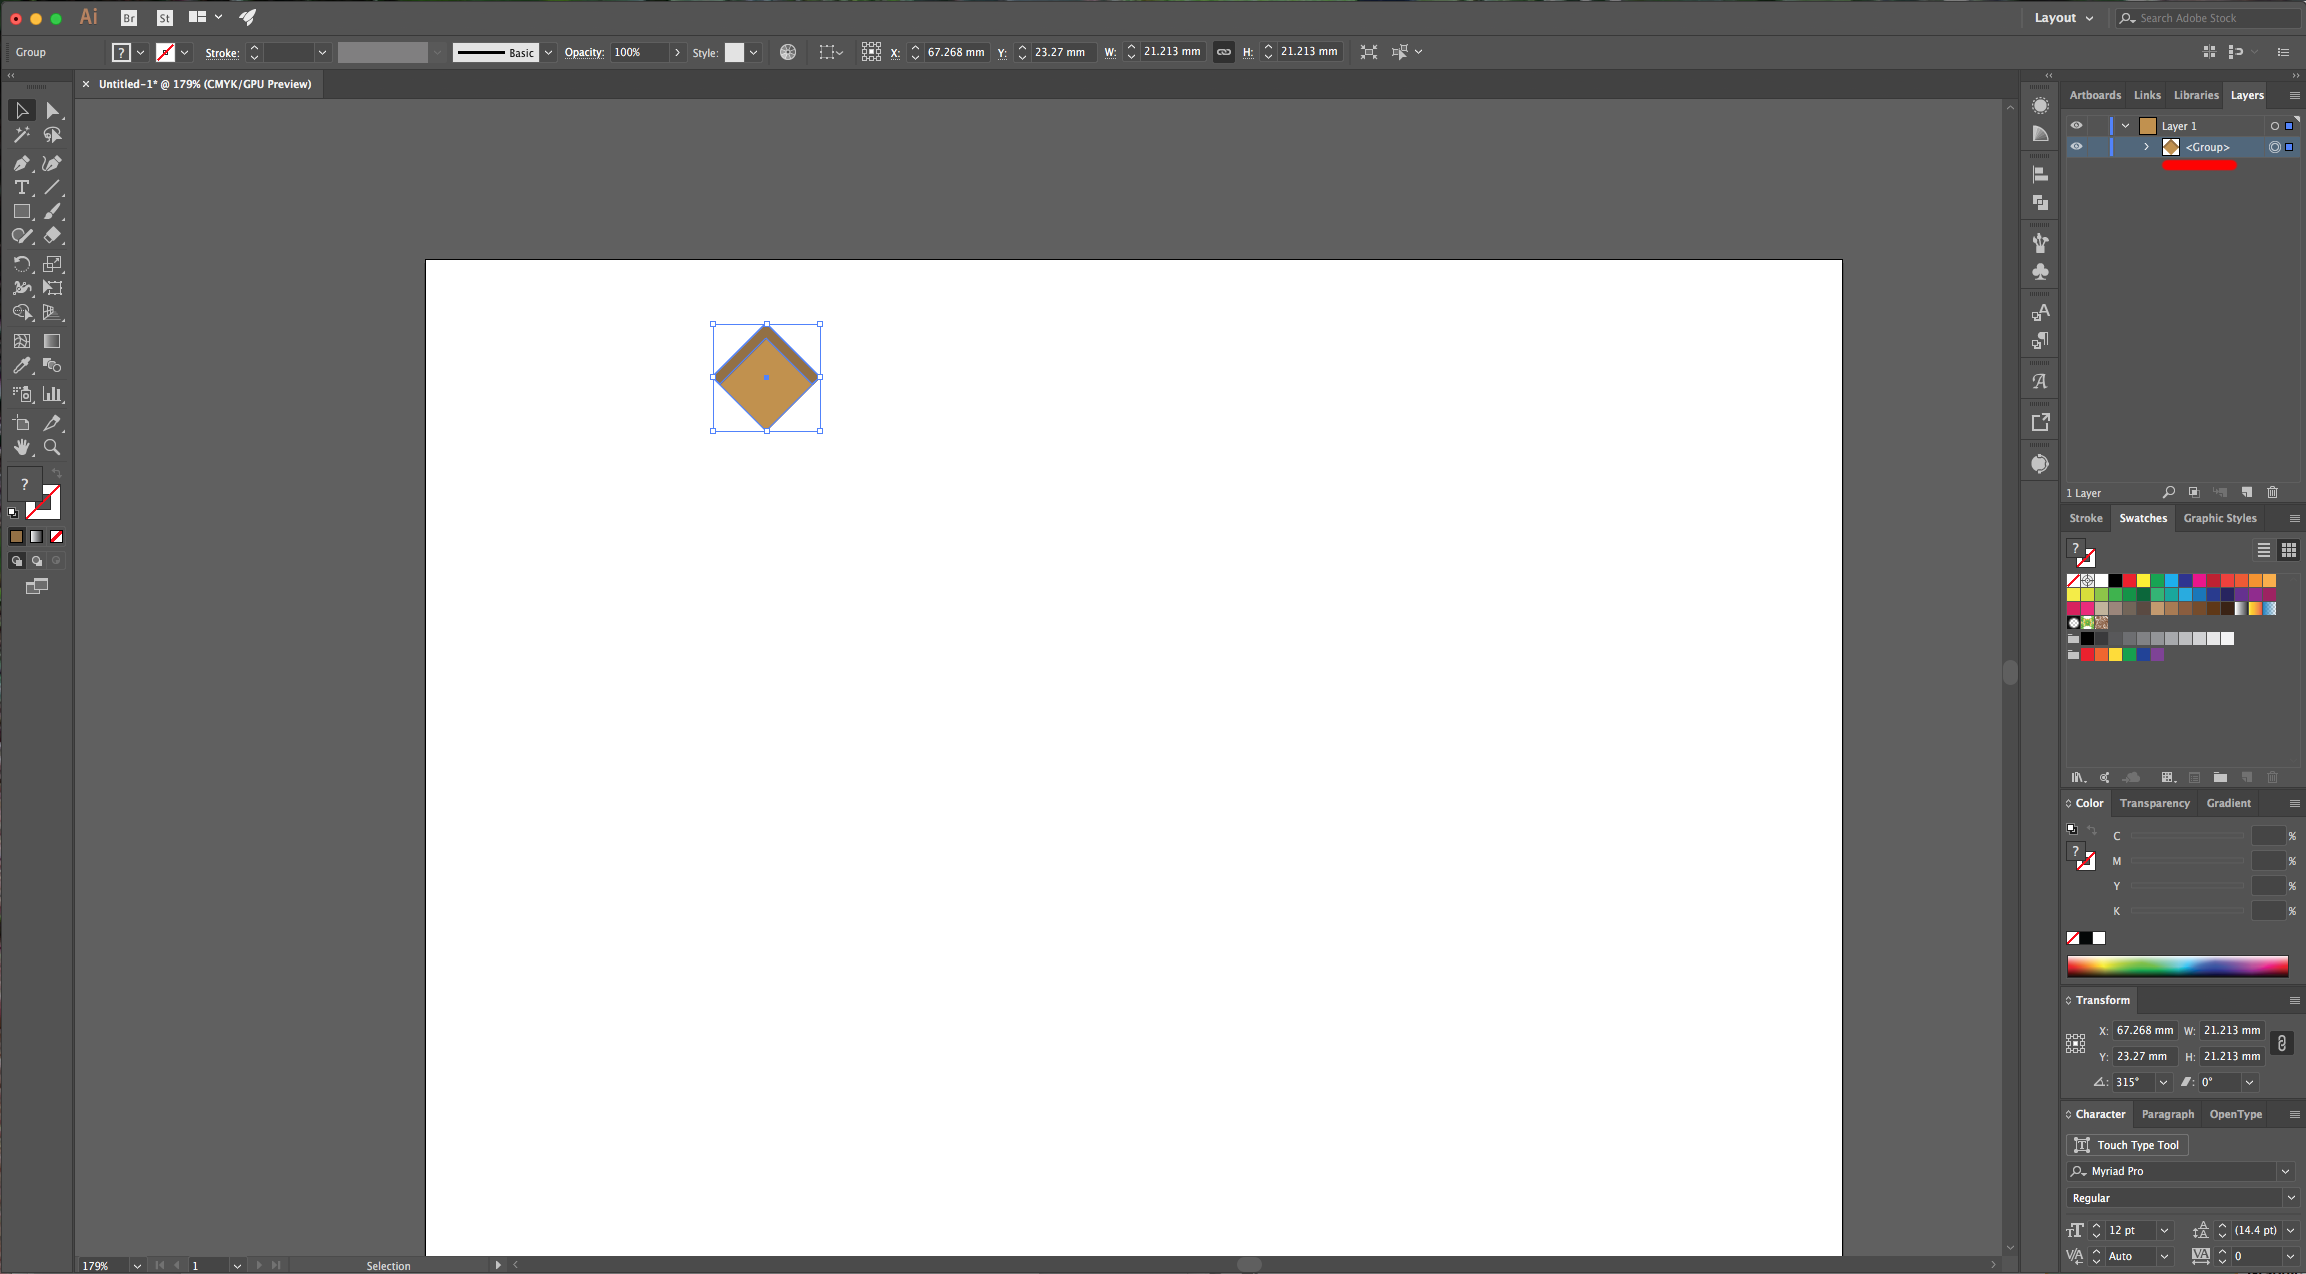
2 - Select the “Free Transform Tool” (E) and rotate your square to a -45° Angle. Hold the “Alt” and “Shift” keys while dragging your shape downwards to duplicate and move your copy. In your “Layers” window click on the little arrow to the left of the “Layer 1” to show its contents. Select the bottom “Rectangle” and duplicate it by dragging it to the “Create New” button at the bottom of the “Layers” Panel.
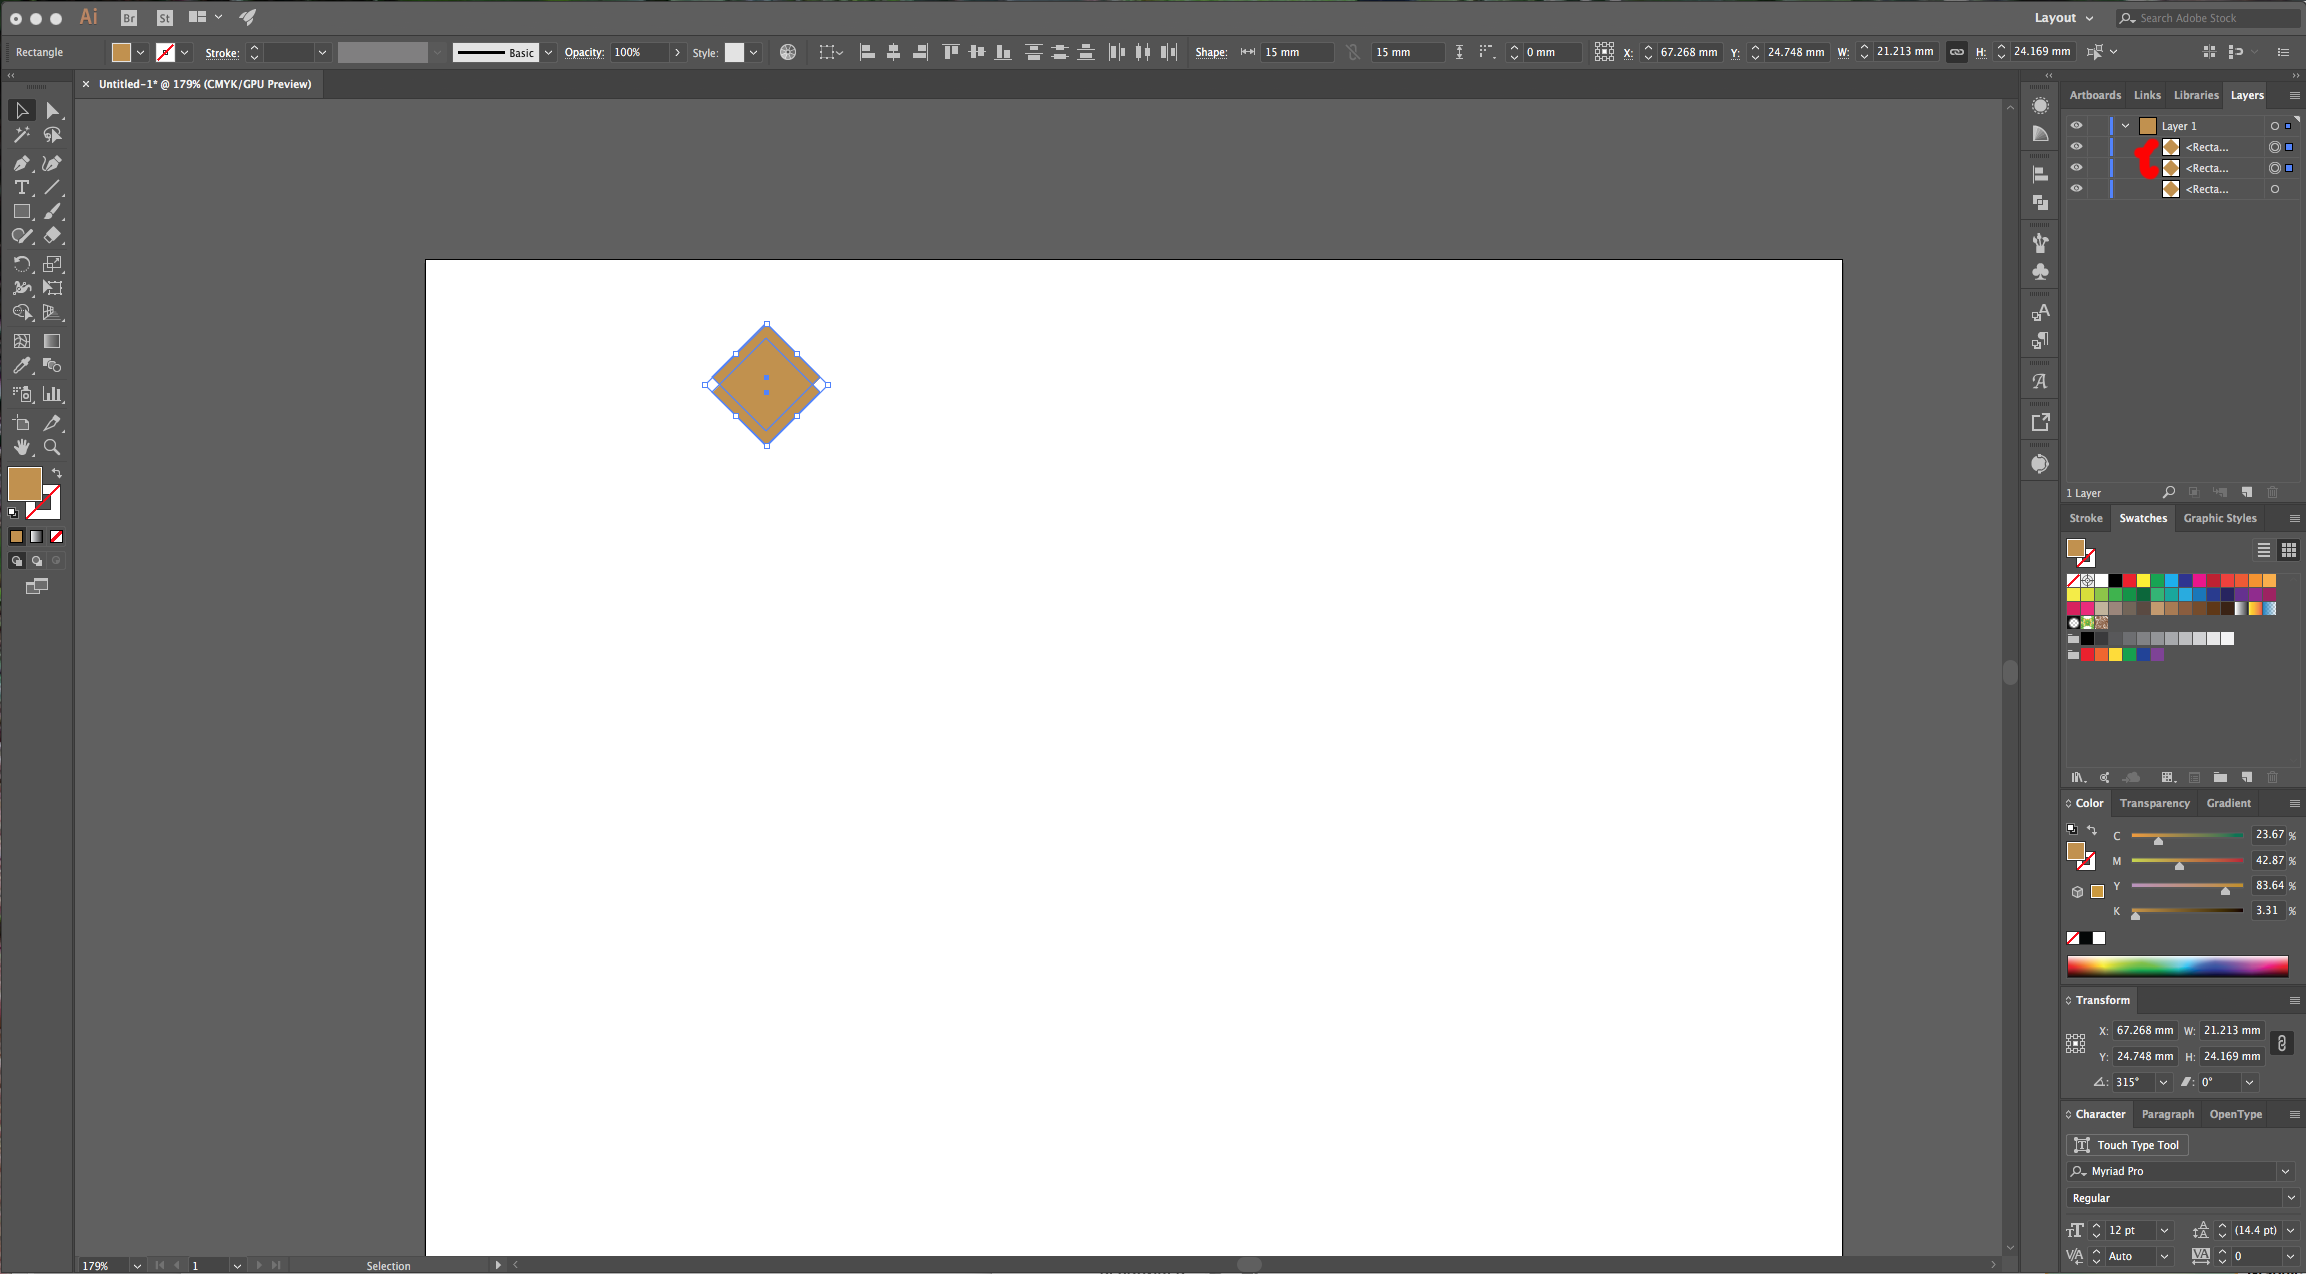
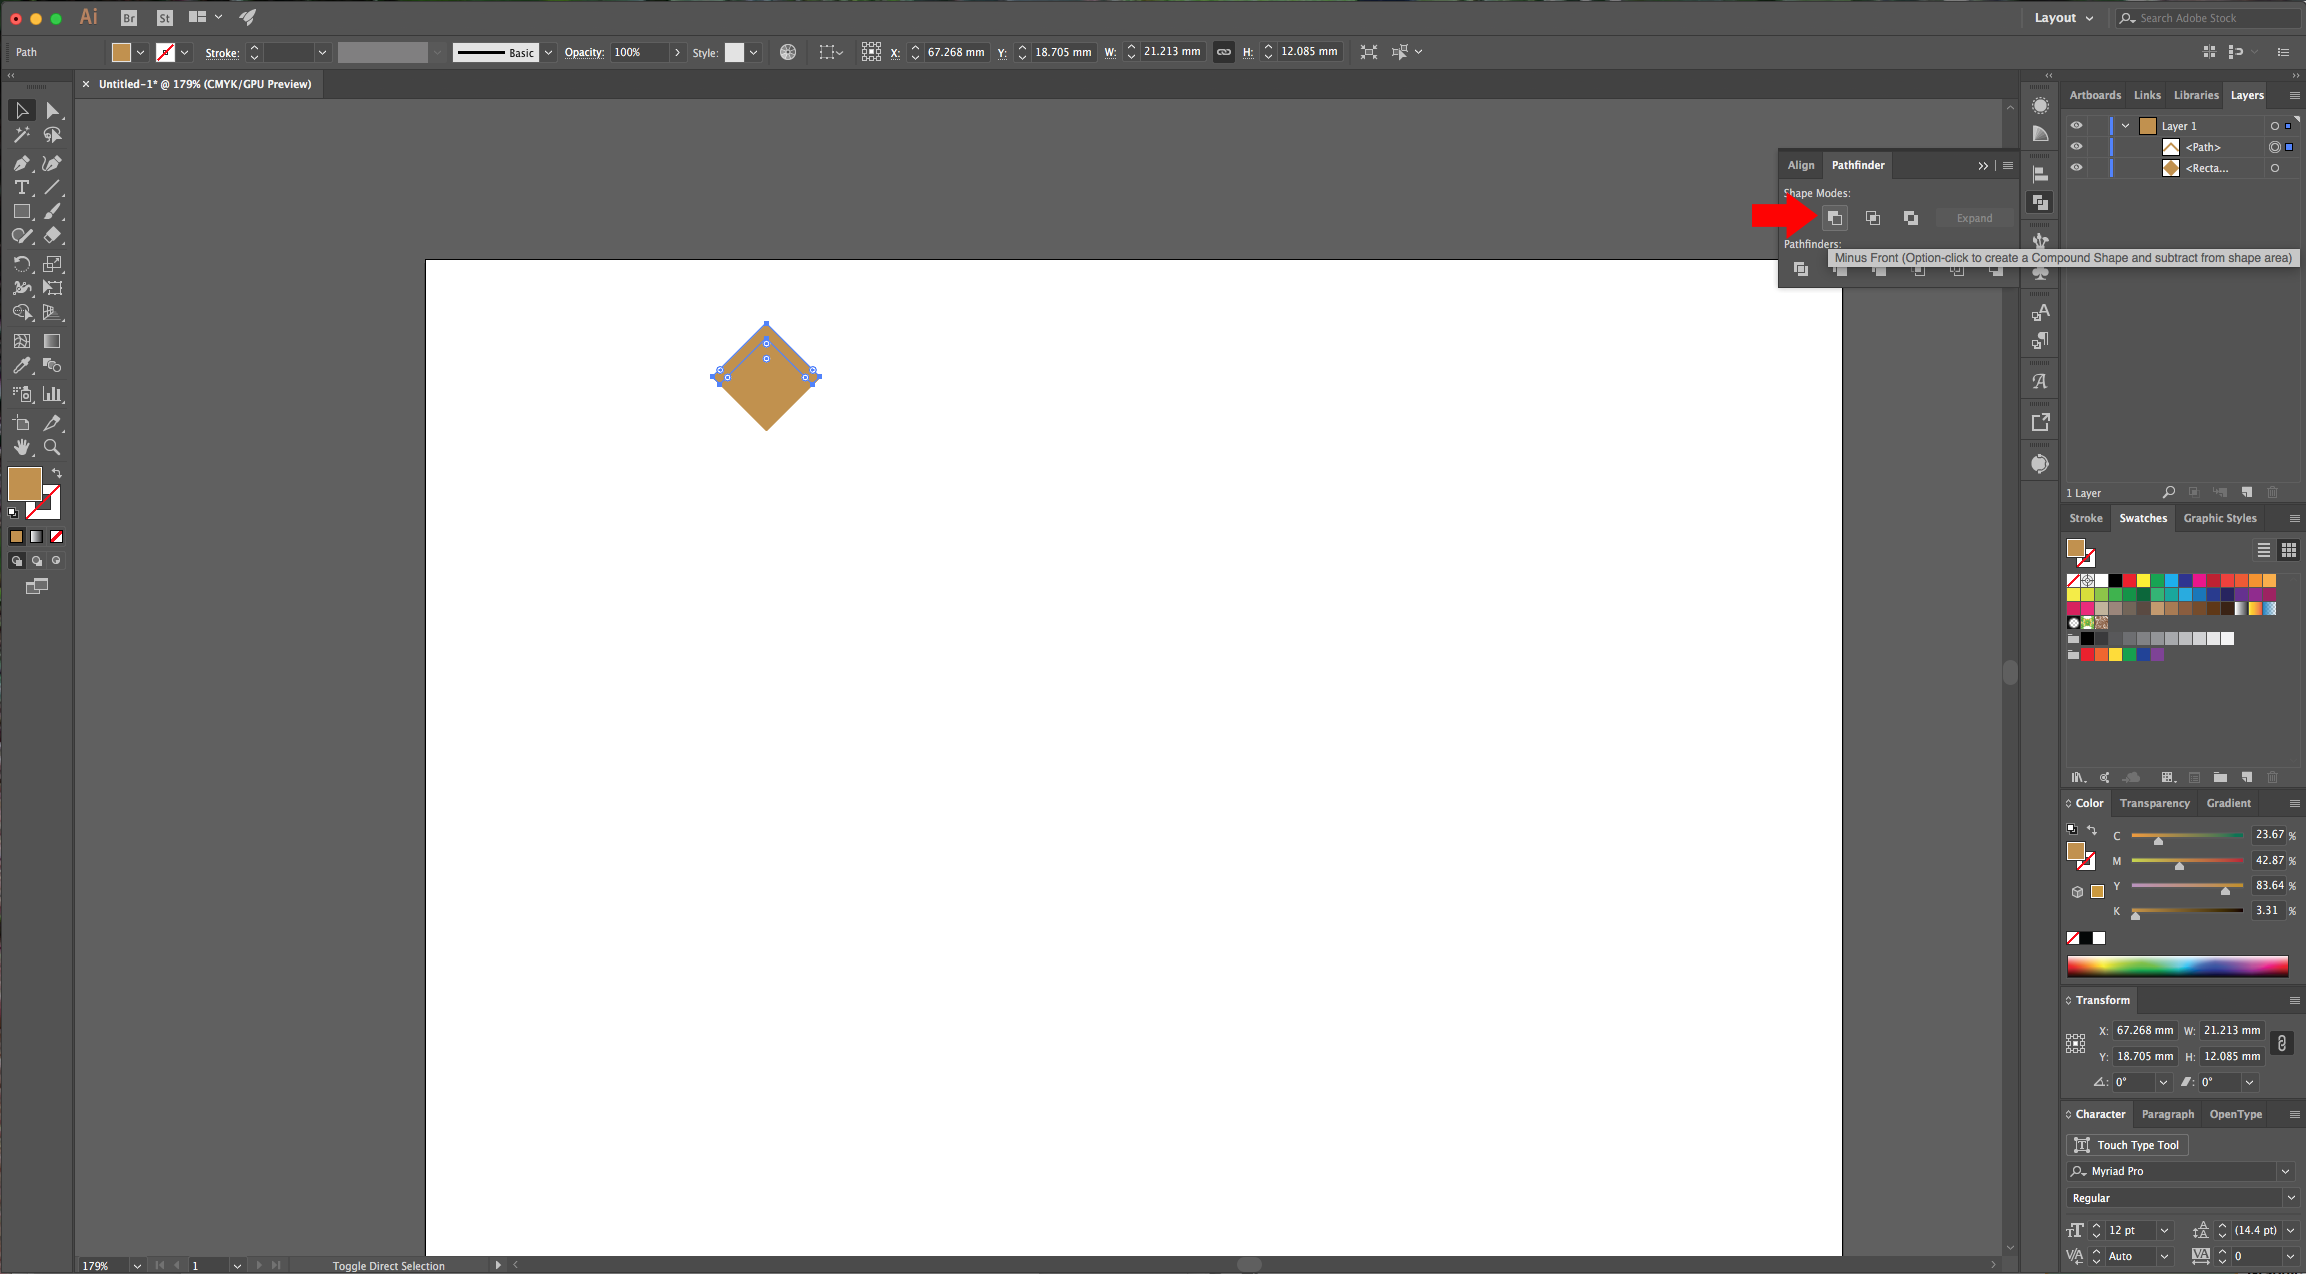
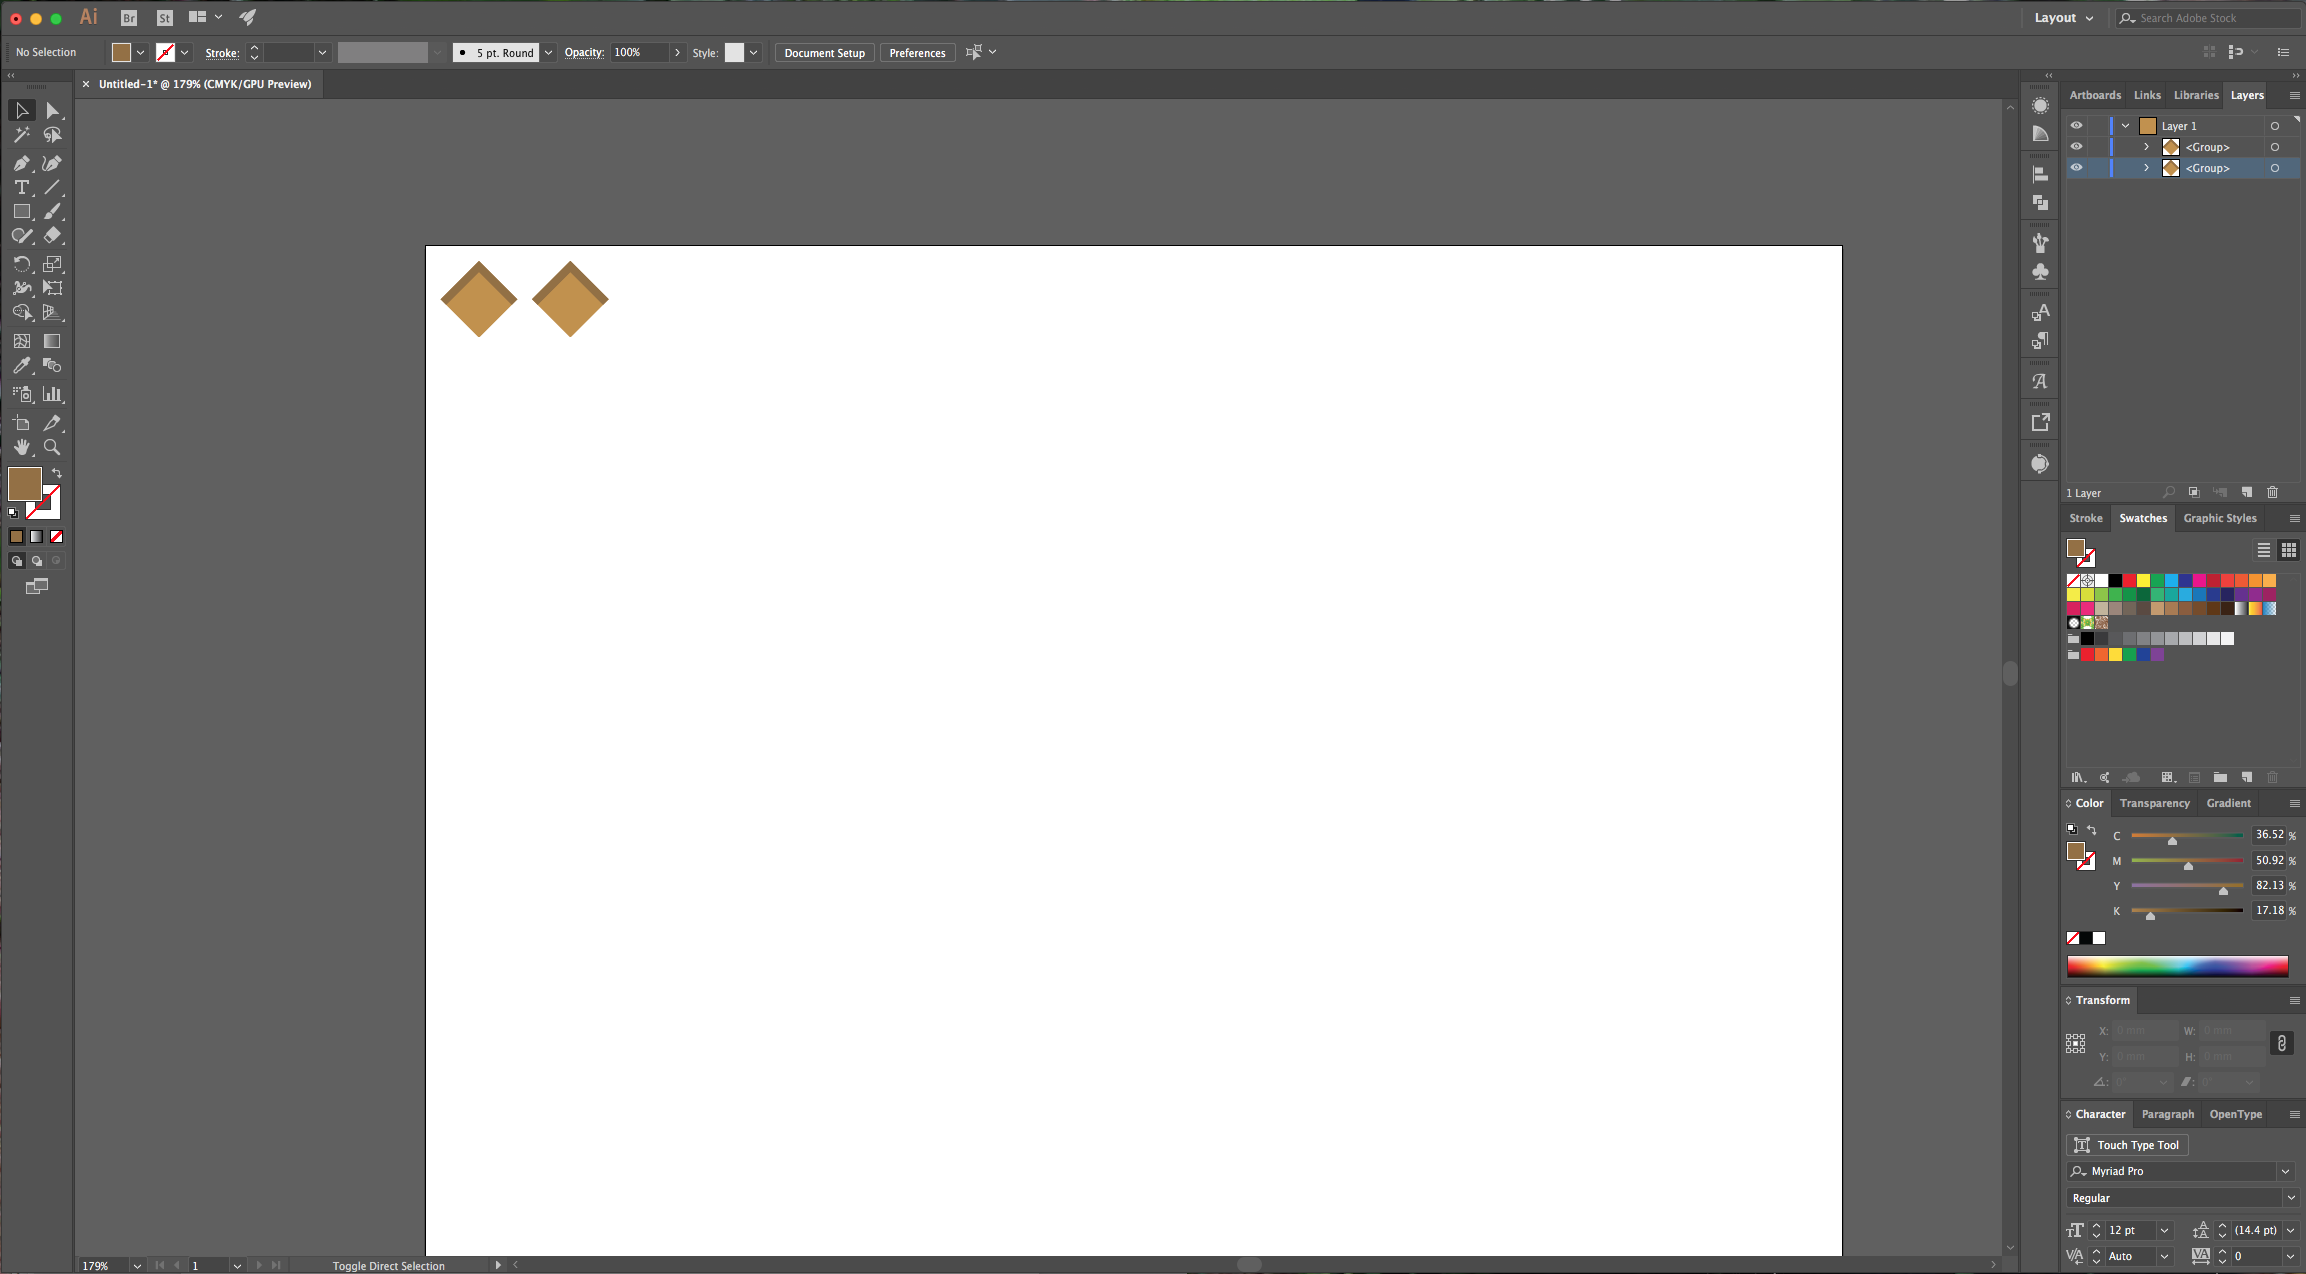
3 - Select the top two “Rectangles” go to the “Pathfinder” Panel and choose “Minus Front”. Then, select your new shape and change the color to a darker shade (#937041). Select your two shapes and “Group” them (Command/Control + G).

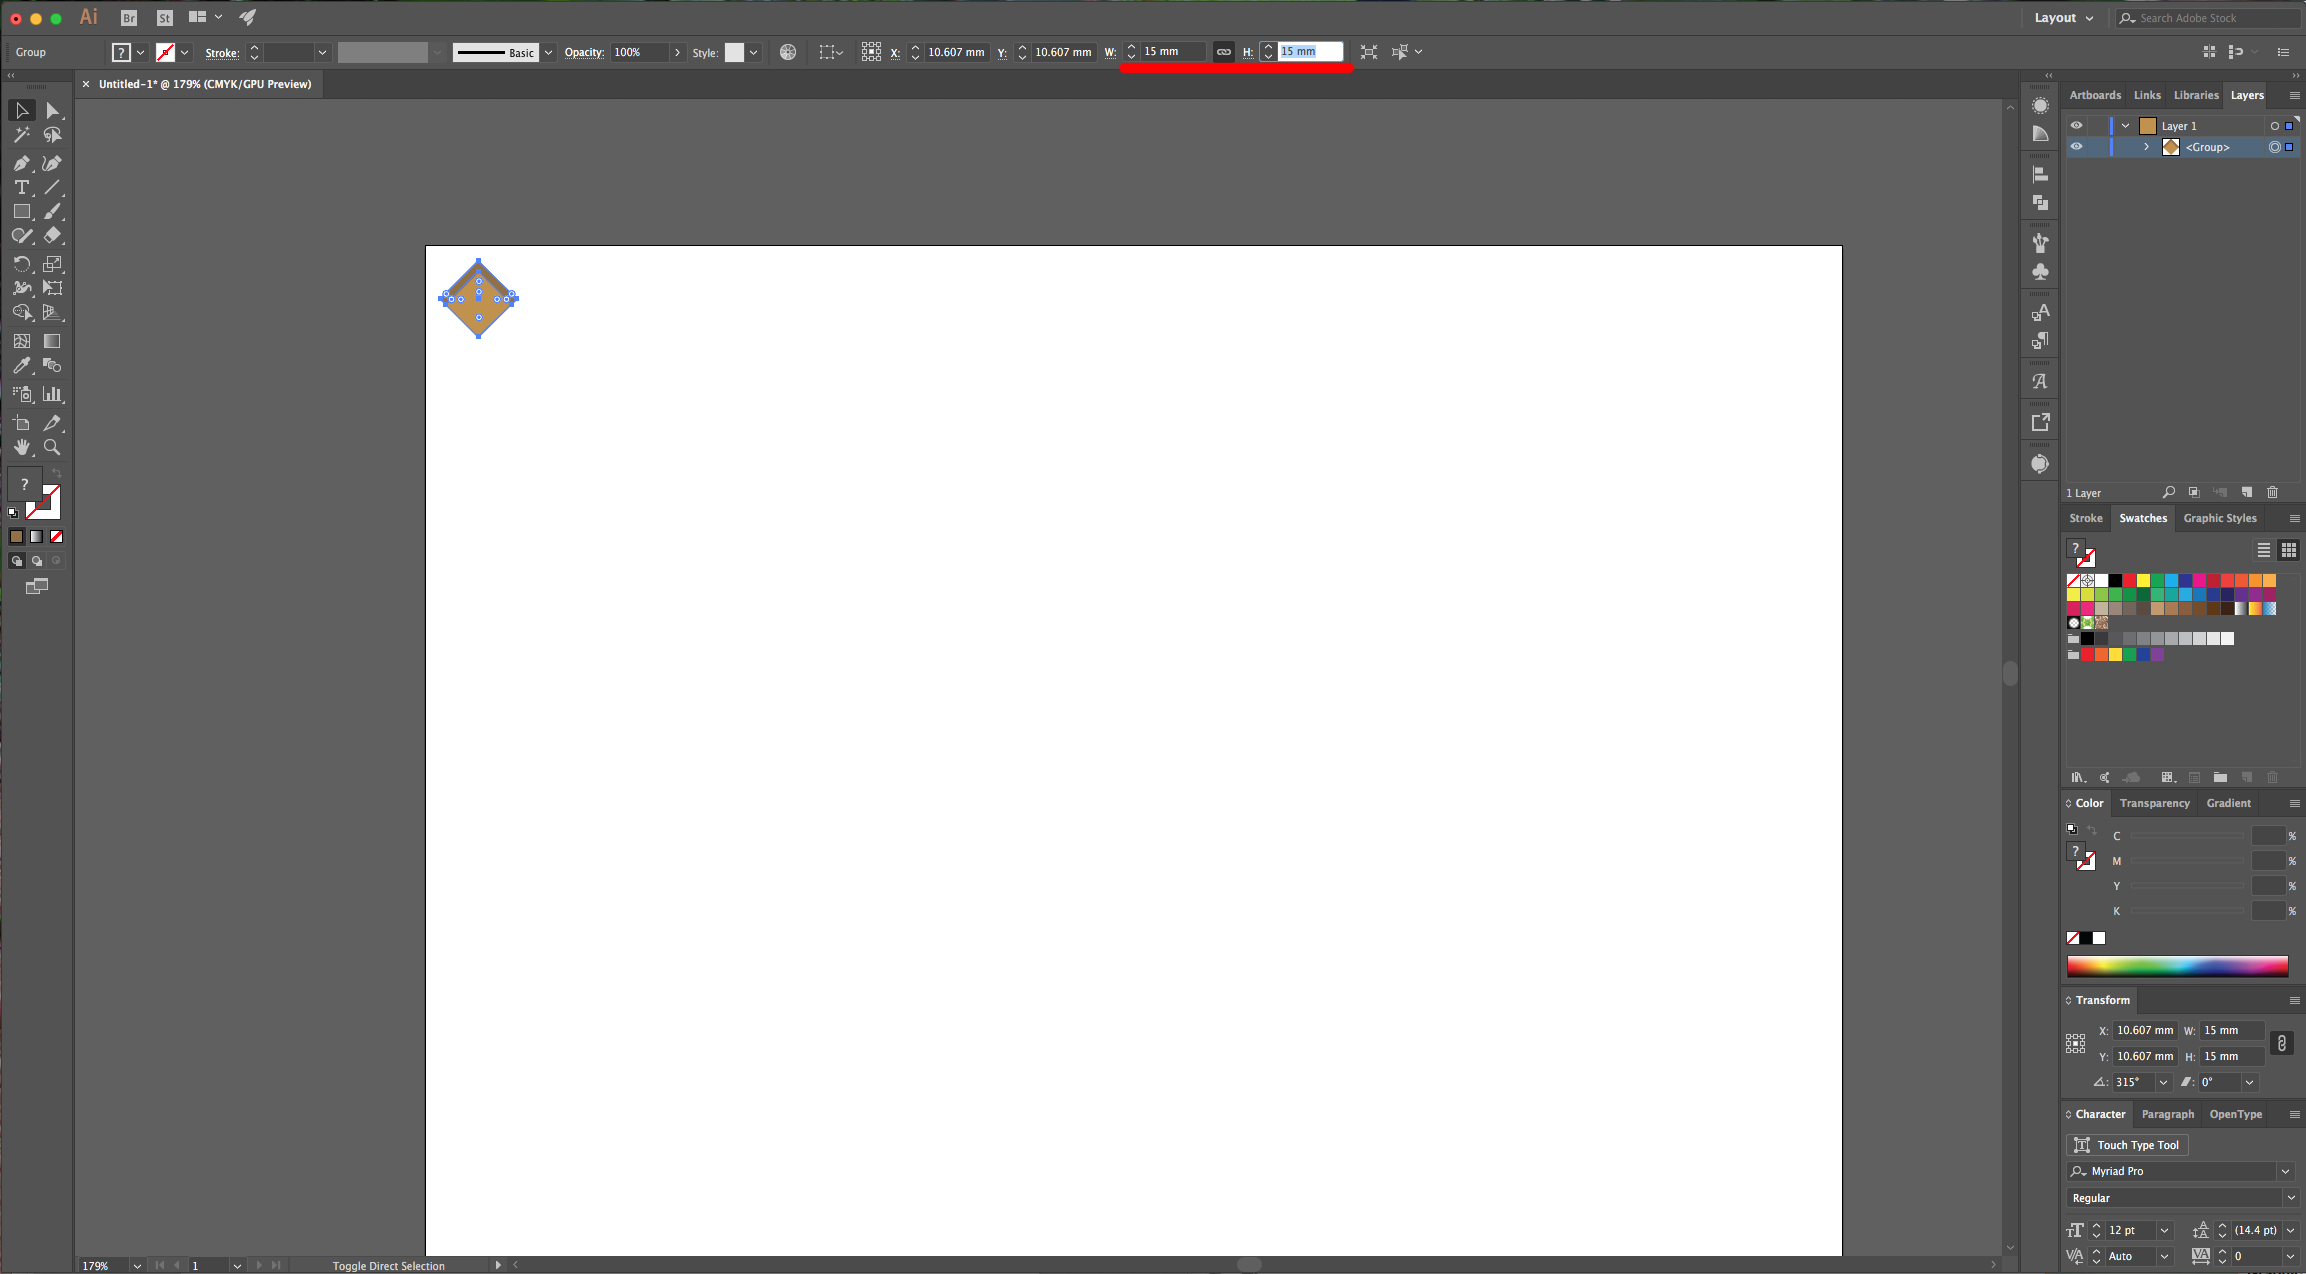
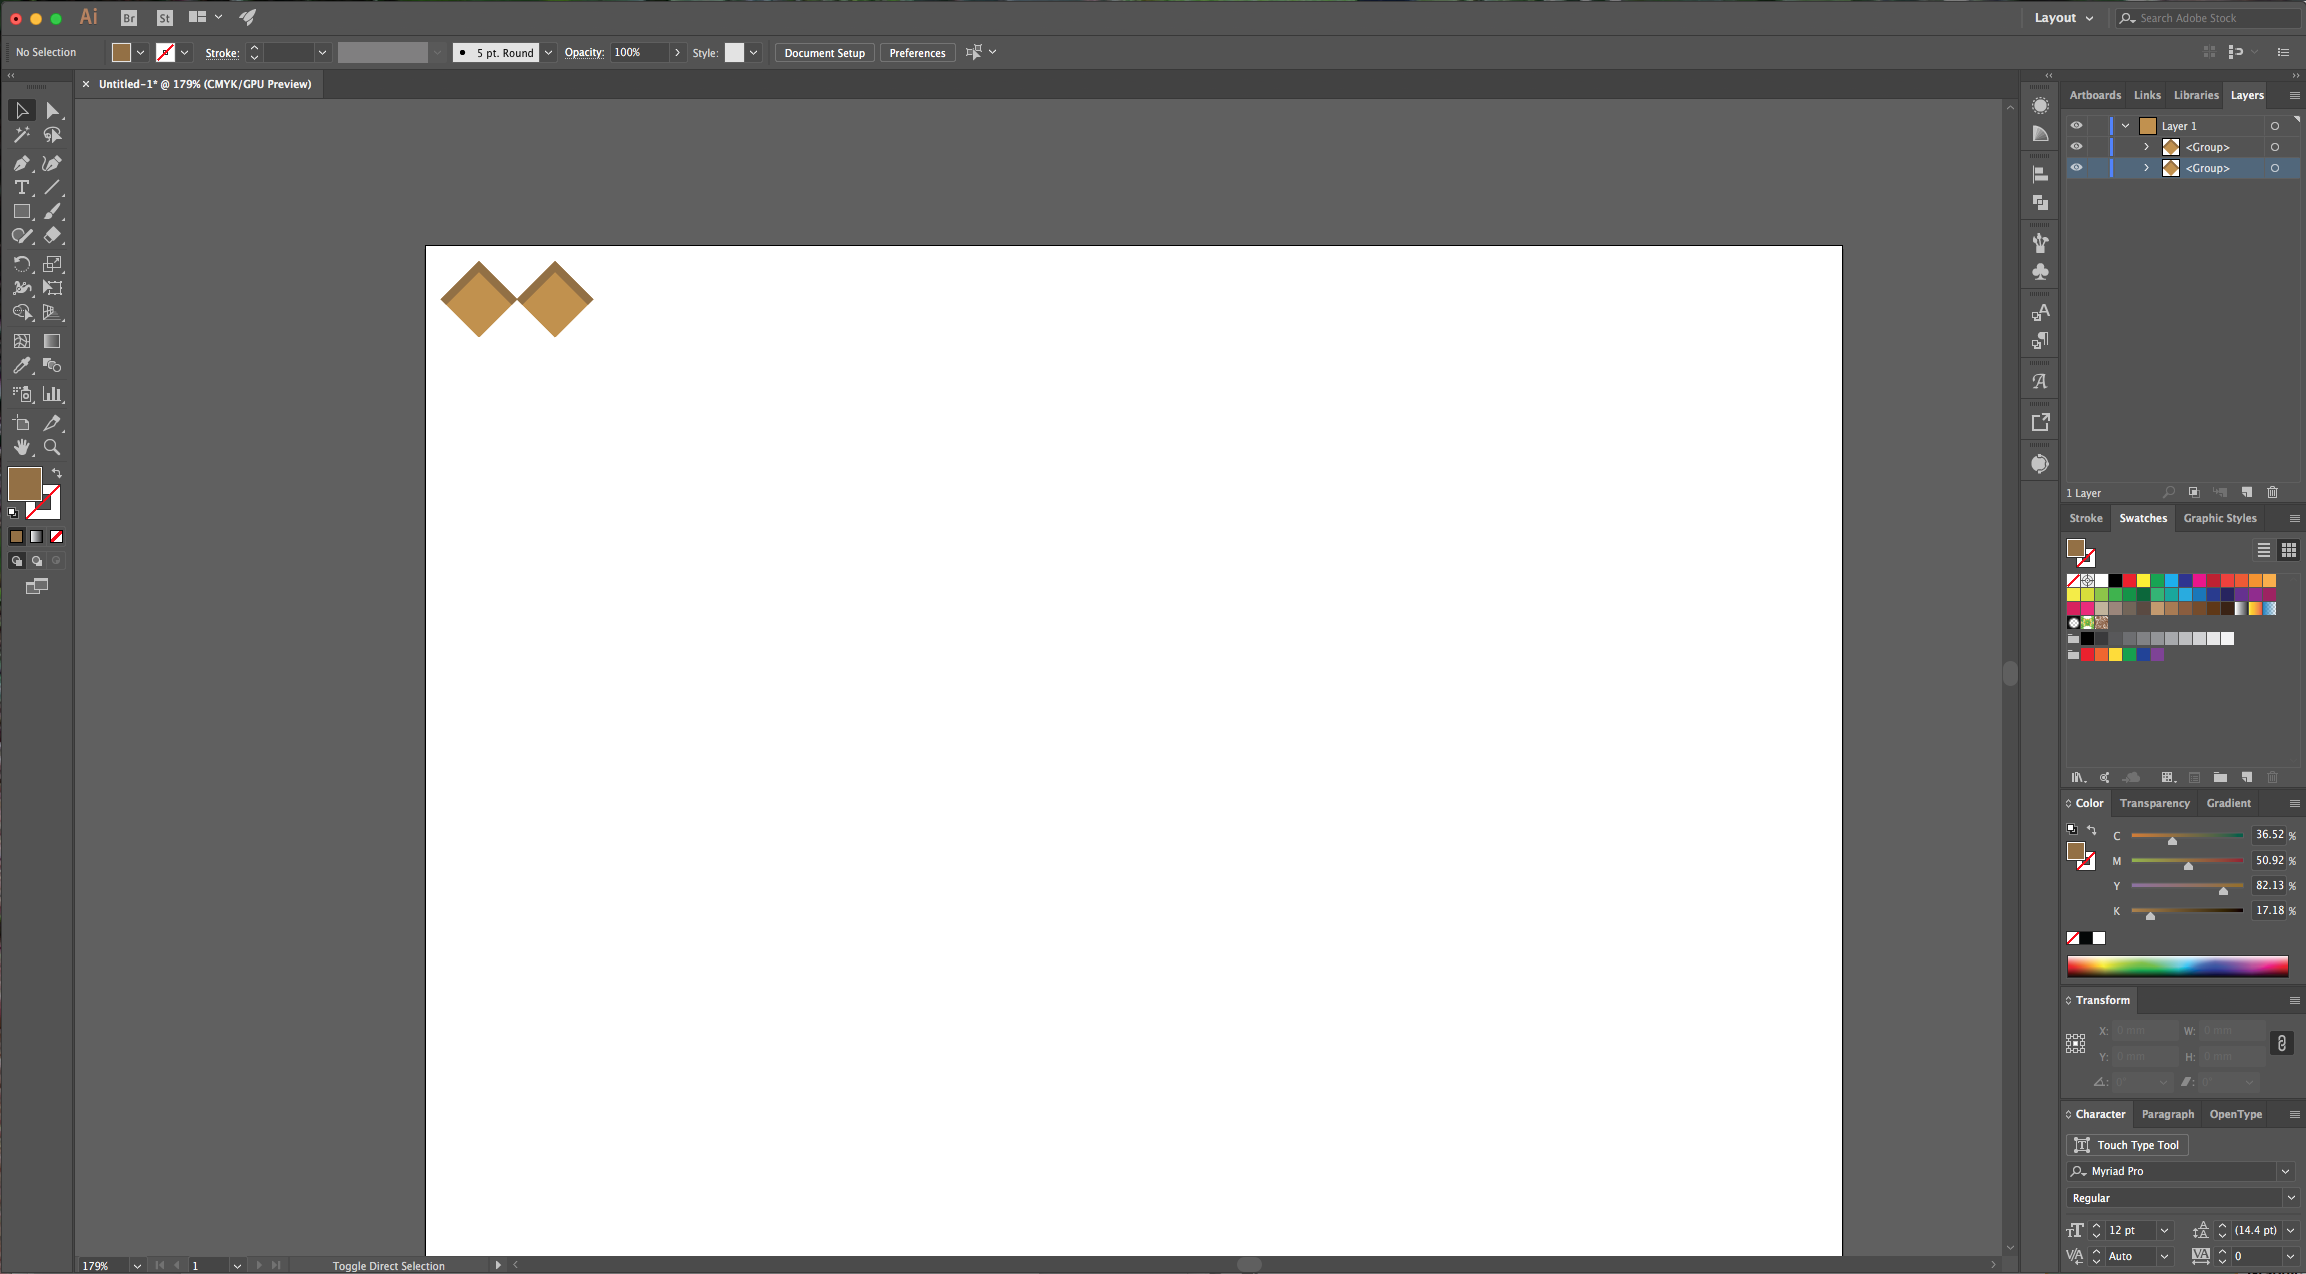
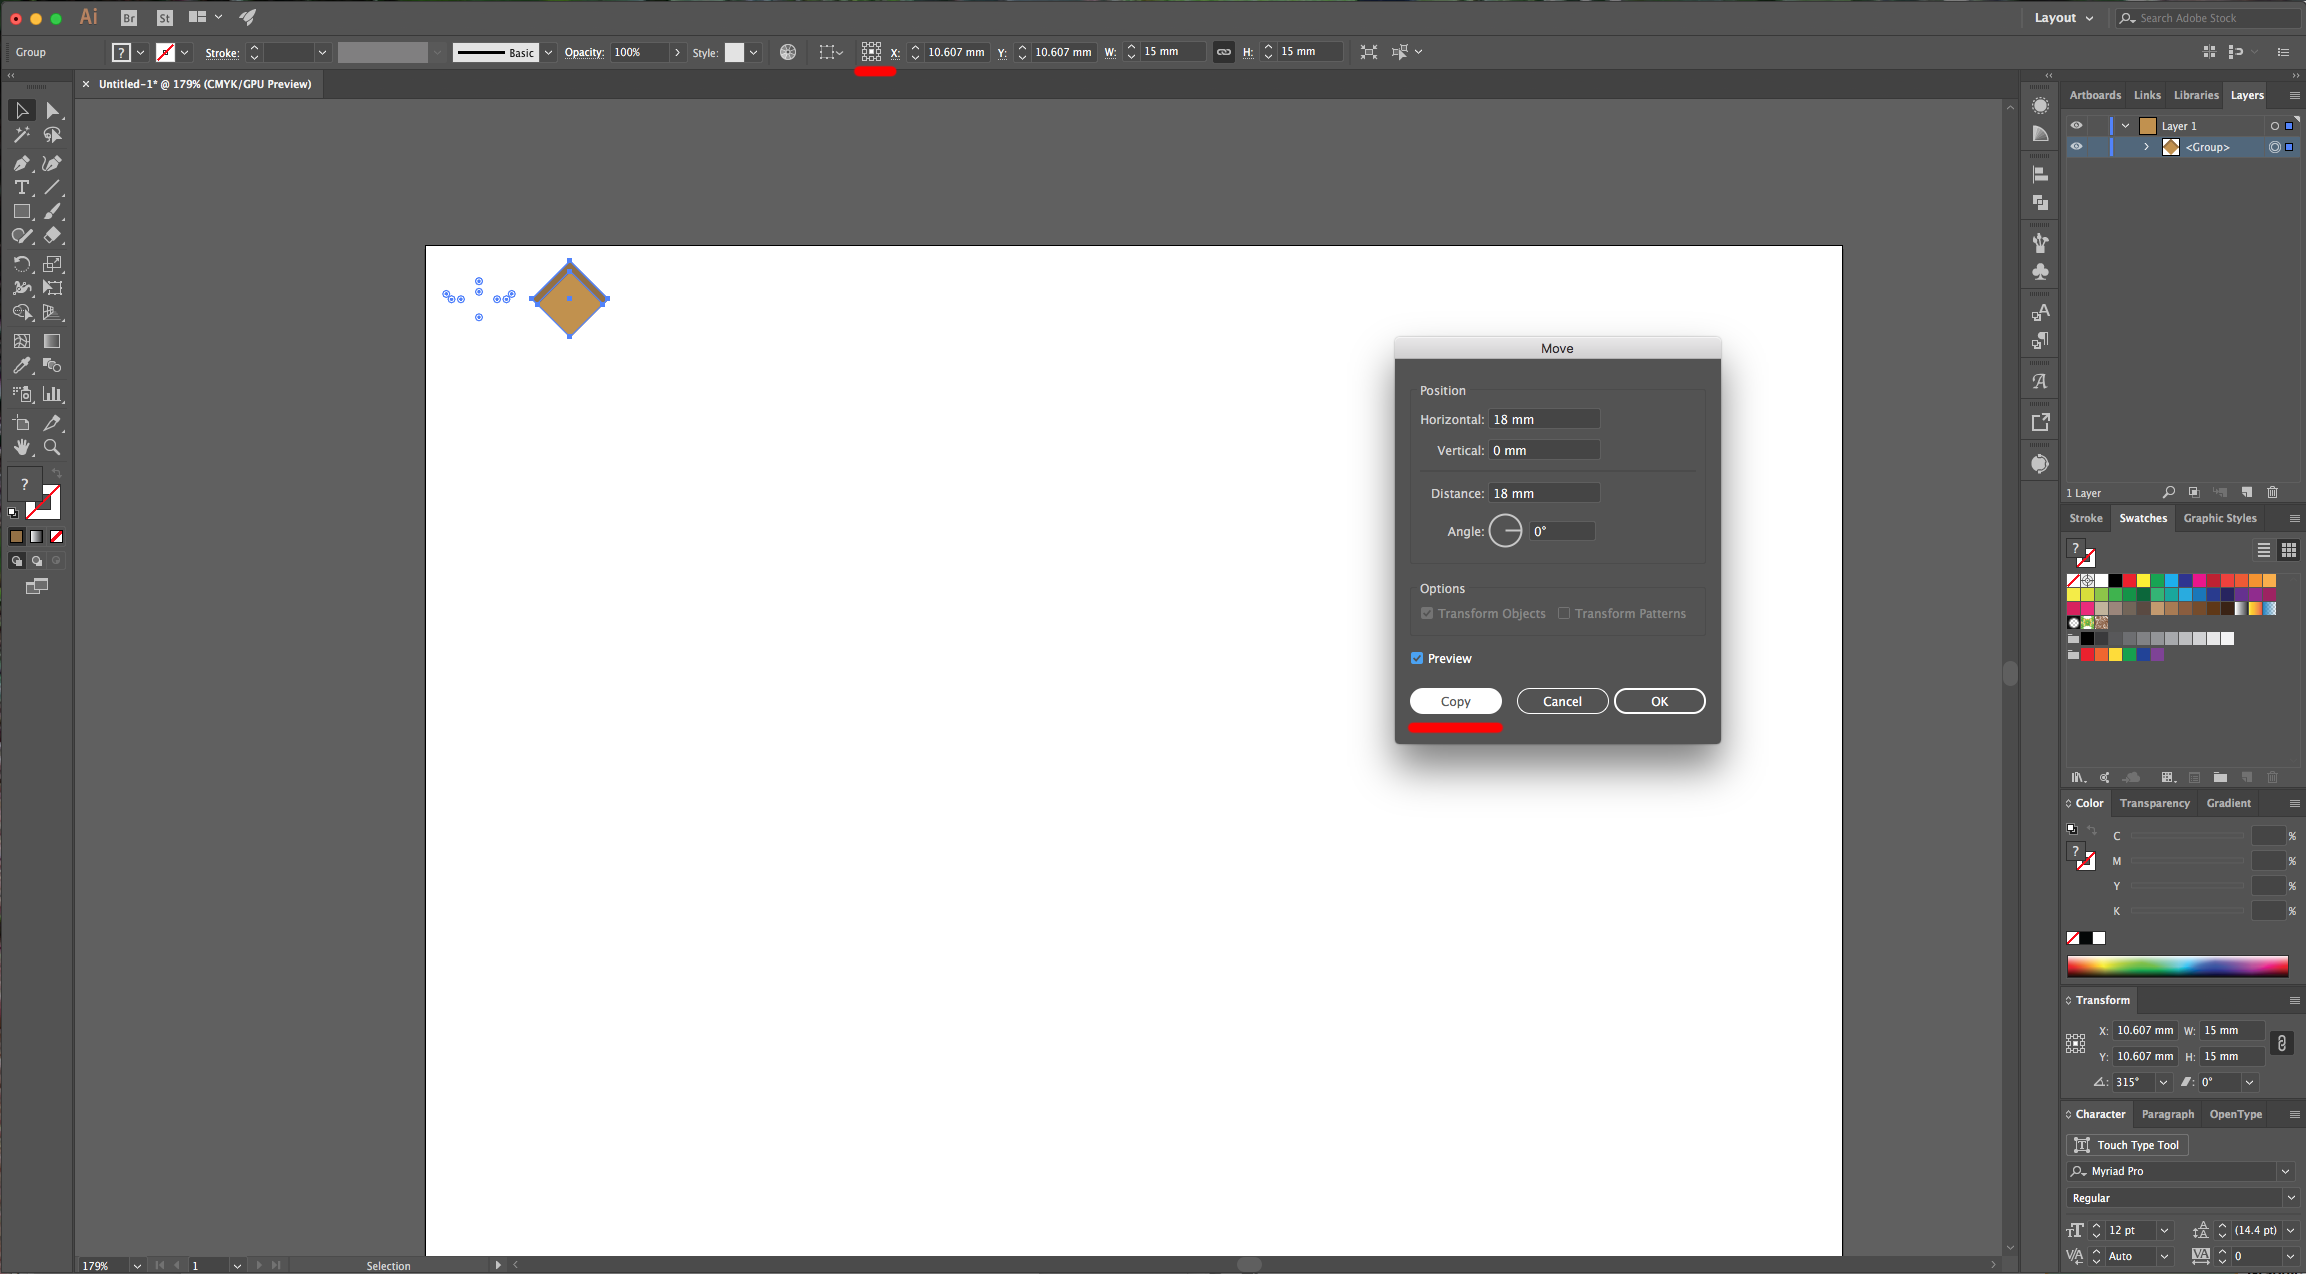
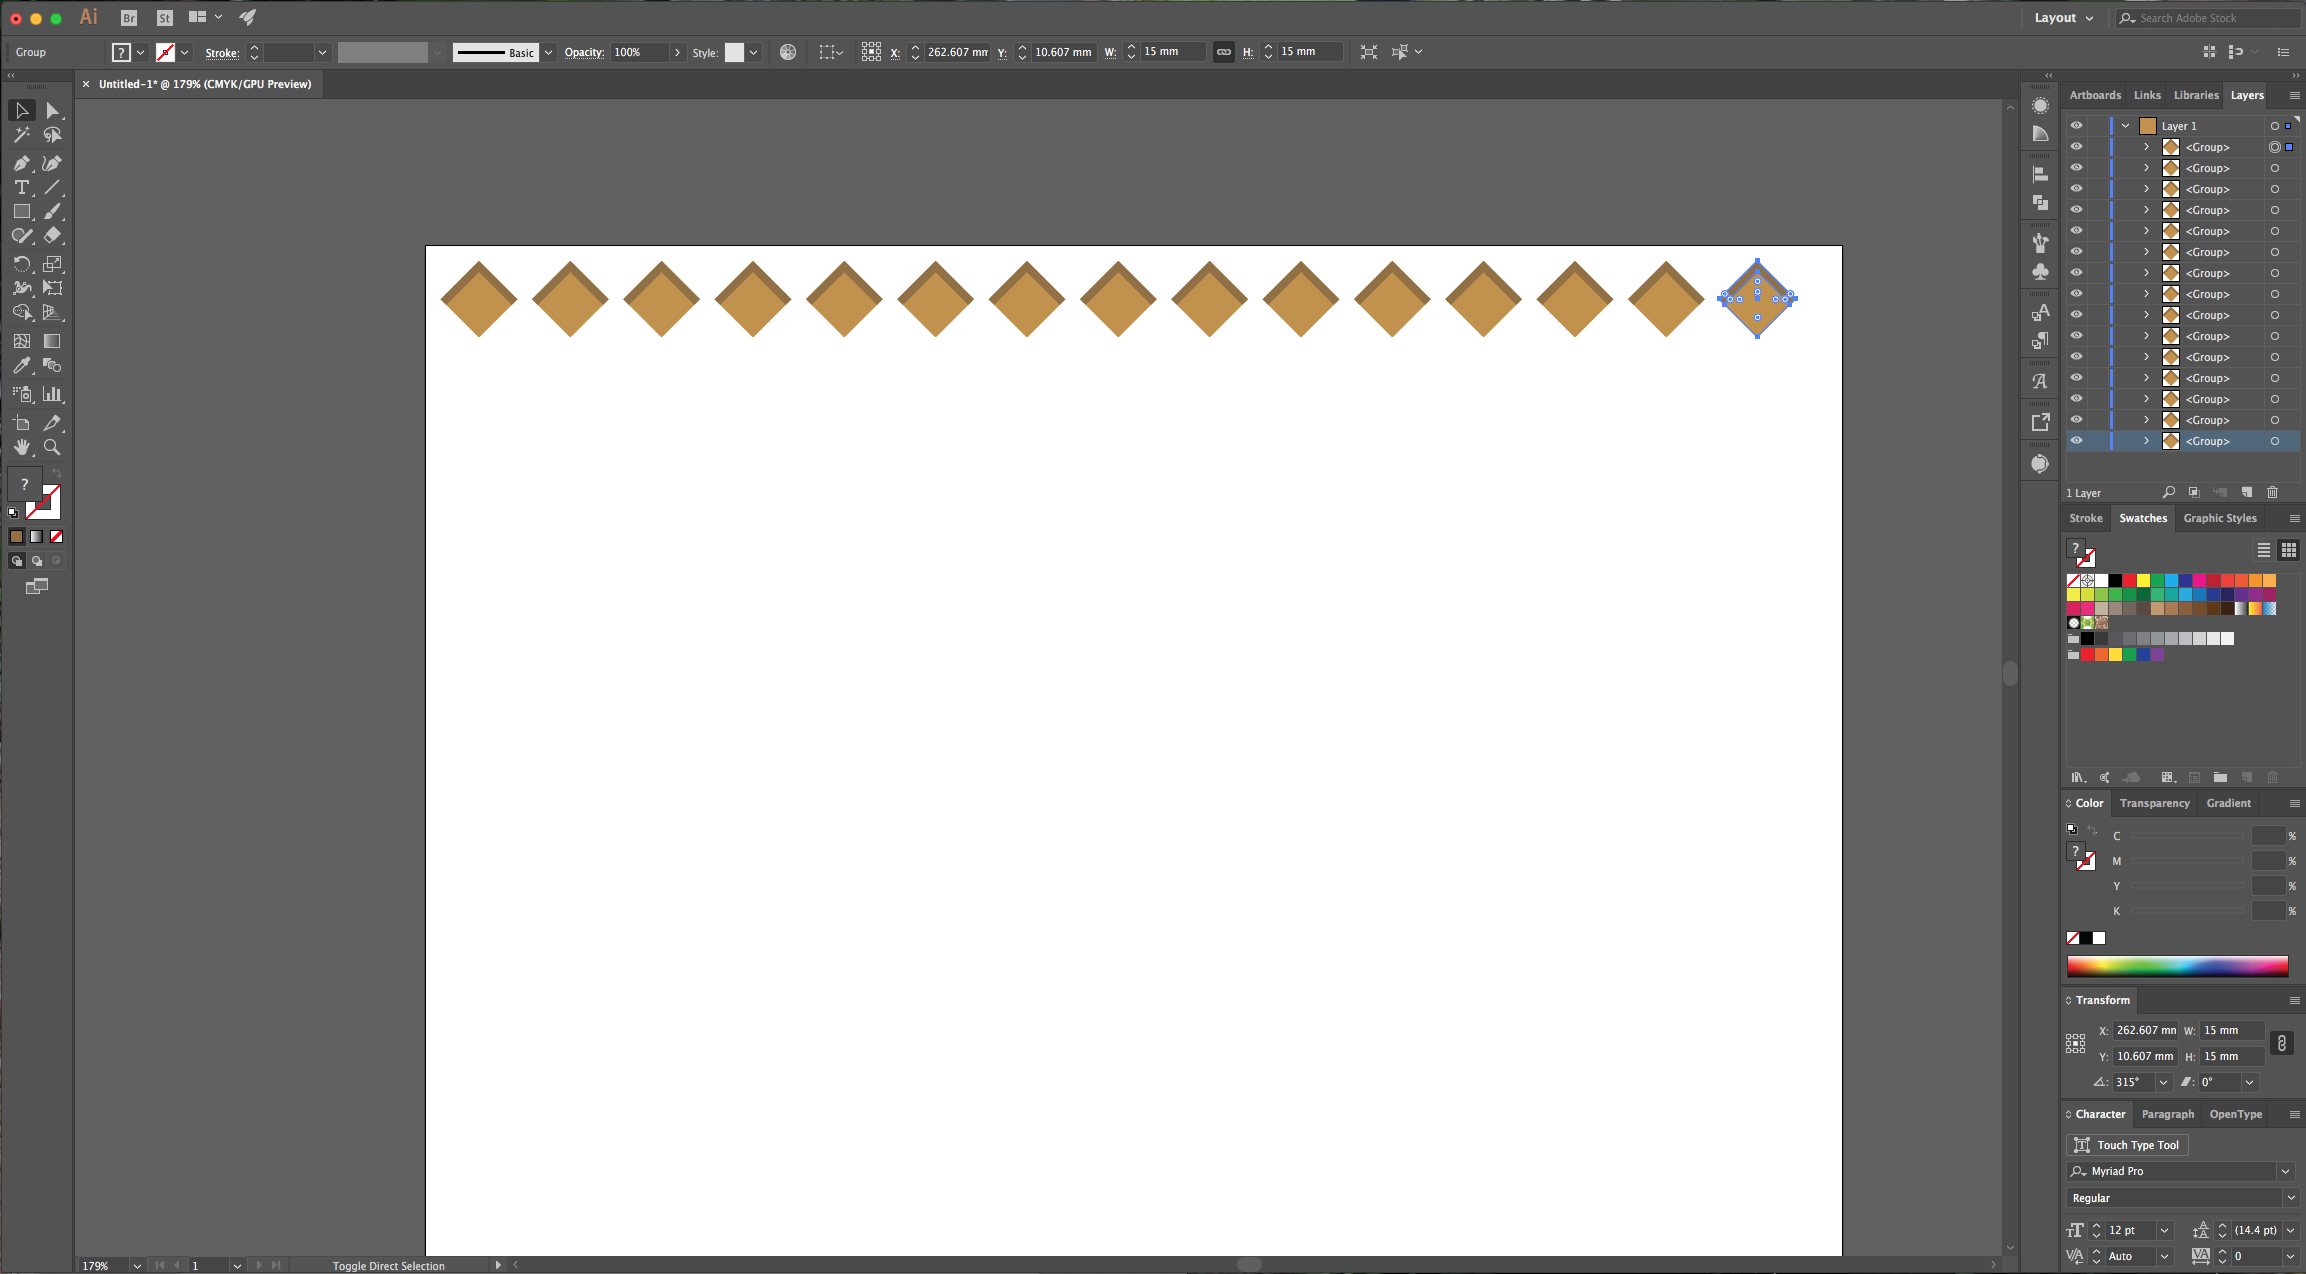
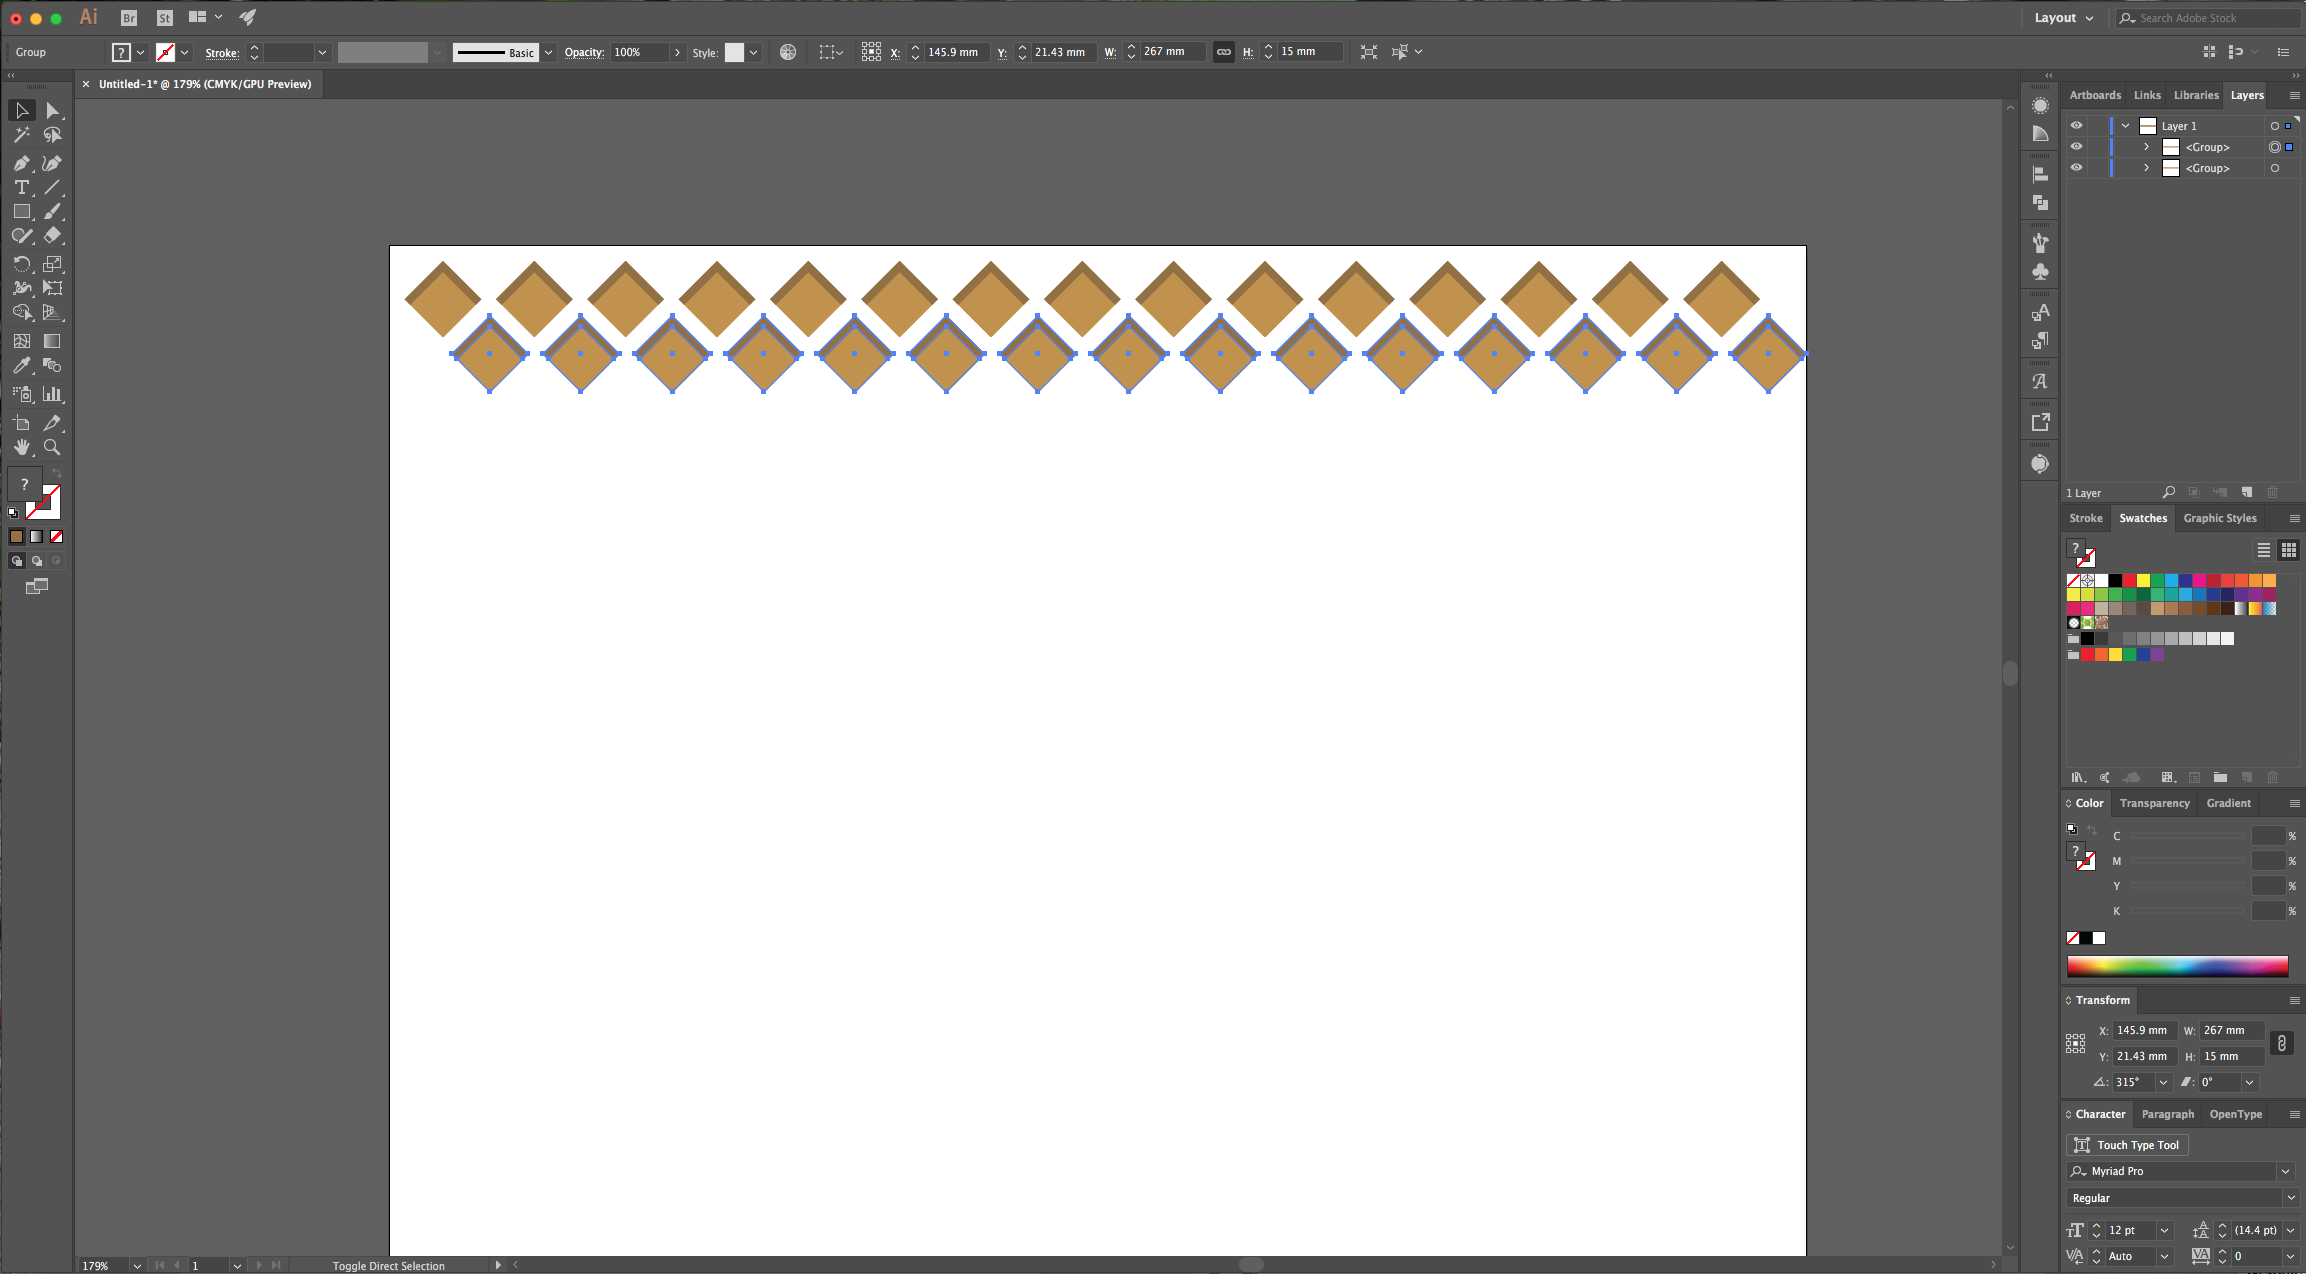
4 - Move your shape to the top-left corner of your document and resize it to 15 x 15 mm making sure “Center” is your “Reference Point” in the top menu. Select your shape and “Move” it (Shift + Command/Control + M) 18 mm “Horizontal”, click “Copy” instead of OK. Then click Command/Control + D to duplicate the action. Repeat as many times as needed to fill the document horizontally.
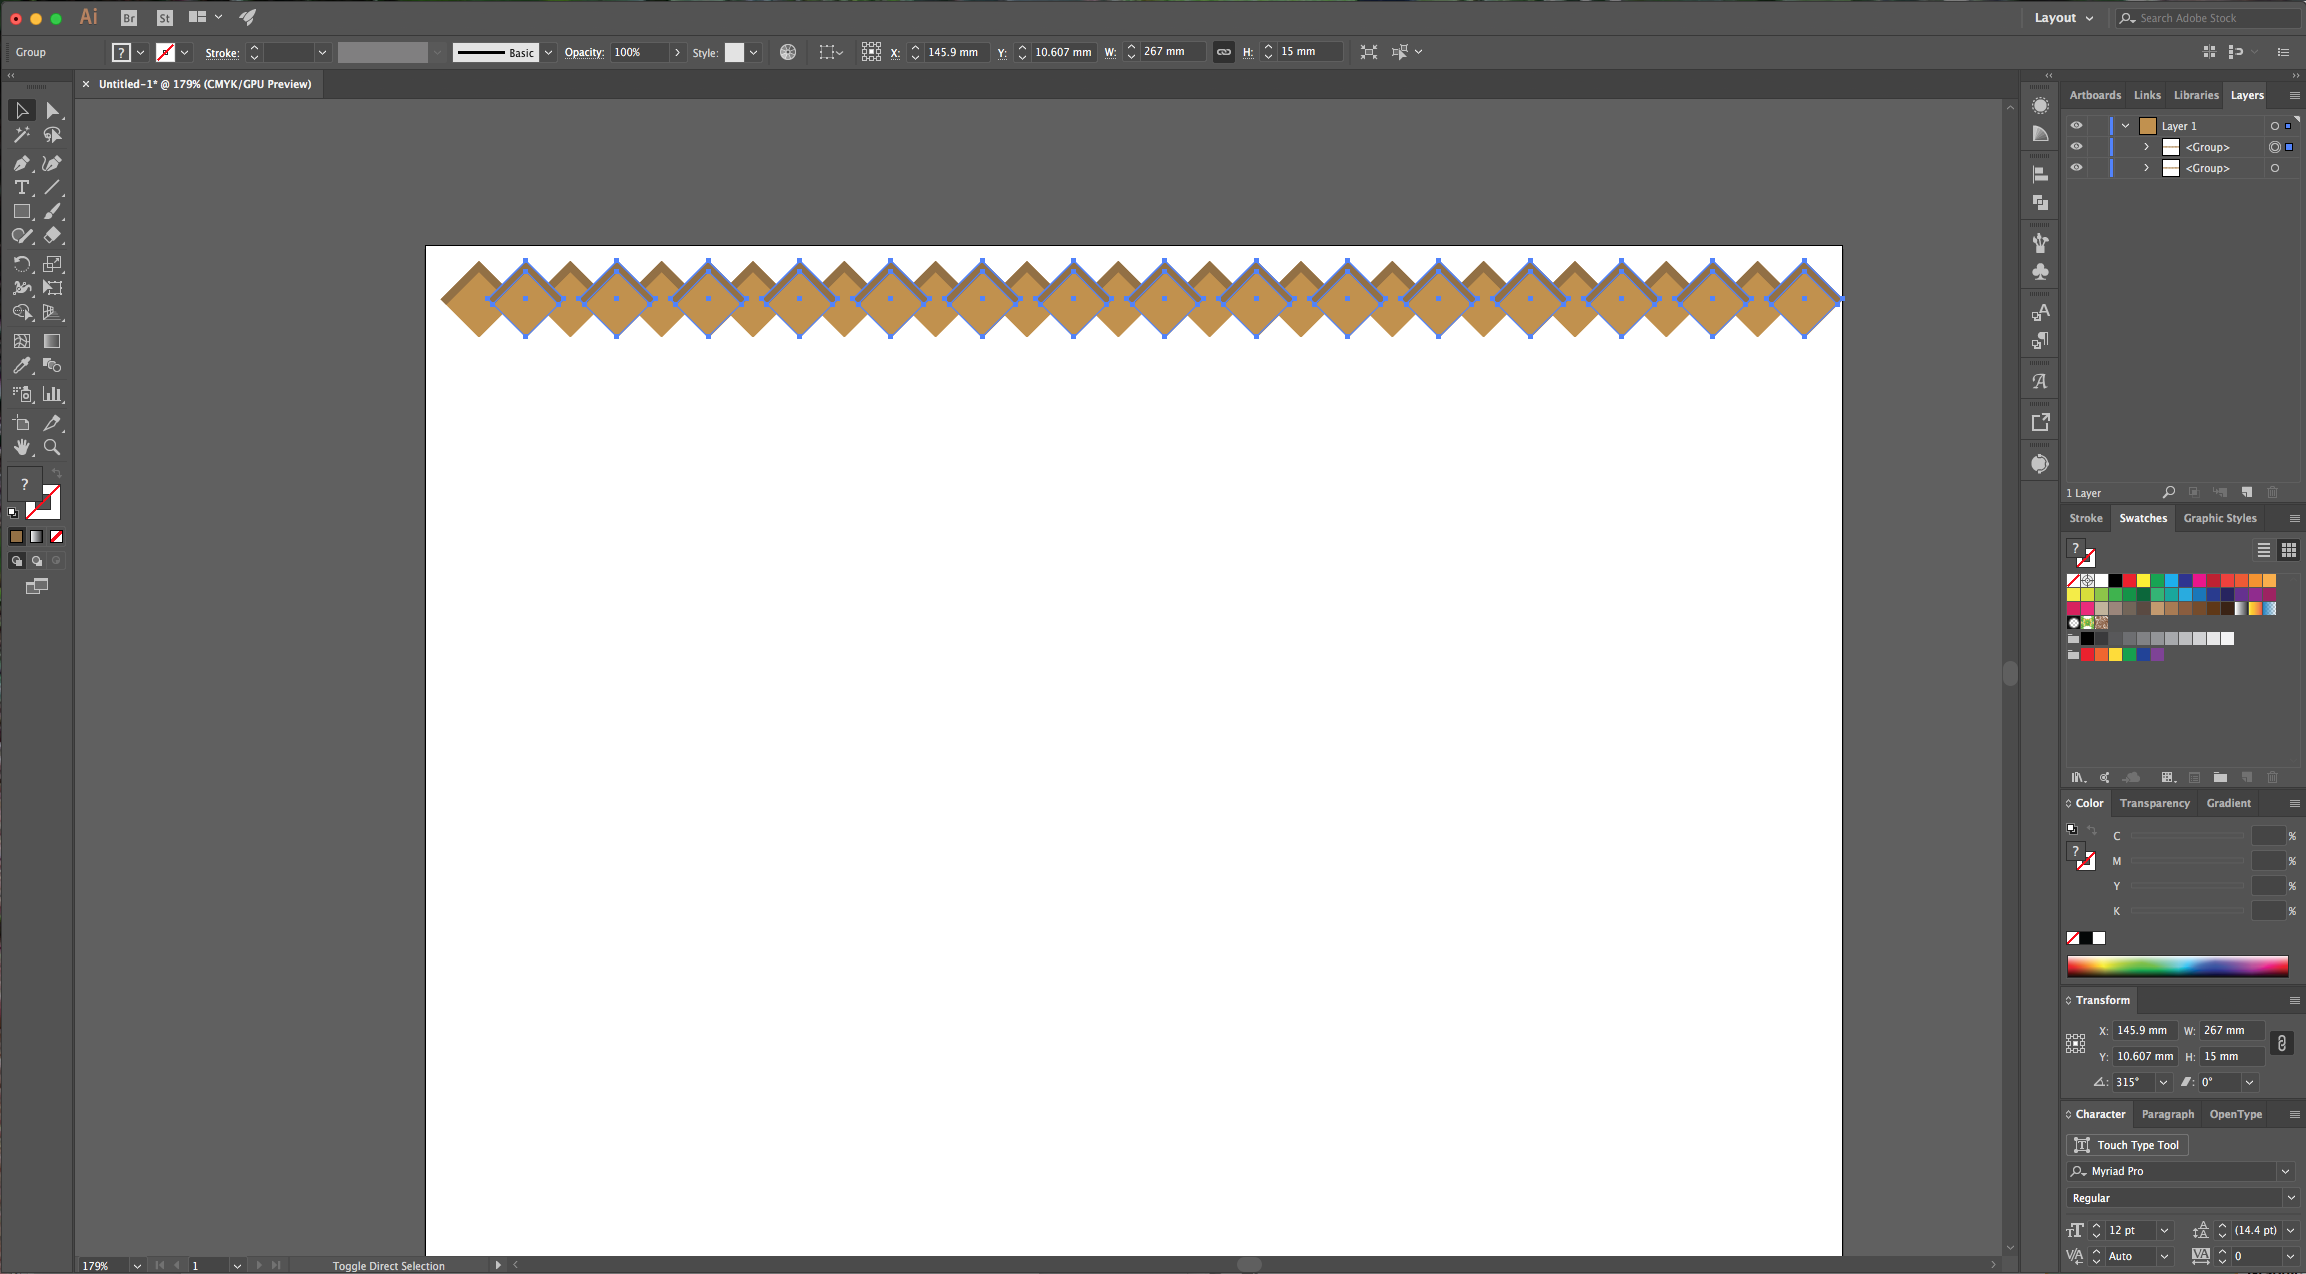
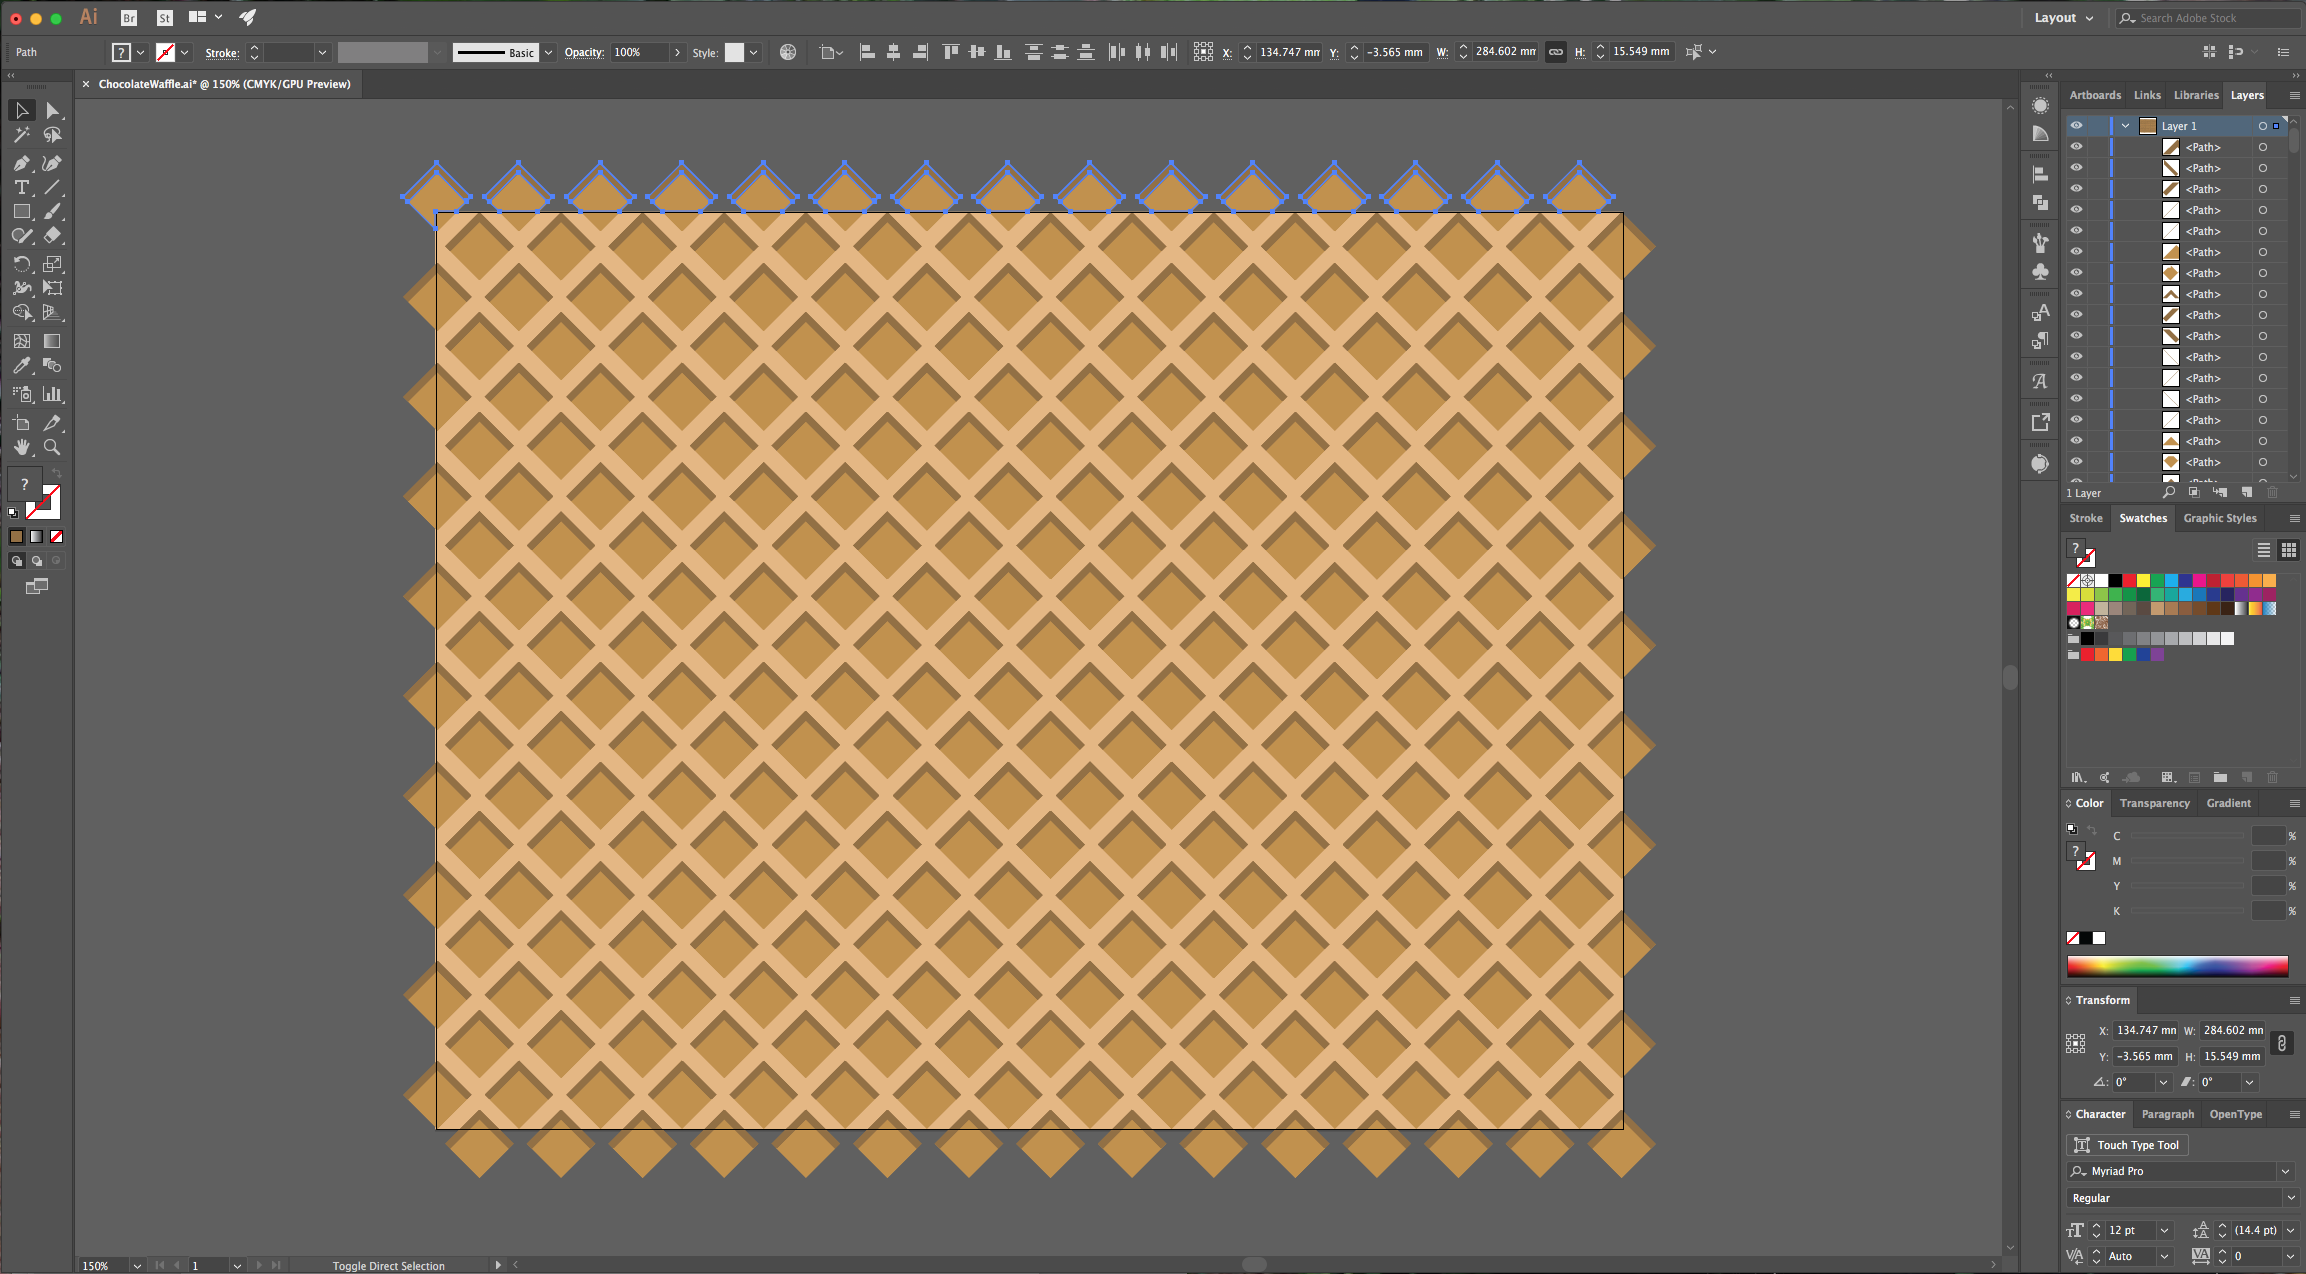
5 - Select all your shapes, group them, duplicate and move the copy by holding the “Alt” and “Shift” keys while dragging to the right. Position the duplicate centers in the middle of the empty space between your squares, then move the duplicate down and leave the same amount of space as the one between the squares.
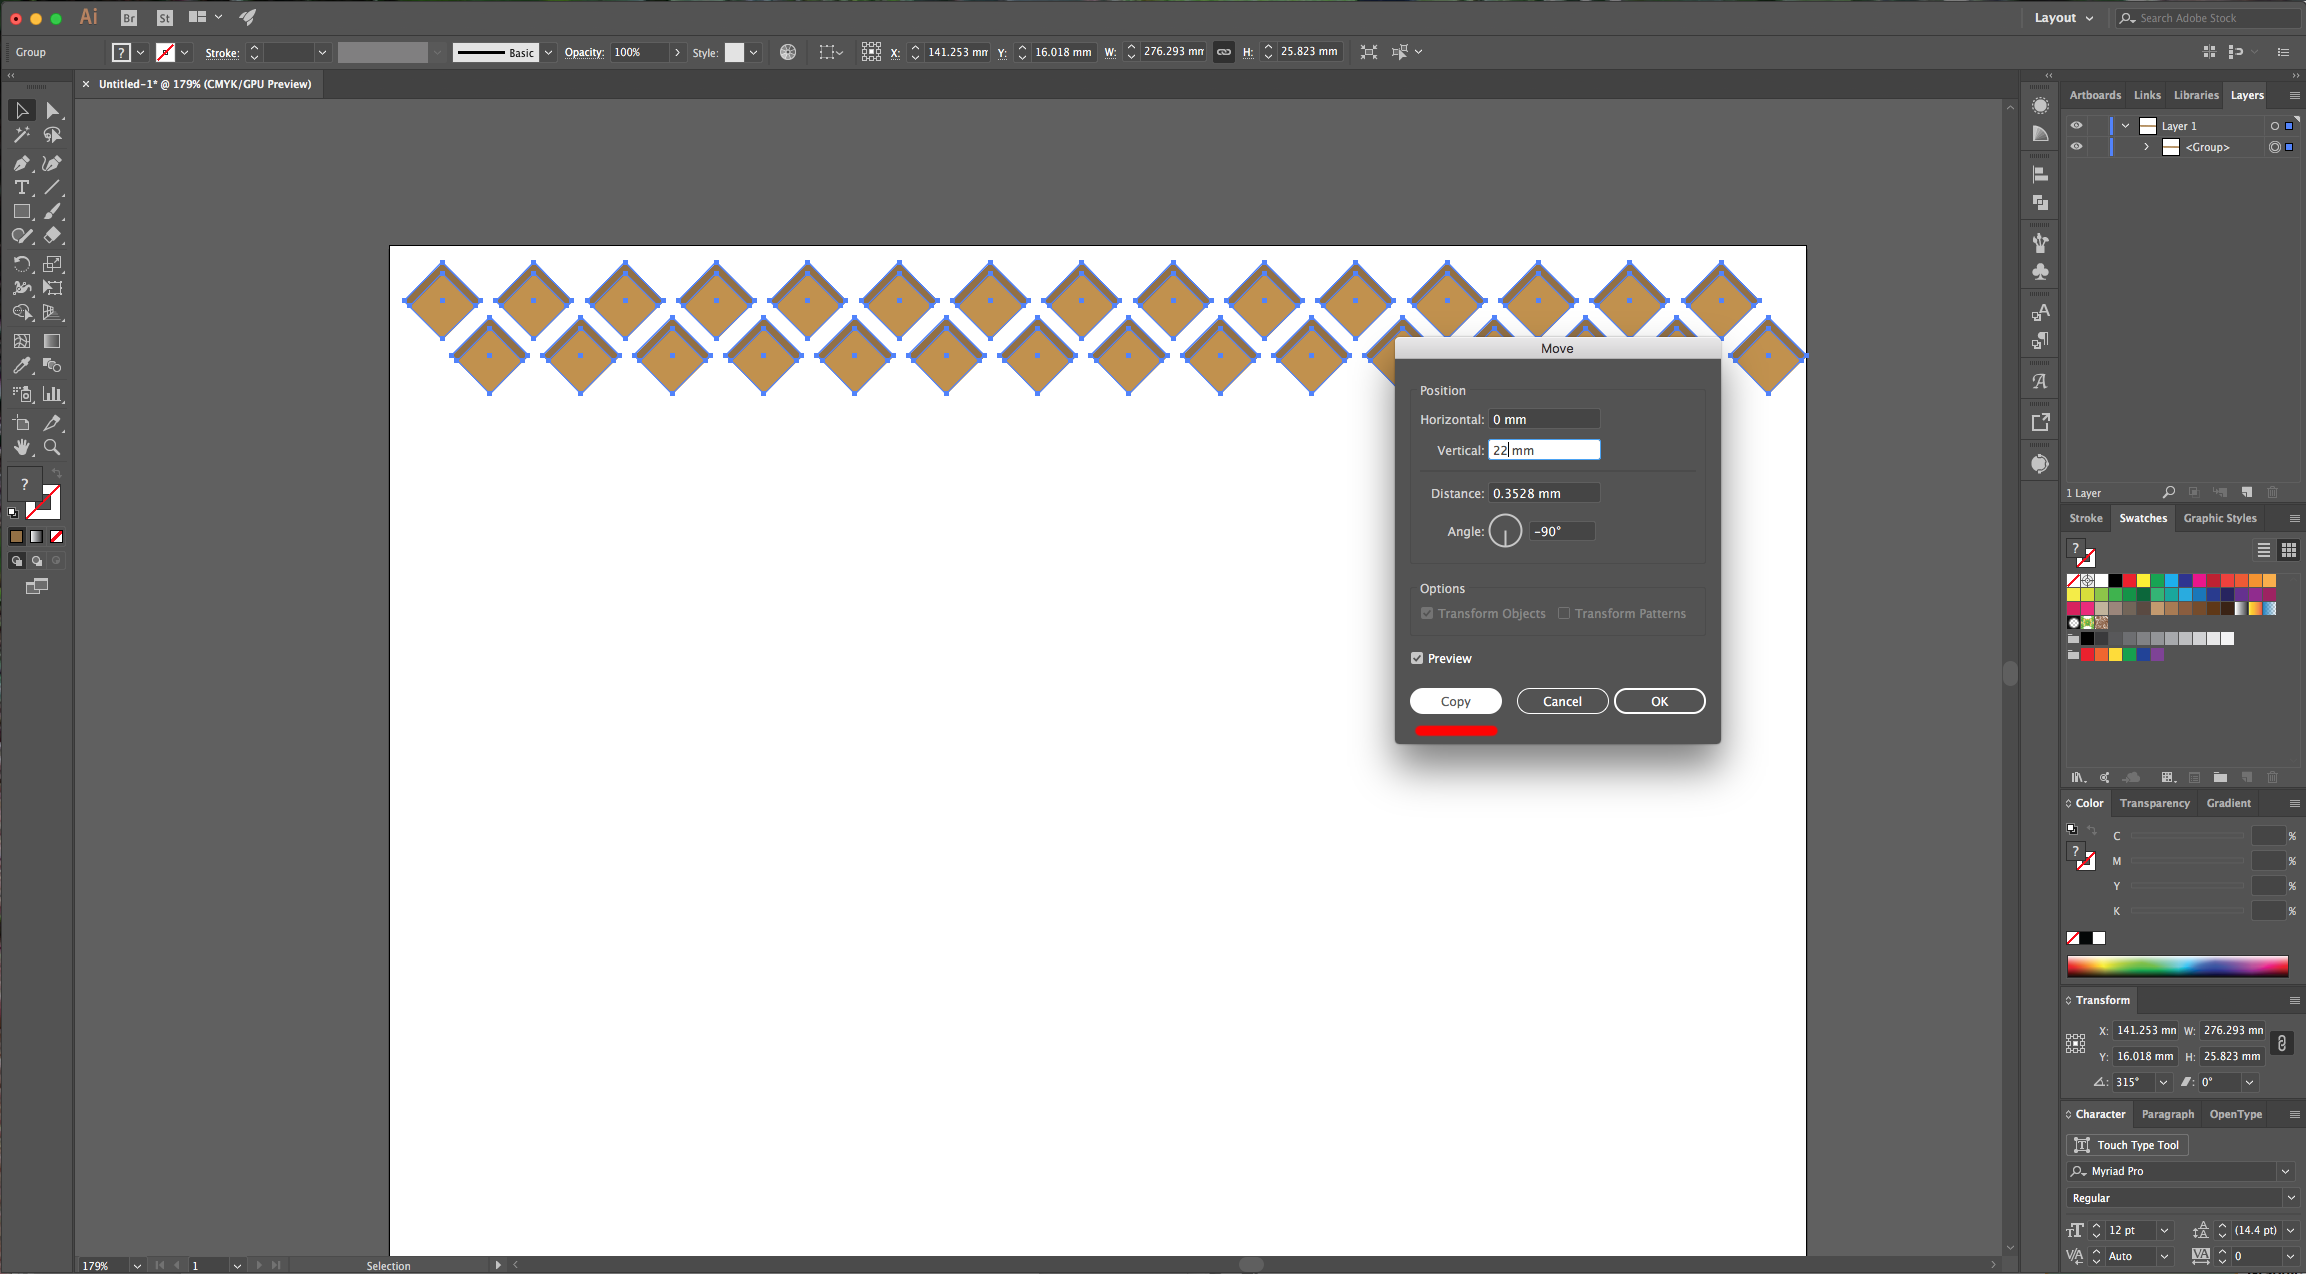
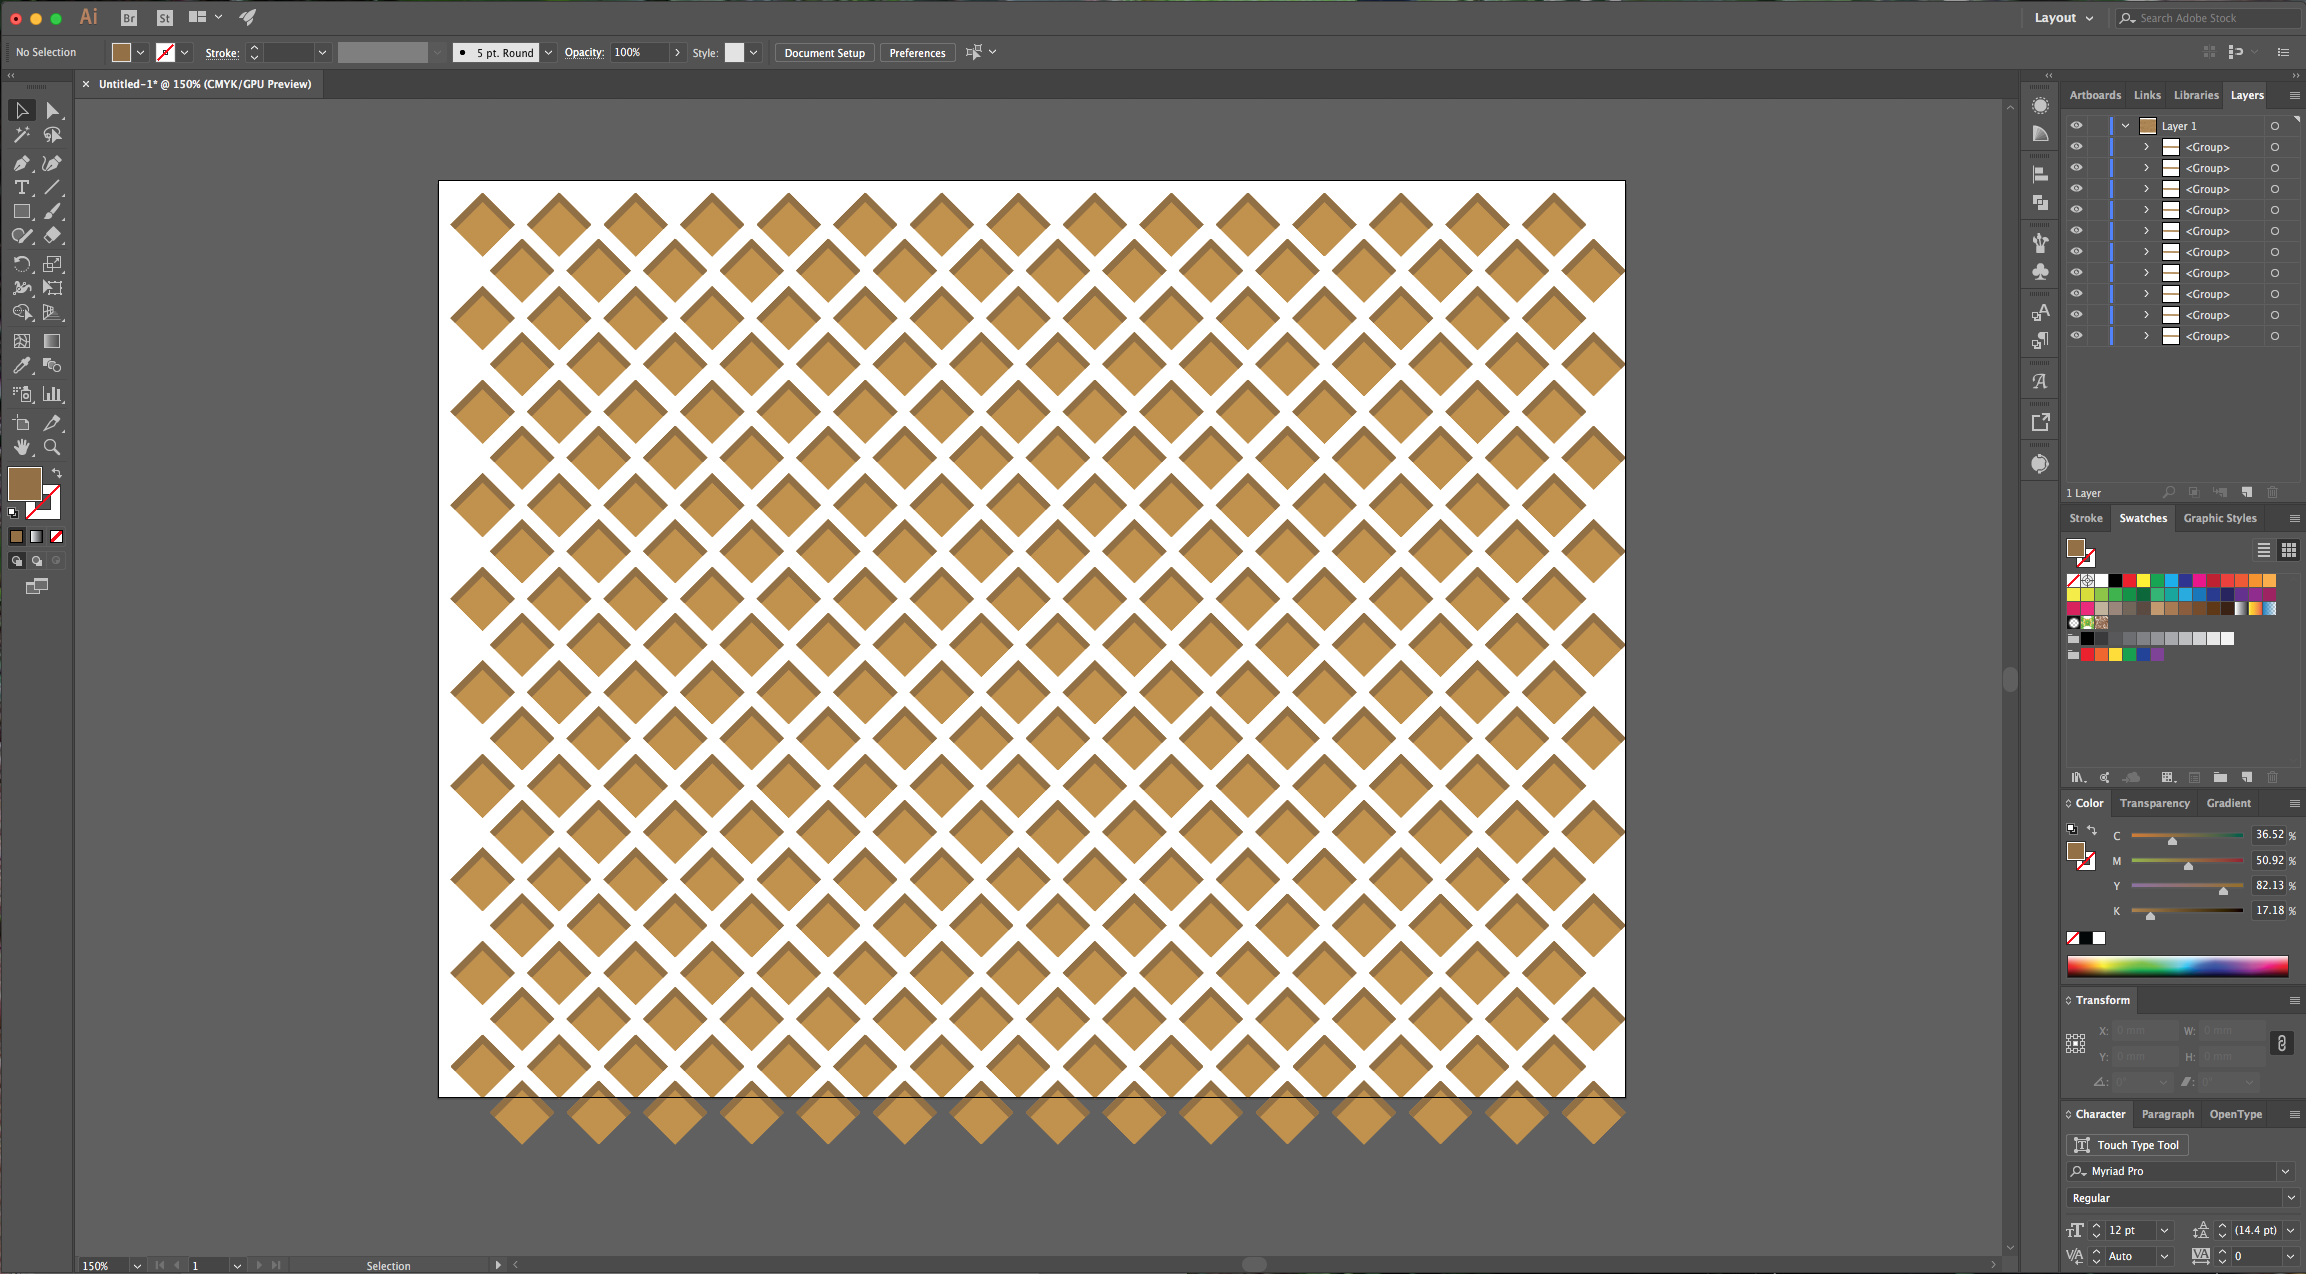
6 - Group everything and “Move” it (Shift + Command/Control + M) 22 mm “Vertical”, click “Copy” instead of OK. Then click Command/Control + D to duplicate the action until your document is covered. Select everything, group it and move it and “Scale” it (Hold the “Shift” key while dragging the corners) to fit the document making sure they are as evenly distributed as possible.
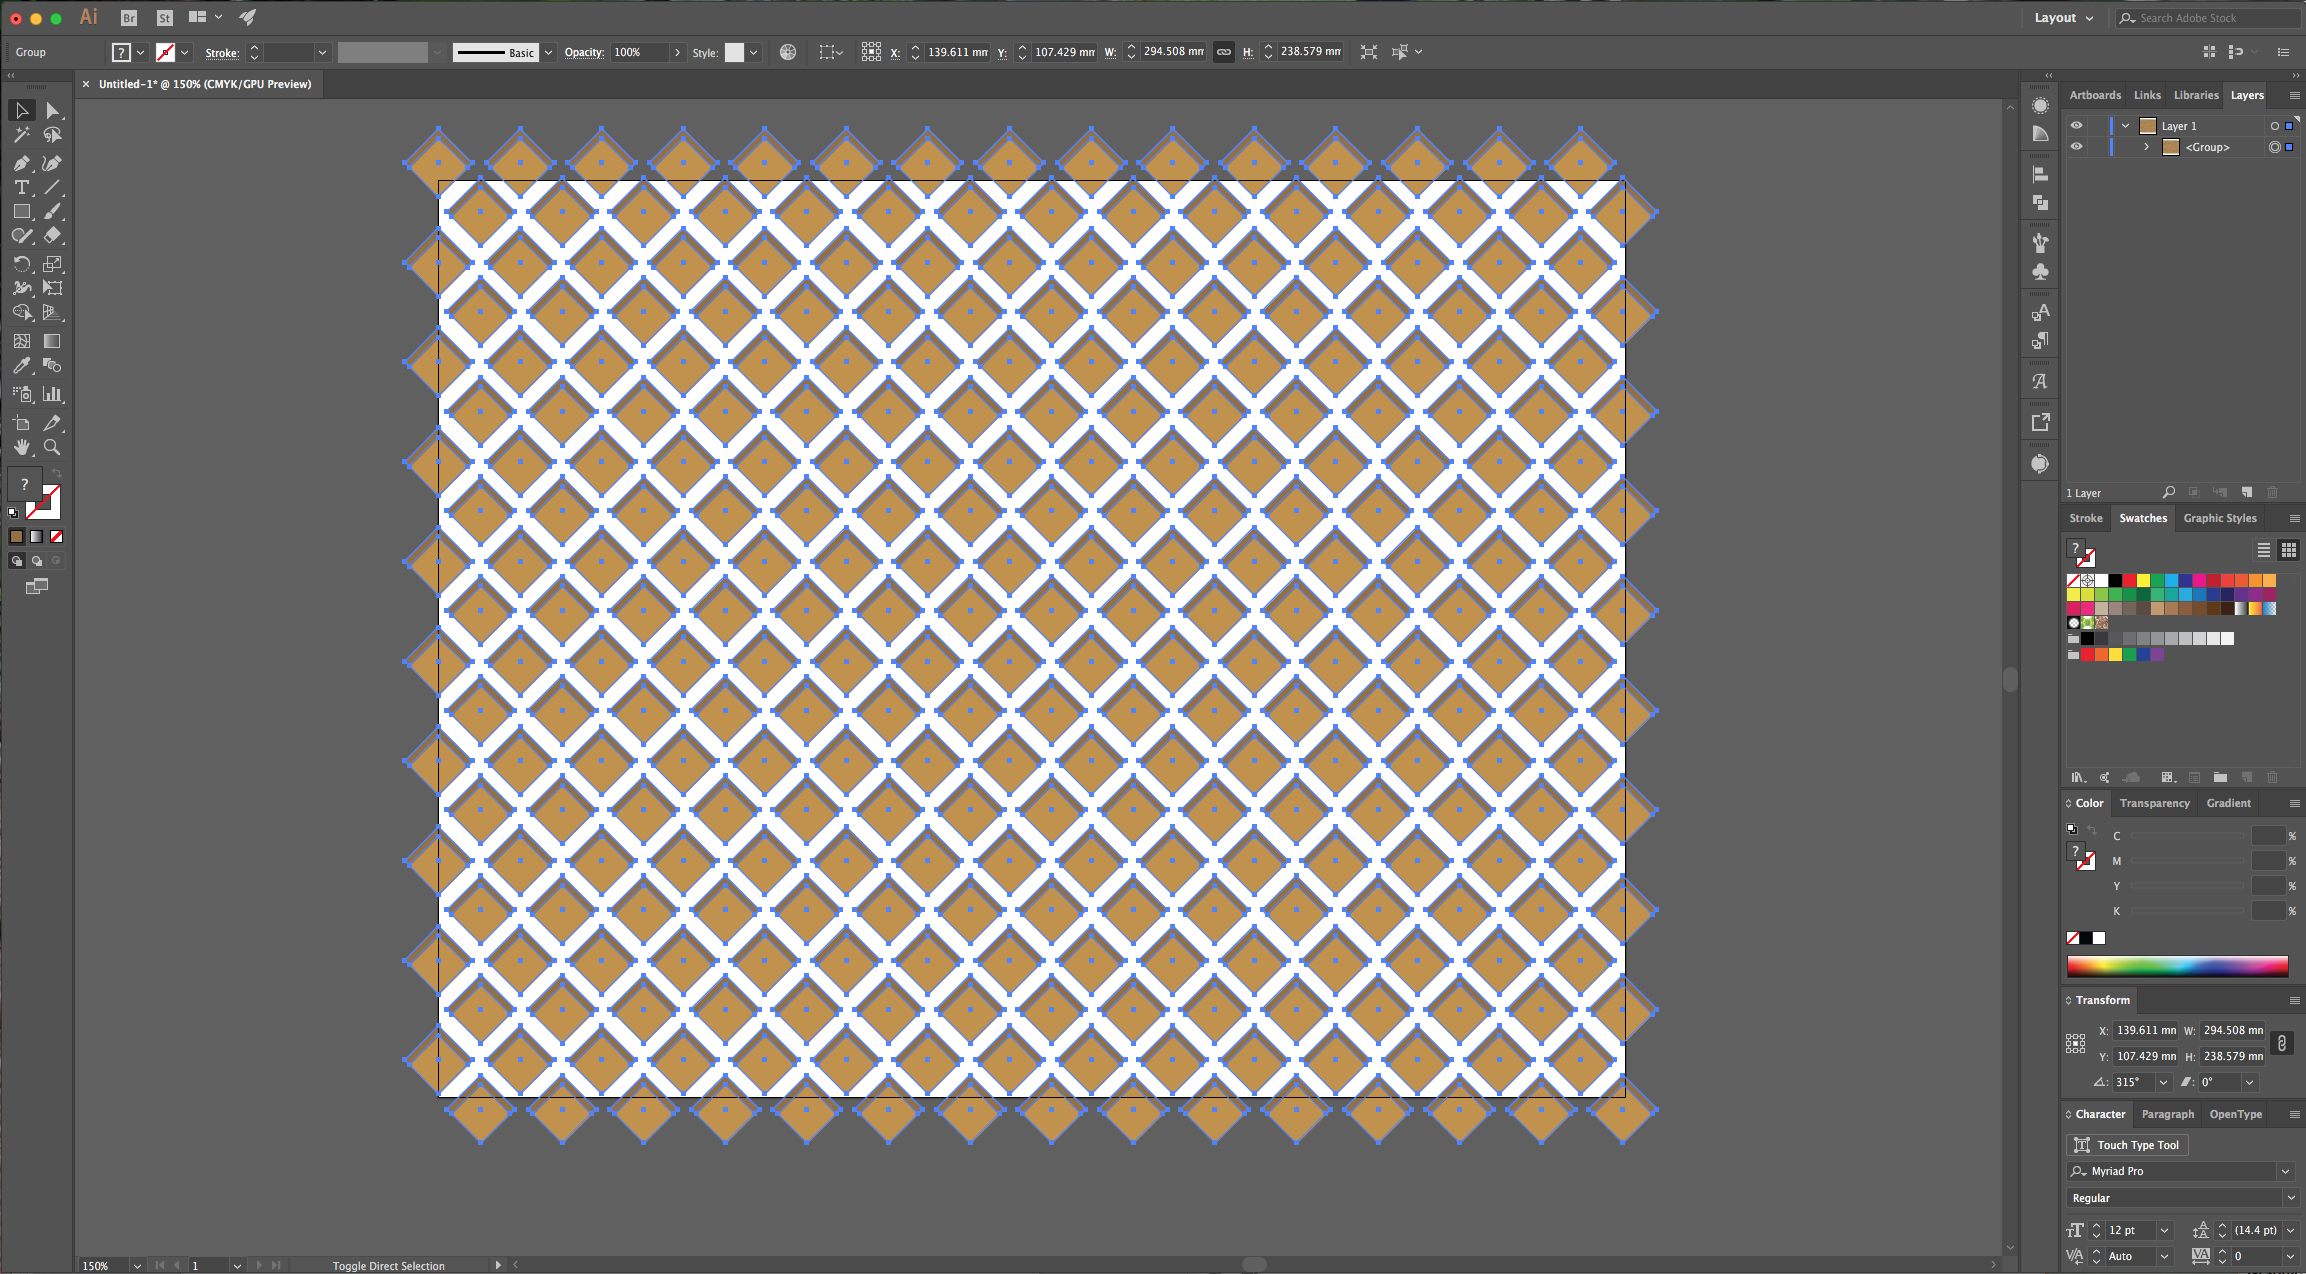
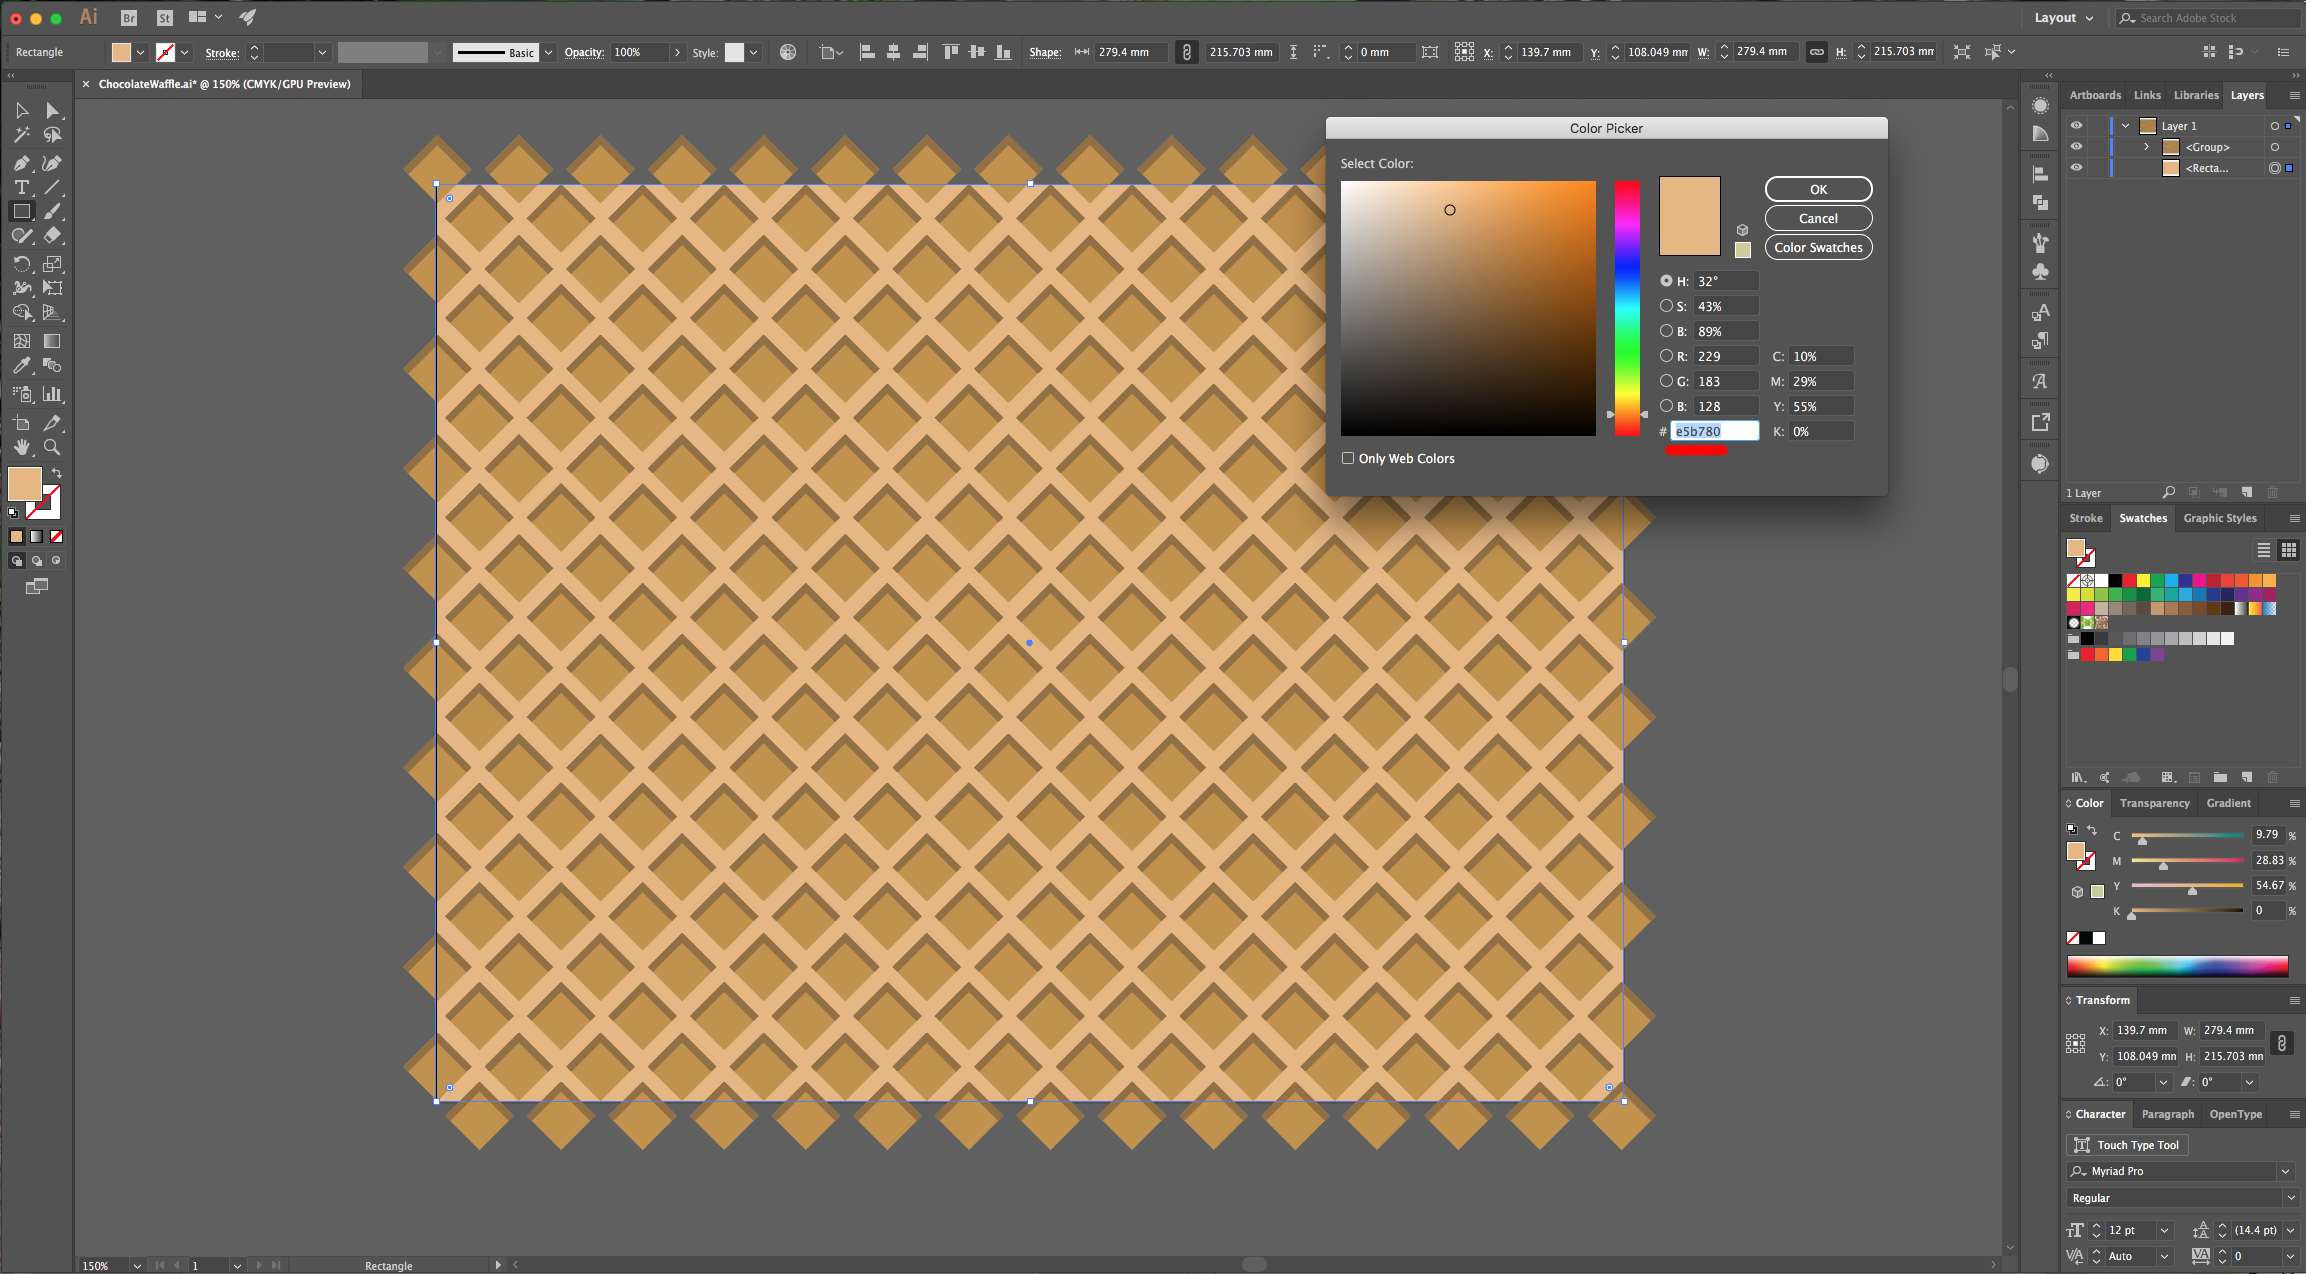
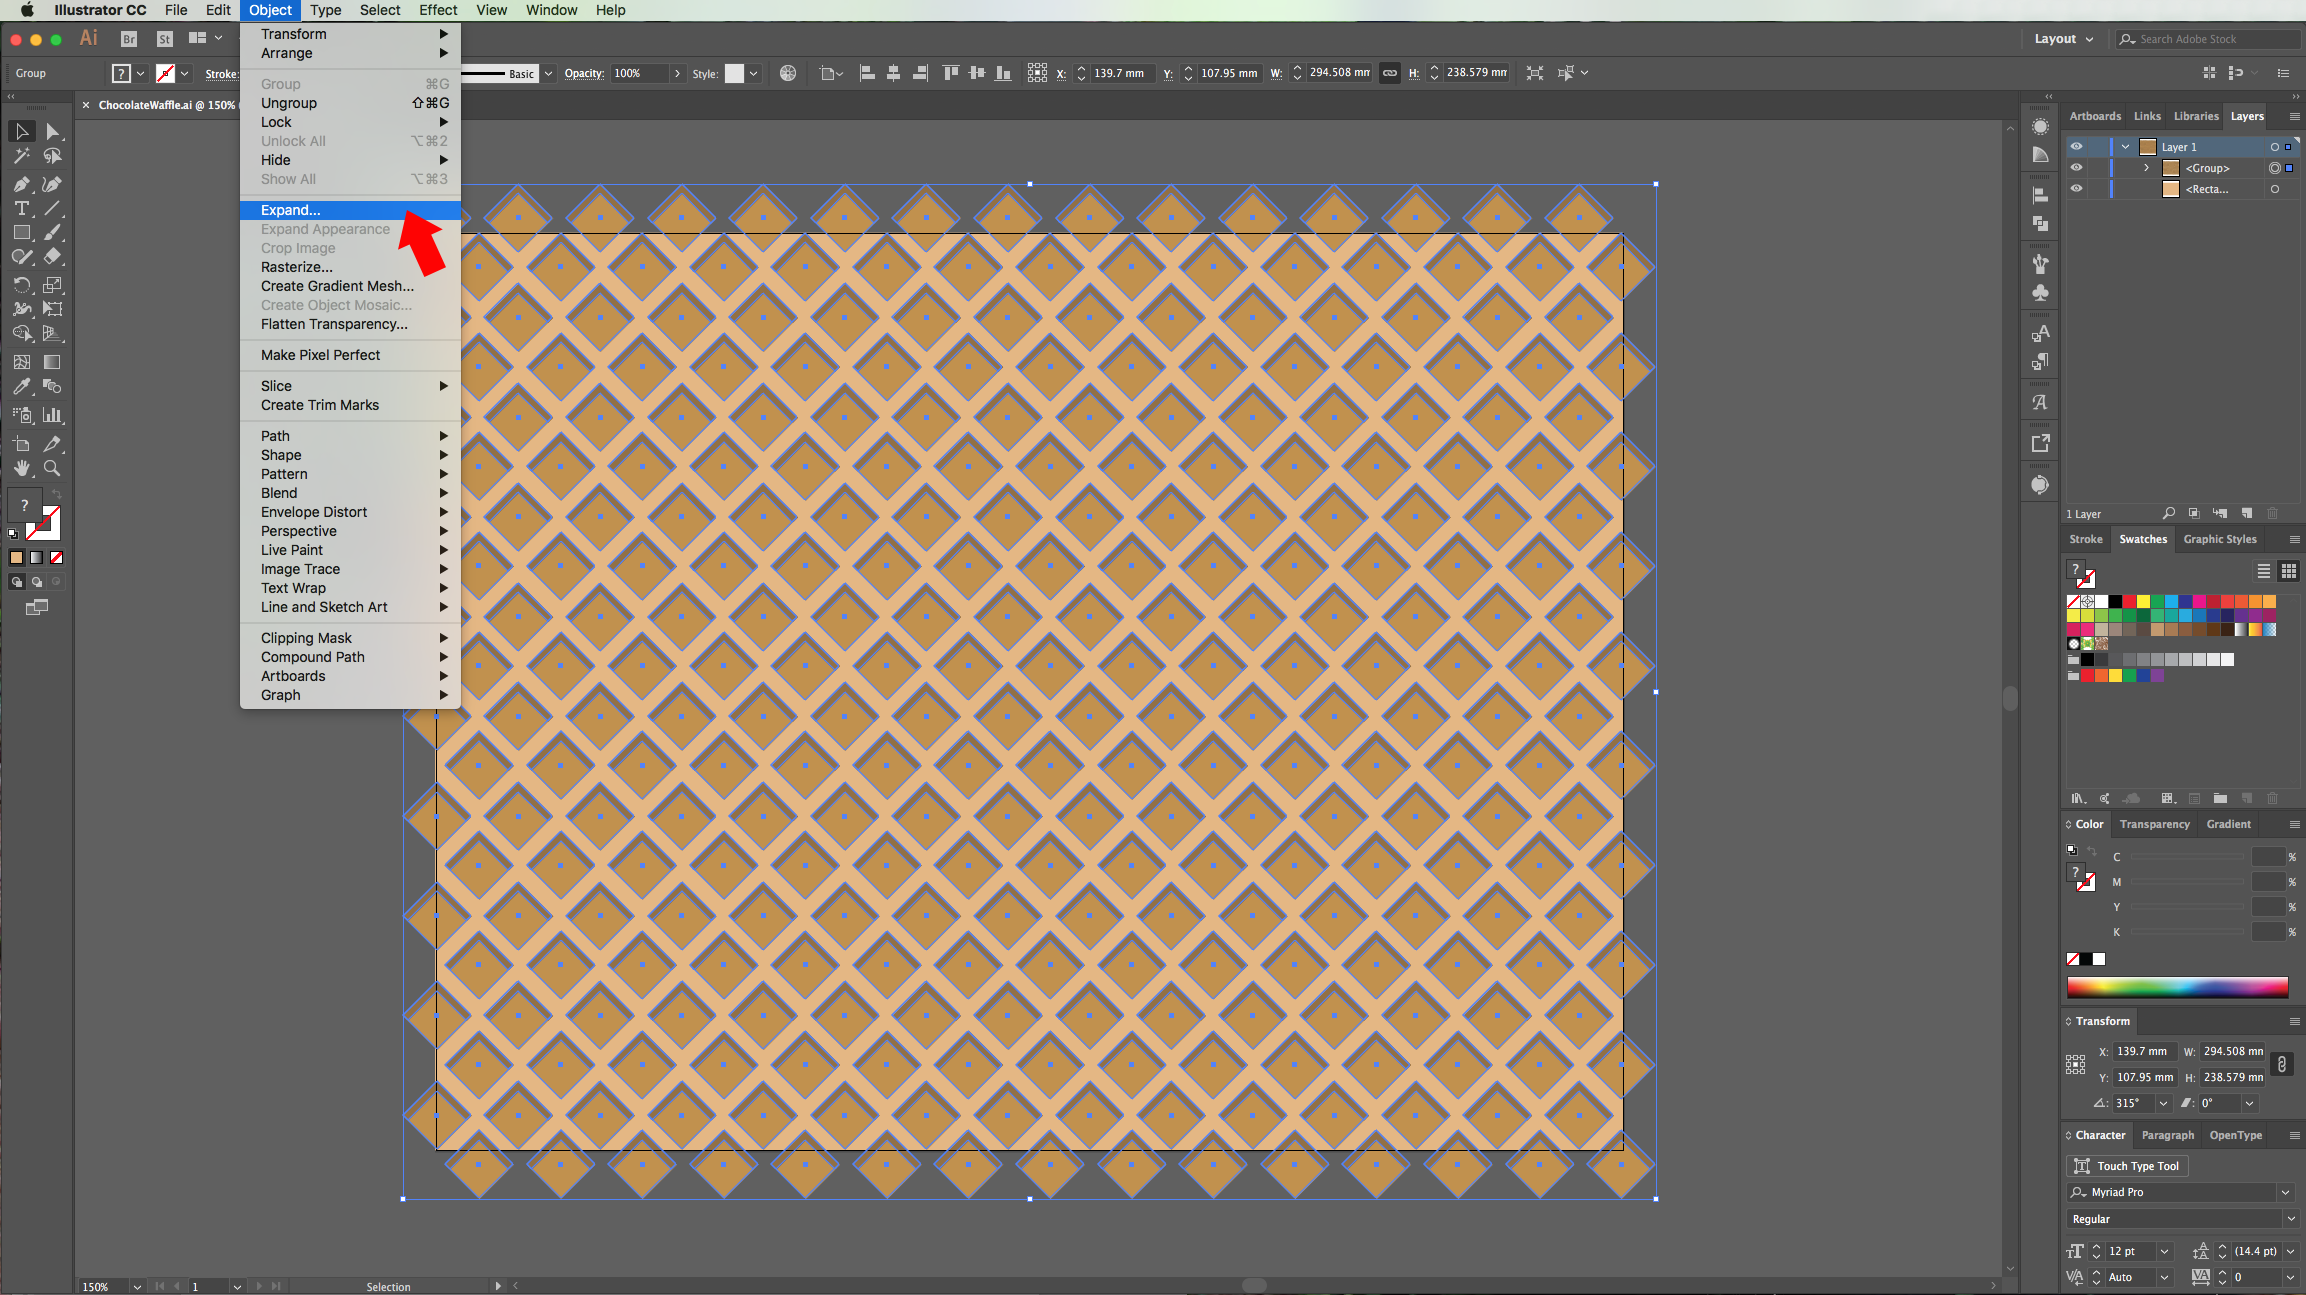
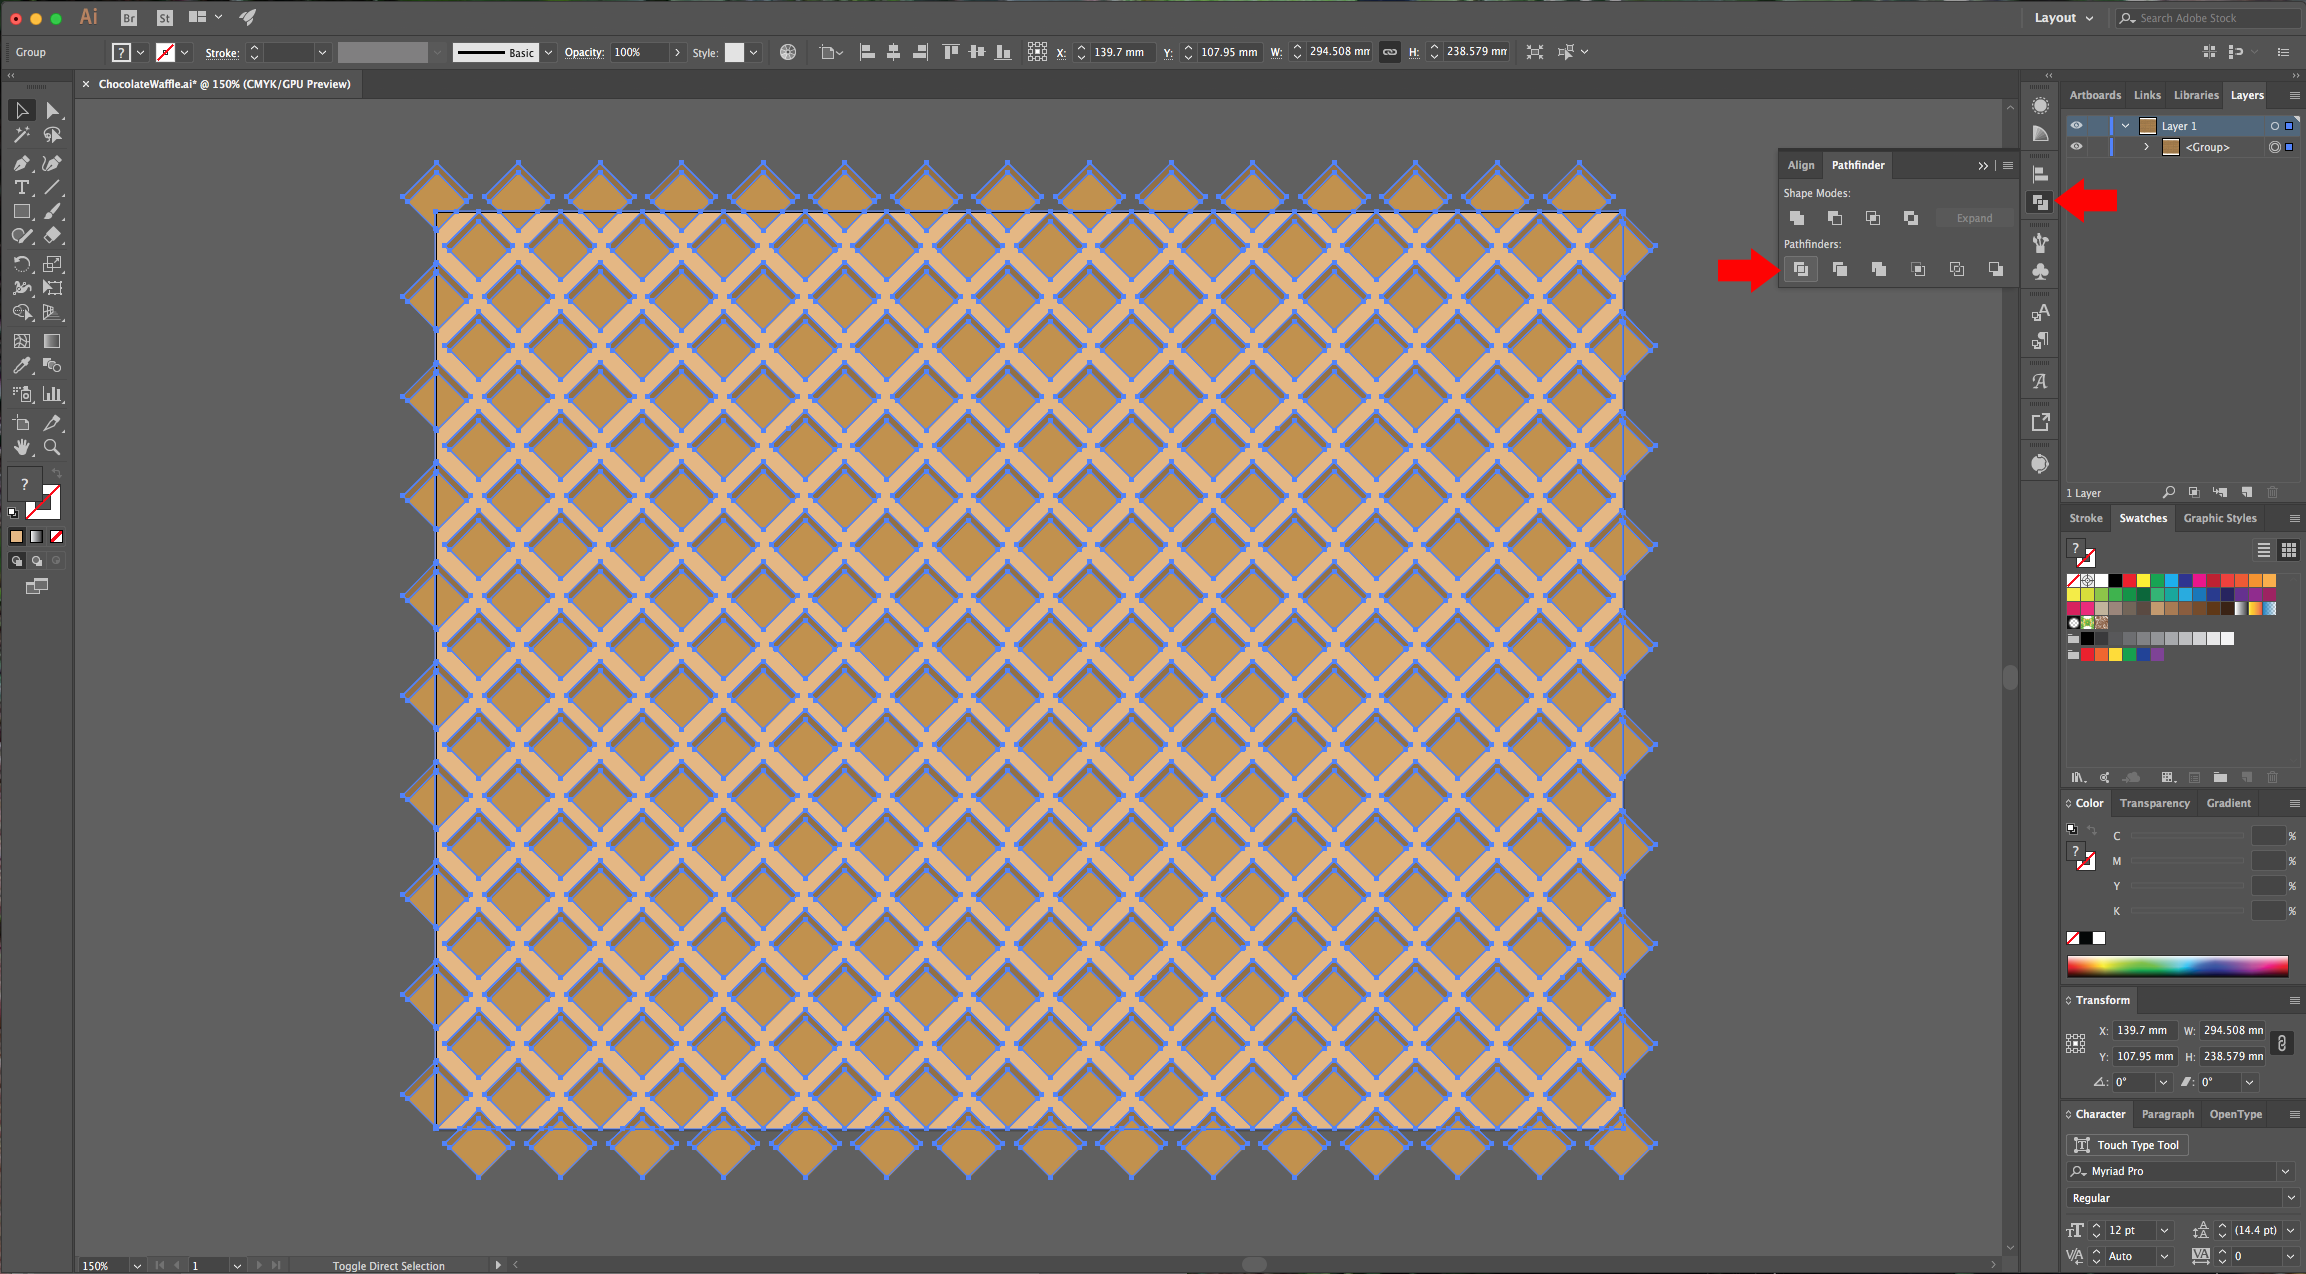
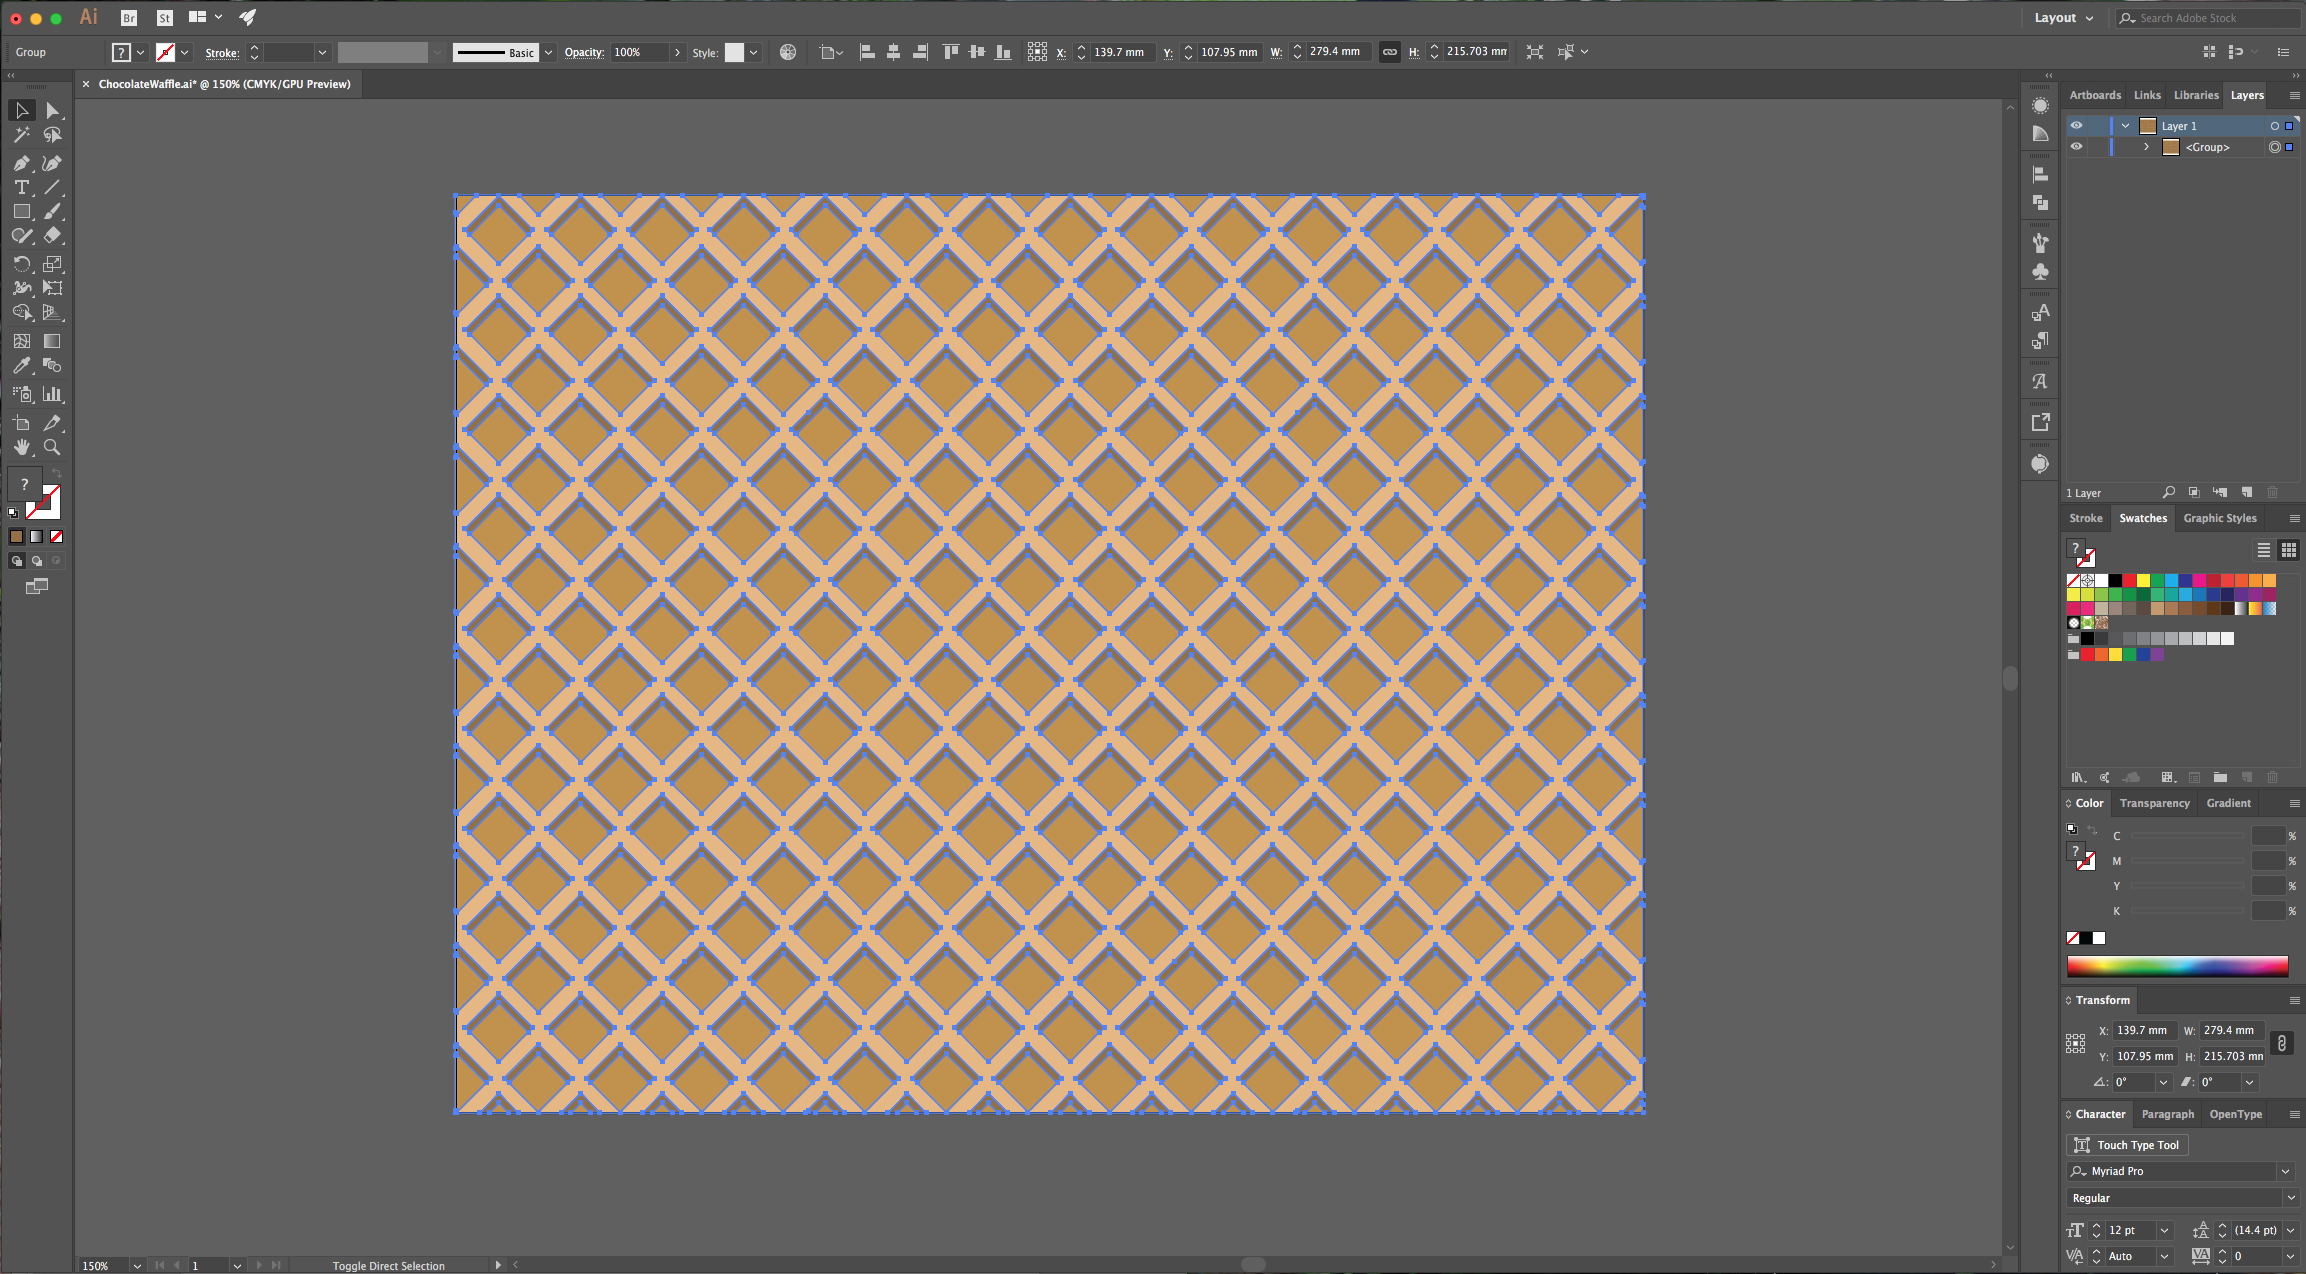
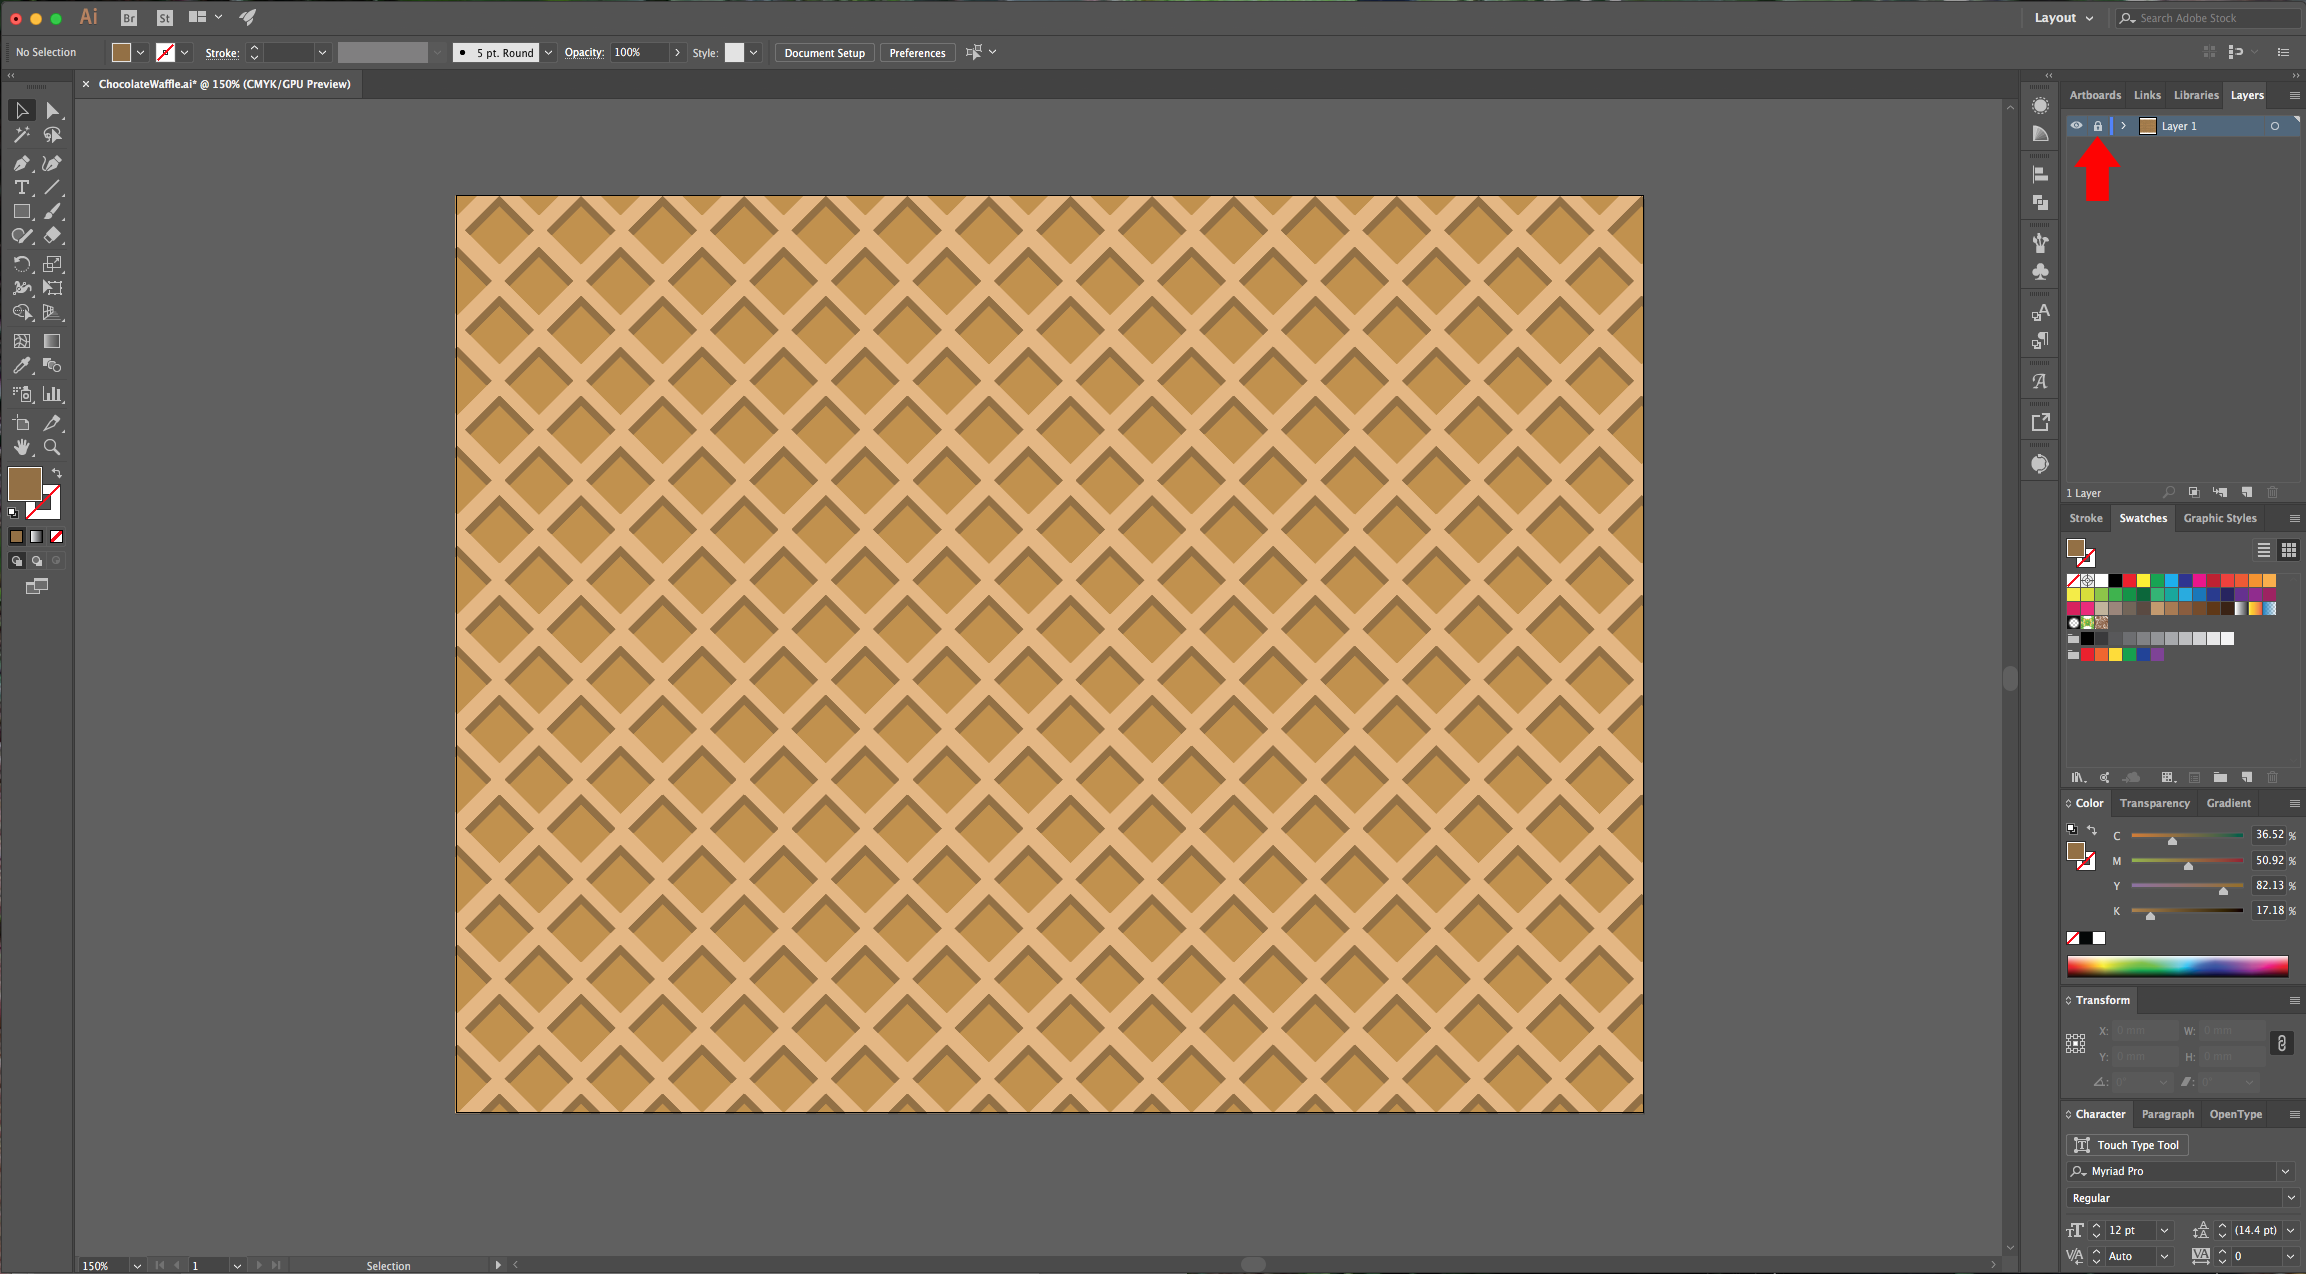
7 - Draw a “Rectangle” that covers your entire document, move it under your “Group” Layer and fill it with an intermediate shade (#e5b780). Select your “Group” and go to Object > Expand, then select both and in the “Pathfinder” Panel choose “Divide”. Ungroup (Shift + Command/Control + G) the resulting path and select the pieces that are outside the Document and delete them. Then, select everything and “Group” it again. Then, lock the layer by clicking to the left of its thumbnail.
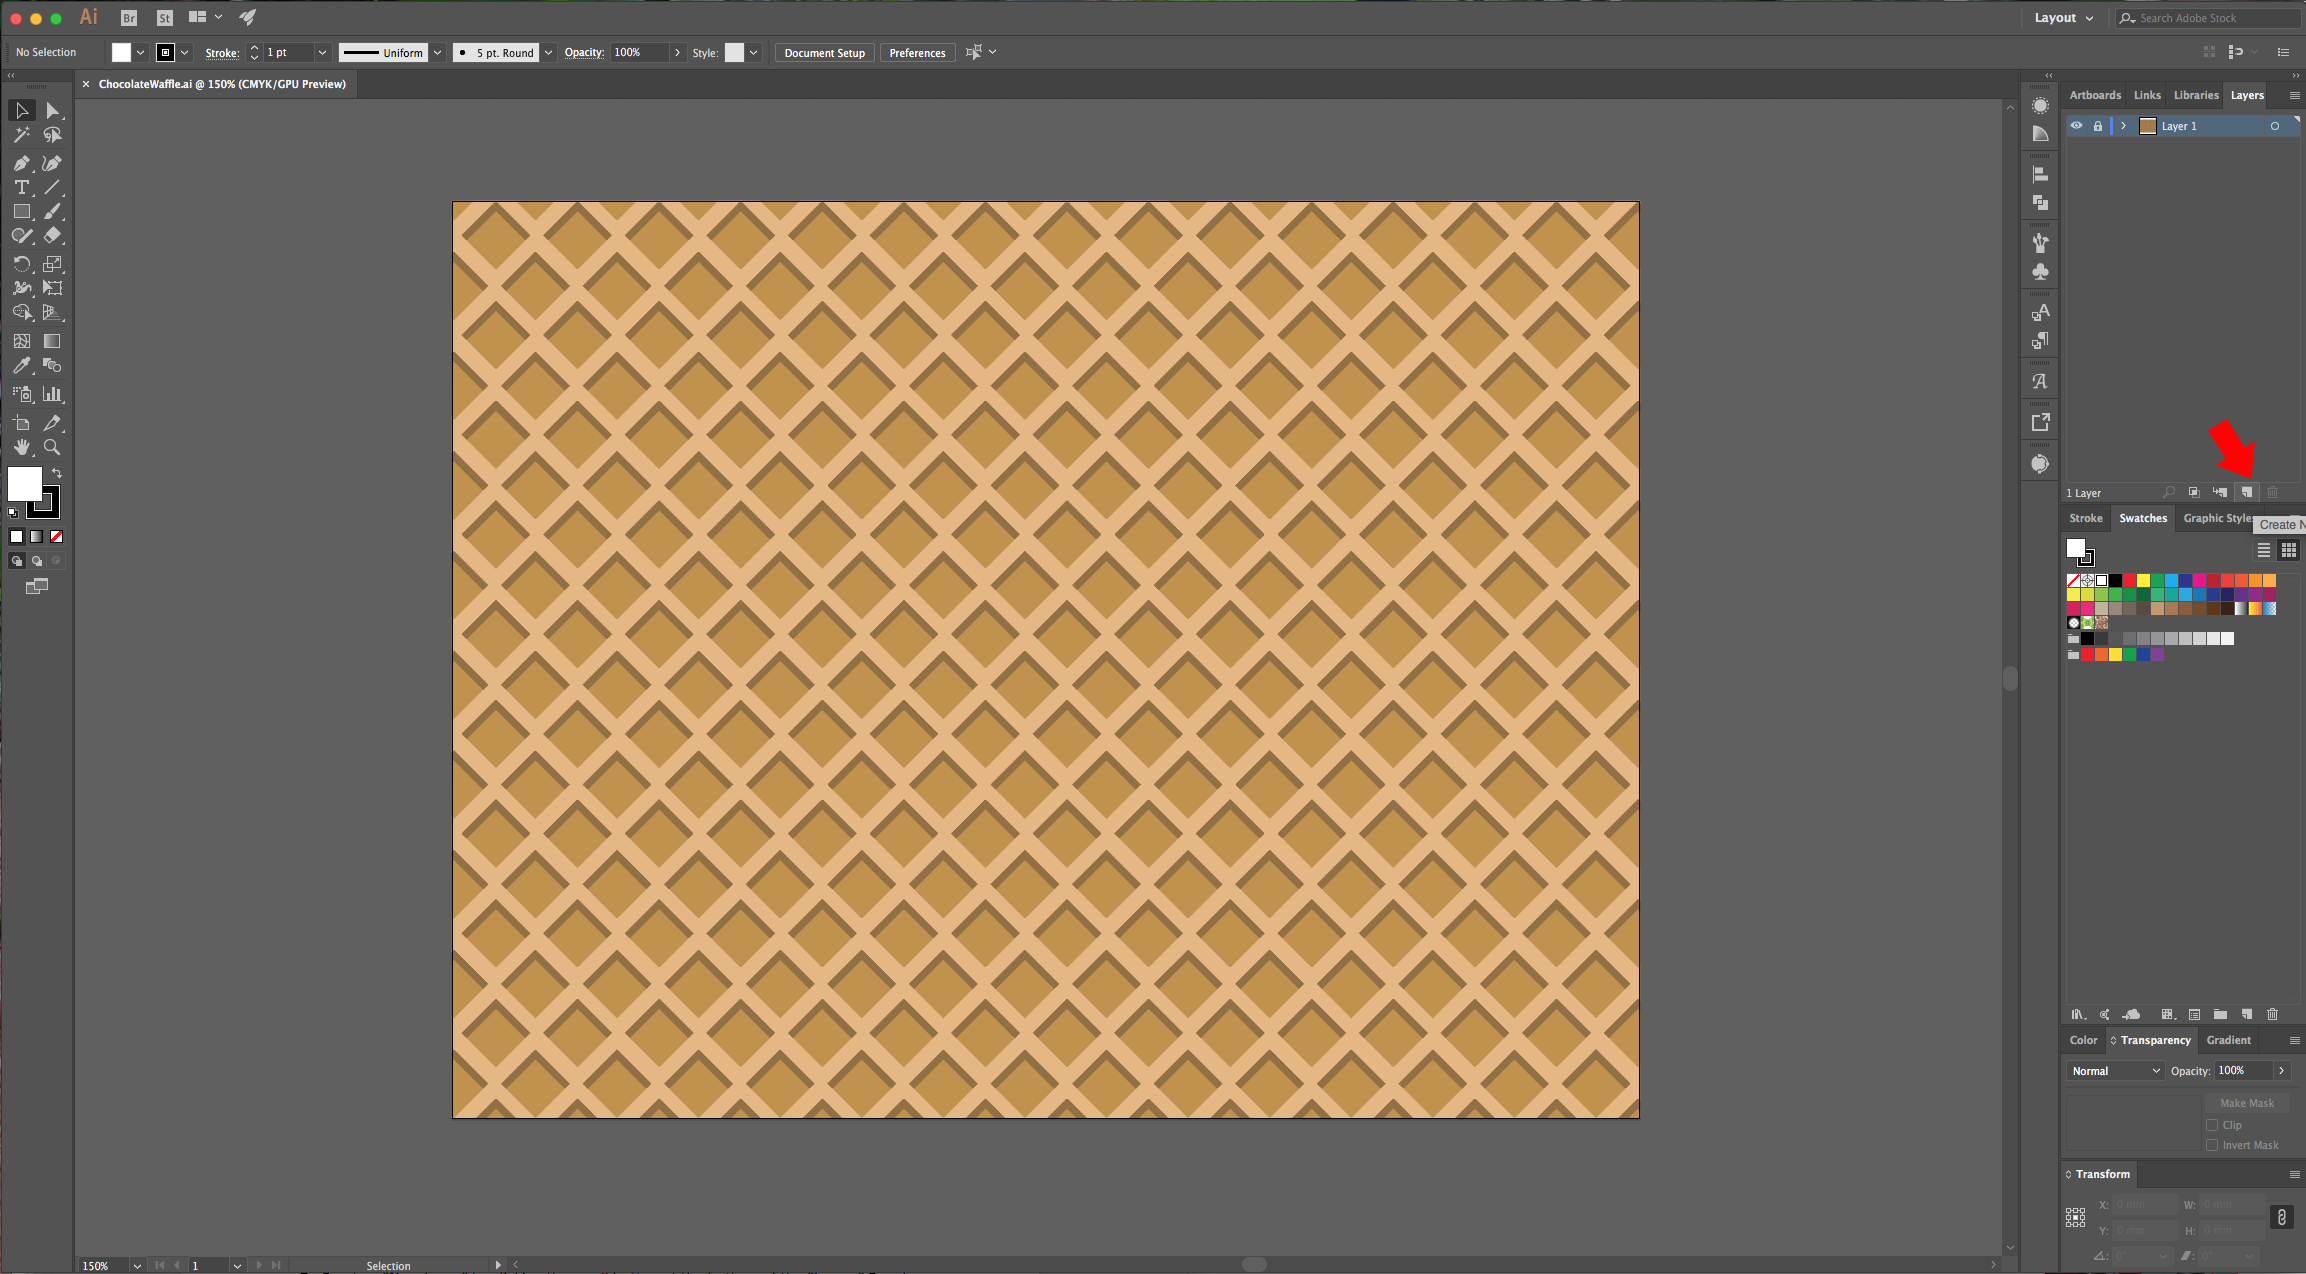
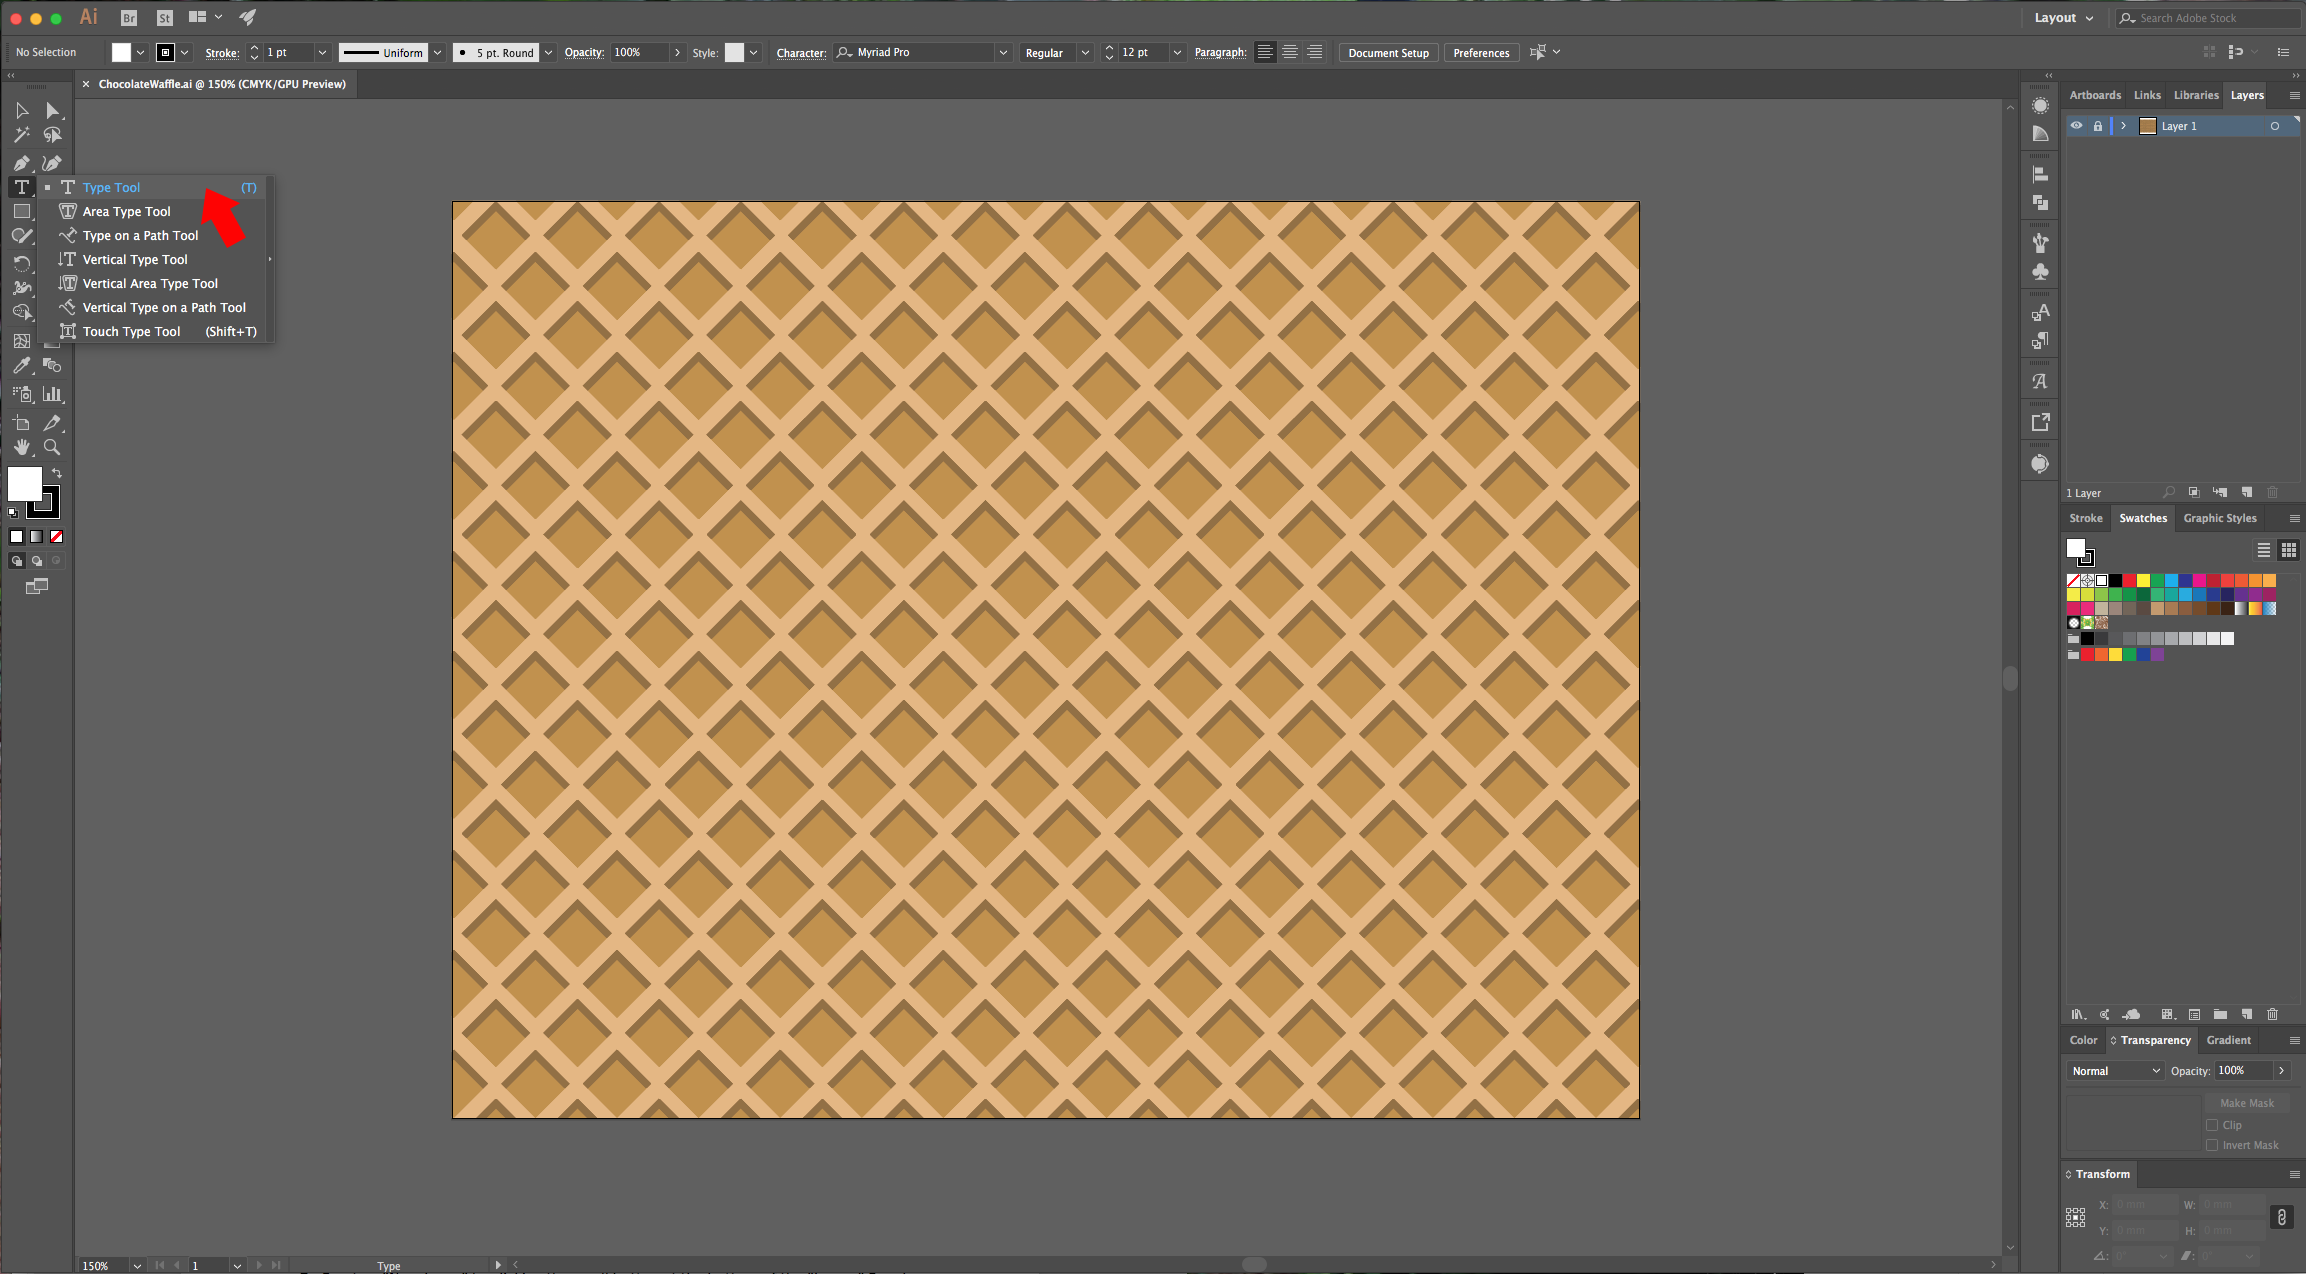
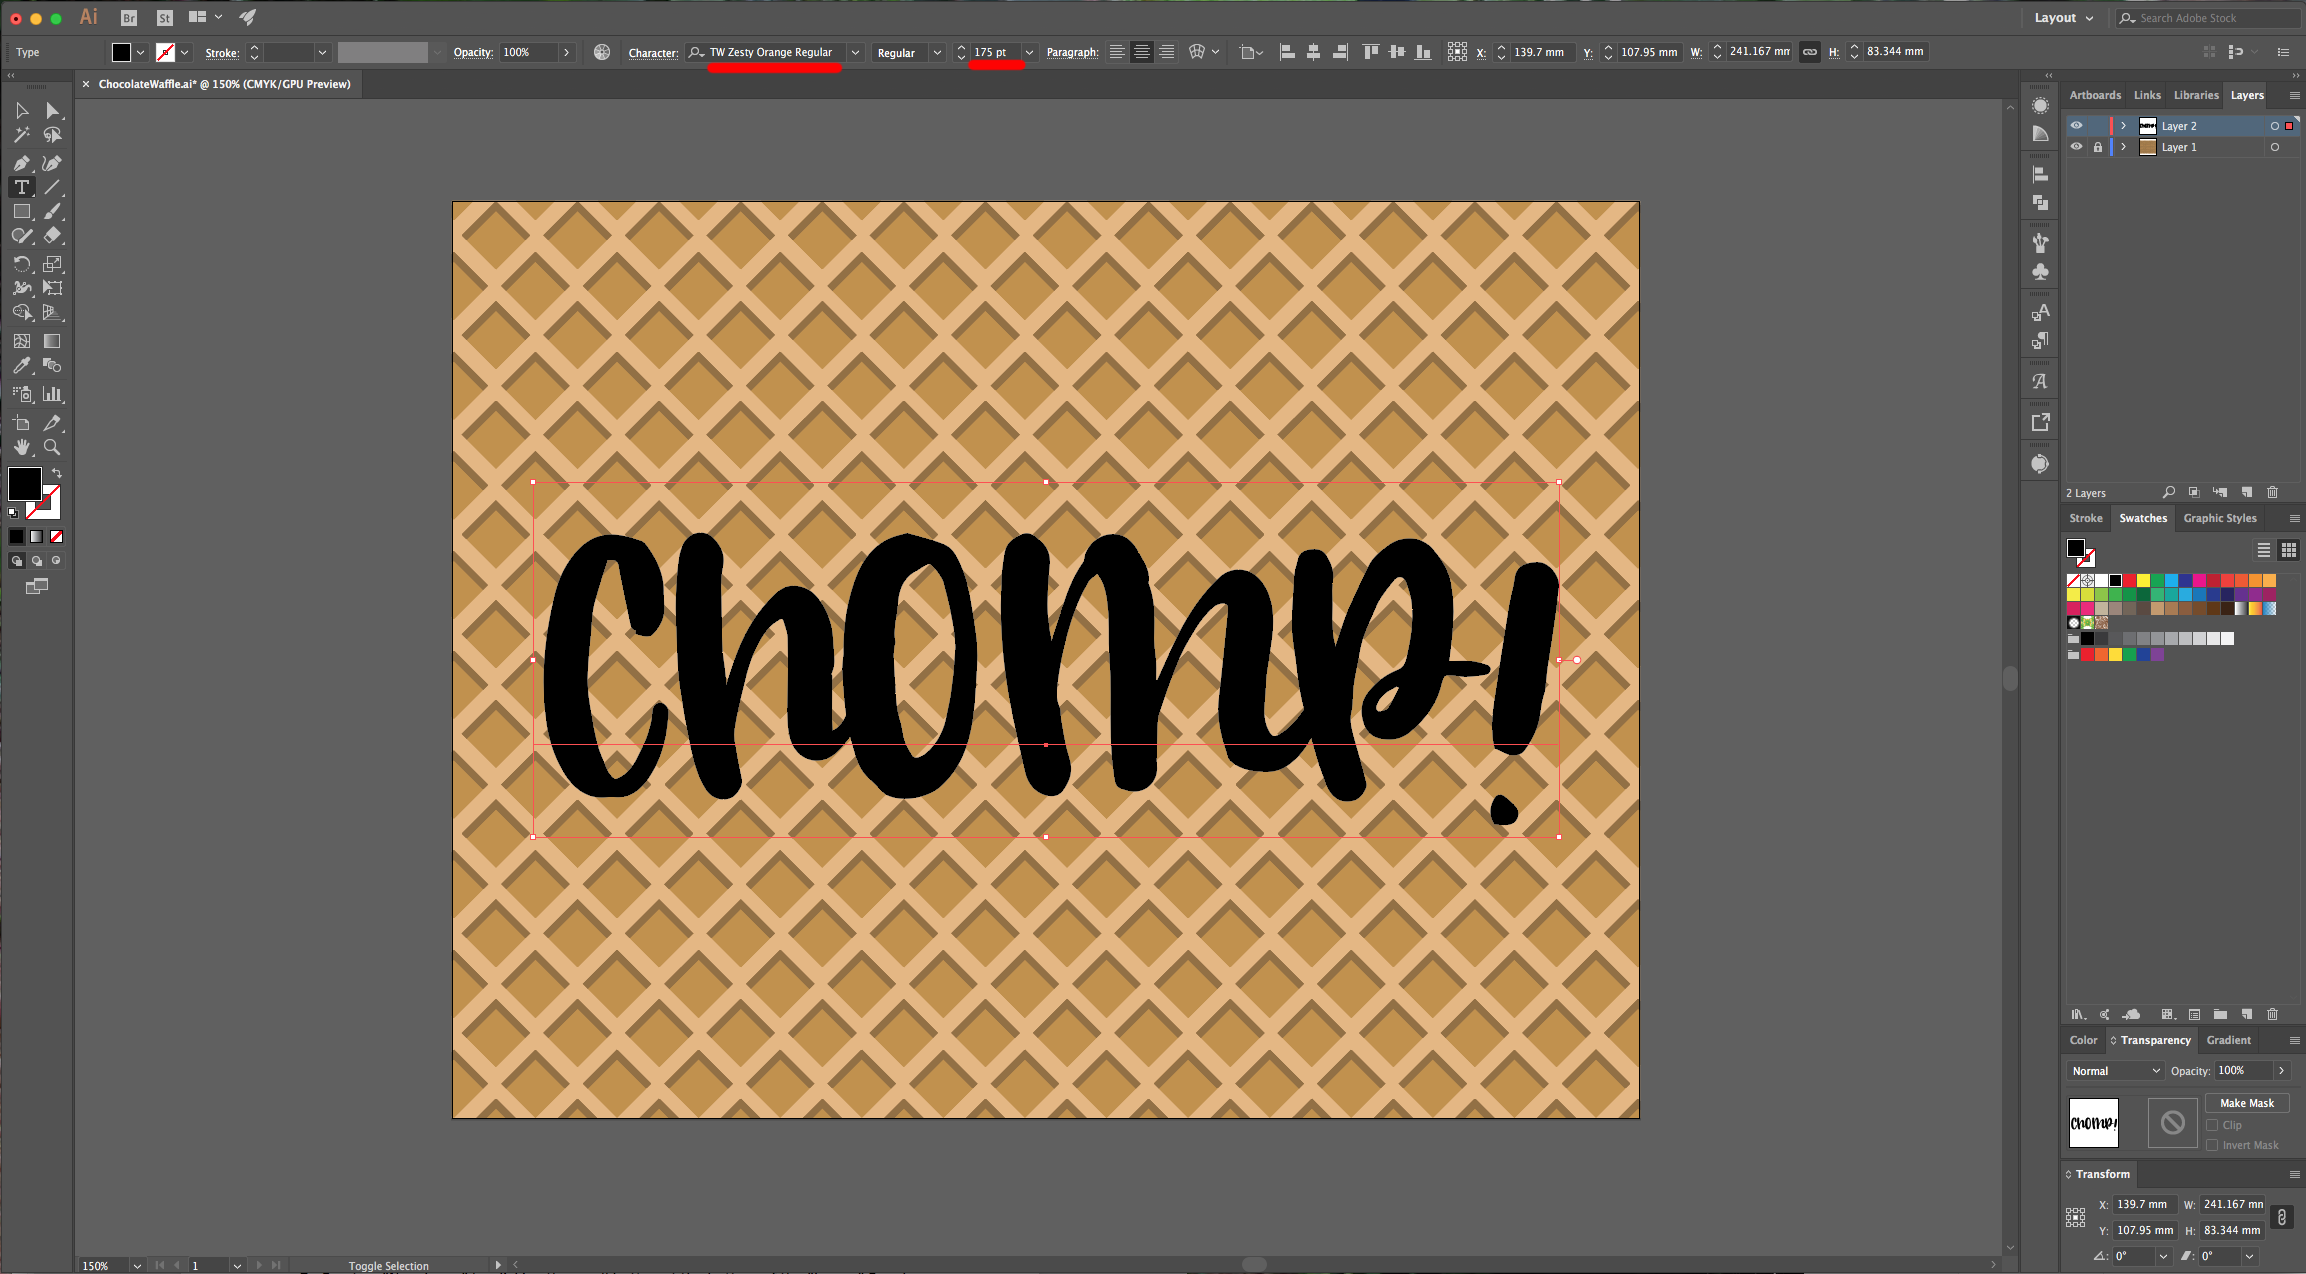
8 - Create a “New Layer” by clicking the small button at the bottom of the “Layers” Panel. Select the “Type Tool” (T), choose a font (works better with a fat font) and type your text. Make it as big as you want.
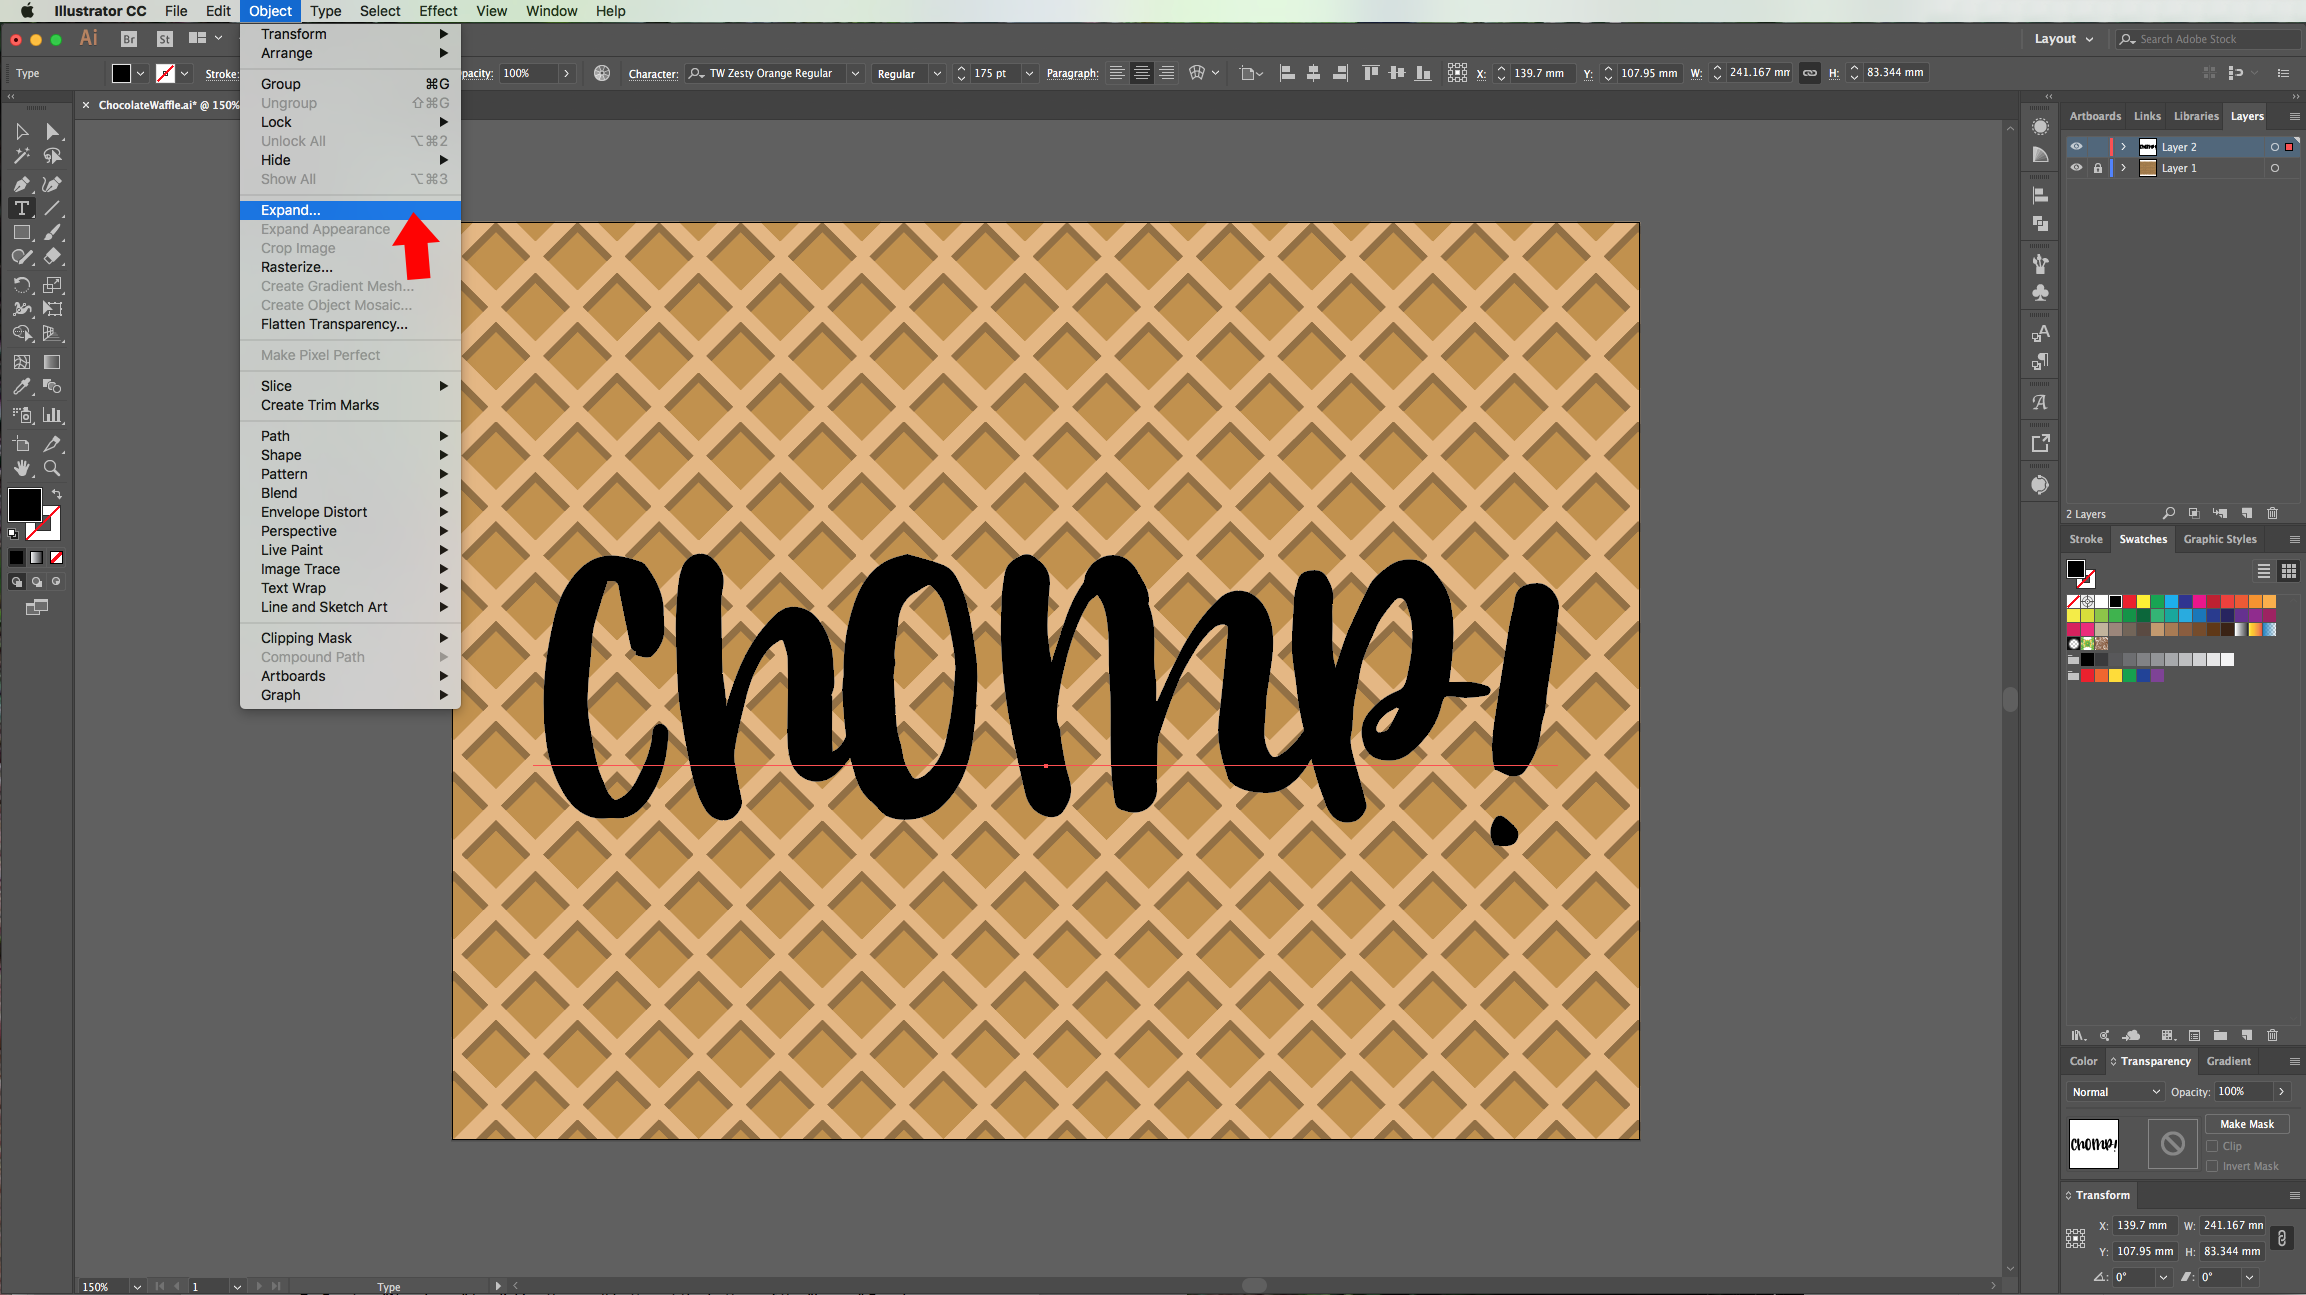
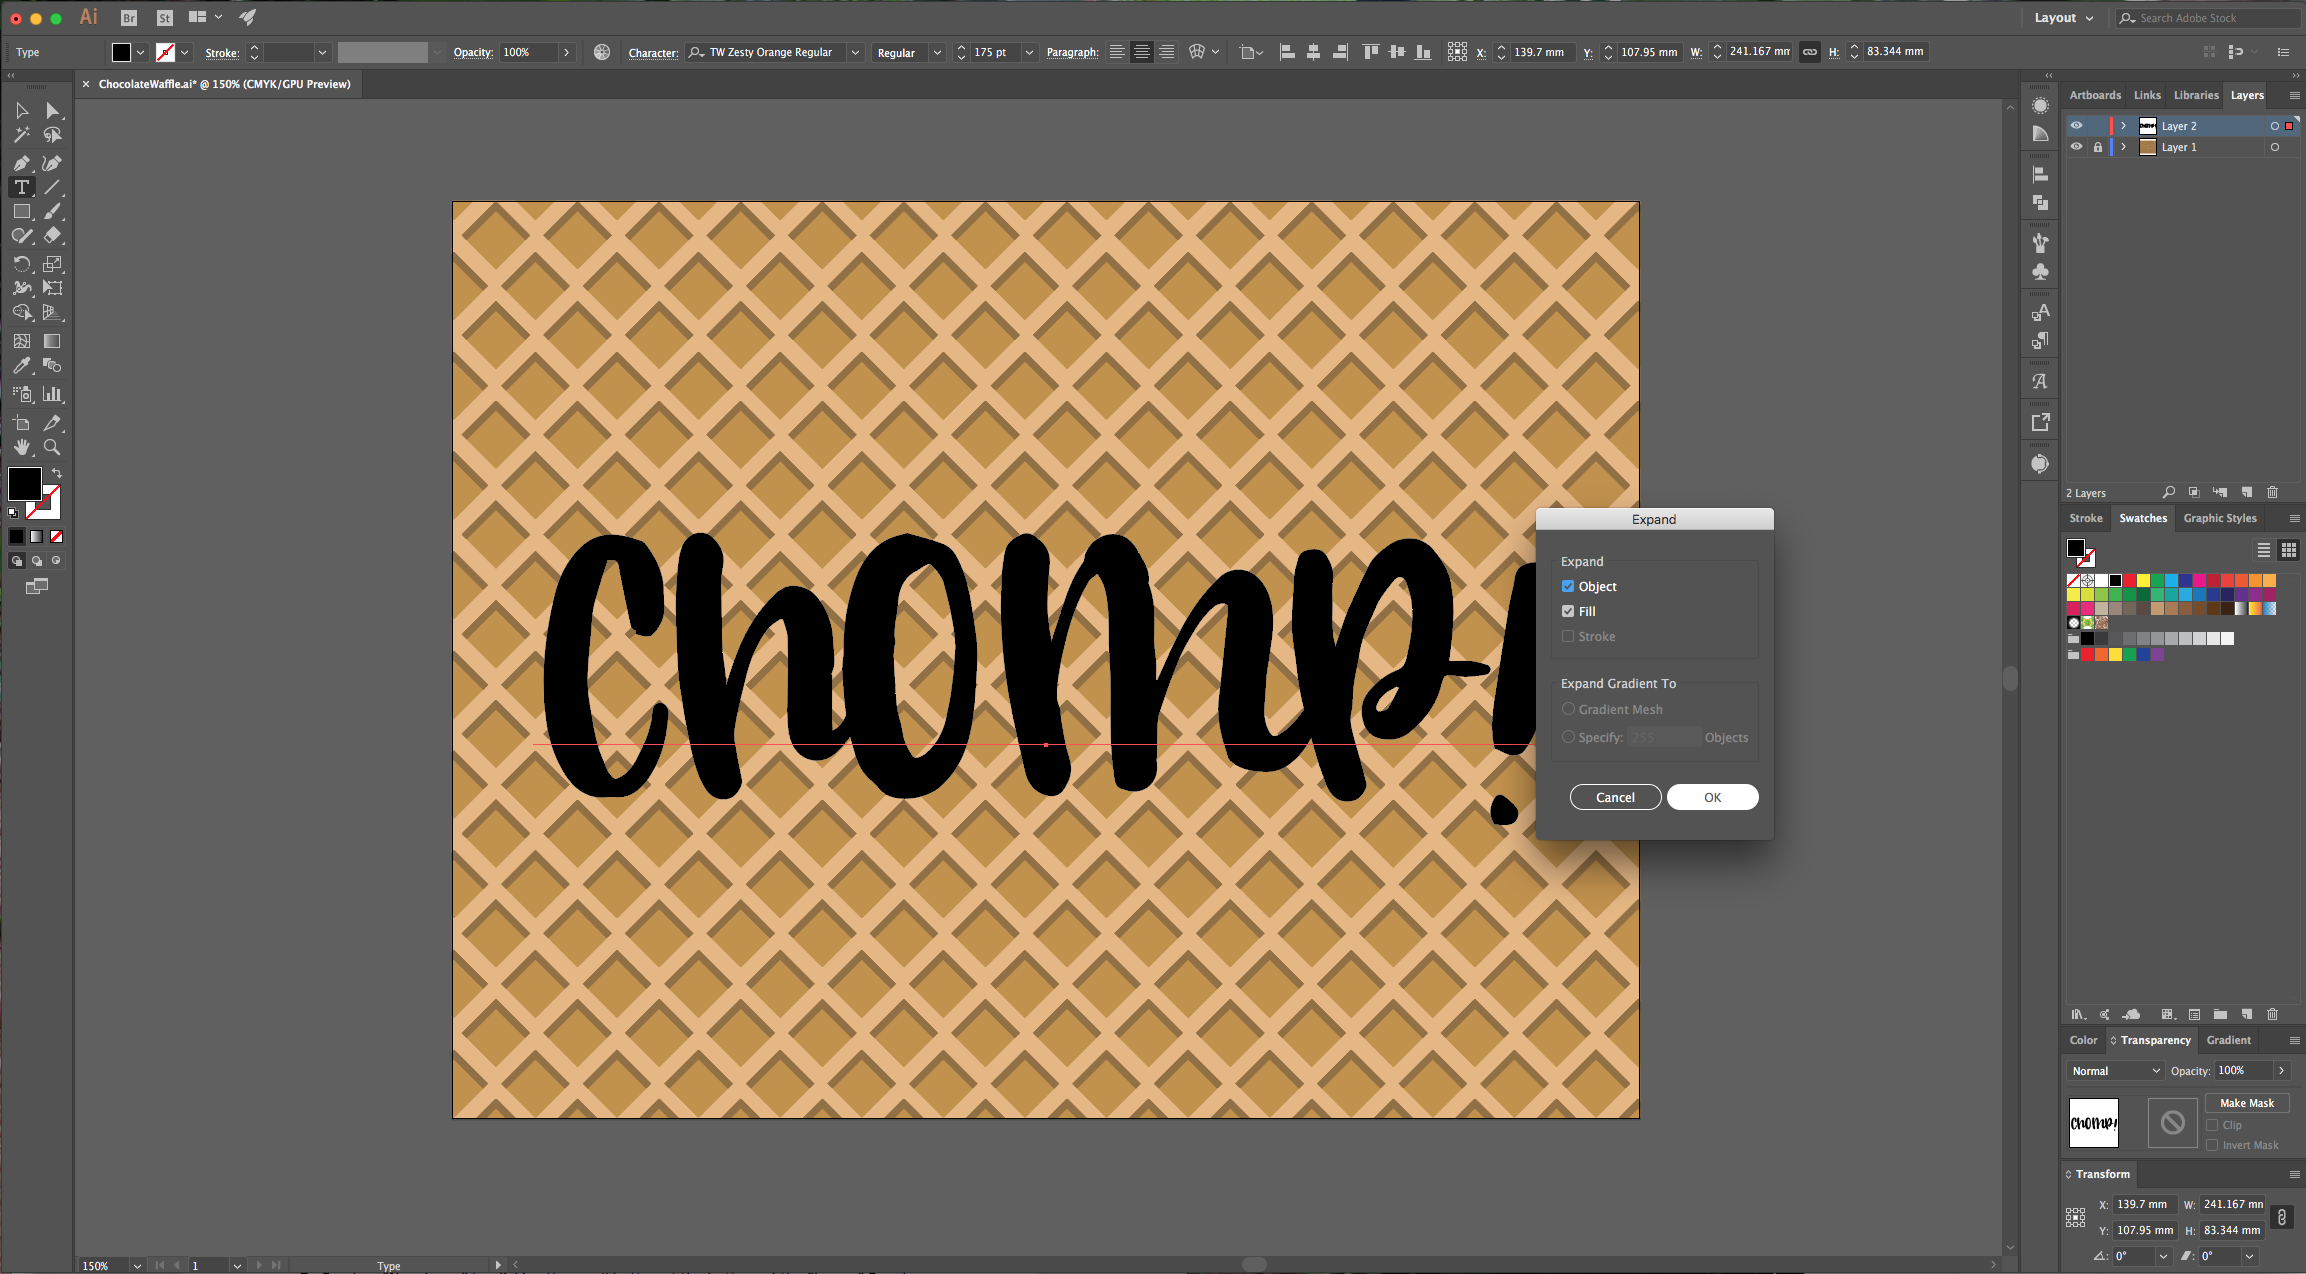
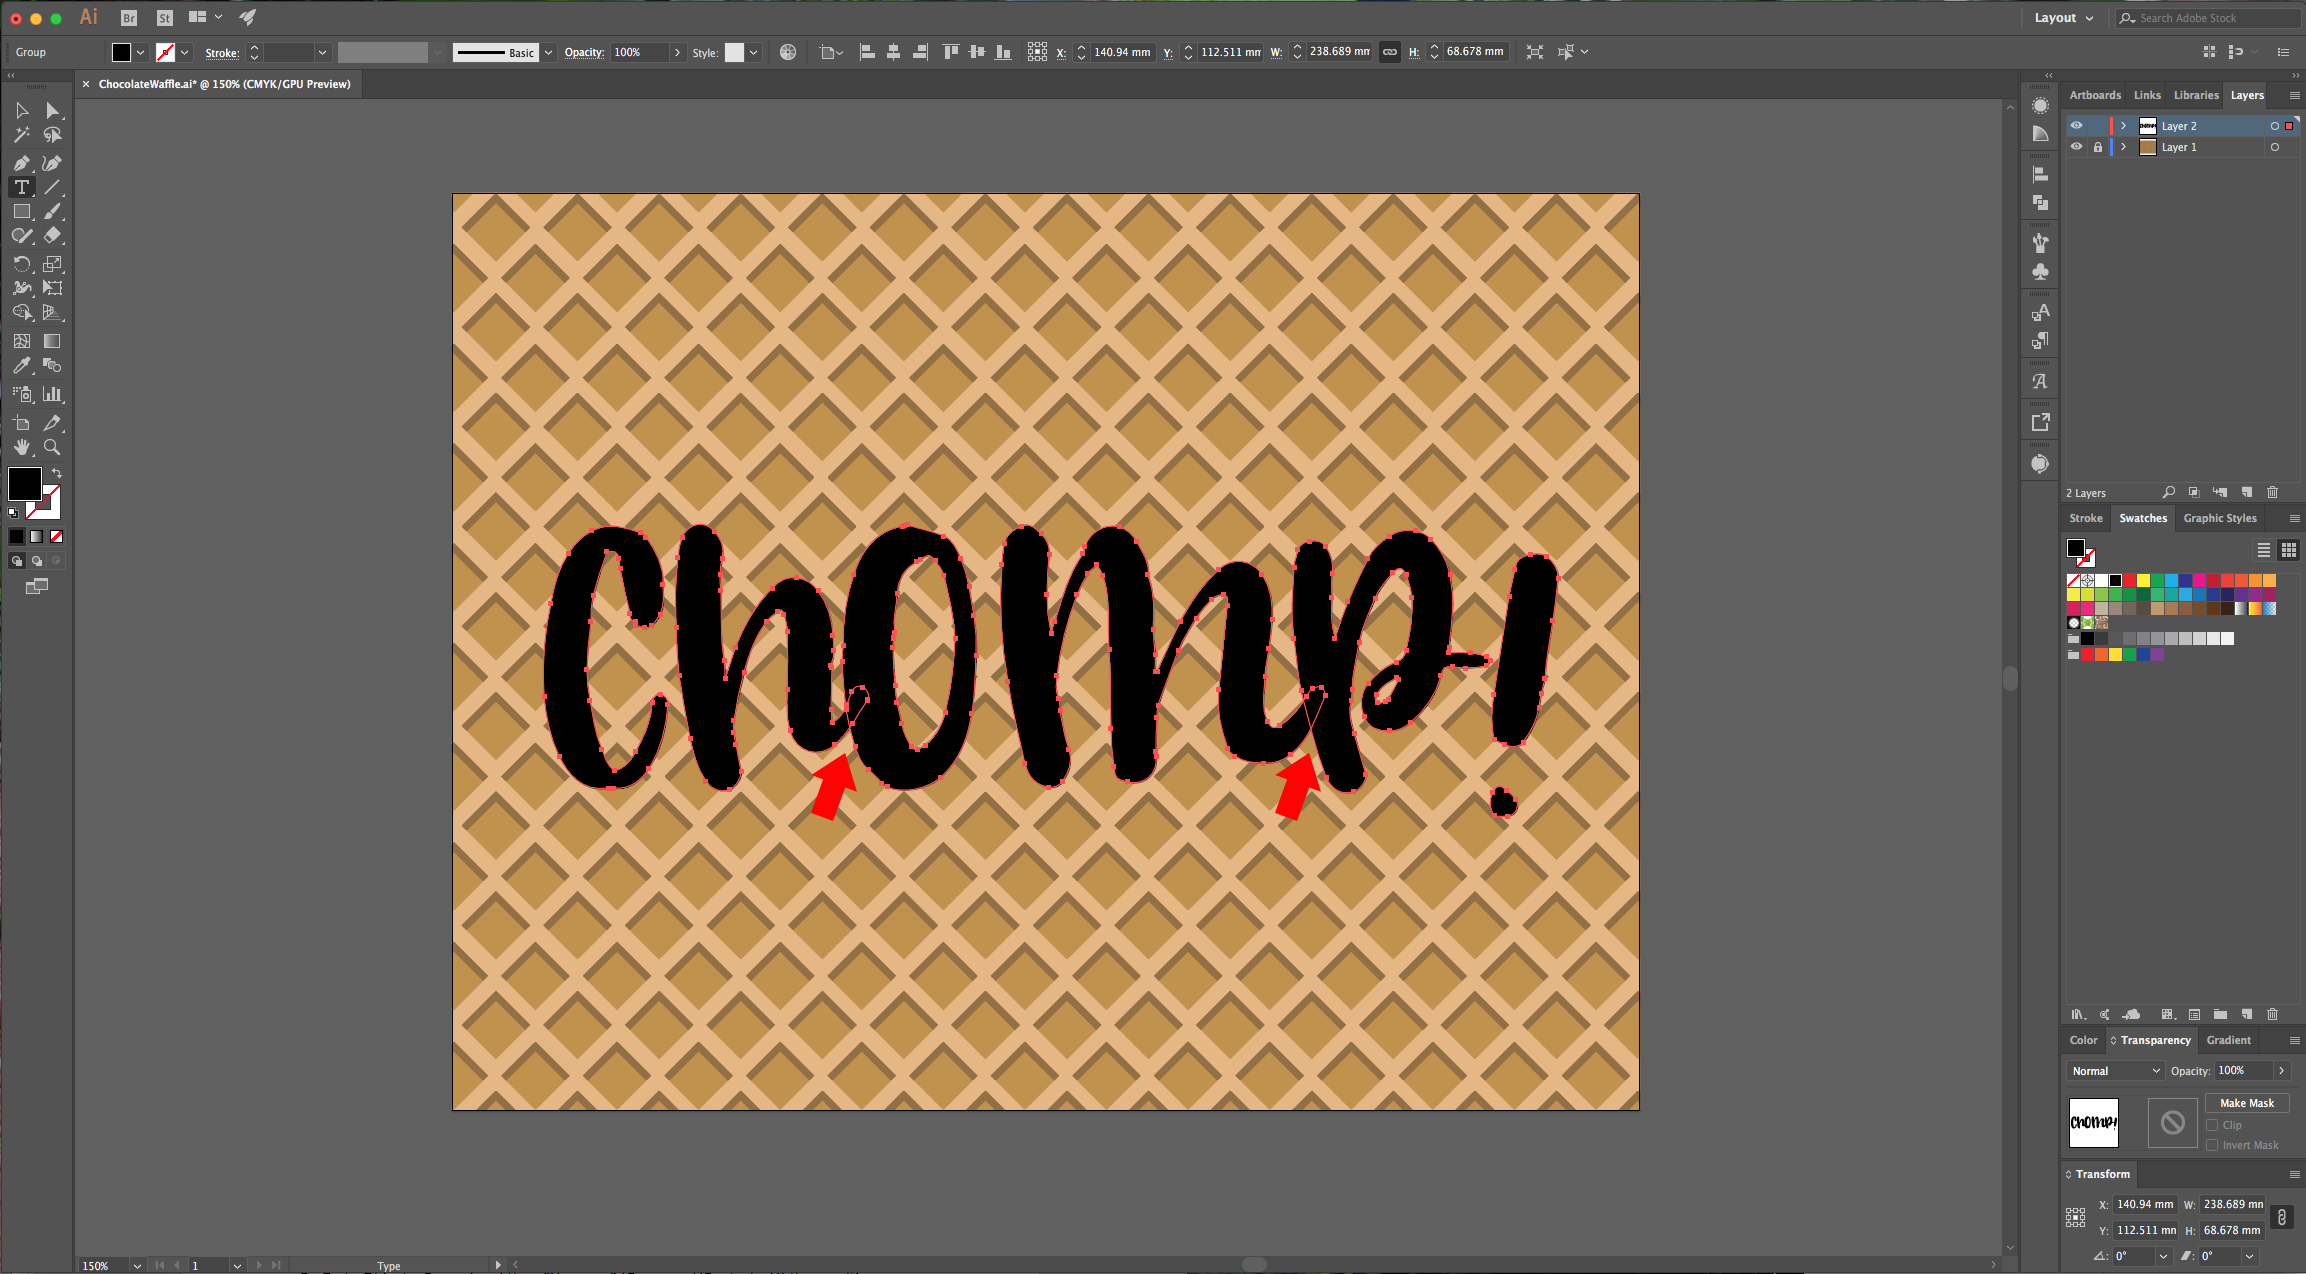
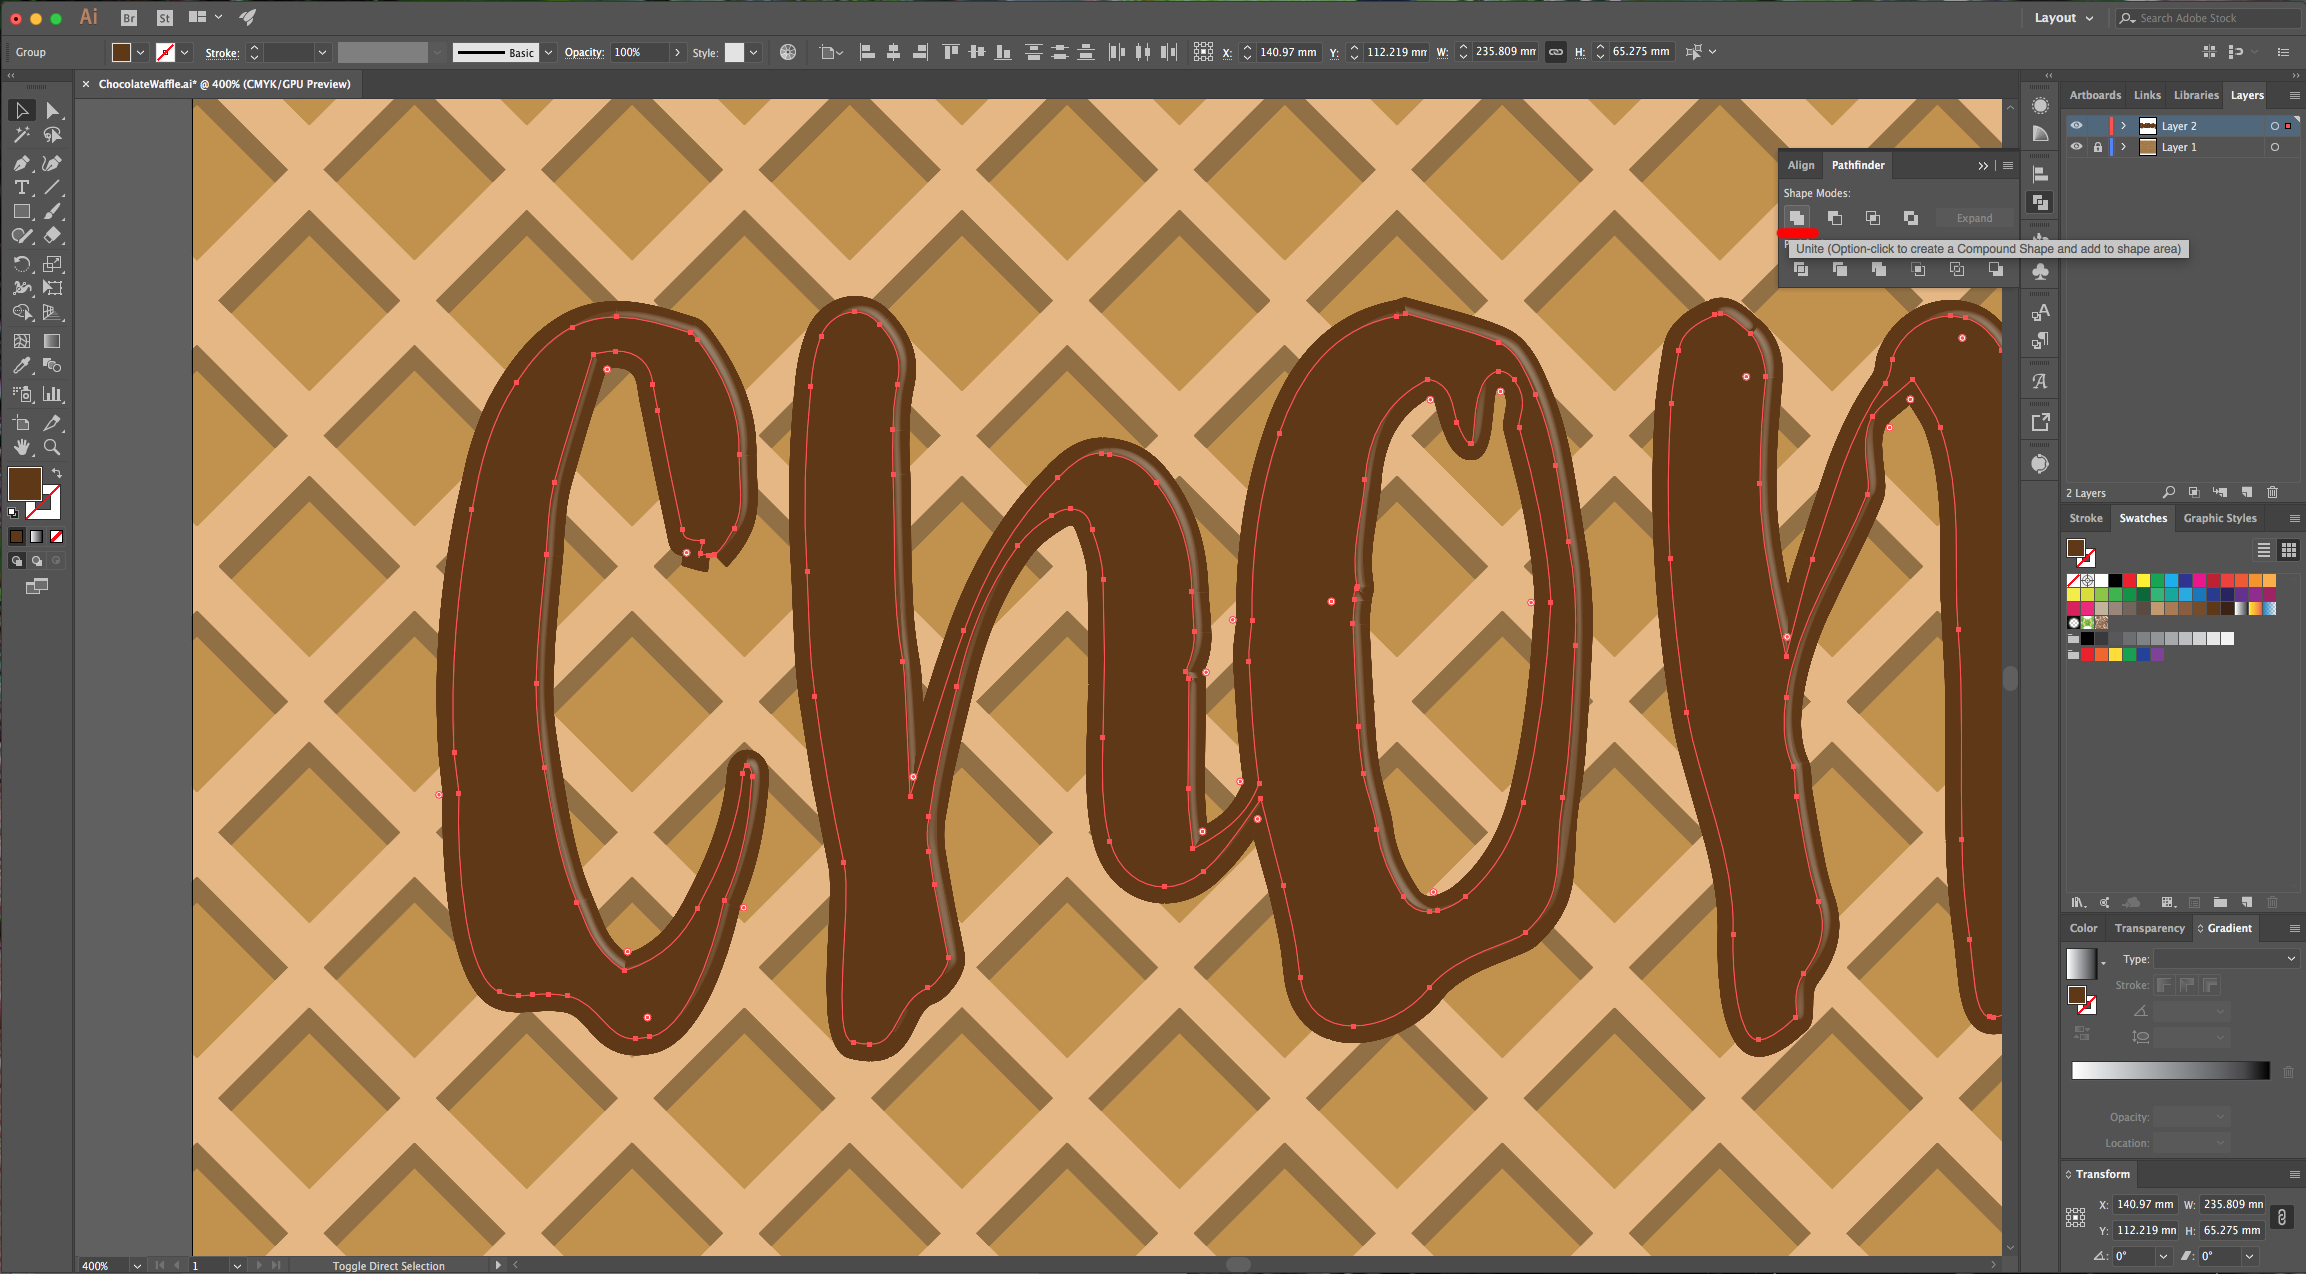
9 - Go to Object > Expand and then “Ungroup” (Command/Control + U) the resulting vector to tweak your letters in case you think is necessary. We had a couple of letters overlapping and decided to keep it that way so we selected them and in the “Pathfinder” Panel chose “Add or Unite”.
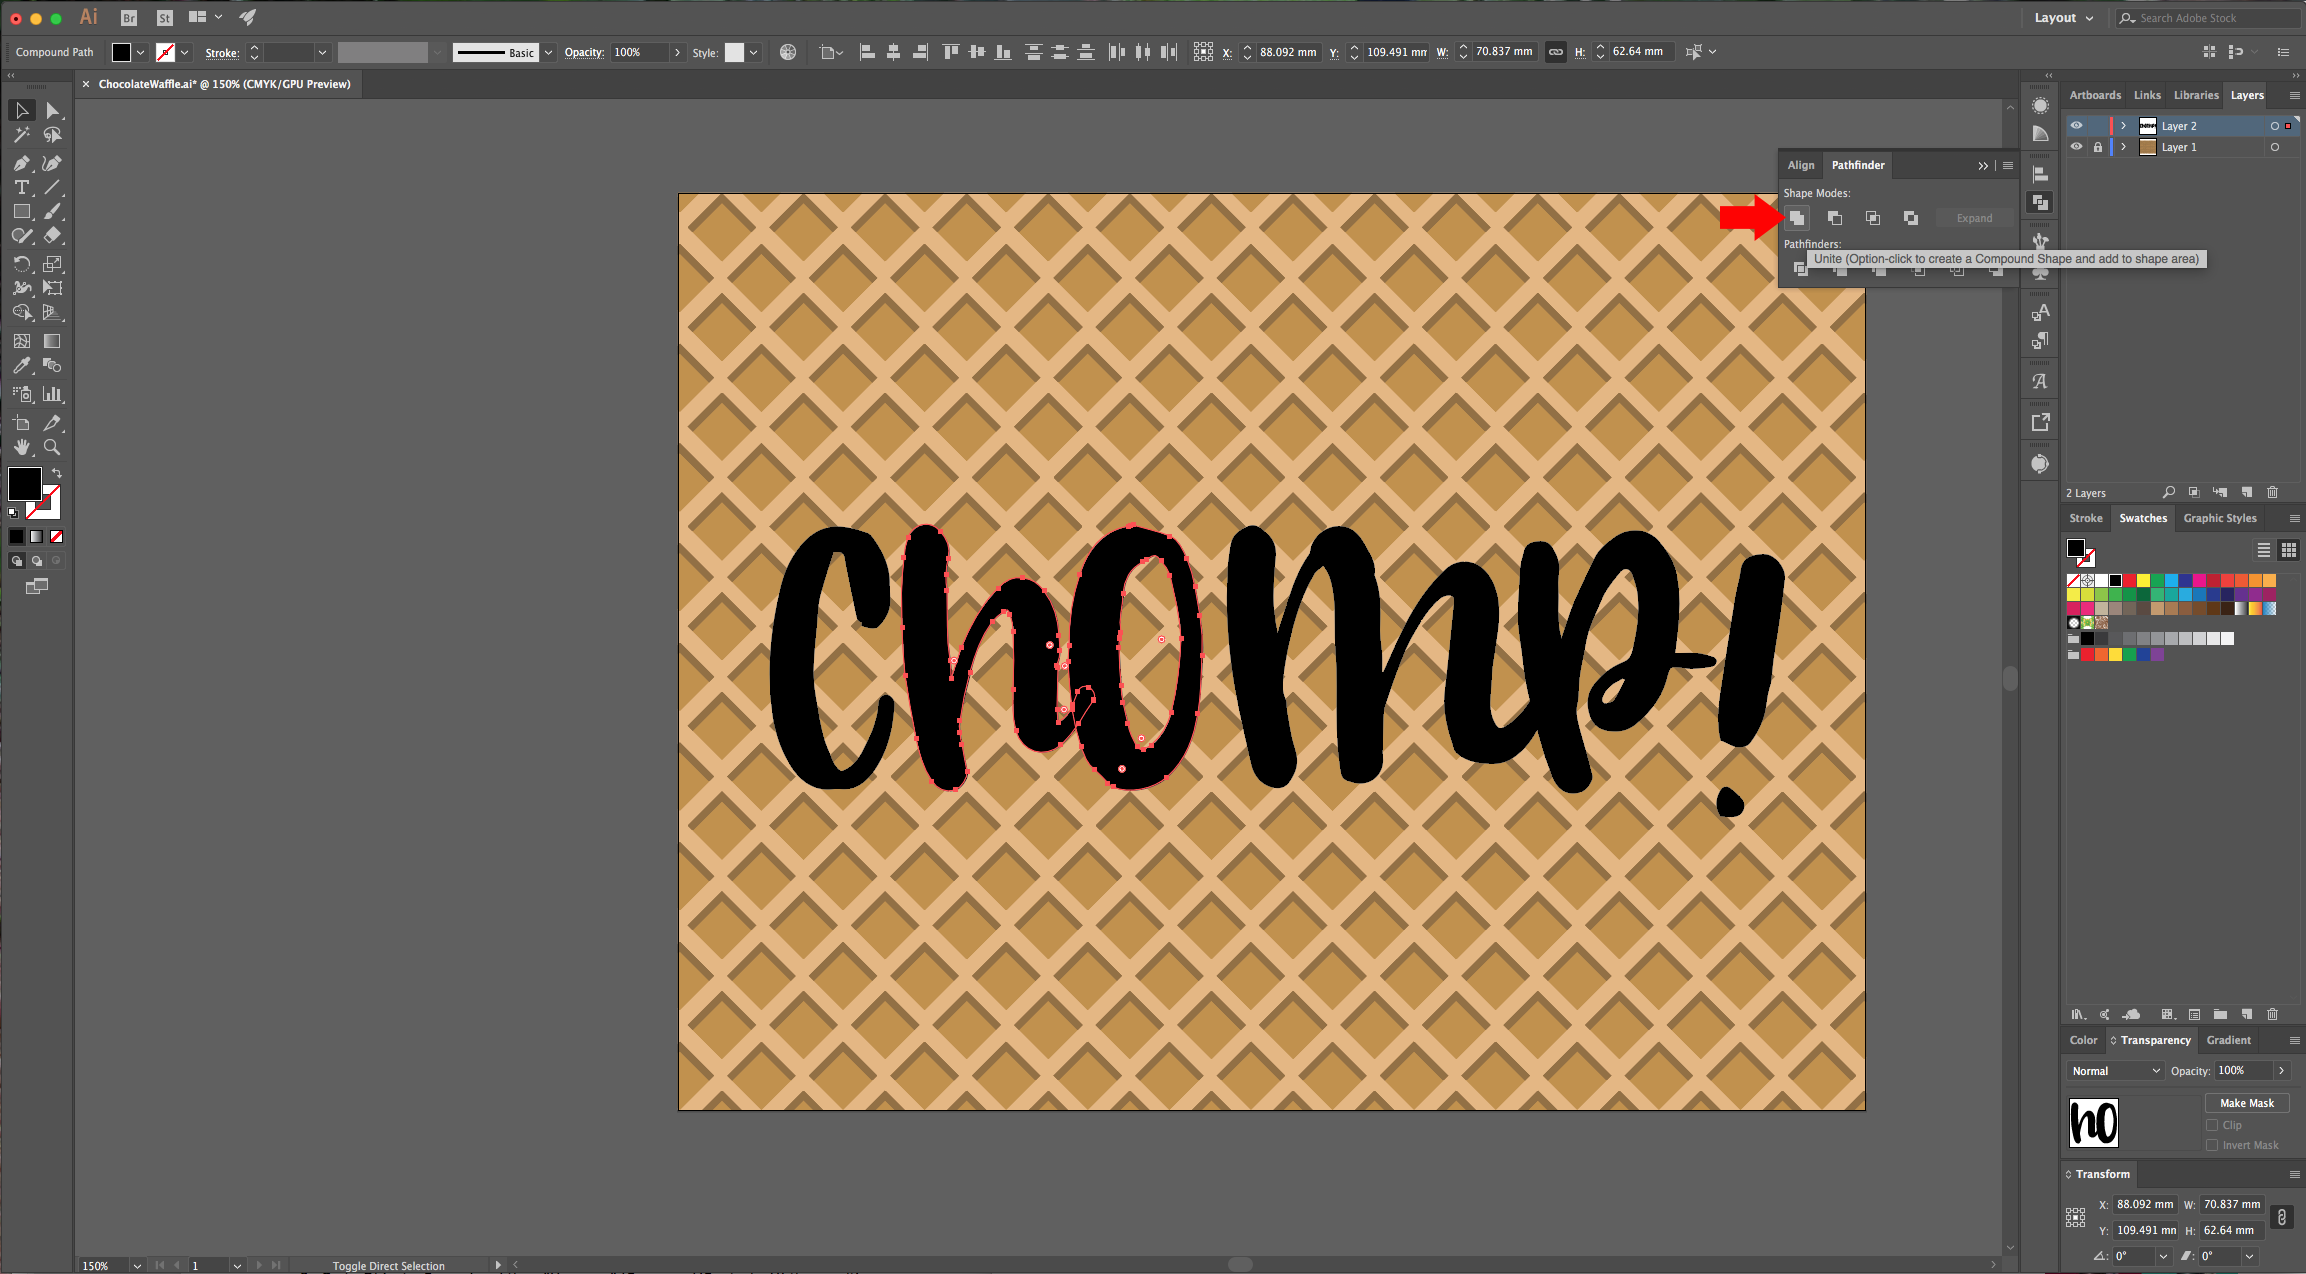
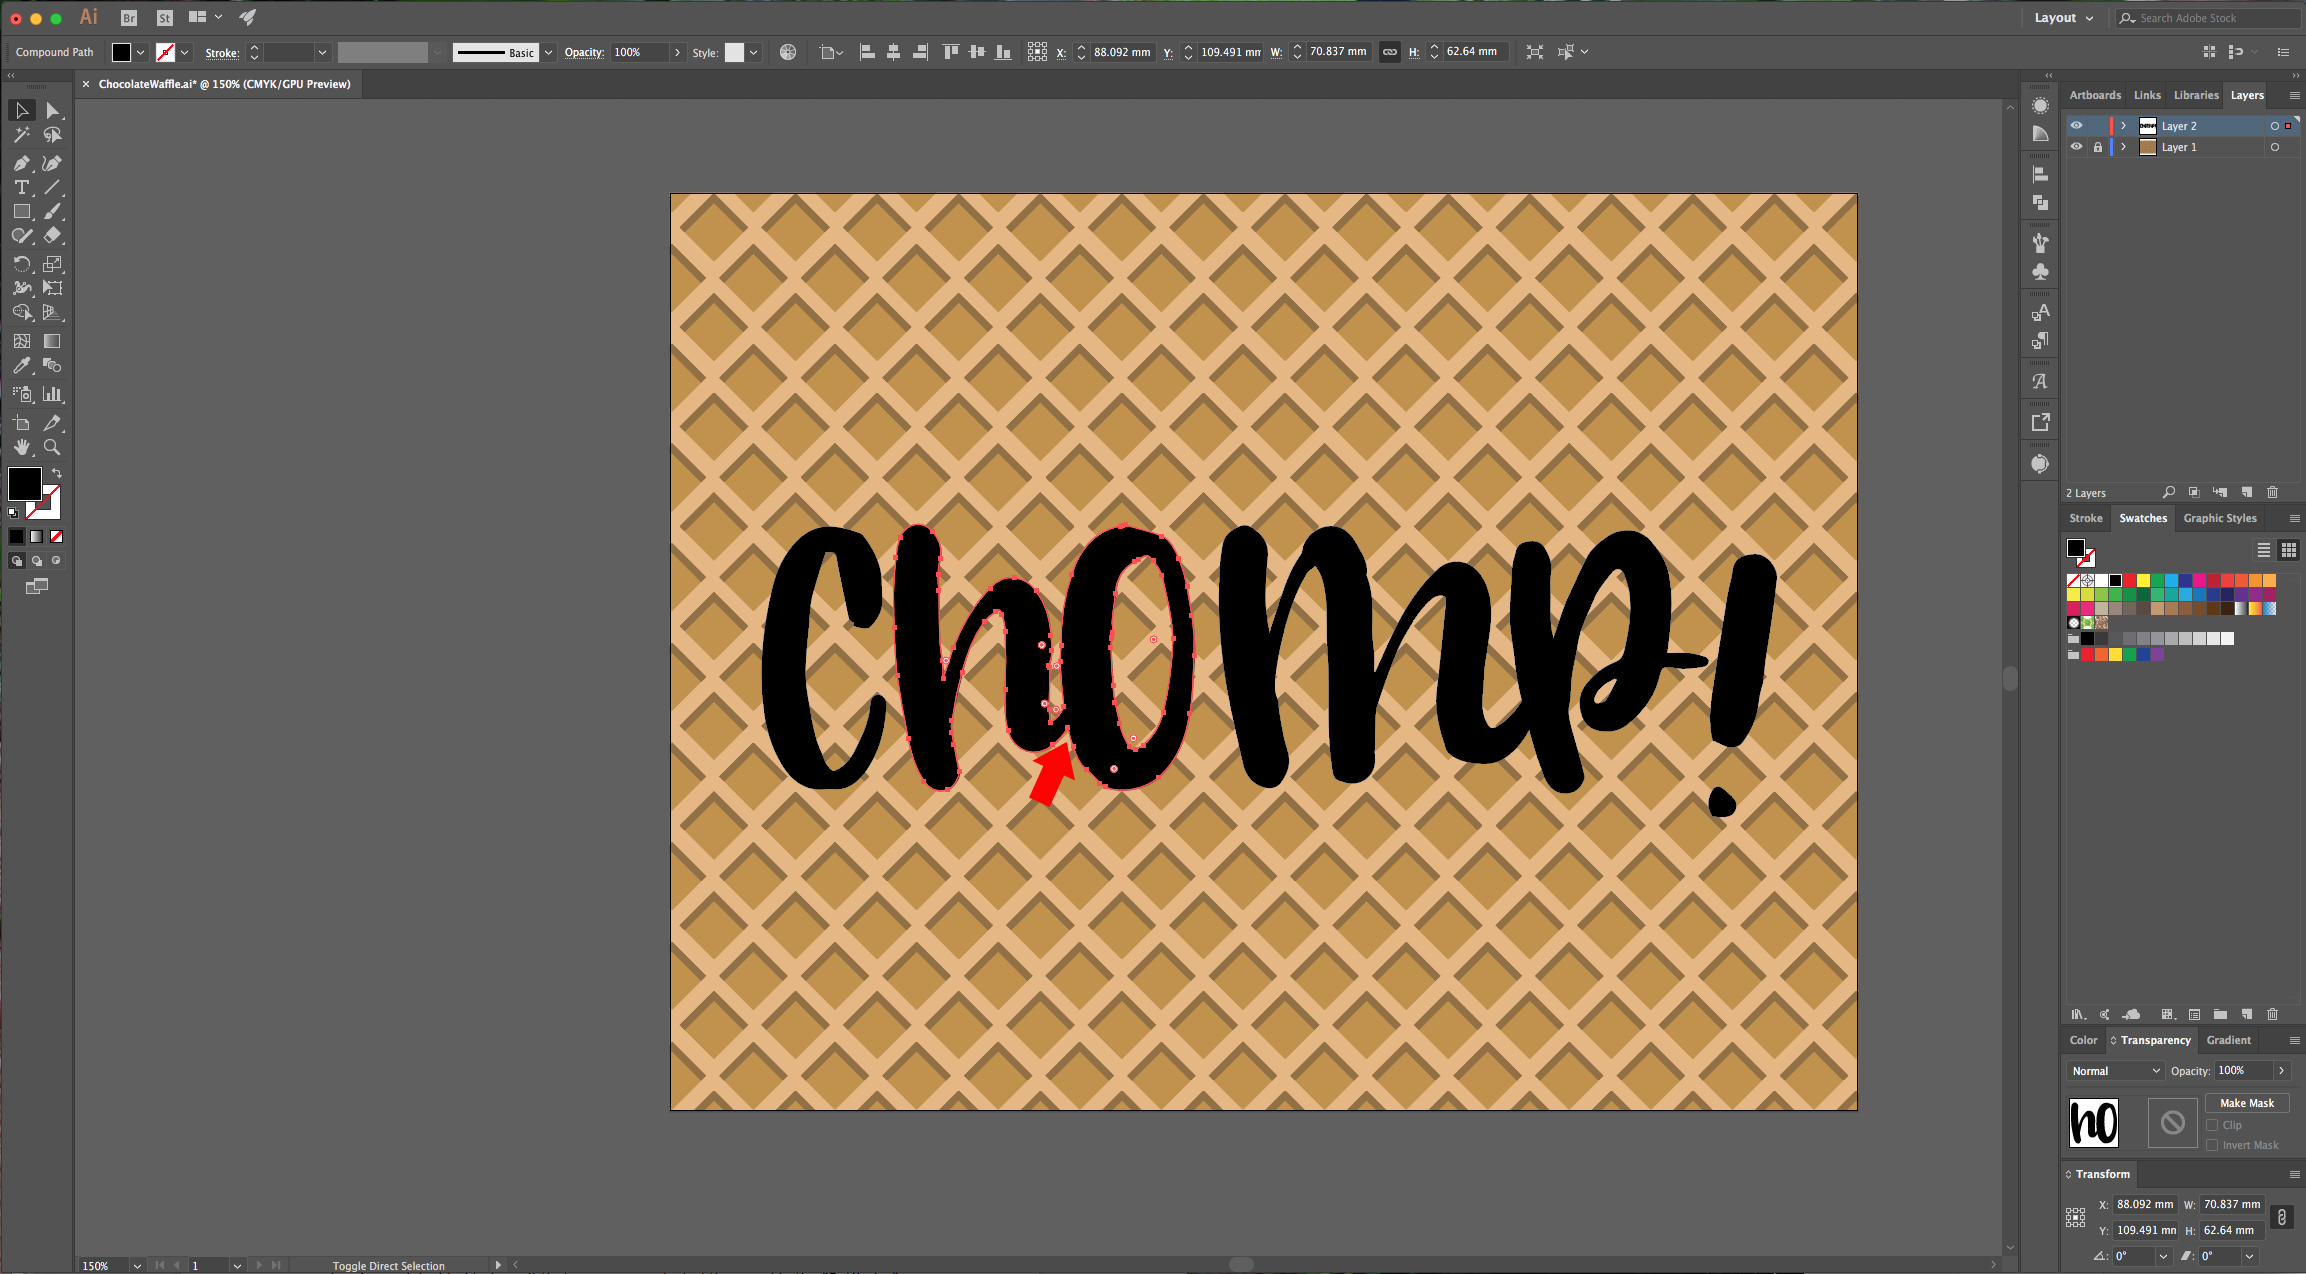
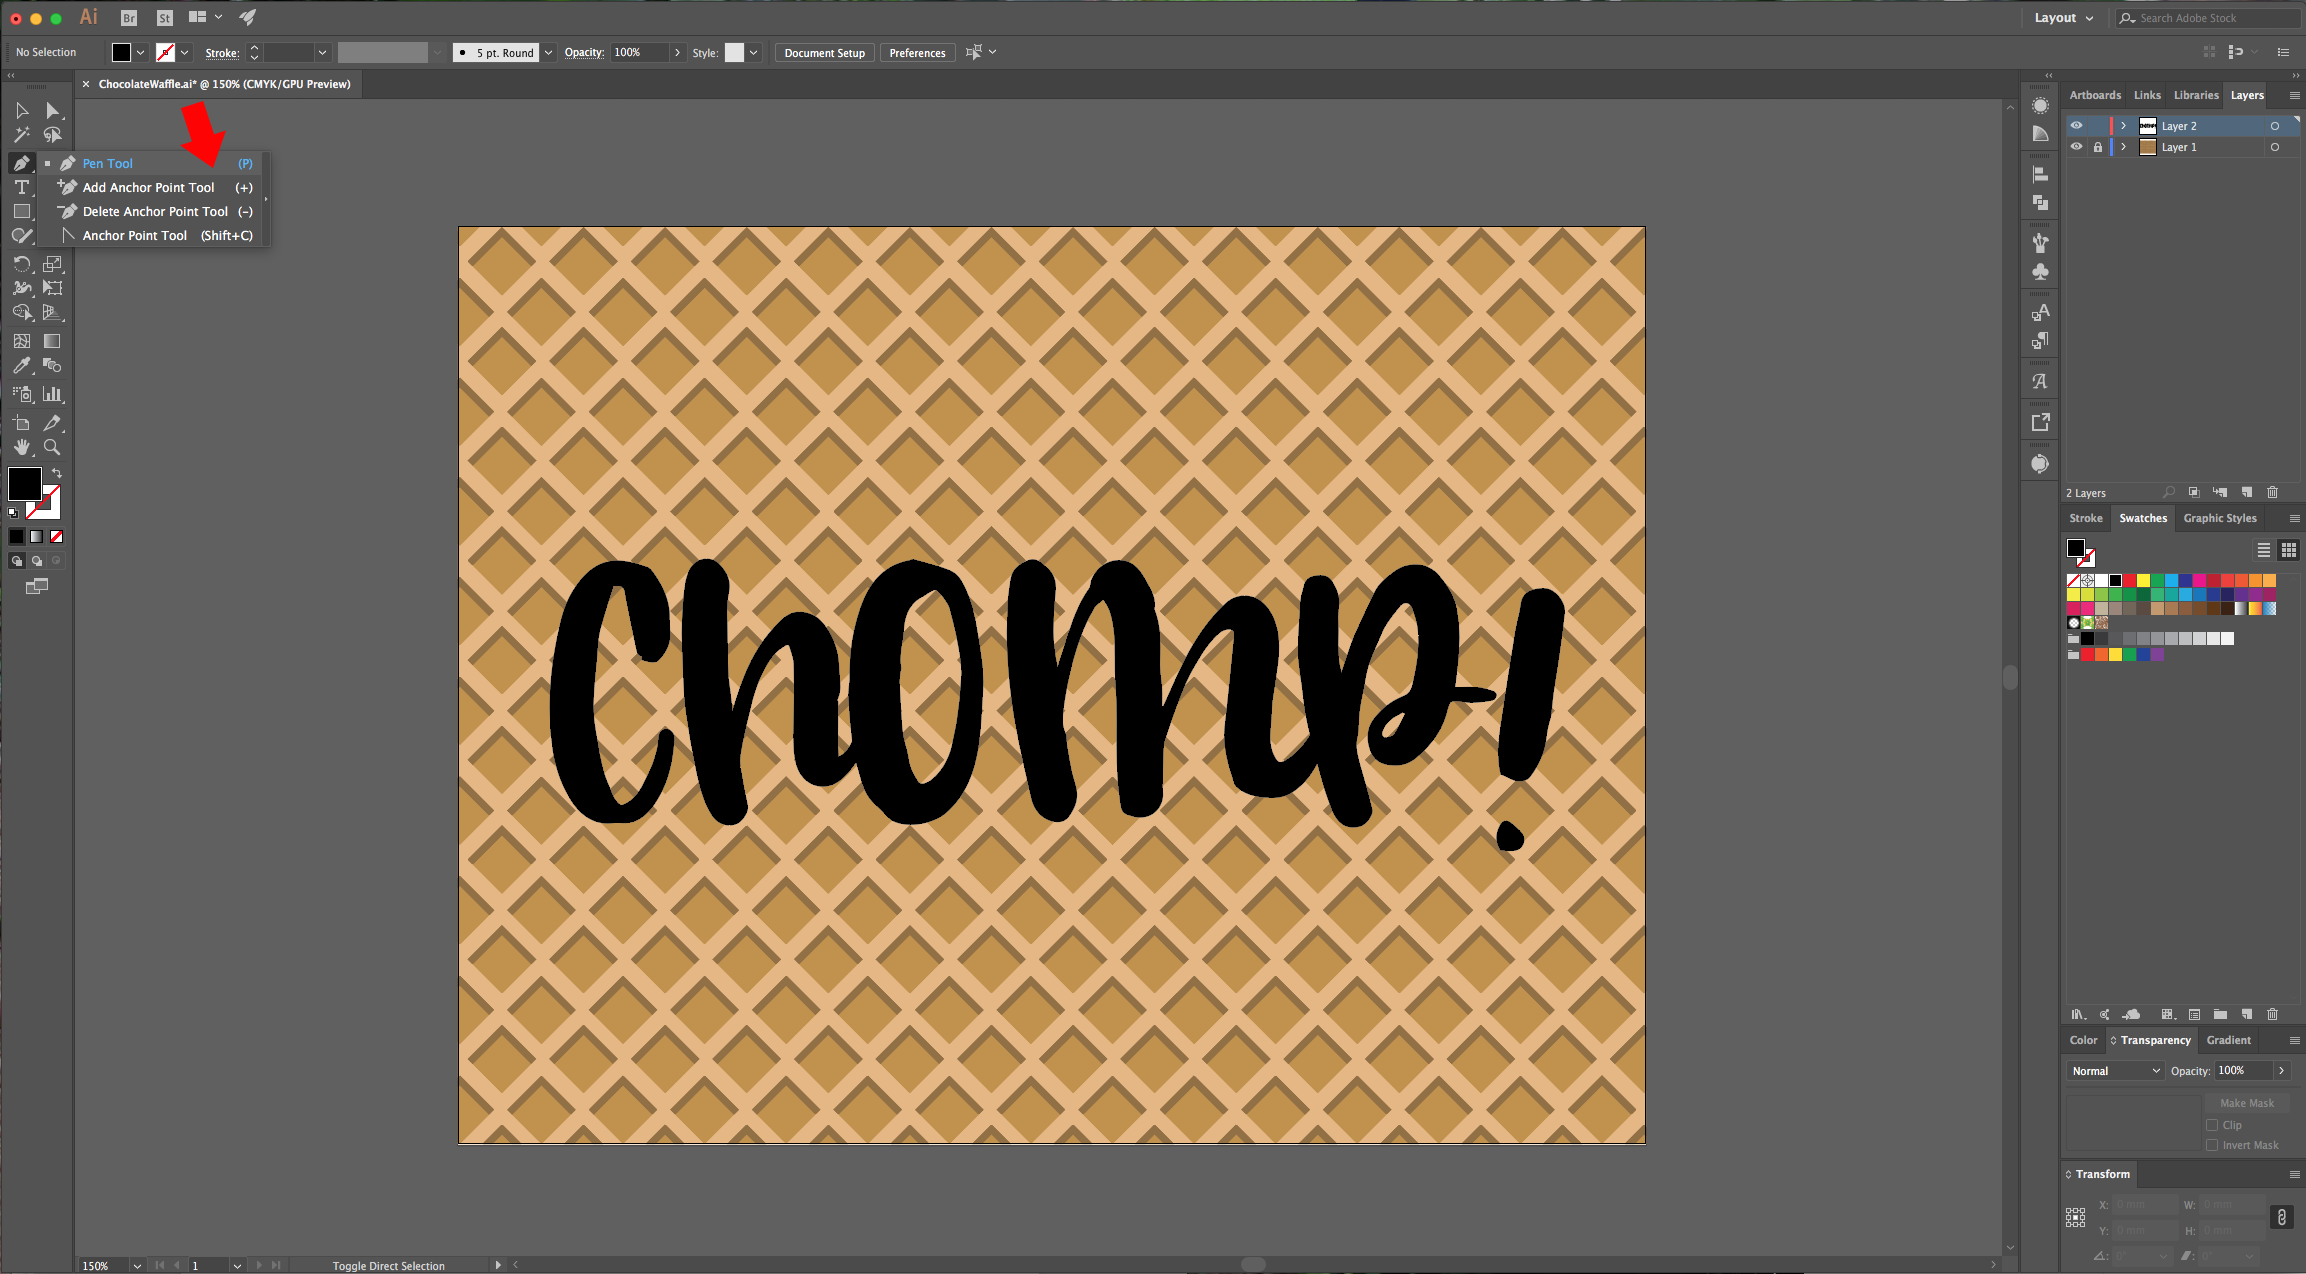
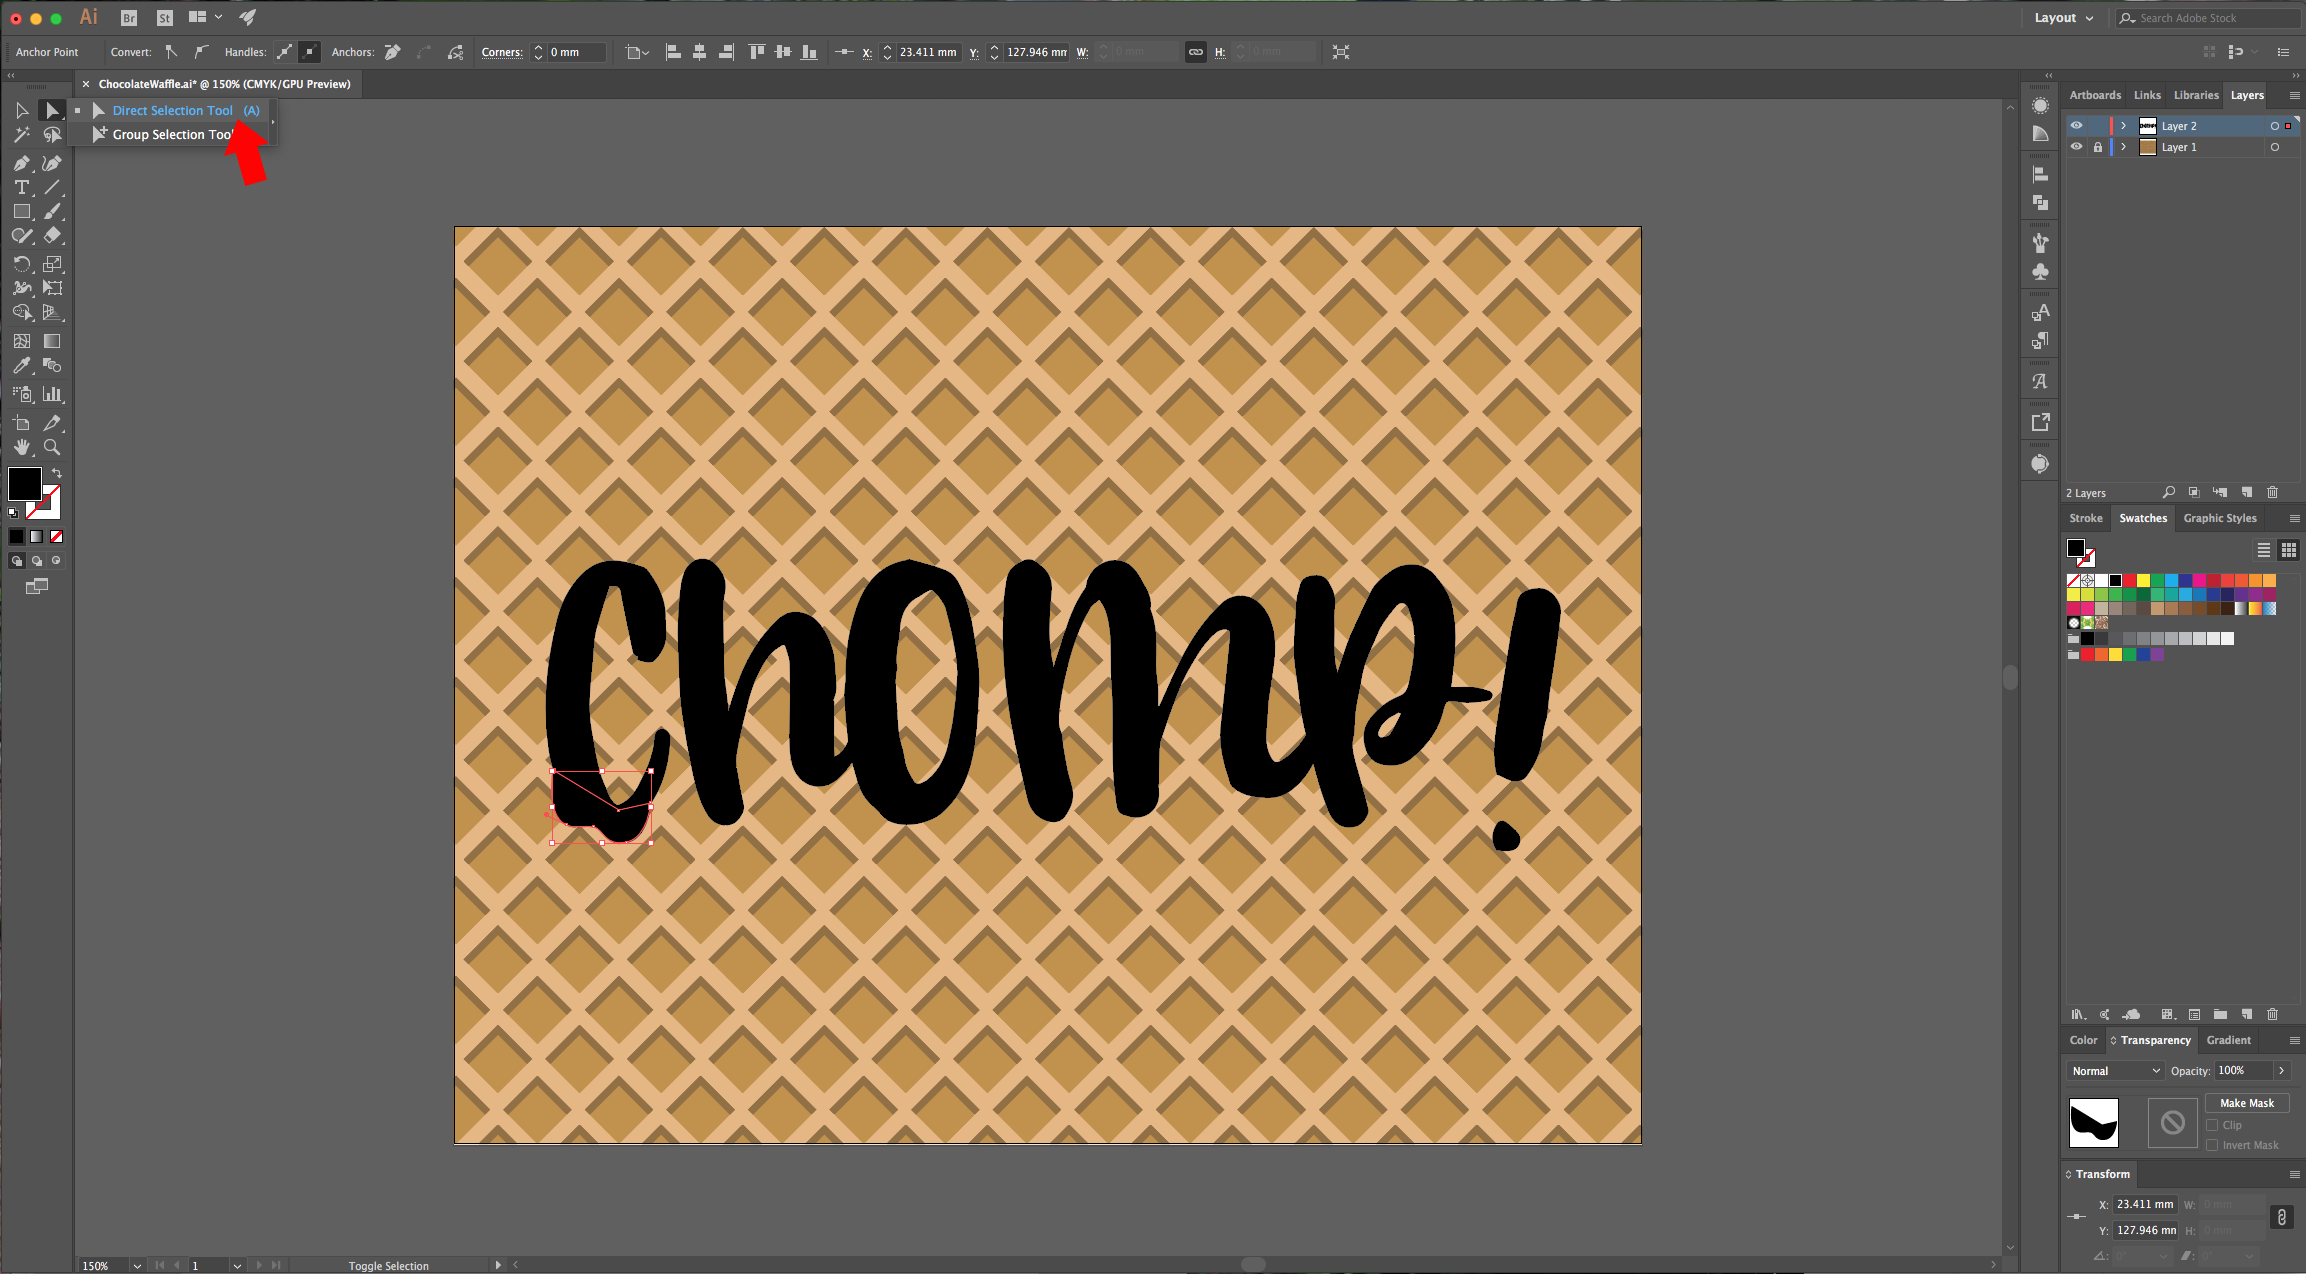
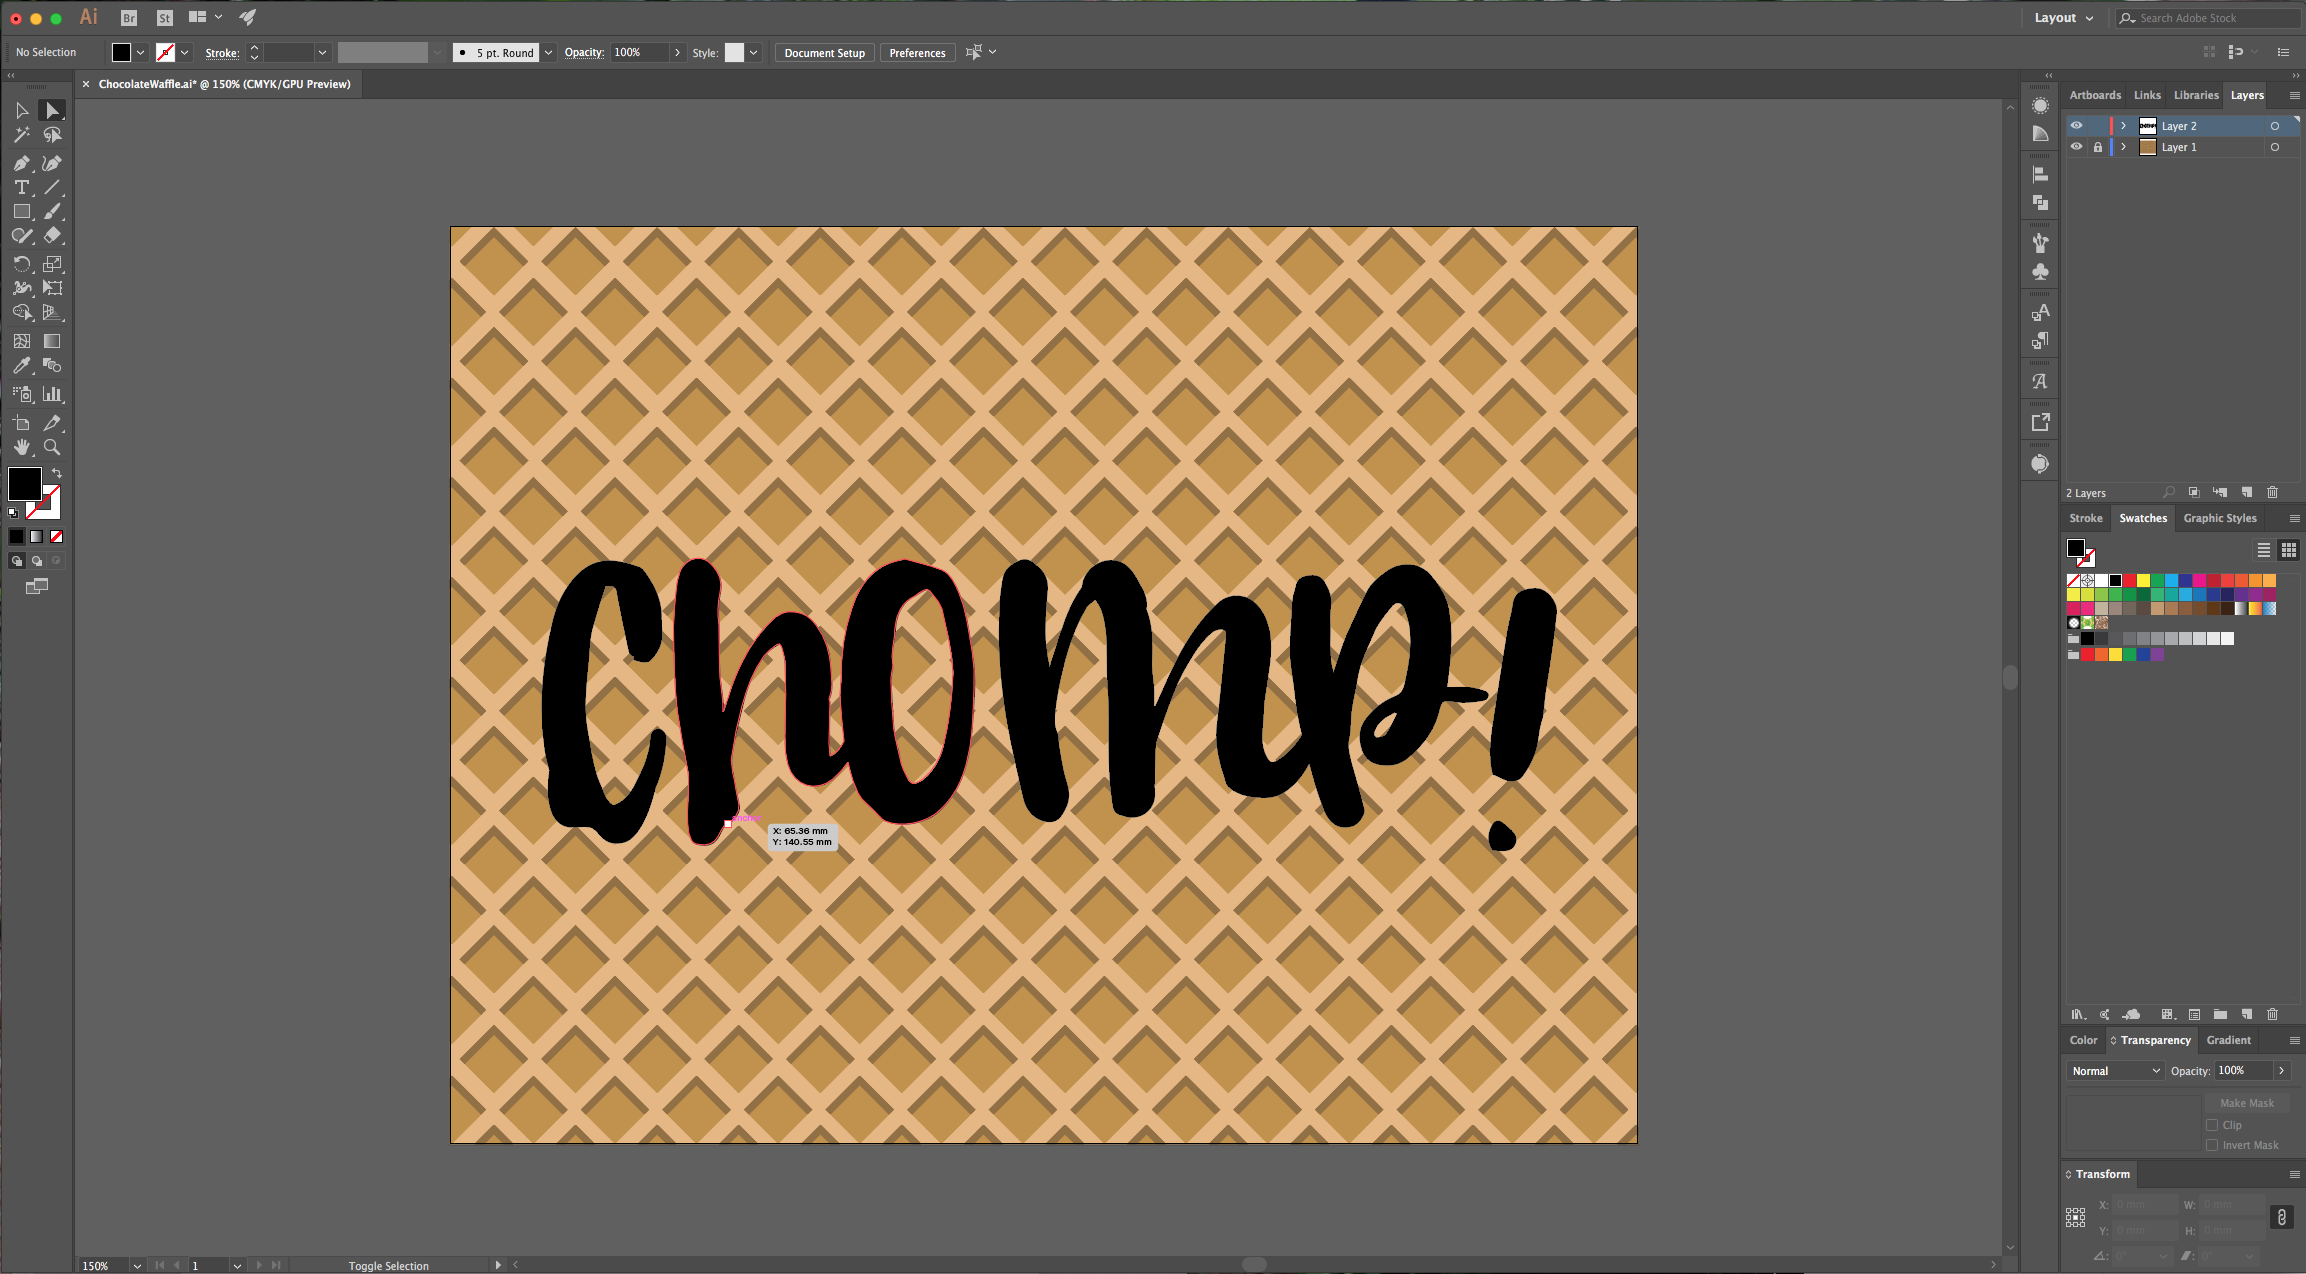
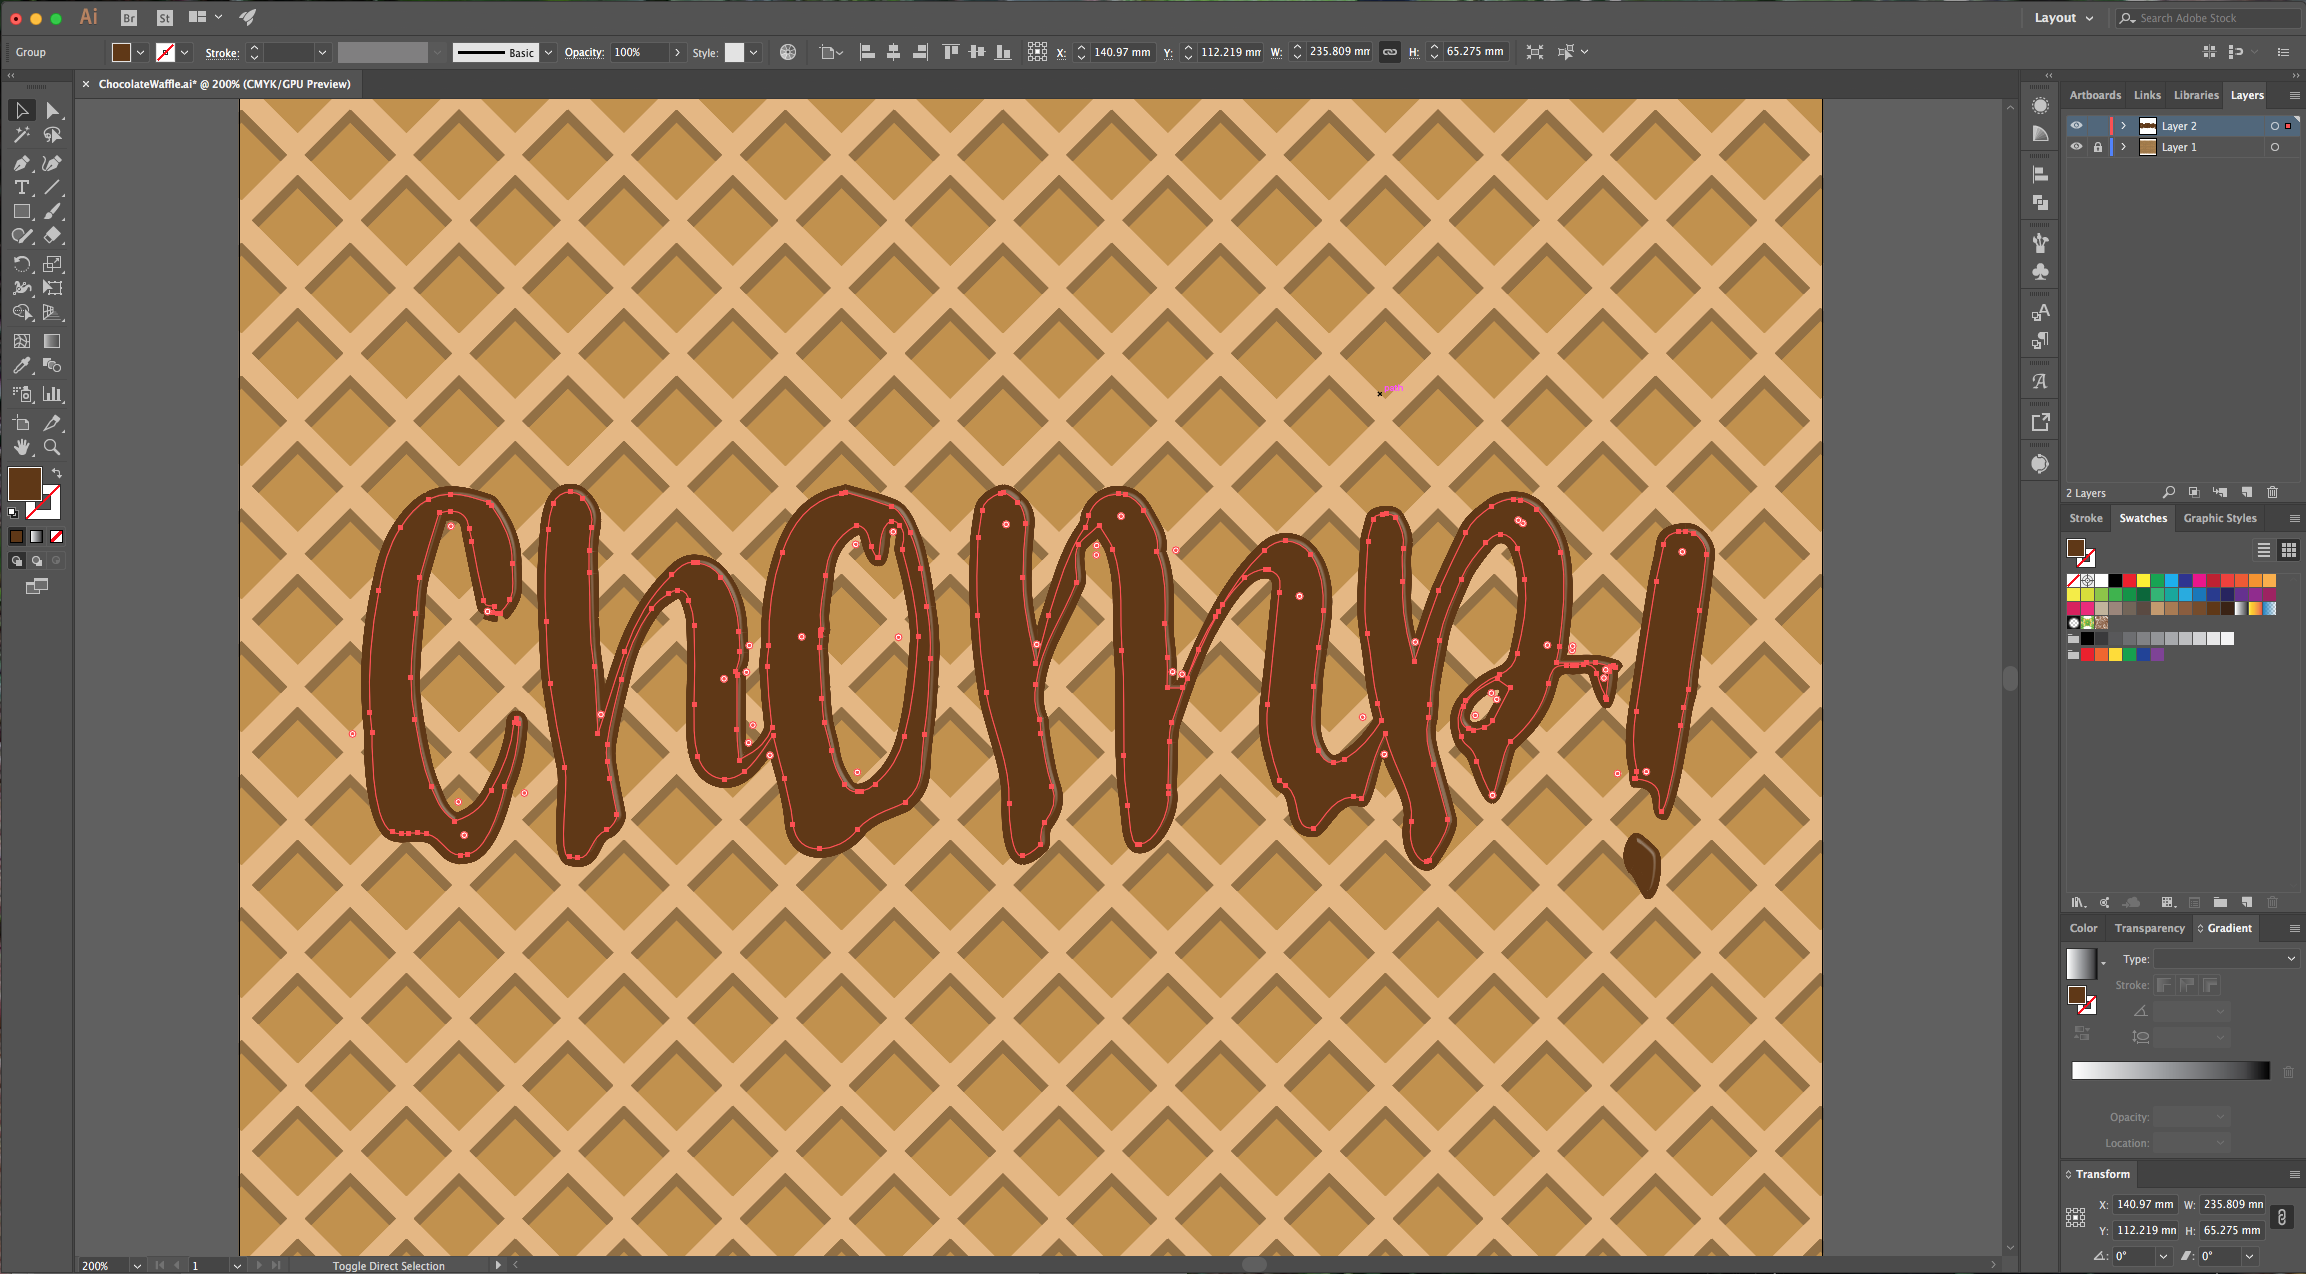
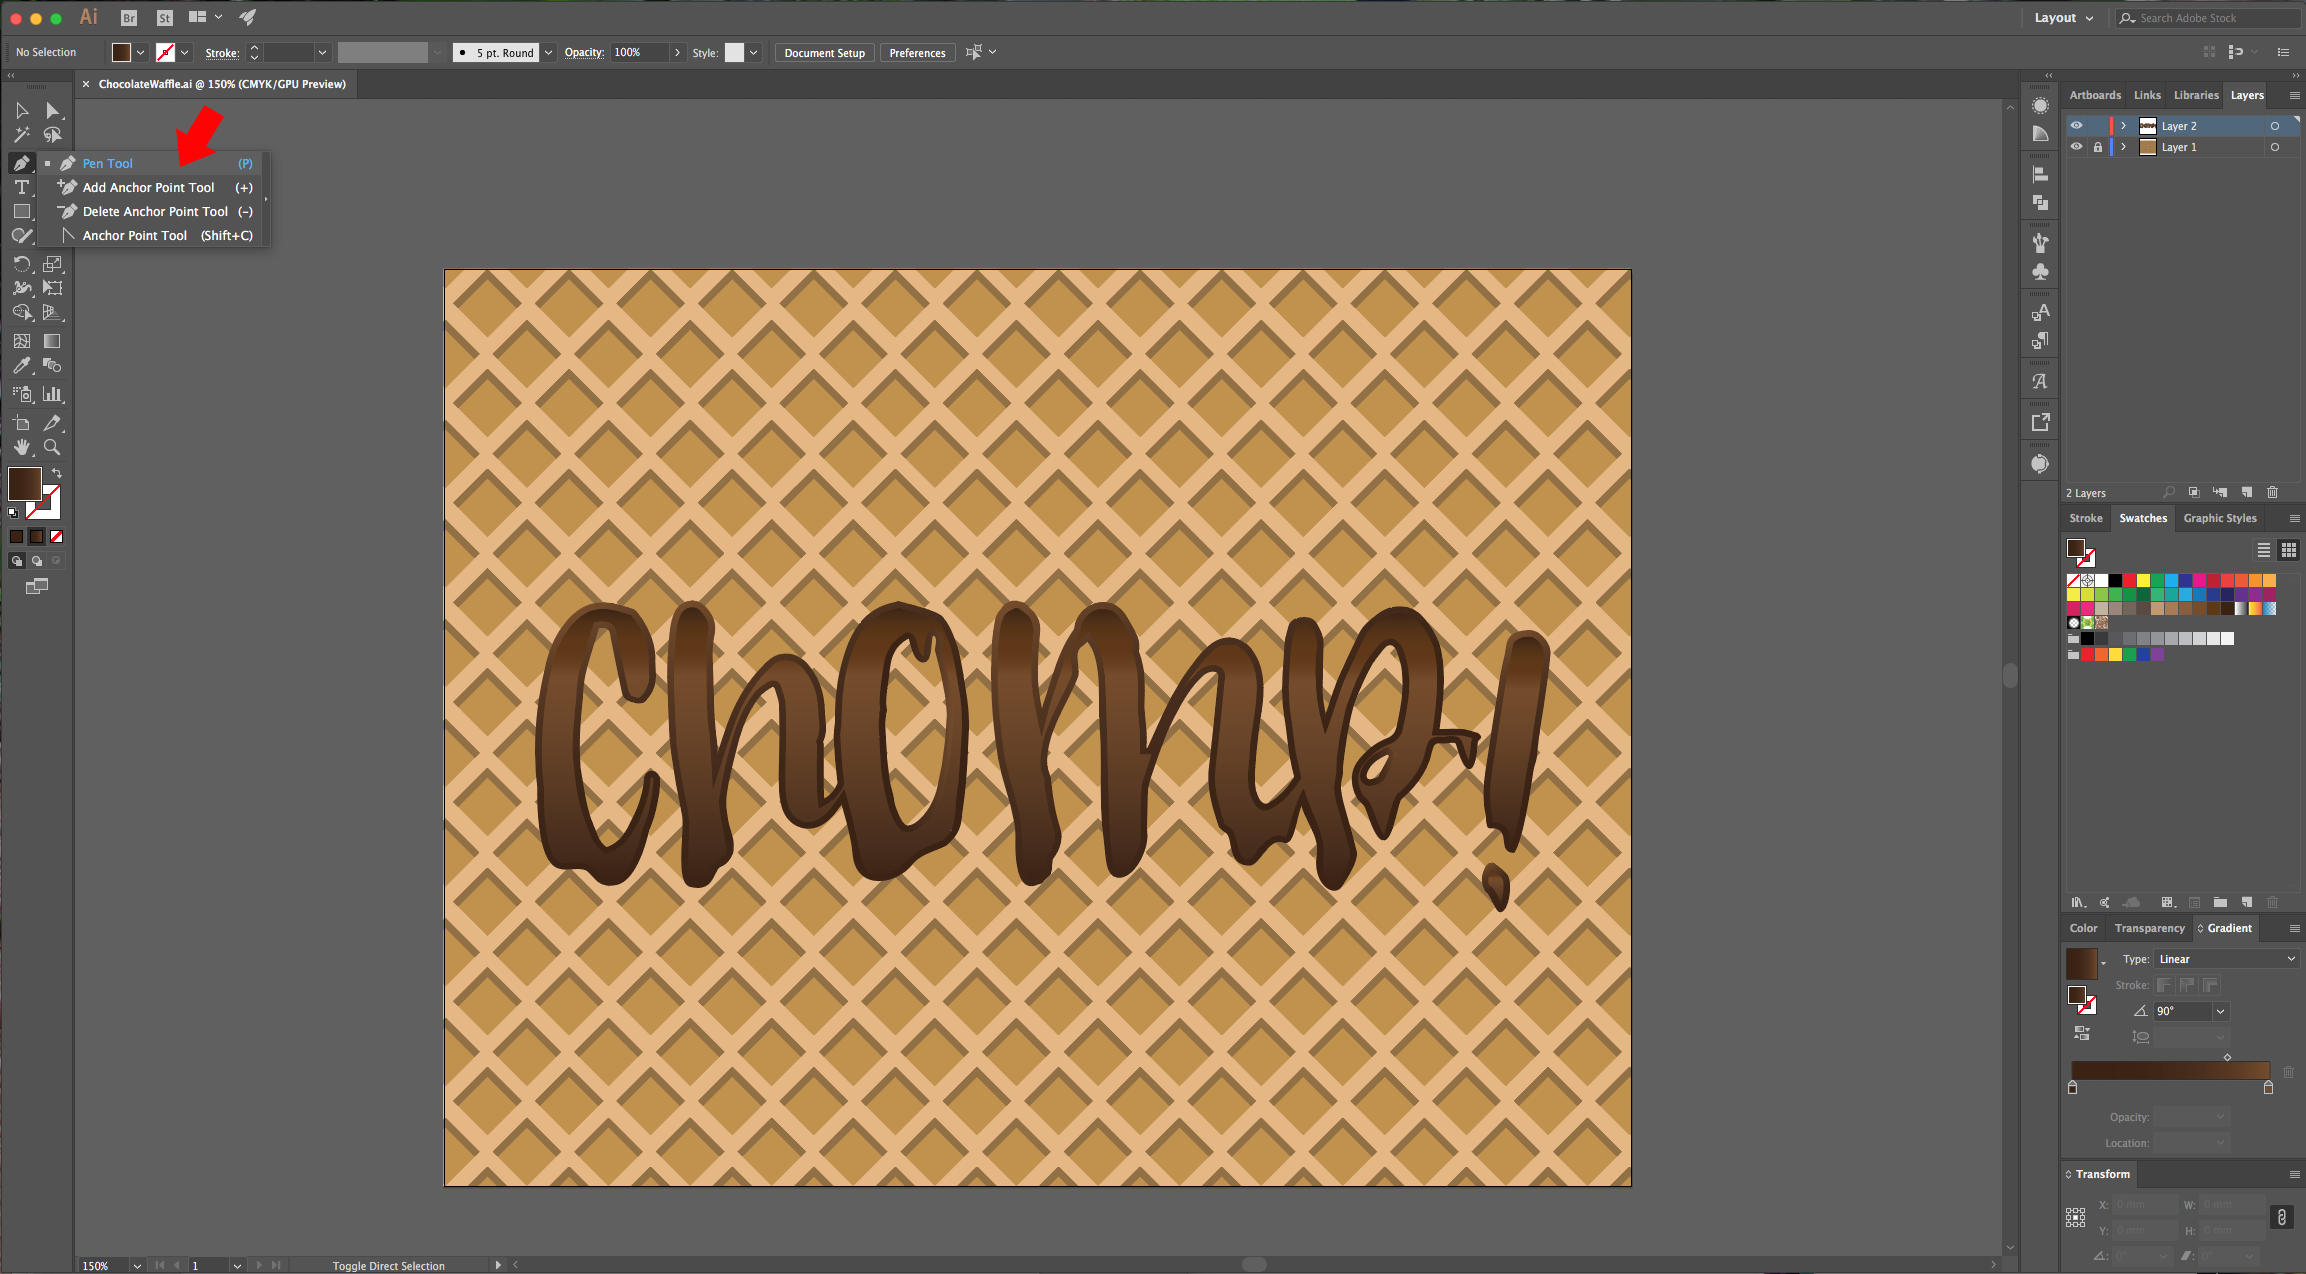
10 - Add some “Dripping” from the text to your text using the “Pen Tool” (P), or the “Direct Selection Tool” (A) to change some of your letters. Don’t forget to “Unite” the added “drops” with the “Pathfinder Tool”.


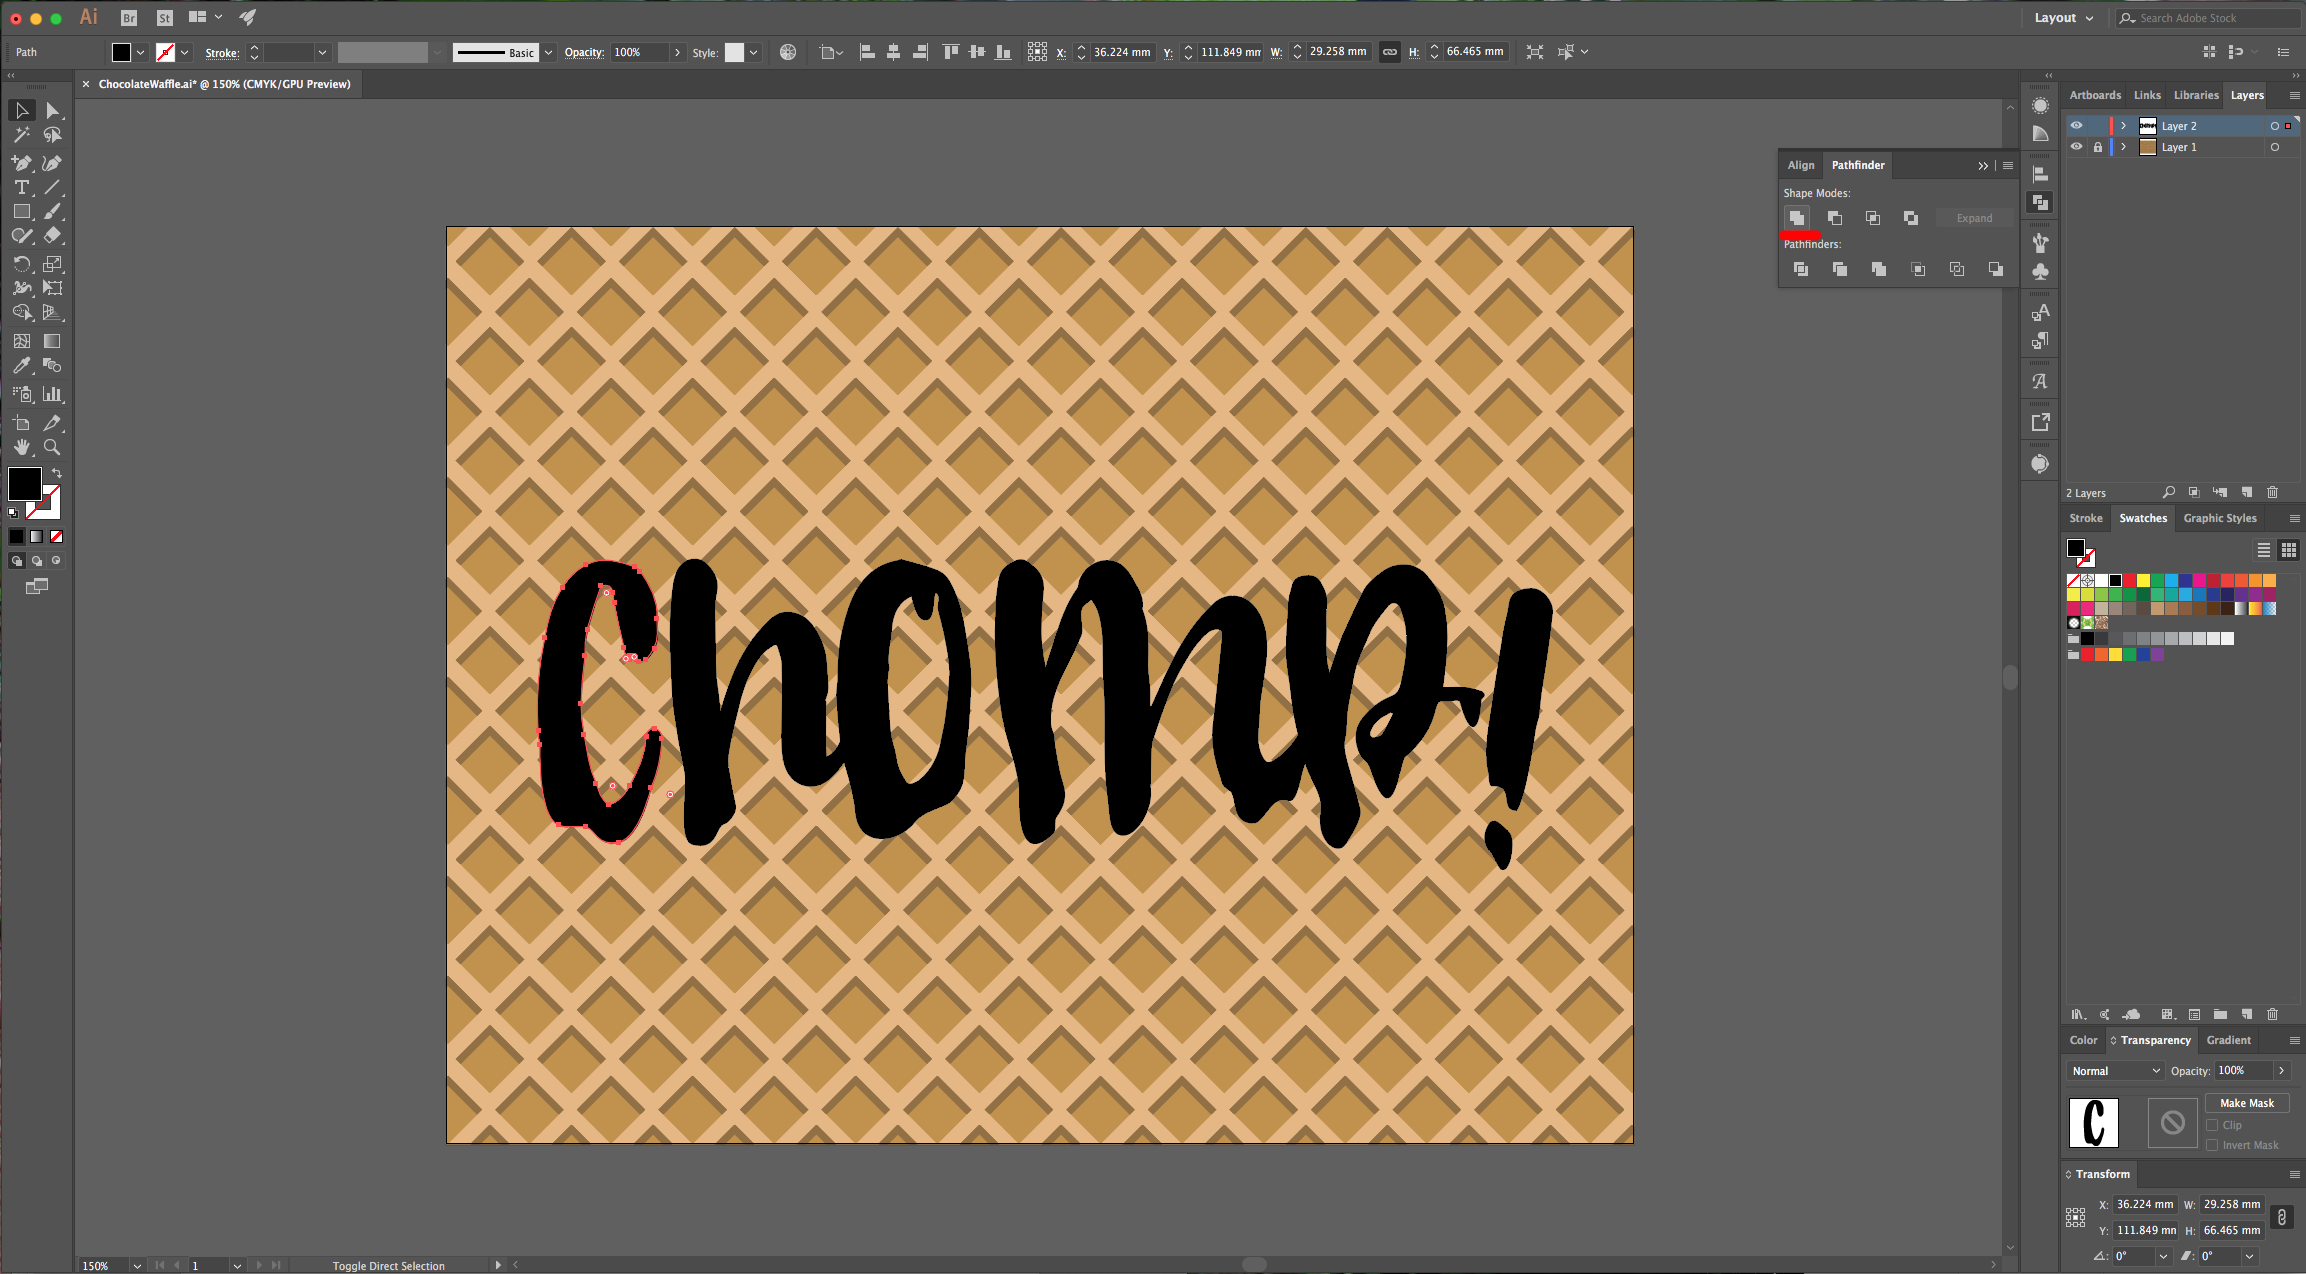
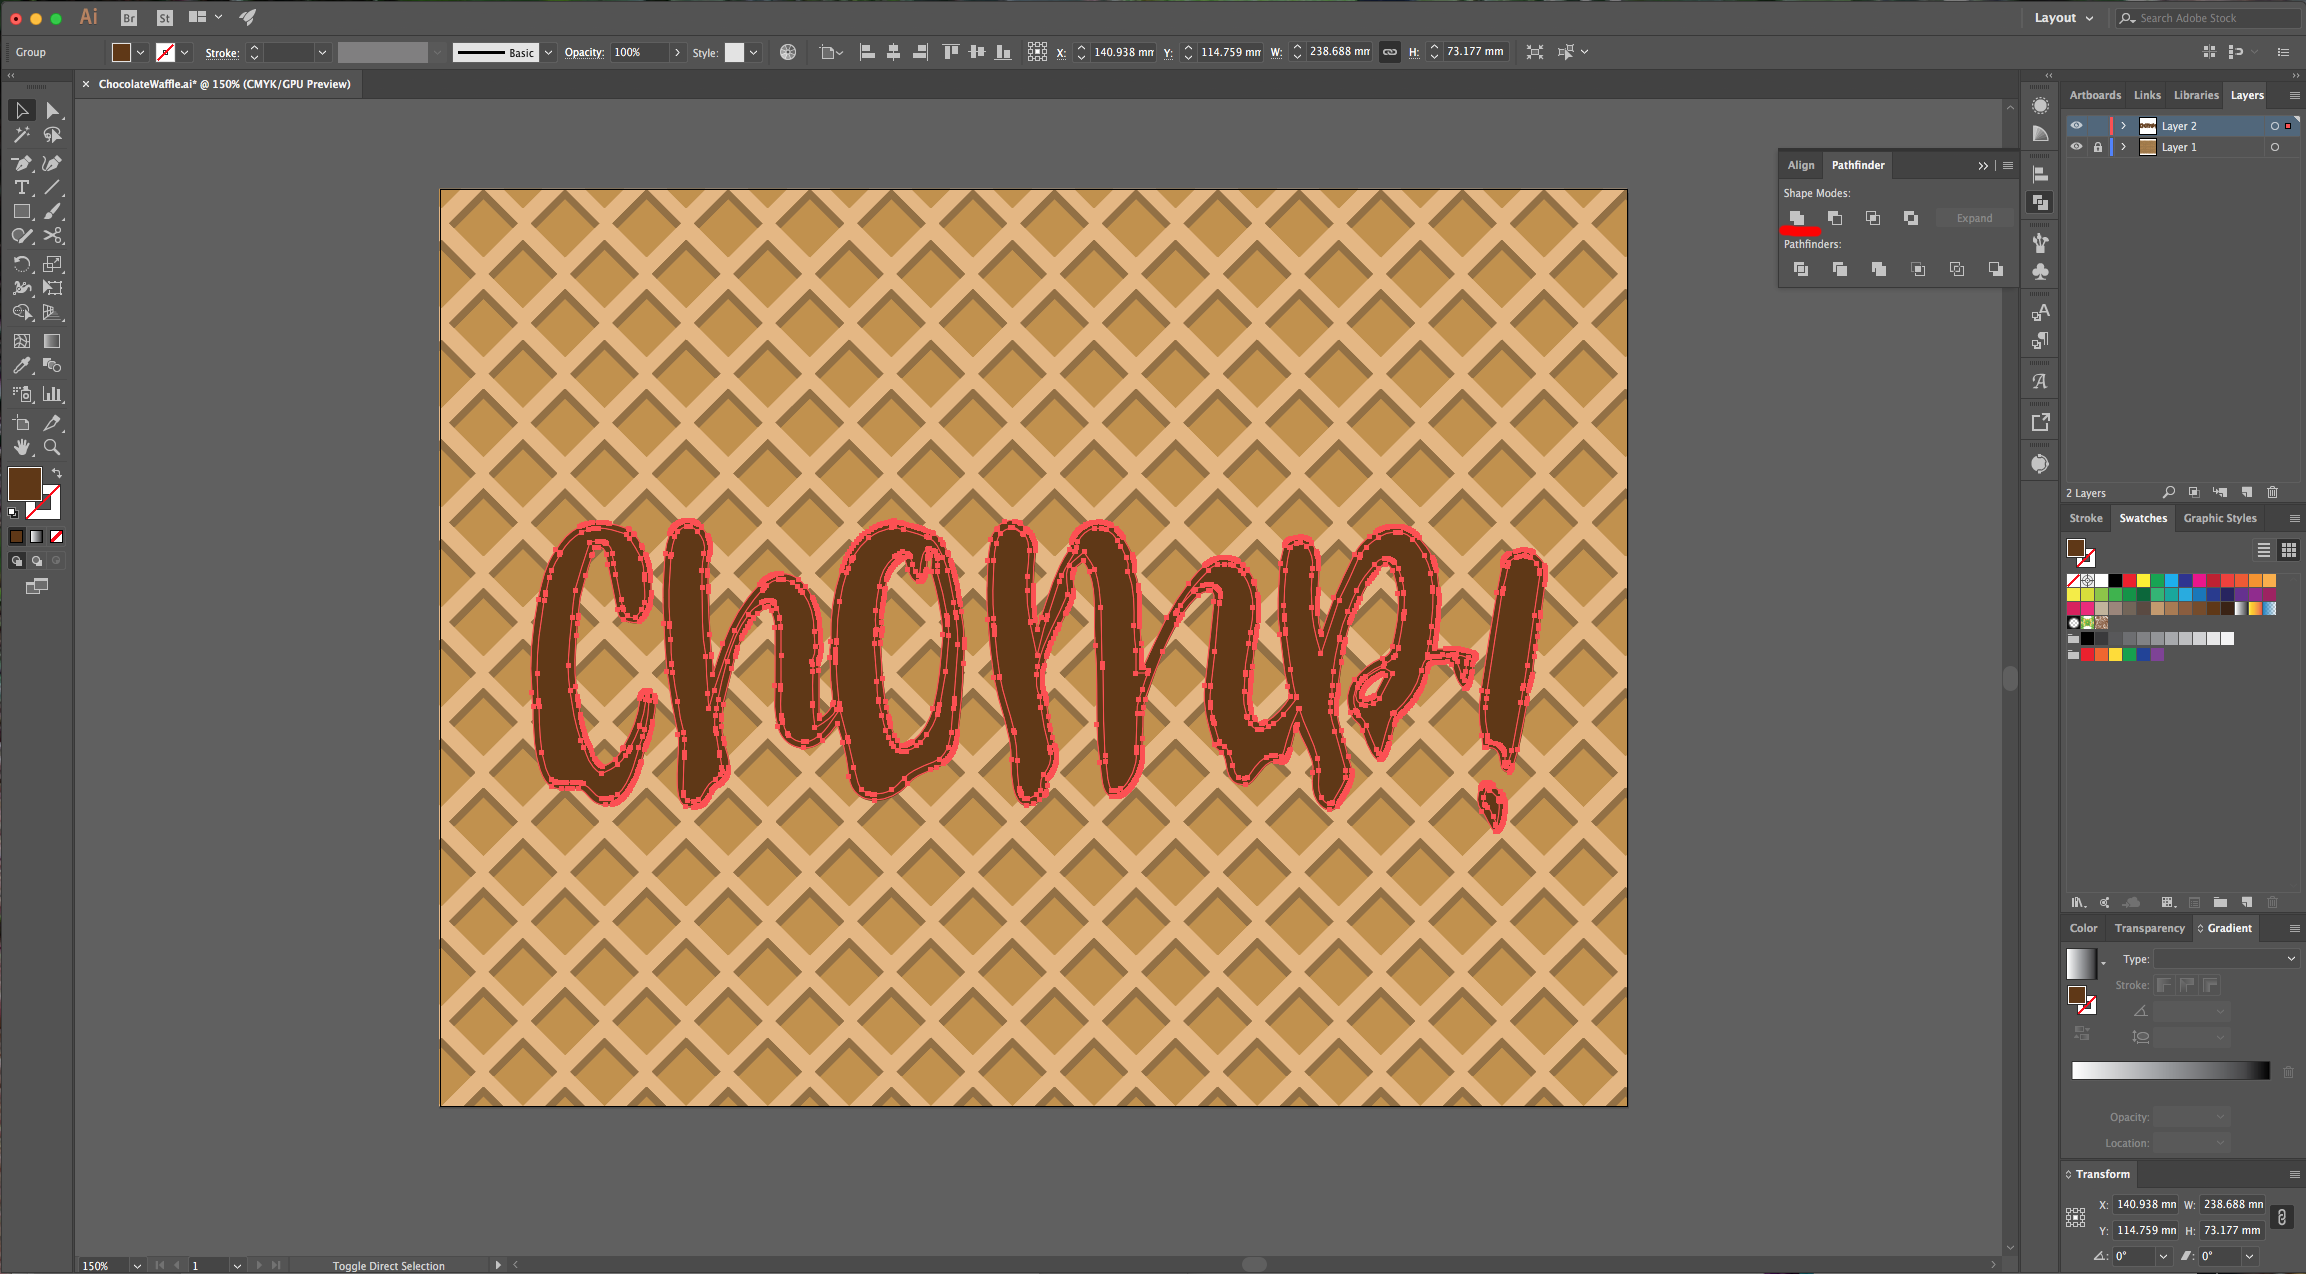
11 - Once you are done adding the drops, select your entire text and in the “Pathfinder” Panel choose the “Add/Unite” option once more.

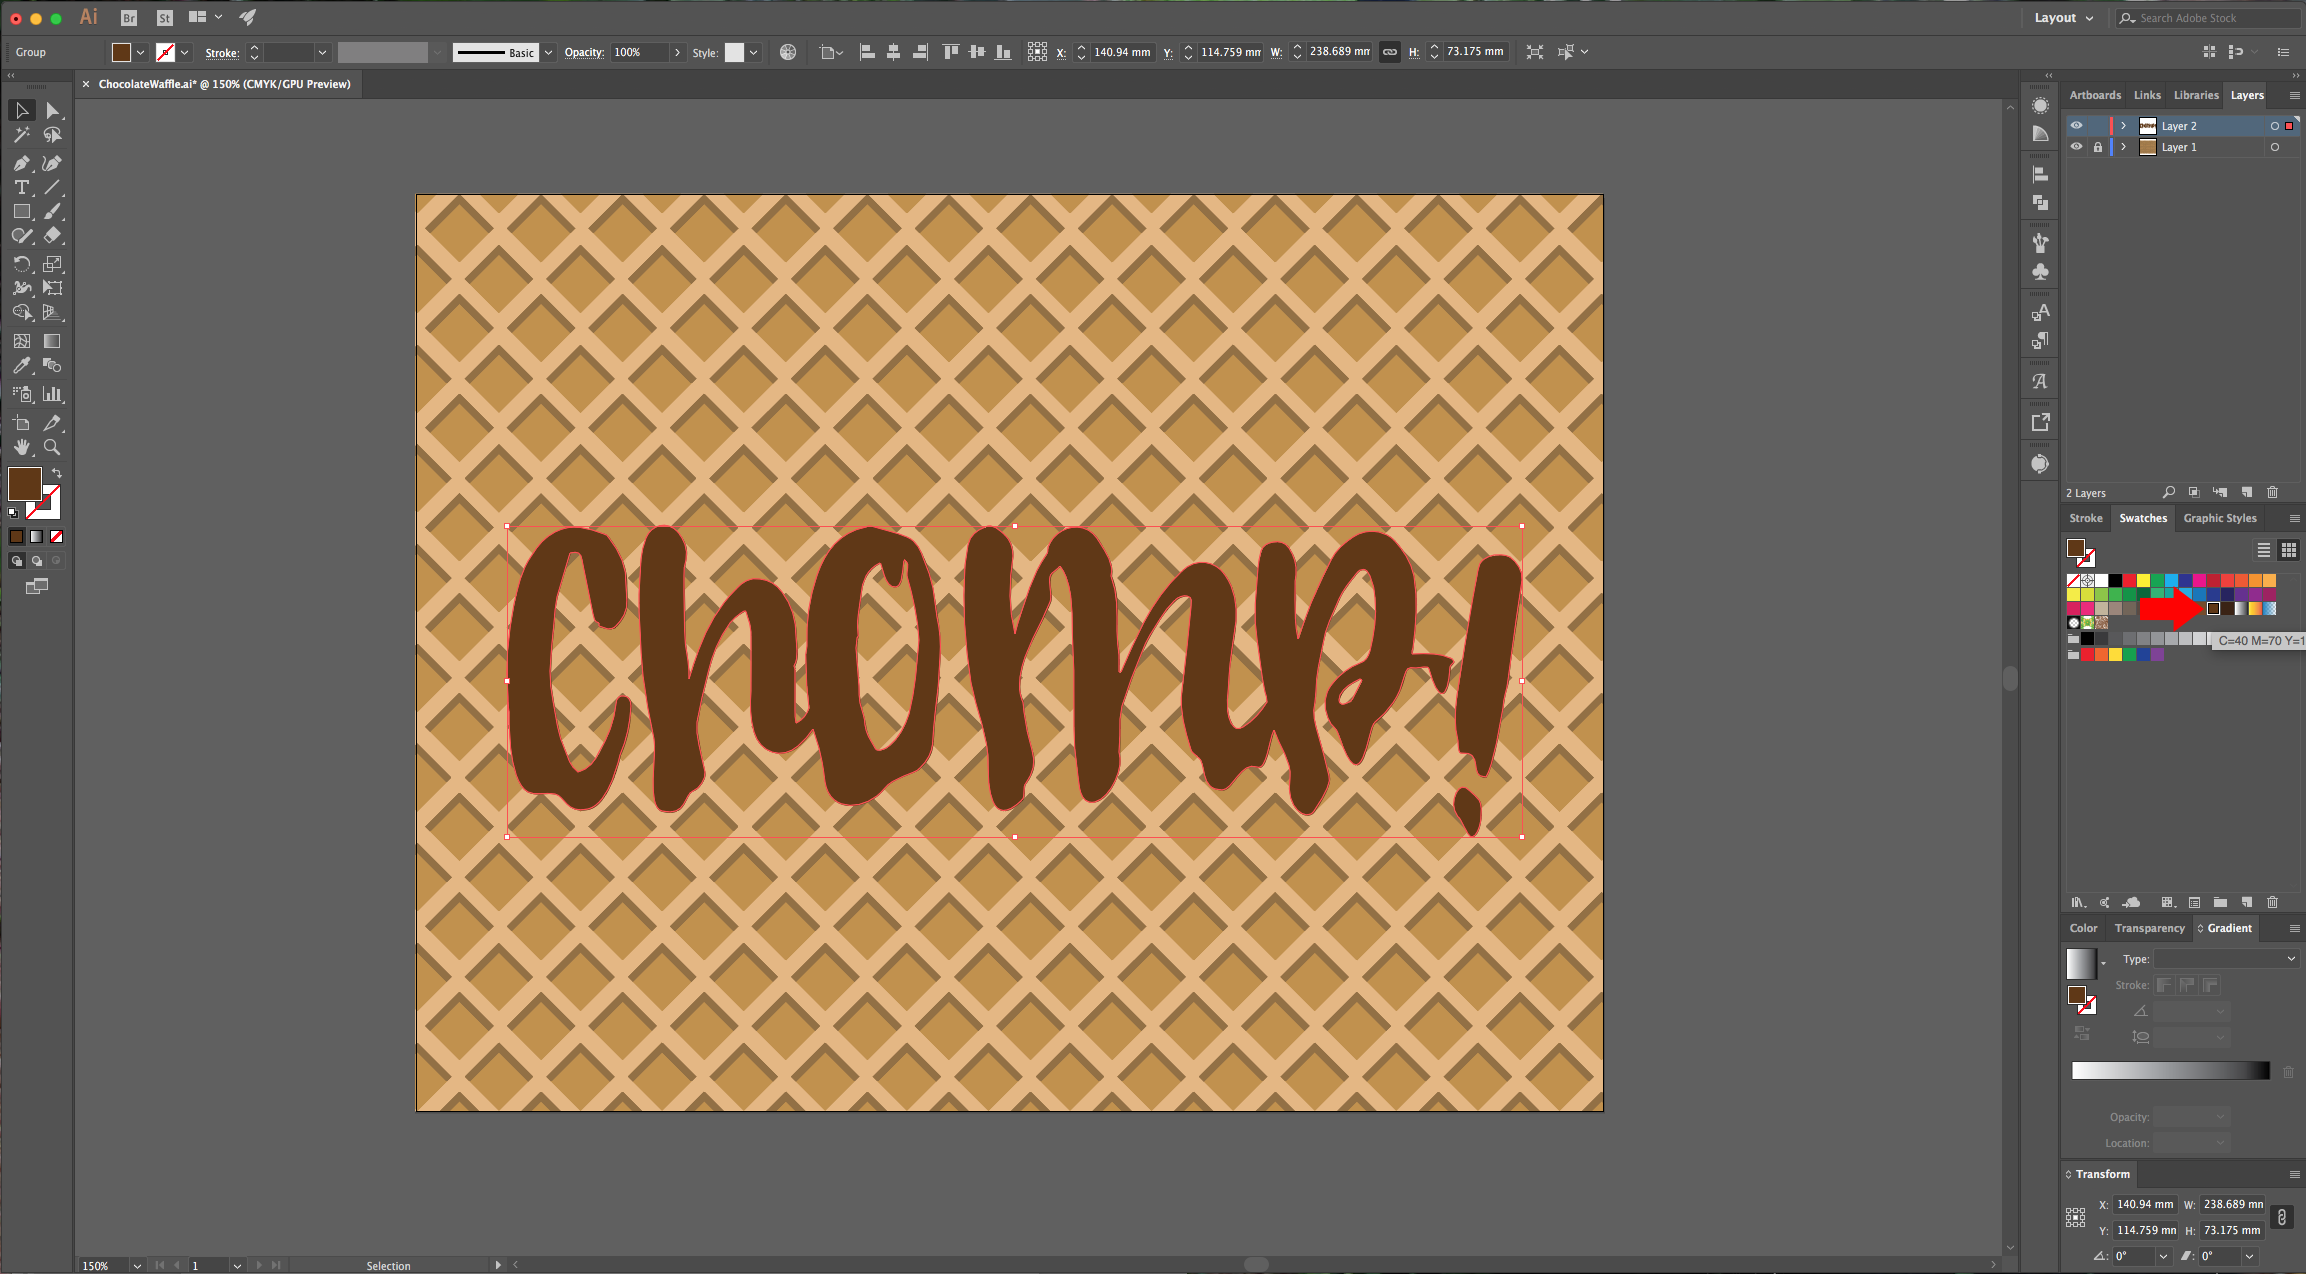
12 - Select your text and change the “Fill” color to a medium brown.
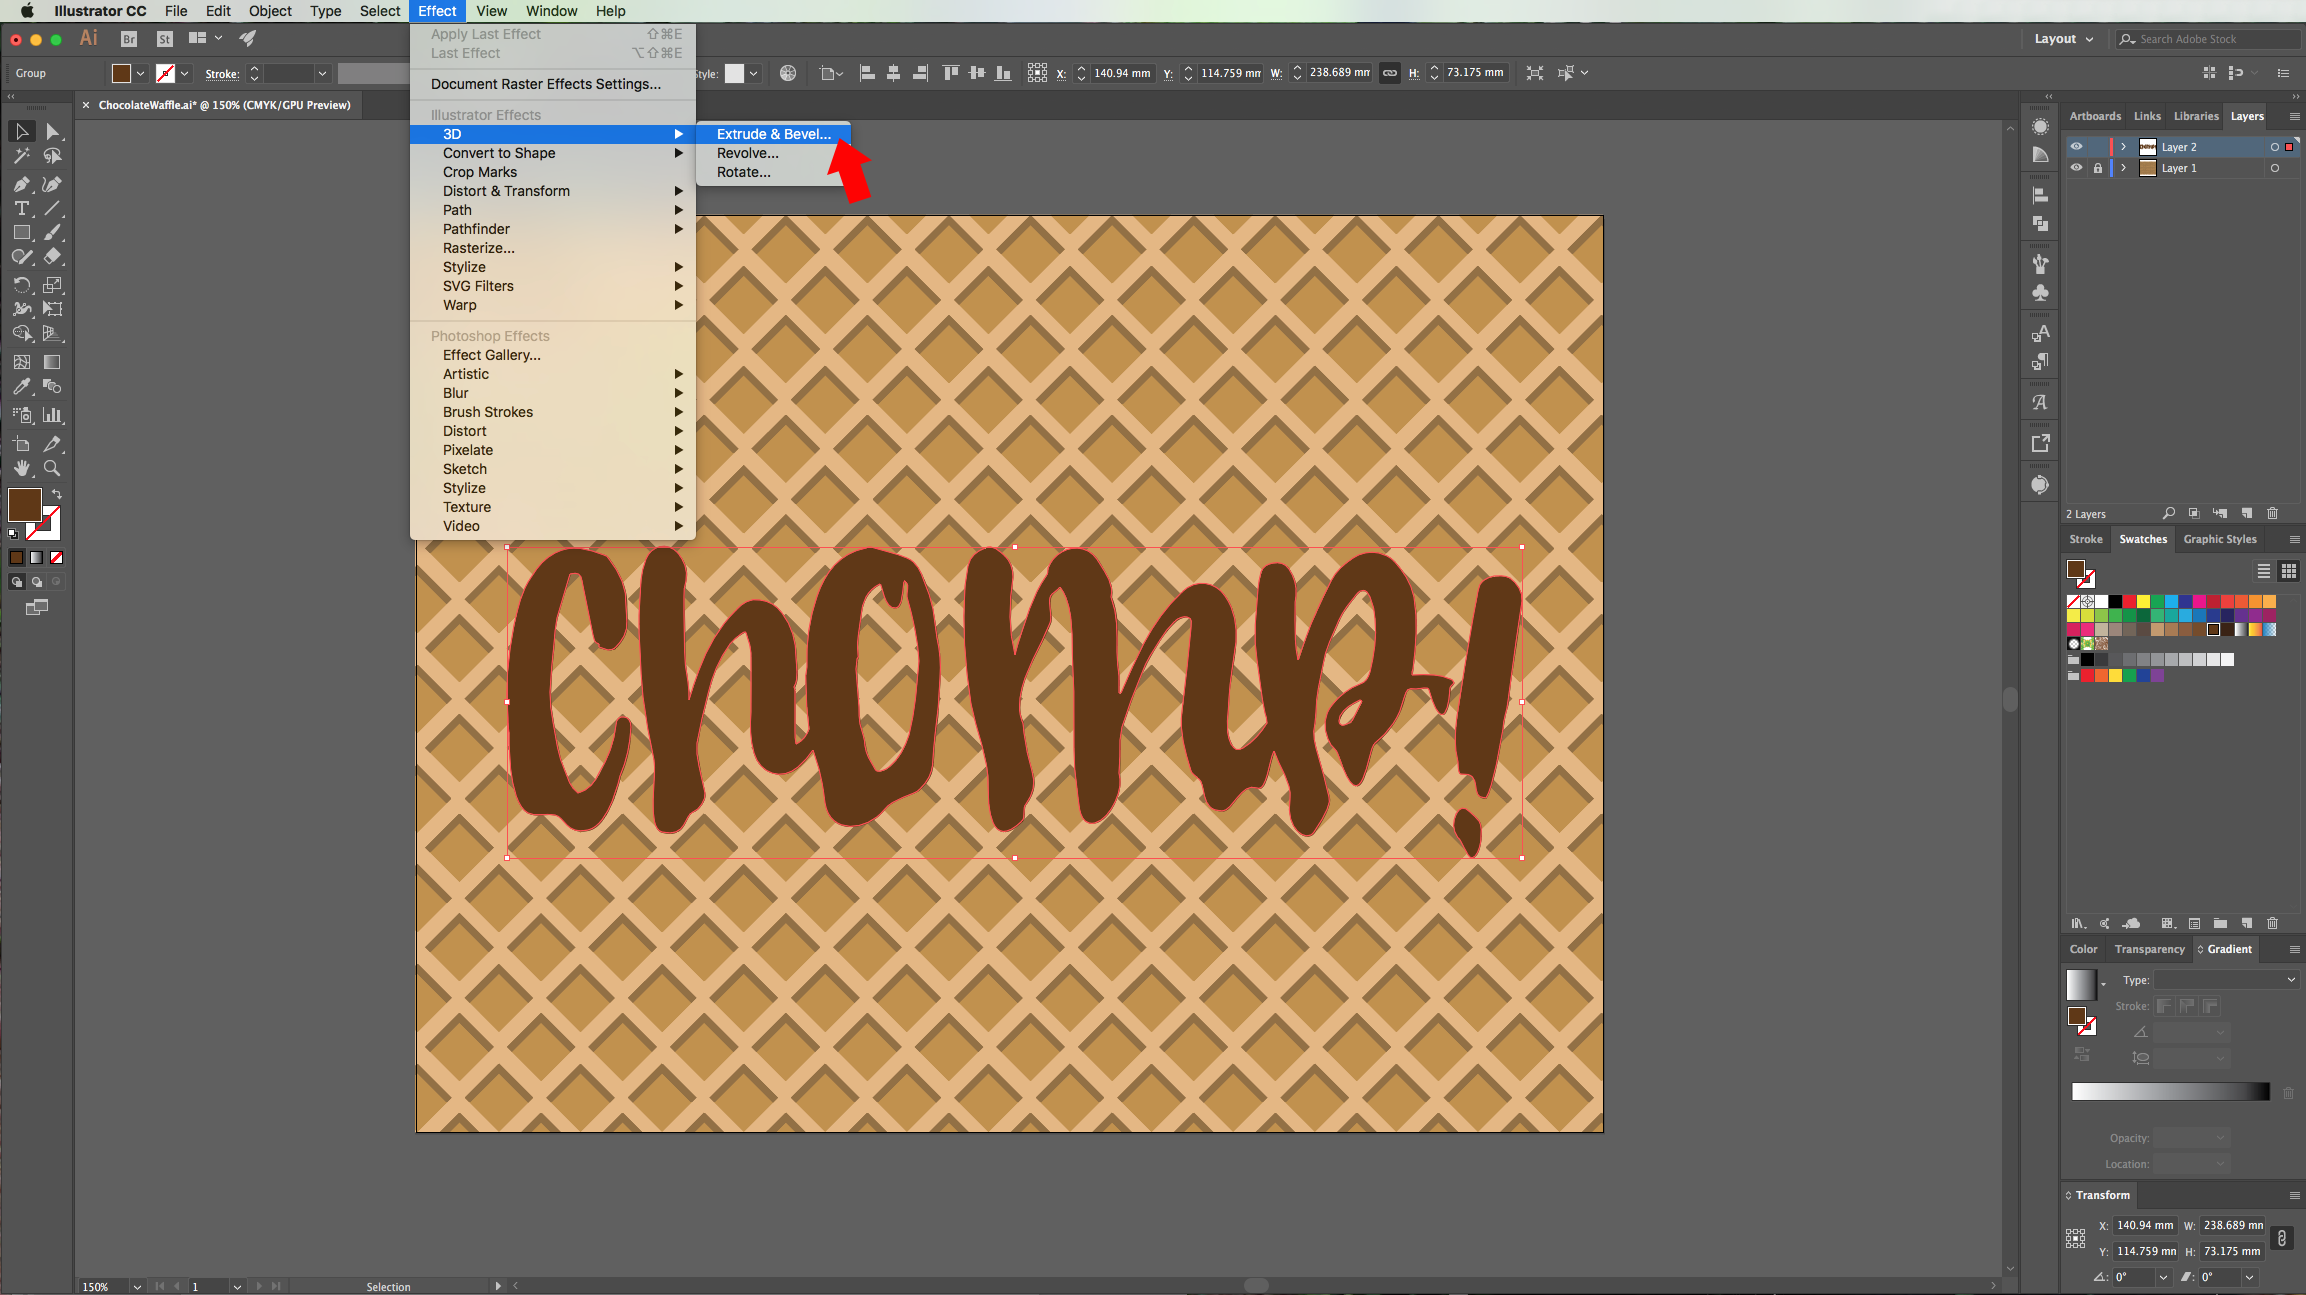
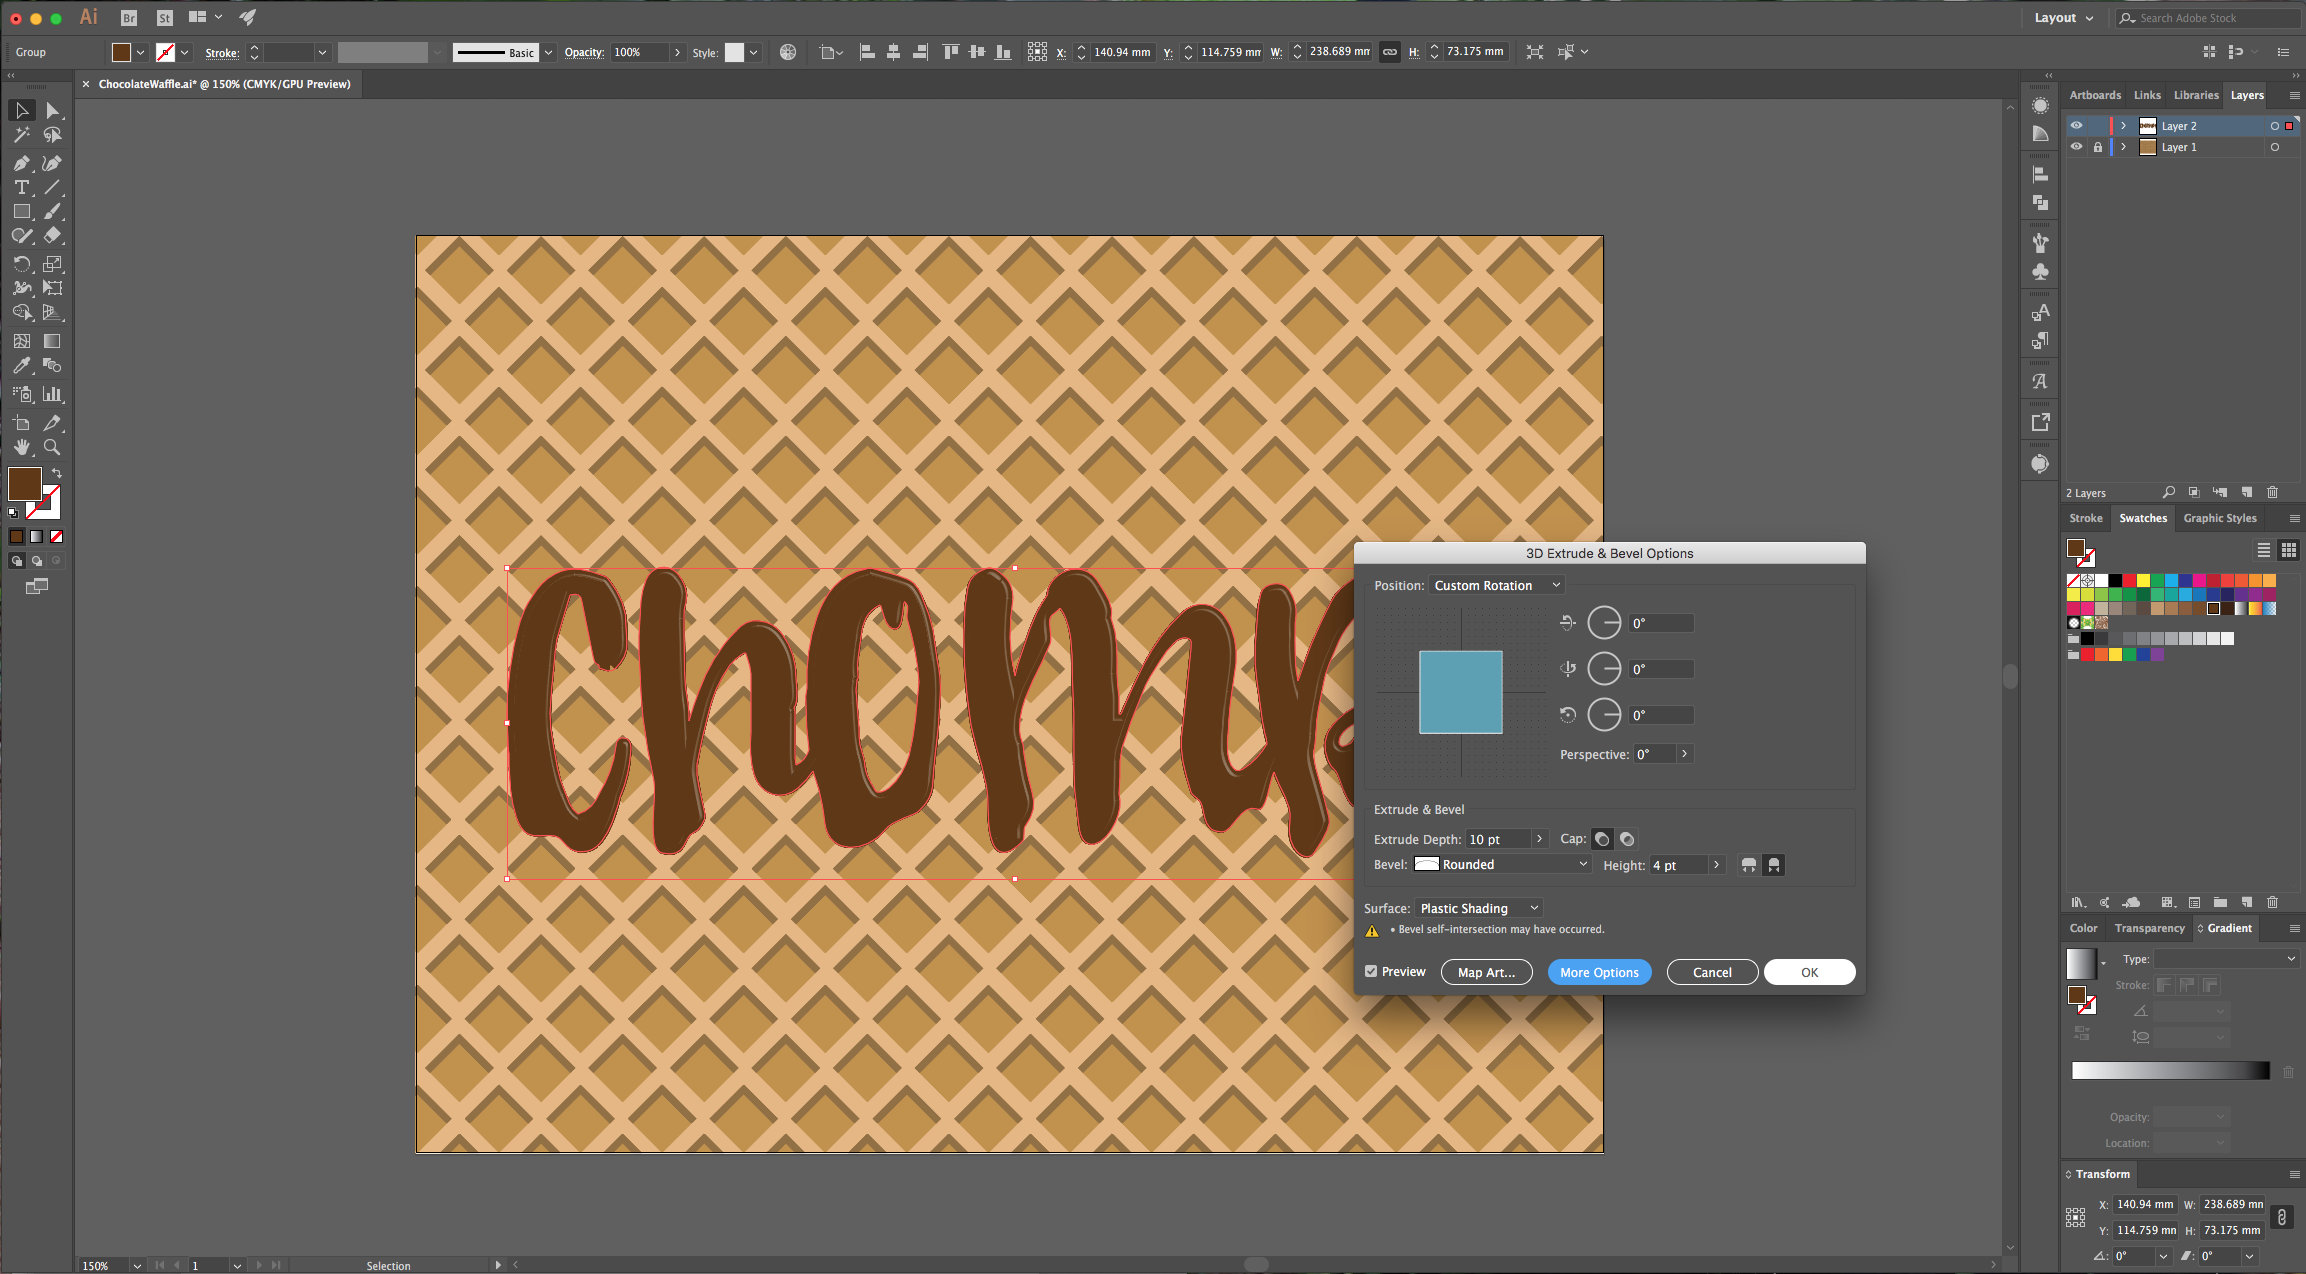
13 - Then go to Effect > 3D > Extrude & Bevel and apply the following values:
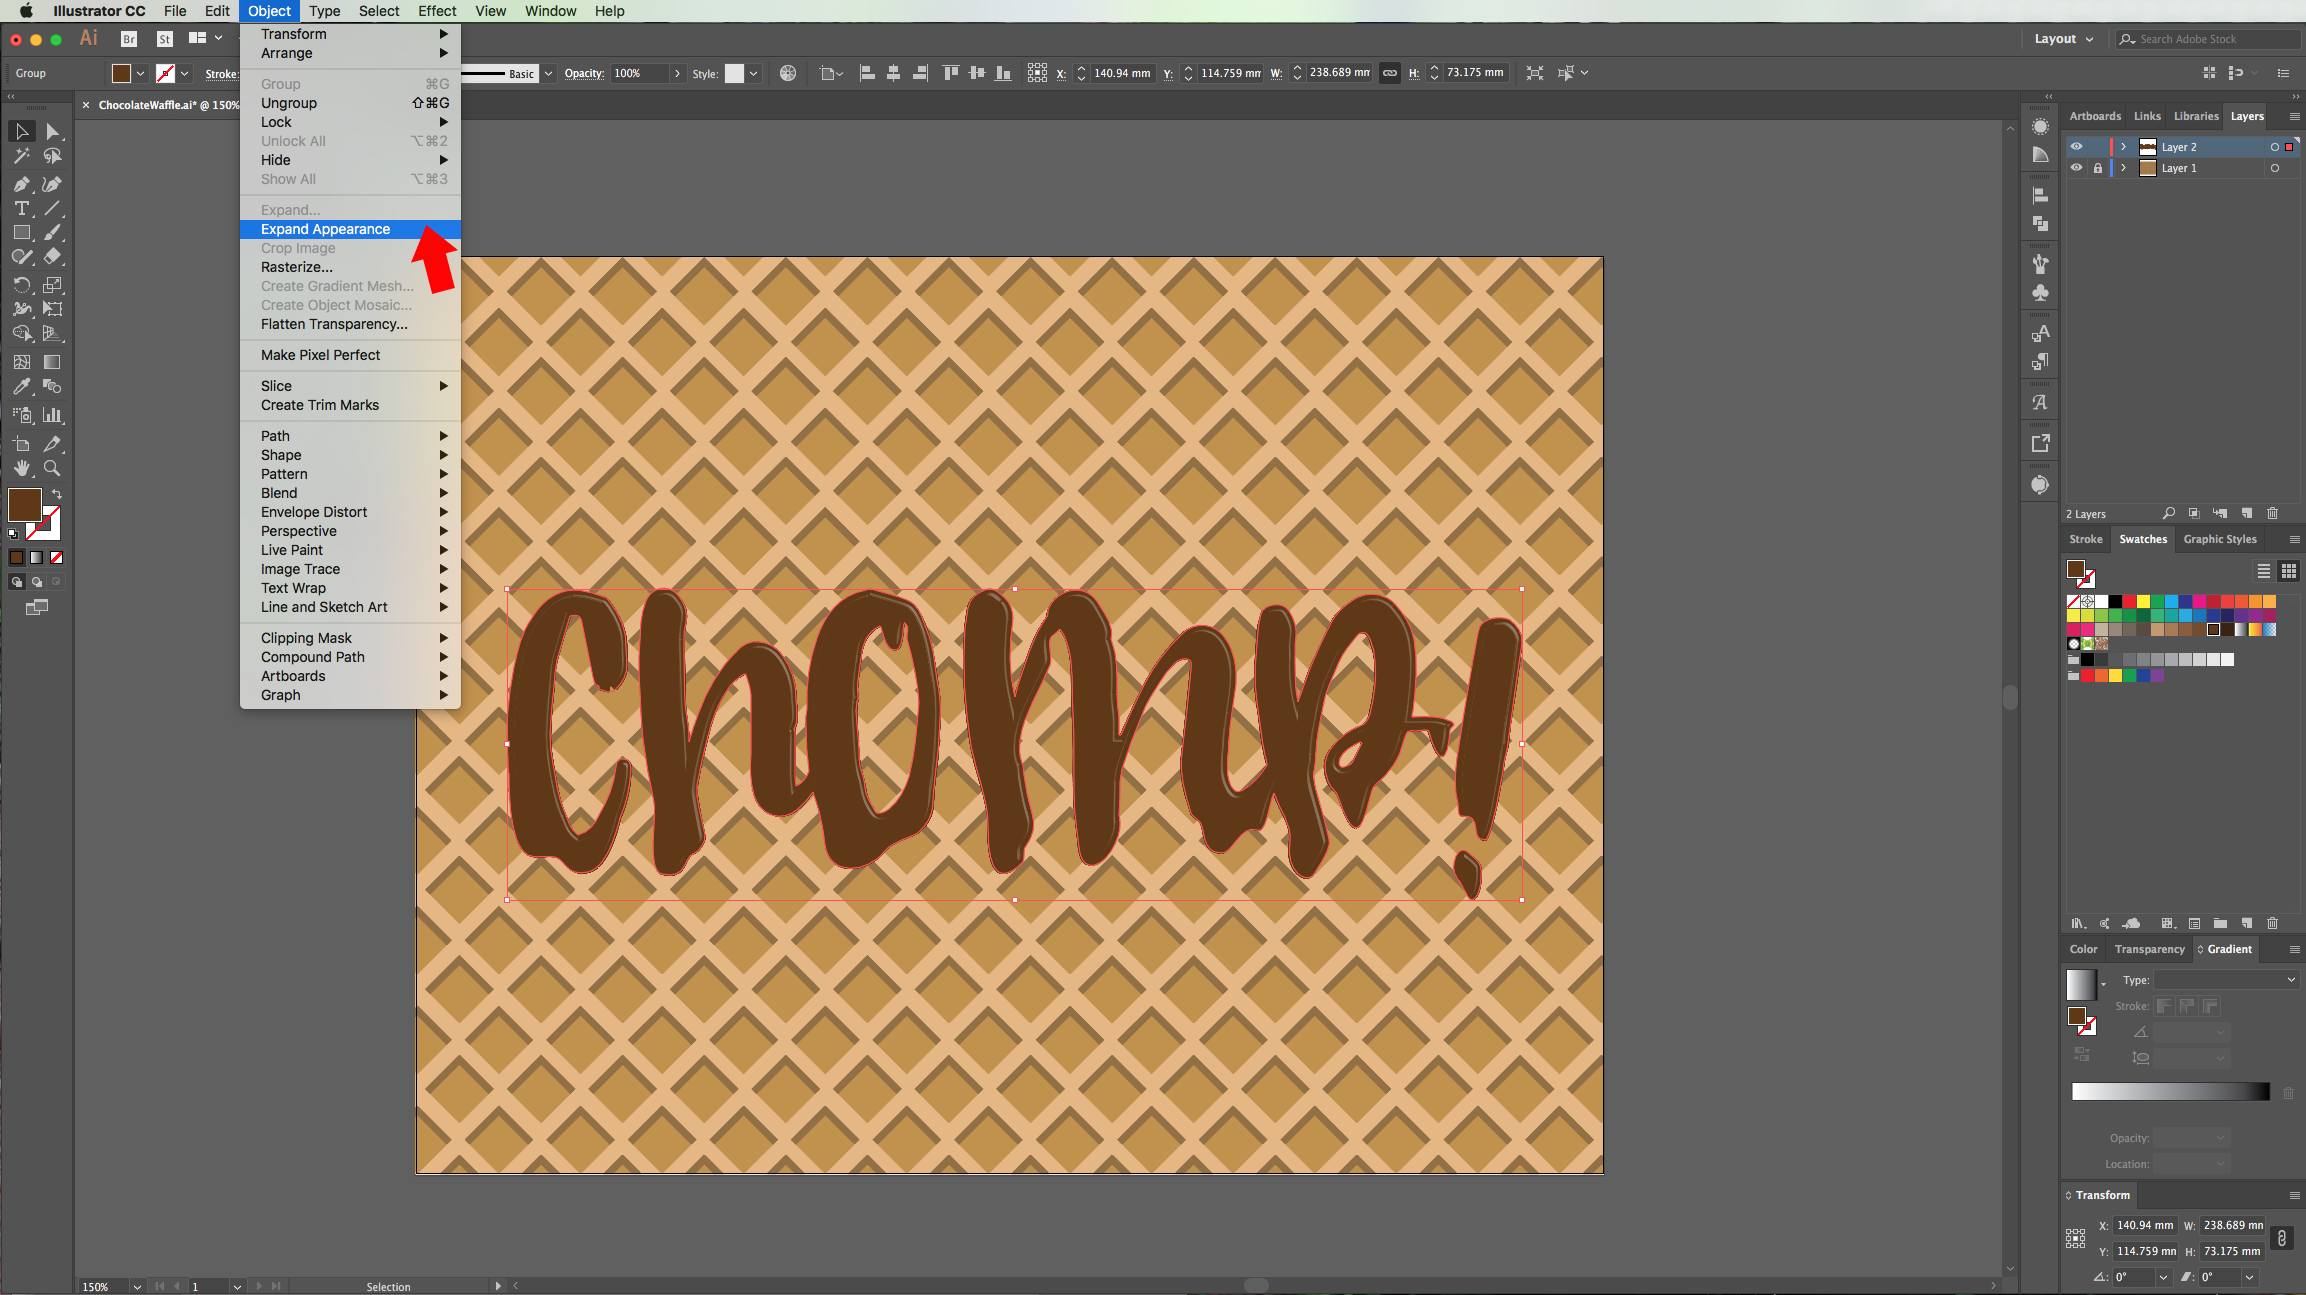
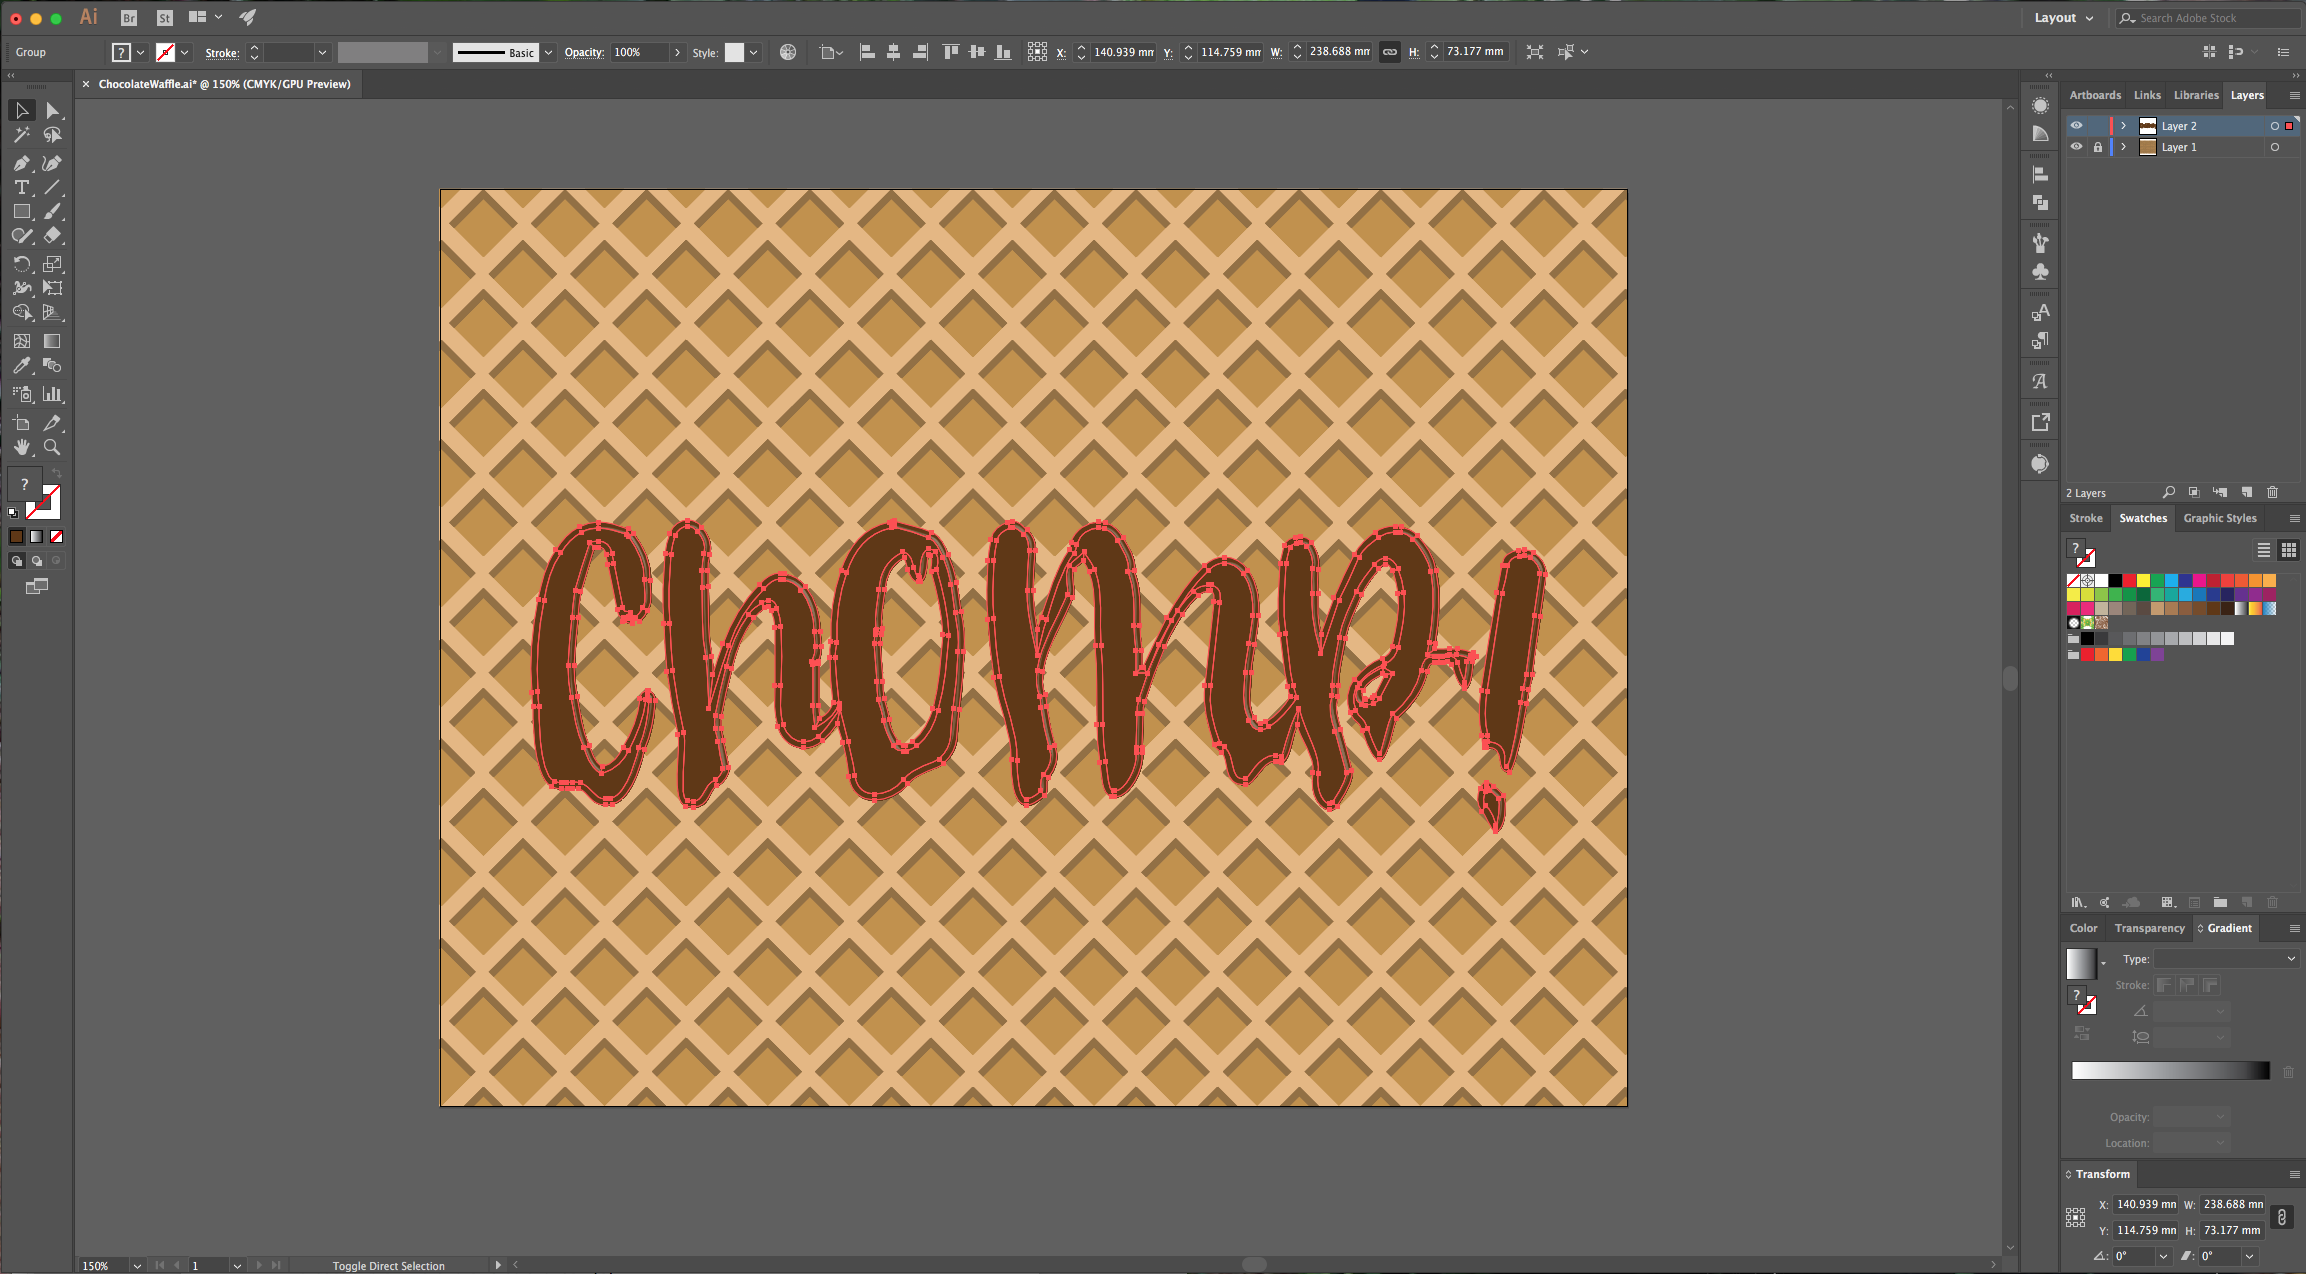
14 - Go to Object > Expand Appearance and then “Ungroup” your text (Command/Control + U). Select each letter (or group of letters) individually and “Ungroup” it again.
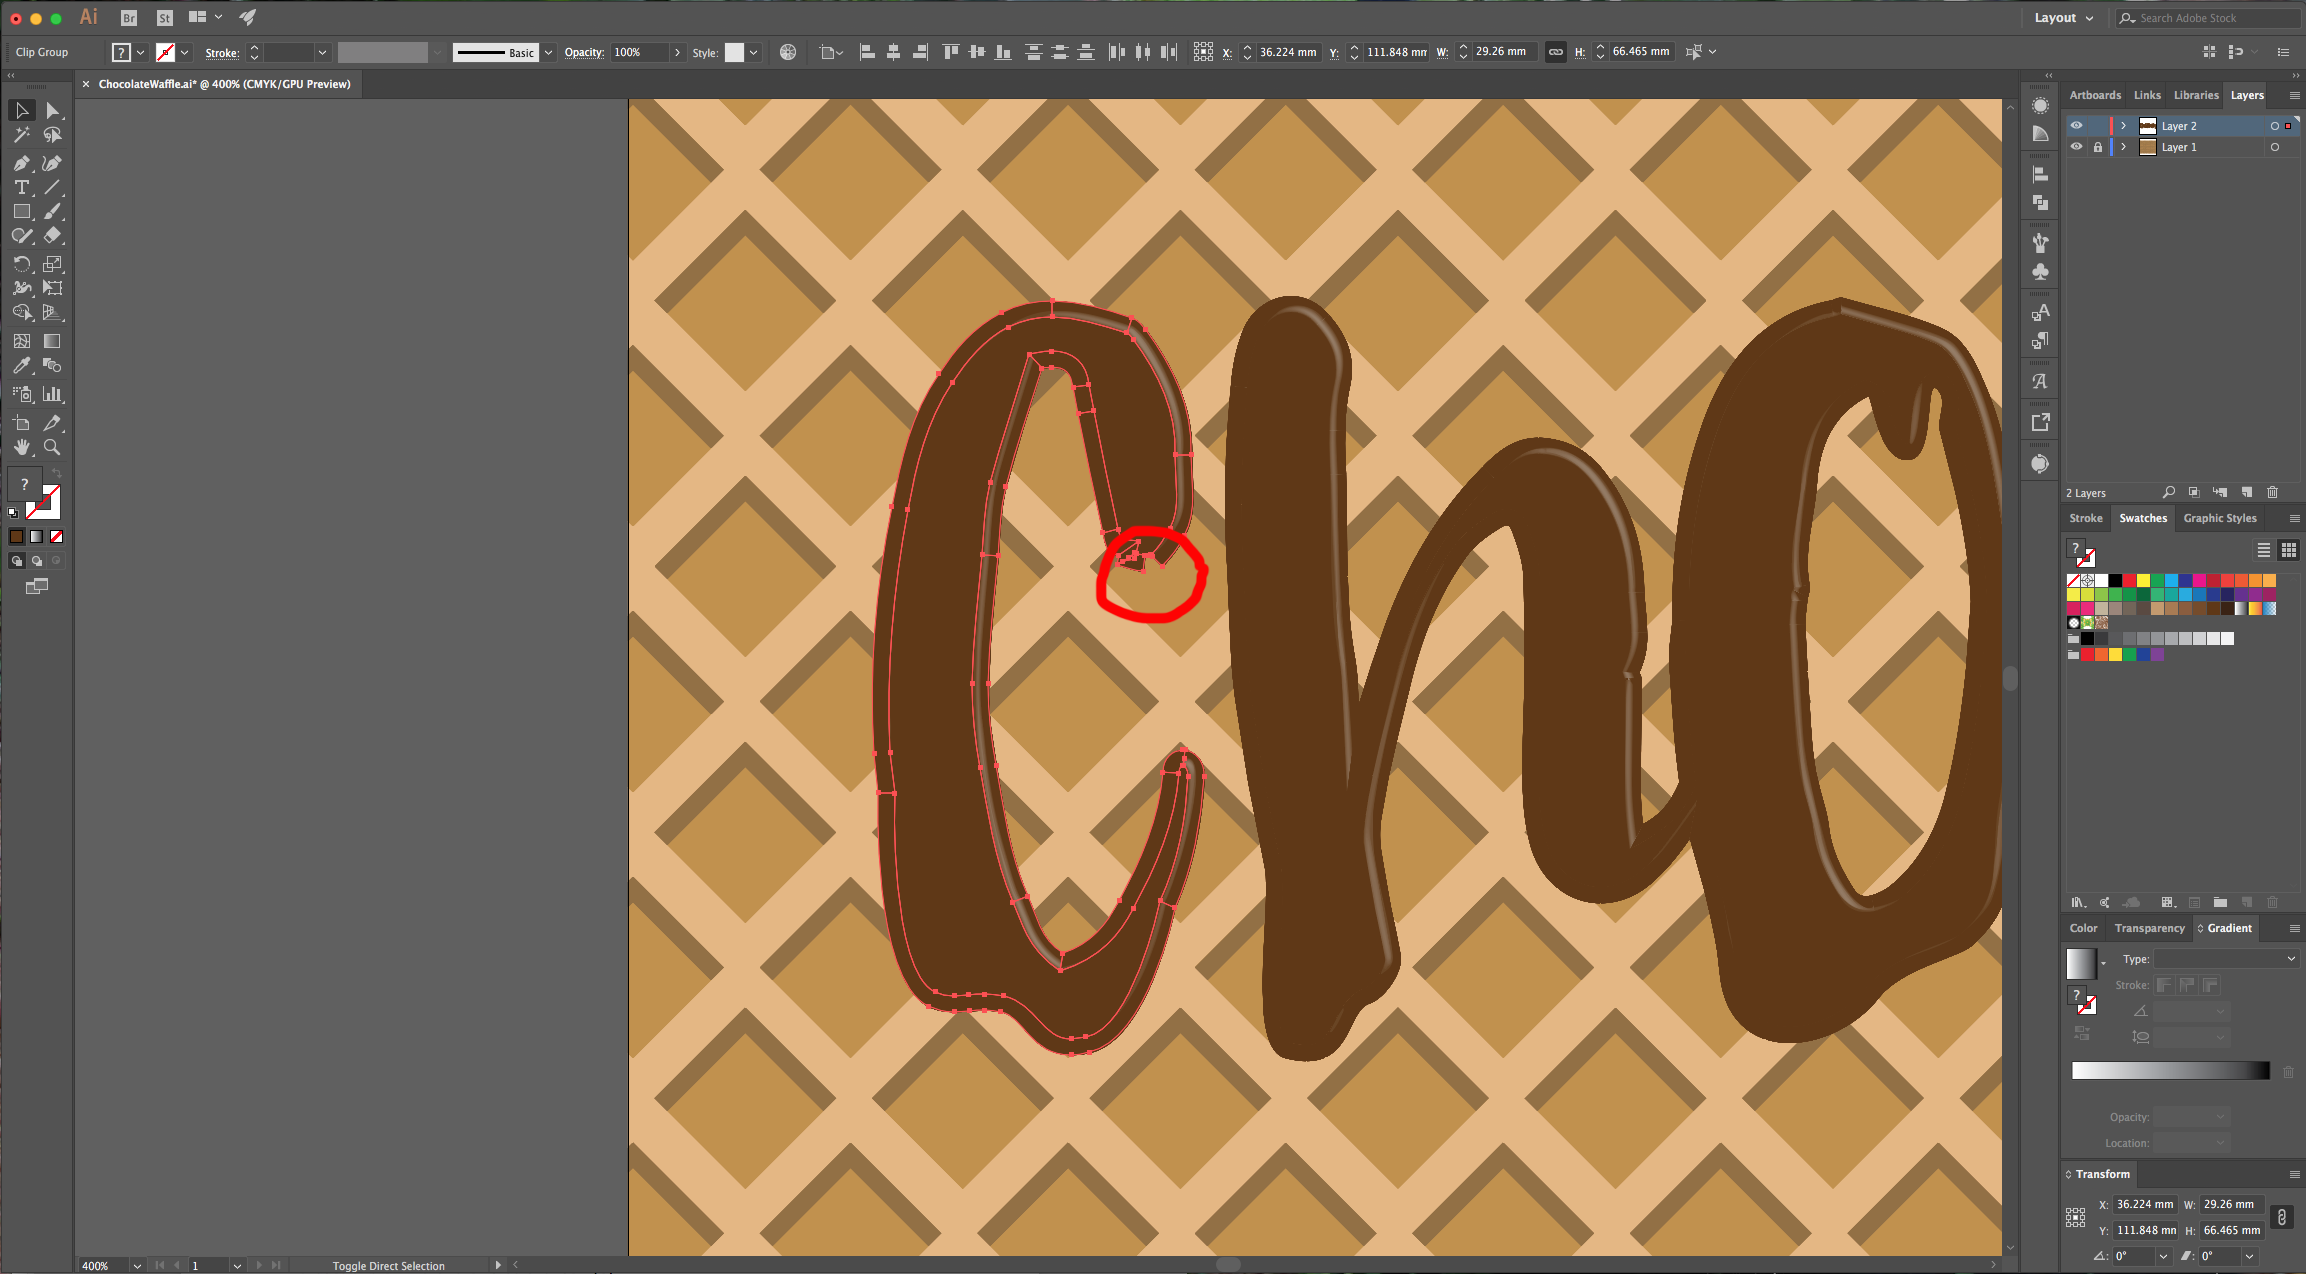
15 - Select the “Top” part of the letters and in the “Pathfinder” Panel choose “Unite”. Then, check the “Sides” of the letters, fix any gaps or imperfections.
16 - Then, select all the sides of the letters and use the “Unite” option in the “Pathfinder” Panel. (Remember to “Deselect” and keep your letter tops group out).
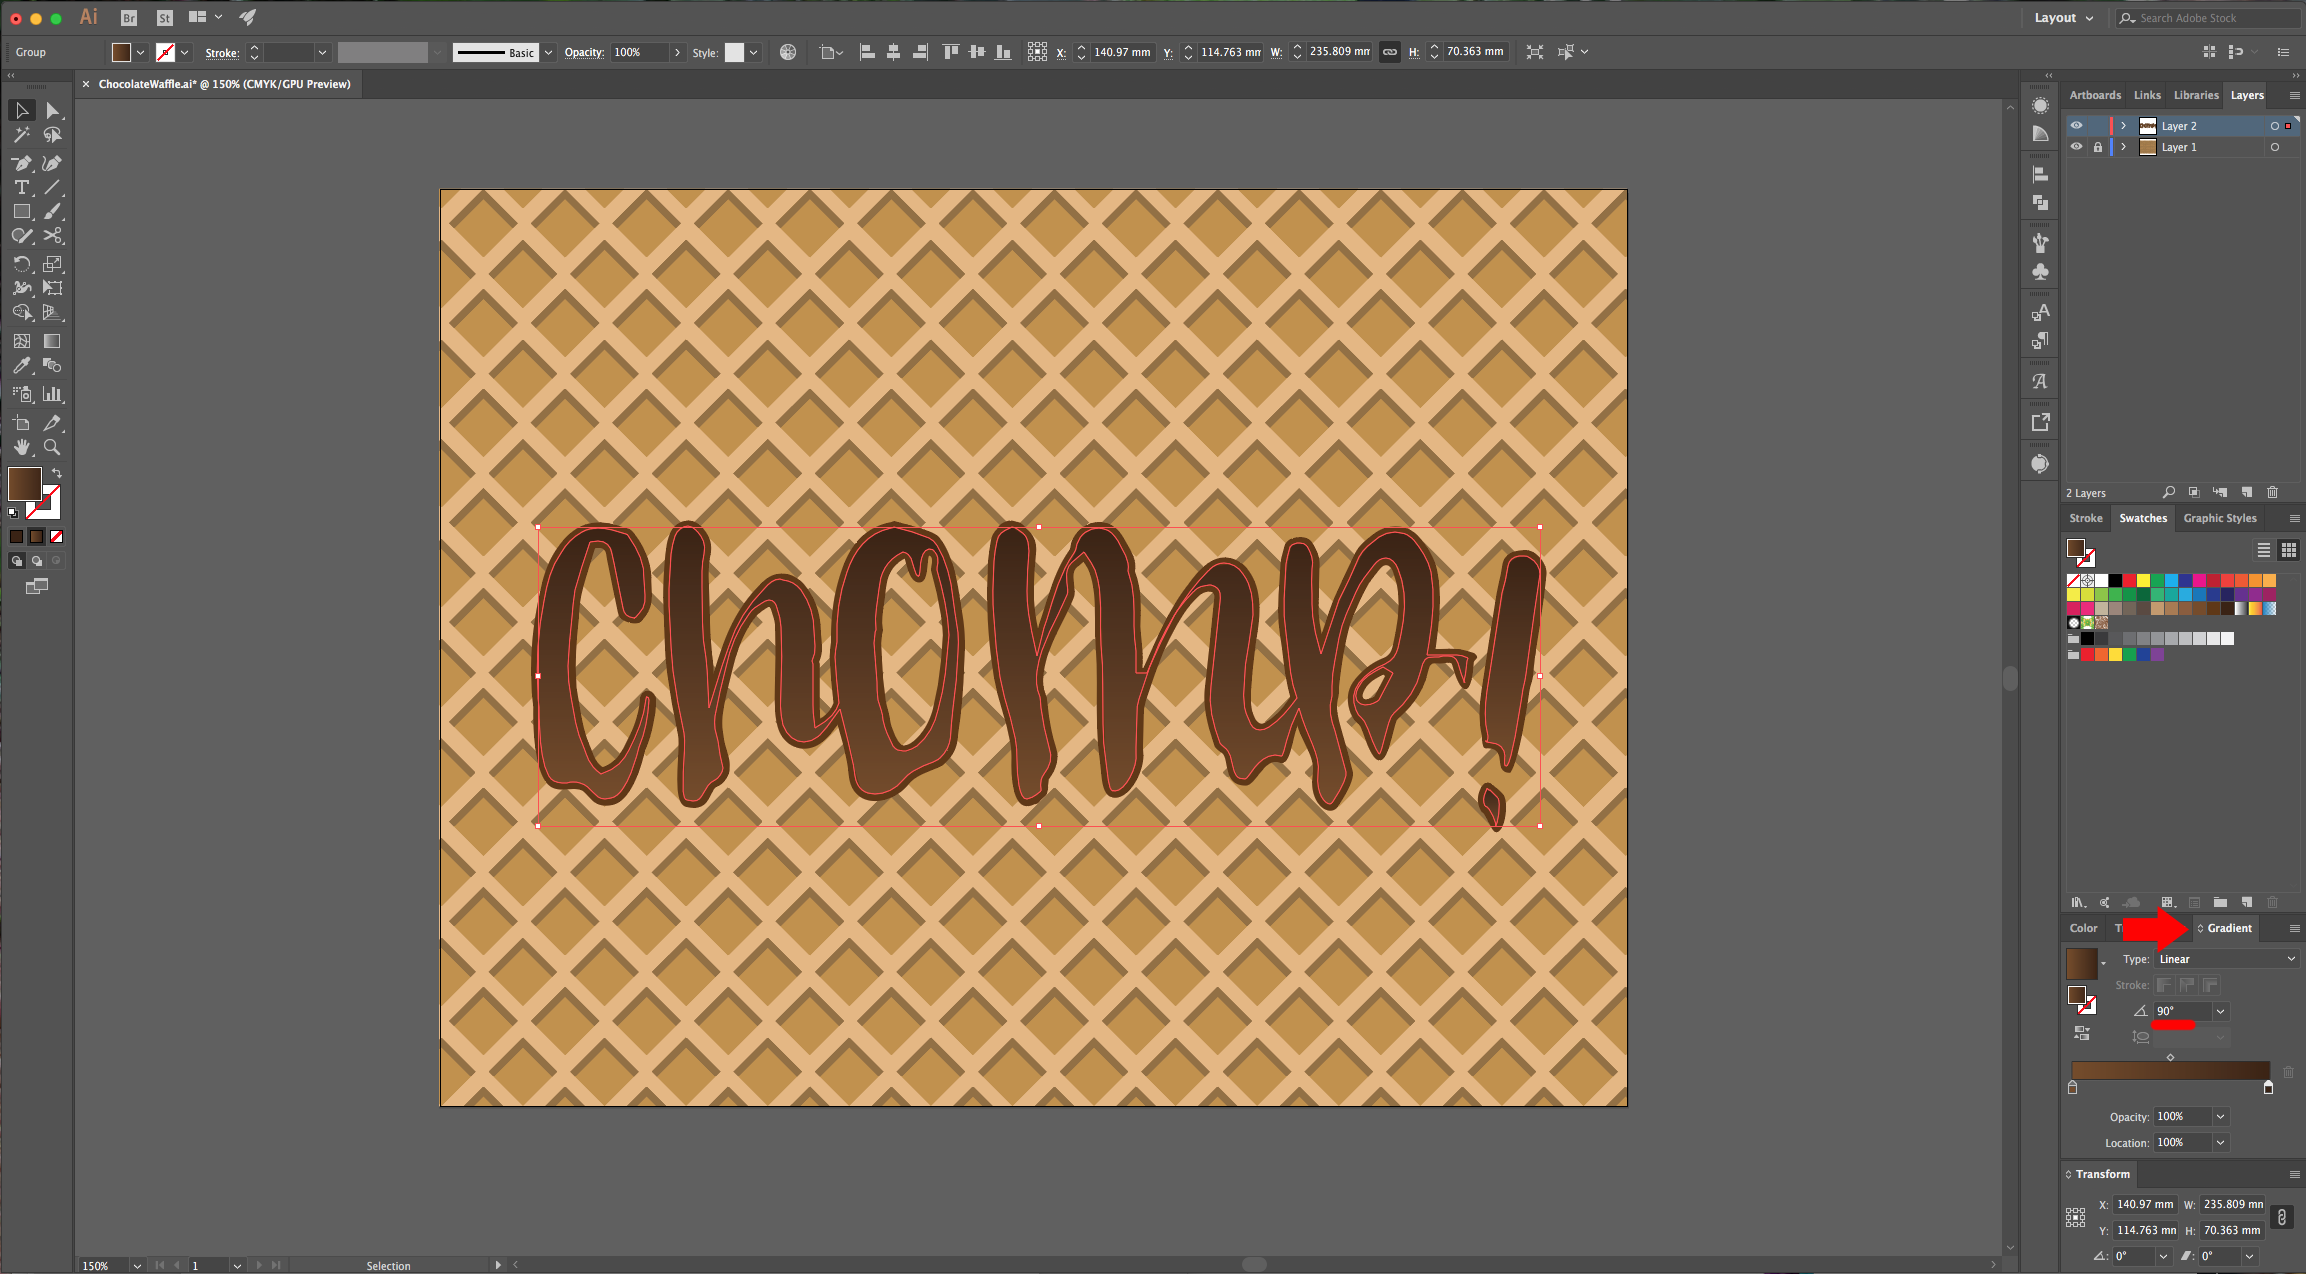
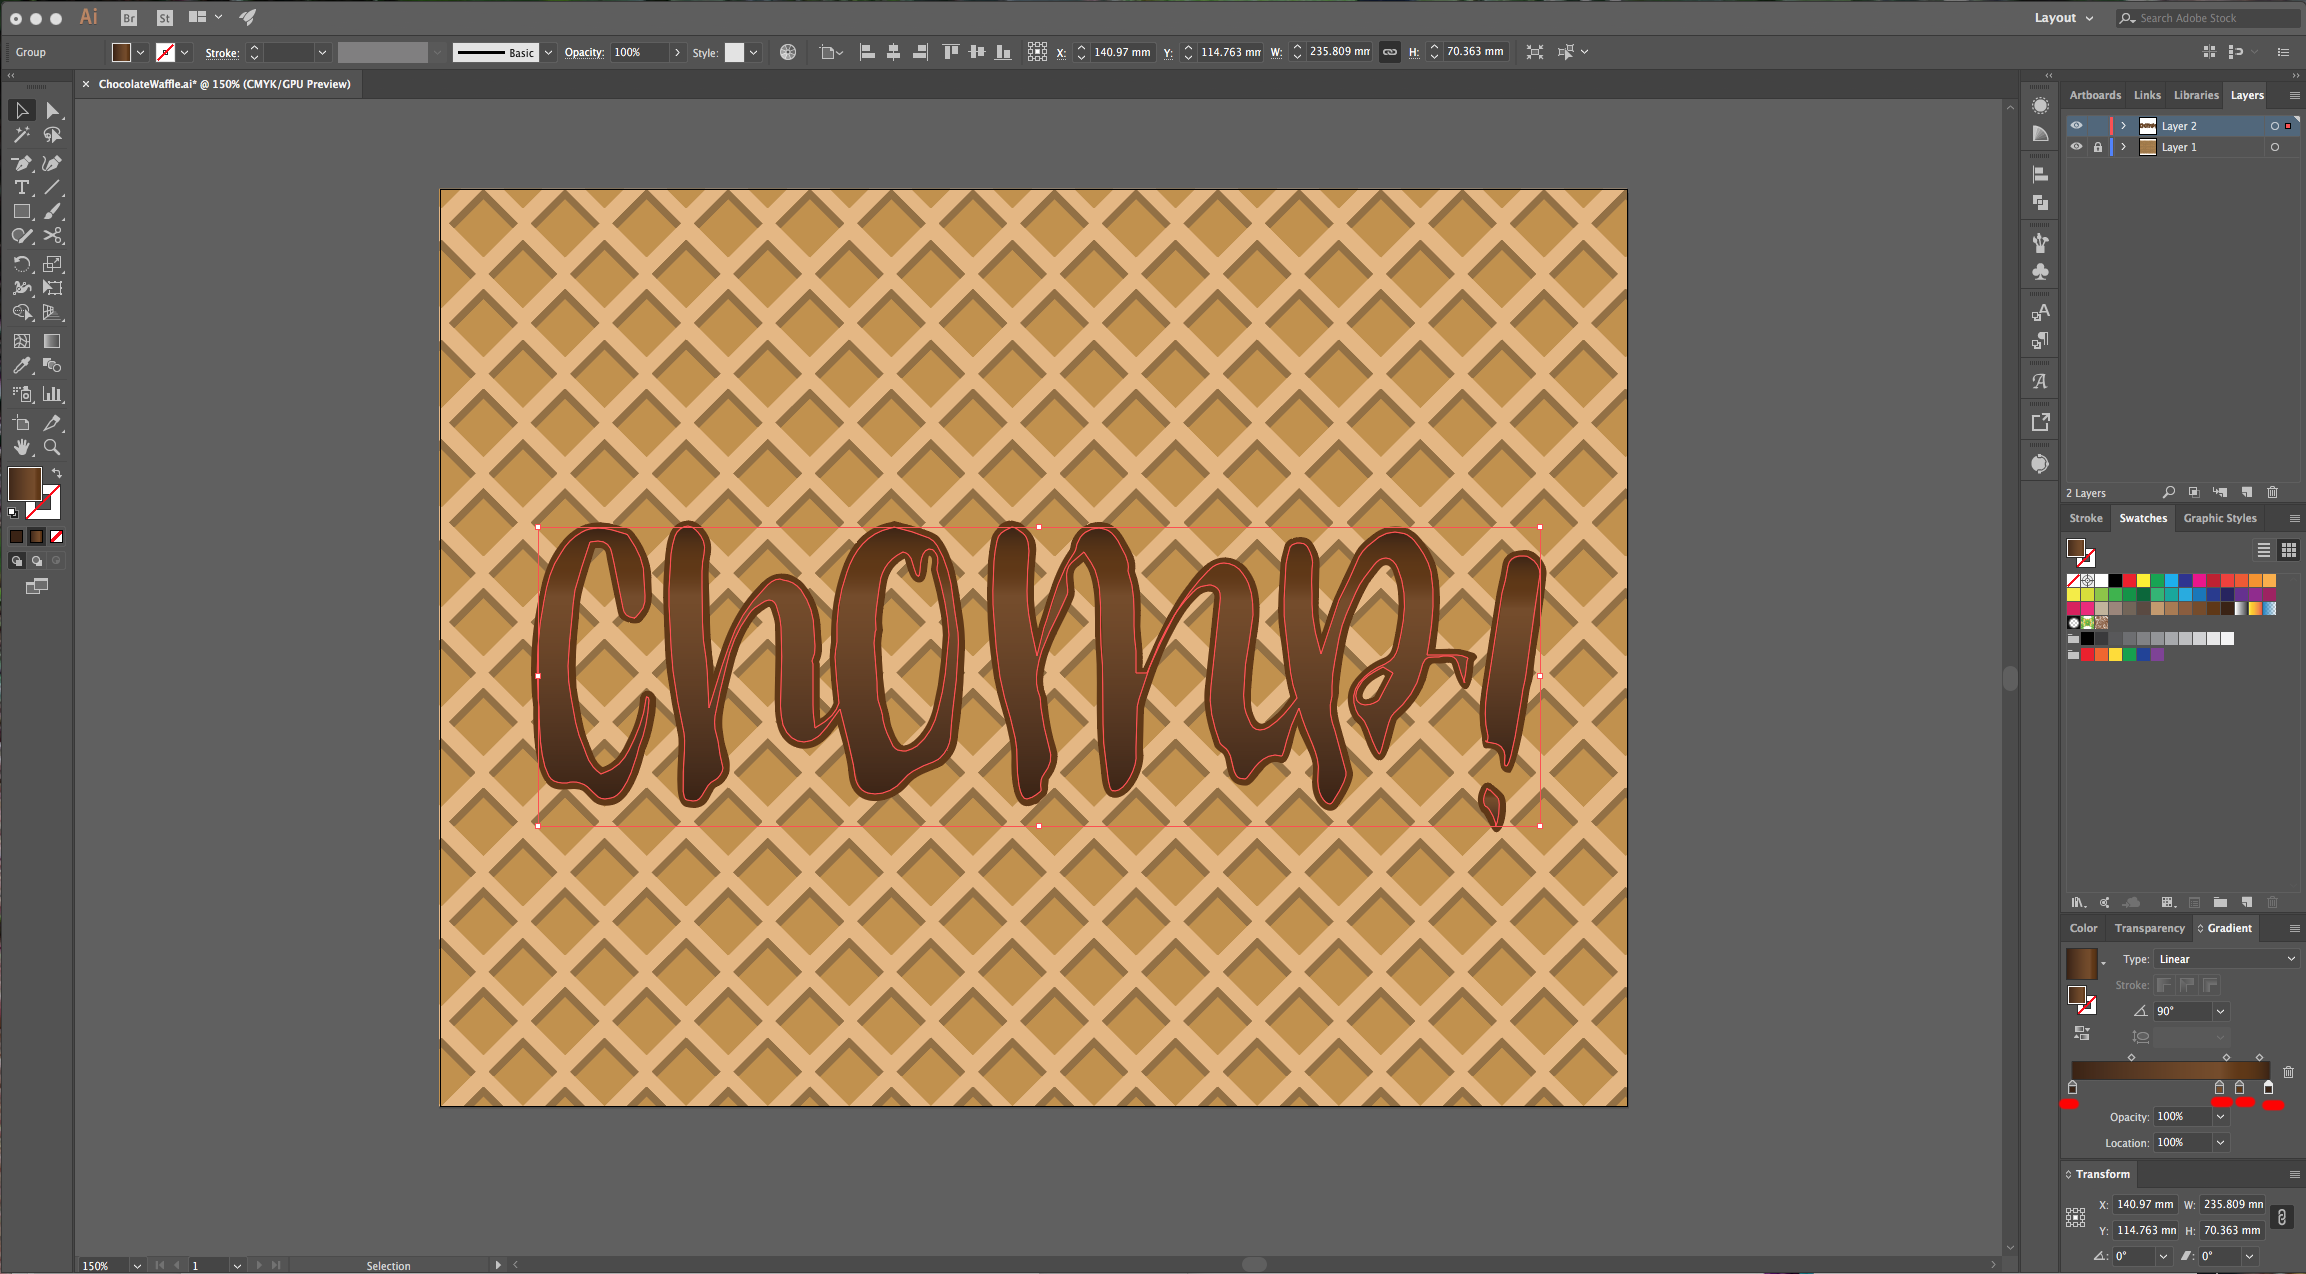
17 - Select your “Top Text” and go to the “Gradient” Panel, apply a “Linear” gradient using some shades of brown. We used 4 from the default “Swatches” the “Locations” are 0%, 75%, 85% and 100%.
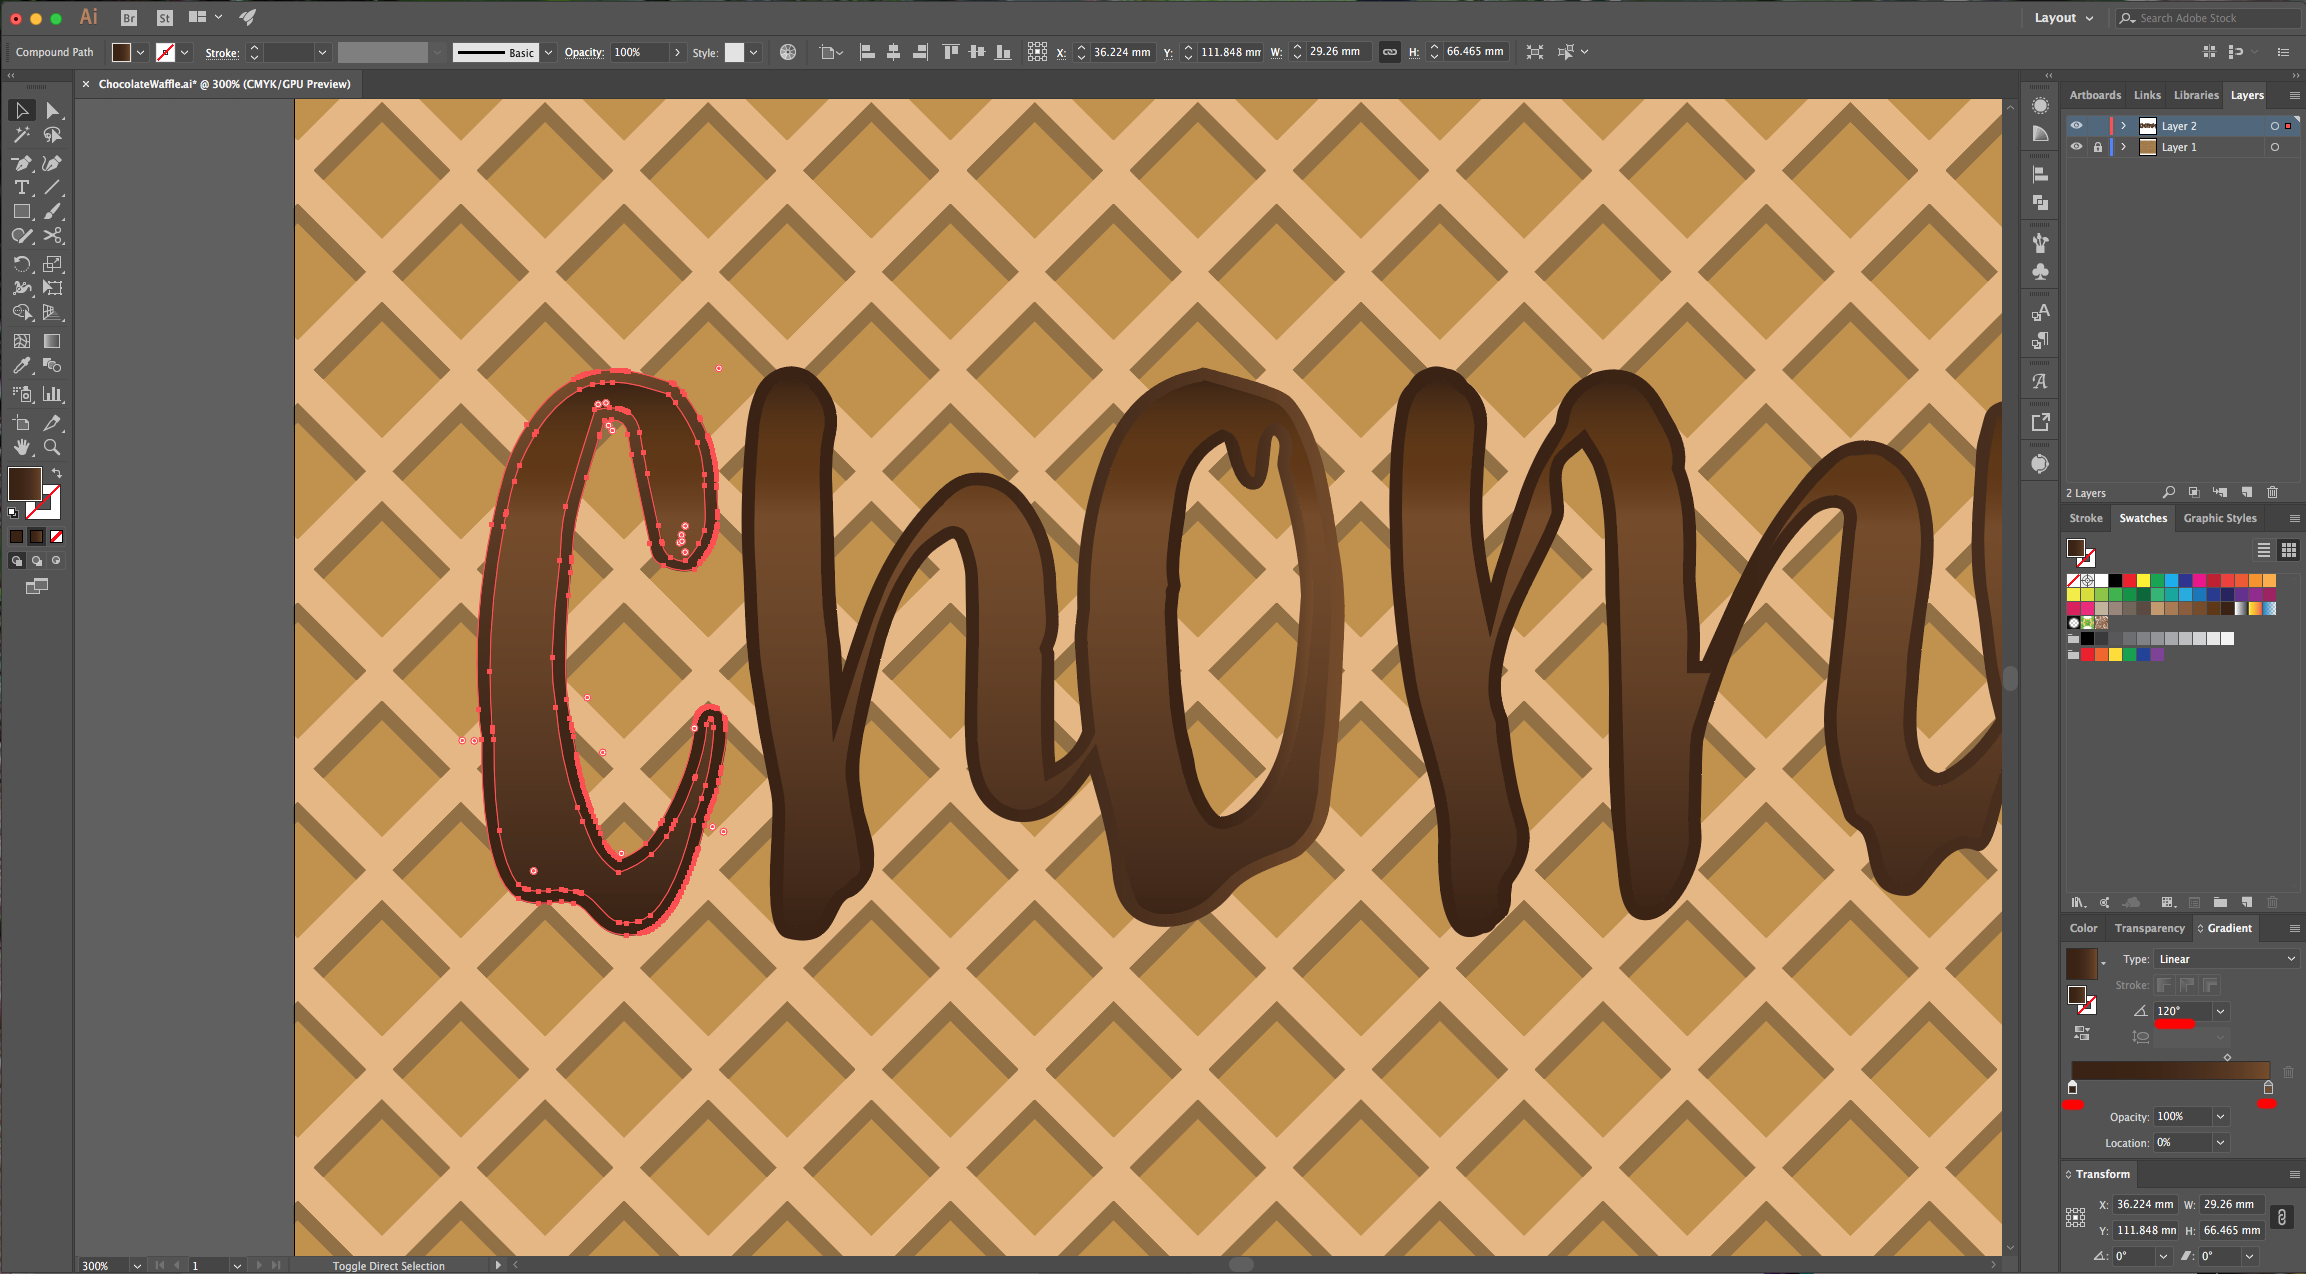
18 - Then, select the “Side Text”, “Ungroup” it (Command/Control + U) and apply another “Gradient” to each letter. This time use just 2 shades of brown and a 120° Angle. Repeat for each letter. You can now select all the “Sides” and “Group” (Command/Control + G) them together.

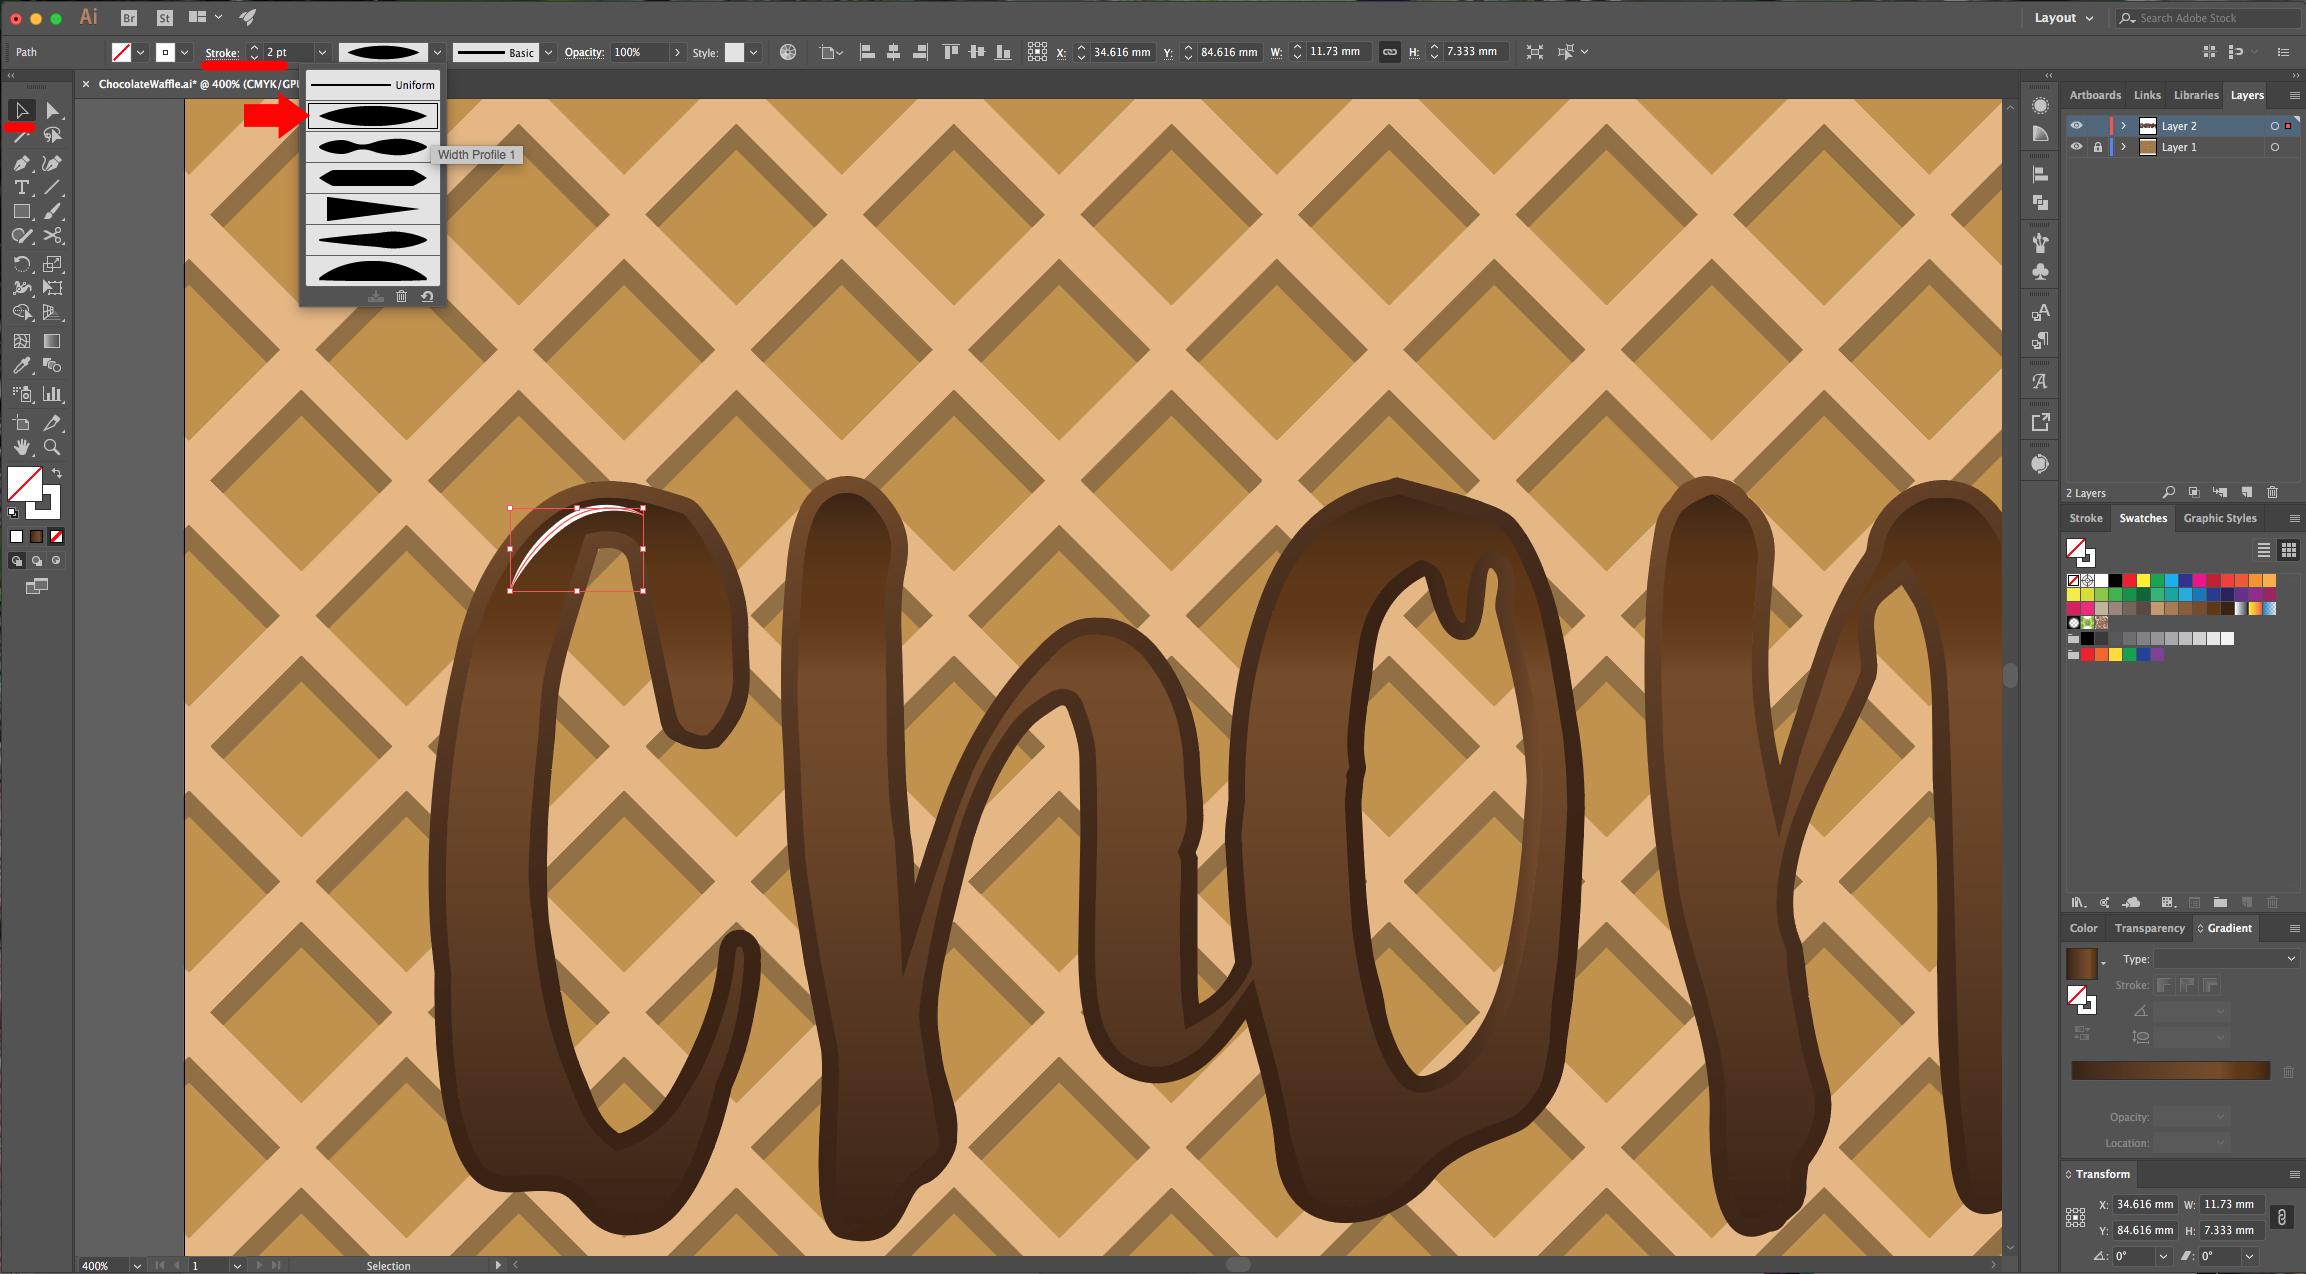
19 - Select the “Pen Tool” (P), choose white as “Stroke” color (No Fill) and draw some “Light Spots” on the top-left of your text. Hit “Enter” to finish the “Path”. Go to the “Stroke” Menu on the top and choose “With Profile 1” and make your “Stroke” Weight 2 or 3 Points depending on your text.
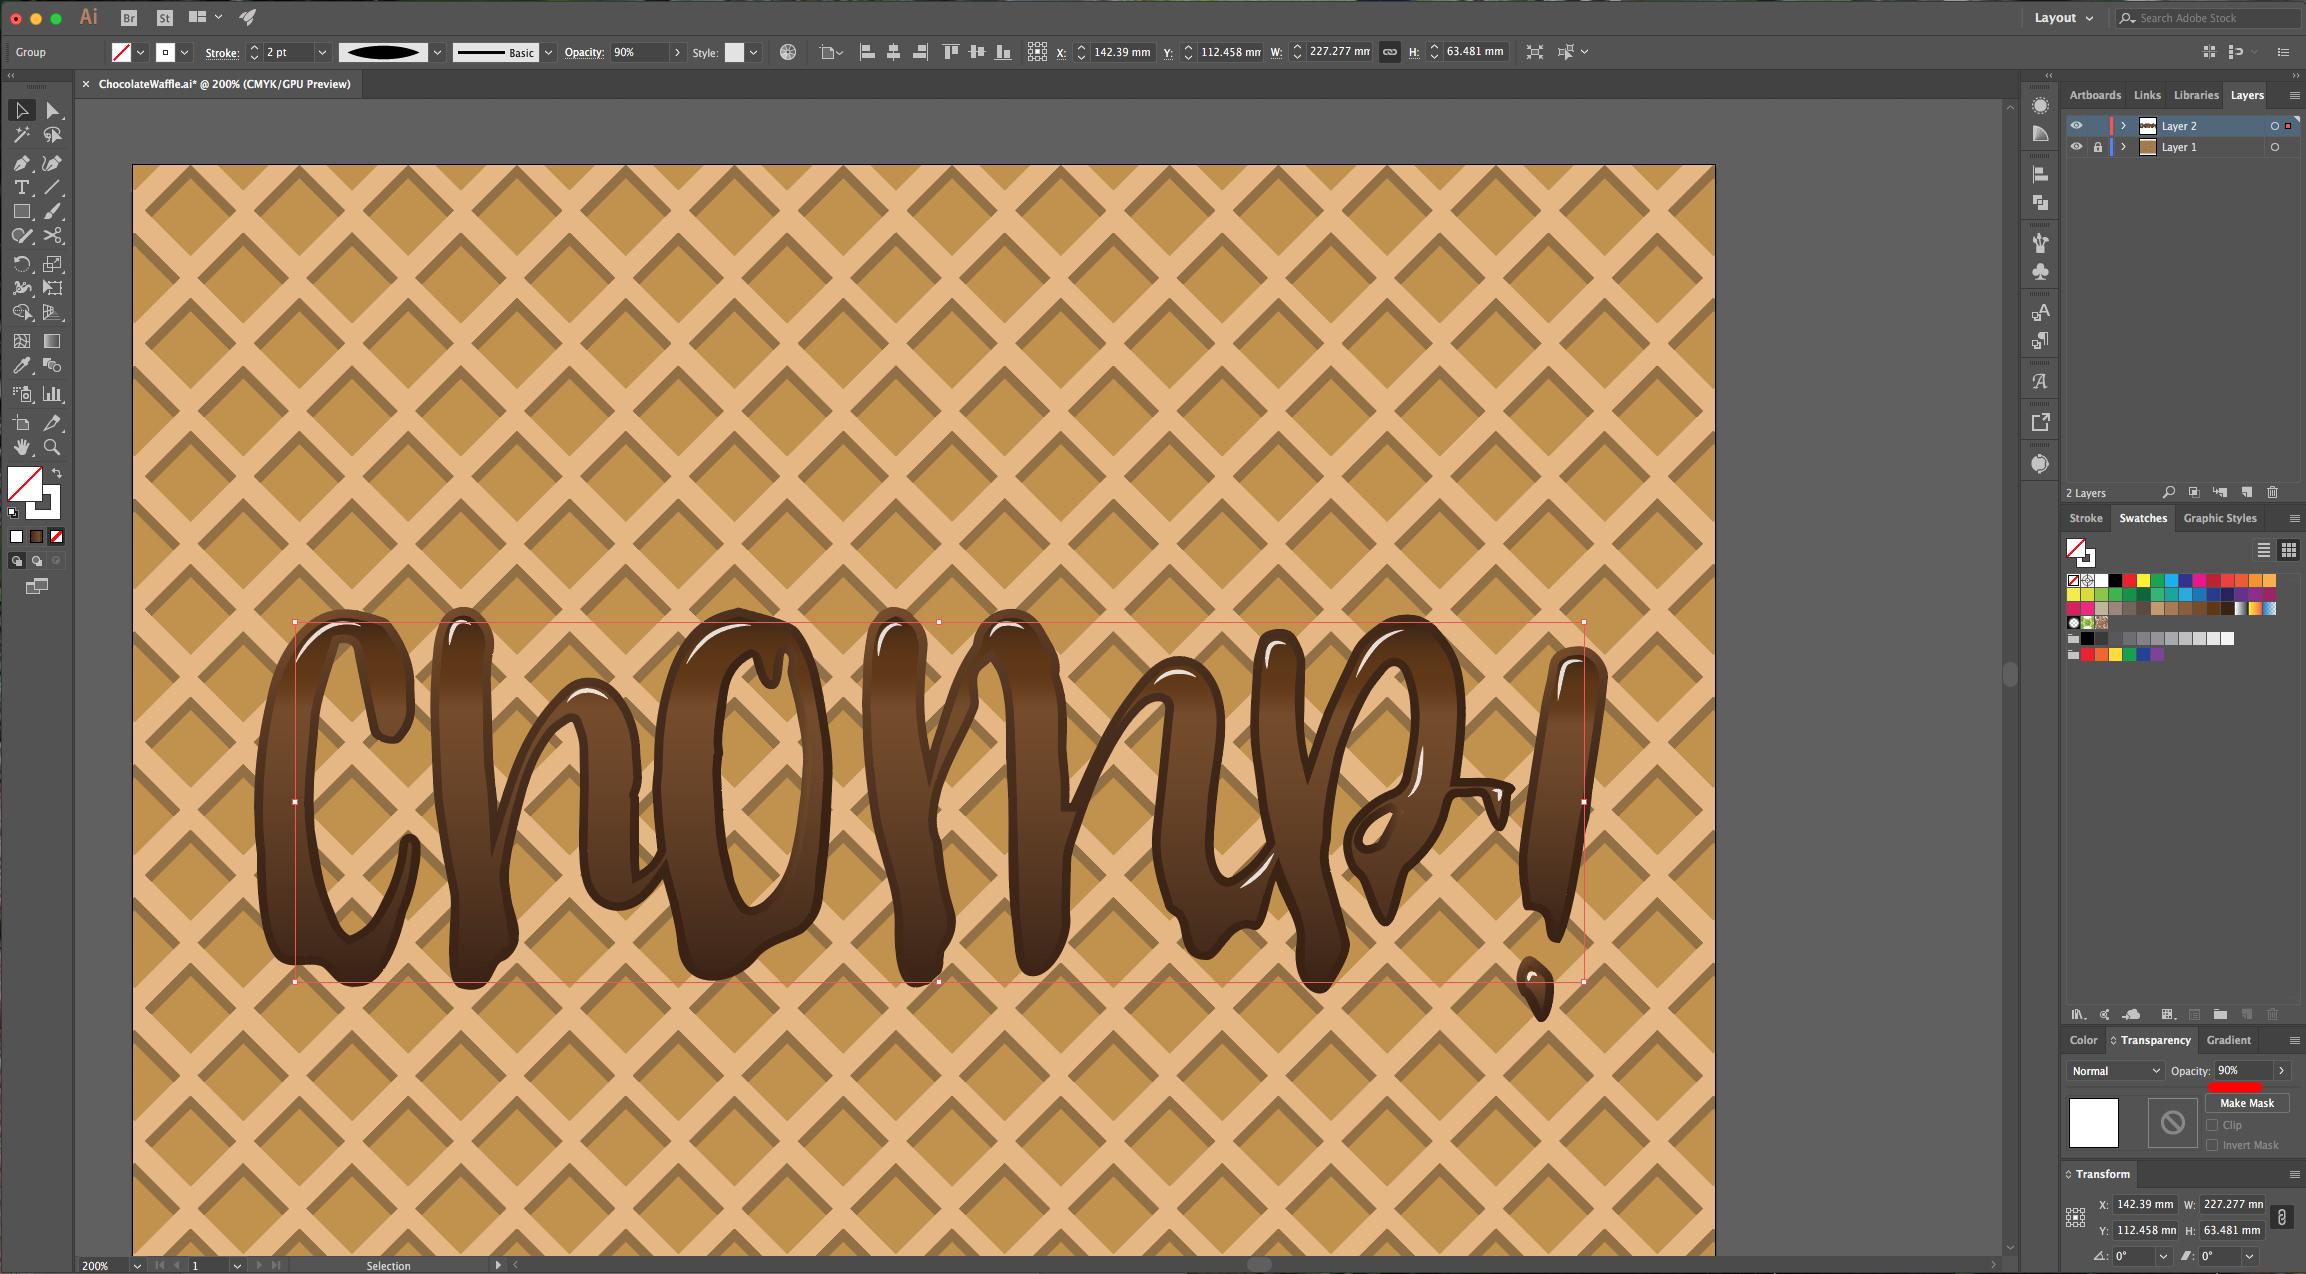
20 - Select all your “Light Spots” and lower the “Opacity” to 90% in the “Transparency” Panel.
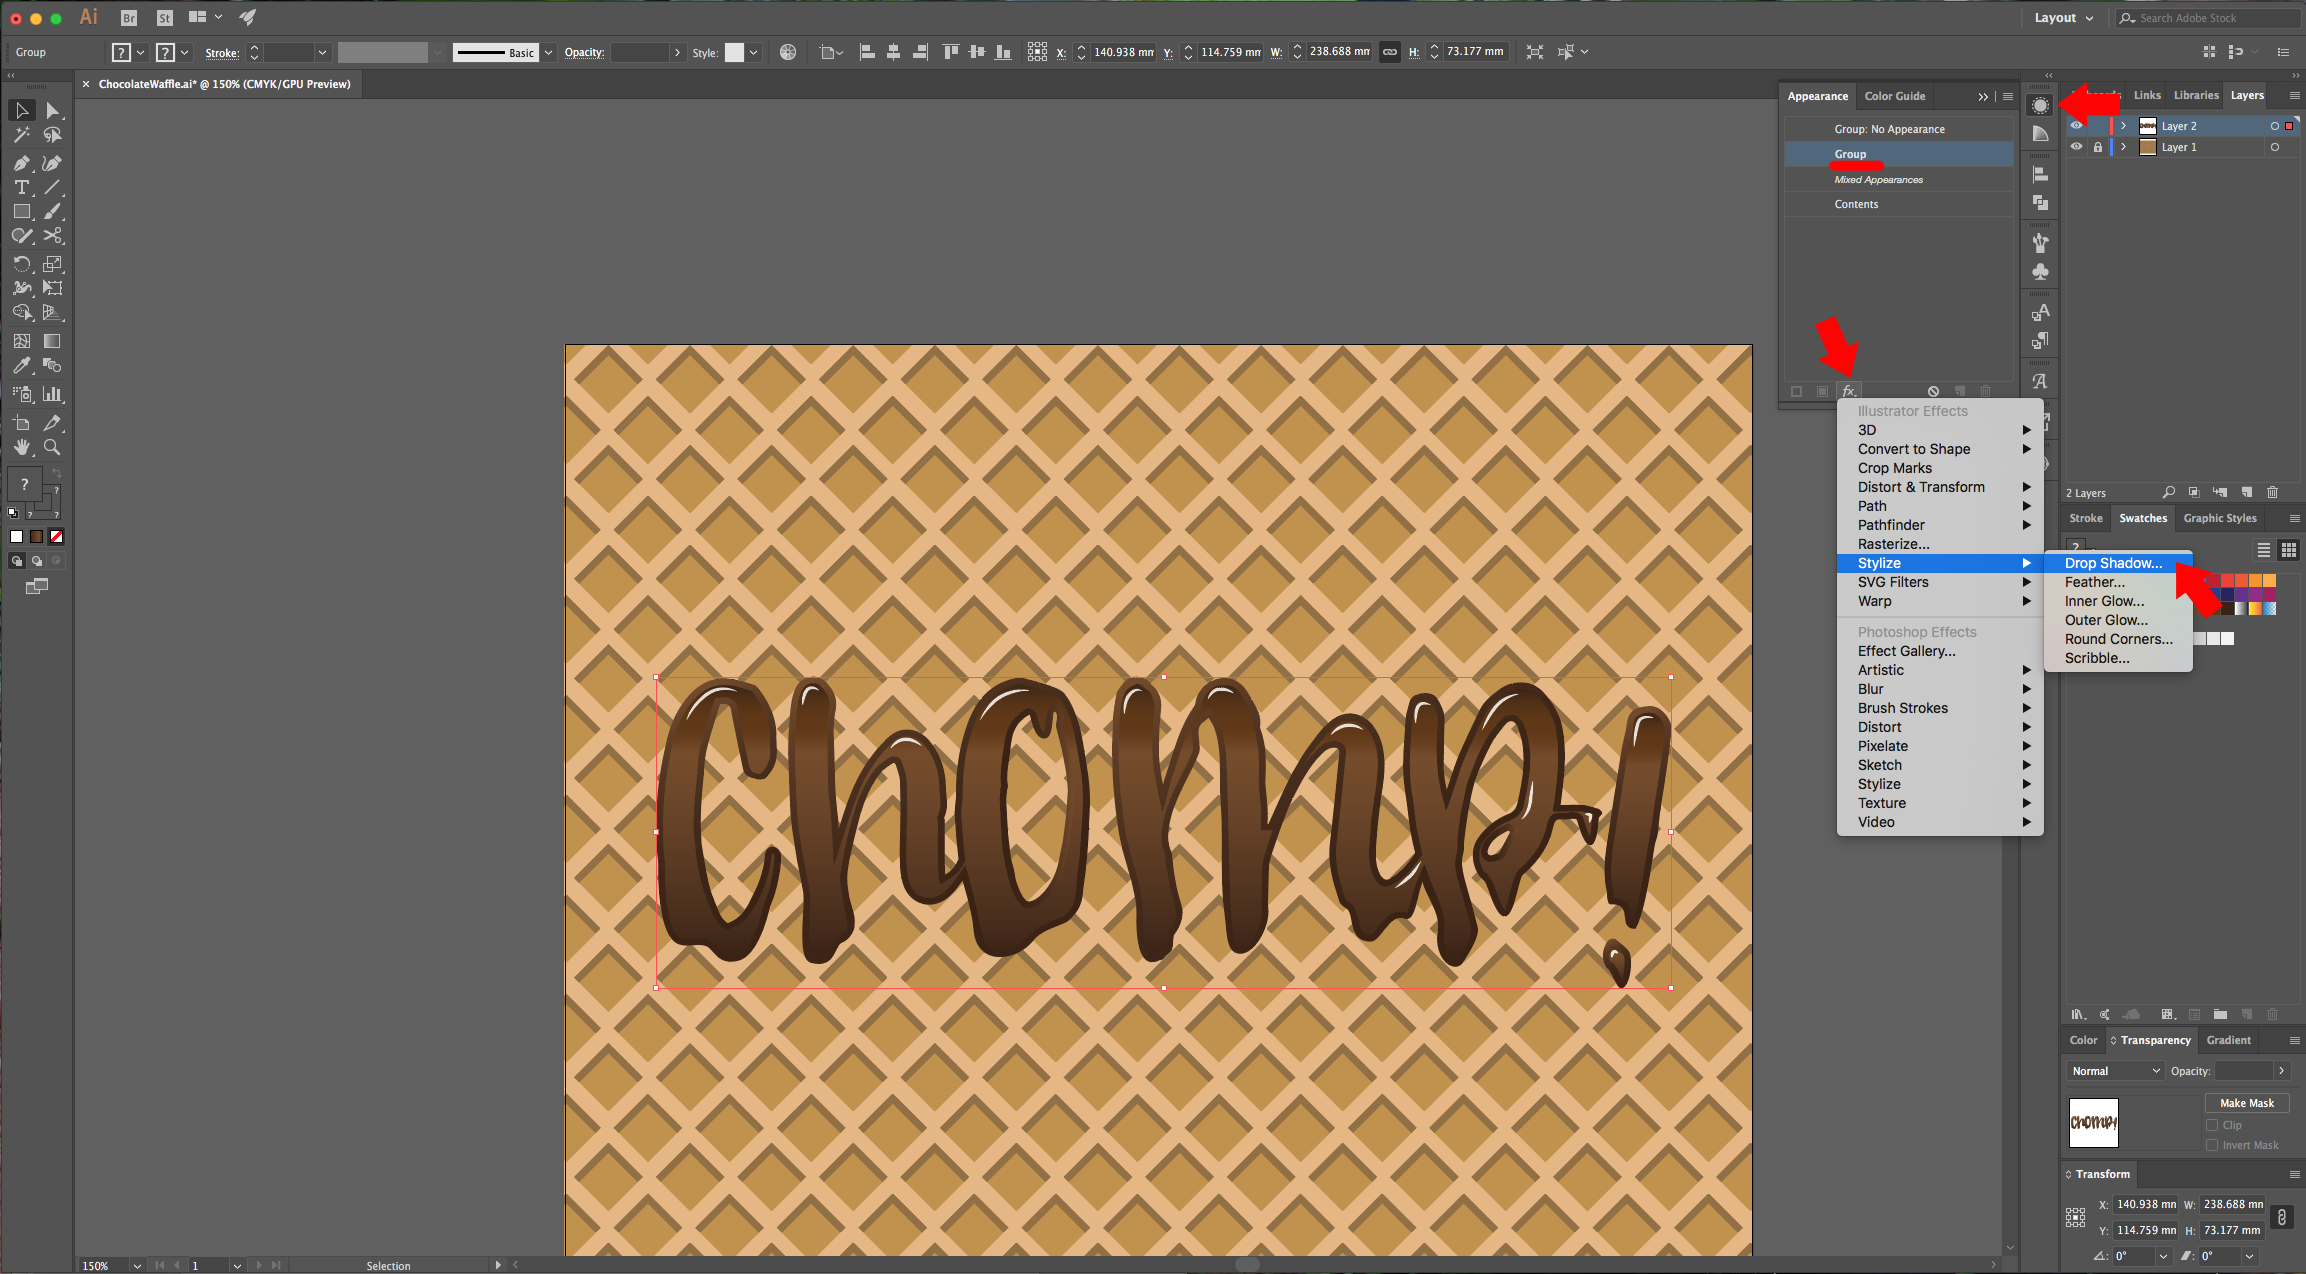
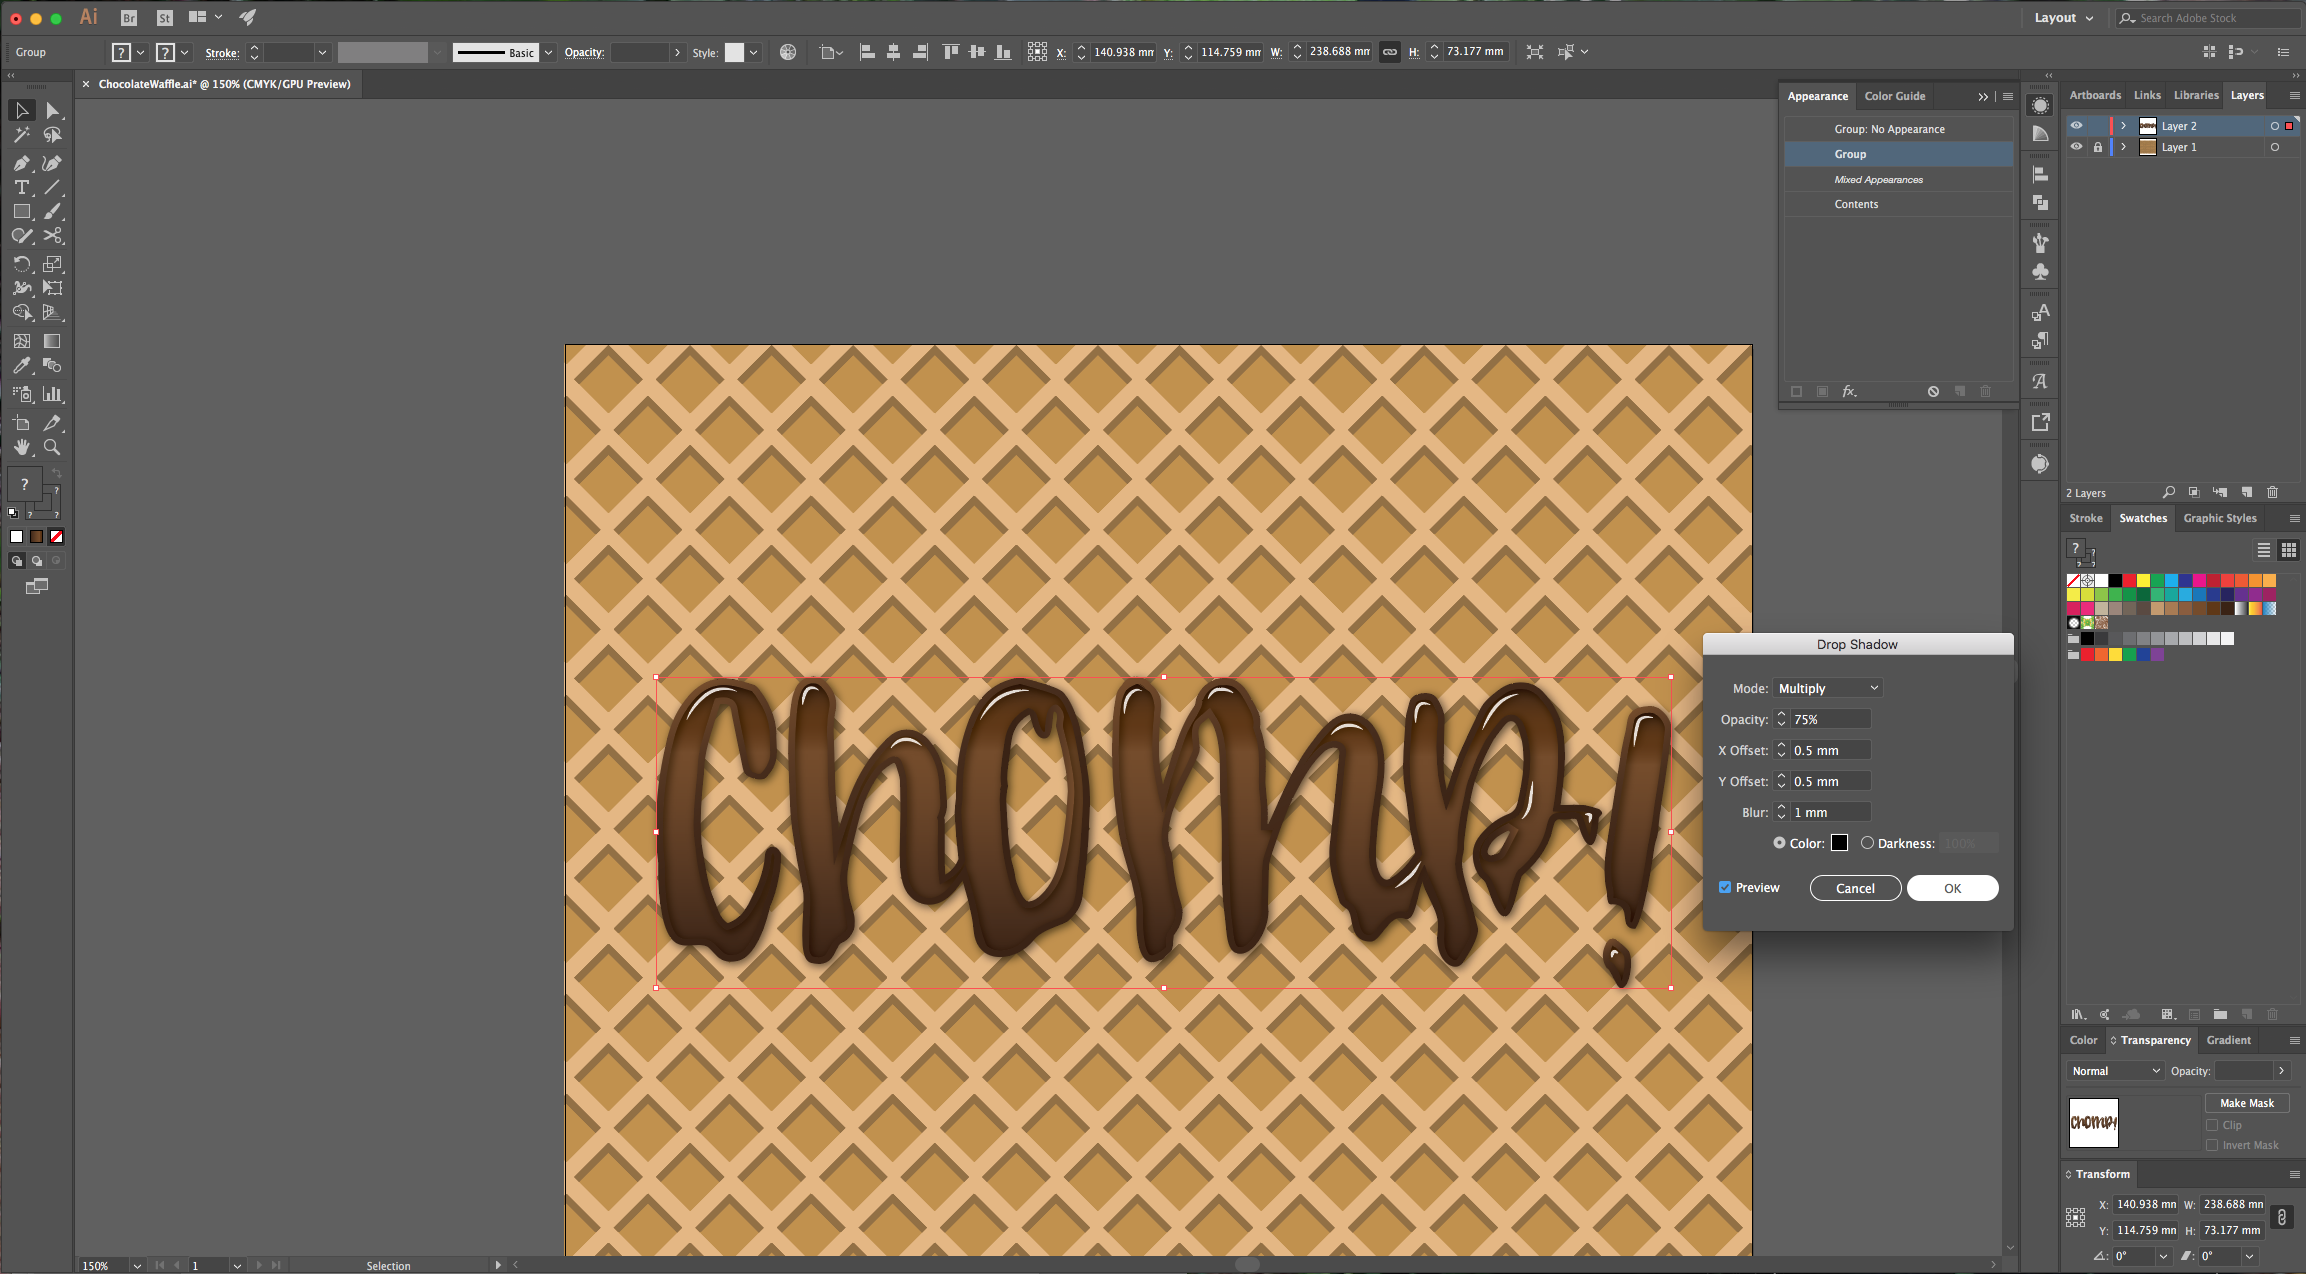
21 - Select all your text, group it together and go to the “Appearance” Panel and making sure your group is selected click the “Add New Effect” button at the bottom of the Panel, go to Stylize > Drop Shadow and apply the following values:
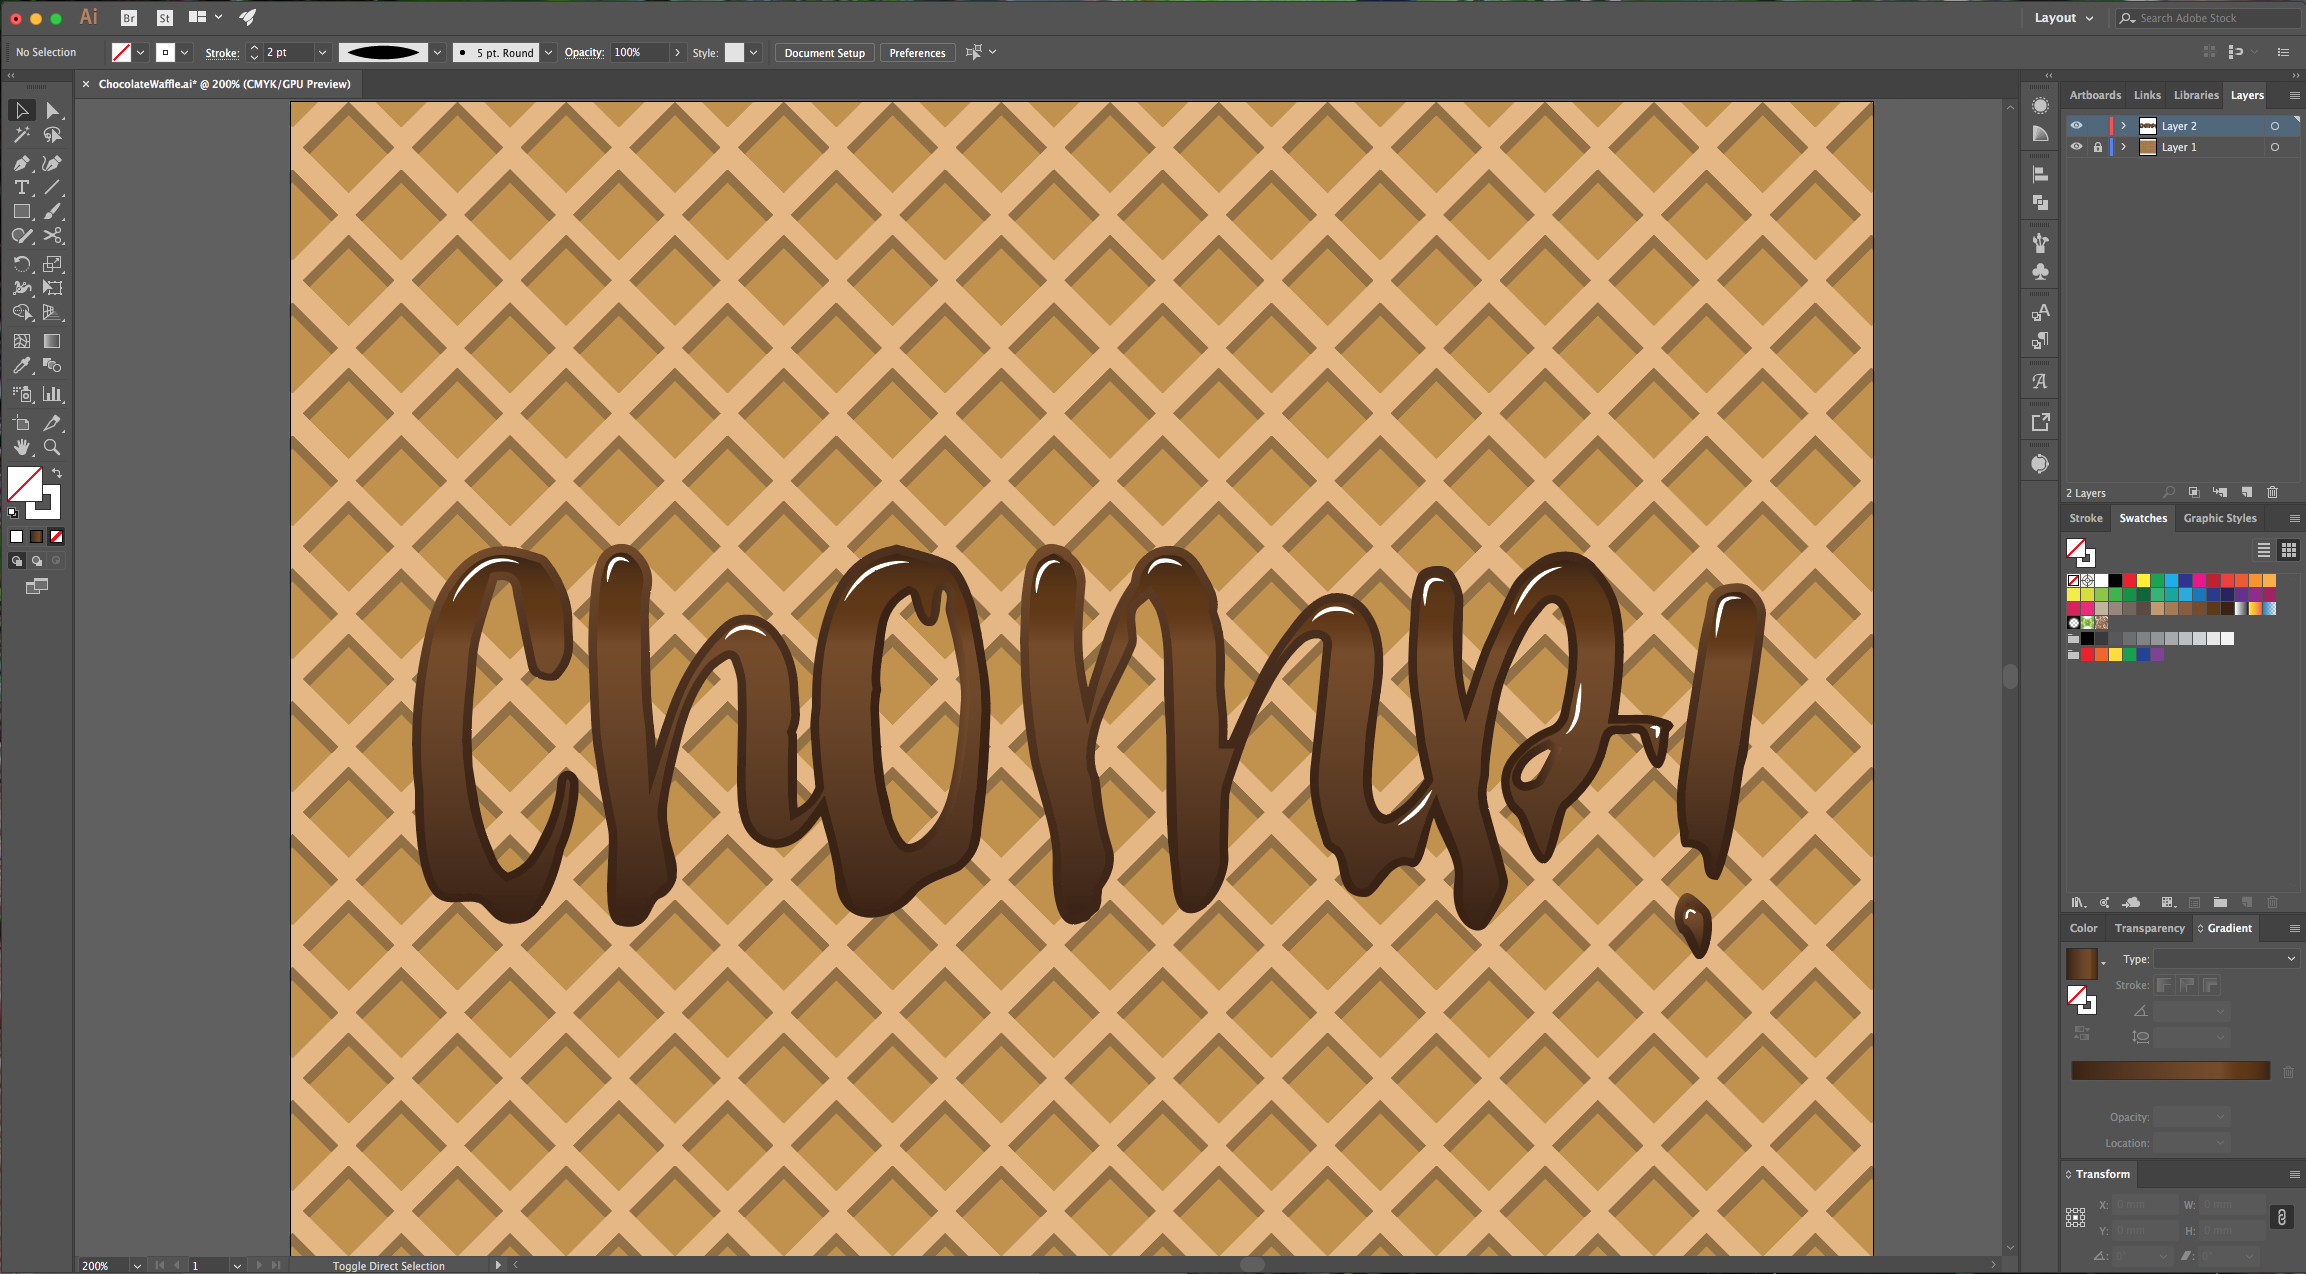
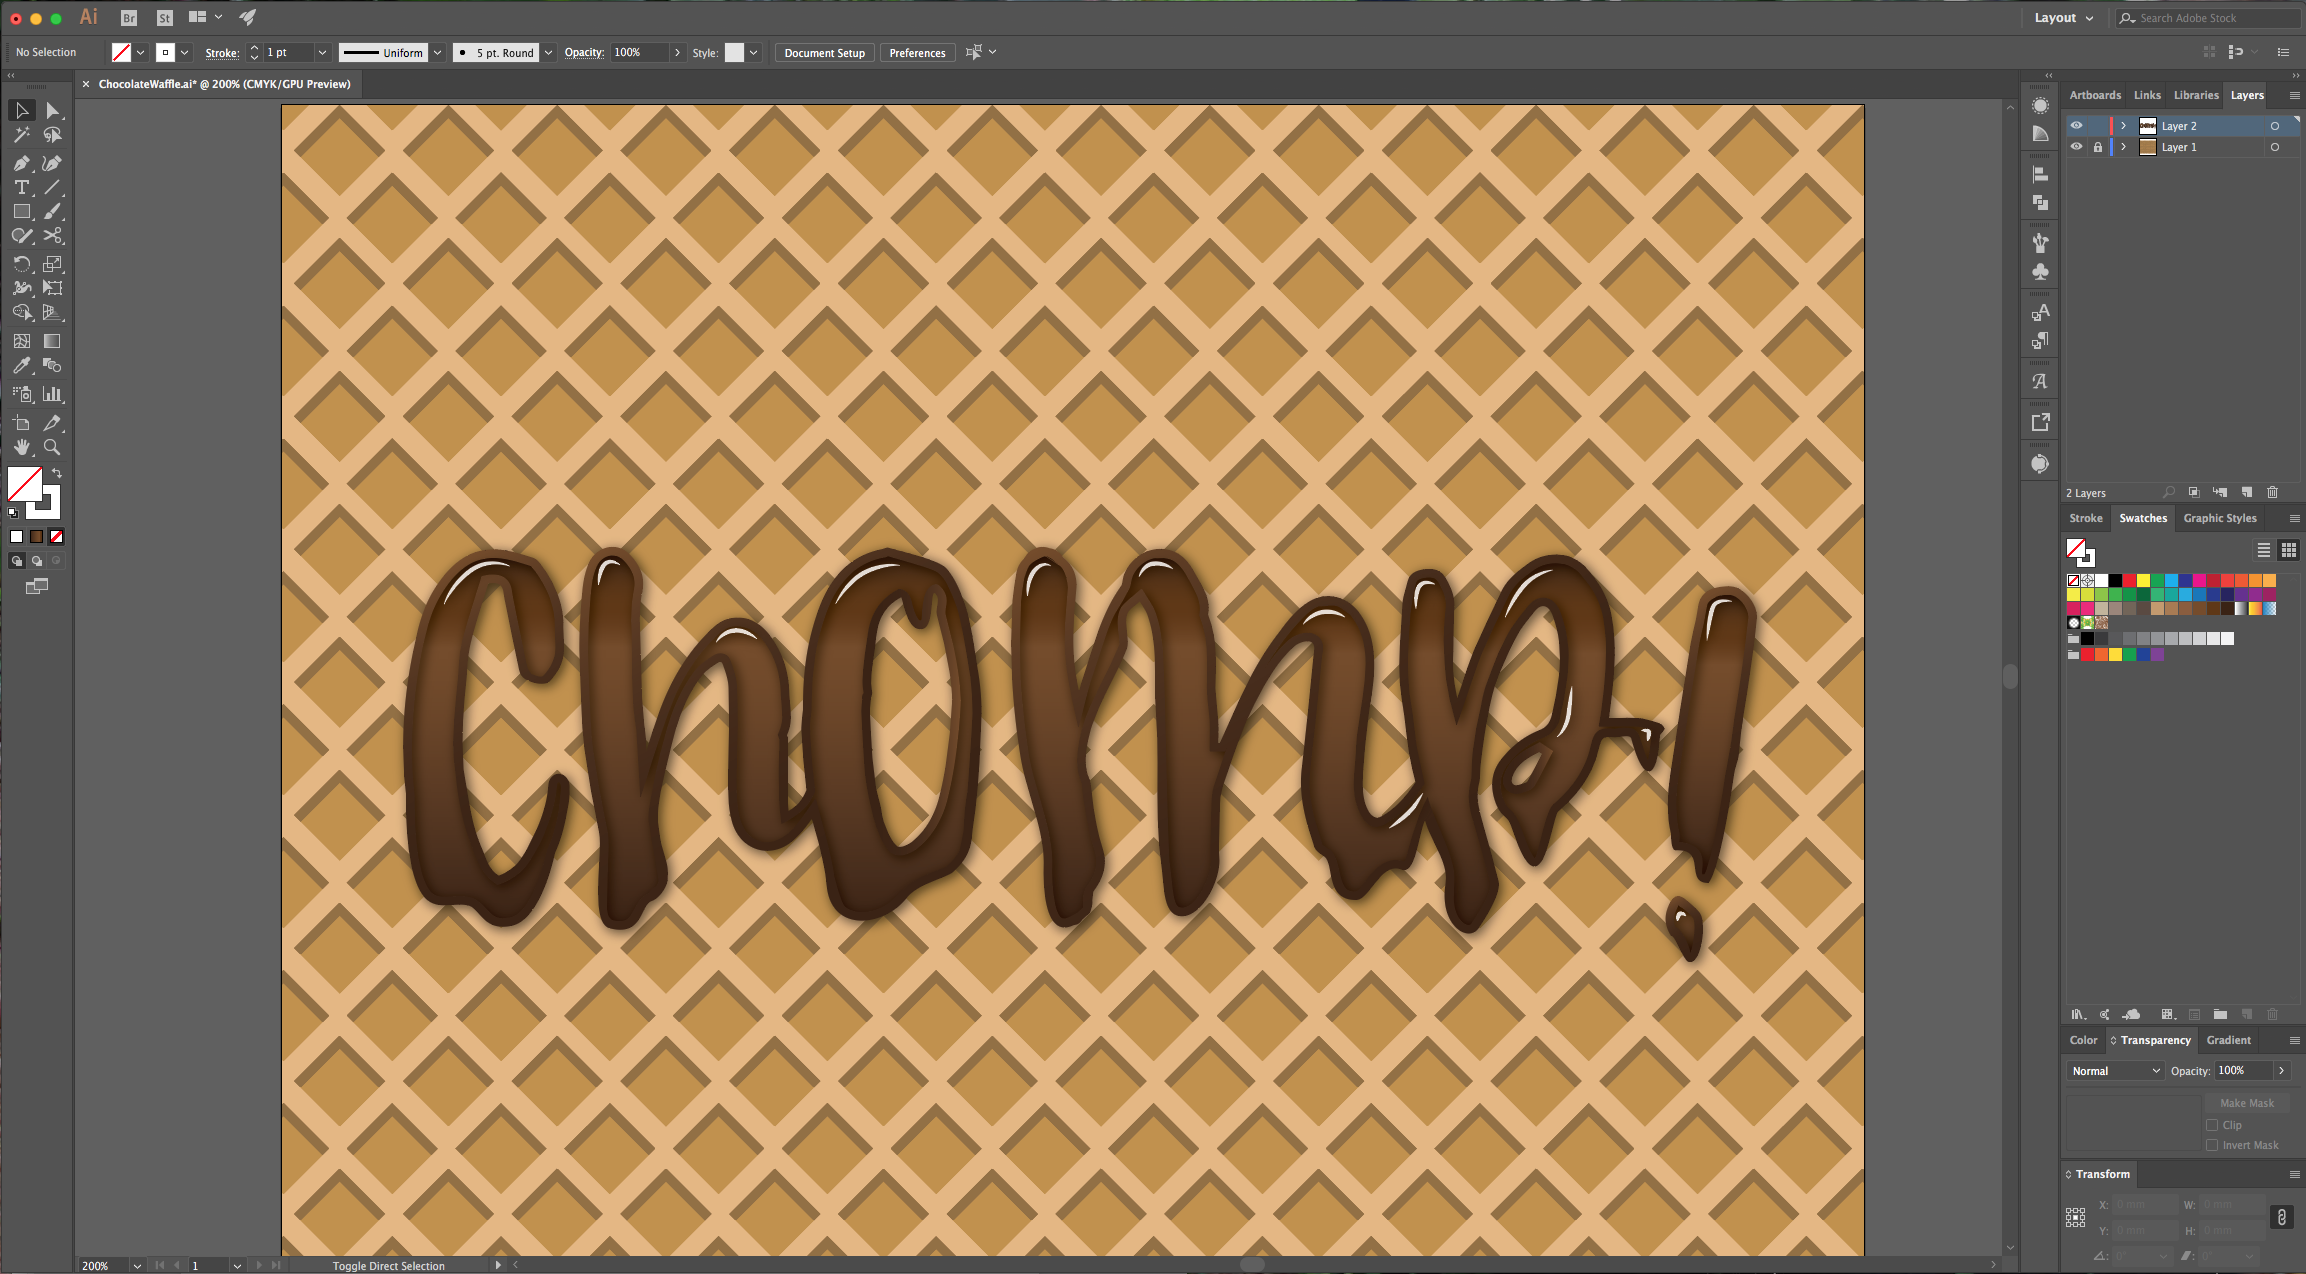
22 - Your text should look similar to this:
1 - First, create a “New Document”. Select the “Rectangle Tool” (M) and while holding the “Shift” key drag from top-left to bottom-right to drag a square. Make it 15 x 15 mm and fill it with a medium brown/orange color (we used #c19048).
2 - Select the “Free Transform Tool” (E) and rotate your square to a -45° Angle. Hold the “Alt” and “Shift” keys while dragging your shape downwards to duplicate and move your copy. In your “Layers” window click on the little arrow to the left of the “Layer 1” to show its contents. Select the bottom “Rectangle” and duplicate it by dragging it to the “Create New” button at the bottom of the “Layers” Panel.
3 - Select the top two “Rectangles” go to the “Pathfinder” Panel and choose “Minus Front”. Then, select your new shape and change the color to a darker shade (#937041). Select your two shapes and “Group” them (Command/Control + G).
4 - Move your shape to the top-left corner of your document and resize it to 15 x 15 mm making sure “Center” is your “Reference Point” in the top menu. Select your shape and “Move” it (Shift + Command/Control + M) 18 mm “Horizontal”, click “Copy” instead of OK. Then click Command/Control + D to duplicate the action. Repeat as many times as needed to fill the document horizontally.
5 - Select all your shapes, group them, duplicate and move the copy by holding the “Alt” and “Shift” keys while dragging to the right. Position the duplicate centers in the middle of the empty space between your squares, then move the duplicate down and leave the same amount of space as the one between the squares.
6 - Group everything and “Move” it (Shift + Command/Control + M) 22 mm “Vertical”, click “Copy” instead of OK. Then click Command/Control + D to duplicate the action until your document is covered. Select everything, group it and move it and “Scale” it (Hold the “Shift” key while dragging the corners) to fit the document making sure they are as evenly distributed as possible.
7 - Draw a “Rectangle” that covers your entire document, move it under your “Group” Layer and fill it with an intermediate shade (#e5b780). Select your “Group” and go to Object > Expand, then select both and in the “Pathfinder” Panel choose “Divide”. Ungroup (Shift + Command/Control + G) the resulting path and select the pieces that are outside the Document and delete them. Then, select everything and “Group” it again. Then, lock the layer by clicking to the left of its thumbnail.
8 - Create a “New Layer” by clicking the small button at the bottom of the “Layers” Panel. Select the “Type Tool” (T), choose a font (works better with a fat font) and type your text. Make it as big as you want.
9 - Go to Object > Expand and then “Ungroup” (Command/Control + U) the resulting vector to tweak your letters in case you think is necessary. We had a couple of letters overlapping and decided to keep it that way so we selected them and in the “Pathfinder” Panel chose “Add or Unite”.
10 - Add some “Dripping” from the text to your text using the “Pen Tool” (P), or the “Direct Selection Tool” (A) to change some of your letters. Don’t forget to “Unite” the added “drops” with the “Pathfinder Tool”.
11 - Once you are done adding the drops, select your entire text and in the “Pathfinder” Panel choose the “Add/Unite” option once more.
12 - Select your text and change the “Fill” color to a medium brown.
13 - Then go to Effect > 3D > Extrude & Bevel and apply the following values:
14 - Go to Object > Expand Appearance and then “Ungroup” your text (Command/Control + U). Select each letter (or group of letters) individually and “Ungroup” it again.
15 - Select the “Top” part of the letters and in the “Pathfinder” Panel choose “Unite”. Then, check the “Sides” of the letters, fix any gaps or imperfections.
16 - Then, select all the sides of the letters and use the “Unite” option in the “Pathfinder” Panel. (Remember to “Deselect” and keep your letter tops group out).
17 - Select your “Top Text” and go to the “Gradient” Panel, apply a “Linear” gradient using some shades of brown. We used 4 from the default “Swatches” the “Locations” are 0%, 75%, 85% and 100%.
18 - Then, select the “Side Text”, “Ungroup” it (Command/Control + U) and apply another “Gradient” to each letter. This time use just 2 shades of brown and a 120° Angle. Repeat for each letter. You can now select all the “Sides” and “Group” (Command/Control + G) them together.
19 - Select the “Pen Tool” (P), choose white as “Stroke” color (No Fill) and draw some “Light Spots” on the top-left of your text. Hit “Enter” to finish the “Path”. Go to the “Stroke” Menu on the top and choose “With Profile 1” and make your “Stroke” Weight 2 or 3 Points depending on your text.
20 - Select all your “Light Spots” and lower the “Opacity” to 90% in the “Transparency” Panel.
21 - Select all your text, group it together and go to the “Appearance” Panel and making sure your group is selected click the “Add New Effect” button at the bottom of the Panel, go to Stylize > Drop Shadow and apply the following values:
22 - Your text should look similar to this:
by @lornacane


