
Confetti Heart in Photoshop
For this tutorial, we will use the image of your choice as “Background” and some “Paper”, “Foil” and/or “Glitter” textures to create the “Confetti”.
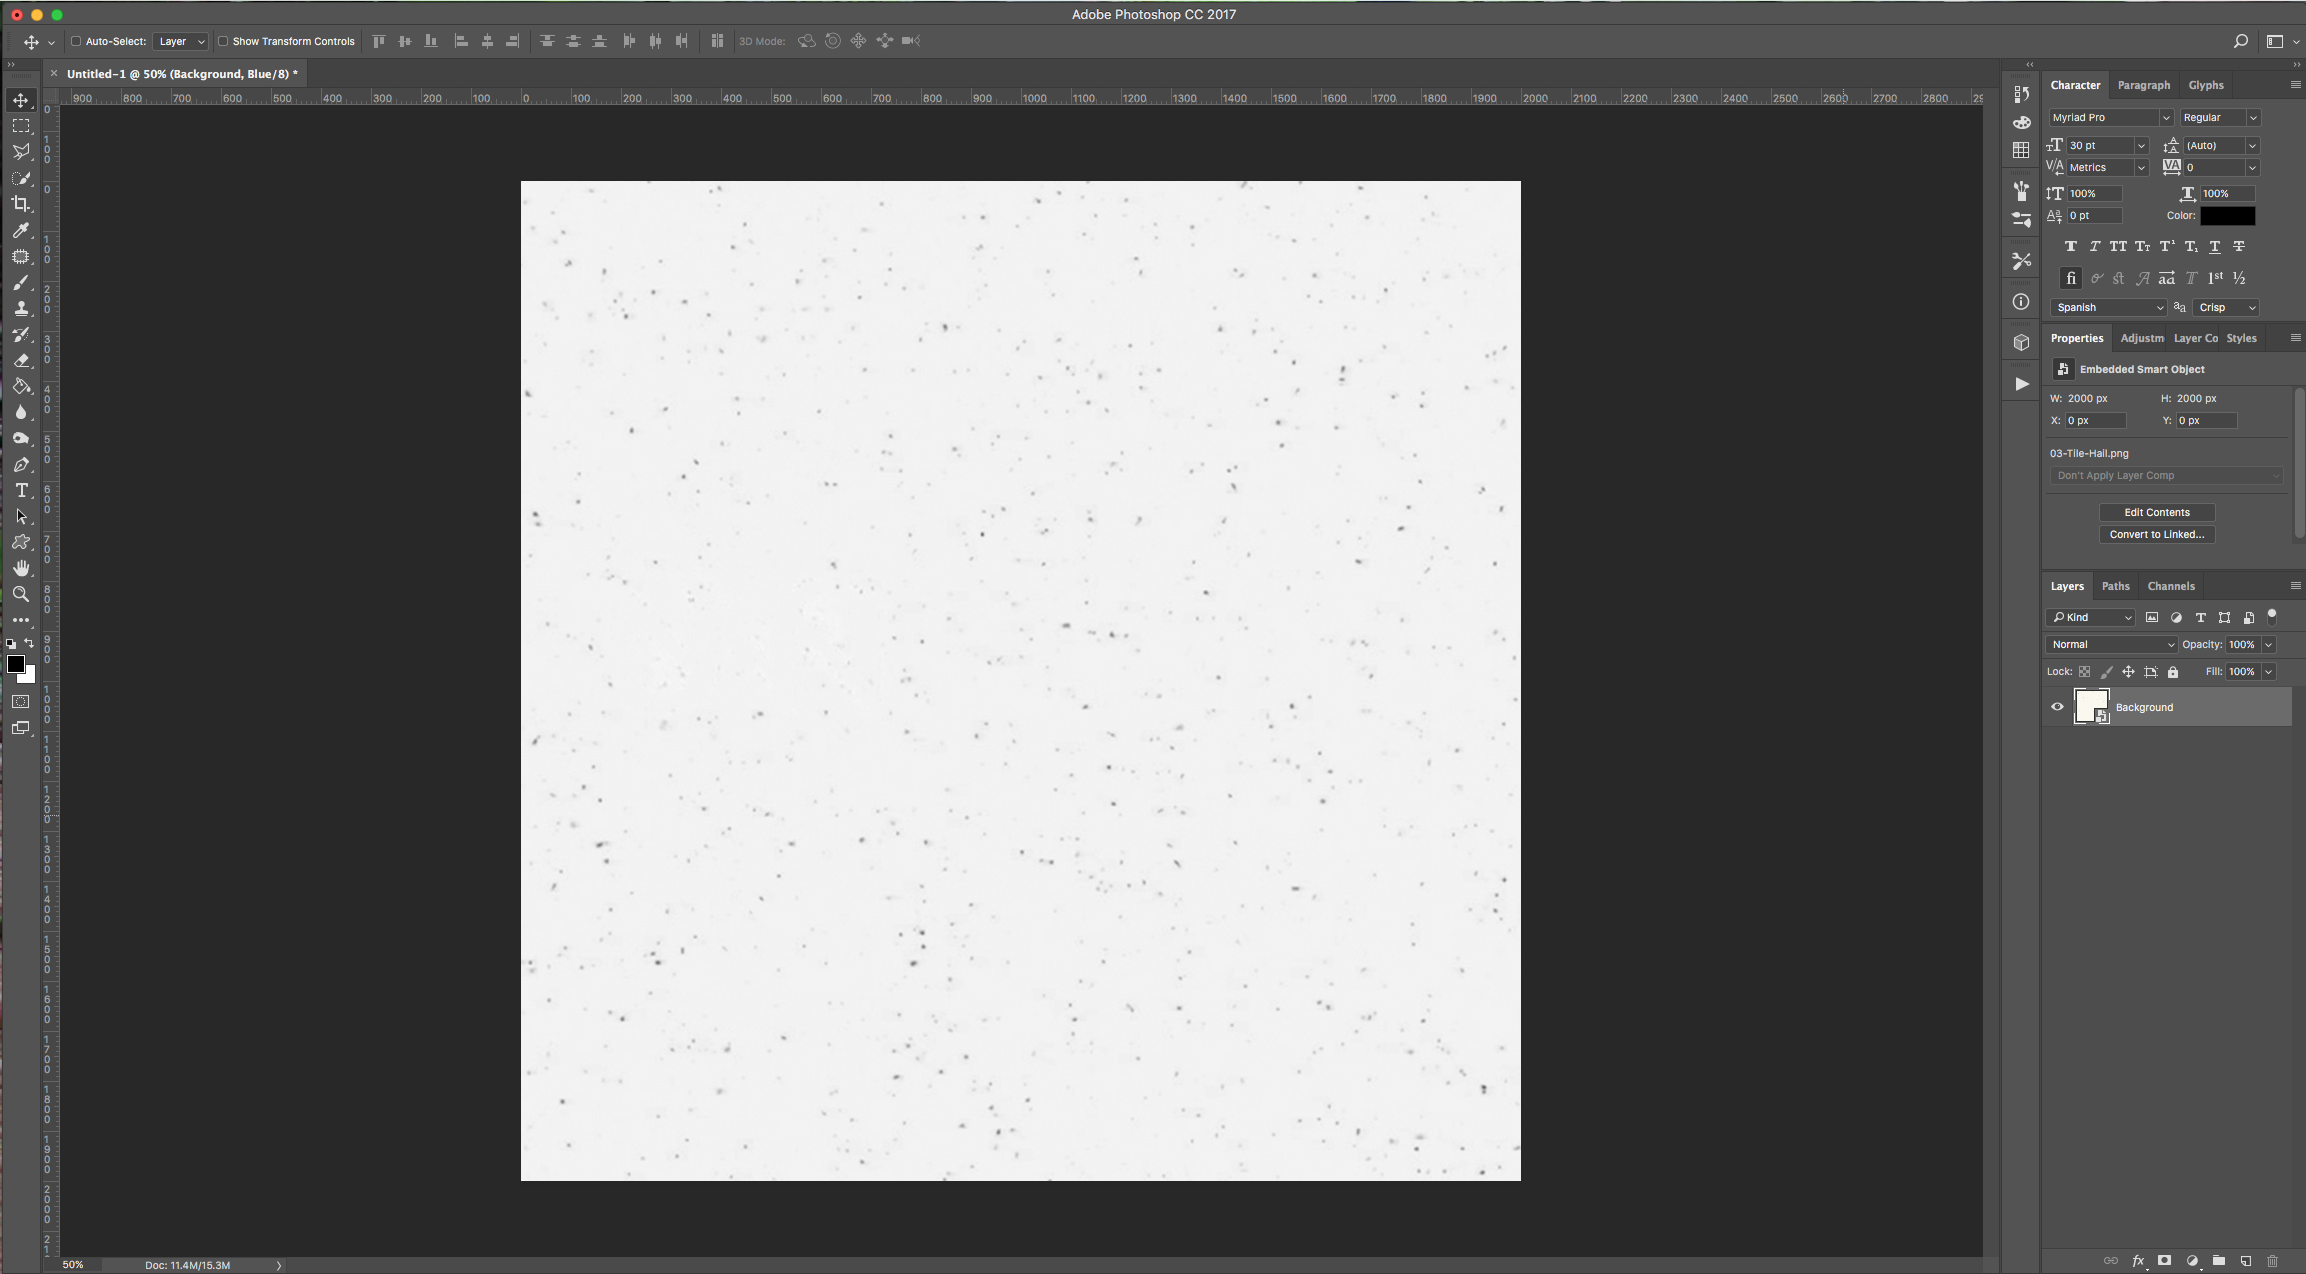
1 - In Photoshop, open the image you want to use as “Background”.
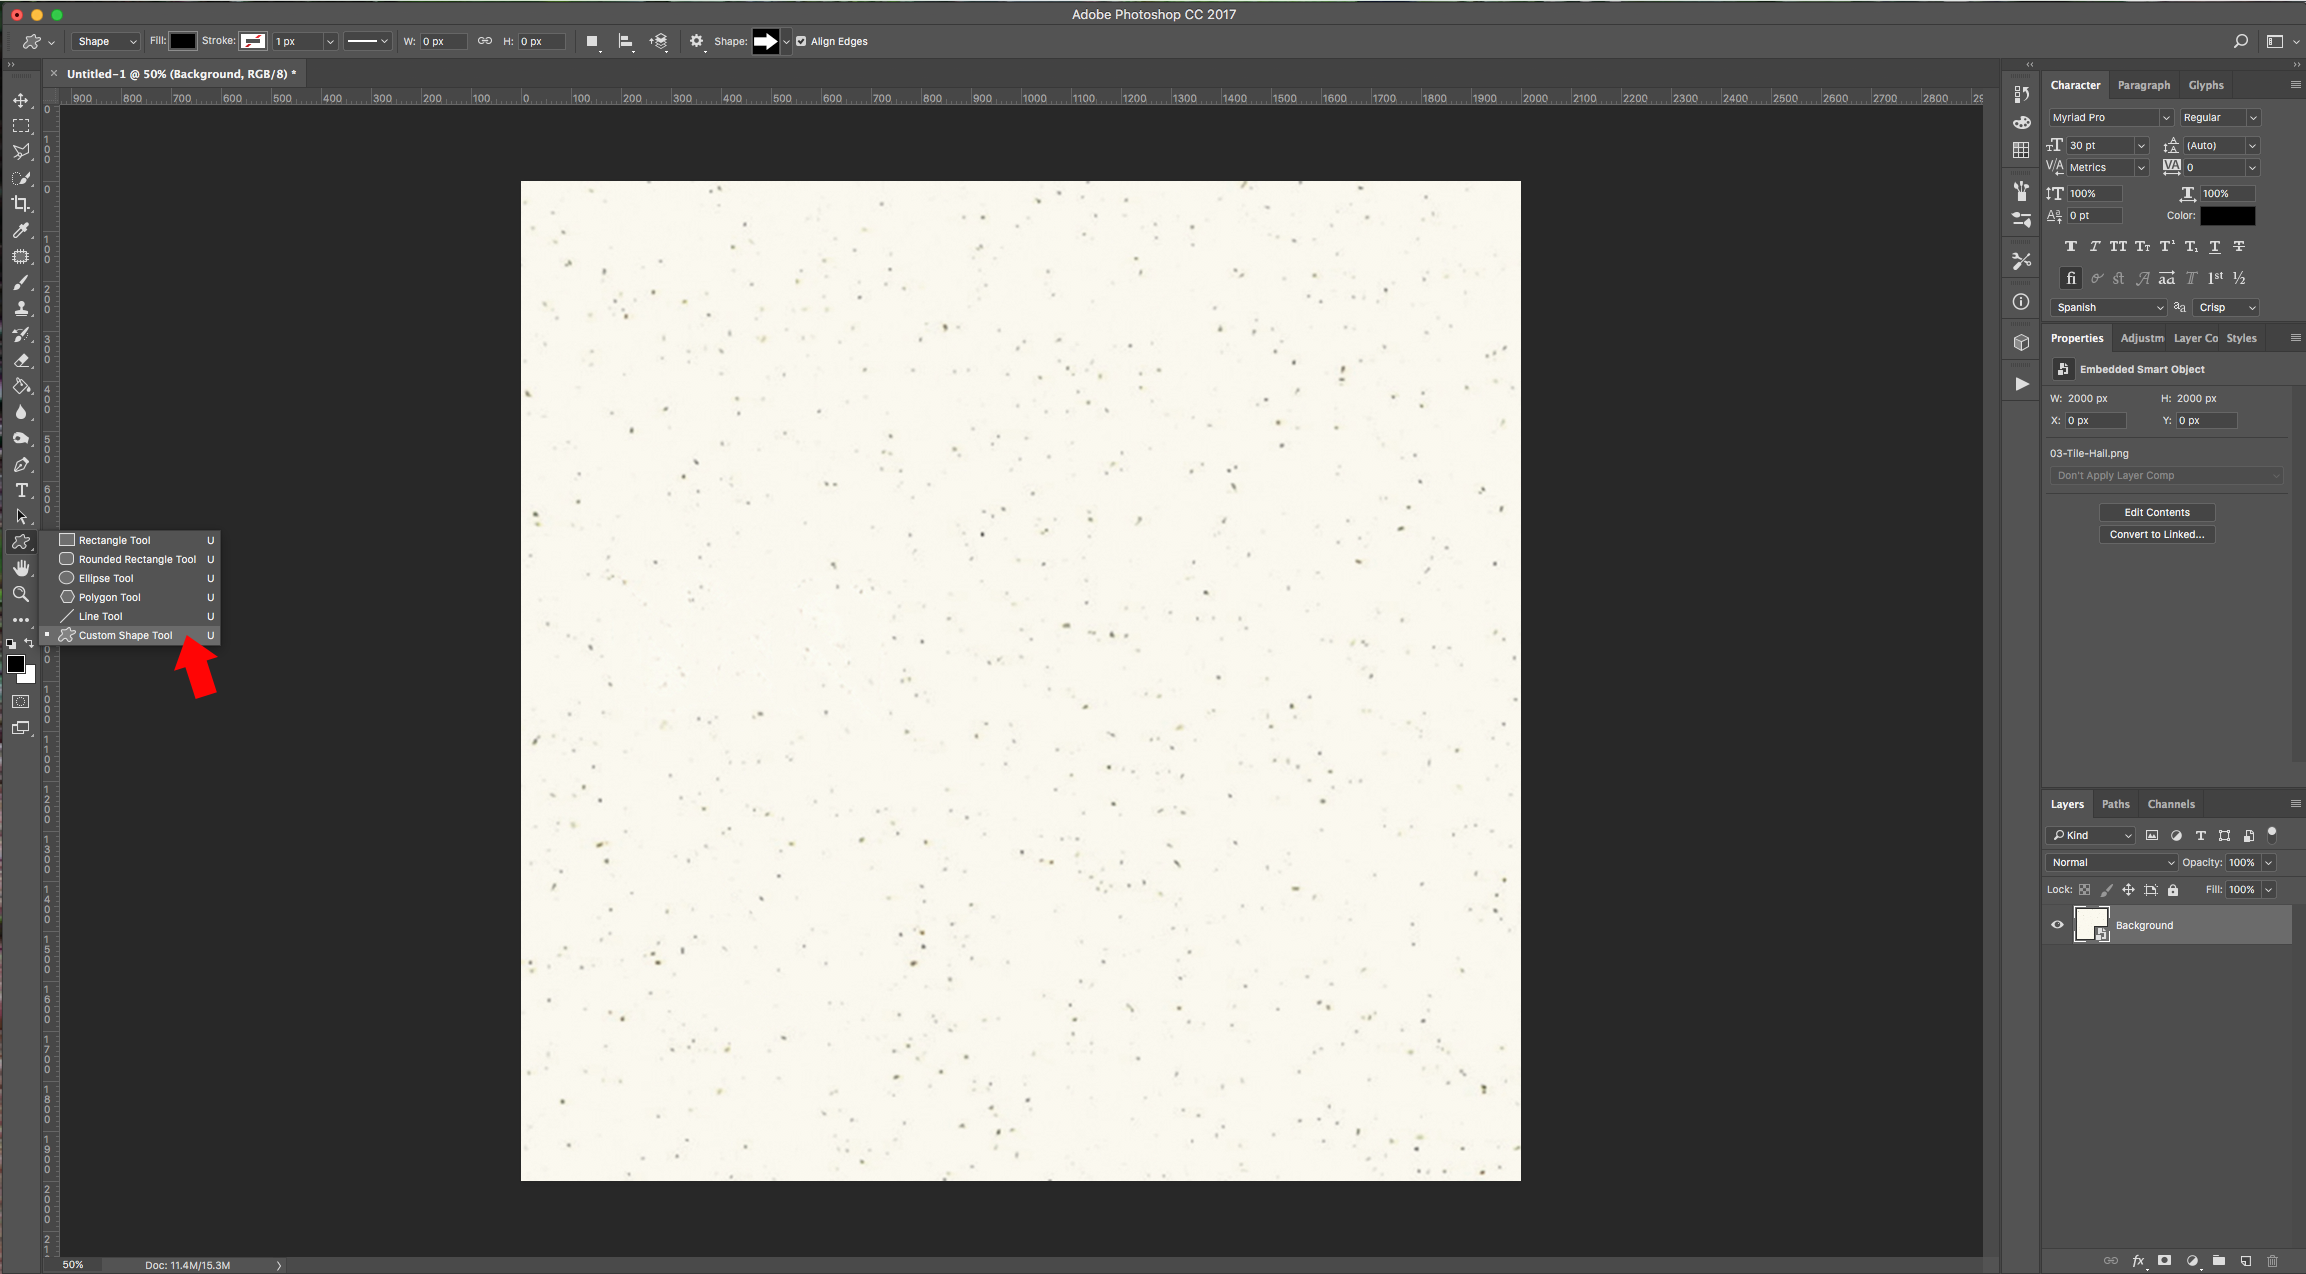
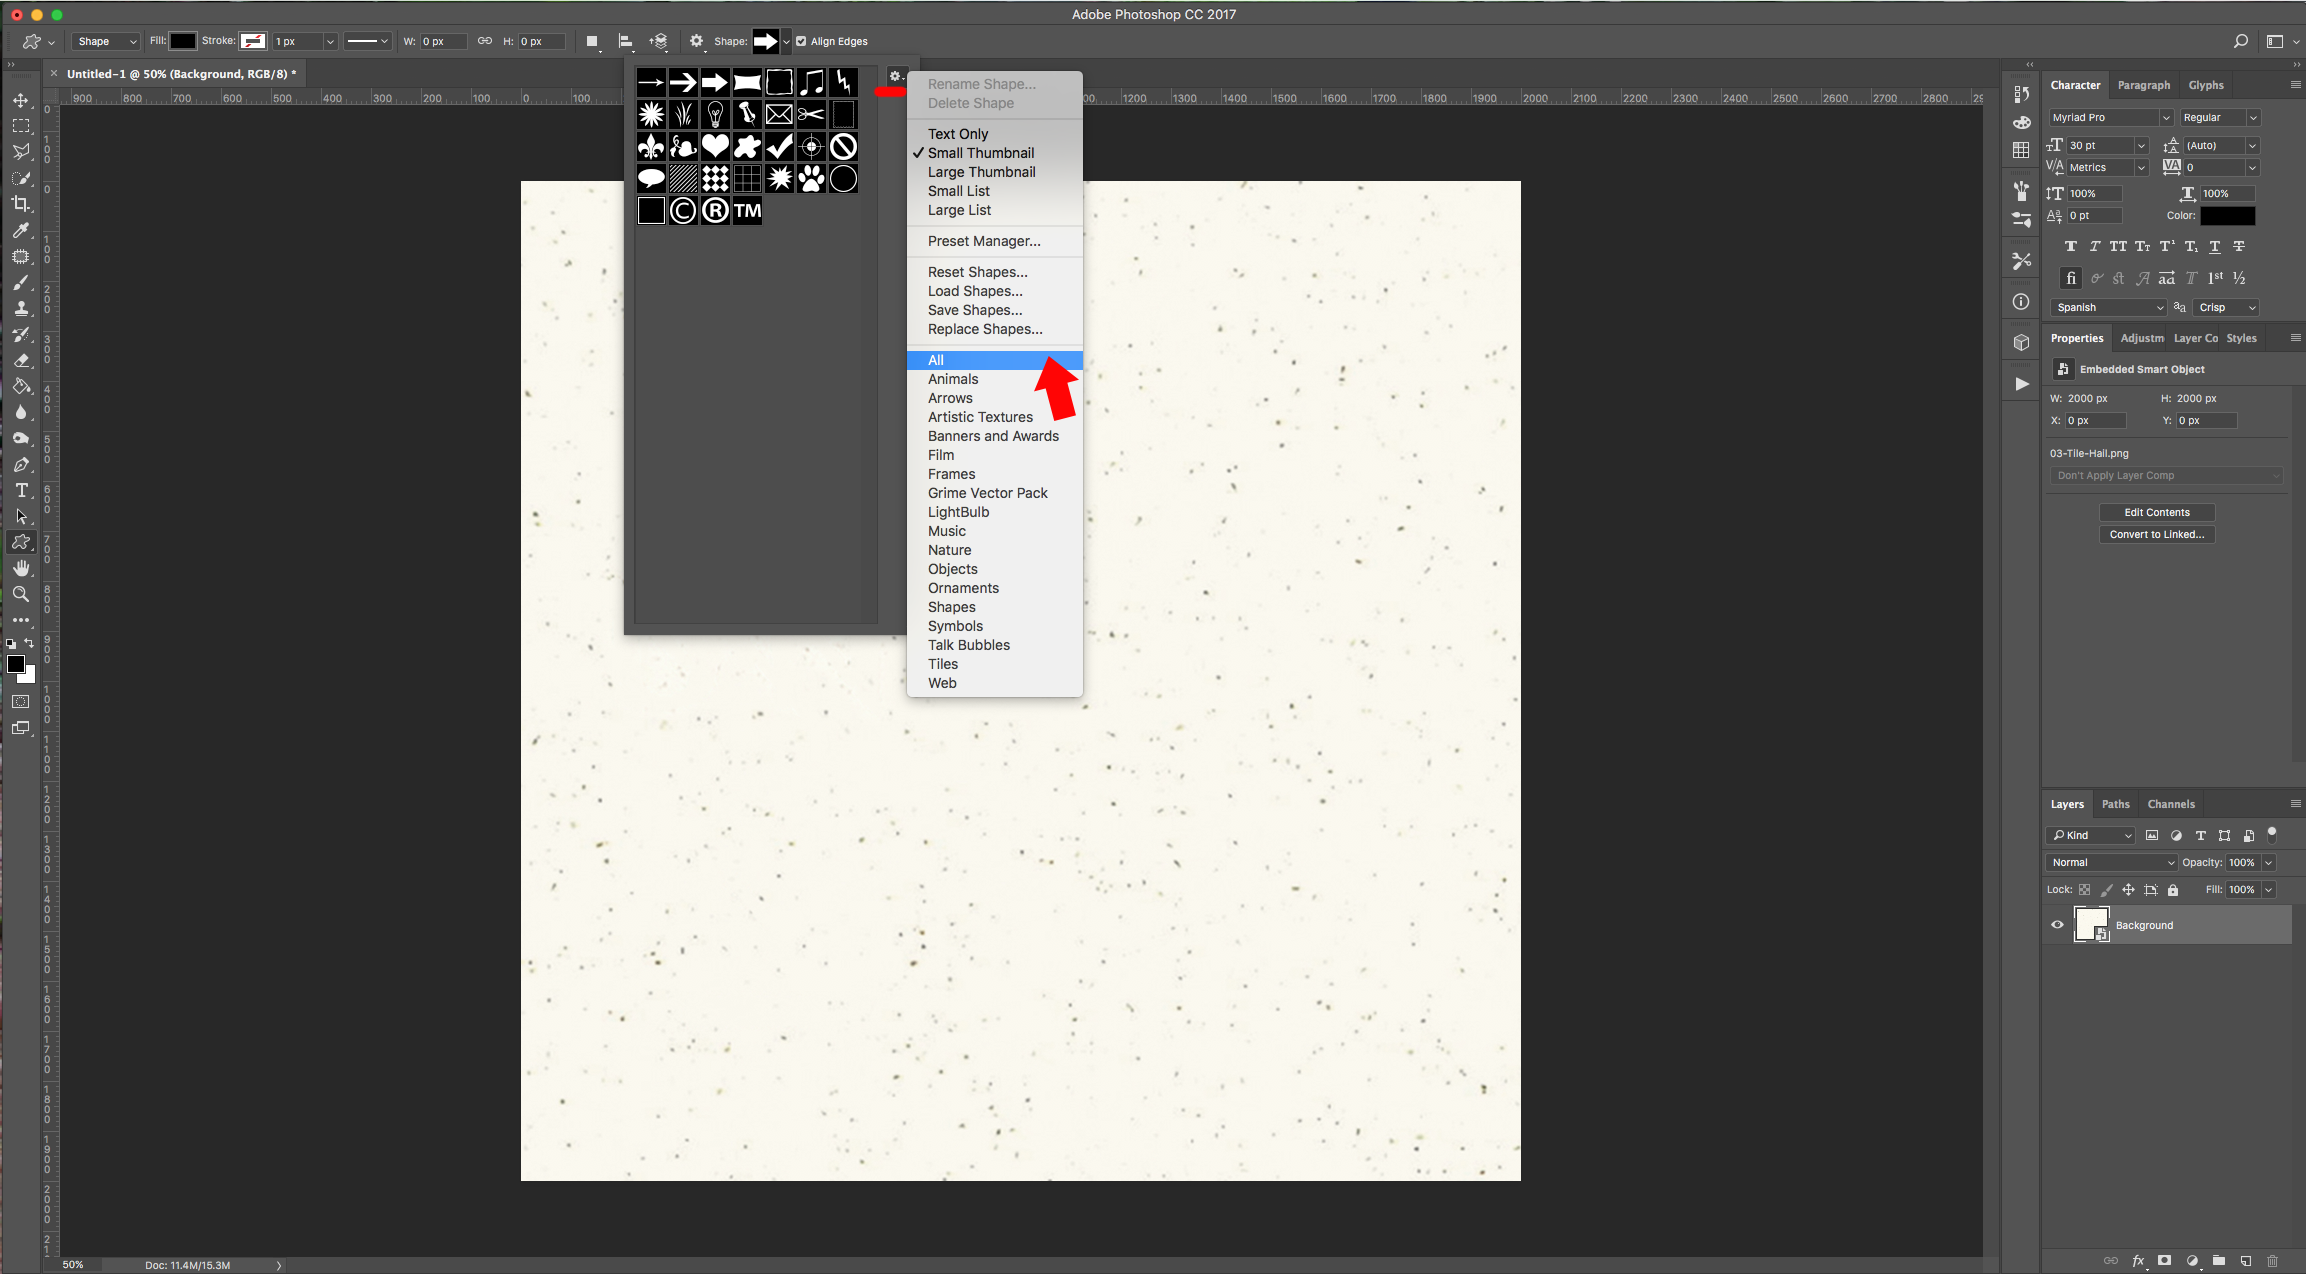
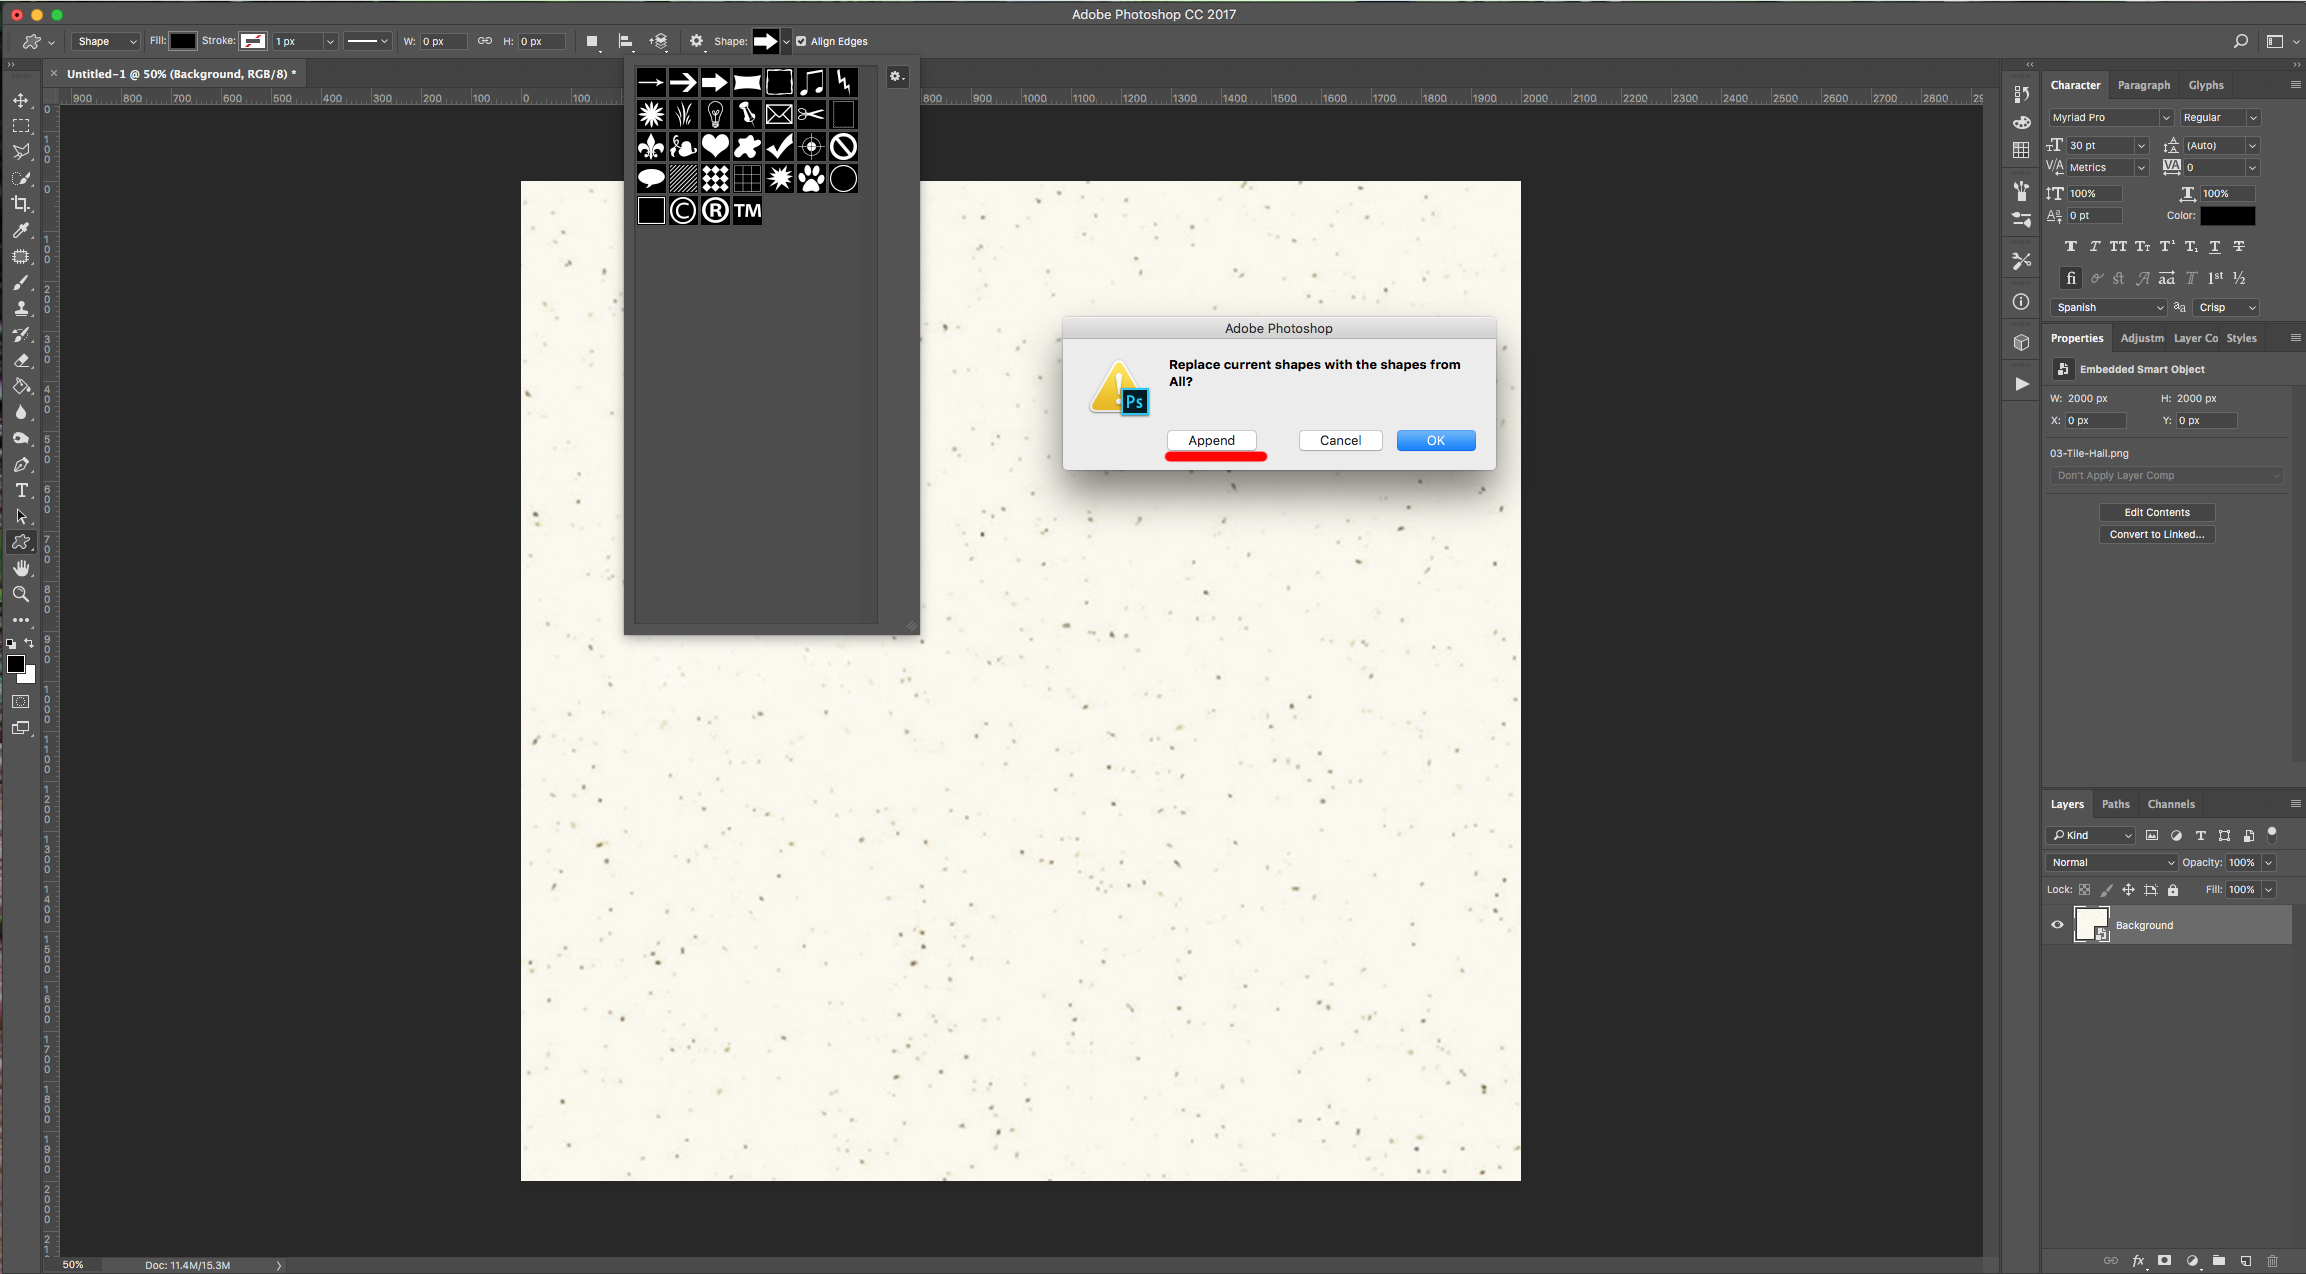
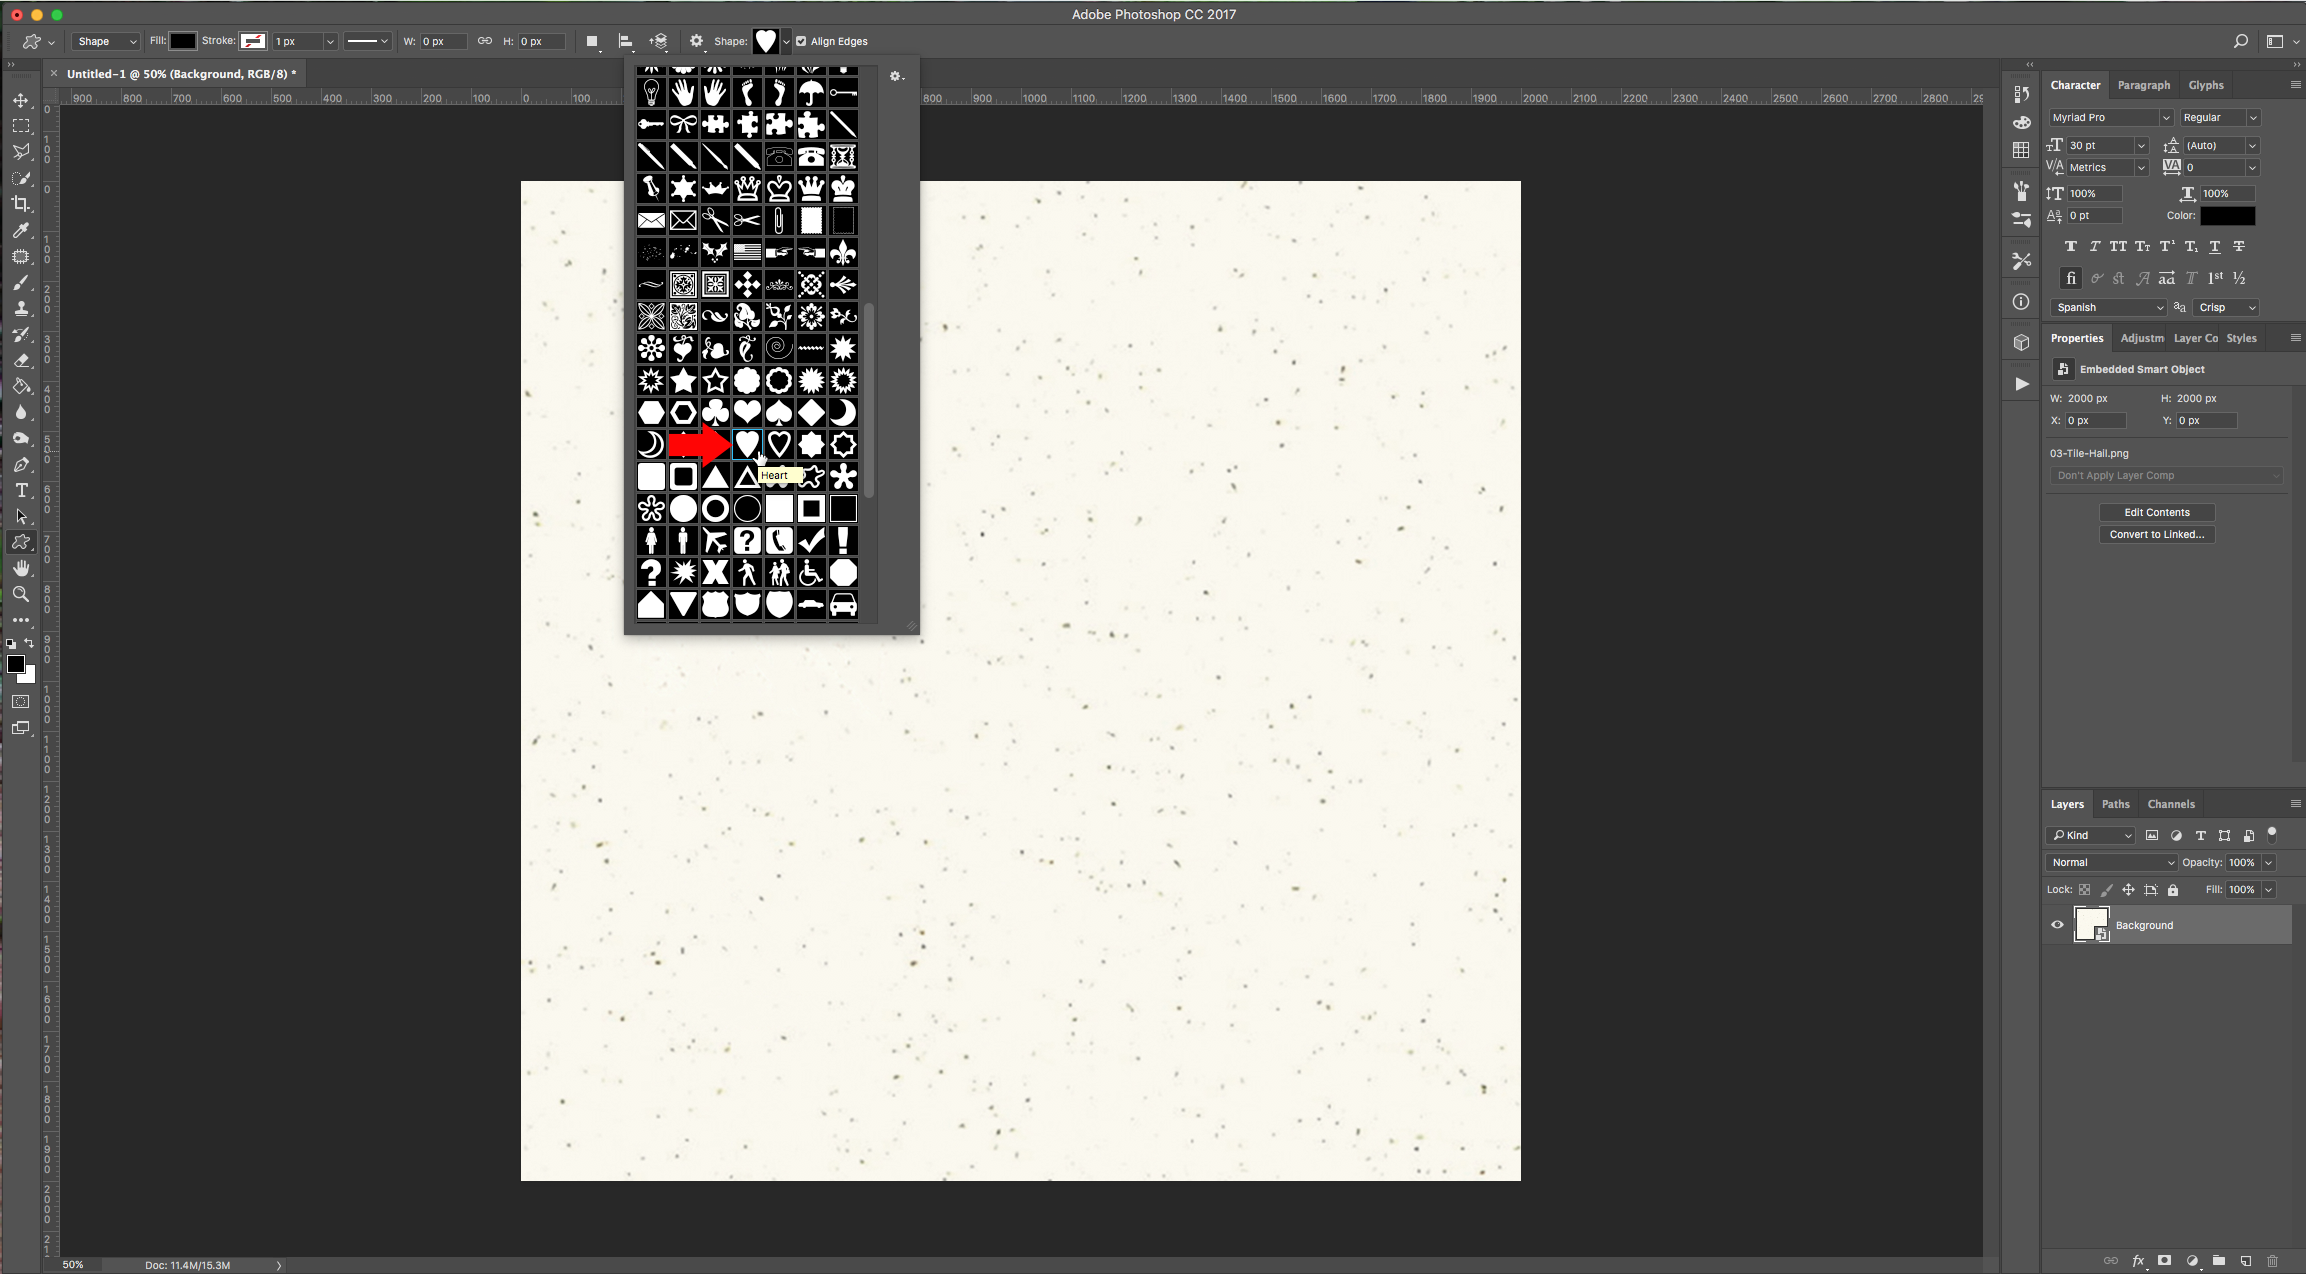
2 - Select the “Custom Shape Tool” (U), in the “Shape” menu click on the small gear icon on the Top-Right, choose “All” and click “Ok” if you want the selected shapes to replace the existing ones or “Append” if you want to add them.
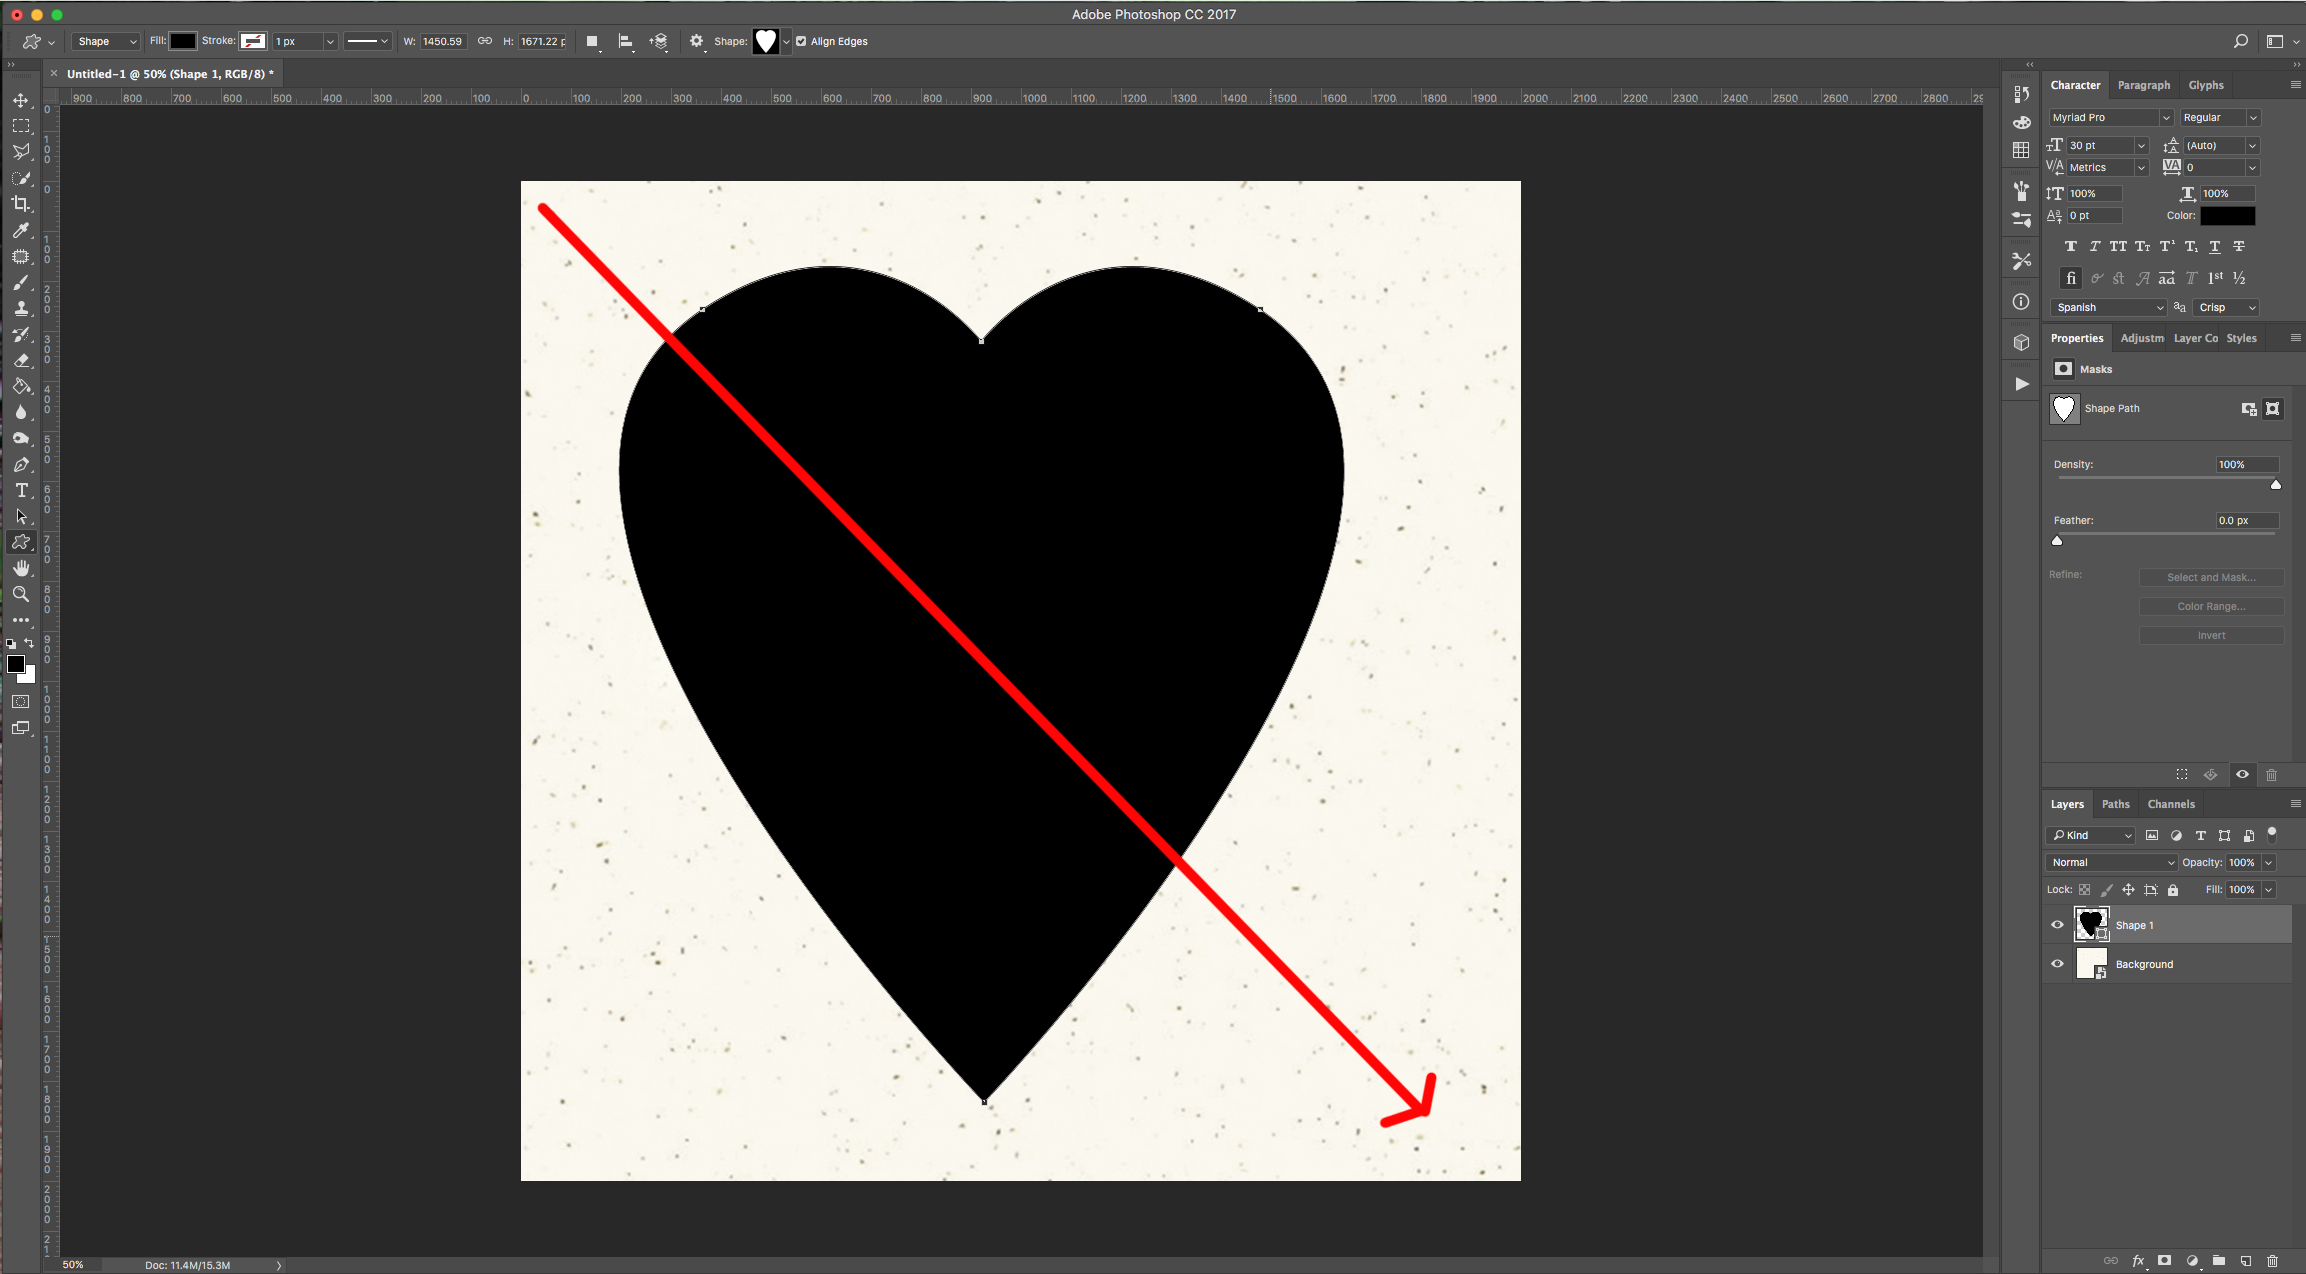
3 - From the “Shapes” Menu select the shape you prefer (we selected the one named “Heart”). Then, click on the Top-Left of your canvas and drag your cursor to create a path with your shape (Hold the “Shift” key while dragging to make the shape proportional).
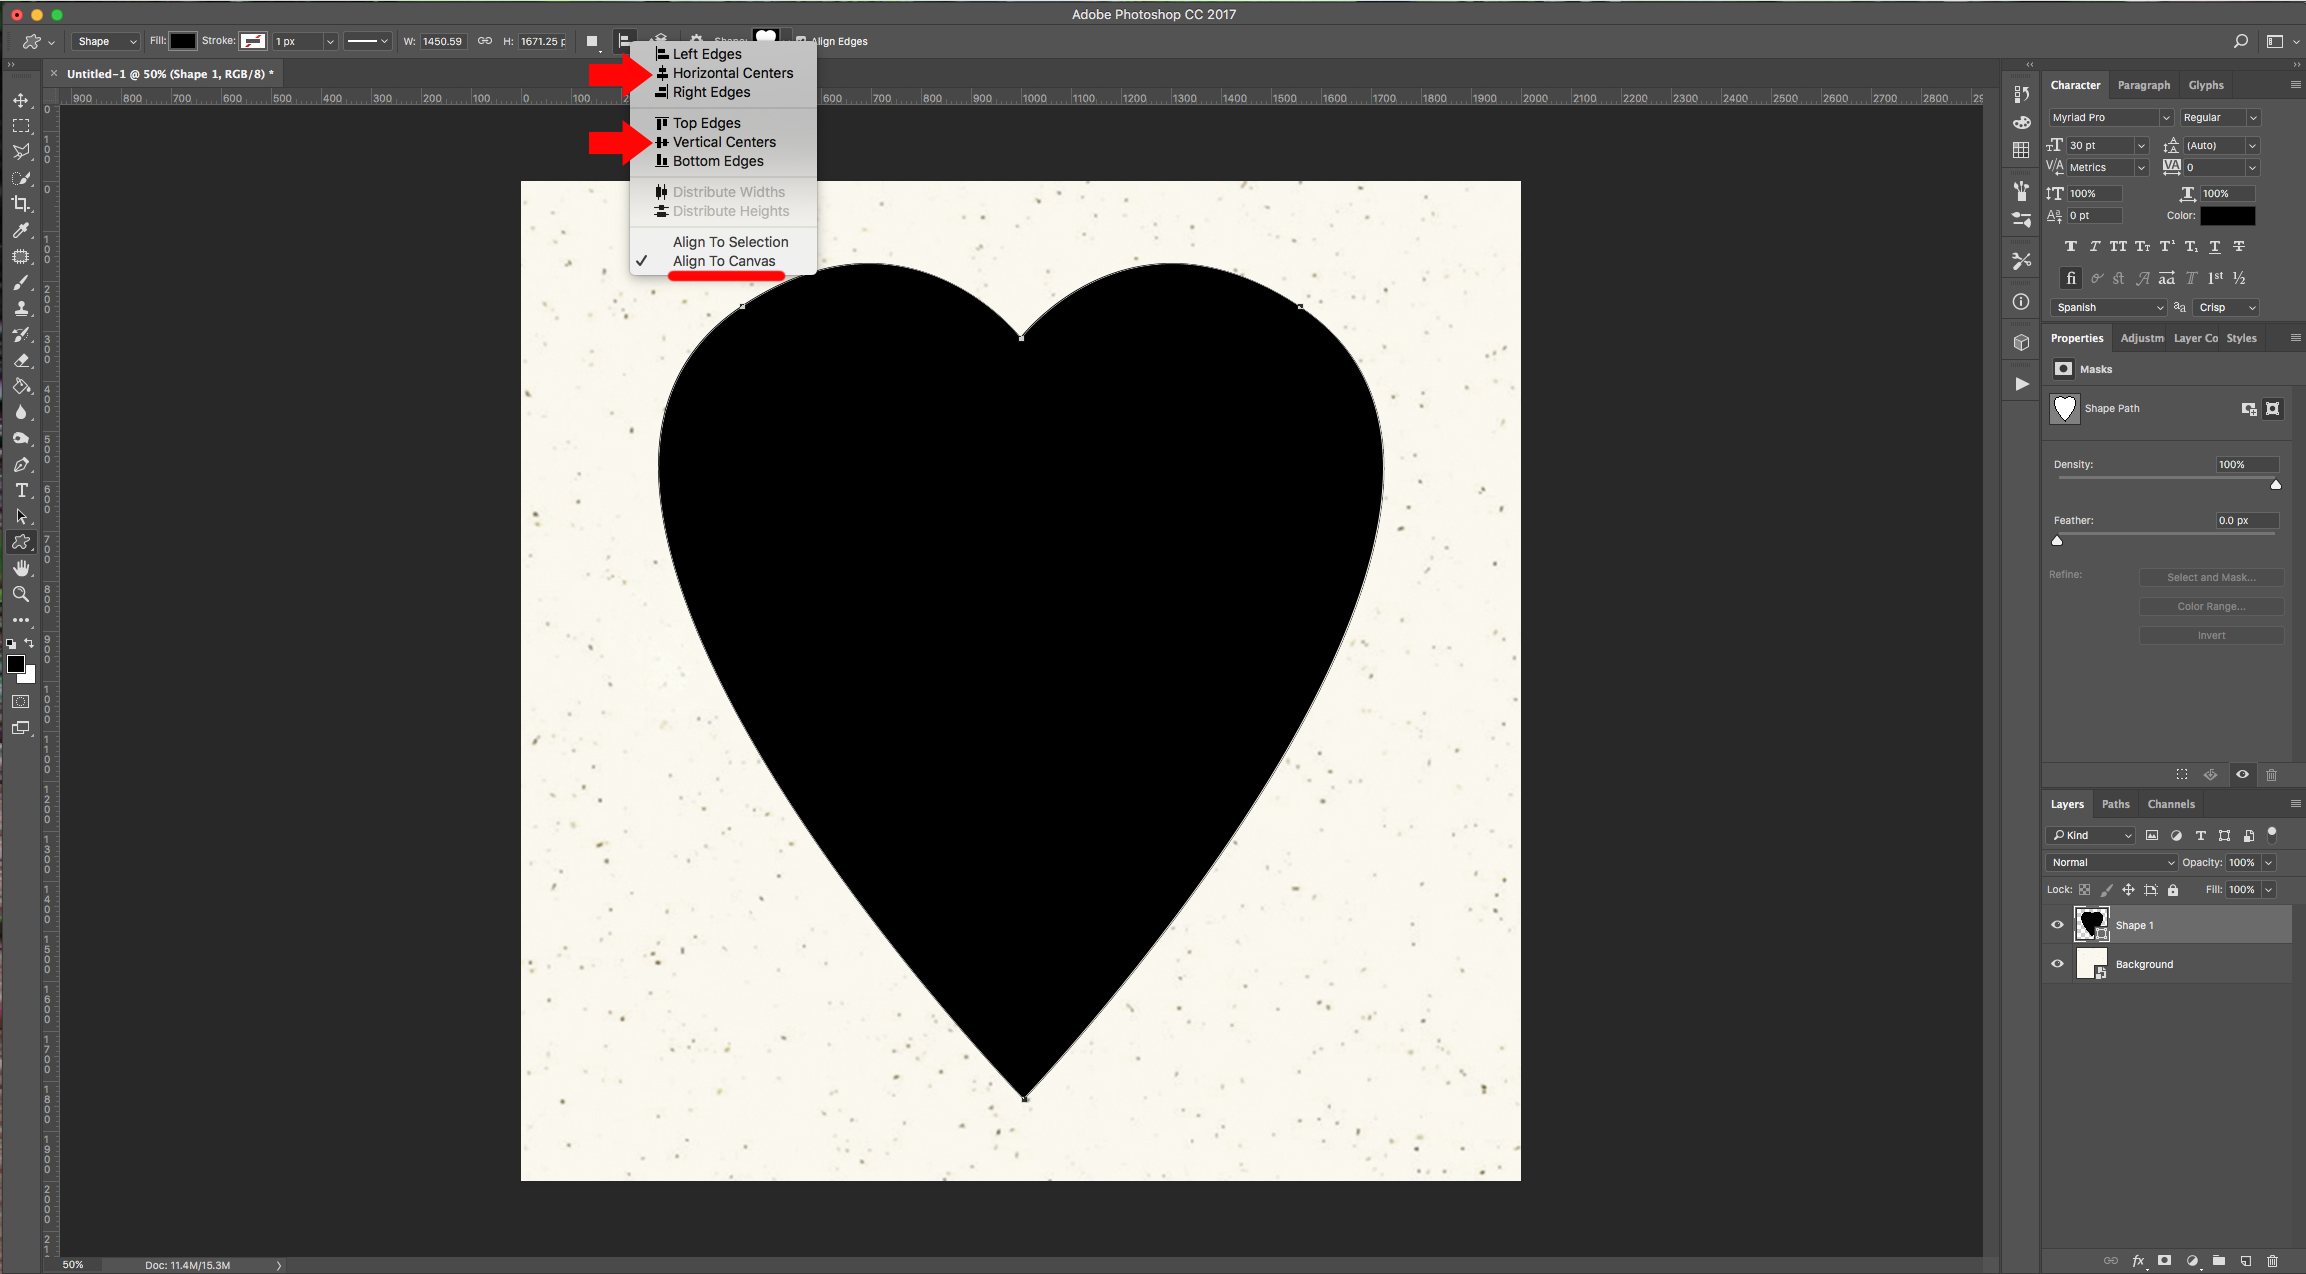
4 - Click in the “Path Alignment” button on the Top Menu and choose “Vertical and Horizontal Centers” making sure “Align to Canvas” is checked to center your shape in the canvas.
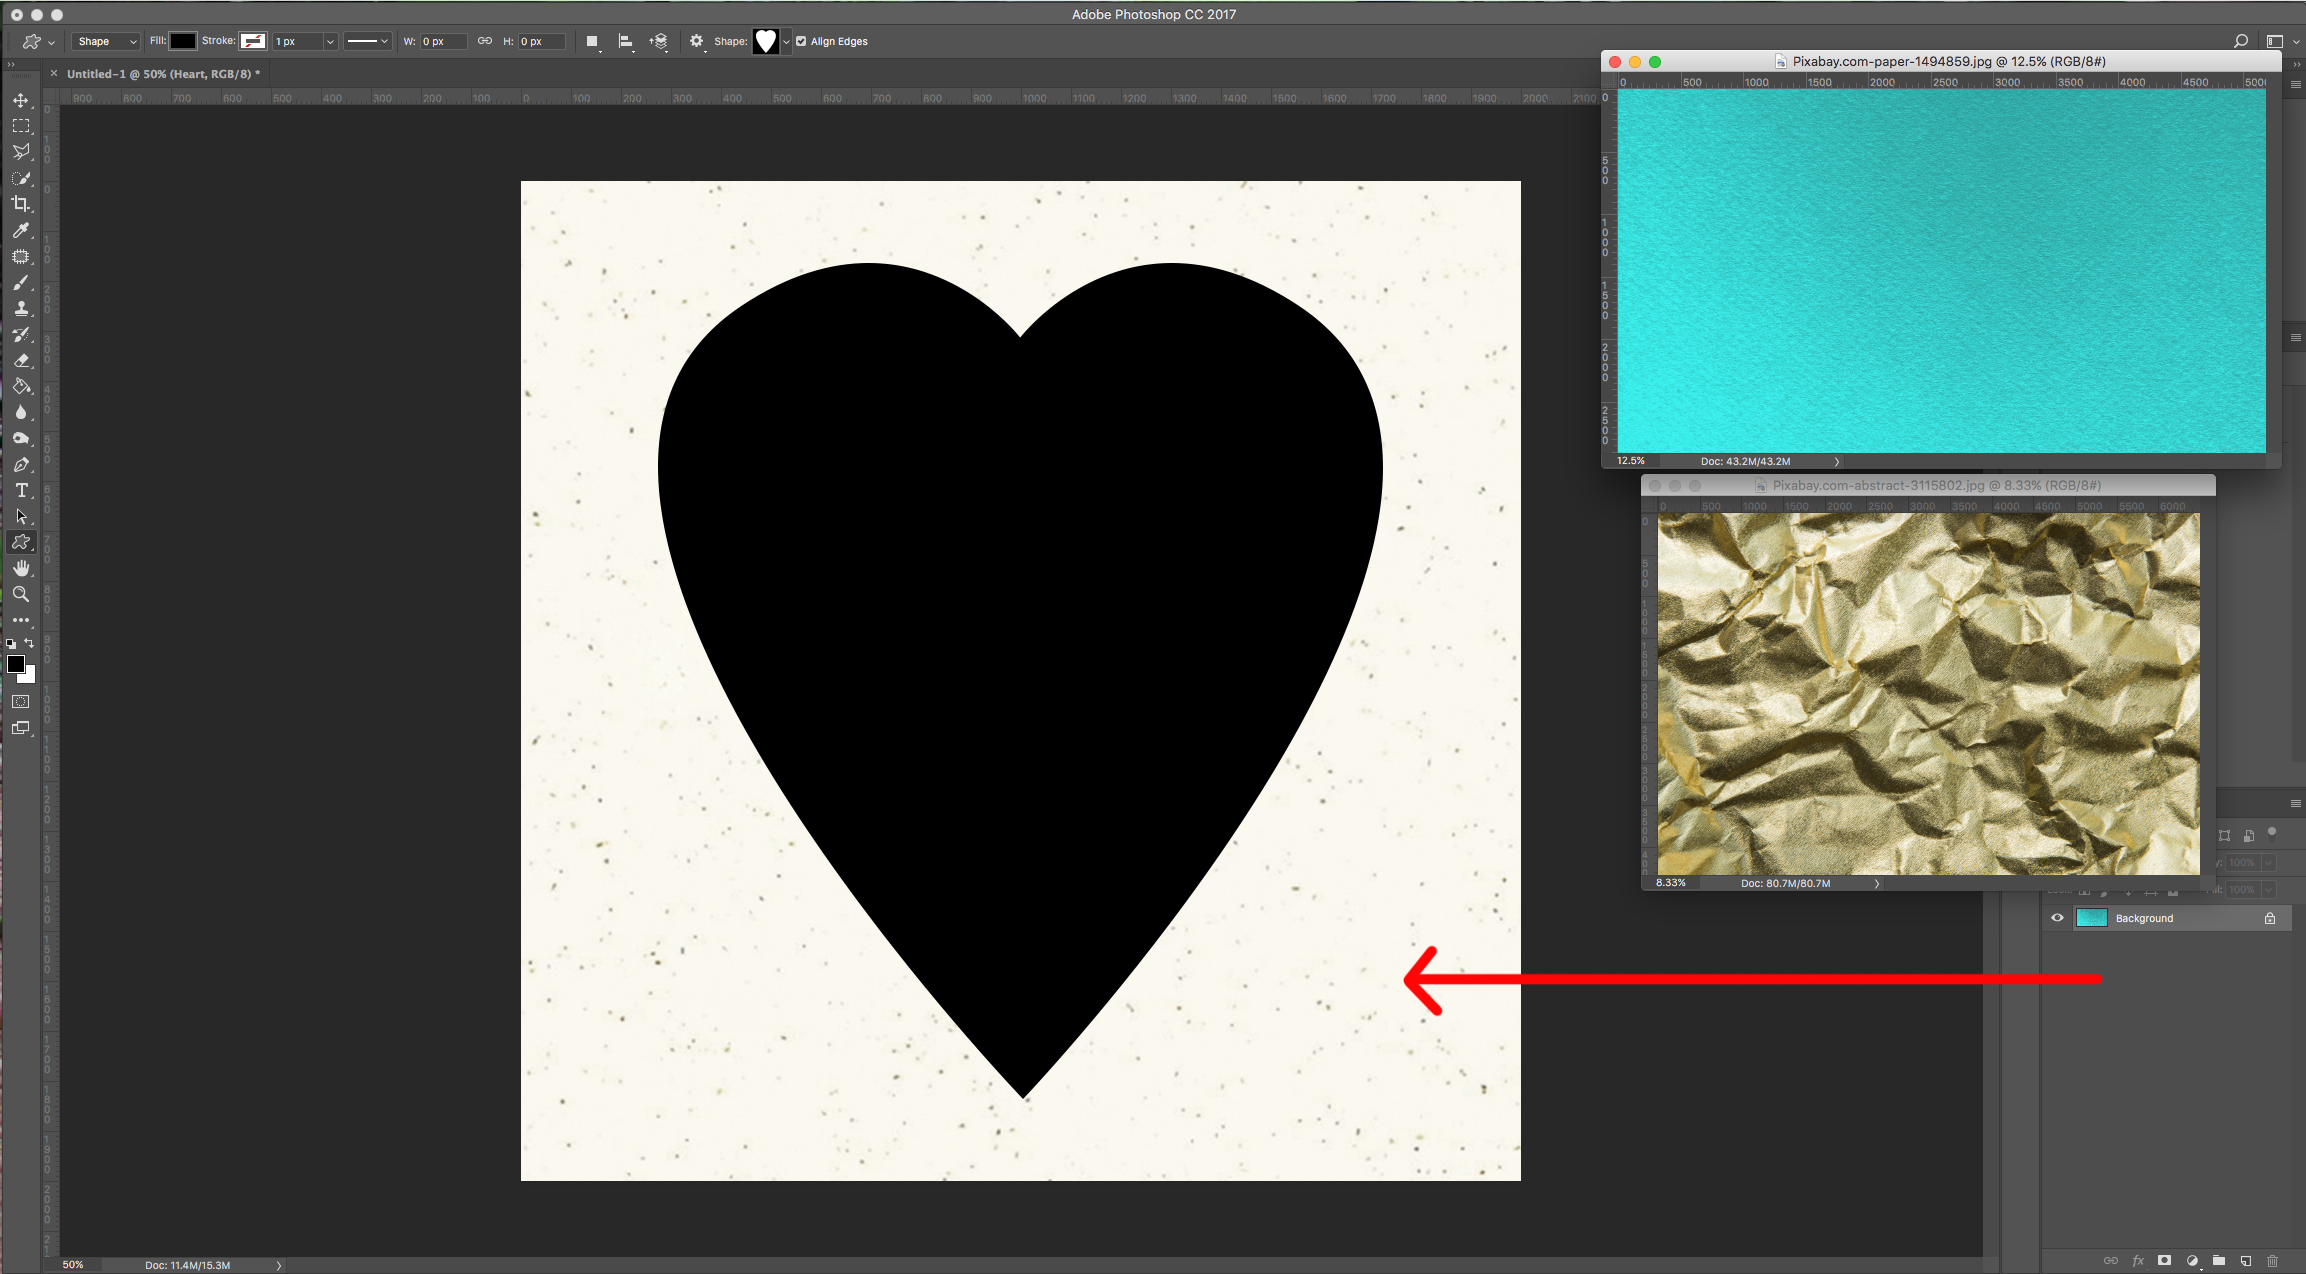
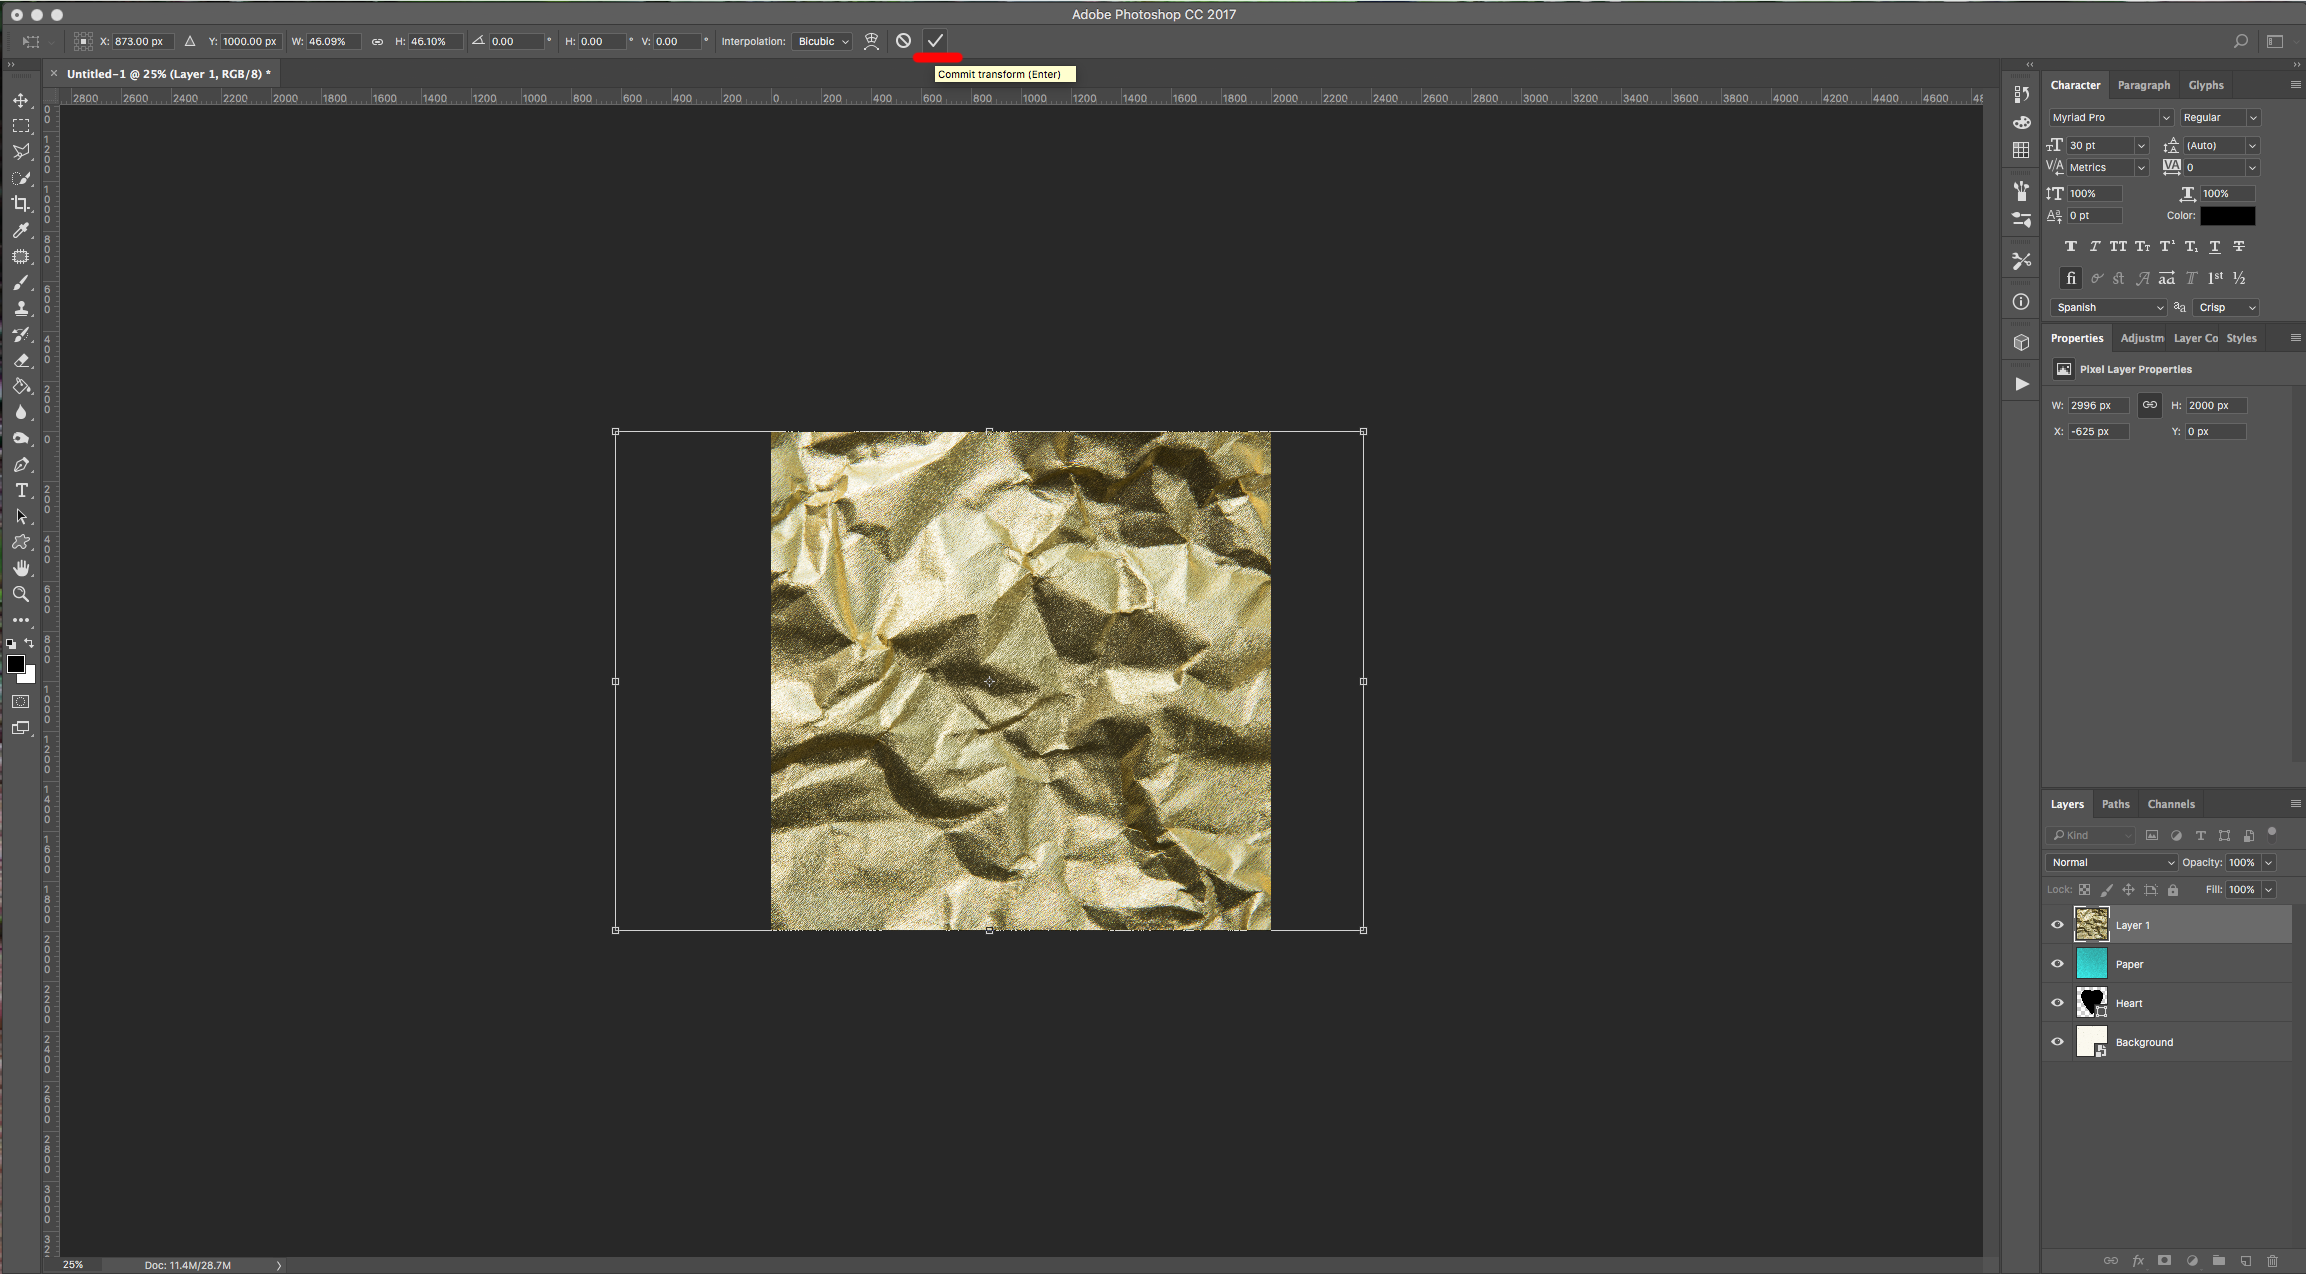
5 - Open the “Texture” files you want to use as “Confetti”, drag them into your “Document”, resize them if needed using “Free Transform” (Command/Control + T) and “Duplicate” (Command/Control + J) each once. Don’t forget to name your Layers.


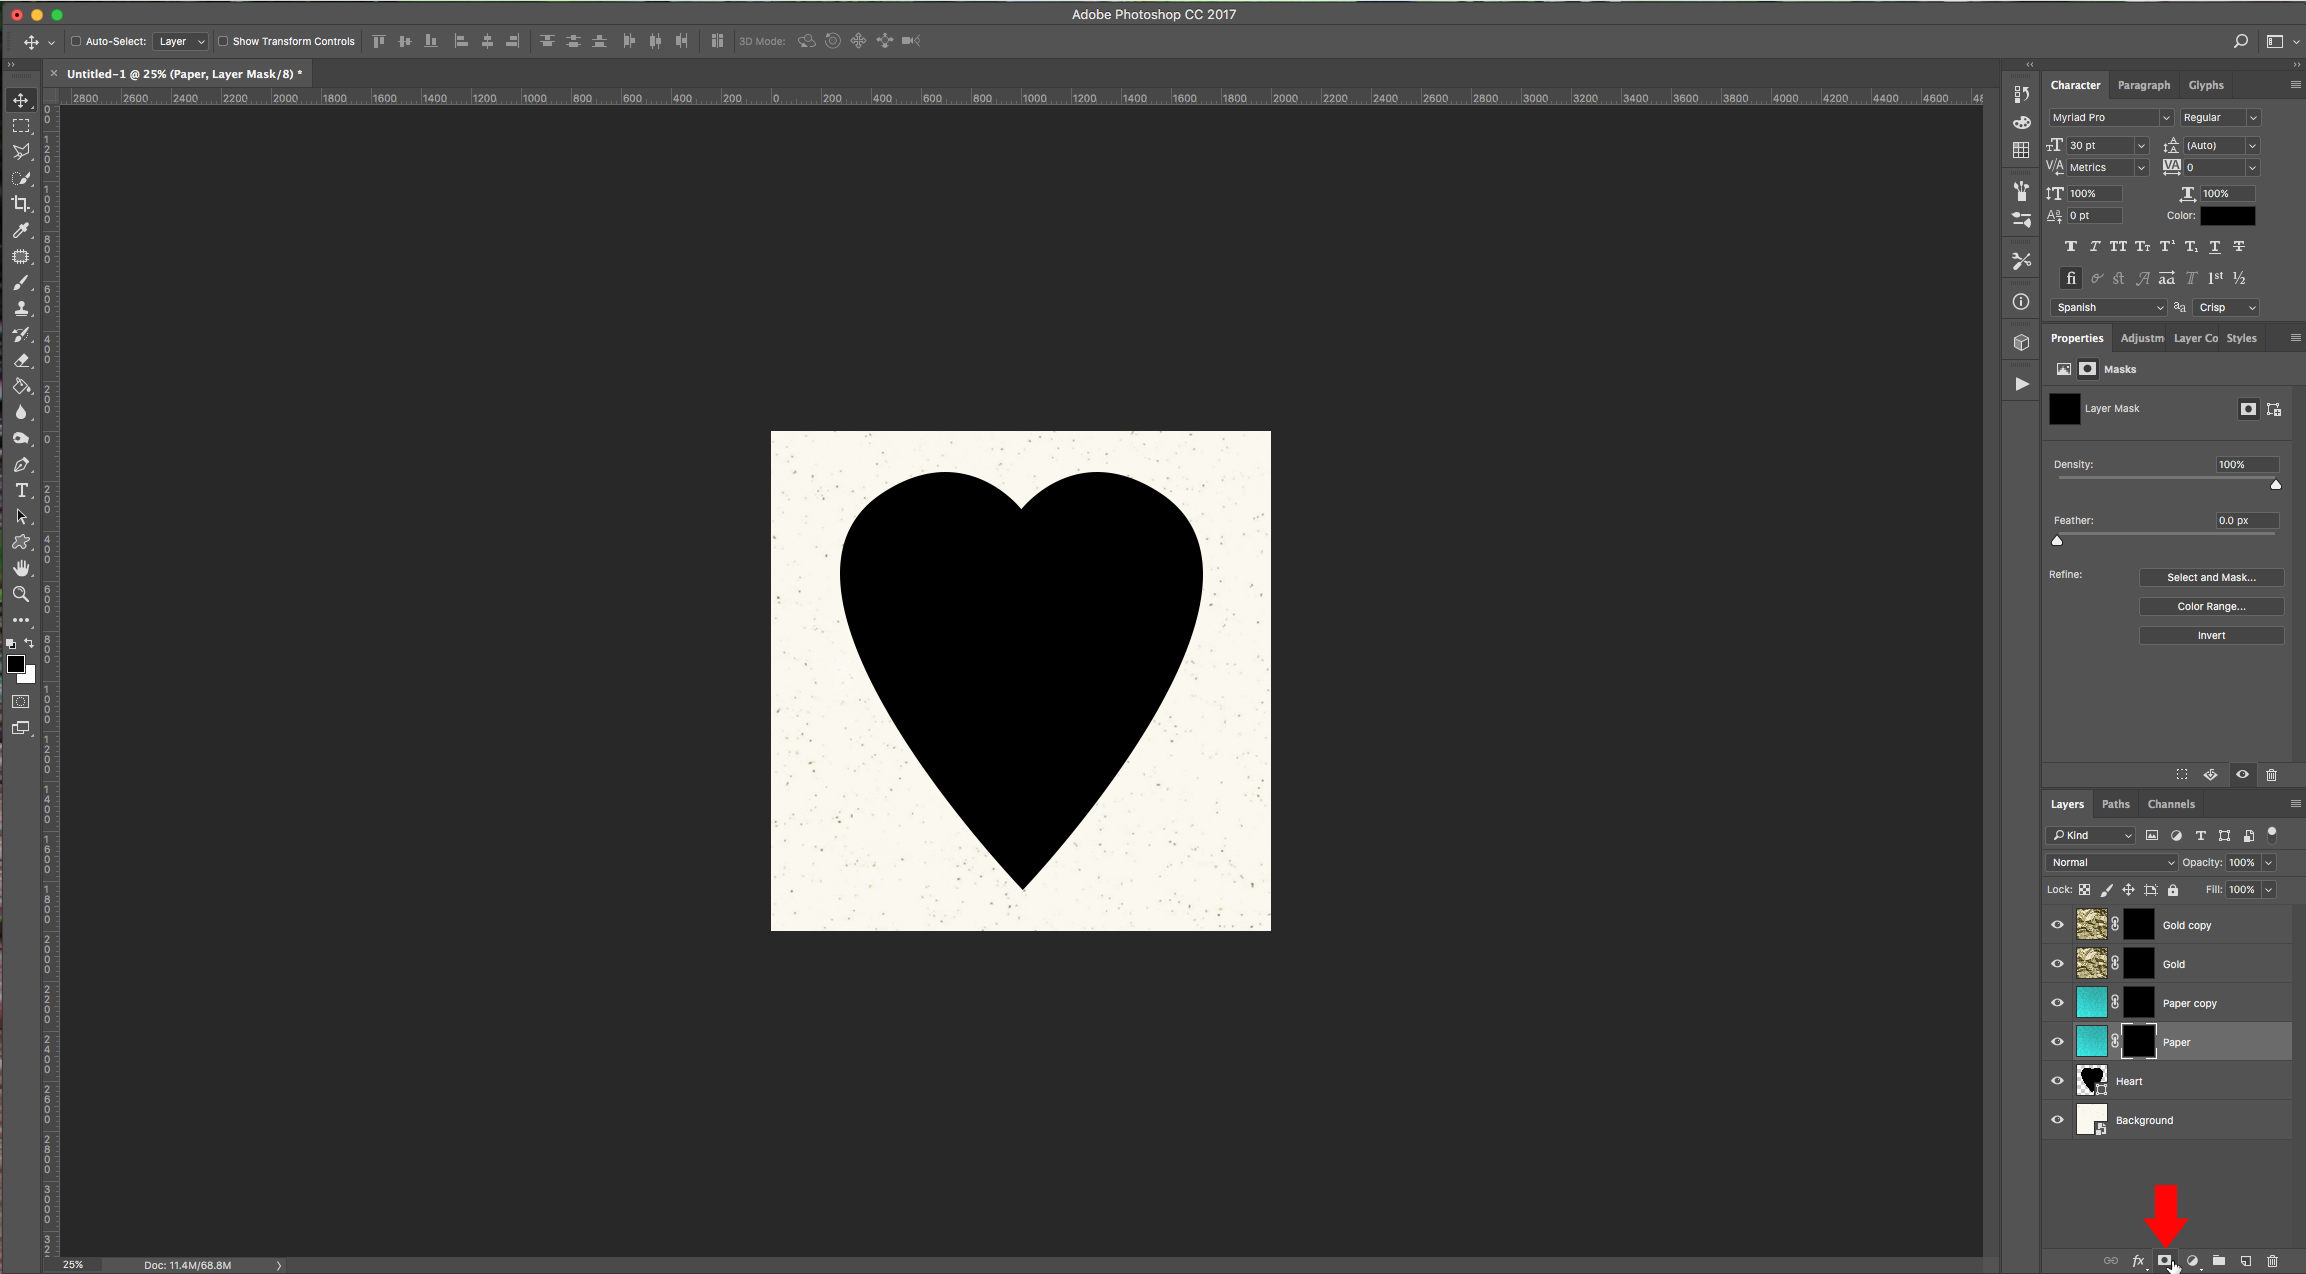
6 - While keeping the “Alt/Option” key pressed click on the “Add Layer Mask” button at the bottom of the “Layers” Panel to add a Mask (it should be filled with Black). The mask will be hiding your texture for now. Repeat with all your “Texture” Layers.
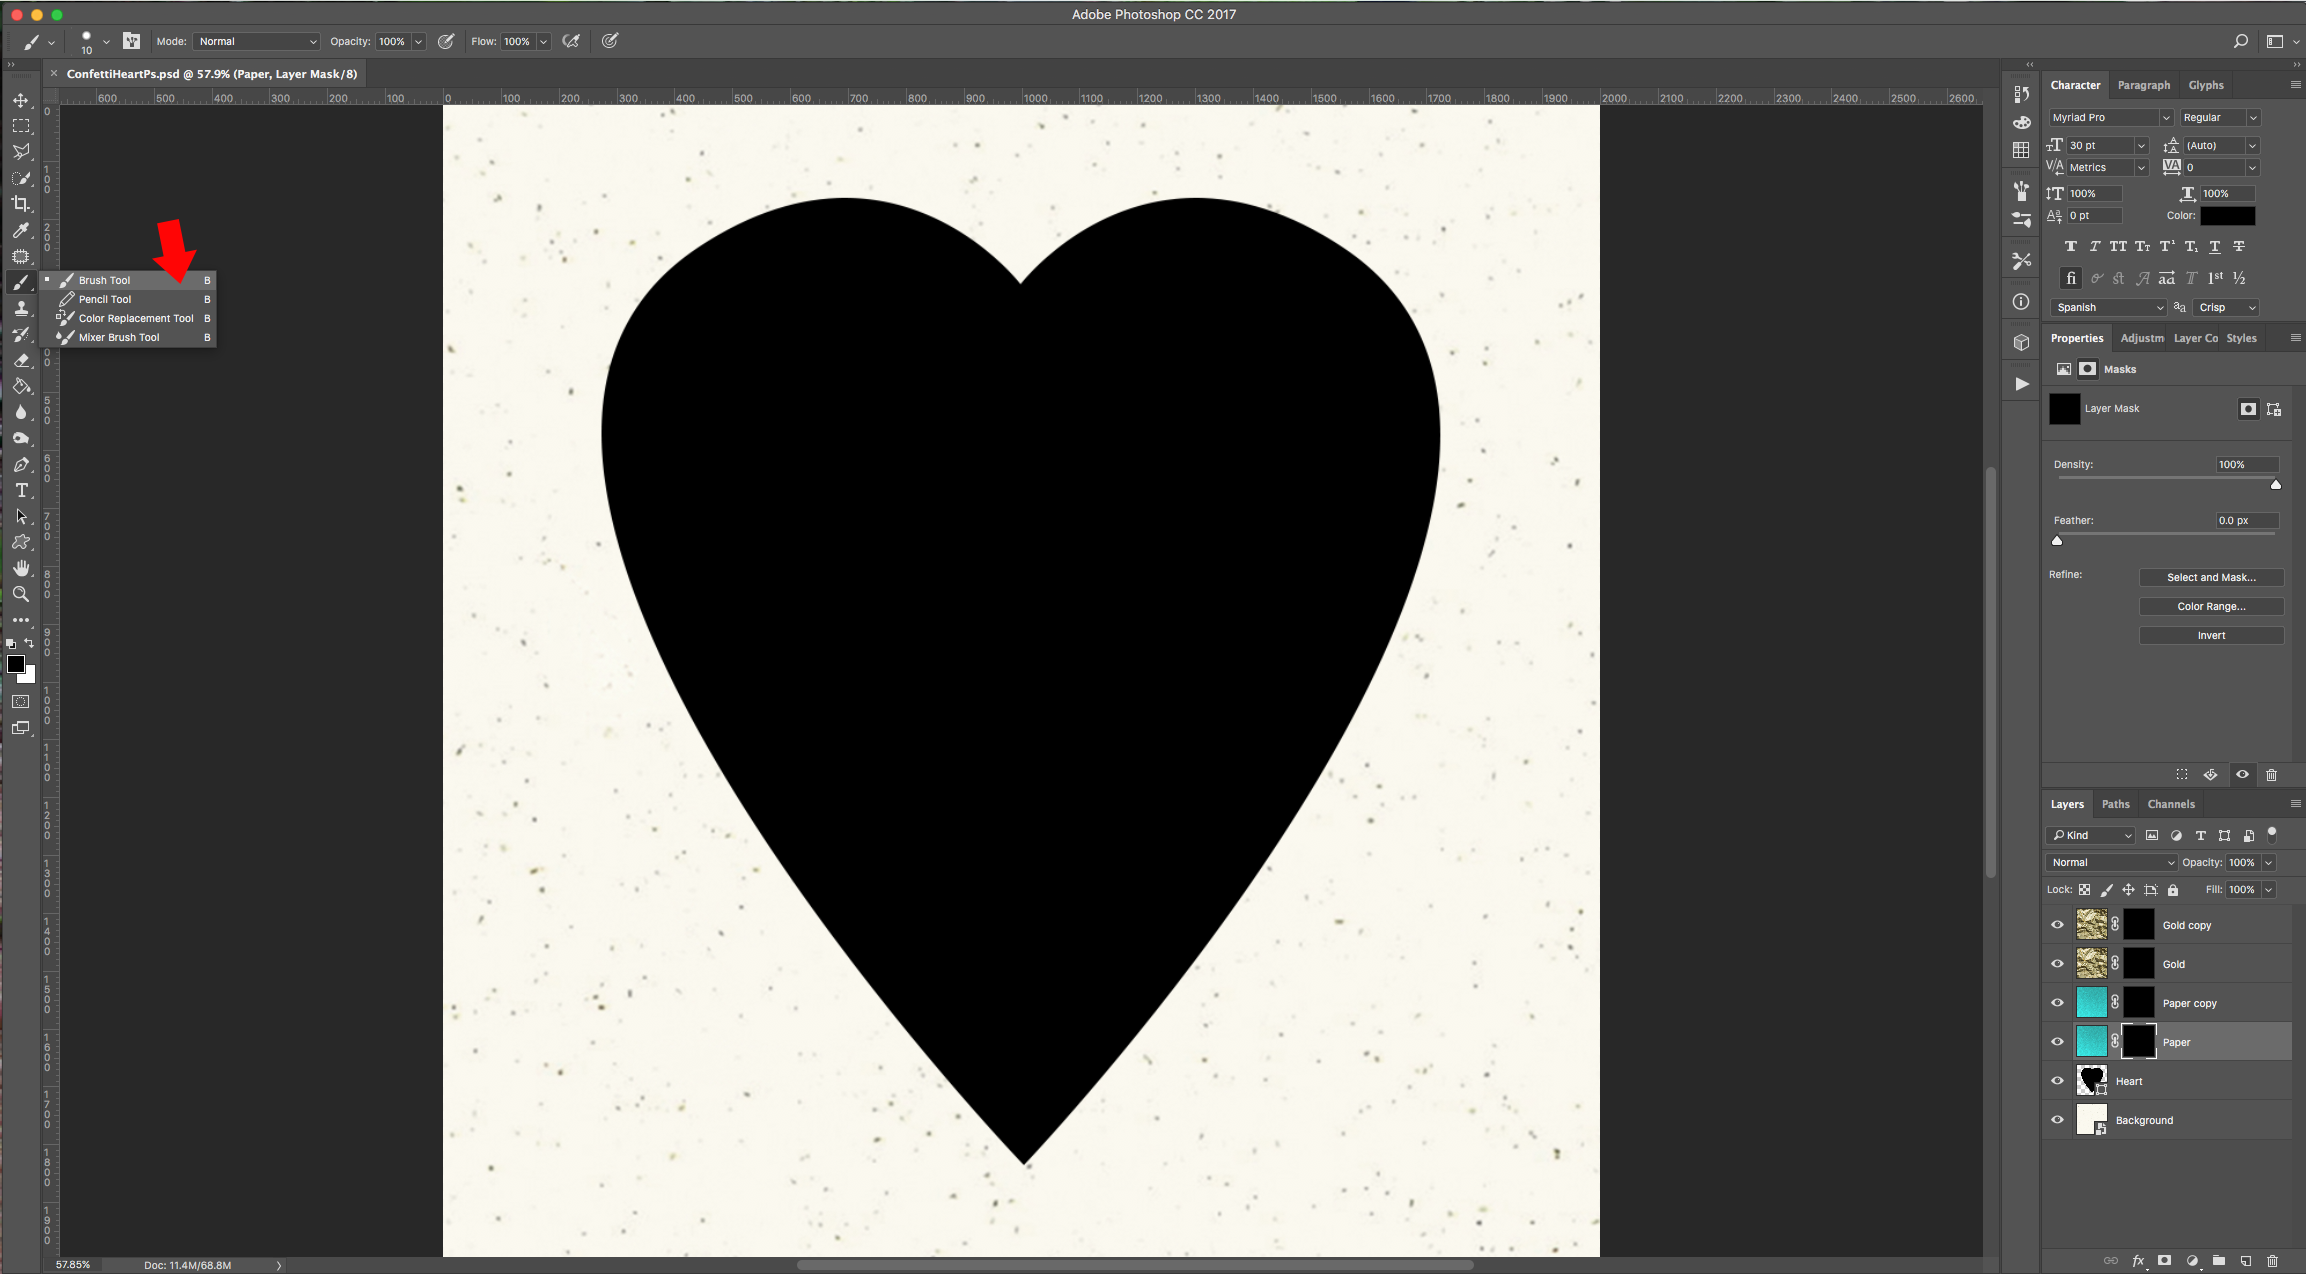
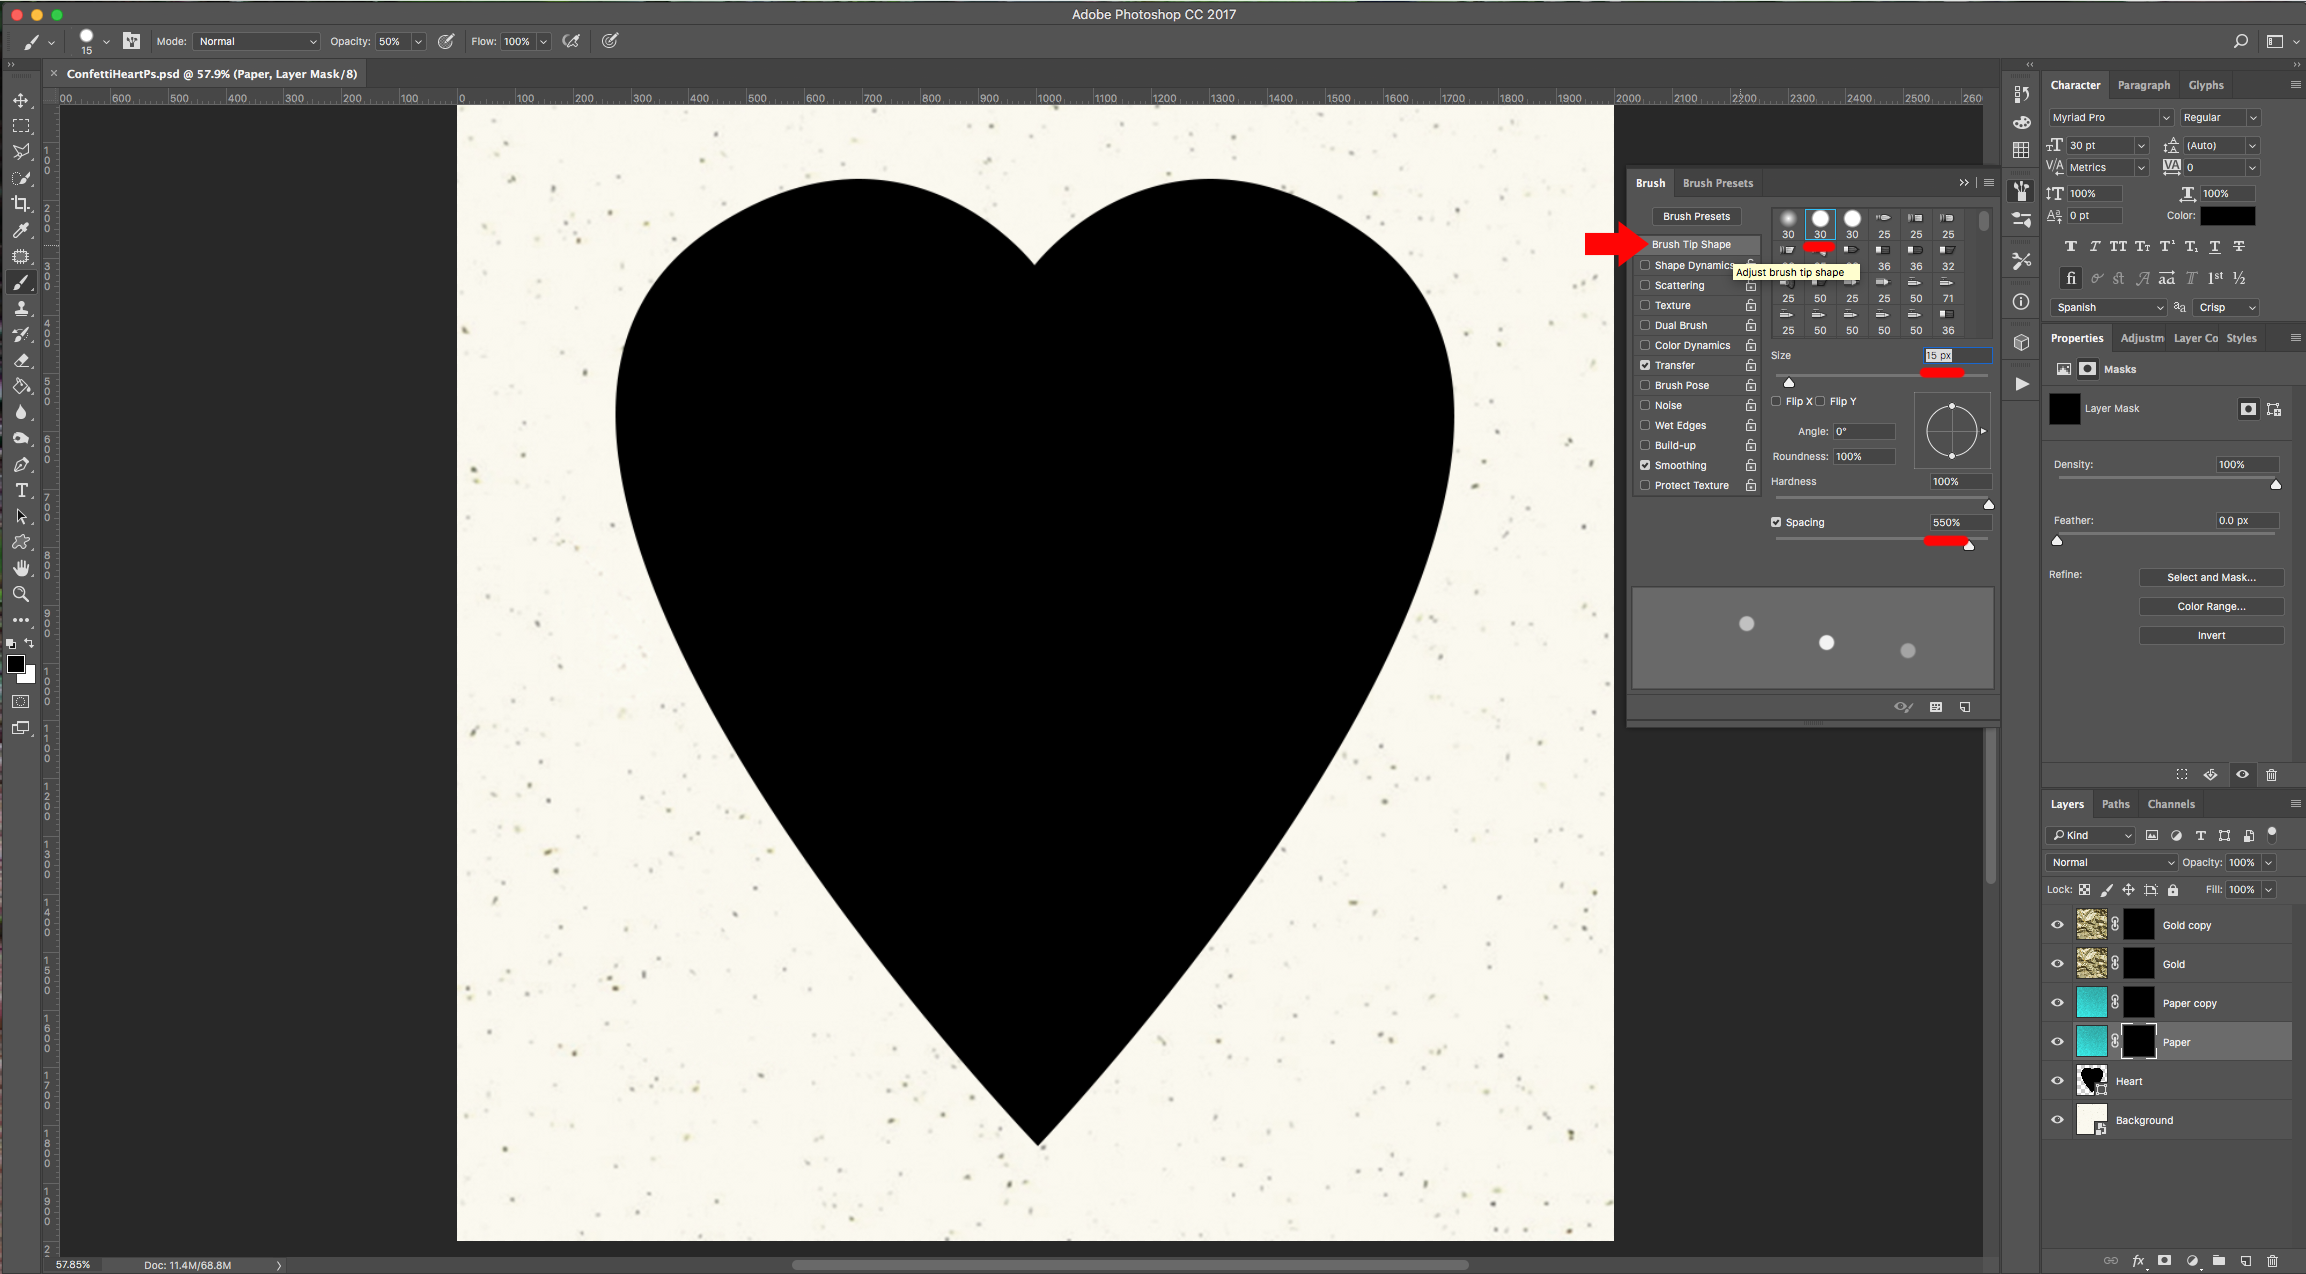
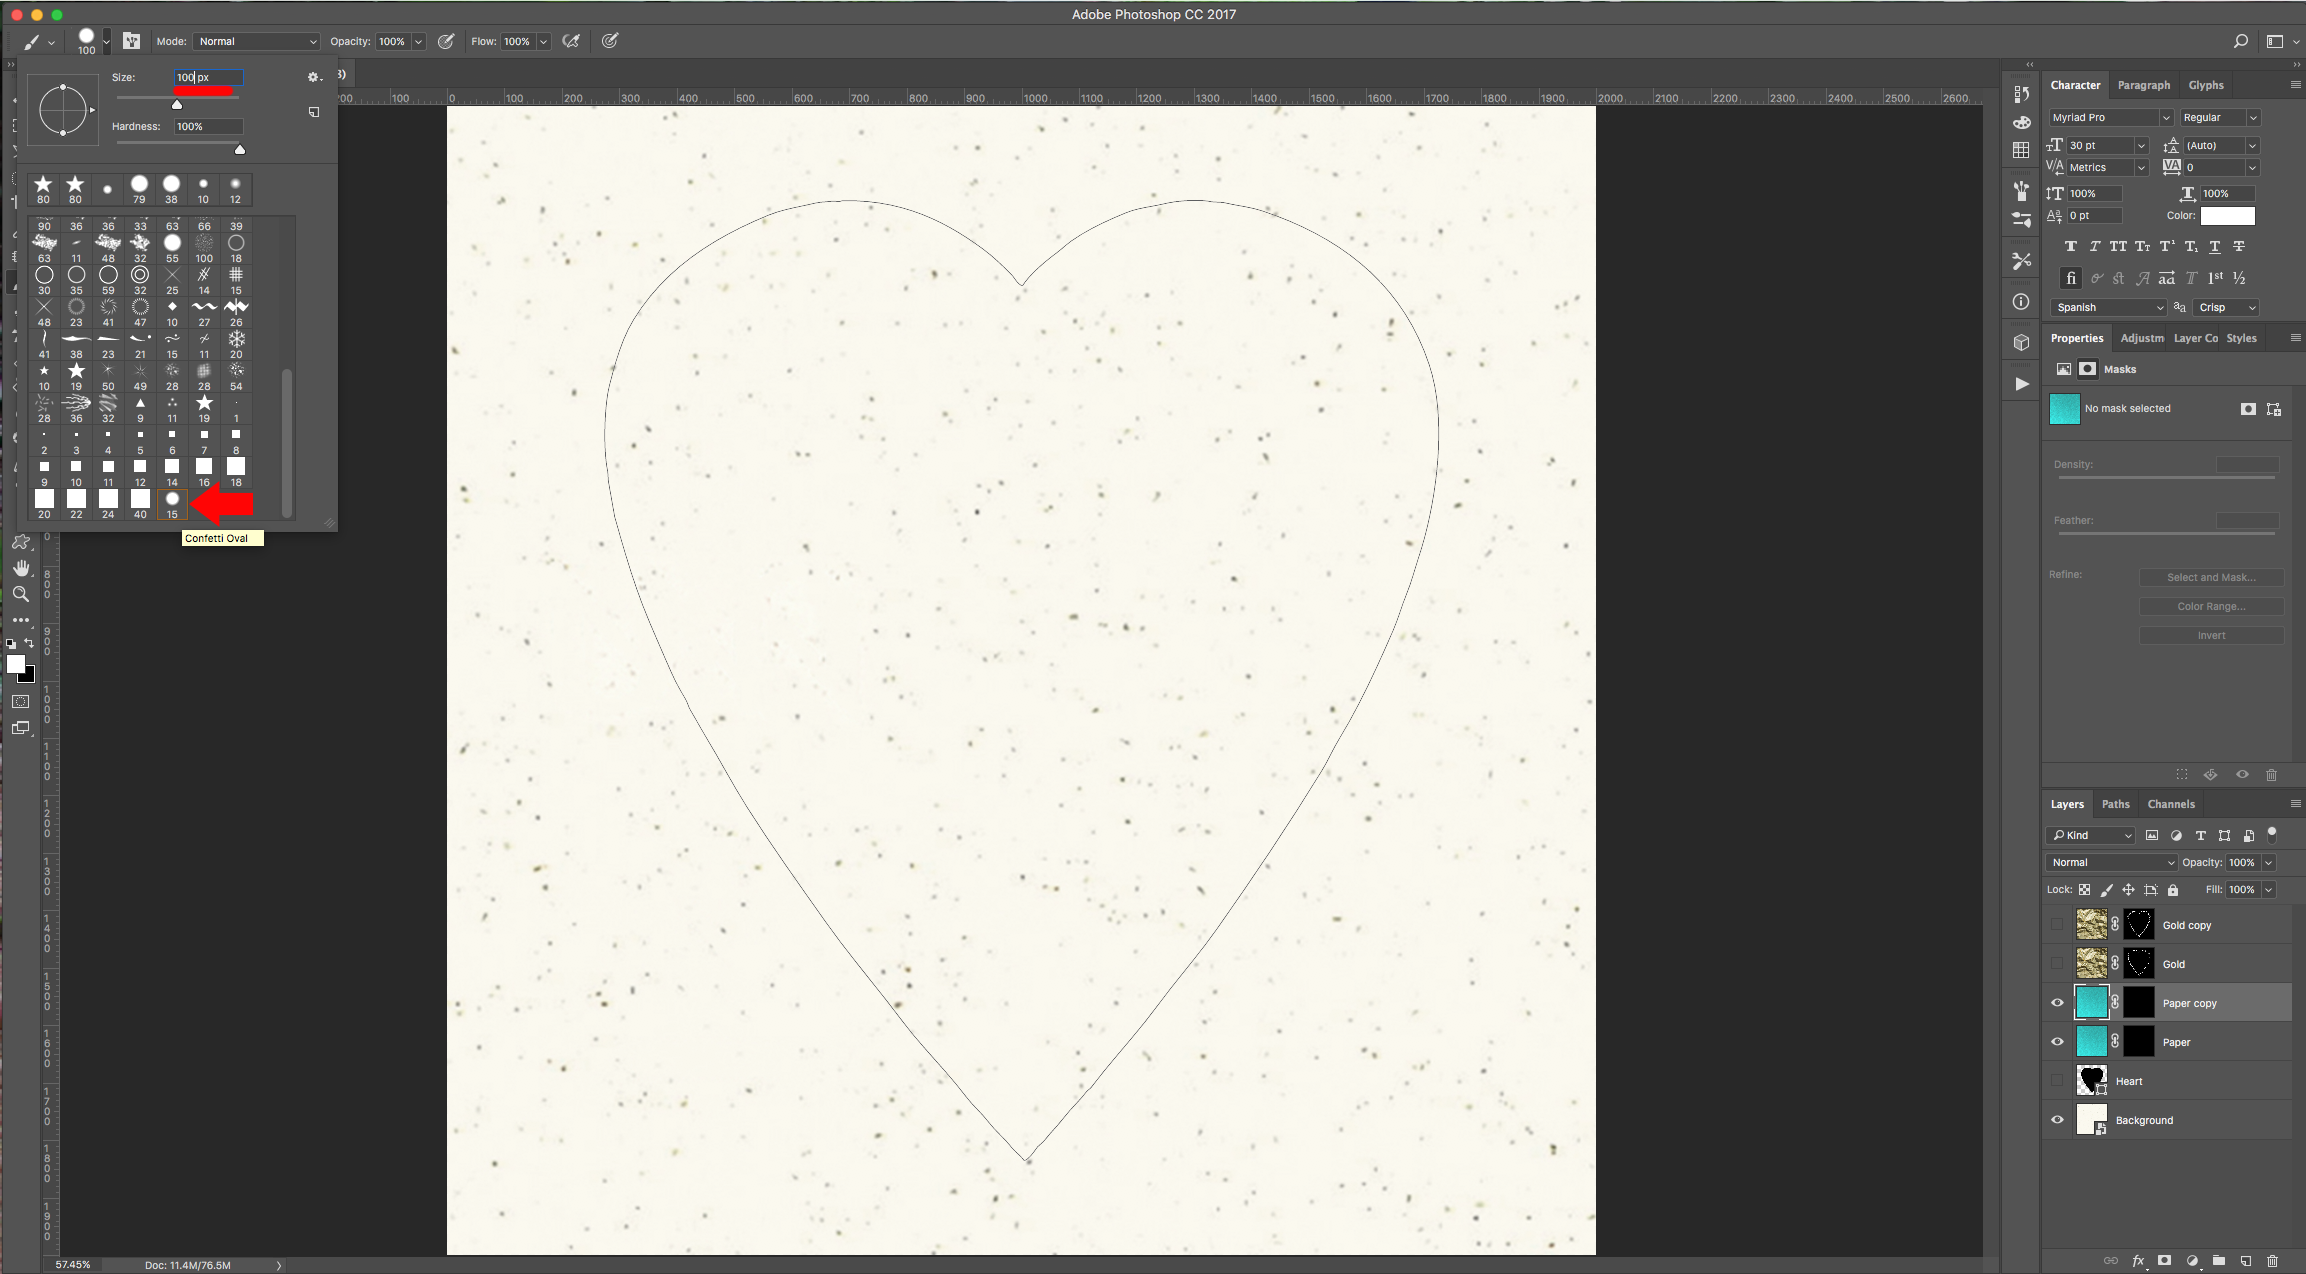
7 - Select the “Brush Tool” (B), open the “Brush Panel” and use the following values to create a “New Brush”:
Brush Tip Shape:
Shape Dynamics:
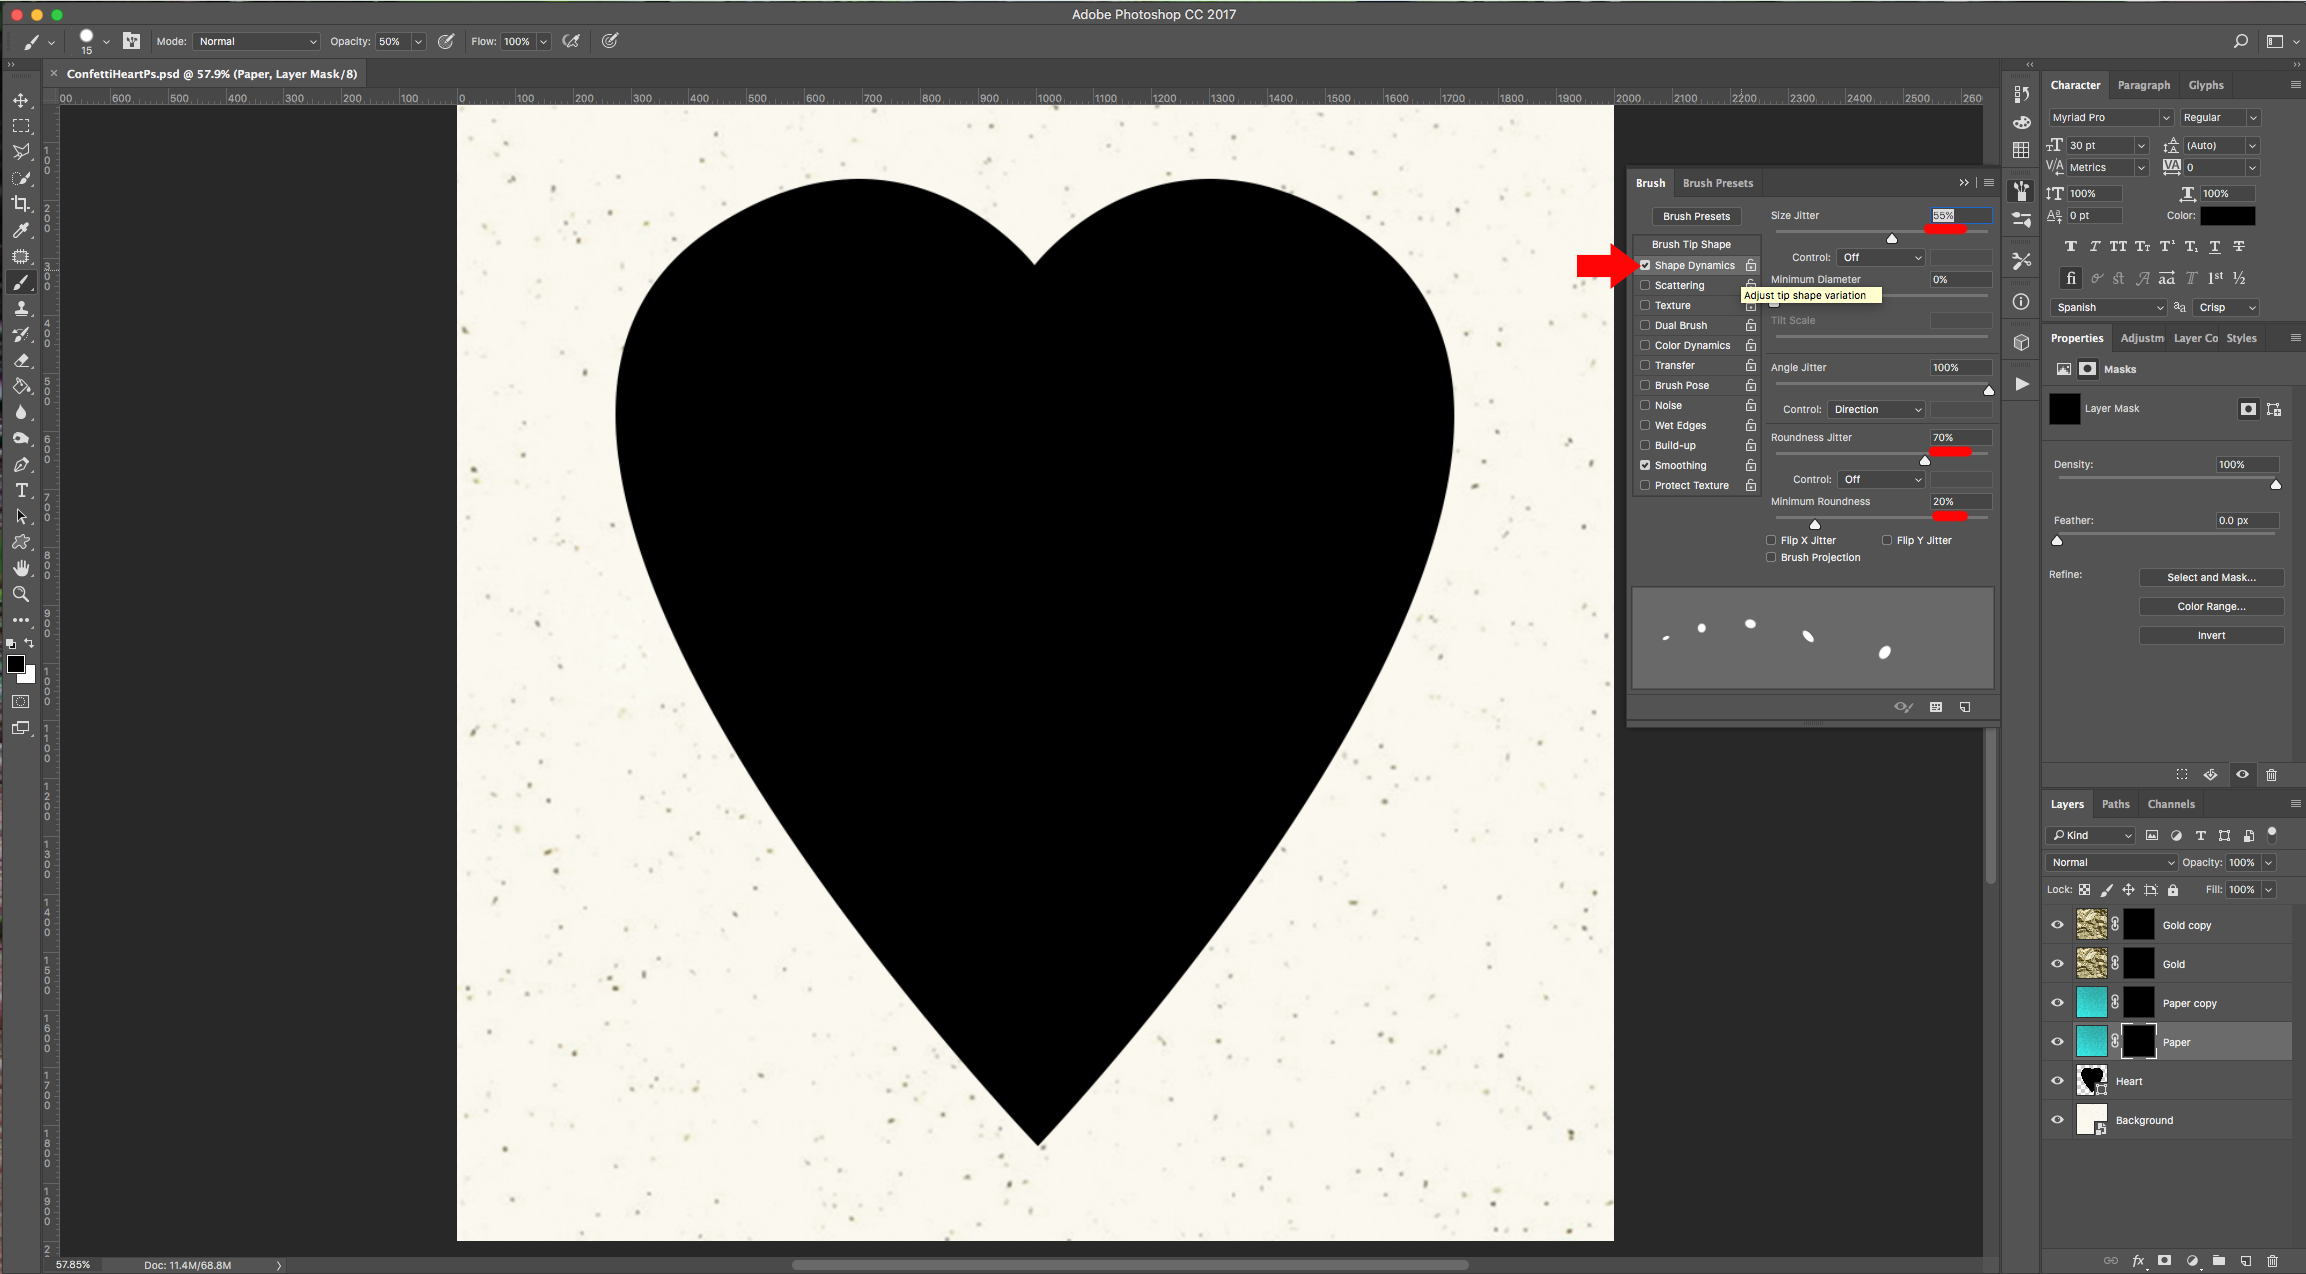
(Make sure “Smoothing” is checked)
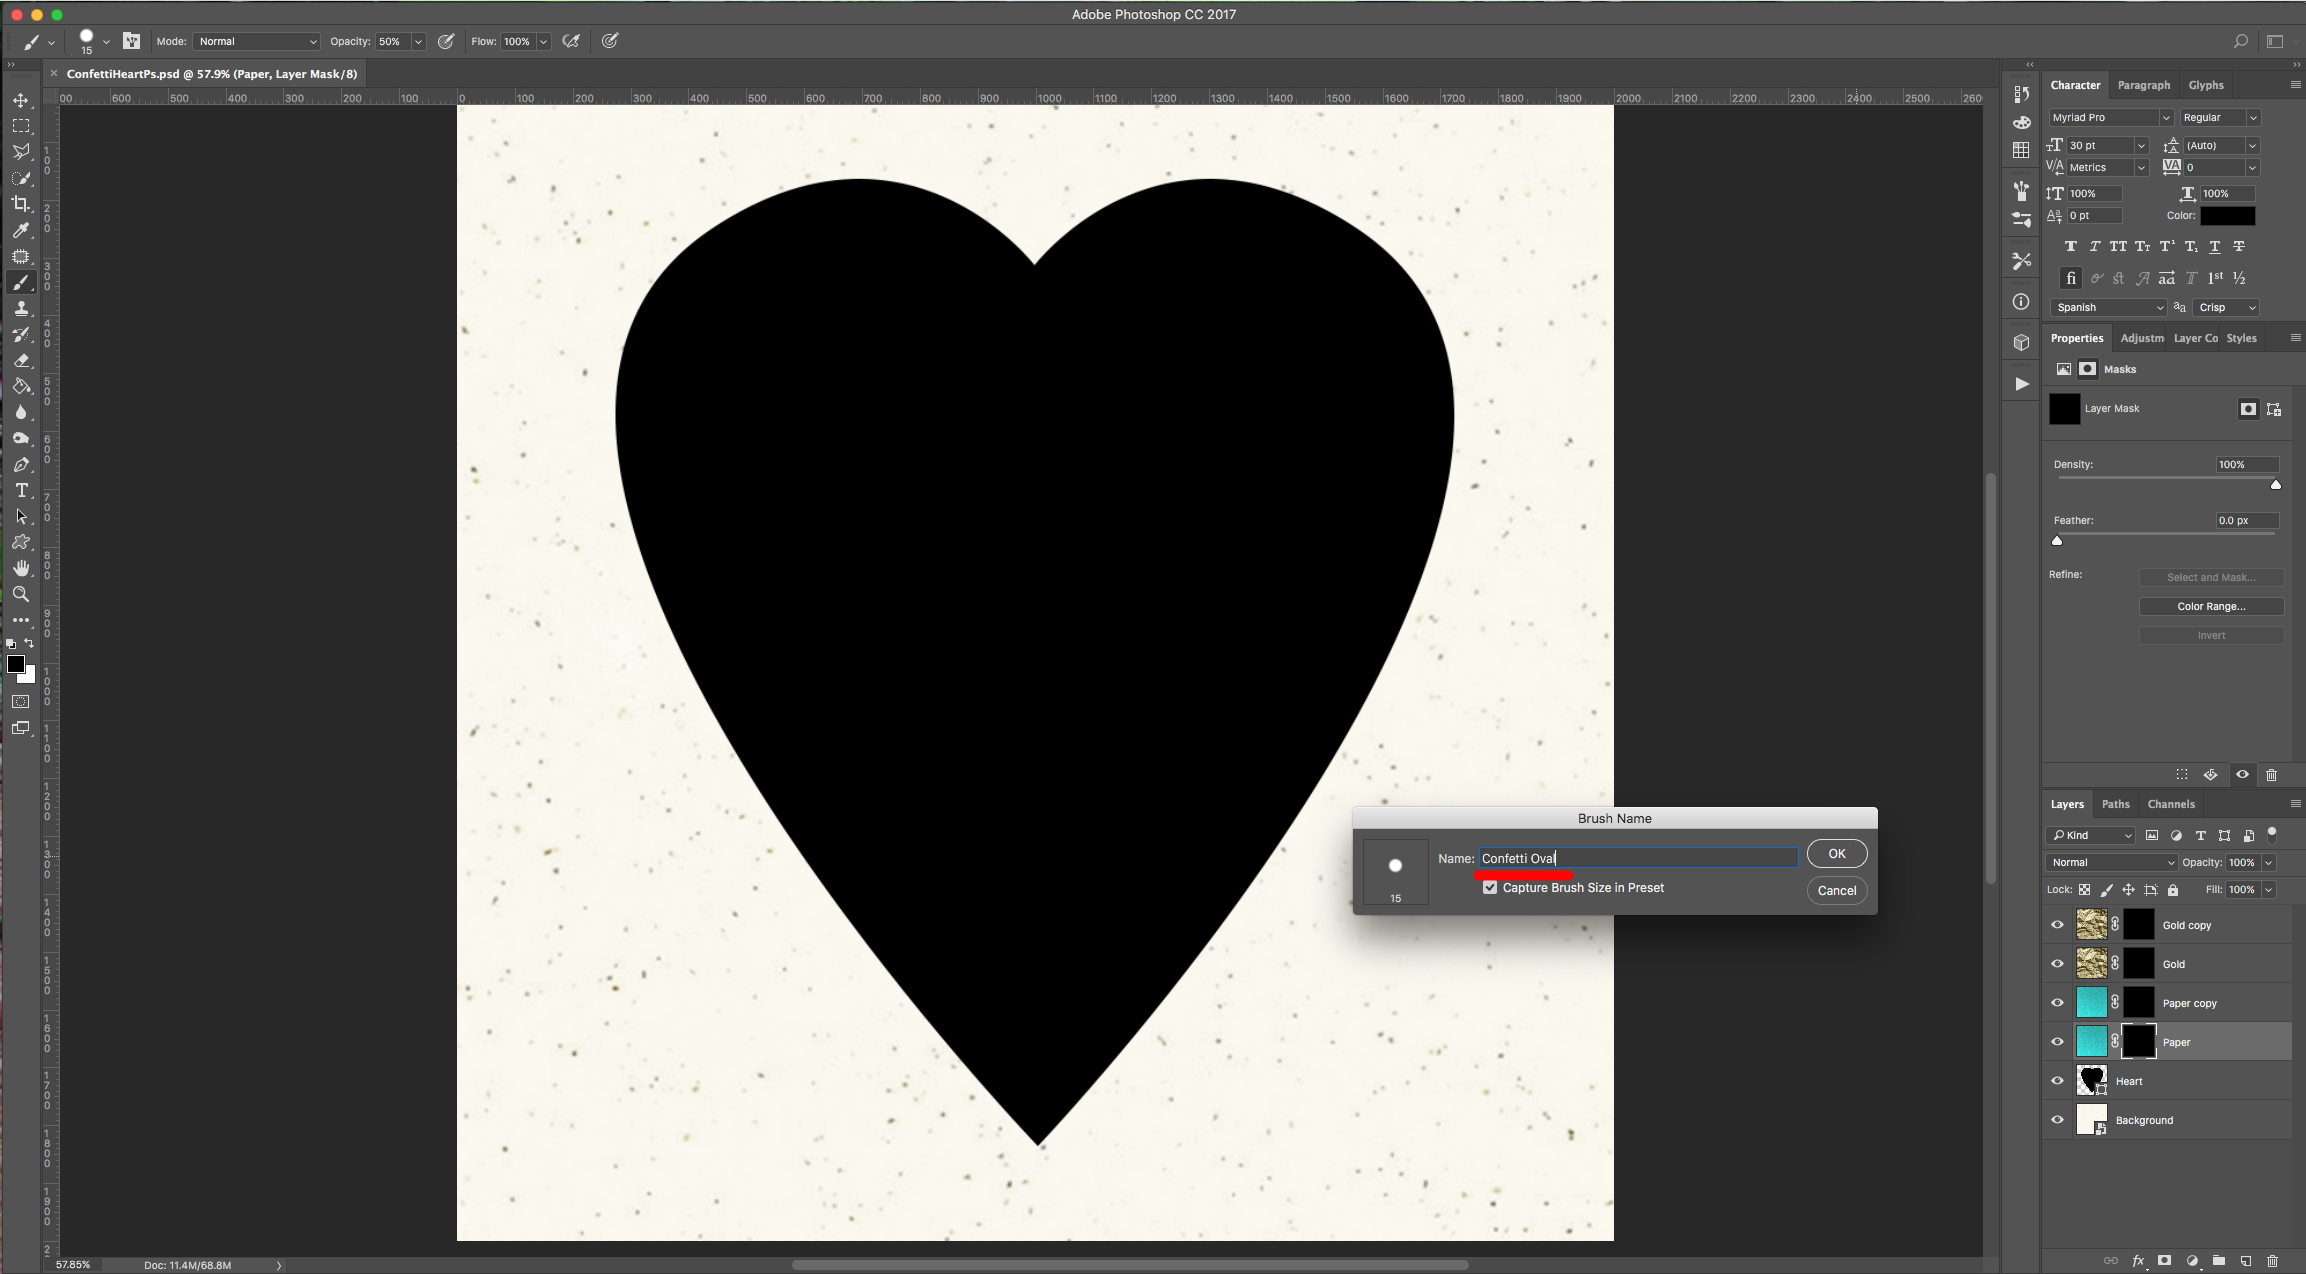
8 - Click on the “Create New Brush” button at the bottom of the “Brush” Panel and name this brush “Confetti Oval”.

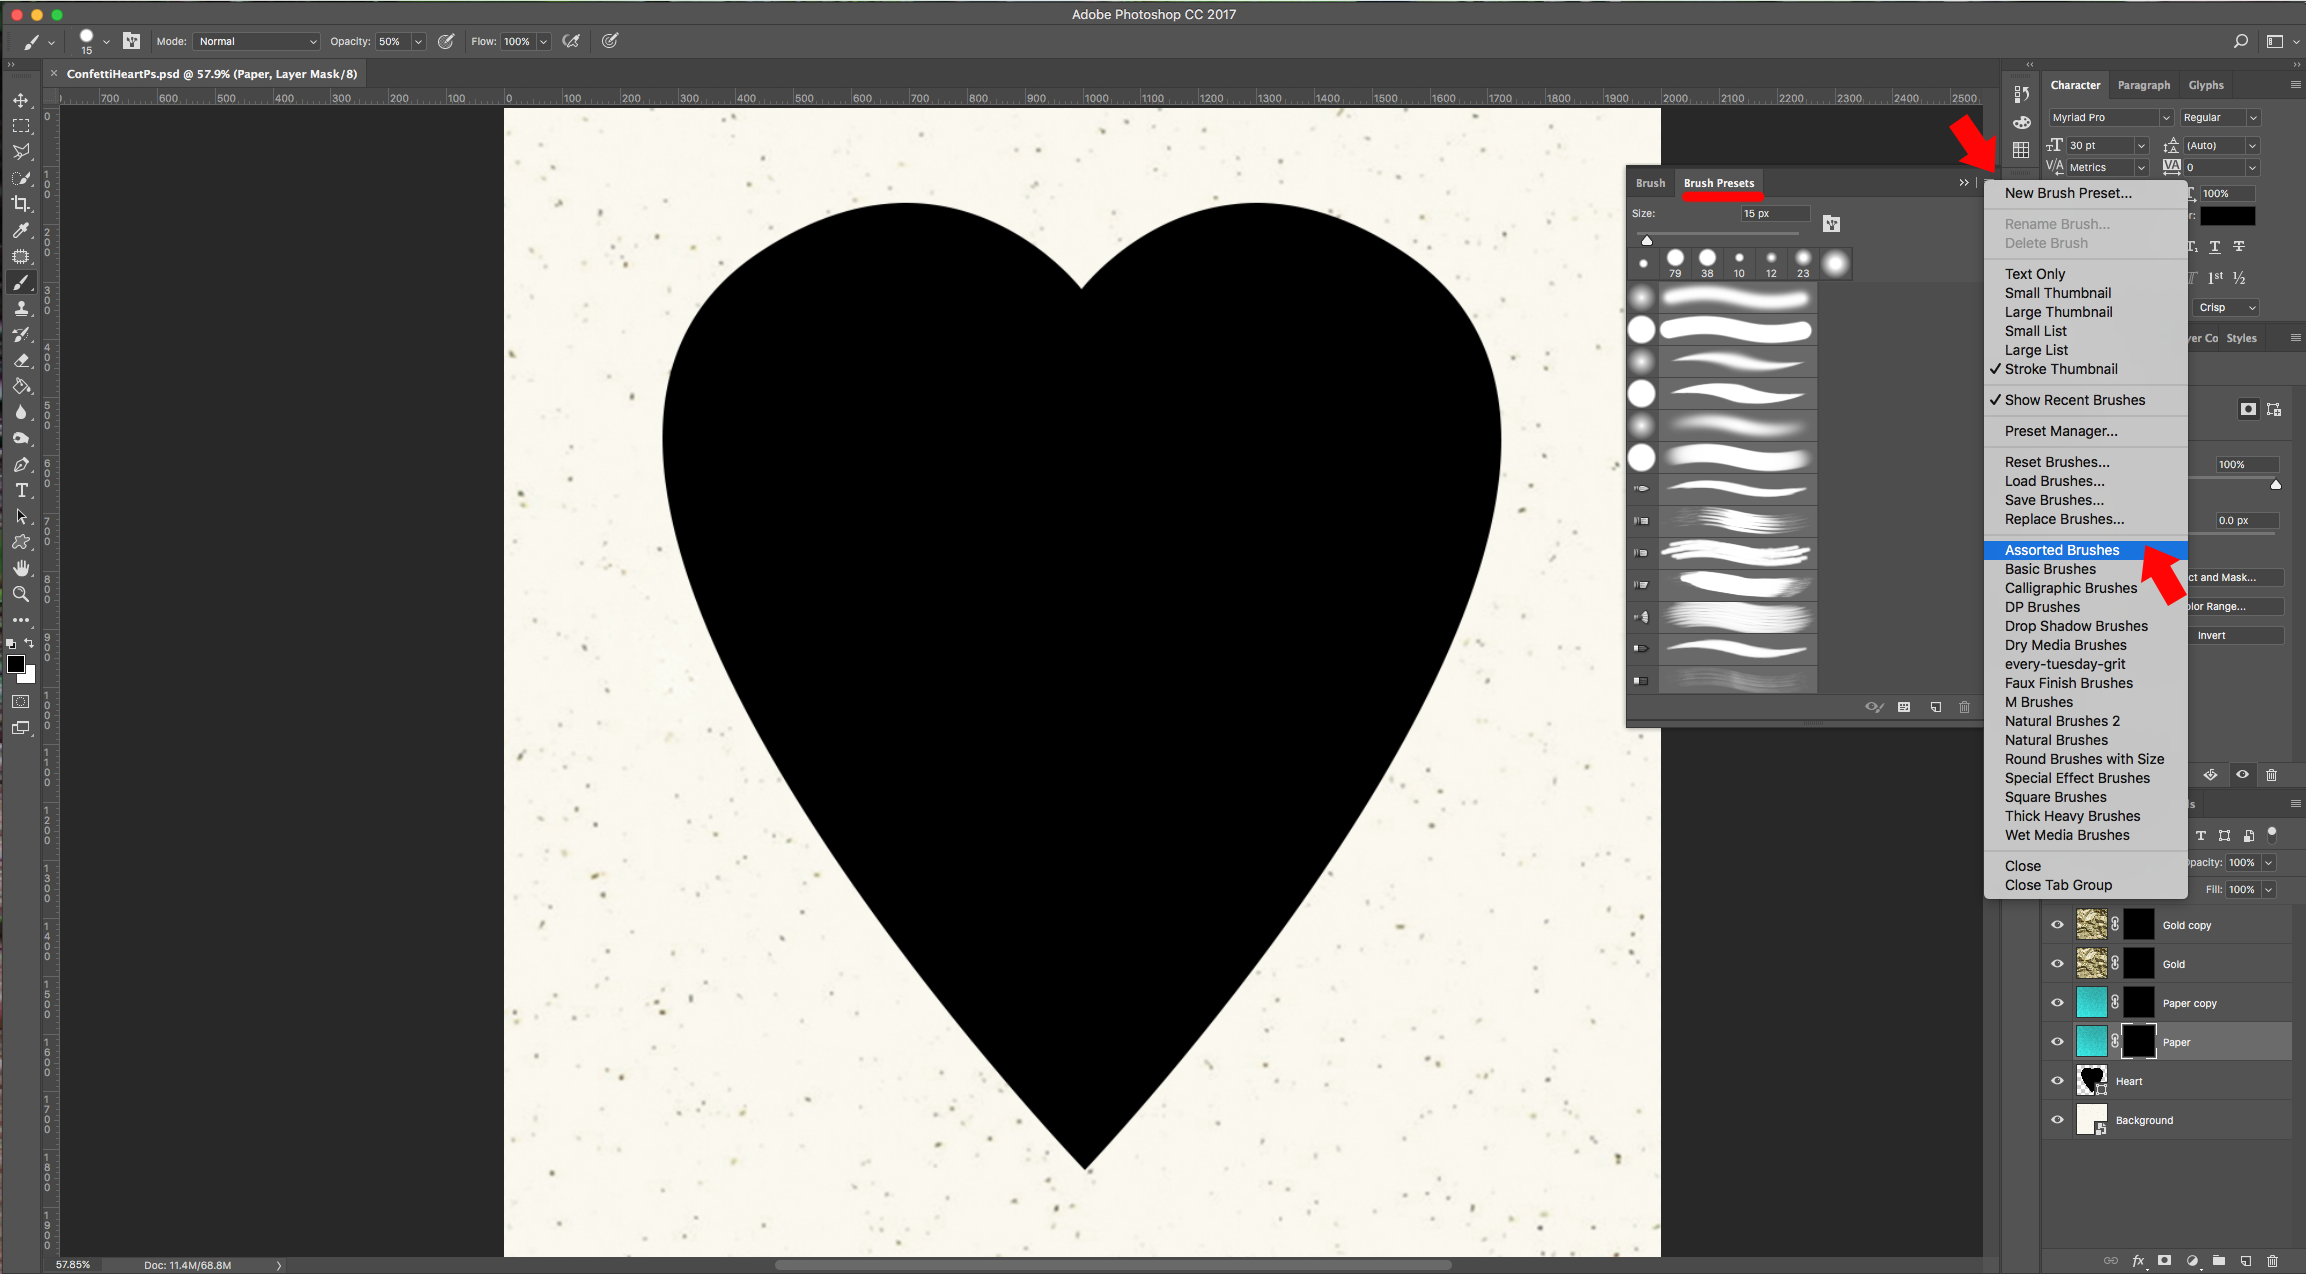
9 - Now we will create a “Star” shaped brush. First, go to the “Brush Presets” Panel, click on the small “Menu” icon on the Top-Right and choose “Assorted Brushes” to load them and click “Ok” if you want the selected brushes to replace the existing ones or “Append” if you want to add them.
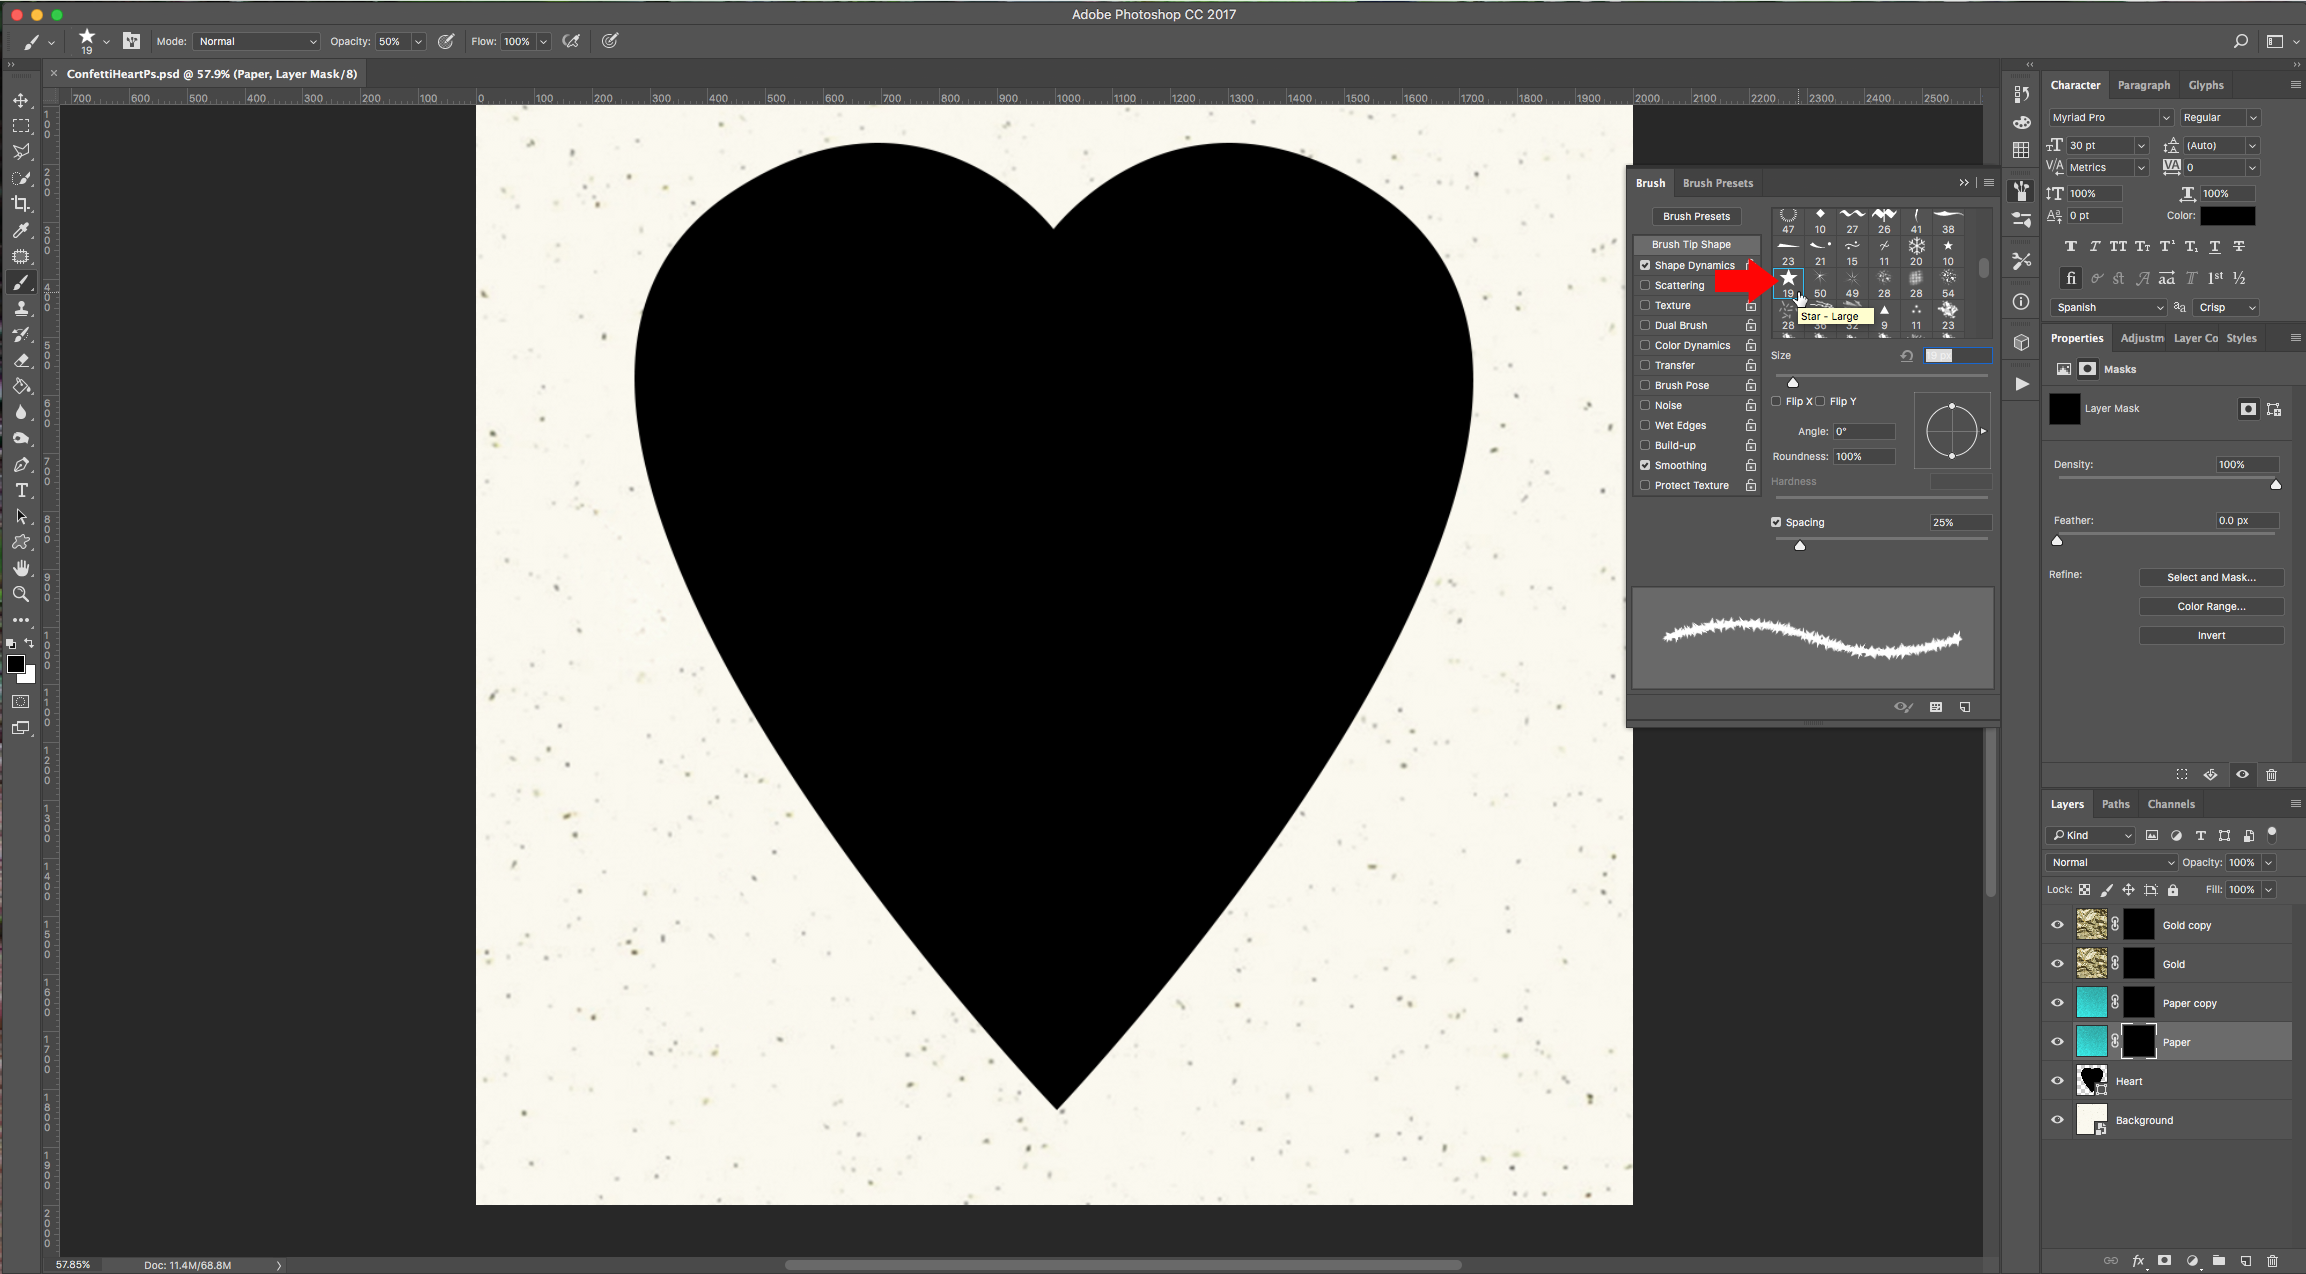
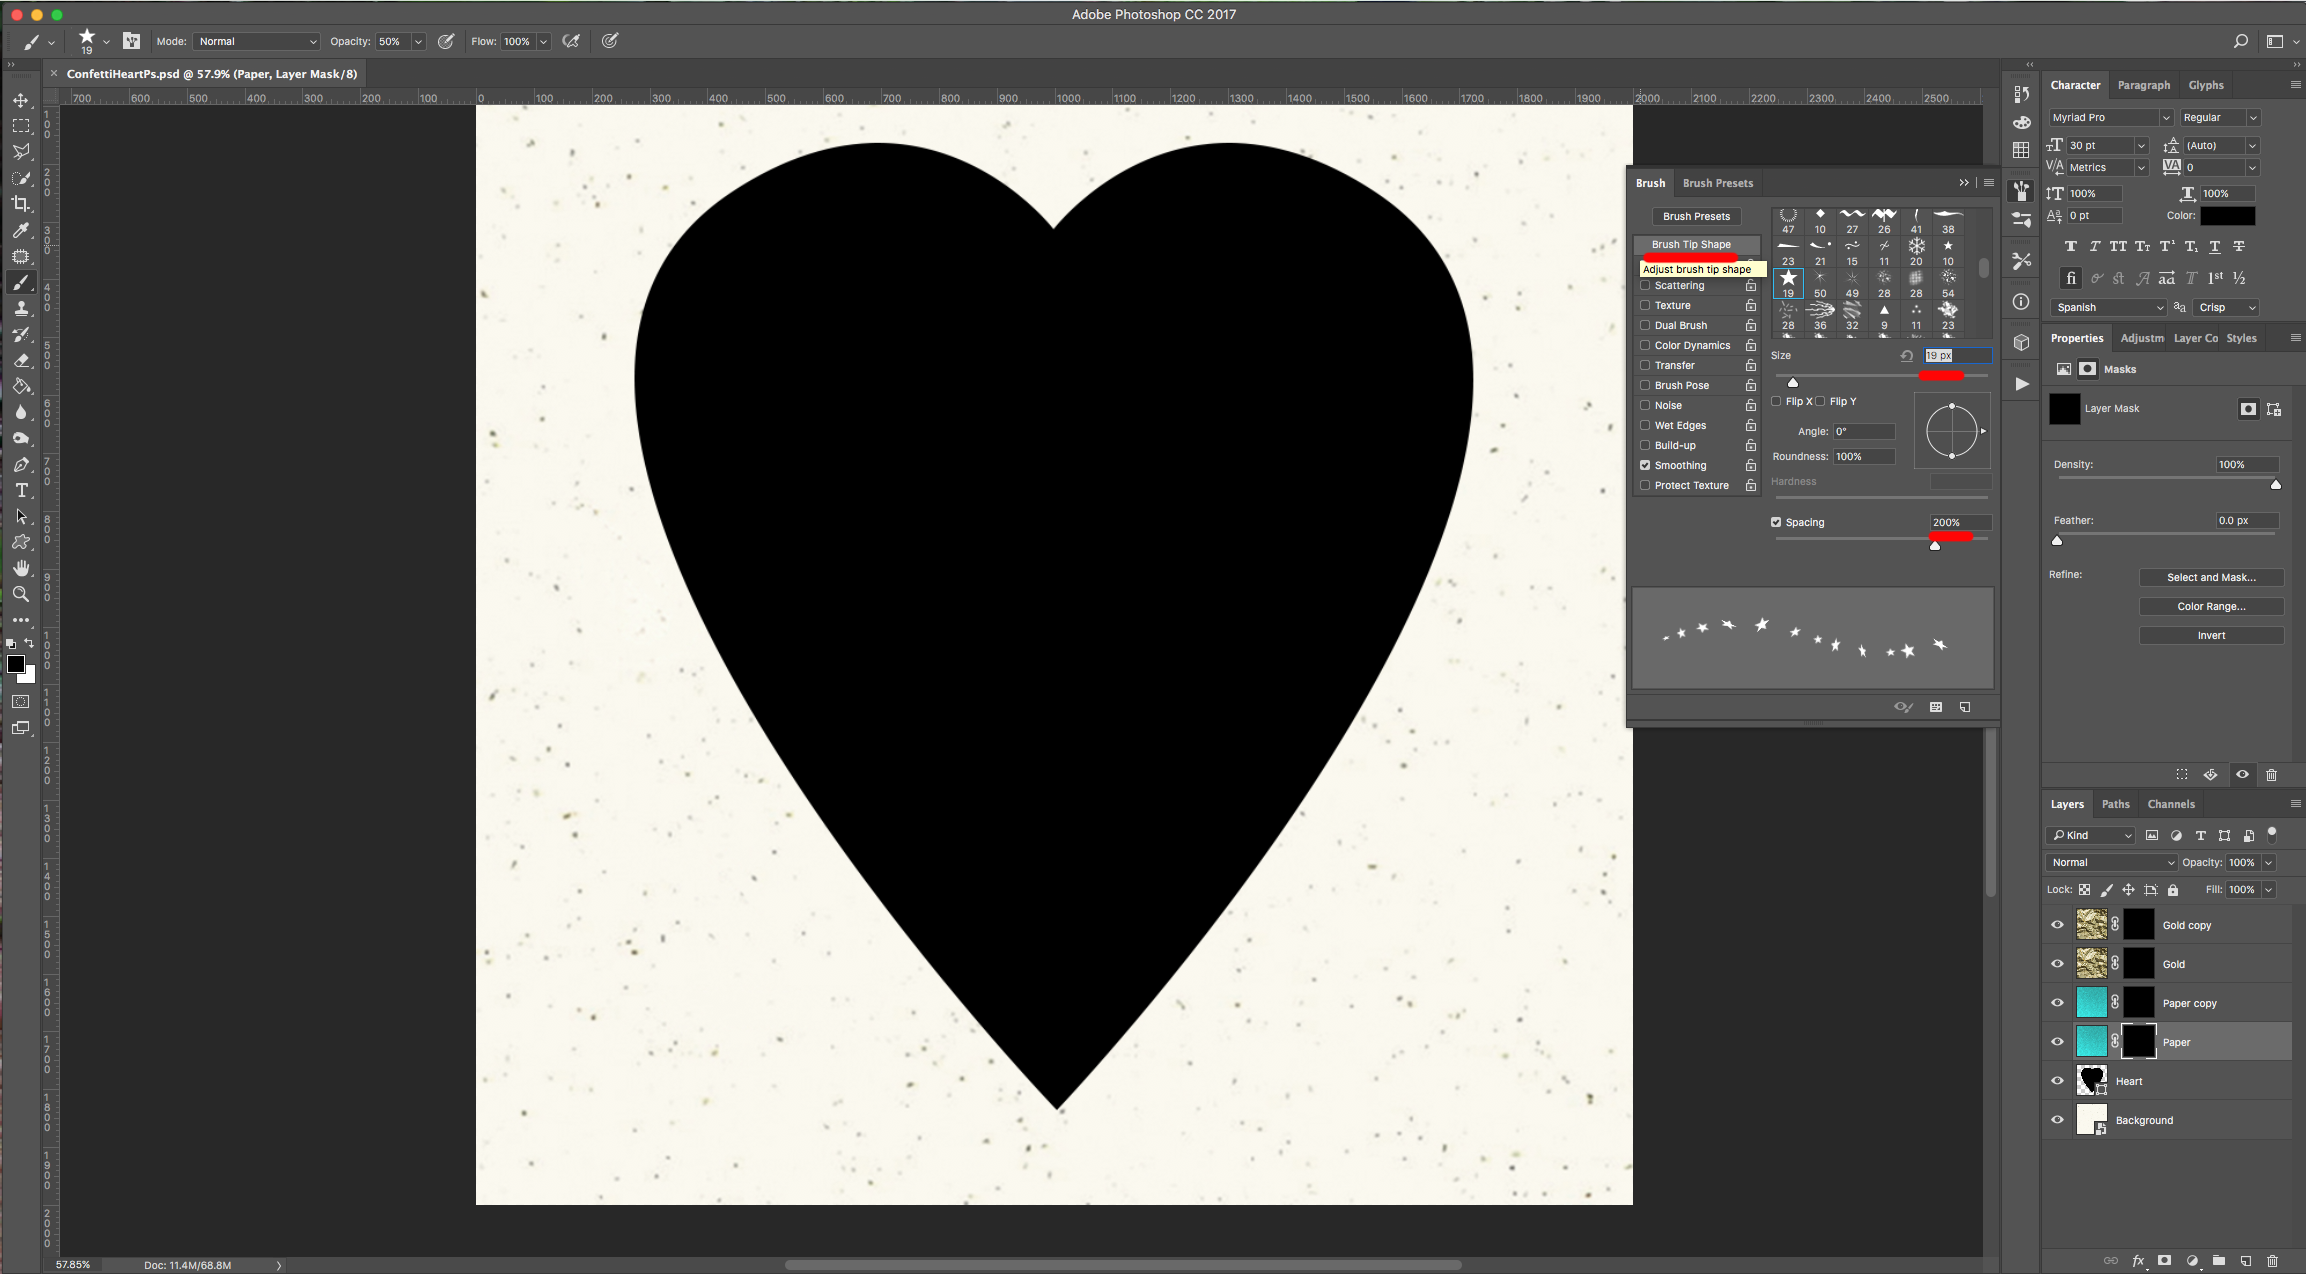
10 - Back in the “Brush” Panel, choose “Star - Large” and use the following values:
Brush Tip Shape:
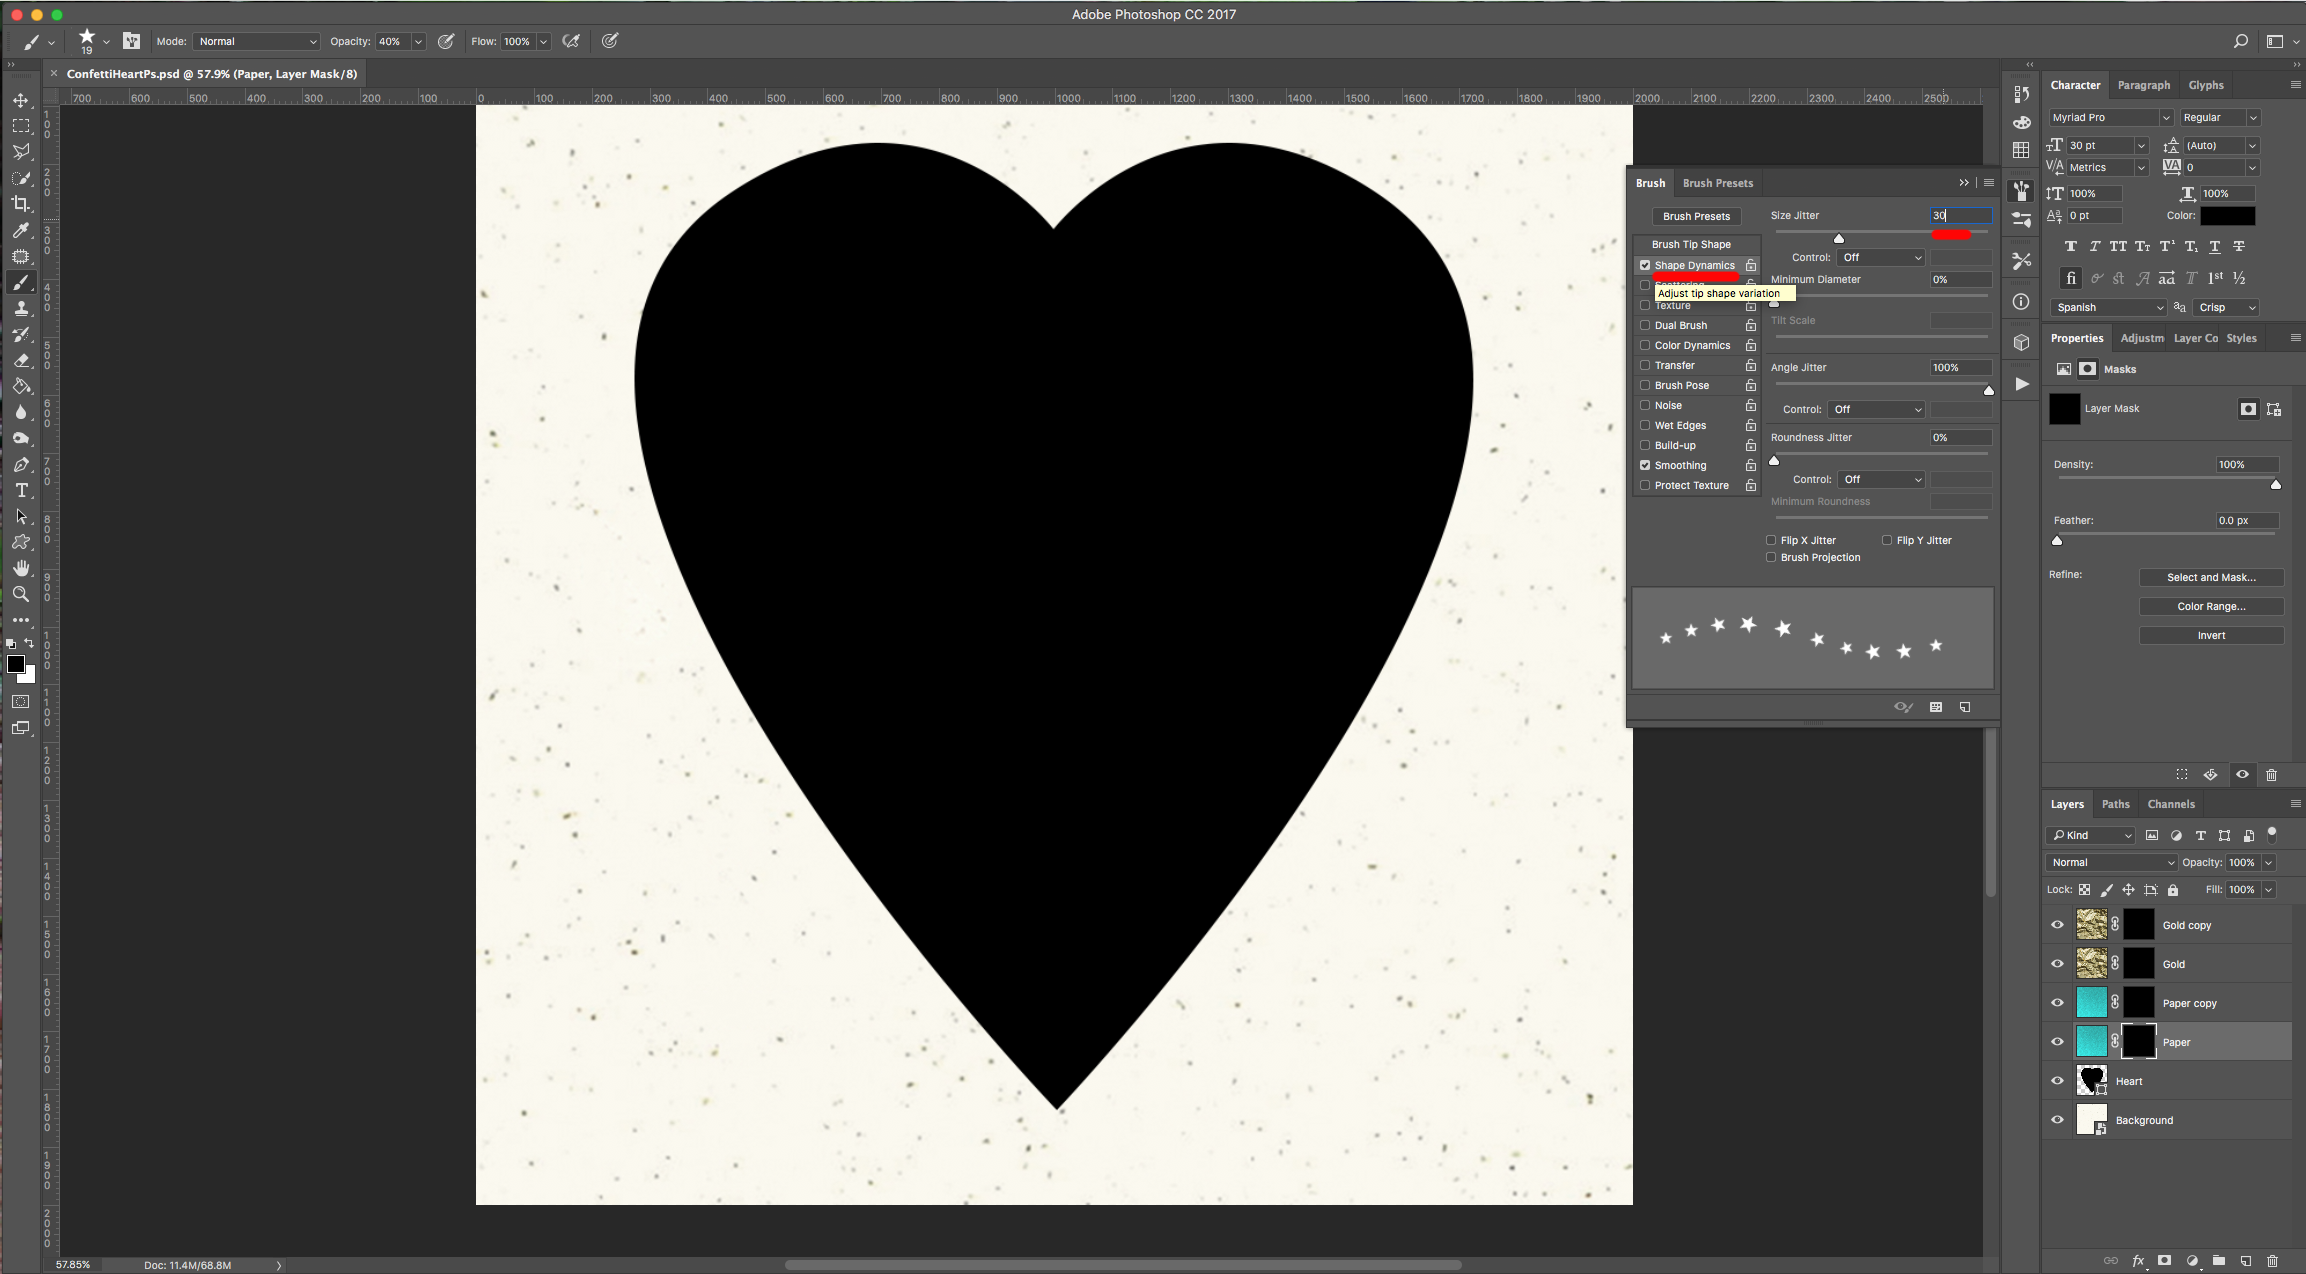
Shape Dynamics:
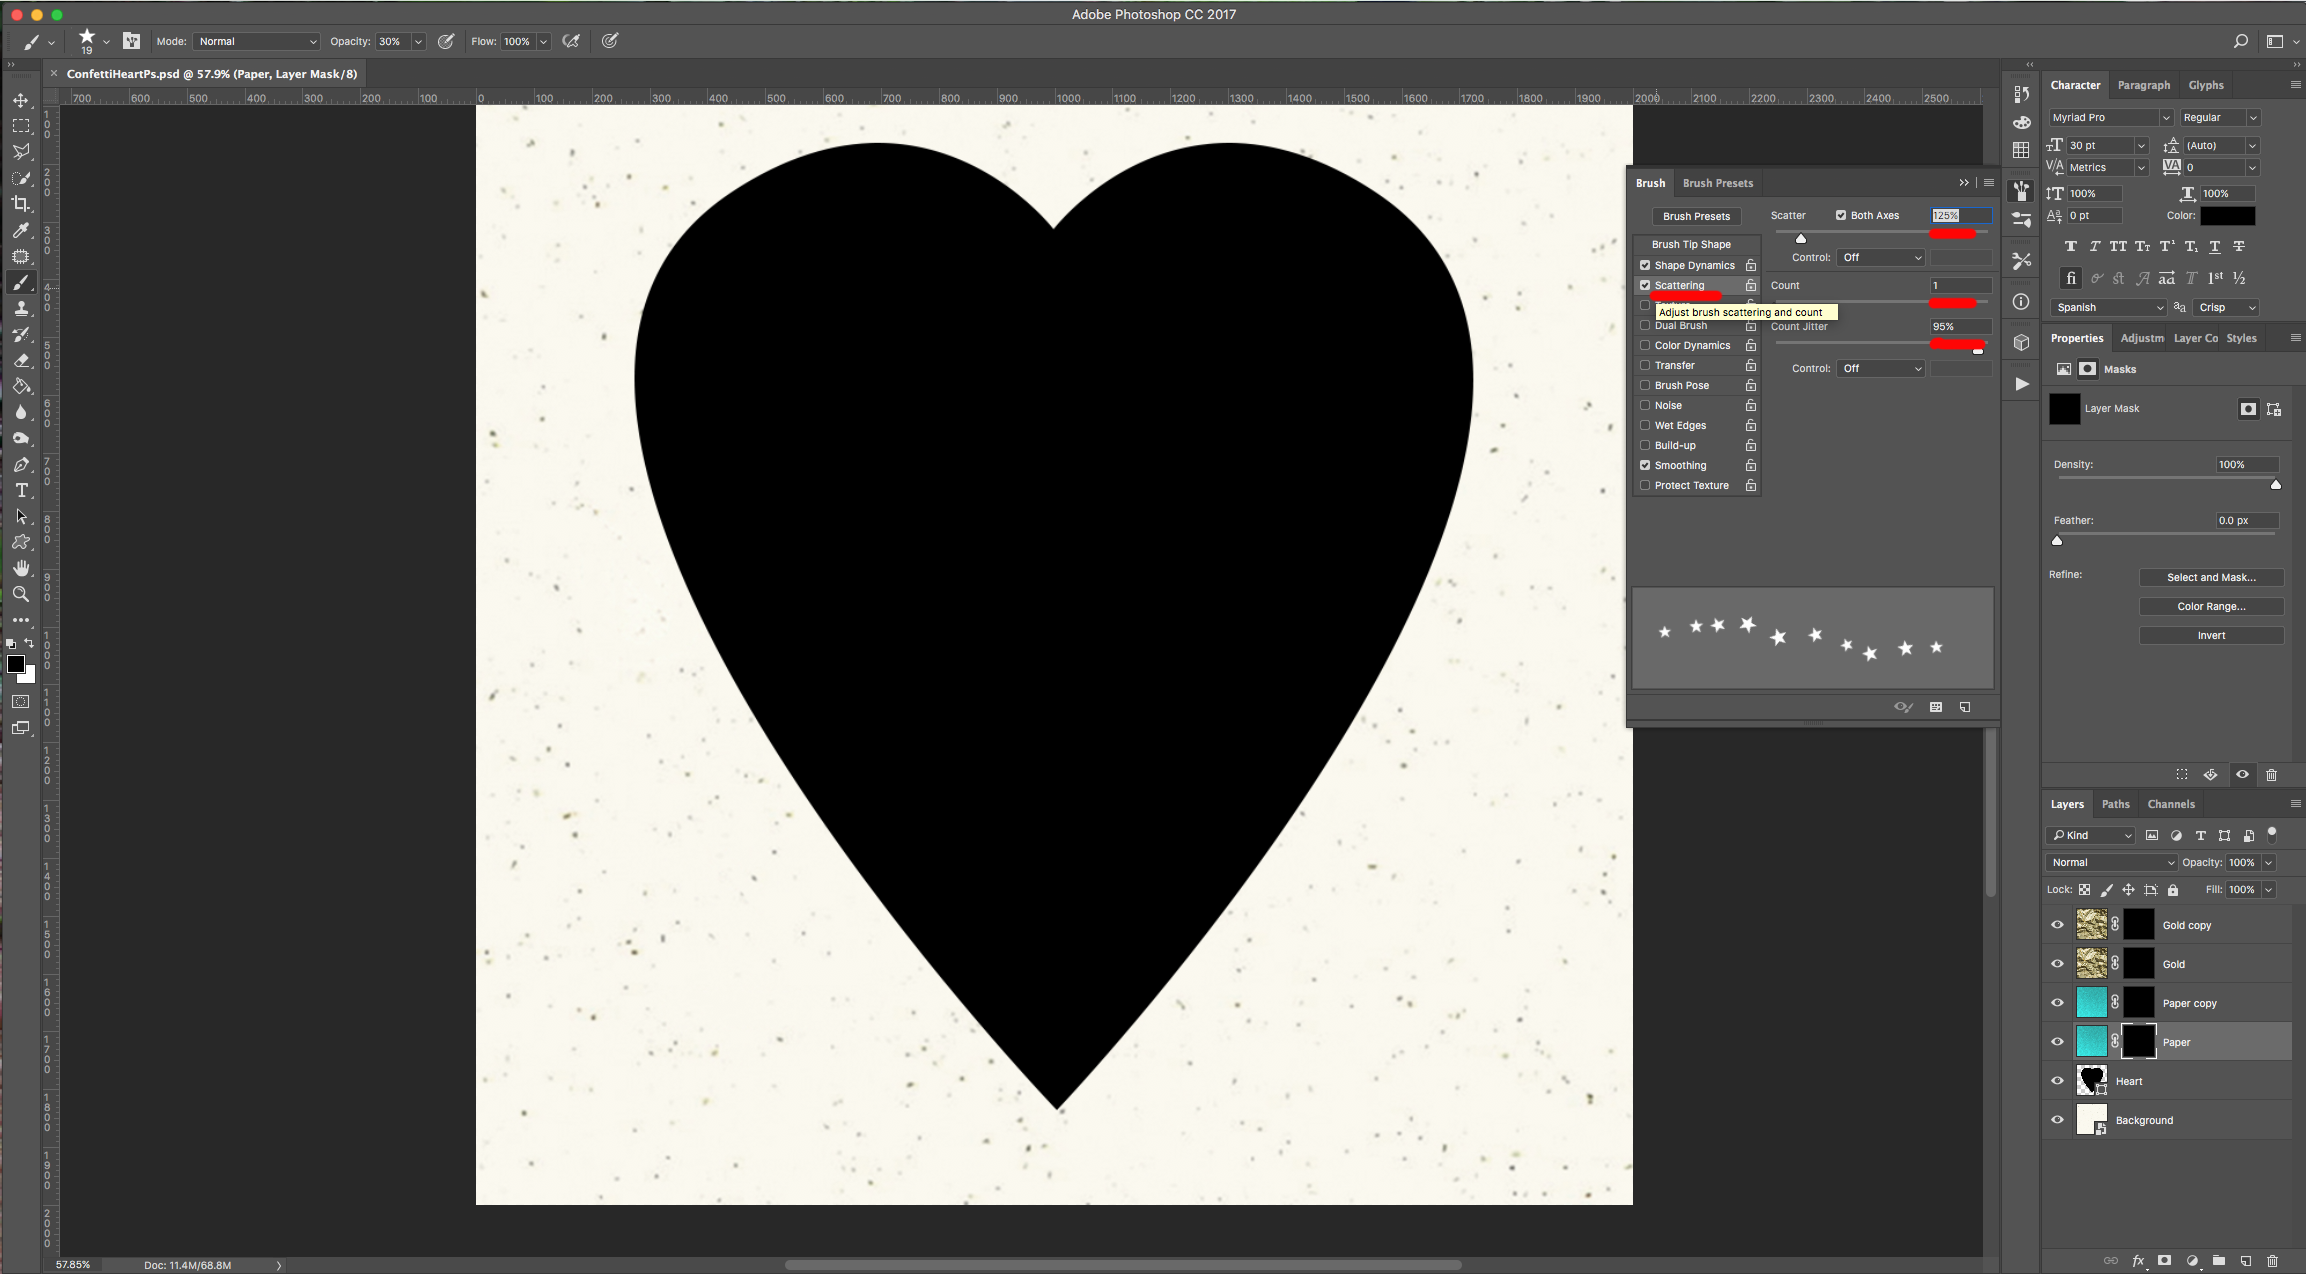
Scattering:
(Make sure “Smoothing” is checked)
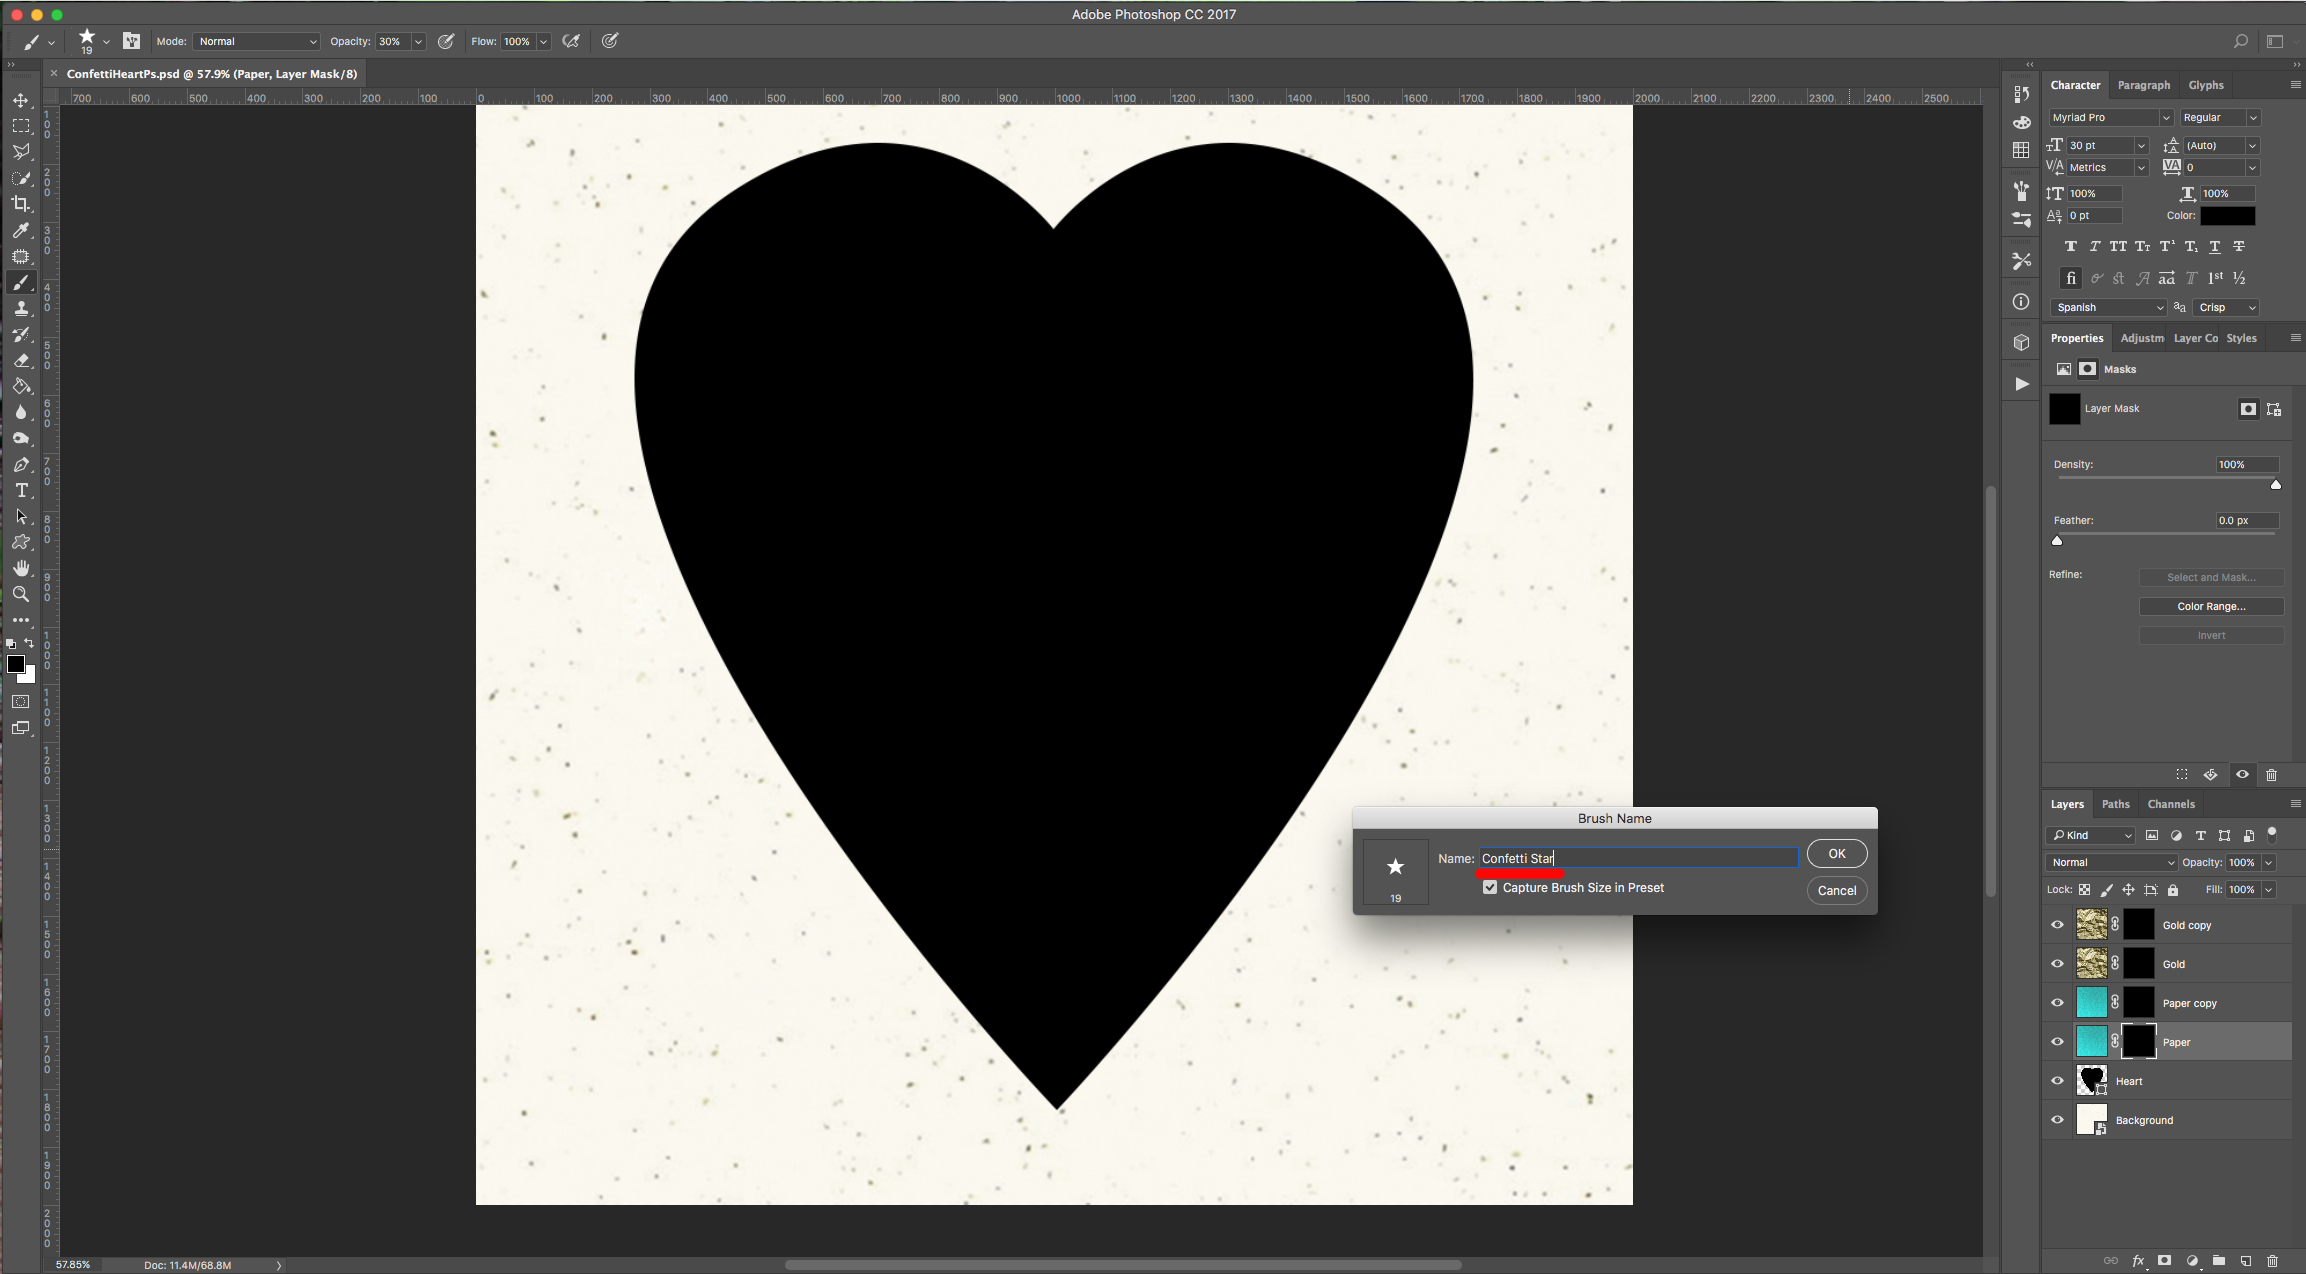
Name this brush “Confetti Star”.
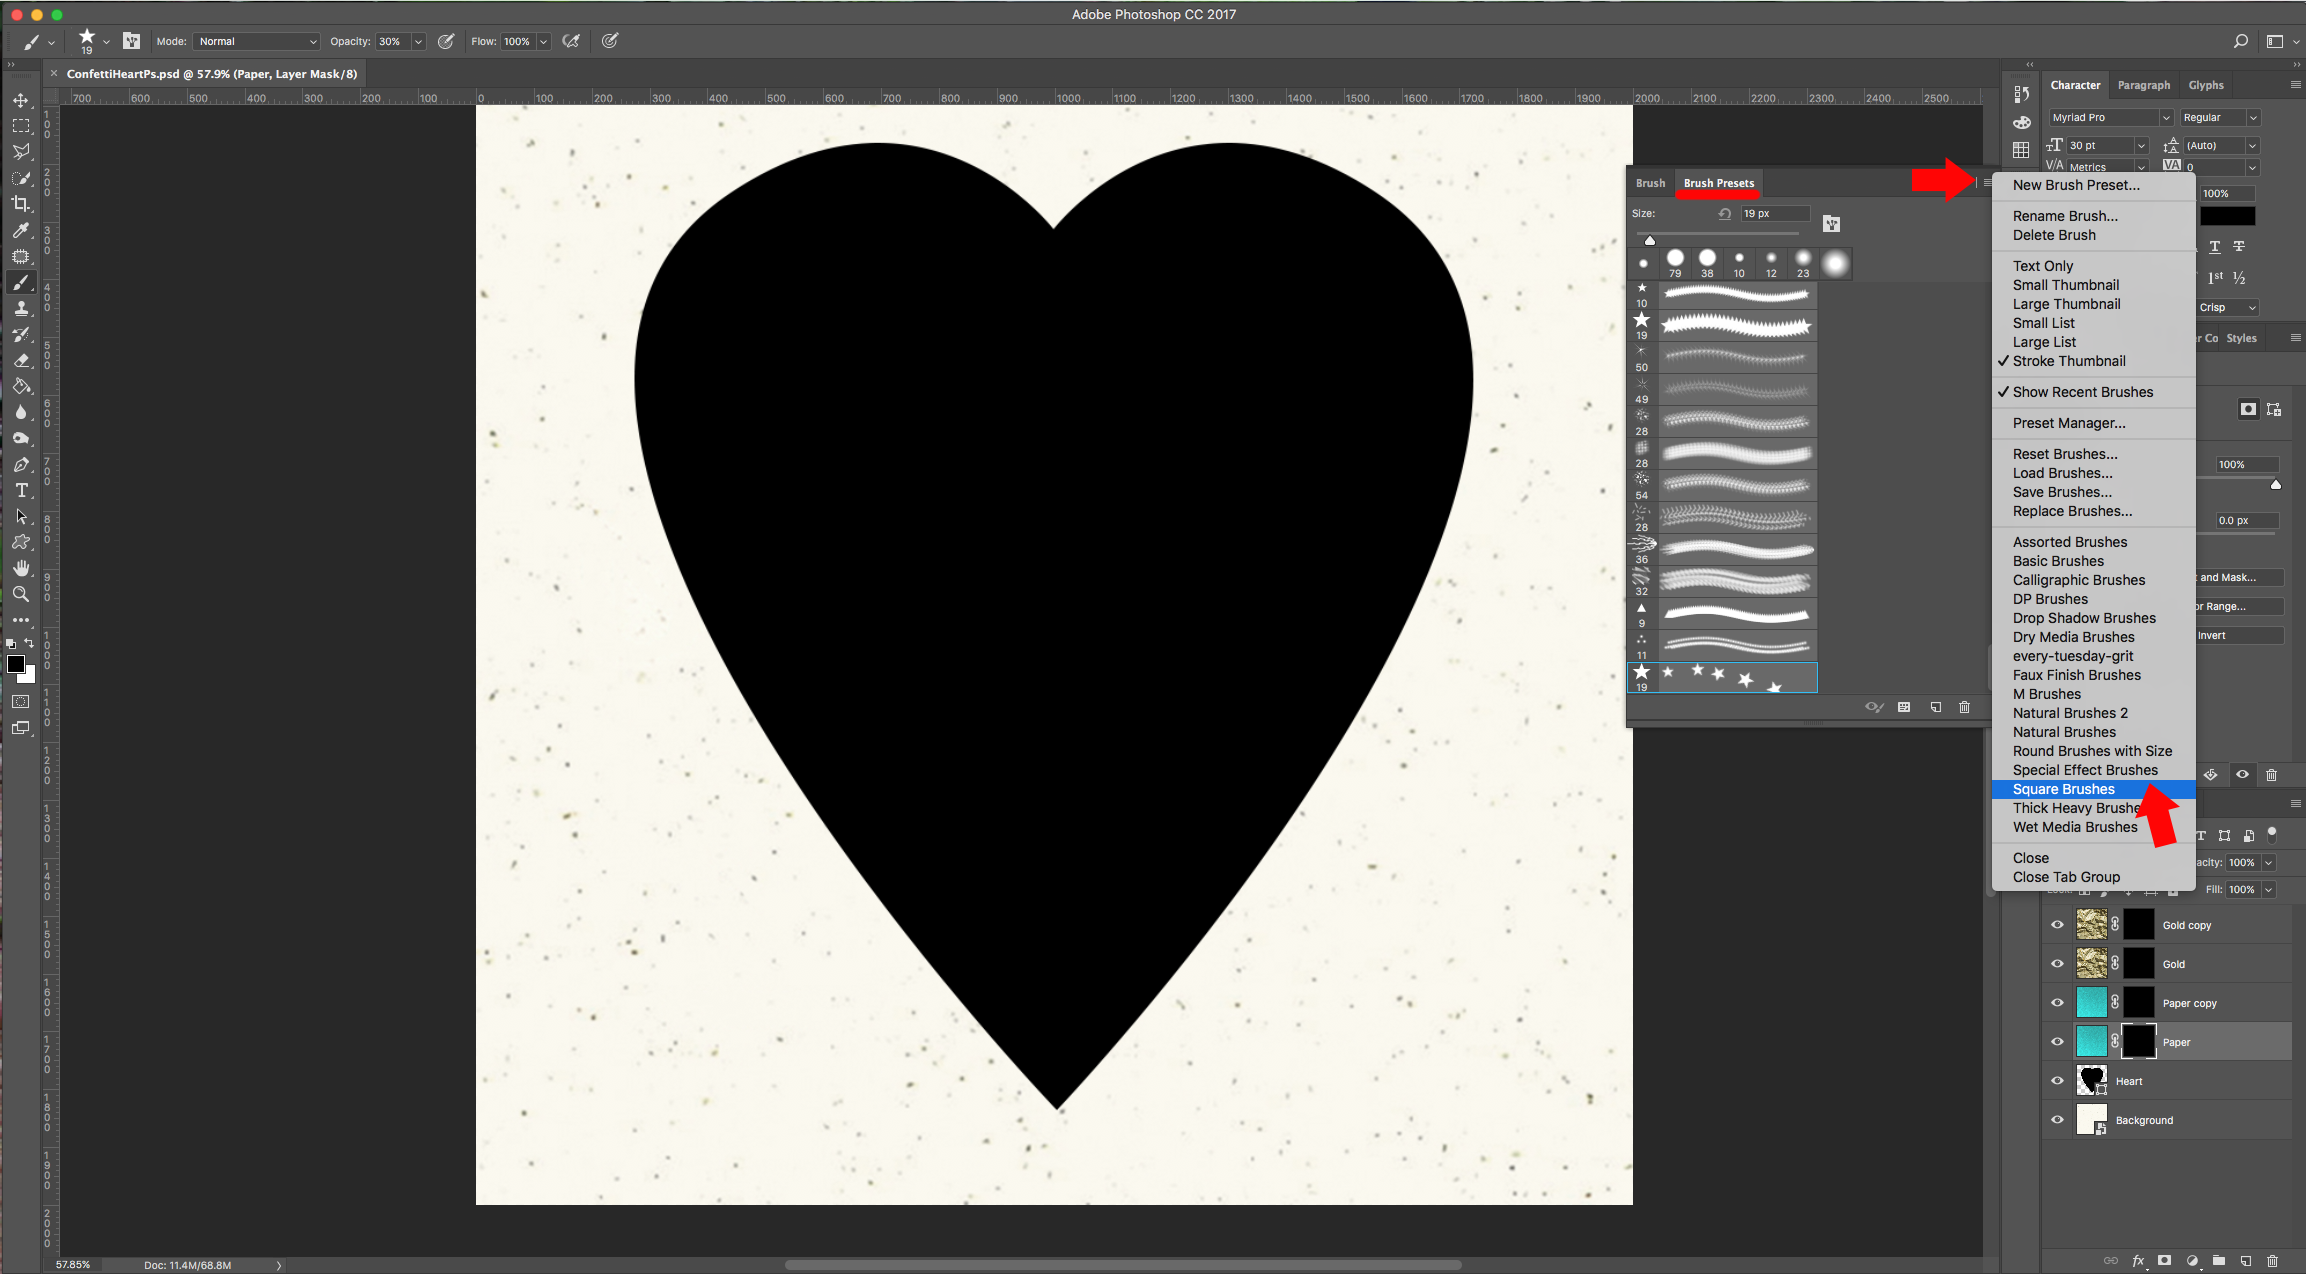
11 - We are going to create a “Squared” brush. Go to the “Brush Presets” Panel, click on the small “Menu” icon on the Top-Right and choose “Square Brushes” to load them and click “Ok” if you want the selected brushes to replace the existing ones or “Append” if you want to add them.
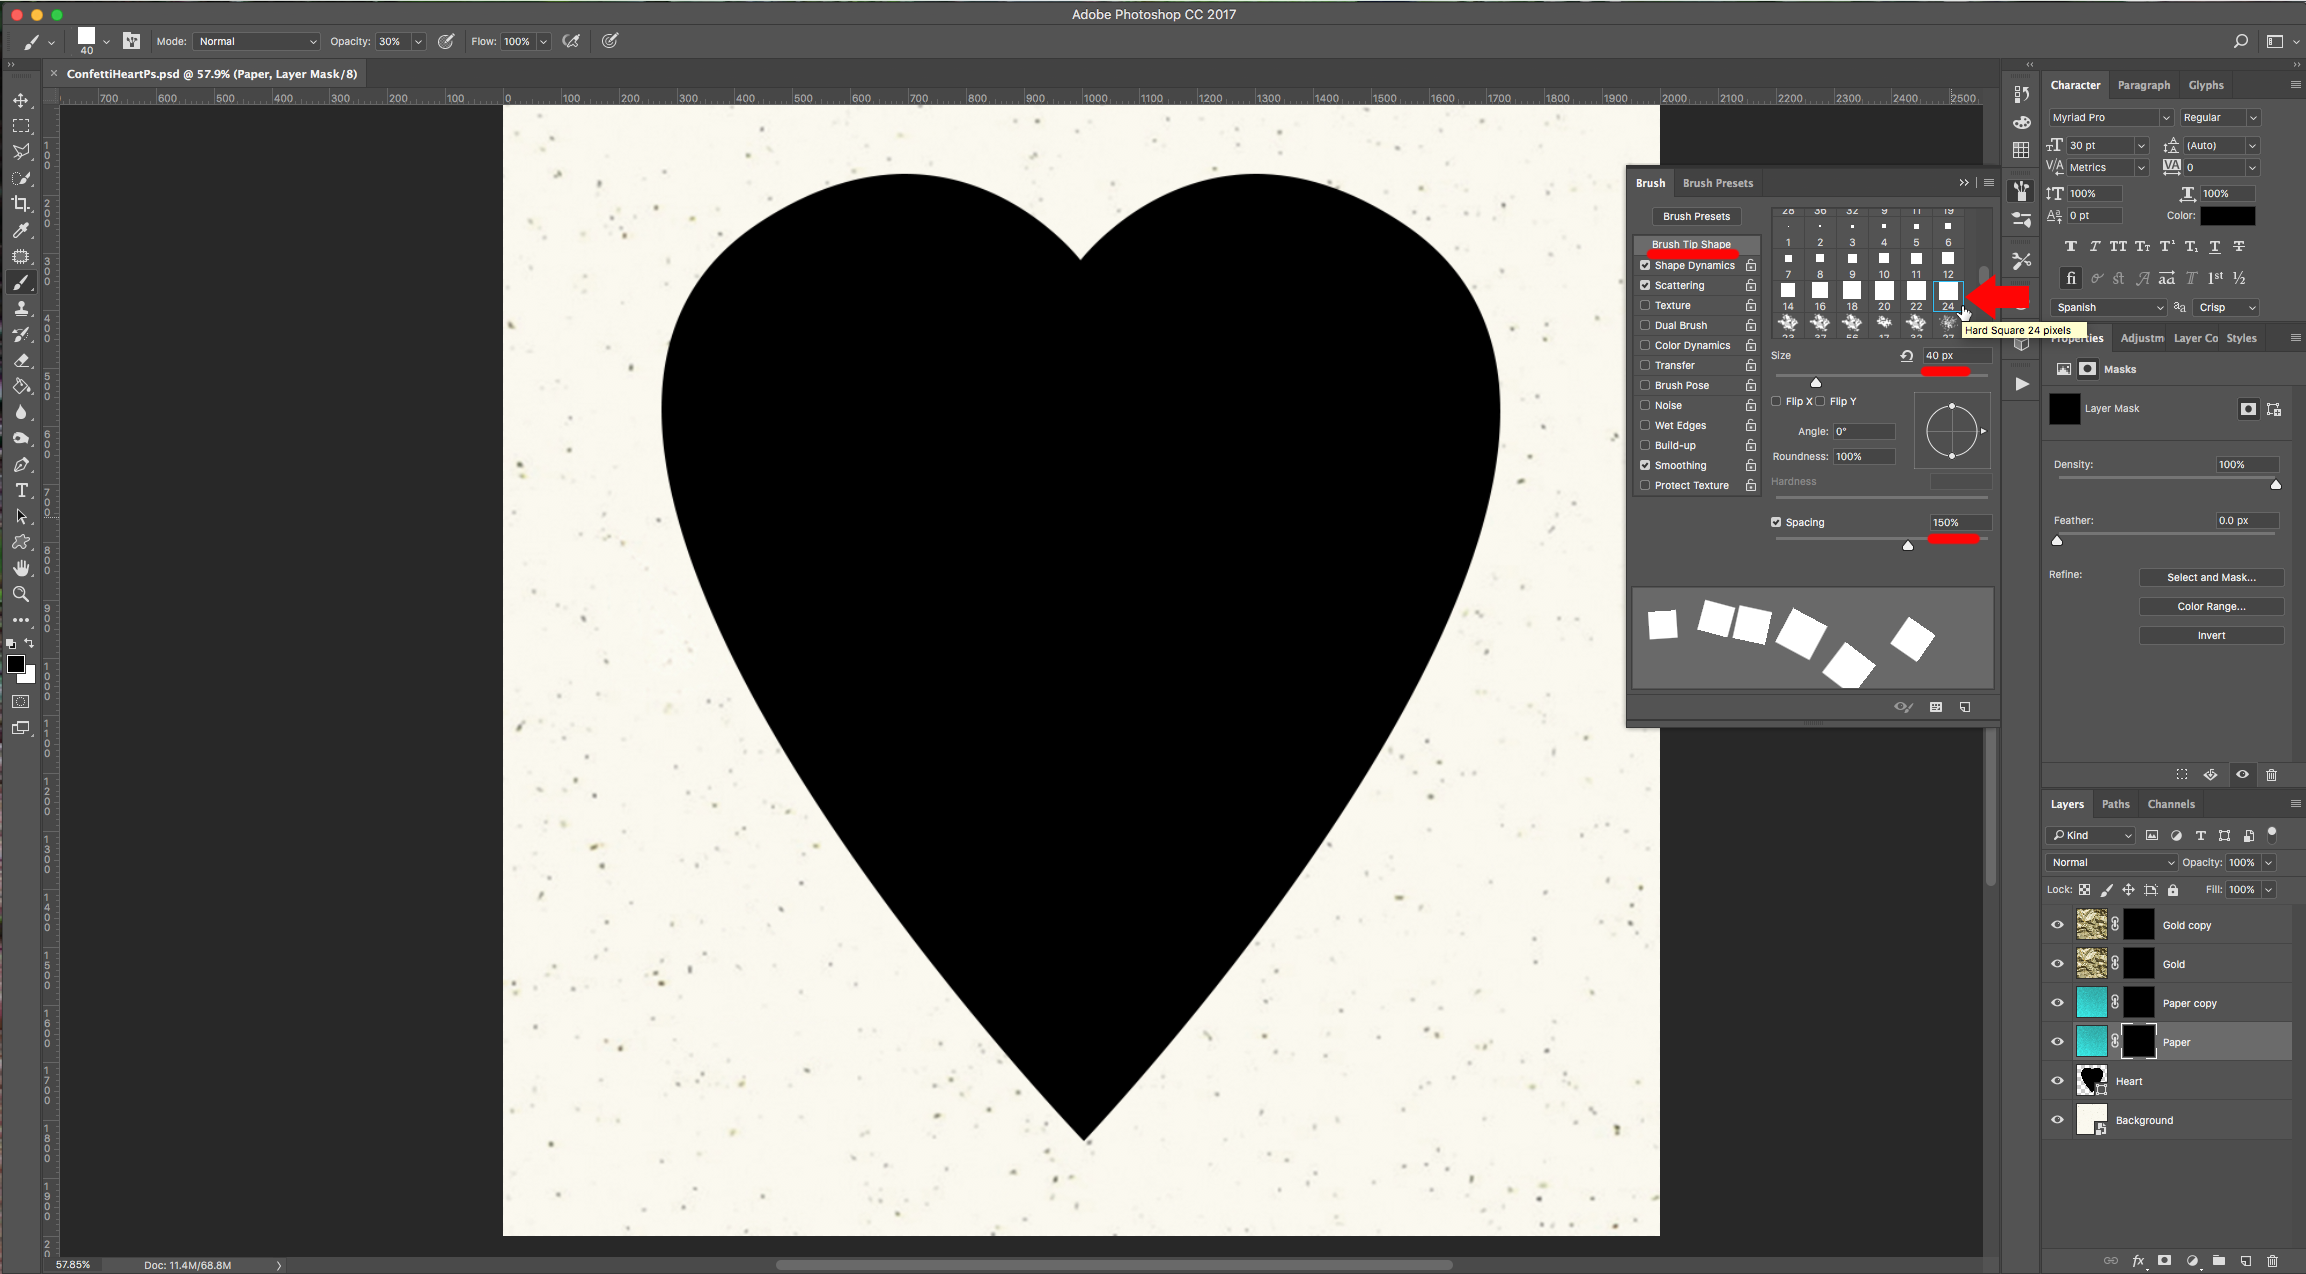
12 - Back in the “Brush” Panel, choose “Hard Square 24 Pixels” and use the following values:
Brush Tip Shape:
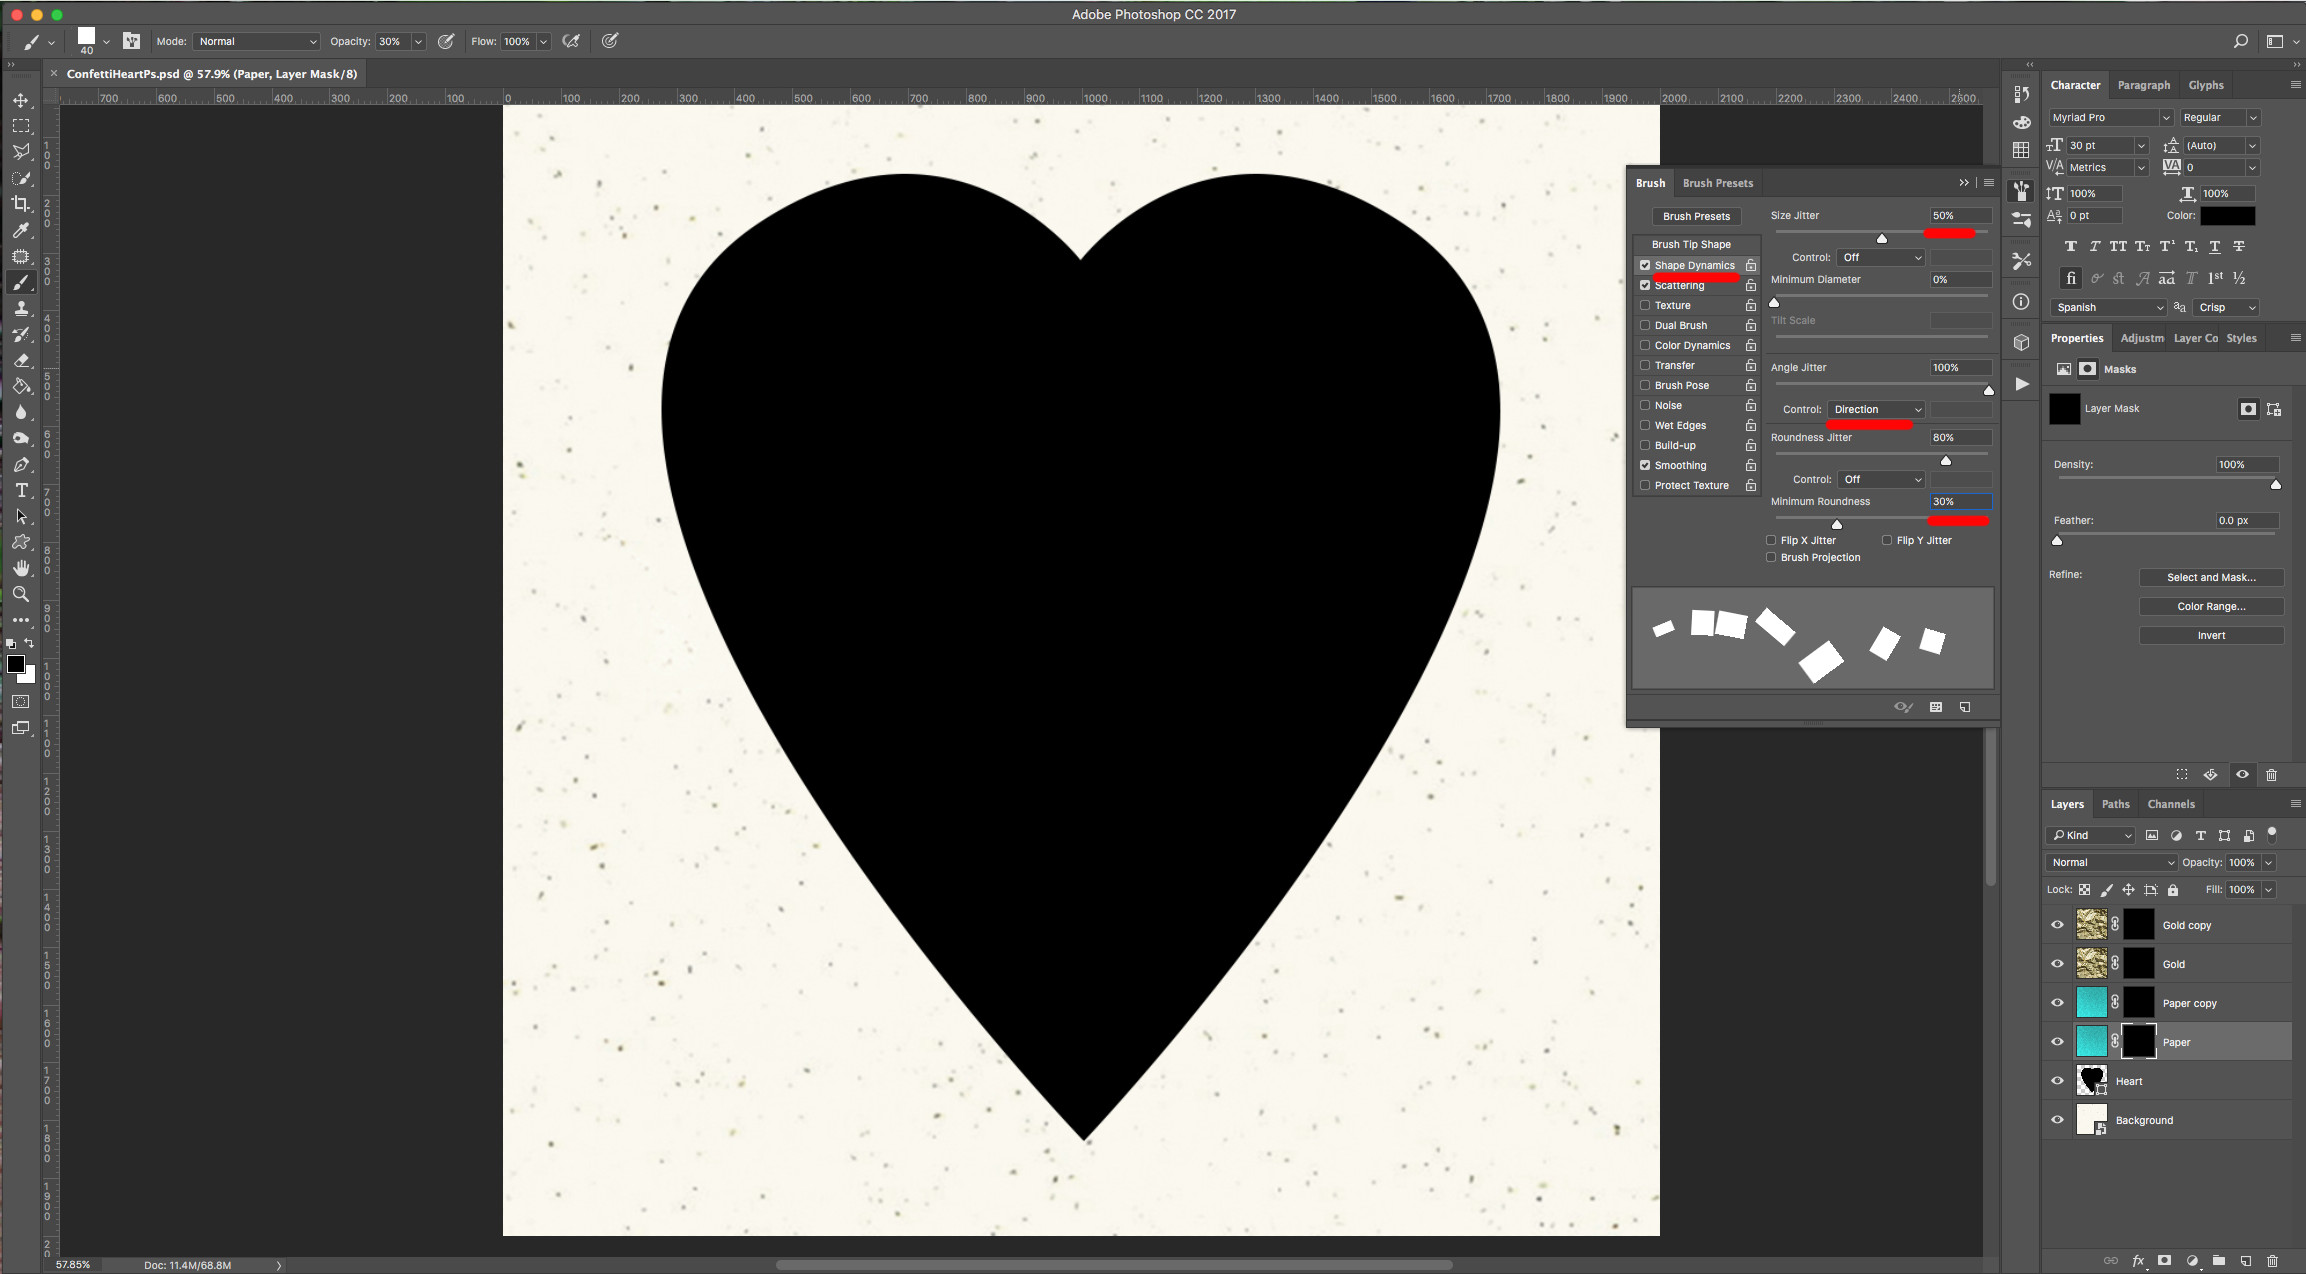
Shape Dynamics:
Scattering:
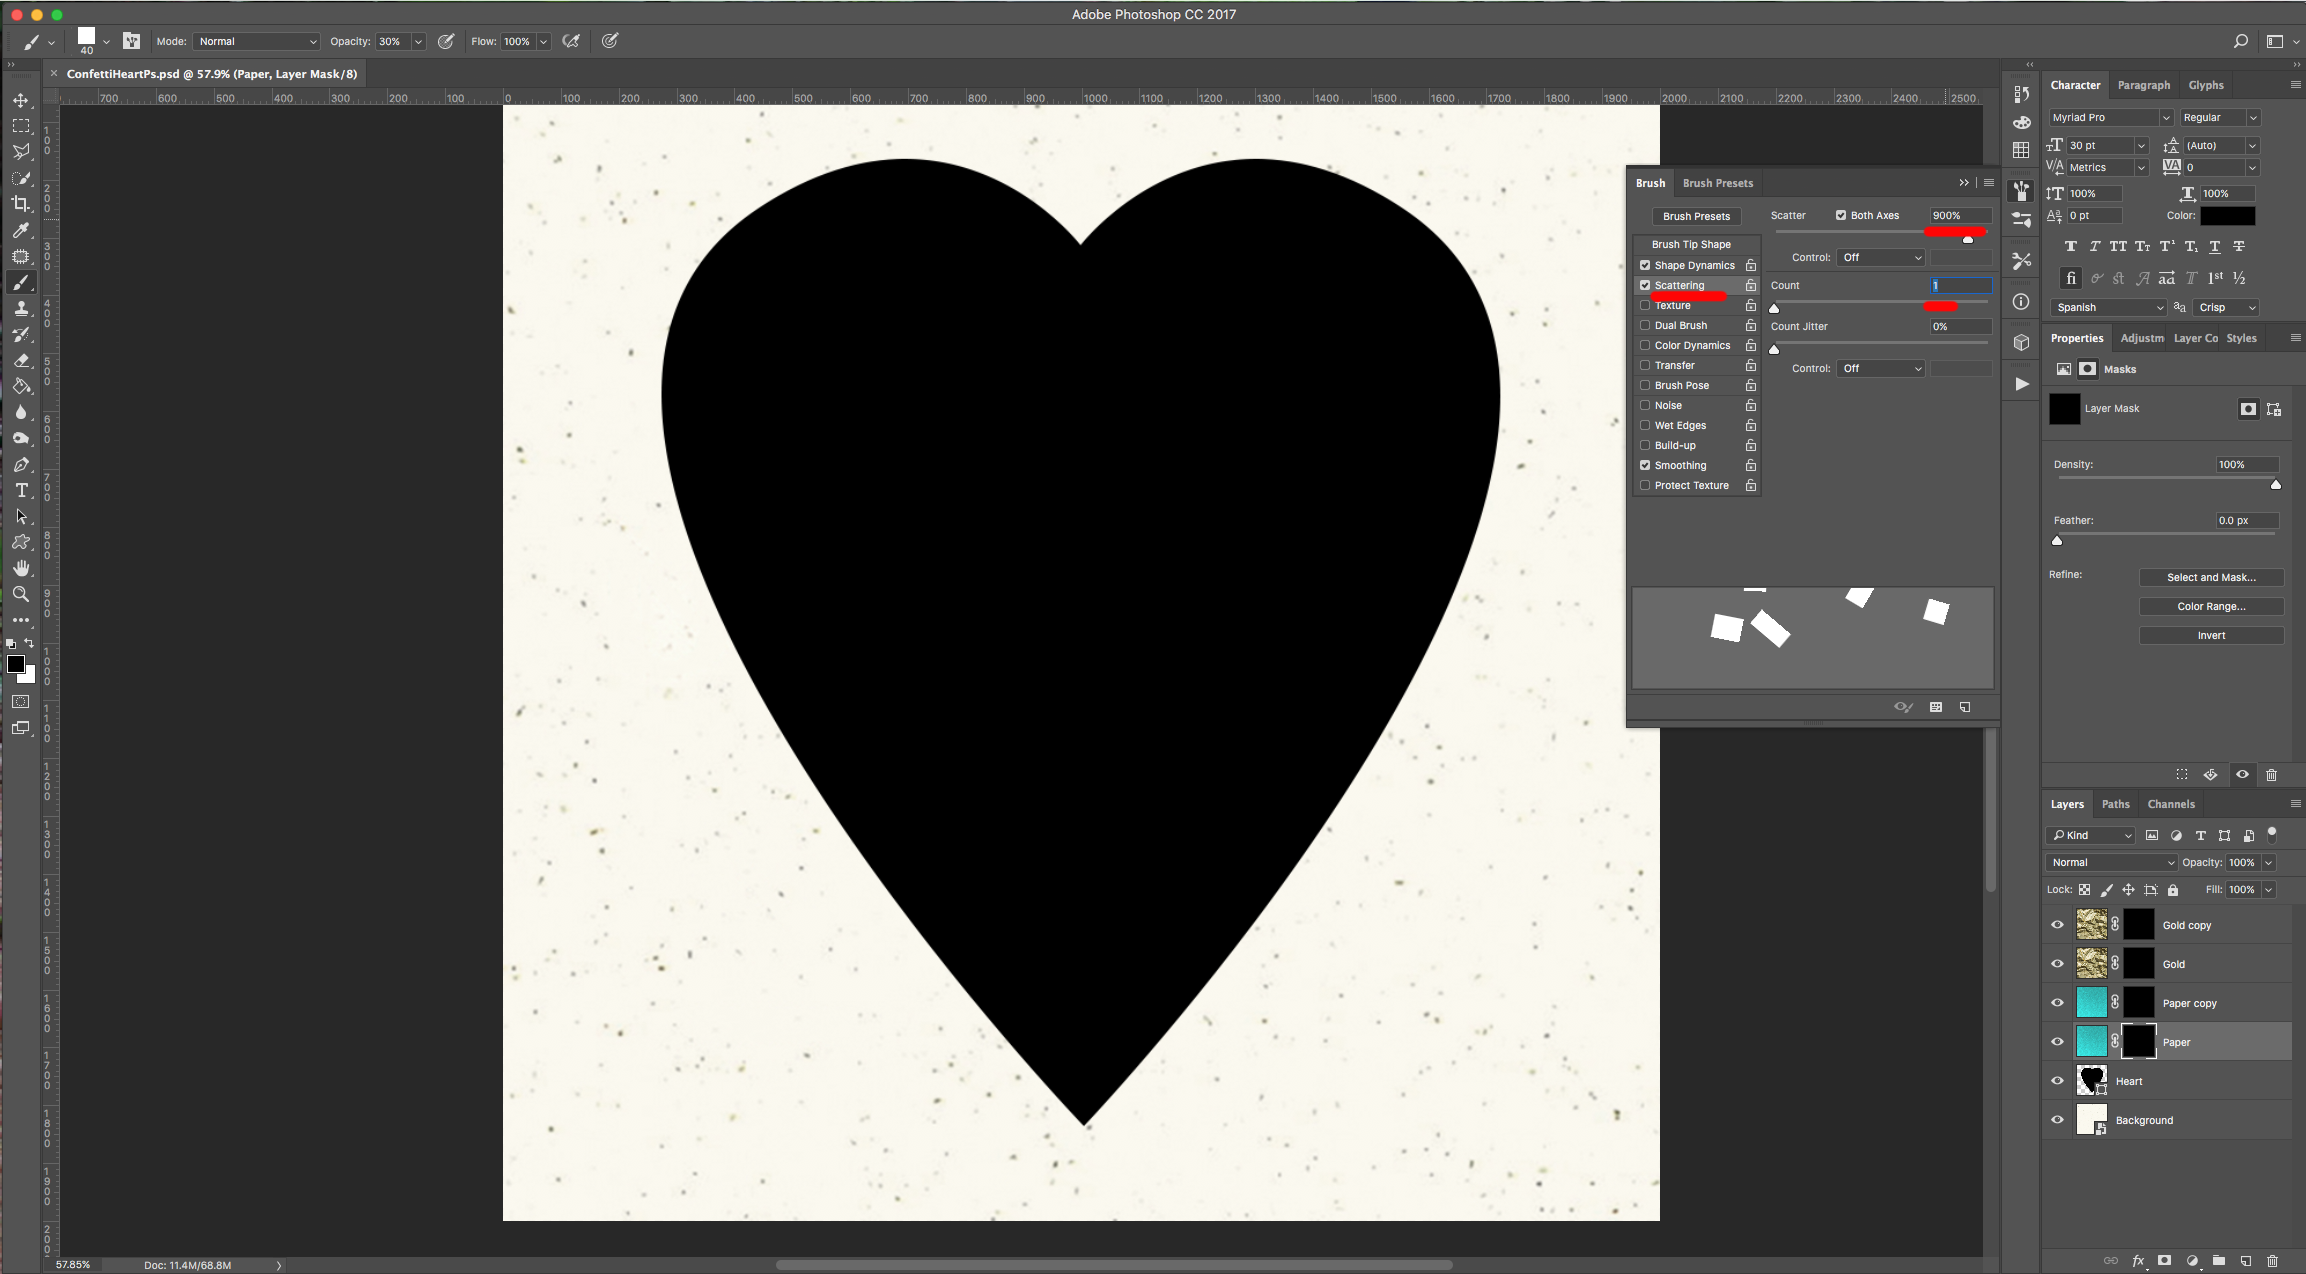
(Make sure “Smoothing” is checked)
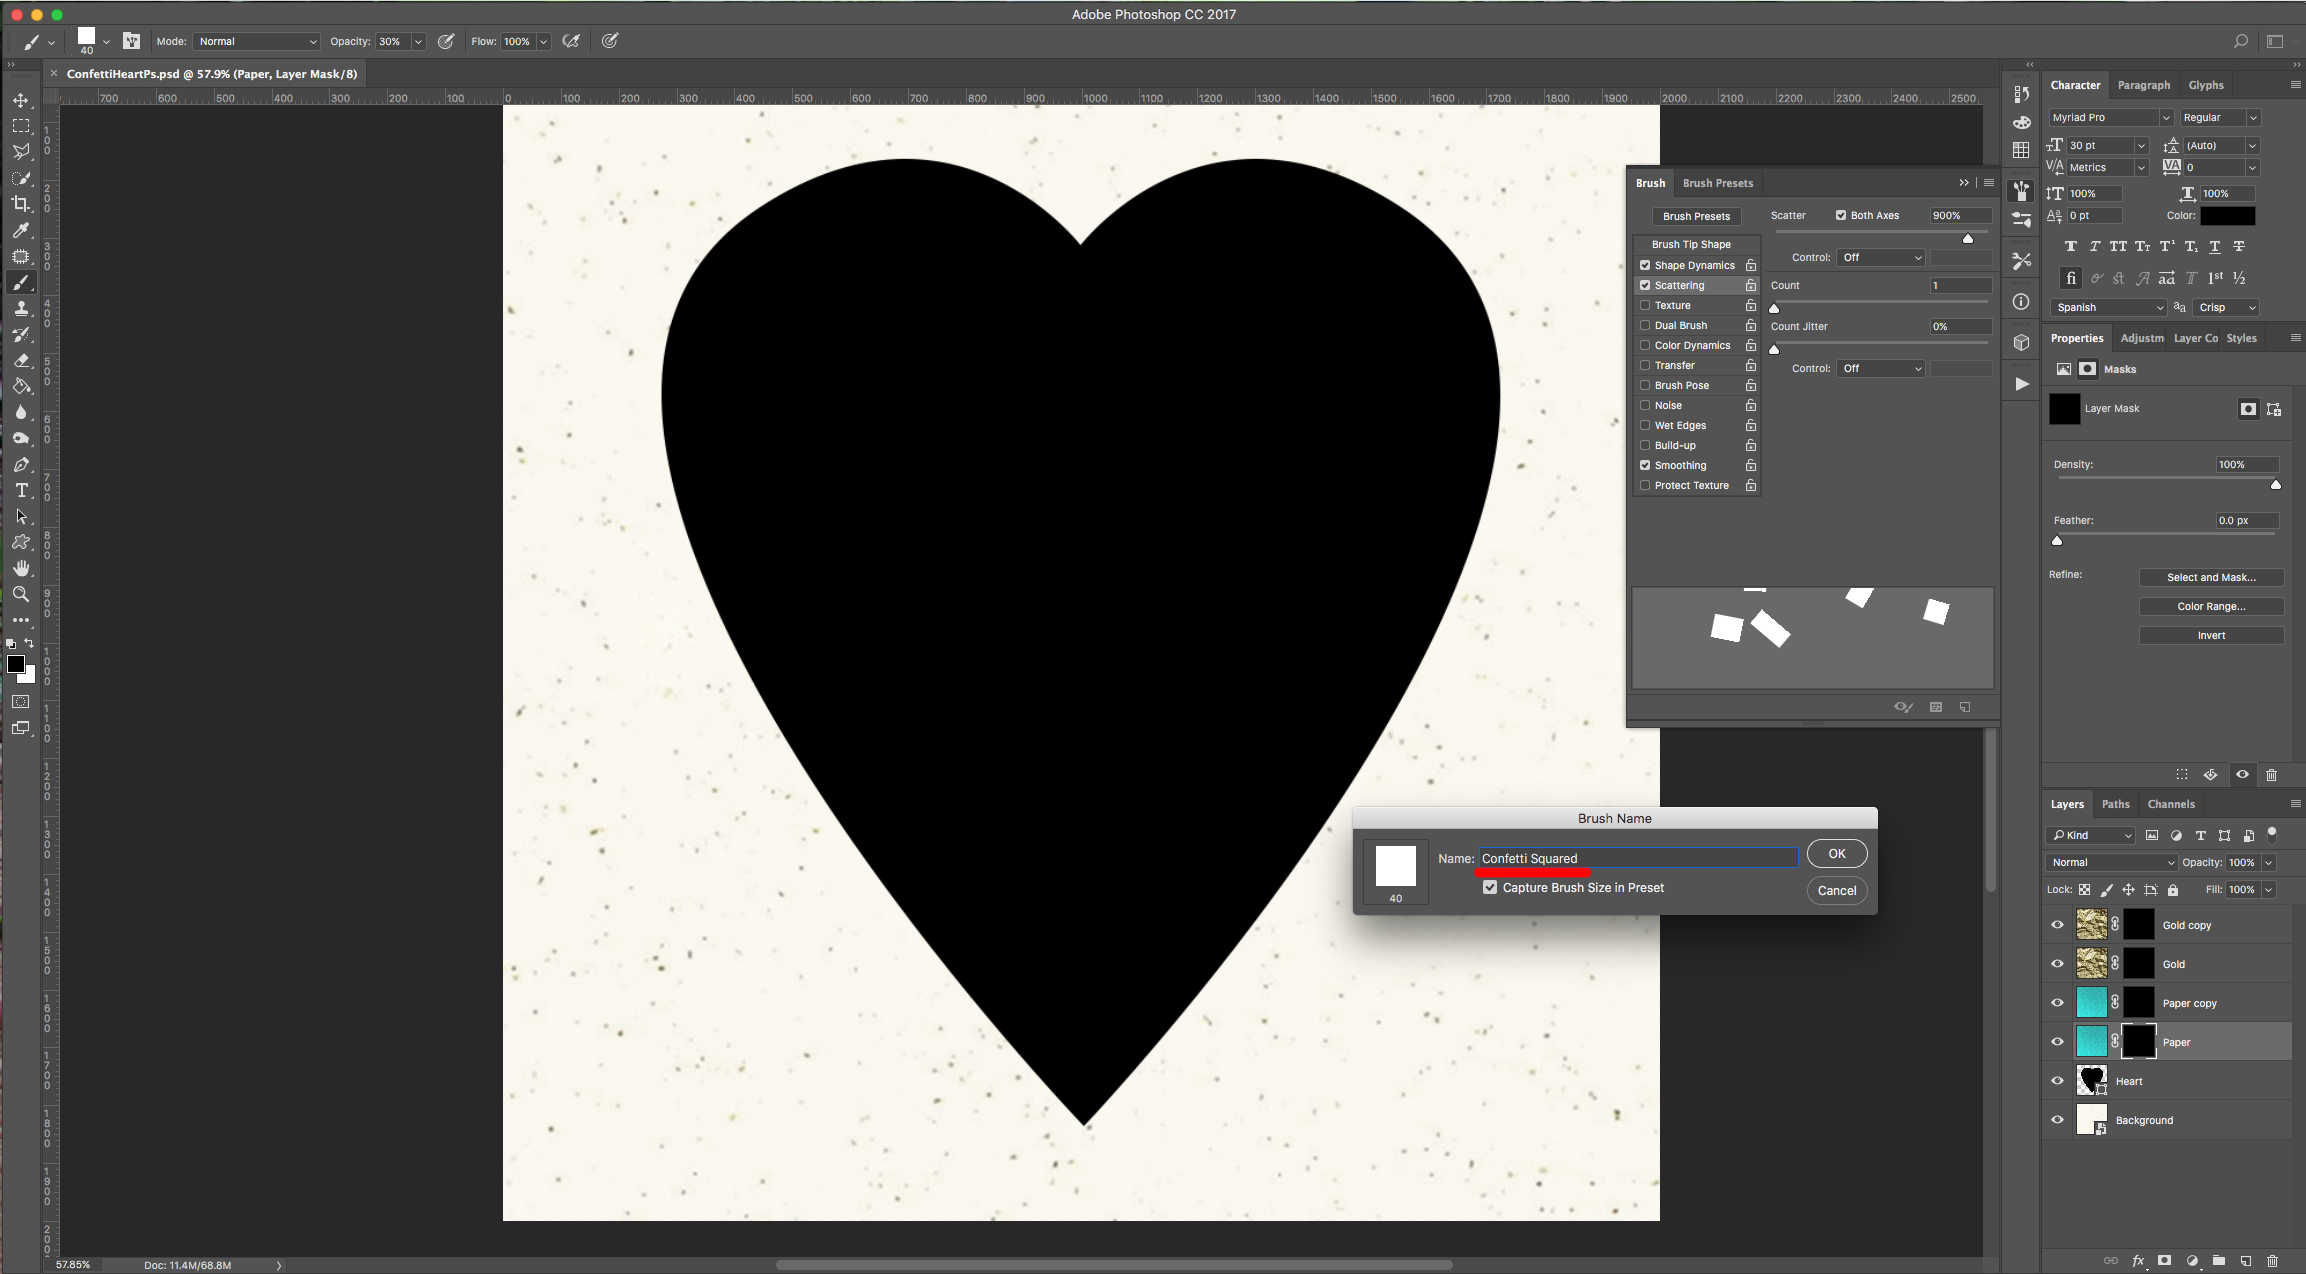
Name this brush “Confetti Squared”.
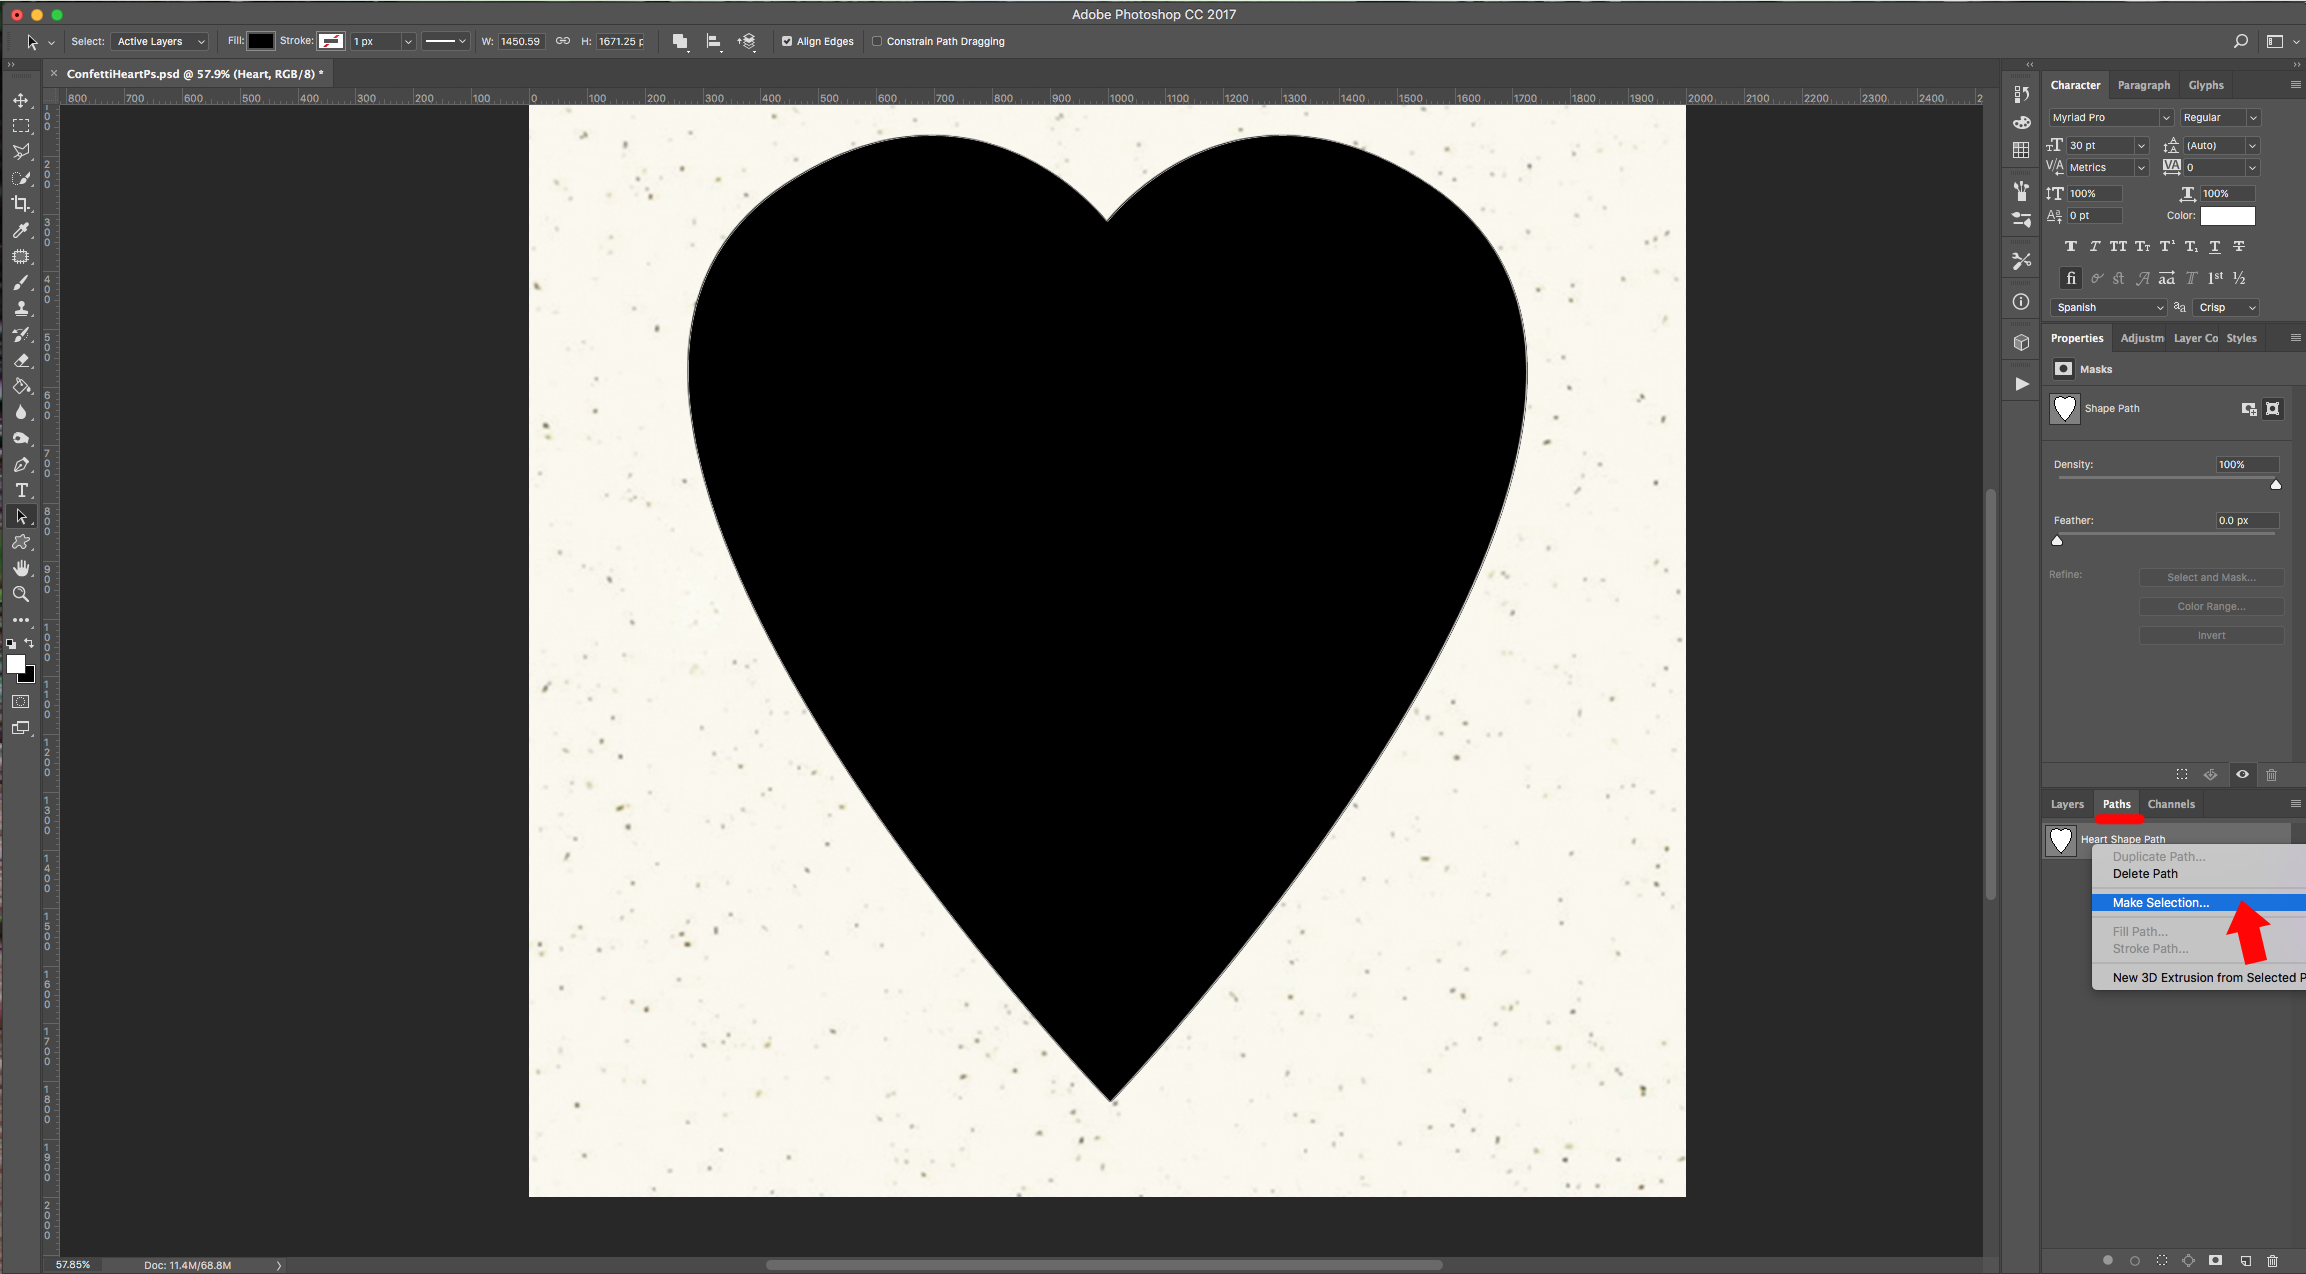
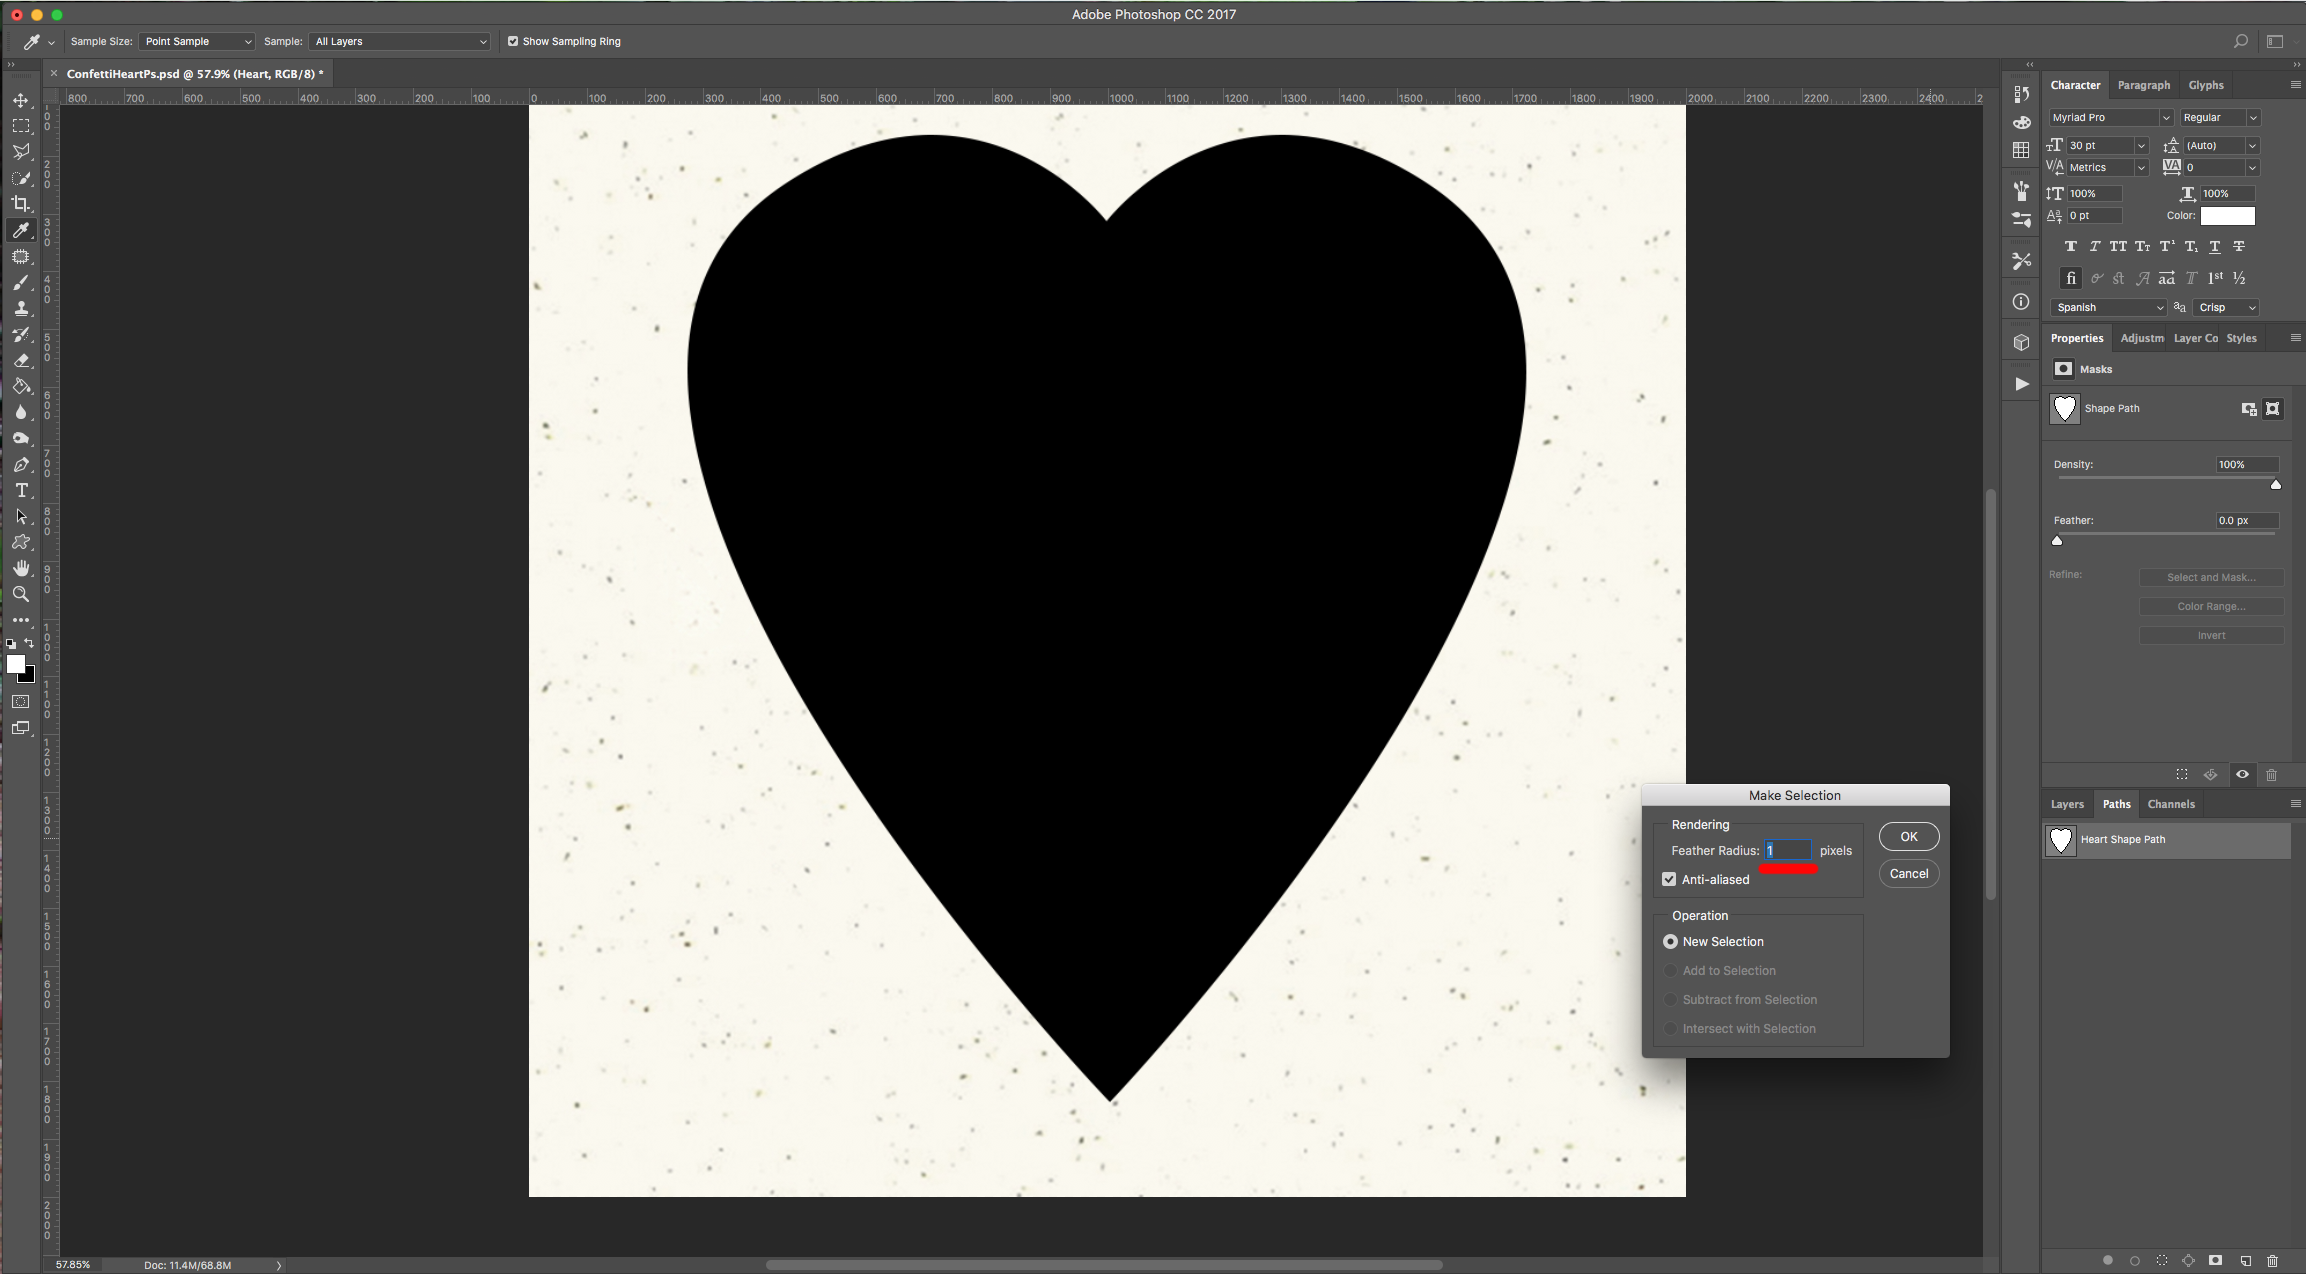
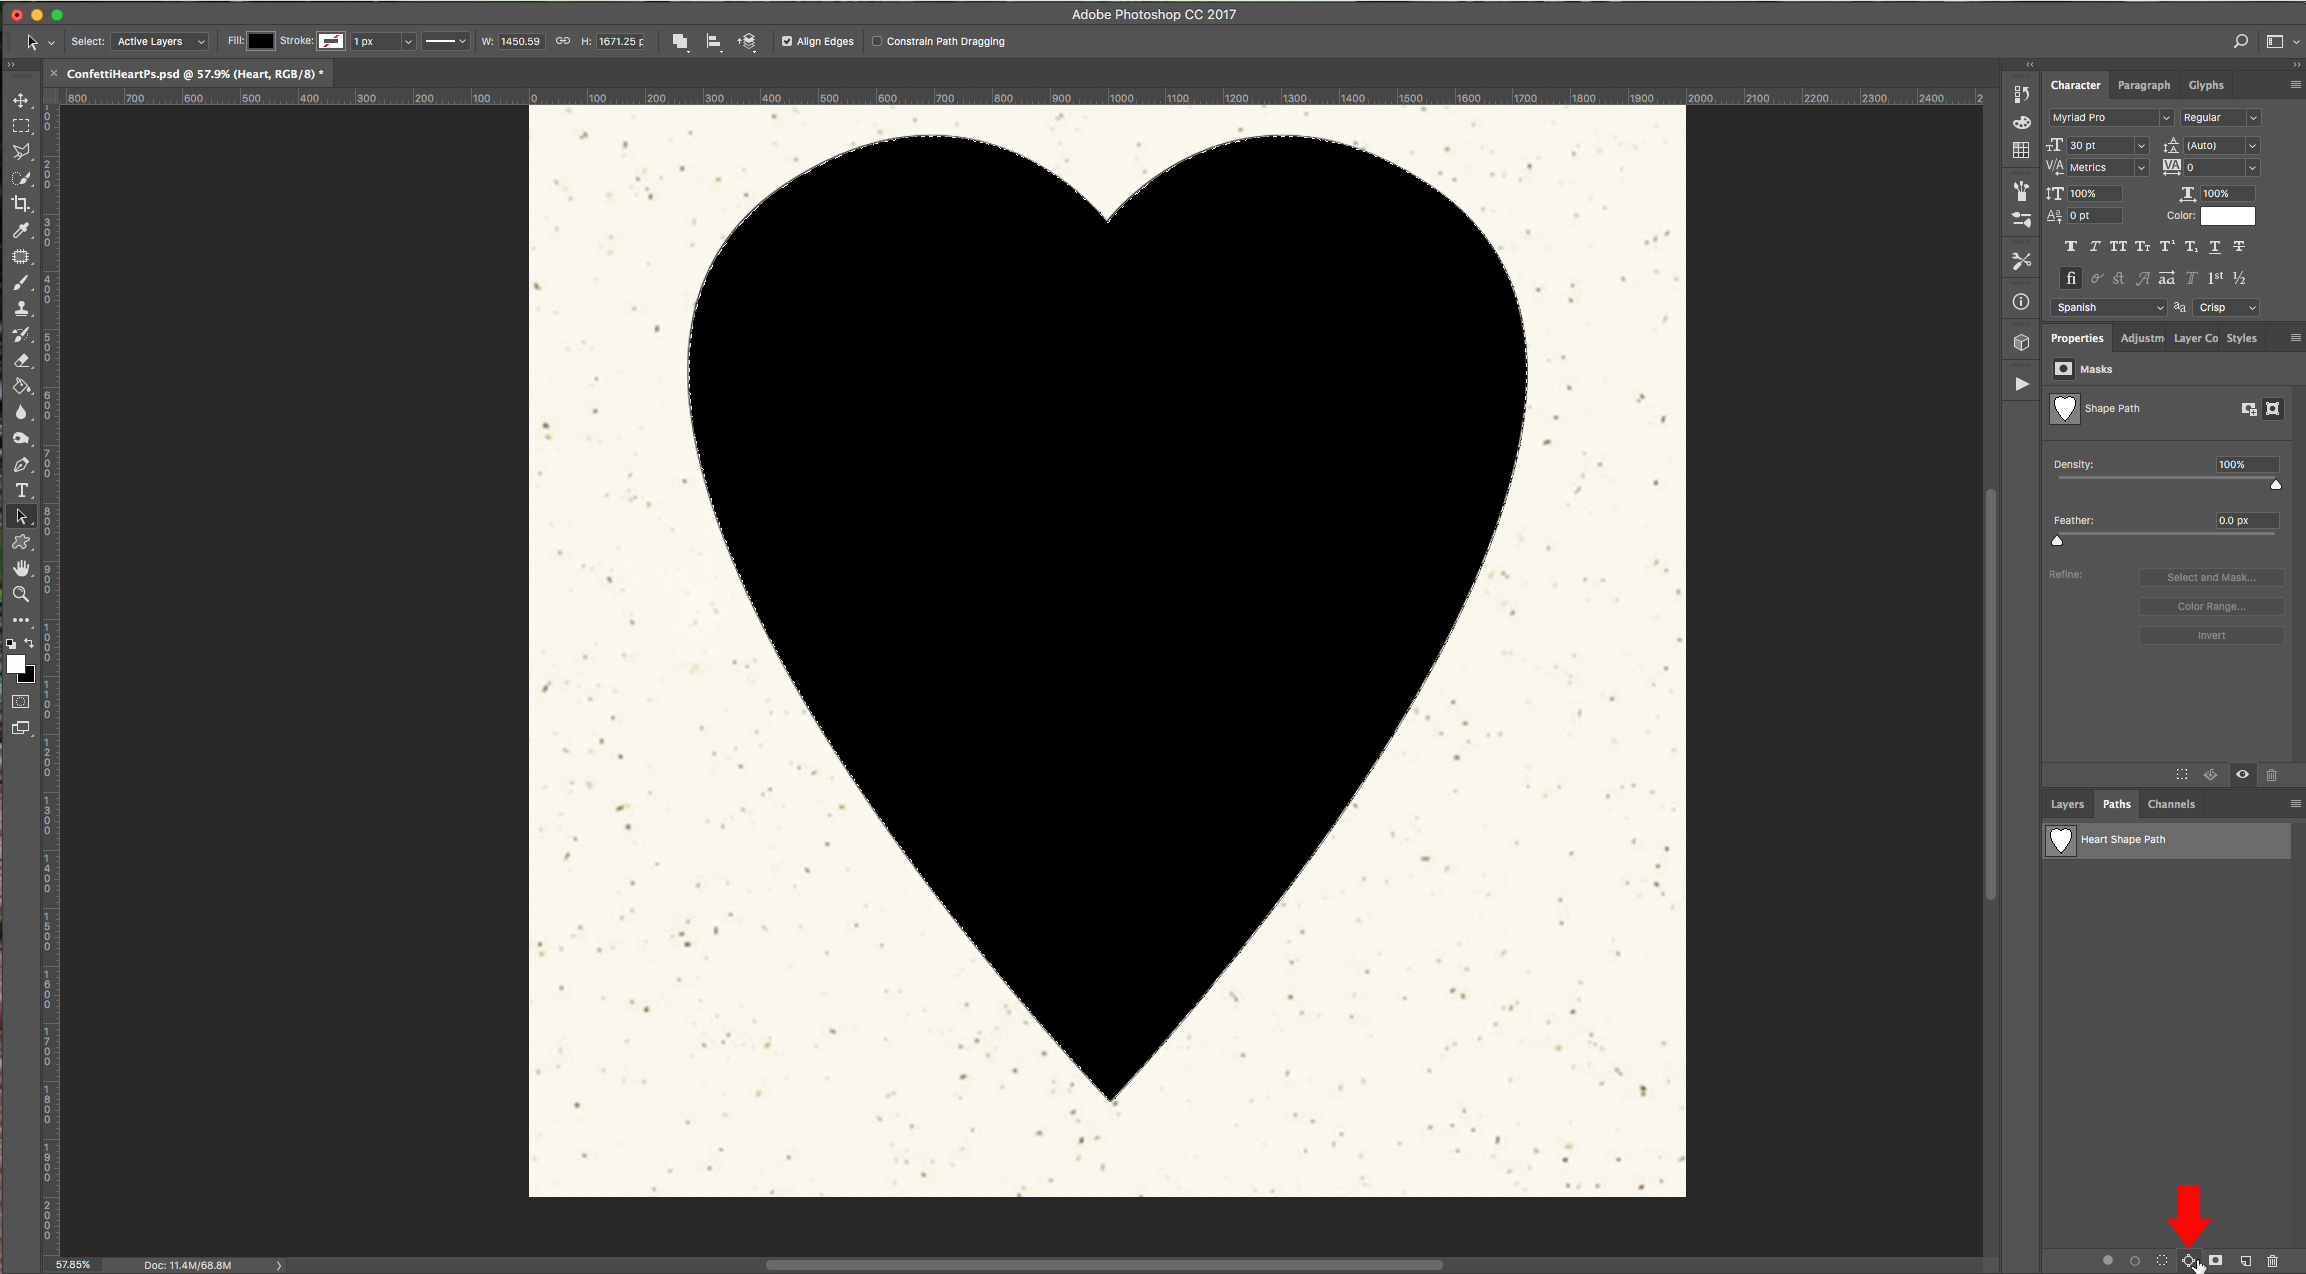
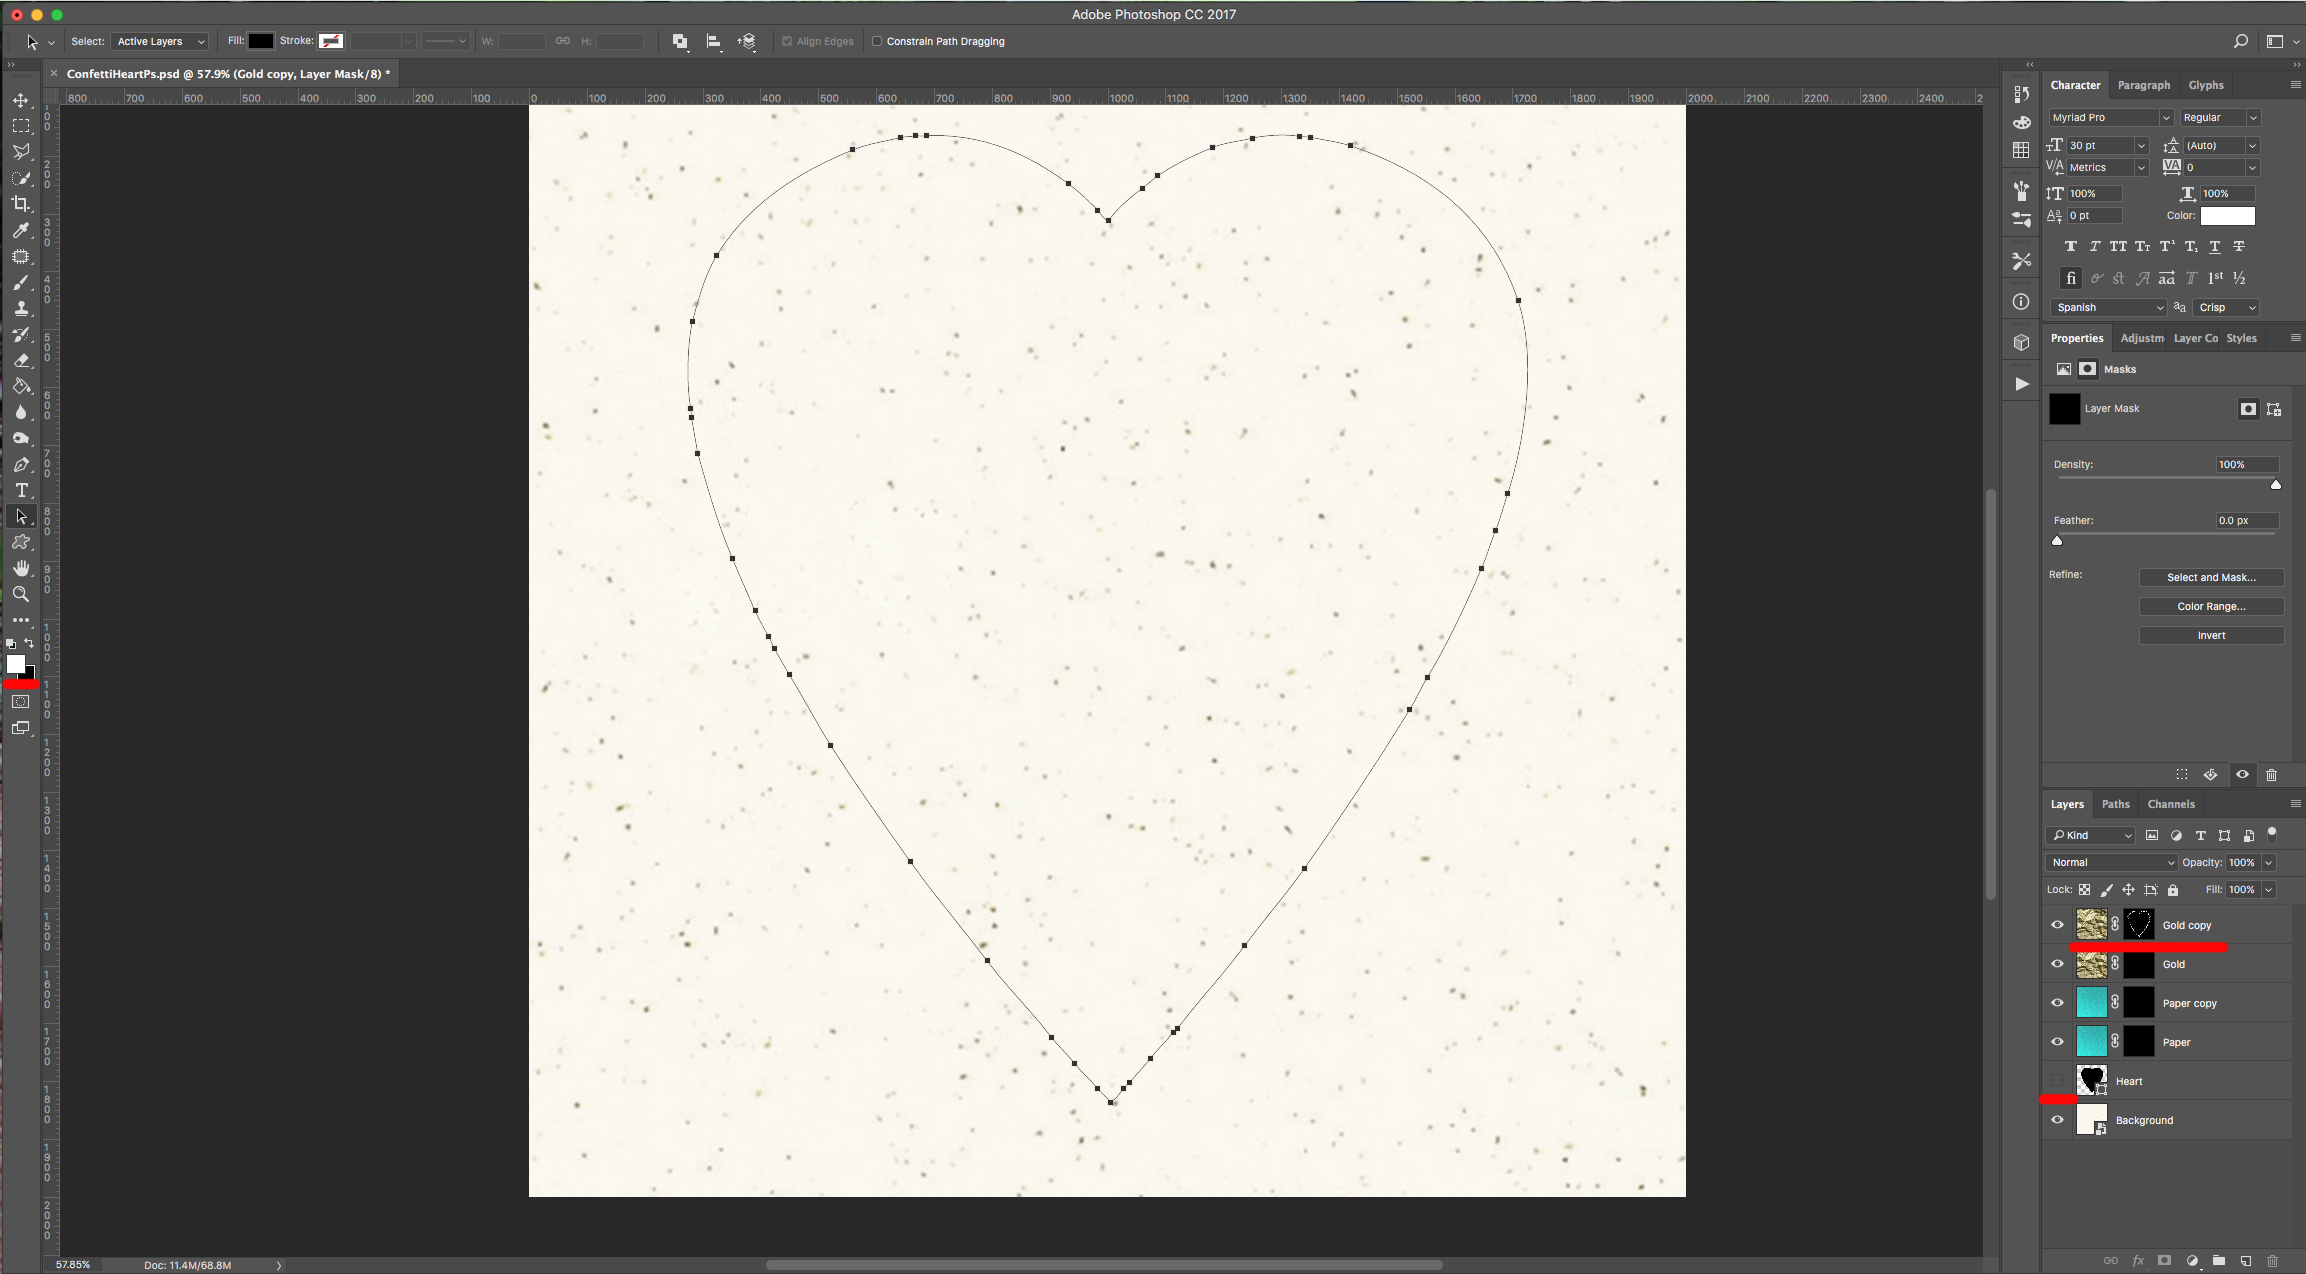
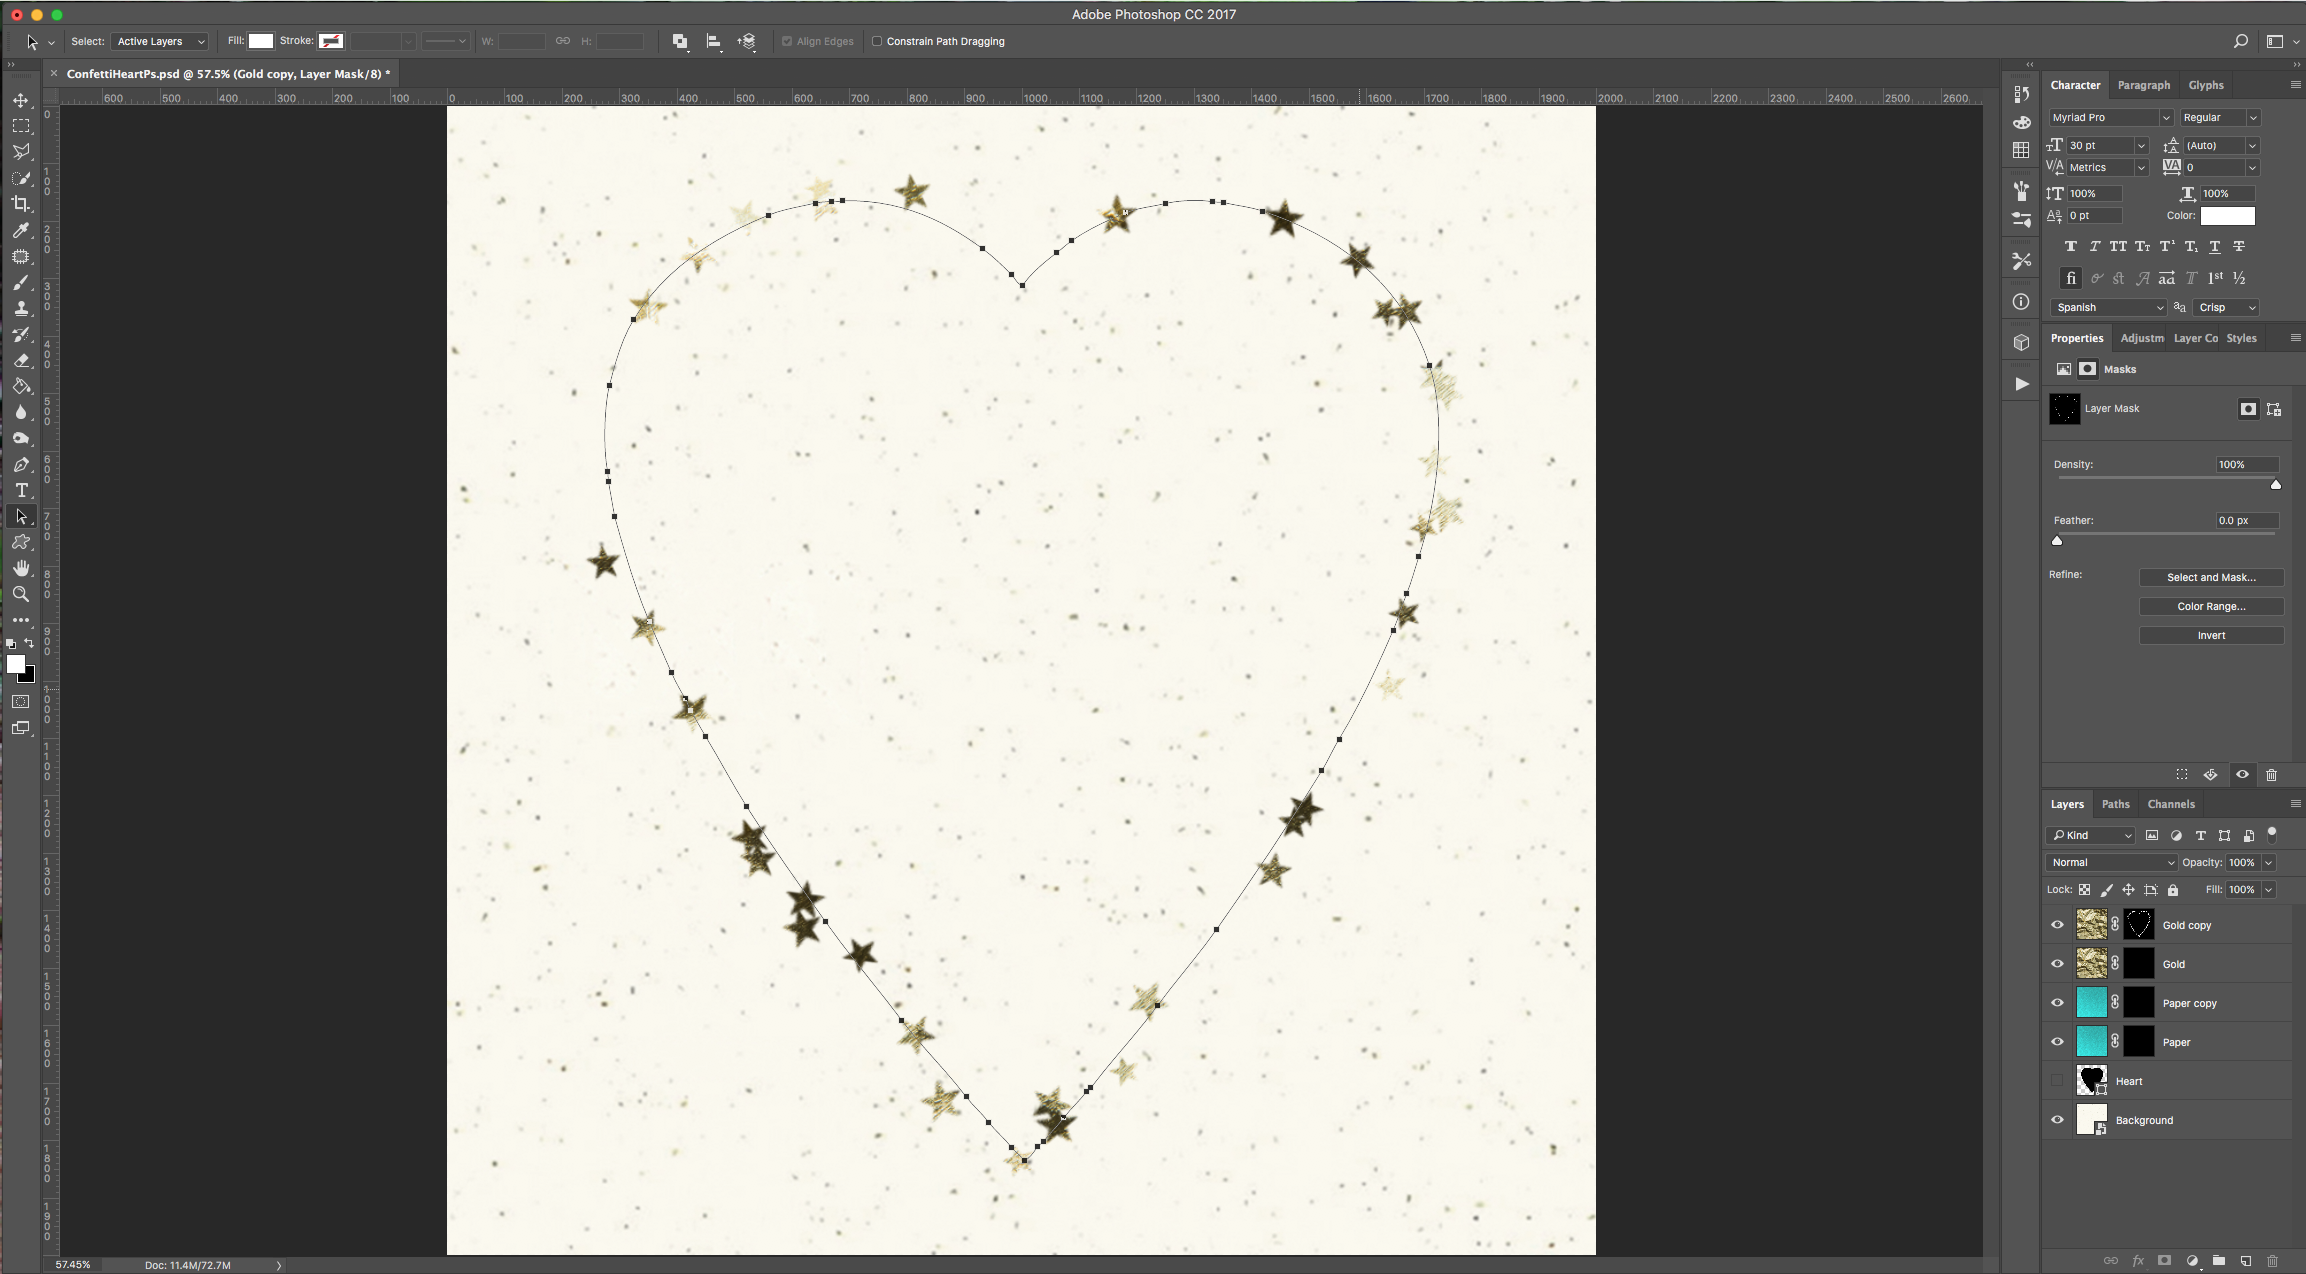
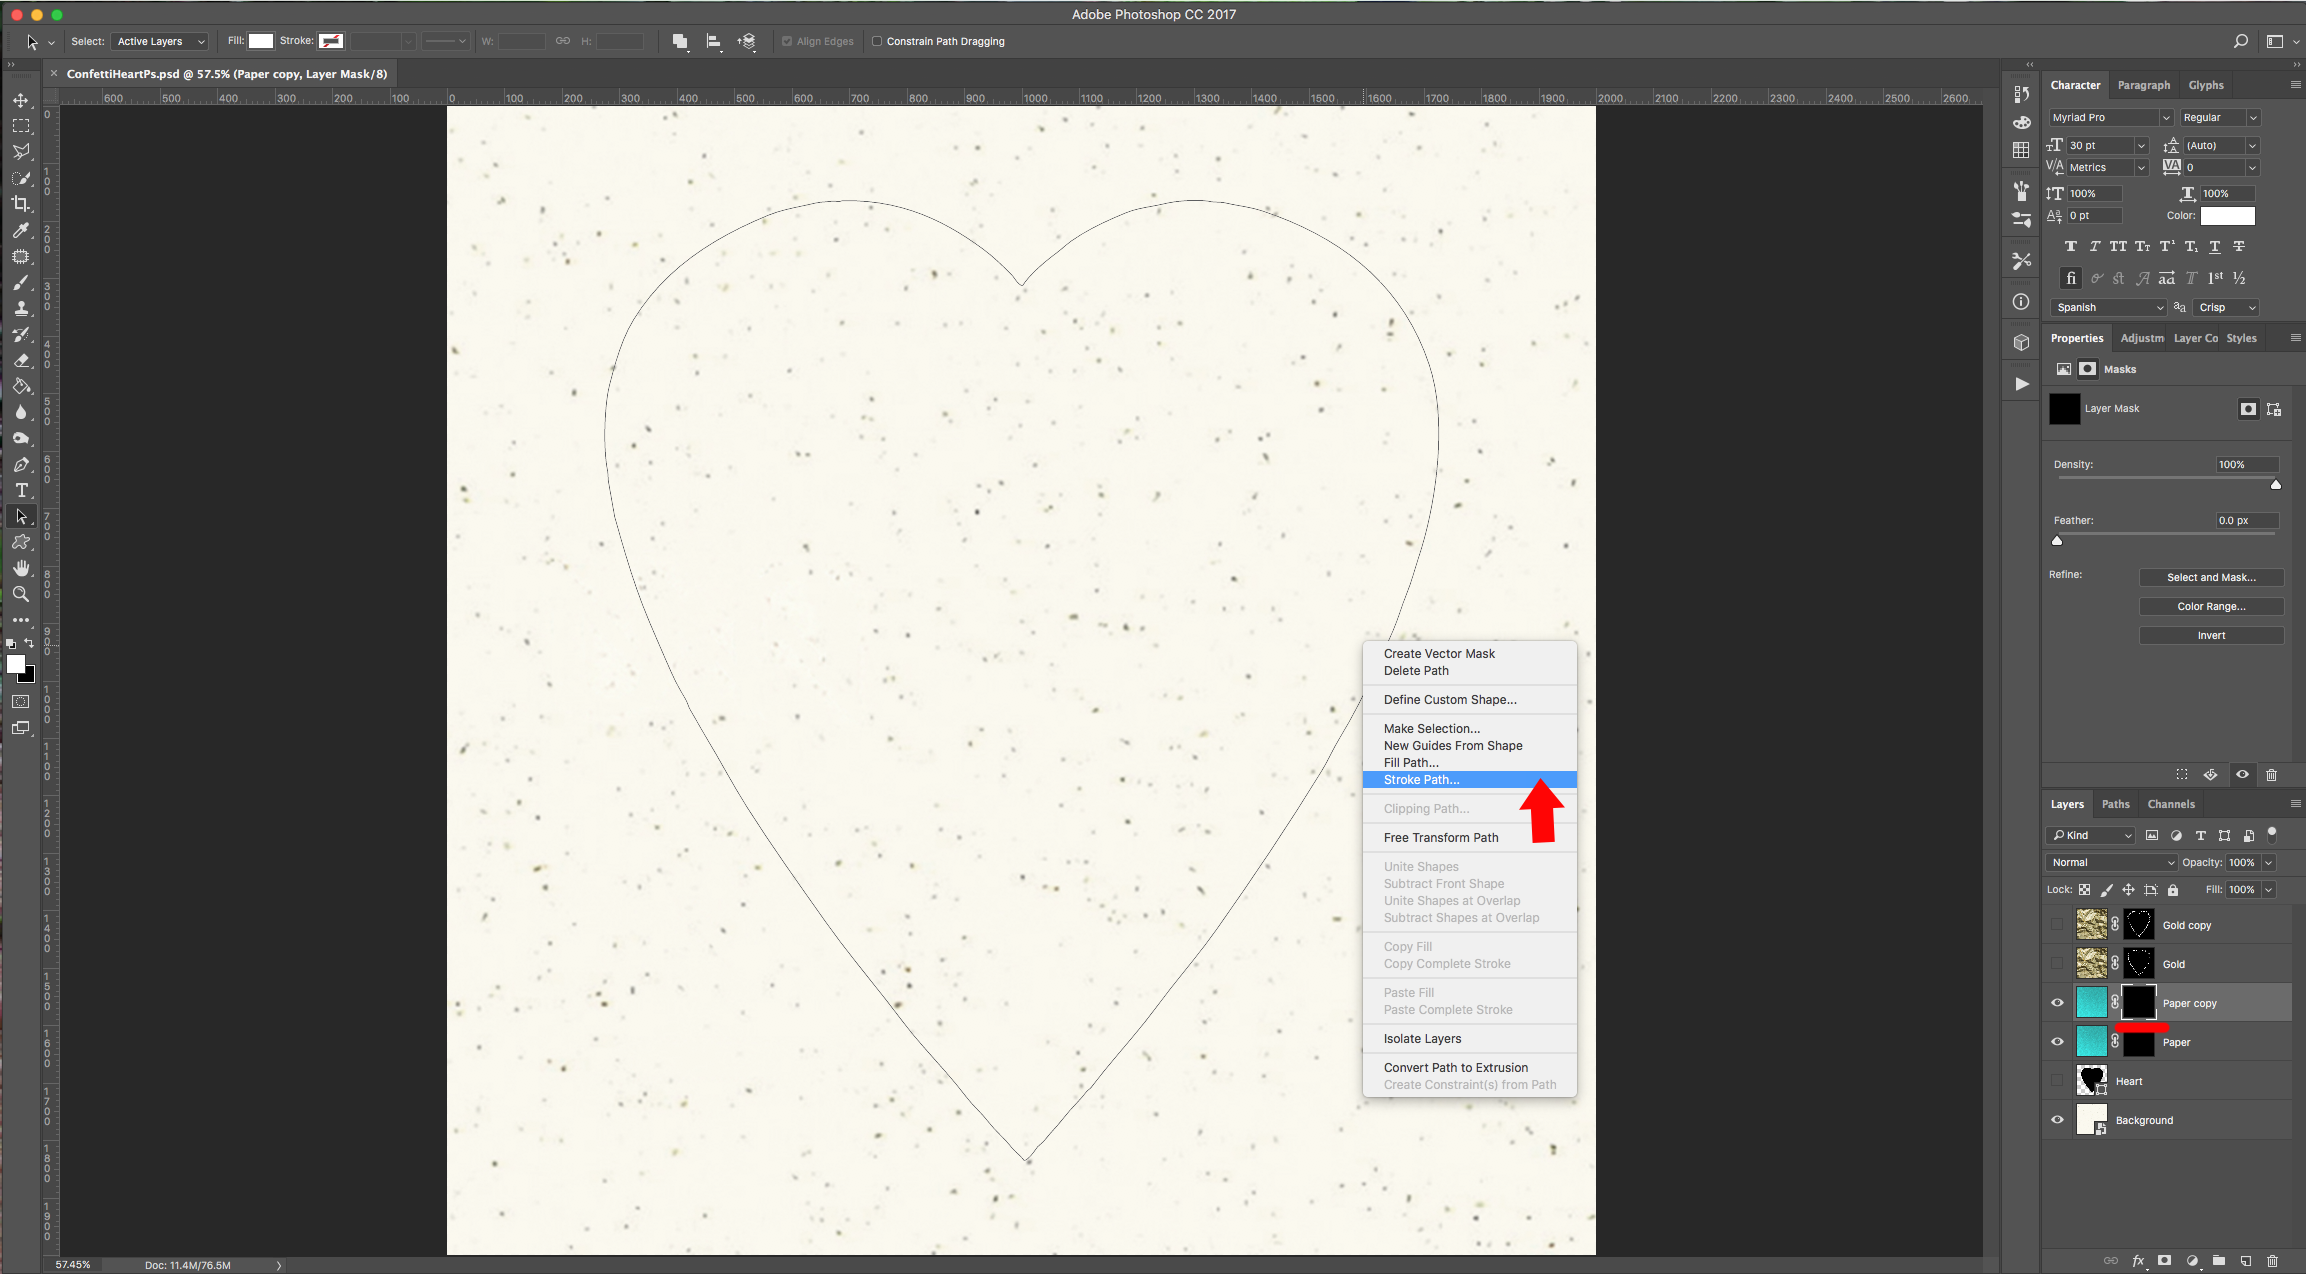
13 - Select your “Heart” Layer, go to the “Paths” Panel, right-click on top of its Thumbnail and choose “Make Selection”, then click on the small “Make Work Path from Selection” button at the bottom of the Panel. Keep your “Work Path” active and head back to the “Layers” Panel. Hide or delete the “Heart” Layer and click on your “Gold Copy” mask thumbnail to select it.
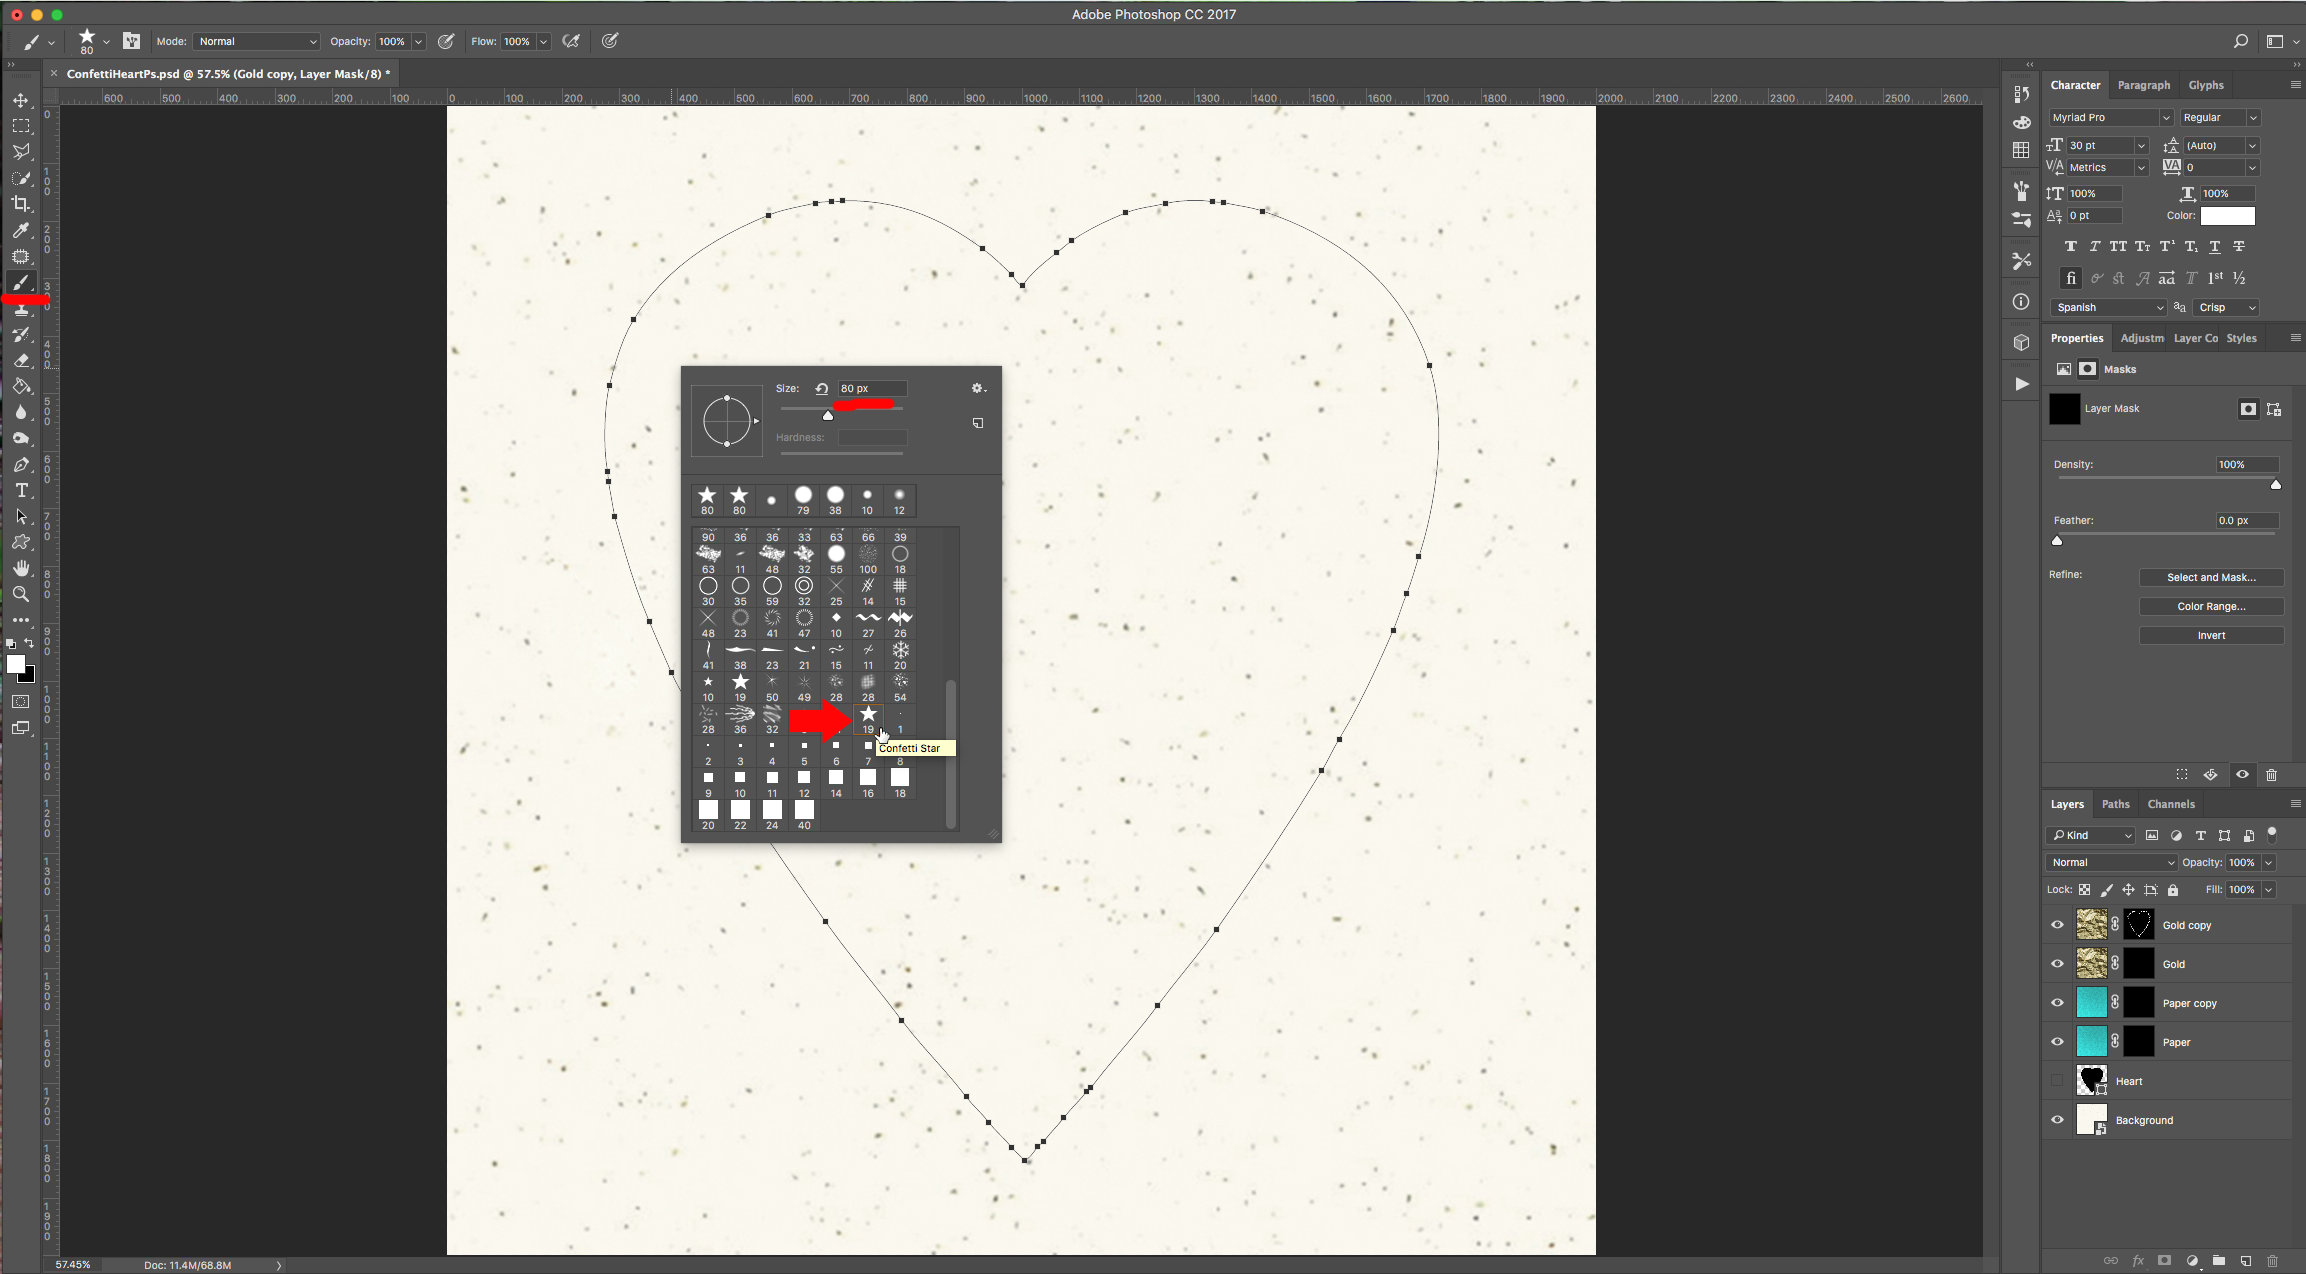
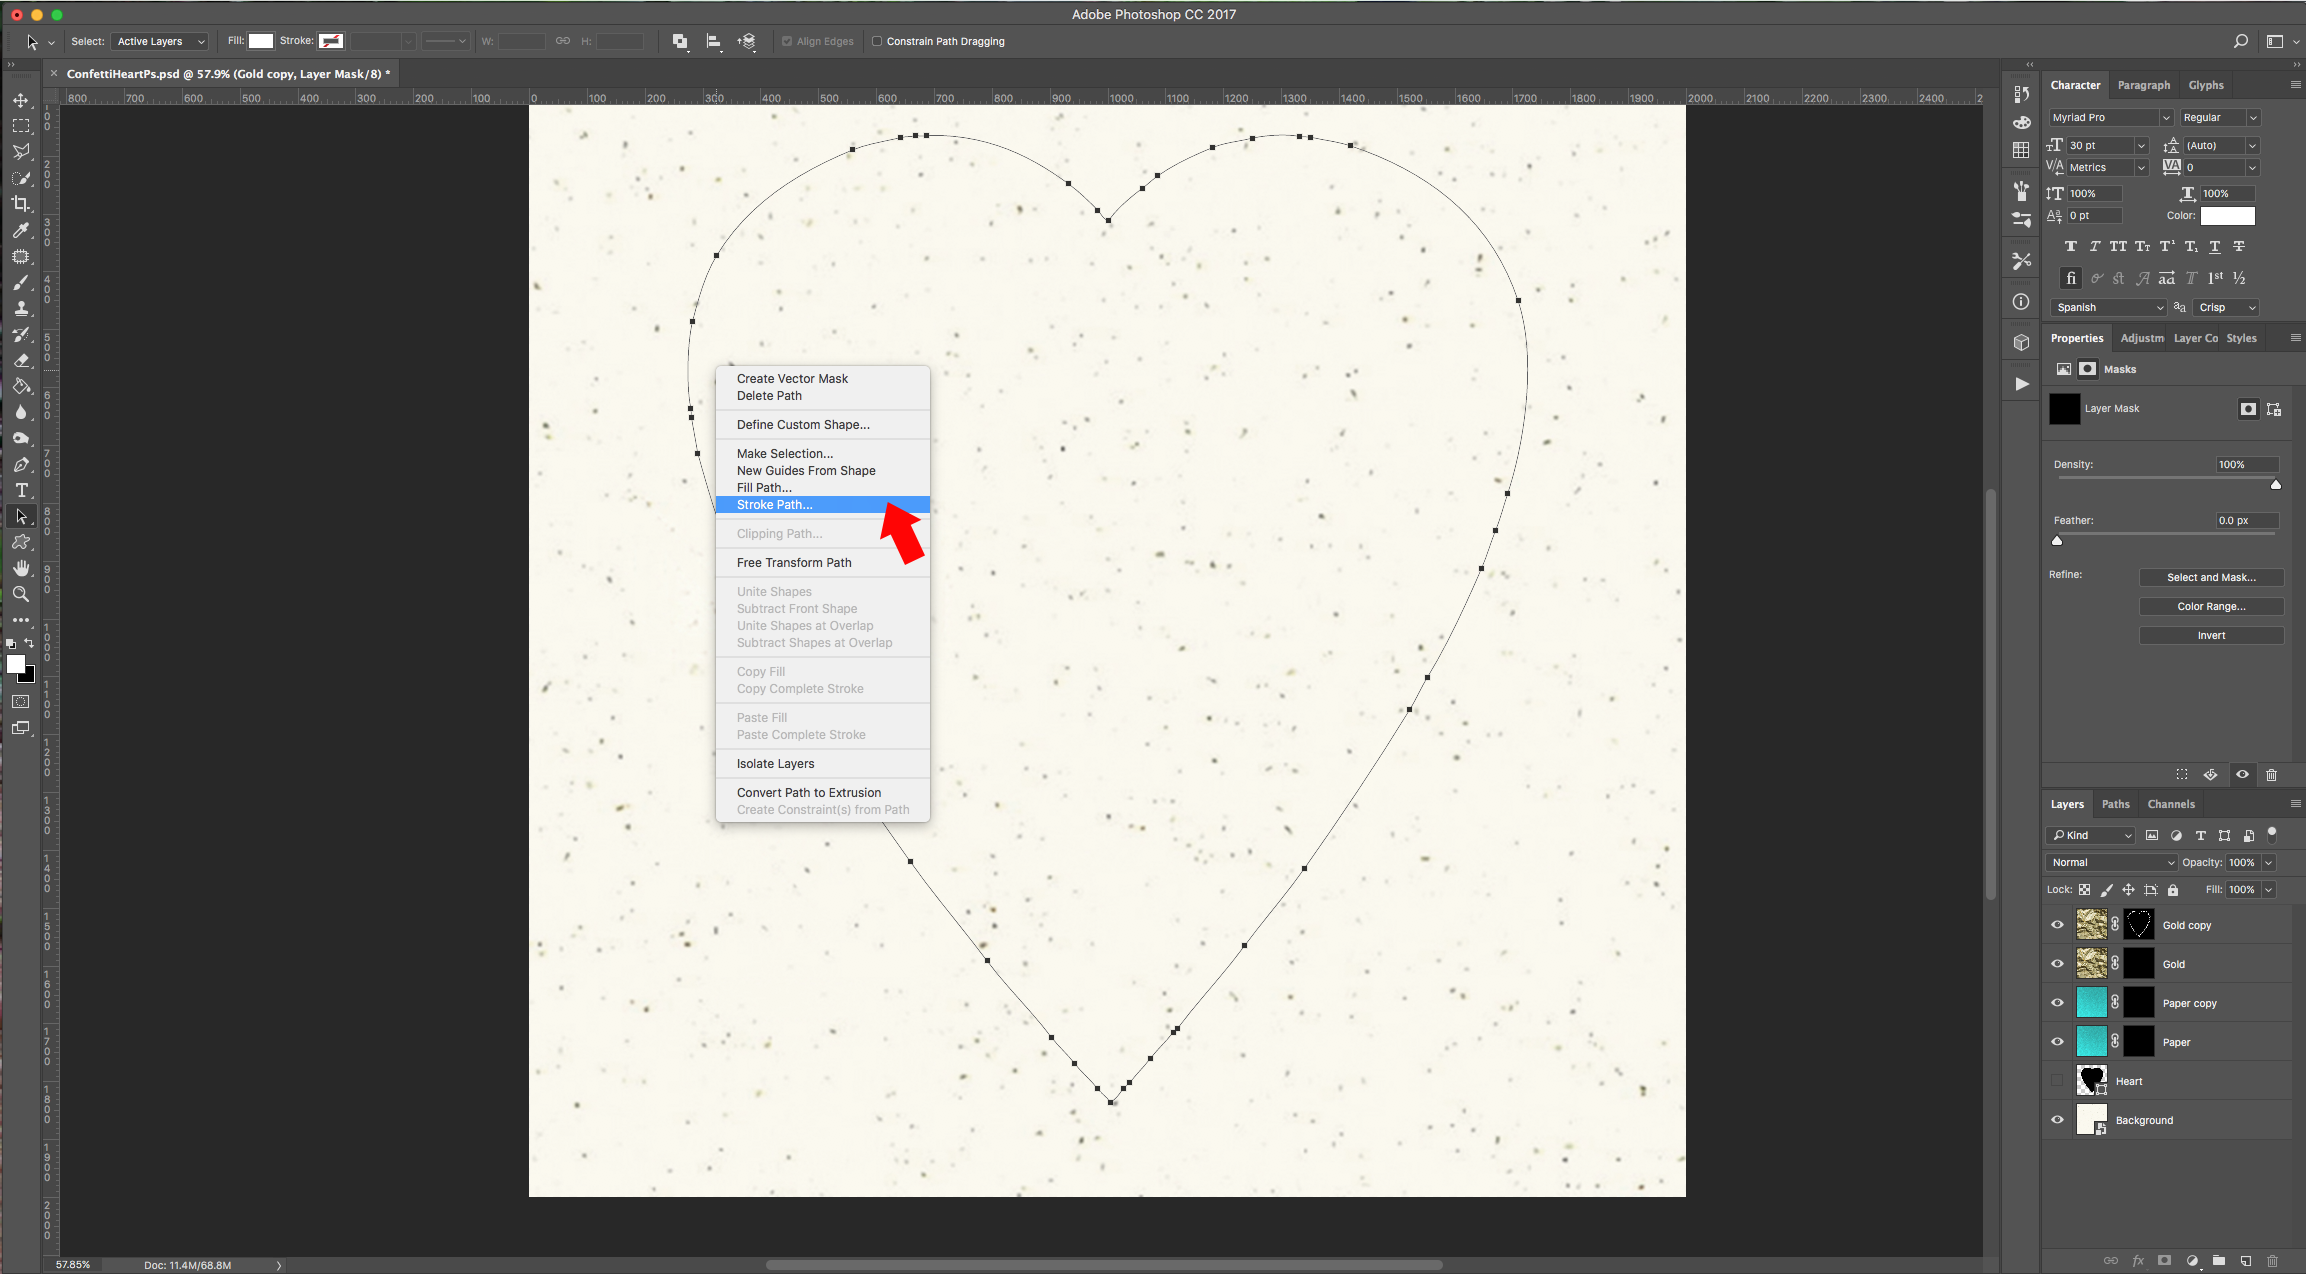
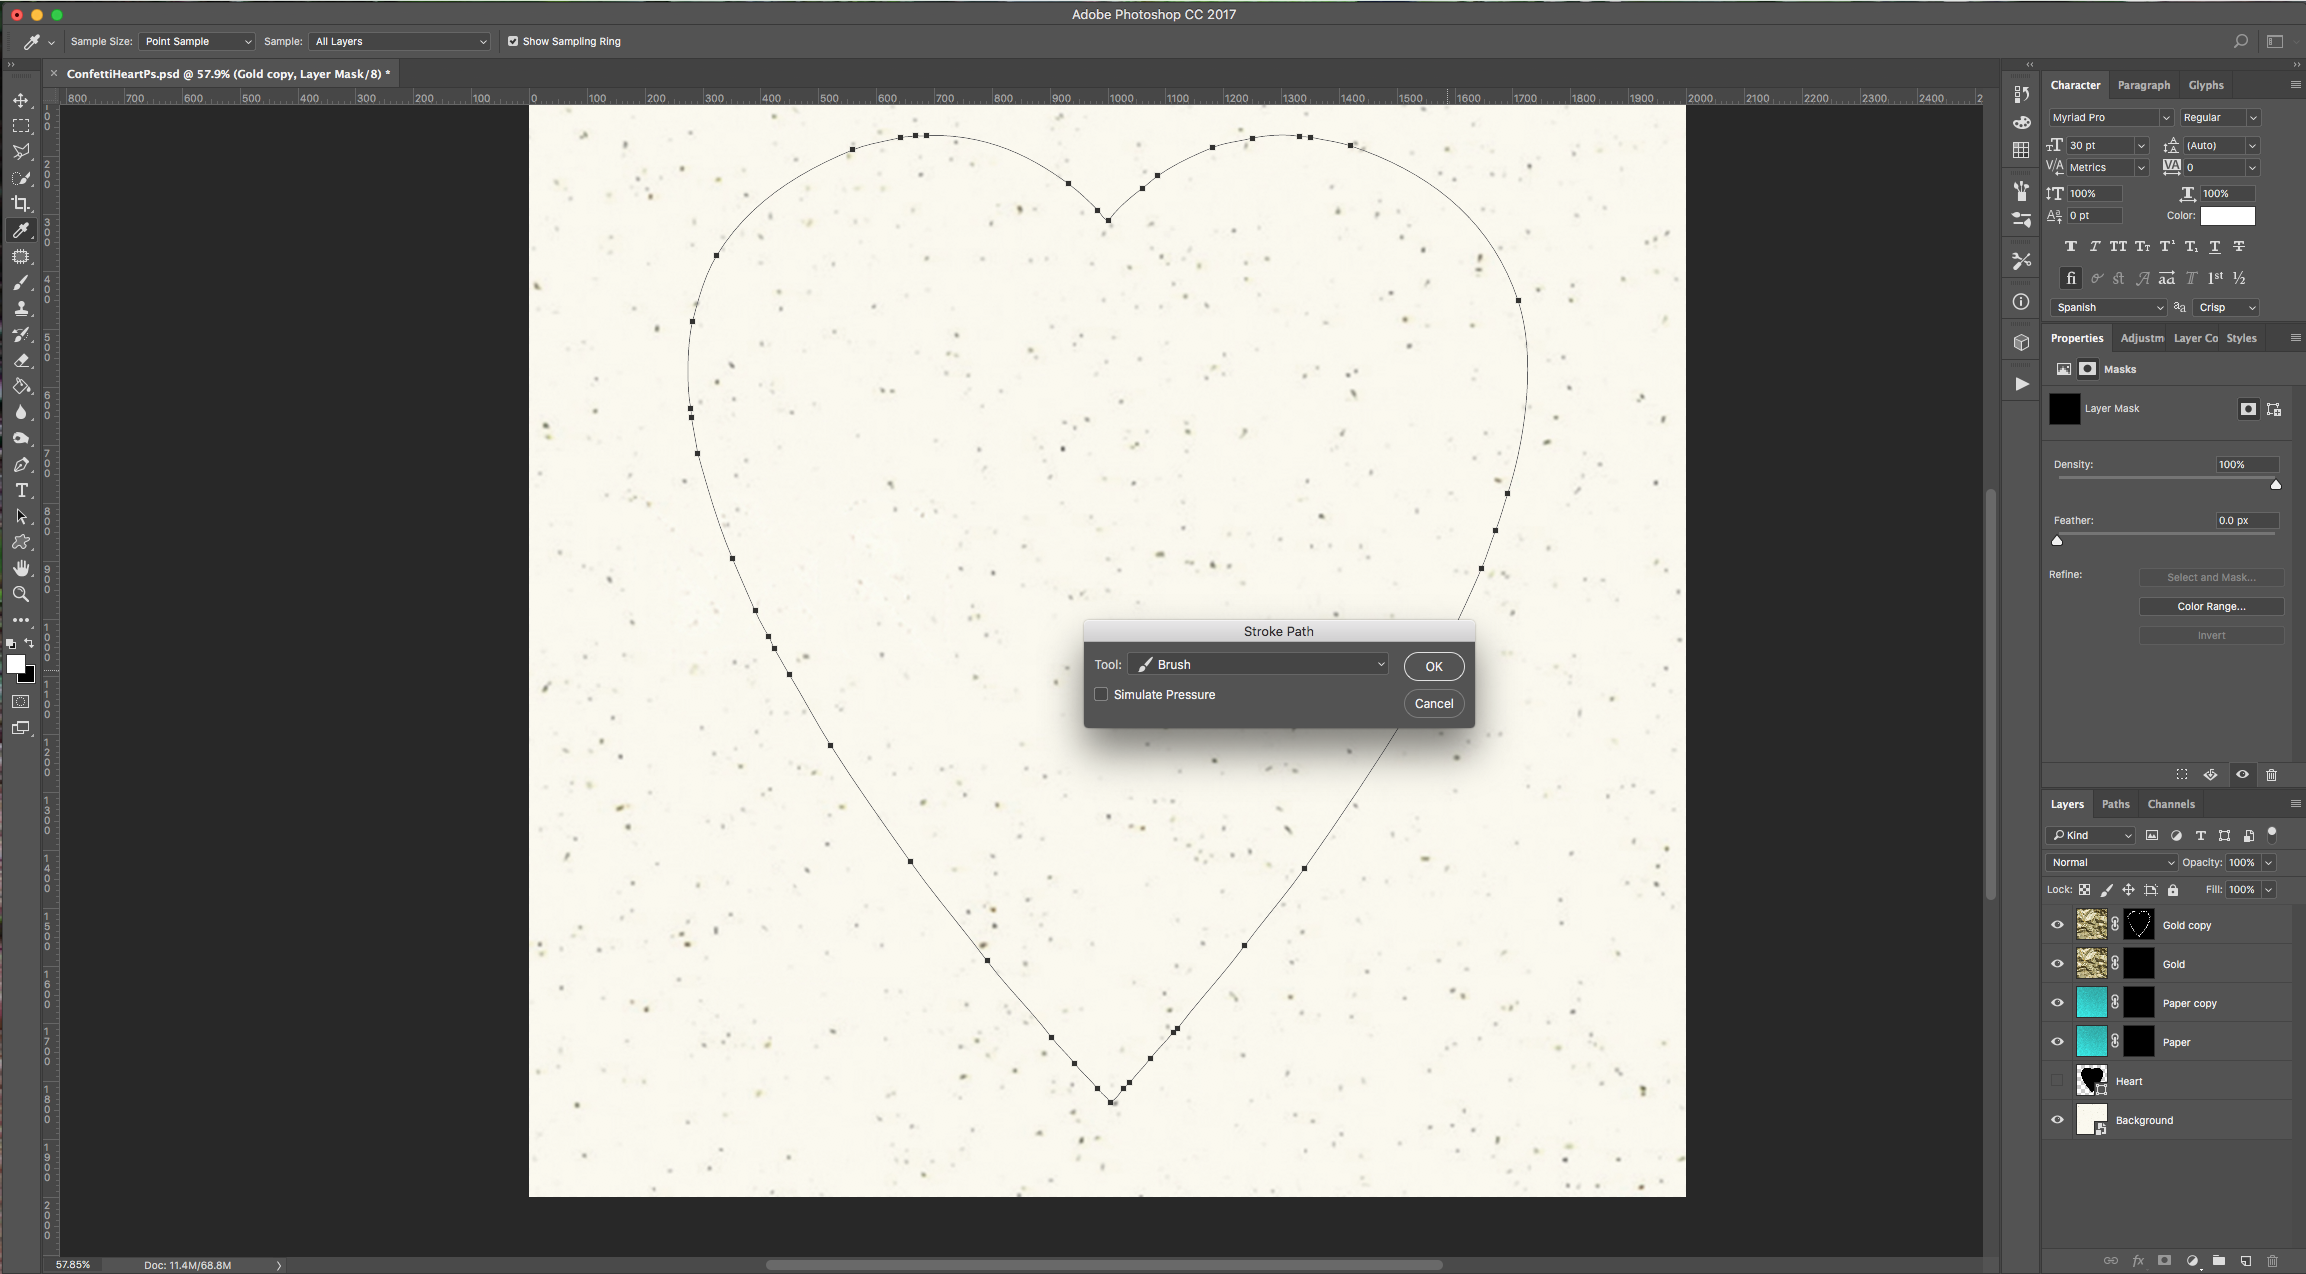
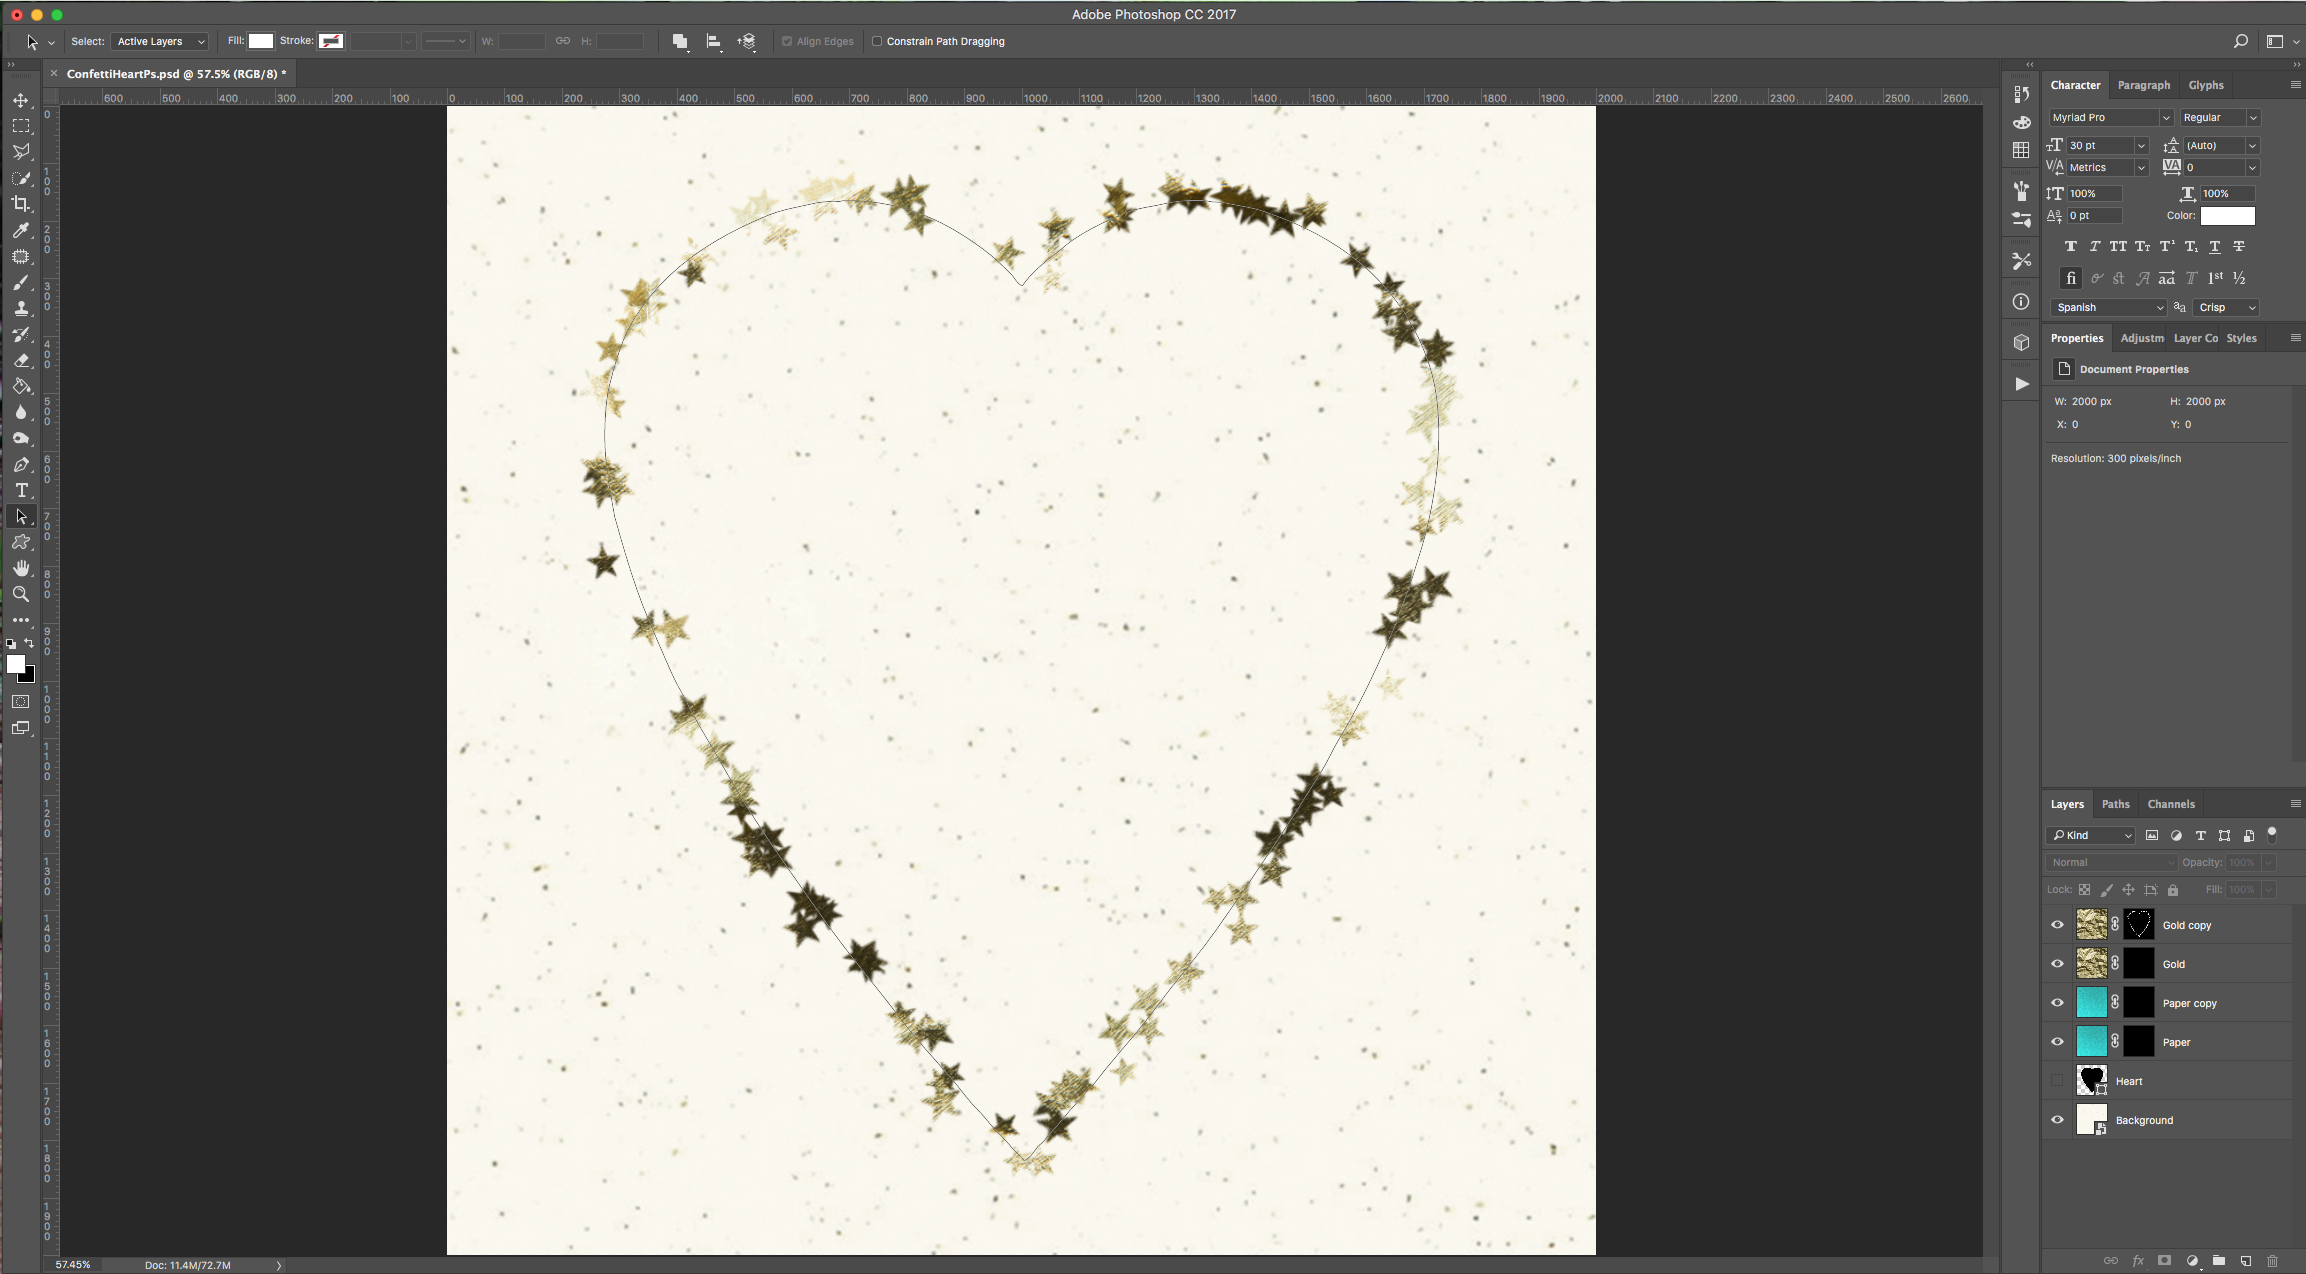
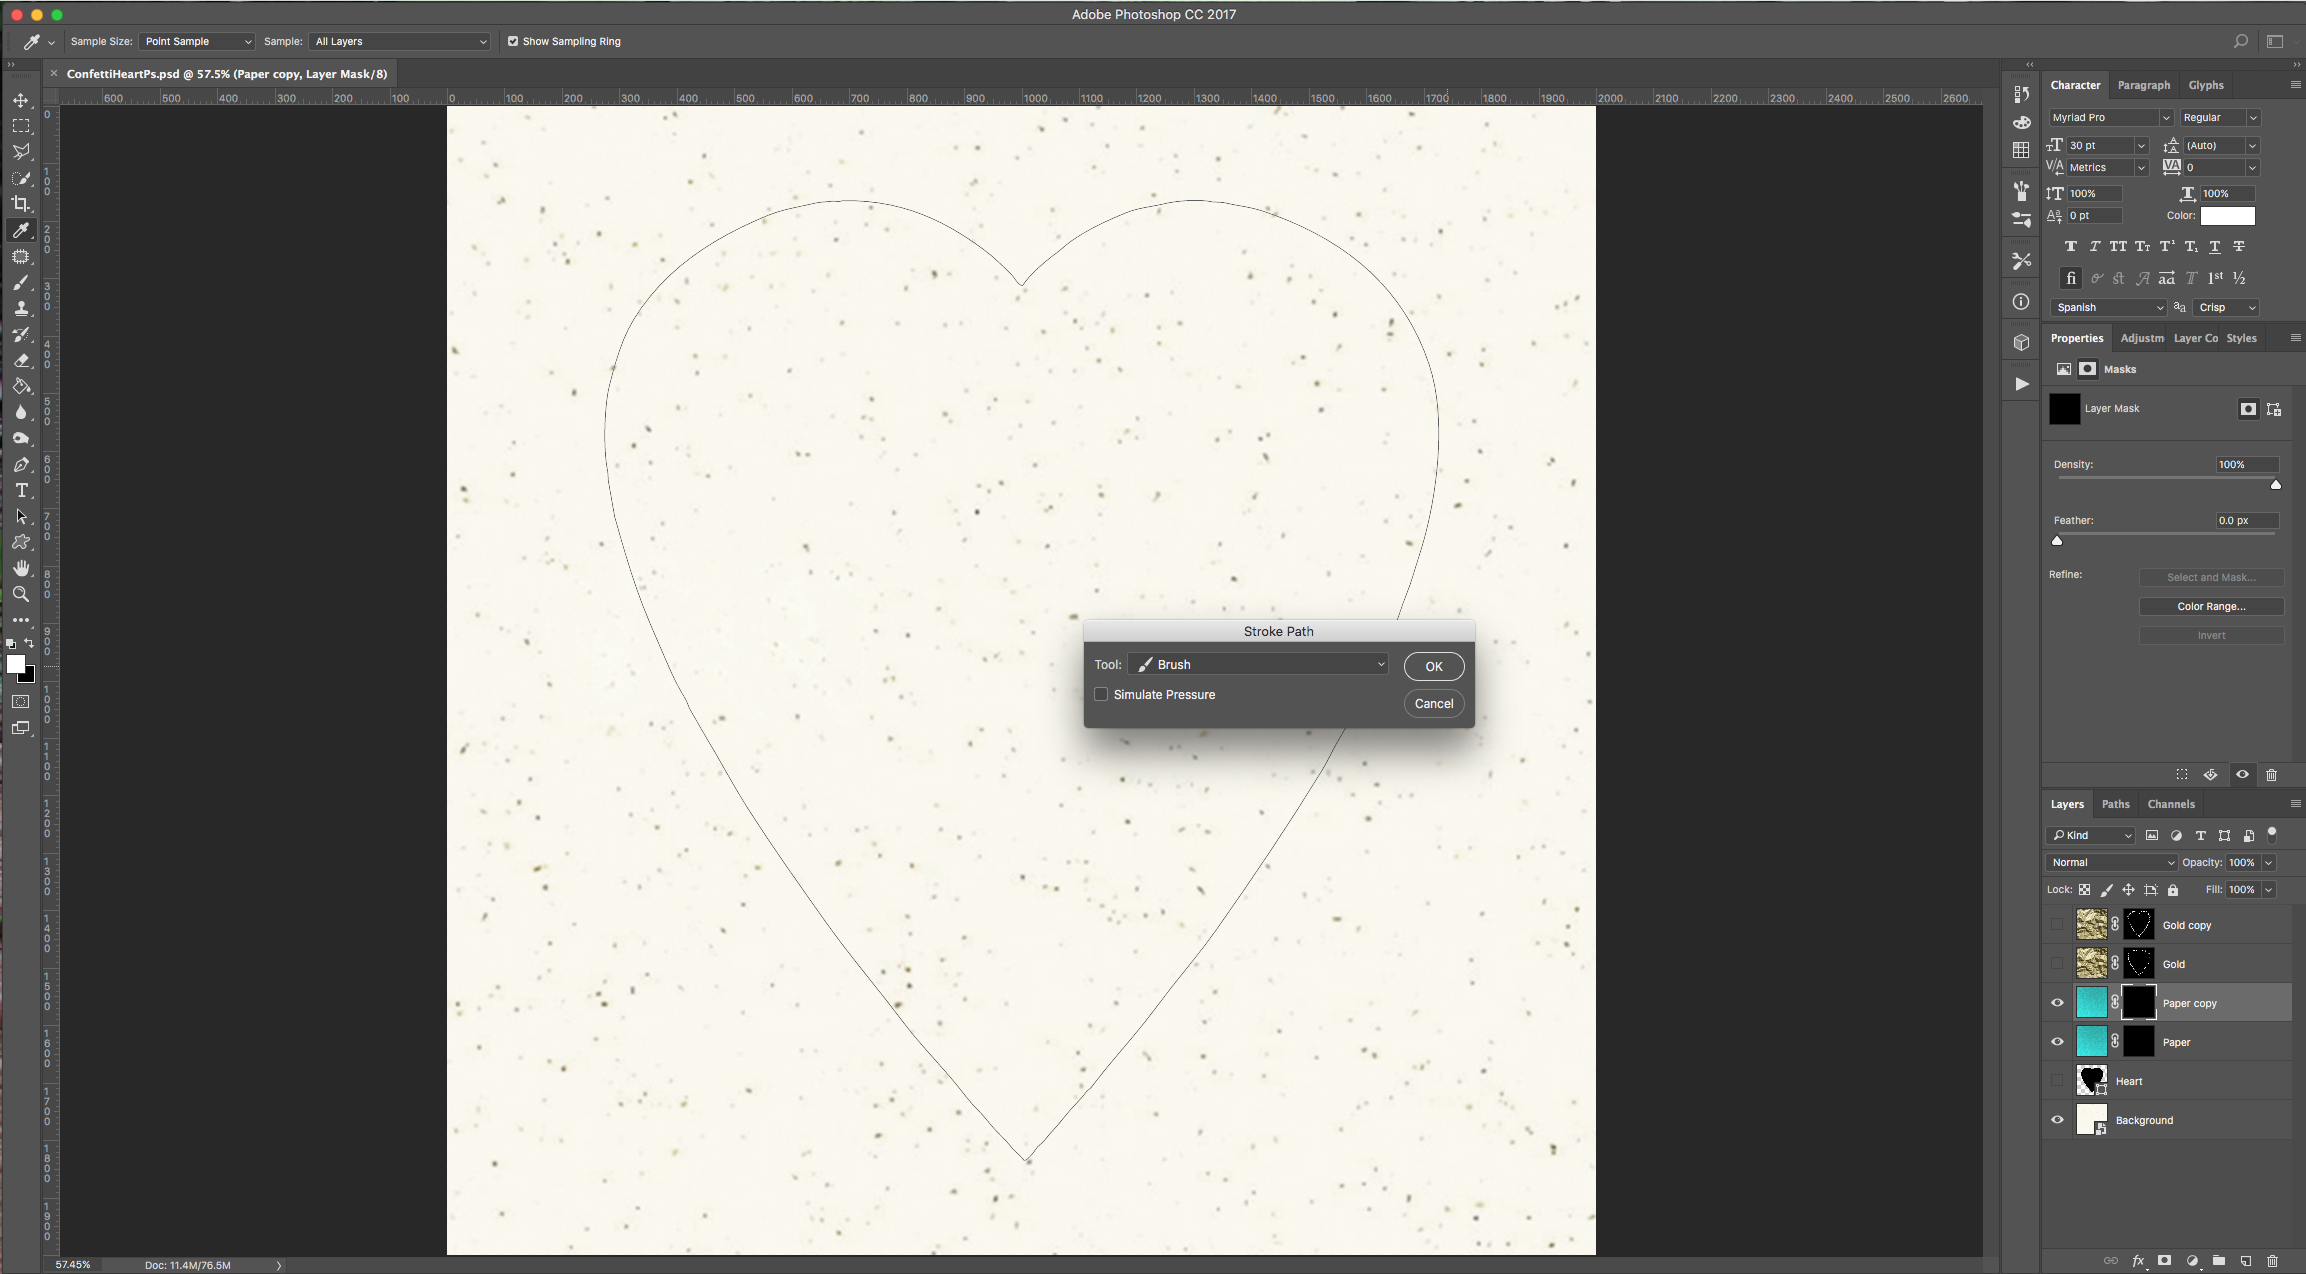
14 - Make sure that your “Confetti Star” Brush is selected, white is the “Fill” color and increase the size of your brush if needed (we made it 80 px). Then, use the “Path Selection Too,” (A), right-click on top of the “Work Path” and choose “Stroke Path”. Repeat a couple more times.
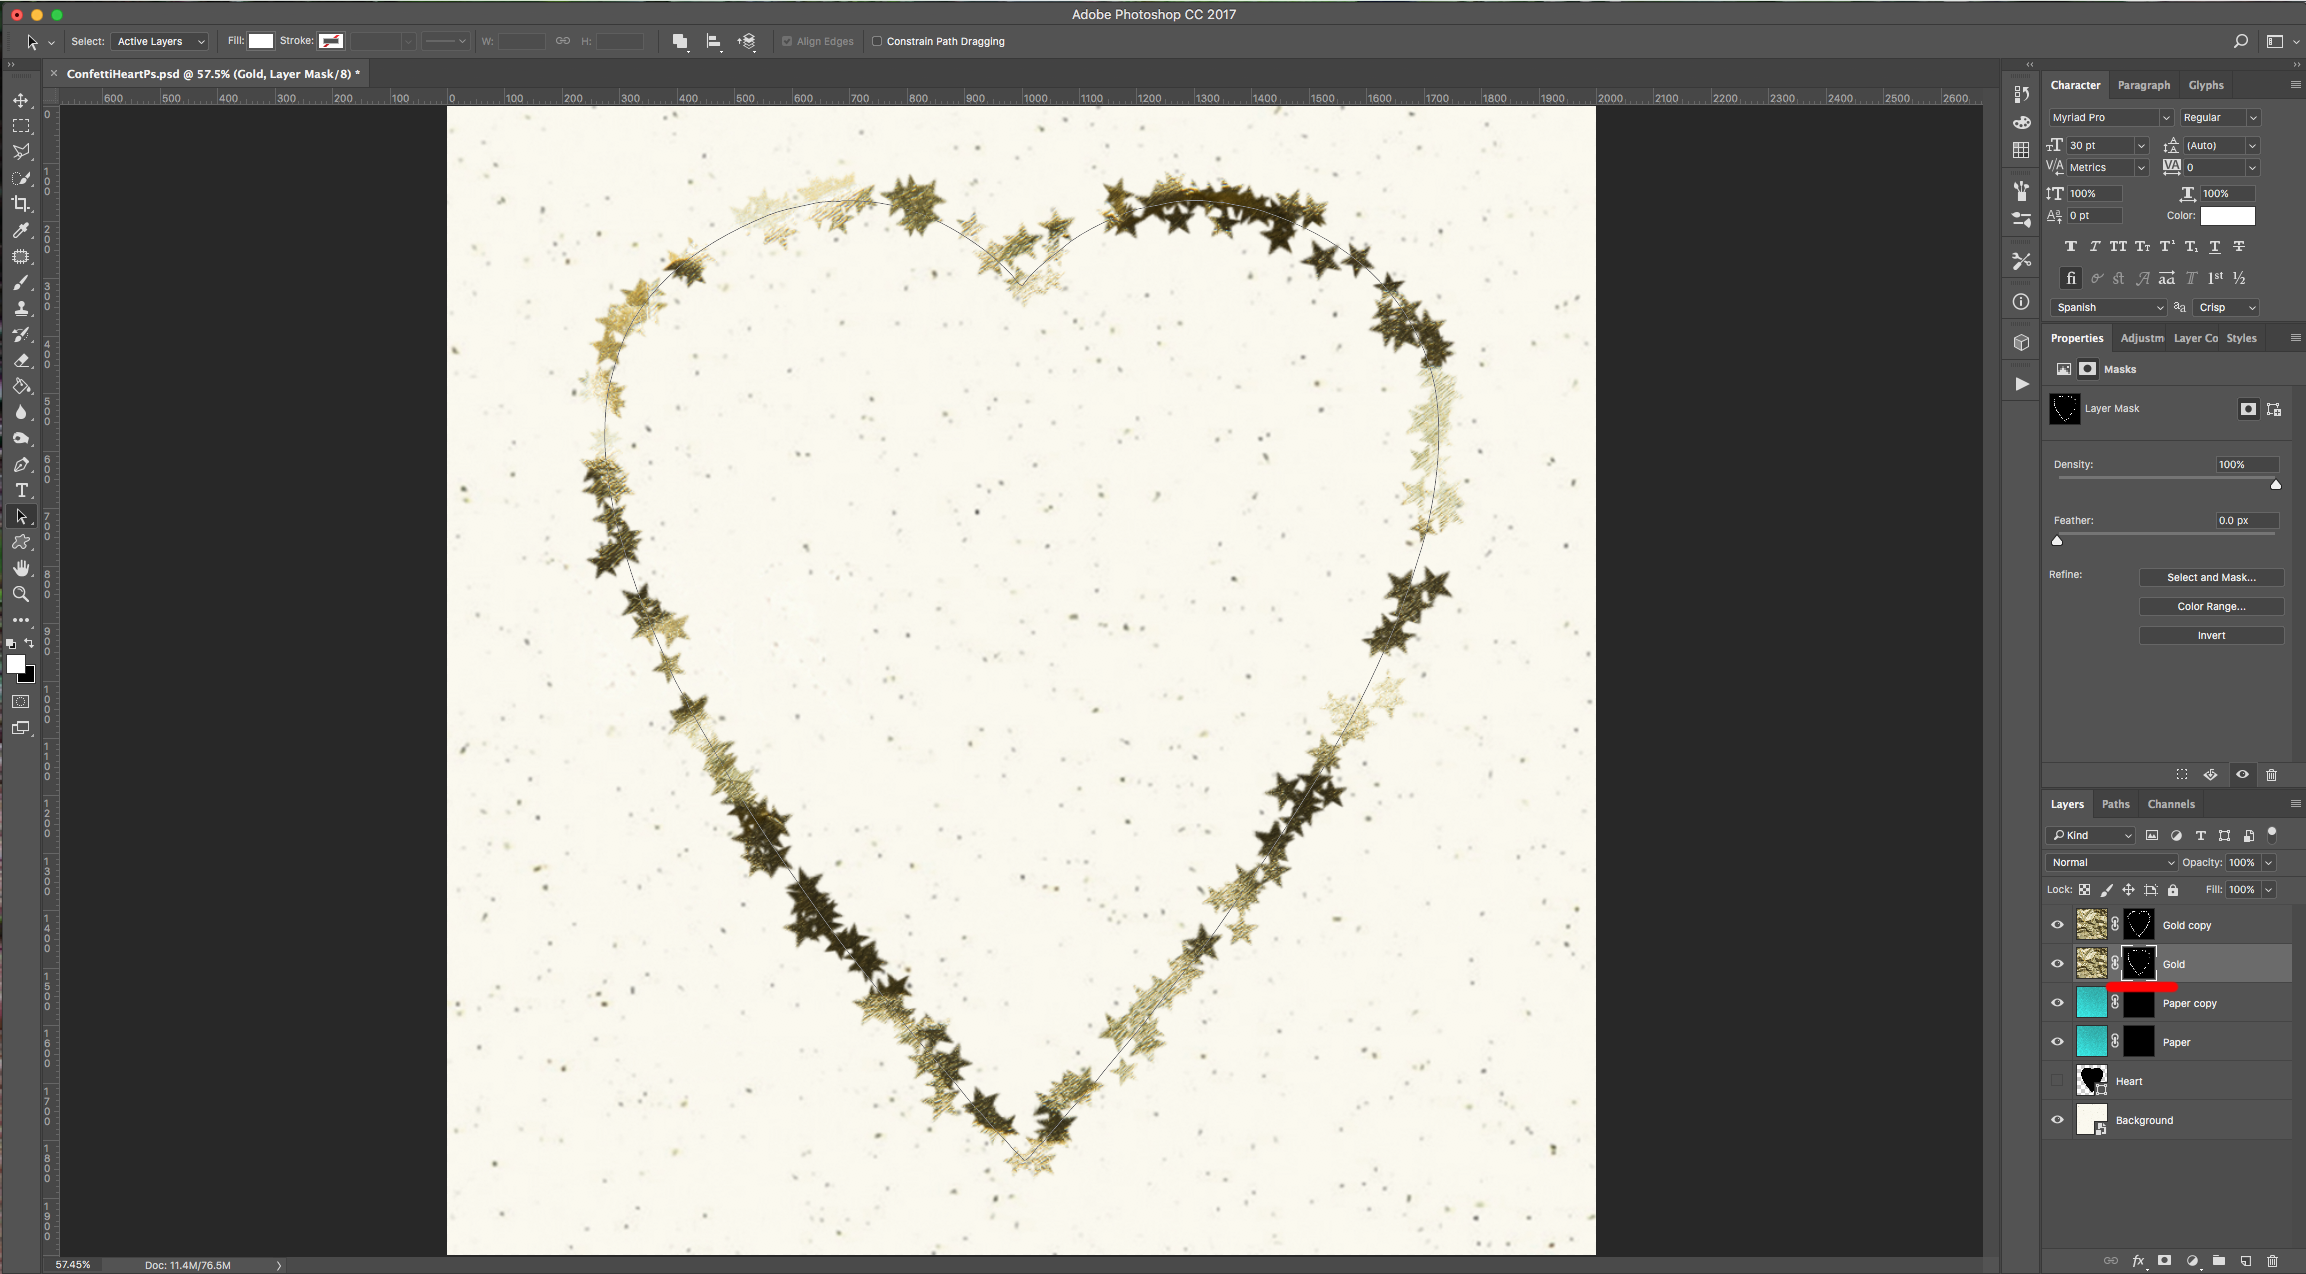
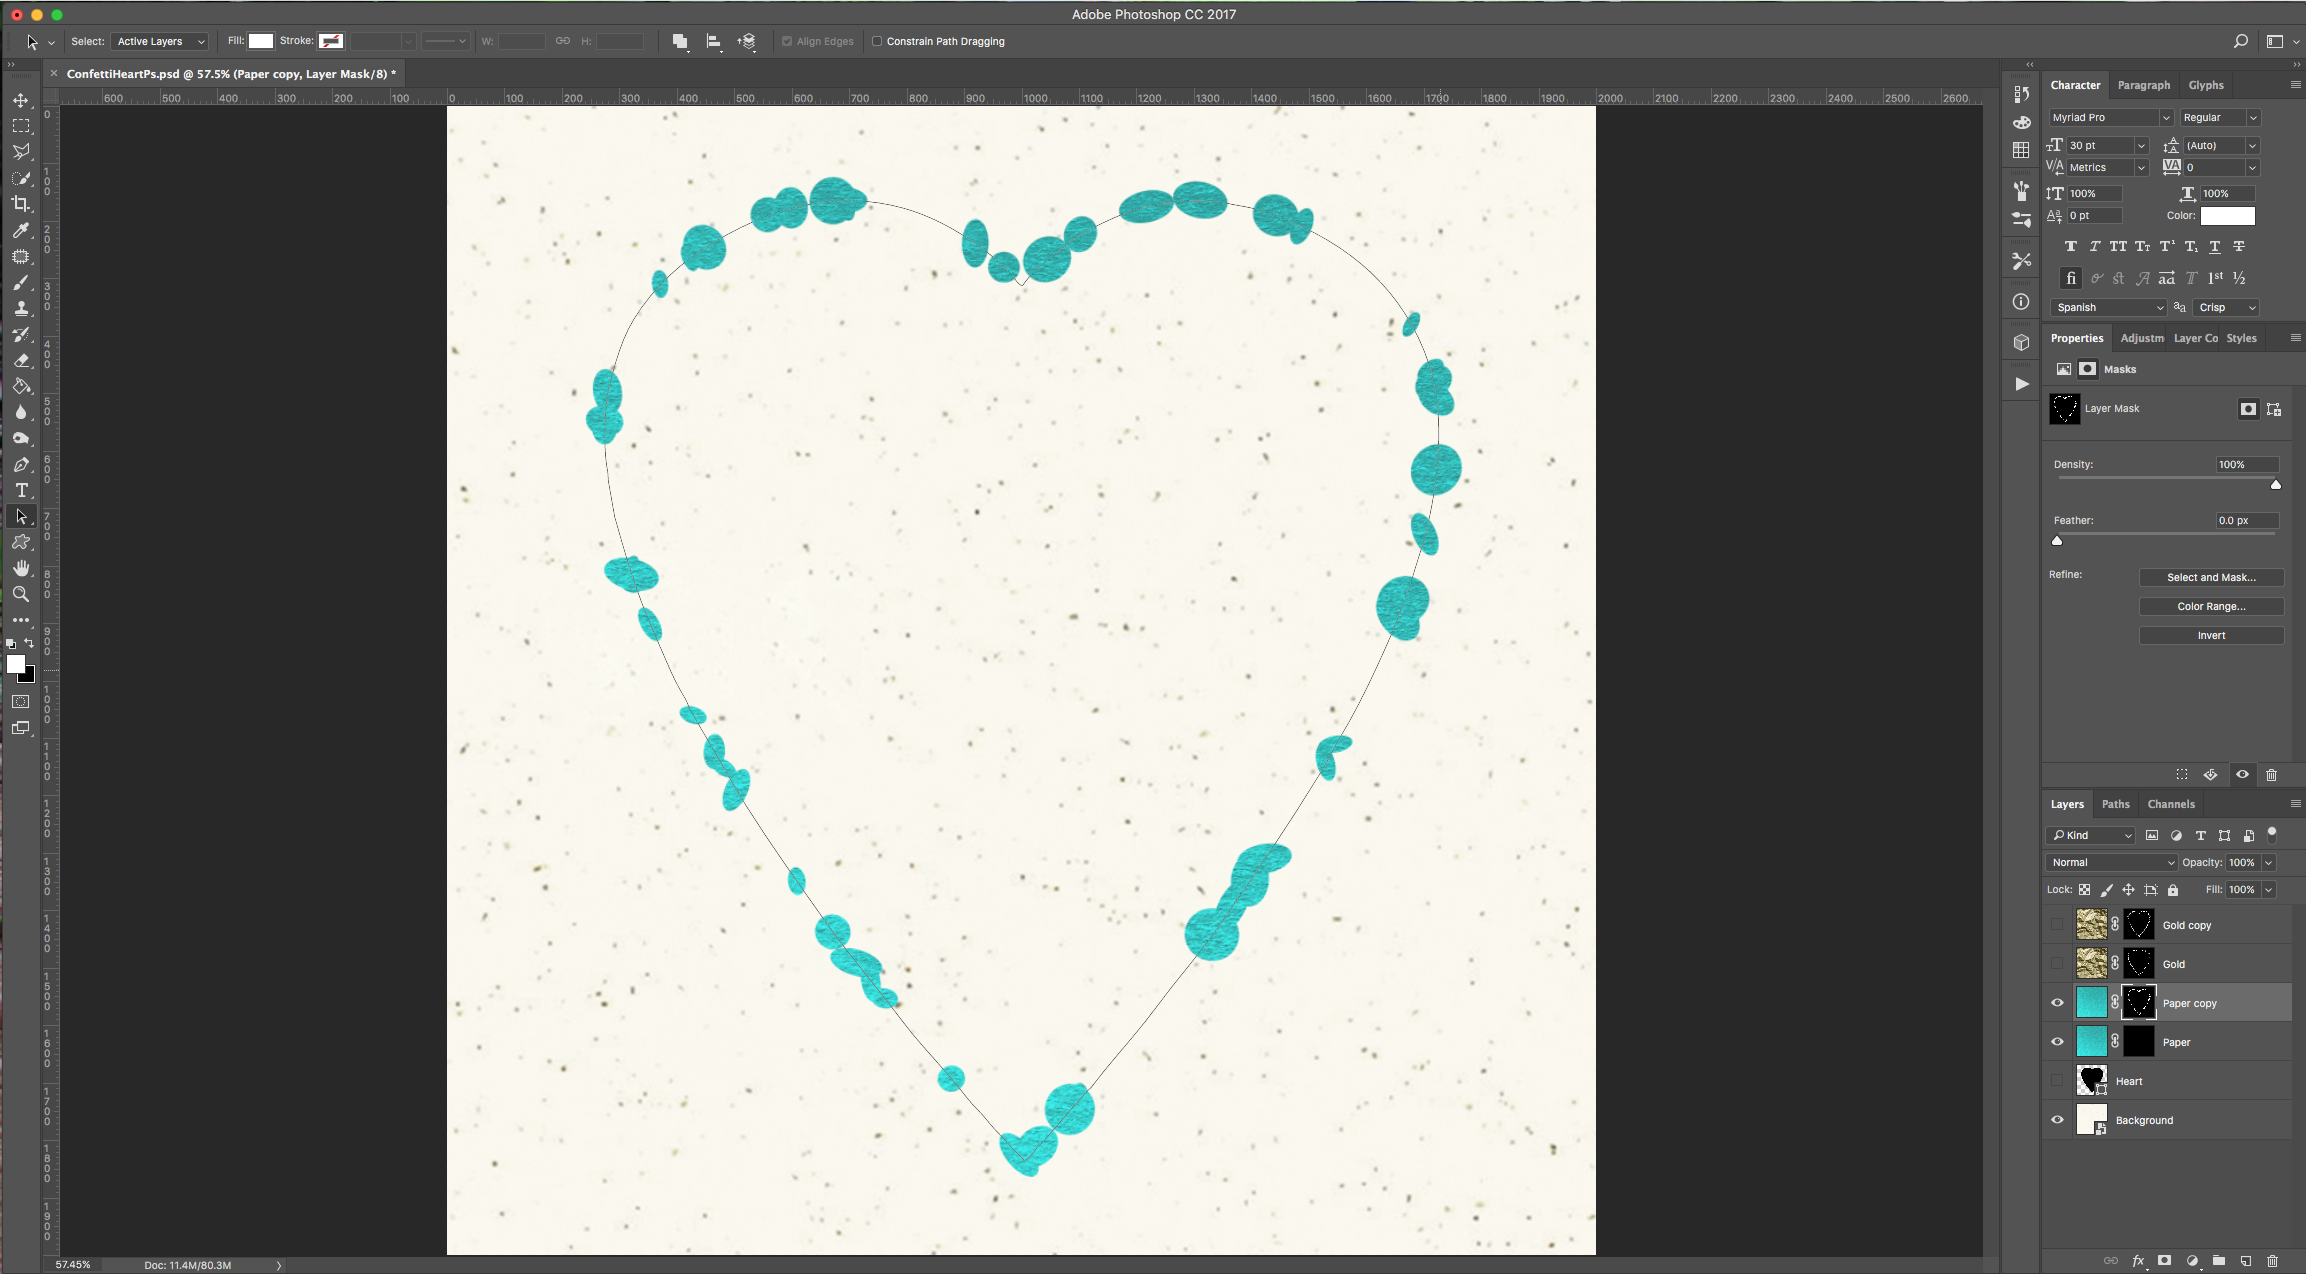
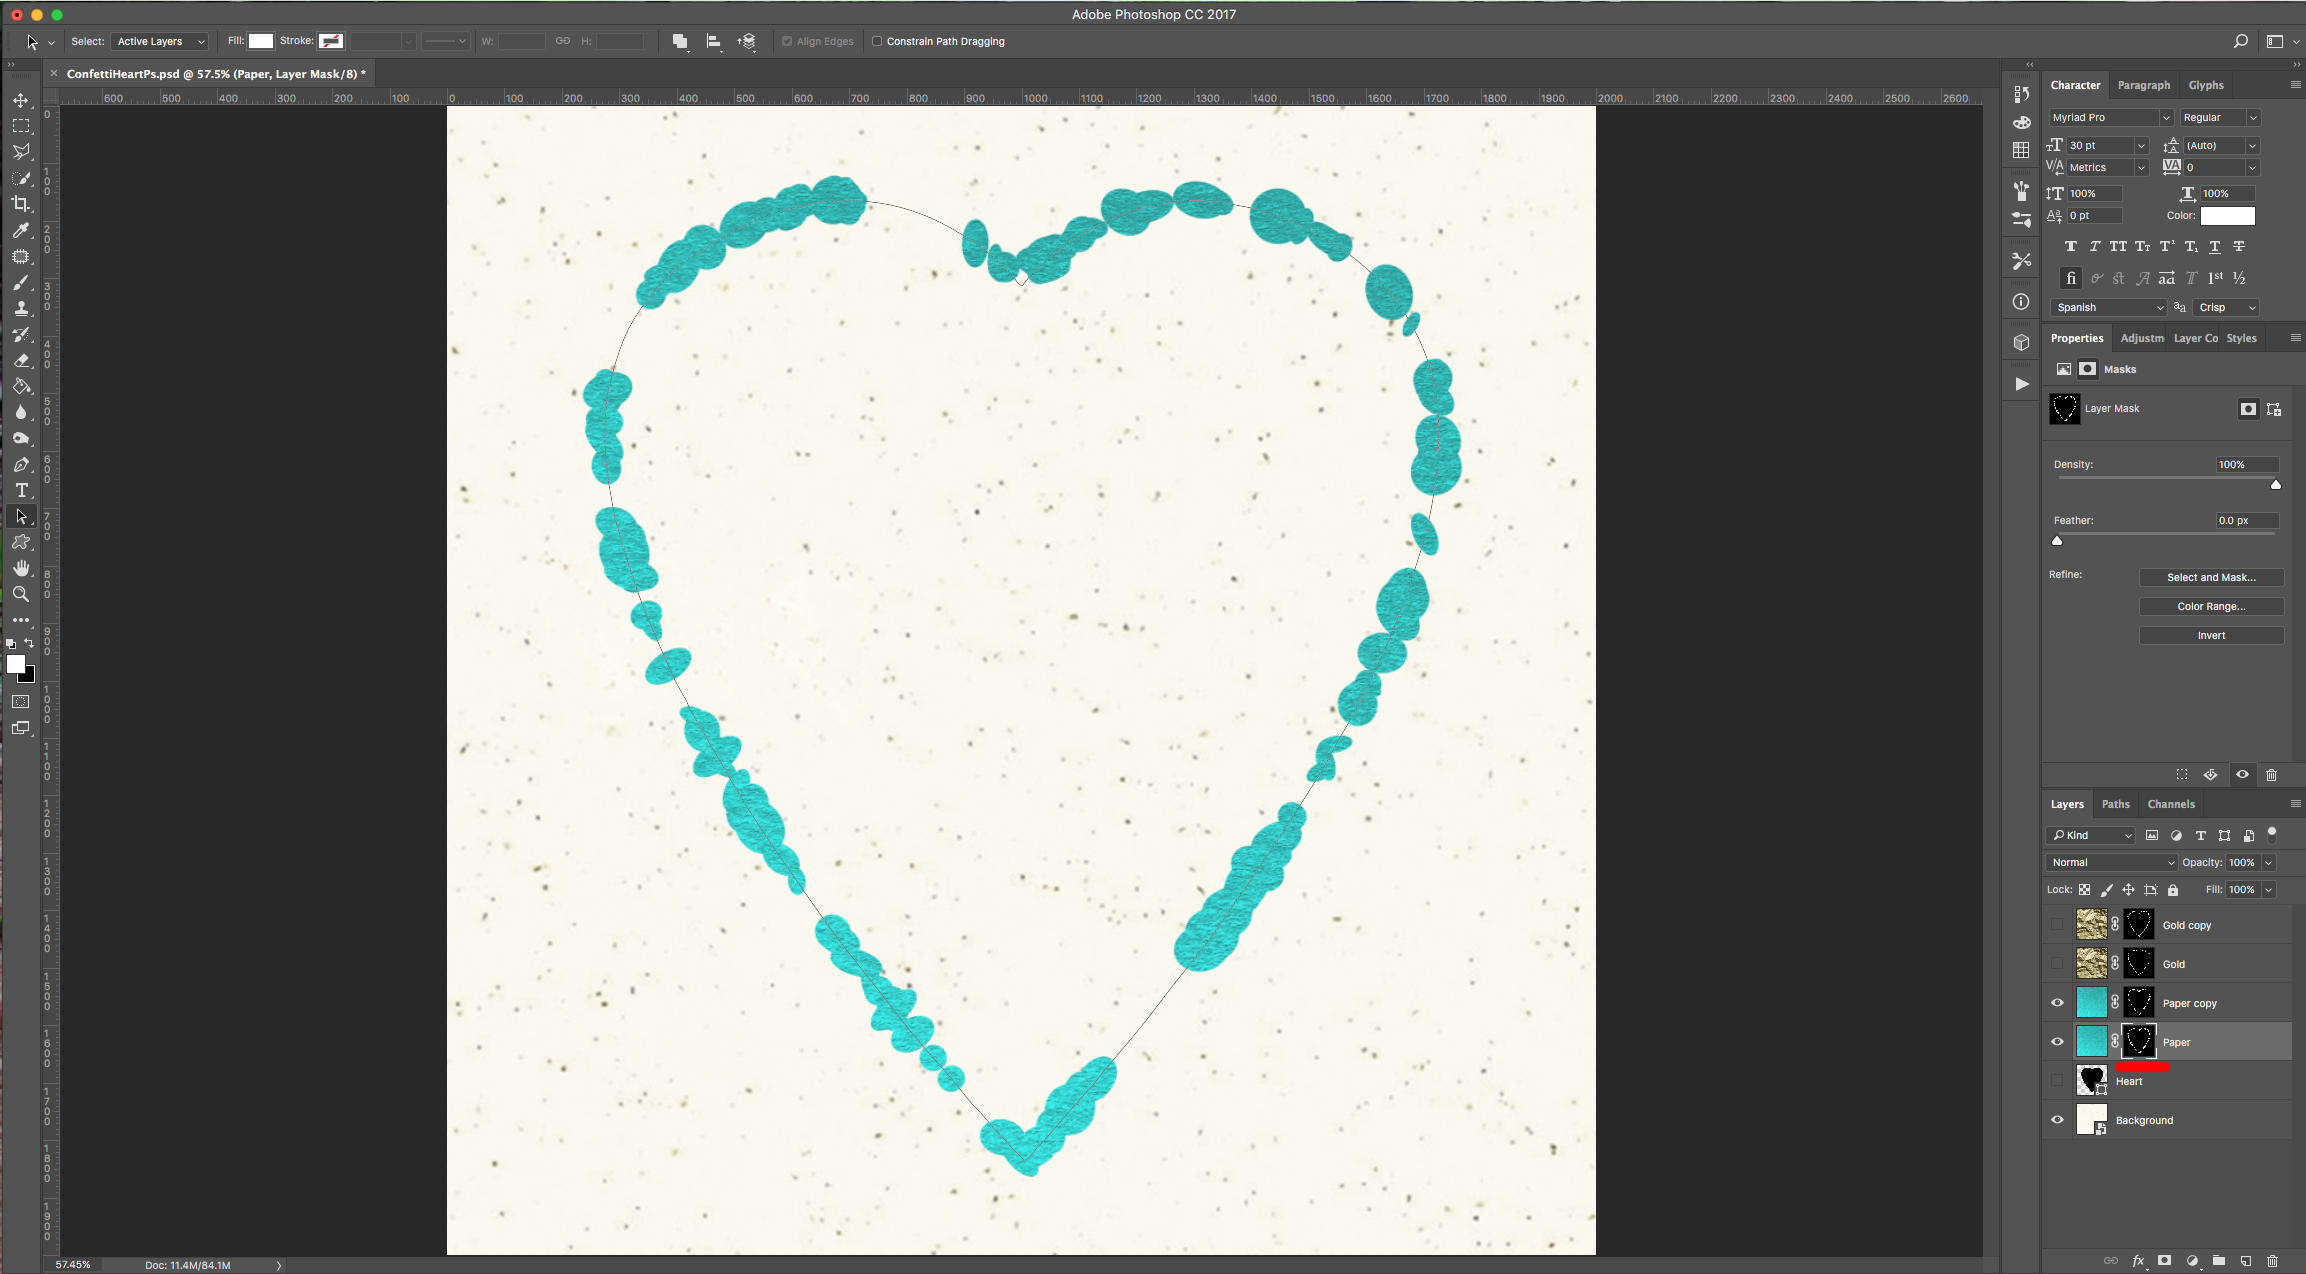
15 - Do the same with the “Gold” Layer, then hide both “Gold” Layers for now by clicking on the small eye icon in the left side of their Thumbnails. Now, choose the “Confetti Oval” Brush and do the same you did in “Step 11” this time with your “Paper” Layers
16 - Double-click on top of your “Paper” Layer Thumbnail and apply the following “Layer Styles”:
Color Overlay:
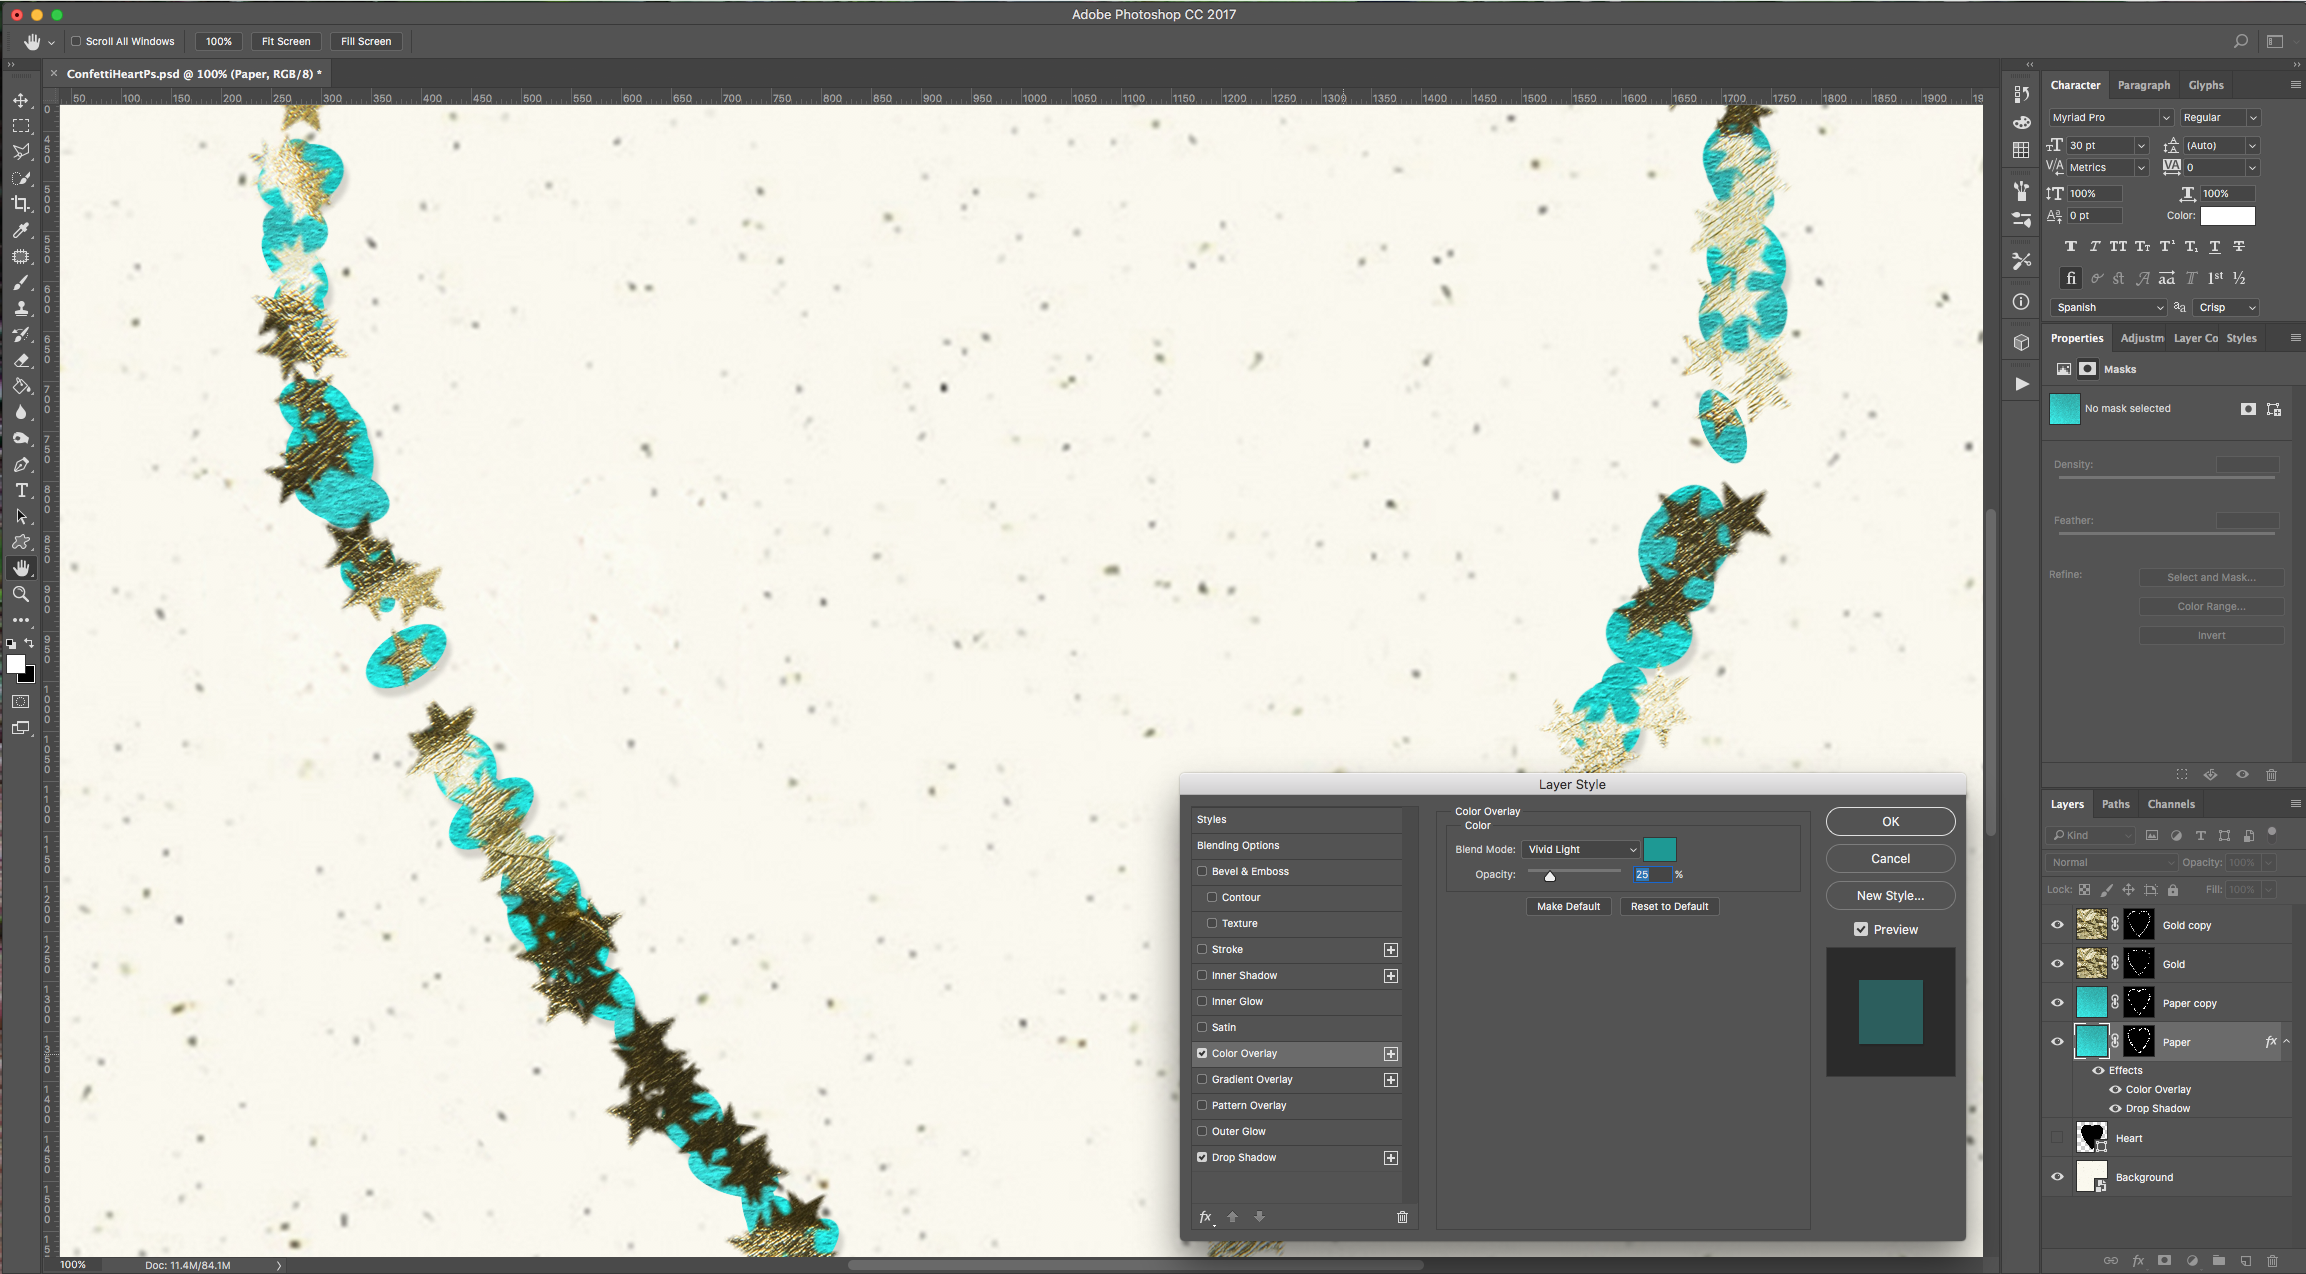
Drop Shadow:

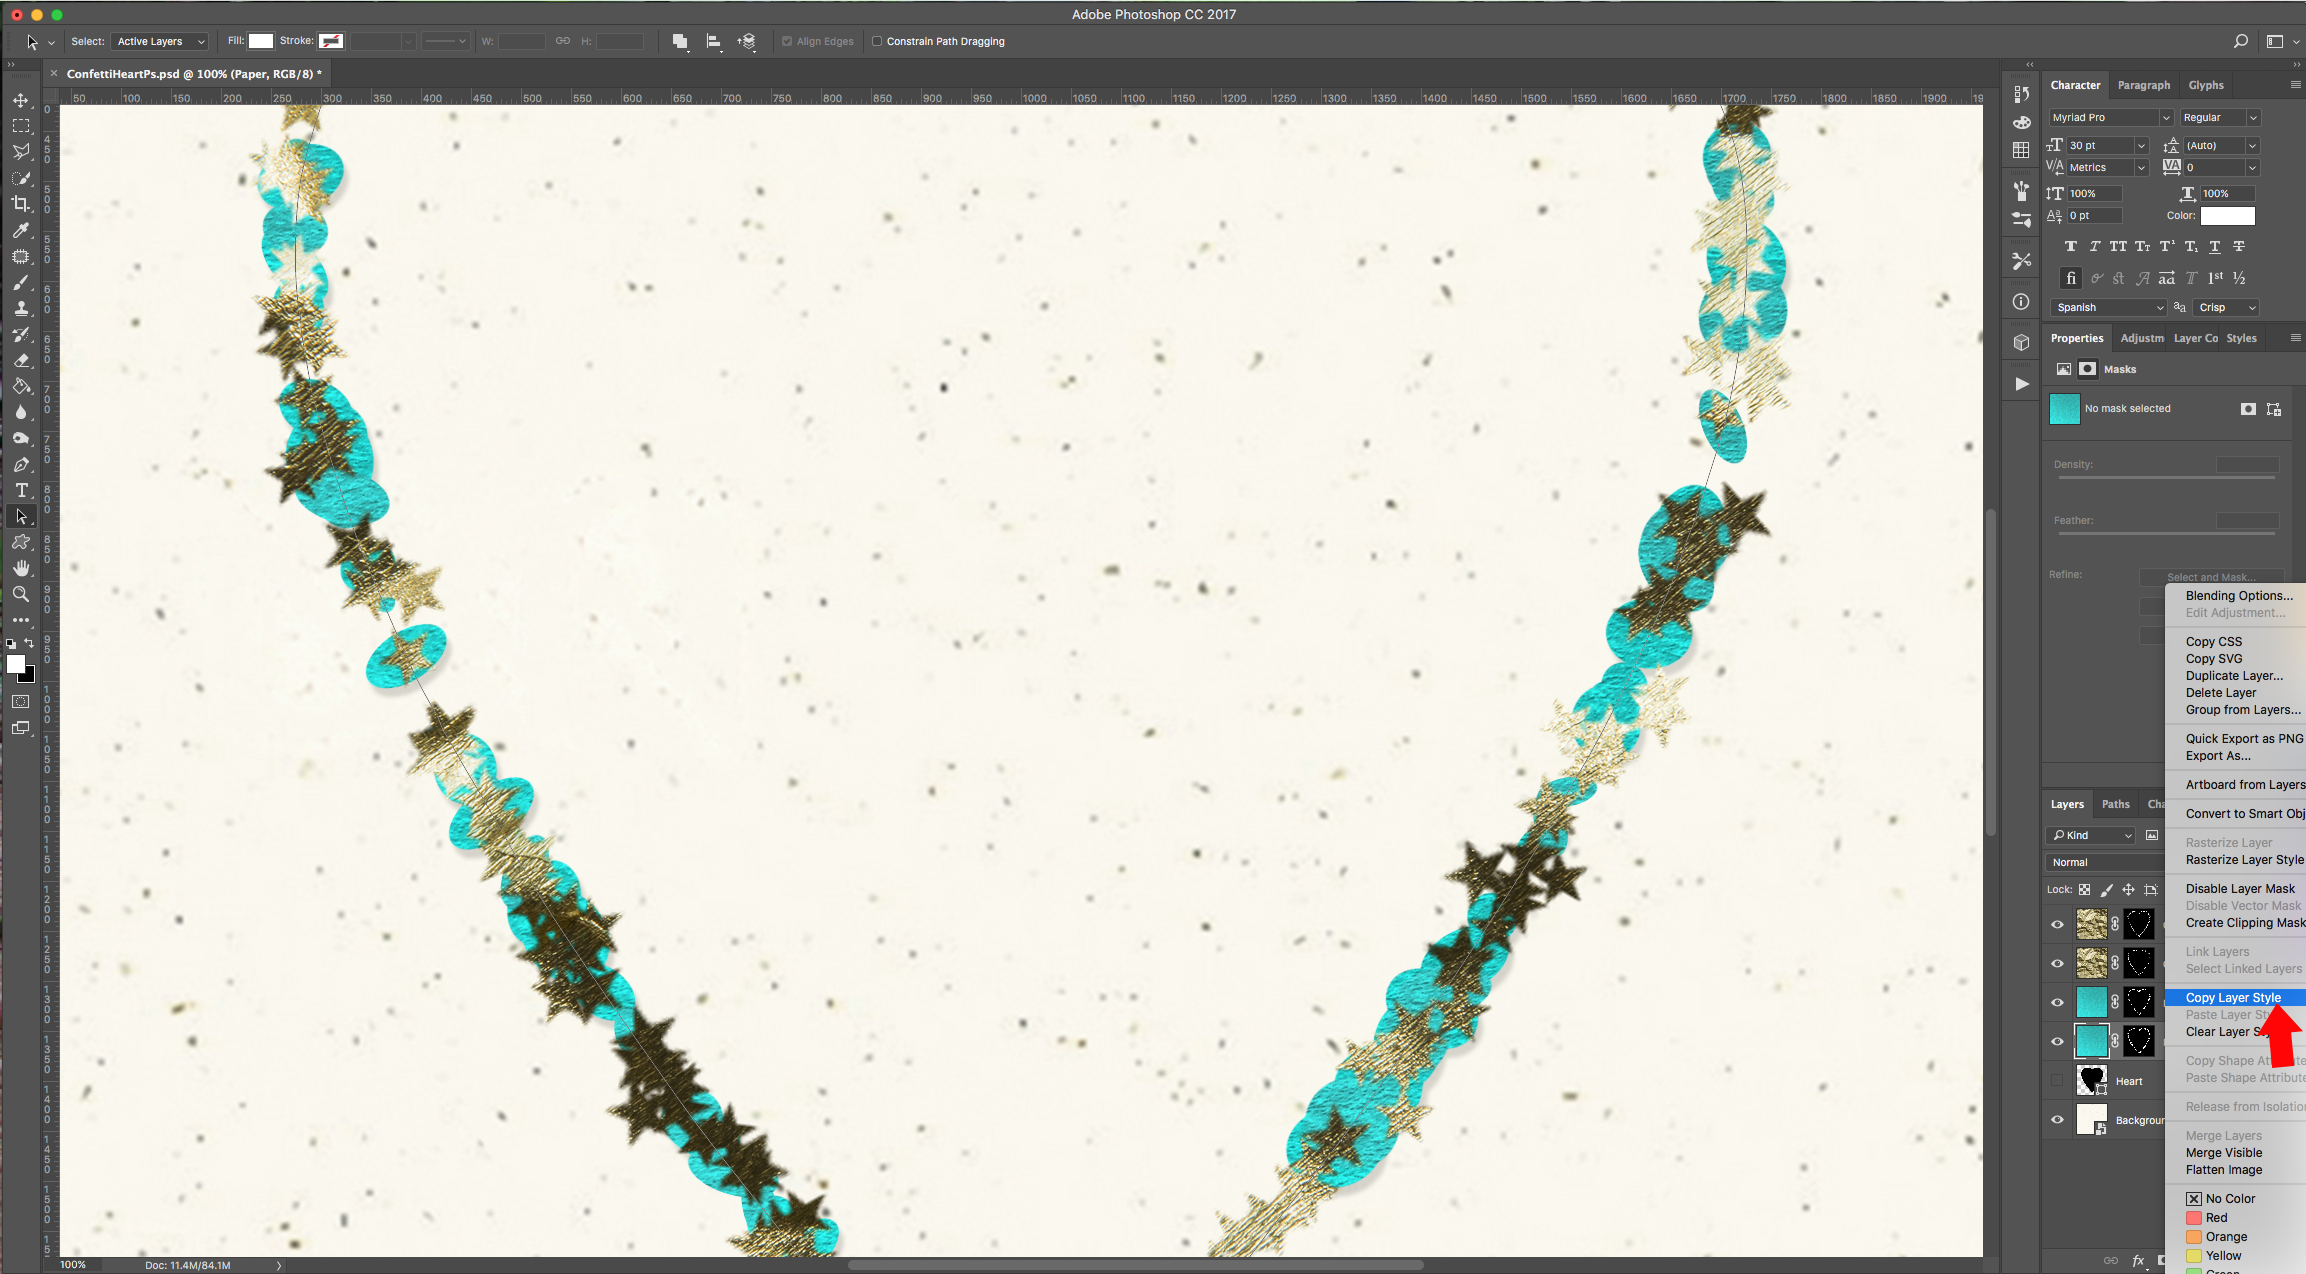
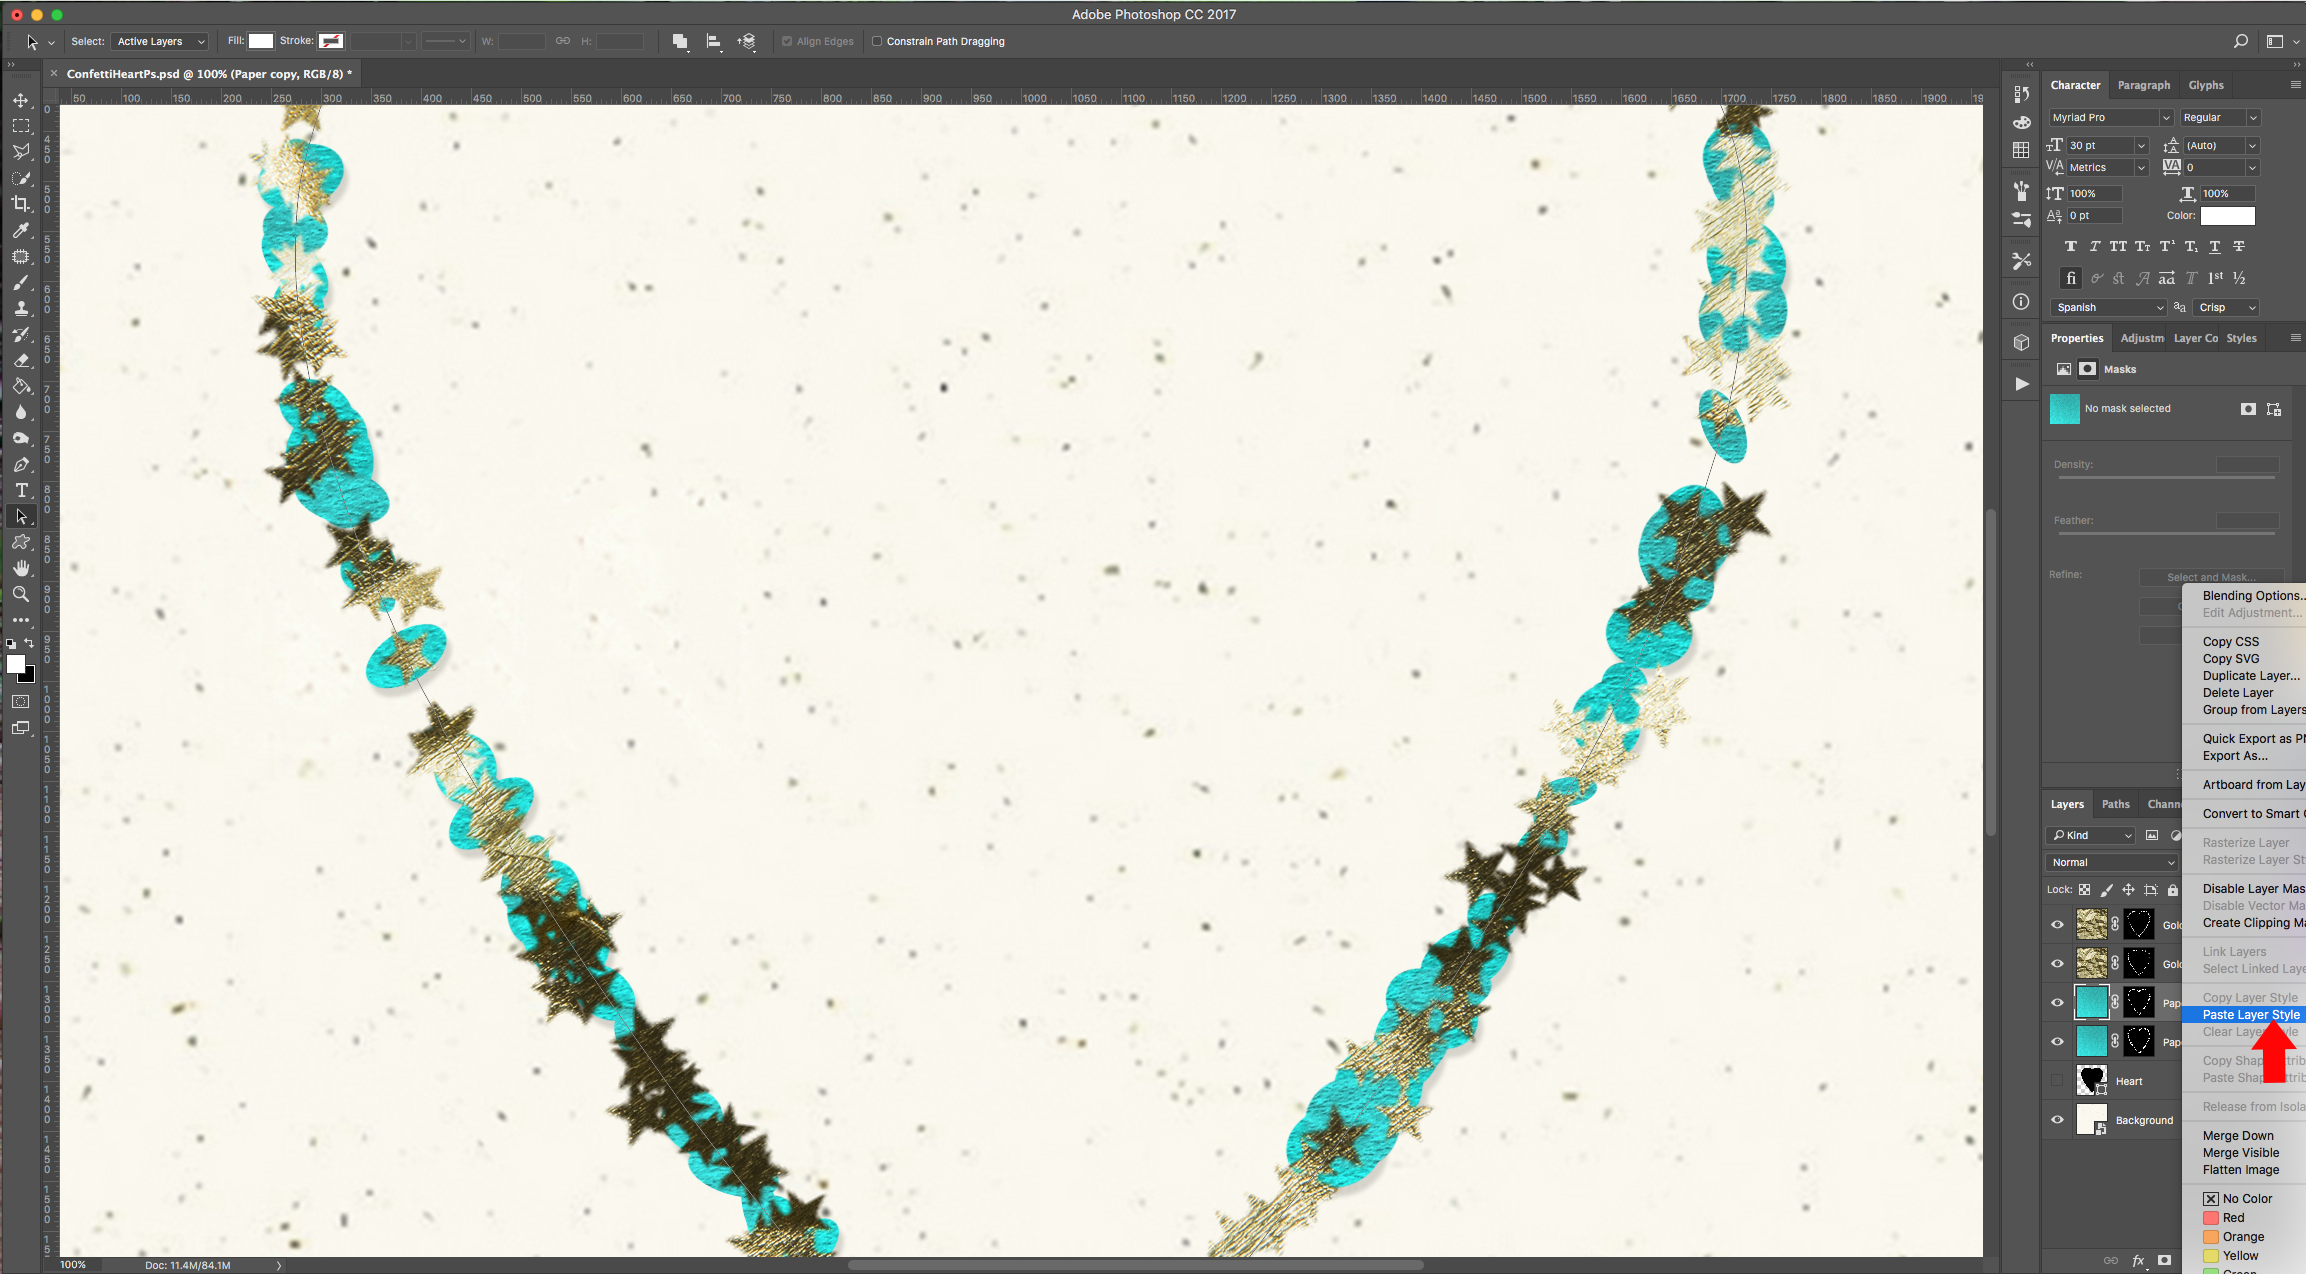
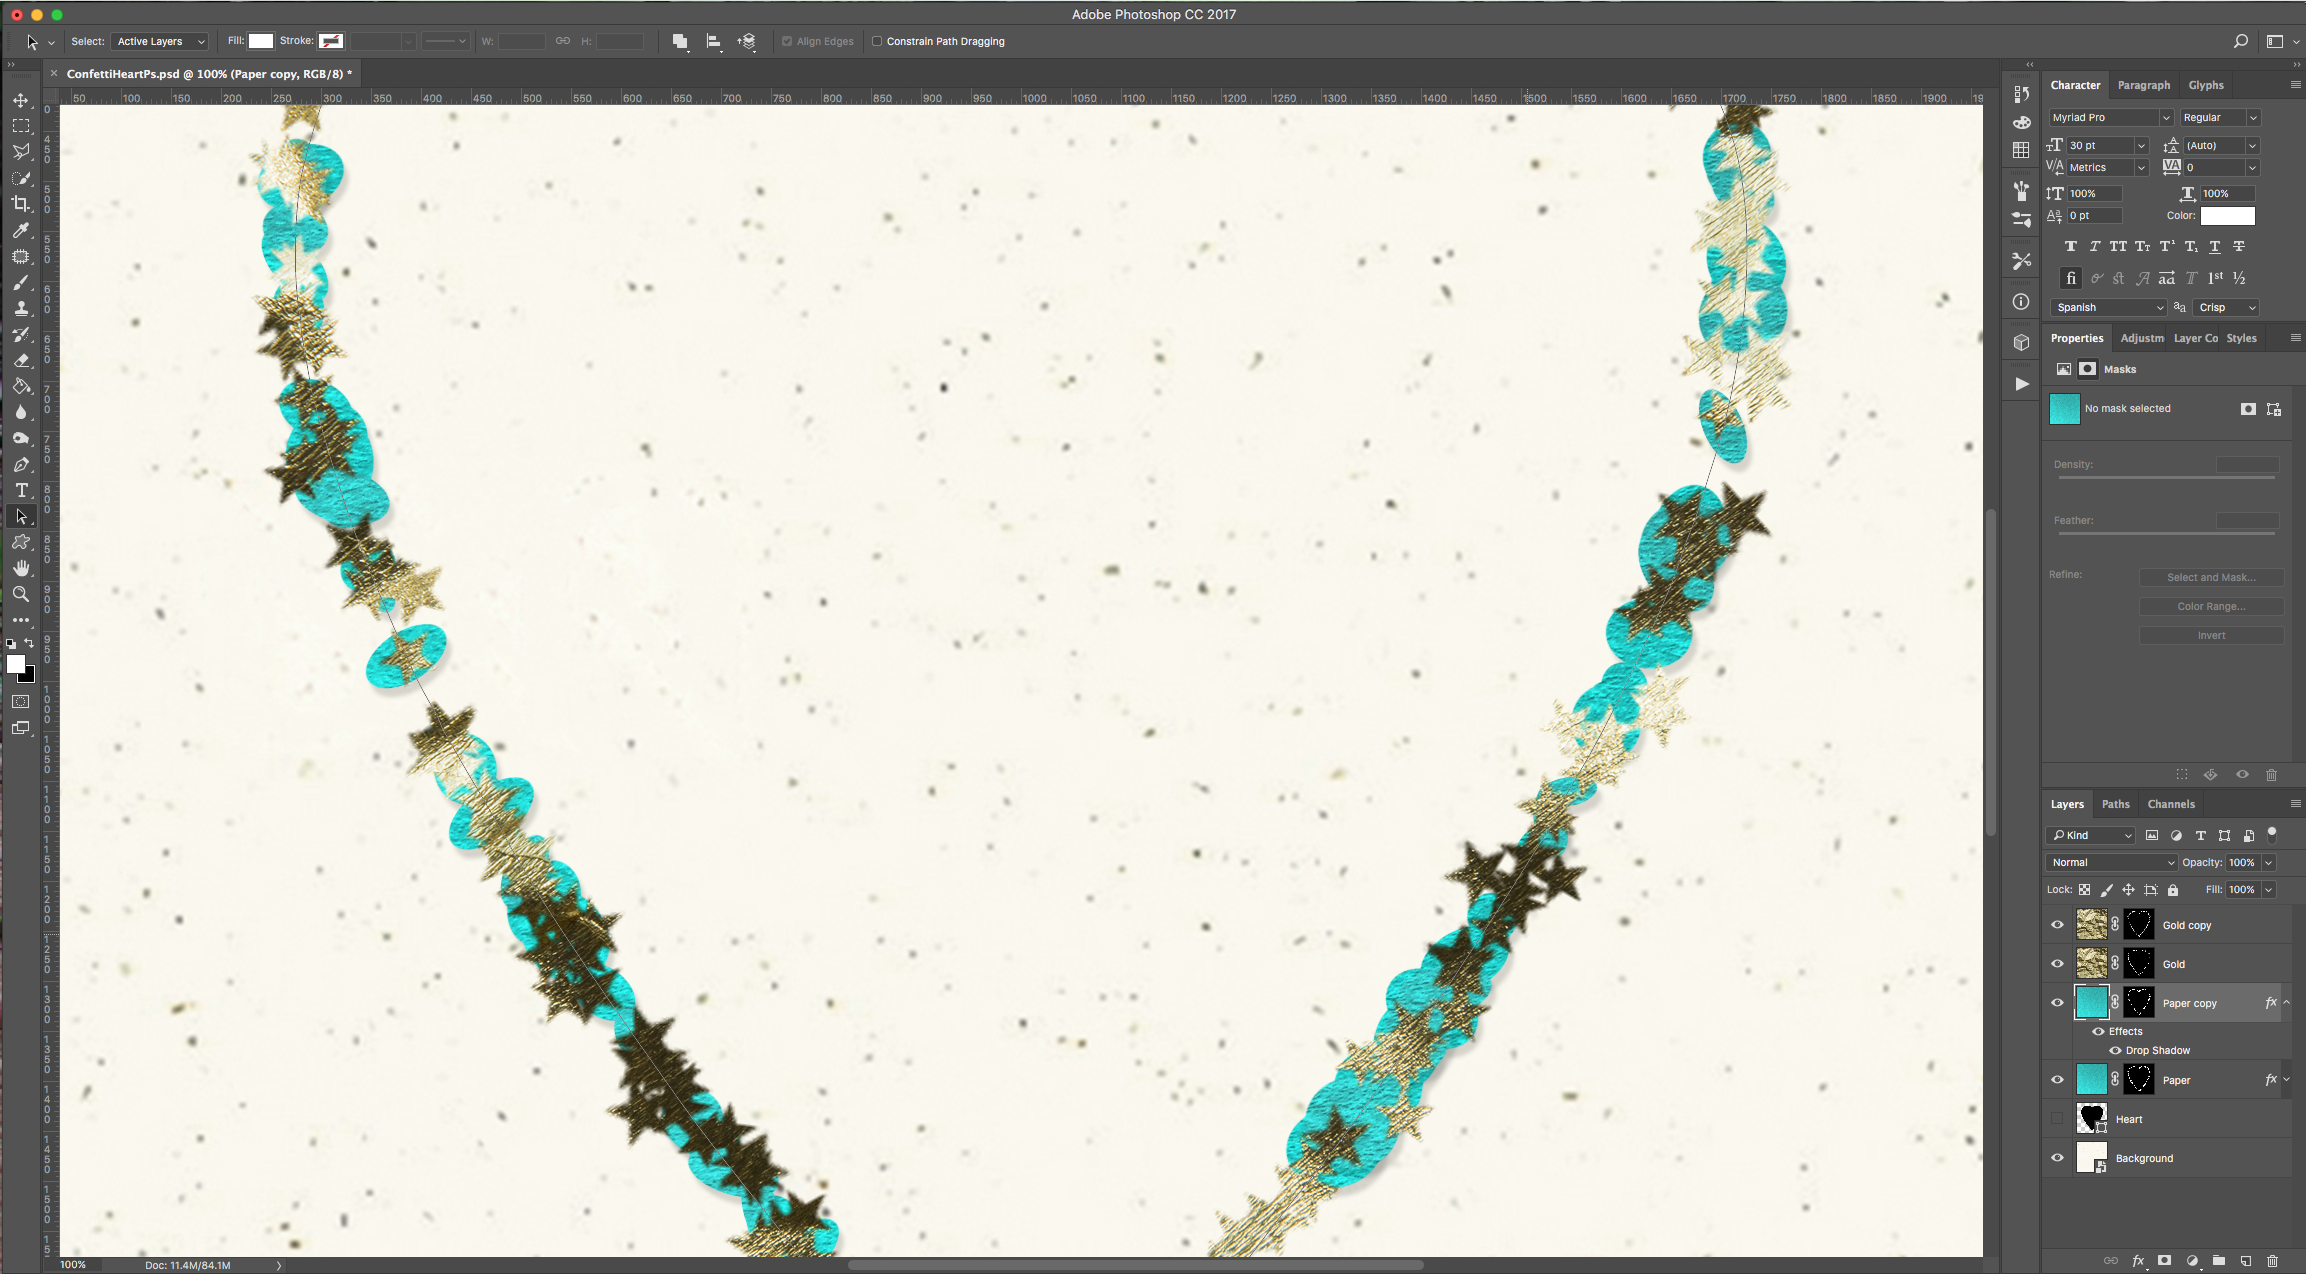
17 - Right-click on top of its Thumbnail and choose “Copy Layer Style”. Right-click on top of the “Paper copy” Layer Thumbnail, choose “Paste Layer Style” and delete the “Color Overlay” by dragging it to the “Trash”.
18 - Hide your “Paper” Layers, double-click on top of your “Gold” Layer Thumbnail and apply the following “Layer Styles”:
Drop Shadow:
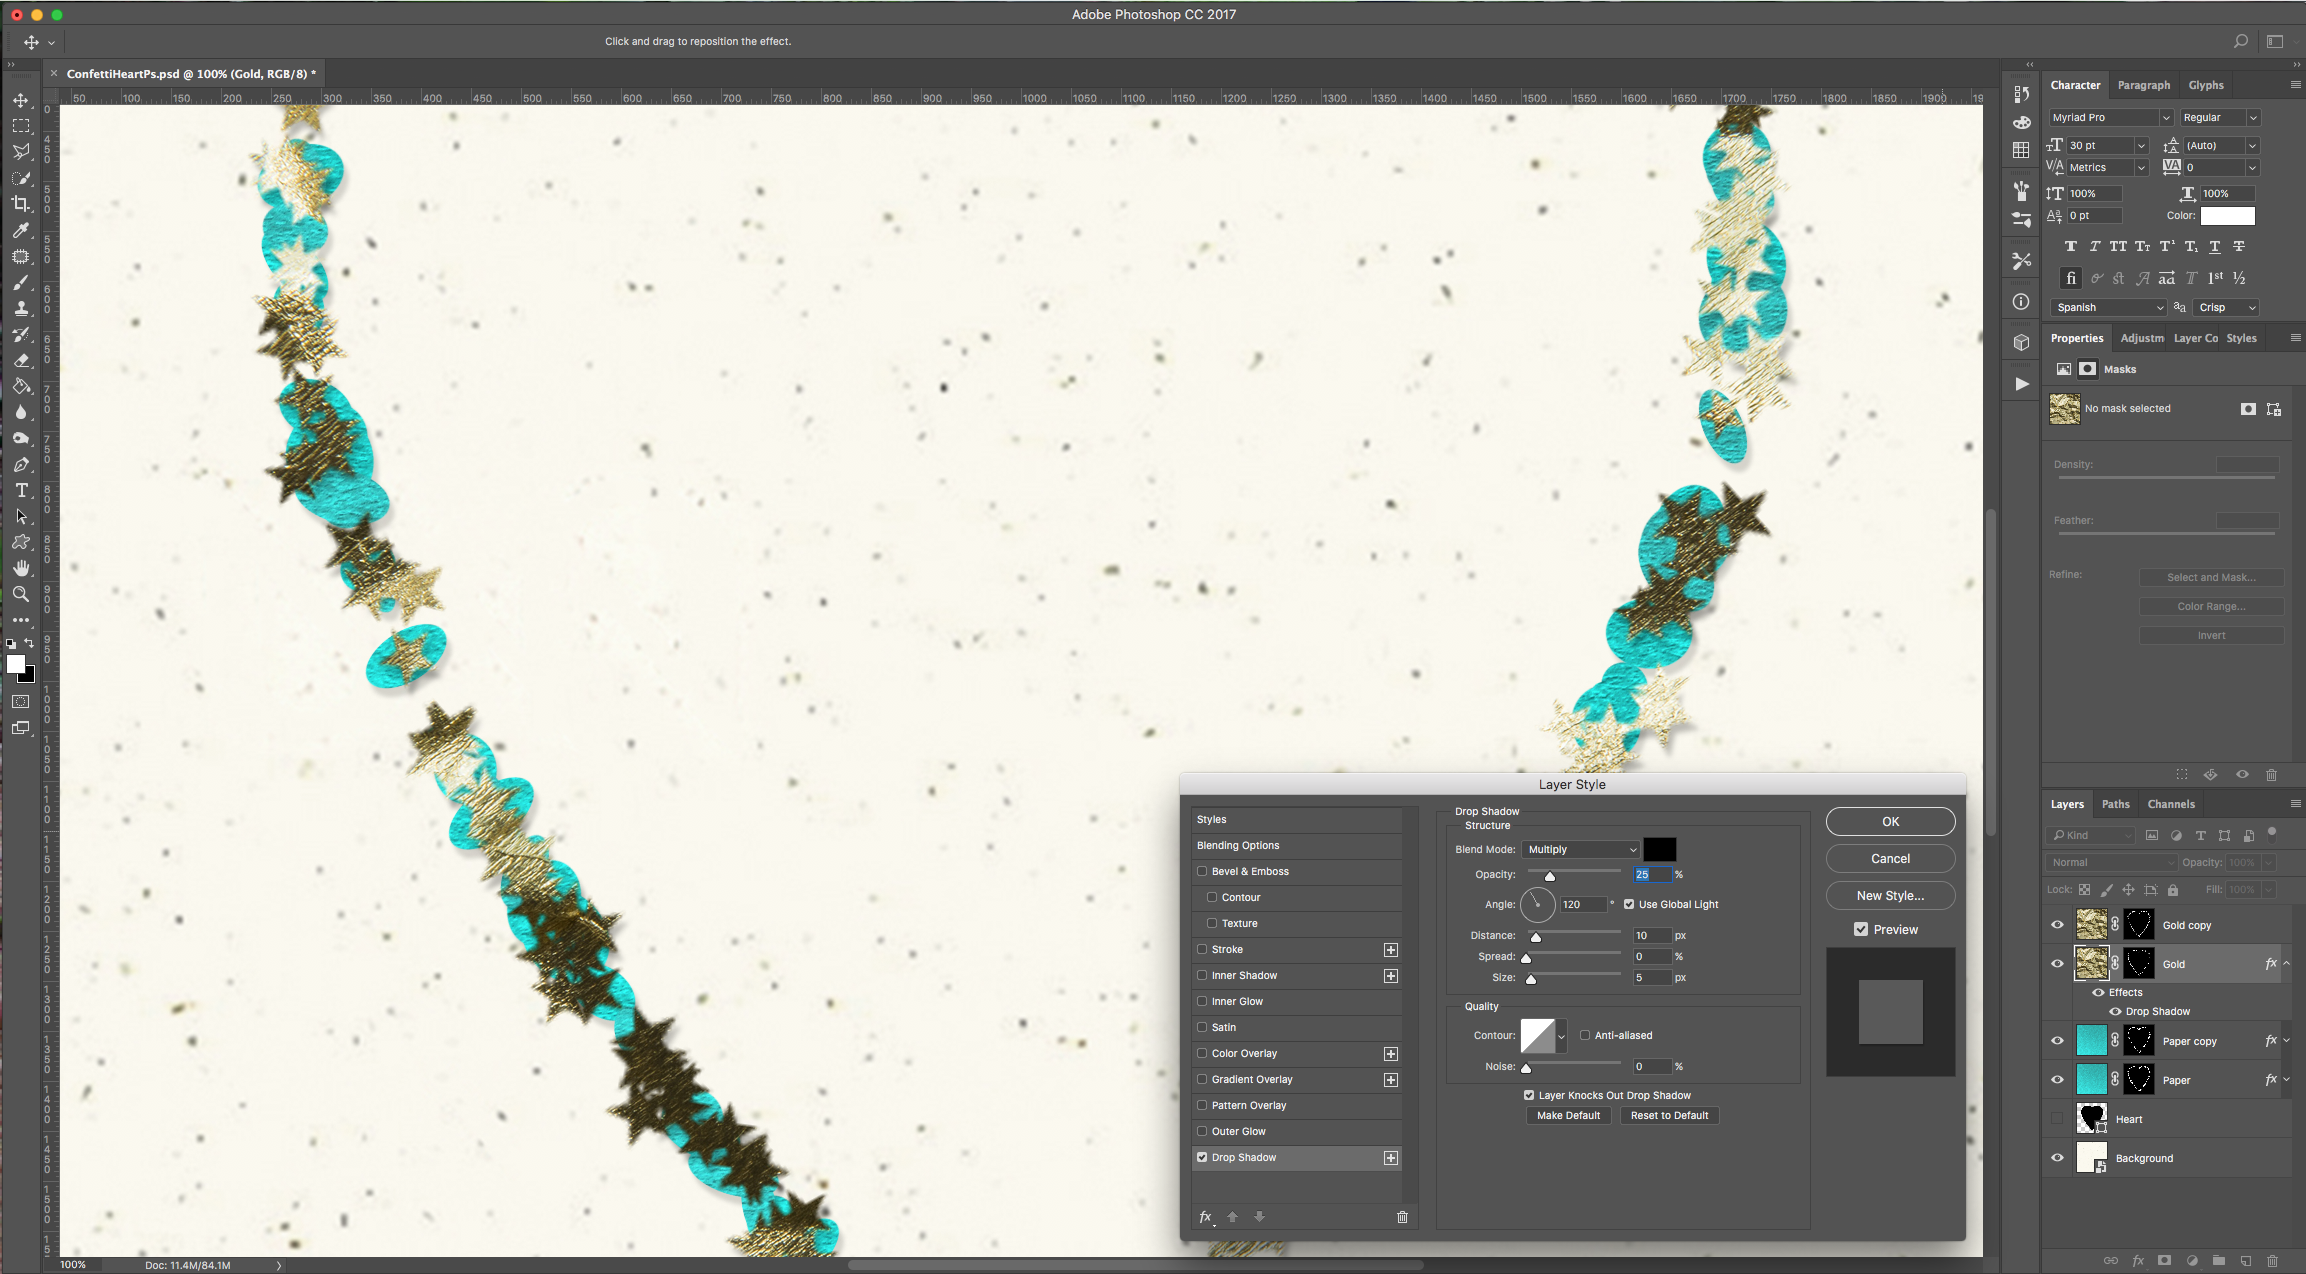
Copy its “Layer Style” and Paste it to “Gold copy”.
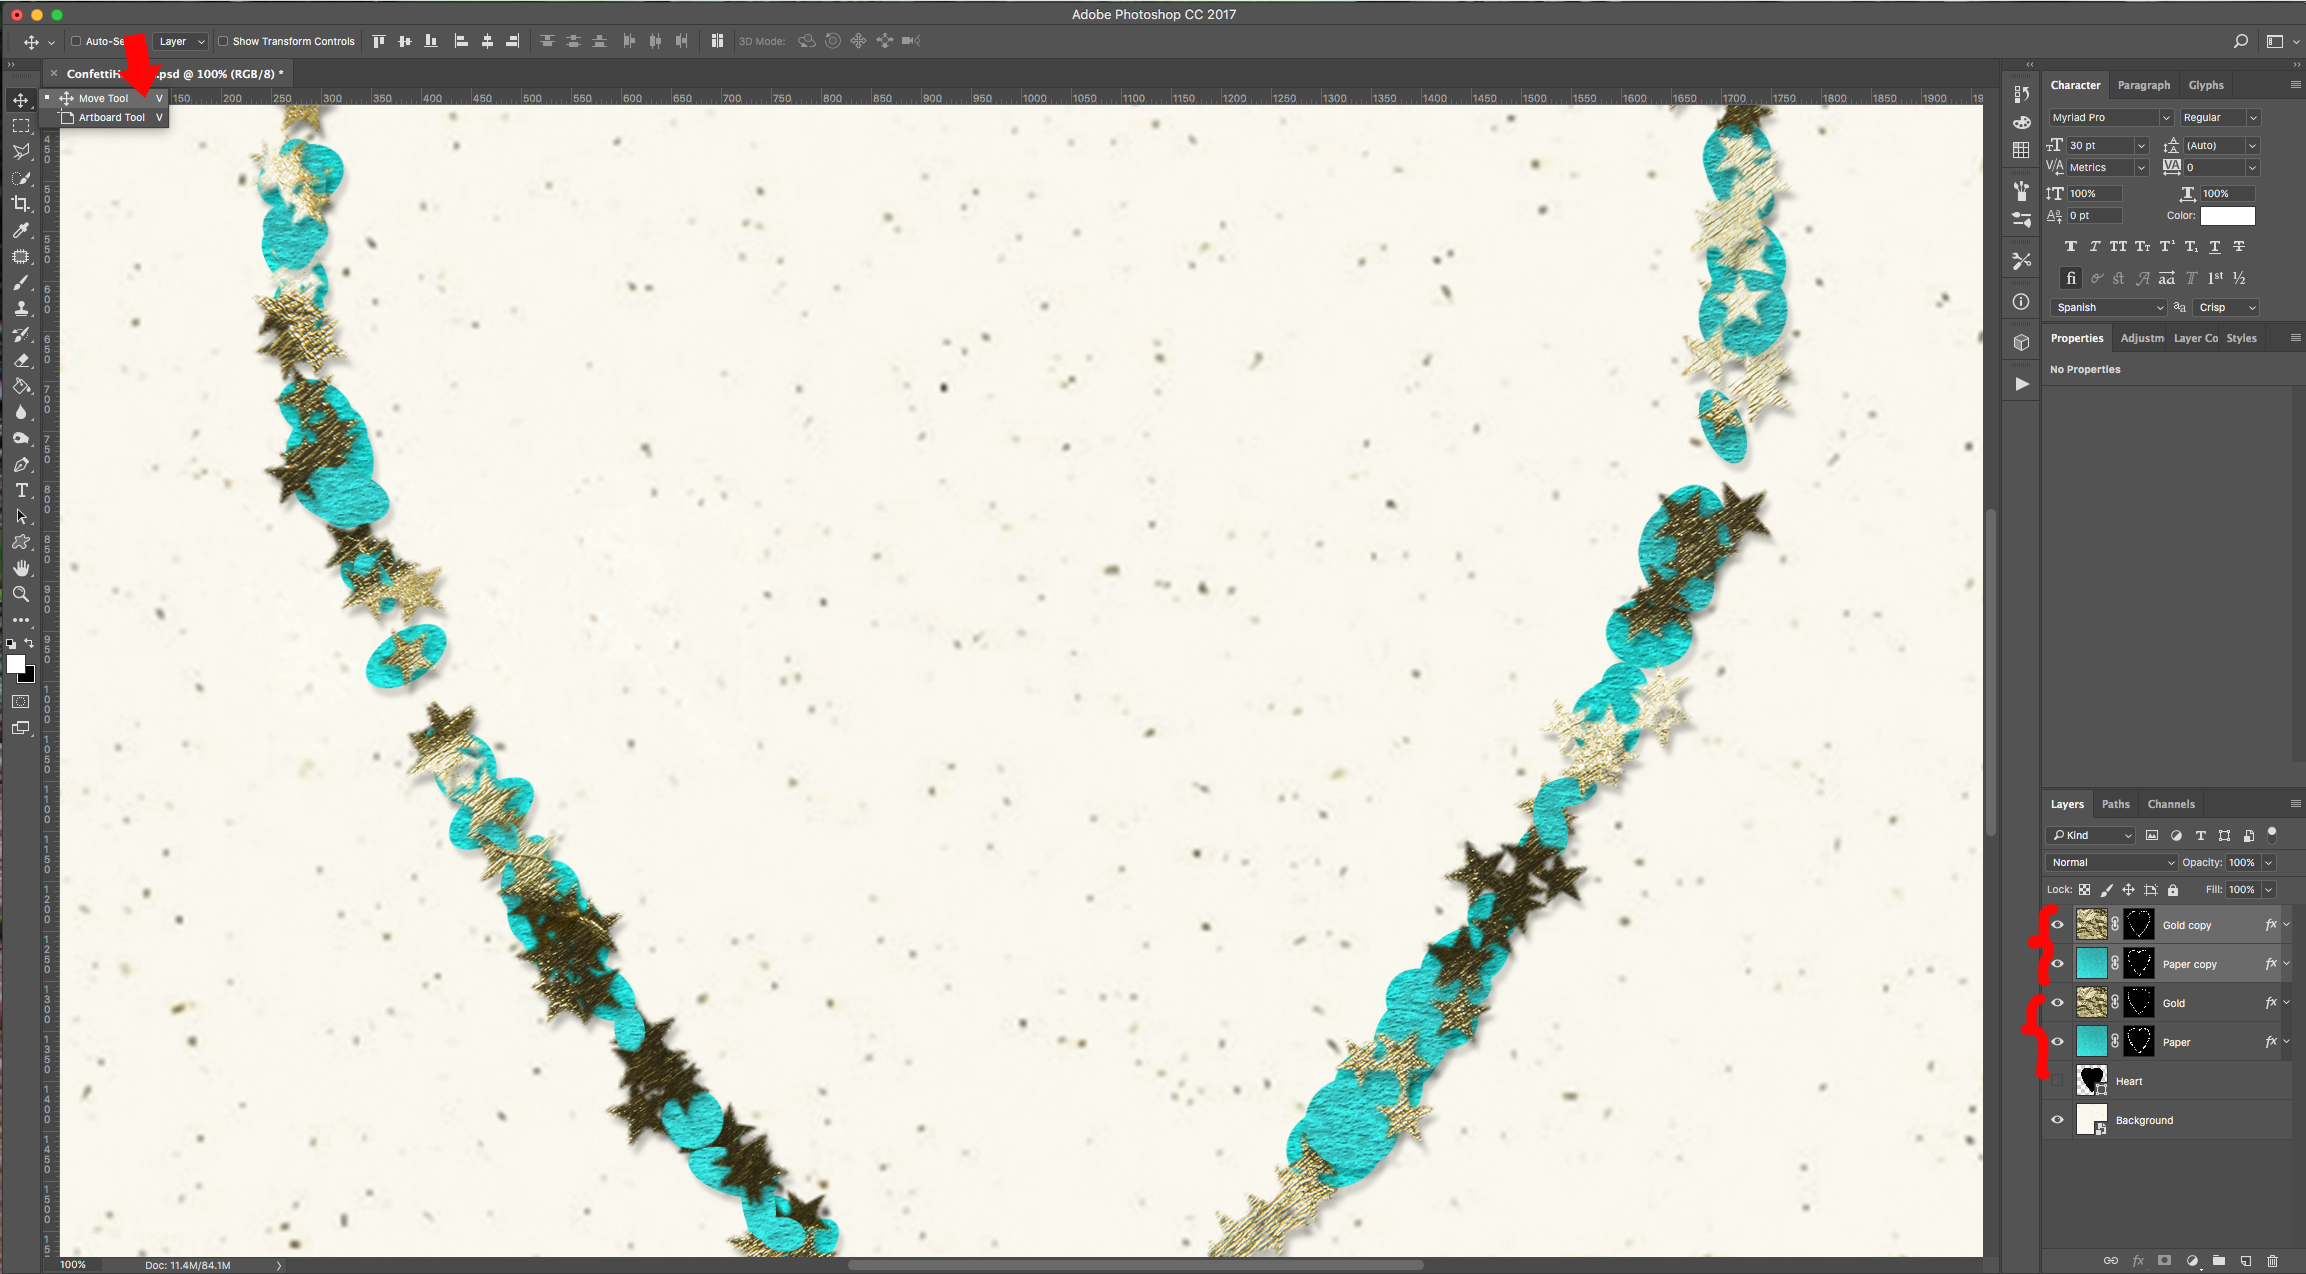
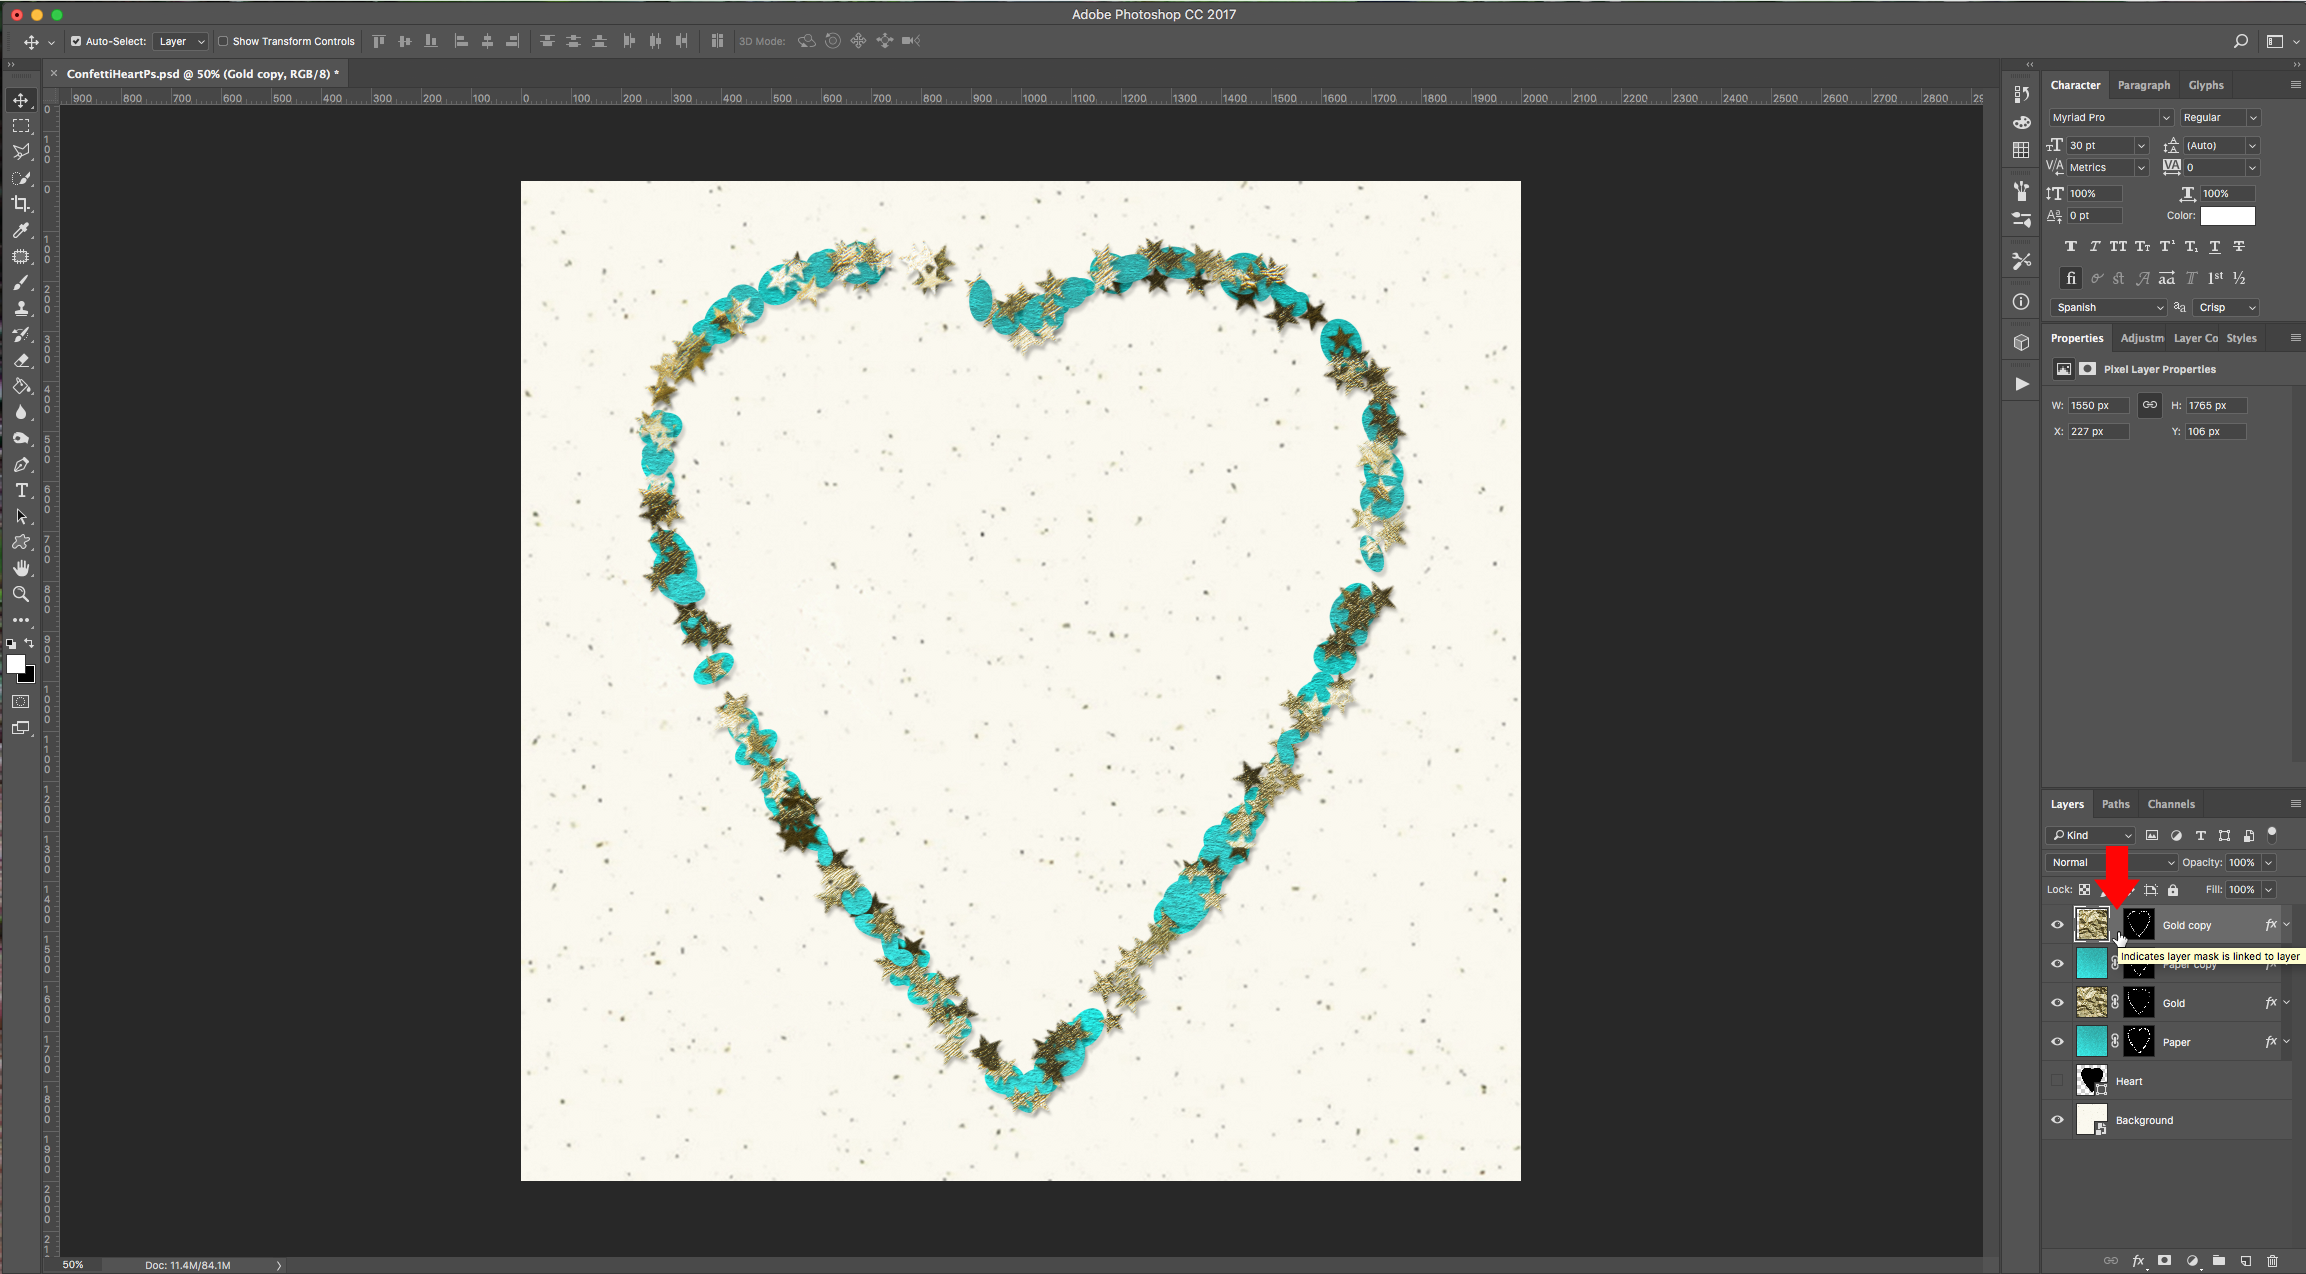
19 - Un-hide your “Paper” Layers, move “Paper copy” under “Gold copy”. Choose one of your “Gold” Layers and un-link it from its “Layer Mask” by clicking on the small chain icon between them. Use the “Move Tool” (V) to move the “Gold” image a bit making your “Confetti” look different from the one in your other Layer. Move each layer some clicks Up/Down and Left/Right individually to give them more depth.
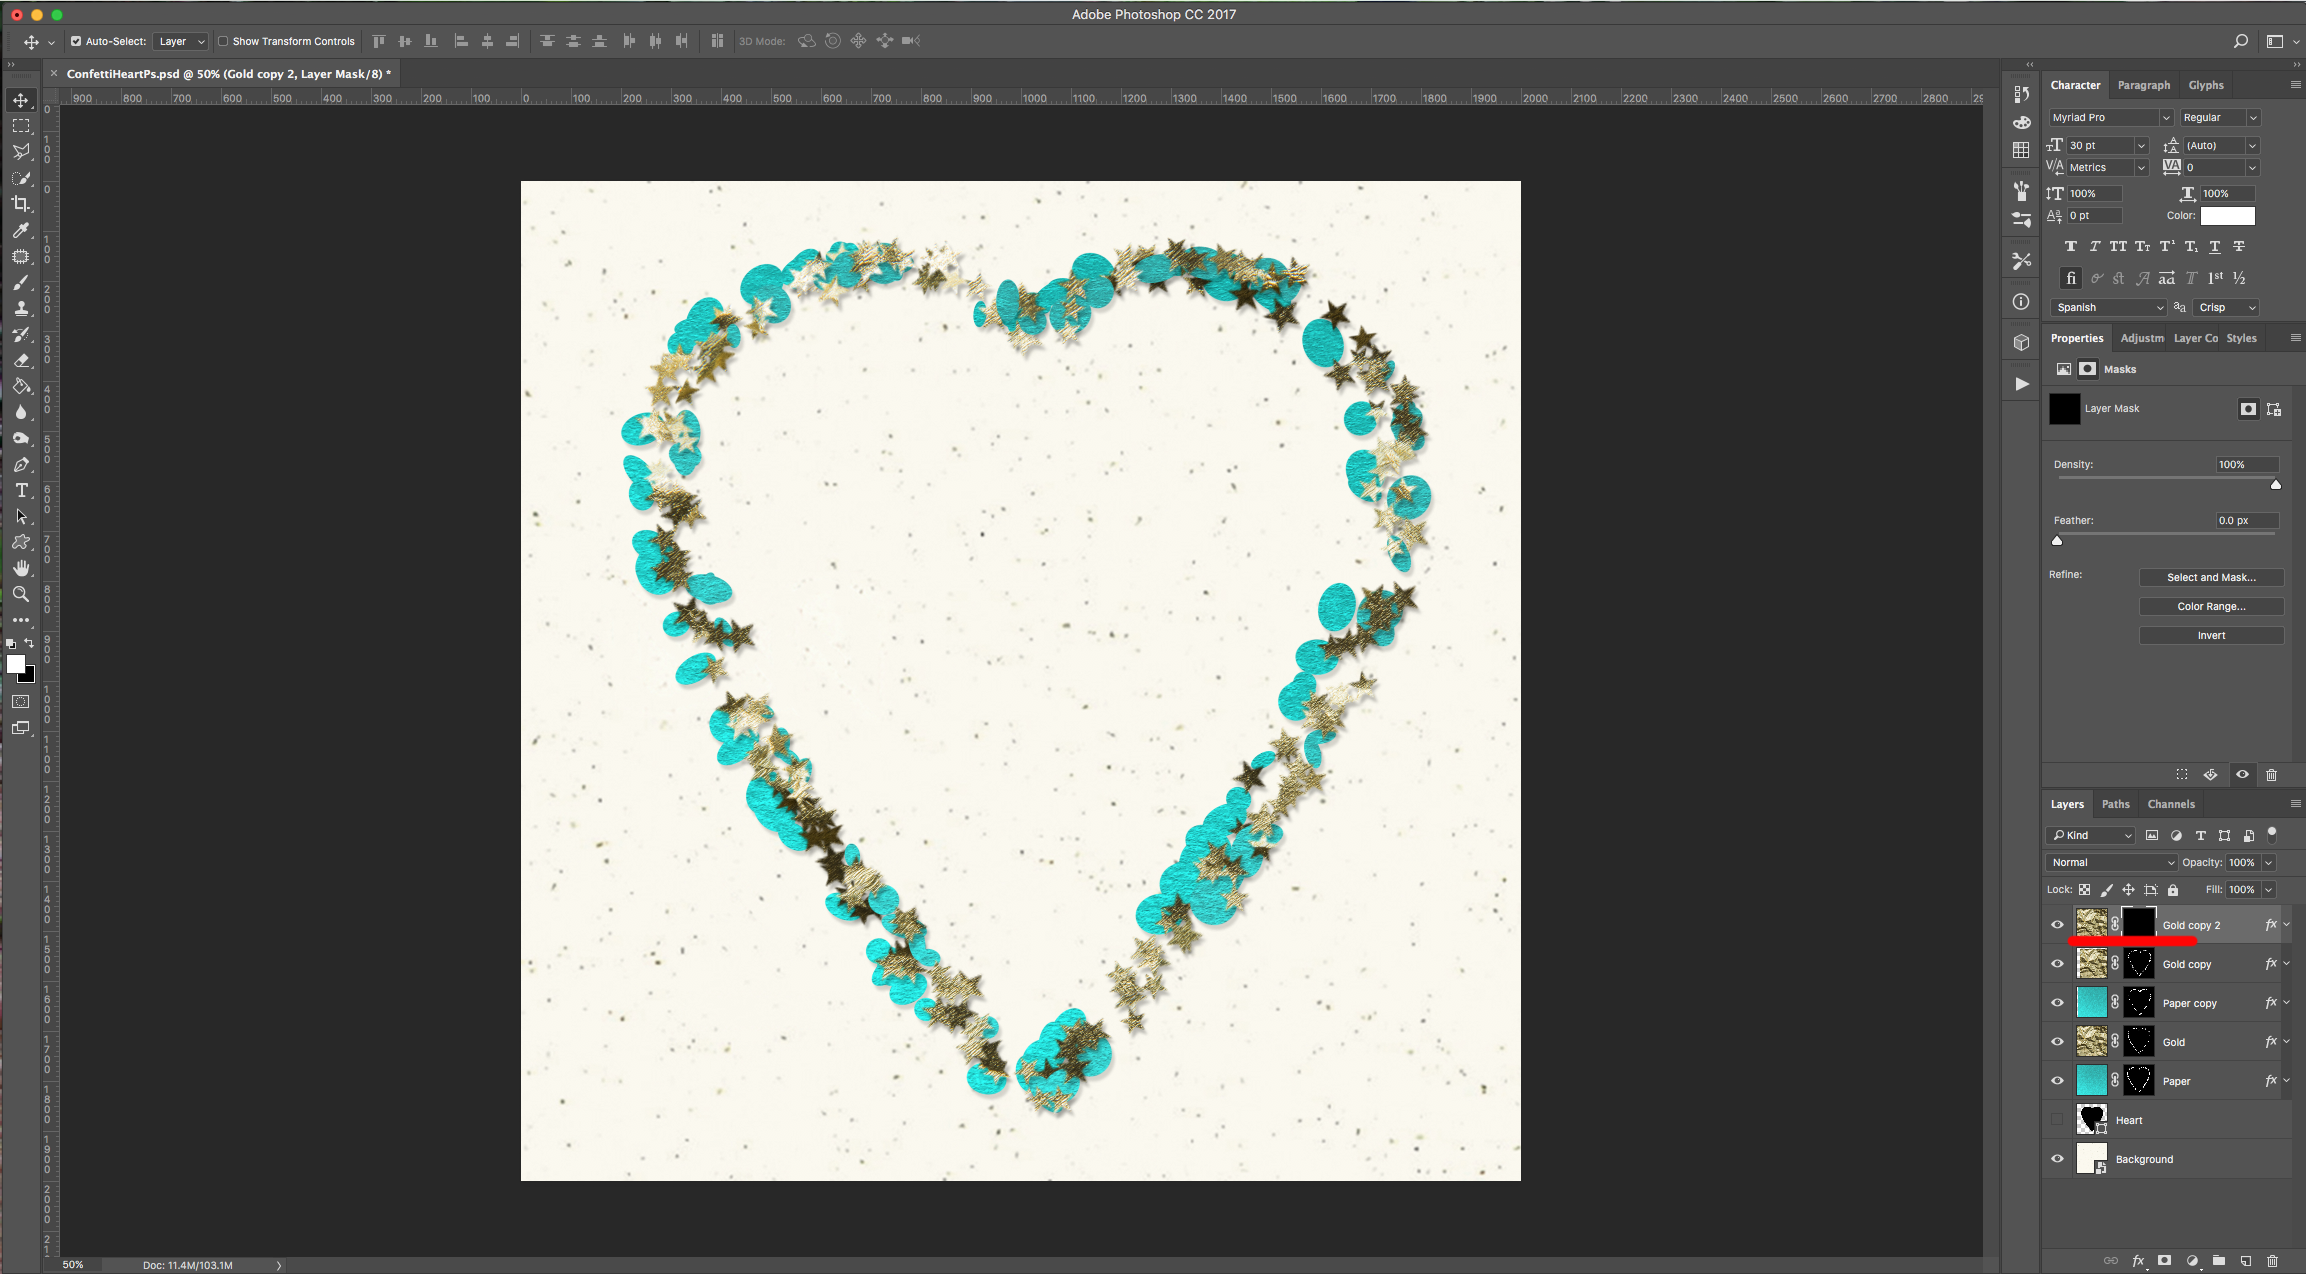
20 - Duplicate one of your “Gold” Layers, place it on top of everything, select the “Layer Mask” and click “Alt/Option + Delete” to fill your mask with the “Background” color (in this case Black).
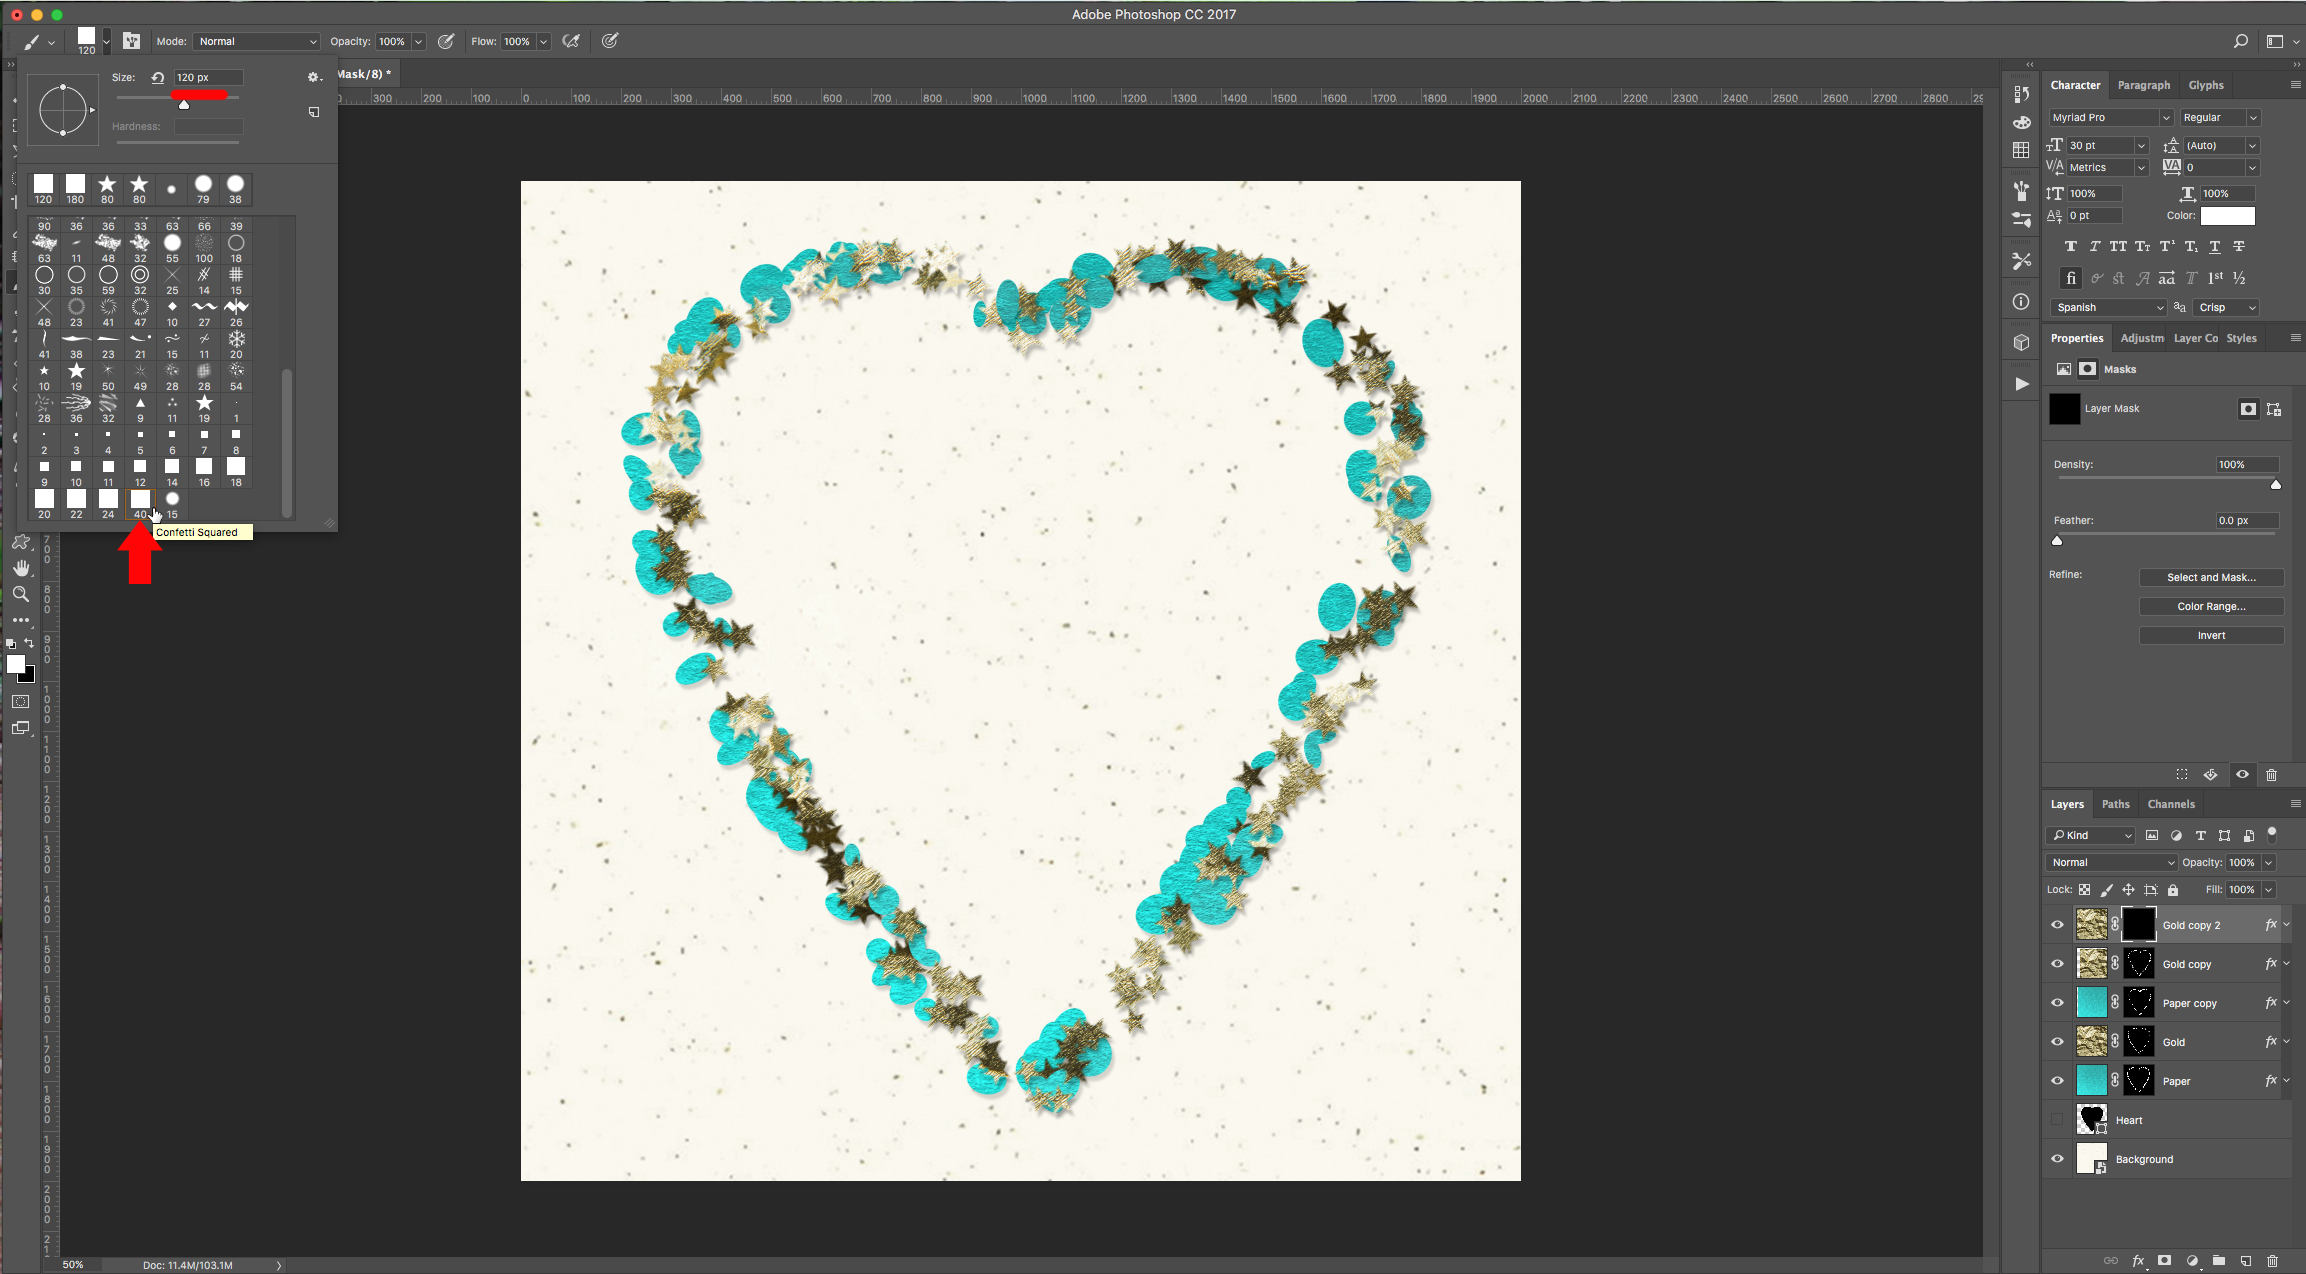
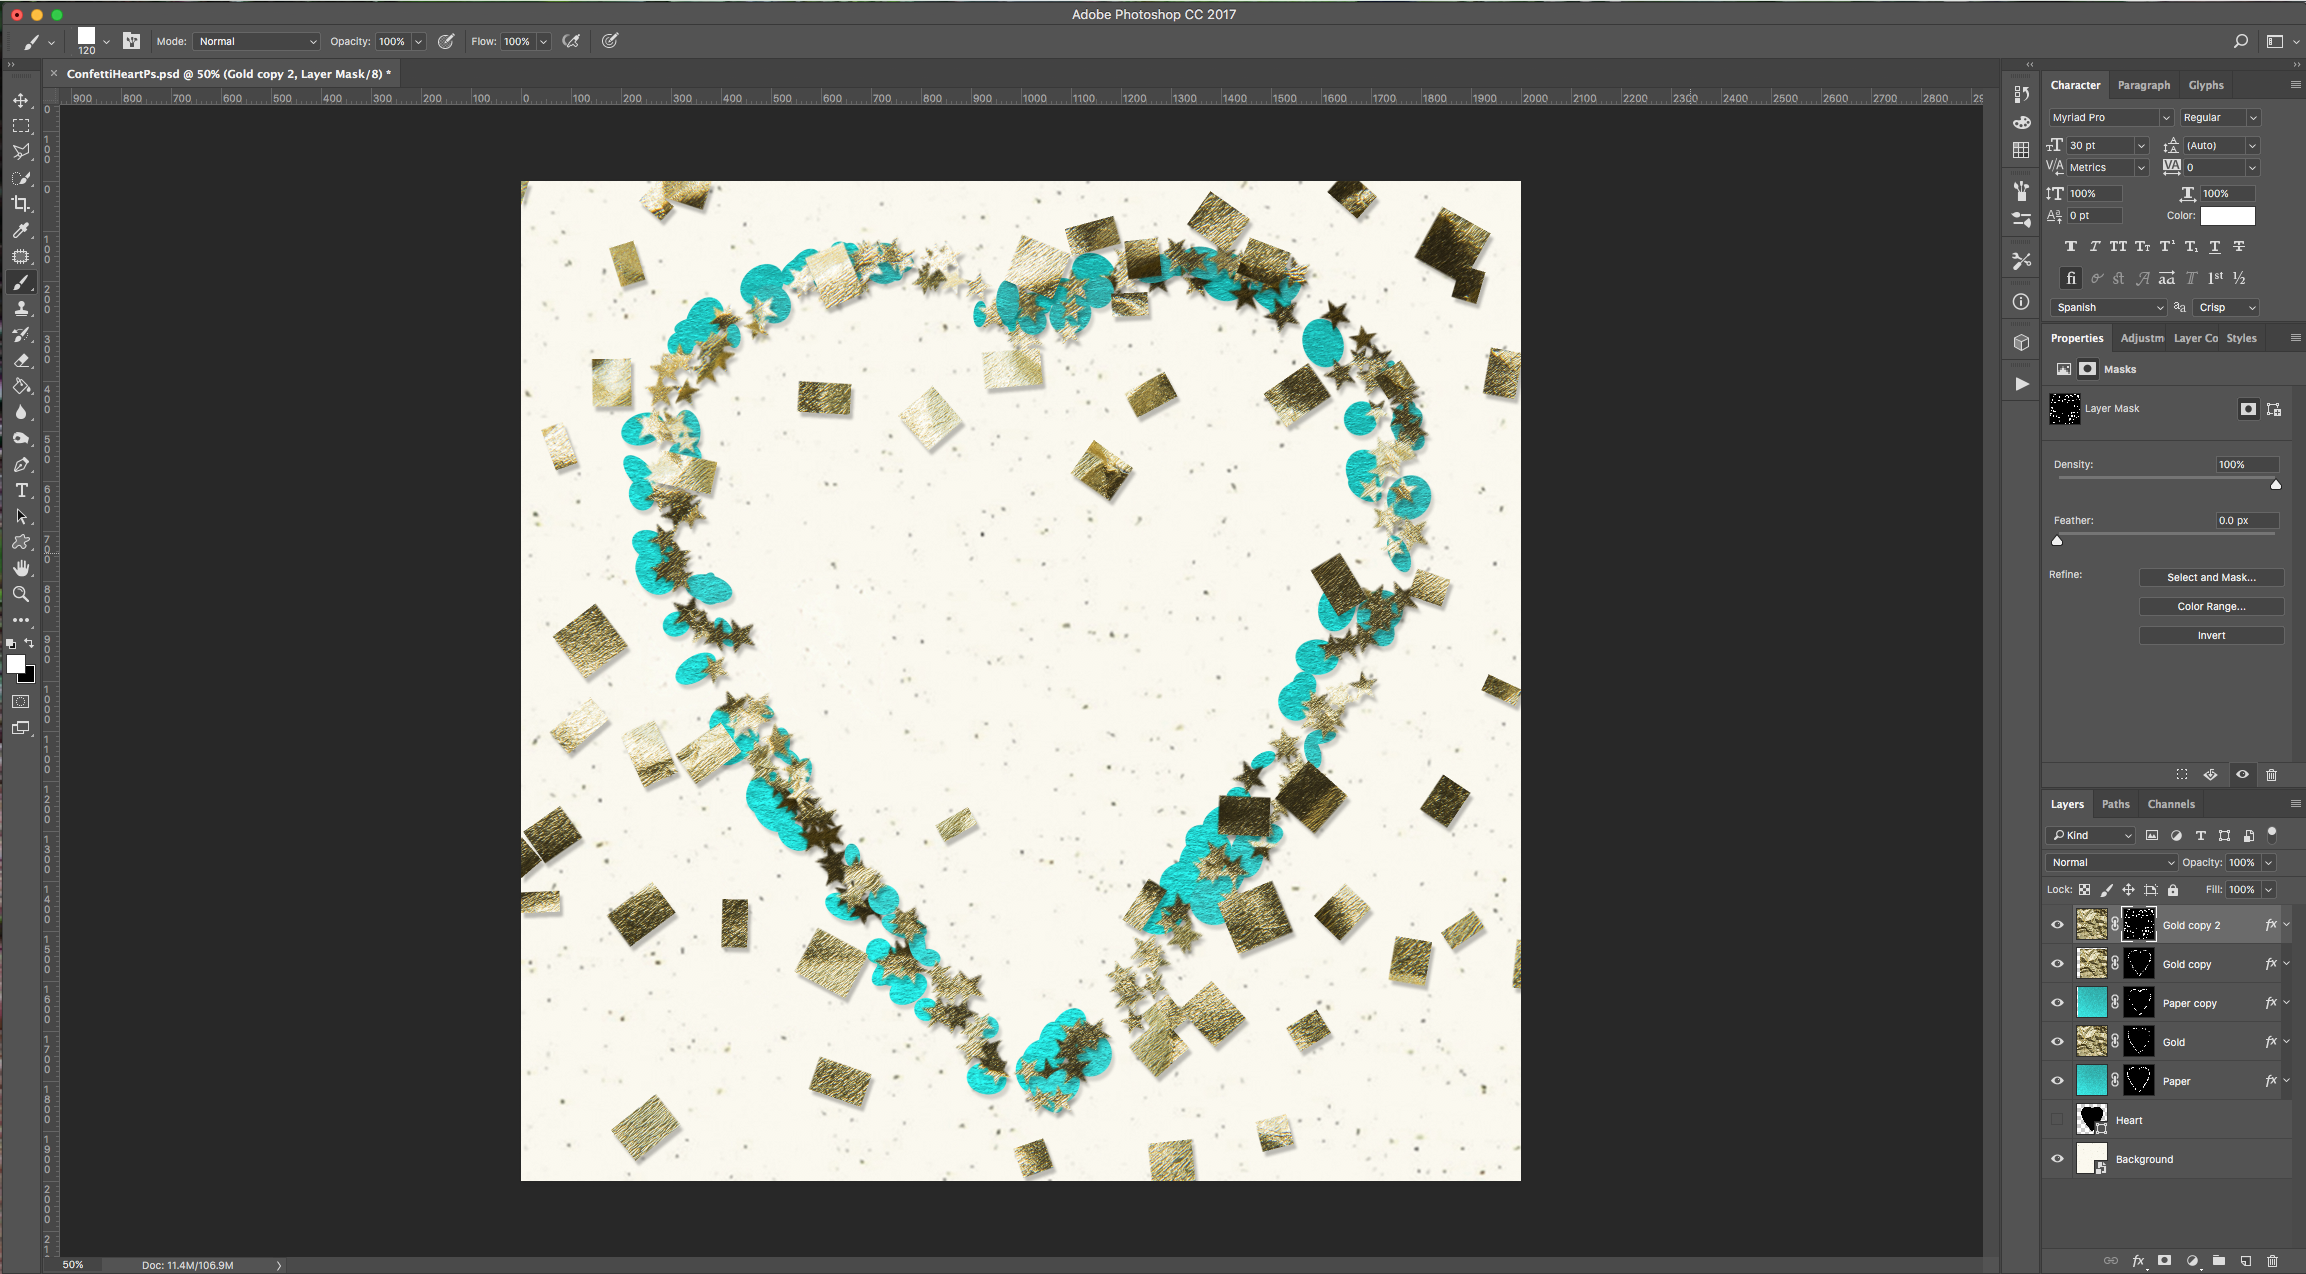
21 - Make sure the “Layer Mask” is selected, and with the “Brush Tool” (B), use the “Confetti Squared” Brush with White as “Foreground” color to paint some confetti around the heart. You may need to change the size of the brush to make it look more realistic (we made it 120 px).
22 - Select your Layer, go to Filter > Blur Gallery > Path Blur and arrange the path to create a semi-circle in the lower portion of your canvas. Use a “Speed” of 100%, a 50% “Tapper” and “End Point Speed” of 40%. Click “OK”.

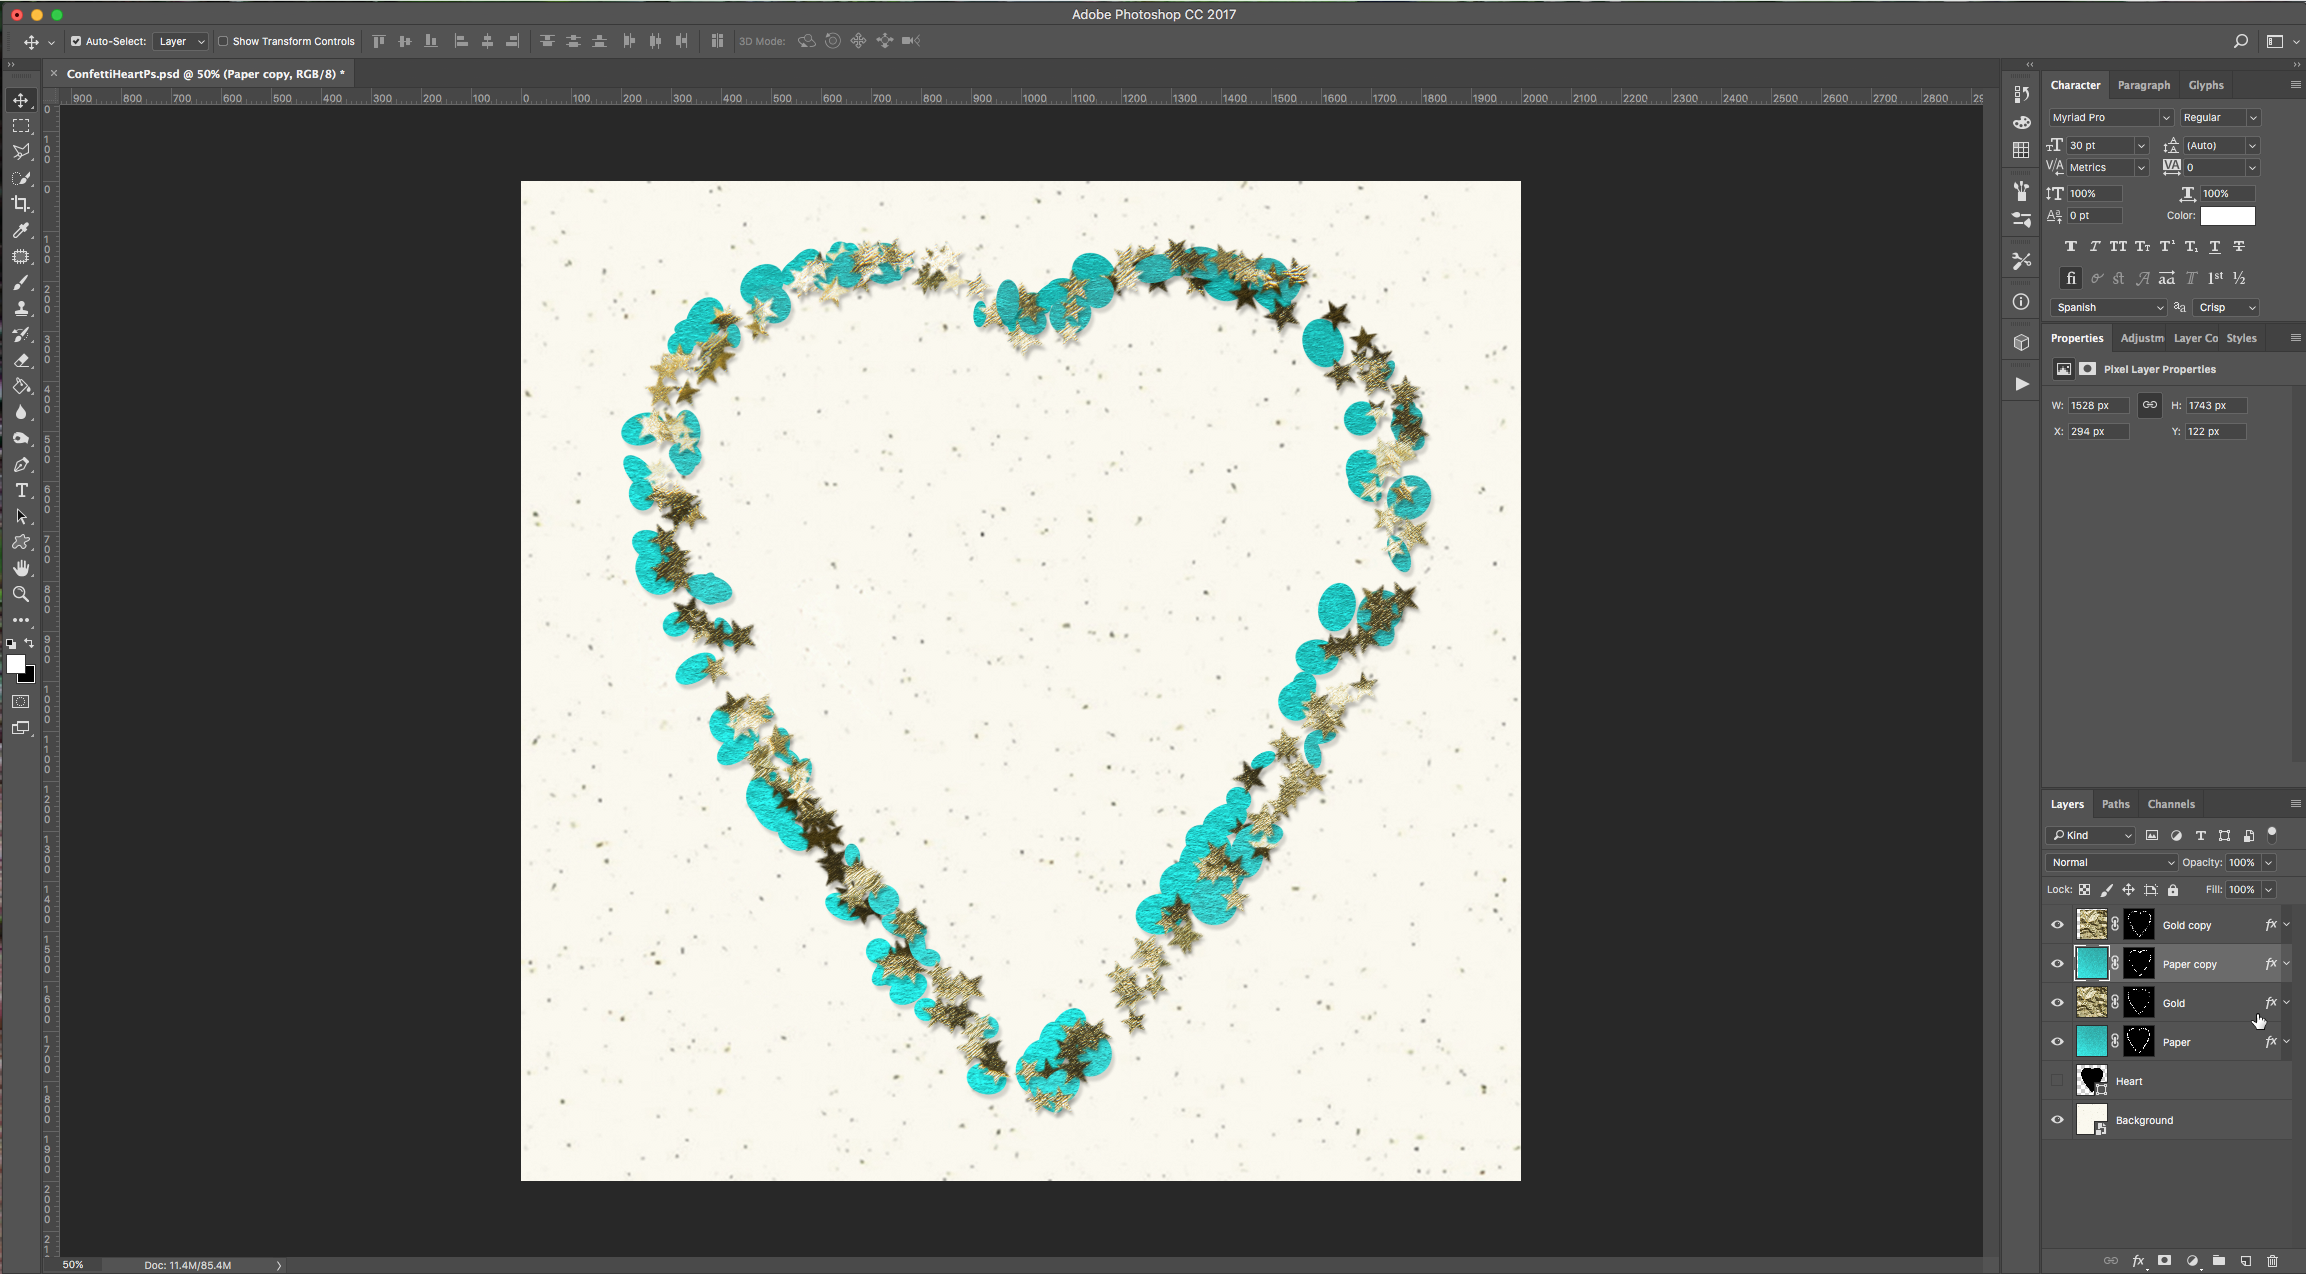
23 - Your “Artwork” should look similar to this.

1 - In Photoshop, open the image you want to use as “Background”.
2 - Select the “Custom Shape Tool” (U), in the “Shape” menu click on the small gear icon on the Top-Right, choose “All” and click “Ok” if you want the selected shapes to replace the existing ones or “Append” if you want to add them.
3 - From the “Shapes” Menu select the shape you prefer (we selected the one named “Heart”). Then, click on the Top-Left of your canvas and drag your cursor to create a path with your shape (Hold the “Shift” key while dragging to make the shape proportional).
4 - Click in the “Path Alignment” button on the Top Menu and choose “Vertical and Horizontal Centers” making sure “Align to Canvas” is checked to center your shape in the canvas.
5 - Open the “Texture” files you want to use as “Confetti”, drag them into your “Document”, resize them if needed using “Free Transform” (Command/Control + T) and “Duplicate” (Command/Control + J) each once. Don’t forget to name your Layers.
6 - While keeping the “Alt/Option” key pressed click on the “Add Layer Mask” button at the bottom of the “Layers” Panel to add a Mask (it should be filled with Black). The mask will be hiding your texture for now. Repeat with all your “Texture” Layers.
7 - Select the “Brush Tool” (B), open the “Brush Panel” and use the following values to create a “New Brush”:
Brush Tip Shape:
Shape Dynamics:
(Make sure “Smoothing” is checked)
8 - Click on the “Create New Brush” button at the bottom of the “Brush” Panel and name this brush “Confetti Oval”.
9 - Now we will create a “Star” shaped brush. First, go to the “Brush Presets” Panel, click on the small “Menu” icon on the Top-Right and choose “Assorted Brushes” to load them and click “Ok” if you want the selected brushes to replace the existing ones or “Append” if you want to add them.
10 - Back in the “Brush” Panel, choose “Star - Large” and use the following values:
Brush Tip Shape:
Shape Dynamics:
Scattering:
(Make sure “Smoothing” is checked)
Name this brush “Confetti Star”.
11 - We are going to create a “Squared” brush. Go to the “Brush Presets” Panel, click on the small “Menu” icon on the Top-Right and choose “Square Brushes” to load them and click “Ok” if you want the selected brushes to replace the existing ones or “Append” if you want to add them.
12 - Back in the “Brush” Panel, choose “Hard Square 24 Pixels” and use the following values:
Brush Tip Shape:
Shape Dynamics:
Scattering:
(Make sure “Smoothing” is checked)
Name this brush “Confetti Squared”.
13 - Select your “Heart” Layer, go to the “Paths” Panel, right-click on top of its Thumbnail and choose “Make Selection”, then click on the small “Make Work Path from Selection” button at the bottom of the Panel. Keep your “Work Path” active and head back to the “Layers” Panel. Hide or delete the “Heart” Layer and click on your “Gold Copy” mask thumbnail to select it.
14 - Make sure that your “Confetti Star” Brush is selected, white is the “Fill” color and increase the size of your brush if needed (we made it 80 px). Then, use the “Path Selection Too,” (A), right-click on top of the “Work Path” and choose “Stroke Path”. Repeat a couple more times.
15 - Do the same with the “Gold” Layer, then hide both “Gold” Layers for now by clicking on the small eye icon in the left side of their Thumbnails. Now, choose the “Confetti Oval” Brush and do the same you did in “Step 11” this time with your “Paper” Layers
16 - Double-click on top of your “Paper” Layer Thumbnail and apply the following “Layer Styles”:
Color Overlay:
Drop Shadow:
17 - Right-click on top of its Thumbnail and choose “Copy Layer Style”. Right-click on top of the “Paper copy” Layer Thumbnail, choose “Paste Layer Style” and delete the “Color Overlay” by dragging it to the “Trash”.
18 - Hide your “Paper” Layers, double-click on top of your “Gold” Layer Thumbnail and apply the following “Layer Styles”:
Drop Shadow:
Copy its “Layer Style” and Paste it to “Gold copy”.
19 - Un-hide your “Paper” Layers, move “Paper copy” under “Gold copy”. Choose one of your “Gold” Layers and un-link it from its “Layer Mask” by clicking on the small chain icon between them. Use the “Move Tool” (V) to move the “Gold” image a bit making your “Confetti” look different from the one in your other Layer. Move each layer some clicks Up/Down and Left/Right individually to give them more depth.
20 - Duplicate one of your “Gold” Layers, place it on top of everything, select the “Layer Mask” and click “Alt/Option + Delete” to fill your mask with the “Background” color (in this case Black).
21 - Make sure the “Layer Mask” is selected, and with the “Brush Tool” (B), use the “Confetti Squared” Brush with White as “Foreground” color to paint some confetti around the heart. You may need to change the size of the brush to make it look more realistic (we made it 120 px).
22 - Select your Layer, go to Filter > Blur Gallery > Path Blur and arrange the path to create a semi-circle in the lower portion of your canvas. Use a “Speed” of 100%, a 50% “Tapper” and “End Point Speed” of 40%. Click “OK”.
23 - Your “Artwork” should look similar to this.
by @lornacane


