- By Design Bundles
- 5 Mins
- Photoshop Tutorials
Cracked Skin and White Eyes in Photoshop Part 2
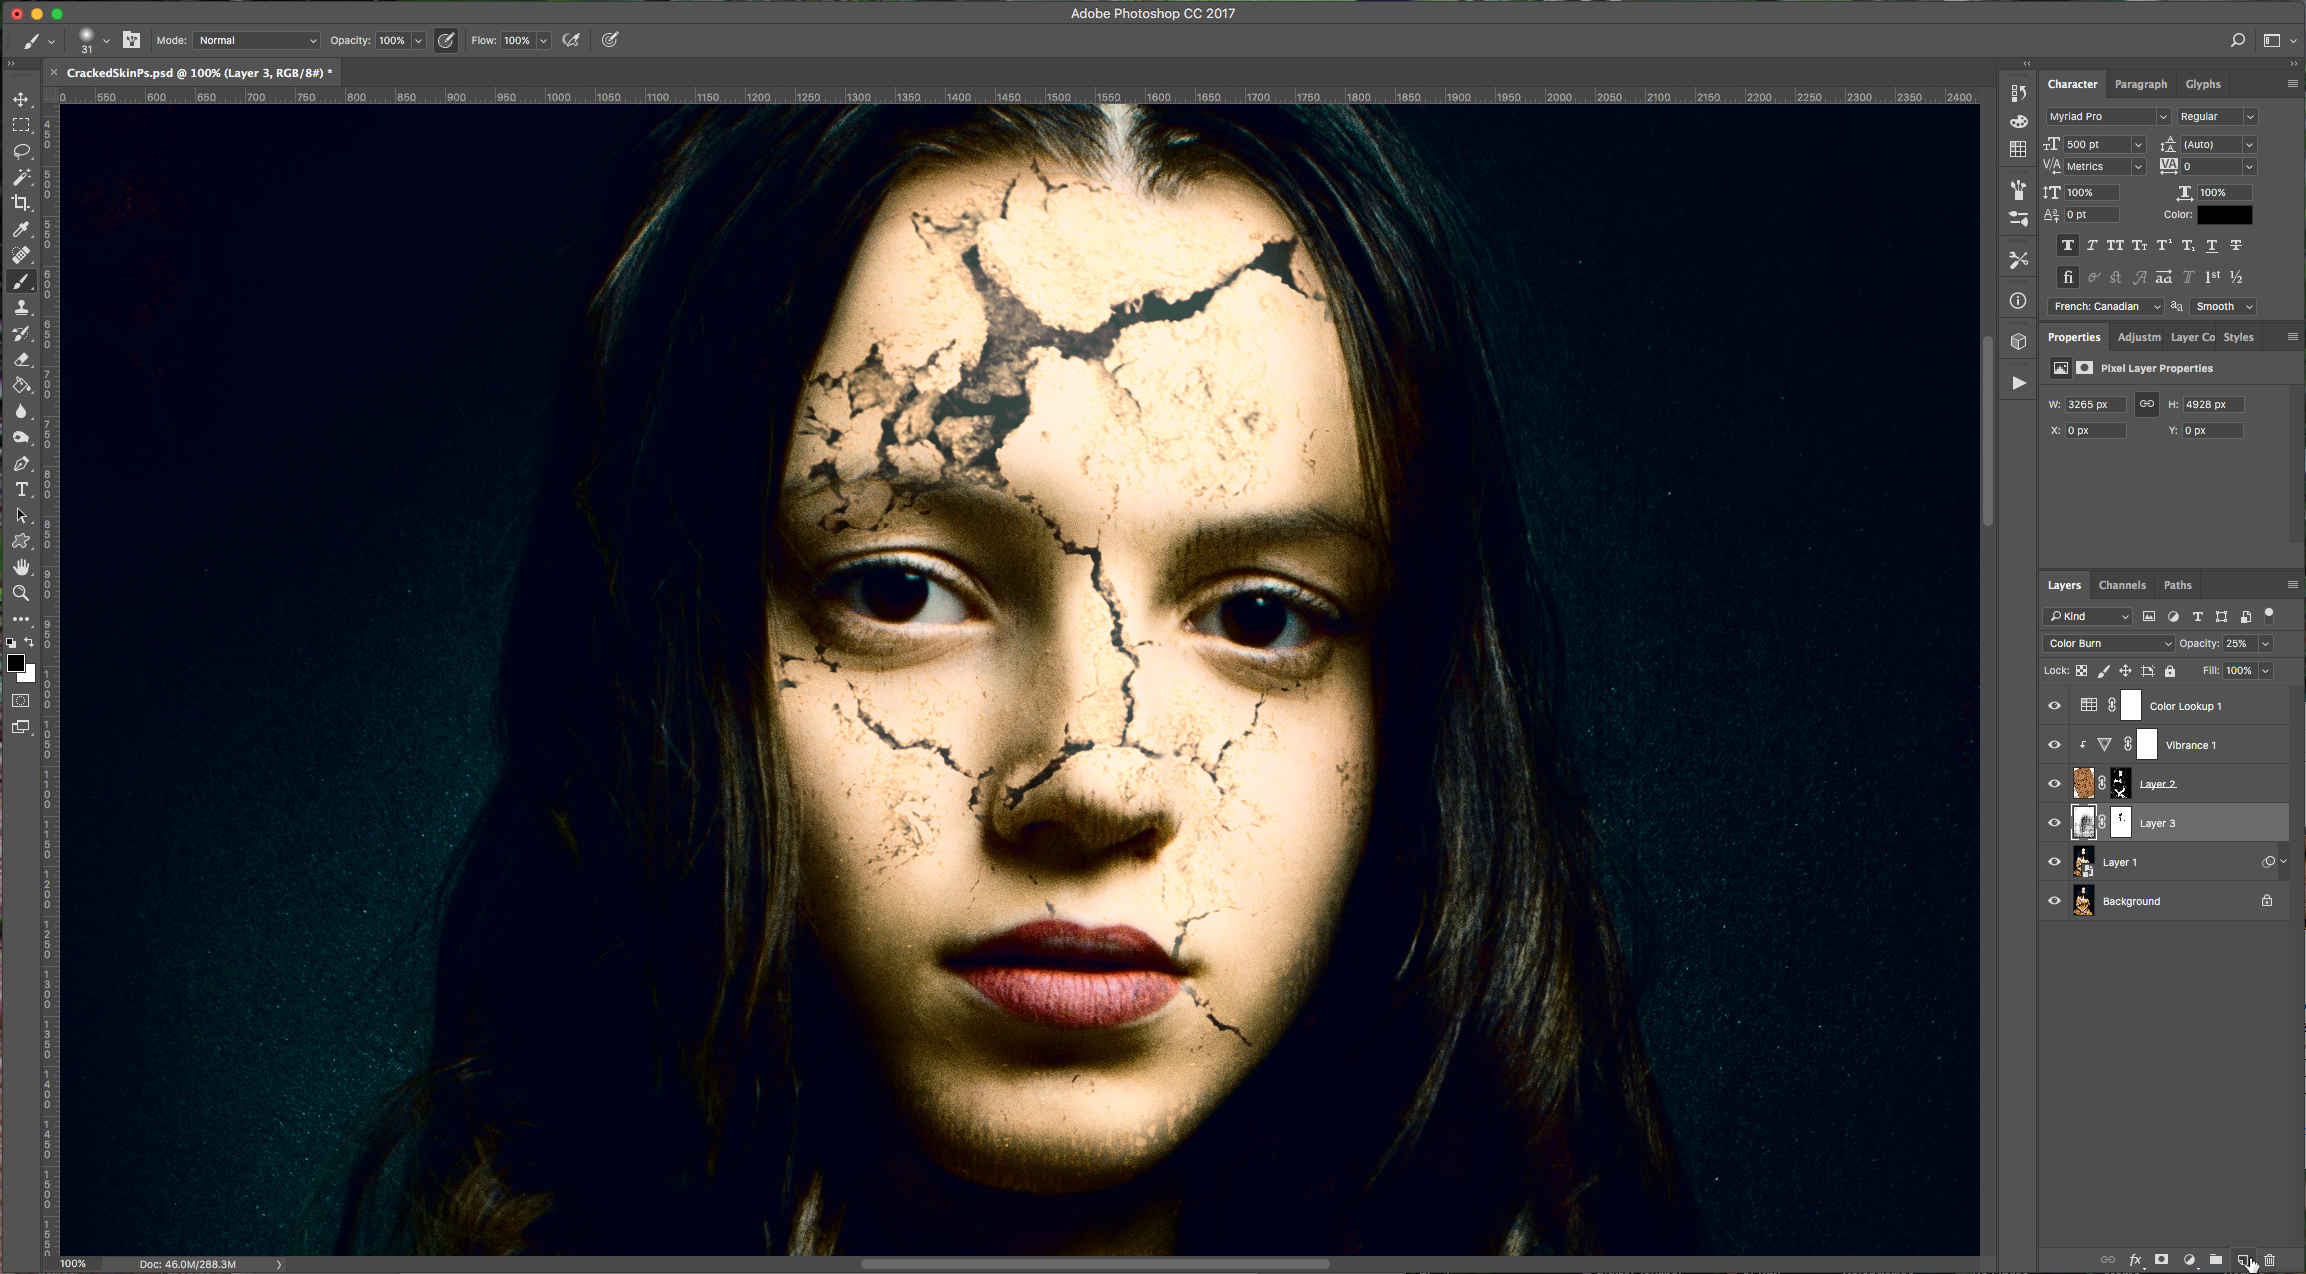
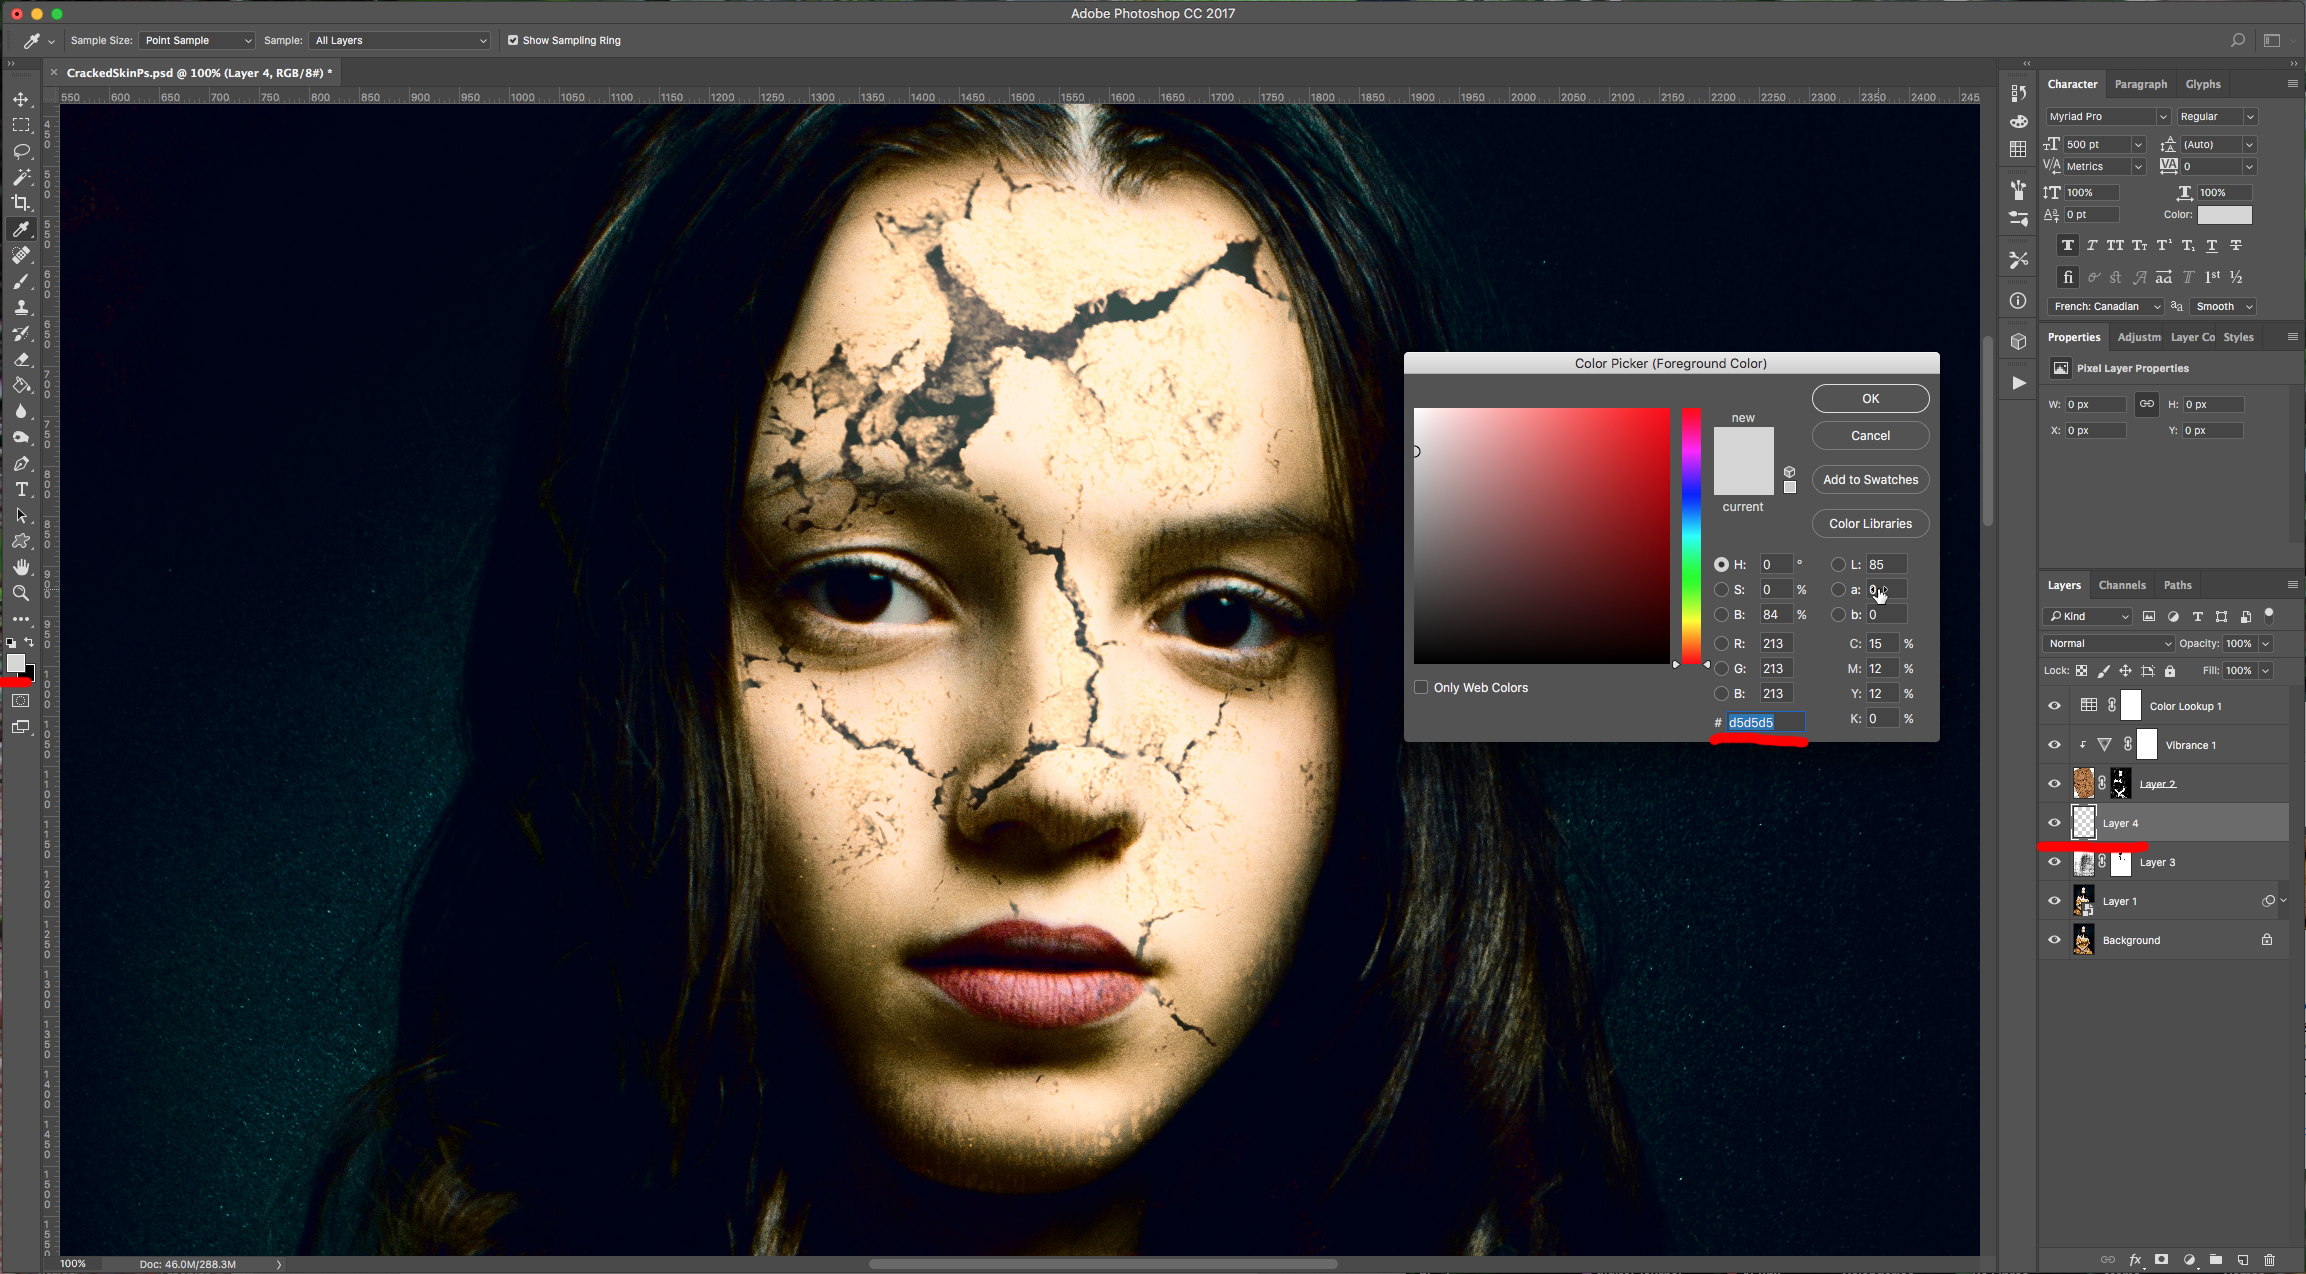
(1) 15 - Create a “New Layer” on top of the “Grunge Texture” (click on the small button at the bottom of the “Layers Panel” and make your “Foreground” color a medium grey (we used #d5d5d5). Or, open the image you chose to work with and then, create the "New layer" on top of it.
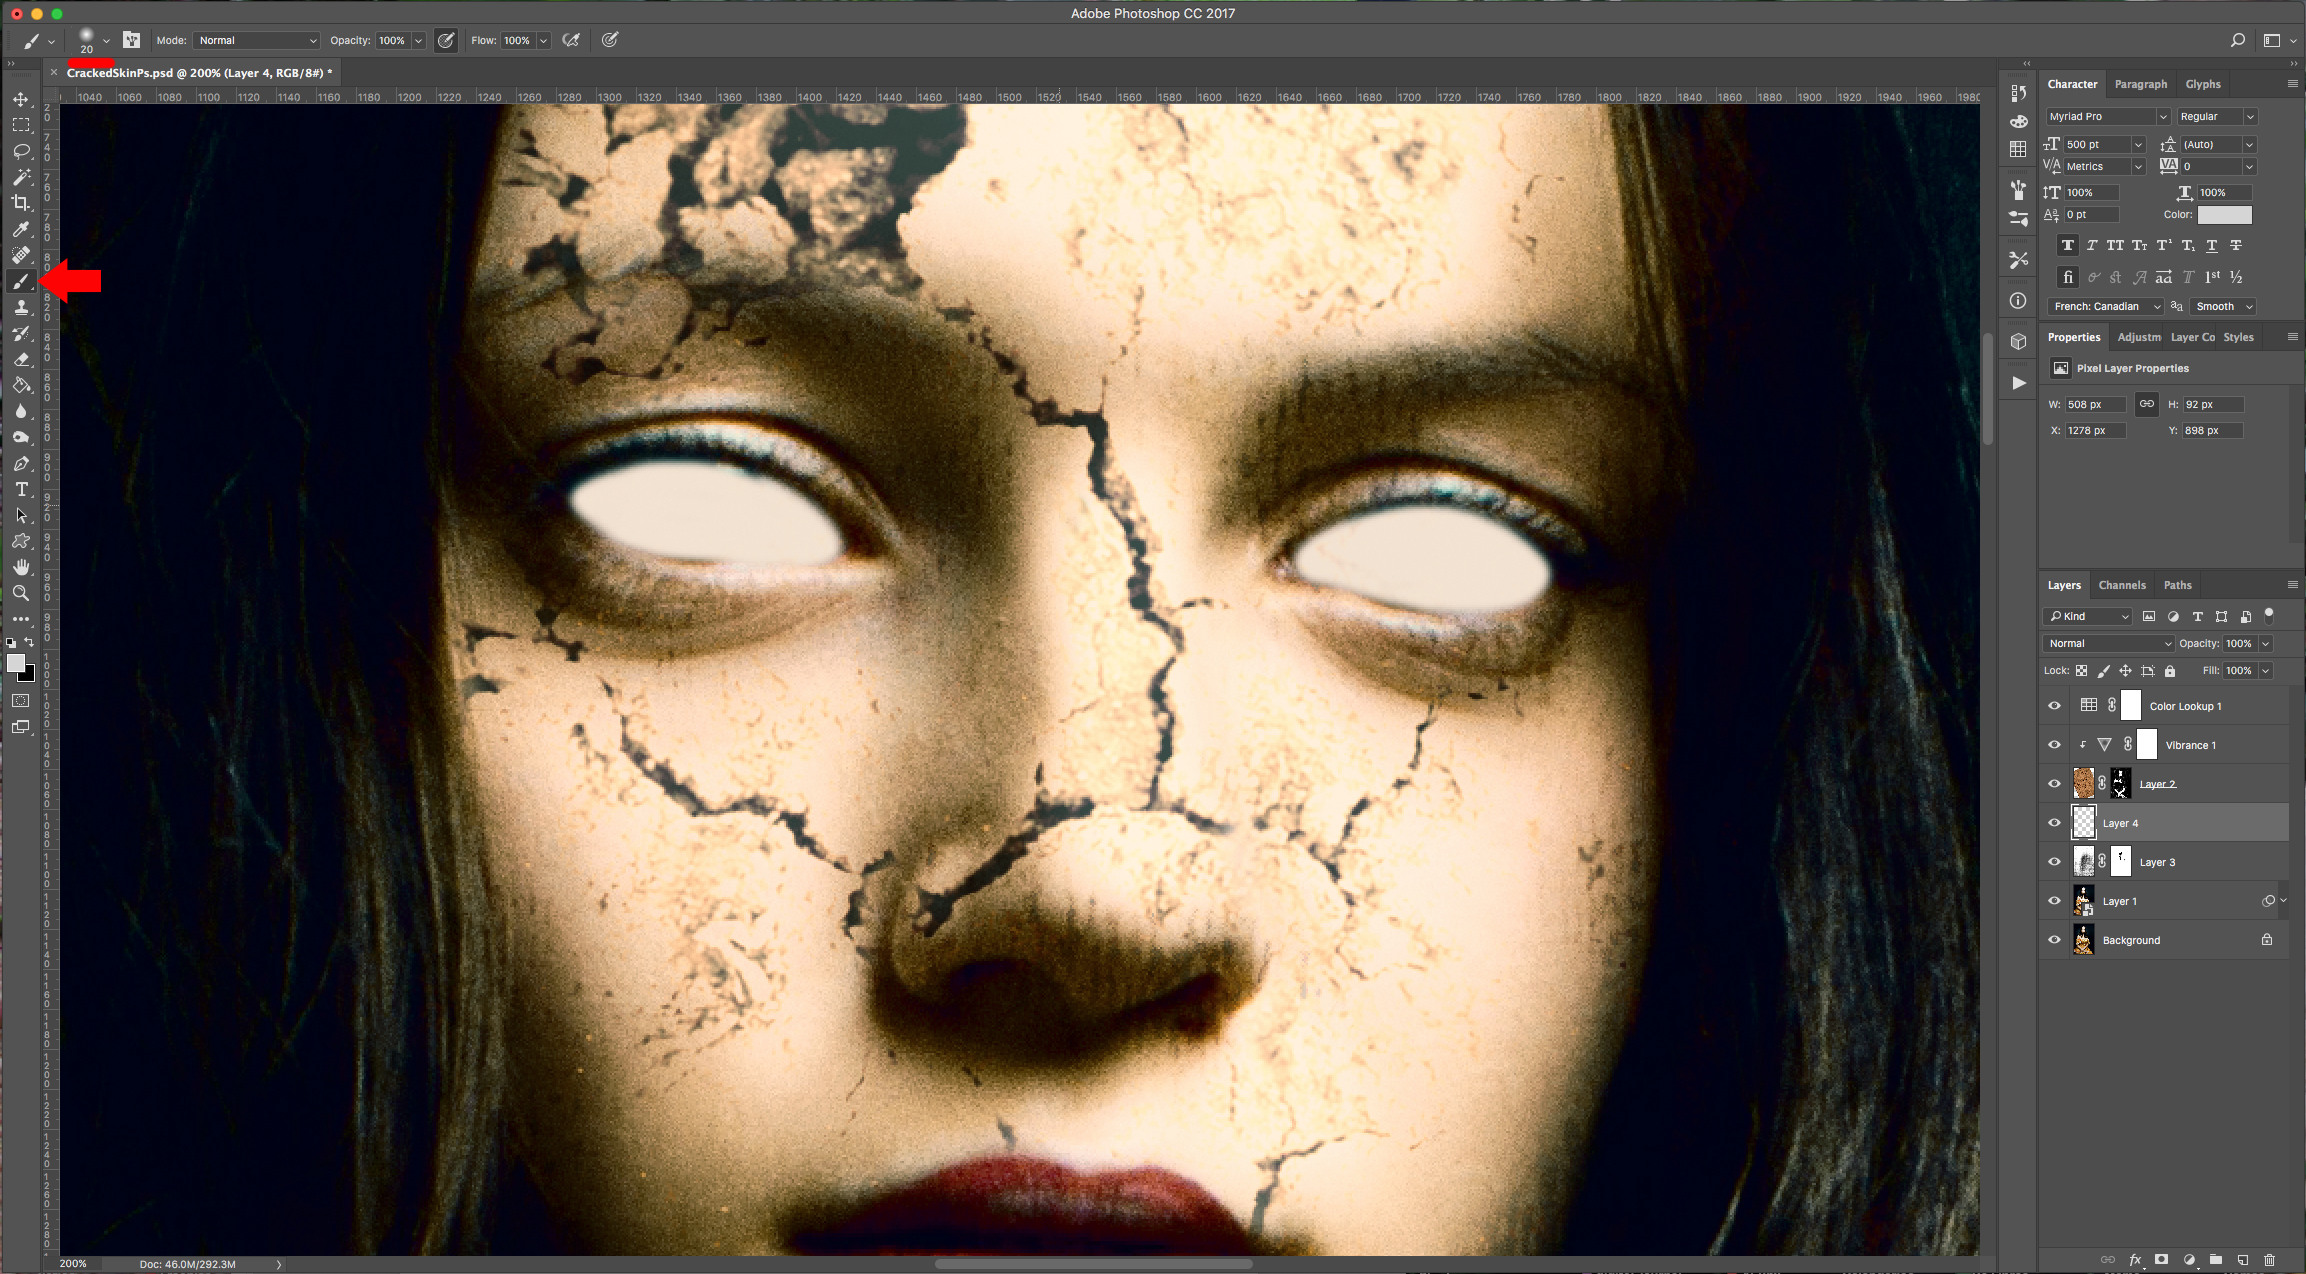
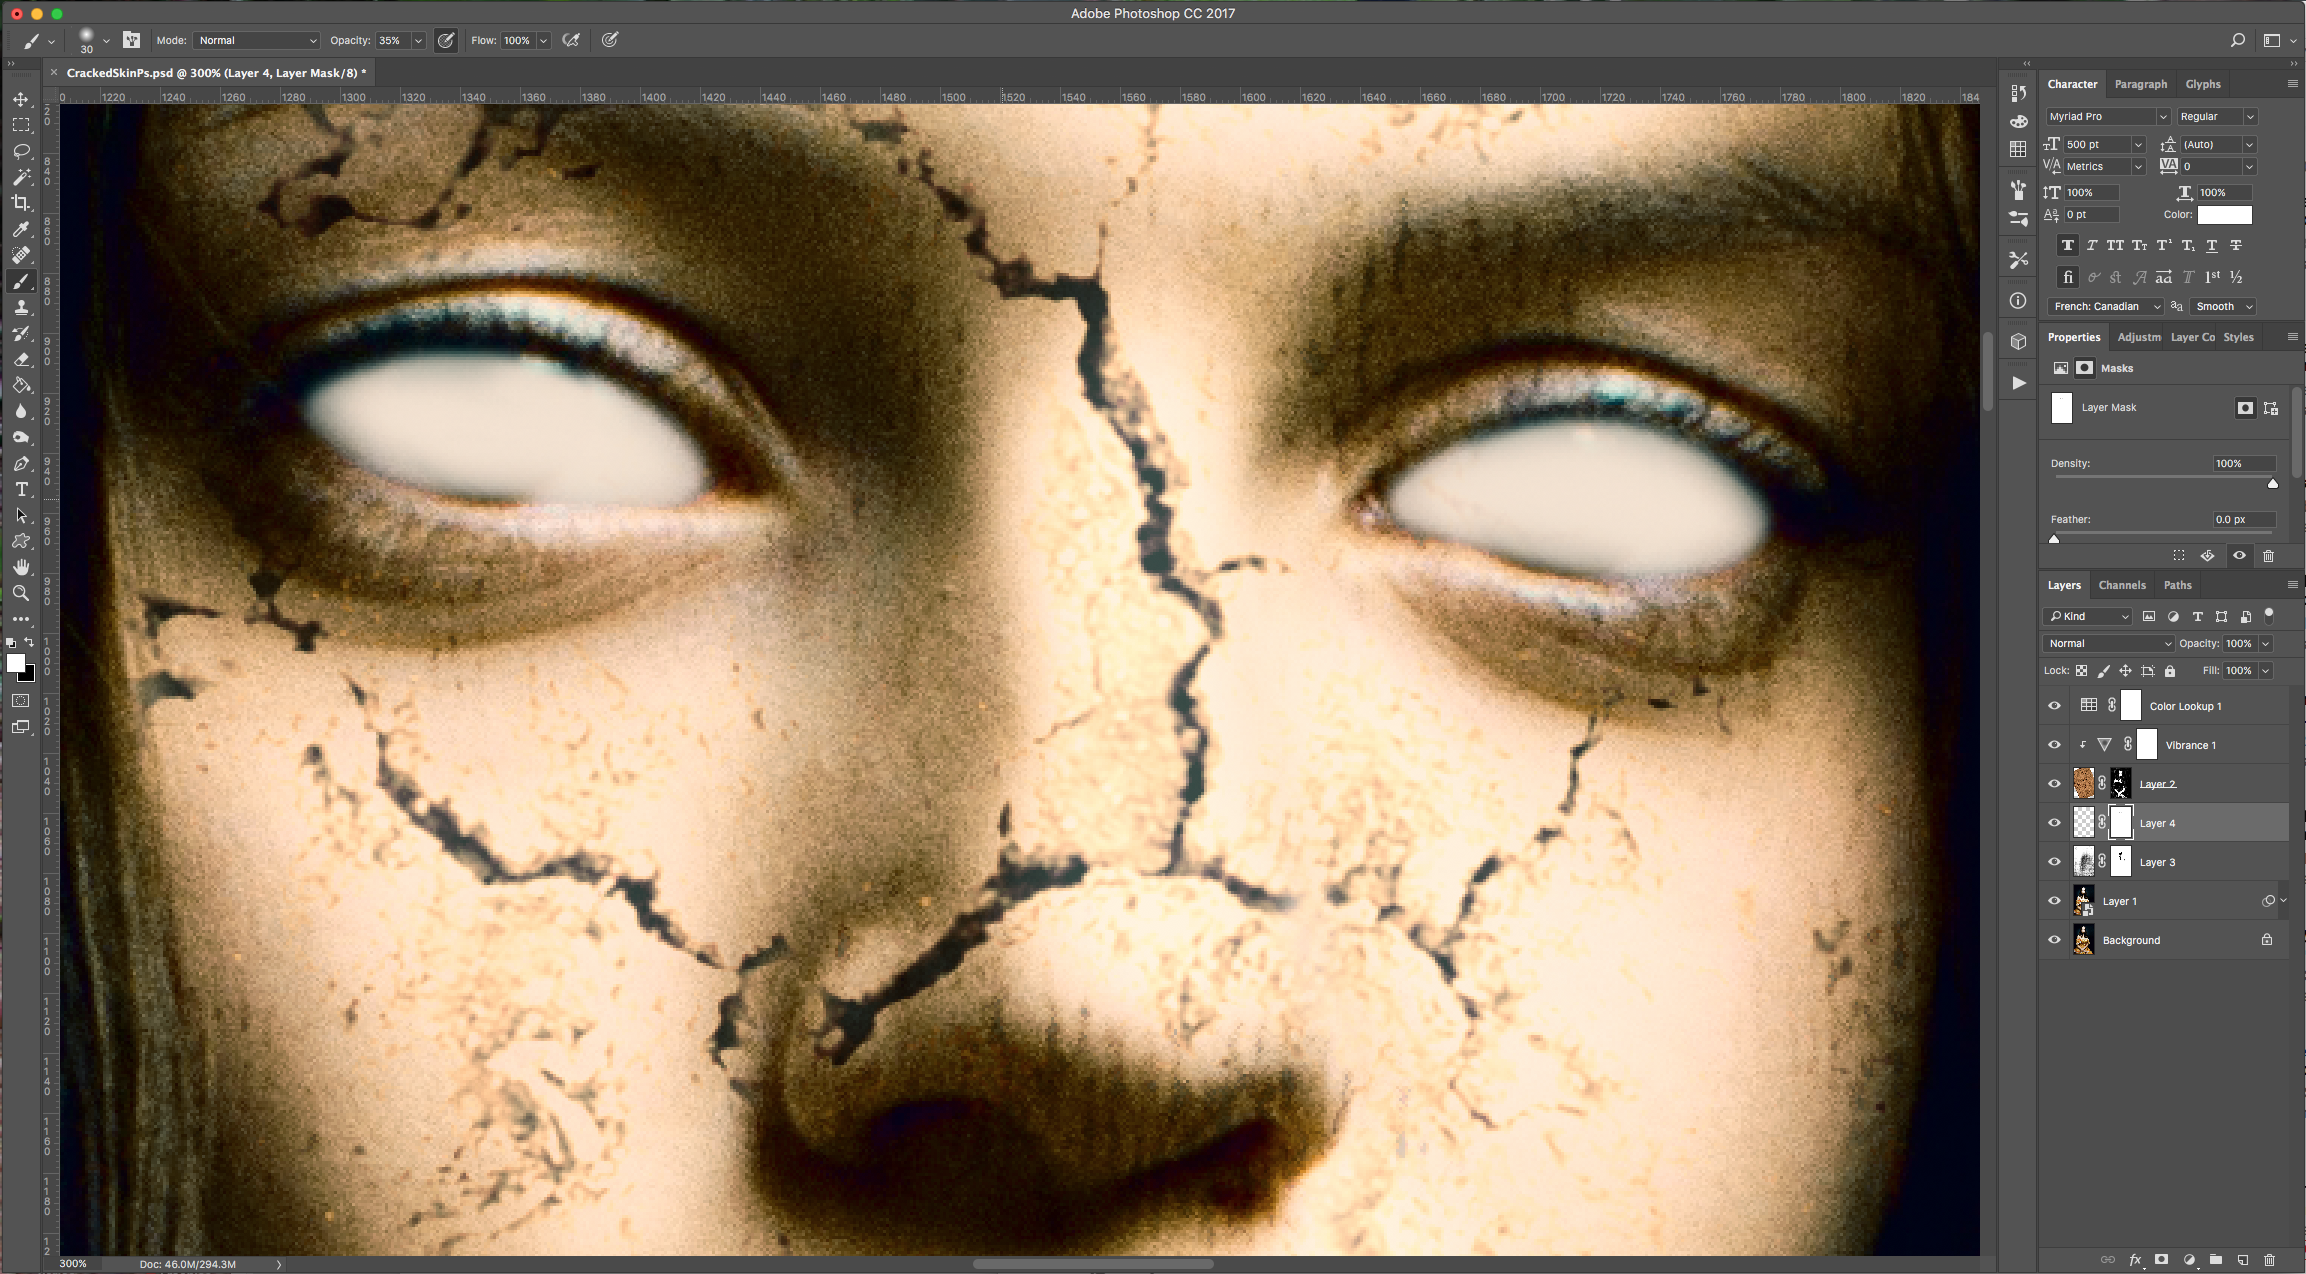
(2) 16 - Use the “Brush Tool” (B) with a small and soft brush (20 px and 0% “Hardness”) to fill the eyes of your subject.
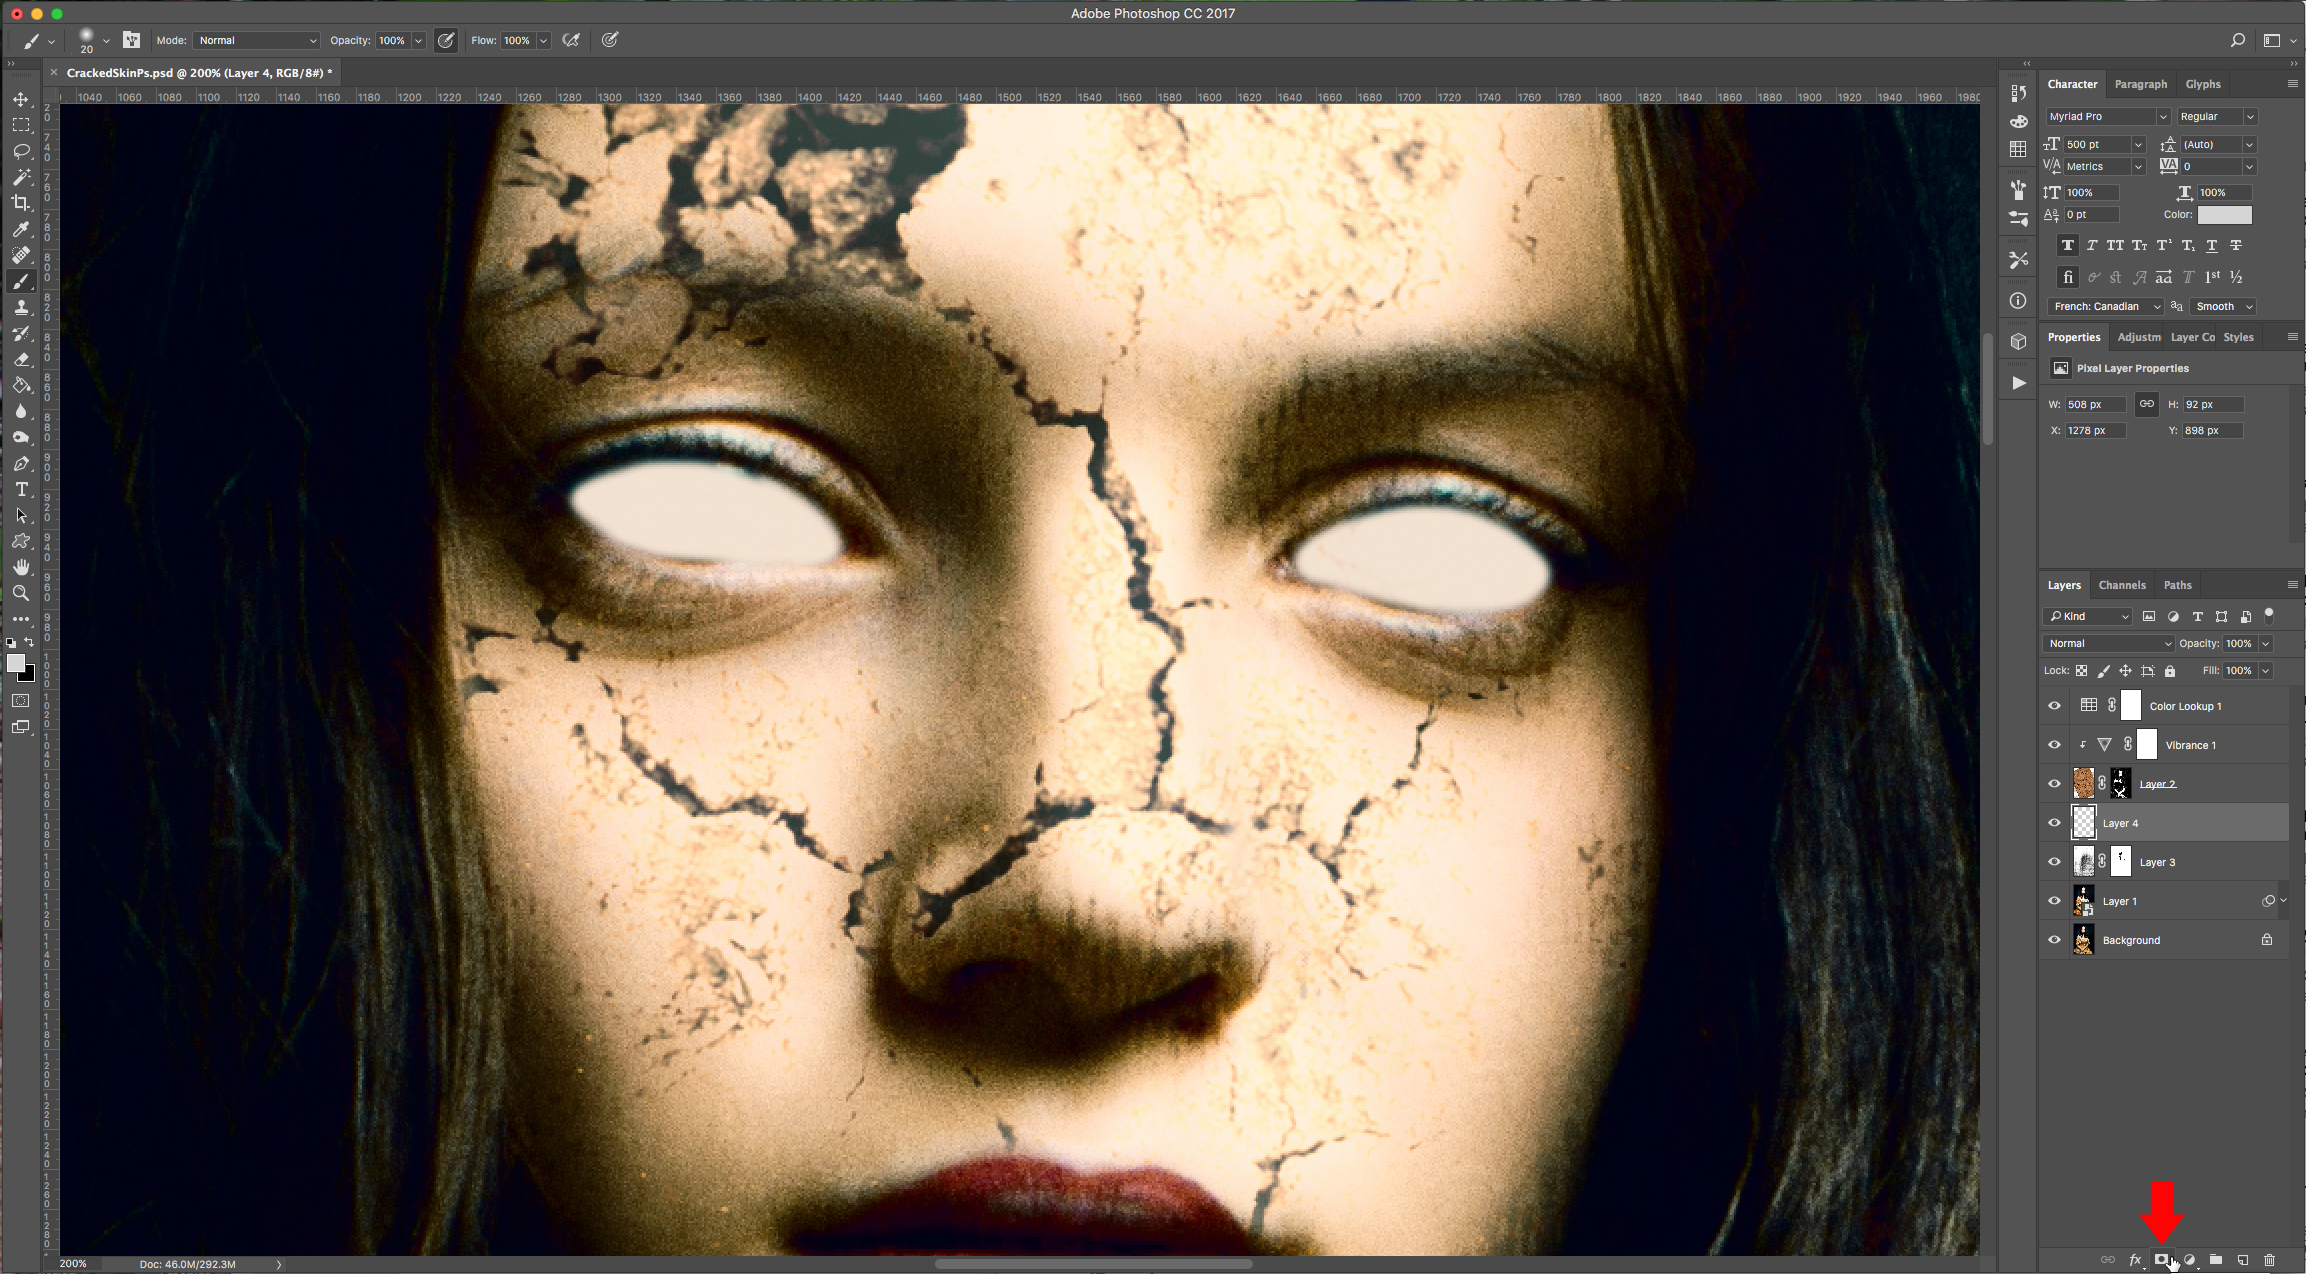
(3) 17 - Add a “Layer Mask” to this New Layer and use the “Brush Tool” (B) with a medium brush (45 px) using Black as “Foreground” color. Lower the “Opacity" of the brush to about 35% and soften the edges of the grey applied on top of the eyes. If you think that you erased too much, just use White instead of Black as “Foreground” color.
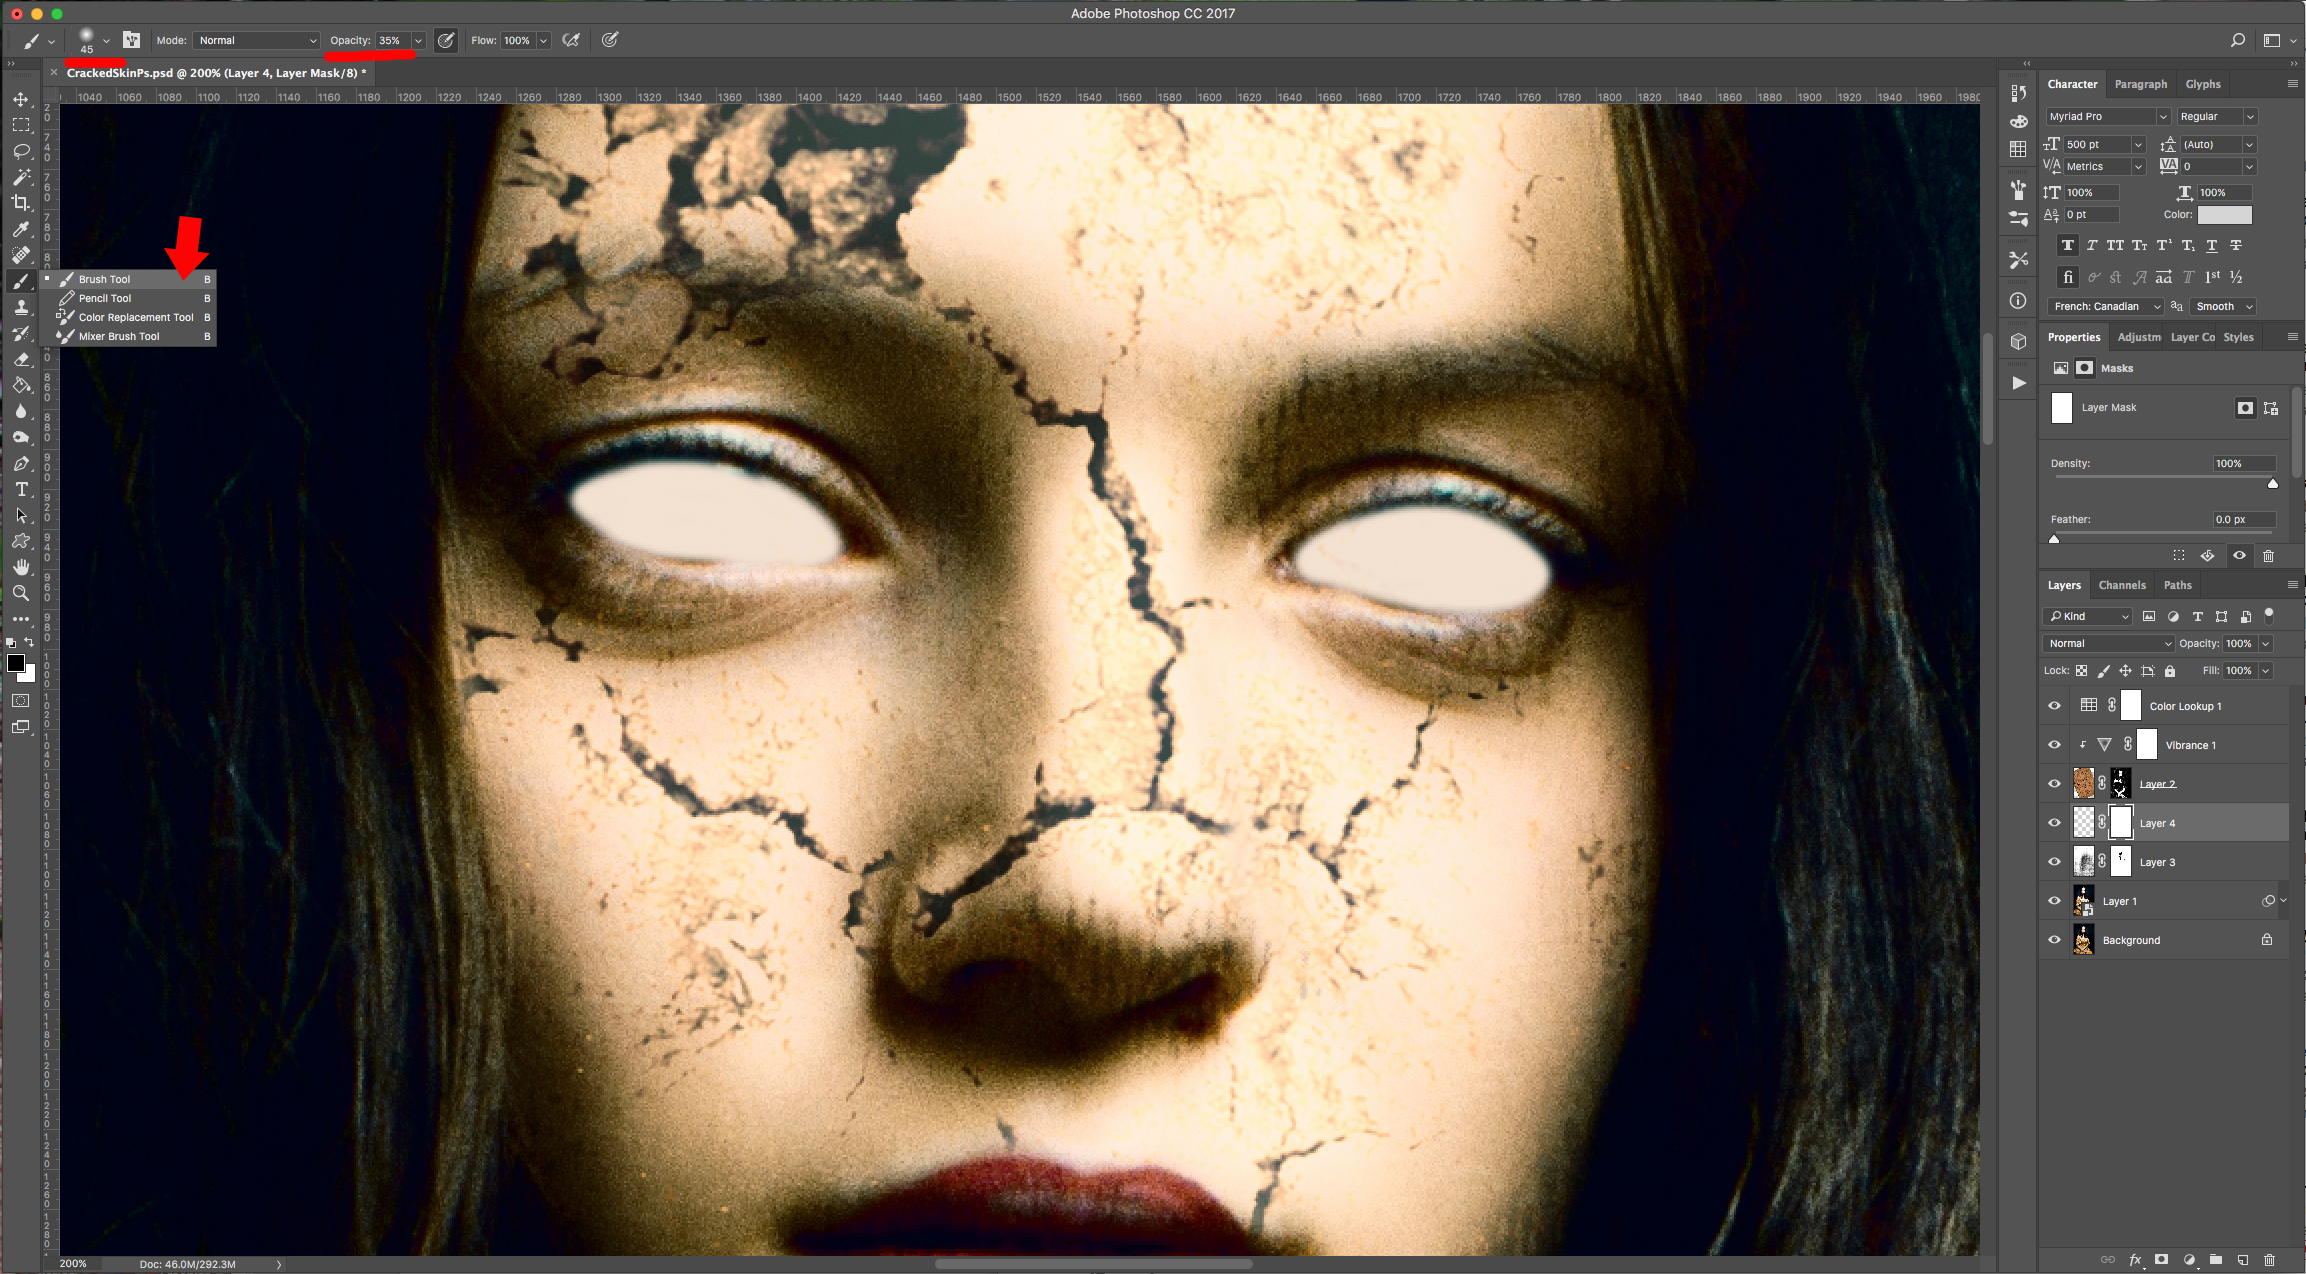
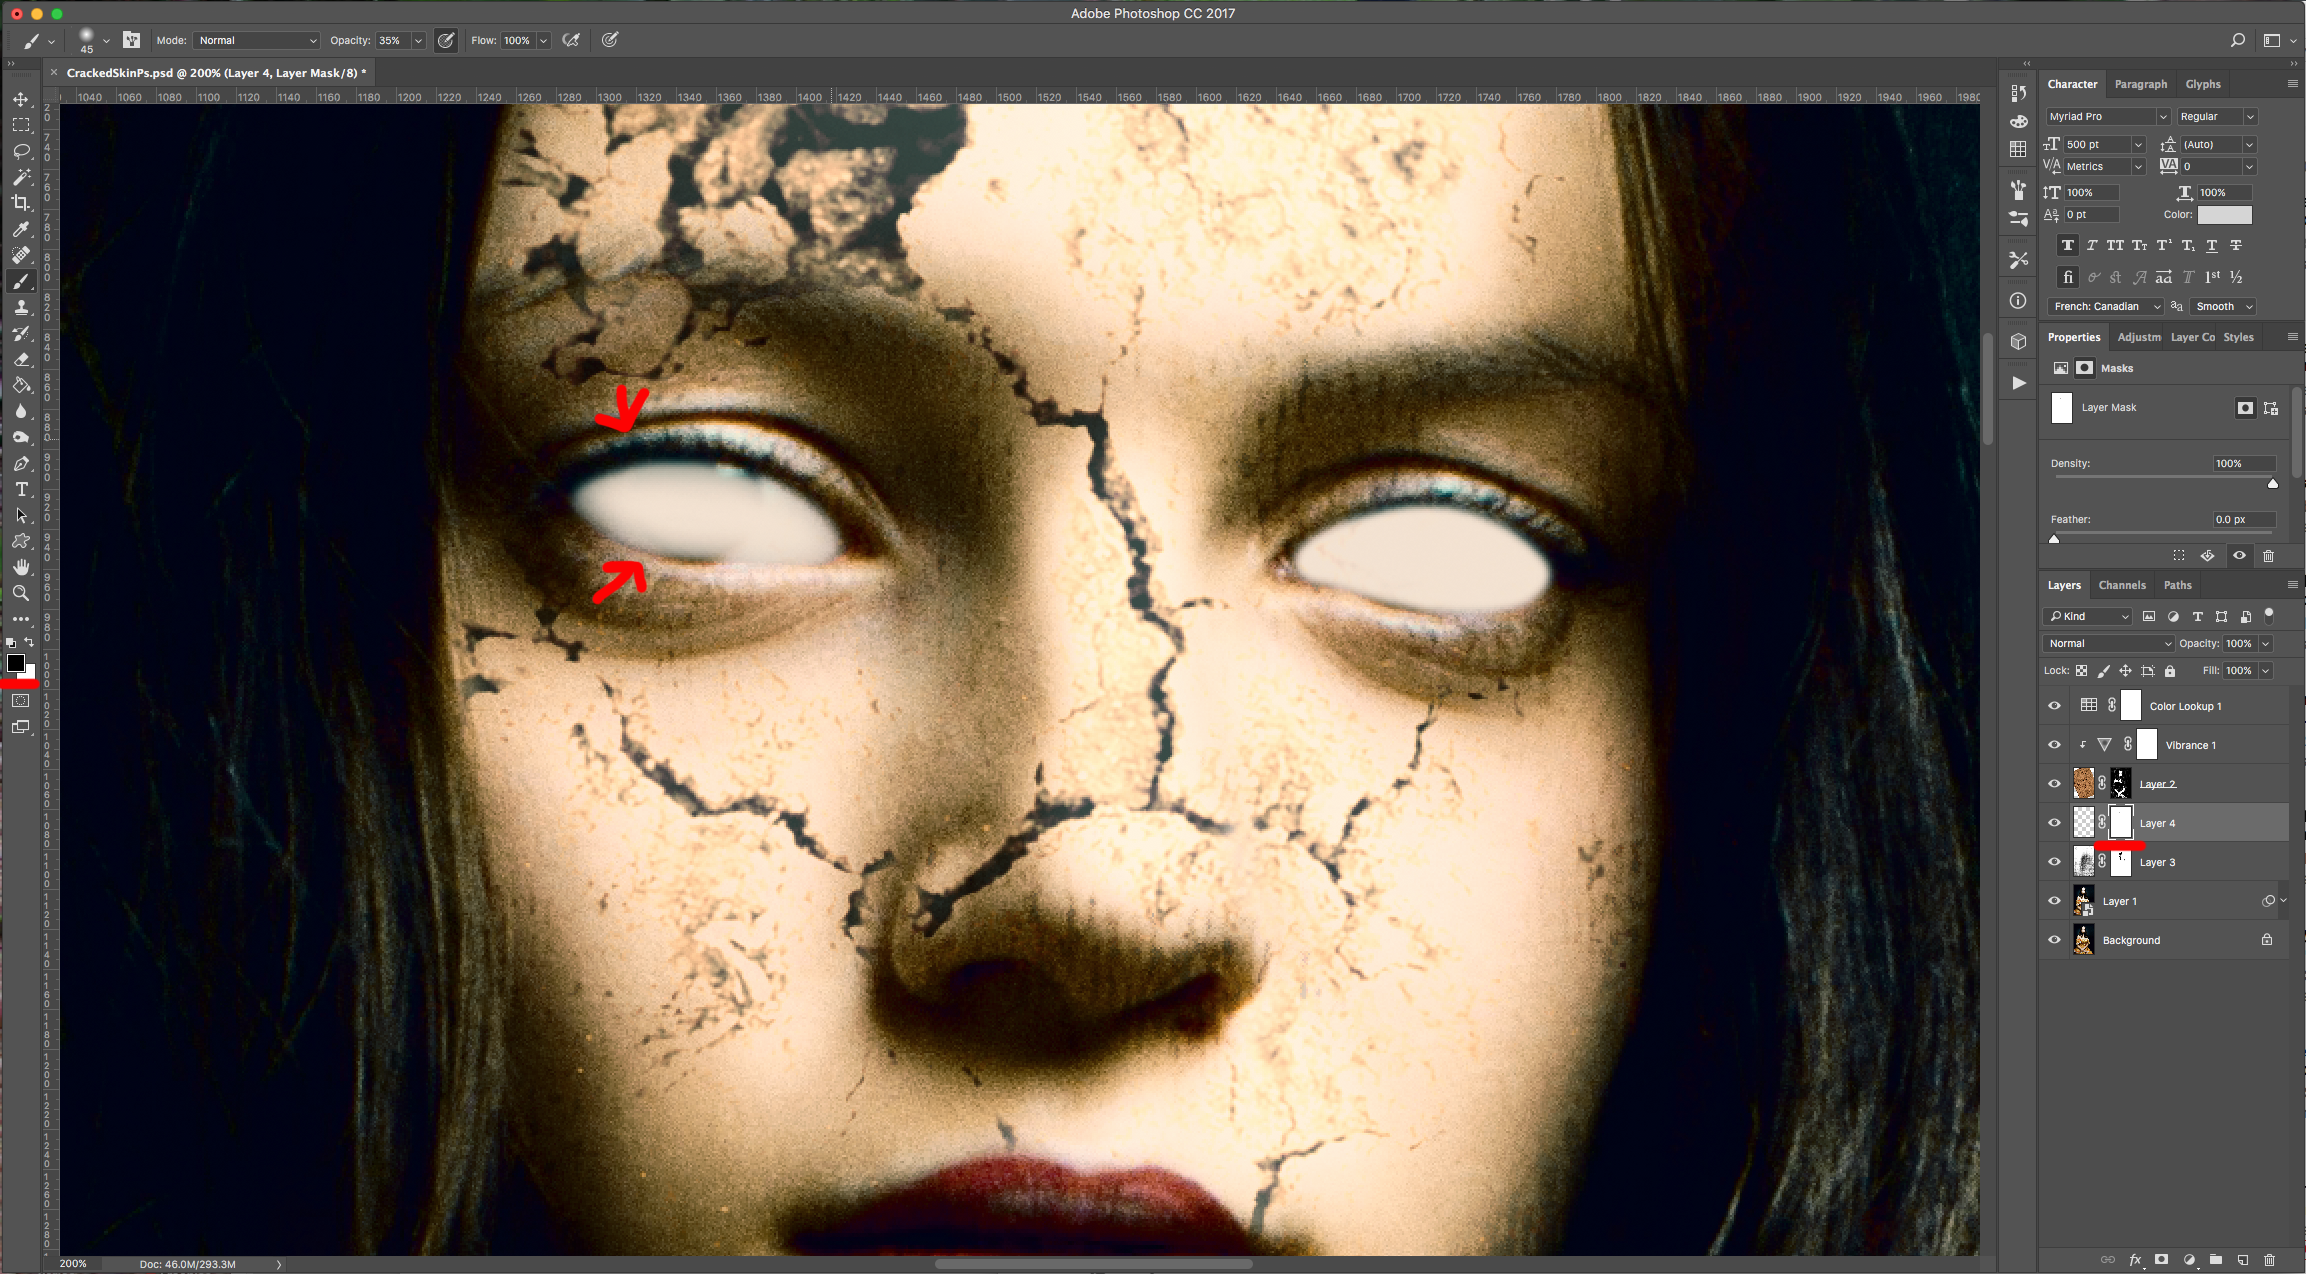
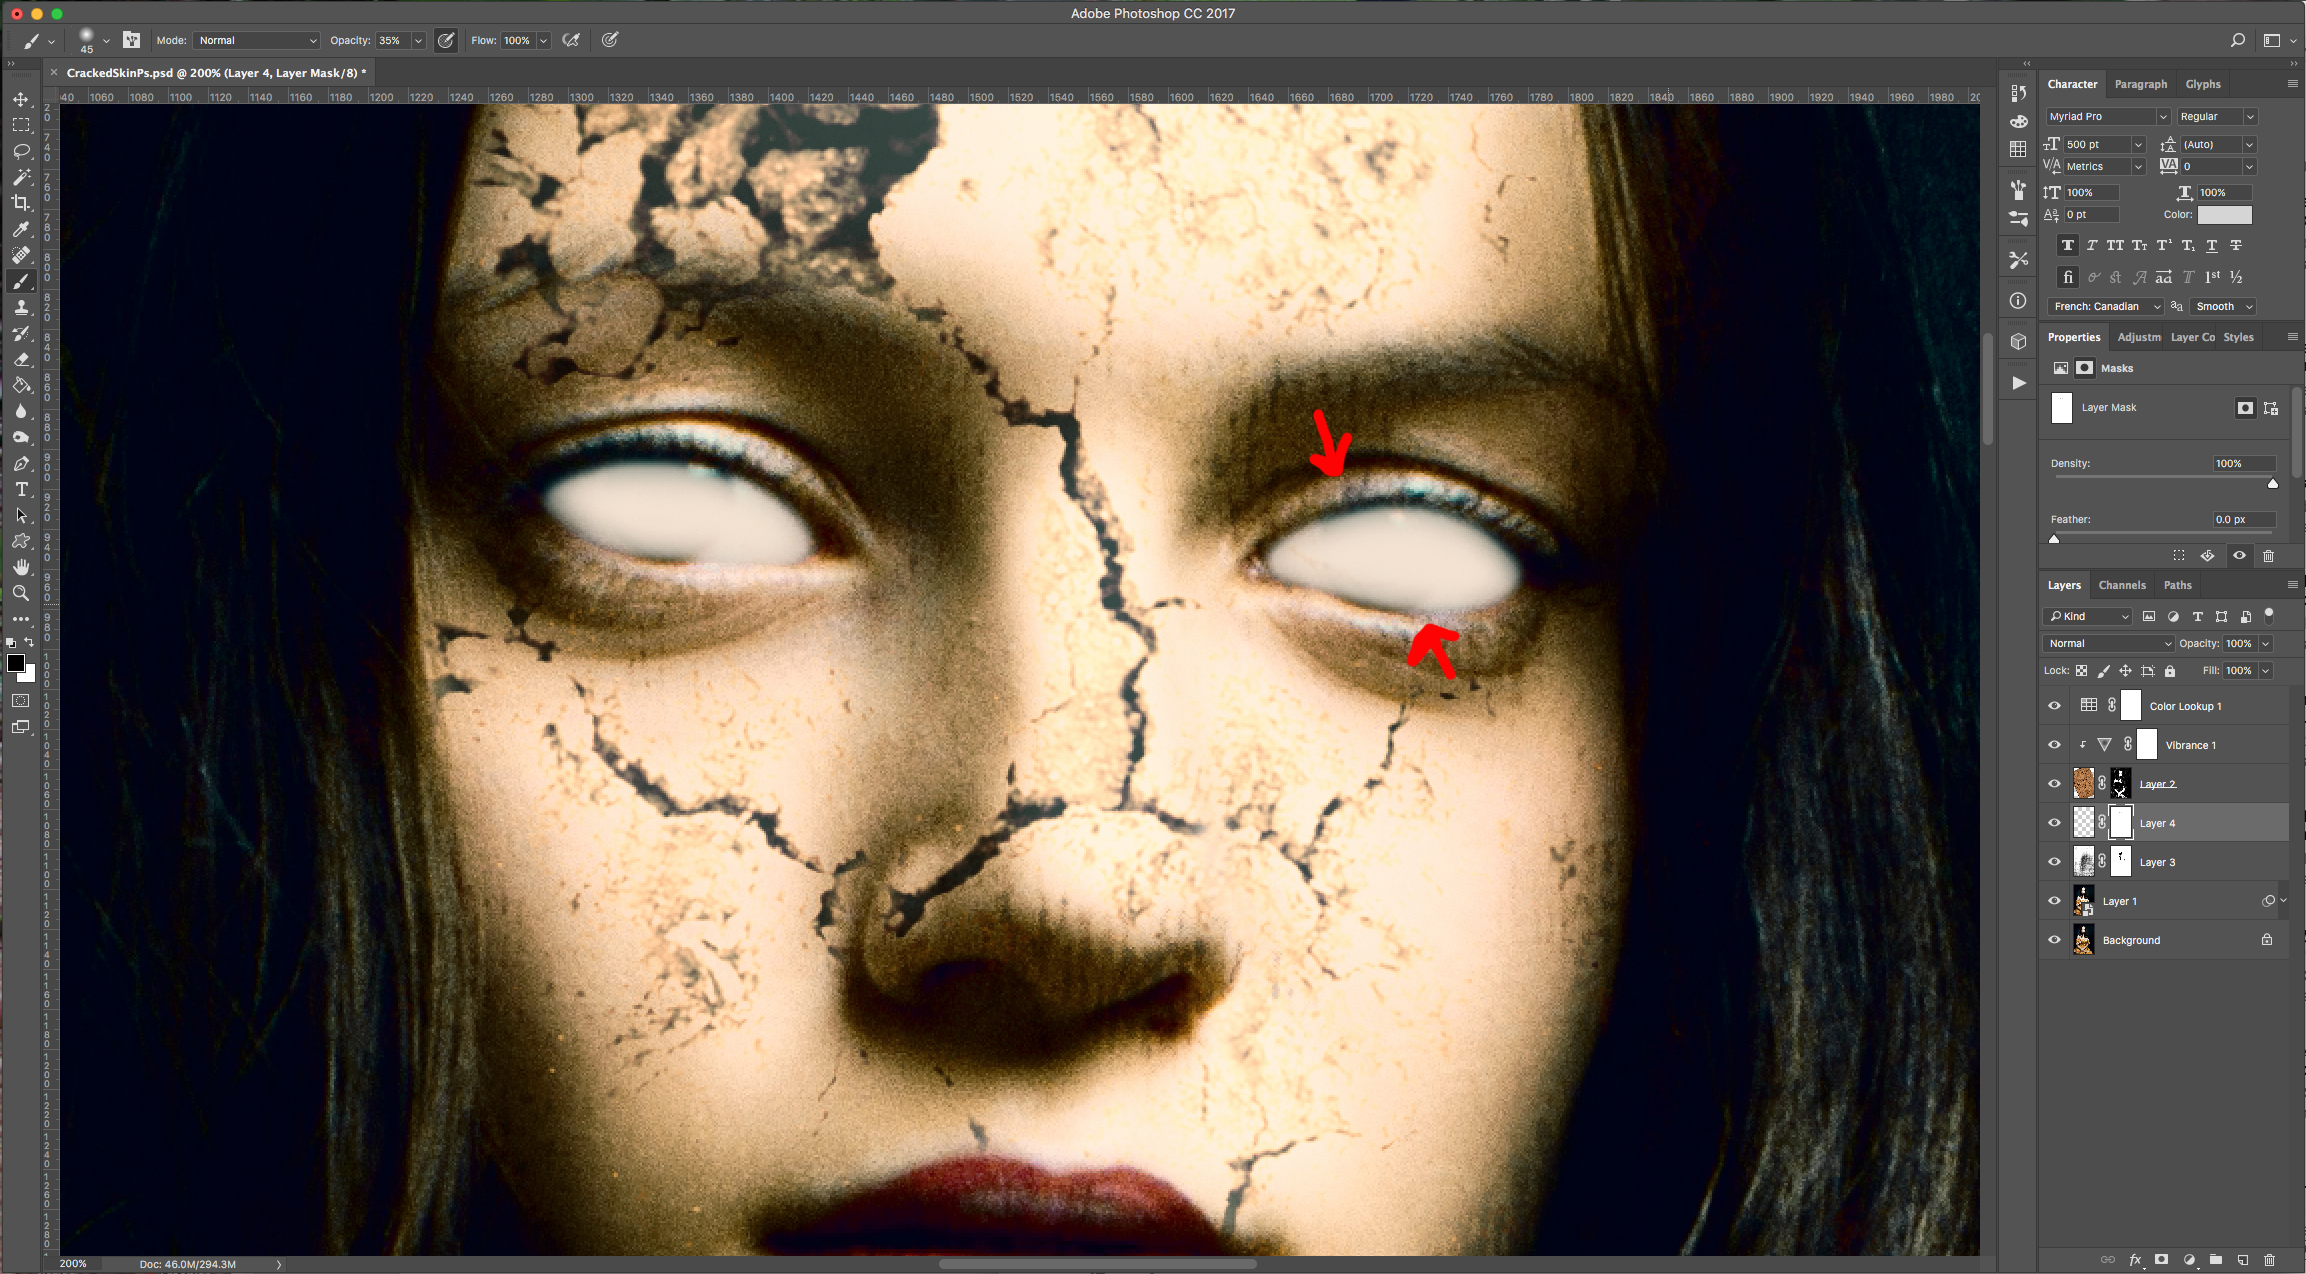
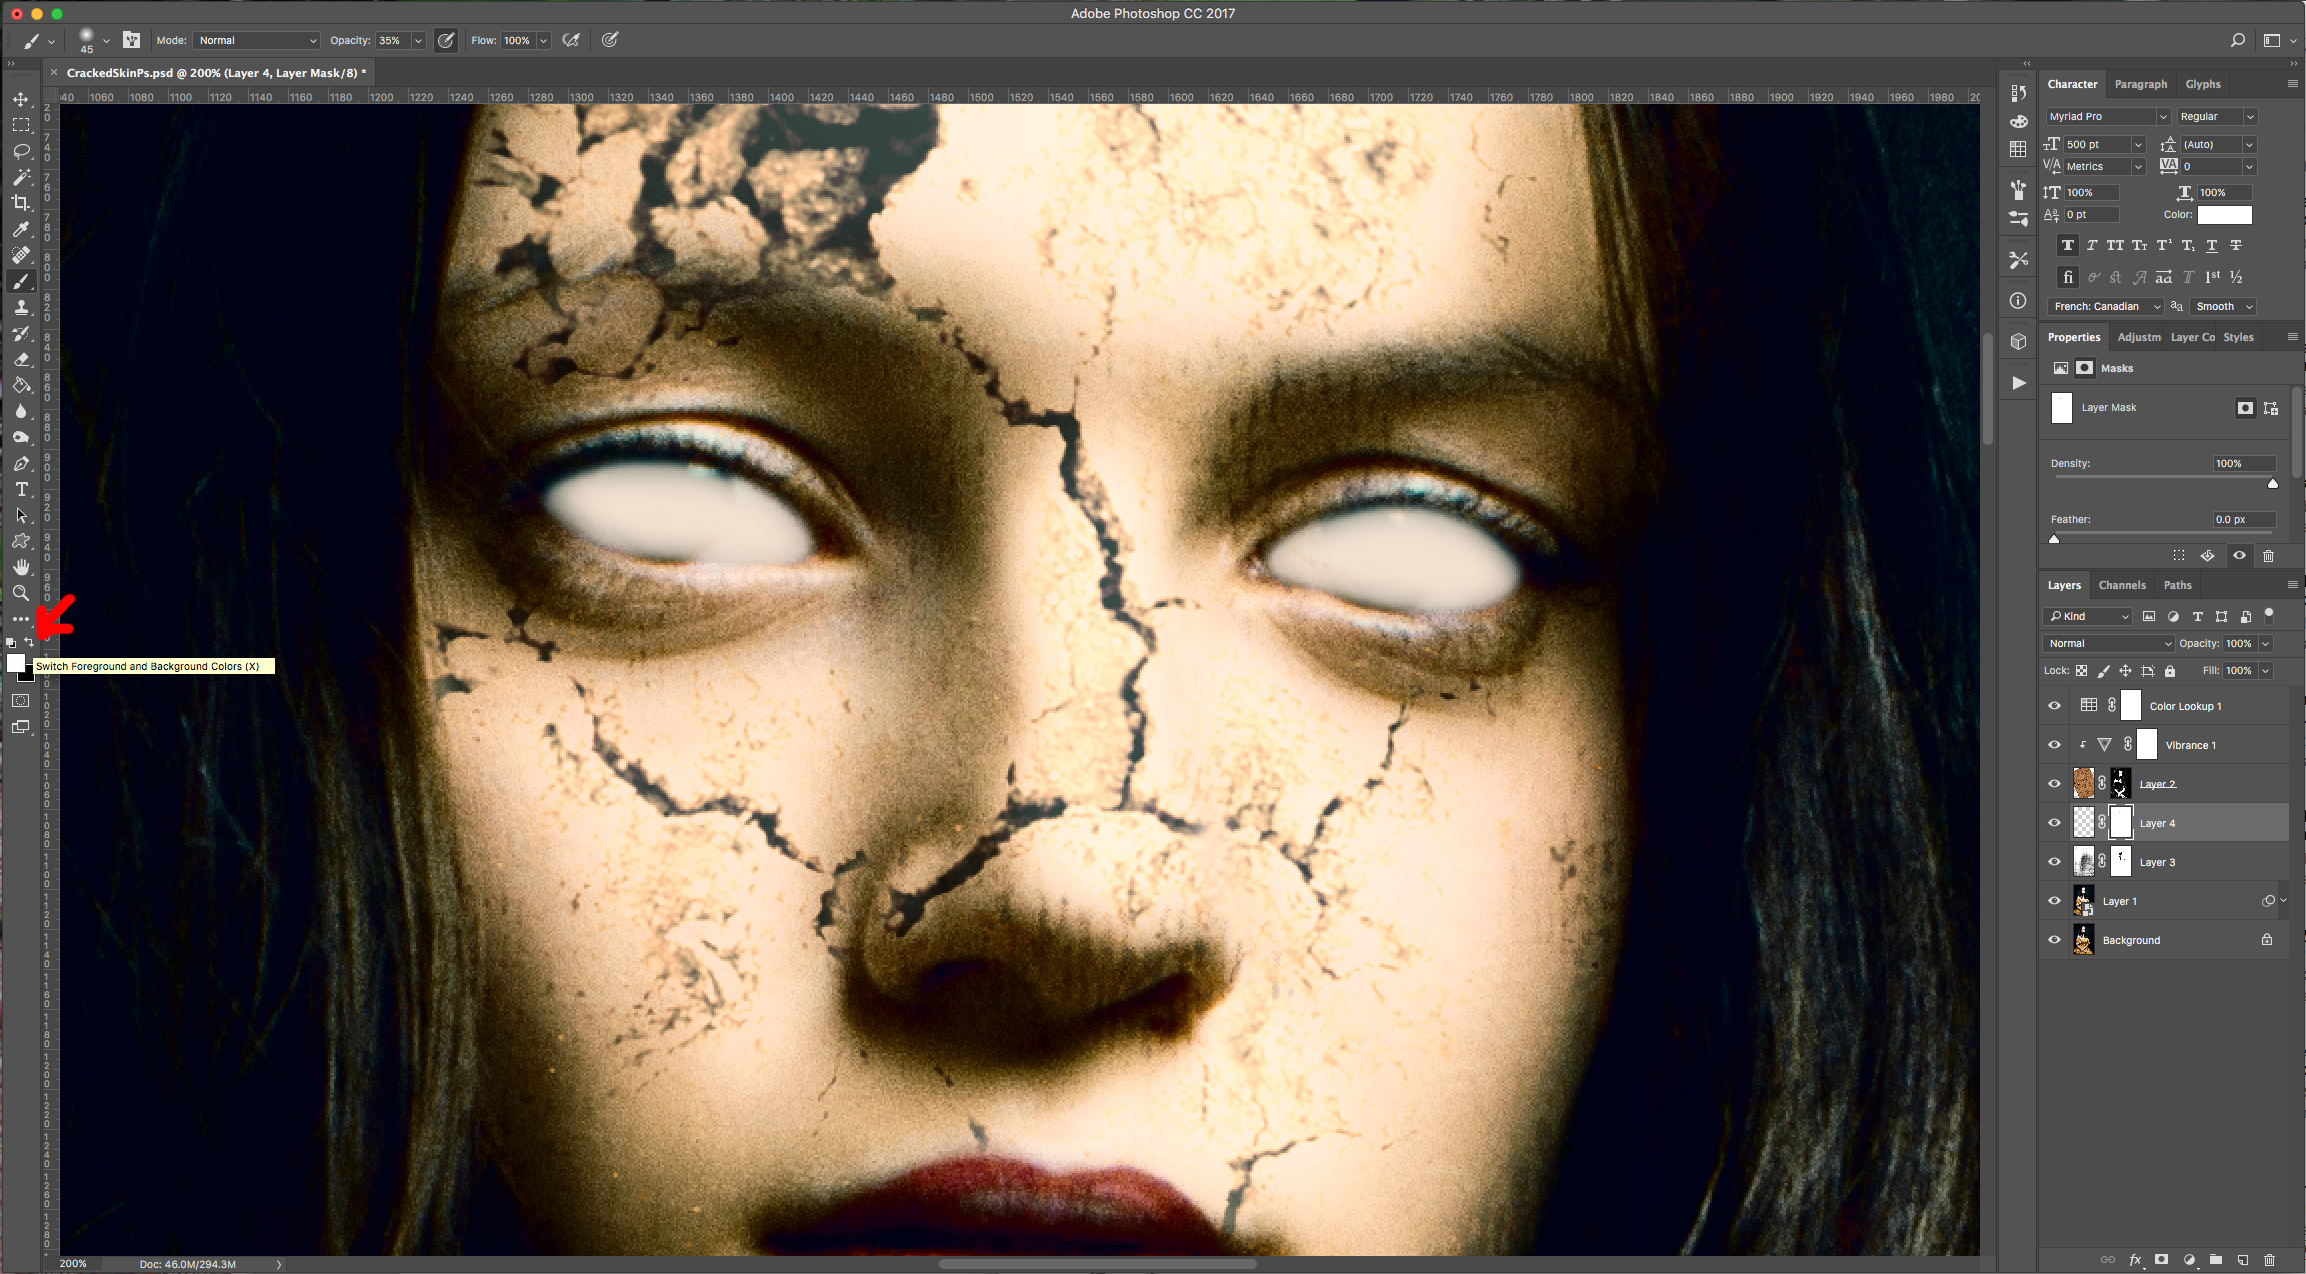
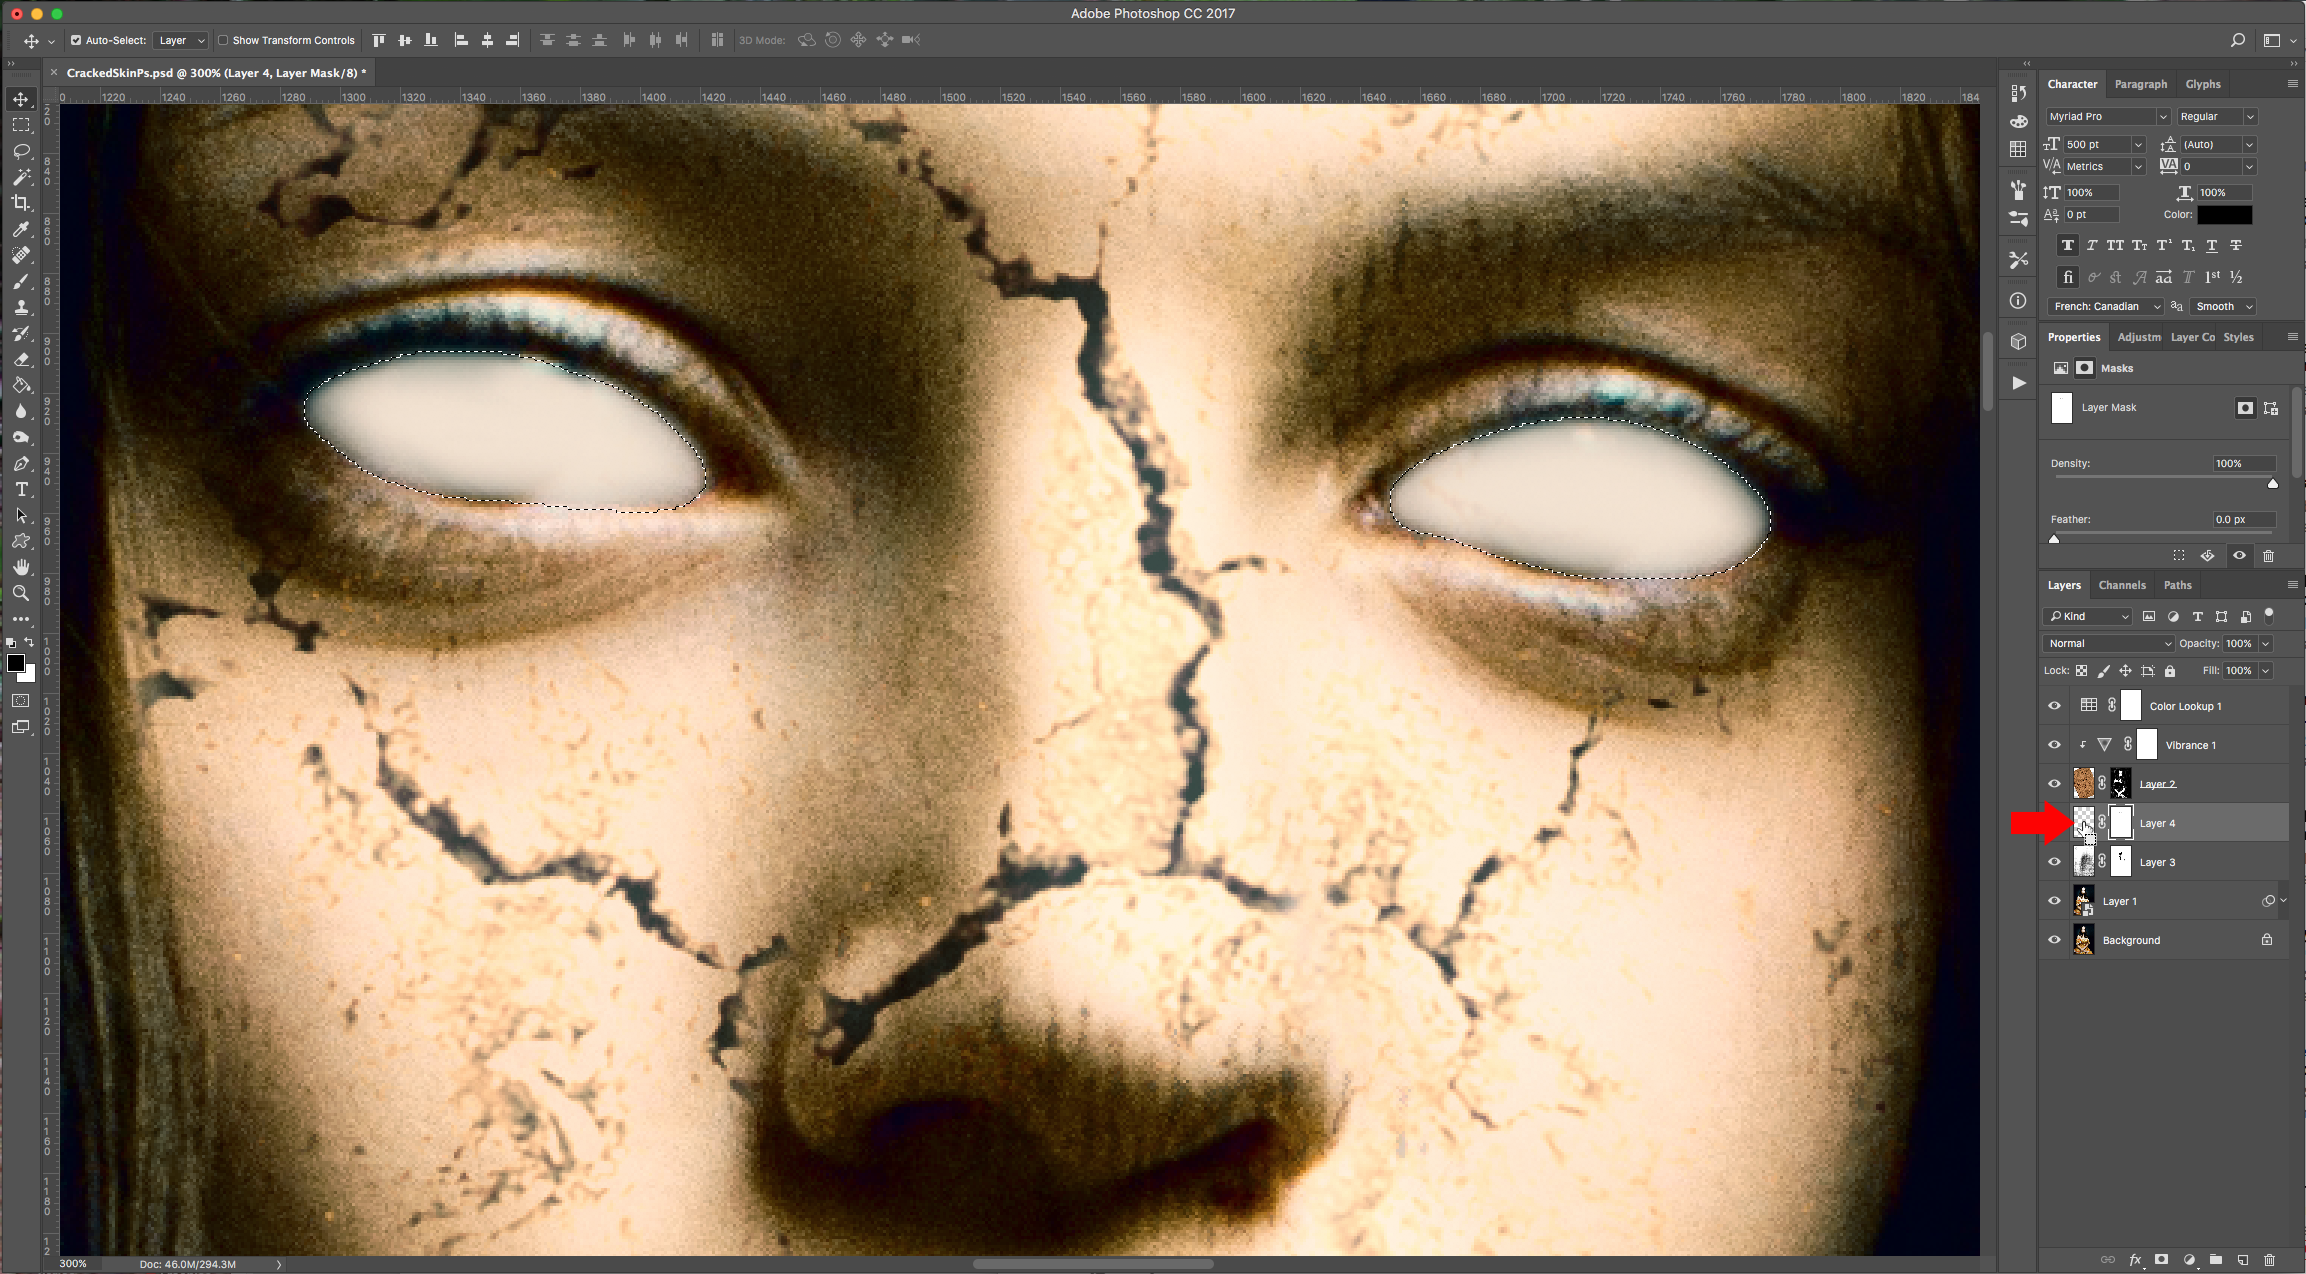
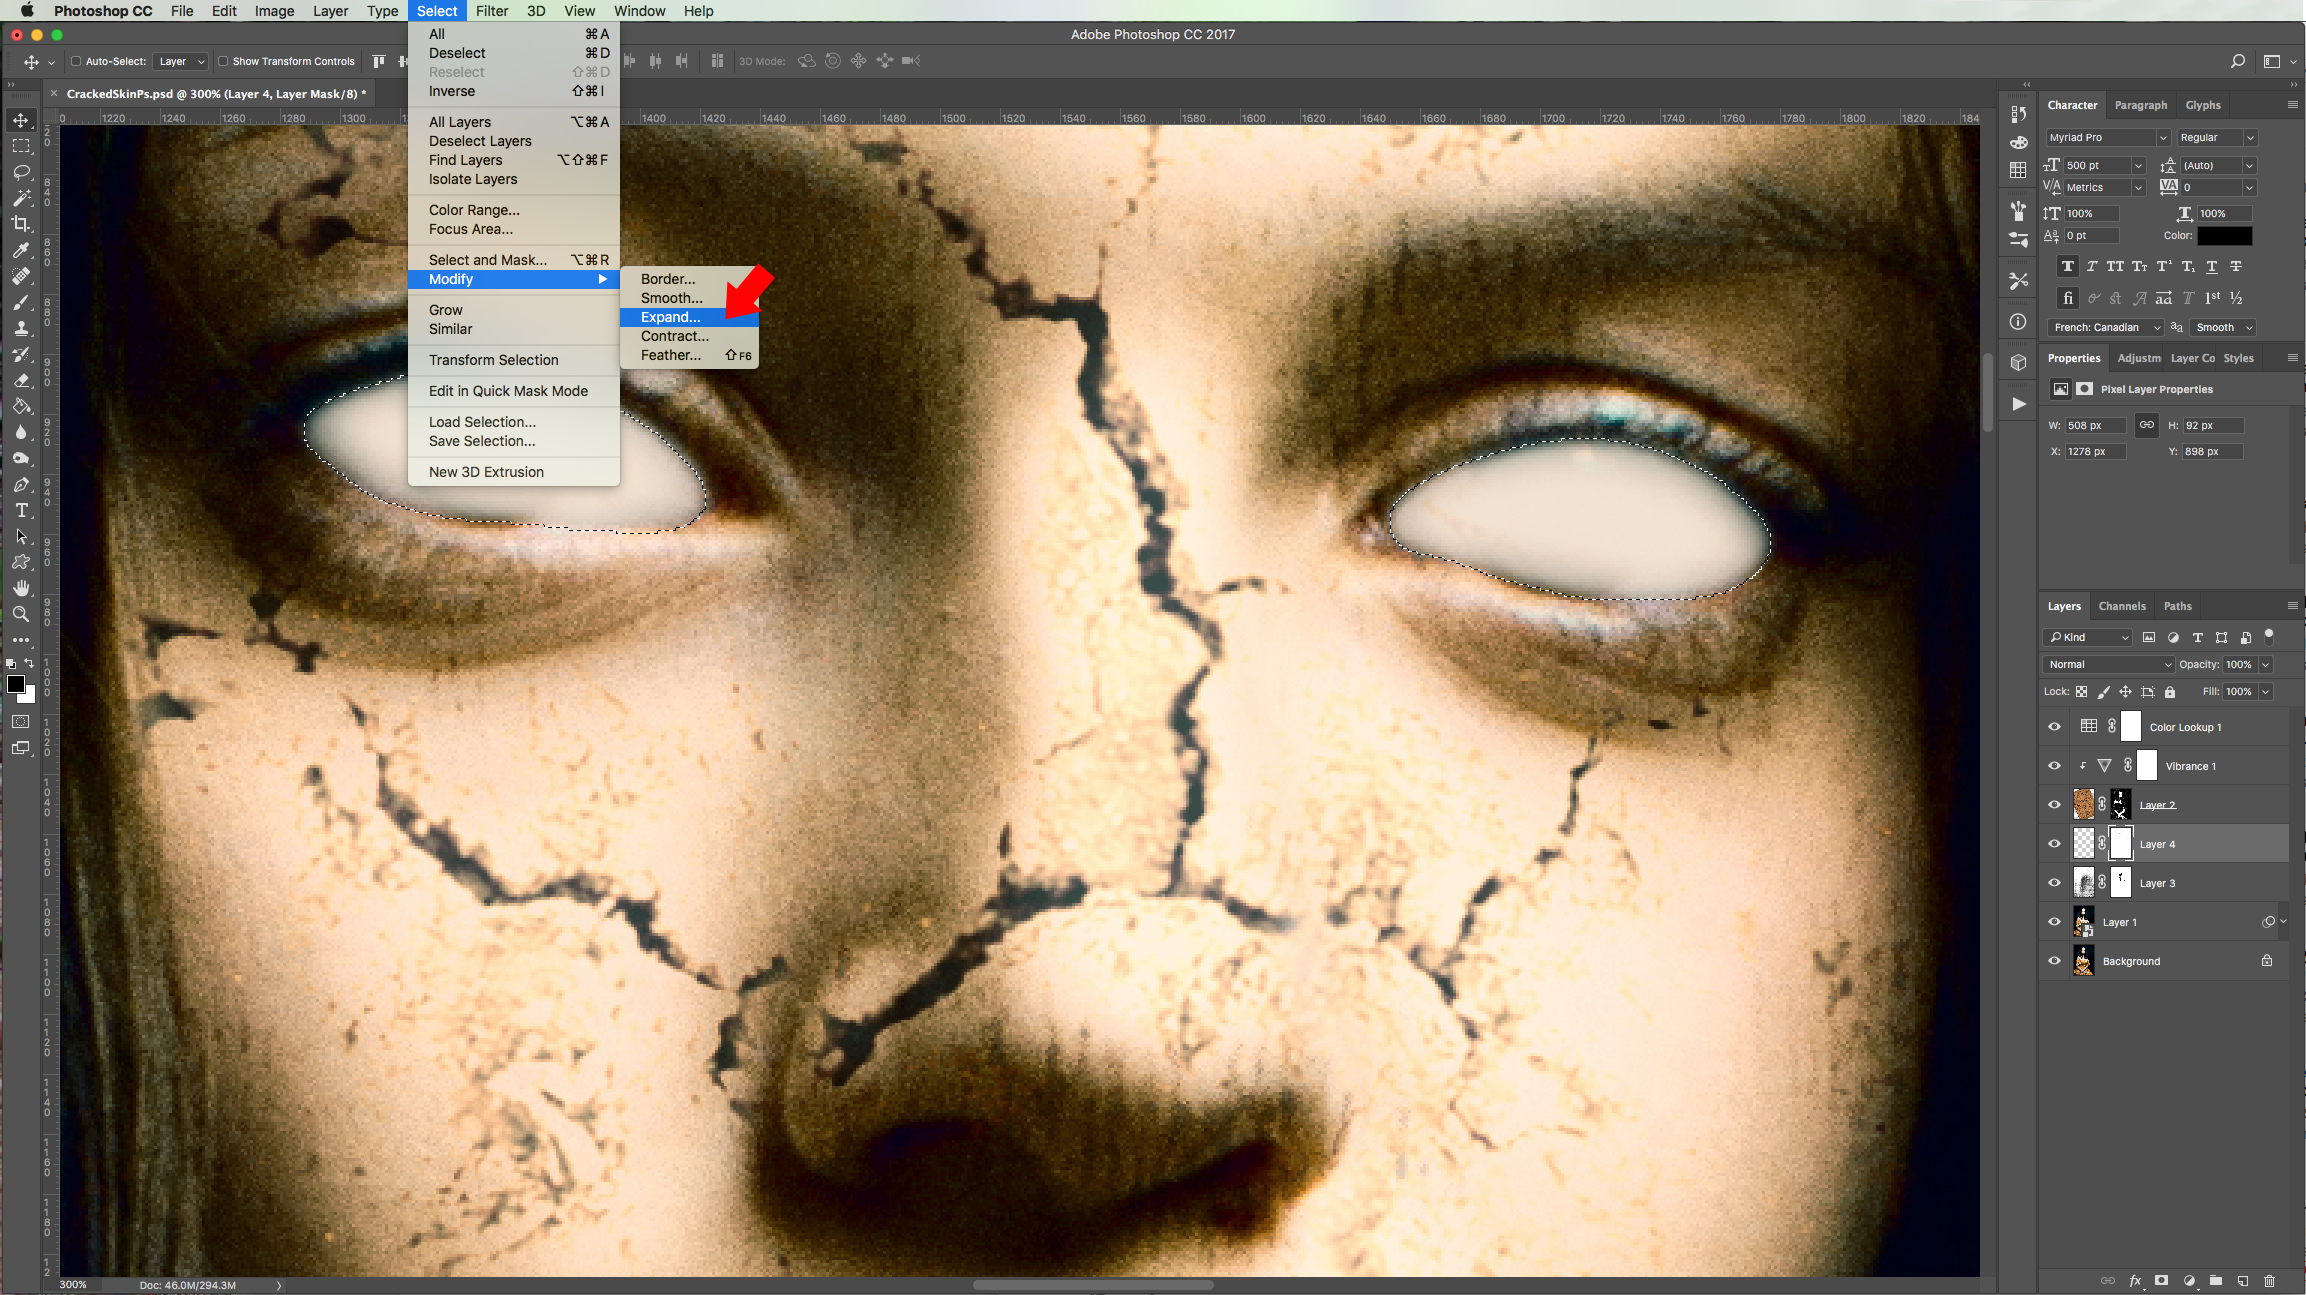
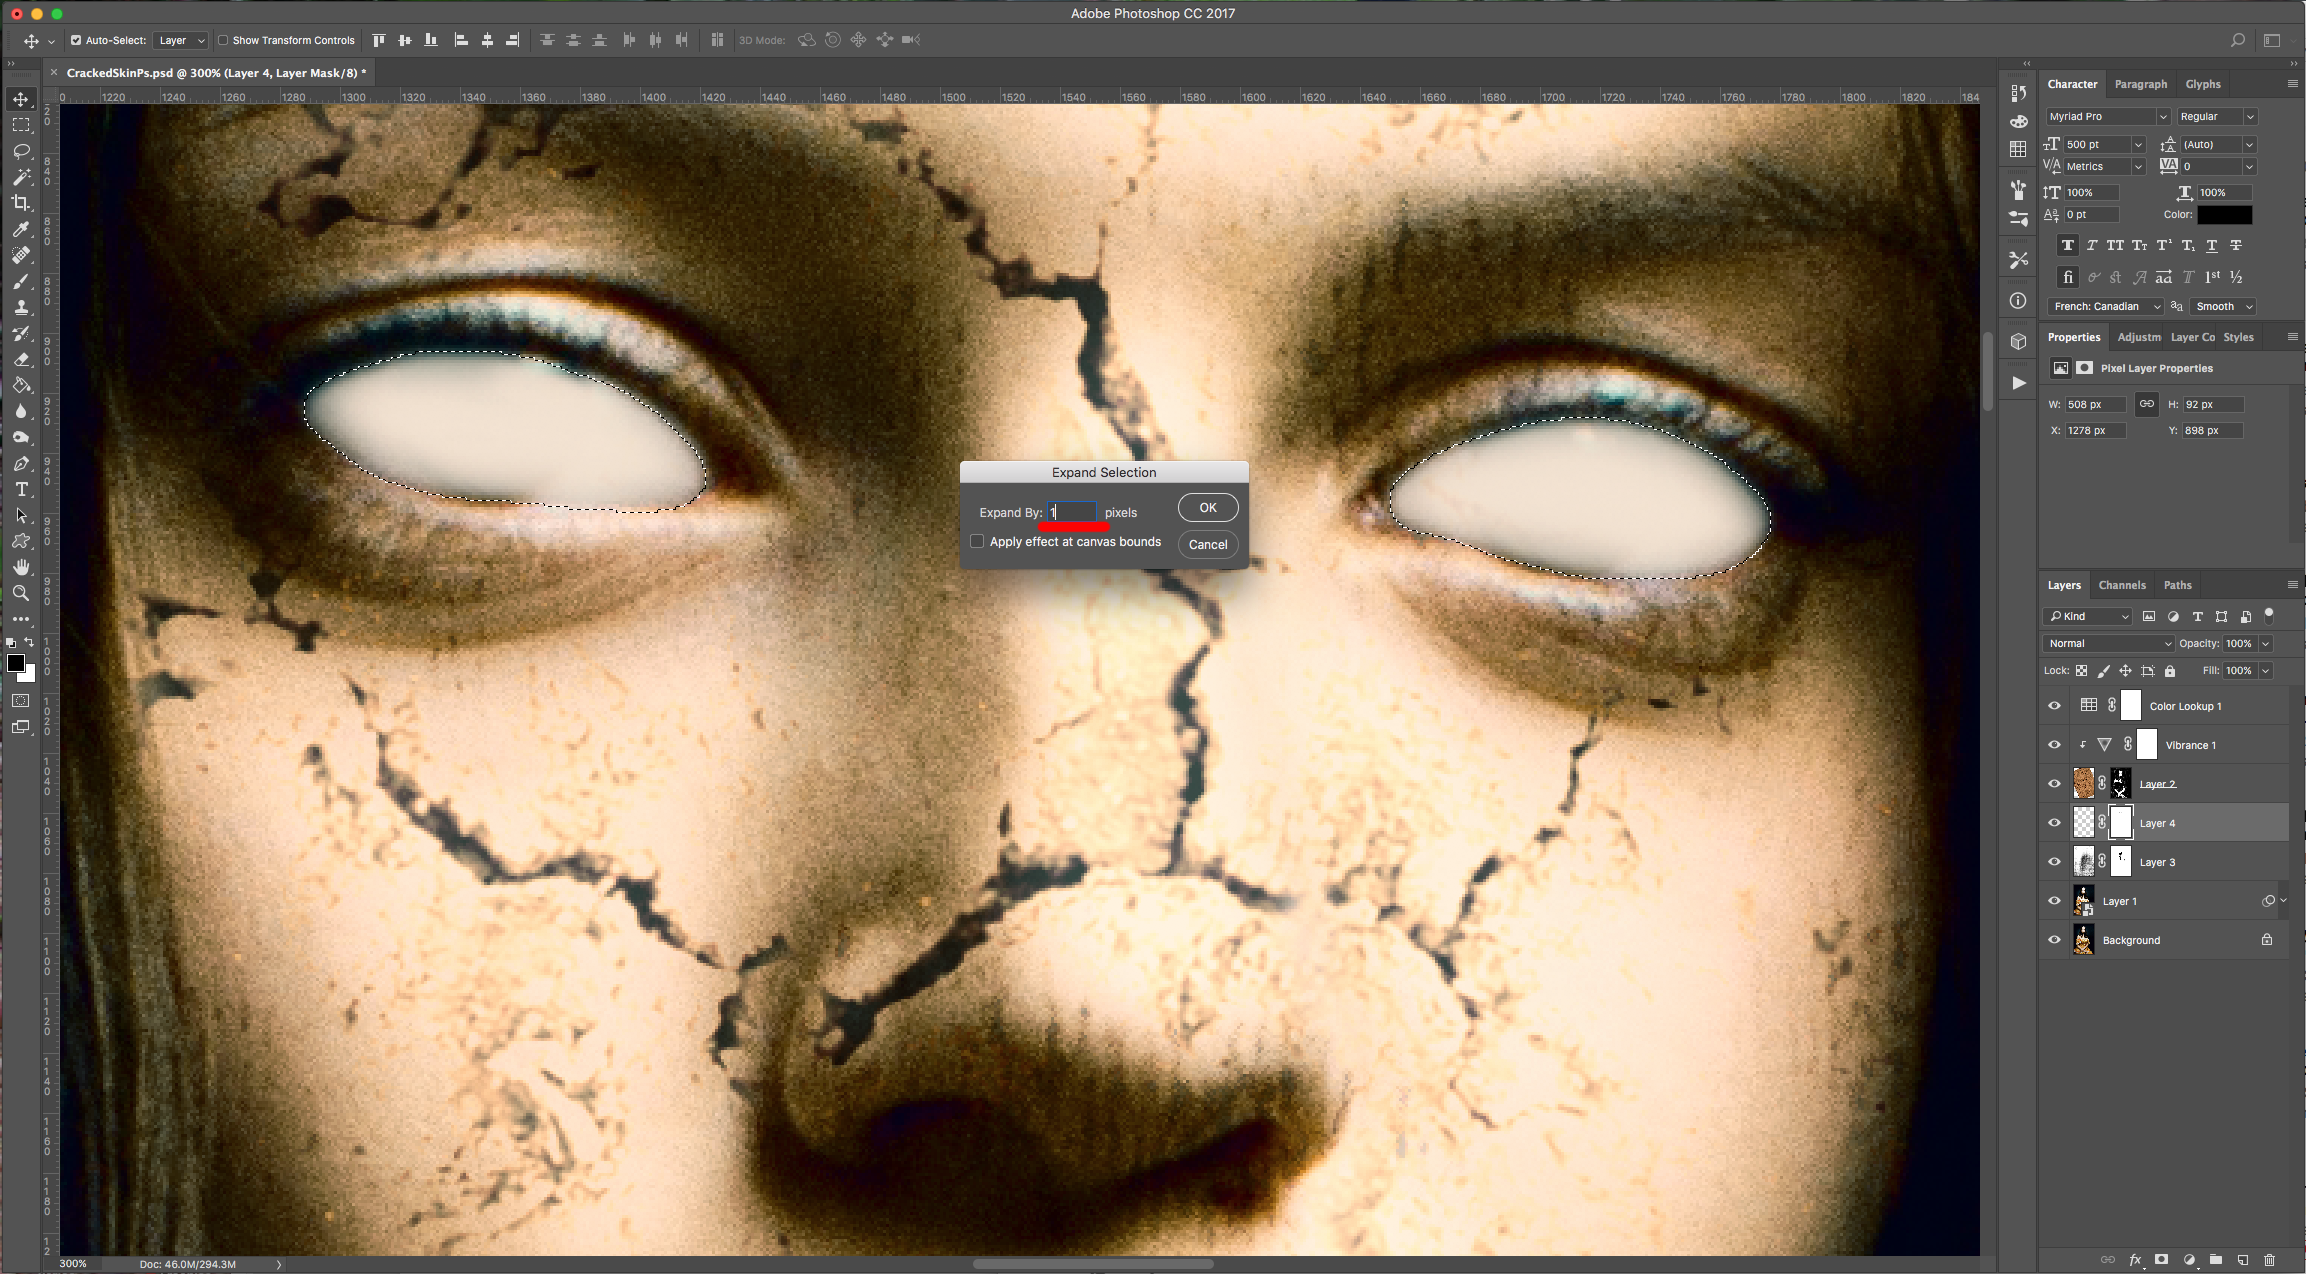
(4) 18 - Click on top of your Layer’s Thumbnail while holding the “Command/Control” key to make a selection, then go to Select > Modify > Expand… and choose a 1 Pixel.
(5) 19 - With your selection still active, create a “New Layer” on top and go to Edit > Fill… (Shift + F5), choose “50% Gray” and change the “Blending Mode” to “Overlay”.
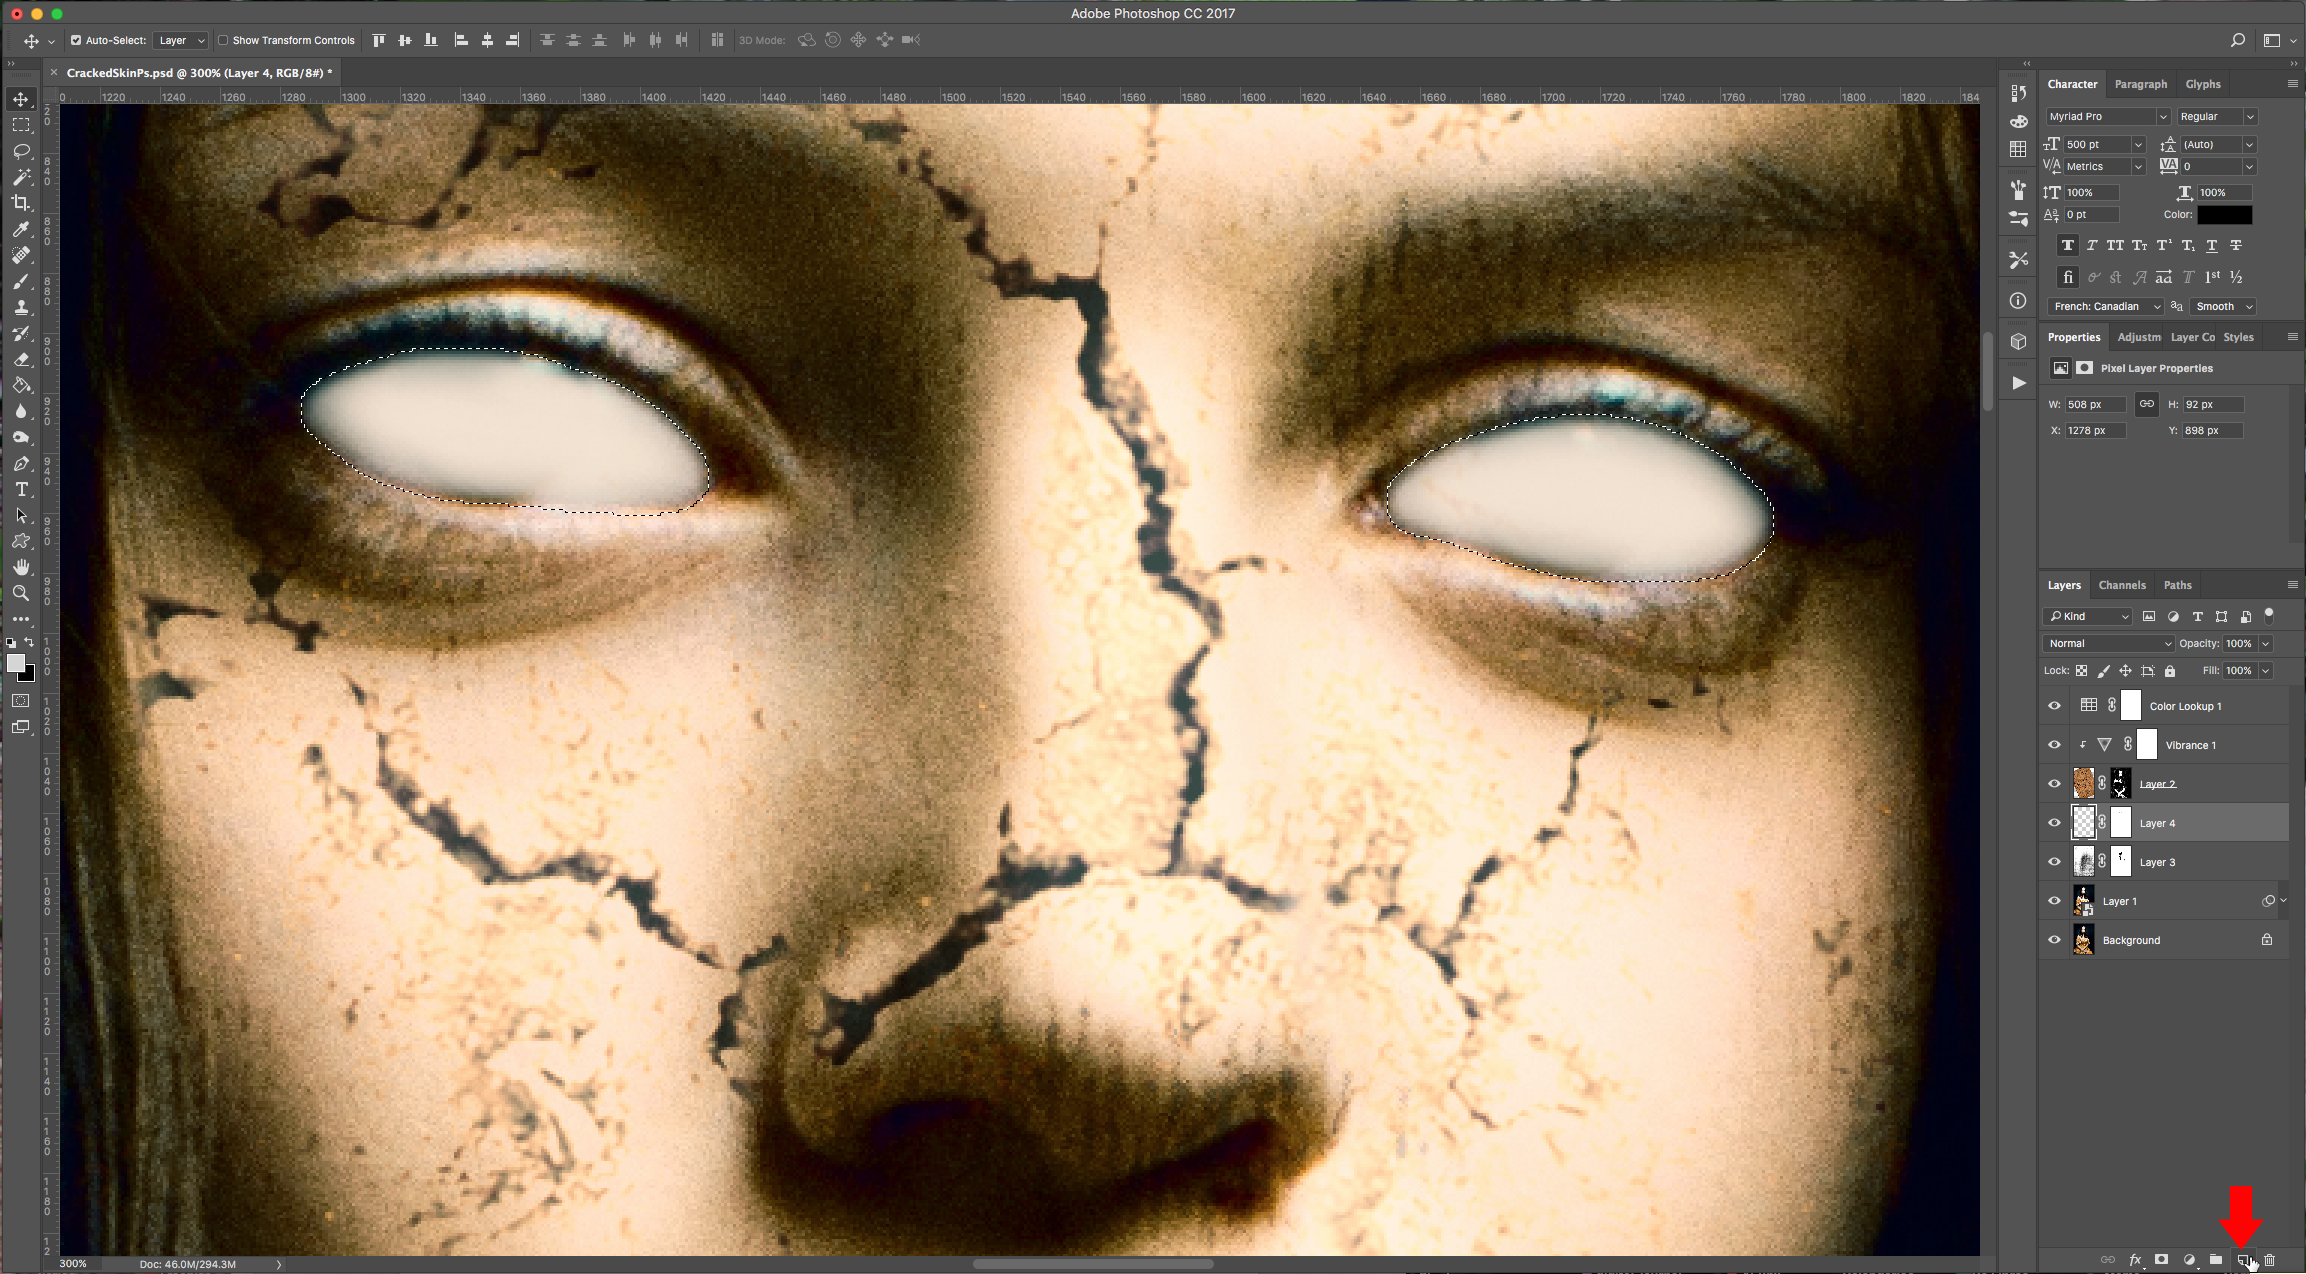
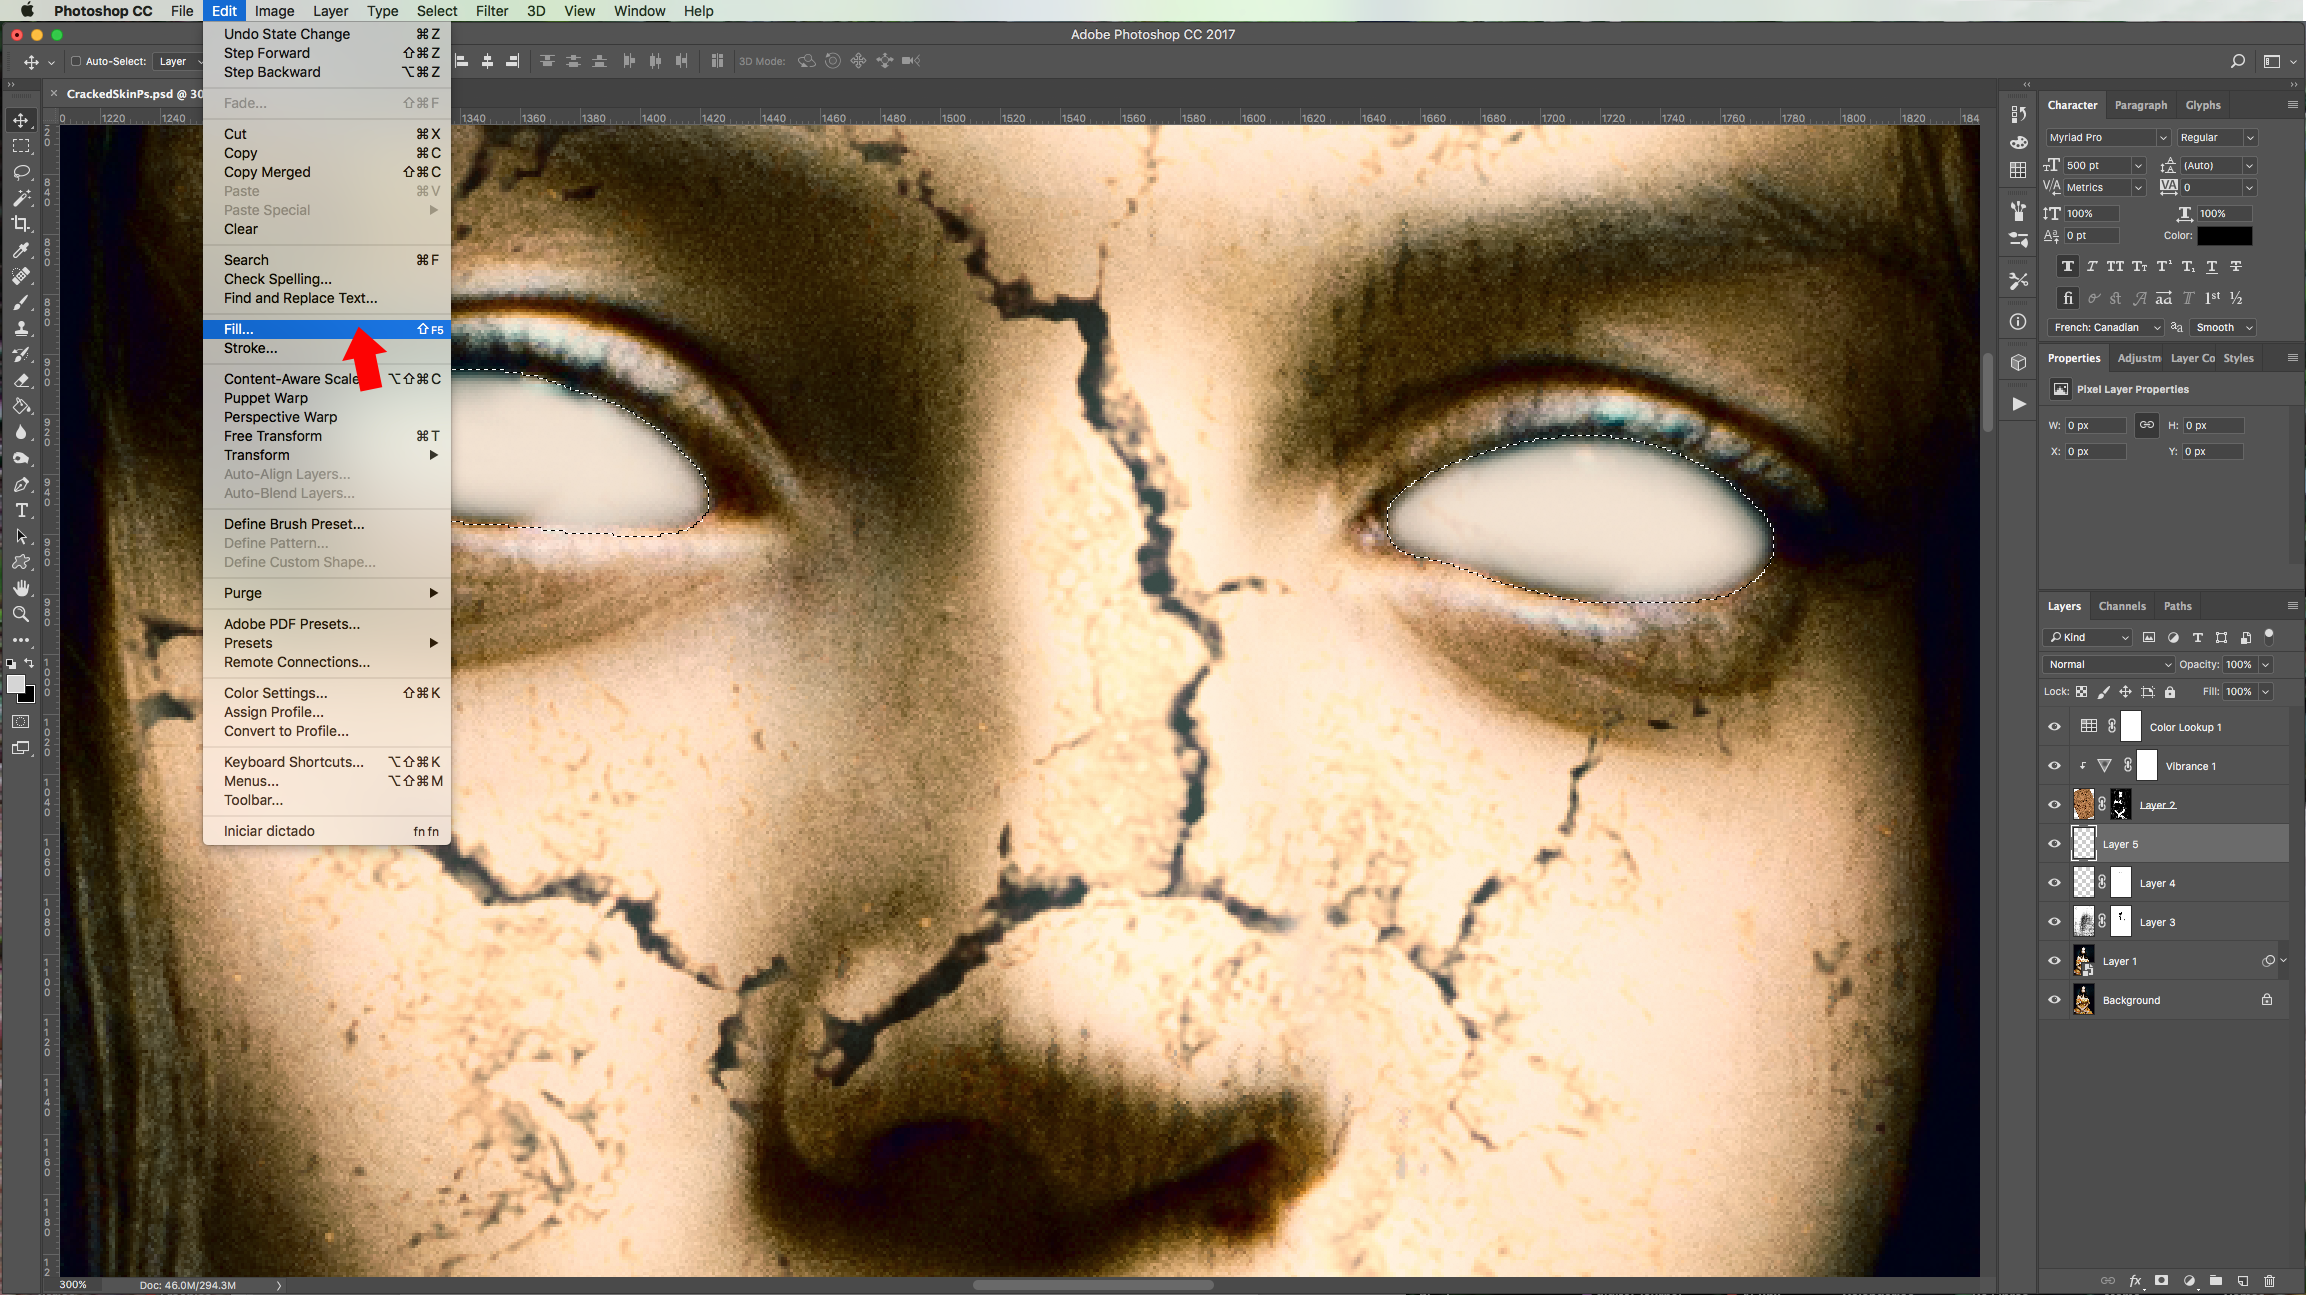
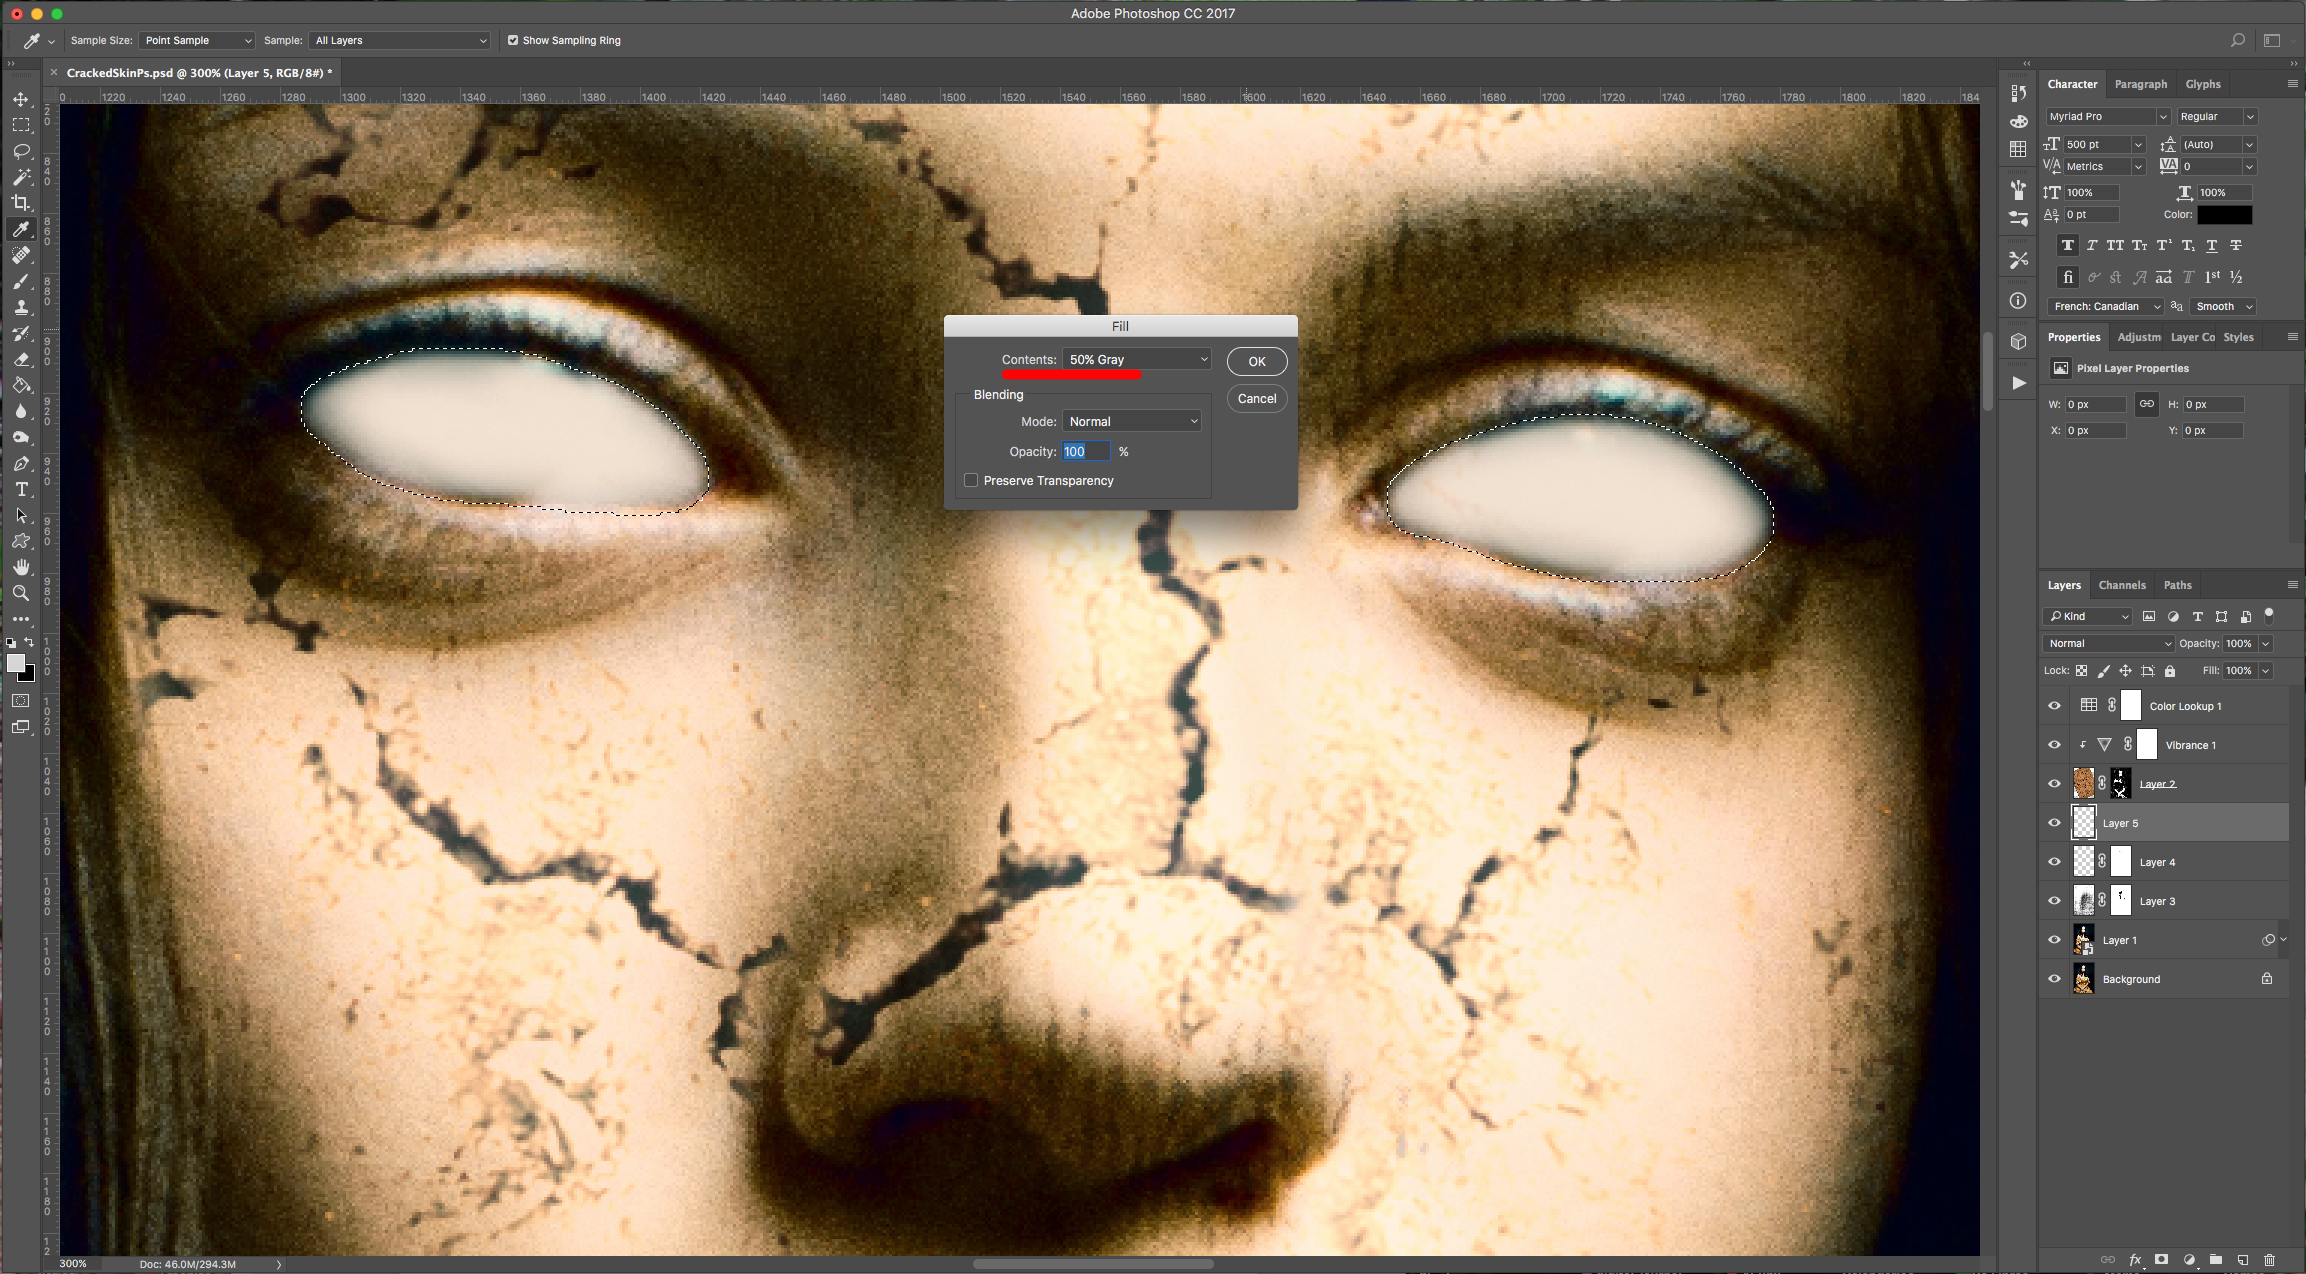
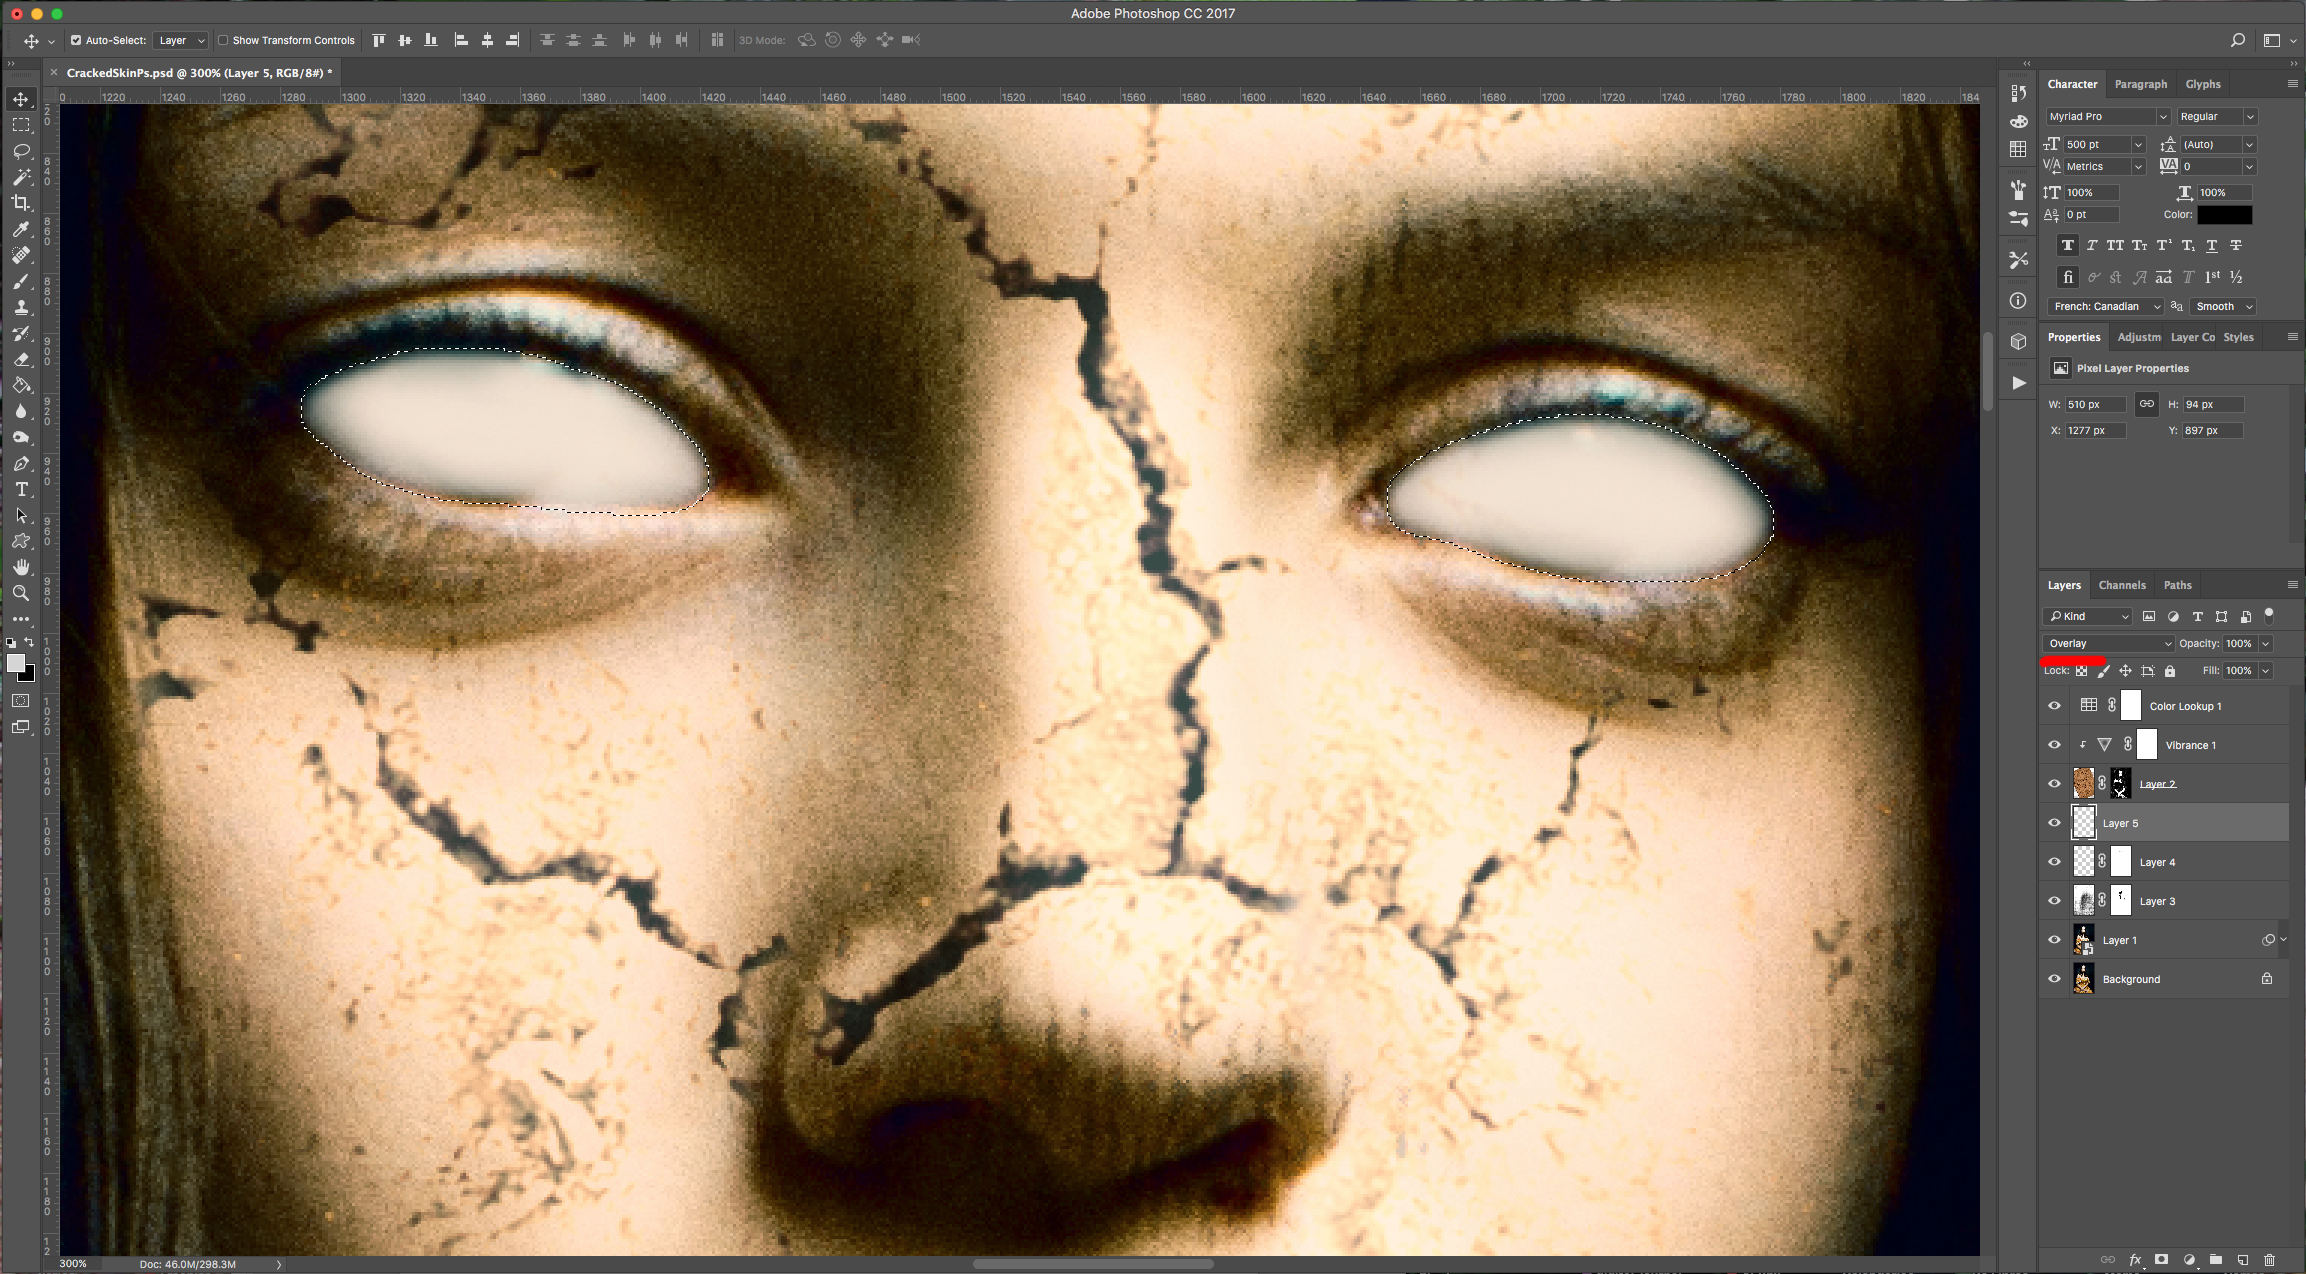
(6) 20 - Select the “Burn Tool” (O), use a 20 Pixels brush, choose “Midtones” for “Range” and an “Exposure” of 40% and work around the edges to give them a bit of depth (this will darken the edges). Change your Tool to “Dodge” (O), keep the 20 Pixels brush, choose “Midtones” for “Range” and an “Exposure” of 65% and check where the real light spots are in your subject’s eyes, then add some strokes in a semi-circular manner on top to keep giving the idea of depth (this will lighten the Top-Center a bit).
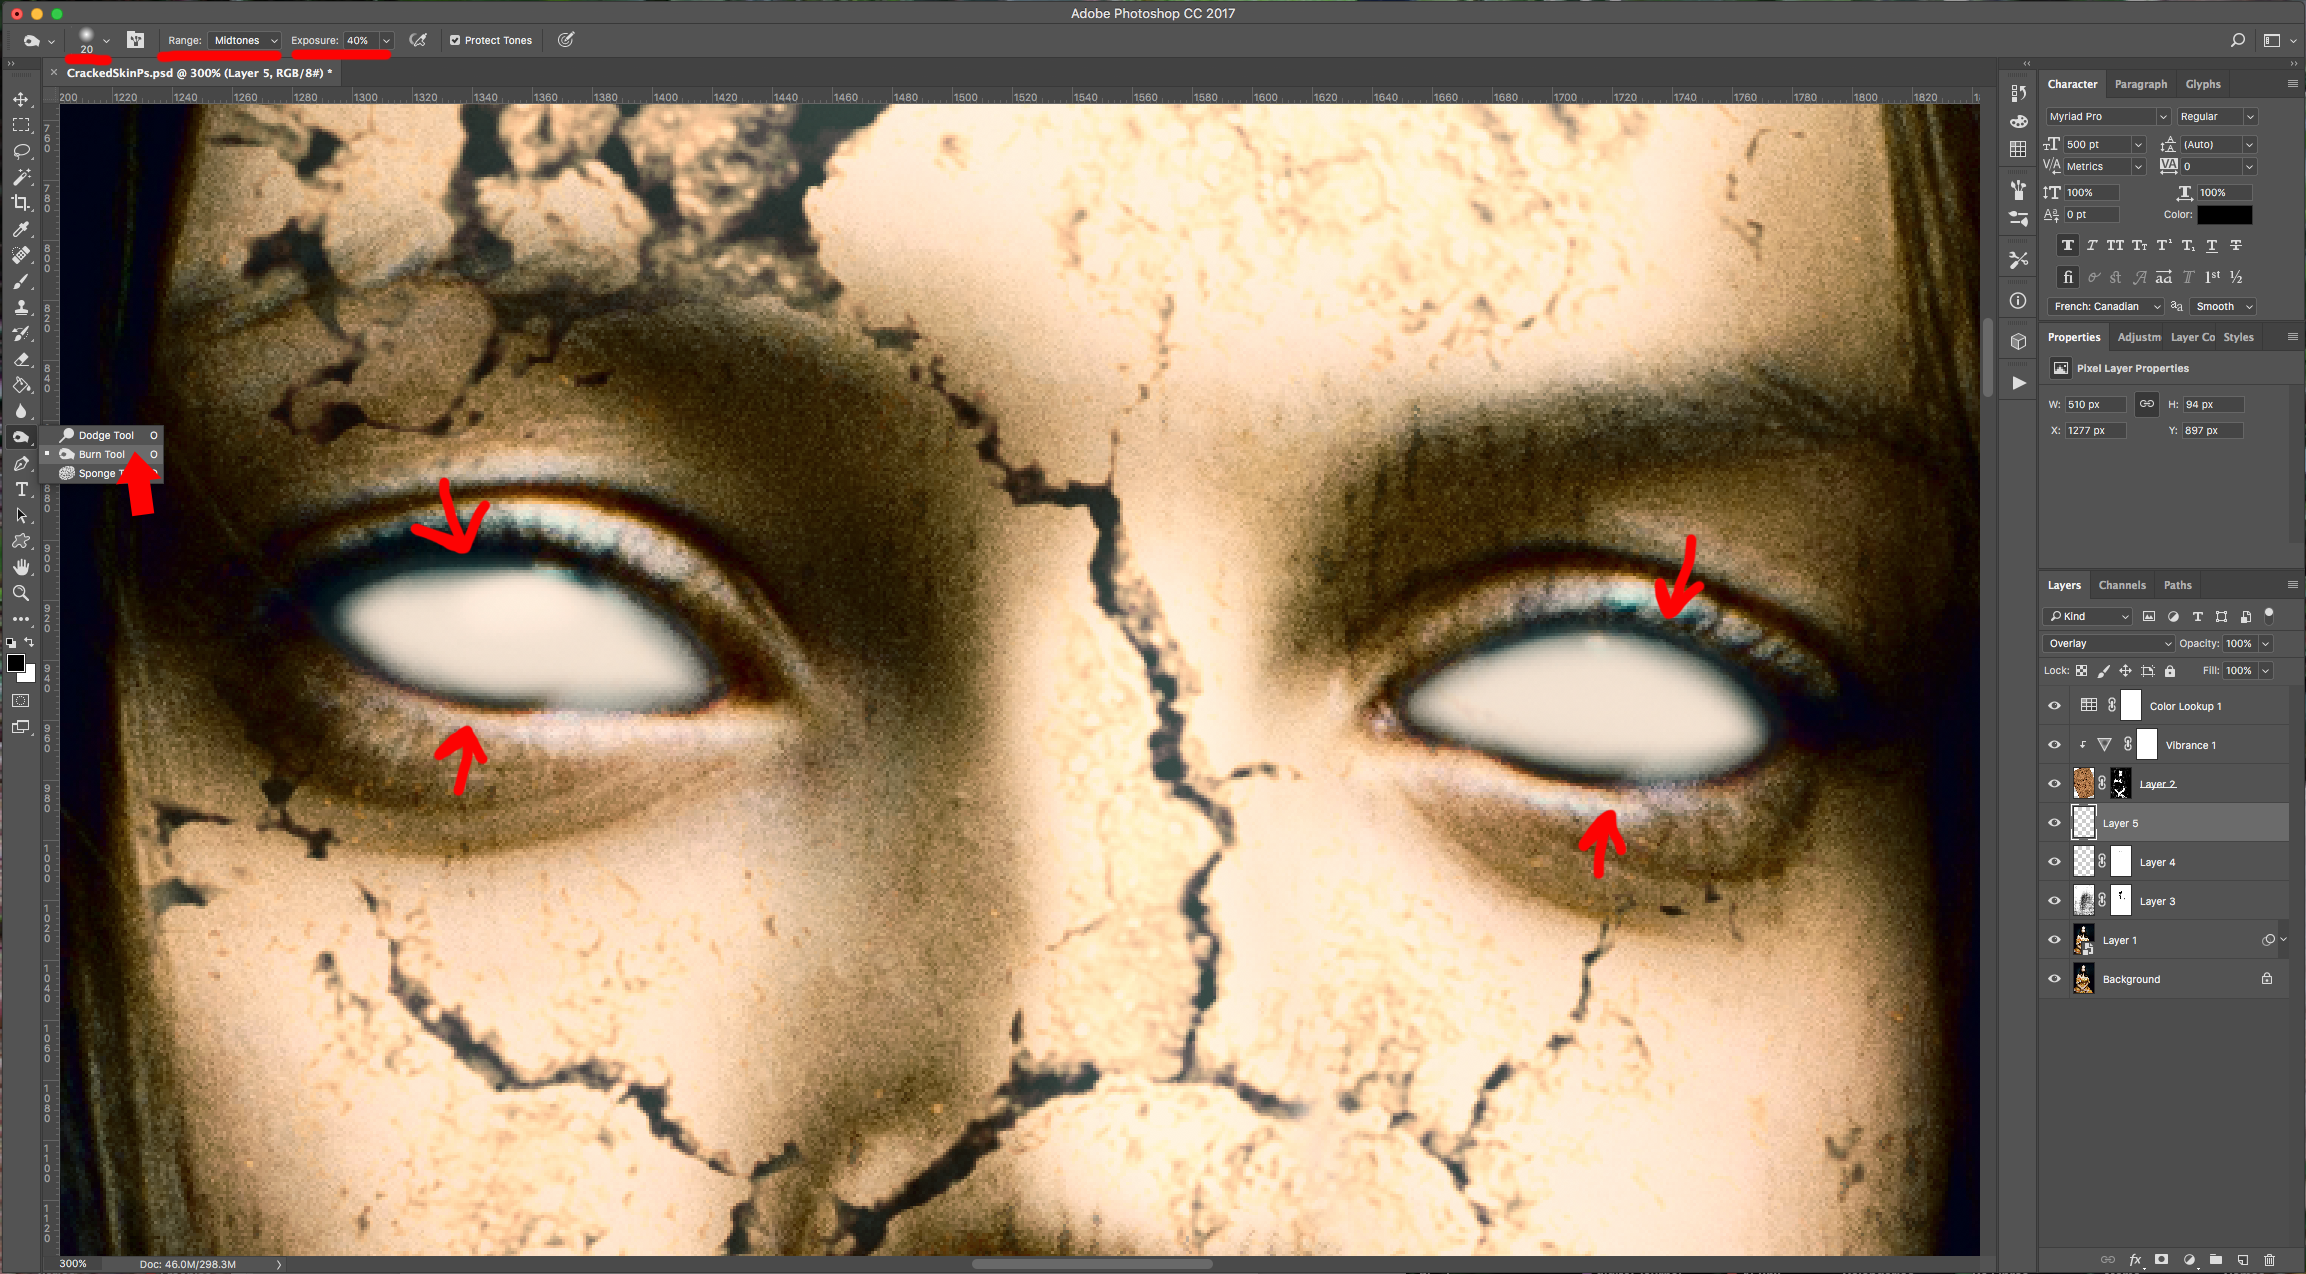
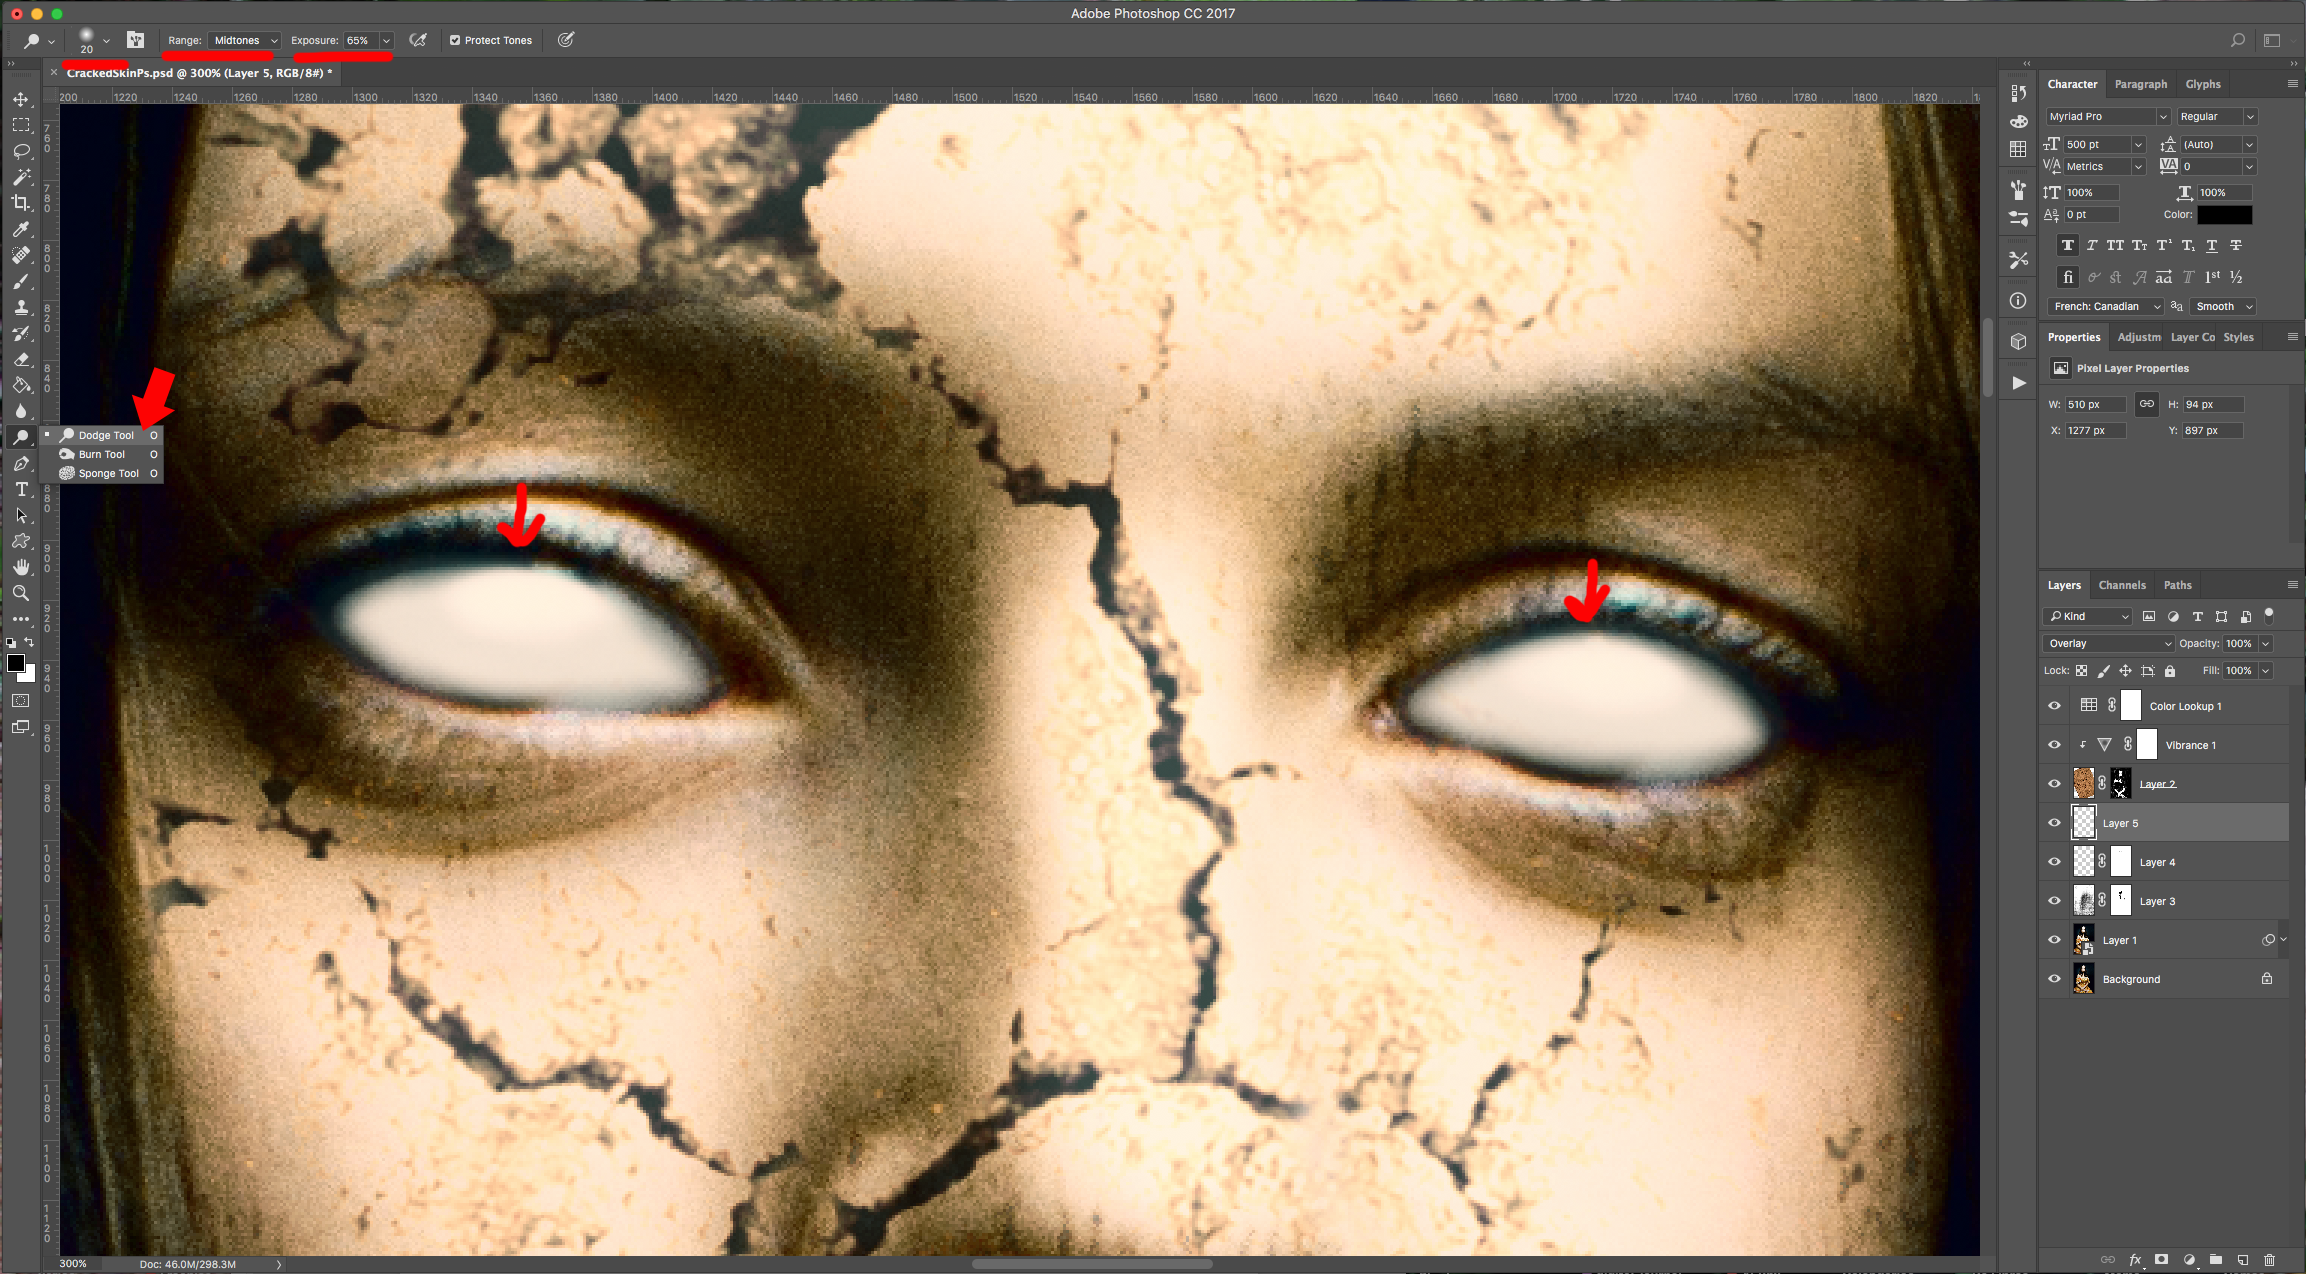
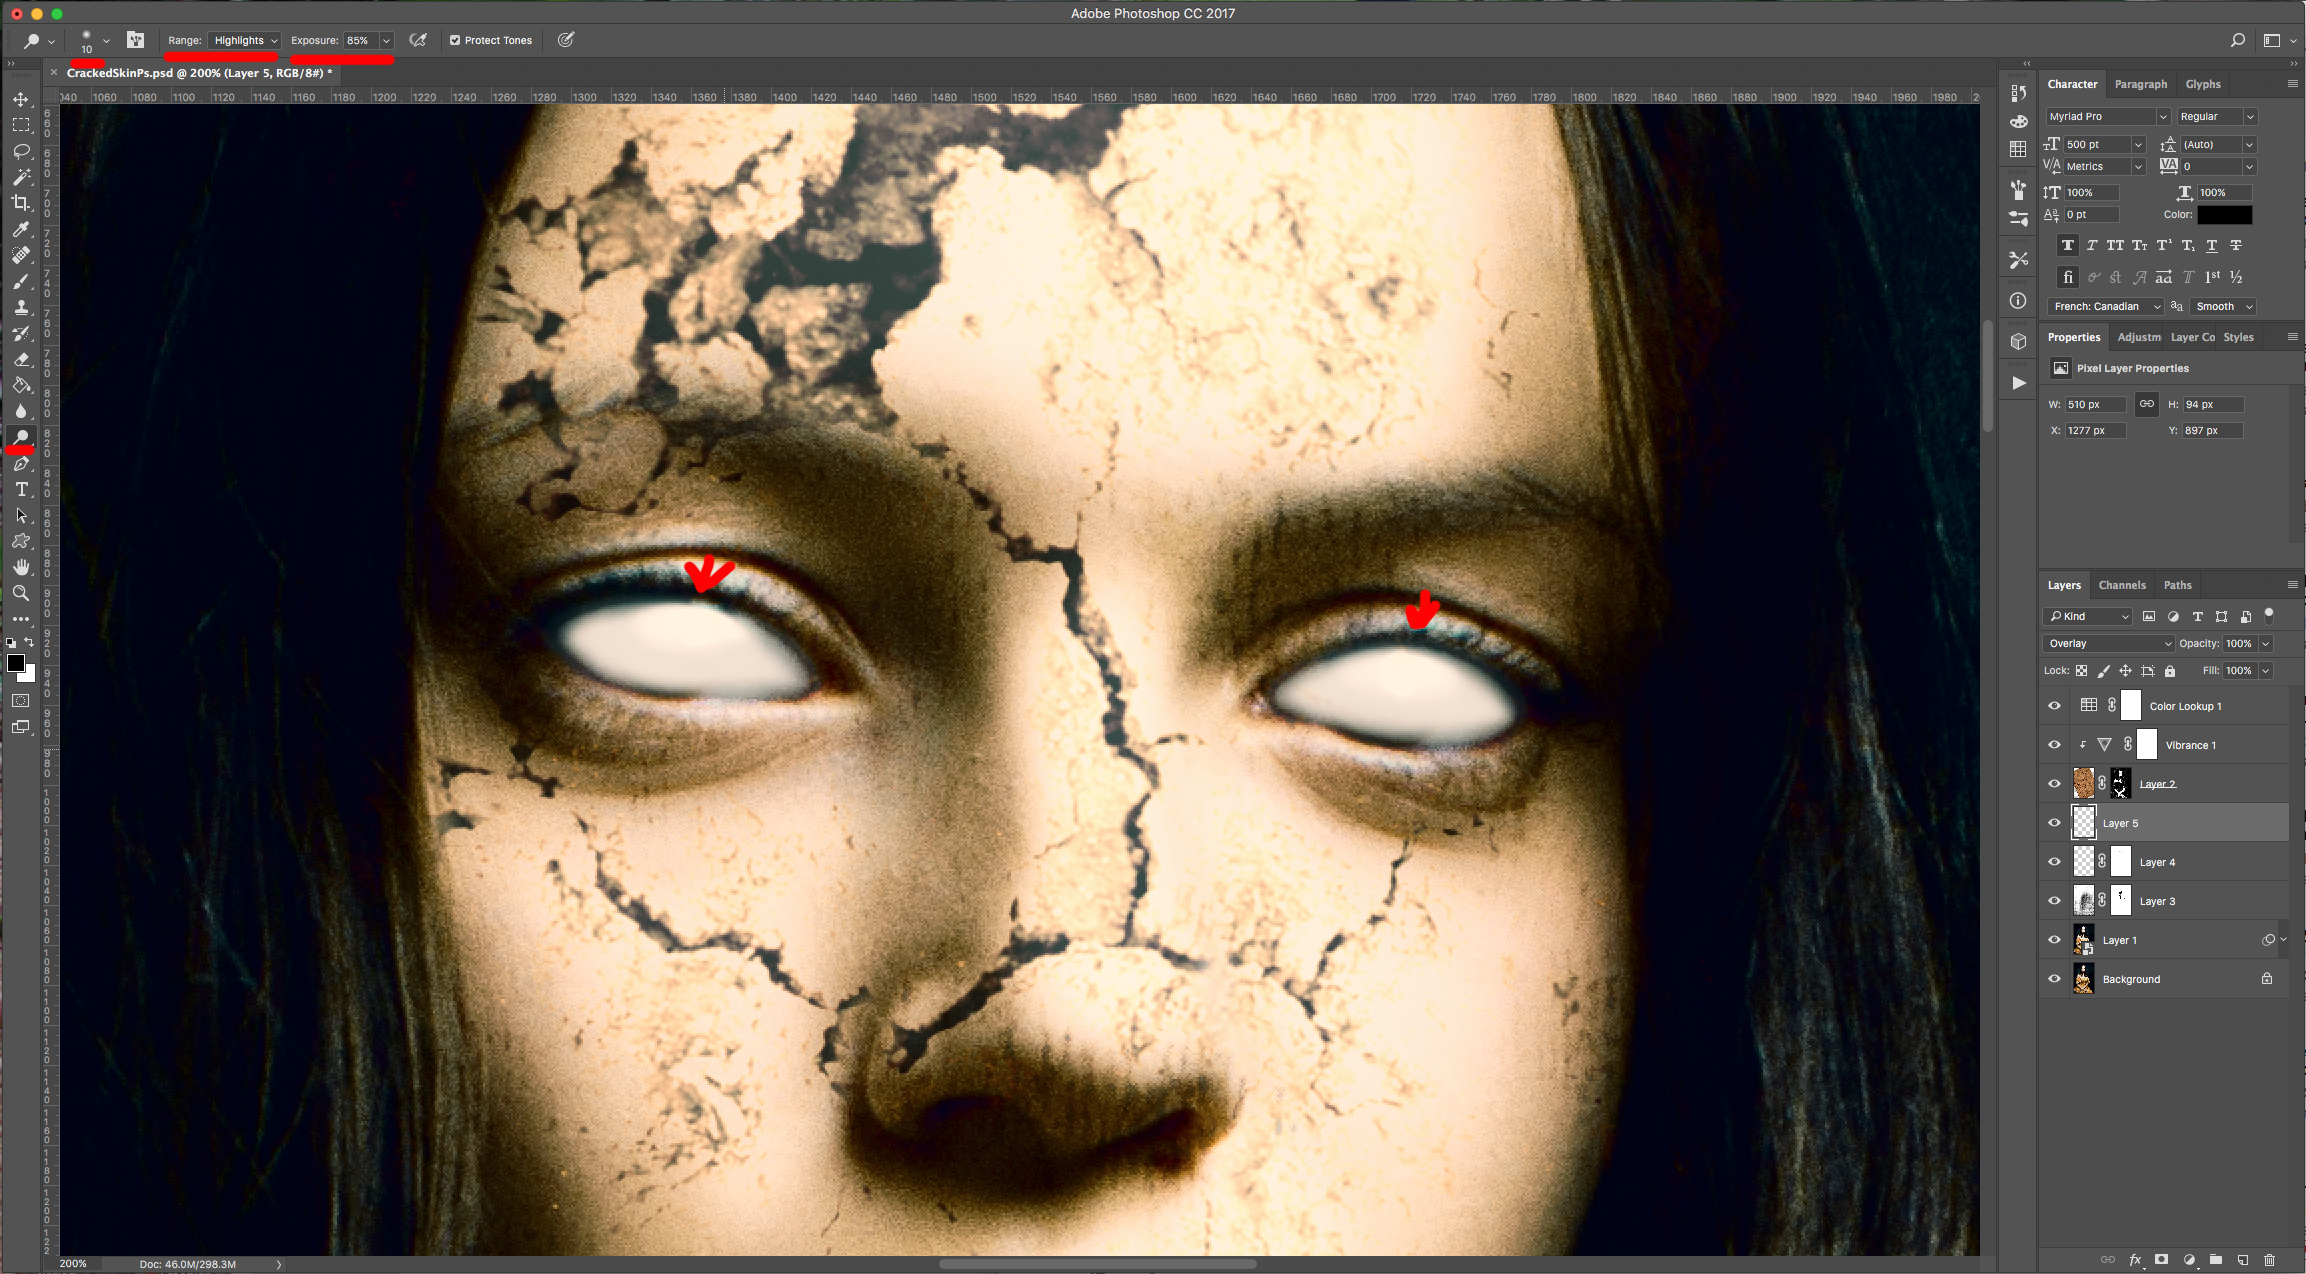
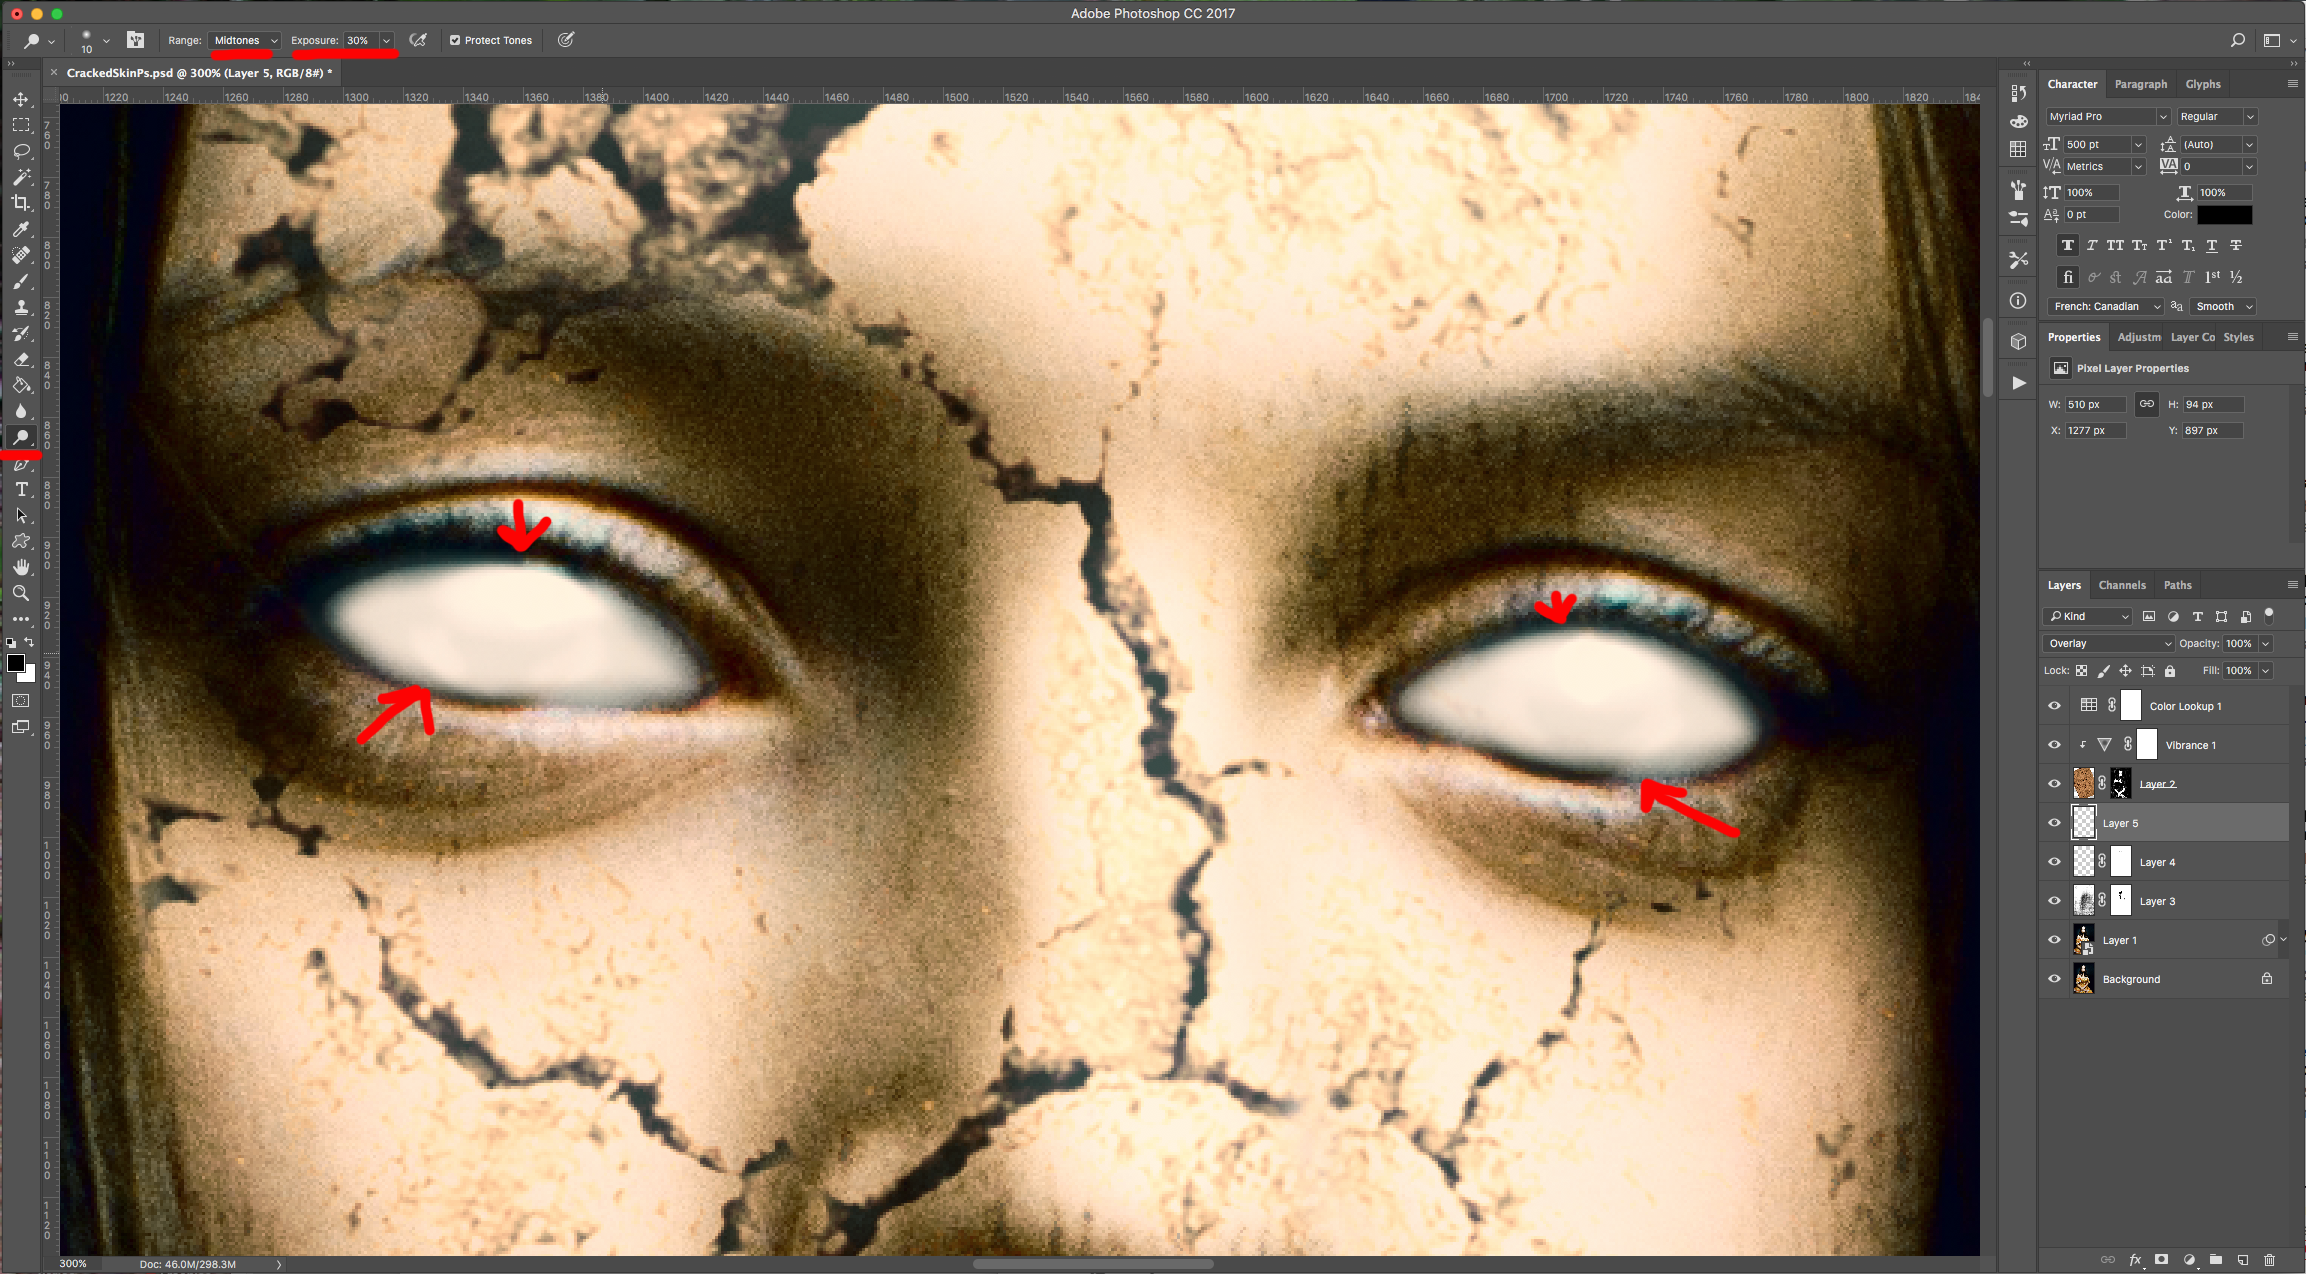
(7) 21 - Make the brush smaller (10 Pixels) and change the “Range” to “Highlights” and the “Exposure” to 55% and add smaller circles on top to make the light more evident. To finish, go back to “Midtones” with a 30% “Exposure” and work a bit on the lower portion of the eye. Go back to the “Burn Tool” (O), change the “Range” to “Highlights” and keep a 40% “Exposure” and work around the edges a bit more.
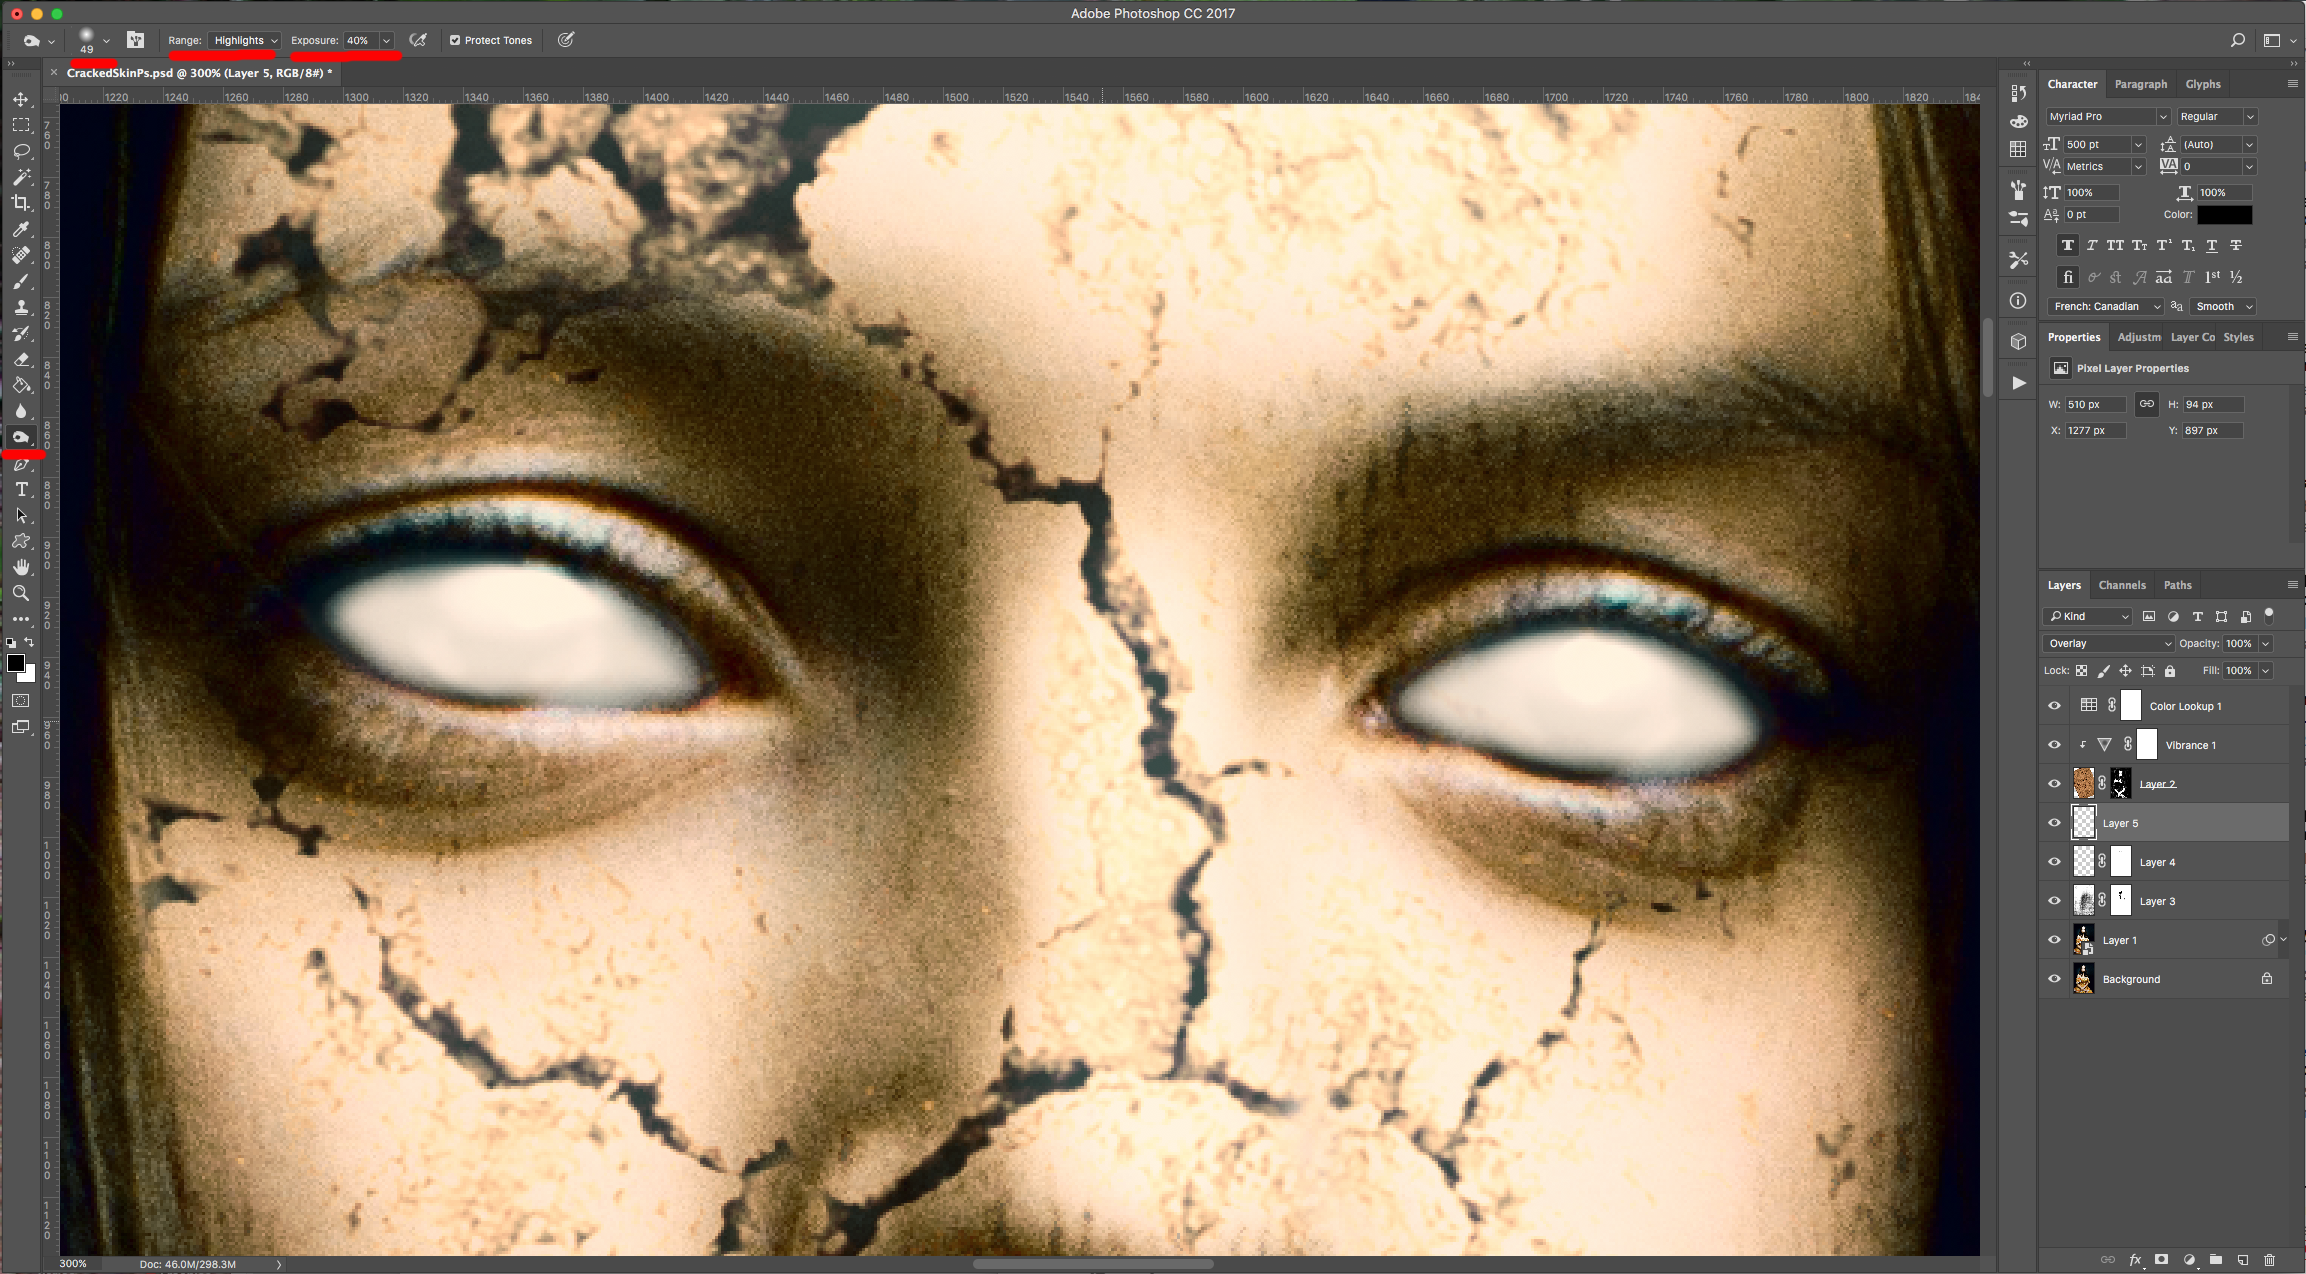
(8) 22 - Check out your Artwork.
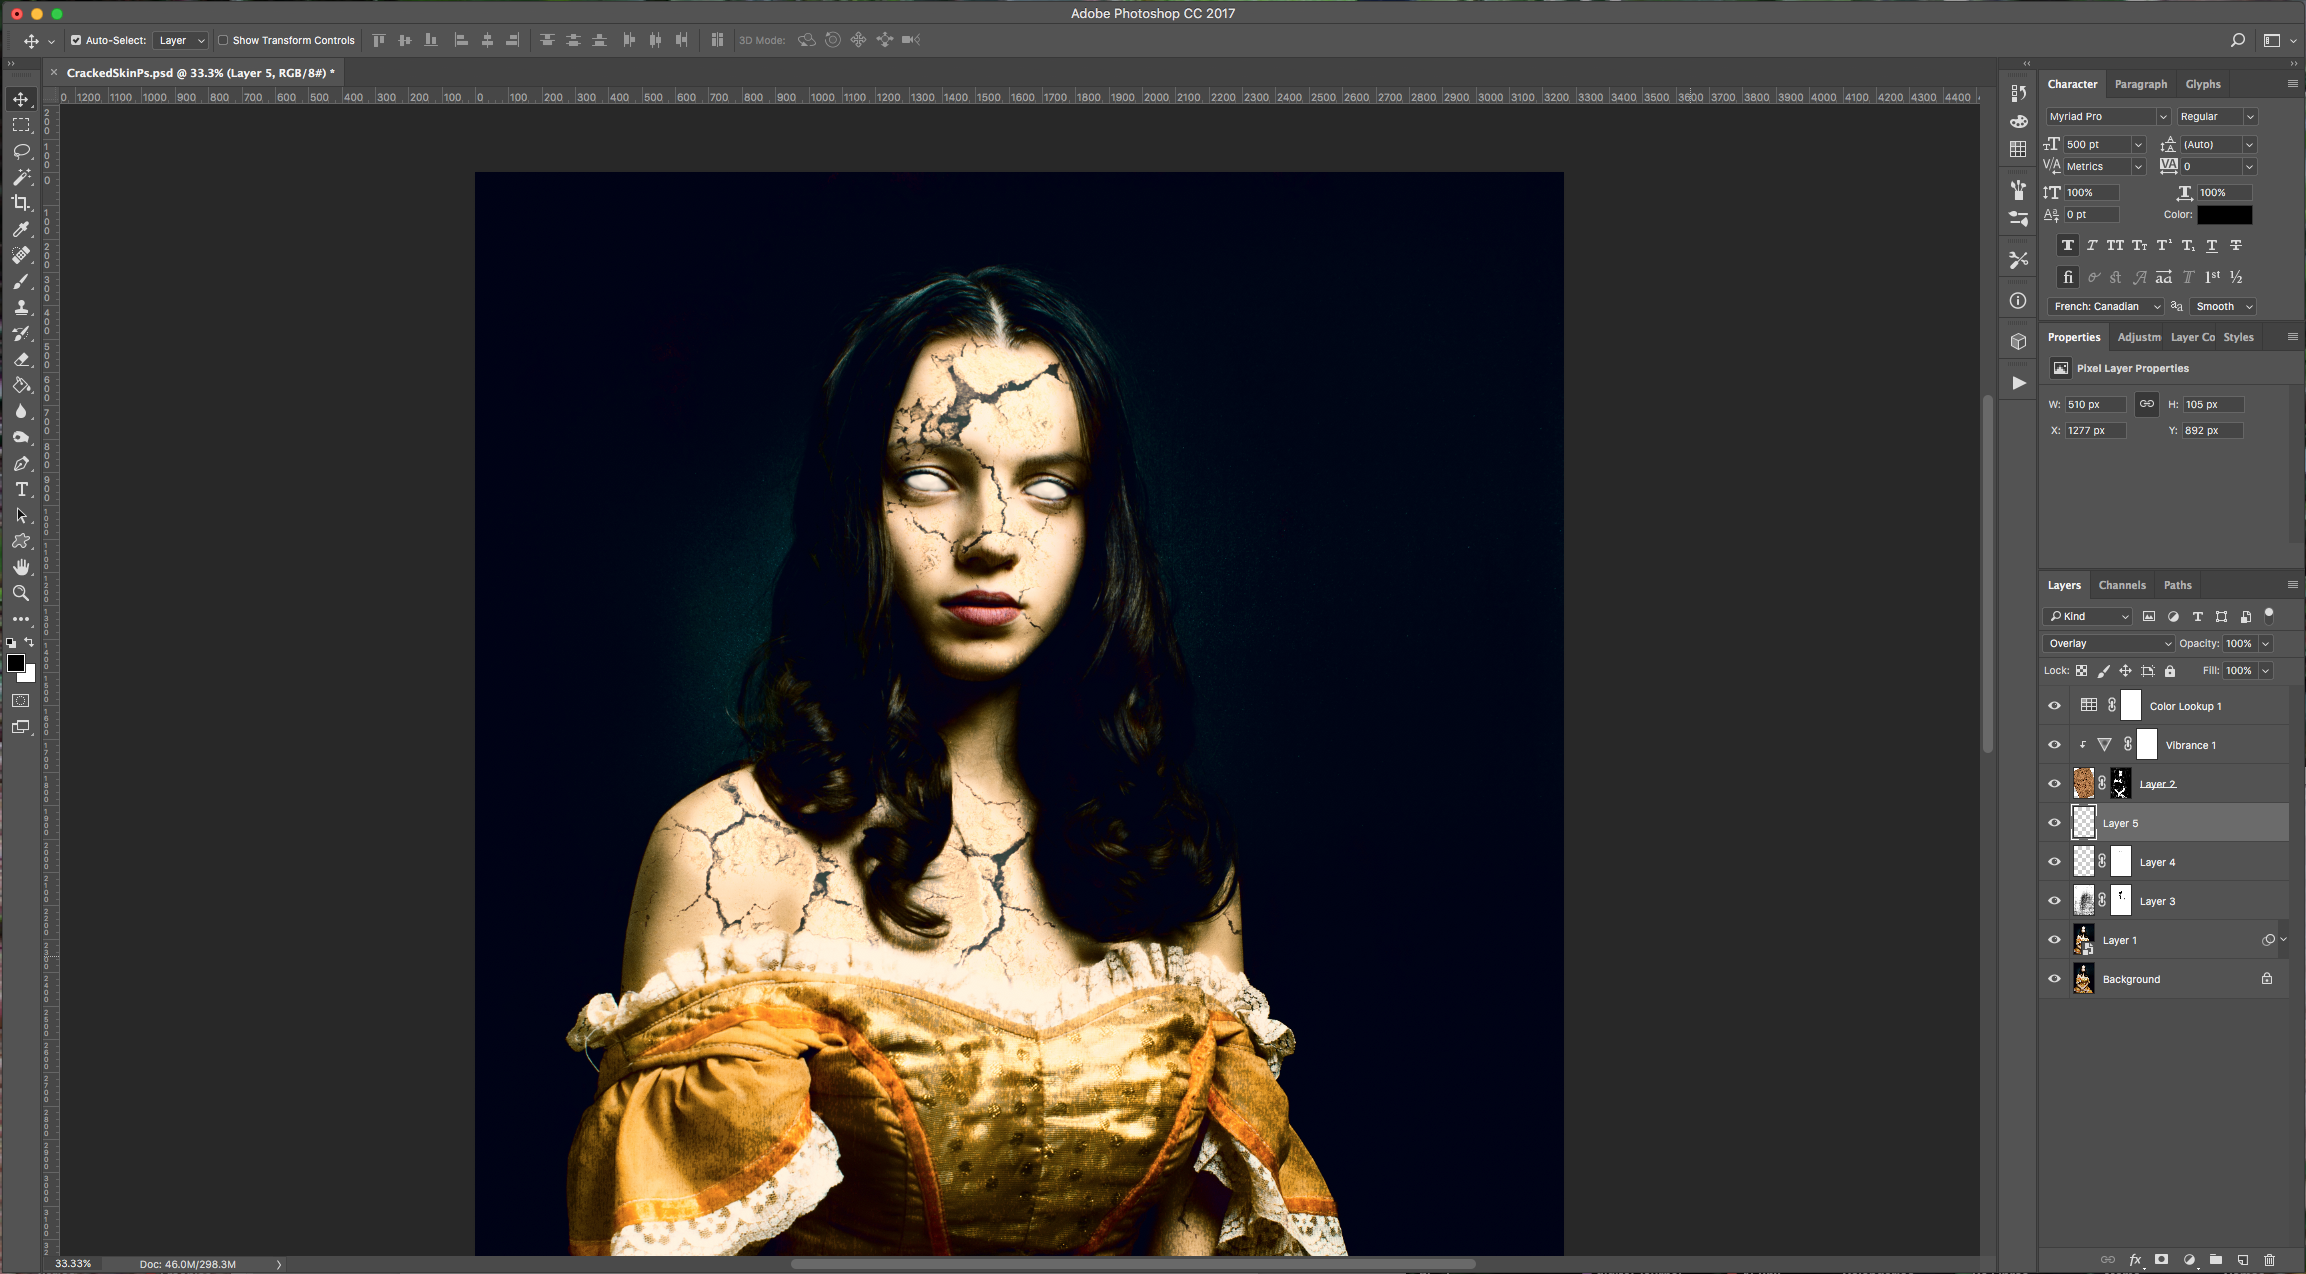
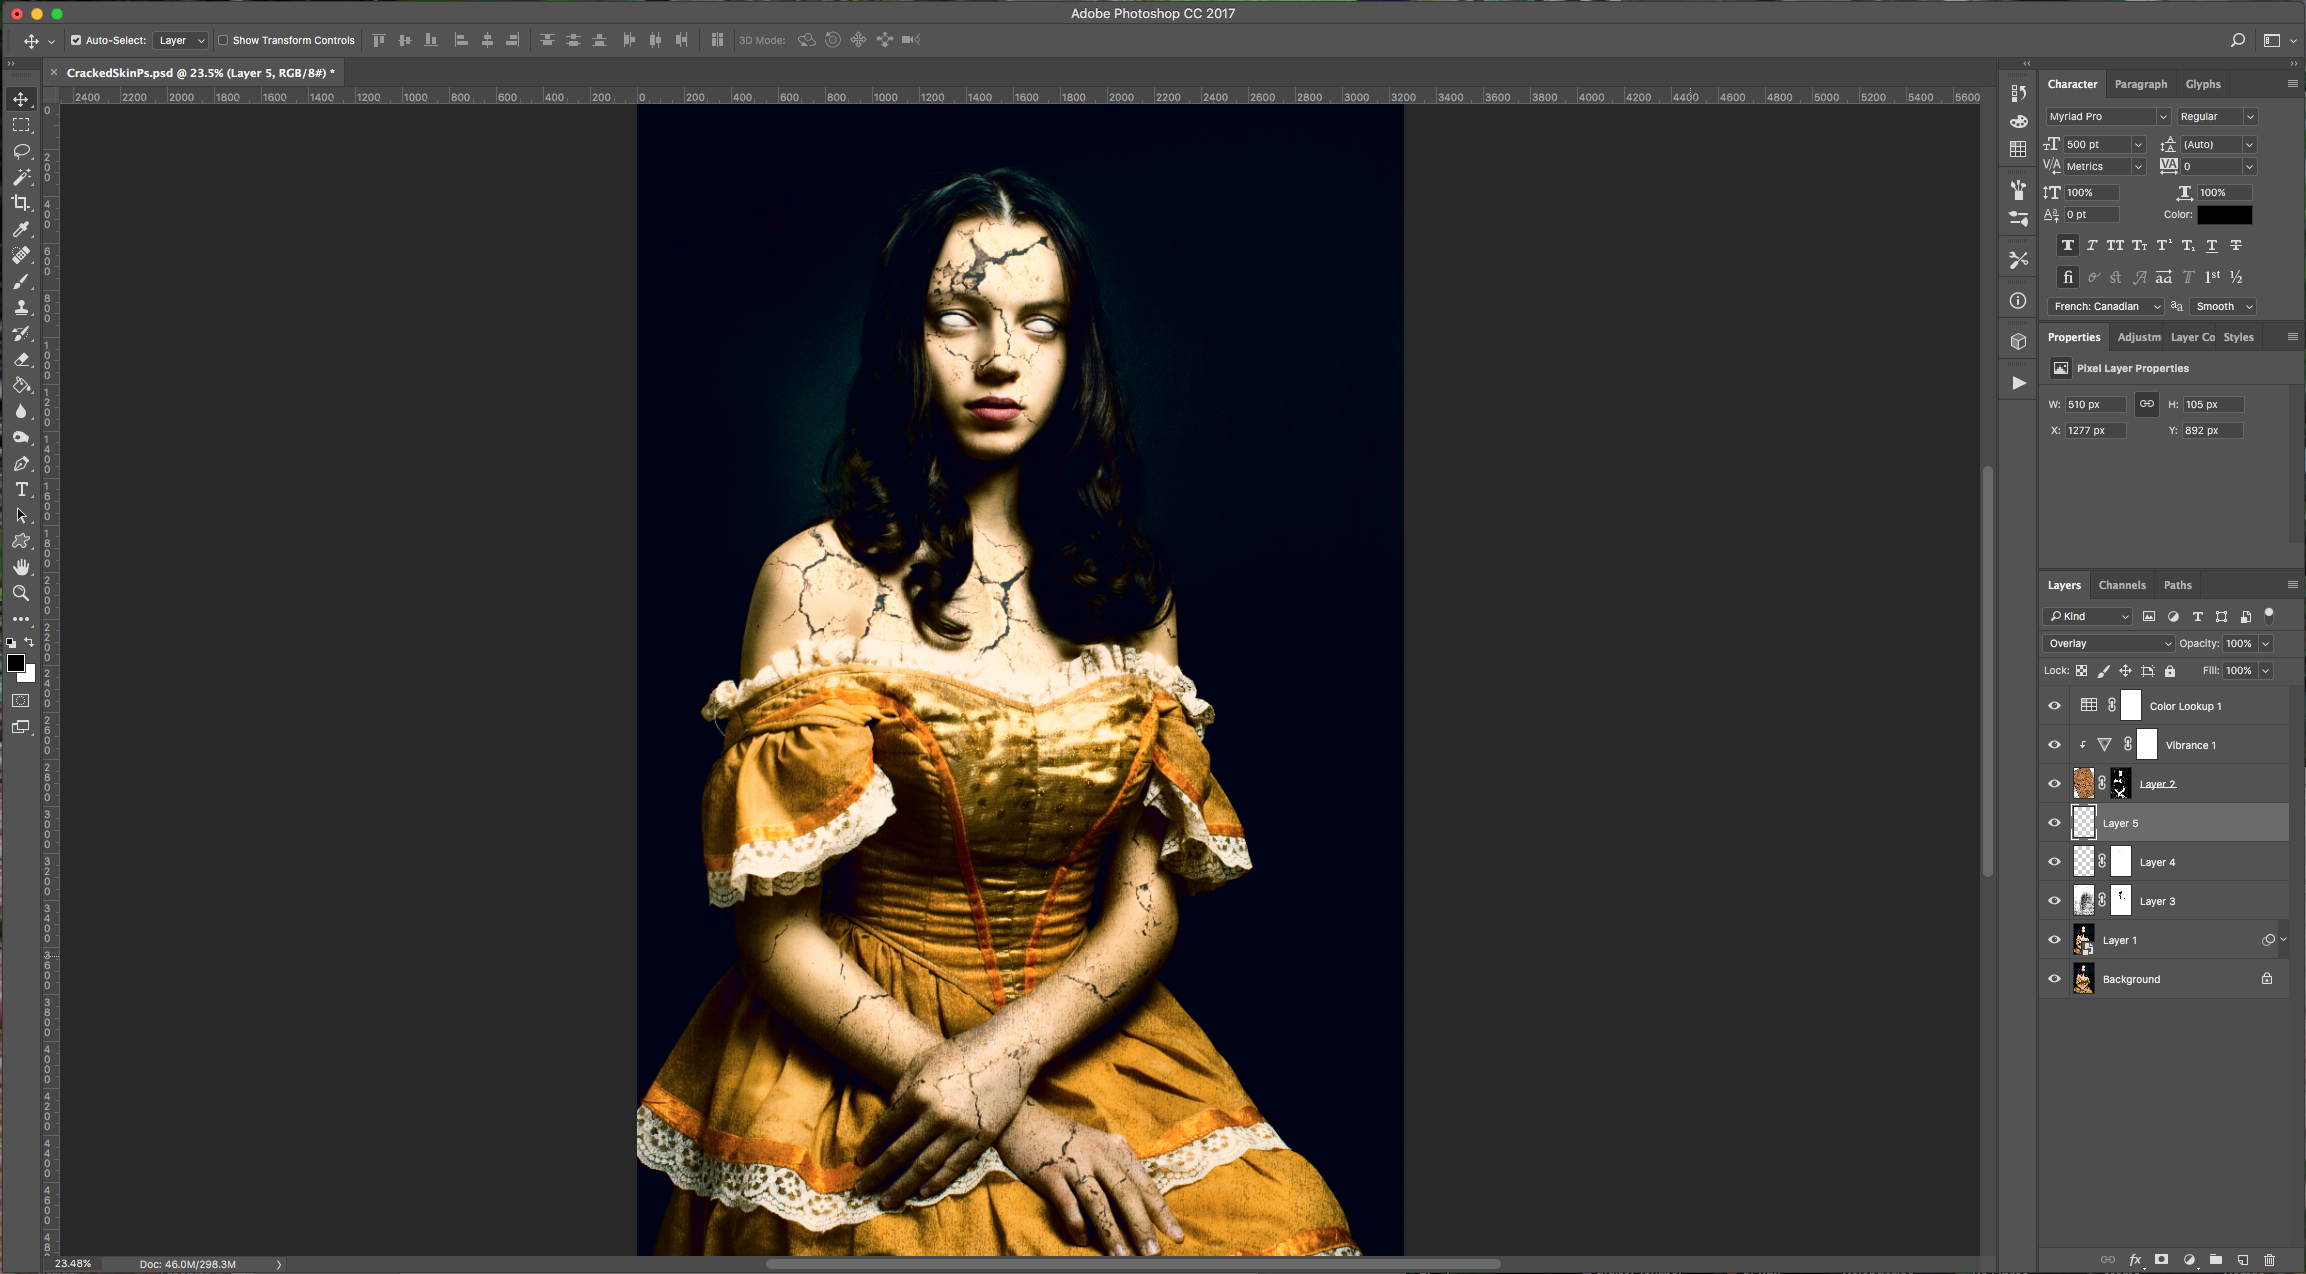
by @lornacane
6 Related Photoshop Tutorials
Today, we will create a cracked skin effect in Photoshop. It looks really cool, and it’s fairly easy to achieve by just overlapping some textures on the skin and blending them onto your subject using Photoshop tools. You can apply this effect to your friend’s photos and turn ...
For this tutorial we are using a canvas or paper background and Titin Script from Font Bundles.1 – Create a new “Gradient Layer” under your “Texture” layer. Use a “Transparent to Fill Color” gradient with #d3d1d1 and #918f8f as colors, the Style as Radial and a 250% Scale. Hit ...
Portraits can be improved by editing your subject's skin to make it nice and smooth. It’s important to keep a balance so that details like eyes, hair, and skin texture are not lost. In this tutorial, you will learn how to retouch skin in Photoshop.You will need a ...
Vintage or black and white images are elegant and classy. But sometimes full-color images are more lively or better suited for your design. Photoshop provides the tools to add colors to your black-and-white pictures. You can even create your own customized color image. Follow our tutorial on how to colorize ...
For this Tutorial, we are going to an image of “Grass” for the “Background, and a light-colored “Brick” Pattern.1 - In Photoshop, open the file you chose as “Background”.2 - Open the “Brick” Pattern image too. Open the “Image Size” Window (Command/Control + Alt/Option + I) and make it 1000 x 1000 ...
1 - In Photoshop, open the Image you chose to work with.2 - Go to the “Adjustments Panel” and create a “New Black & White Adjustment Layer”. Tweak the different values until you are happy with the results.3 - You can also use some of the “Presets” included in the “Properties ...

 All your Font Needs


