Cricut Design Space 3 Overview Part 1
The new Cricut Design Space 3 software has just been released and there are many new features and differences with it. One of the best features is the software does not rely now on a flash player so the first thing you will find is the software runs much more smoothly and there is less lagging.
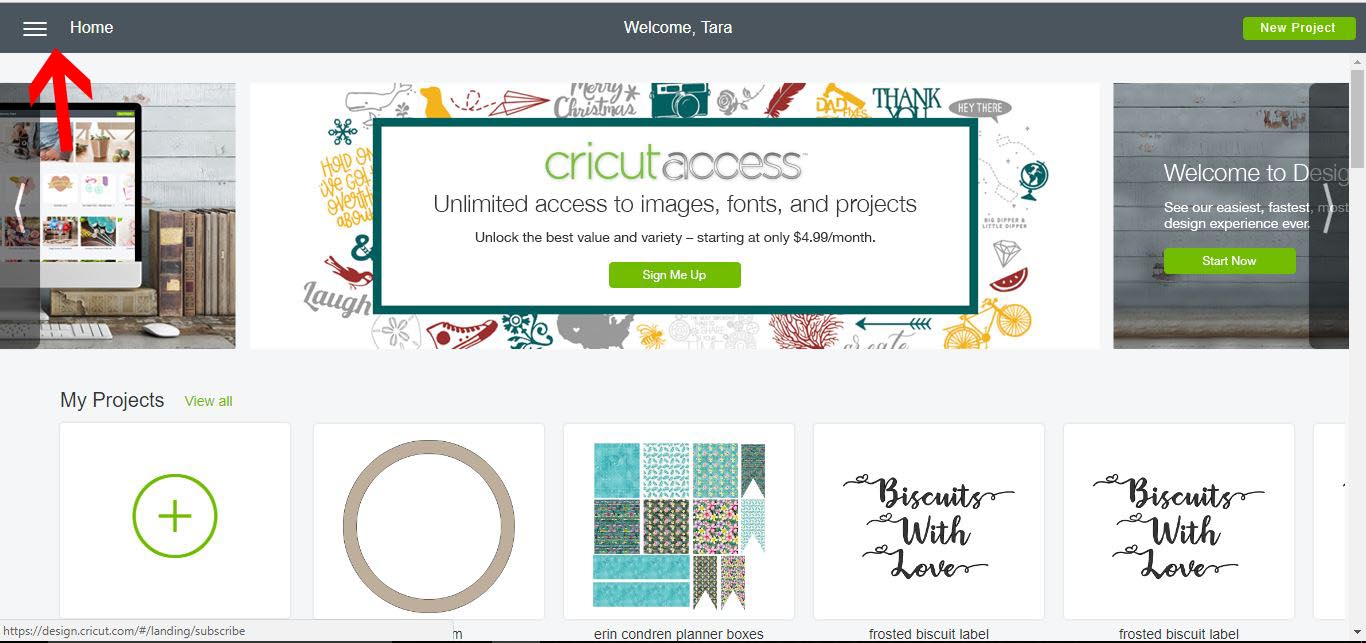
1- Open Cricut Design Space. The new opening pages has a cleaner layout with everything clearly displayed. Everything you need for your cricut machine is now found at the top left home icon.
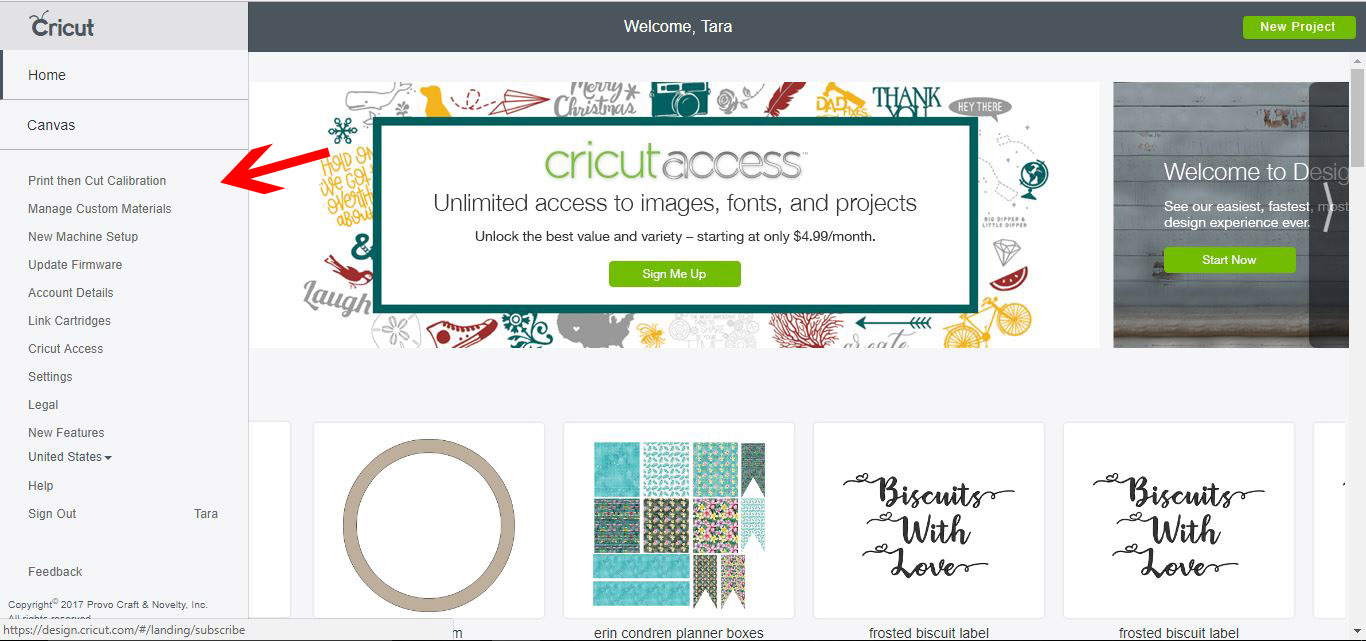
2- Click on the 3 lines to access the main menu. This includes your print and cut calibration, settings machine set up and many other features.
It is great to have them all together in one place to access.
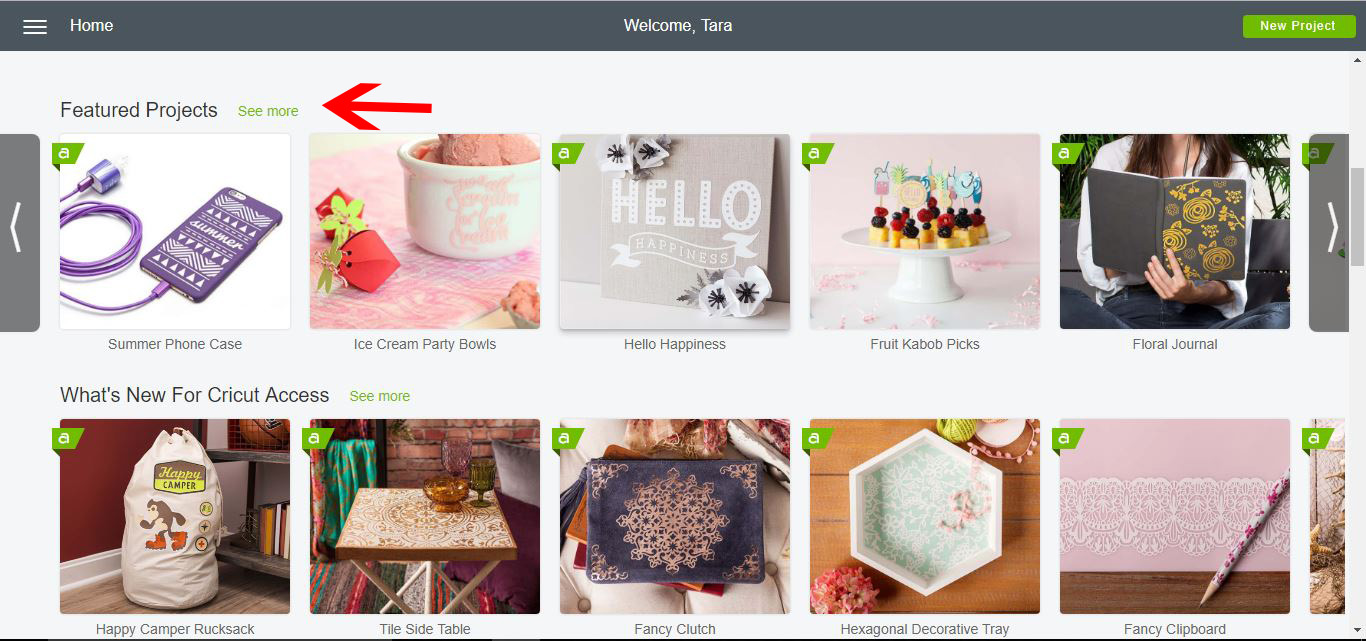
3- On to main page you now have a "My Projects" section. All your projects are located here. the most recent will be on the home screen, now shown as large thumbnails for you to see what is in each project.
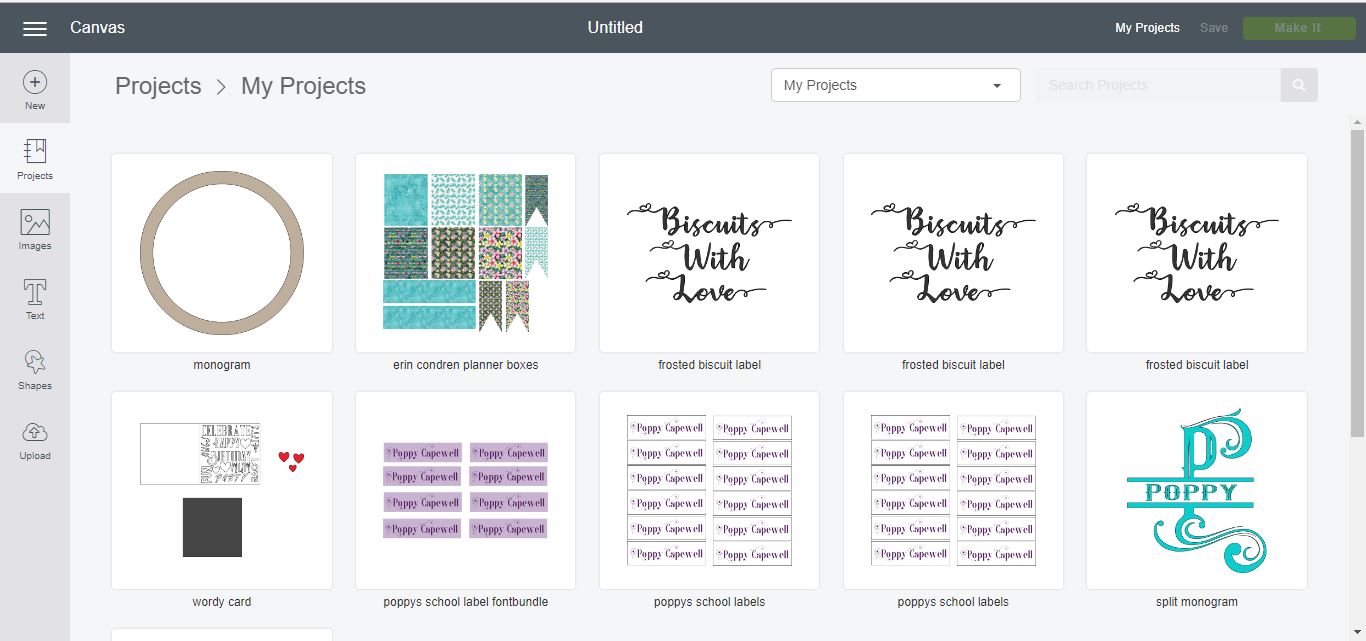
4- By clicking on the View all option all your your projects will appear with a large thumbnail. This is great to see what file you need.
5- Also on the home screen You have the Featured projects section, here you can see the latest projects that cricut have released. You can also click on the "see more" icon to check out even more new projects.
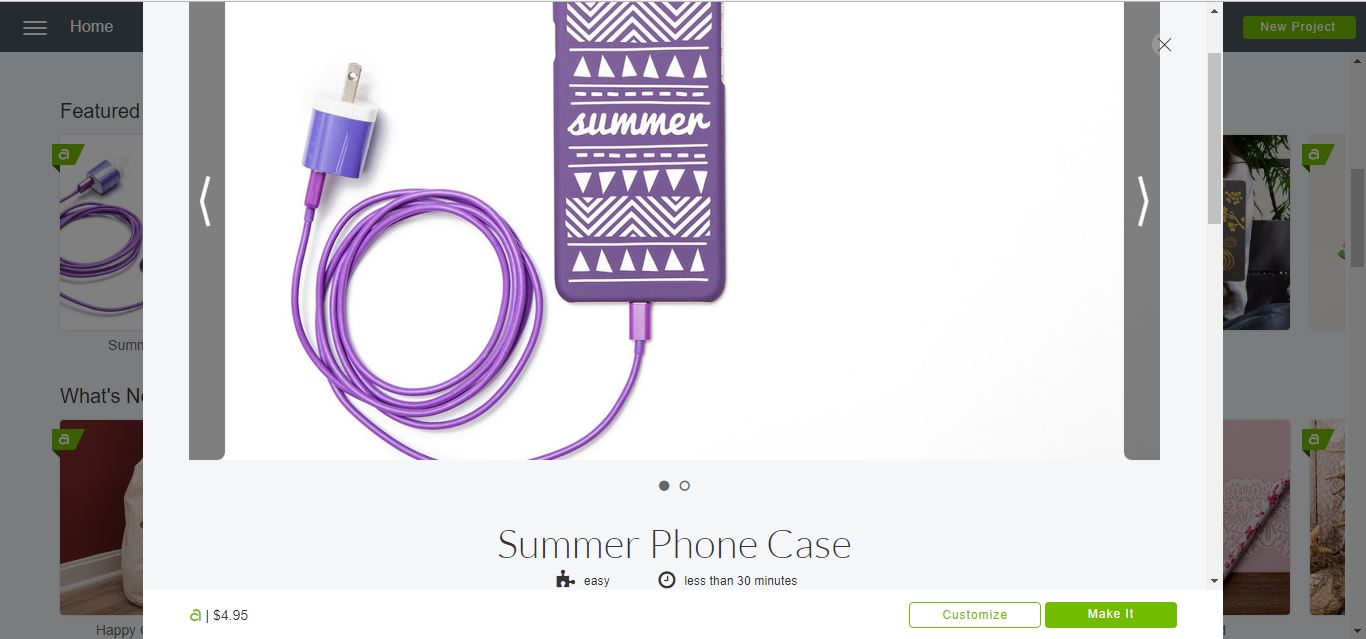
6- When you select a project that cricut has created, A new pop up window will appear with the project image and the option to customize it or make it. If you select the make it icon you will make the design in the image, where if you select the customize icon you have the option to change the design.
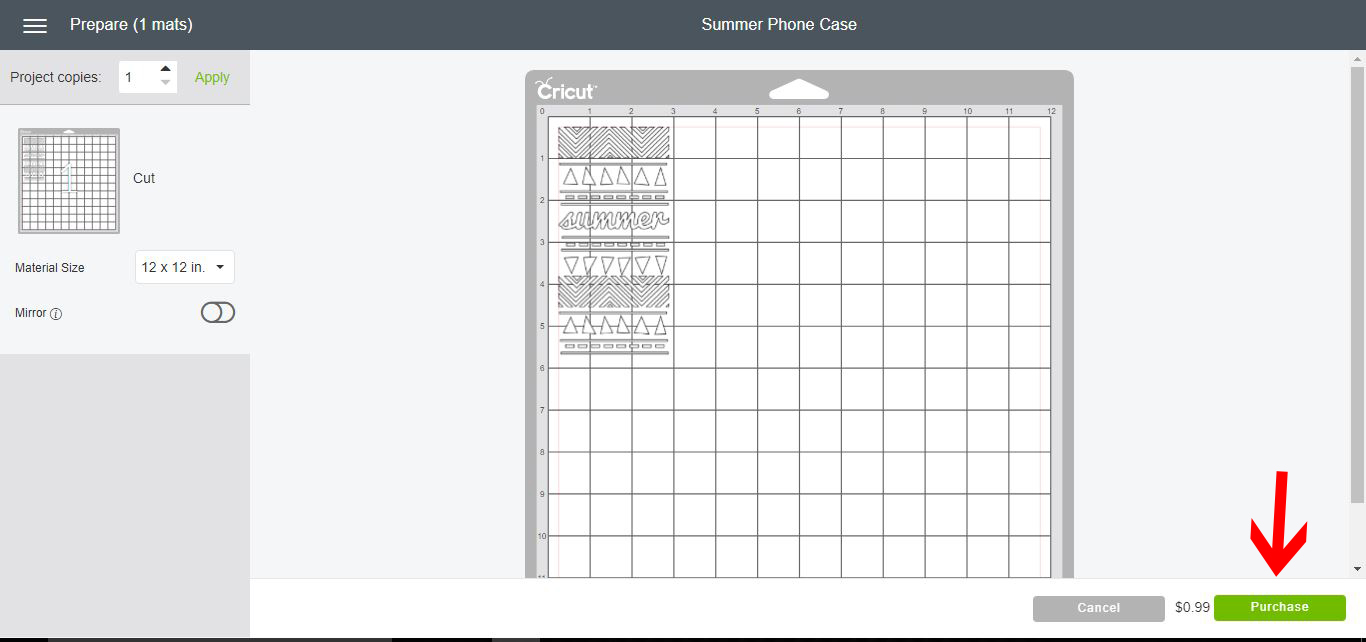
7-After selecting the make it icon, the new software automatically takes you to the cut screen now. If there is a cost for the design you will see a purchase icon and a price. If the item is free or you have cricut access you will have a continue icon.
8- To create a new project, you now have a large New Project icon in the top right of the new home page.
9- Select the icon and this will now bring you automatically to a new project canvas to use.
1- Open Cricut Design Space. The new opening pages has a cleaner layout with everything clearly displayed. Everything you need for your cricut machine is now found at the top left home icon.
2- Click on the 3 lines to access the main menu. This includes your print and cut calibration, settings machine set up and many other features.
It is great to have them all together in one place to access.
3- On to main page you now have a "My Projects" section. All your projects are located here. the most recent will be on the home screen, now shown as large thumbnails for you to see what is in each project.
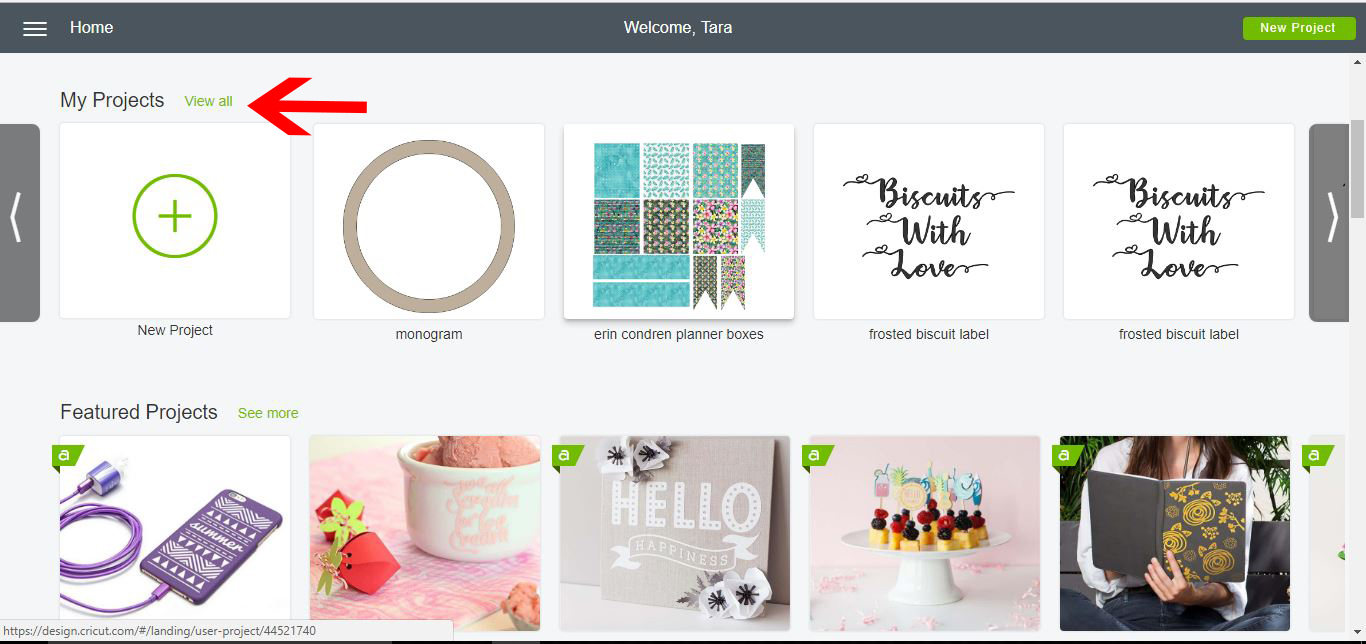
4- By clicking on the View all option all your your projects will appear with a large thumbnail. This is great to see what file you need.
5- Also on the home screen You have the Featured projects section, here you can see the latest projects that cricut have released. You can also click on the "see more" icon to check out even more new projects.
6- When you select a project that cricut has created, A new pop up window will appear with the project image and the option to customize it or make it. If you select the make it icon you will make the design in the image, where if you select the customize icon you have the option to change the design.
7-After selecting the make it icon, the new software automatically takes you to the cut screen now. If there is a cost for the design you will see a purchase icon and a price. If the item is free or you have cricut access you will have a continue icon.
8- To create a new project, you now have a large New Project icon in the top right of the new home page.

9- Select the icon and this will now bring you automatically to a new project canvas to use.


