Drop Shadow Feature in Silhouette V4.1
*Designer Edition and higher.
1- Open Silhouette Studio.
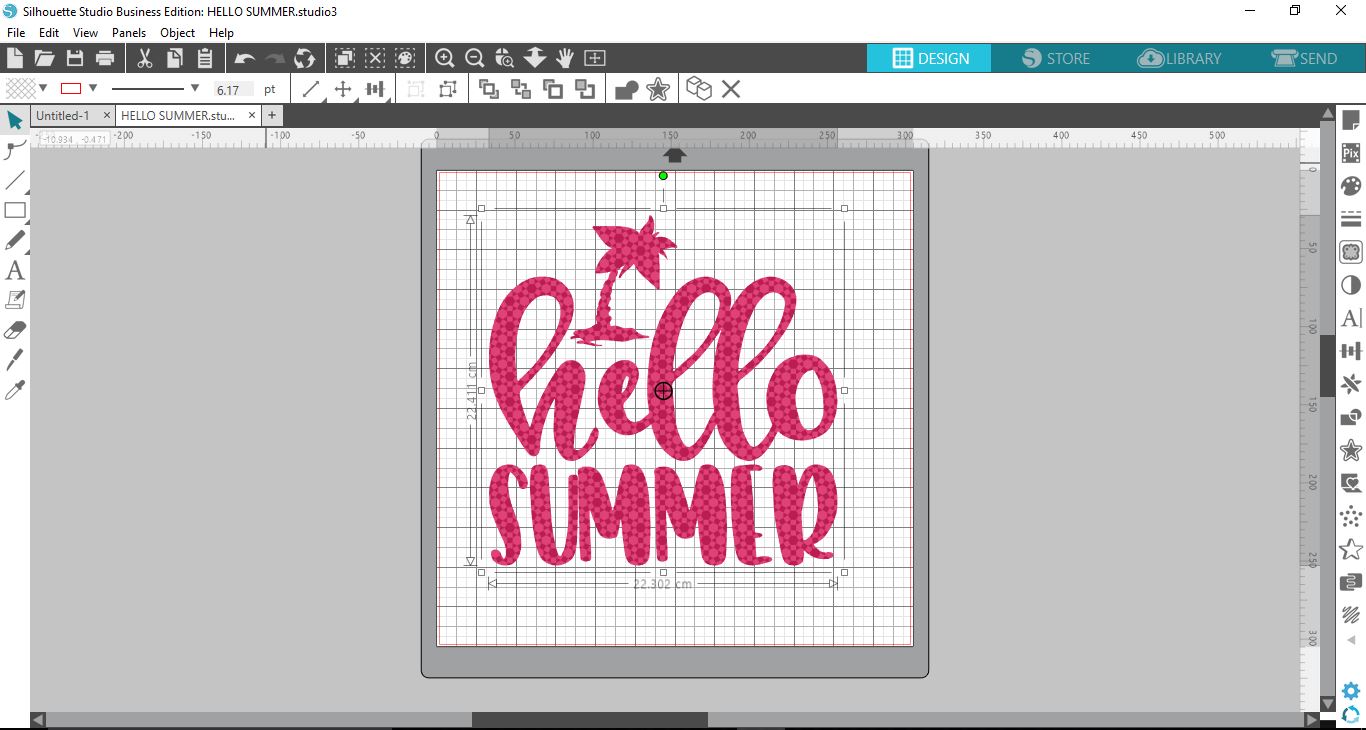
2- Insert or design the text you would like to add a drop shadow to. I used this Free SVG Bundle.
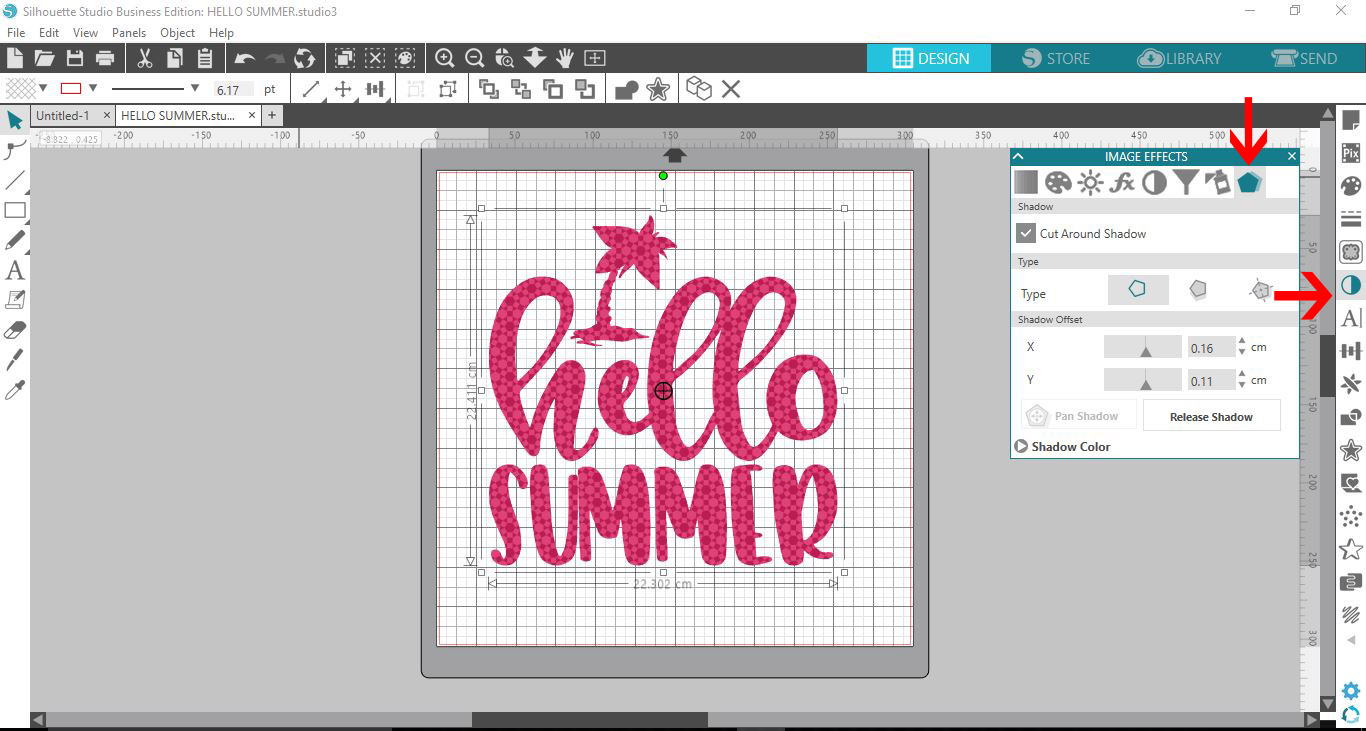
3- Click on the image effects icon to access the image effects panel. Next click on the drop shadow icon which is the last icon in the row.
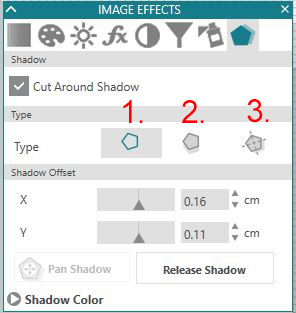
4- In the drop shadow feature you will have 3 different options for drop shadow. Off (1), Dynamic (2), and fixed (3).
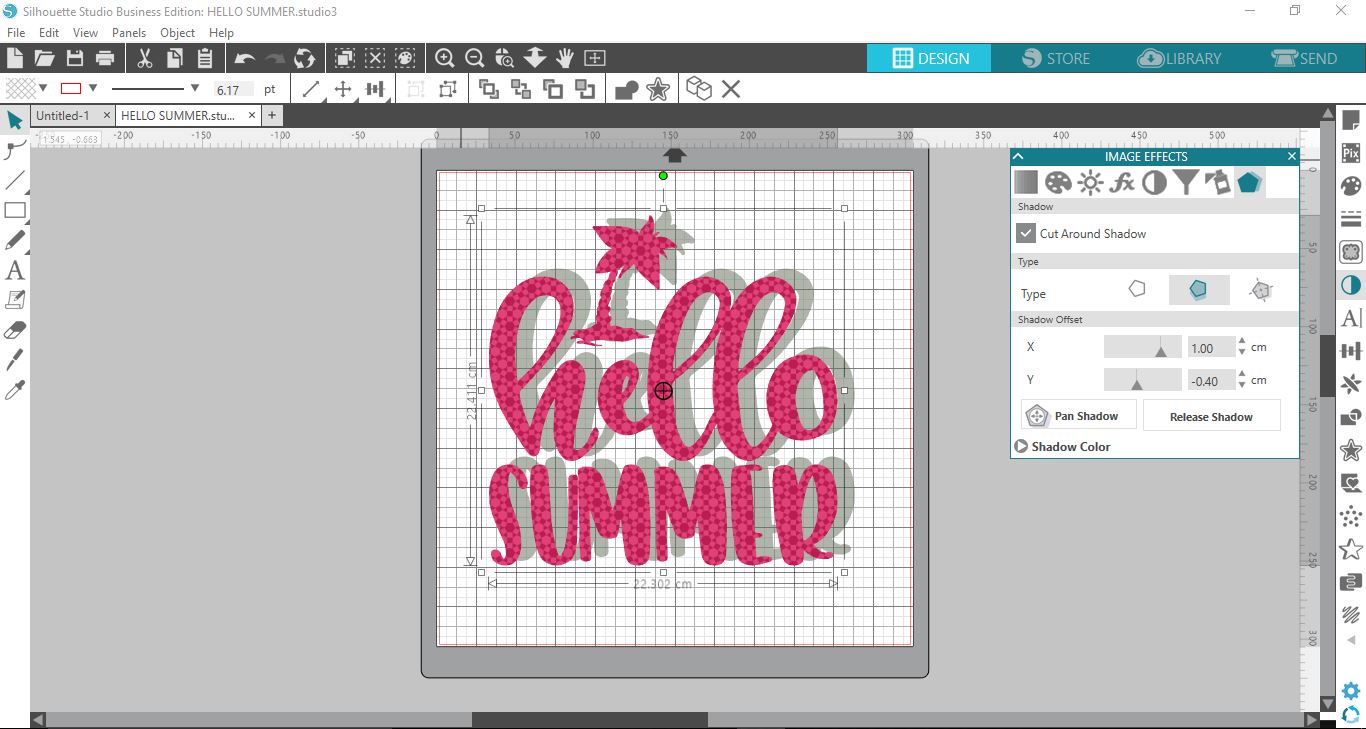
5- Clicking on the dynamic or fixed option will produce a drop shadow onto your text. The drop shadow is an exact duplicate of the actual text and just centered slightly off to the right to create the shadow.
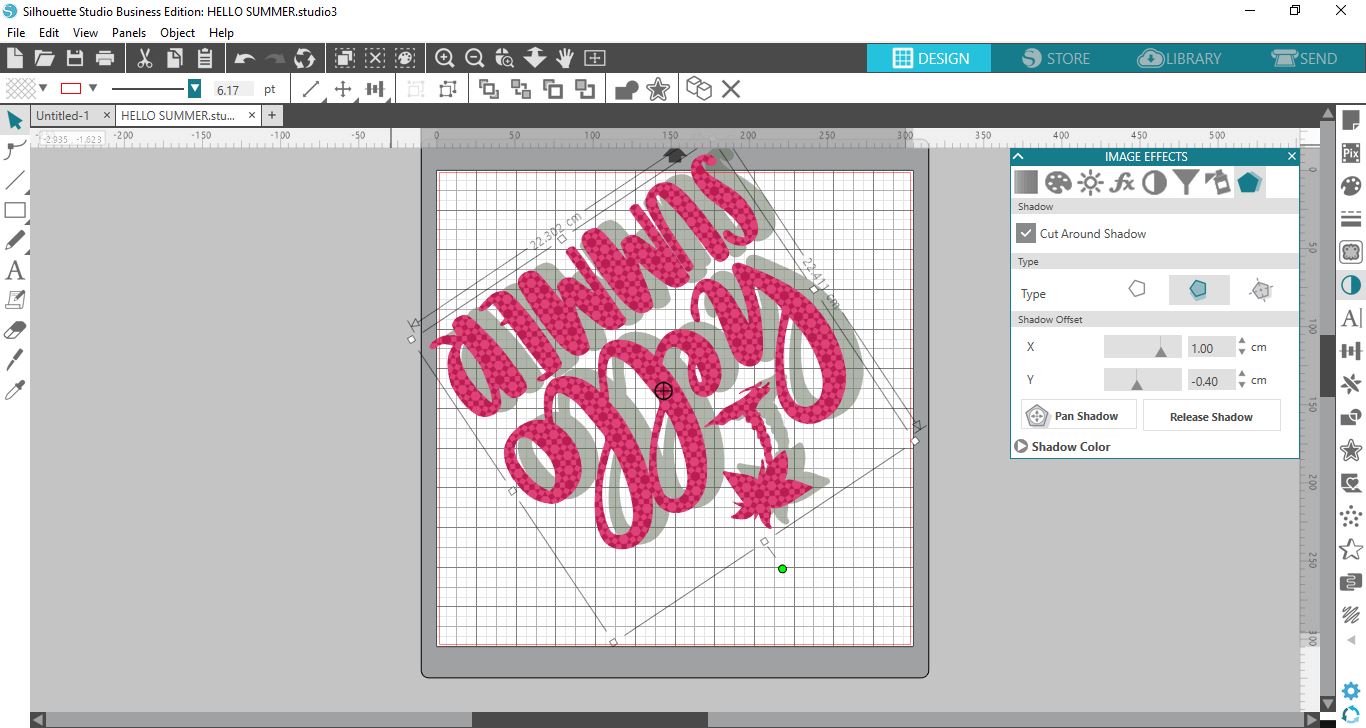
6- When you select the dynamic option the drop shadow will follow the "light source" no matter where you move your text. so even if the text is moved upside down the shadow will still mover as the light sources would. so in the below image even upside down the shadow is still on the right of the text.
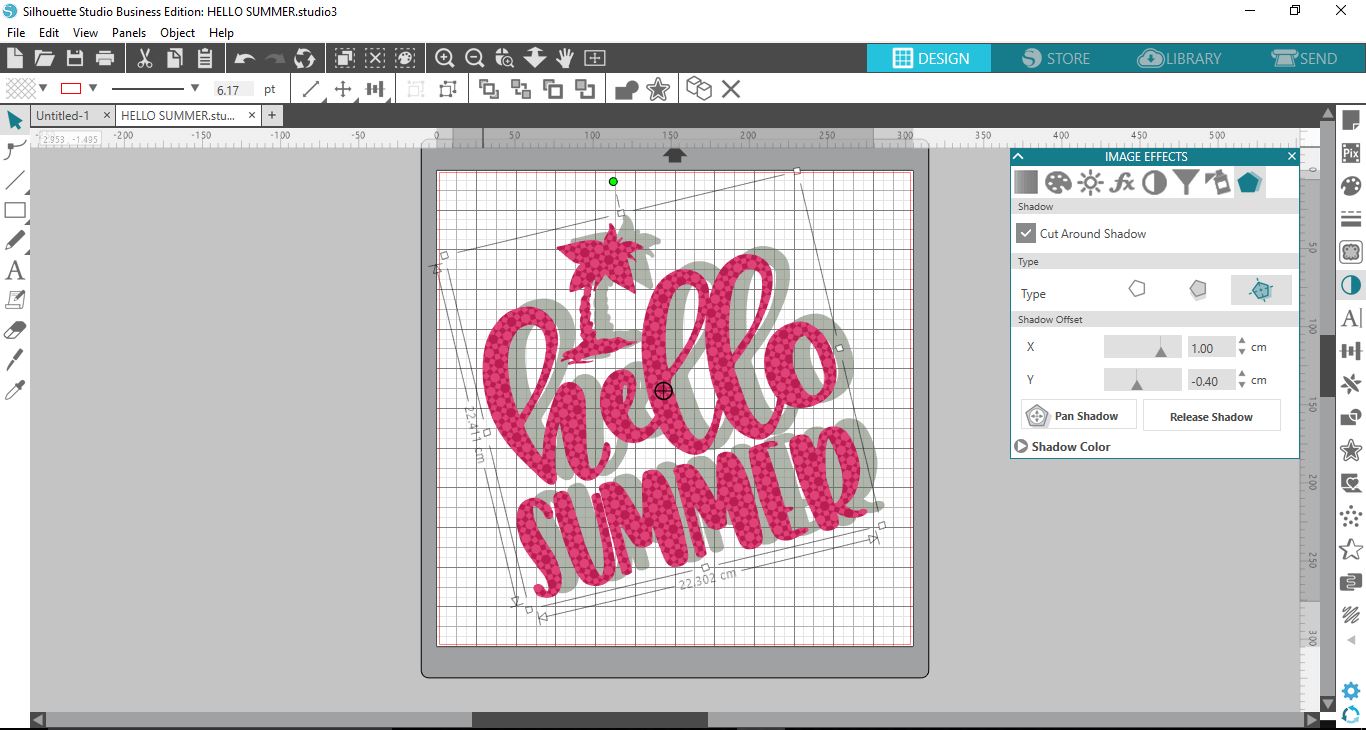
7- If you select fixed the drop shadow will lock with your text, and if you move the text the shadow will stay with the text in the same place, eg. if you turn your text upside down, the text would be seen on the left and would not follow the "light source" as it does in the dynamic option.
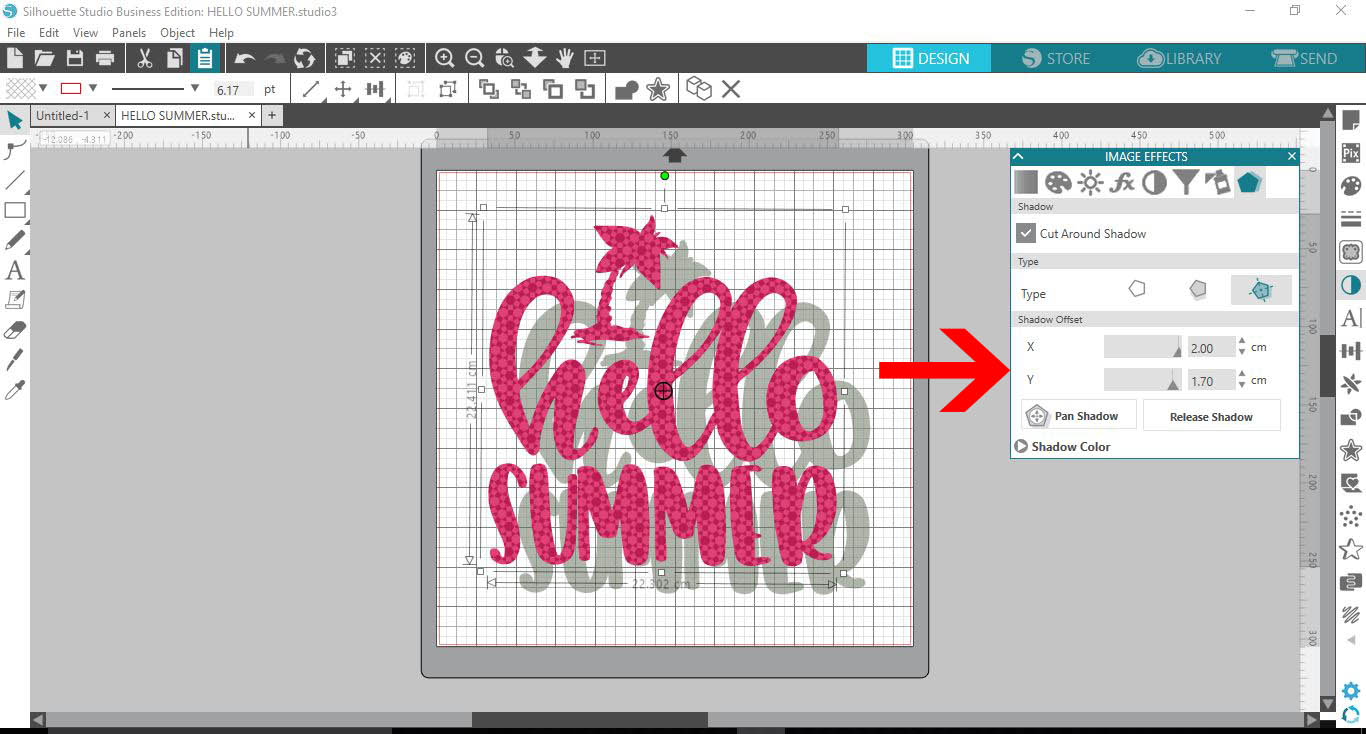
8- You can also adjust the shadow offset by changing the X and Y options on your panel.
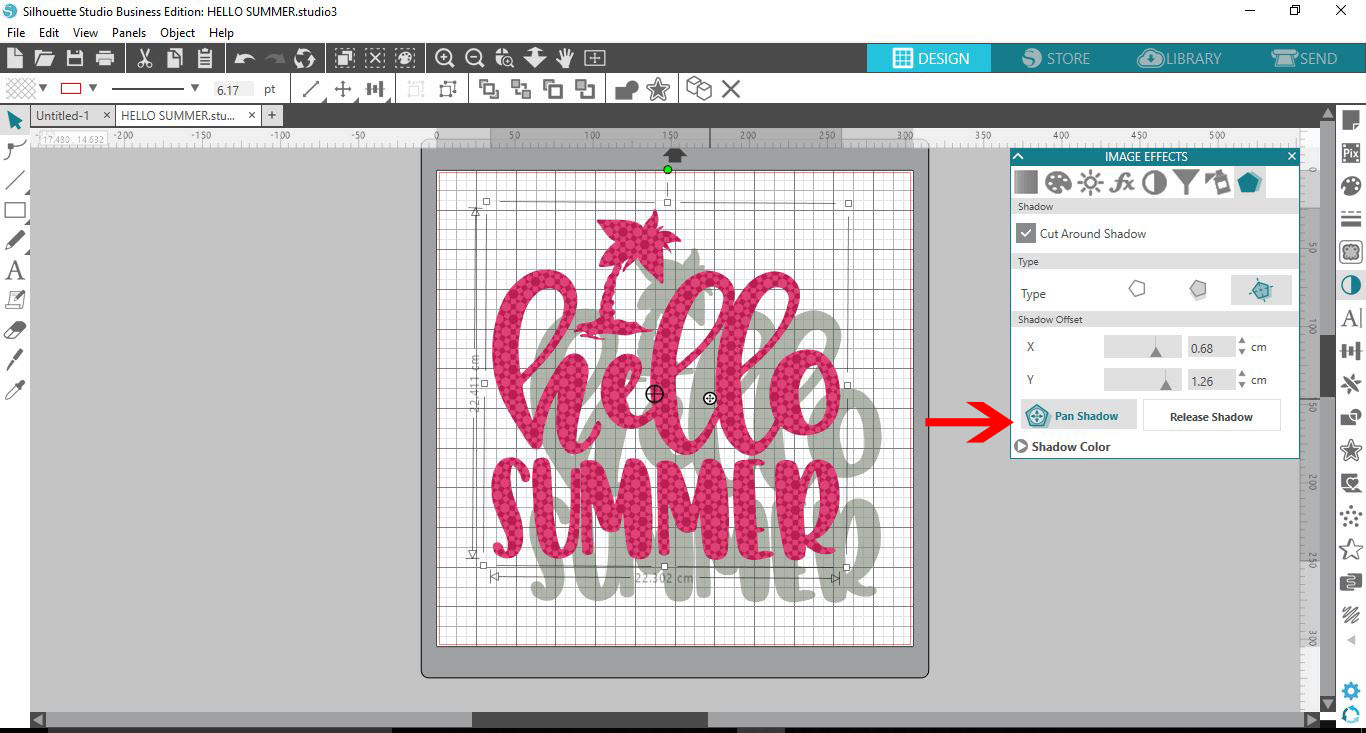
9- By selecting the pan shadow option you can manually move the shadow with the small circle toggle that appears in the middle of your design. this is a small circle with an X in it. Click on this toggle and the shadow can me adjusted anywhere on the page.
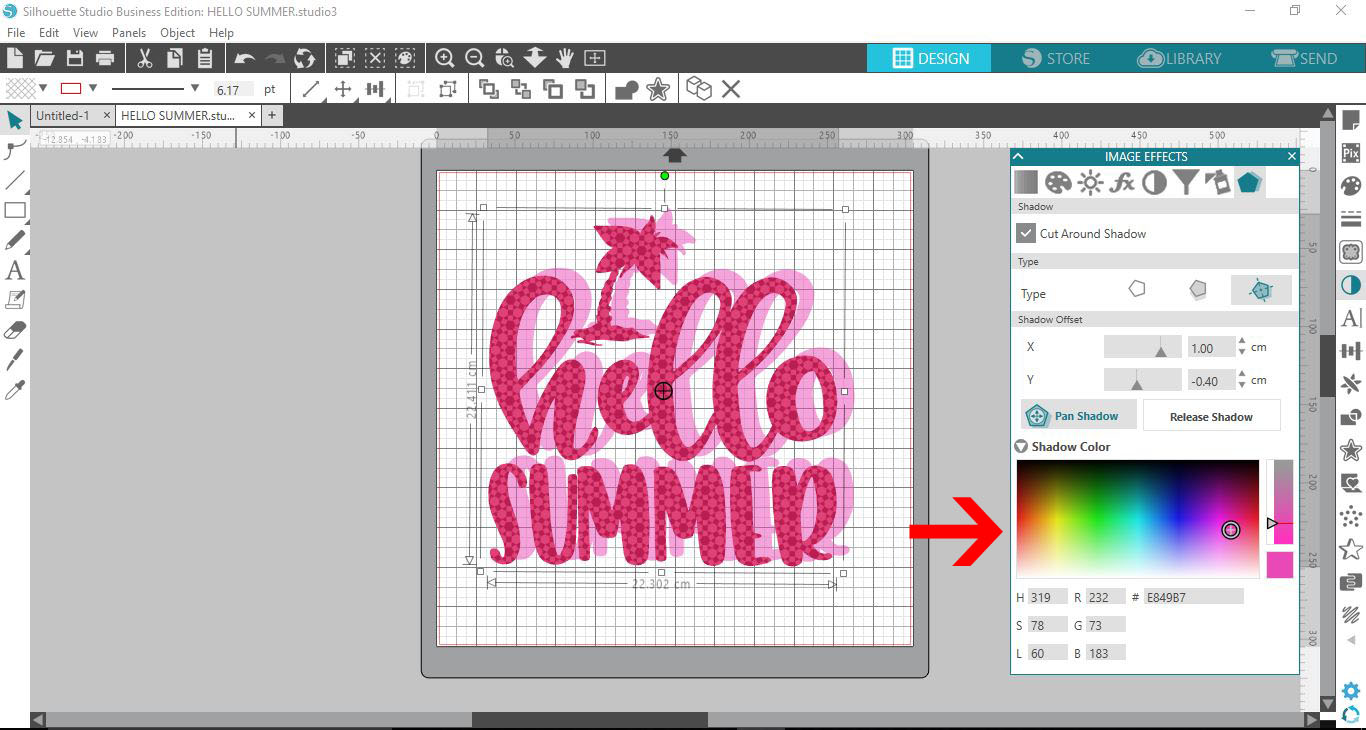
10- You can also change the color of your drop shadow .
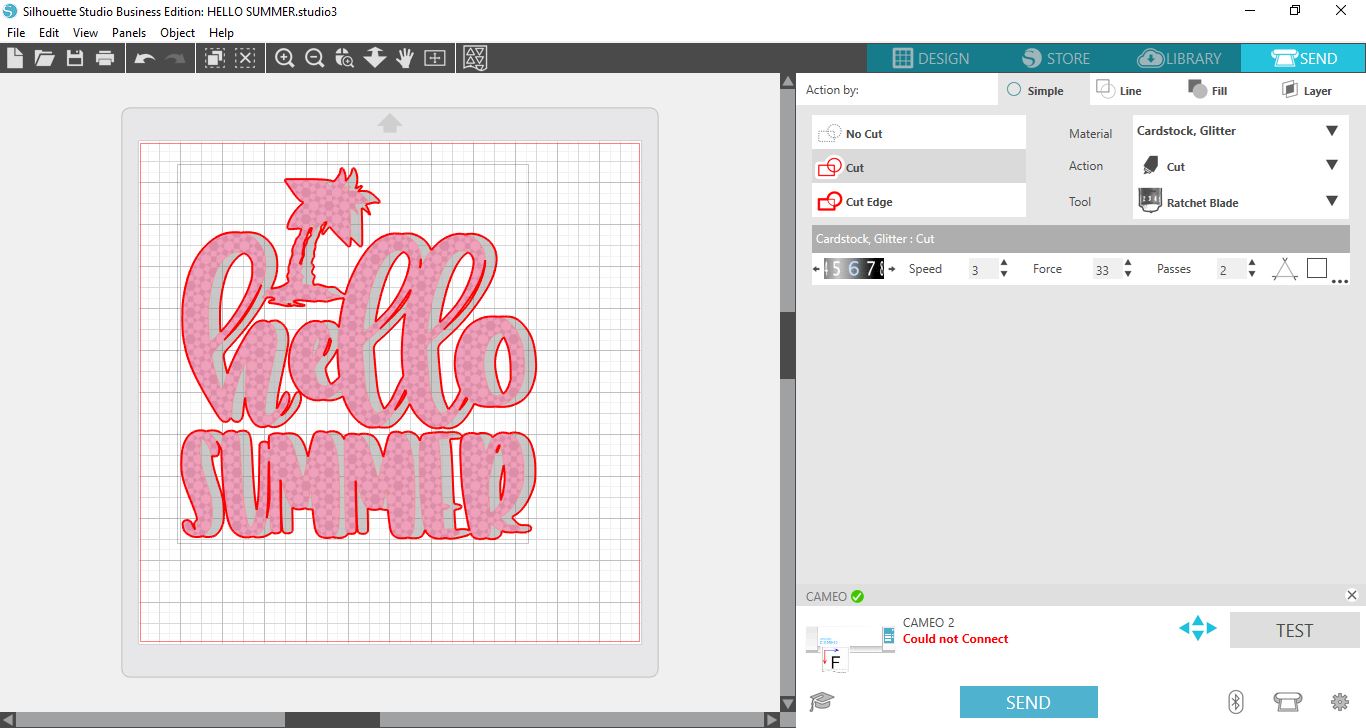
11- When you finally go to the send option and cut screen you will see that the machine will also cut around the drop shadow. You can change this option in the drop shadow panel by unchecking the cut around shadow box.
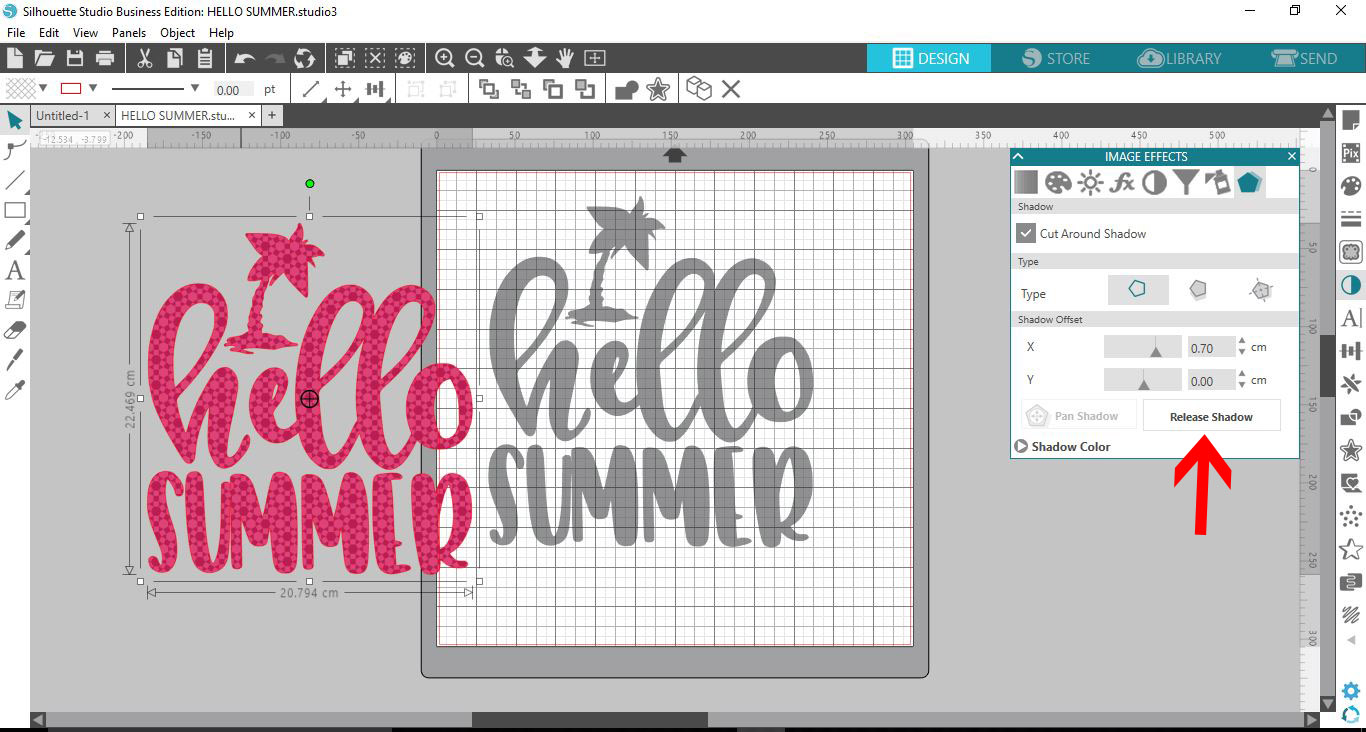
12- Finally you can release the shadow from the text. This is a great option if you want to cut separate so you can layer them manually.
1- Open Silhouette Studio.
2- Insert or design the text you would like to add a drop shadow to. I used this Free SVG Bundle.
3- Click on the image effects icon to access the image effects panel. Next click on the drop shadow icon which is the last icon in the row.
4- In the drop shadow feature you will have 3 different options for drop shadow. Off (1), Dynamic (2), and fixed (3).
5- Clicking on the dynamic or fixed option will produce a drop shadow onto your text. The drop shadow is an exact duplicate of the actual text and just centered slightly off to the right to create the shadow.
6- When you select the dynamic option the drop shadow will follow the "light source" no matter where you move your text. so even if the text is moved upside down the shadow will still mover as the light sources would. so in the below image even upside down the shadow is still on the right of the text.
7- If you select fixed the drop shadow will lock with your text, and if you move the text the shadow will stay with the text in the same place, eg. if you turn your text upside down, the text would be seen on the left and would not follow the "light source" as it does in the dynamic option.
8- You can also adjust the shadow offset by changing the X and Y options on your panel.
9- By selecting the pan shadow option you can manually move the shadow with the small circle toggle that appears in the middle of your design. this is a small circle with an X in it. Click on this toggle and the shadow can me adjusted anywhere on the page.
10- You can also change the color of your drop shadow .
11- When you finally go to the send option and cut screen you will see that the machine will also cut around the drop shadow. You can change this option in the drop shadow panel by unchecking the cut around shadow box.
12- Finally you can release the shadow from the text. This is a great option if you want to cut separate so you can layer them manually.