- By Design Bundles
- 6 Mins
- Procreate Tutorials
How to Make Drop Shadow Lettering in Procreate
Please note: we are using the latest version of Procreate 5X. If you do not see the features mentioned below, ensure your Procreate is up-to-date.
Step 1 - Making the Lettering
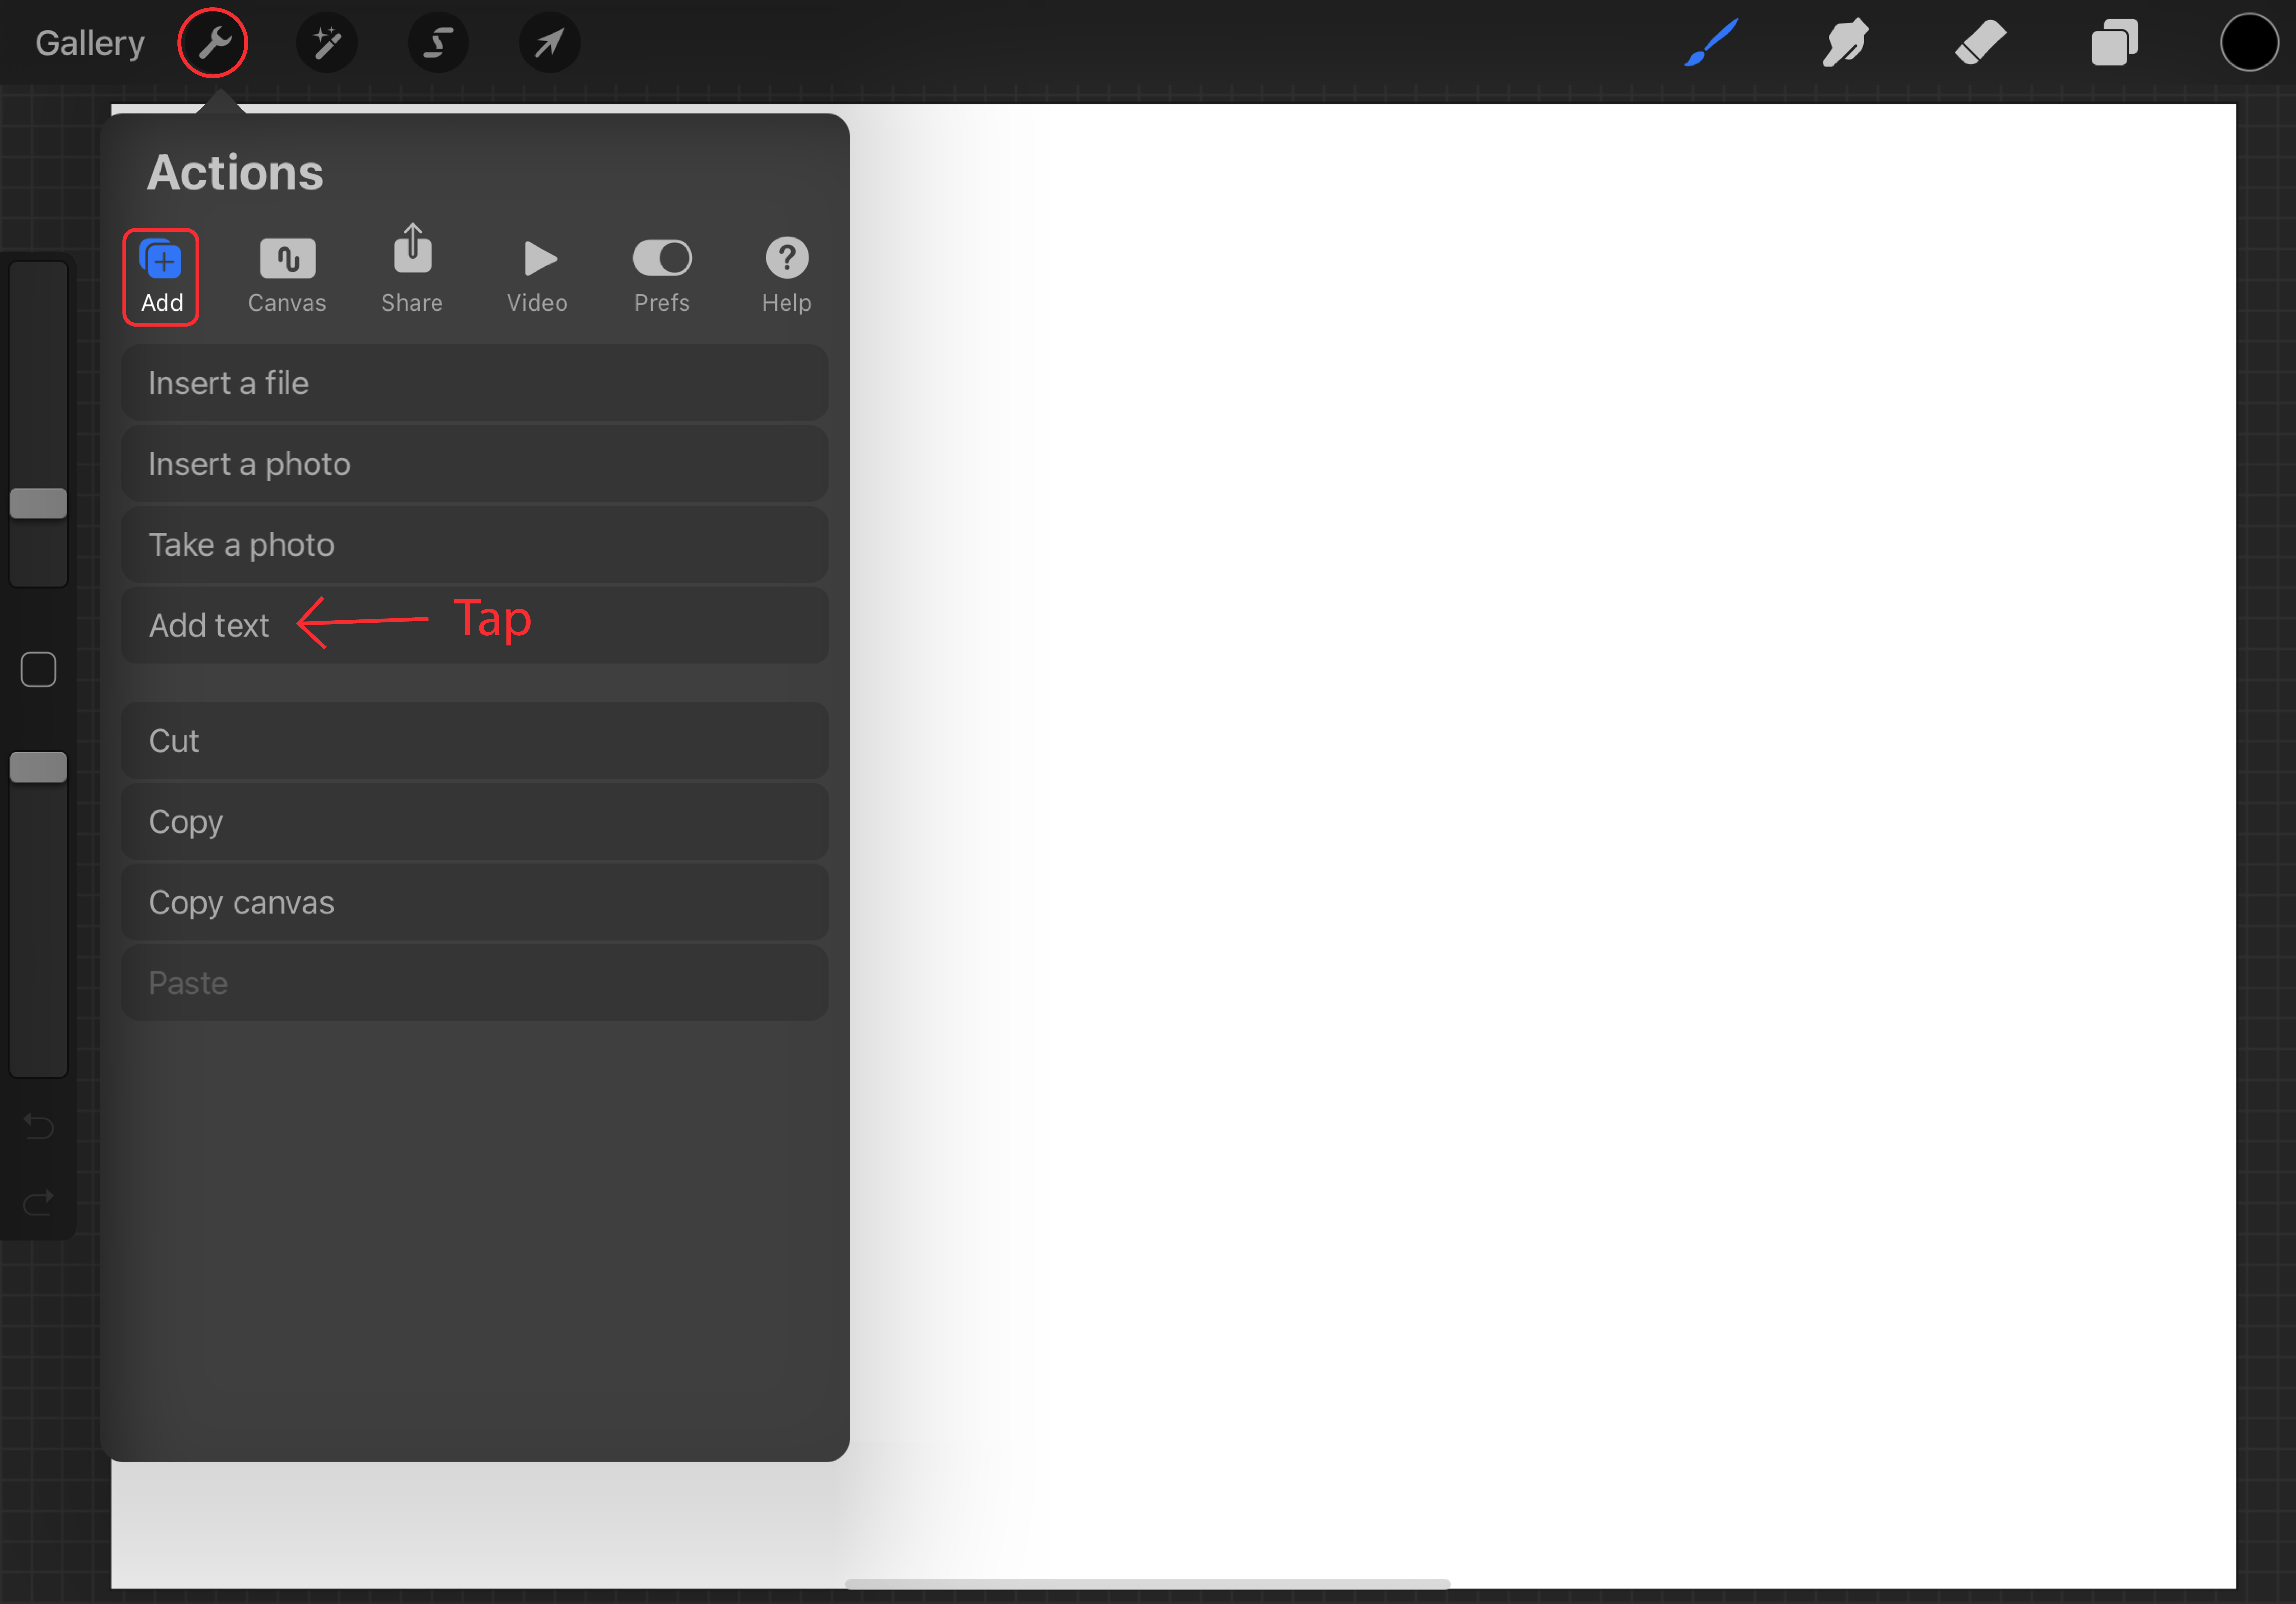
First, we will import our font to Procreate and in a new canvas add a text box and type out the wording we want to add a drop shadow to. You can add text by tapping on the Actions (Wrench) icon at the top left of your toolbar. Tap on “Add” and select “Add text”. This will add a text box to your canvas.
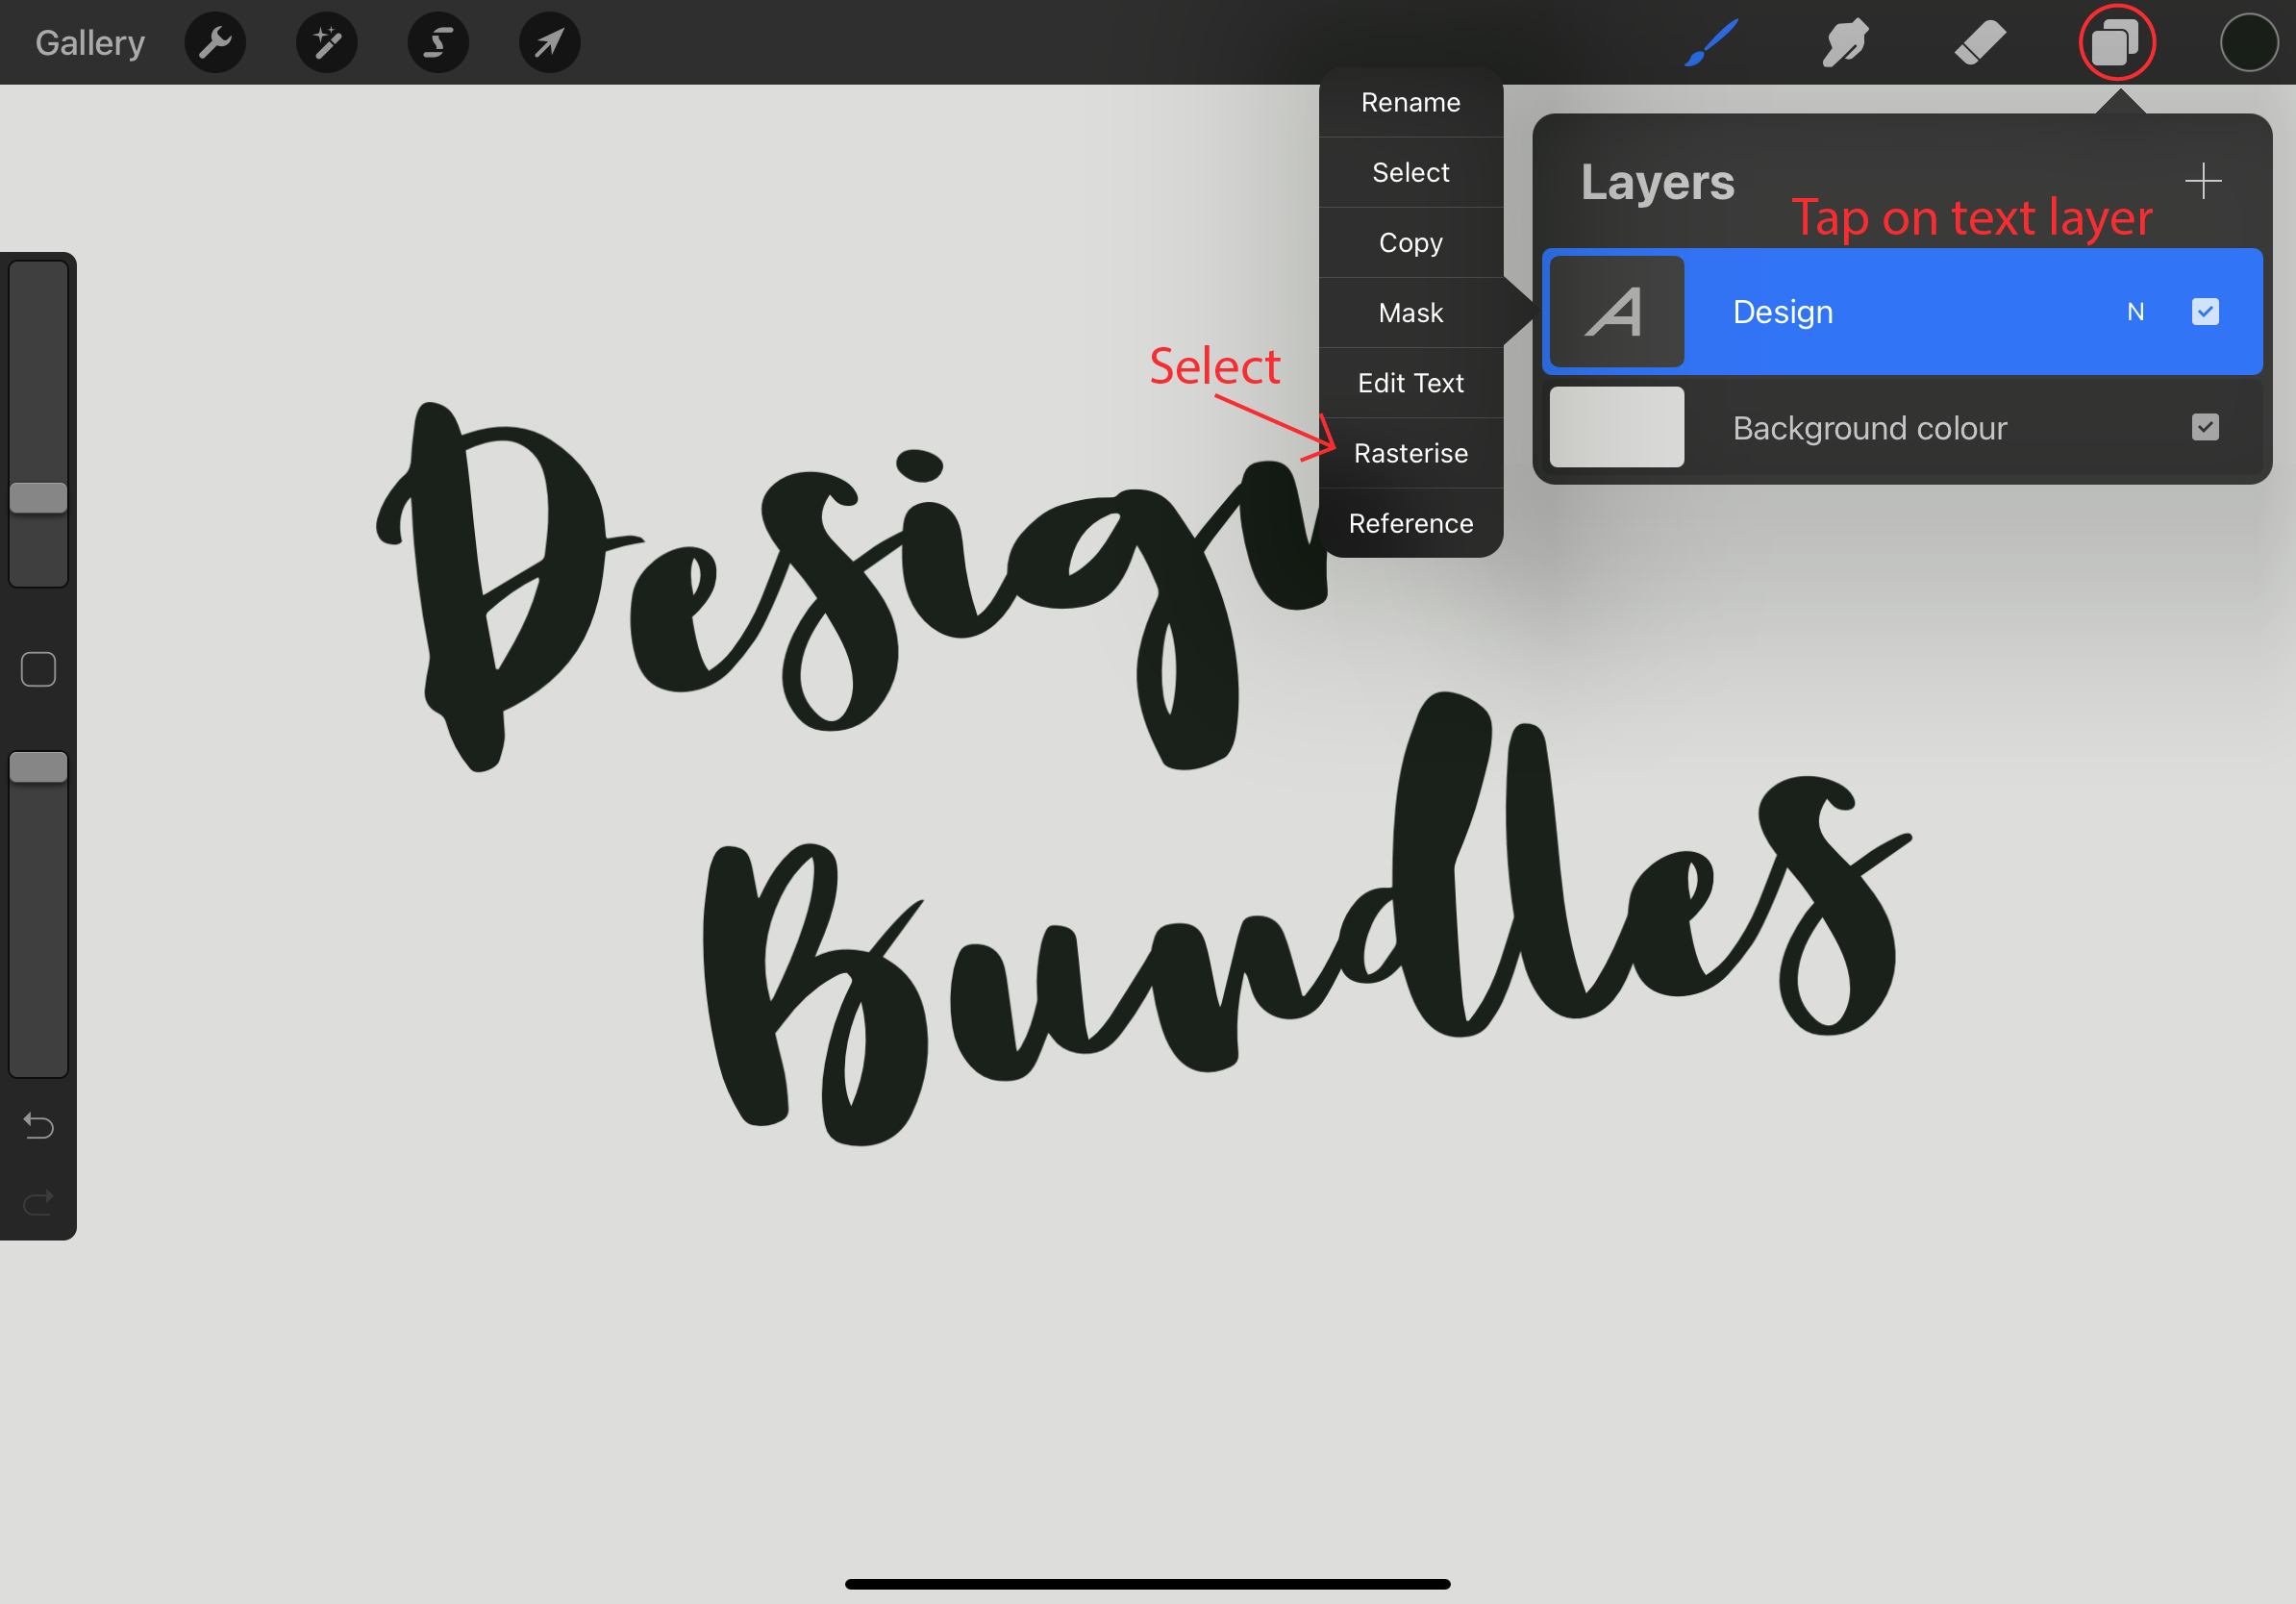
Go ahead and type in your wording and set your font style. Once you are done coloring, sizing, and making all edits to your text we are going to rasterise it. To rasterise your lettering open your layers panel and tap on the text layer. You will see a layers options tab pop up next to the layers panel, tap on “Rasterise”.
Step 2 - Duplicate the Lettering
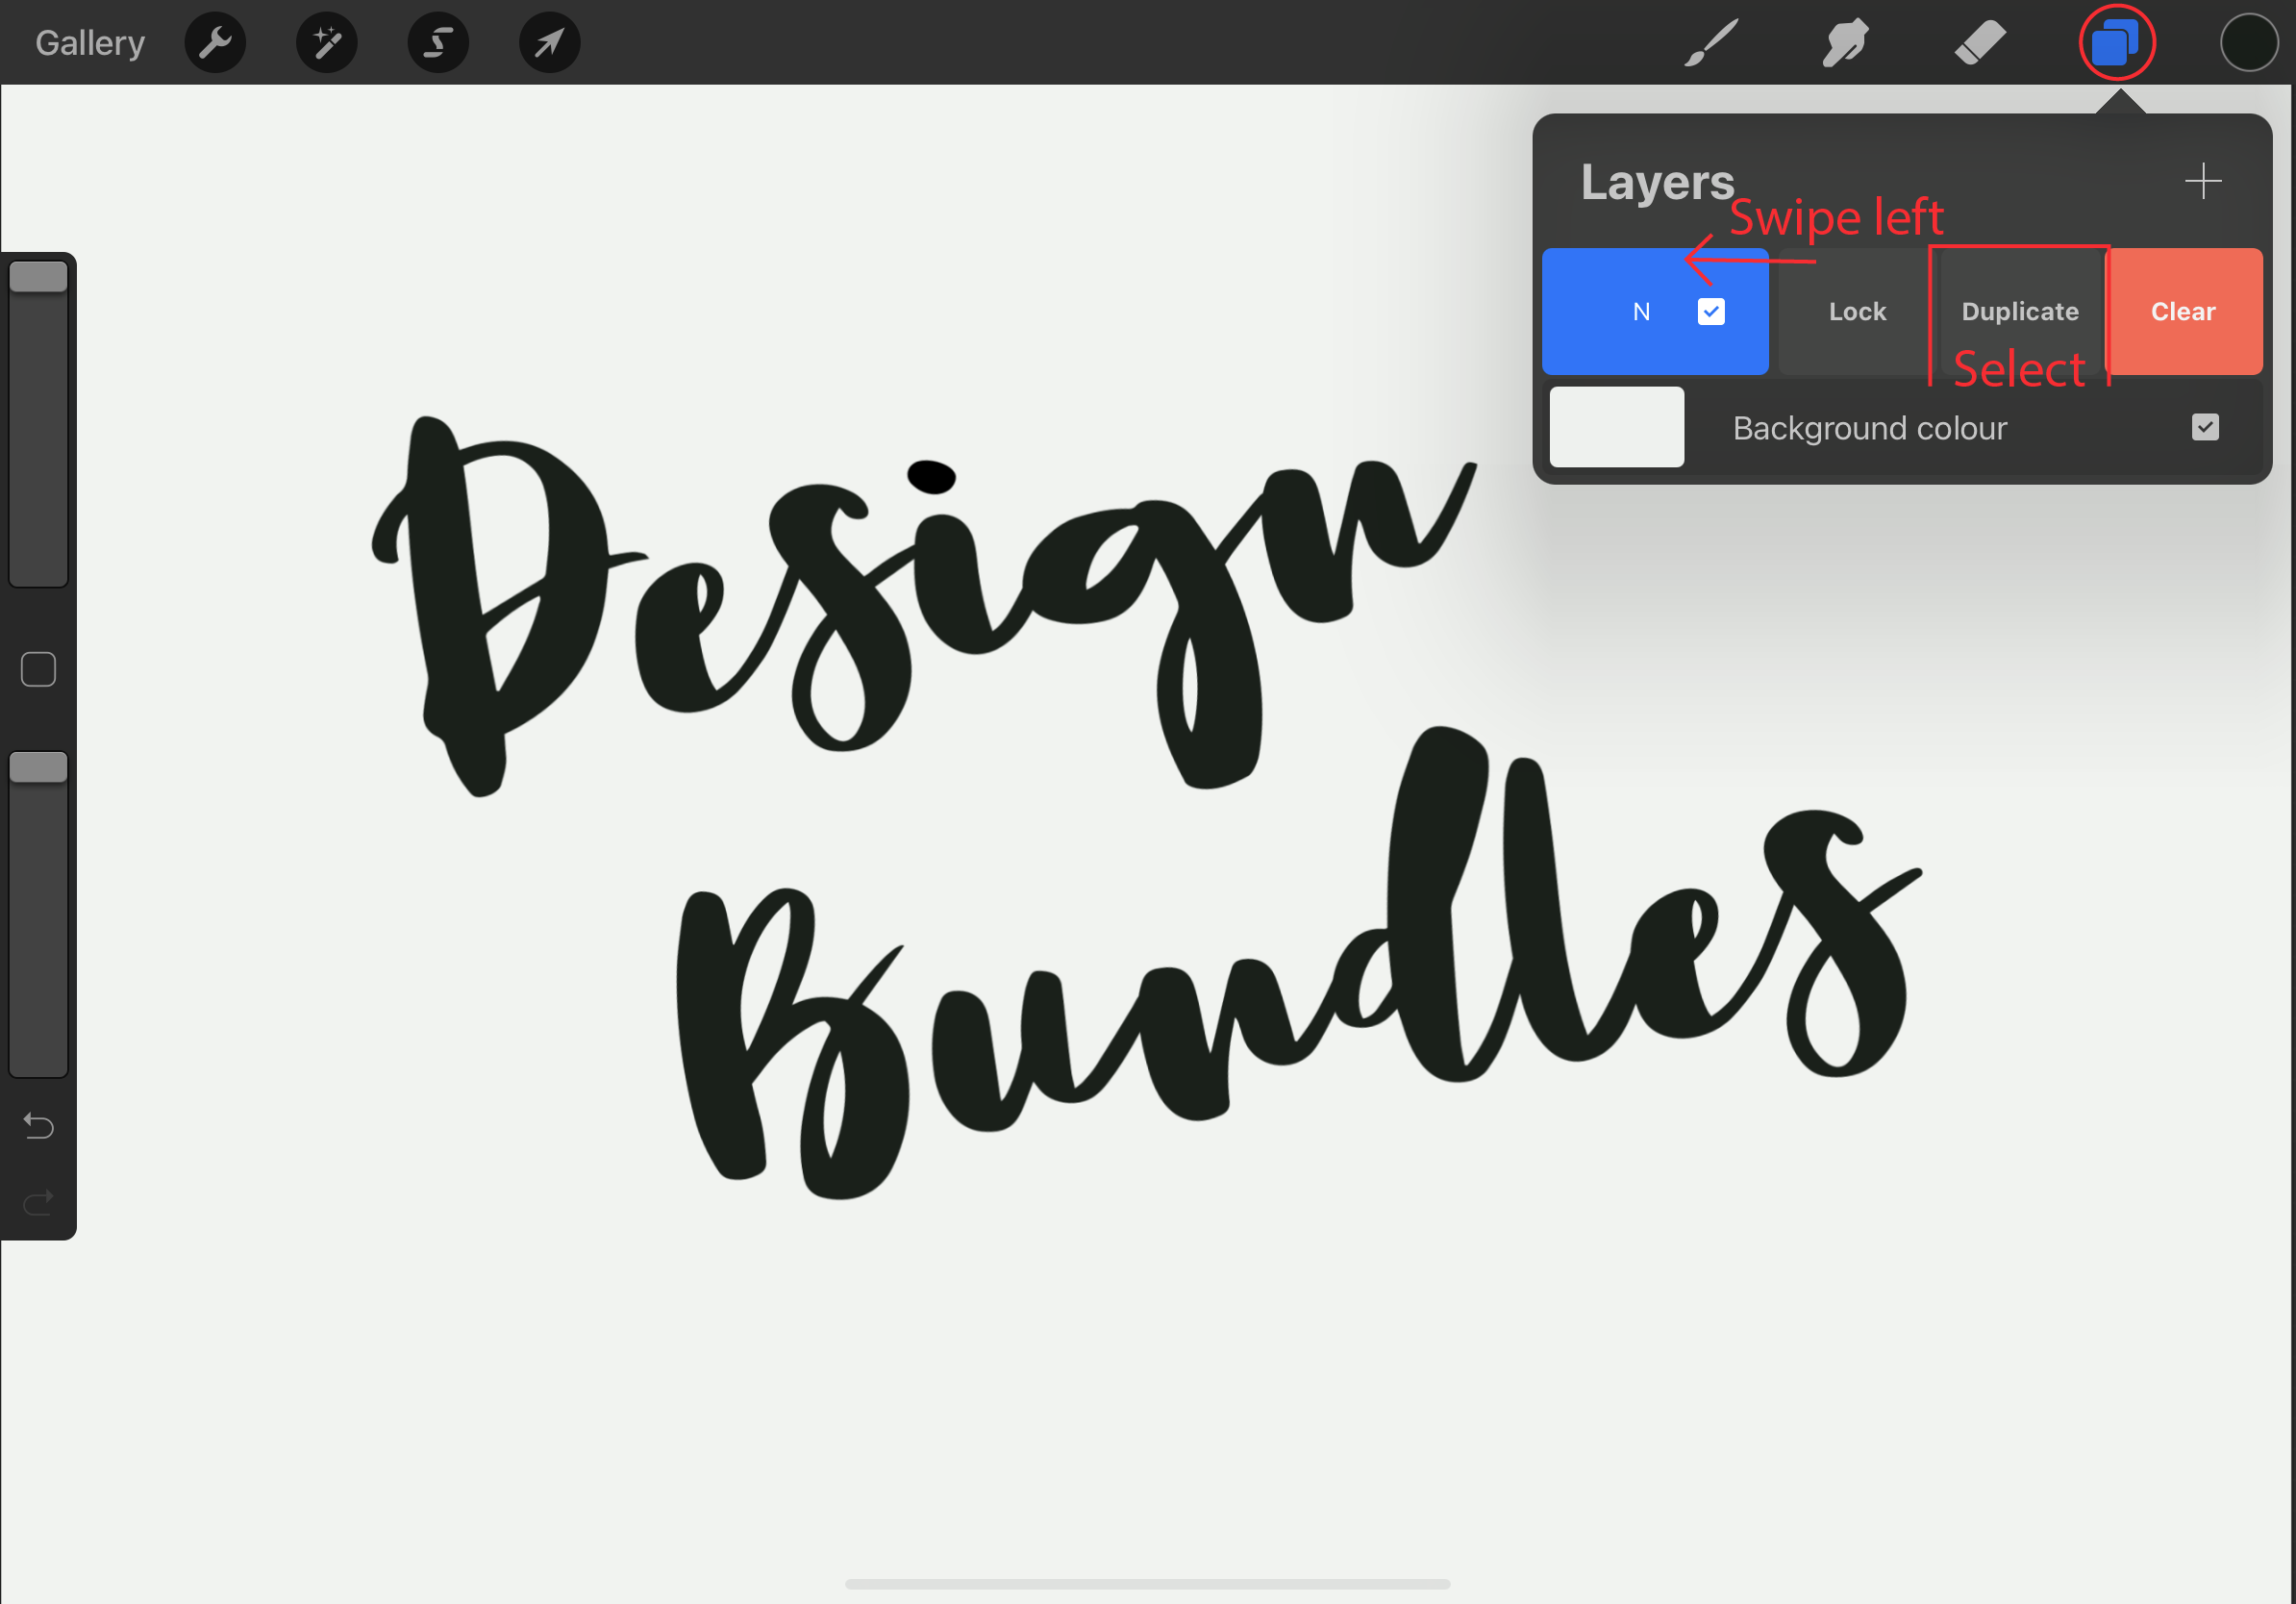
With our text rasterised we can go ahead and make a copy and use the text as our drop shadow. To Duplicate your lettering keep your layers panel open and swipe left on your text layer then tap on duplicate from the options shown.
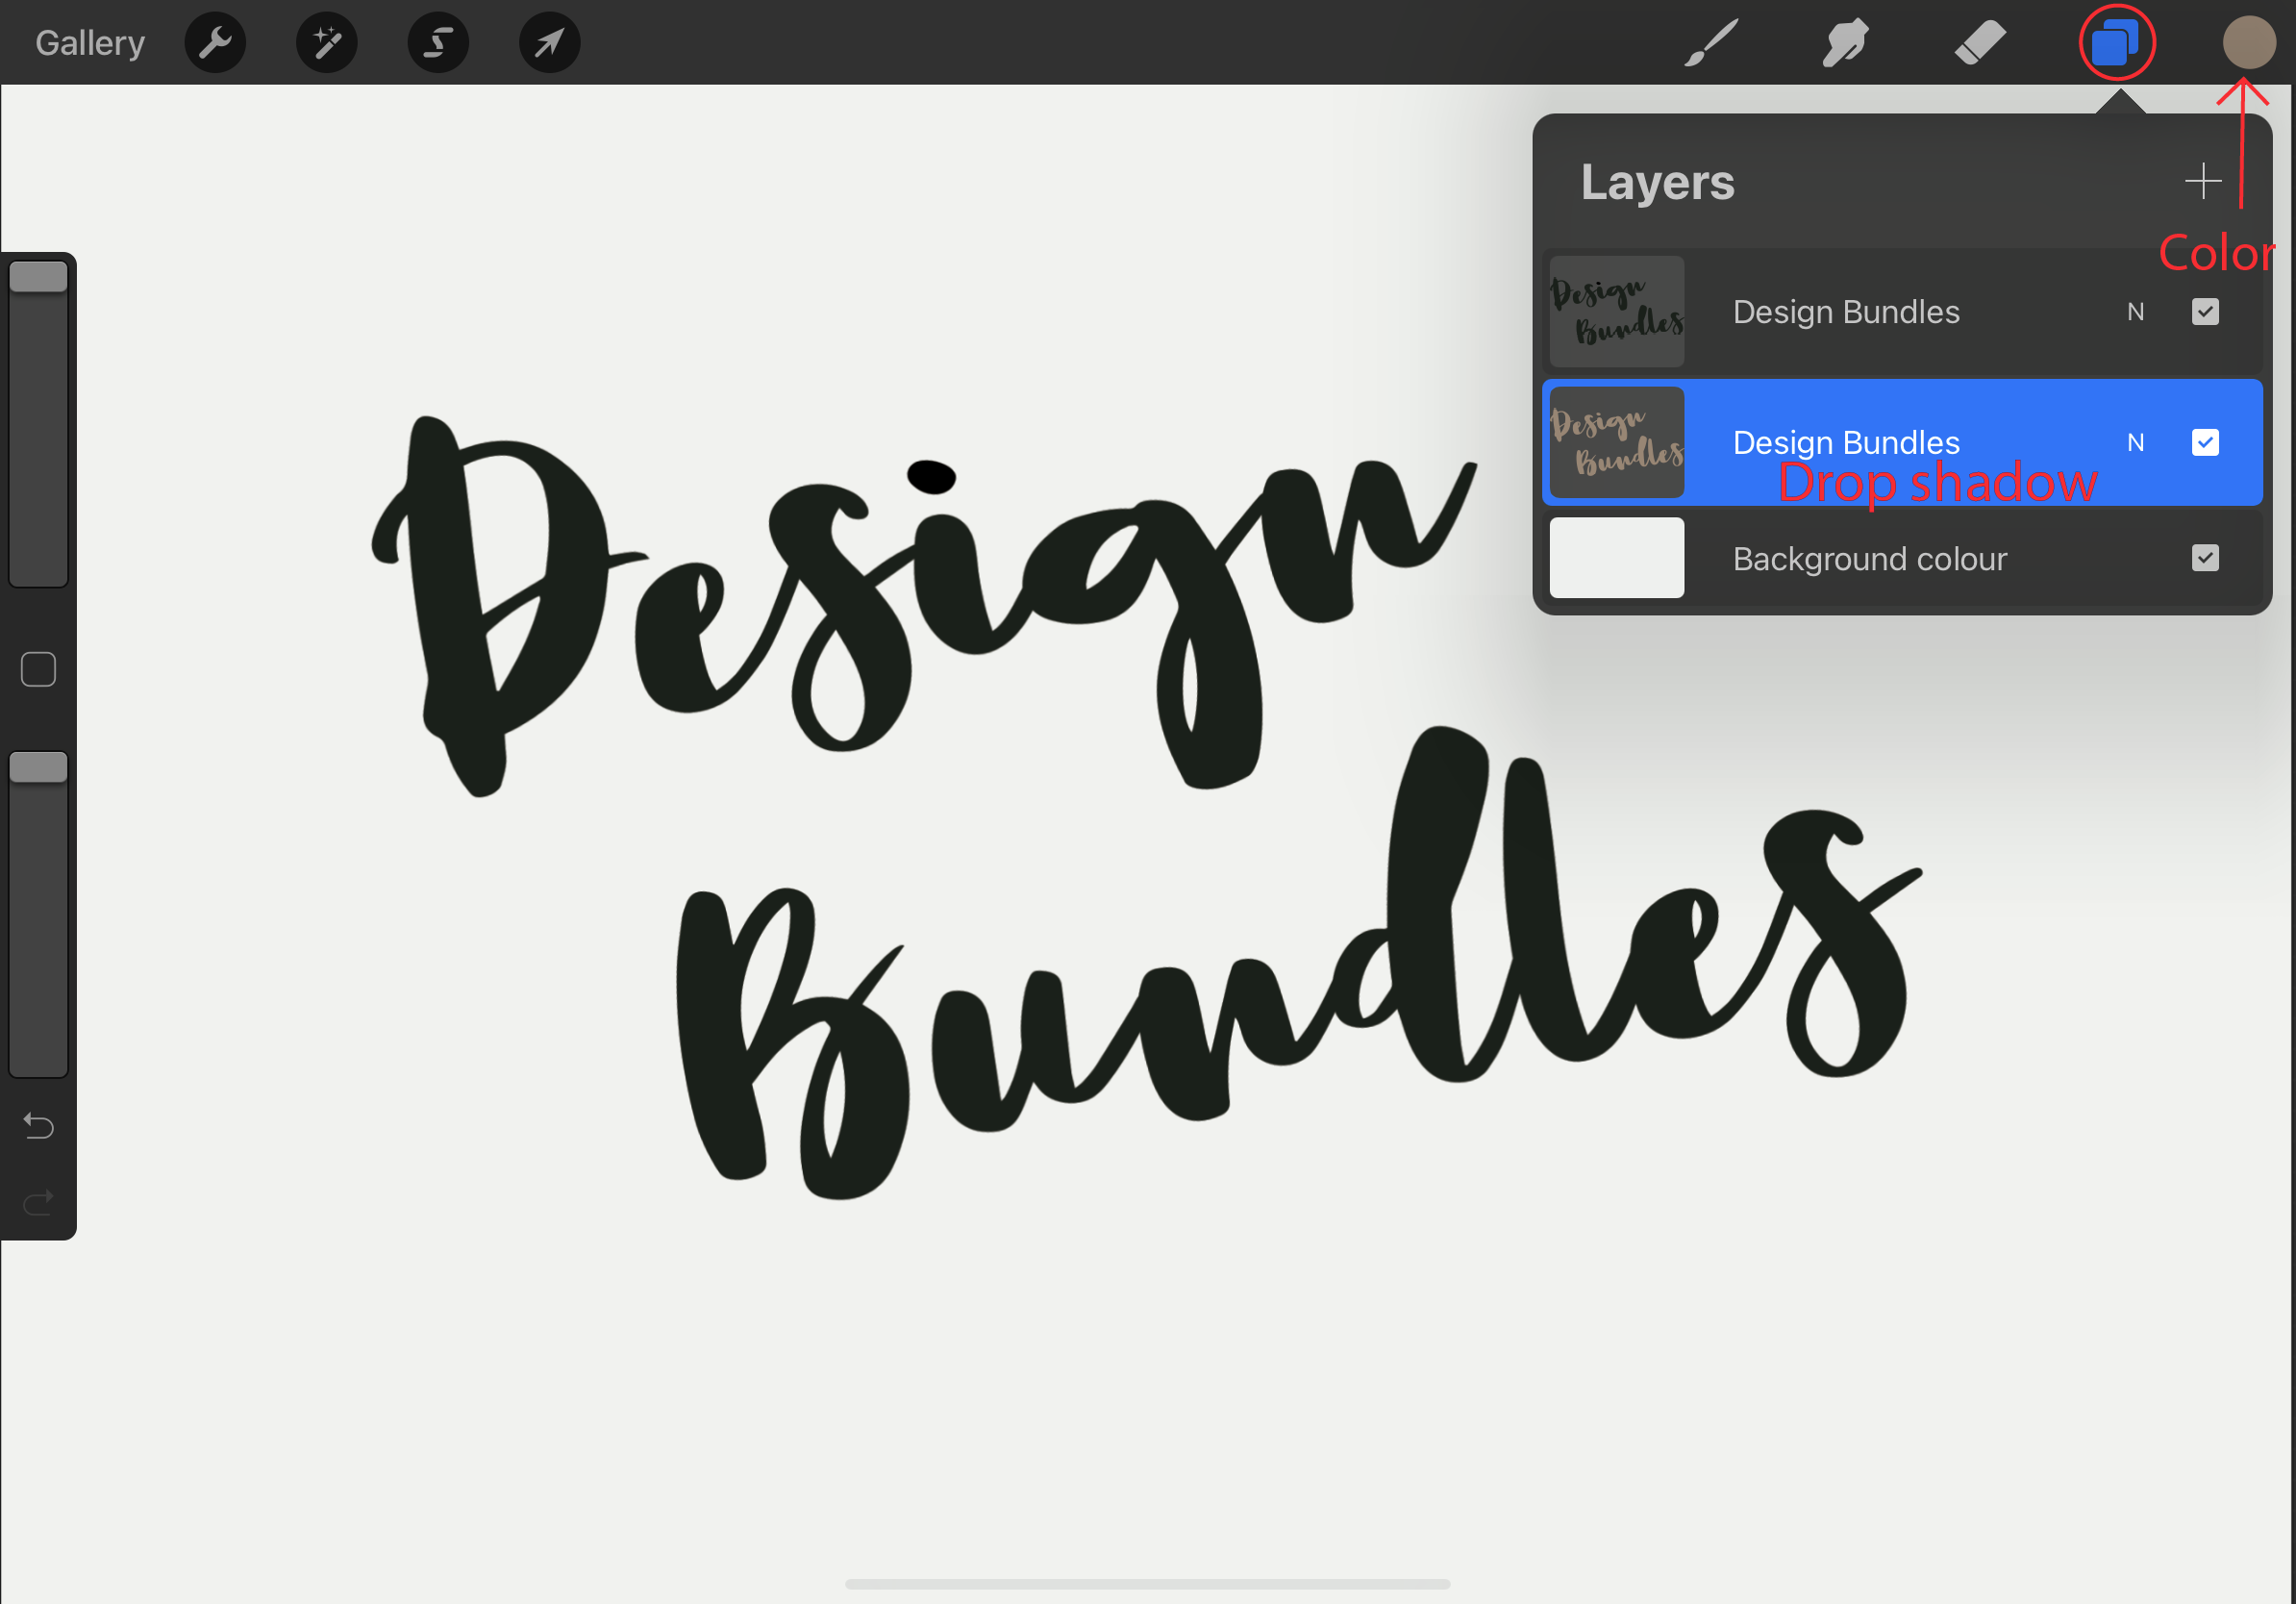
We now have 2 copies of our lettering, the top one will be our main lettering and the bottom one will be our drop shadow. You can go ahead and change the drop shadow color. A quick way to do this is to select the layer and choose a color, then drag and drop the color onto the text.
Note: You can always color the top layer to the color you want your drop shadow to be and then drag that layer below your main lettering layer.
Step 3 - Position the Drop Shadow
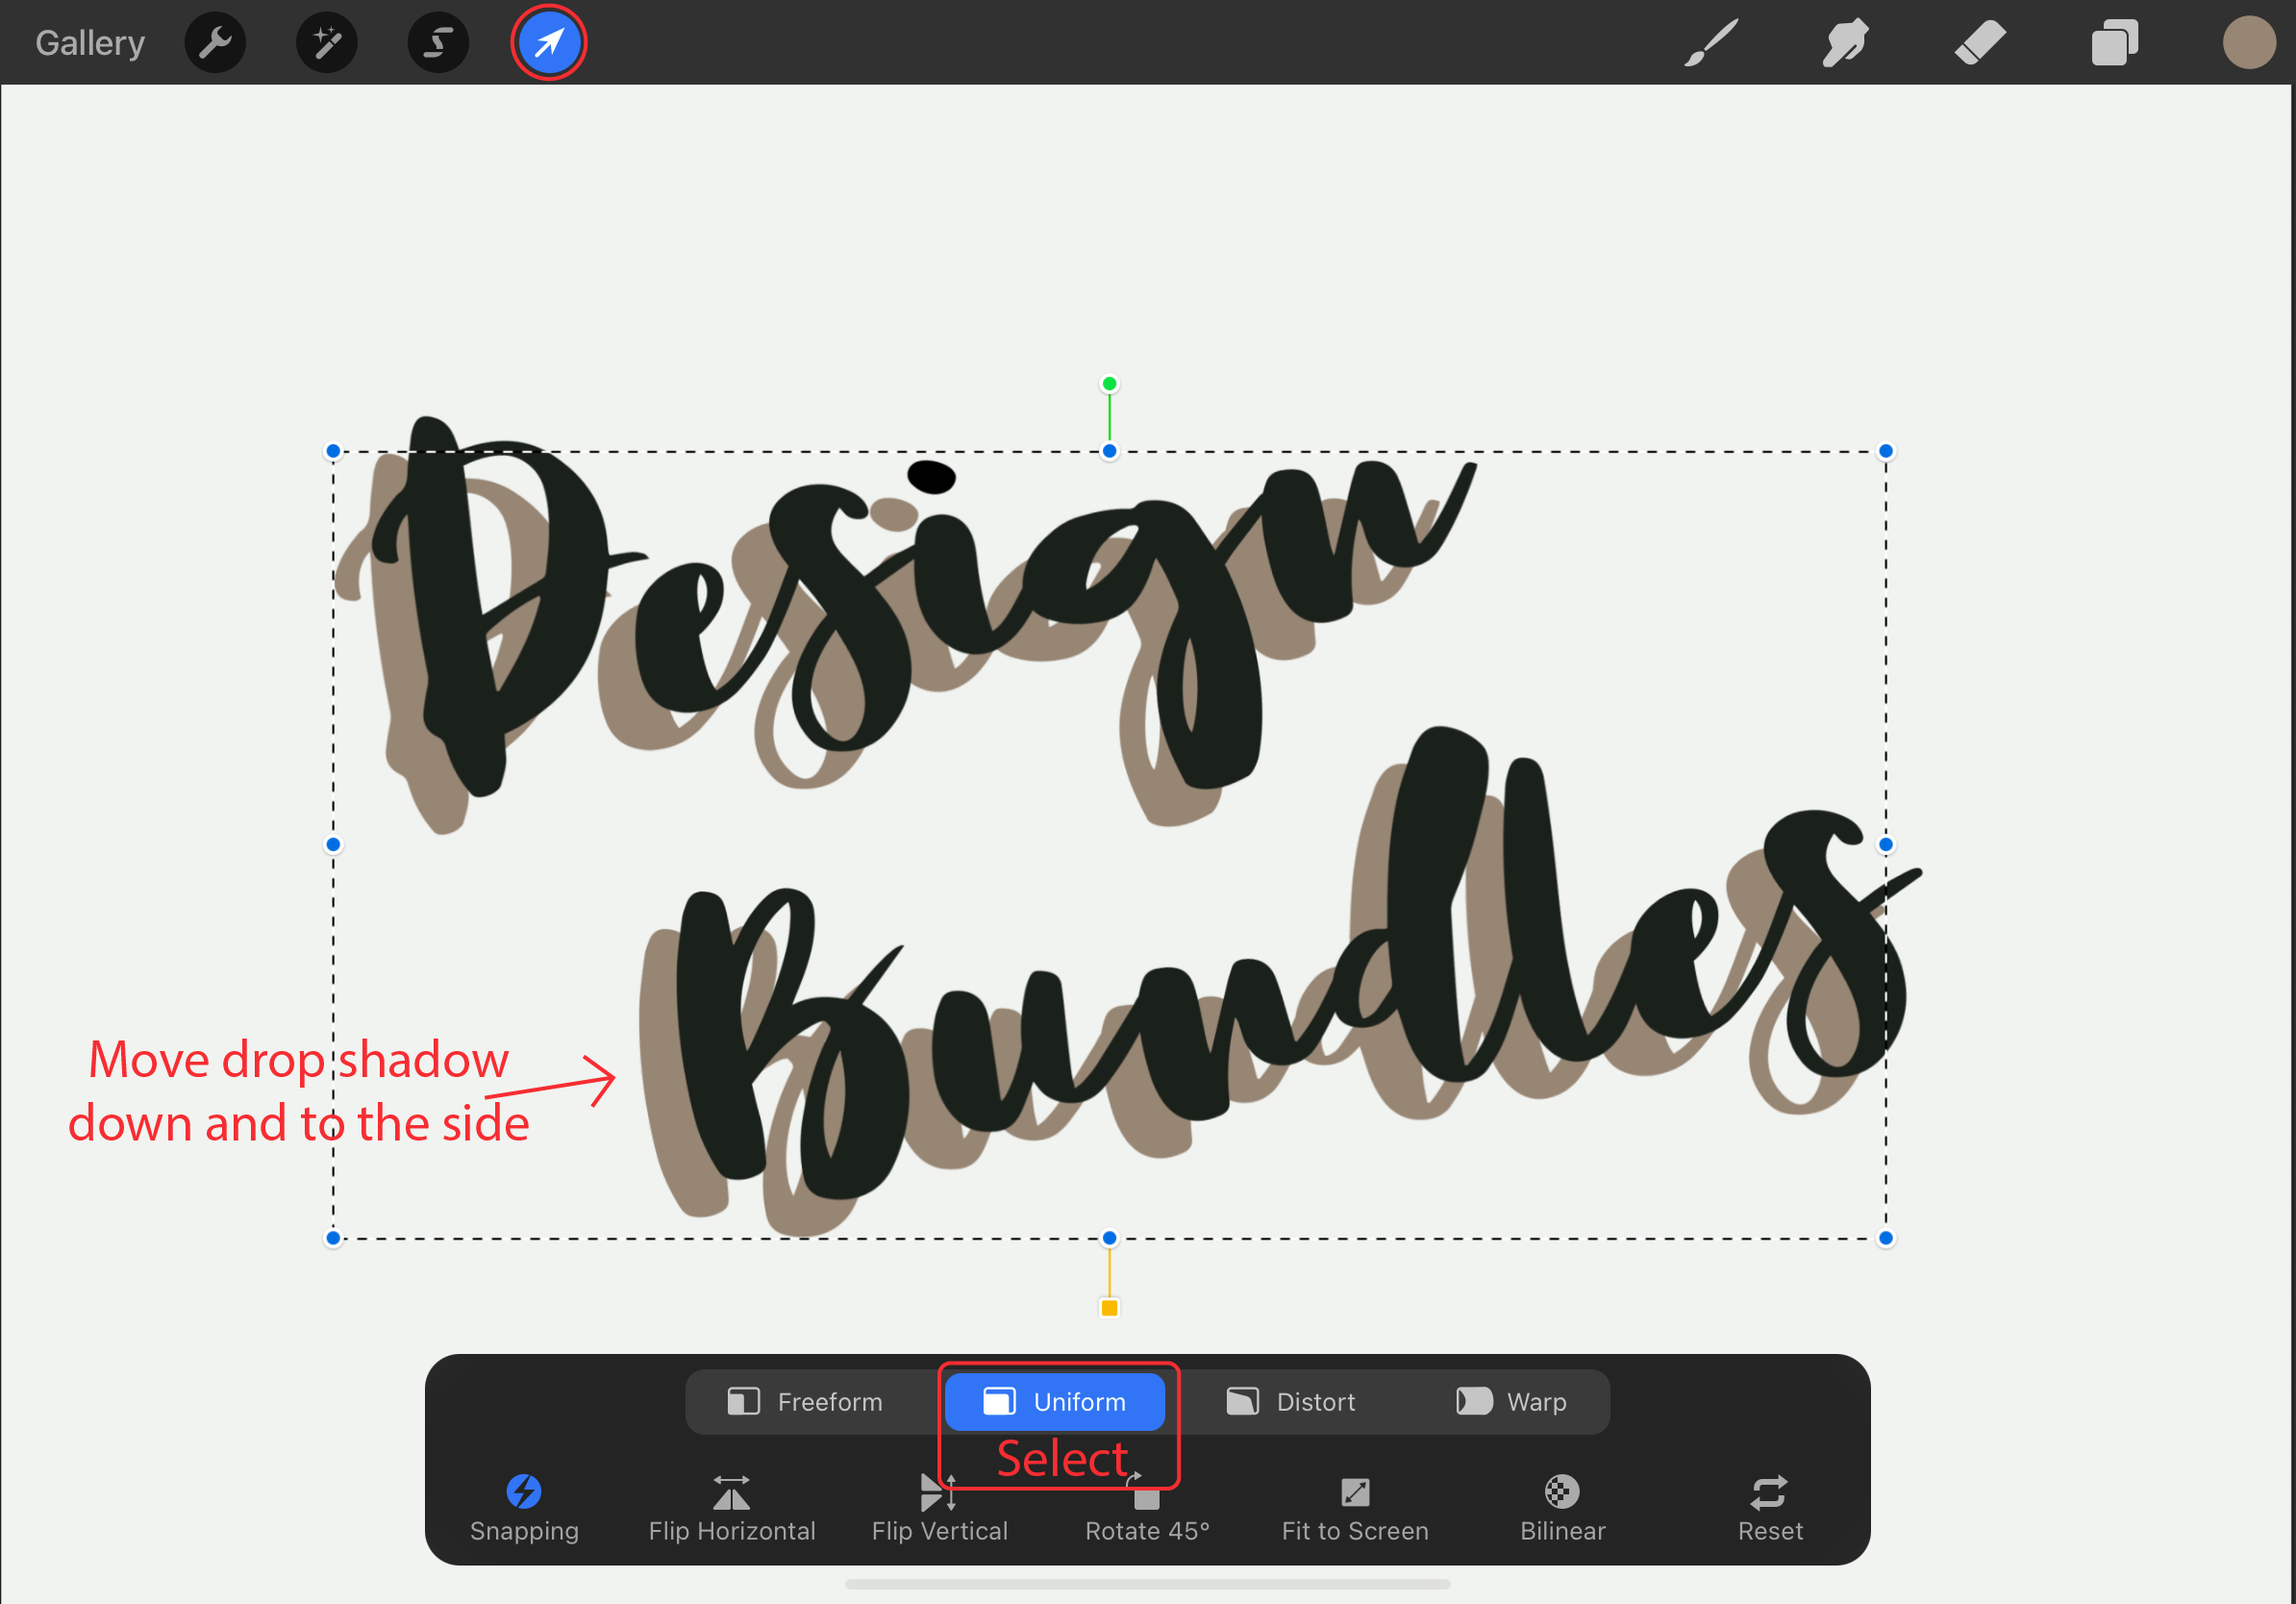
Keeping your bottom layer selected, tap on the “transformation” icon (Mouse-pointer Icon) on the Toolbar. From the options at the bottom, select “Uniform” to keep the ratio of your lettering. Move your lettering down and to the side, enough so that it isn’t hidden behind your top layer. Deselect the Transformation icon when done.
Step 4 - Fill the Drop Shadow
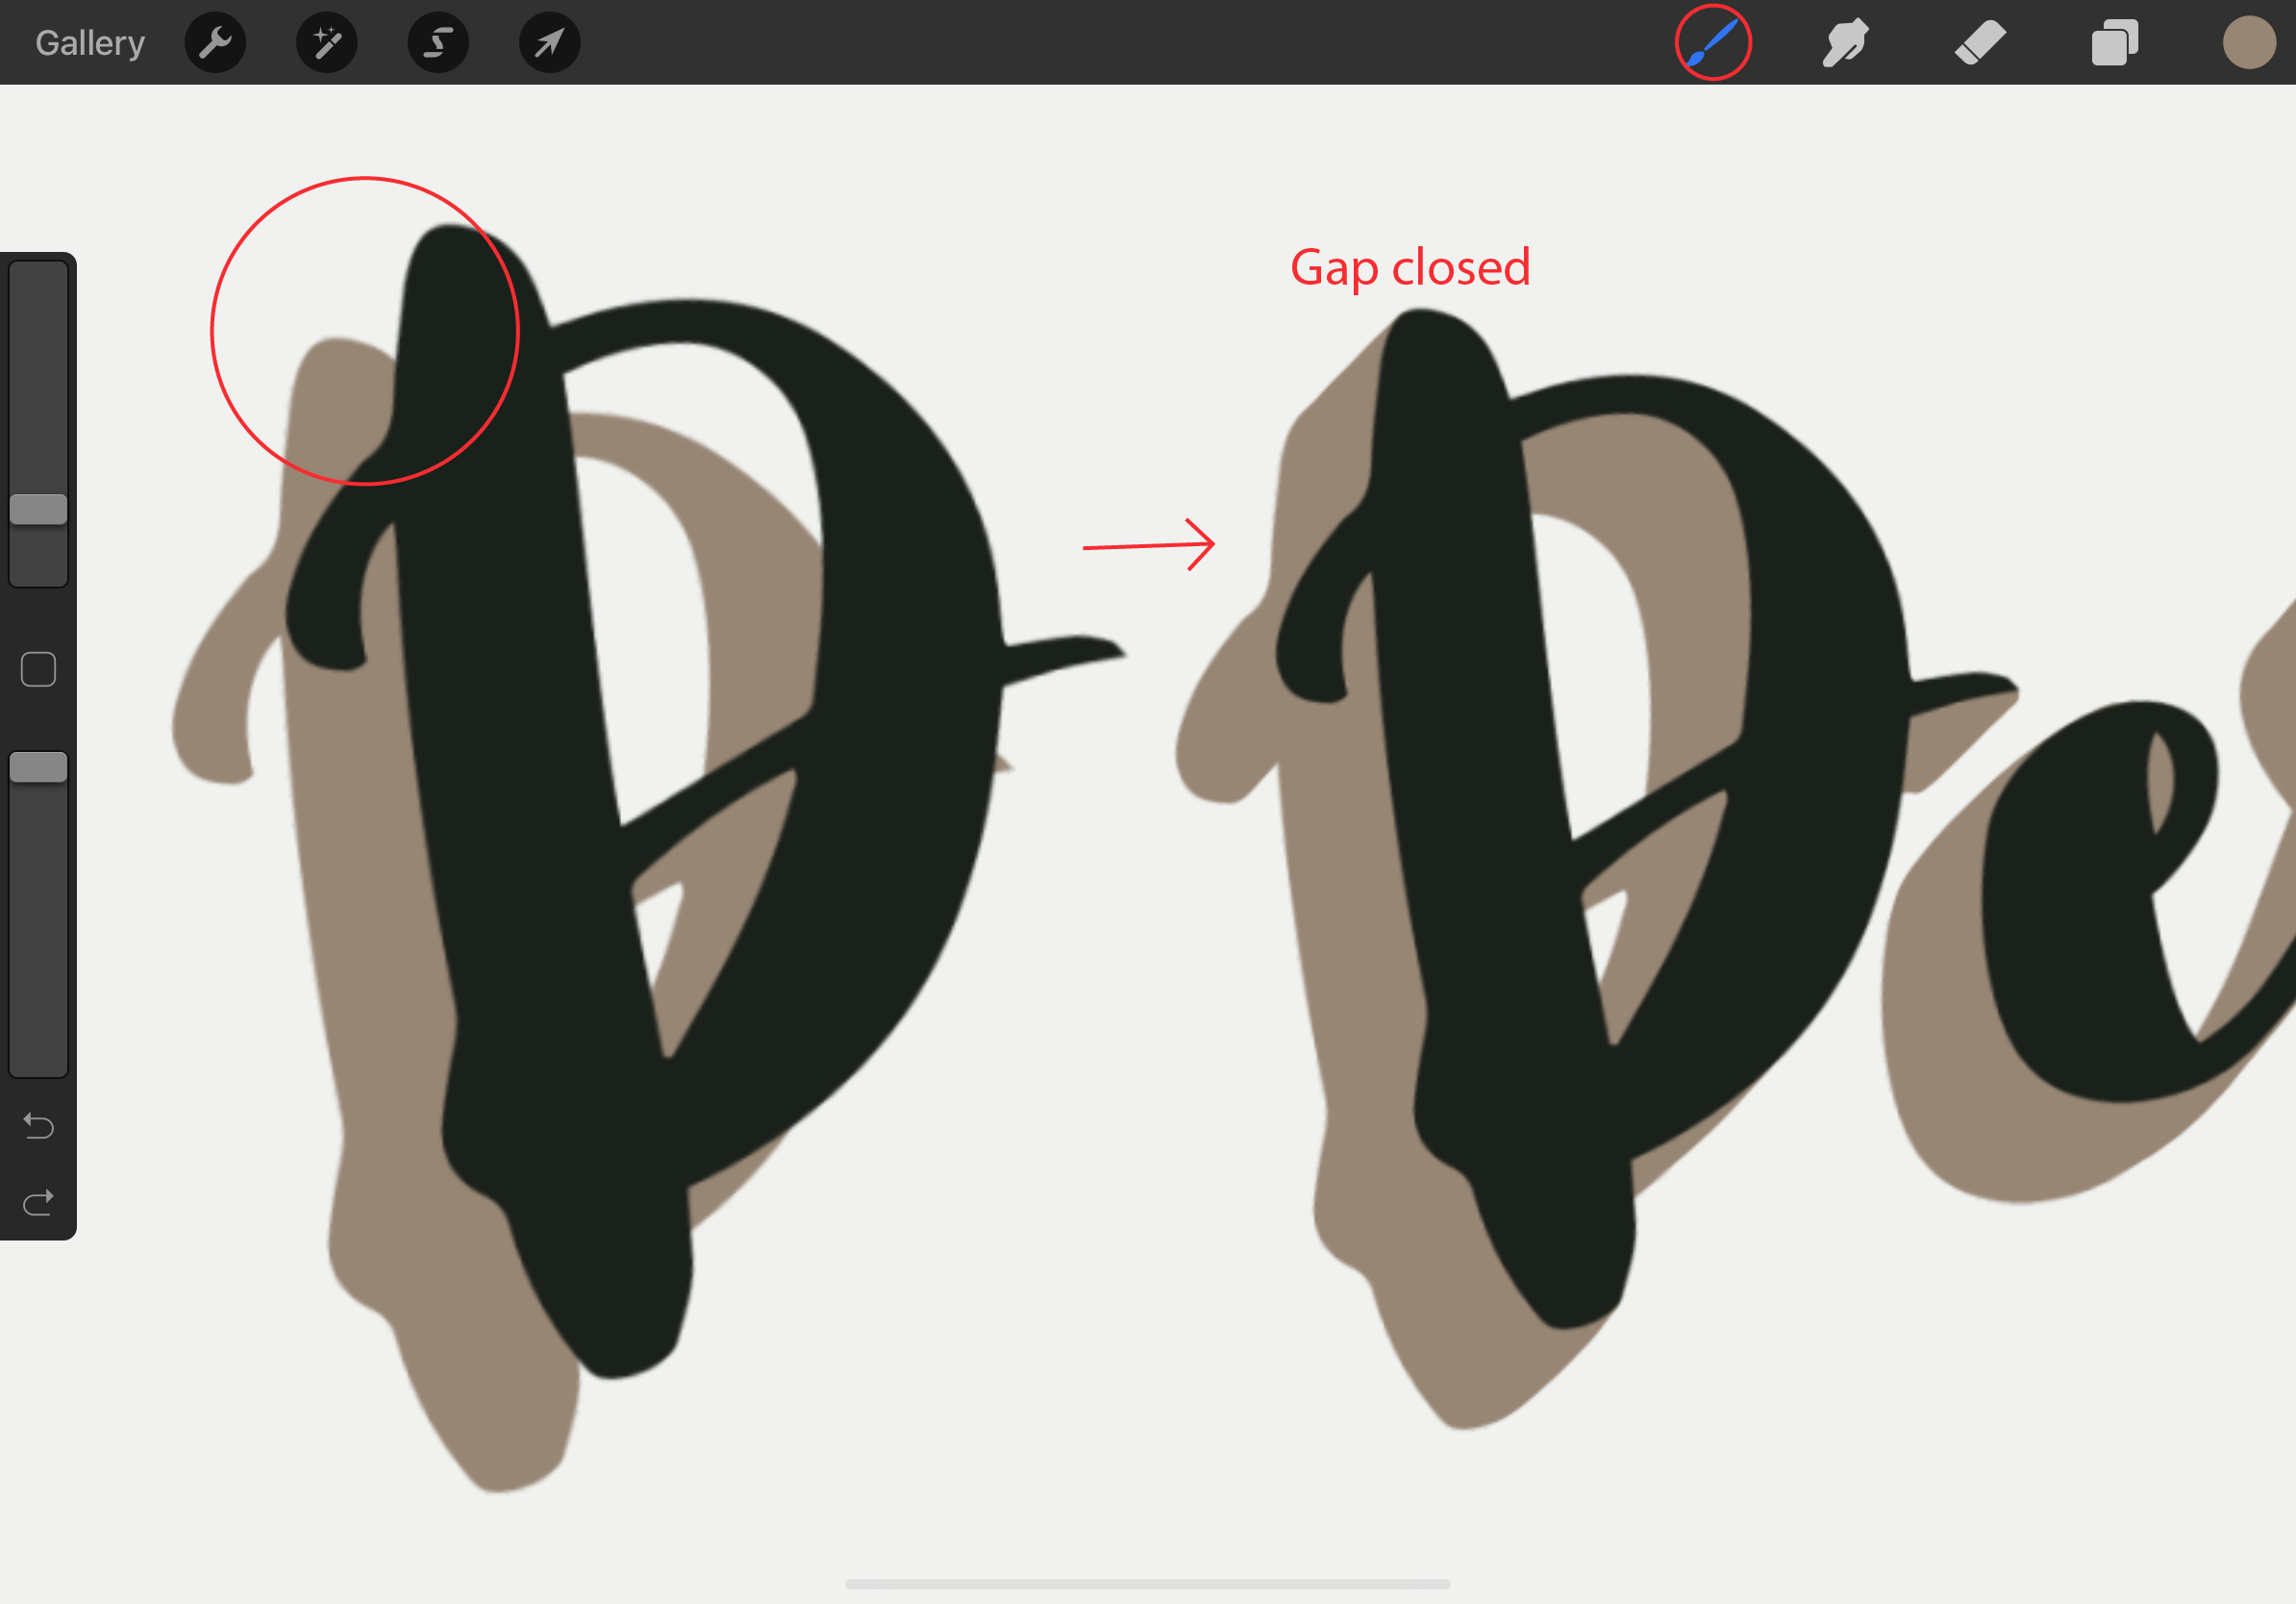
When you have spaced your drop shadow layer you will notice gaps between them. We need to go to the bottom layer and fill in the gaps. Making it look like a seamless extension. I used the “Monoline” brush provided by Procreate to fill in the gaps and making sure I was mindful of the direction of my drop shadow.
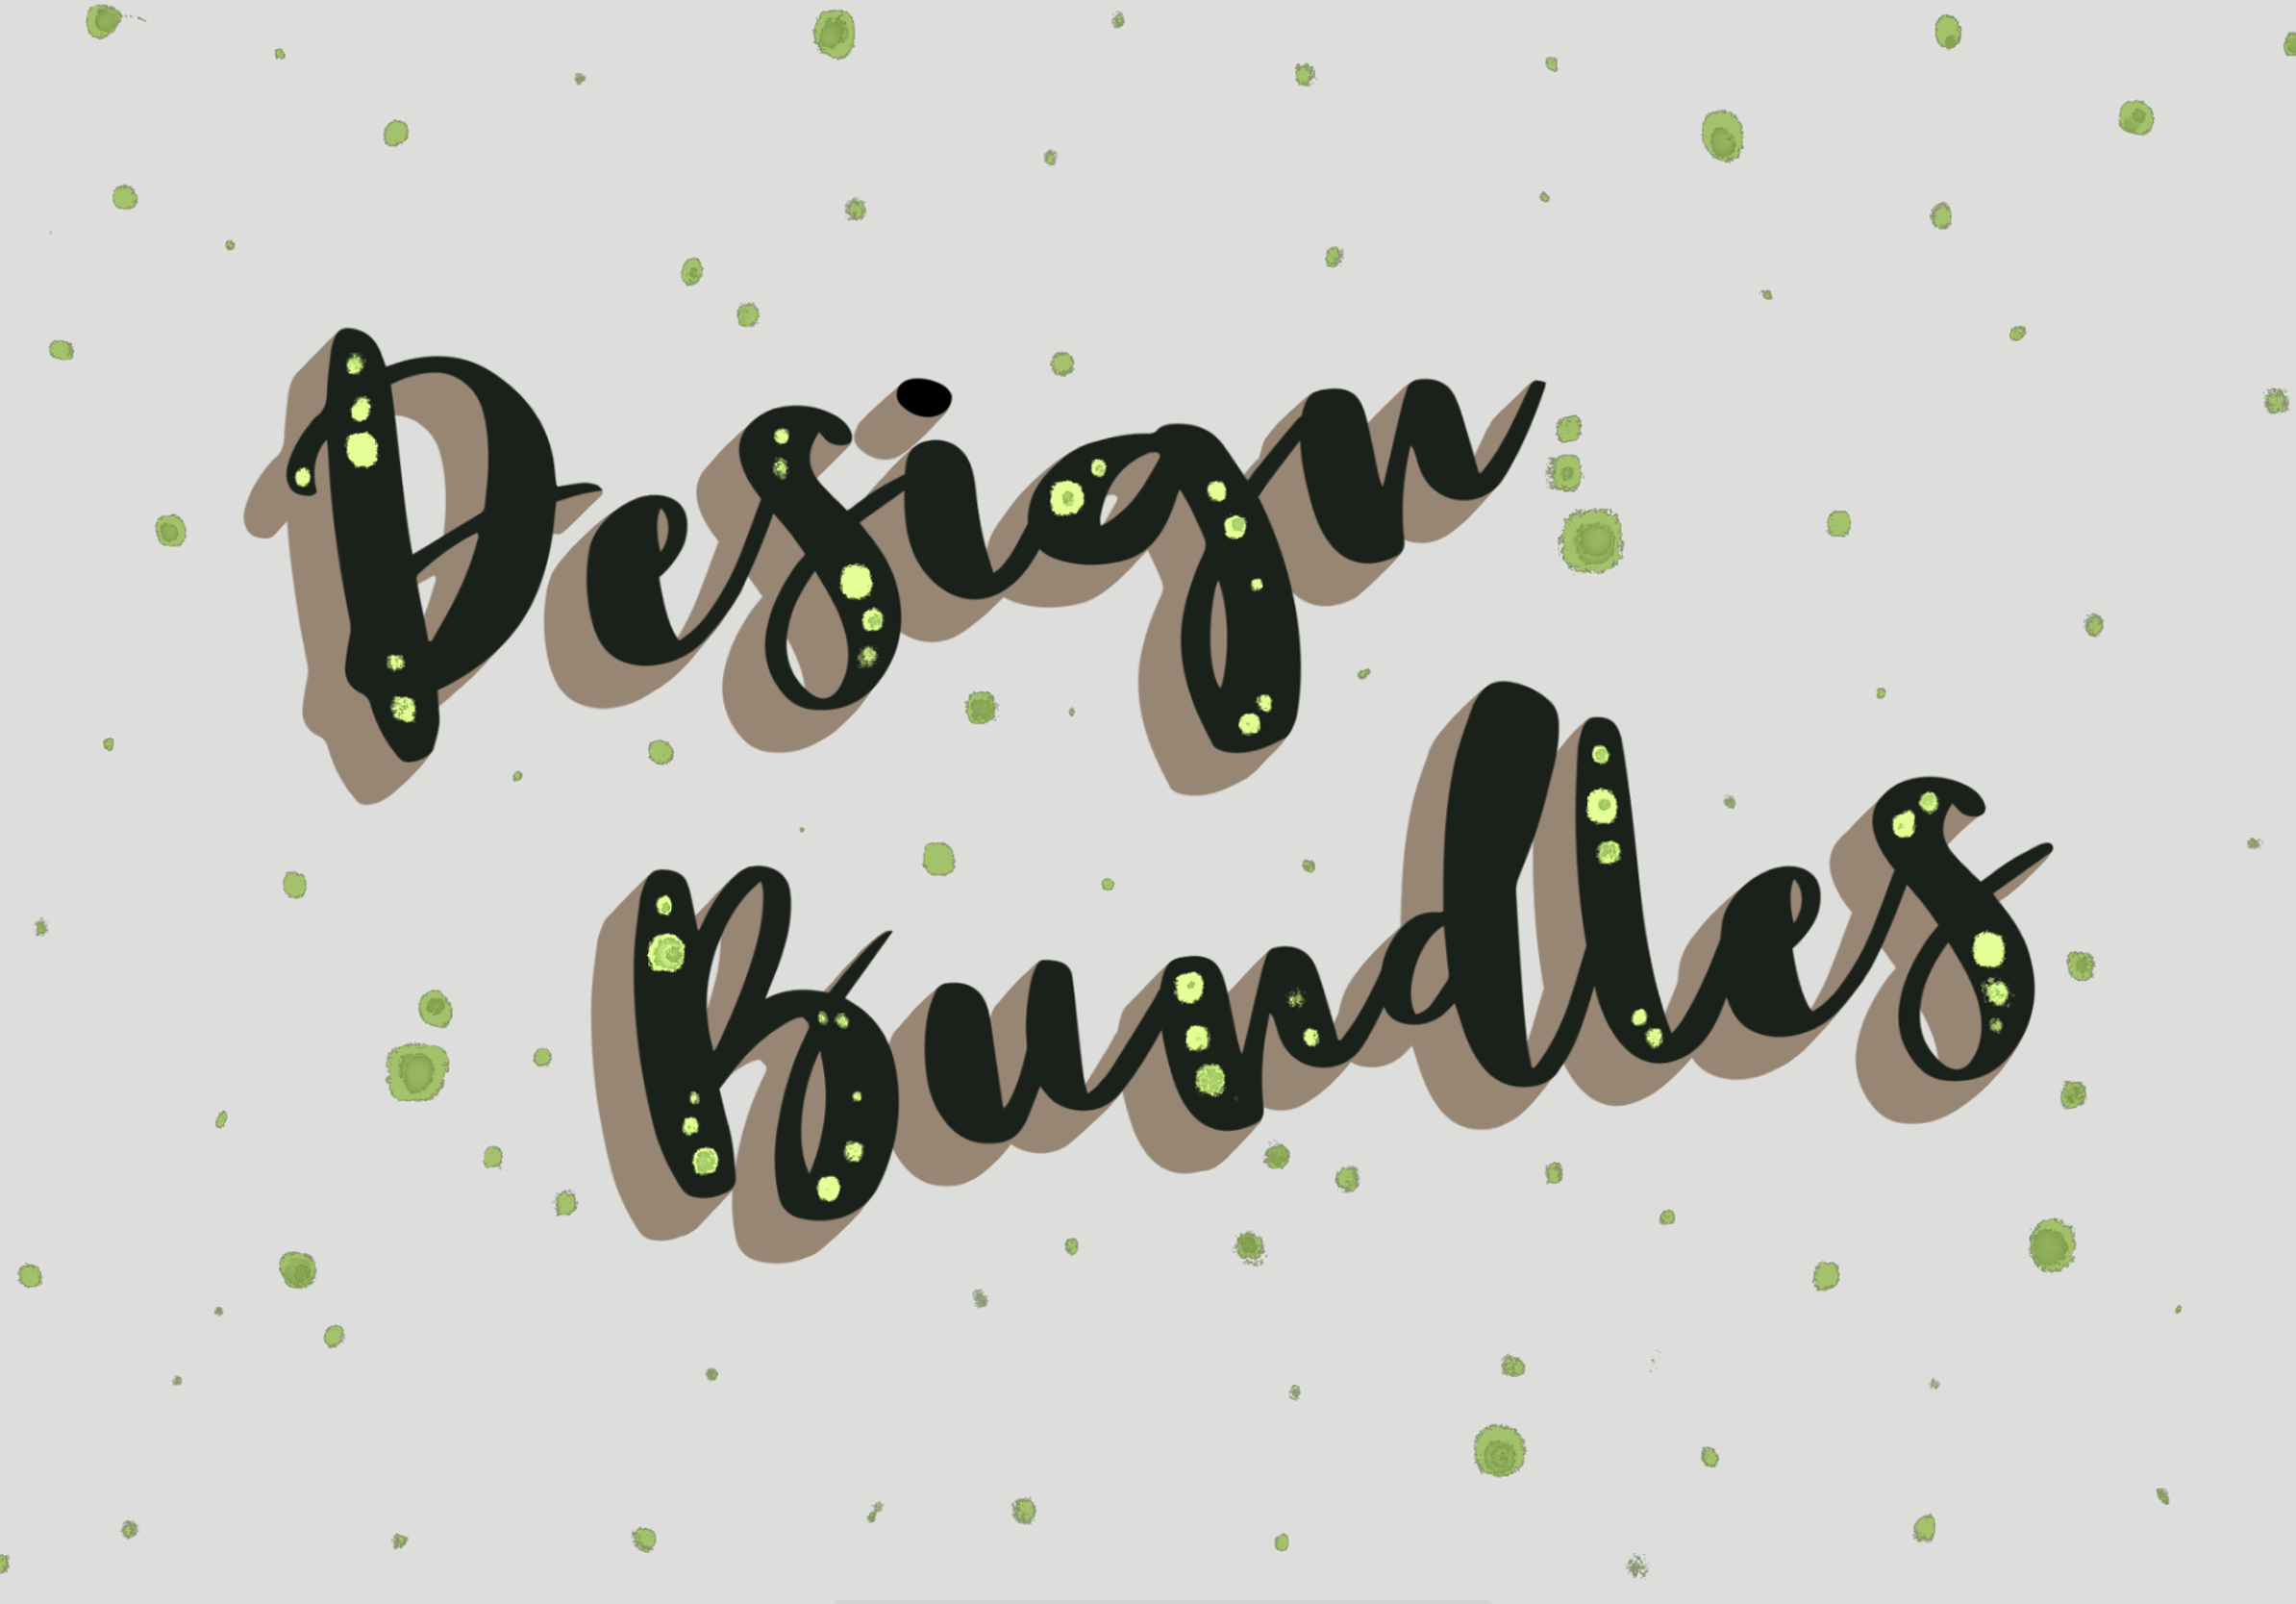
We are done, you can leave your lettering just as is or add finishing touches. I wanted to add some green detailing to finish off my drop shadow lettering.
If you liked this tutorial, make sure to check out our other lettering tutorials such as creating ribbon lettering, and making watercolor lettering in Procreate.
6 Related Procreate Tutorials
Long shadows are popular in logos and they are easy to make in Inkscape. In this tutorial, we will use the font Lagoon font.Step 1 - Draw a SquareUse the Create Rectangles and Squares tool to draw a square.Step 2 - Type out your word or phraseUse the Create and ...
Sublimation designs have become extremely popular with DIYers and crafters. Having the option to make custom prints for yourself is a great way of expressing your style. In this tutorial, we will show you how you can use Procreate to make your Sublimation designs and send them to your printer ...
You can make your custom Procreate brushes that add unique textures and strokes to your artwork. And the best part of making your brushes is it’s so much fun and enables you to take real-world textures and shapes and make them digital. In this tutorial, we’re going to ...
Do you want a multicolored rainbow brush that you can make from your favorite standard Procreate Brush? In this tutorial, I’ll take you through the steps on how you can turn any brush into a fun rainbow brush. We are using the Blackburn brush that comes standard with Procreate ...
Procreate textures unlock endless possibilities when creating artwork. Not only can a texture brush be used for adding texture, but is a great time saver and can add unique patterns and backgrounds. In this tutorial, we are going to create a textured brush for Procreate. If you are short on ...
Procreate stamp brushes are a great tool to have. They can be used to add creative elements like leaves or base models for drawing. The stamp brushes can be customized and new brushes created with ease. In this tutorial we are going to create a stamp brush in Procreate. If ...

 All your Font Needs


