Editable Flip Clock Text in Illustrator
For this tutorial, you will need a couple of images to add to the text and the Free Font “Open Sans”.
1 - In Illustrator, create a “New Document”. Use “Pixels” as “Unit”.

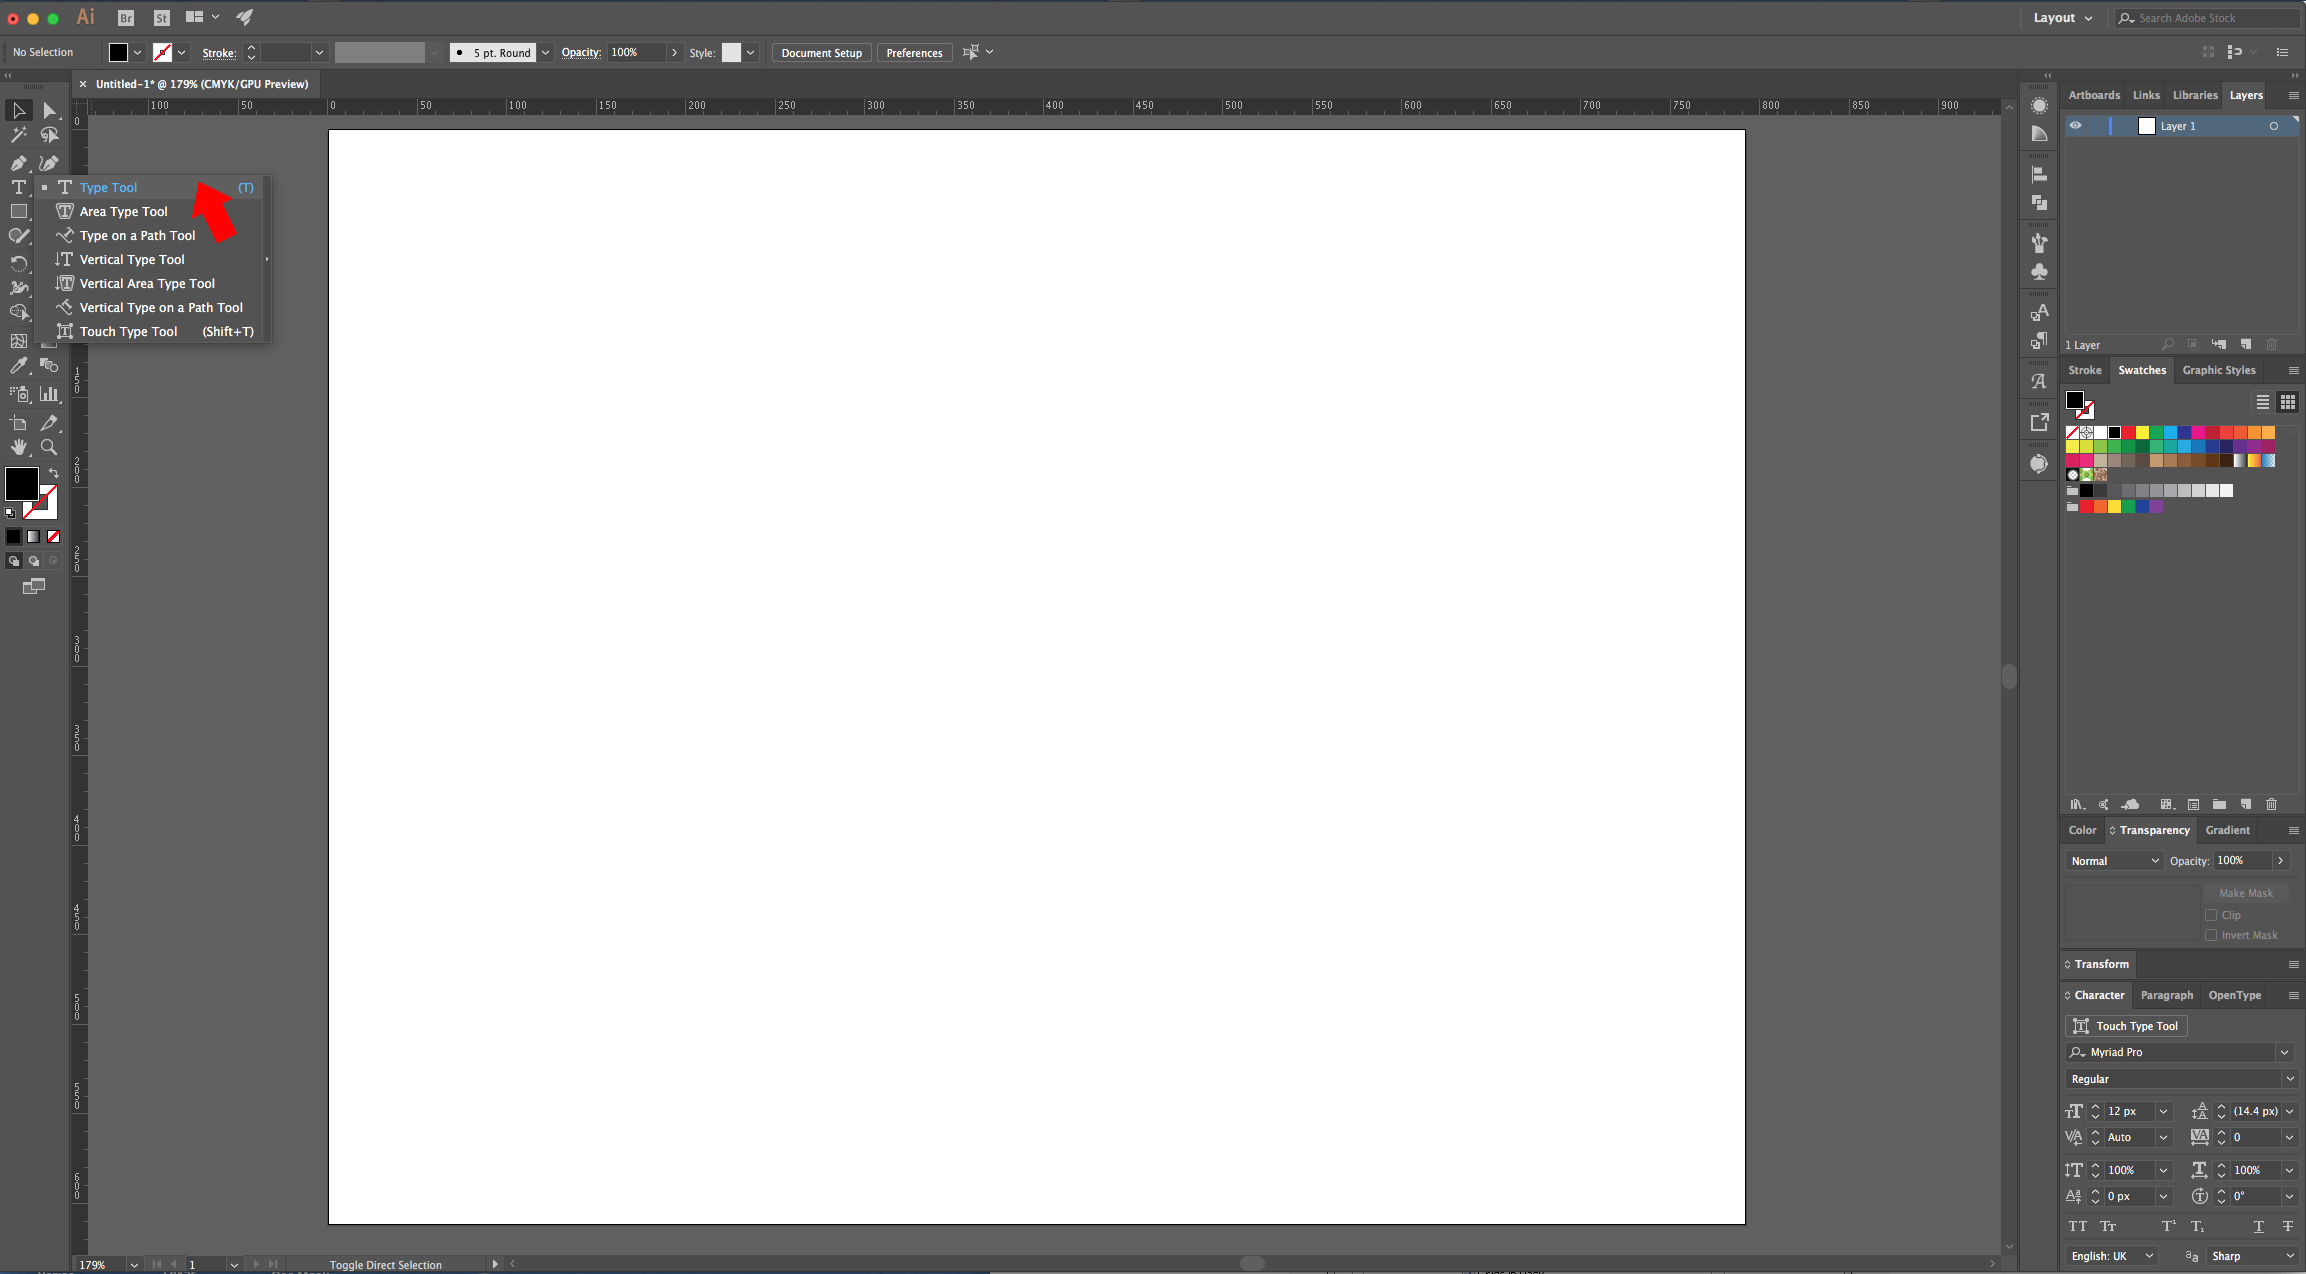
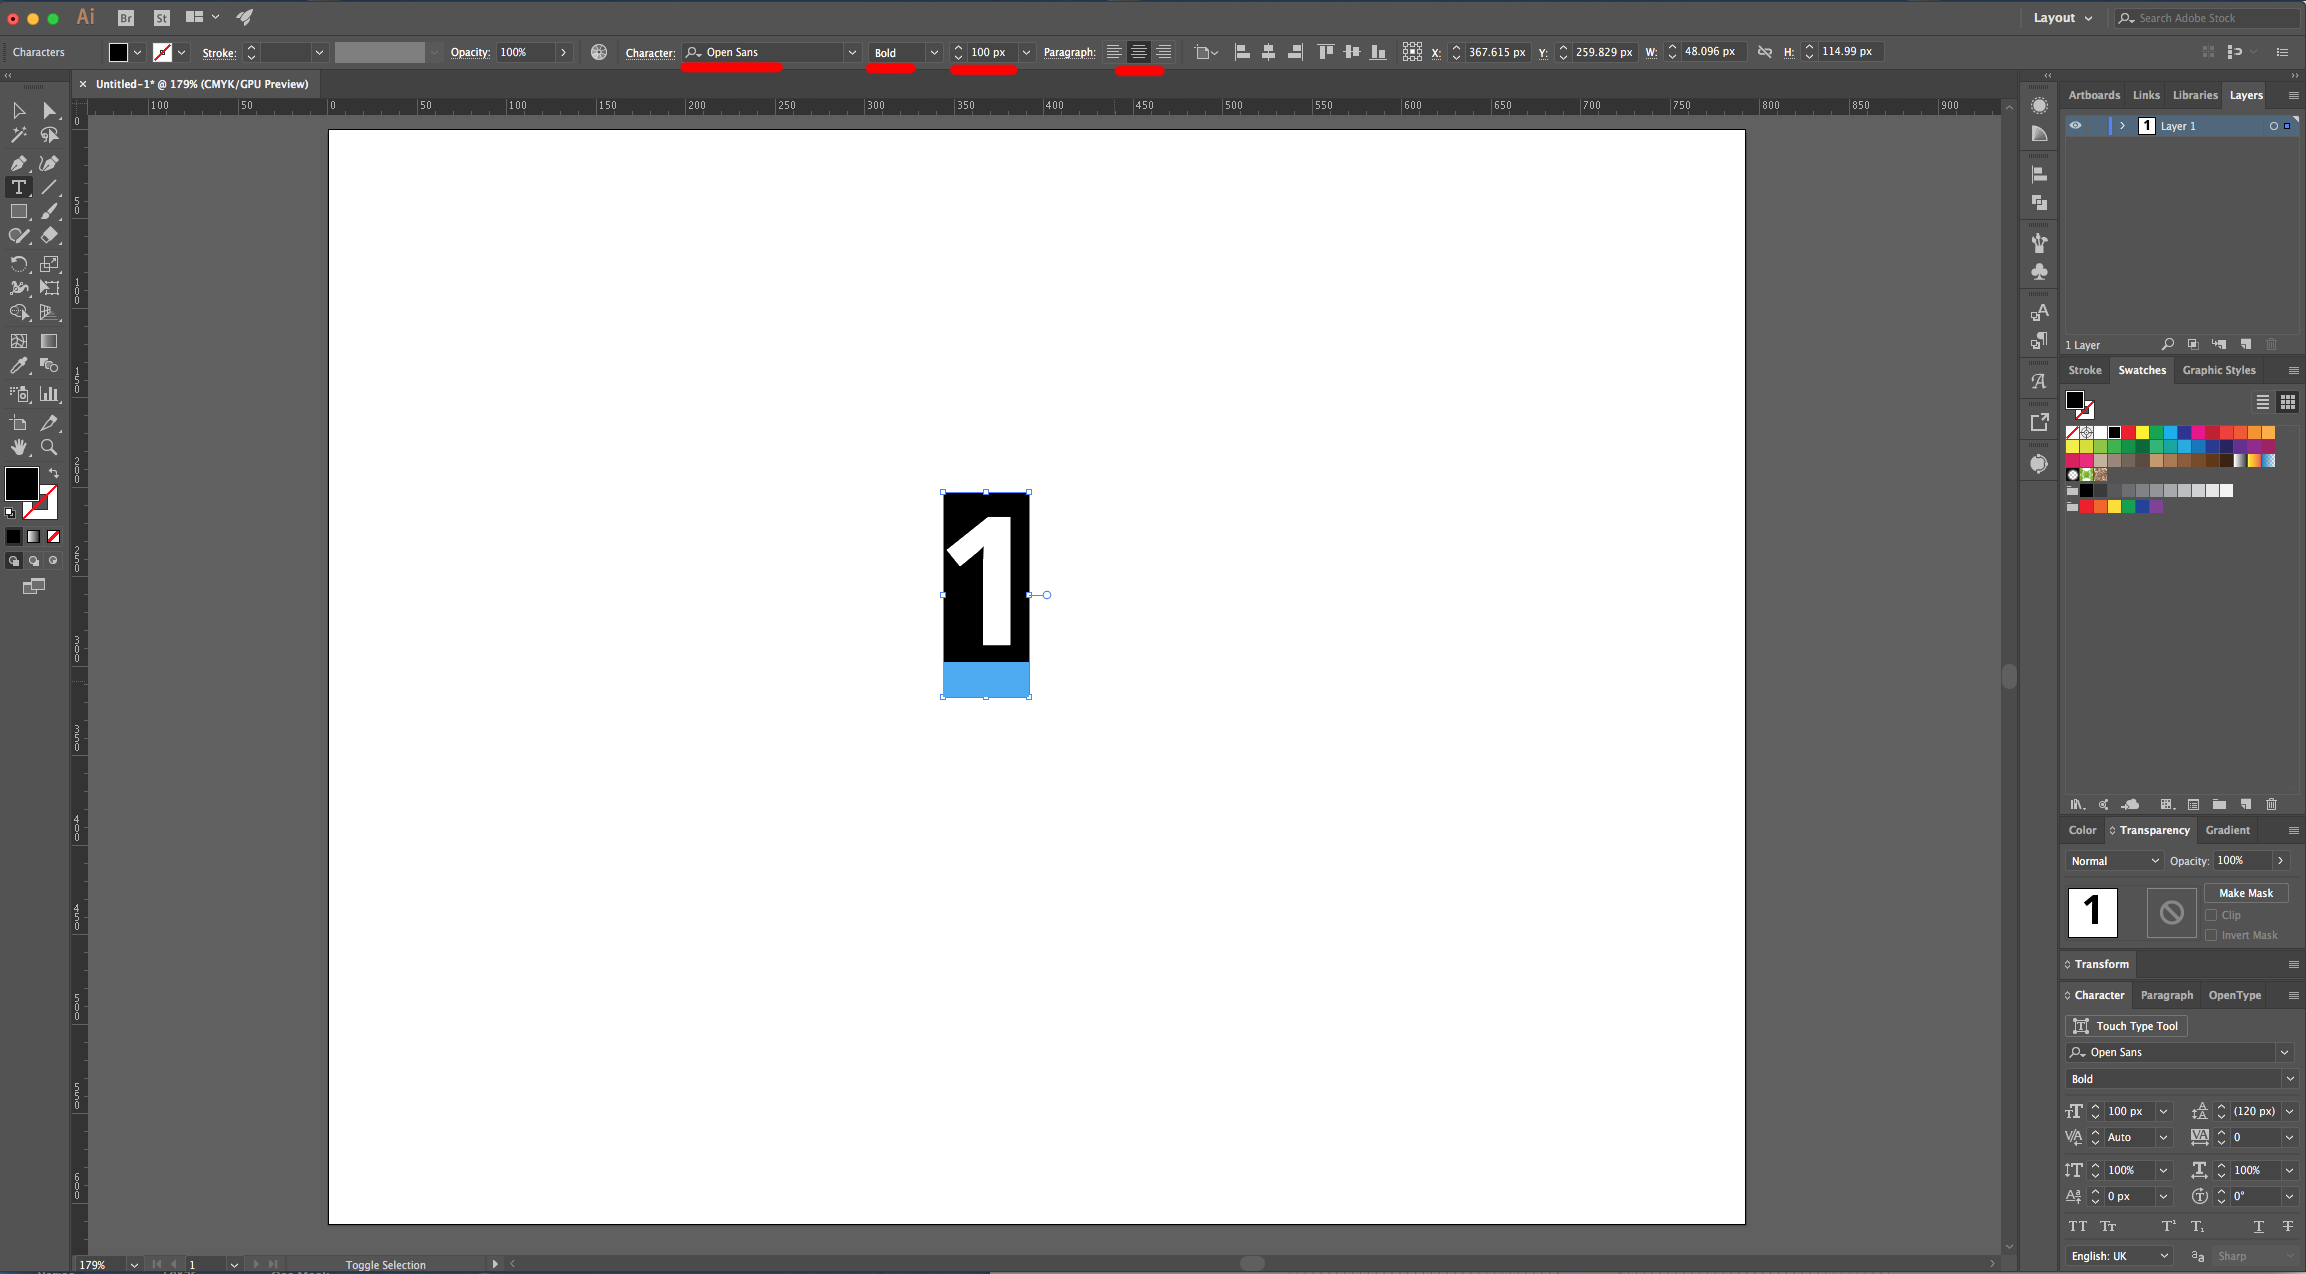
2 - Select the “Type Tool” (T), choose your font (we used “Open Sans Bold”) and type your text.
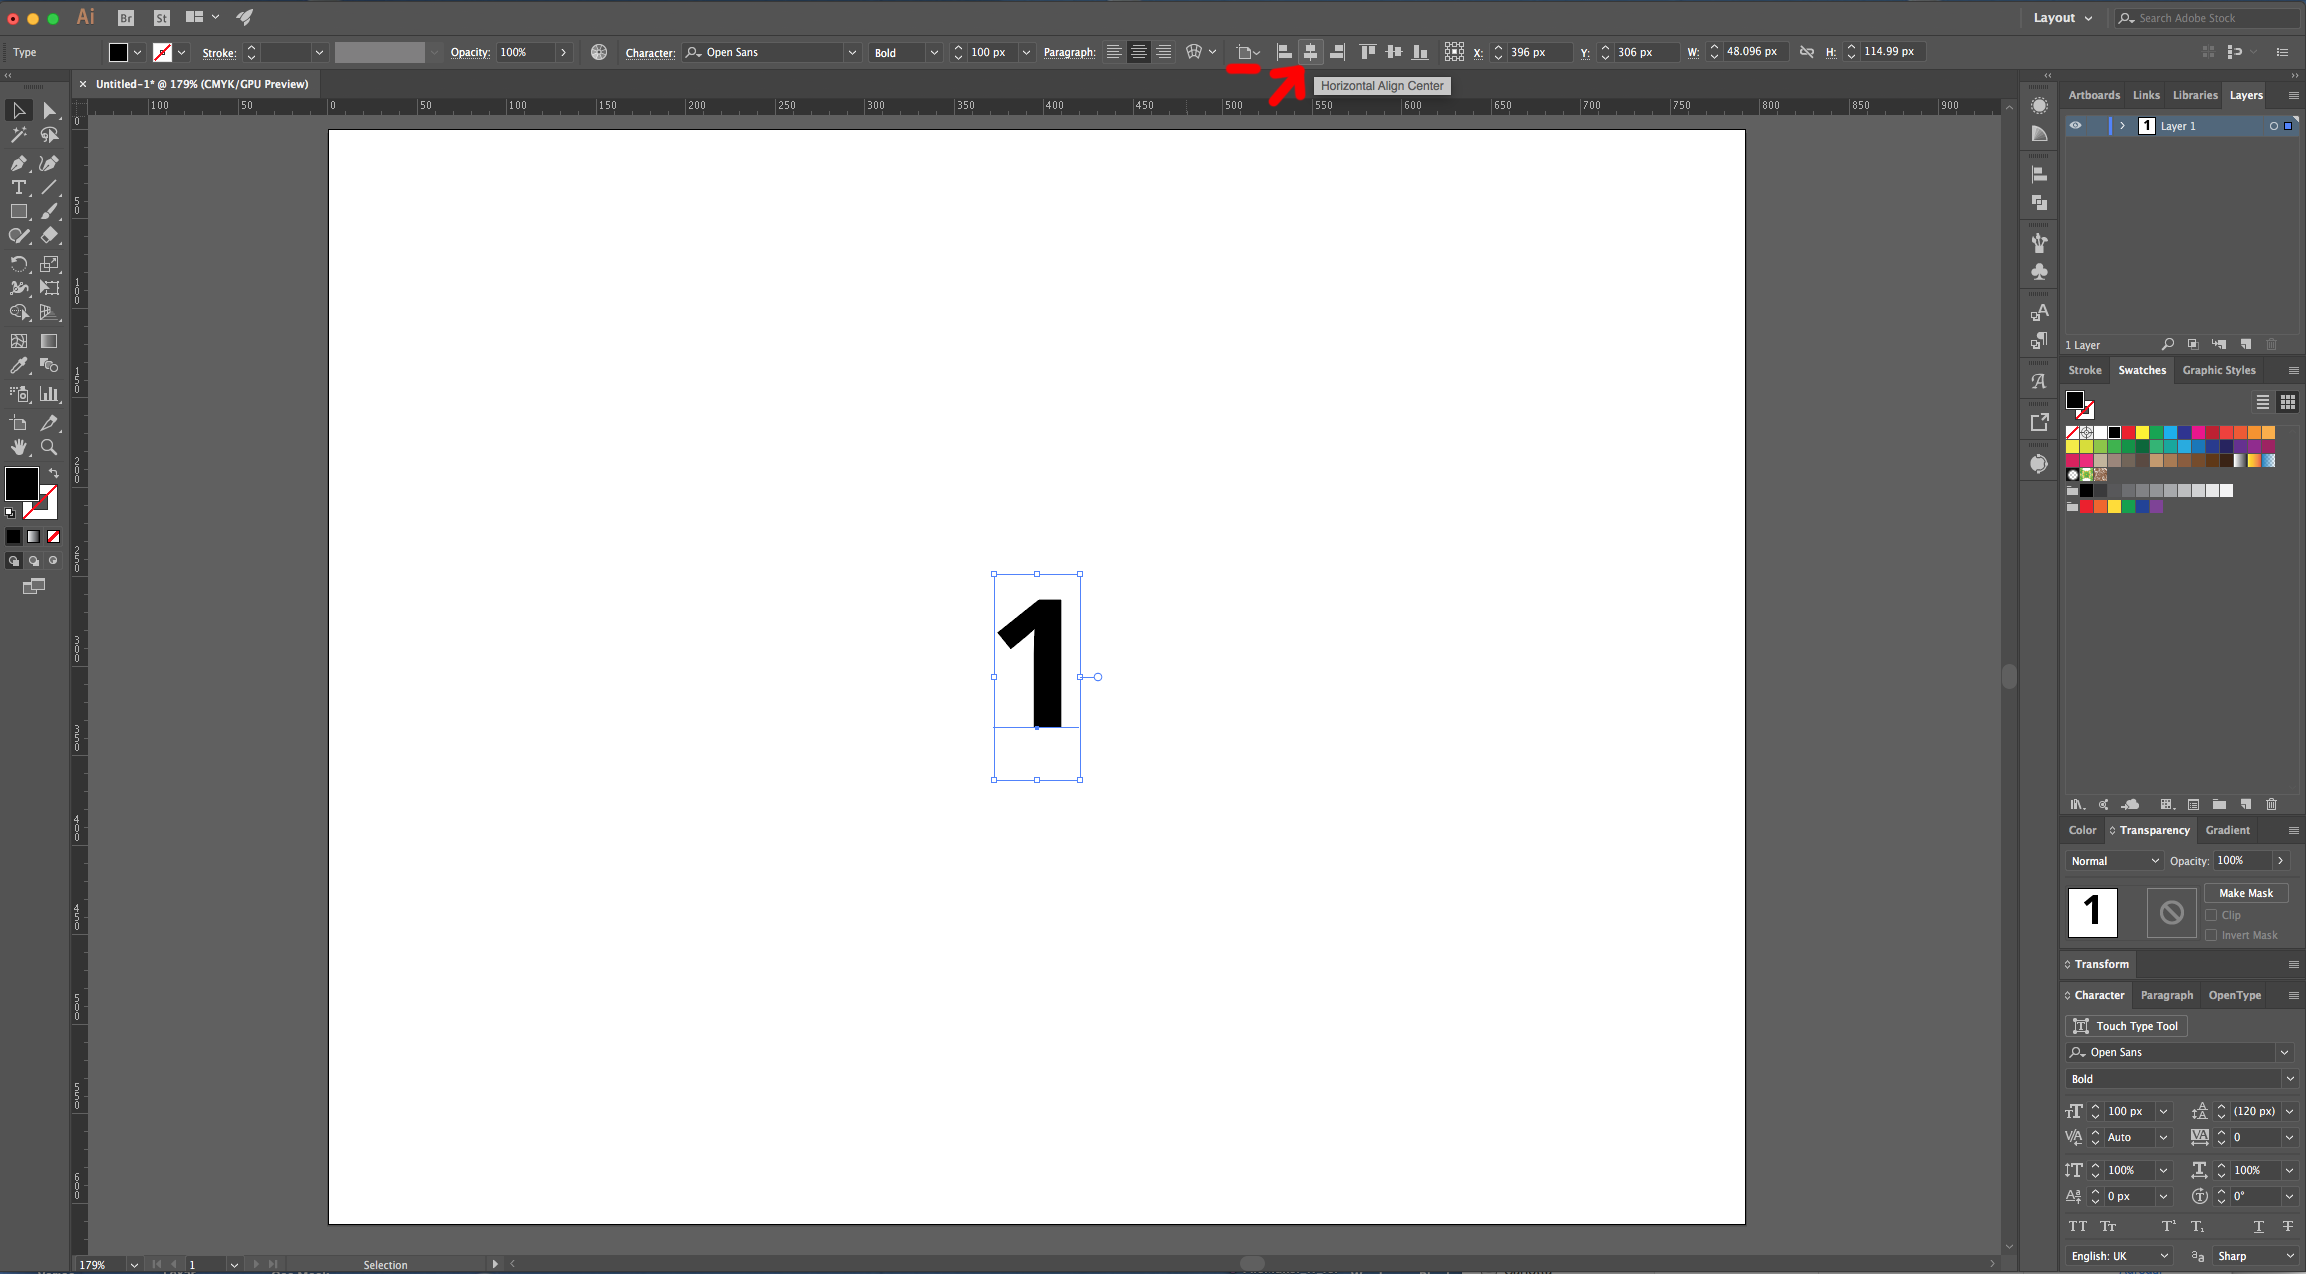
3 - Center it using the “Horizontal and Vertical Align Center” options on your Top Menu and make sure that “Align to Artboard” is selected. Or use the same options in the “Align Panel”.

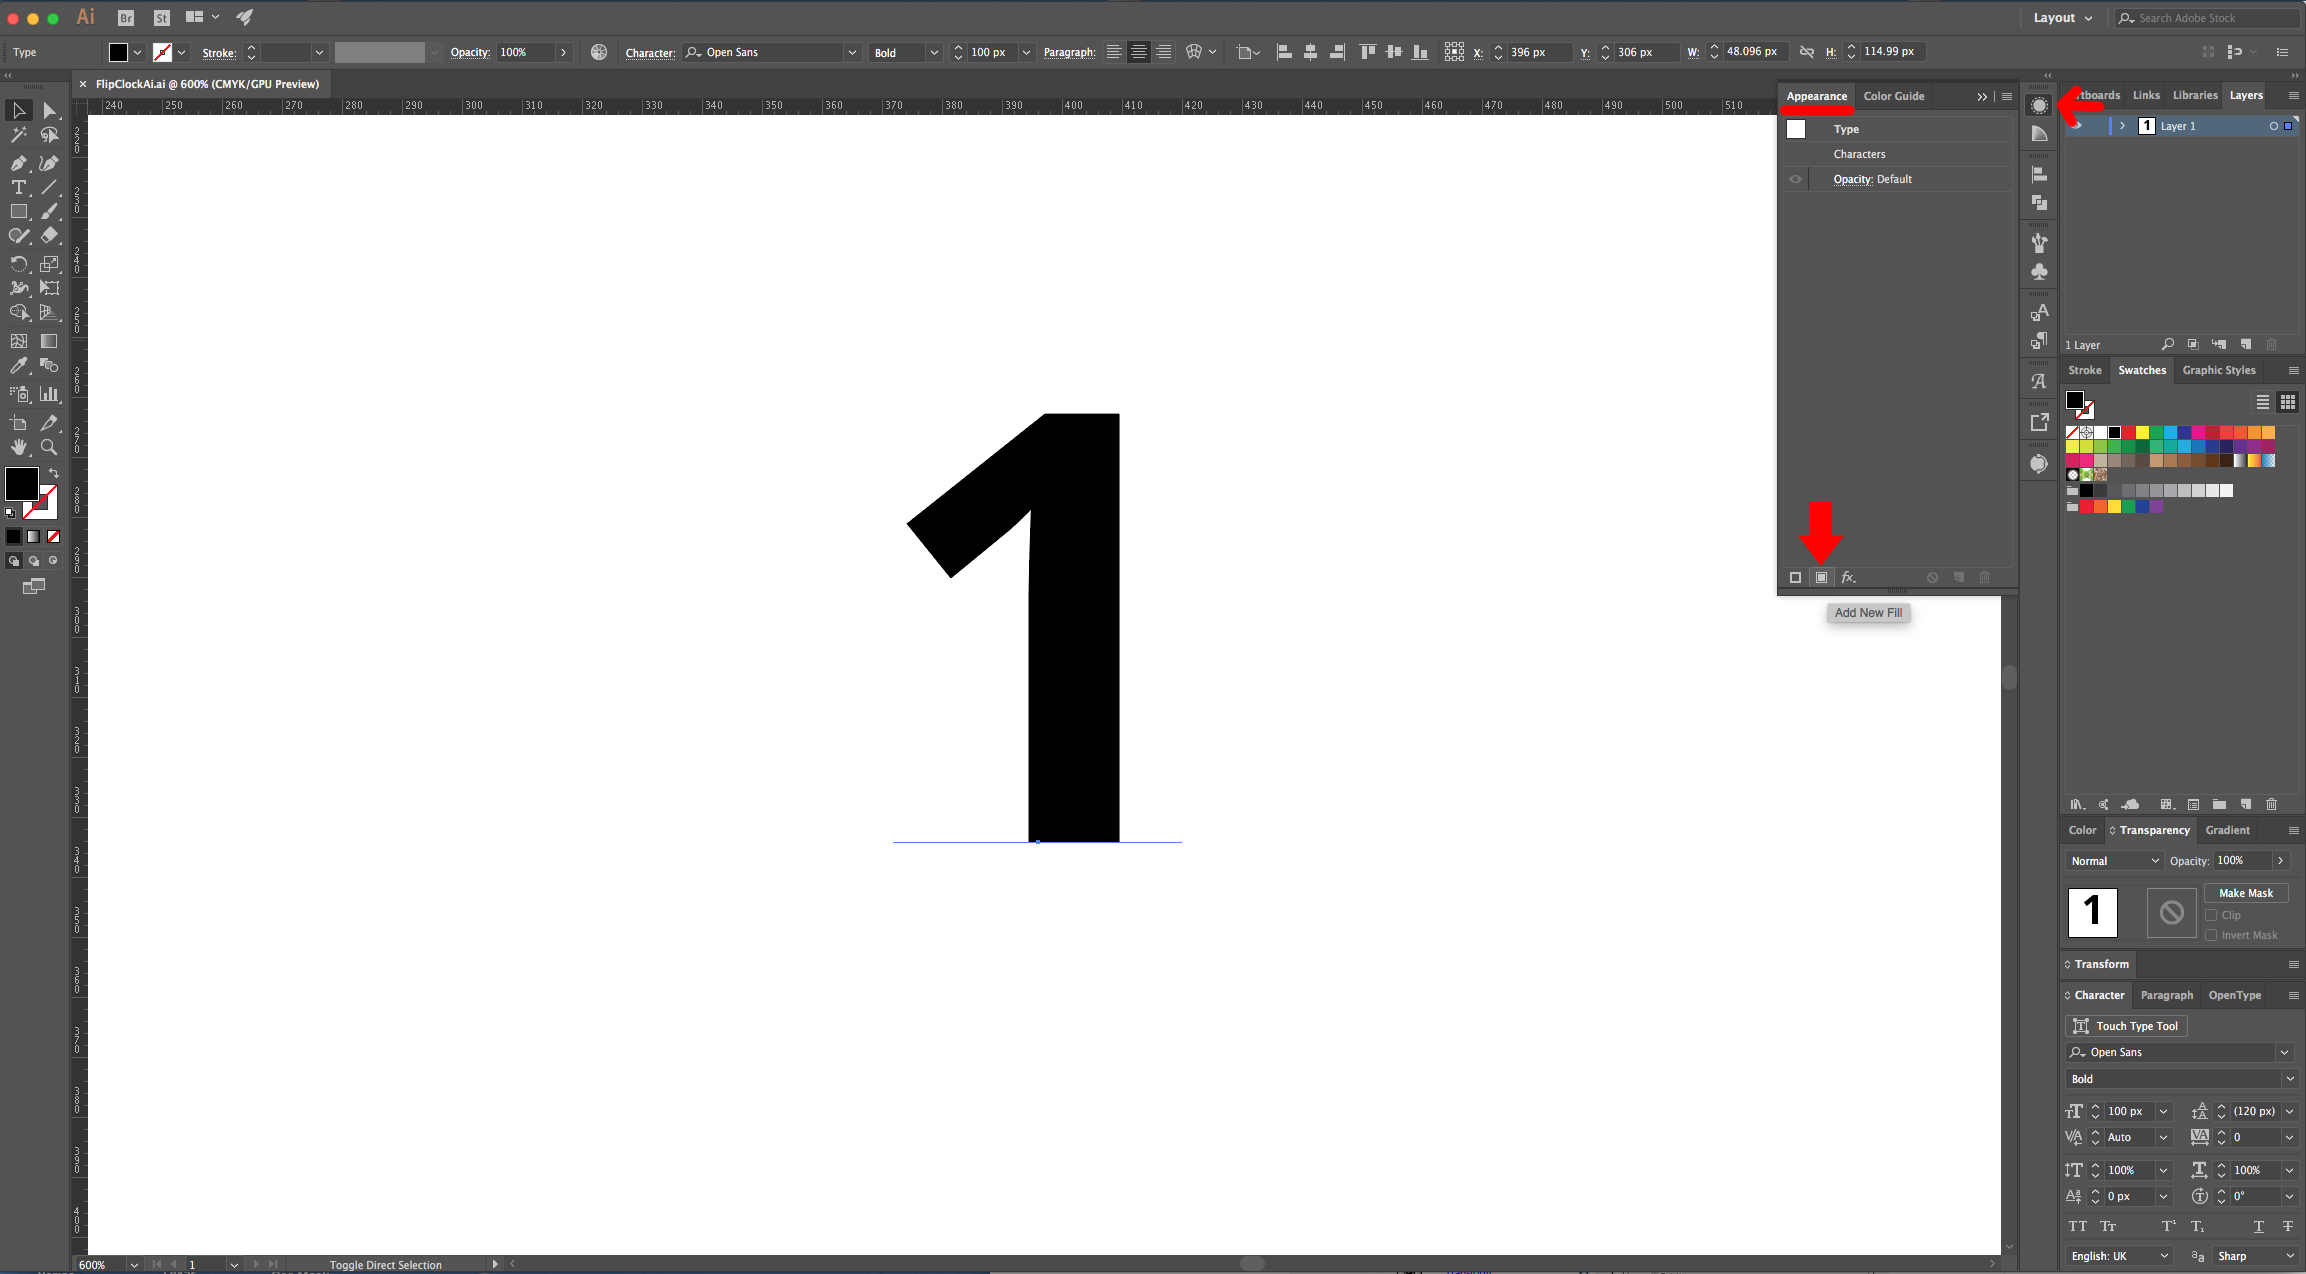
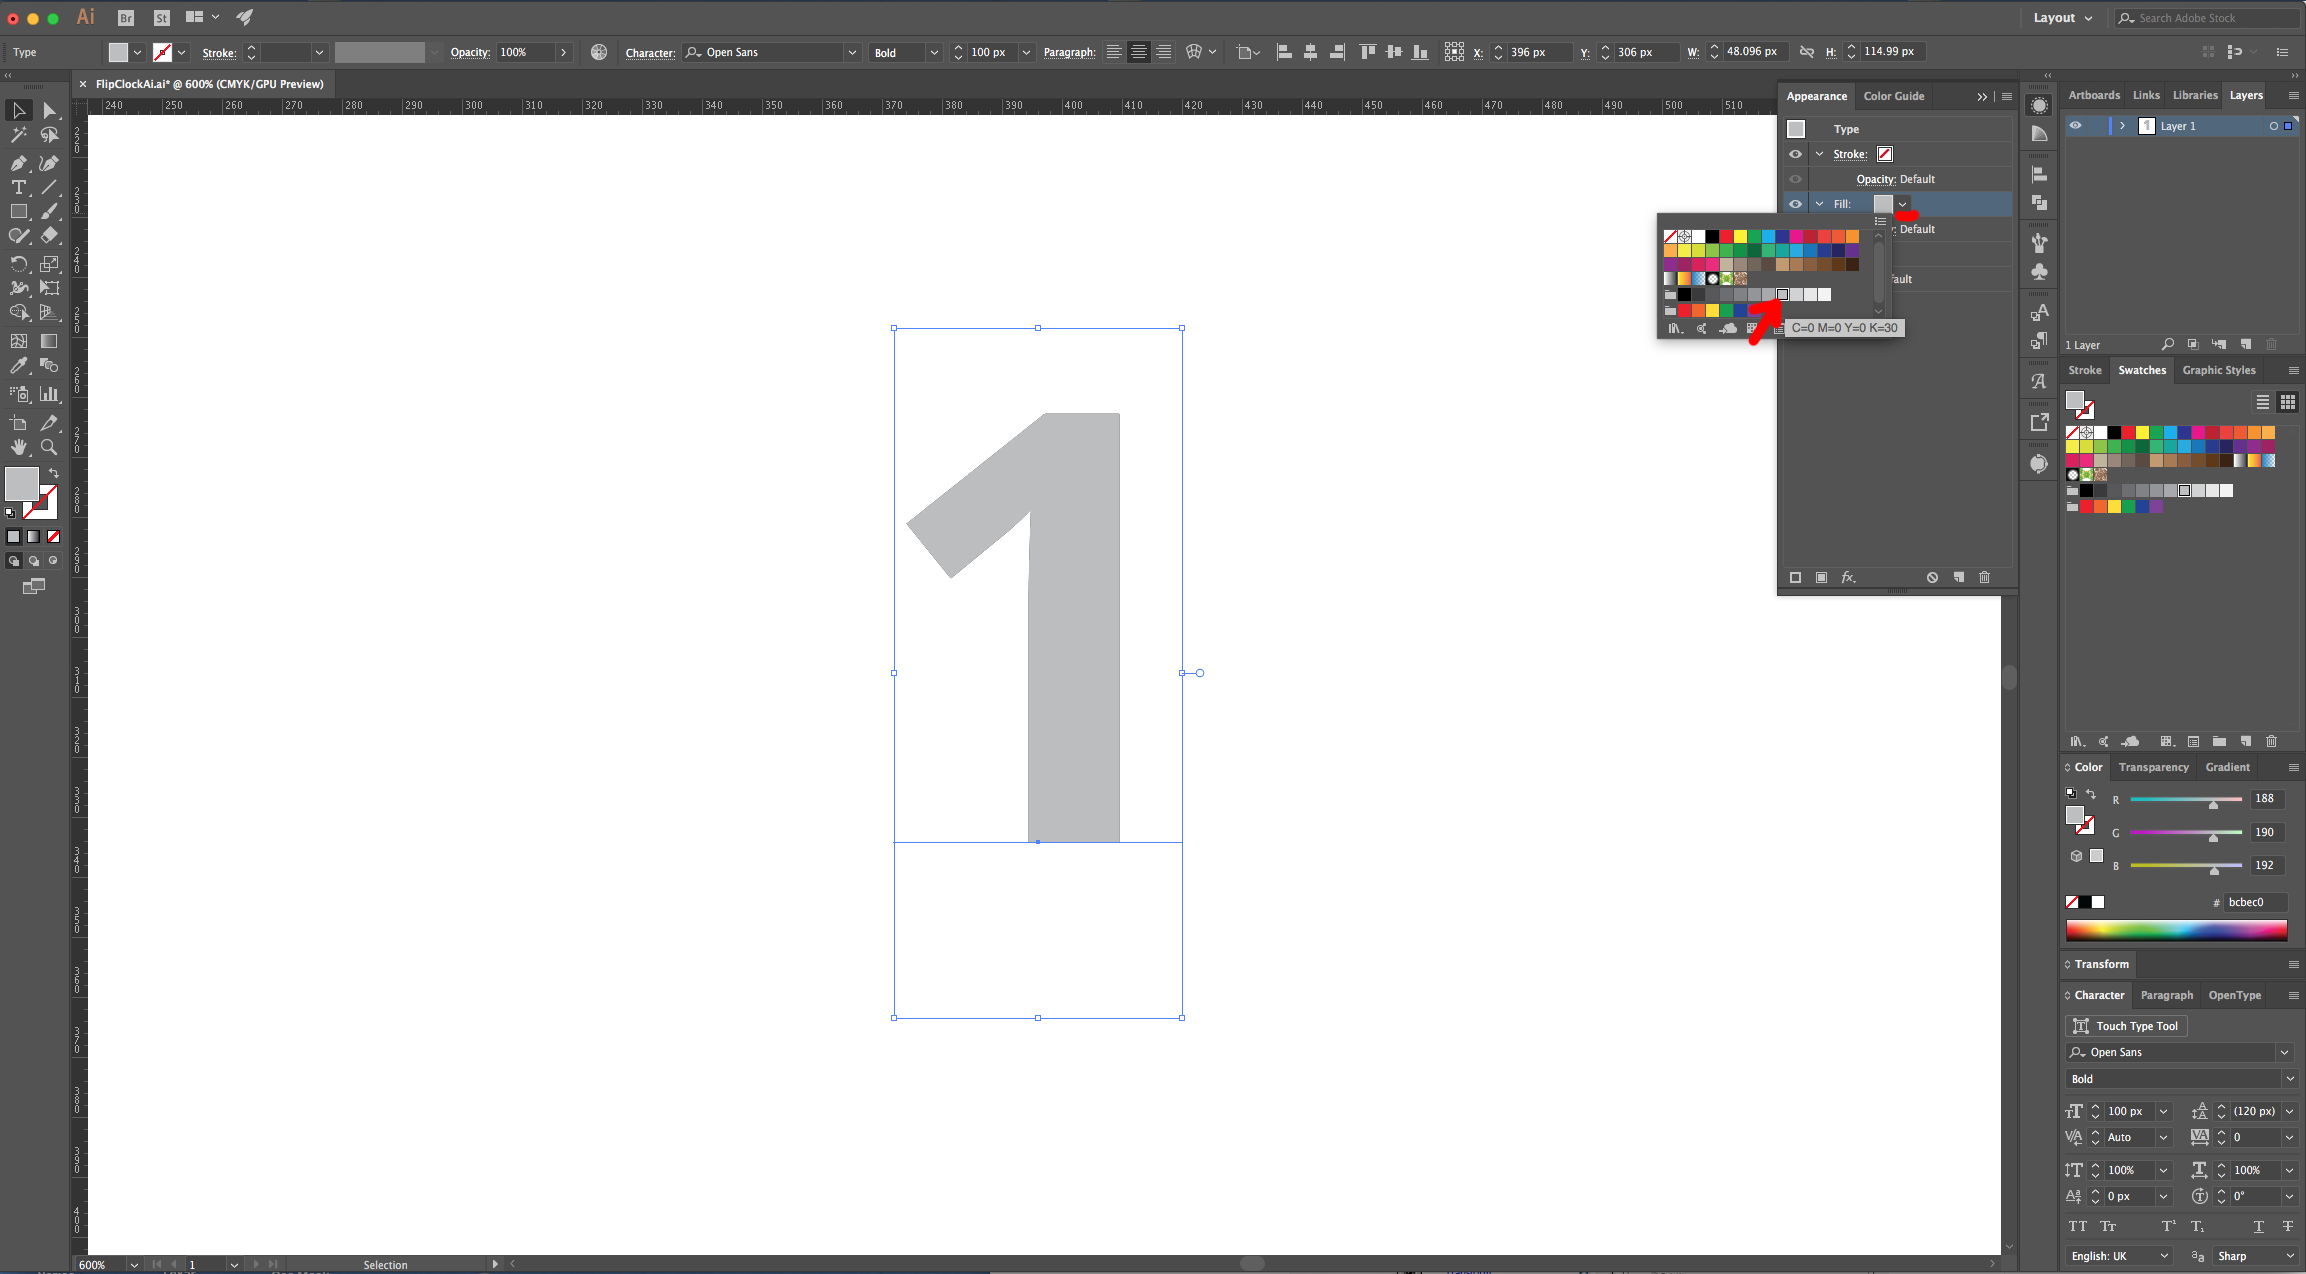
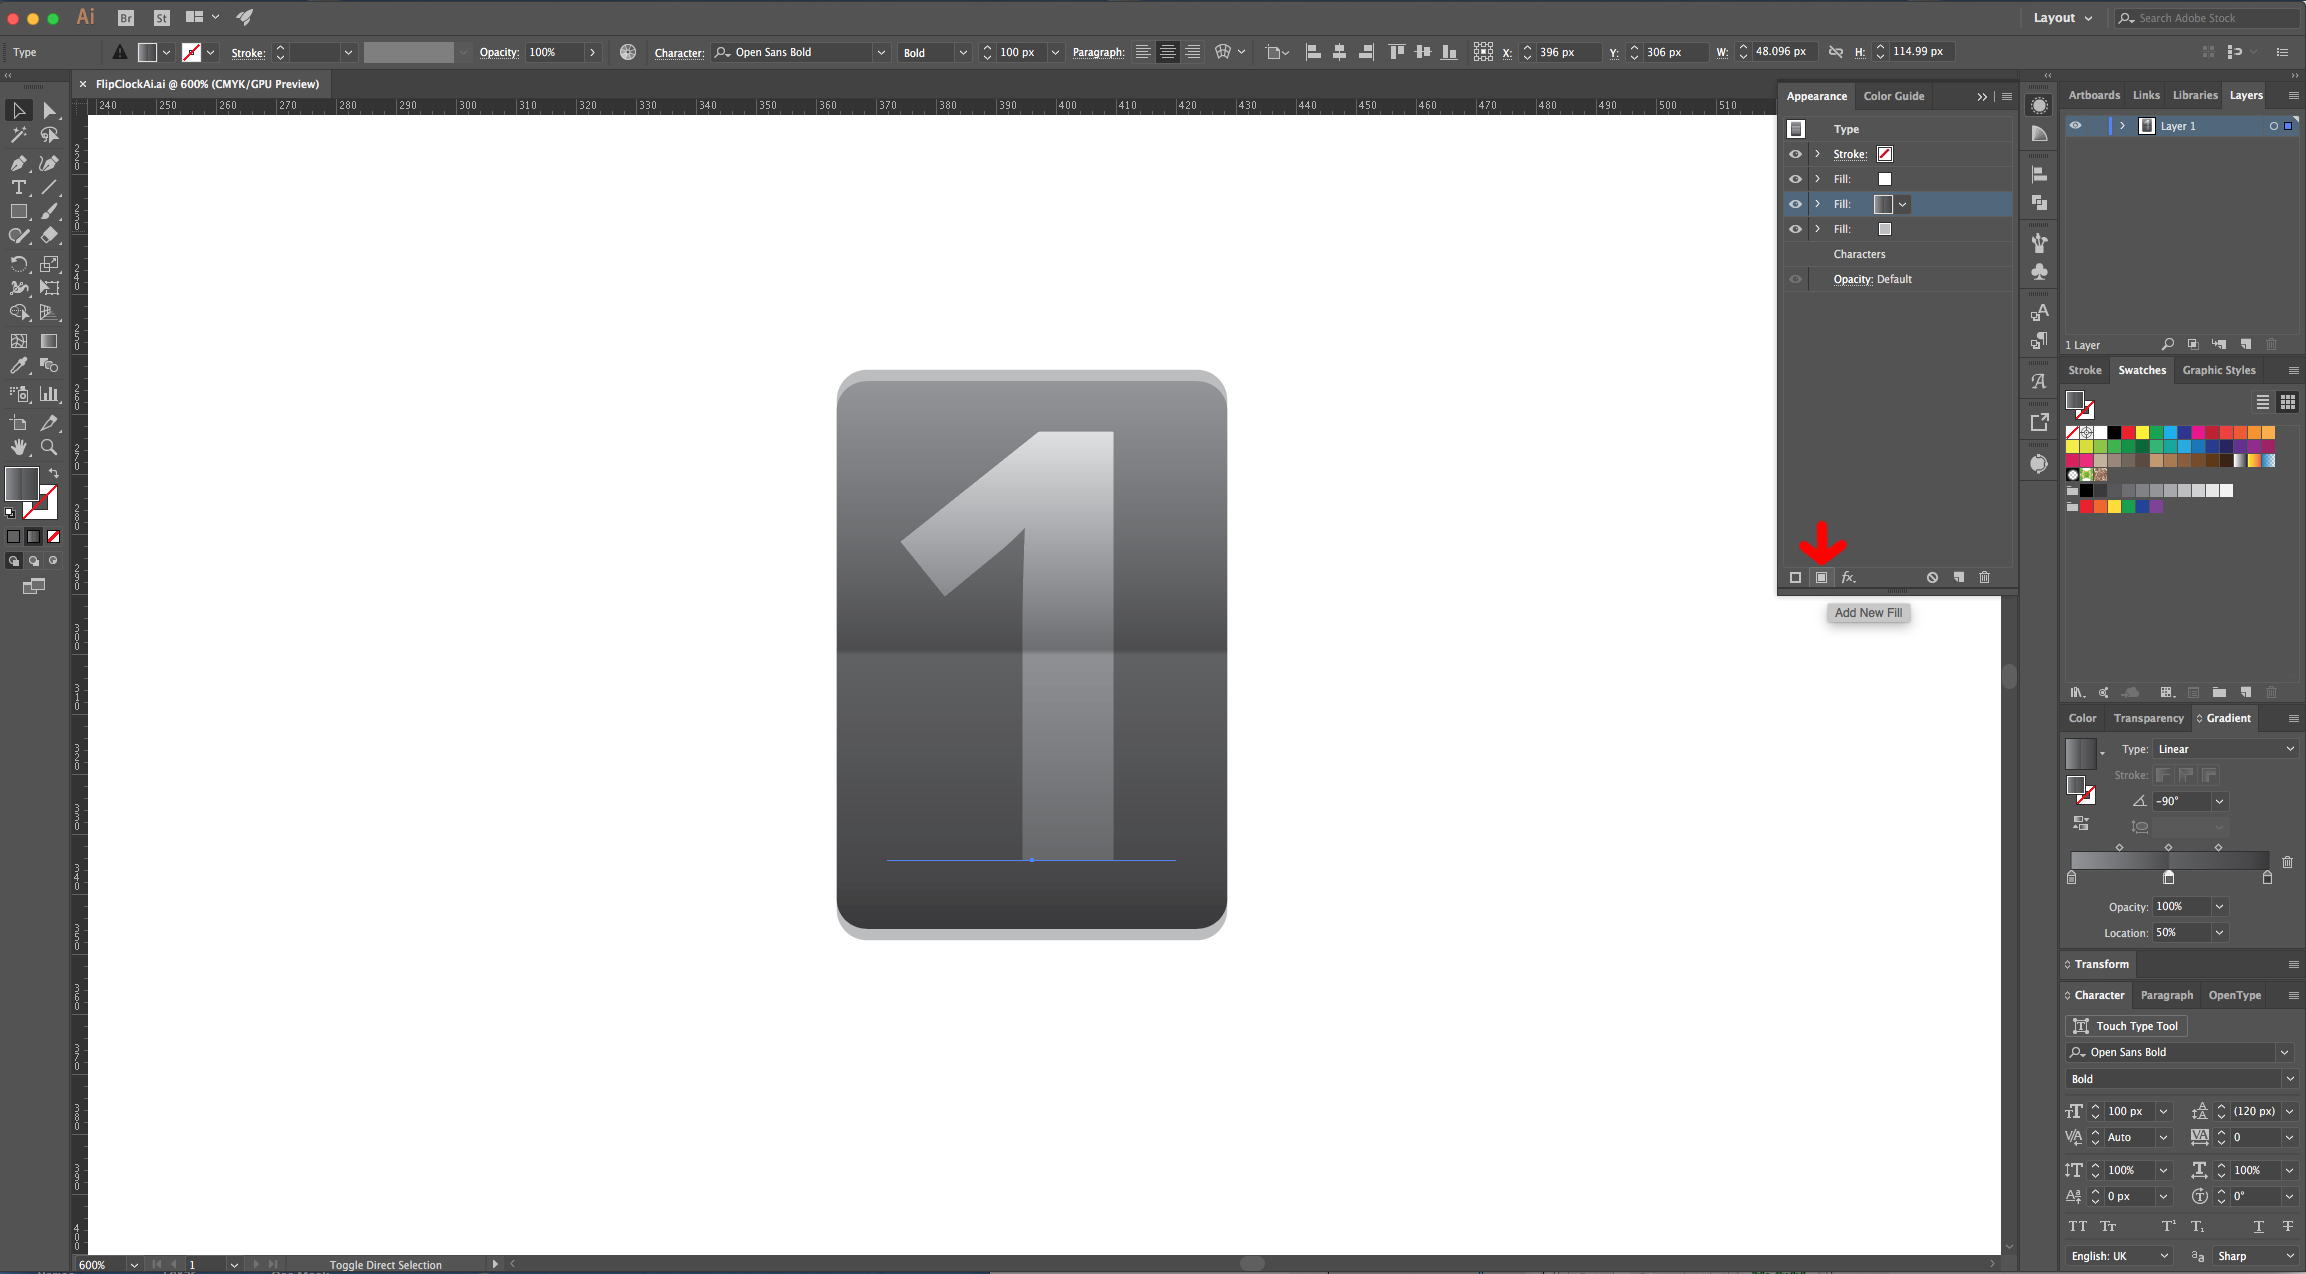
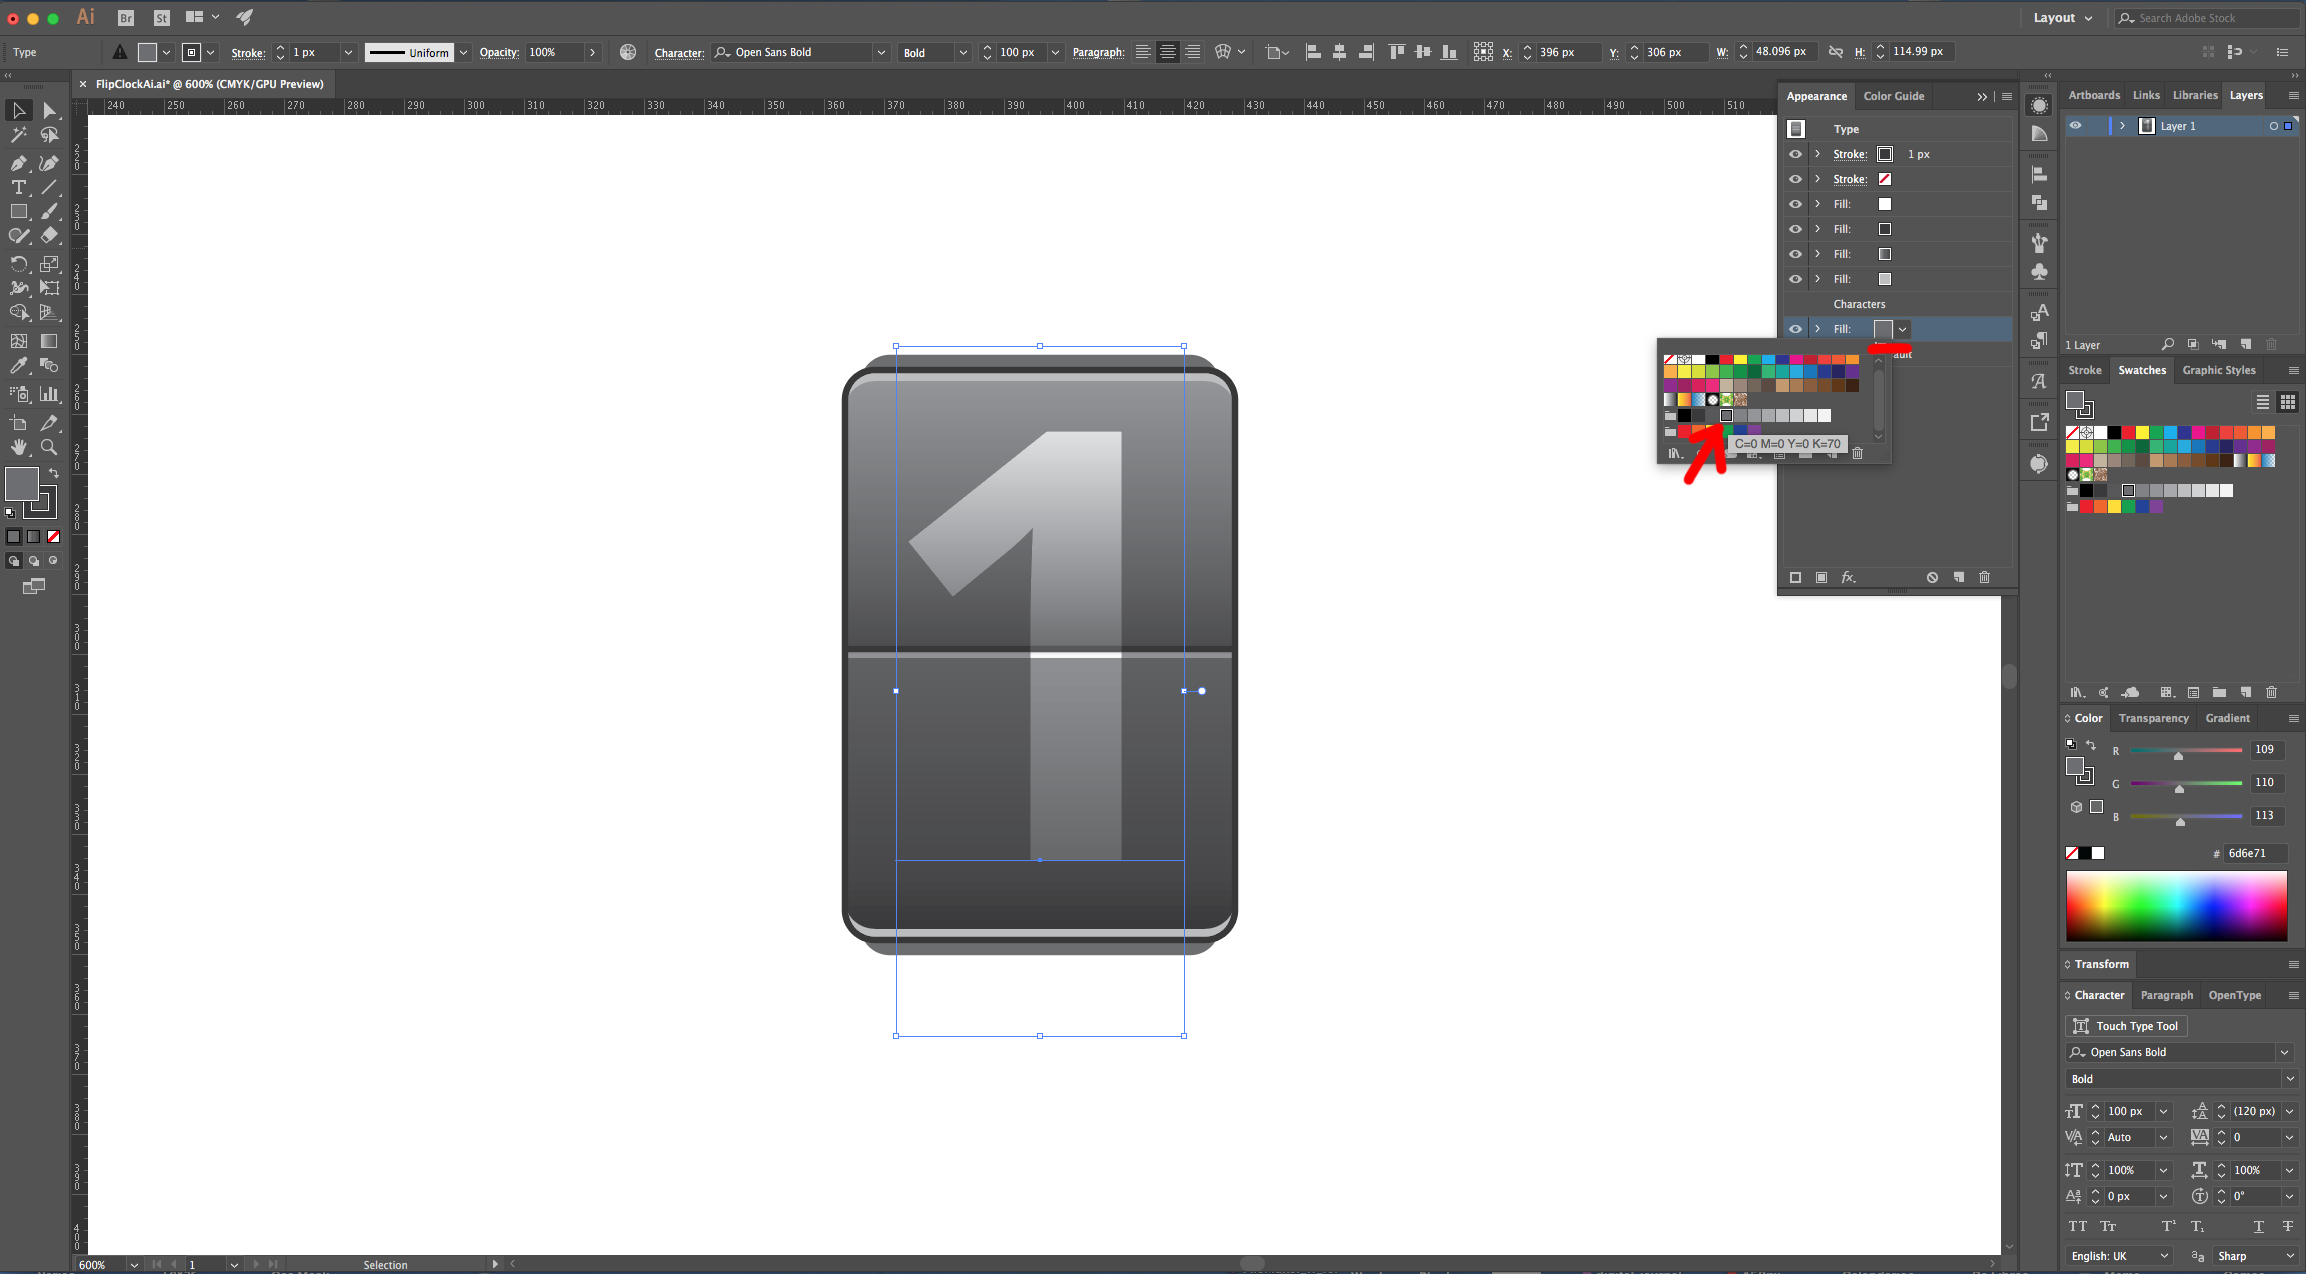
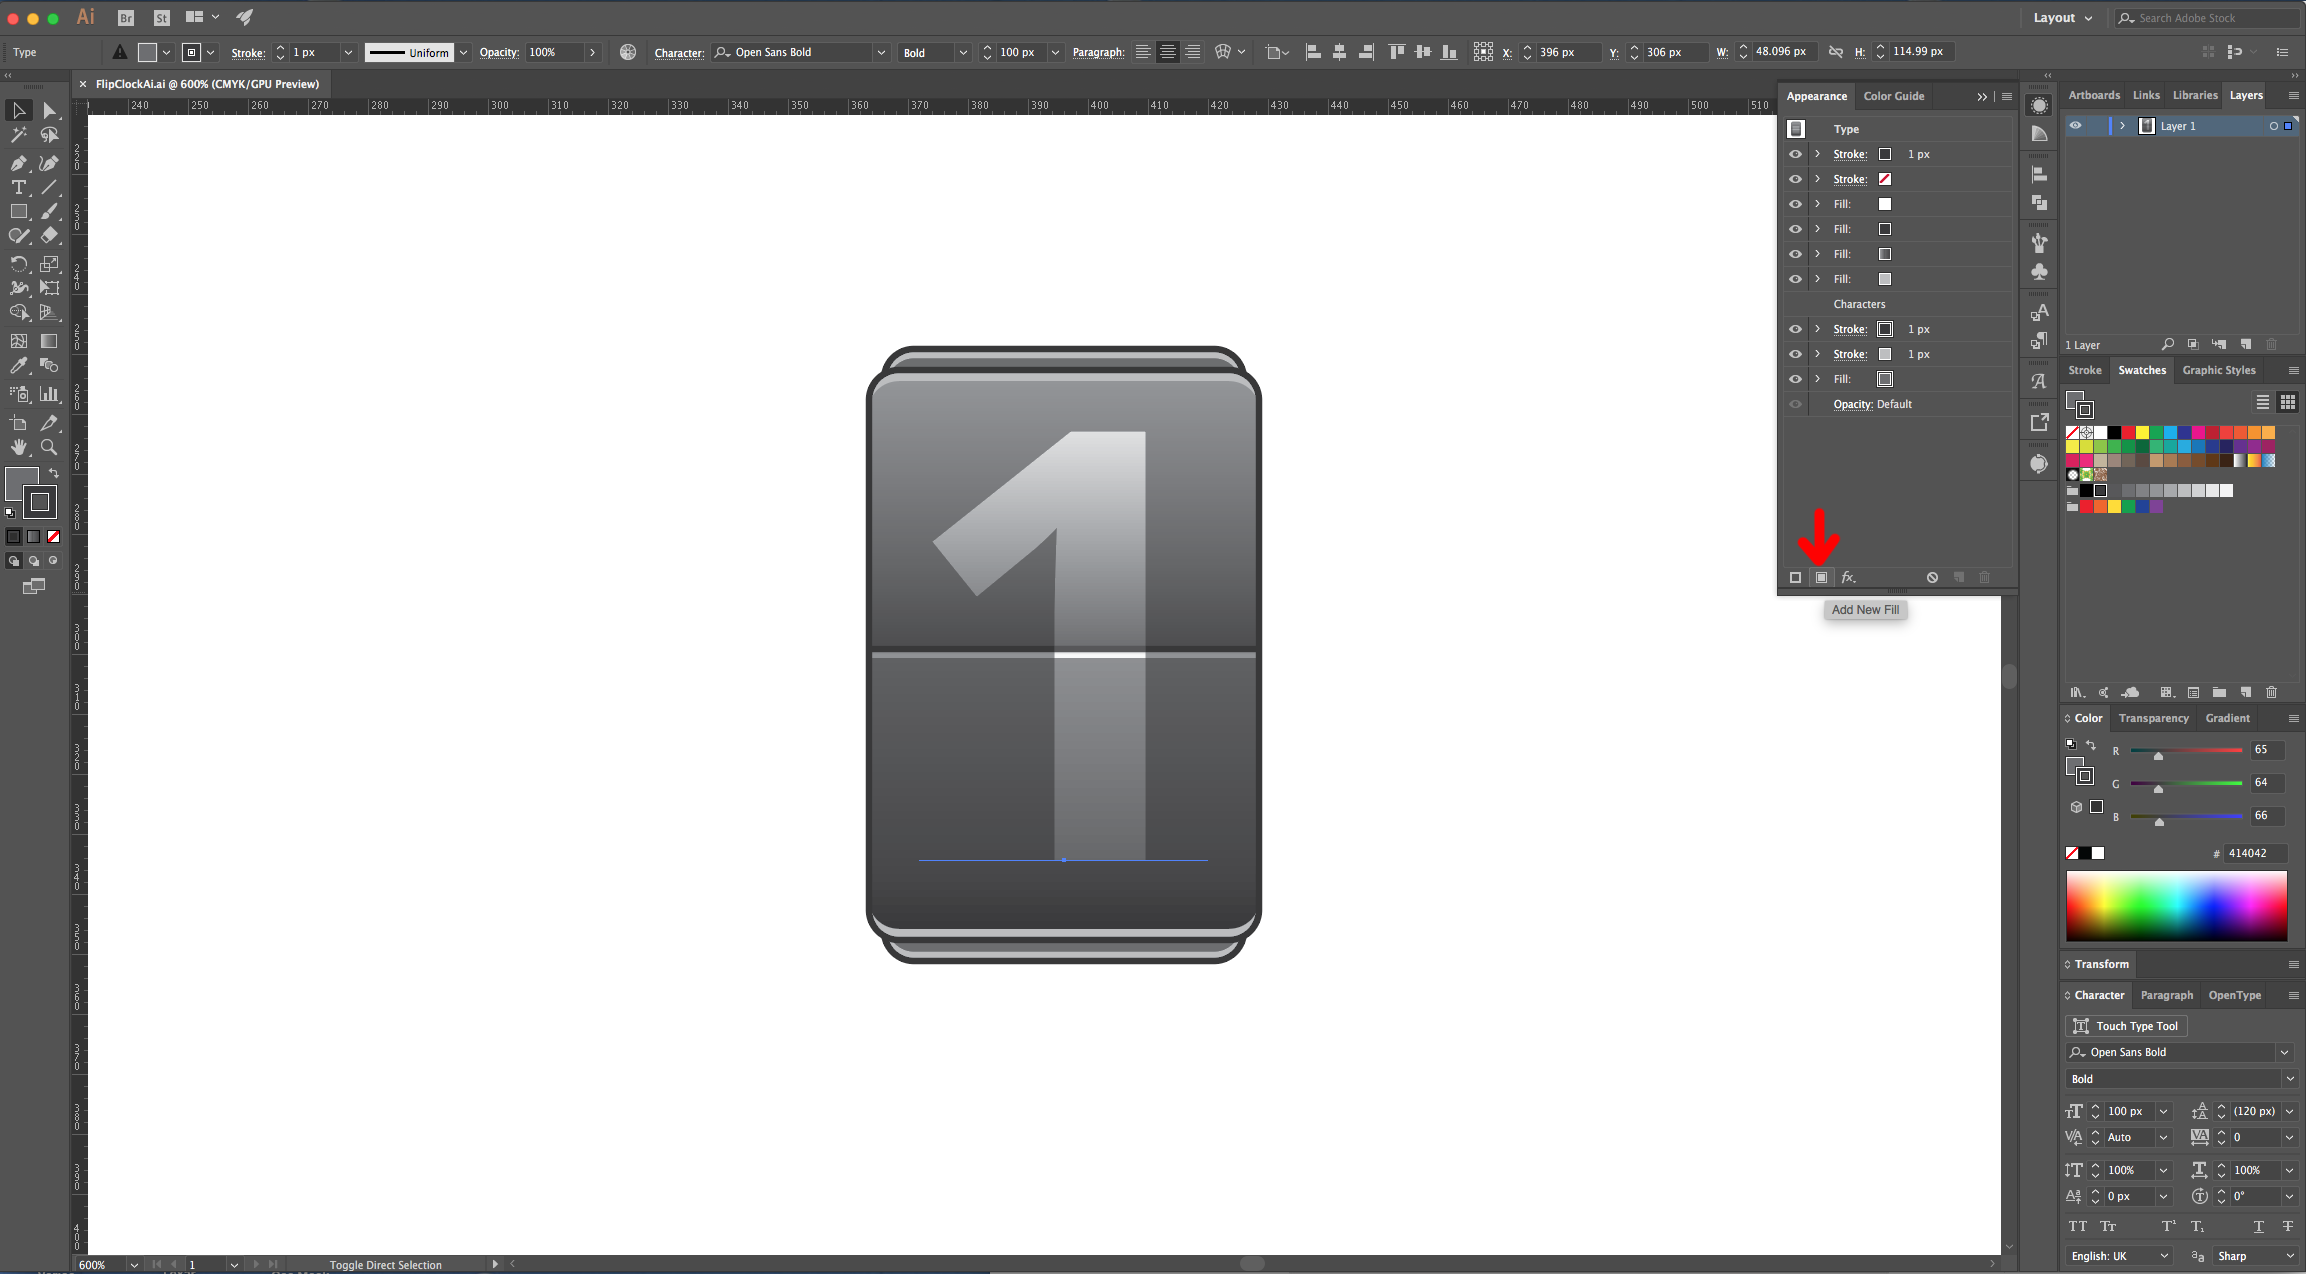
4 - Make sure your text is selected and go to the “Appearance Panel”, click on the “Add New Fill” button at the bottom of the Panel. Use a Light Grey (30 K) as fill color.
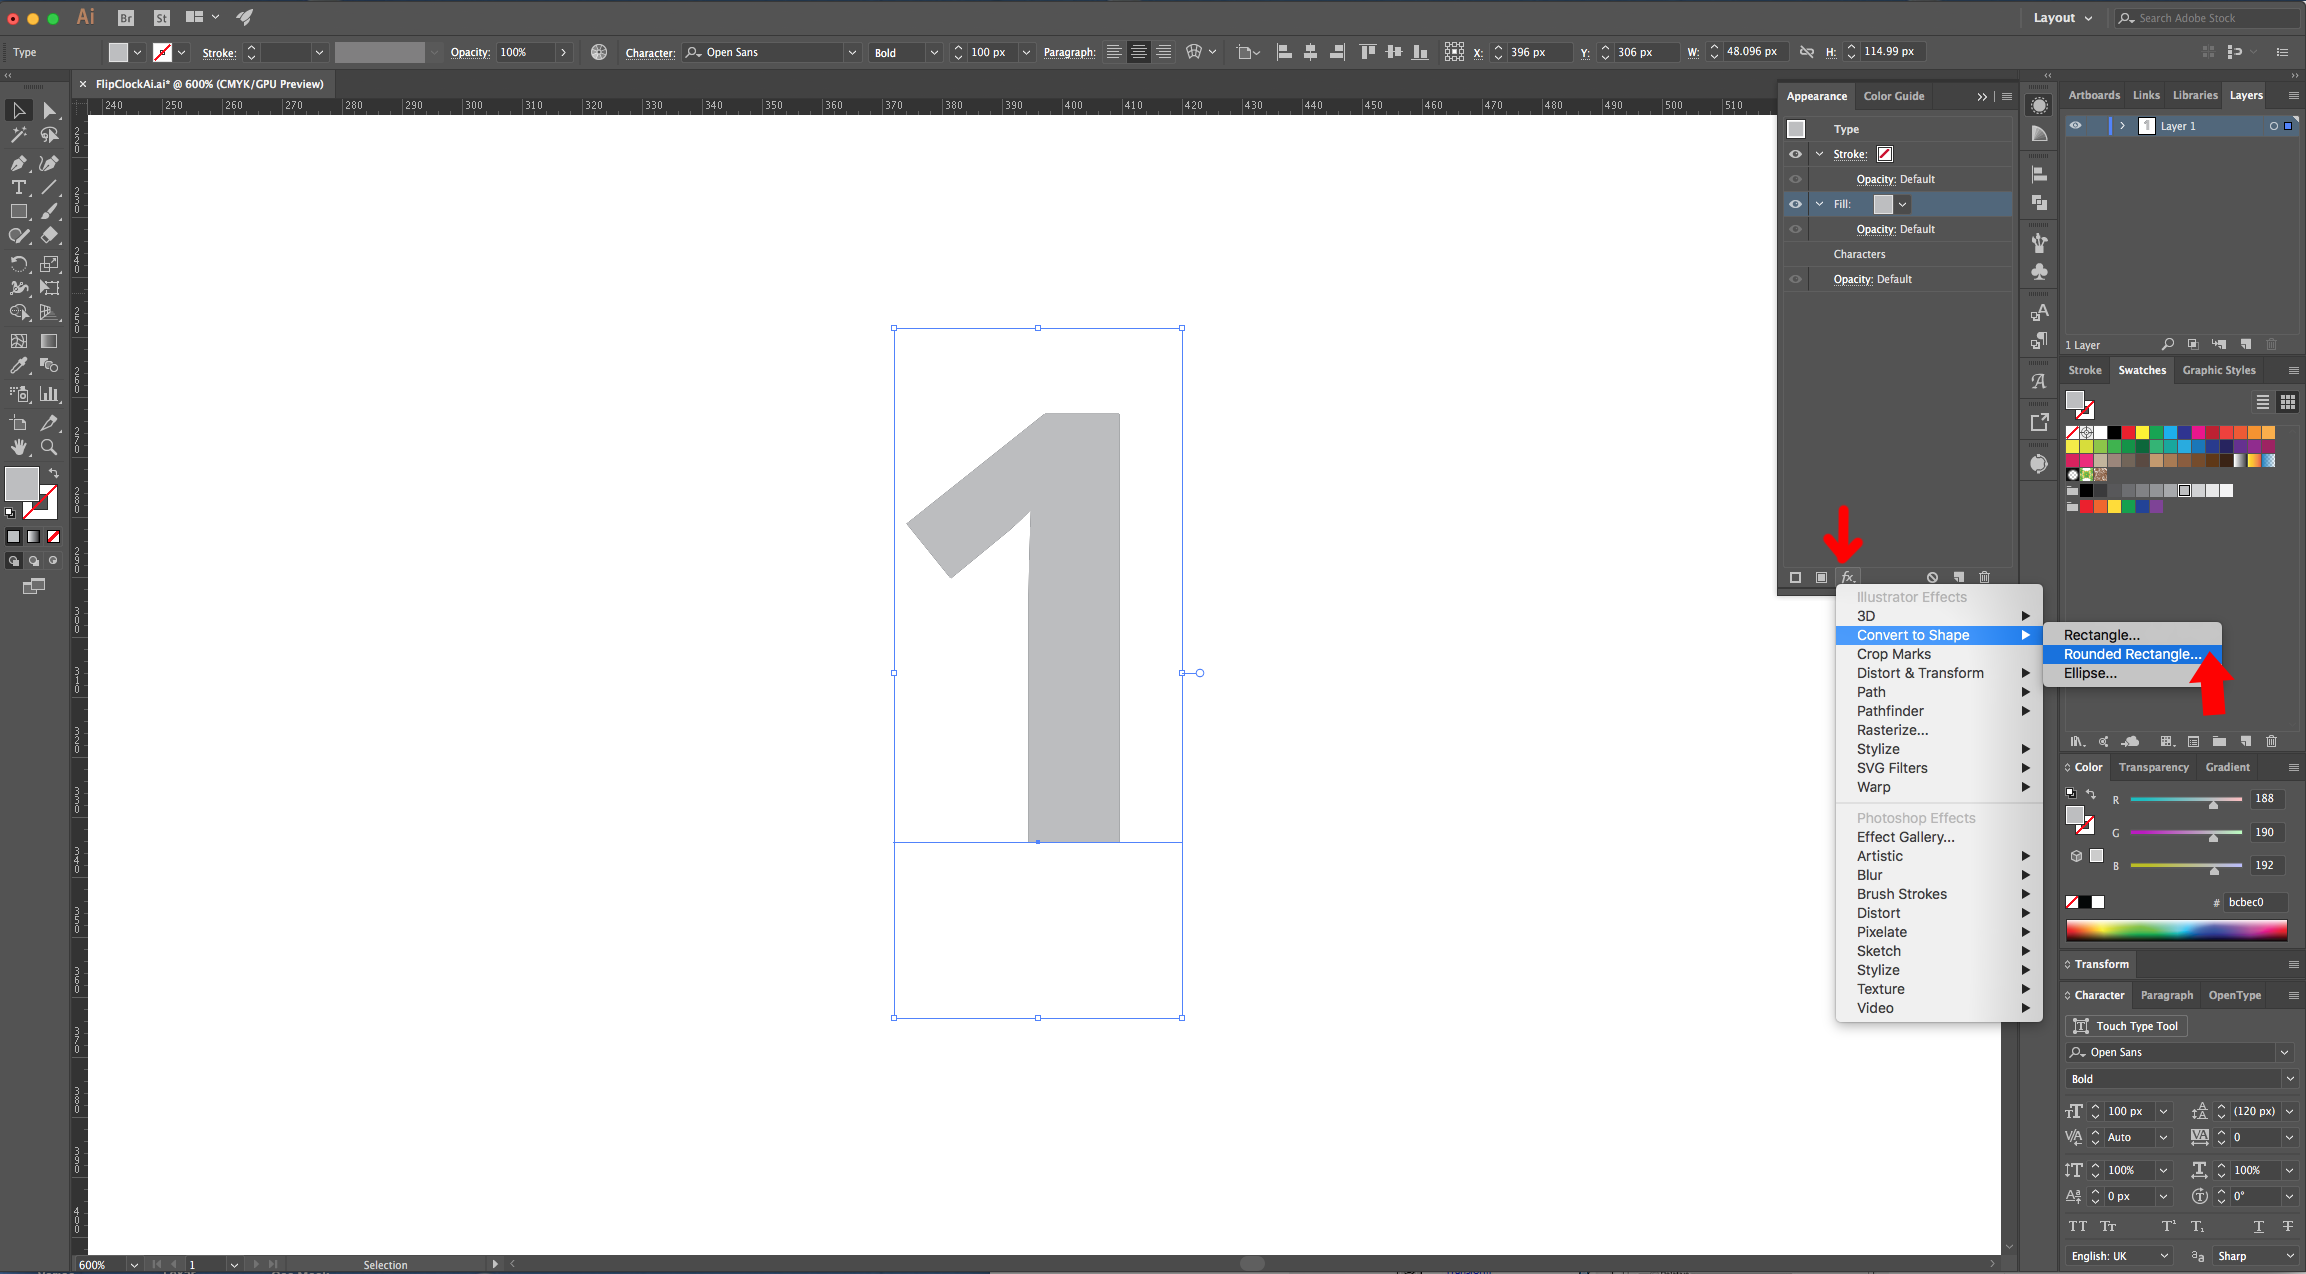
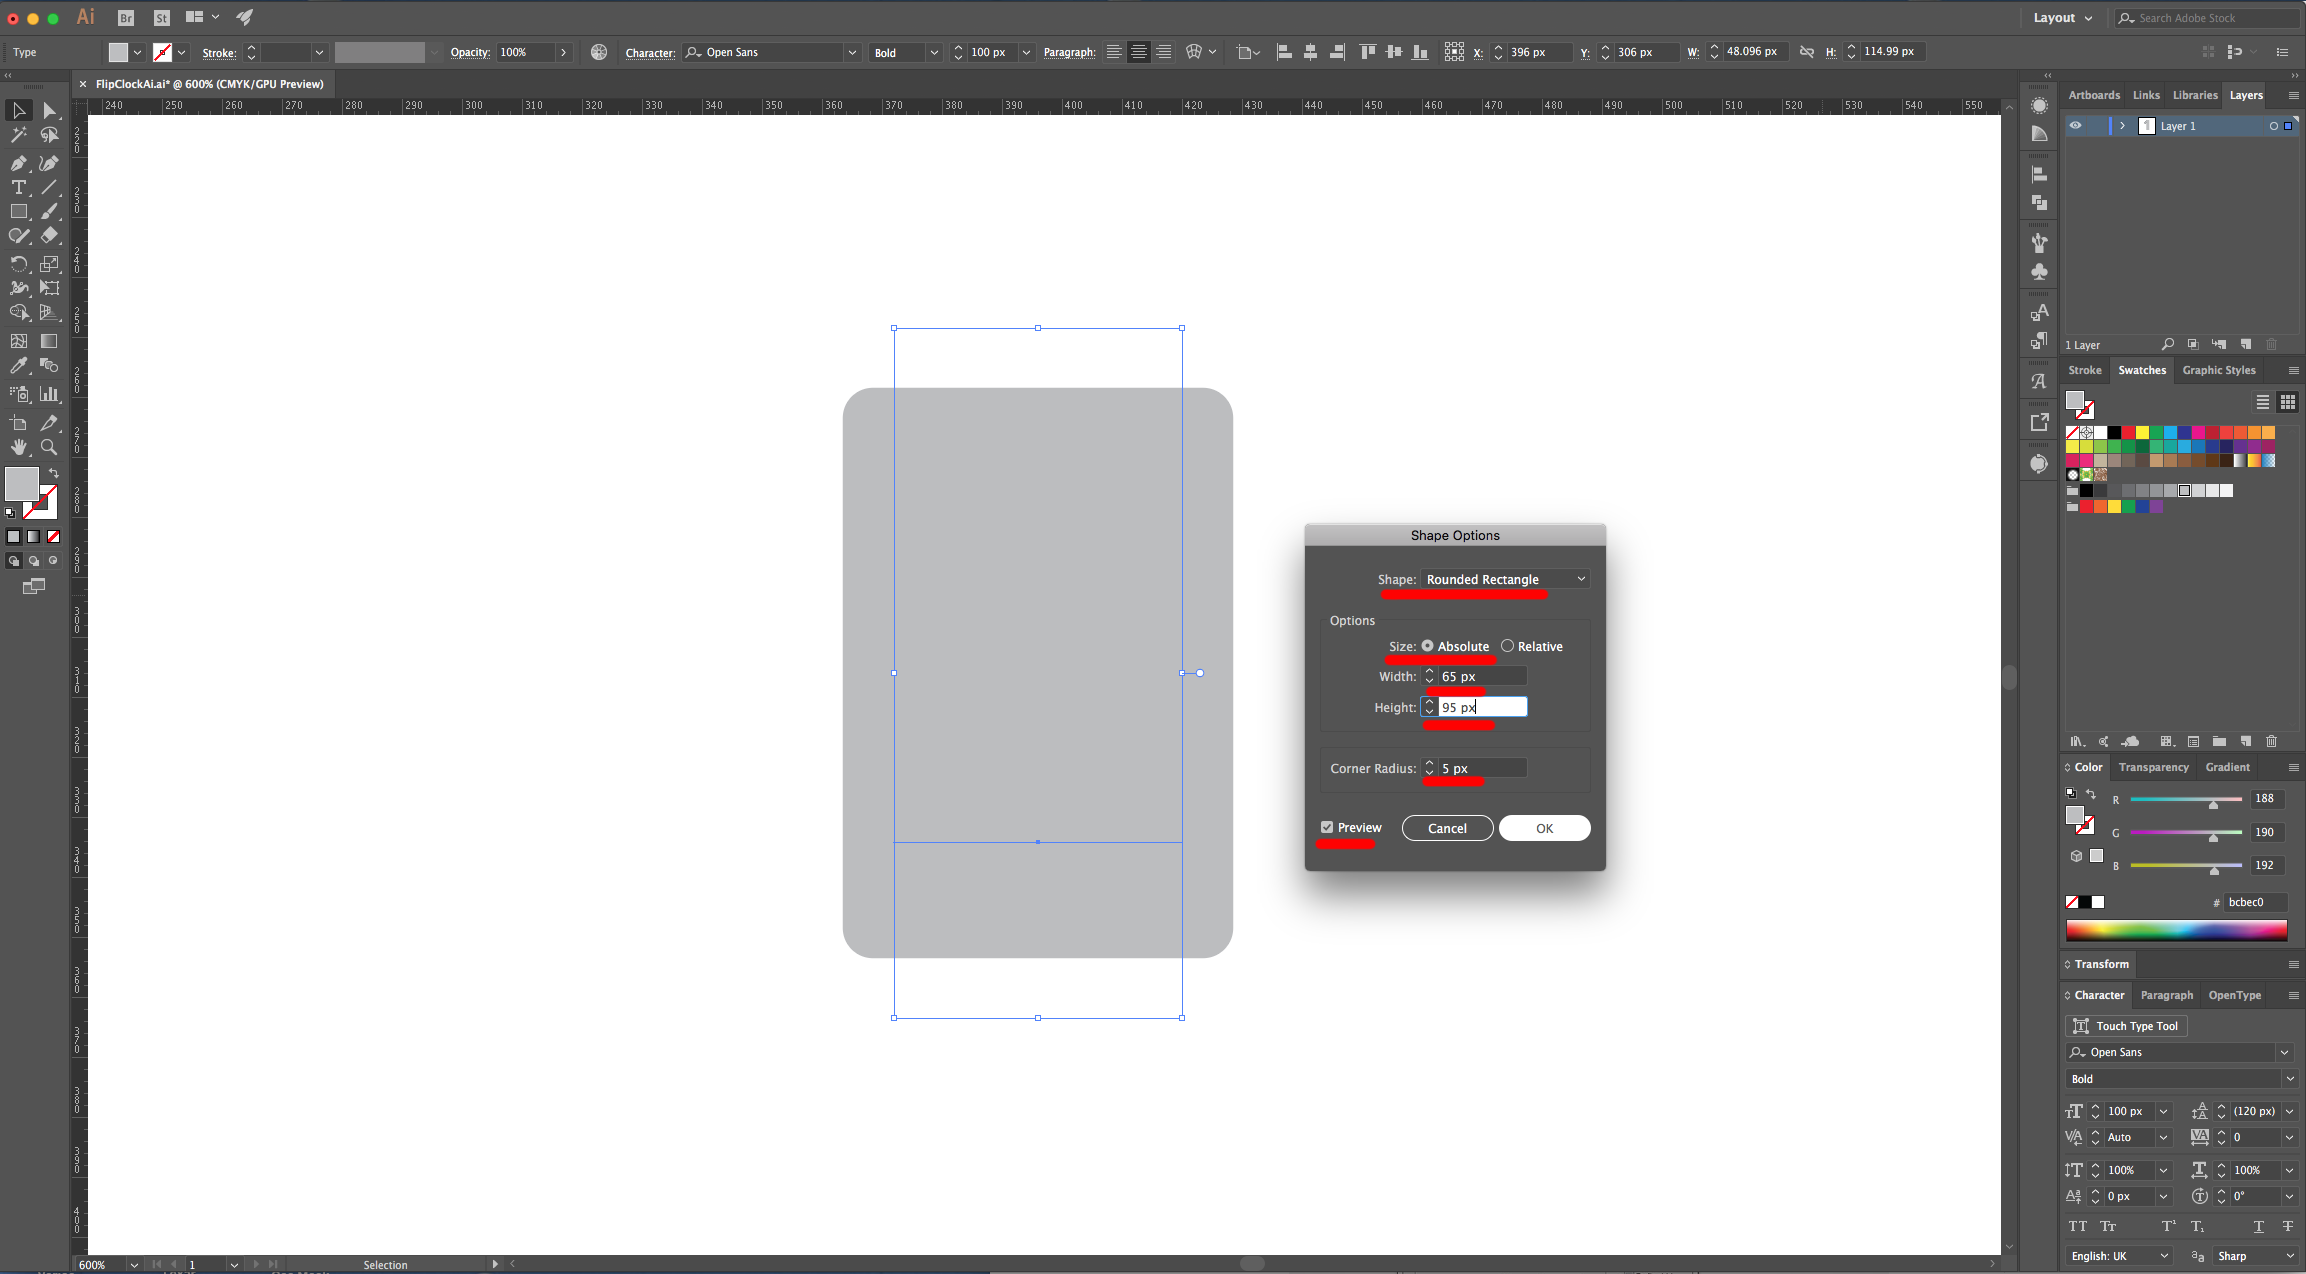
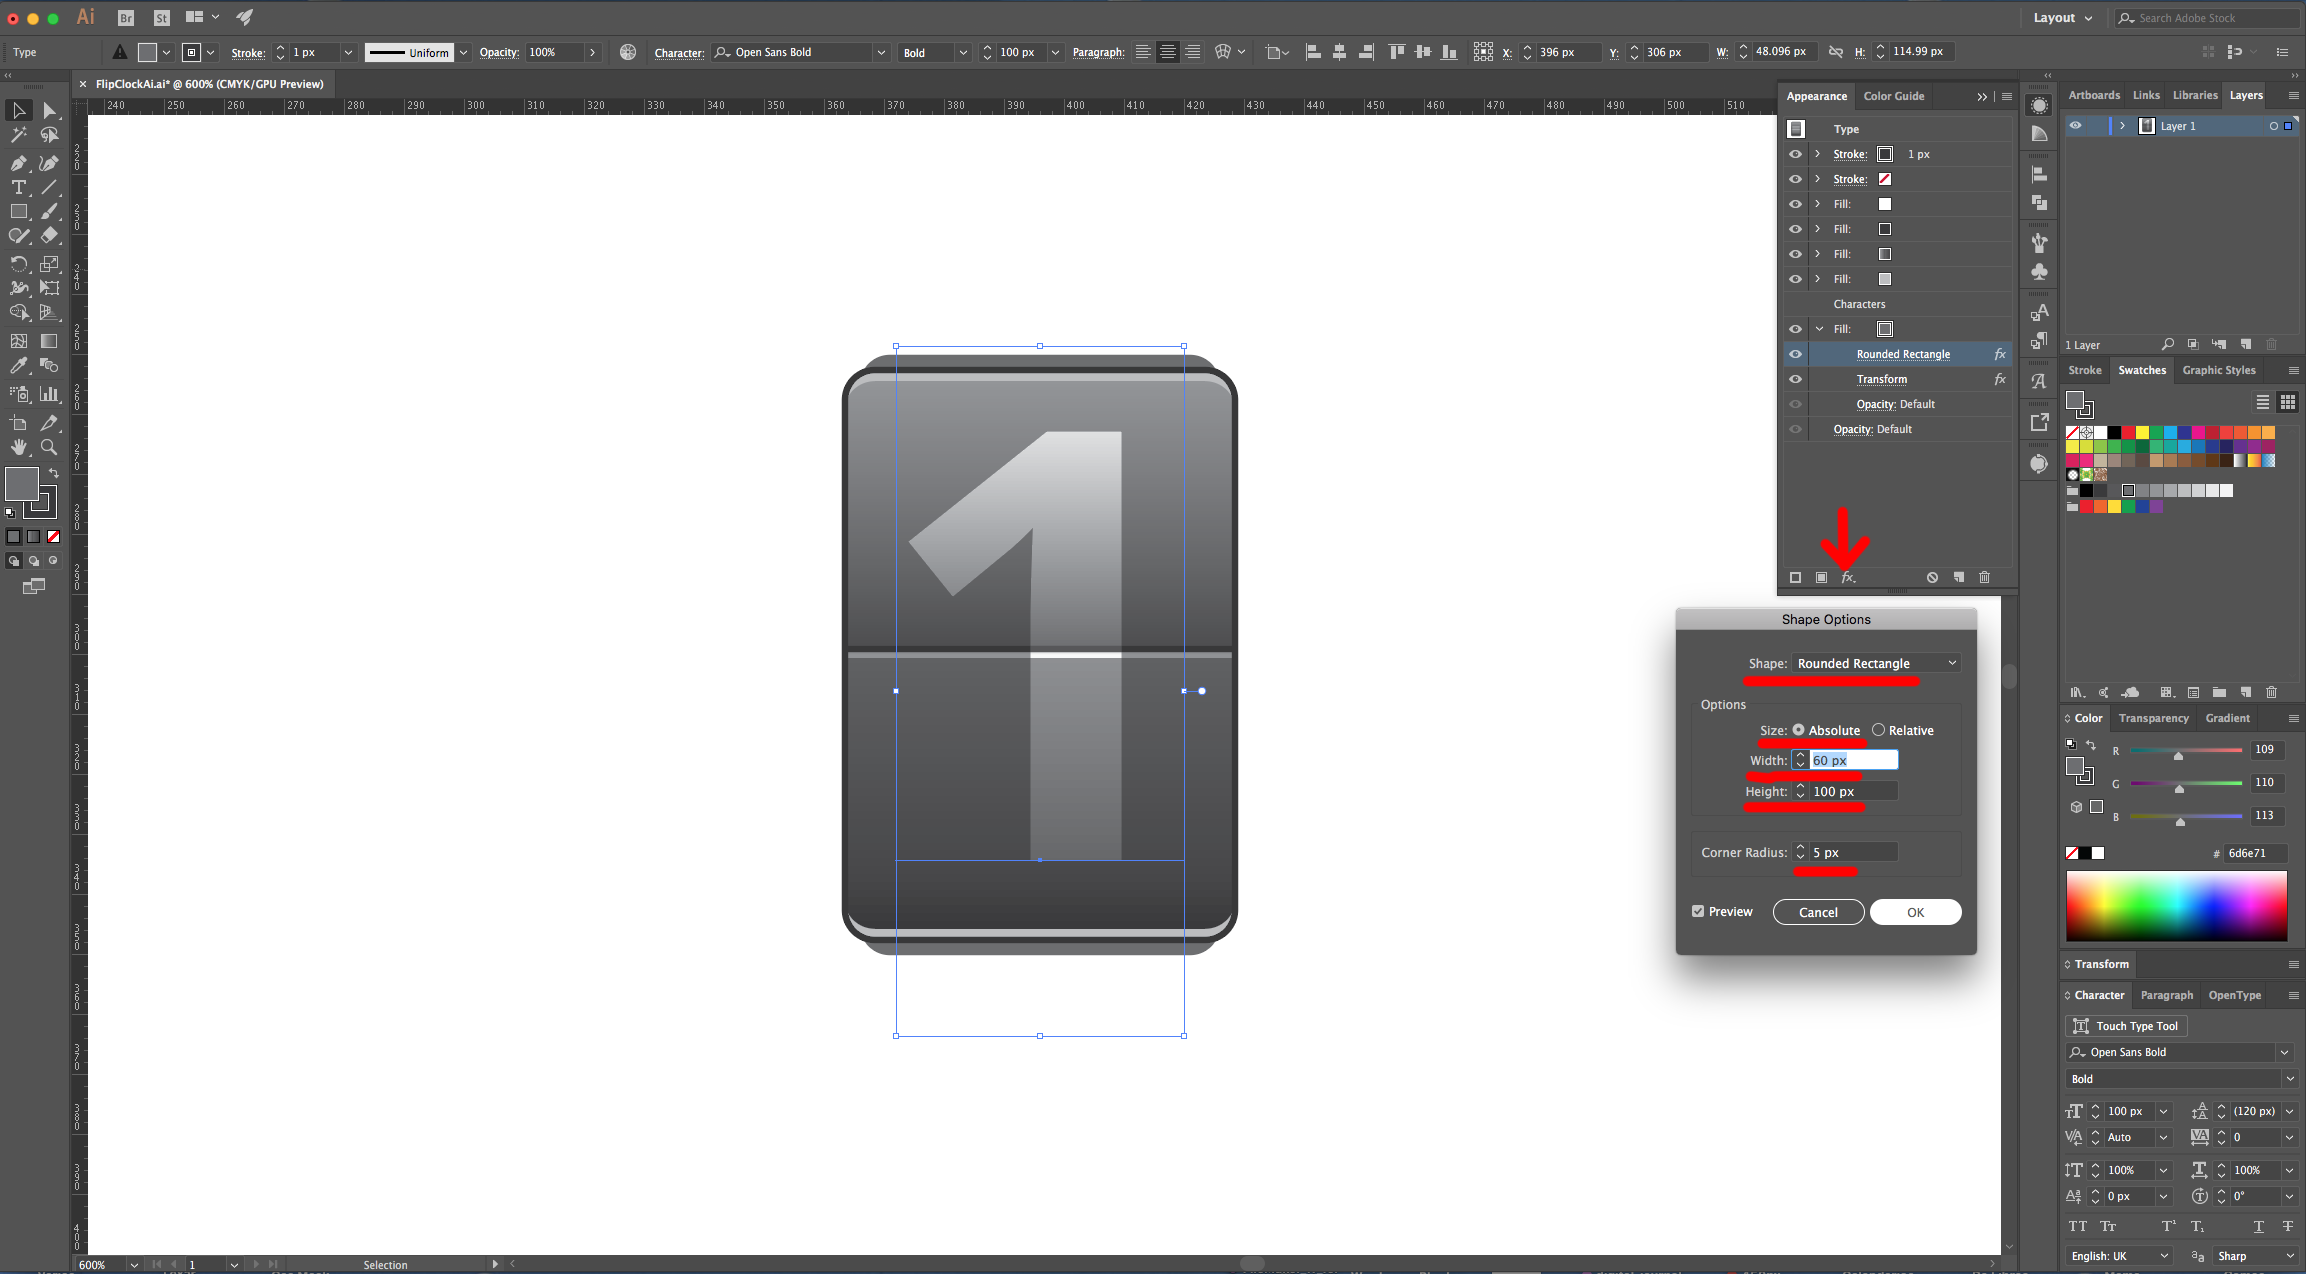
5 - Then, click on the “Effects Menu” on the Bottom-Left side of the Appearance Panel and navigate to Convert to Shape > Rounded Rectangle… and use the following values. Once you are done click “OK”.
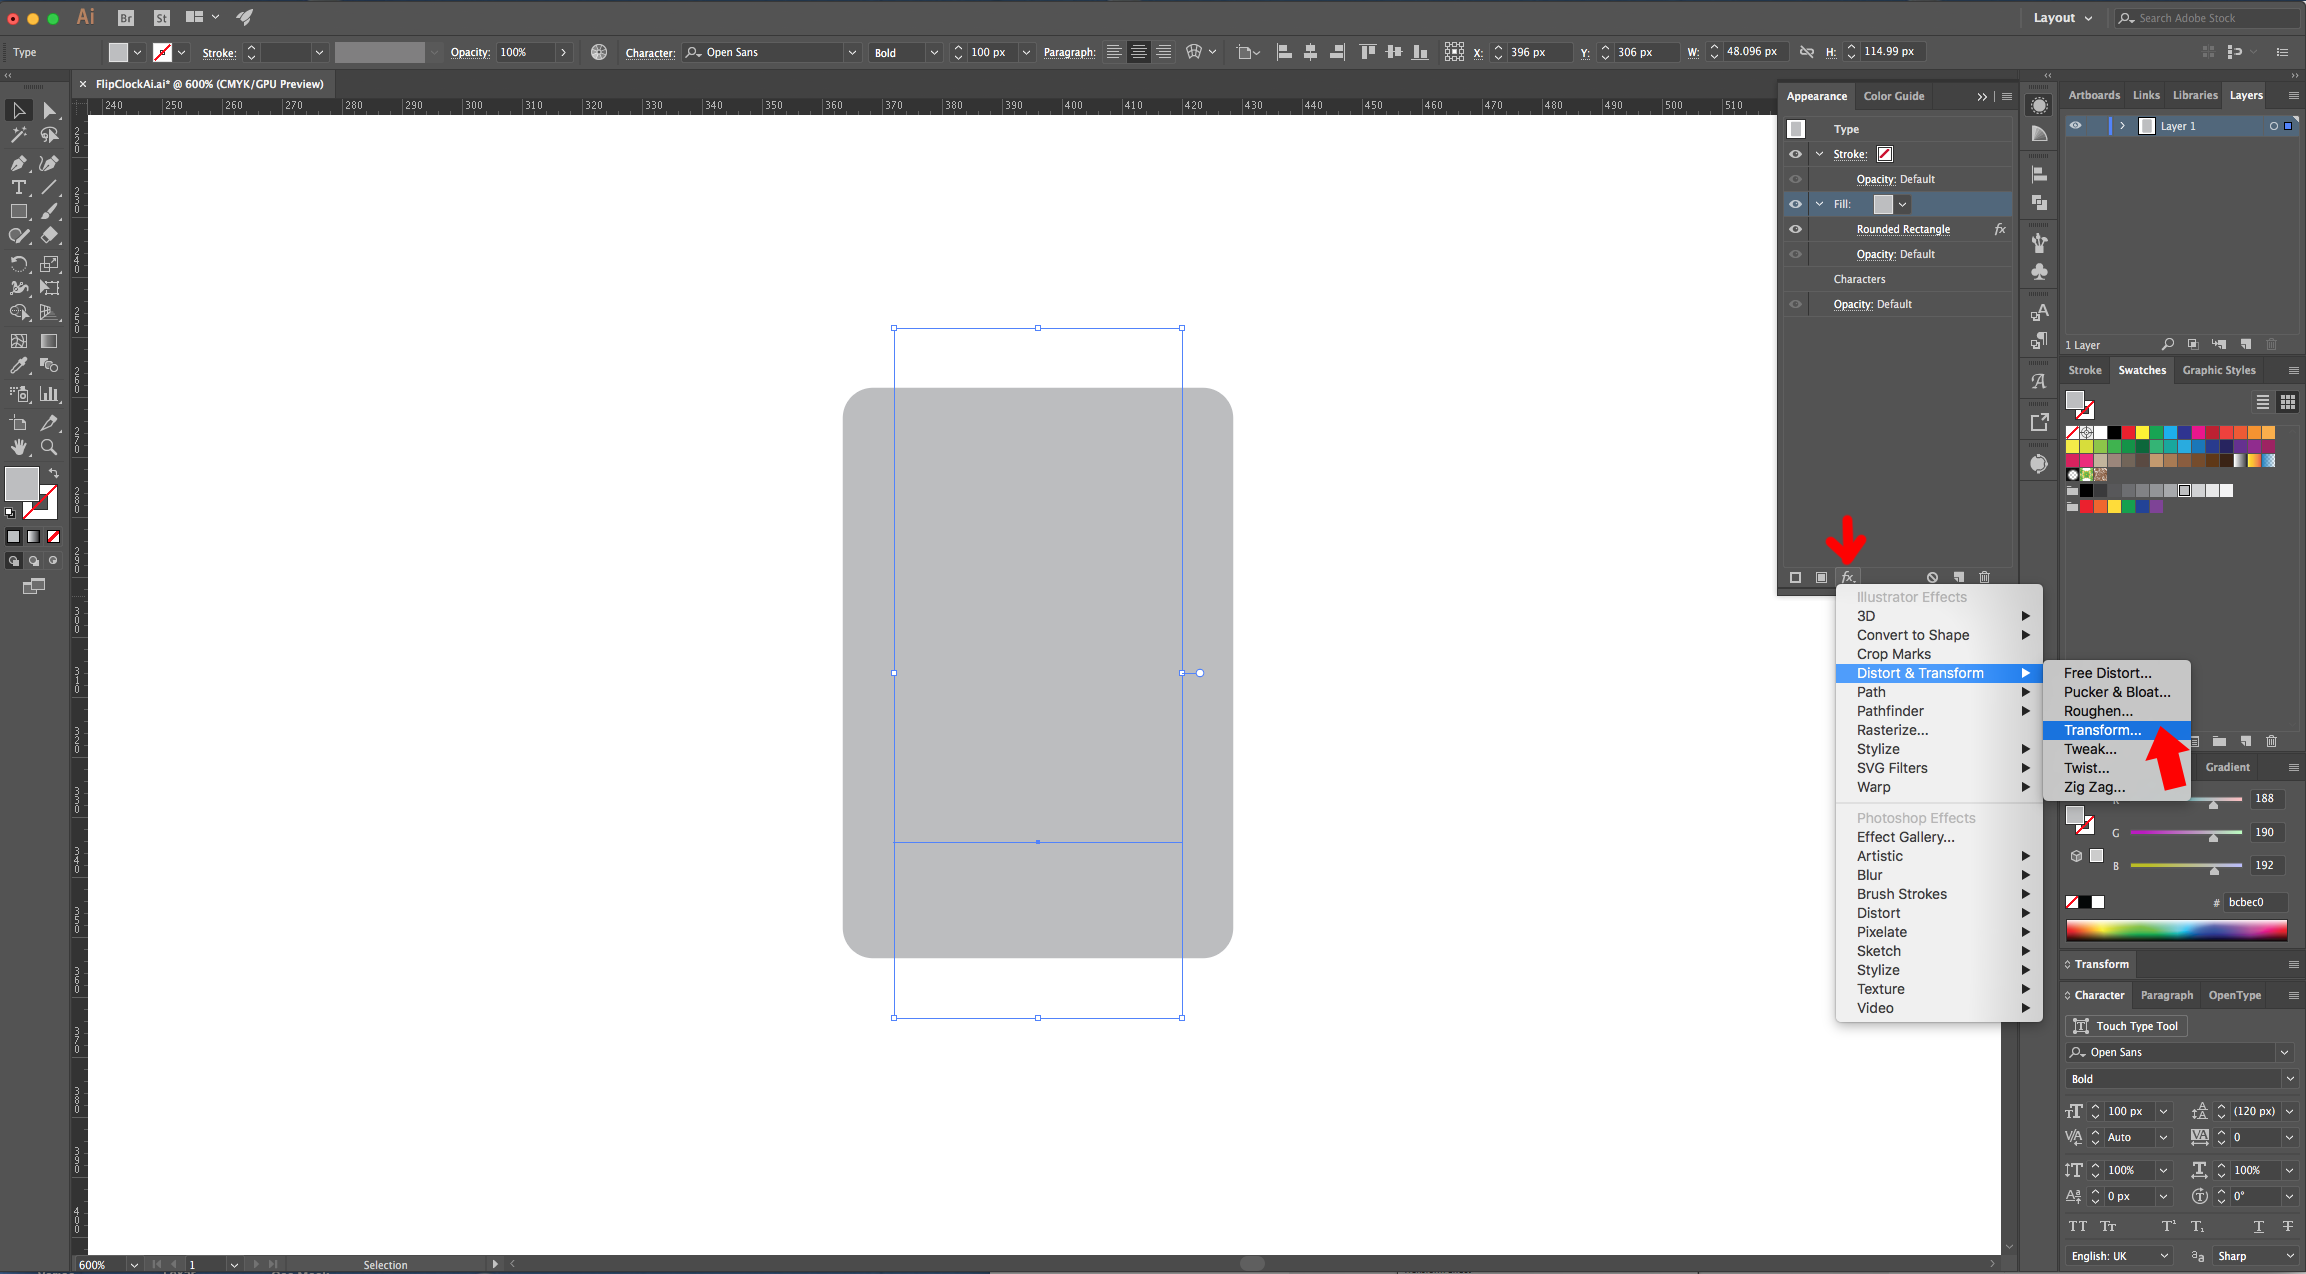
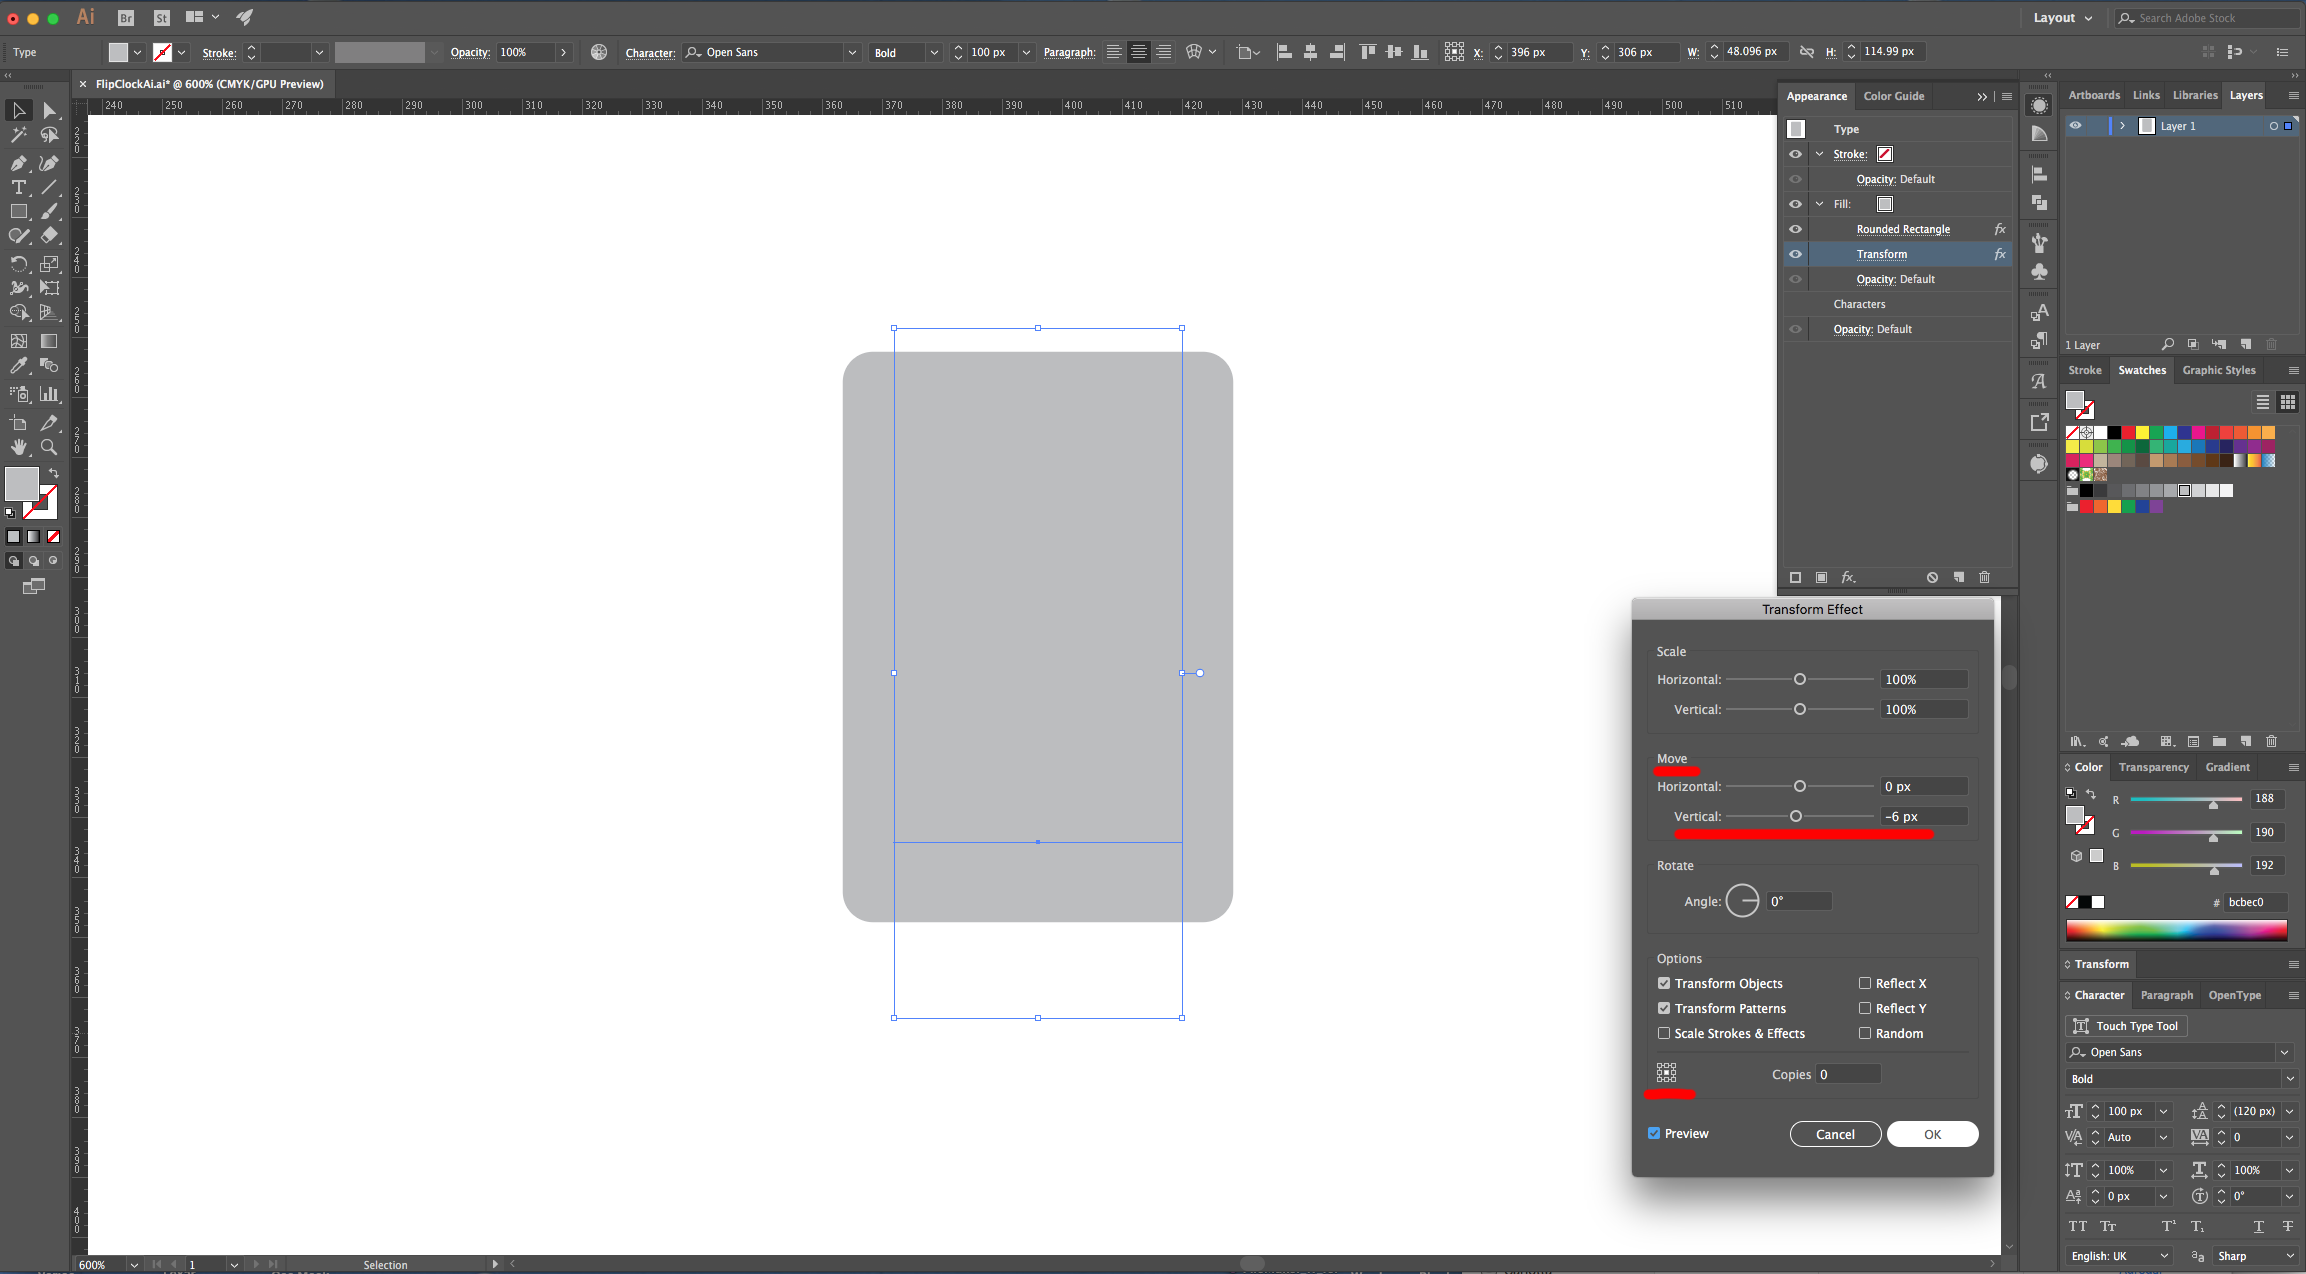
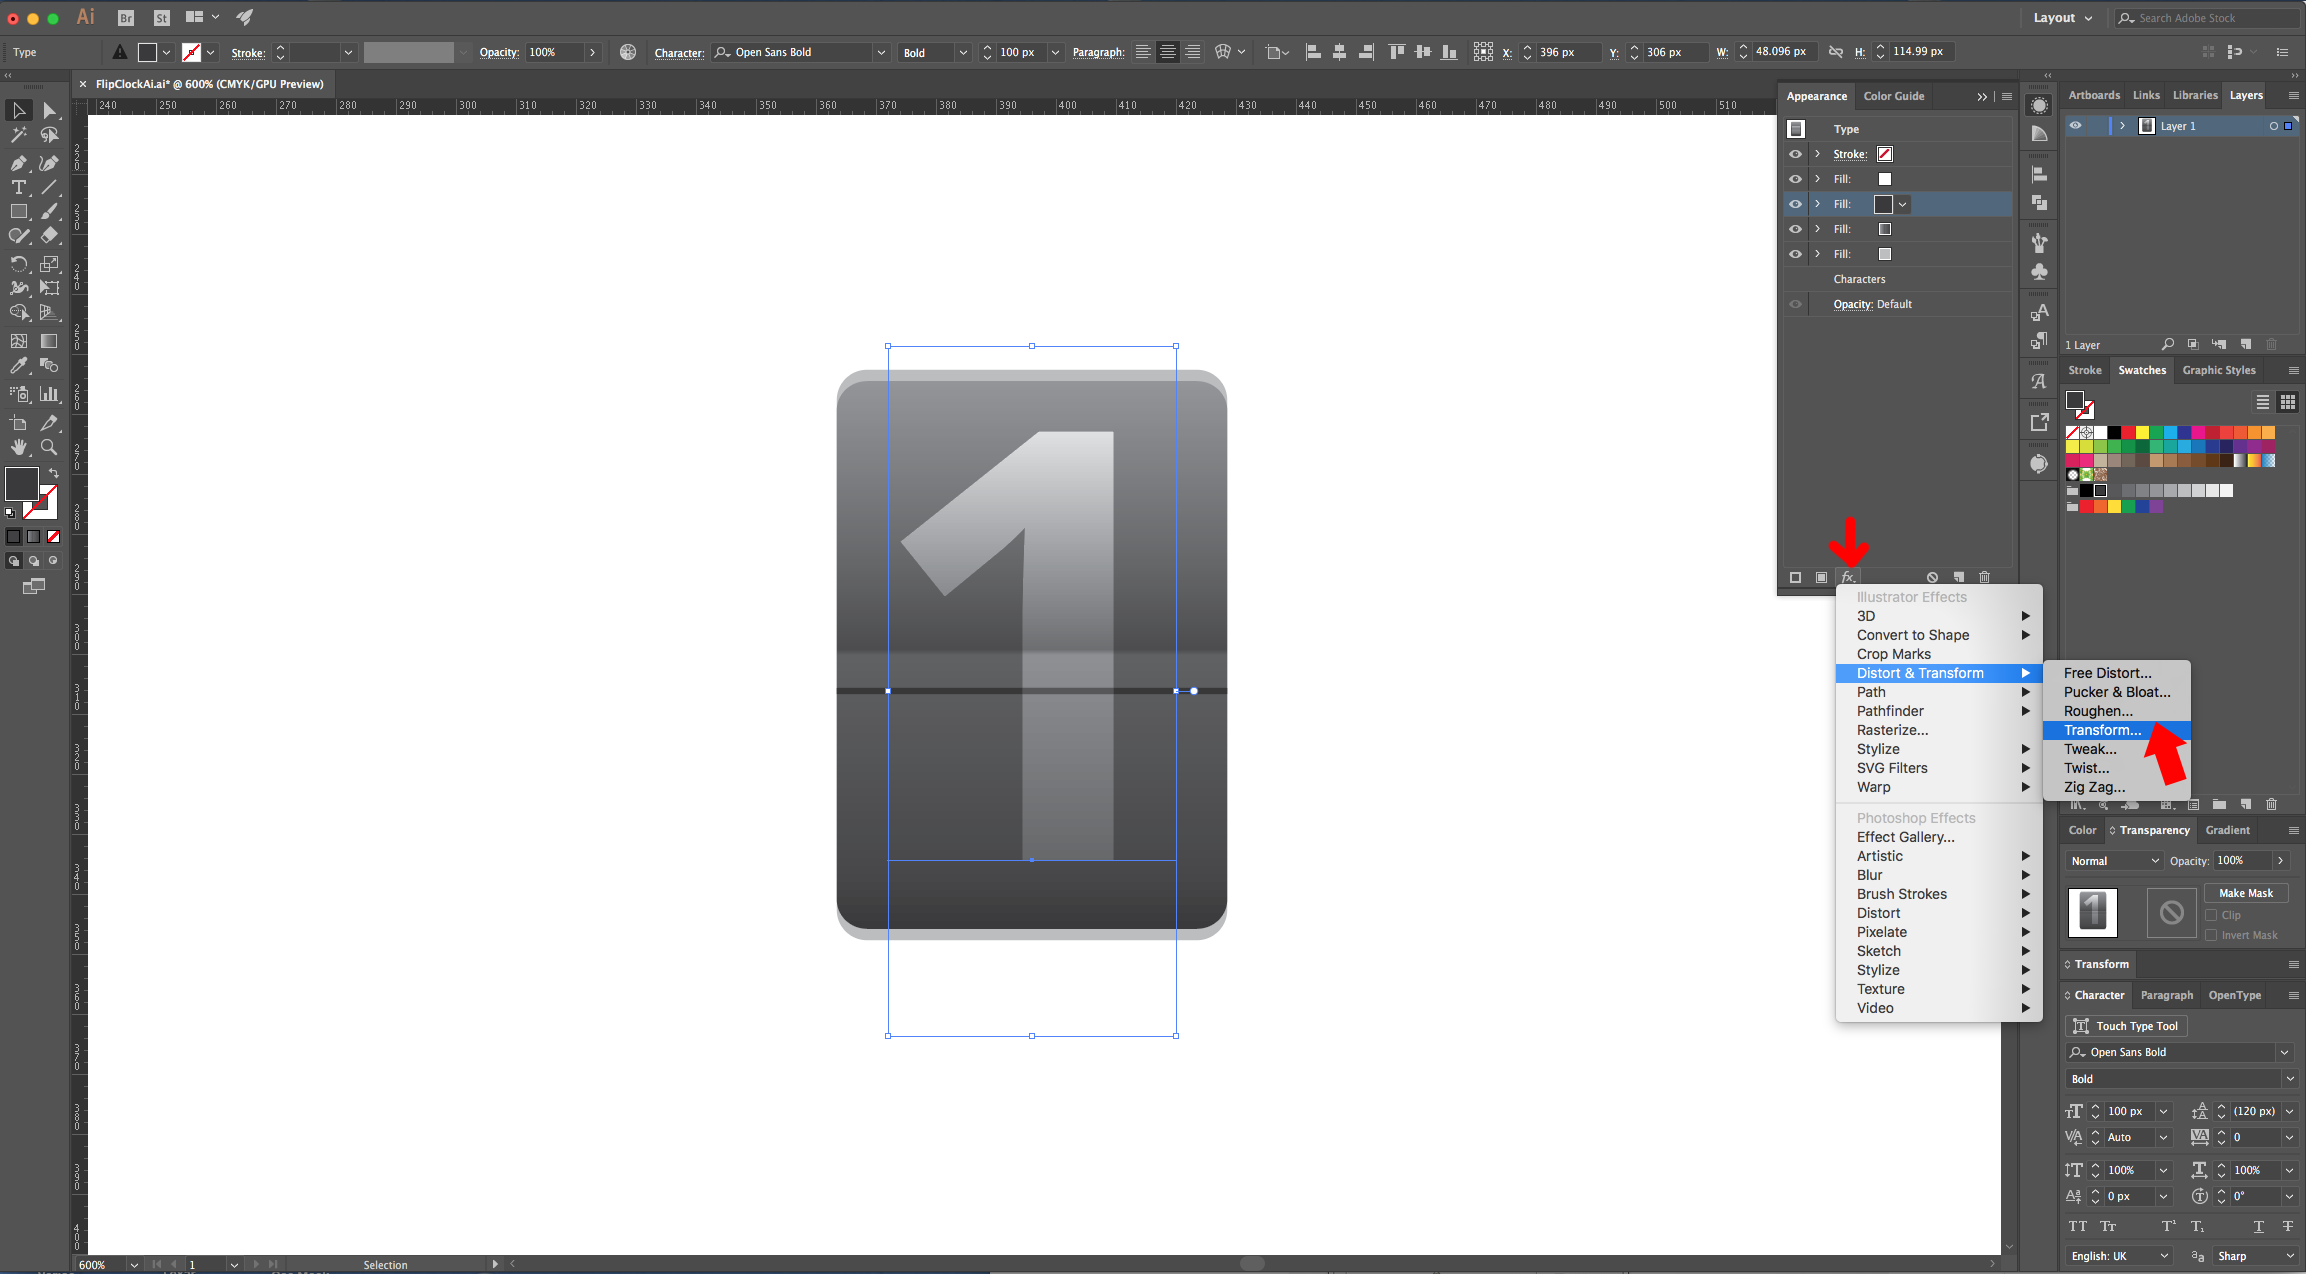
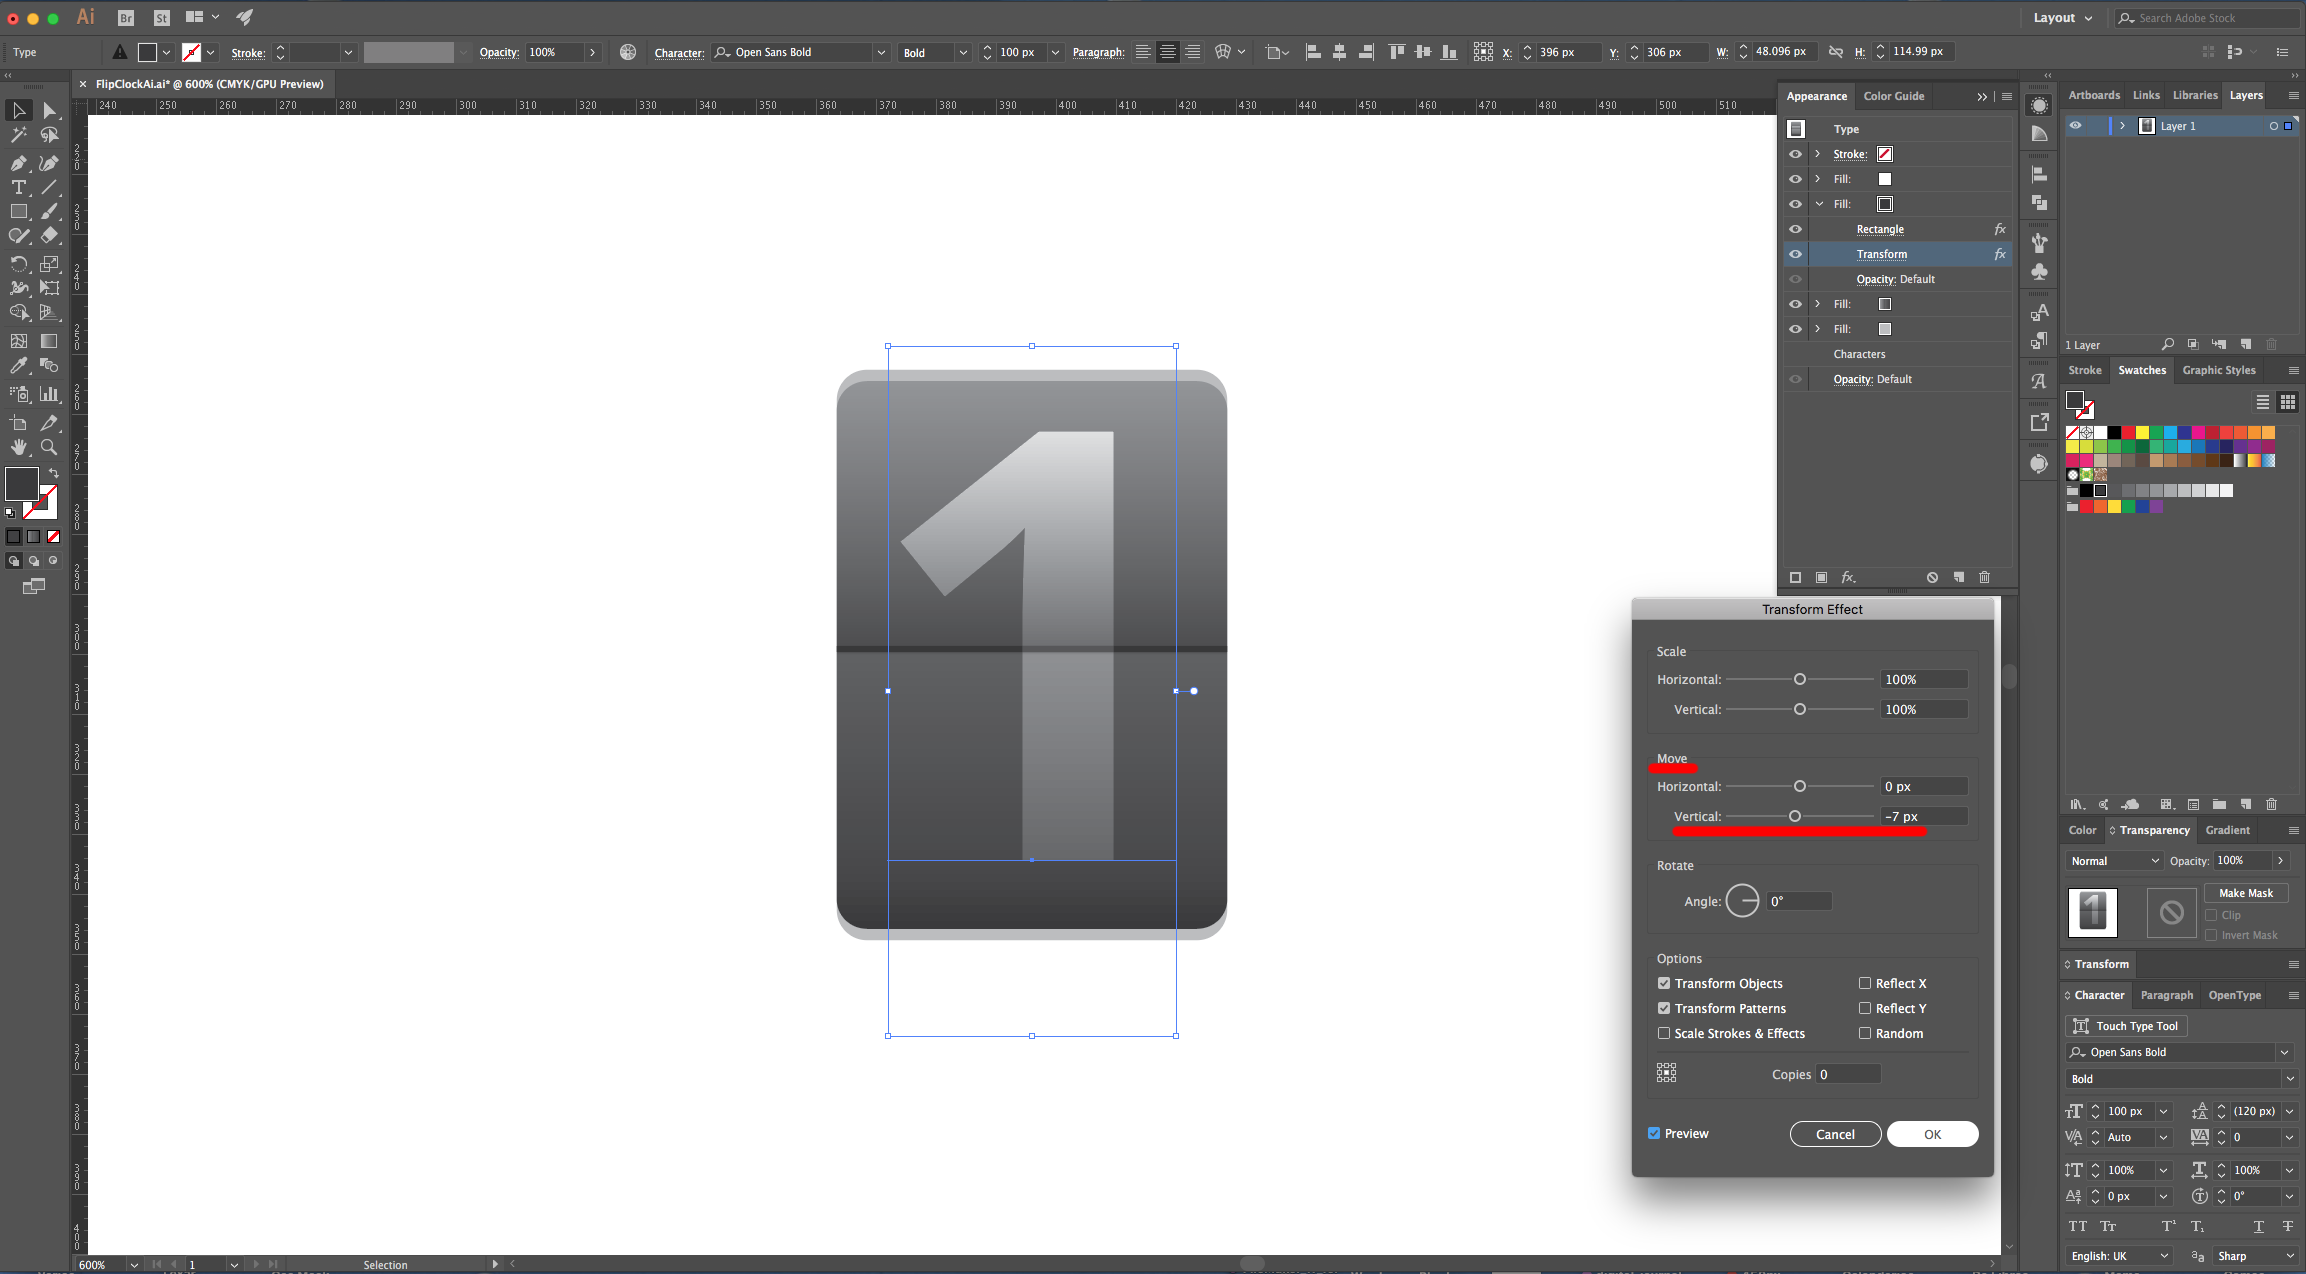
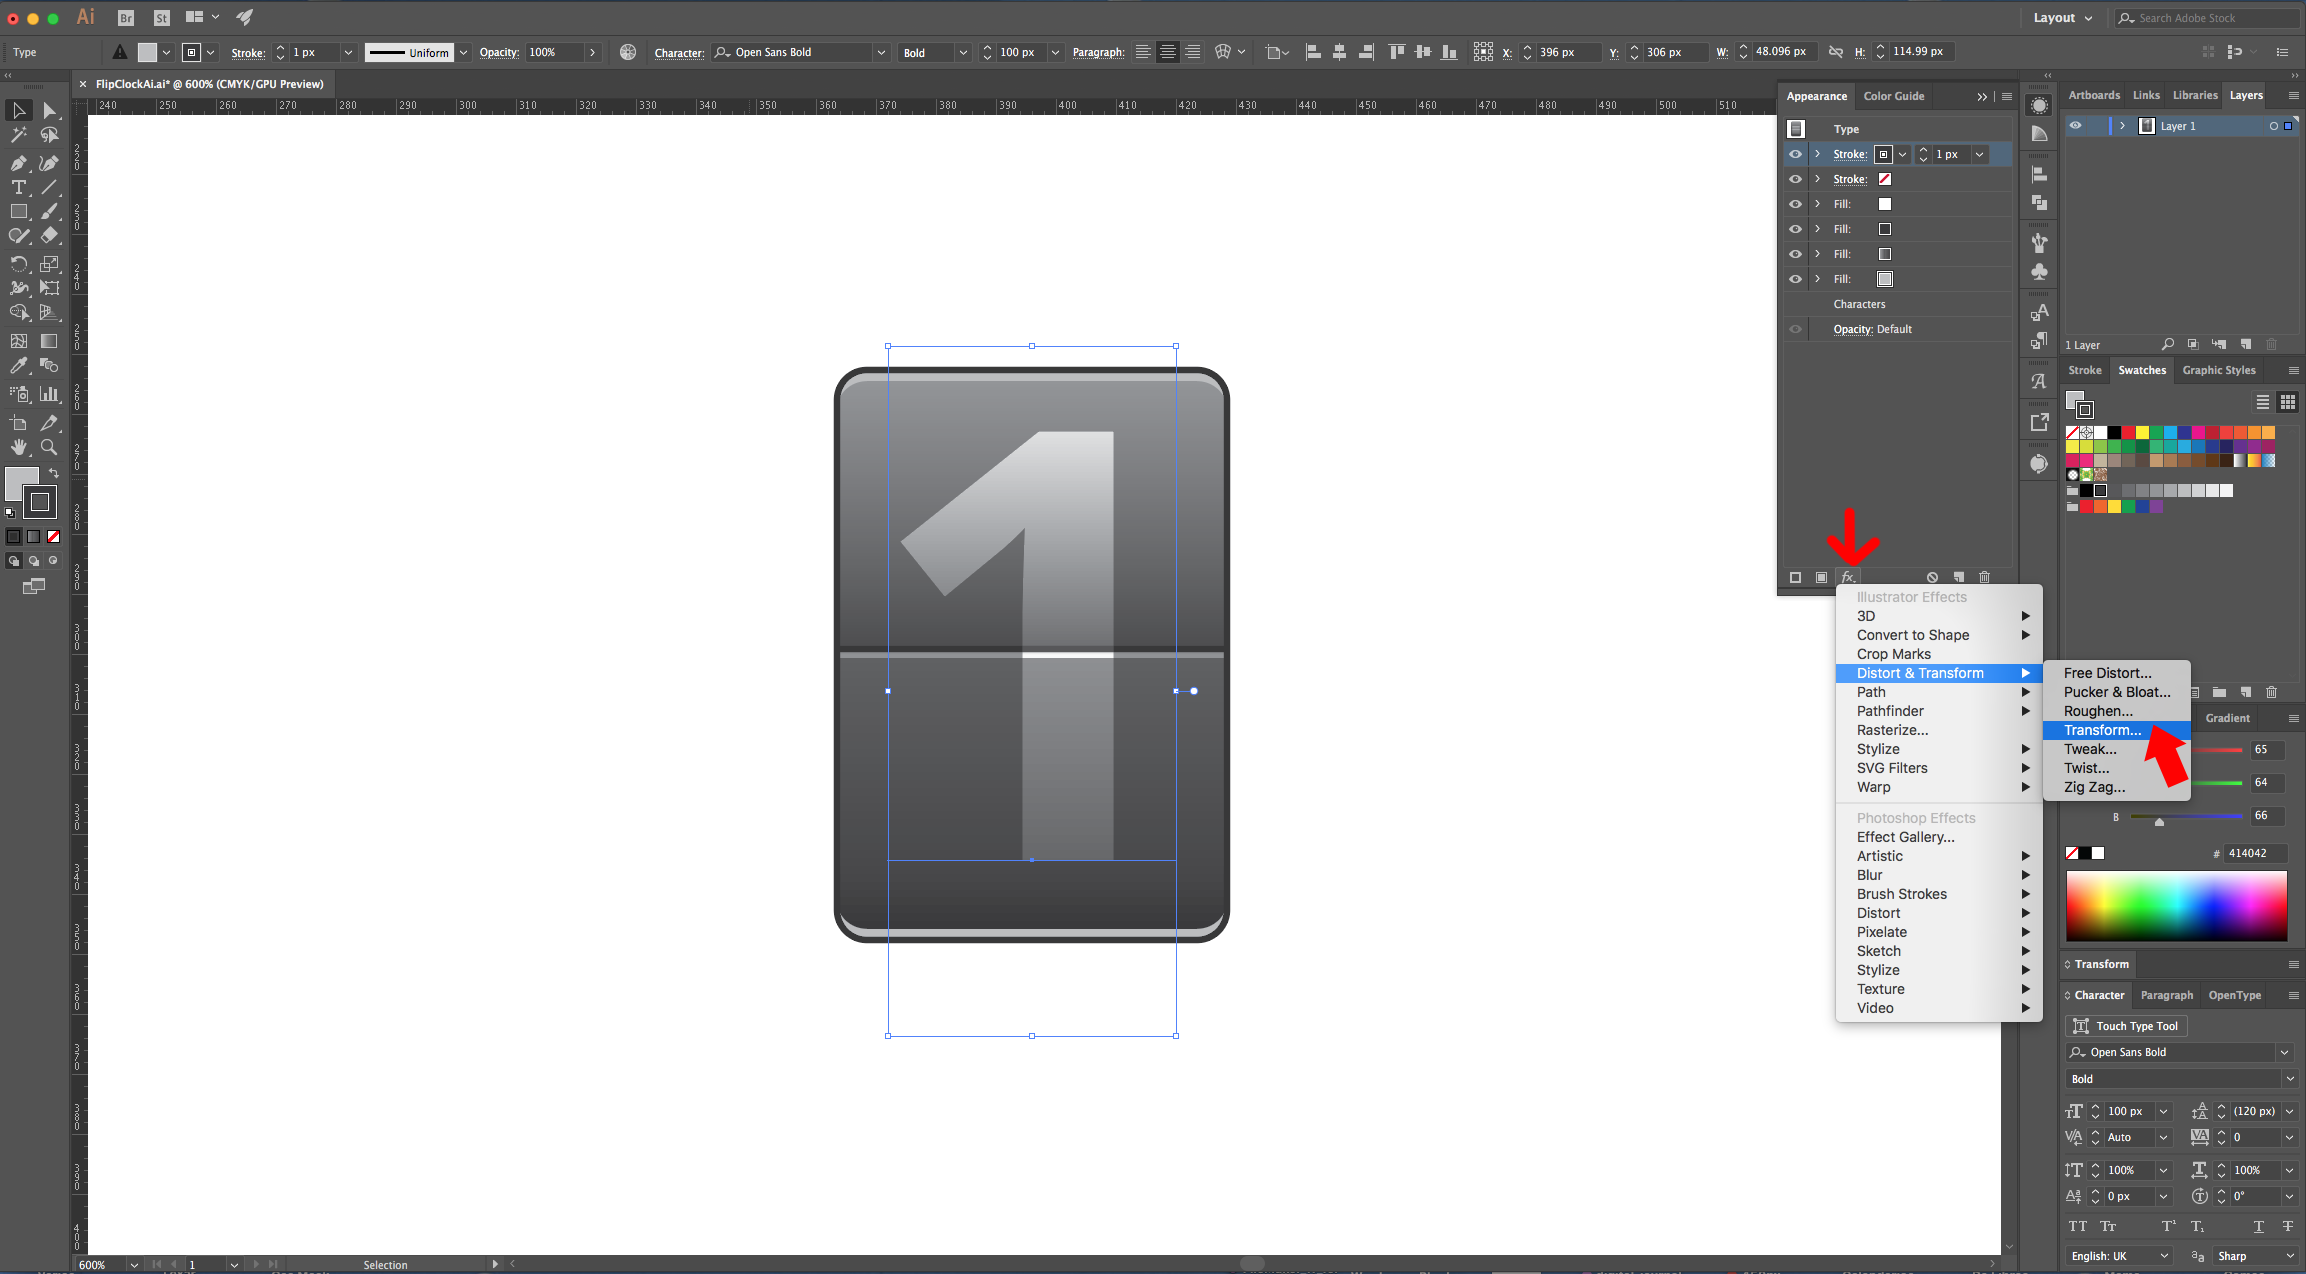
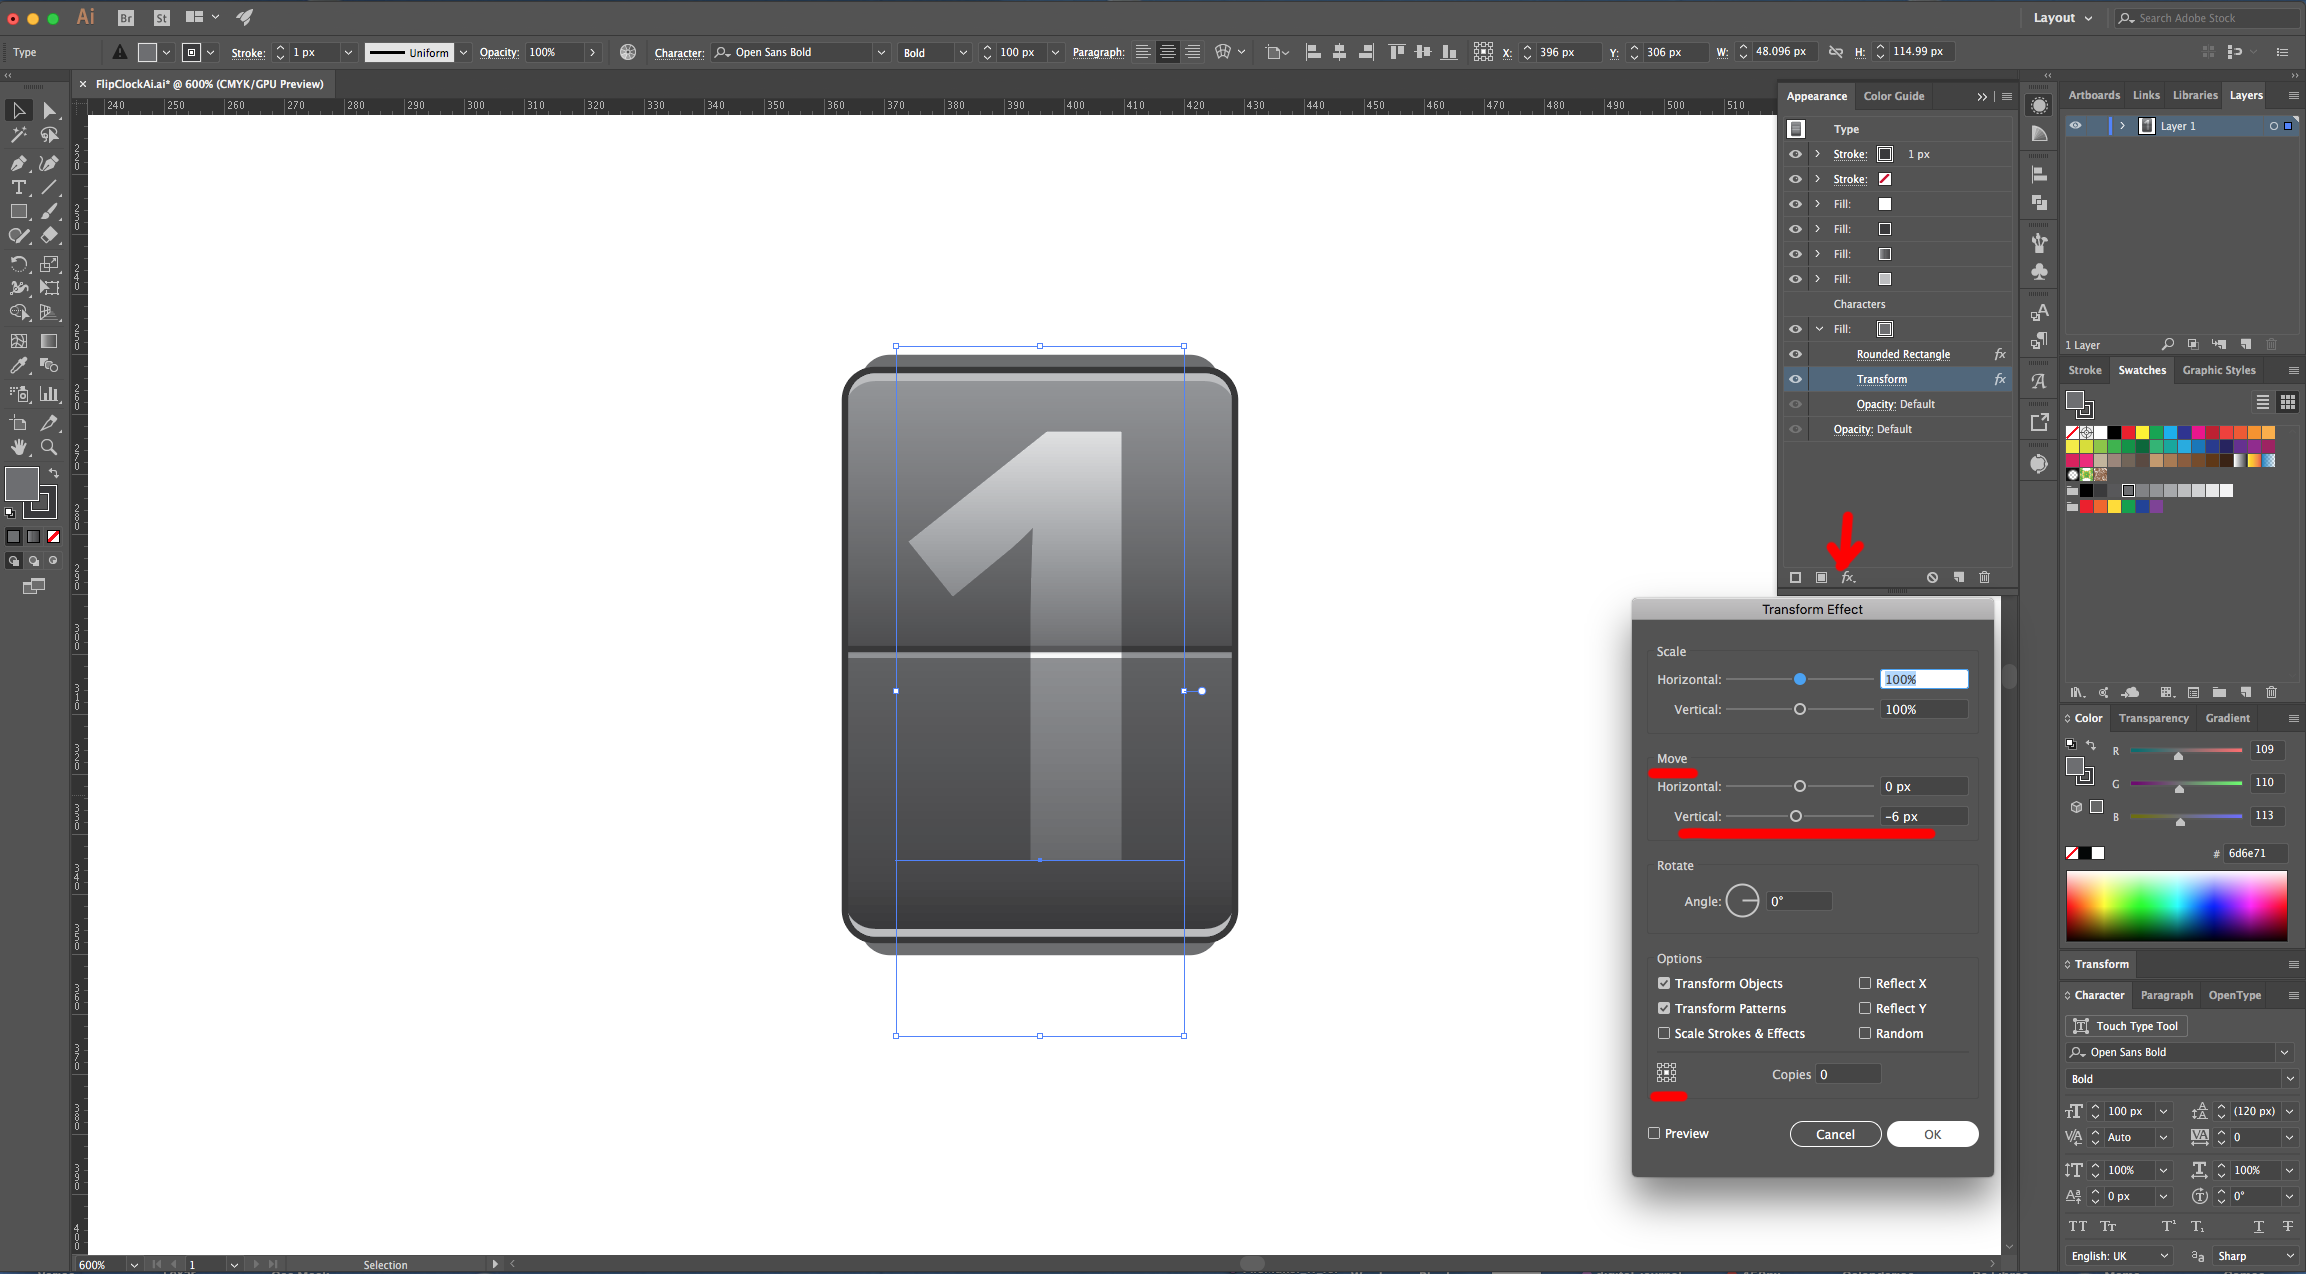
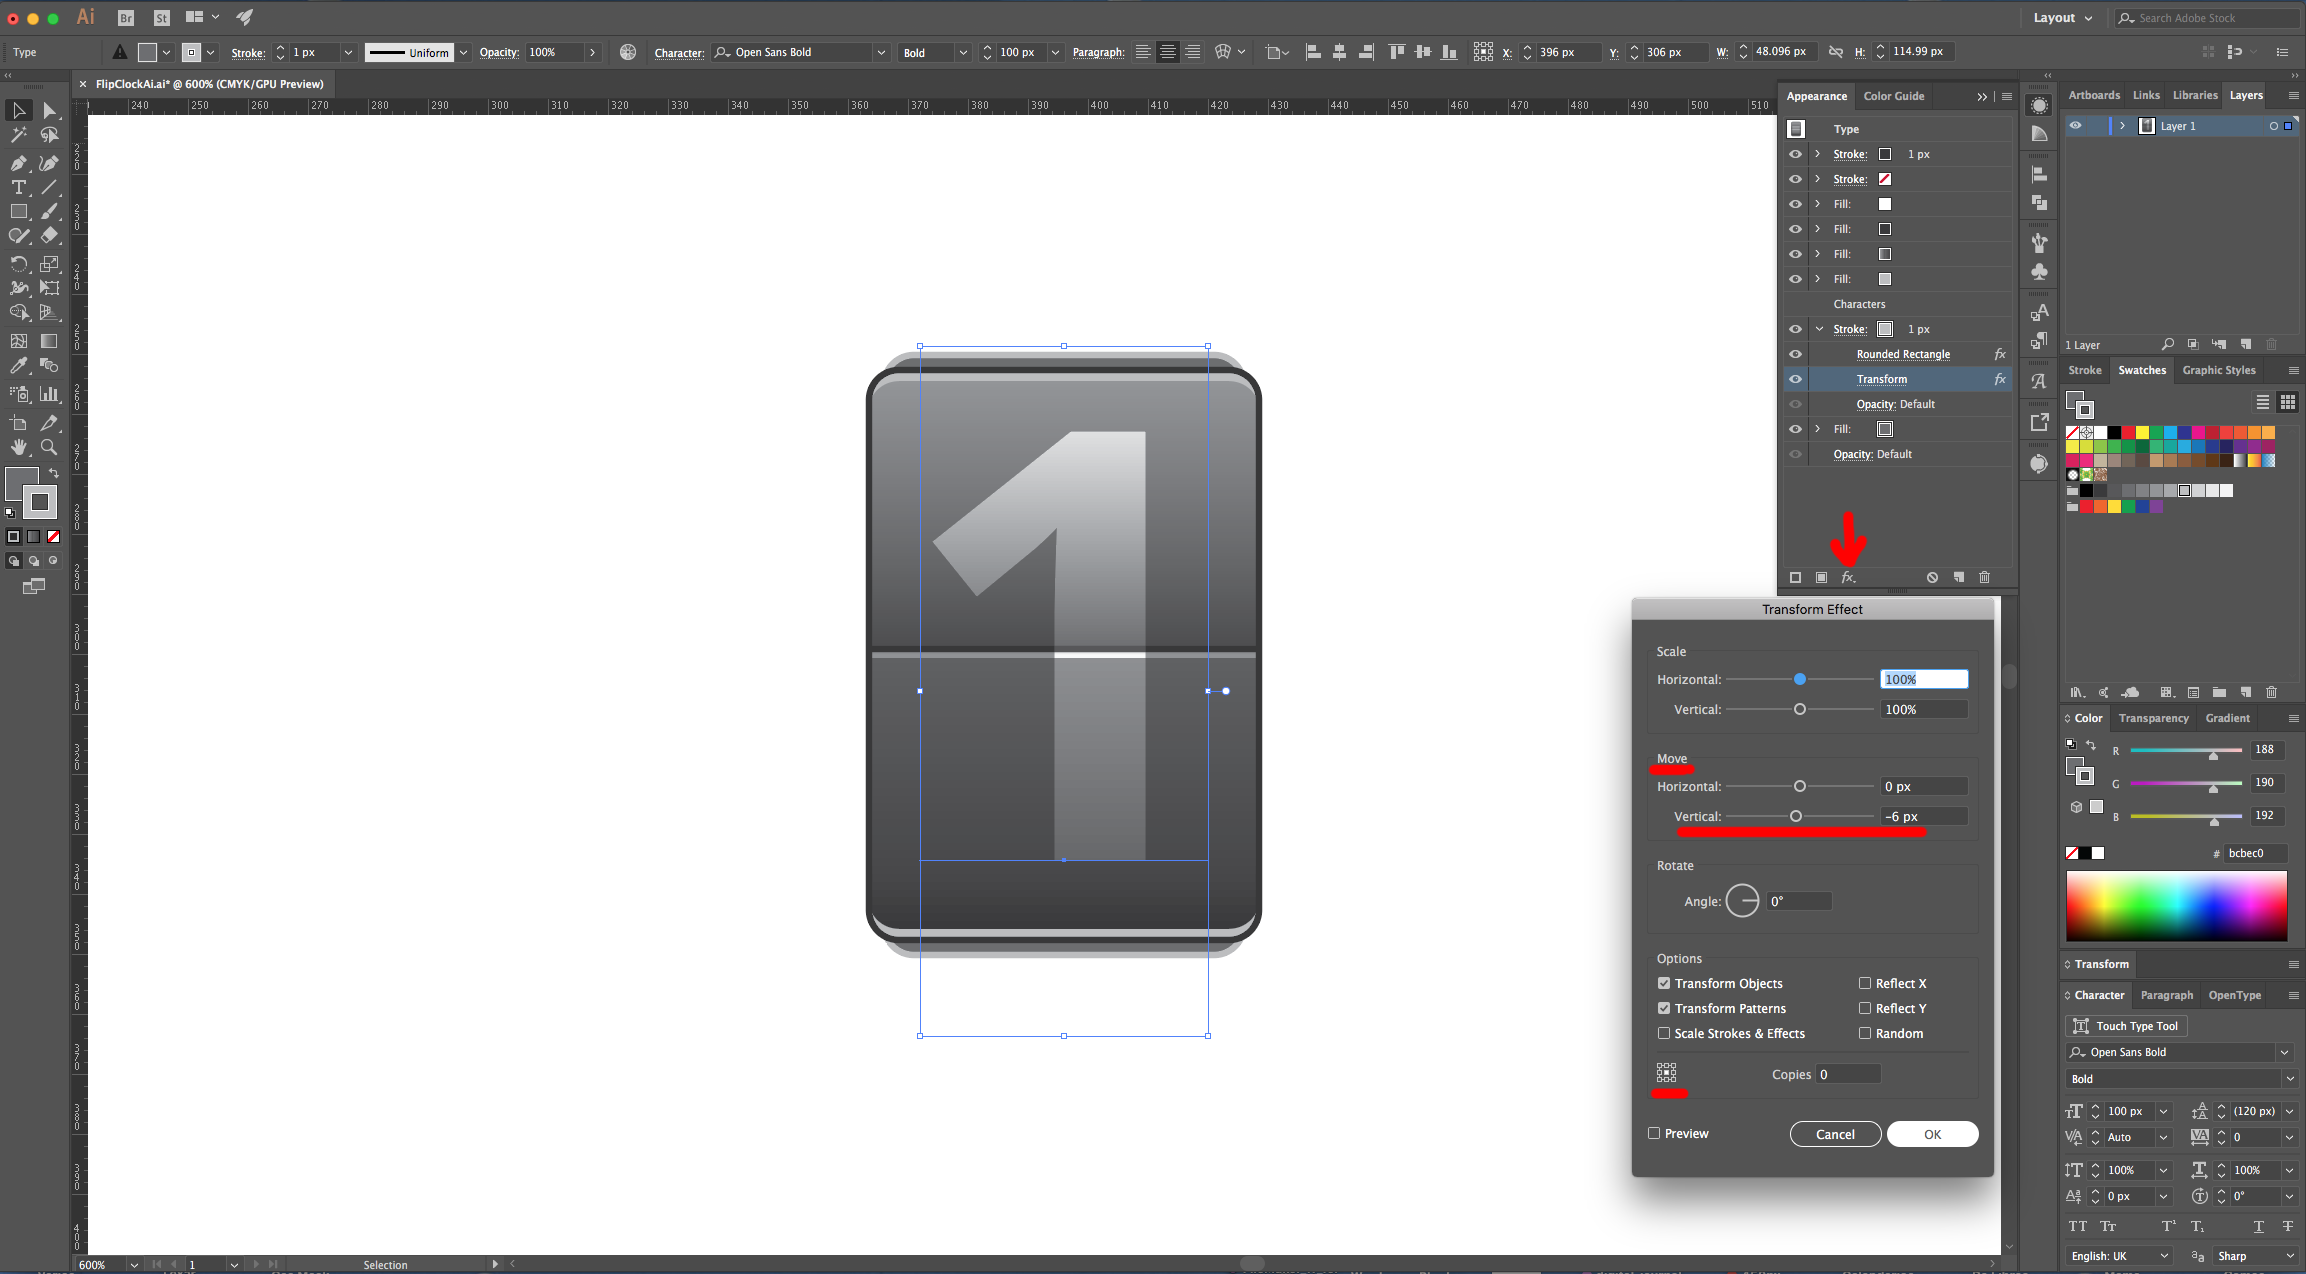
6 - Click on the “Effects Menu” again and navigate to Distort & Transform > Transform … and use the following values. Once you are done click “OK”.
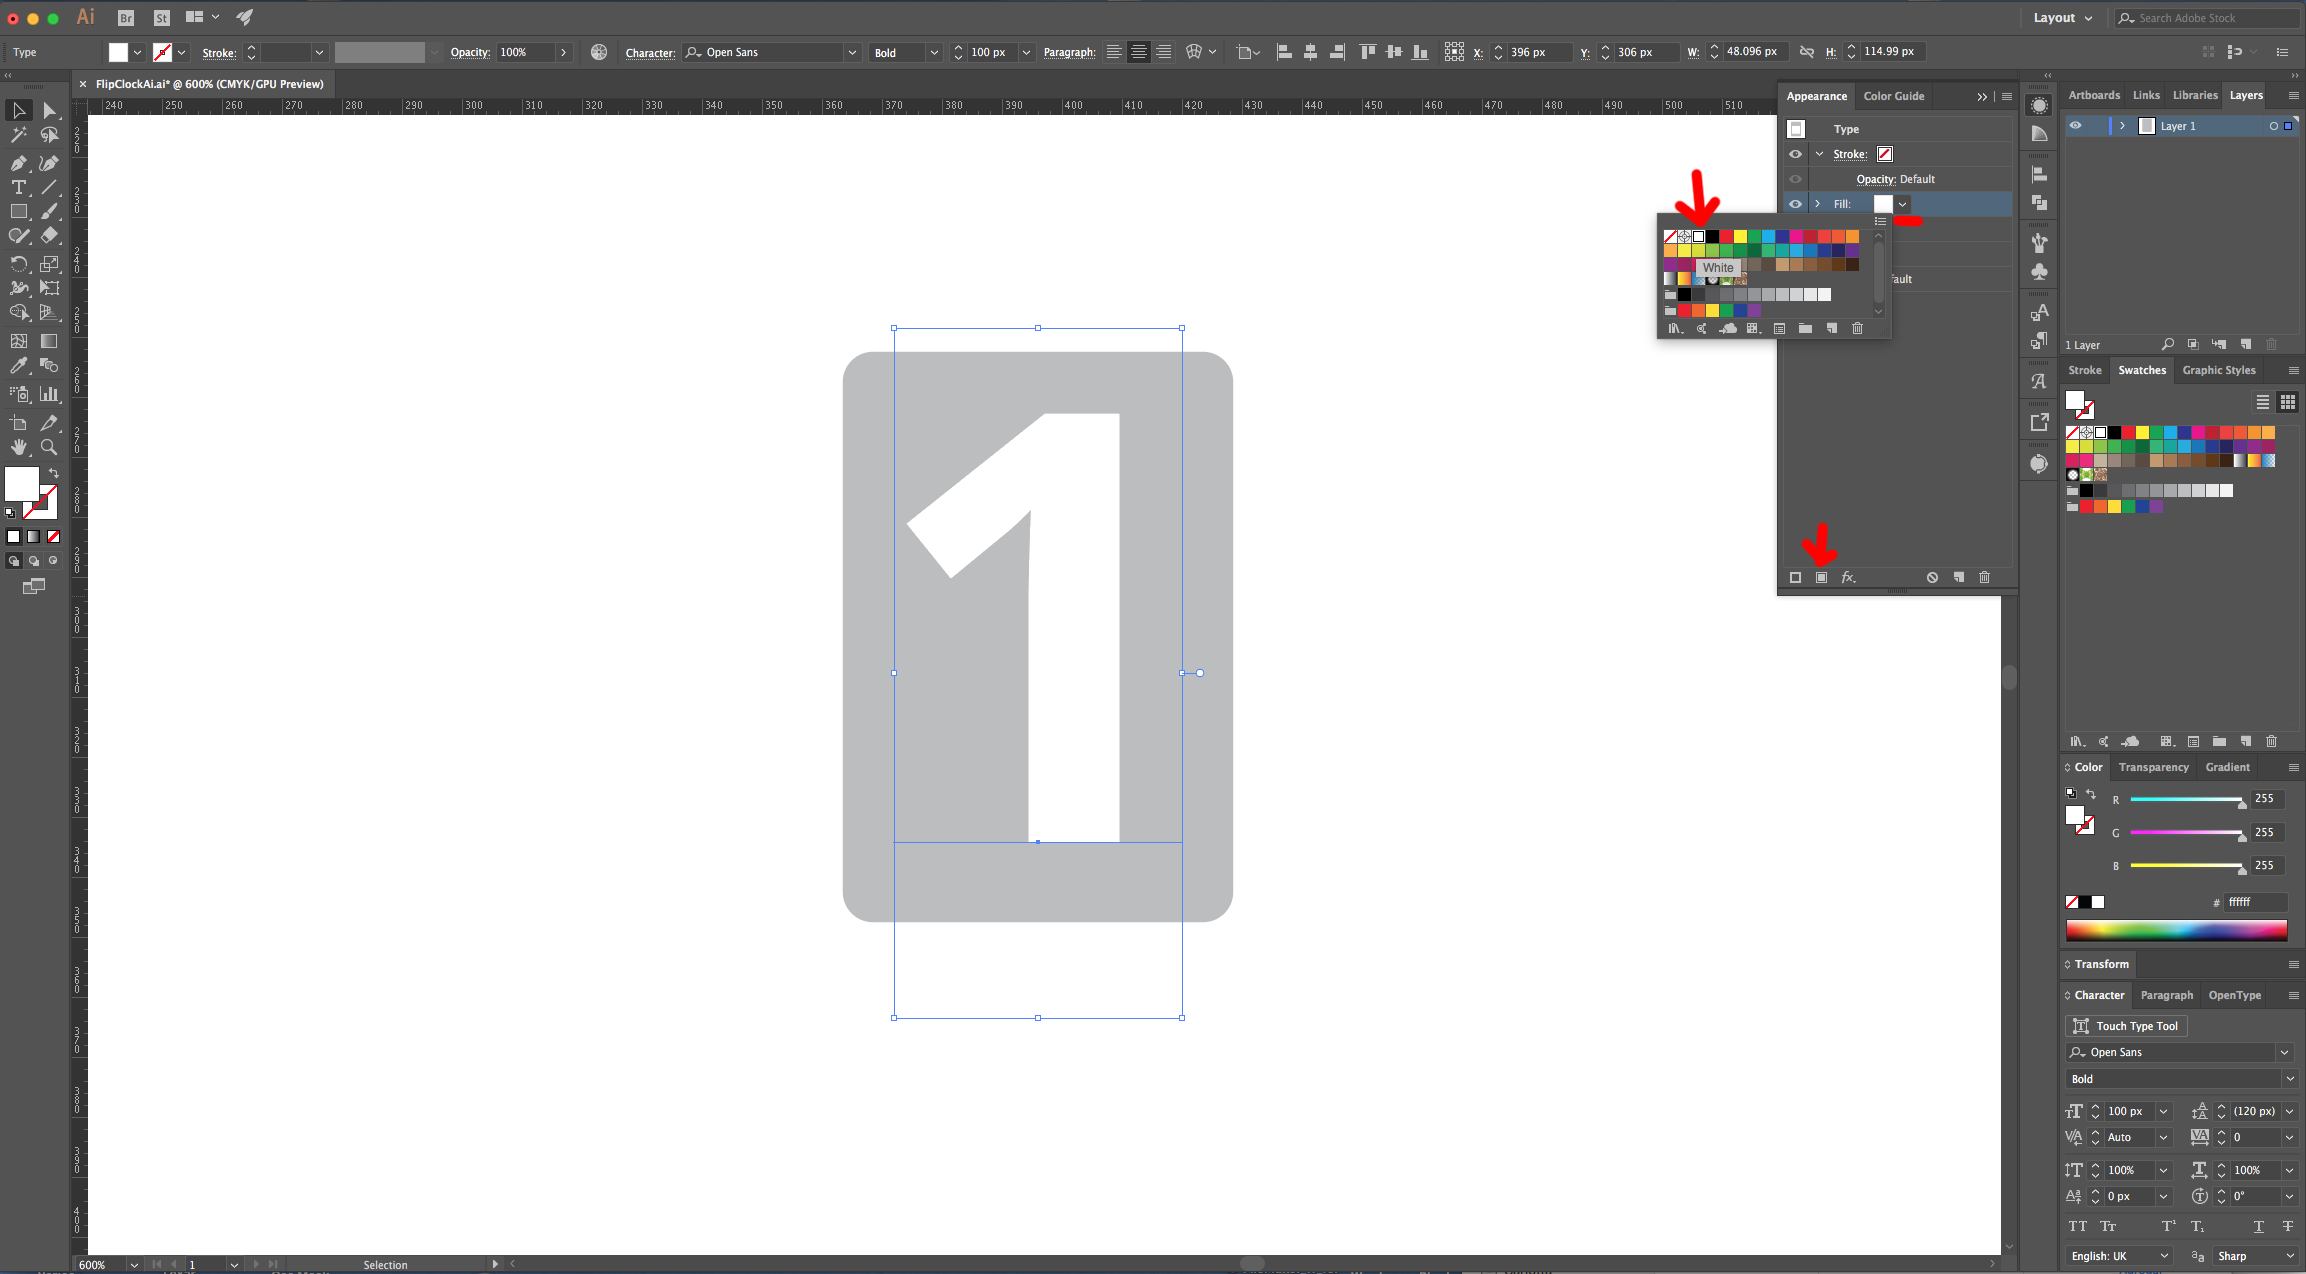
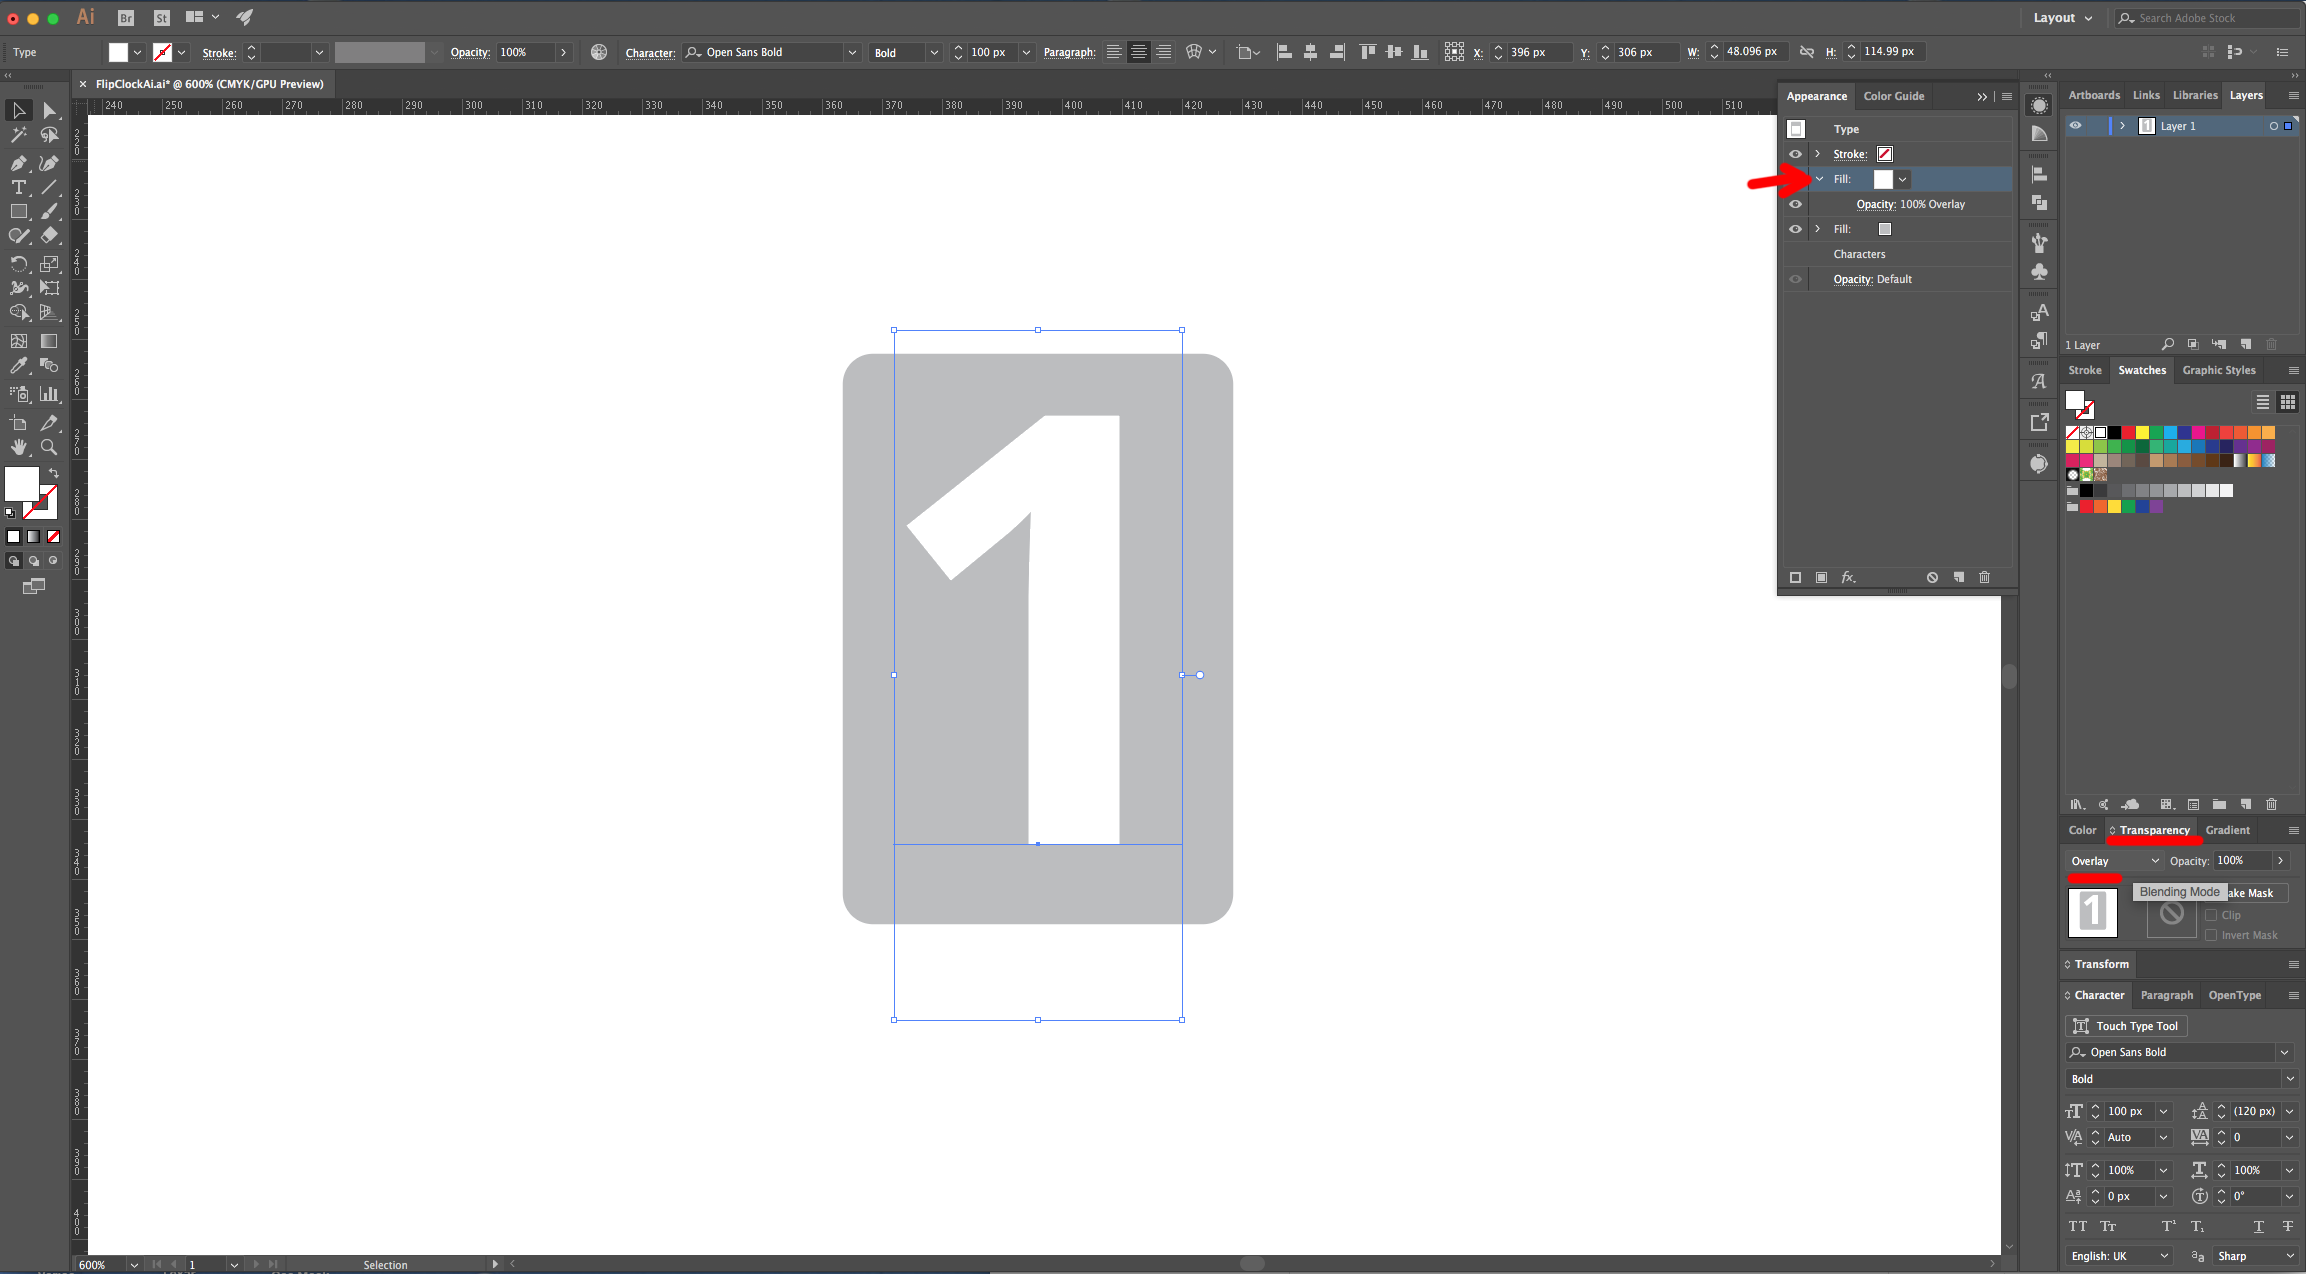
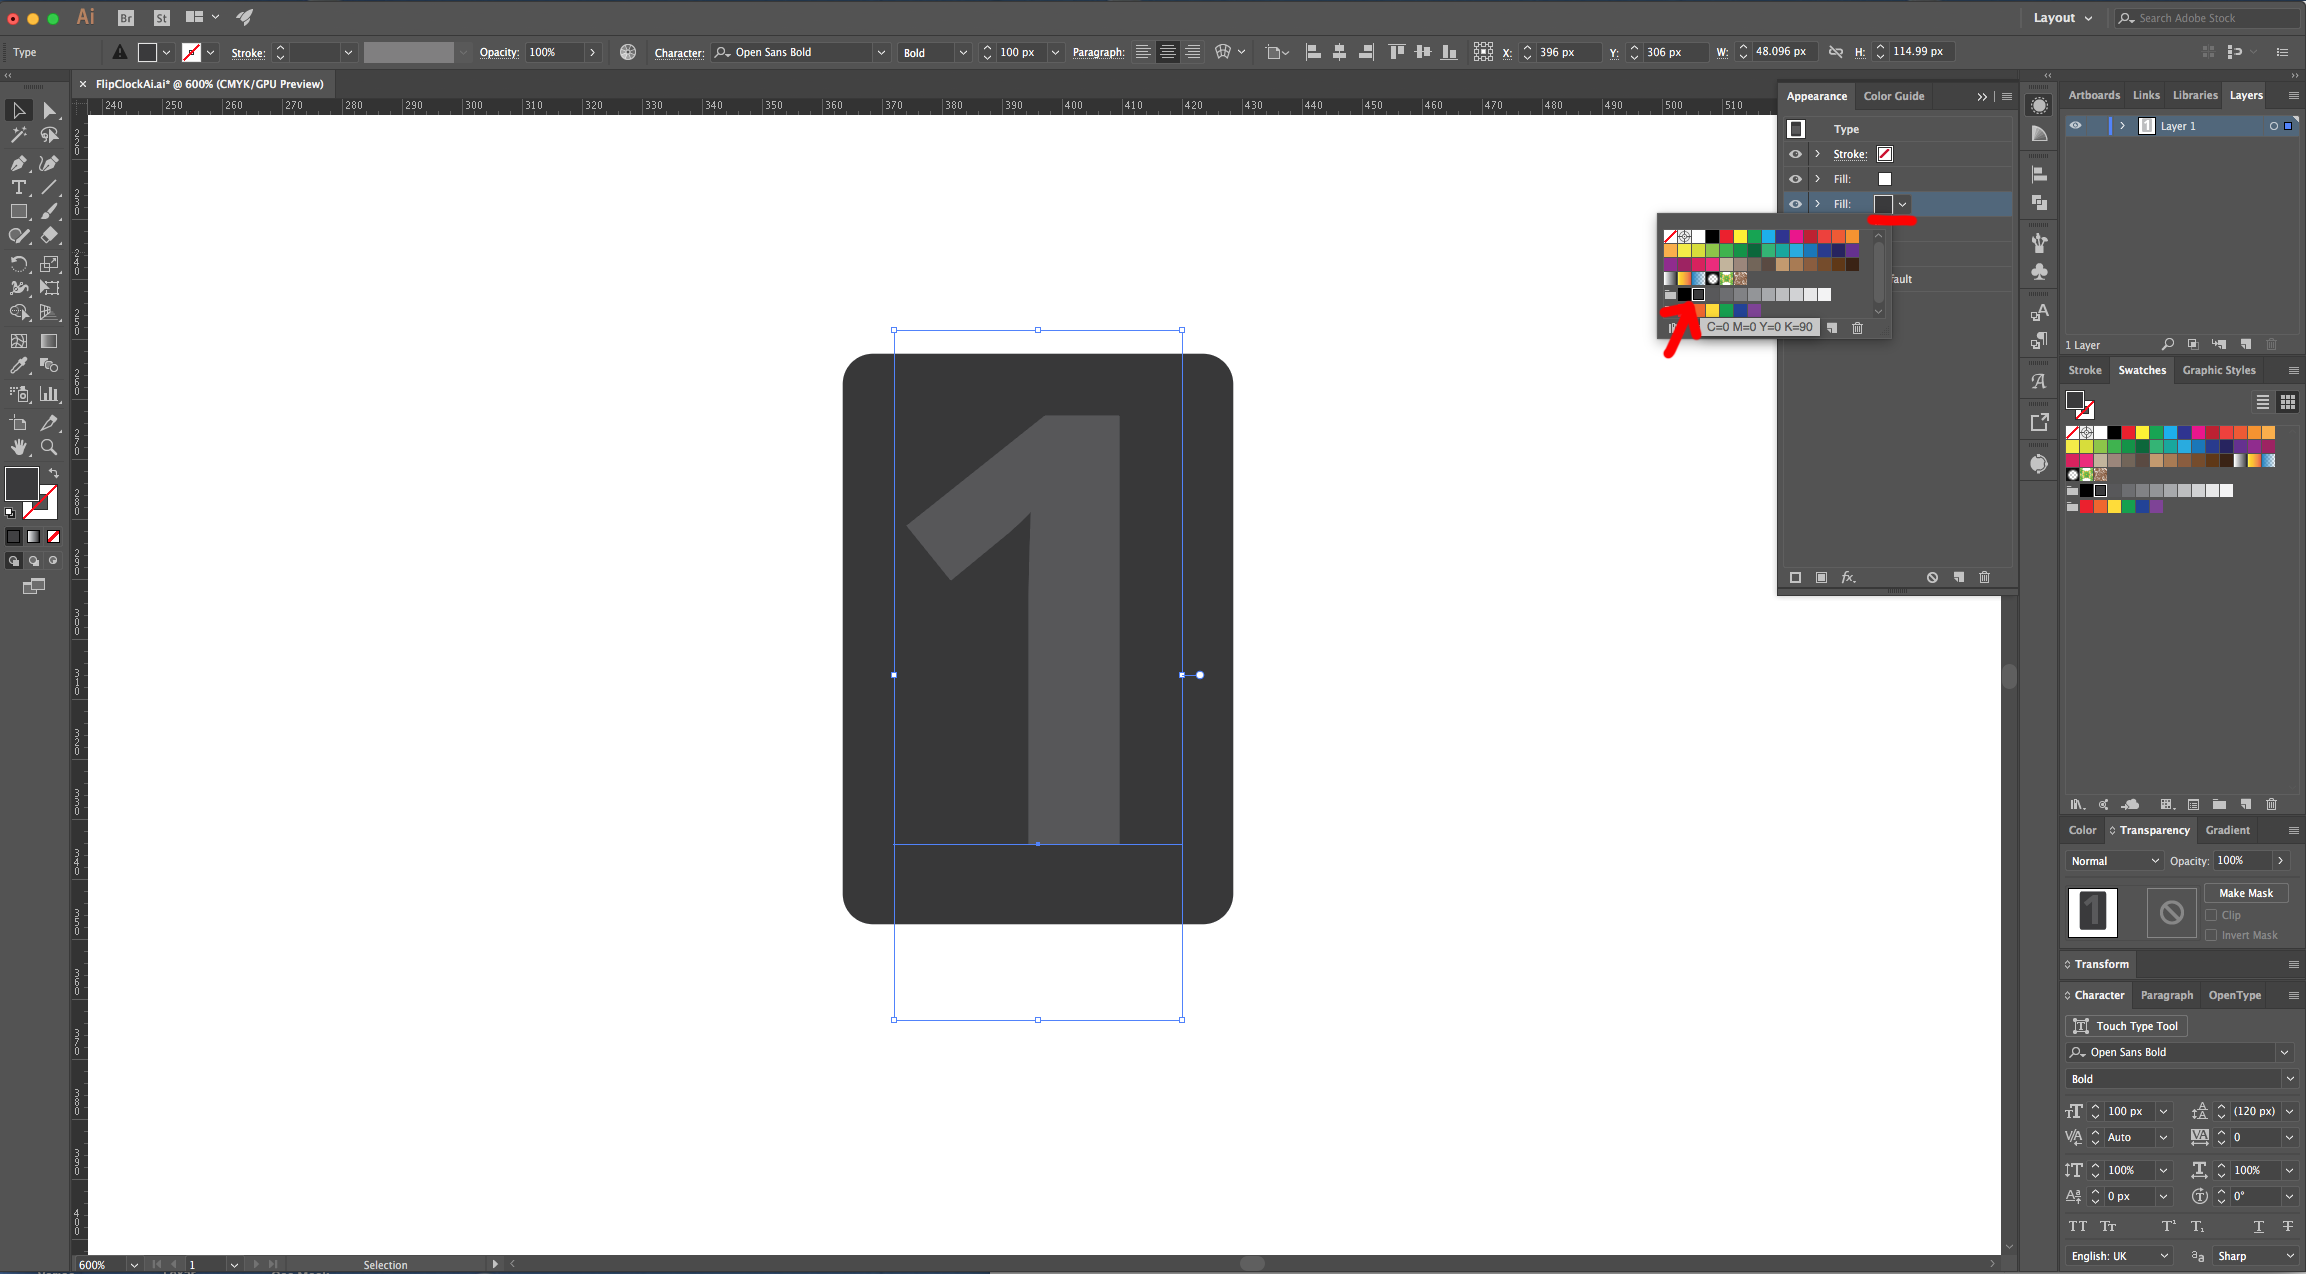
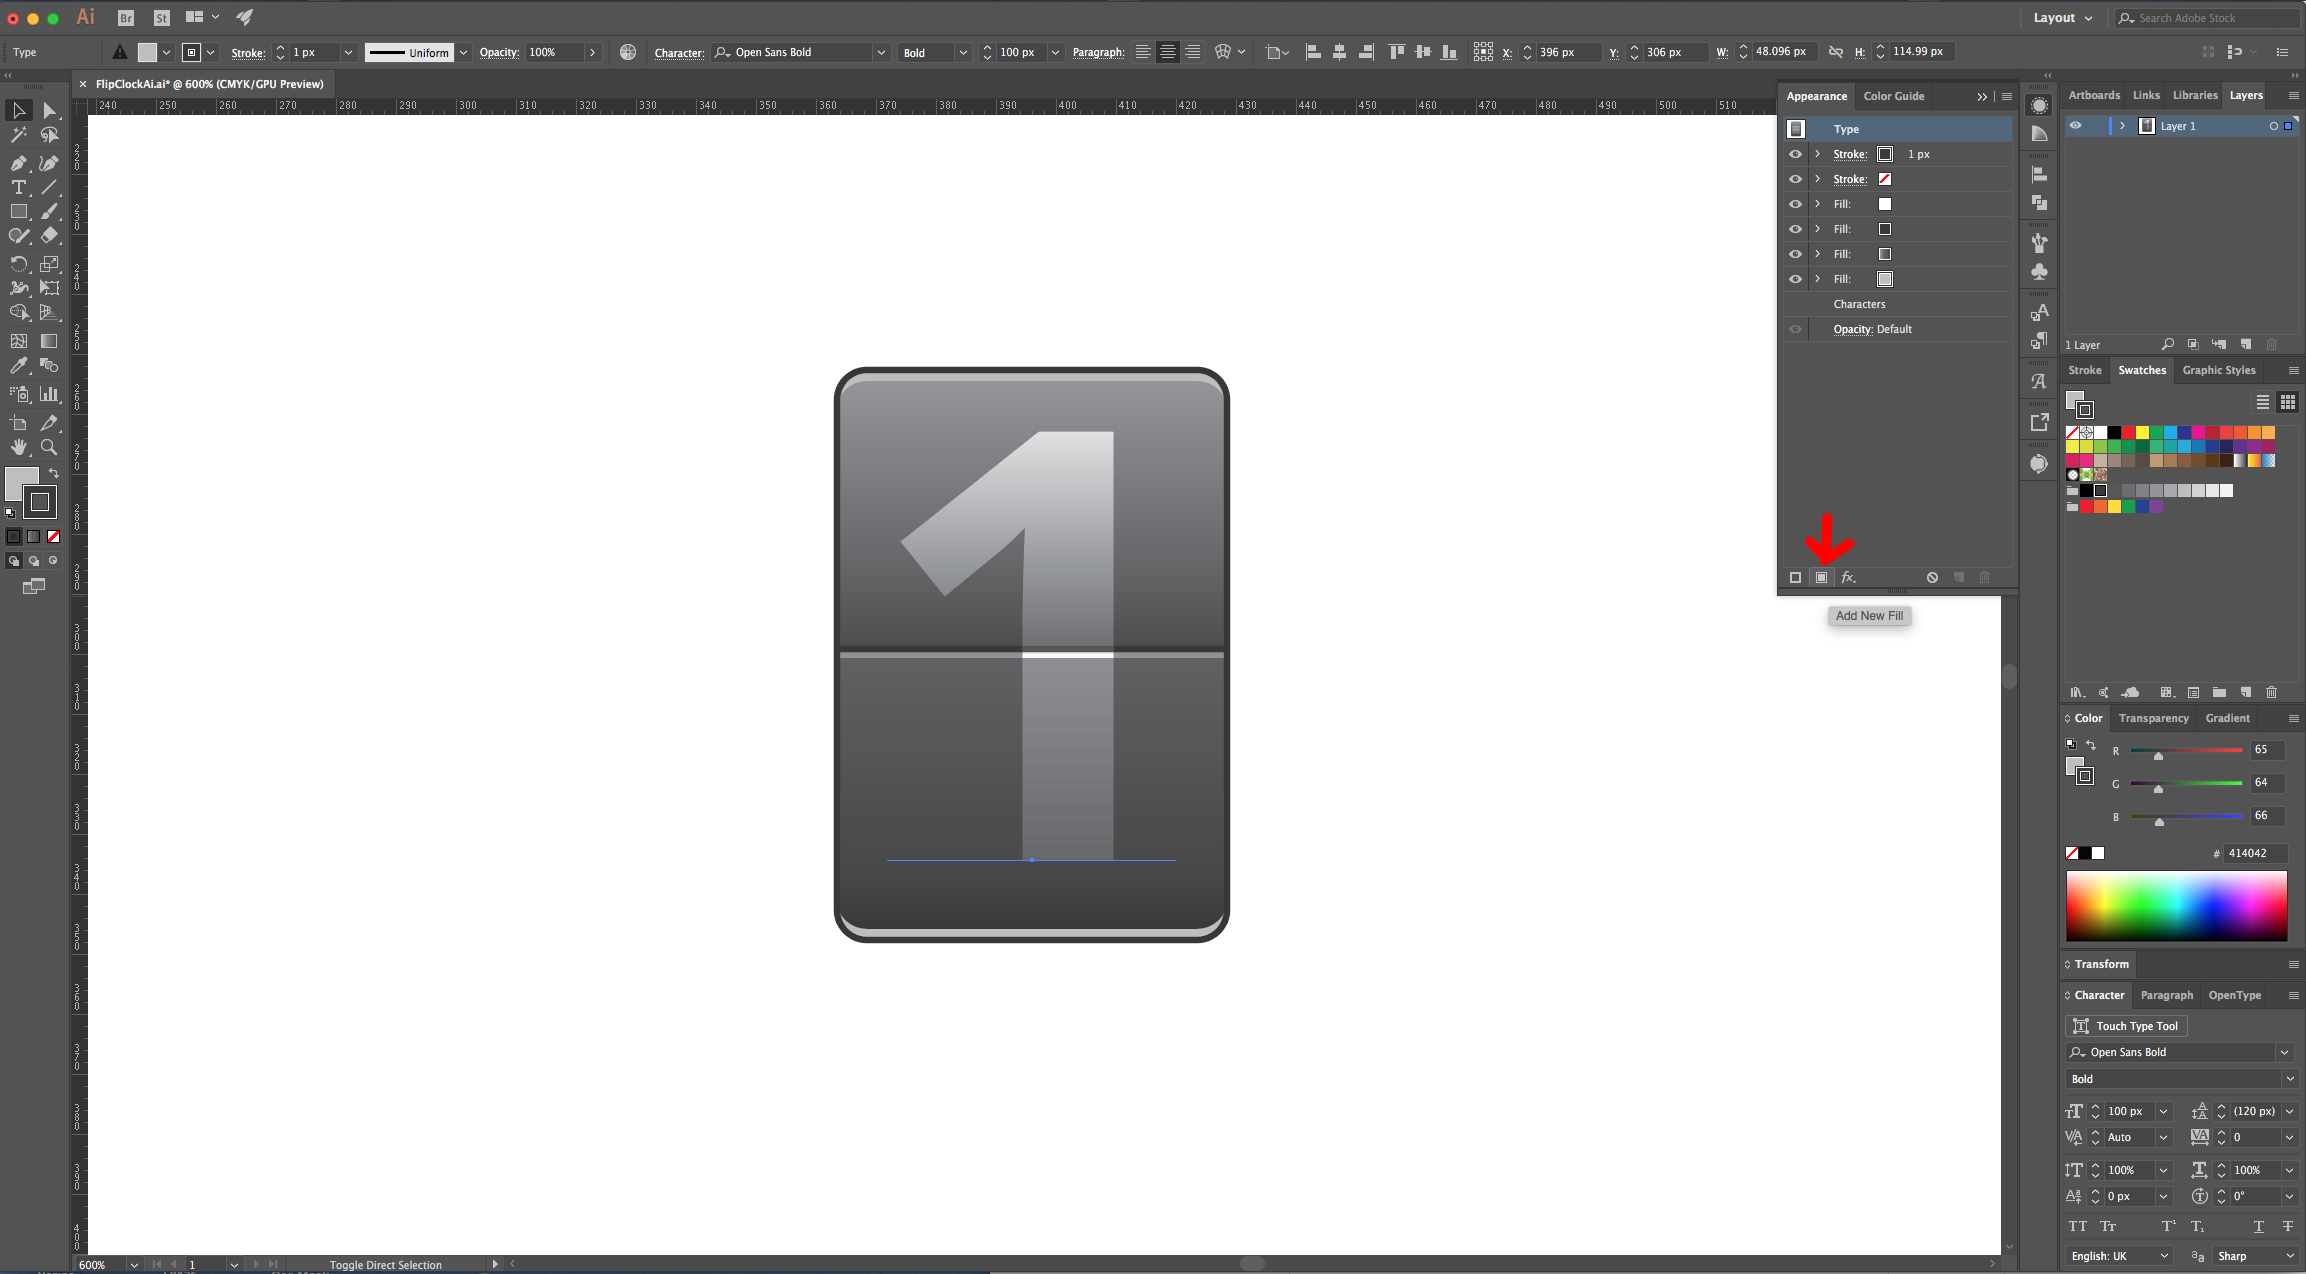
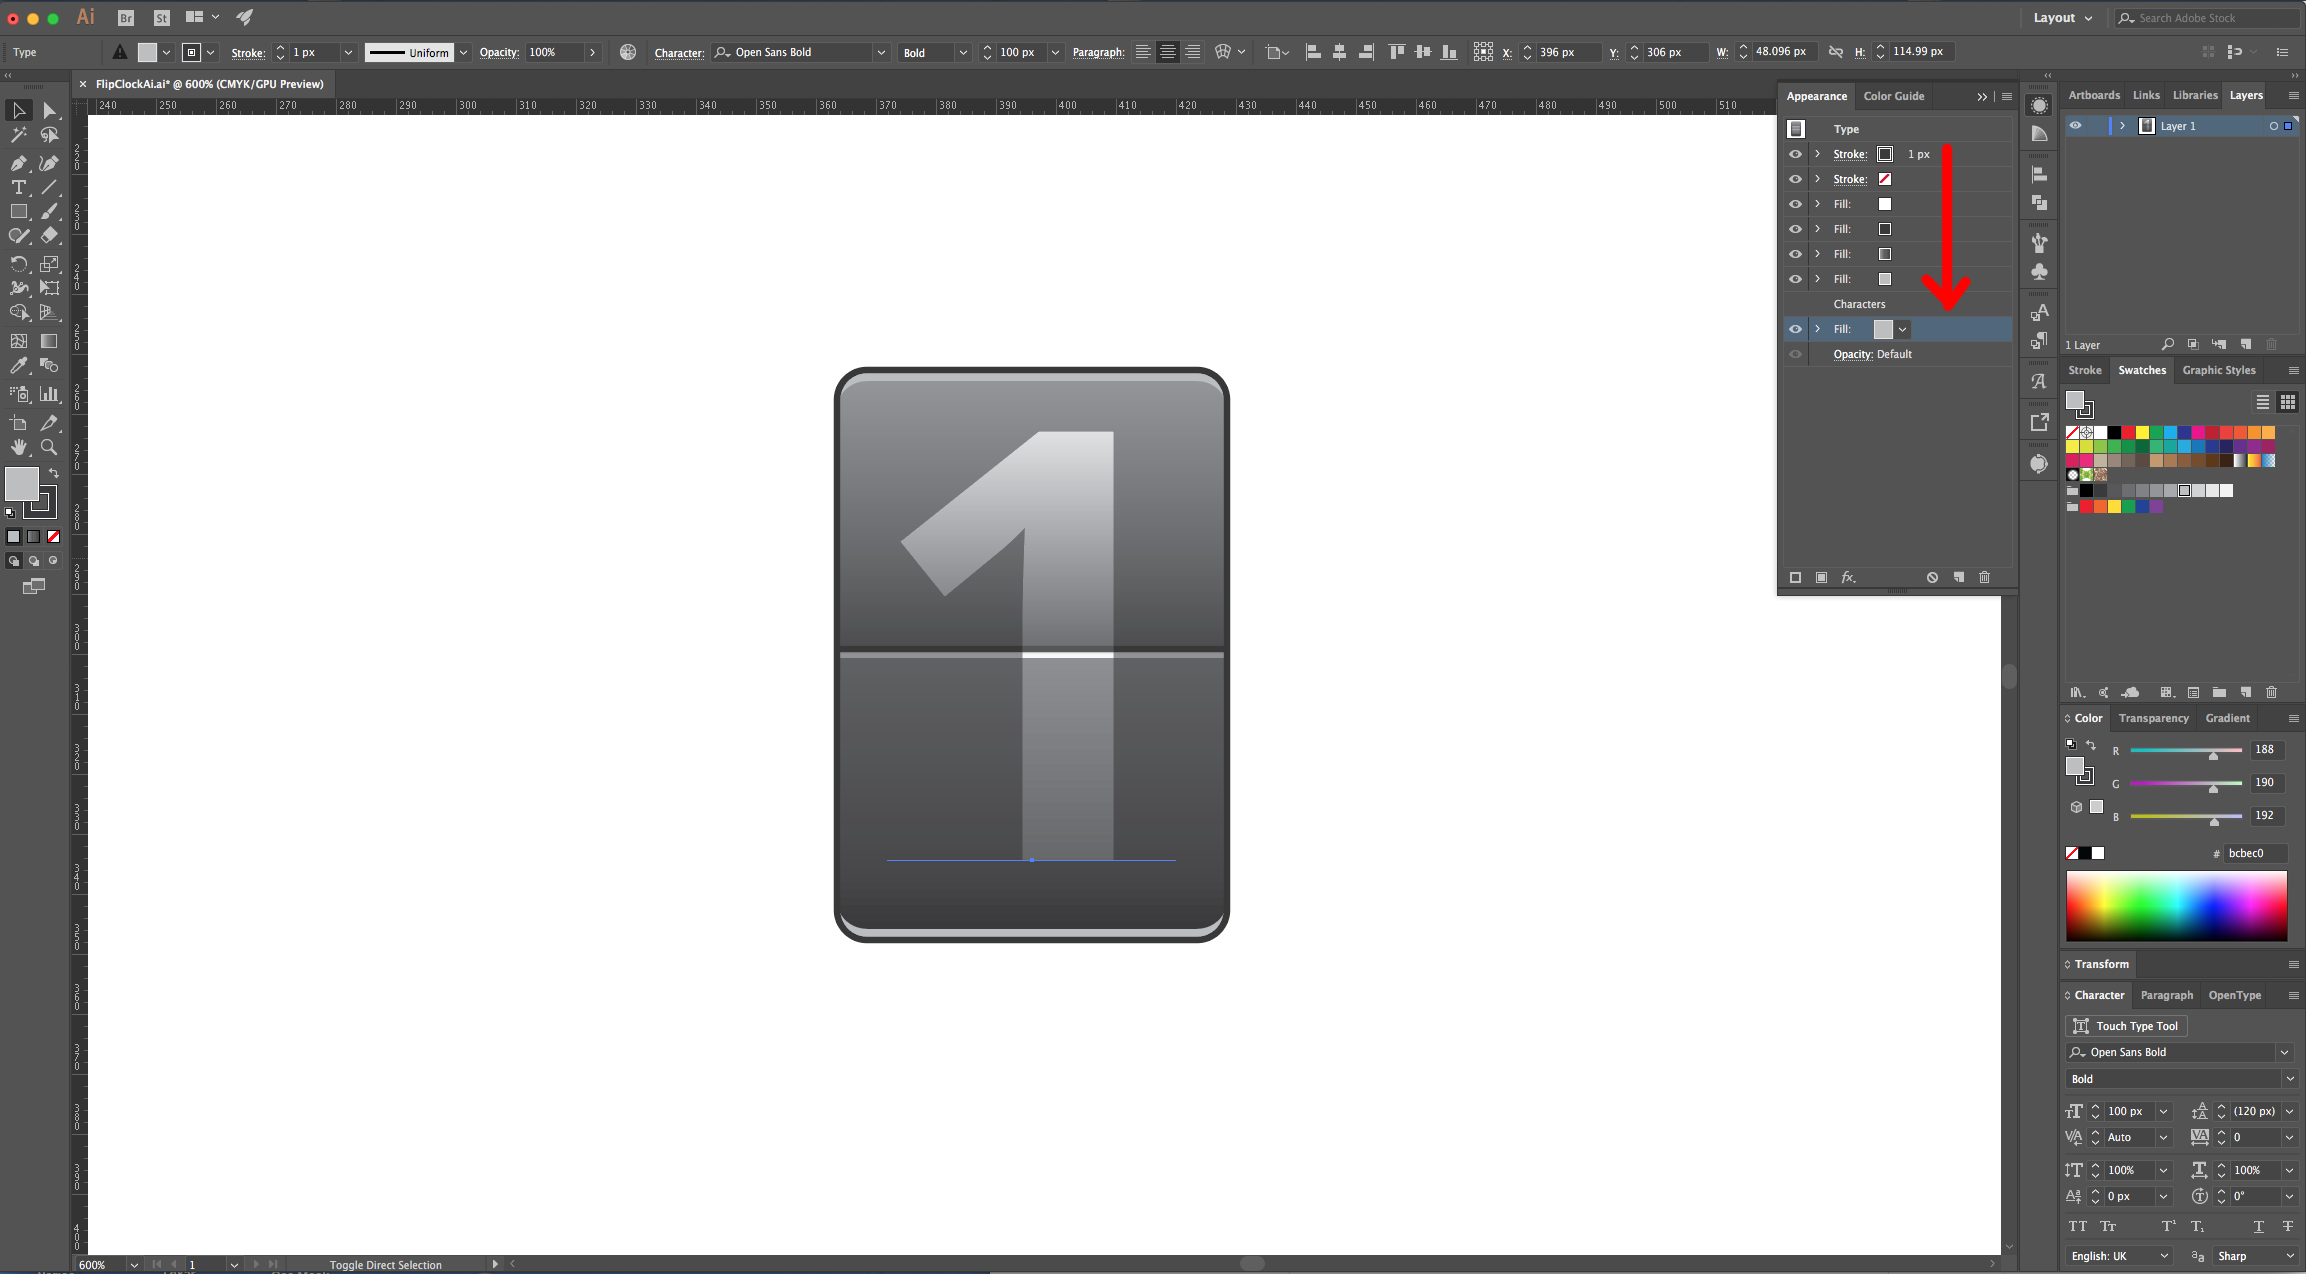
7 - Without deselecting your Text, create another “Fill”, make sure it is on top of the other one, use White as fill color and change the “Blending Mode” in the “Transparency Panel” to “Overlay”.
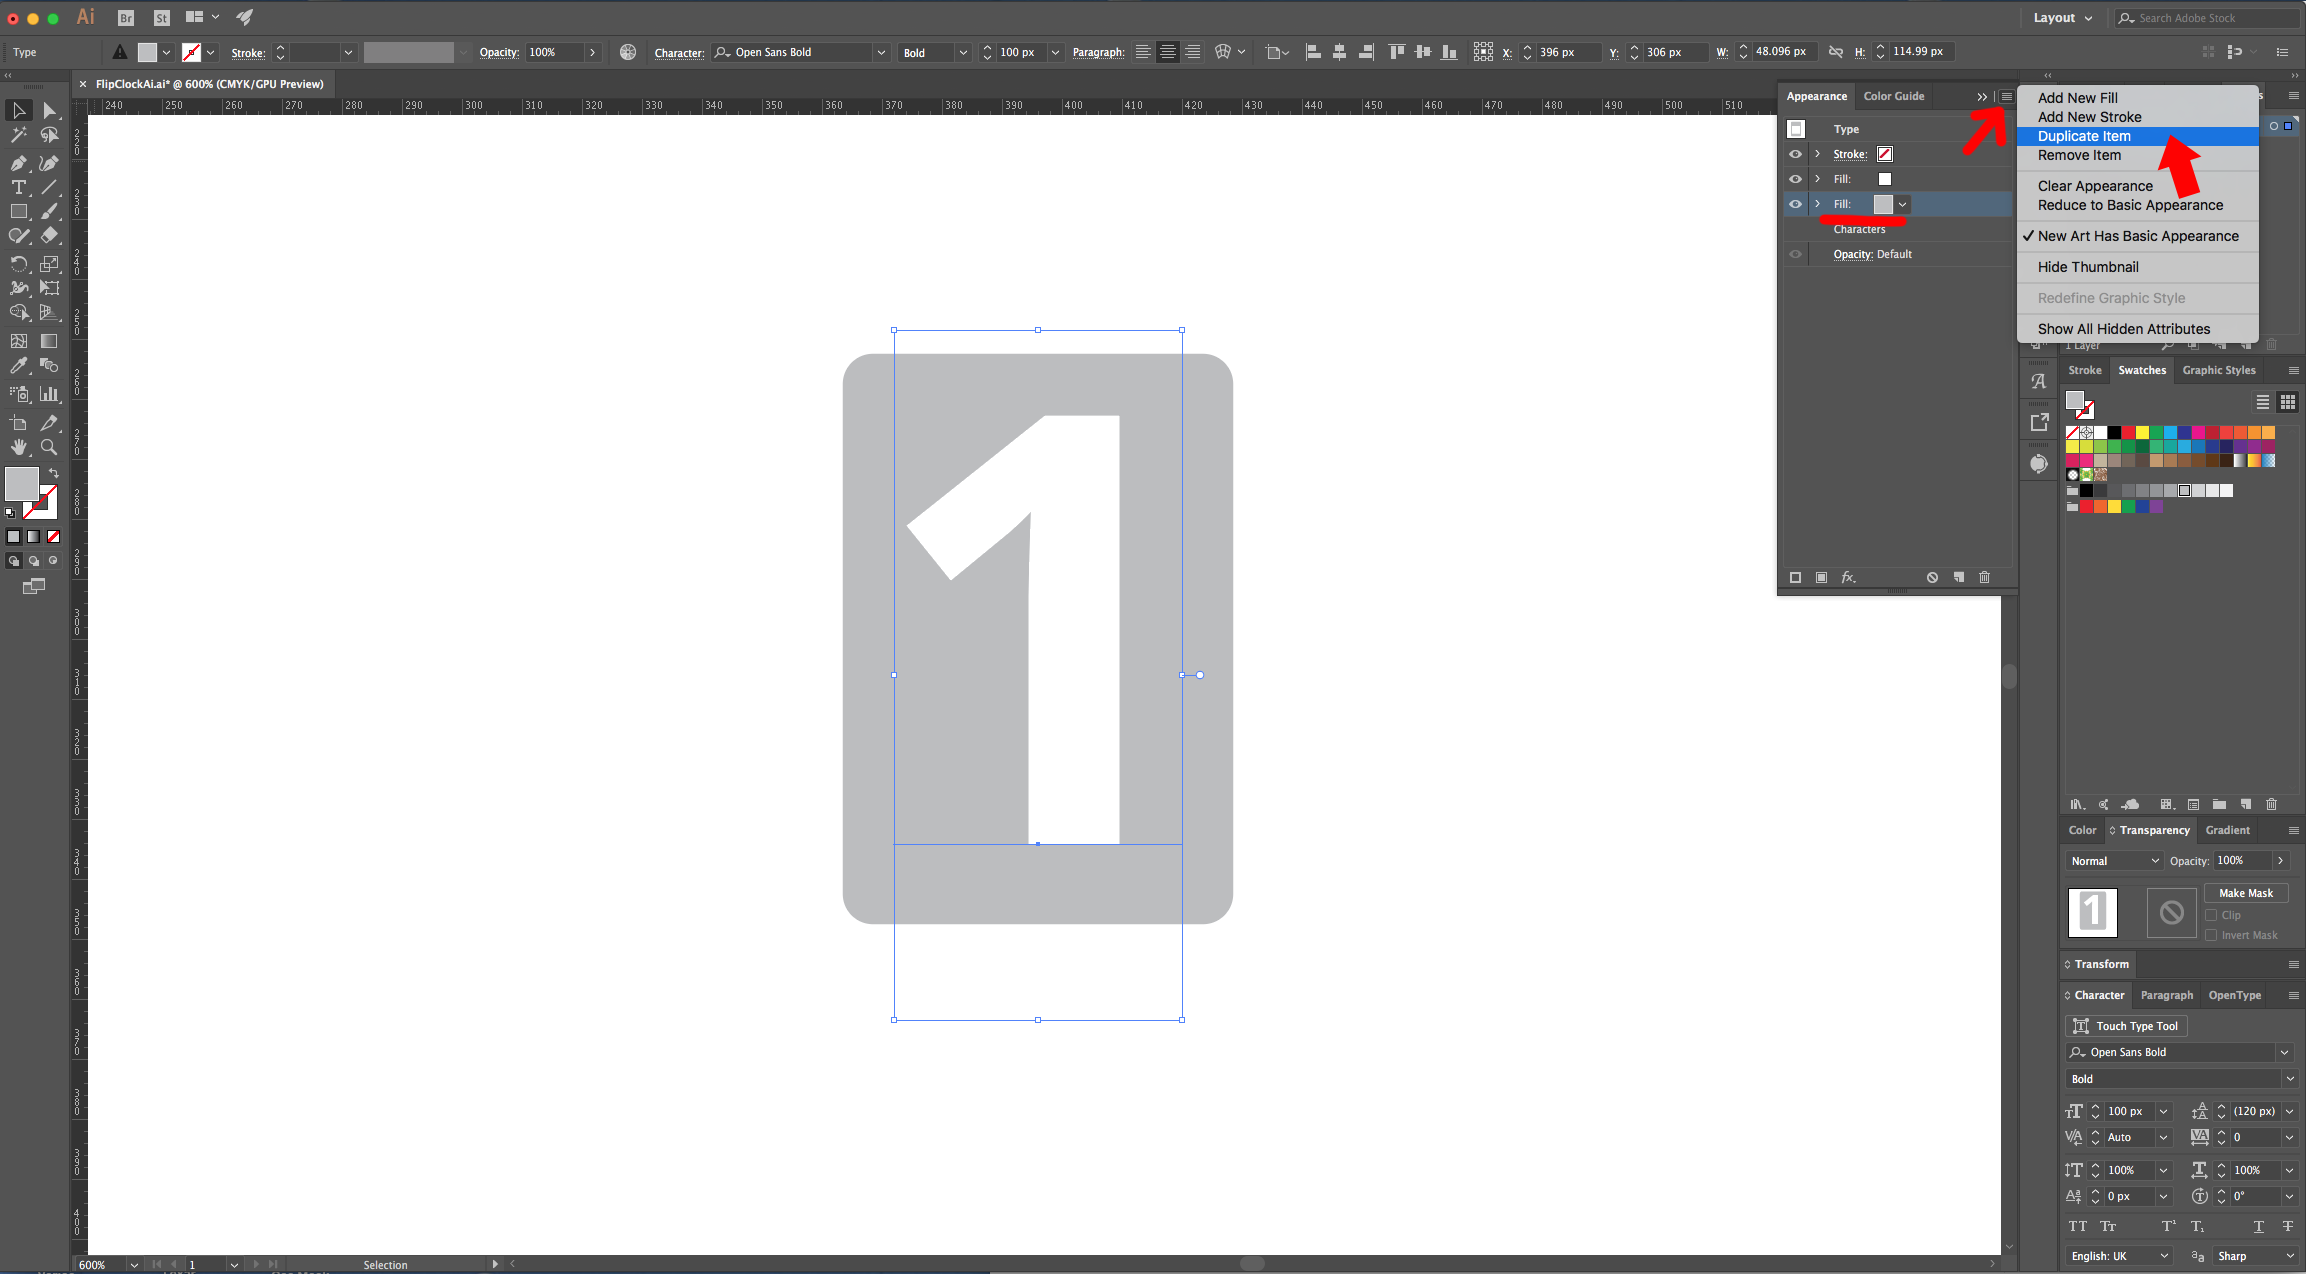
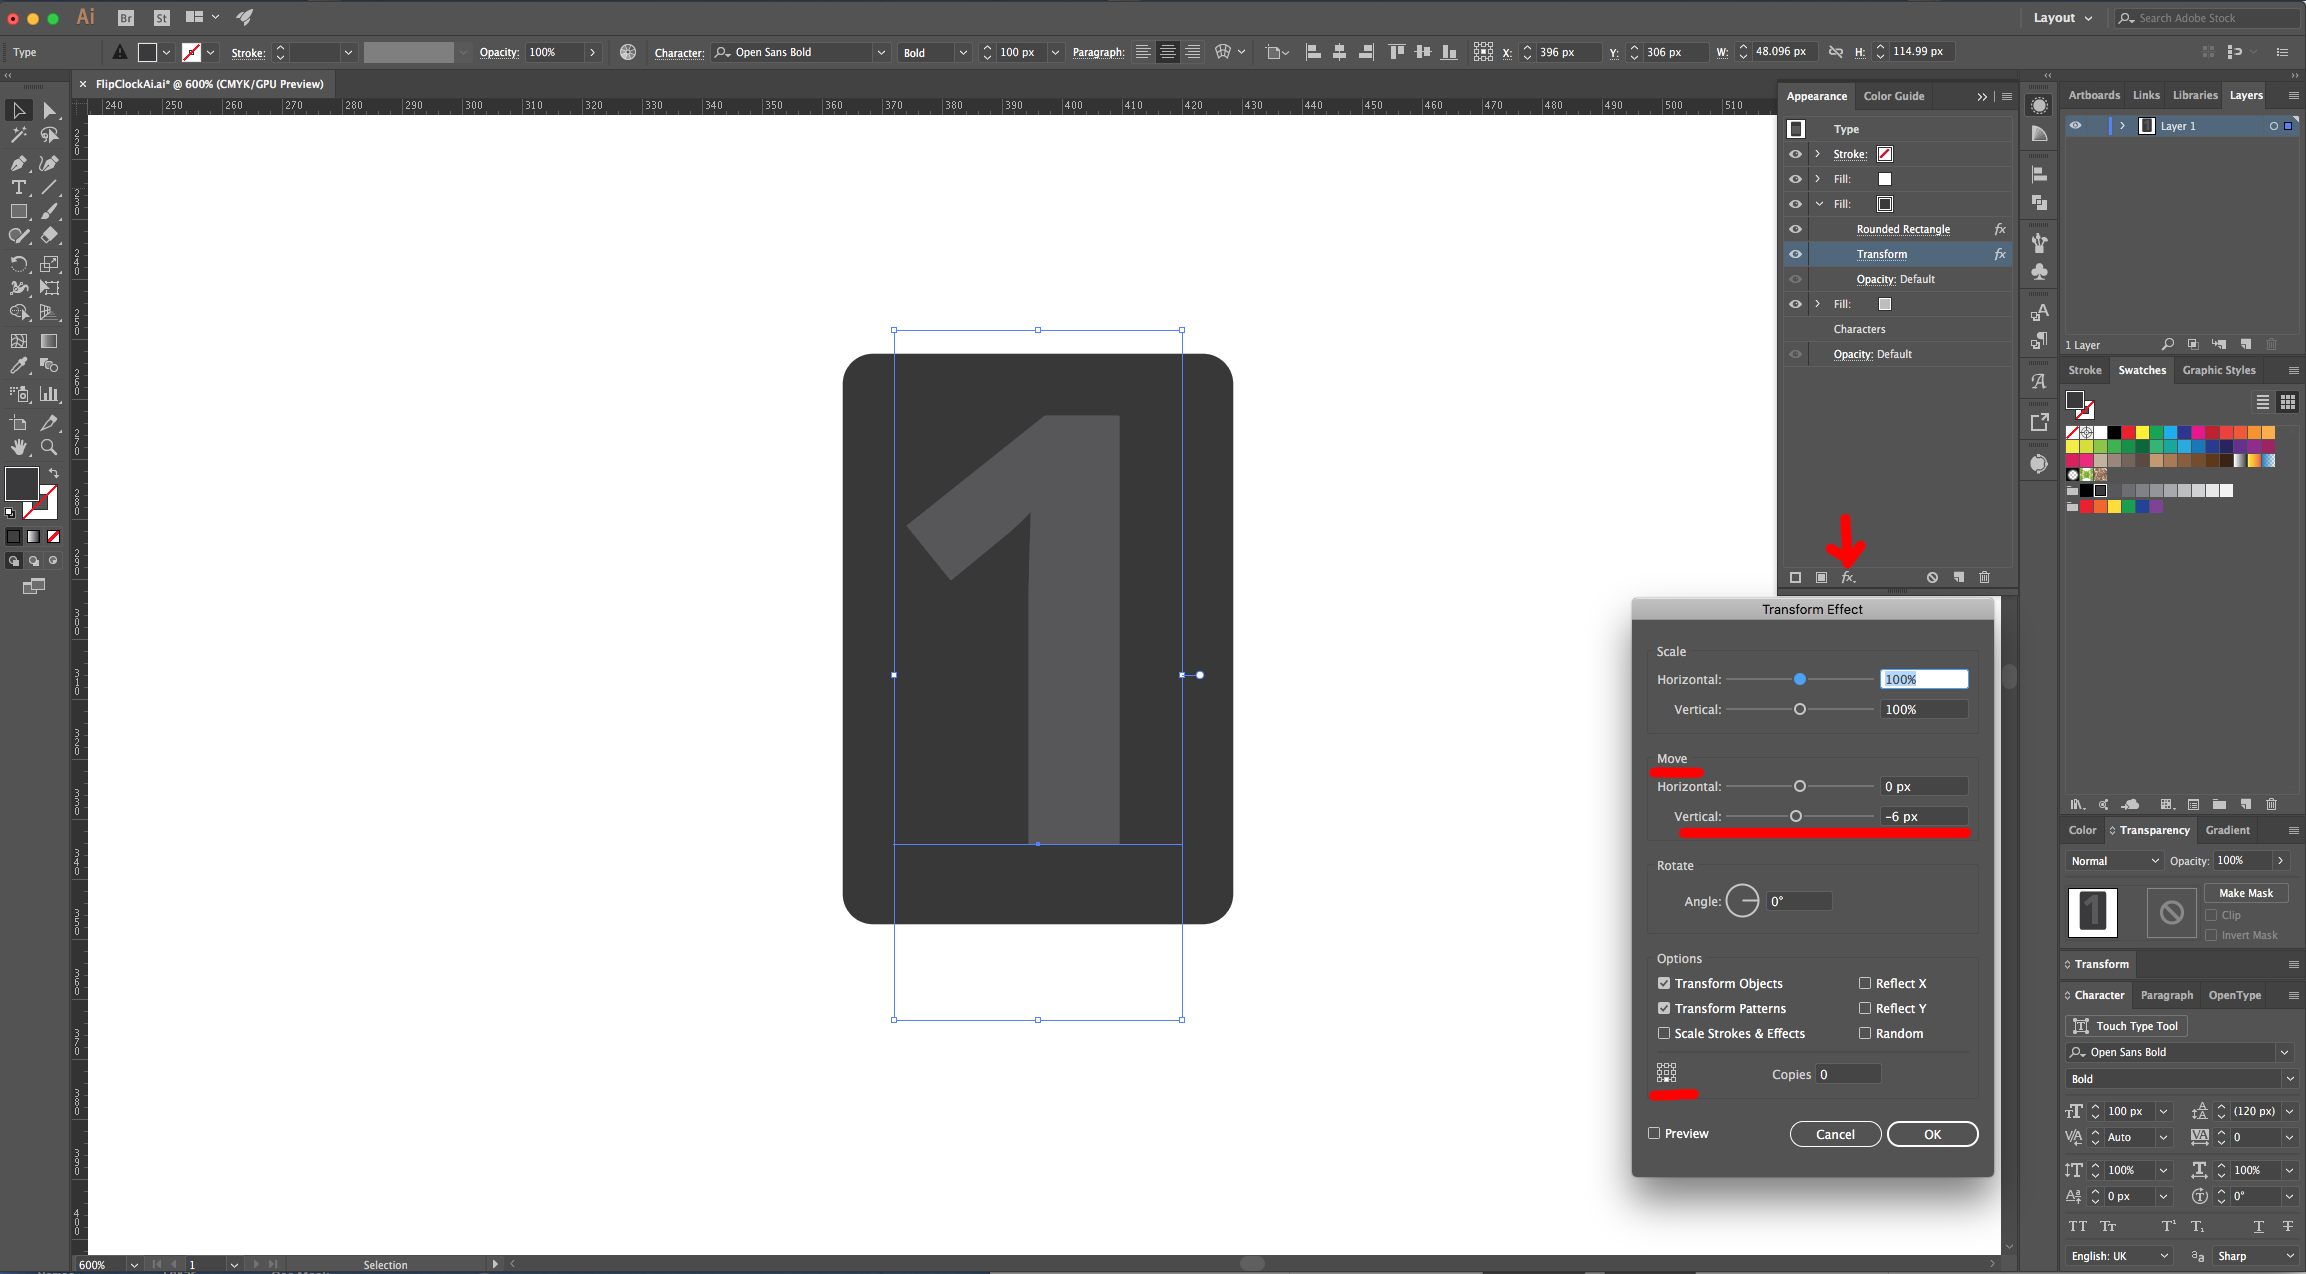
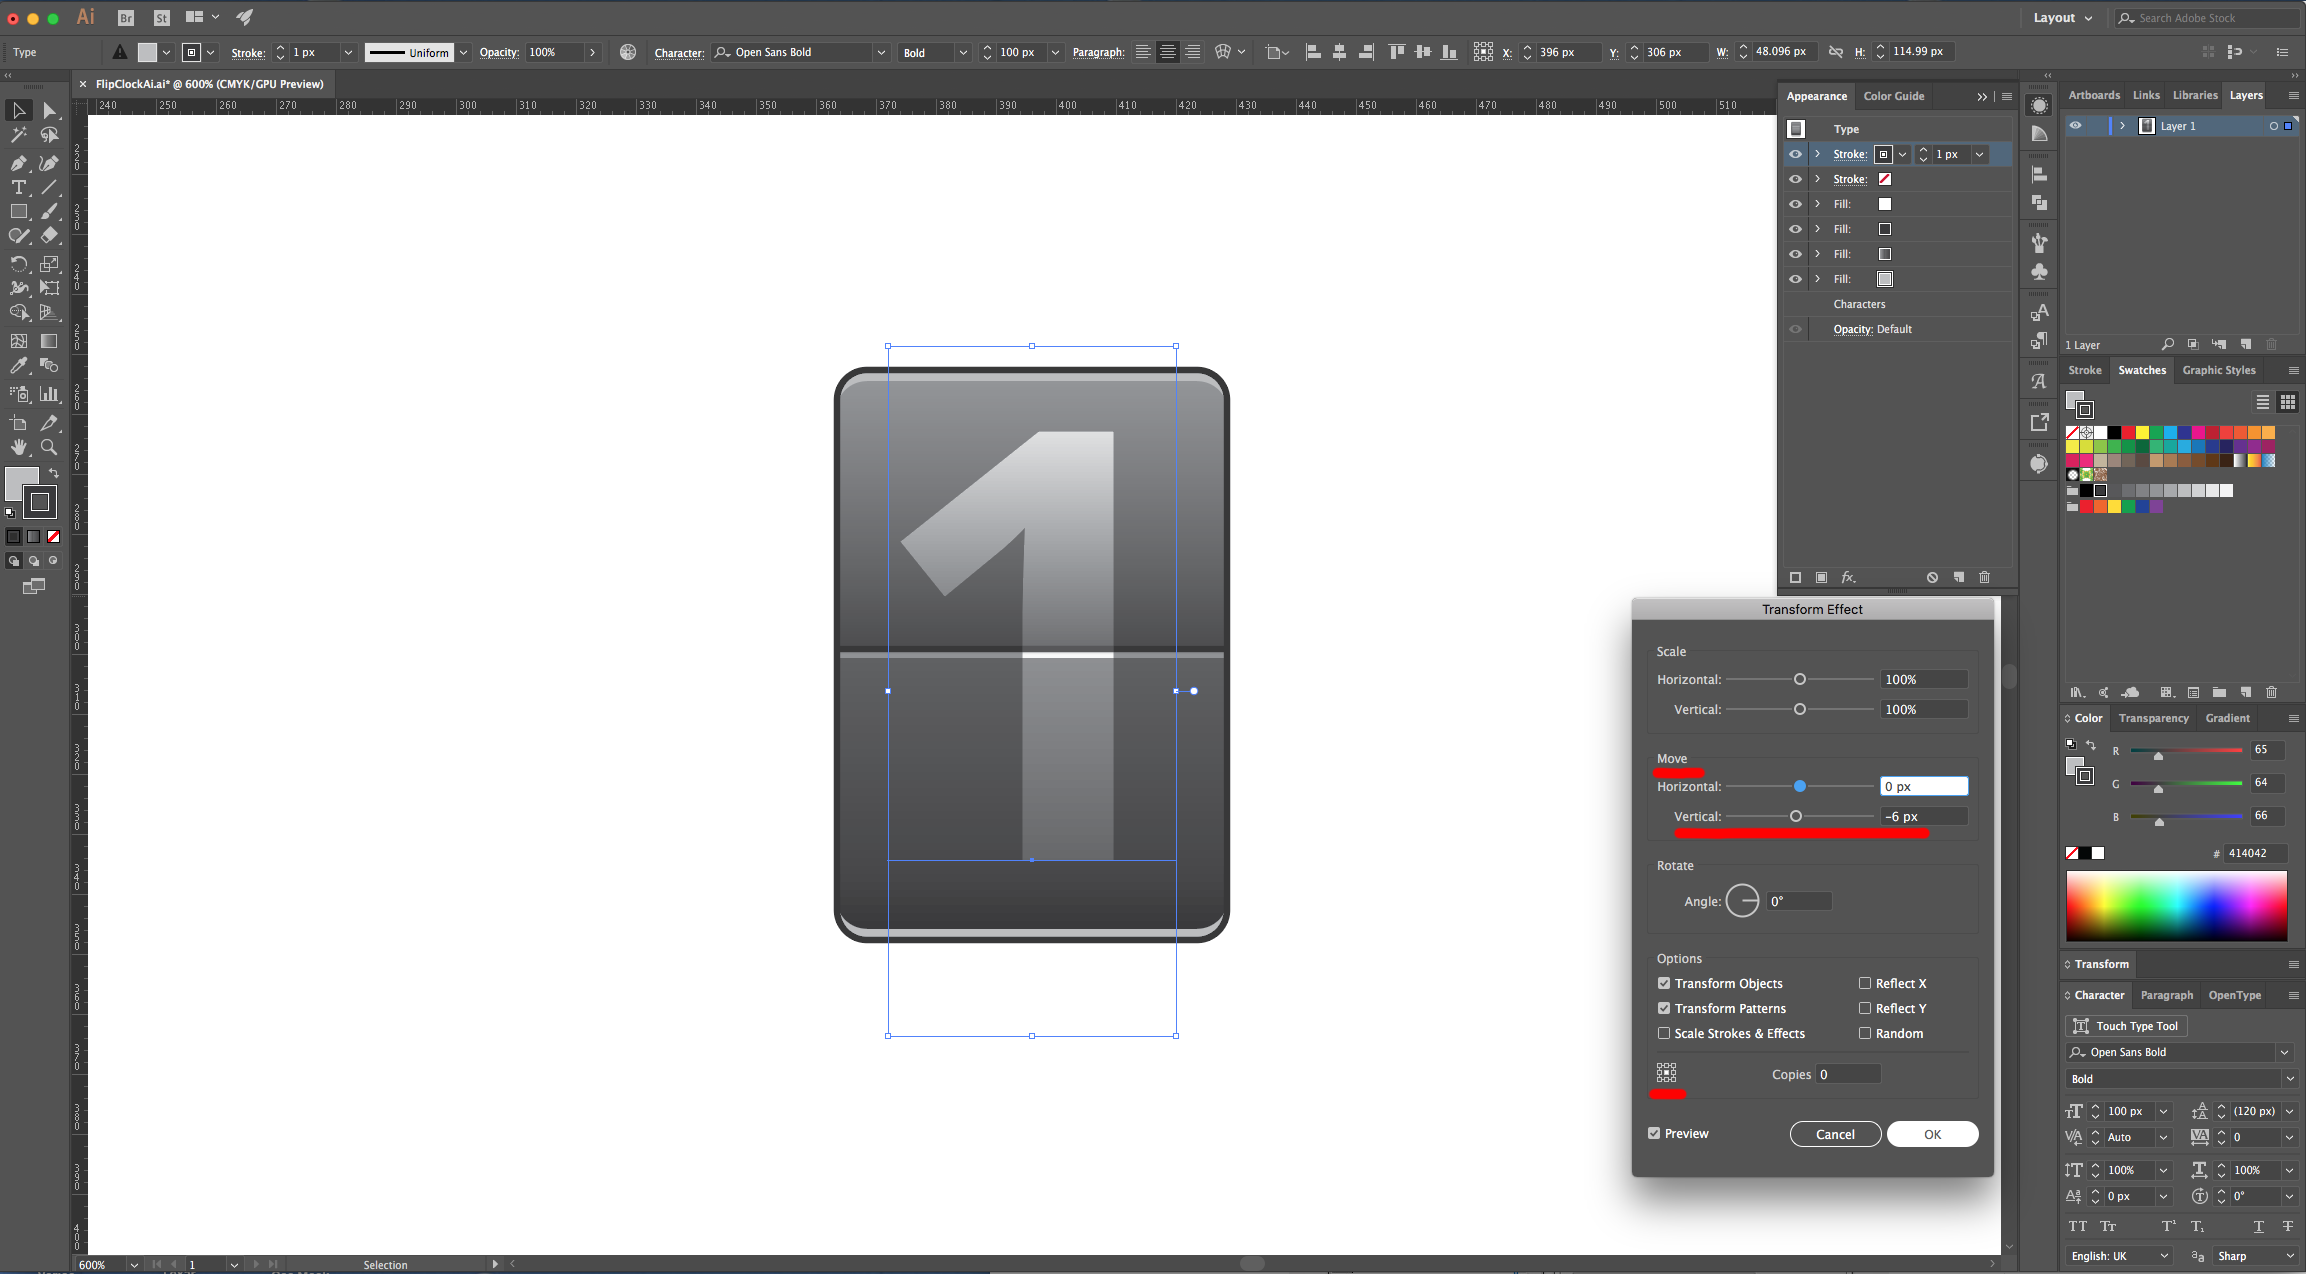
8 - Stay on the “Appearance Panel”, select the Grey fill, click on the Drop-Down Menu on the Top-Right and choose “Duplicate Item”. Make the Fill color to a Darker Grey (90 K). Click on the small arrow to the left of the Fill to show its contents, double-click on the “Transform” Effect to open the Dialog and change the “Align To” point to the “Bottom Center”.
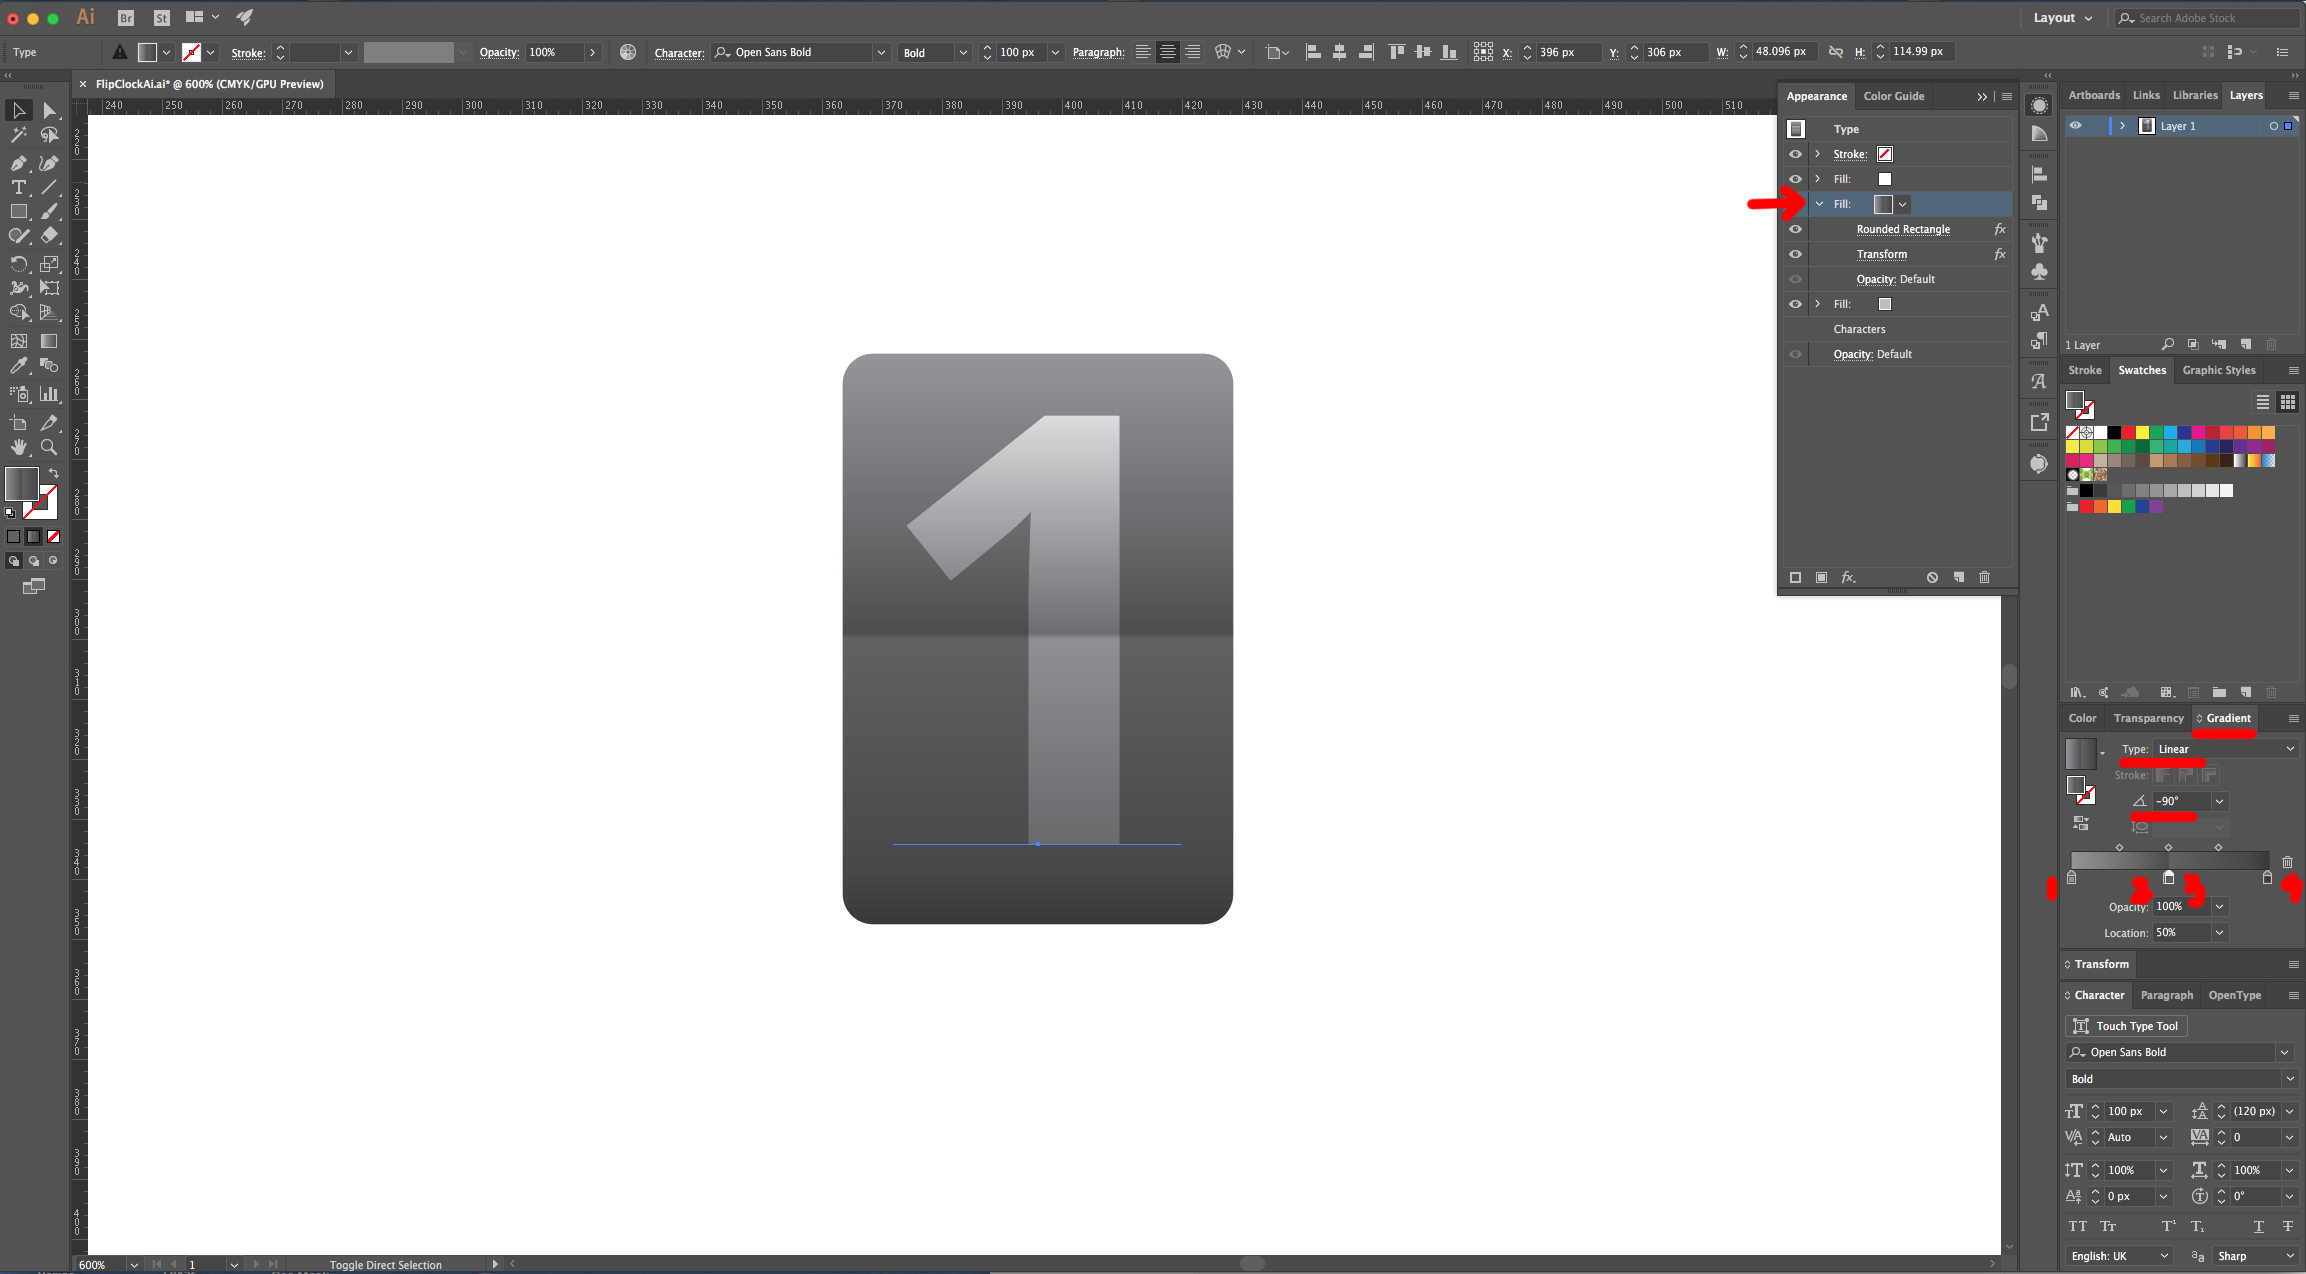
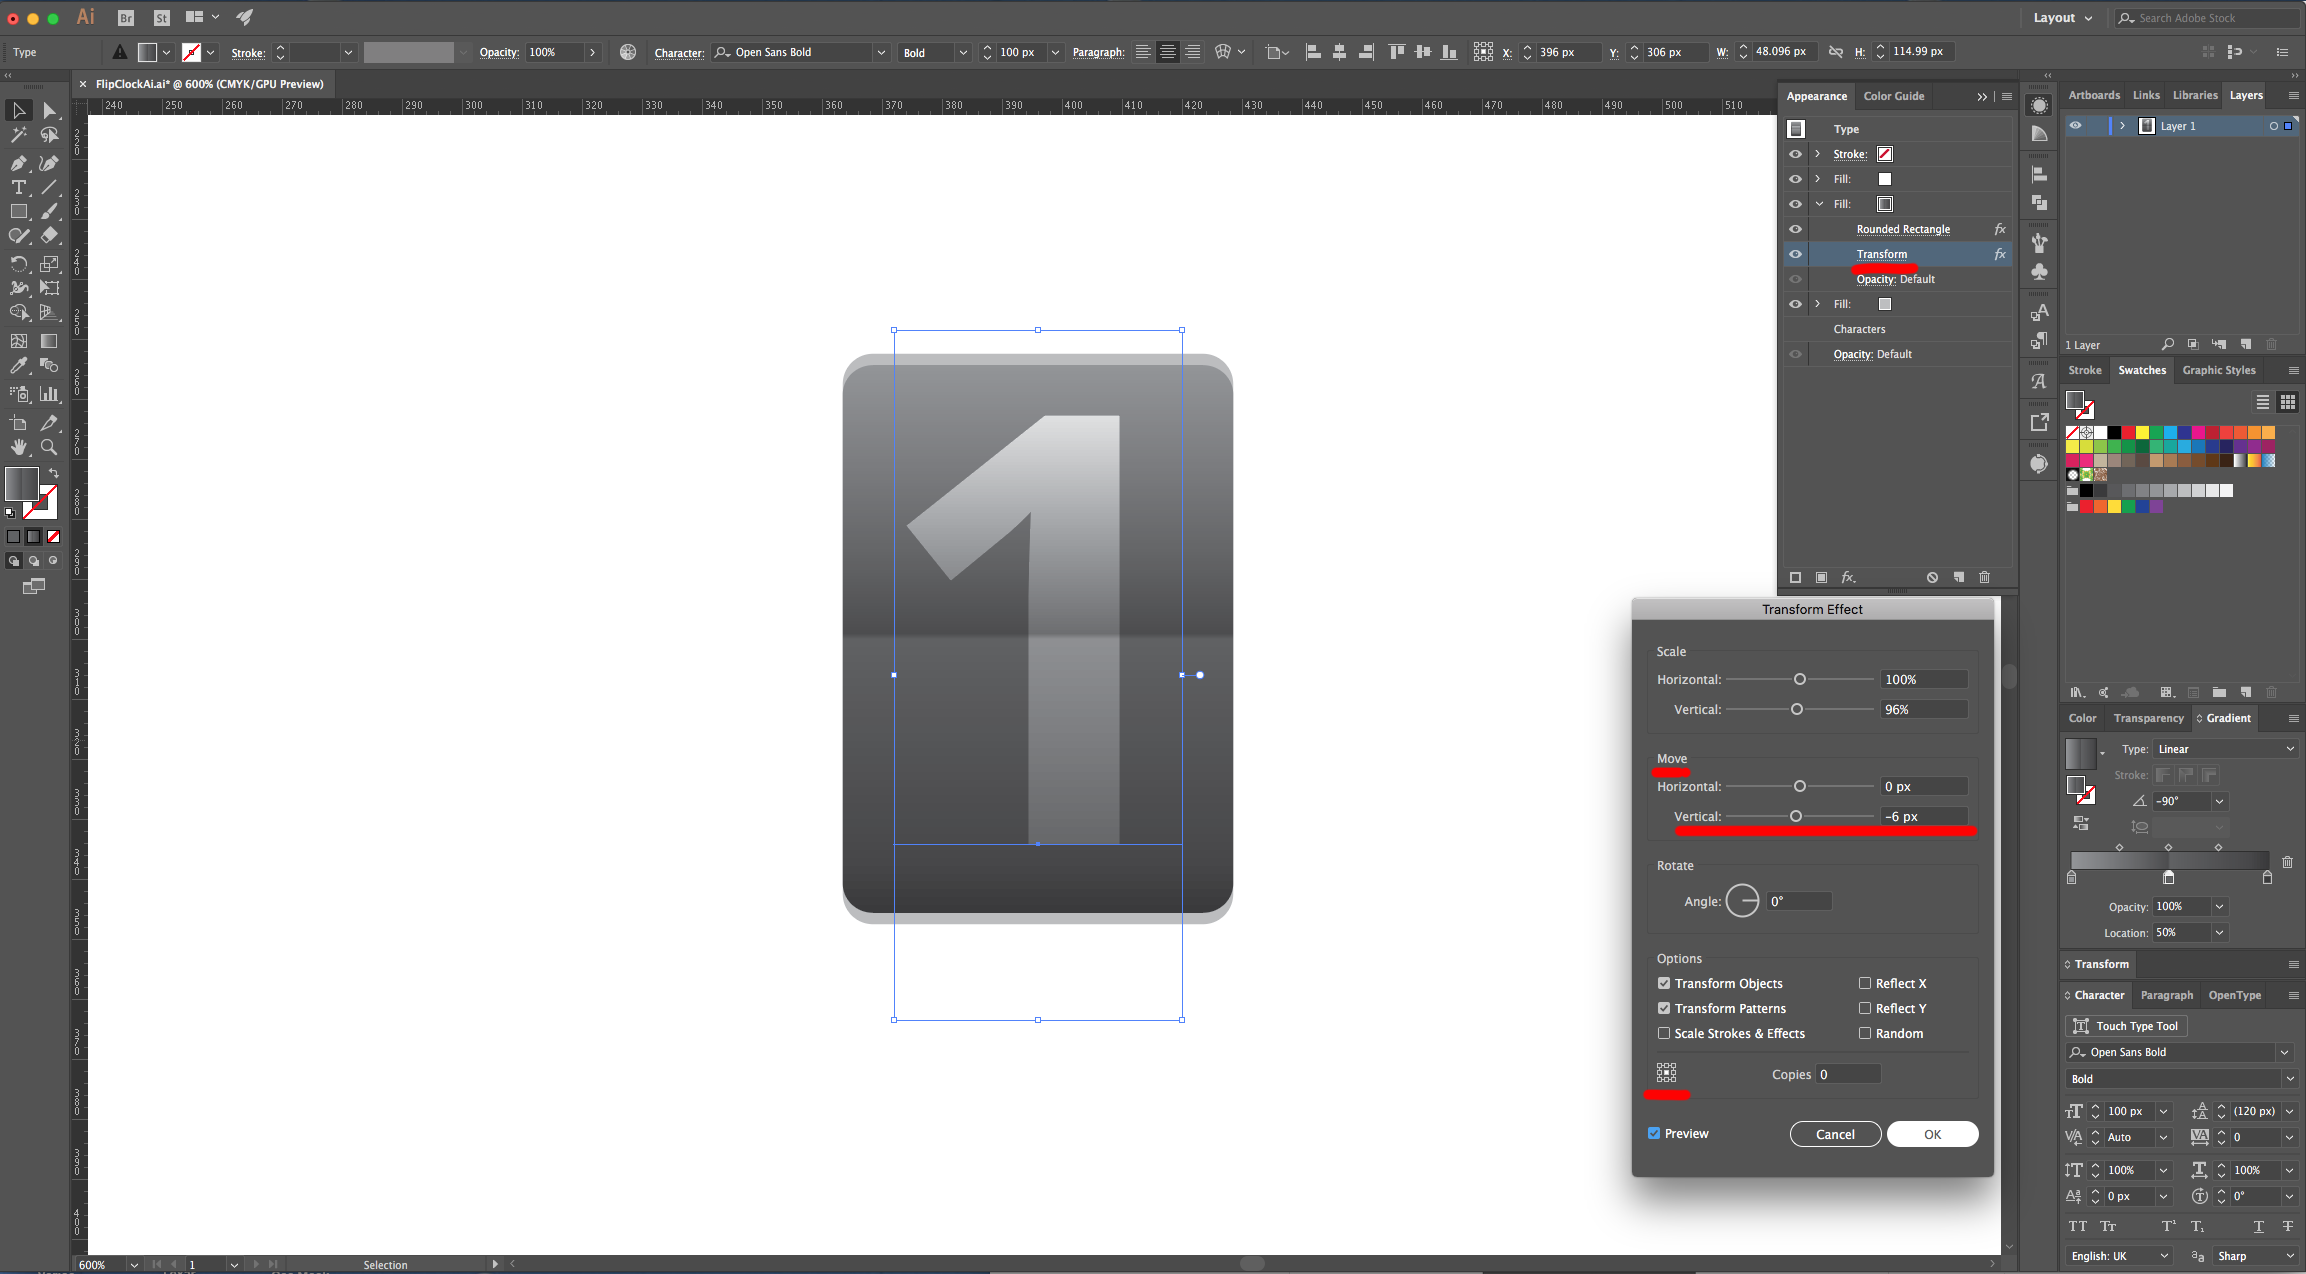
9 - Change the Fill to a “Linear Gradient” with a -90° Angle and the following values (1: Color 50 K , Location 0%, 2: Color 85 K, Location 49%, 3: Color 75 K, Location 50%, 4: Color 90 K, Location 100%). Double-click on the “Transform” Effect to open the Dialog and change the “Align To” point to the “Center”.
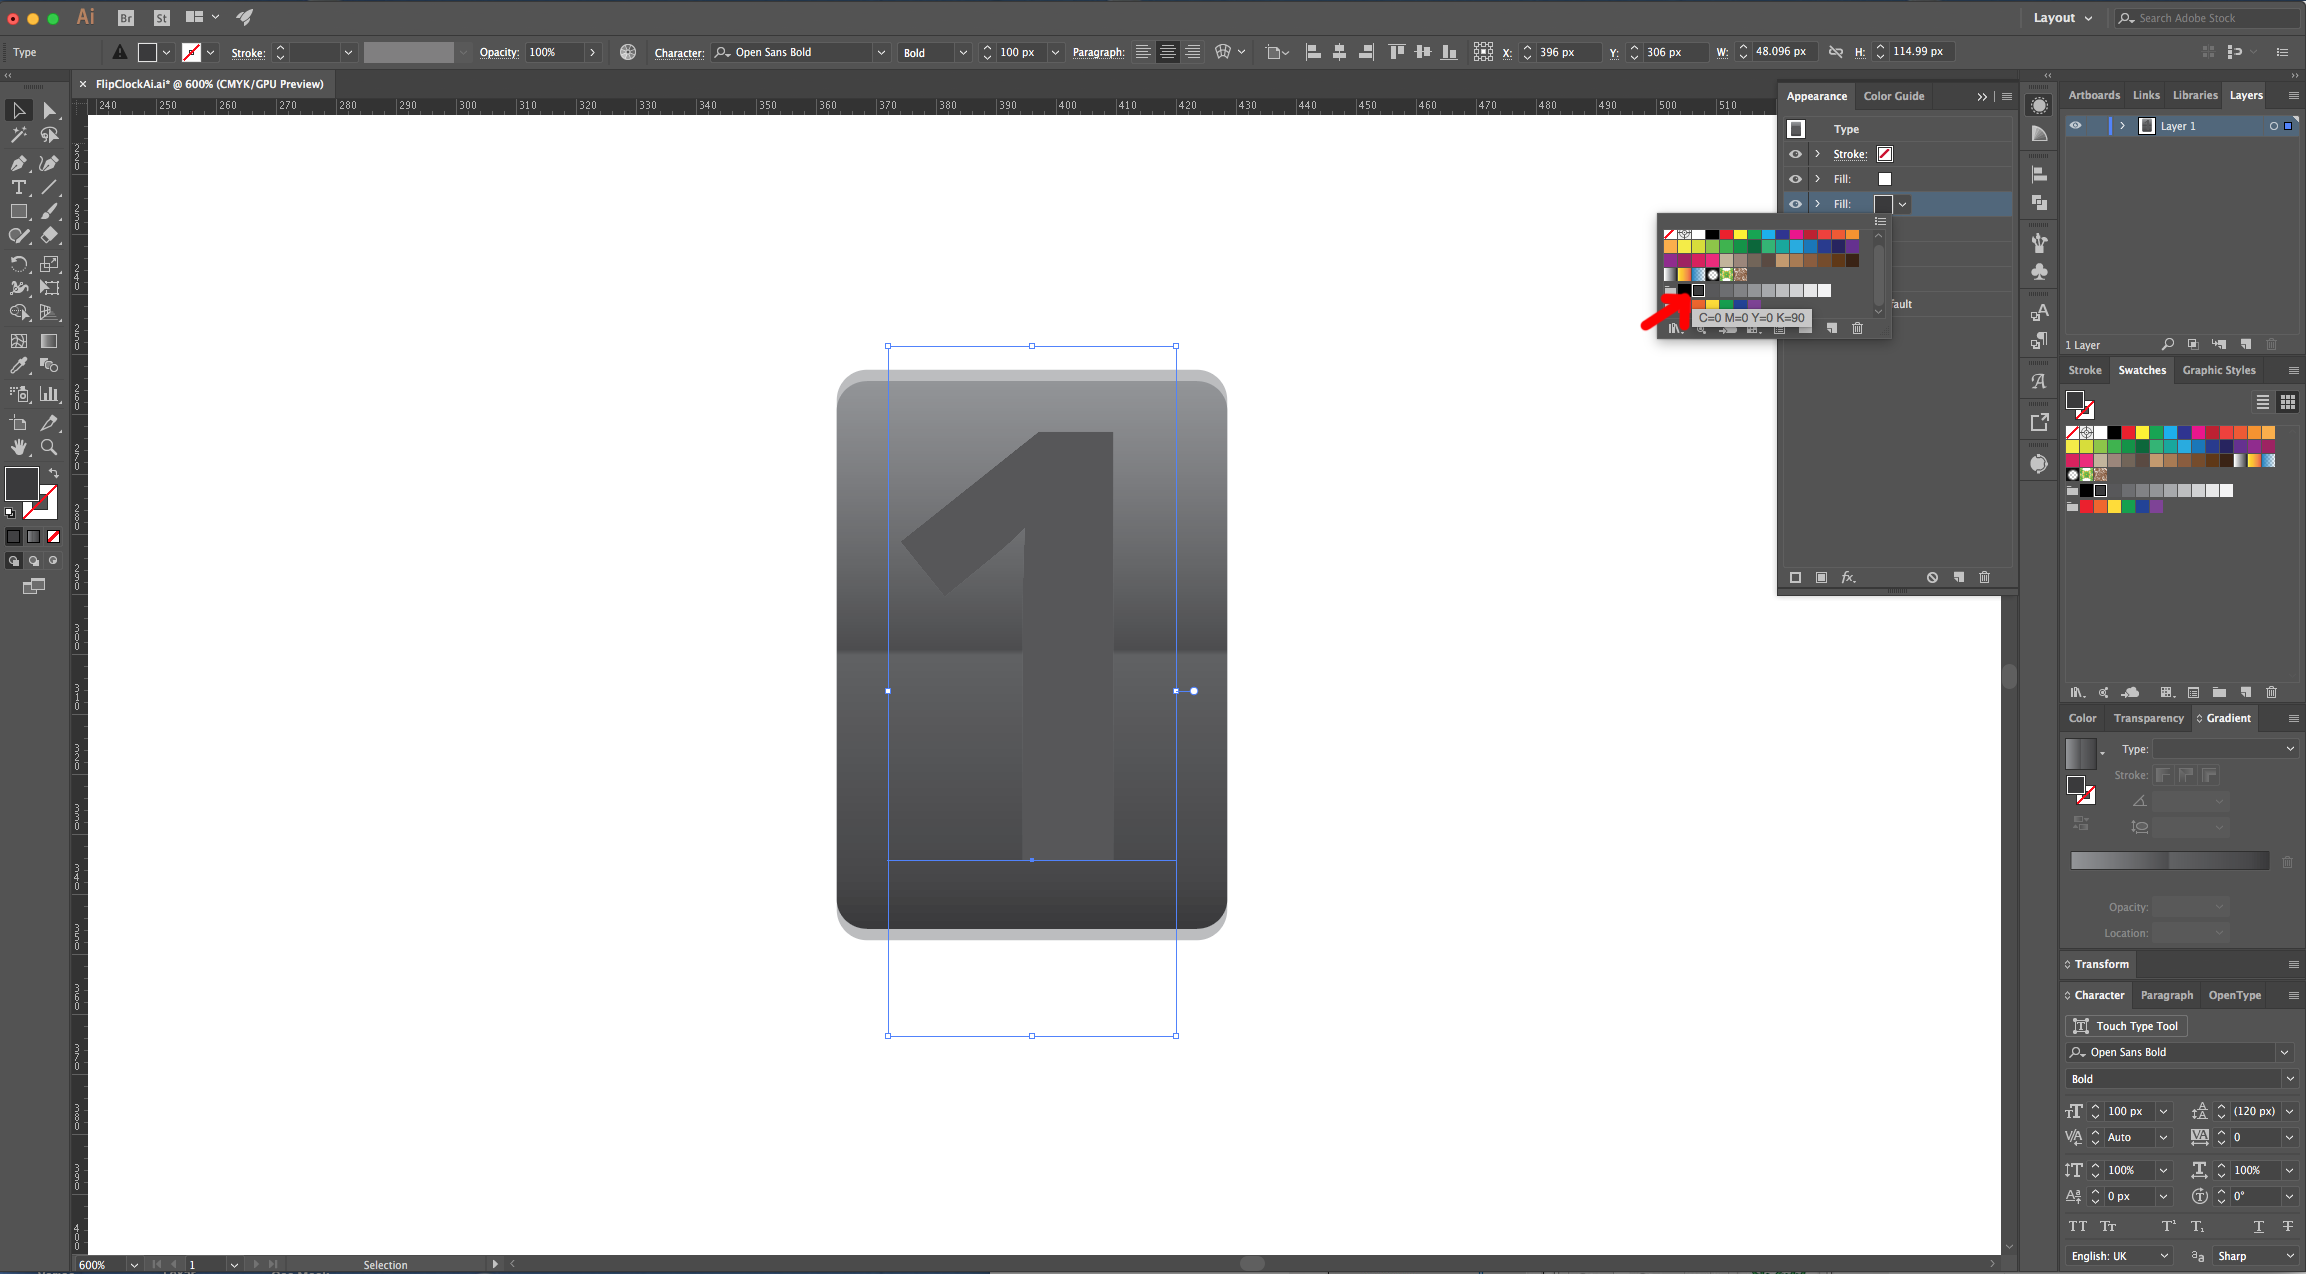
10 - Without deselecting your Text, create another “Fill”, make sure it is on top of the Gradient one, use a Dark Grey (90 K) as fill color,
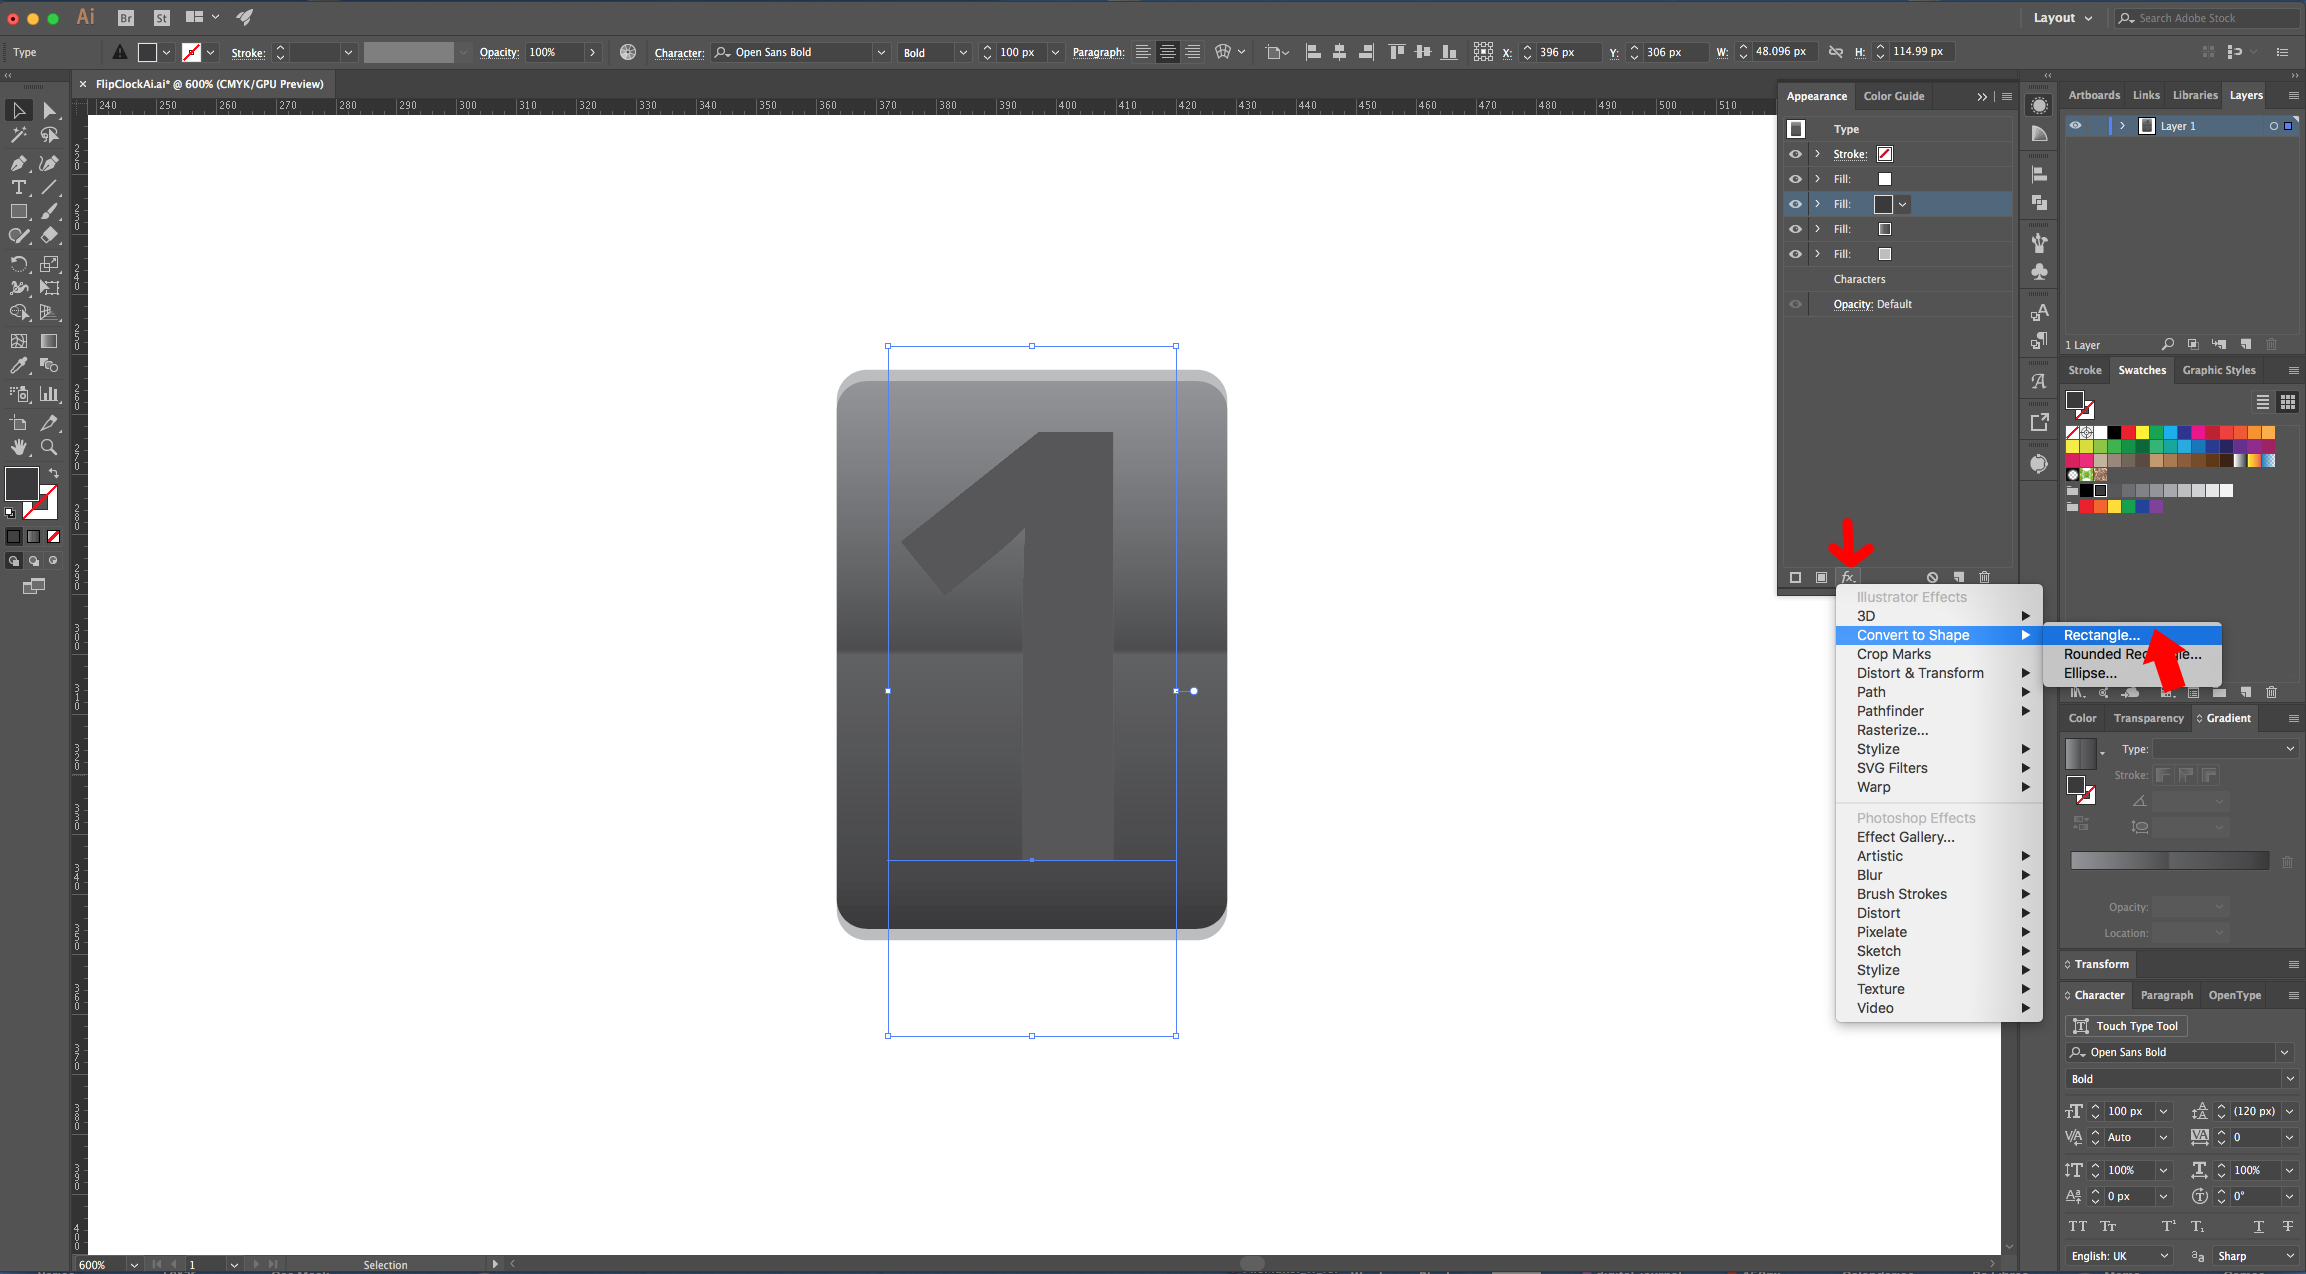
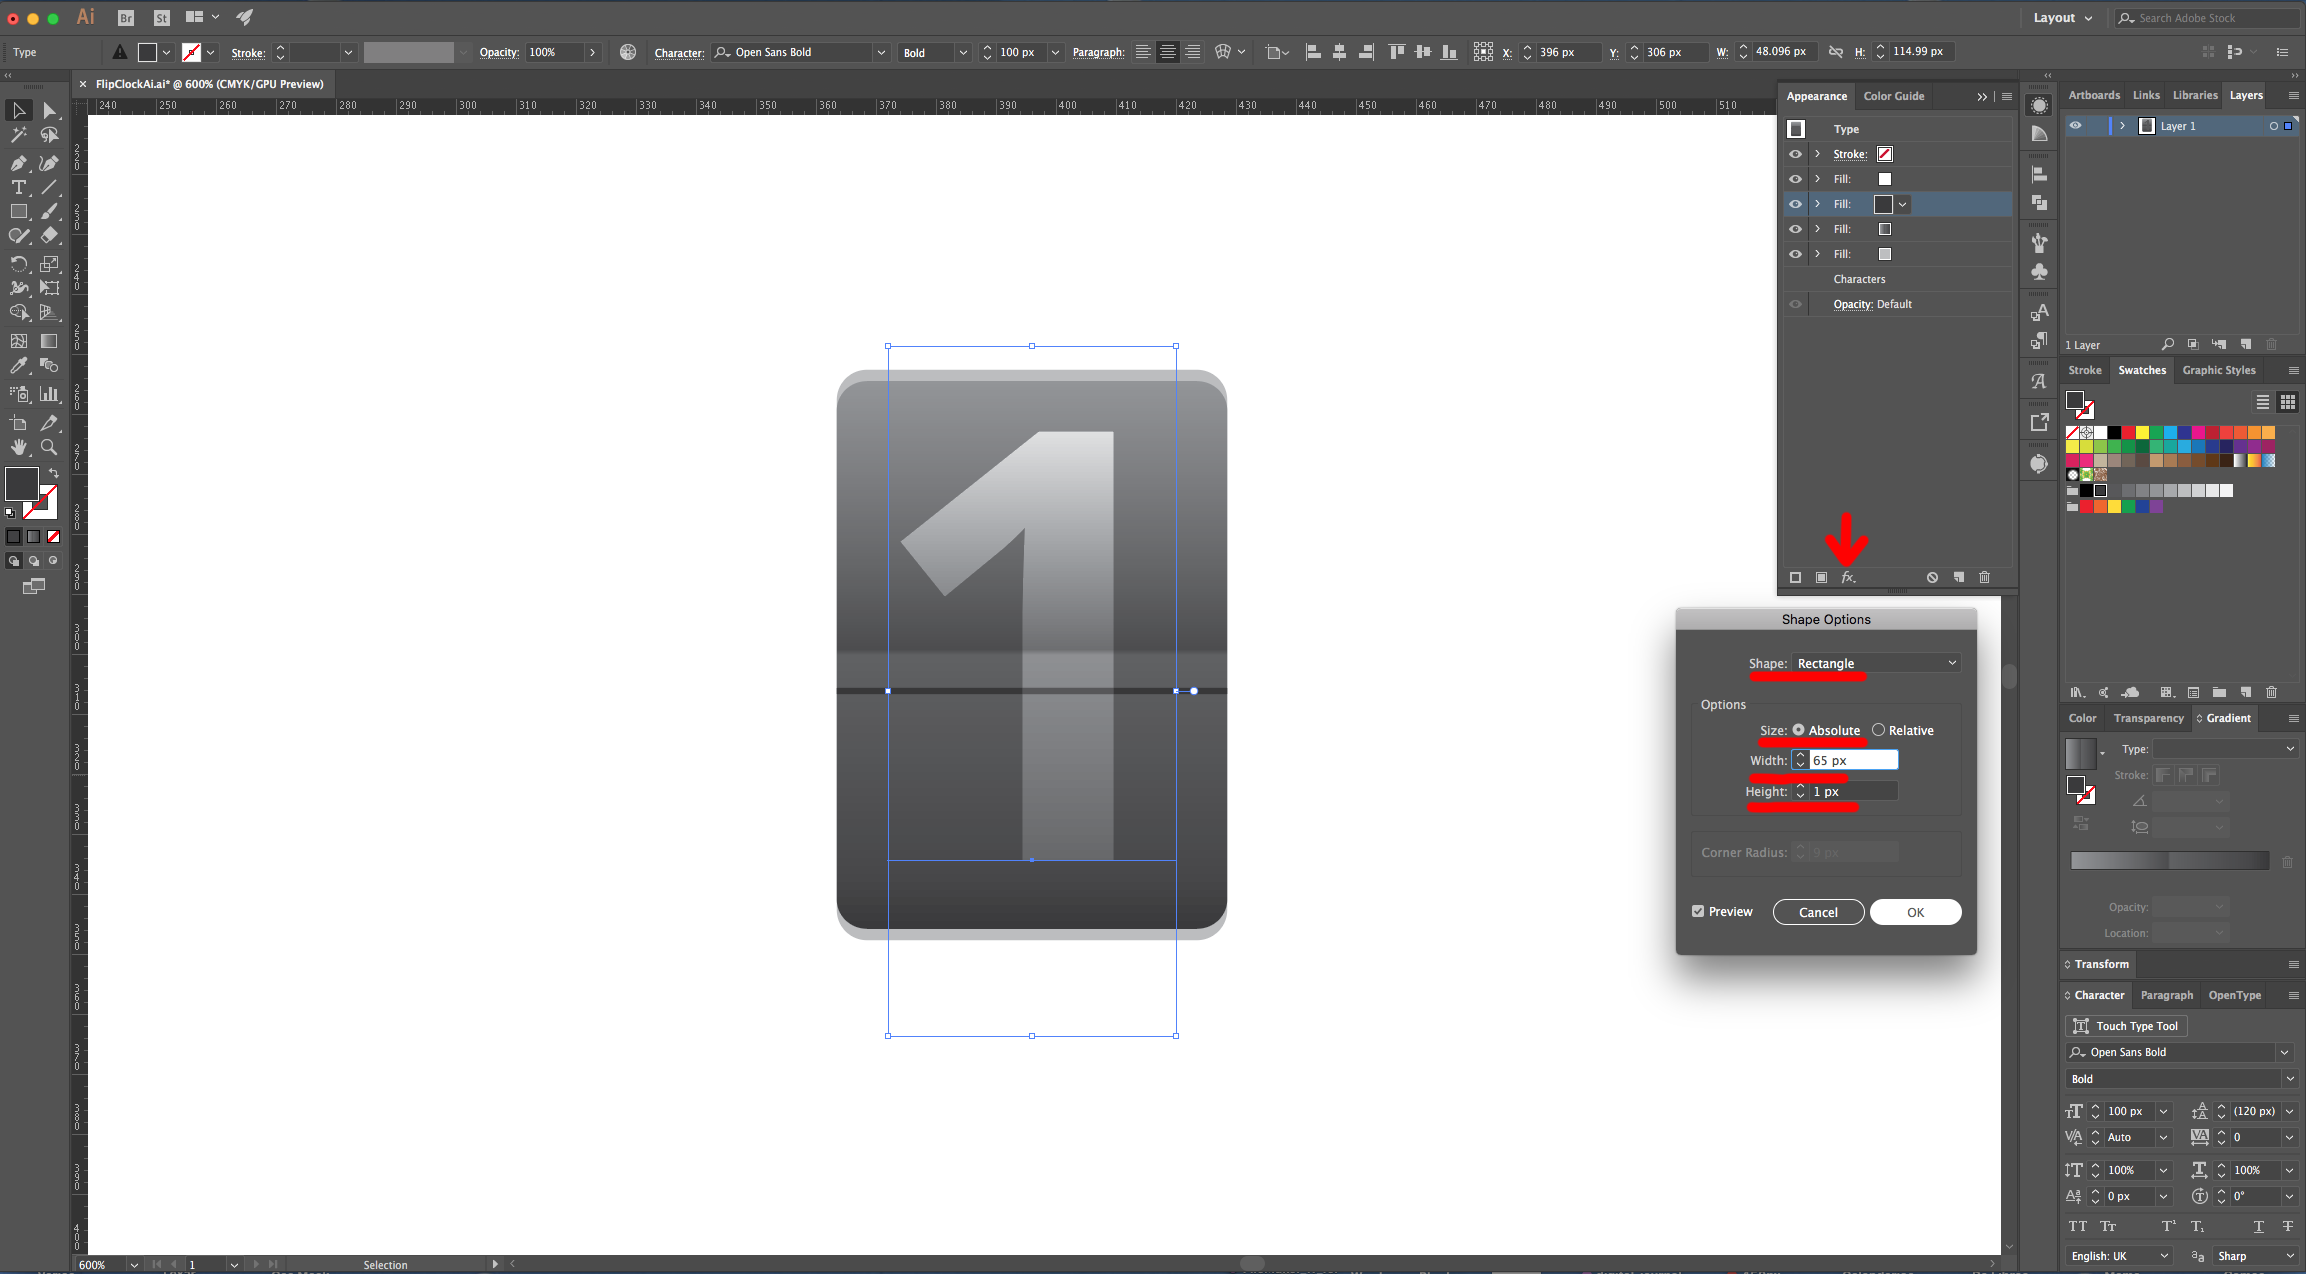
11 - Without deselecting, click on the “Effects Menu” and navigate to Convert to Shape > Rectangle… and use the following values. Once you are done click “OK”. Now, go to Distort & Transform > Transform … and use the following values. Once you are done click “OK”.
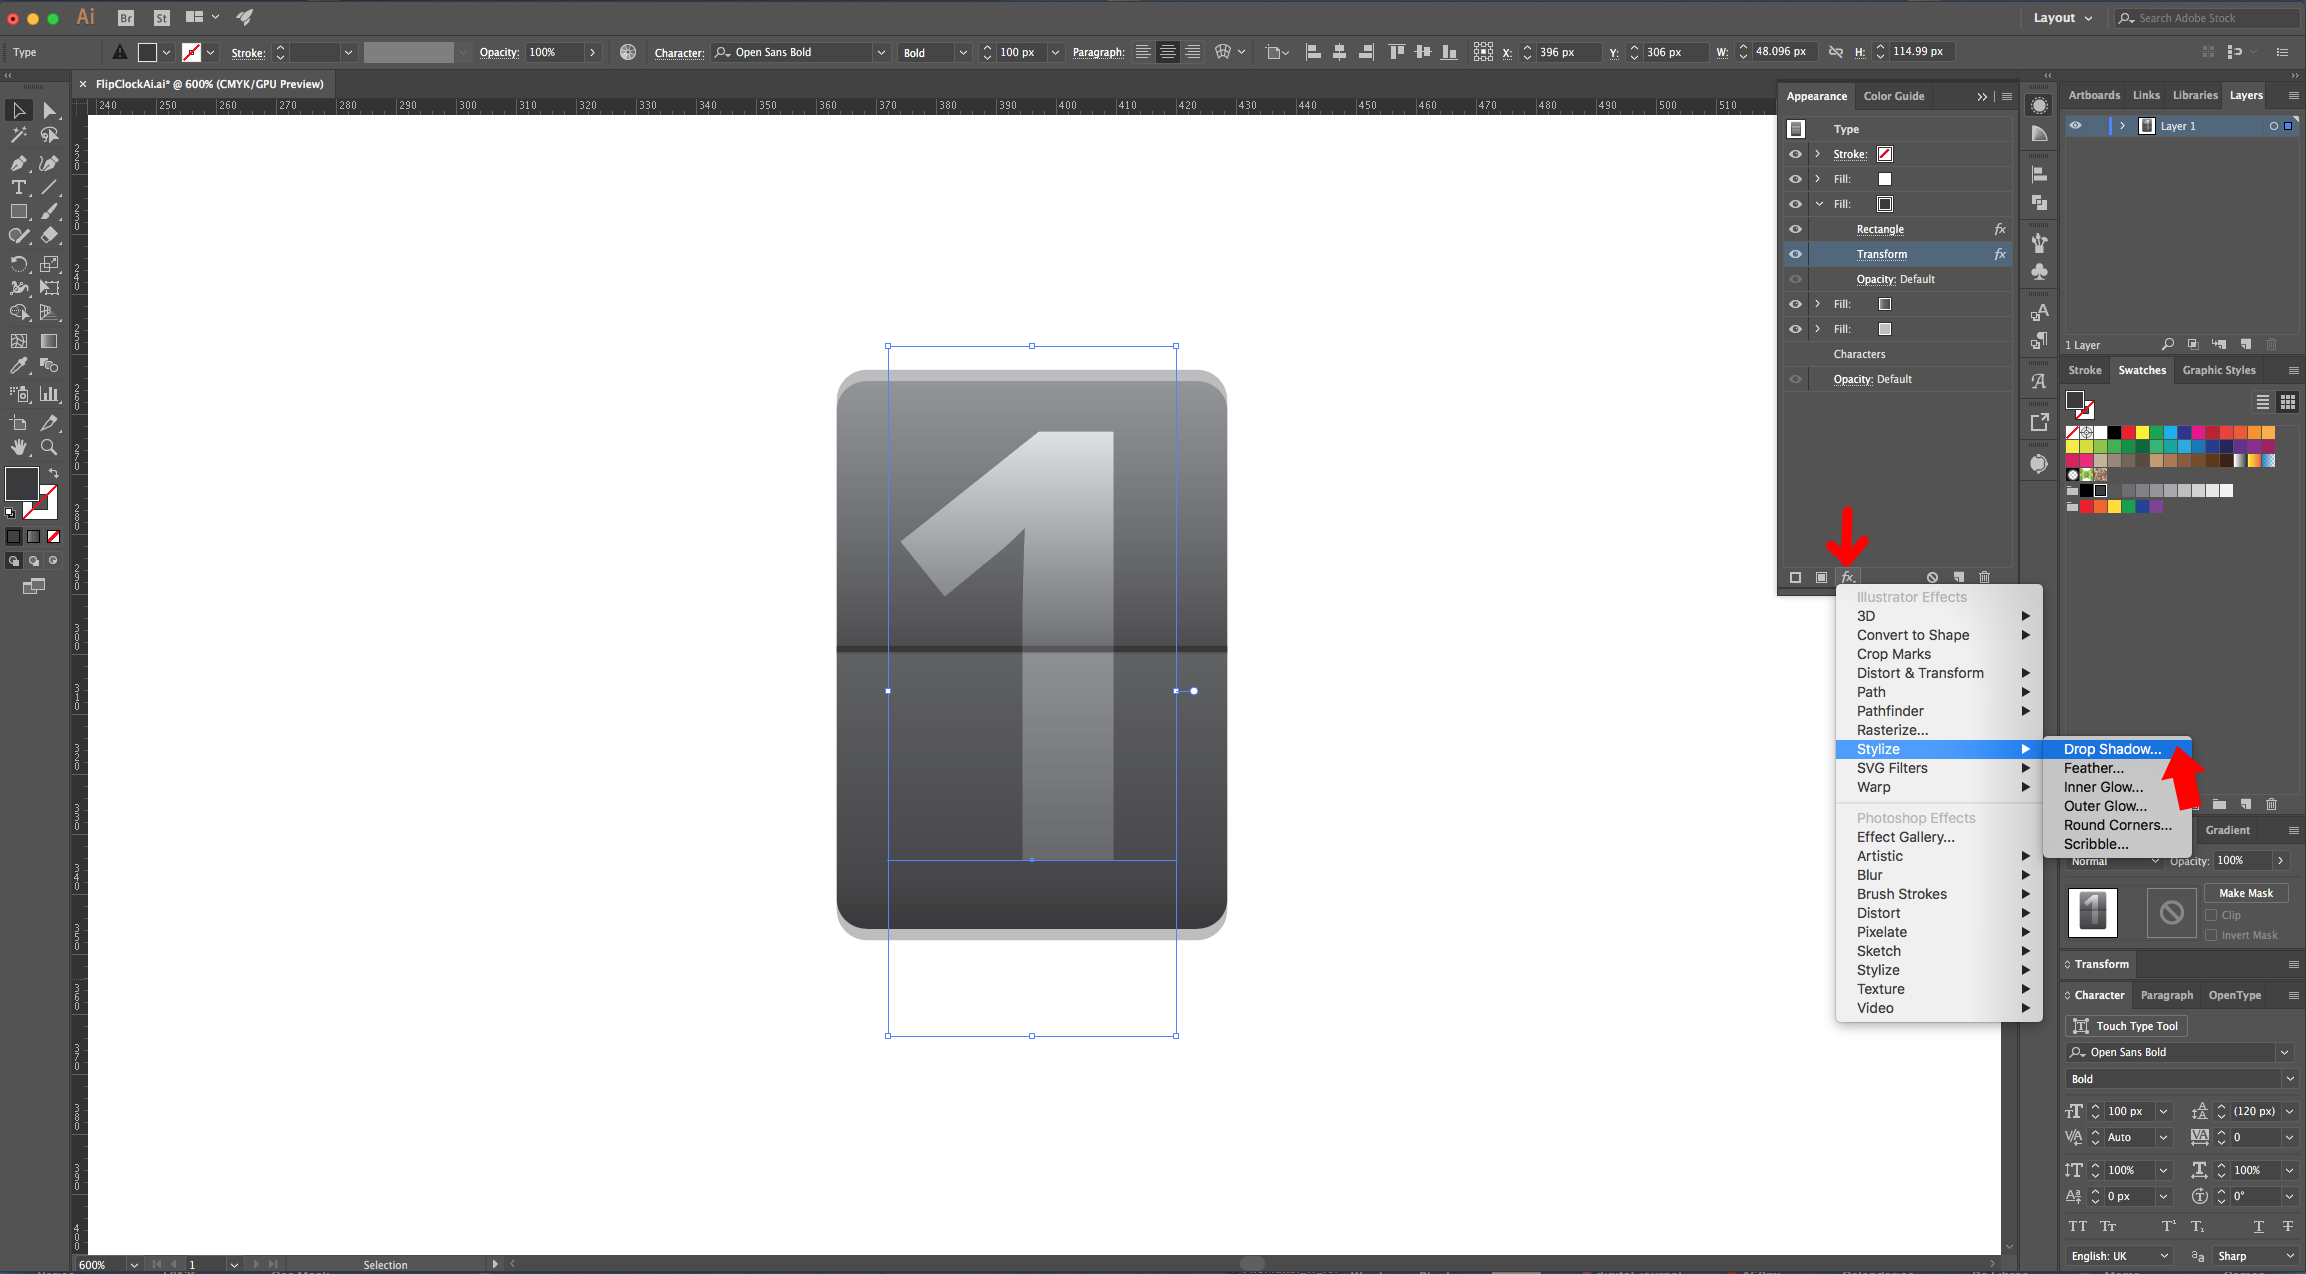
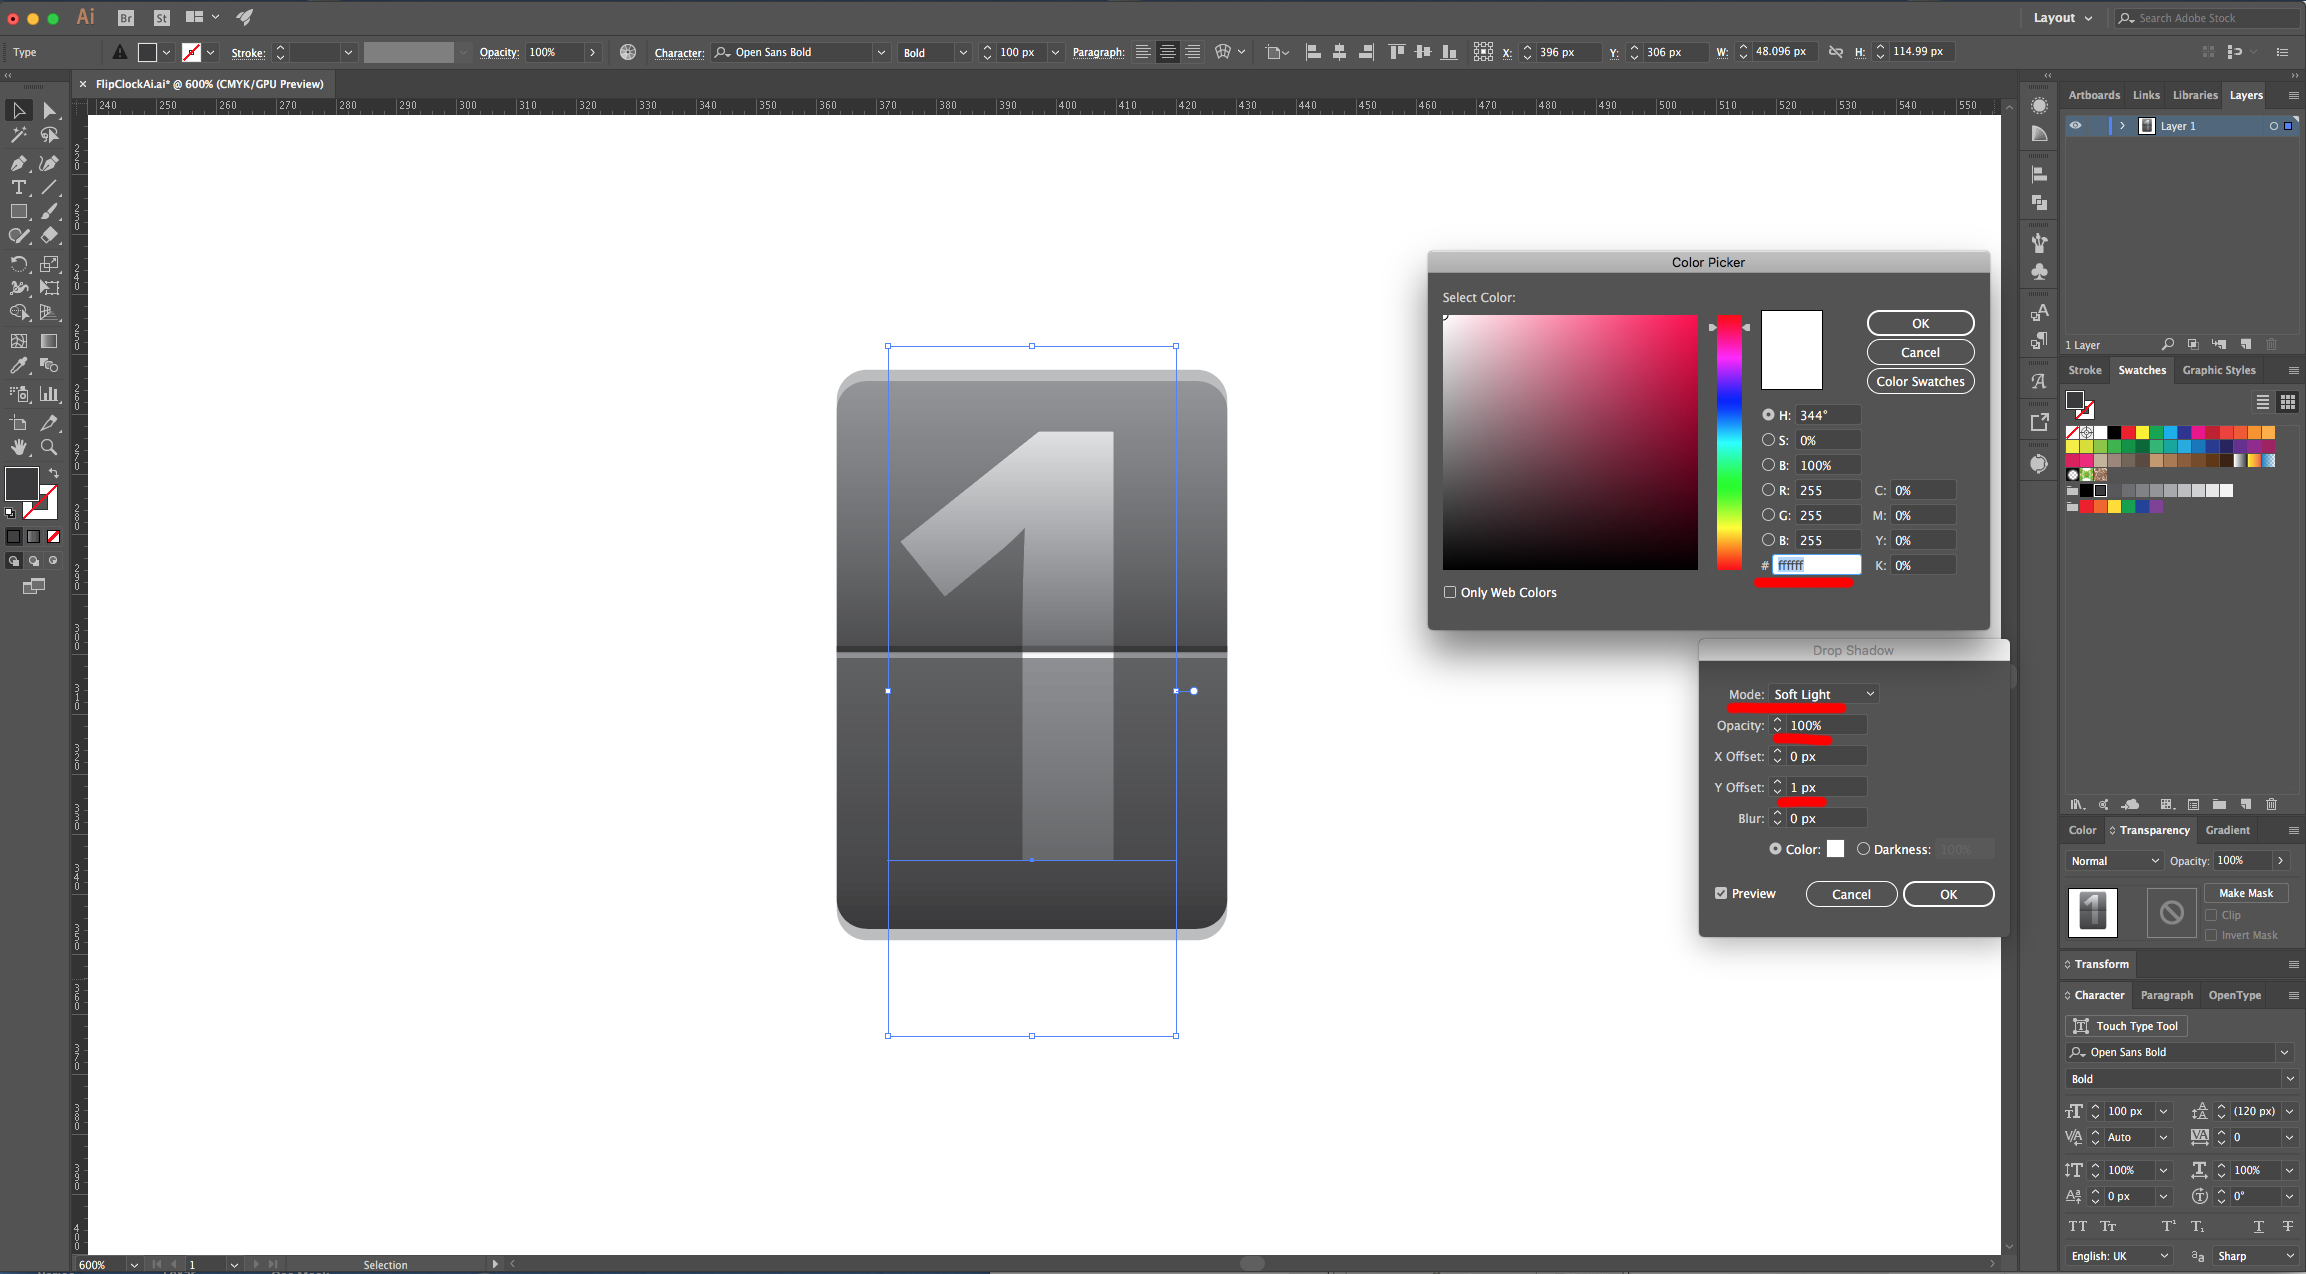
12 - Finally, apply another Effect. Navigate to Stylize > Drop Shadow… and use the following values:
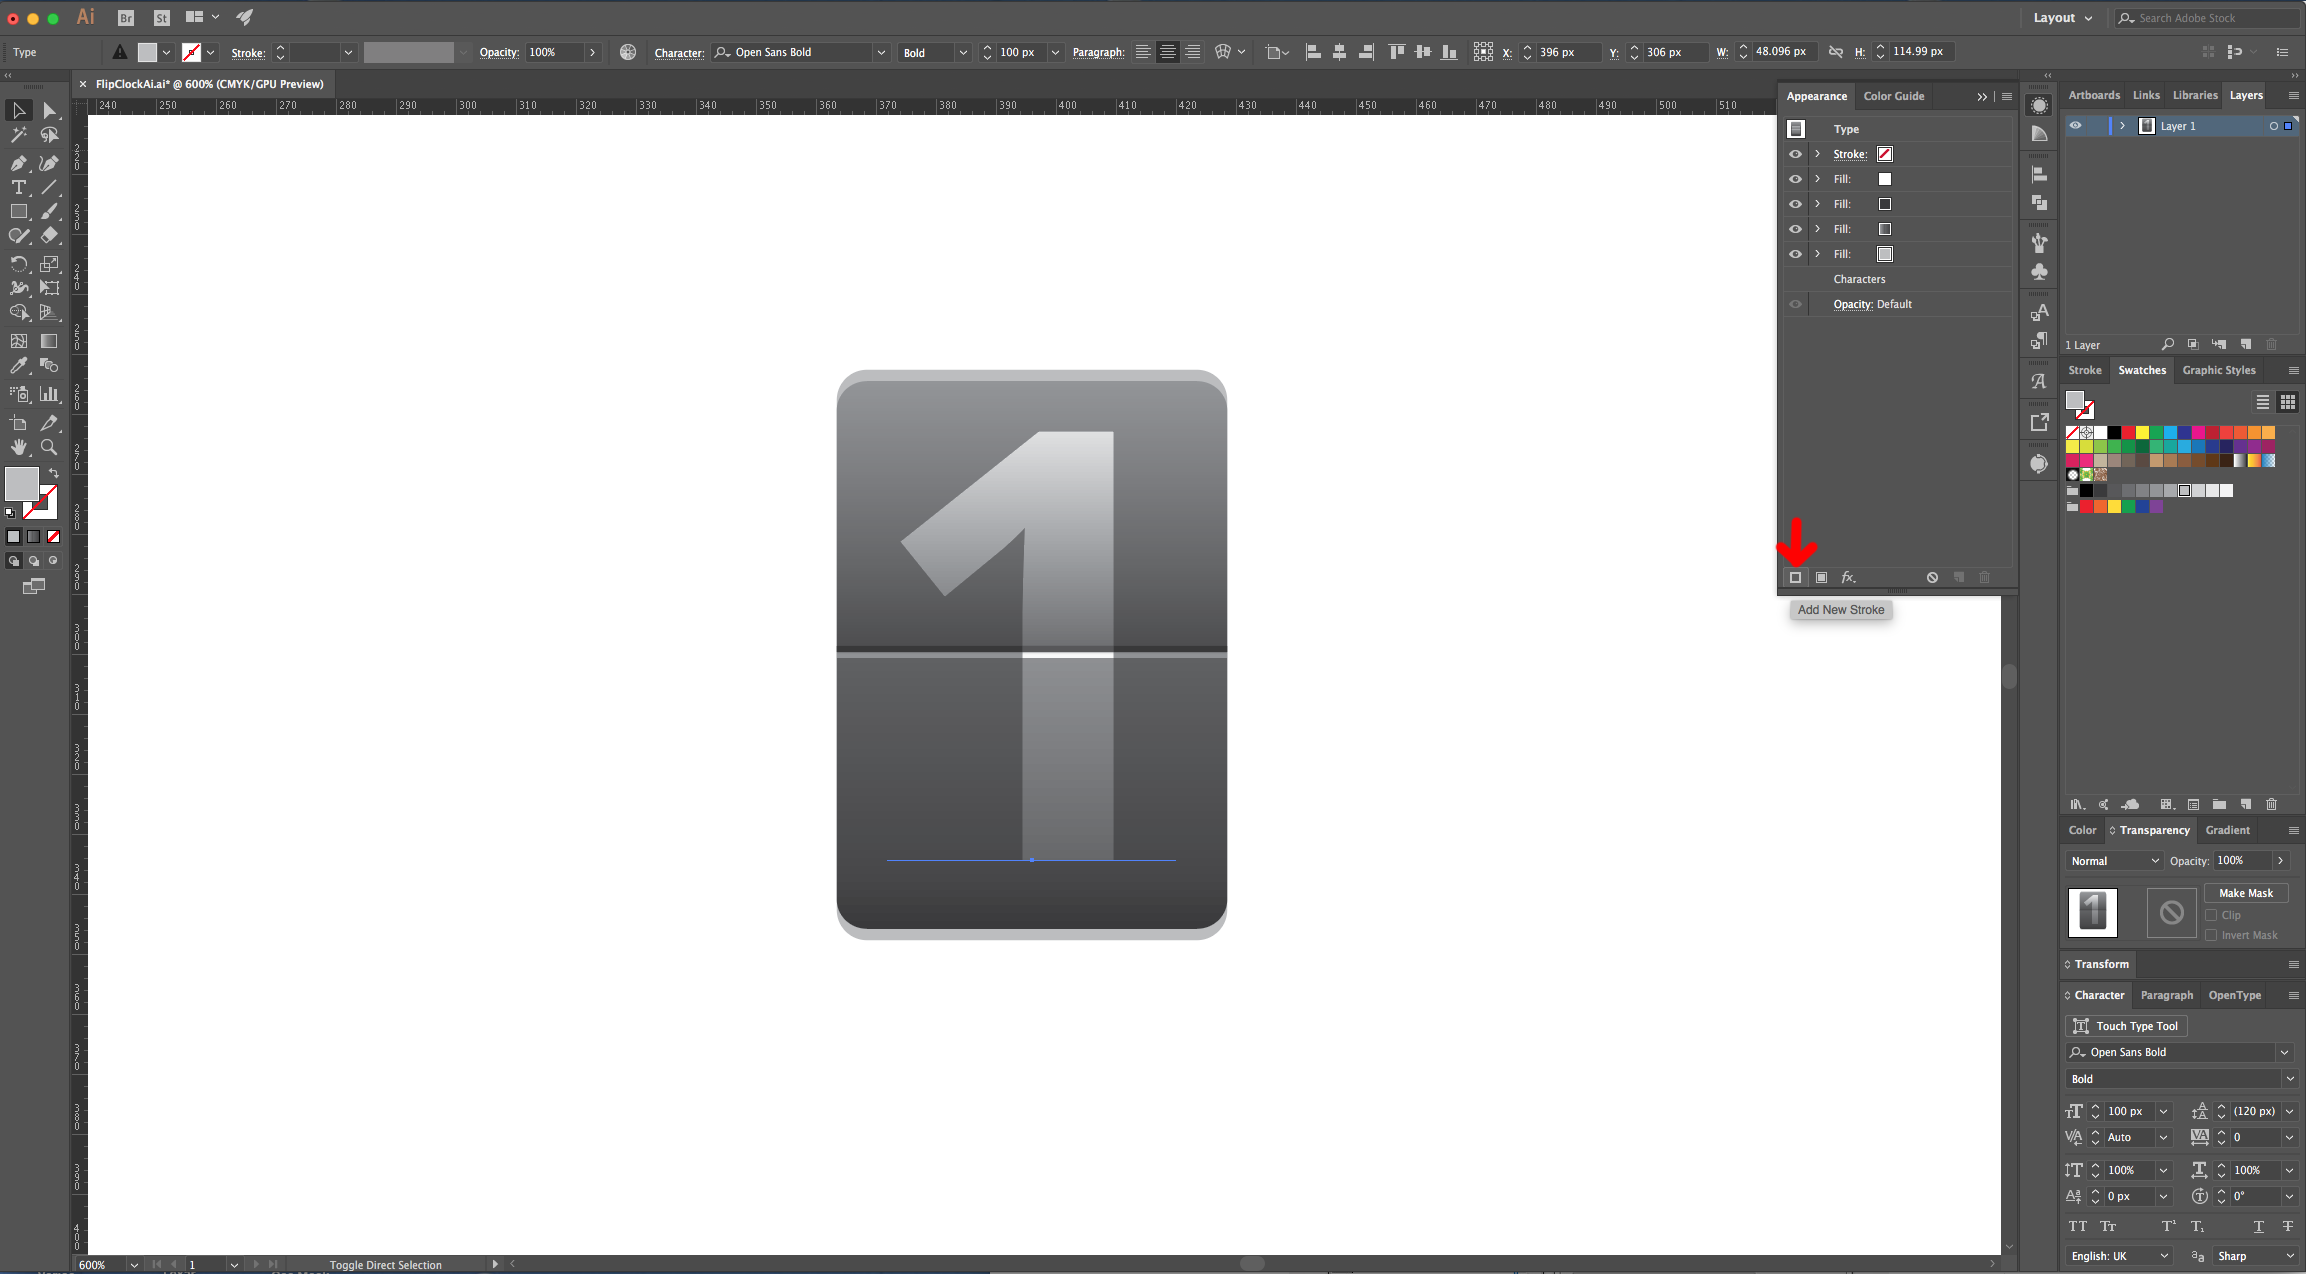
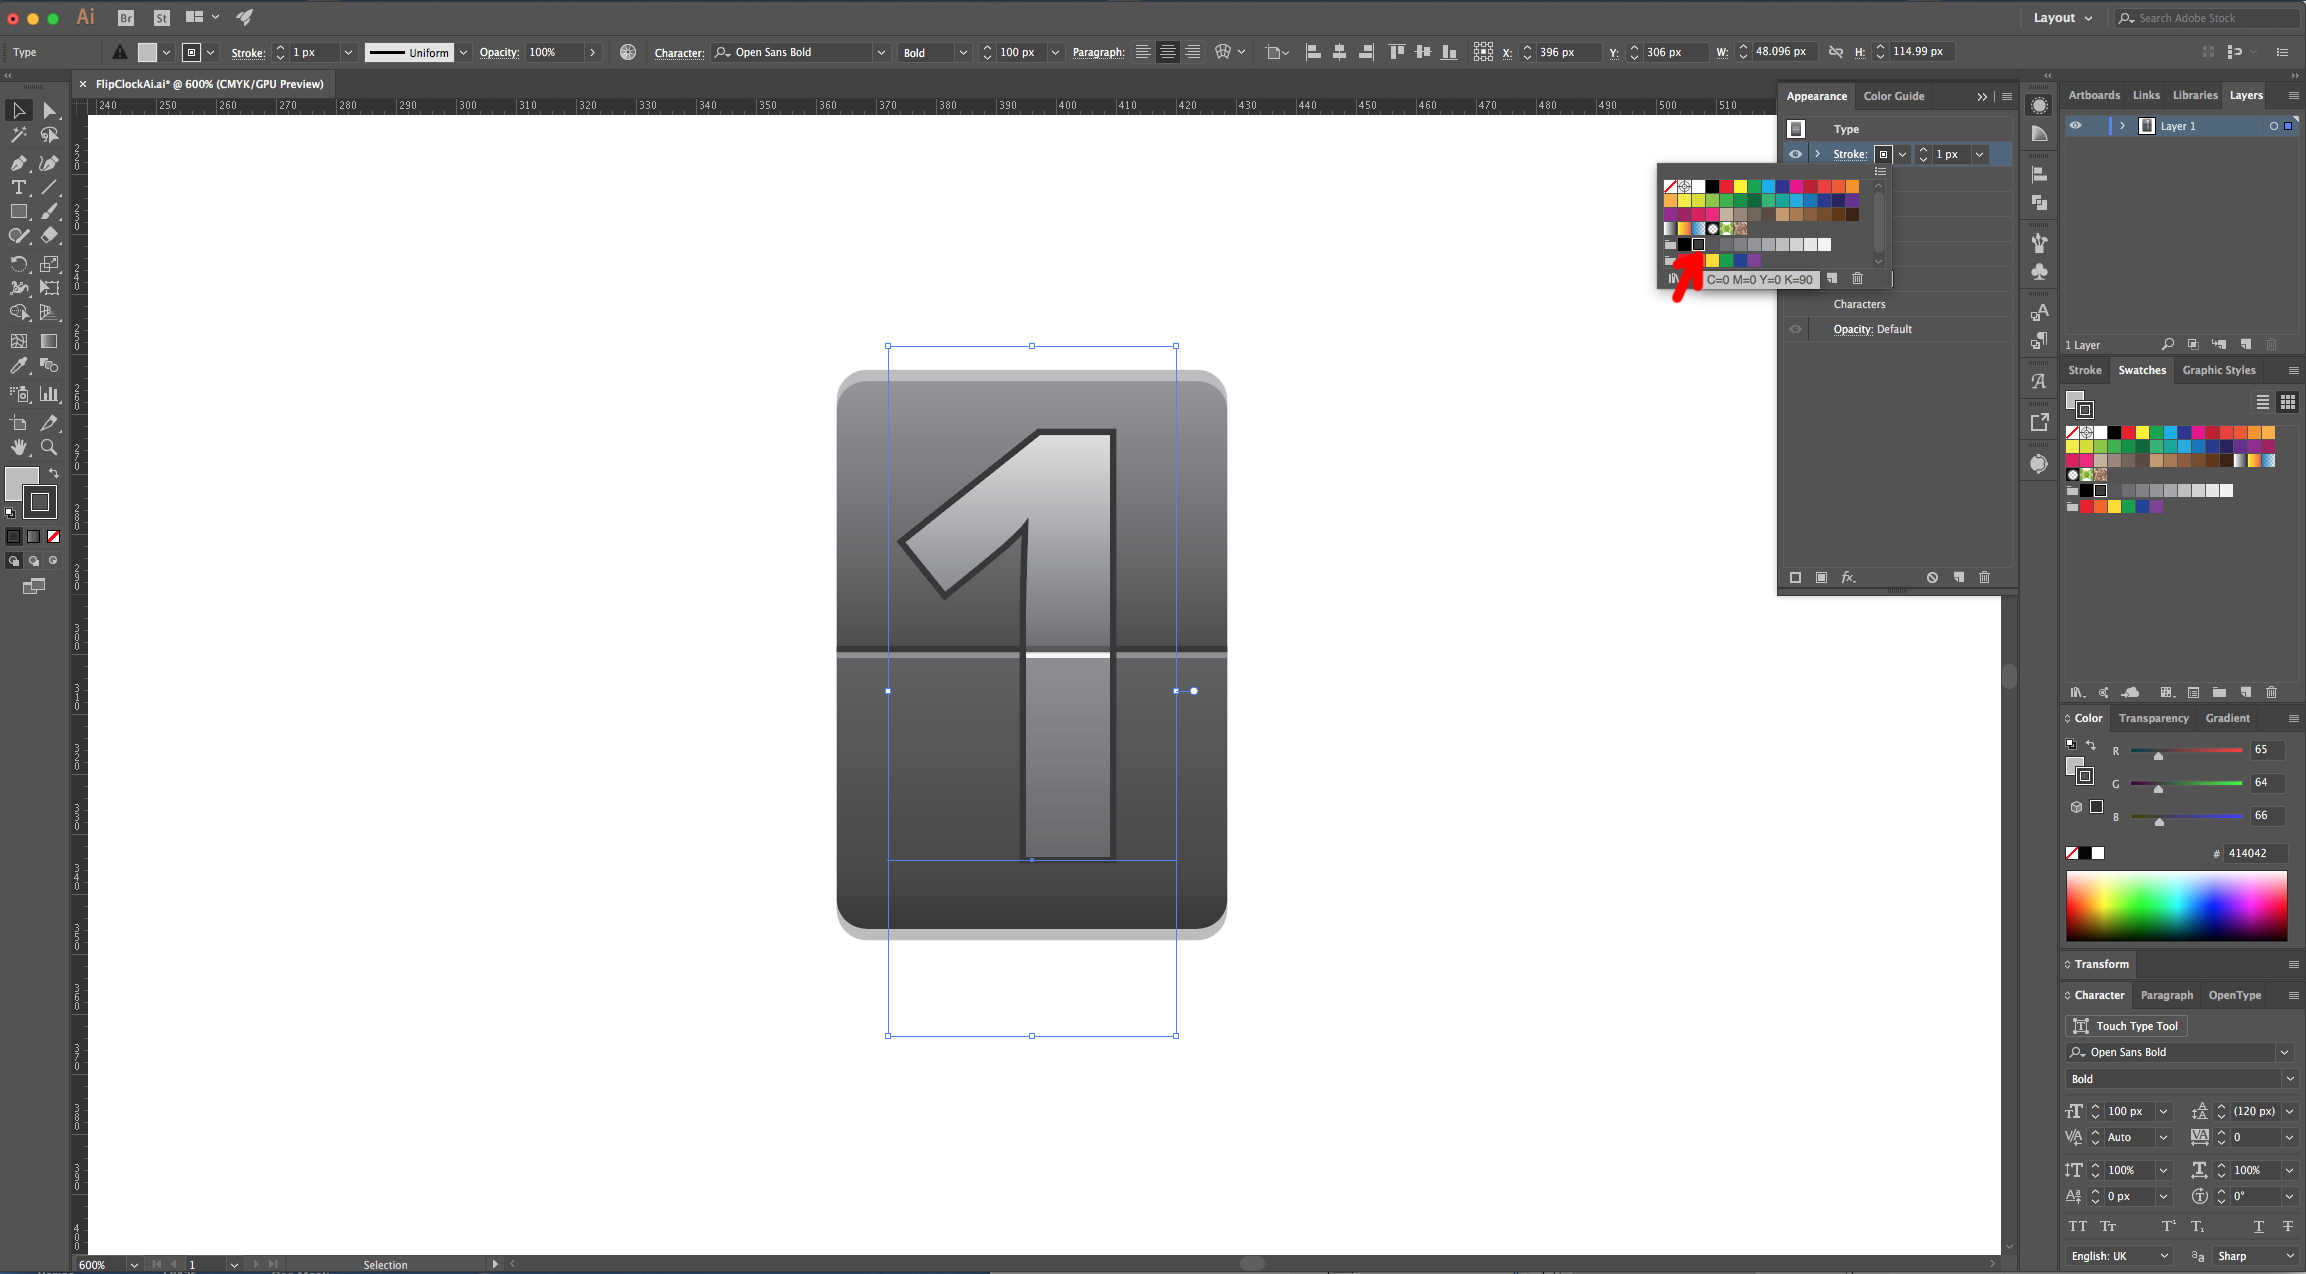
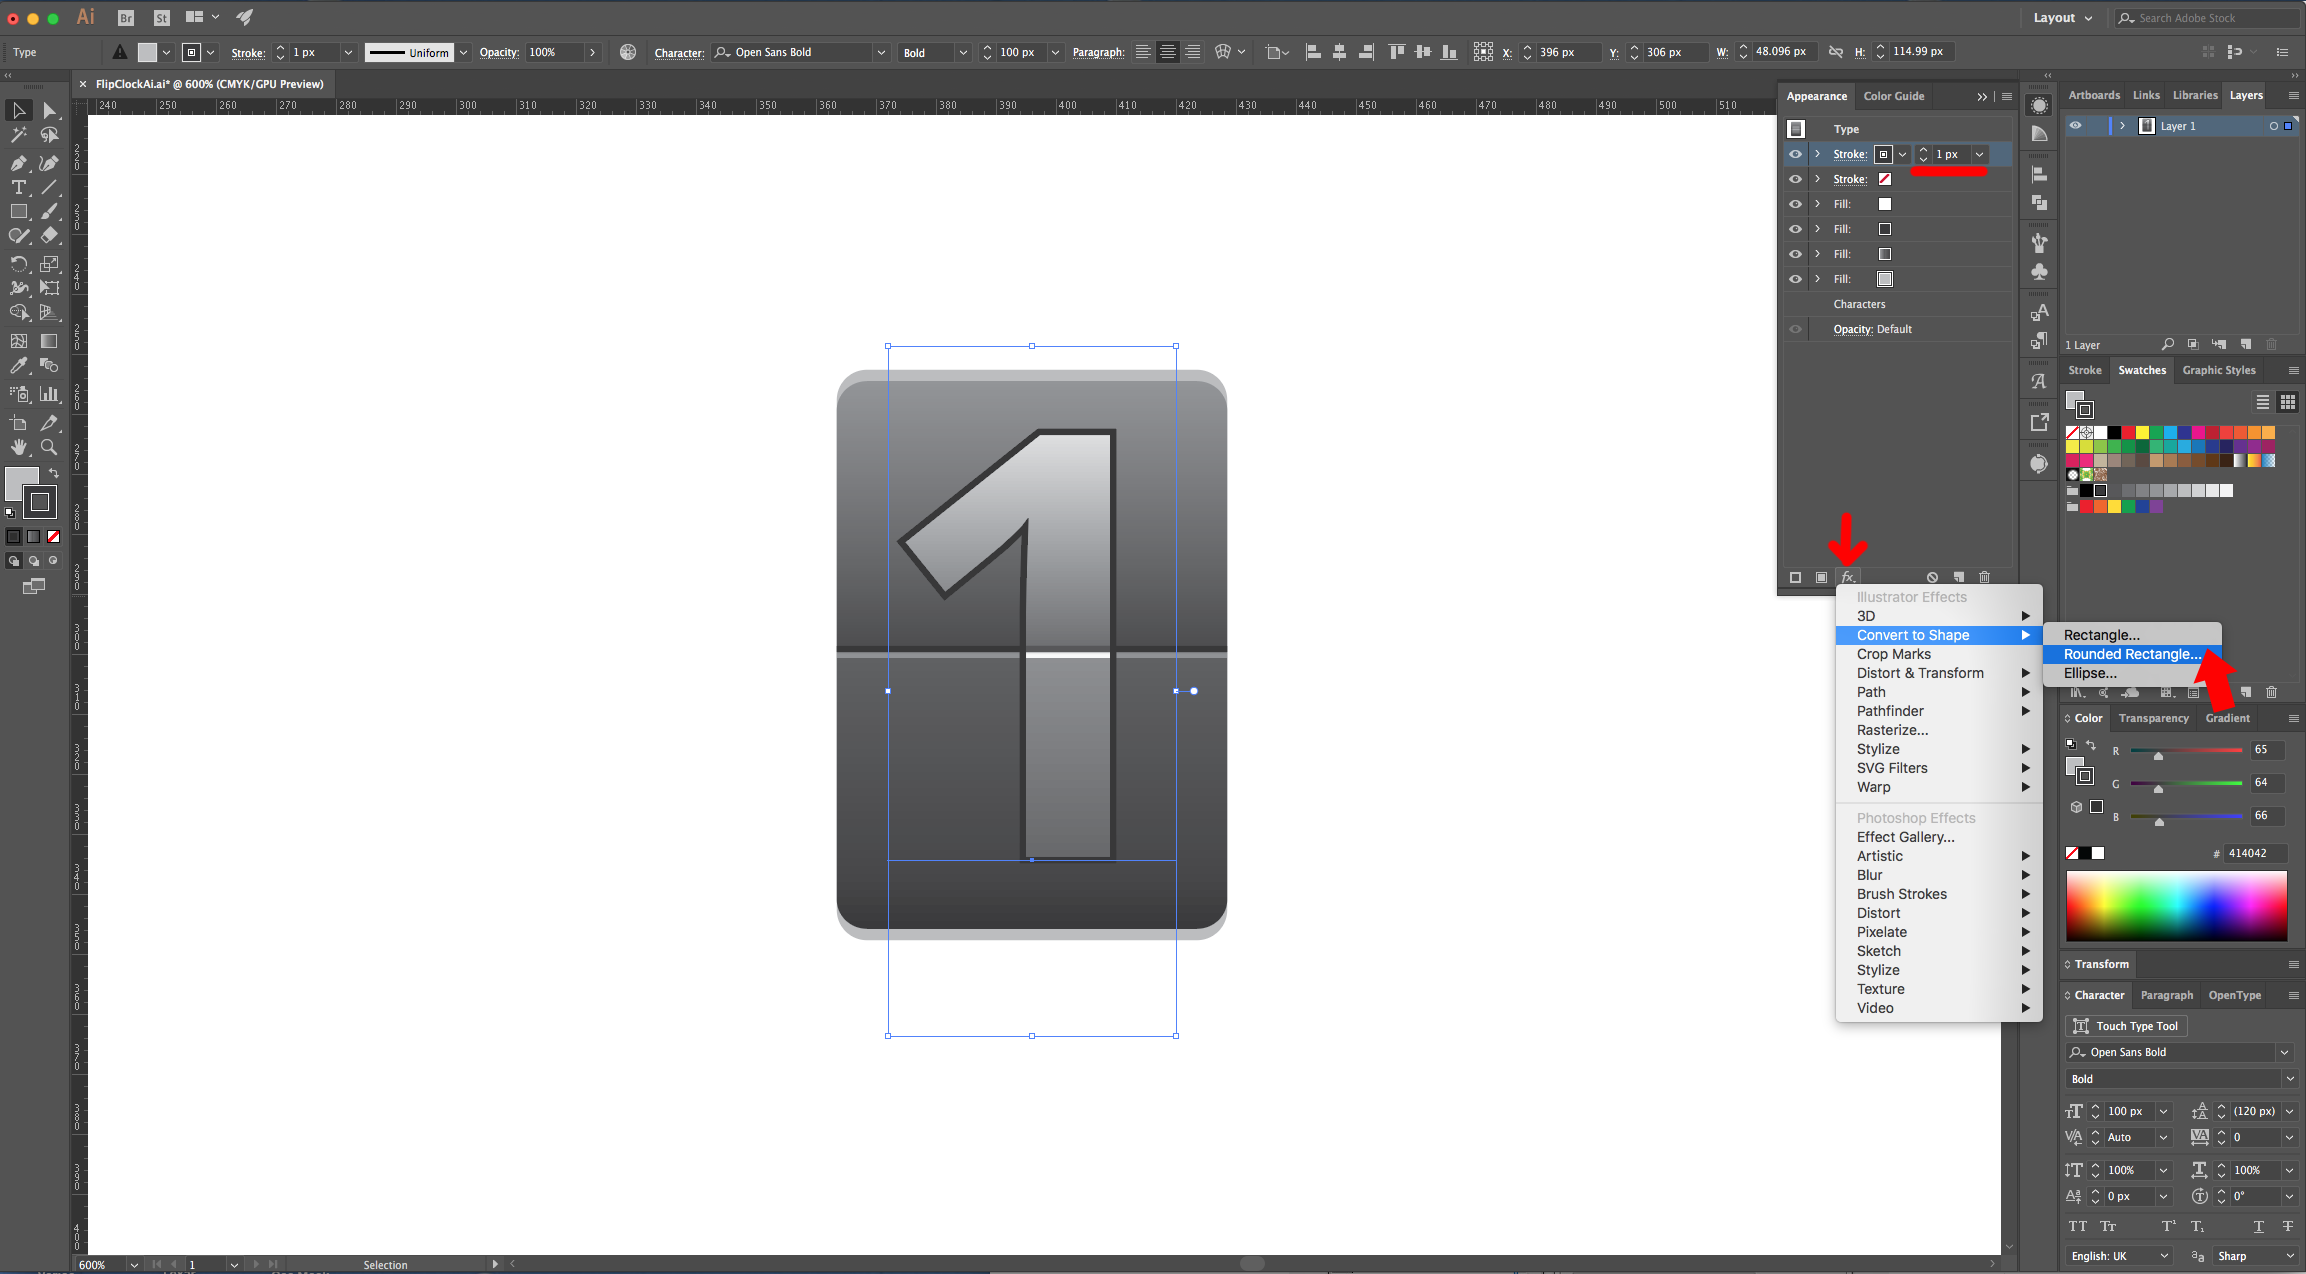
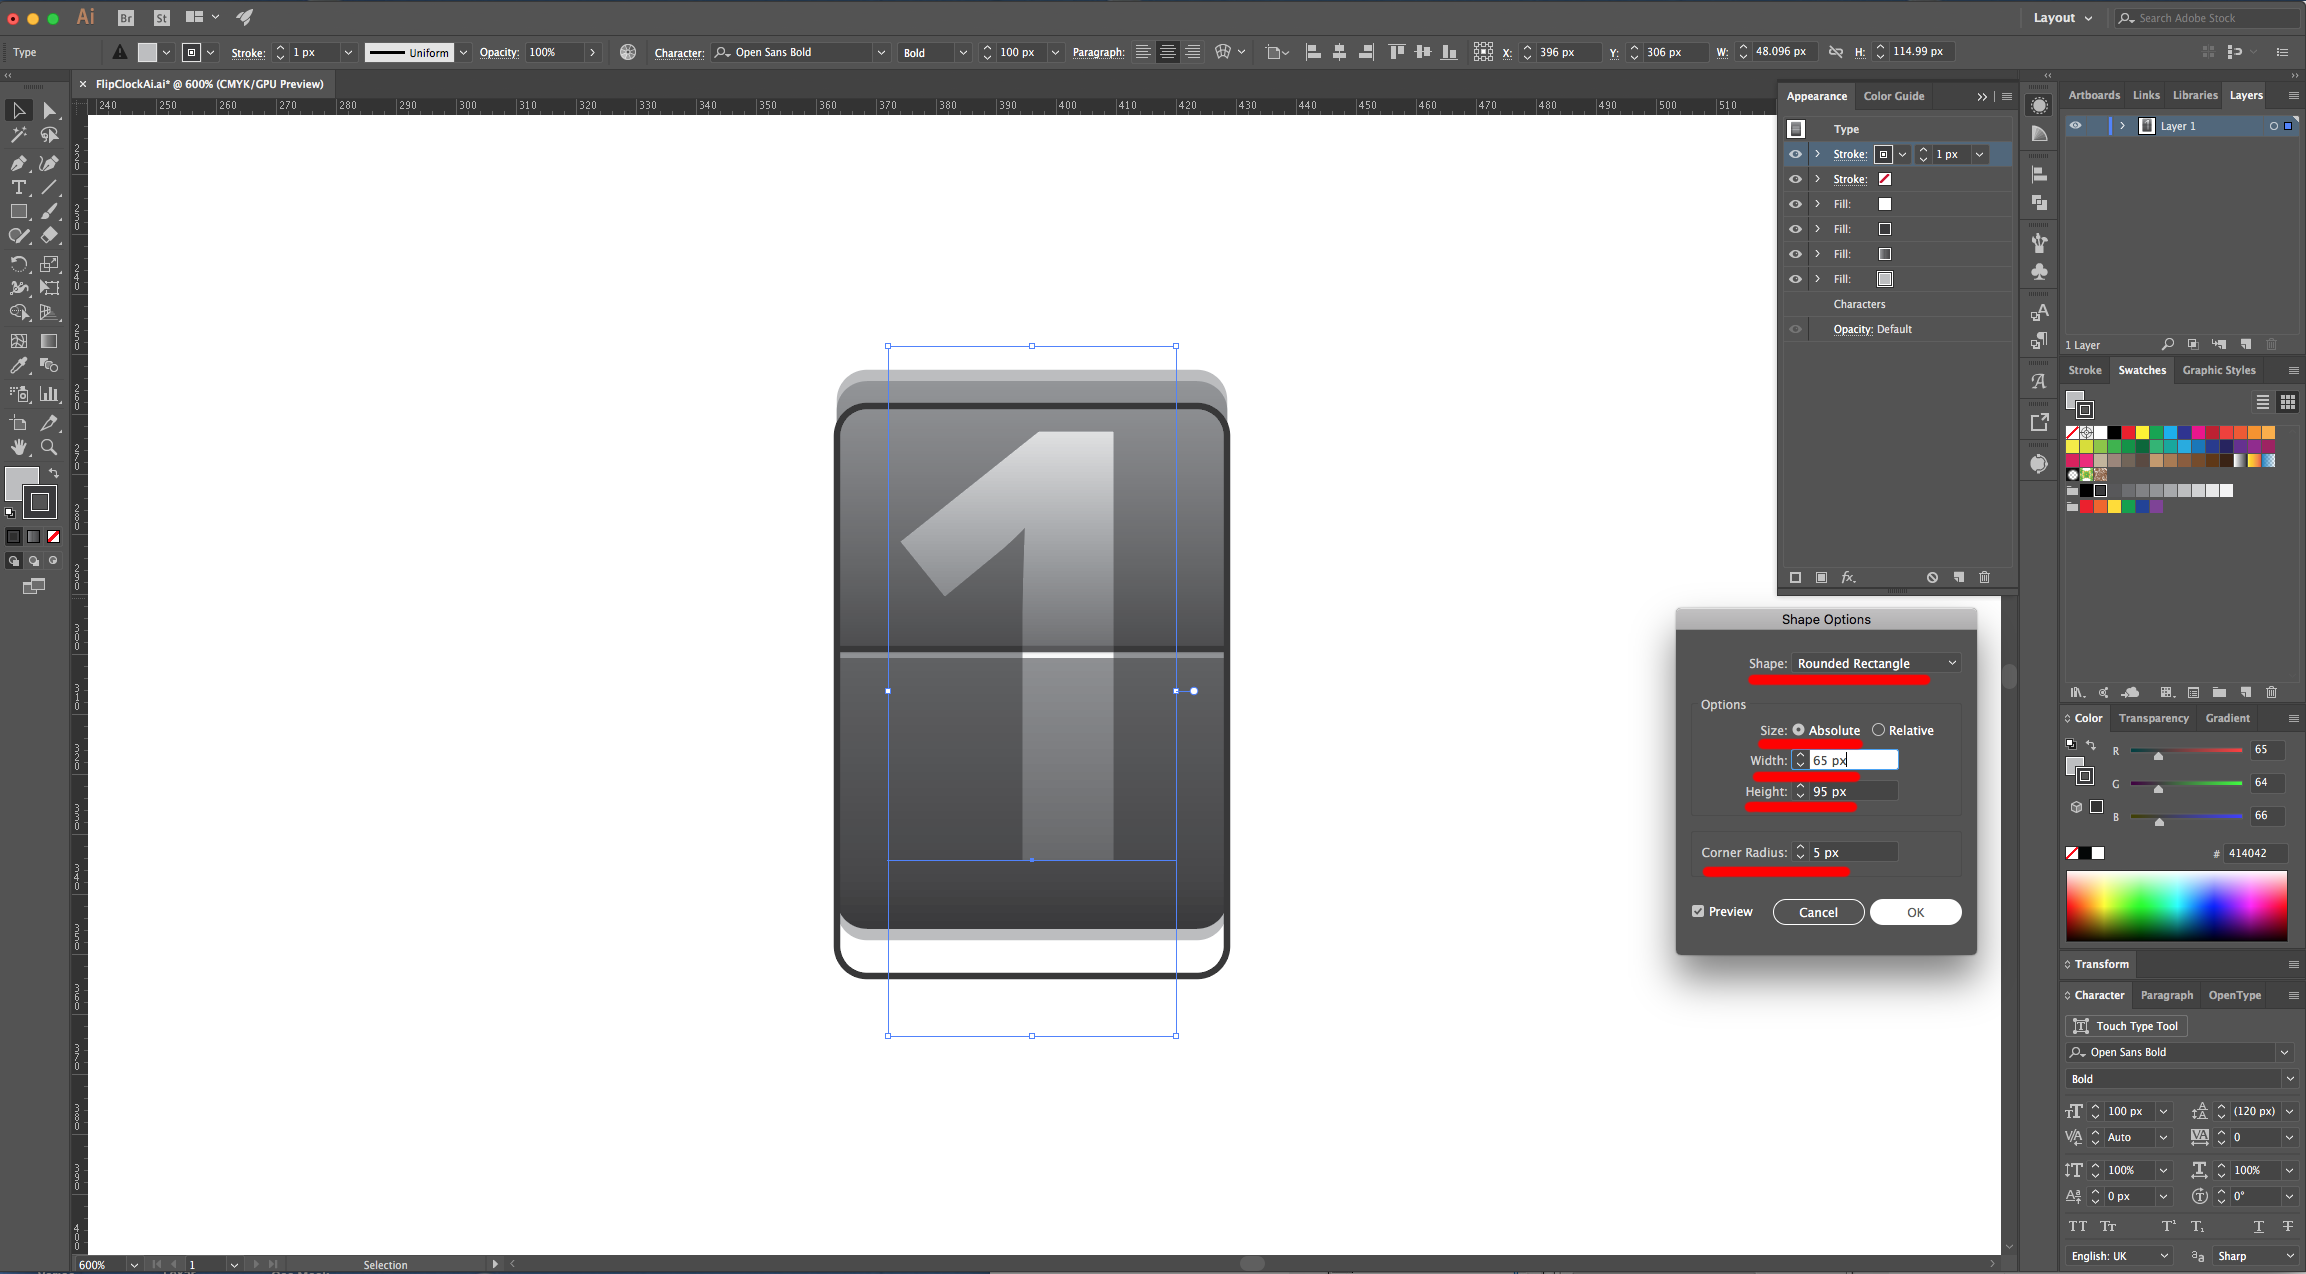
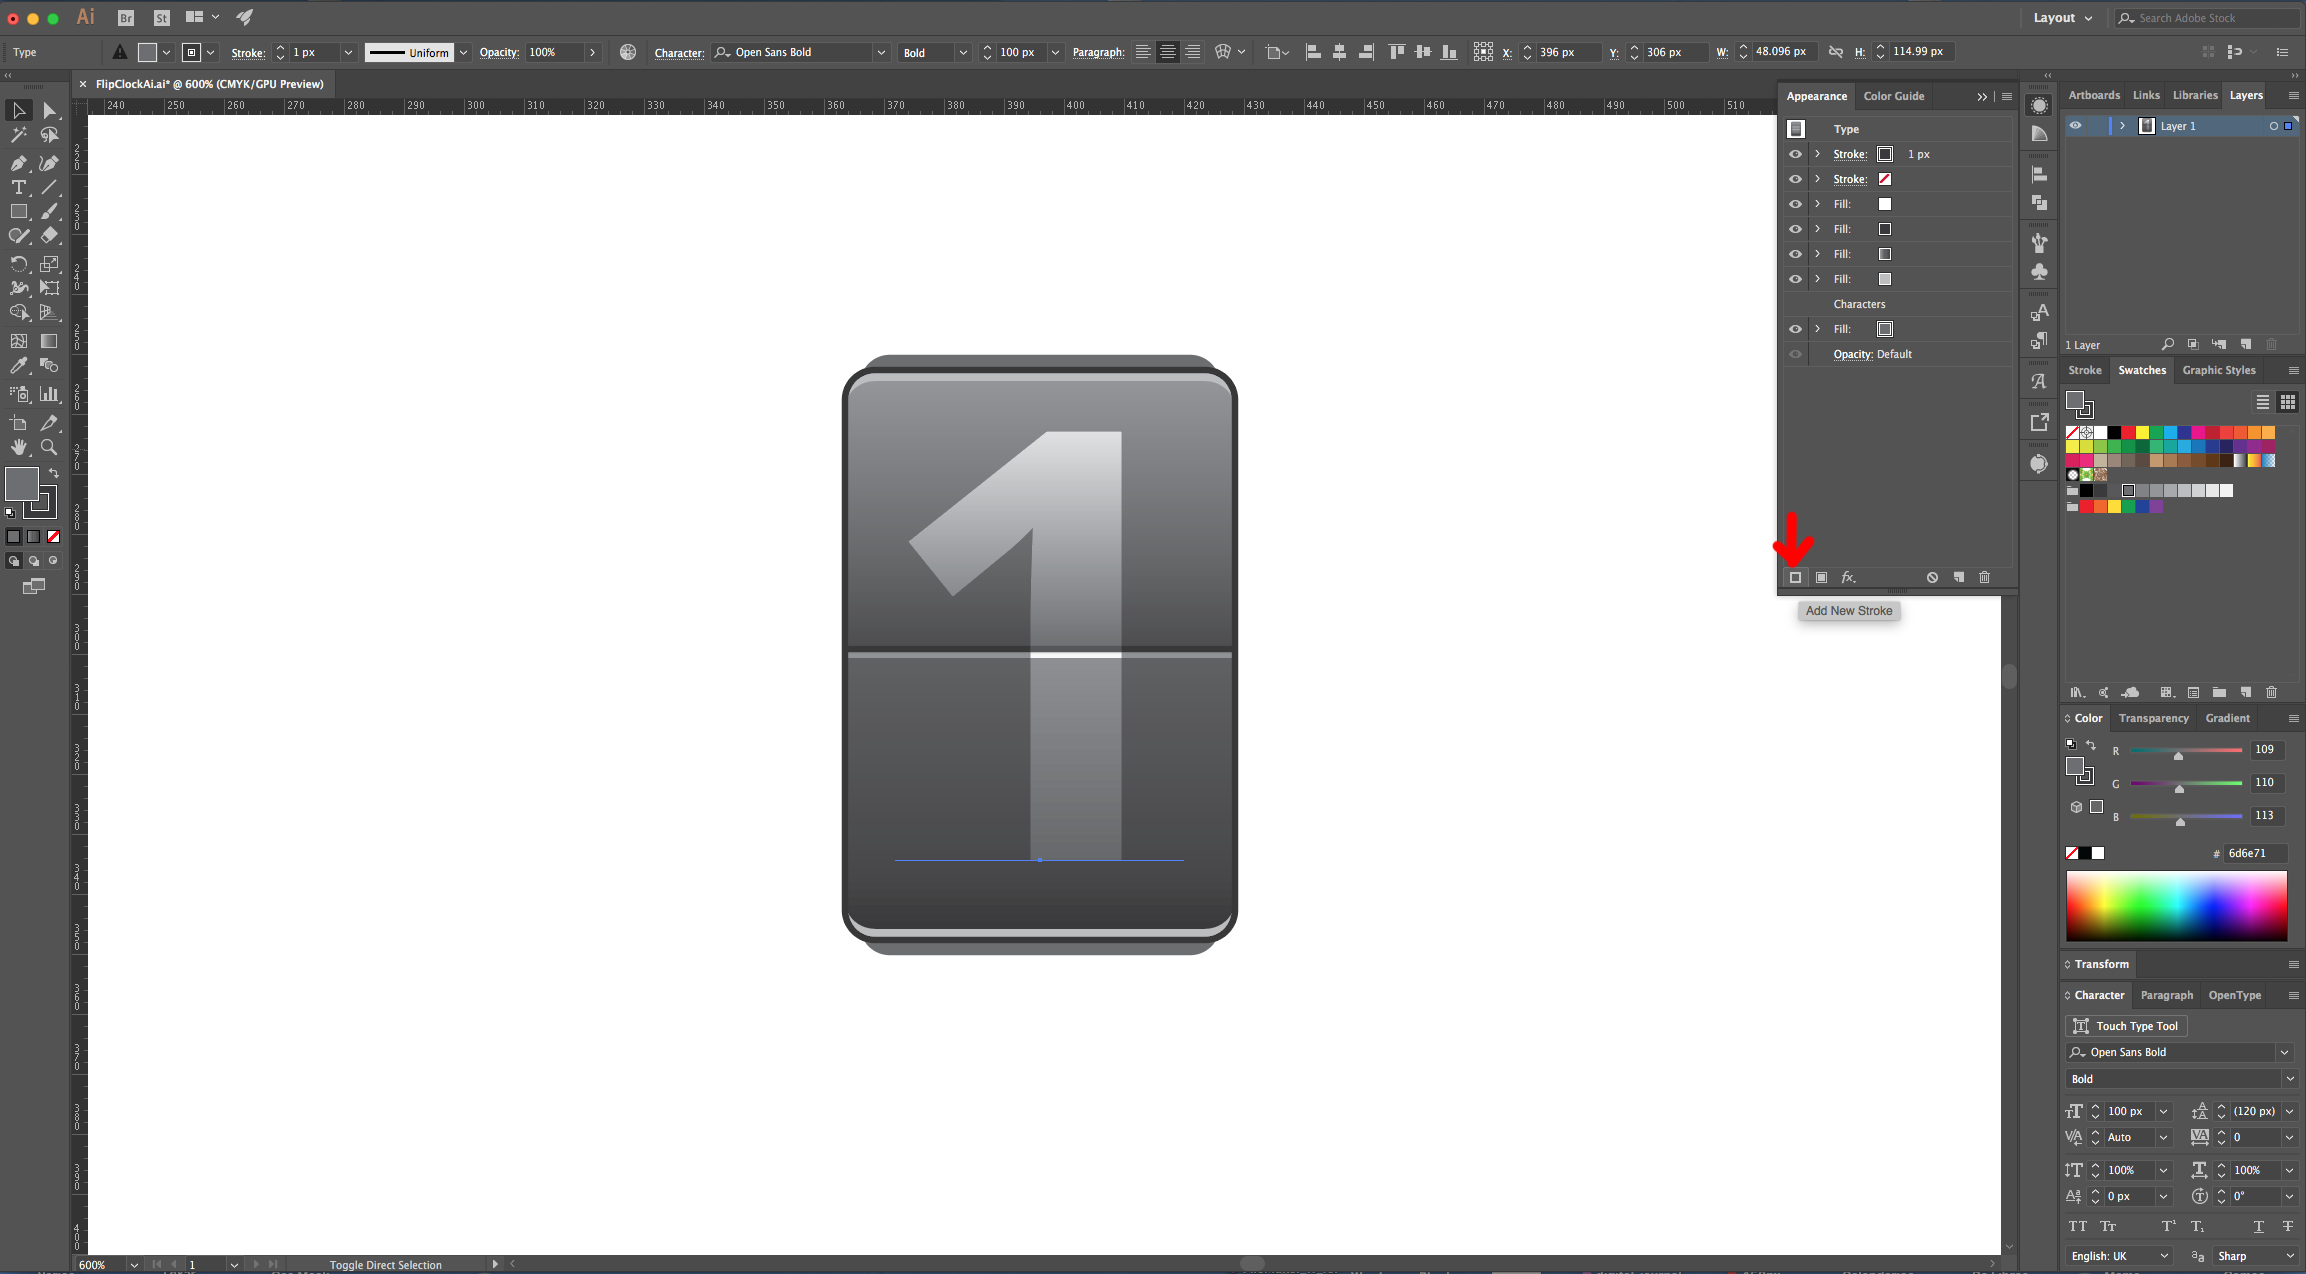
13 - Stay on the “Appearance Panel” with your text selected but make sure that none of the Fills is selected. Click on the “Add New Stroke” button at the bottom of the Panel (this will place the Stroke on Top of everything). Use 90 K as color and a 1 px size. Click on the “Effects Menu” on the Bottom-Left side of the Appearance Panel and navigate to Convert to Shape > Rounded Rectangle… and use the following values. Once you are done click “OK”.
14 - Click on the “Effects Menu” again and navigate to Distort & Transform > Transform … and use the following values. Once you are done click “OK”.
15 - Stay on the “Appearance Panel” with your text selected but make sure that none of the Fills is selected. Click on the “Add New Fill” button at the bottom of the Panel then drag the New Fill to the bottom. Use 70 K as fill color.
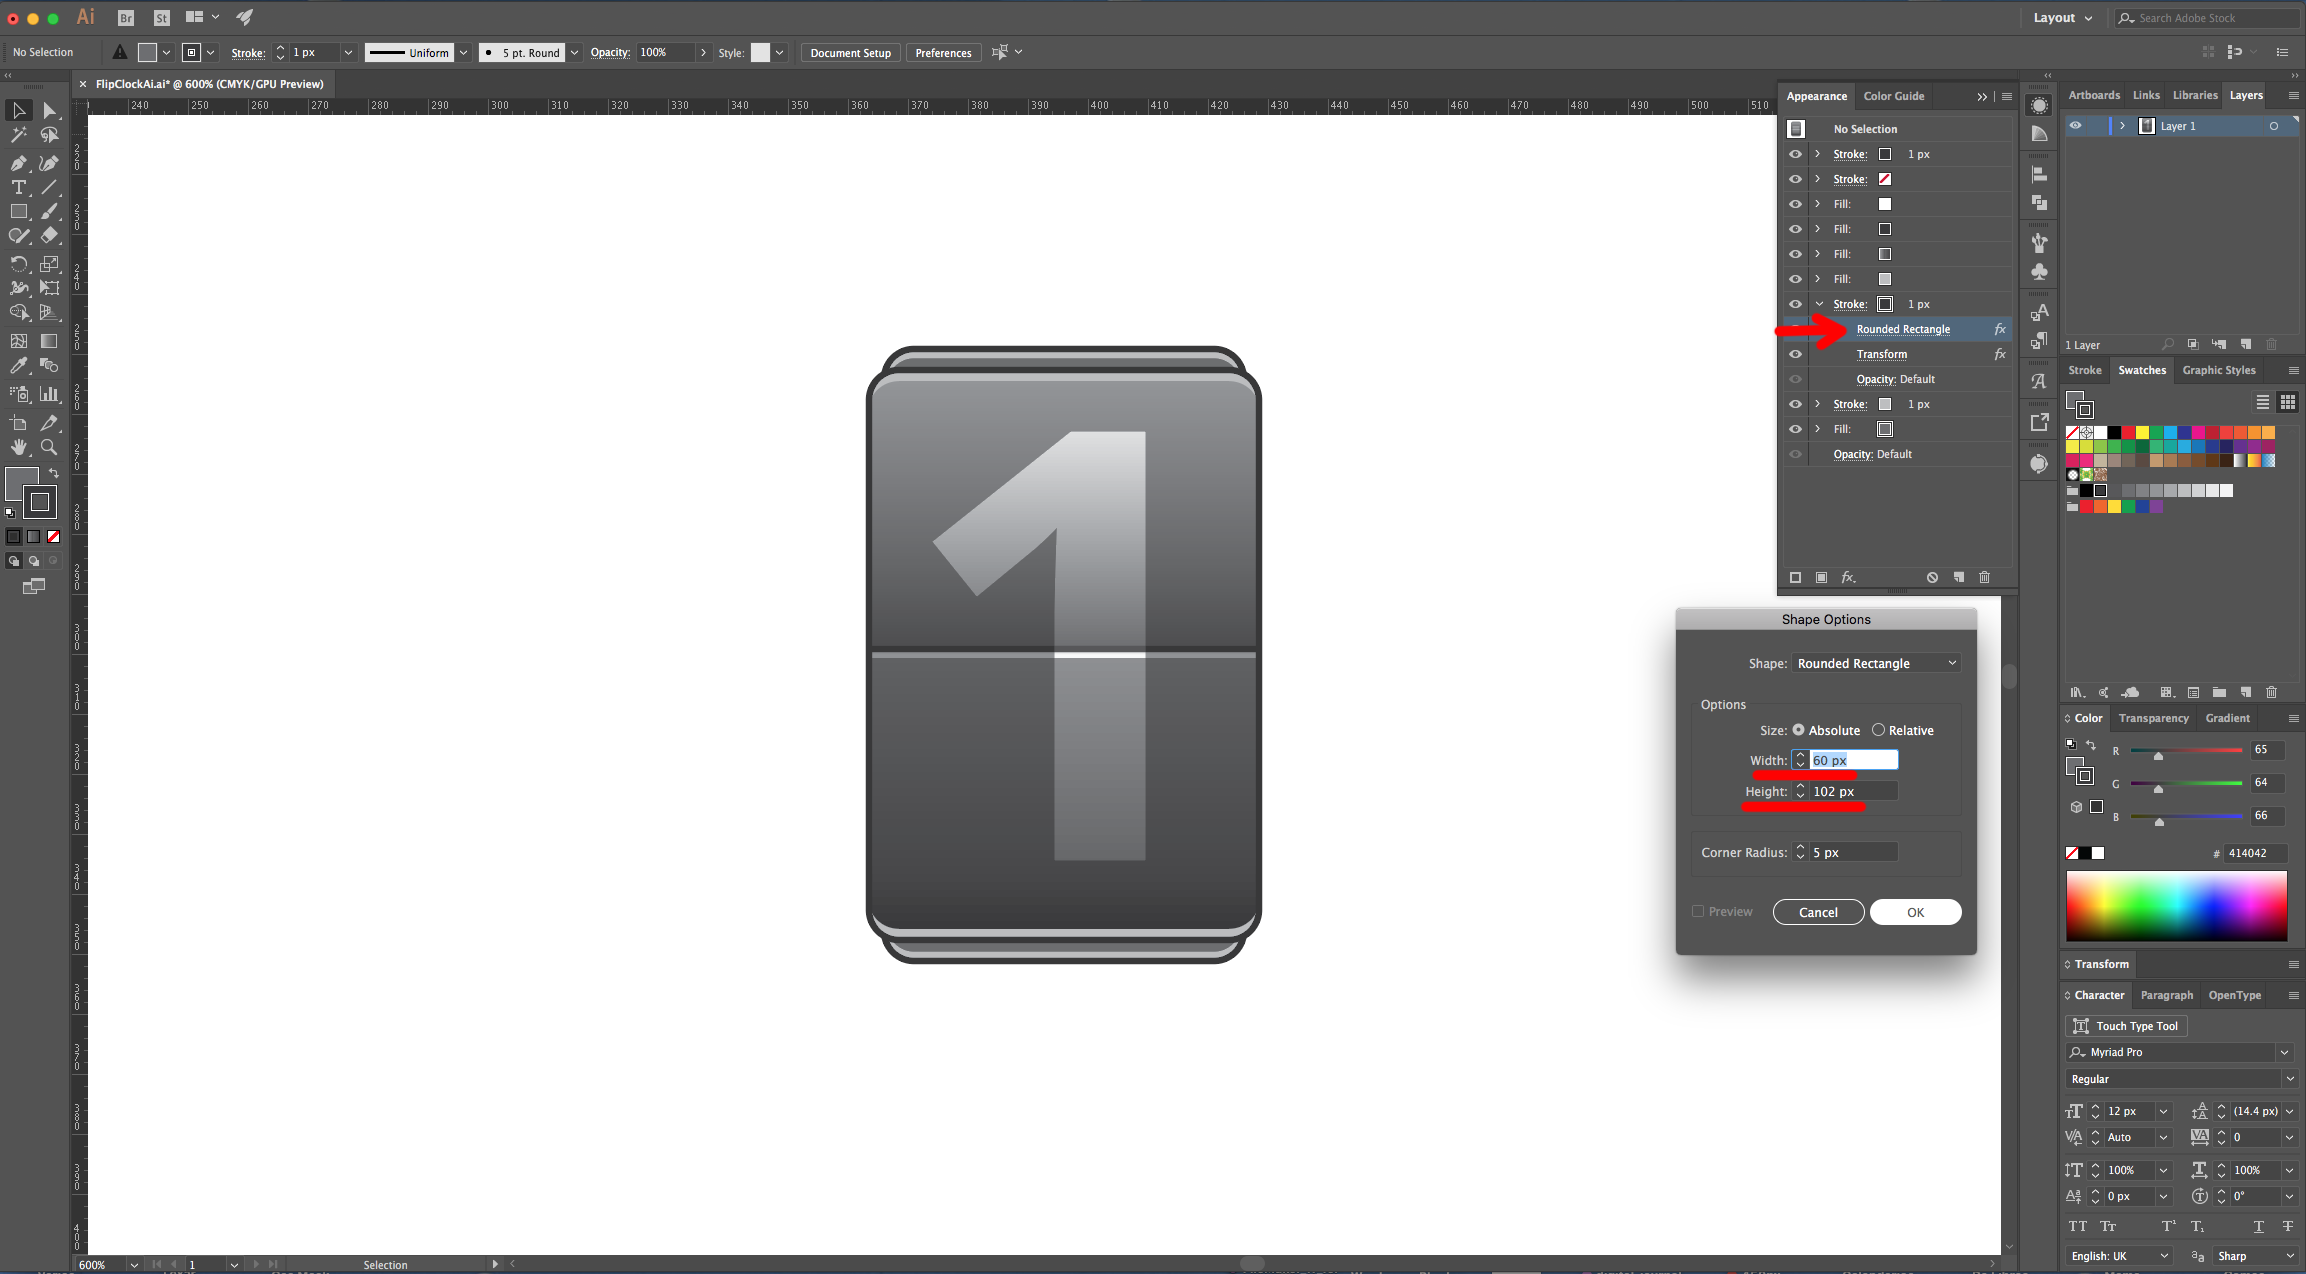
16 - With the Fill still selected, click on the “Effects Menu” on the Bottom-Left side of the Appearance Panel and navigate to Convert to Shape > Rounded Rectangle… and use the following values. Once you are done click “OK”. Click on the “Effects Menu” again and navigate to Distort & Transform > Transform … and use the following values. Once you are done click “OK”.
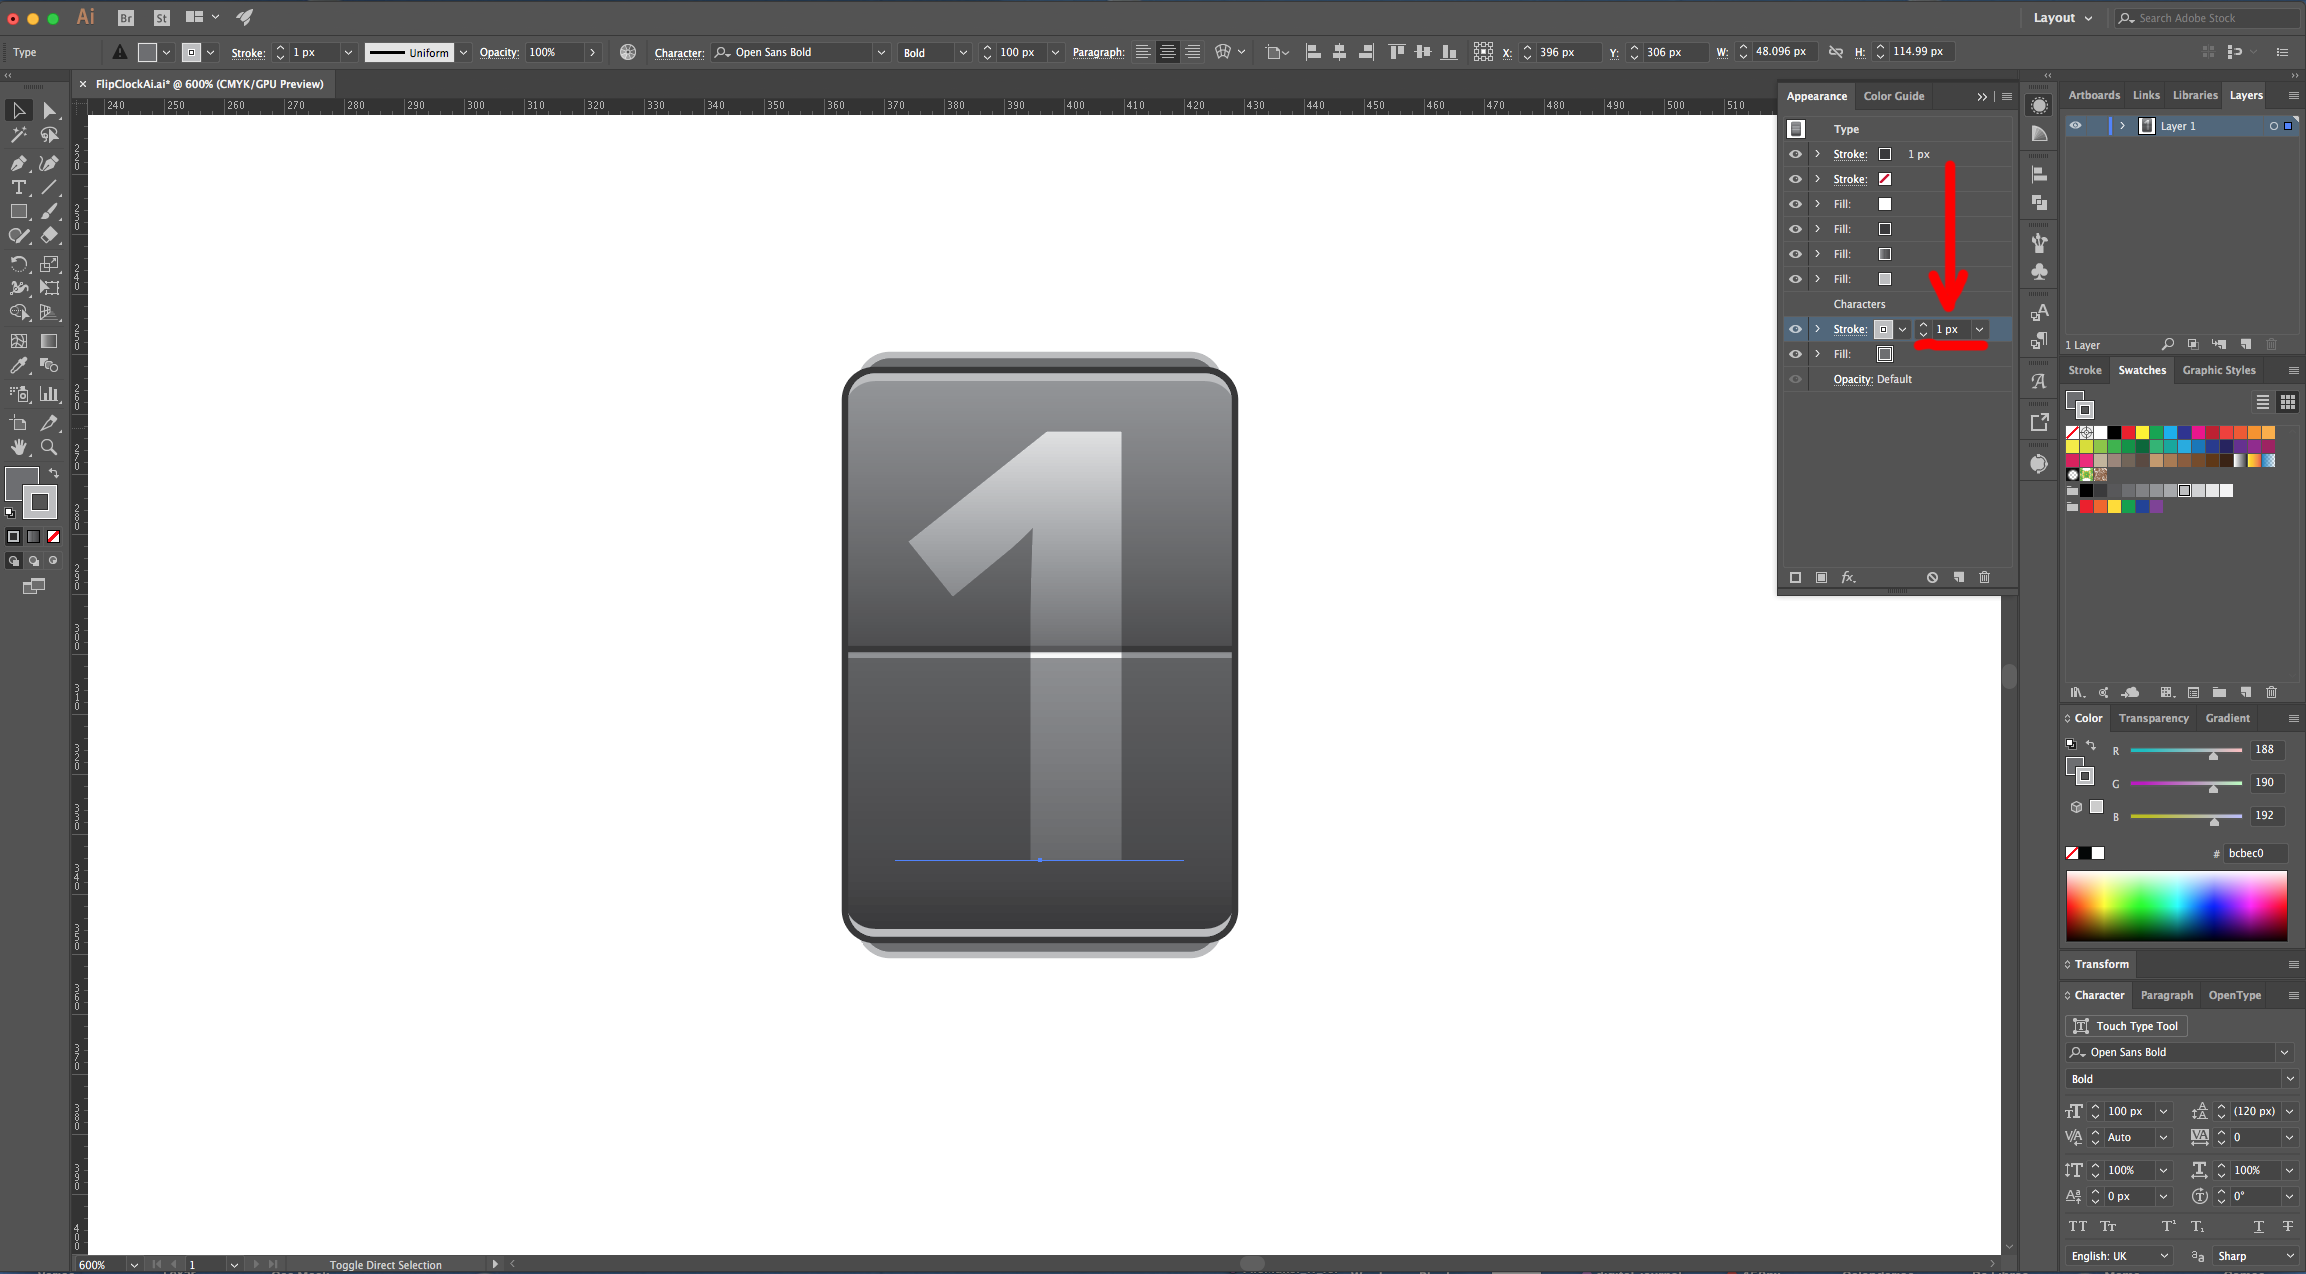
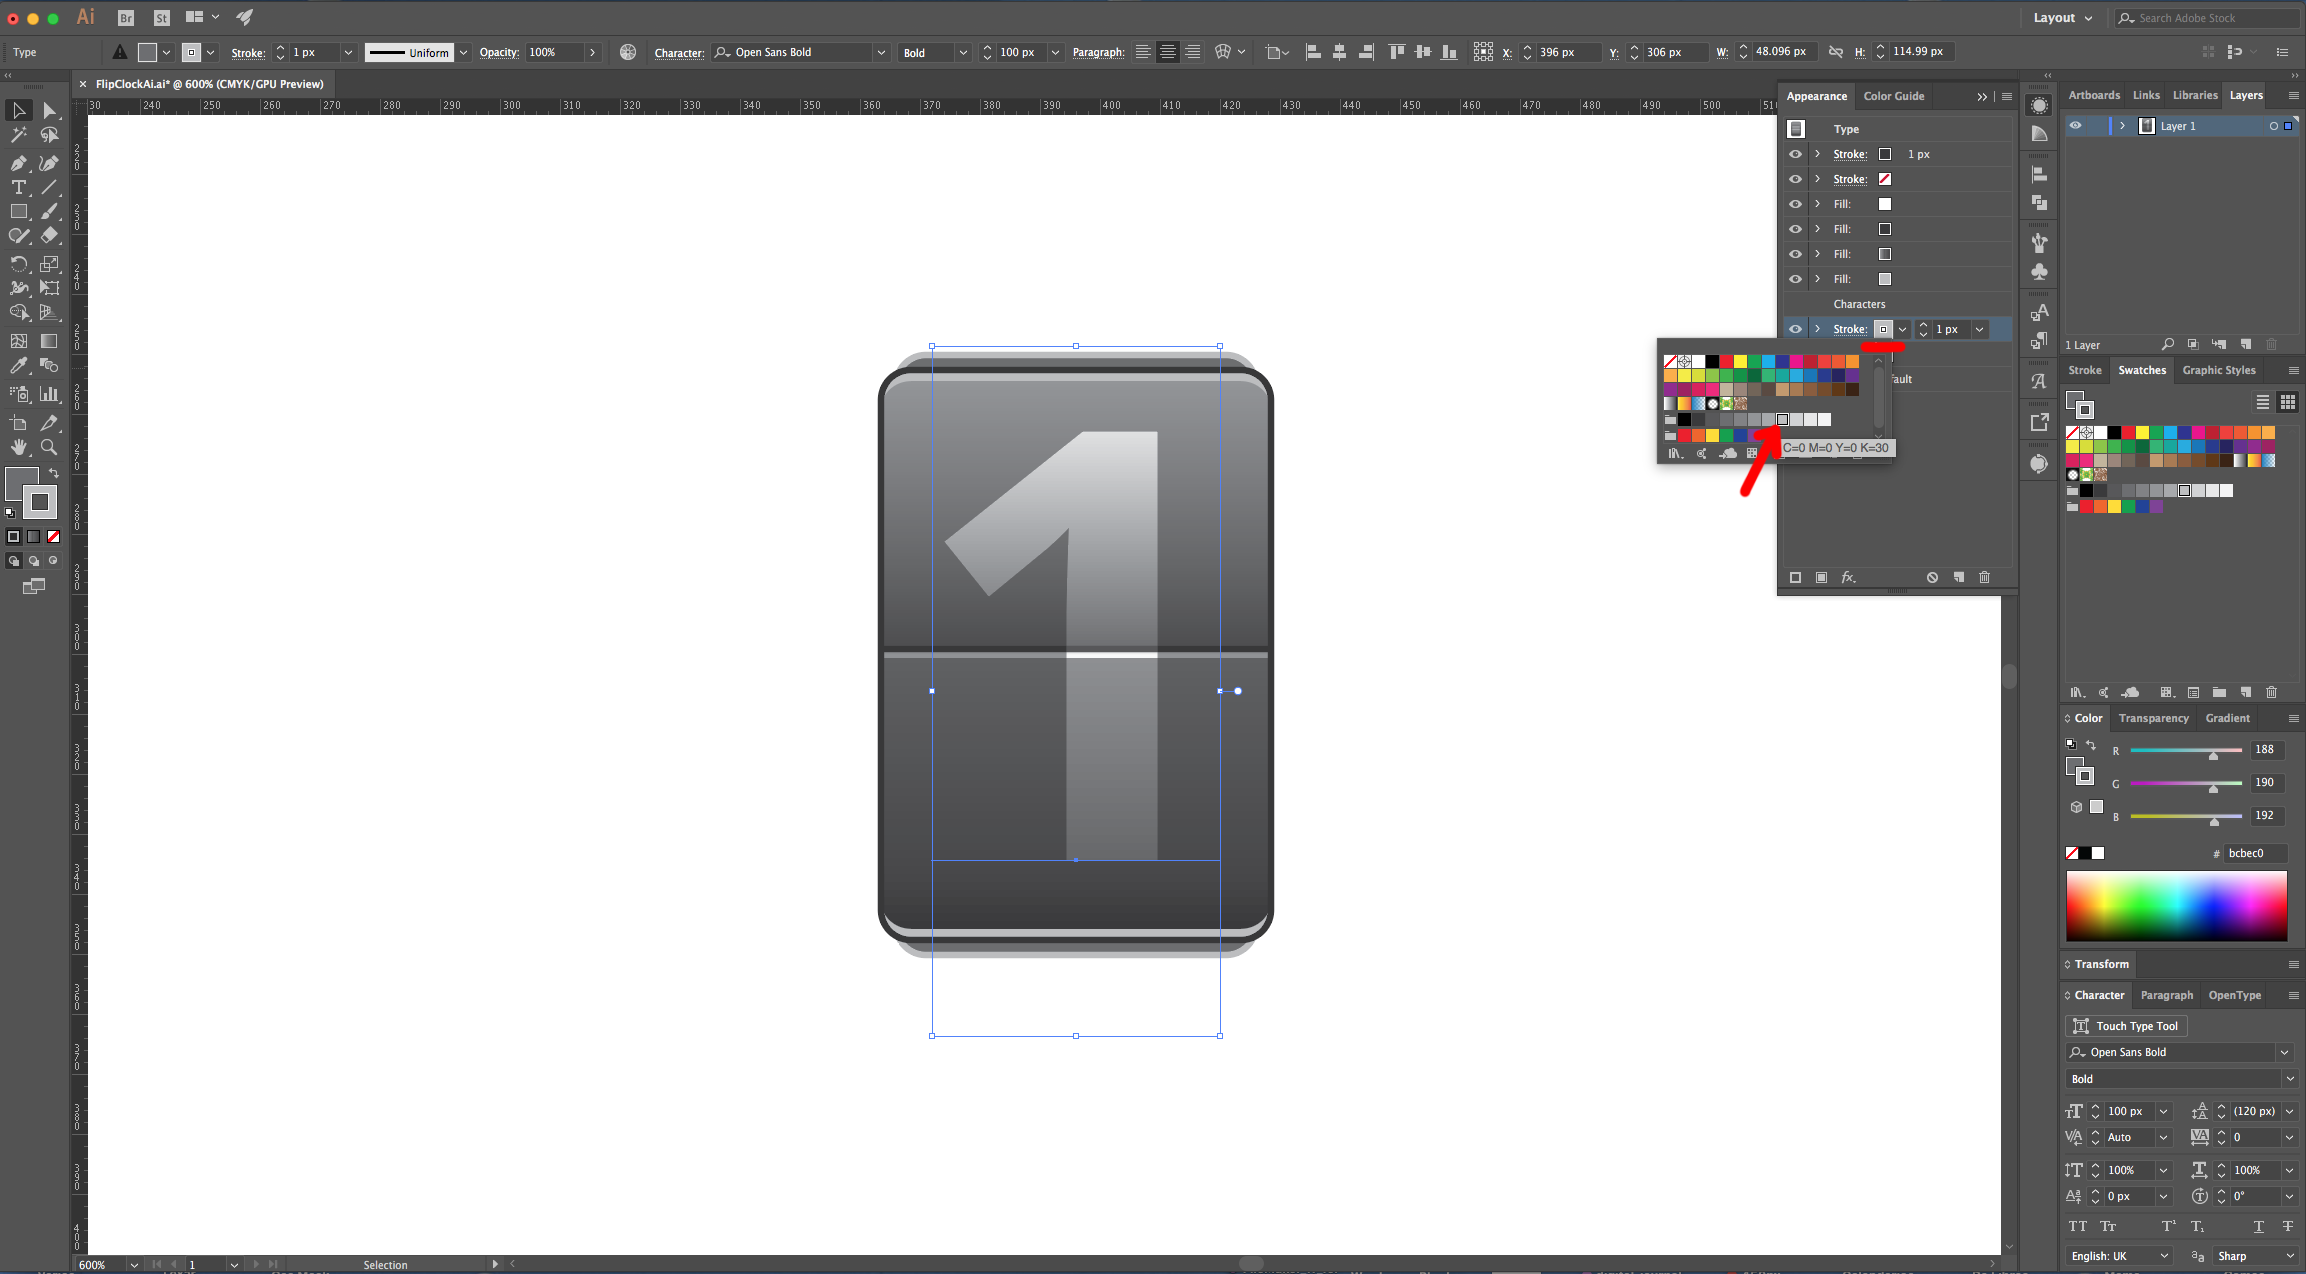
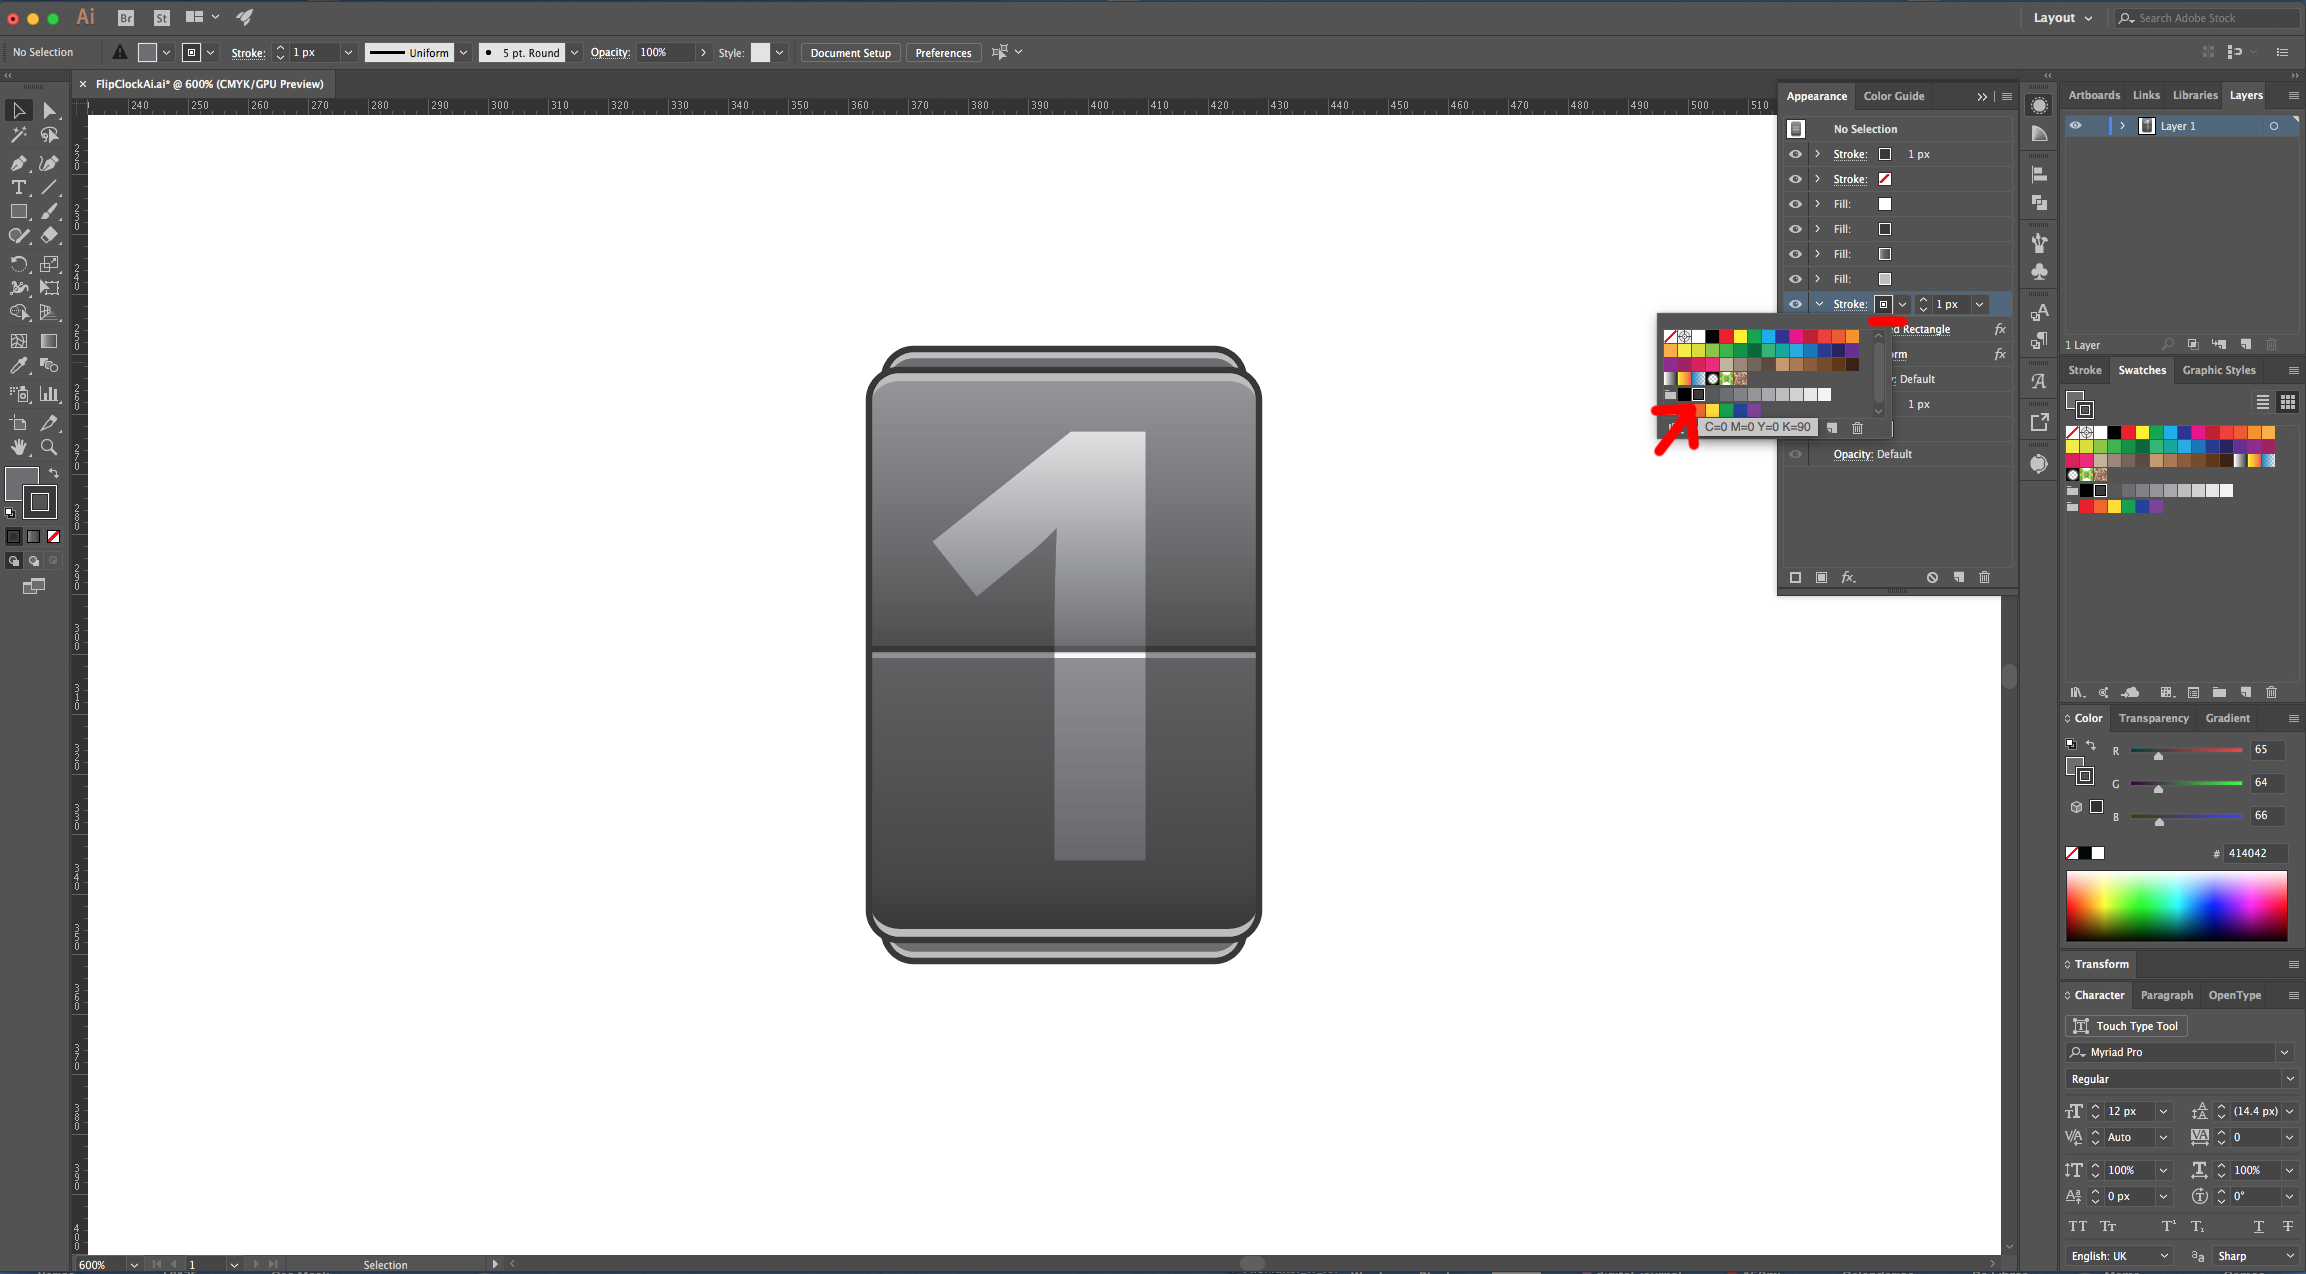
17 - Stay on the “Appearance Panel” with your text selected but make sure that none of the Fills is selected. Click on the “Add New Stroke” button at the bottom of the Panel. Drag the Stroke down so it sits on top of your last Fill but under everything else. Use 30 K as color and a 1 px size. Click on the “Effects Menu” on the Bottom-Left side of the Appearance Panel and navigate to Convert to Shape > Rounded Rectangle… and use the following values. Once you are done click “OK”.

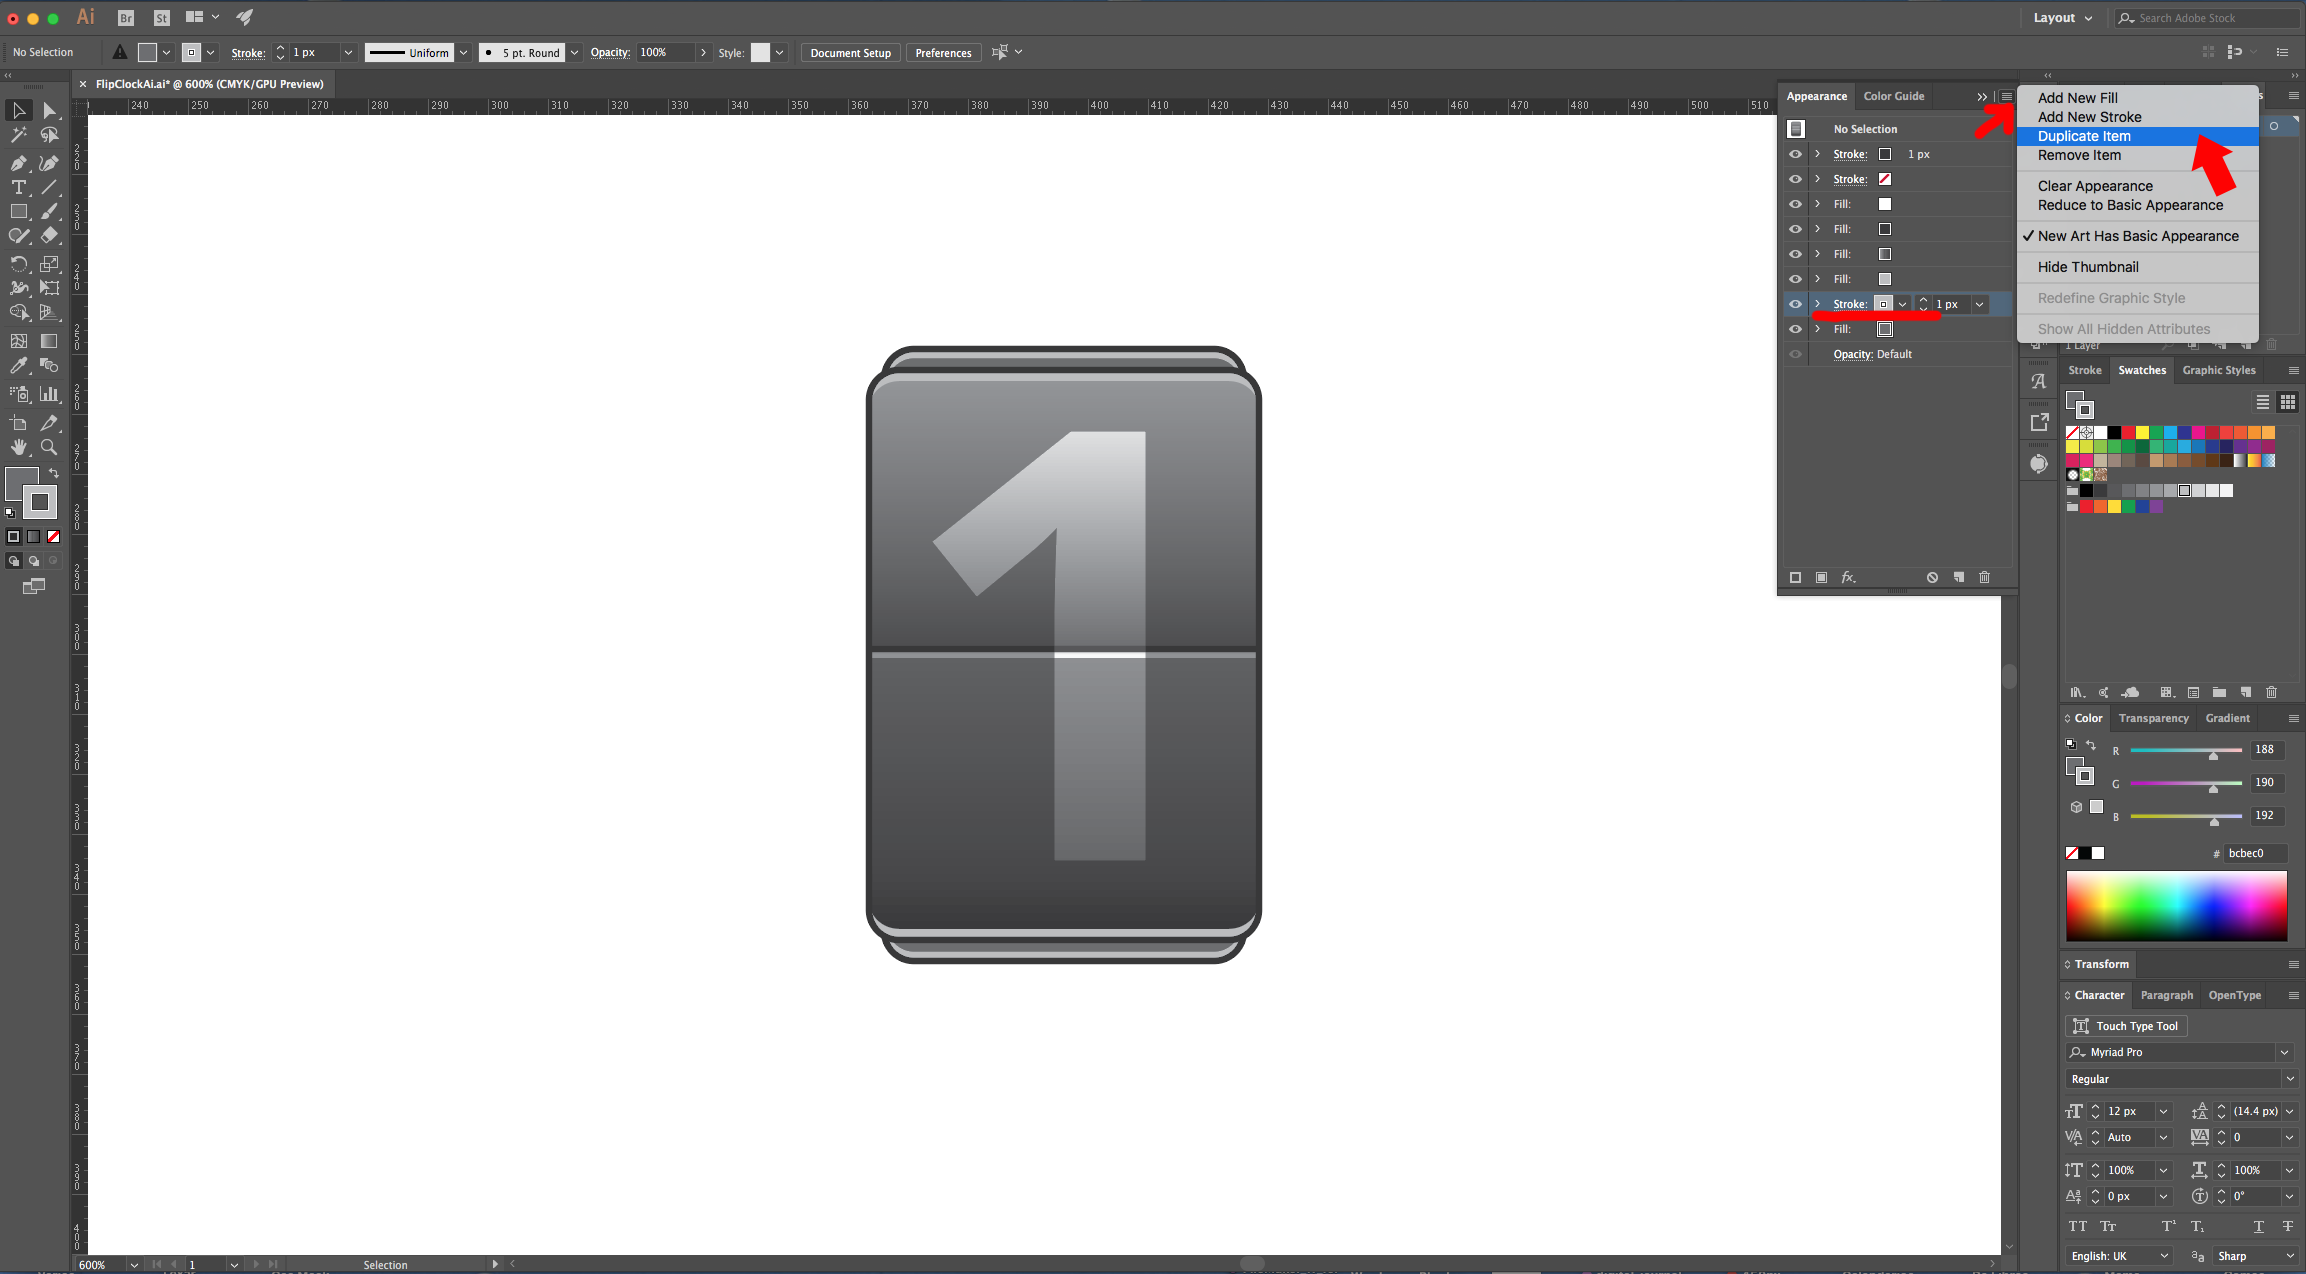
18 - With the last Stroke still selected, click on the Drop-Down Menu on the Top-Right and choose “Duplicate Item”. Change the Fill color to a Darker Grey (90 K). Click on the small arrow to the left of the Fill to show its contents, double-click on the “Rounded Rectangle” Effect to open the Dialog and change its values.
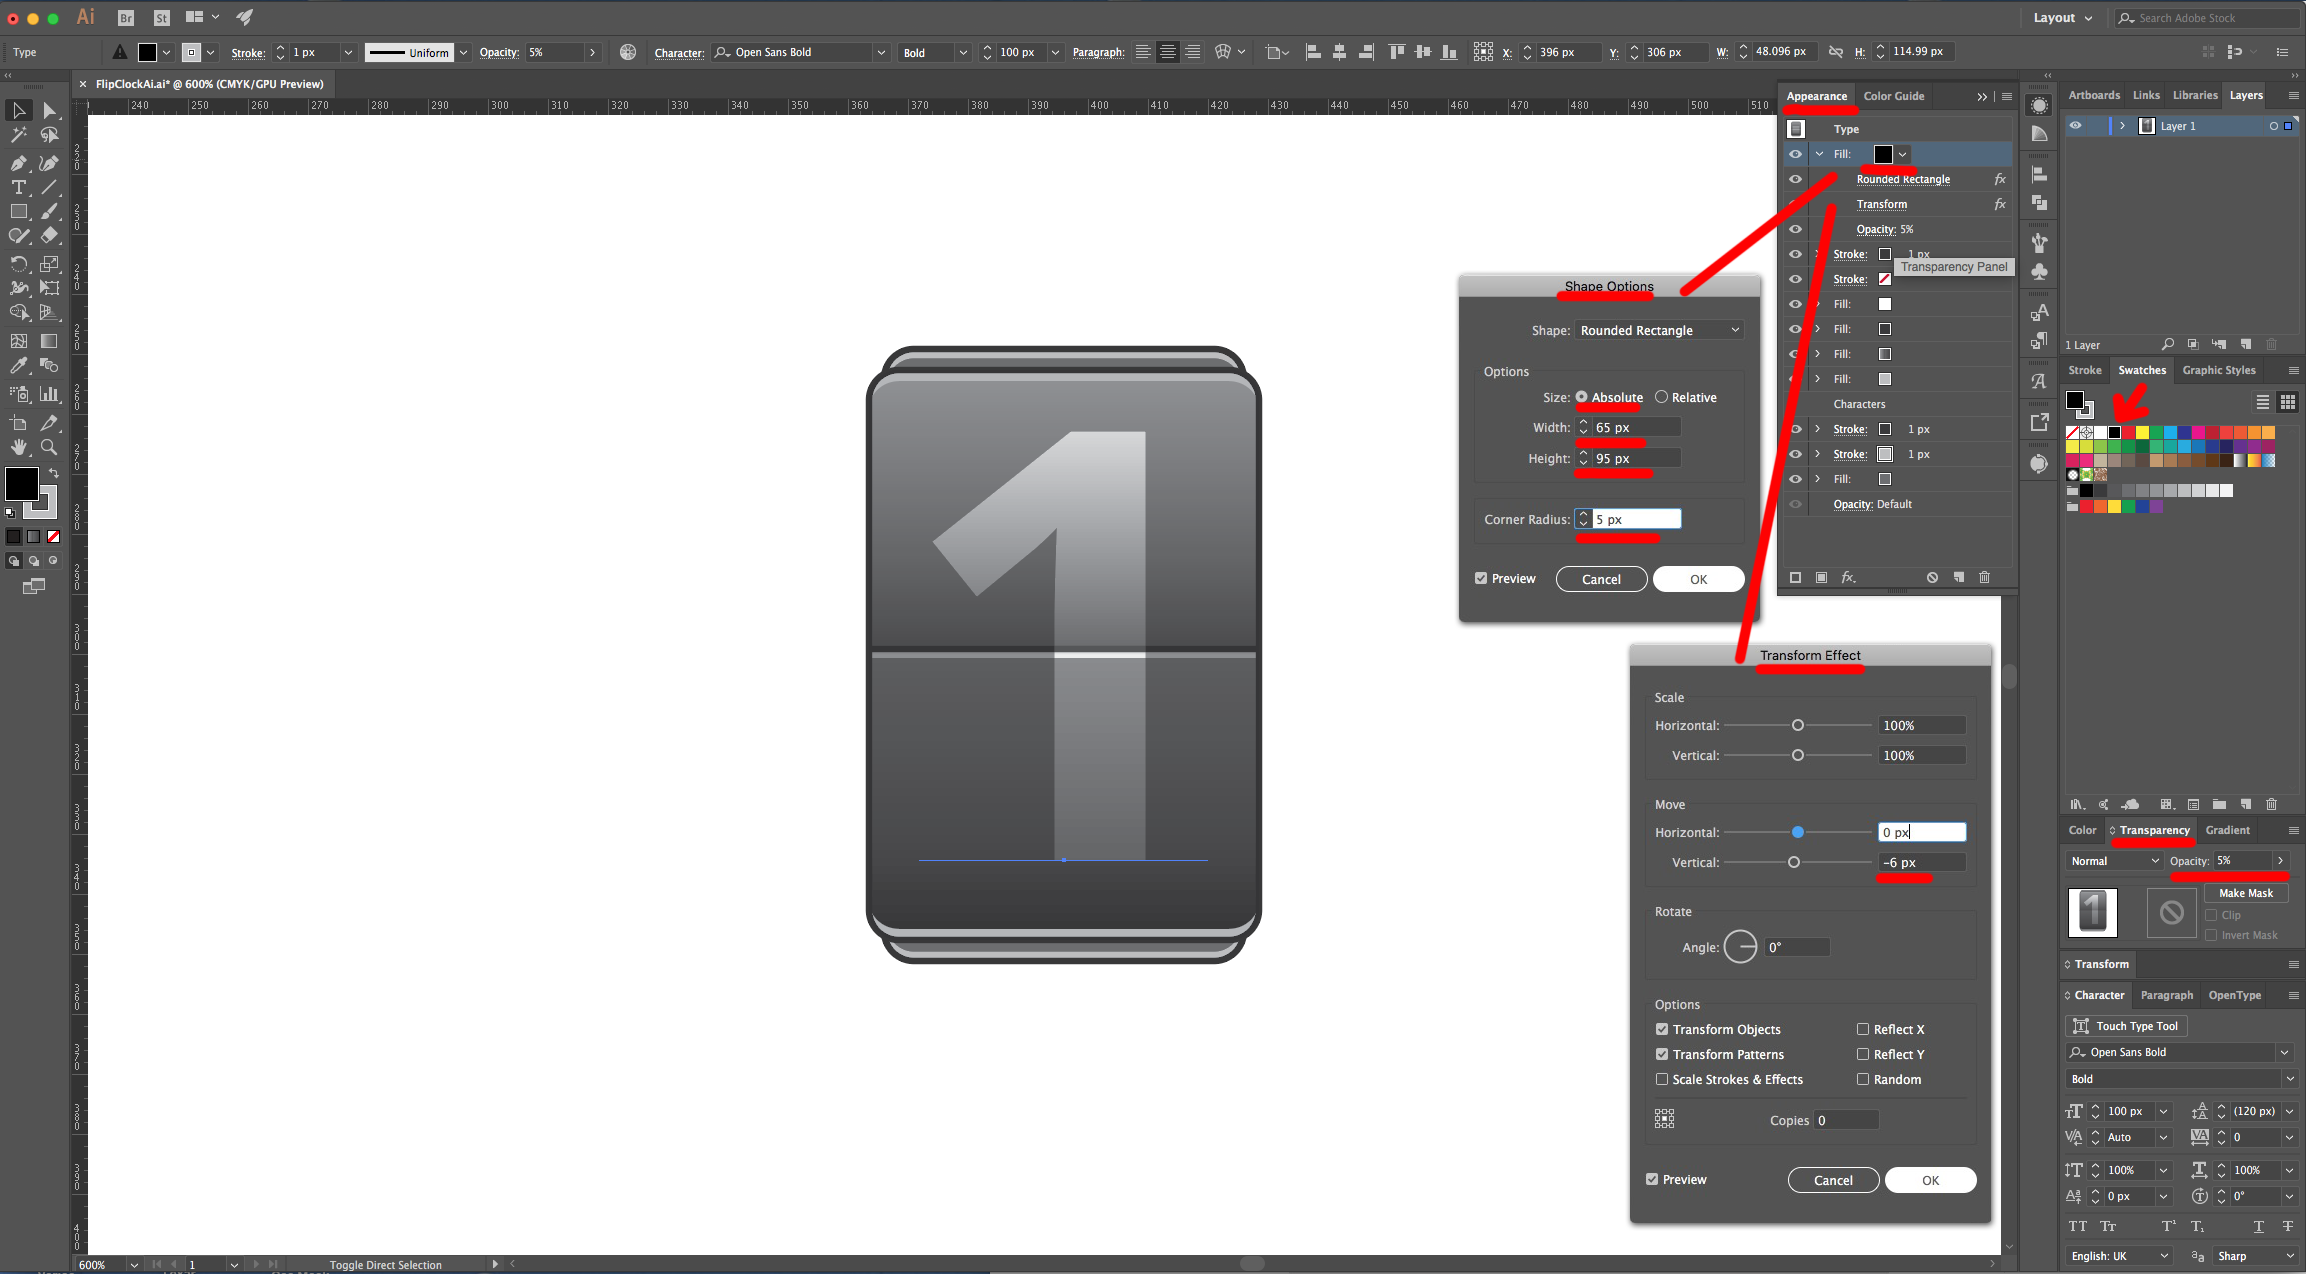
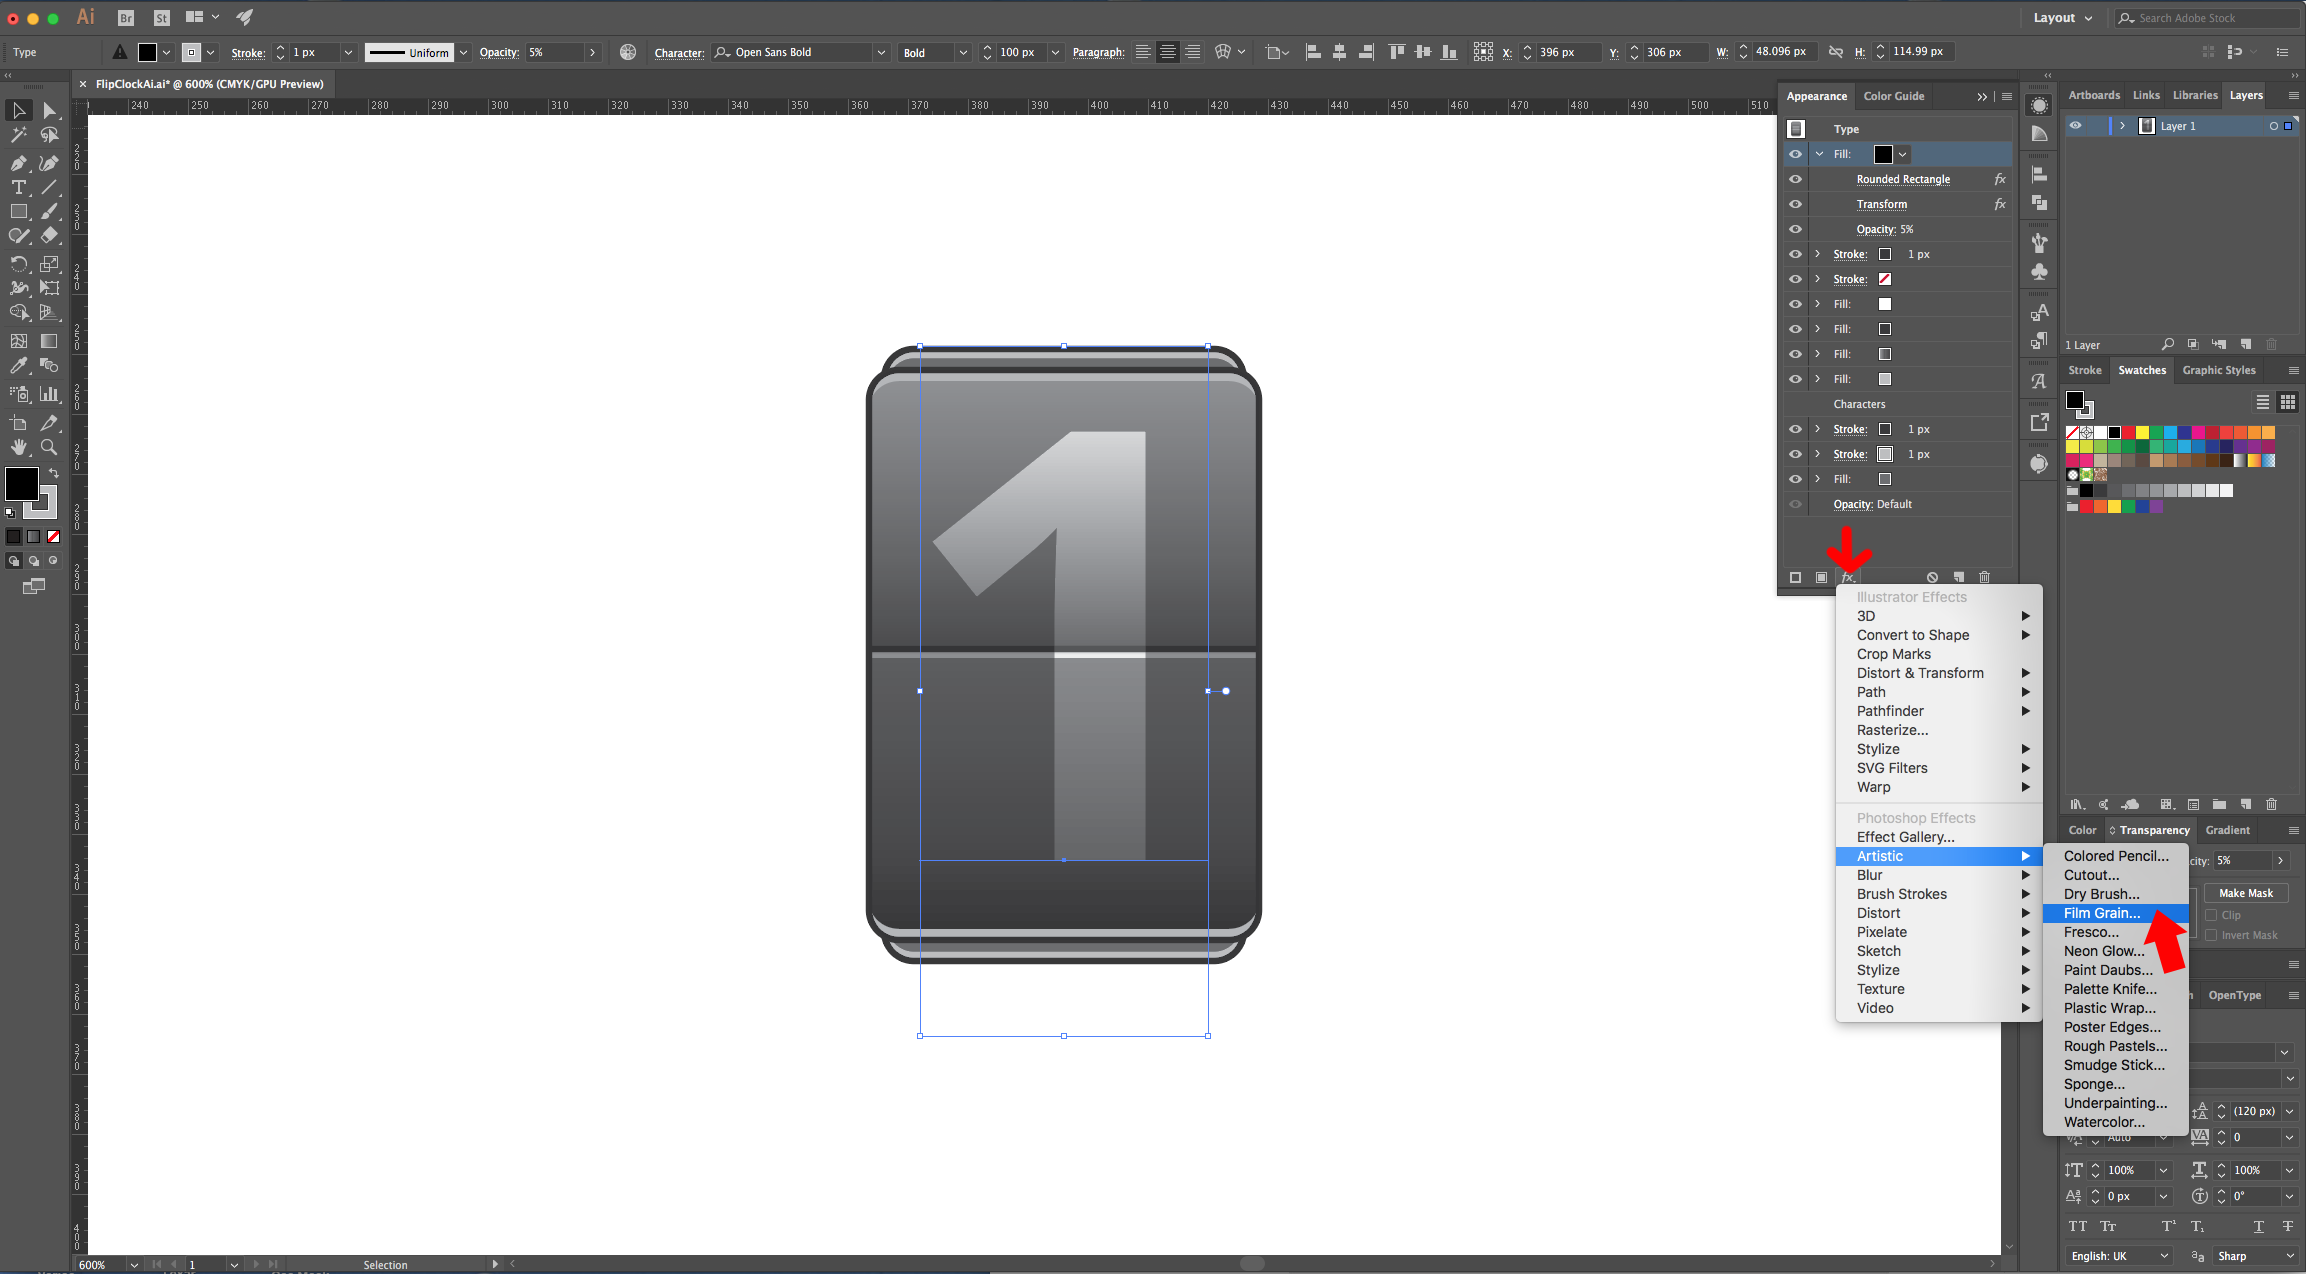
19 - Add a “New Fill” on top of everything, use Black as fill color and click on the “Effects Menu” on the Bottom-Left side of the Appearance Panel and navigate to Convert to Shape > Rounded Rectangle… and use the following values. Once you are done click “OK”. Click on the “Effects Menu” again and navigate to Distort & Transform > Transform … and use the following values. Once you are done click “OK”. Change the “Opacity” to 5% in the “Transparency Panel”.
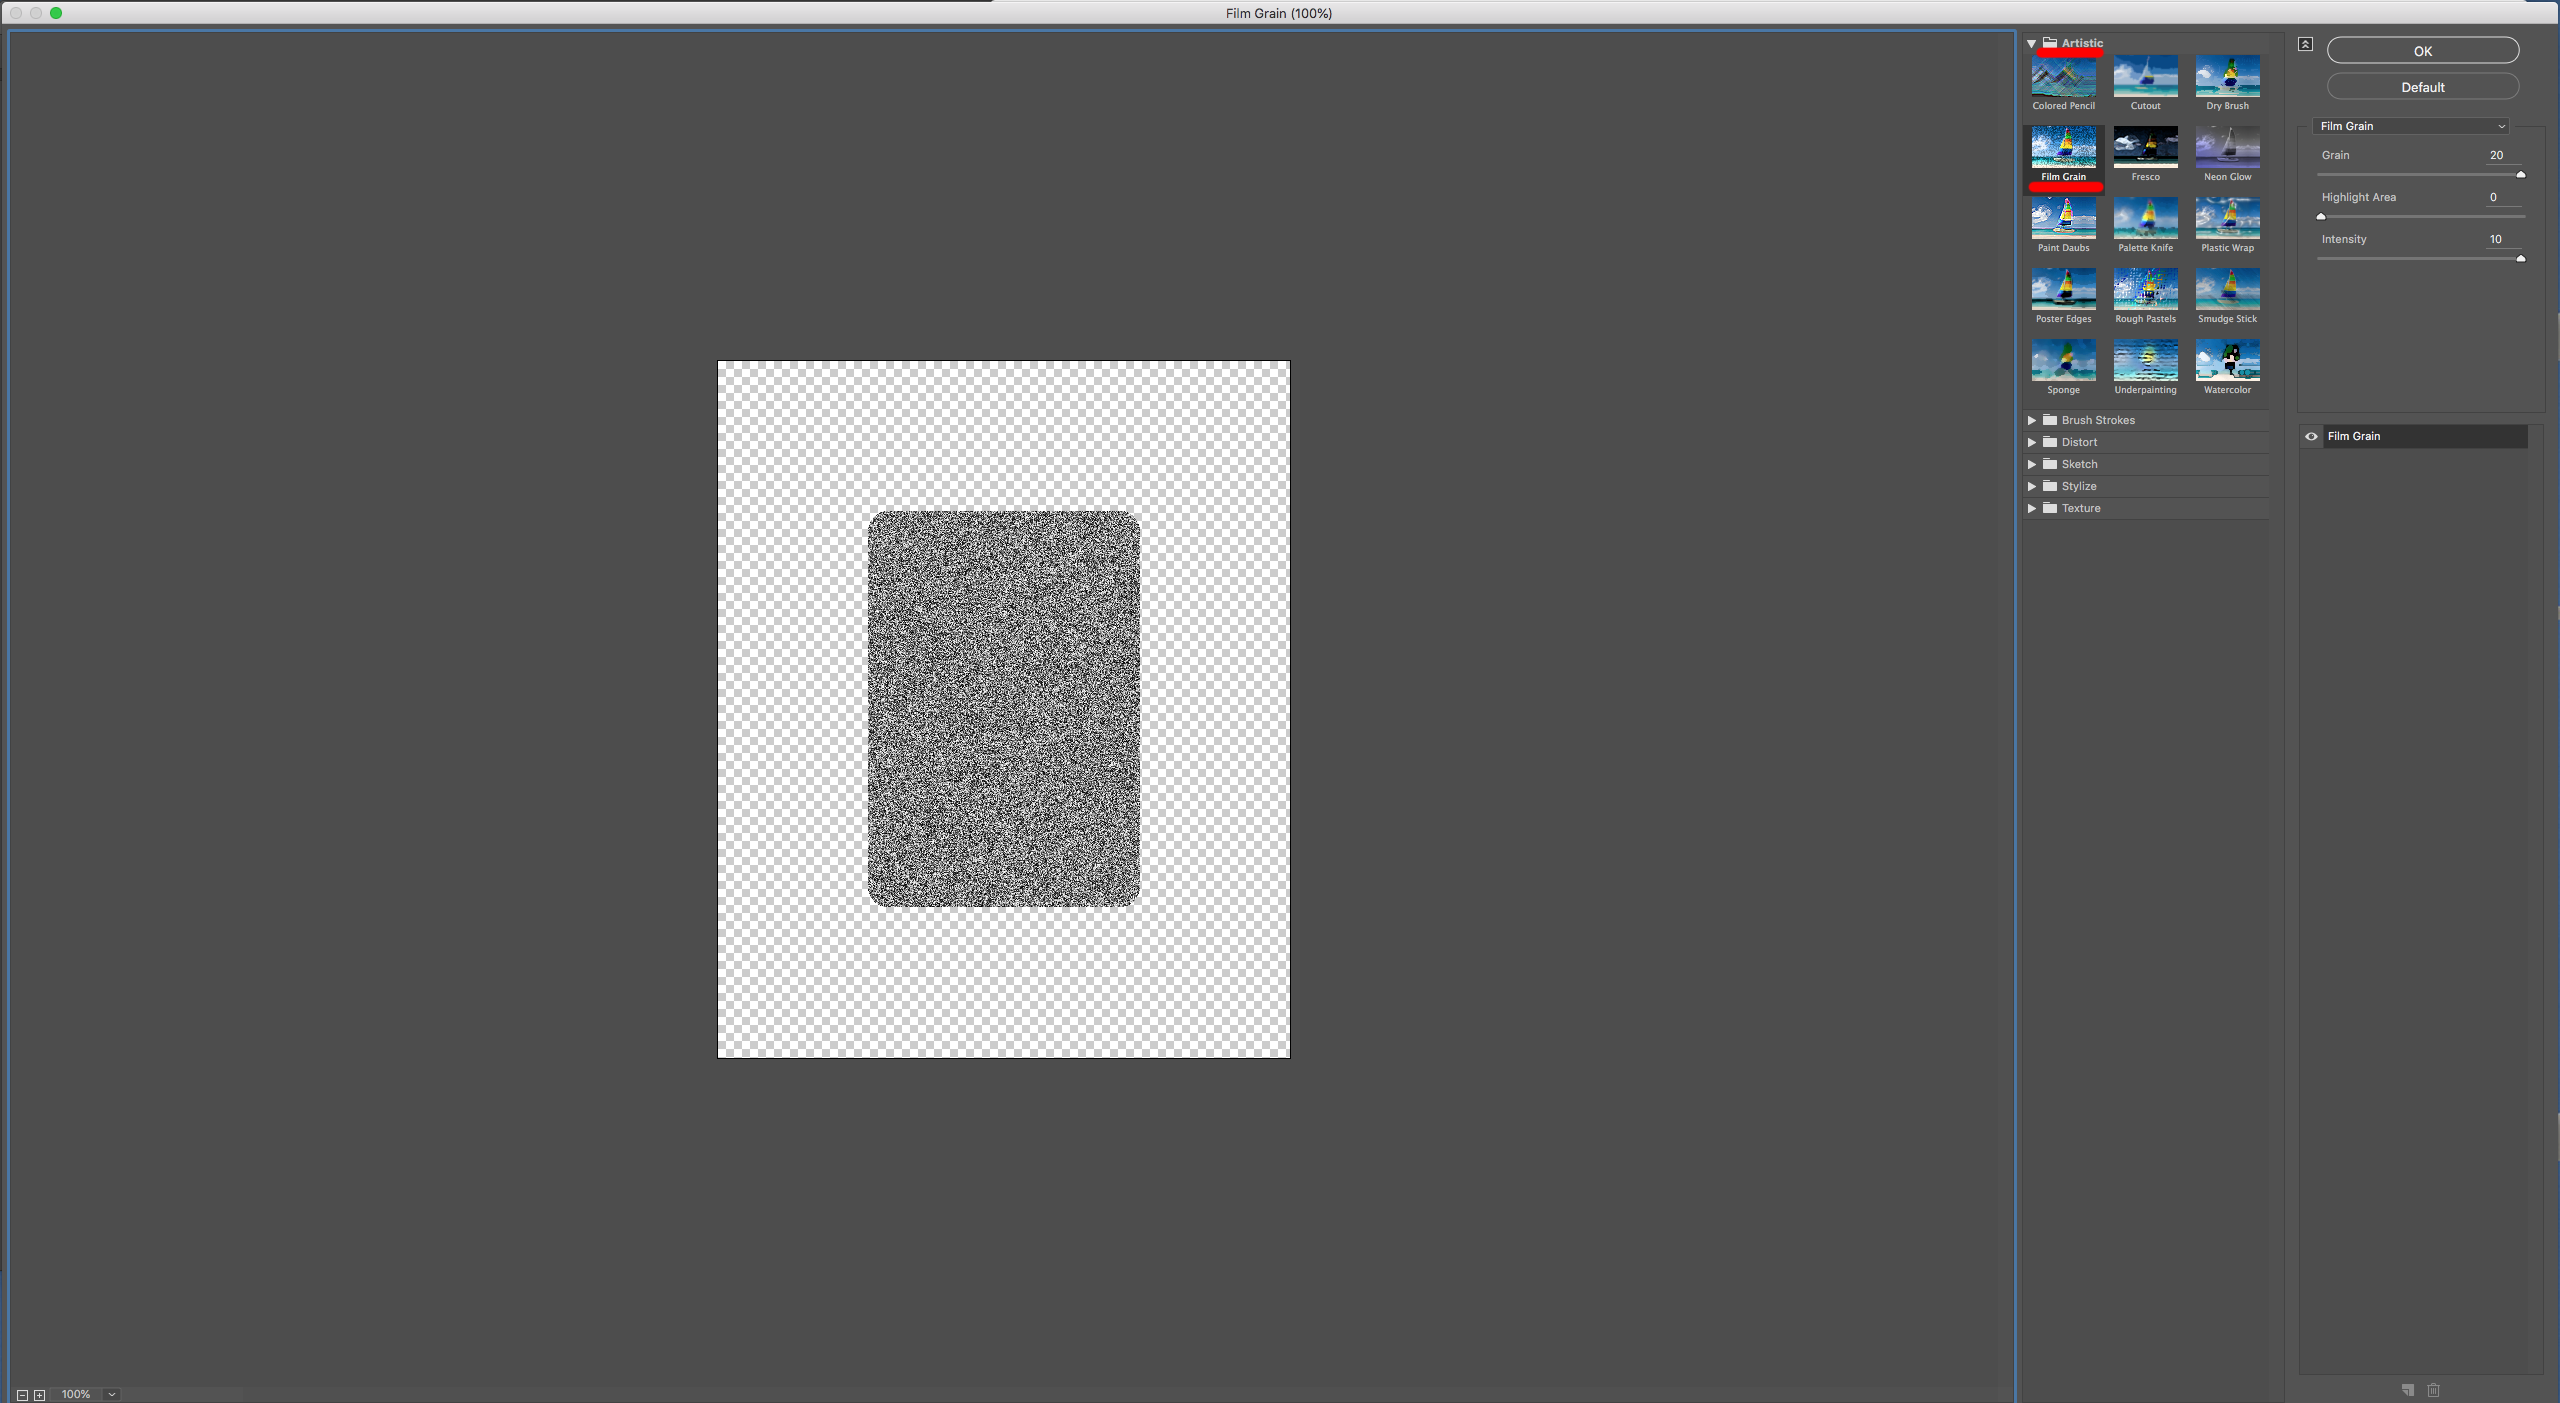
20 - Finally, apply another Effect. Navigate to Artistic > Film Grain… and use the following values:
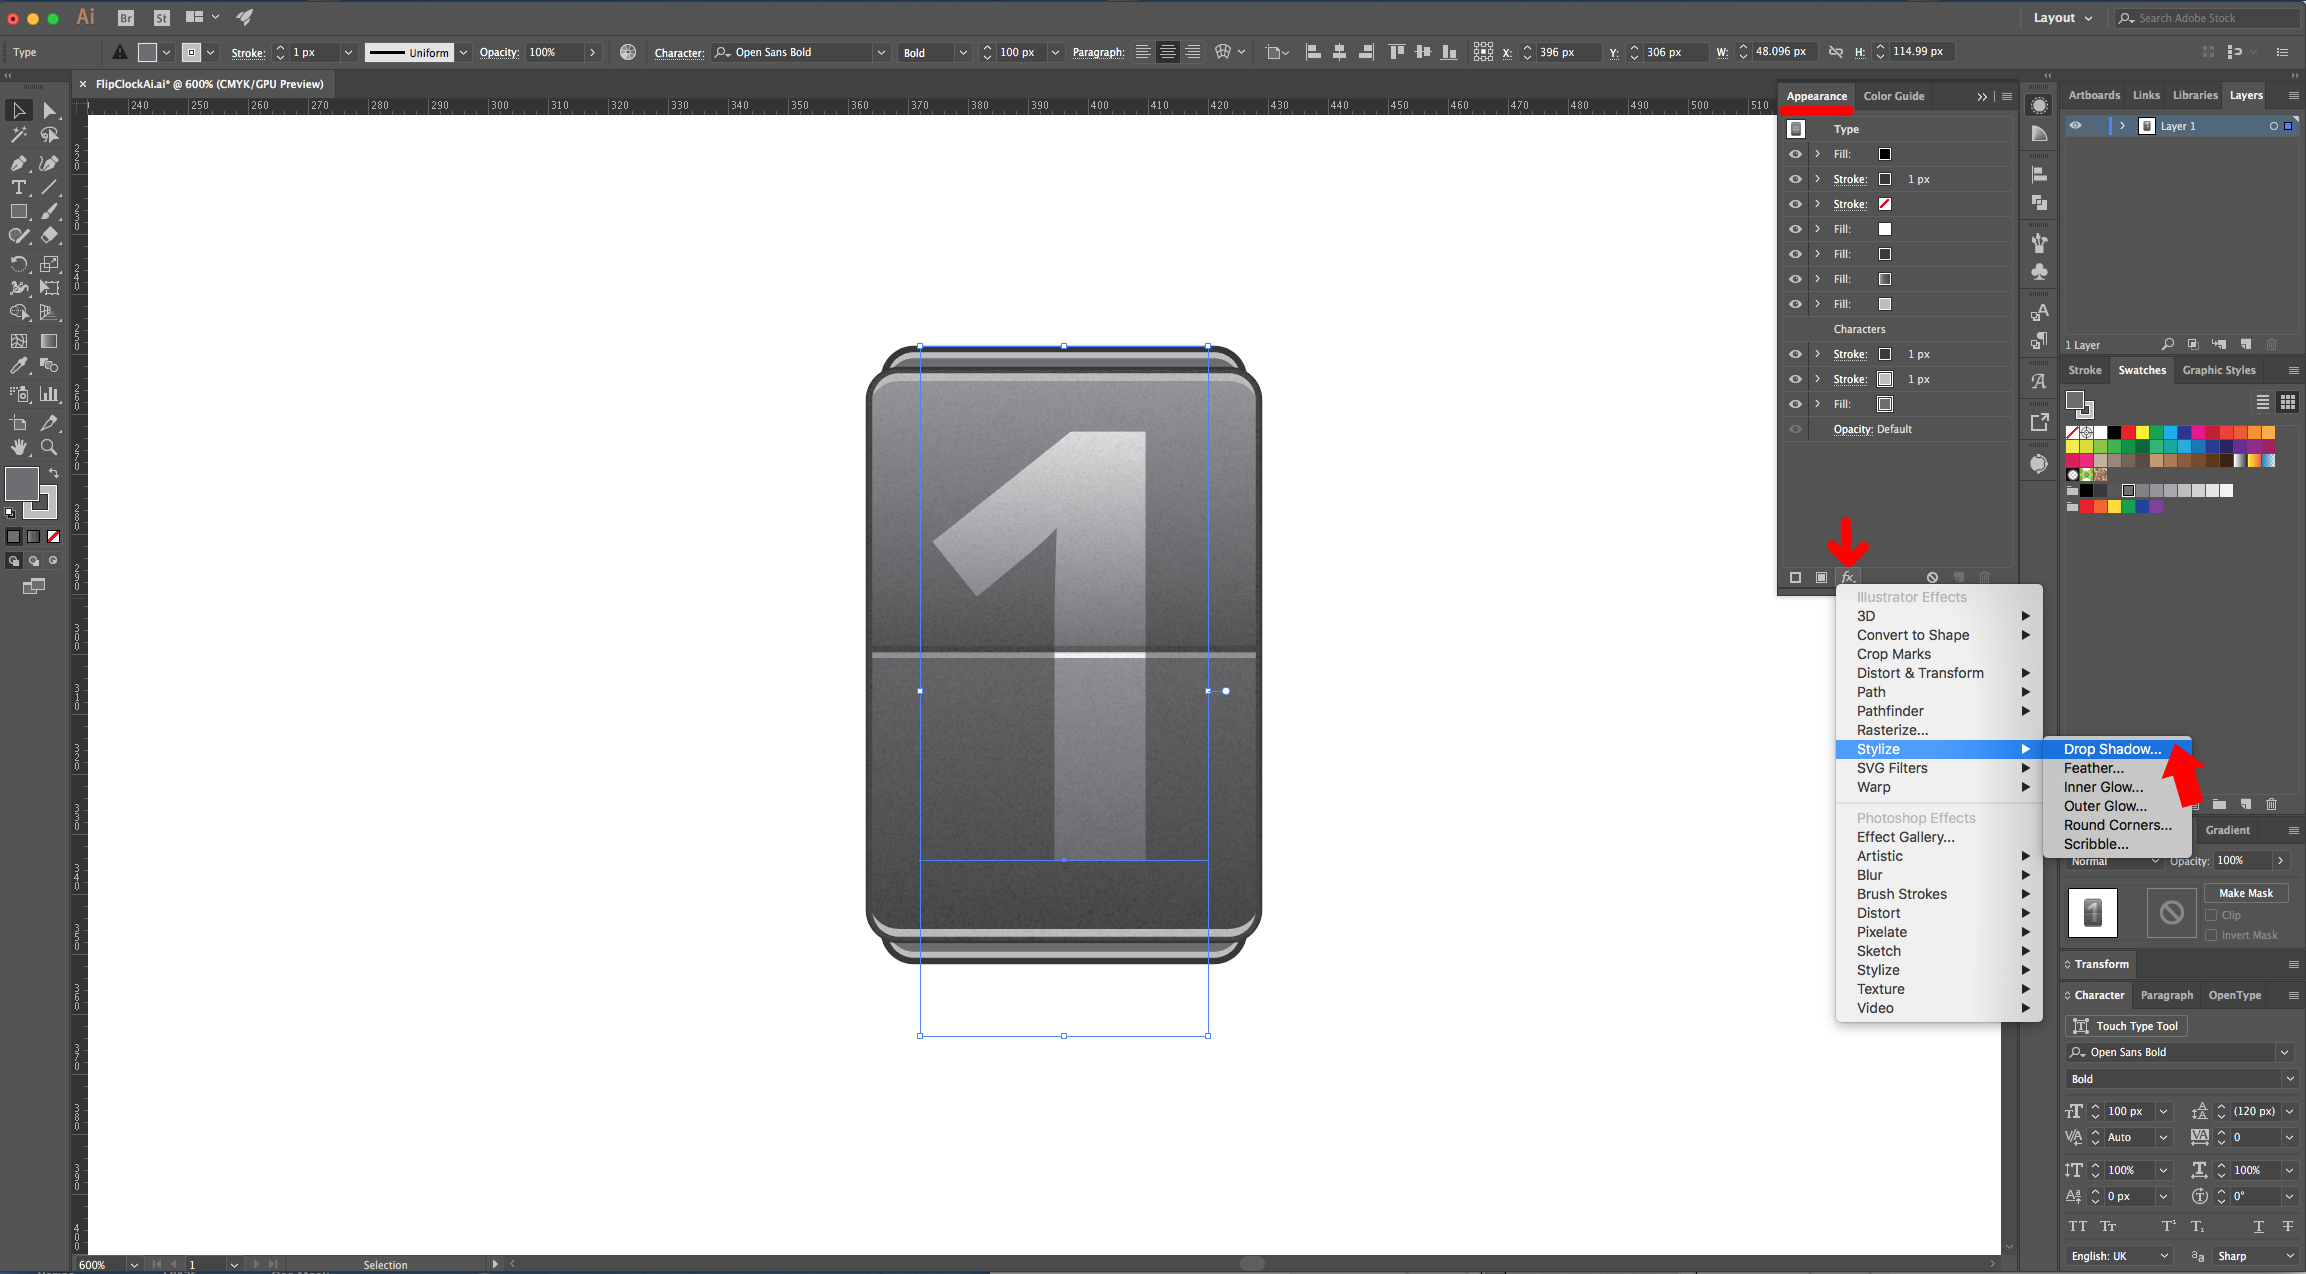
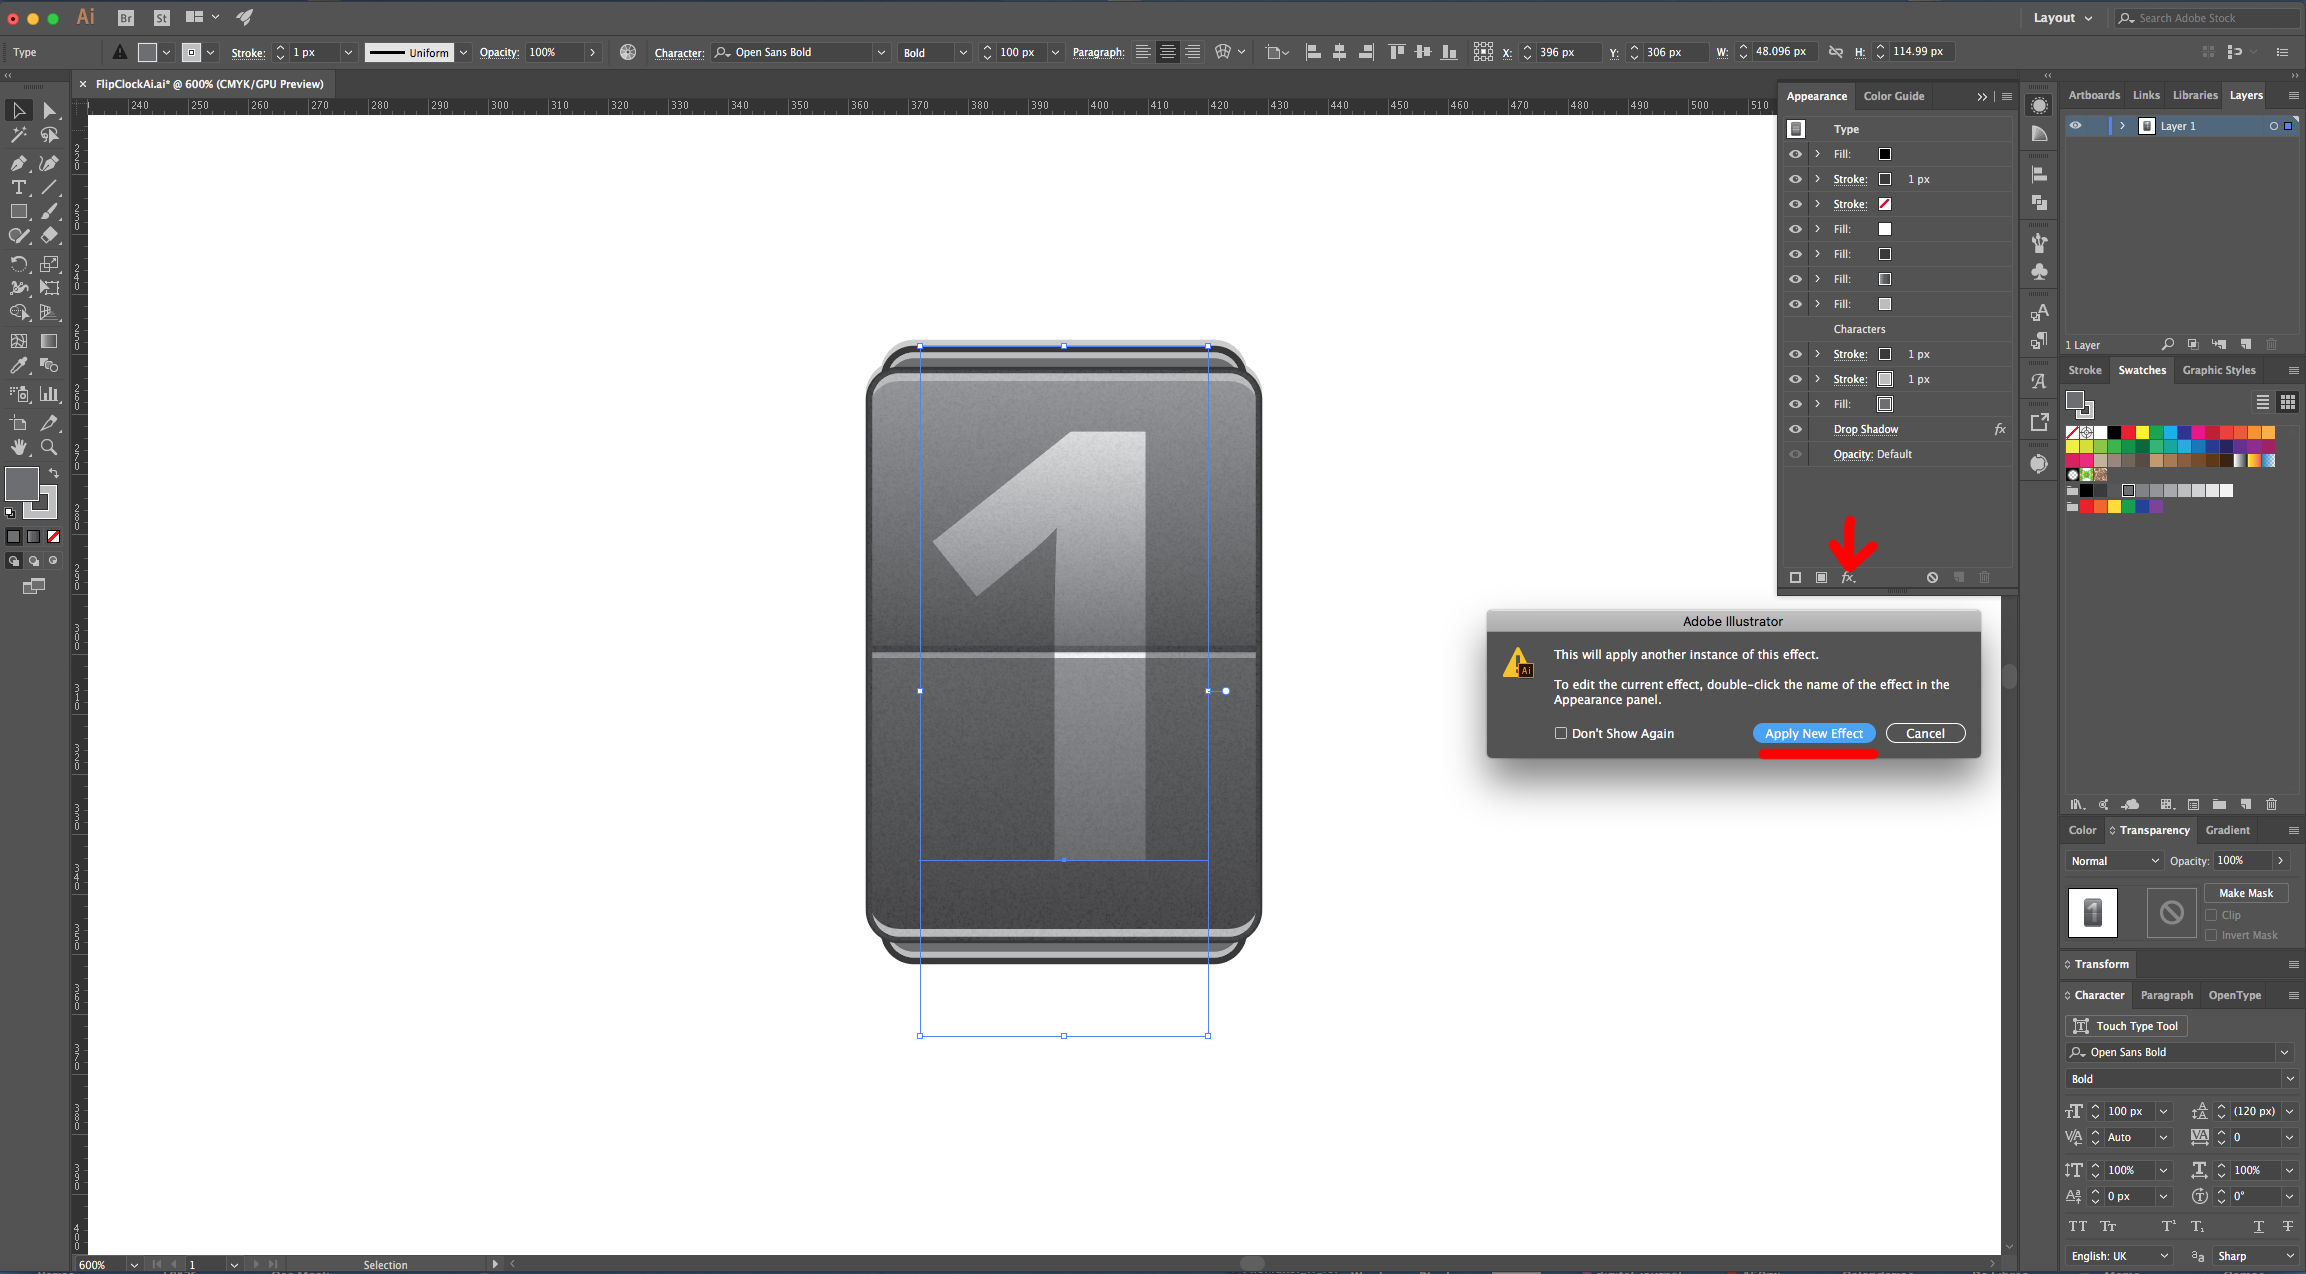
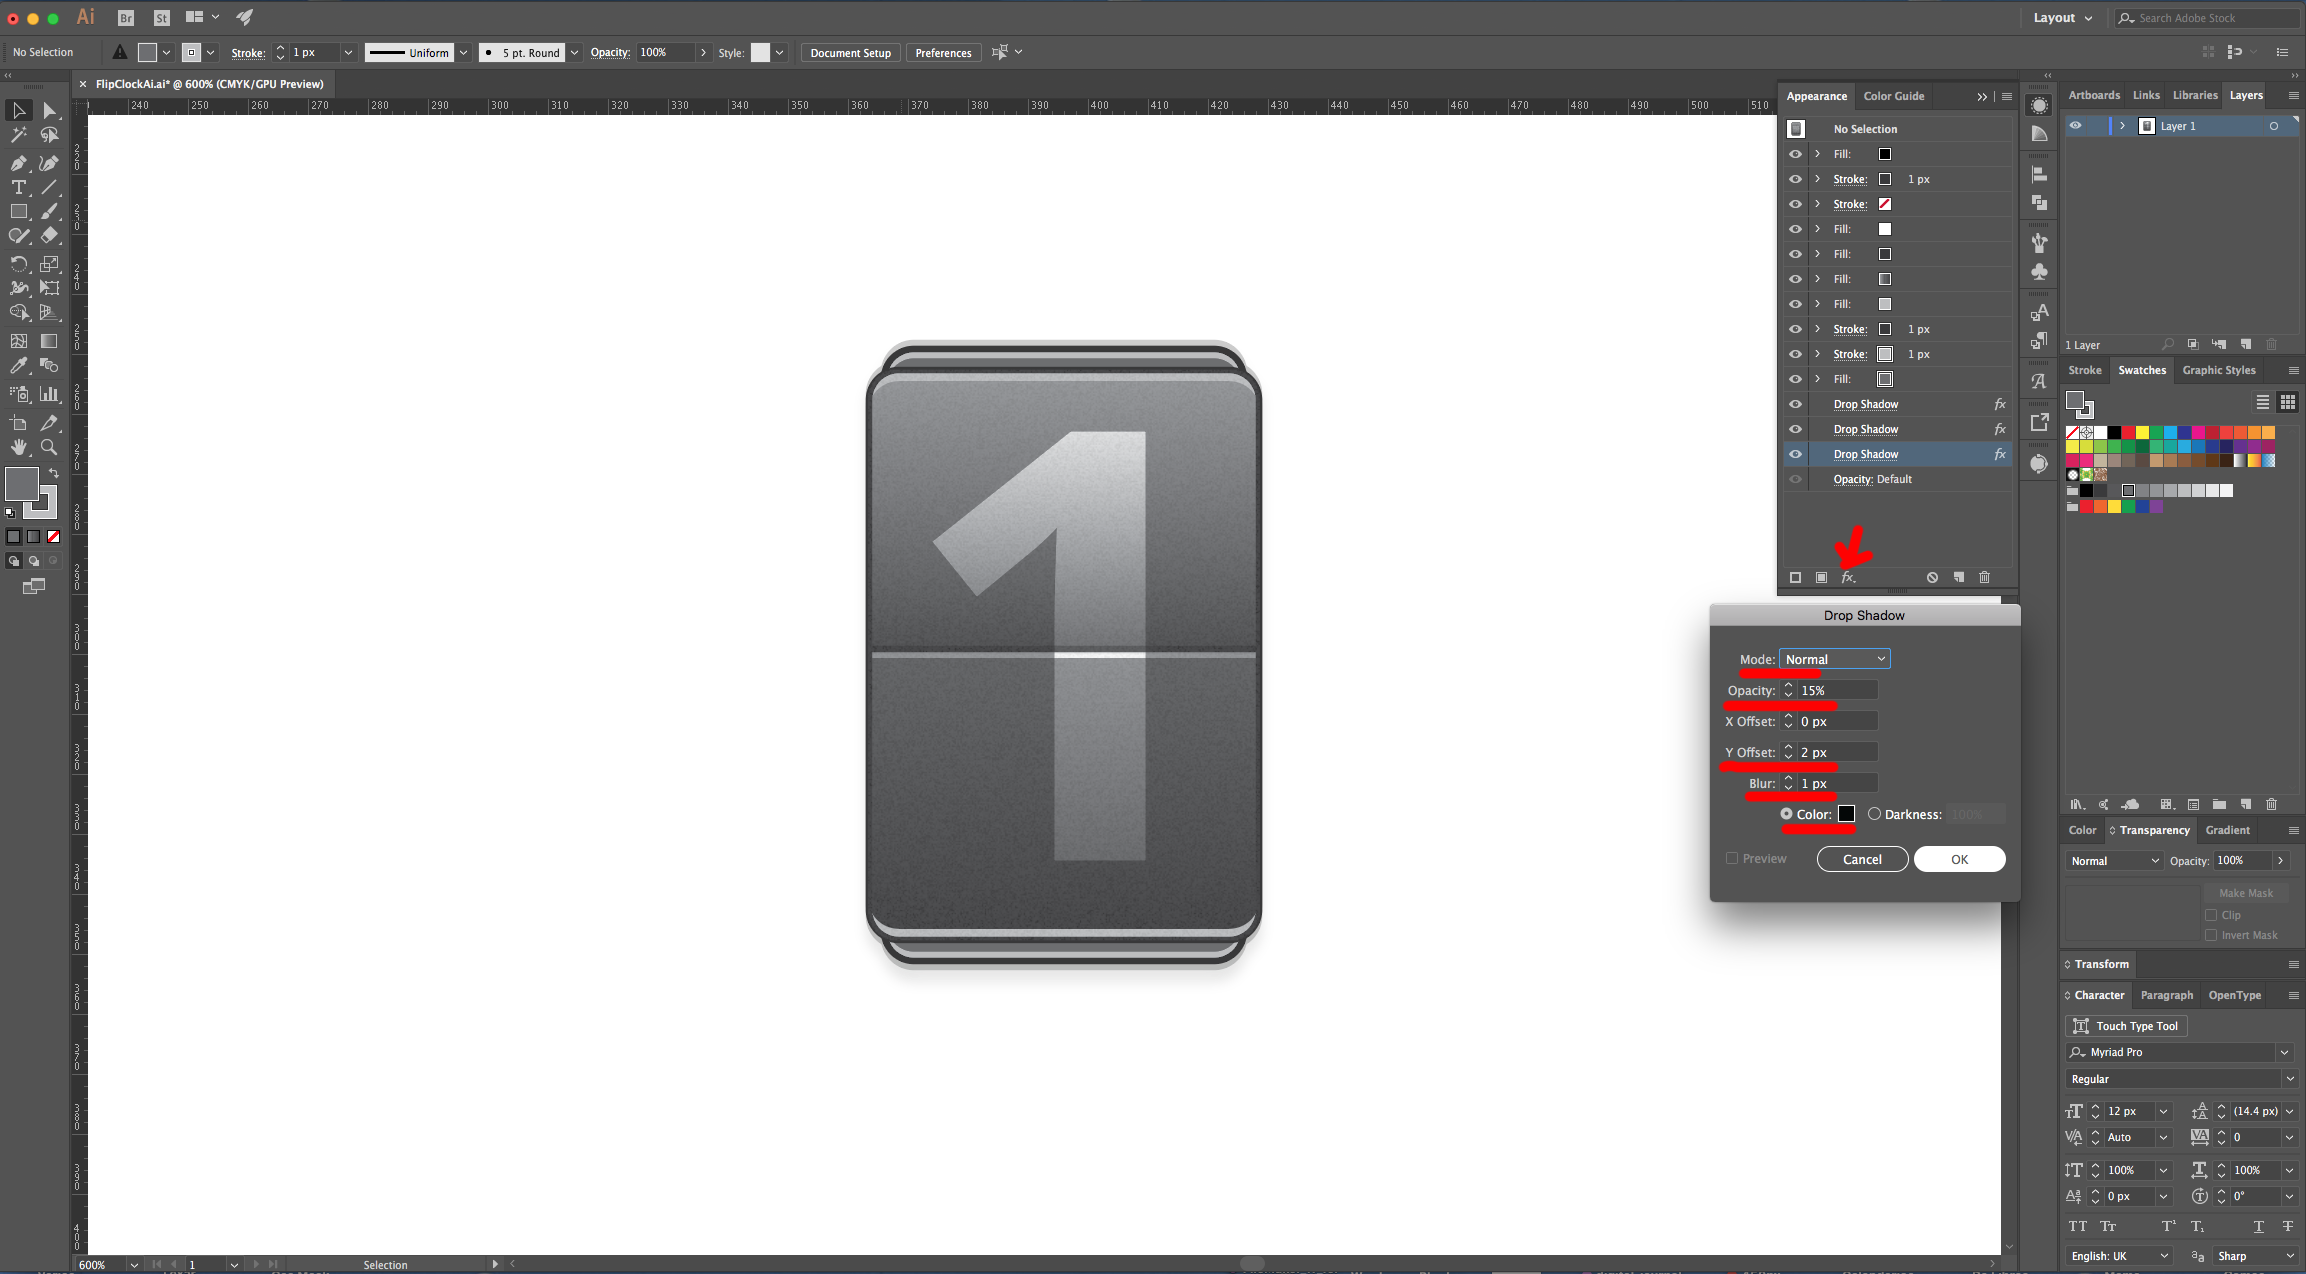
21 - Stay on the “Appearance Panel” with your text selected but make sure that none of the Fills is selected. Click on the “Effects Menu” on the Bottom-Left side of the Appearance Panel and navigate to Stylize > Drop Shadow… and use the following values.

22 - Repeat “Step 21” 2 more times. Click “Apply New Effect” if asked and use the following values for the second “Drop Shadow”.

And these for the third.
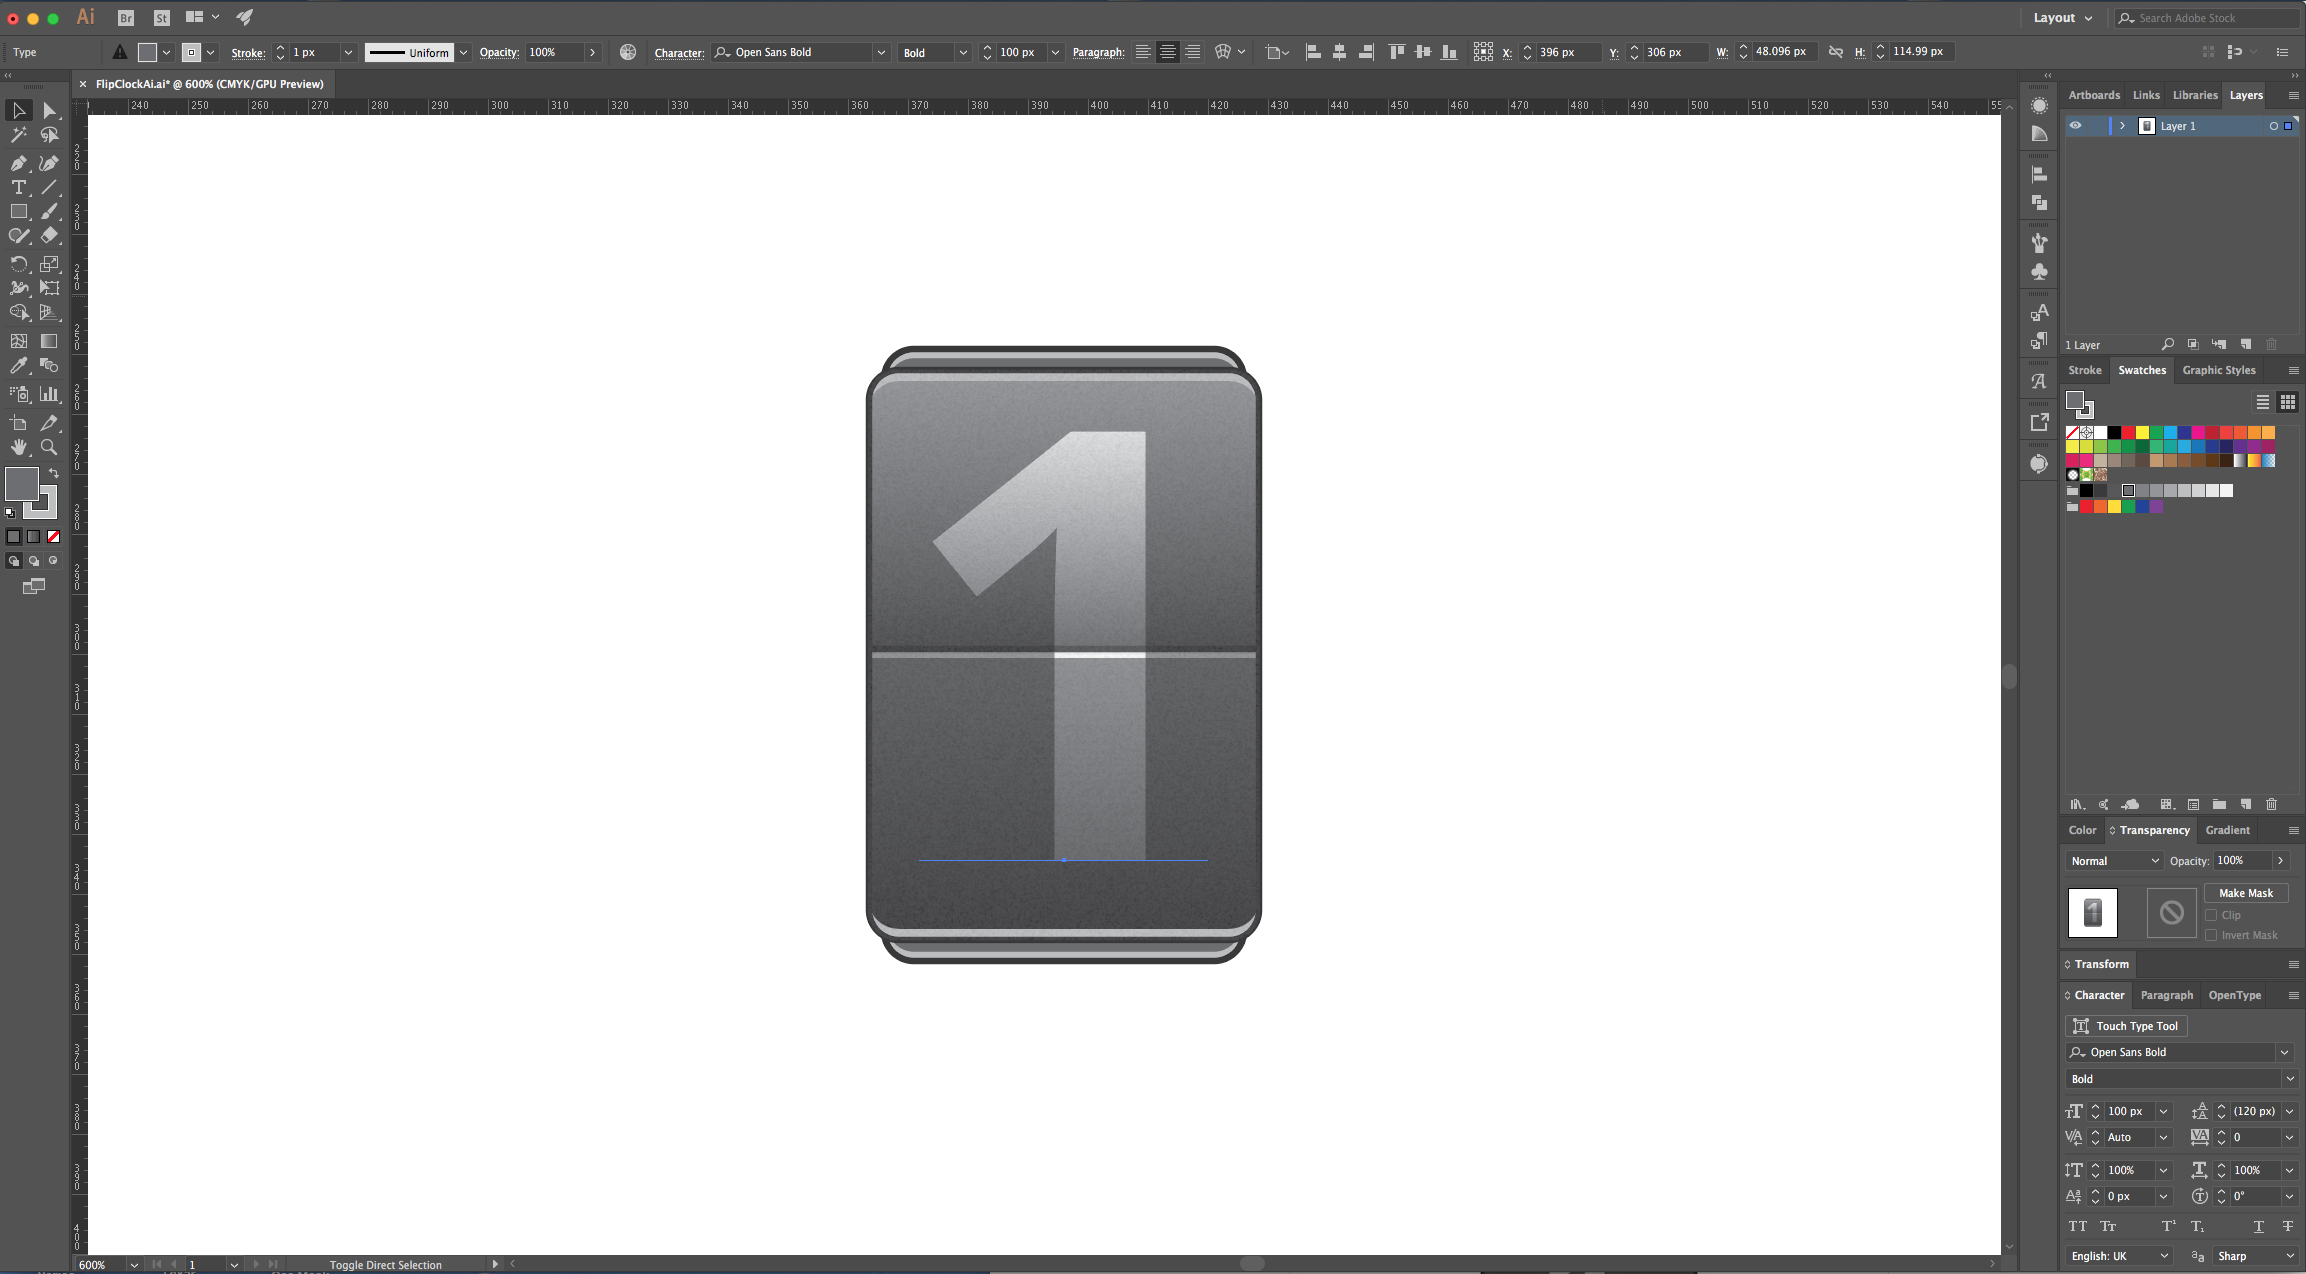
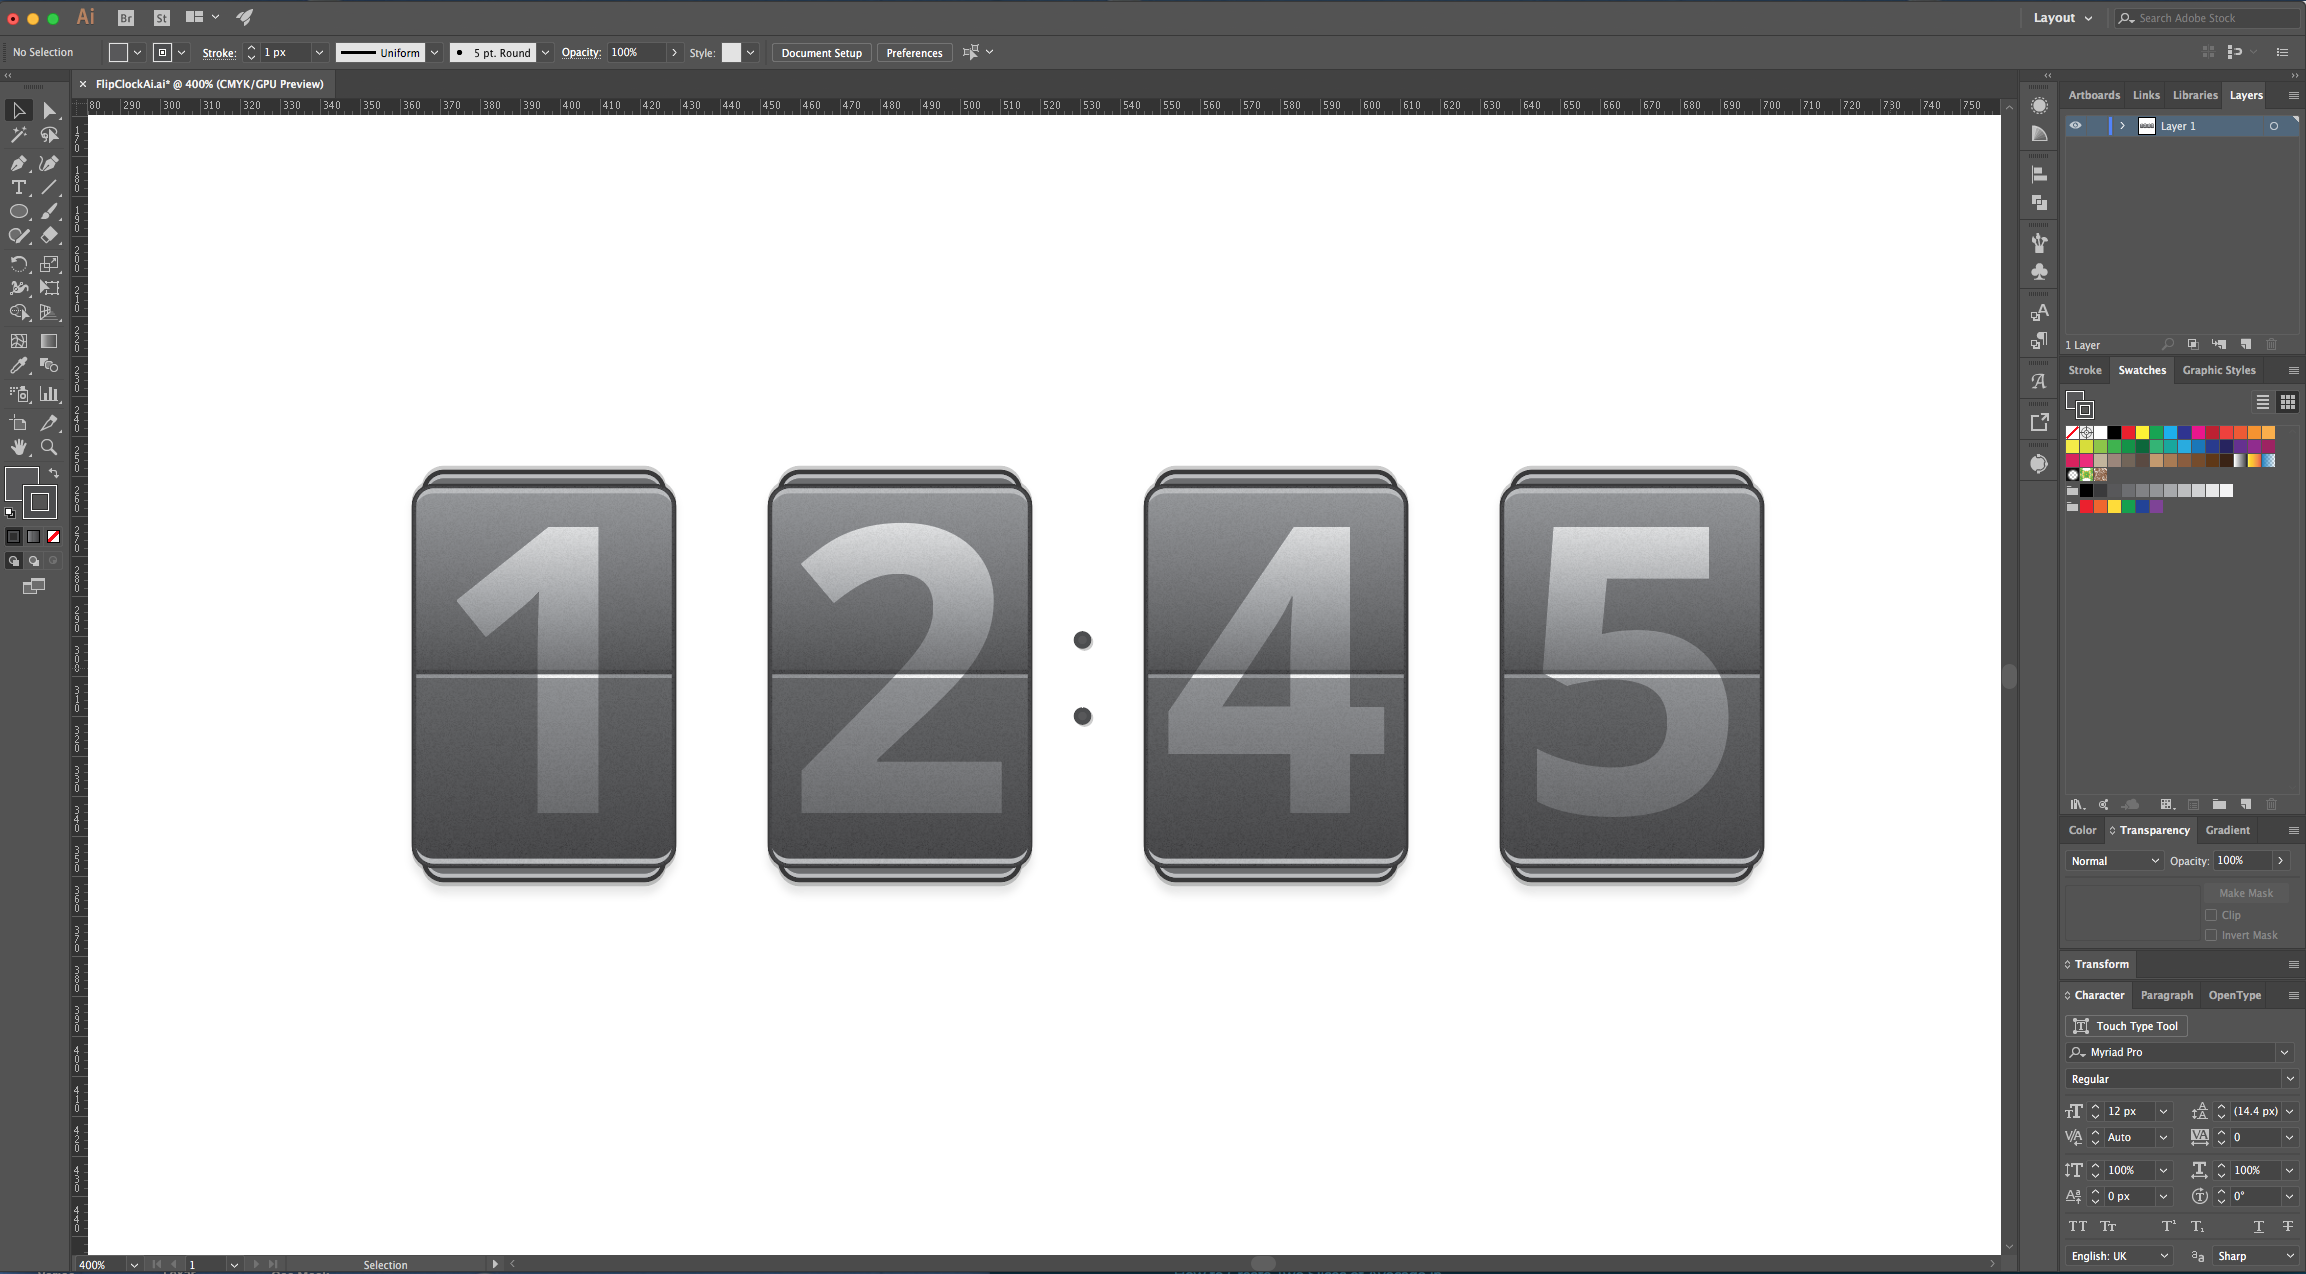
23 - You can “Copy” (Command/Control + C) and “Paste” (Command/Control + V) the text to create more numbers. And you can change the number since the text is editable.
1 - In Illustrator, create a “New Document”. Use “Pixels” as “Unit”.
2 - Select the “Type Tool” (T), choose your font (we used “Open Sans Bold”) and type your text.
3 - Center it using the “Horizontal and Vertical Align Center” options on your Top Menu and make sure that “Align to Artboard” is selected. Or use the same options in the “Align Panel”.
4 - Make sure your text is selected and go to the “Appearance Panel”, click on the “Add New Fill” button at the bottom of the Panel. Use a Light Grey (30 K) as fill color.
5 - Then, click on the “Effects Menu” on the Bottom-Left side of the Appearance Panel and navigate to Convert to Shape > Rounded Rectangle… and use the following values. Once you are done click “OK”.
6 - Click on the “Effects Menu” again and navigate to Distort & Transform > Transform … and use the following values. Once you are done click “OK”.
7 - Without deselecting your Text, create another “Fill”, make sure it is on top of the other one, use White as fill color and change the “Blending Mode” in the “Transparency Panel” to “Overlay”.
8 - Stay on the “Appearance Panel”, select the Grey fill, click on the Drop-Down Menu on the Top-Right and choose “Duplicate Item”. Make the Fill color to a Darker Grey (90 K). Click on the small arrow to the left of the Fill to show its contents, double-click on the “Transform” Effect to open the Dialog and change the “Align To” point to the “Bottom Center”.
9 - Change the Fill to a “Linear Gradient” with a -90° Angle and the following values (1: Color 50 K , Location 0%, 2: Color 85 K, Location 49%, 3: Color 75 K, Location 50%, 4: Color 90 K, Location 100%). Double-click on the “Transform” Effect to open the Dialog and change the “Align To” point to the “Center”.
10 - Without deselecting your Text, create another “Fill”, make sure it is on top of the Gradient one, use a Dark Grey (90 K) as fill color,
11 - Without deselecting, click on the “Effects Menu” and navigate to Convert to Shape > Rectangle… and use the following values. Once you are done click “OK”. Now, go to Distort & Transform > Transform … and use the following values. Once you are done click “OK”.
12 - Finally, apply another Effect. Navigate to Stylize > Drop Shadow… and use the following values:
13 - Stay on the “Appearance Panel” with your text selected but make sure that none of the Fills is selected. Click on the “Add New Stroke” button at the bottom of the Panel (this will place the Stroke on Top of everything). Use 90 K as color and a 1 px size. Click on the “Effects Menu” on the Bottom-Left side of the Appearance Panel and navigate to Convert to Shape > Rounded Rectangle… and use the following values. Once you are done click “OK”.
14 - Click on the “Effects Menu” again and navigate to Distort & Transform > Transform … and use the following values. Once you are done click “OK”.
15 - Stay on the “Appearance Panel” with your text selected but make sure that none of the Fills is selected. Click on the “Add New Fill” button at the bottom of the Panel then drag the New Fill to the bottom. Use 70 K as fill color.
16 - With the Fill still selected, click on the “Effects Menu” on the Bottom-Left side of the Appearance Panel and navigate to Convert to Shape > Rounded Rectangle… and use the following values. Once you are done click “OK”. Click on the “Effects Menu” again and navigate to Distort & Transform > Transform … and use the following values. Once you are done click “OK”.
17 - Stay on the “Appearance Panel” with your text selected but make sure that none of the Fills is selected. Click on the “Add New Stroke” button at the bottom of the Panel. Drag the Stroke down so it sits on top of your last Fill but under everything else. Use 30 K as color and a 1 px size. Click on the “Effects Menu” on the Bottom-Left side of the Appearance Panel and navigate to Convert to Shape > Rounded Rectangle… and use the following values. Once you are done click “OK”.
18 - With the last Stroke still selected, click on the Drop-Down Menu on the Top-Right and choose “Duplicate Item”. Change the Fill color to a Darker Grey (90 K). Click on the small arrow to the left of the Fill to show its contents, double-click on the “Rounded Rectangle” Effect to open the Dialog and change its values.
19 - Add a “New Fill” on top of everything, use Black as fill color and click on the “Effects Menu” on the Bottom-Left side of the Appearance Panel and navigate to Convert to Shape > Rounded Rectangle… and use the following values. Once you are done click “OK”. Click on the “Effects Menu” again and navigate to Distort & Transform > Transform … and use the following values. Once you are done click “OK”. Change the “Opacity” to 5% in the “Transparency Panel”.
20 - Finally, apply another Effect. Navigate to Artistic > Film Grain… and use the following values:
21 - Stay on the “Appearance Panel” with your text selected but make sure that none of the Fills is selected. Click on the “Effects Menu” on the Bottom-Left side of the Appearance Panel and navigate to Stylize > Drop Shadow… and use the following values.
22 - Repeat “Step 21” 2 more times. Click “Apply New Effect” if asked and use the following values for the second “Drop Shadow”.
And these for the third.
23 - You can “Copy” (Command/Control + C) and “Paste” (Command/Control + V) the text to create more numbers. And you can change the number since the text is editable.
by @lornacane


