From White to Black in Photoshop
For this tutorial you will need an Image or Portrait to work with. Is better if it has a neutral “Background”.
1 - In Photoshop, open the image you chose.

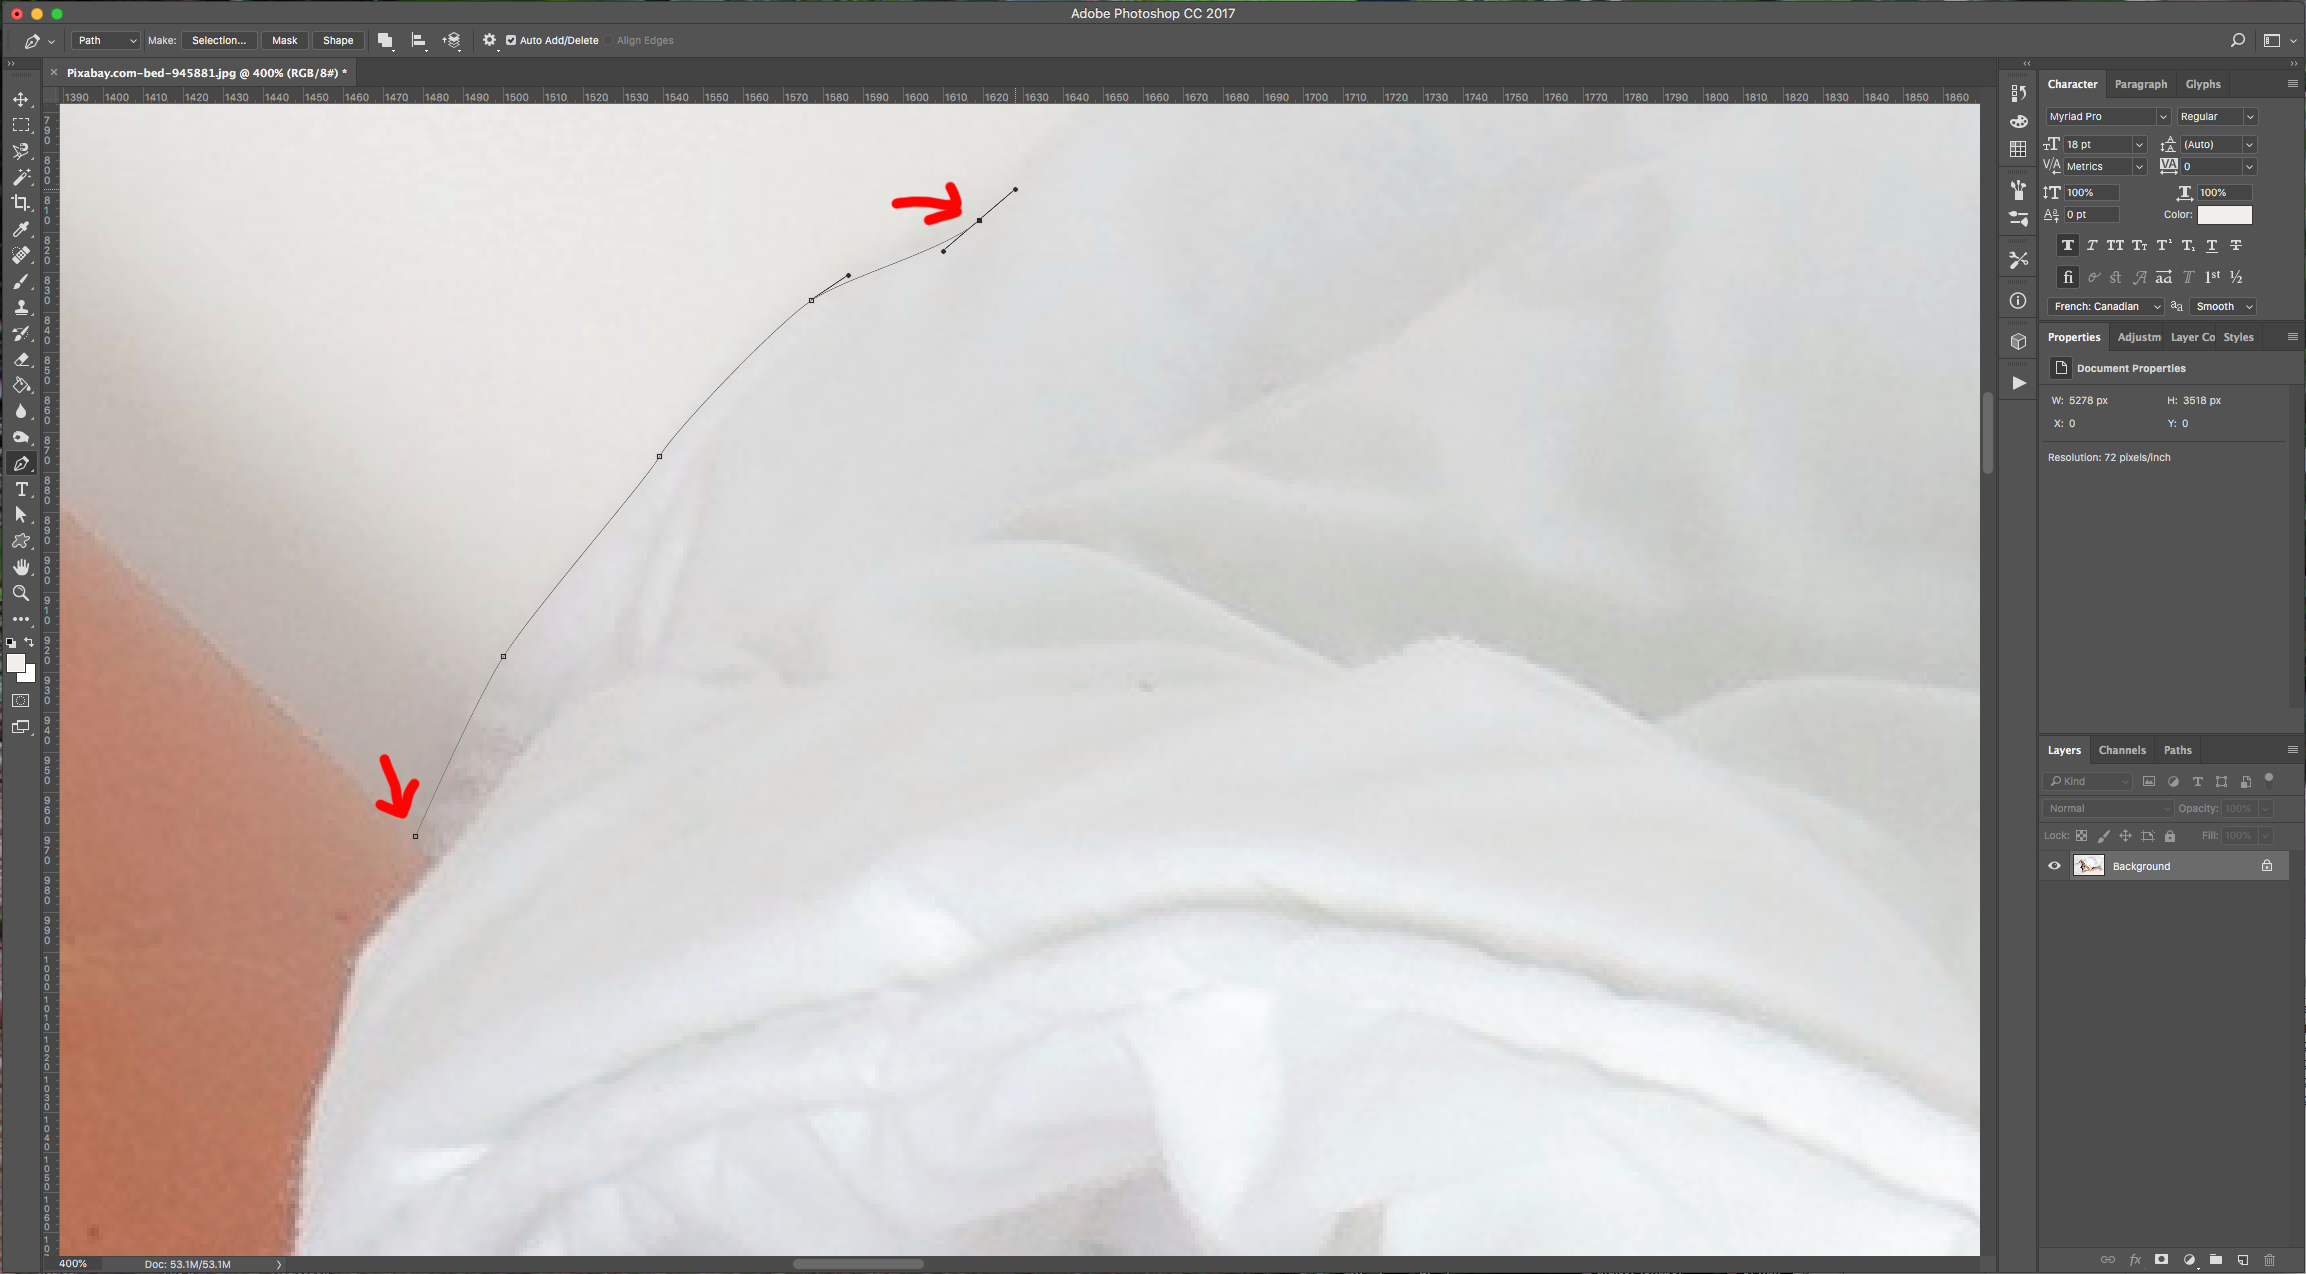
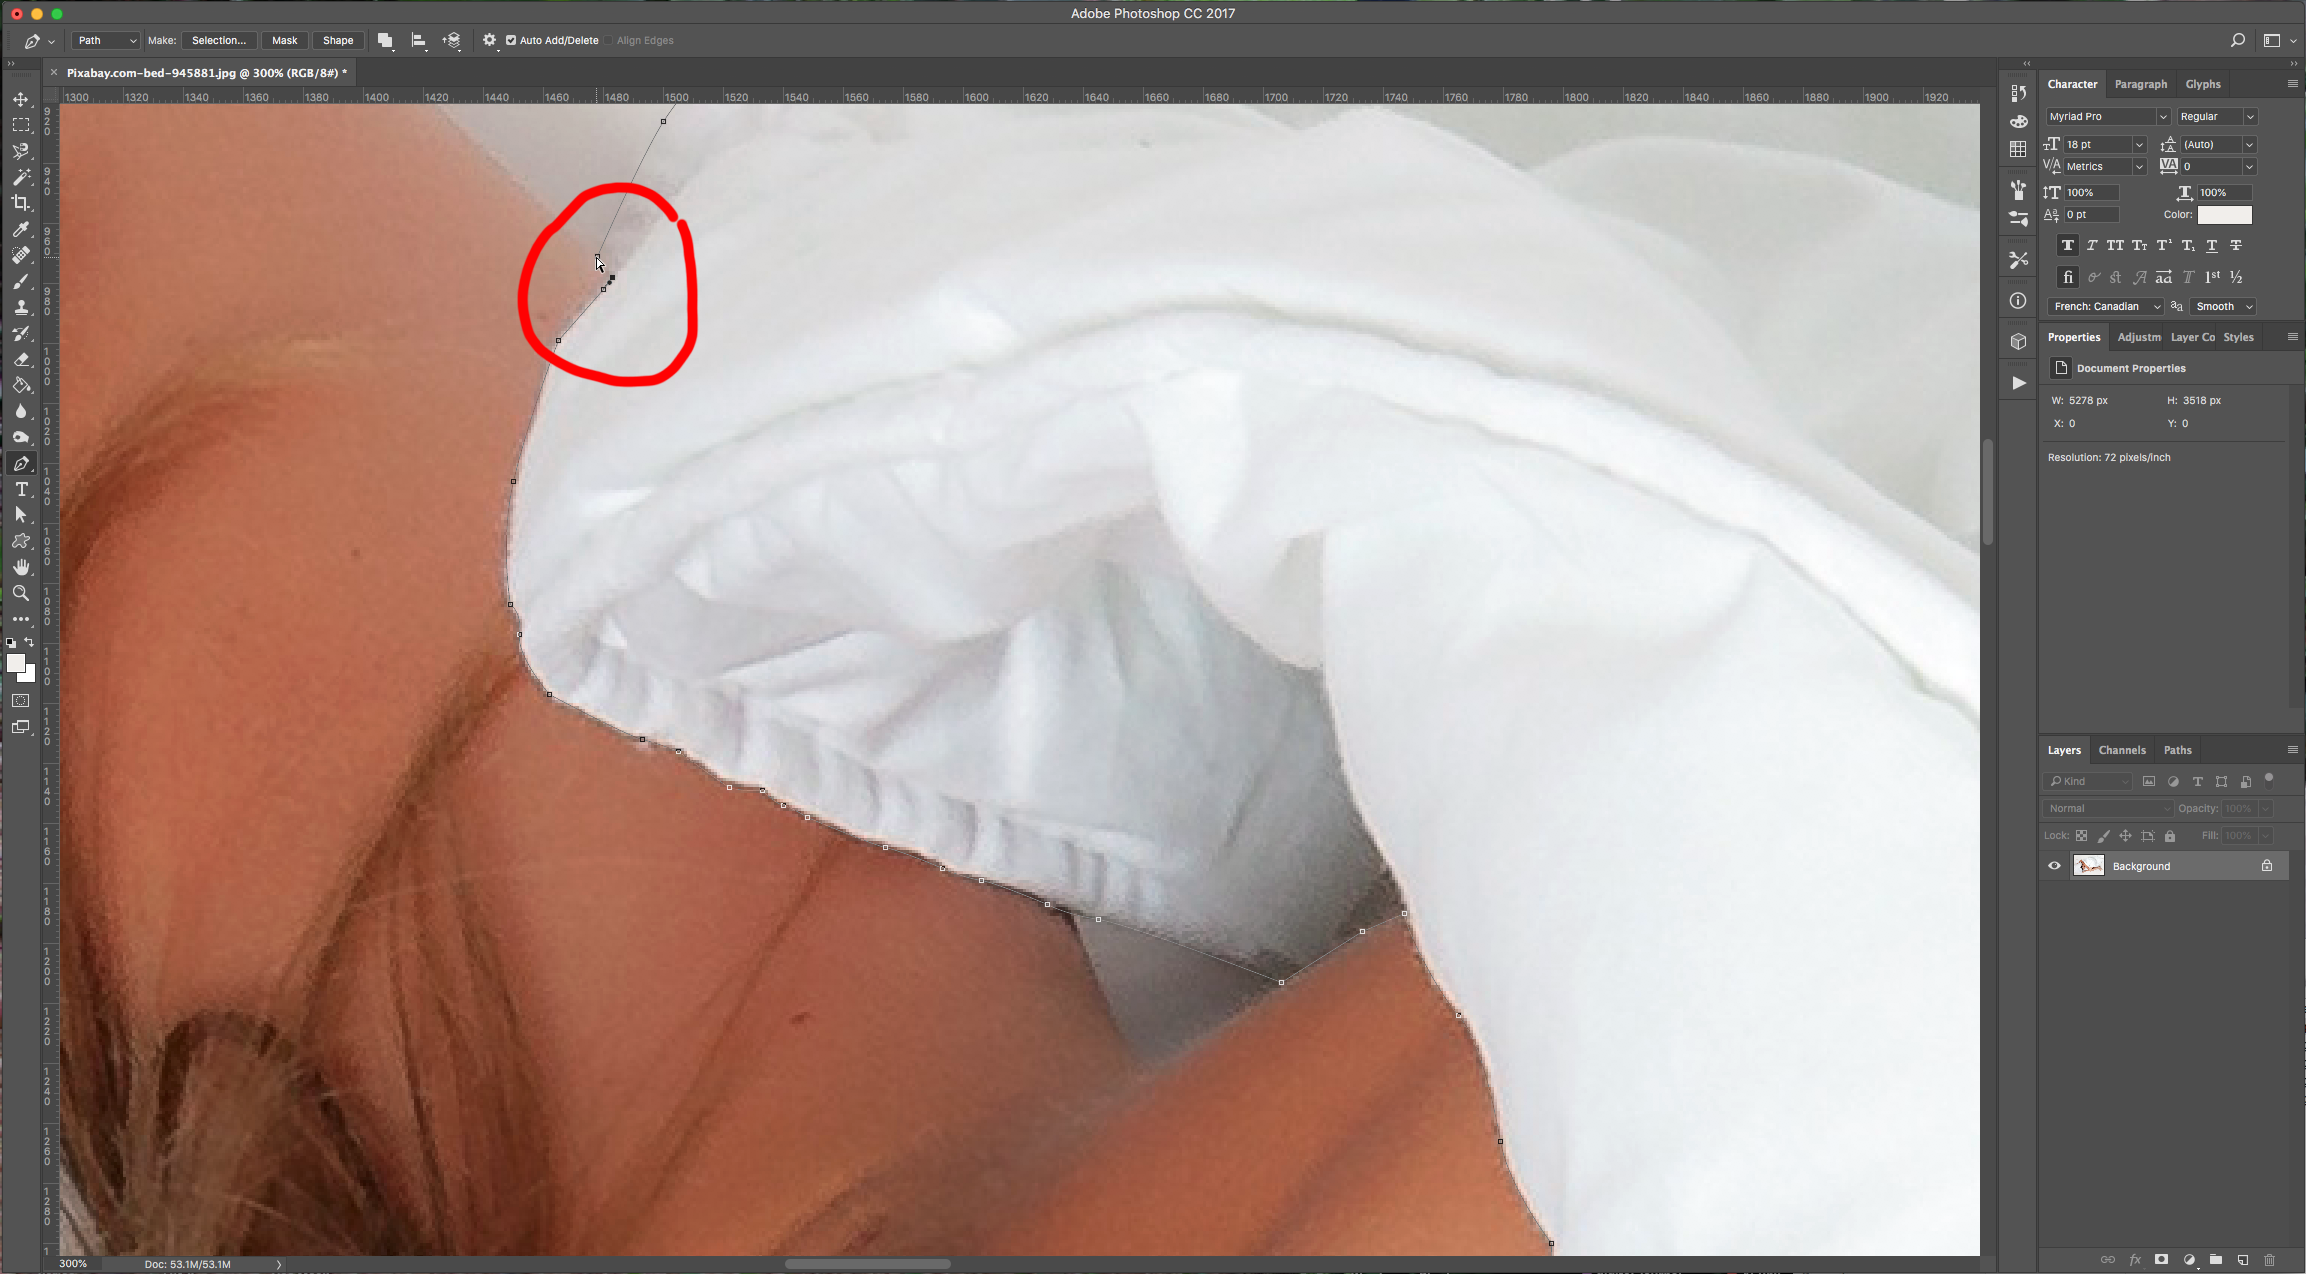
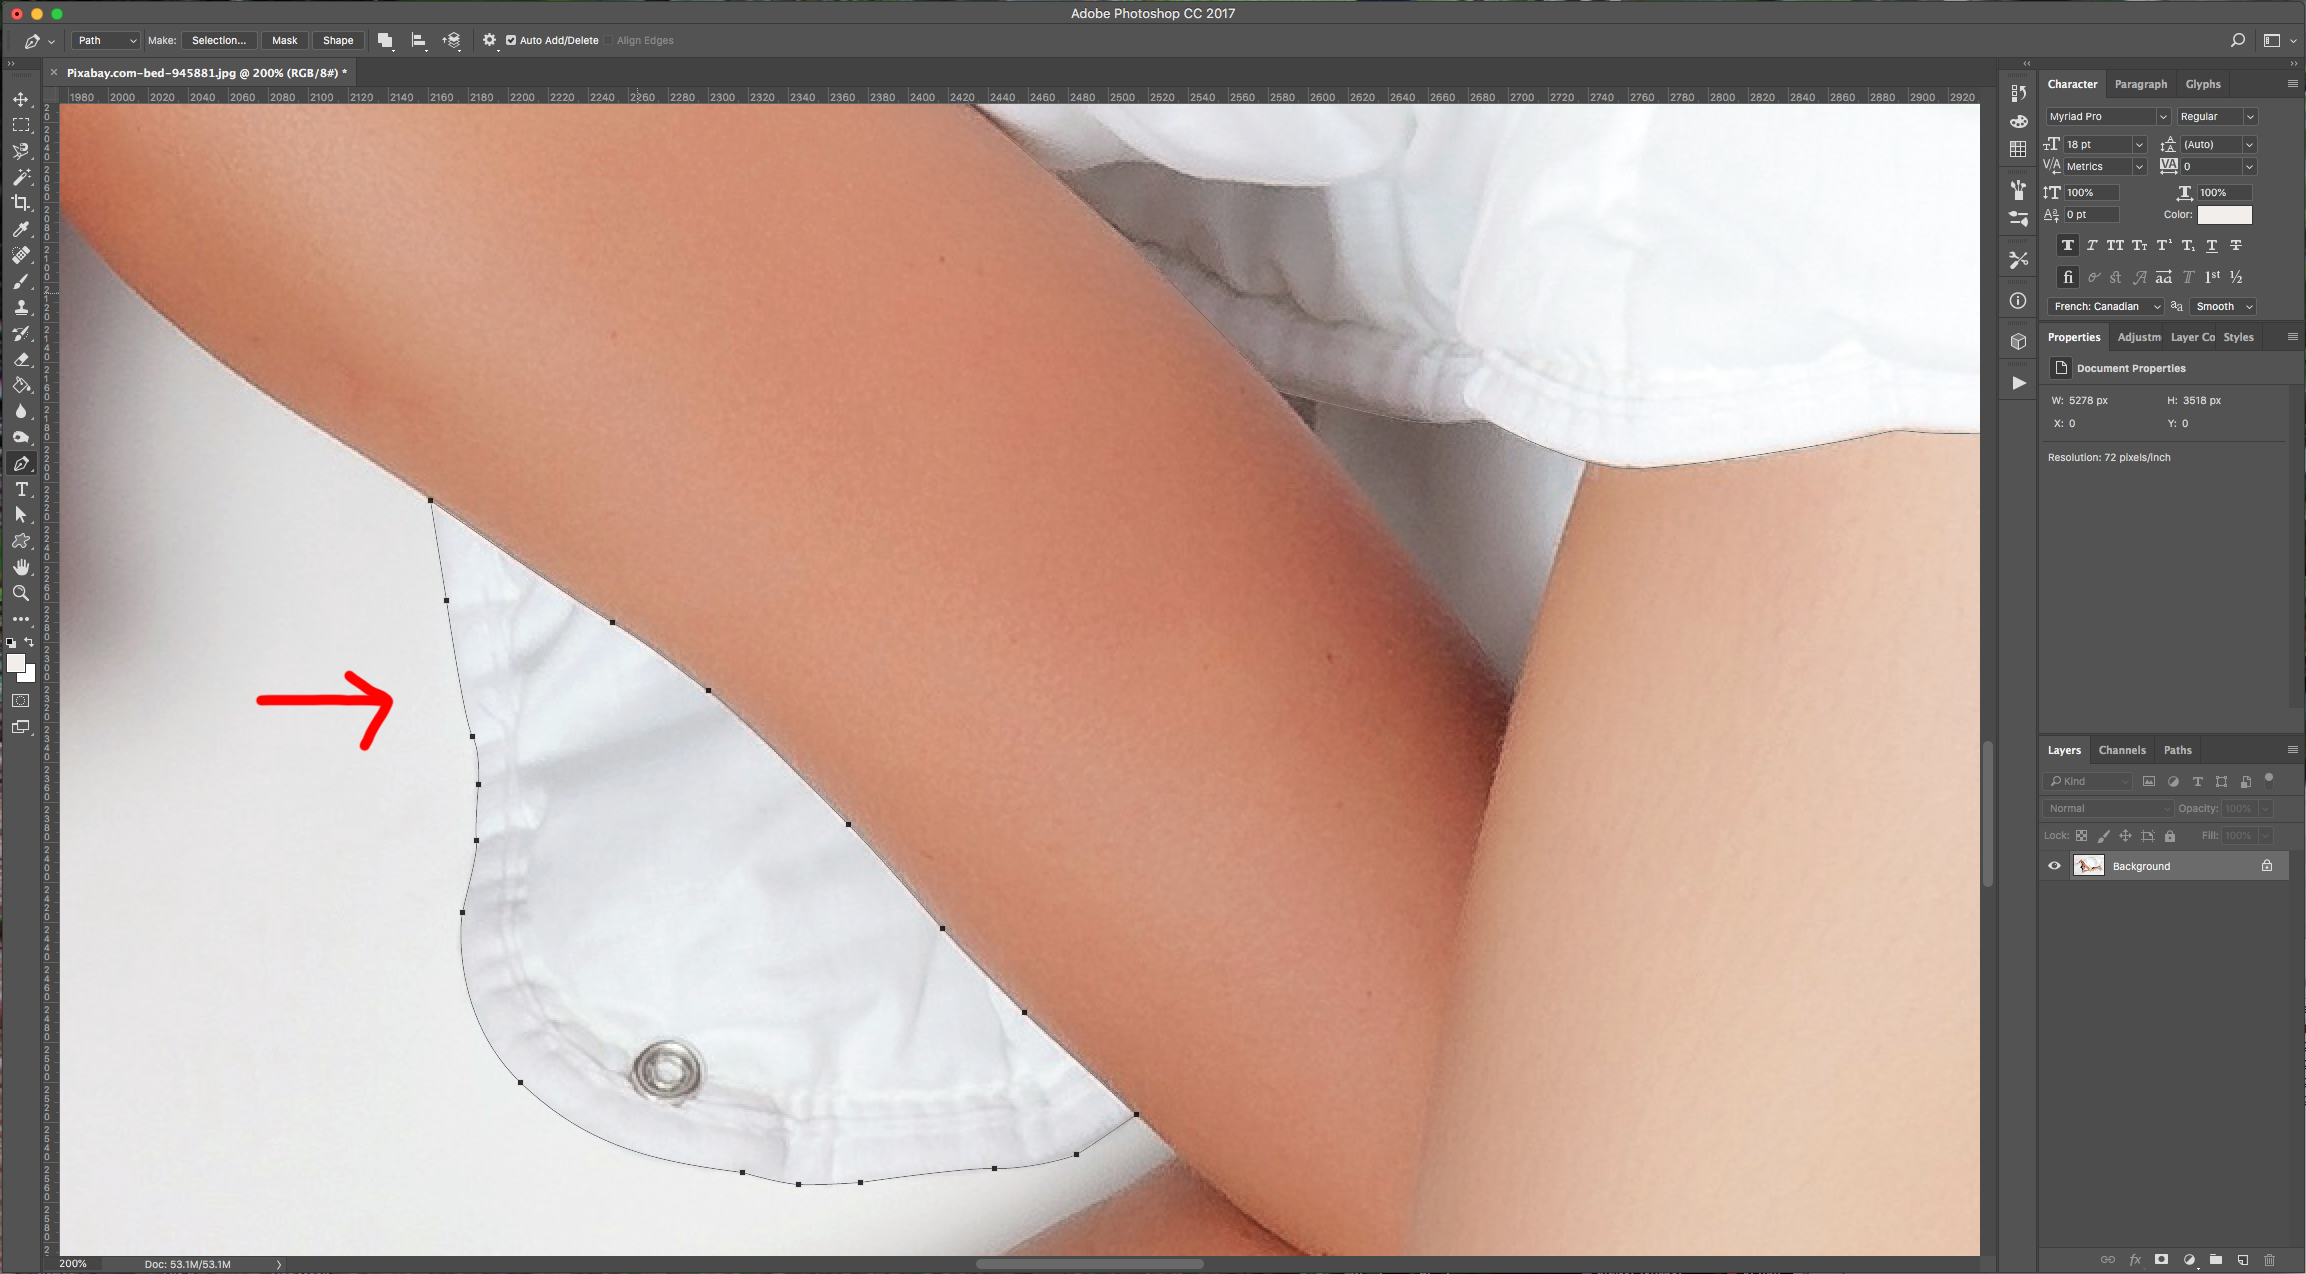
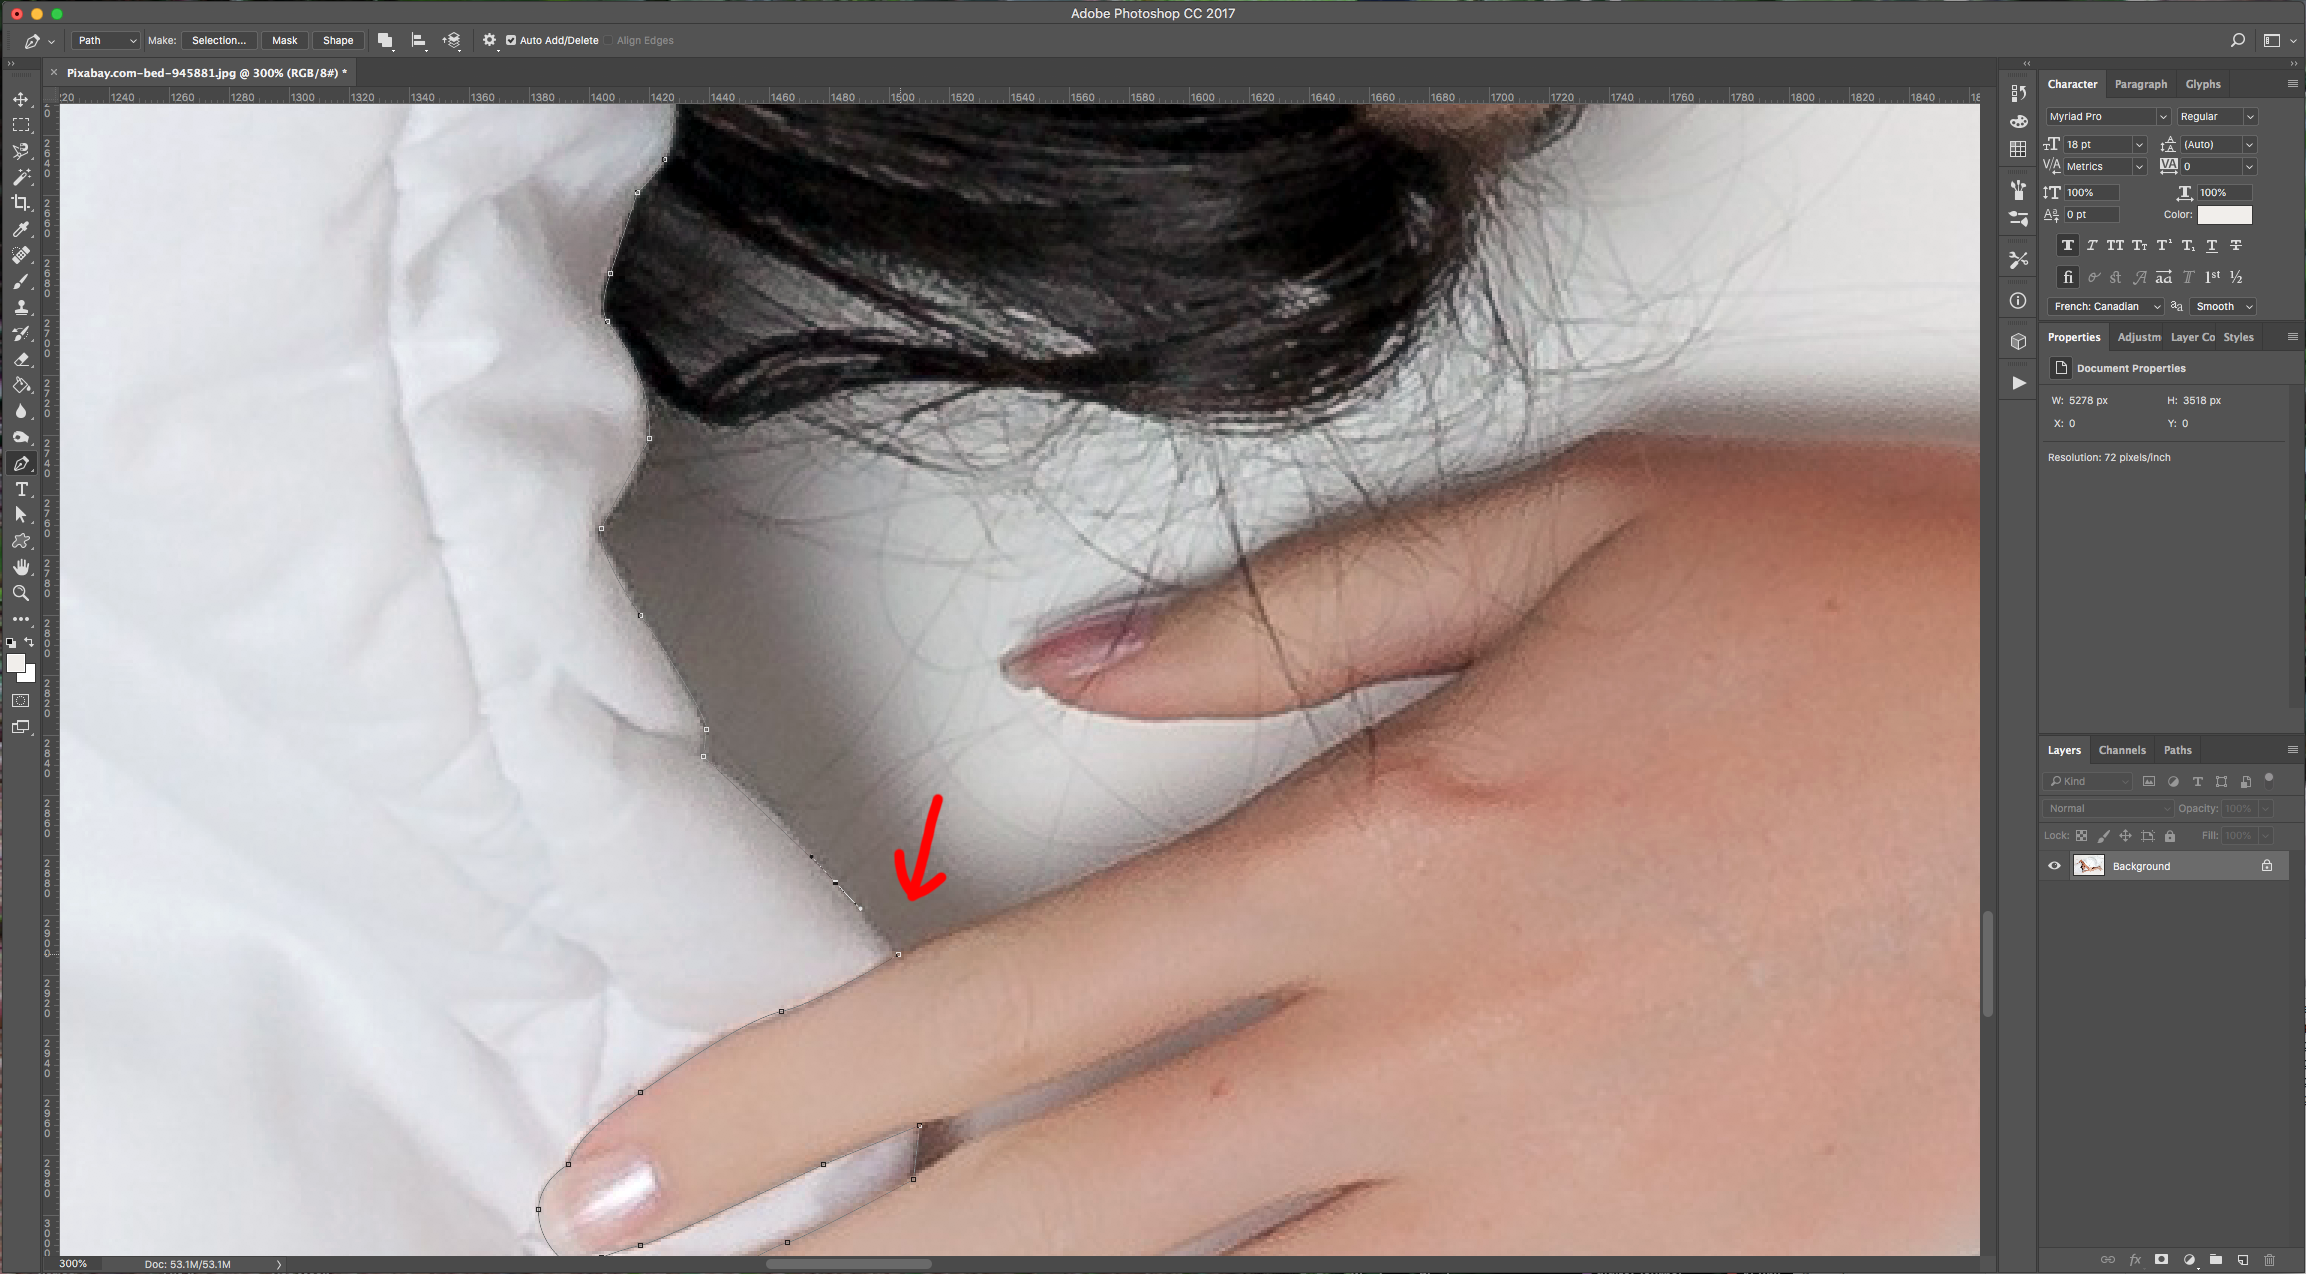
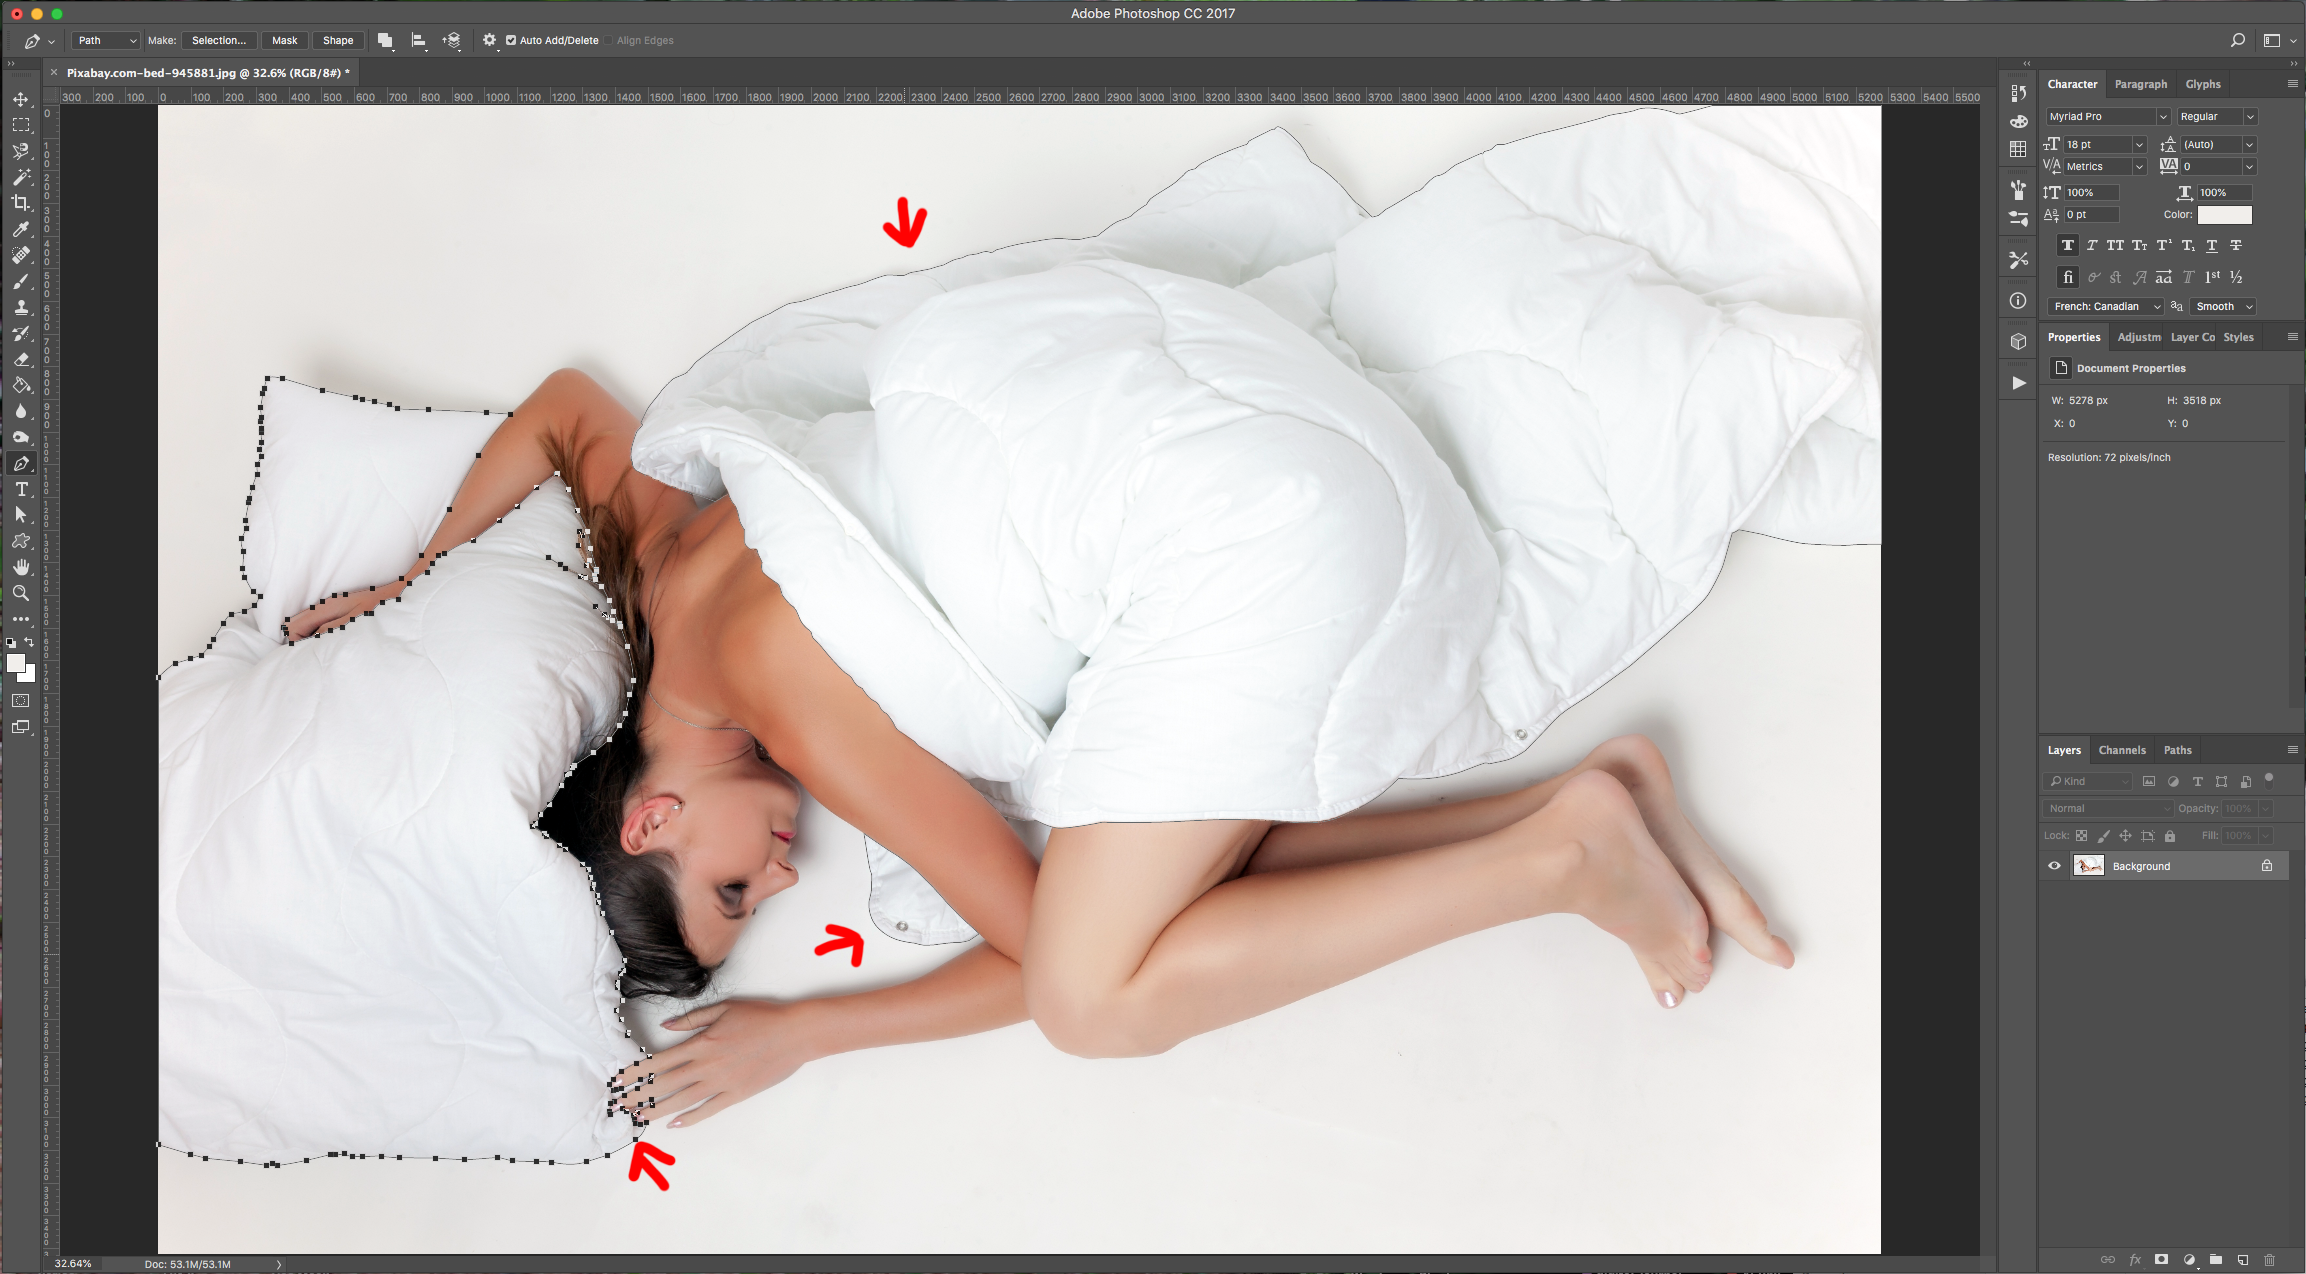
2 - Select the “Pen Tool” (P), choose “Path” in Top Menu and start adding “Anchor Points” around the parts of the image you want to outline. To make a curved path click and drag with your cursor and if you want to straighten the next line, hold the “Alt/Option” key and click on the “Anchor Point”. Go back to your starting point to close the Path.

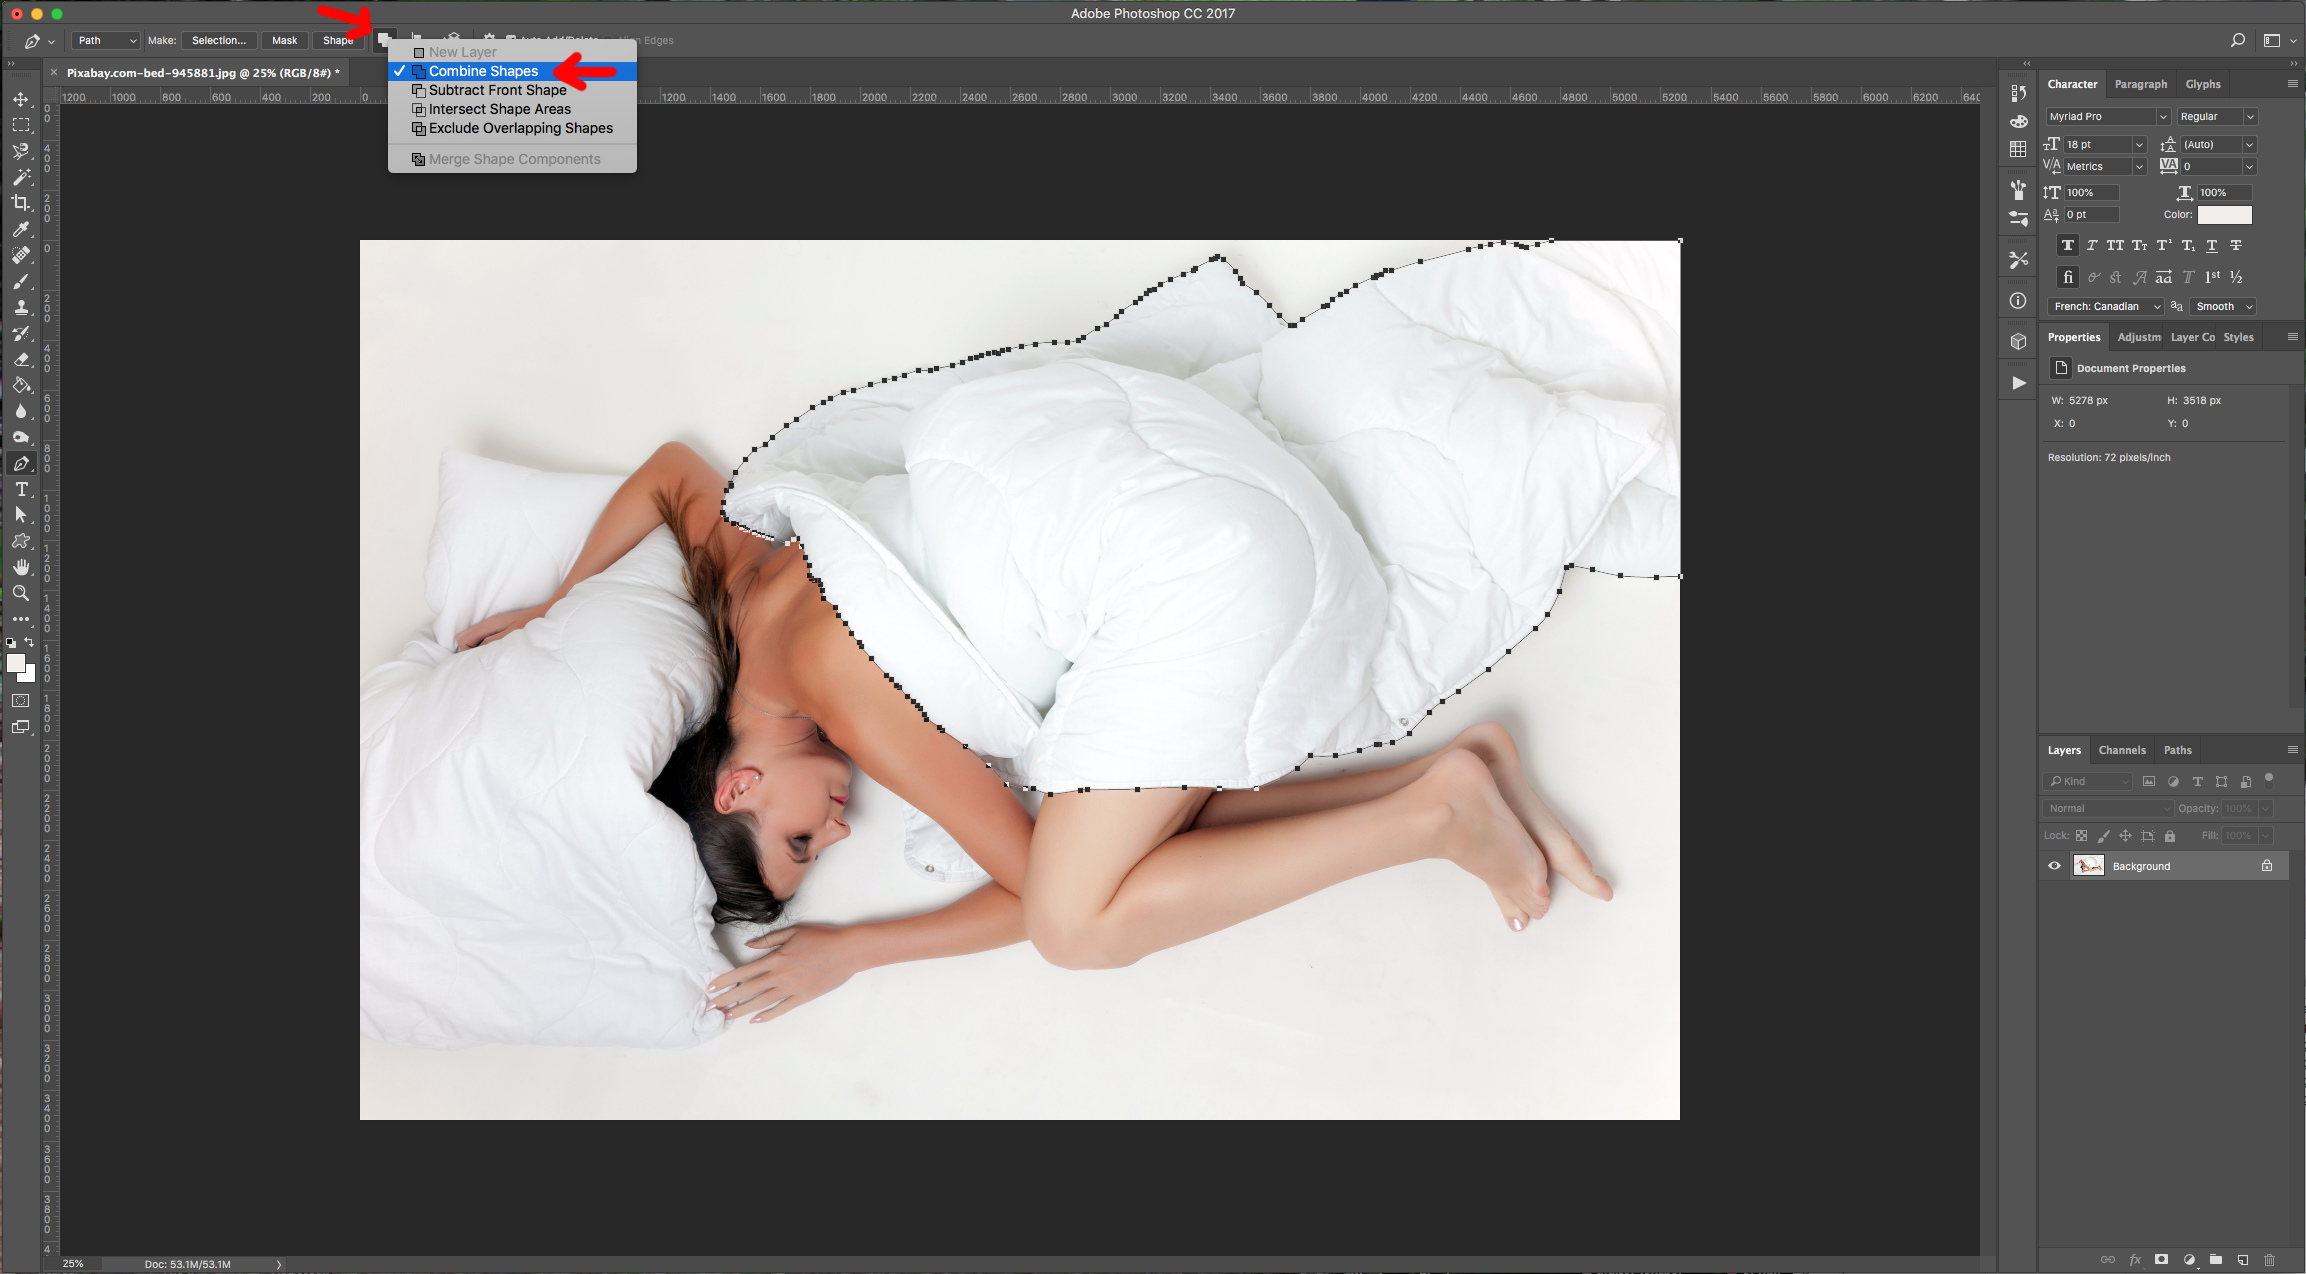
3 - To “Add” to the “Path” without creating a new layer, select “Combine Shapes” in the Top Menu and create the “Paths” you need.
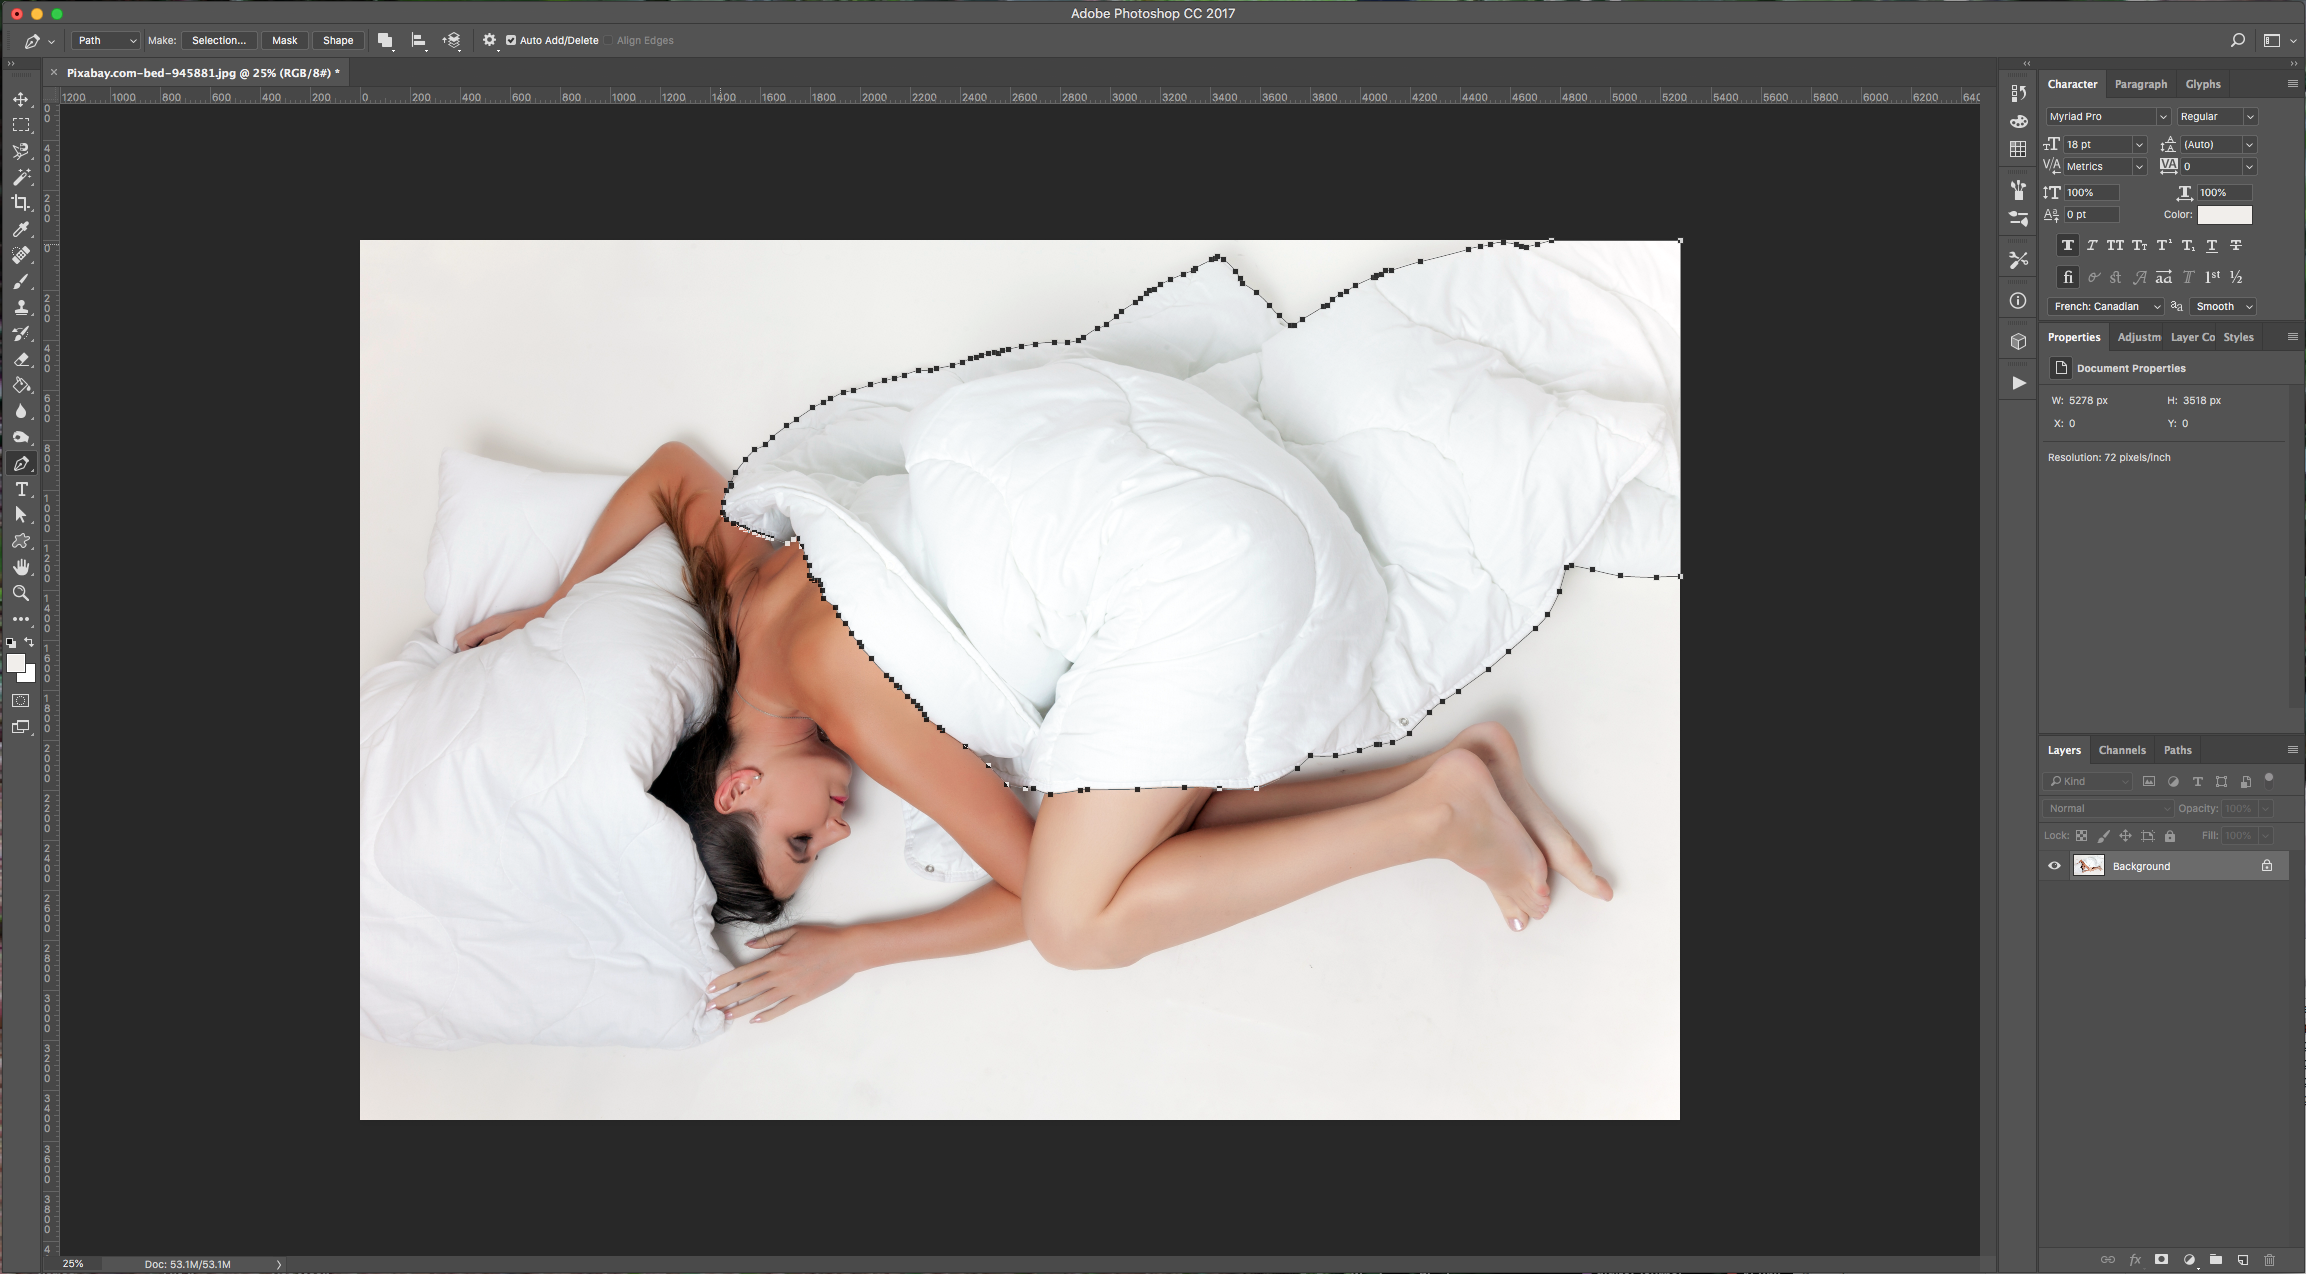
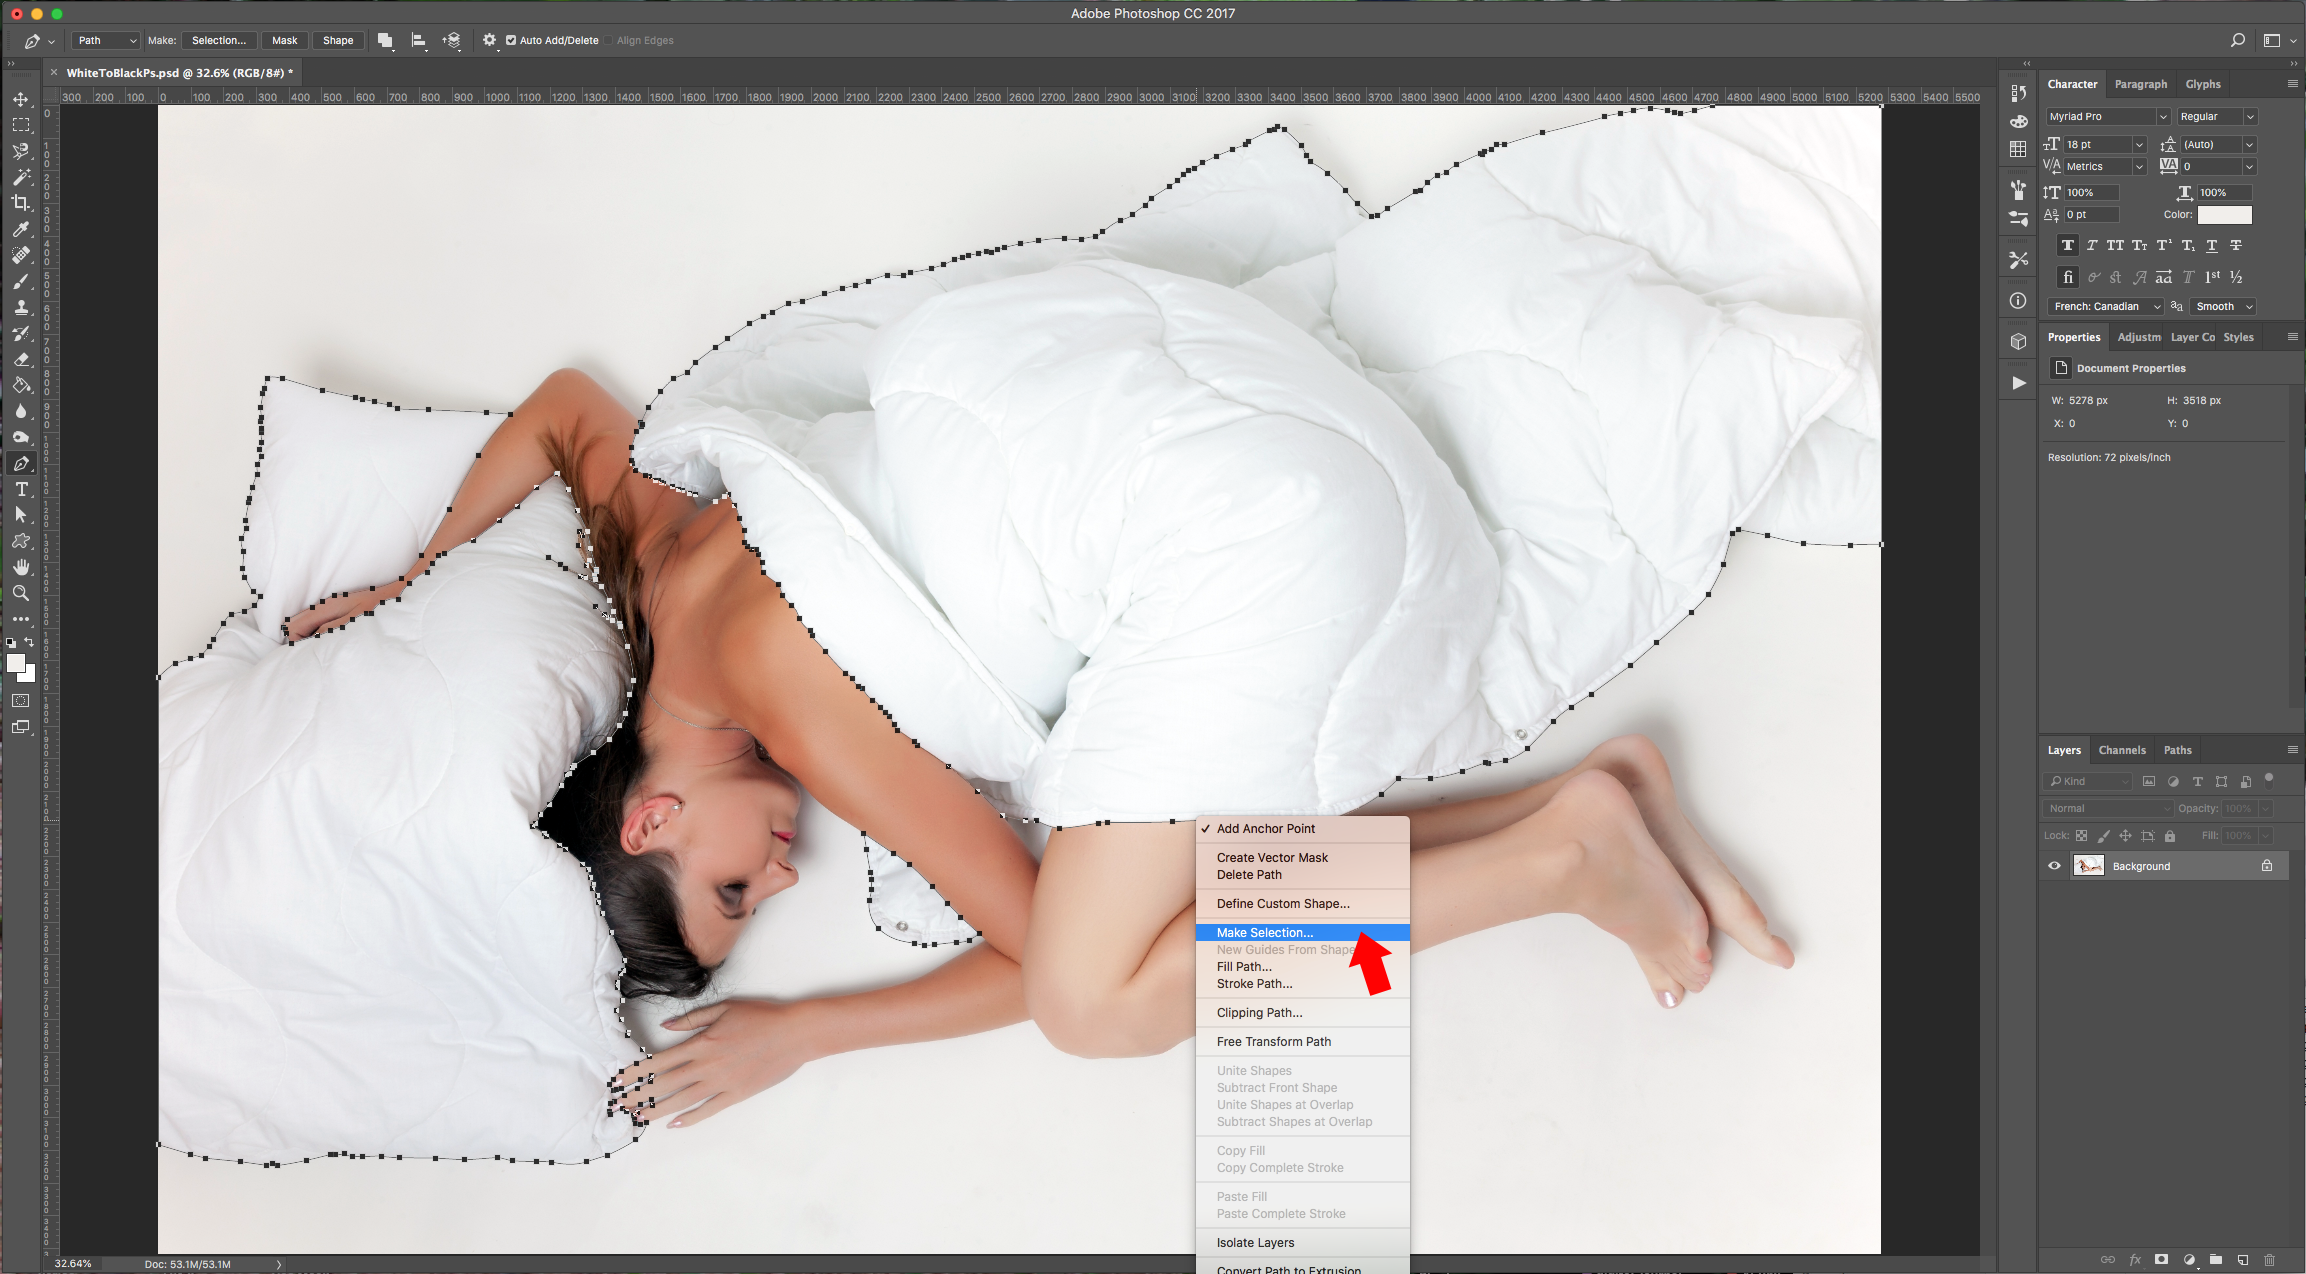
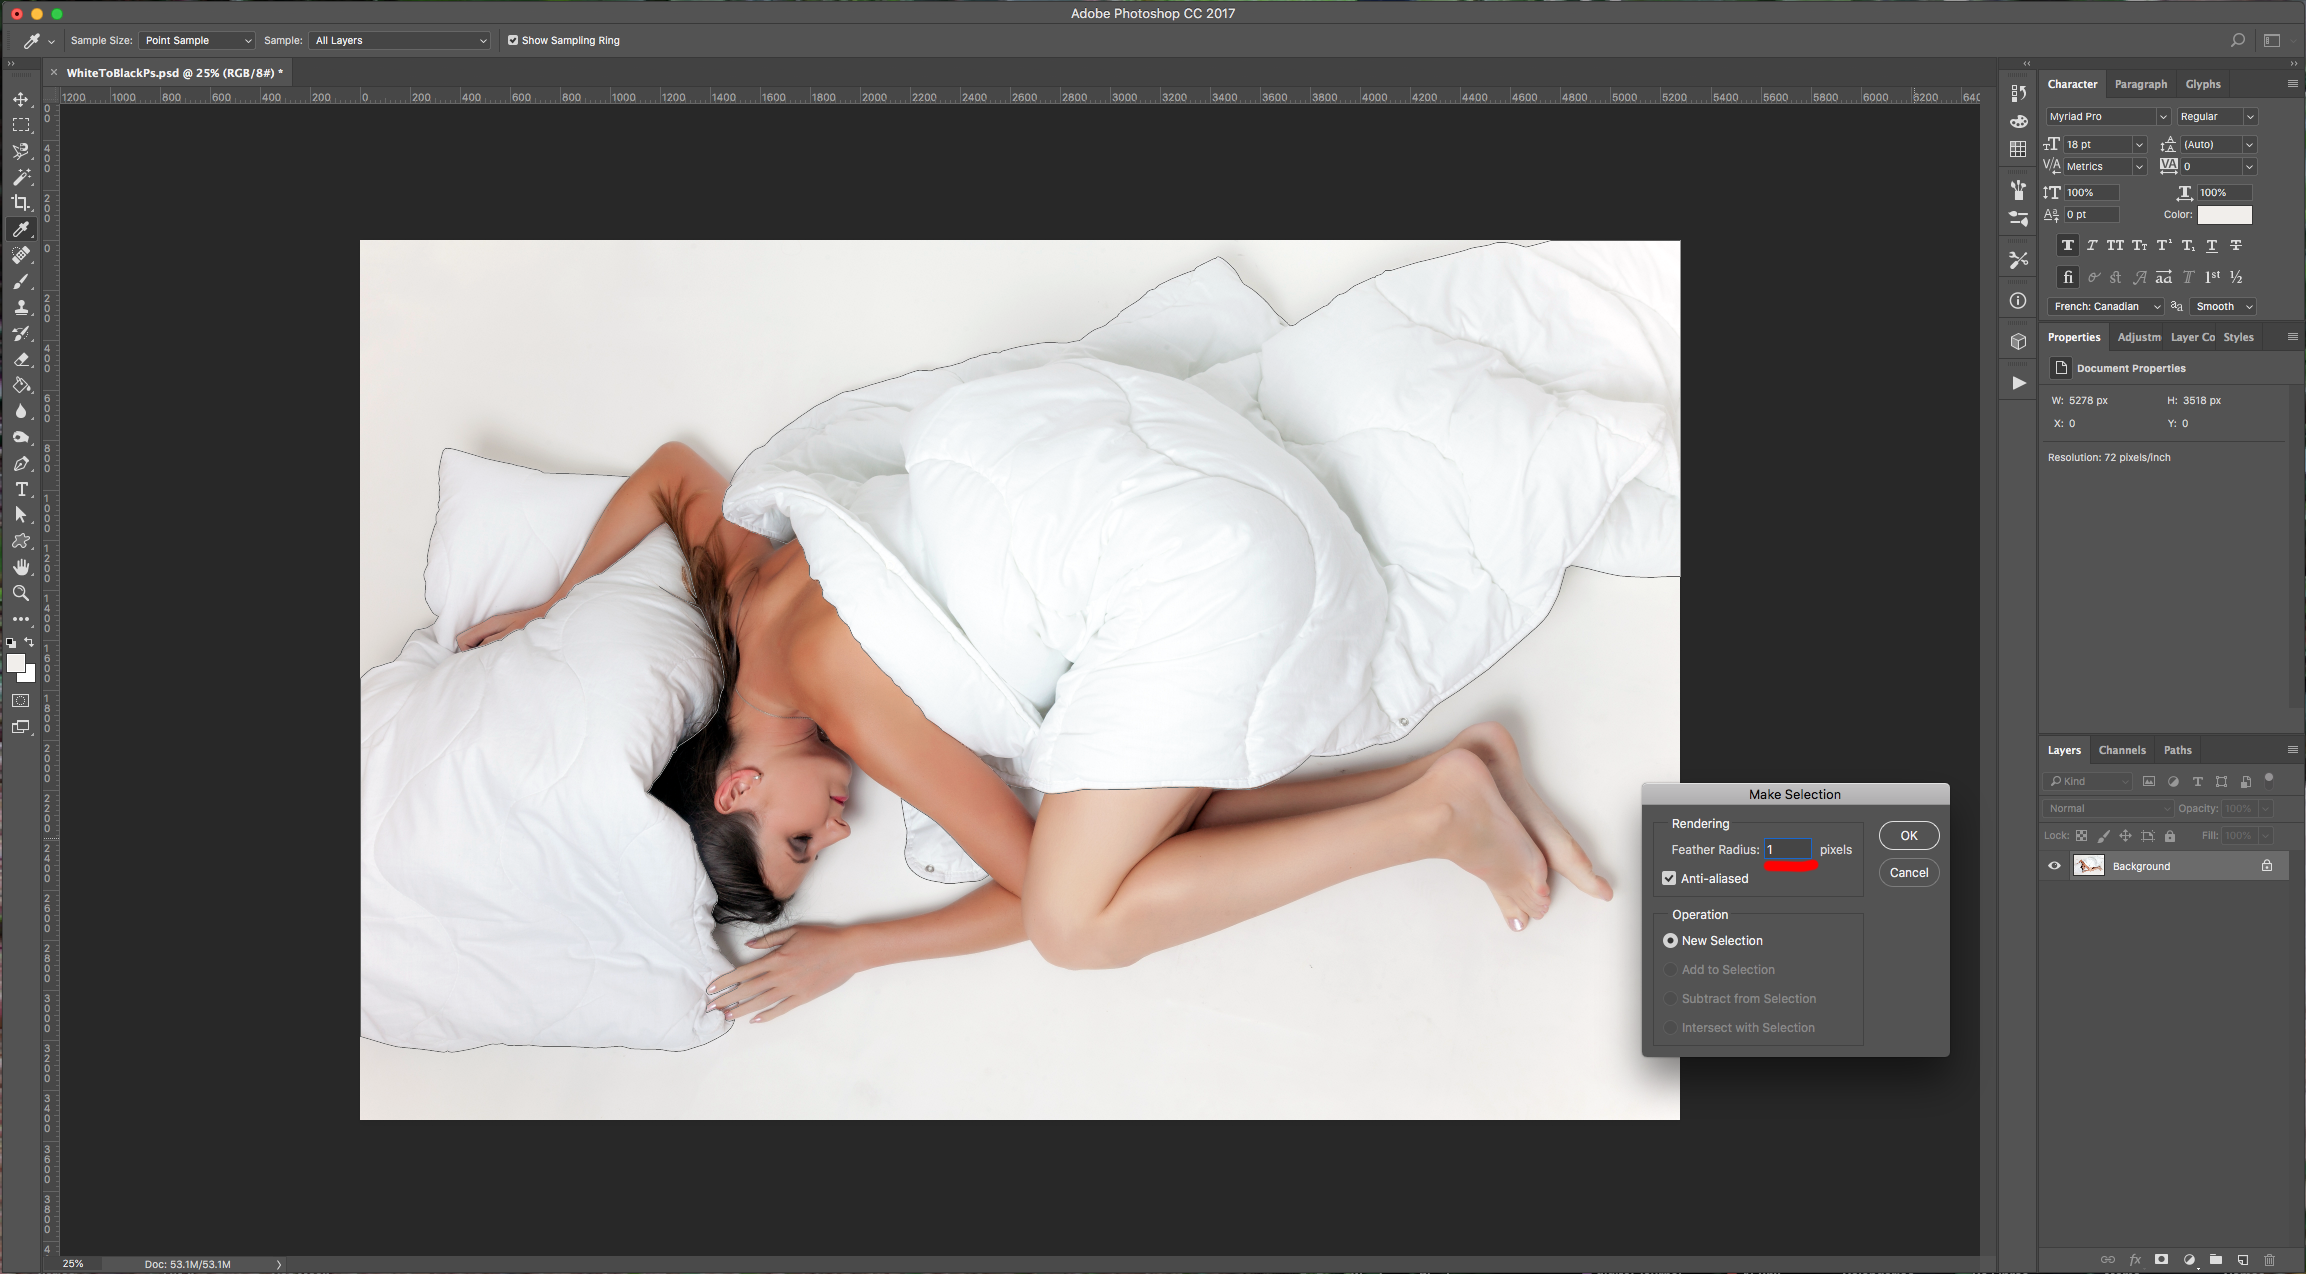
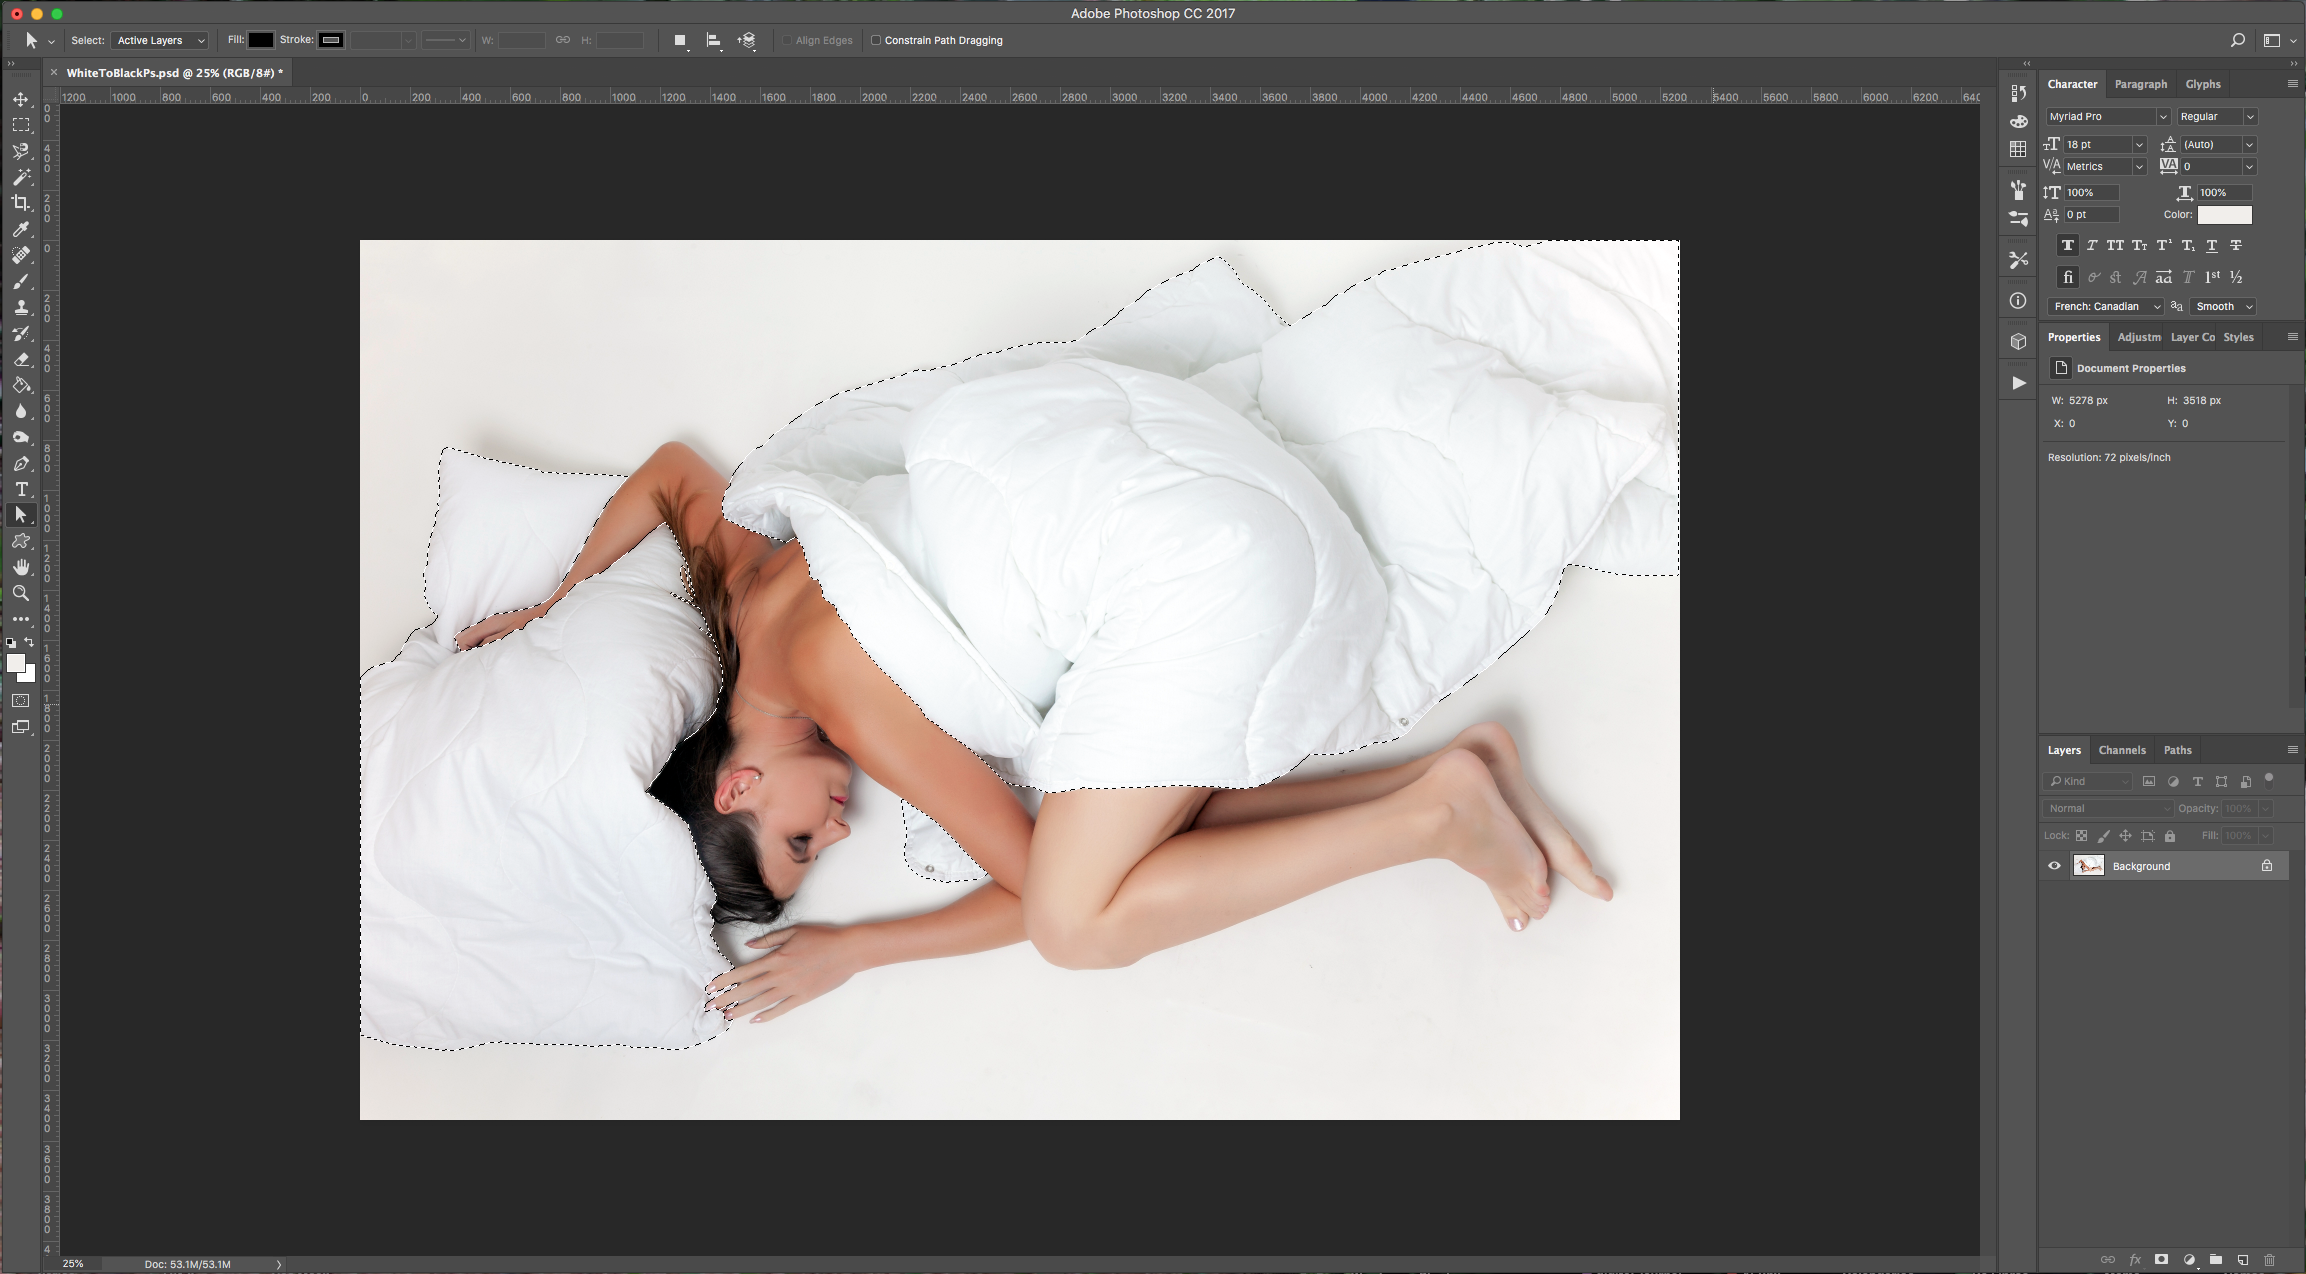
4 - Right-click on top of the “Path” and choose “Make Selection” and use a “Feather Radius” of 1 Pixel. You can always “Save” your path in the “Paths” Panel to use it in case you make a mistake.
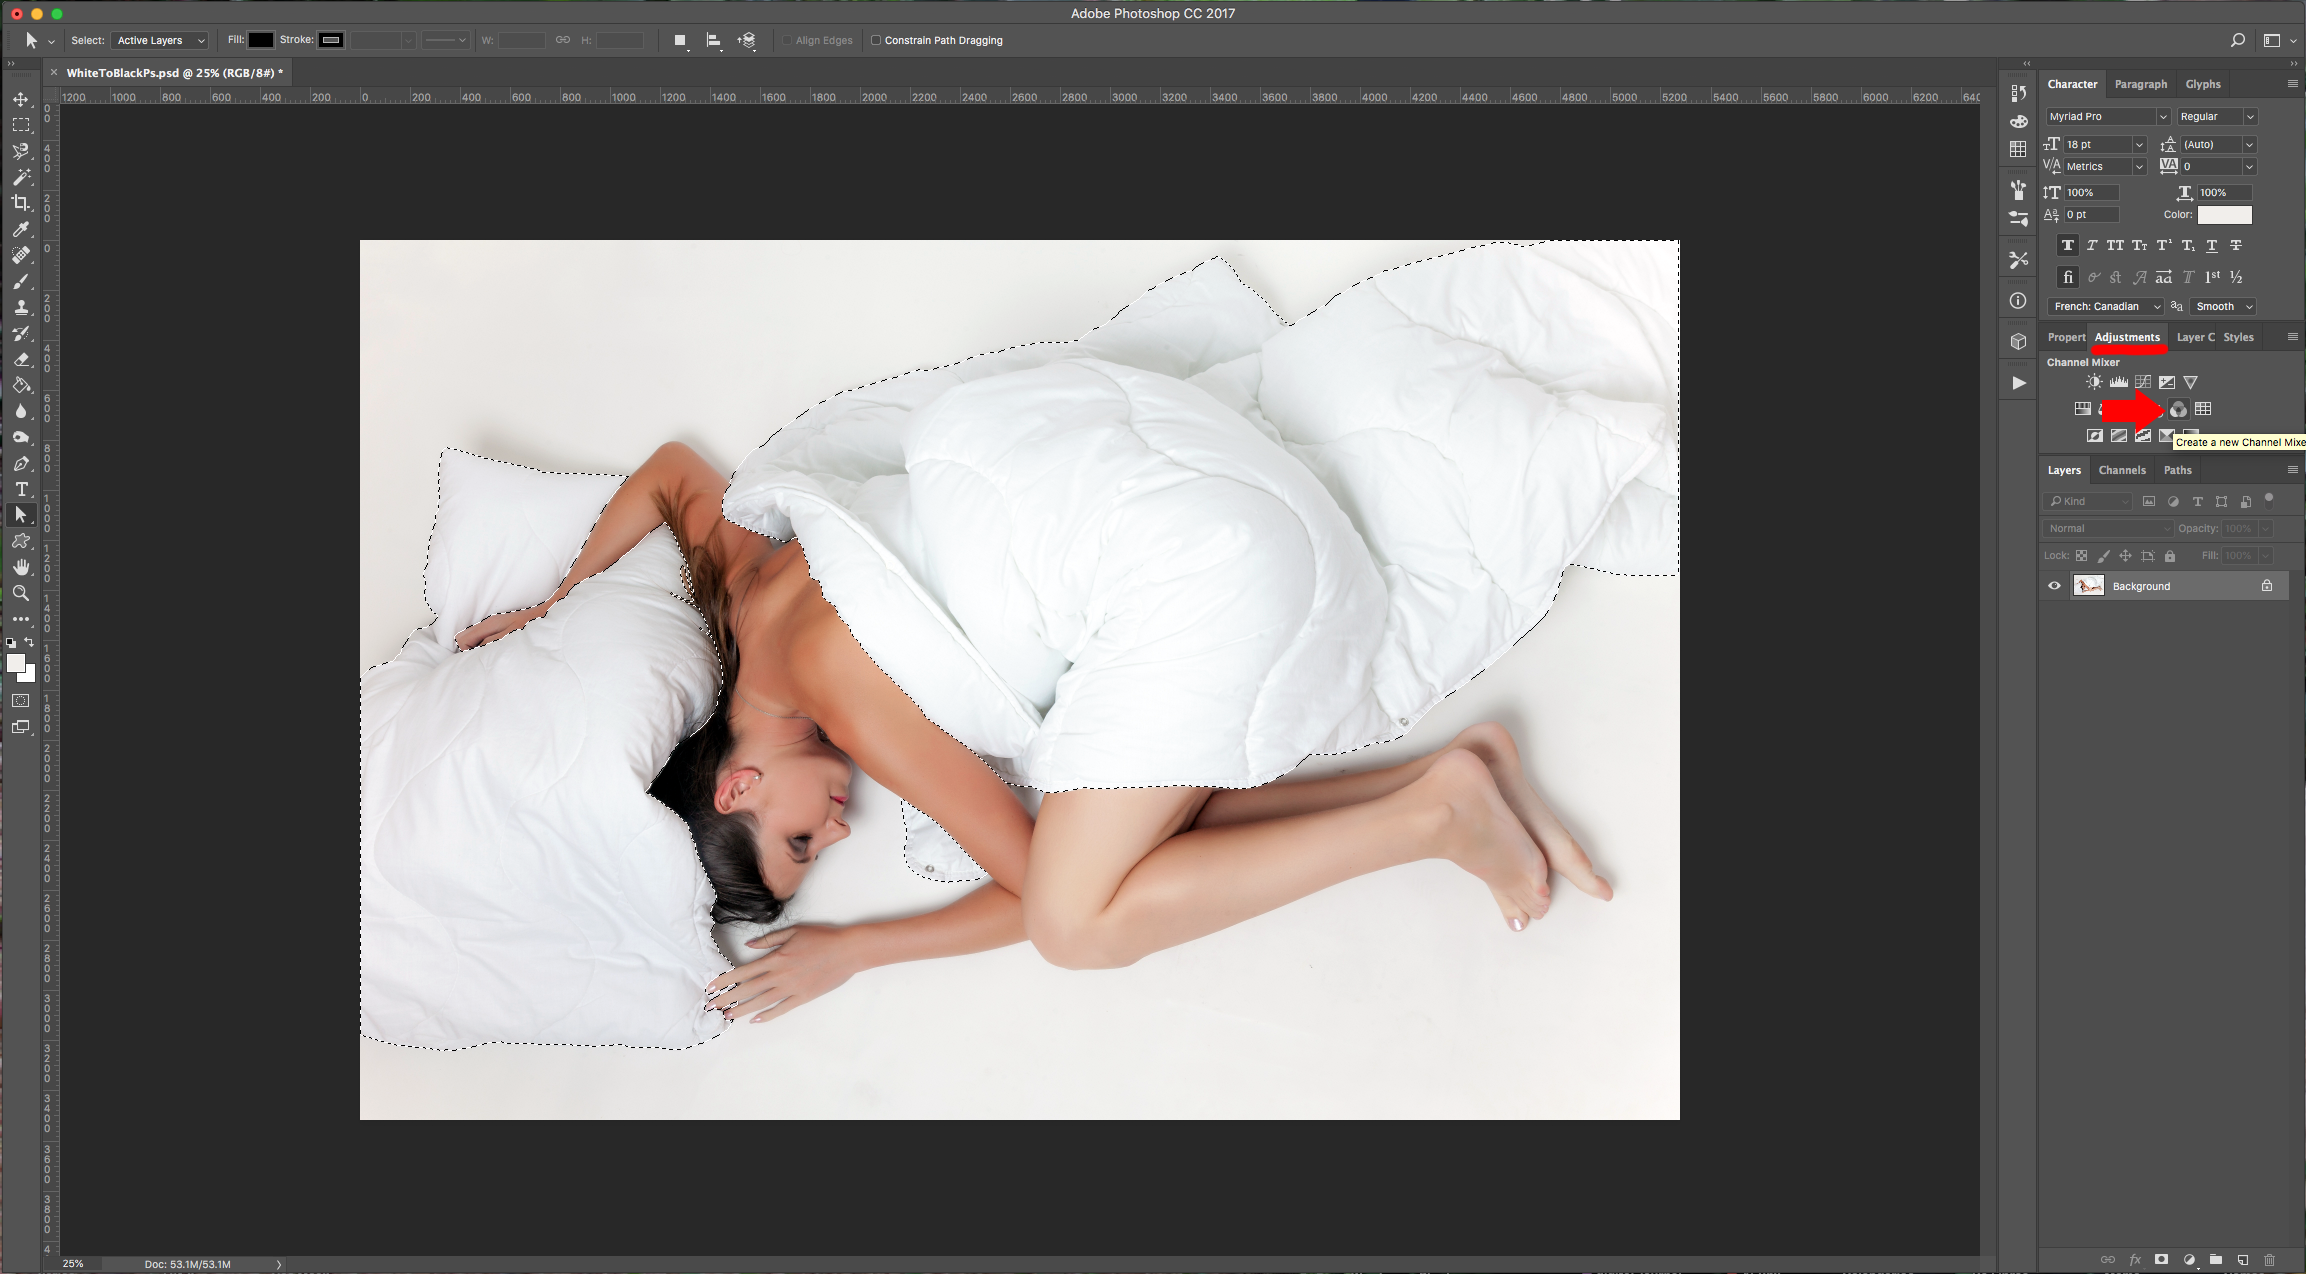
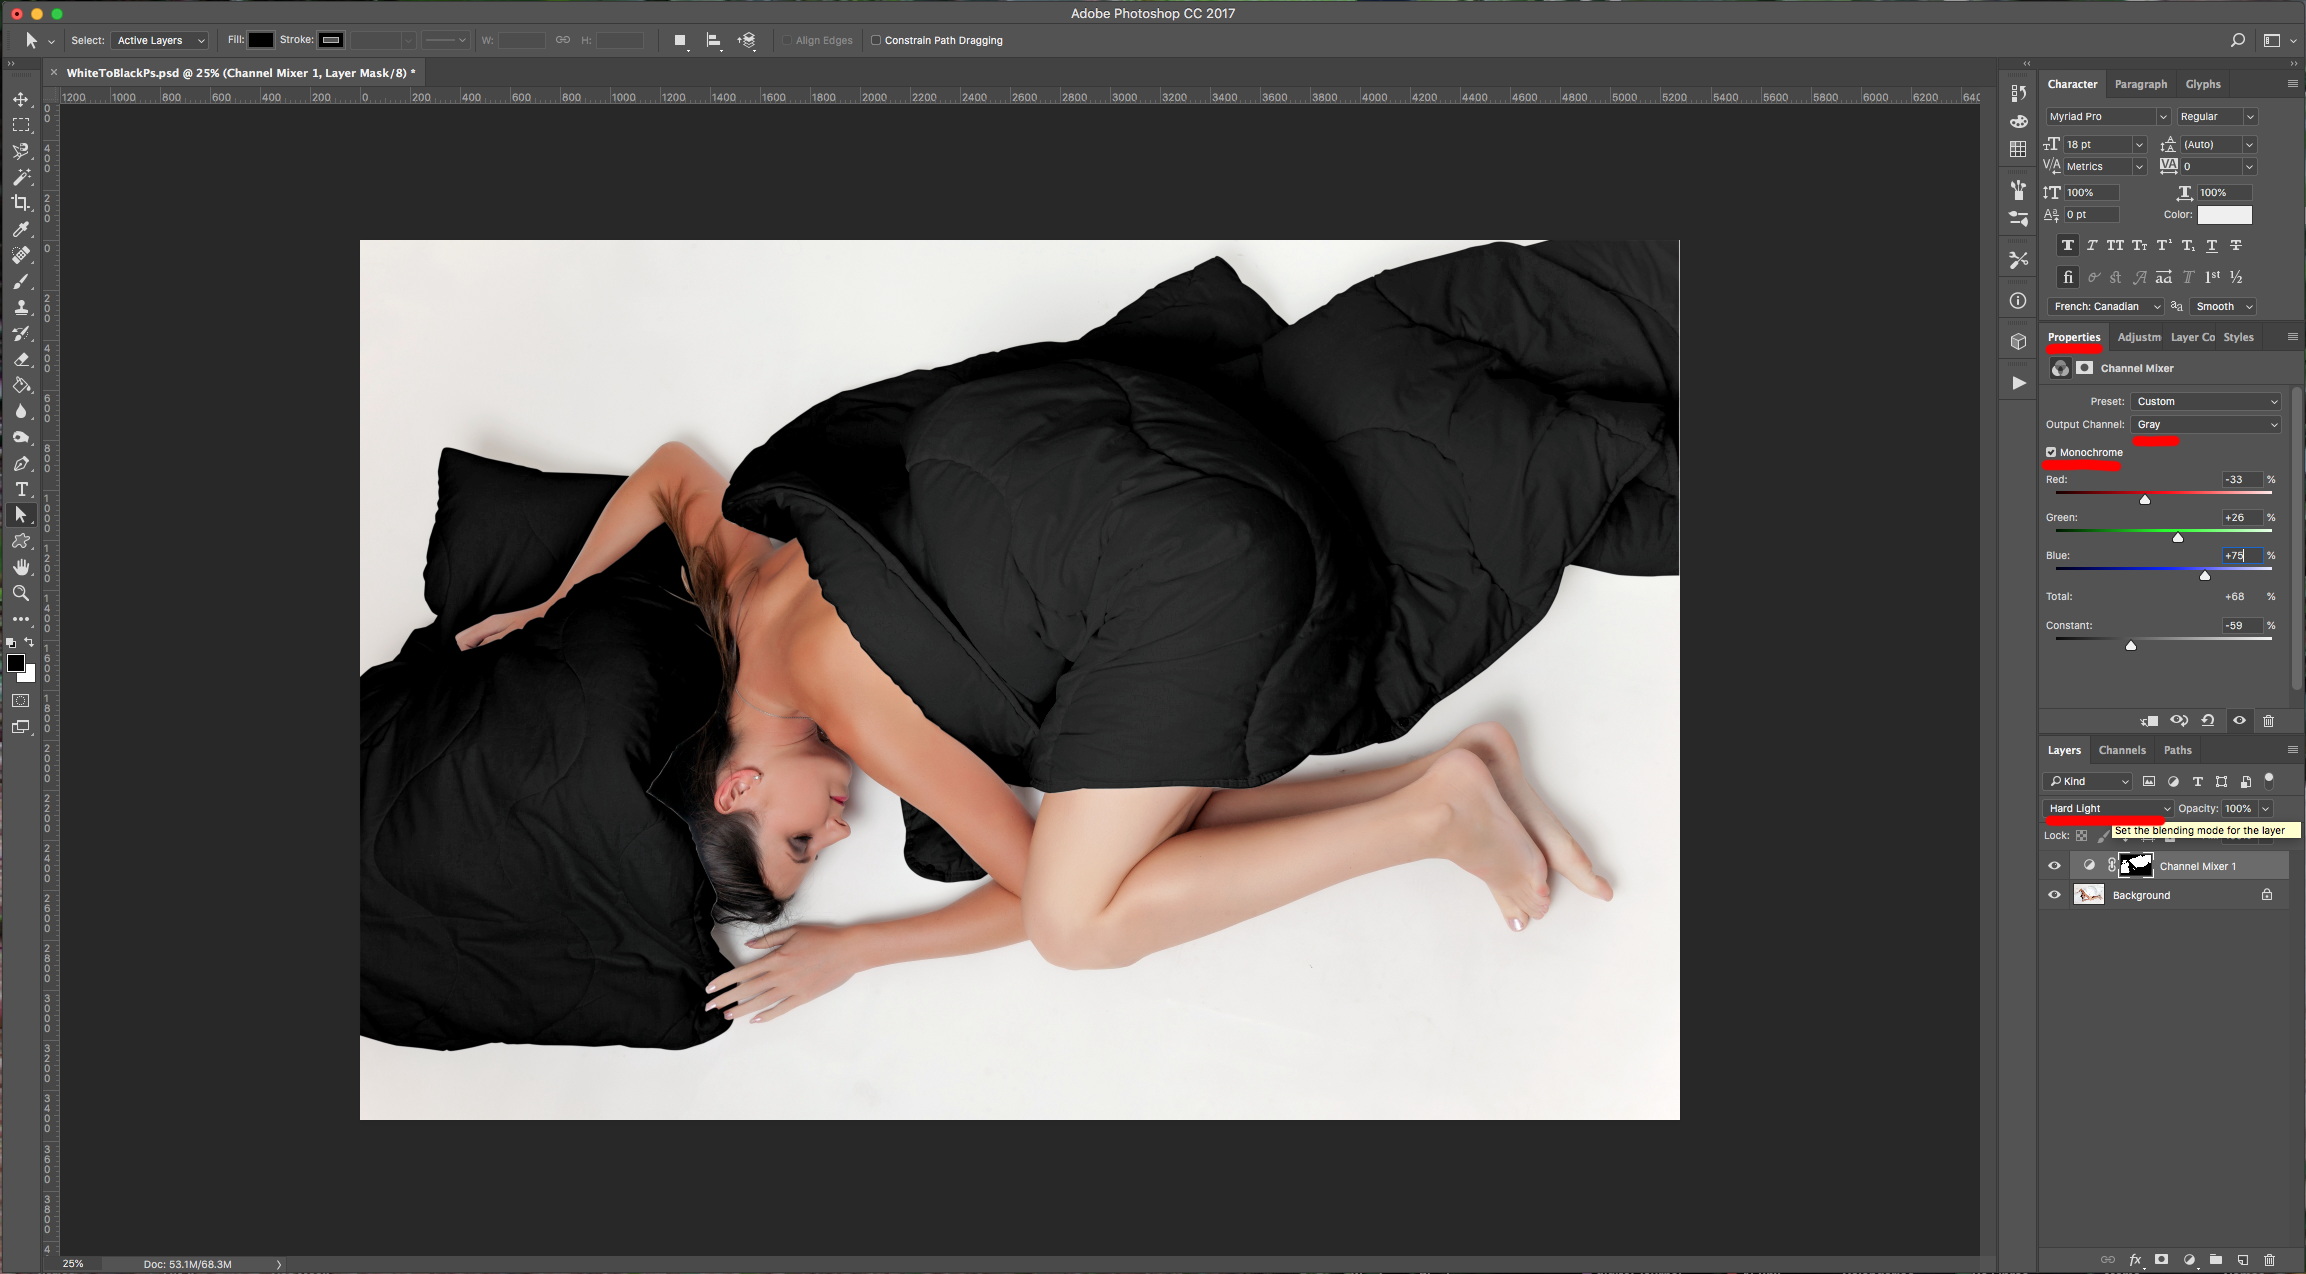
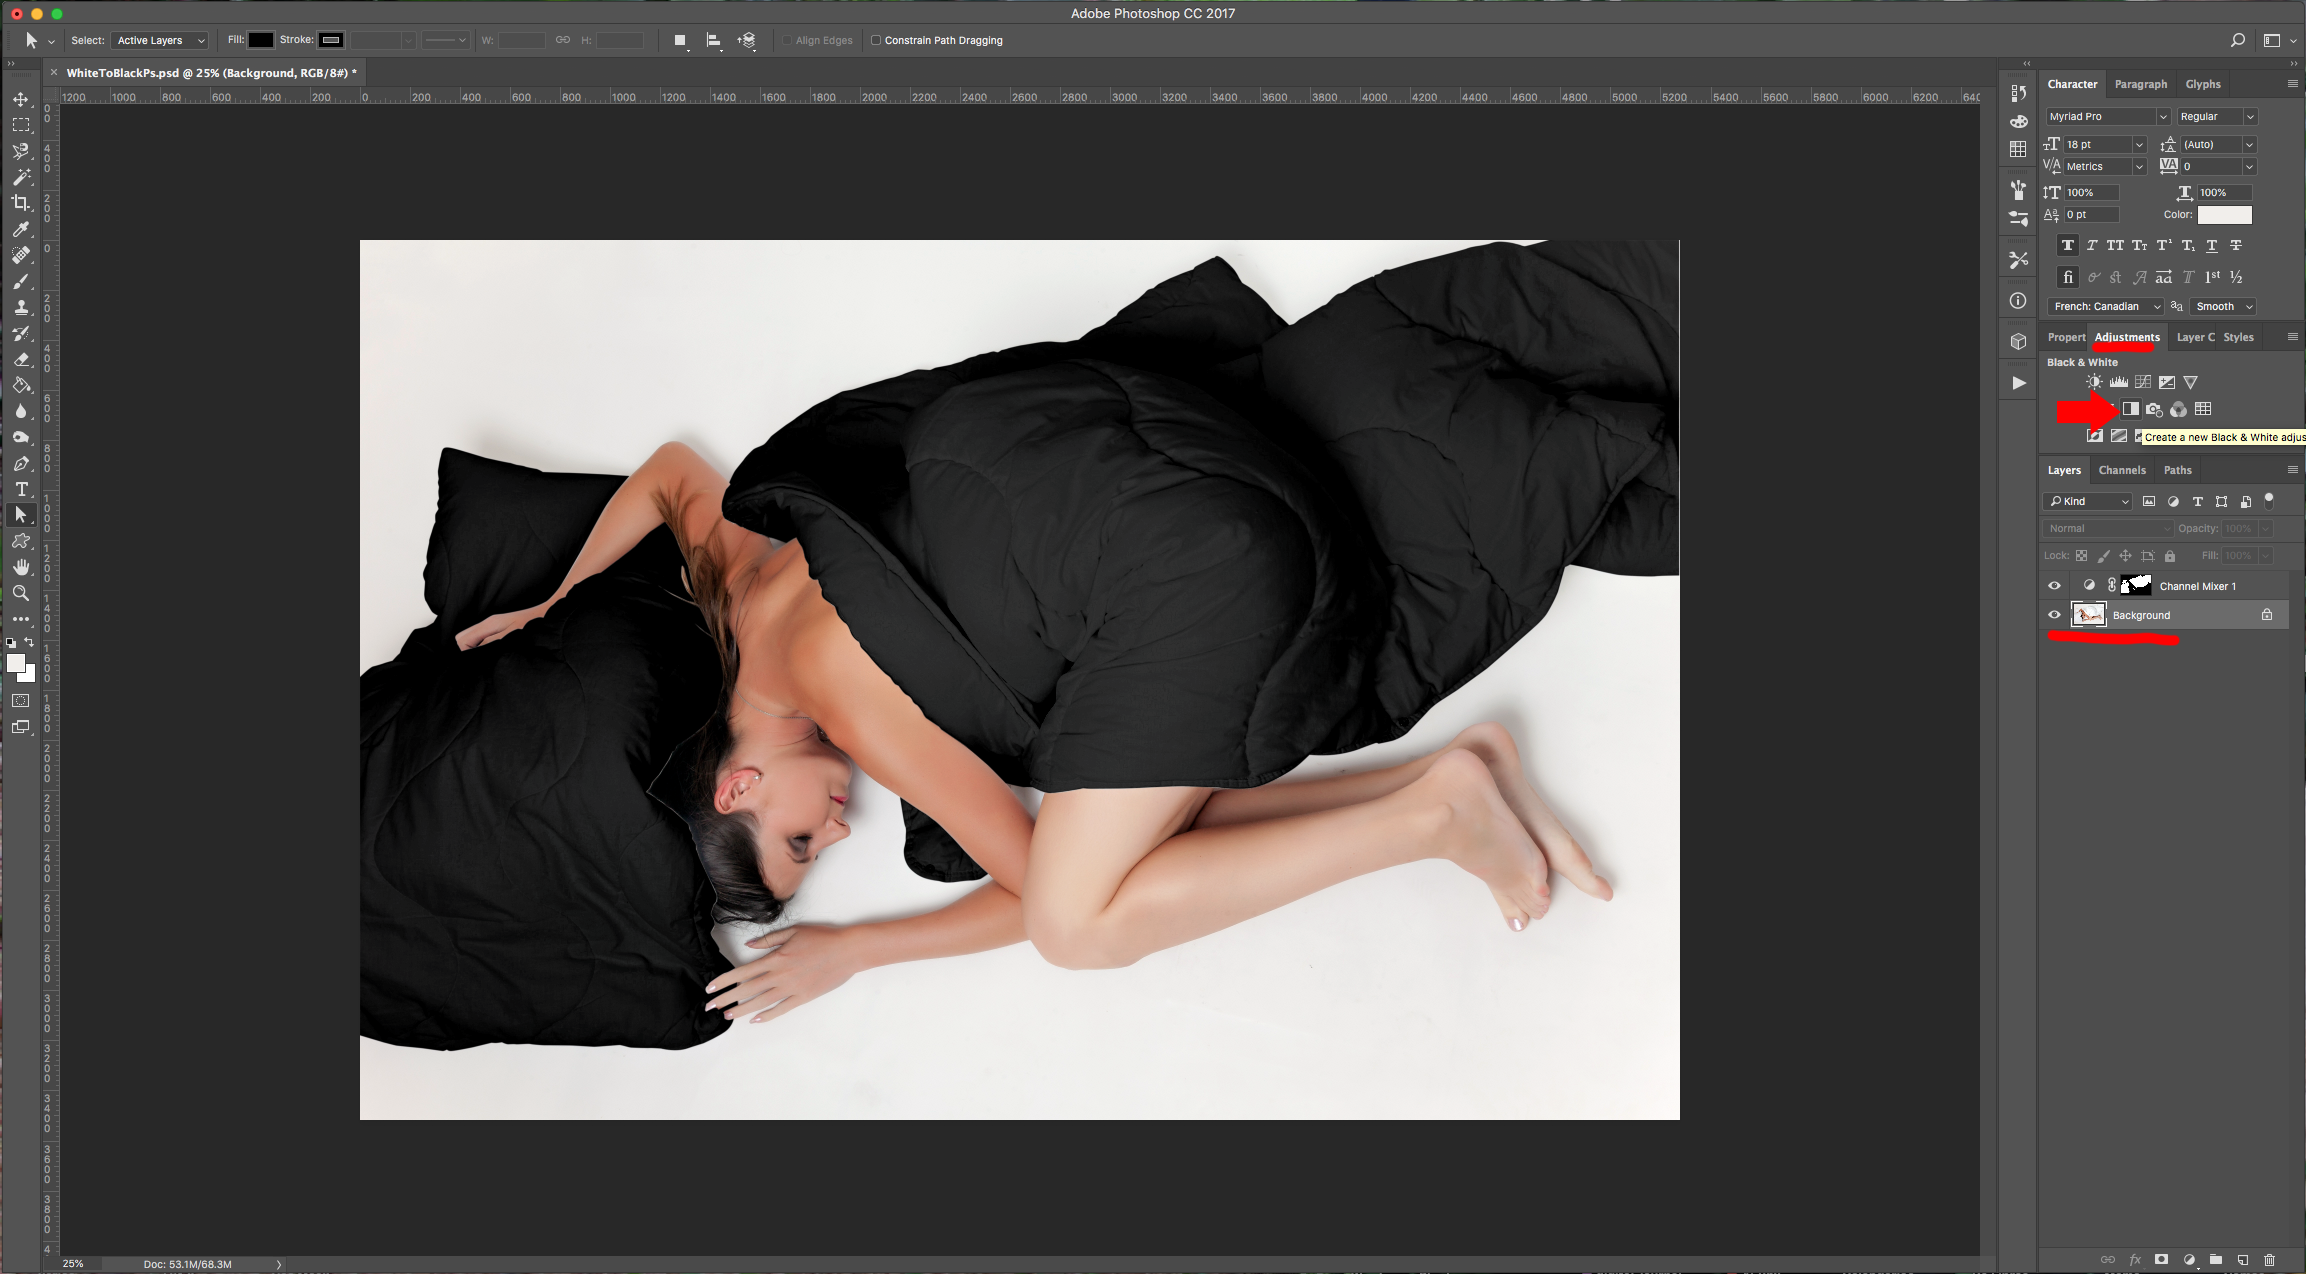
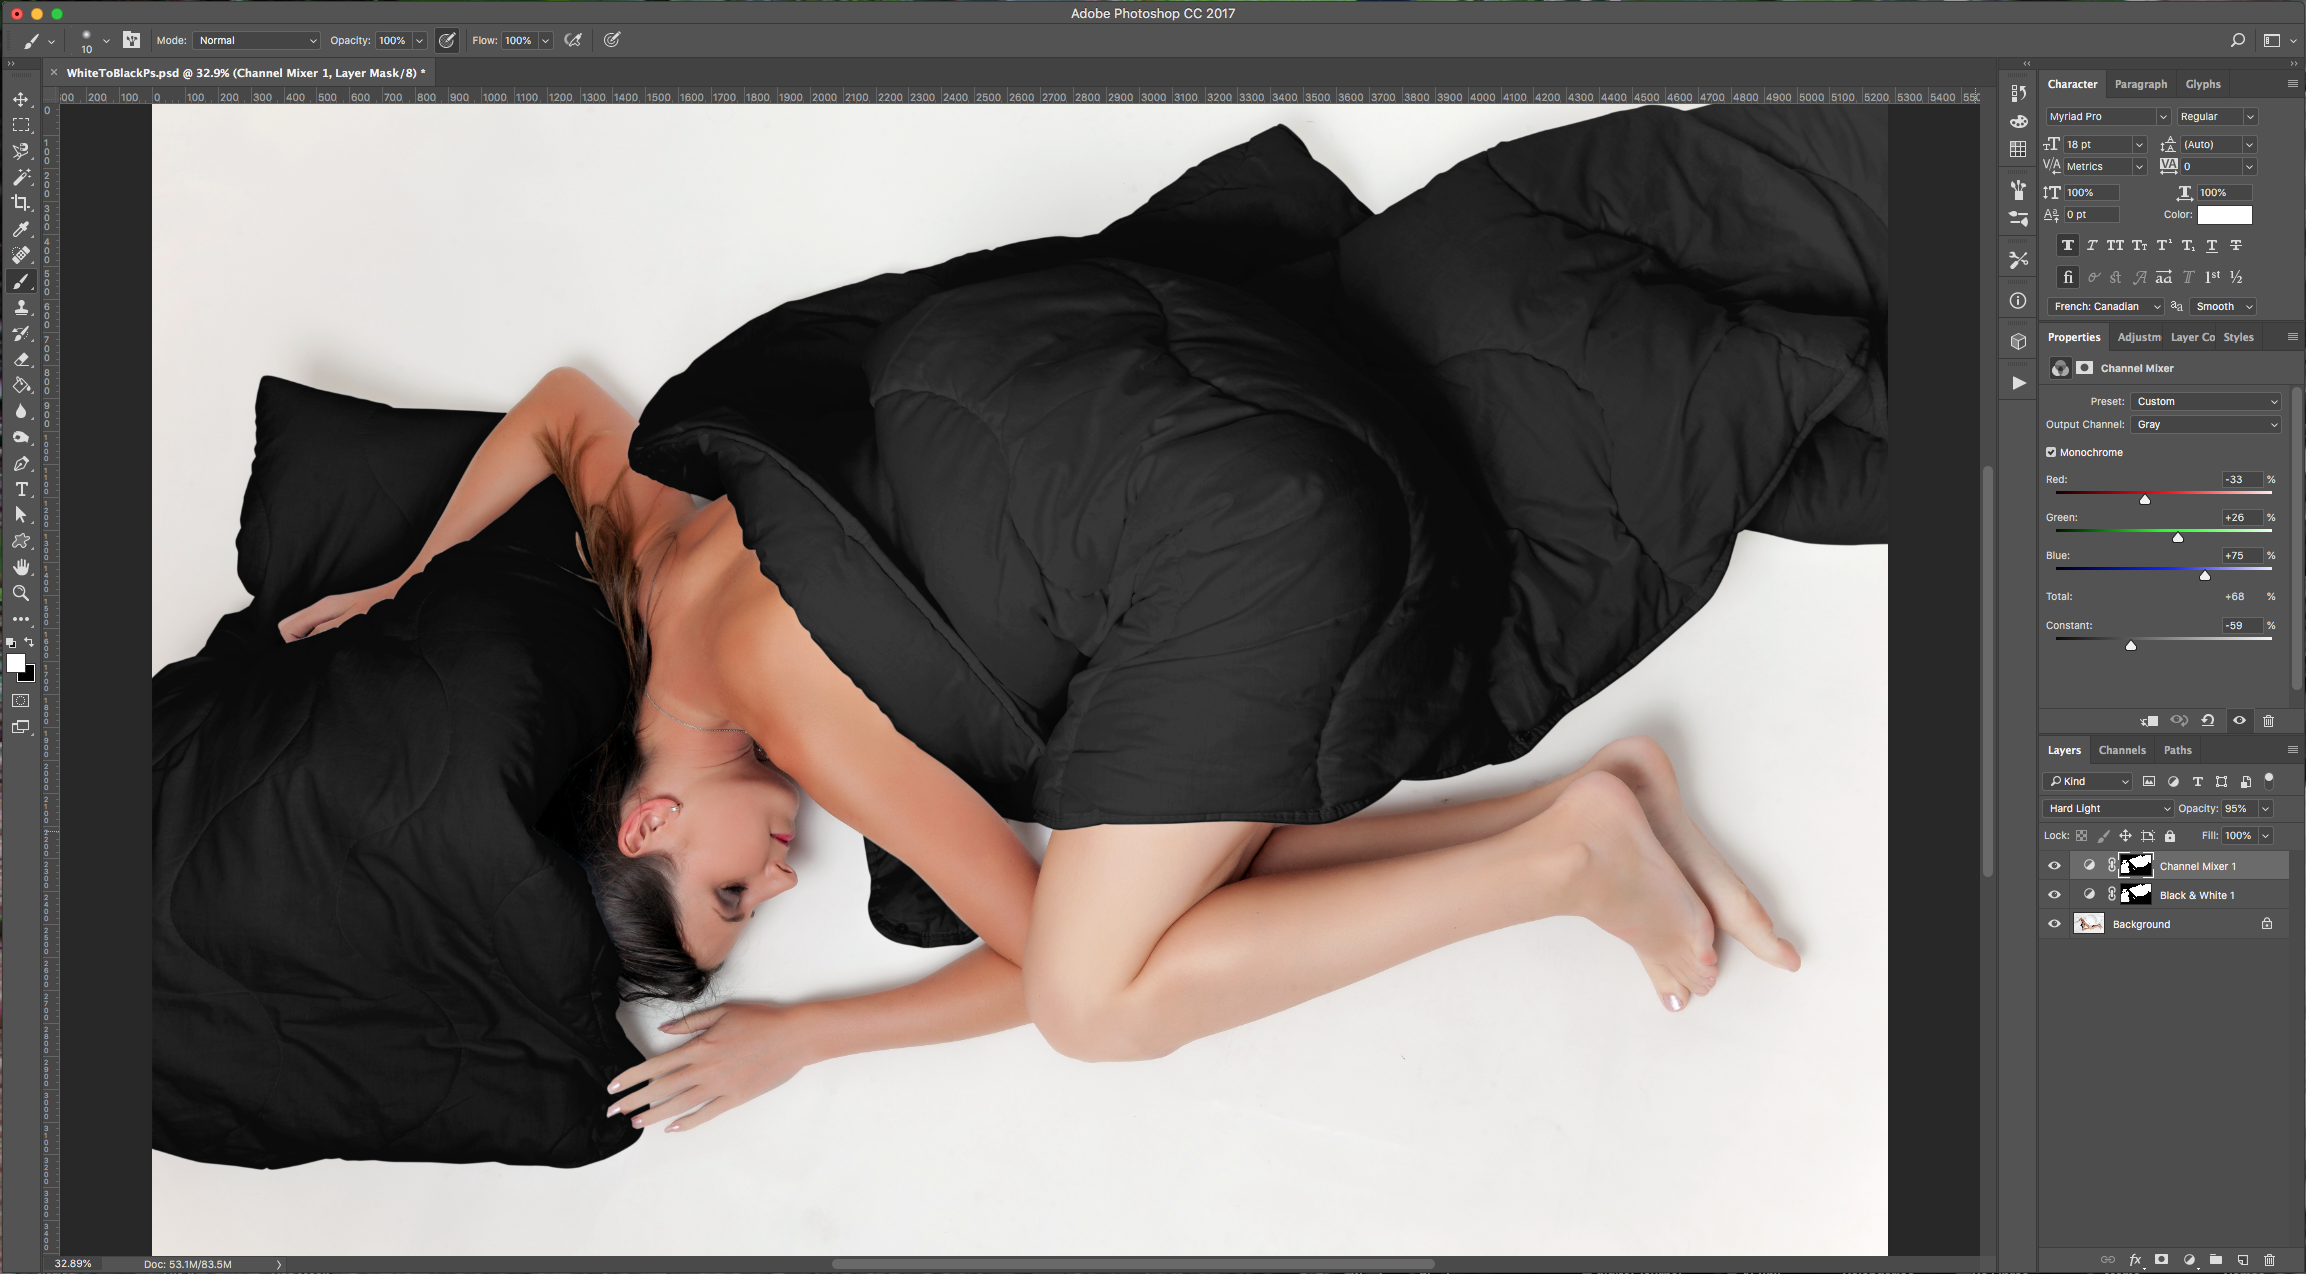
5 - Create a “New Channel Mixer Adjustment Layer” in the “Adjustments Panel”, choose “Gray” as “Output Channel” and fiddle with the levers until you get a Black shade with good contrast and highlights . Change the “Blending Mode” to “Hard Light”.
6 - Select your “Background” Layer, then go to the “Adjustments Panel” and create a “New Black and White Adjustment Layer”. Hold the “Alt/Option” key while dragging the “Mask” of the “Channel Mixer Adjustment Layer” onto the “Mask” of the “Black and White Adjustment Layer”.
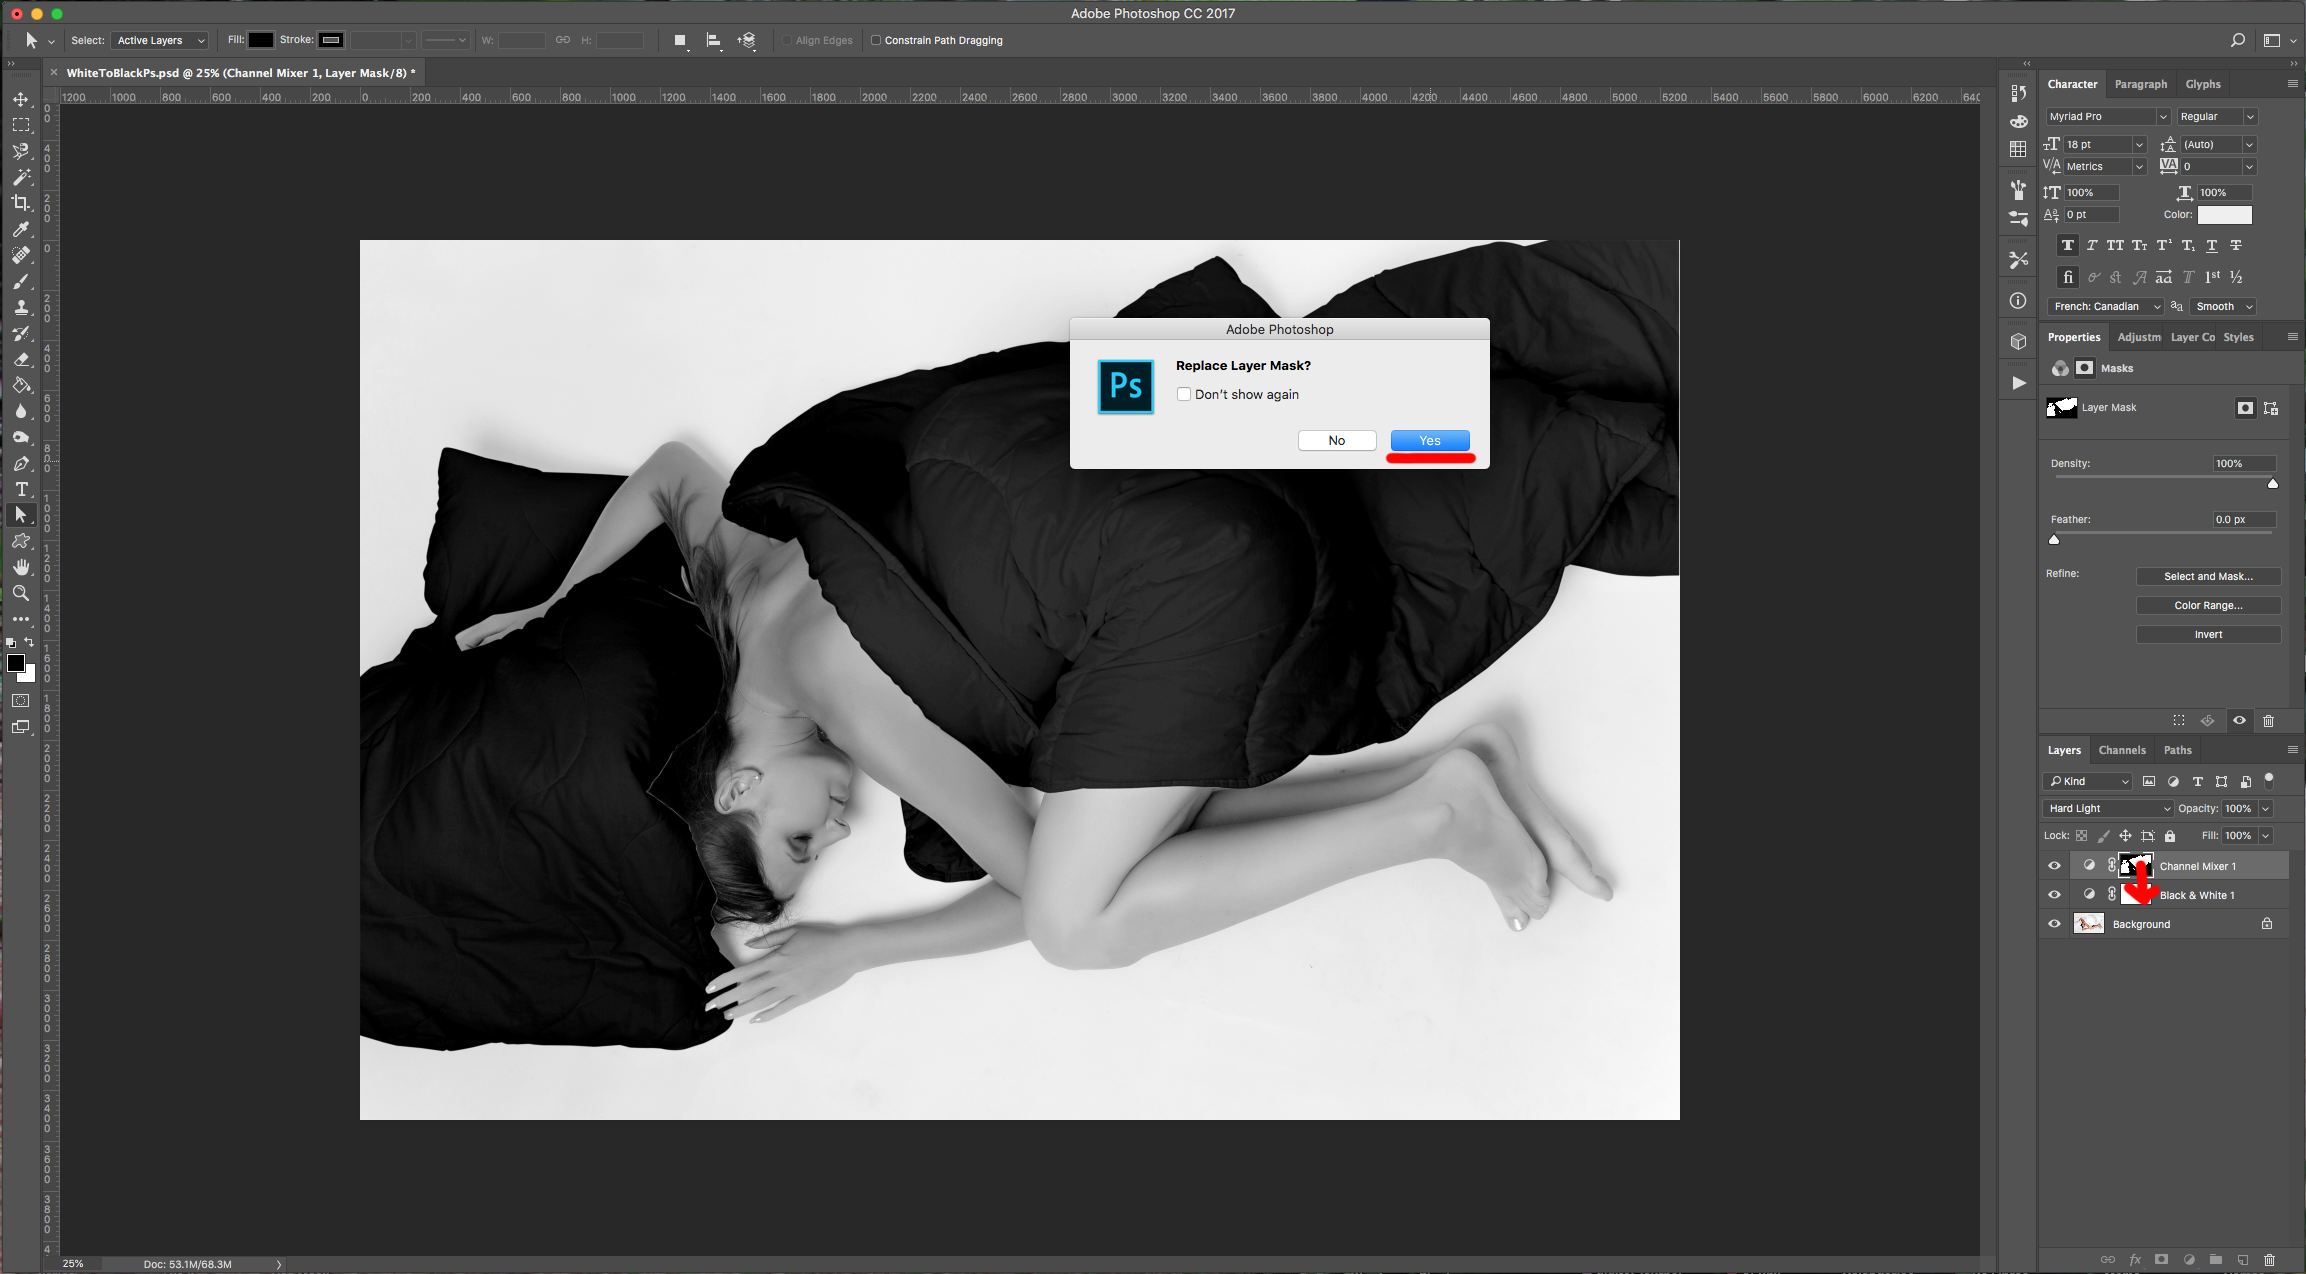
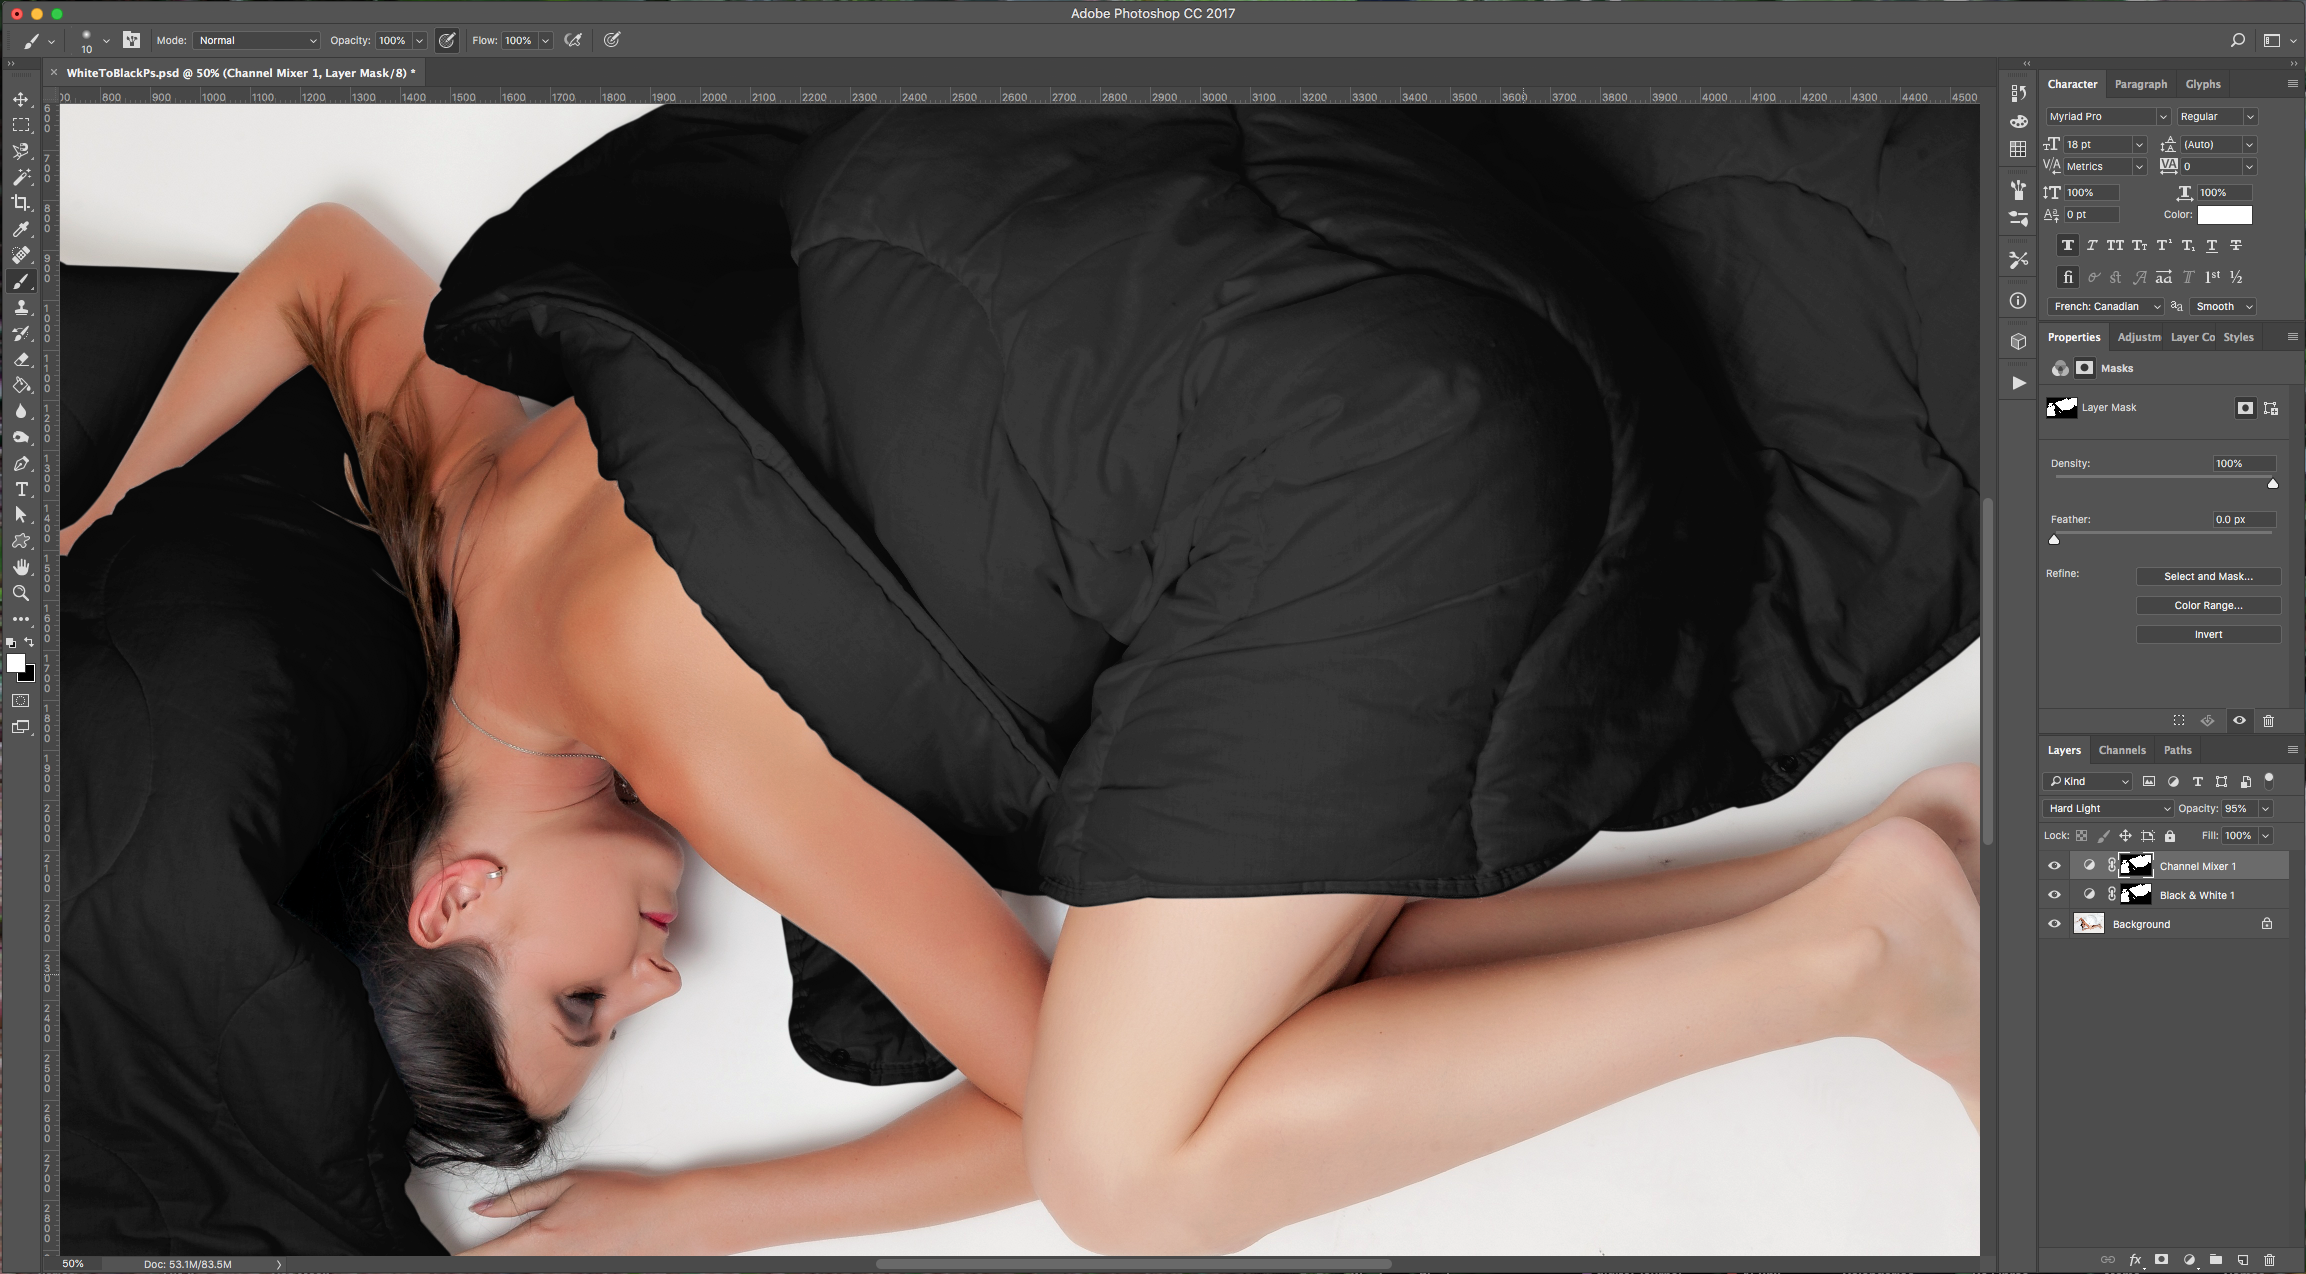
7 - Click “OK” when asked if you want to “Replace Layer Mask”. This will mask only the outlined object and give more depth. Lower the “Opacity” to 95%.

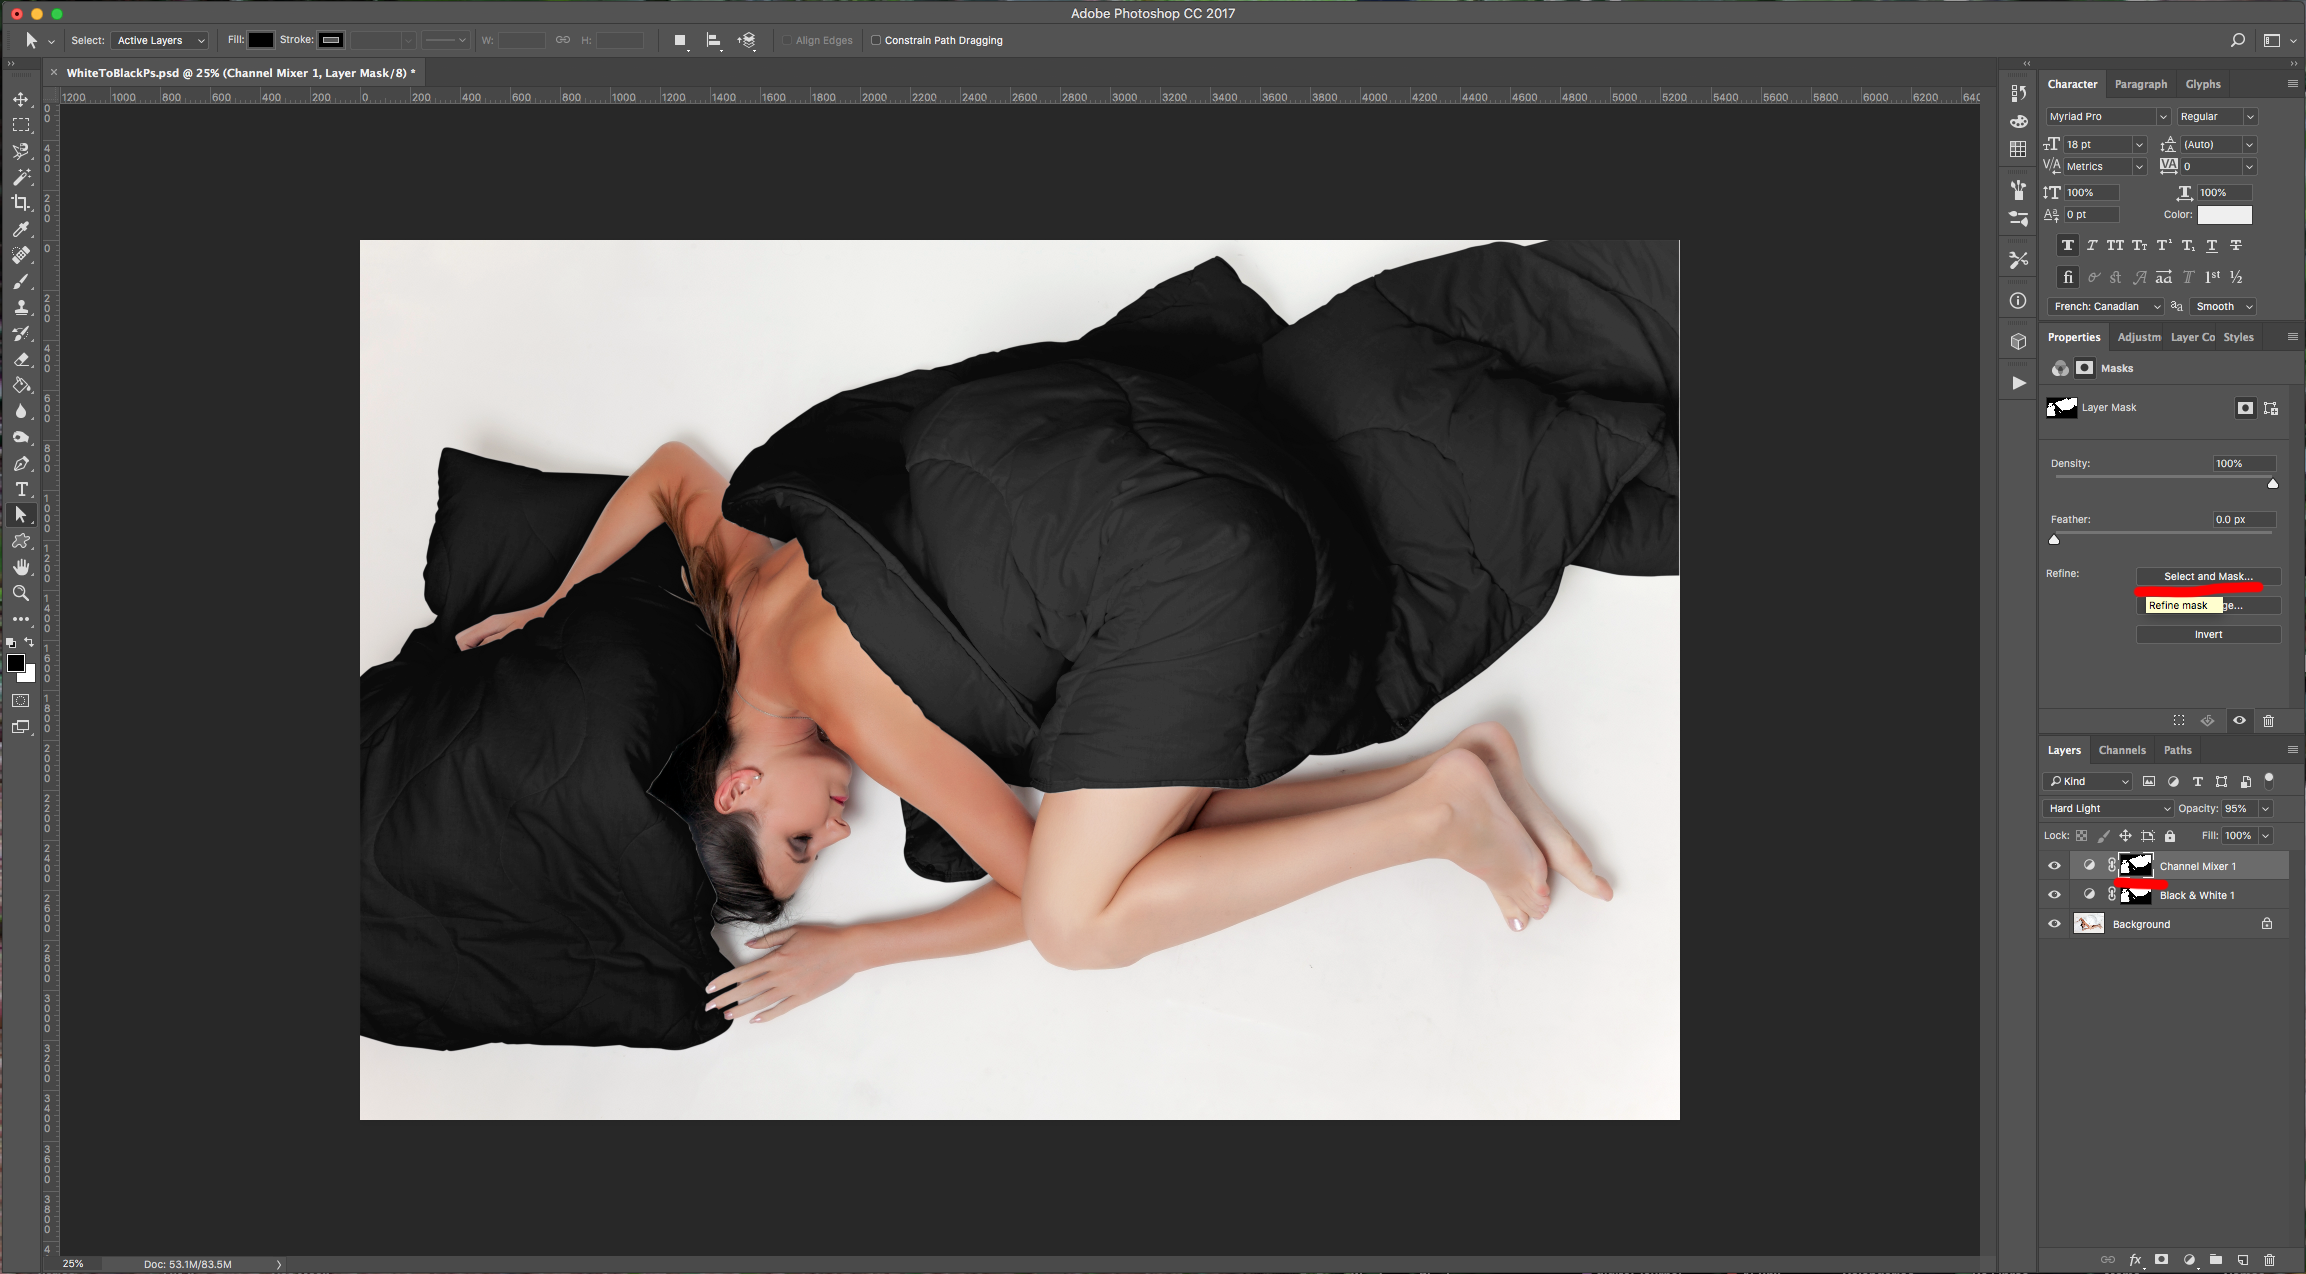
8 - Select the “Channel Mixer Adjustment Layer Mask” and click “Select and Mask” in the “Properties Panel”. Play around with the settings to clean up the edges if needed, then click “OK”.

9 - With the “Mask” Thumbnail still selected, use the “Brush Tool” (B) with a small and medium soft brush (10 px and 50% “Hardness”) and White as “Foreground” color, clean the edges a bit to make them look more natural.
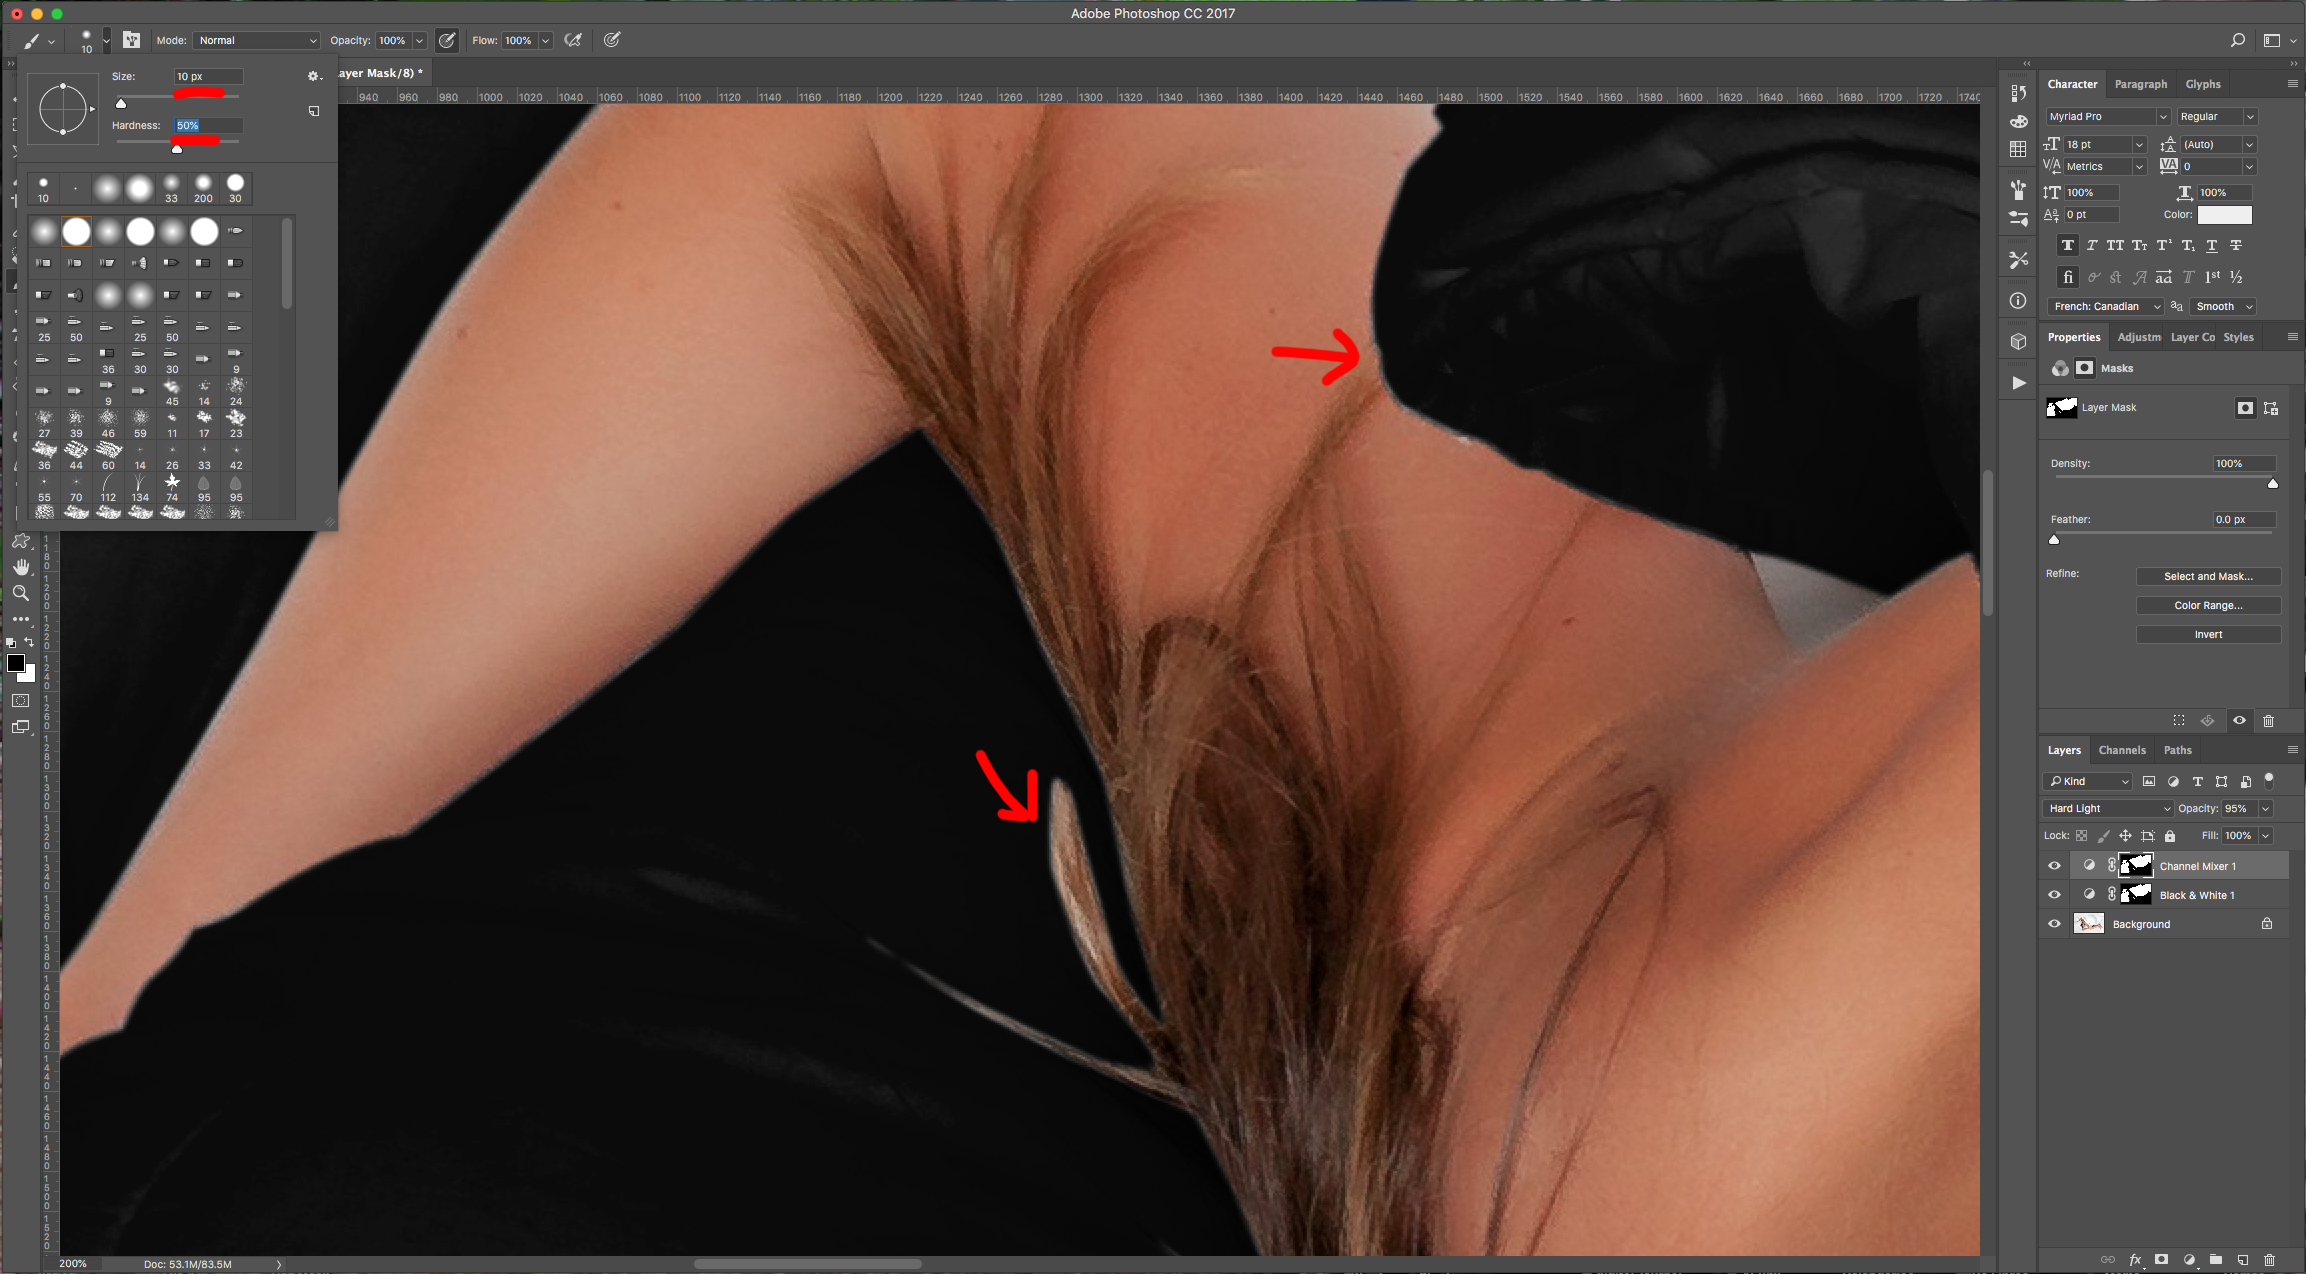
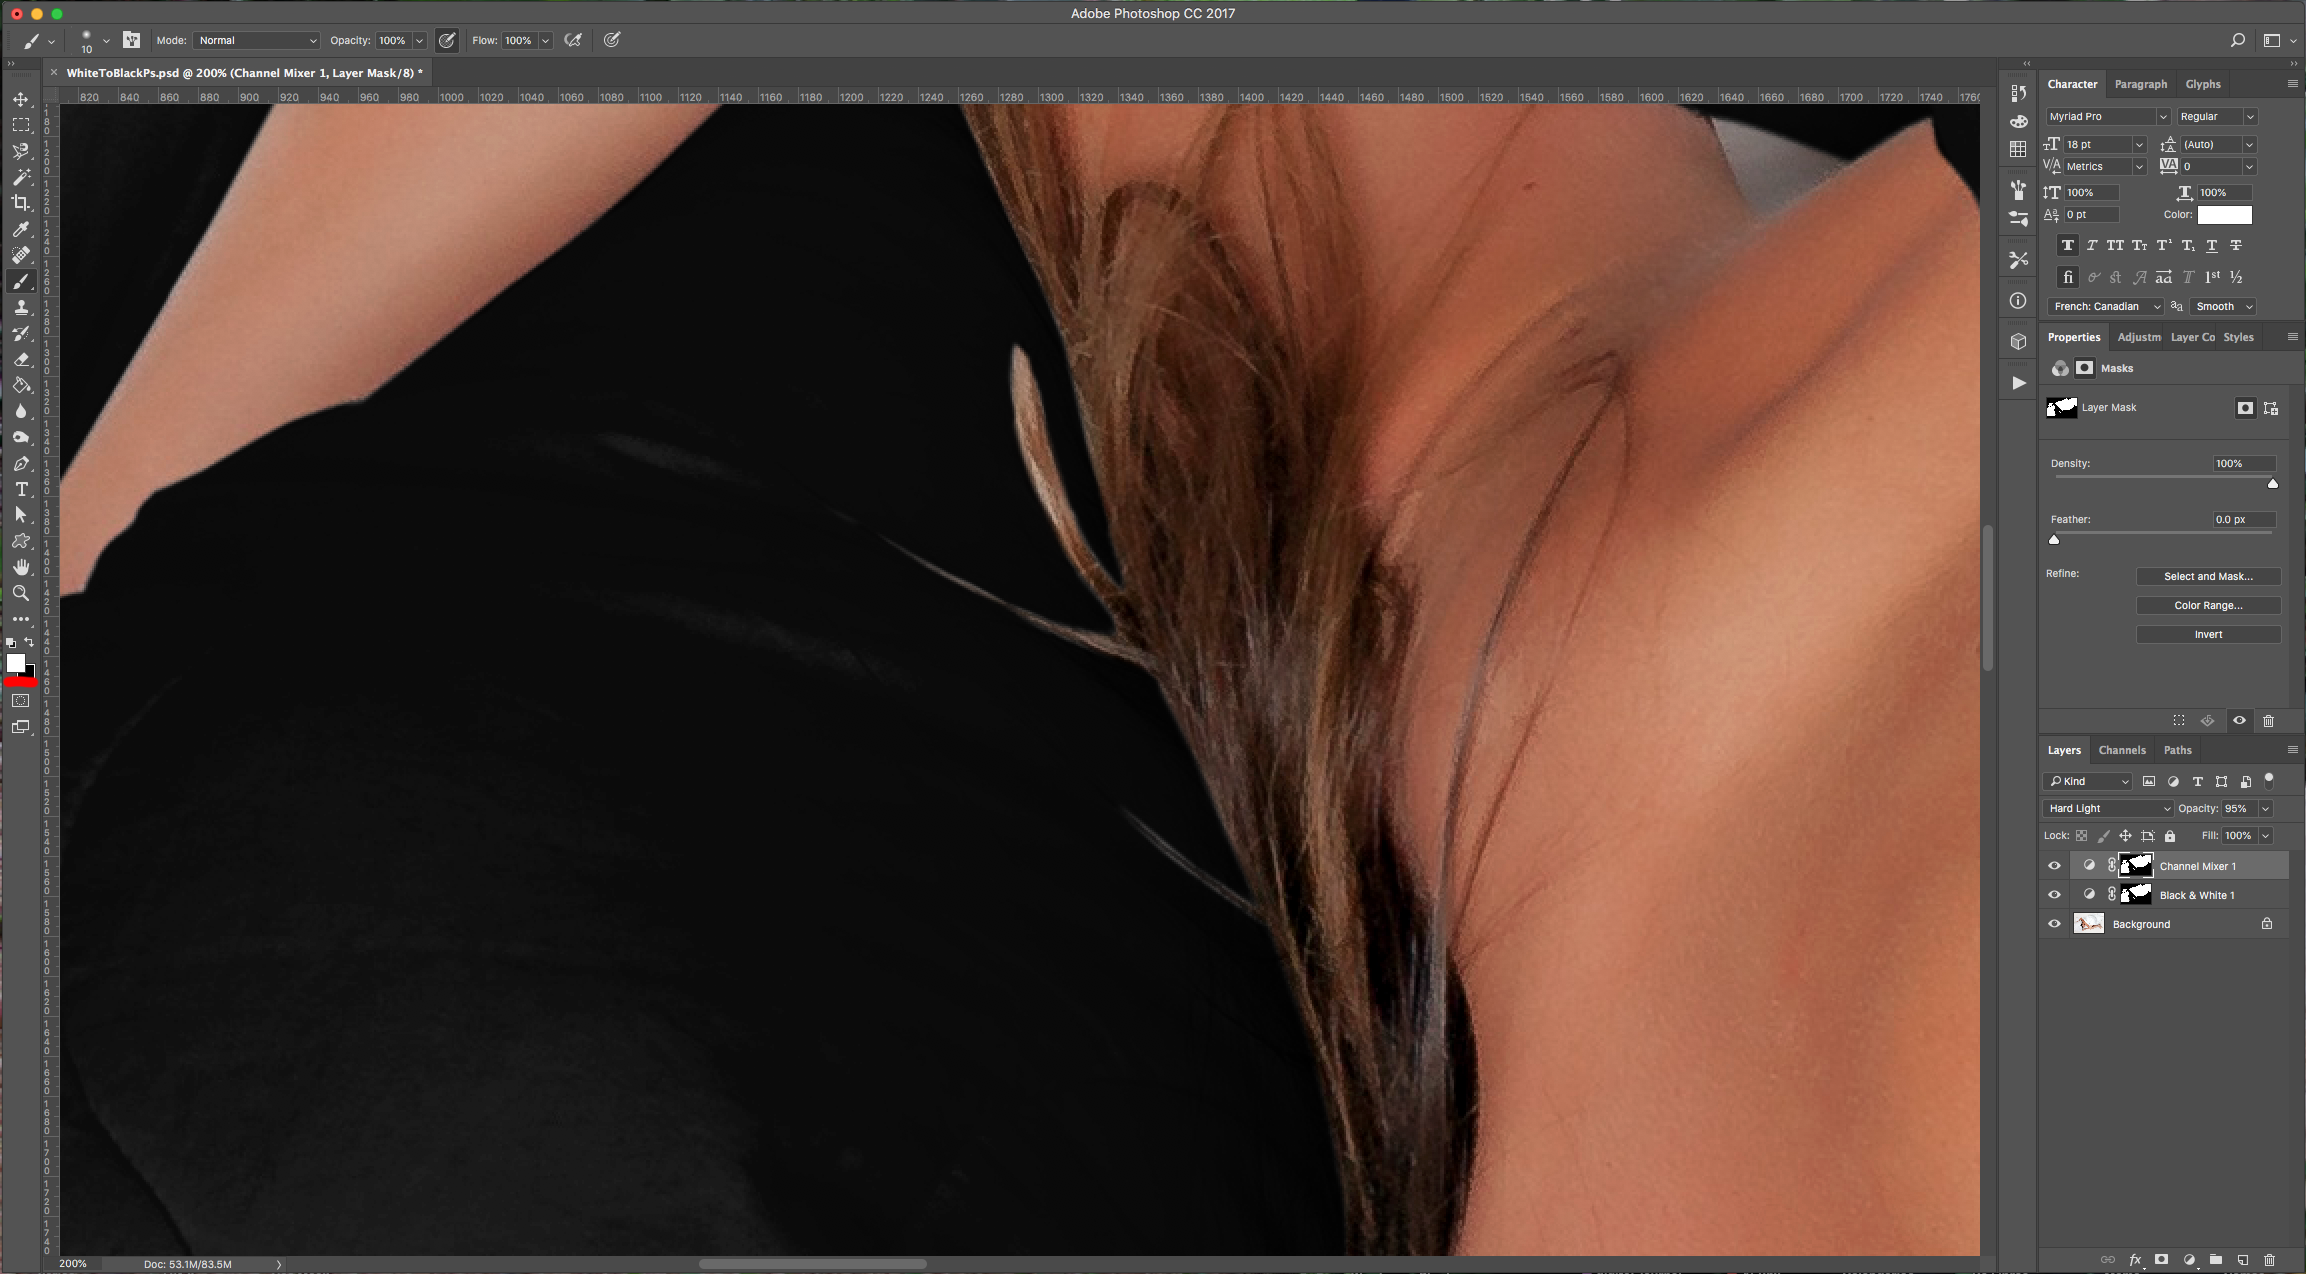
10 - Your image should be similar to this.
1 - In Photoshop, open the image you chose.
2 - Select the “Pen Tool” (P), choose “Path” in Top Menu and start adding “Anchor Points” around the parts of the image you want to outline. To make a curved path click and drag with your cursor and if you want to straighten the next line, hold the “Alt/Option” key and click on the “Anchor Point”. Go back to your starting point to close the Path.
3 - To “Add” to the “Path” without creating a new layer, select “Combine Shapes” in the Top Menu and create the “Paths” you need.
4 - Right-click on top of the “Path” and choose “Make Selection” and use a “Feather Radius” of 1 Pixel. You can always “Save” your path in the “Paths” Panel to use it in case you make a mistake.
5 - Create a “New Channel Mixer Adjustment Layer” in the “Adjustments Panel”, choose “Gray” as “Output Channel” and fiddle with the levers until you get a Black shade with good contrast and highlights . Change the “Blending Mode” to “Hard Light”.
6 - Select your “Background” Layer, then go to the “Adjustments Panel” and create a “New Black and White Adjustment Layer”. Hold the “Alt/Option” key while dragging the “Mask” of the “Channel Mixer Adjustment Layer” onto the “Mask” of the “Black and White Adjustment Layer”.
7 - Click “OK” when asked if you want to “Replace Layer Mask”. This will mask only the outlined object and give more depth. Lower the “Opacity” to 95%.
8 - Select the “Channel Mixer Adjustment Layer Mask” and click “Select and Mask” in the “Properties Panel”. Play around with the settings to clean up the edges if needed, then click “OK”.
9 - With the “Mask” Thumbnail still selected, use the “Brush Tool” (B) with a small and medium soft brush (10 px and 50% “Hardness”) and White as “Foreground” color, clean the edges a bit to make them look more natural.
10 - Your image should be similar to this.
by @lornacane


