
How to Add Embossing Effect to Cookie Cutter Using a SVG file In Silhouette Alta 3D Printer Software
In only 4 steps, discover how to make an embossed cookie cutter with the Silhouette Alta 3D printer.
Do you want to learn how to make cookie embossers with your Silhouette Alt 3D Printer? Then we have a sweet tutorial for you. Use a SVG file to create a cookie cutter with Silhouette Studio and the Alta software. So let’s get started.
We will be using a mermaid tail SVG for this tutorial. There are tons of Summer SVGs to choose from on Design Bundles! You can use the Free Edition of Silhouette Studio to edit your SVG design.
Step 1 - Edit the SVG in Silhouette Studio
Before we can use the SVG, we need to edit it first so we can create a cookie cutter. Begin by opening Silhouette Studio.
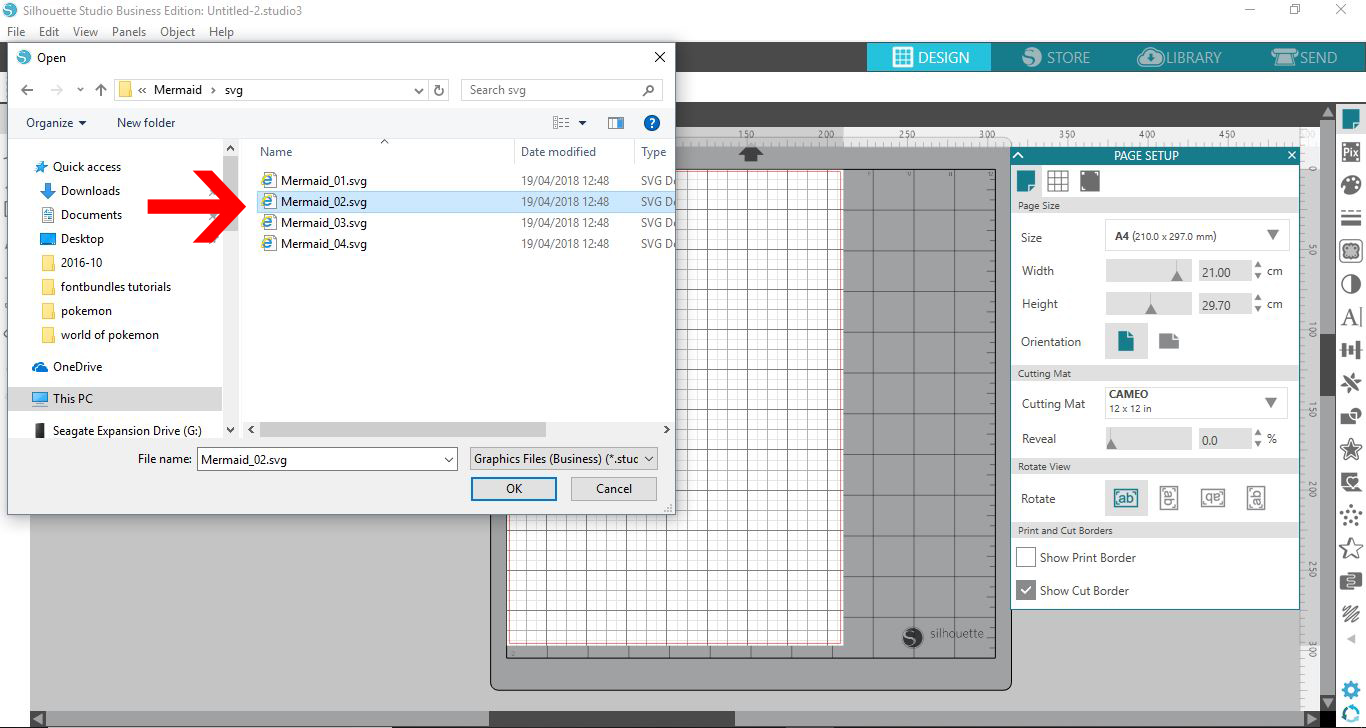
Open your SVG file. You can do this by clicking on the Folder icon in the top toolbar or going to File > Open.
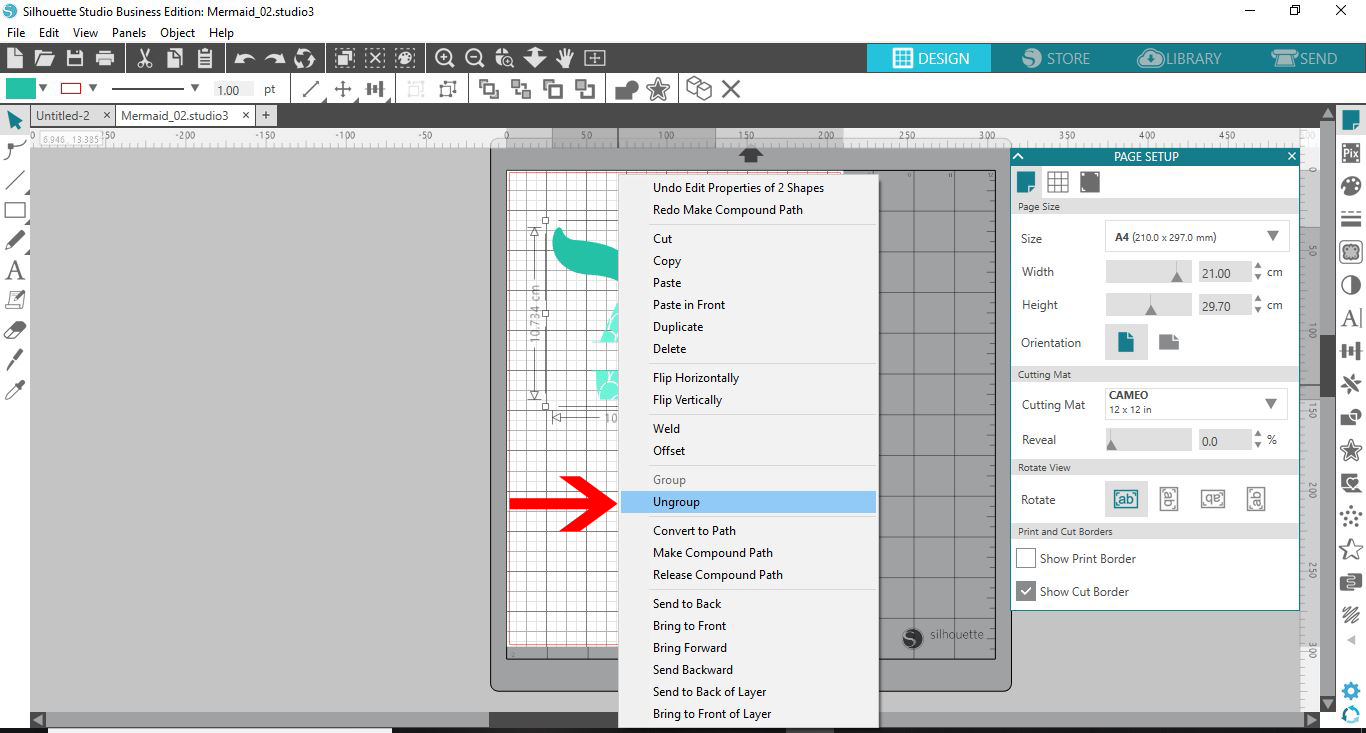
Once opened, we need to ungroup the design by right clicking > Ungroup.
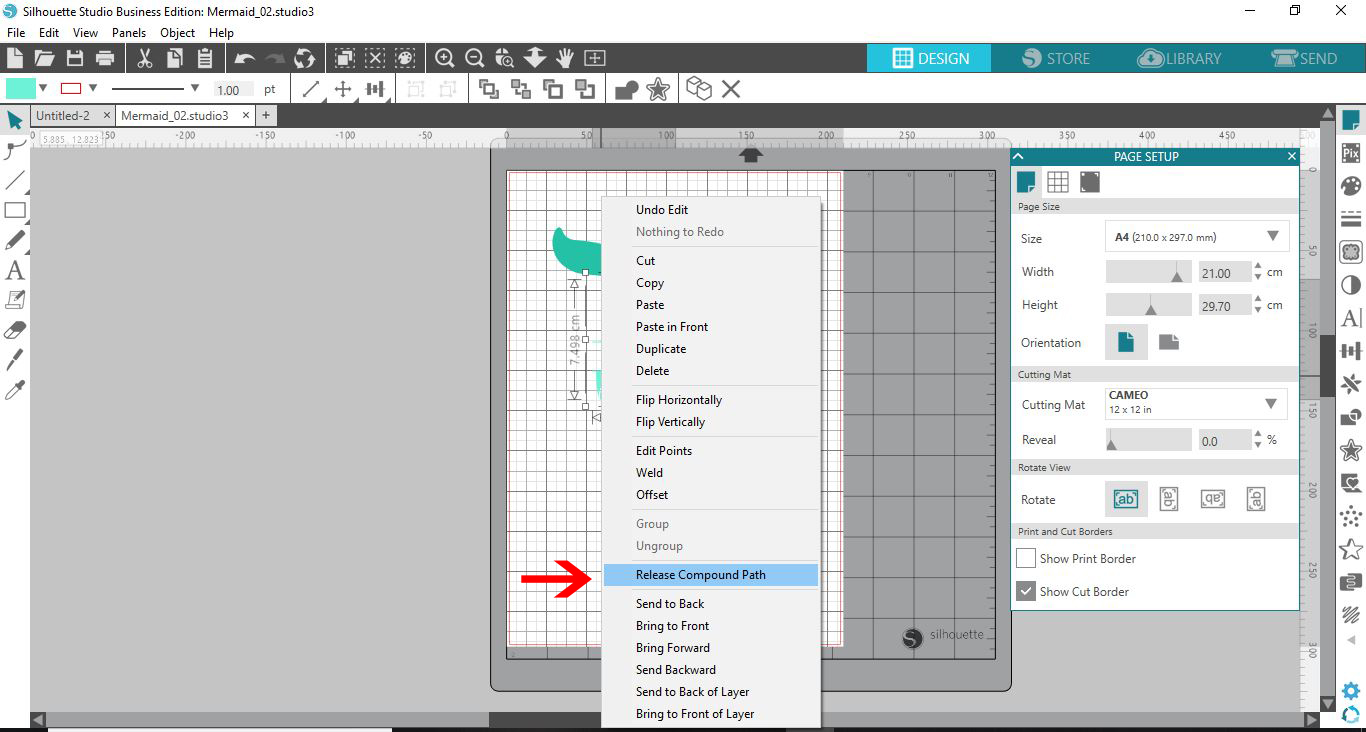
Once again, right click and select Release Compound Path. We do this in case we want to remove parts of the design that are not needed.
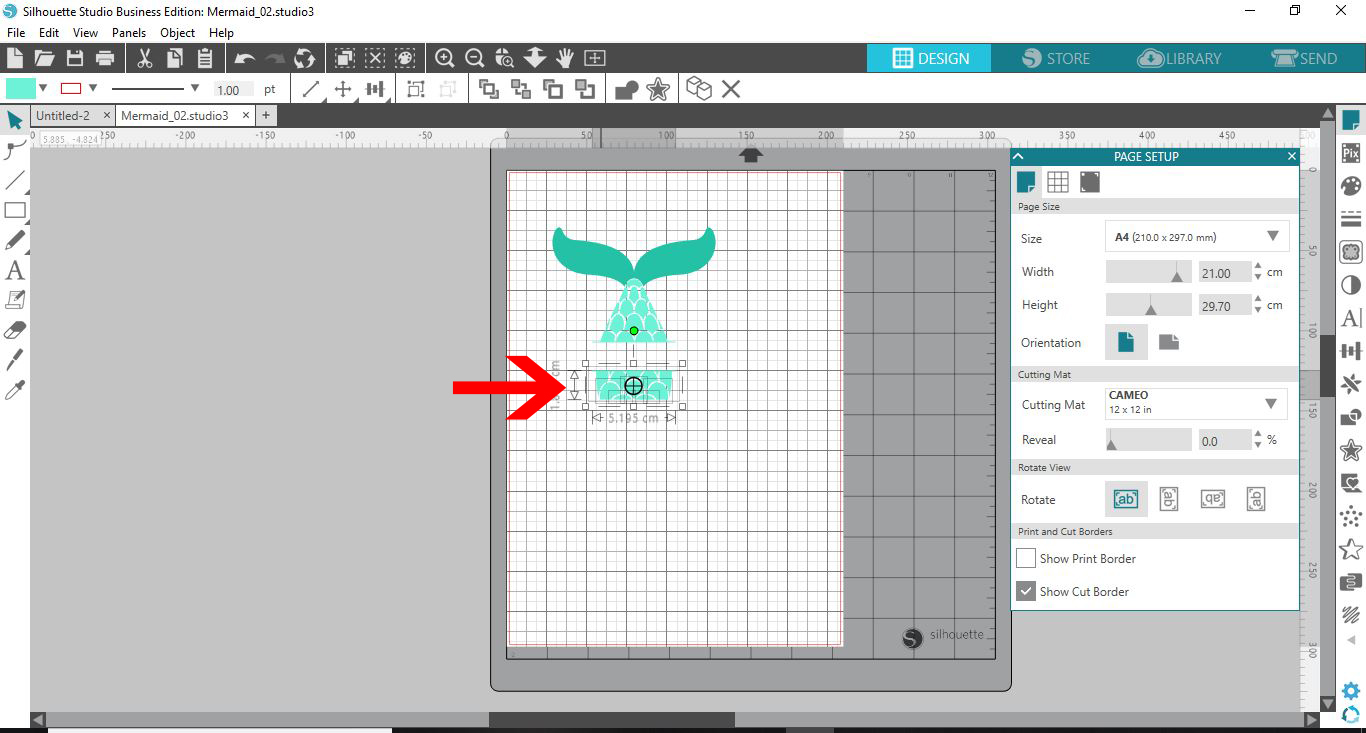
Go ahead and remove any unwanted parts. The design we are using is a monogram, so we removed the lower area.
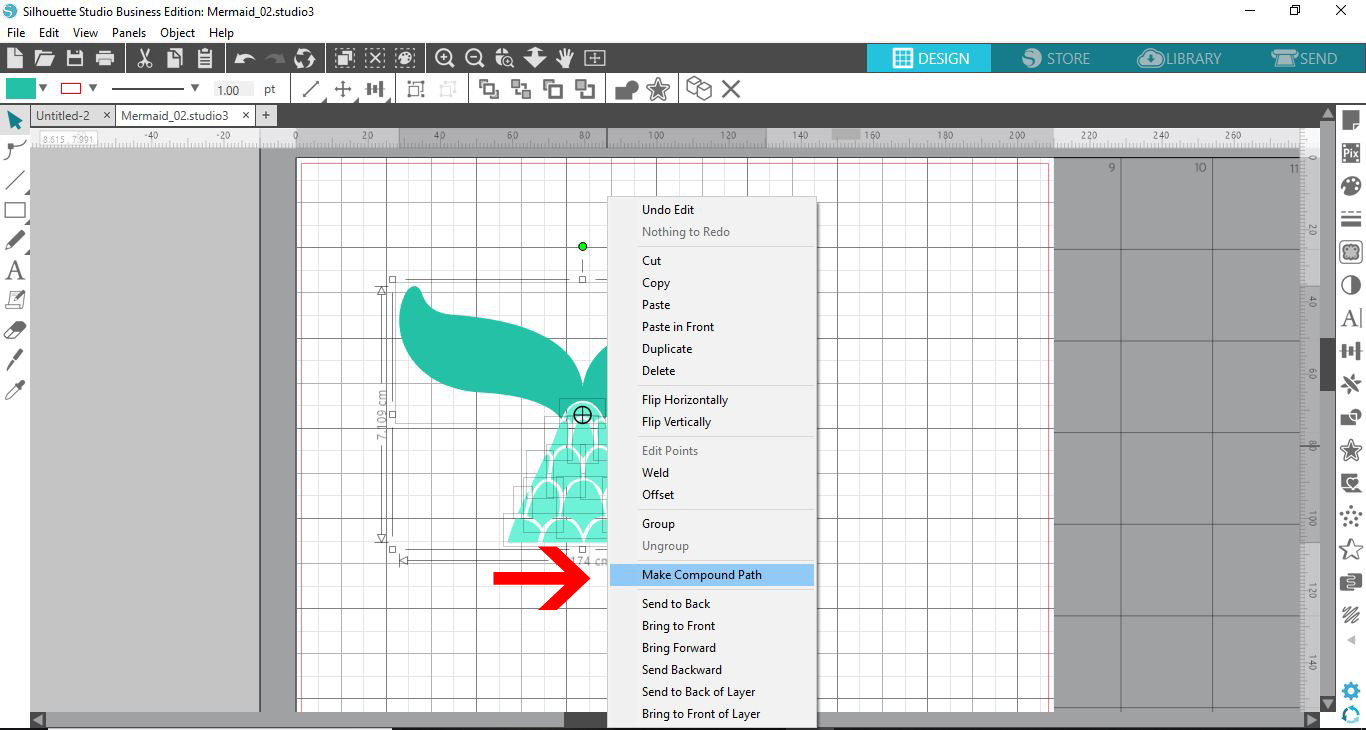
When you are done editing, you need to create a compound path. Right click > Make CompoundPath. This will create a single object from the design.
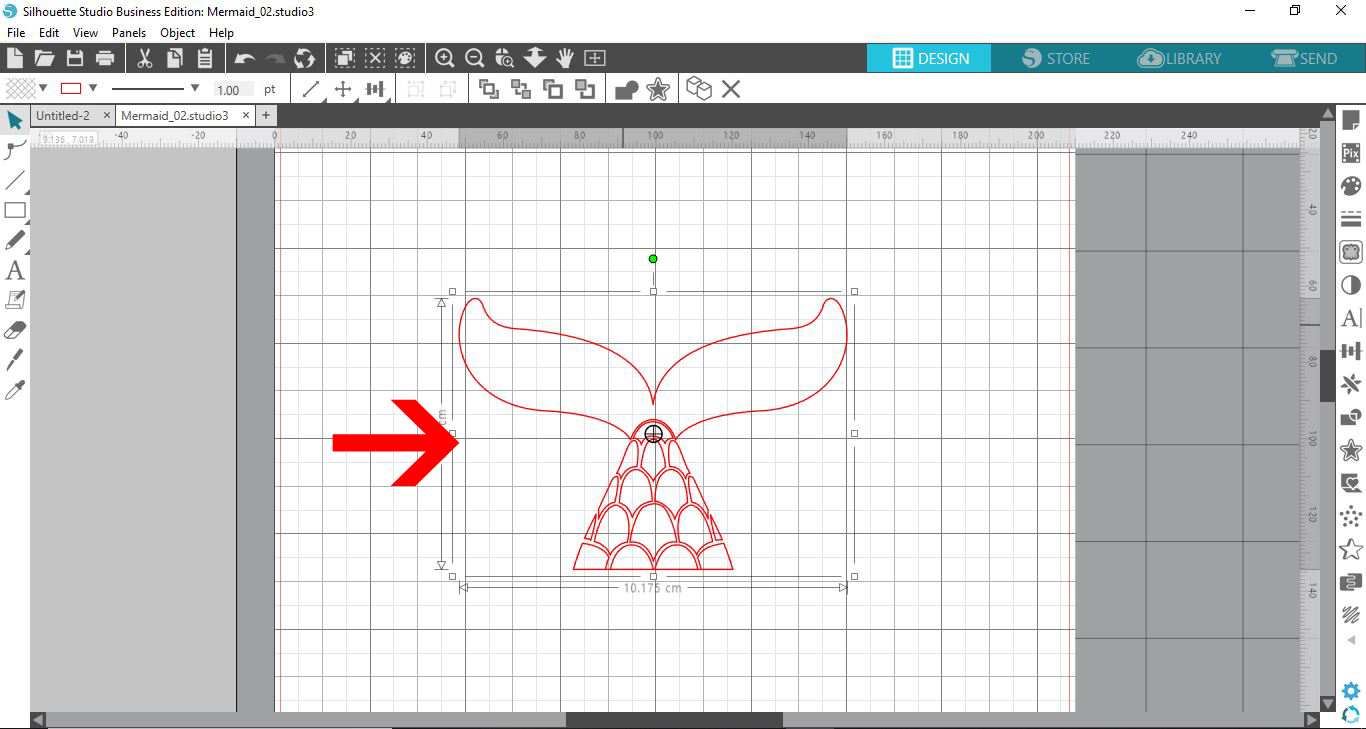
To clearly see the cut lines, we need to remove the Fill. You can do this by using the Fill Panel on the right side toolbar. Alternatively, click on the Color Picker box in the top toolbar then select the hatch box.
We have a helpful tutorial on using the Advanced Color settings if needed.
You can also change the line color to red if it isn’t already. This is found next to the Color Picker box.

This is how your design should look now.
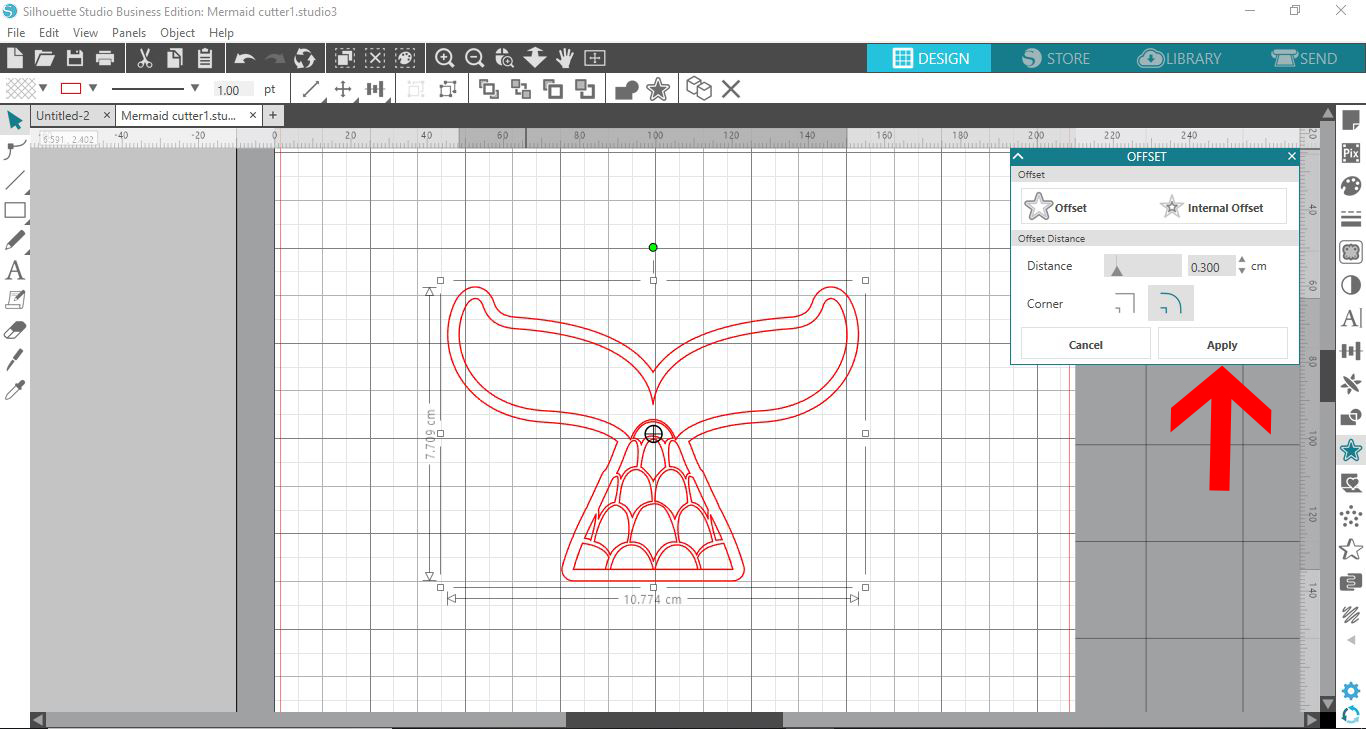
Step 2 - Create an Offset in Silhouette Studio
The design will be the embossed area for the cookie cutter. We need to create an offset for the side that will cut into the cookie dough. Open the Offset panel on the right side toolbar.
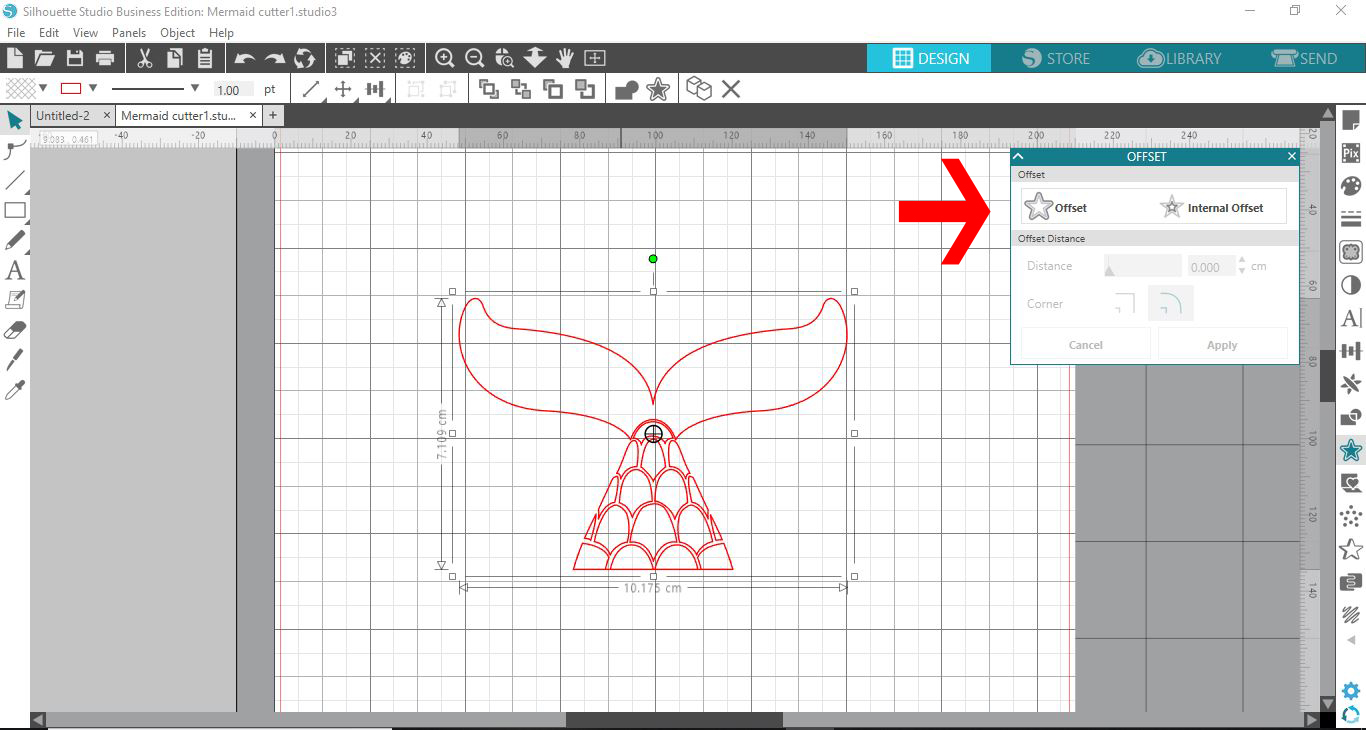
Create an offset according to how high you want the side of the cookie cutter to be.
Step 3 - Save the File in Silhouette Studio
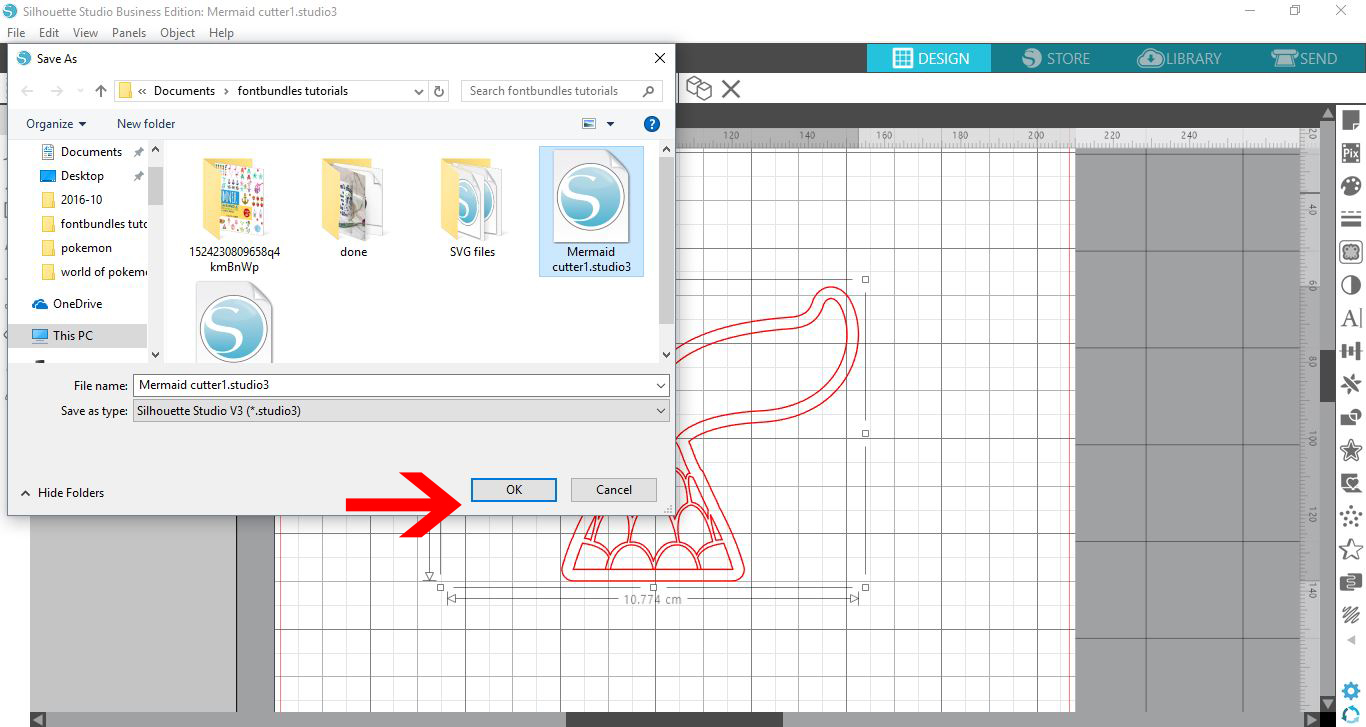
Select the entire design with the offset by using the Move Tool or Edit > Select All. Now, right click > Group. Then, go to File > Save As to save to your hard drive.
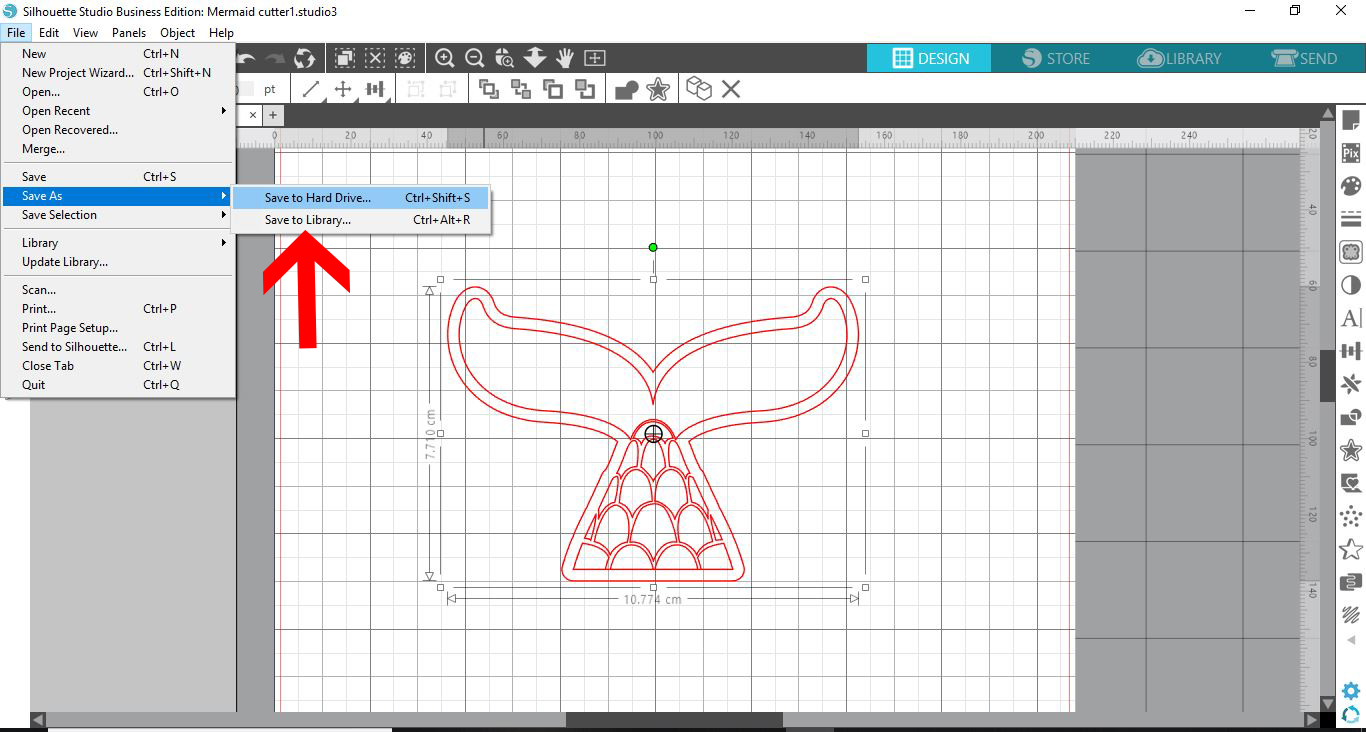
Give your file a name, choose a location and save in the Silhouette Studio file format.
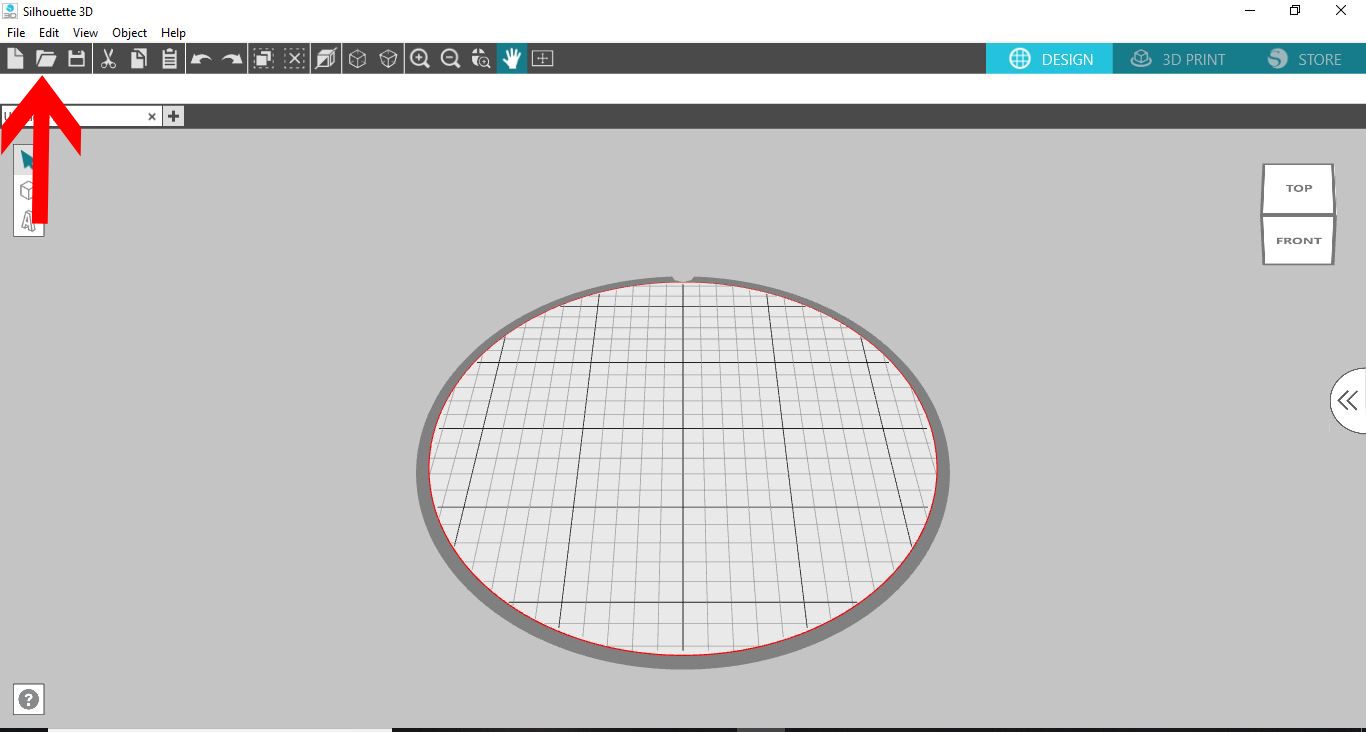
Step 4 - Print the Cookie Cutter
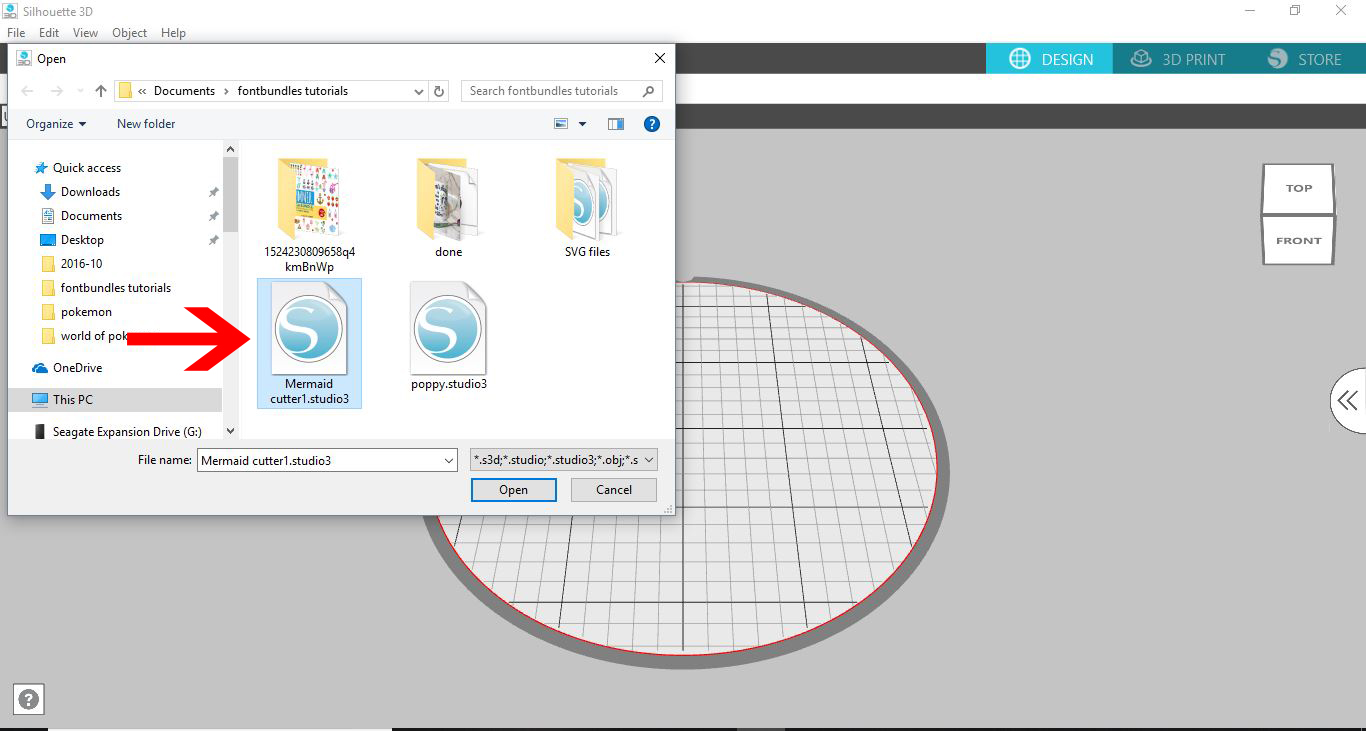
Open the 3D Alta software, then click on the Folder icon in the top toolbar.
Select the Silhouette Studio file you saved in Step 3.
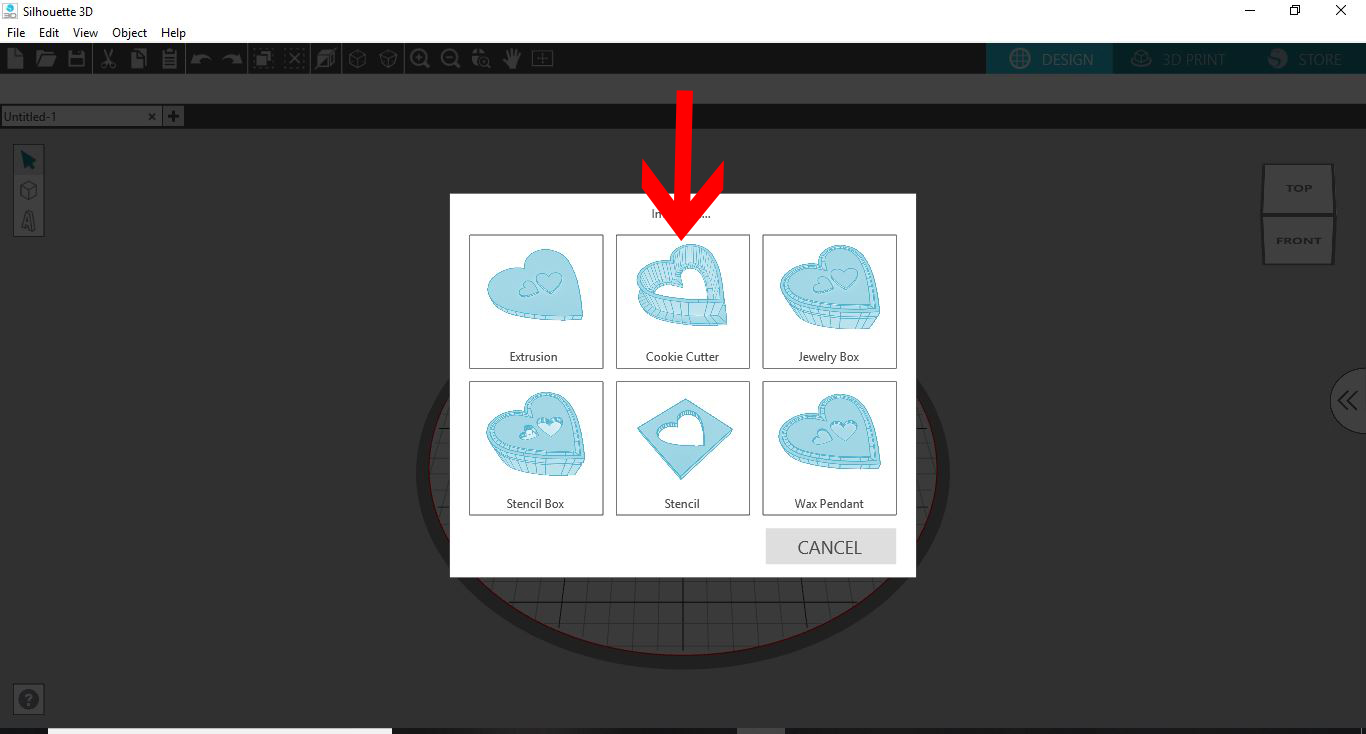
In the new window that appears, select the Cookie Cutter option.
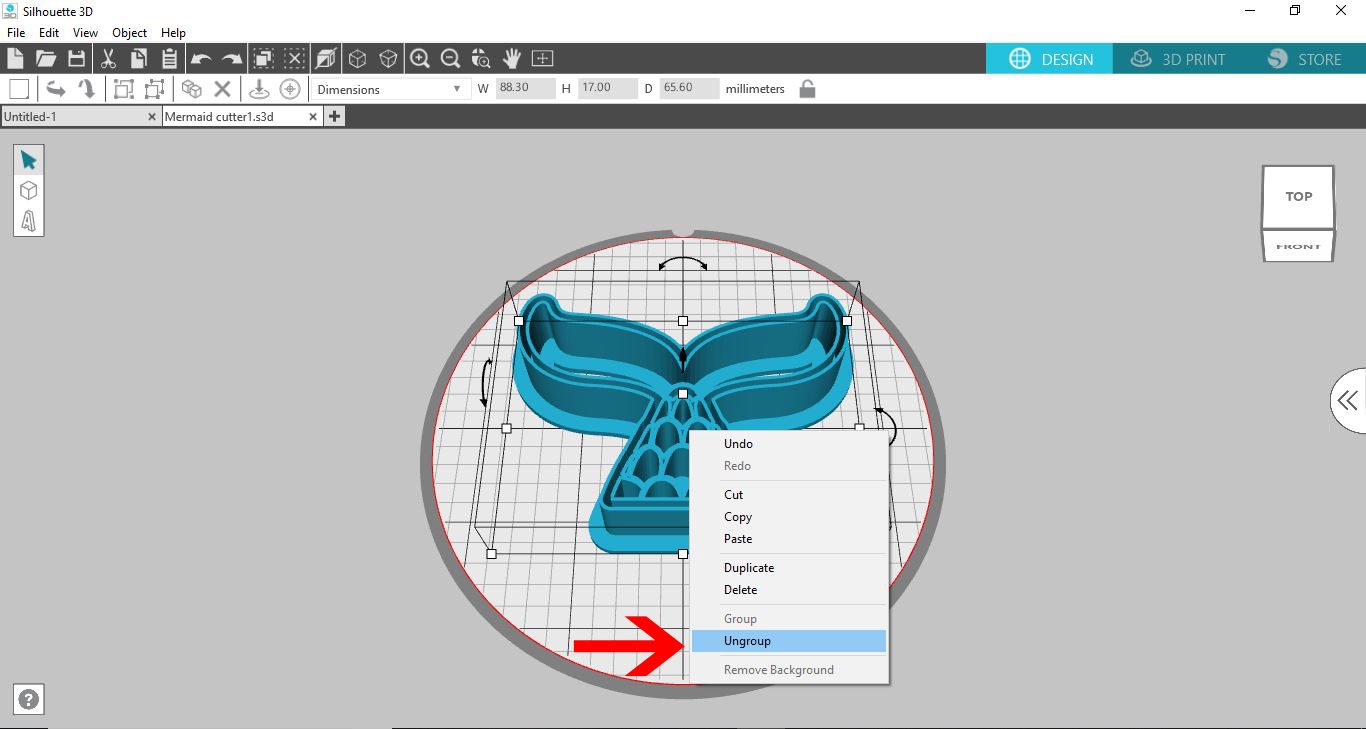
While your design will show as a Cookie Cutter, all parts are still the same height. So, if you try to print this, you will end up with many small pieces.
In order to create the embossed part, we will need to lower the pattern on the inside. To do this right click > Ungroup.
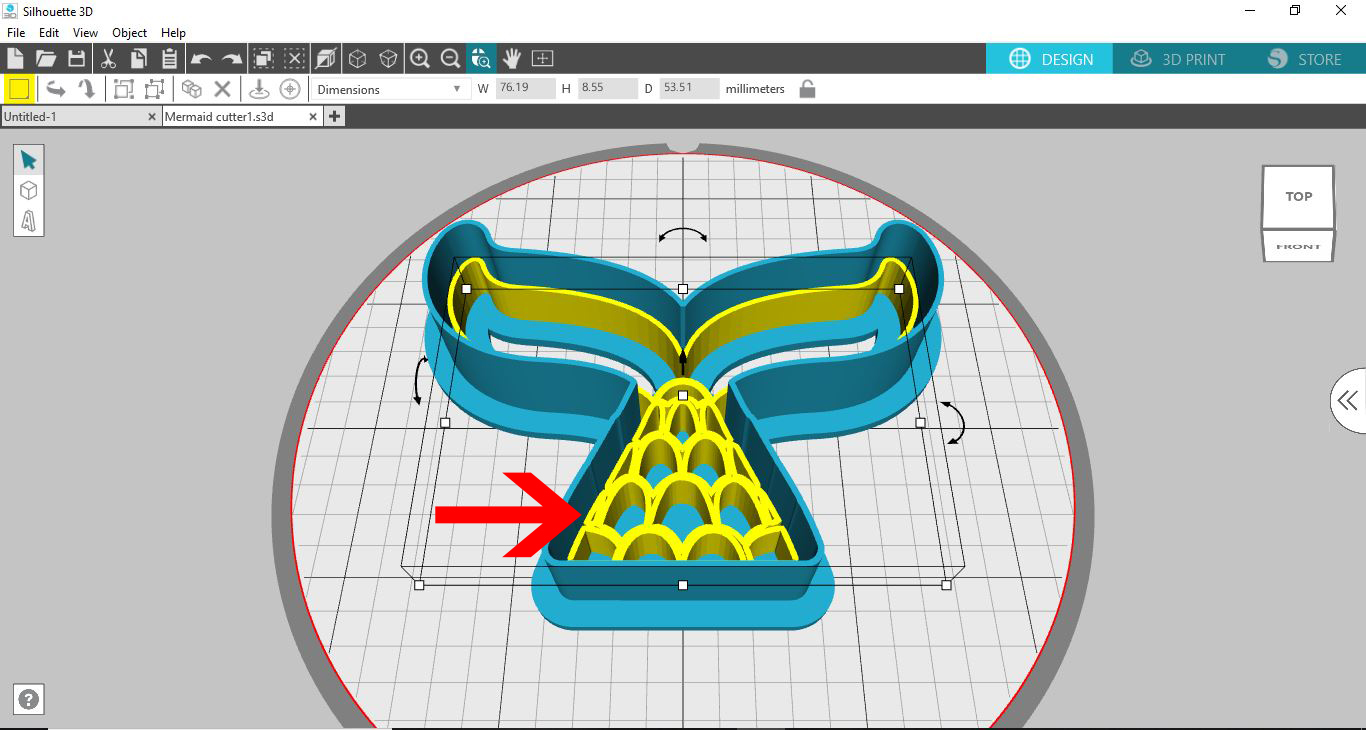
We have highlighted the inner design in yellow so you can better see what we are doing. You don’t need to do this, it is merely a visual guide.
Select the inner pattern, then lower to half the height of the outer part of the cutter. This will ensure that the inner pattern will emboss instead of cut.
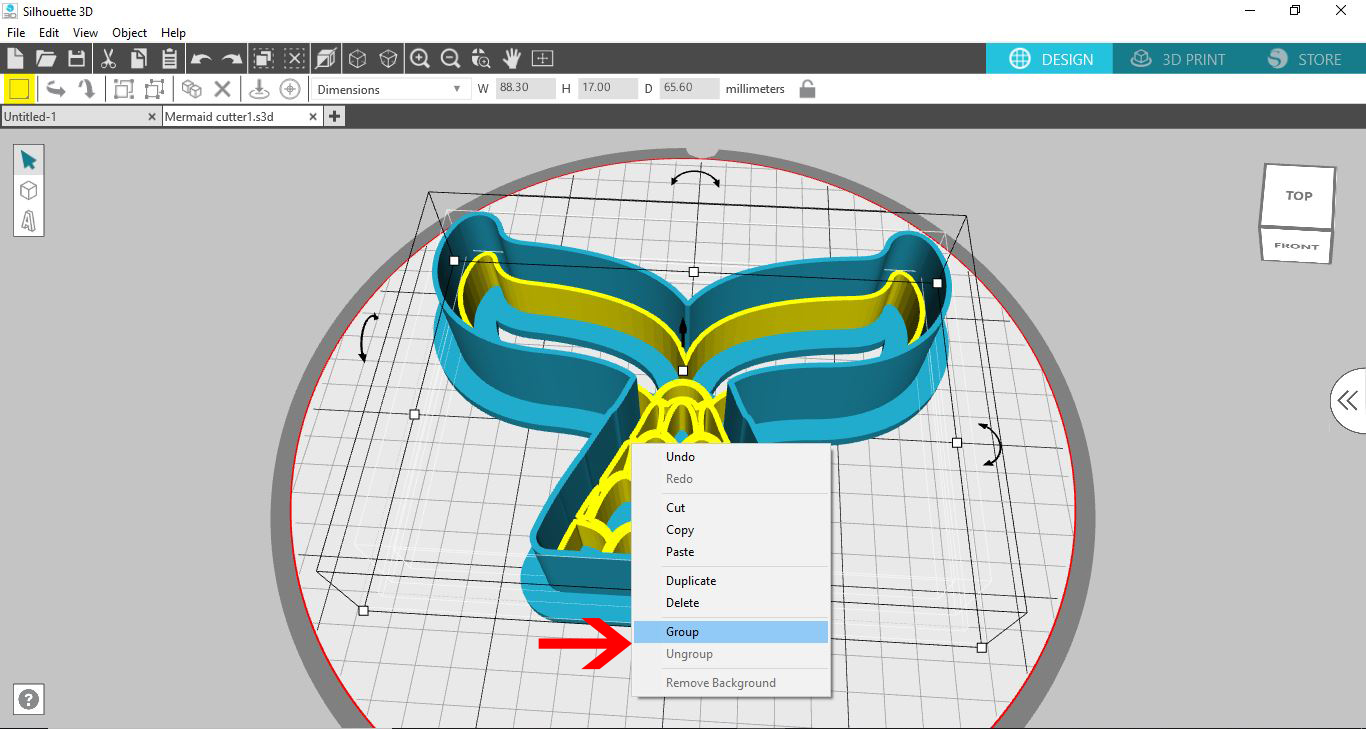
When you are happy with the height, select the entire design then right click > Group. The design will now be one object.
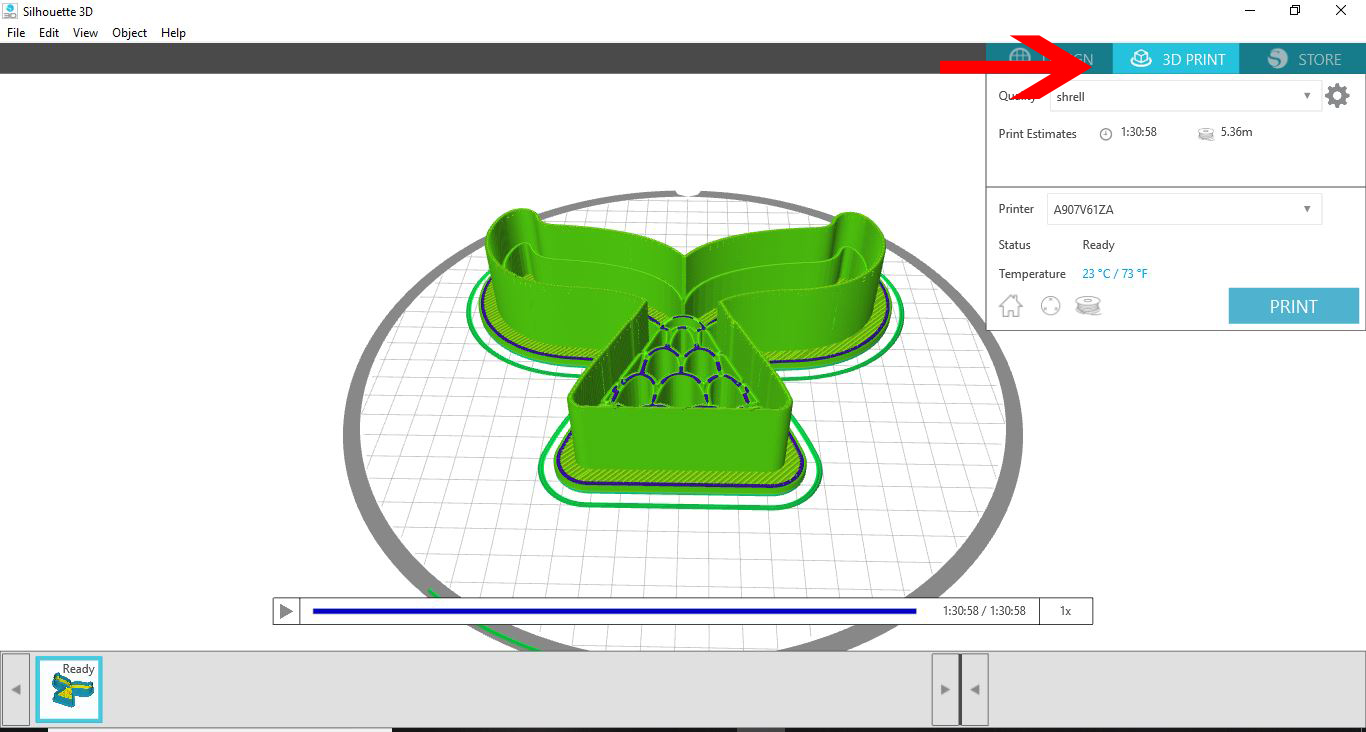
Click on the 3D Print icon top right, adjust your print settings then click Print.
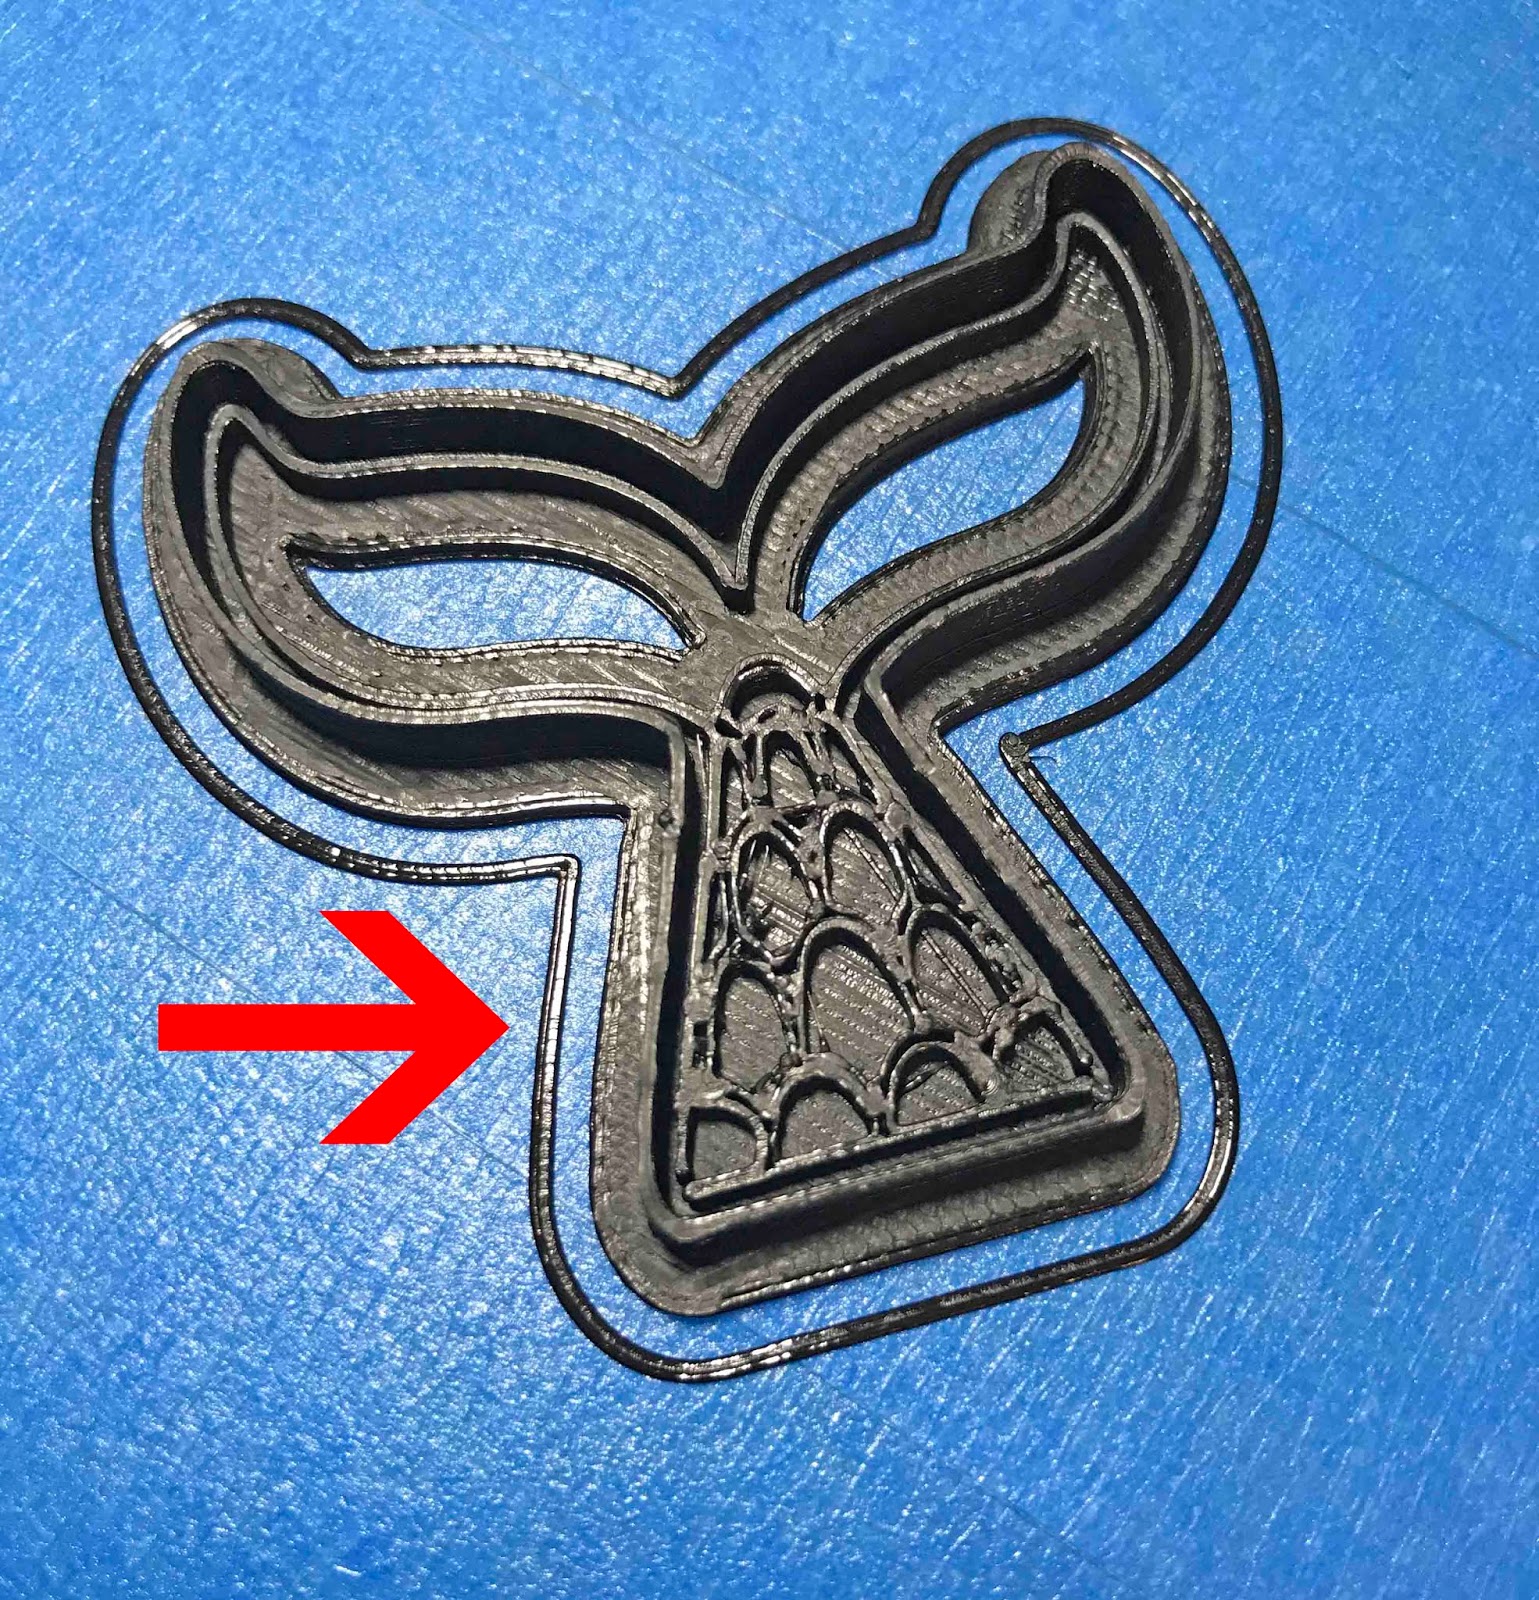
Your completed print will have a brim. Remove this then detach the embossed Cookie Cutter.
Enjoy using your new Cookie Cutter. Dip your cutter in flour before using it to help make a clean cut. Then, use a rolling pin over the cutter to emboss the design evenly. How cute are these?
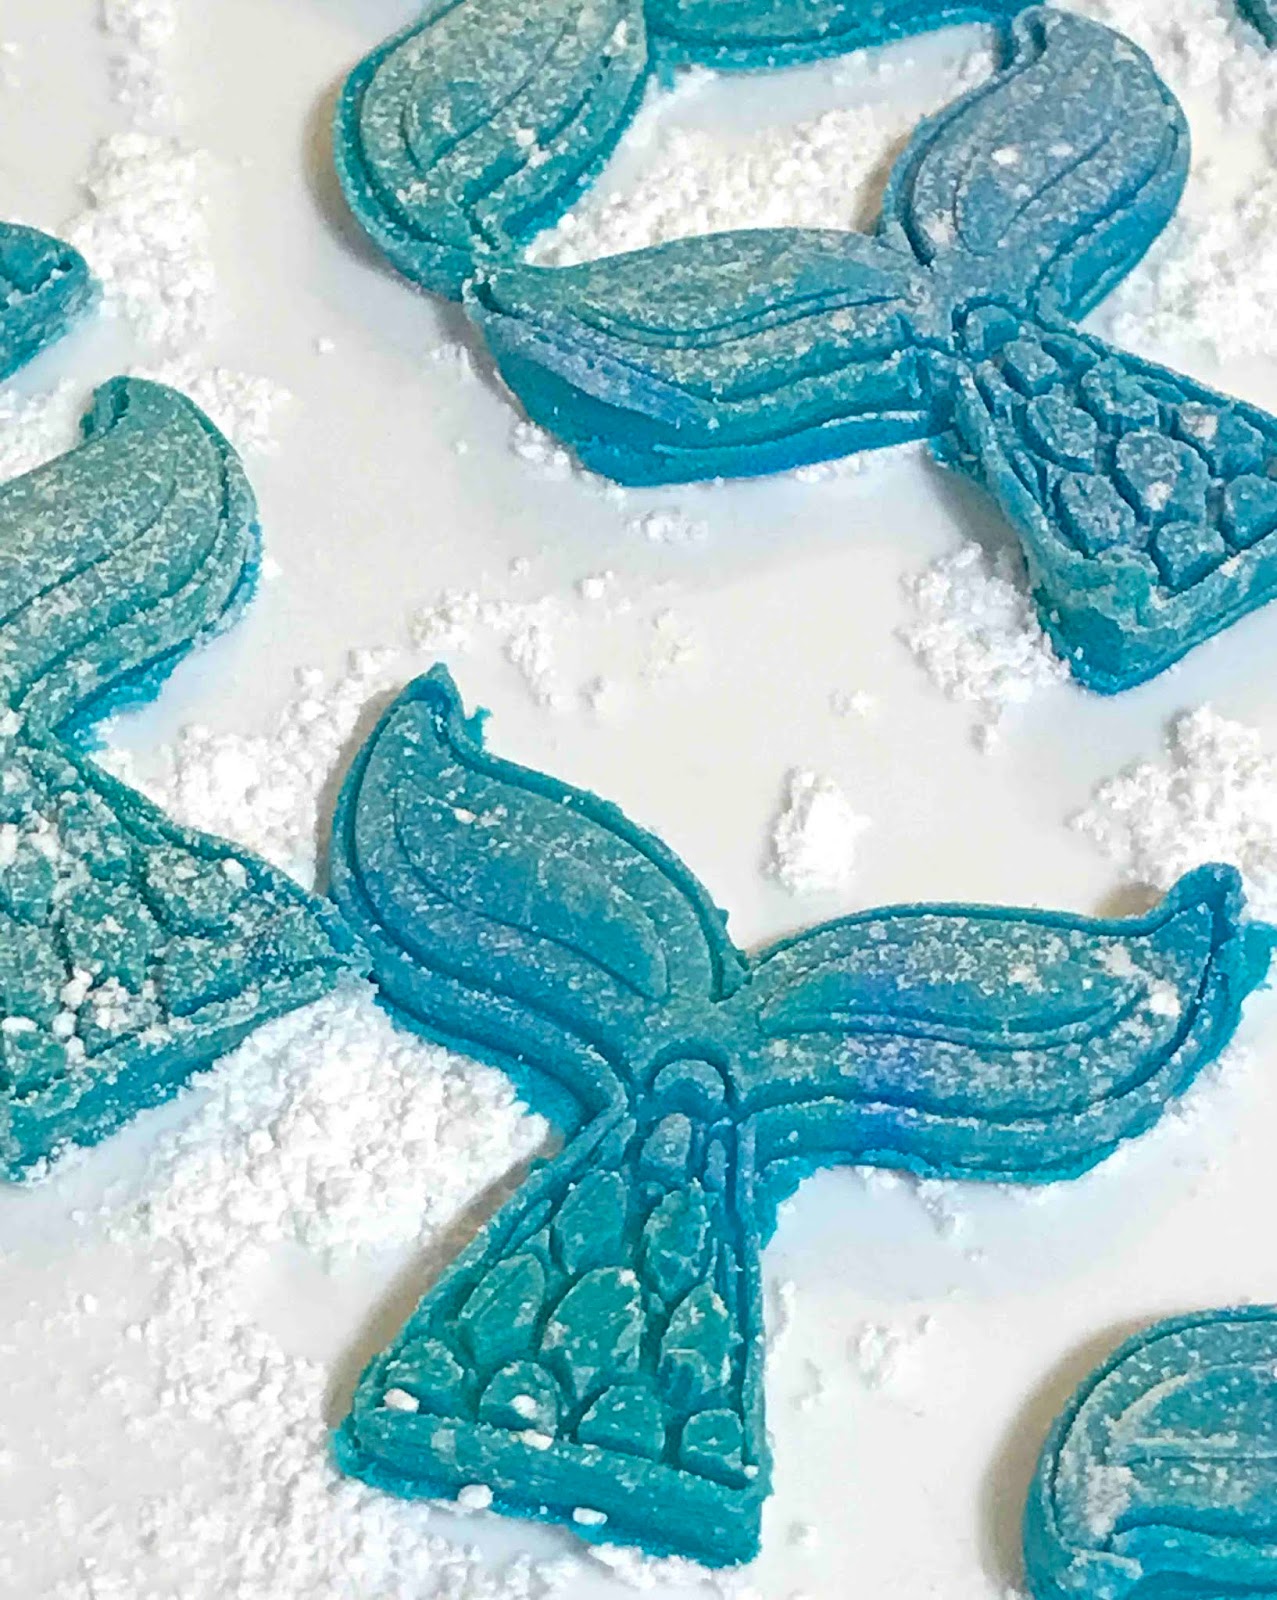
If making cookies, add some icing for a finished touch. Fondant, like below, can be dried out and used as sweet cake toppers.

Well done! You have just learned how to make cookie embossers with your Silhouette Alta printer. There are so many SVG designs you can use to create fun baking tools. We hope that you enjoyed following this tutorial and love your new cookie cutter as much as we do.


