Unlimited Downloads 15% off Marketplace Purchases Exclusive Software Access Unlimited Downloads
15% off Marketplace Purchases
Exclusive Software Access
Go Unlimited Maybe Later
How to Use a DXF file in the Silhouette Alta 3D software
  • By Design Bundles
  • 25 Oct 2018
  • 3 Mins
  • Silhouette Tutorials

How to Use a DXF file in the Silhouette Alta 3D software

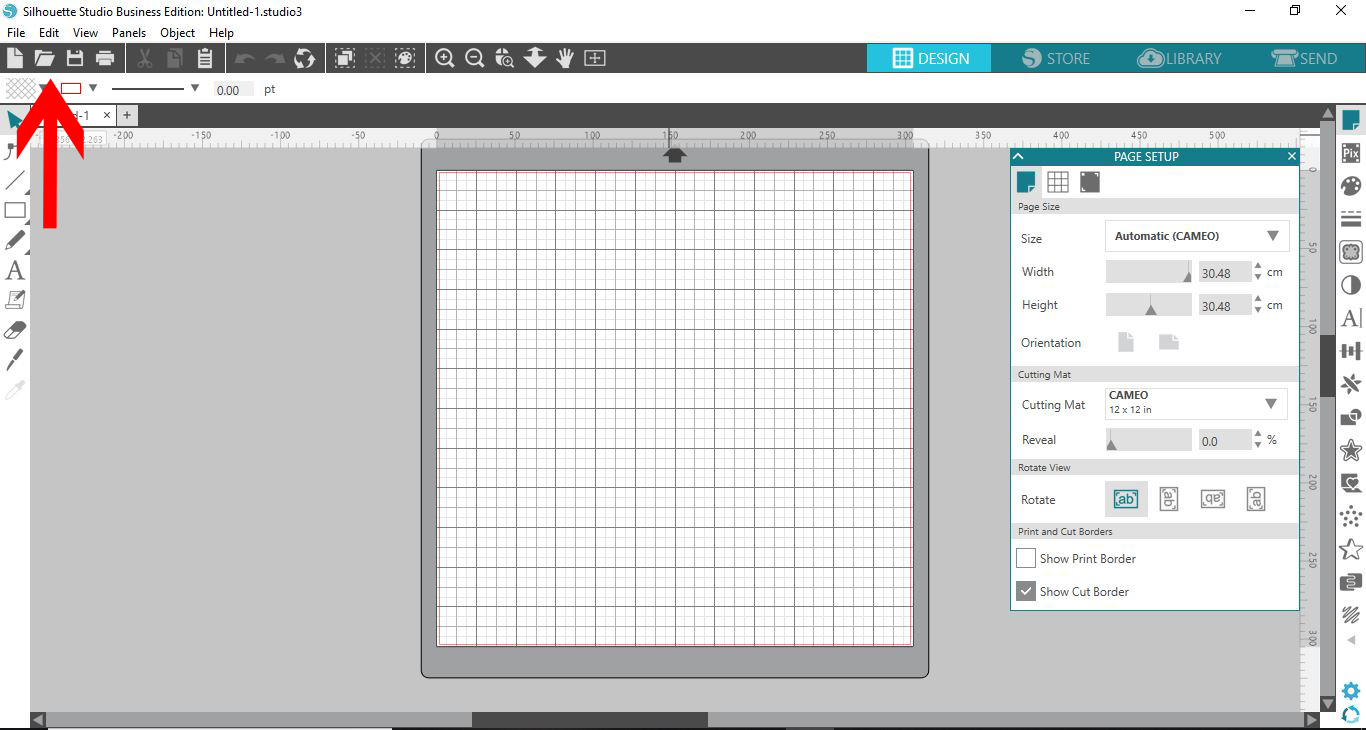
1- Open up Silhouette Studio software (Business Edition). Click on the open folder.

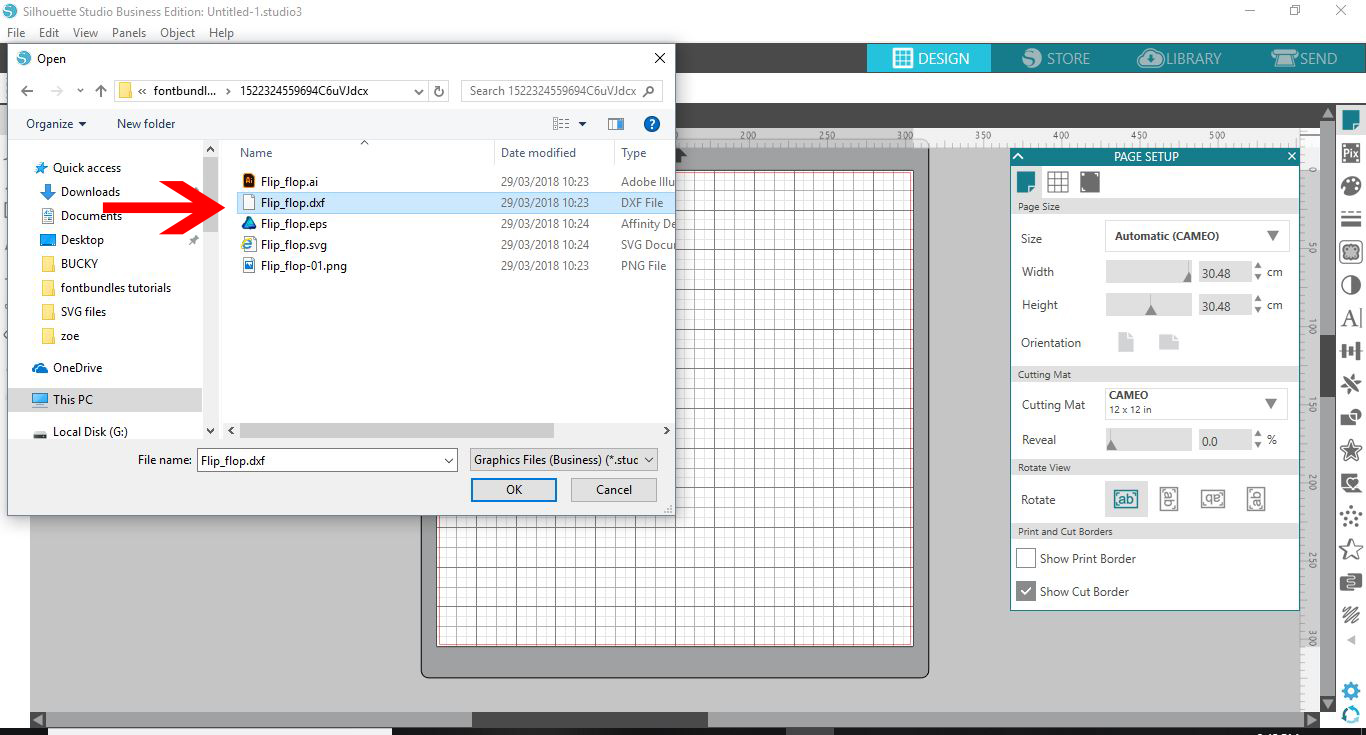
2- Click and open your DXF file. I am using theflip flop monogram svgfrom designbundles.net

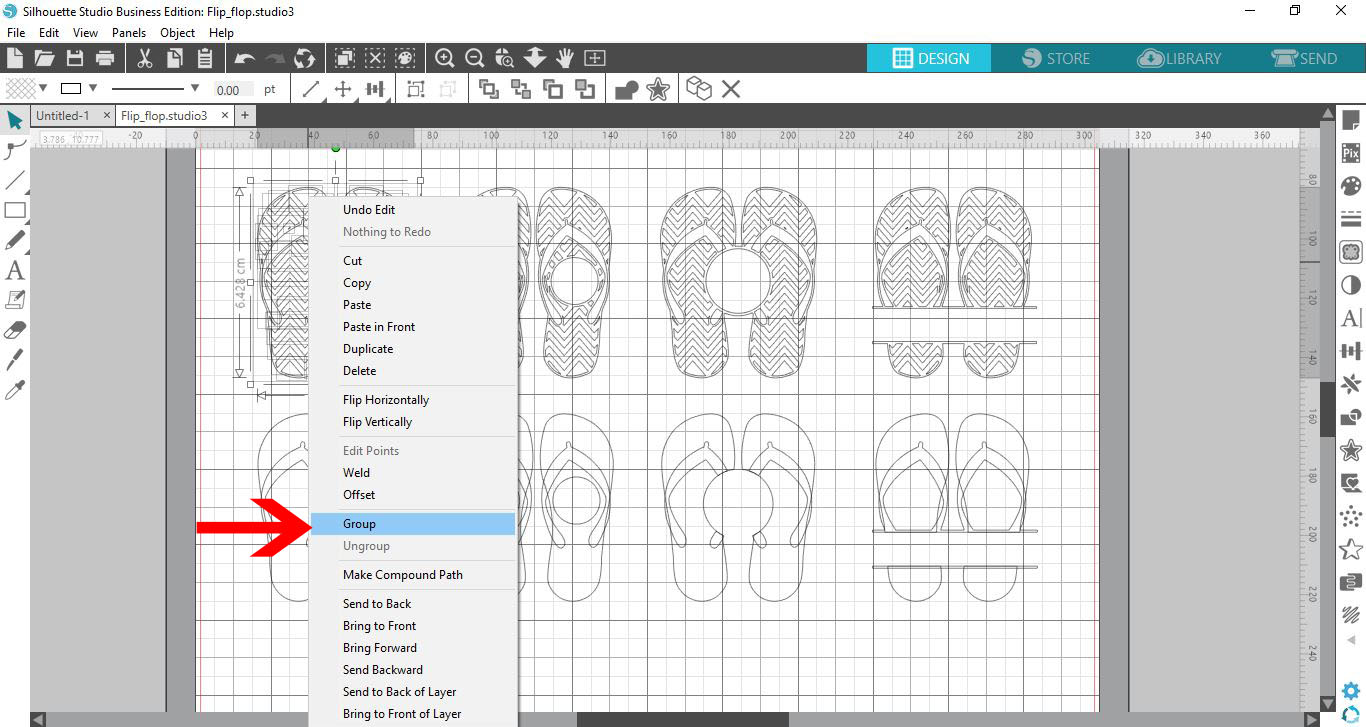
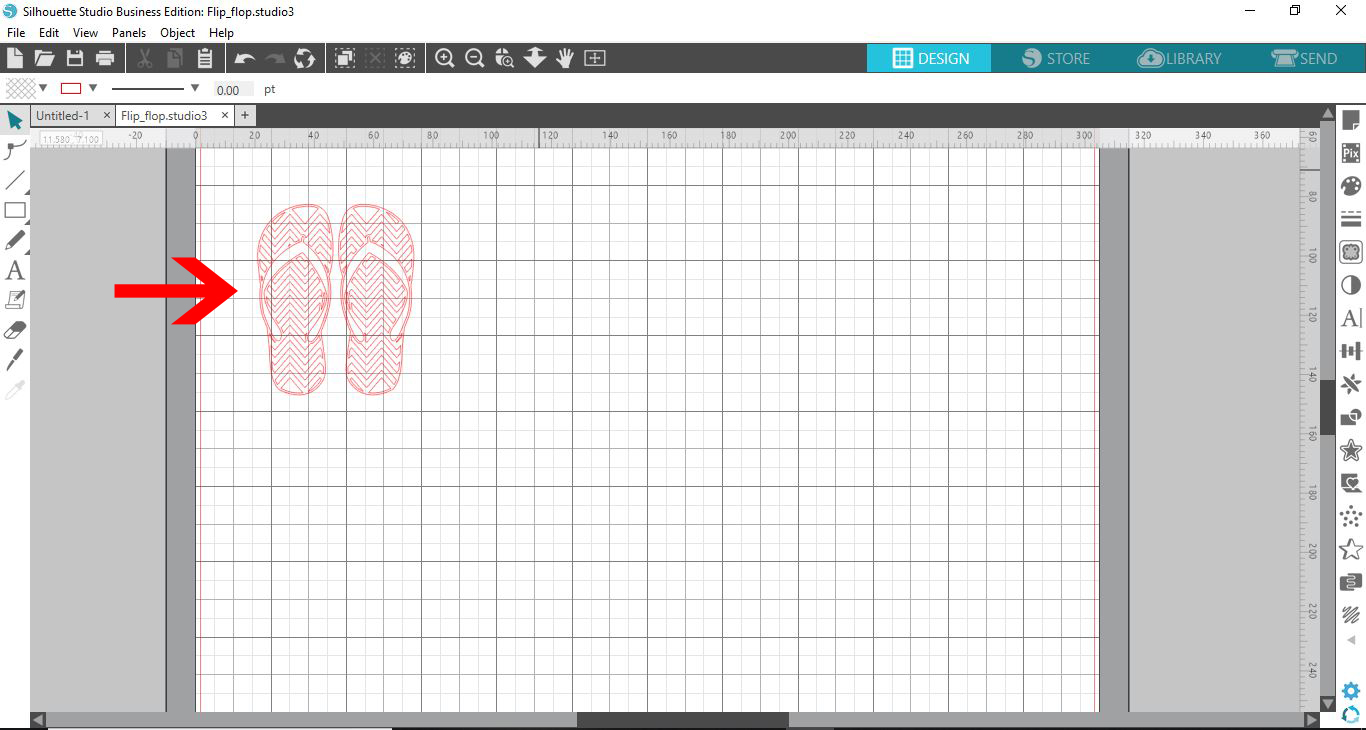
3- The file will now appear in your design area.

4- Ungroup the design, then select the part you would like to use.

5- Right click and group the part you want to use.

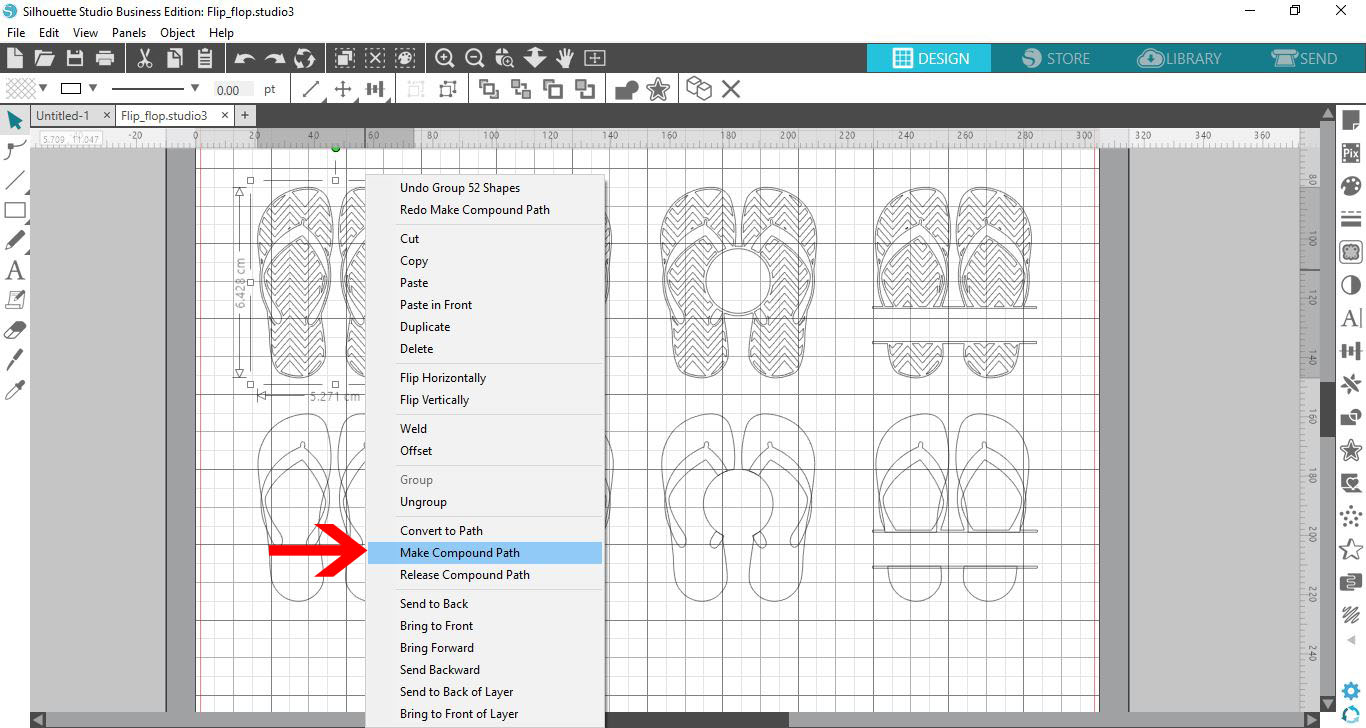
6- Right click again and make a compound path.

7- Delete any other part of your design you do not need.

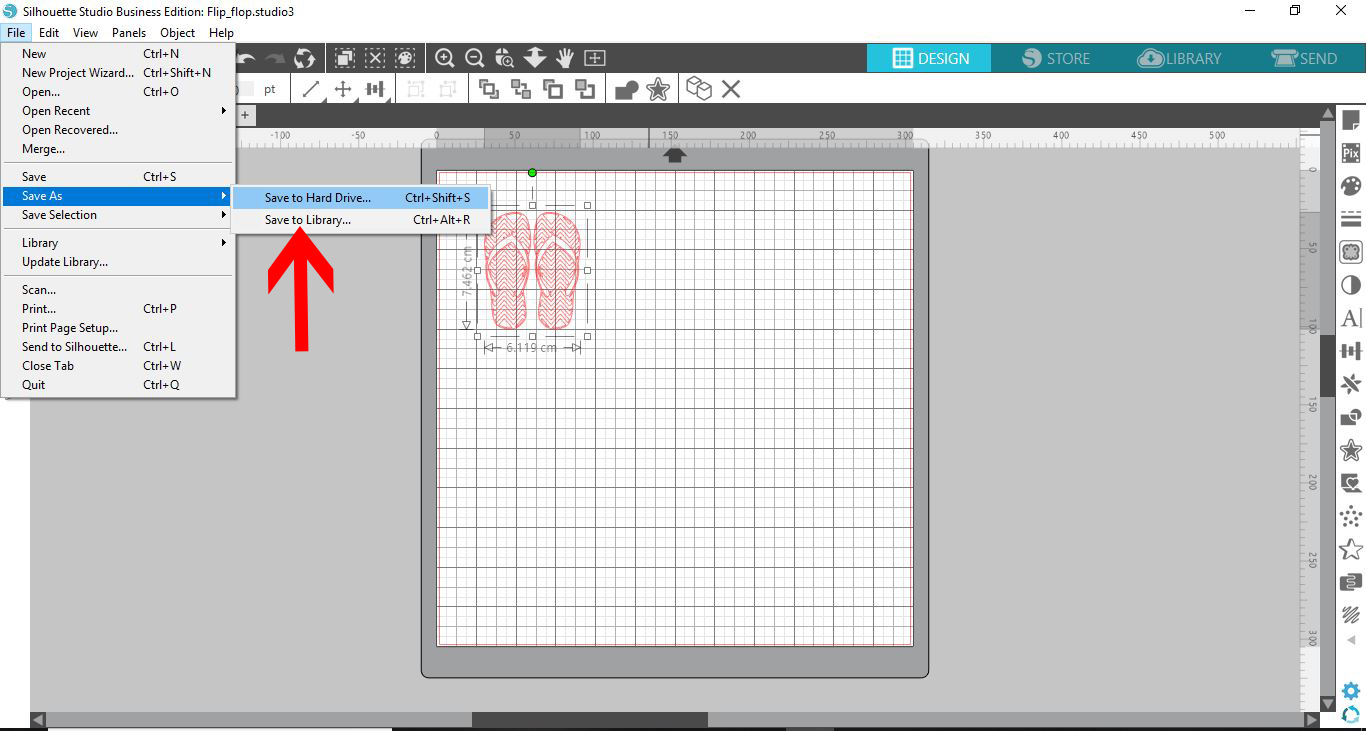
8- Go to file - save as - save to hard drive.

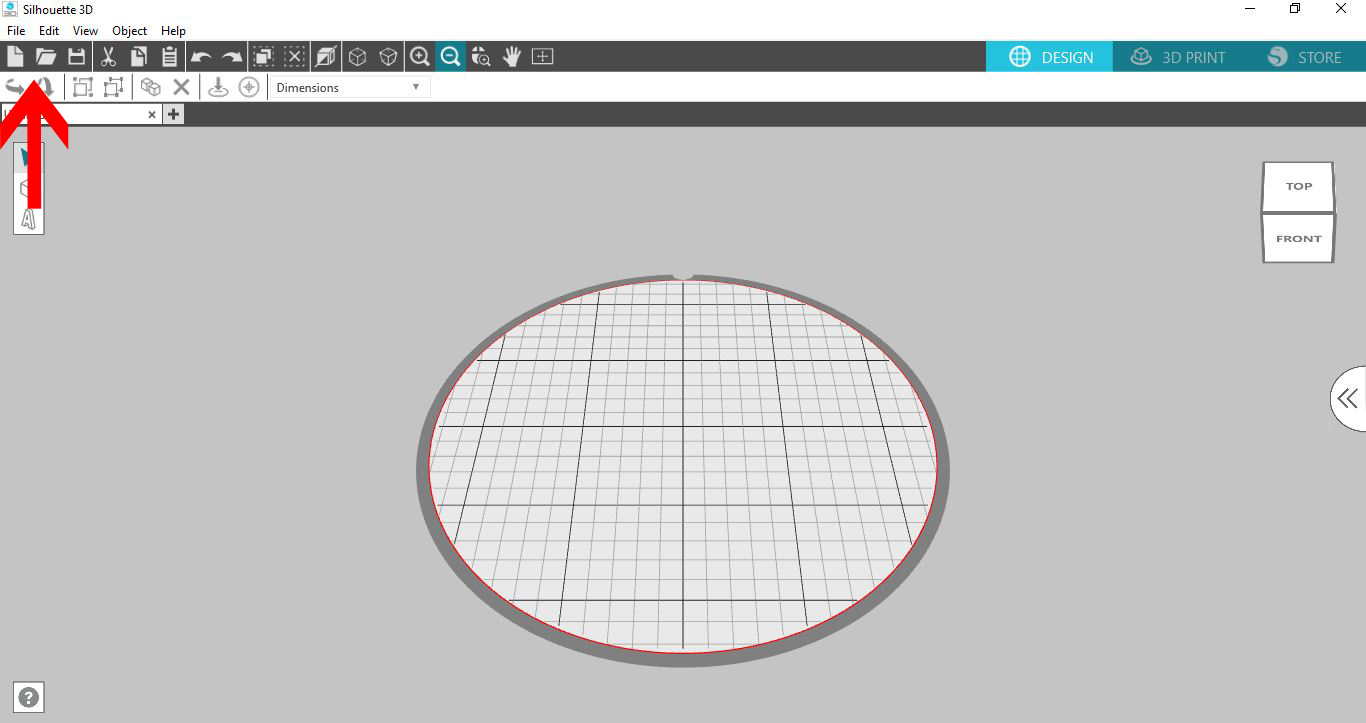
9- Open the Alta 3D software. Click on the open folder icon.

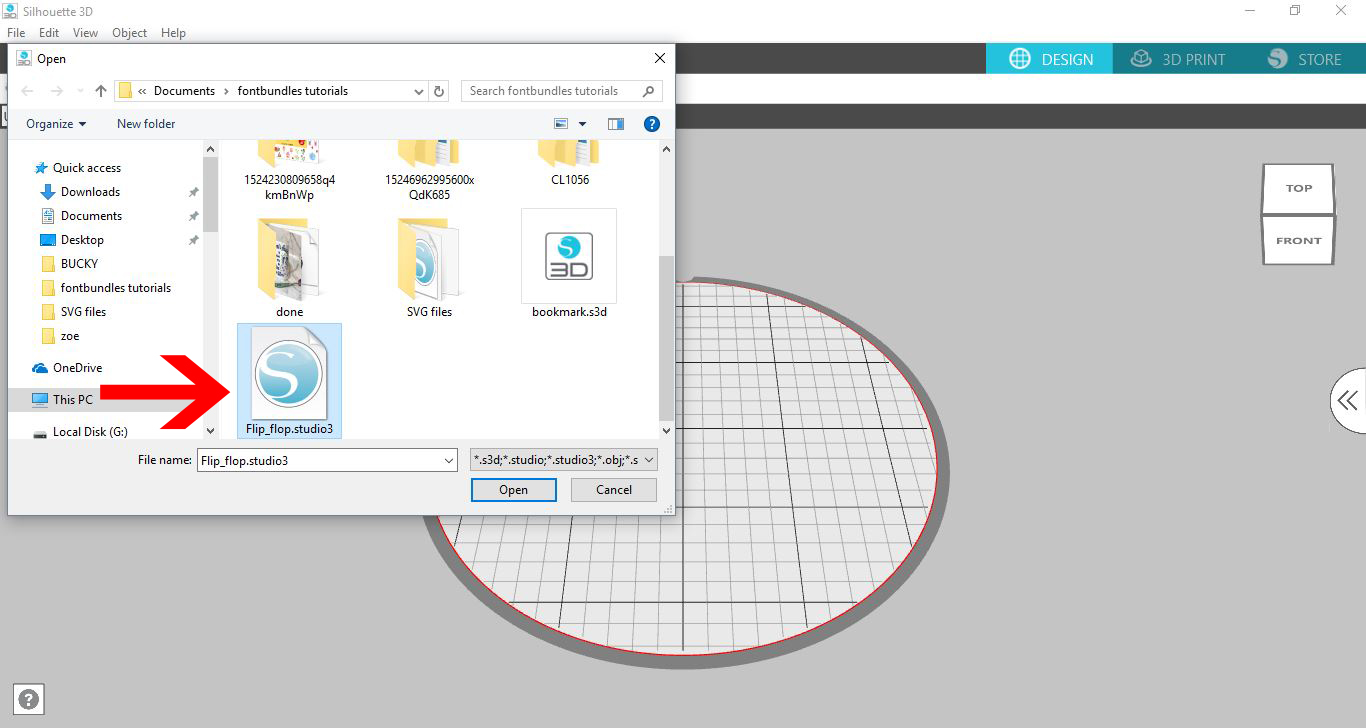
10- Find your saved studio file and open it.

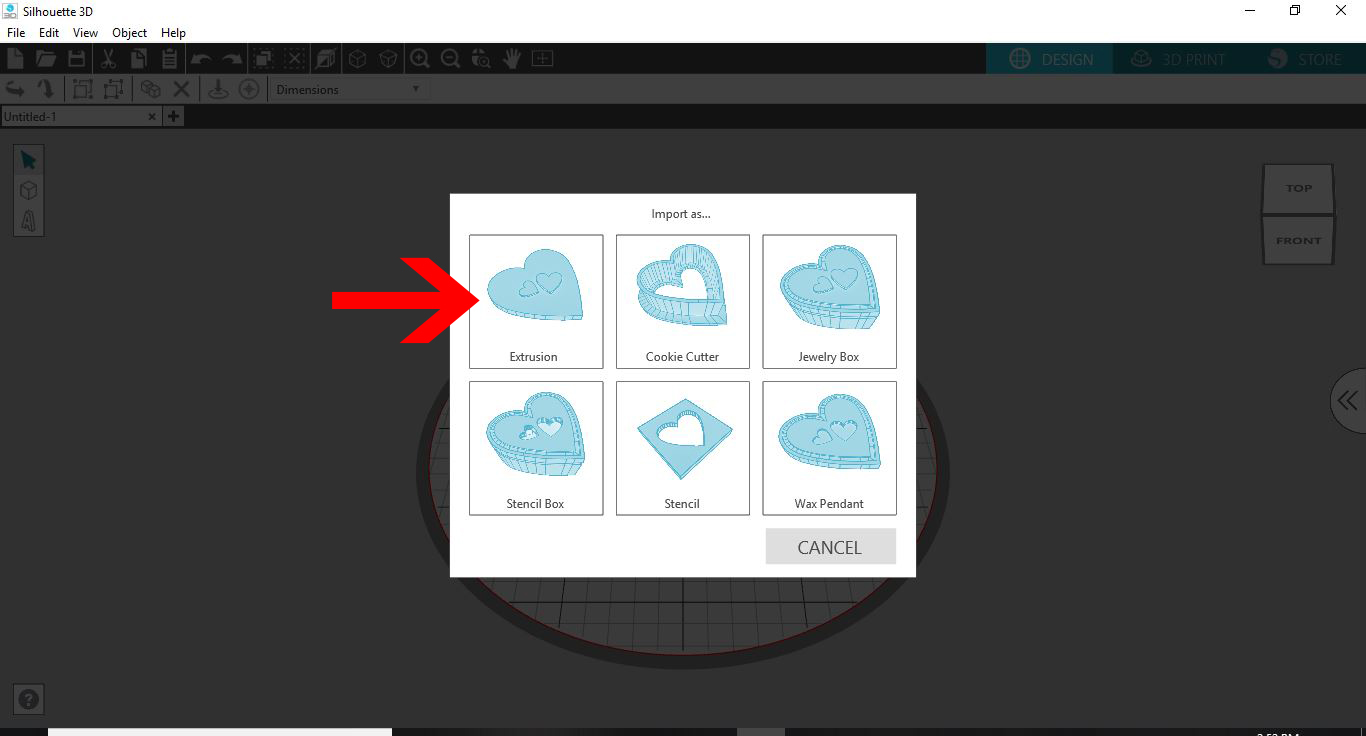
11- a new window will appear. this will determine what you convert your design to. I am picking extrusion.

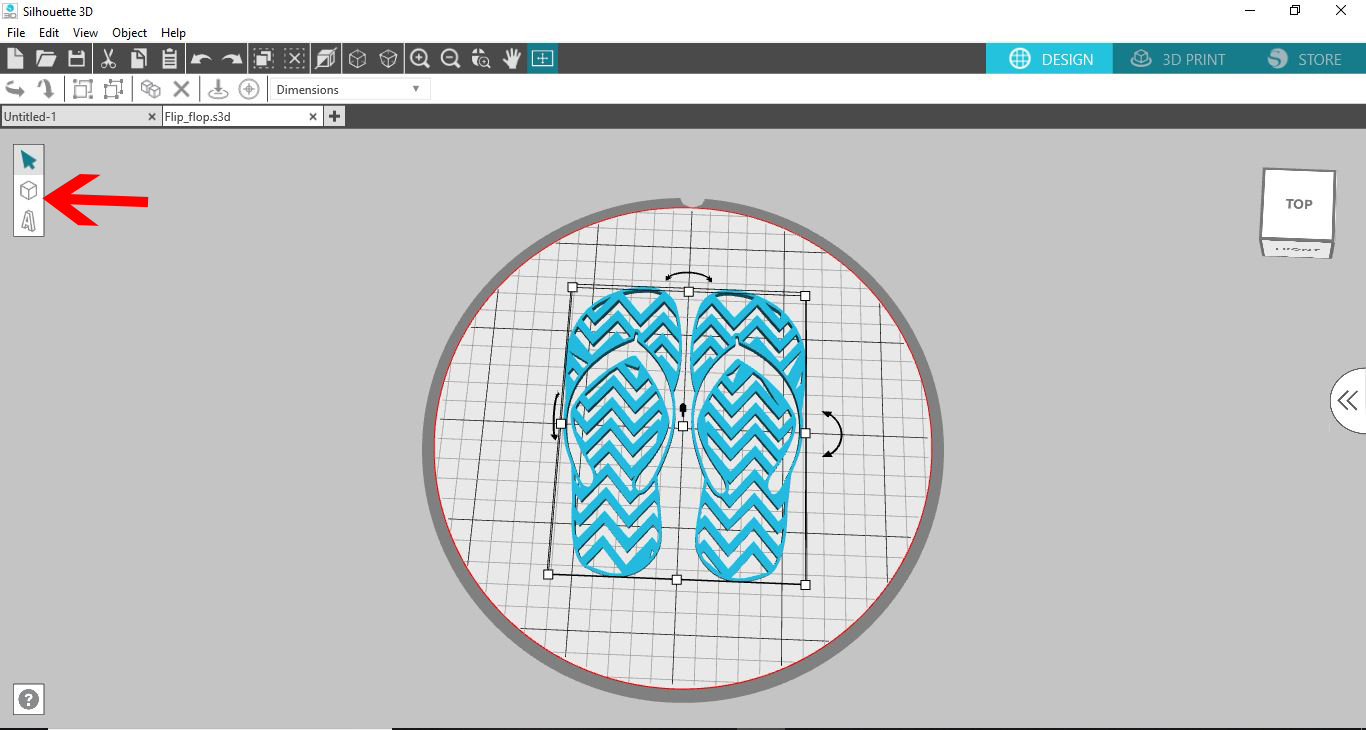
12- Your design will be imported and converted into your 3D software design space.

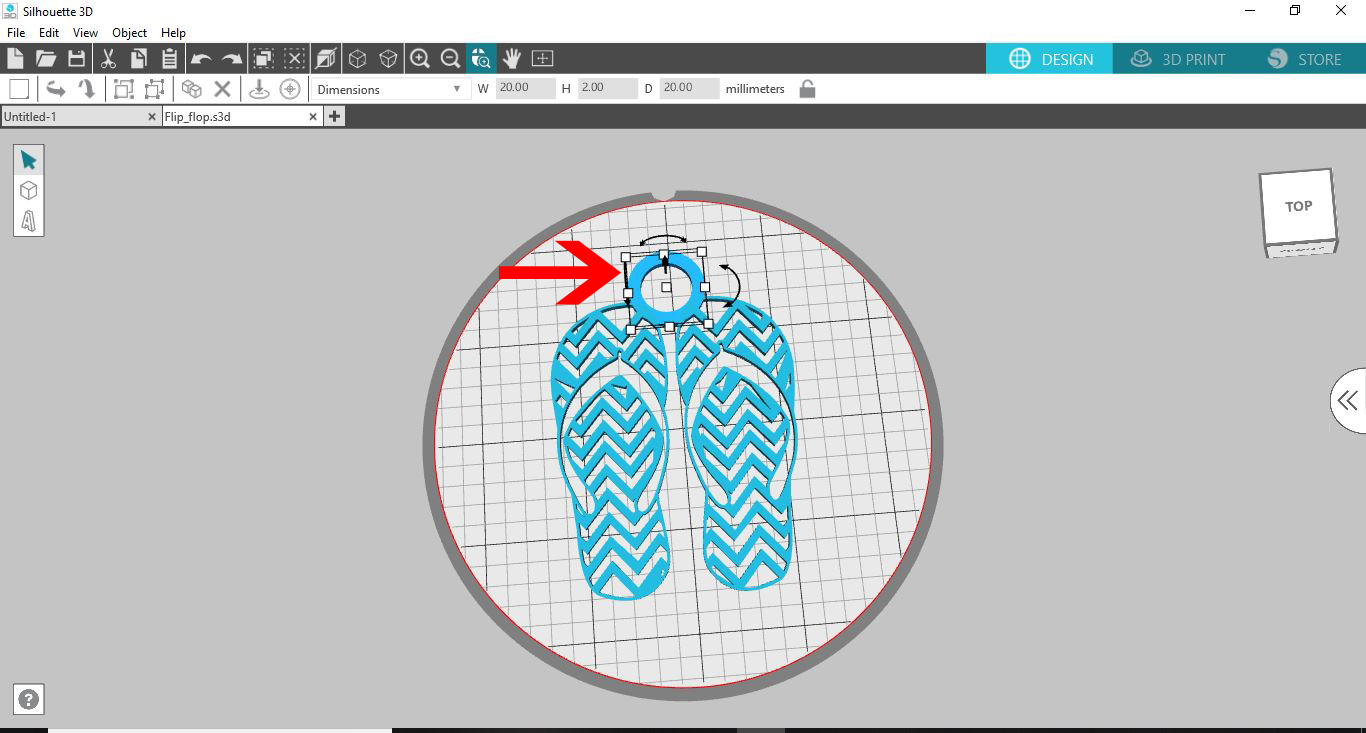
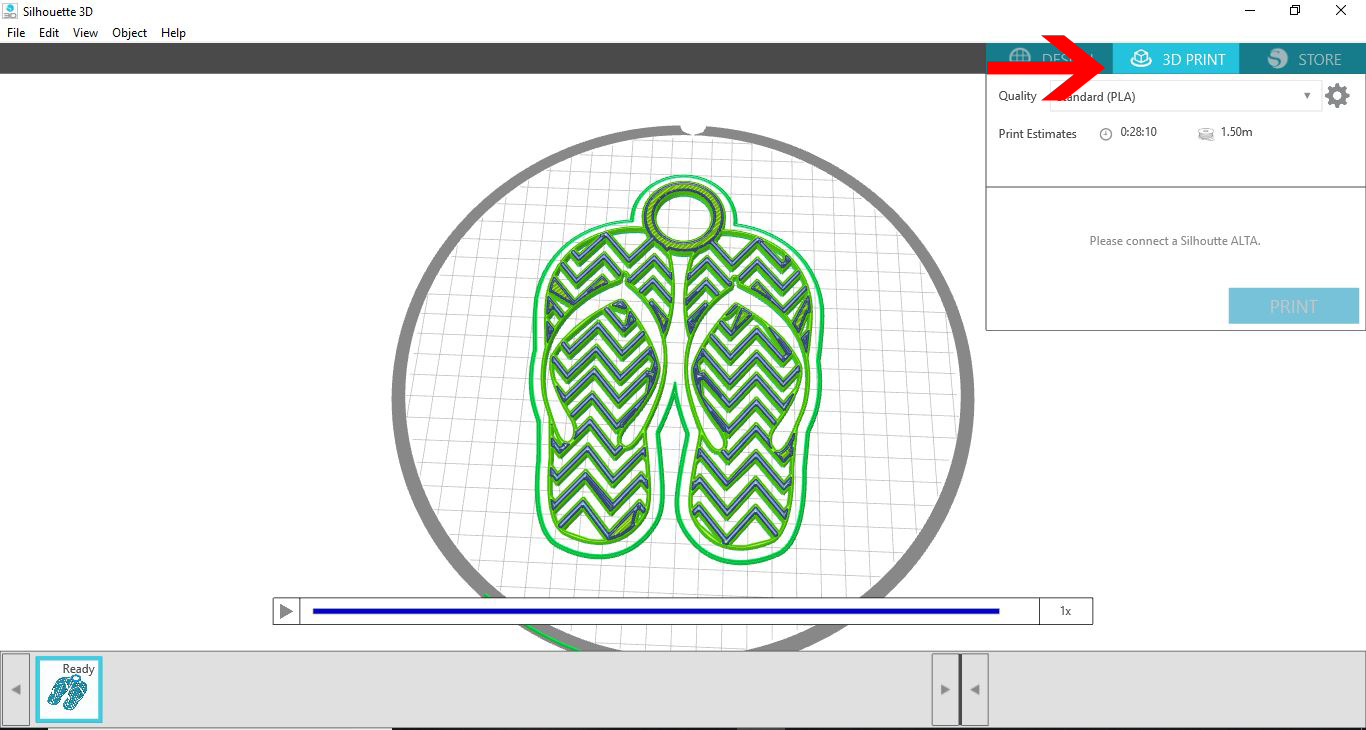
13- If you want ot add to your imported design you can add and group it. I have added a tube to join the 2 flip flops and at the same time create a loop to create this design to a keyring.

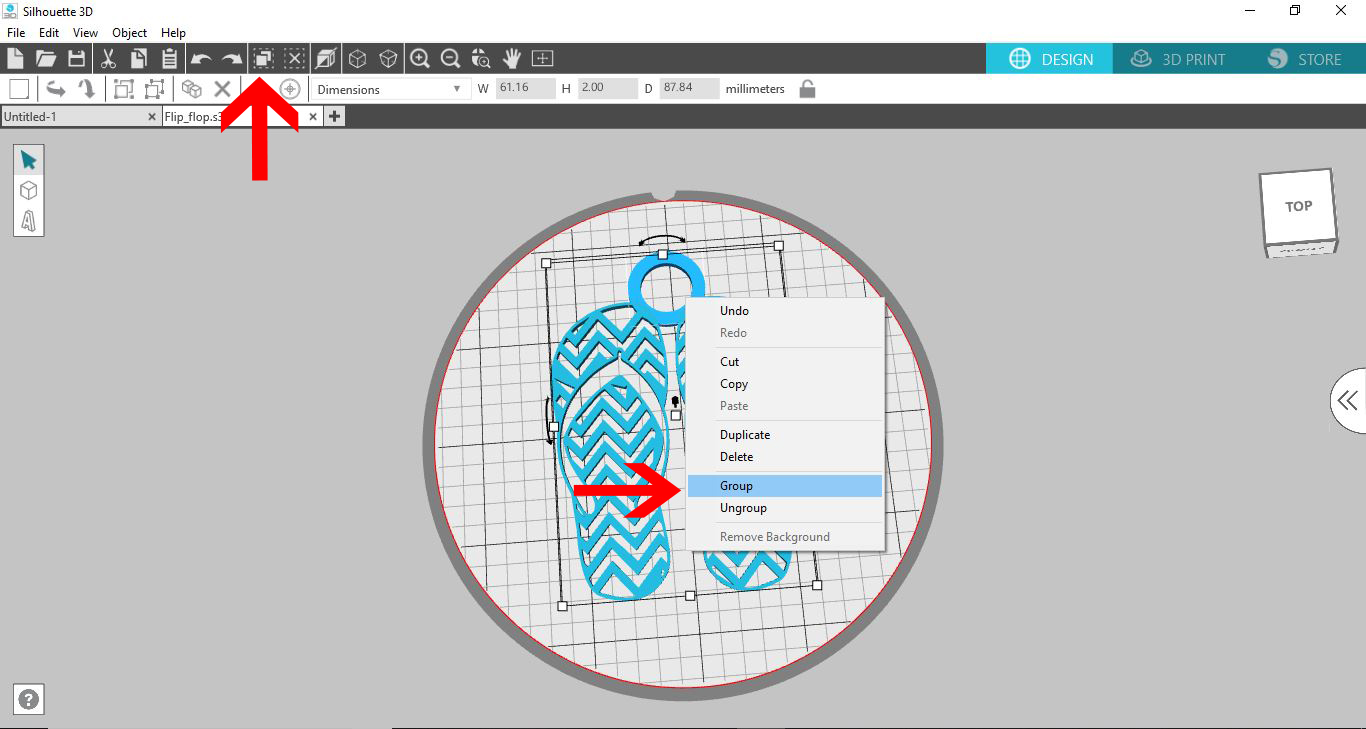
14- When adding new parts to your design, if you want them to print all together you need to group them. Click on the select all icon, then right click and click on group.

15-Your software will slice the design and you can print your design.

16- Your design is printed.


6 Related Silhouette Tutorials

1- Ope Silhouette Studio Software (Business Edition). Click on the open folder icon.2- Find your EPS file and open it. I am using acat lover svgfrom designbundles.net3- Your file has now imported to the design space.4- Select the image and right click and check ungroup.5- ...

1- Open Silhouette Studio software (free edition). Click on open file.2- Select the PNG you would like to use.3- Select your PNG and then click on the trace icon. We need to trace the image as when you use a PNG file there are no cut lines. In ...

With the Silhouette Alta 3D software, you can also create text designs. Objects with 3D text can be personalized for all kinds of projects. These projects can include cake toppers, luggage tags, monograms, and so much more. In this tutorial, we will show you how to use the Text tool ...

1- Open Silhouette Studio Software (Business Edition).Click on the open folder.2- Find your Ai file and open. I am usingI love you svgfrom designbundles.net3-A new window will appear. This will let you import the design as a vector file. click on import.4- It will take ...

1- Open the Silhouette Alta 3d software. Click on the shapes icon.2- Select your first shape.3- Click on your dome. Adjust the size and make the dome flat.4- Adjust the thickness of the shape to only 1 mm thick.5- Lengthen the shape to make the clip part ...

Do you want to learn how to make cookie embossers with your Silhouette Alt 3D Printer? Then we have a sweet tutorial for you. Use a SVG file to create a cookie cutter with Silhouette Studio and the Alta software. So let’s get started.We will be using a ...

You may also like

Help Center
ol image