Unlimited Downloads 15% off Marketplace Purchases Exclusive Software Access Unlimited Downloads
15% off Marketplace Purchases
Exclusive Software Access
Save 70% on Plus Maybe Later
How to use Fonts to Make a Bookmark in Silhouette Alta 3D software
  • By Design Bundles
  • 25 Oct 2018
  • 4 Mins
  • Silhouette Tutorials

How to use Fonts to Make a Bookmark in Silhouette Alta 3D software

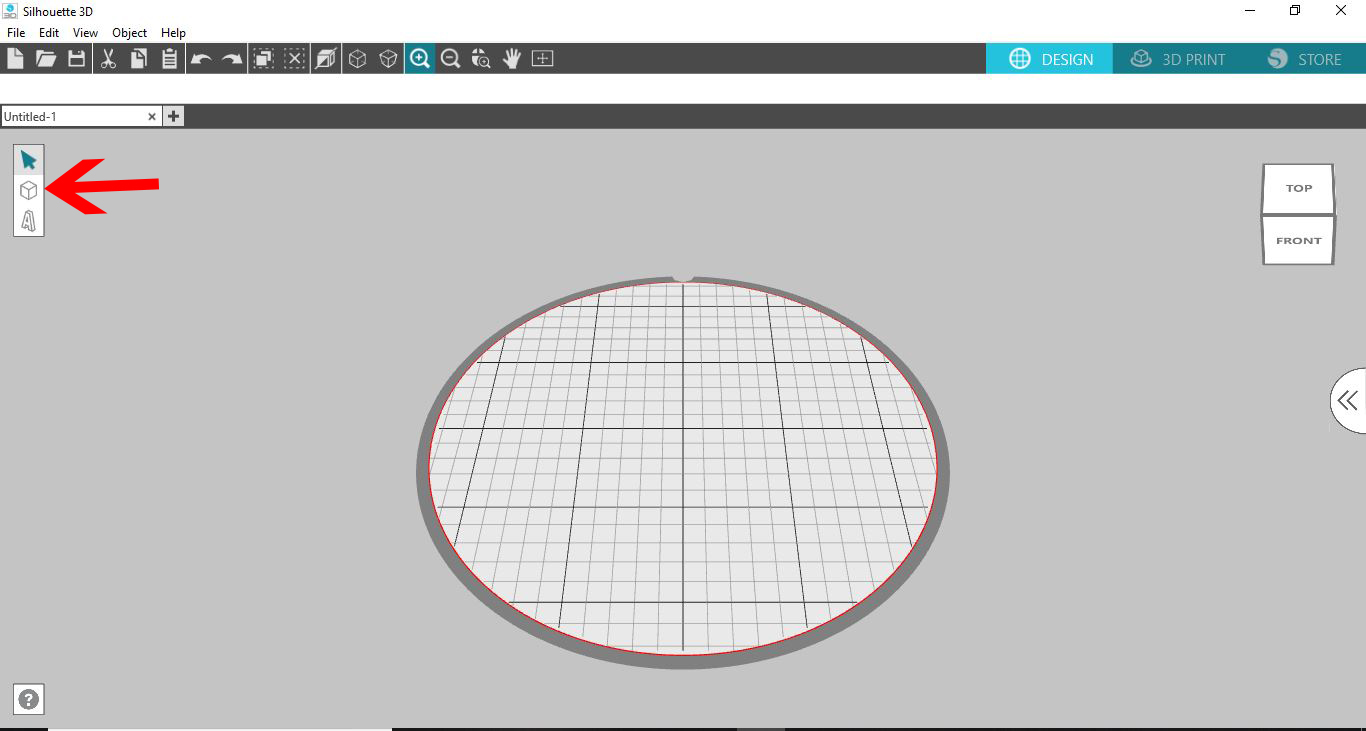
1- Open the Silhouette Alta 3d software. Click on the shapes icon.

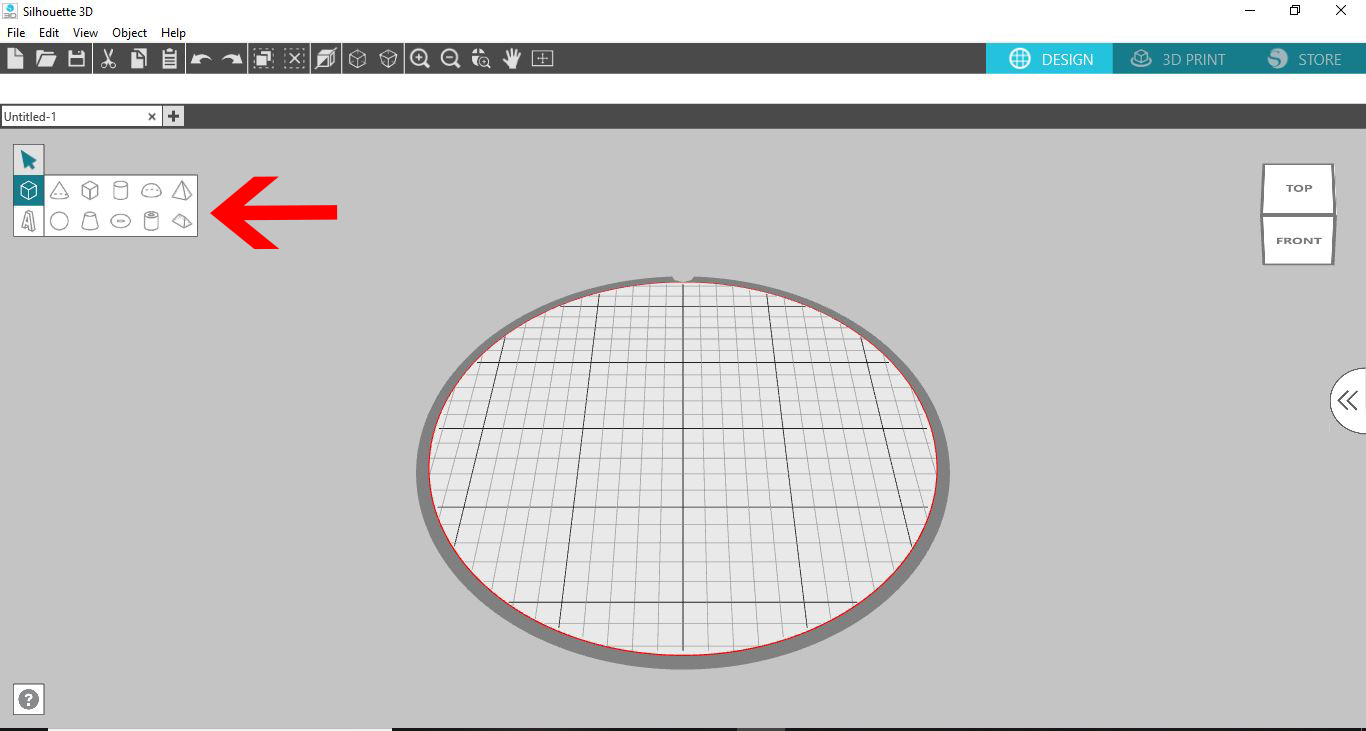
2- Select your first shape.

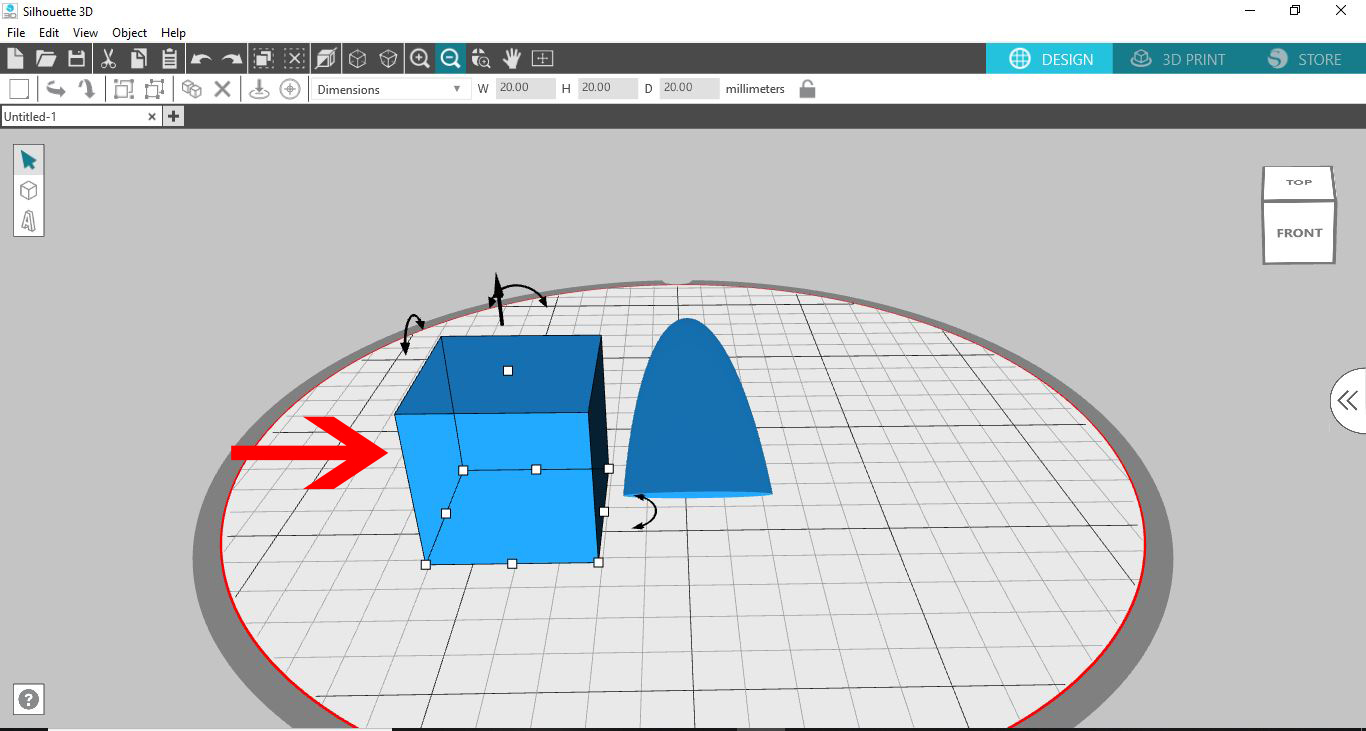
3- Click on your dome. Adjust the size and make the dome flat.

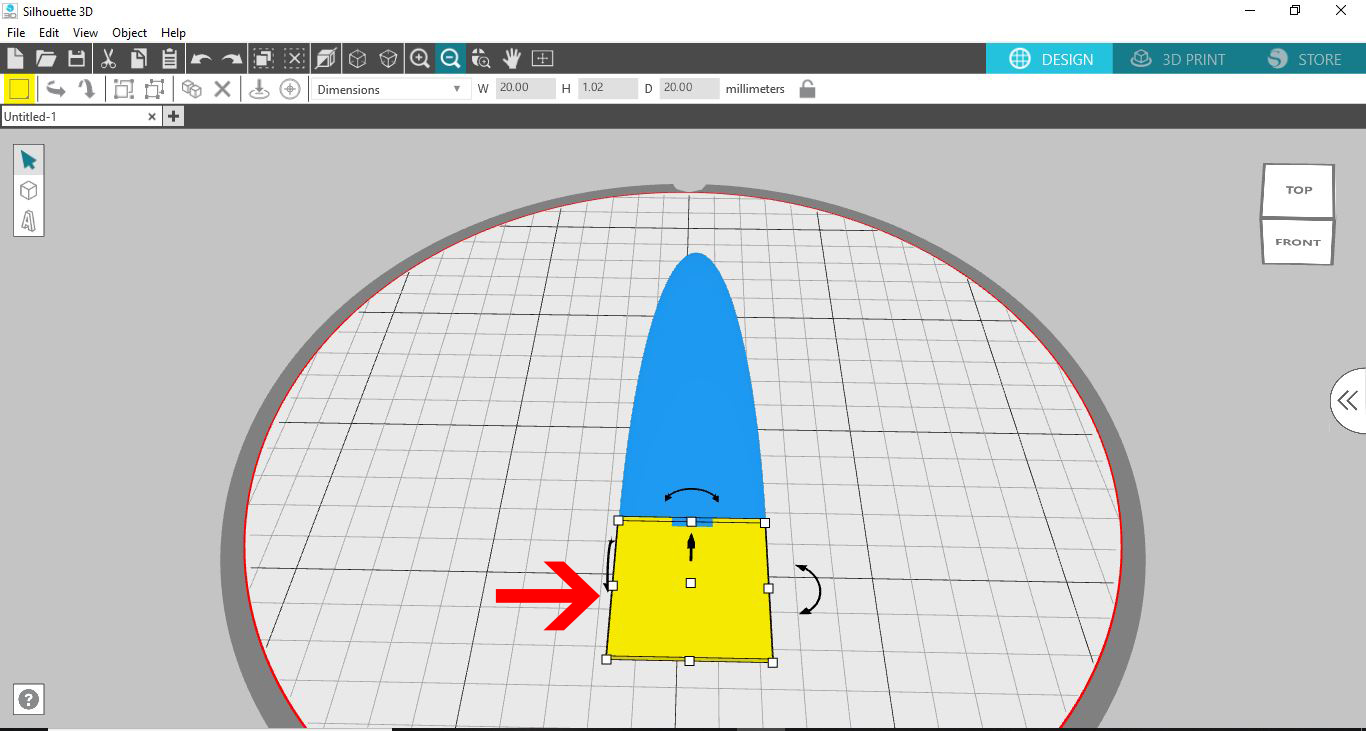
4- Adjust the thickness of the shape to only 1 mm thick.

5- Lengthen the shape to make the clip part of the bookmark. Next select the shape tool again.

6- Create a cube.

7- Flatten the cube to 1mm and then resize ot the same width as the other shape (blue shape) over lap slightly.

8- Create another cube.

9- Resize again to 1 mm thick and a lot thinner.

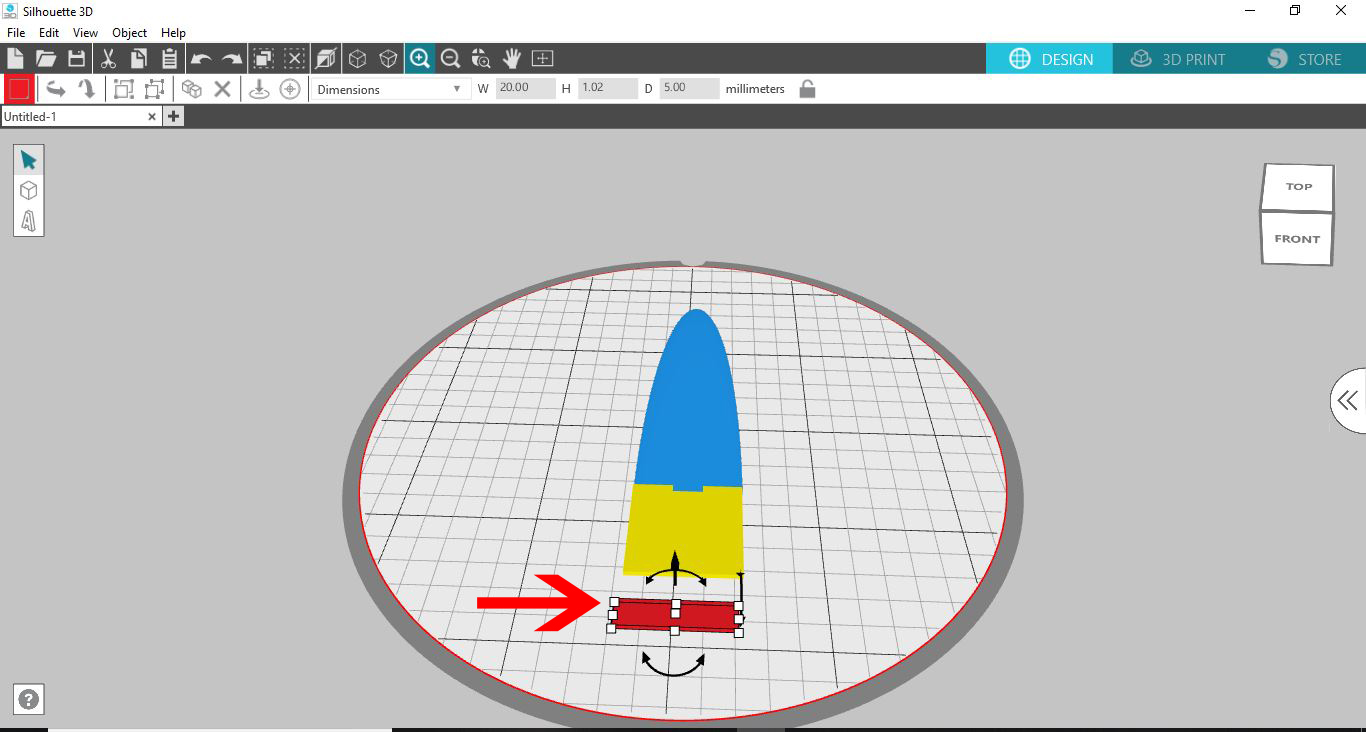
10- Right click and duplicate your shape (red rectangle) several times.

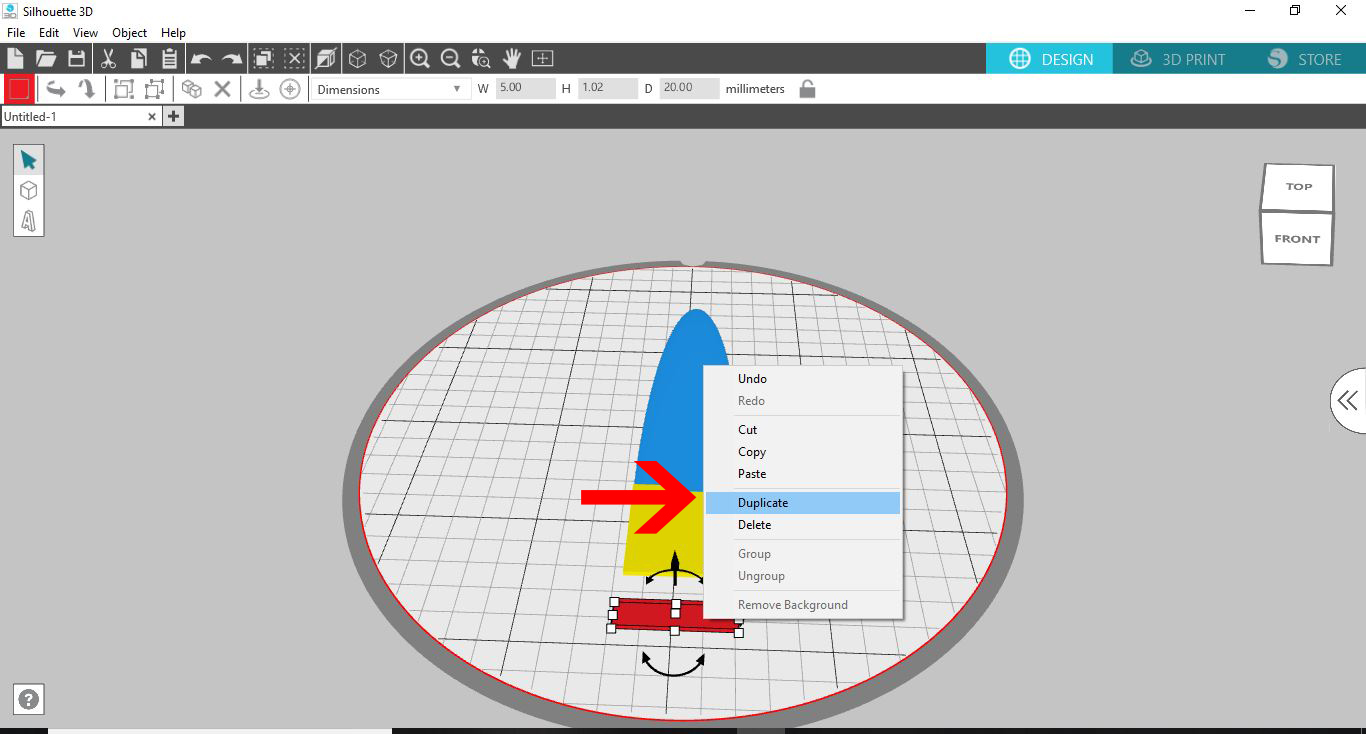
11- Place around the yellow and blue shapes.

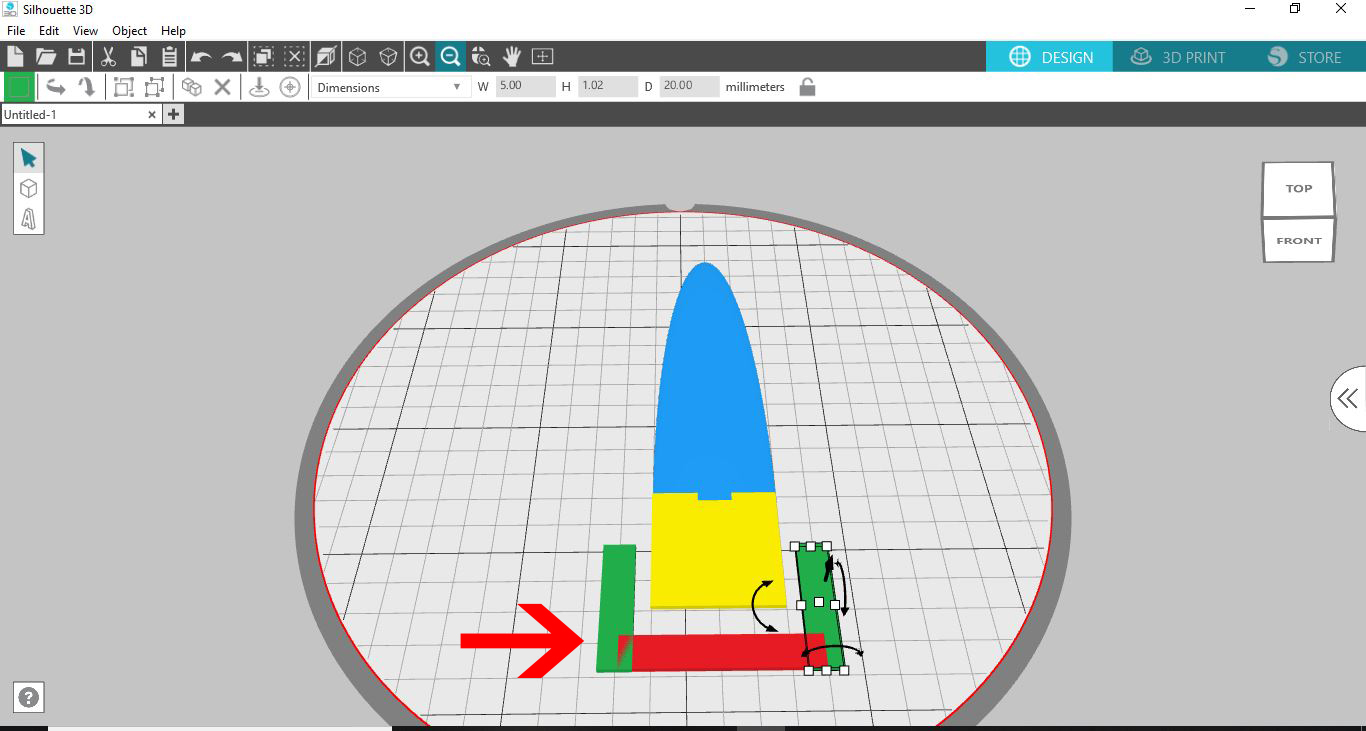
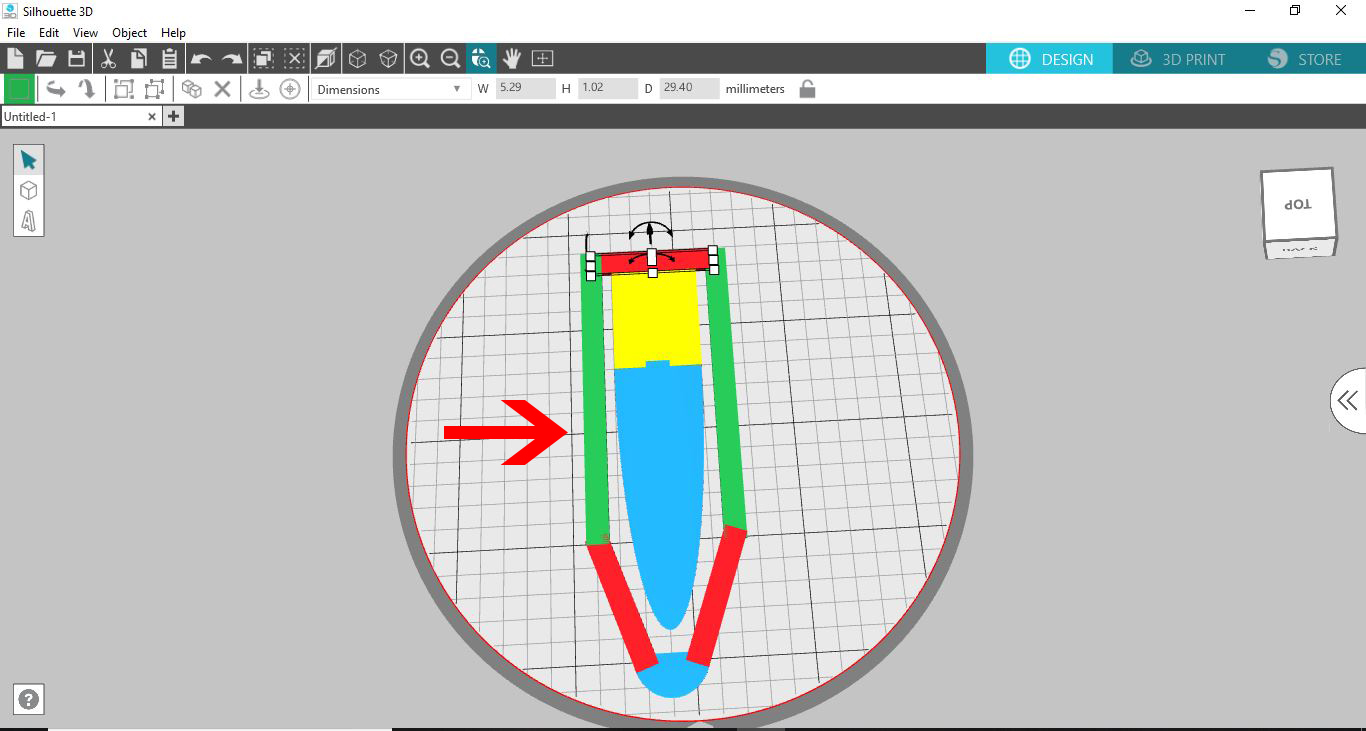
12- lengthen the green rectangles and duplicate the red rectangles again to add to the end of the green rectangles. Lastly duplicate the blue shape and adjust size to cape and join all the shapes together. Basically you are making a large paper clip type bookmark.

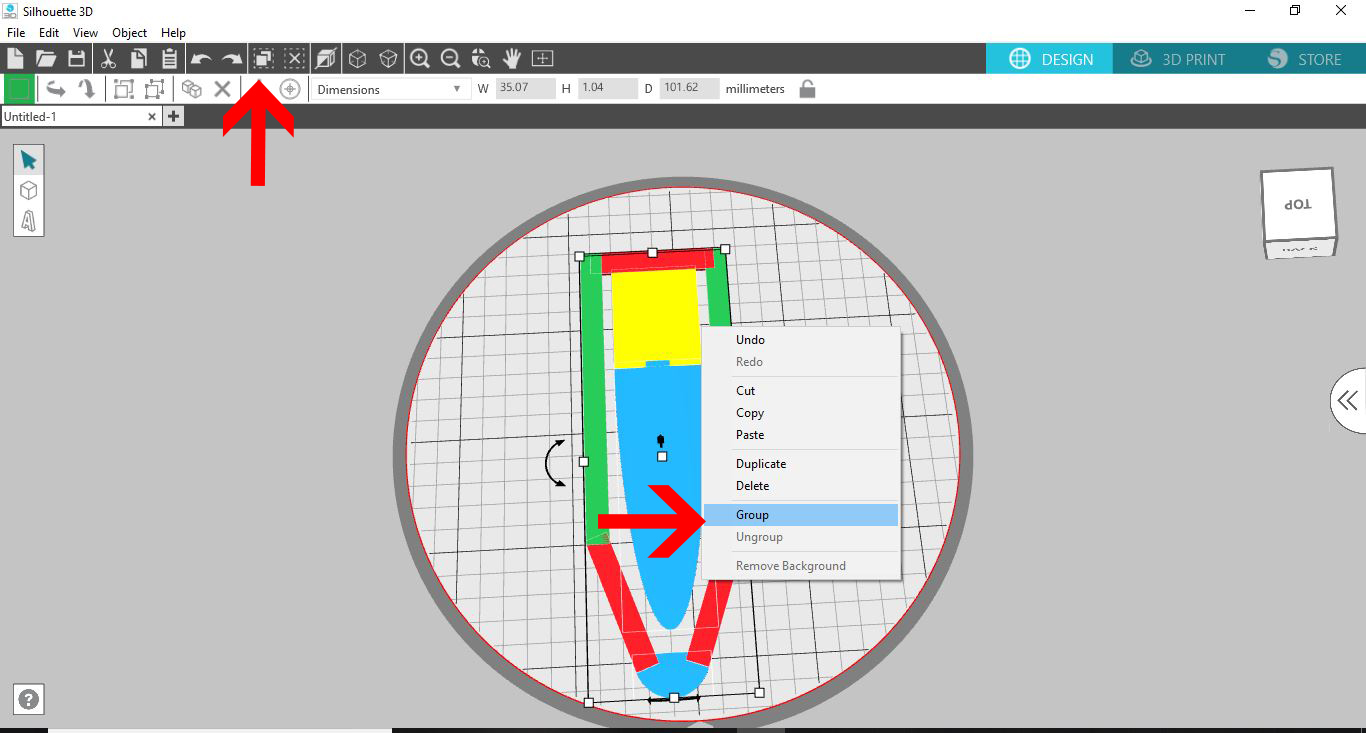
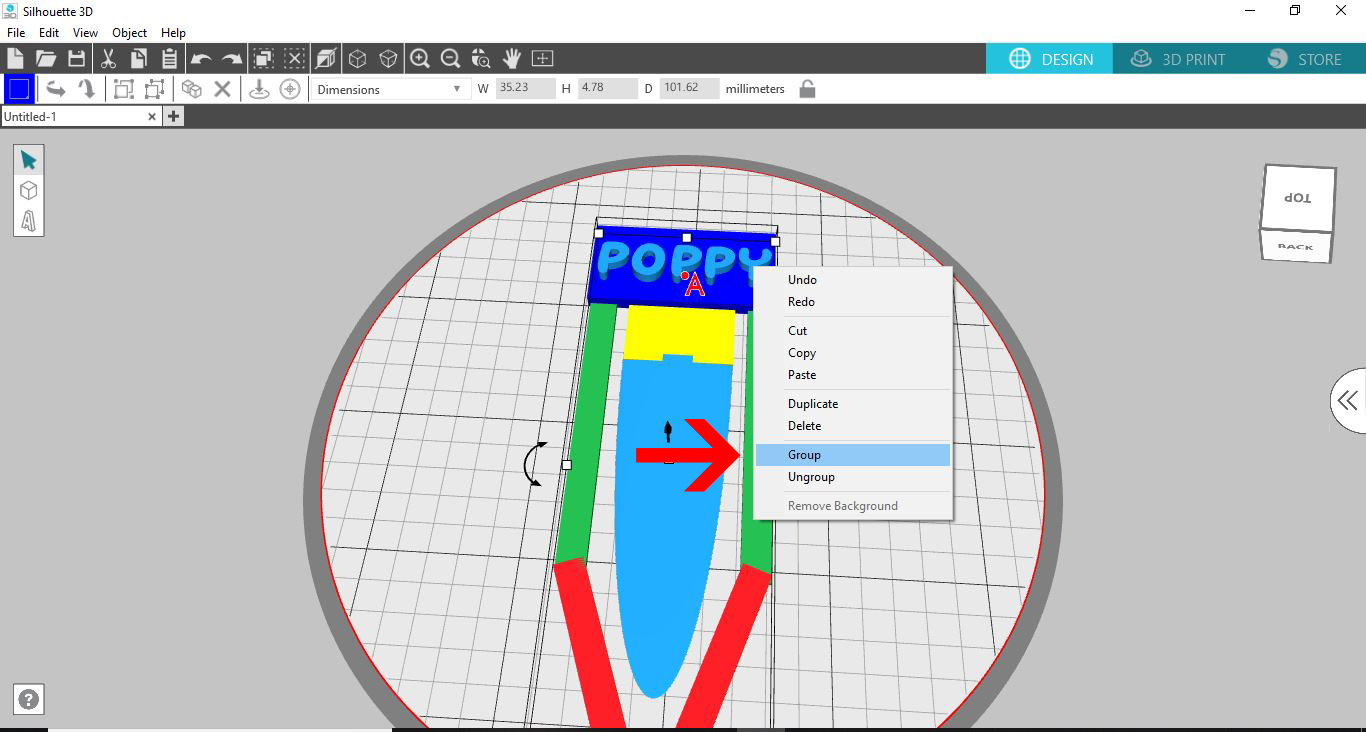
13- Click the select all icon, then right click and group your shapes. For any design to print as a single item you need to group your shapes. this is similar to welding shapes in silhouette studio.

14- Click the shape icon again and create another cube.

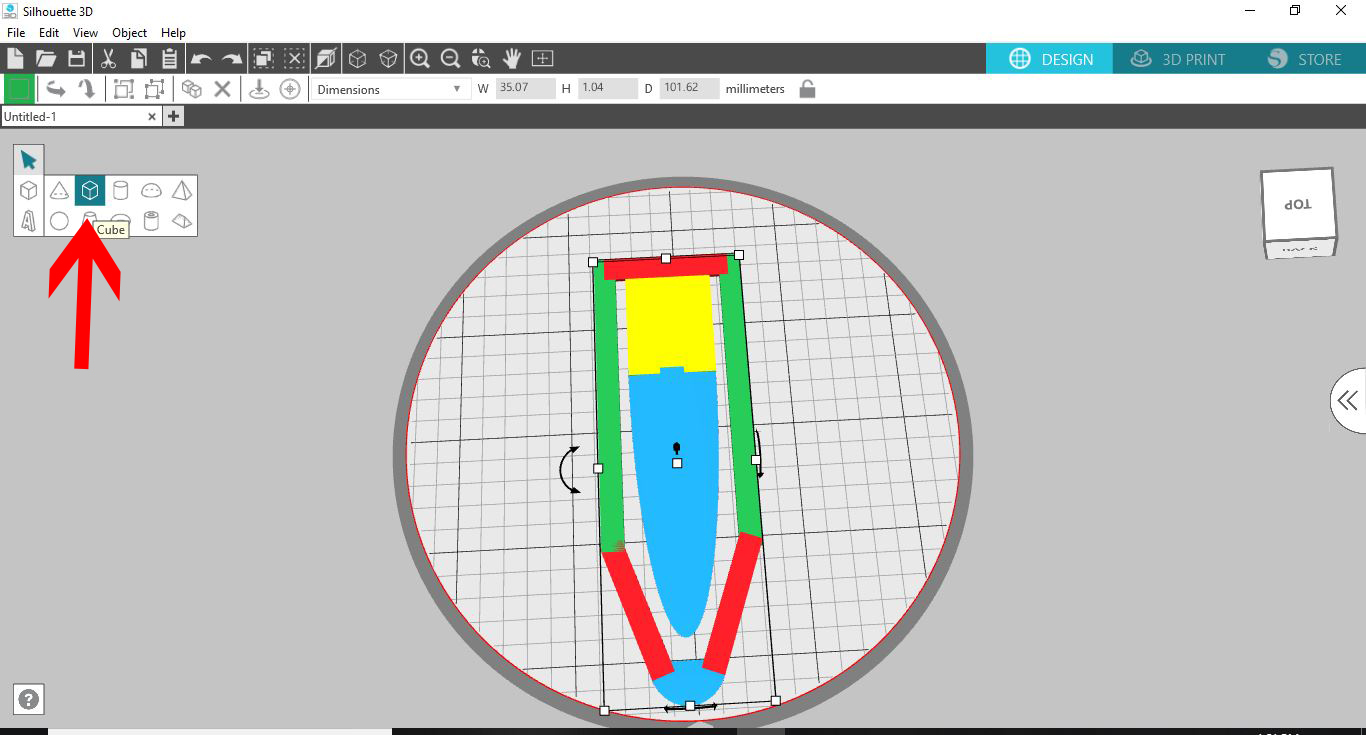
15- adjust the size of the cube (navy) and create it slightly thicker than the design you currently have.

16- Place at the top of your bookmark. this will be the base plate for your text.

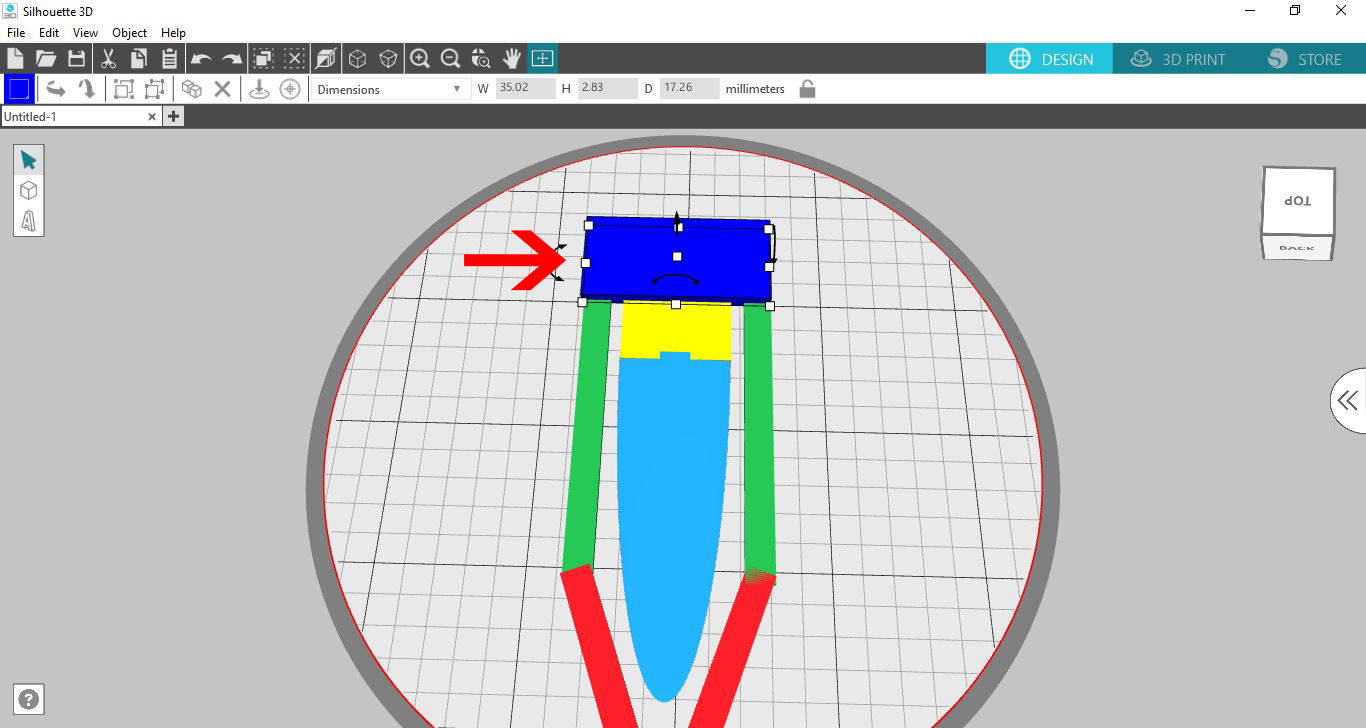
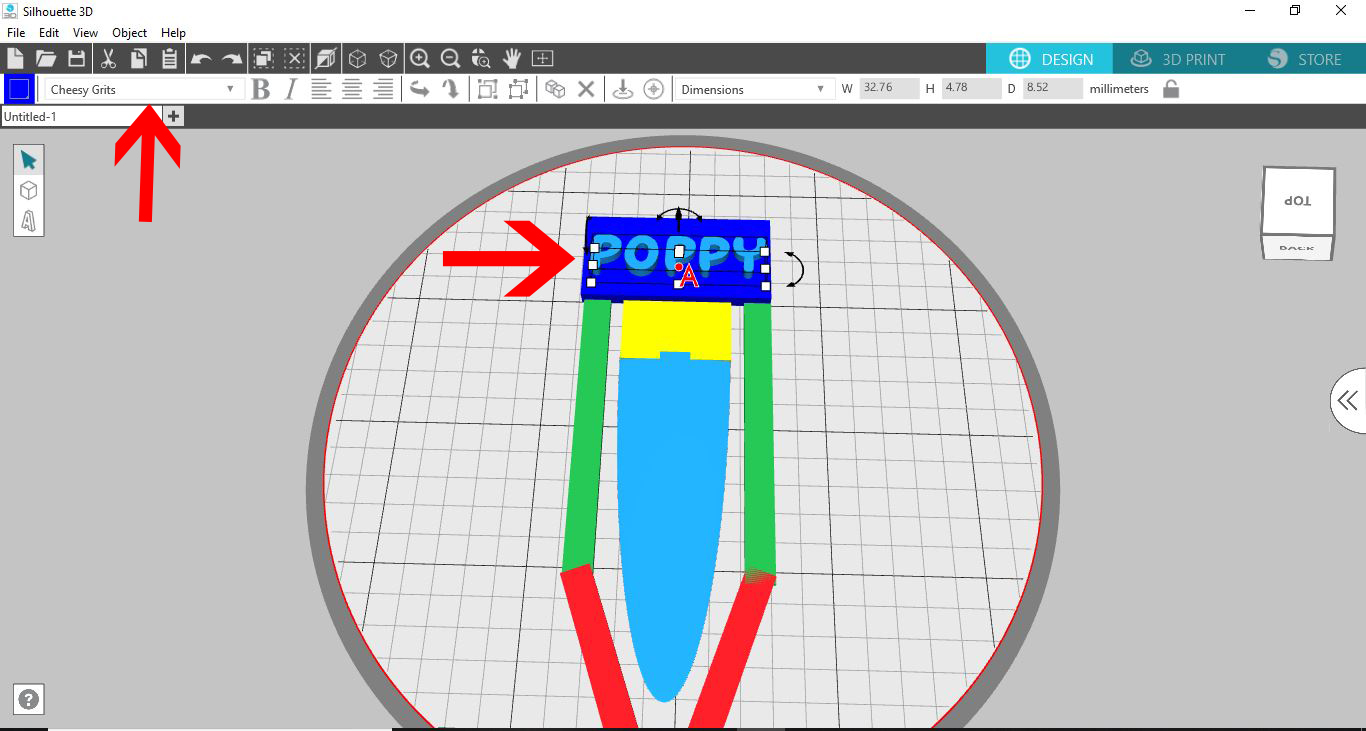
17- Click the text icon.
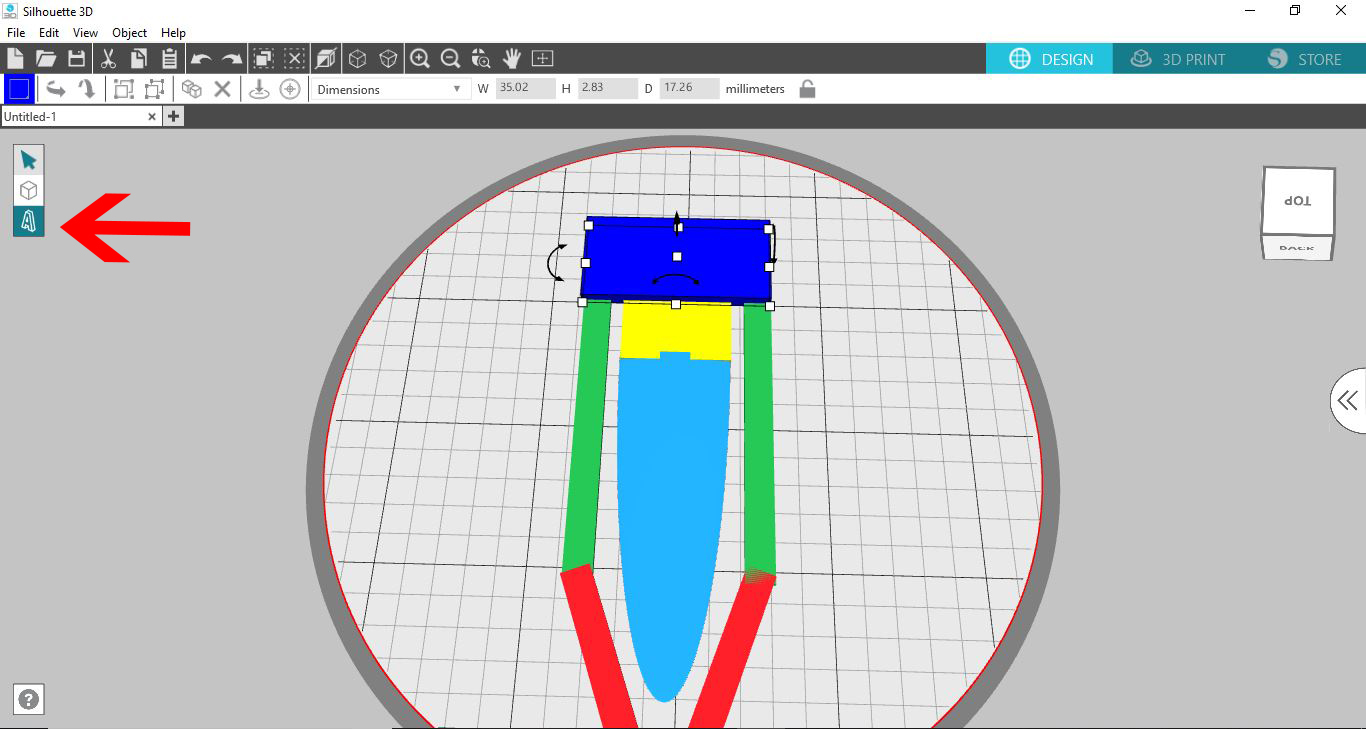
18- Type your text.

19- Adjust the size of the text, and the font. I am using Cheesy Grits font from fontbundles.net Place the text on the navy shape. Make sure your text is thicker than the navy shape so it will be seen when printed.

20- Again click on the select all icon and then right click and group everything together.

21-Click on 3D print and then adjust settings and print your design.

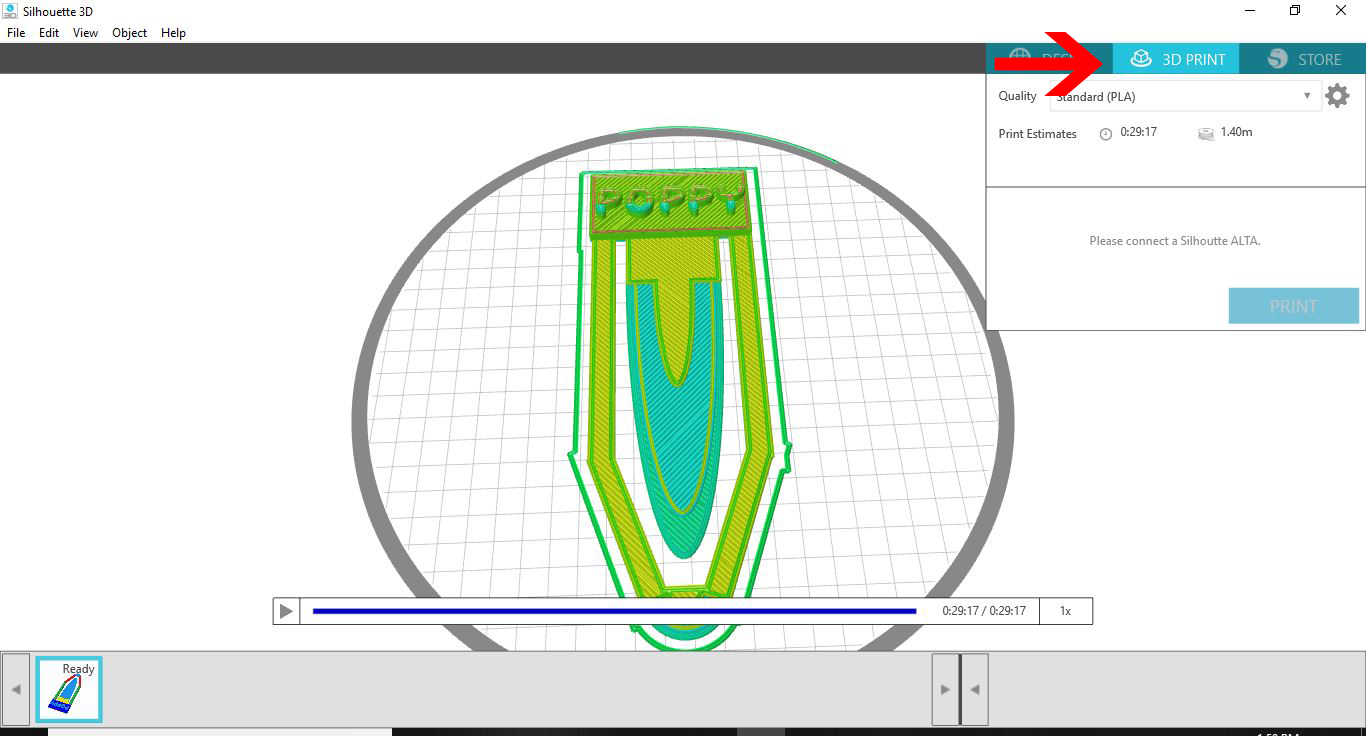
22- Your bookmark is now printed.


6 Related Silhouette Tutorials

1- Ope Silhouette Studio Software (Business Edition). Click on the open folder icon.2- Find your EPS file and open it. I am using acat lover svgfrom designbundles.net3- Your file has now imported to the design space.4- Select the image and right click and check ungroup.5- ...

1- Open up Silhouette Studio software (Business Edition). Click on the open folder.2- Click and open your DXF file. I am using theflip flop monogram svgfrom designbundles.net3- The file will now appear in your design area.4- Ungroup the design, then select the part you would like ...

1- Open Silhouette Studio Software (Business Edition).Click on the open folder.2- Find your Ai file and open. I am usingI love you svgfrom designbundles.net3-A new window will appear. This will let you import the design as a vector file. click on import.4- It will take ...

With the Silhouette Alta 3D software, you can also create text designs. Objects with 3D text can be personalized for all kinds of projects. These projects can include cake toppers, luggage tags, monograms, and so much more. In this tutorial, we will show you how to use the Text tool ...

Do you want to learn how to make cookie embossers with your Silhouette Alt 3D Printer? Then we have a sweet tutorial for you. Use a SVG file to create a cookie cutter with Silhouette Studio and the Alta software. So let’s get started.We will be using a ...

1- Open Silhouette Studio software (free edition). Click on open file.2- Select the PNG you would like to use.3- Select your PNG and then click on the trace icon. We need to trace the image as when you use a PNG file there are no cut lines. In ...

You may also like

Help Center