How to Find Which Layer a Stray Mark is on in Procreate
This Procreate tutorial is a must read and is sure to save you time and stress!

This Procreate tutorial is a must read and is sure to save you time and stress!
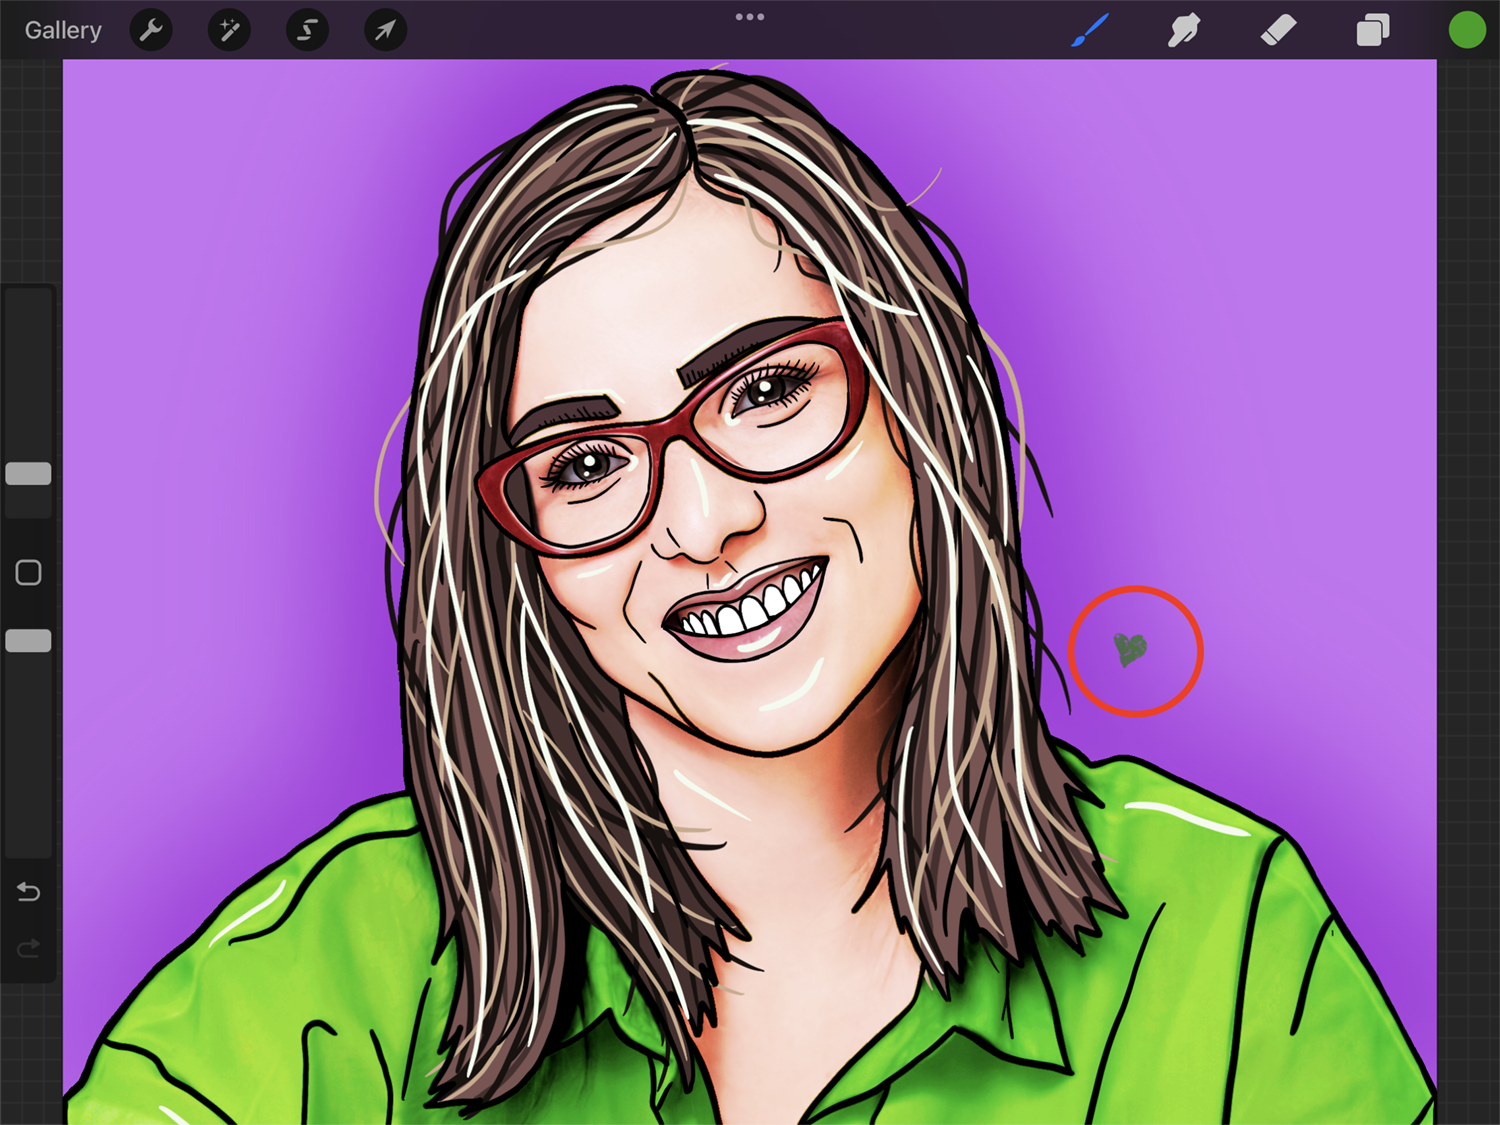
If you realize that you have a stray mark in your artwork, and you really don’t want to go layer by layer to find where it is, here’s a really nifty hack that will help you find it in no time so that you can get back to work.

For this example, we used the artwork we created following our tutorial on drawing flat characters in Procreate. Feel free to check it out if you want to learn how to use that cool technique for your artwork.
First, we need to adjust Procreate’s Layer Select Preferences so that we will be able to use this option properly.
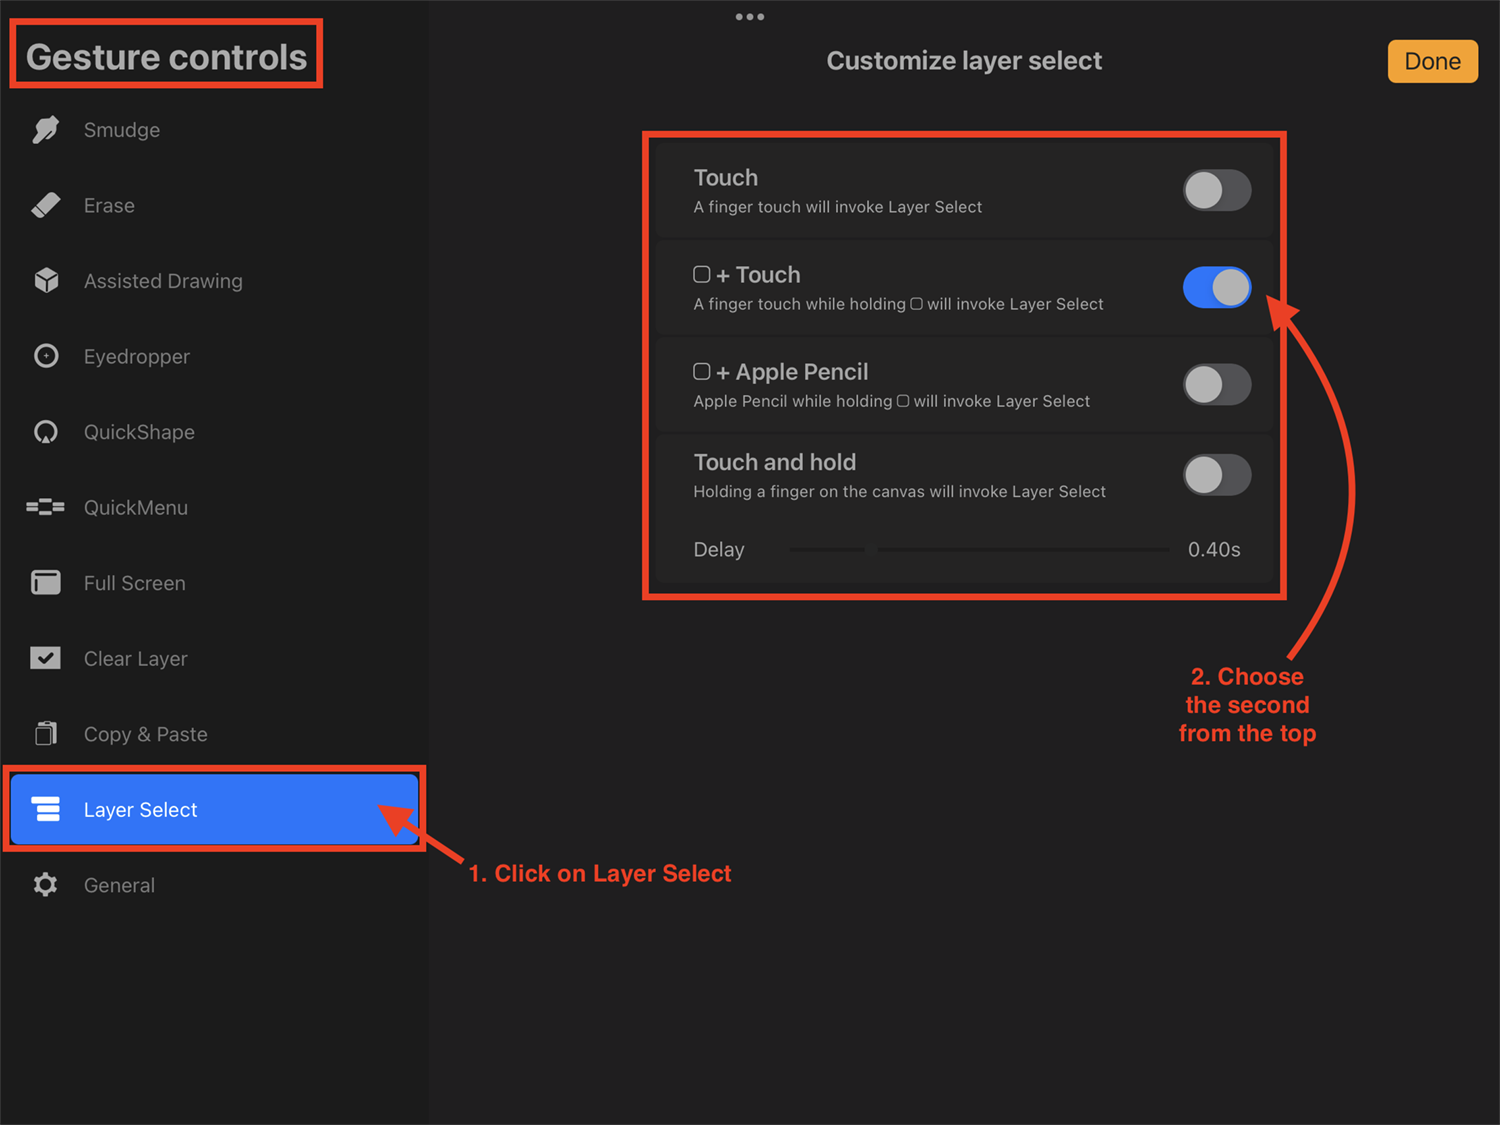
Open theActions menu by clicking on the wrench icon in the top menu bar. Then click the Preferences icon and finally on Gesture controls to open the submenu.

Next, click on the Layer Select tab to open the Customize layer select options. Tap on the button next to the second option from the top (Modify button + Touch) to turn it on.
You can choose any other option that suits you better, but this is the one that will interfere less with other gestures that you may use in your workflow.

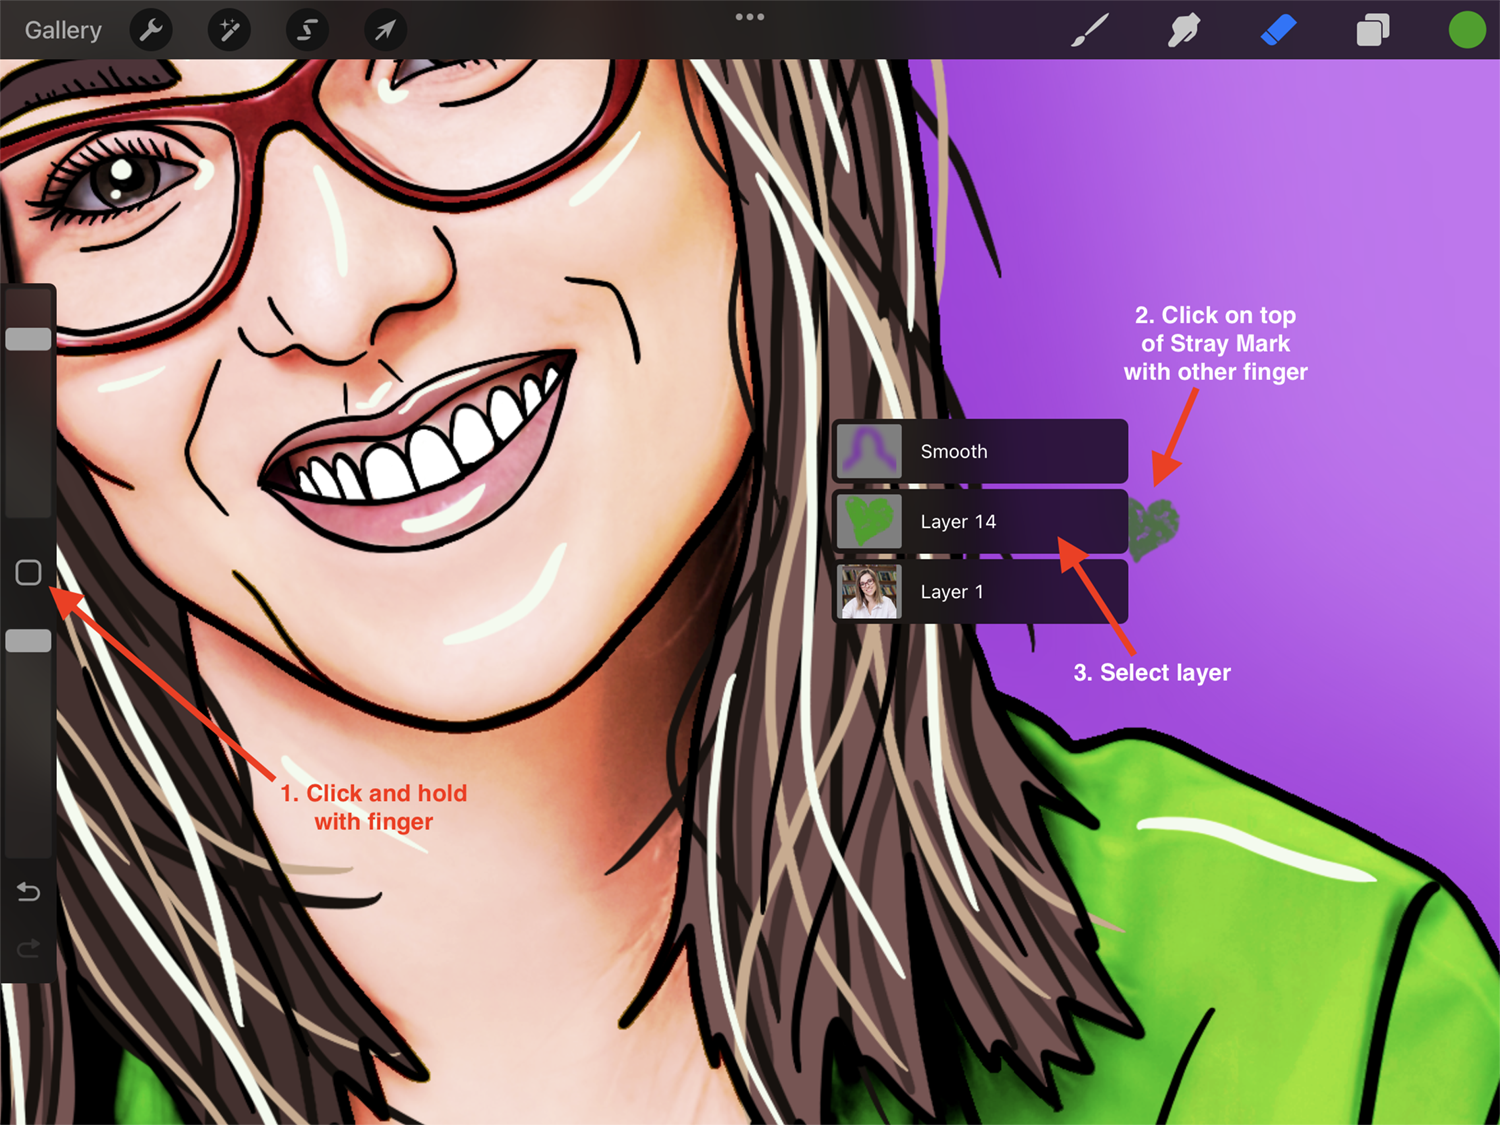
Now, zoom in on the stray mark so you have a better view. Then tap on top of the stray mark while holding the Modifybutton (small square icon) in the sidebar.
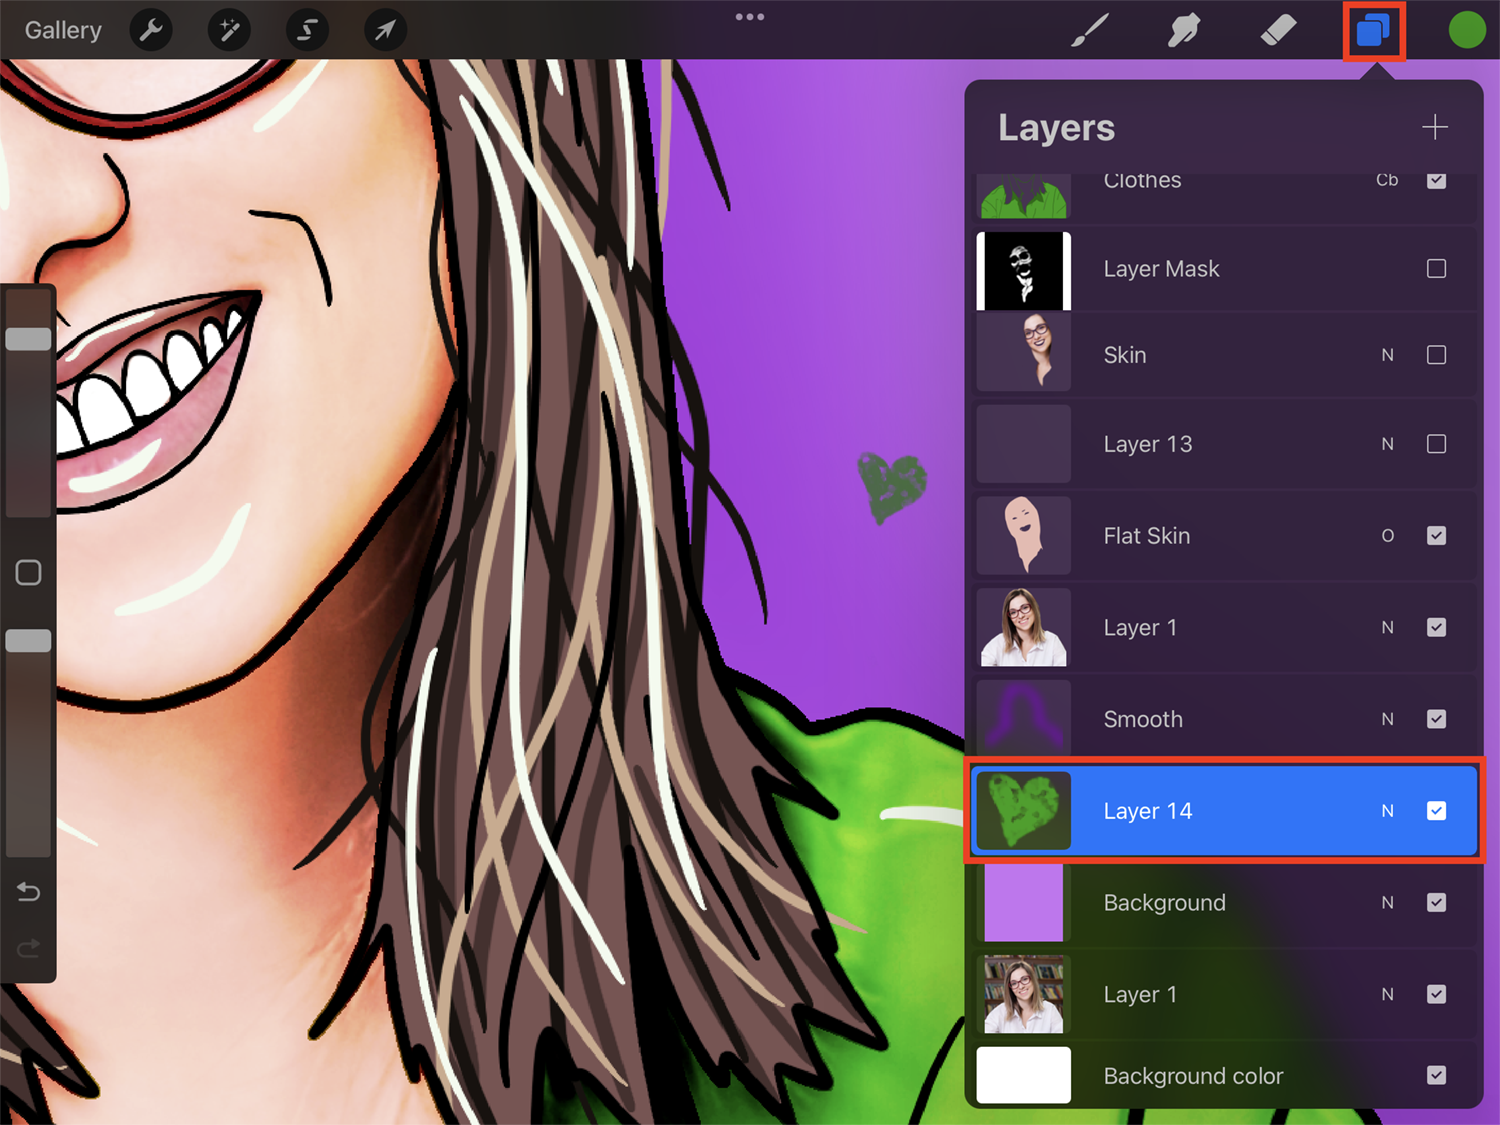
TheLayer Select popup will appear, showing you all the visible layers available in that location, including the one containing your stray mark.

Then, just select the layer and get rid of the mark by erasing it or by deleting the entire layer.
You can also drag toward the layer you want and then release your finger while on top of it to instantly select that layer.

We hope you enjoyed this Procreate tutorial. If you did, be sure to check out how to copy layers to a new canvas, import and use brushes, and make a transparent background in Procreate.
You’ve downloaded and installed your font and now it’s time to design! Finding fonts on your PC is essential when creating designs. You’ll want to know what fonts you have and how to preview your fonts to see which one fits best for your design.There are ...
You can easily create cool text effects in Procreate, such as intertwined text, by using layer masks. You can use this text effect when creating designs for logos, posters, greeting cards, etc.In this tutorial, we will be discussing how to use layer masks. Similar to clipping masks, using layer ...
Have you ever wanted to learn how to layer Cricut Iron-on vinyl but thought it was too intimidating? With our easy-to-follow guide, you'll learn how to layer vinyl in no time. Cricut's Iron-on vinyl is simply Heat Transfer Vinyl. The carrier sheets are very forgiving, allowing you to reposition your ...
Sublimation designs have become extremely popular with DIYers and crafters. Having the option to make custom prints for yourself is a great way of expressing your style. In this tutorial, we will show you how you can use Procreate to make your Sublimation designs and send them to your printer ...
In today’s exciting tutorial, you will discover how to use Animation Assist in Procreate! Use this incredibly powerful tool in Procreate V5 to easily assist in creating animation. If you are using an earlier version, we have an alternative tutorial on how to animate in Procreate that you can ...
Graffiti fonts turn bland, boring text in artistic expressions and epic designs. They can have a spray painted look, a vintage appeal, be heavy metal or look like dripping paint. One way to make use of these decorative fonts is on a shirt or hoodie with Heat Transfer Vinyl.Adding ...
By using our website you consent to all cookies in accordance with our cookie policy.


