
Plastic Text Effect in Illustrator
For this Tutorial, we are using the font Beach.
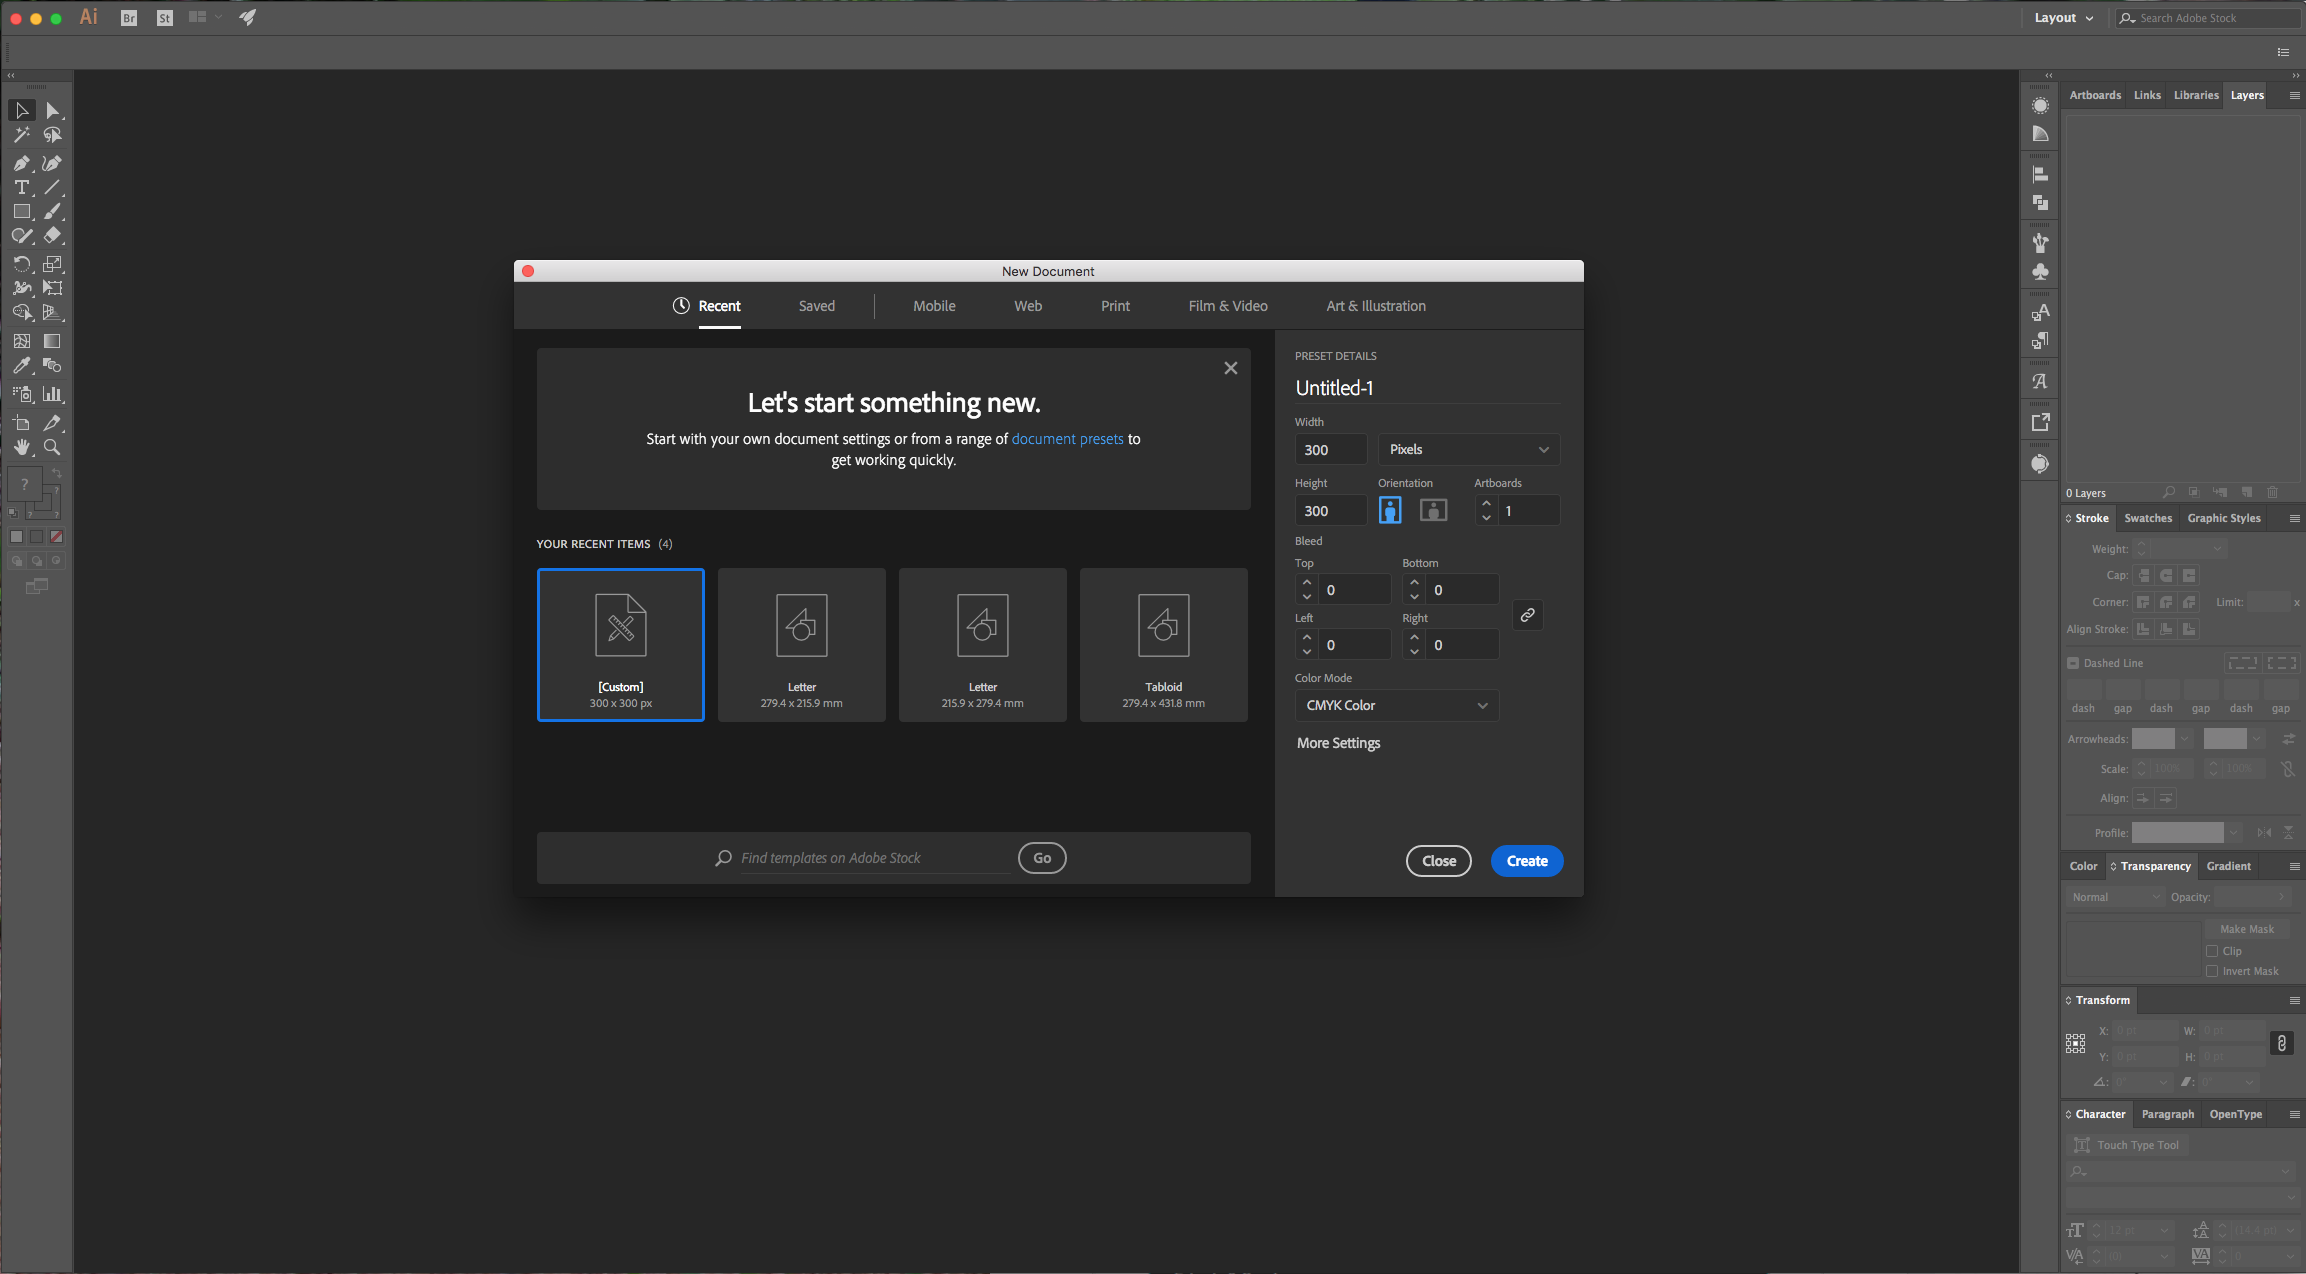
1 - In Illustrator, create a “New Document”.
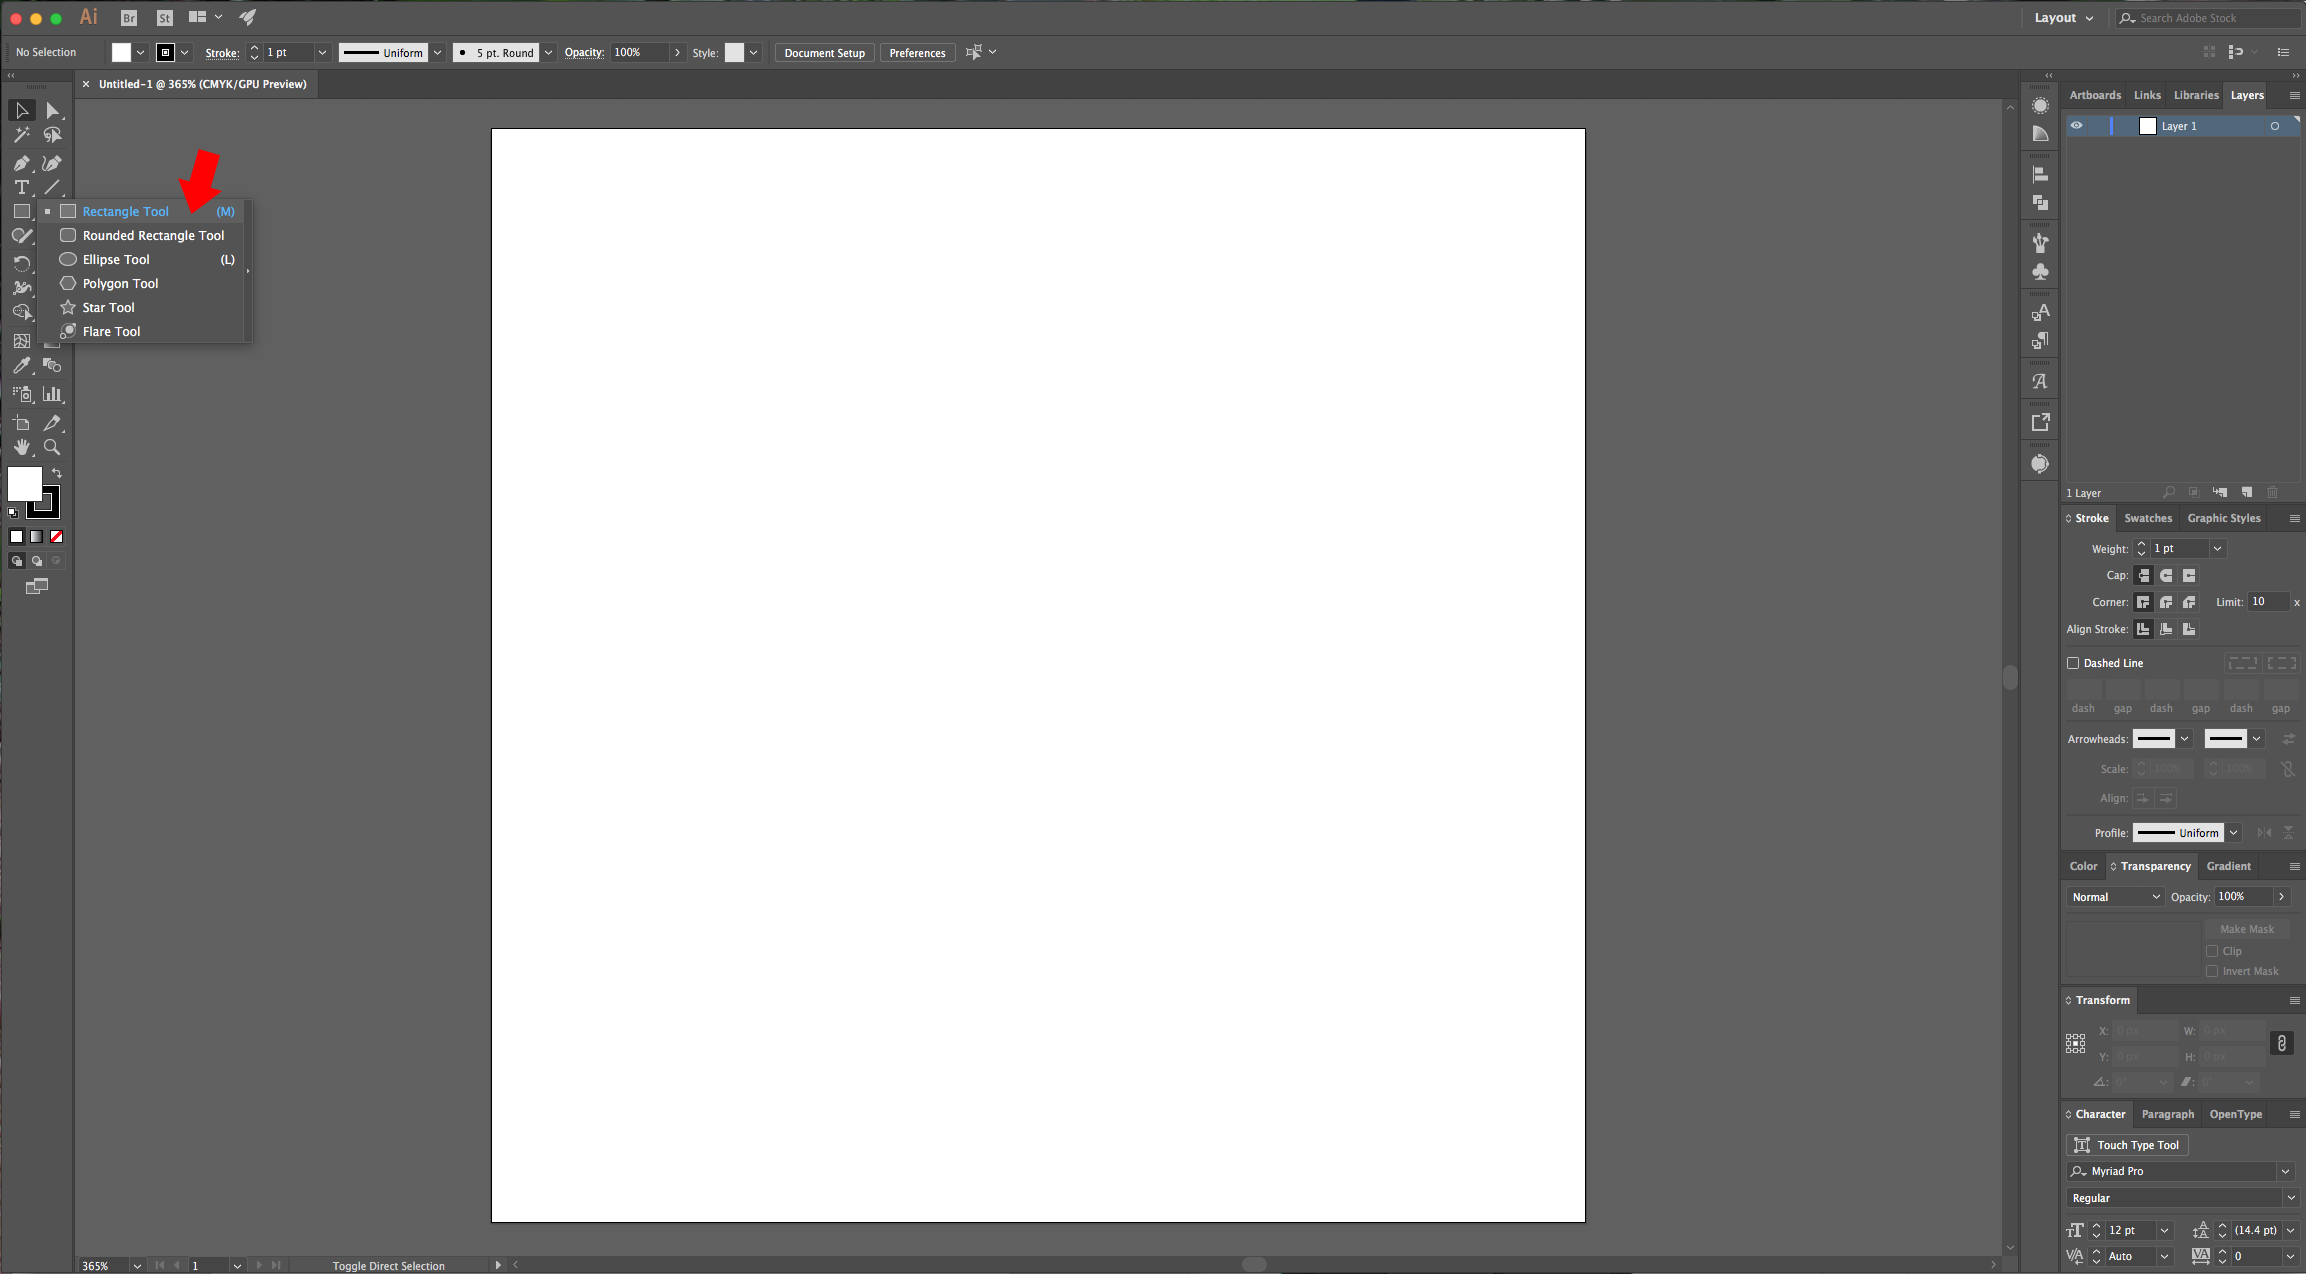
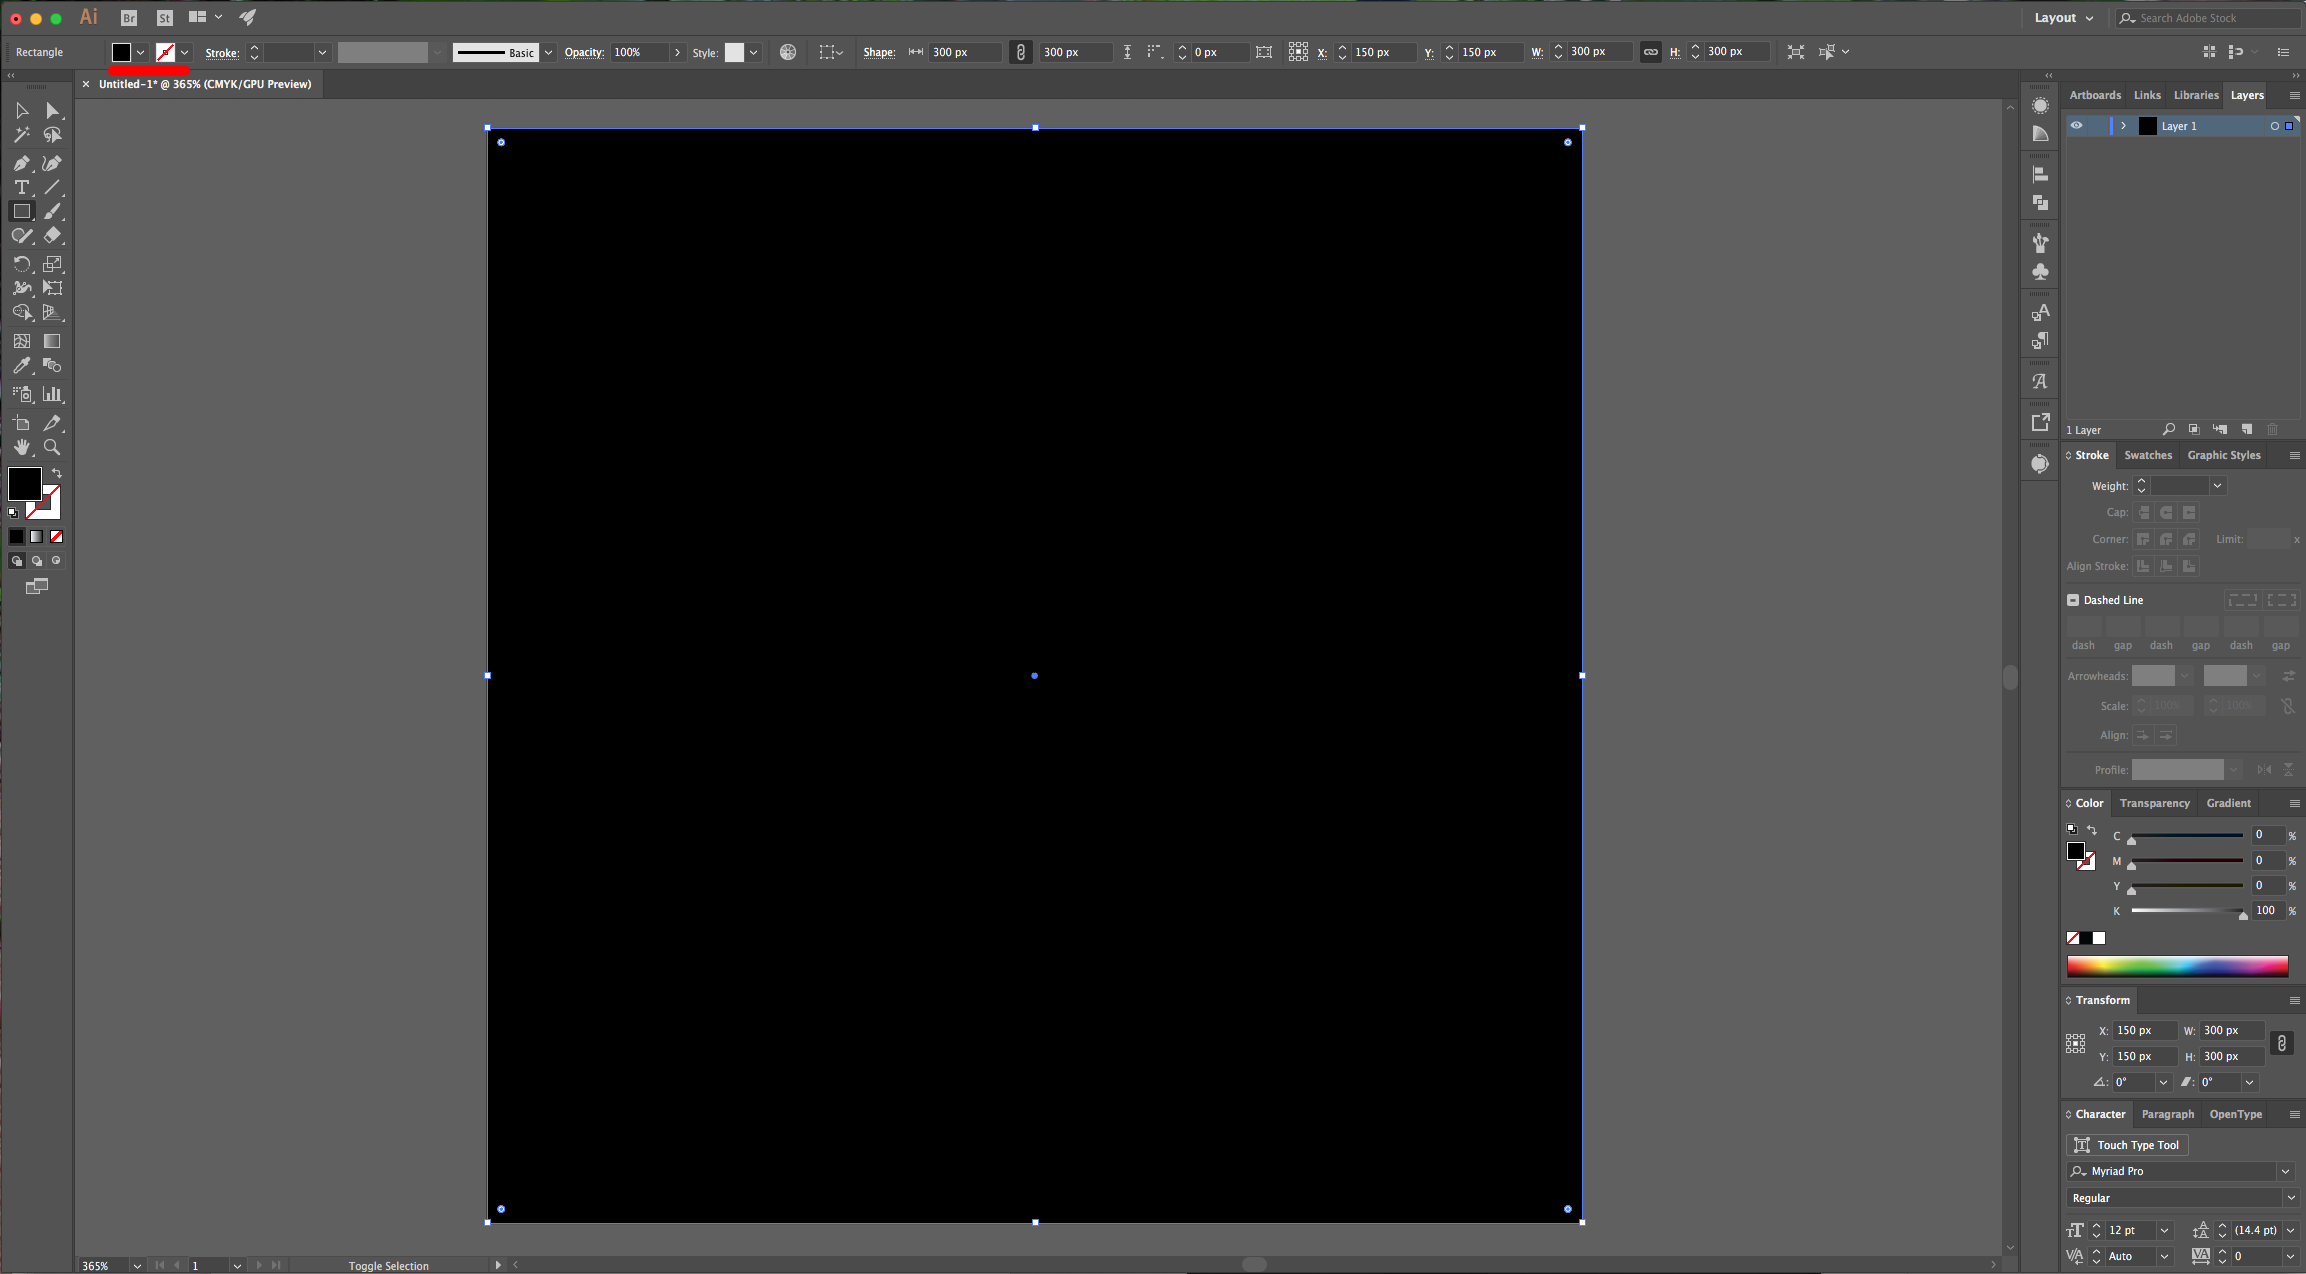
2 - Select the “Rectangle Tool” and draw a rectangle that overlaps your “Artboard”. Use black as “Fill” color and none as “Stroke” color.
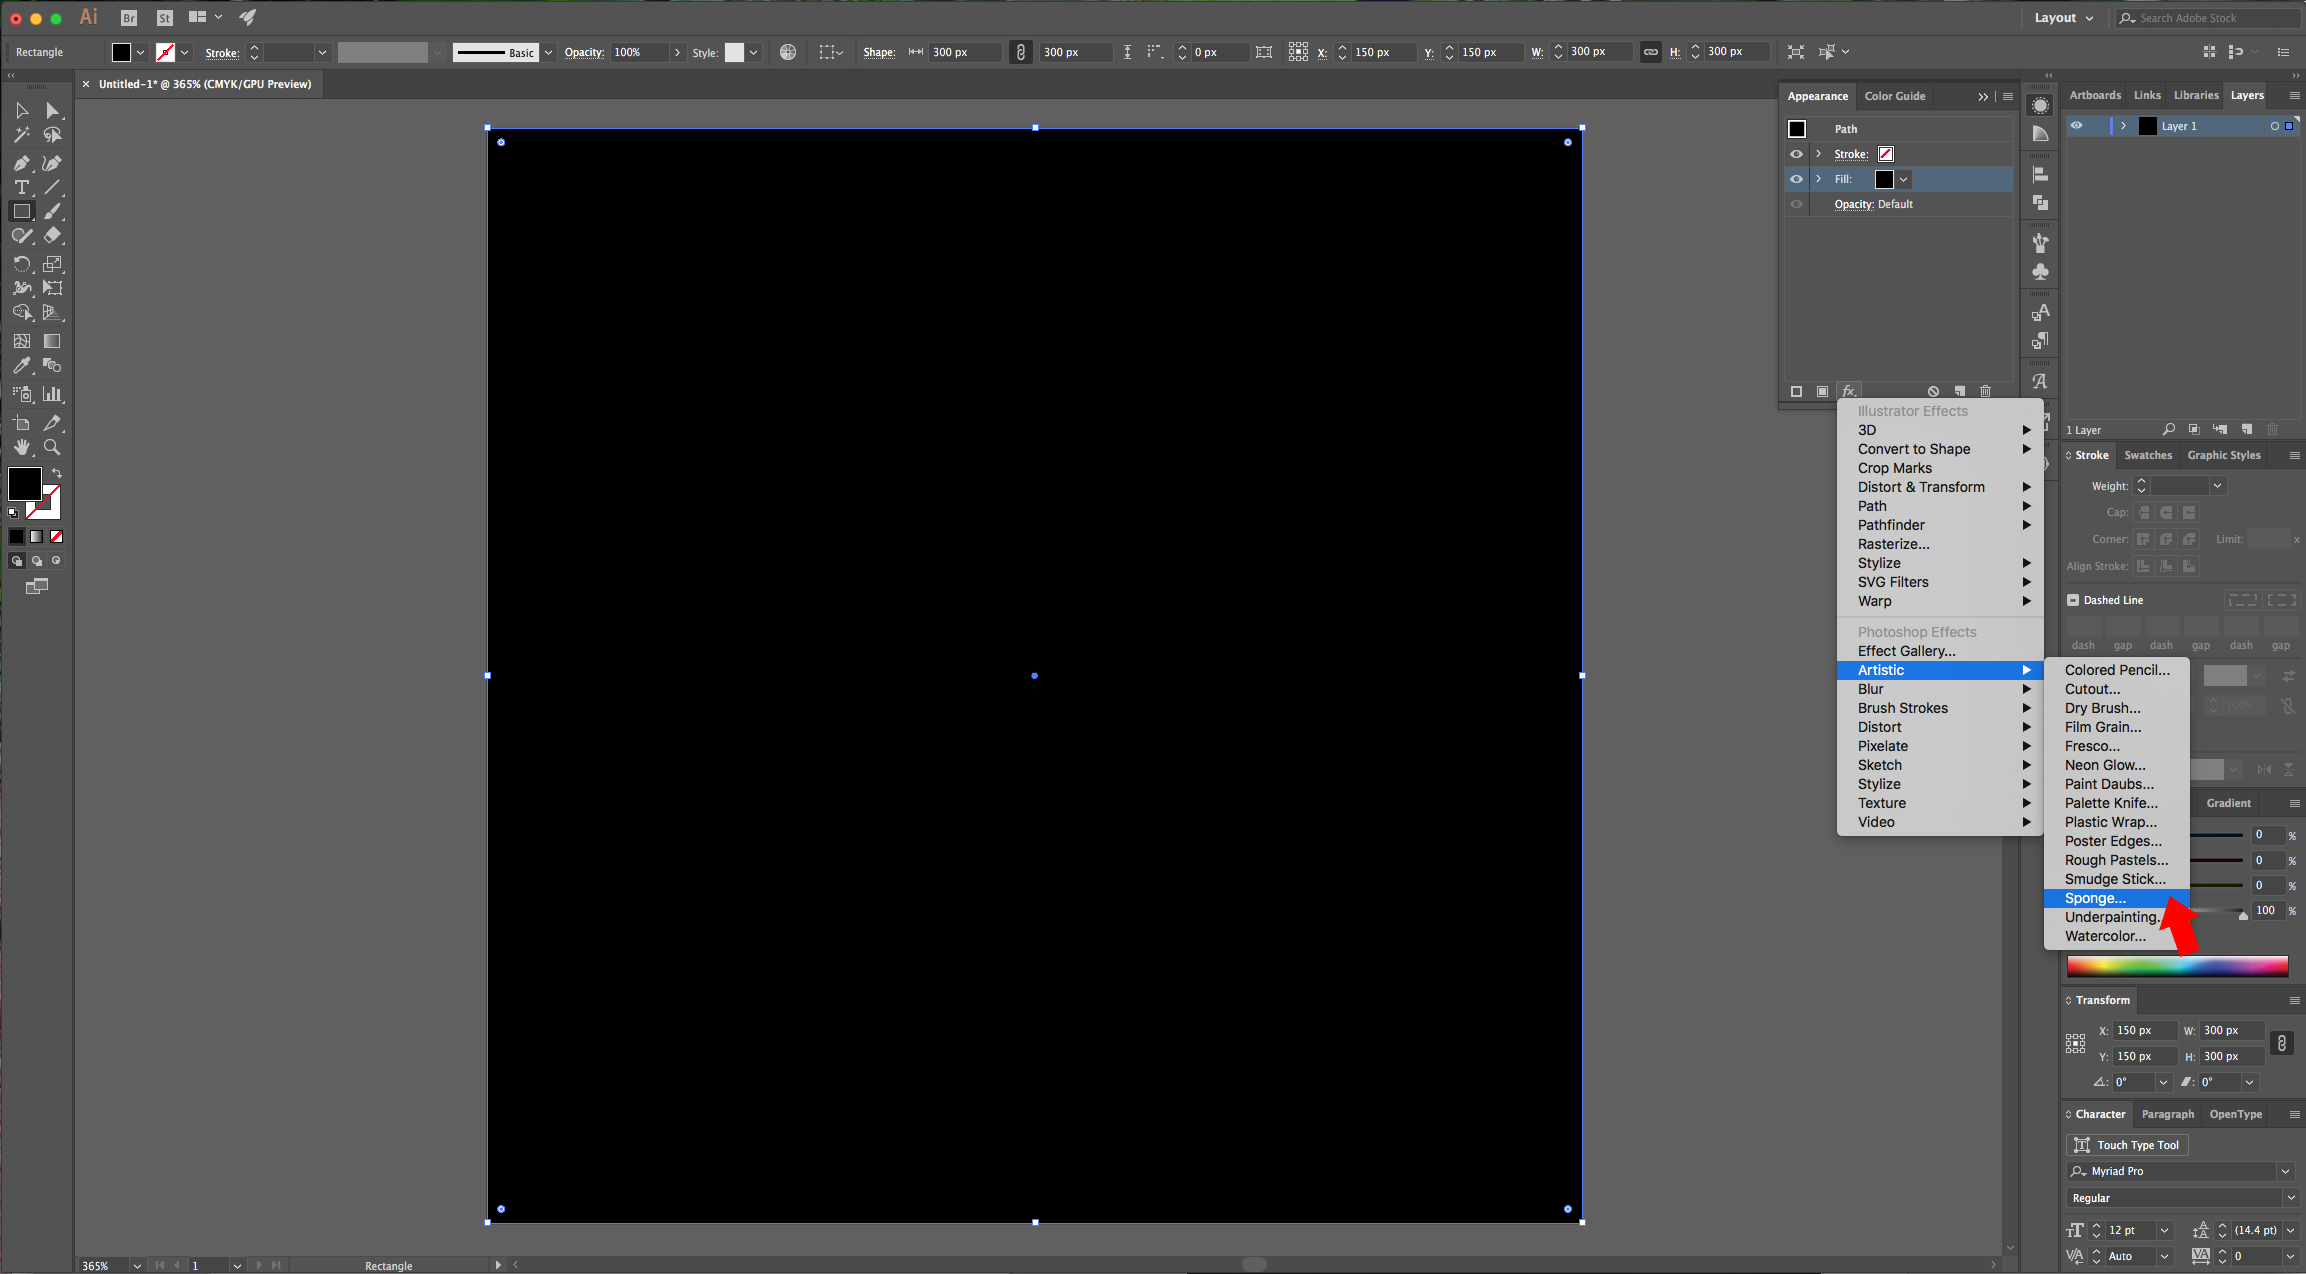
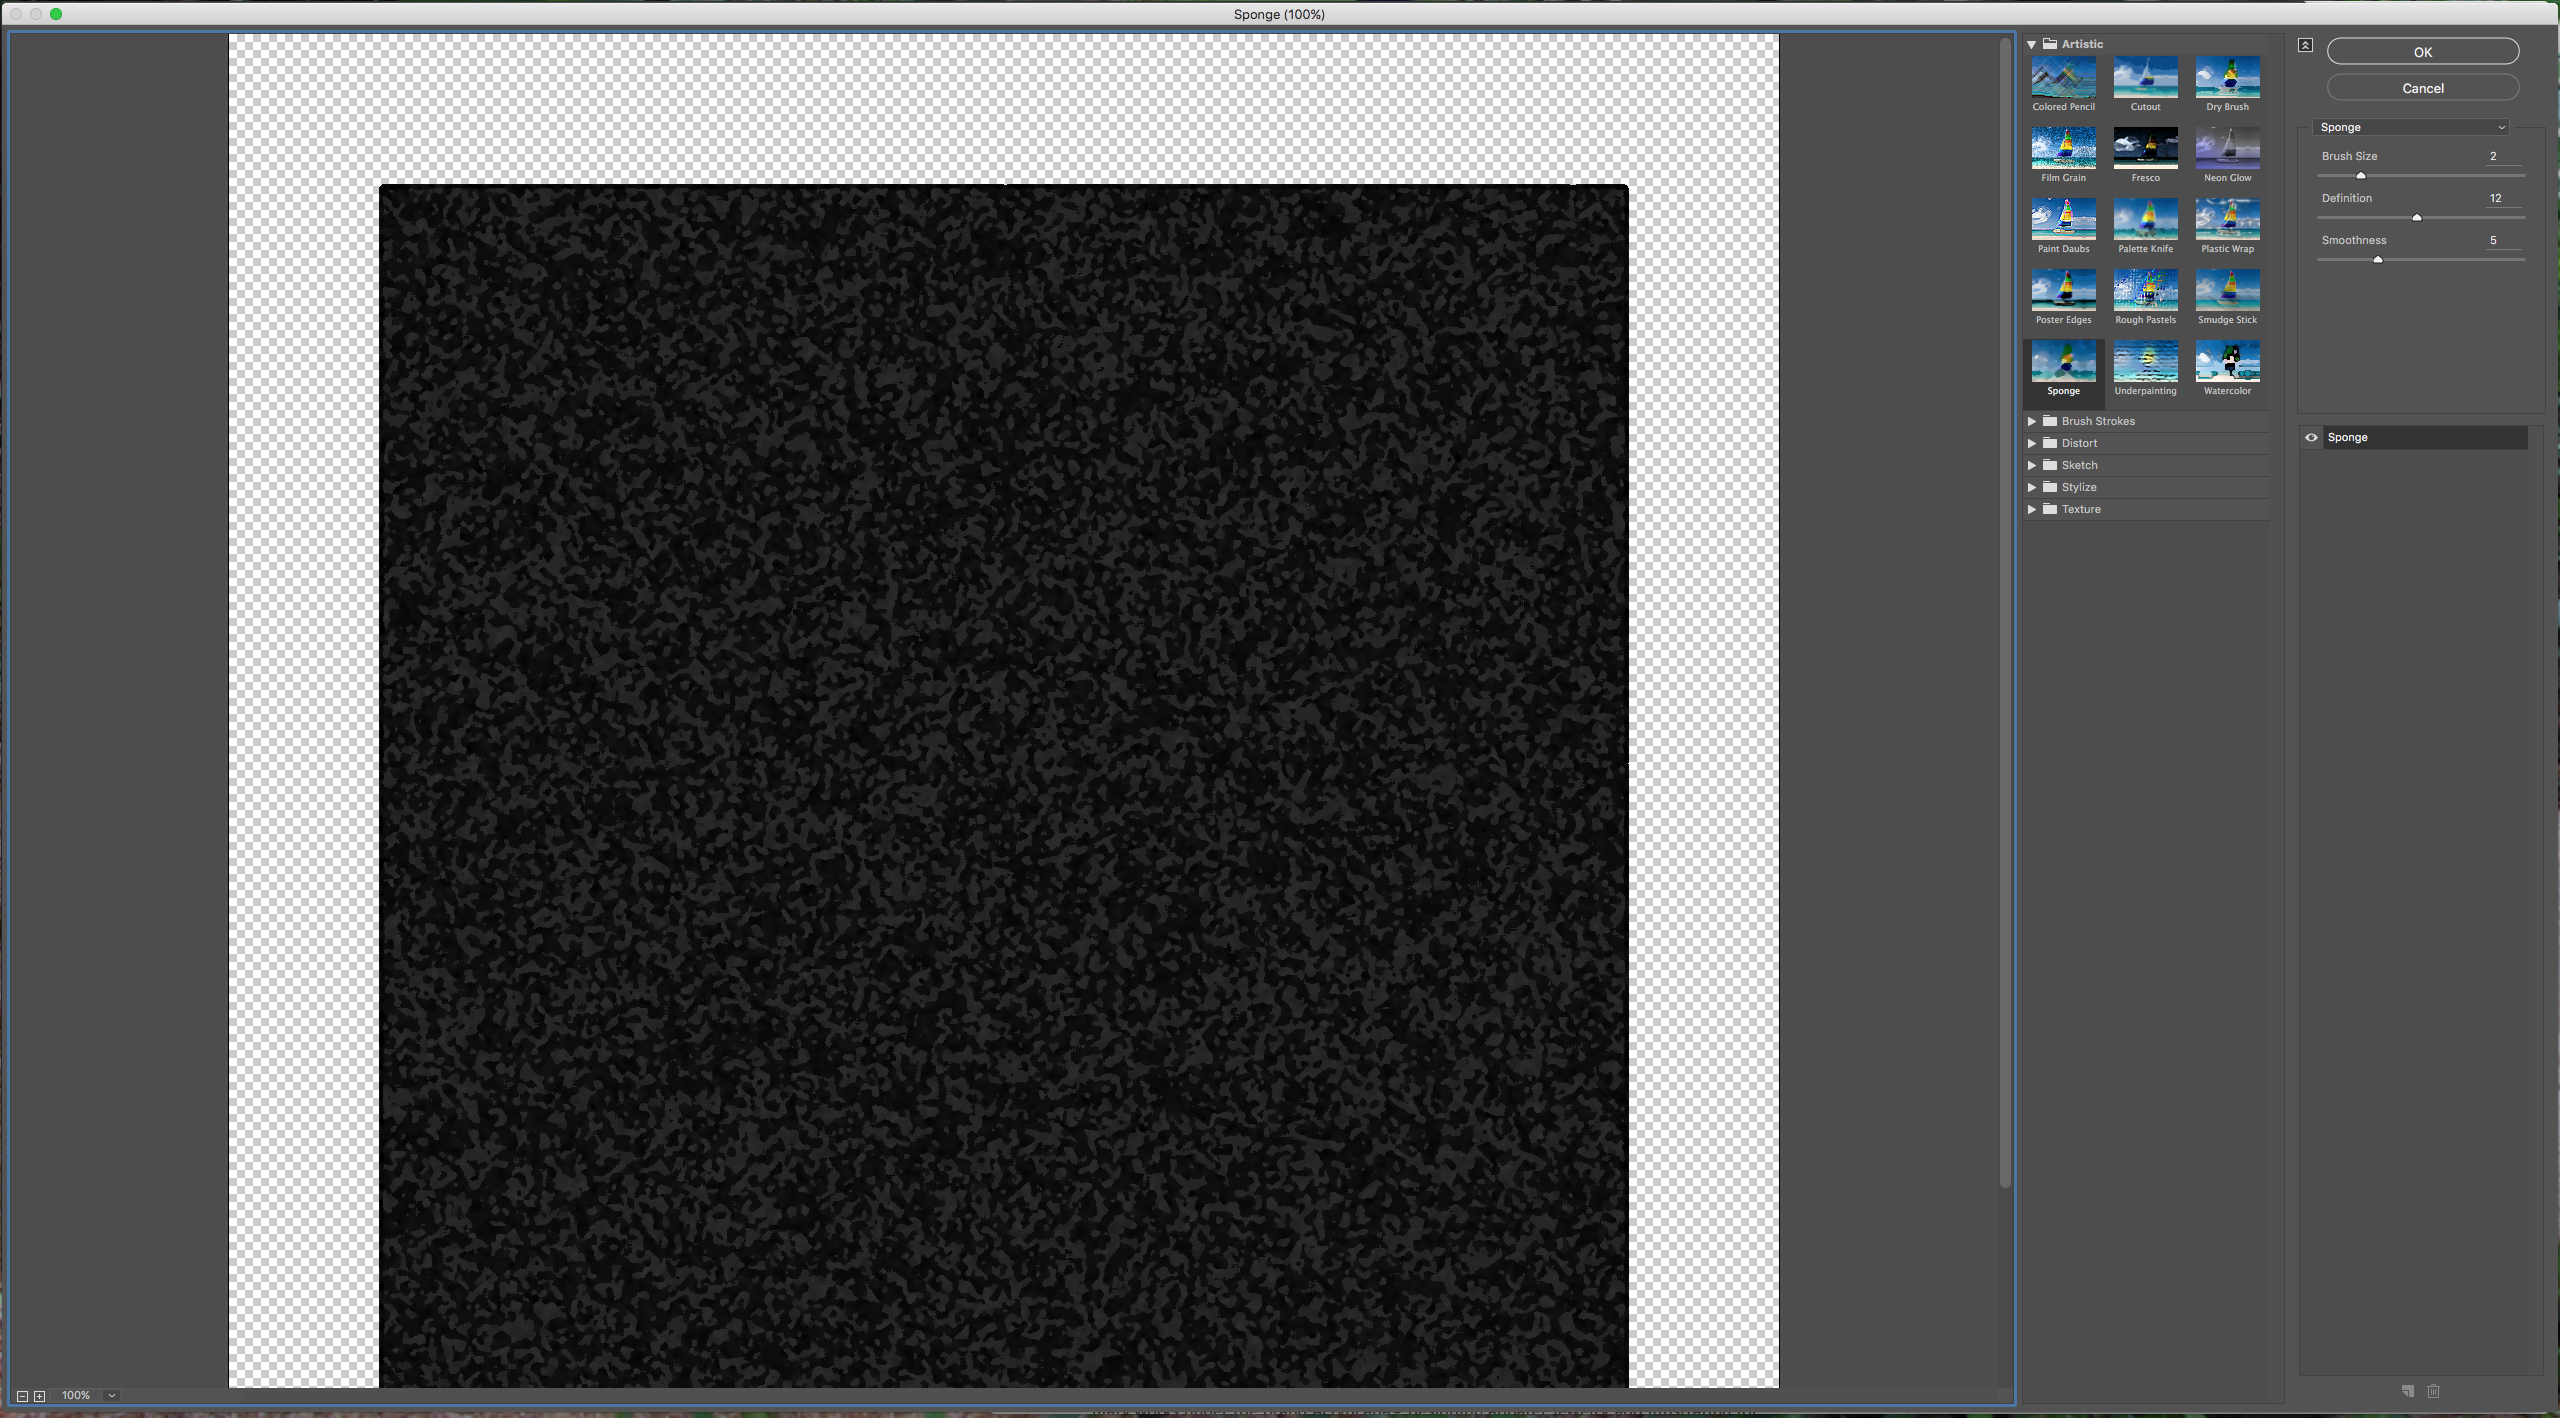
3 - In the “Appearance” Panel select the “Fill”, click on the “Add New Effect” button at the bottom of the Panel and go to Artistic > Sponge, apply the default values:
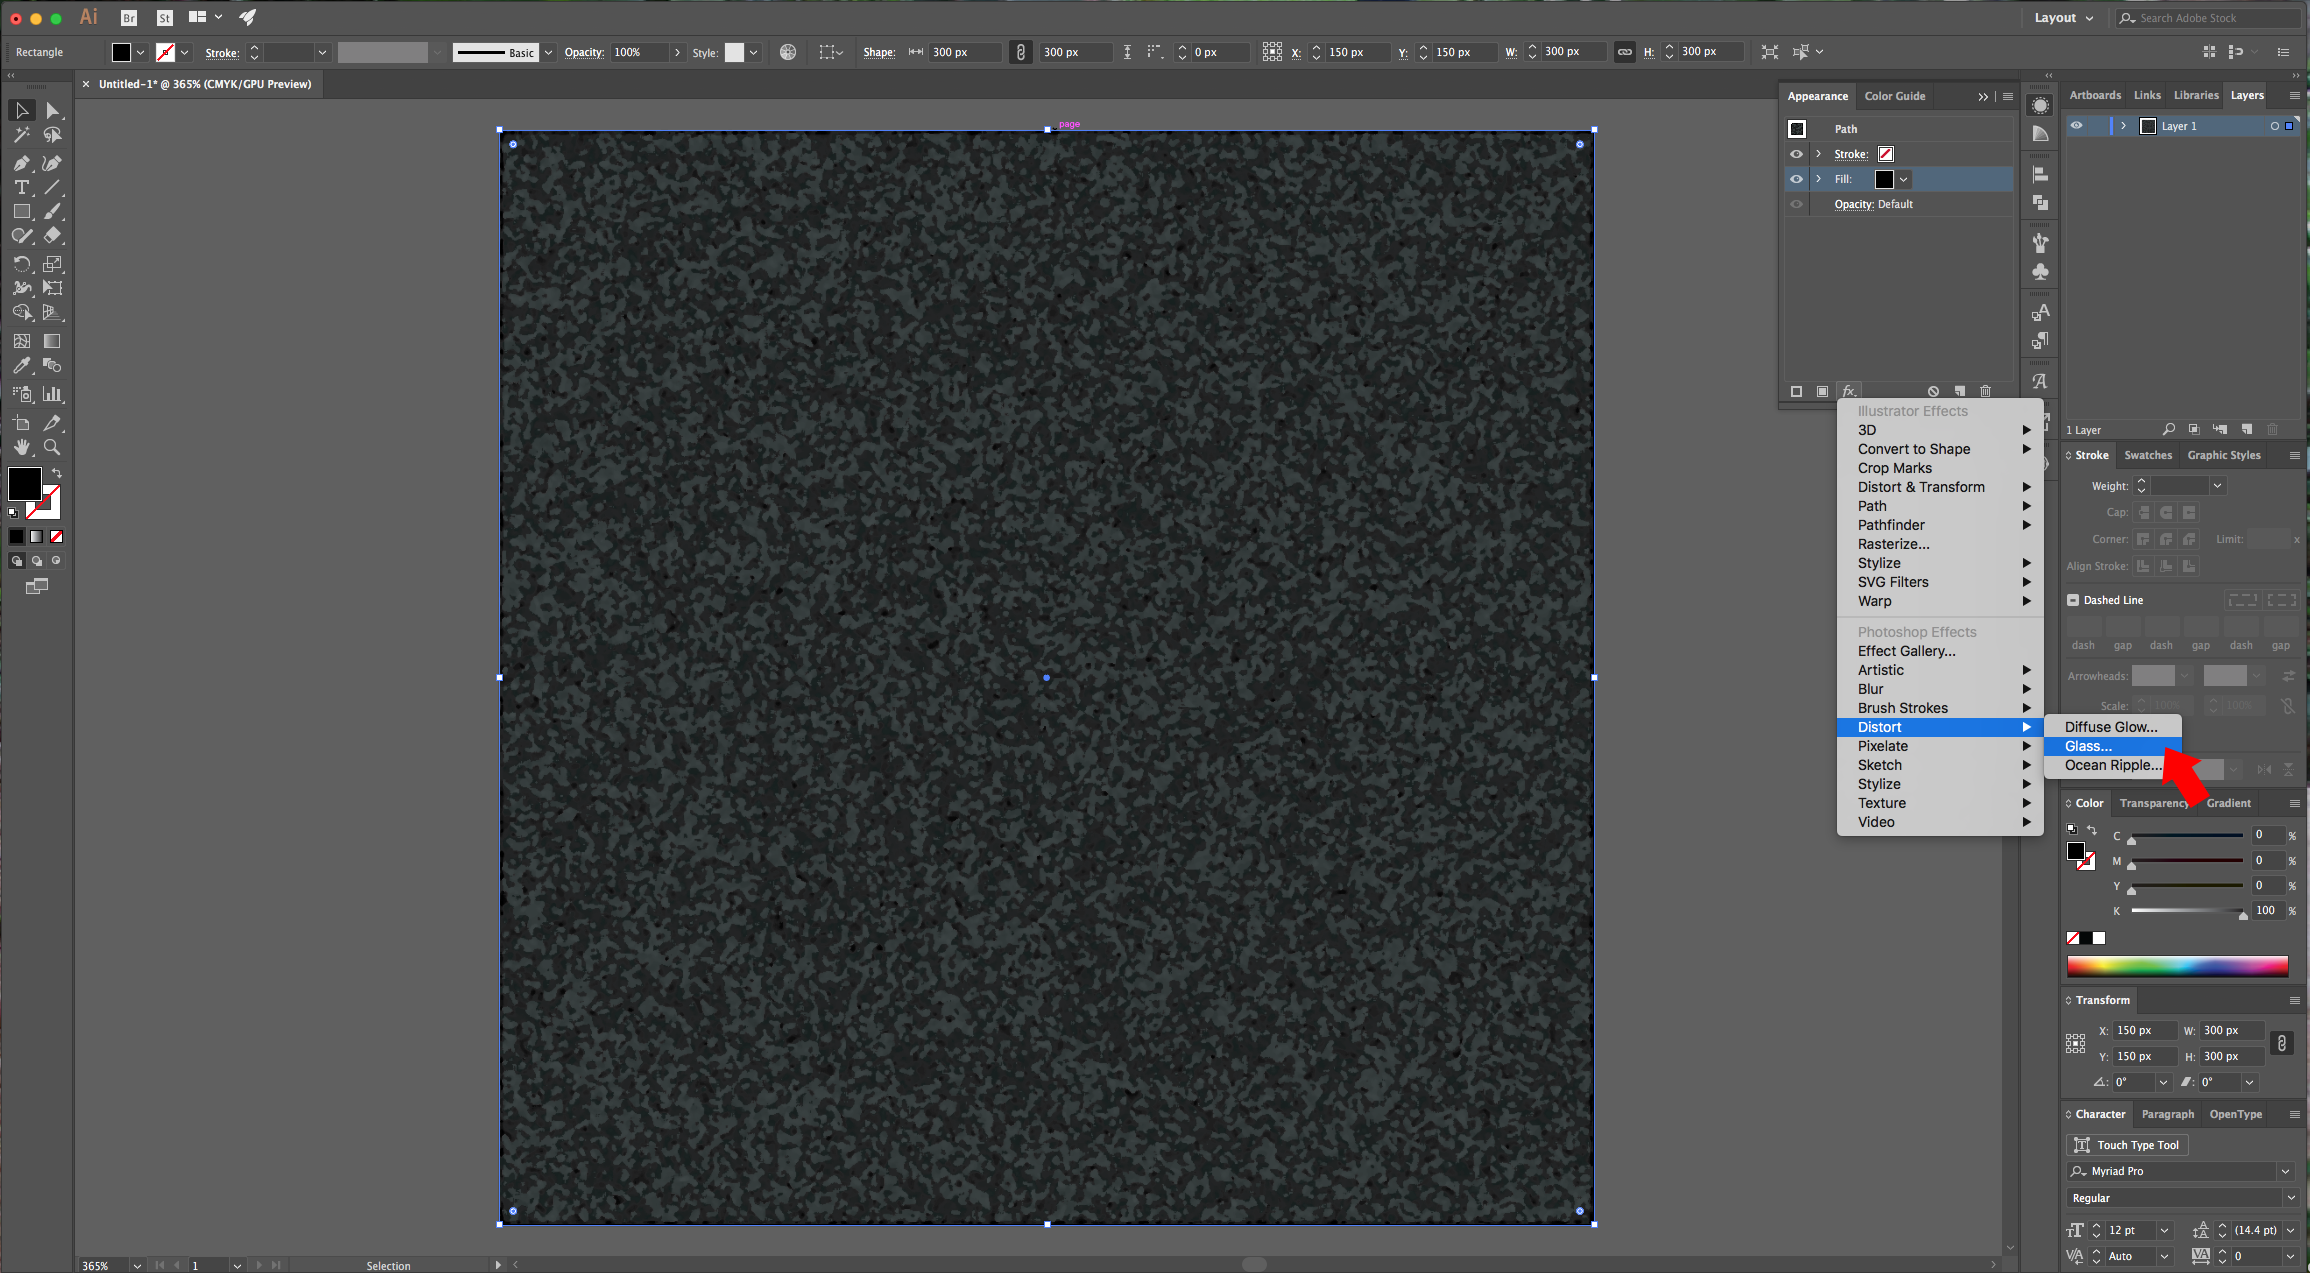
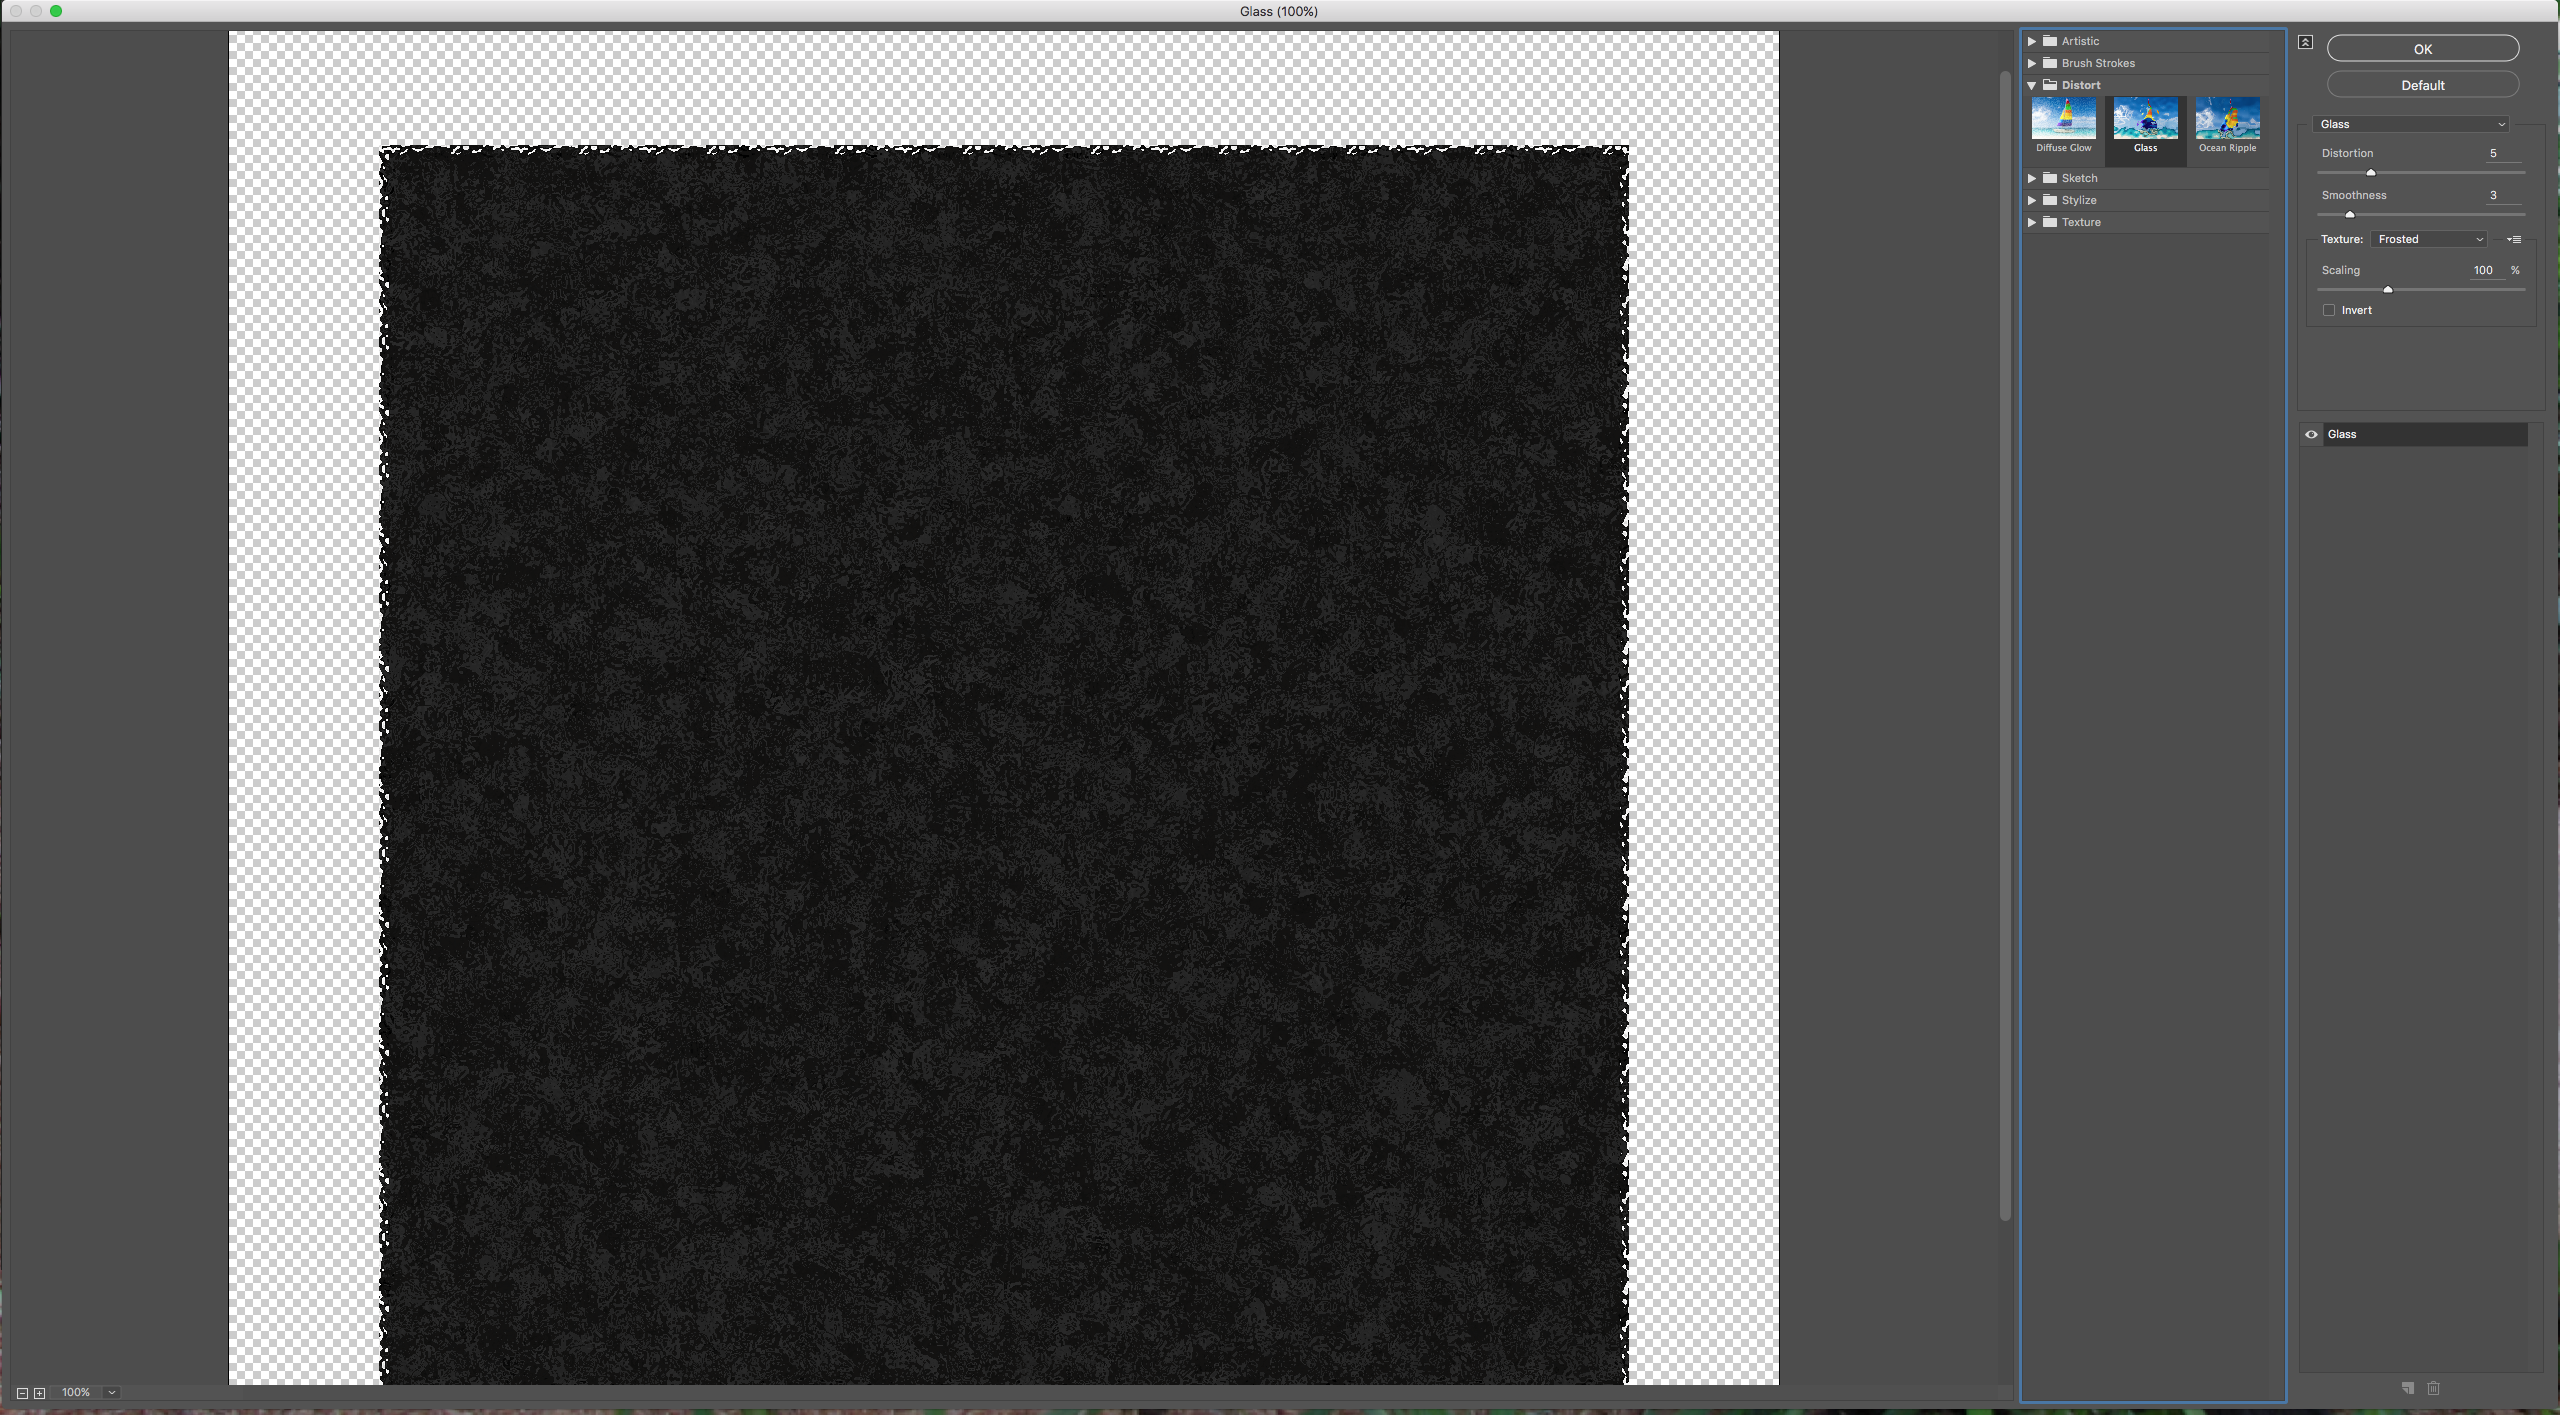
4 - Then go to Distort > Glass and use the following values:
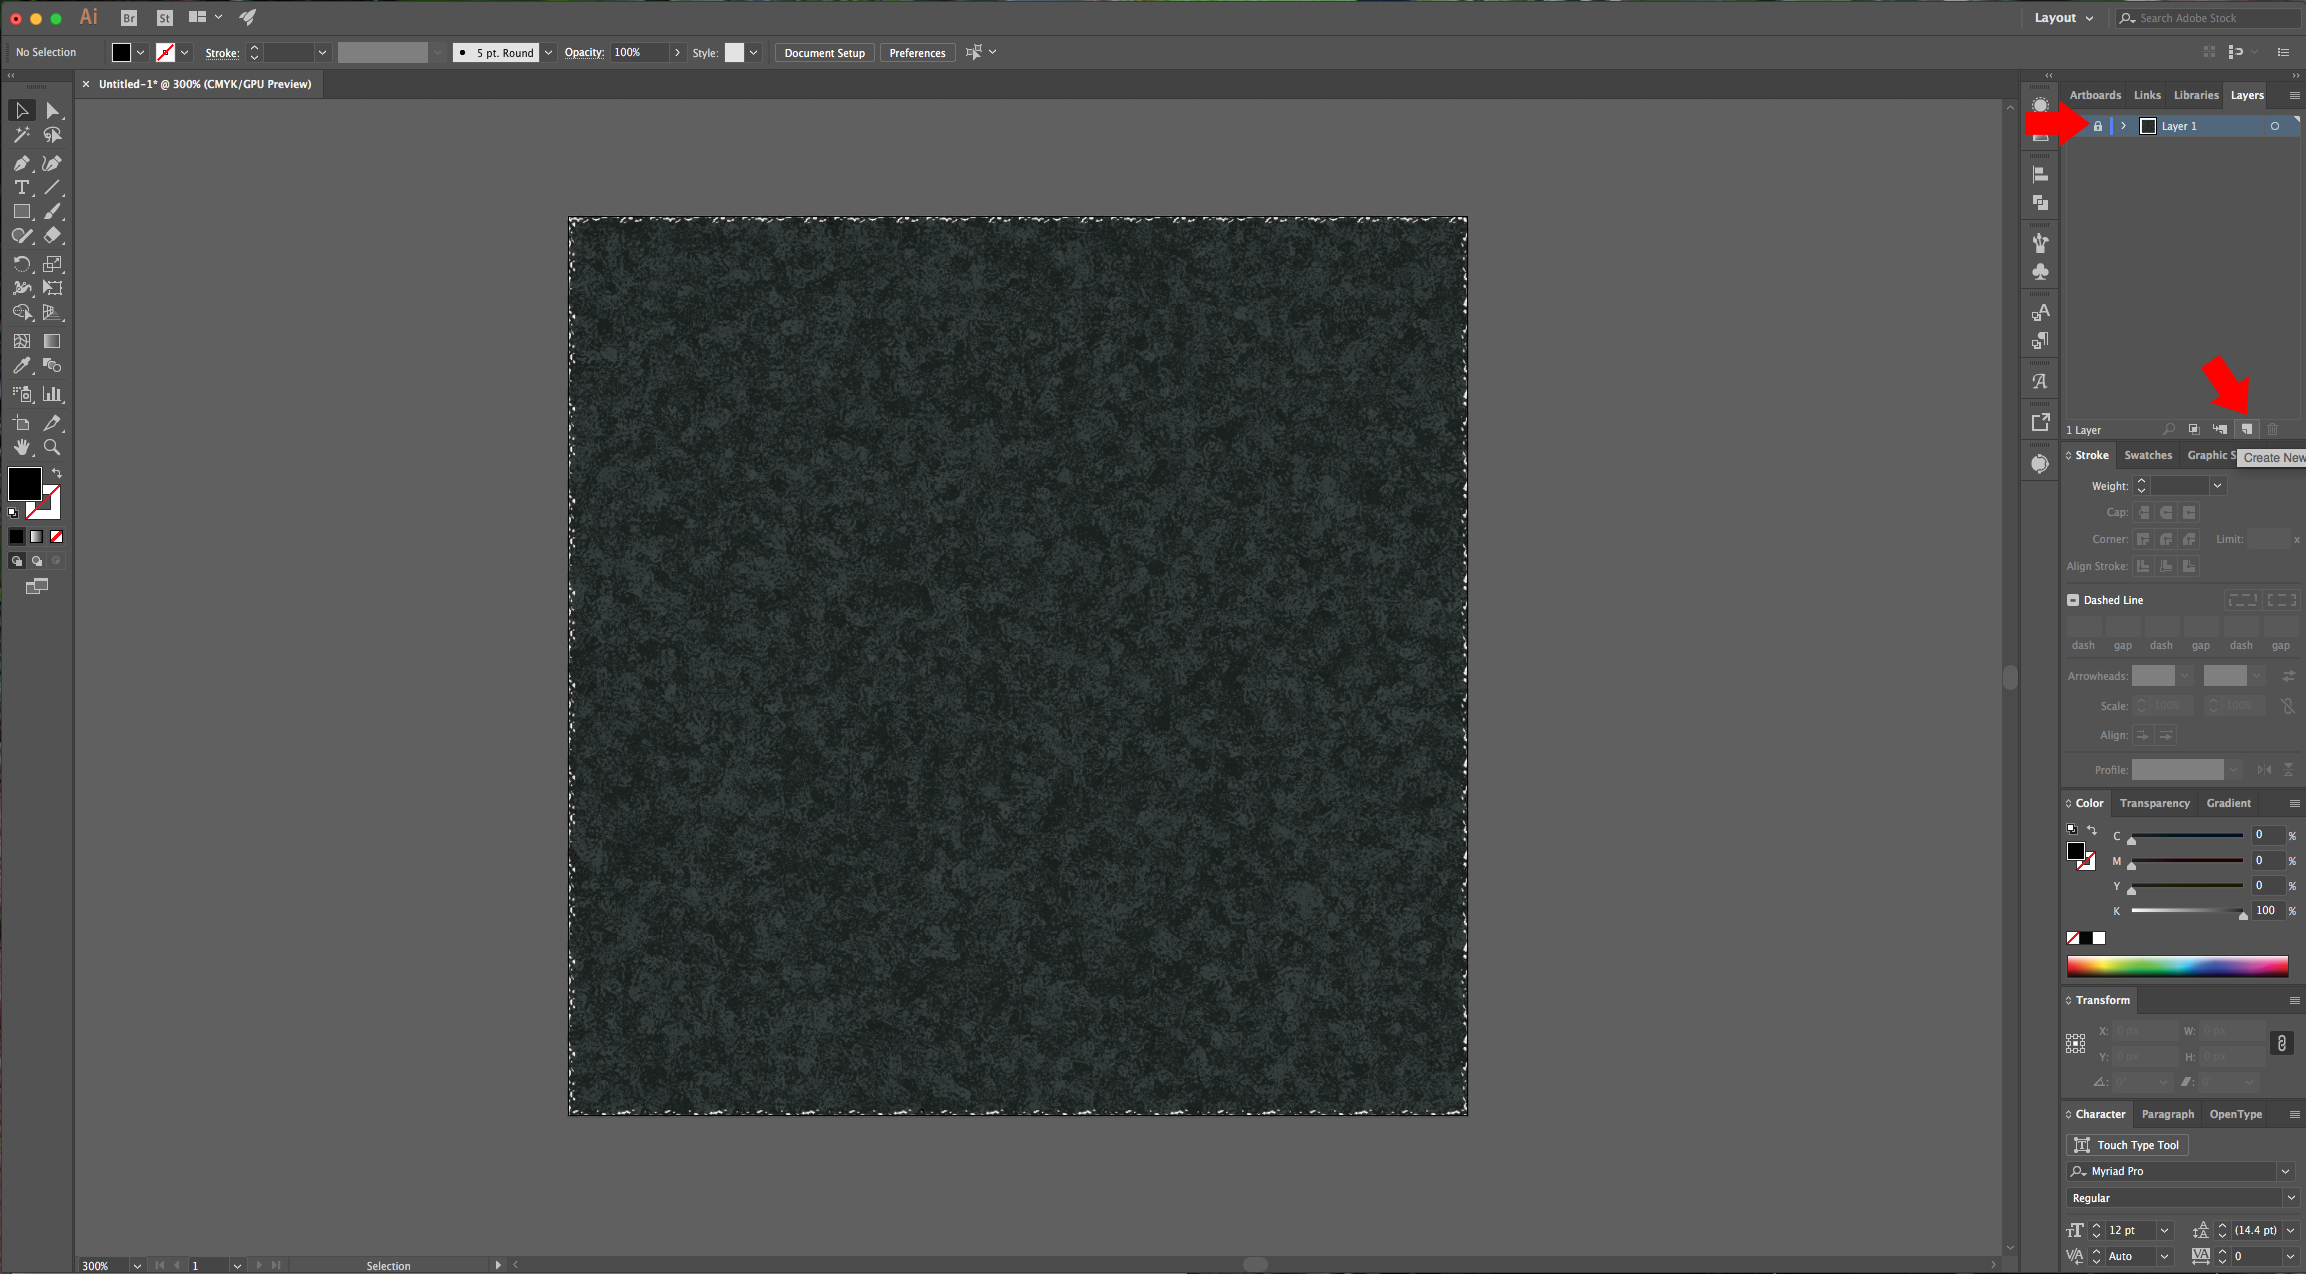
5 - Go to the “Layers” Panel and lock your current layer by clicking on the small space to the left of the thumbnail and invoke the small lock icon. Then create a “New Layer” (Command/Control + L) or click the small button at the bottom of the Panel.
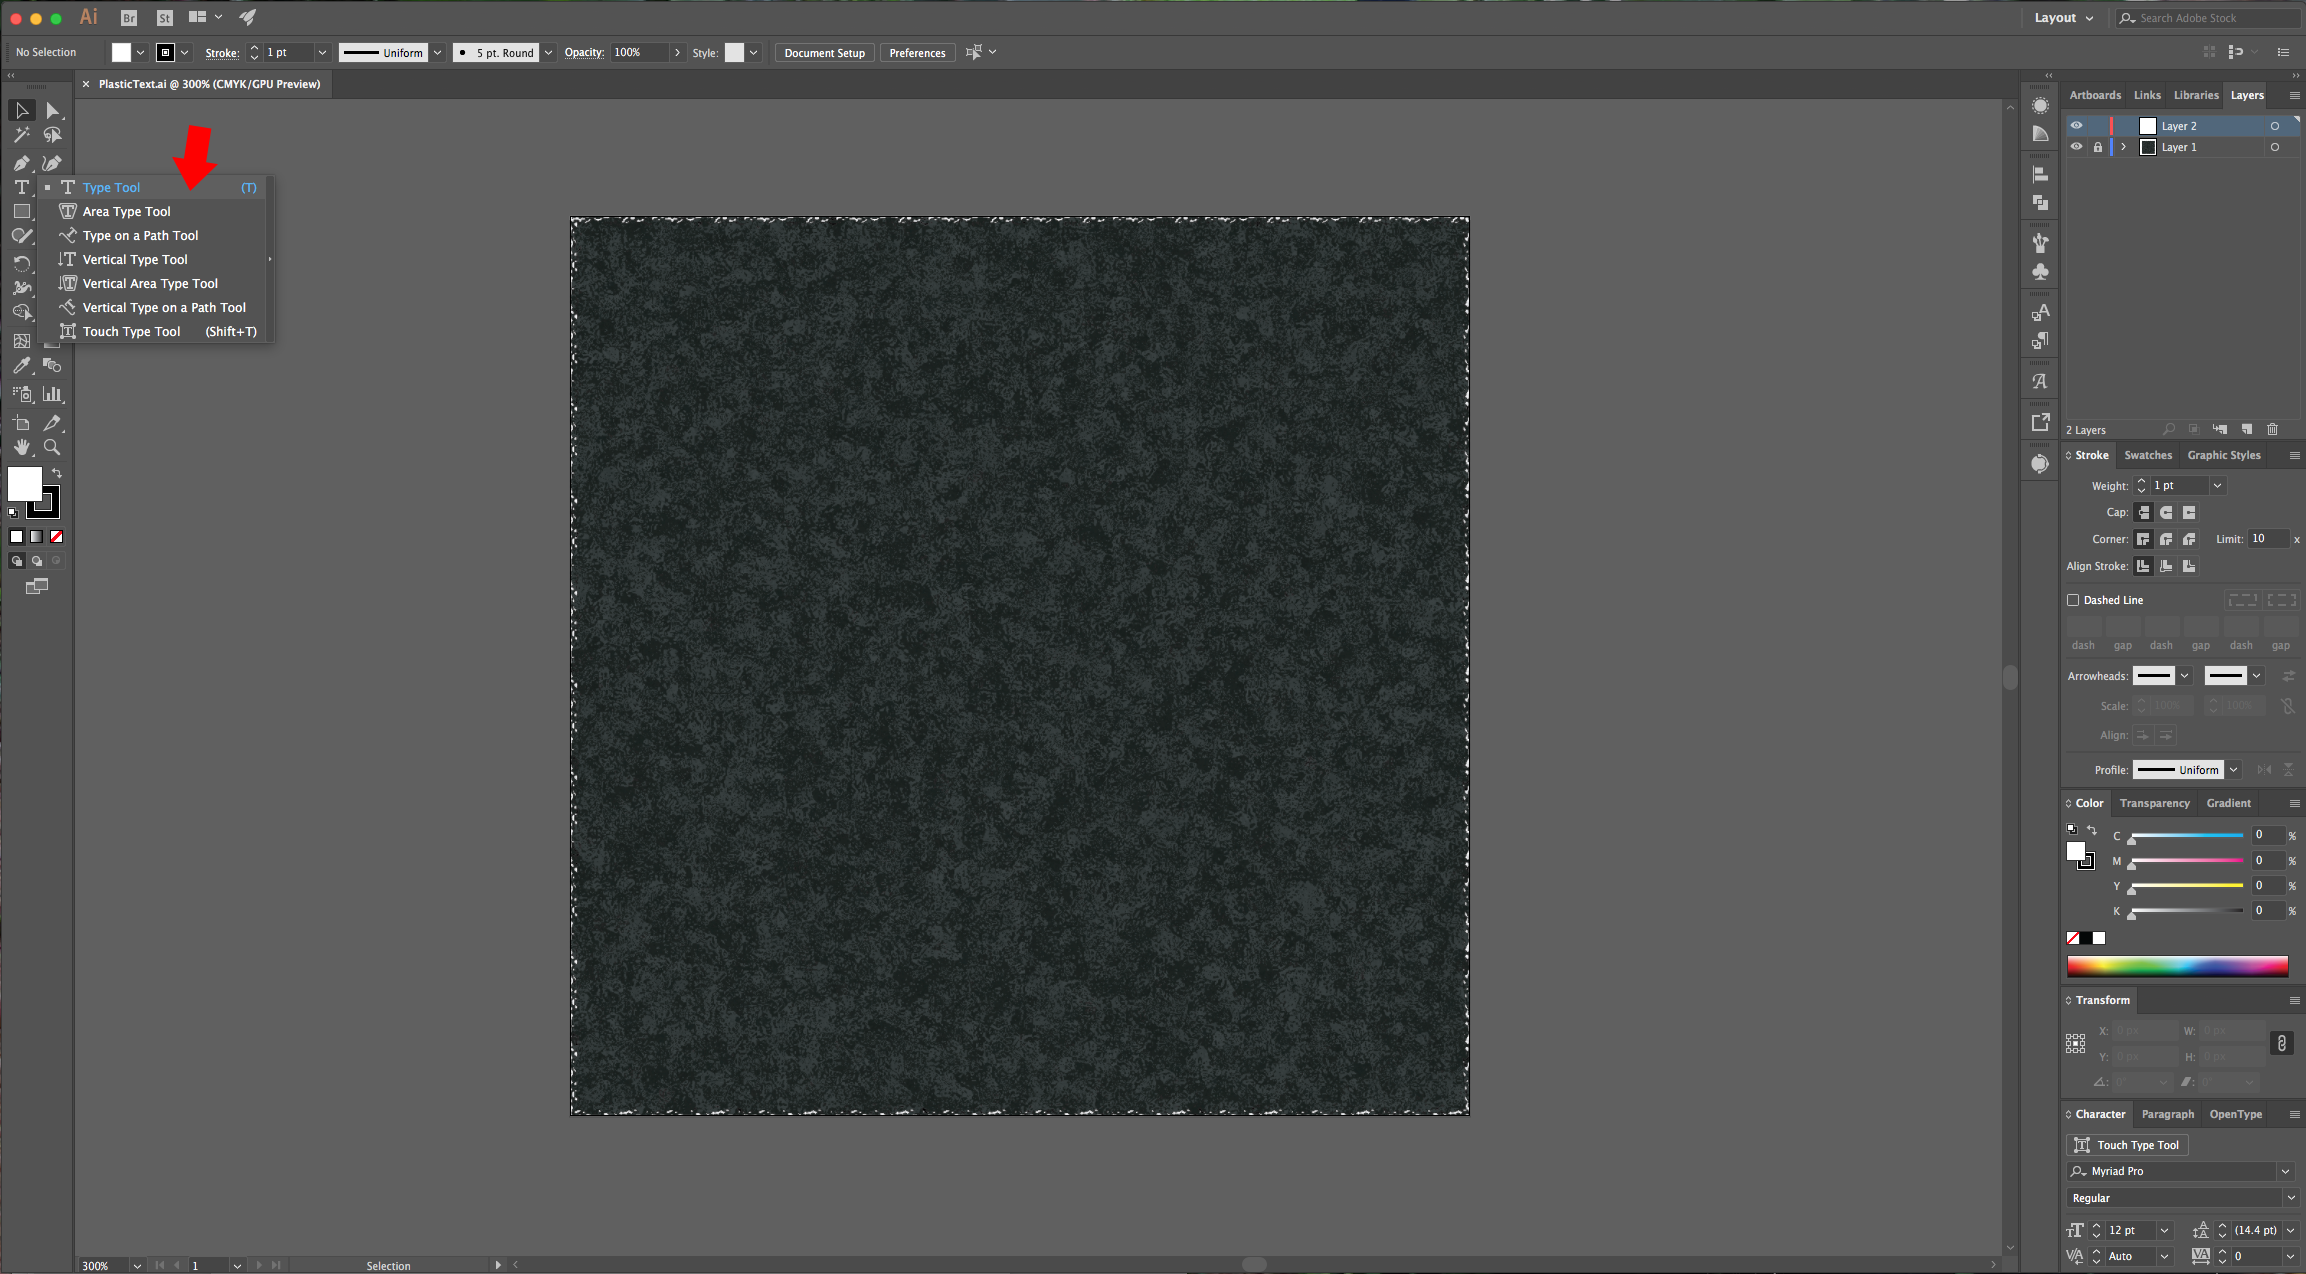
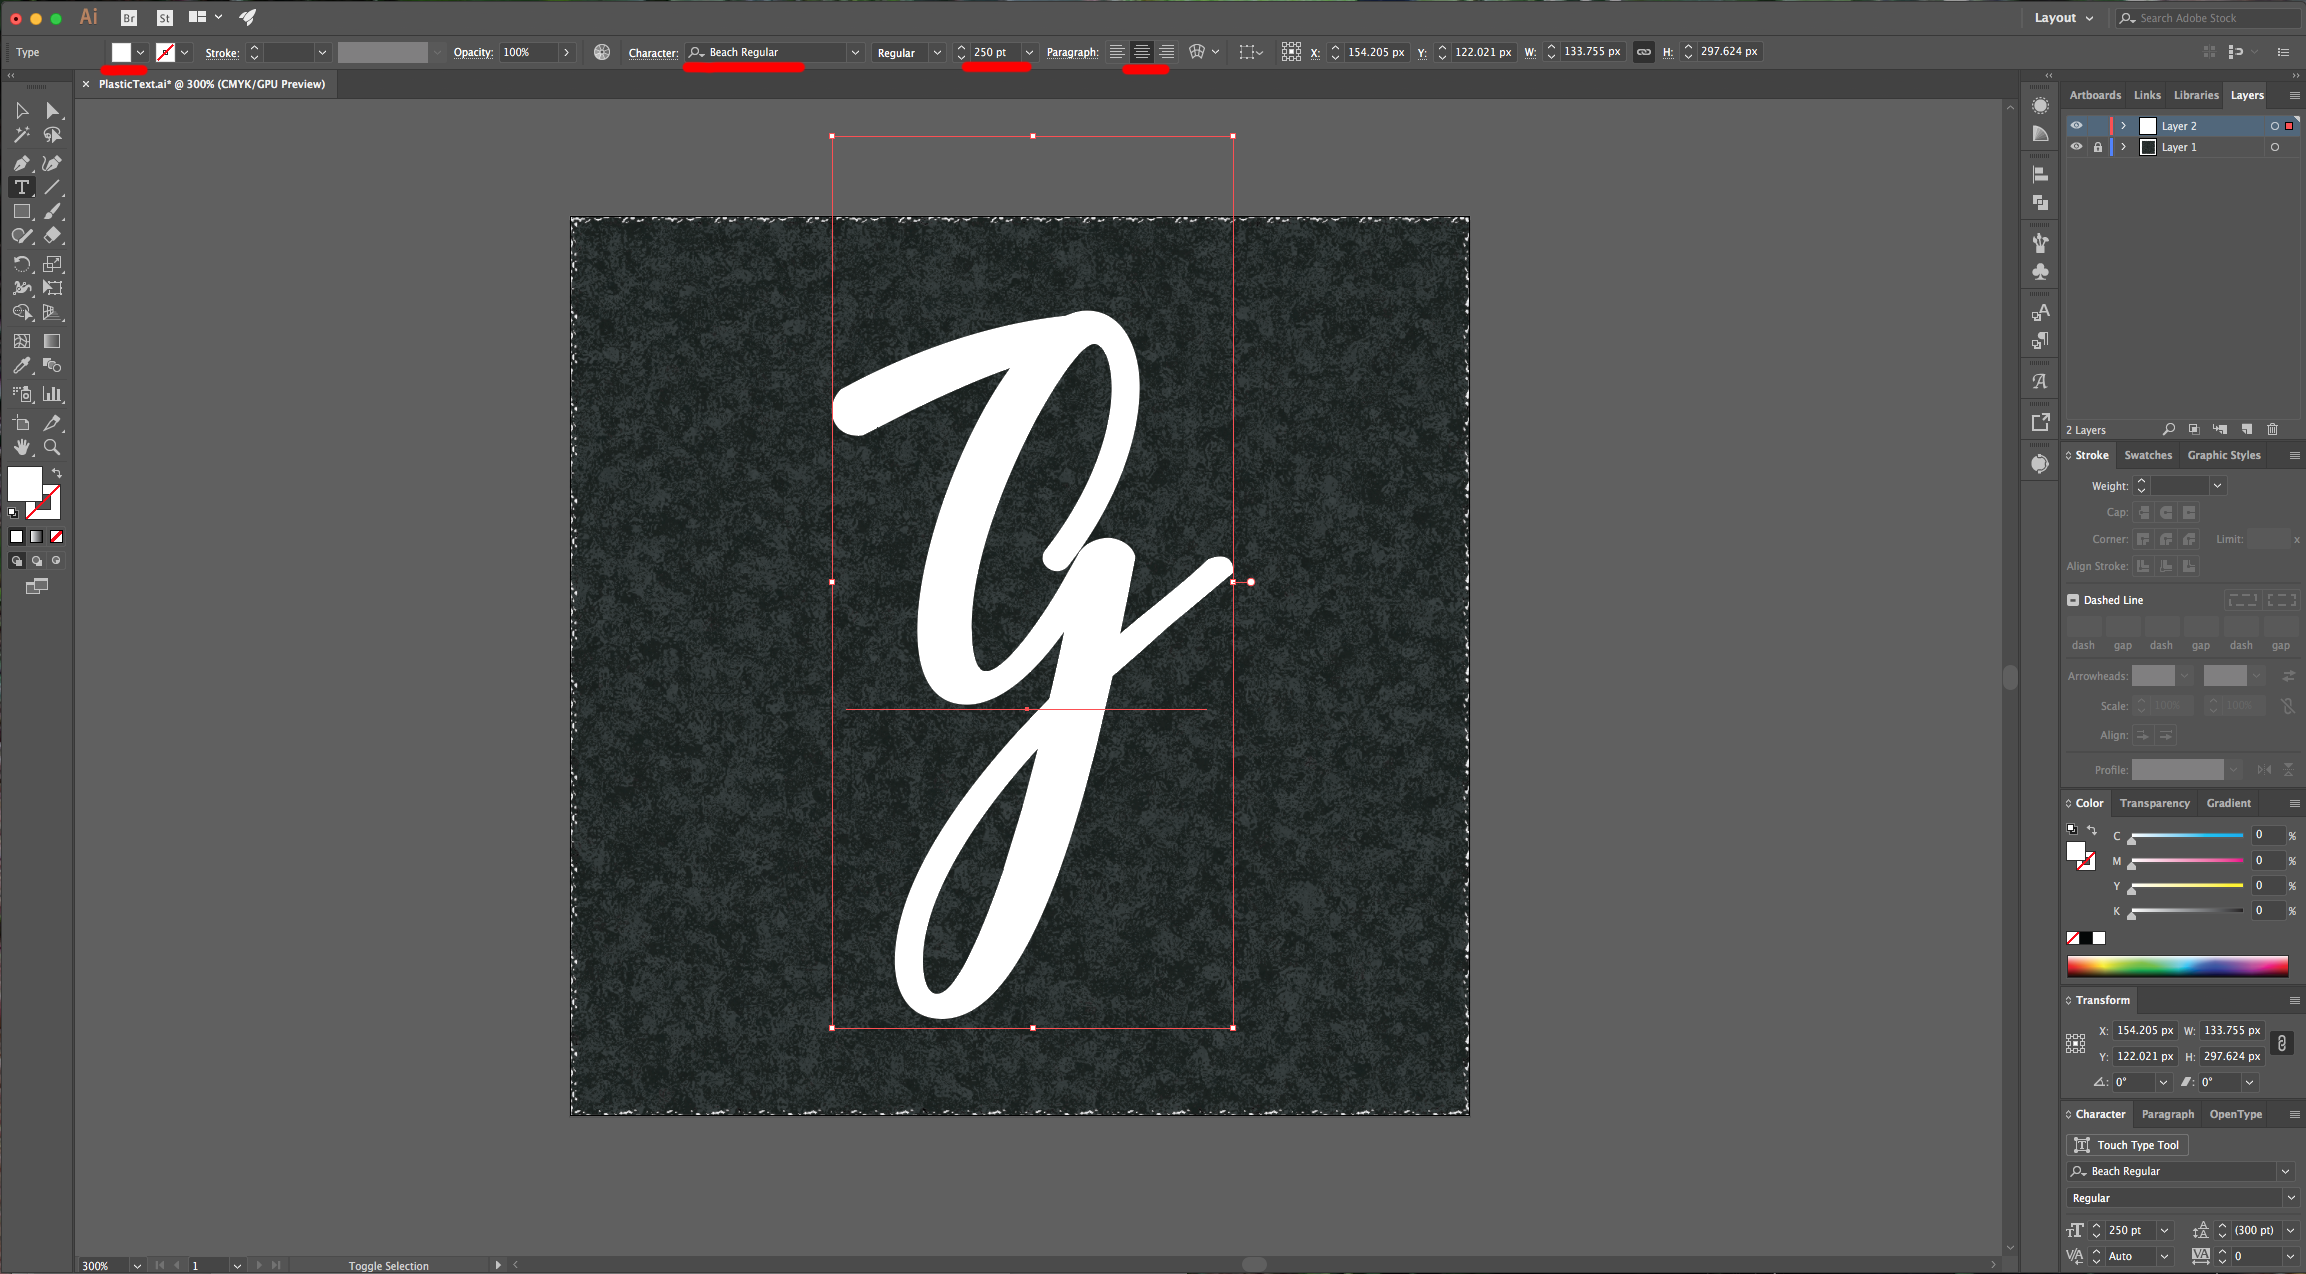
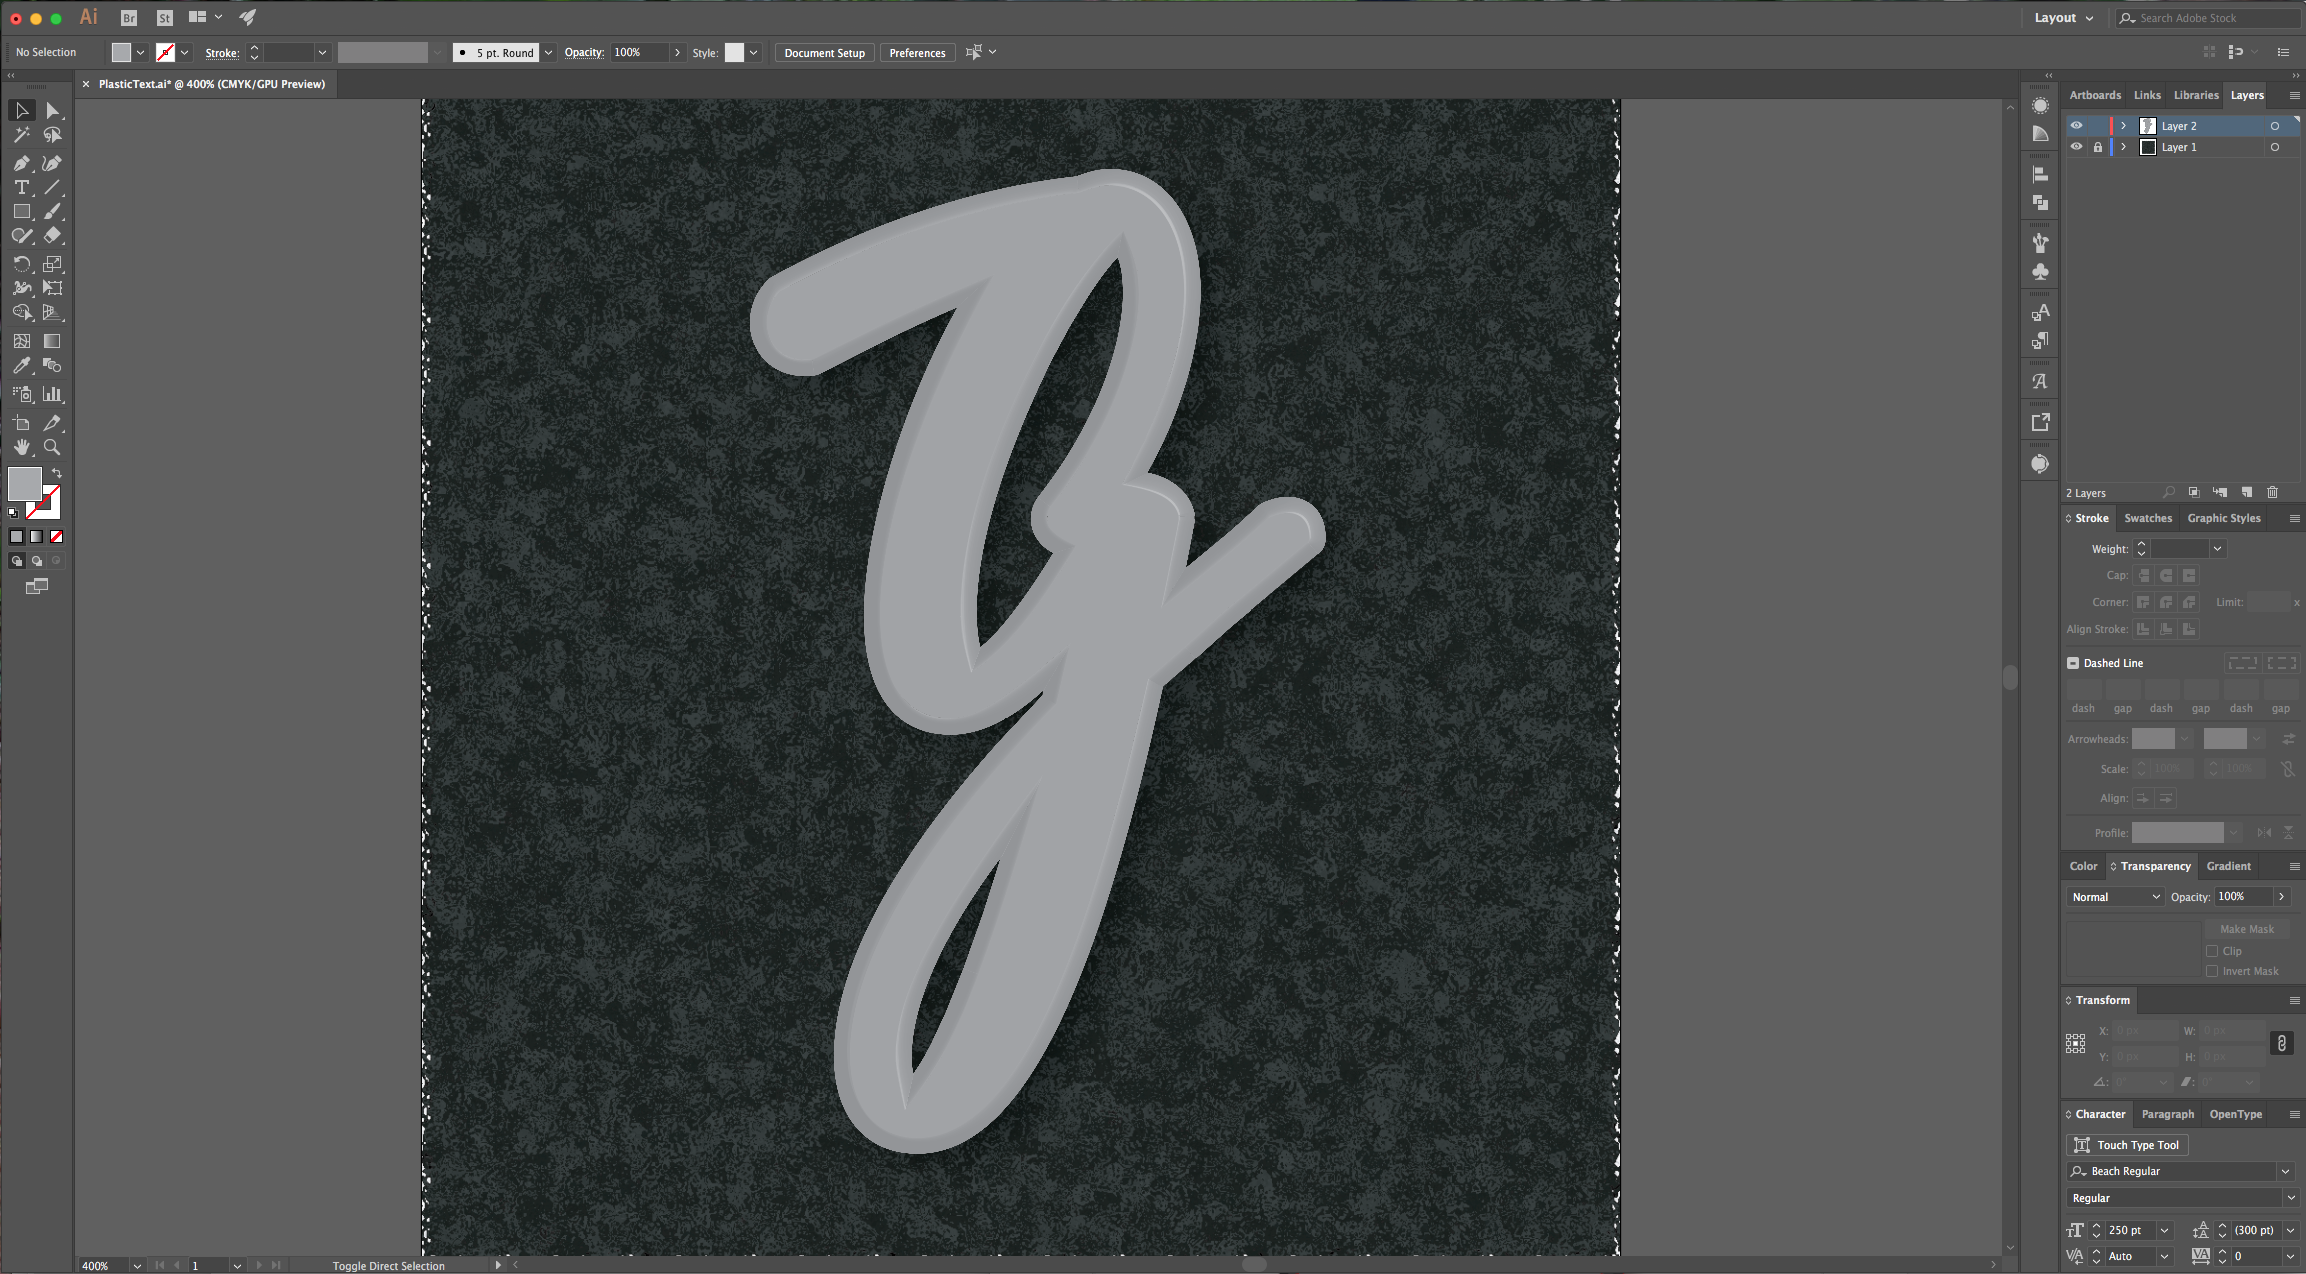
6 - Select the “Type Tool” (T) and choose the font of your liking (we used Beach Regular). Type some text.
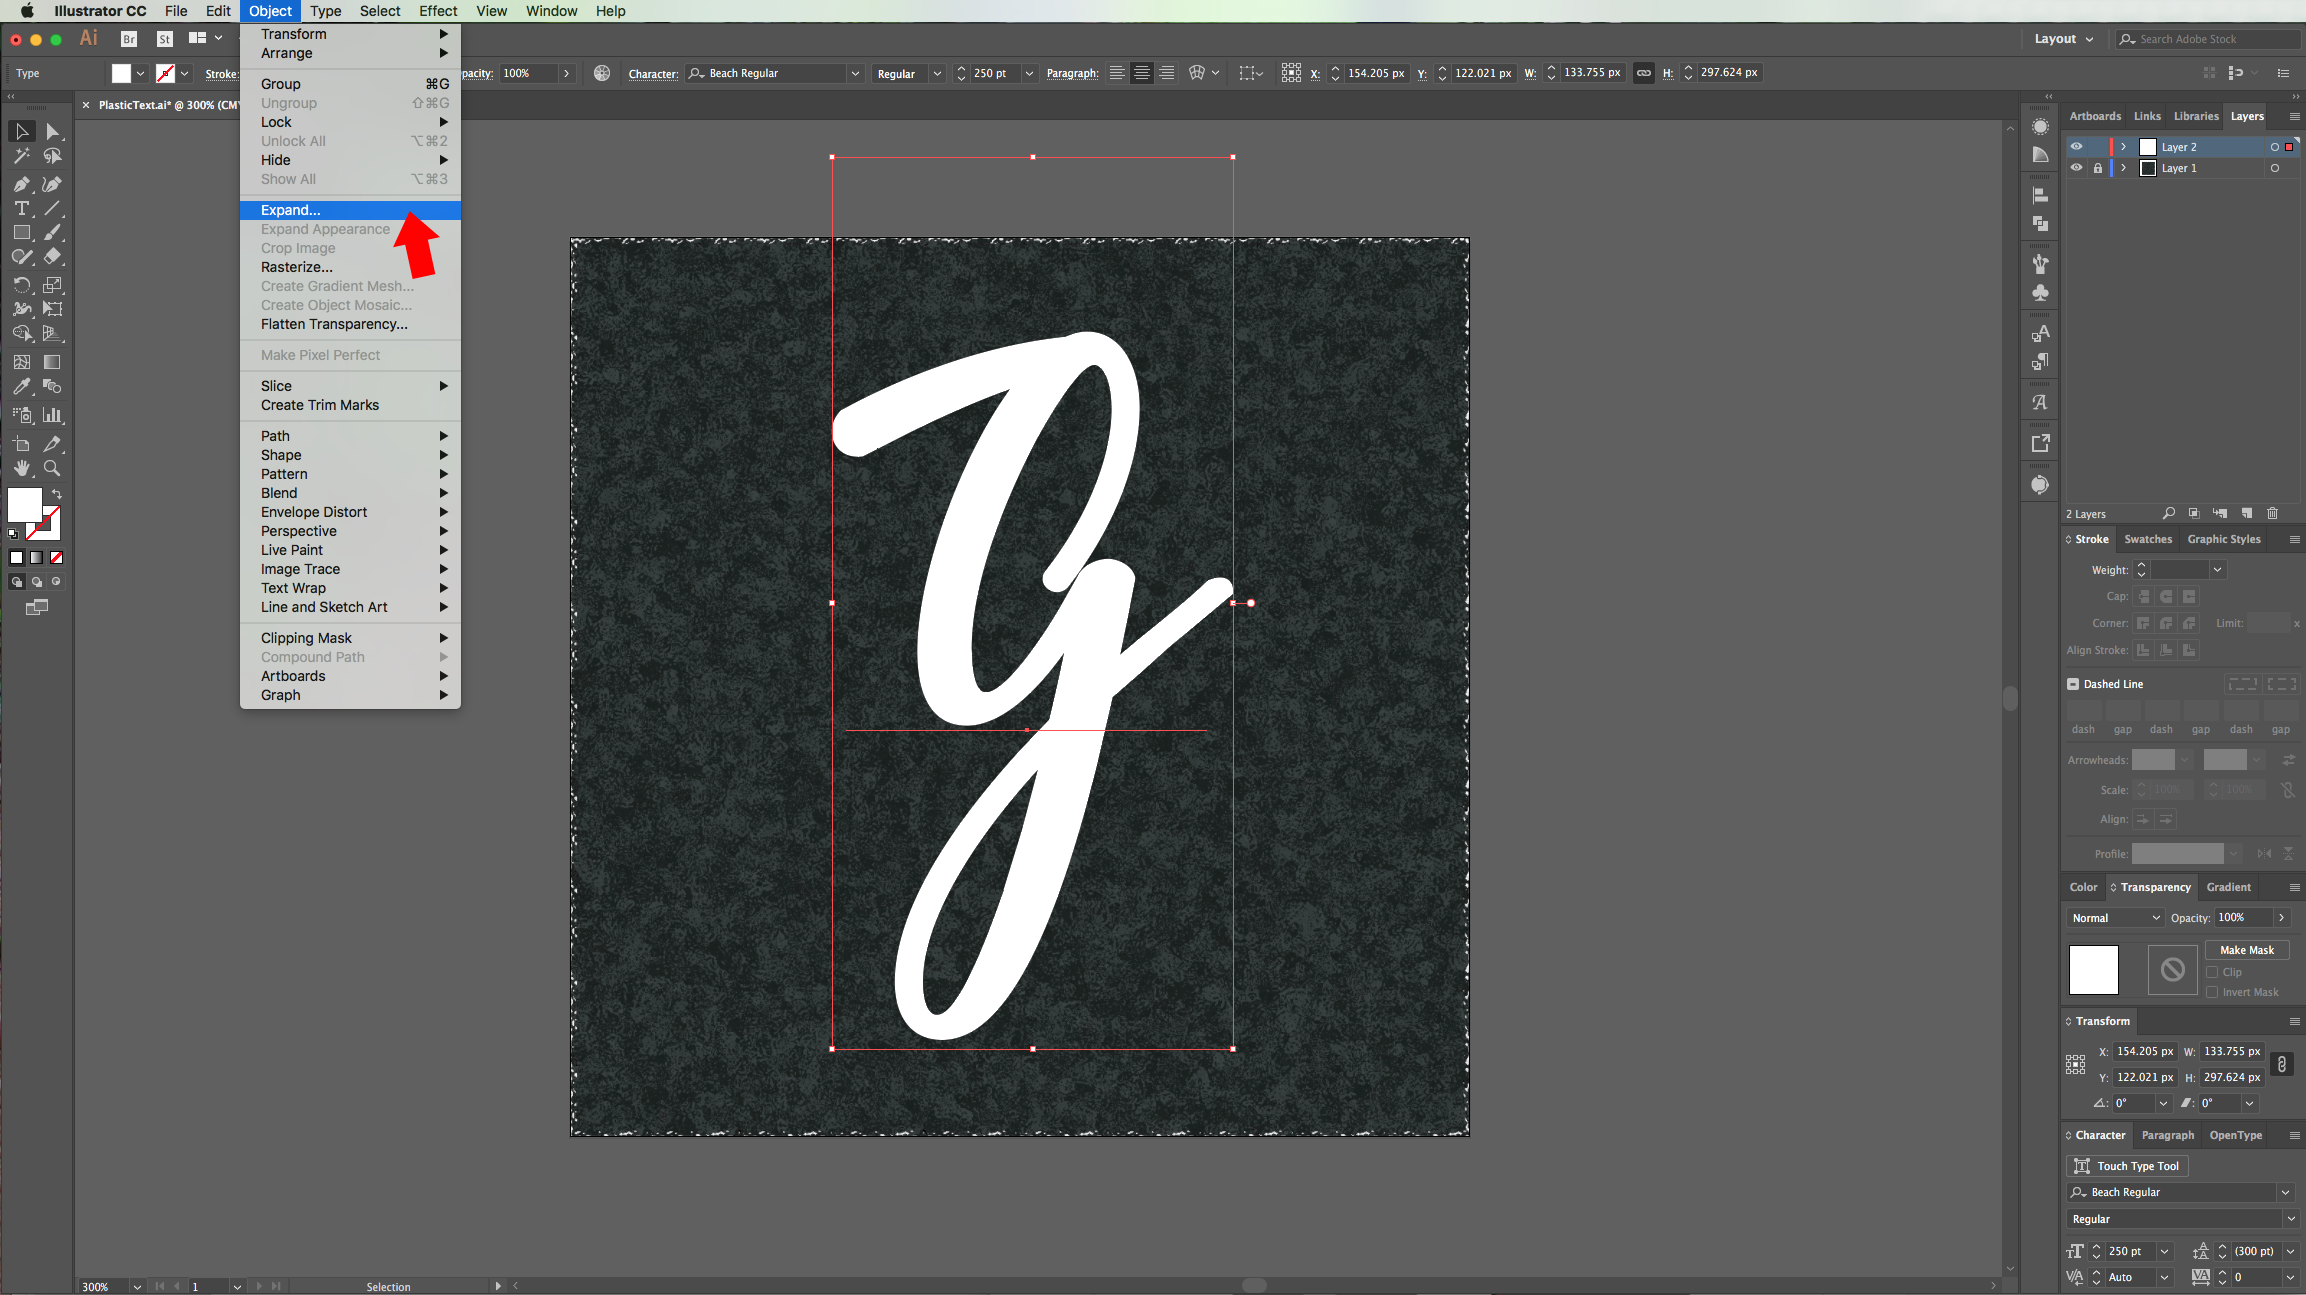
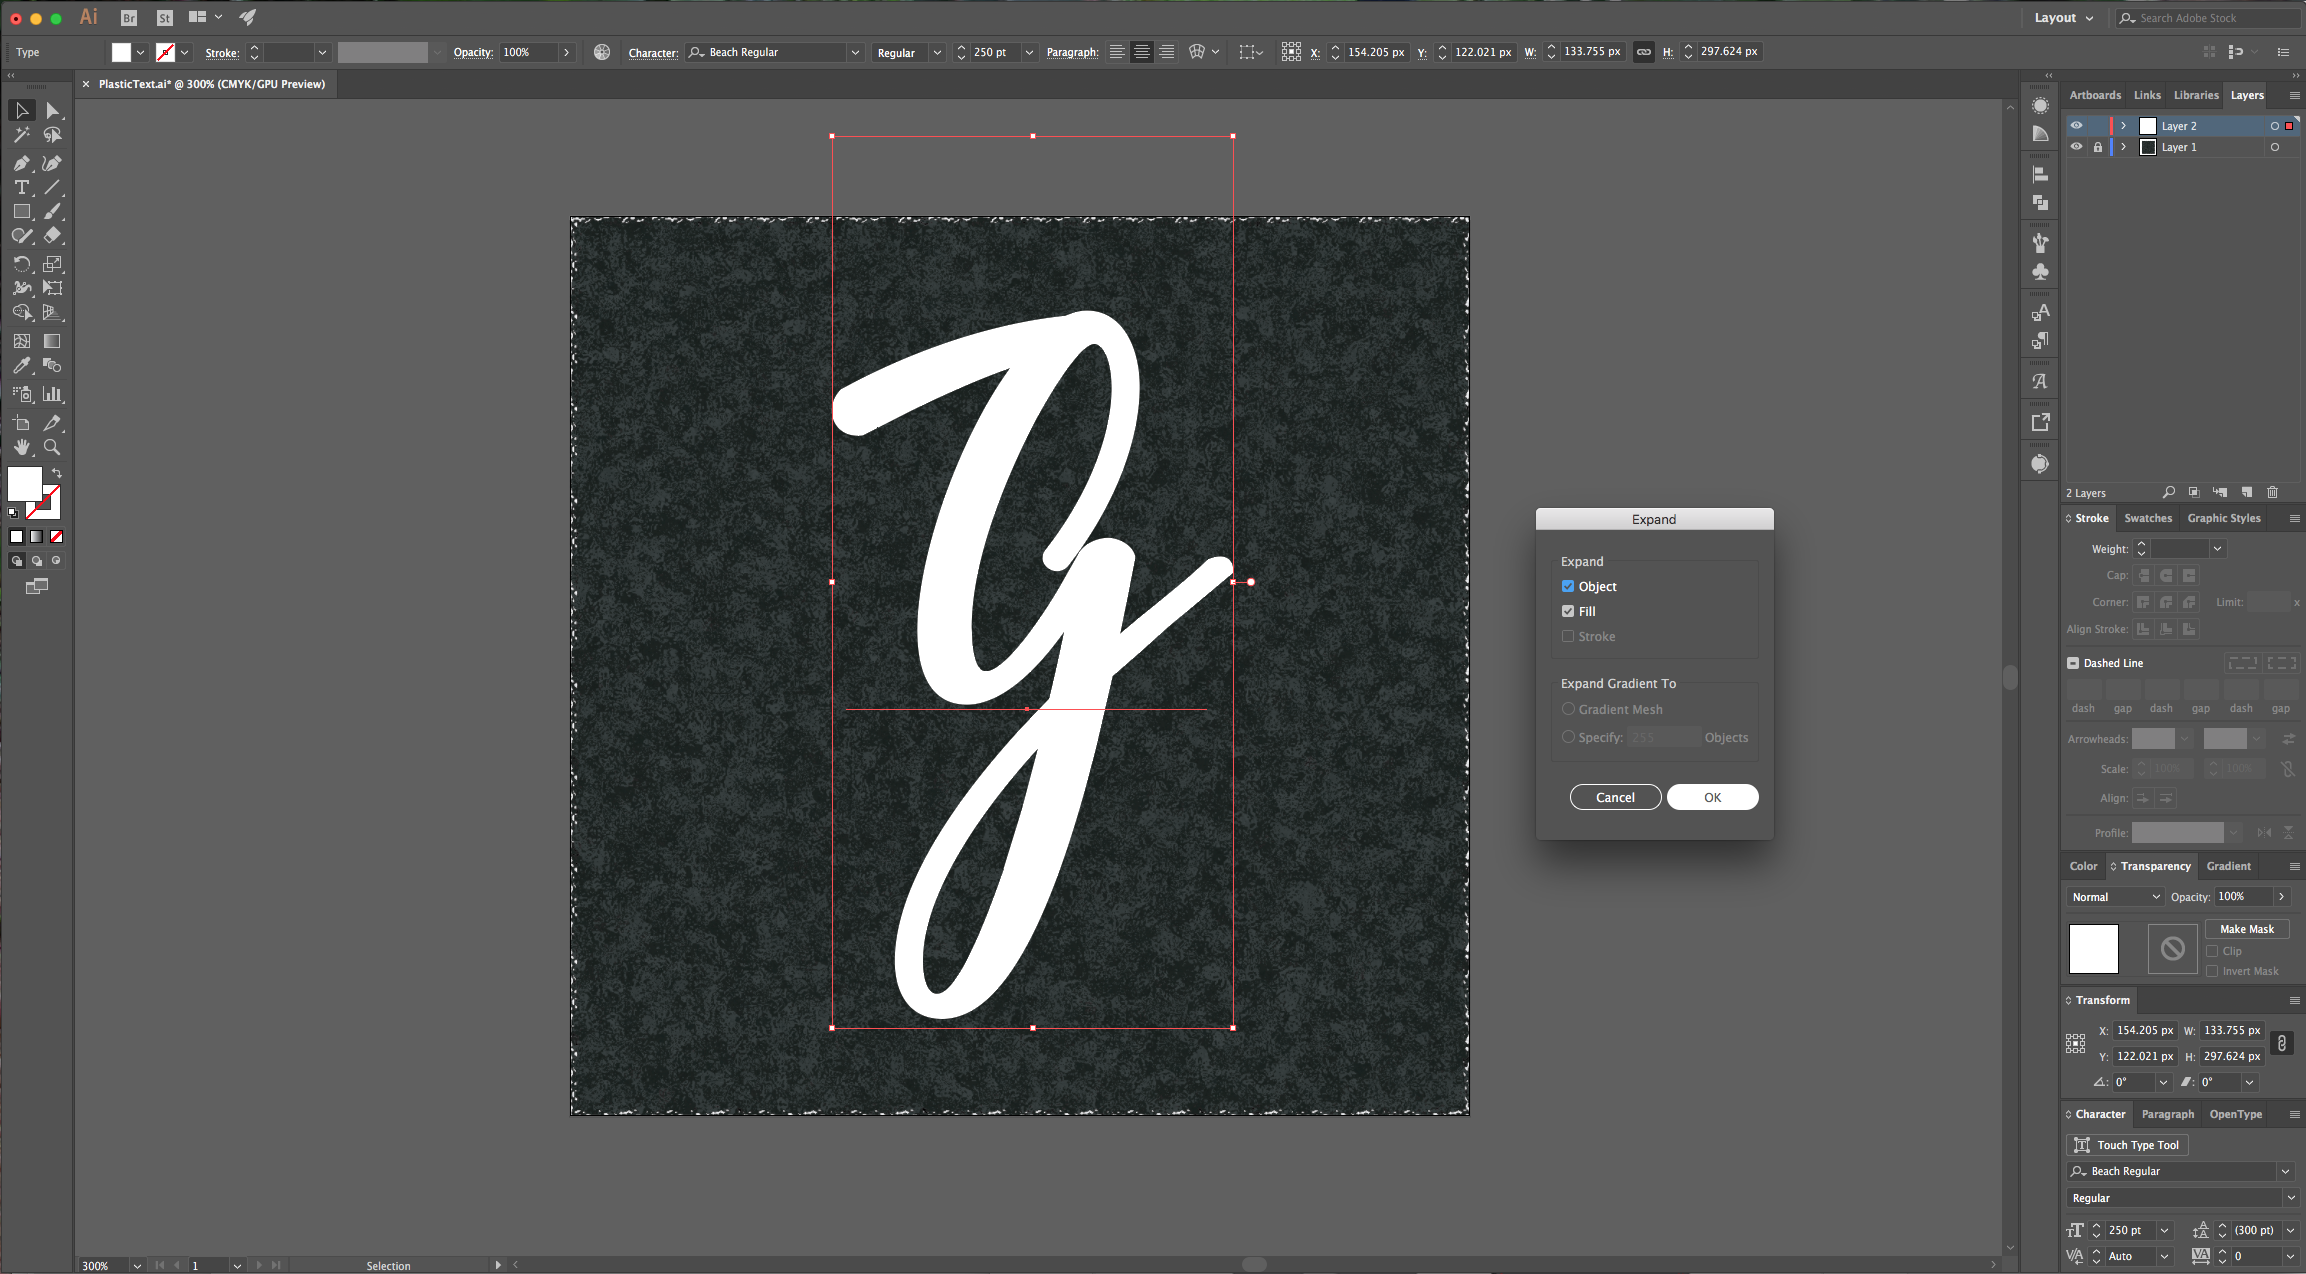
7 - With your text selected go to Object > Expand and make sure that the “Object” and “Fill” boxes are checked. Click “OK”.
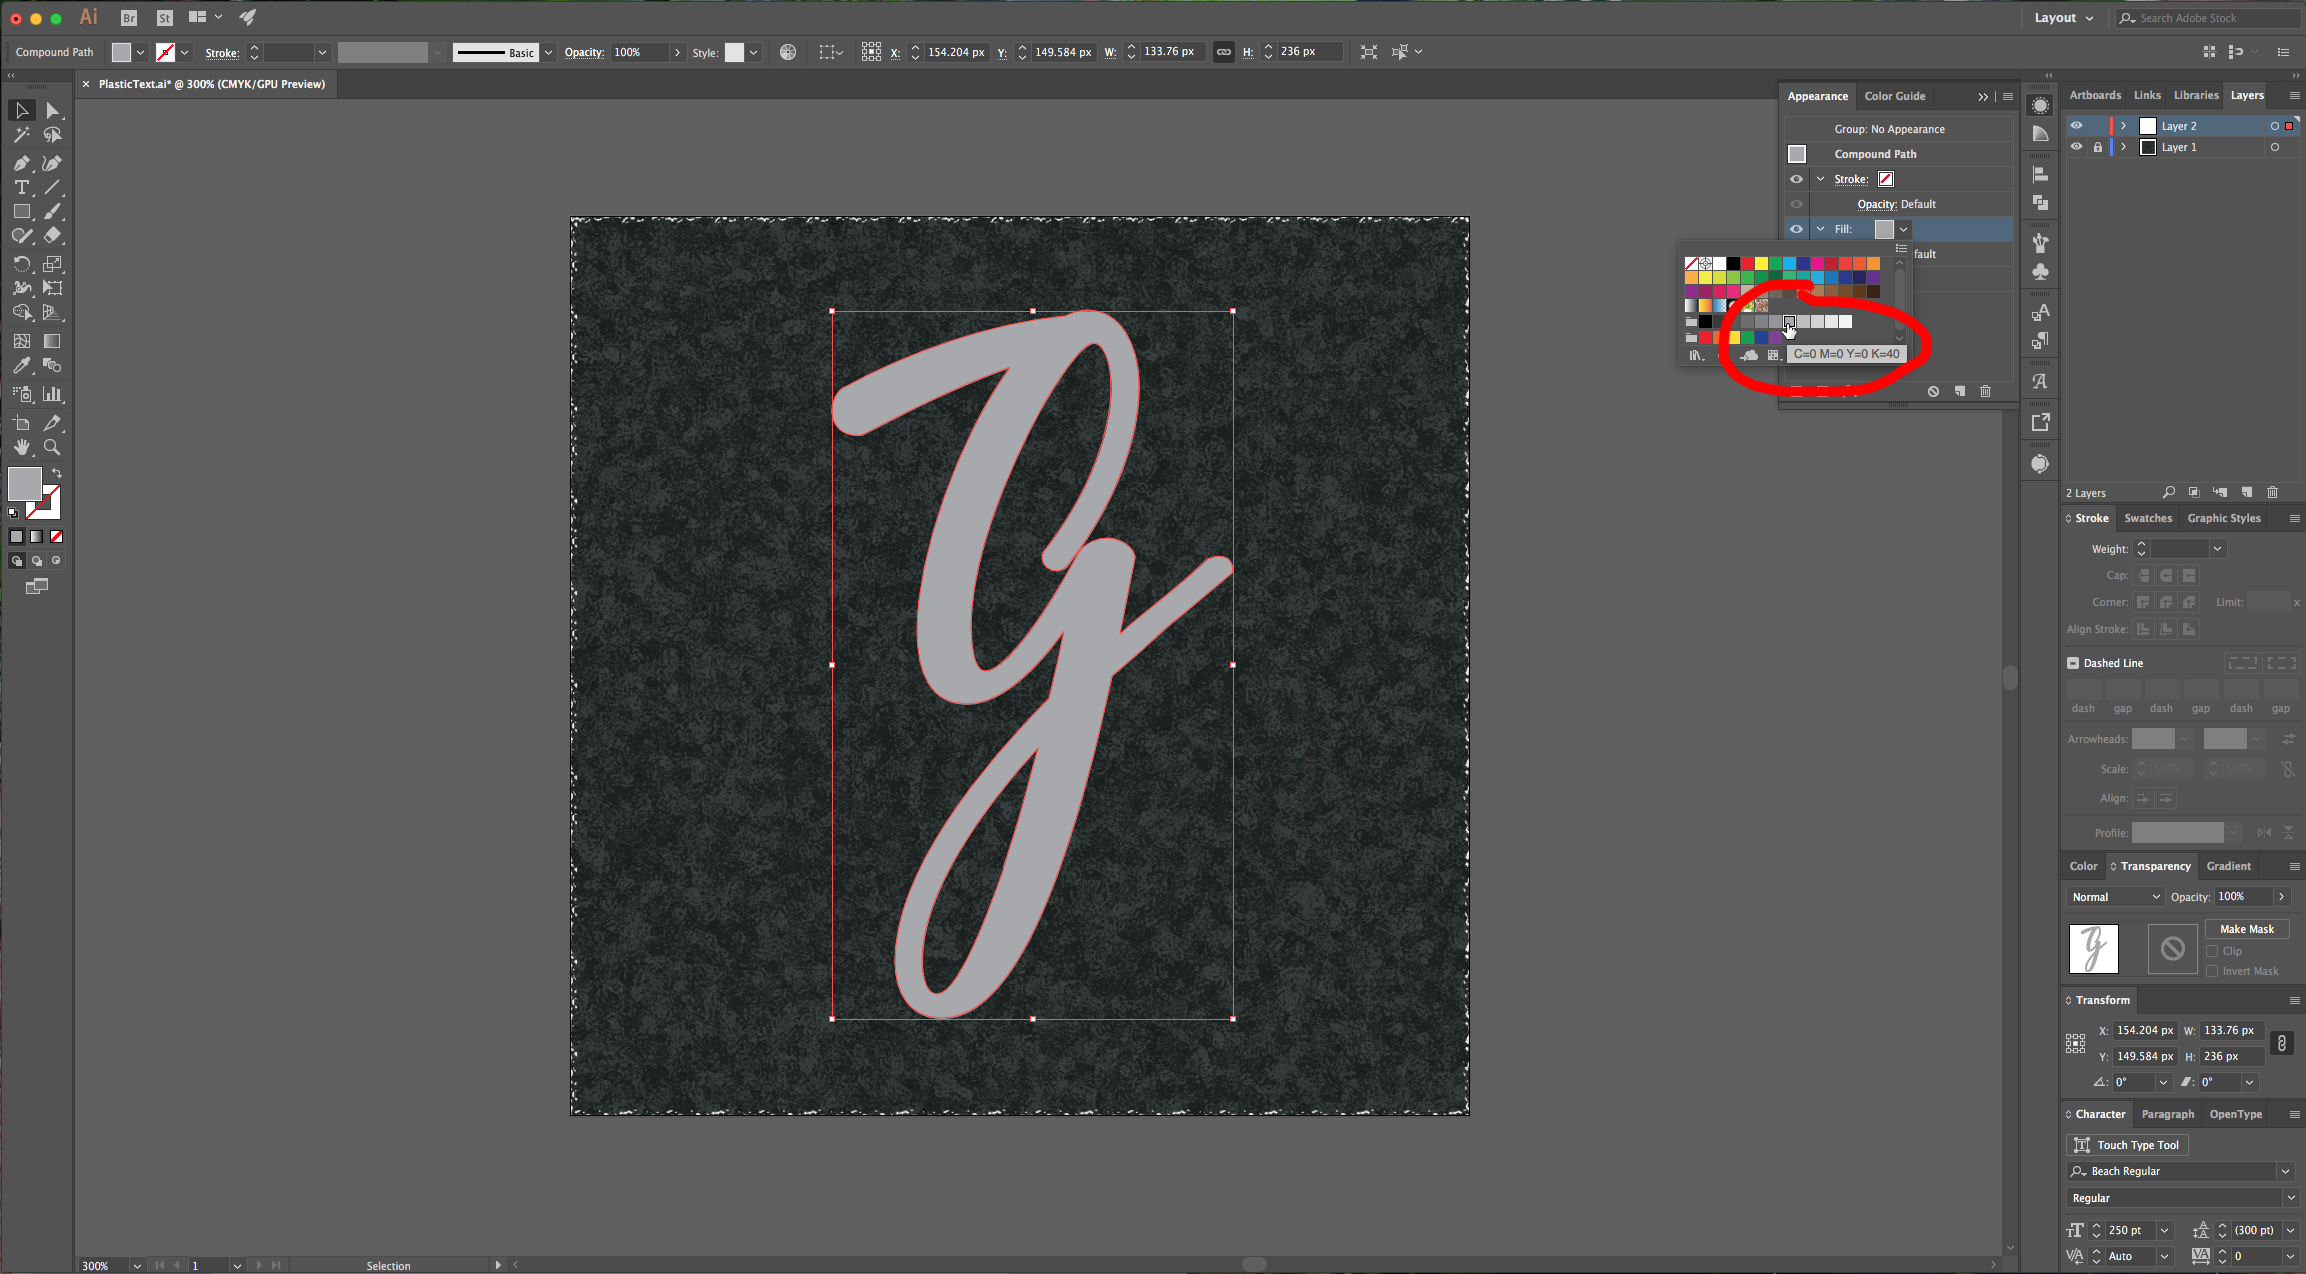
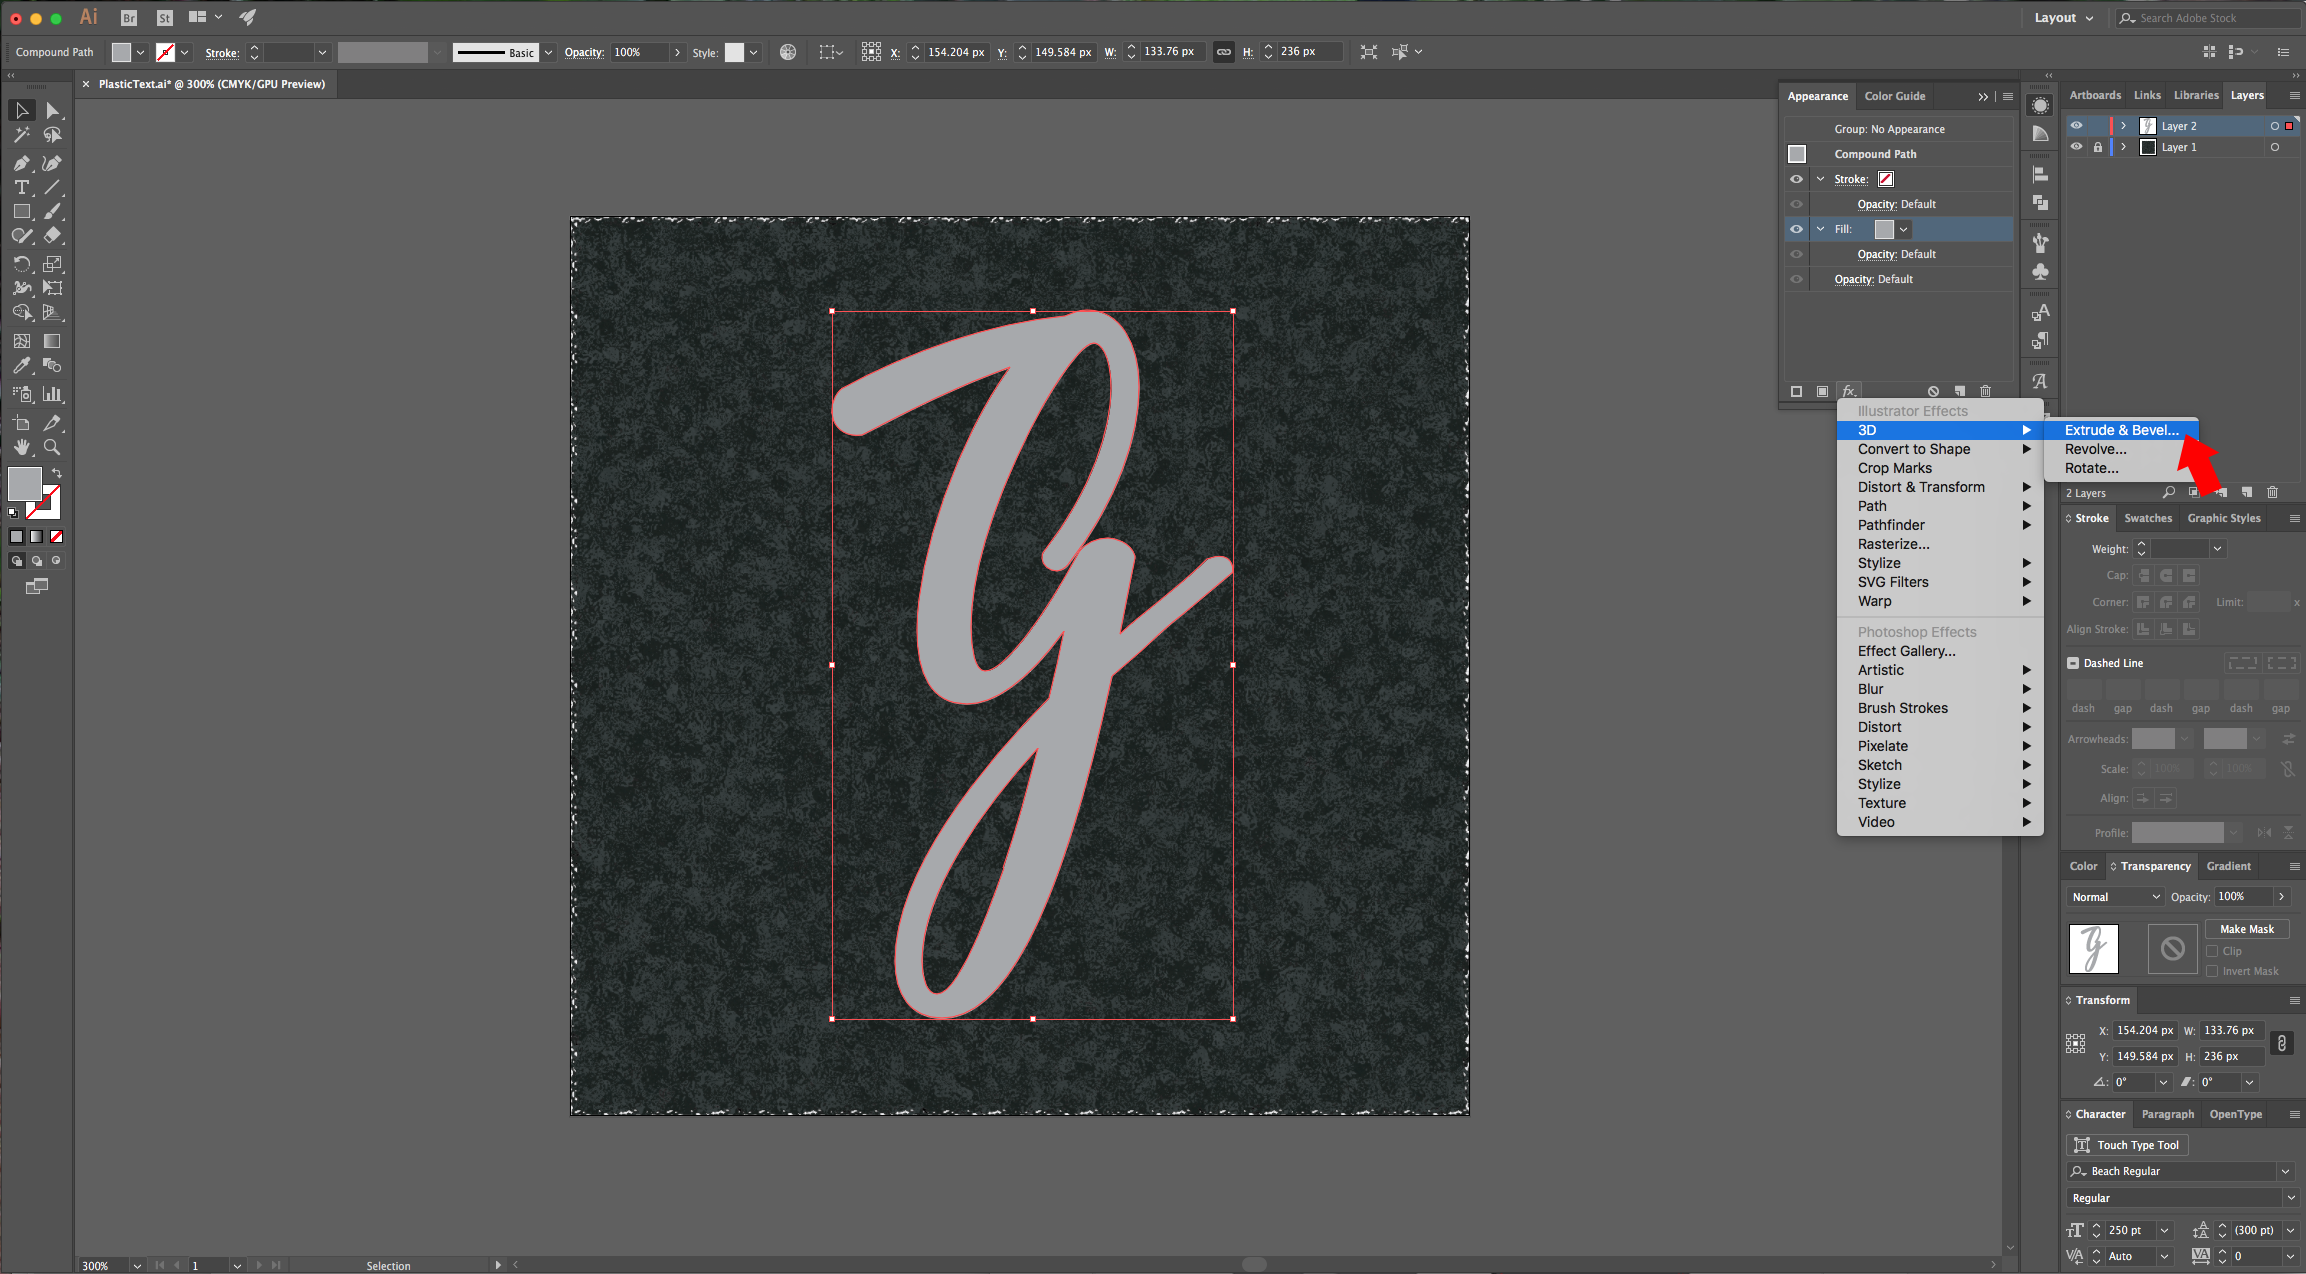
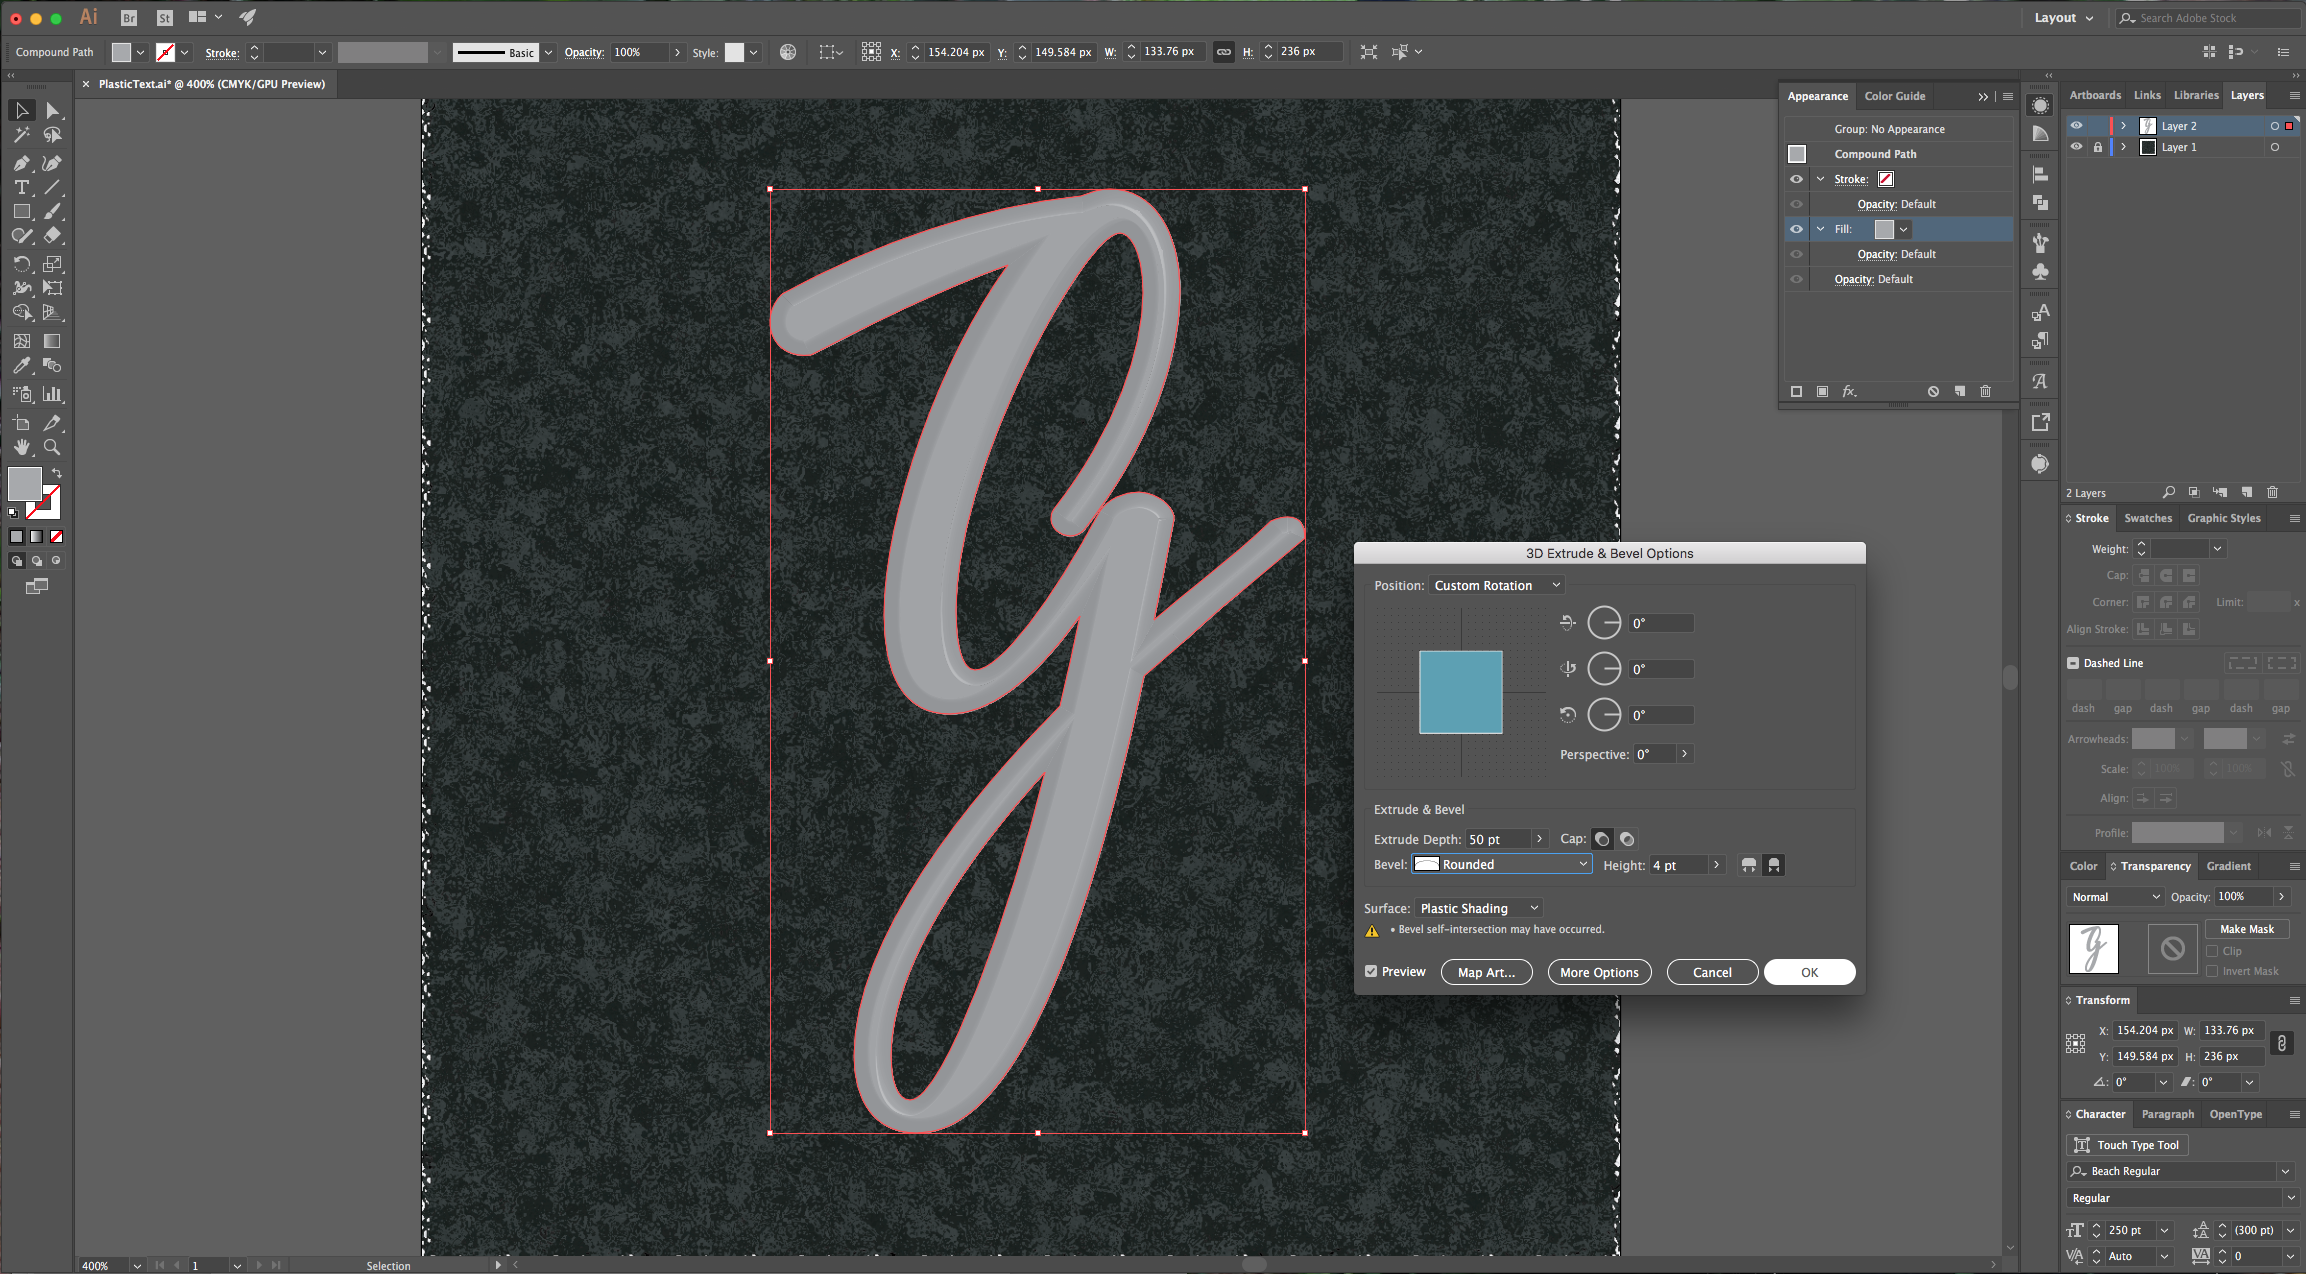
8 - In the “Appearance” Panel double-click on “Contents” and change your text “Fill” to a medium gray. Then go to the “Effect” menu and choose 3D > Extrude & Bevel, set each axis to 0° and use a “Rounded” 4 Point “Bevel”.
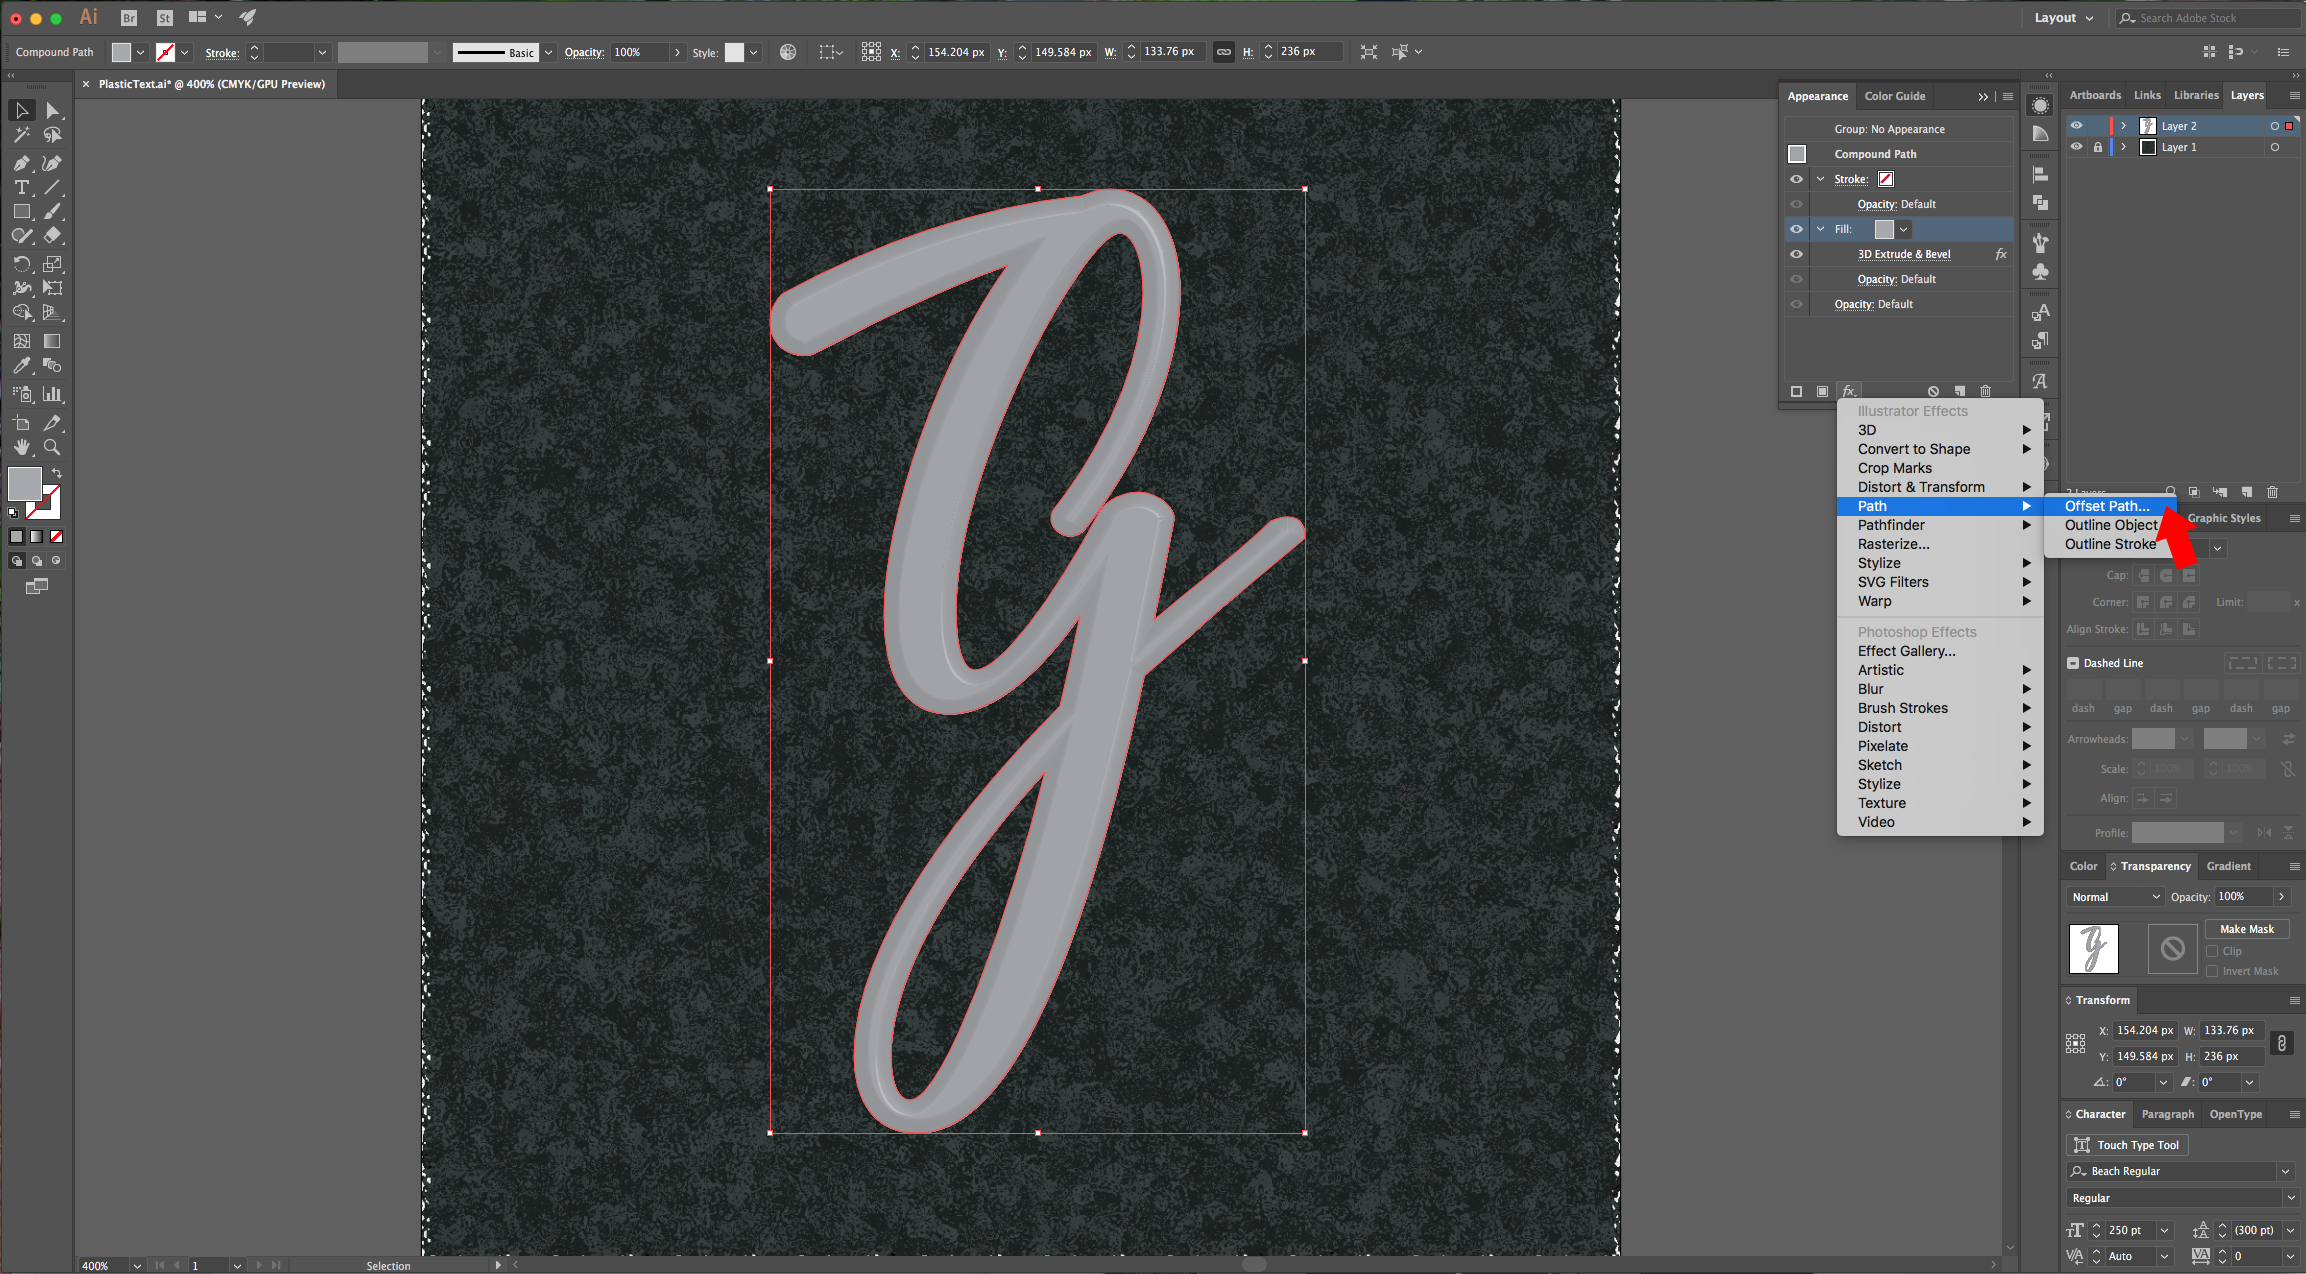
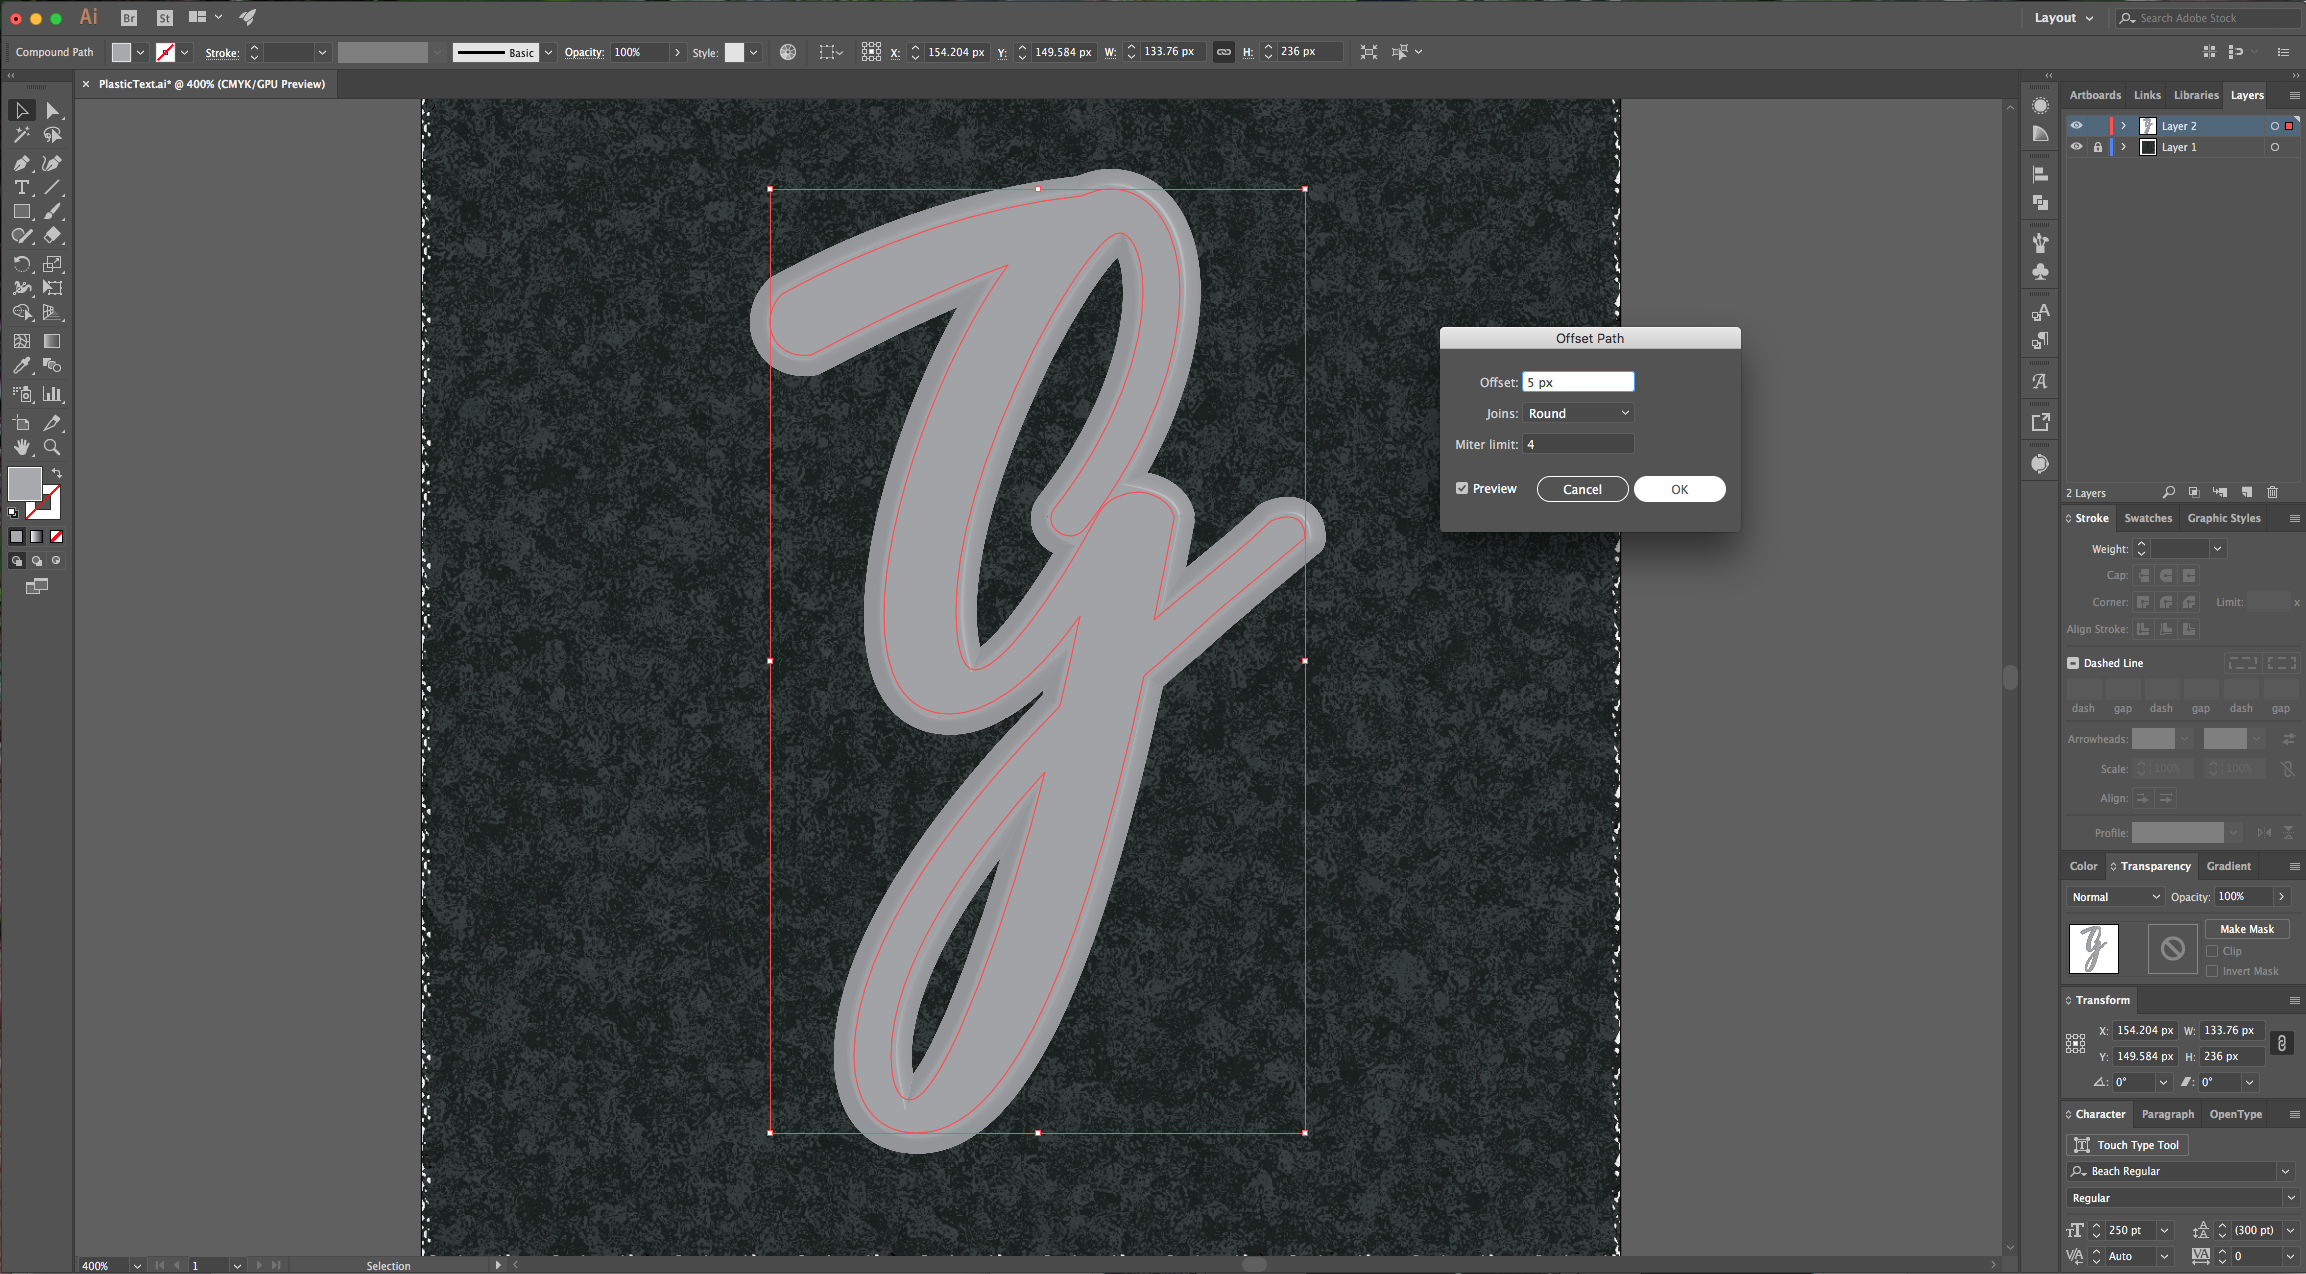
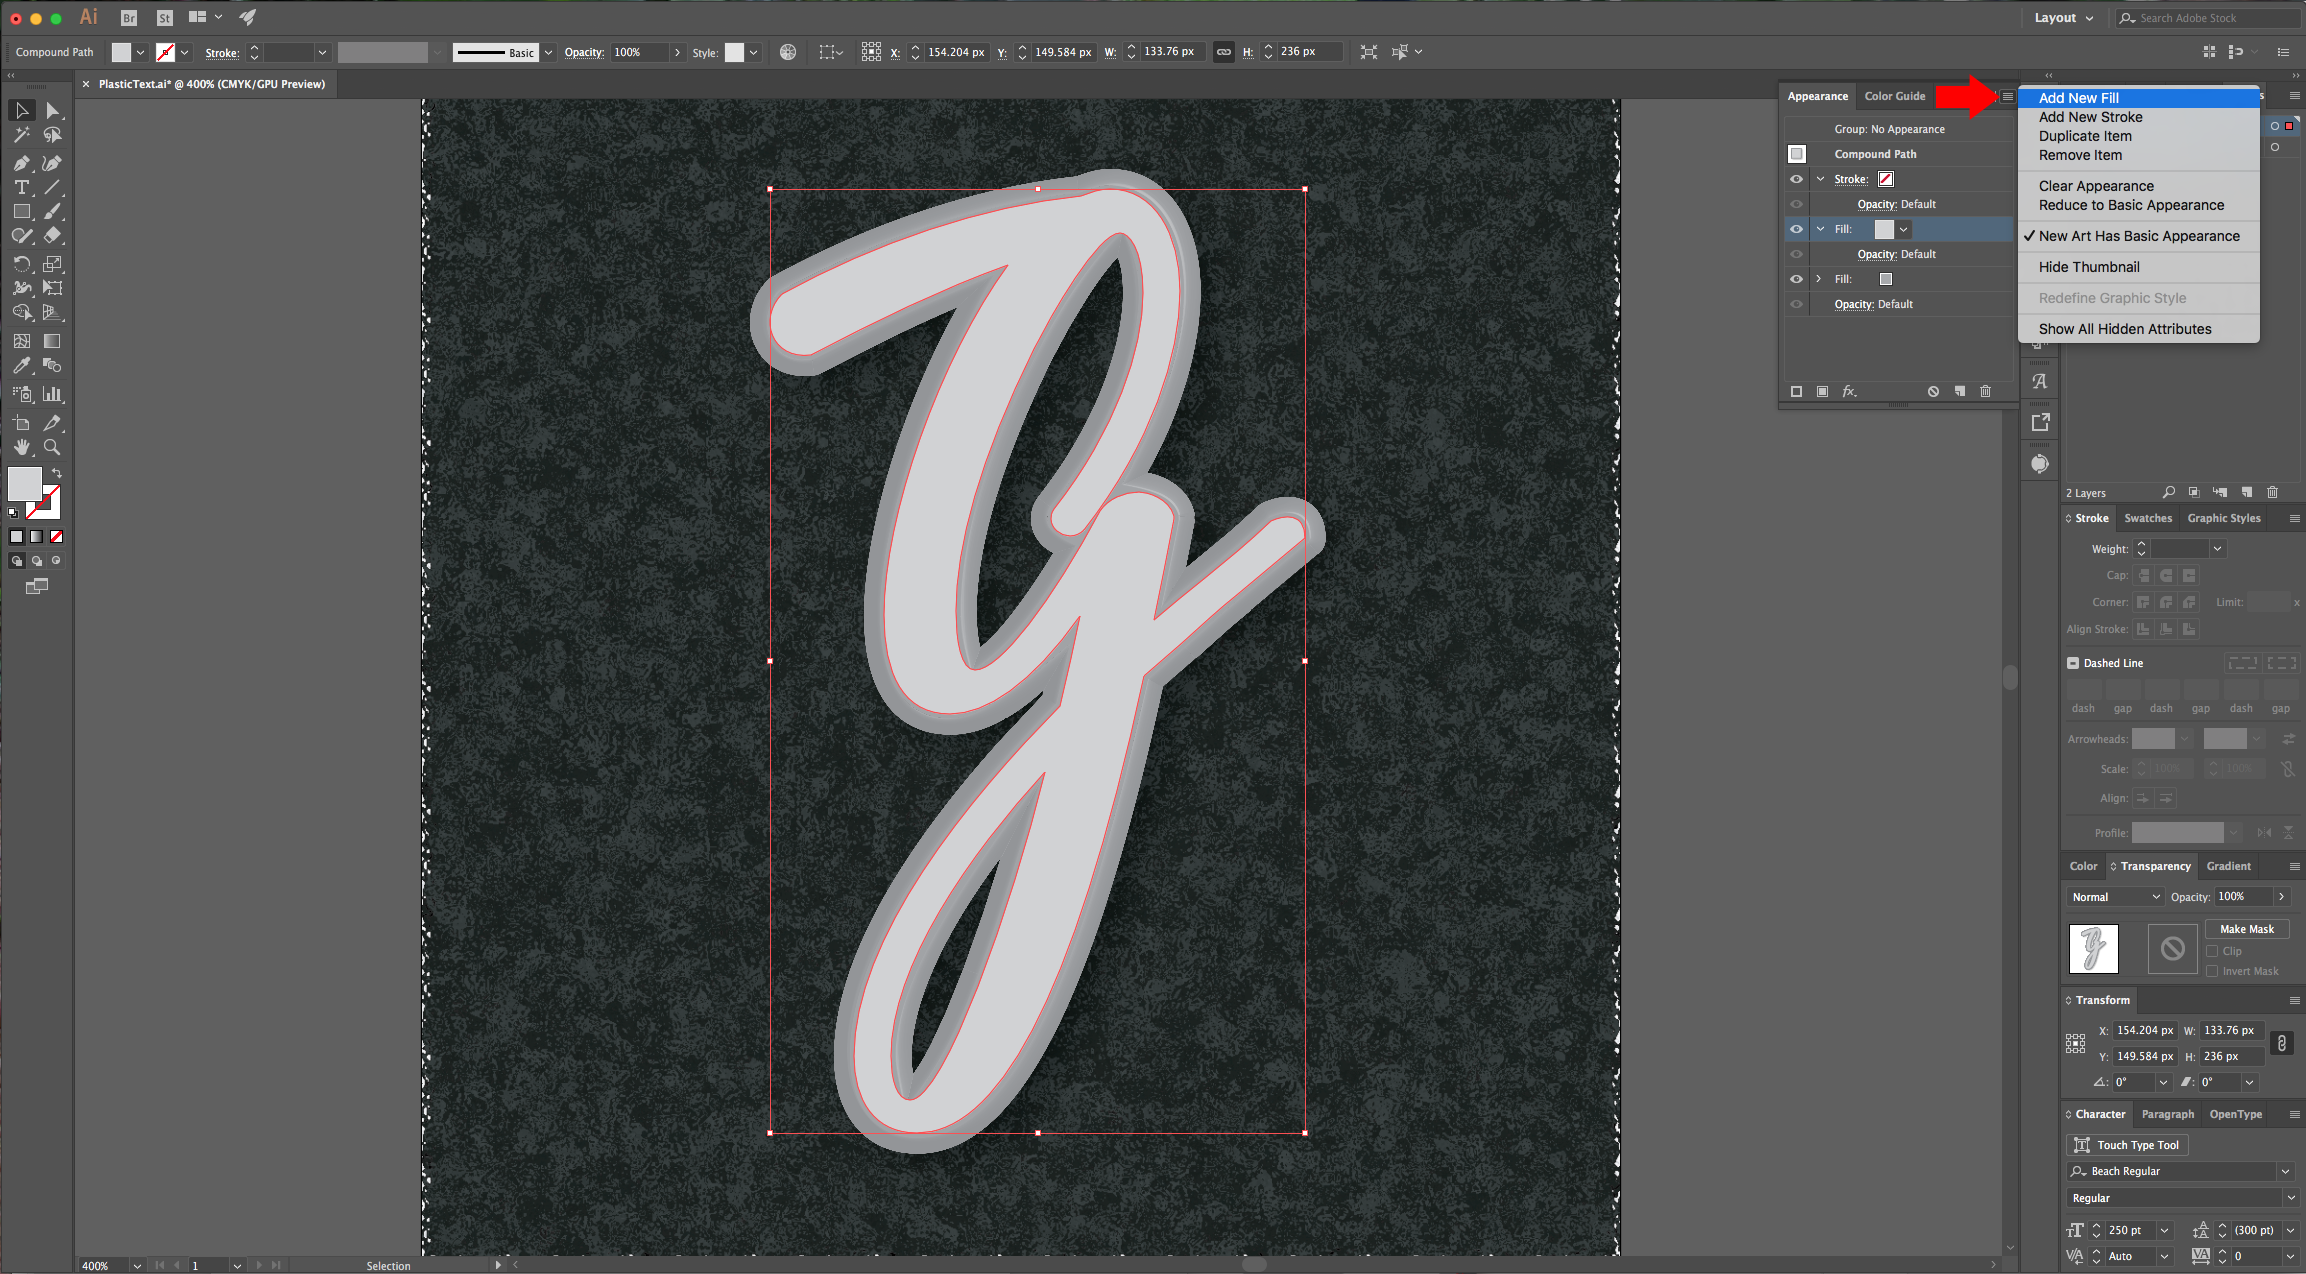
9 - Make sure you are still selecting the “Fill” layer in the “Appearance” Panel and go to Effect > Path > Offset Path and use the following values:
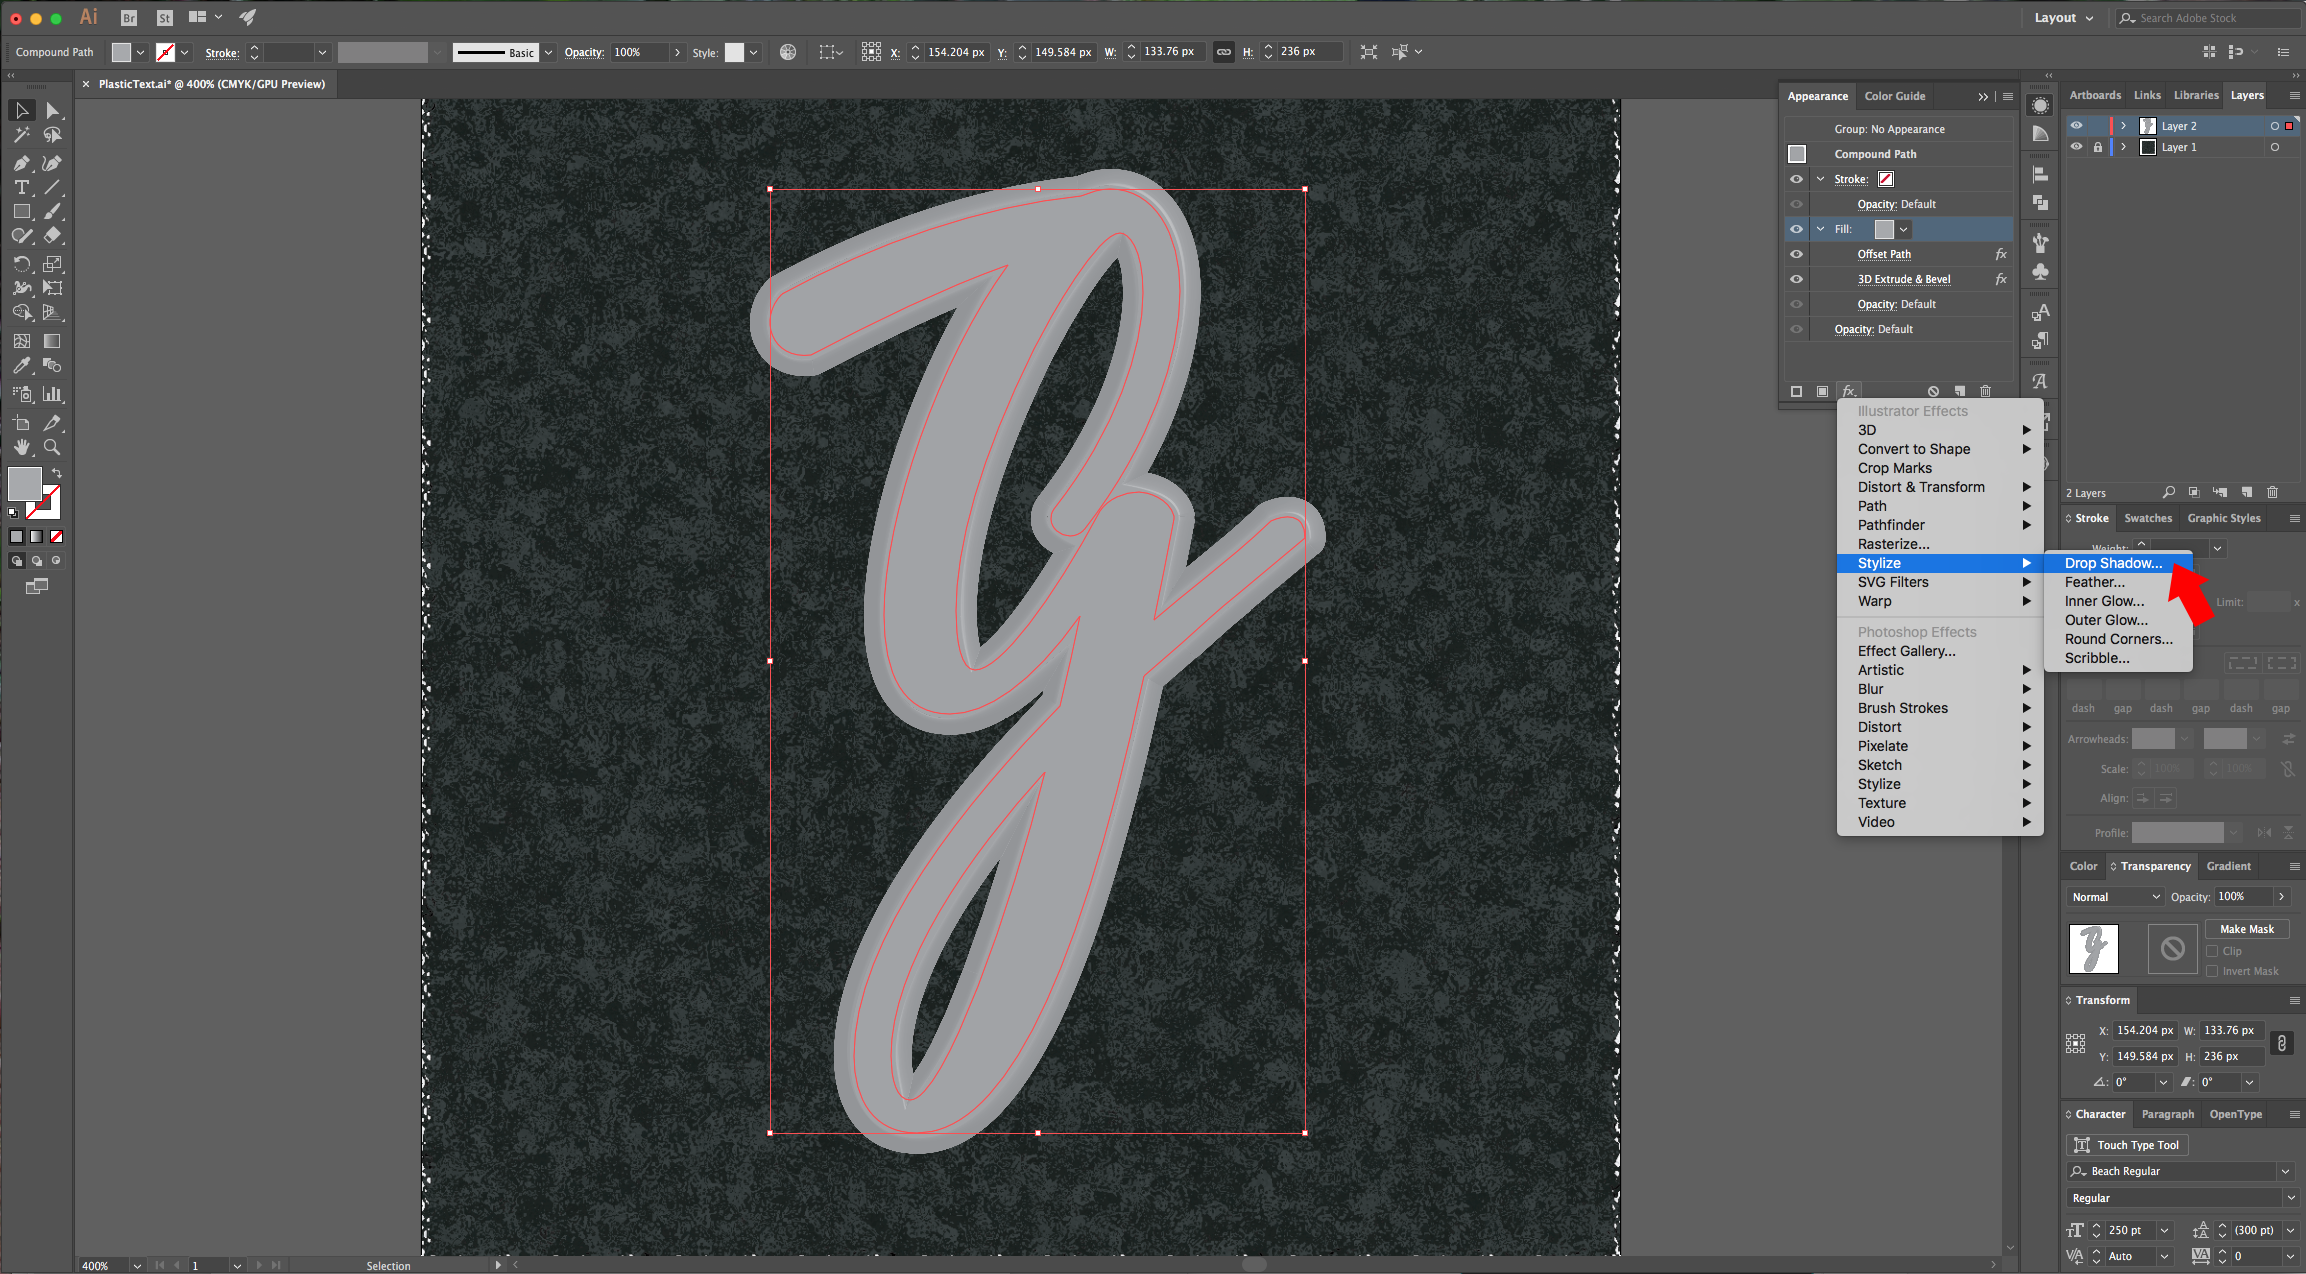
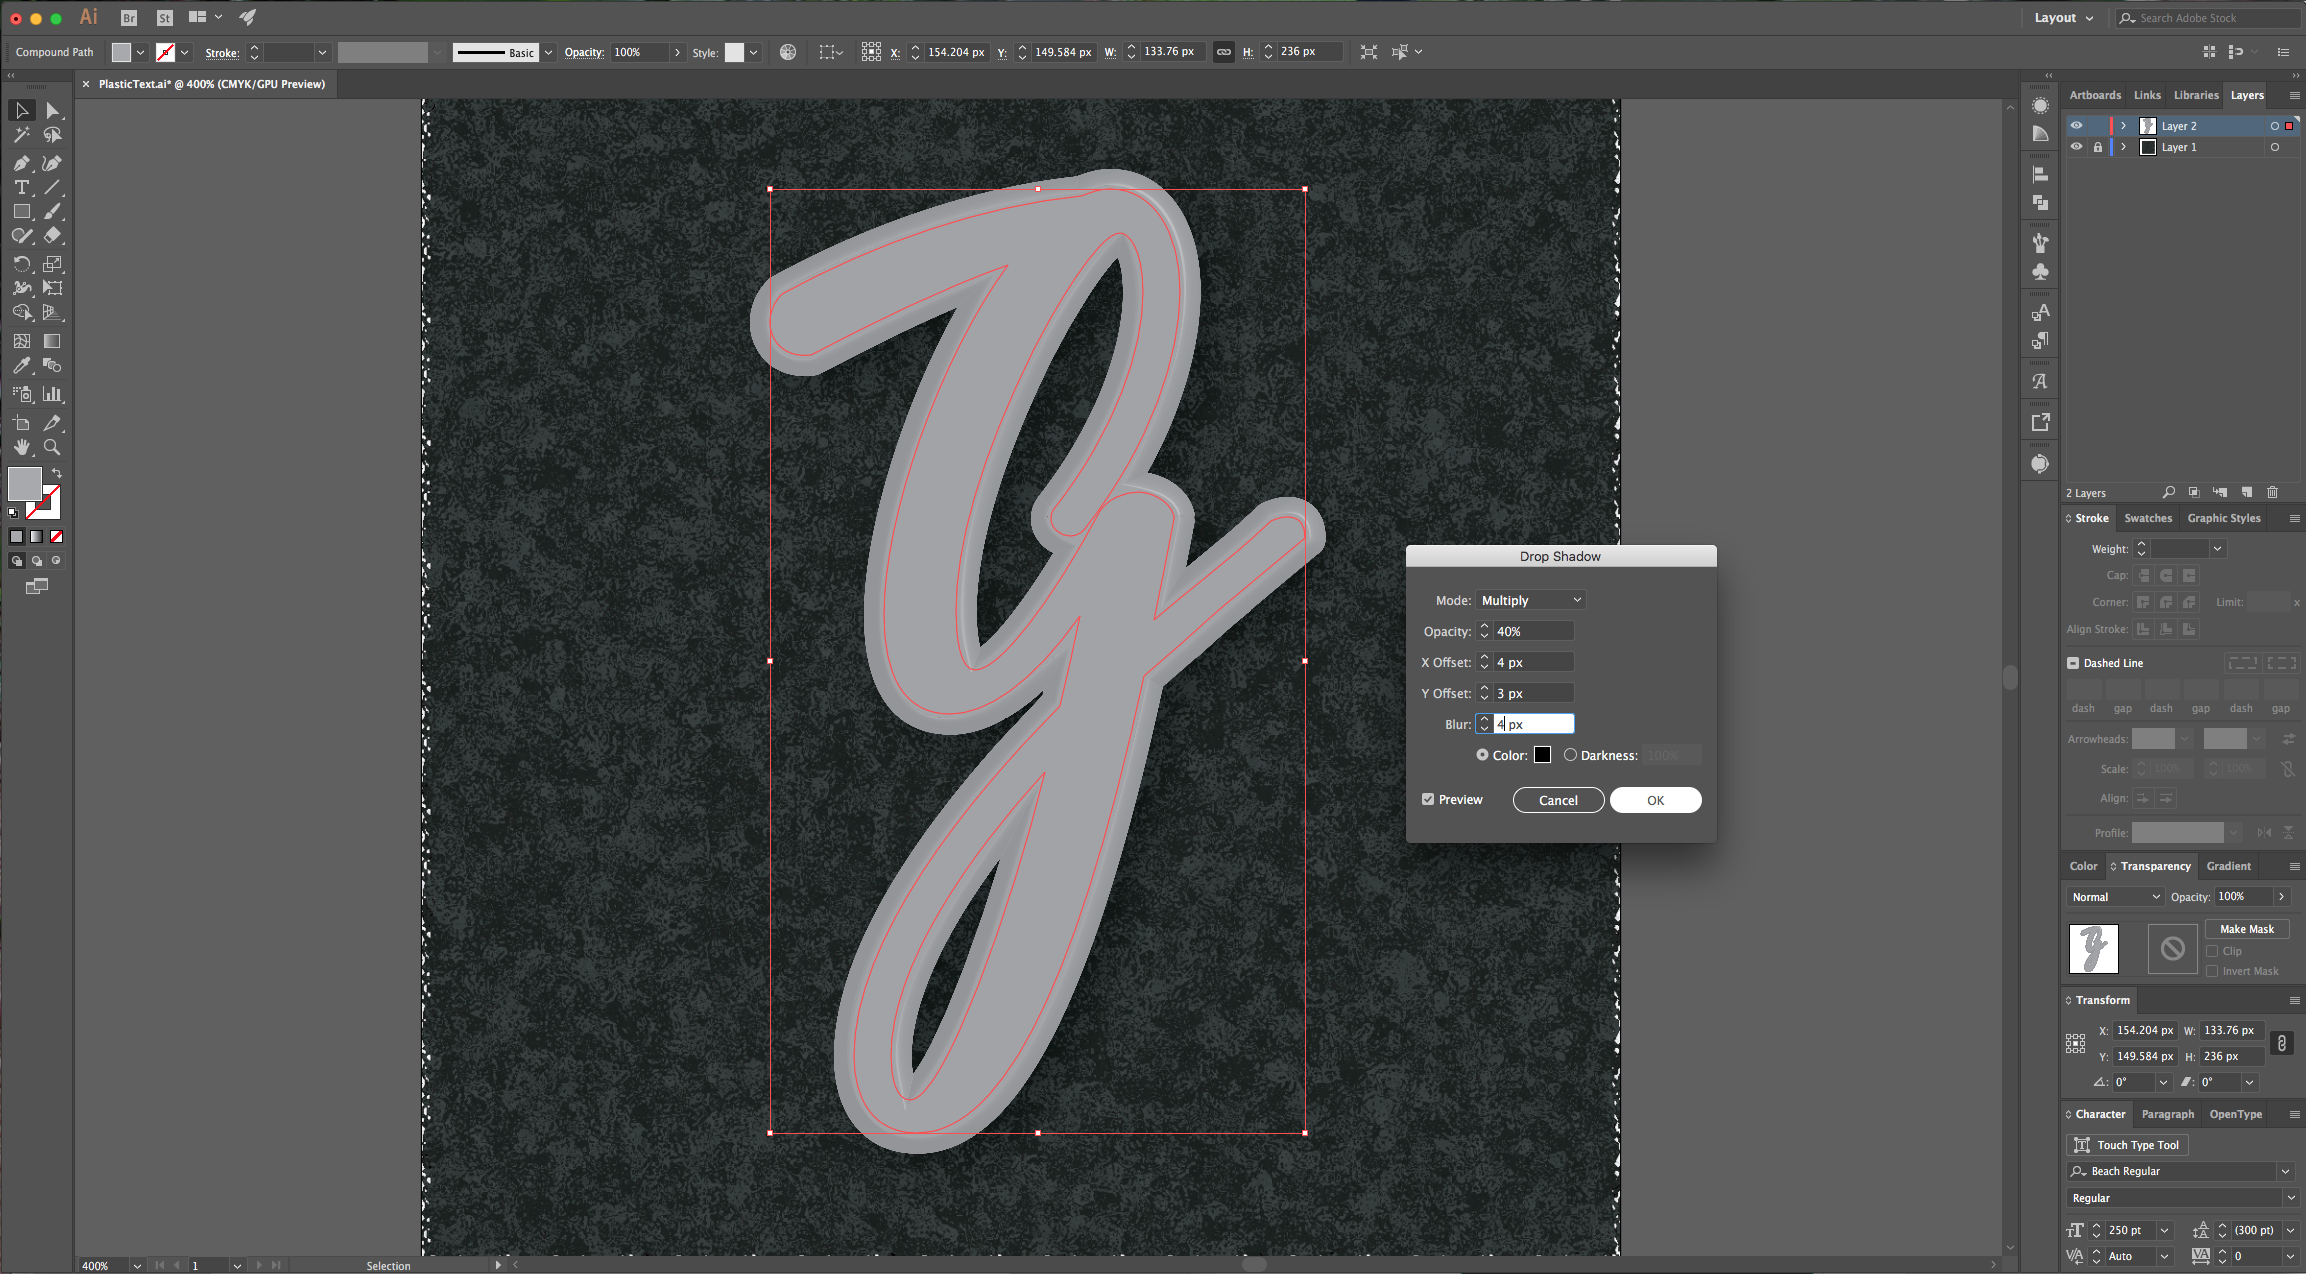
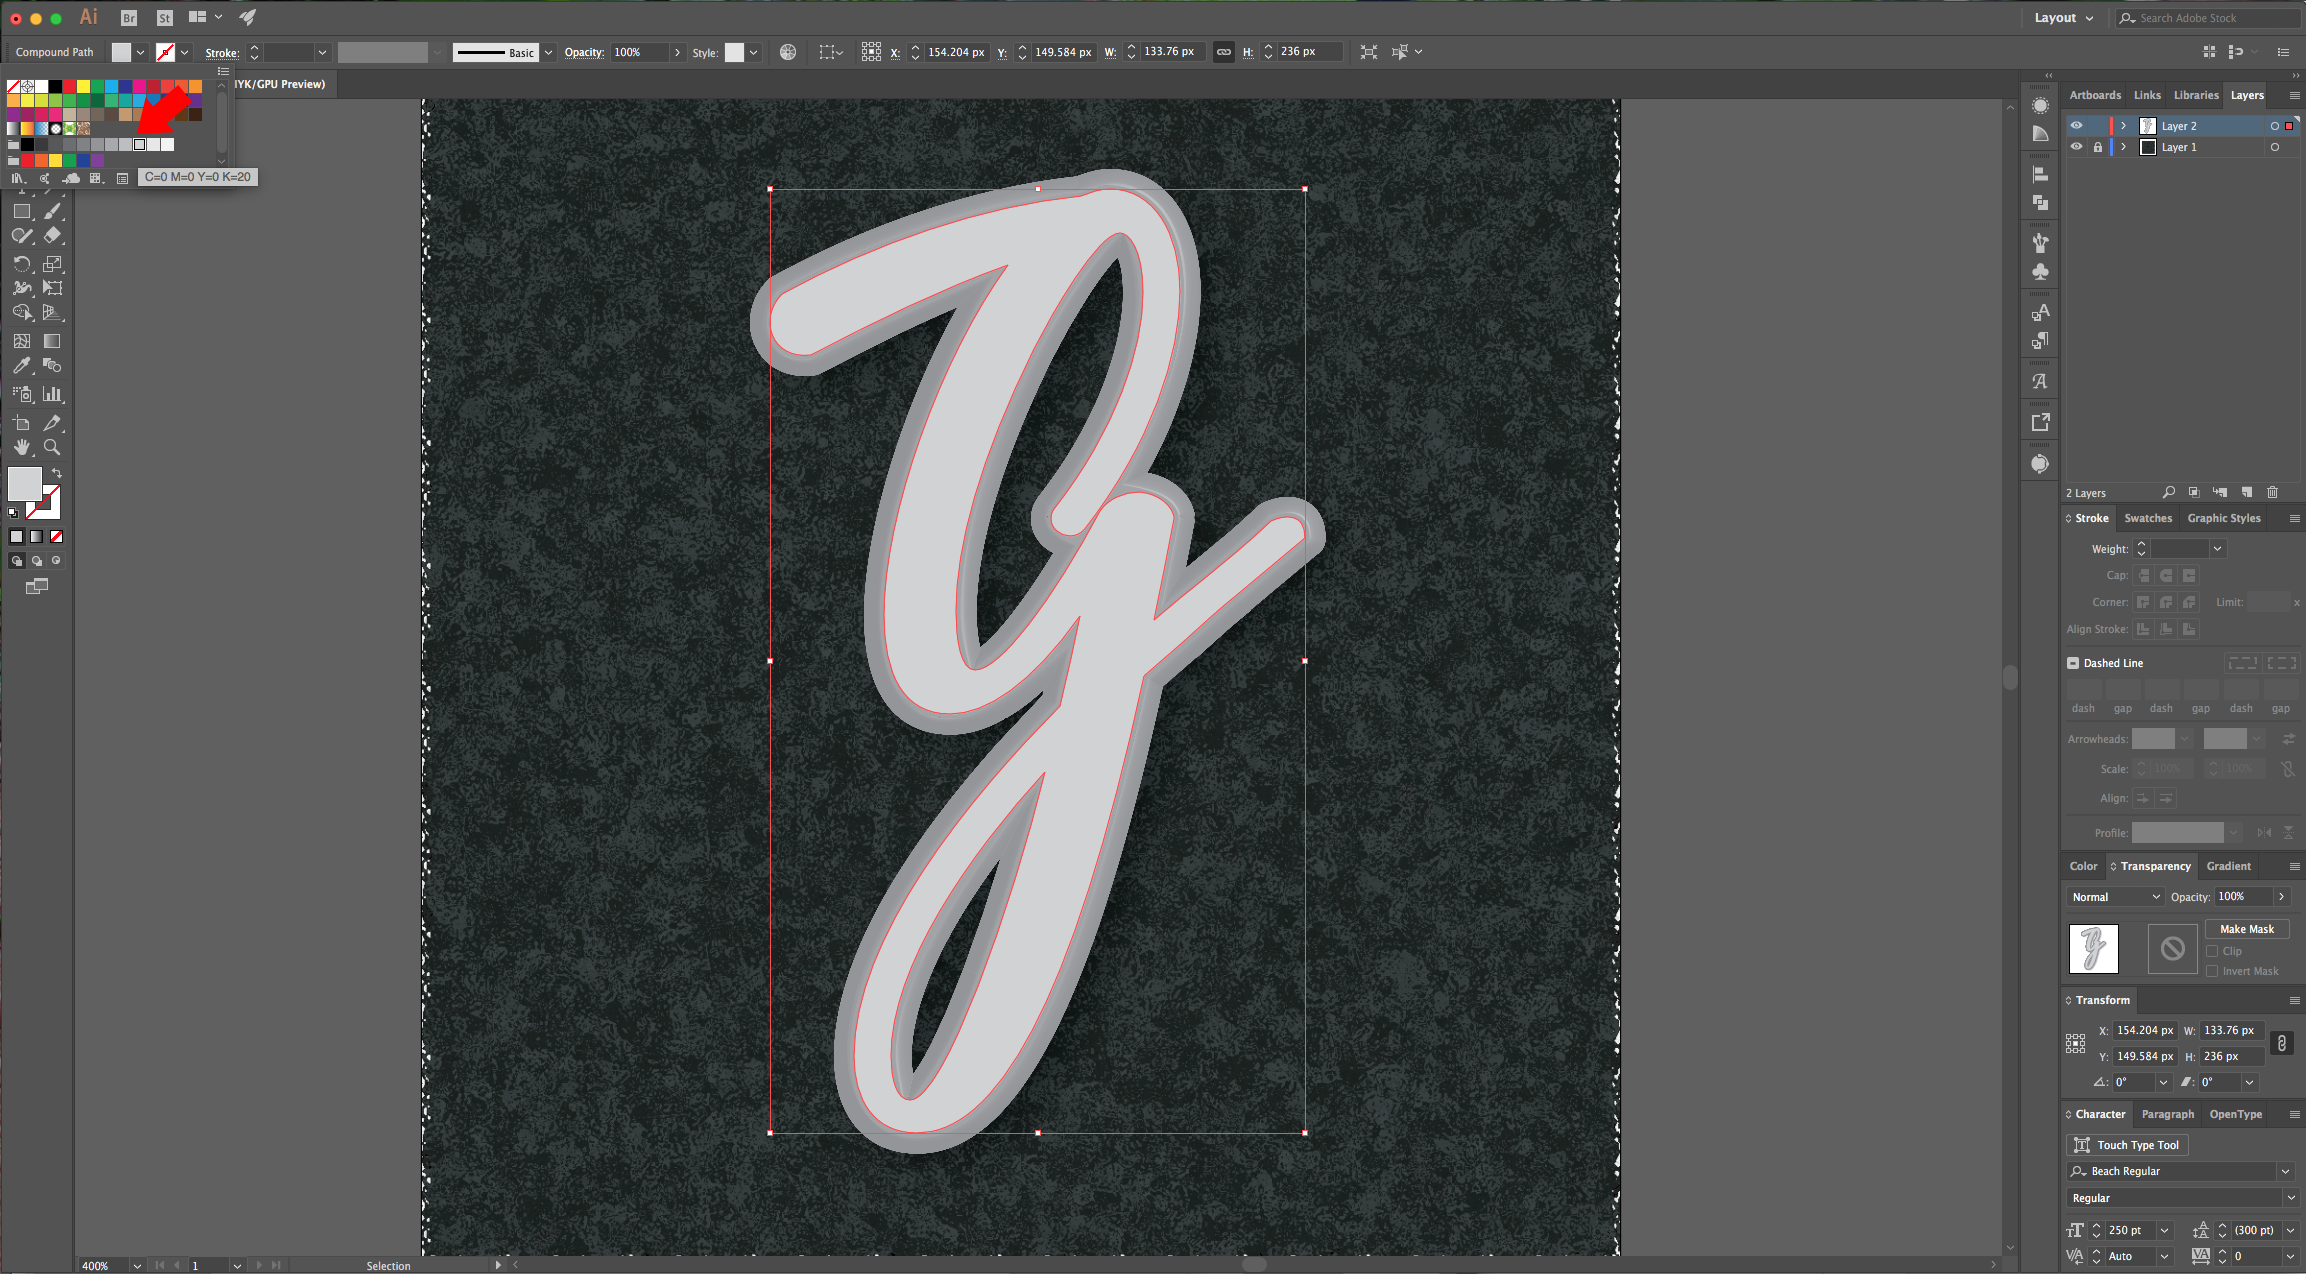
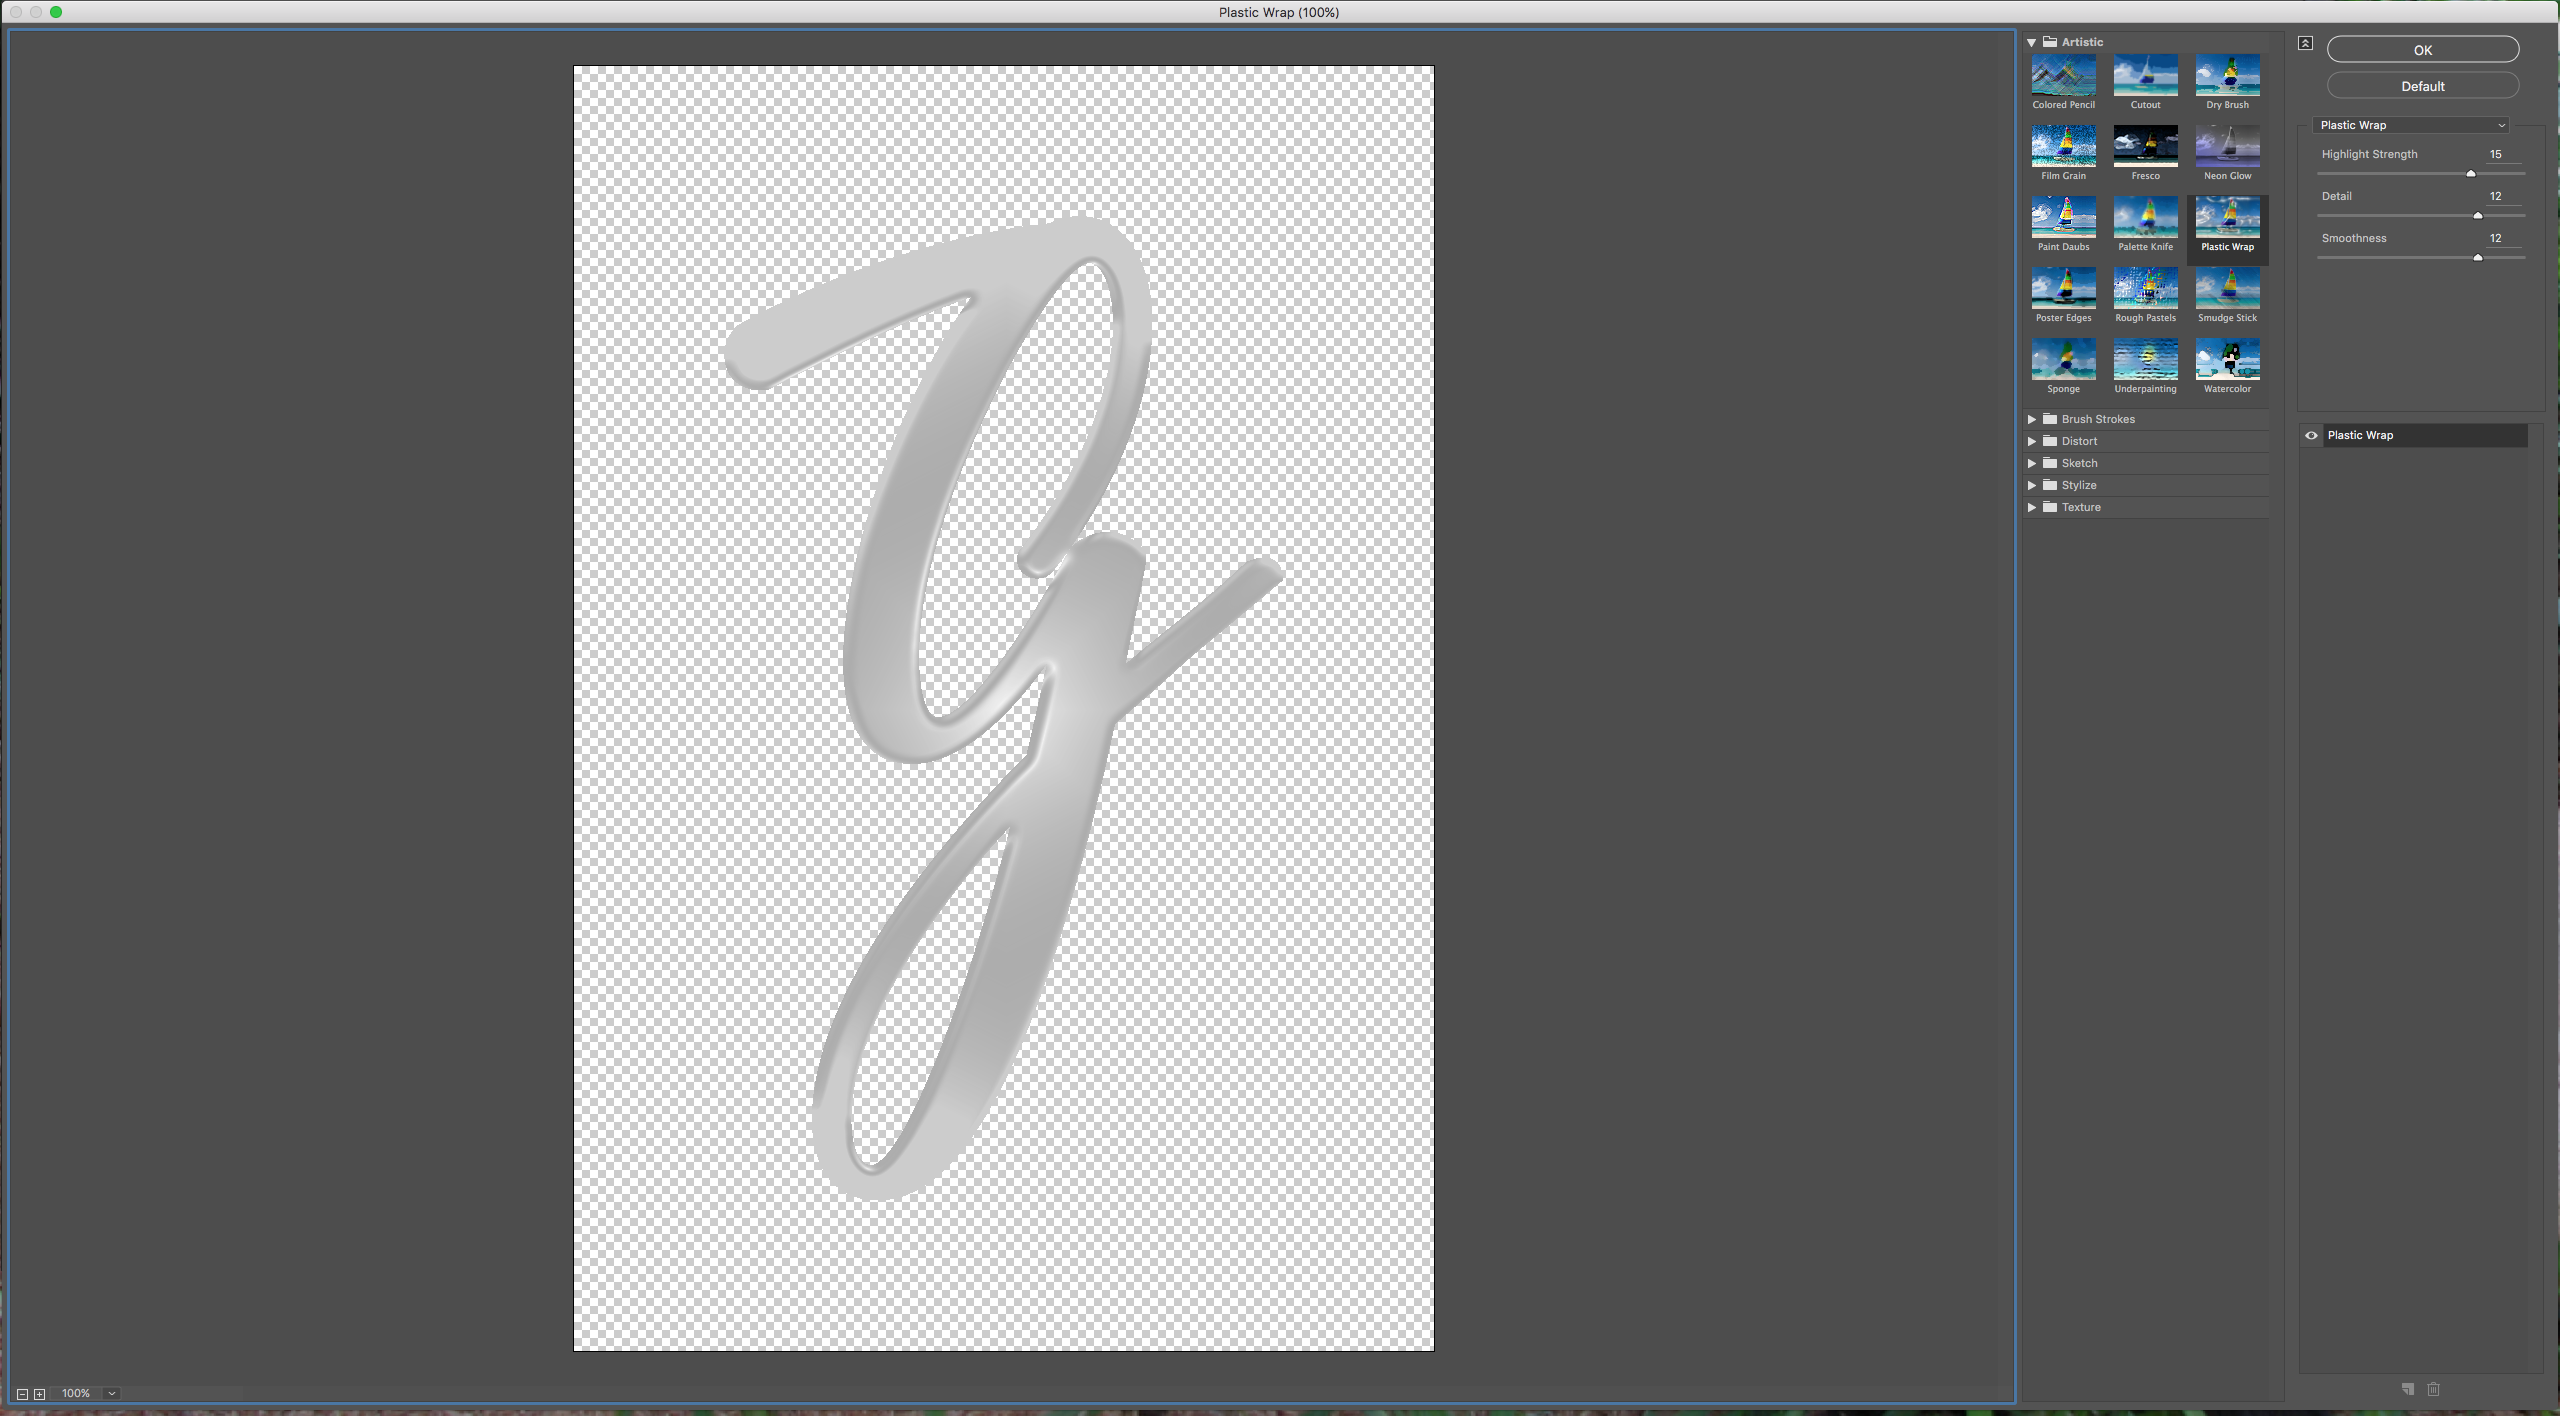
10 - Then go to Effect > Stylize > Drop Shadow and use these values:
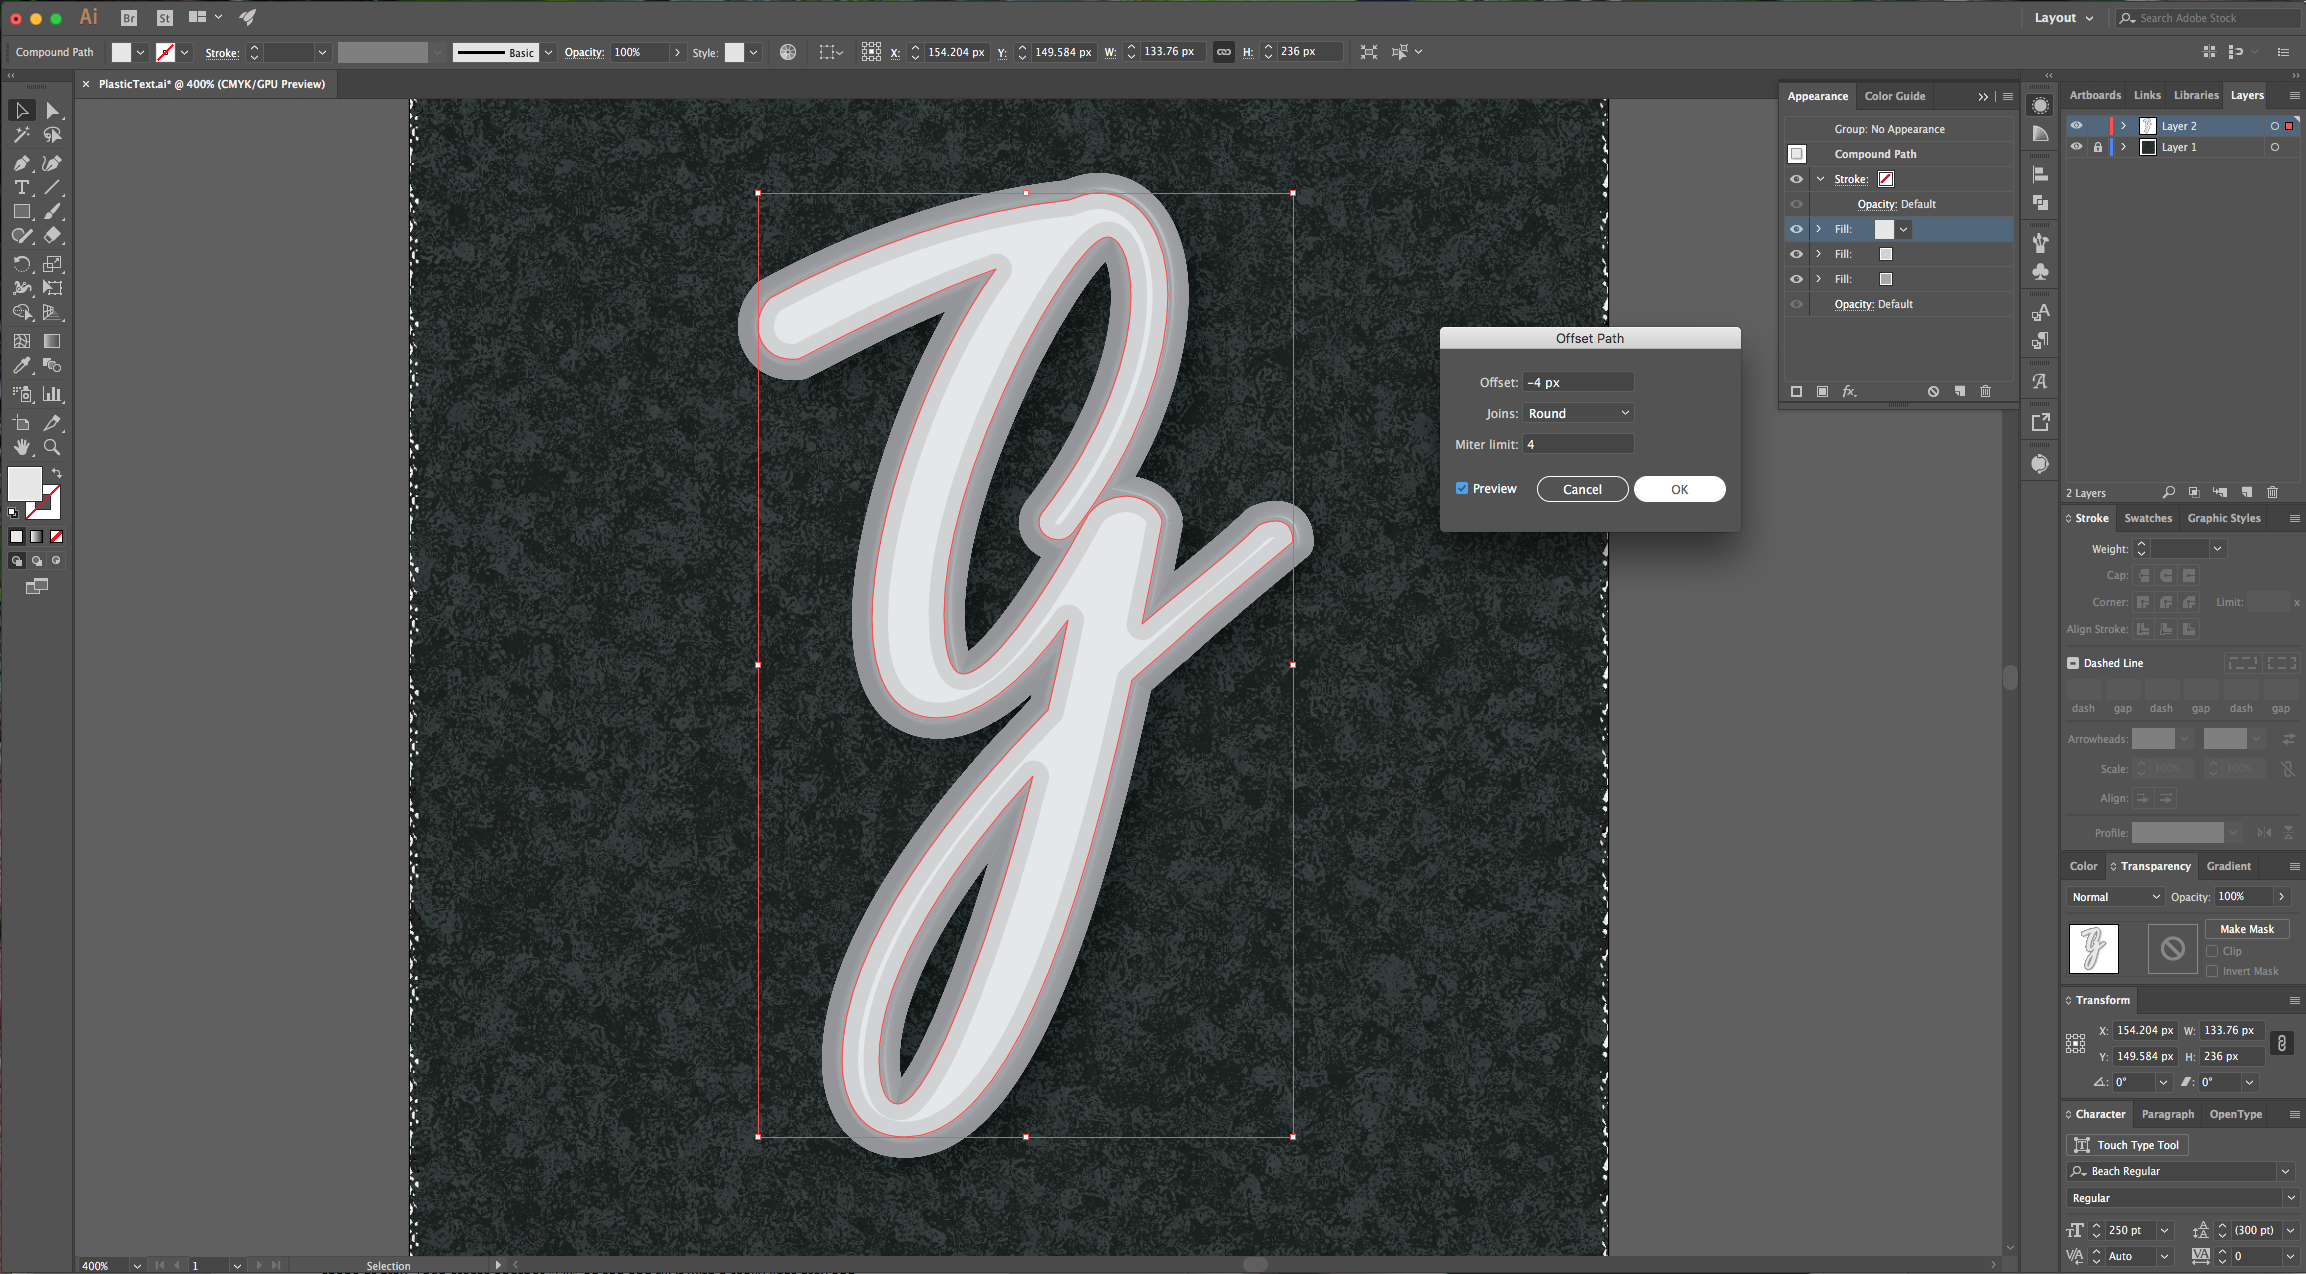
11 - Create a “New Fill” on top of the one you’ve been working and fill it with a lighter shade of gray. Go to Effects > Artistic > Plastic Wrap and use the following settings:
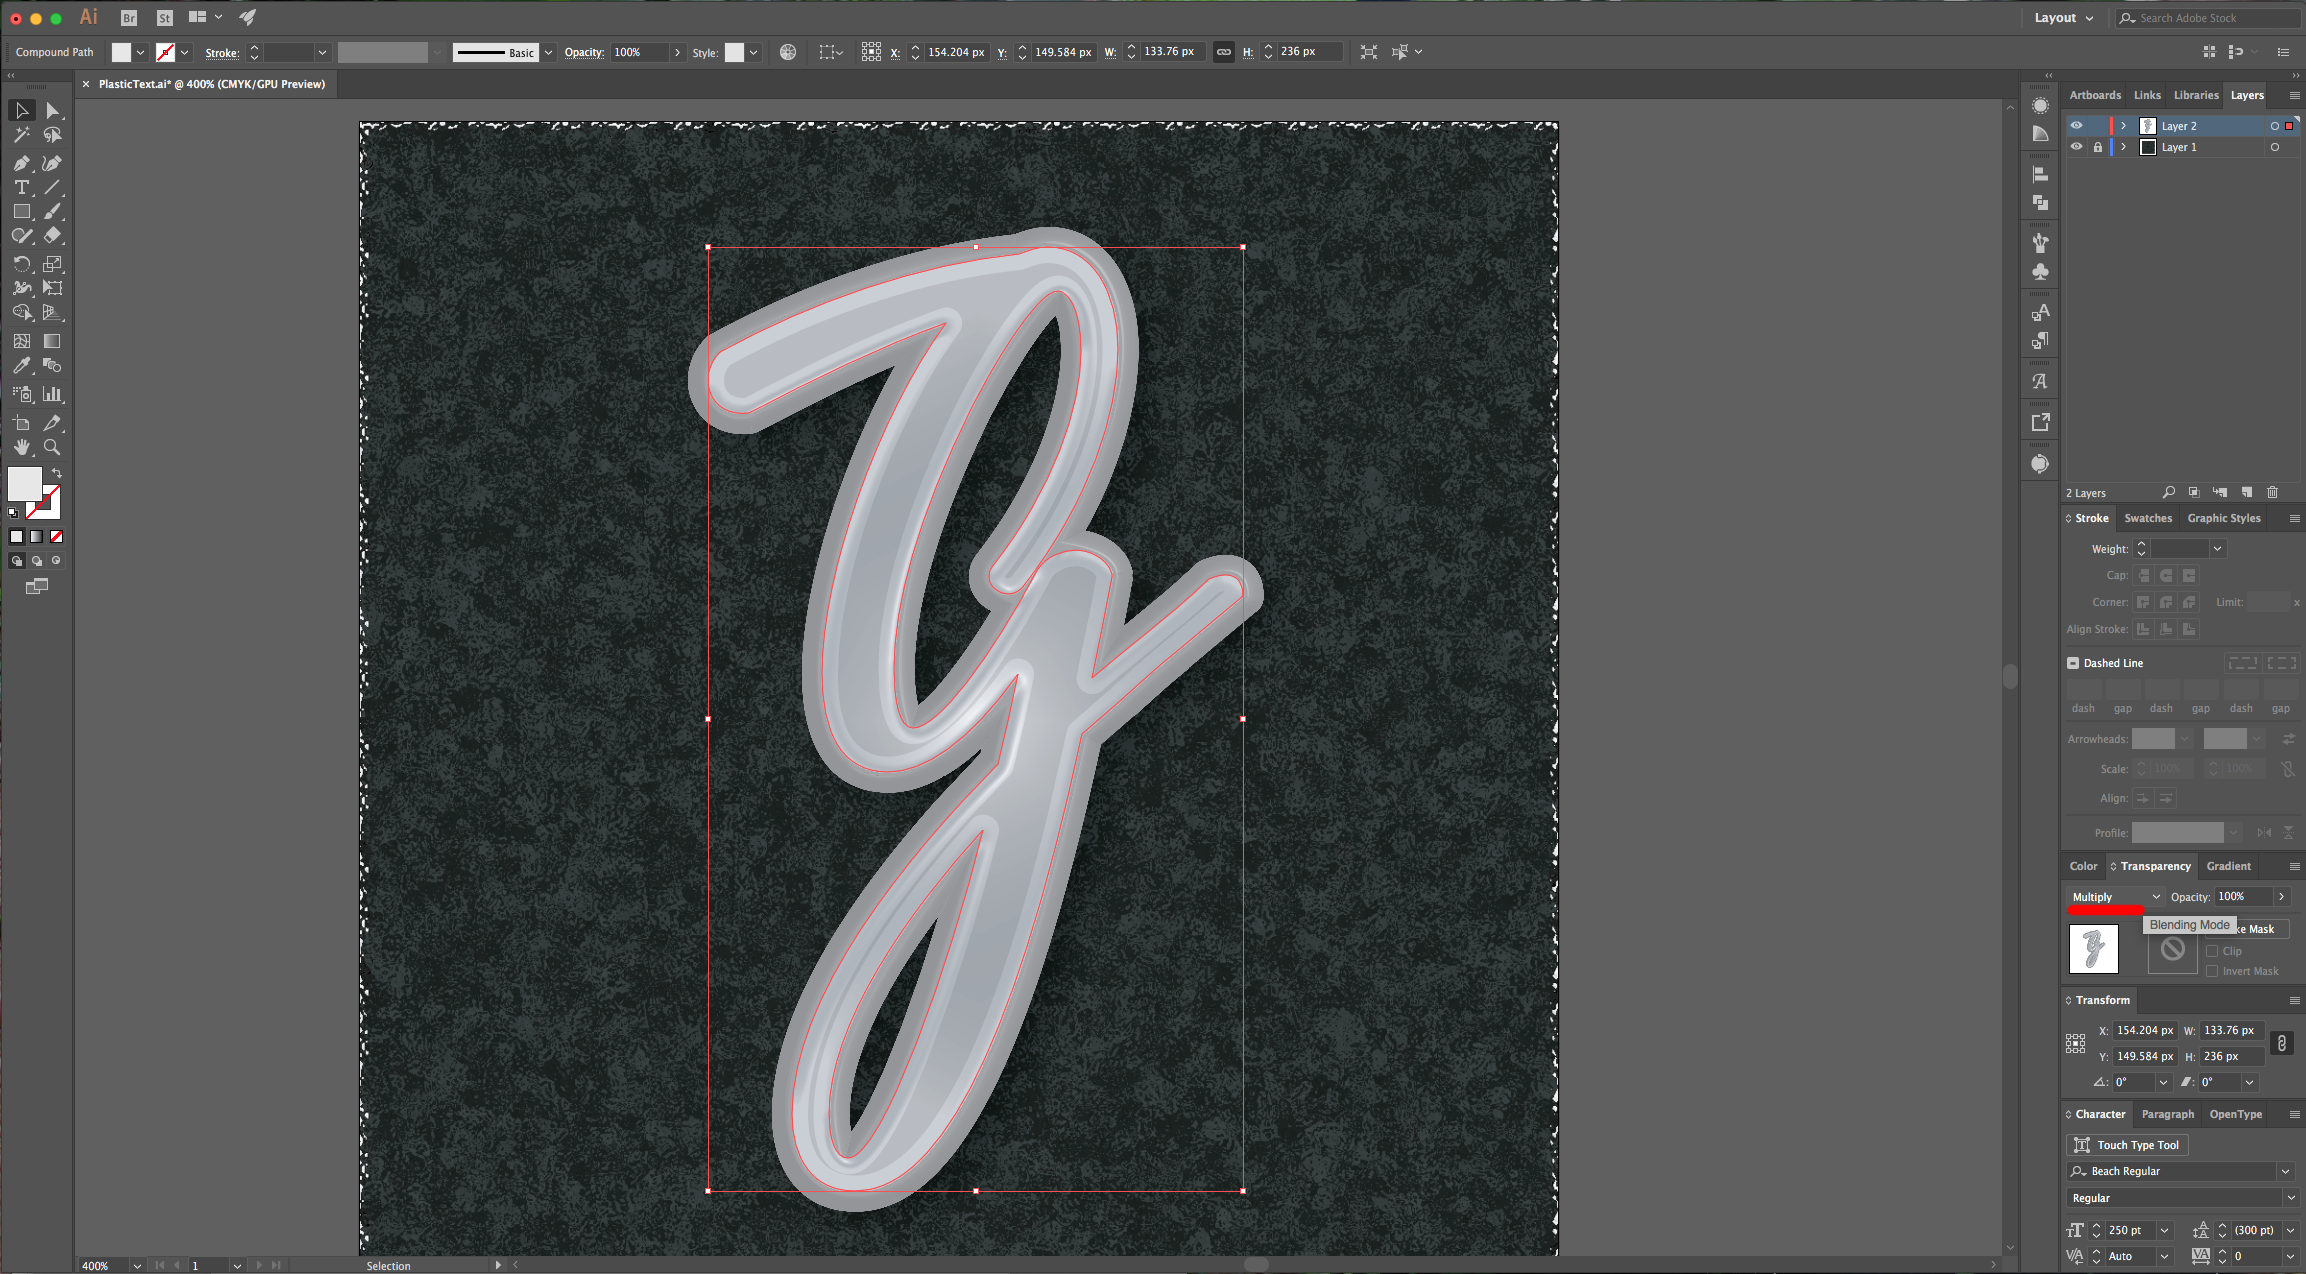
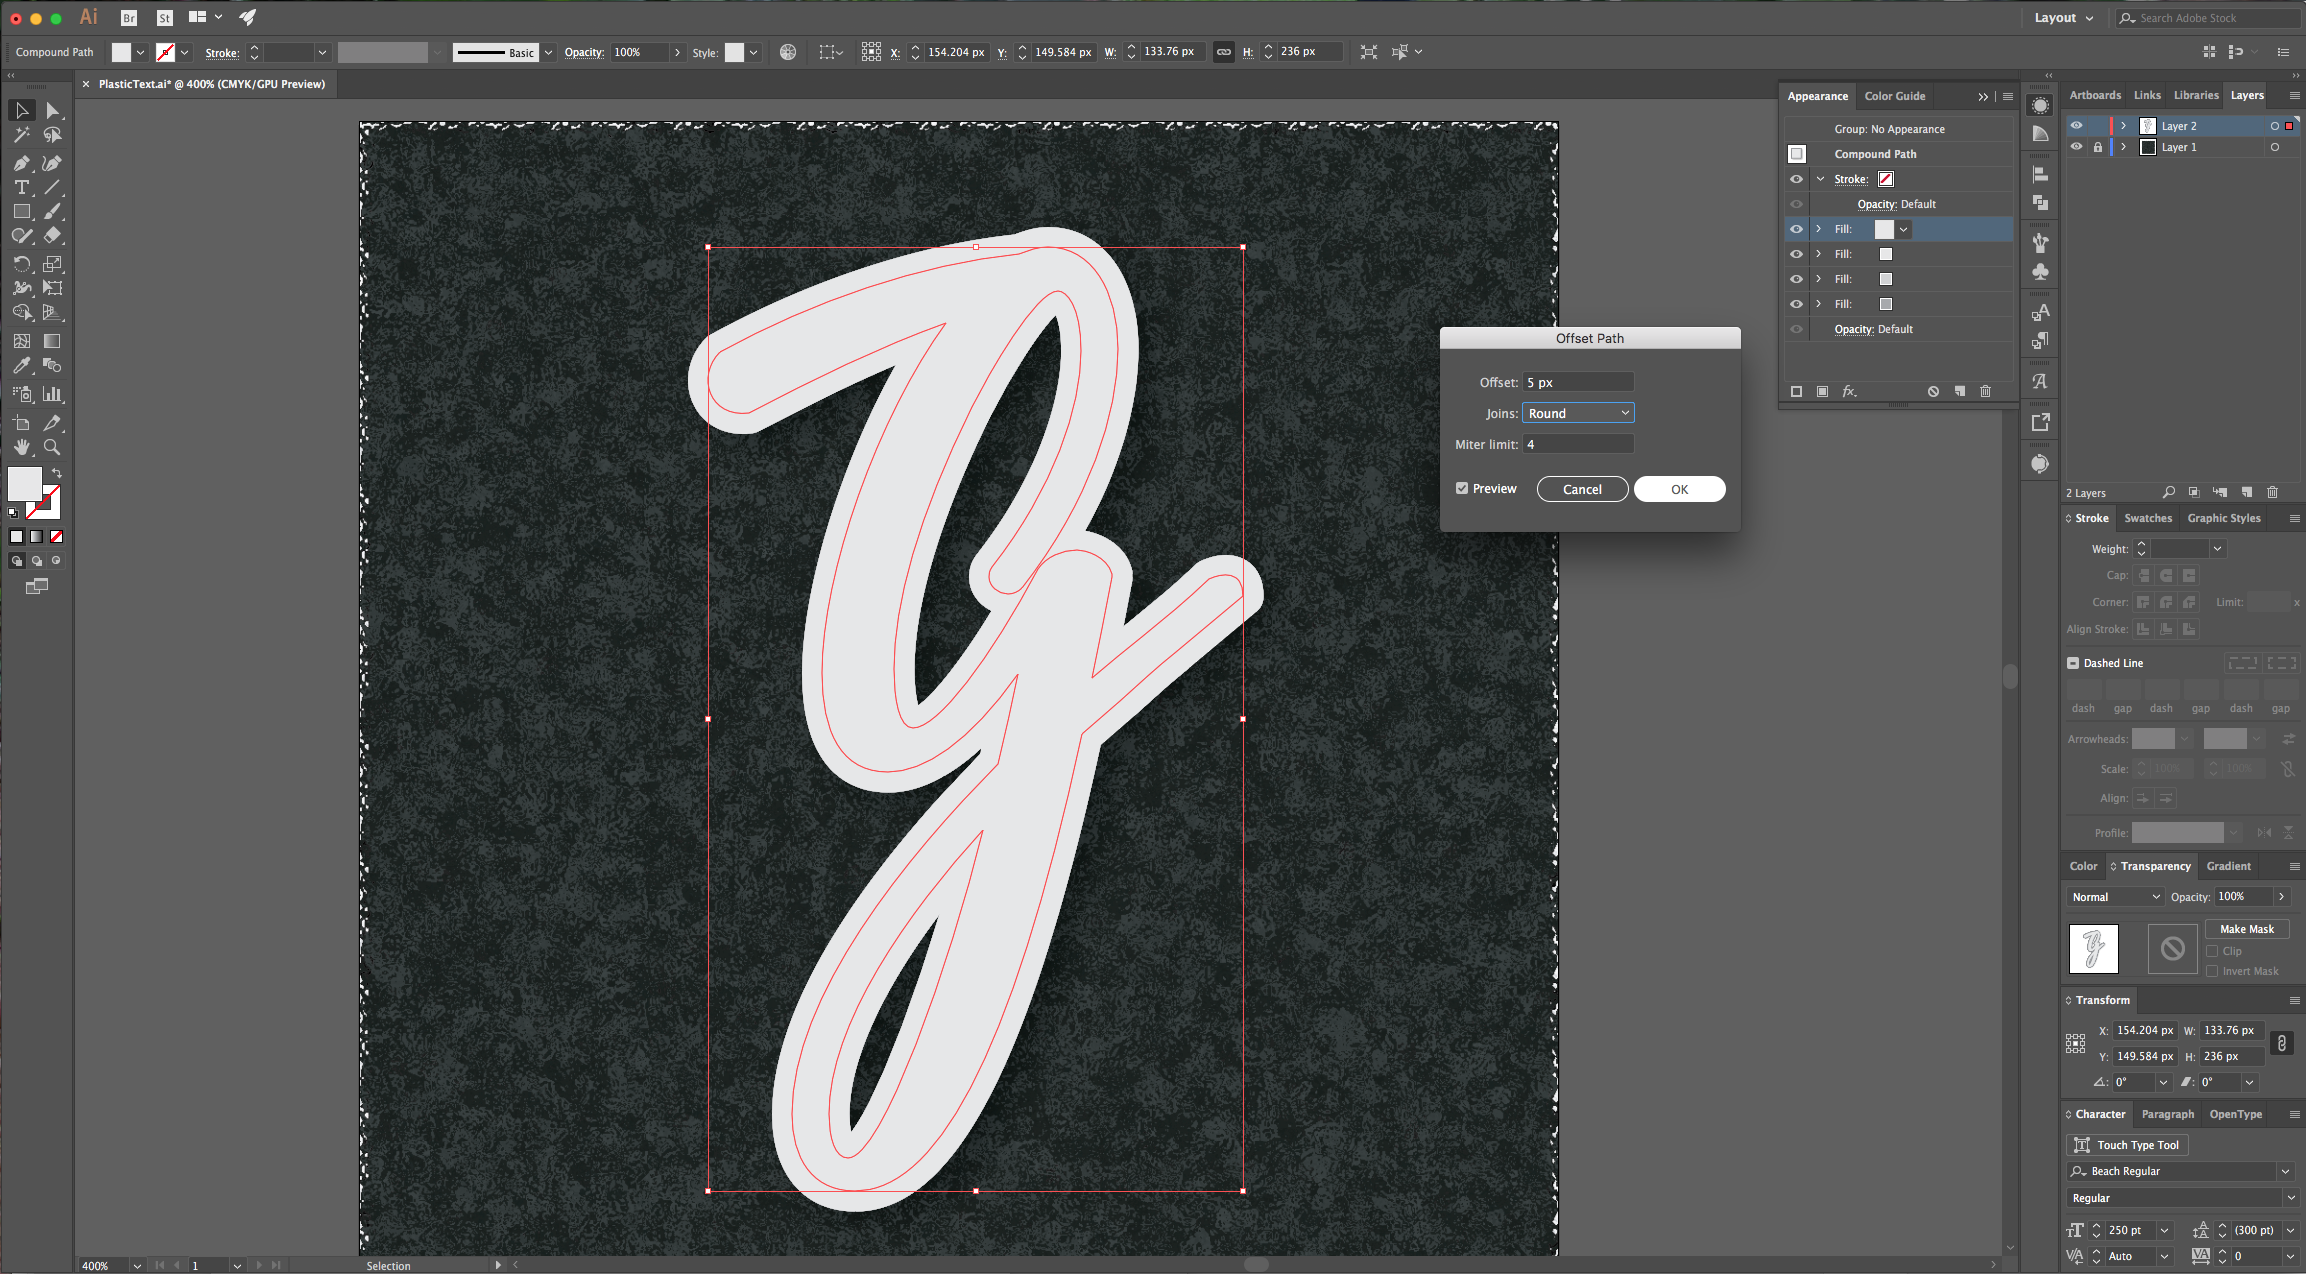
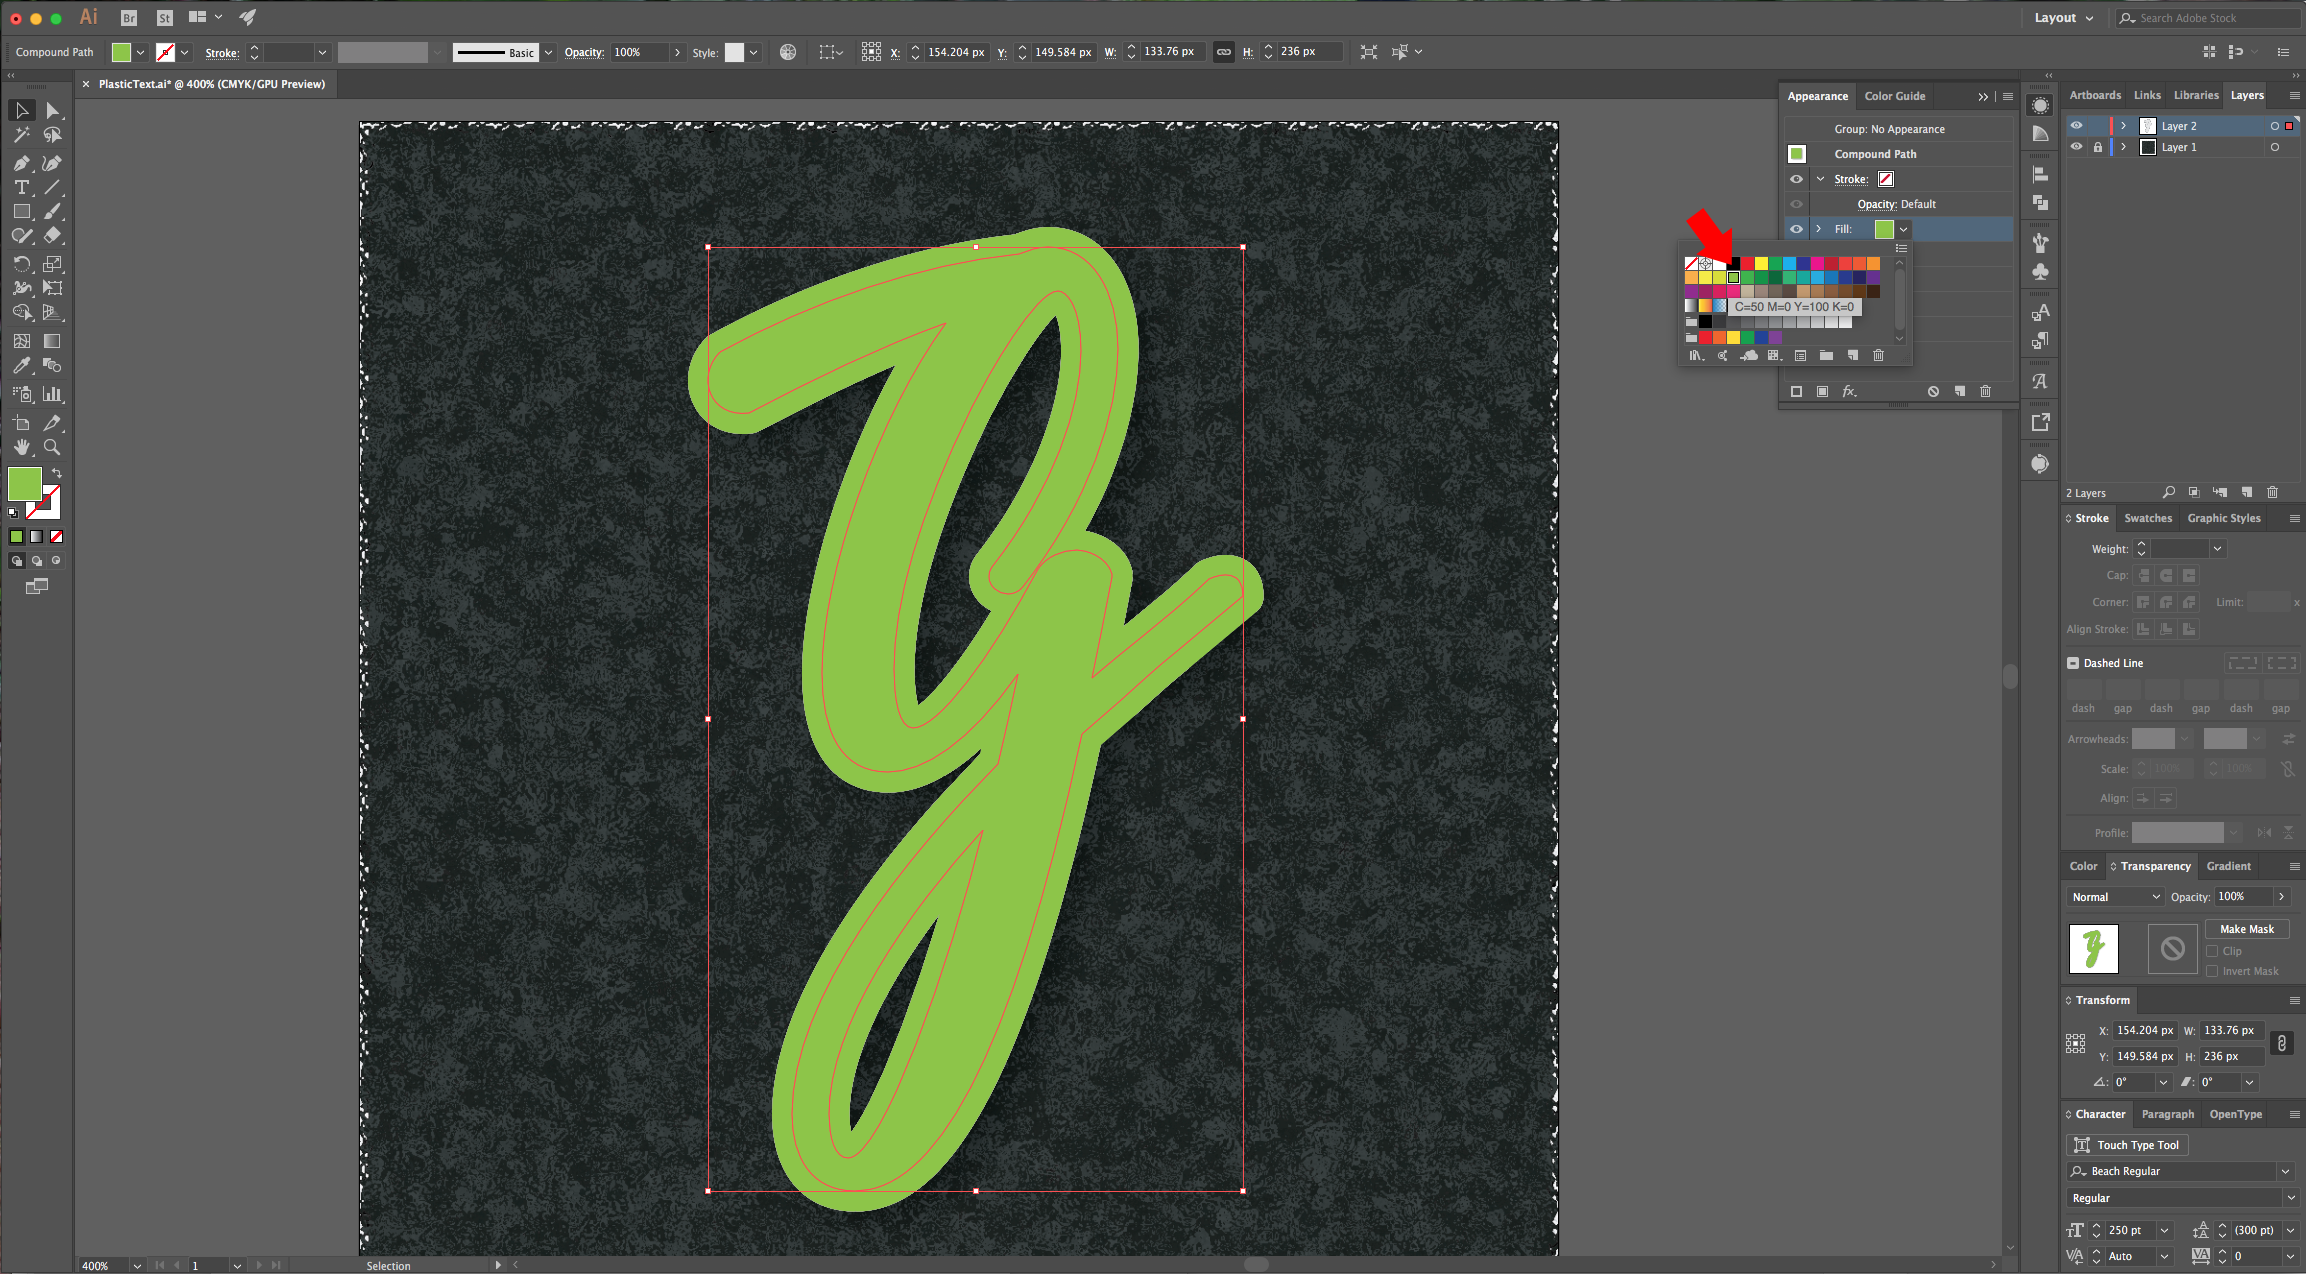
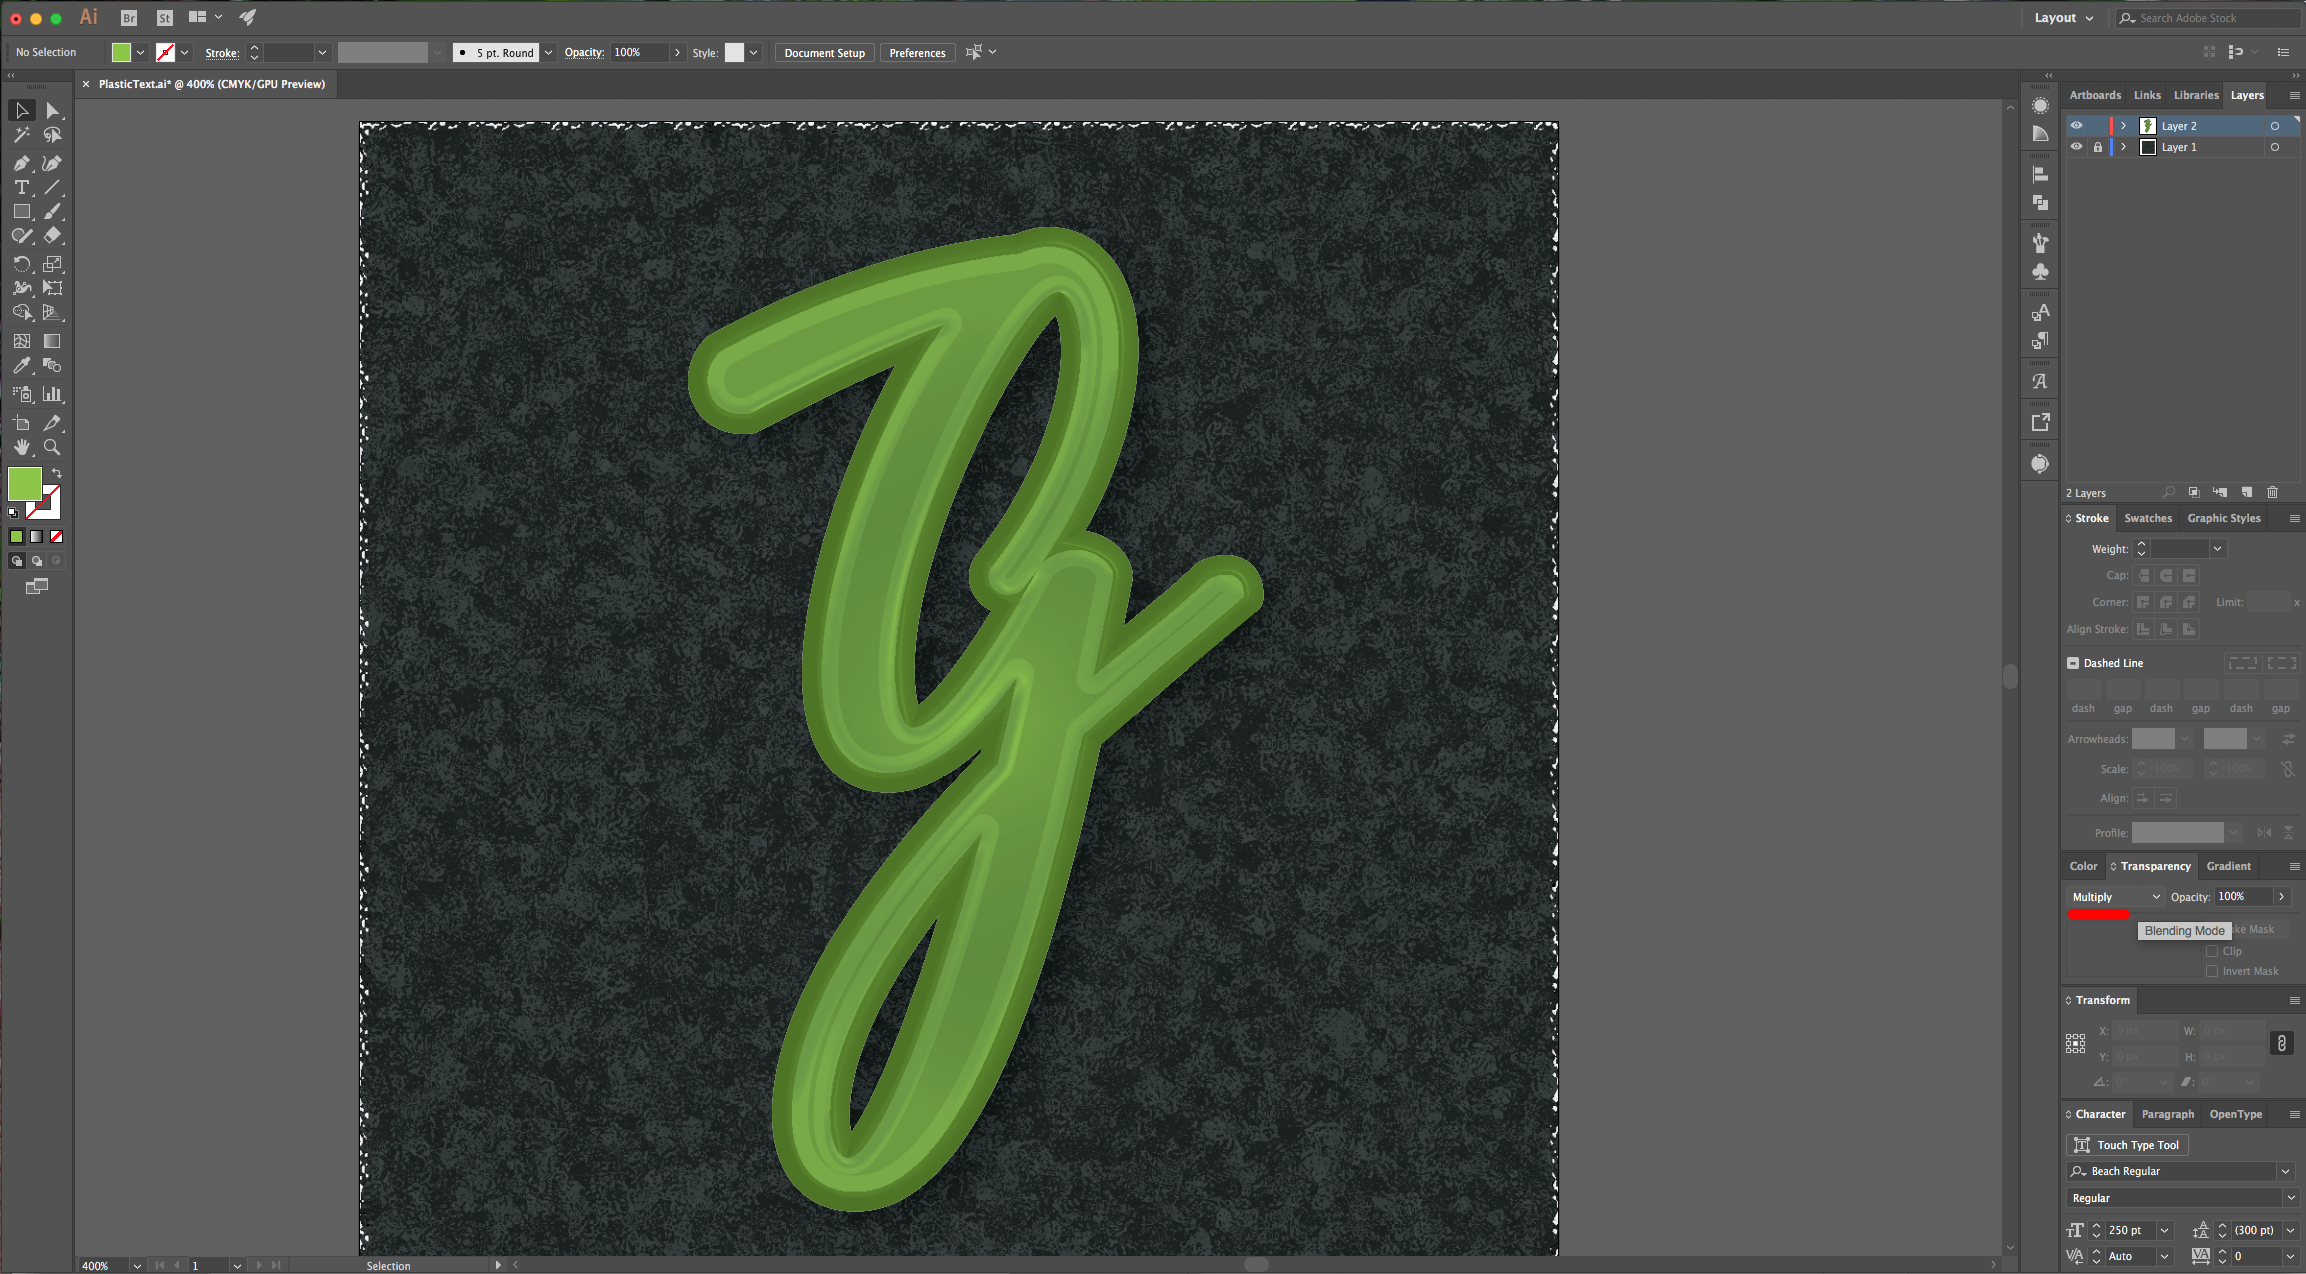
12 - Then create another “Fill” on top and fill it with a really light grey and “Offset” the Path by -4 px. Change this layer’s “Blending Mode” to “Multiply” in the “Transparency” Panel.

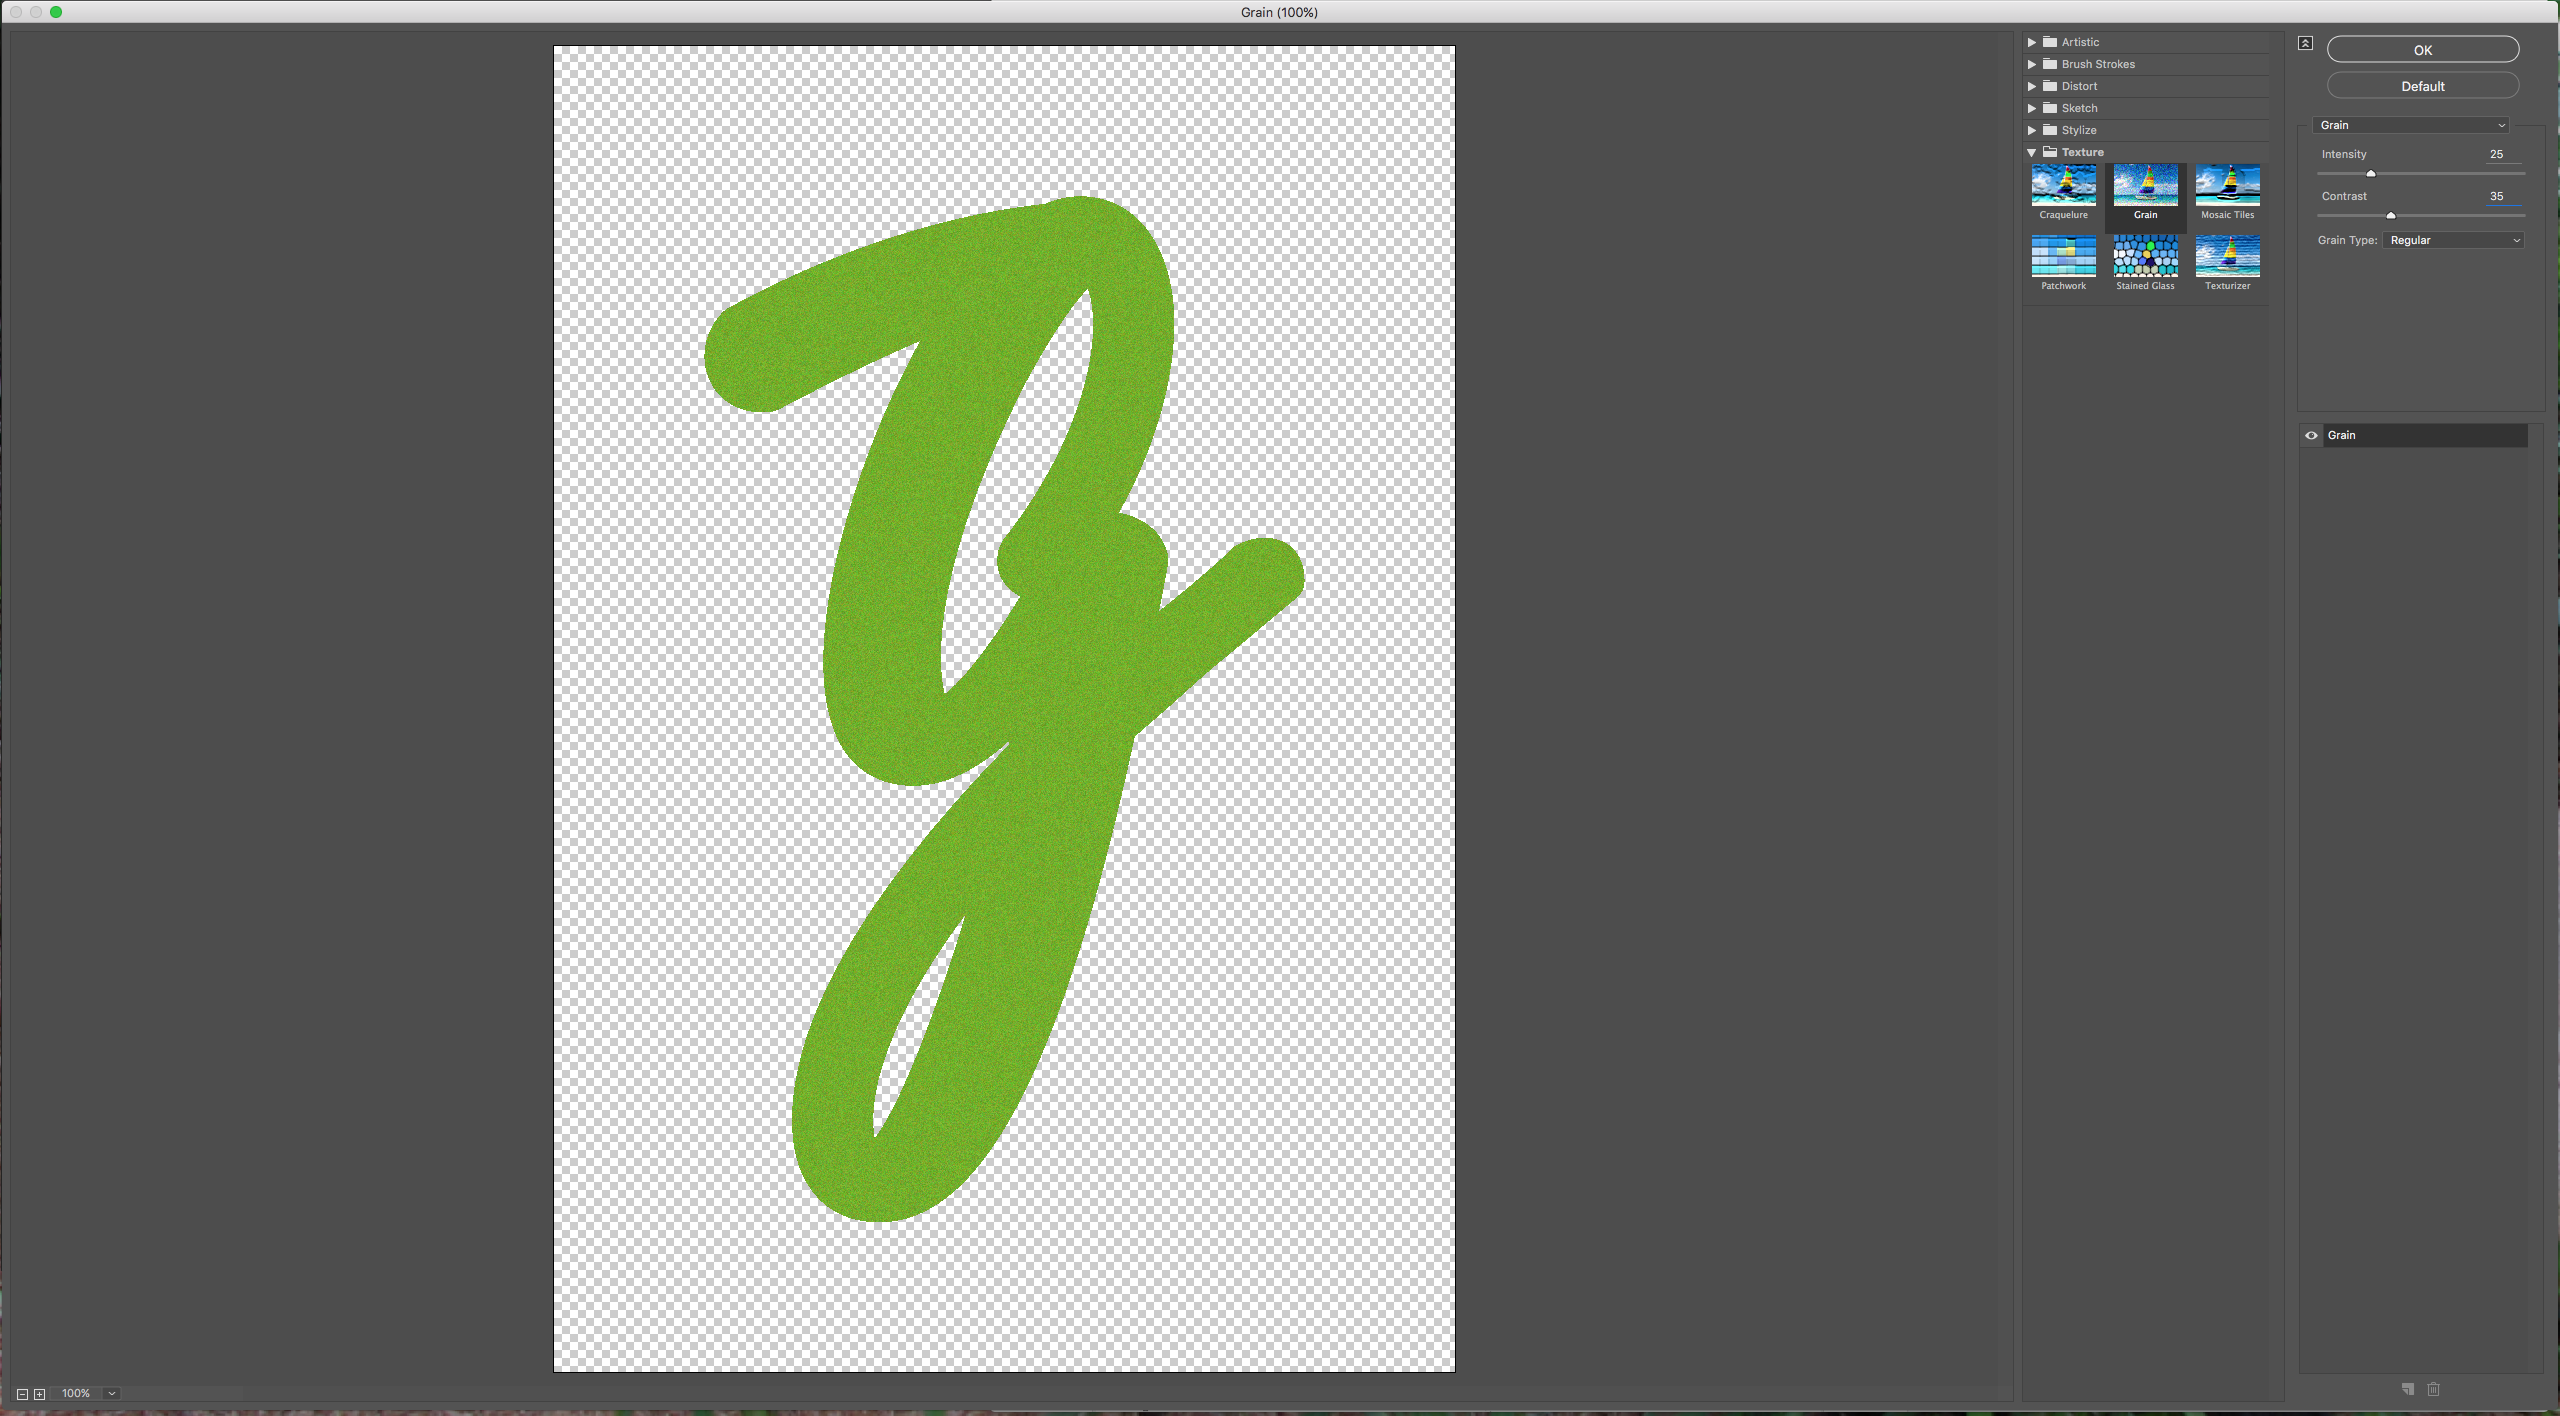
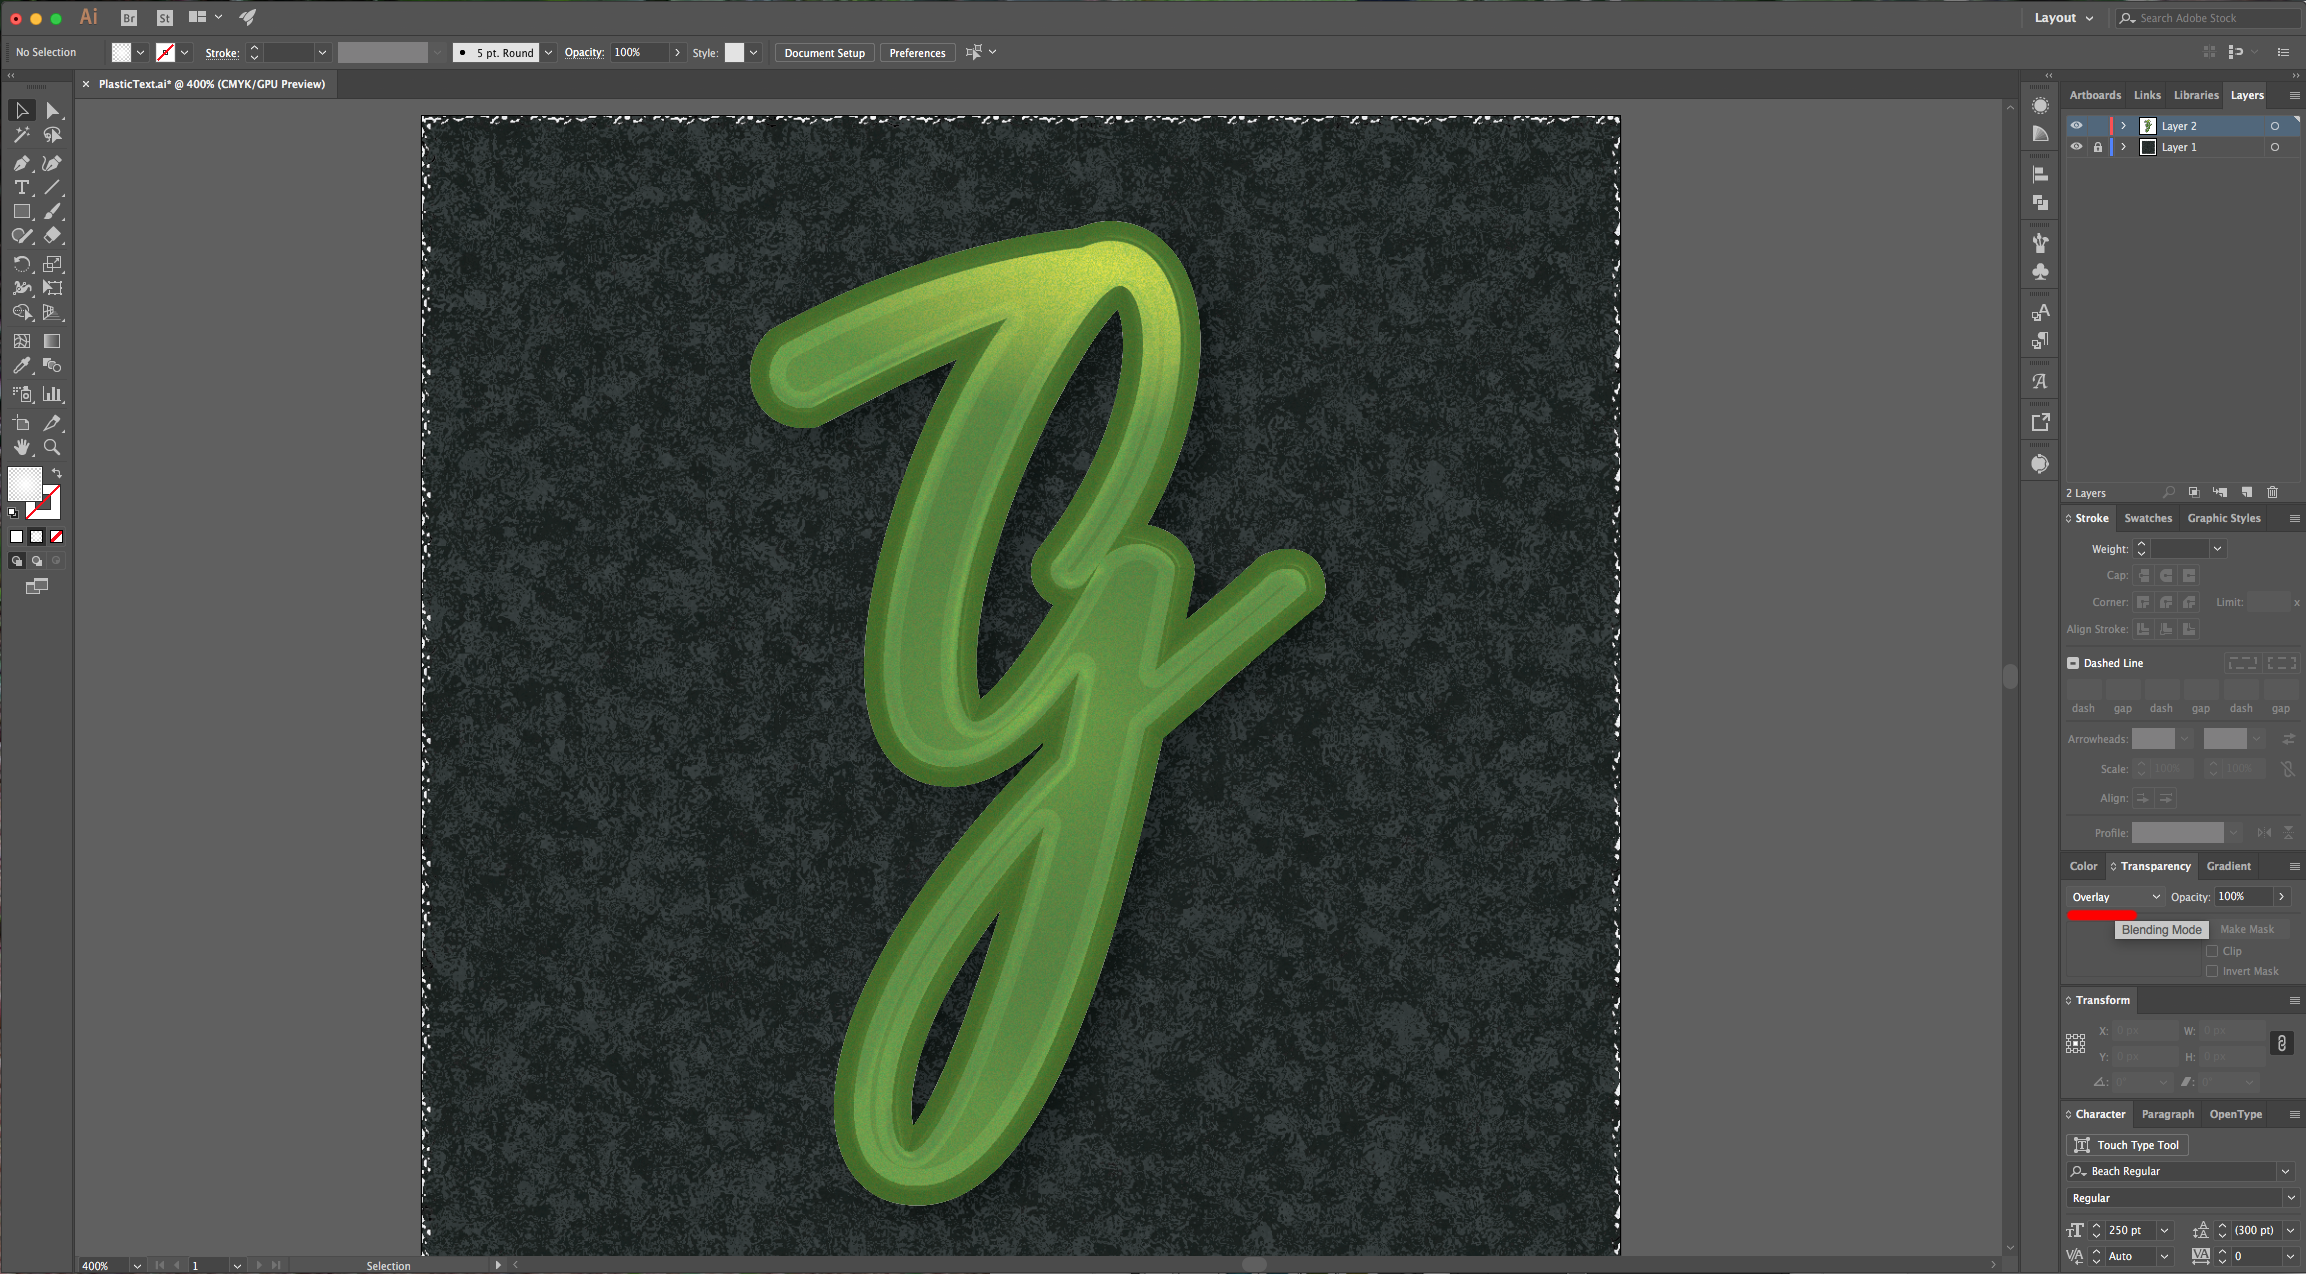
13 - Create another “Fill” layer on top of the others, “Offset” the Path by 5 pixels and use a bright “Fill” color. Set the “Blending Mode” to “Multiply”. On the same “Fill” go to Effect > Texture > Grain and use the following values:


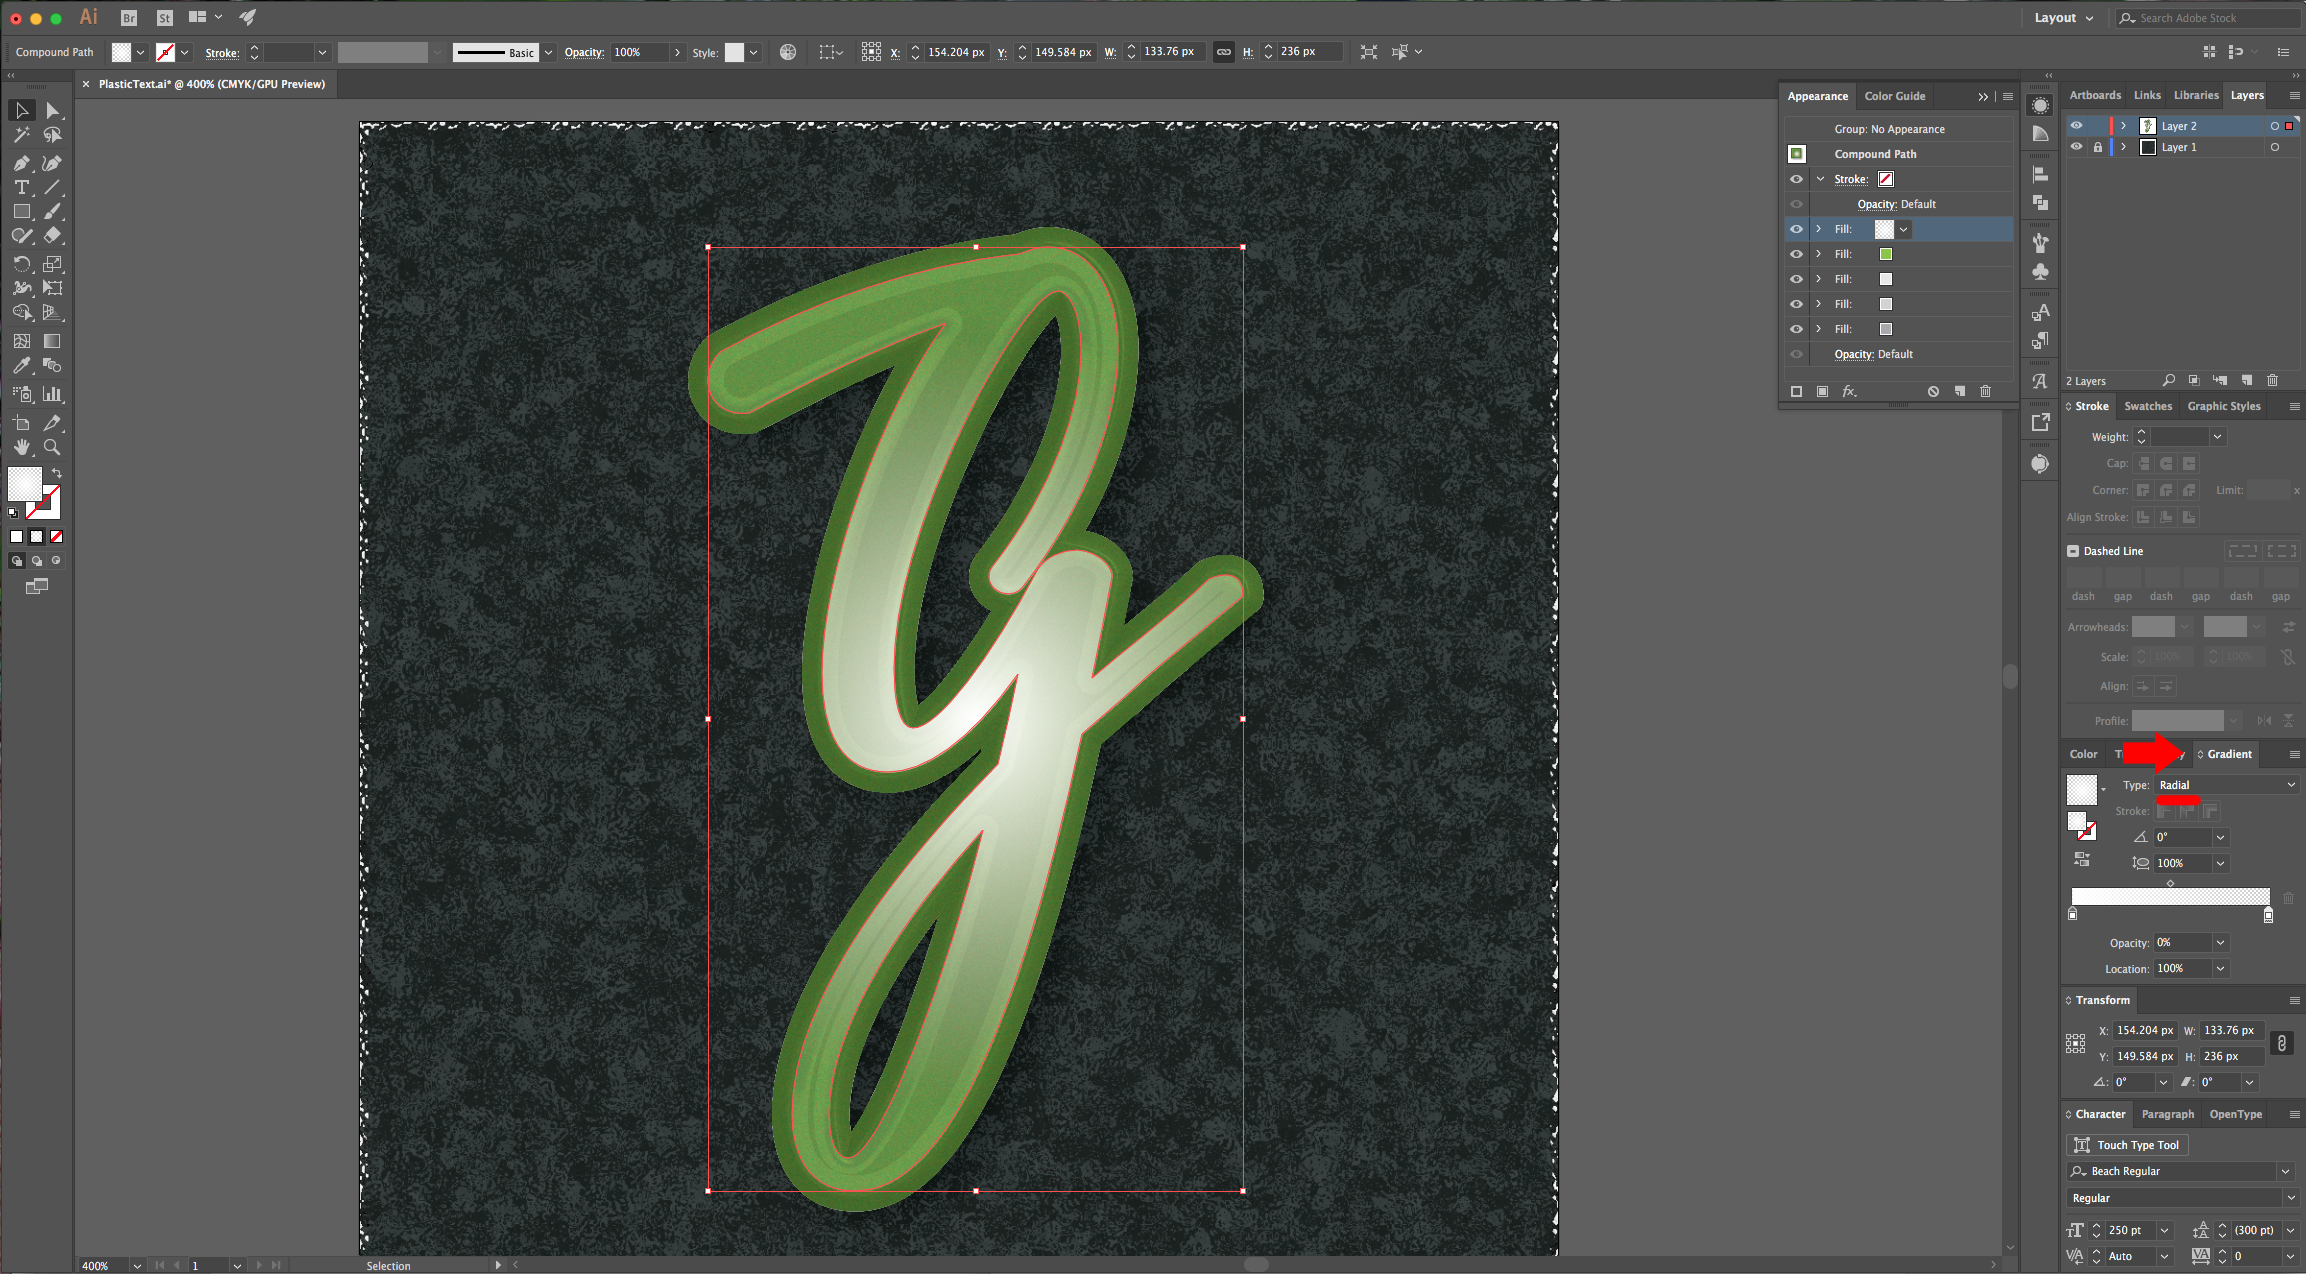
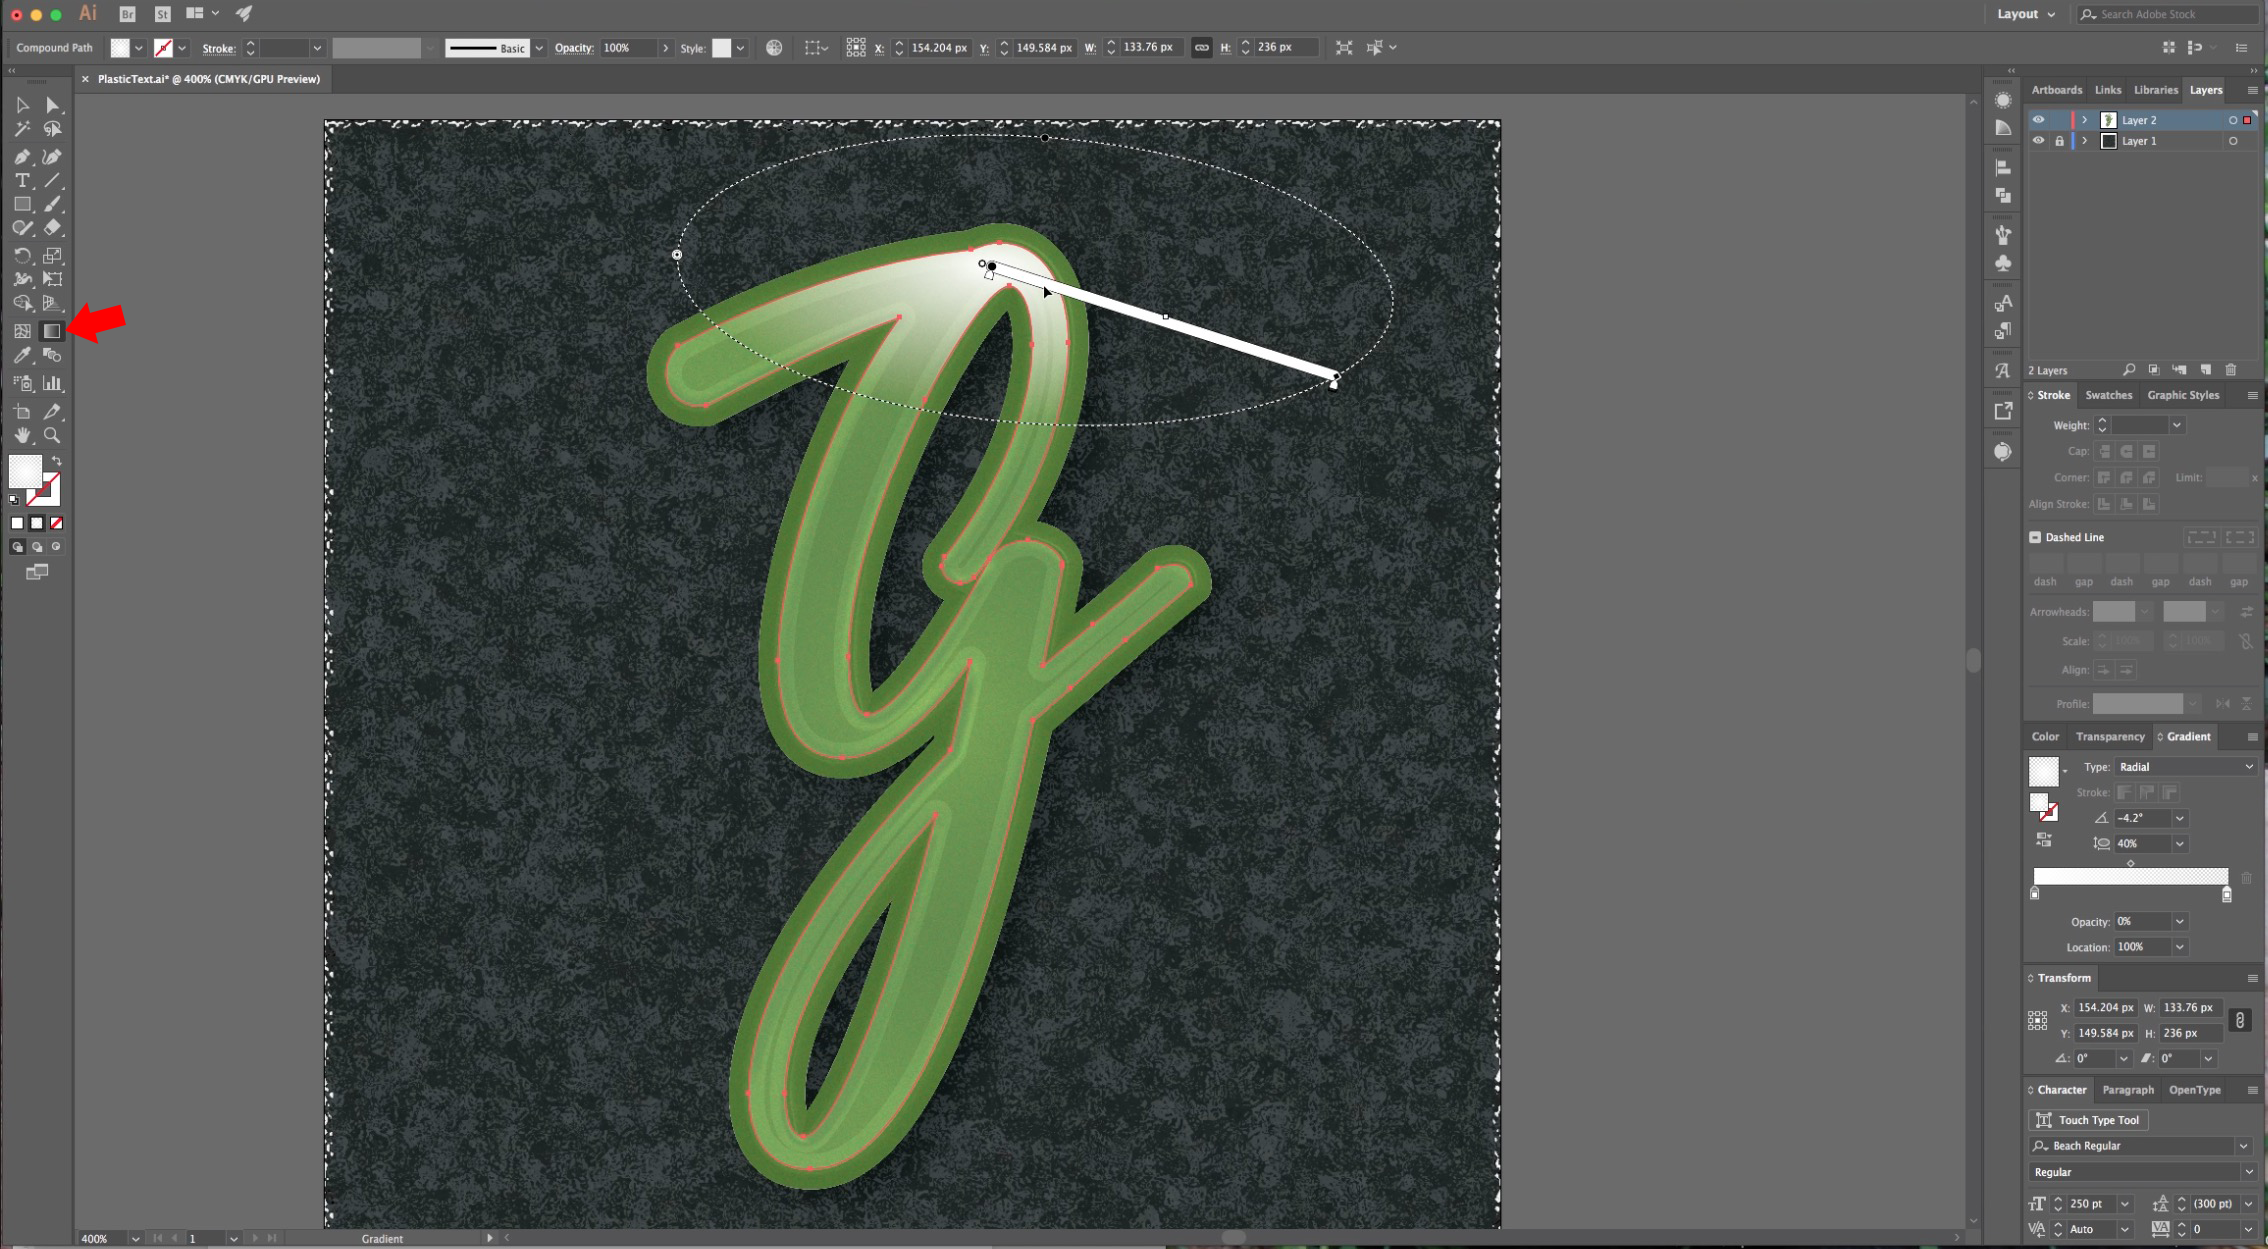
14 - Create one final “Fill” layer on top of the others. Apply a “Radial Gradient” filled with white, going from 100% Opacity to 0%. Set the “Blending Mode” to “Overlay” then use the “Gradient Tool” (G) to adjust the “Radius” and position it in the upper right side.
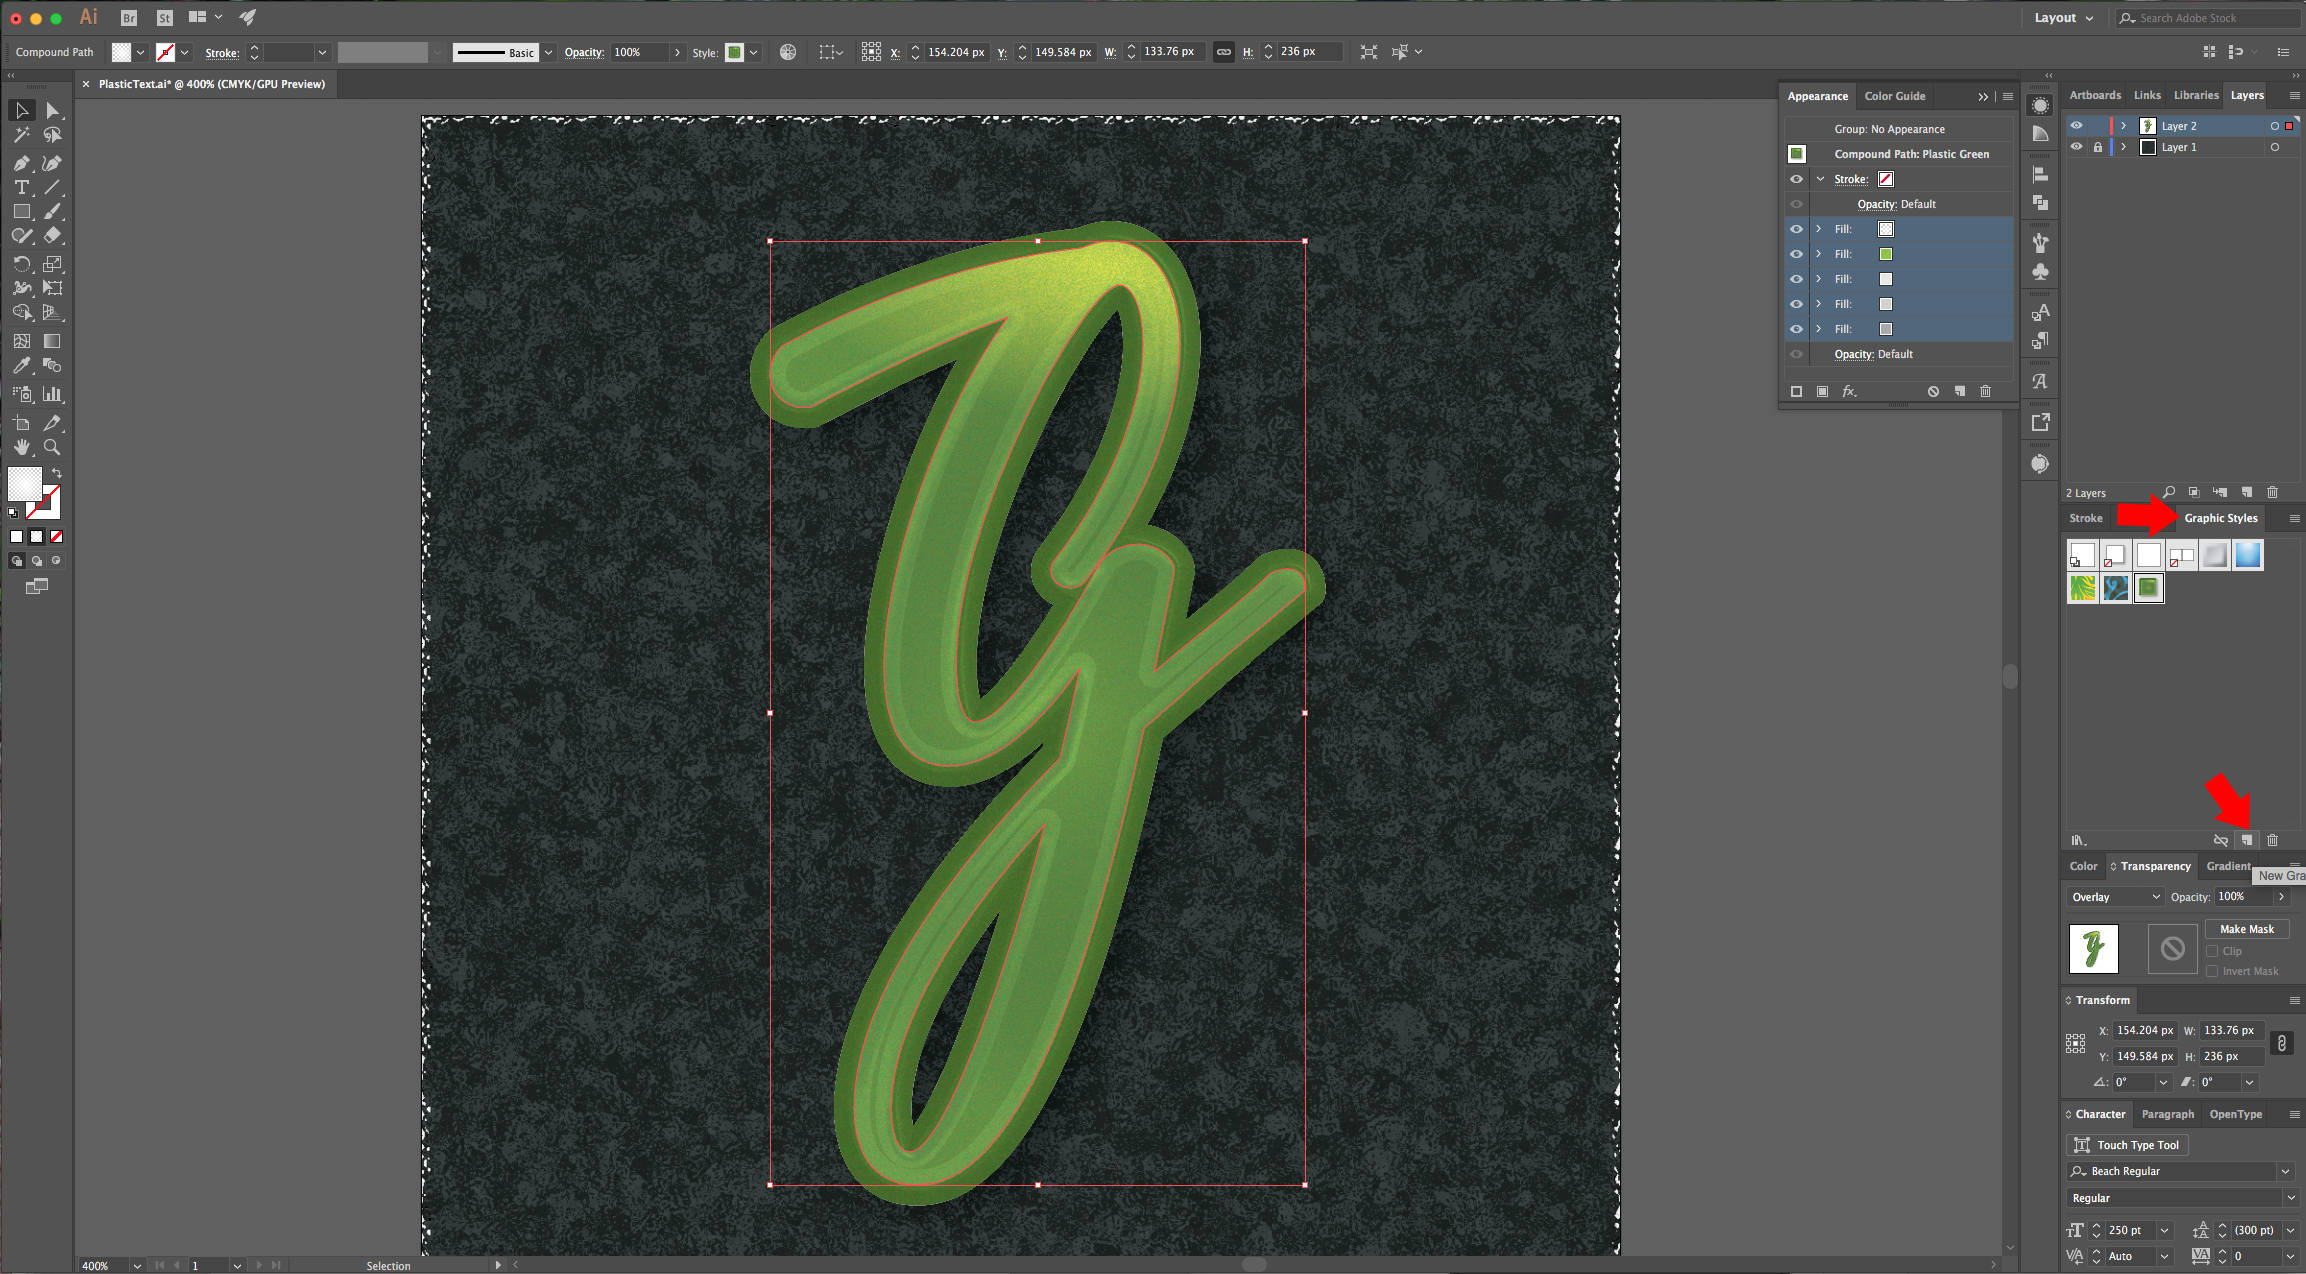
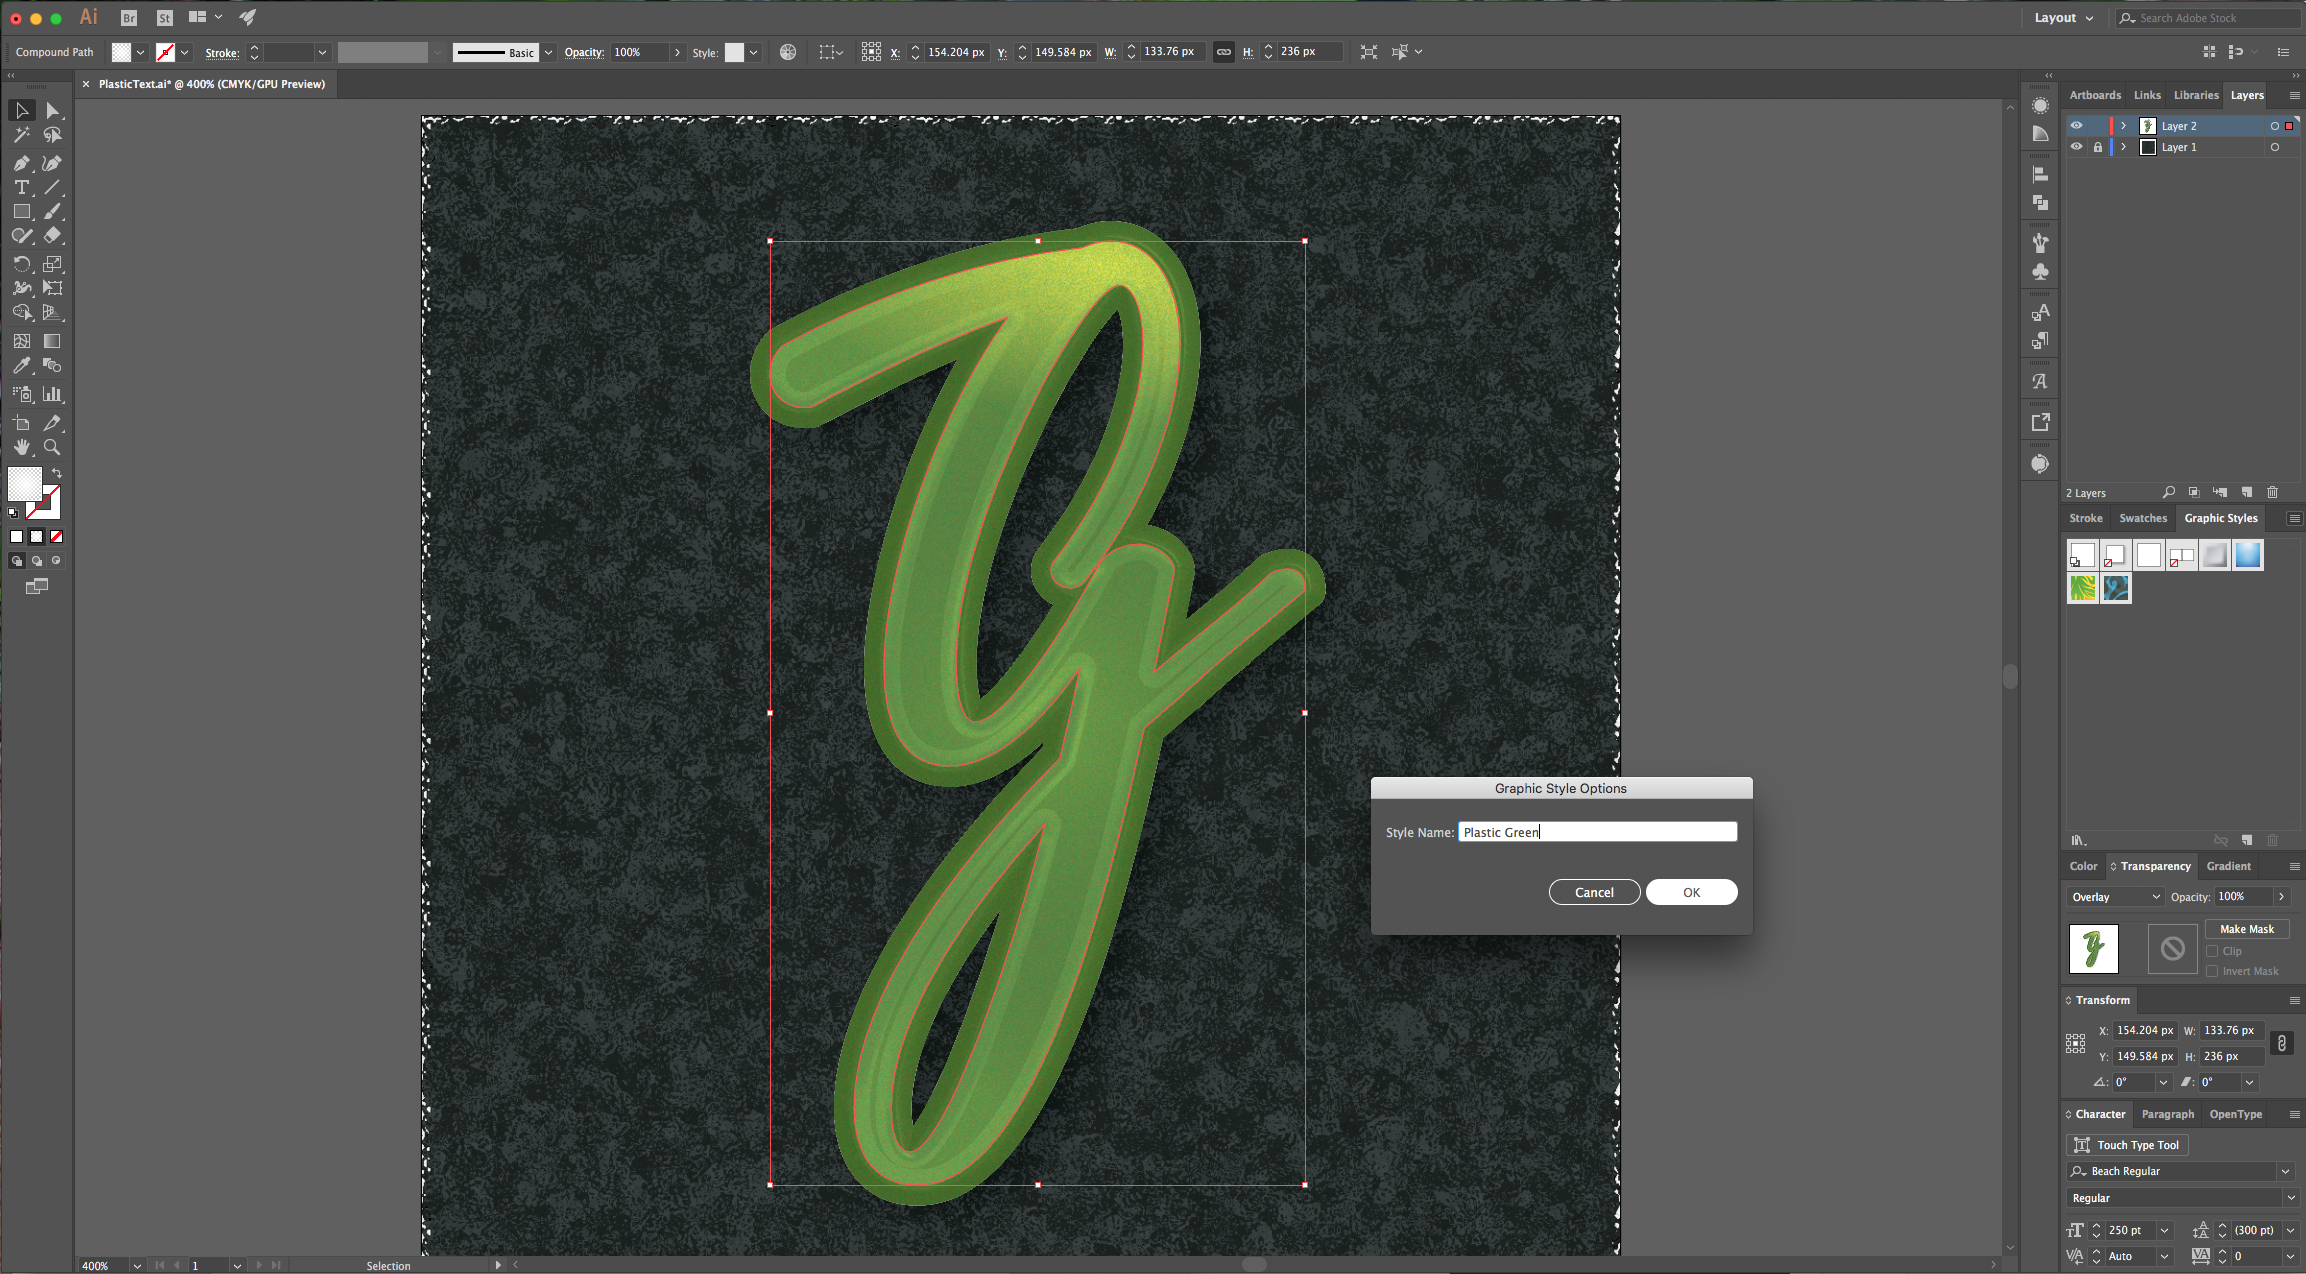
15 - Select your text (all the layers), go to “Graphic Styles” Panel and “Create a New Graphic Style” give it a name and save it. Now you can use the “Style” for other text or graphics.
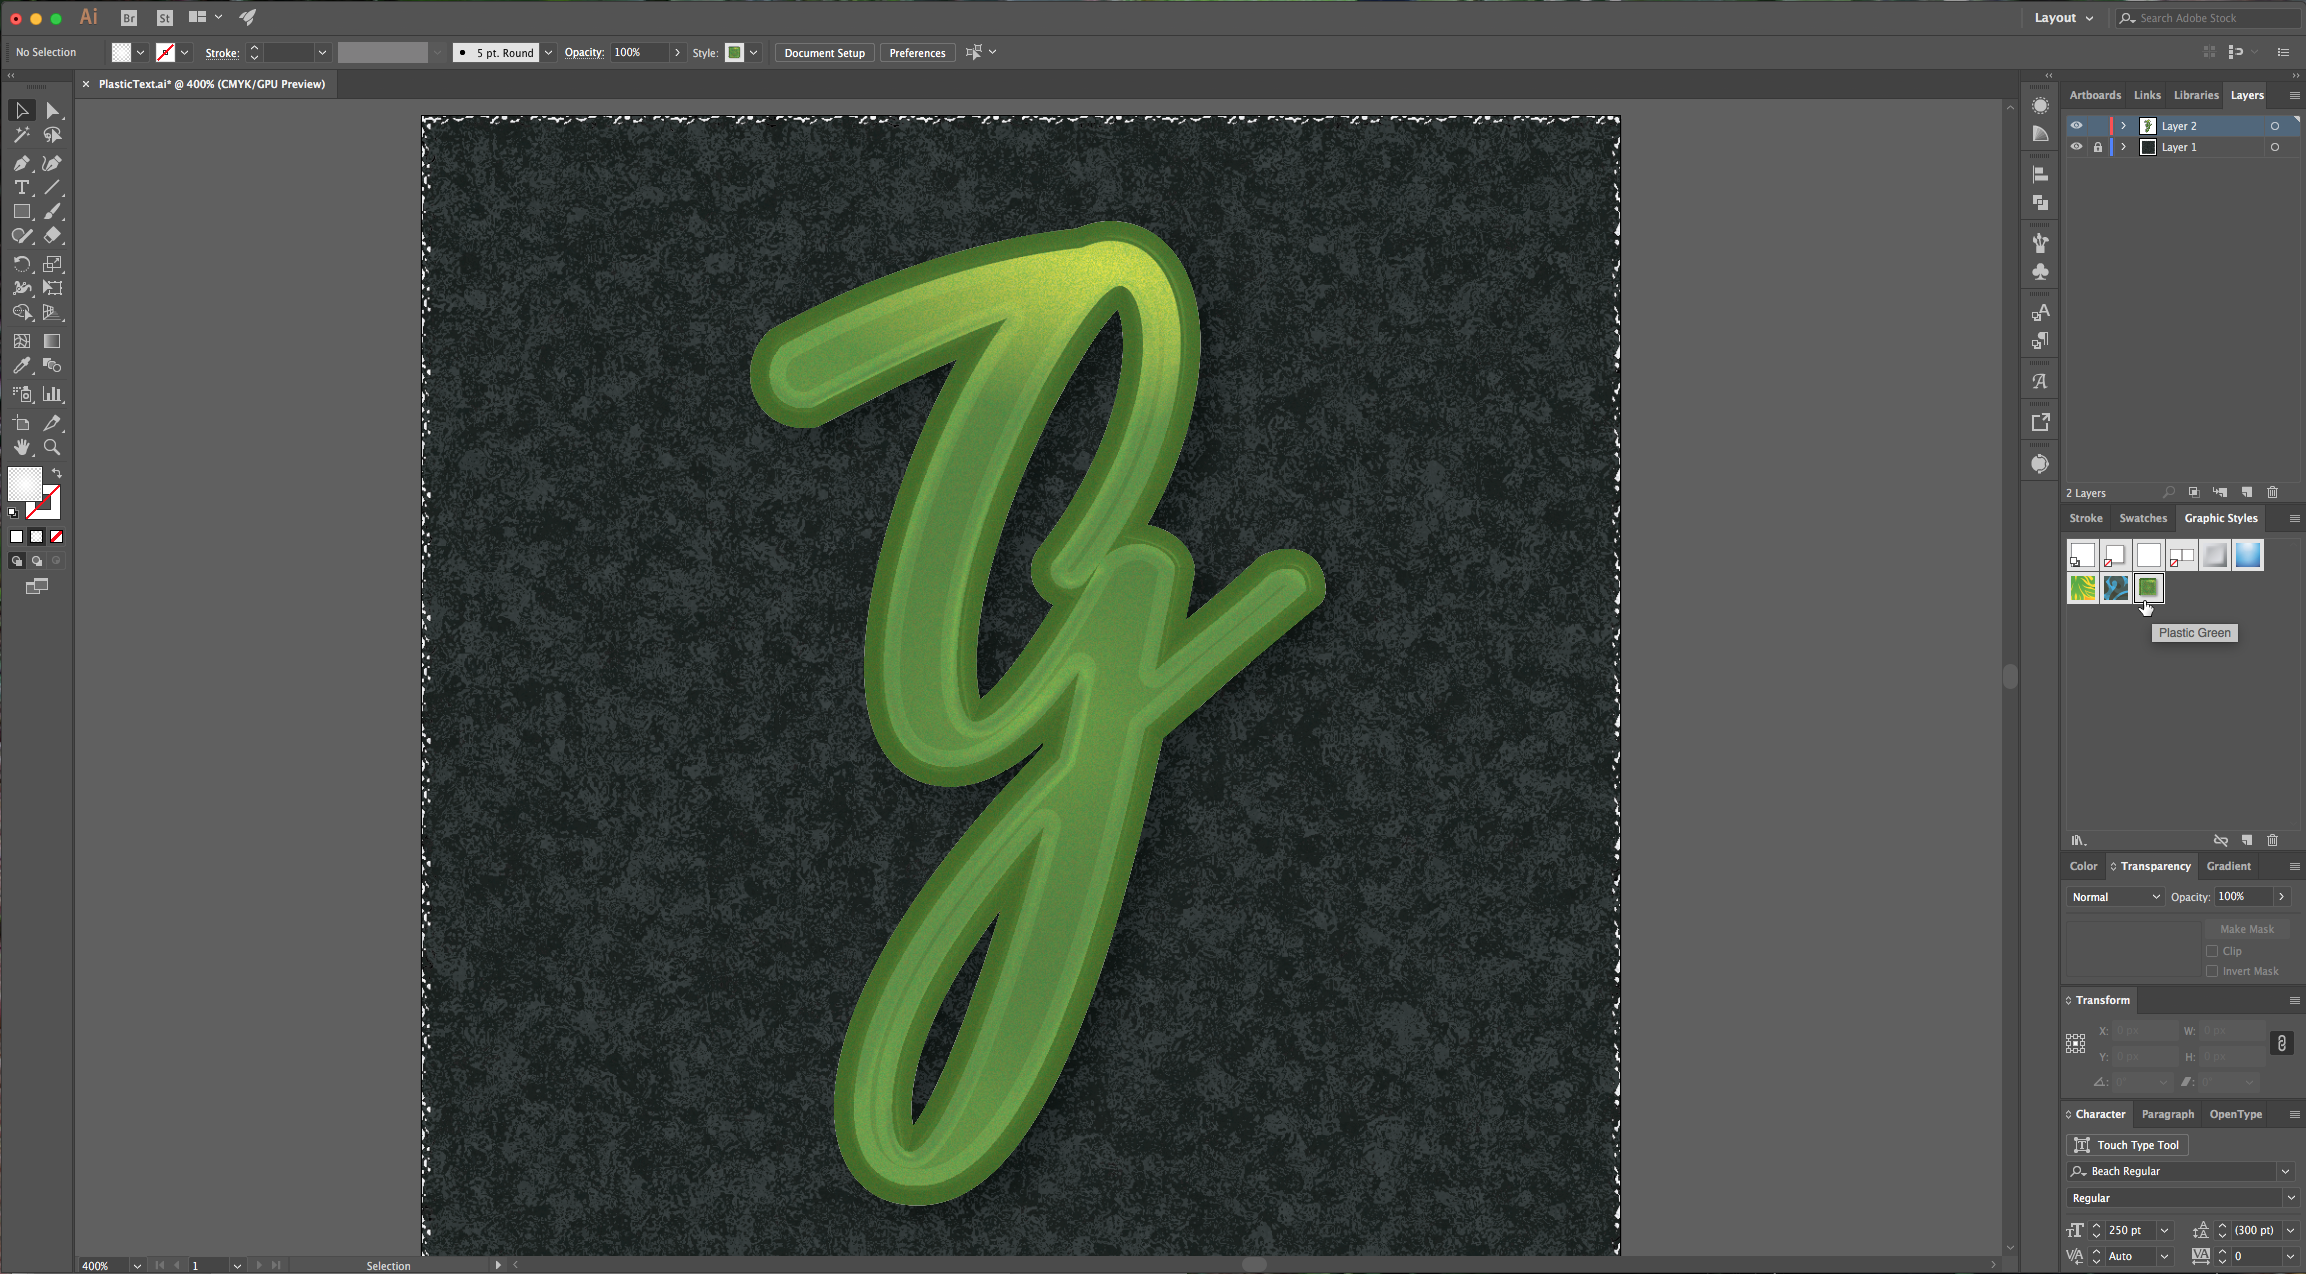
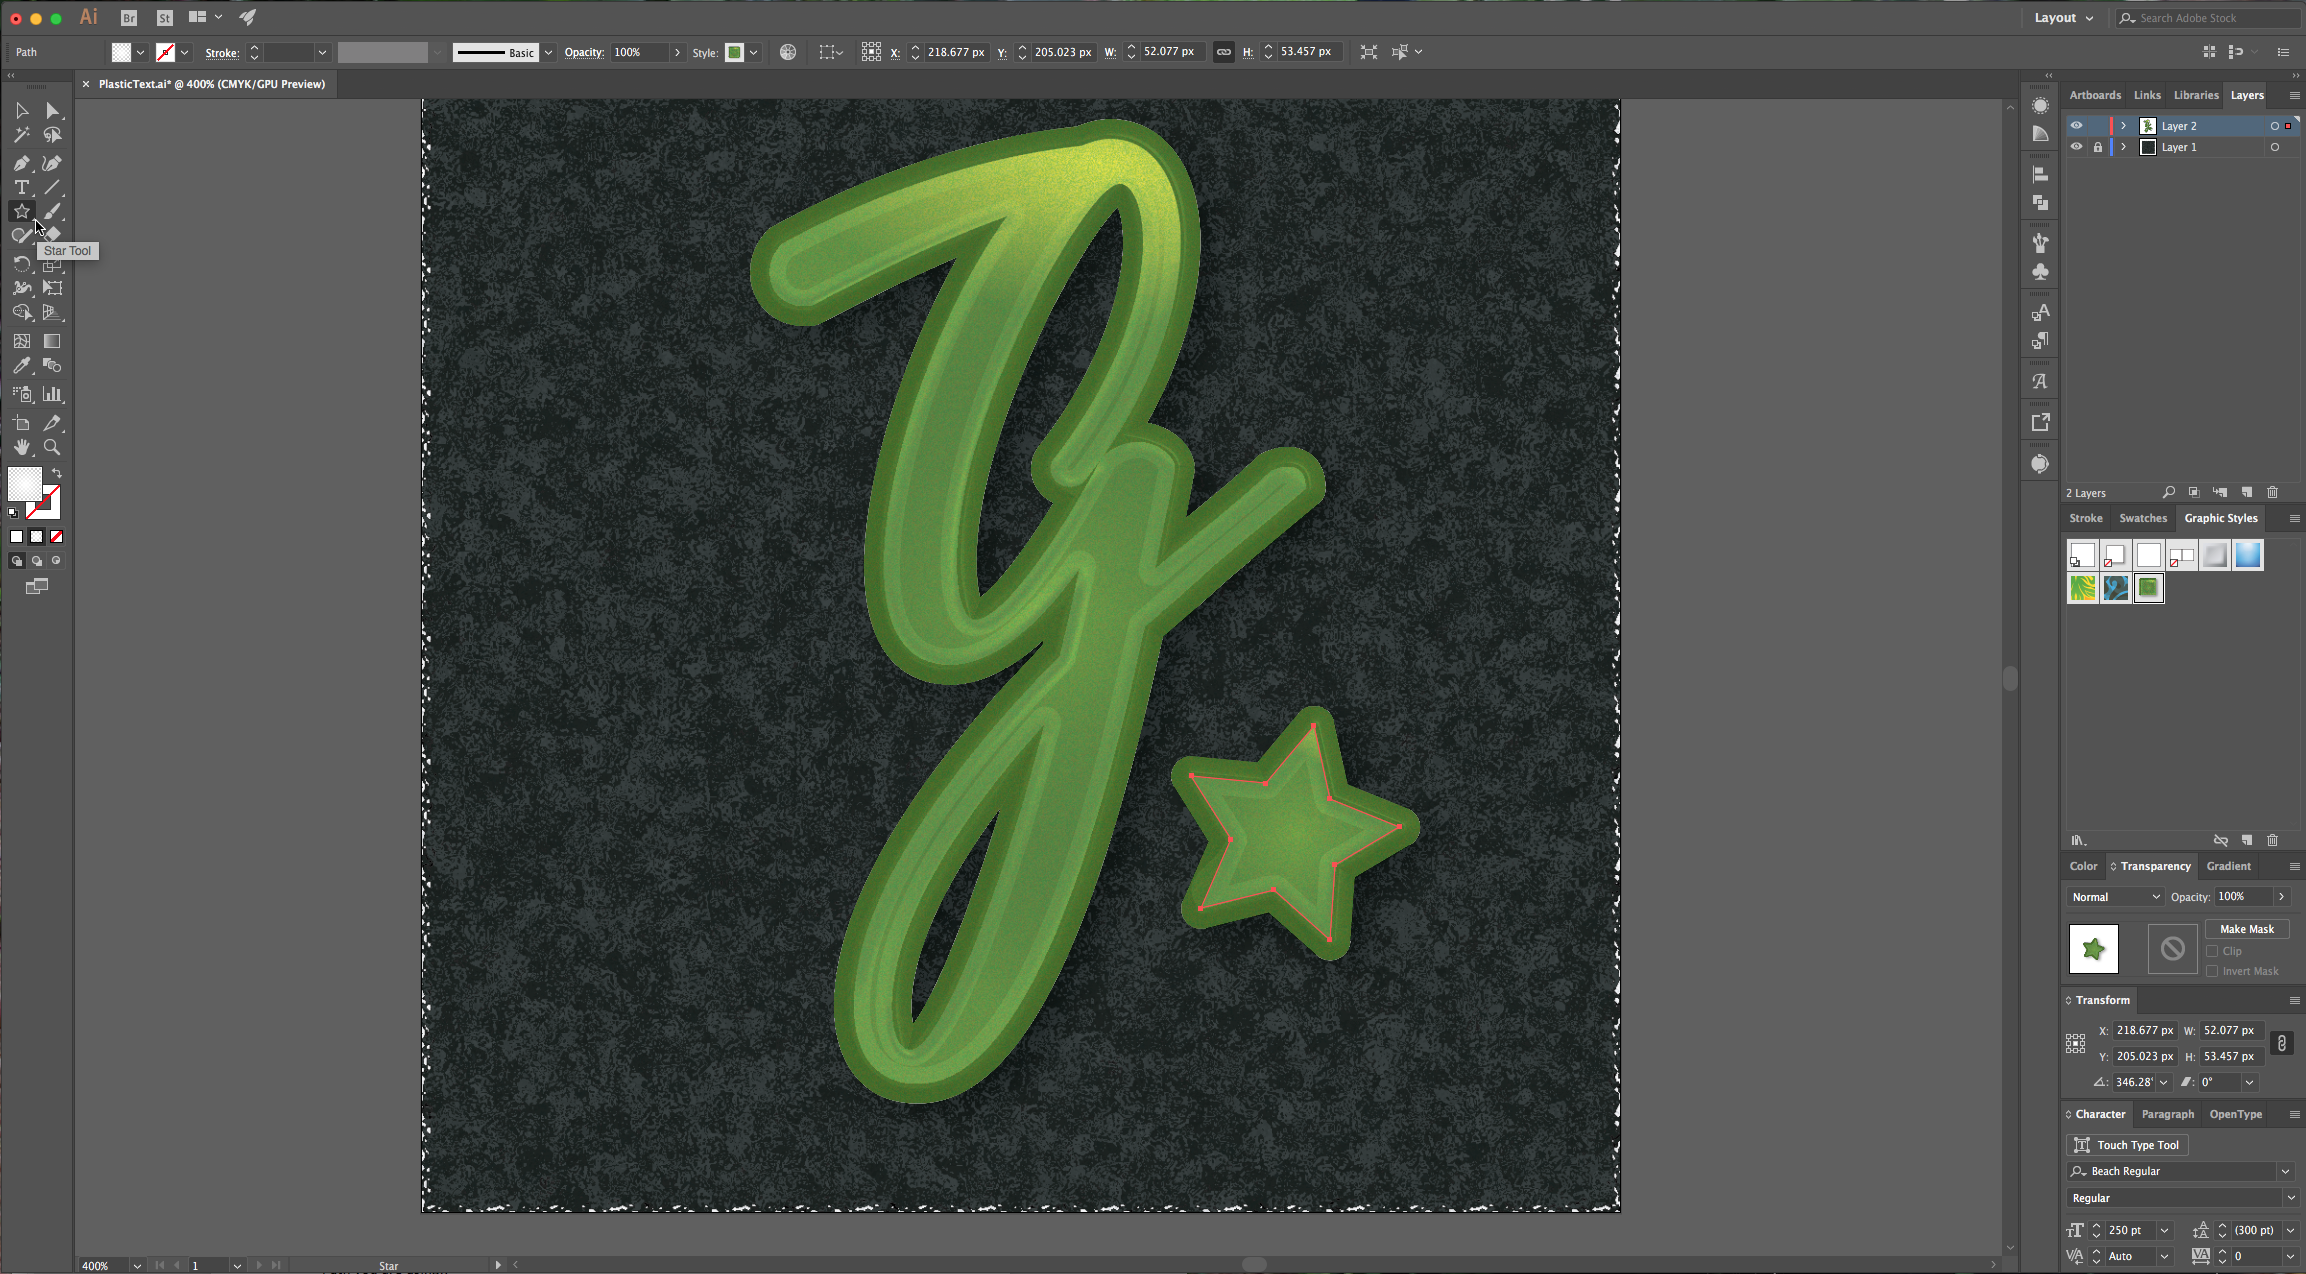
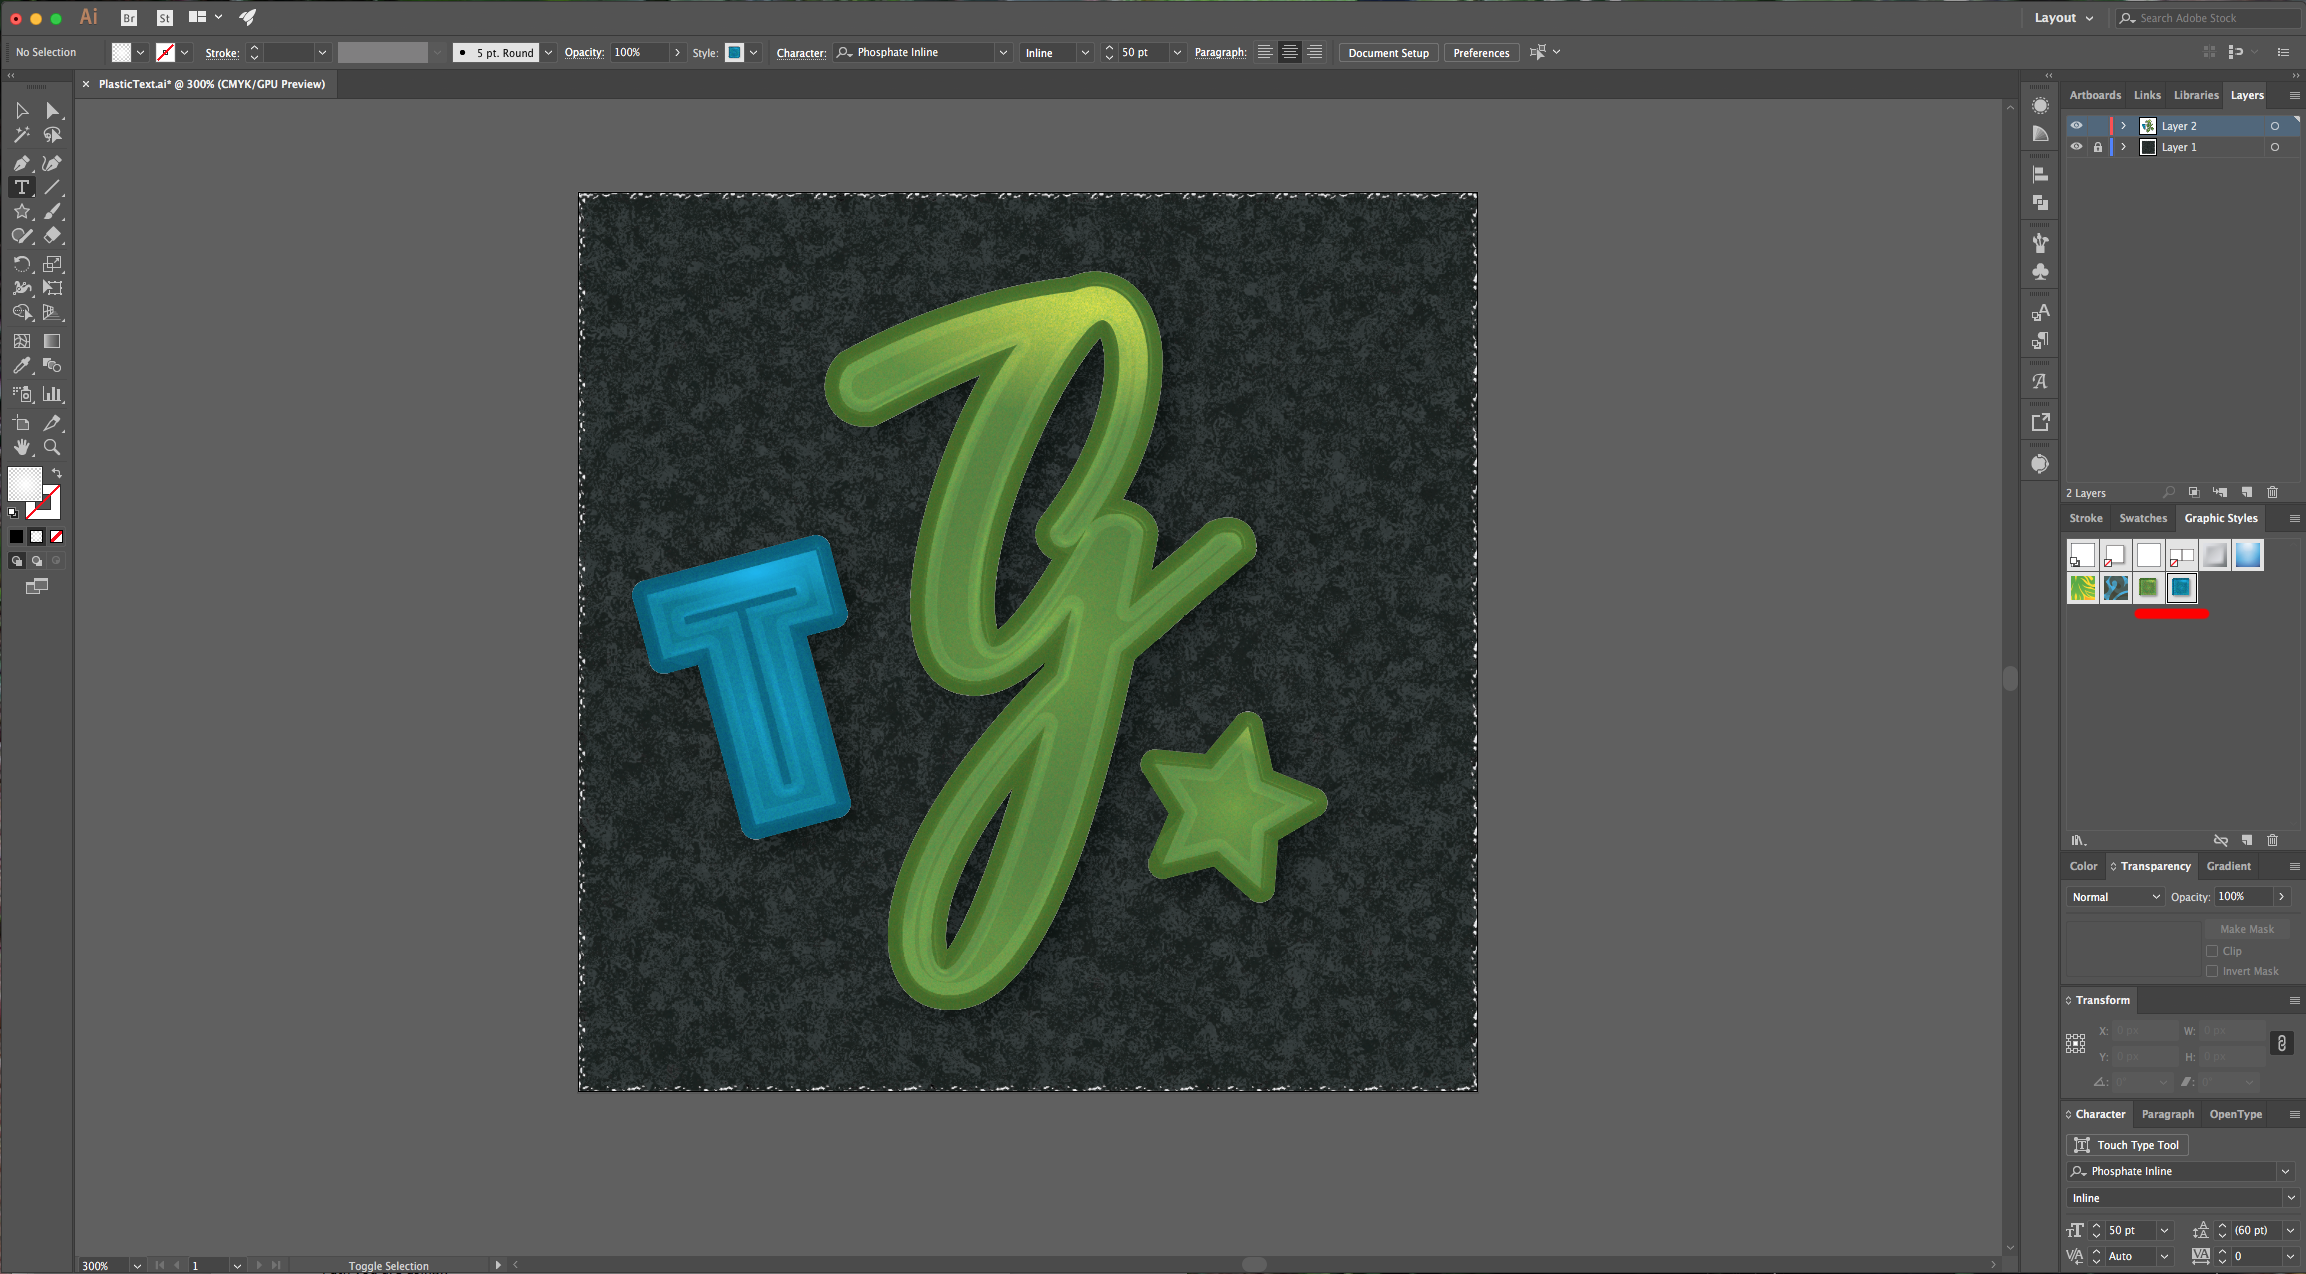
16 - You can also change the color of the color layer and save it as a different “Style”.
(You may want to change the values used in the different Effects depending on the Font or Path you are using).
1 - In Illustrator, create a “New Document”.
2 - Select the “Rectangle Tool” and draw a rectangle that overlaps your “Artboard”. Use black as “Fill” color and none as “Stroke” color.
3 - In the “Appearance” Panel select the “Fill”, click on the “Add New Effect” button at the bottom of the Panel and go to Artistic > Sponge, apply the default values:
4 - Then go to Distort > Glass and use the following values:
5 - Go to the “Layers” Panel and lock your current layer by clicking on the small space to the left of the thumbnail and invoke the small lock icon. Then create a “New Layer” (Command/Control + L) or click the small button at the bottom of the Panel.
6 - Select the “Type Tool” (T) and choose the font of your liking (we used Beach Regular). Type some text.
7 - With your text selected go to Object > Expand and make sure that the “Object” and “Fill” boxes are checked. Click “OK”.
8 - In the “Appearance” Panel double-click on “Contents” and change your text “Fill” to a medium gray. Then go to the “Effect” menu and choose 3D > Extrude & Bevel, set each axis to 0° and use a “Rounded” 4 Point “Bevel”.
9 - Make sure you are still selecting the “Fill” layer in the “Appearance” Panel and go to Effect > Path > Offset Path and use the following values:
10 - Then go to Effect > Stylize > Drop Shadow and use these values:
11 - Create a “New Fill” on top of the one you’ve been working and fill it with a lighter shade of gray. Go to Effects > Artistic > Plastic Wrap and use the following settings:
12 - Then create another “Fill” on top and fill it with a really light grey and “Offset” the Path by -4 px. Change this layer’s “Blending Mode” to “Multiply” in the “Transparency” Panel.
13 - Create another “Fill” layer on top of the others, “Offset” the Path by 5 pixels and use a bright “Fill” color. Set the “Blending Mode” to “Multiply”. On the same “Fill” go to Effect > Texture > Grain and use the following values:
14 - Create one final “Fill” layer on top of the others. Apply a “Radial Gradient” filled with white, going from 100% Opacity to 0%. Set the “Blending Mode” to “Overlay” then use the “Gradient Tool” (G) to adjust the “Radius” and position it in the upper right side.
15 - Select your text (all the layers), go to “Graphic Styles” Panel and “Create a New Graphic Style” give it a name and save it. Now you can use the “Style” for other text or graphics.
16 - You can also change the color of the color layer and save it as a different “Style”.
(You may want to change the values used in the different Effects depending on the Font or Path you are using).


