Unlimited Downloads 15% off Marketplace Purchases Exclusive Software Access Unlimited Downloads
15% off Marketplace Purchases
Exclusive Software Access
Go Unlimited Maybe Later
  • By Design Bundles
  • 01 Jun 2017
  • 4 Mins
  • Silhouette Tutorials

Silhouette V4 Software New Layout Part 2


The New Silhouette V4 software has been released and there are a lot of changes with the layout. This is part two of several tutorials showing where all the common functions are now located.
I am using the Designer Edition to run through the new layout.
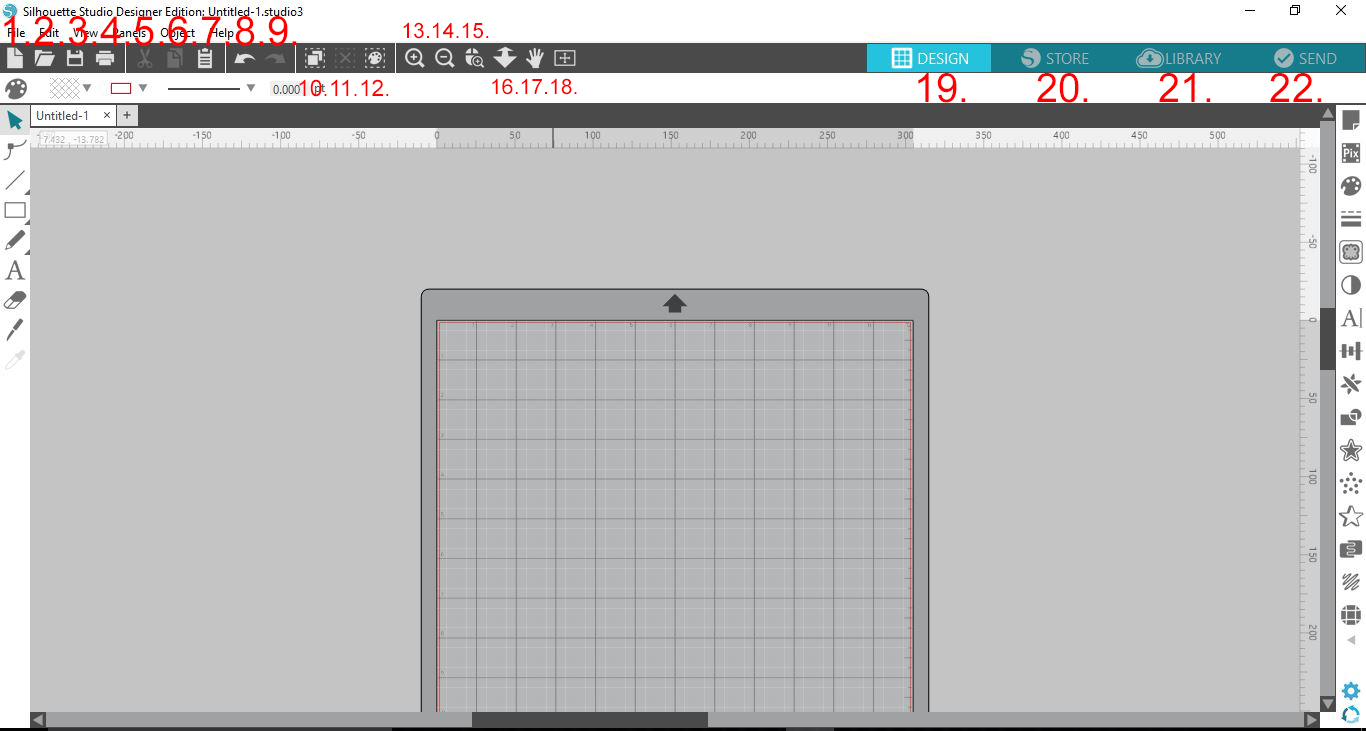
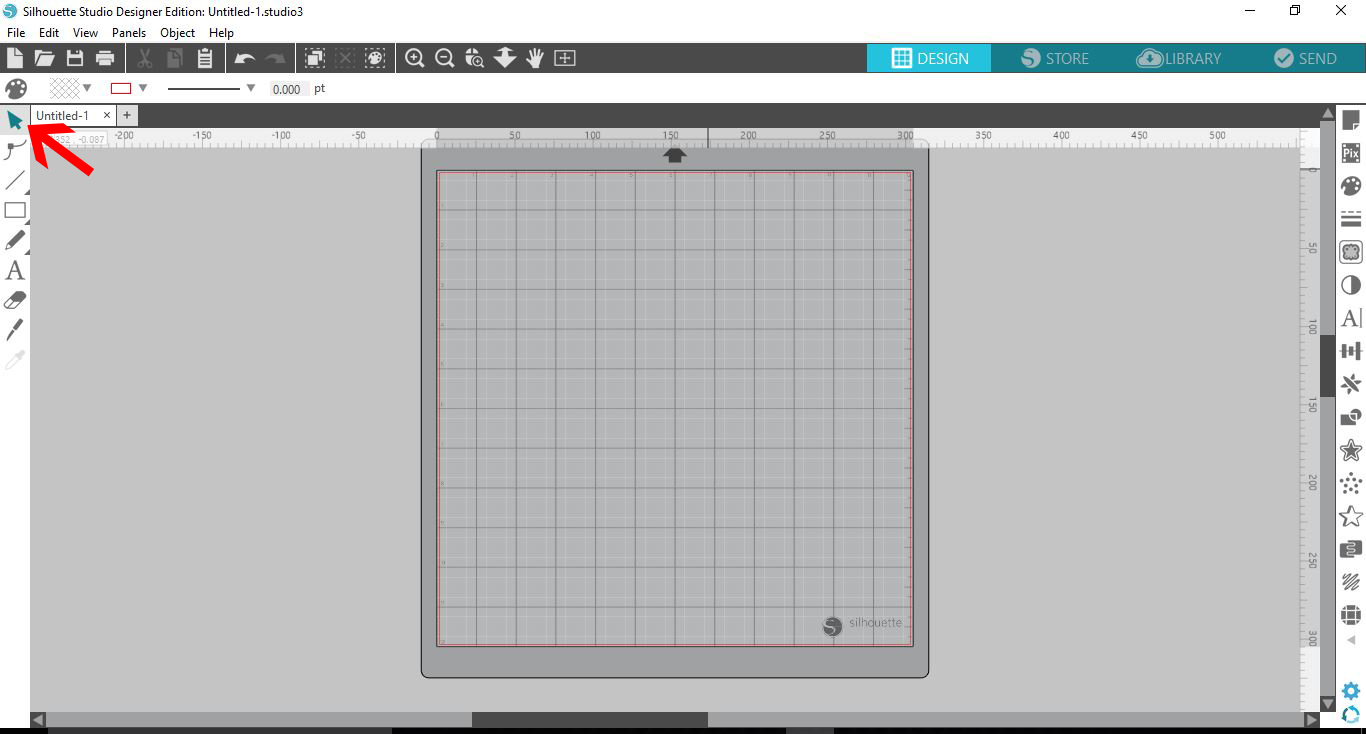
1- Select tool.  Is the the same as the V3 software in the top left.


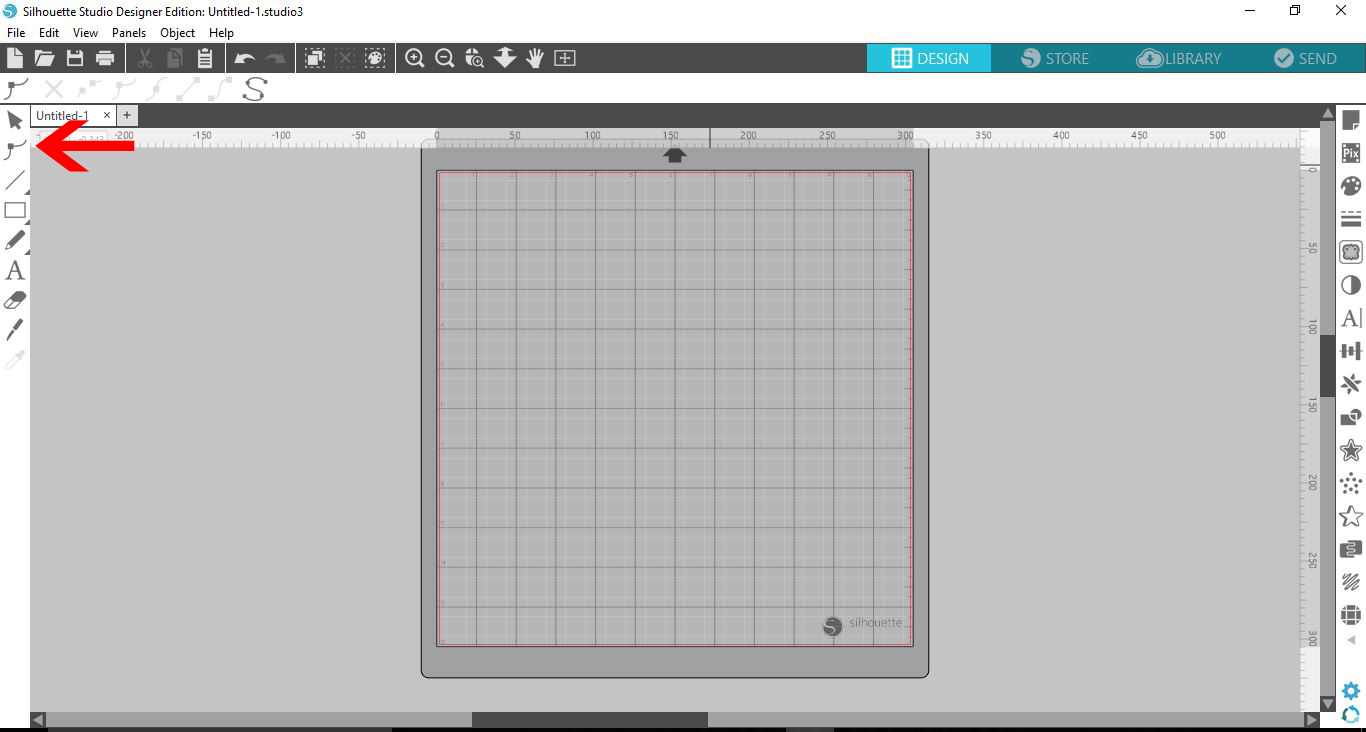
2-  Edit points. We now have a icon for edit points. This is a great new option where you can select any part of your design then select the edit point icon. When selected in the top toolbar all your options will appear that use to appear in a pop up box in V3.


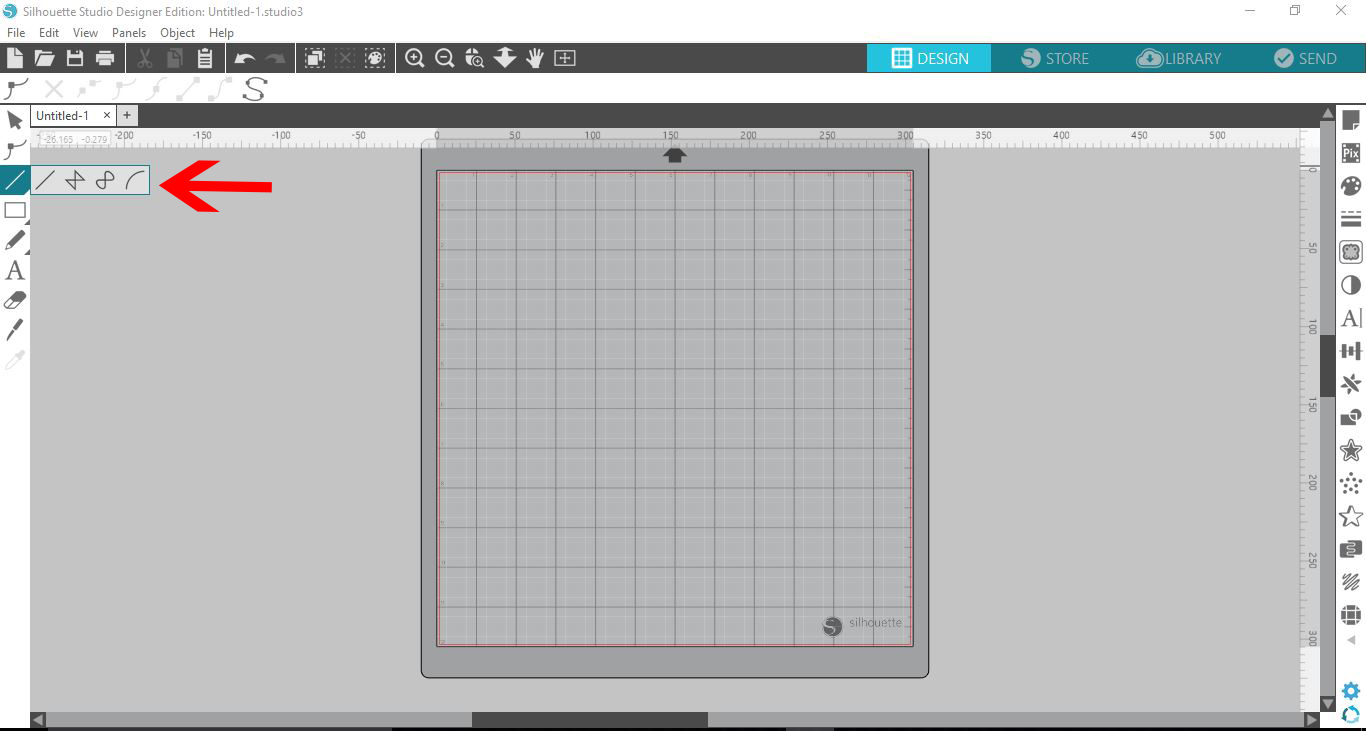
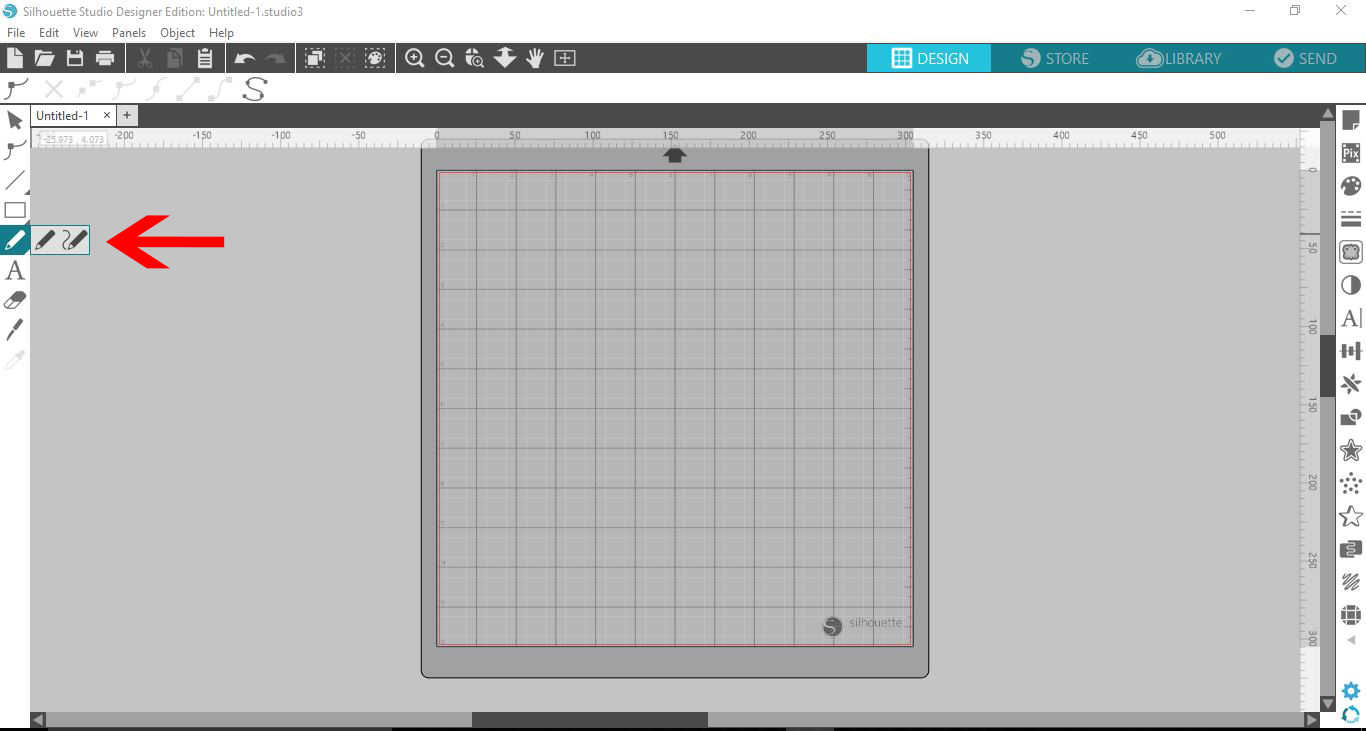
3- Line tool. All the line tool options are now located in one icon. When you hover your select tool over the line tool a pop out box will appear with all the line options you can select. These were previously separate on the left toolbar in V3.


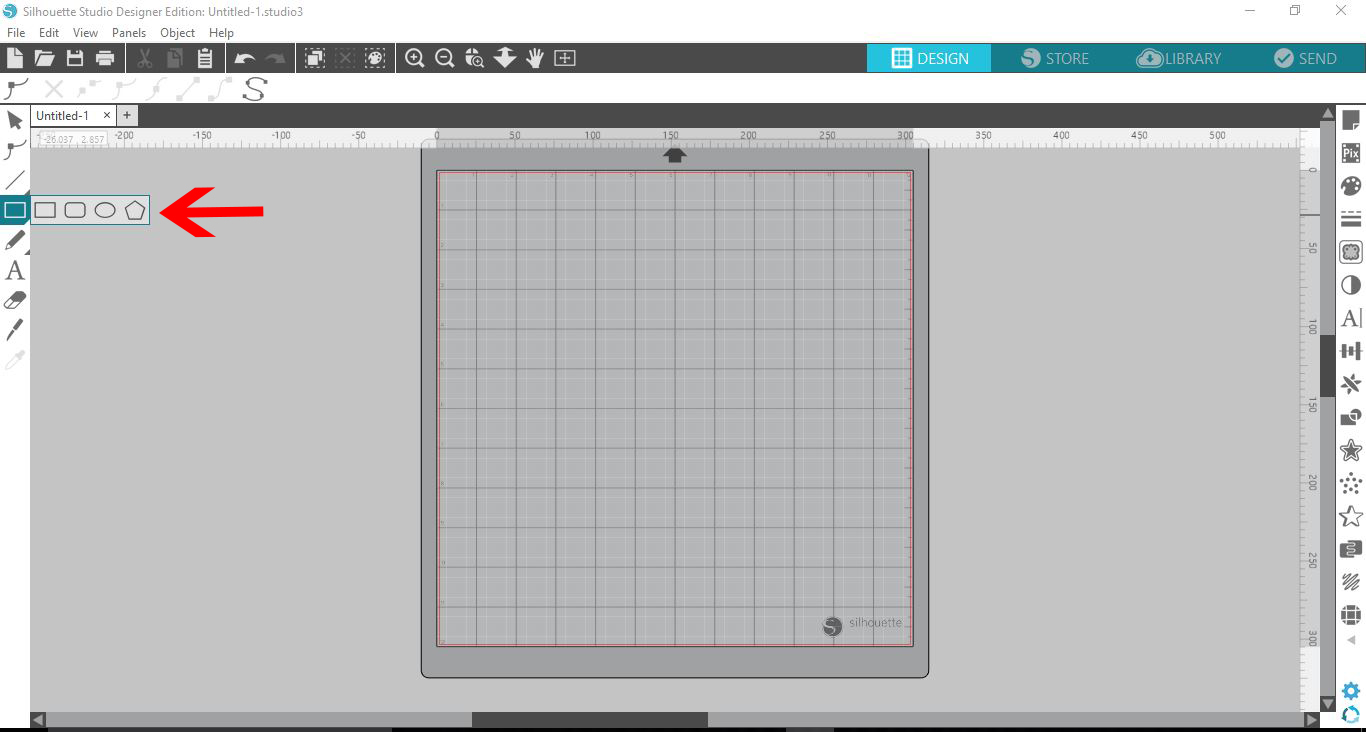
4- Shape tool. All the shape tools are now located in the same icon. Hover your select tool over the shape tool and a pop out box will appear giving you the option to select different shapes.


5- Draw tool. This includes draw freehand and draw smooth freehand.


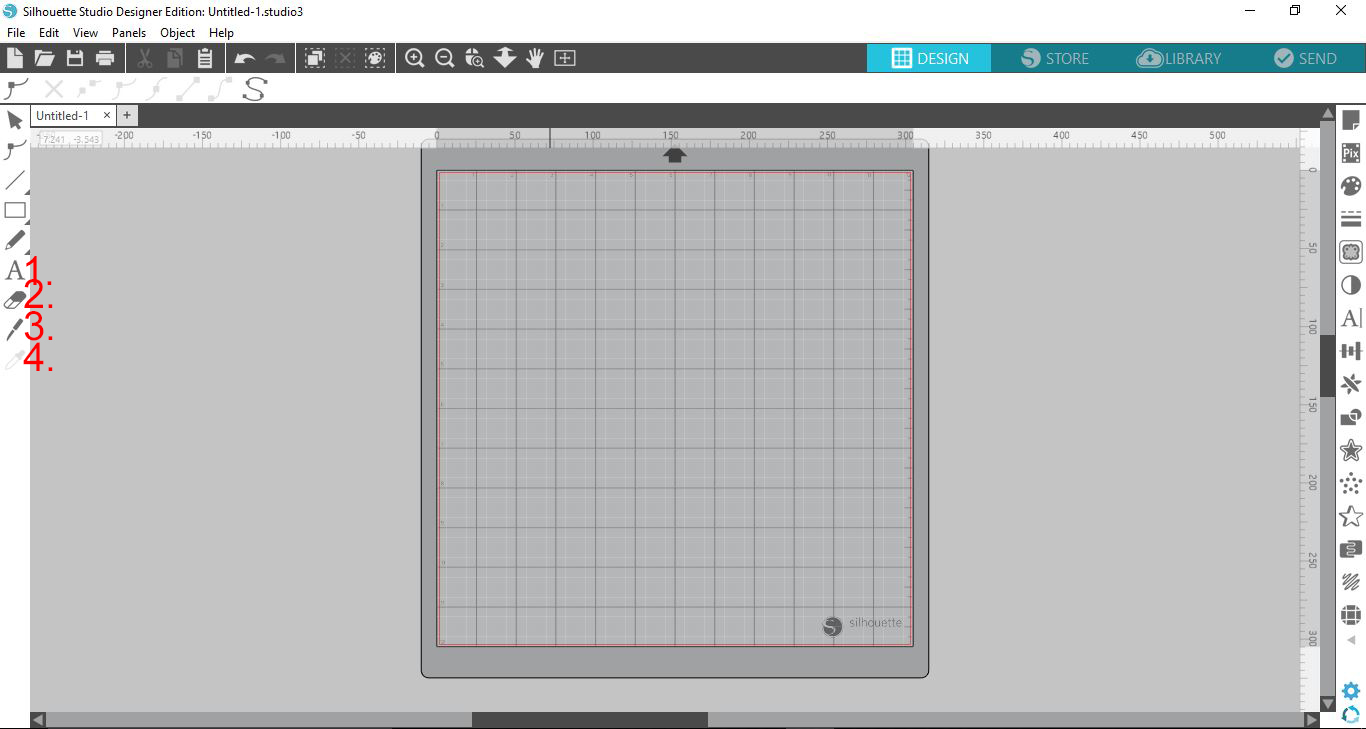
6-  Then next 4 icons in the left toolbar include Text (1), Eraser tool (2), Knife tool (3), Transform property tool (4). Each of these tools when selected, their properties will now appear in the top toolbar rather than a pop up window like in V3.


7-  Next there is a top tool bar. Here you will find basic functions you will need for use with the silhouette software.
1- New Document
2- Open document
3- Save
4- Print
5- Cut
6- Copy
7- Paste
8- Undo
9- Redo
10- Select all
11- Deselect all
12- Select by colour
13- Zoom in
14- Zoom out
15- Drag over a shape to zoom
16- zoom in and out using the mouse
17- Pan using mouse
18- Fit to window
19- Design space
20- Silhouette store
21- Library
22- Send to silhouette.


6 Related Silhouette Tutorials

The New Silhouette V4 software has been released and there are a lot of changes with the layout. This is part one of several tutorials showing where all the common functions are now located.I am using the Designer Edition to run through the new layout.1- Page Setup. Now ...

Silhouette V4  Software New Layout Part 3The New Silhouette V4 software has been released and there are a lot of changes with the layout. This is part  of three several tutorials showing where all the common functions are now located.I am using the Designer Edition to run through the ...

1- with the new V4 software the send to Silhouette icon is now on the right at the top toolbar. Rather than a little icon we now have a "send" text and tick icon.2- Once you select the send icon a new window will appear. This has changed dramatically ...

In the New Silhouette V4 software there are now 3 trace functions. regular trace, Trace by colour and magnet trace. I will be using the designer software in this tutorials.To use the trace by colour and magnet trace you will require the designer edition.1- Open your software.2- Open ...

1- Open up Silhouette Studio and access the text tool.2- Type your text.3-Select the text panel from the right toolbar and select your font. When using the sketch feature a bigger bold font tends to work better. I am usingBlack Velvet 2from fontbundles.net4- Once you have ...

In the business edition of the new V4 silhouette software, you can now add bar codes to your print and cut files. This can allow you to print off many copies of your project and then come back at a later time and cut the files without even opening the ...

You may also like

Help Center
ol image