Speed Line Text Effect in Adobe Illustrator
1- Open AI and create a new document.
2- Using the text tool, write your text. Any thick bold font would work well with this technique.
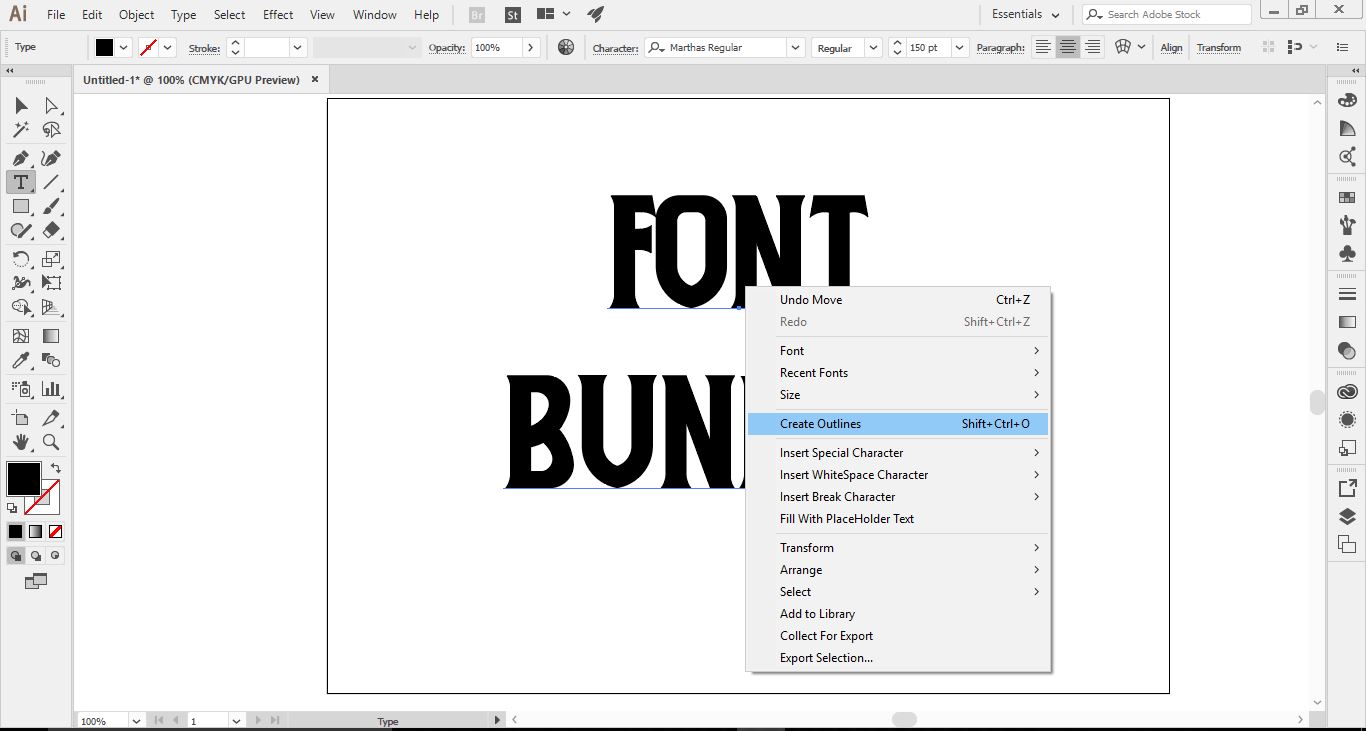
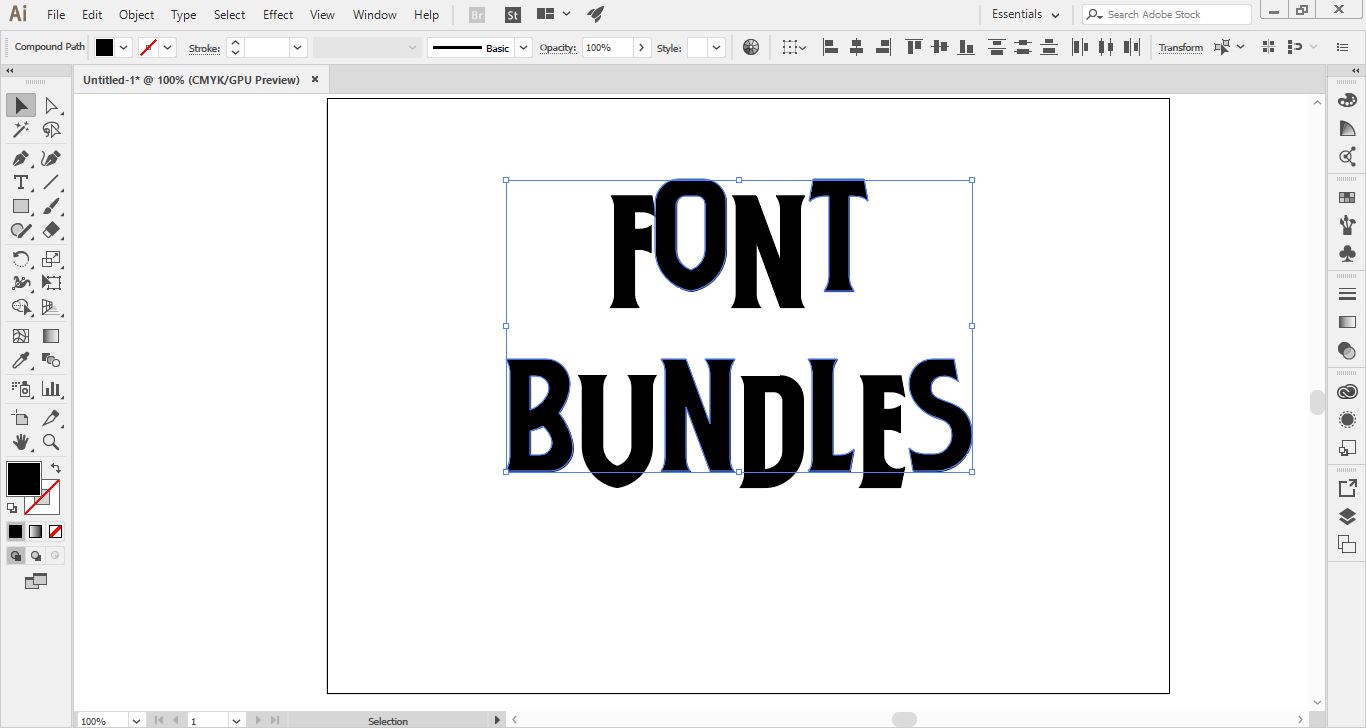
3- Right-click on your text and choose Create Outlines to convert the text into shapes.
4- Right-click again and ungroup.
5- Select every second letter (hold the shift key and click), then slightly move the selected letters upward.
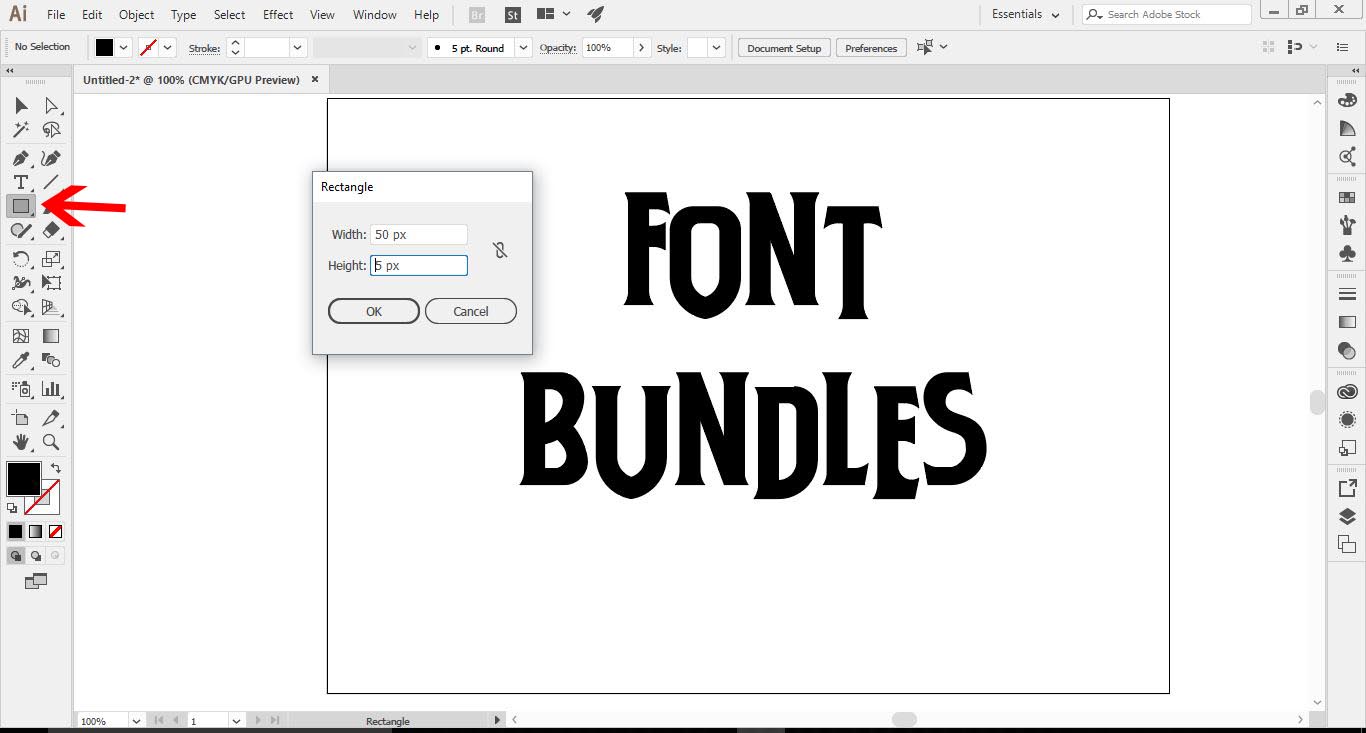
6- Select the rectangle tool, and click once on your artboard. The Rectangle window will appear. Create a rectangle by using the dimensions 50 px wide by 5 px high. Click OK.
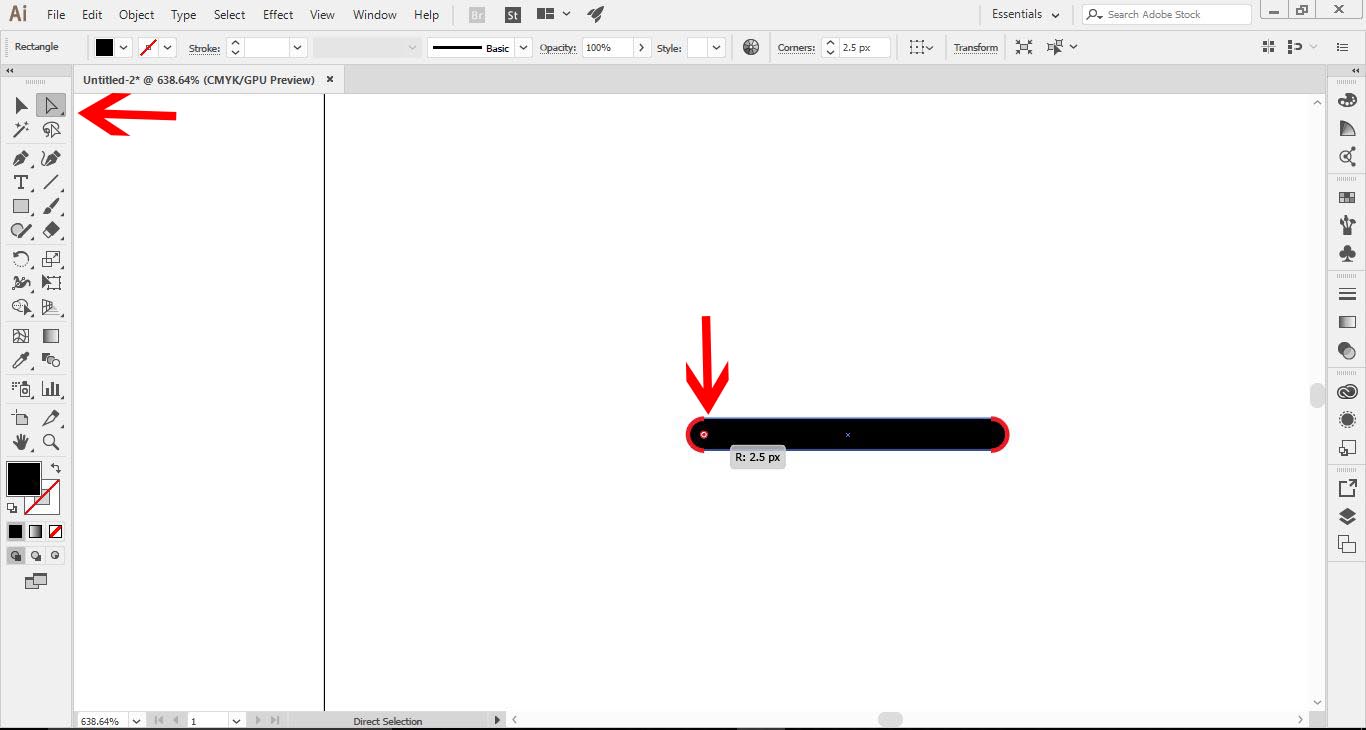
7- Zoom into your rectangle and select the Direct Selection Tool (A) in your left toolbar. Next, using the corner widgets, drag them inward to create curved corners on your rectangle.
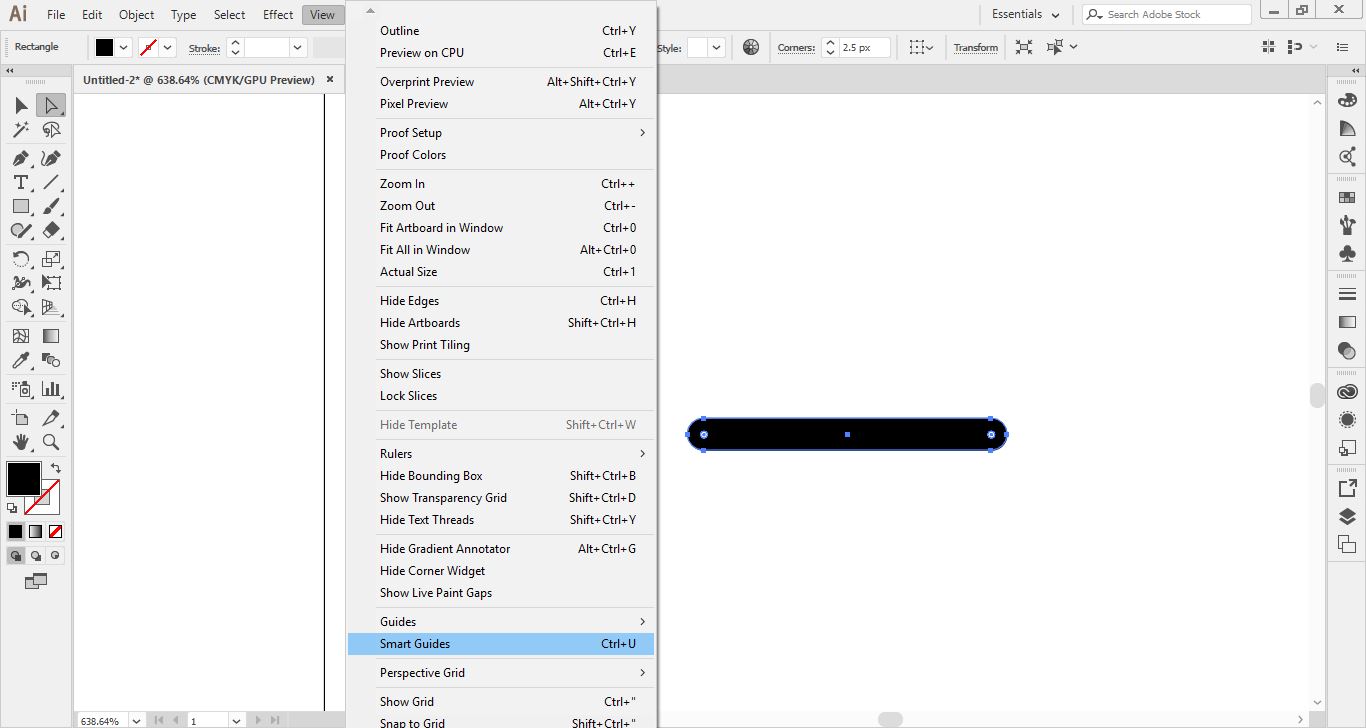
8- Go to View > Enable Smart Guide. This will give you lines when moving objects so you can line up your rectangles later.
9- Move your rectangle over your first letter. Hold down the ALT key and drag to a new point. This will duplicate your rectangle. Start placing the rectangles using this method on the left sides of your letters. Make some shorter than others.
10- Select everything using the Selection Tool *(V).
11- Hold the Shift key and select all the letters. This will remove them from the selection leaving only the small rectangles you placed in step 9.
12- Go to Object > Transform > Transform Each.
13- The Transform Each window will pop up. Change vertical scale to 50% (1) and vertical move to 5 px (2). In the align icon, select the top middle (3). Make sure the Preview box is checked, then click Copy (4).
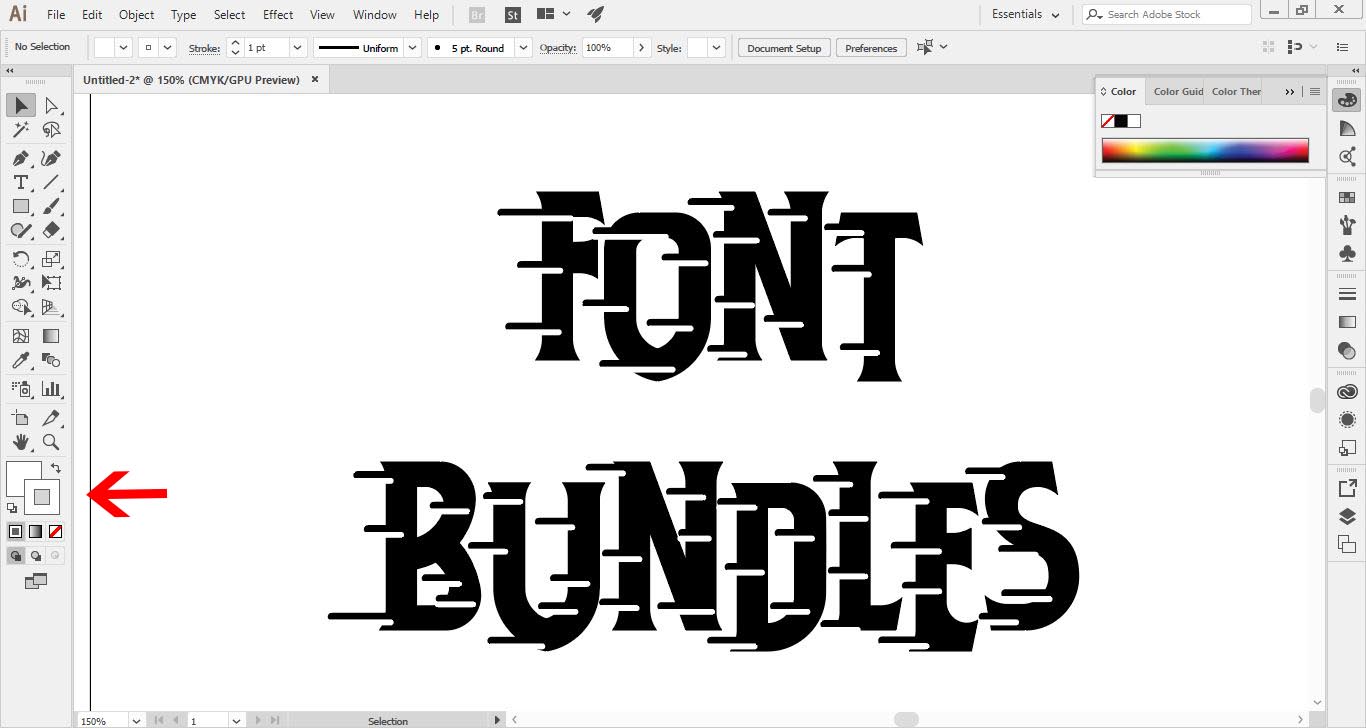
14- This will copy your previous rectangles and place them below them. Change the color of the new rectangles to white.
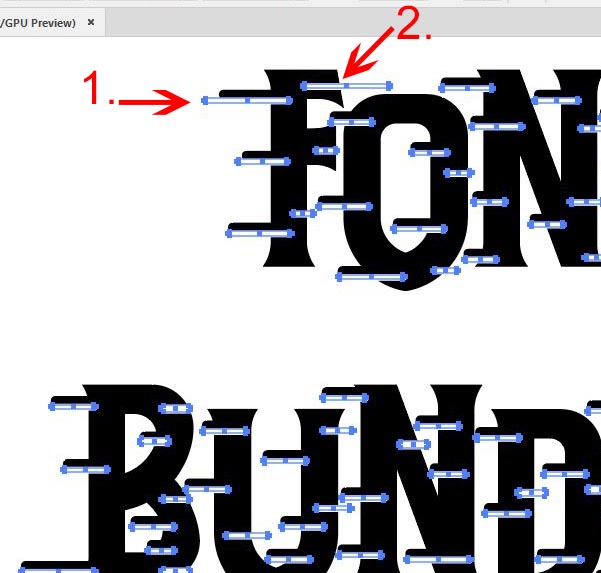
15- Zoom into your text. Hold the ALT key and the white rectangle, and drag new white rectangles to the right side of your letter.
16- Repeat this randomly all over your text in different places and sizes.
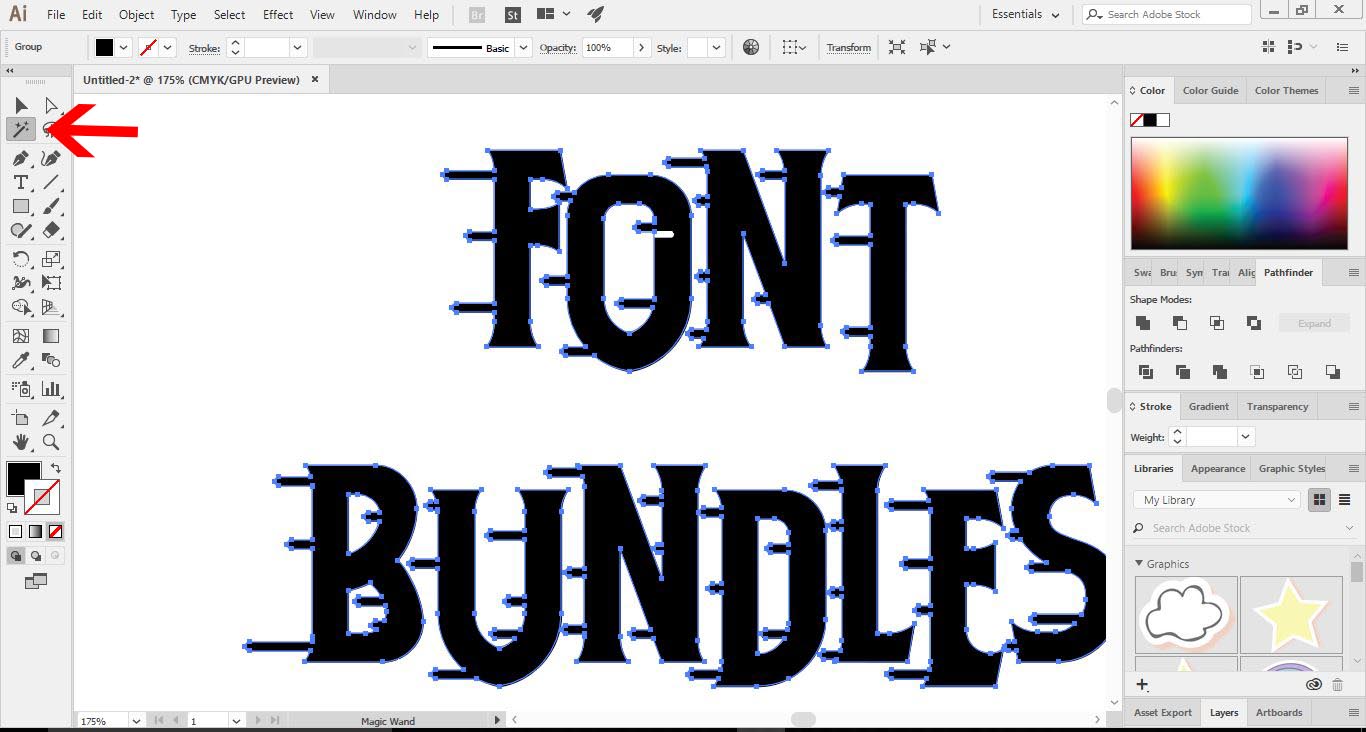
17- Select everything on the artboard, then select the Magic Wand Tool. Hold down the ALT key while clicking on one of the white rectangles. This will deselect anything else that is similar. All your white rectangles will be deselected.
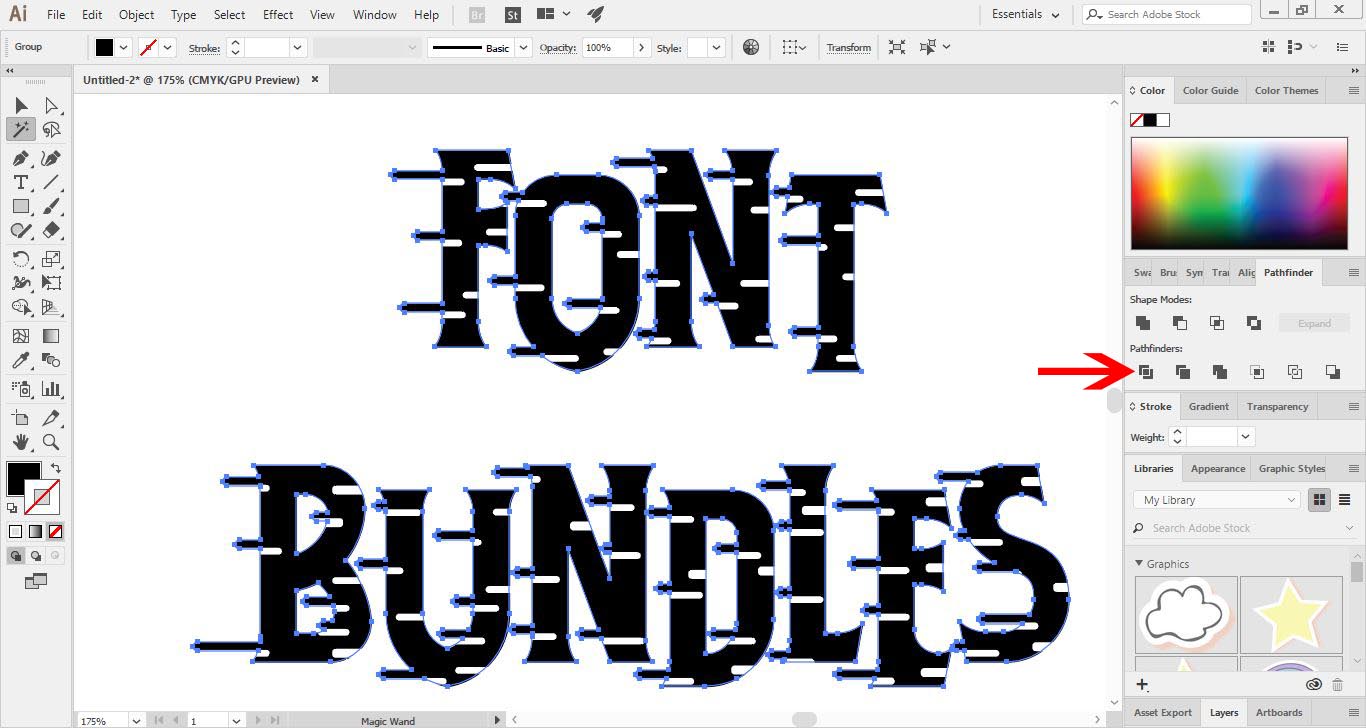
18- Only the black text and rectangles are now selected. Click the Unite icon in the Pathfinder panel. This will join the text and the rectangles, making one outline.
19- Next select Object > Compound Path > Make.
20- Select everything. Then in the Pathfinder panel, select the Minus icon. This will punch out the white shapes from the black shapes.
21- Select the first letter with the Direct Selection Tool, then click on the straight corners and drag in the nodes to curve all the straight corners.
22- Repeat on all the letters.
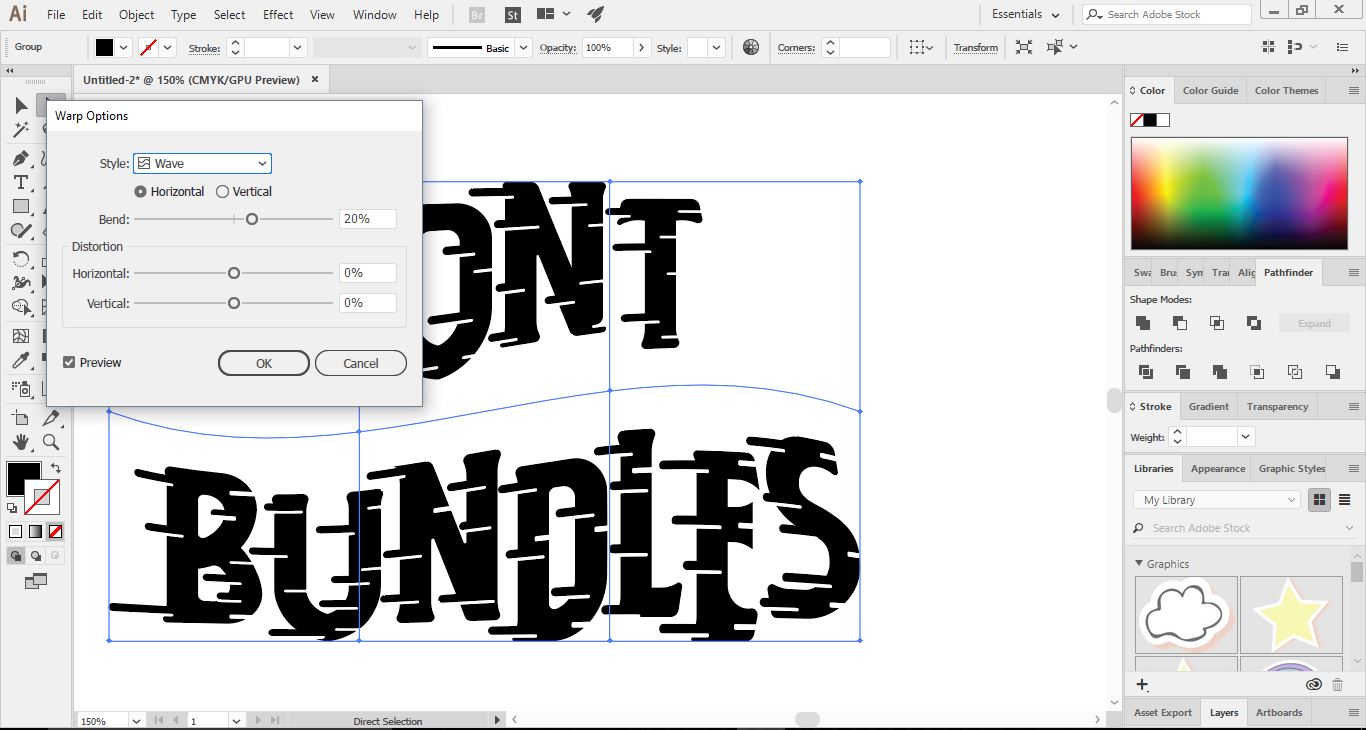
23- Click Object > Envelope Distort > Make with Warp.
24- The Warp Options window will appear. Choose the Warp function you want from the drop-down box, then adjust the bend to 20%. Click OK.
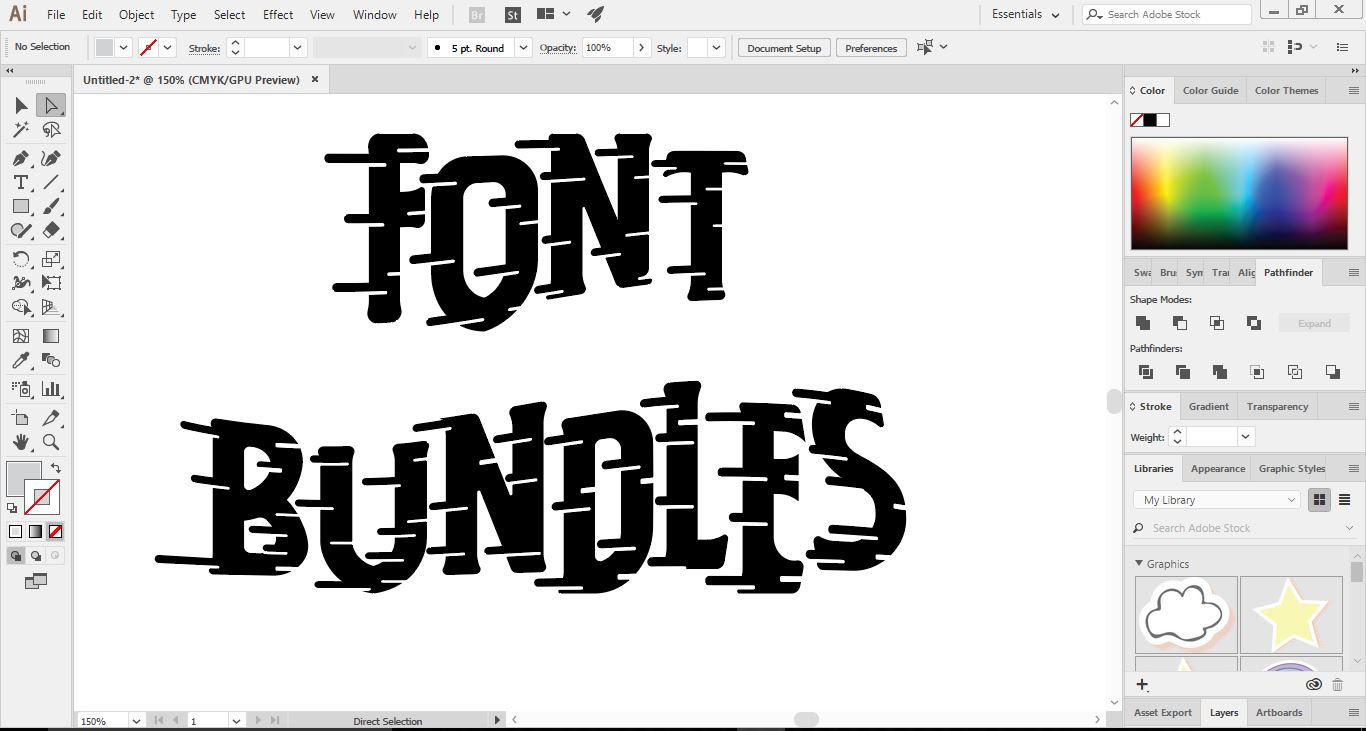
25- This will give your text more of a speed effect, and now your text is complete.

2- Using the text tool, write your text. Any thick bold font would work well with this technique.

3- Right-click on your text and choose Create Outlines to convert the text into shapes.
4- Right-click again and ungroup.

5- Select every second letter (hold the shift key and click), then slightly move the selected letters upward.
6- Select the rectangle tool, and click once on your artboard. The Rectangle window will appear. Create a rectangle by using the dimensions 50 px wide by 5 px high. Click OK.
7- Zoom into your rectangle and select the Direct Selection Tool (A) in your left toolbar. Next, using the corner widgets, drag them inward to create curved corners on your rectangle.
8- Go to View > Enable Smart Guide. This will give you lines when moving objects so you can line up your rectangles later.
9- Move your rectangle over your first letter. Hold down the ALT key and drag to a new point. This will duplicate your rectangle. Start placing the rectangles using this method on the left sides of your letters. Make some shorter than others.

10- Select everything using the Selection Tool *(V).
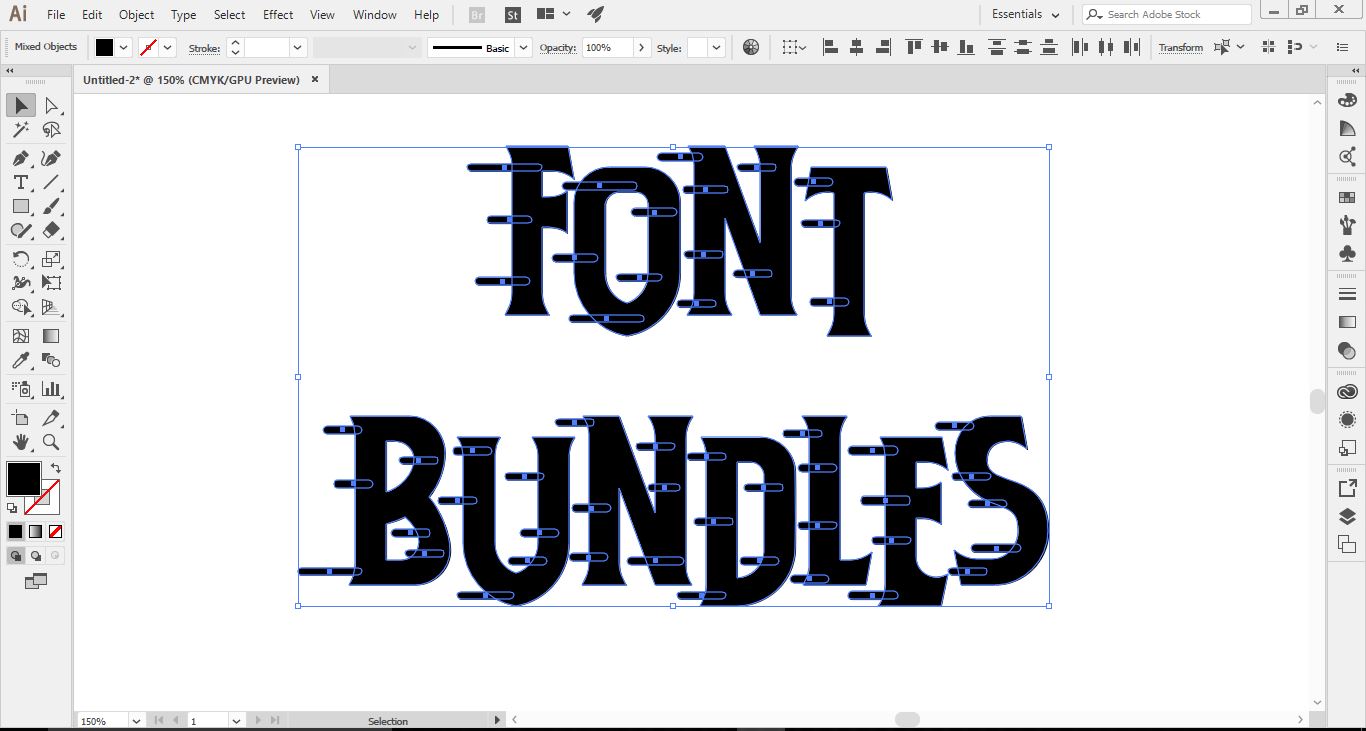
11- Hold the Shift key and select all the letters. This will remove them from the selection leaving only the small rectangles you placed in step 9.

12- Go to Object > Transform > Transform Each.

13- The Transform Each window will pop up. Change vertical scale to 50% (1) and vertical move to 5 px (2). In the align icon, select the top middle (3). Make sure the Preview box is checked, then click Copy (4).

14- This will copy your previous rectangles and place them below them. Change the color of the new rectangles to white.
15- Zoom into your text. Hold the ALT key and the white rectangle, and drag new white rectangles to the right side of your letter.
16- Repeat this randomly all over your text in different places and sizes.

17- Select everything on the artboard, then select the Magic Wand Tool. Hold down the ALT key while clicking on one of the white rectangles. This will deselect anything else that is similar. All your white rectangles will be deselected.
18- Only the black text and rectangles are now selected. Click the Unite icon in the Pathfinder panel. This will join the text and the rectangles, making one outline.
19- Next select Object > Compound Path > Make.

20- Select everything. Then in the Pathfinder panel, select the Minus icon. This will punch out the white shapes from the black shapes.

21- Select the first letter with the Direct Selection Tool, then click on the straight corners and drag in the nodes to curve all the straight corners.

22- Repeat on all the letters.

23- Click Object > Envelope Distort > Make with Warp.

24- The Warp Options window will appear. Choose the Warp function you want from the drop-down box, then adjust the bend to 20%. Click OK.
25- This will give your text more of a speed effect, and now your text is complete.