
Striped Shadow Text Effect in Illustrator
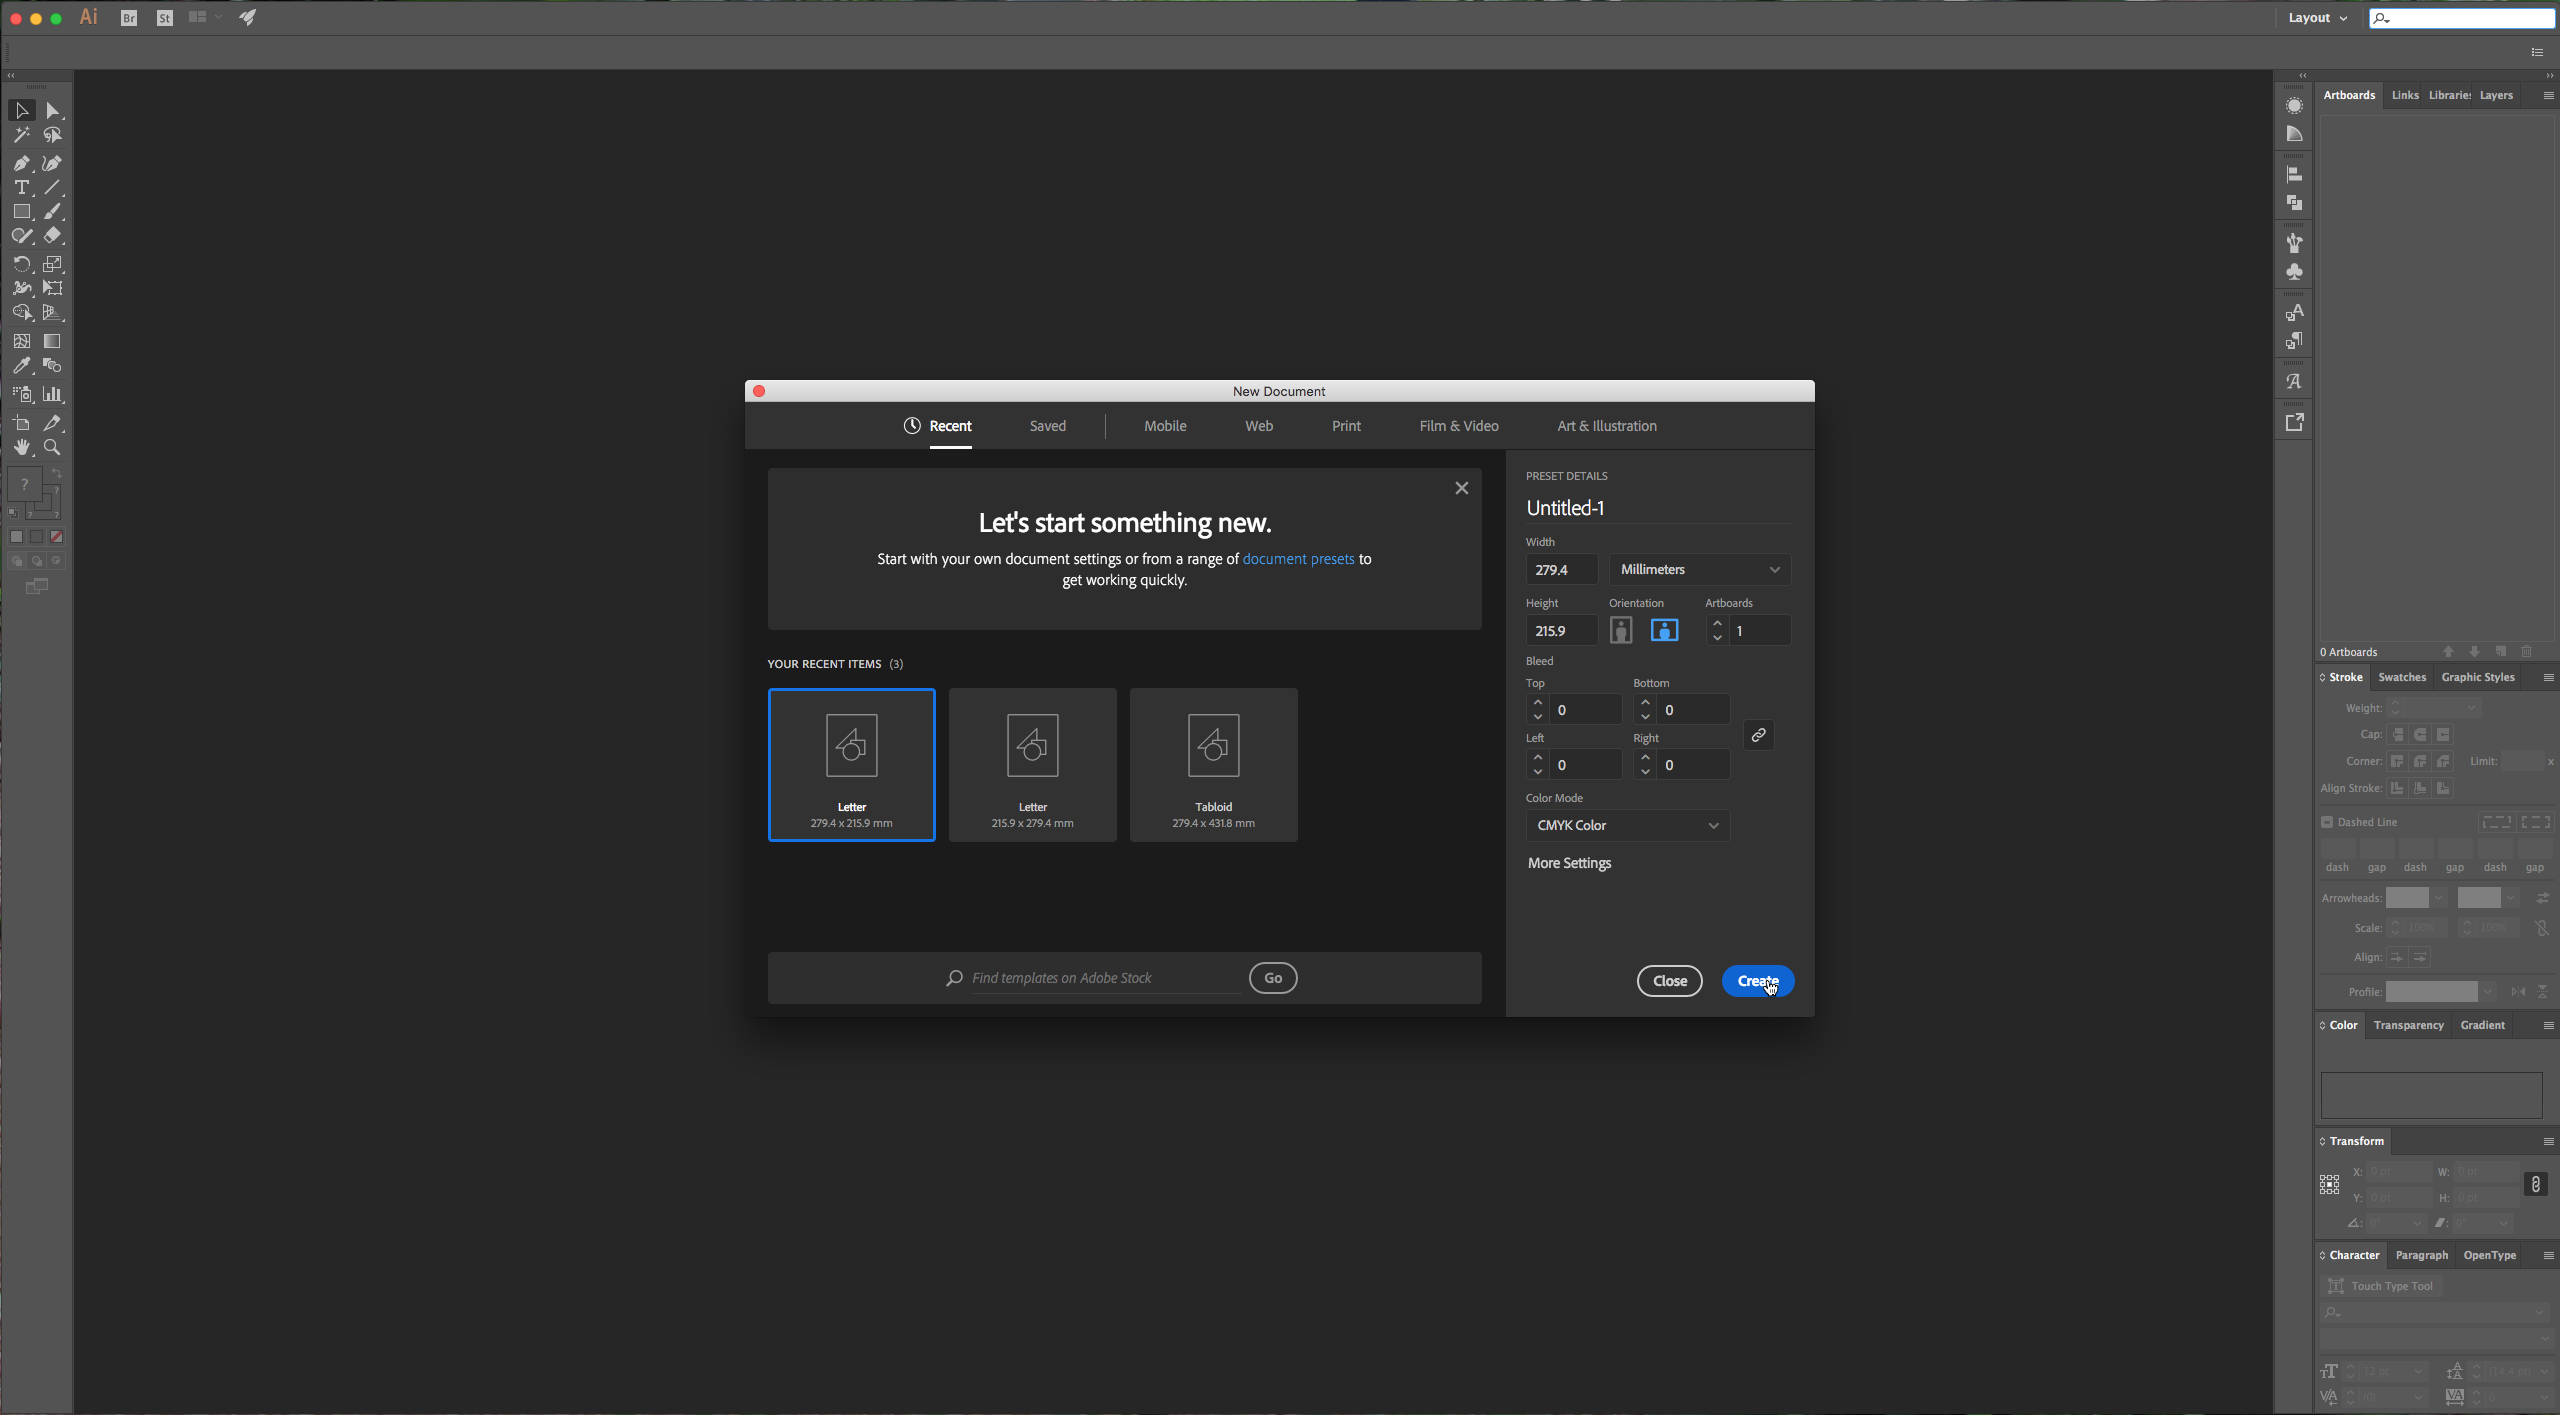
1 – In Illustrator create a new document or open an existing one you wish to modify and type your text. For this tutorial we used “The Witch” from Fontbundles.net https://fontbundles.net/paperwitch/1356-the-witch-typeface.
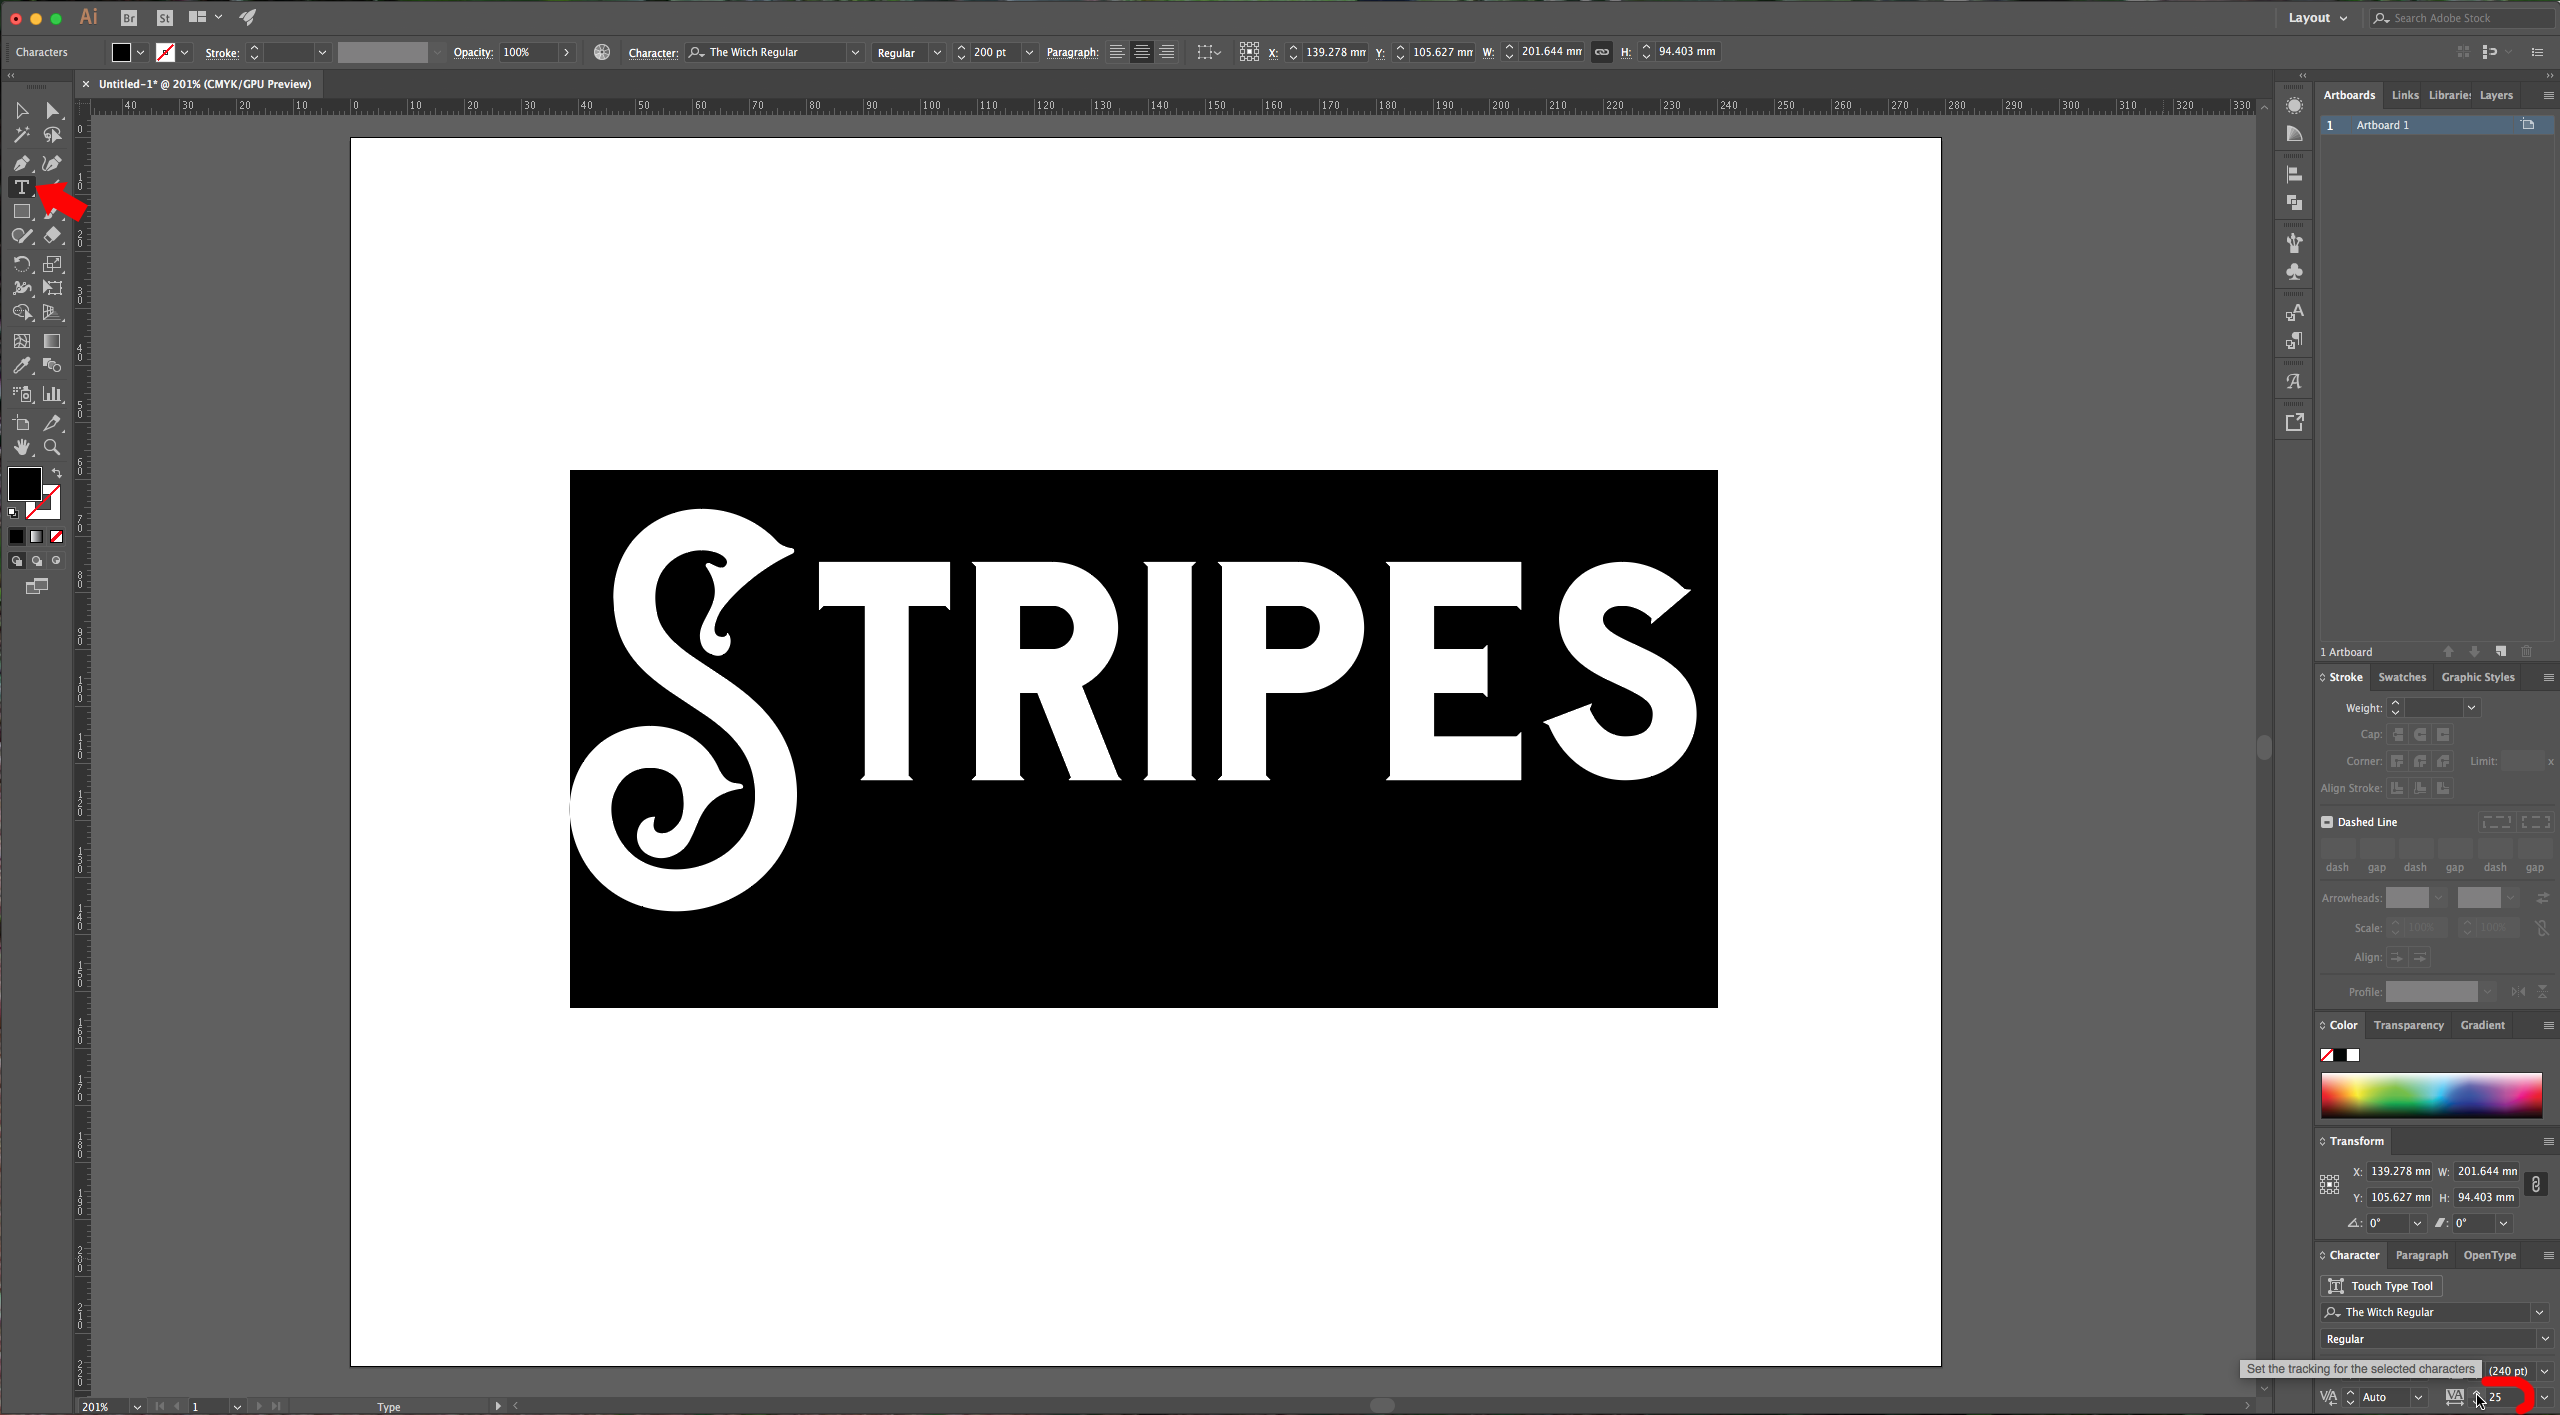
2 – Select your text and increase the “Tracking” to 25 in the “Character” menu. This will give you a bit more space between letters.
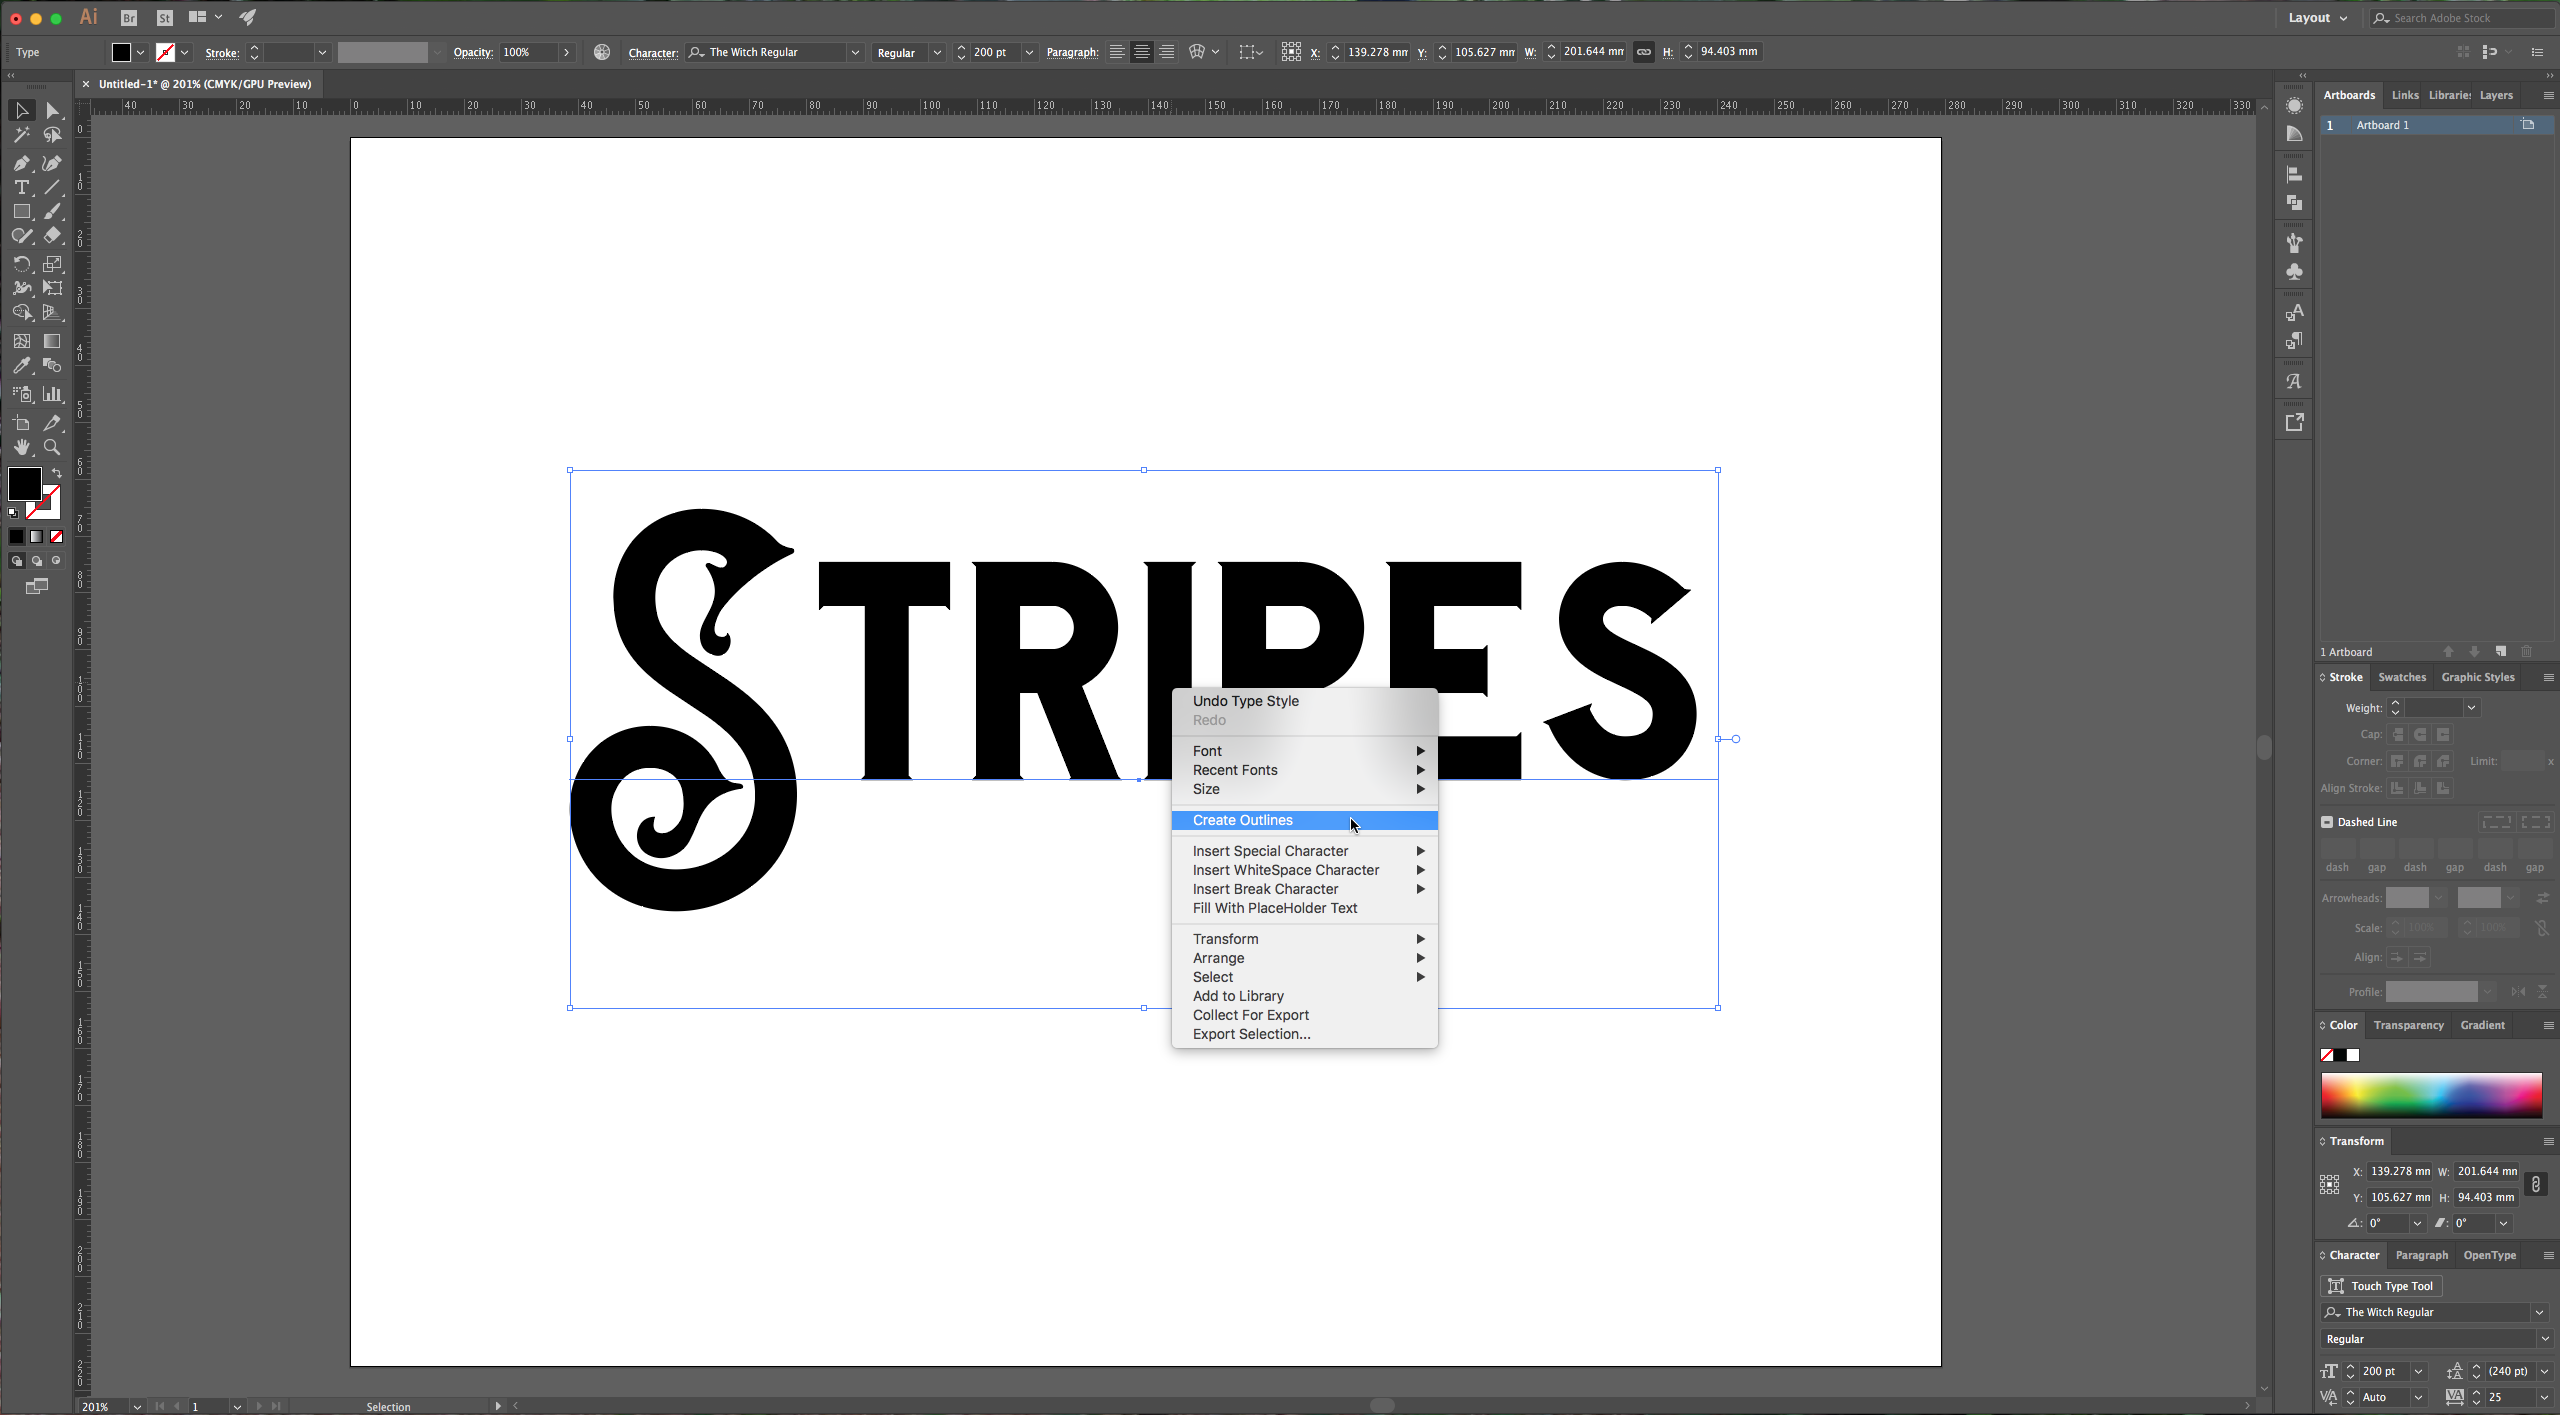
3 – Once you are satisfied right-click on top of your text and select “Create Outlines” (Shift + Command/Control + O). This will turn your text into a vector.
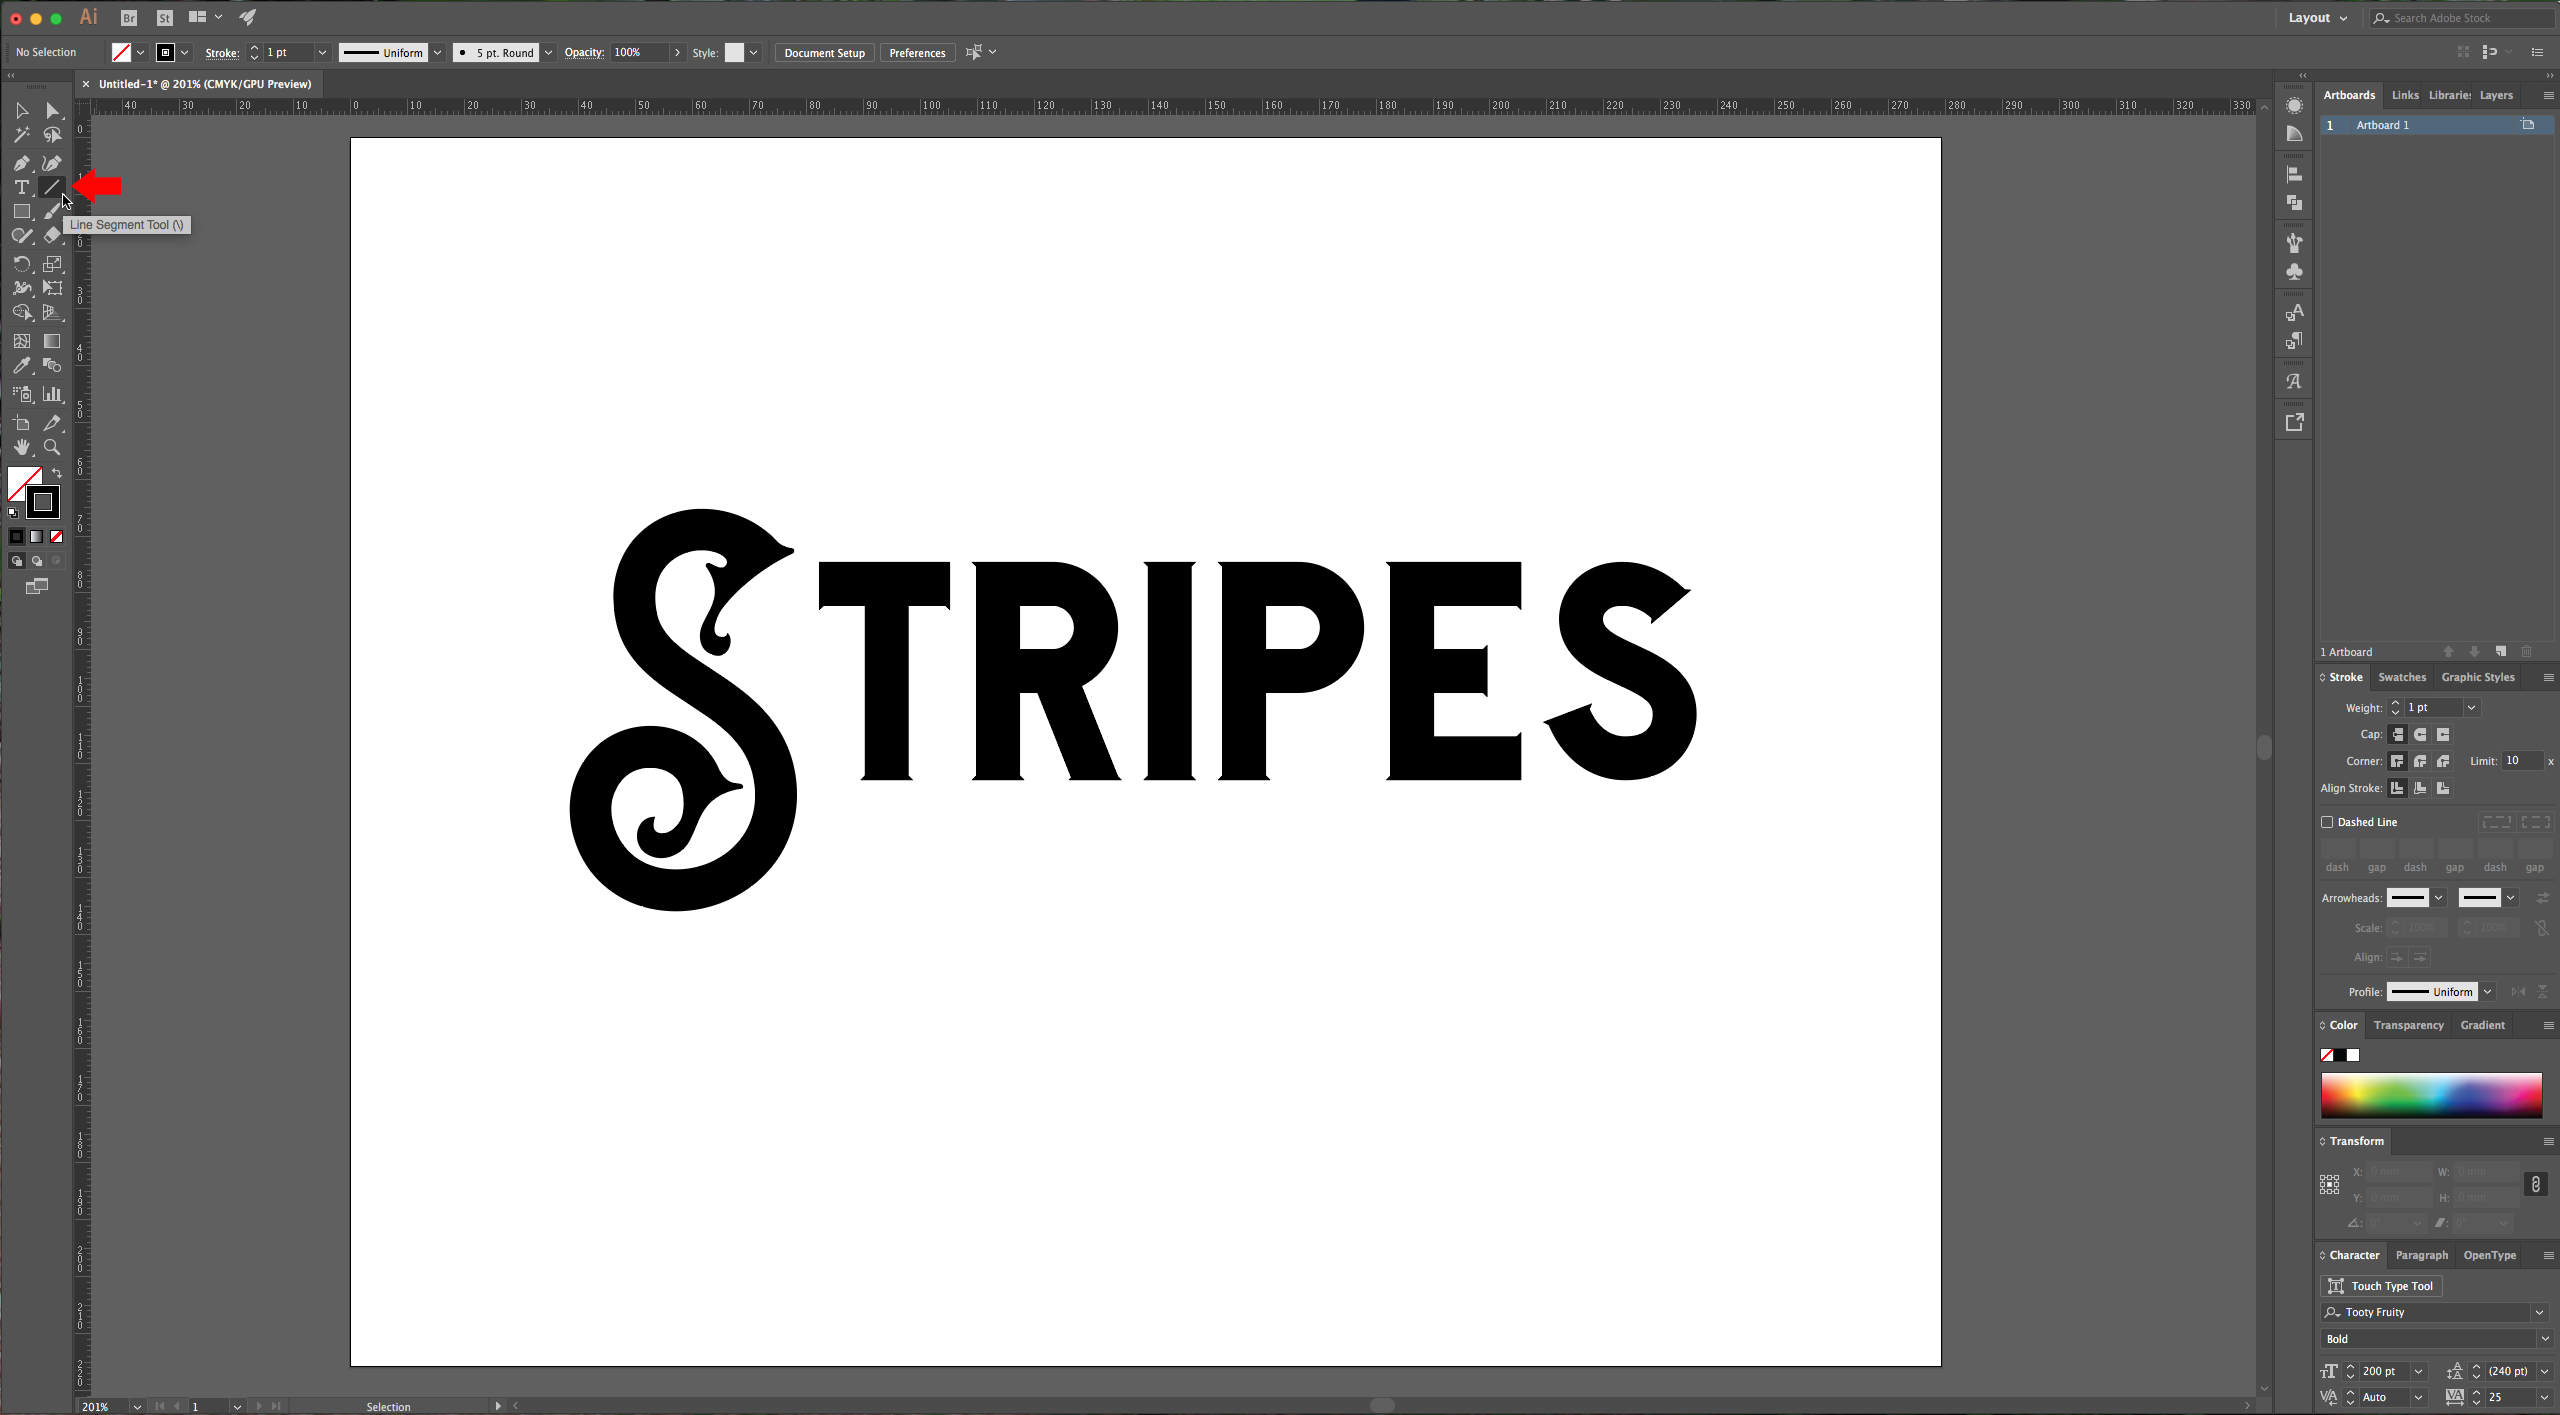
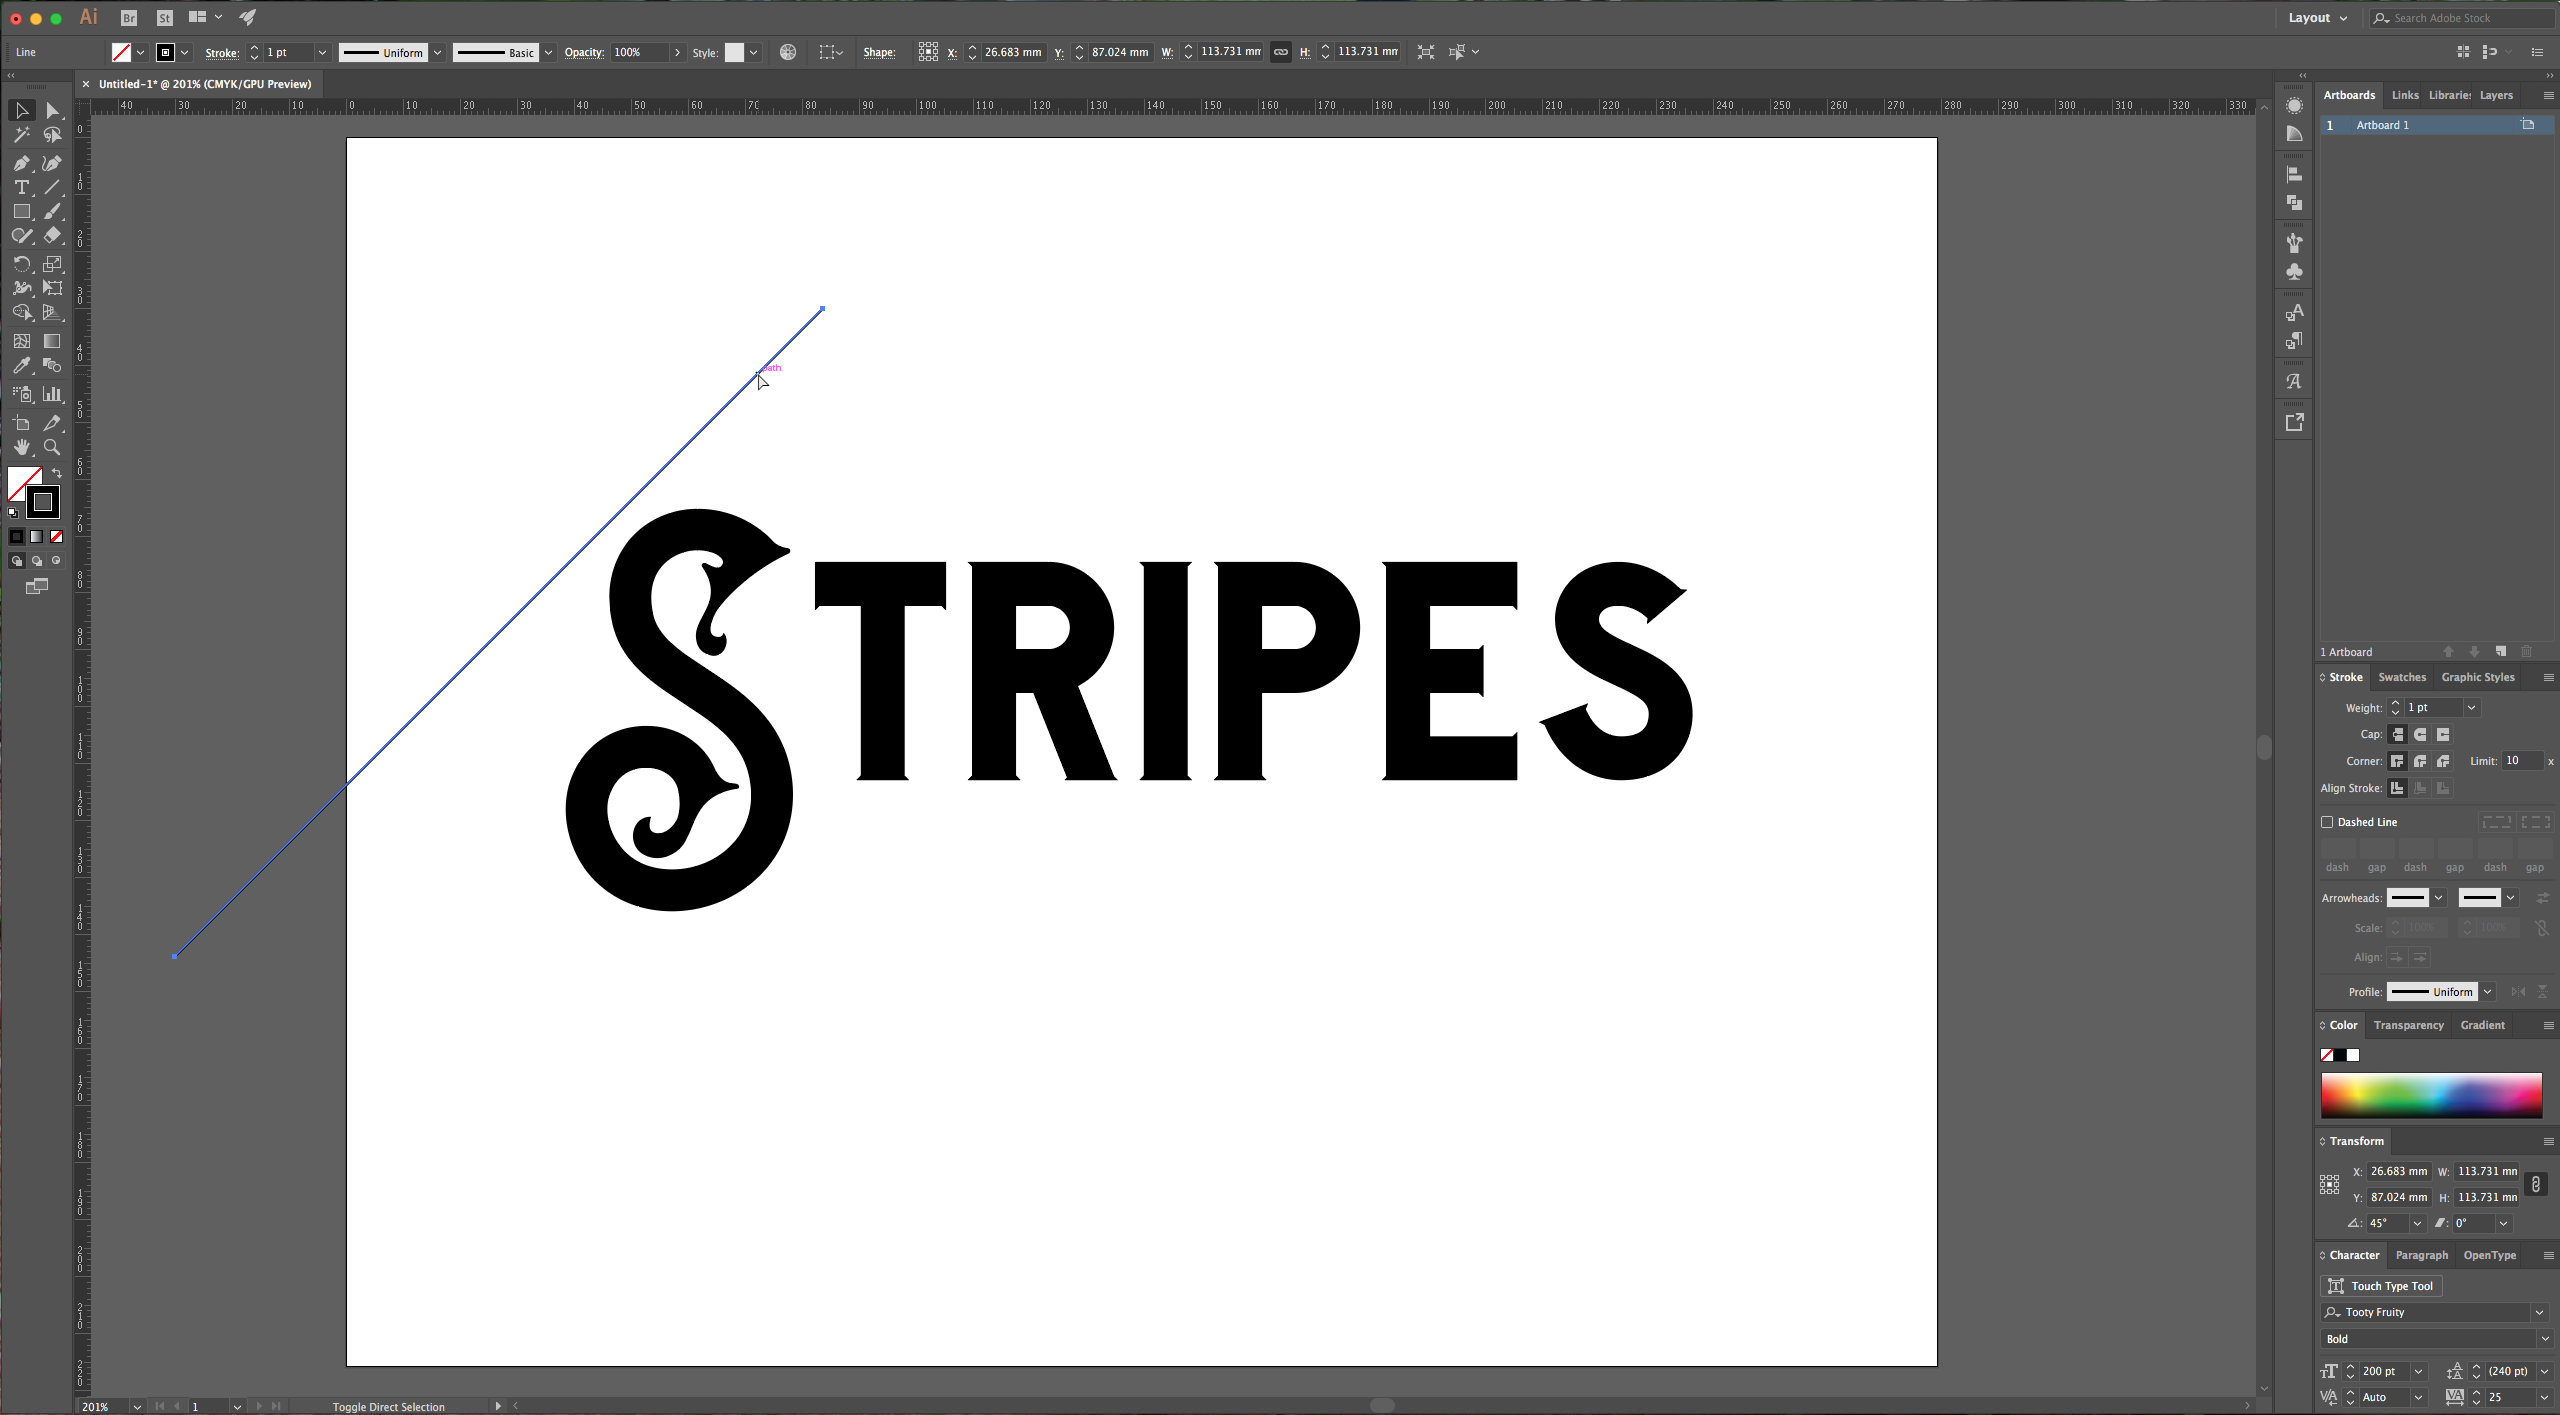
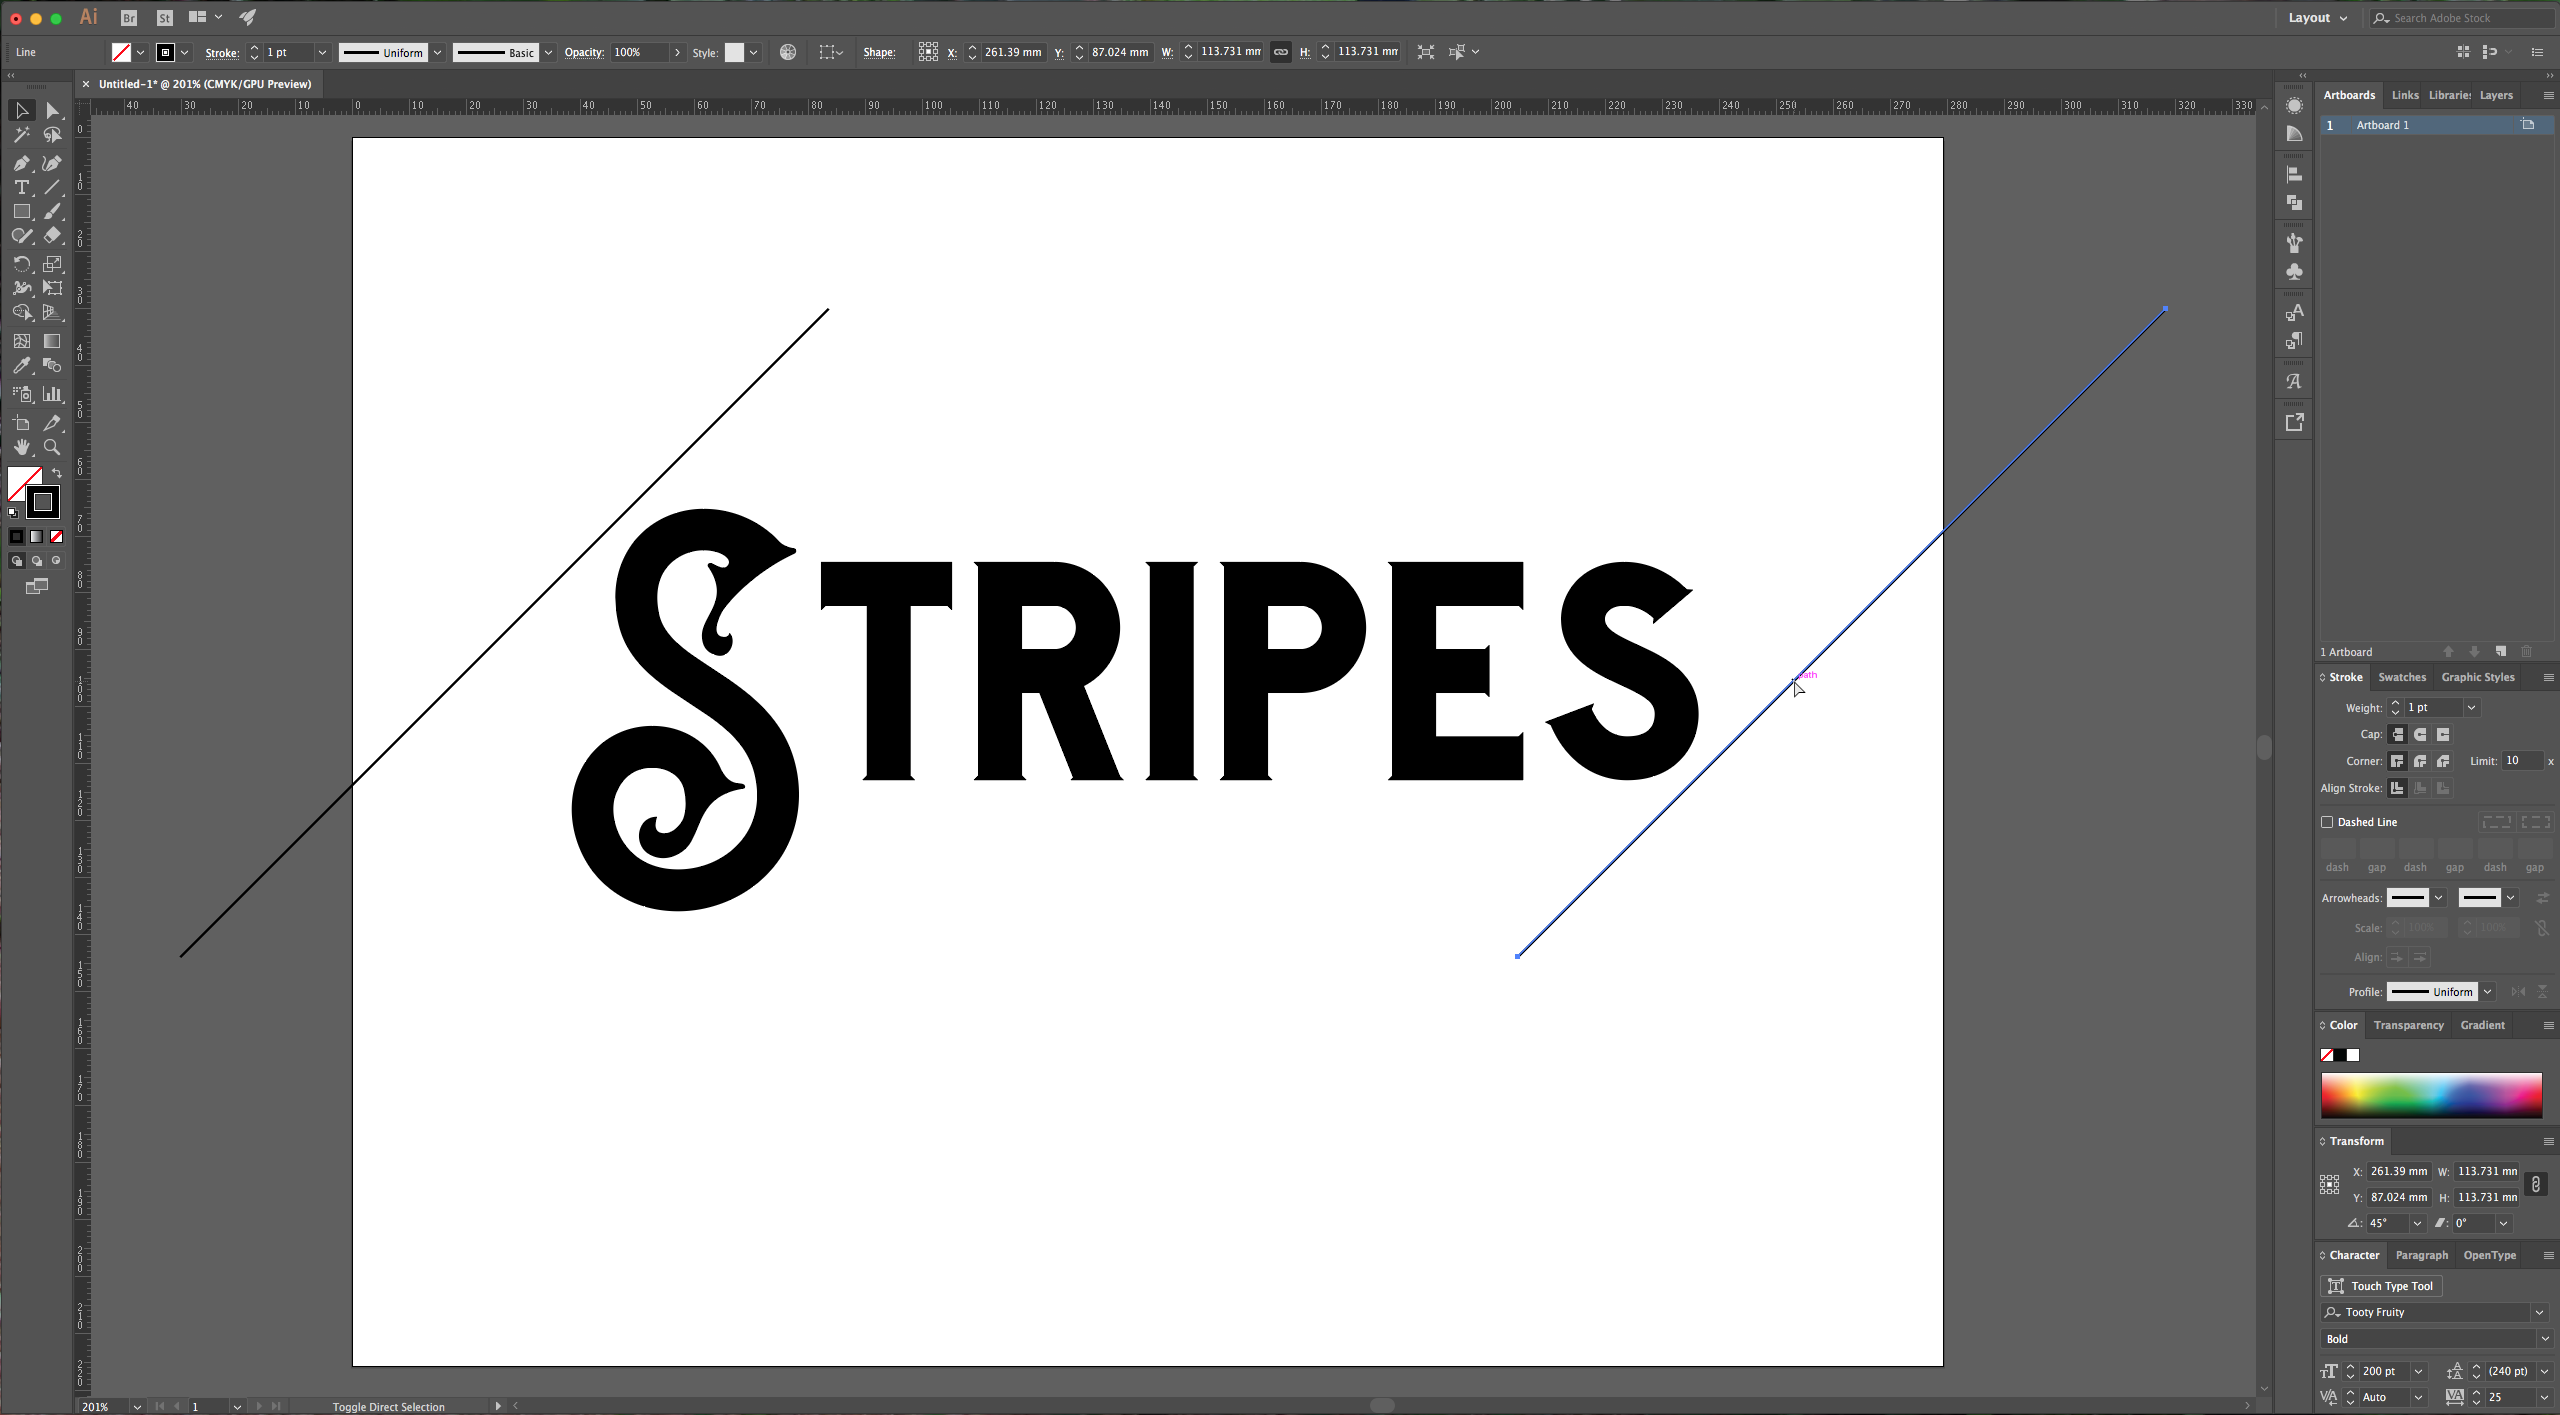
4 – Select your “Line Segment” Tool and make sure your fill color is set to “None”. While holding the “Shift” key to make it snap to a 45-degree angle draw a line that is taller than your text and is positioned to its left. Select your line, click “Alt” to make a copy and move it to the right of your text. While dragging the copy hold the “Shift” key so your copy of the line will move so it stays in its place.
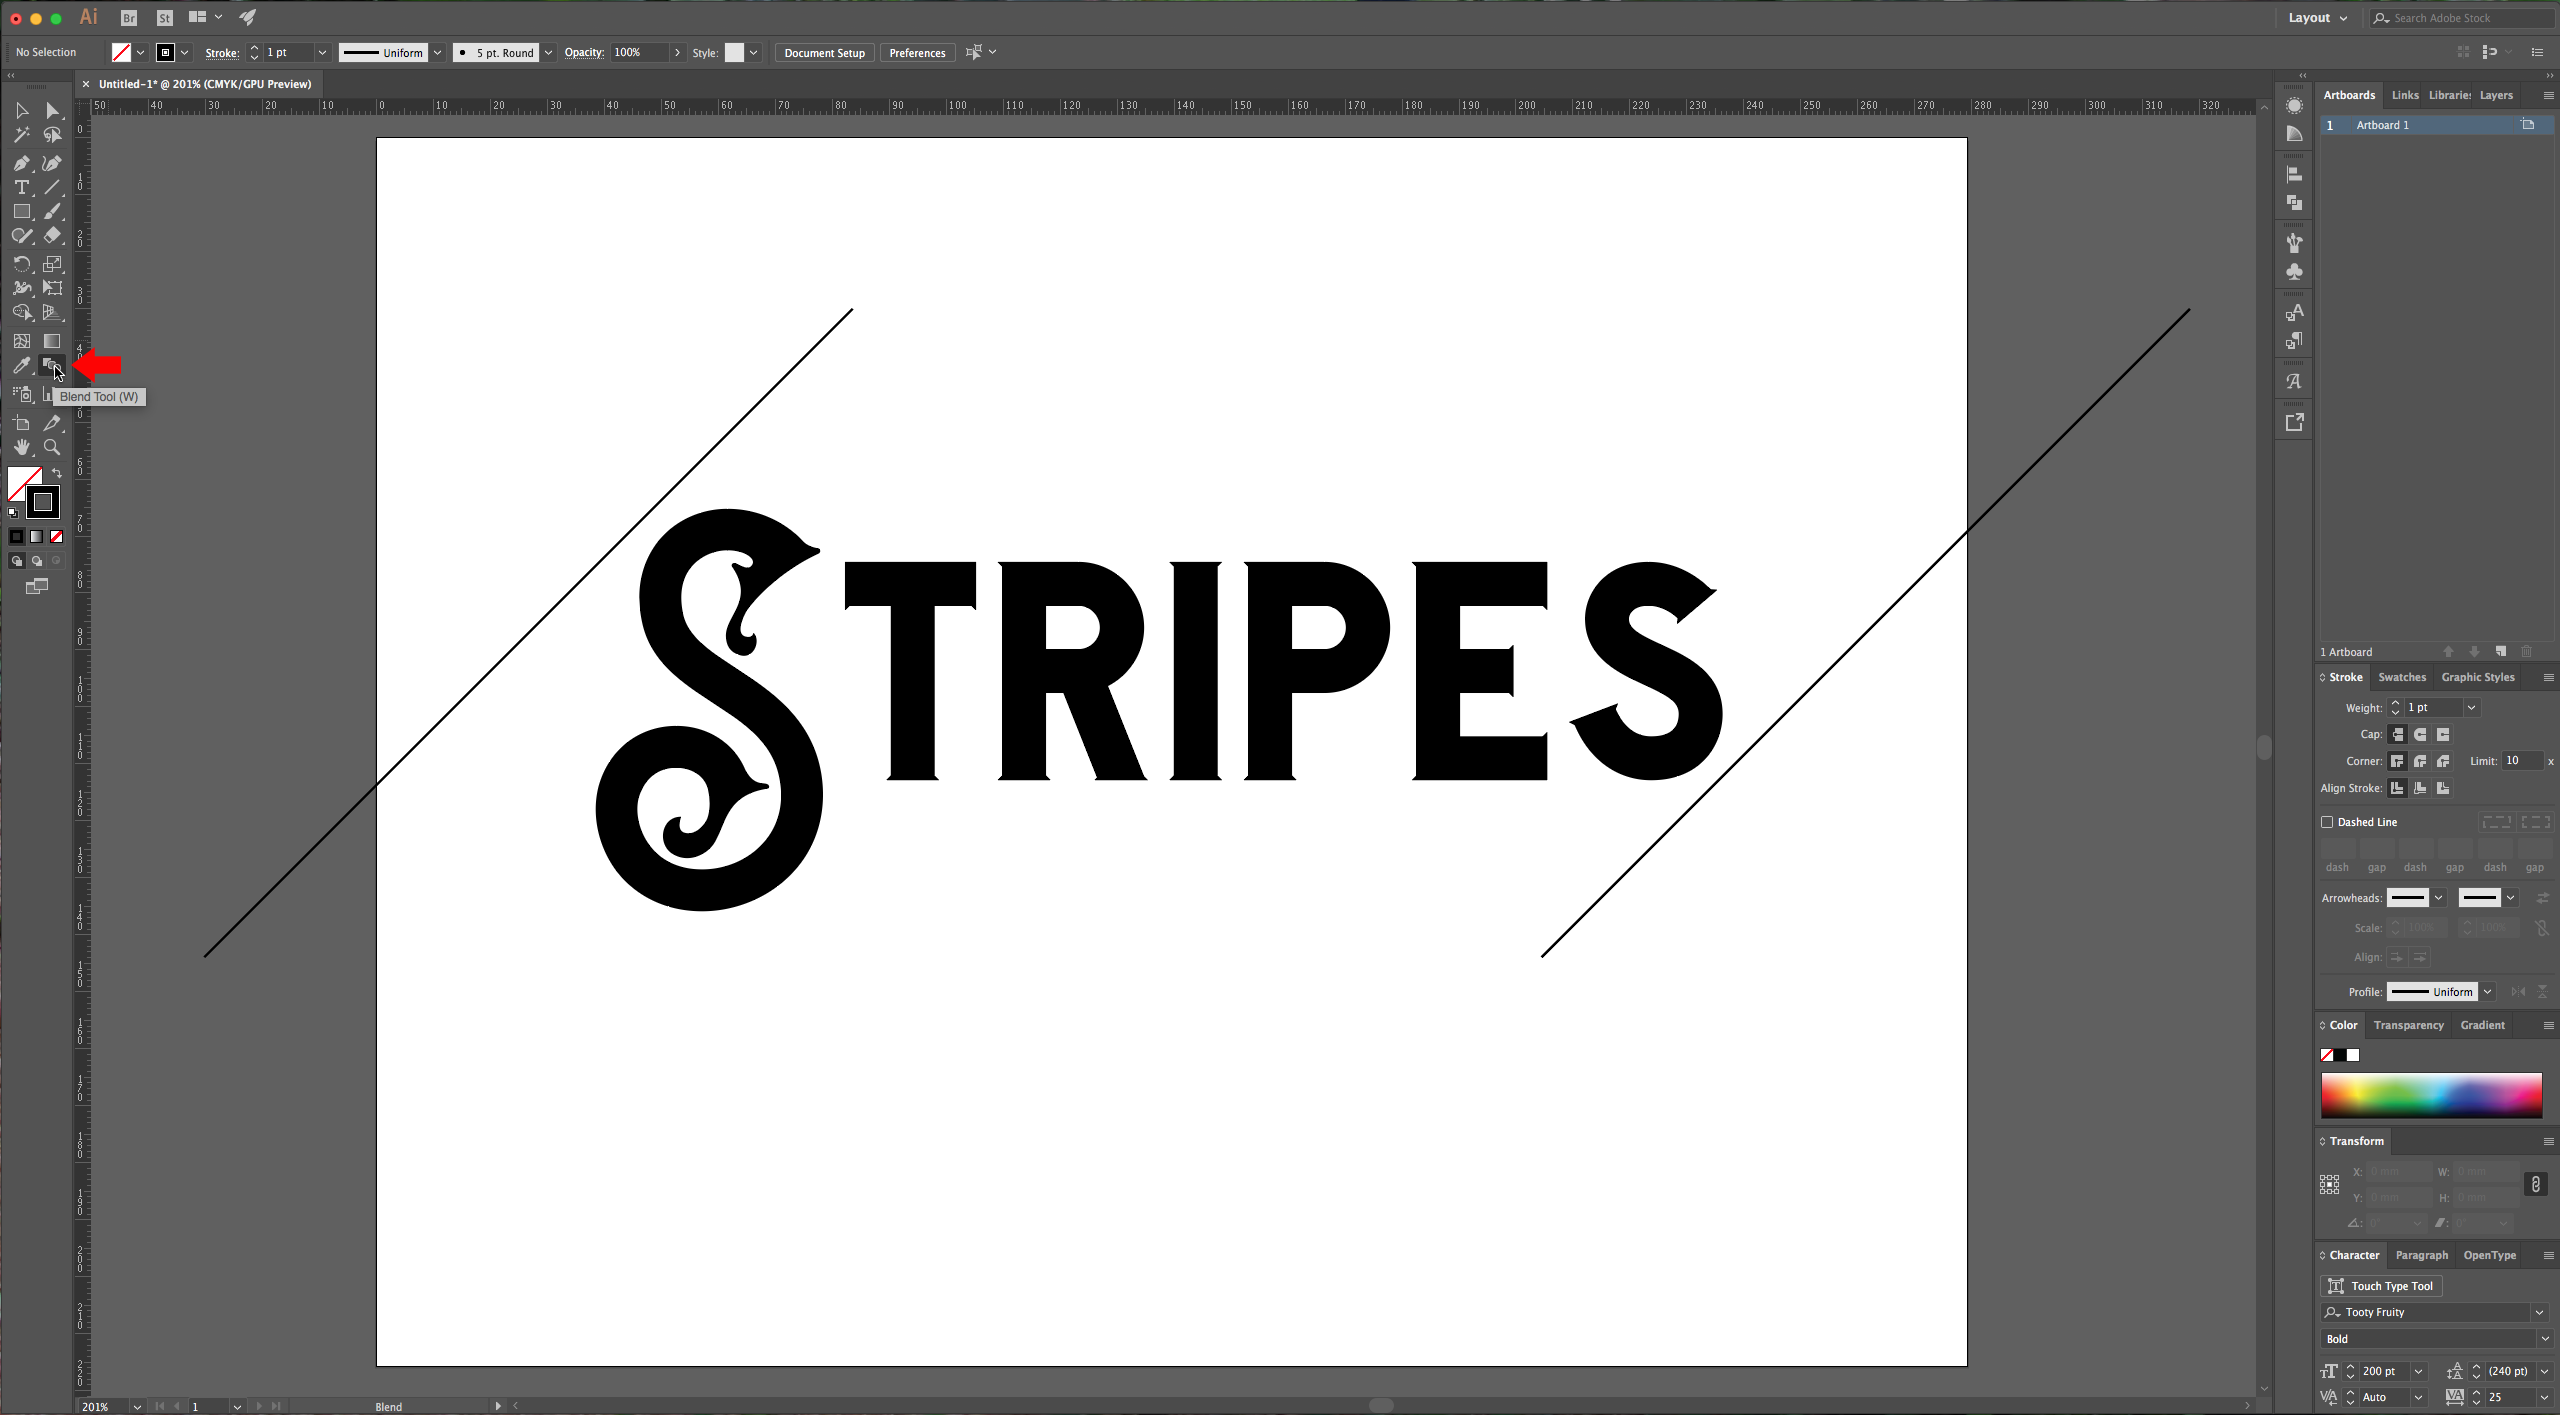
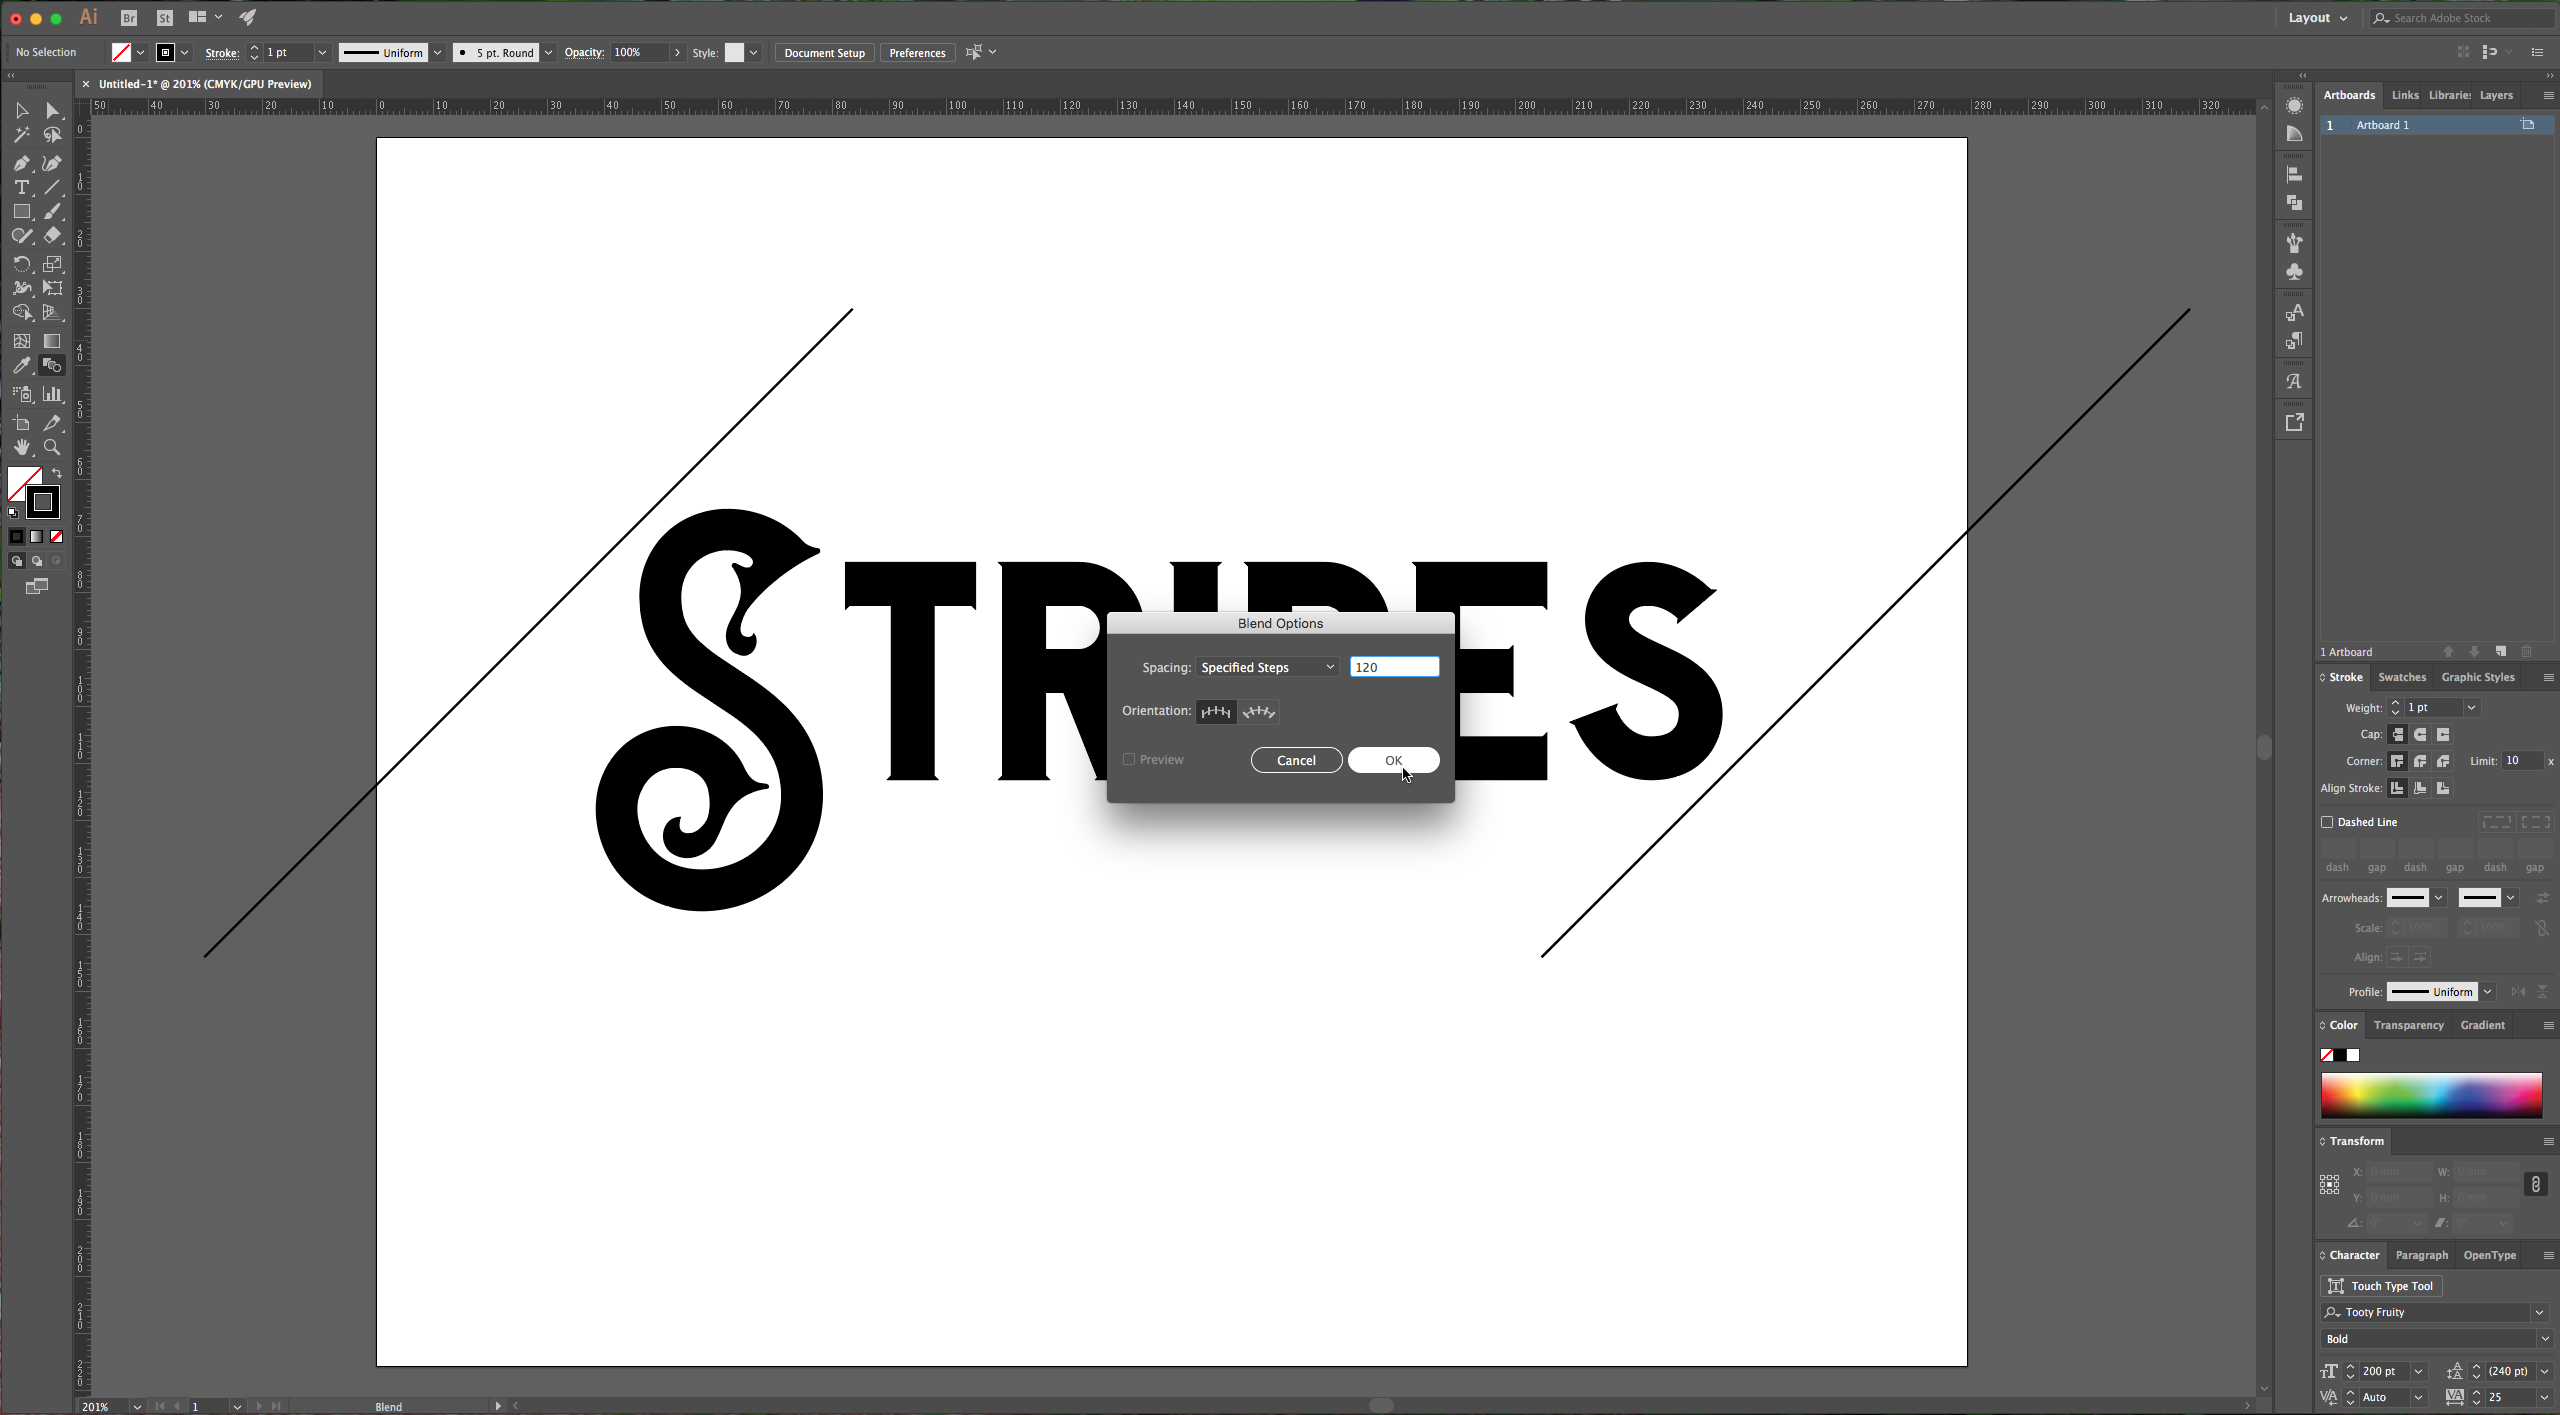
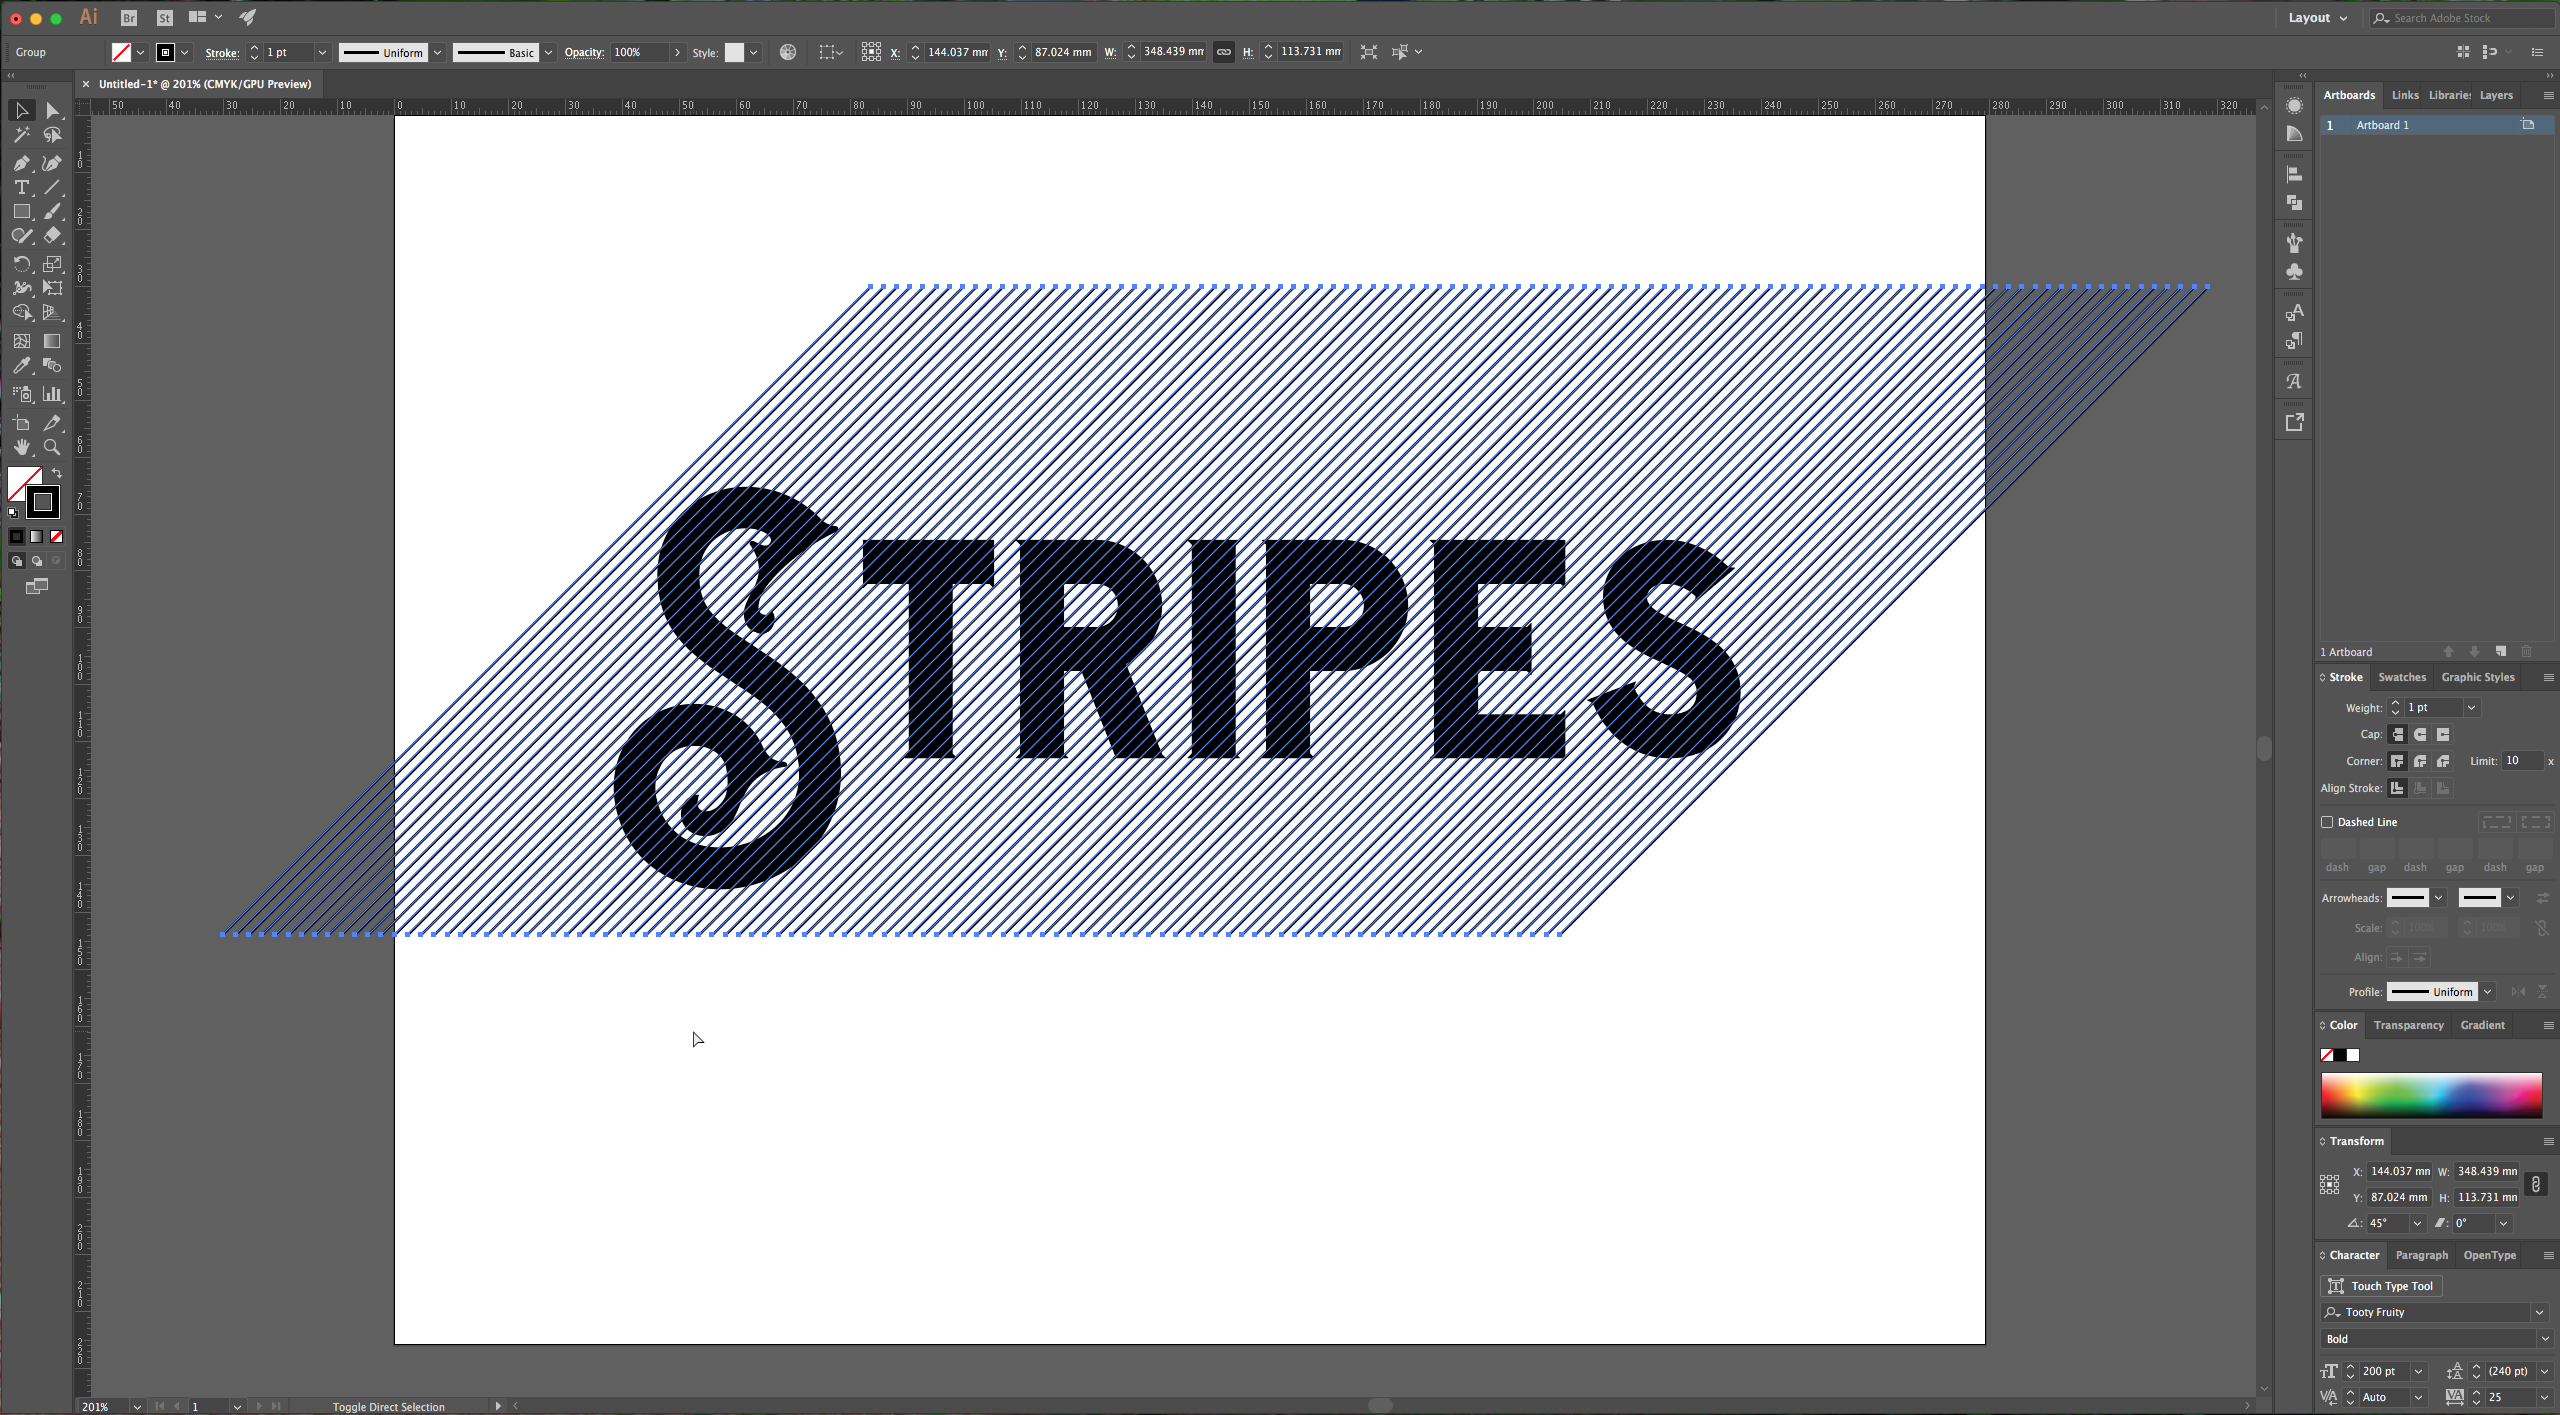
5 - Select the “Blend” Tool (W) from your Toolbox and double-click on it to invoke a dialog window. Choose “Specified Steps” for Spacing and use a value of 100. Then click on one line (you will notice that your cursor changes and the little square fills with black and an asterisk appears) then click on the other line (a plus sign will appear on your cursor). You can undo and change the values of the “Blending Options” until you are happy with your results.
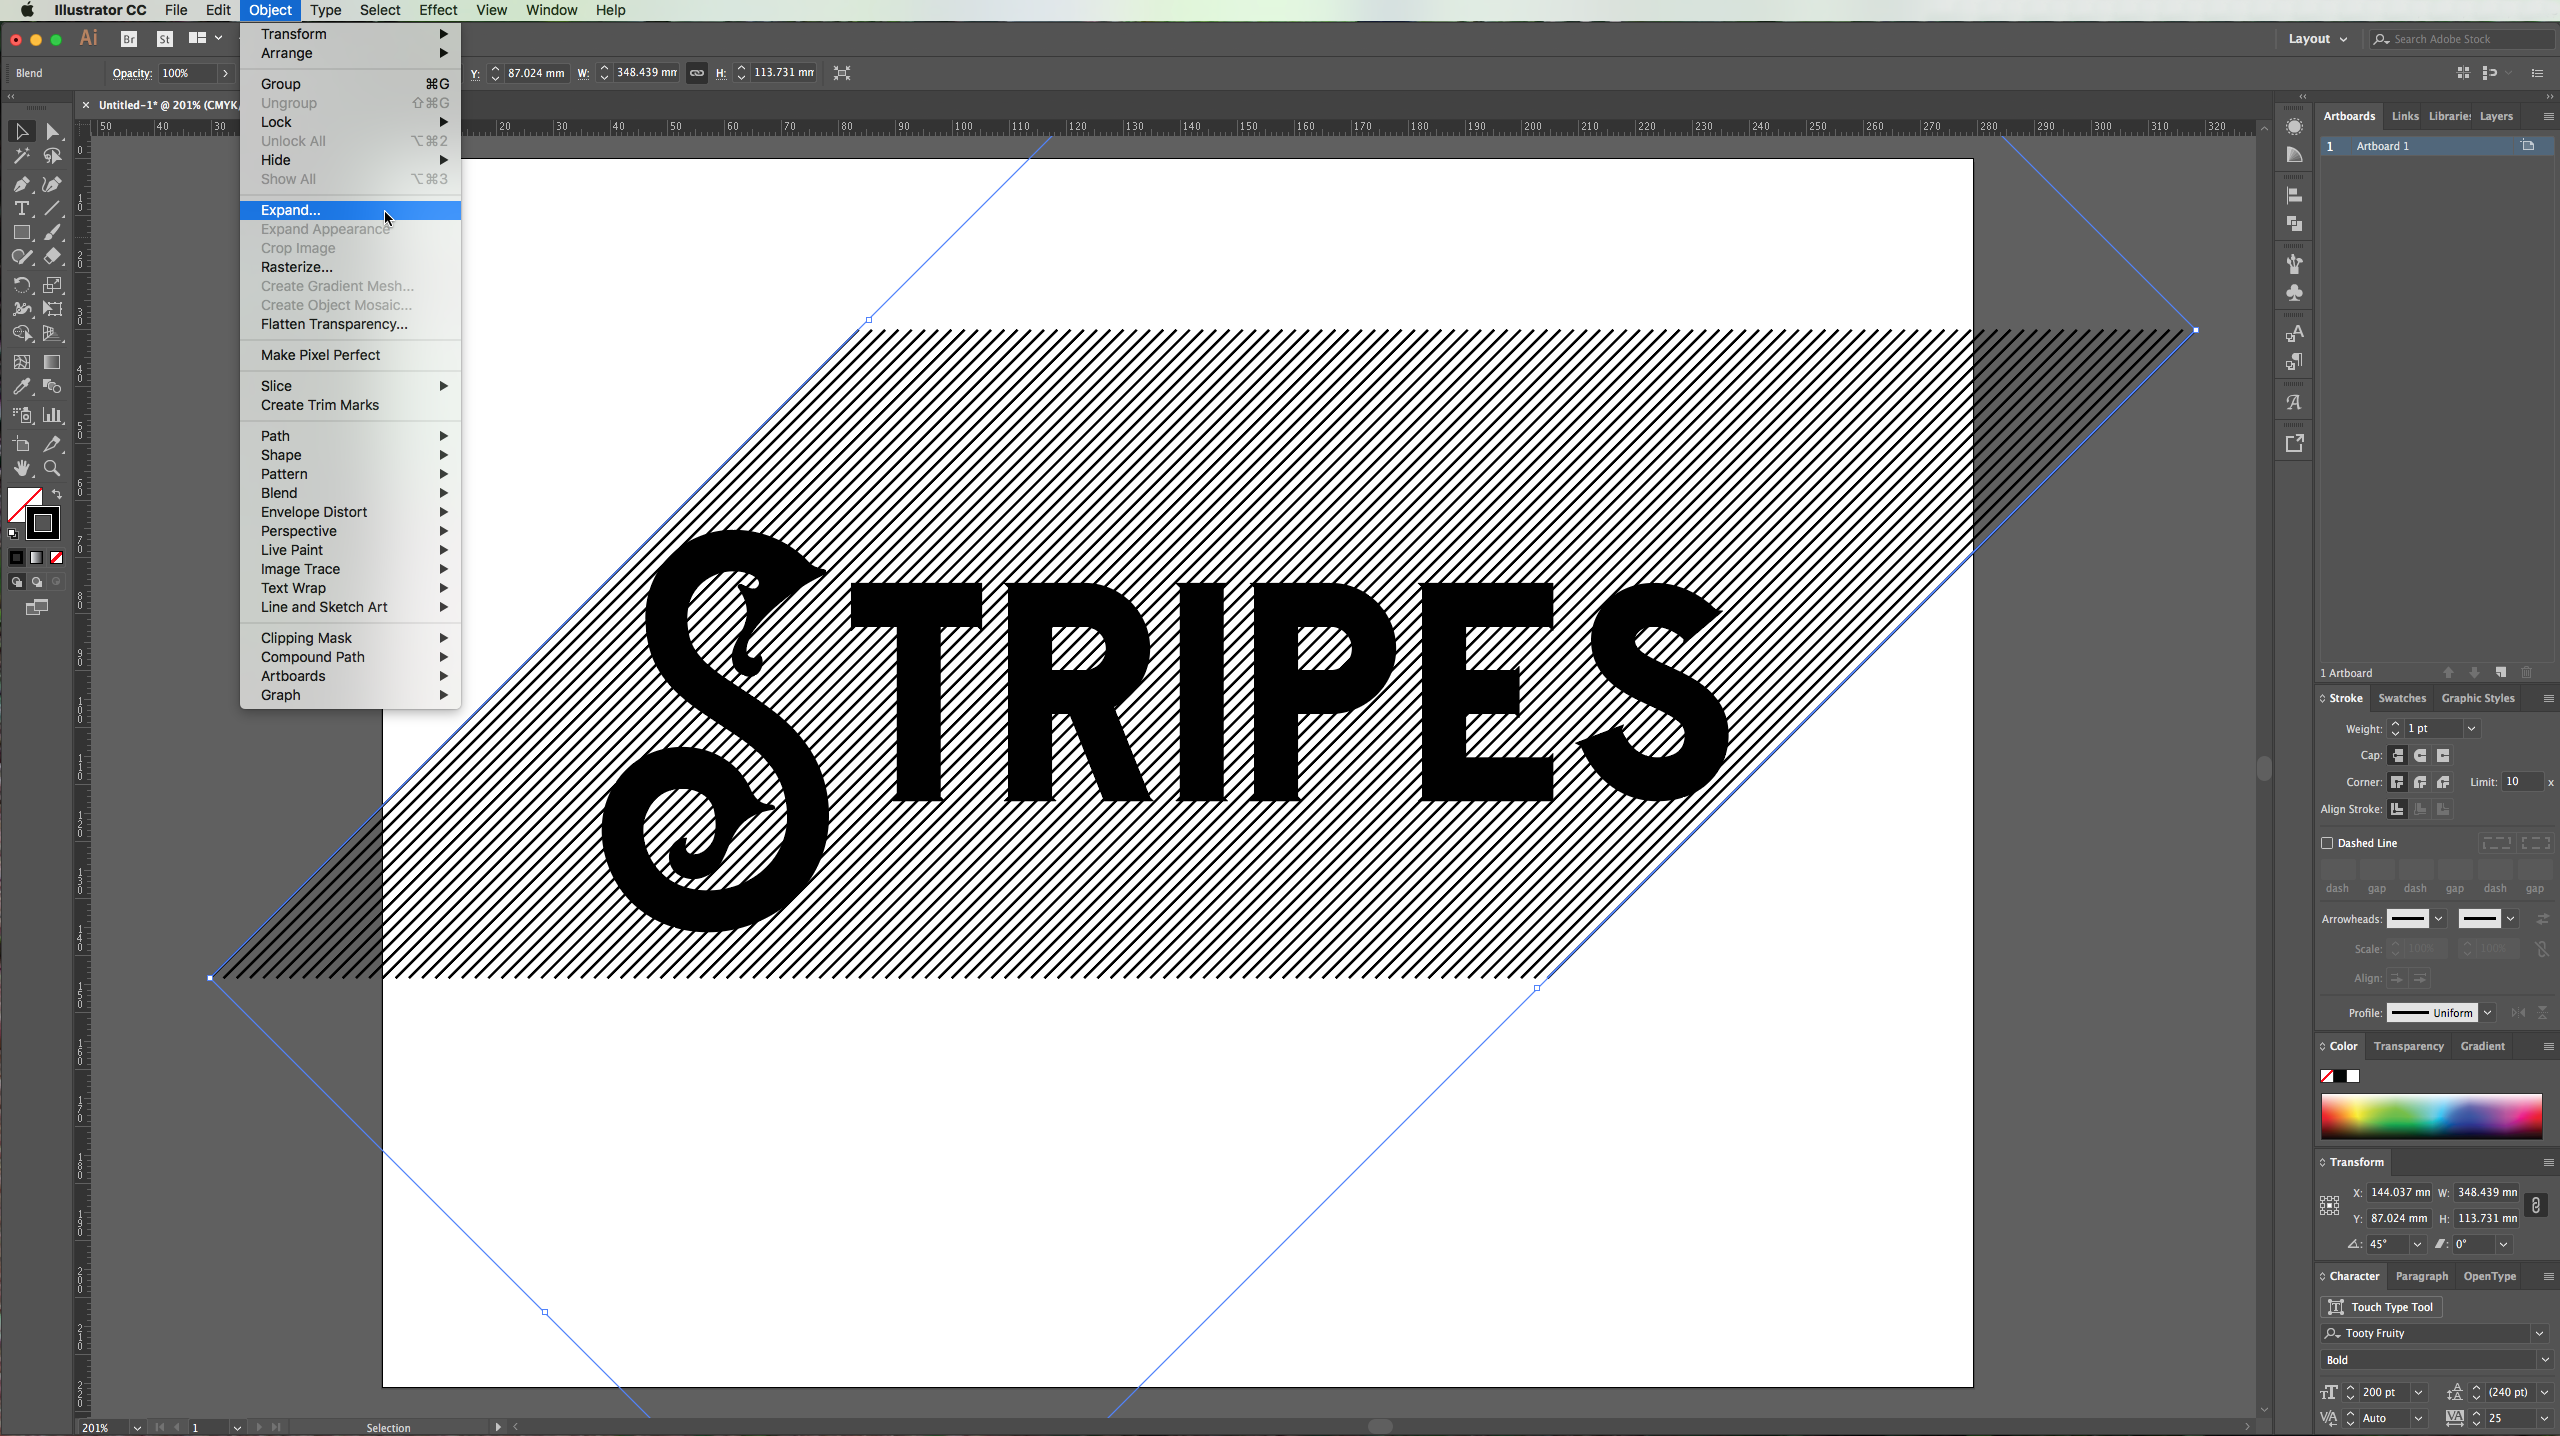
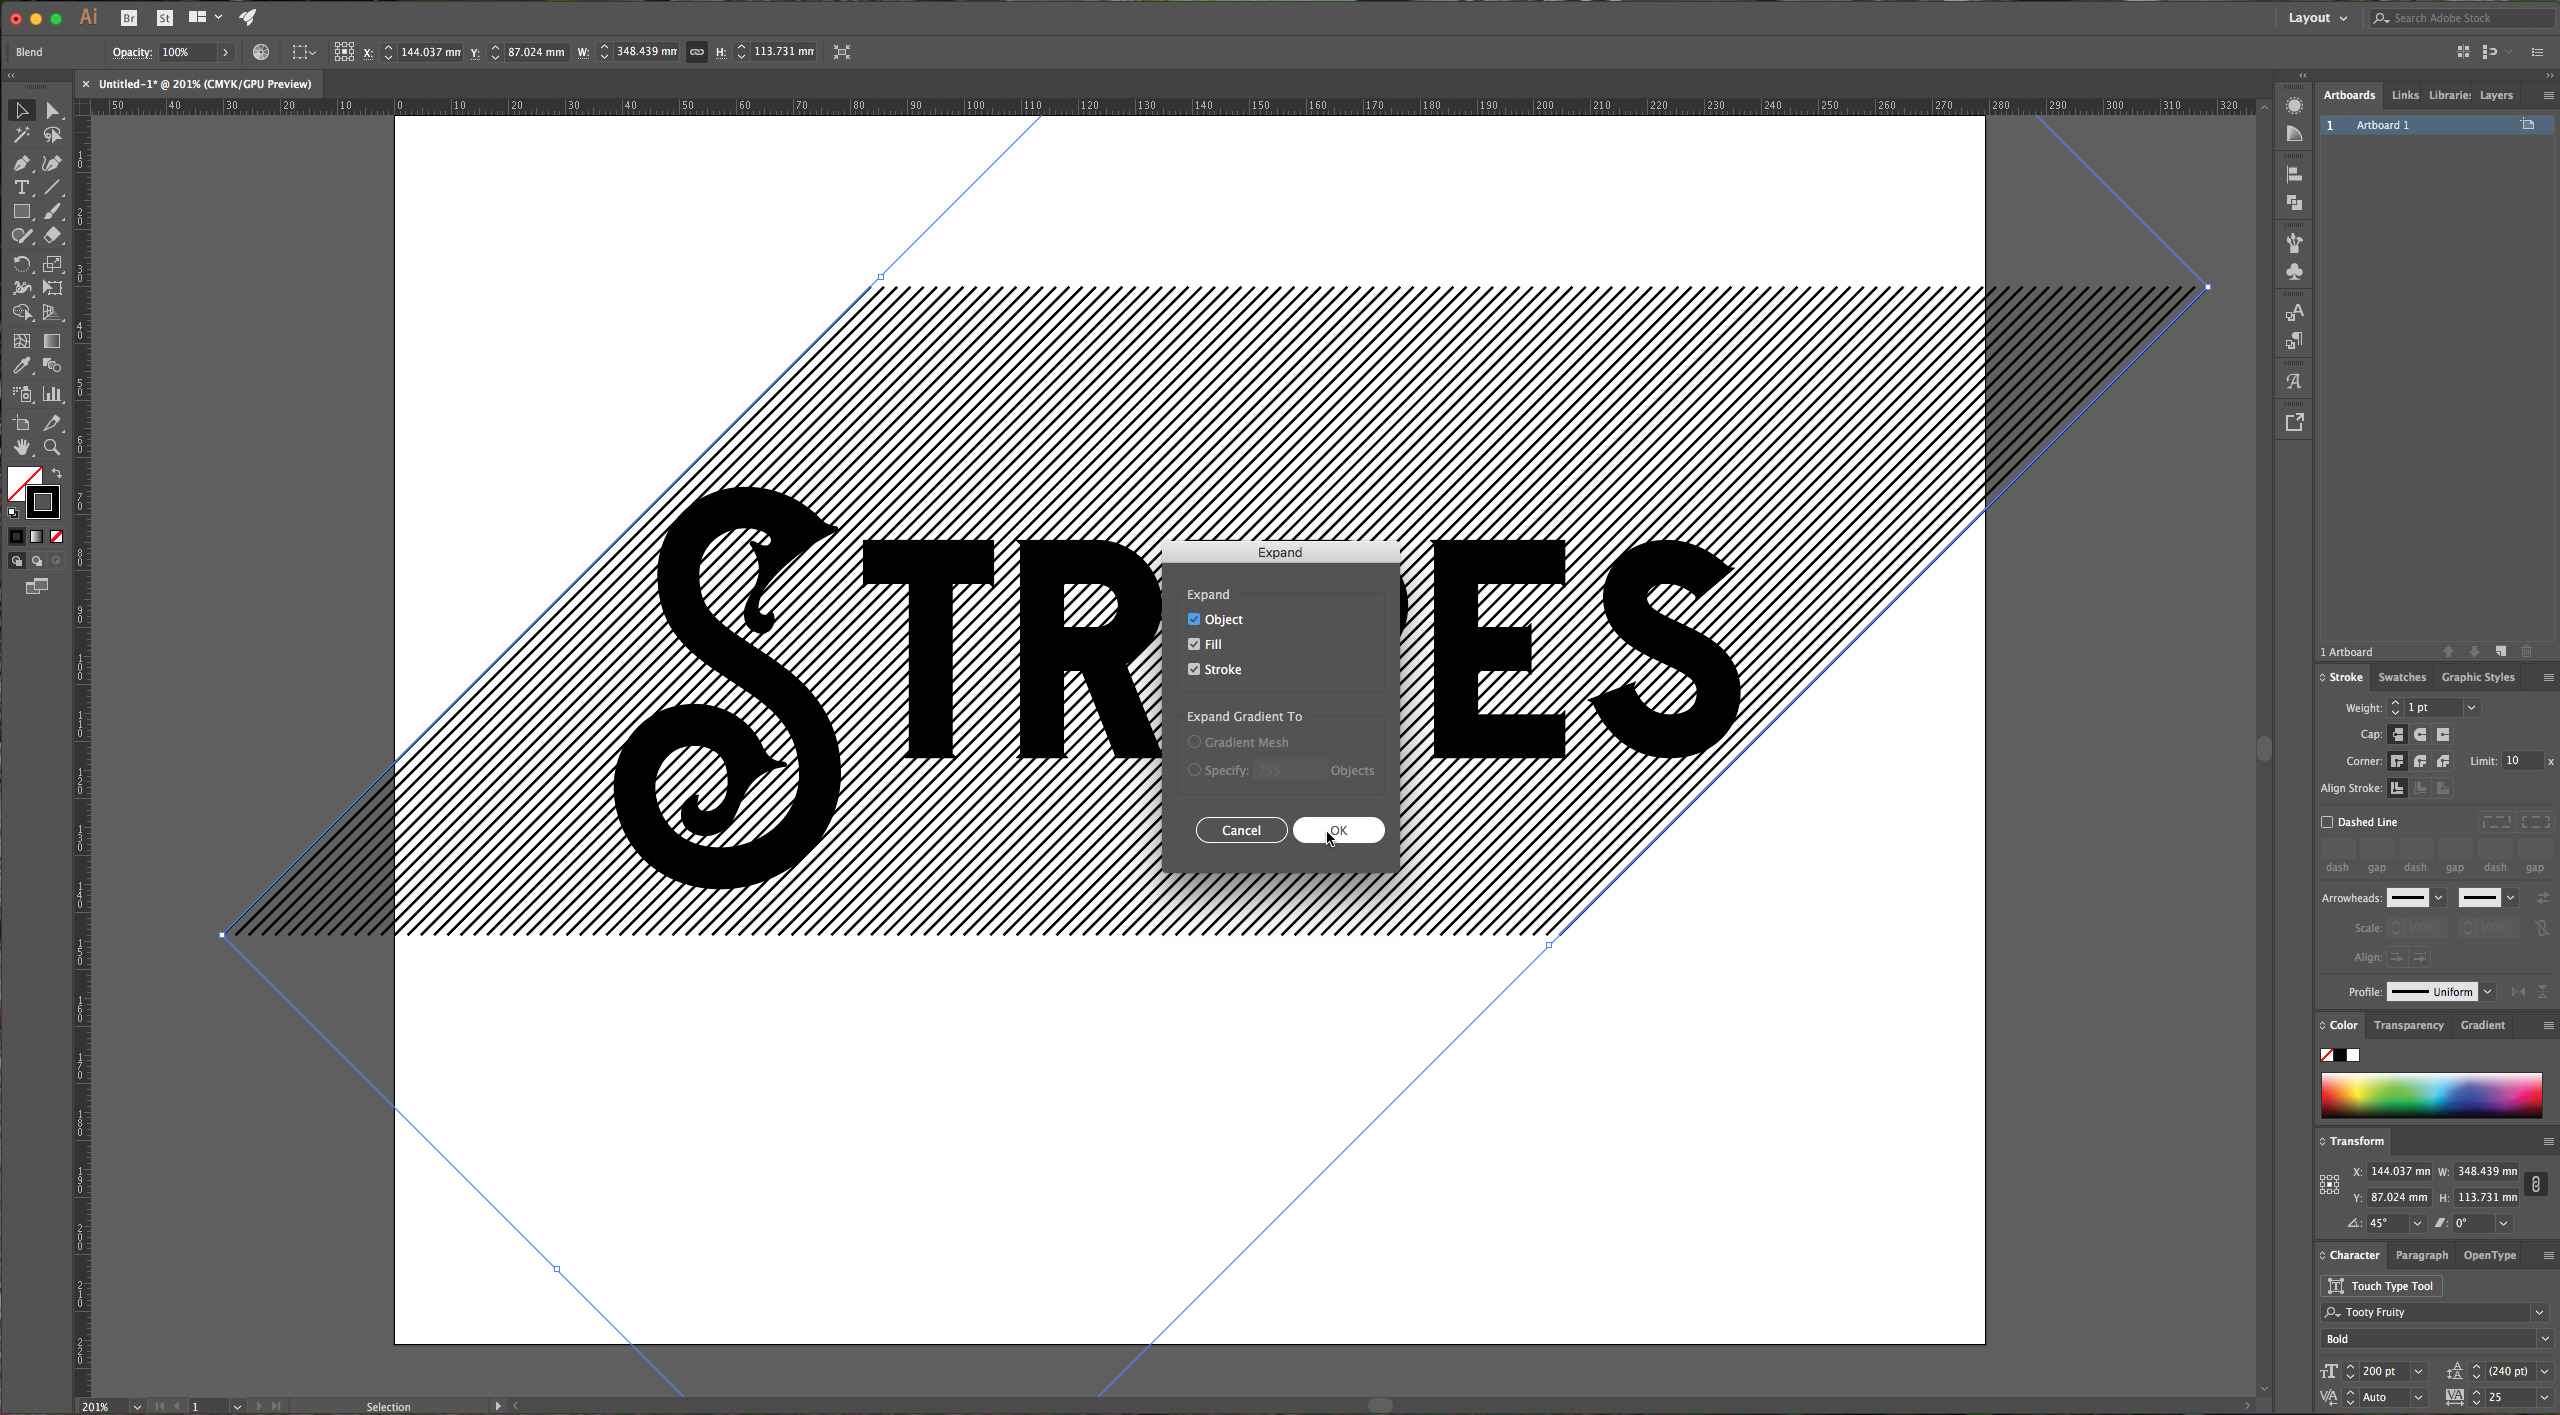
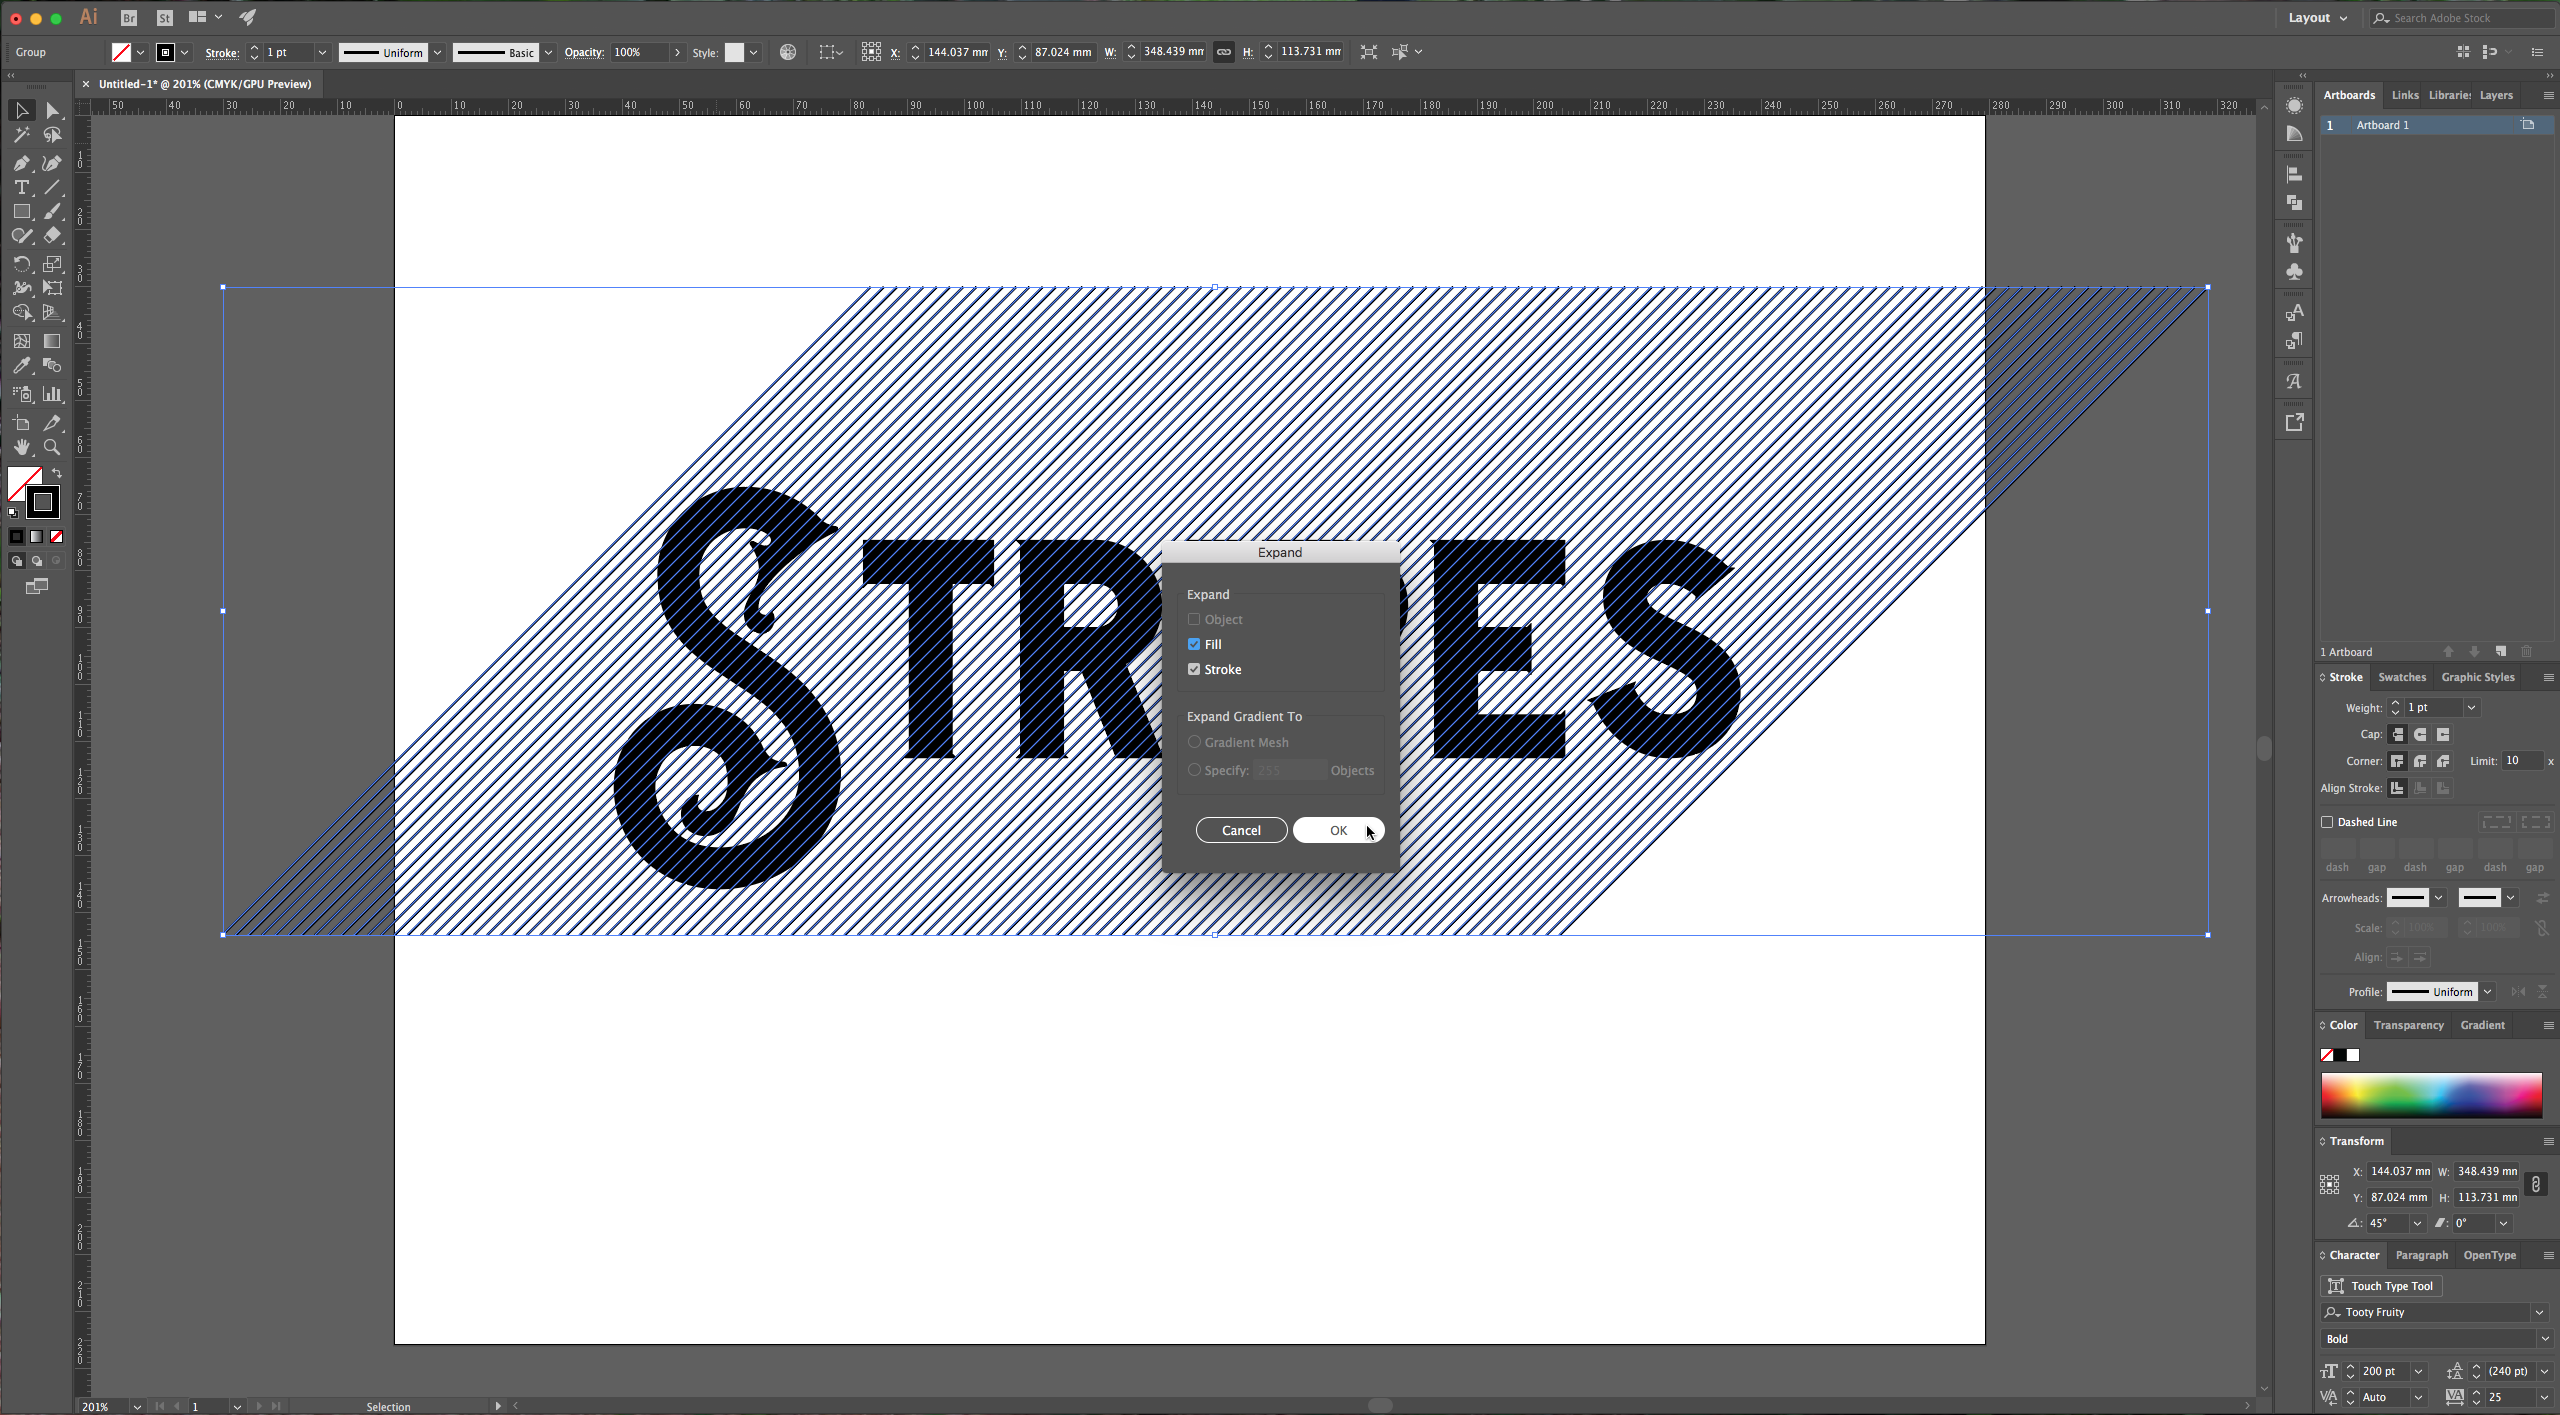
6 – Select your stripes and go to Object > Expand and make sure that all the options are checked (Object, Fill and Stroke) in the window that appears, then click OK. Then go to Object > Expand again and make sure Fill and Stroke are selected and click OK again. This will turn your strokes into objects.
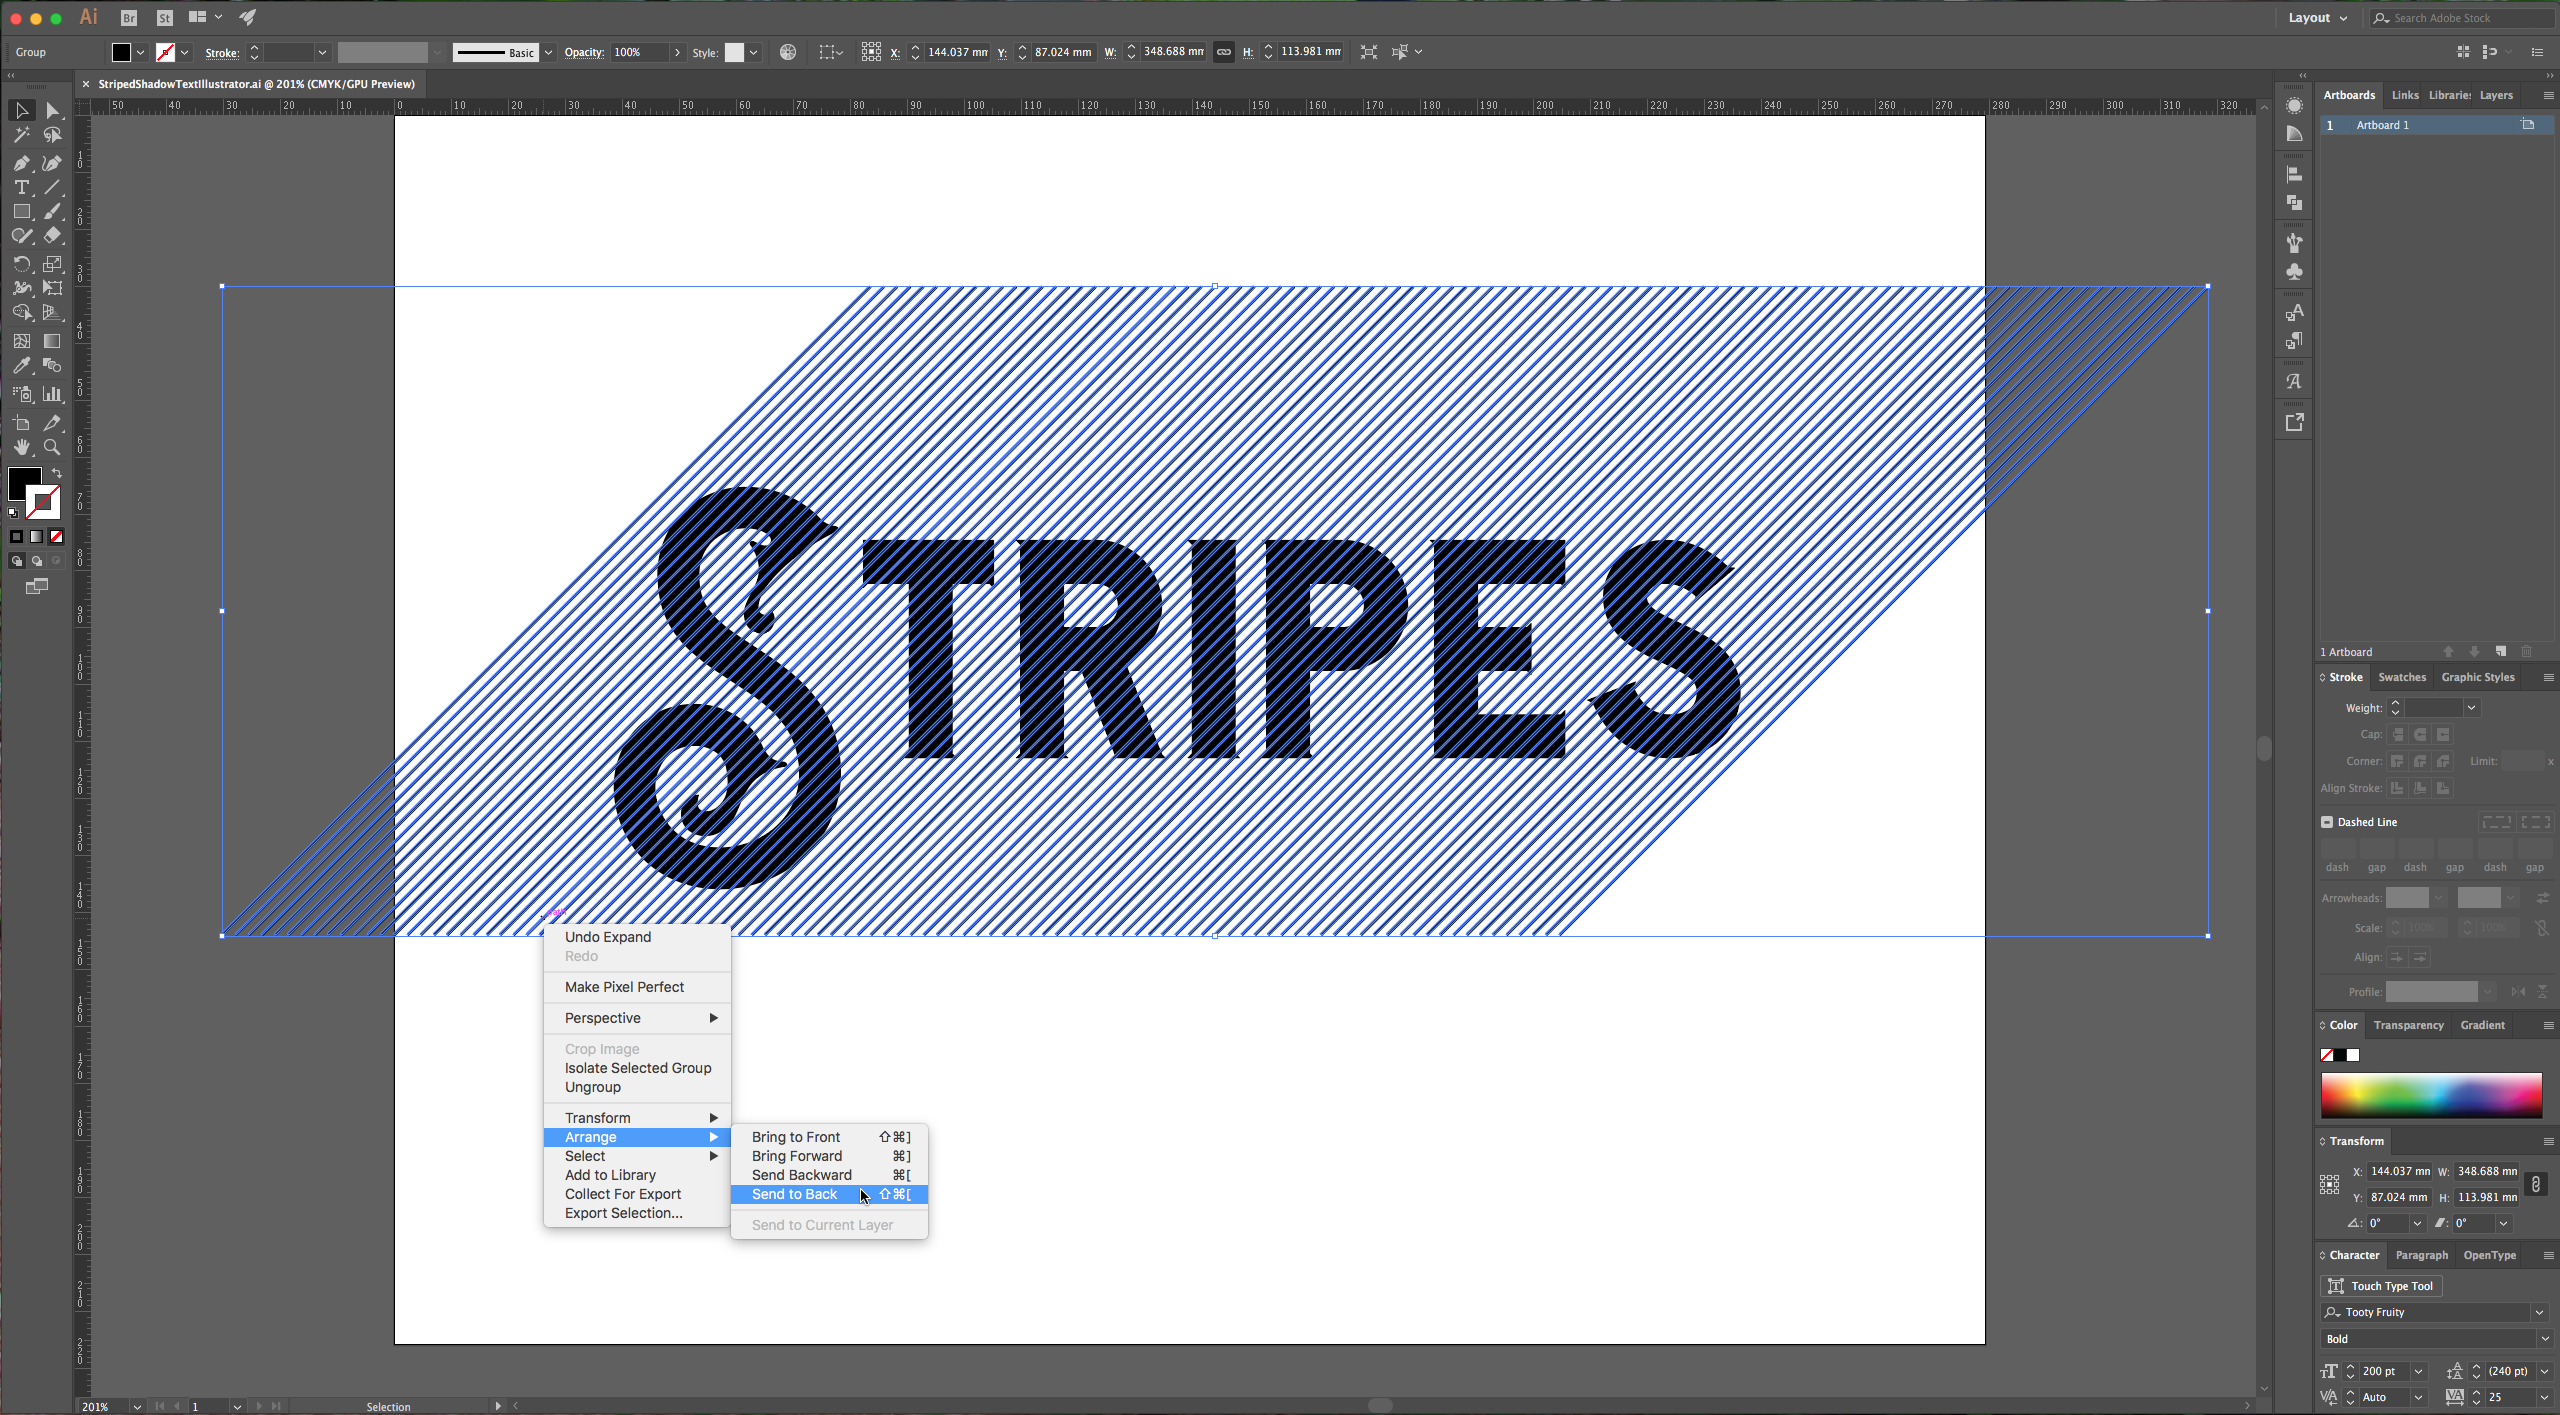
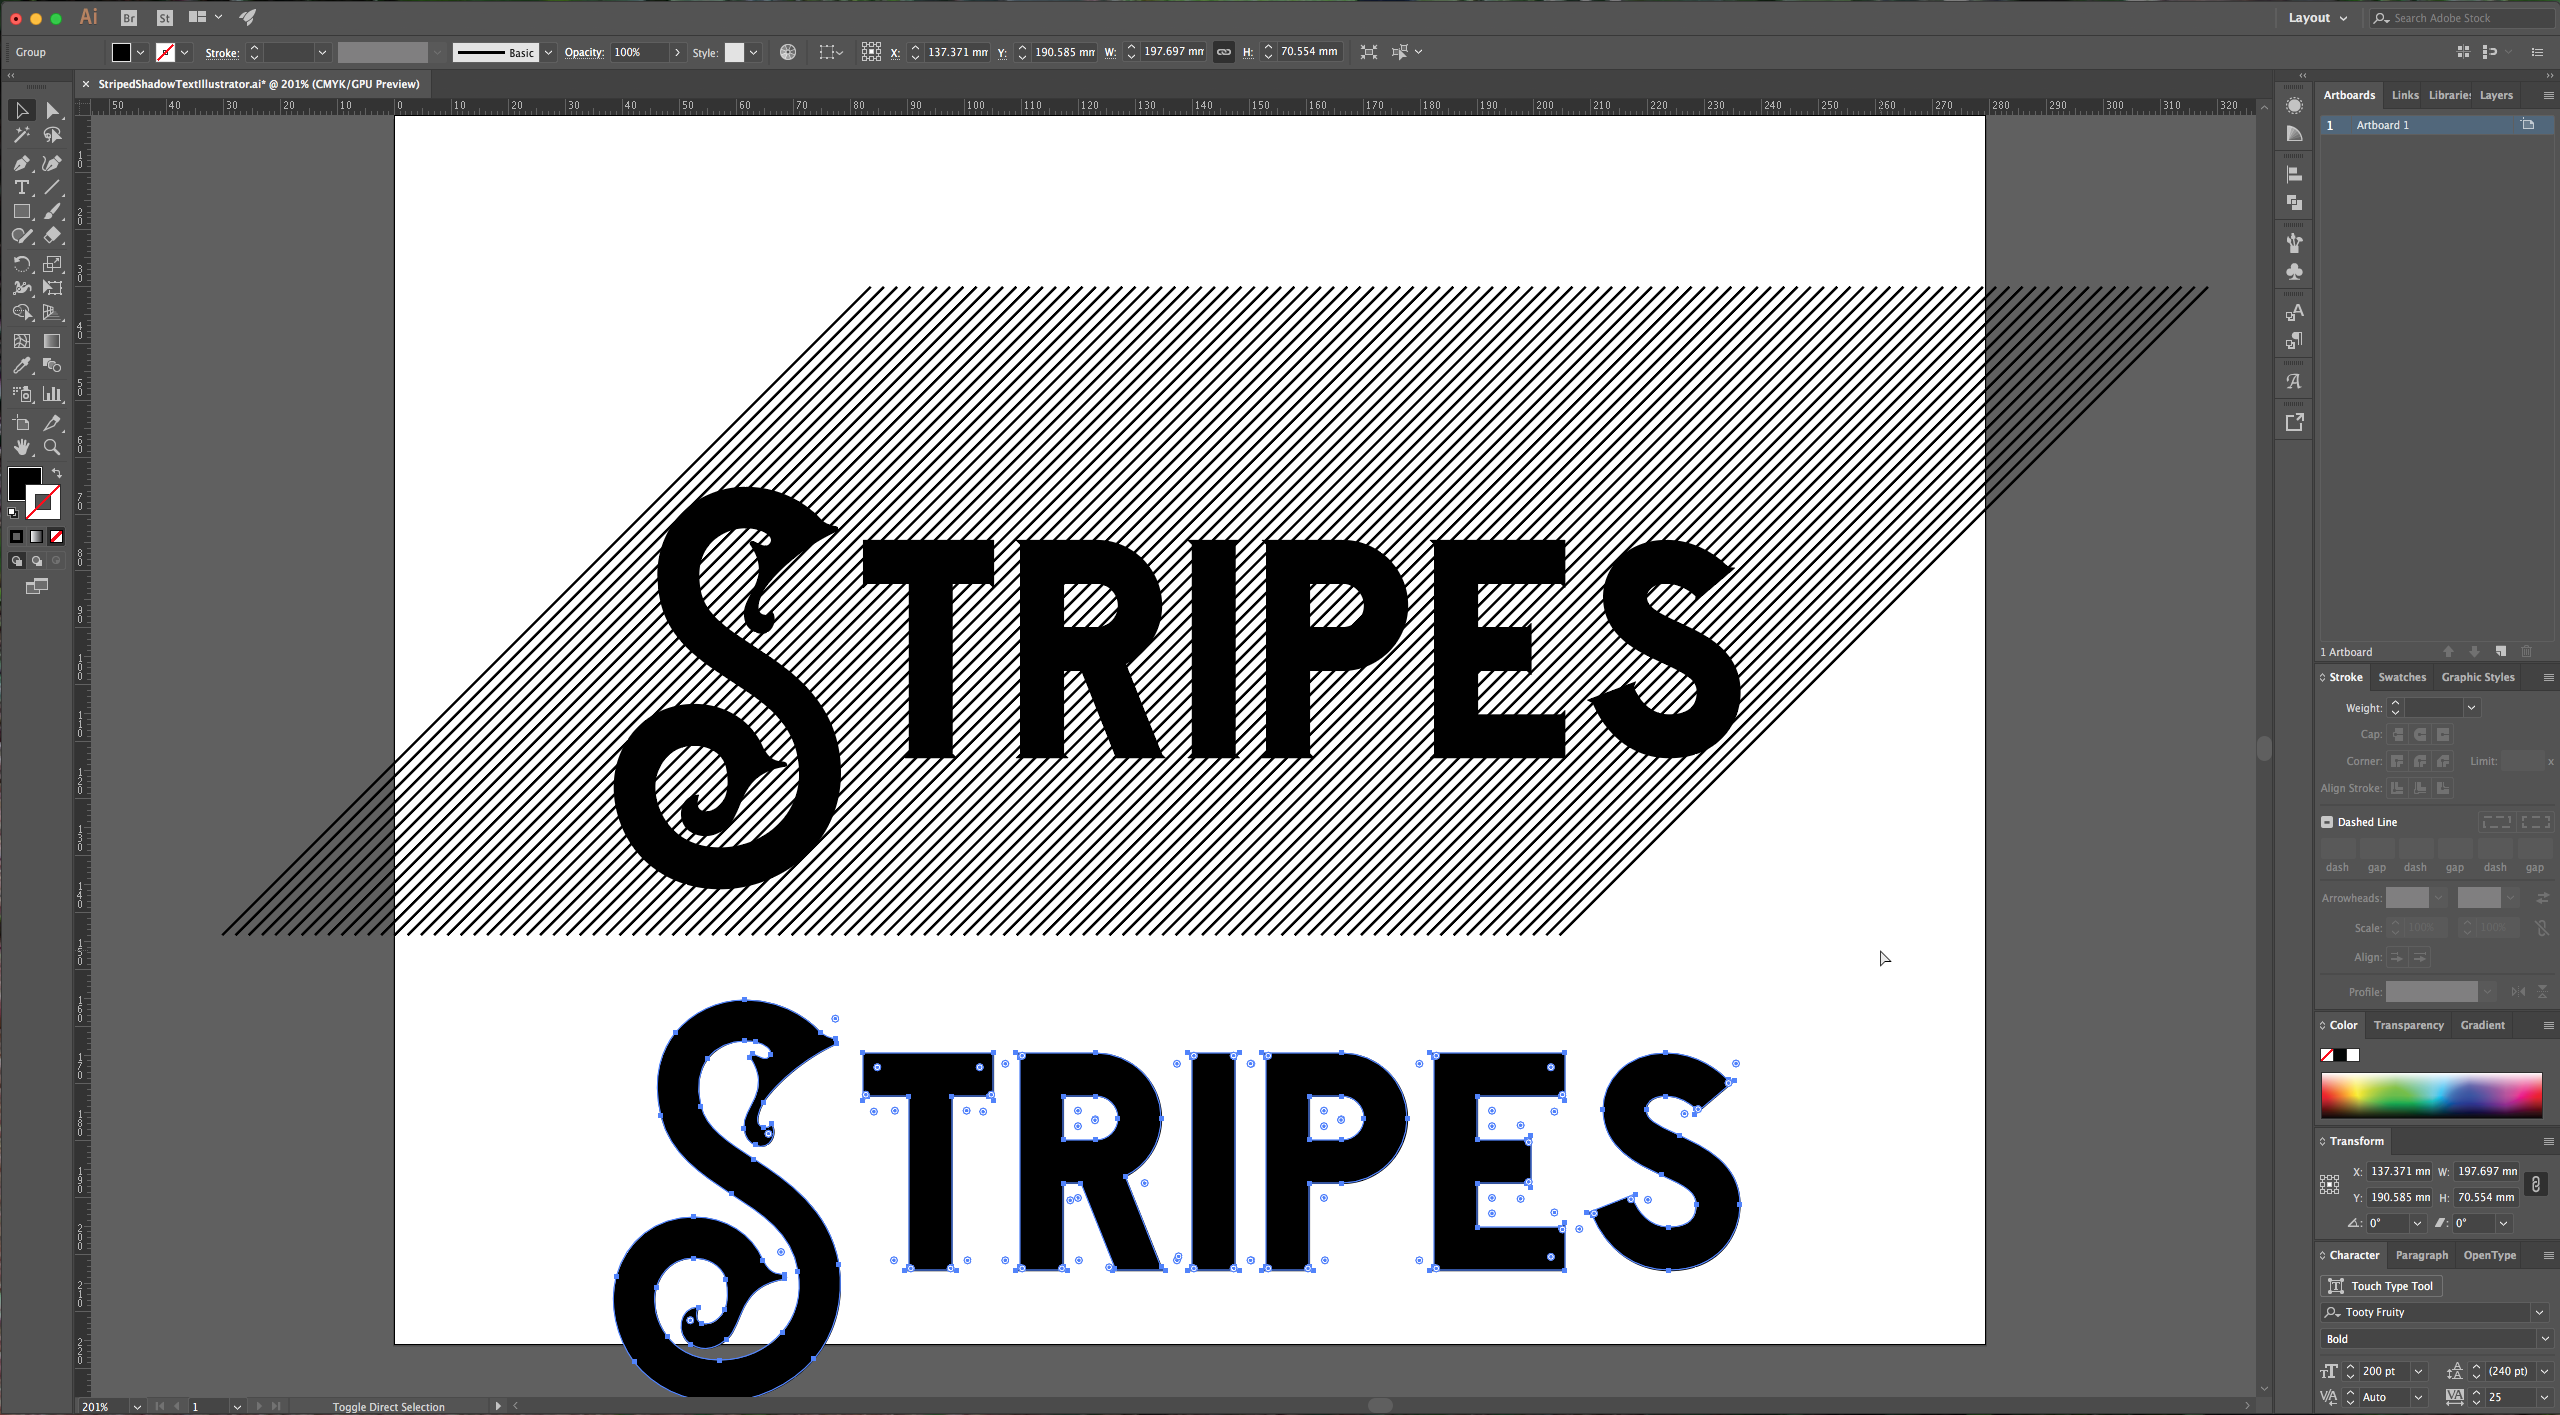
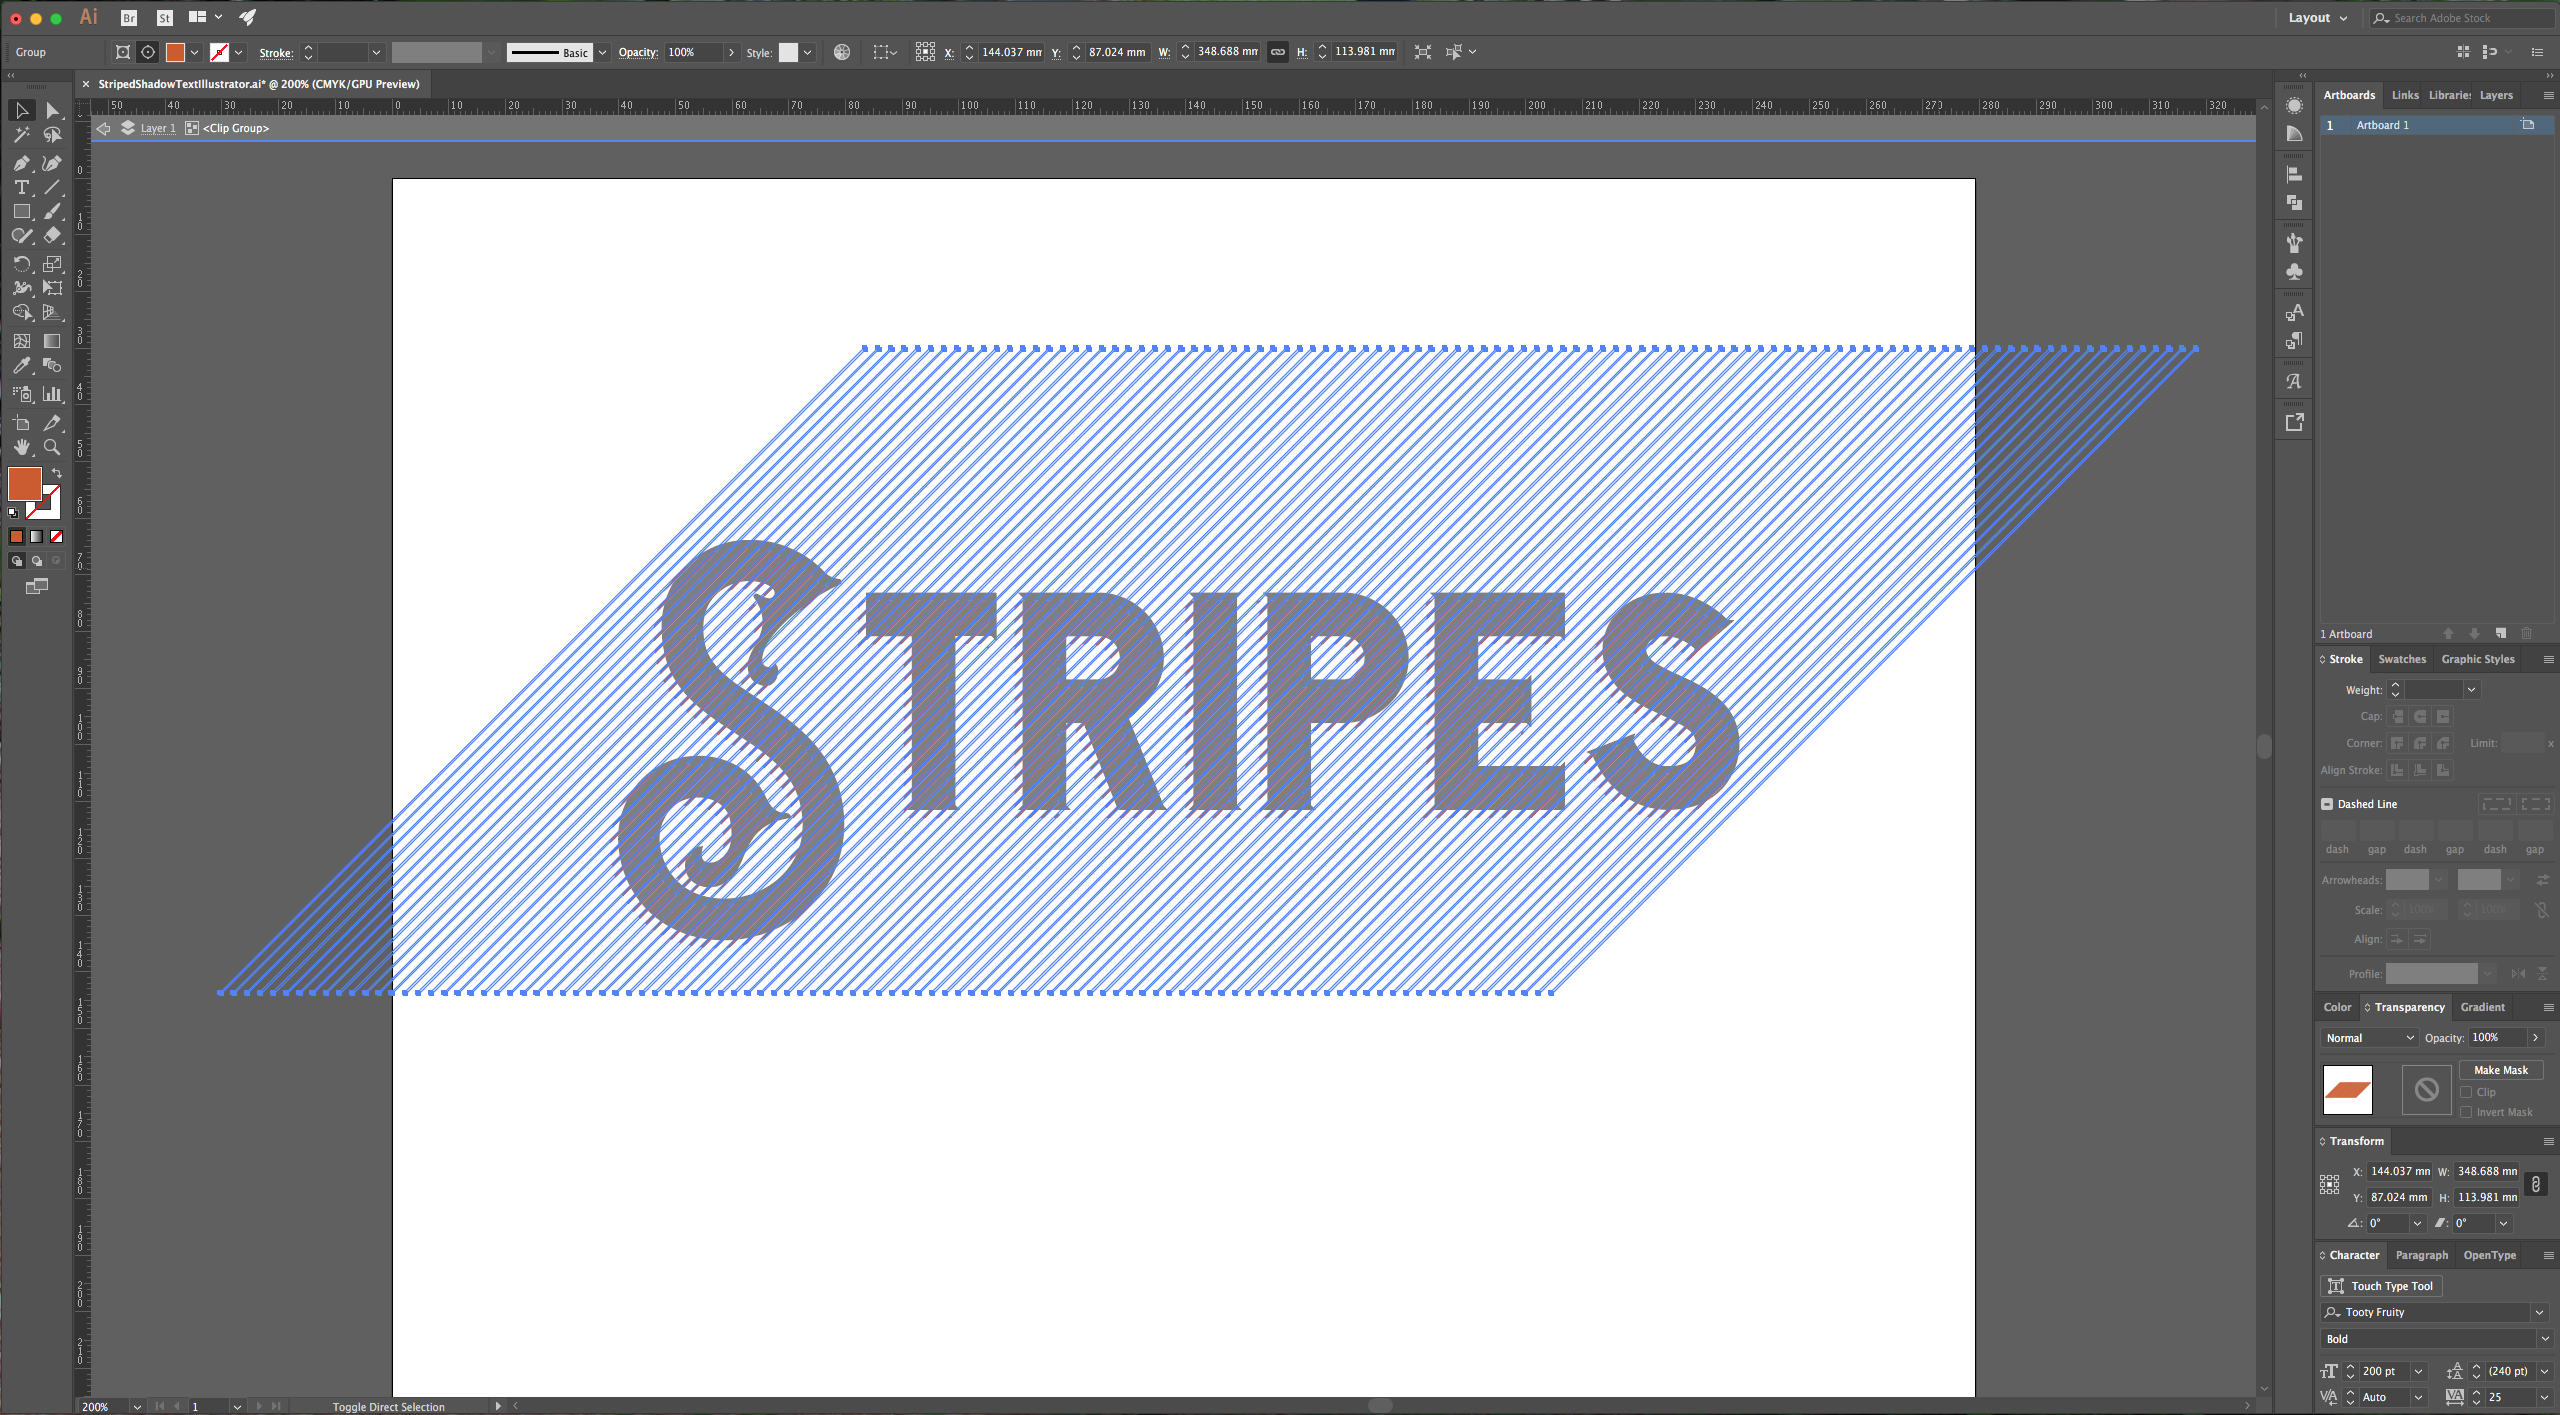
7 – With your stripes selected right-click on them and then go to Arrange > Send to Back. Make a copy (Command/Control + C) of your text and then paste it in place (Shift + Command/Control + V). Drag it up or down while holding the “Shift” key soy it will stay in line.
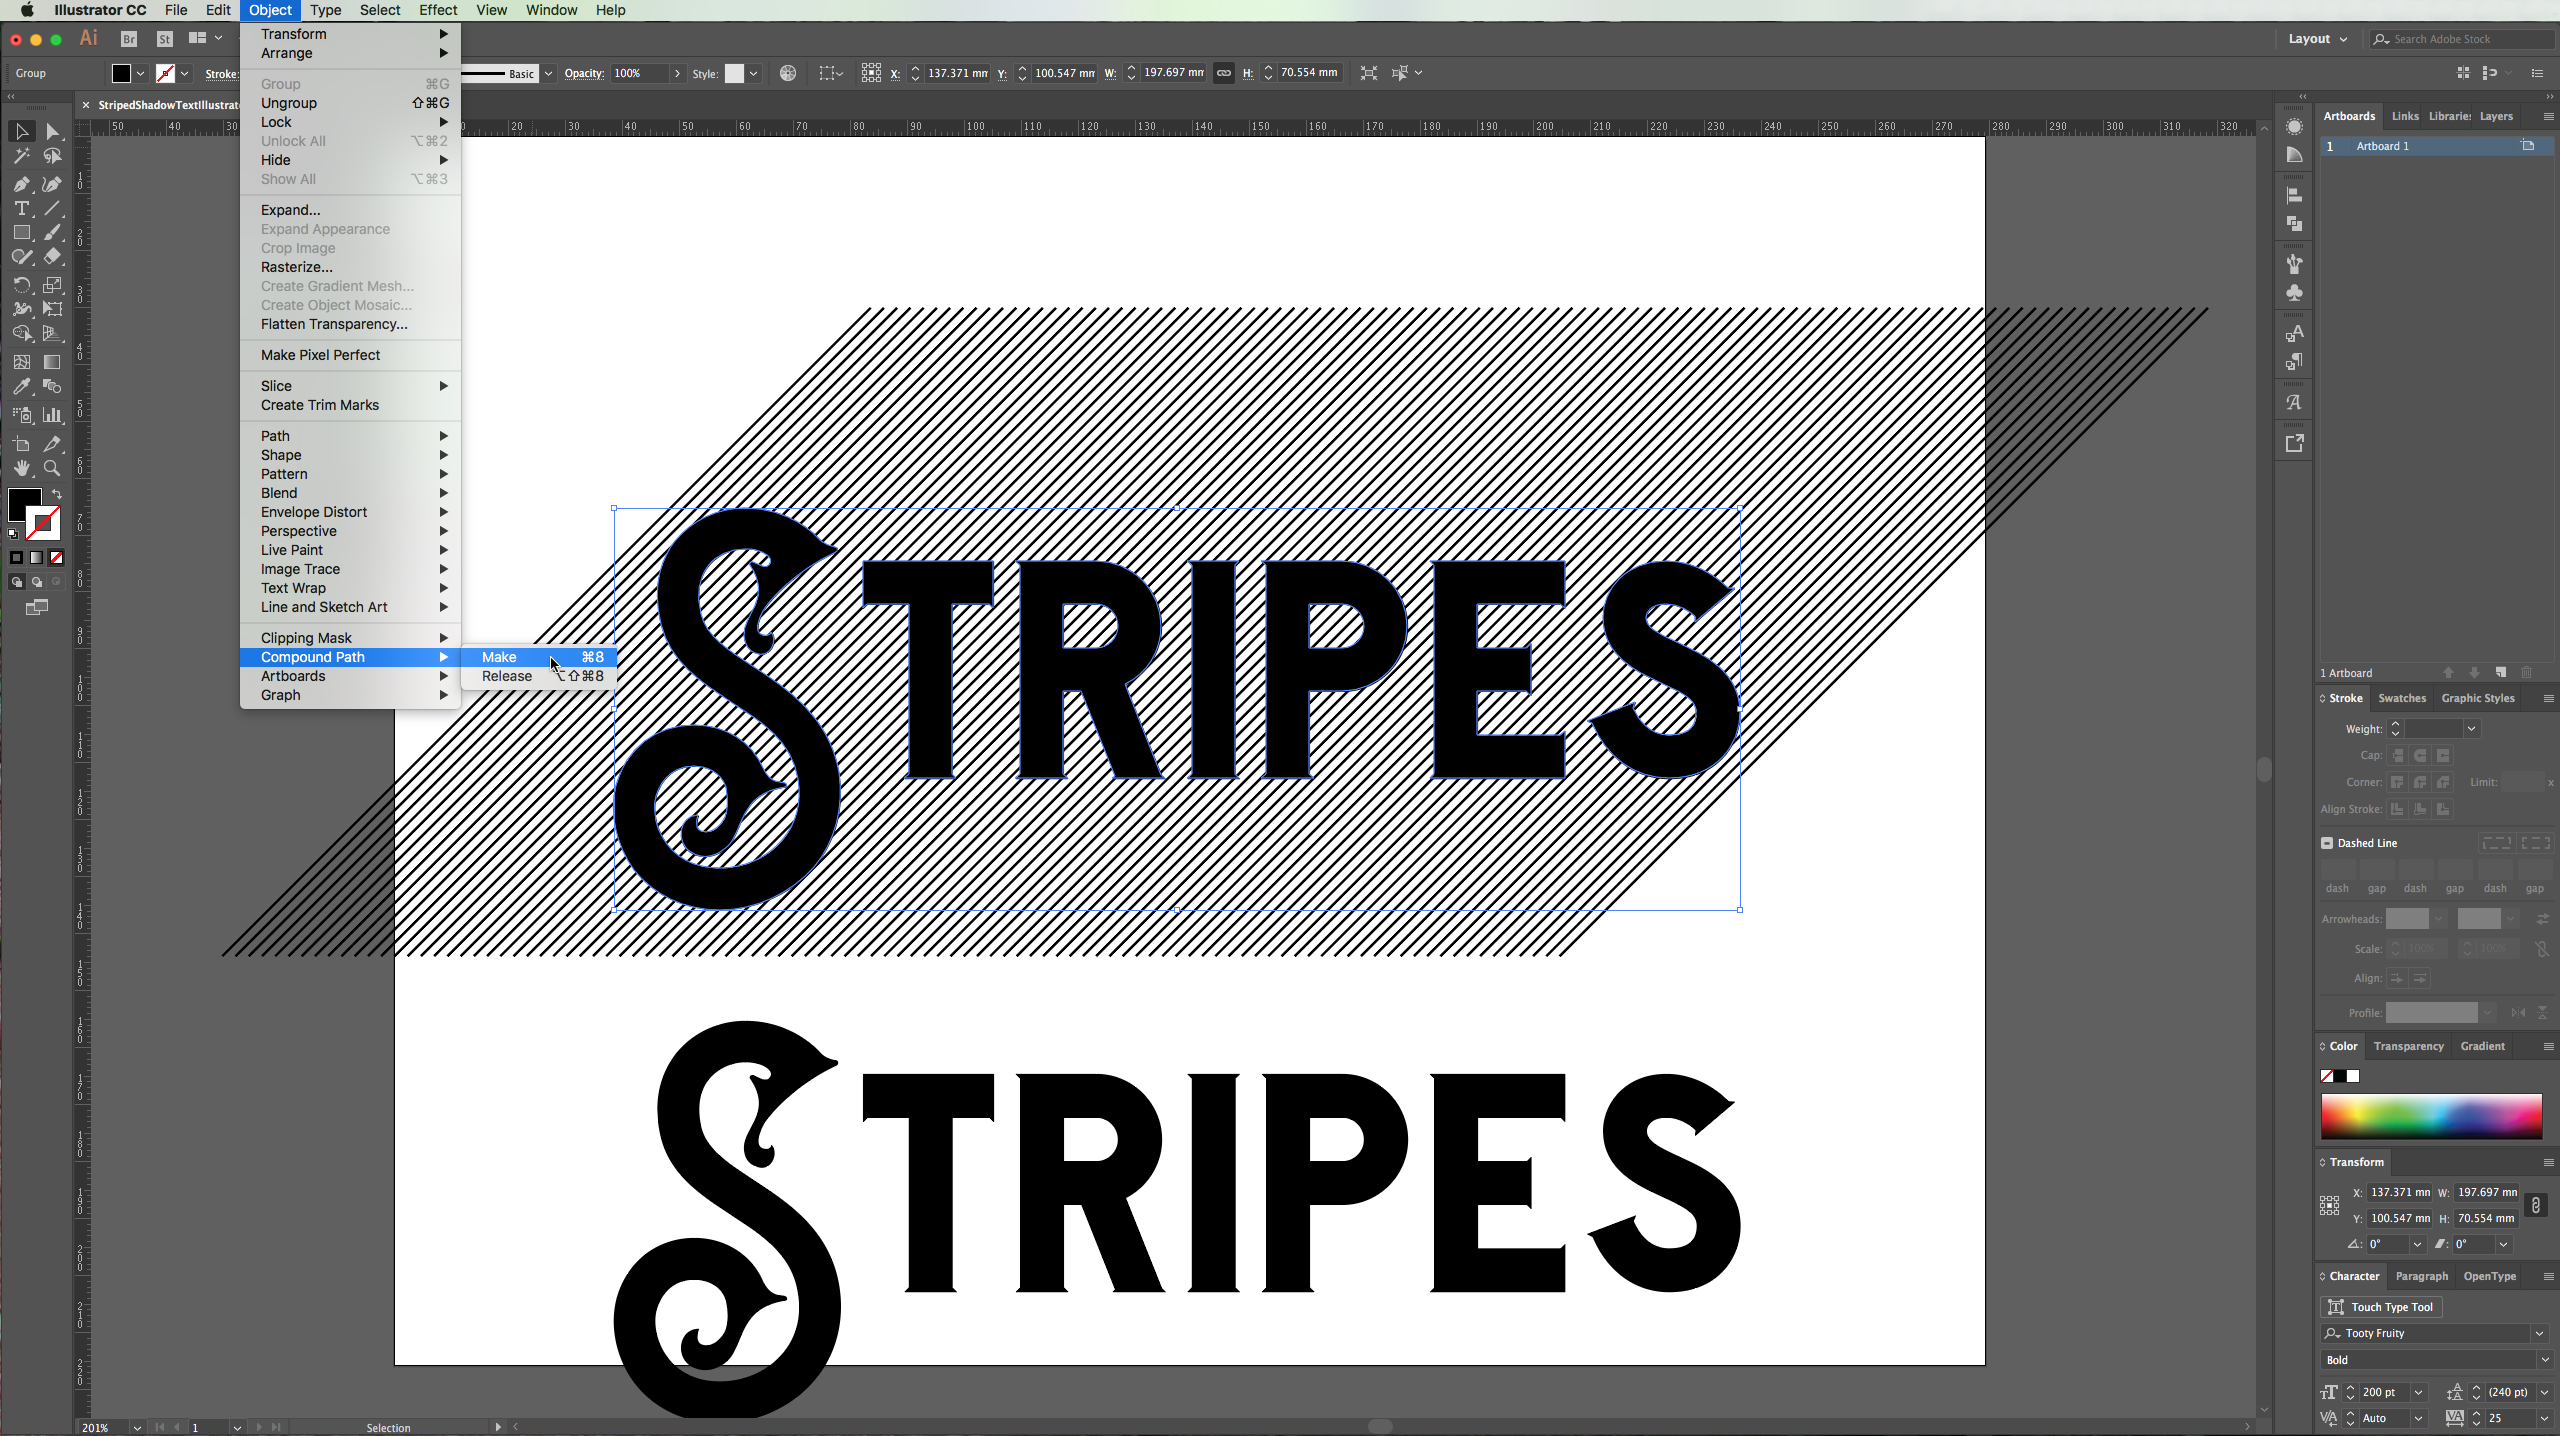
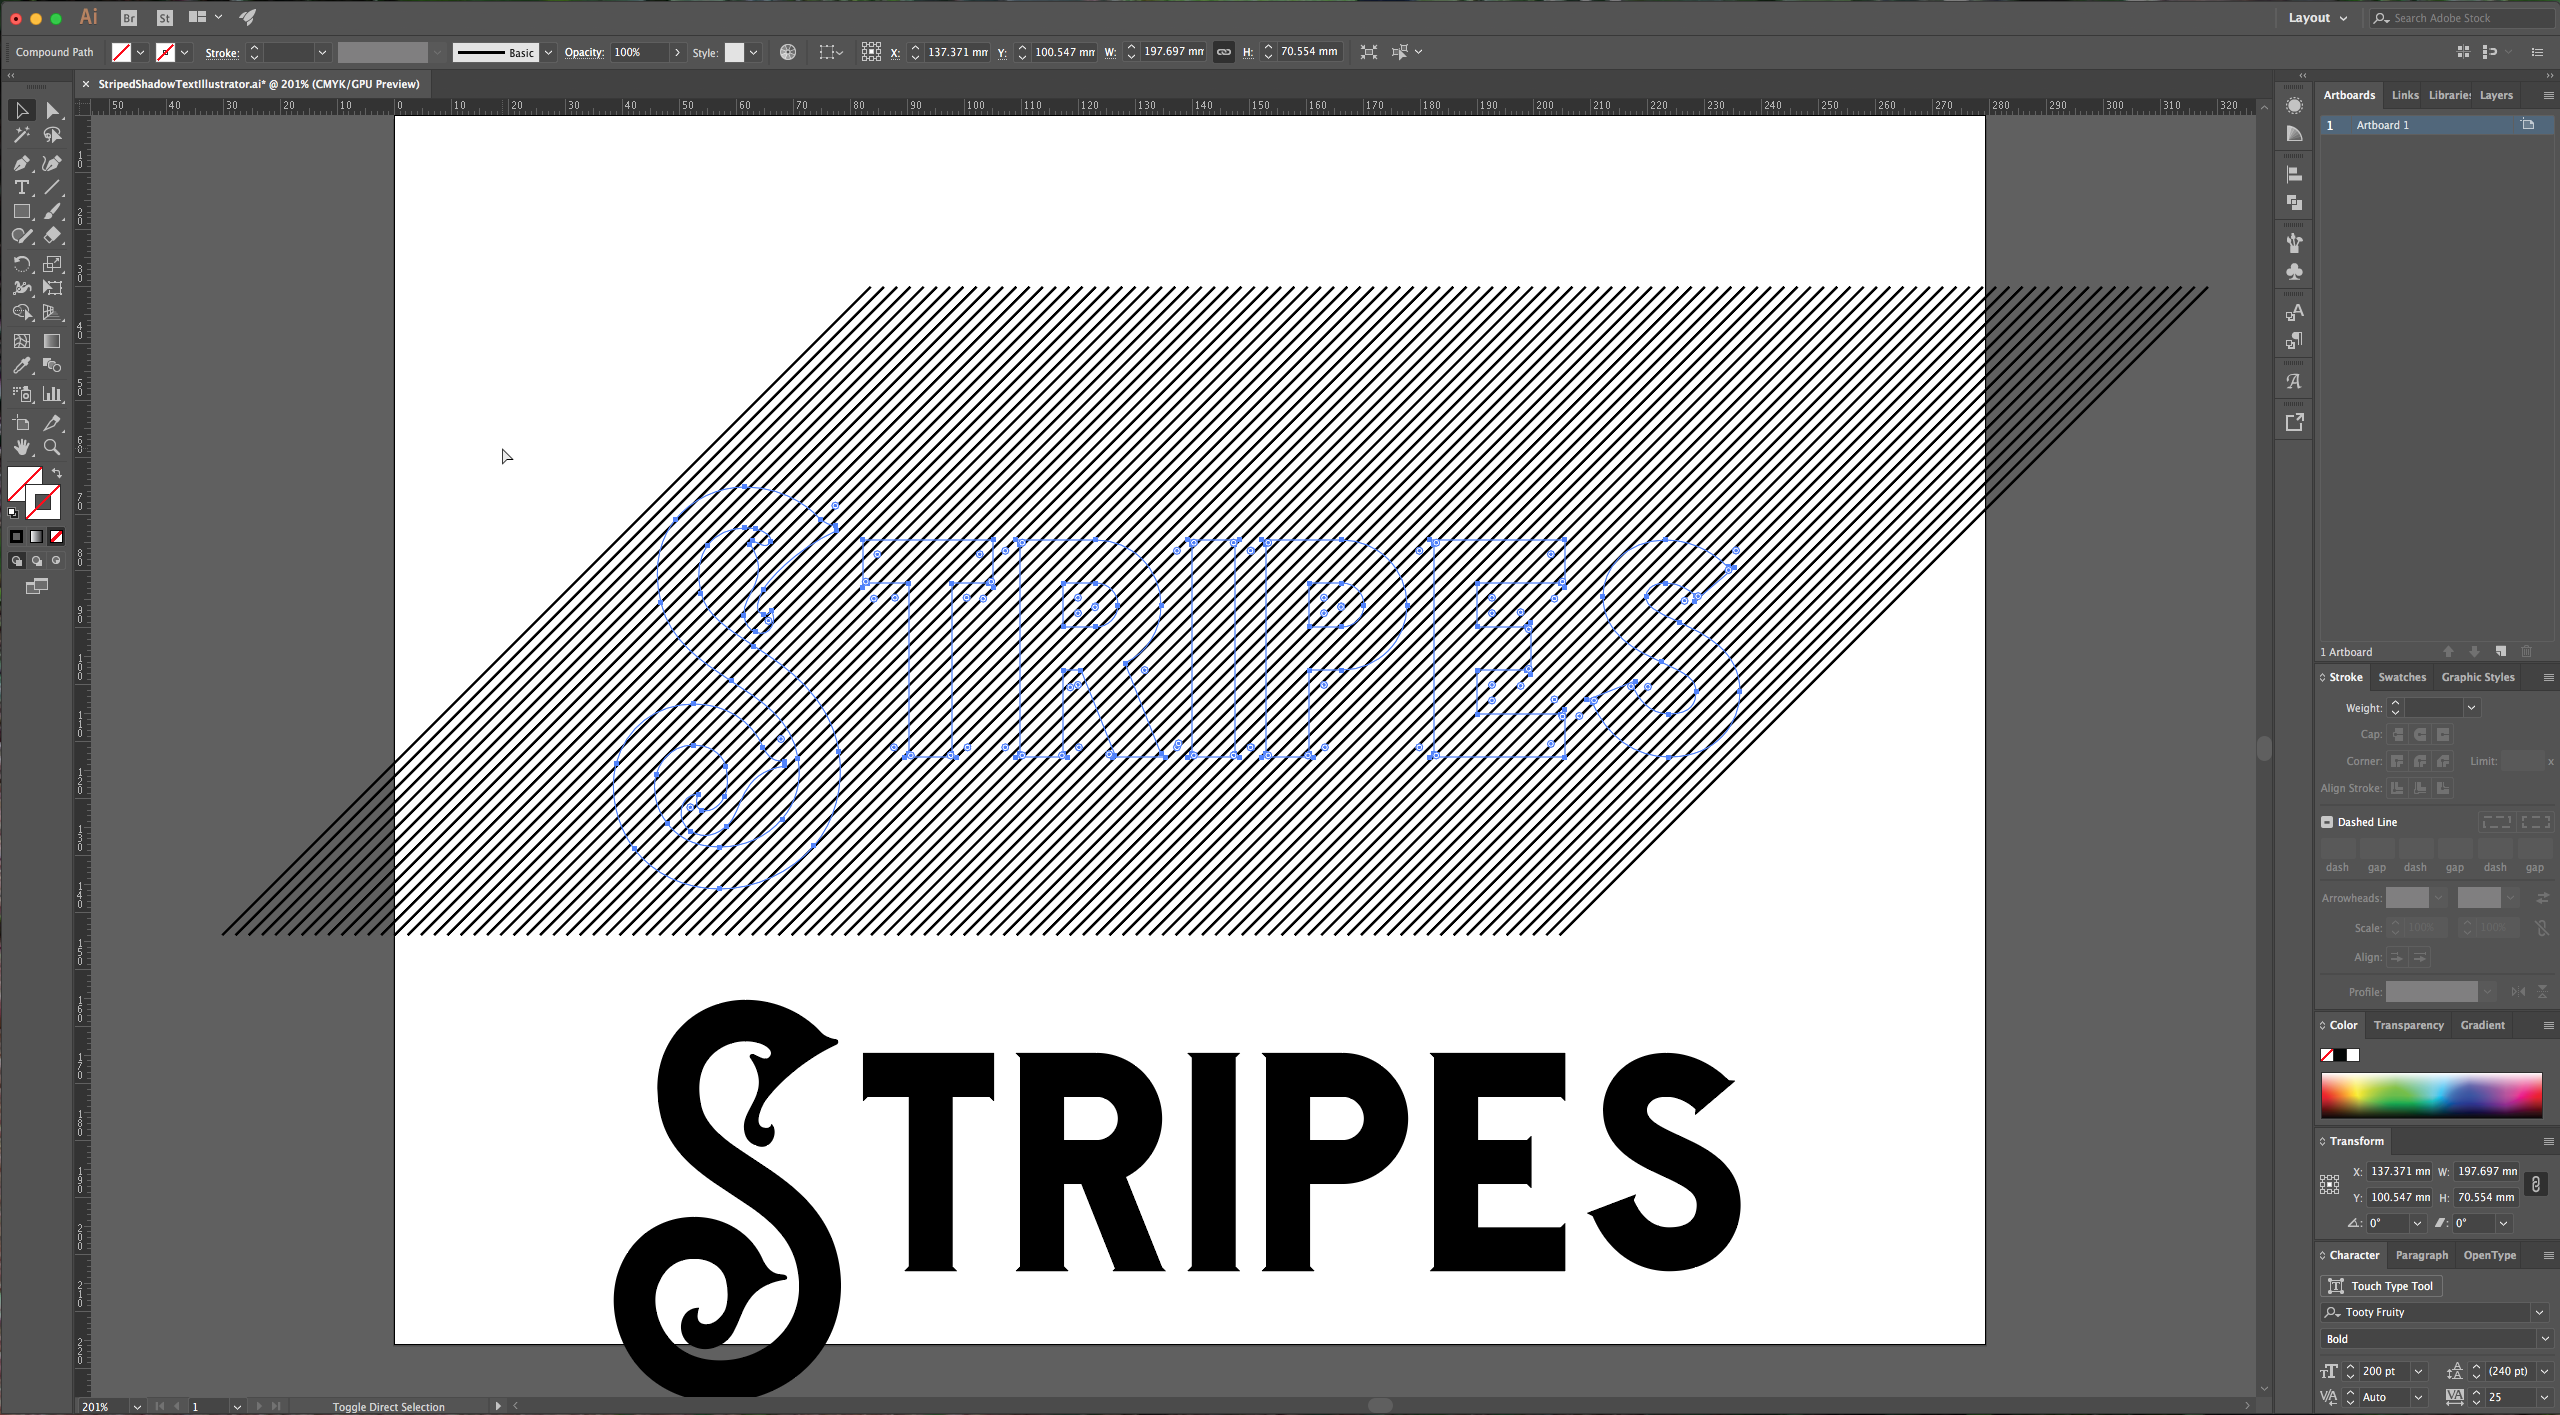
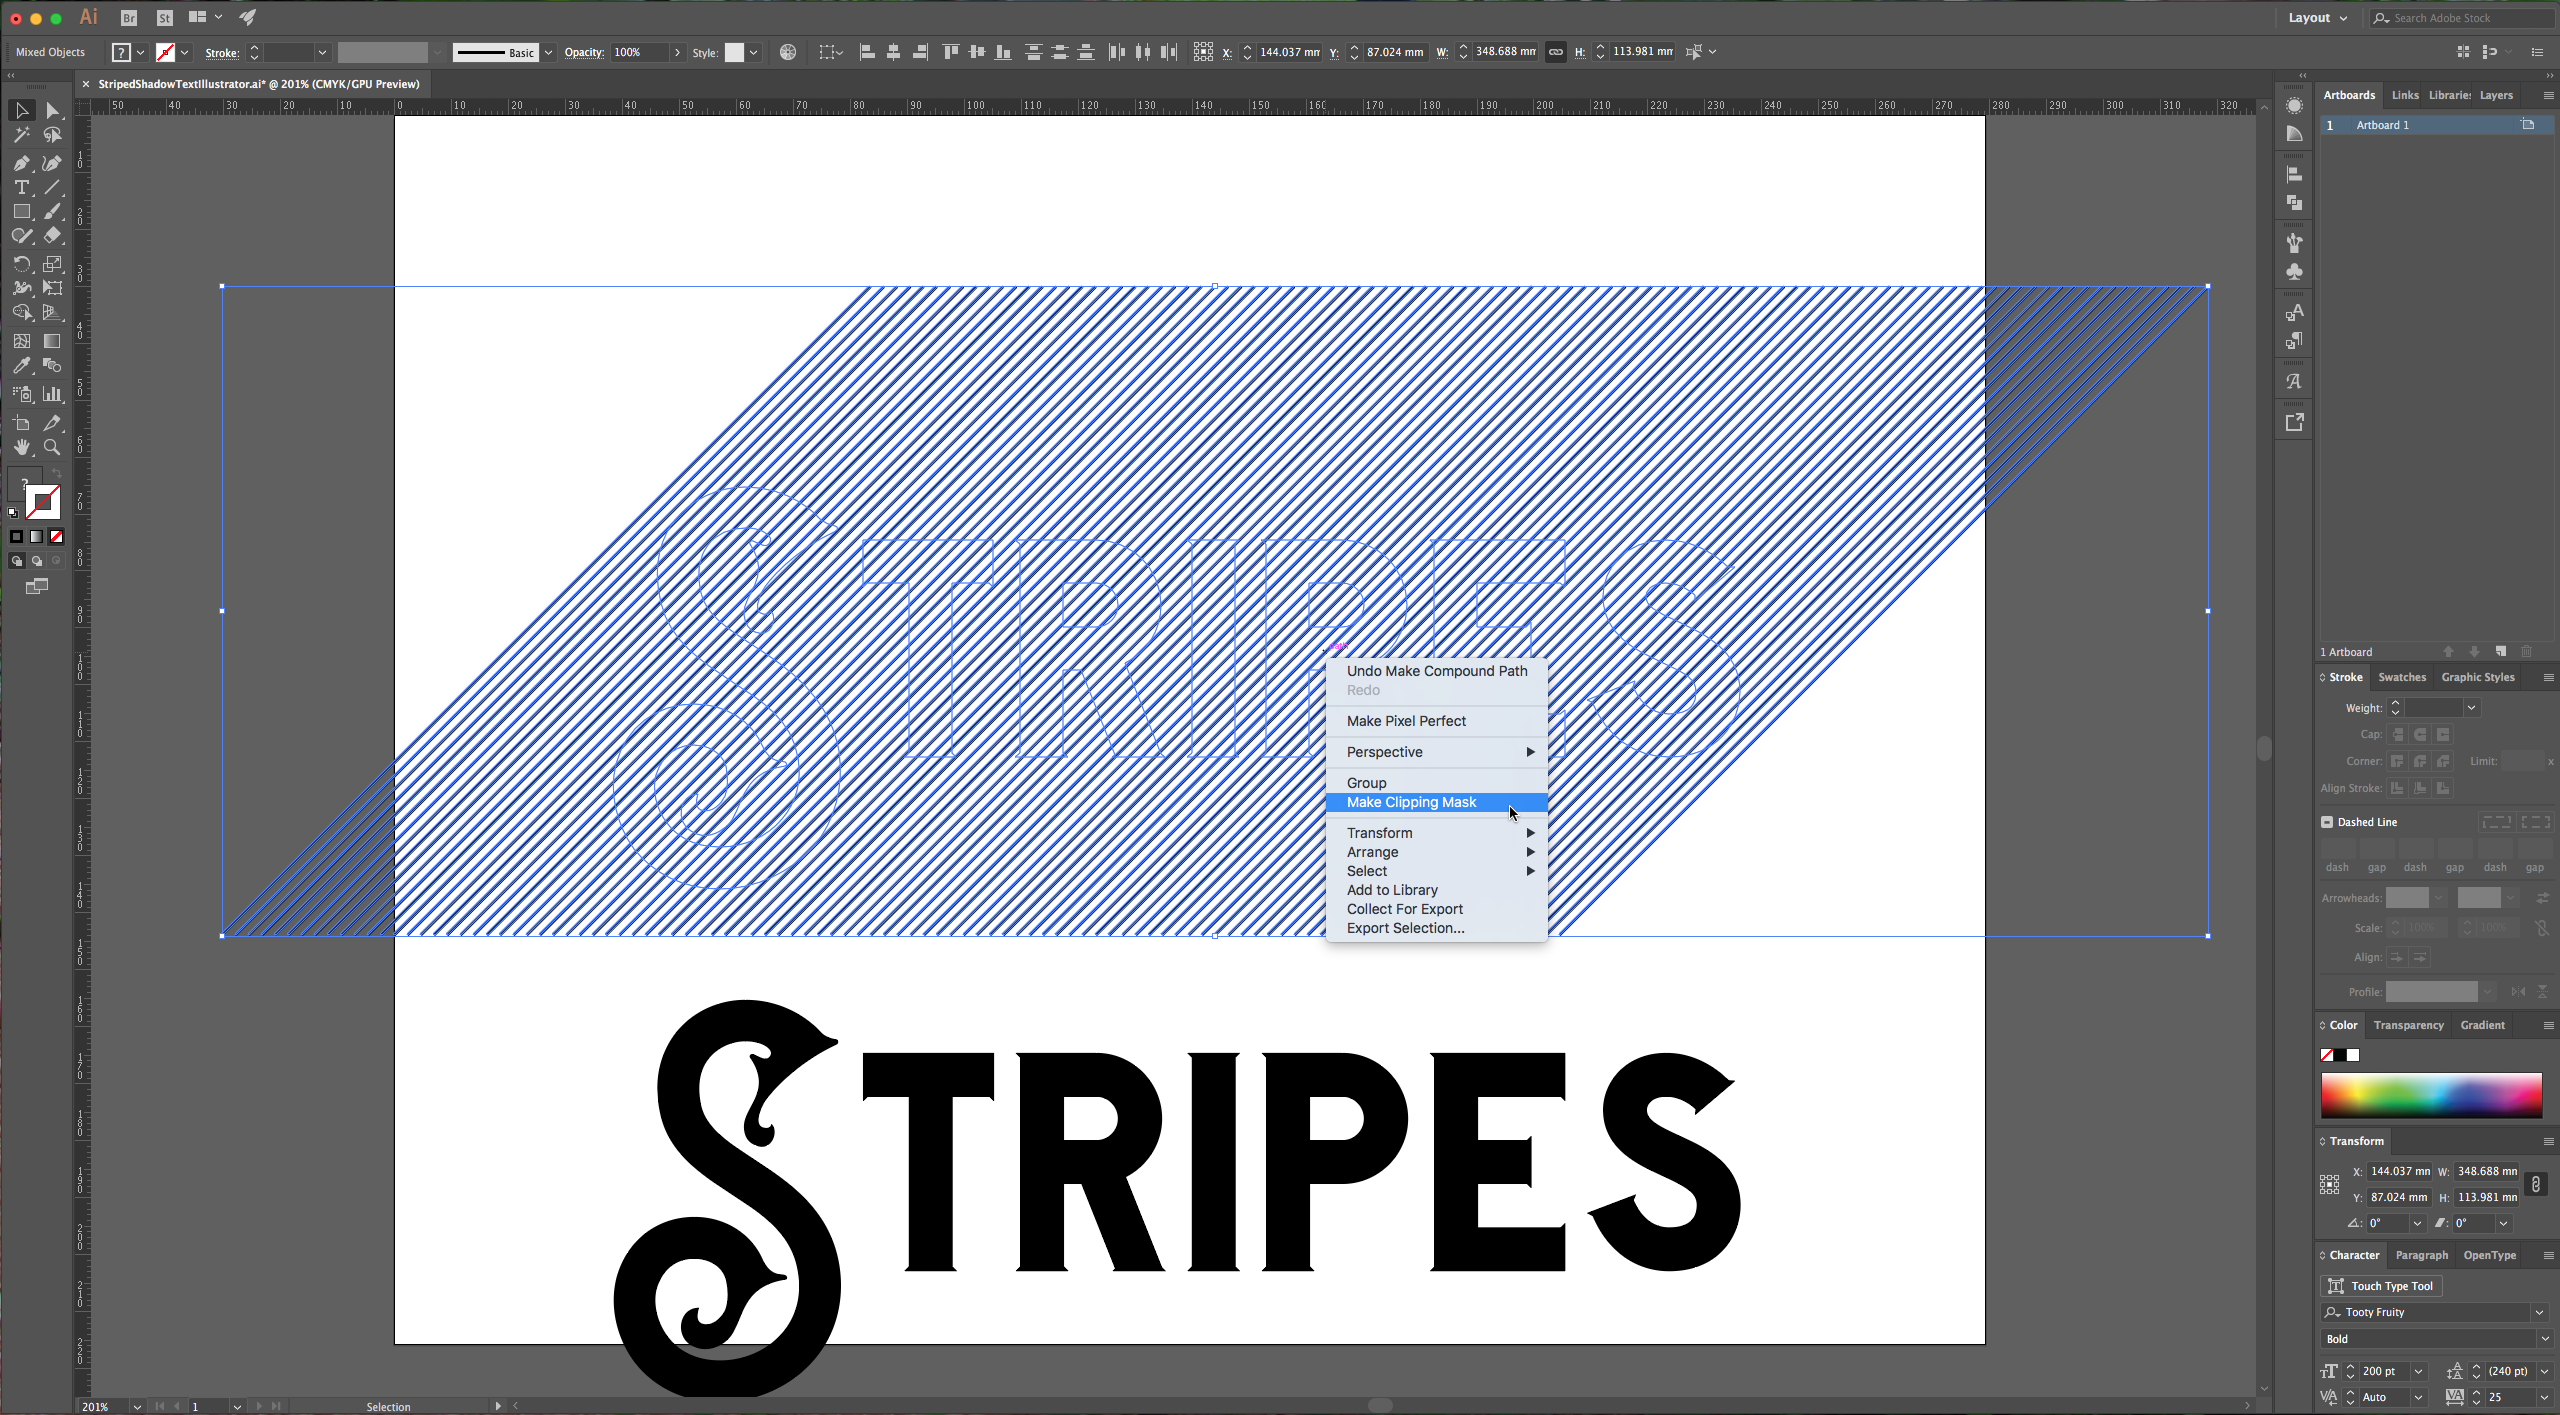
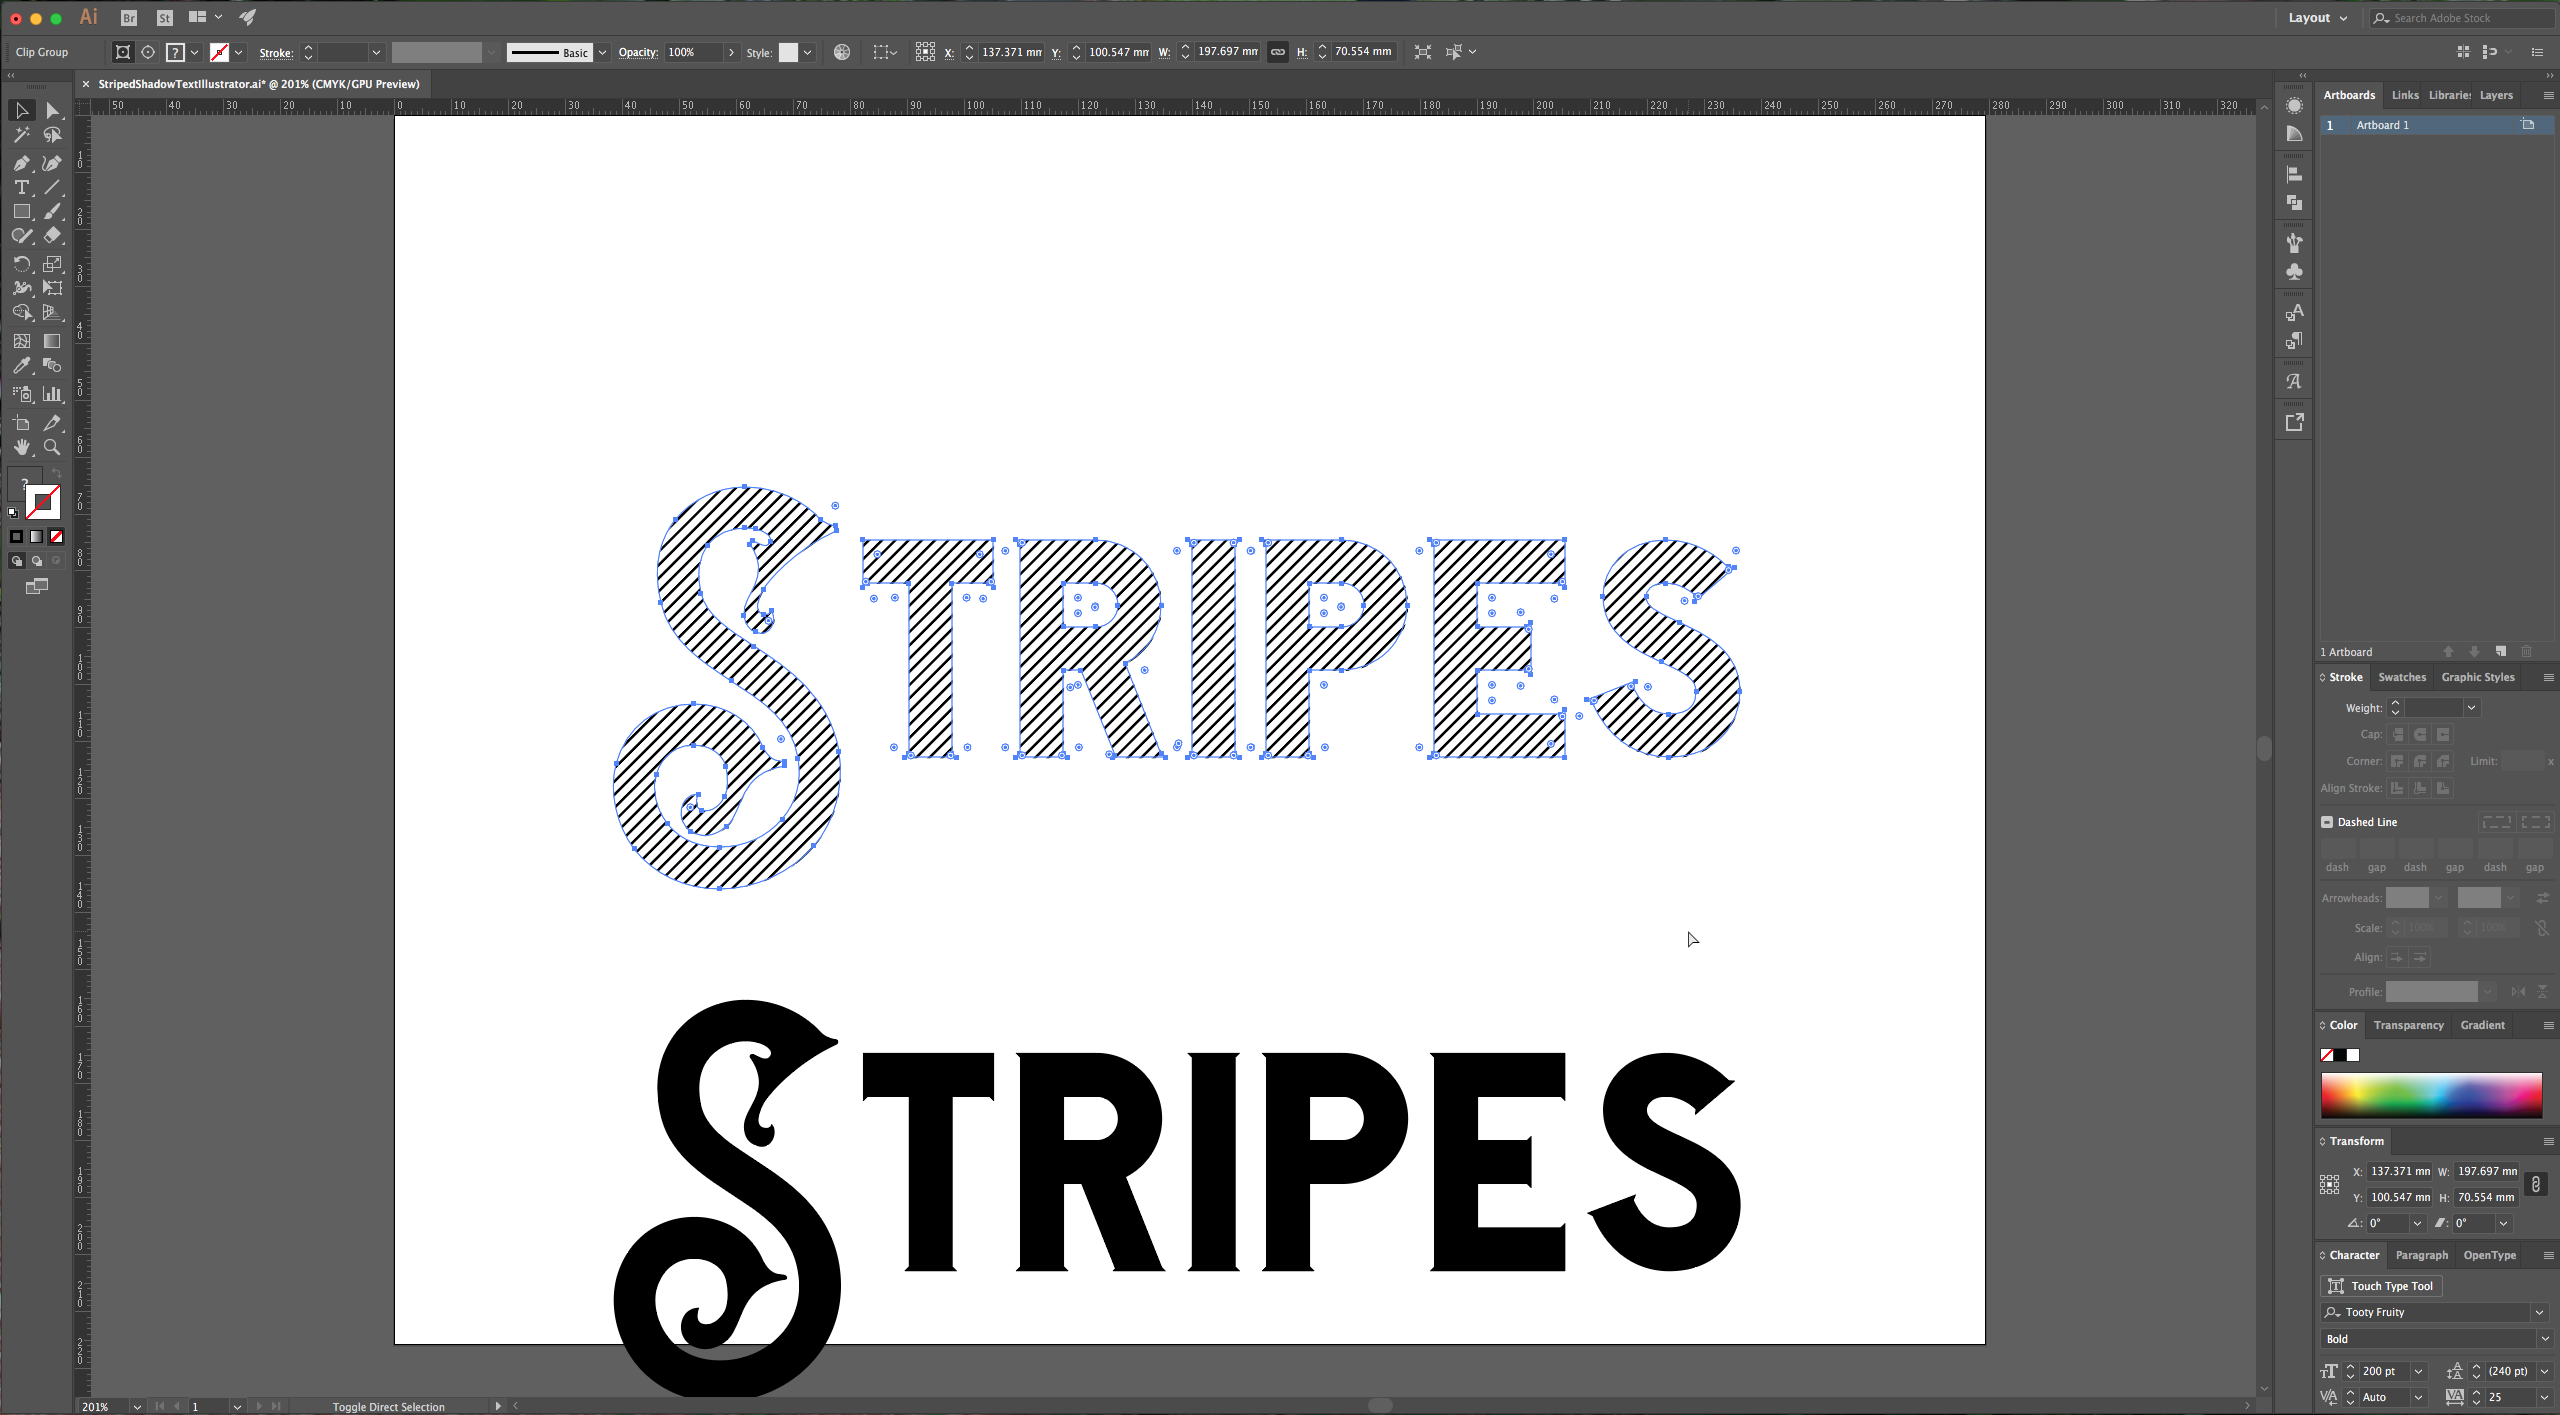
8 – Now, select your original text and go to Object > Compound Path > Make (Command/Control + 8). Your text will lose its color. Select the text and stripes together, right-click and choose “Make Clipping Mask”. Your stripes should now be clipped inside your text.
9 – Move your copy of the text on top of the striped text and then move it some clicks up and to the right (we used four clicks each).
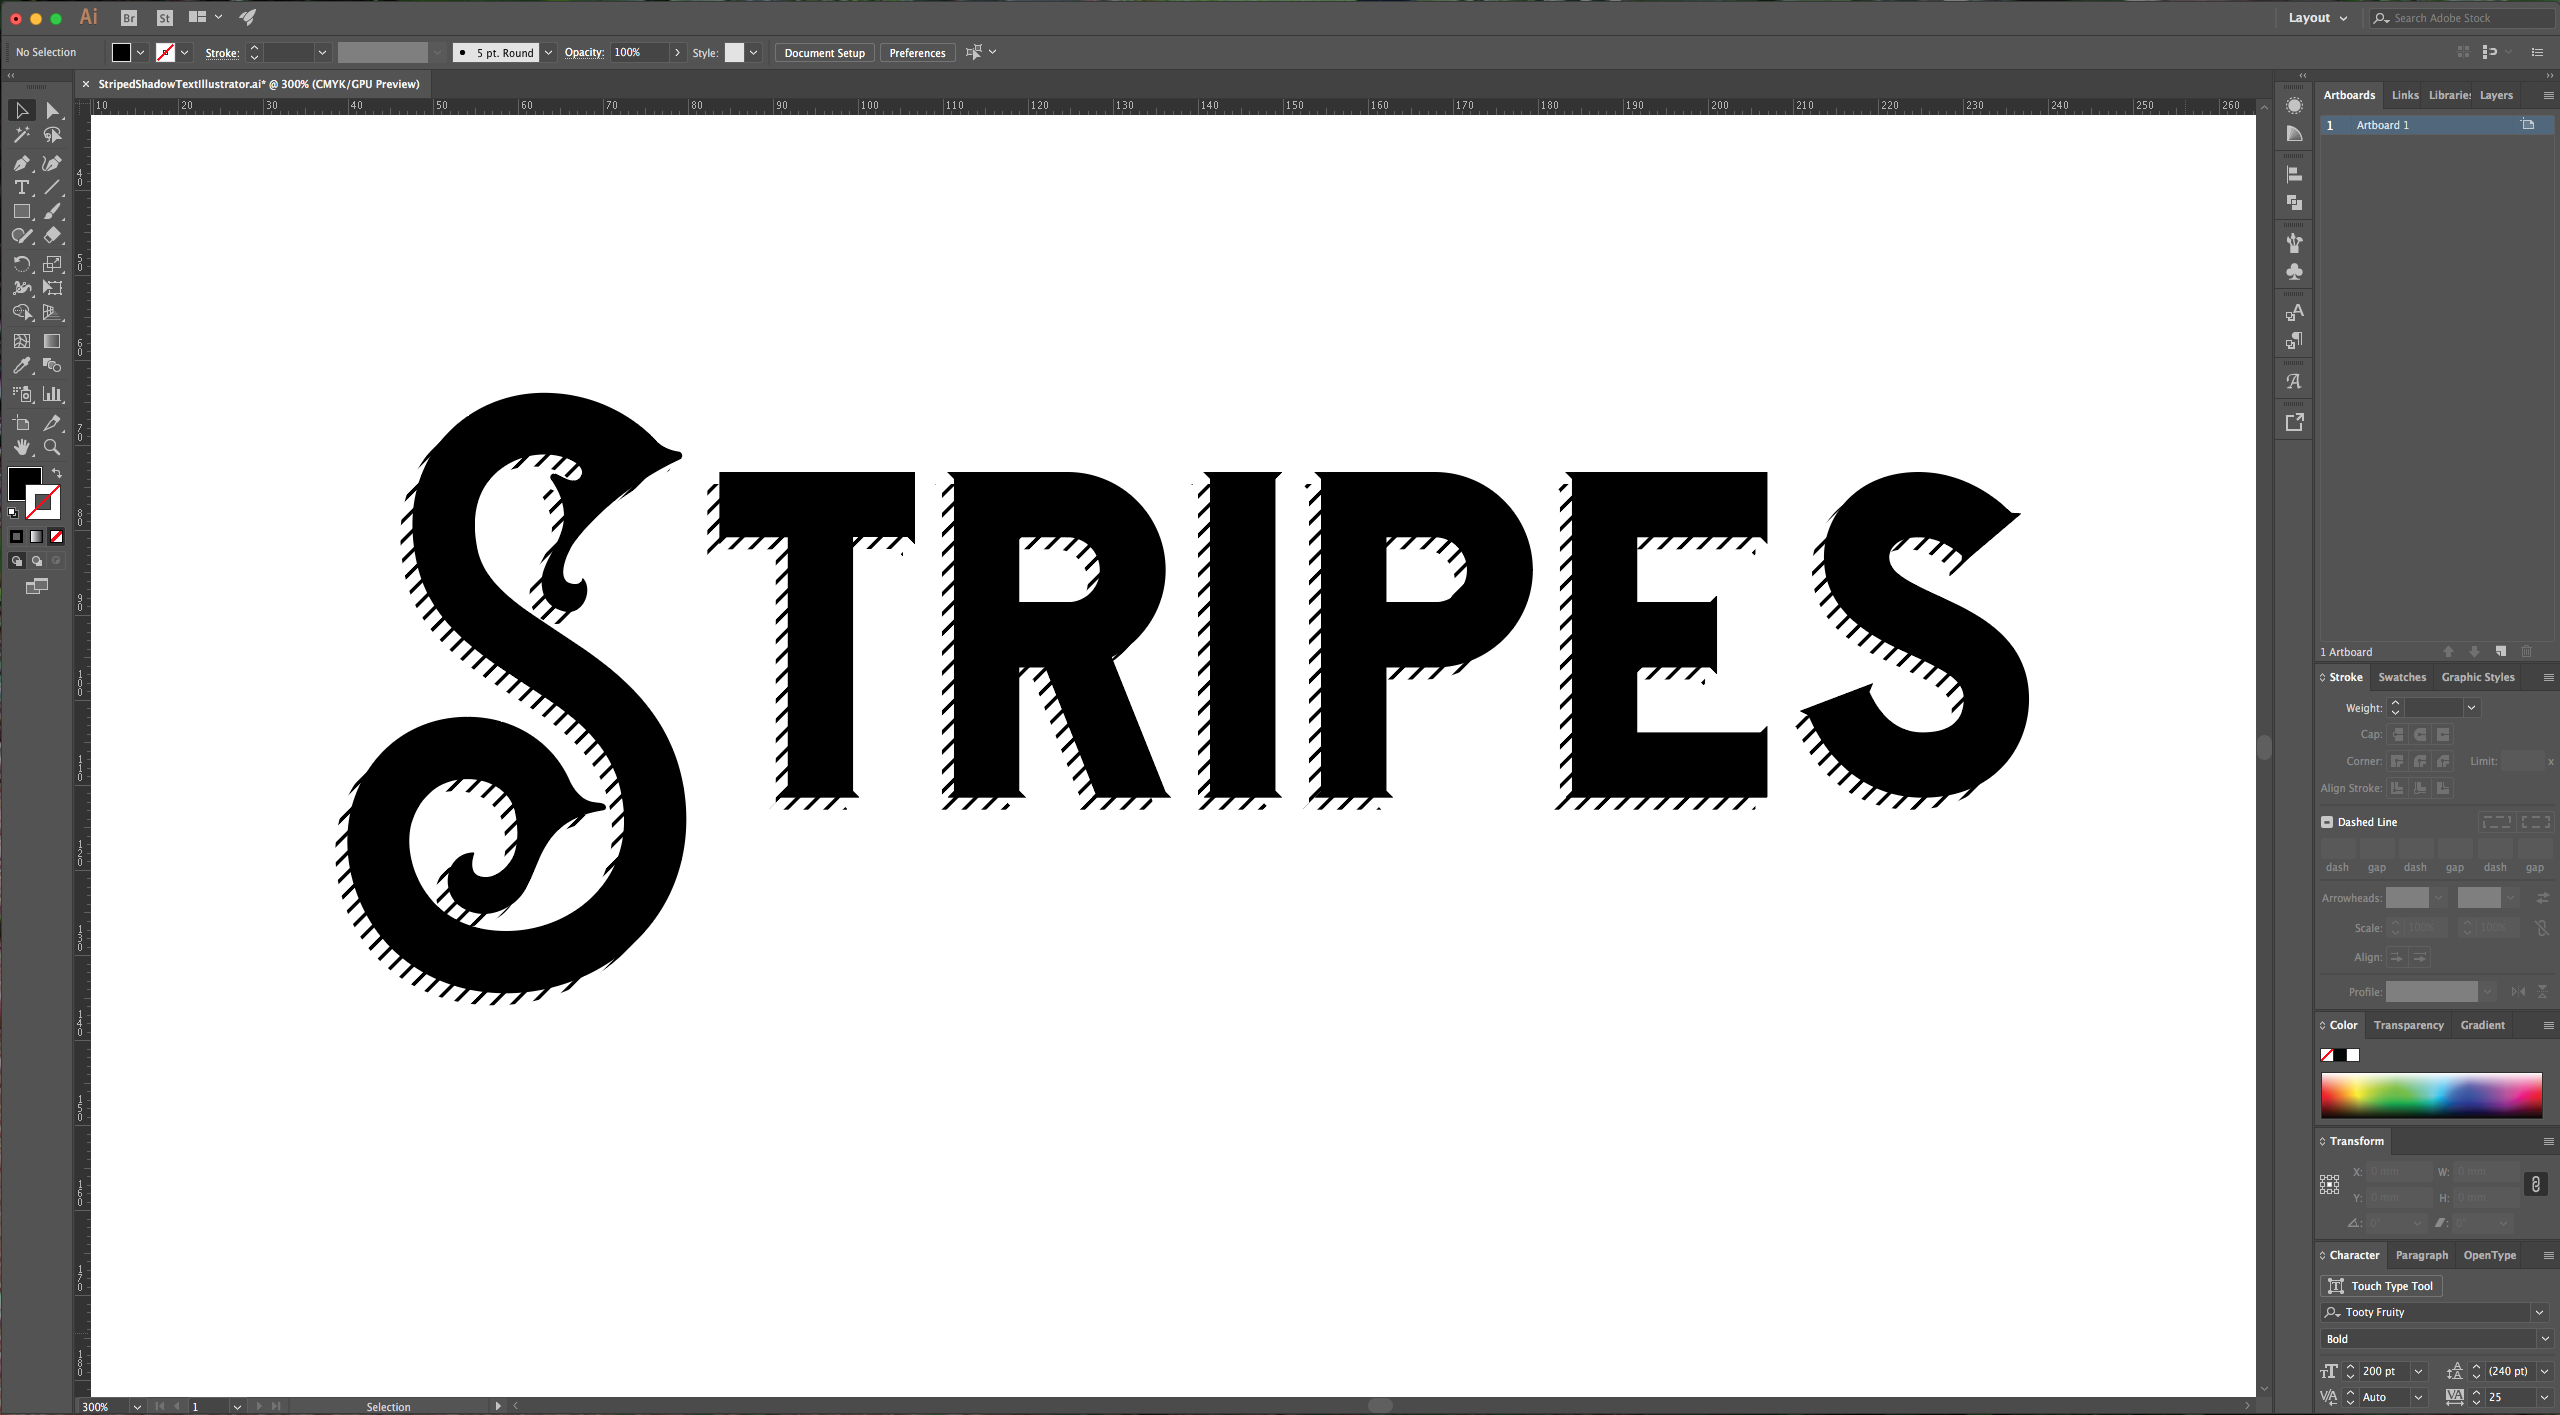
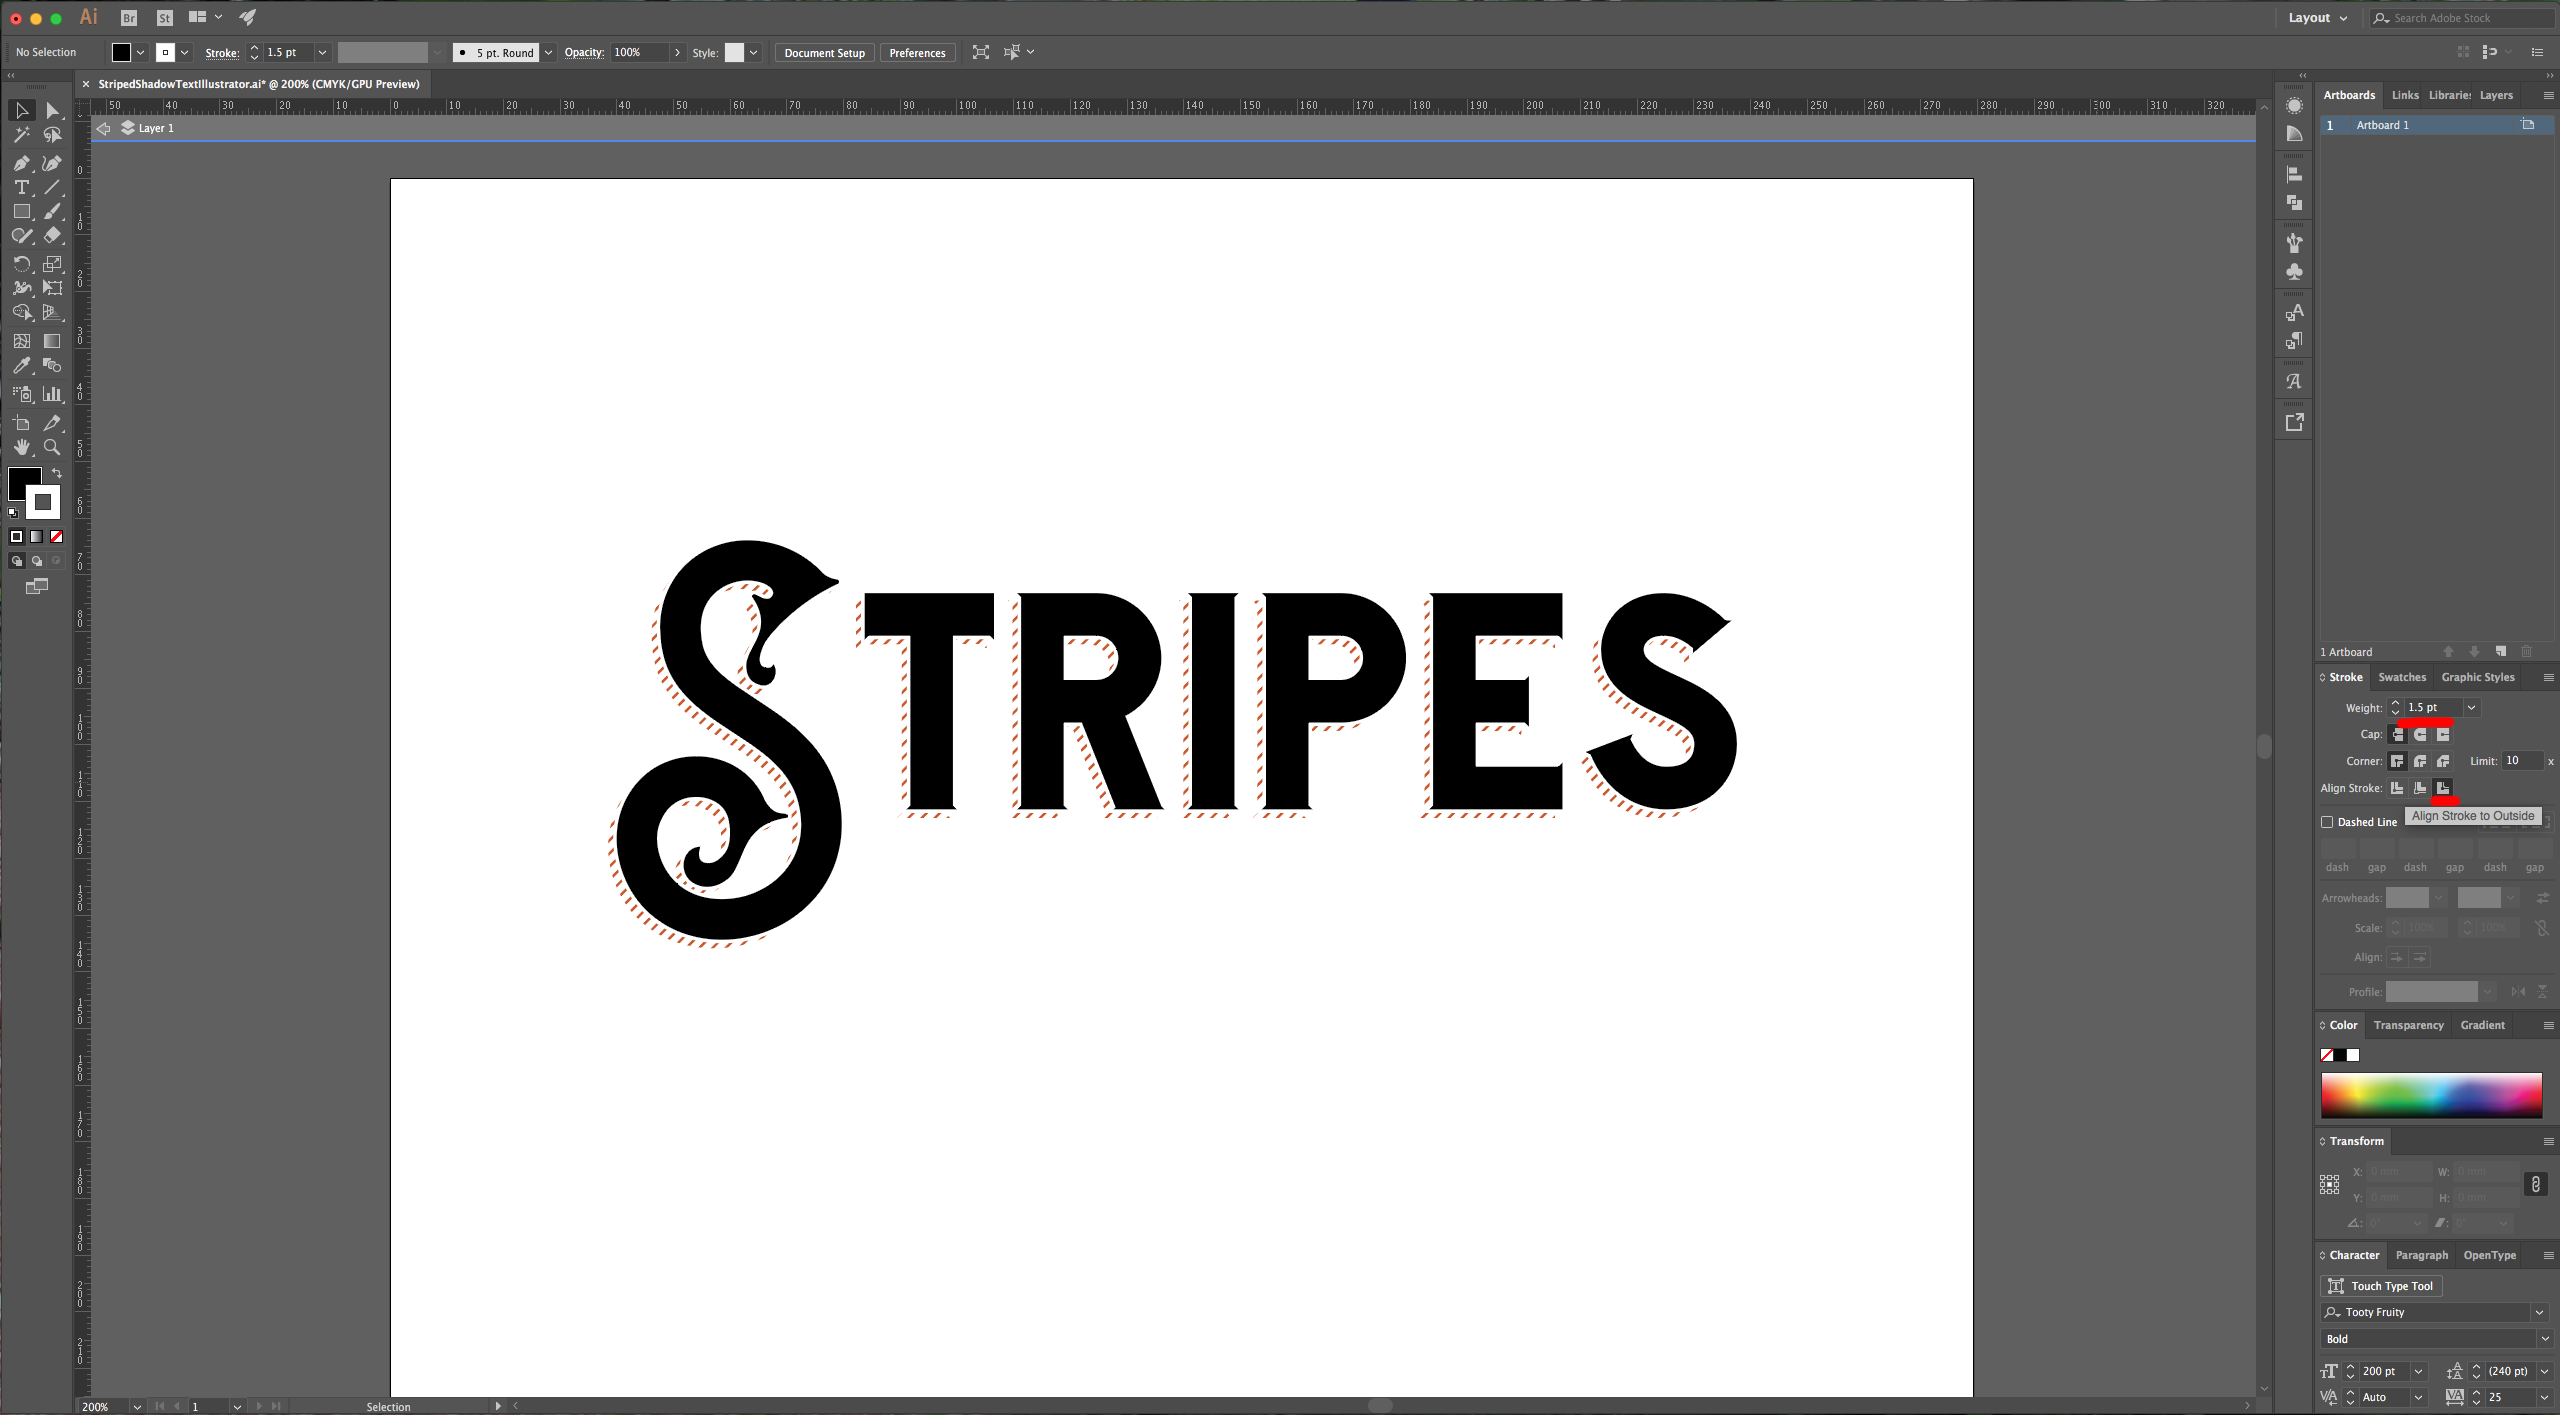
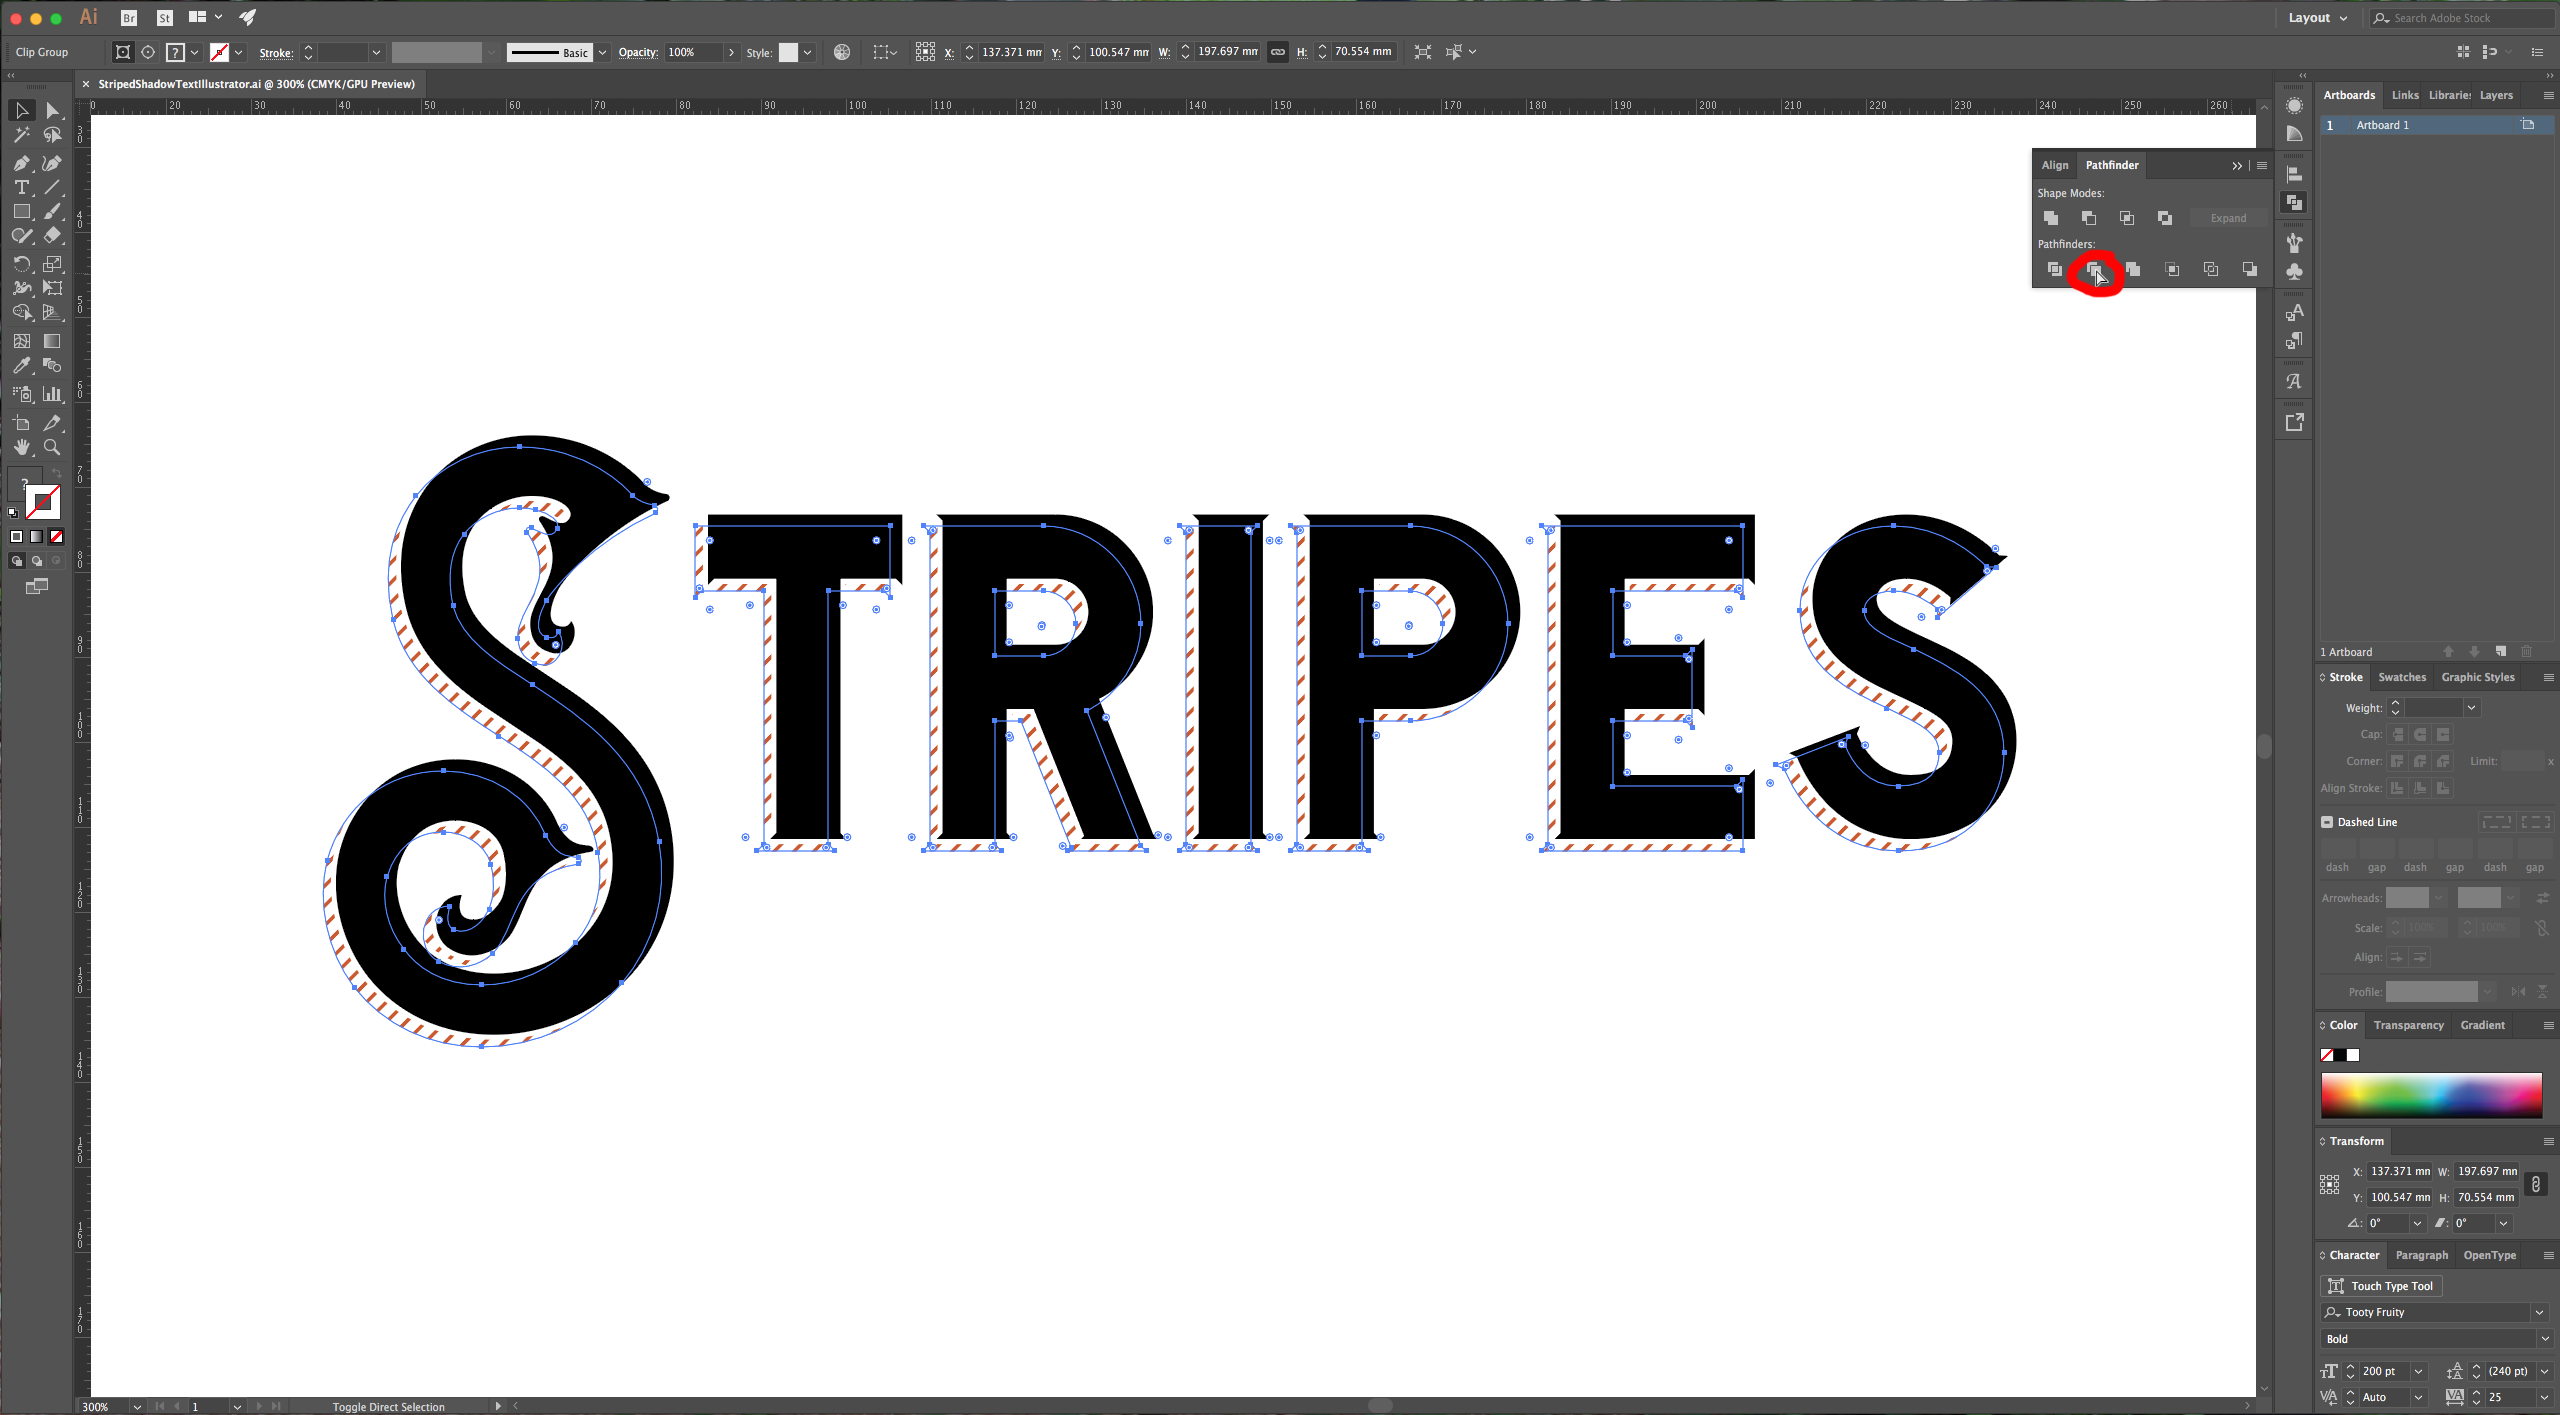
10 – You can change the color of the text and/or stripes and even ad some separation by giving your text a white stroke to achieve the effect (we made the stroke’s “Weight” 1.5 pt and aligned it to the outside of the text. To change the color of your stripes you will have to double-click on it several times until you isolate the paths or you won’t be able to change the color. Or use the “Trim” function in the “Pathfinder” menu.

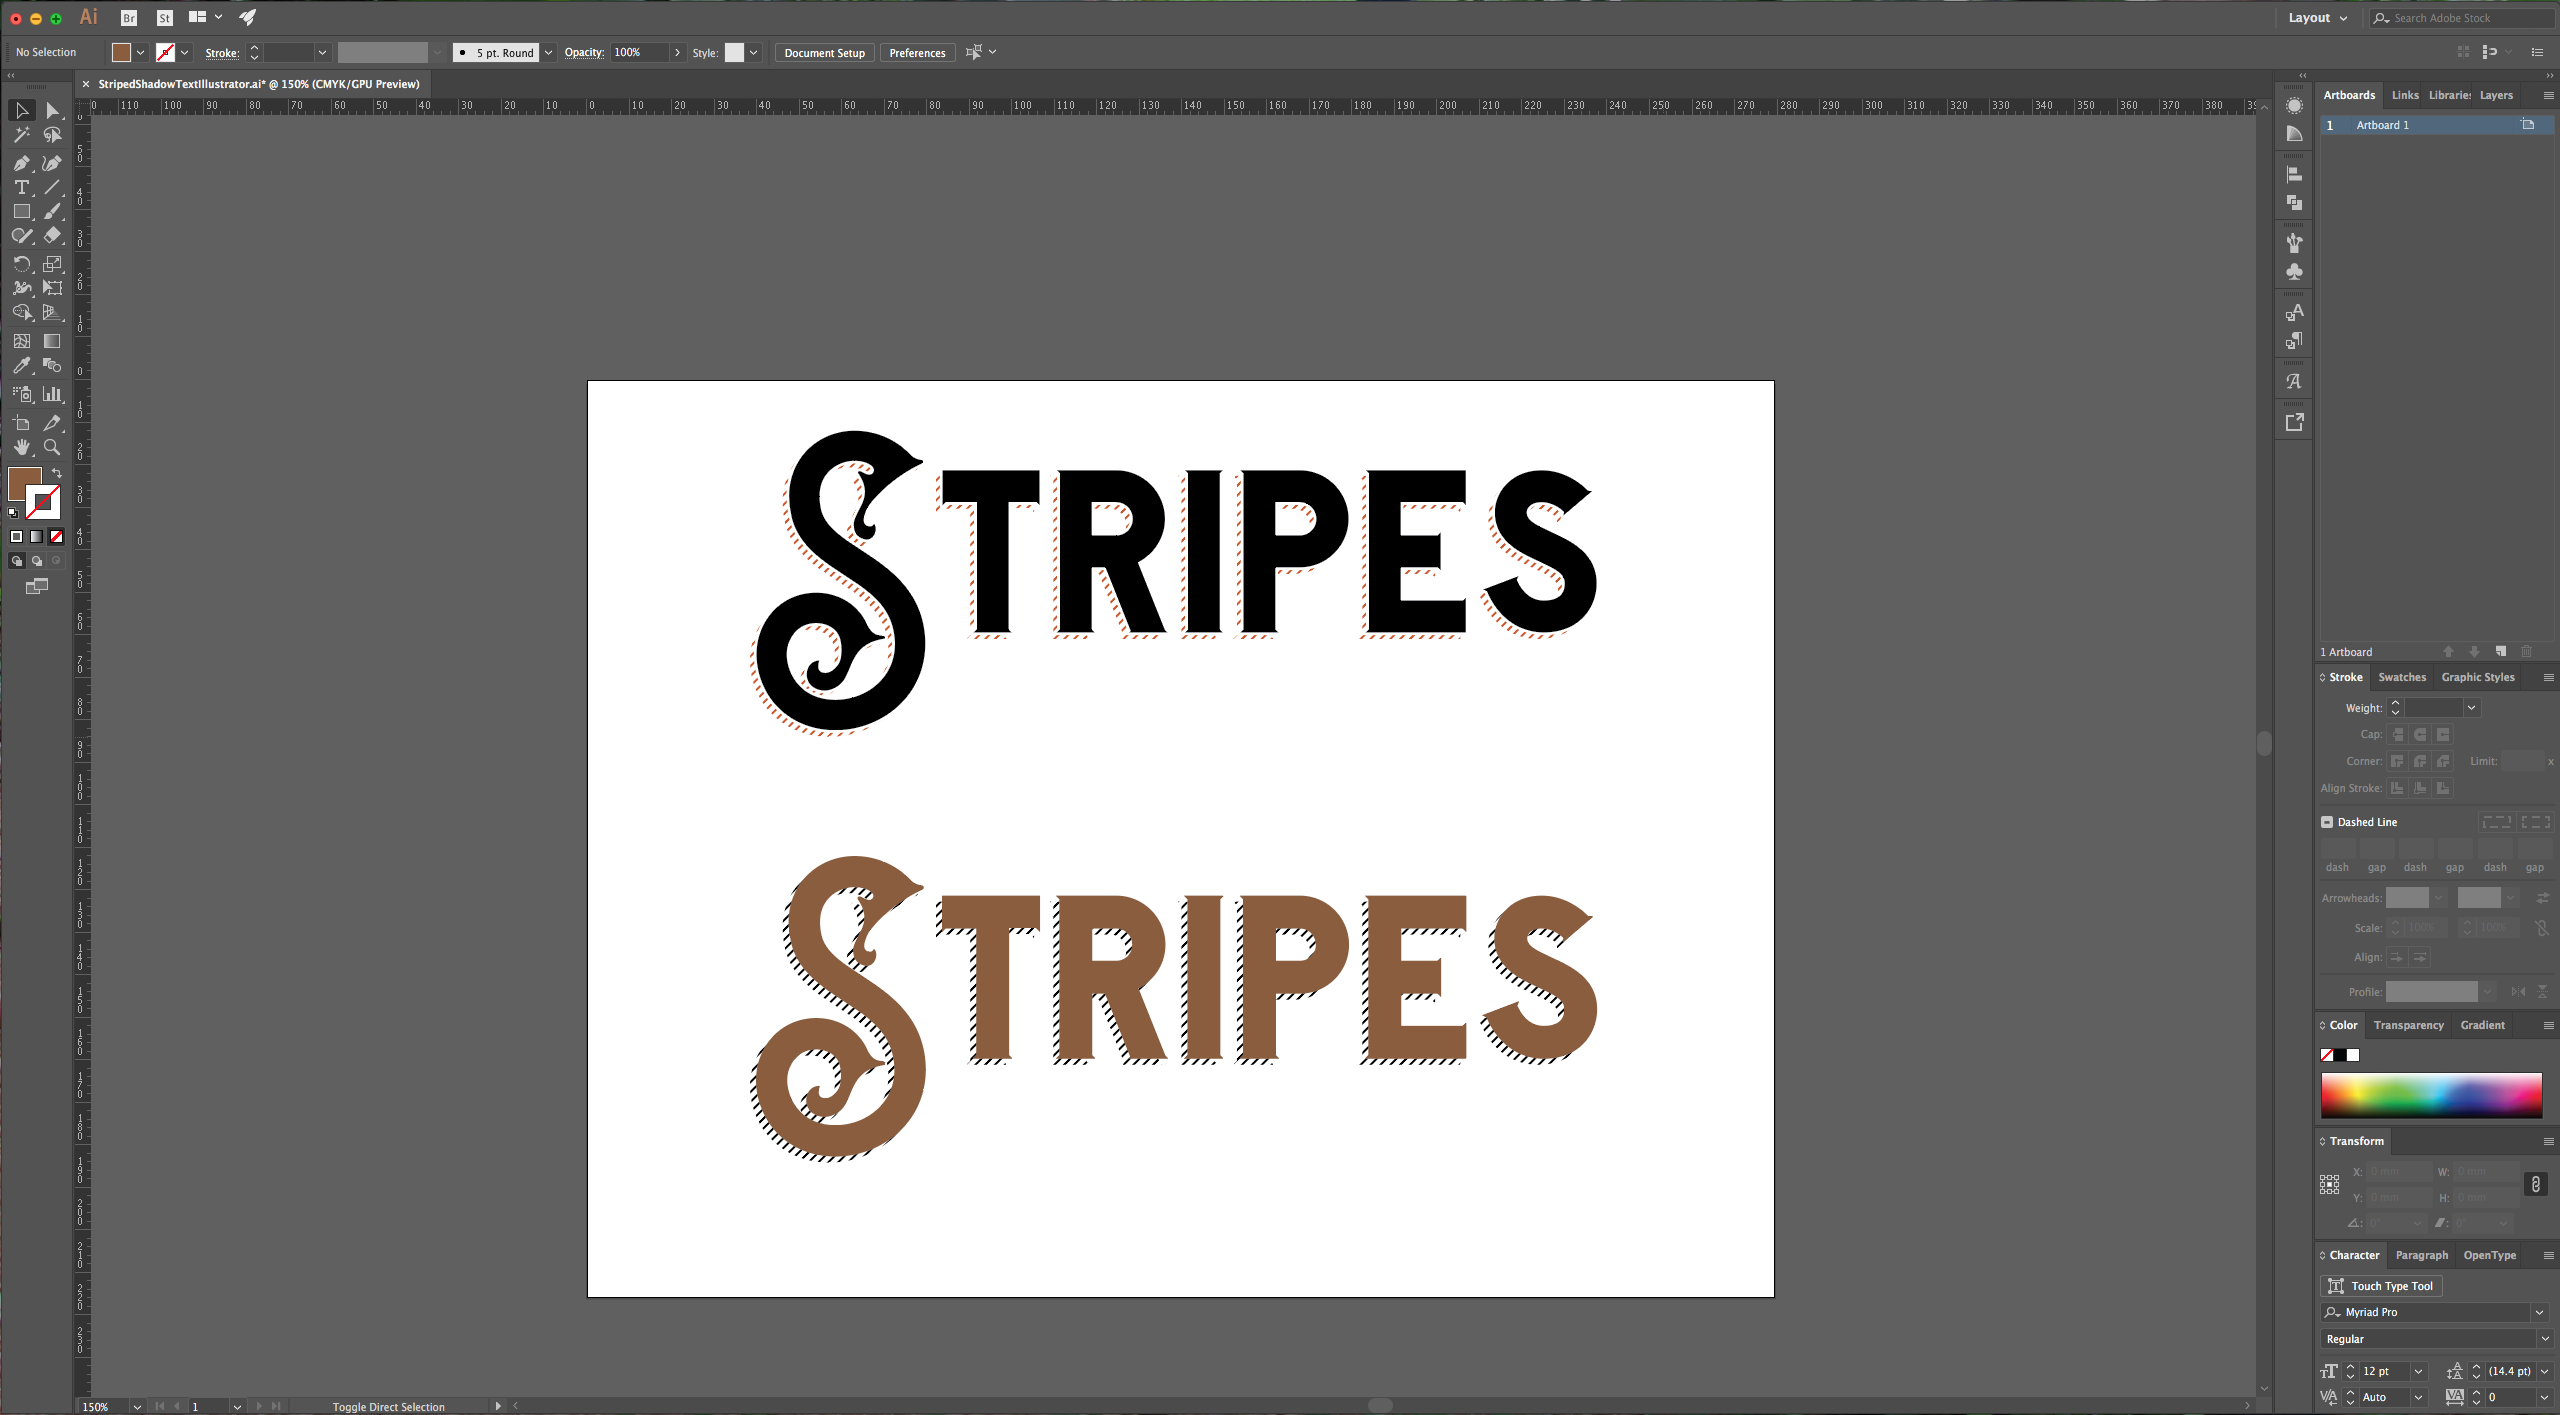
11 – Check the results.
Save
Save
2 – Select your text and increase the “Tracking” to 25 in the “Character” menu. This will give you a bit more space between letters.
3 – Once you are satisfied right-click on top of your text and select “Create Outlines” (Shift + Command/Control + O). This will turn your text into a vector.
4 – Select your “Line Segment” Tool and make sure your fill color is set to “None”. While holding the “Shift” key to make it snap to a 45-degree angle draw a line that is taller than your text and is positioned to its left. Select your line, click “Alt” to make a copy and move it to the right of your text. While dragging the copy hold the “Shift” key so your copy of the line will move so it stays in its place.
5 - Select the “Blend” Tool (W) from your Toolbox and double-click on it to invoke a dialog window. Choose “Specified Steps” for Spacing and use a value of 100. Then click on one line (you will notice that your cursor changes and the little square fills with black and an asterisk appears) then click on the other line (a plus sign will appear on your cursor). You can undo and change the values of the “Blending Options” until you are happy with your results.
6 – Select your stripes and go to Object > Expand and make sure that all the options are checked (Object, Fill and Stroke) in the window that appears, then click OK. Then go to Object > Expand again and make sure Fill and Stroke are selected and click OK again. This will turn your strokes into objects.
7 – With your stripes selected right-click on them and then go to Arrange > Send to Back. Make a copy (Command/Control + C) of your text and then paste it in place (Shift + Command/Control + V). Drag it up or down while holding the “Shift” key soy it will stay in line.
8 – Now, select your original text and go to Object > Compound Path > Make (Command/Control + 8). Your text will lose its color. Select the text and stripes together, right-click and choose “Make Clipping Mask”. Your stripes should now be clipped inside your text.
9 – Move your copy of the text on top of the striped text and then move it some clicks up and to the right (we used four clicks each).
10 – You can change the color of the text and/or stripes and even ad some separation by giving your text a white stroke to achieve the effect (we made the stroke’s “Weight” 1.5 pt and aligned it to the outside of the text. To change the color of your stripes you will have to double-click on it several times until you isolate the paths or you won’t be able to change the color. Or use the “Trim” function in the “Pathfinder” menu.
11 – Check the results.
by @lornacane
Save
Save


