


By Design Bundles
Scan N Cut Tutorials4 min
Tracing basics in Canvas Workspace
* Formally Brother Scan and Cut Canvas
** Note that this new software is downloadable to your PC or laptop.
1- Log in to Canvas Workspace.
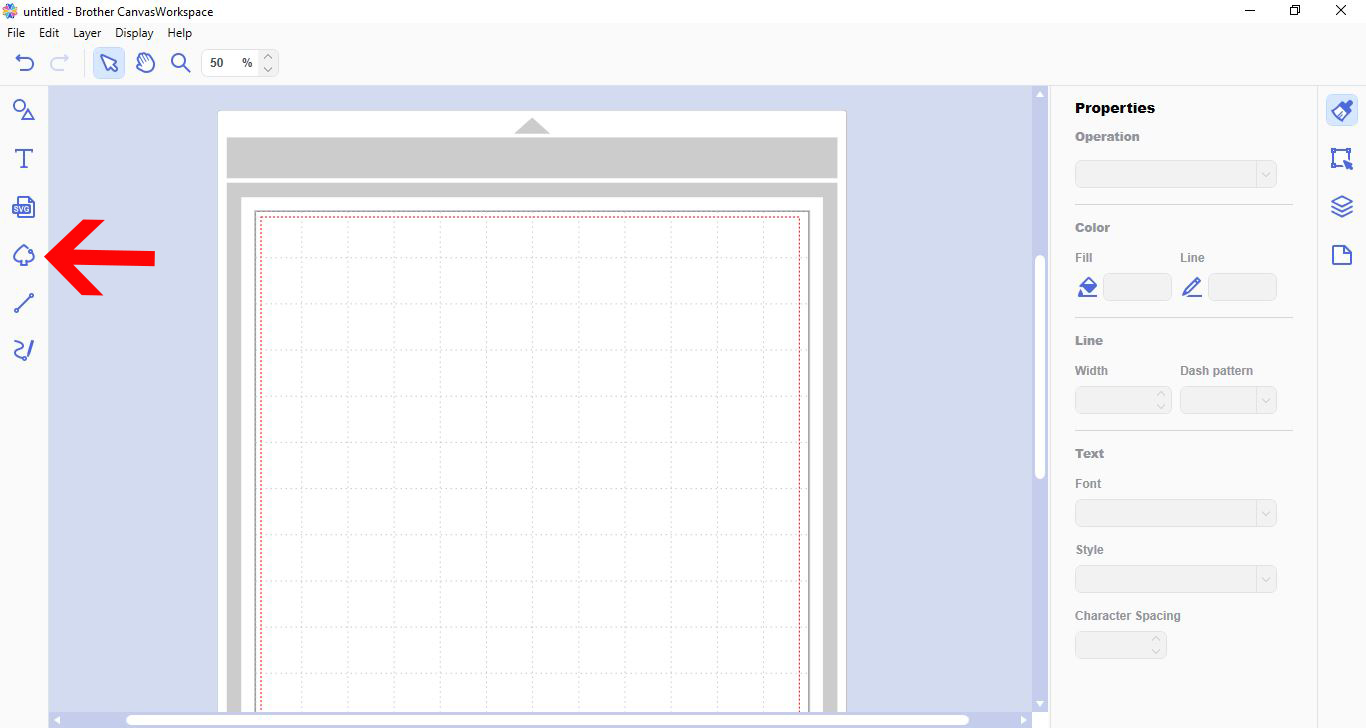
2- Click the tracing icon in the left toolbar.
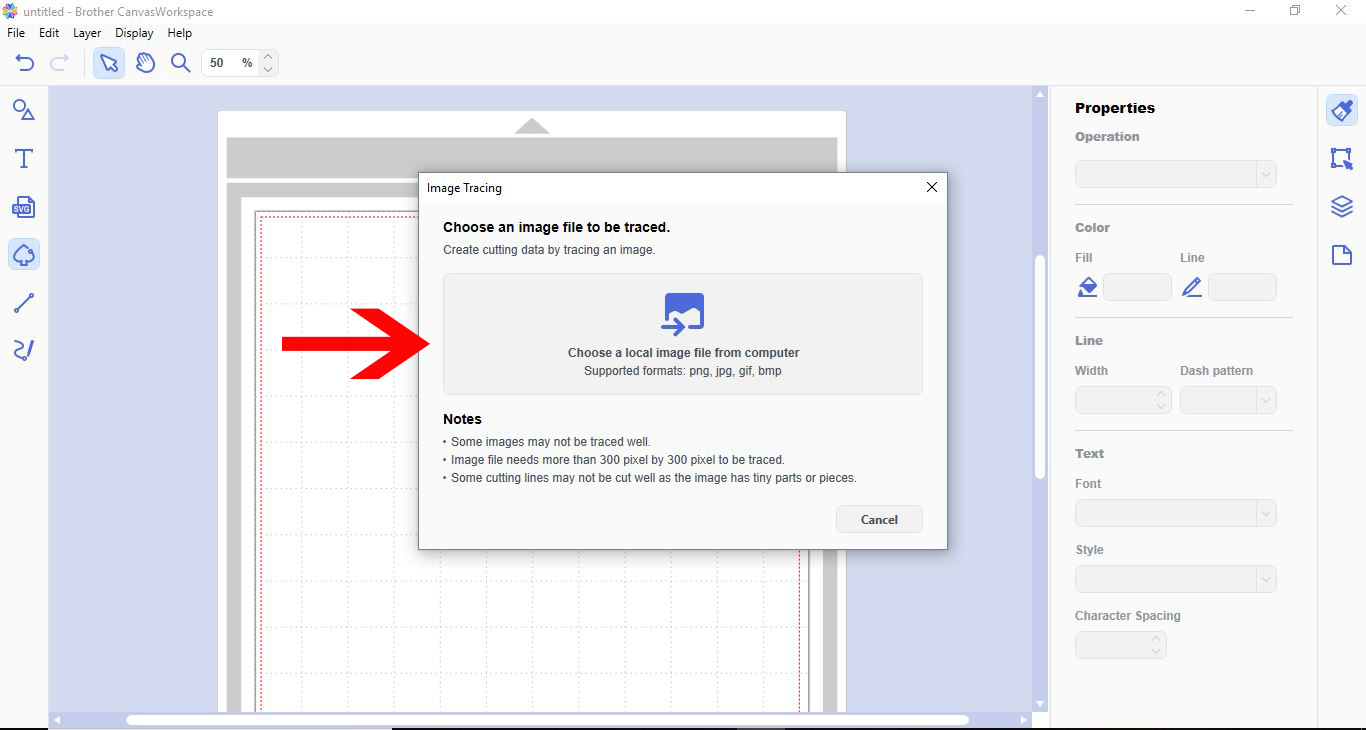
3- A new window will appear asking you to upload your image to trace.
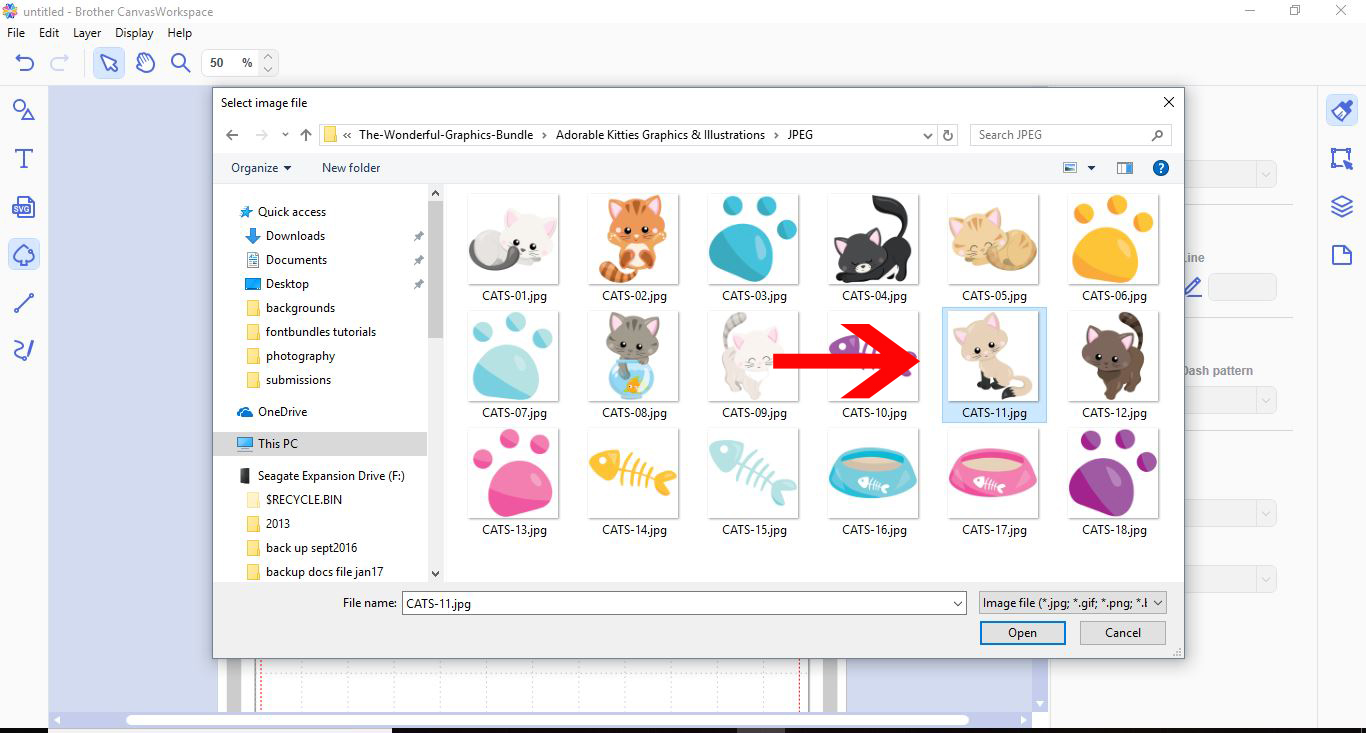
4- Select your image. I am using Adorable kitties graphics from Design Bundles.
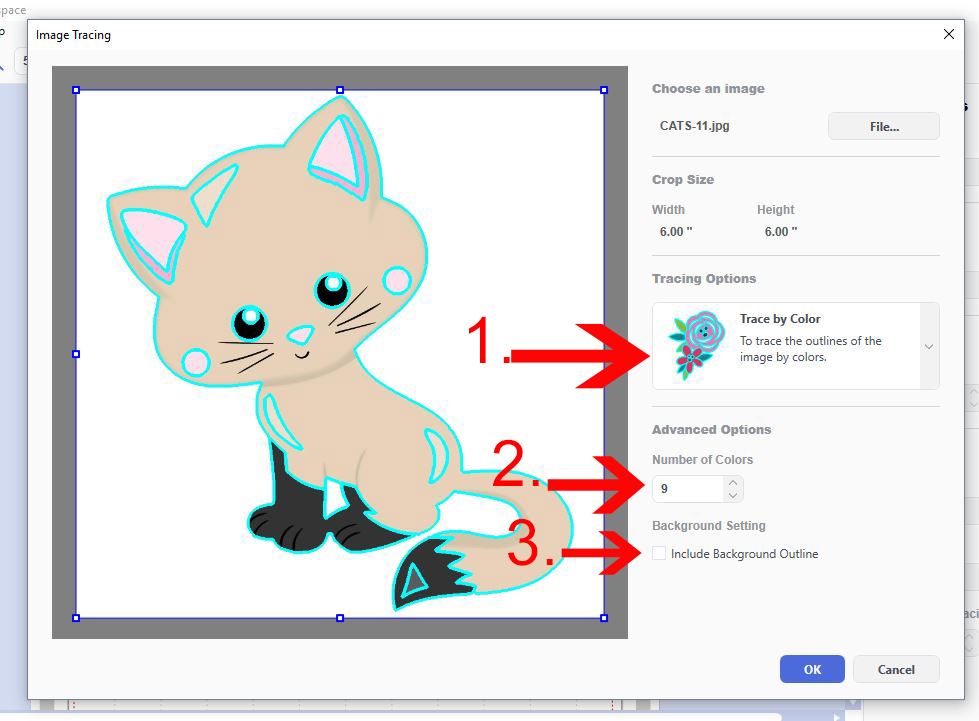
5- Your image will appear in a new window. The first choice is the trace outline feature. You will see a blue trace line around your image.
6- There is also a trace by color option (1). Depending on the number of colors in your image, change the number (2). You can also have the background selected as a color to be traced if you need to (3). Once happy, click on OK.
7- Your traced image will appear on your design screen.
8-If you highlight the whole image, you will see that each color is now a cut line.
9- If you click on Layers in the right toolbar, you will see that each part of the design has a separate layer.
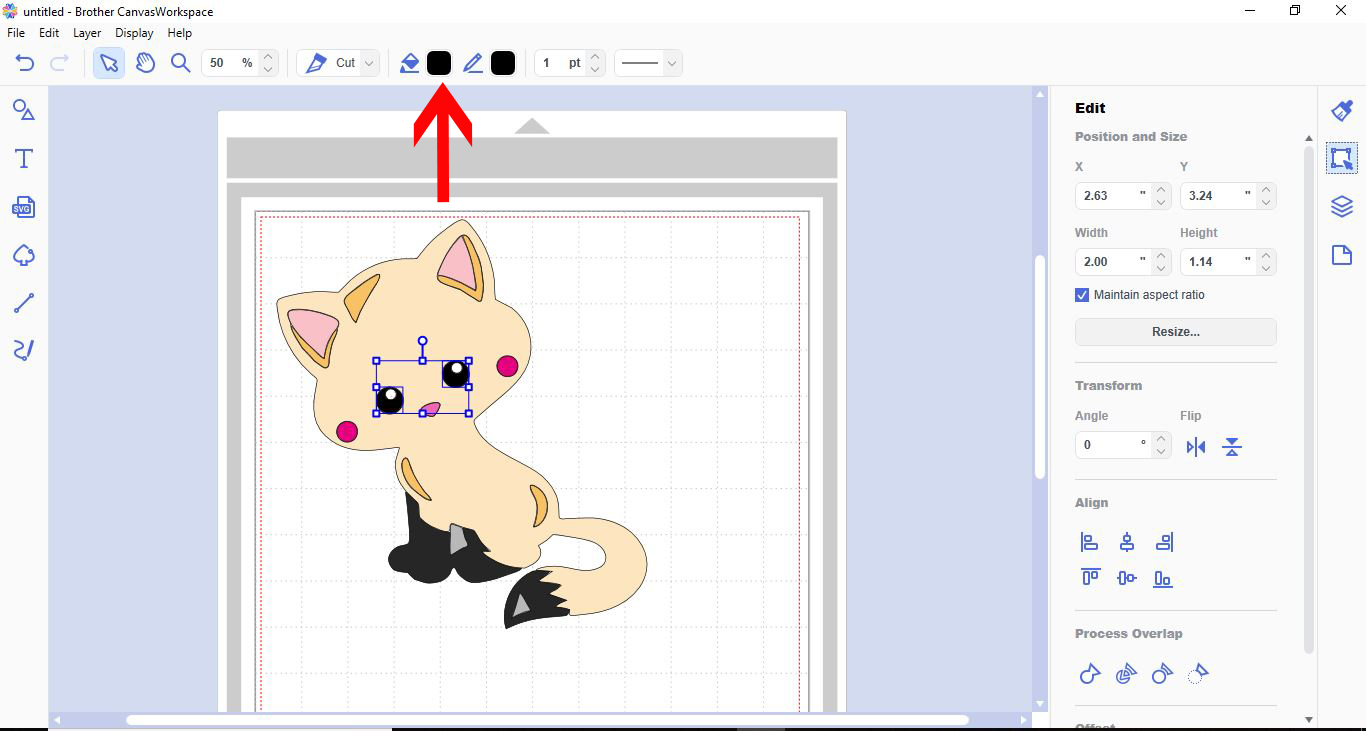
10- By selecting each layer, you can color them in with the fill tool.
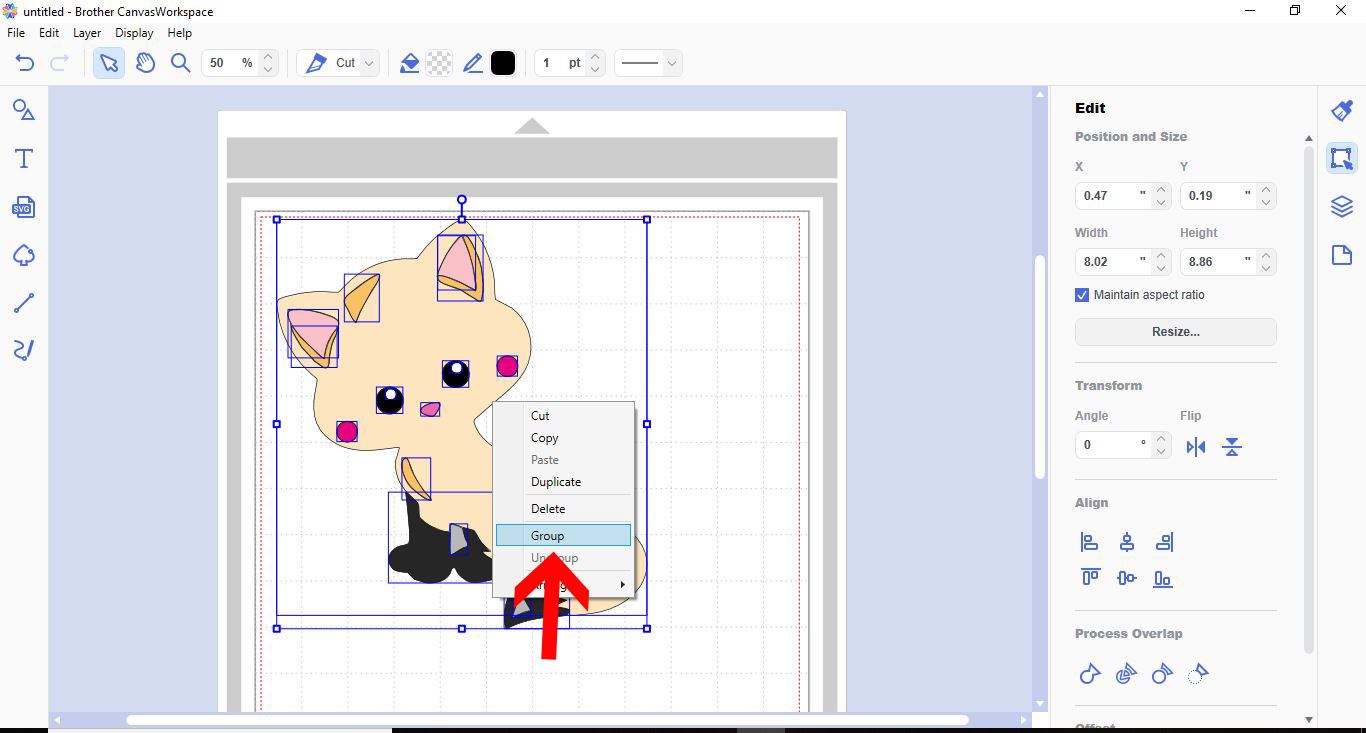
11- Once you are happy with your design, select the whole thing, right-click, and group your design.
** Note that this new software is downloadable to your PC or laptop.
1- Log in to Canvas Workspace.

2- Click the tracing icon in the left toolbar.
3- A new window will appear asking you to upload your image to trace.
4- Select your image. I am using Adorable kitties graphics from Design Bundles.
5- Your image will appear in a new window. The first choice is the trace outline feature. You will see a blue trace line around your image.

6- There is also a trace by color option (1). Depending on the number of colors in your image, change the number (2). You can also have the background selected as a color to be traced if you need to (3). Once happy, click on OK.
7- Your traced image will appear on your design screen.
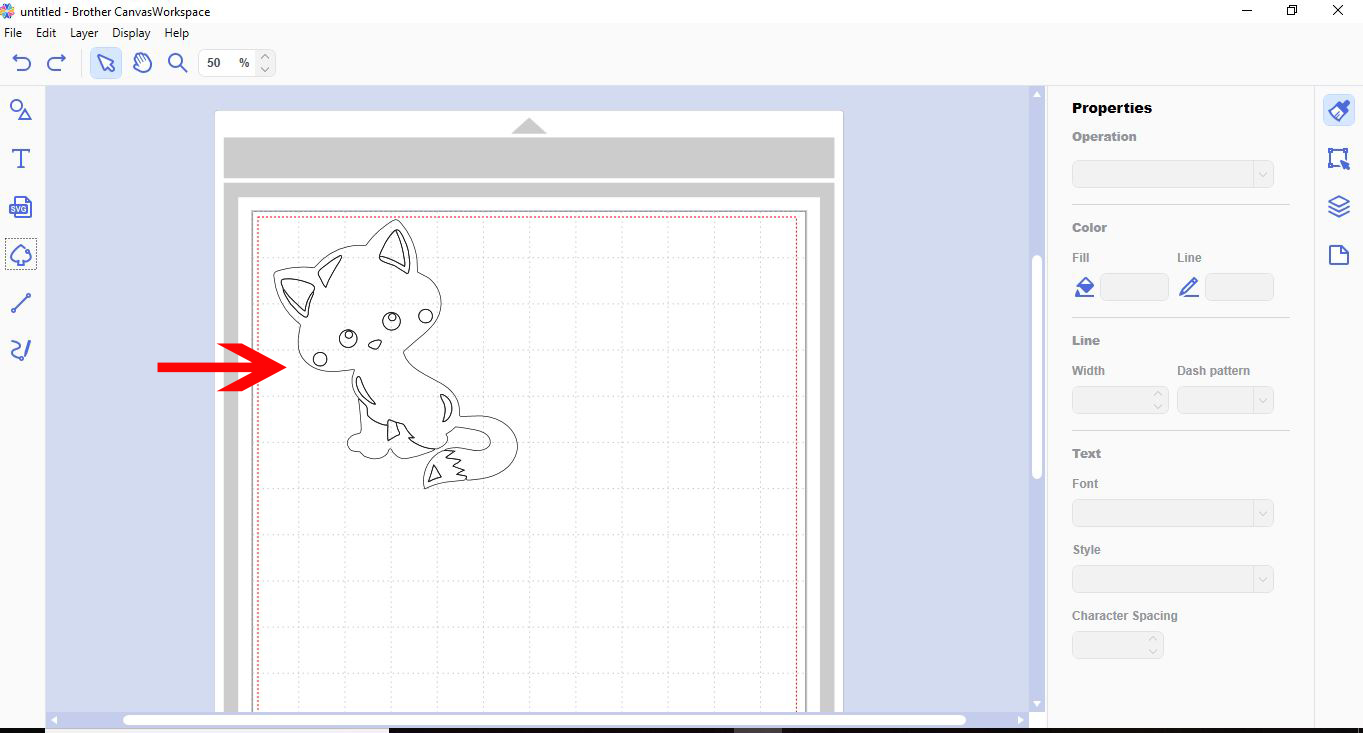
8-If you highlight the whole image, you will see that each color is now a cut line.
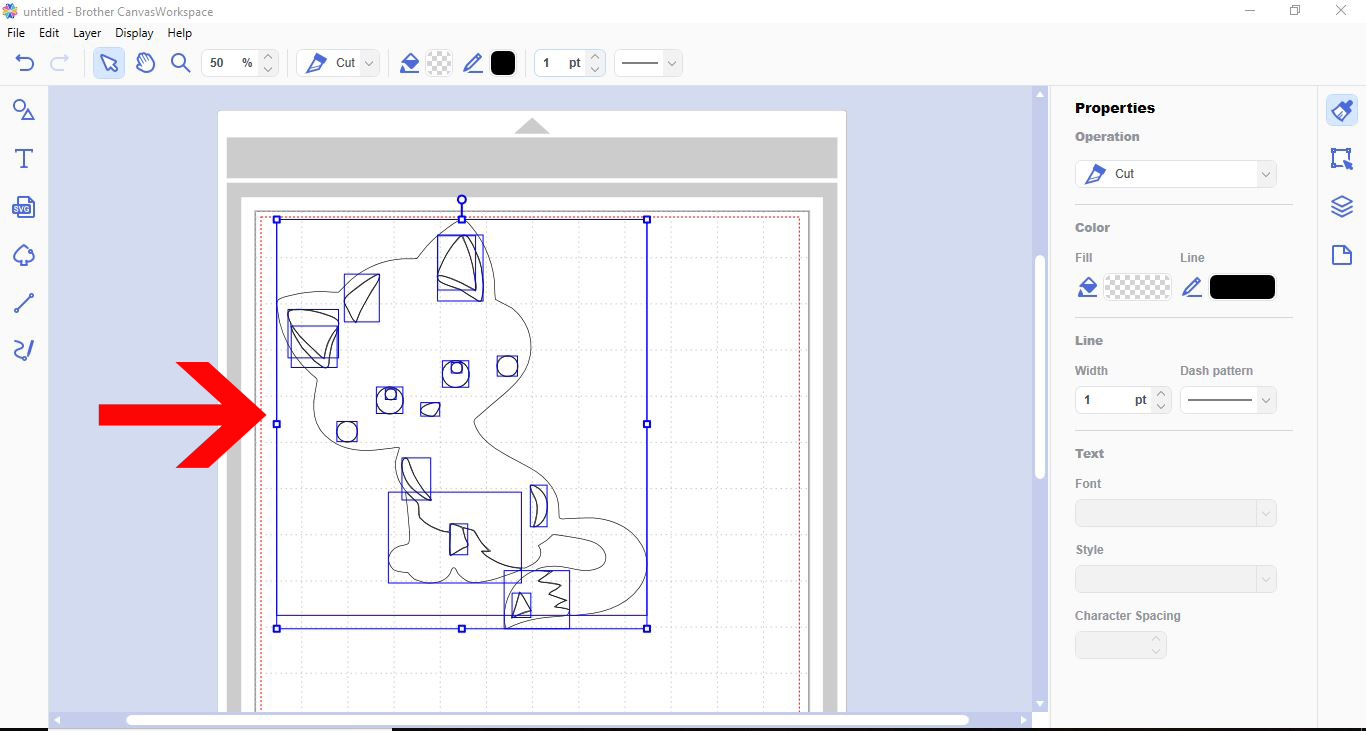
9- If you click on Layers in the right toolbar, you will see that each part of the design has a separate layer.

10- By selecting each layer, you can color them in with the fill tool.
11- Once you are happy with your design, select the whole thing, right-click, and group your design.
Related Tutorials
Scan N Cut Tutorials
Tracing an image in Brother scan and cut canvas workspace
Scan N Cut Tutorials
Canvas Workspace basics
Scan N Cut Tutorials
How to create curved text in brother scan and cut canvas workspace
Learn how to curve text in Brother Scan N Cut
Scan N Cut Tutorials
How to make a image larger than your cutting mat in Brother Scan N Cut canvas workspace
Learn how to cut designs larger than your cutting mat in Brother Scan N Cut canvas.
Scan N Cut Tutorials


