


By Design Bundles
Scan N Cut Tutorials4 min
Tracing an image in Brother scan and cut canvas workspace
1- Open Scan and cut canvas workspace. Click on the trace icon.
2- The image tracing tool will appear.
3- A new window will appear Click on the icon to select your image to trace.
4- Select your image.
5- The design will appear in the image tracing window. There will be an aqua outline where it will trace.
6- In the drop down box select trace by color. This will allow you to trace not only the outside edge but also the inside lines.
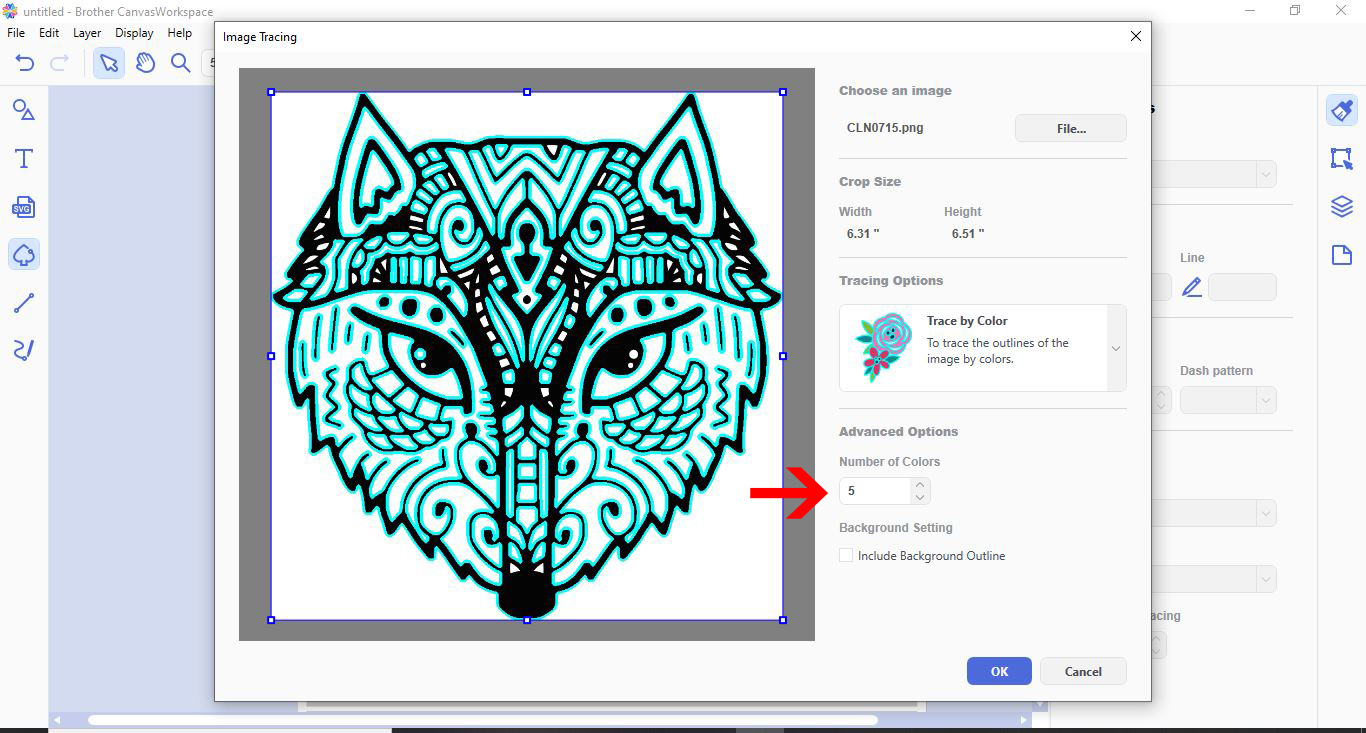
7- With a black image you will not need more than 5 in the number of colors option. Once all the lines you want are highlighted, click ok.
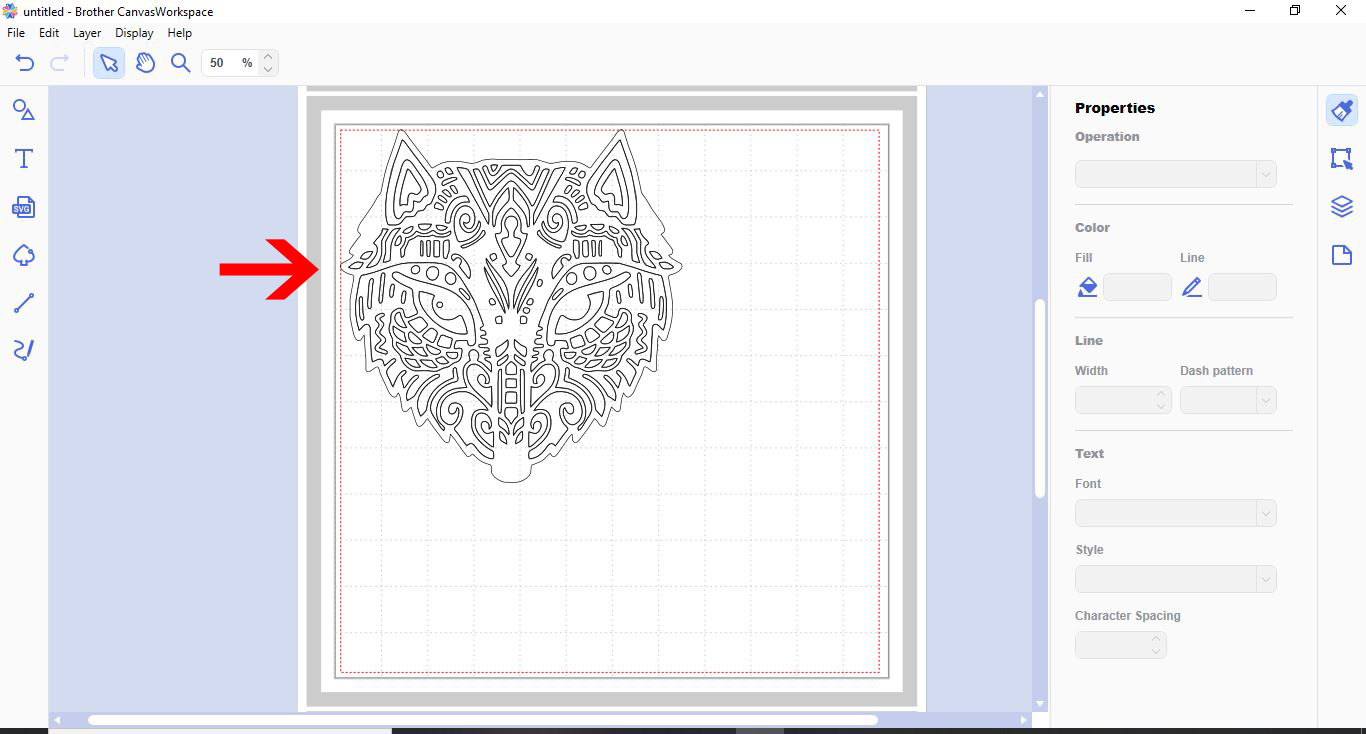
8- Your design will appear in your design space ready to cut or draw.
9- When you are tracing a color image the process is the same as steps 1- 4. Make sure you select the trace to color option.
10- Count the number of colors you have in your design and change the number of colors to it in the number box. This will adjust the trace lines.
11- Your traced image will appear in your design space, and each colour will have been traced separately.
12- You can now select each colour group and then fill it in the colour you need.
13- After each colour is filled in you can now use your design to print or use the colours as a guide when cutting it.
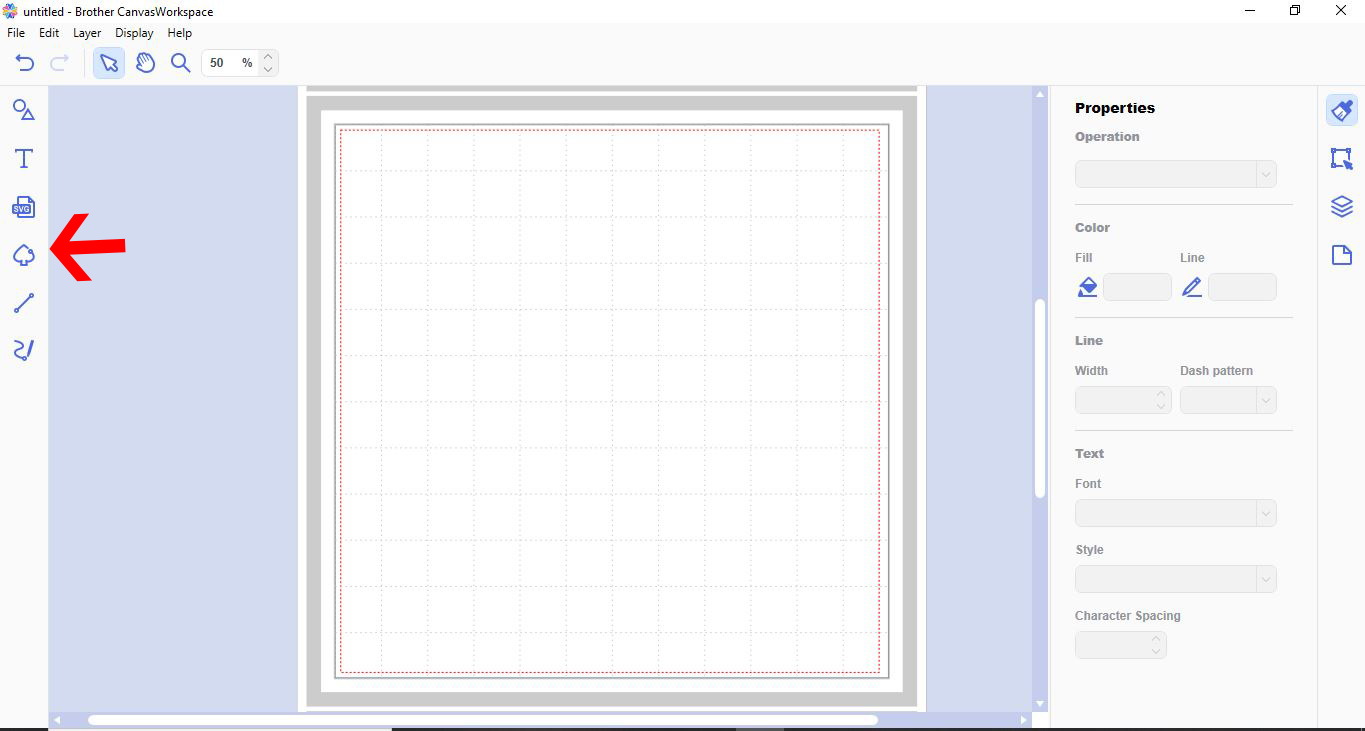
2- The image tracing tool will appear.
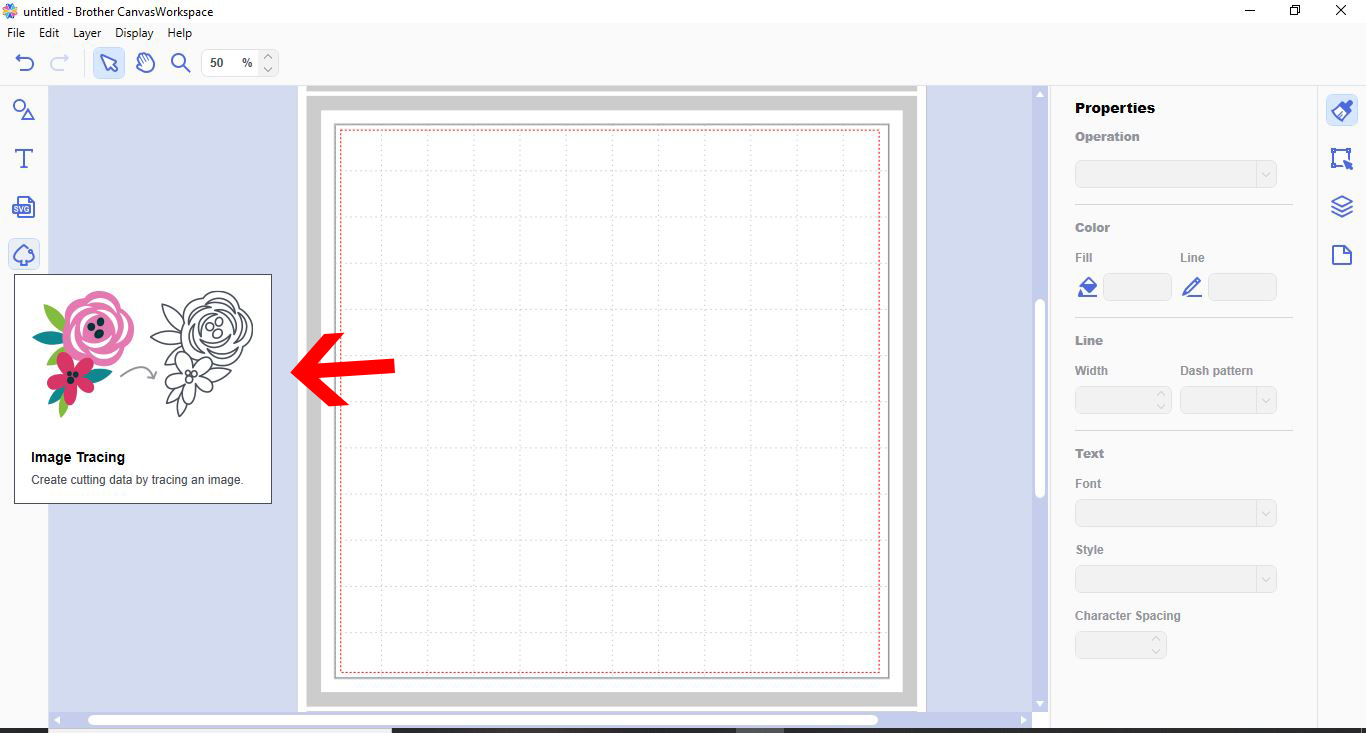
3- A new window will appear Click on the icon to select your image to trace.
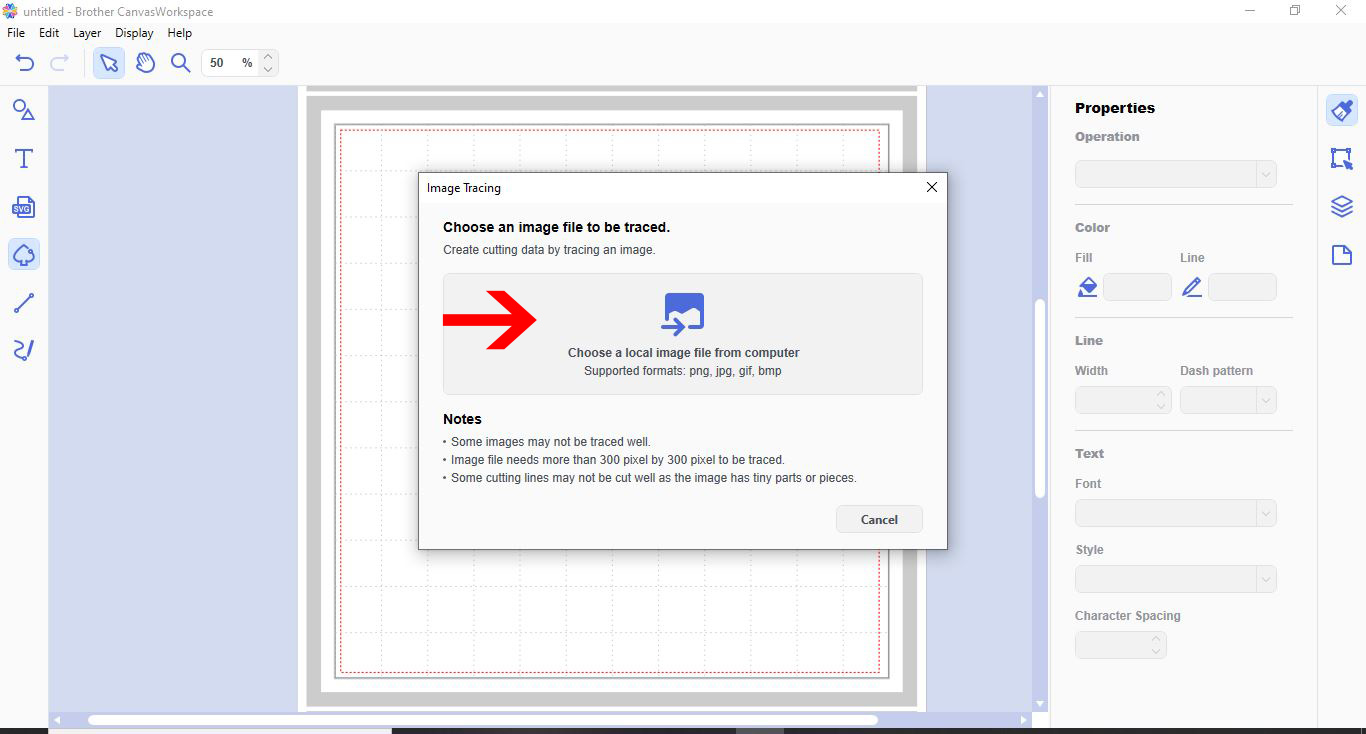
4- Select your image.
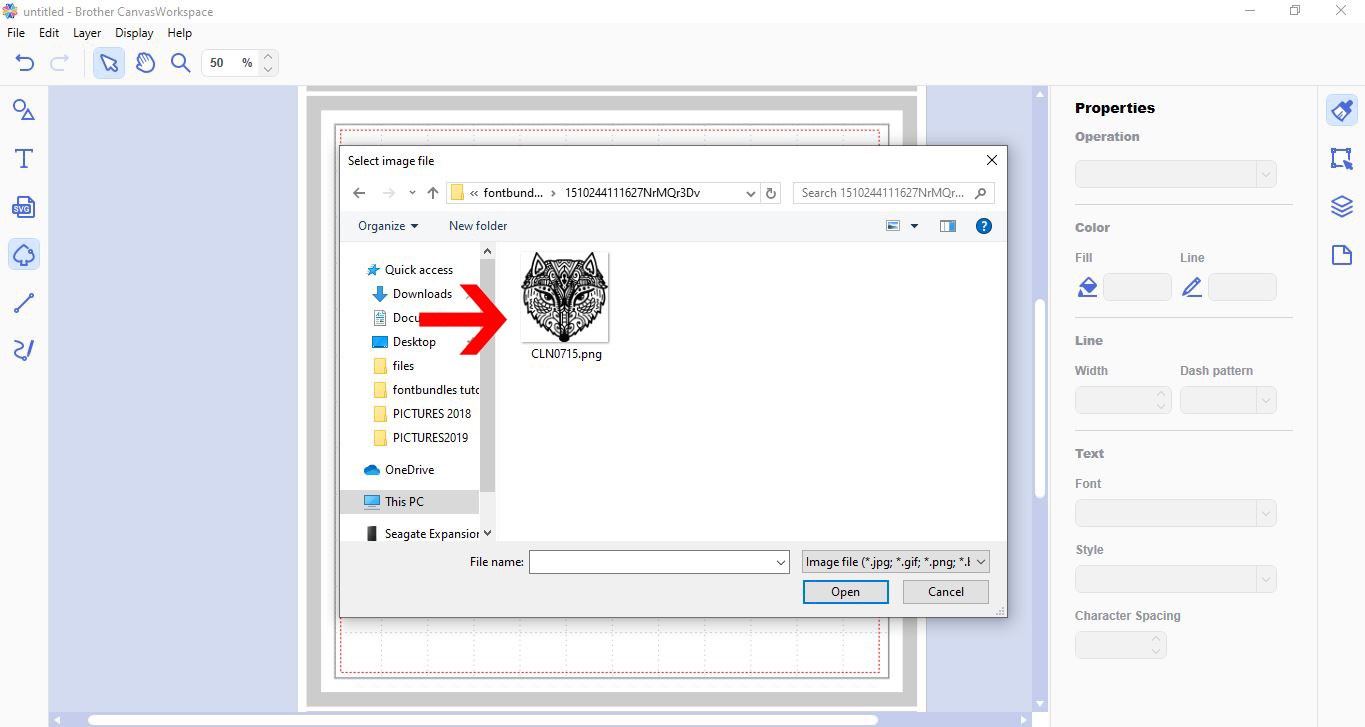
5- The design will appear in the image tracing window. There will be an aqua outline where it will trace.
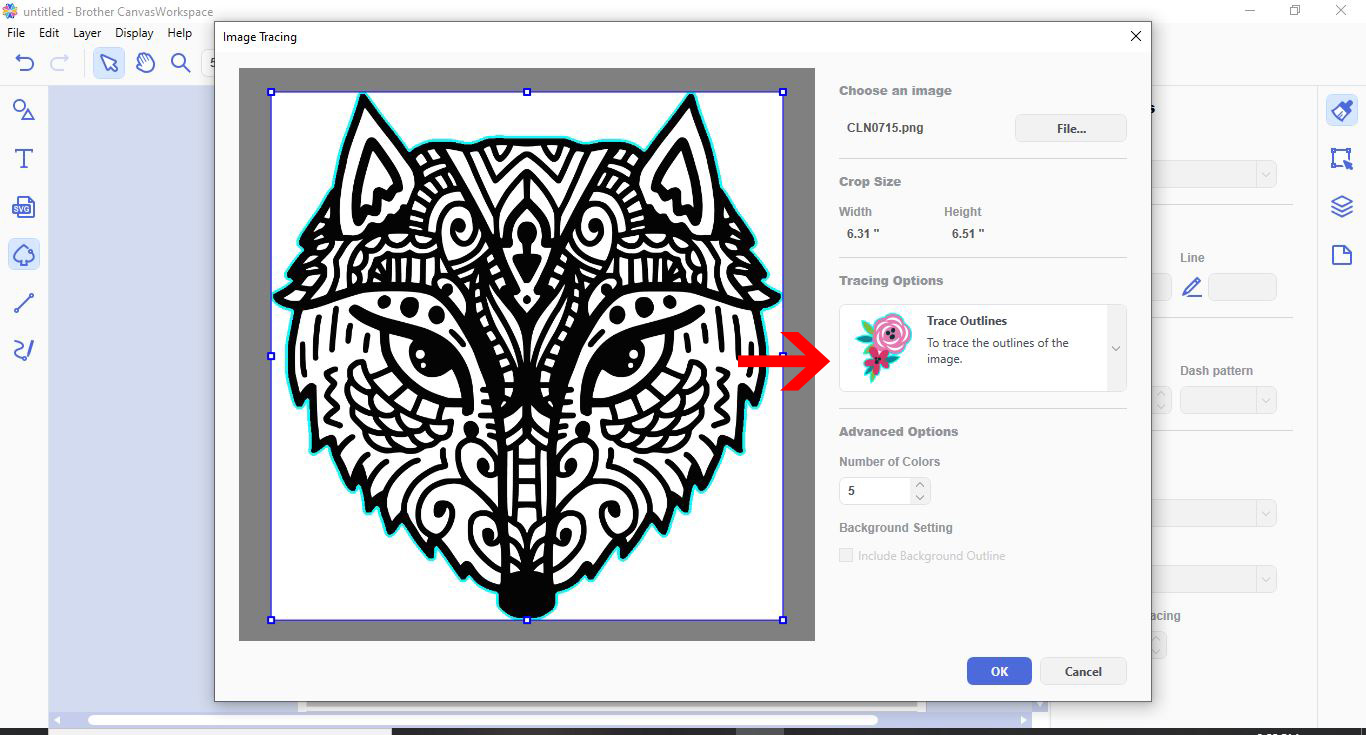
6- In the drop down box select trace by color. This will allow you to trace not only the outside edge but also the inside lines.
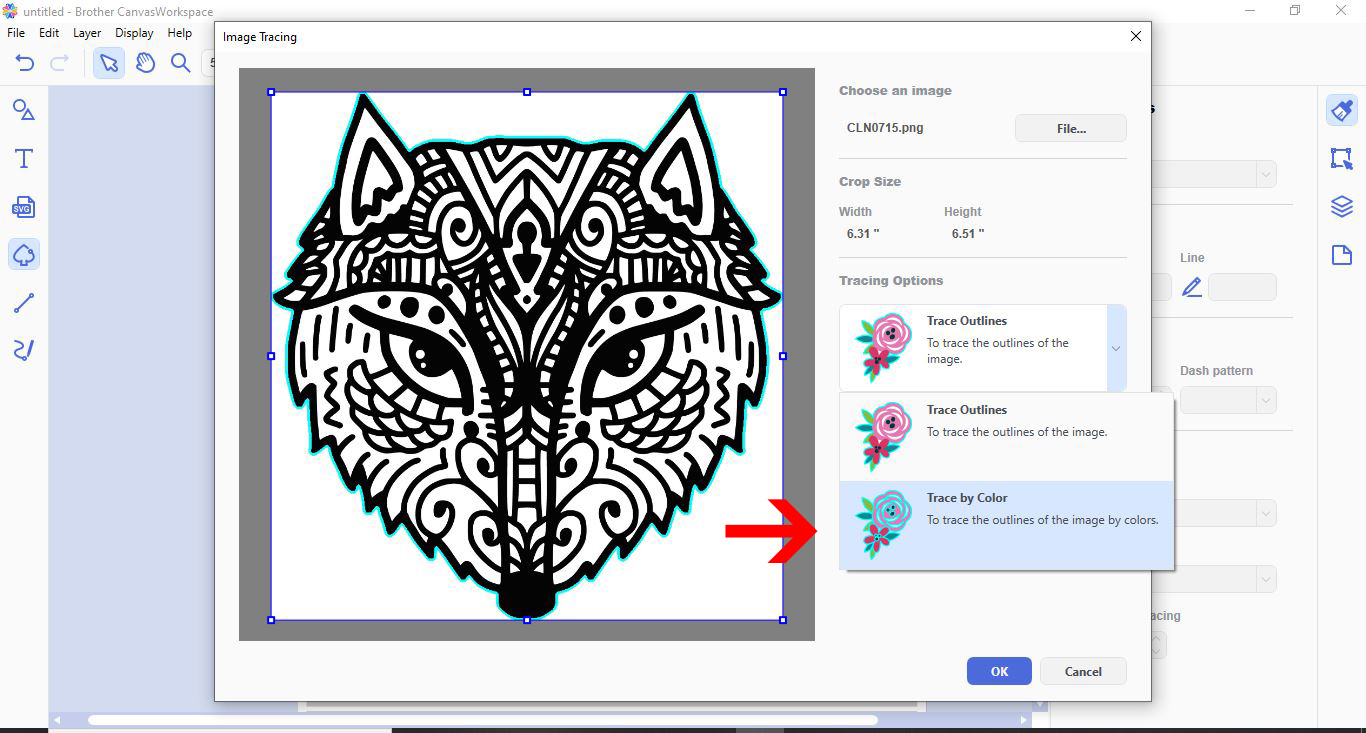
7- With a black image you will not need more than 5 in the number of colors option. Once all the lines you want are highlighted, click ok.
8- Your design will appear in your design space ready to cut or draw.
9- When you are tracing a color image the process is the same as steps 1- 4. Make sure you select the trace to color option.
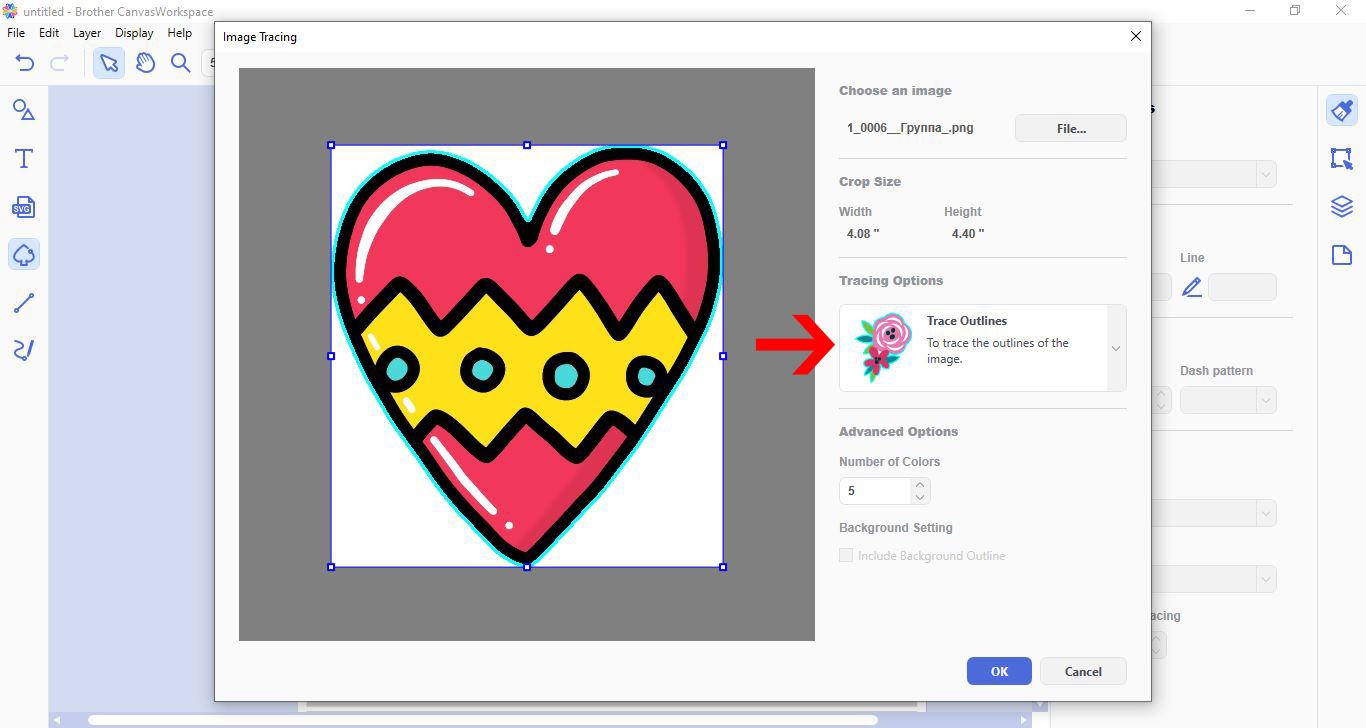
10- Count the number of colors you have in your design and change the number of colors to it in the number box. This will adjust the trace lines.
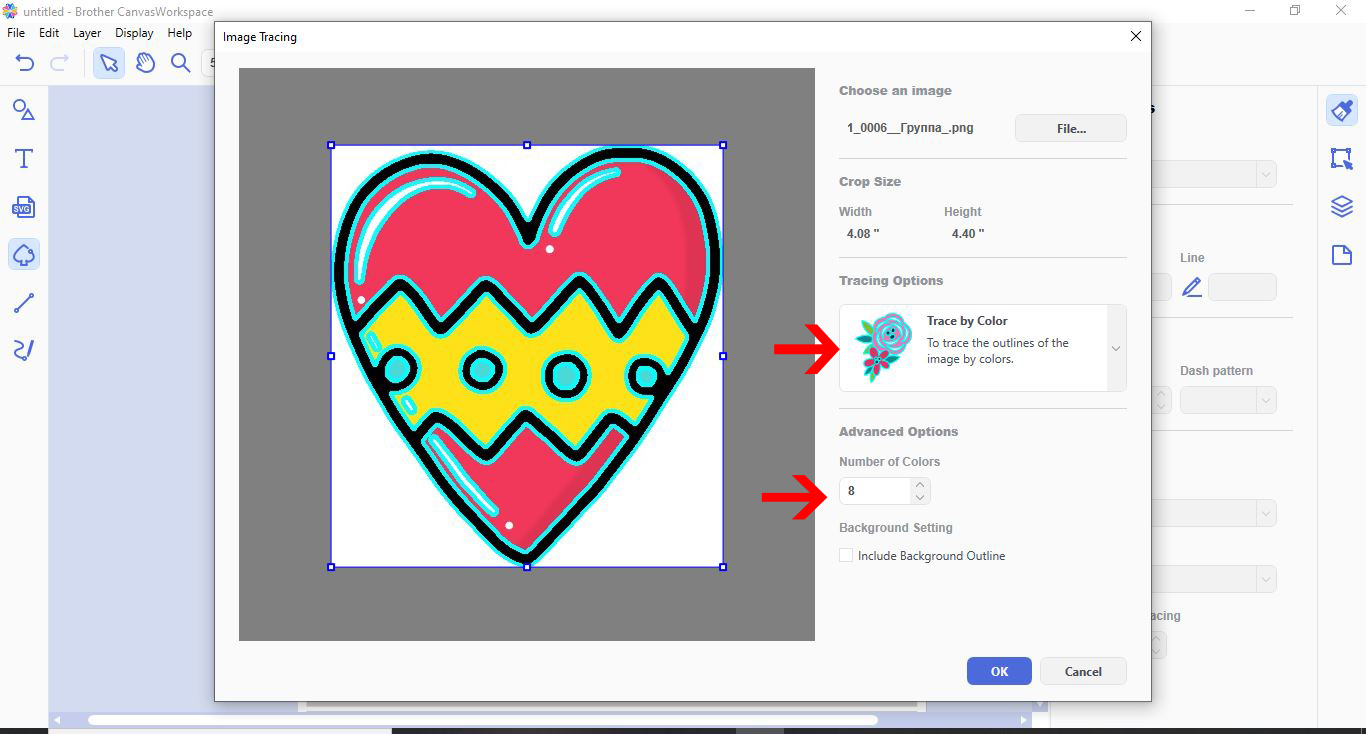
11- Your traced image will appear in your design space, and each colour will have been traced separately.
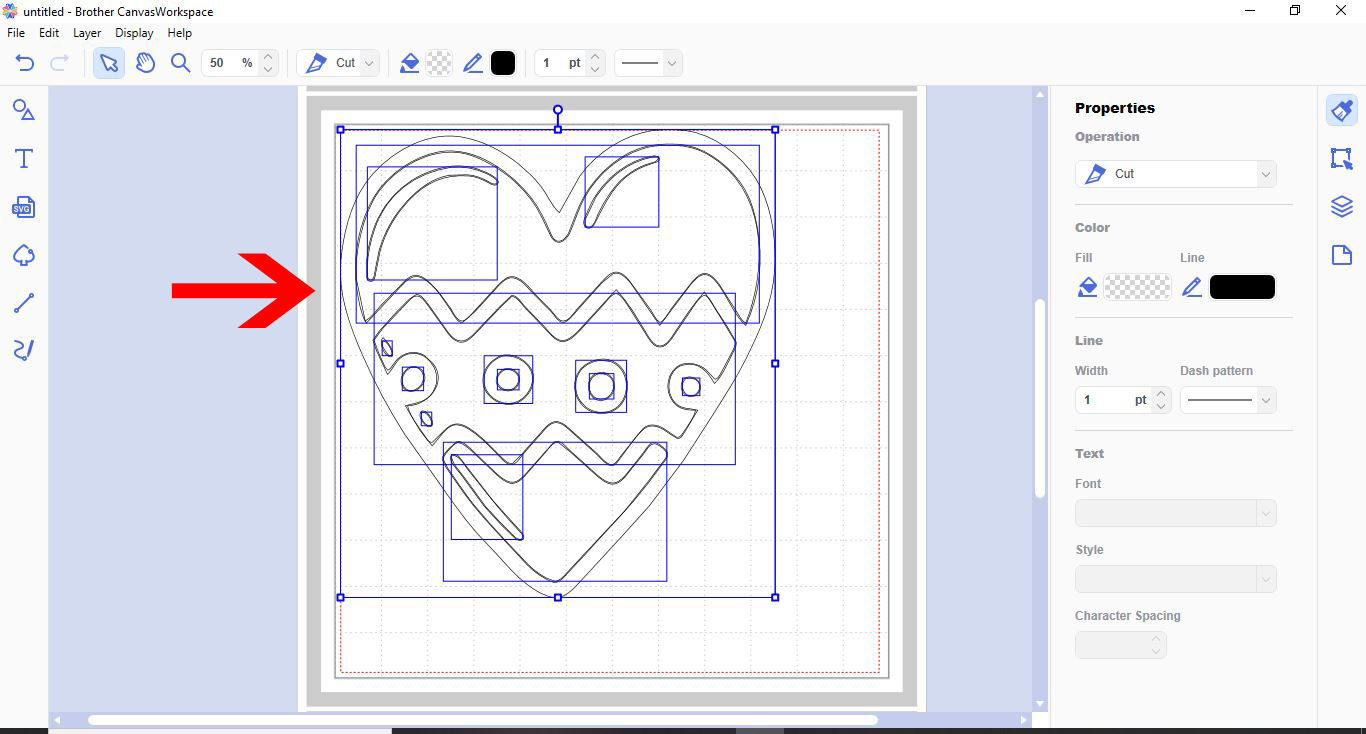
12- You can now select each colour group and then fill it in the colour you need.
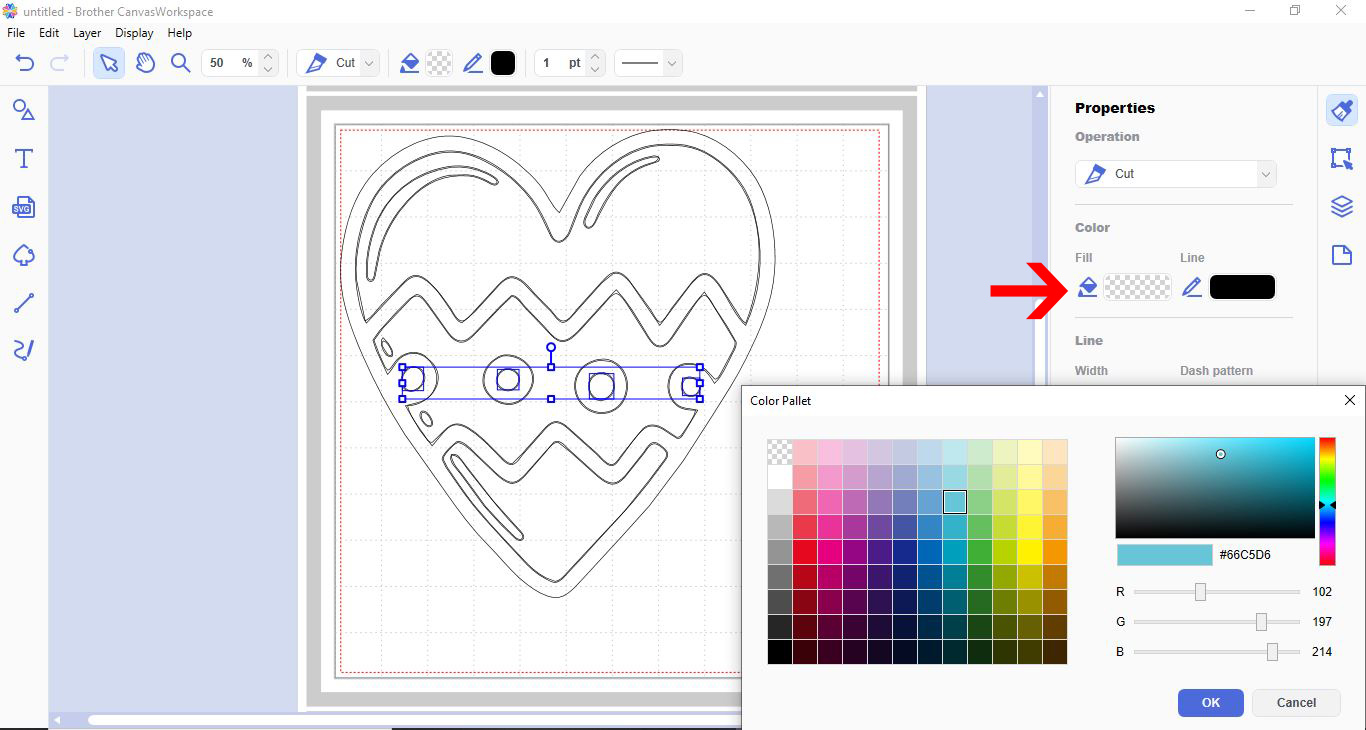
13- After each colour is filled in you can now use your design to print or use the colours as a guide when cutting it.

Related Tutorials
Scan N Cut Tutorials
How to make a image larger than your cutting mat in Brother Scan N Cut canvas workspace
Learn how to cut designs larger than your cutting mat in Brother Scan N Cut canvas.
Scan N Cut Tutorials
Spacing images evenly on a line in Brother scan and cut canvas workspace
Scan N Cut Tutorials
How to create curved text in brother scan and cut canvas workspace
Learn how to curve text in Brother Scan N Cut
Scan N Cut Tutorials
Converting SVG to FCM cutting fine in Brother scan and cut canvas workspace
Scan N Cut Tutorials


