
Transparent Clothing in Photoshop
Learn how to create transparent clothing in Photoshop using layer masks.
Today, we will show you how to create transparent clothing in Photoshop. This effect is really cool and could be used in sublimation designs to make great gifts, or you could just gift it as a photo.

For this tutorial, you want to use an image of a person with evenly toned clothes. You may have to cut the person out of the image, so it’s best to use a photo where you can easily remove the background.
We will be using a photo of some friends at the park. The background looks a little busy, but the man in front stands out from it. The background image we are using today is a beach scenery photo.
Step 1 – Edit Photo and Cut Out the Person
First, open your photo of the person in Photoshop. To easily cut the person out of your picture, you may need to increase the contrast.
Increase Contrast if Needed
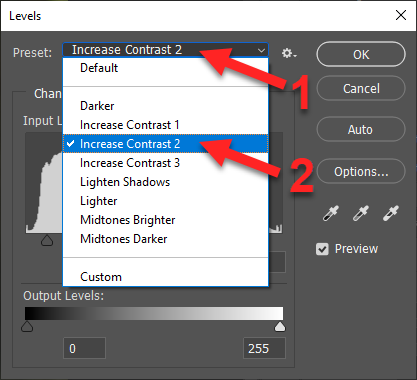
If your image is a bit dull, you’ll want to give it a bit more contrast. Go to Image > Adjustments > Levels (Cmd/Ctrl + L).

Select Increase Contrast 2 from the Preset dropdown.
Duplicate Image Layer
Duplicate your image by dragging it to the New Layer button at the bottom of your Layers panel.

Draw a Path Around the Person Using the Pen Tool
Zoom in as much as you can and select the Pen Tool (P).

Start drawing a path around the person by clicking on the image to add anchor points. You can click and drag to make a curved line if needed. Make it as accurate as you can, but don’t worry because we will fix the details later.

Draw all the way around the person until you are back at the first anchor point. Make sure you click the first anchor point to close the path. Don’t forget the areas between the arms and body, if there are any.

Make a Selection of All the Paths
Make Selection of the Outside Path
After closing your path, select the Path Selection Tool (A). Click the outside path to select it. Then, right-click and choose Make a Selection.

In the Make Selection dialog, leave the settings and click OK.

Make Selection of Inside Paths
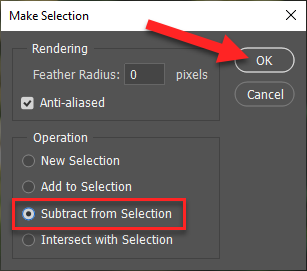
If you have any inside paths between the arm and body, as we do, click the inside path with the Path Selection Tool (A), right-click, and click Make a Selection again.

In the Make Selection dialog, click on Subtract from Selection and click OK.
Now you should see marching ants where the selection has been made.

Add a Layer Mask to the Duplicate Image Layer and Hide the Original Image Layer
Go back to the Layers panel, select your Background copy layer and click on the Add Layer Mask button at the bottom right to create a layer mask. Hide Background layer by clicking on the little eye icon to the left of the layer thumbnail.

Refine the Mask
Then select the Background copy mask and click the Brush Tool (B) in the left toolbar.

Zoom in and use a small soft brush. Erase with black as the foreground color or add with white as the foreground color. You can change the dimension of your brush to make it easier to reach some areas.

Step 2 - Prepare Transparent Clothing
Make a Selection of the Shirt
Click on the Background copy layer’s image thumbnail this time and the Magic Wand Tool (W).
Now click on the shirt. To add to the selection, click the Add to Selection option in the Control panel at the top. Keep clicking on different portions of the shirt until you have the whole shirt selected.
If you see that the selection is going beyond the shirt, you can reduce the Tolerance to about 10.

Then you can finish up with the Lasso Tool (L) if needed. Remember to click the Add to or Subtract from Selection buttons.

Ensure that the whole shirt has been selected, including areas not connected to the rest of the shirt, like the area below the arm in our photo.

Mask the Shirt
Click on Background copy’s layer mask, select black as the Foreground color, and click Alt + Backspace to erase the shirt.

Keep your selection active and select the image thumbnail this time. Click Command/Control + J to create a new layer with the shirt pasted onto it. Double-click the layer name and rename it to Shirt.

Then click Shirt layer’s eye icon to hide it.

Check for Pixels That Need to Be Deleted
Zoom in and check your Background copy layer. If you see some visible pixels that shouldn’t be there, select the layer mask thumbnail and Brush Tool (B). Then erase the pixels using black as the foreground color.

Show, Desaturate, and Change Blend Mode for Shirt Layer
Select Shirt layer and click the eye icon to show it again. Remove color from the layer by clicking Shift + Cmd/Ctrl + U to desaturate it. Then change the Blend Mode in the Layers panel to Overlay.

Step 3 - Copy and Paste New Background Image Under Background Copy Layer
Open your new background image. Then copy (Cmd/Ctrl + C) and paste (Cmd/Ctrl + V) it under the Background copy layer.

Step 4 – Adjust Shirt and Background Copy Layer if Needed
If the image of your person is too small or too big, you can adjust the size by selecting your Shirt and Background copy layers, then pressing Cmd/Ctrl + T to enable Free Transform Path. Click and drag one of the handles to resize the layers and position them wherever you want.
We flipped our Shirt and Background copy layers horizontally so the light source matches the new background image. Then we scaled the layers down and moved them to the right.

Now we will add some finishing touches, such as a levels adjustment layer to Shirt layer and a Displace filter to the new background image layer.
Step 5 – Add Levels Adjustment Layer
Add a Levels Adjustment Layer and Clip It to Shirt Layer
With the Shirt layer selected, click the New Fill or Adjustment Layer button at the bottom of the Layers panel, and choose Levels.

Click the little clipping mask button in the Properties panel to clip the Levels layer to the Shirt layer.

In the Properties panel, darken the midtones and lighten the highlights a bit. This will make the contour of the shirt a bit more defined.

Step 6 - Create Shirt PSD File
Duplicate the Shirt Layer as a New Document
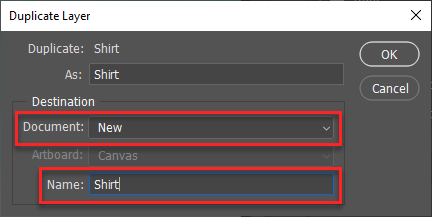
Right-click on top of your Shirt layer and select Duplicate Layer.

In the Duplicate Layer dialog, choose New for the Document option to save it to a new document. Enter Shirt for the Name option and click OK.
Apply a Gaussian Blur
In the new document, go to Filter > Blur > Gaussian Blur.

Apply a Radius of 2 pixels in the Gaussian Blur dialog and click OK.

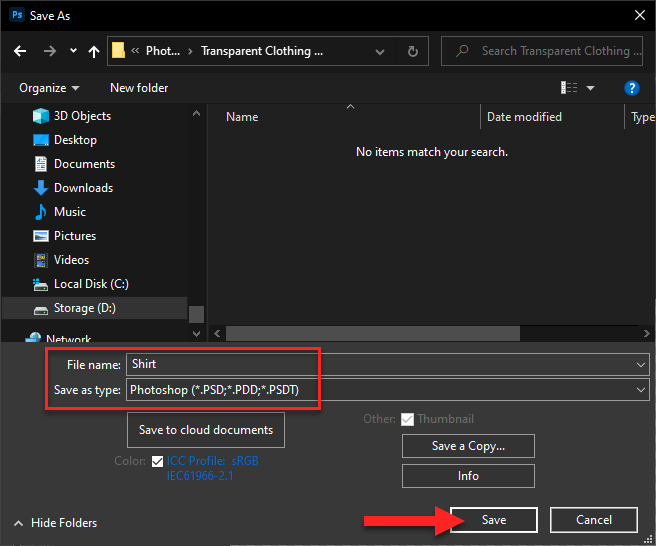
Save as a PSD
Save your file as a PSD with the name Shirt.
Step 7 - Make New Background Image Layer a Smart Object and Add a Displace Filter
Convert New Background Image Layer to Smart Object
Go back to your original file. Right-click on your new background image layer and select Convert to Smart Object.

Add and Edit Displace Filter Layer
With the new background image layer selected, go to Filter > Distort > Displace.

Keep the default values in the Displace dialog and click OK.

Then choose the Shirt file you just saved and click Open.

Invert Smart Filters Mask
Select the Smart Filters’mask thumbnail and click Command/Control + I to invert it.

The Smart Filters mask thumbnail will show as black after being inverted.

Make a Selection of Shirt Layer
While holding the Command/Control key, click on the Shirt layer to make a selection.
Make sure your Foreground color is white. Click on the Smart Filtersmask thumbnail and press Alt + Backspace. The Displace filter will only be applied to the shirt now. Click Command/Control + D to deselect.

Increase Displace Values if Needed
If you think the effect is not very visible, double-click on the Displace filter, increase the Horizontal Scale and Vertical Scale values and click OK. Then select the Shirt file again.

Check to see if you’re happy with the results. Notice that the boat in the following image is more wrinkled.

And that’s how you make transparent clothing in Photoshop. We hope you make use of this awesome effect the next time you have photos to edit!!


