
3D Comic Text in Photoshop
One of the most iconic and recognizable features of comics is the typography they use, which you can create in Photoshop. You can incorporate this text style in all kinds of designs, like vintage retro or designs for kids, since it is very versatile. And, it is a really cool way of attracting attention and making your designs pop.
We will achieve the effect using layer styles and a filter to add a comic book look. You can then use your creations on stickers, t-shirt designs, promo badges, flyers, posters, etc.
In this tutorial, we are using the Festival Comedy font, but there are tons of great comic fonts available on Font Bundles to choose from.
Contents
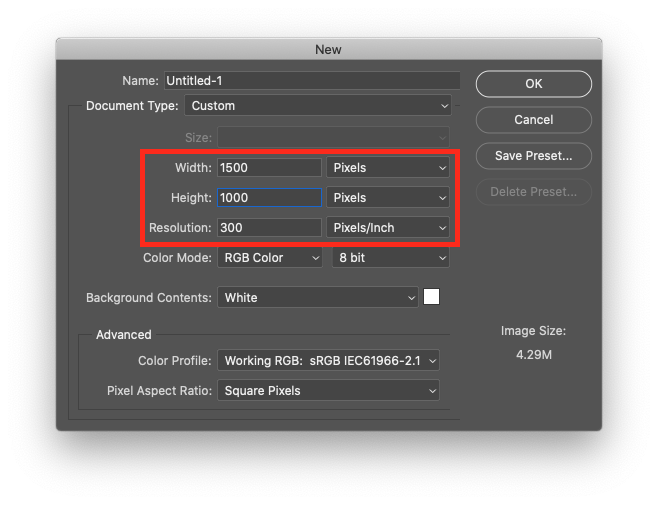
In Photoshop, create a new document. Give it the size and resolution that fits your needs, but remember that if you want to use it for printing, you should use 300 ppi. Ours was 1500 x 1000 px @300 ppi.
To begin with, we are going to add a fitting background using a bright color with a halftone pattern overlay on it.
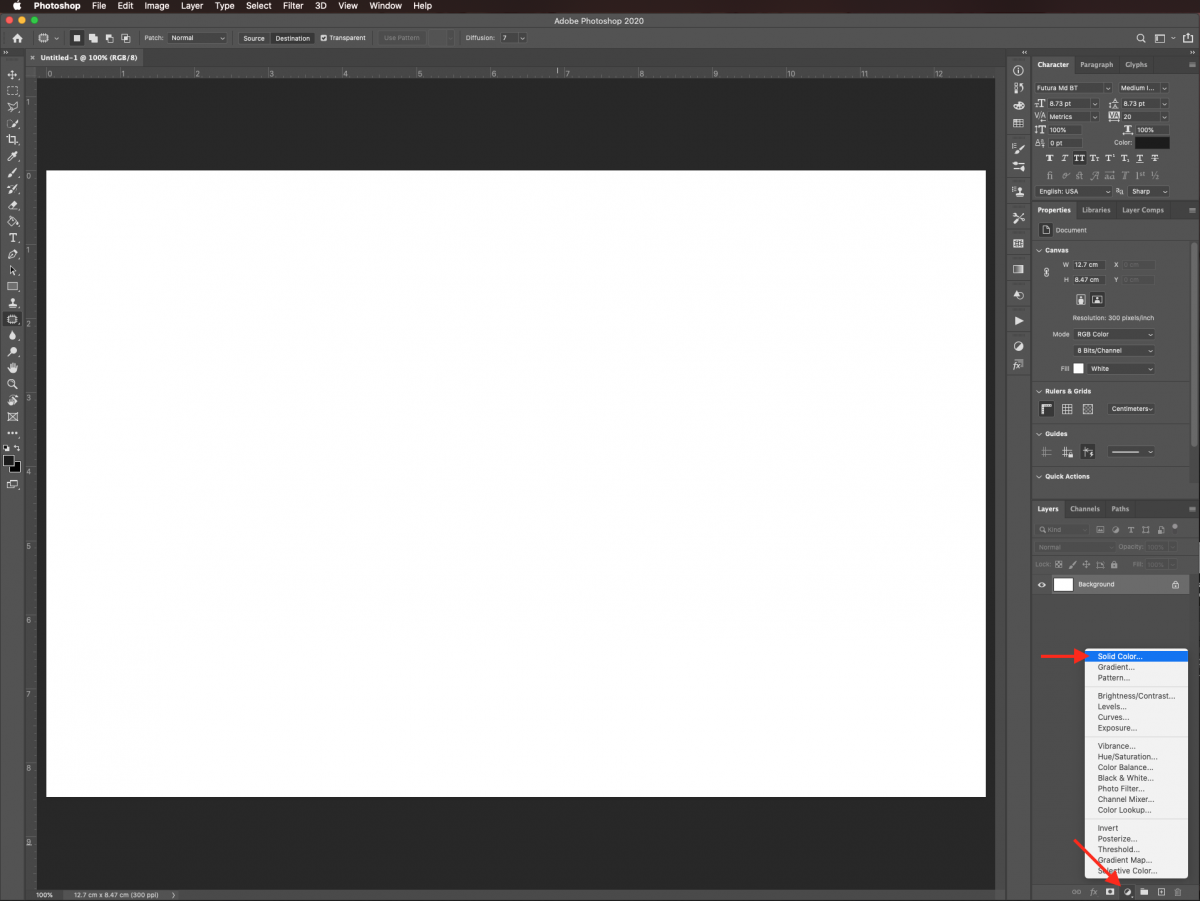
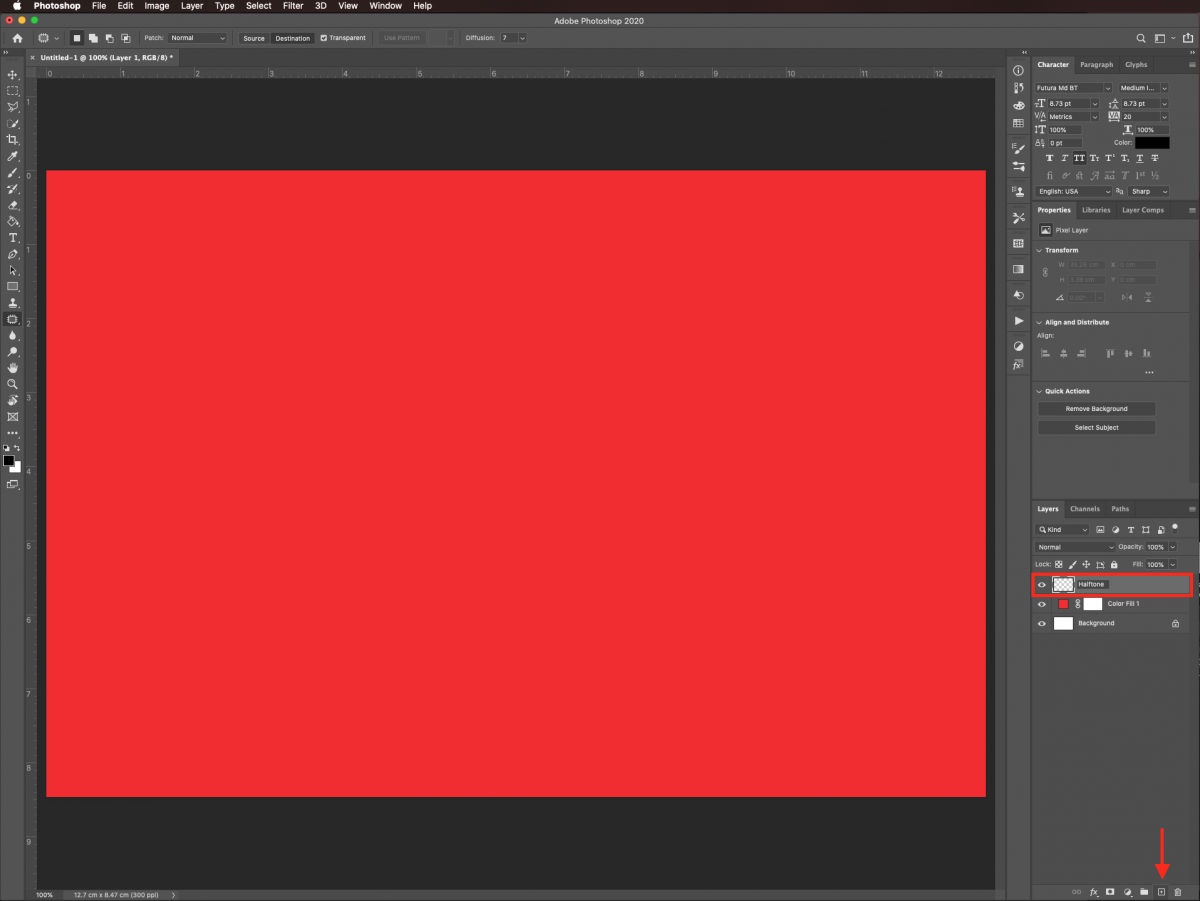
To add the background color, click on the small black and white circle at the bottom of the Layers panel to add a Solid Color fill layer.
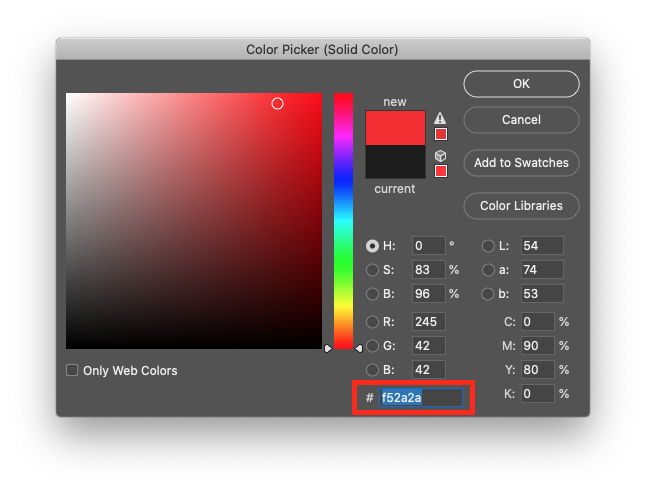
We used a bright red shade (#f52a2a) as the fill color for ours.
To add the halftone pattern, create a new layer on top of everything and name it Halftone.
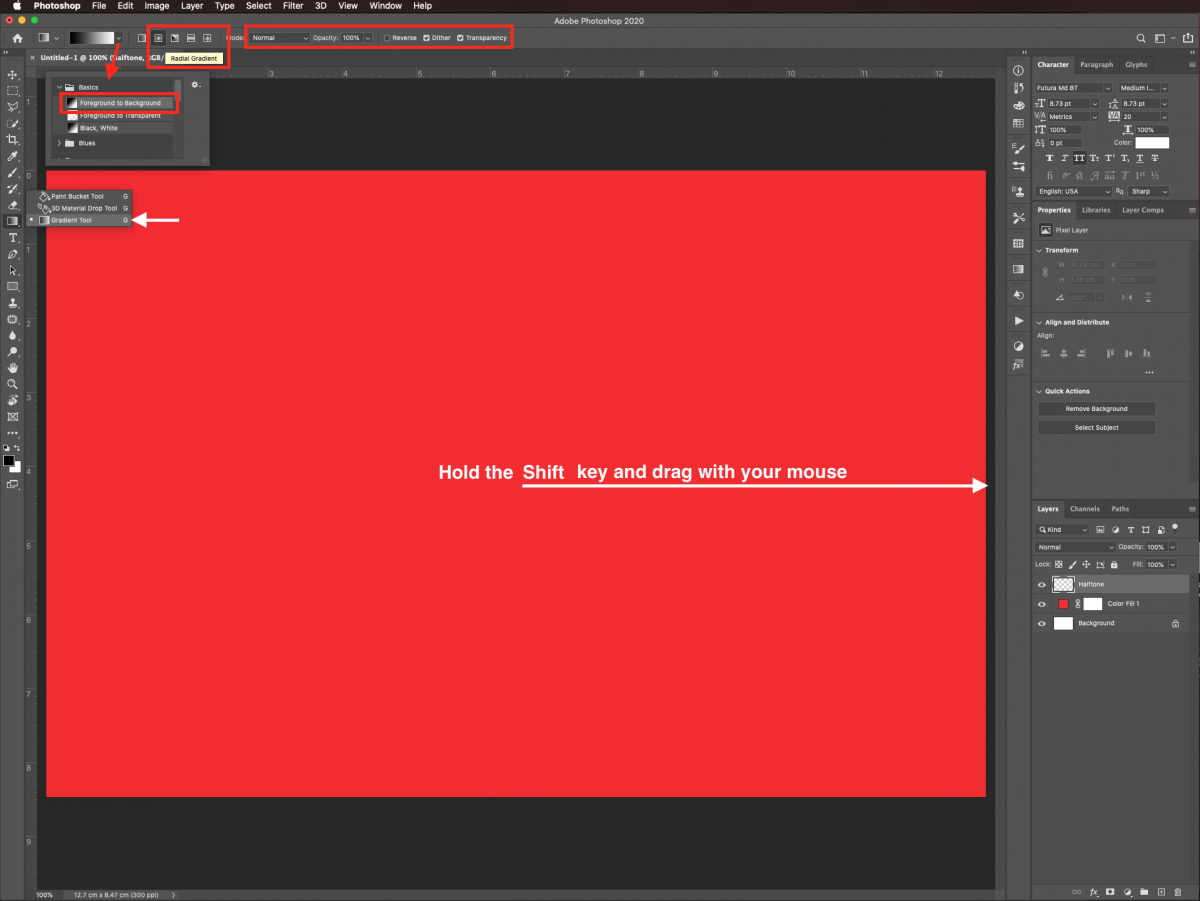
Select the Gradient tool (G). Set the gradient to Foreground to Background, choose Radial as the Gradient Type, and leave the rest of the settings as default.
Then, starting roughly from the center of your canvas, click and drag your cursor to the side while holding the Shift key. Release your mouse when you reach the edge.
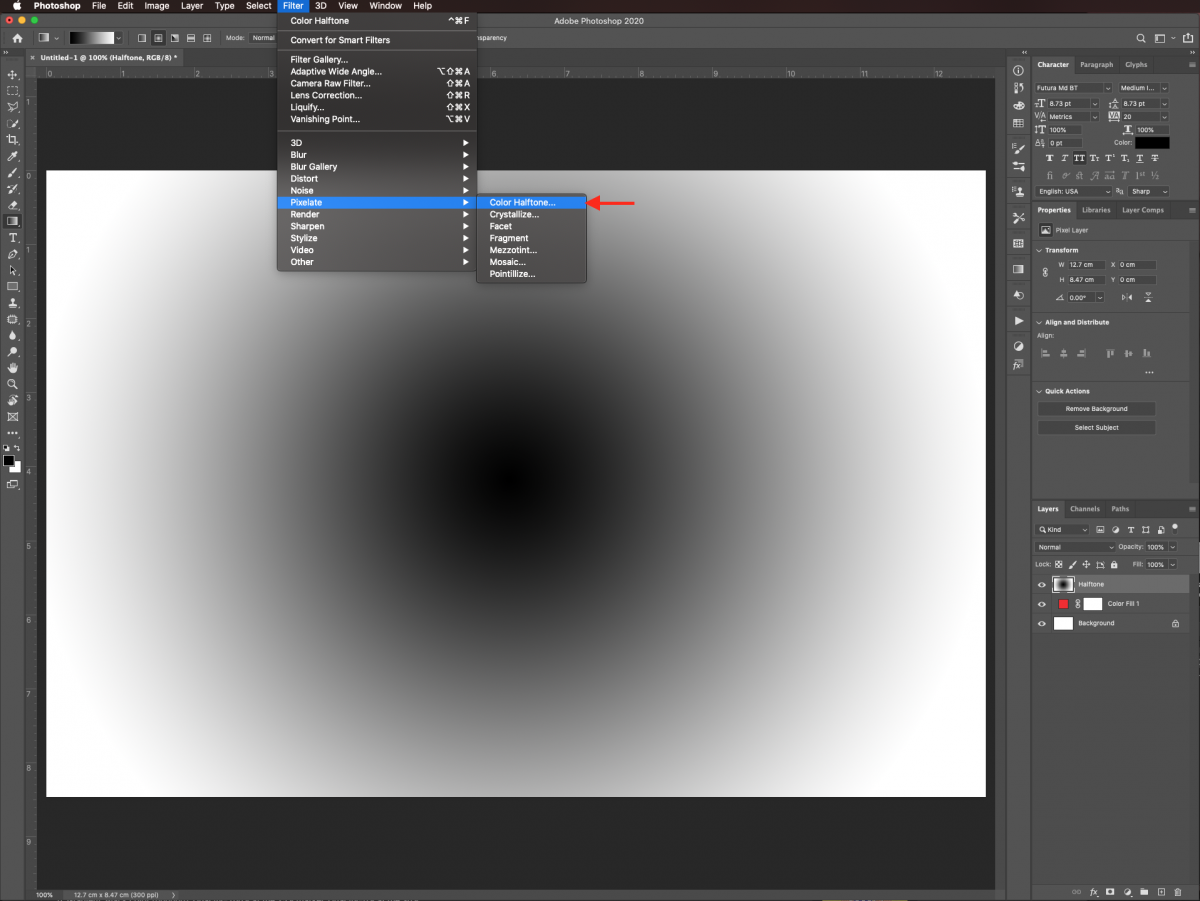
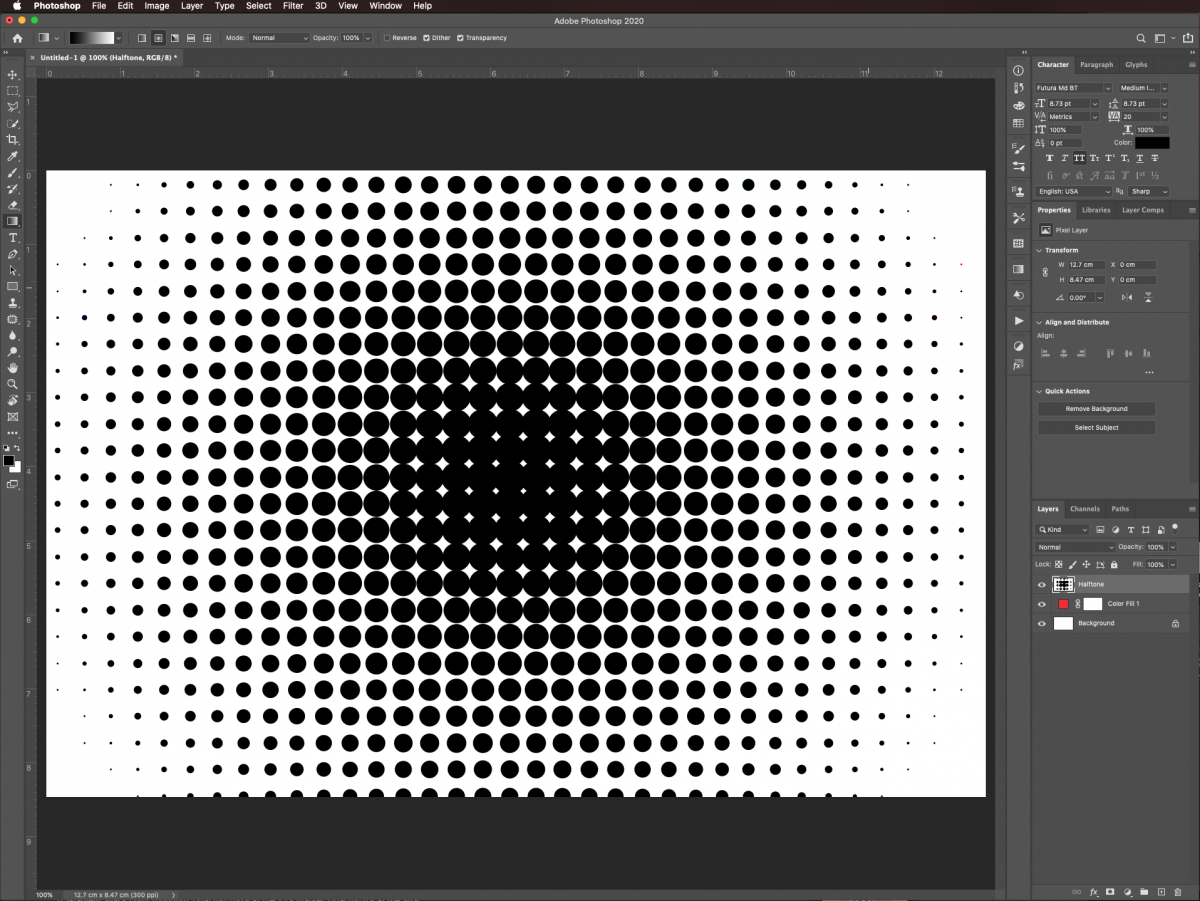
The resulting gradient should have a black center and white edges all around.

Then, go to Filter > Pixelate > Color Halftone.
On the Color Halftone panel, input a value of 30 Pixels for the Max. Radius and 0 for the remaining ones. Click Ok.
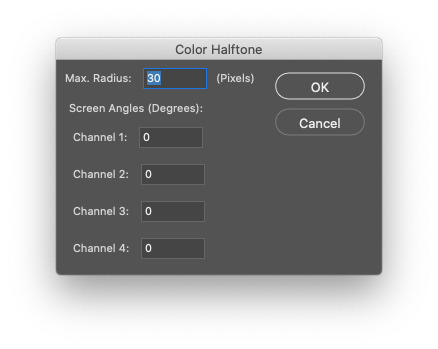
This will turn your gradient into a halftone.
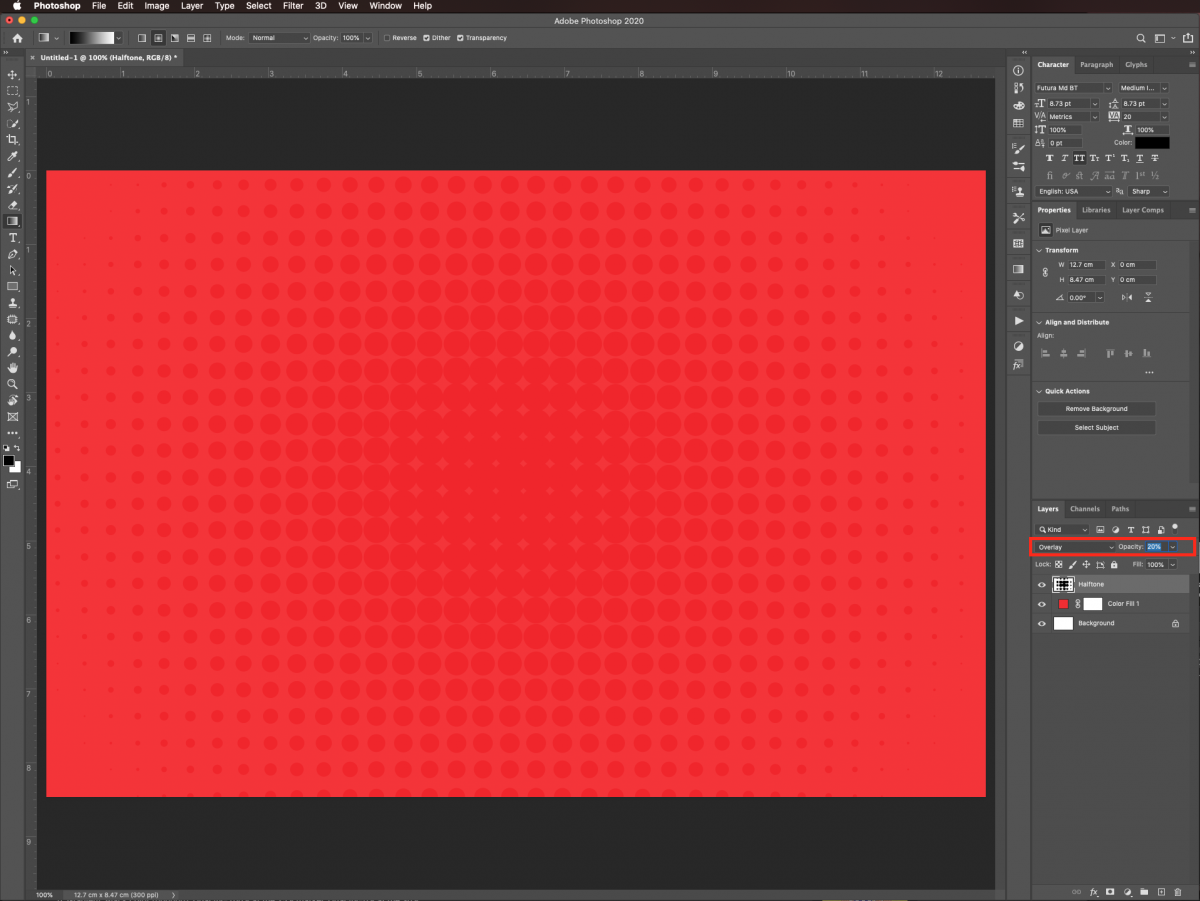
Finally, change the Blending Mode of the Halftone layer to Overlay, and lower the Opacity to 20%.
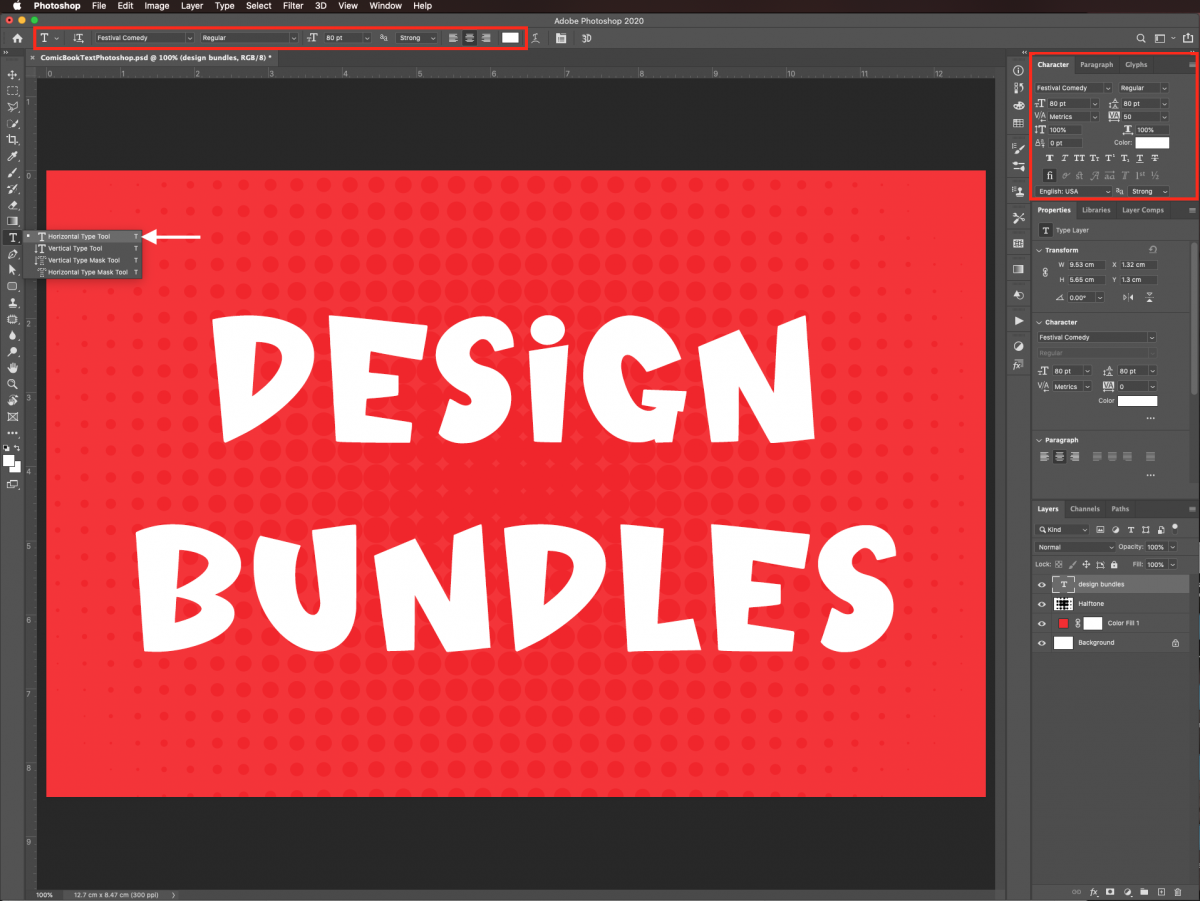
Now it’s time to add the text. Select the Type tool (T), choose your font from the type menu, and type your text.
Use white as the Fill color. The size will depend on the word or phrase you choose.
If your text has more than one line, you may need to adjust the alignment, the leading, and/or the kerning between words and letters.
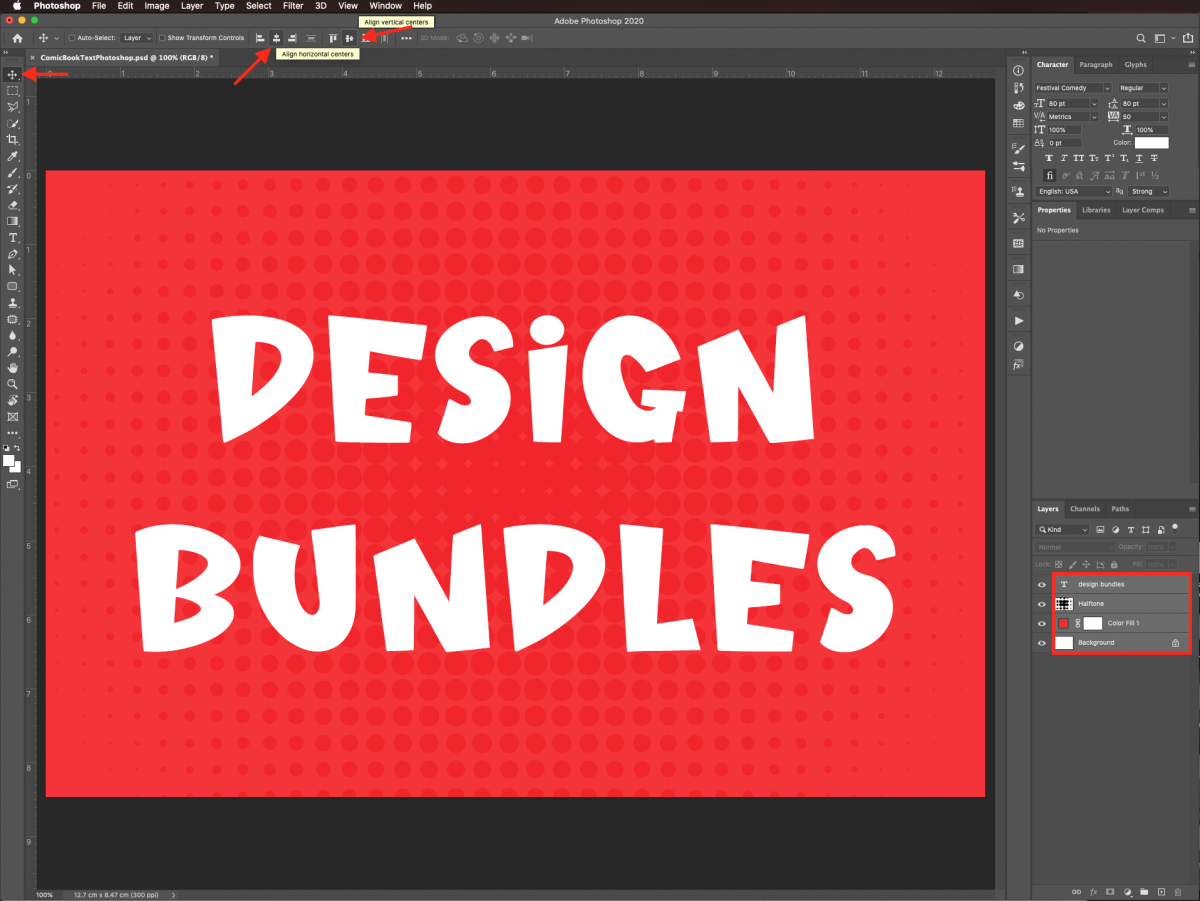
Center your text by selecting all your layers (Shift key) and clicking the Align Vertical and Horizontal Centers buttons on the top menu.
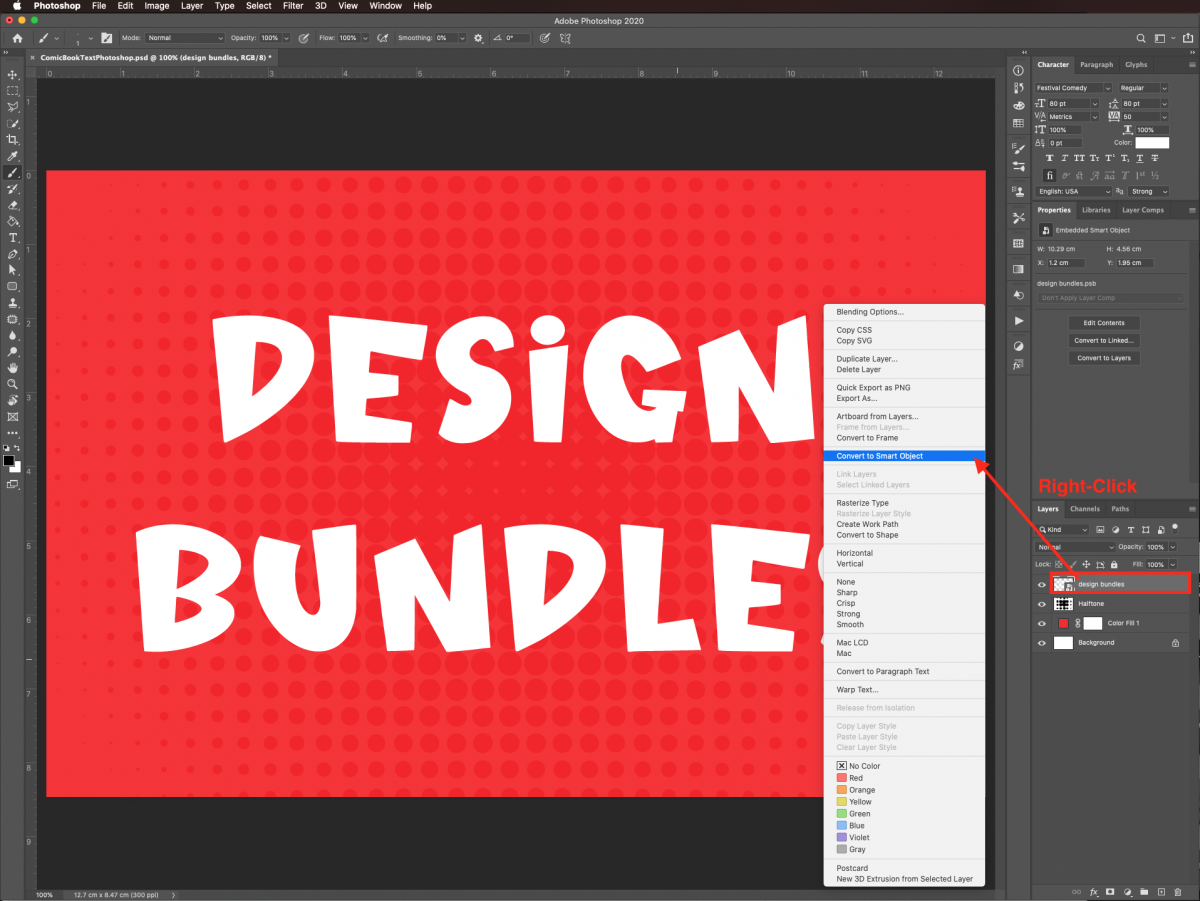
Right-click on top of the text layer thumbnail, and choose Convert to Smart Object from the drop-down menu. This will let you add filters and/or layer styles to your text in a non-destructive way and adjust them if needed.
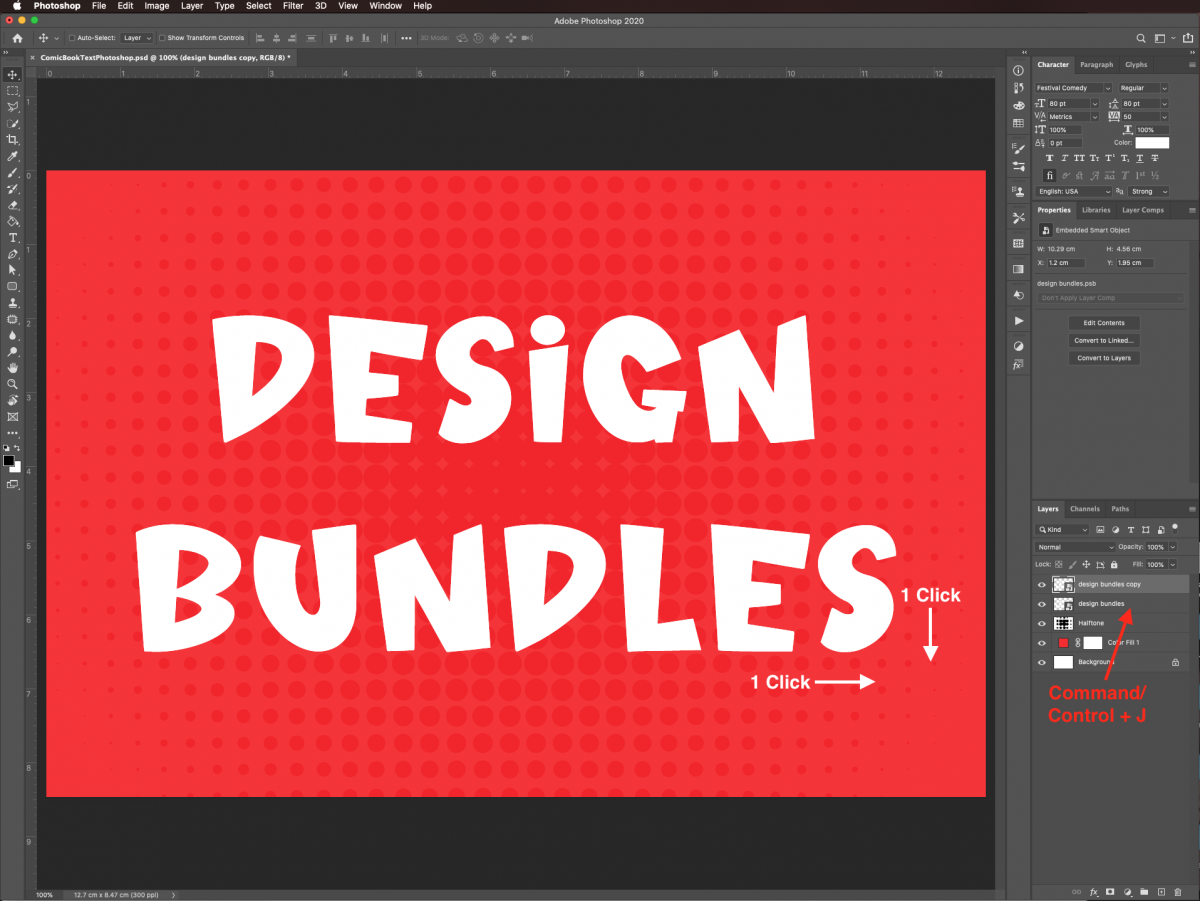
To create the 3D effect, we will duplicate our text layer several times and move each duplicate in similar increments.
First, duplicate your text layer (Command/Control + J). Then, with its thumbnail selected in the Layers panel, move the duplicate one click down and one click right using the arrow keys.
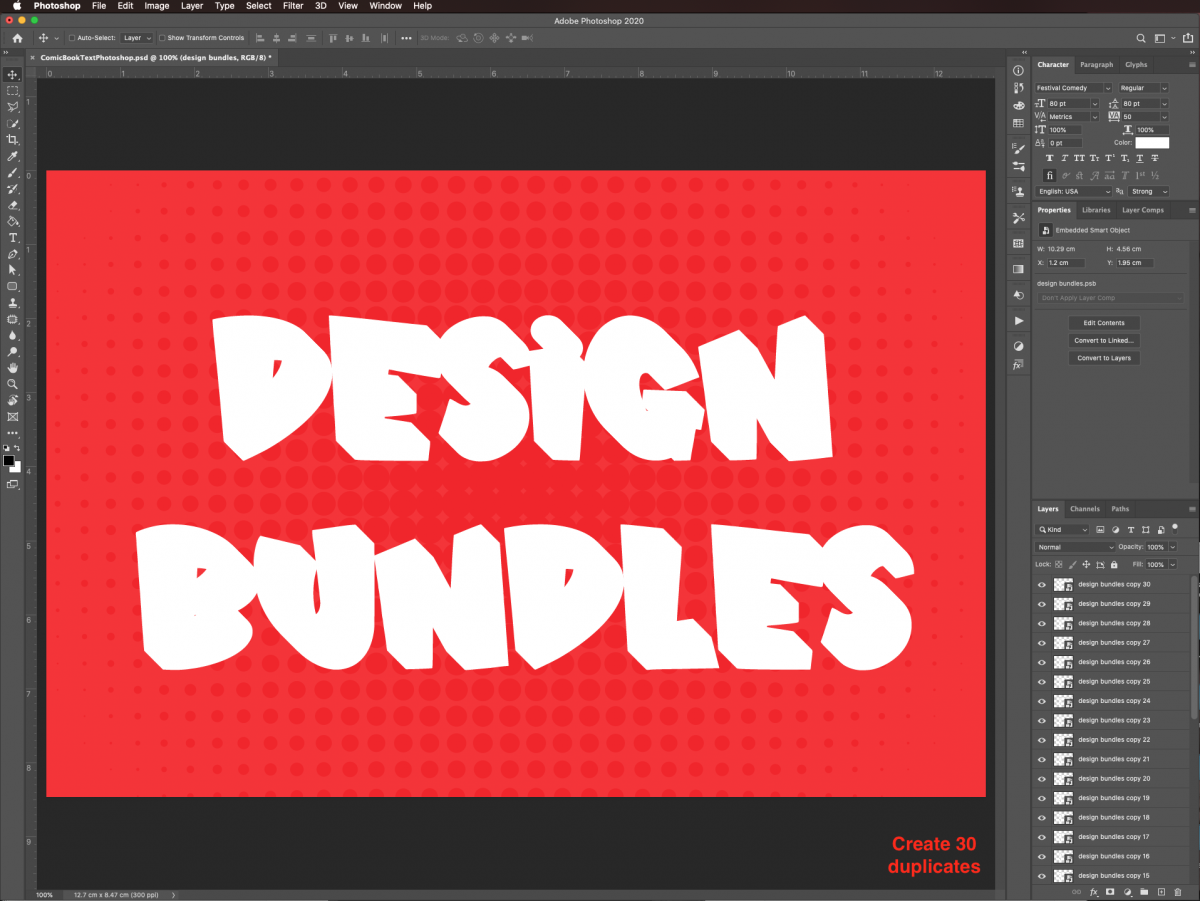
Without deselecting, create another duplicate and move it one click down and one click right using the arrow keys too. Keep going until you create around 30 copies of the original text layer.
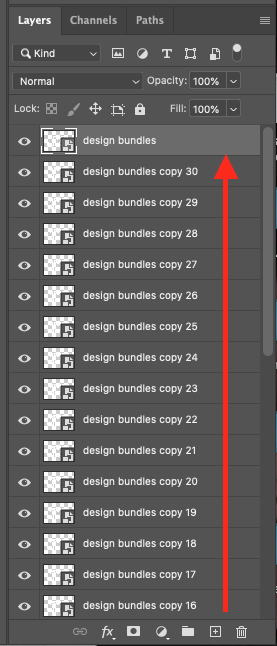
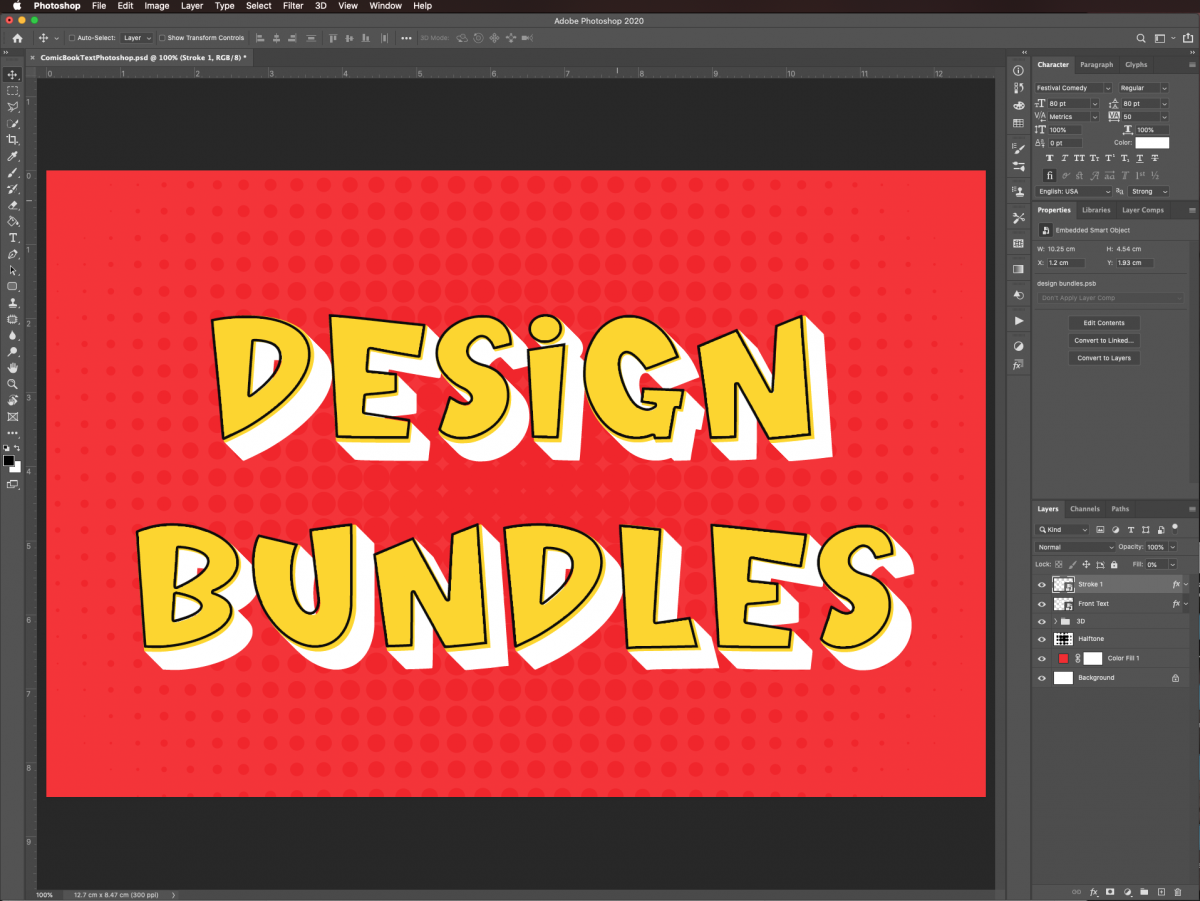
Then, drag the original text layer and position it on top of everything.
Now, we are going to fill the front text with a bright yellow shade.
Rename the original text layer Front Text. Double-click on top of its thumbnail, and apply the following Layer Styles.
In the Color Overlay tab, use:
Select all the duplicates (Shift key), but leave out the original text layer and group them together. Go to Layer > Group Layers (Command/Control +G).
Give the folder a name to identify it better. We named our folder 3D.
Next, we are going to duplicate the front text layer a few times and apply some layer styles to them to achieve the comic book look.
First, duplicate your text layer (Command/Control + J). Change its name to Stroke 1 and make sure it is placed on top in the Layers panel.
Then, double-click on top of its thumbnail to open the Layers Styles window. In the Stroke tab, use the following:
Uncheck the Color Overlay box if needed.
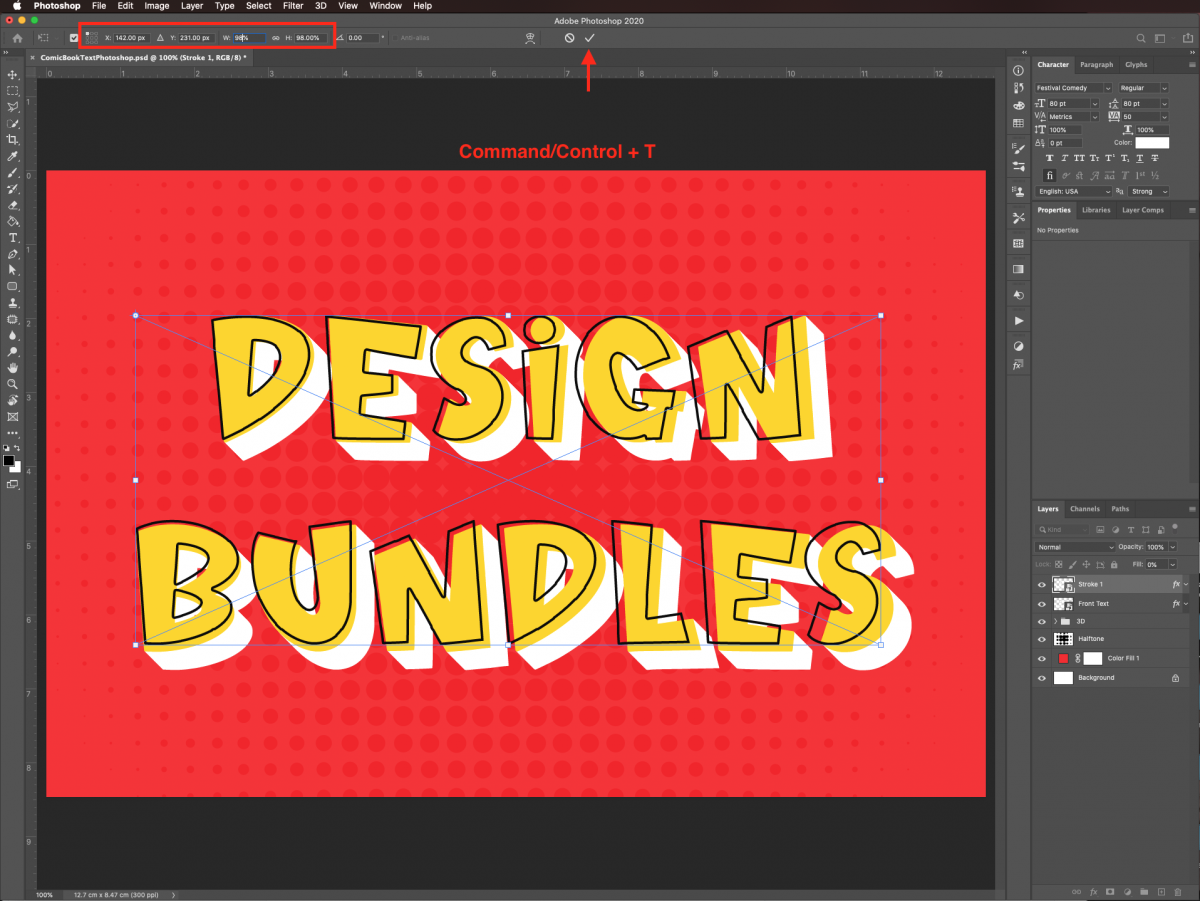
We need to distort this text a bit. Enter Free Transform (Command/Control + T), and change the reference point to the top left corner square on the reference point locator in the options bar.
Since some of the letters in the Stoke 1 layer are not correctly aligned with the ones in the Front Text layer, we are going to need to reposition them one by one.
Use any selection tool you want, like the Rectangular Marquee tool or the Polygonal Lasso tool (L), and select the letter.
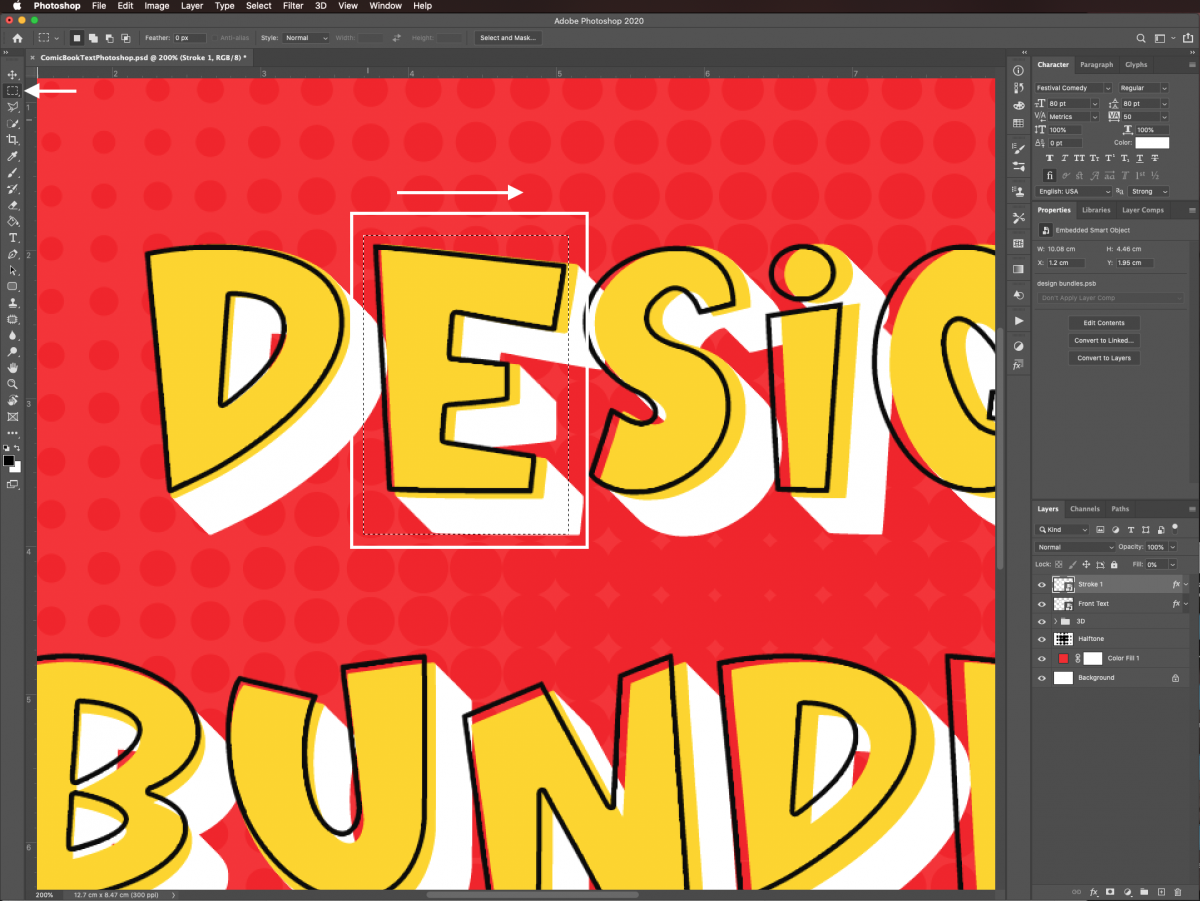
Switch to the Move tool (V), and using the arrow keys, move the letter until its top-left portion is aligned with the top-left portion of the same letter from the Front Text layer. Once you are done, hit D to deselect.

Repeat until you have repositioned all the letters that need it.
Now, create another duplicate of the Front Text layer (Command/Control + J). Change its name to Stroke 2 and make sure it is placed on top of the Layers panel.
Double-click on top of its thumbnail to open the Layers Styles window. In the Outer Glow tab, use the following:
Uncheck the Color Overlay box if needed.

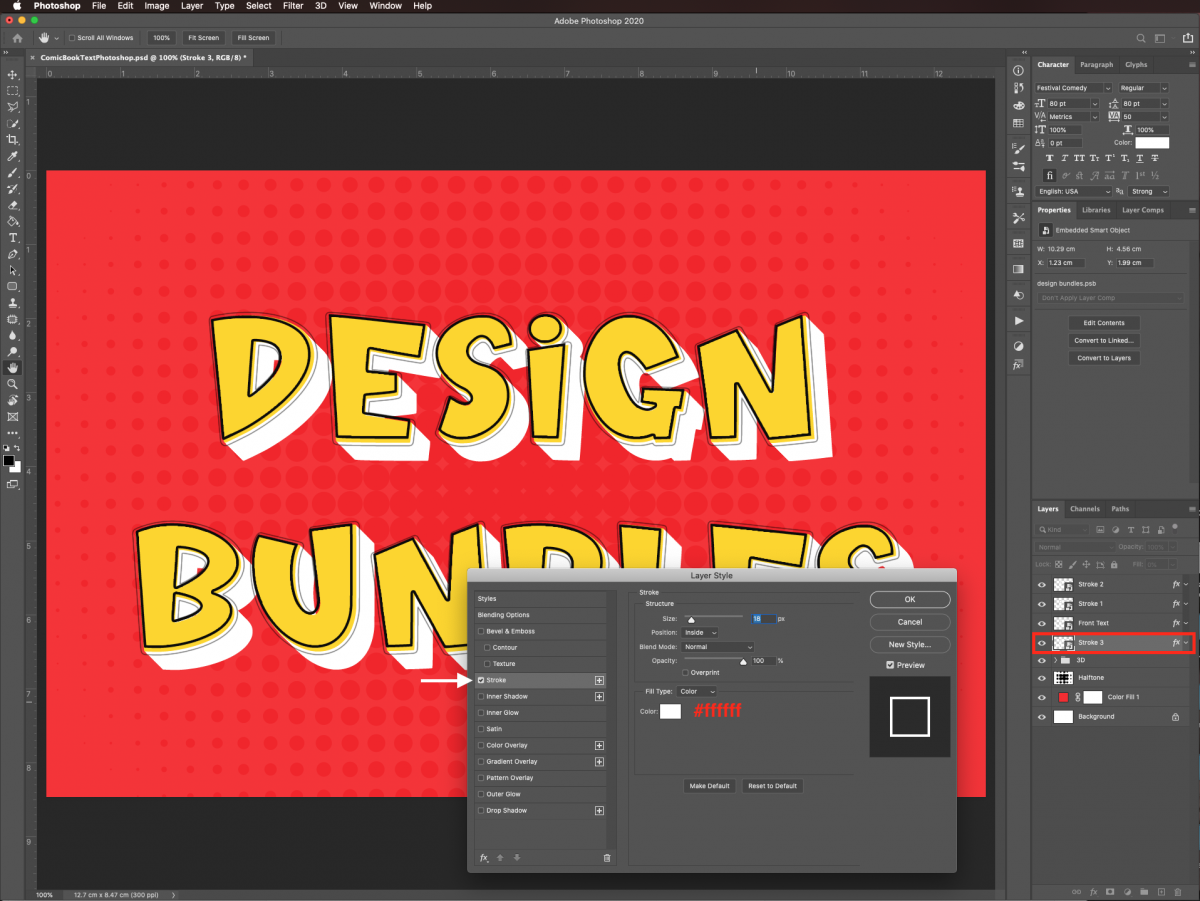
Finally, create another duplicate of the Front Text layer (Command/Control + J). Change its name to Stroke 3, and this time, place its thumbnail under the Front Text layer.
Open the Layers Styles window, and in the Stroke tab, use the following values:
Uncheck the Color Overlay box if needed.
To finish up applying the comic book look to the text, we are going to apply some layer styles to the text layers and to the folder itself.
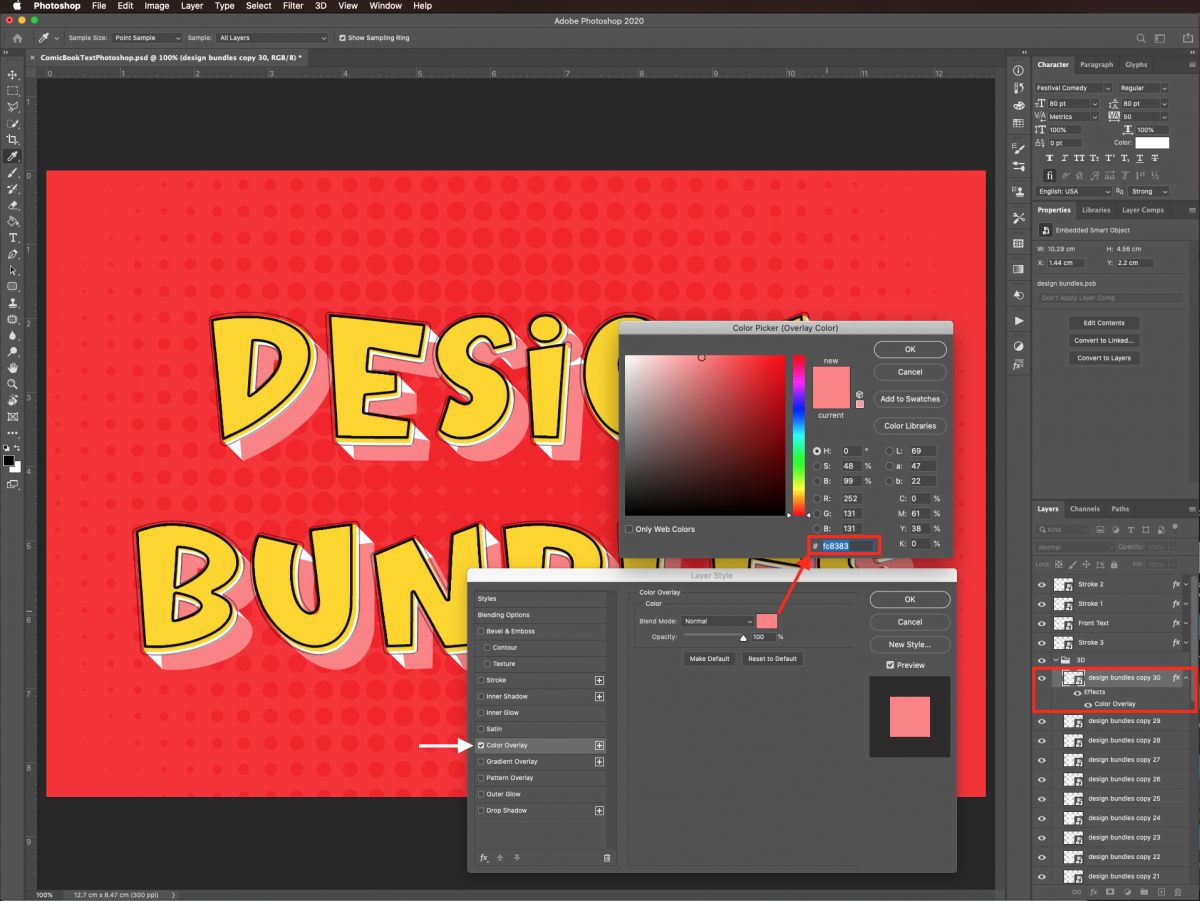
To start, select one of the 3D text layers (inside the 3D folder). Double-click on top of its thumbnail, and change the following Color Overlay values in the Layer Styles panel:
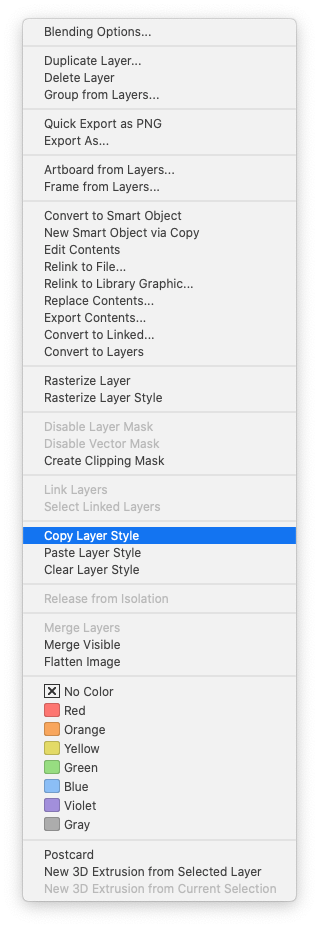
We need to add the same color to the rest of the 3D text layers. Right-click on top of its thumbnail and select Copy Layer Style.
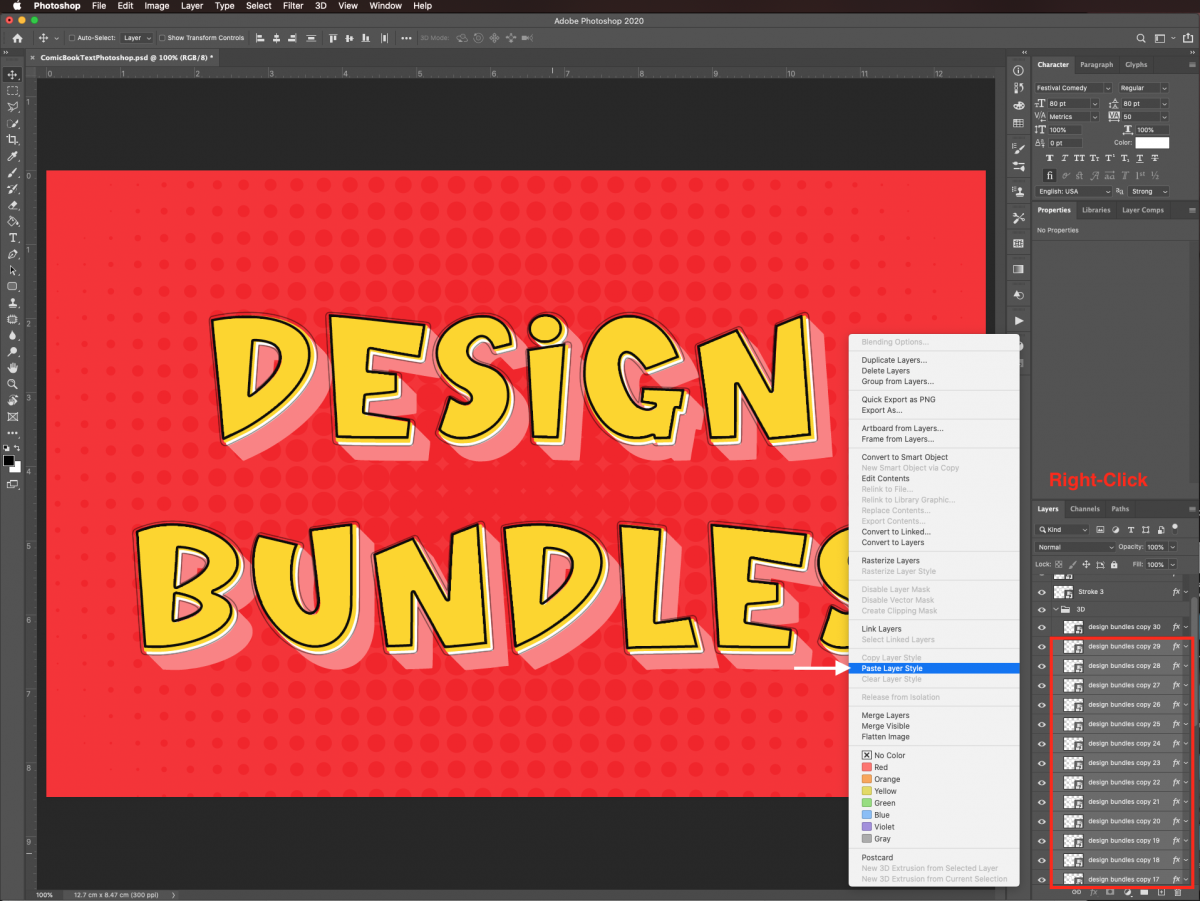
Then, select the other 3D text layers (Shift key), right-click on top of the selection, and this time use Paste Layer Style.
We are going to make a pattern with diagonal lines to use on the 3D text layers.
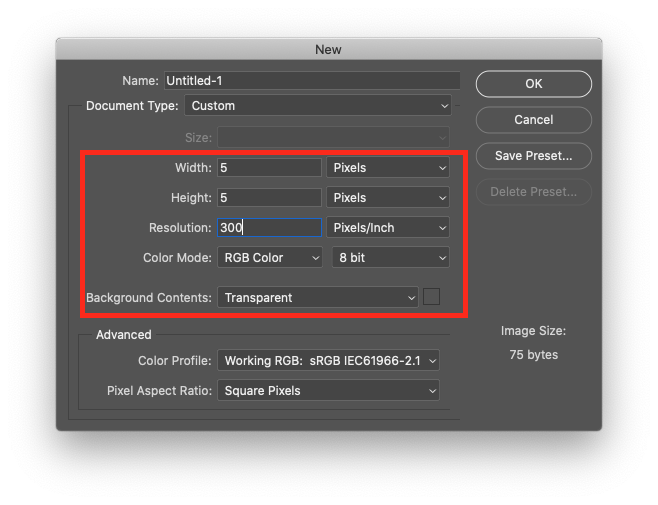
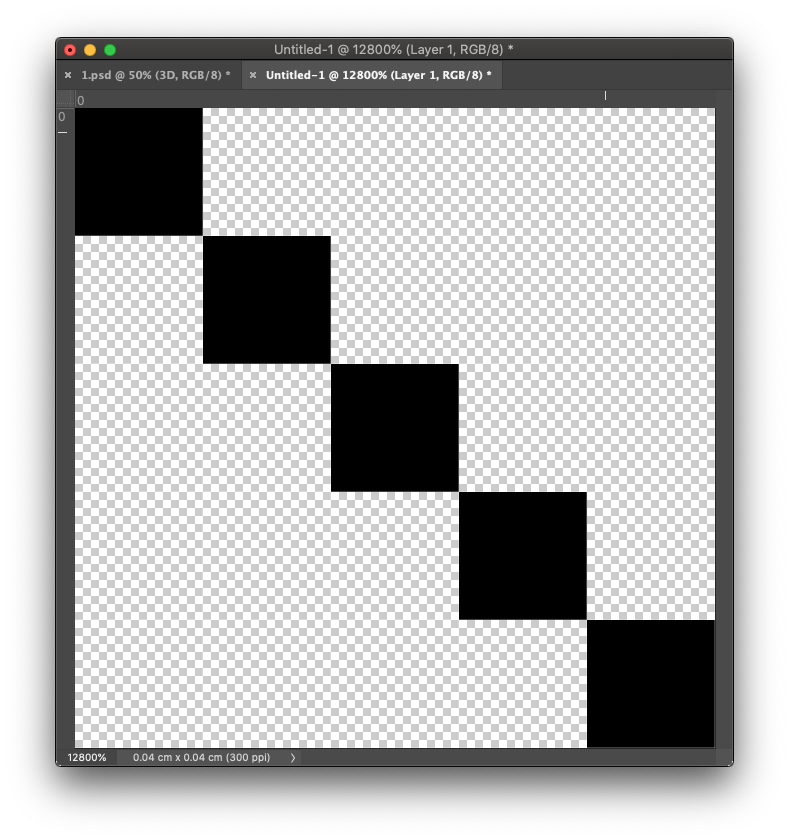
Create a new document, and make it 5 x 5 pixels @300 ppi with a transparent background.
Zoom in as much as you can and use black to paint some pixels coming down diagonally from the top-left to the bottom-right corner.
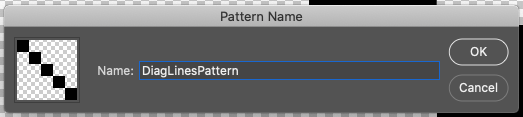
Once you are done, go to Edit > Define Pattern and name the pattern DiagLinesPattern on the popup window. Click Ok.
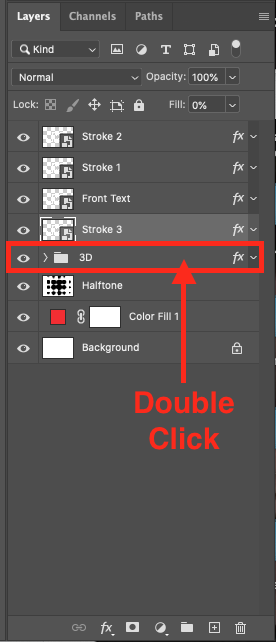
Select the 3D folder and double-click on top of its thumbnail to open the Layer Styles window.
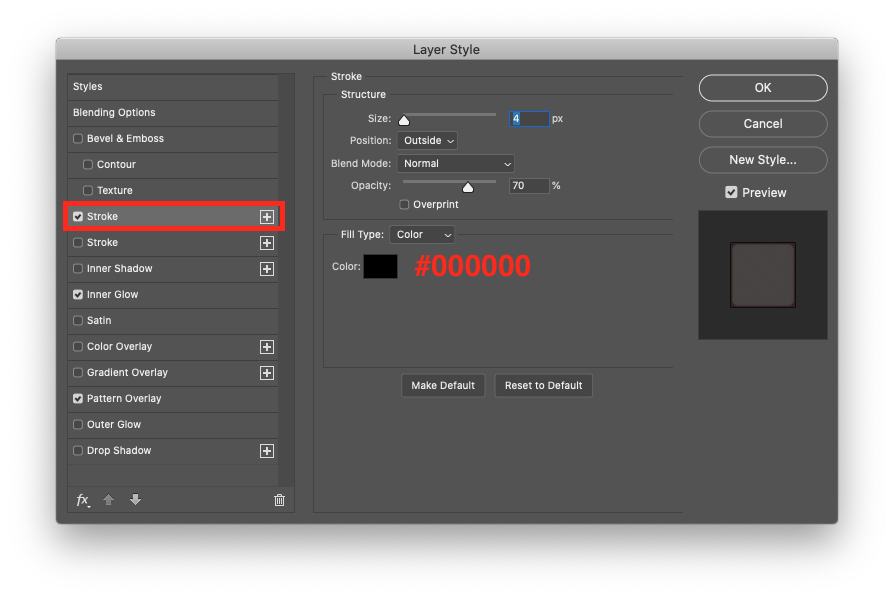
In the Stroke tab, apply the following:
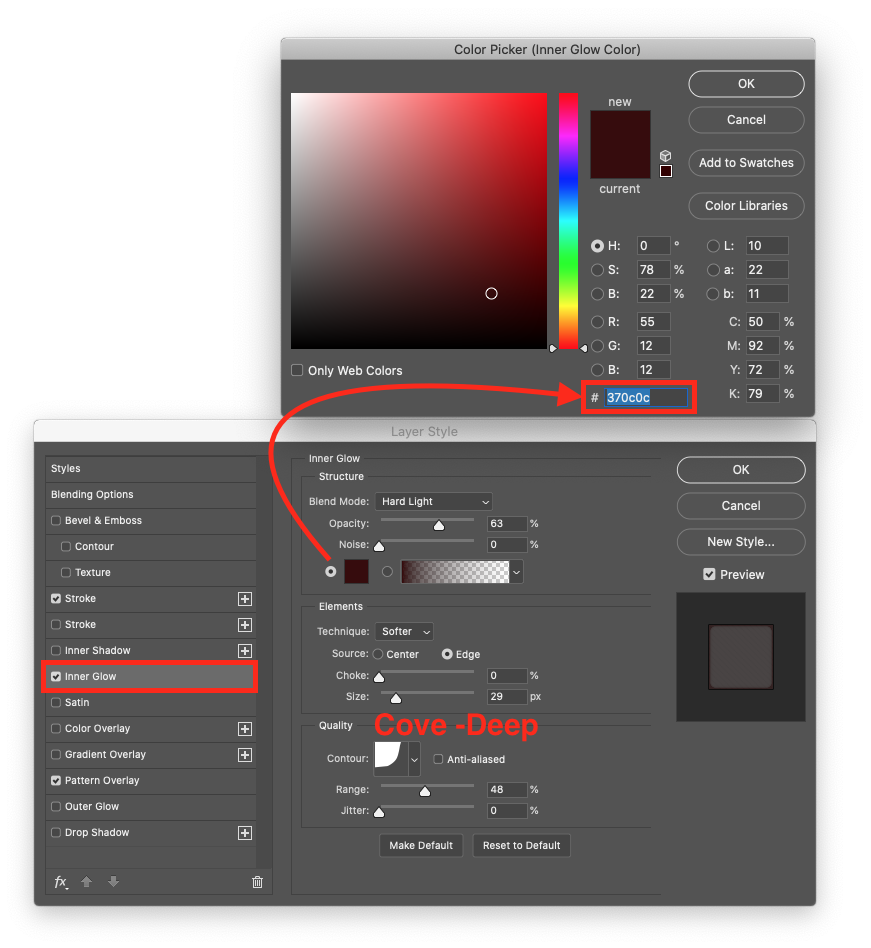
Then, in the Inner Glow tab, use:
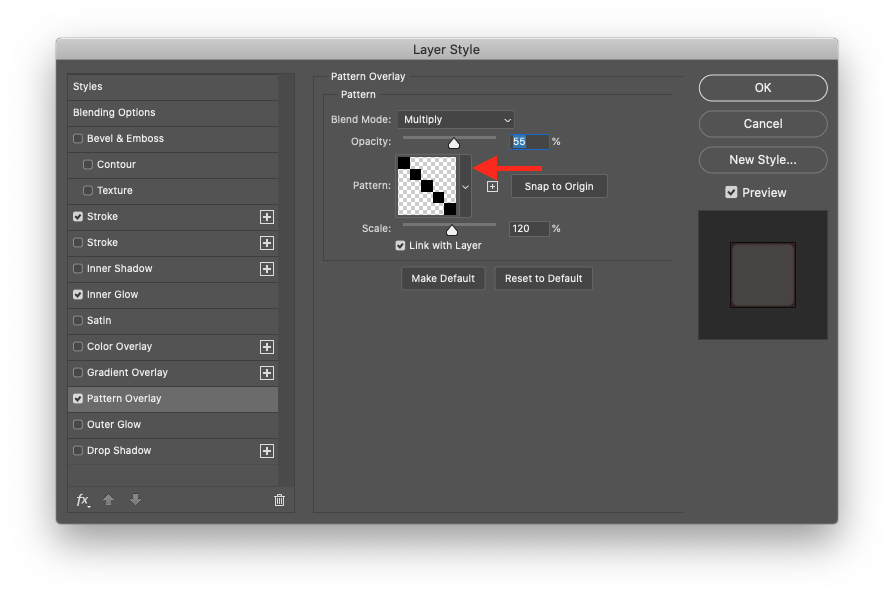
Finally, in the Pattern Overlay tab, use:
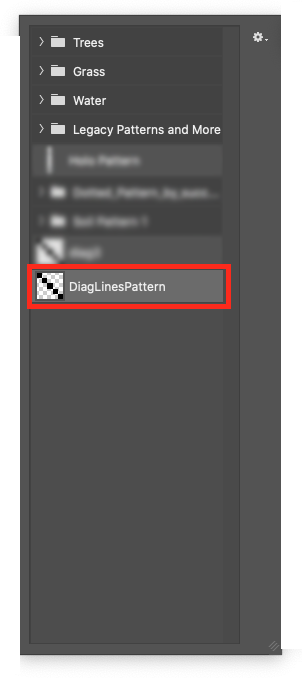
Click on the Pattern thumbnail to open a drop-down menu, and select the one you created before (DiagLinesPattern). Click Ok.
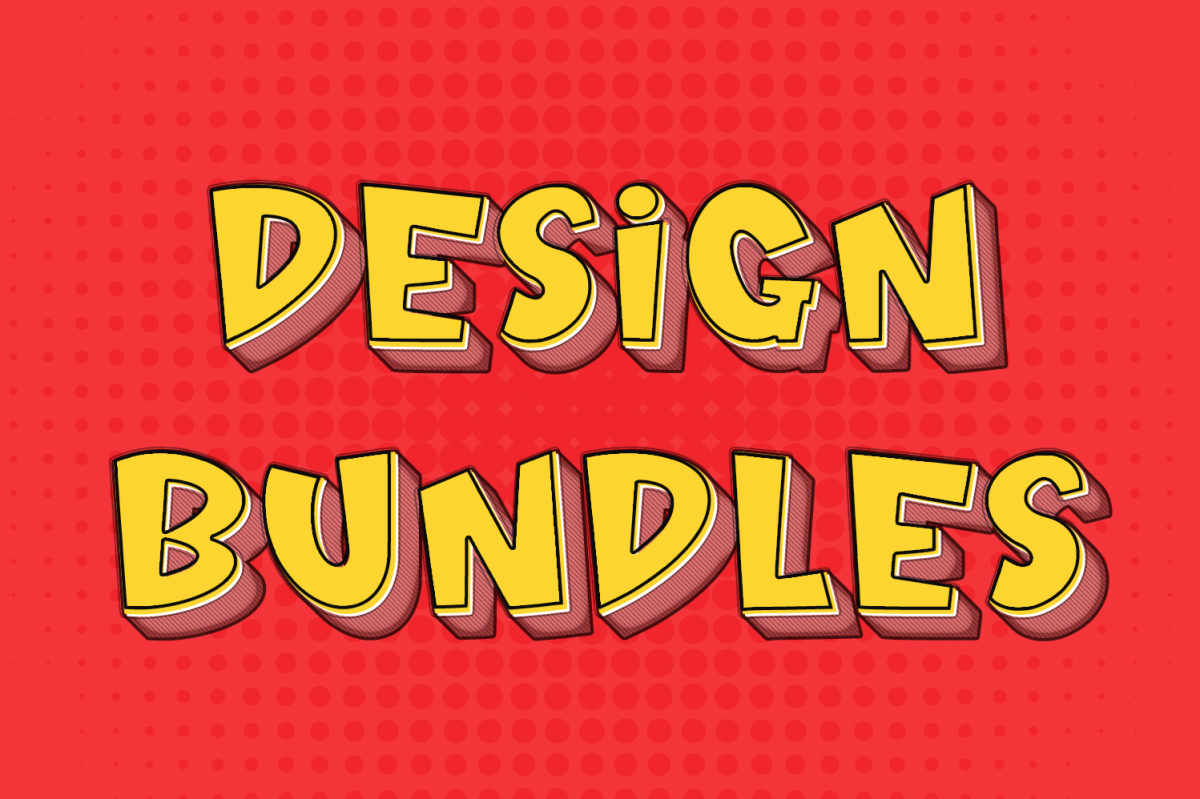
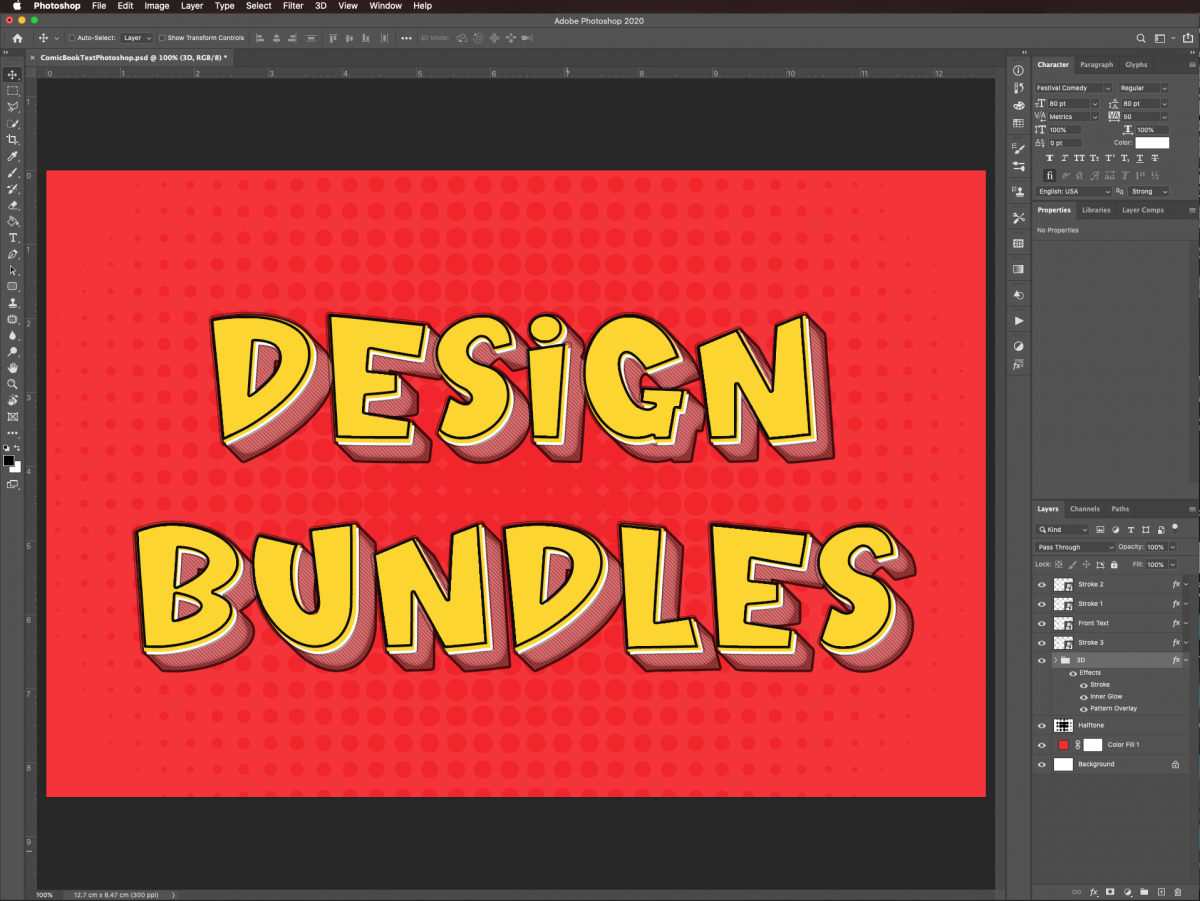
This is how our 3D comic text looks!
Remember that you can change the colors and layer style values to transform the effect and achieve different looks.
Next, you can learn how to make a peeling sticker effect and how to flip an image in Adobe Photoshop.
We will achieve the effect using layer styles and a filter to add a comic book look. You can then use your creations on stickers, t-shirt designs, promo badges, flyers, posters, etc.
In this tutorial, we are using the Festival Comedy font, but there are tons of great comic fonts available on Font Bundles to choose from.
Contents
- Create Your Document
- Add the Background
- Add the Text
- Make the Text 3D
- Give the Front Text a Comic Book Look Using Layer Styles
- Give the 3D Layers a Comic Book Look Using Layer Styles
Step 1 - Create Your Document
In Photoshop, create a new document. Give it the size and resolution that fits your needs, but remember that if you want to use it for printing, you should use 300 ppi. Ours was 1500 x 1000 px @300 ppi.
Step 2 - Add the Background
To begin with, we are going to add a fitting background using a bright color with a halftone pattern overlay on it.
Add the Background Color
To add the background color, click on the small black and white circle at the bottom of the Layers panel to add a Solid Color fill layer.
We used a bright red shade (#f52a2a) as the fill color for ours.
Add the Halftone Pattern
To add the halftone pattern, create a new layer on top of everything and name it Halftone.
Select the Gradient tool (G). Set the gradient to Foreground to Background, choose Radial as the Gradient Type, and leave the rest of the settings as default.
Then, starting roughly from the center of your canvas, click and drag your cursor to the side while holding the Shift key. Release your mouse when you reach the edge.
The resulting gradient should have a black center and white edges all around.
Then, go to Filter > Pixelate > Color Halftone.
On the Color Halftone panel, input a value of 30 Pixels for the Max. Radius and 0 for the remaining ones. Click Ok.
This will turn your gradient into a halftone.
Finally, change the Blending Mode of the Halftone layer to Overlay, and lower the Opacity to 20%.
Step 3 - Add the Text
Now it’s time to add the text. Select the Type tool (T), choose your font from the type menu, and type your text.
Use white as the Fill color. The size will depend on the word or phrase you choose.
If your text has more than one line, you may need to adjust the alignment, the leading, and/or the kerning between words and letters.
Center your text by selecting all your layers (Shift key) and clicking the Align Vertical and Horizontal Centers buttons on the top menu.
Make Front Text a Smart Object
Right-click on top of the text layer thumbnail, and choose Convert to Smart Object from the drop-down menu. This will let you add filters and/or layer styles to your text in a non-destructive way and adjust them if needed.
Step 4 - Make the Text 3D
To create the 3D effect, we will duplicate our text layer several times and move each duplicate in similar increments.
Duplicate and Move the Front Text Layer Many Times
First, duplicate your text layer (Command/Control + J). Then, with its thumbnail selected in the Layers panel, move the duplicate one click down and one click right using the arrow keys.
Without deselecting, create another duplicate and move it one click down and one click right using the arrow keys too. Keep going until you create around 30 copies of the original text layer.
Reposition the Main Text Layer
Then, drag the original text layer and position it on top of everything.
Give the Main Text a Color
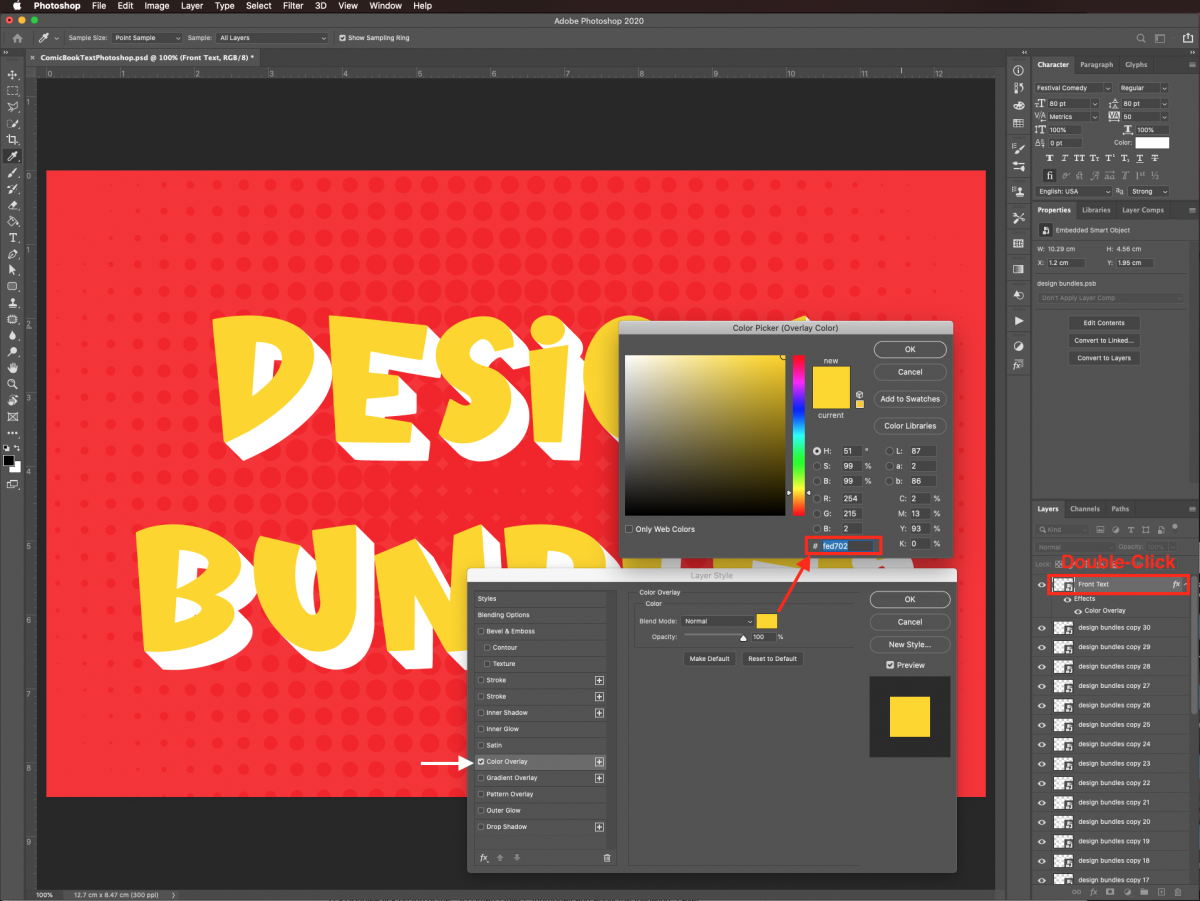
Now, we are going to fill the front text with a bright yellow shade.
Rename the original text layer Front Text. Double-click on top of its thumbnail, and apply the following Layer Styles.
In the Color Overlay tab, use:
- Color: #fed702
- Blend Mode: Normal
- Opacity : 100%
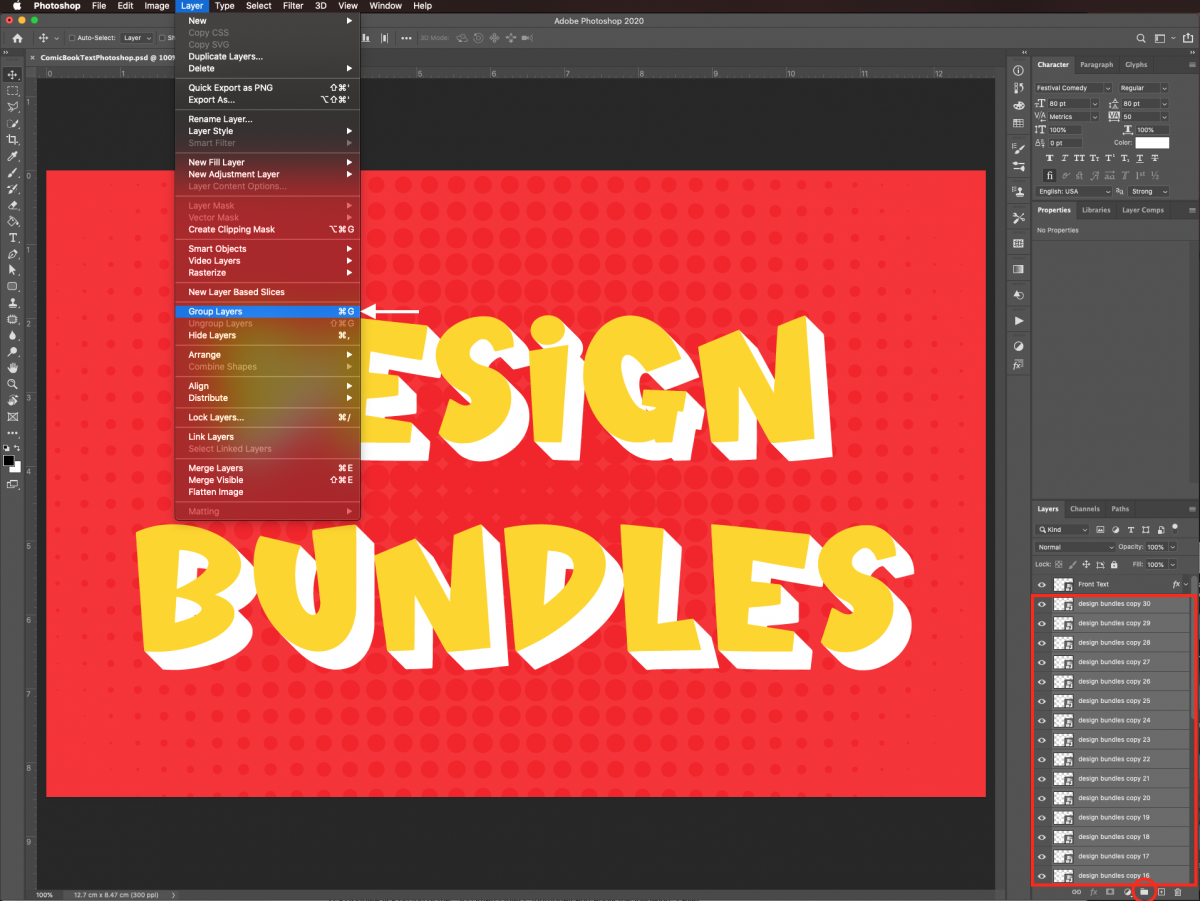
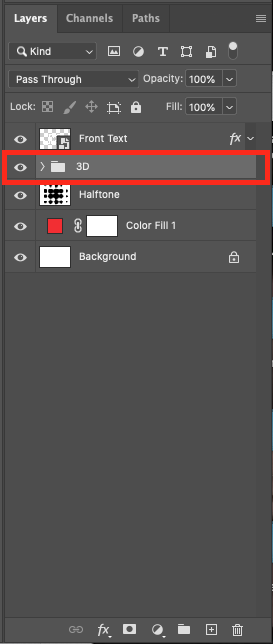
Group the 3D Layers
Select all the duplicates (Shift key), but leave out the original text layer and group them together. Go to Layer > Group Layers (Command/Control +G).
Give the folder a name to identify it better. We named our folder 3D.
Step 4 - Give the Front Text a Comic Book Look Using Layer Styles
Next, we are going to duplicate the front text layer a few times and apply some layer styles to them to achieve the comic book look.
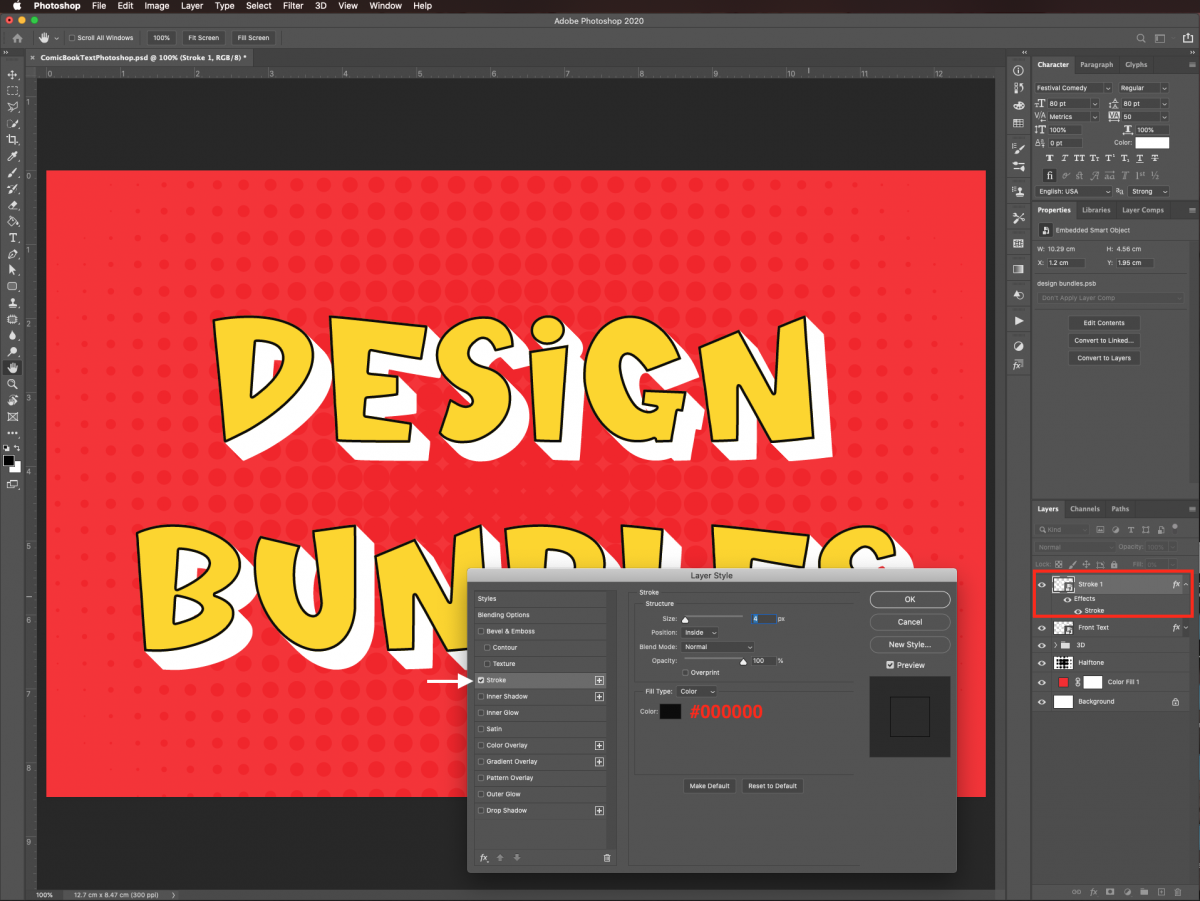
First, duplicate your text layer (Command/Control + J). Change its name to Stroke 1 and make sure it is placed on top in the Layers panel.
Create a Layer Style Layer
Then, double-click on top of its thumbnail to open the Layers Styles window. In the Stroke tab, use the following:
- Color: black (#000000)
- Size: 4
- Position: Inside
- Blend Mode: Normal
- Opacity: 100%
Uncheck the Color Overlay box if needed.
Distort the Text Layer
We need to distort this text a bit. Enter Free Transform (Command/Control + T), and change the reference point to the top left corner square on the reference point locator
Adjust the Alignment of the Letters
Since some of the letters in the Stoke 1 layer are not correctly aligned with the ones in the Front Text layer, we are going to need to reposition them one by one.
Use any selection tool you want, like the Rectangular Marquee tool or the Polygonal Lasso tool (L), and select the letter.
Switch to the Move tool (V), and using the arrow keys, move the letter until its top-left portion is aligned with the top-left portion of the same letter from the Front Text layer. Once you are done, hit D to deselect.
Repeat until you have repositioned all the letters that need it.
Add a Second Layer Style Layer
Now, create another duplicate of the Front Text layer (Command/Control + J). Change its name to Stroke 2 and make sure it is placed on top of the Layers panel.
Double-click on top of its thumbnail to open the Layers Styles window. In the Outer Glow tab, use the following:
- Blend Mode: Normal
- Color: #000000
- Opacity: 50%
- Nose: 0%
- Technique: Softer
- Spread: 75%
- Size: 6%
- Contour: Cone
- Range: 100%
- Jitter: 0%
Uncheck the Color Overlay box if needed.
Add a Final Layer Style Layer
Finally, create another duplicate of the Front Text layer (Command/Control + J). Change its name to Stroke 3, and this time, place its thumbnail under the Front Text layer.
Open the Layers Styles window, and in the Stroke tab, use the following values:
- Size: 16 px
- Position: Inside
- Blend Mode: Normal
- Opacity: 100%
- Color: white (#ffffff)
Uncheck the Color Overlay box if needed.
Step 5 - Give the 3D Layers a Comic Book Look Using Layer Styles
To finish up applying the comic book look to the text, we are going to apply some layer styles to the text layers and to the folder itself.
Add Color to the 3D Text Layers
To start, select one of the 3D text layers (inside the 3D folder). Double-click on top of its thumbnail, and change the following Color Overlay values in the Layer Styles panel:
- Color: #fc8383
- Blend Mode: Normal
- Opacity: 100%
We need to add the same color to the rest of the 3D text layers. Right-click on top of its thumbnail and select Copy Layer Style.
Then, select the other 3D text layers (Shift key), right-click on top of the selection, and this time use Paste Layer Style.
Create a Pattern
We are going to make a pattern with diagonal lines to use on the 3D text layers.
Create a new document, and make it 5 x 5 pixels @300 ppi with a transparent background.
Zoom in as much as you can and use black to paint some pixels coming down diagonally from the top-left to the bottom-right corner.
Once you are done, go to Edit > Define Pattern and name the pattern DiagLinesPattern on the popup window. Click Ok.
Apply Some Layer Styles to the 3D Folder
Select the 3D folder and double-click on top of its thumbnail to open the Layer Styles window.
In the Stroke tab, apply the following:
- Color: (#000000)
- Size: 4px
- Position: Inside
- Blend Mode: Normal
- Opacity: 70%
Then, in the Inner Glow tab, use:
- Color: #370c0c
- Blend Mode: Hard Light
- Opacity: 63%
- Technique: Softer
- Source: Edge
- Choke: 0%
- Size: 29%
- Contour: Cove-Deep
- Range: 48%
- Jitter: 0%
Finally, in the Pattern Overlay tab, use:
- Blend Mode: Multiply
- Opacity: 55%
- Scale: 120%
- Link with Layer: box checked.
Click on the Pattern thumbnail to open a drop-down menu, and select the one you created before (DiagLinesPattern). Click Ok.
This is how our 3D comic text looks!
Remember that you can change the colors and layer style values to transform the effect and achieve different looks.
Next, you can learn how to make a peeling sticker effect and how to flip an image in Adobe Photoshop.


