
Anaglyph 3D Text Effect Poster in Illustrator
For this tutorial, you will need a vectorized “Eye Chart “ or some Text for your “Poster” and some vector “3D Glasses”.
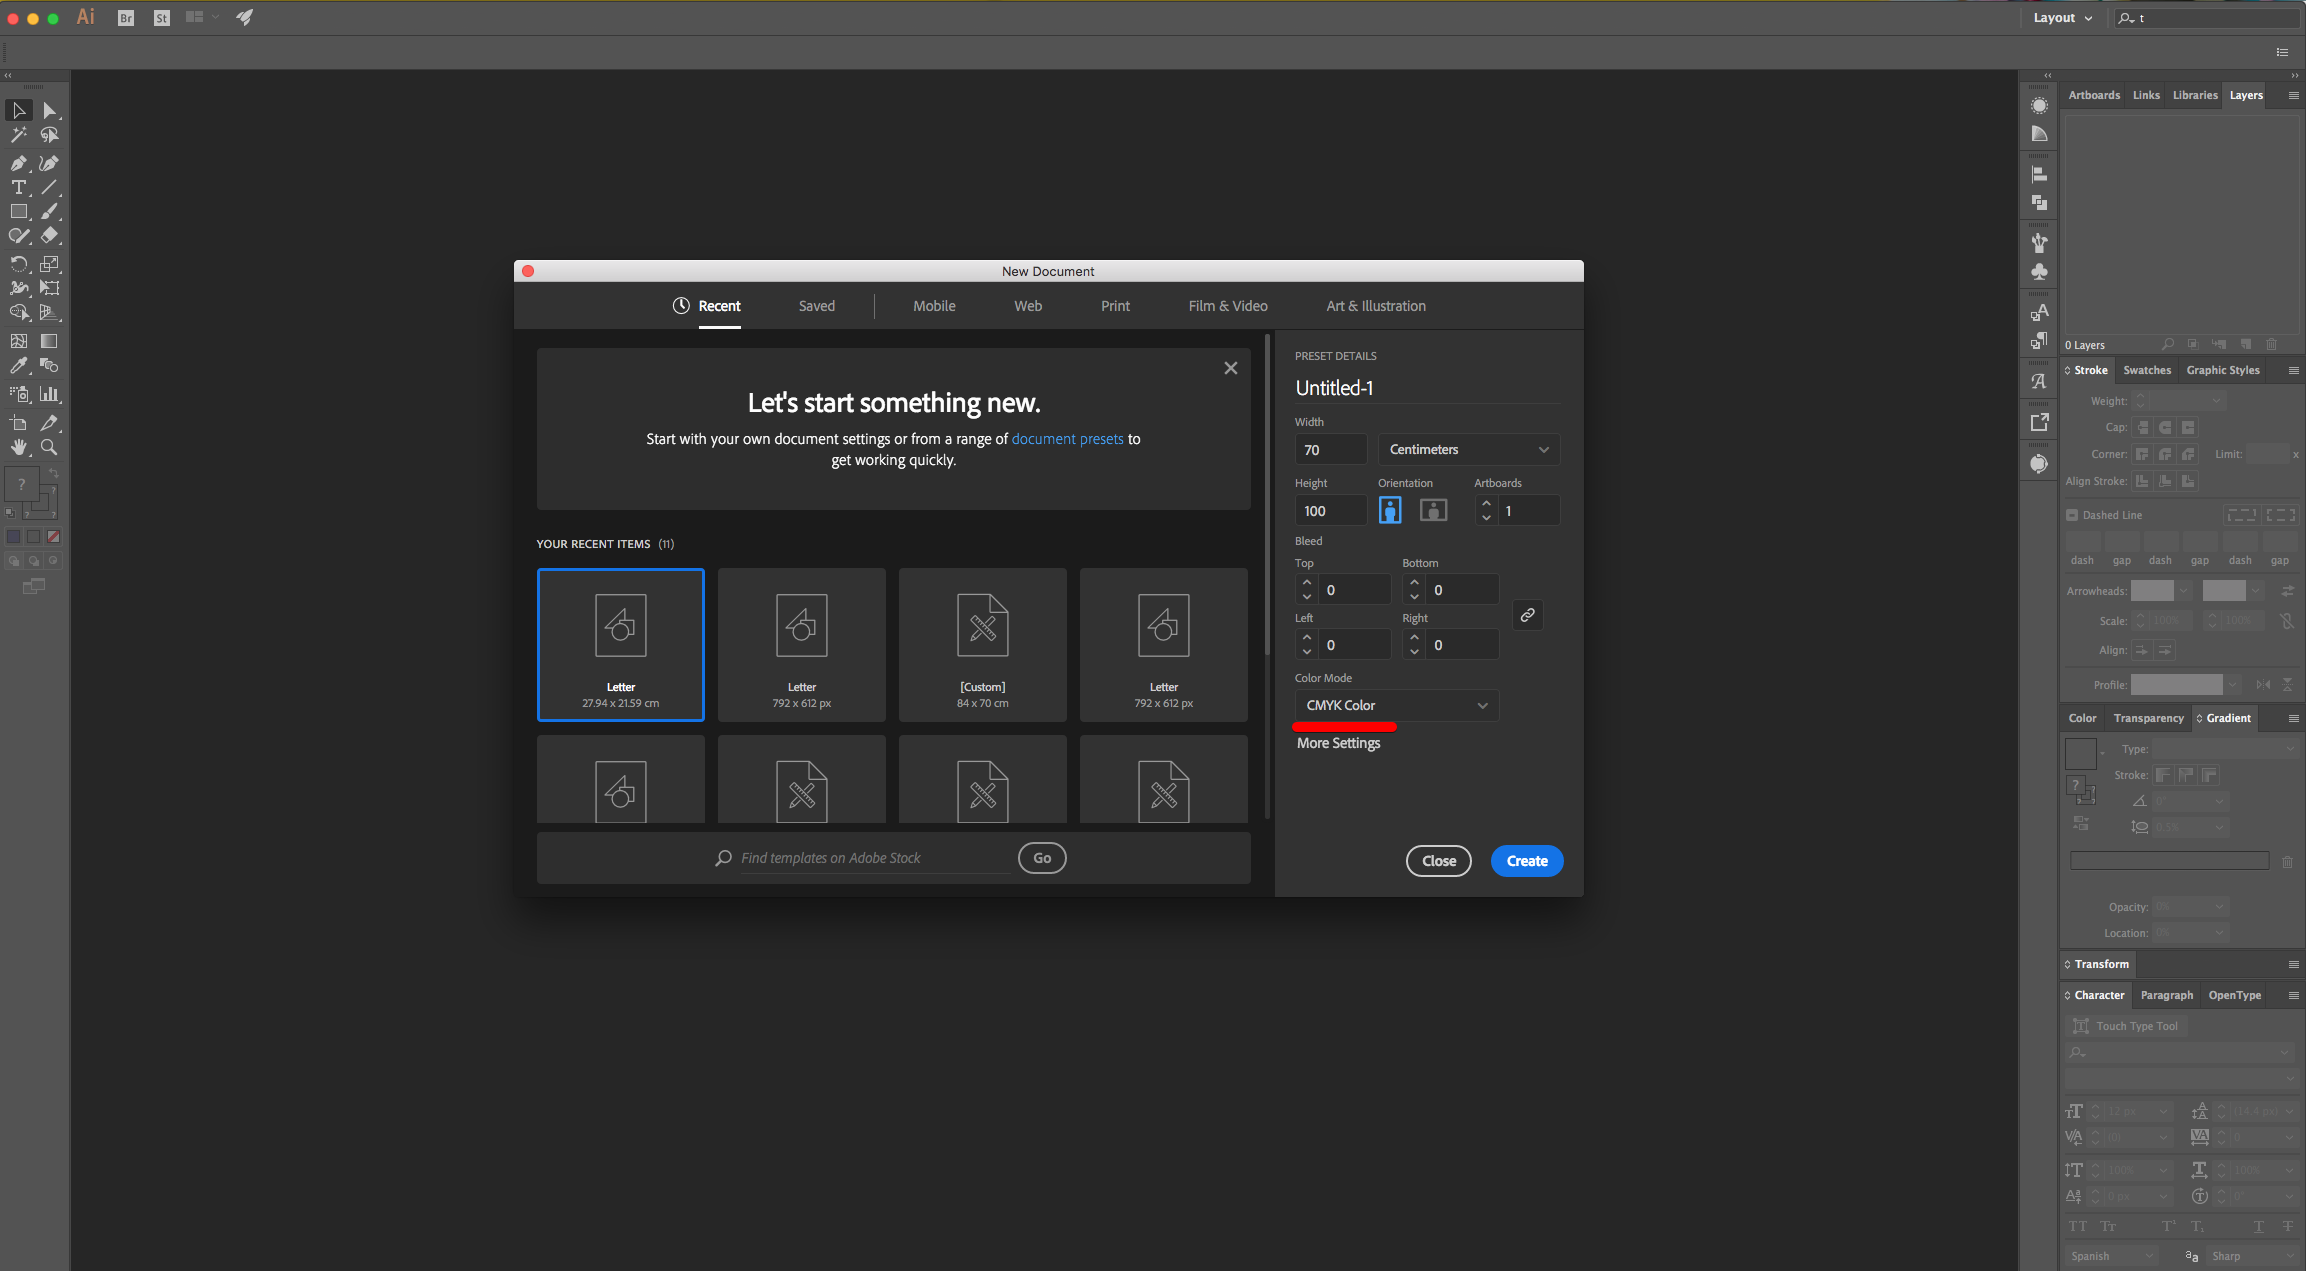
1 - In Illustrator, create a “New Document”. Make it 70 x 100 cm @300 dpi and choose CMYK as “Color Mode”.
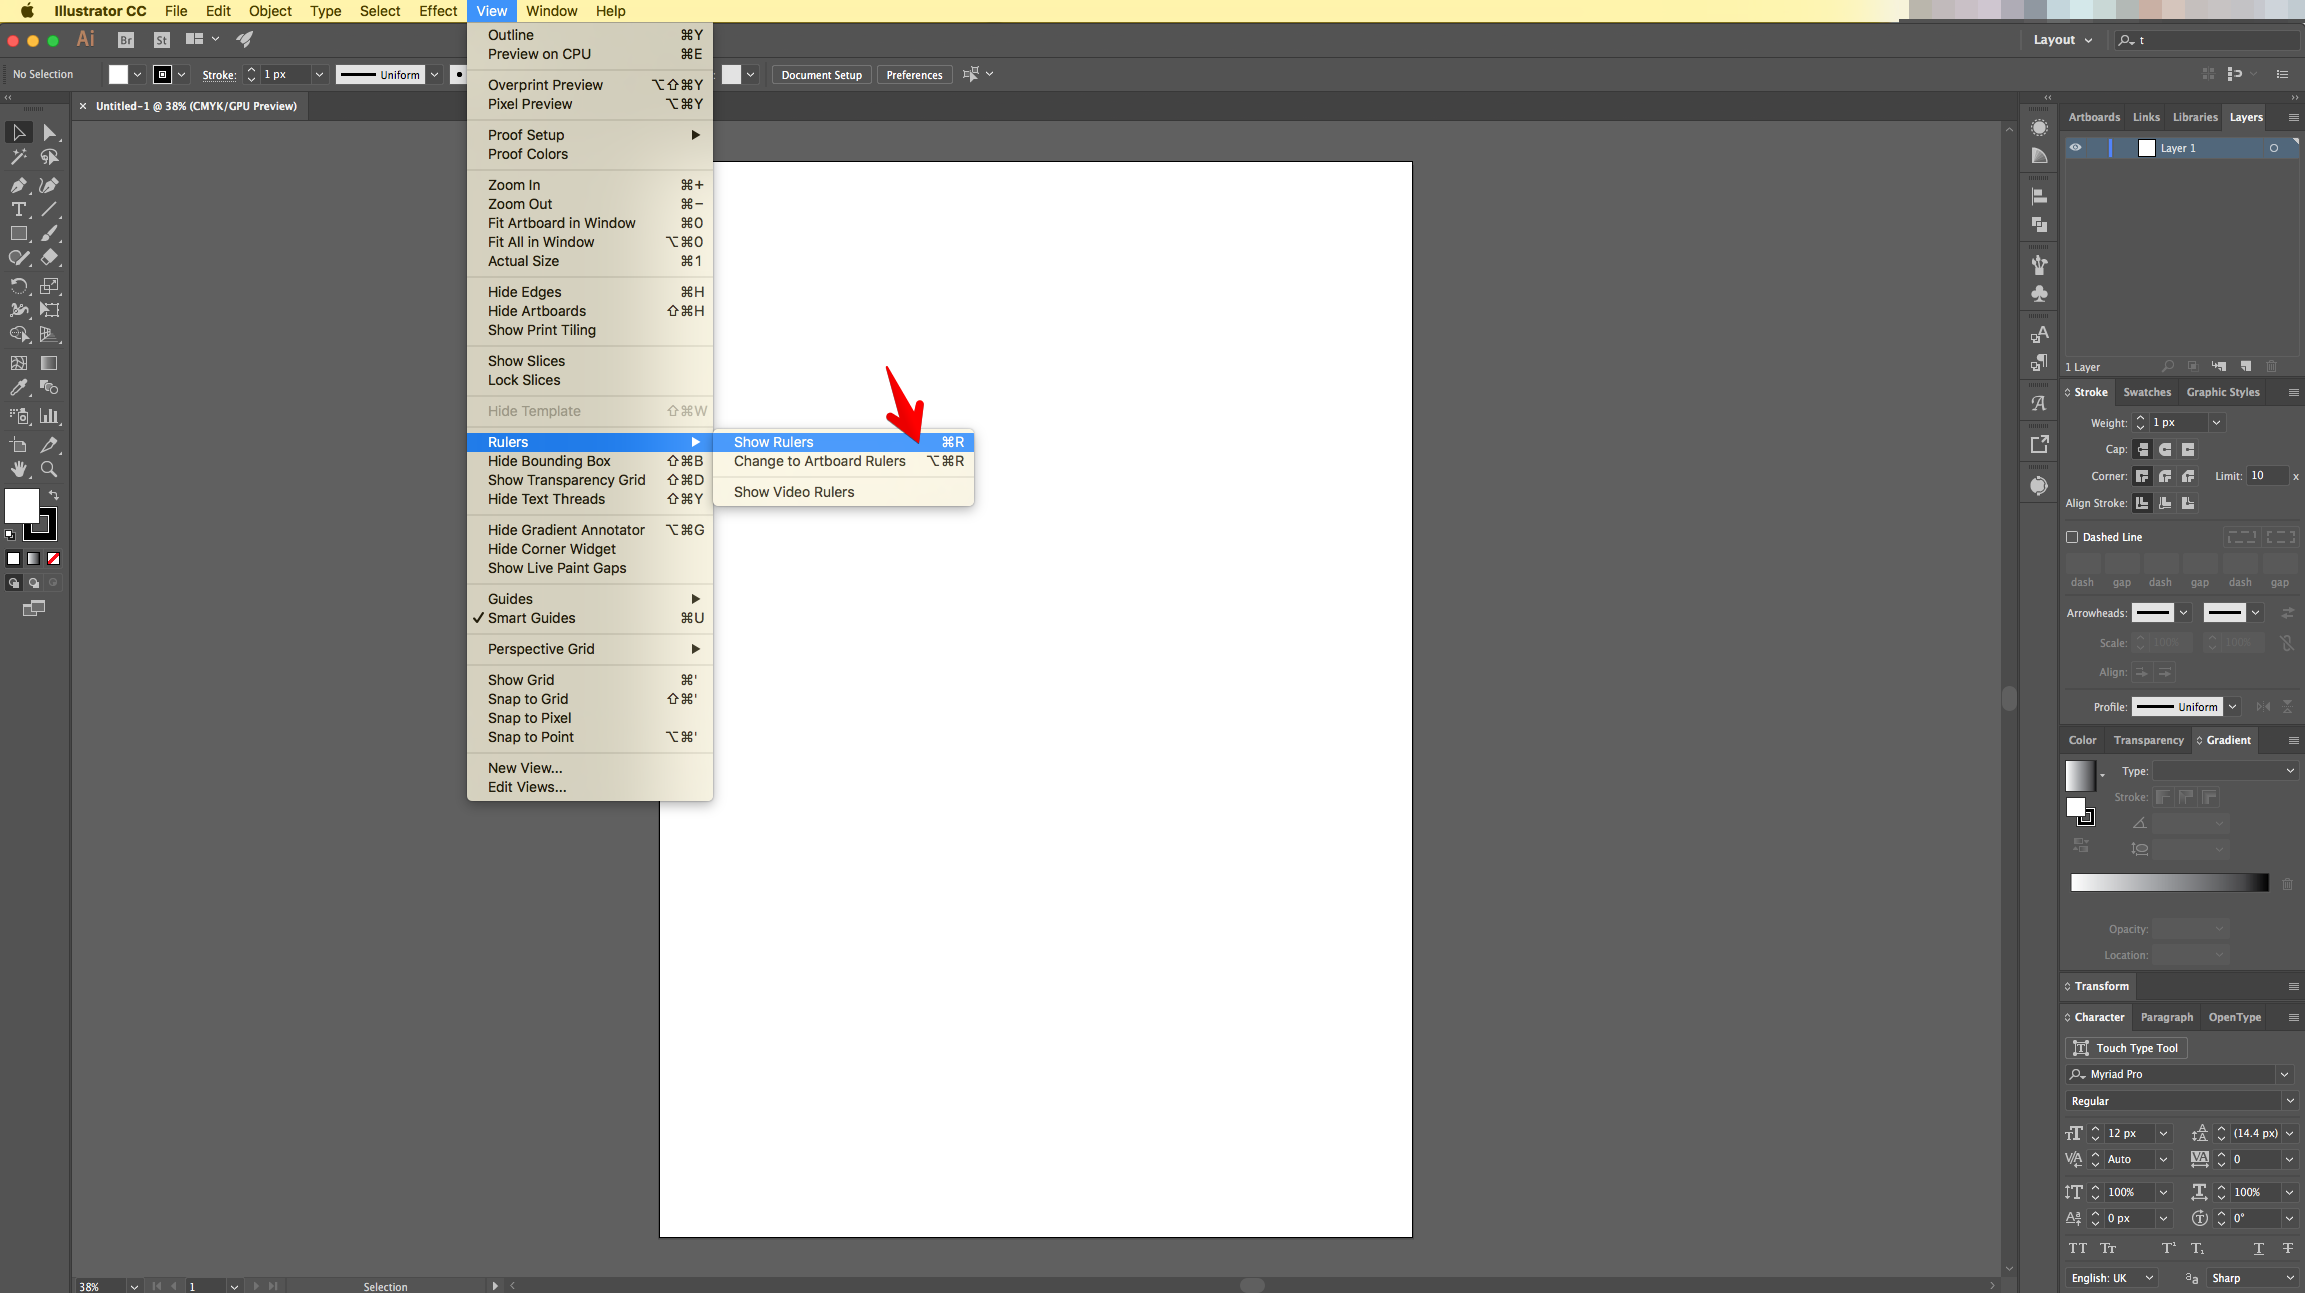
2 - Go to Image > View > Rulers to bring out the document’s “Rulers”.
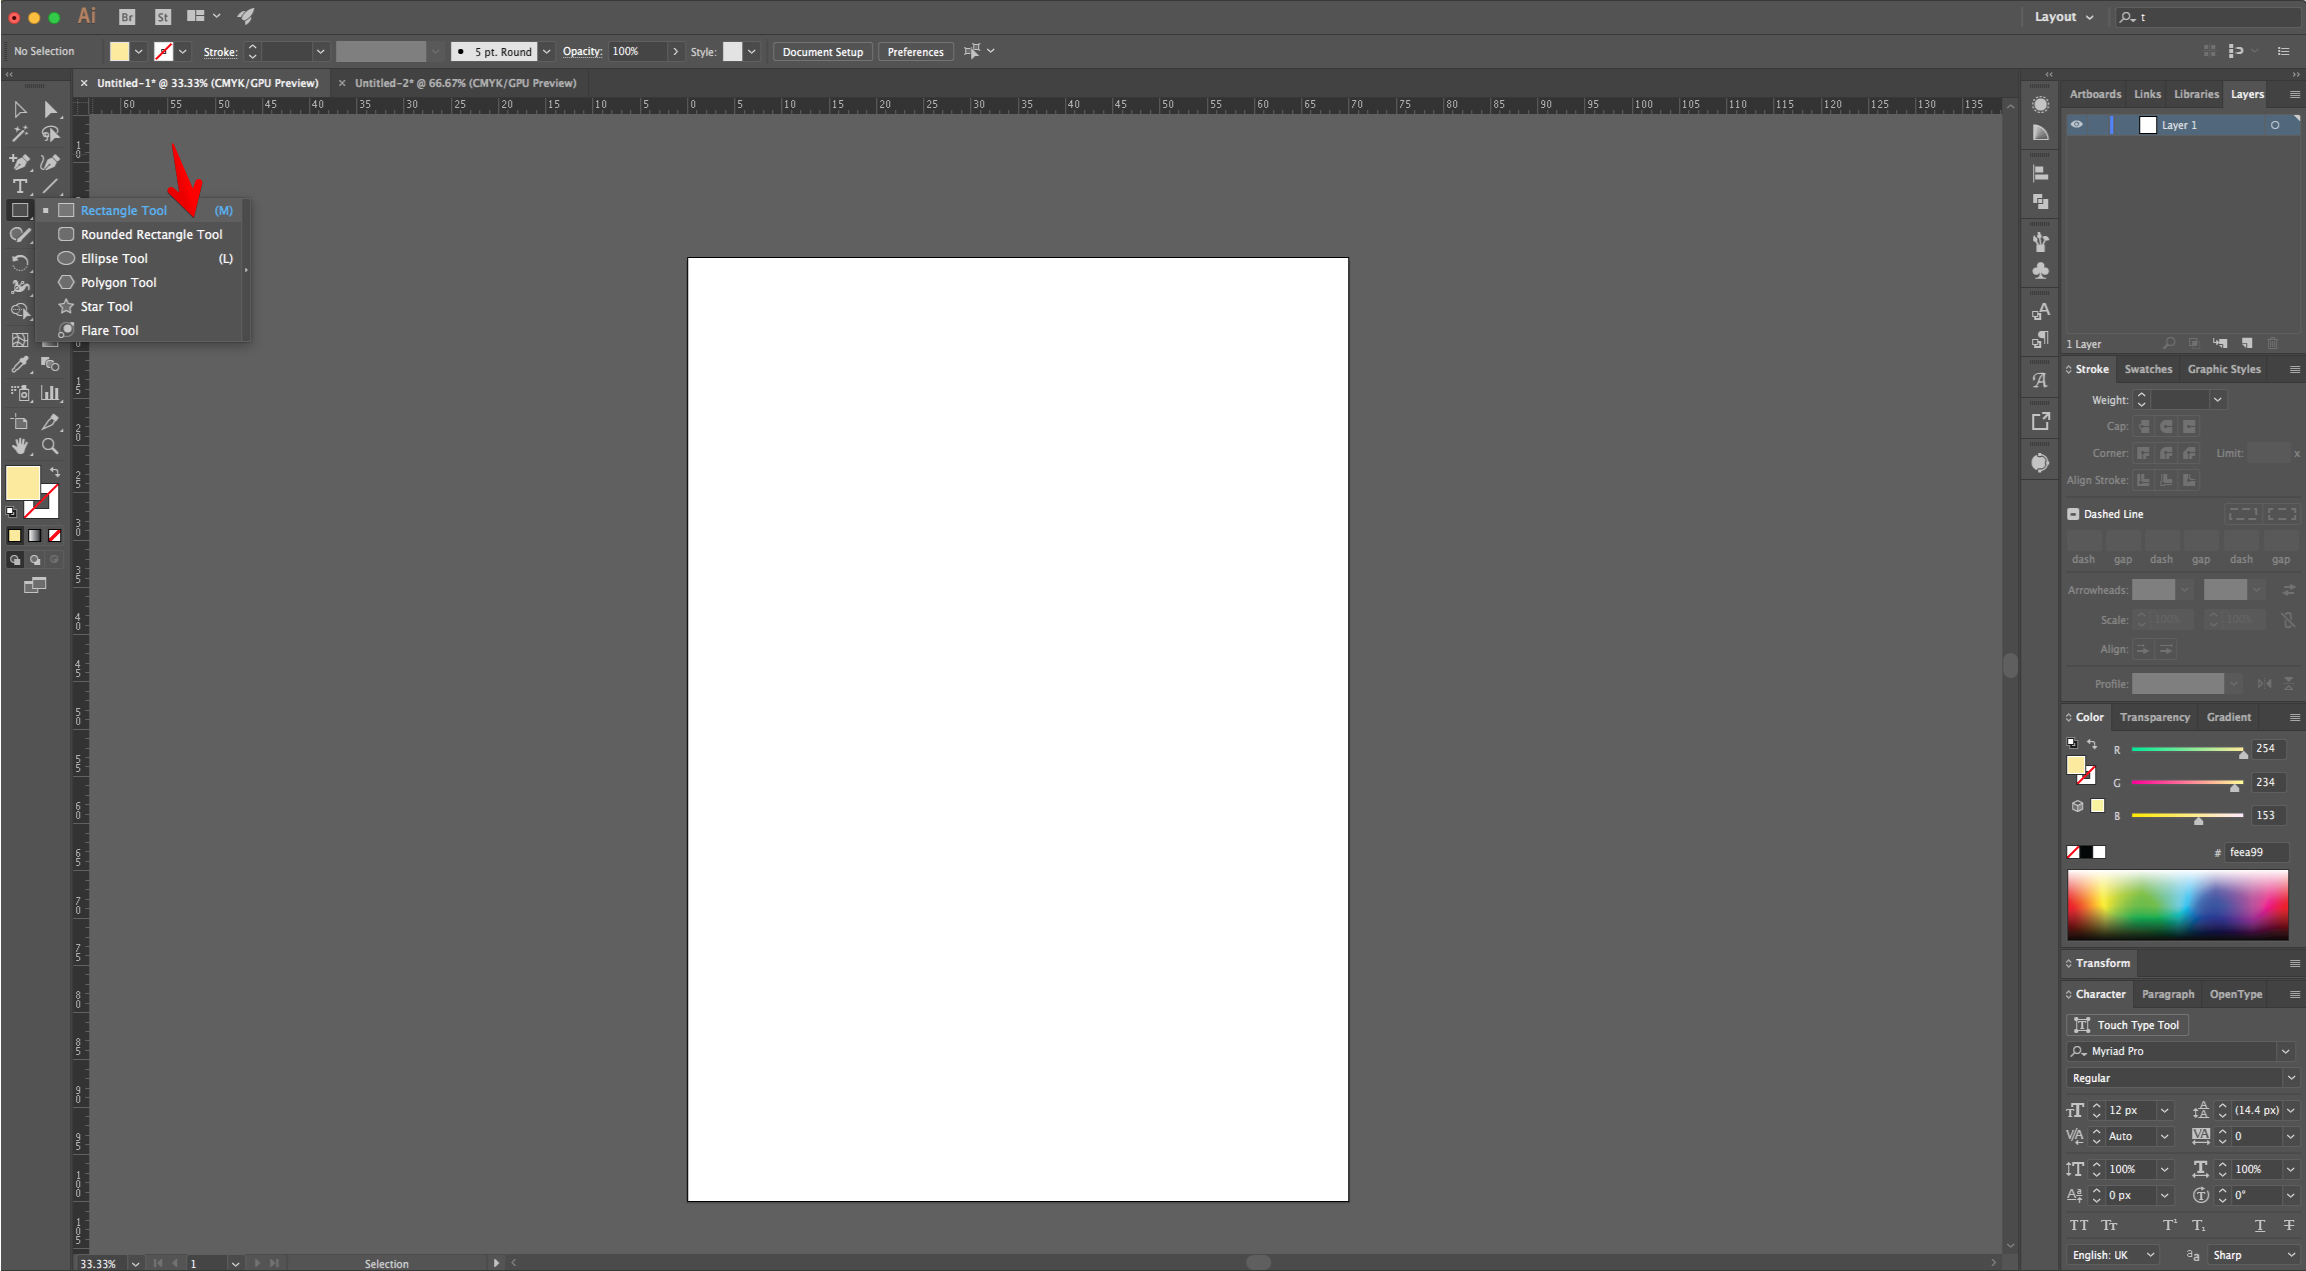
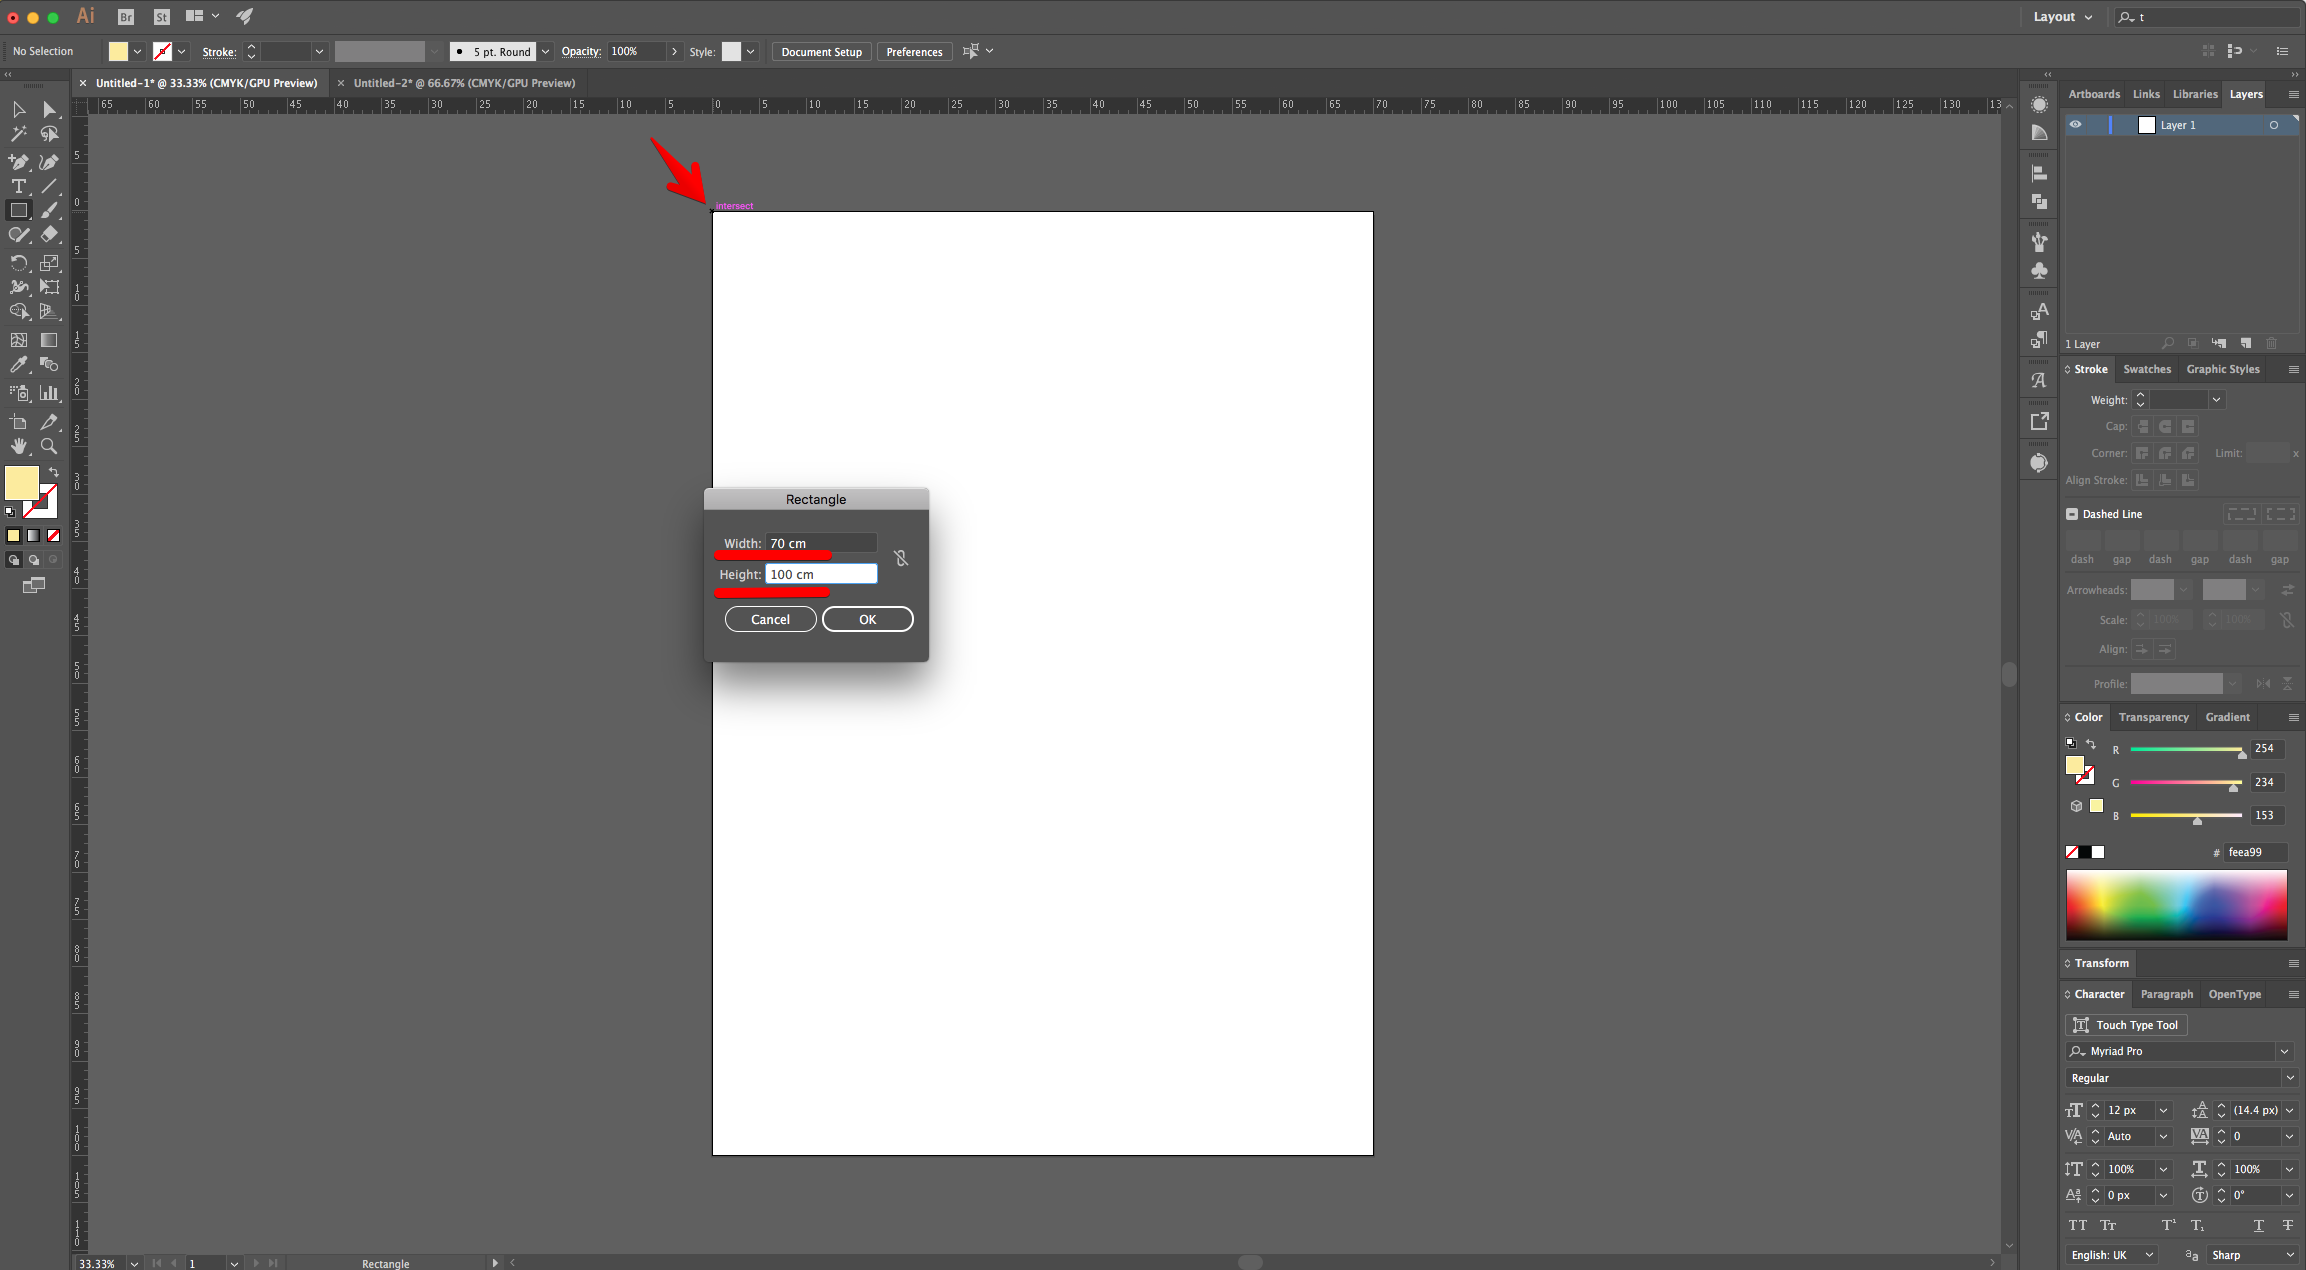
3 - Select the “Rectangle Tool” (M), click on the Top - Left corner of your document’s and input the same “Width” and “Height” values.
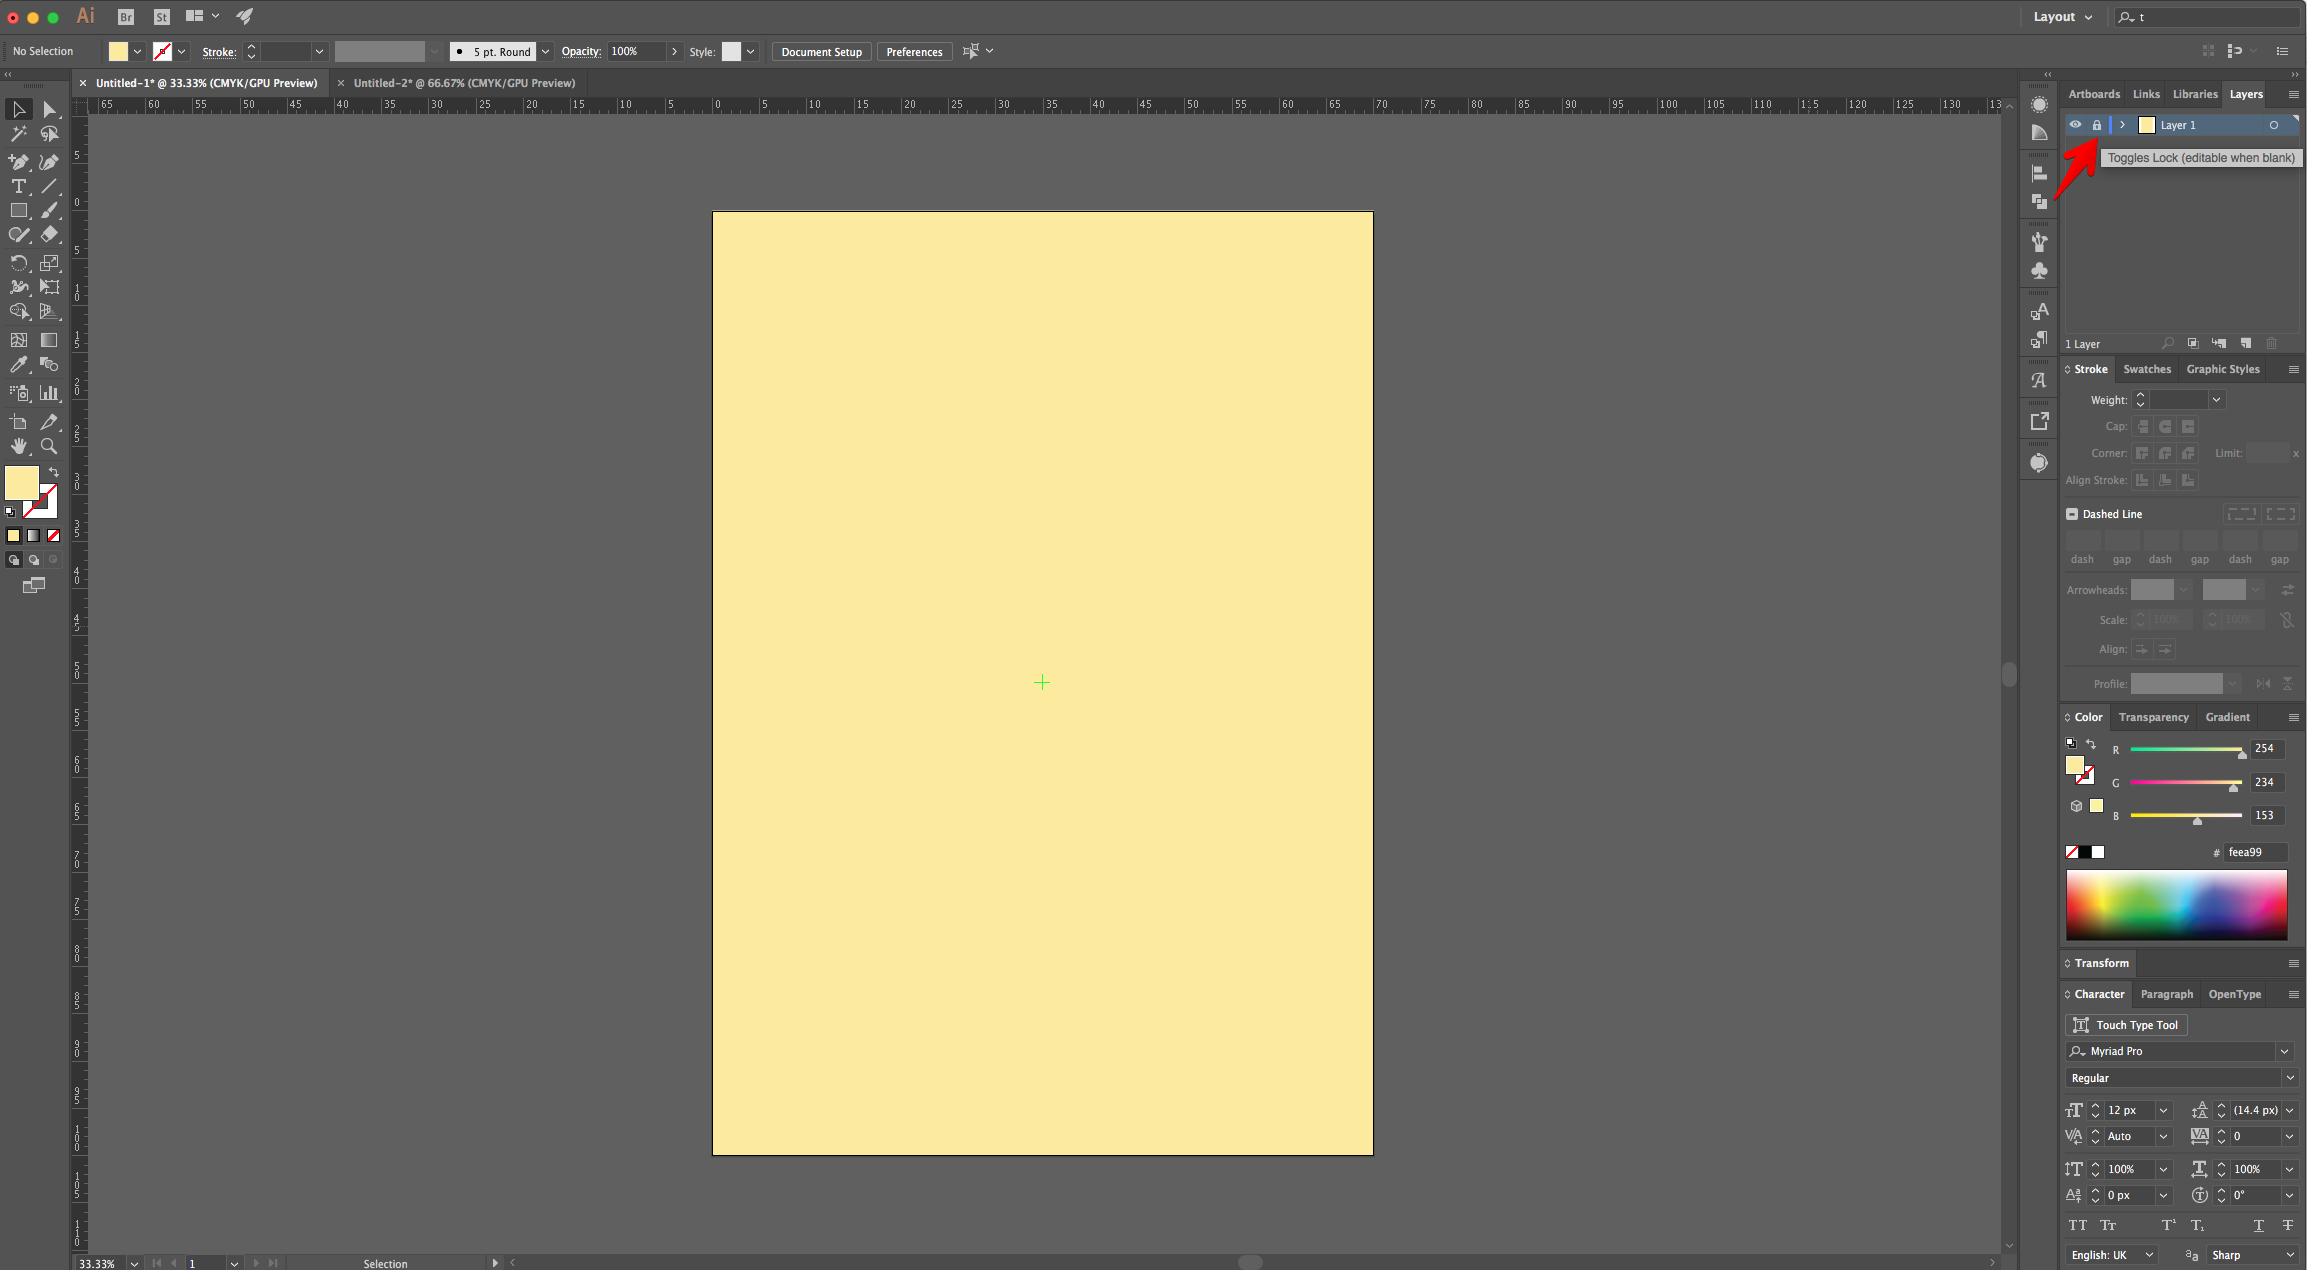
4 - Use a Light Yellow as “Fill” color. We used #feea99.

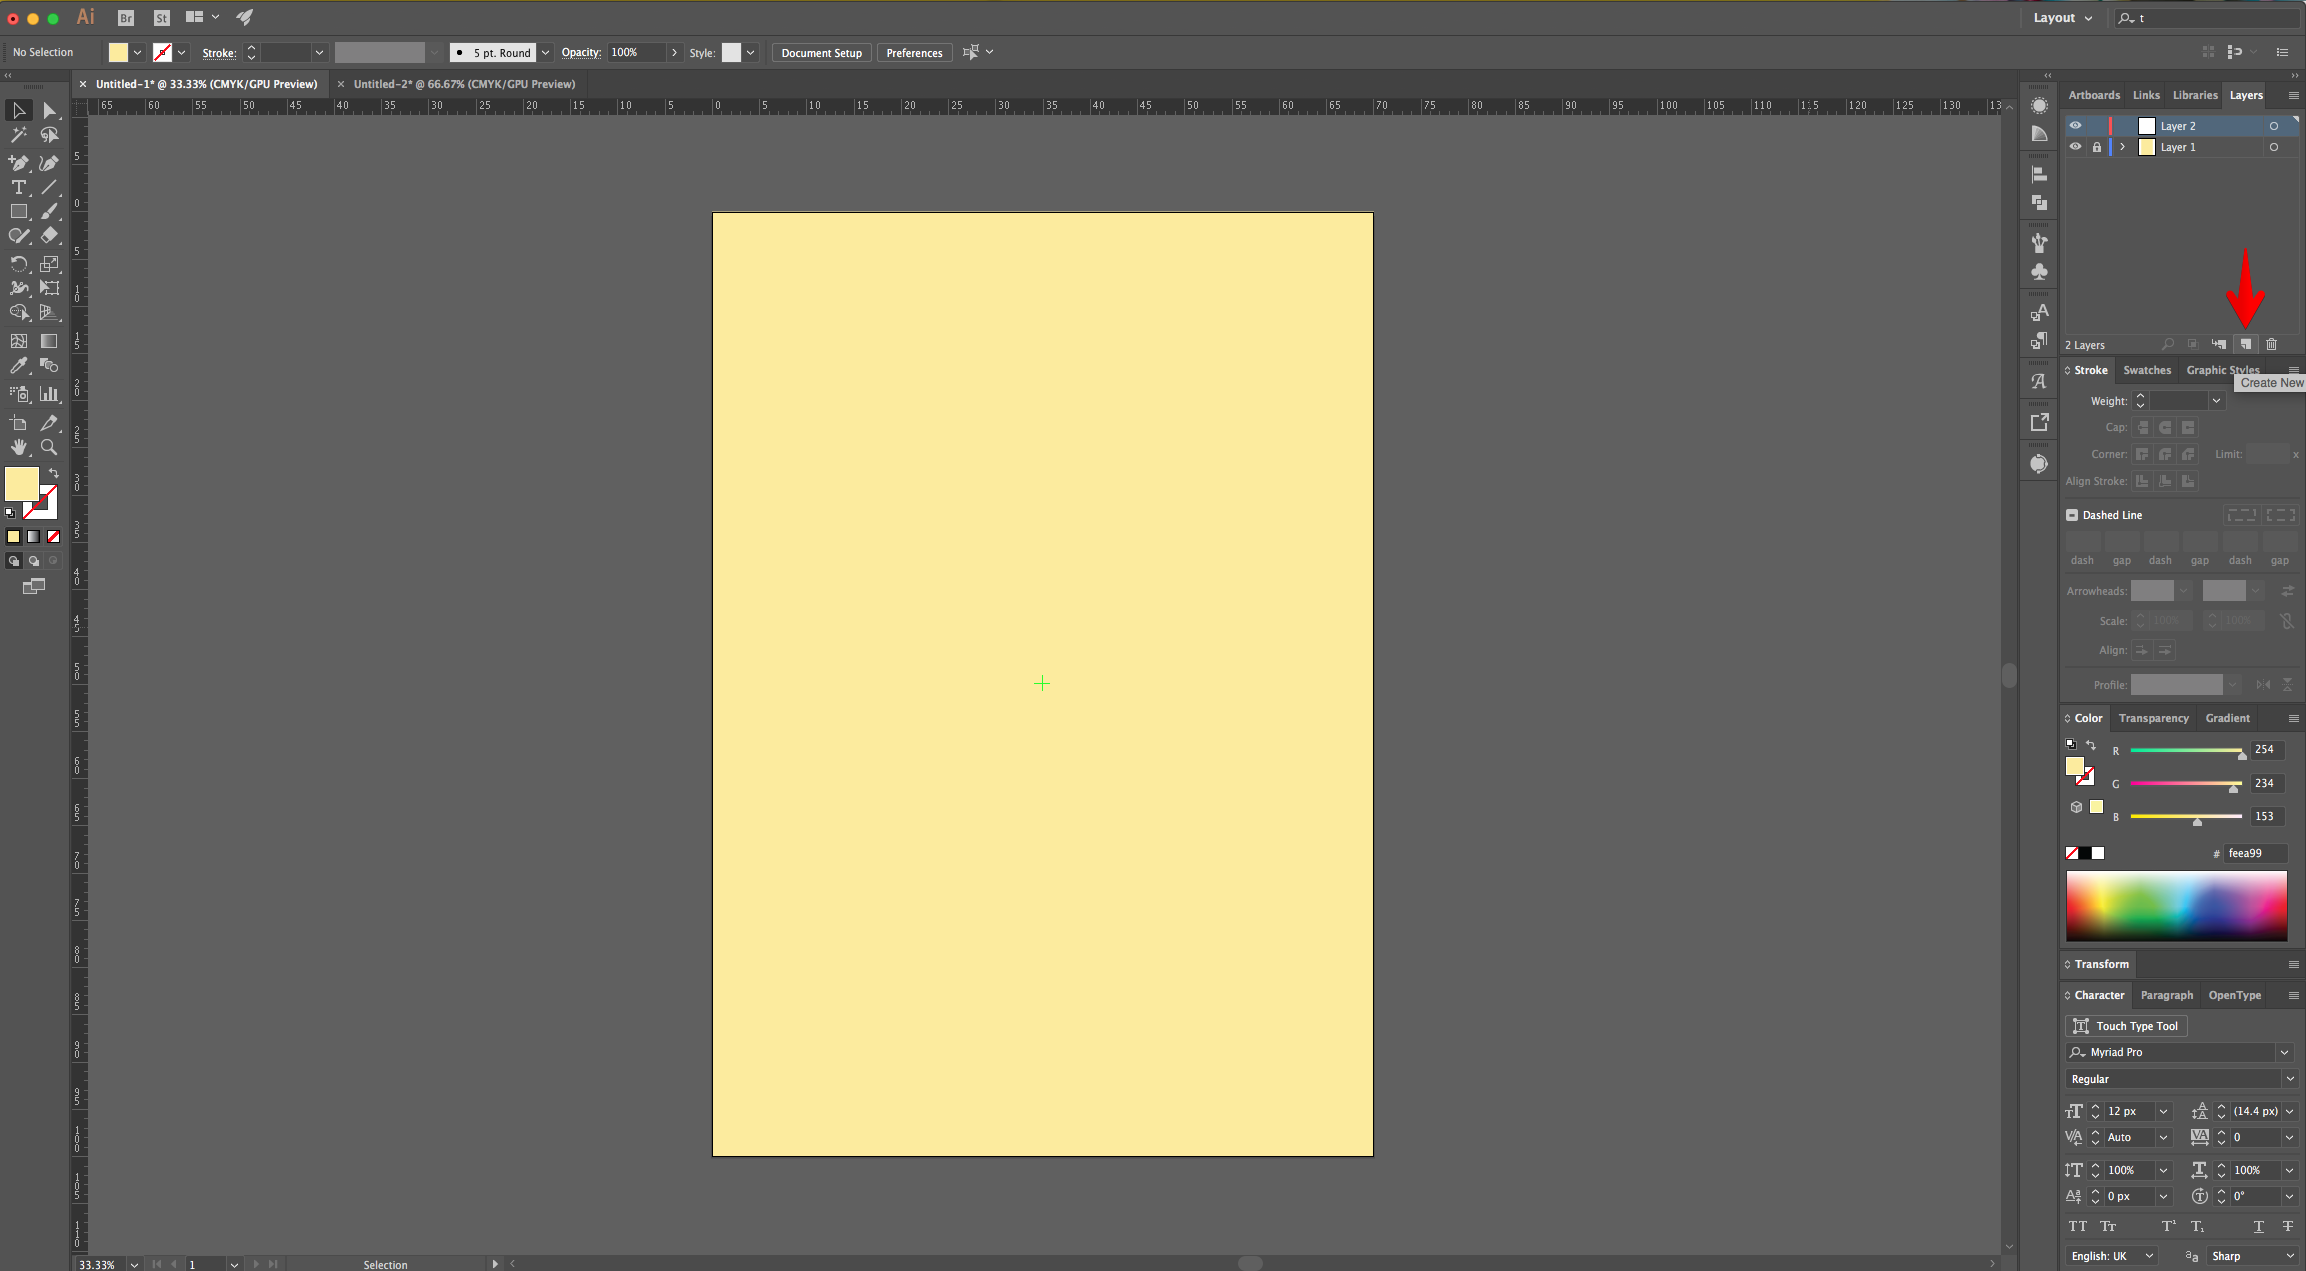
5 - “Lock” the background using the small “Padlock” icon on the left side of its Thumbnail and then create a “New Layer” by clicking on the small button at the bottom of the “Layers Panel”.
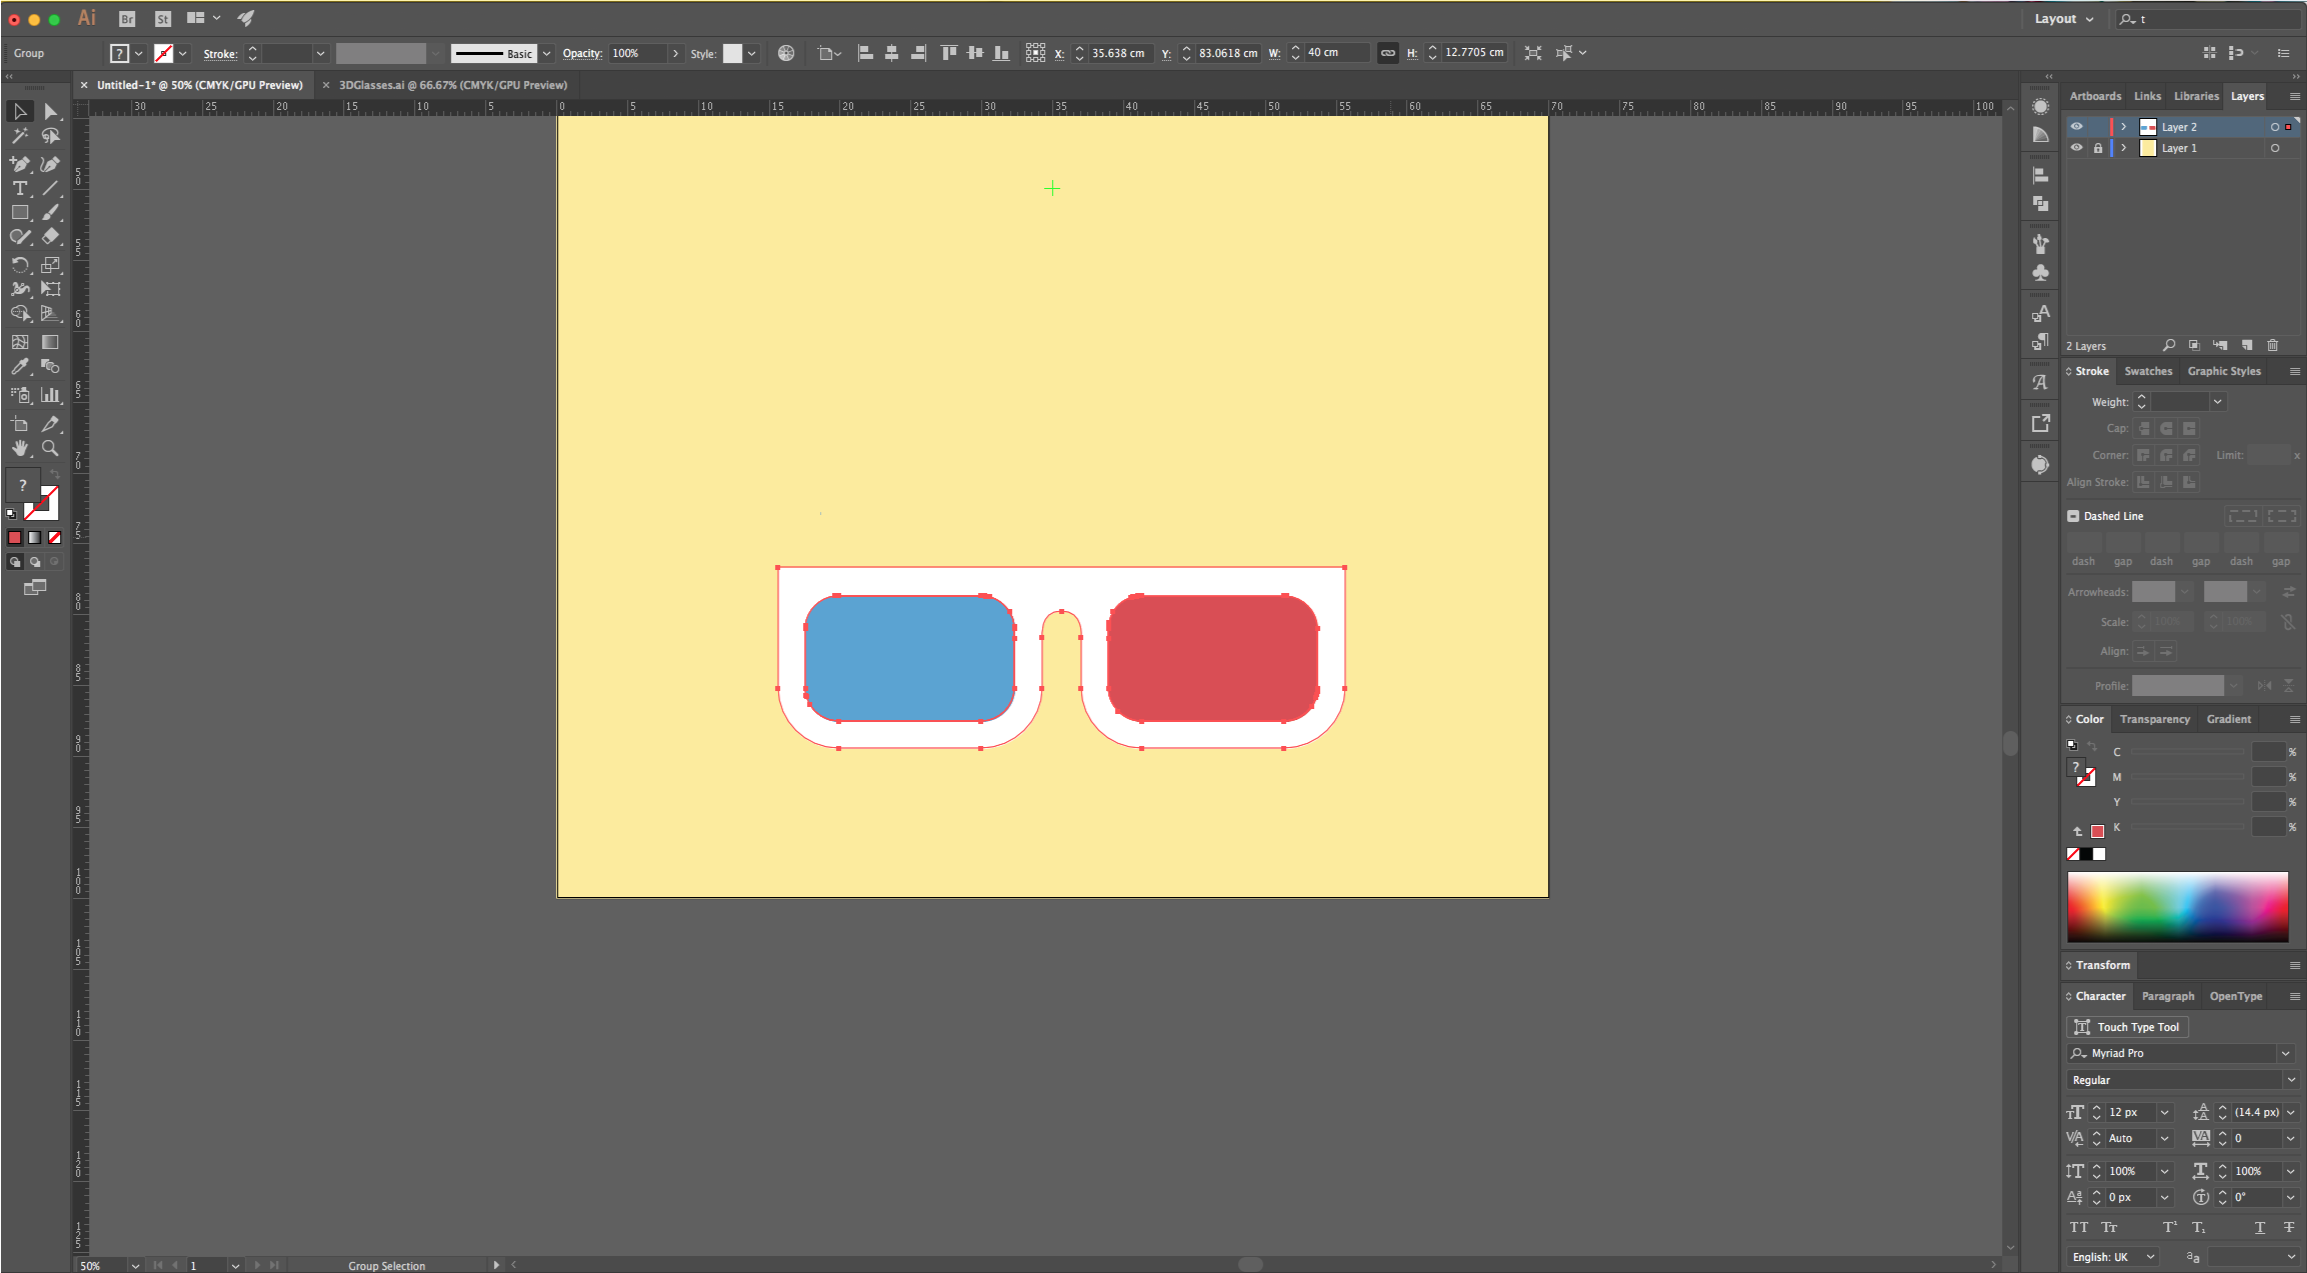
6 - “Copy” (Command/Control + C) and “Paste” (Command/Control + V) the “3D Glasses” into your file (or create them yourself using the “Pen Tool” (P).
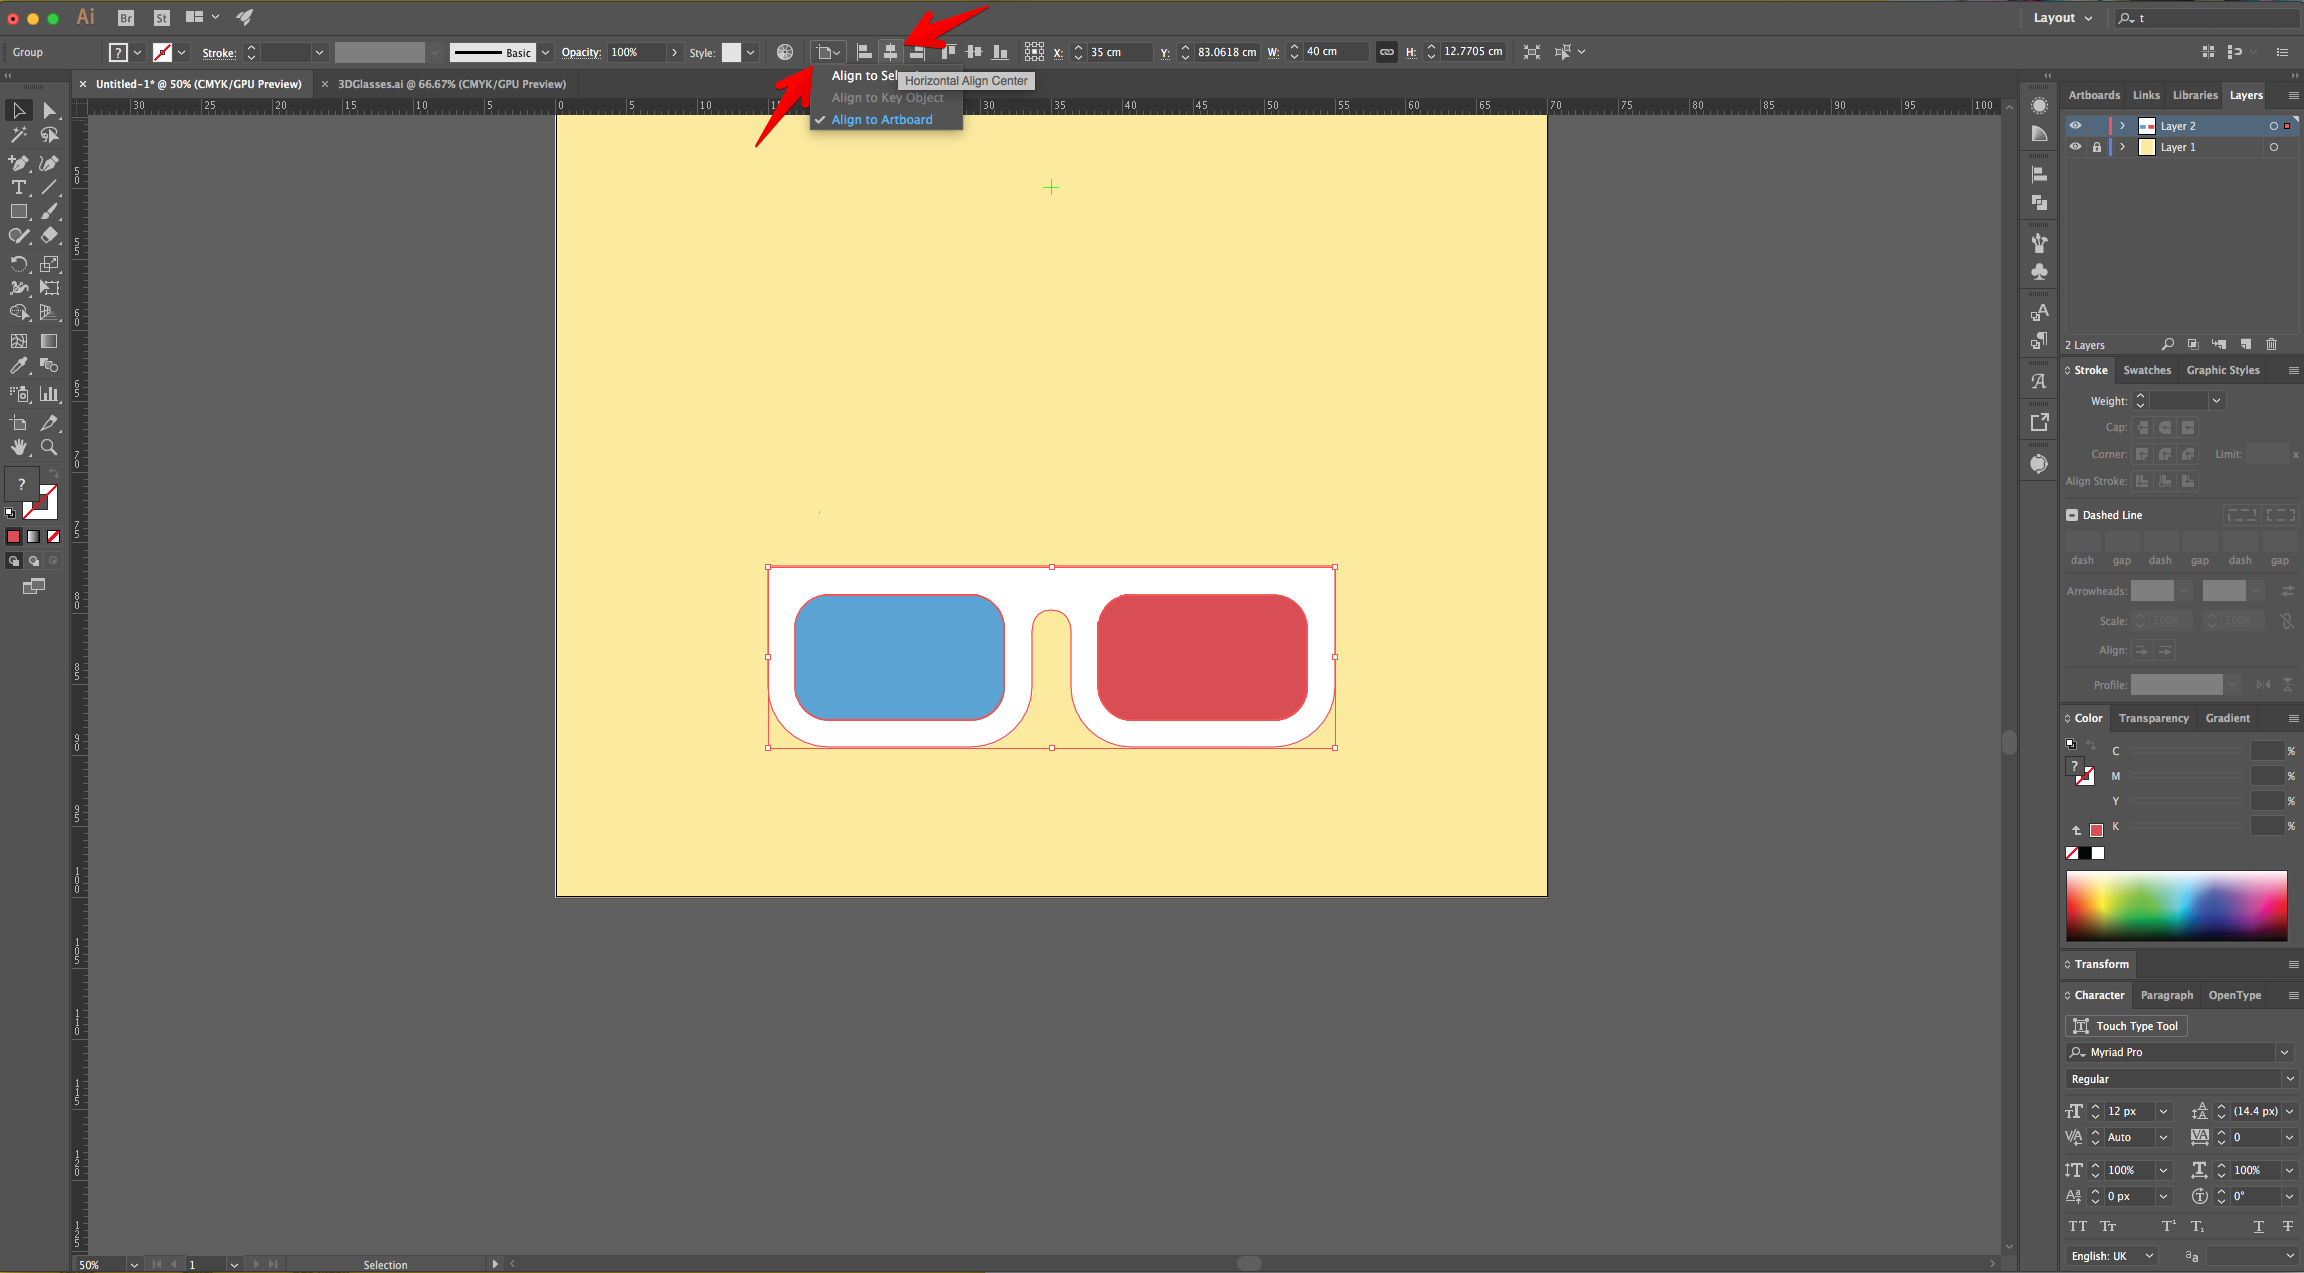
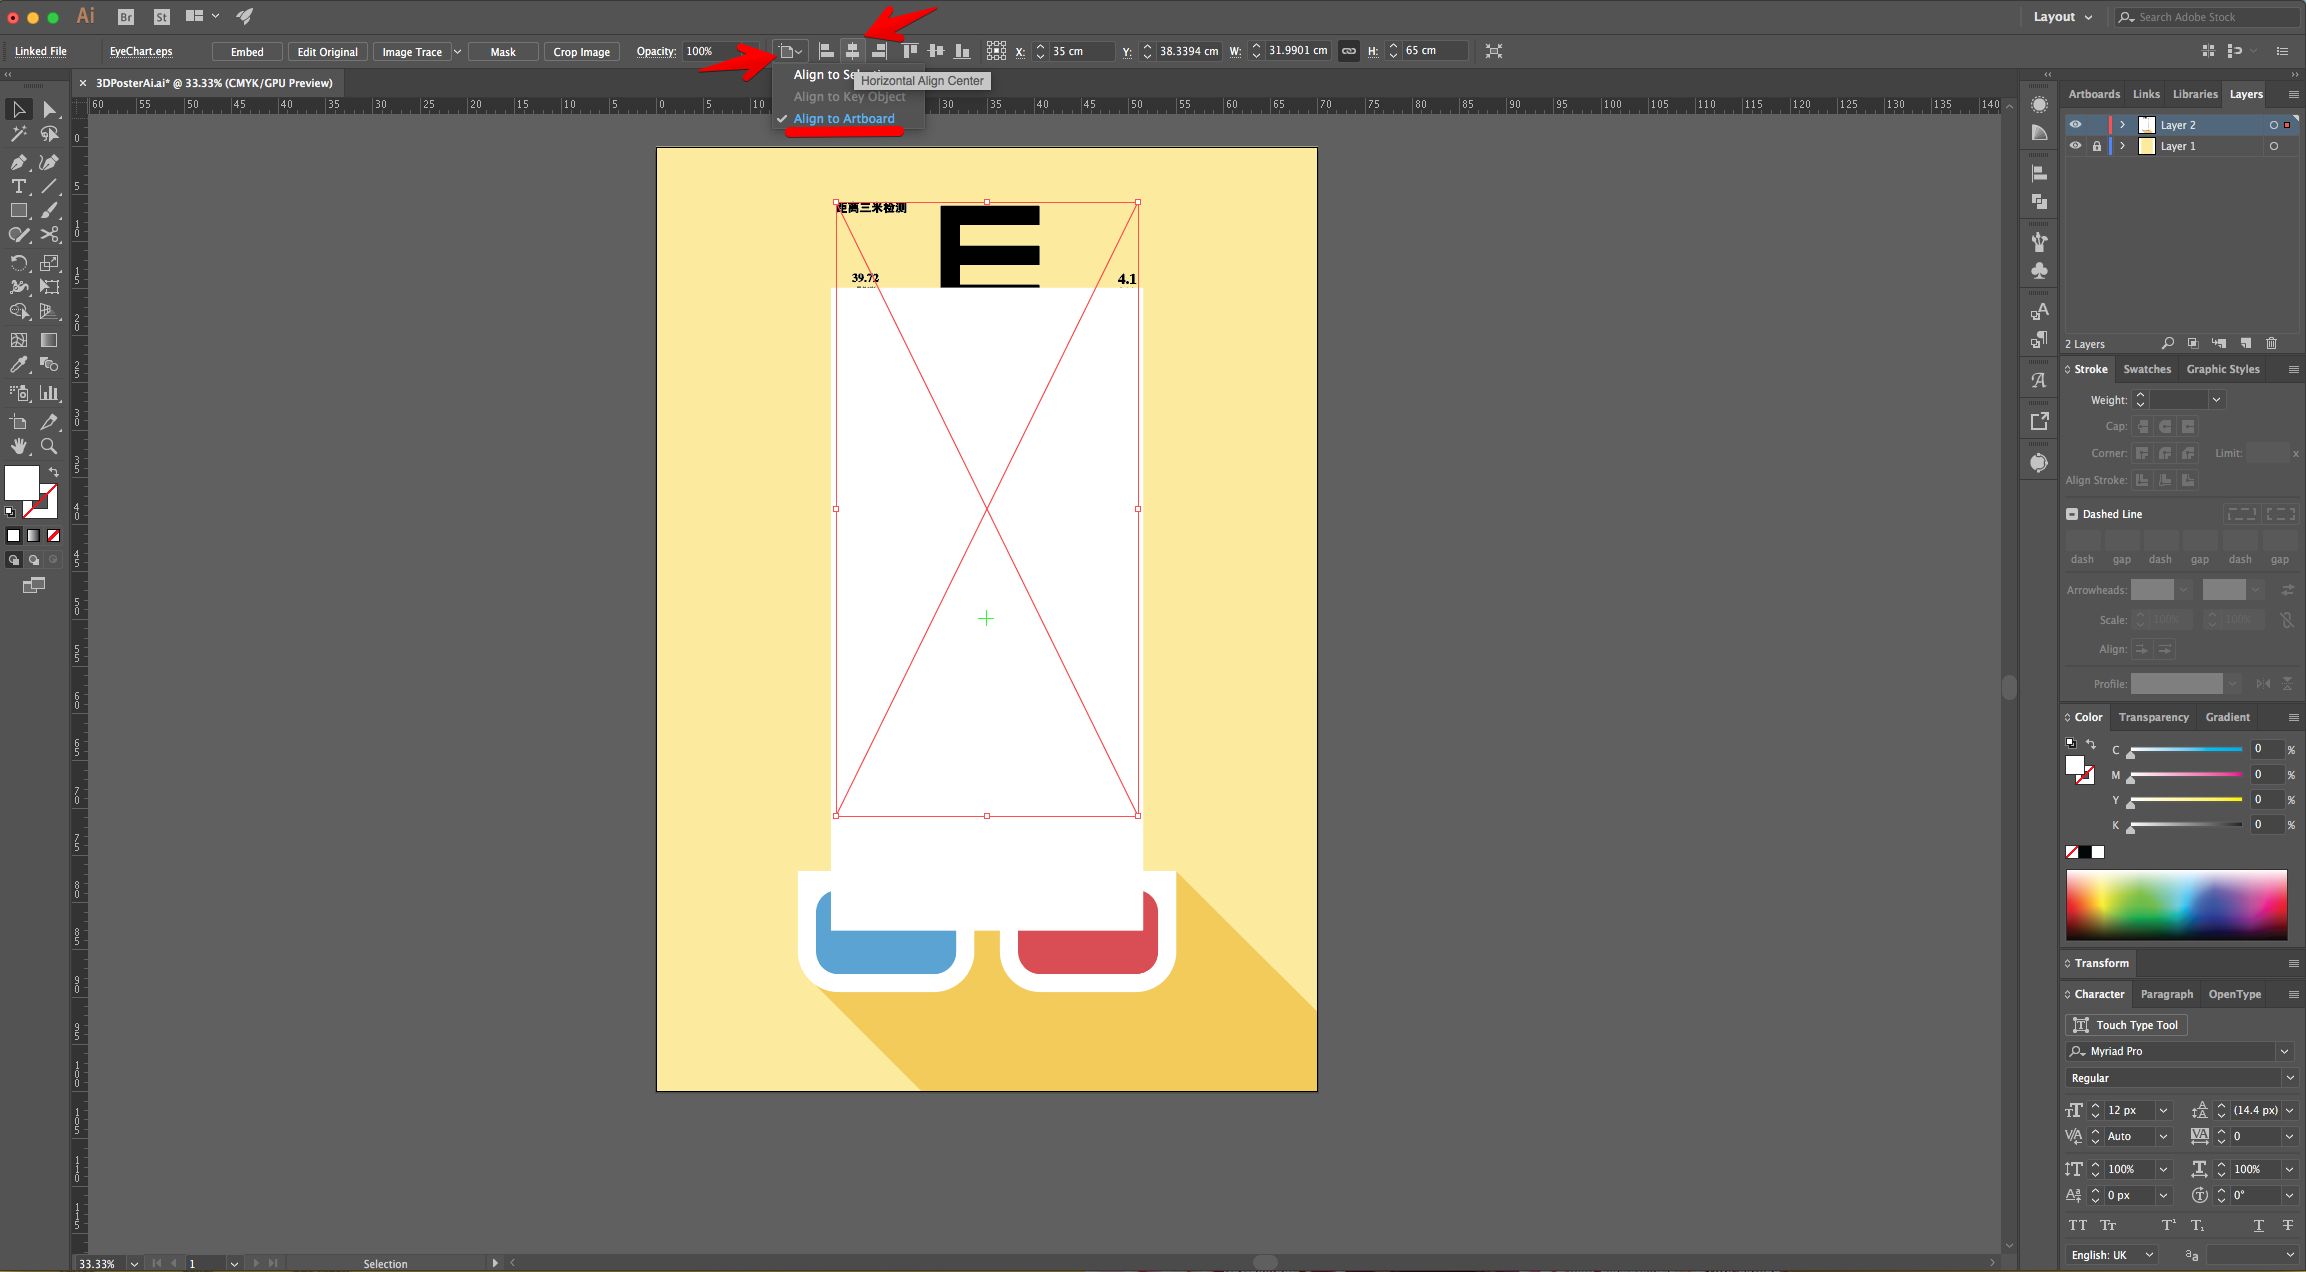
7 - Center it using the “Horizontal Align Center” option on your Top Menu and make sure that “Align to Artboard” is selected. Or use the same options in the “Align Panel”.
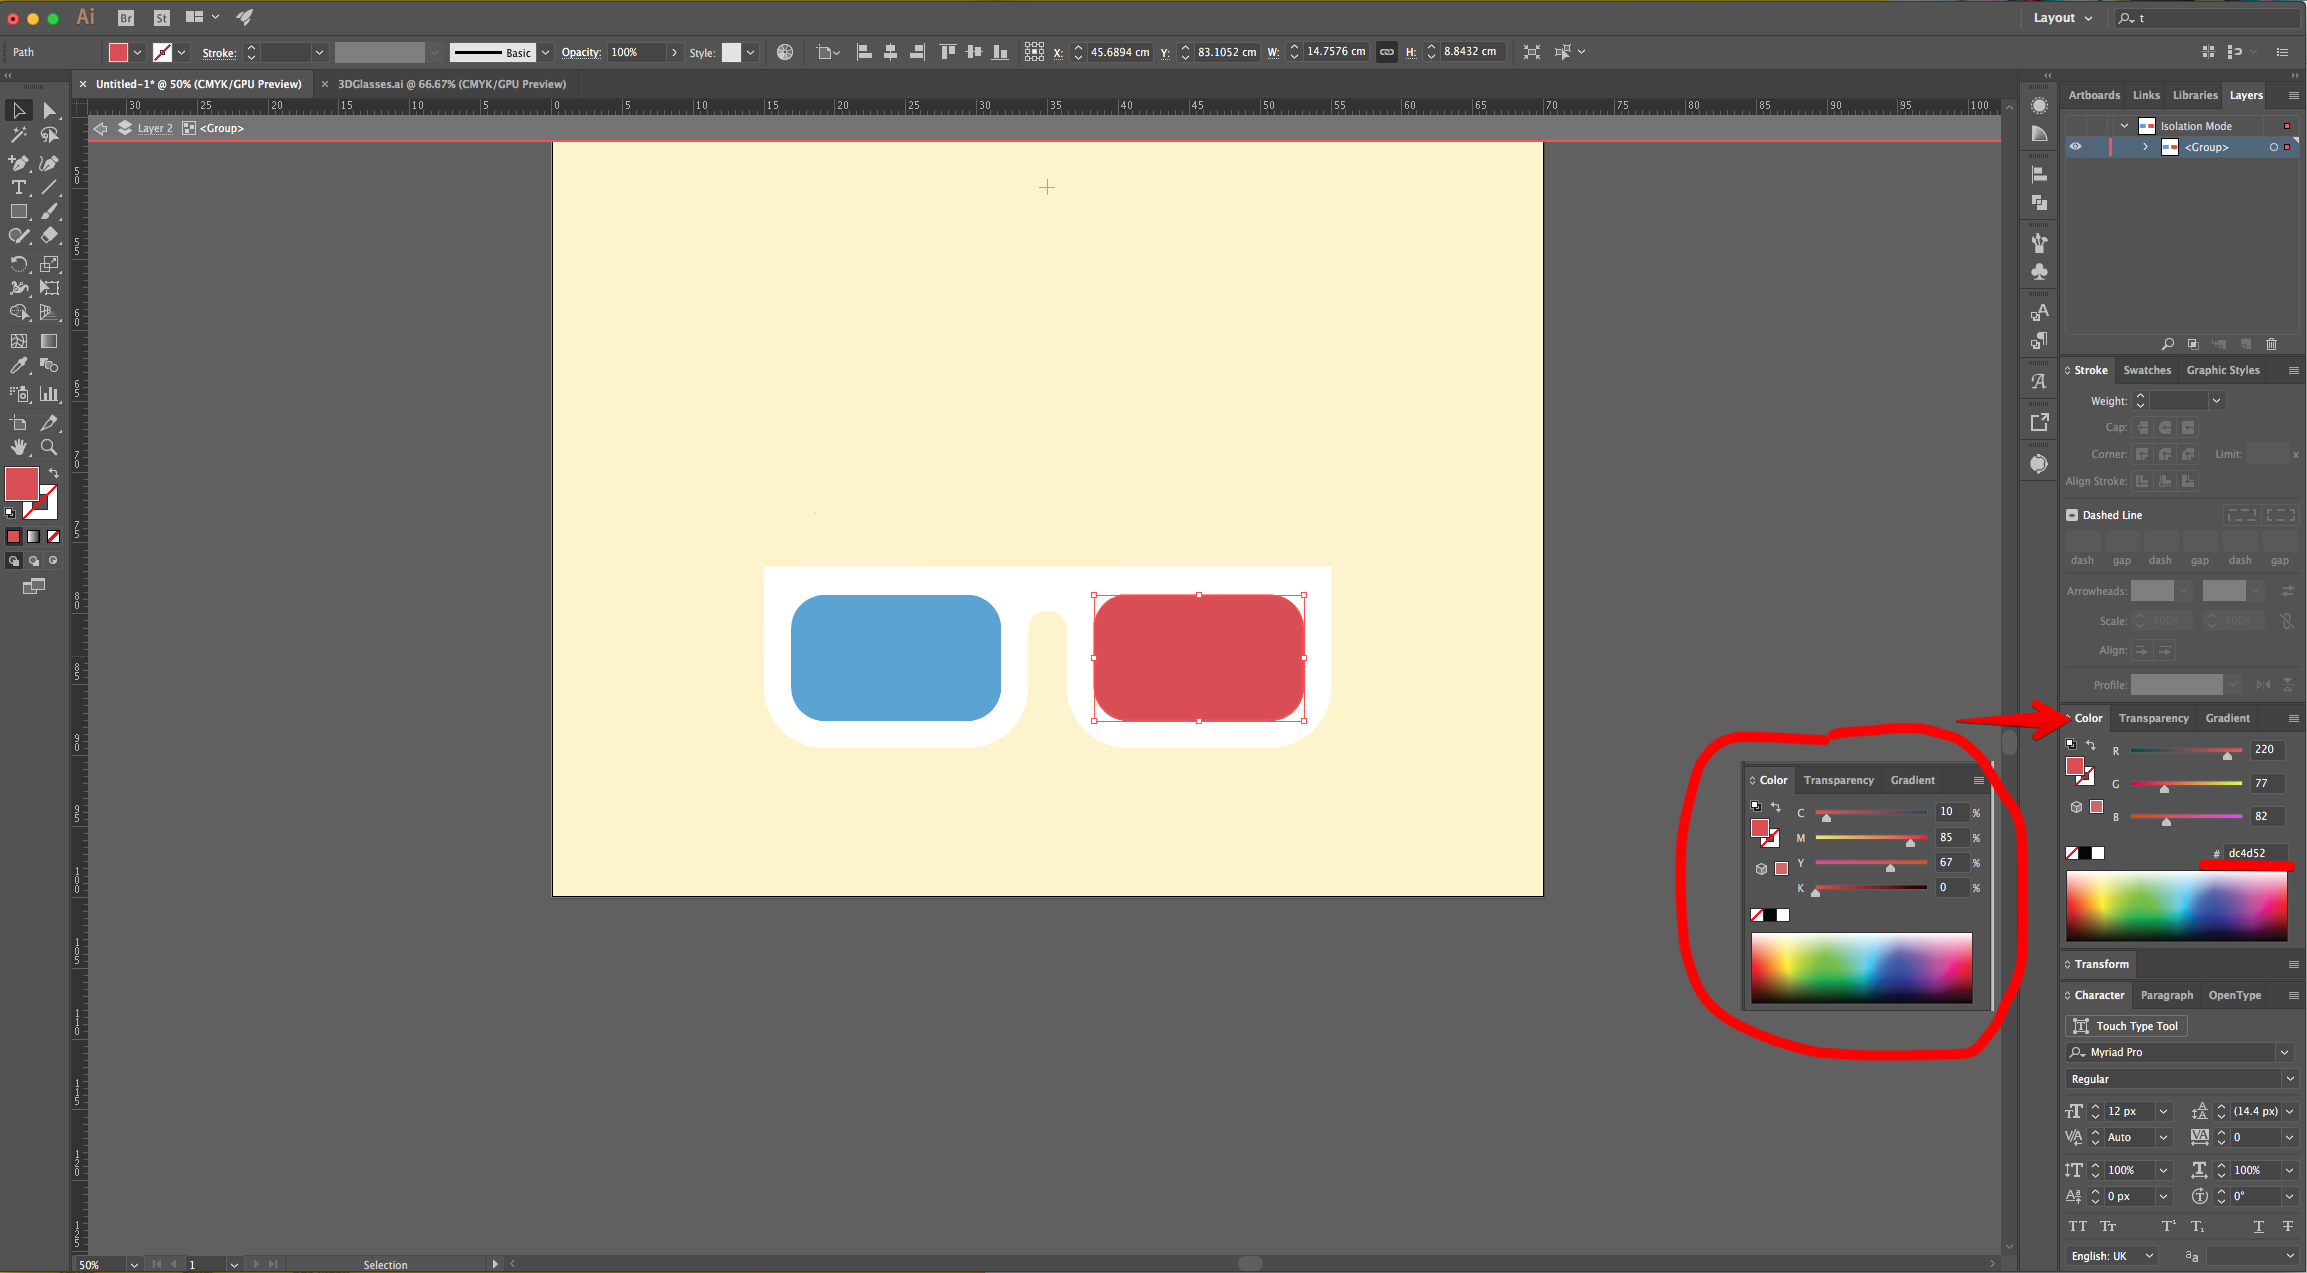
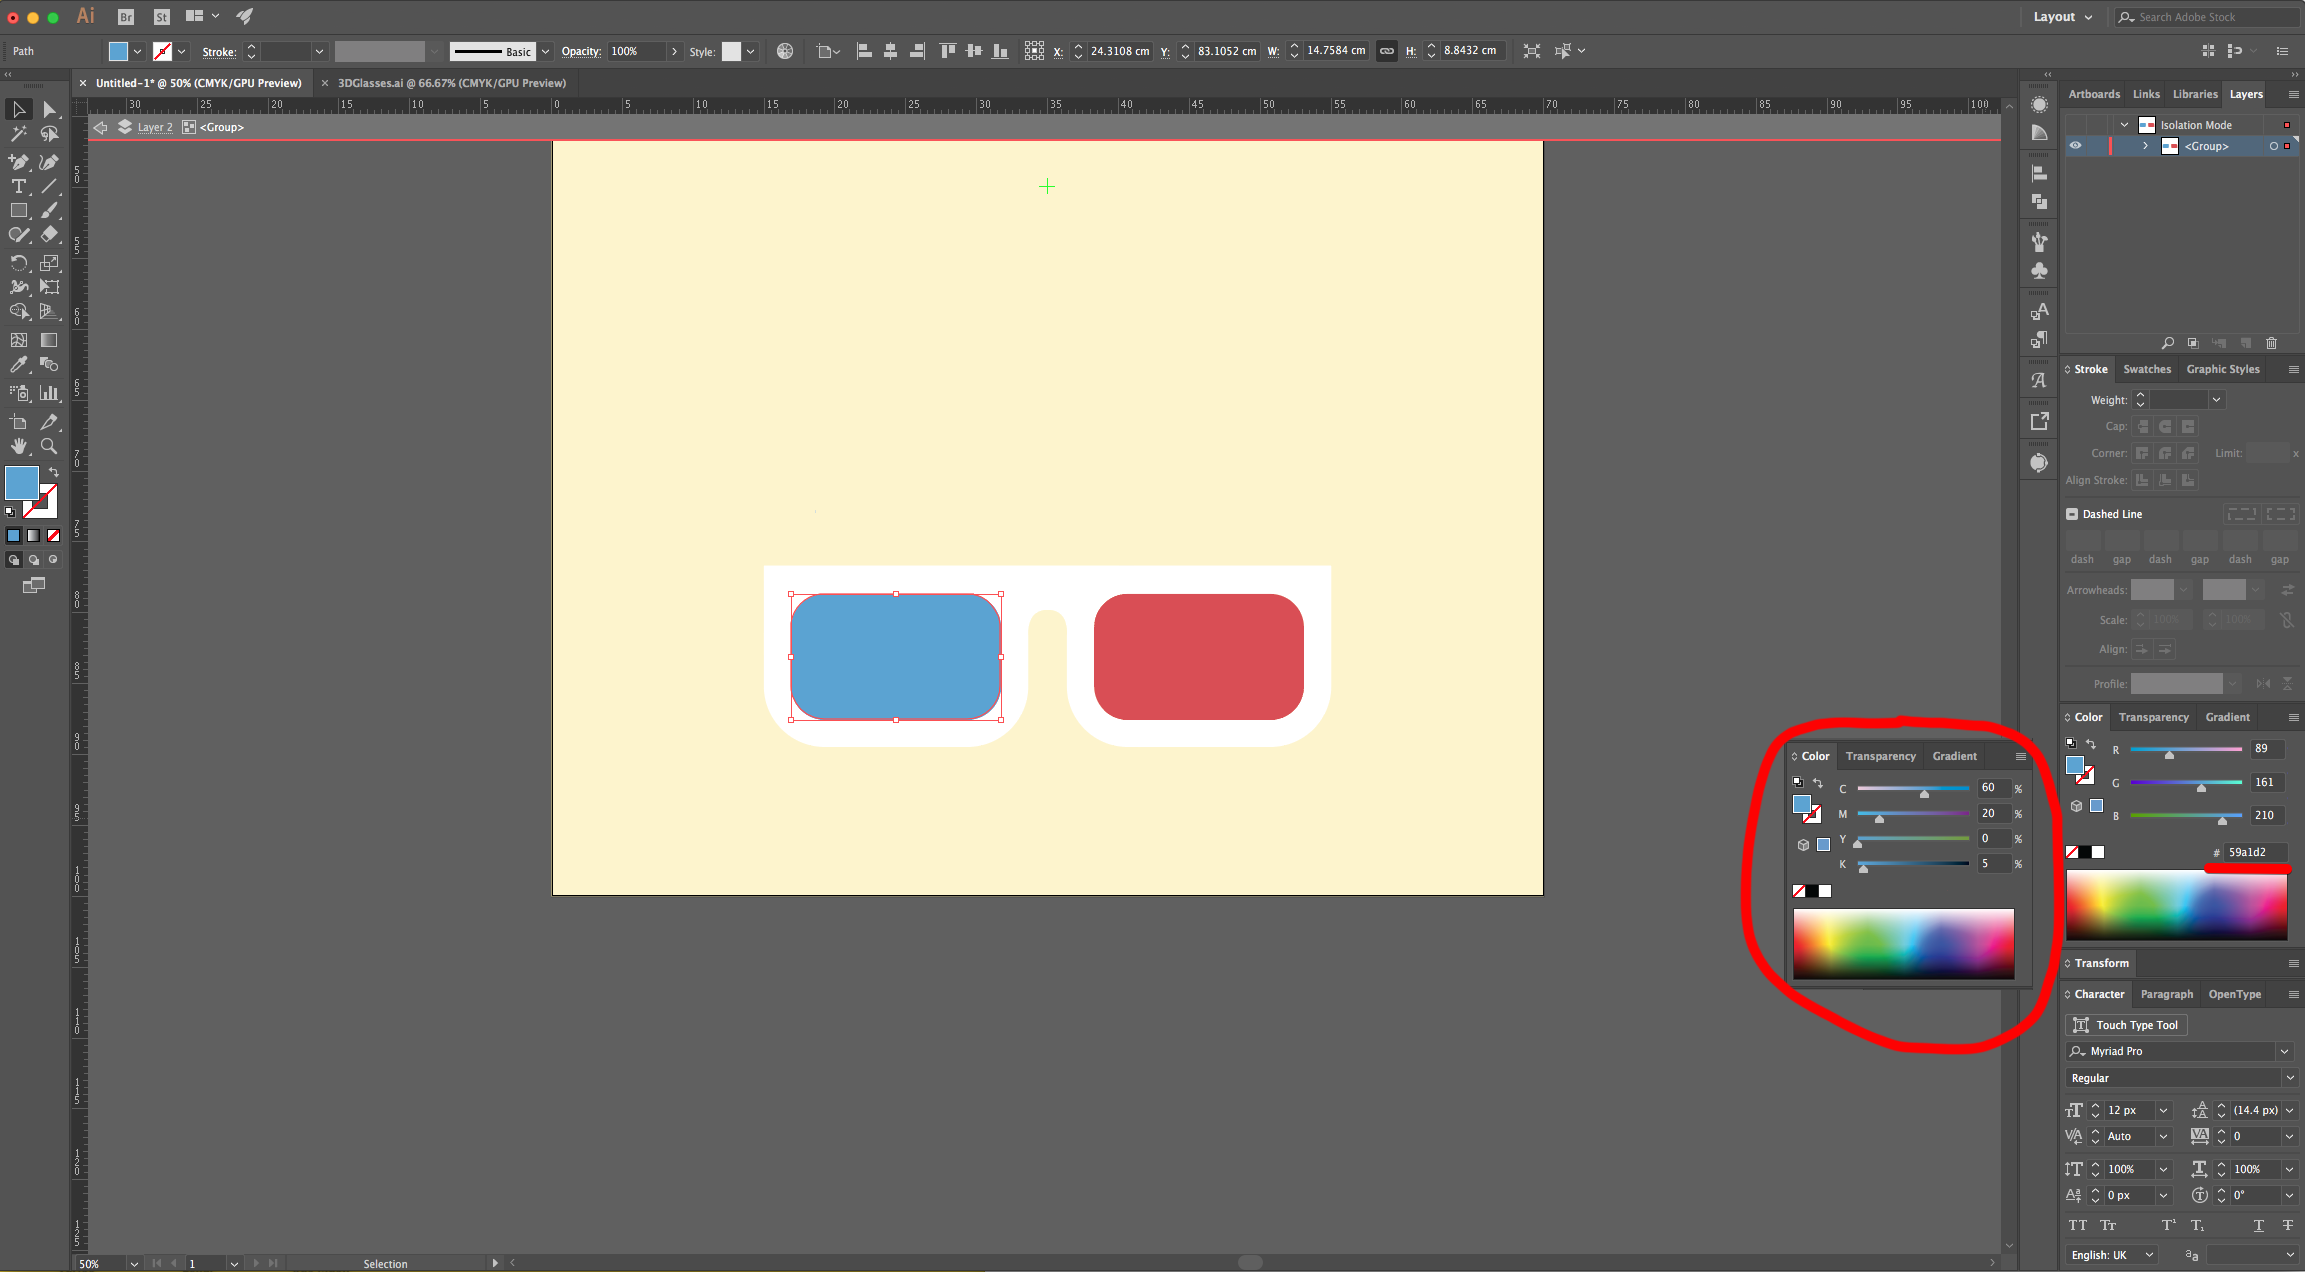
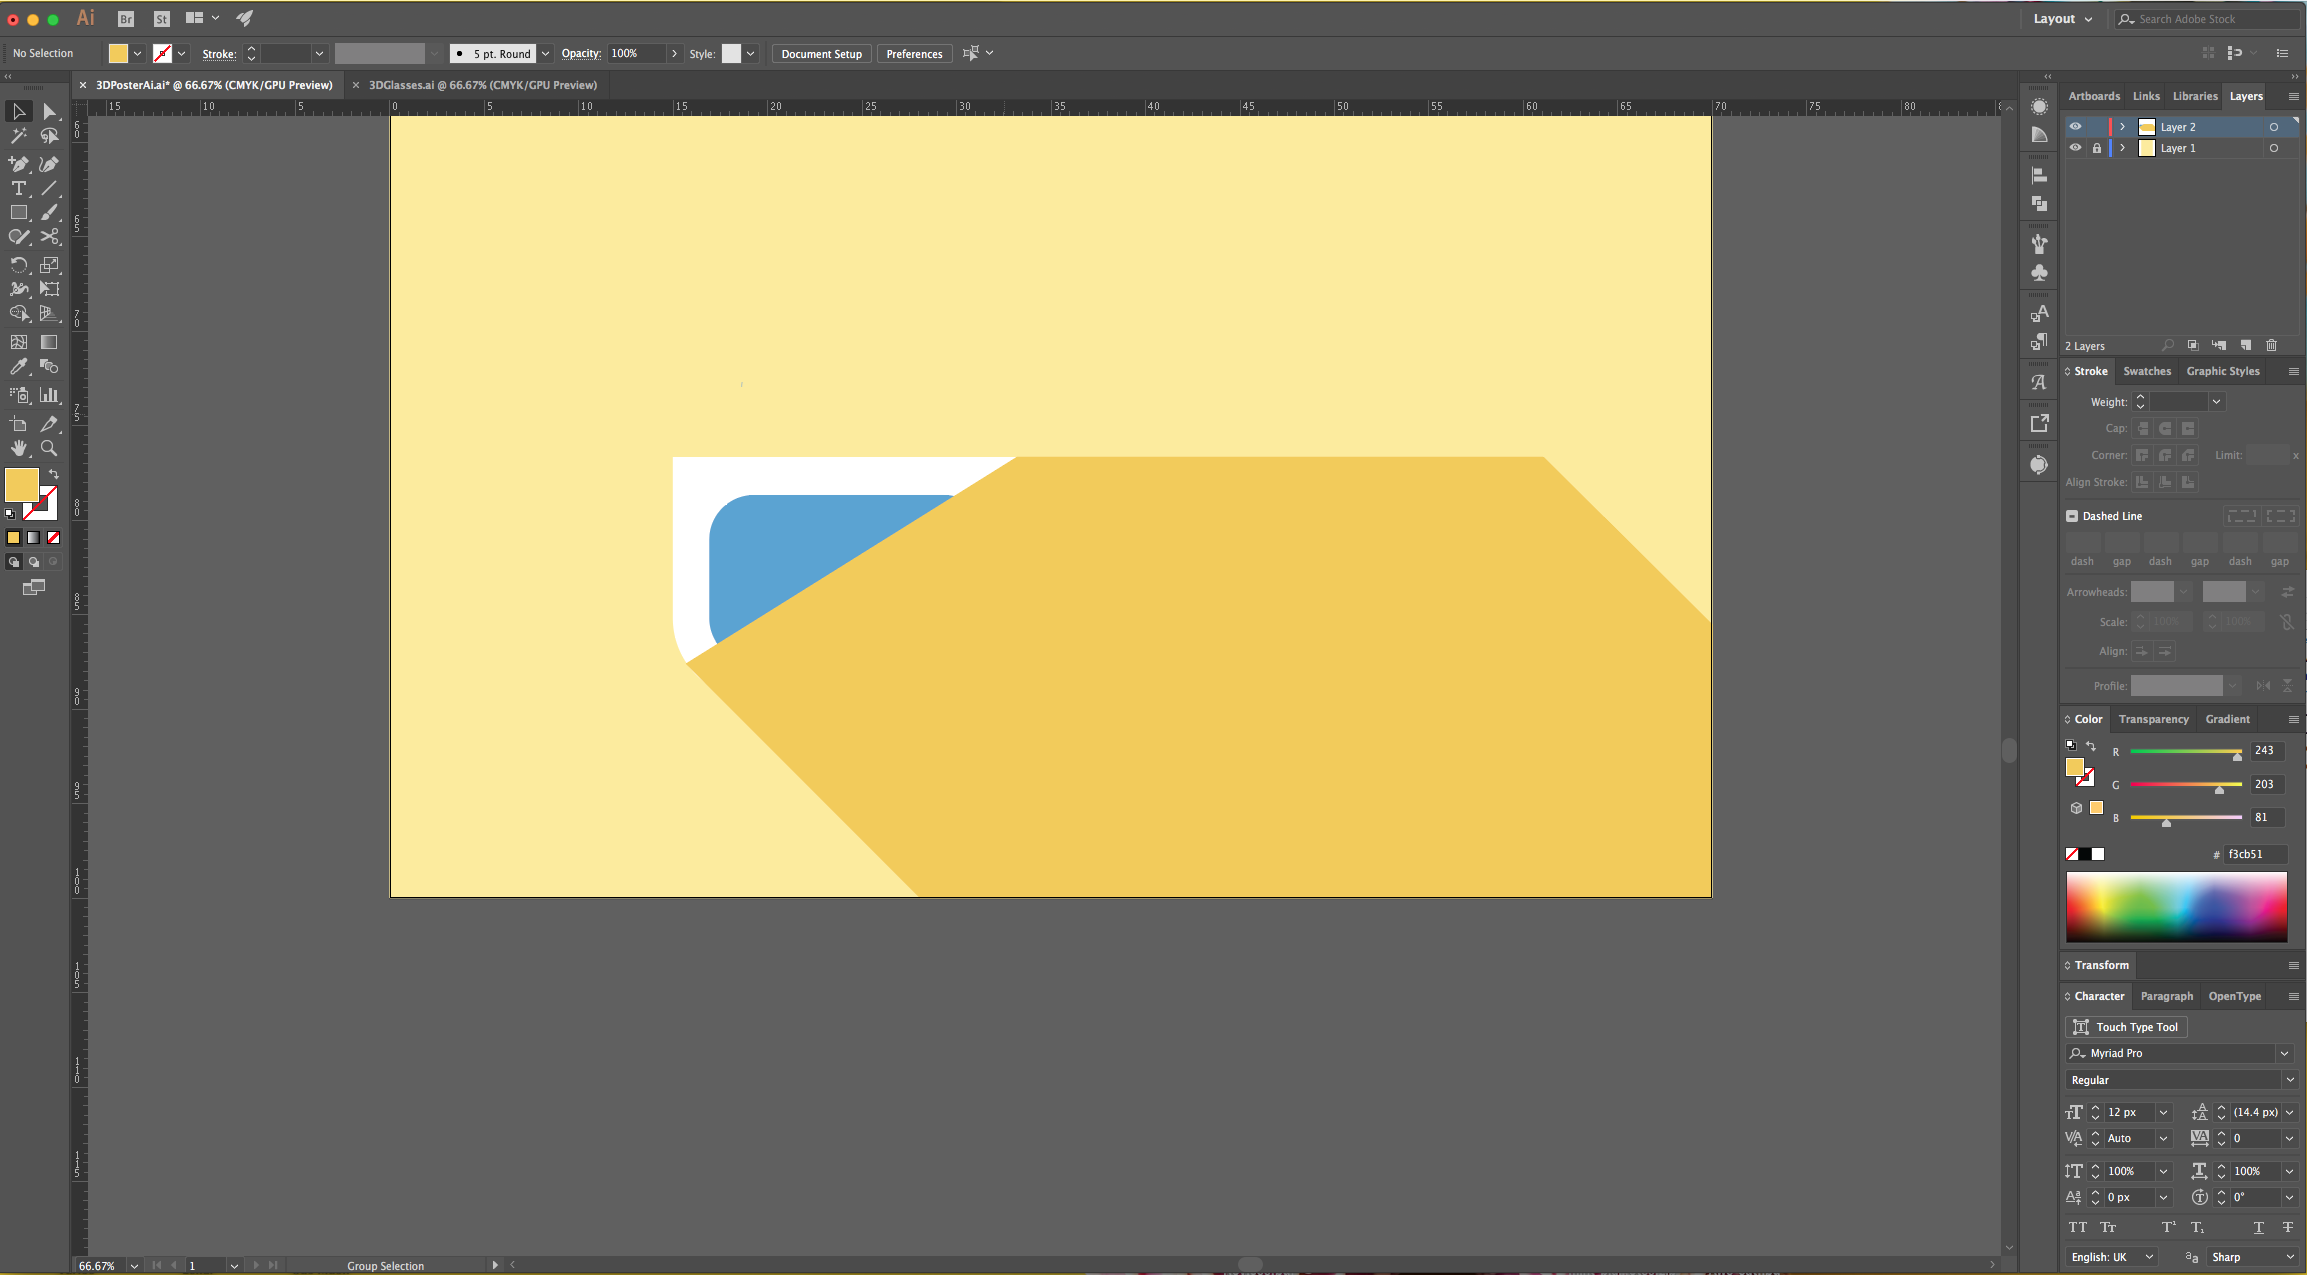
8 - Select the “Red” right-hand part of your Glasses and use #dc4d52 as “Fill” color. Do the same with the “Blue” left-hand portion and use #59a1d2.
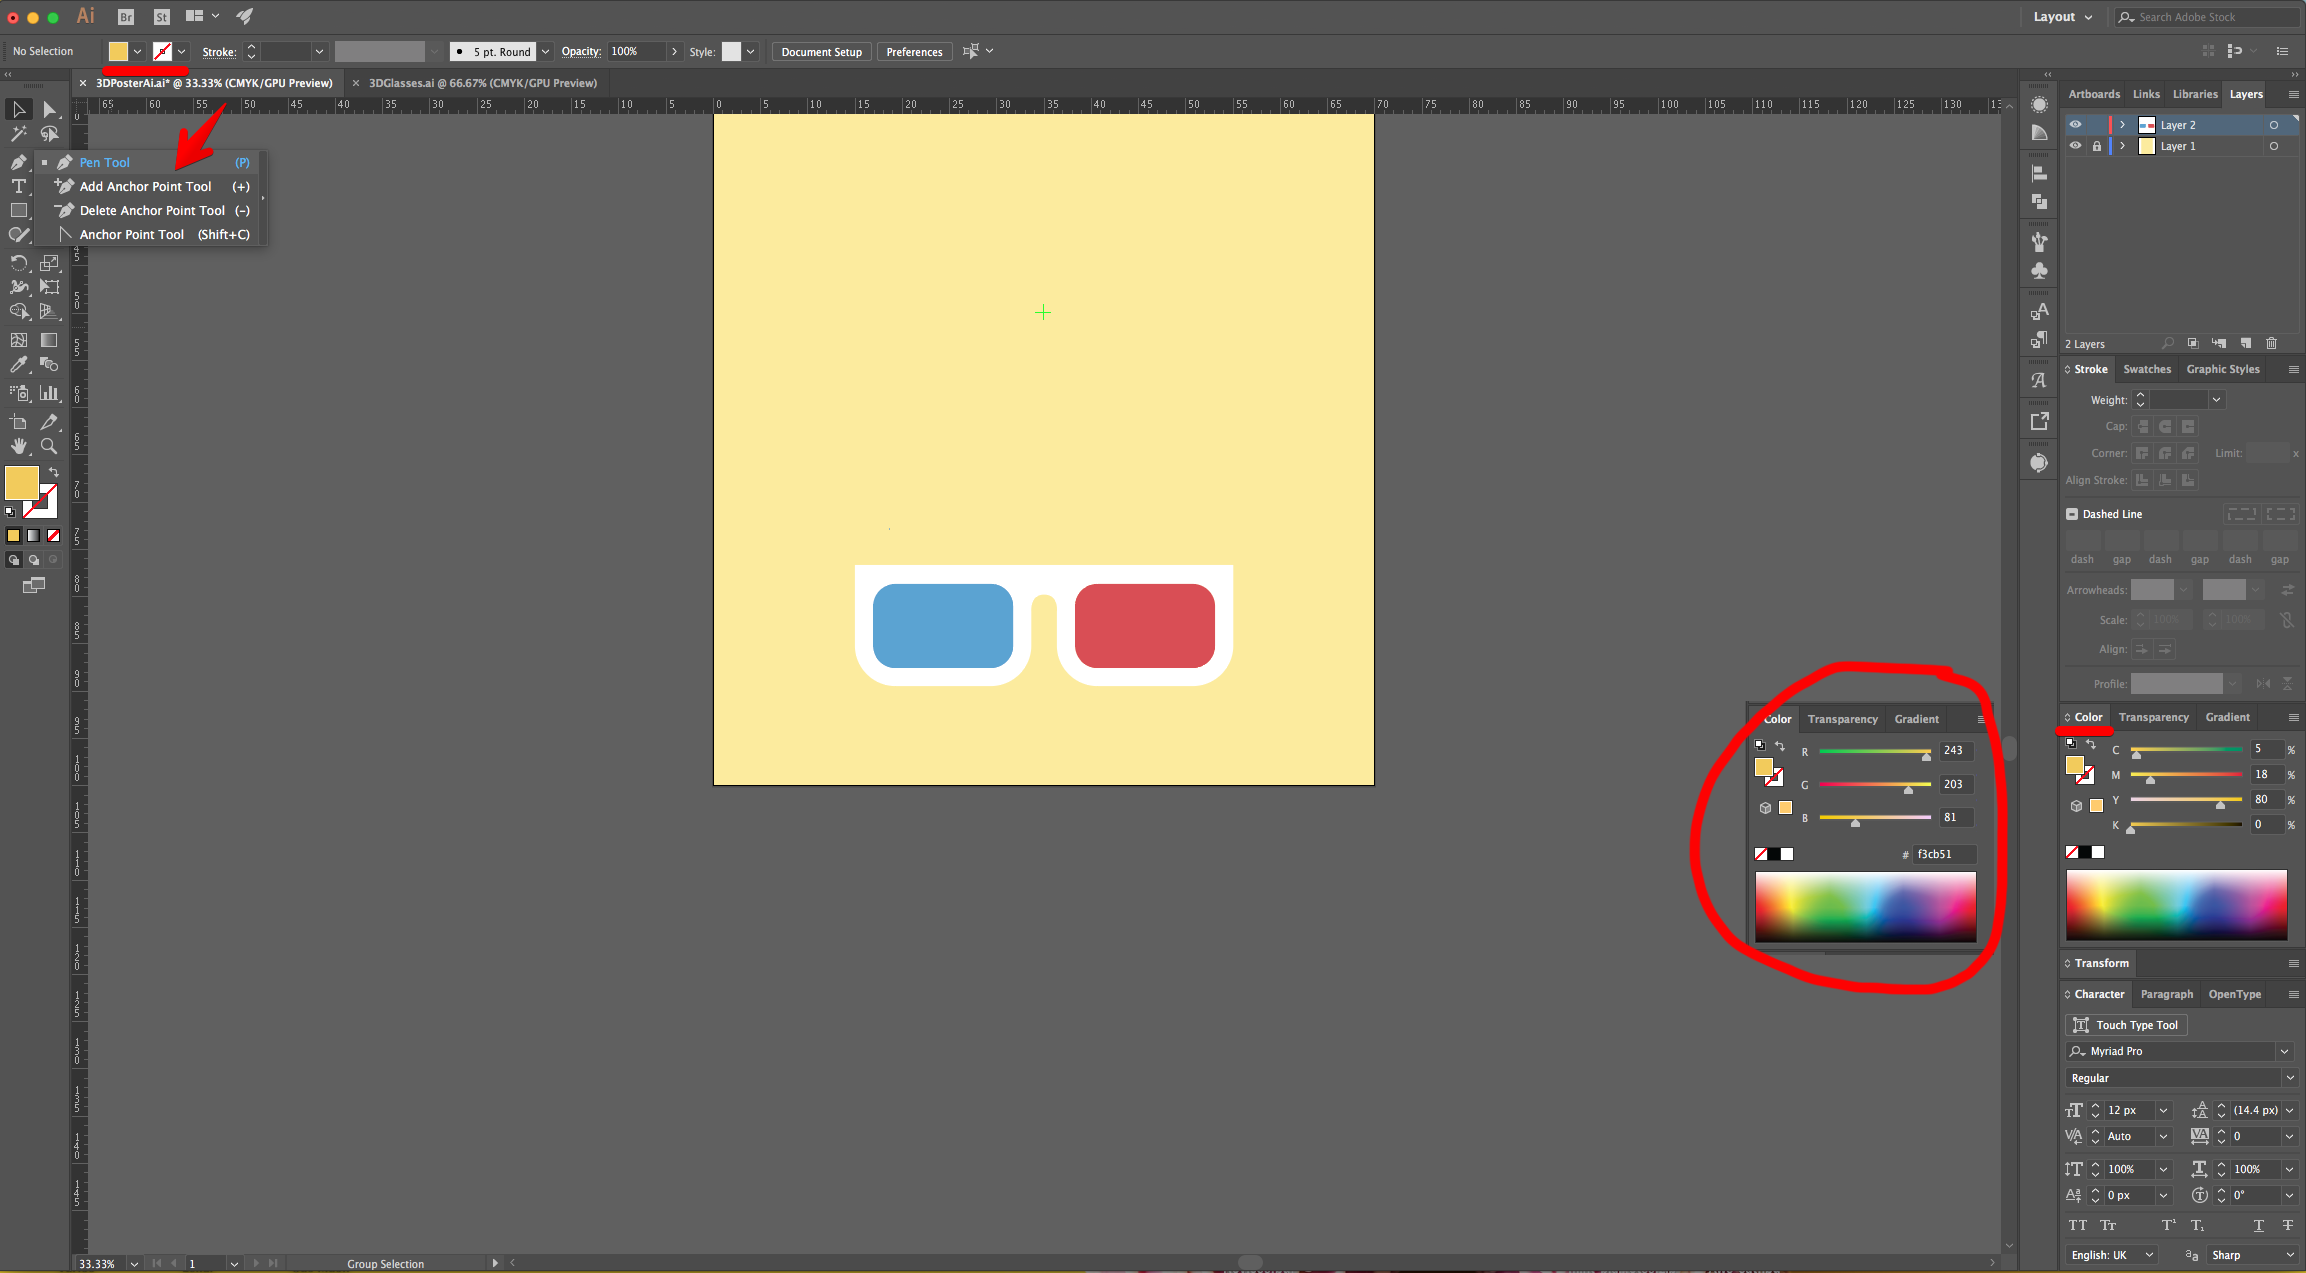
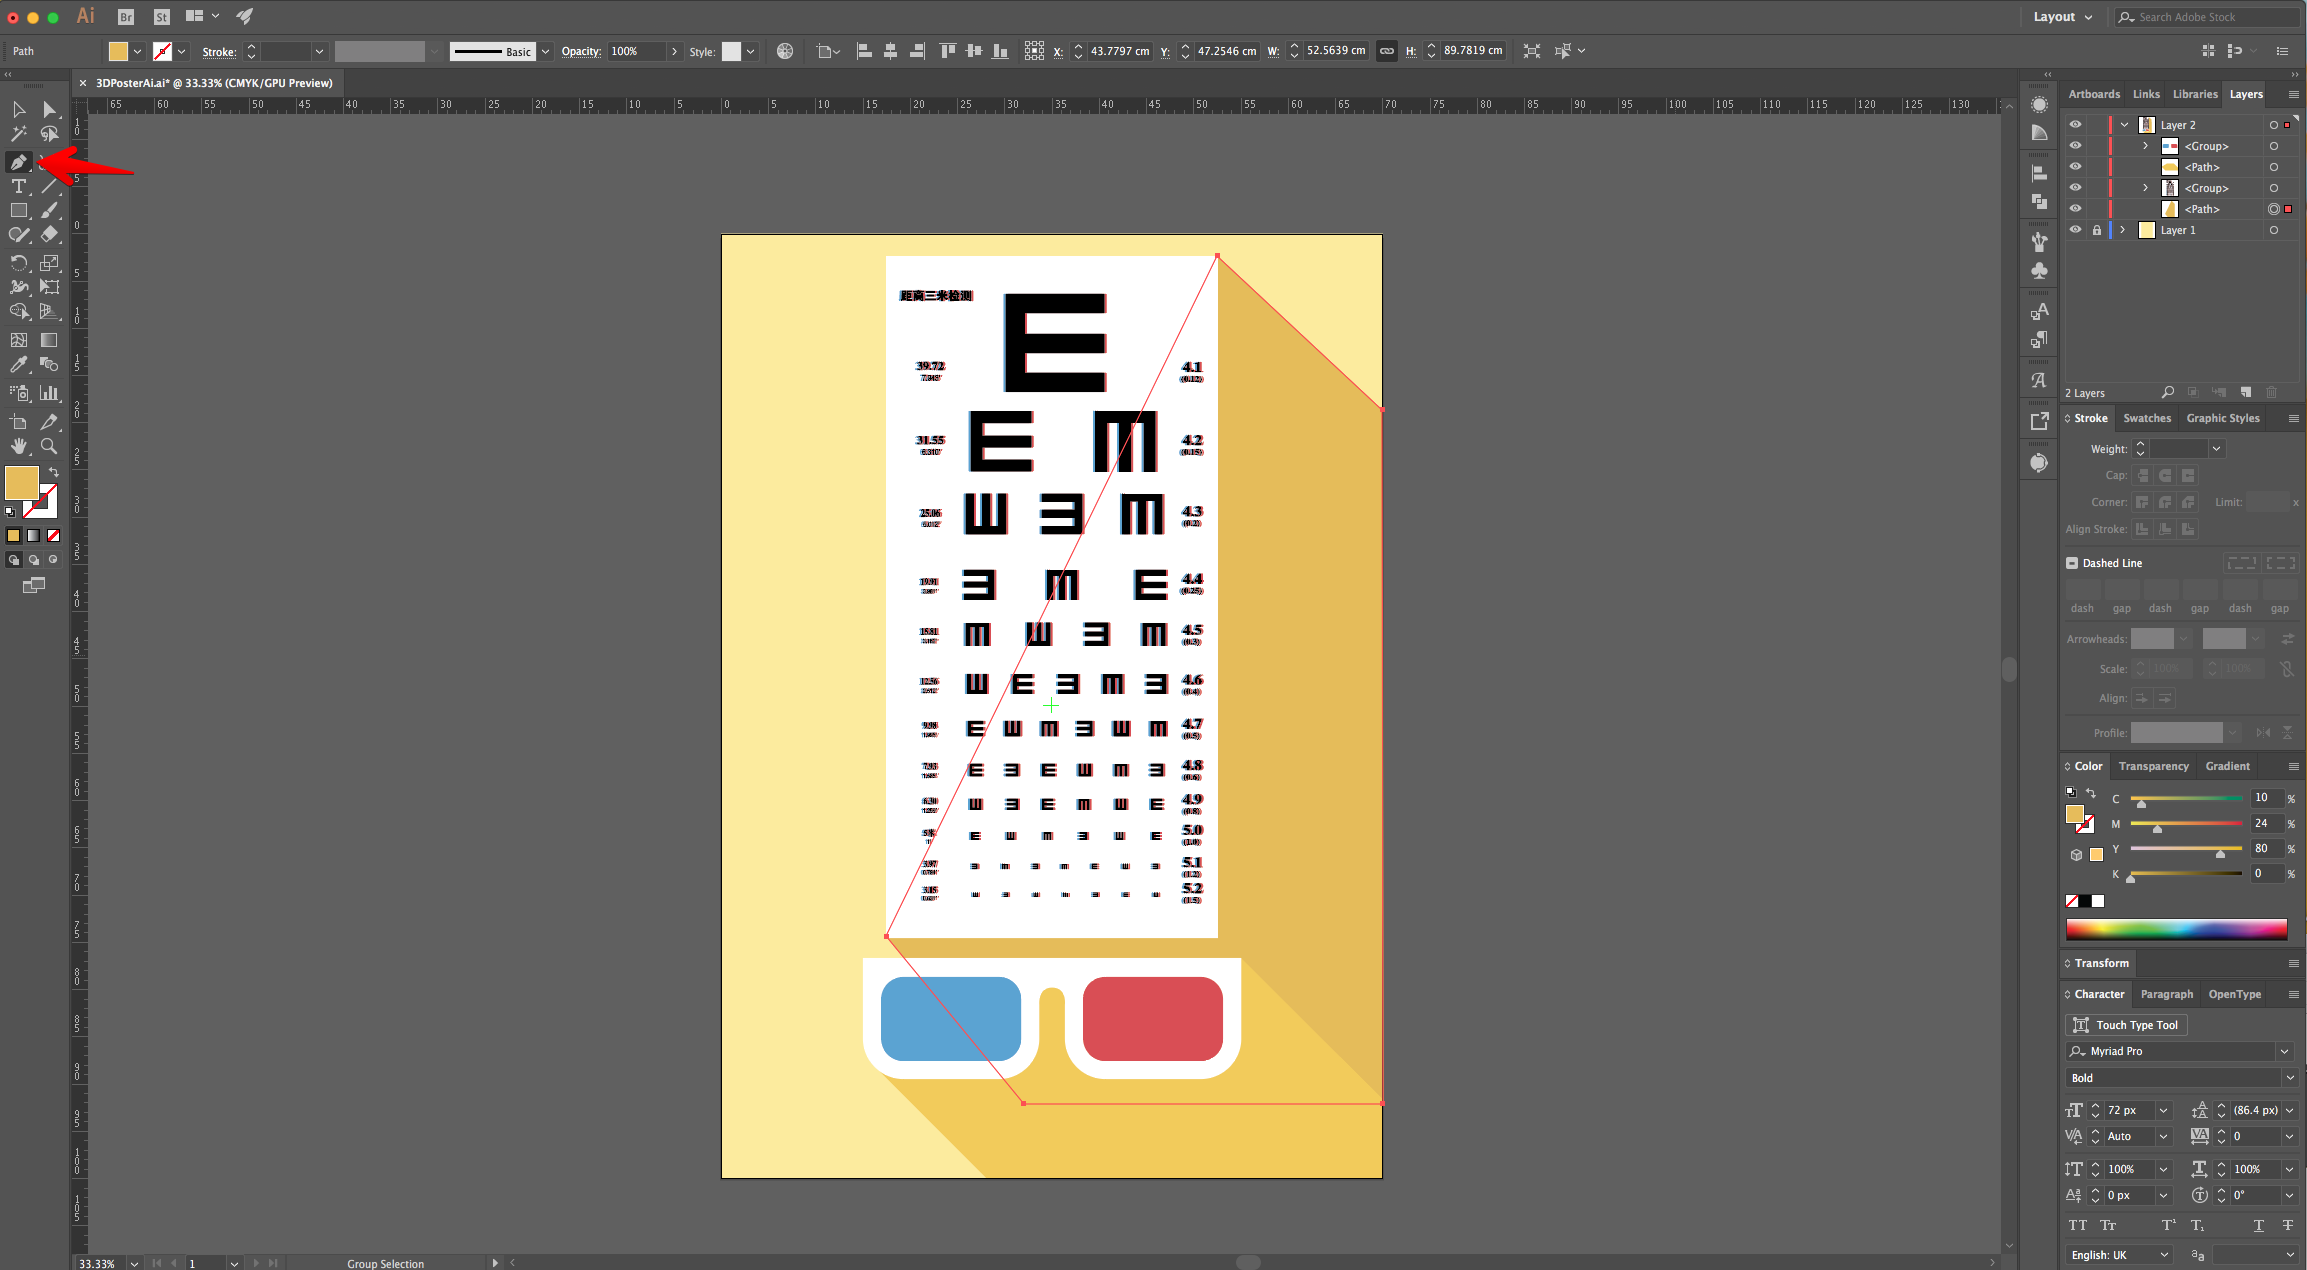
9 - Use the “Pen Tool” (P) with a darker shade of Yellow (#f3cb51) to create a “Long Shadow” effect to your “Glasses”.
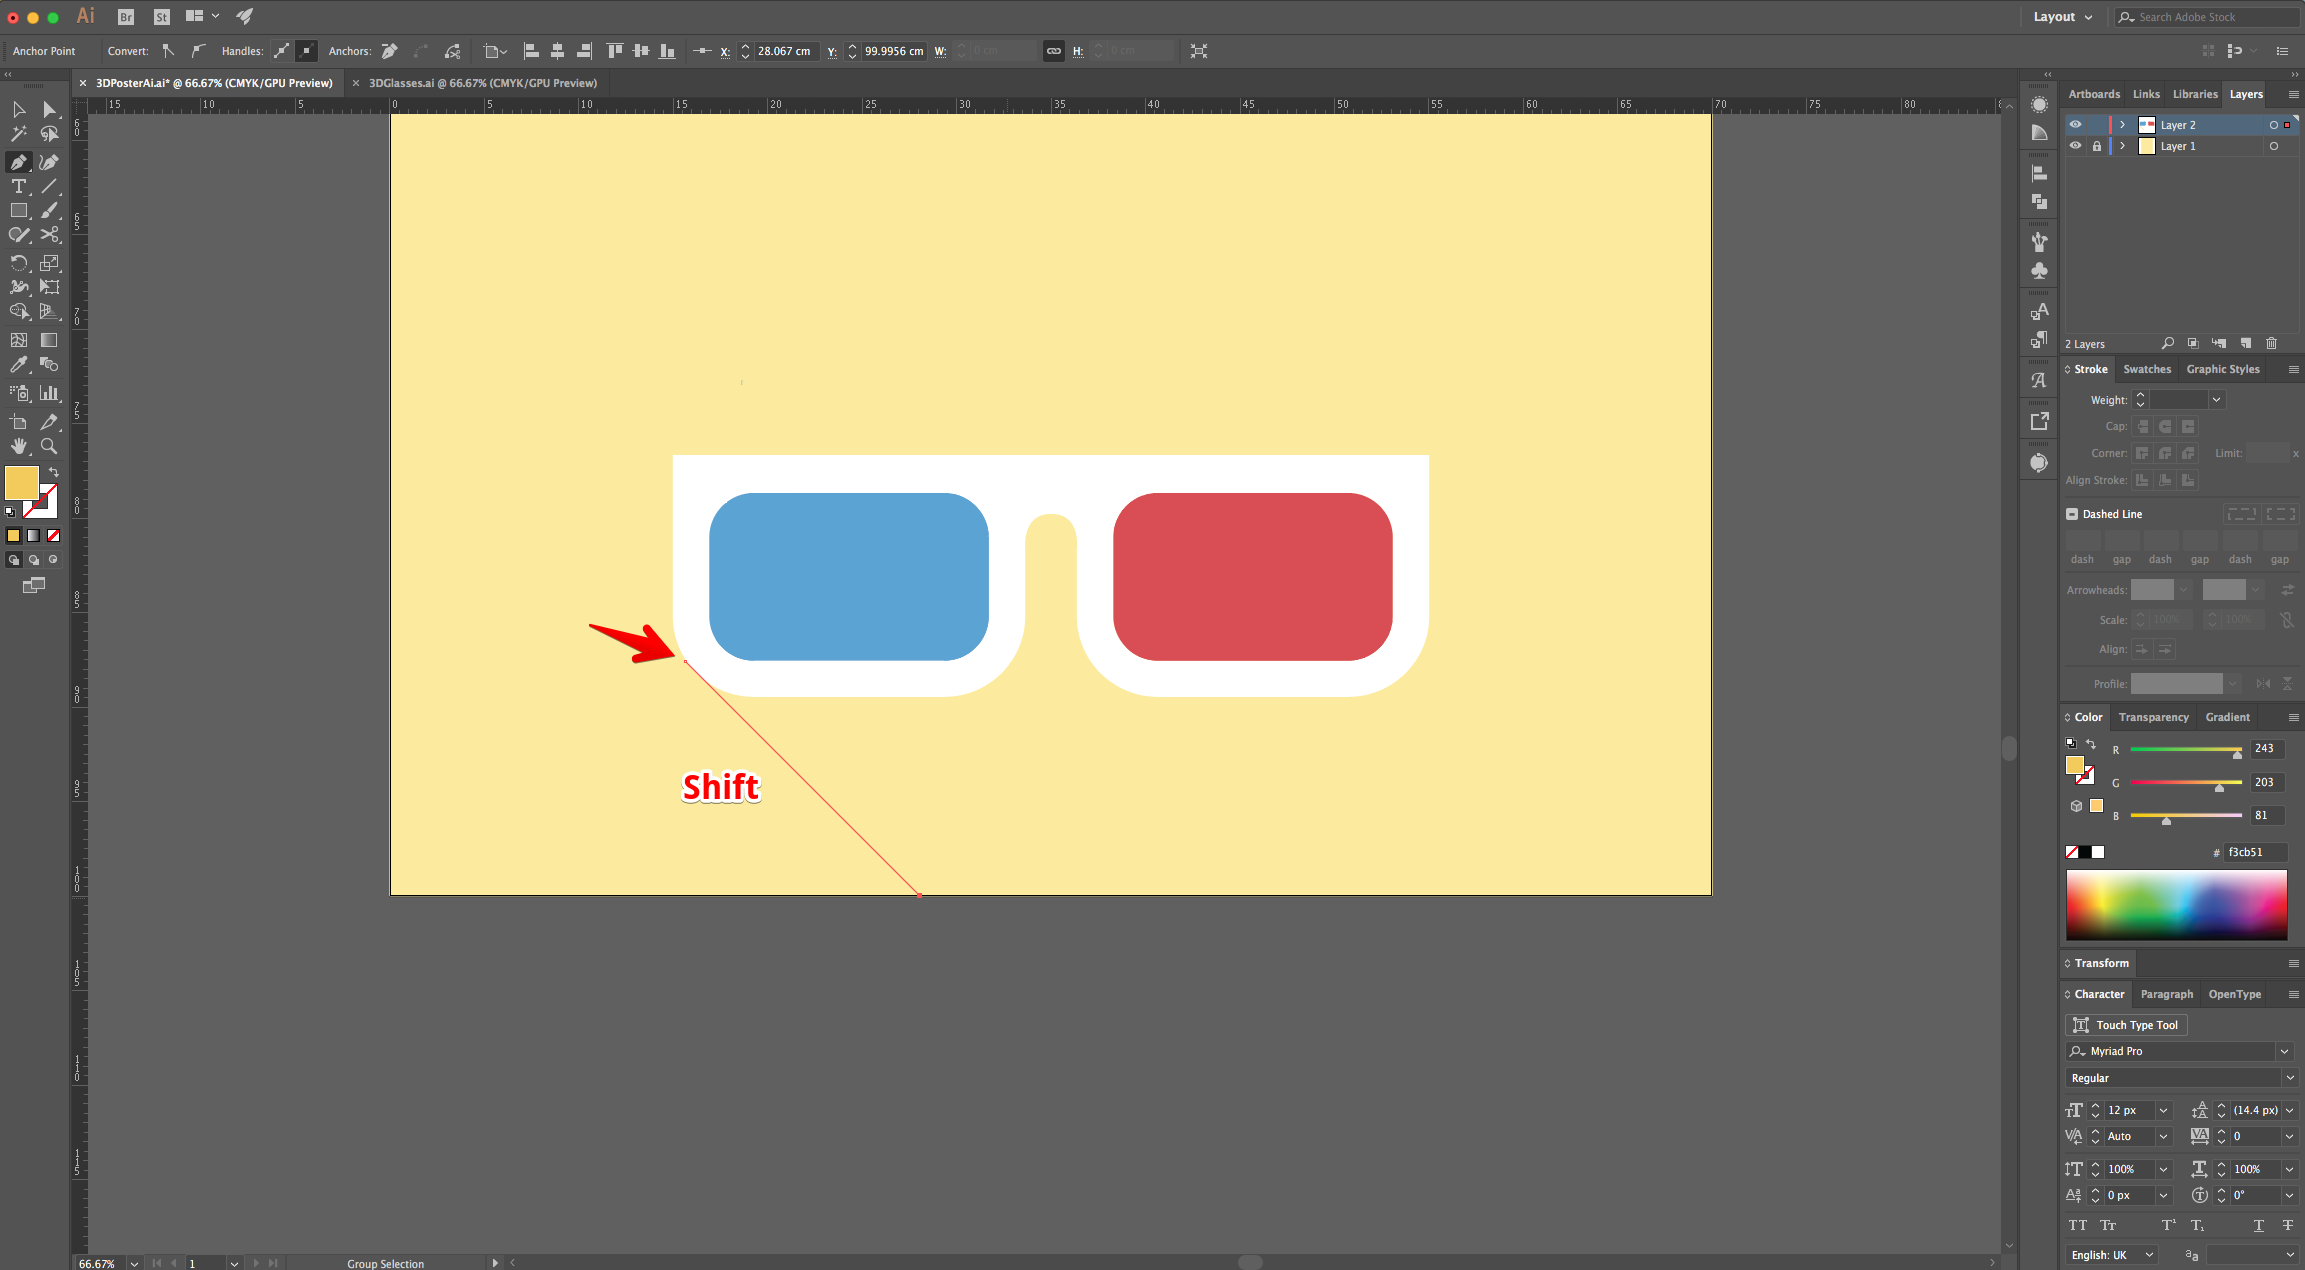
10 - Hold the “Shift” key to make the lines “Straight” and at an 45° Angle. Start on the bottom-left of the Glasses to the bottom edge of the Document (45°), then to the bottom-right corner and back up to the top-right of the Glasses. To finish, close the Path.
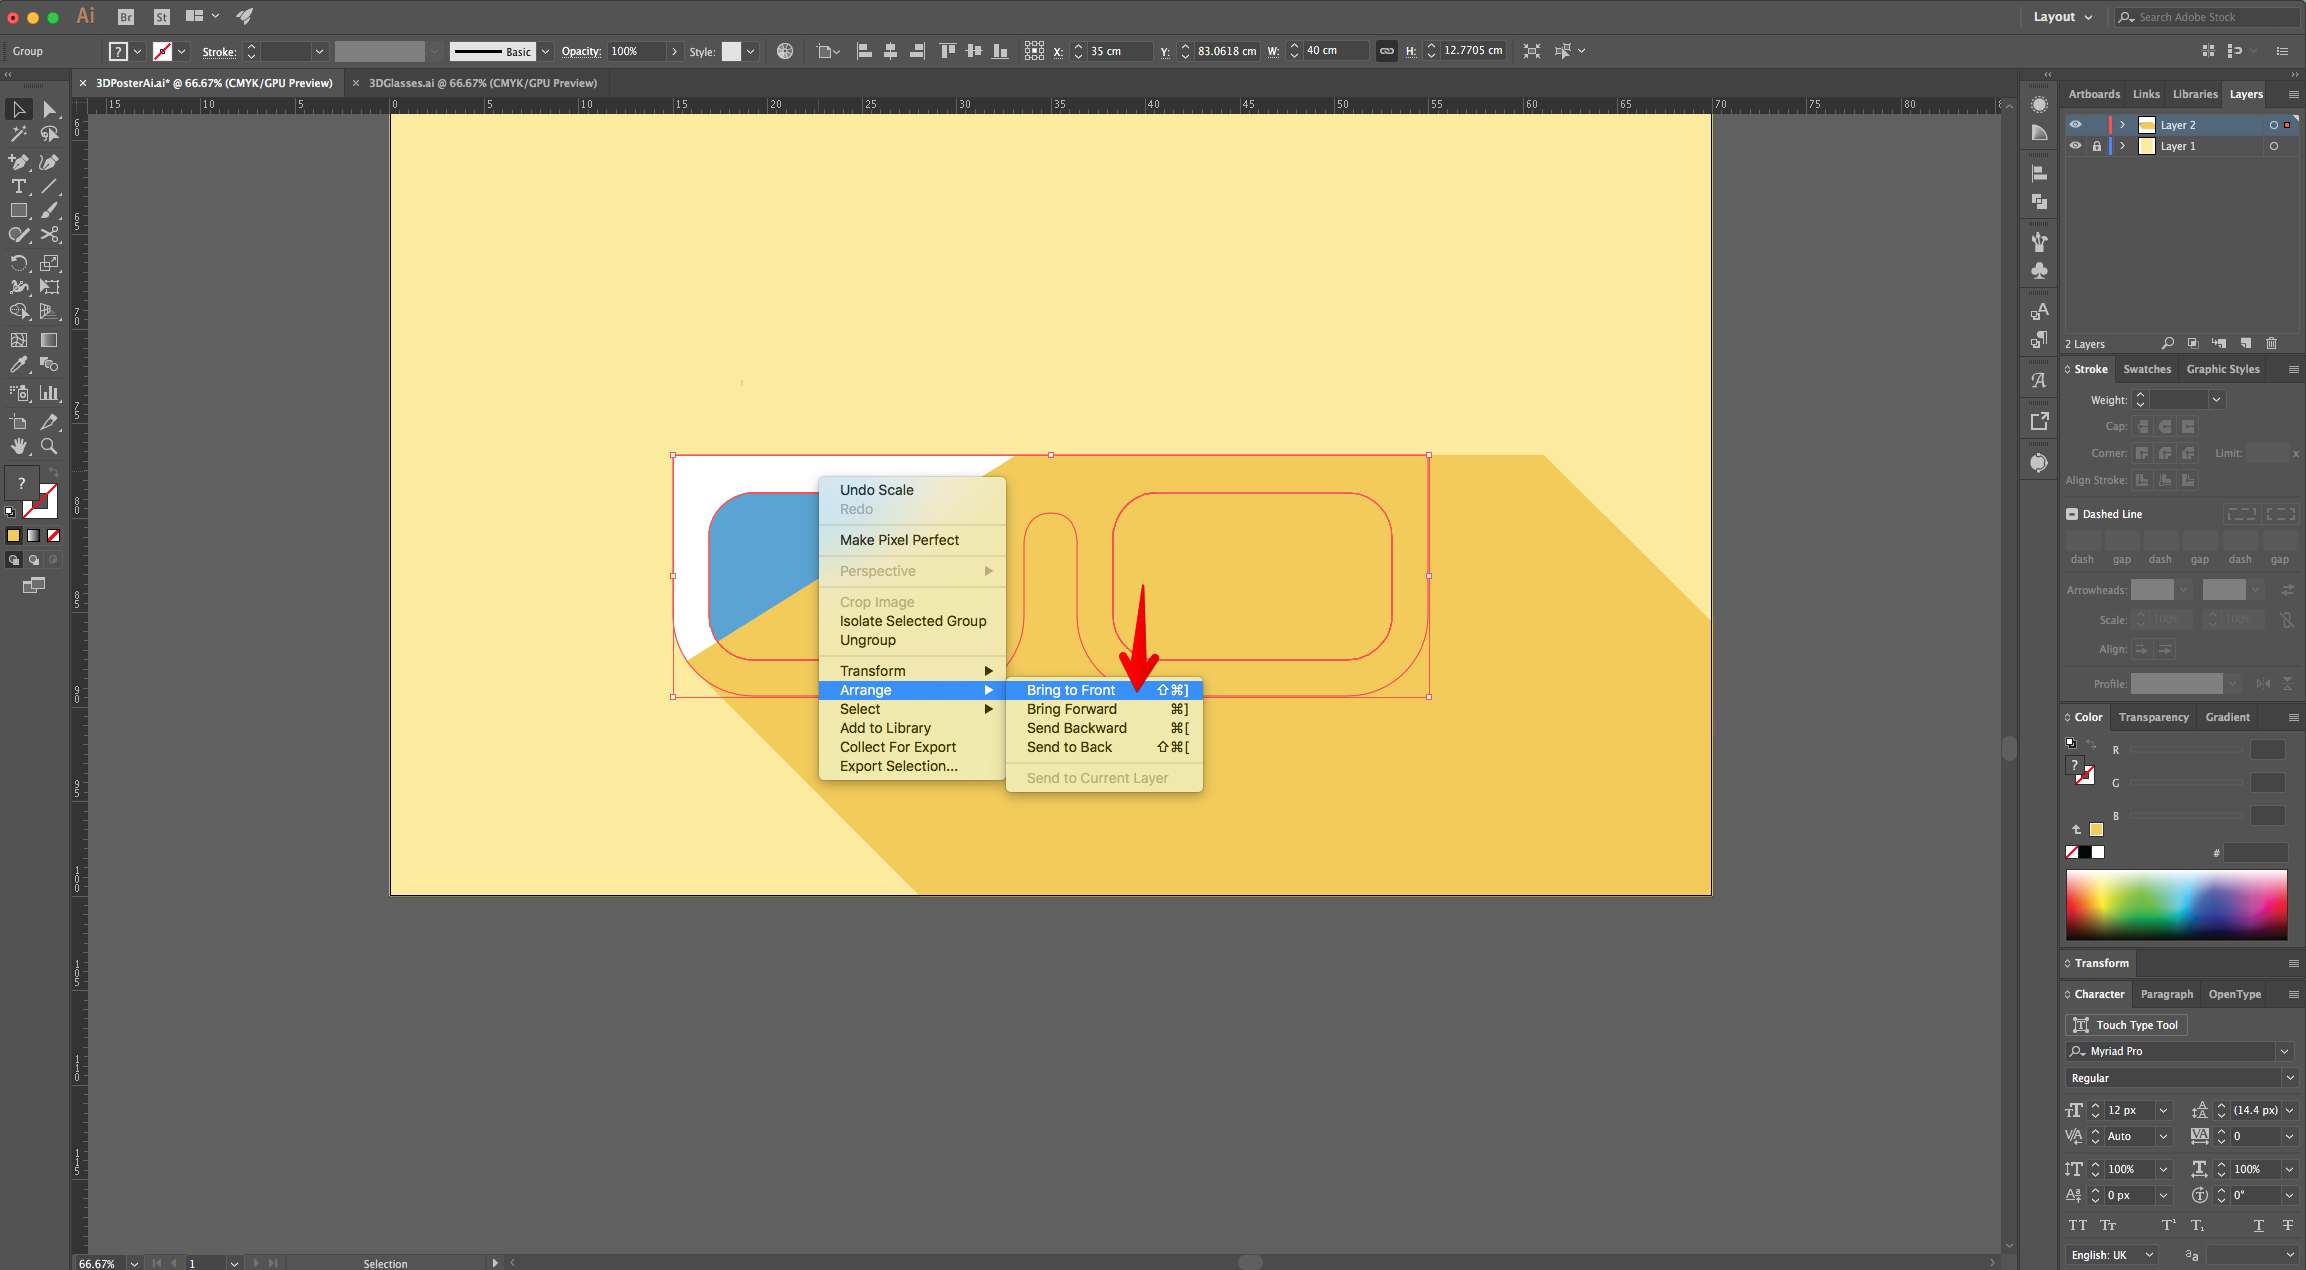
11 - Right-click on top of the “Glasses” and choose “Bring to Front” to place them on top of the “Shadow”.
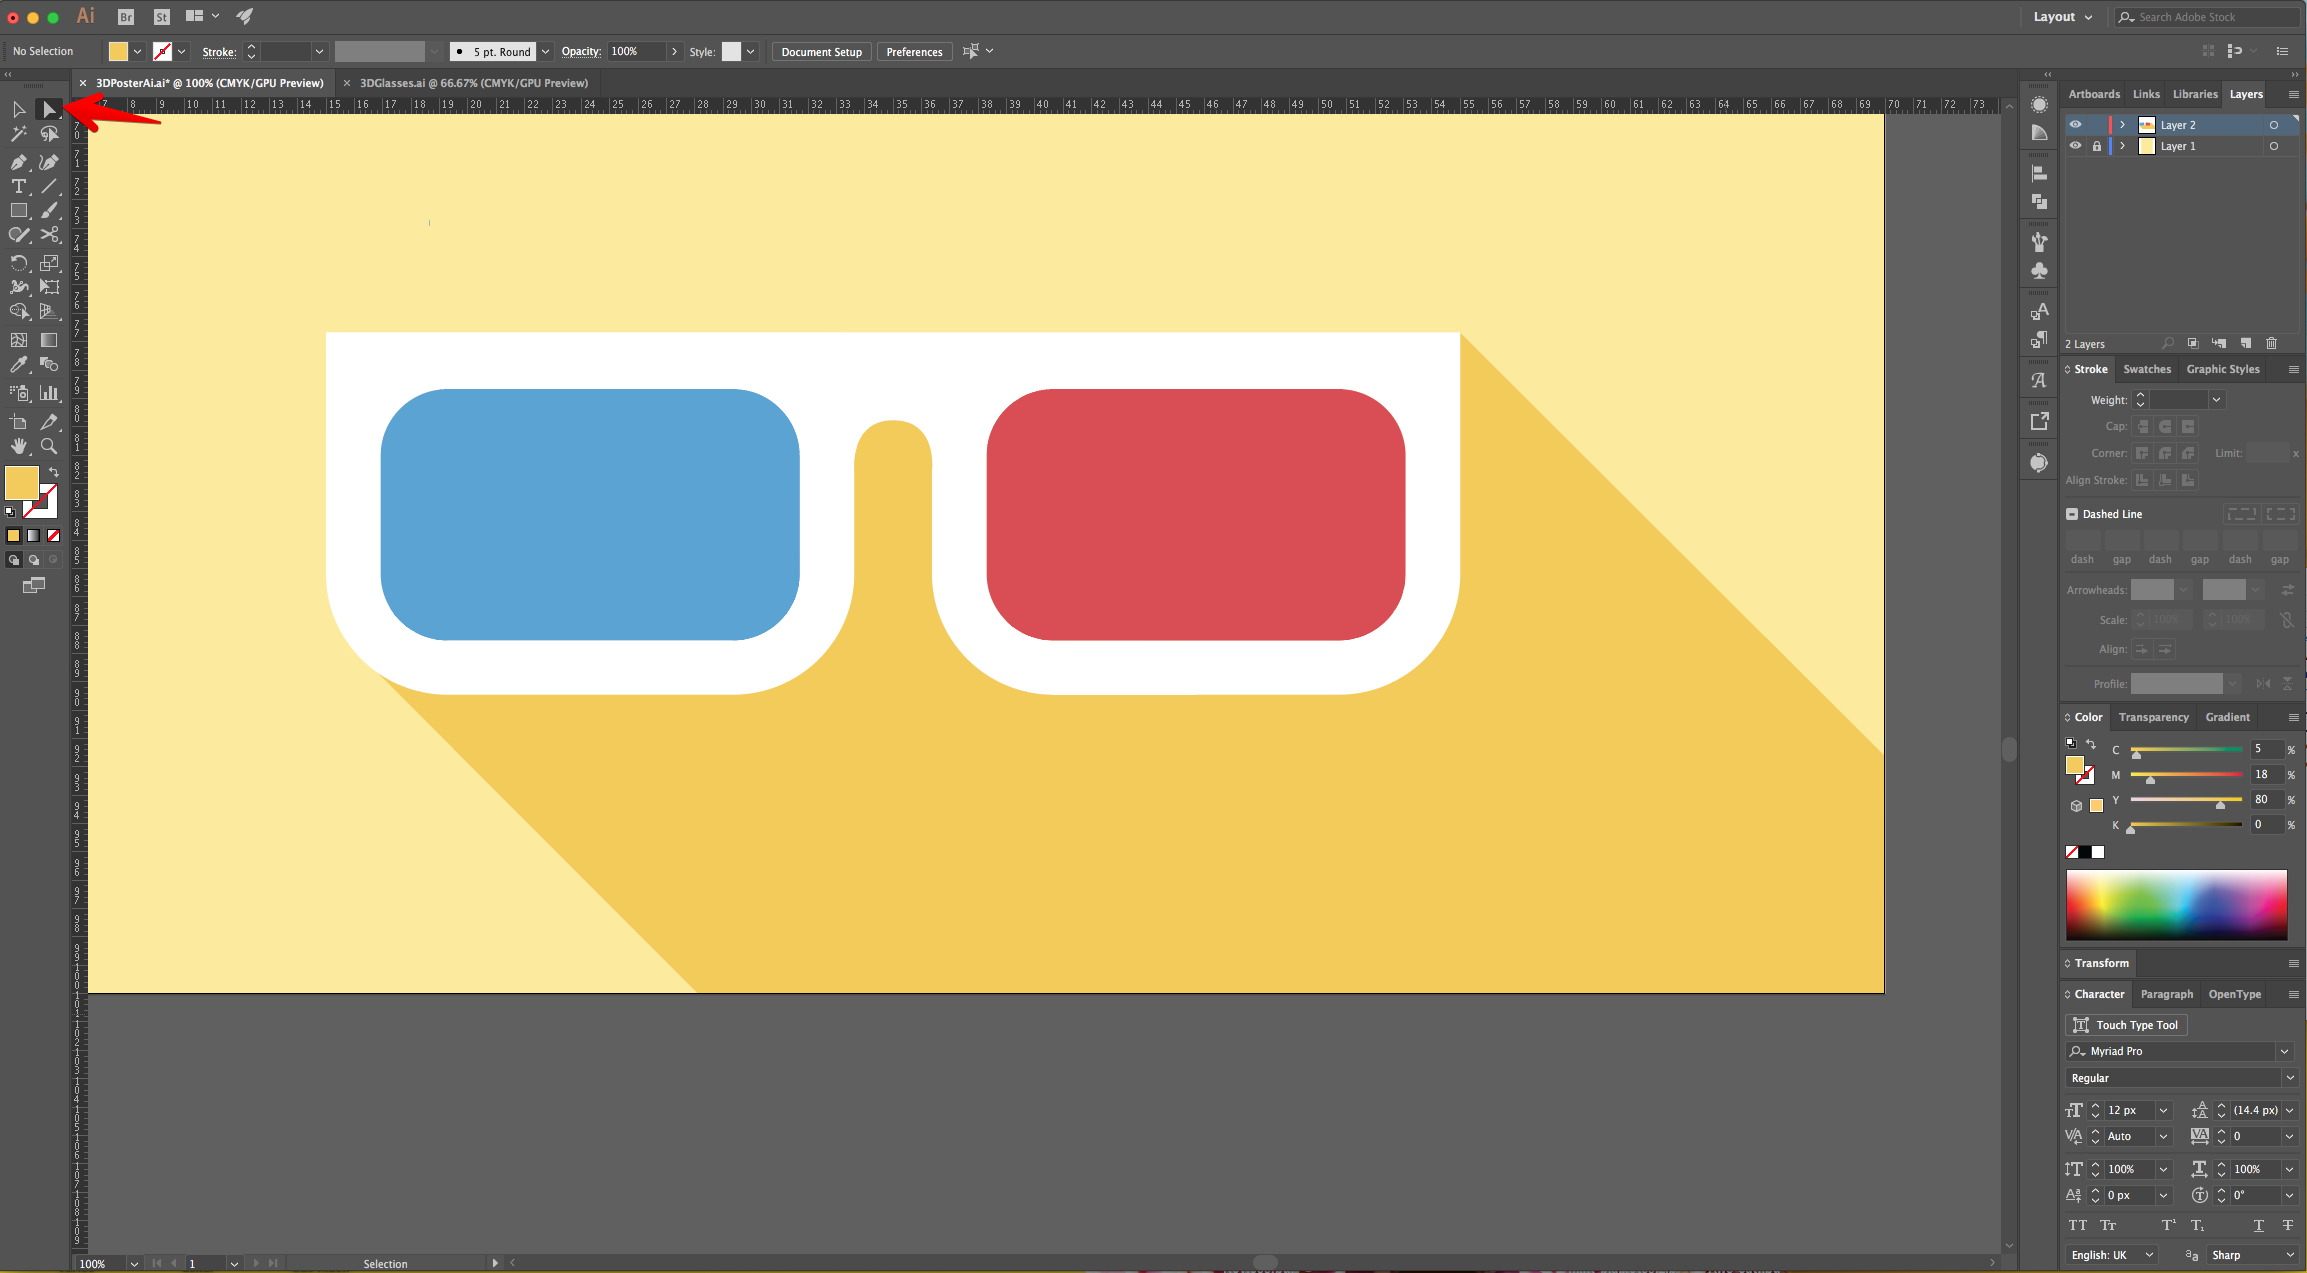
12 - Use the “Direct Selection Tool” (A) to fix any portion of the “Vectors” that needs to be adjusted.
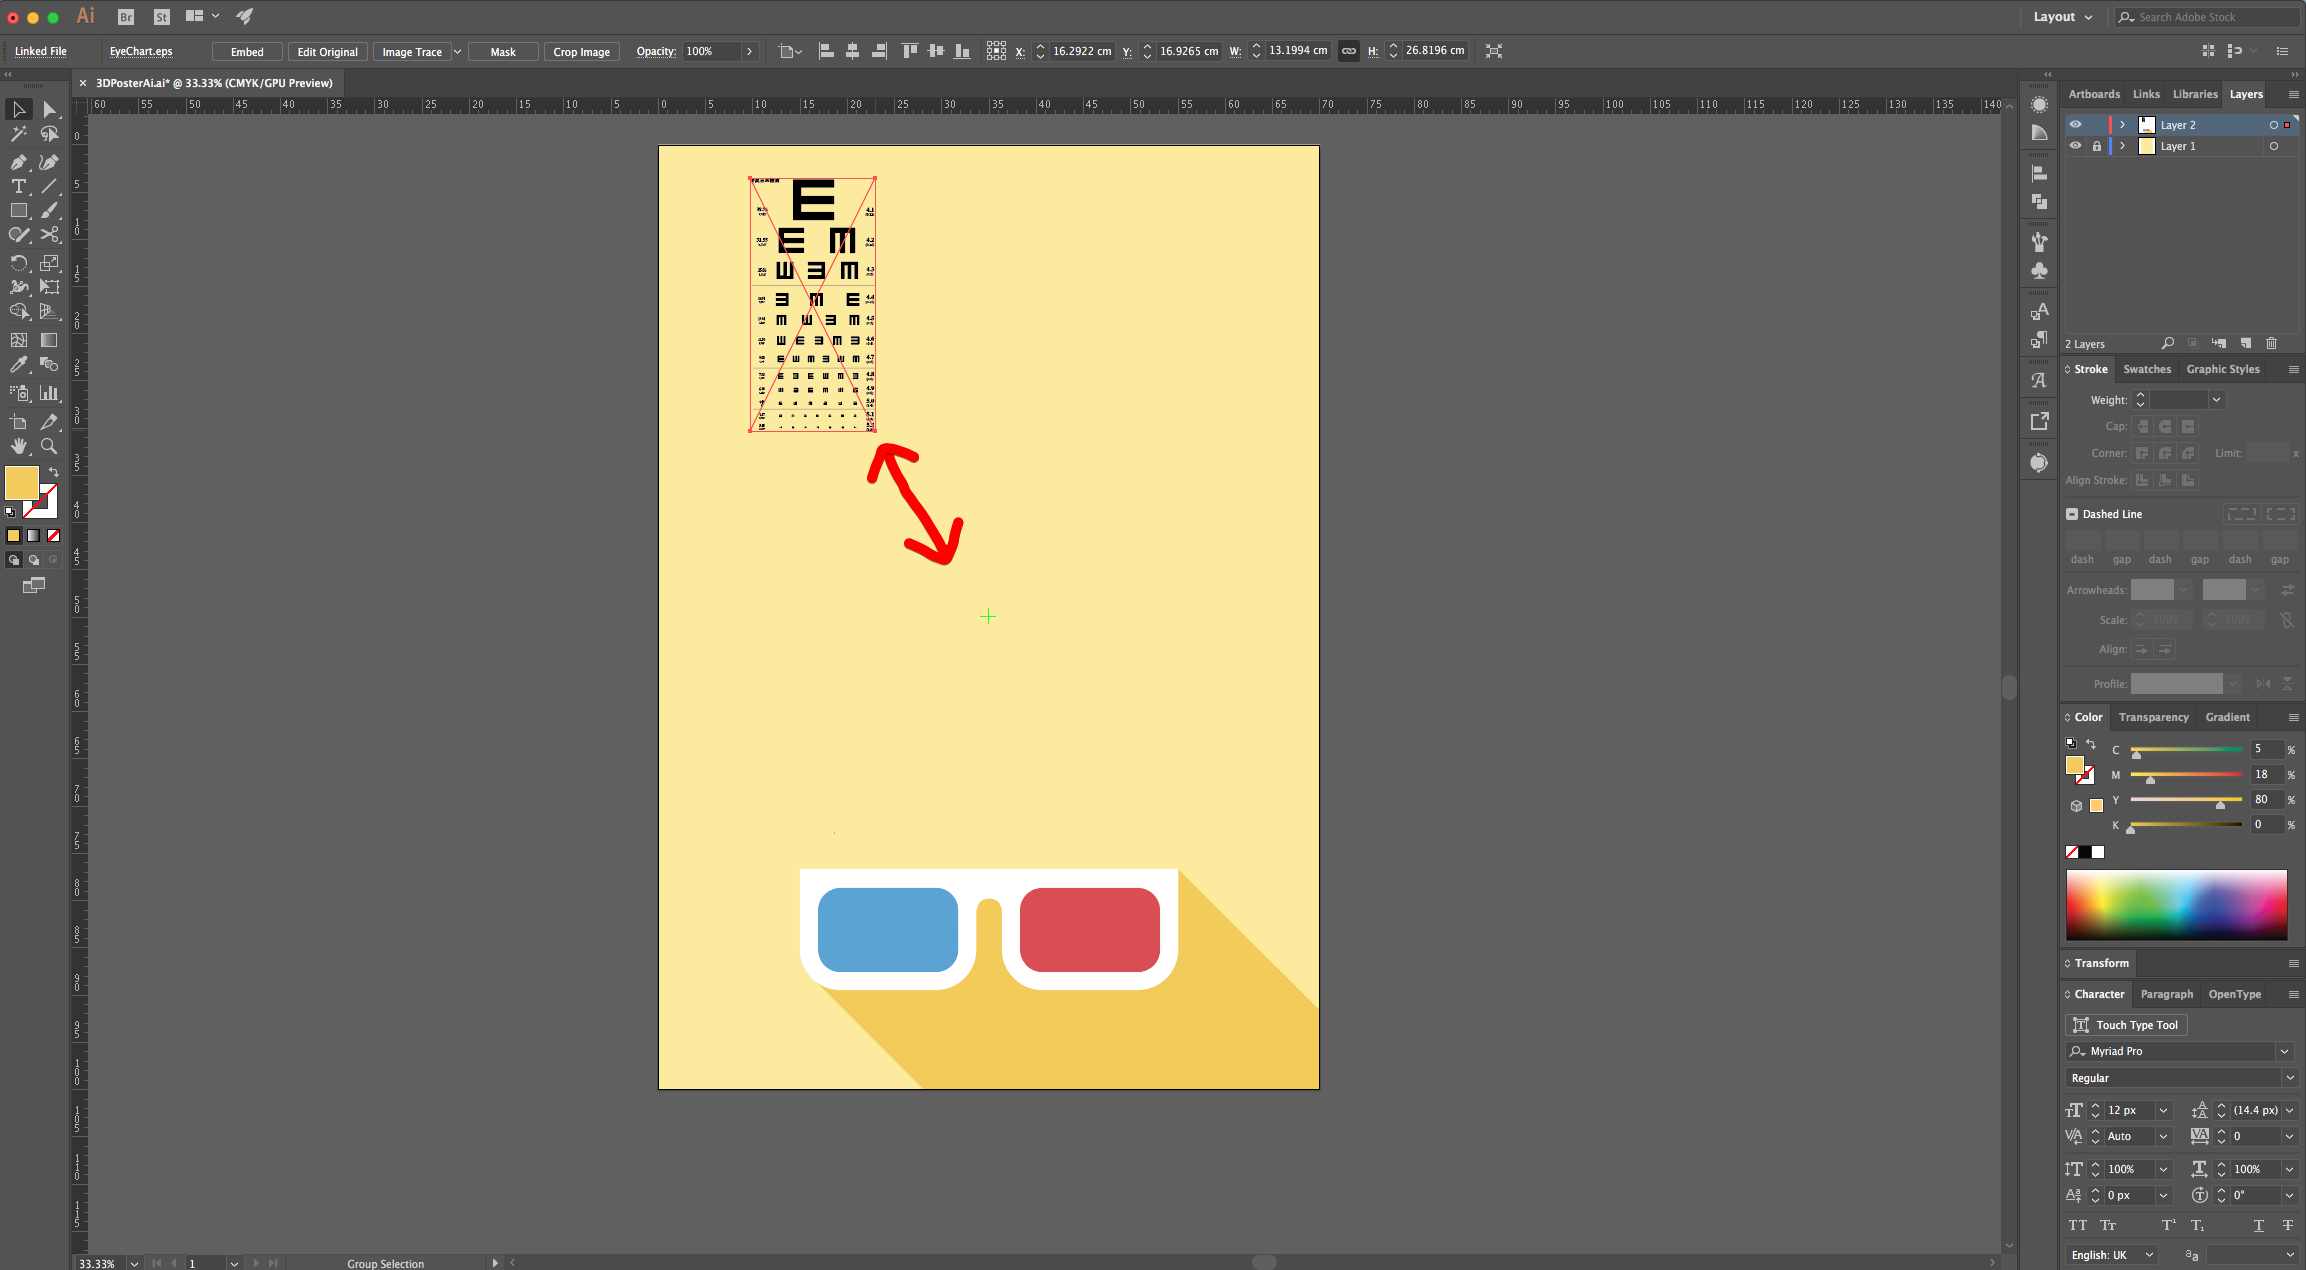
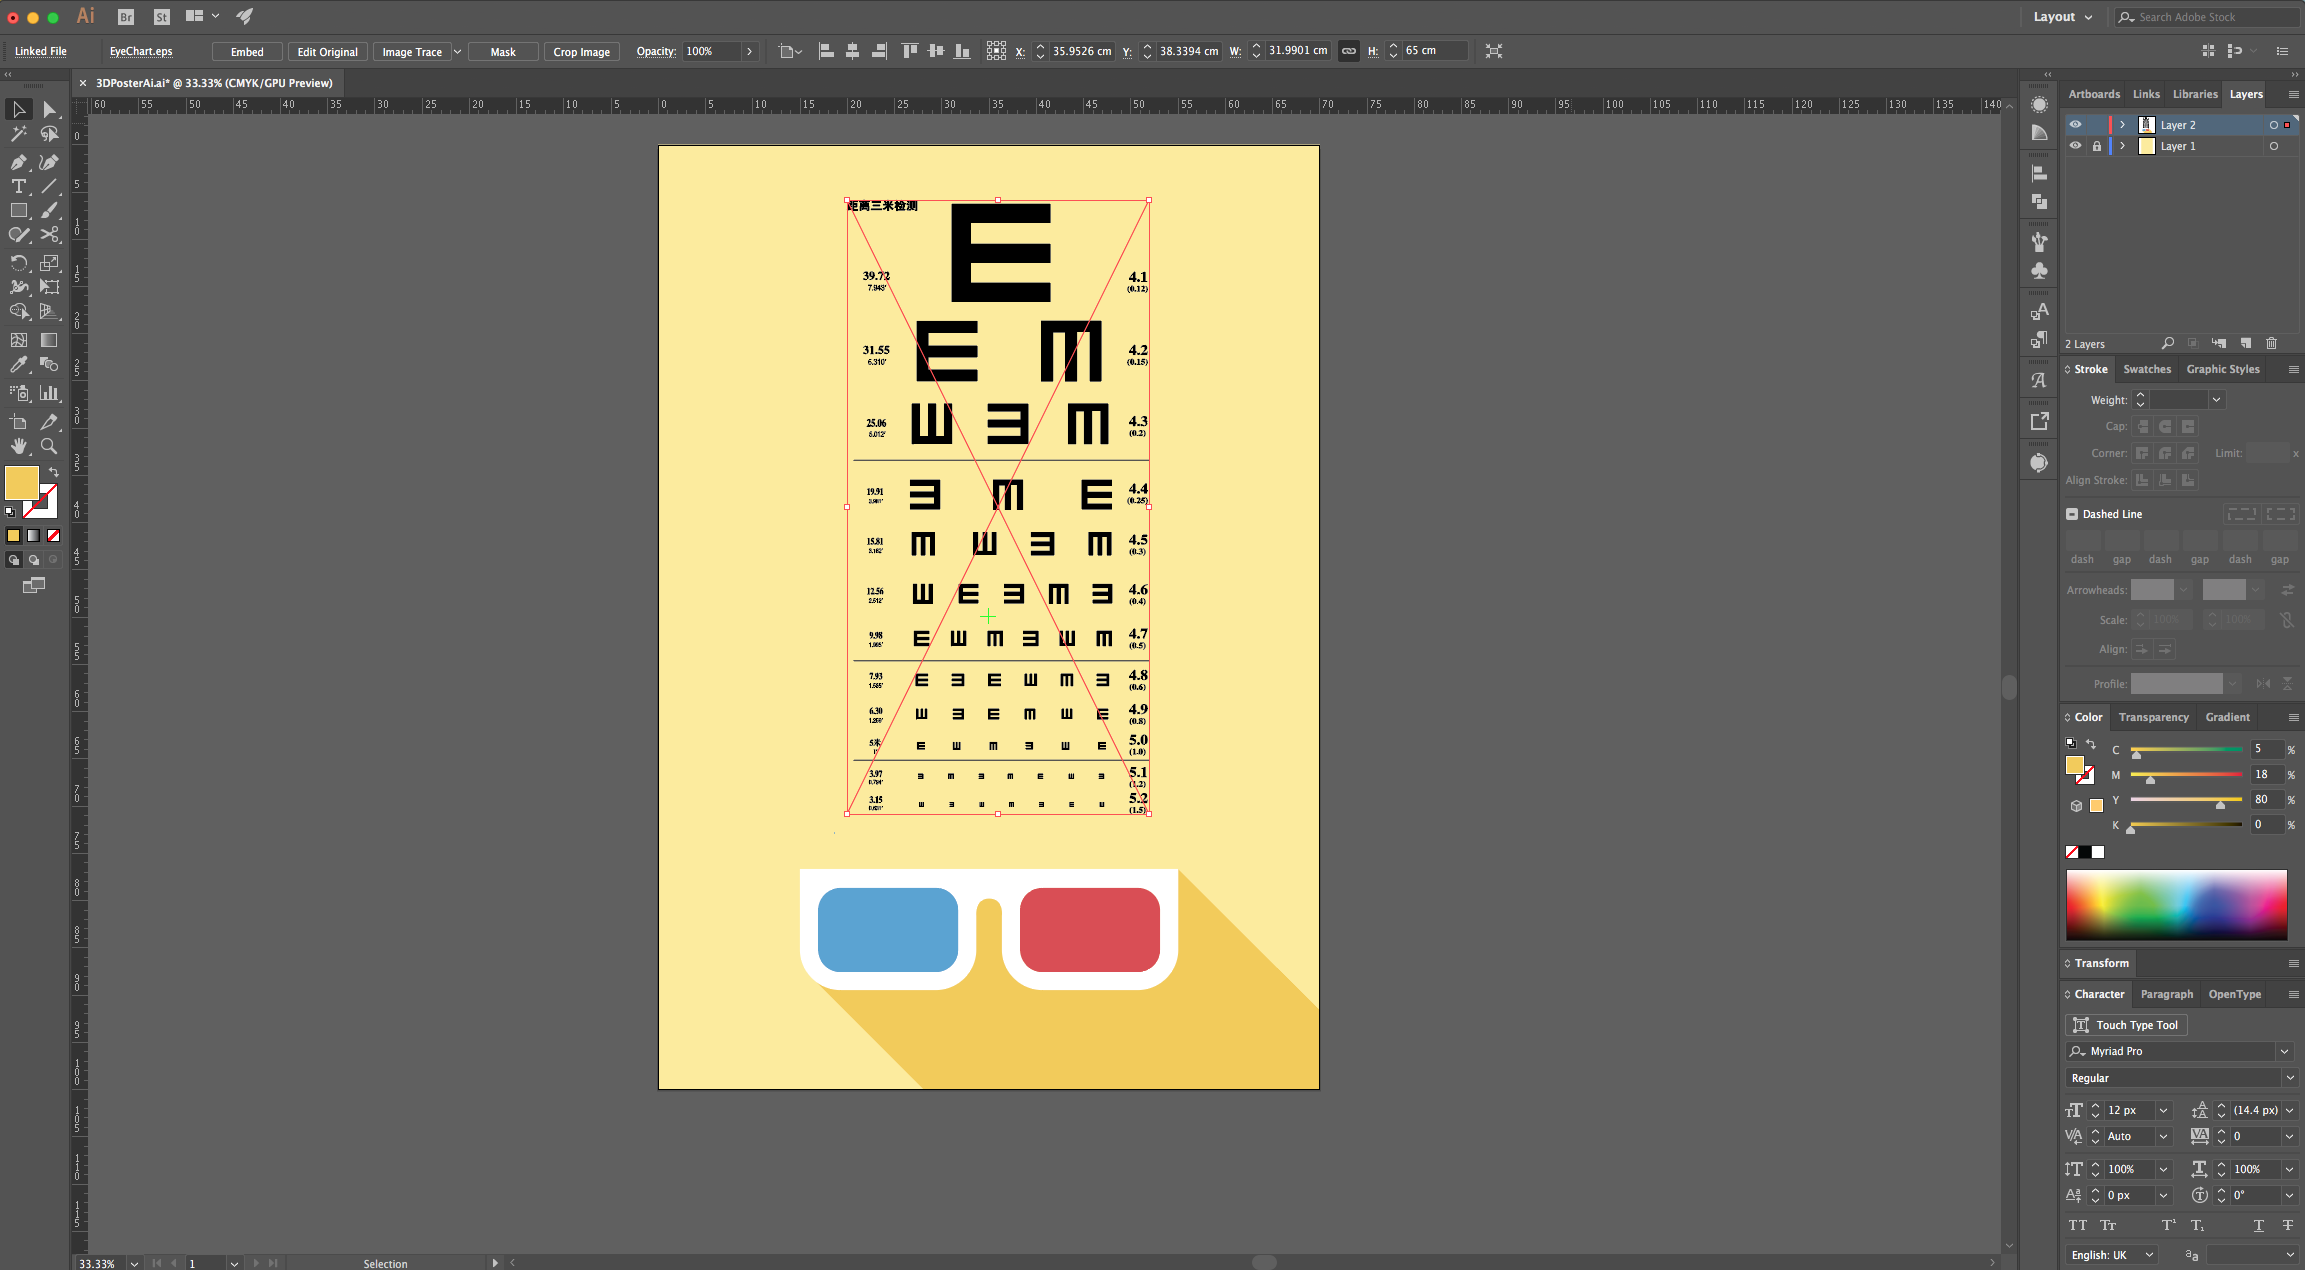
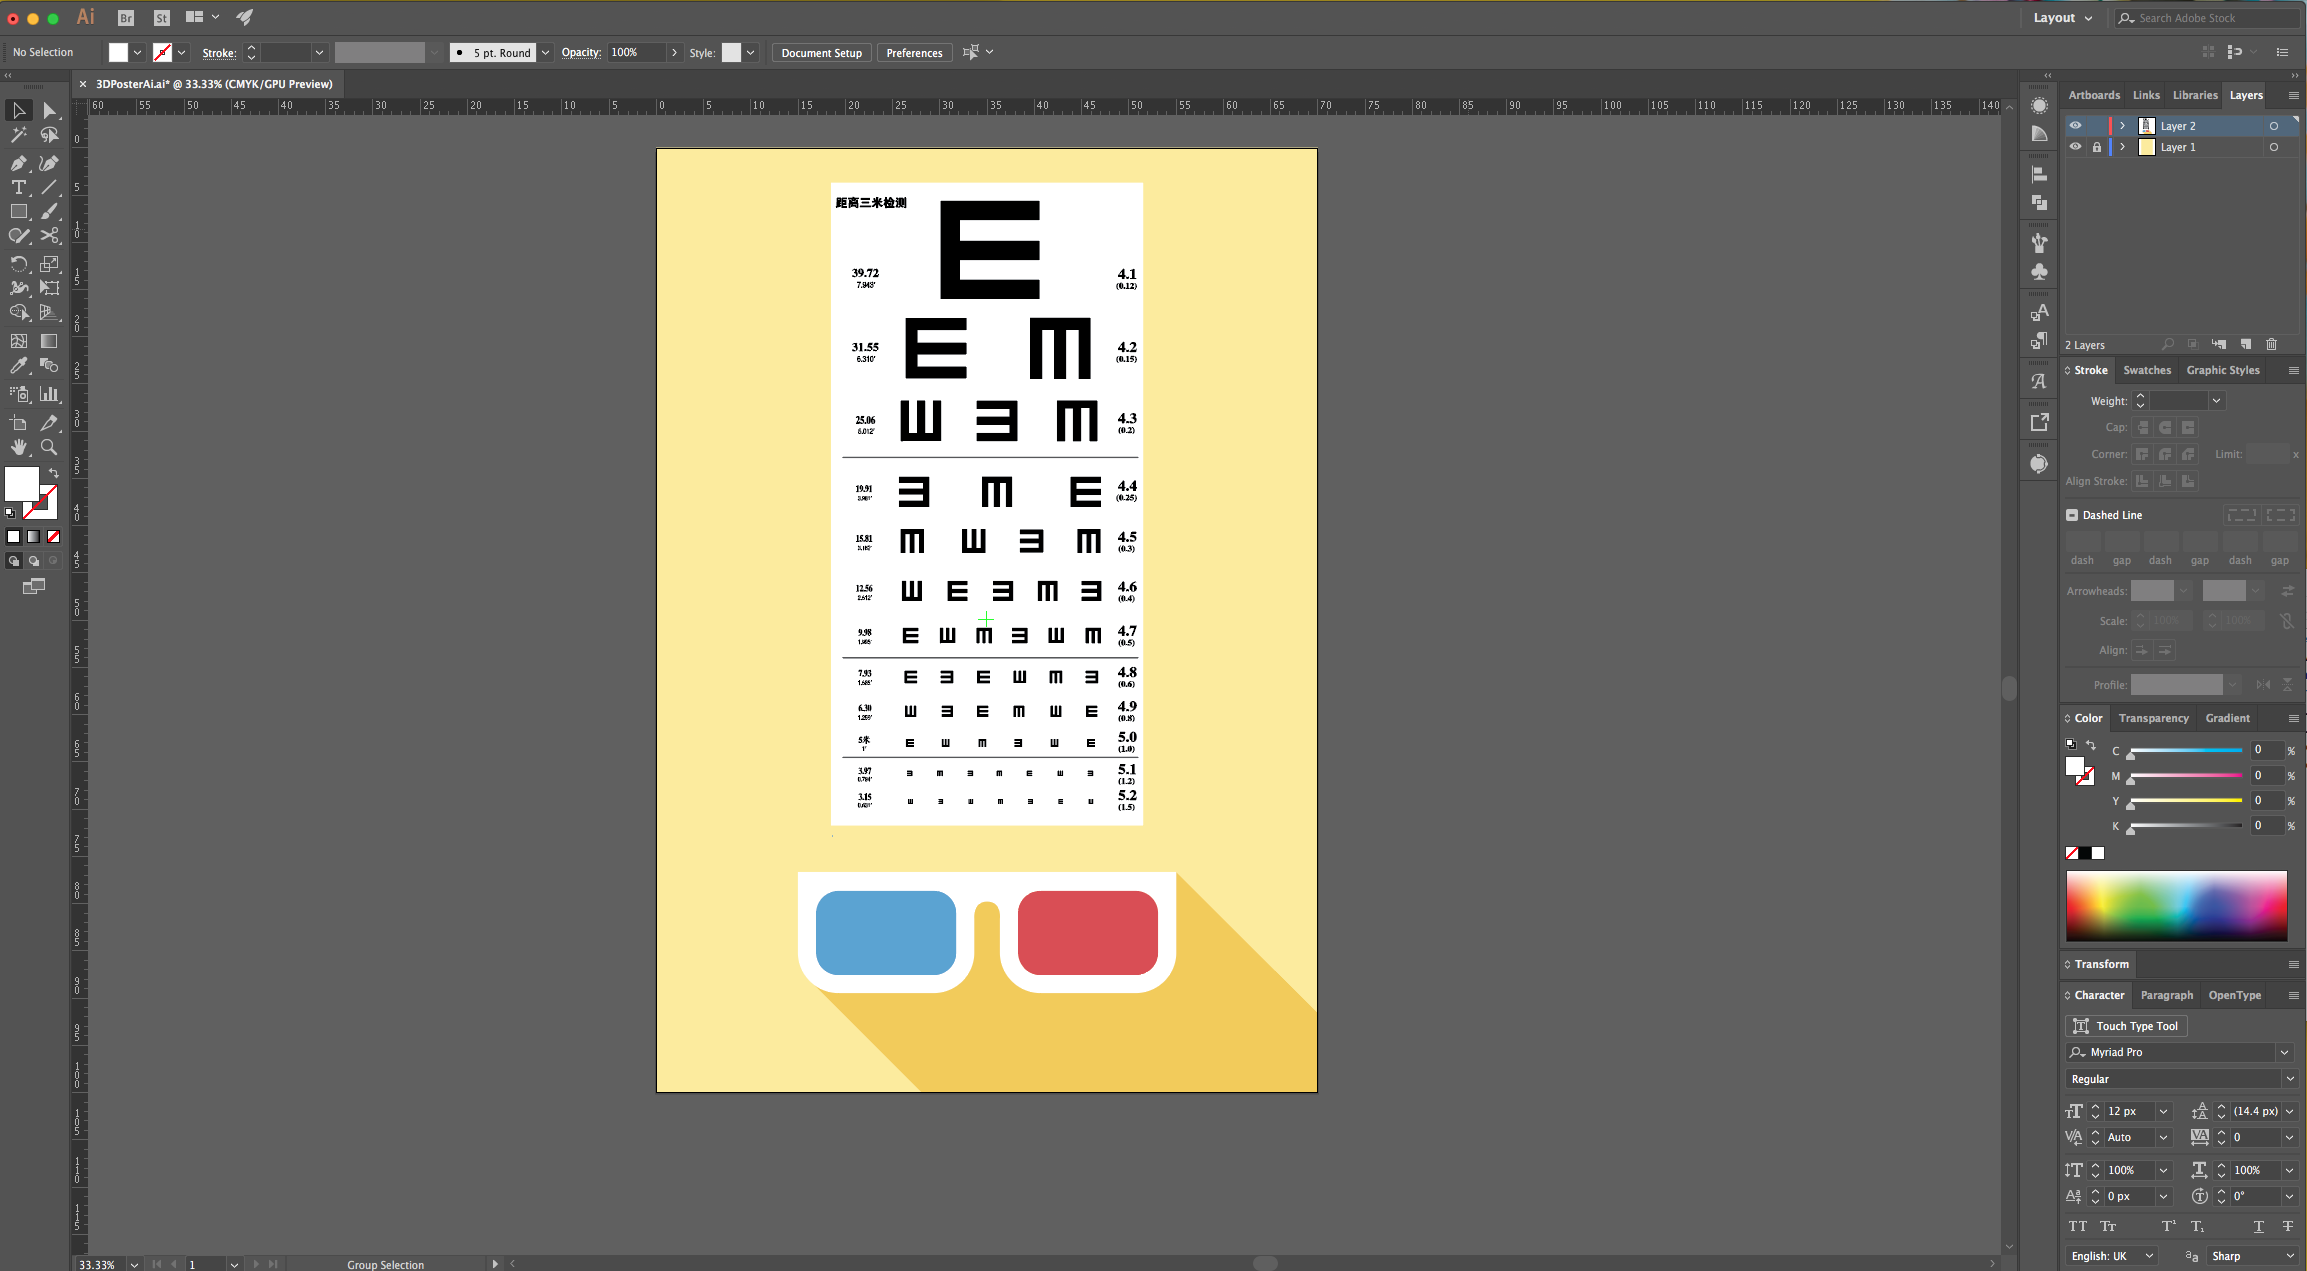
13 - Now, go to File > Place and navigate to where the “Eye Chart” file is saved and select it. Click “Place” to bring it into your “Document”. You can also use “Copy” (Command/Control + C) and “Paste” (Command/Control + V) from another File.

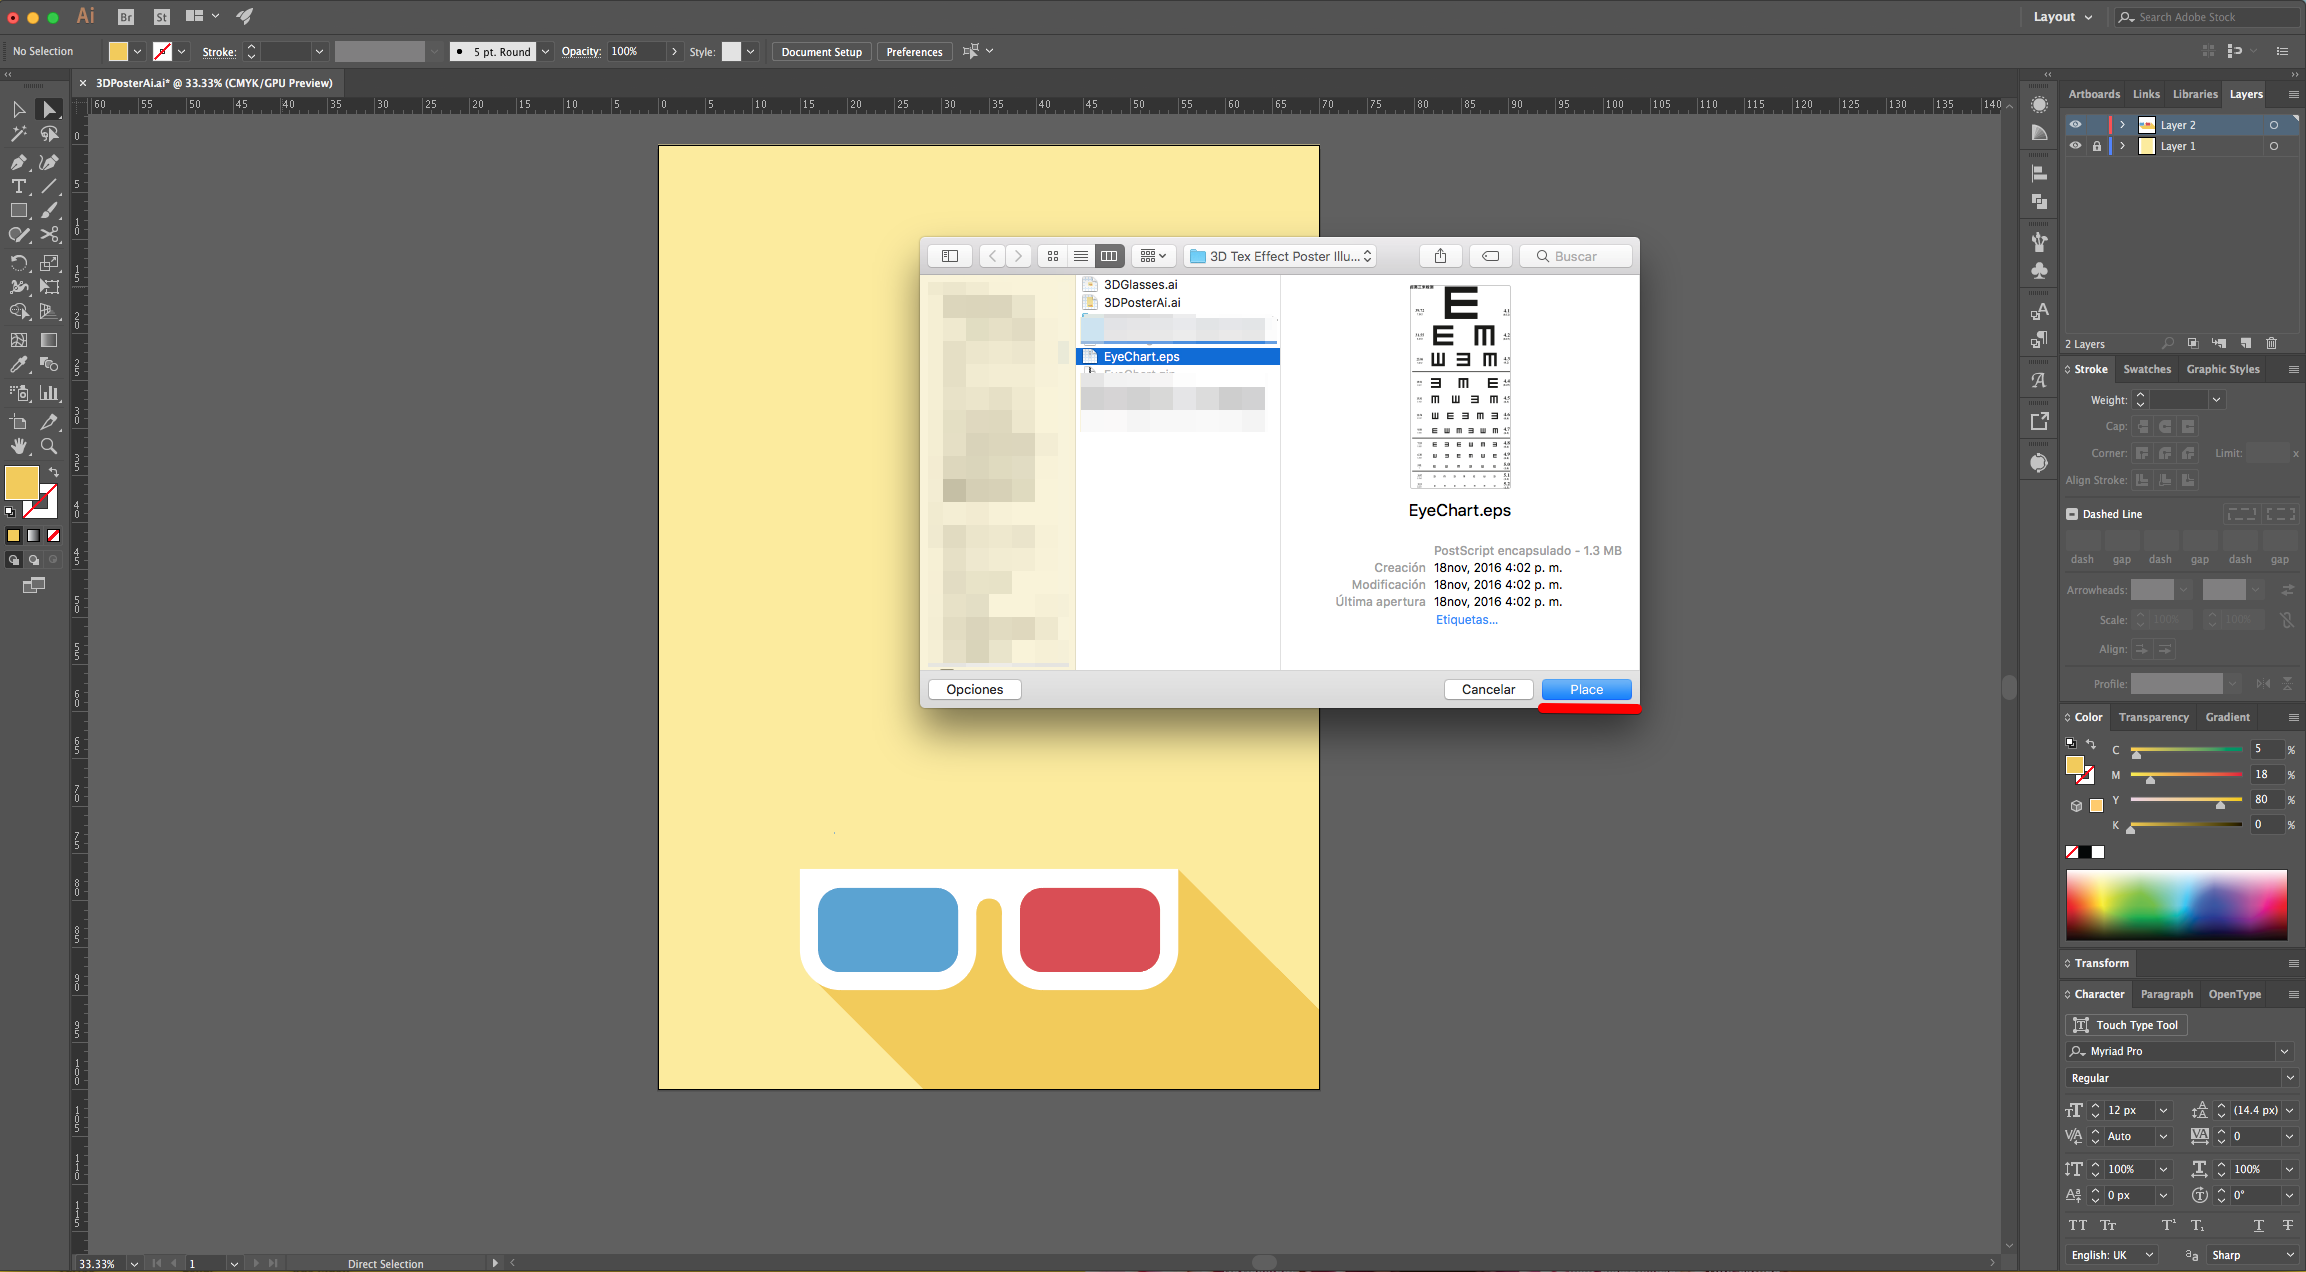
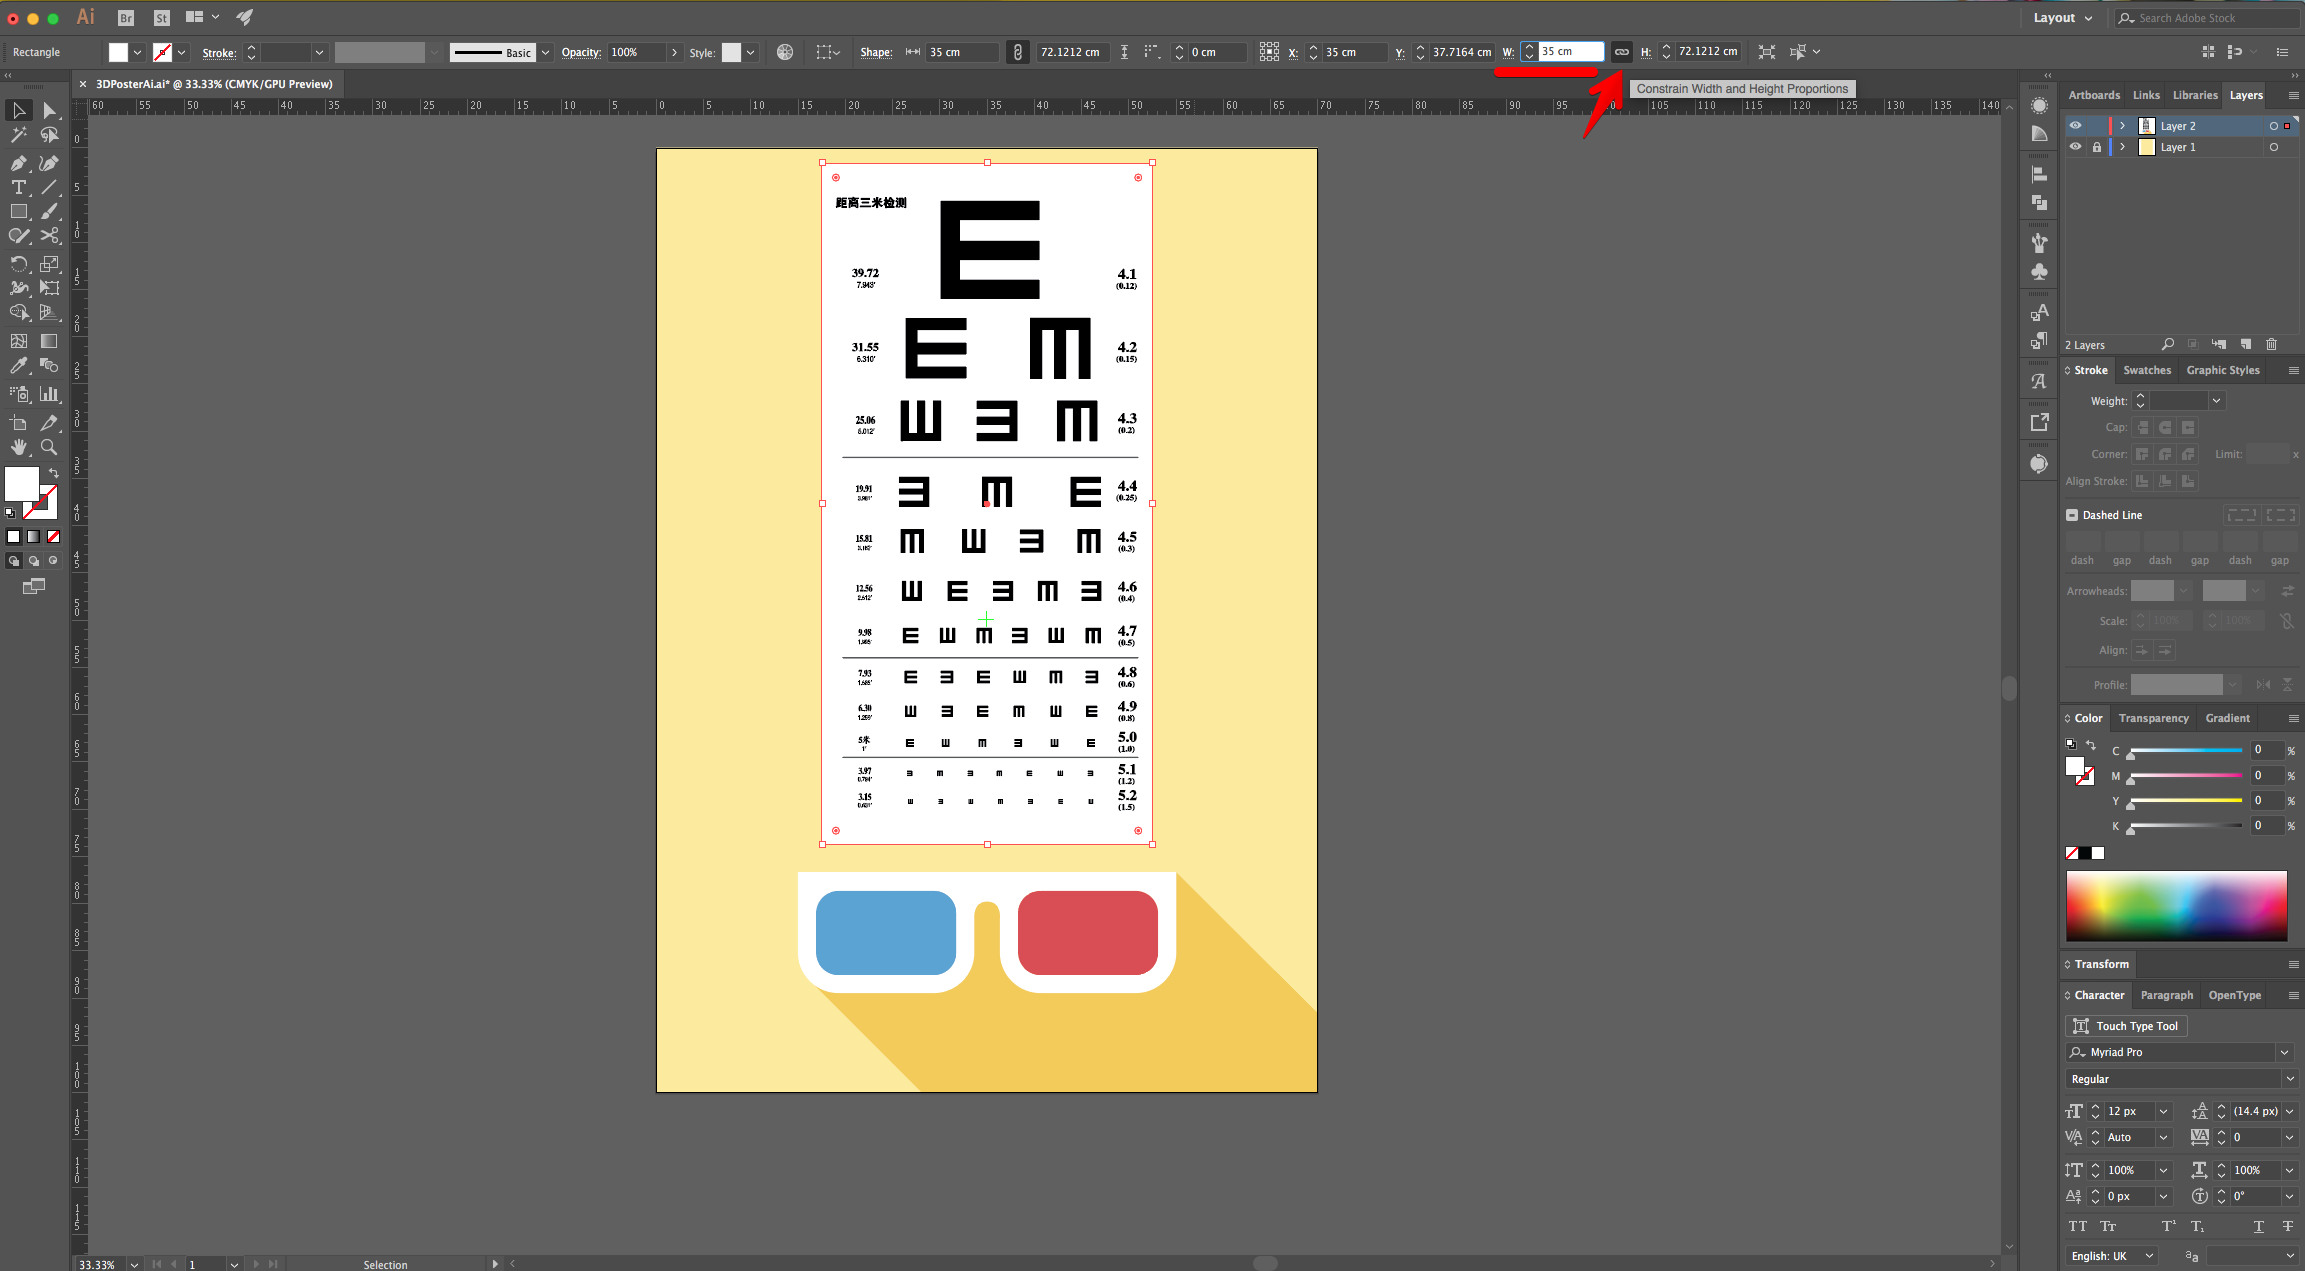
14 - Resize it if needed and make it fit proportionally in the empty space in the “Document”.
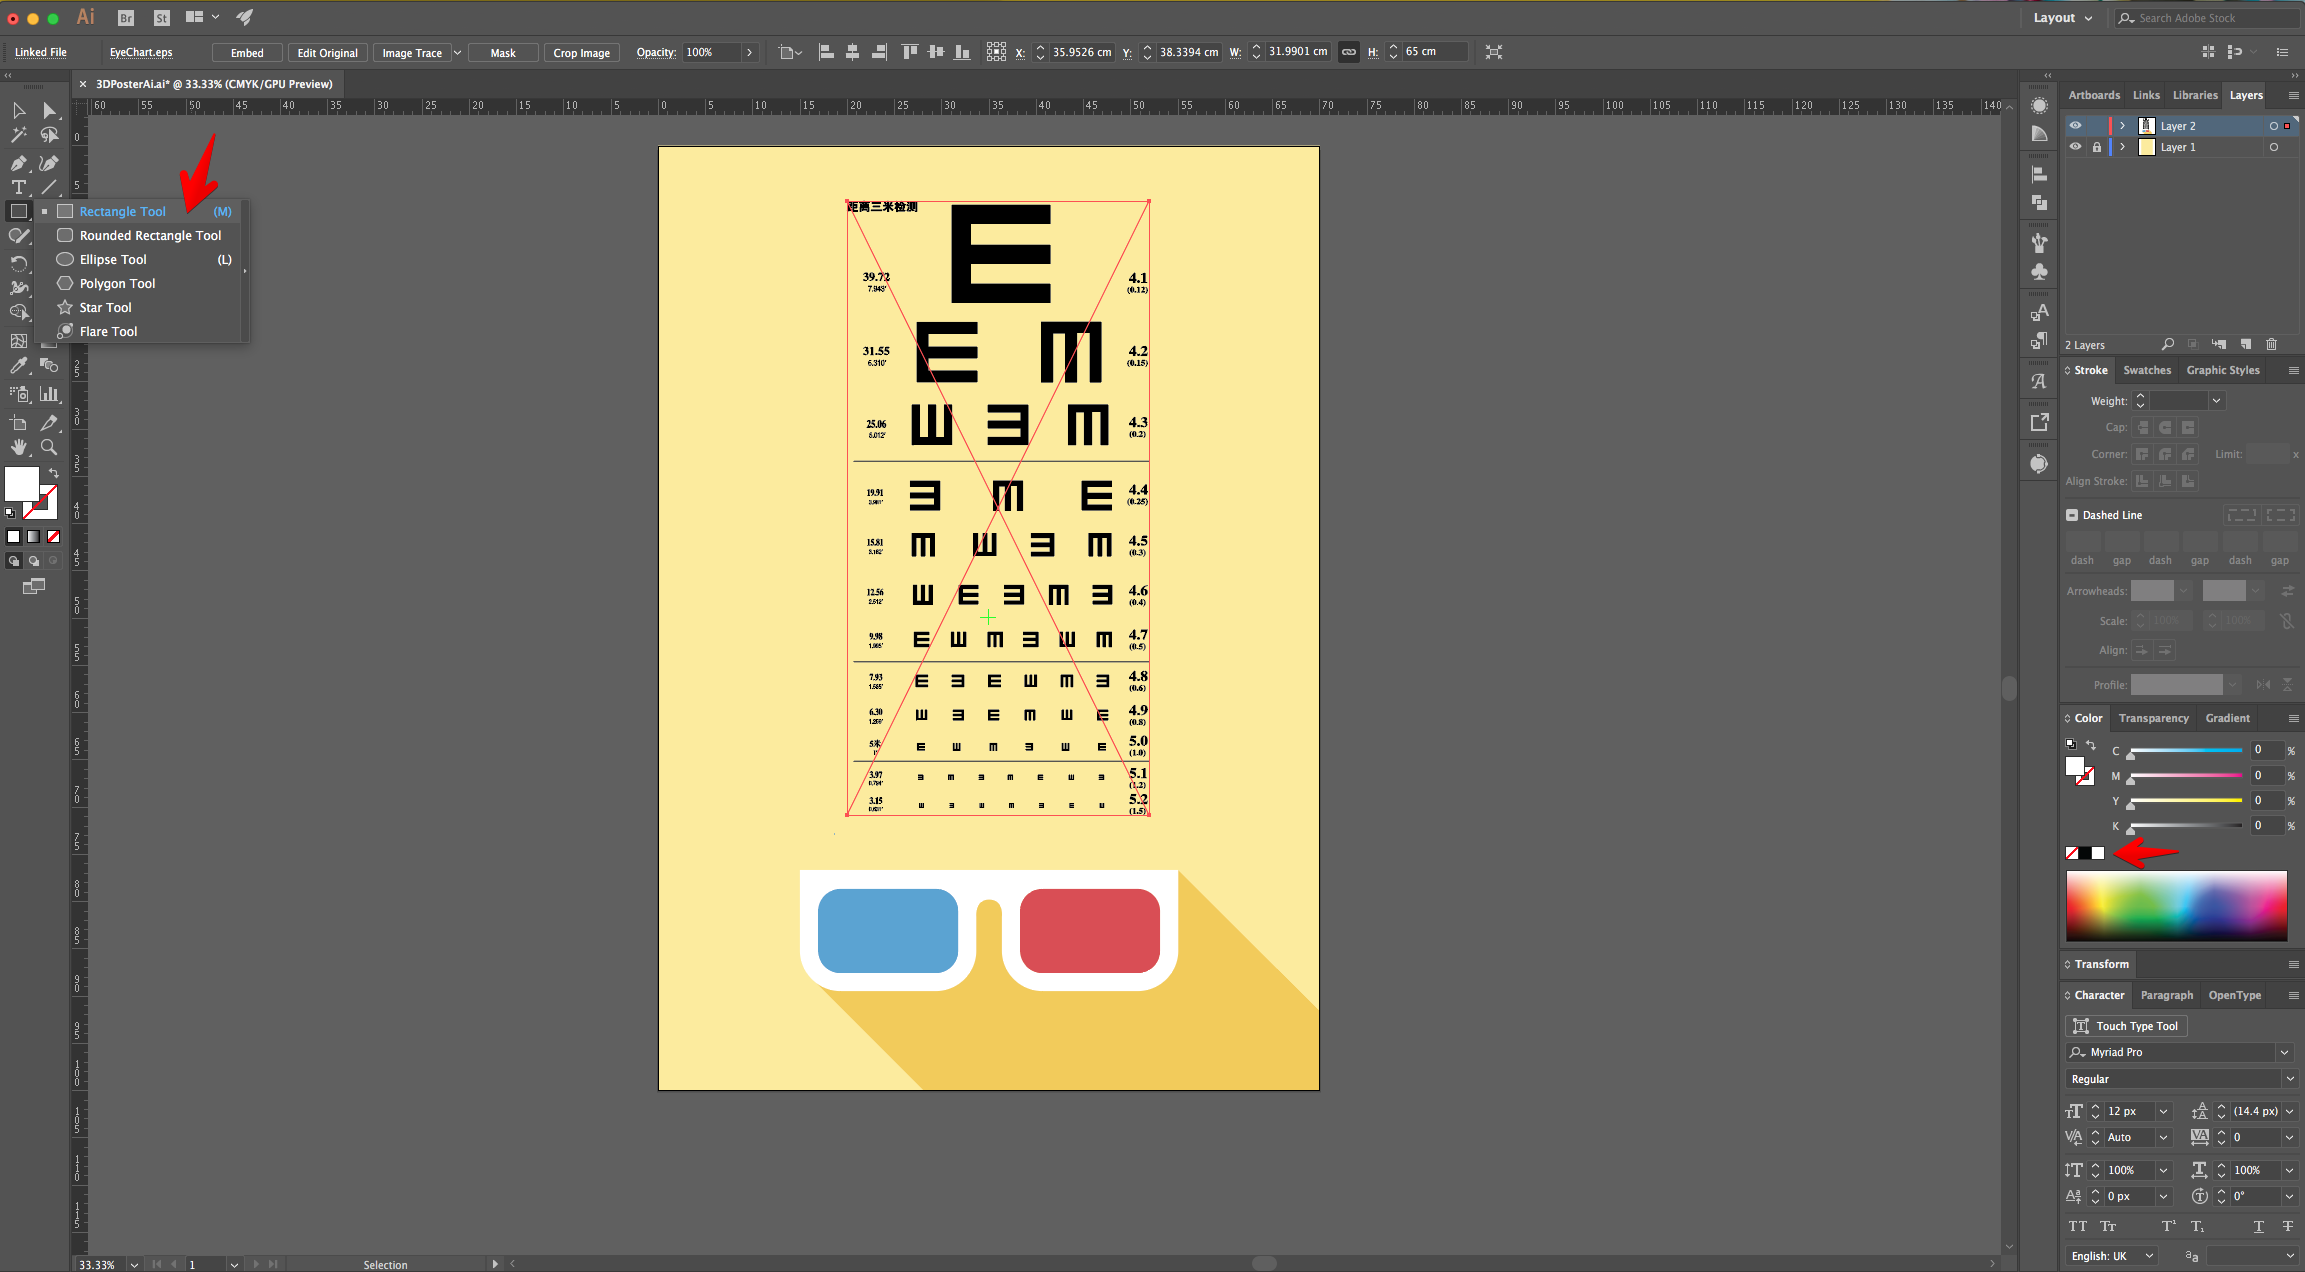
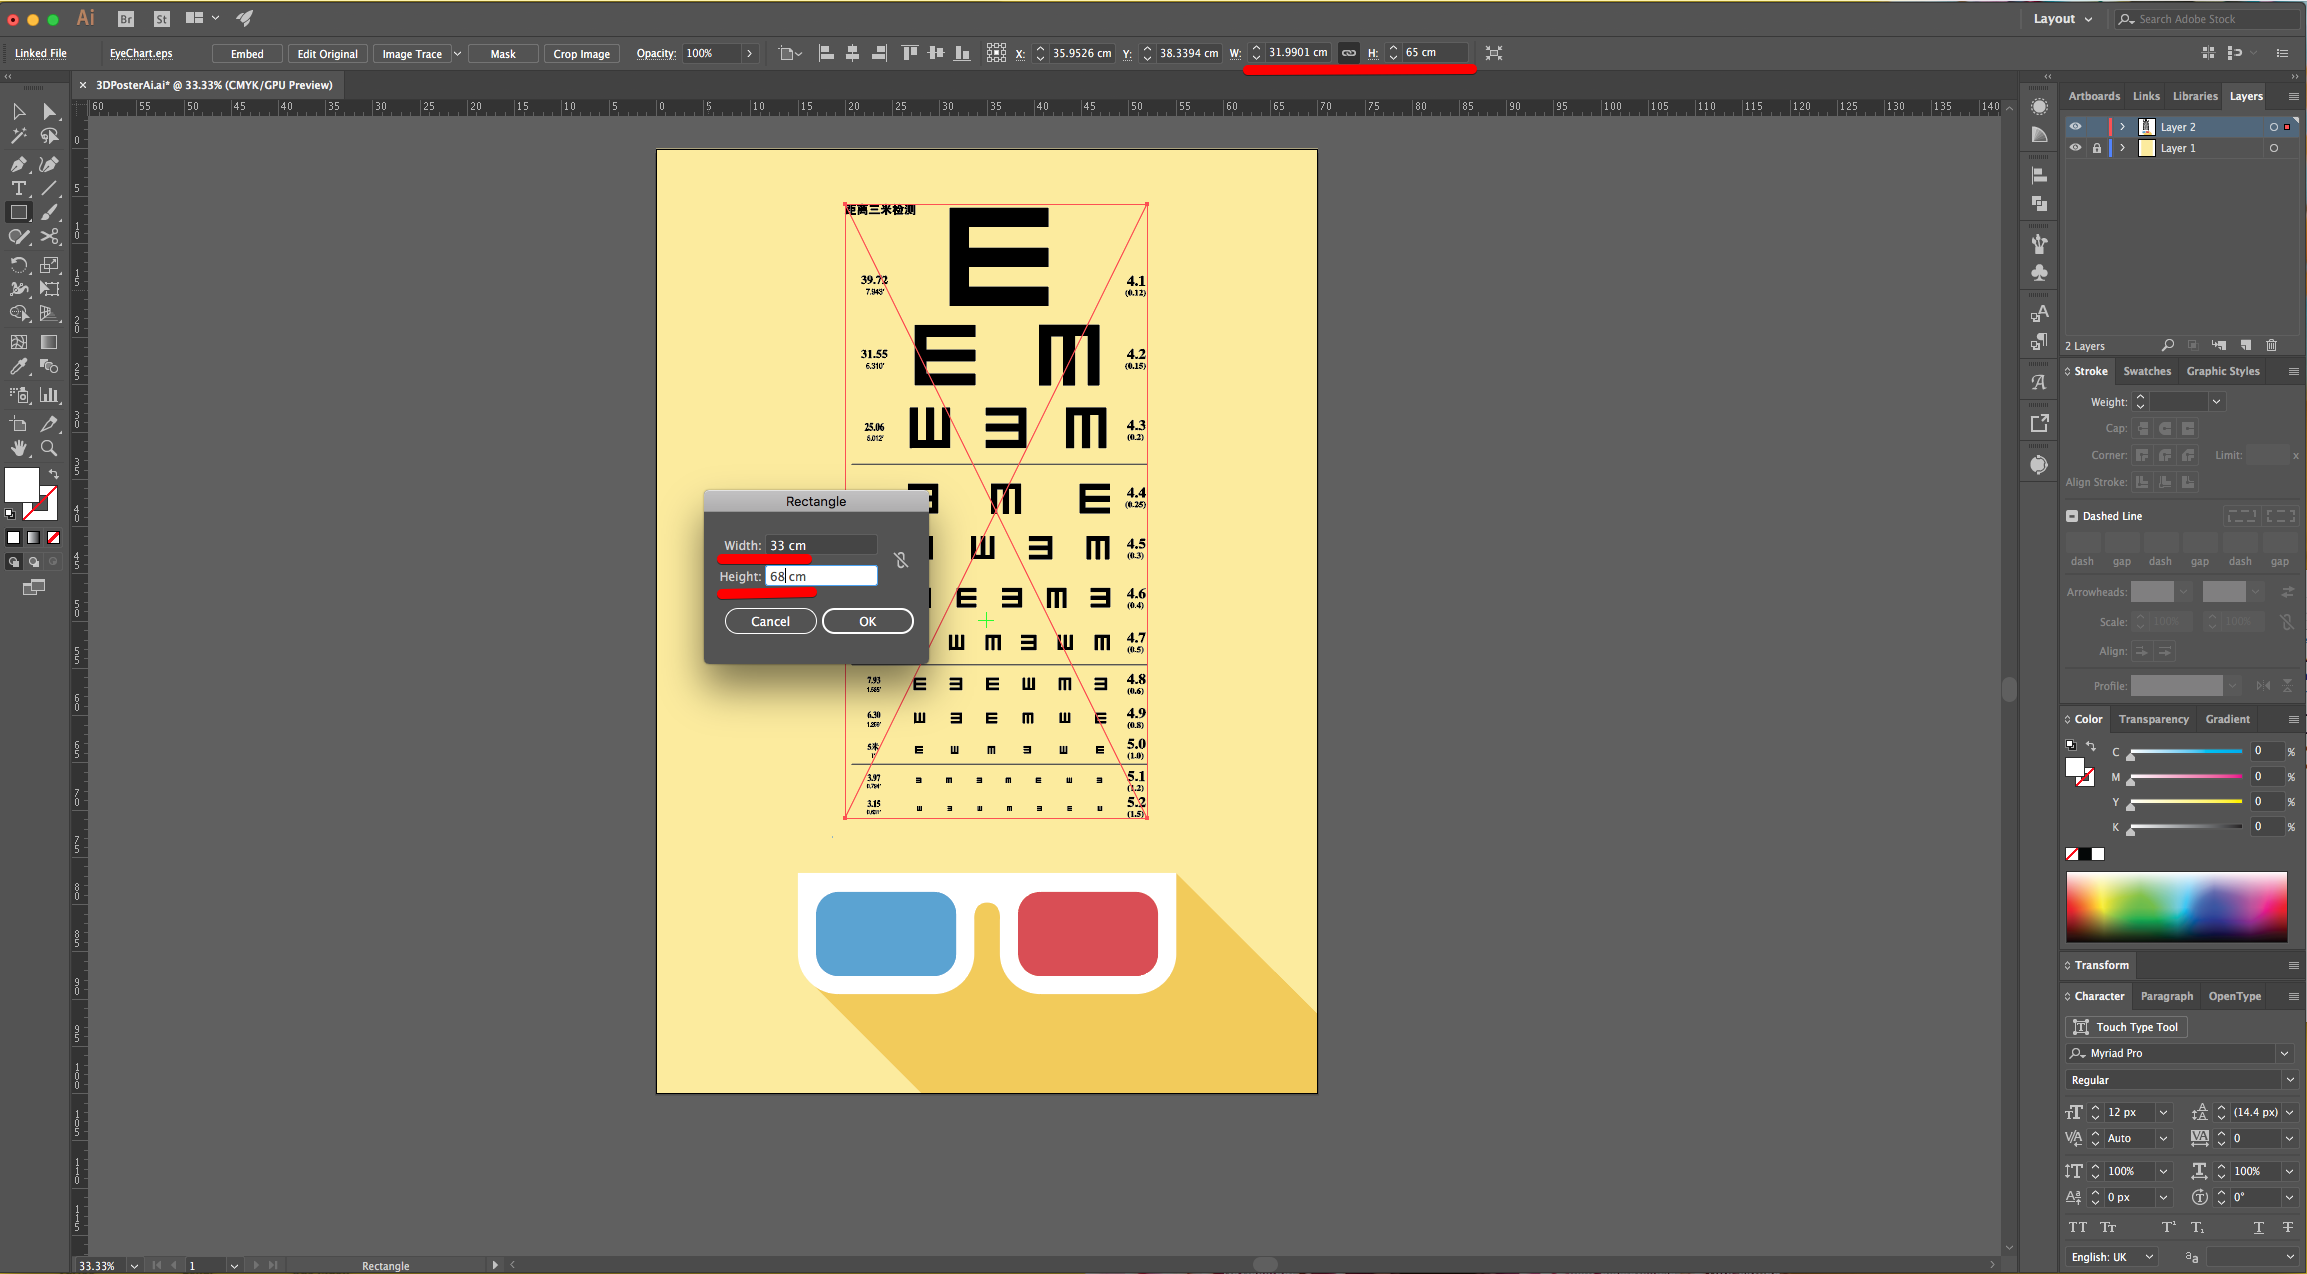
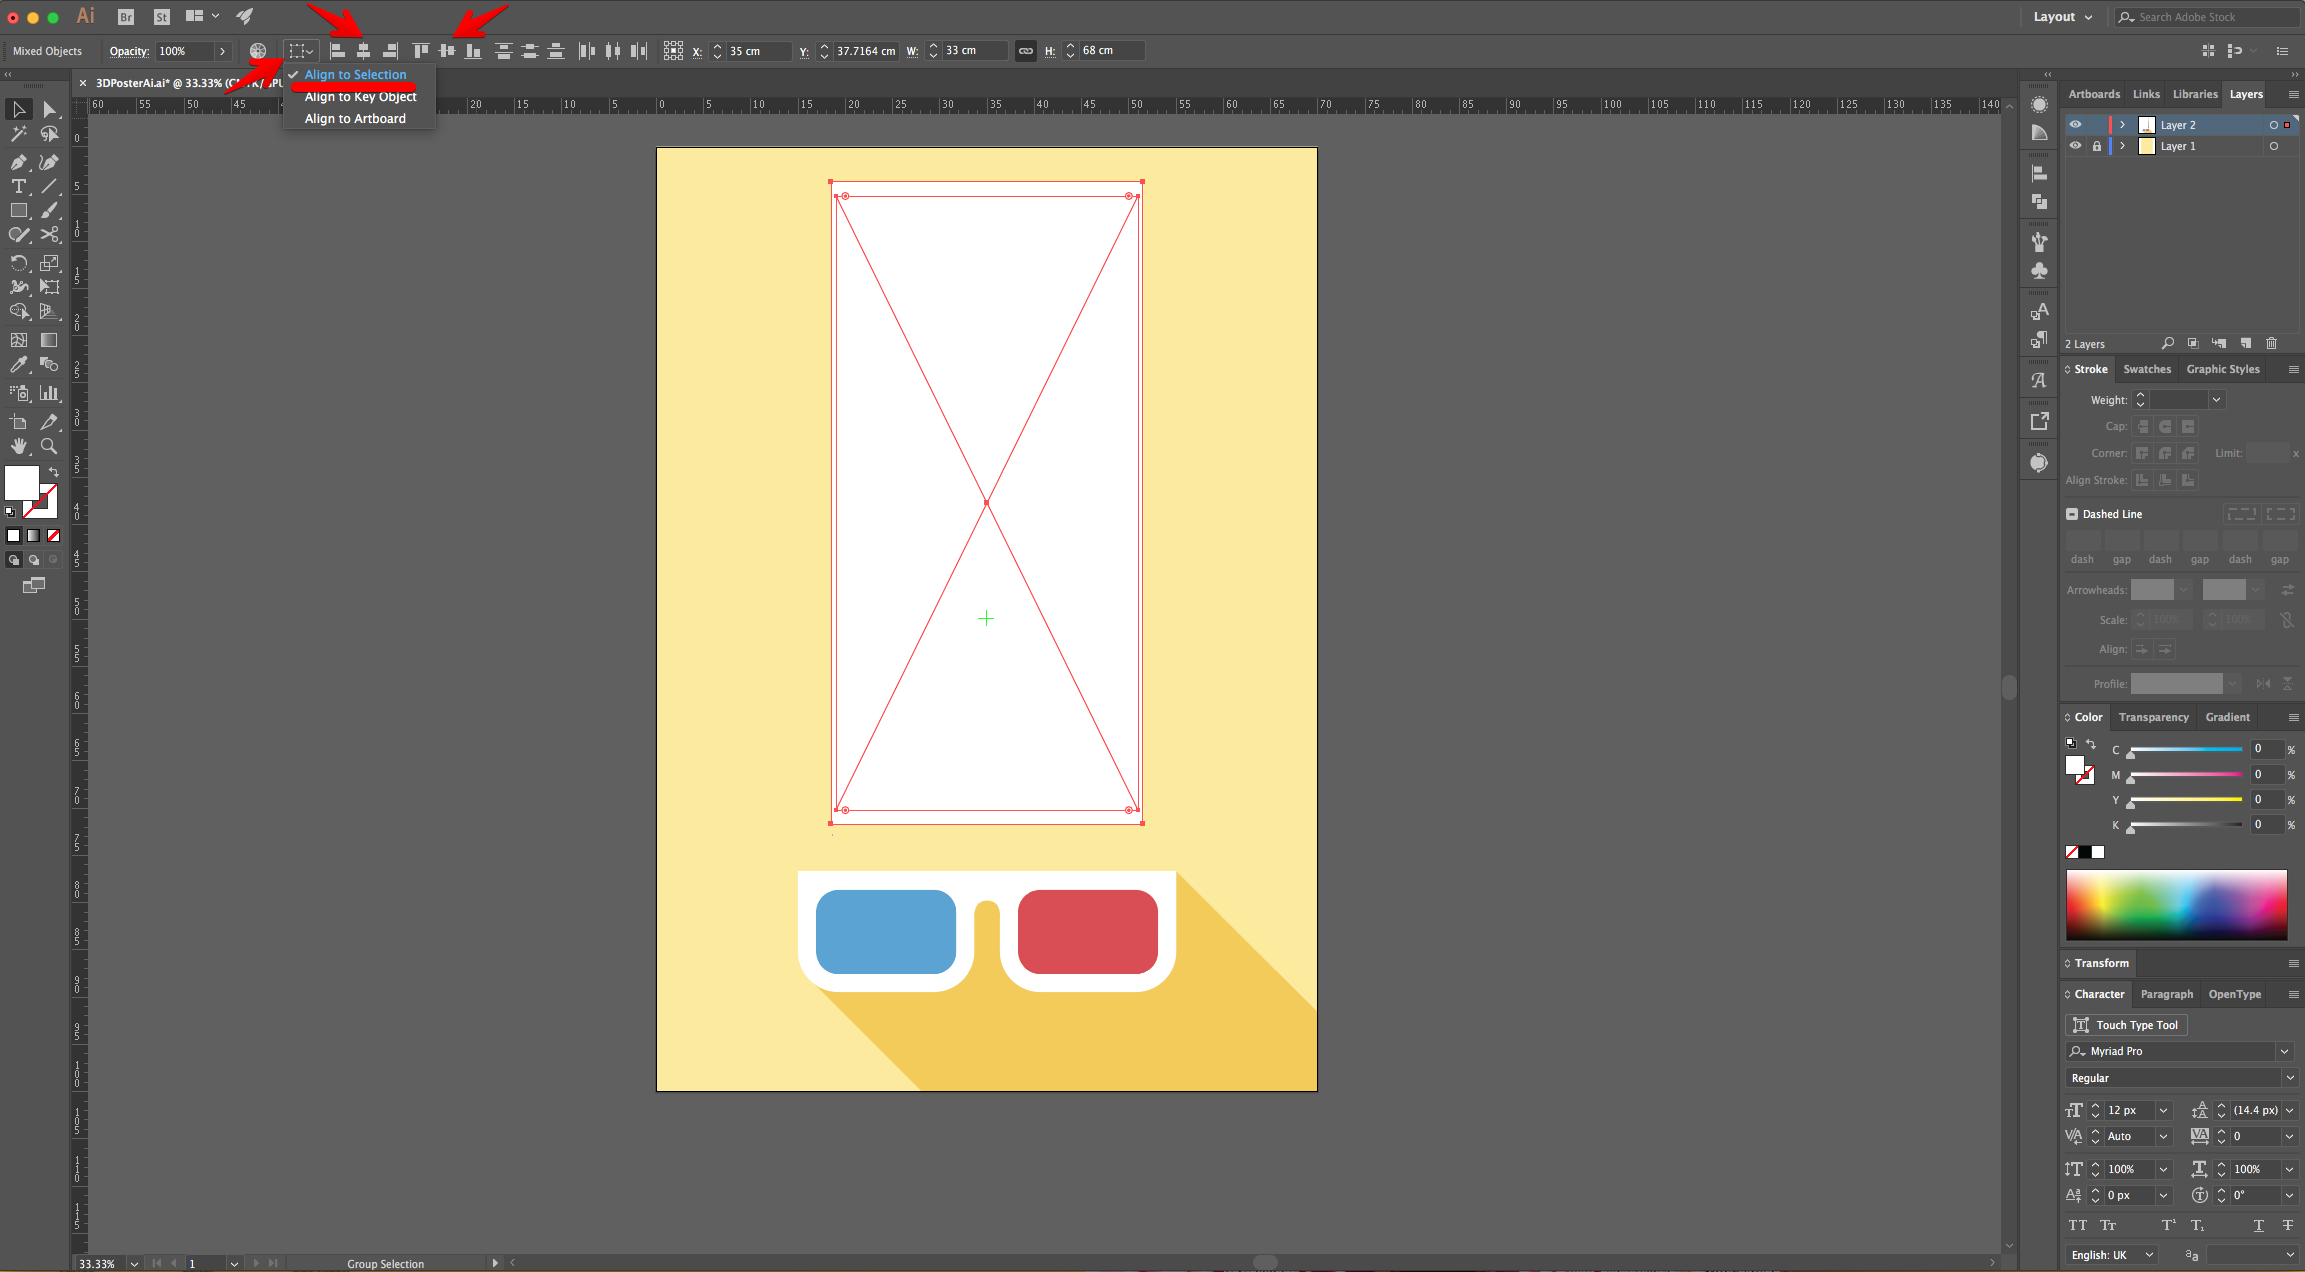
15 - Use the “Rectangle Tool” (M) to create a White Background for the “Eye Chart”. Click inside the document and input a “Width” and “Height” that is a couple of centimeters larger than the “Eye Chart”.
16 - Center it using the “Horizontal Align Center” option on your Top Menu and make sure that “Align to Artboard” is selected. Or use the same options in the “Align Panel. Then select both “Eye Chart” and White Background and Align them using the “Horizontal and Vertical Align Center” option on your Top Menu this time making sure that “Align to Selection” is selected. Or use the same options in the “Align Panel.
17 - Right-click on top of the White Background and choose “Send Backward” to place it under the “Eye Chart”. If you think that the white edges should be bigger, just change the “Width” and/or “Height” values in the Top Menu and Center everything again.

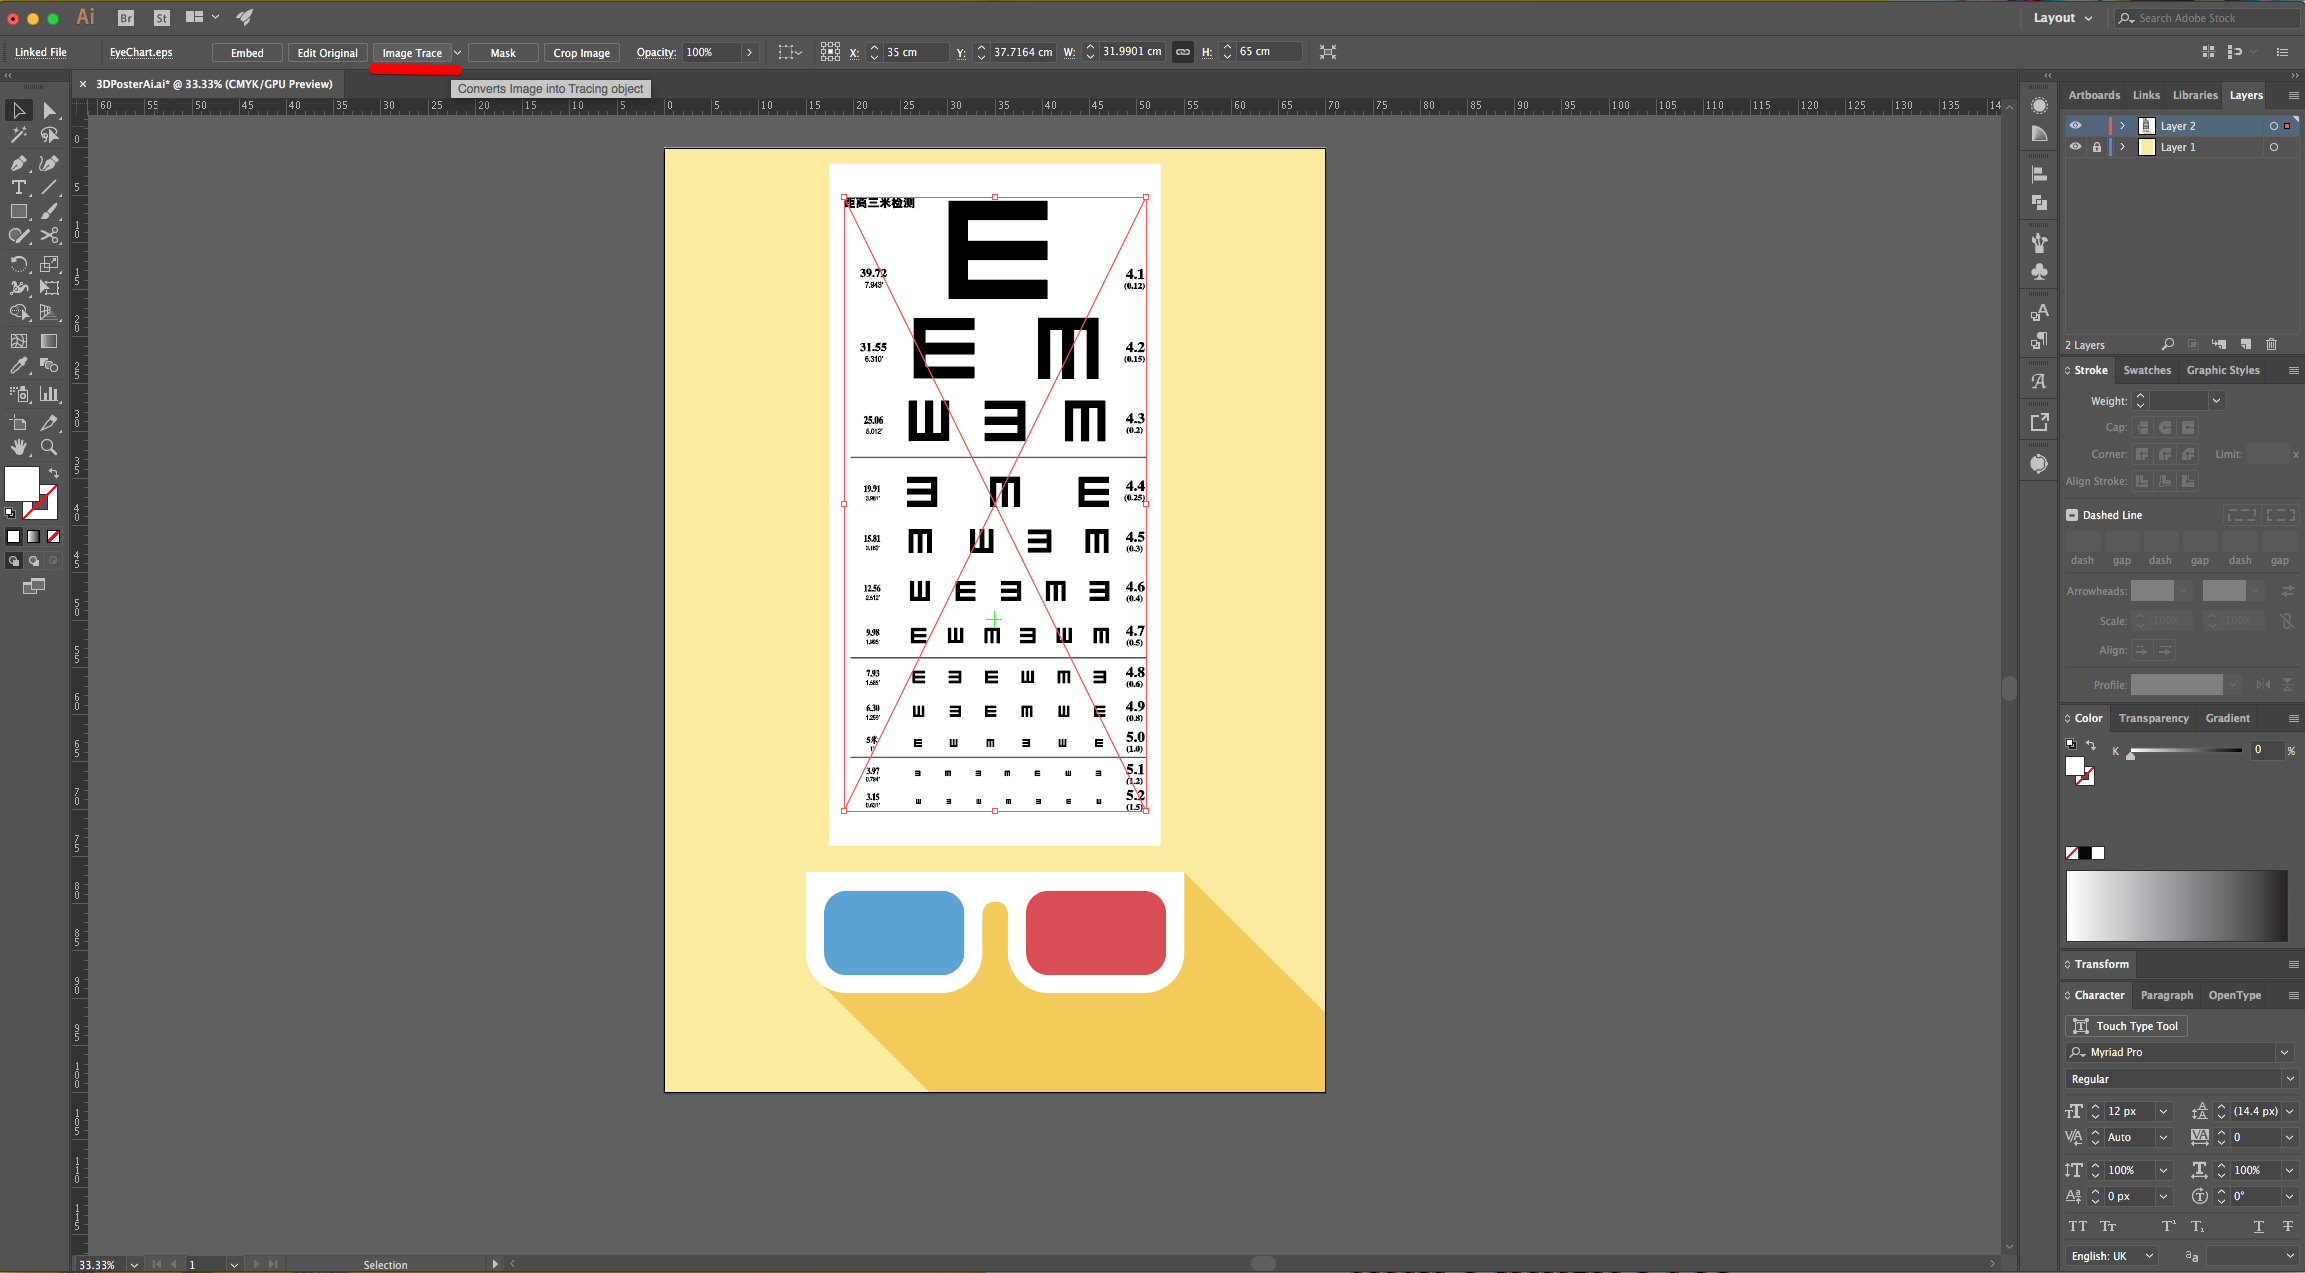
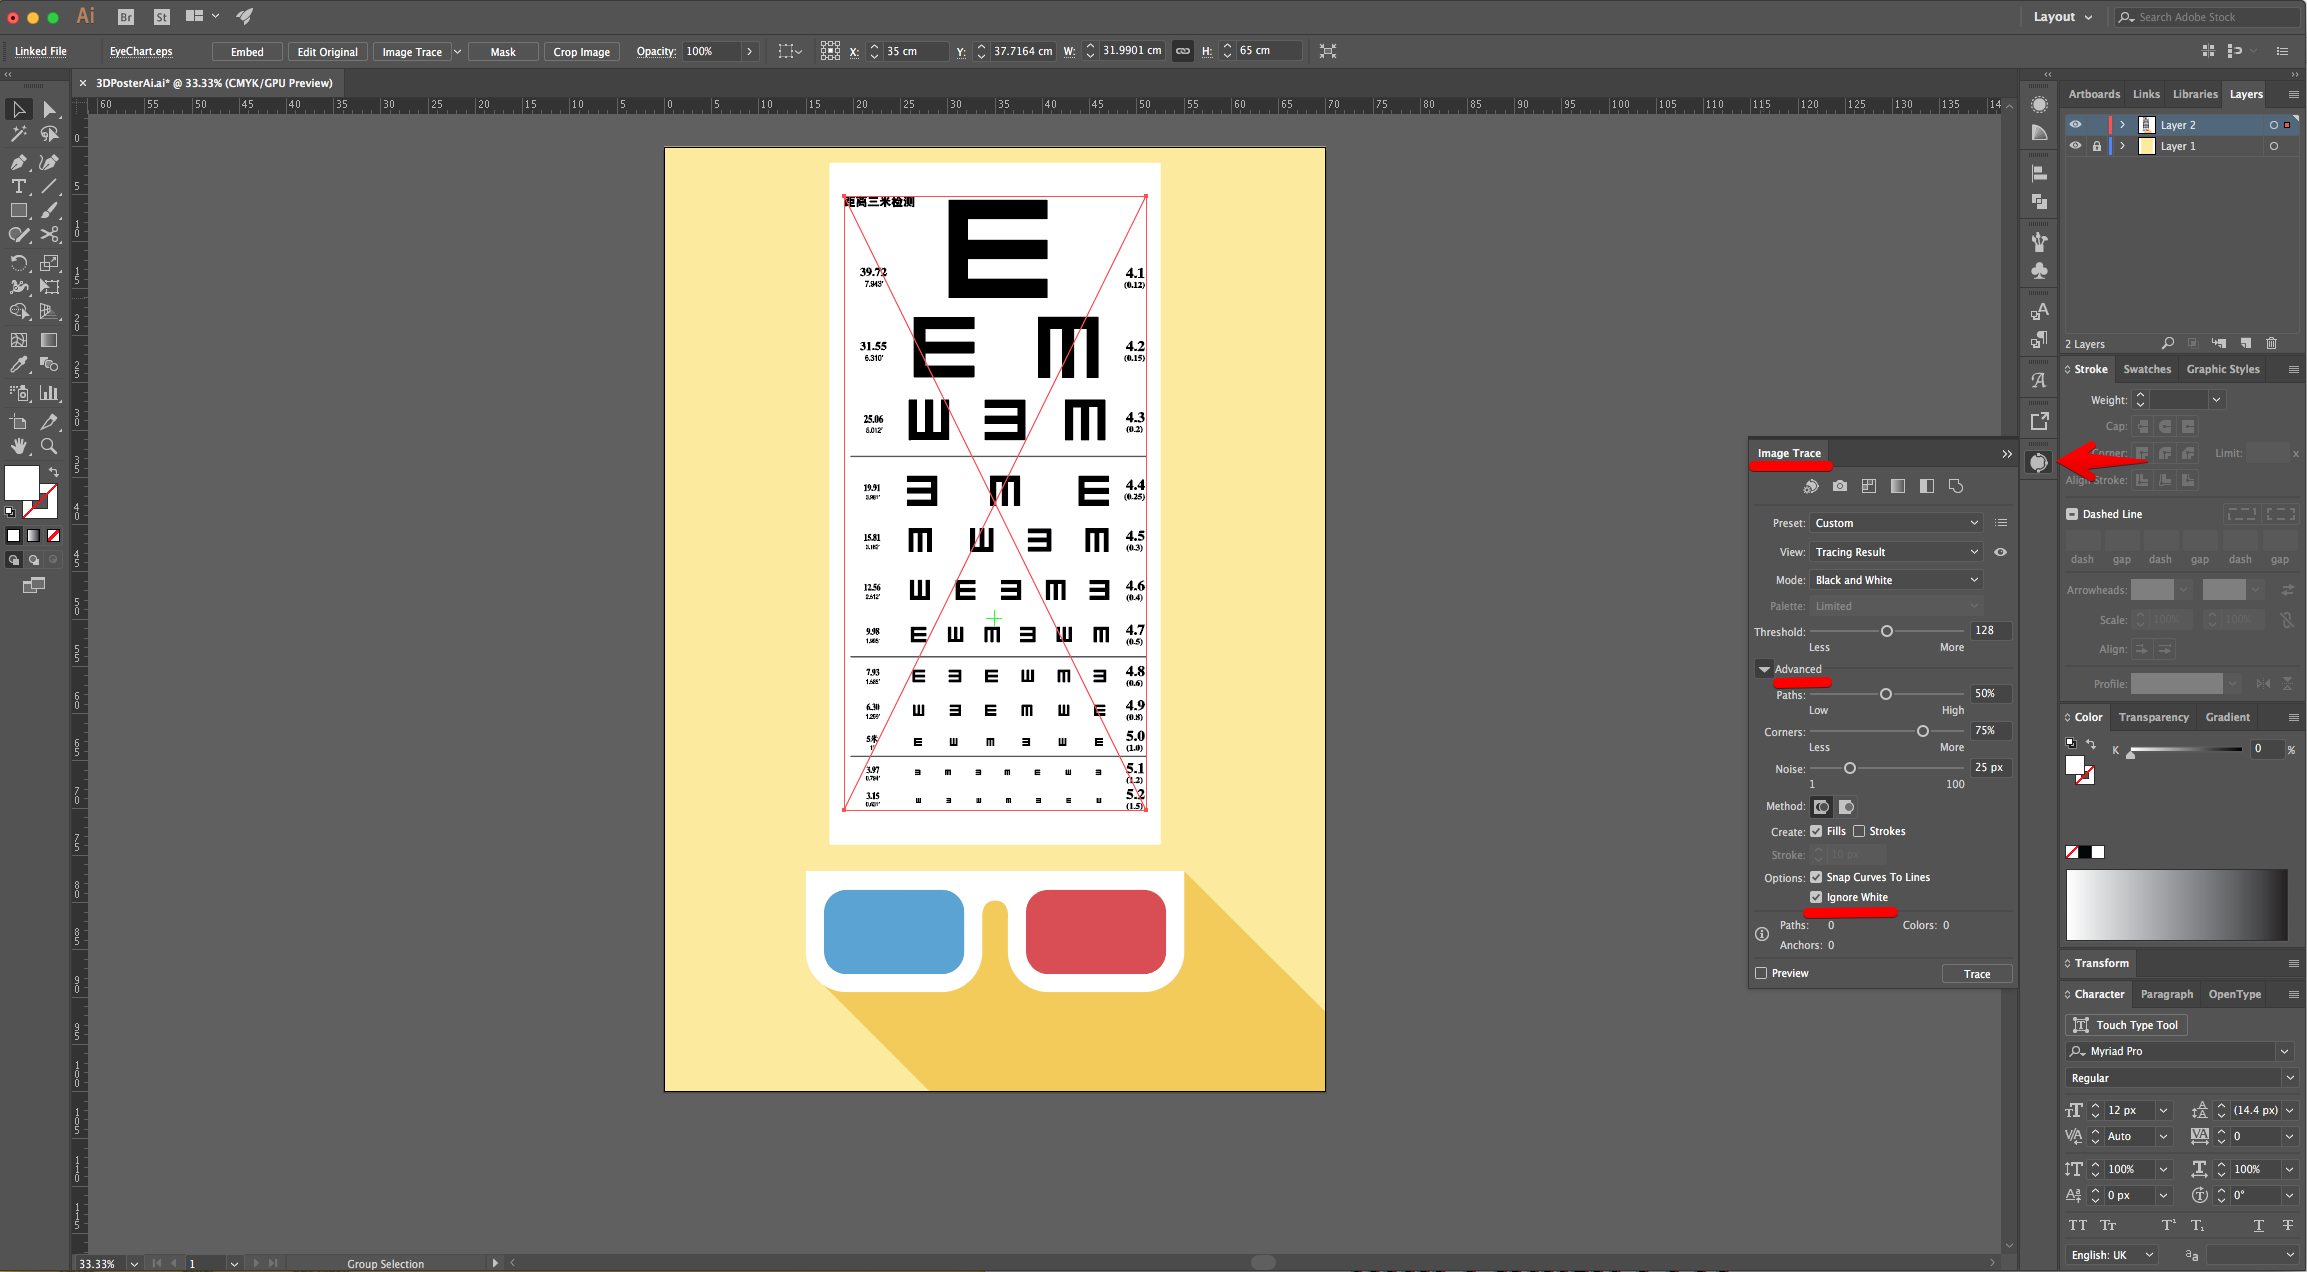
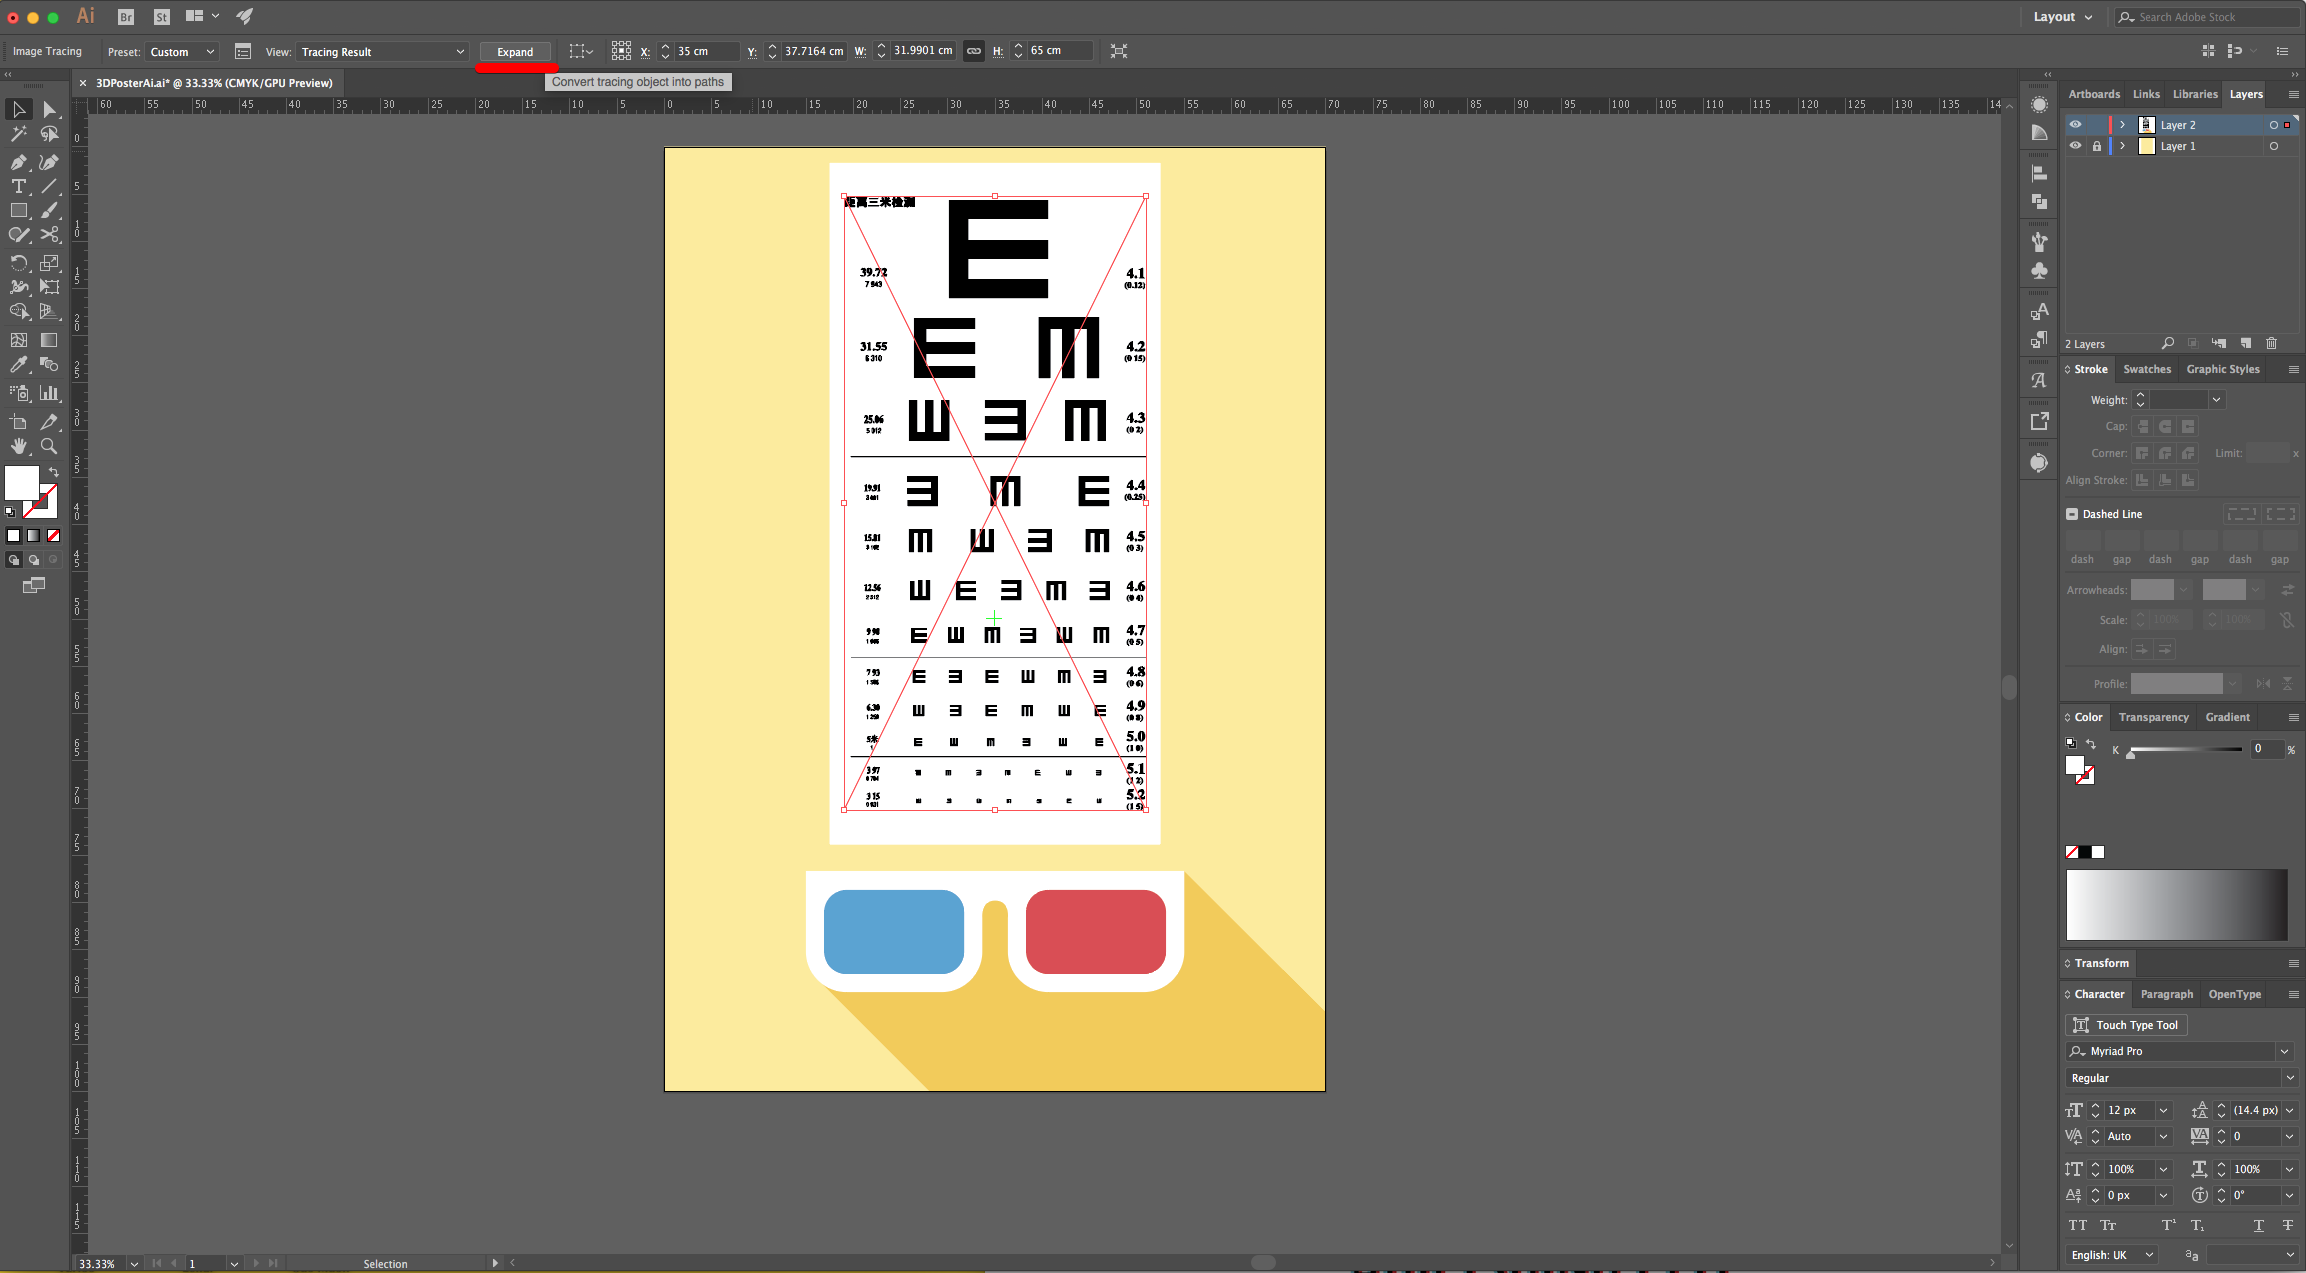
18 - If the “Eye Chart” is an image you need to transform it into Vectors. Select the Chart and click the “Image Trace” button on the “Top Menu”. Open the “Image Trace” Panel, click the “Advanced” Tab “Image Trace” check the “Ignore White” box. Click “Trace” and then “Expand” on the Top Menu.
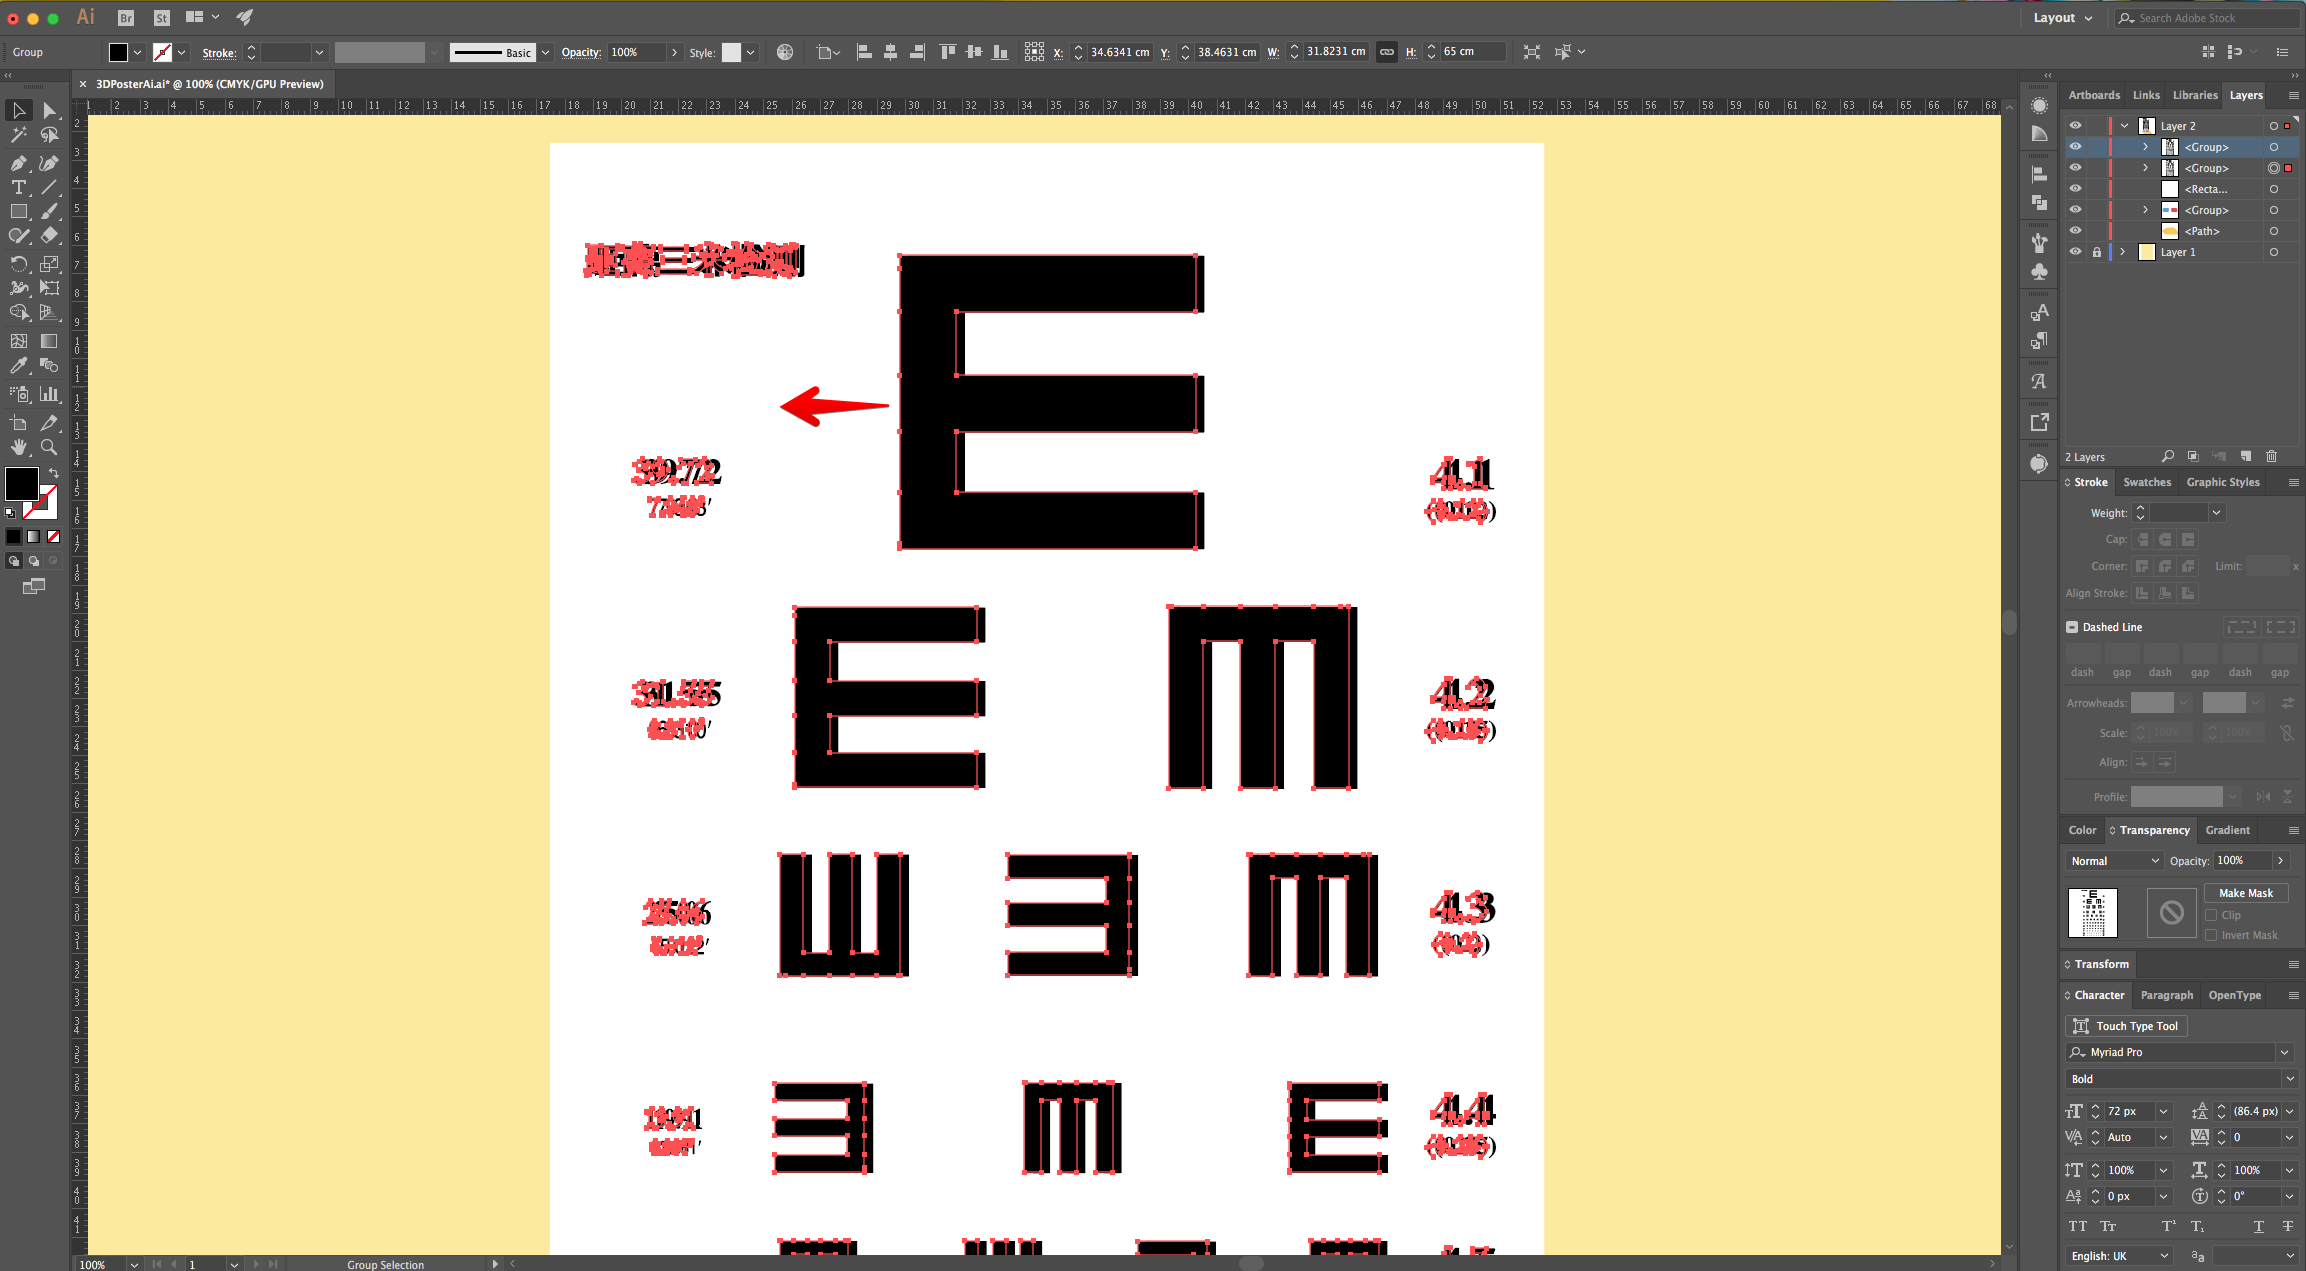
19 - Select the “Eye Chart”, make a “Copy” (Command/Control + C), then “Paste in Back” (Command/Control + B) to paste it under the original one.
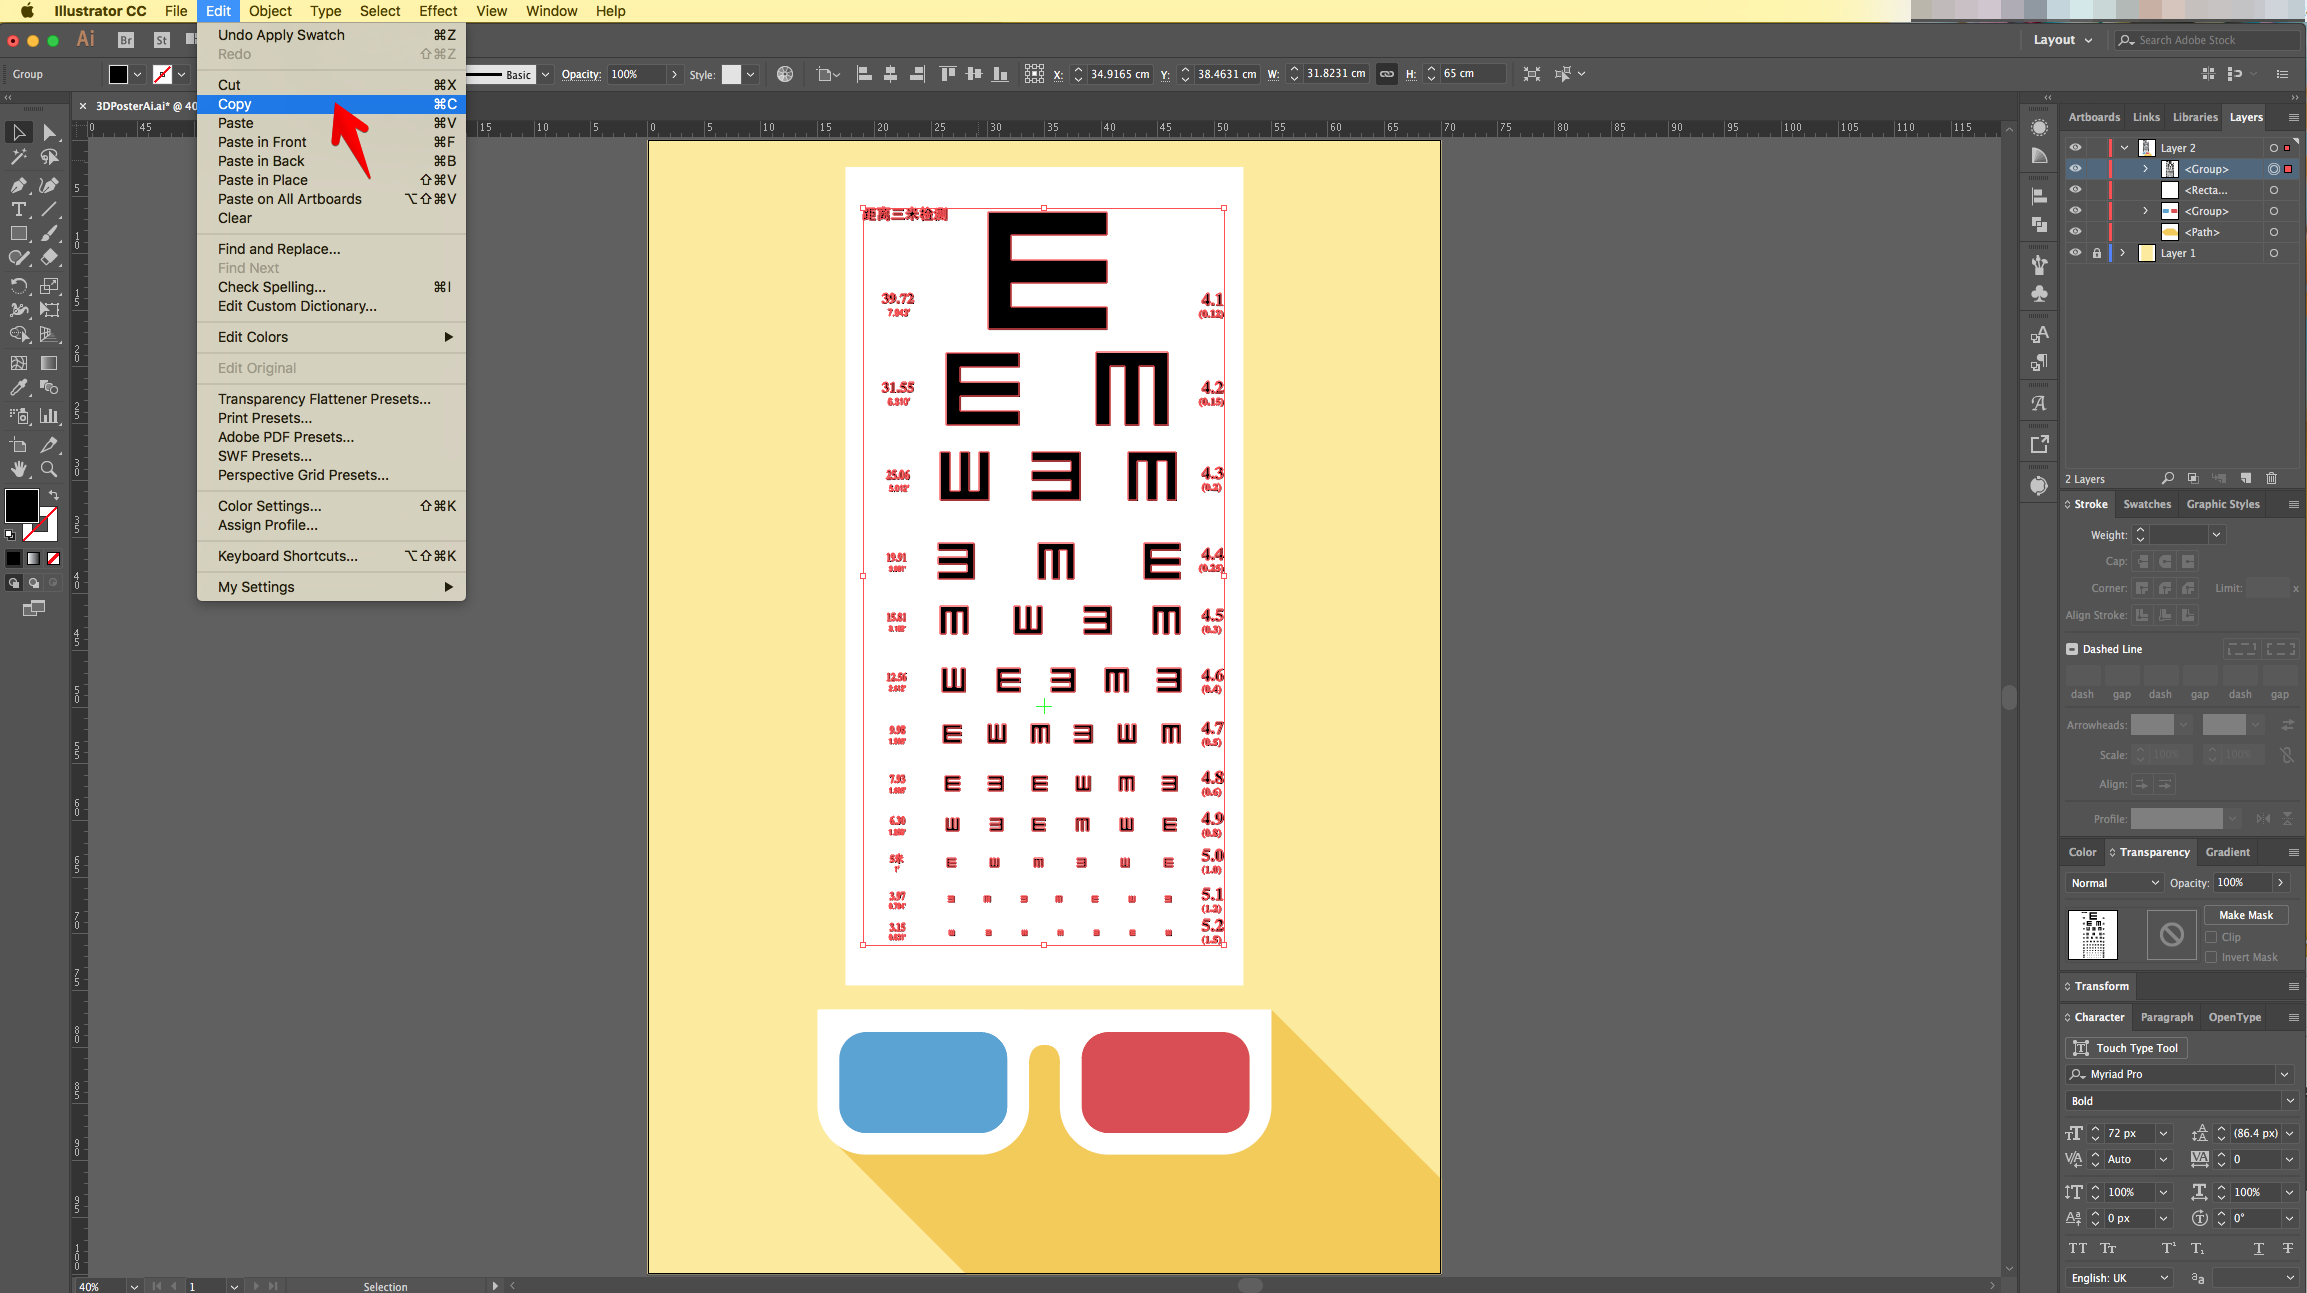

20 - Move the “Copy” a few clicks to the Left.
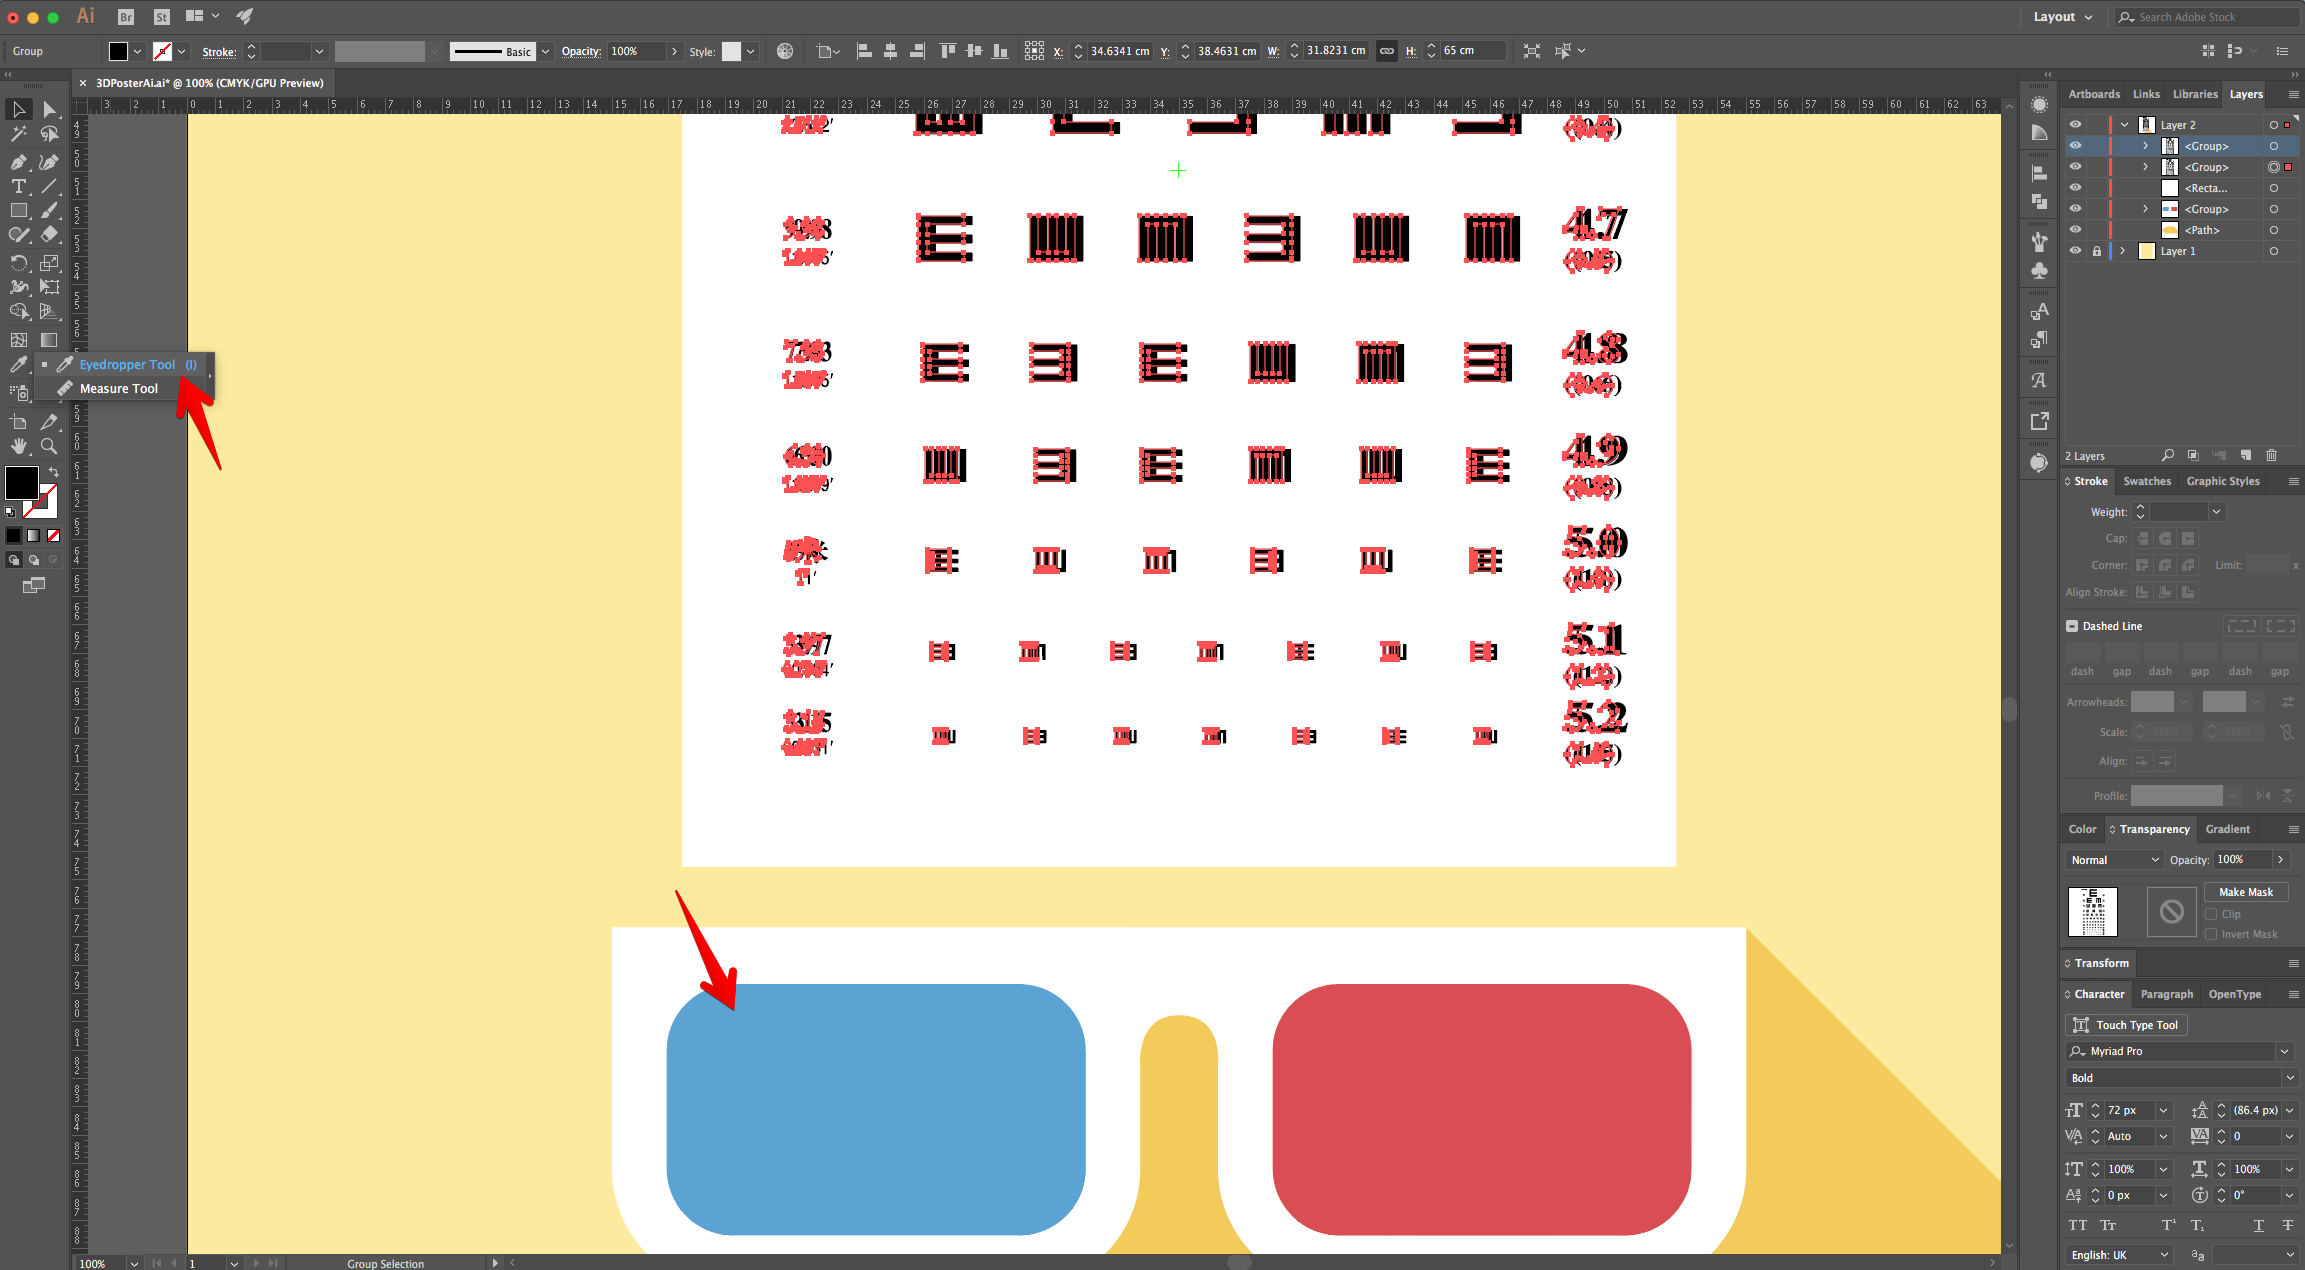
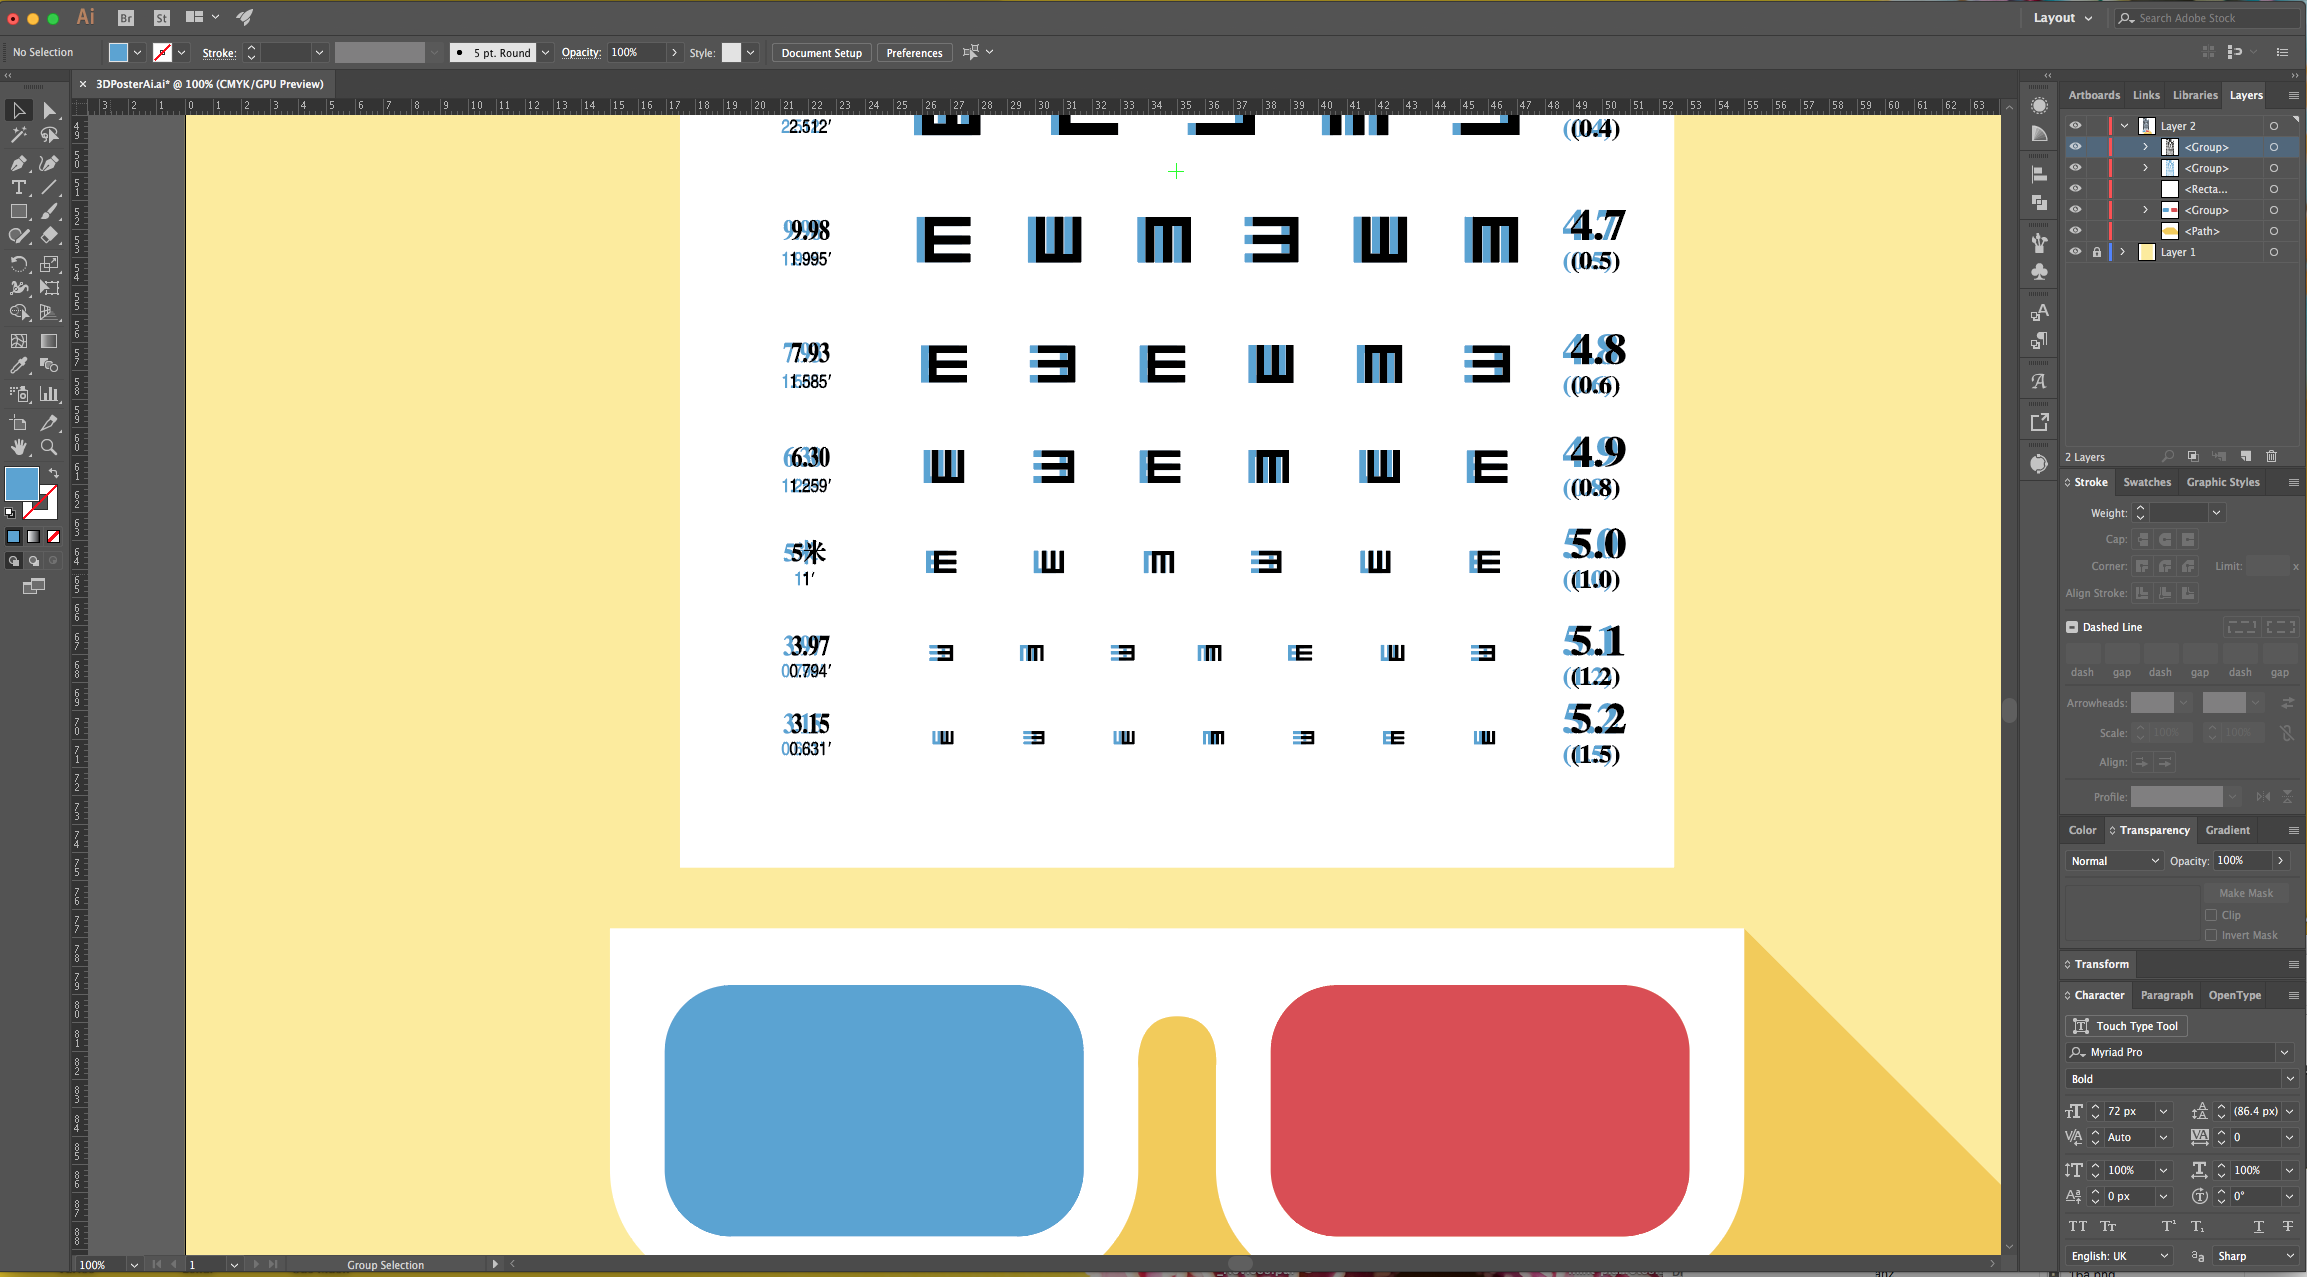
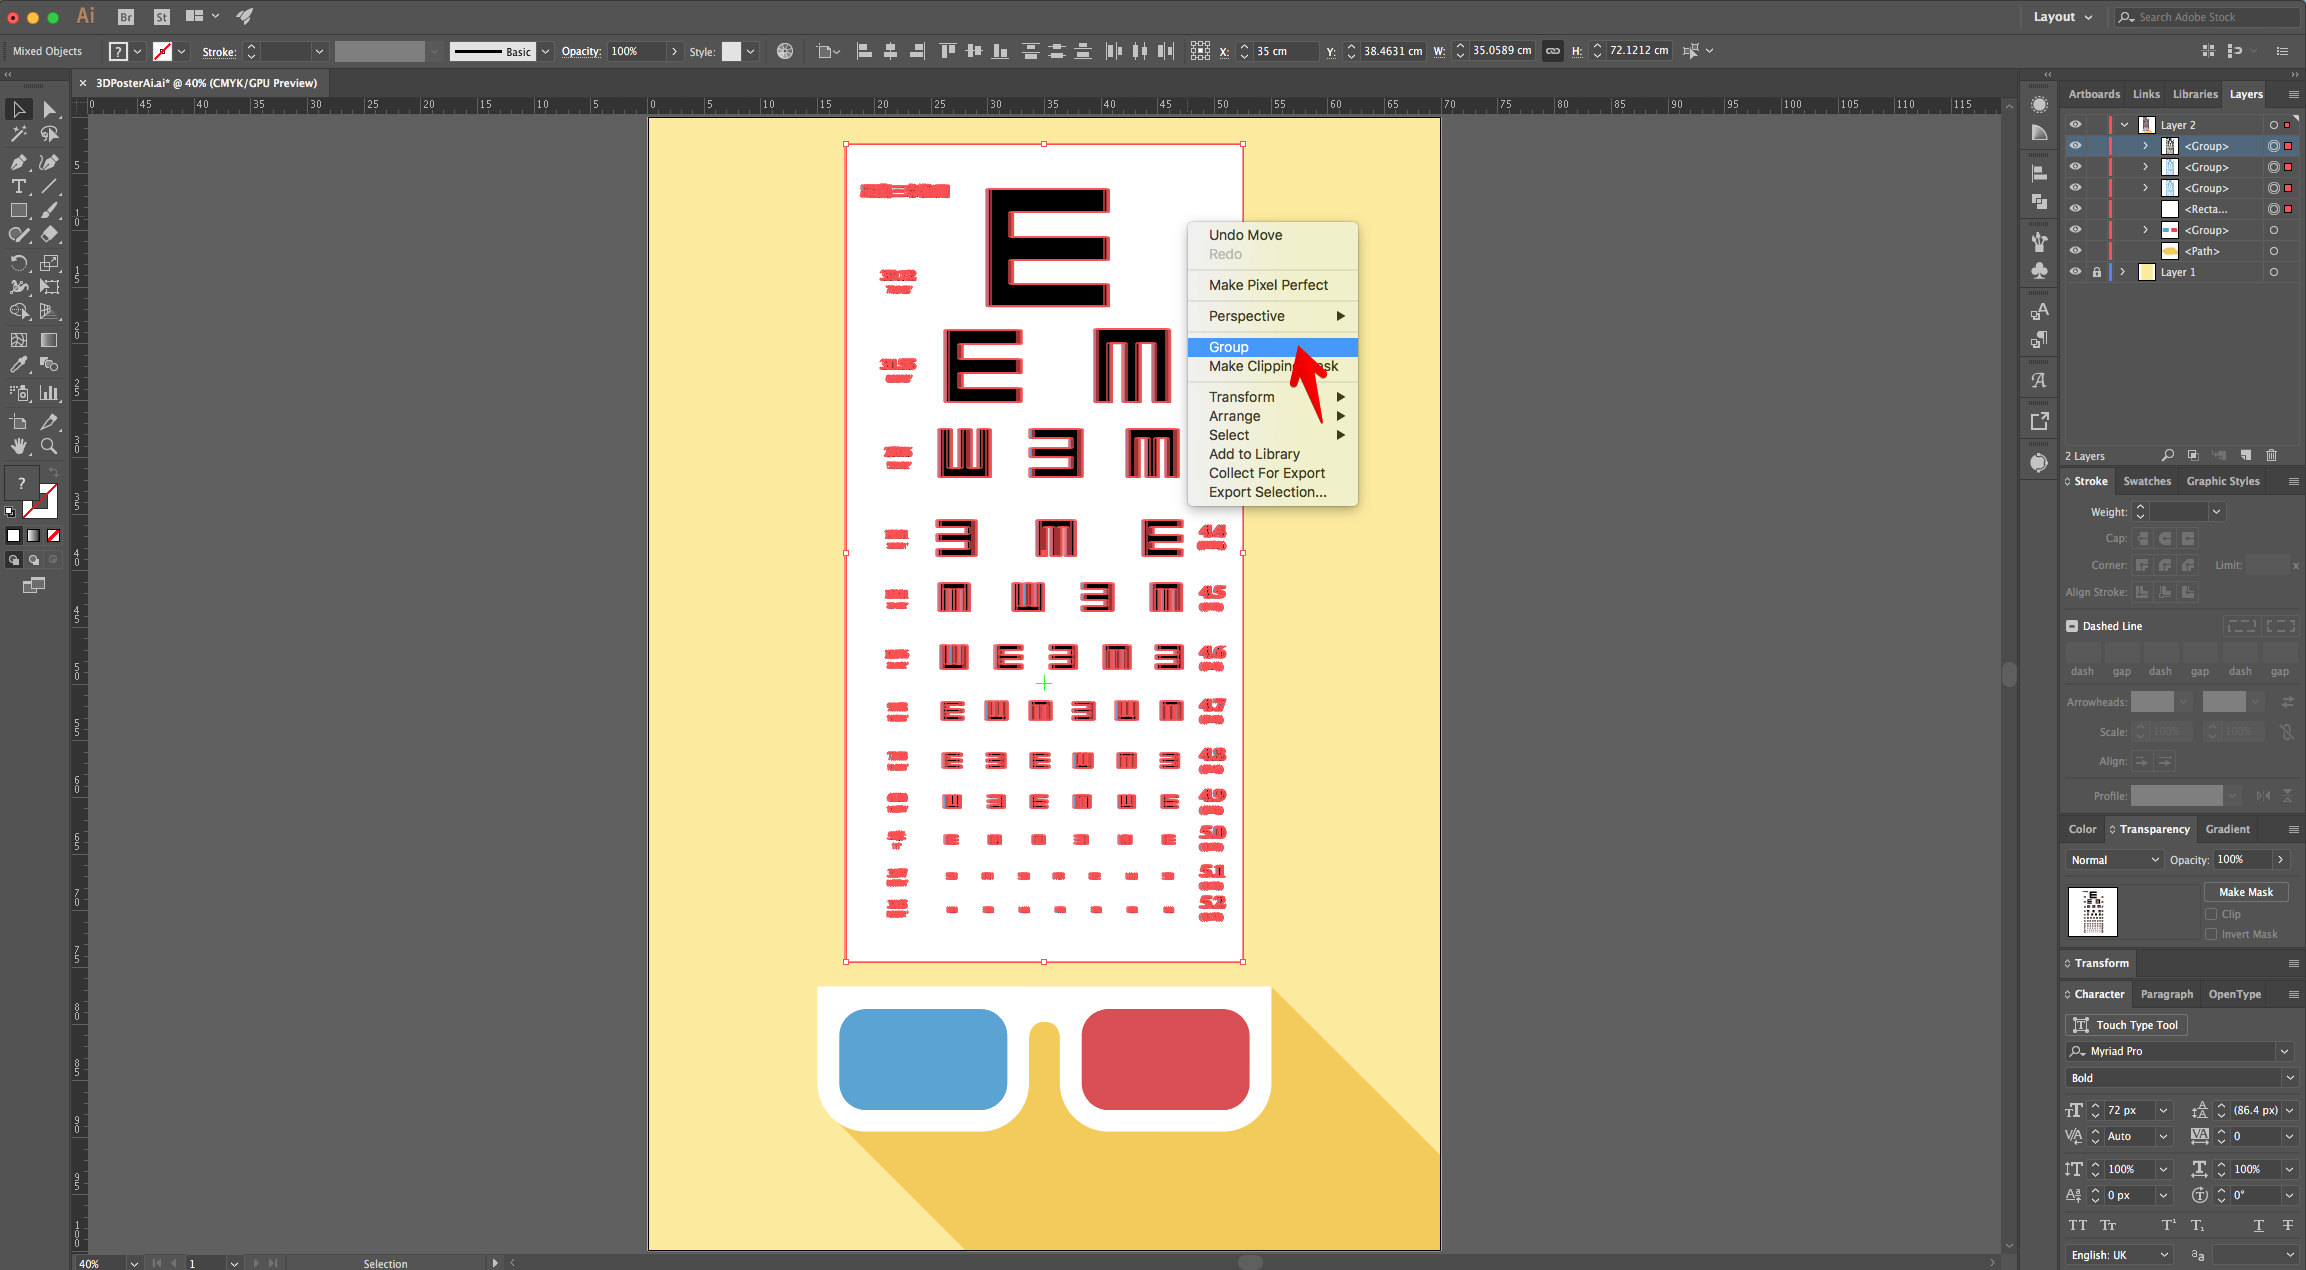
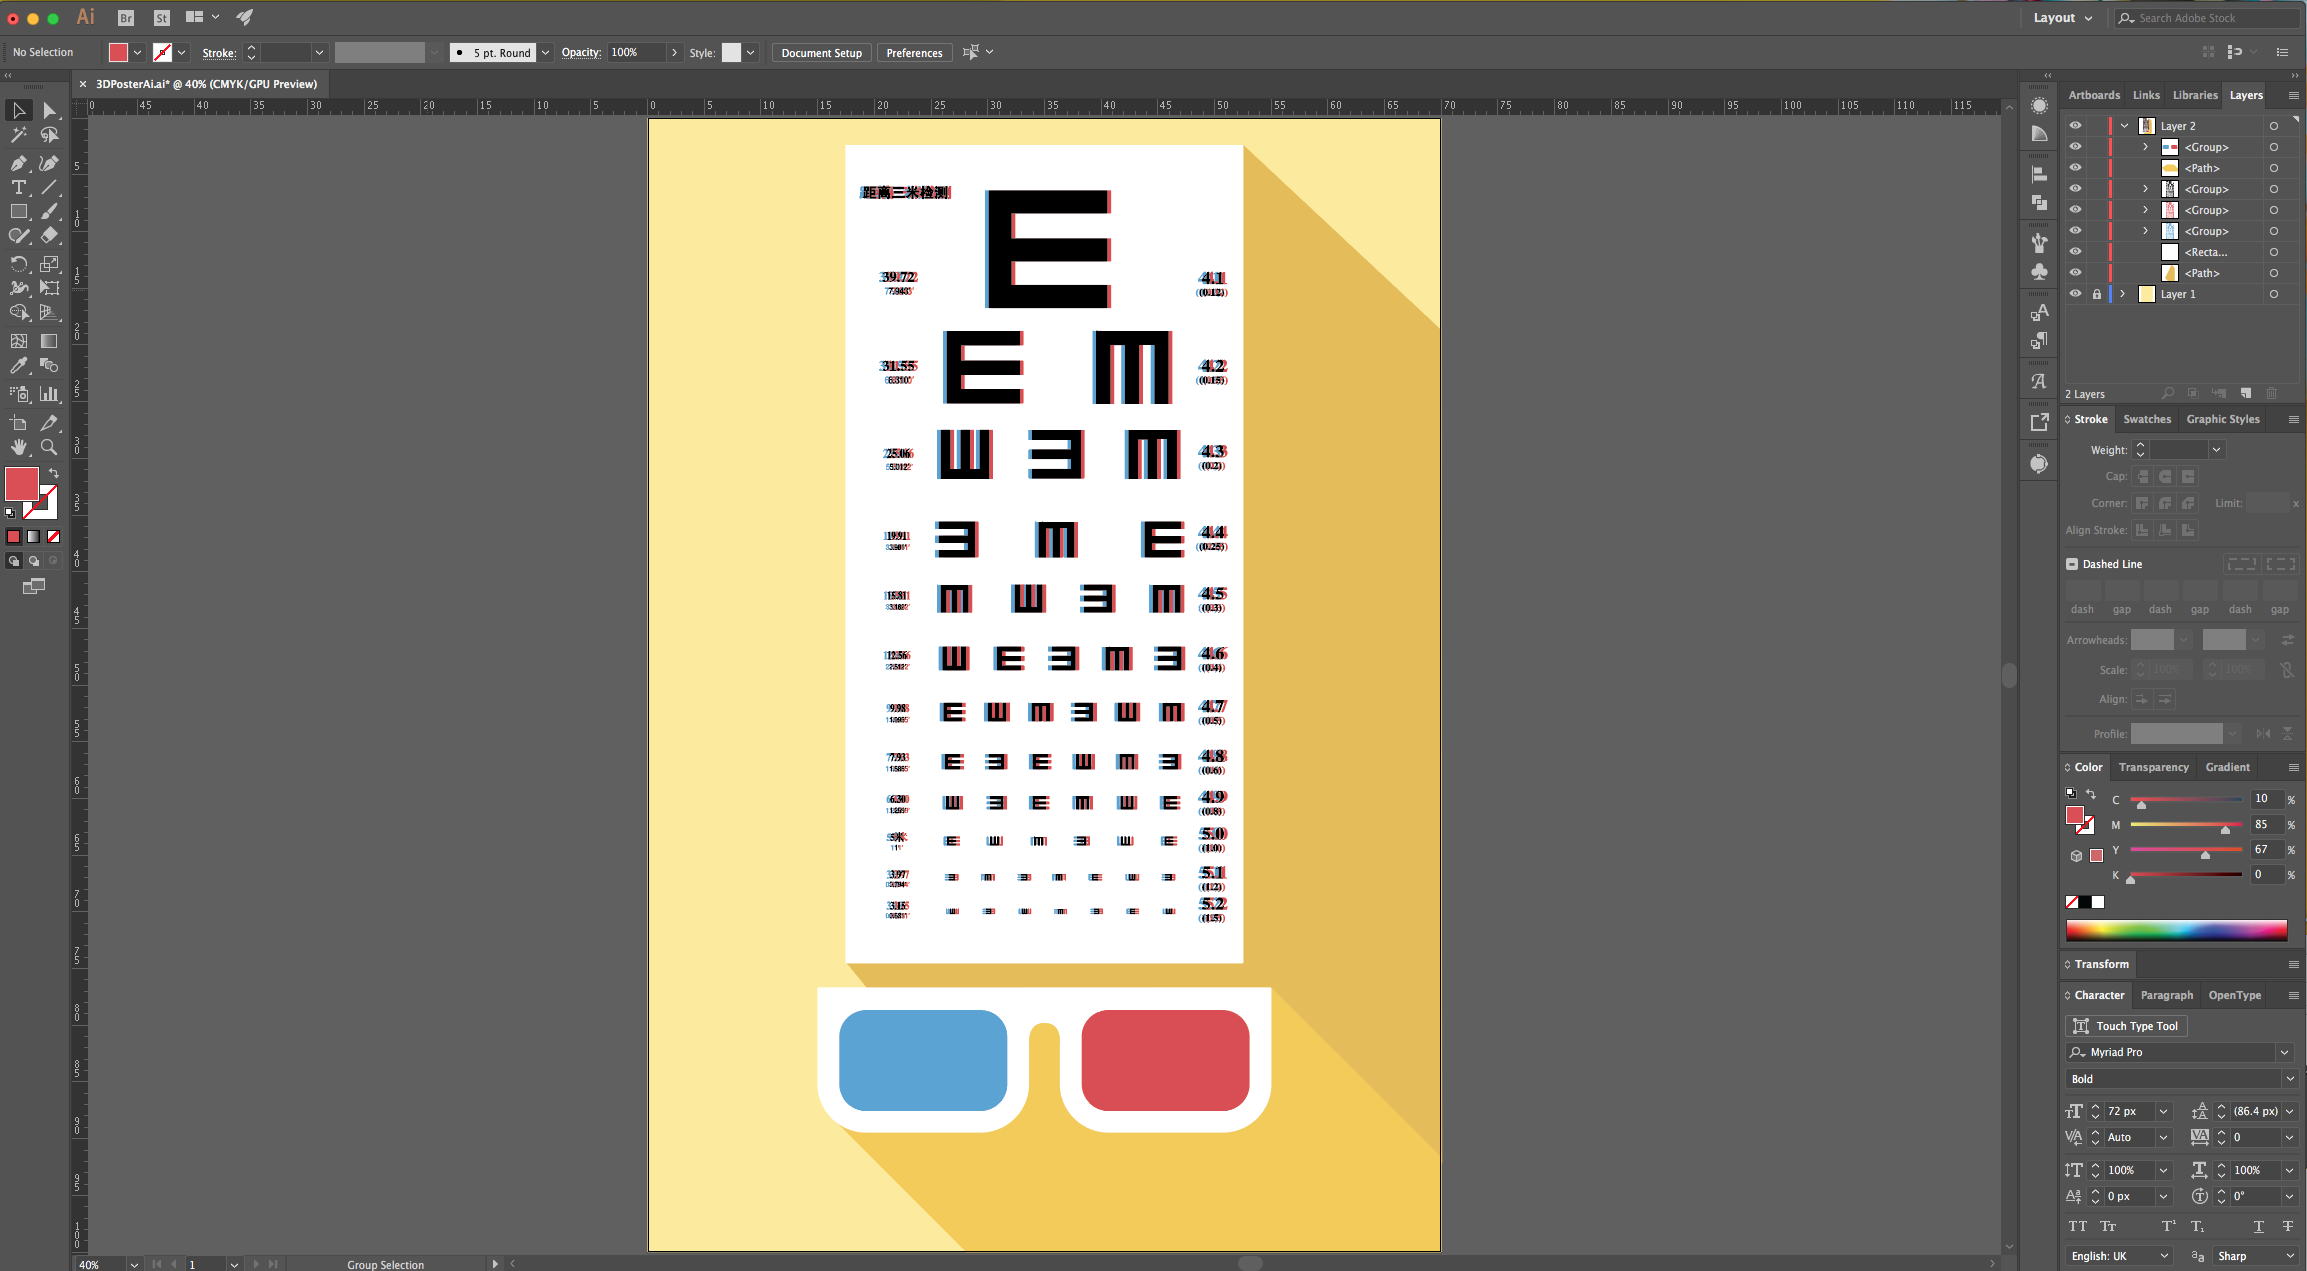
21 - Select the “Eyedropper Tool” (E) and with the bottom “Eye Chart” still selected, click on top of the “Blue Glass Lens” to get the same “Fill” color. “Paste in Back” (Command/Control + B) another copy but this time move it to the right and fill it with the “Red Glass Lens” color.
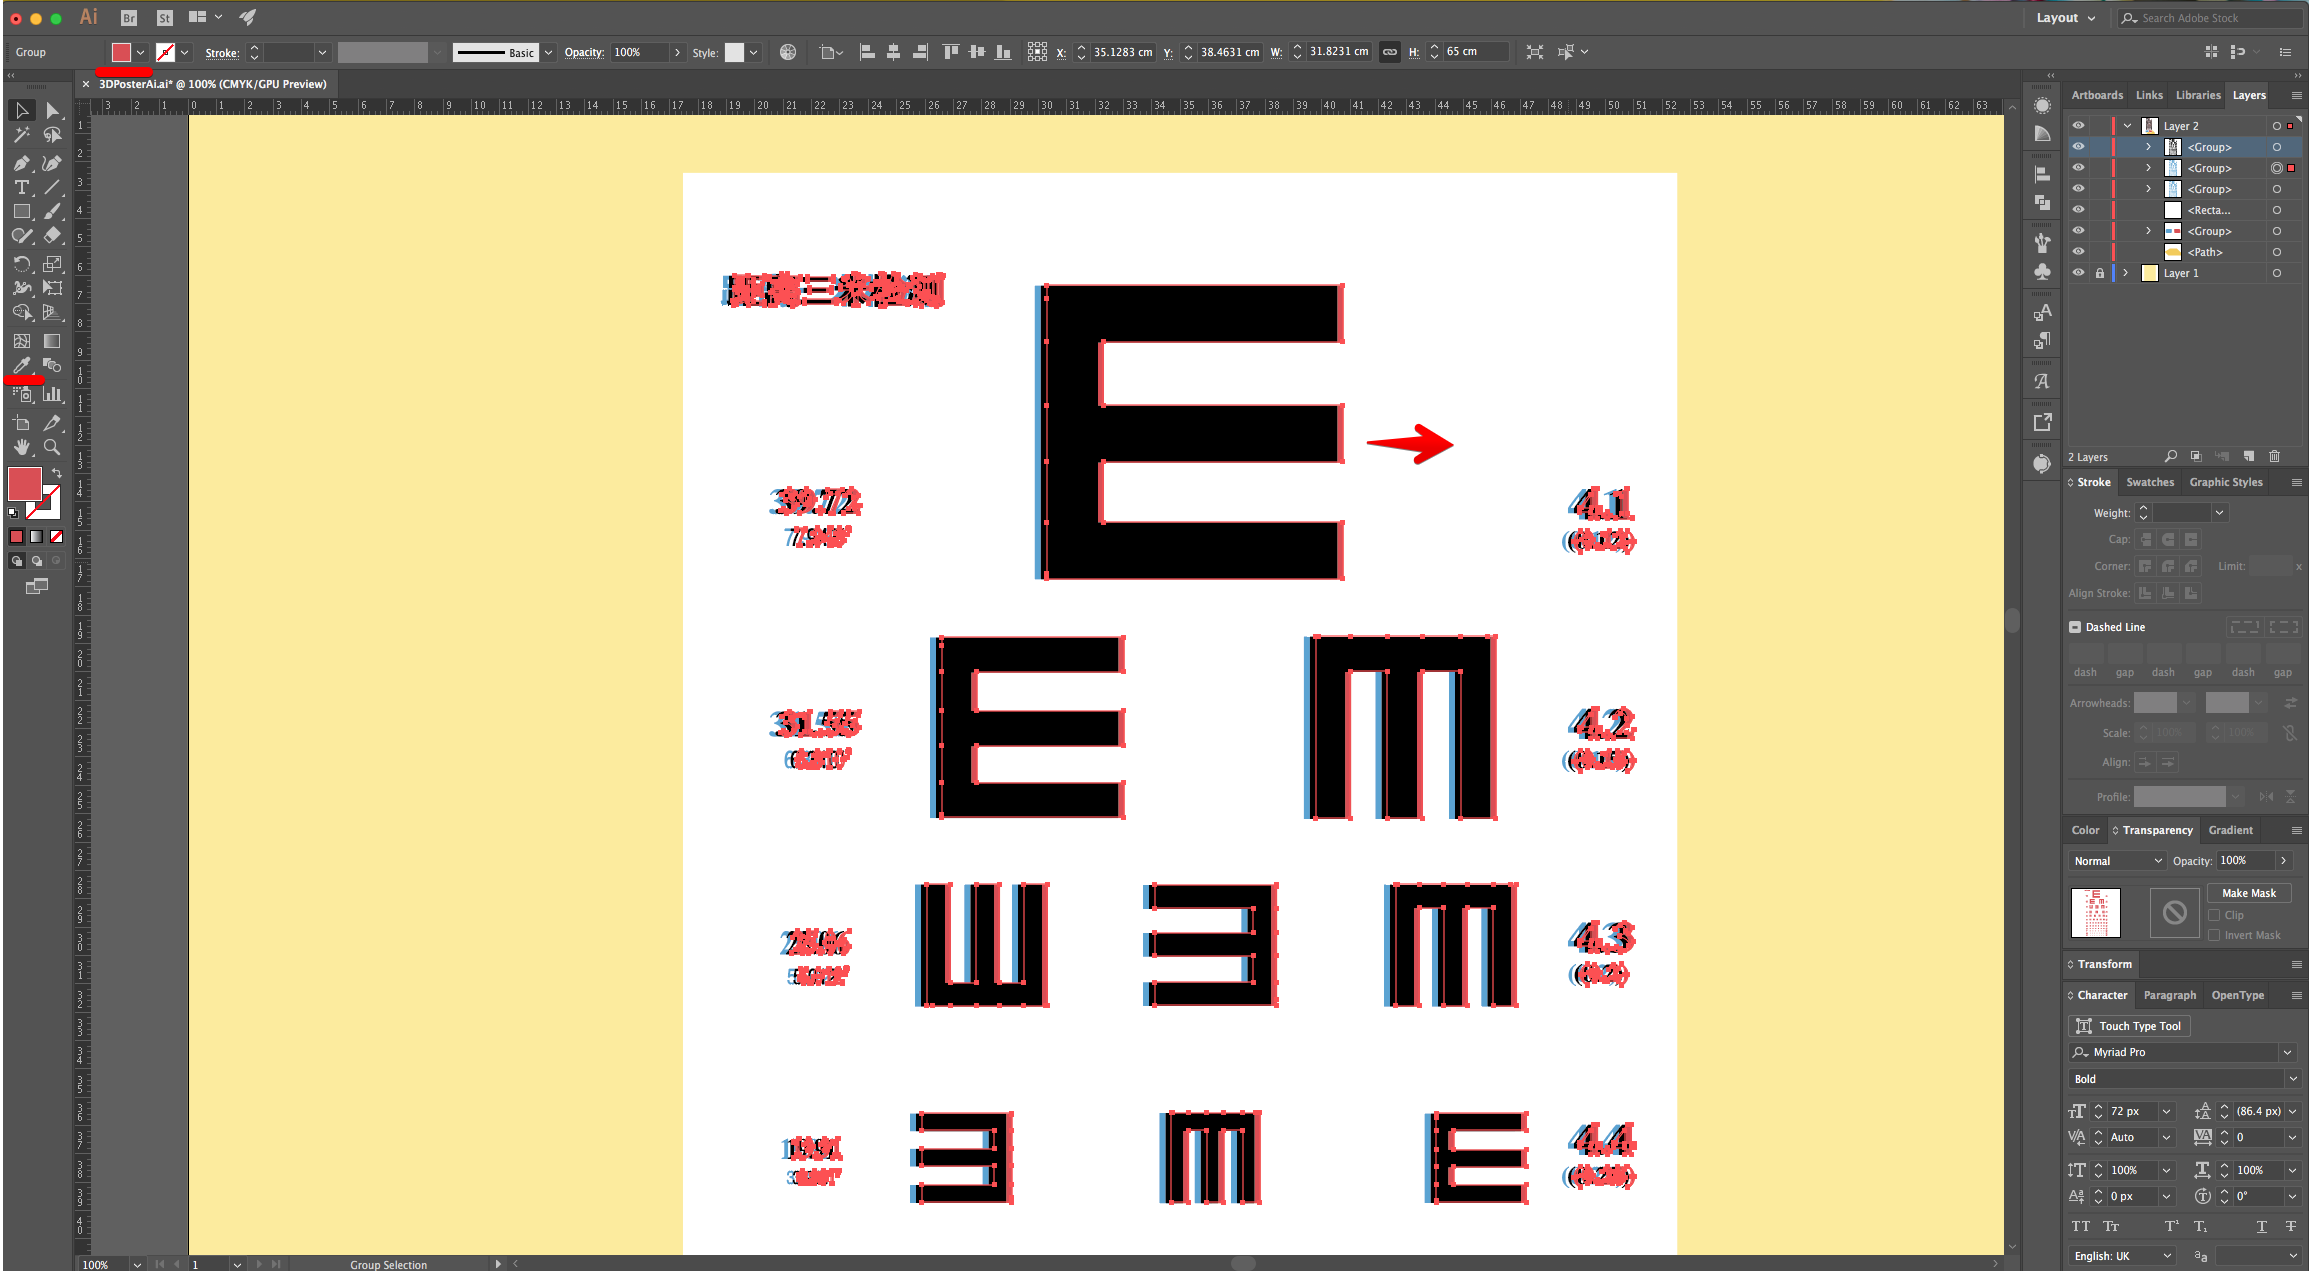
22 - Group all the “Eye Chart” instances and the White Background, right-click on top of them and choose “Group” (Command/Control + G). Add a slightly darker “Long Shadow” to the “Eye Chart” group.
23 - Check it out.
1 - In Illustrator, create a “New Document”. Make it 70 x 100 cm @300 dpi and choose CMYK as “Color Mode”.
2 - Go to Image > View > Rulers to bring out the document’s “Rulers”.
3 - Select the “Rectangle Tool” (M), click on the Top - Left corner of your document’s and input the same “Width” and “Height” values.
4 - Use a Light Yellow as “Fill” color. We used #feea99.
5 - “Lock” the background using the small “Padlock” icon on the left side of its Thumbnail and then create a “New Layer” by clicking on the small button at the bottom of the “Layers Panel”.
6 - “Copy” (Command/Control + C) and “Paste” (Command/Control + V) the “3D Glasses” into your file (or create them yourself using the “Pen Tool” (P).
7 - Center it using the “Horizontal Align Center” option on your Top Menu and make sure that “Align to Artboard” is selected. Or use the same options in the “Align Panel”.
8 - Select the “Red” right-hand part of your Glasses and use #dc4d52 as “Fill” color. Do the same with the “Blue” left-hand portion and use #59a1d2.
9 - Use the “Pen Tool” (P) with a darker shade of Yellow (#f3cb51) to create a “Long Shadow” effect to your “Glasses”.
10 - Hold the “Shift” key to make the lines “Straight” and at an 45° Angle. Start on the bottom-left of the Glasses to the bottom edge of the Document (45°), then to the bottom-right corner and back up to the top-right of the Glasses. To finish, close the Path.
11 - Right-click on top of the “Glasses” and choose “Bring to Front” to place them on top of the “Shadow”.
12 - Use the “Direct Selection Tool” (A) to fix any portion of the “Vectors” that needs to be adjusted.
13 - Now, go to File > Place and navigate to where the “Eye Chart” file is saved and select it. Click “Place” to bring it into your “Document”. You can also use “Copy” (Command/Control + C) and “Paste” (Command/Control + V) from another File.
14 - Resize it if needed and make it fit proportionally in the empty space in the “Document”.
15 - Use the “Rectangle Tool” (M) to create a White Background for the “Eye Chart”. Click inside the document and input a “Width” and “Height” that is a couple of centimeters larger than the “Eye Chart”.
16 - Center it using the “Horizontal Align Center” option on your Top Menu and make sure that “Align to Artboard” is selected. Or use the same options in the “Align Panel. Then select both “Eye Chart” and White Background and Align them using the “Horizontal and Vertical Align Center” option on your Top Menu this time making sure that “Align to Selection” is selected. Or use the same options in the “Align Panel.
17 - Right-click on top of the White Background and choose “Send Backward” to place it under the “Eye Chart”. If you think that the white edges should be bigger, just change the “Width” and/or “Height” values in the Top Menu and Center everything again.
18 - If the “Eye Chart” is an image you need to transform it into Vectors. Select the Chart and click the “Image Trace” button on the “Top Menu”. Open the “Image Trace” Panel, click the “Advanced” Tab “Image Trace” check the “Ignore White” box. Click “Trace” and then “Expand” on the Top Menu.
19 - Select the “Eye Chart”, make a “Copy” (Command/Control + C), then “Paste in Back” (Command/Control + B) to paste it under the original one.
20 - Move the “Copy” a few clicks to the Left.
21 - Select the “Eyedropper Tool” (E) and with the bottom “Eye Chart” still selected, click on top of the “Blue Glass Lens” to get the same “Fill” color. “Paste in Back” (Command/Control + B) another copy but this time move it to the right and fill it with the “Red Glass Lens” color.
22 - Group all the “Eye Chart” instances and the White Background, right-click on top of them and choose “Group” (Command/Control + G). Add a slightly darker “Long Shadow” to the “Eye Chart” group.
23 - Check it out.
by @lornacane


