Banner, Label Templates in Illustrator (Part 1)
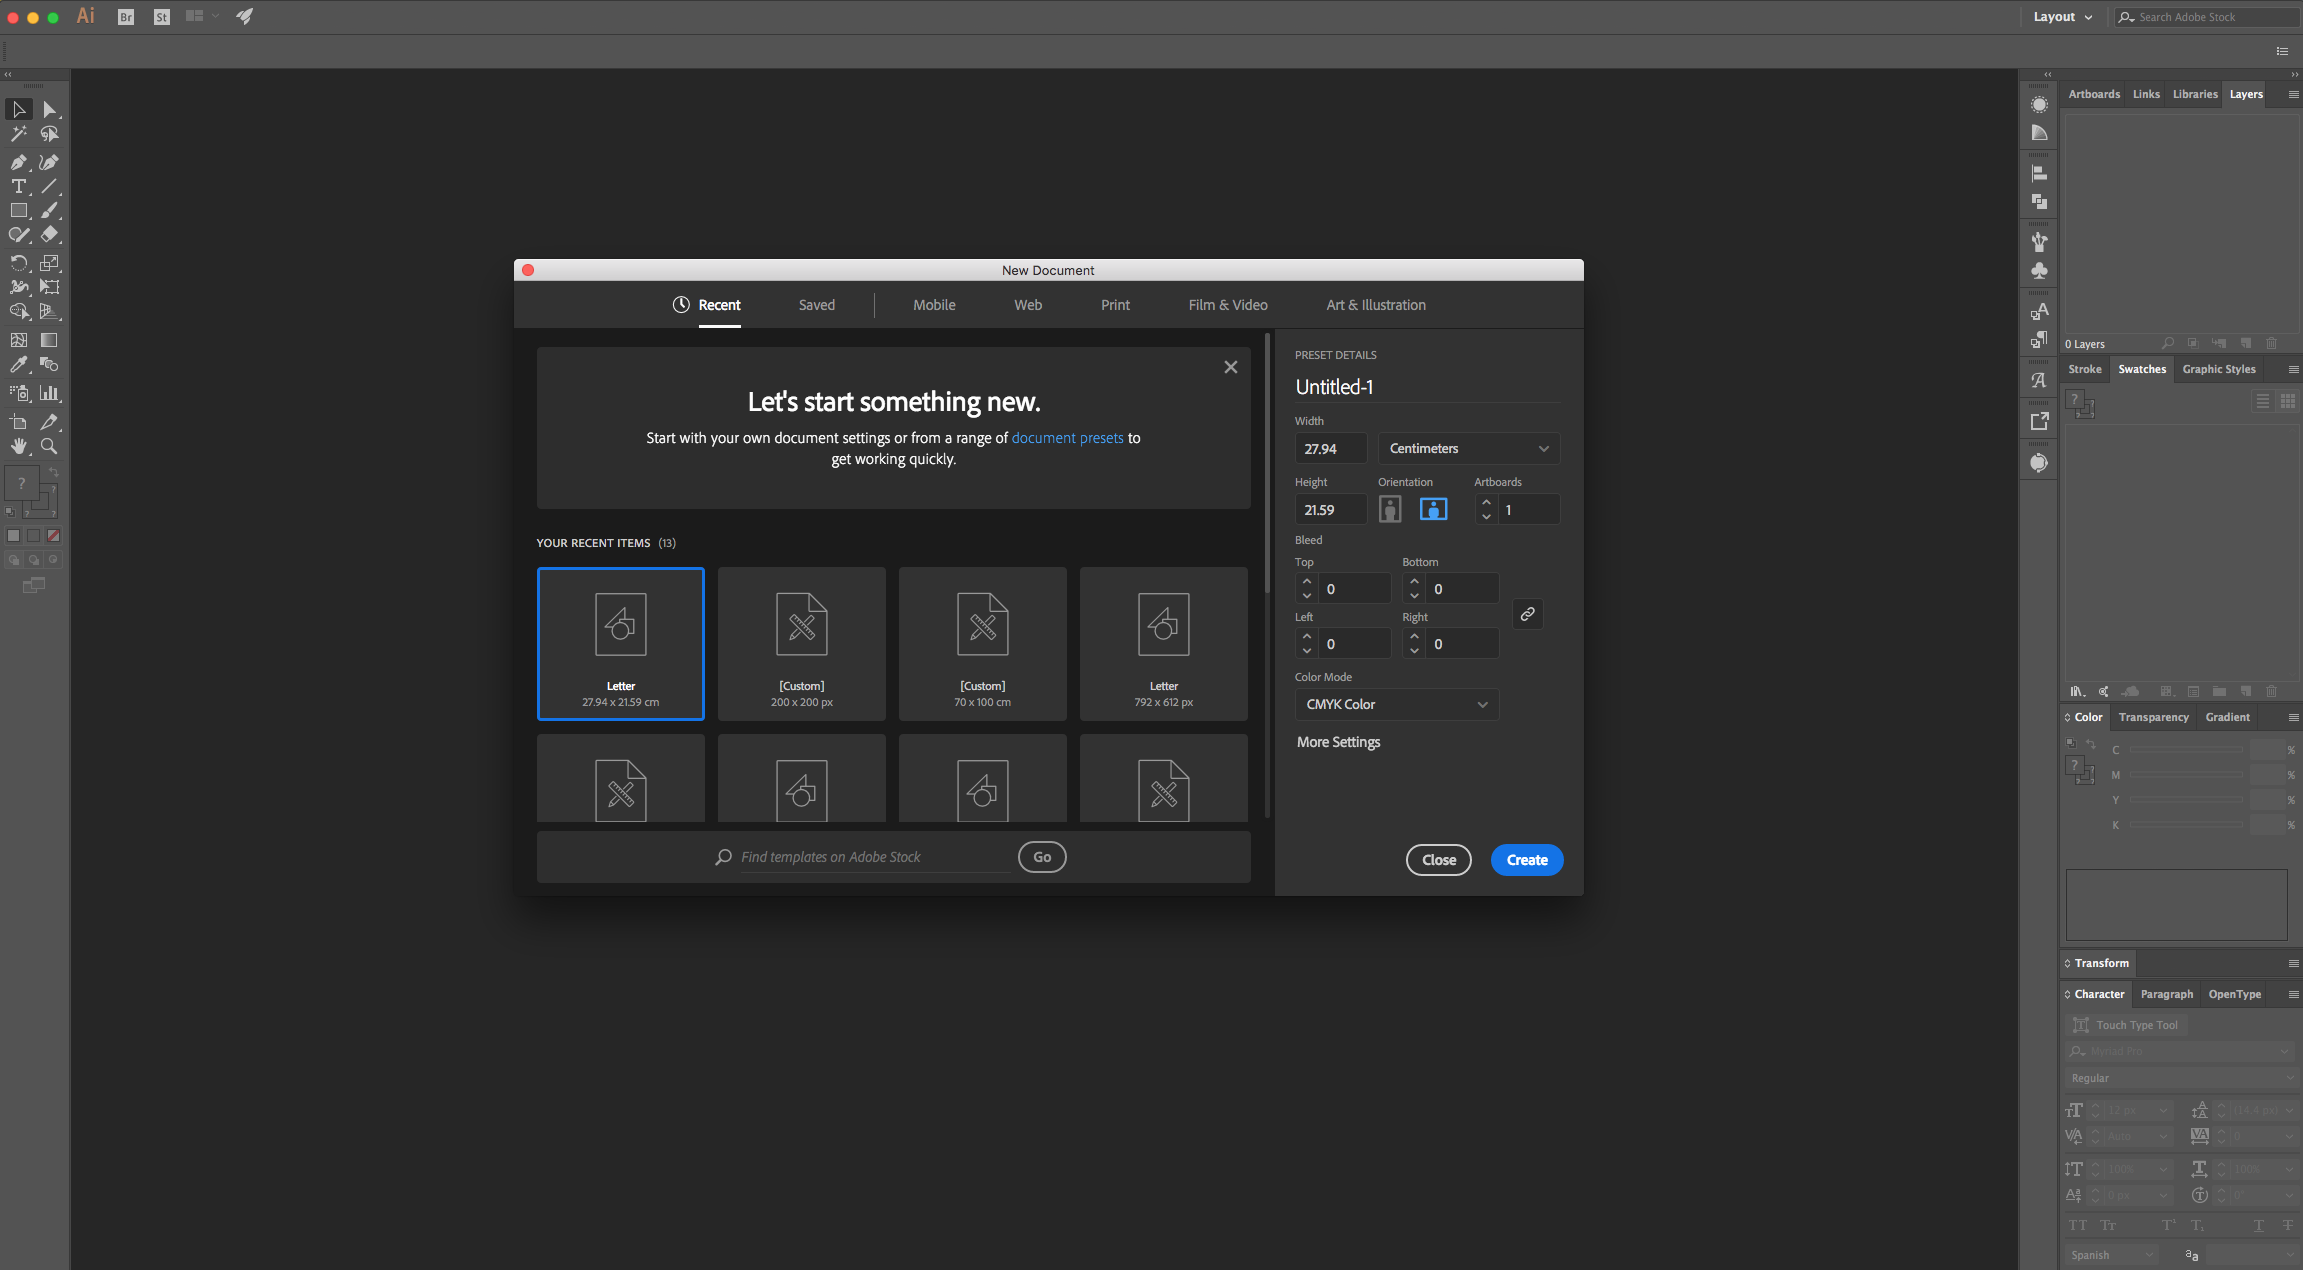
1 - In Illustrator, create a “New Document”.
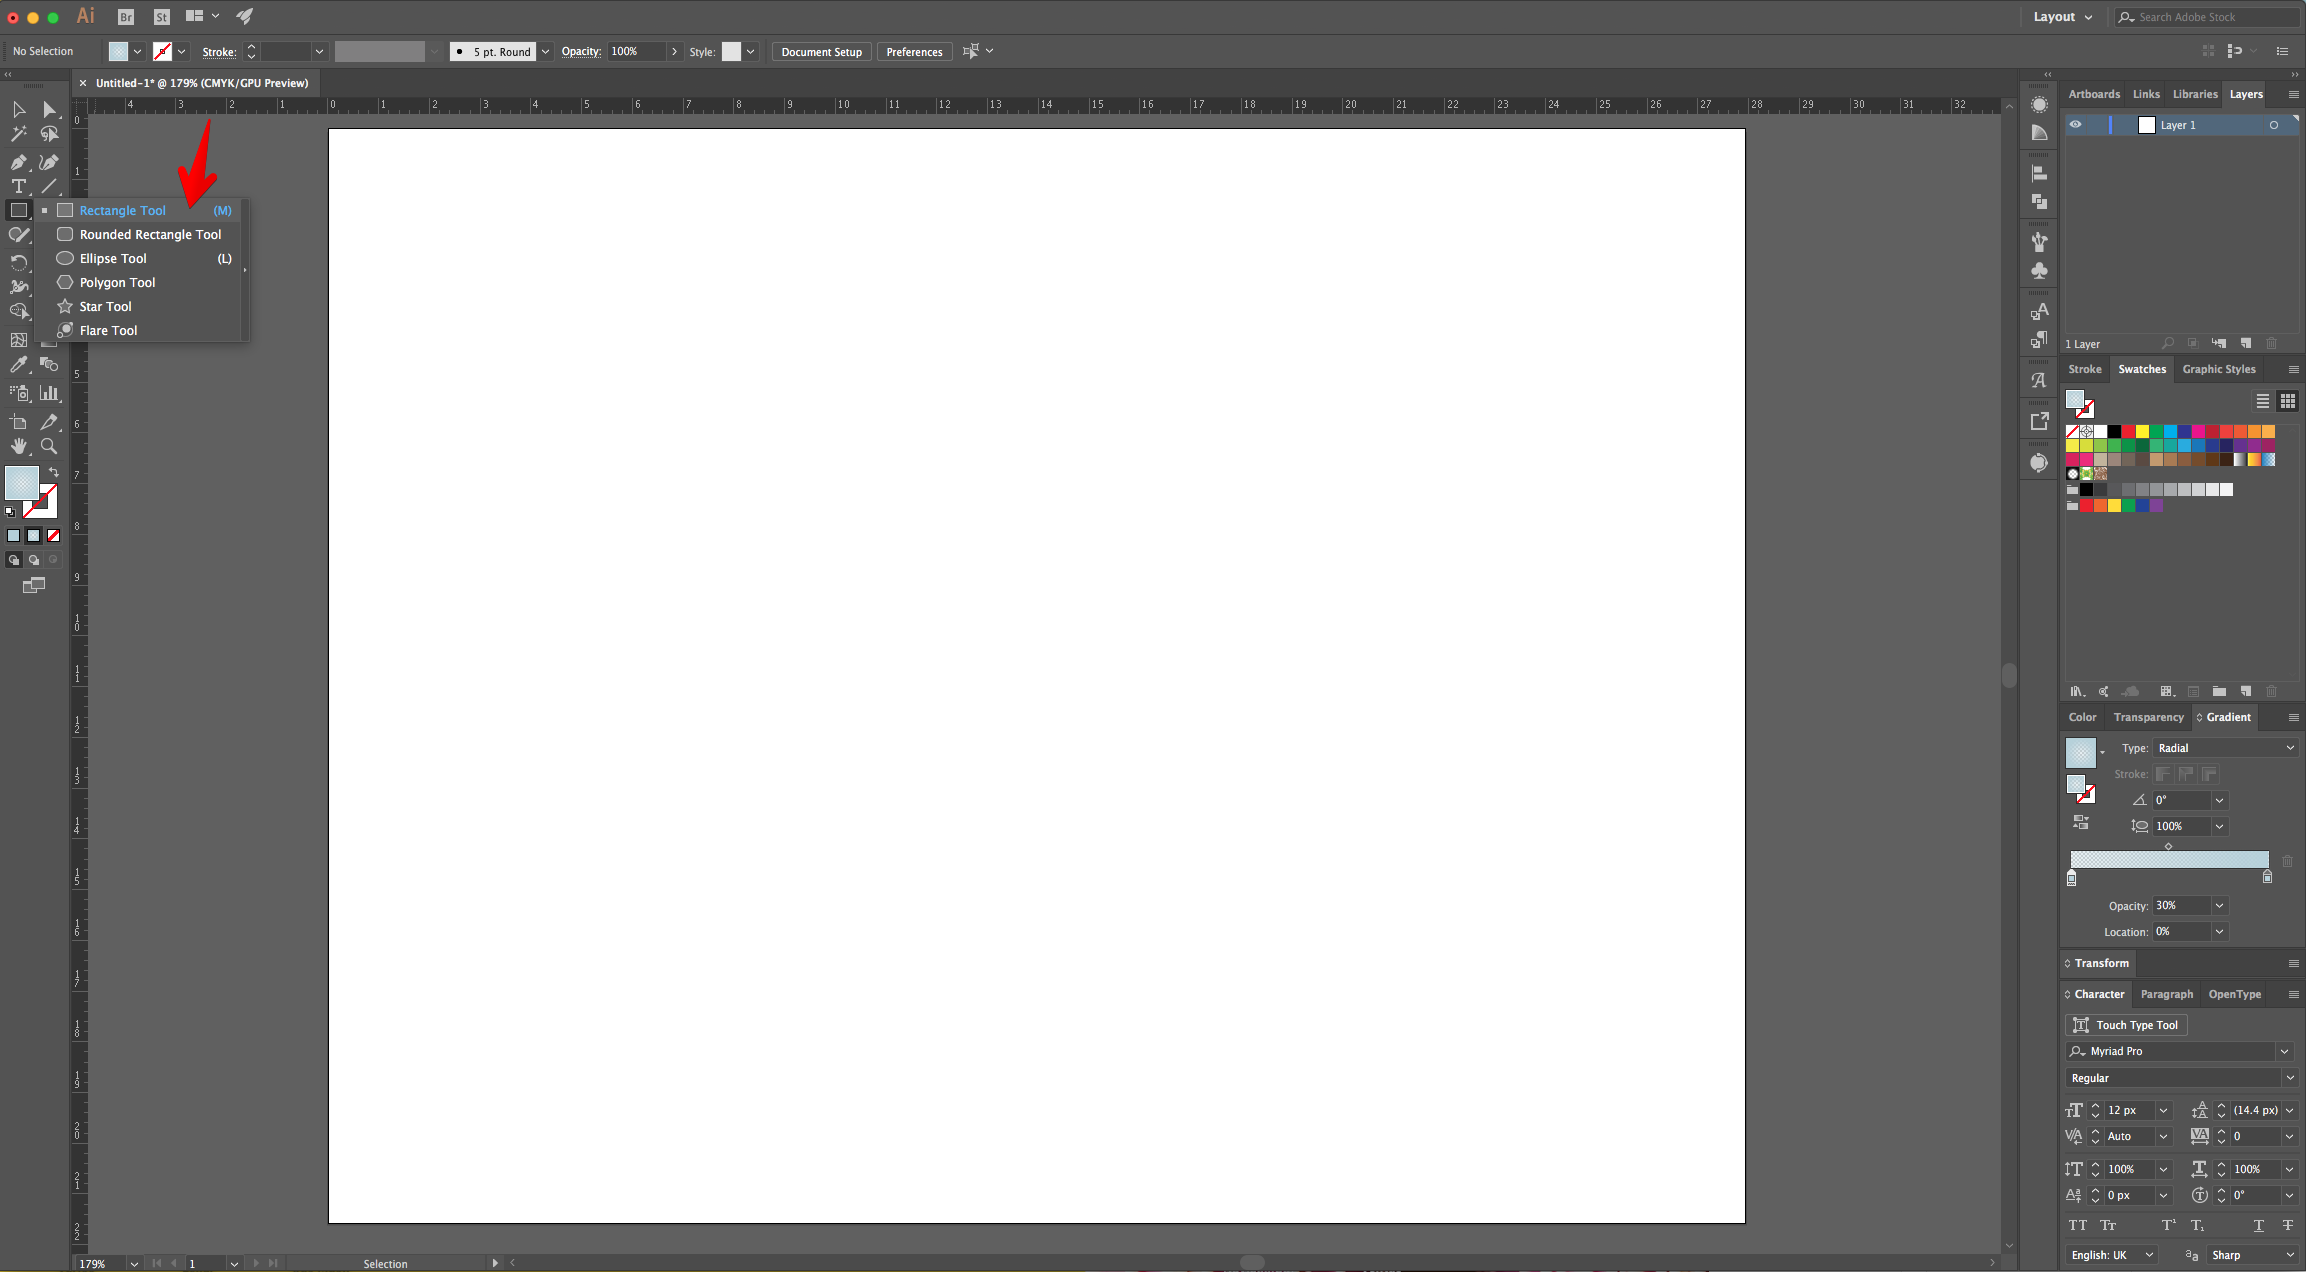
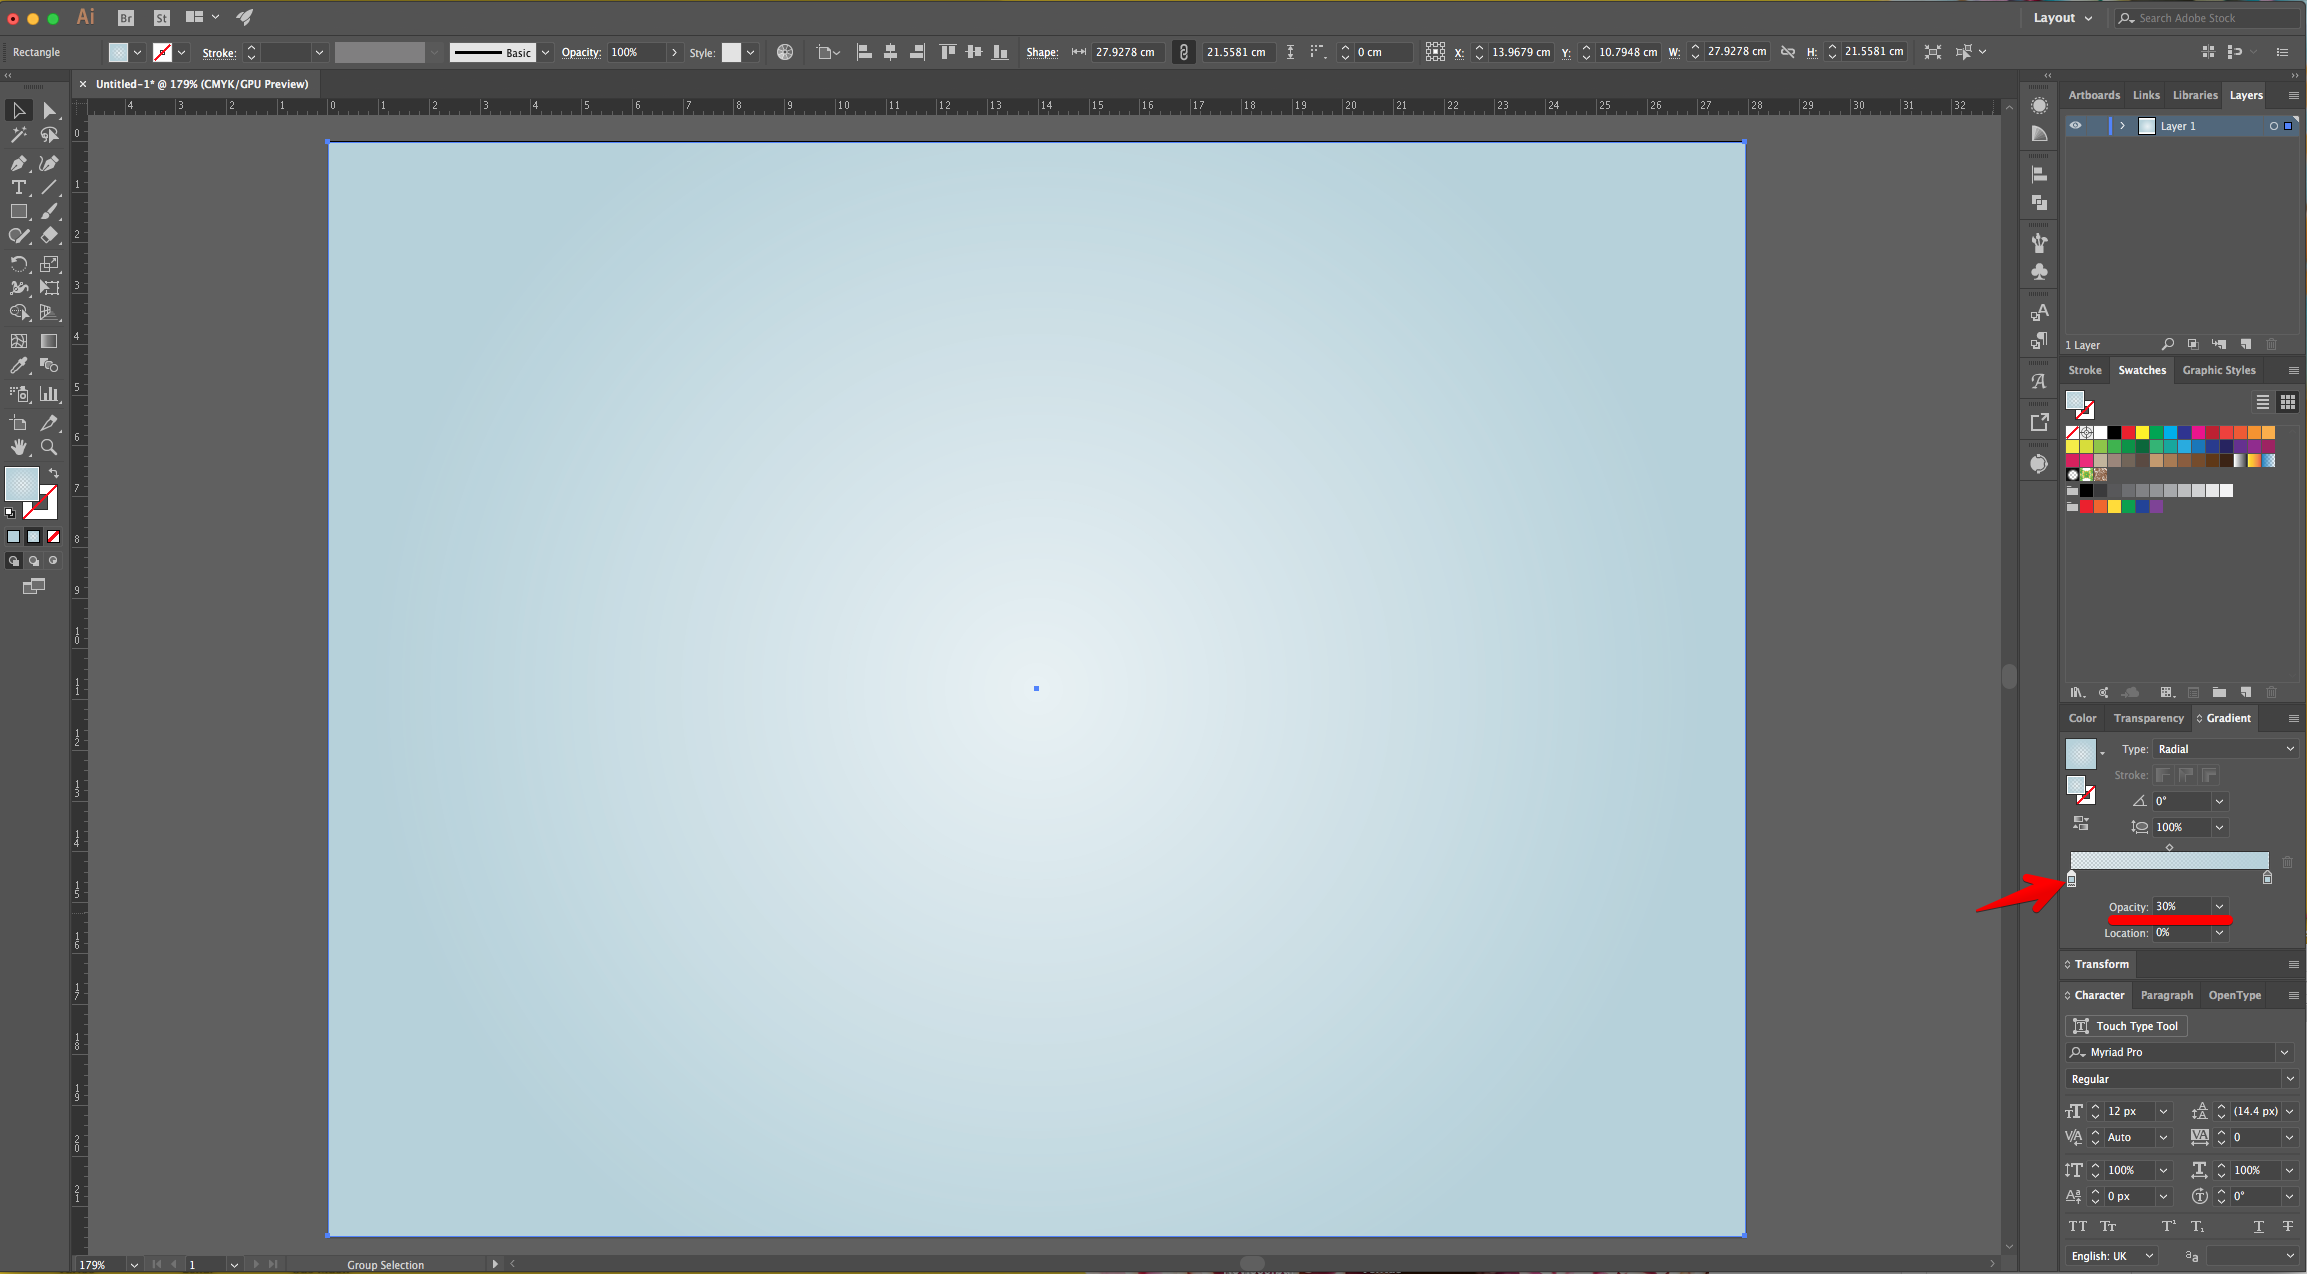
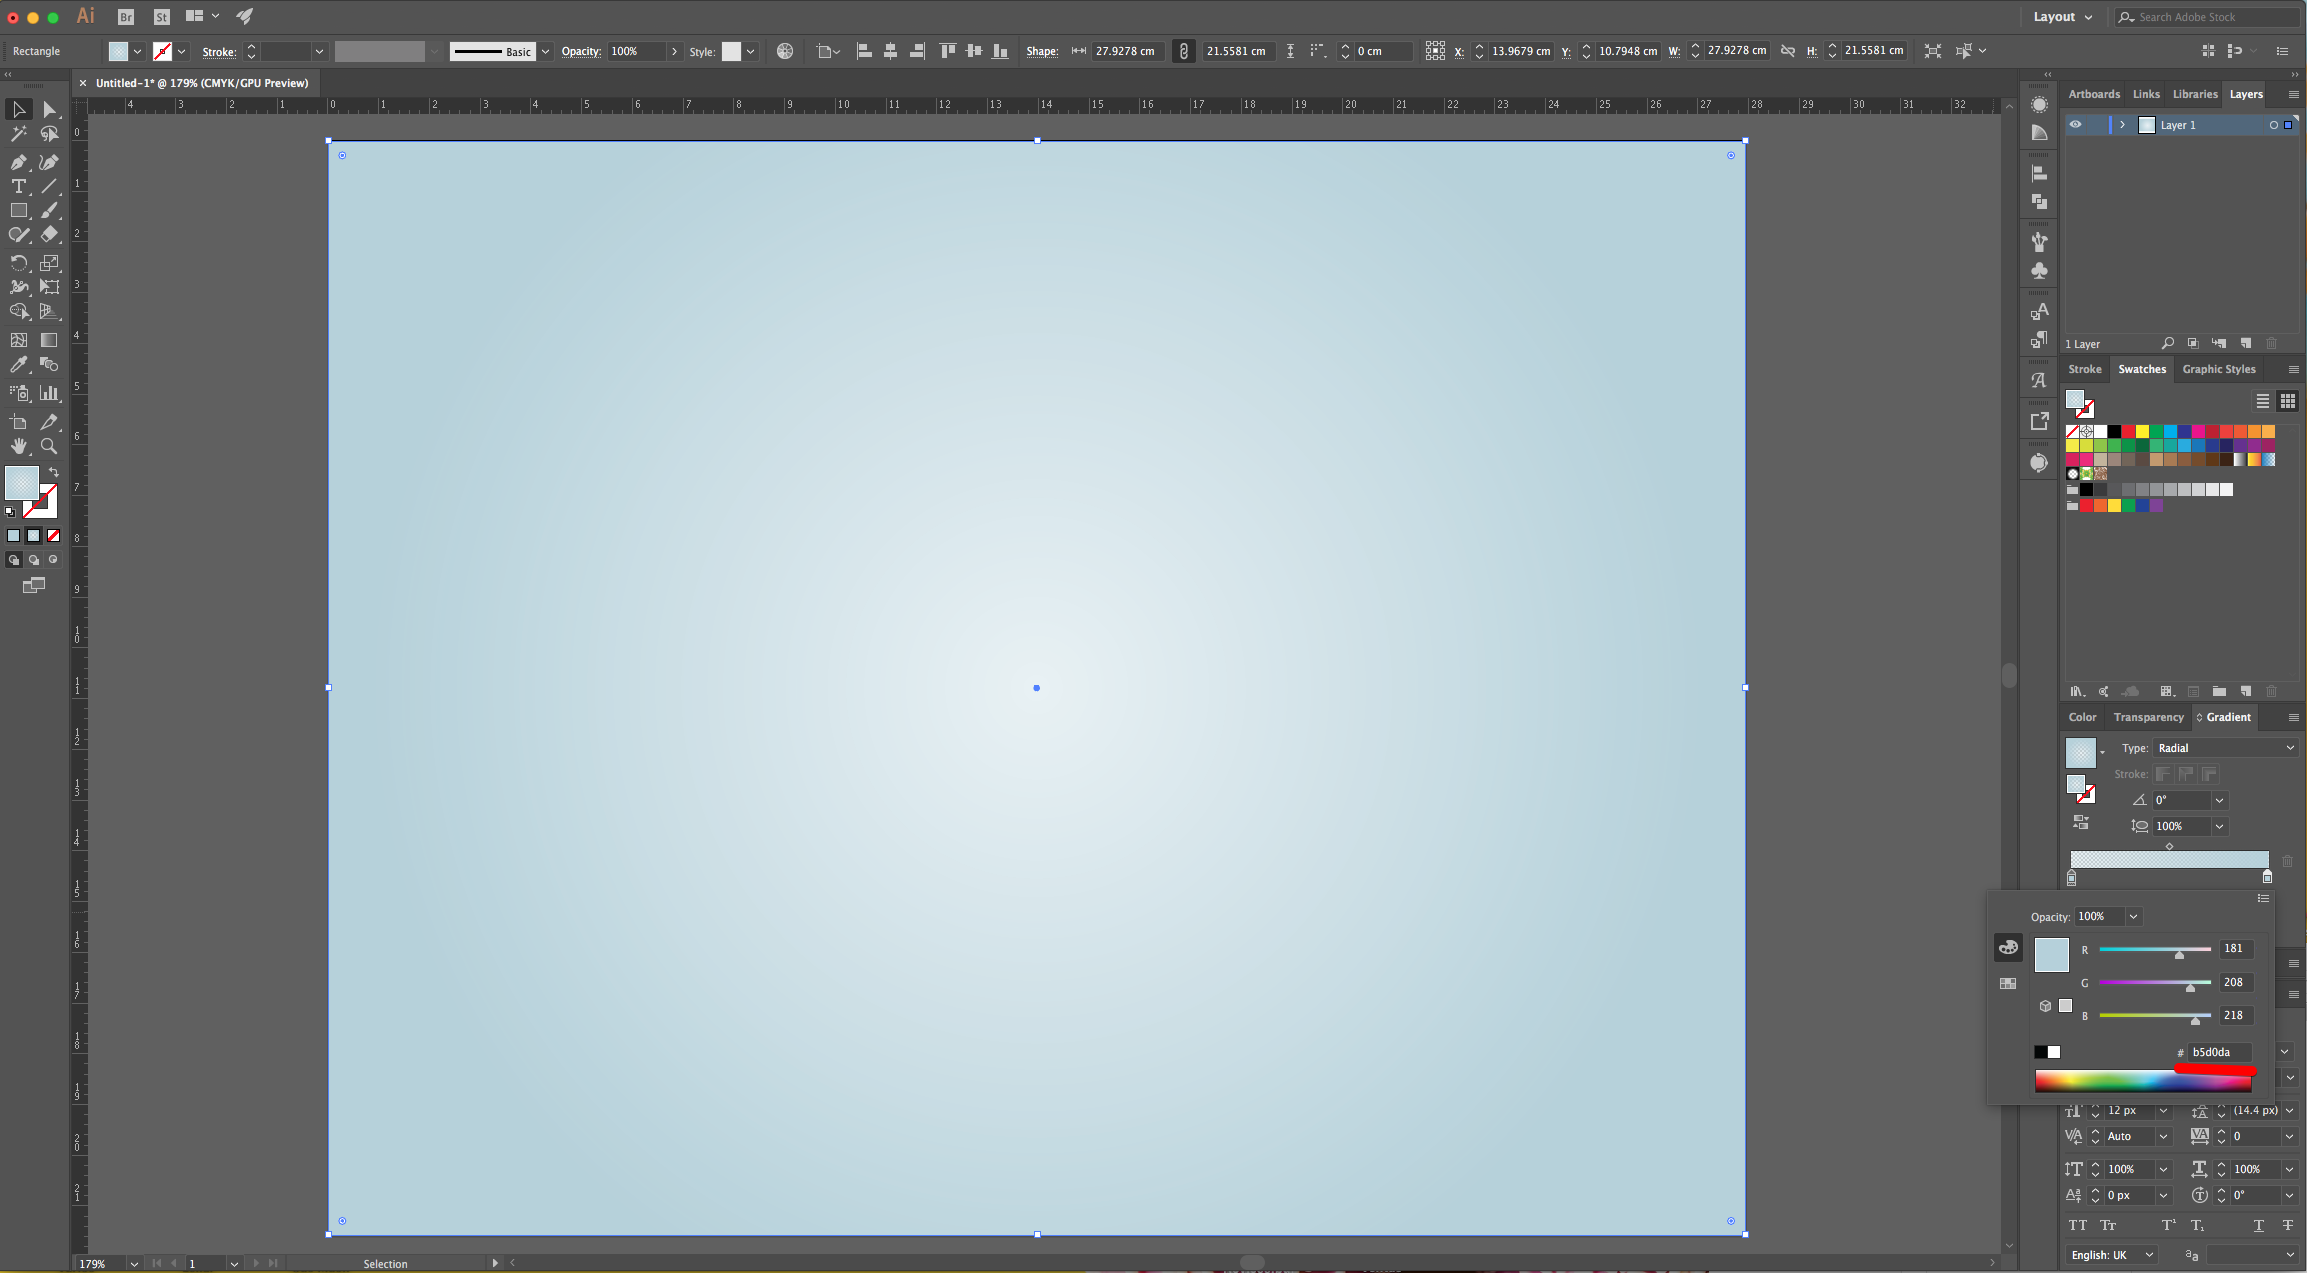
2 - Select the “Rectangle Tool” (M) and create a “Rectangle” that covers the entire Document. Fill it with a “Radial Gradient” going from a light blue (#b5d0da) at 30% “Opacity” to 100% “Opacity”.
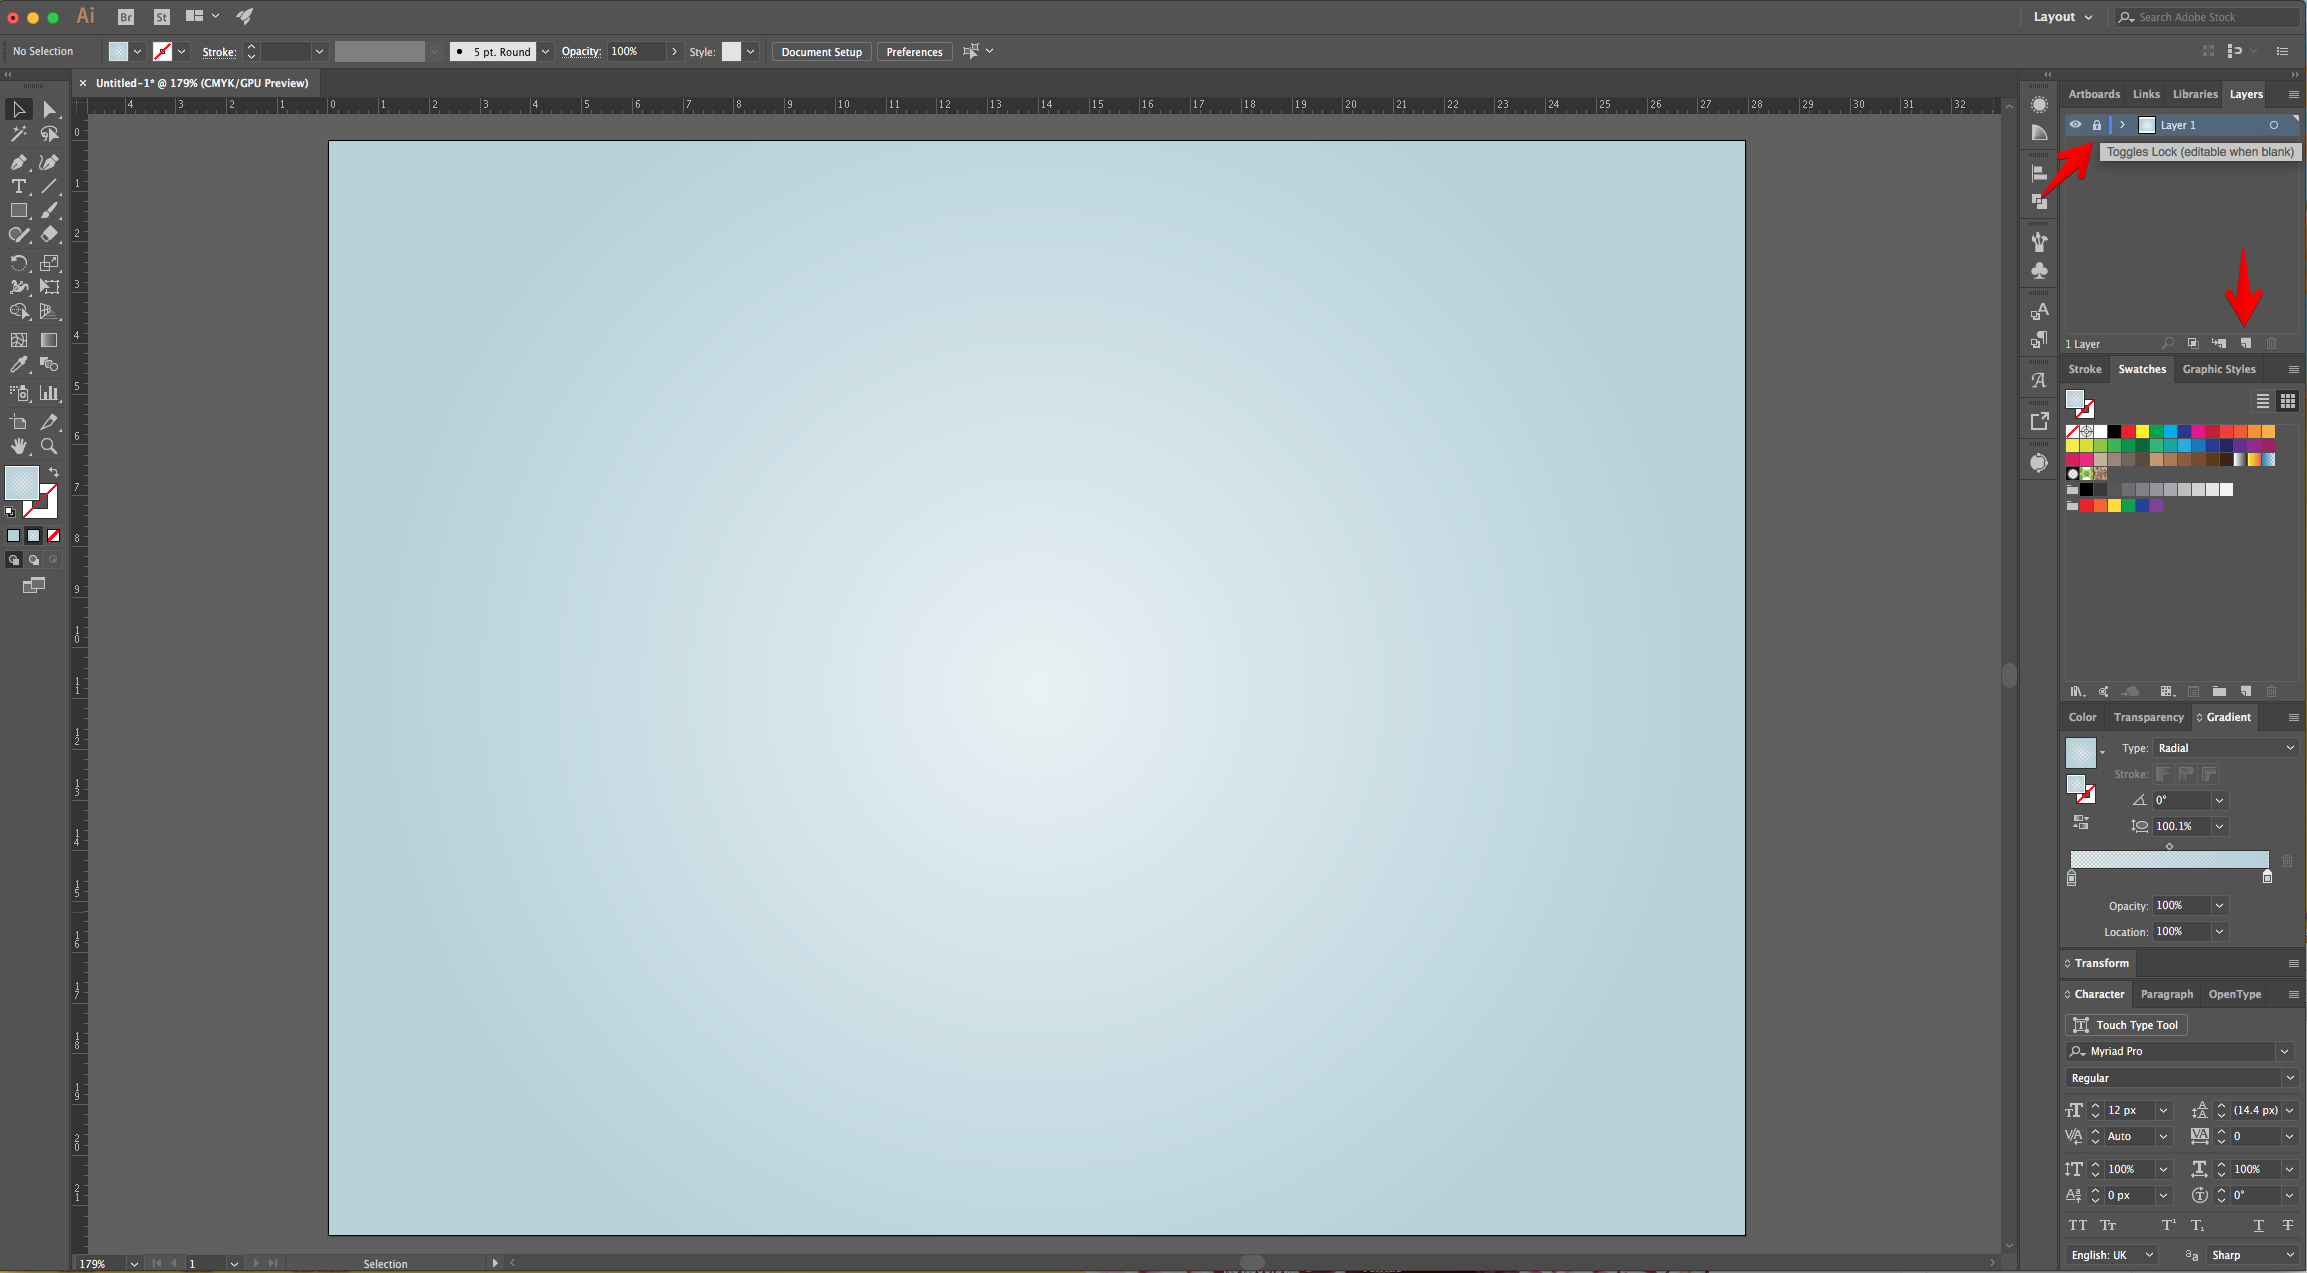
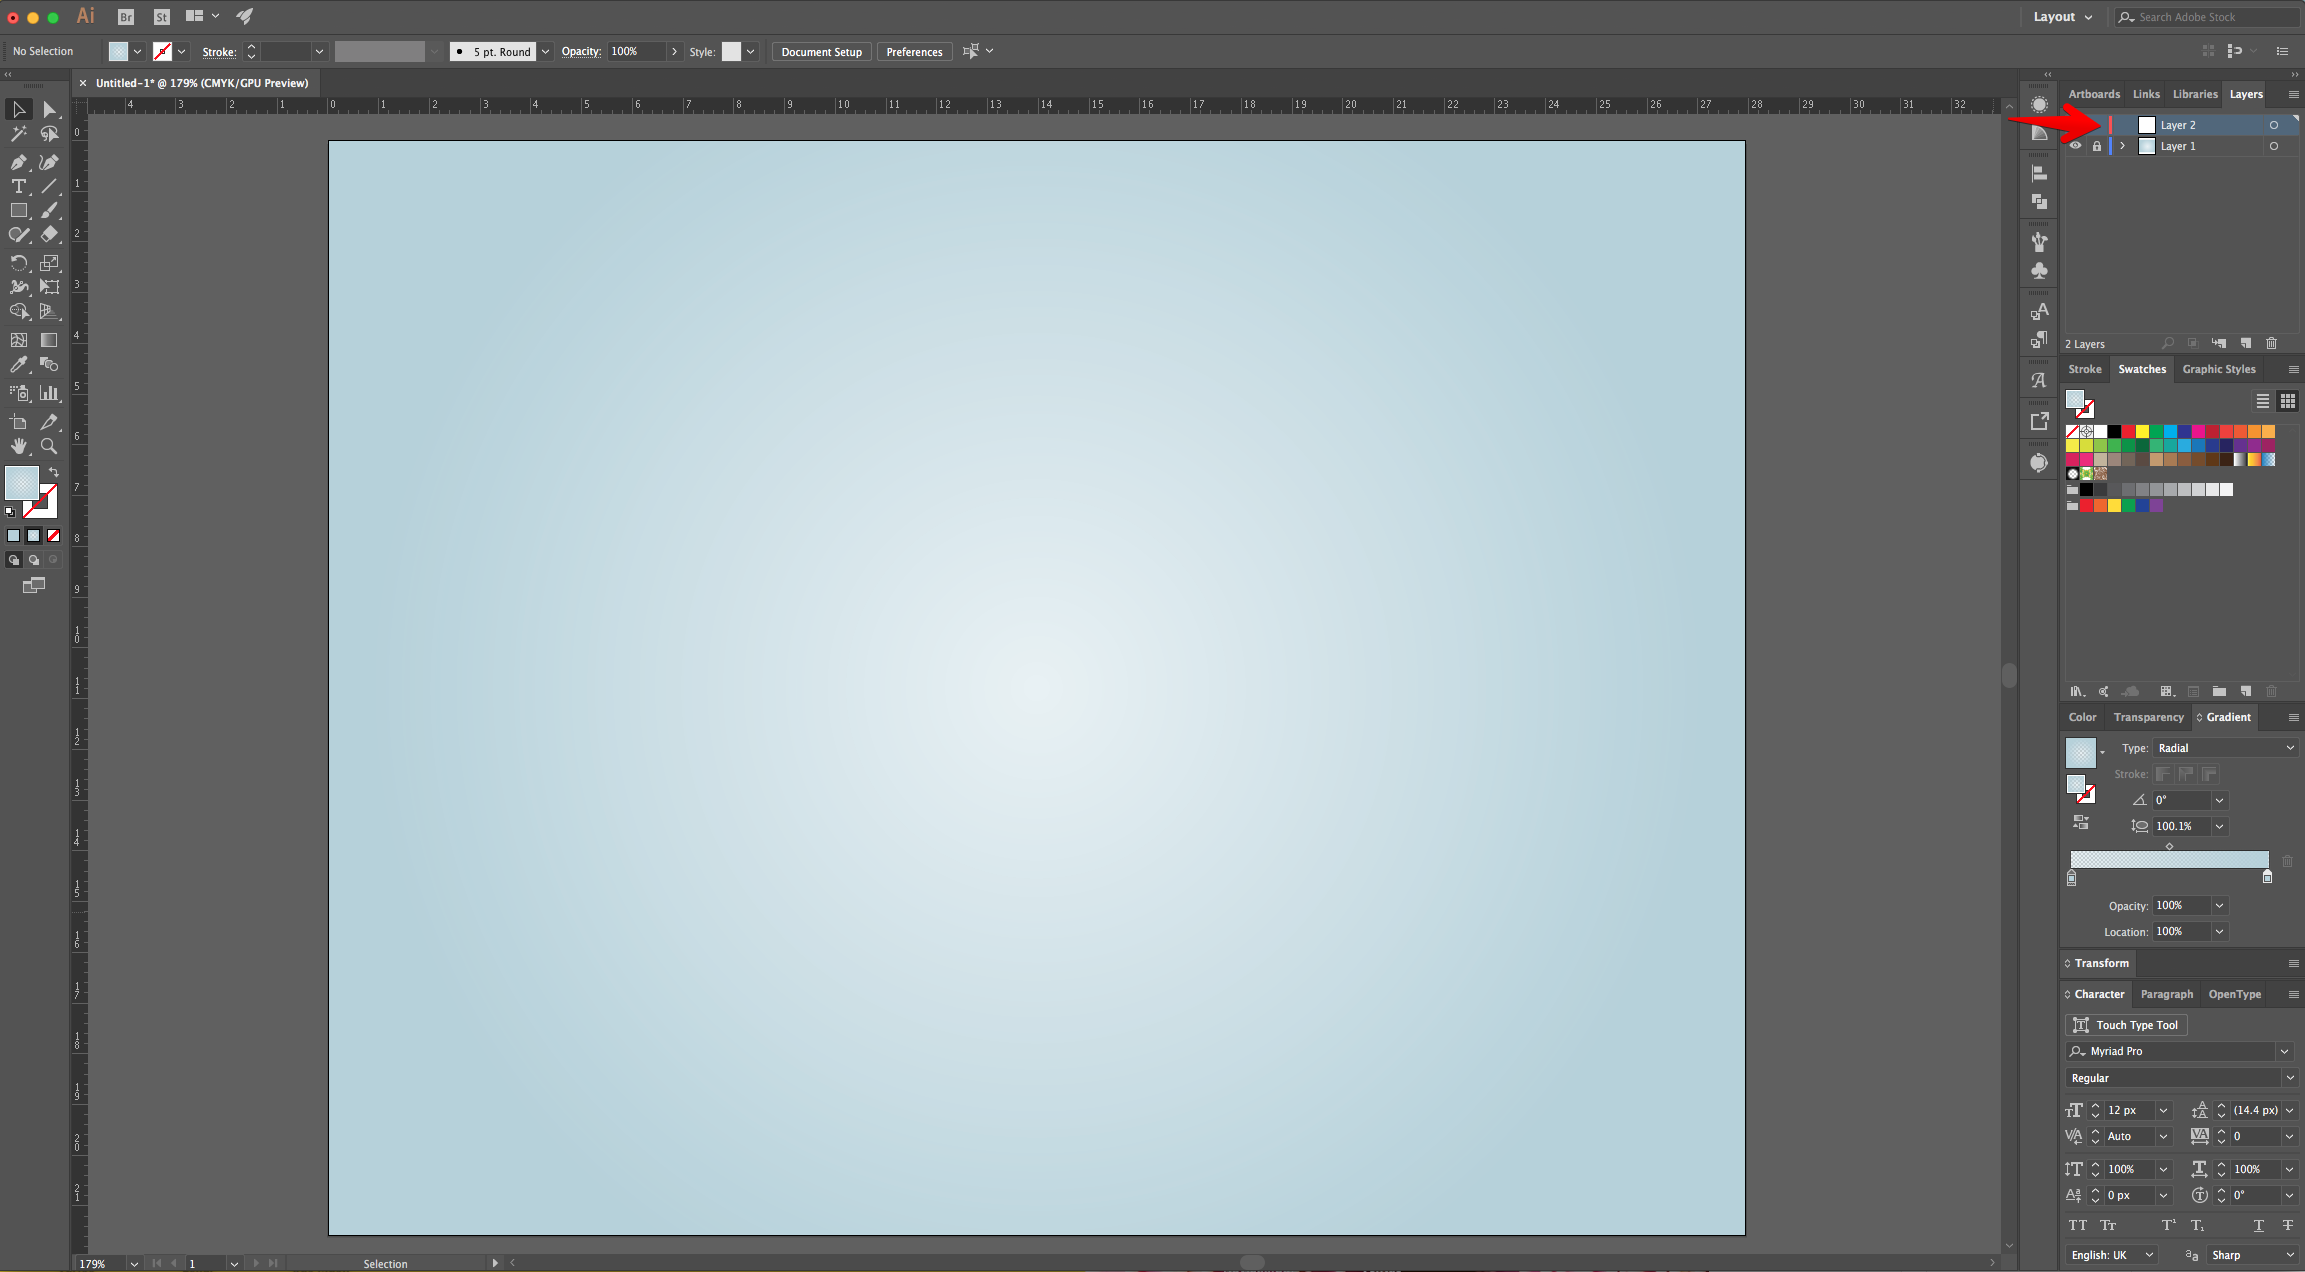
3 - “Lock” your Layer using the small “Padlock” icon on the left side of its Thumbnail and then create a “New Layer” by clicking on the small button at the bottom of the “Layers Panel”.
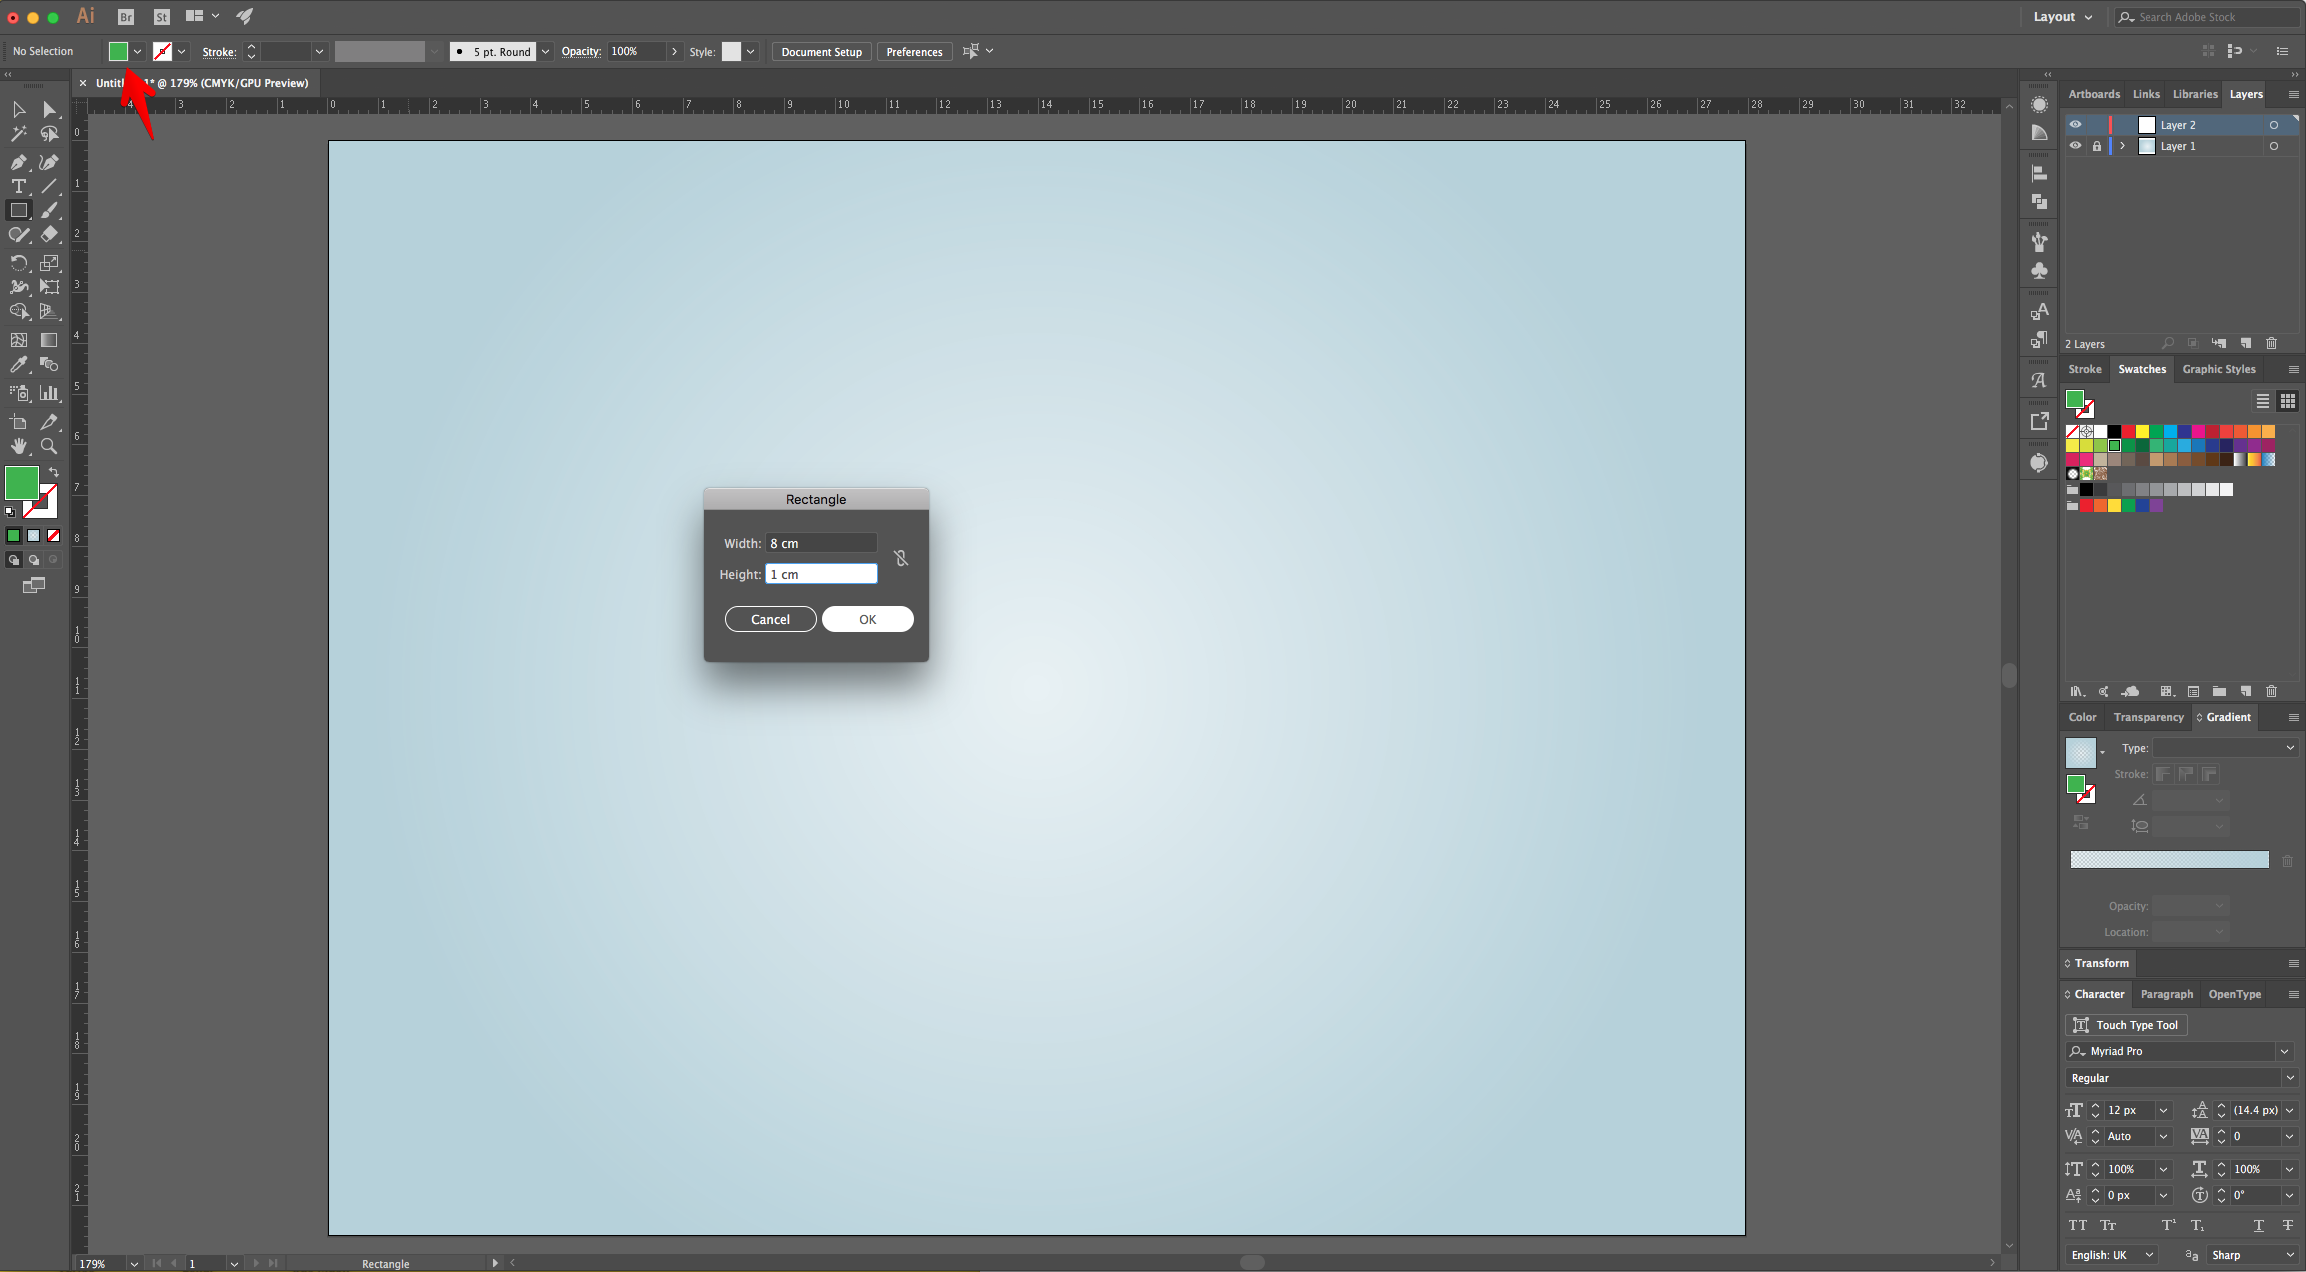
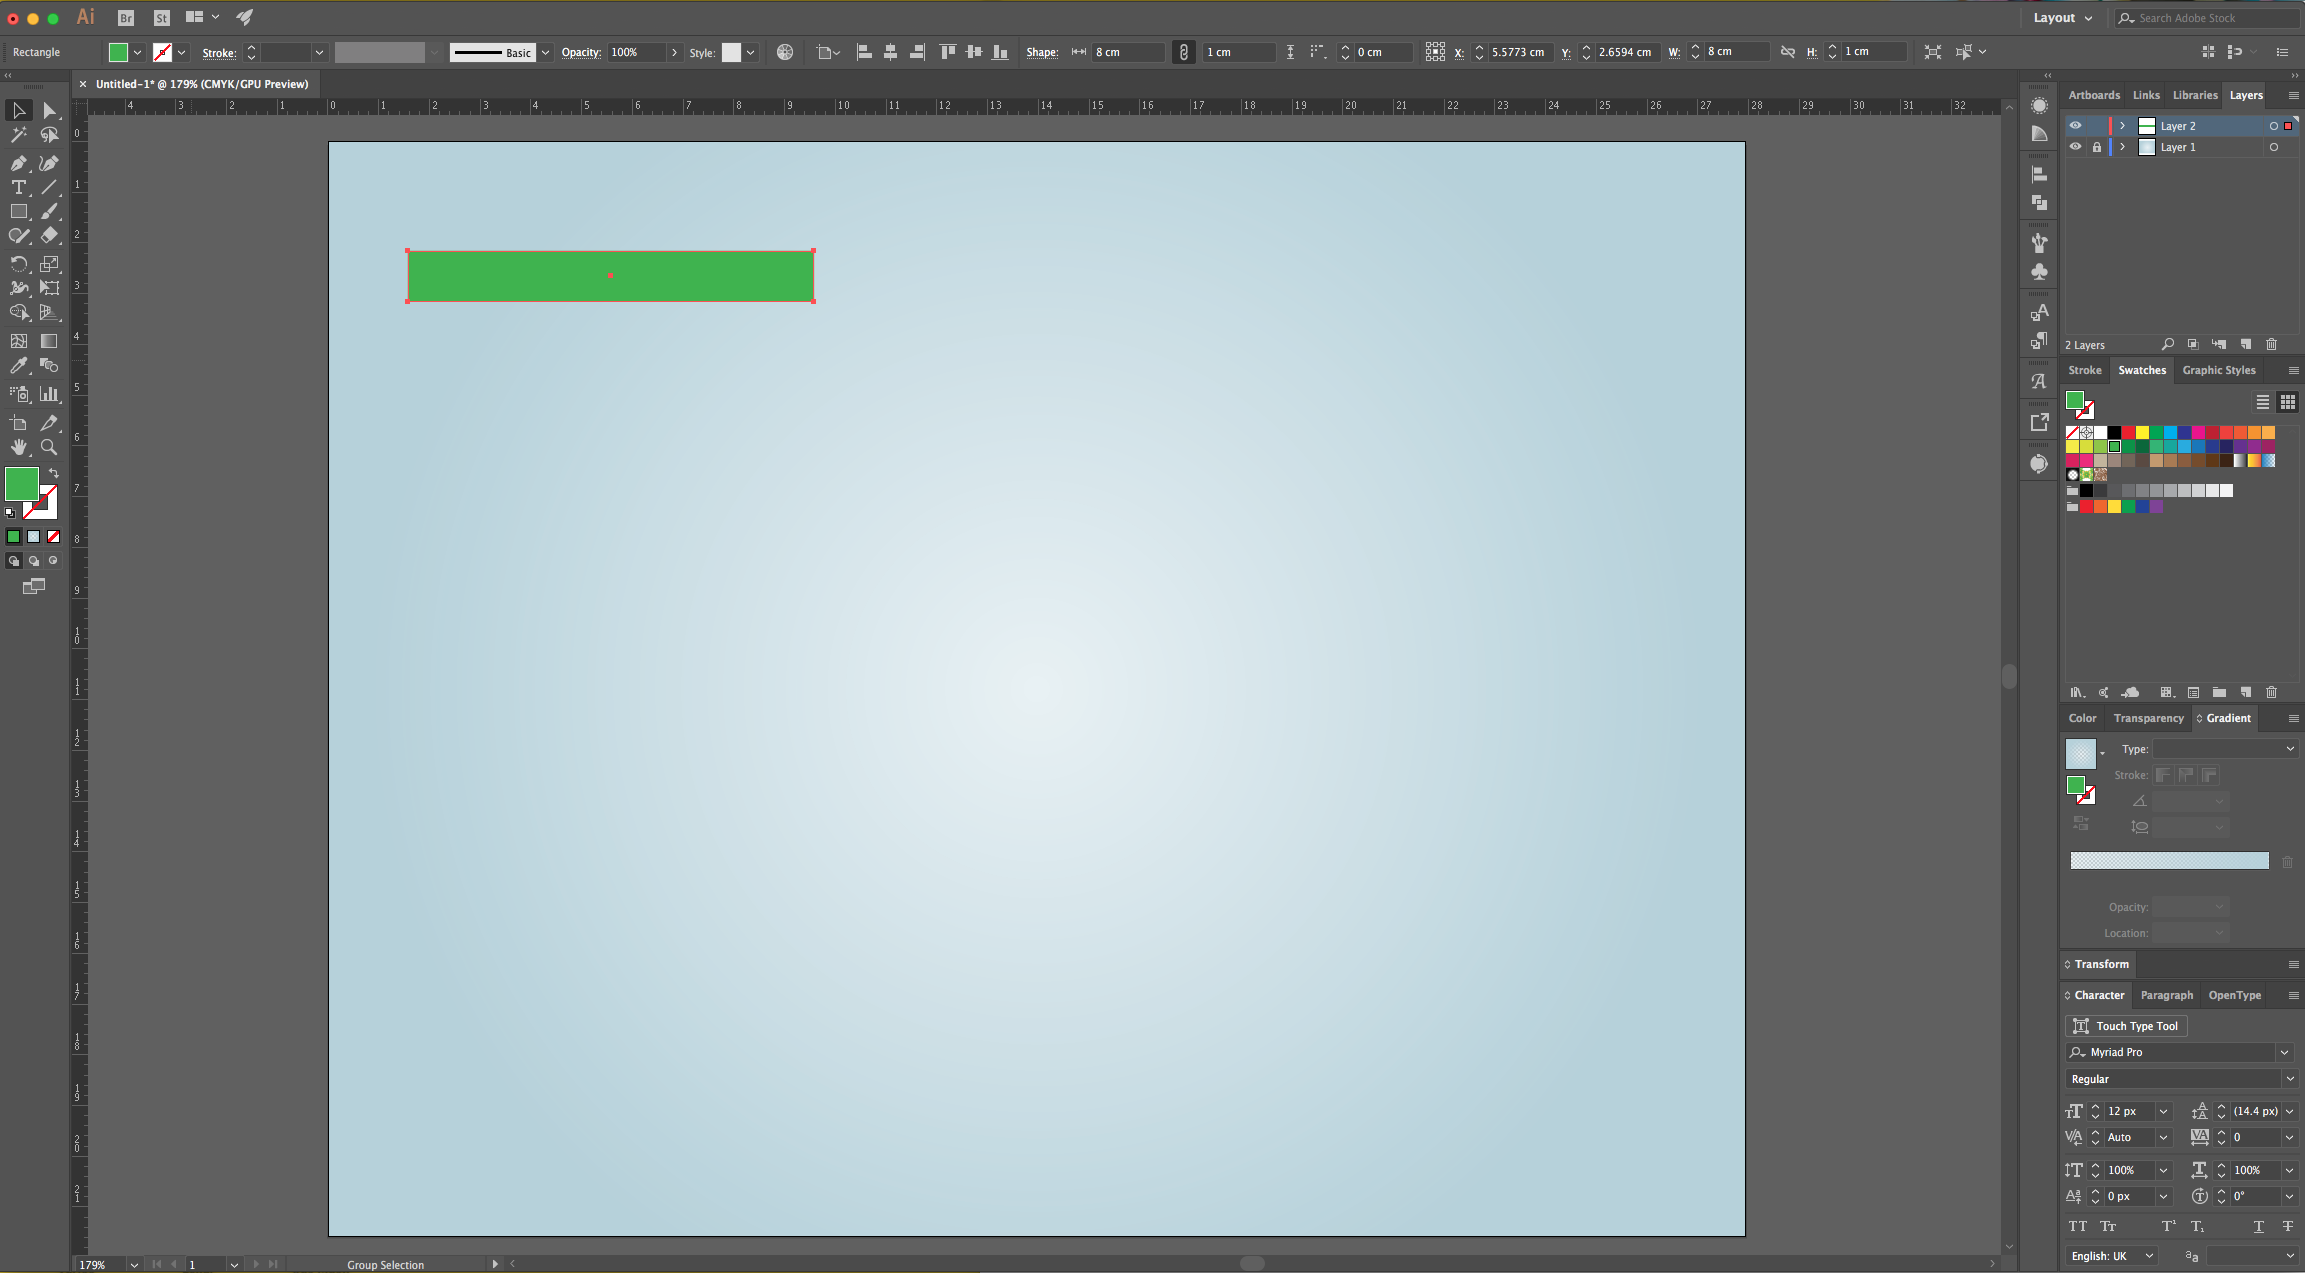
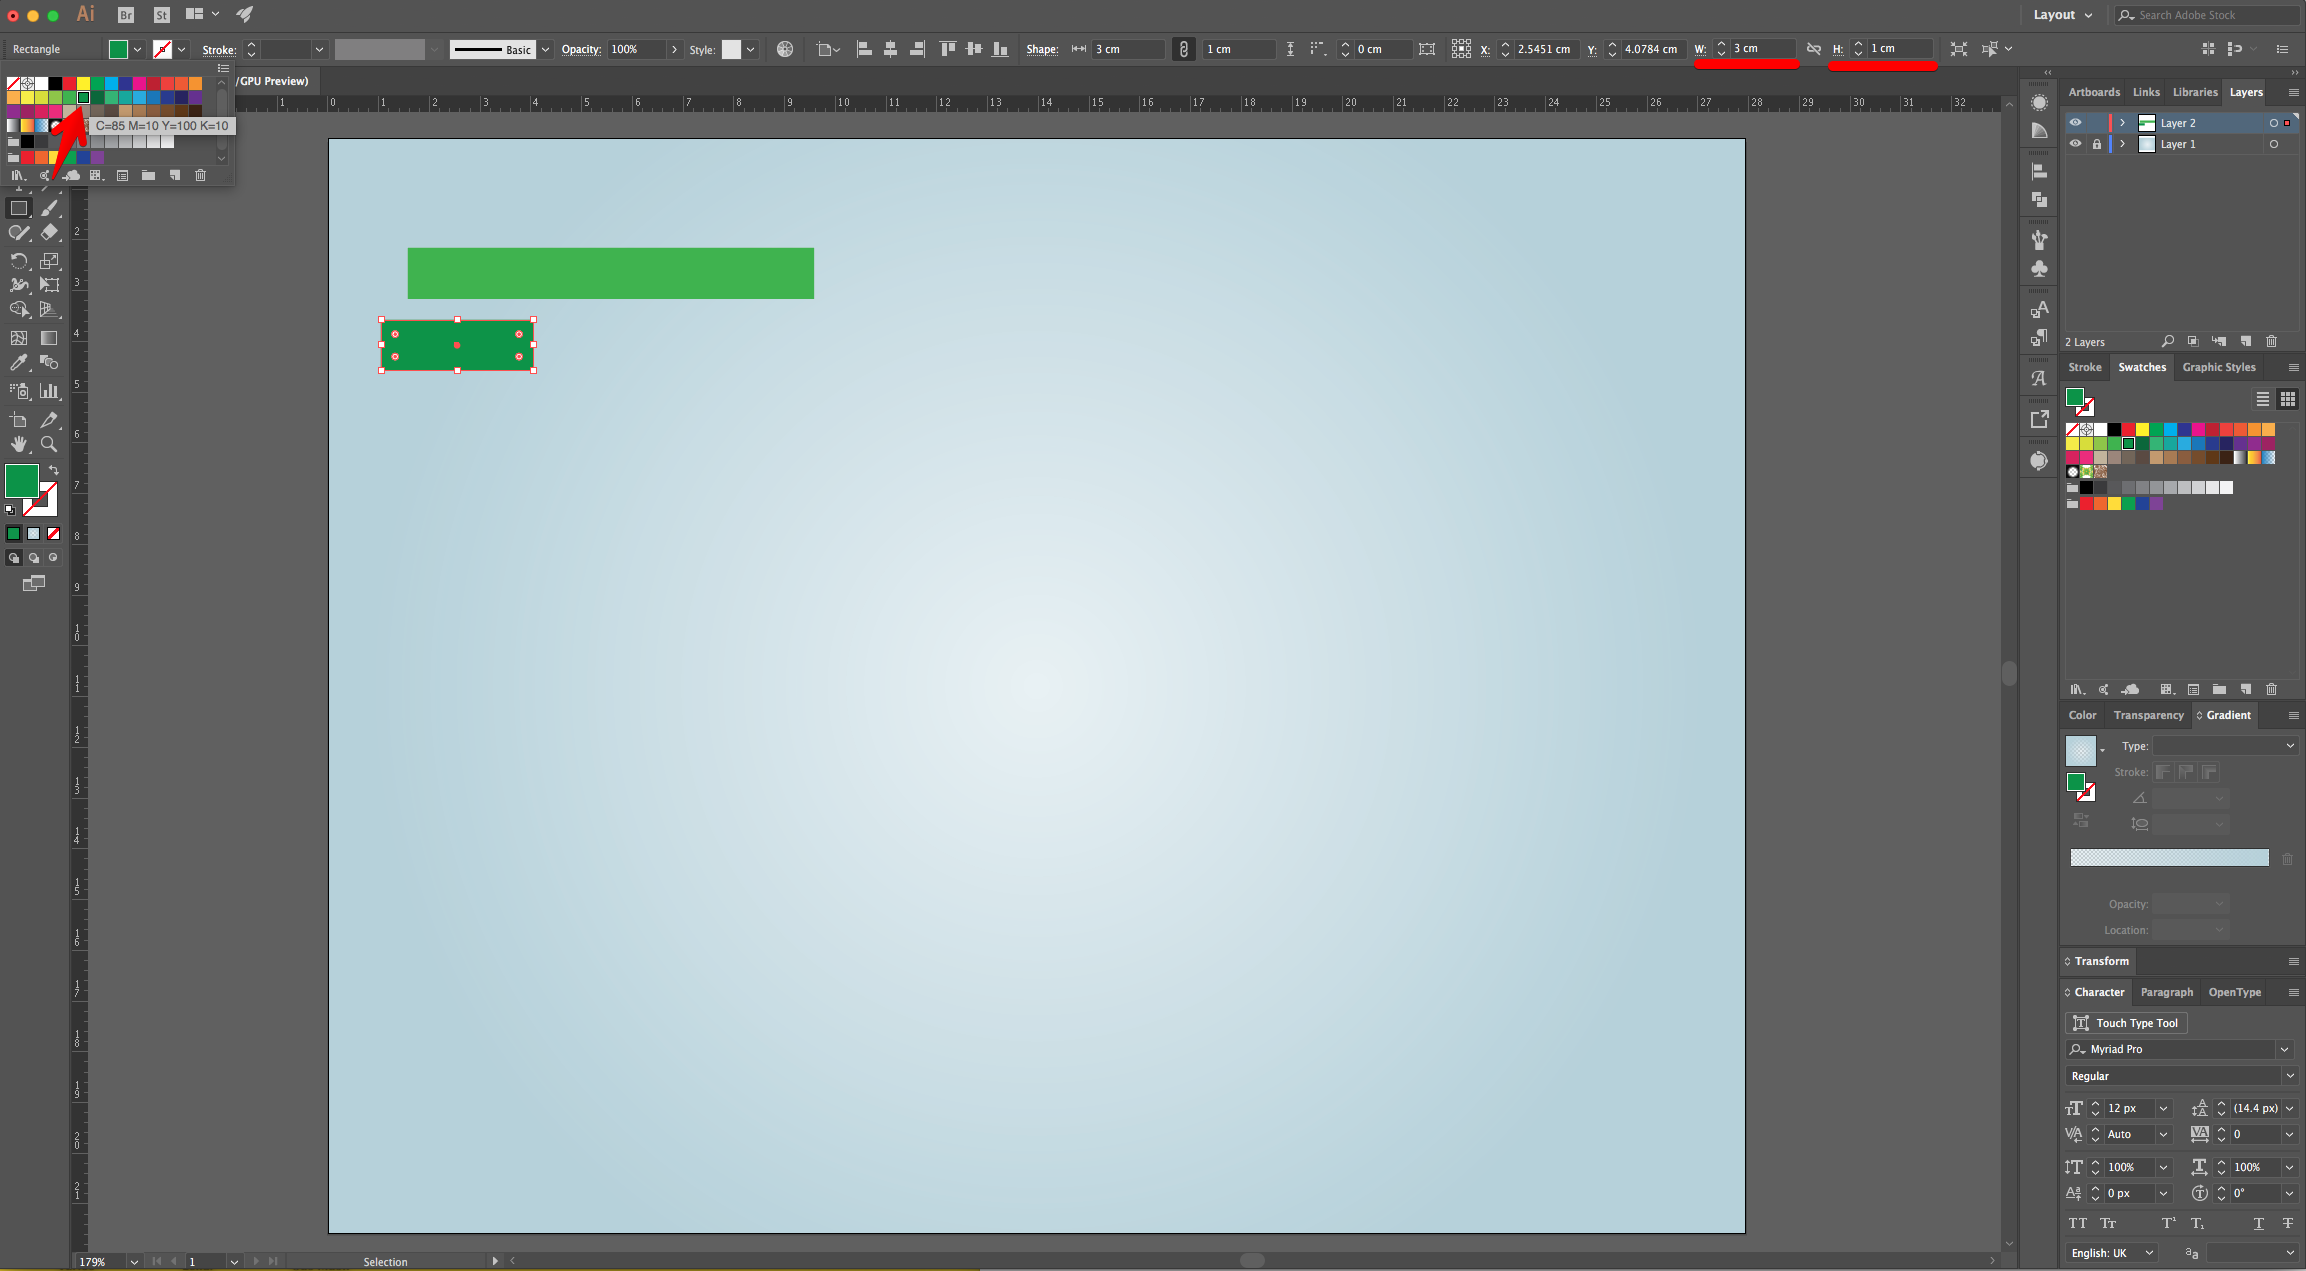
4 - Select the “Rectangle Tool” (M) again, click inside you Canvas and create a 8 cm (Width) by 1 cm (Height) “Rectangle”. Fill it with the color of your choice (we used a Medium Green from the “Swatches Panel”).

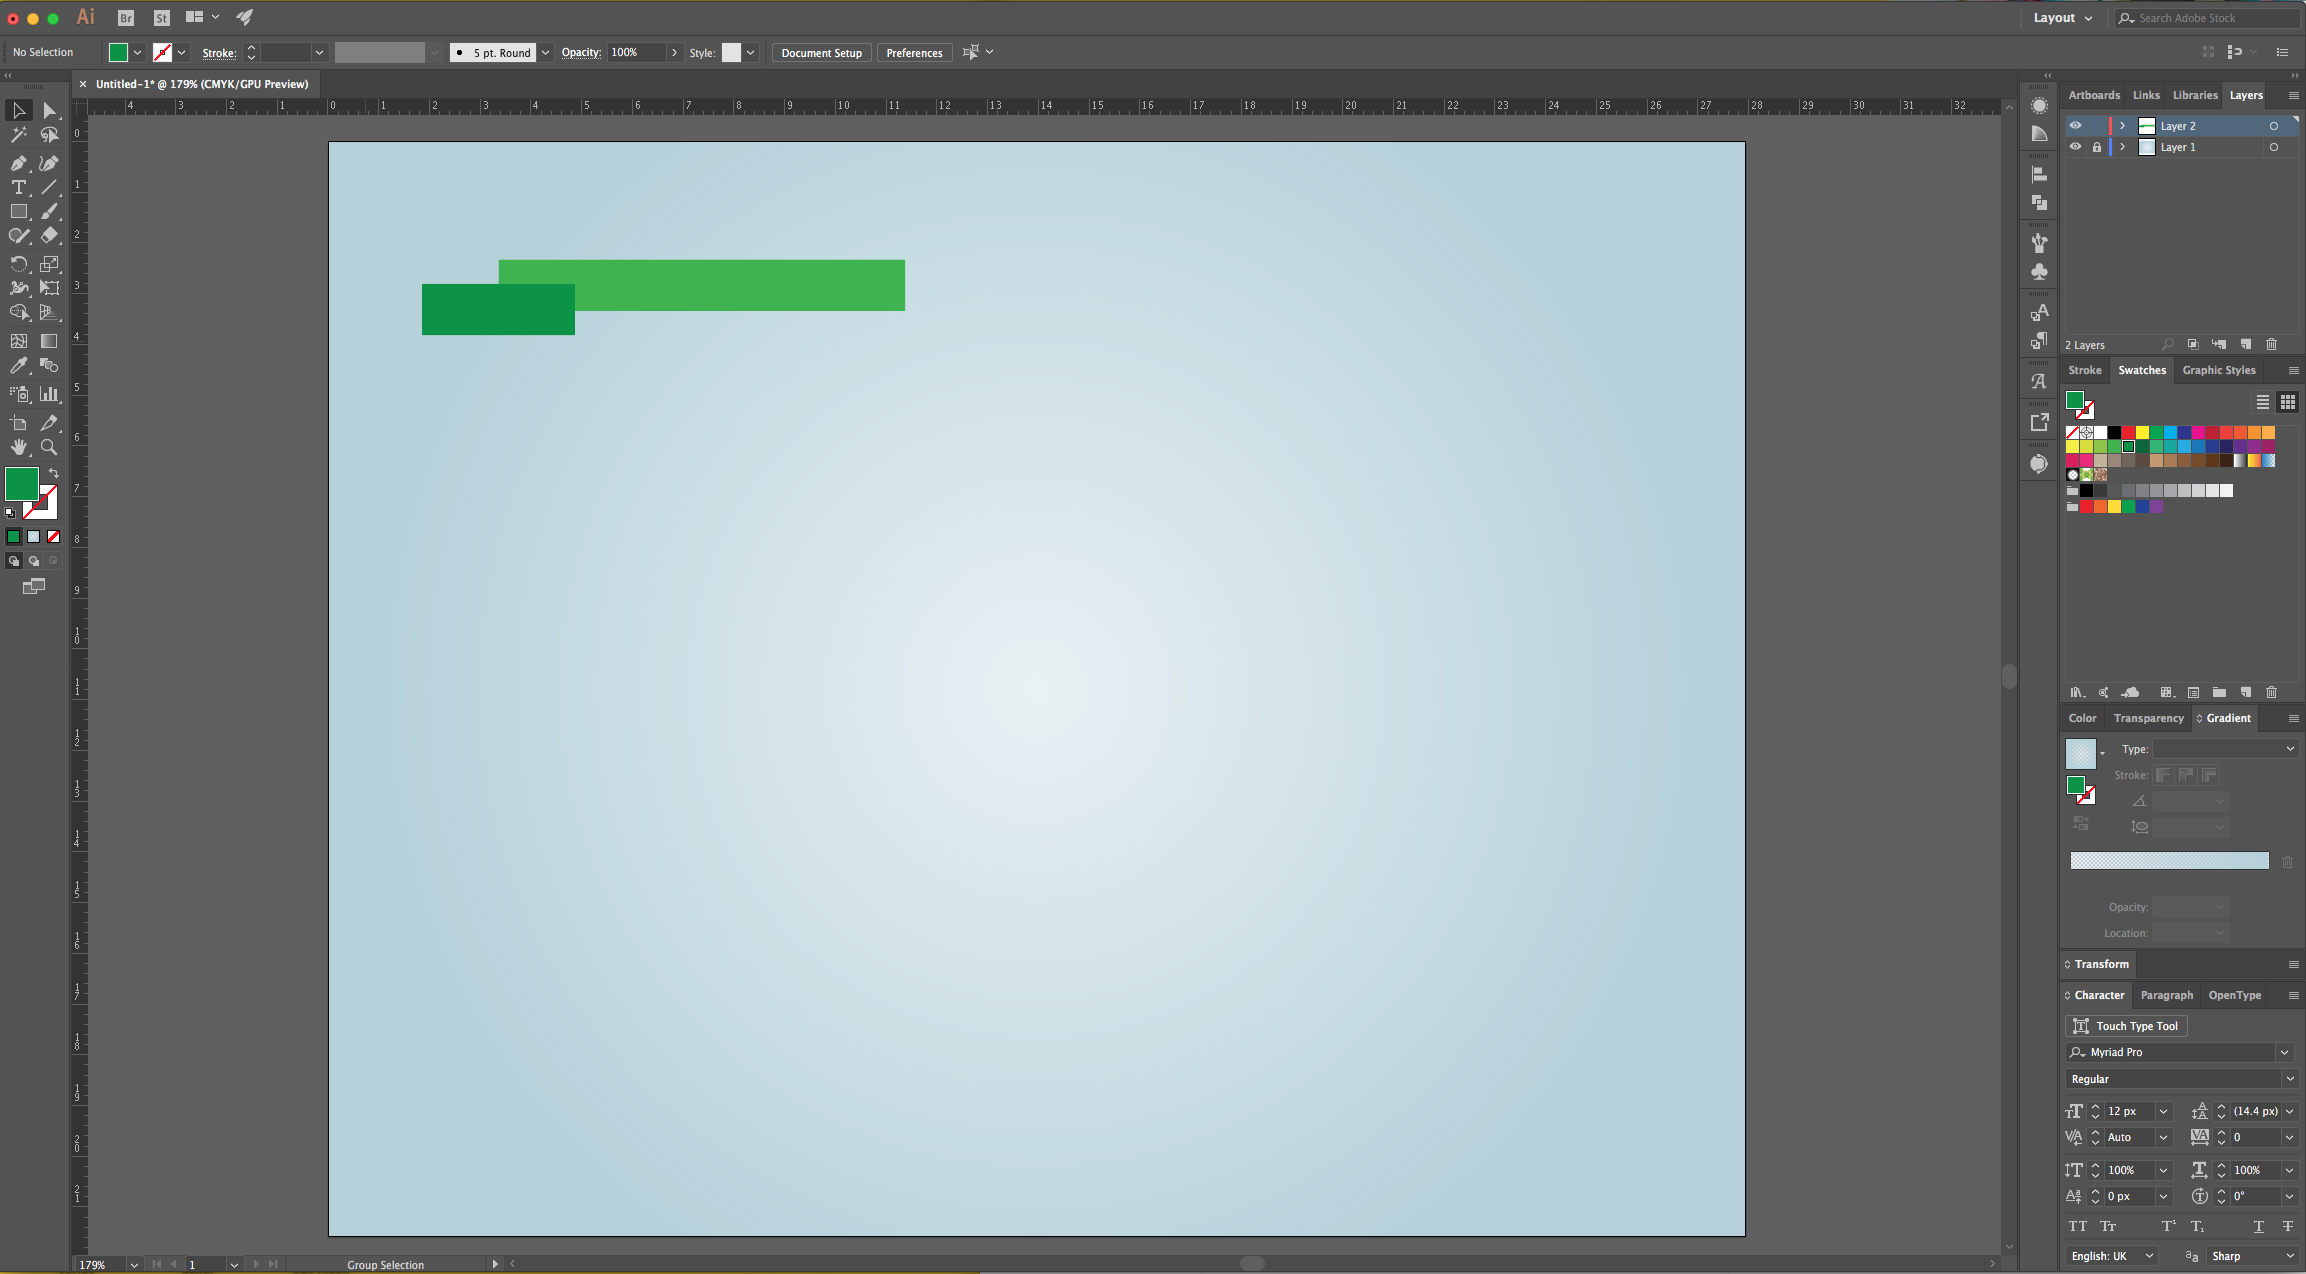
5 - Create another “Rectangle”. Make it the same “Height” (1 cm) but change the “Width” to 3 cm and fill it with a darker Green. Place it on top of the first “Rectangle” on the Bottom-Left. The Top-Center of the new one should coincide with the Center-Left of the bottom one.
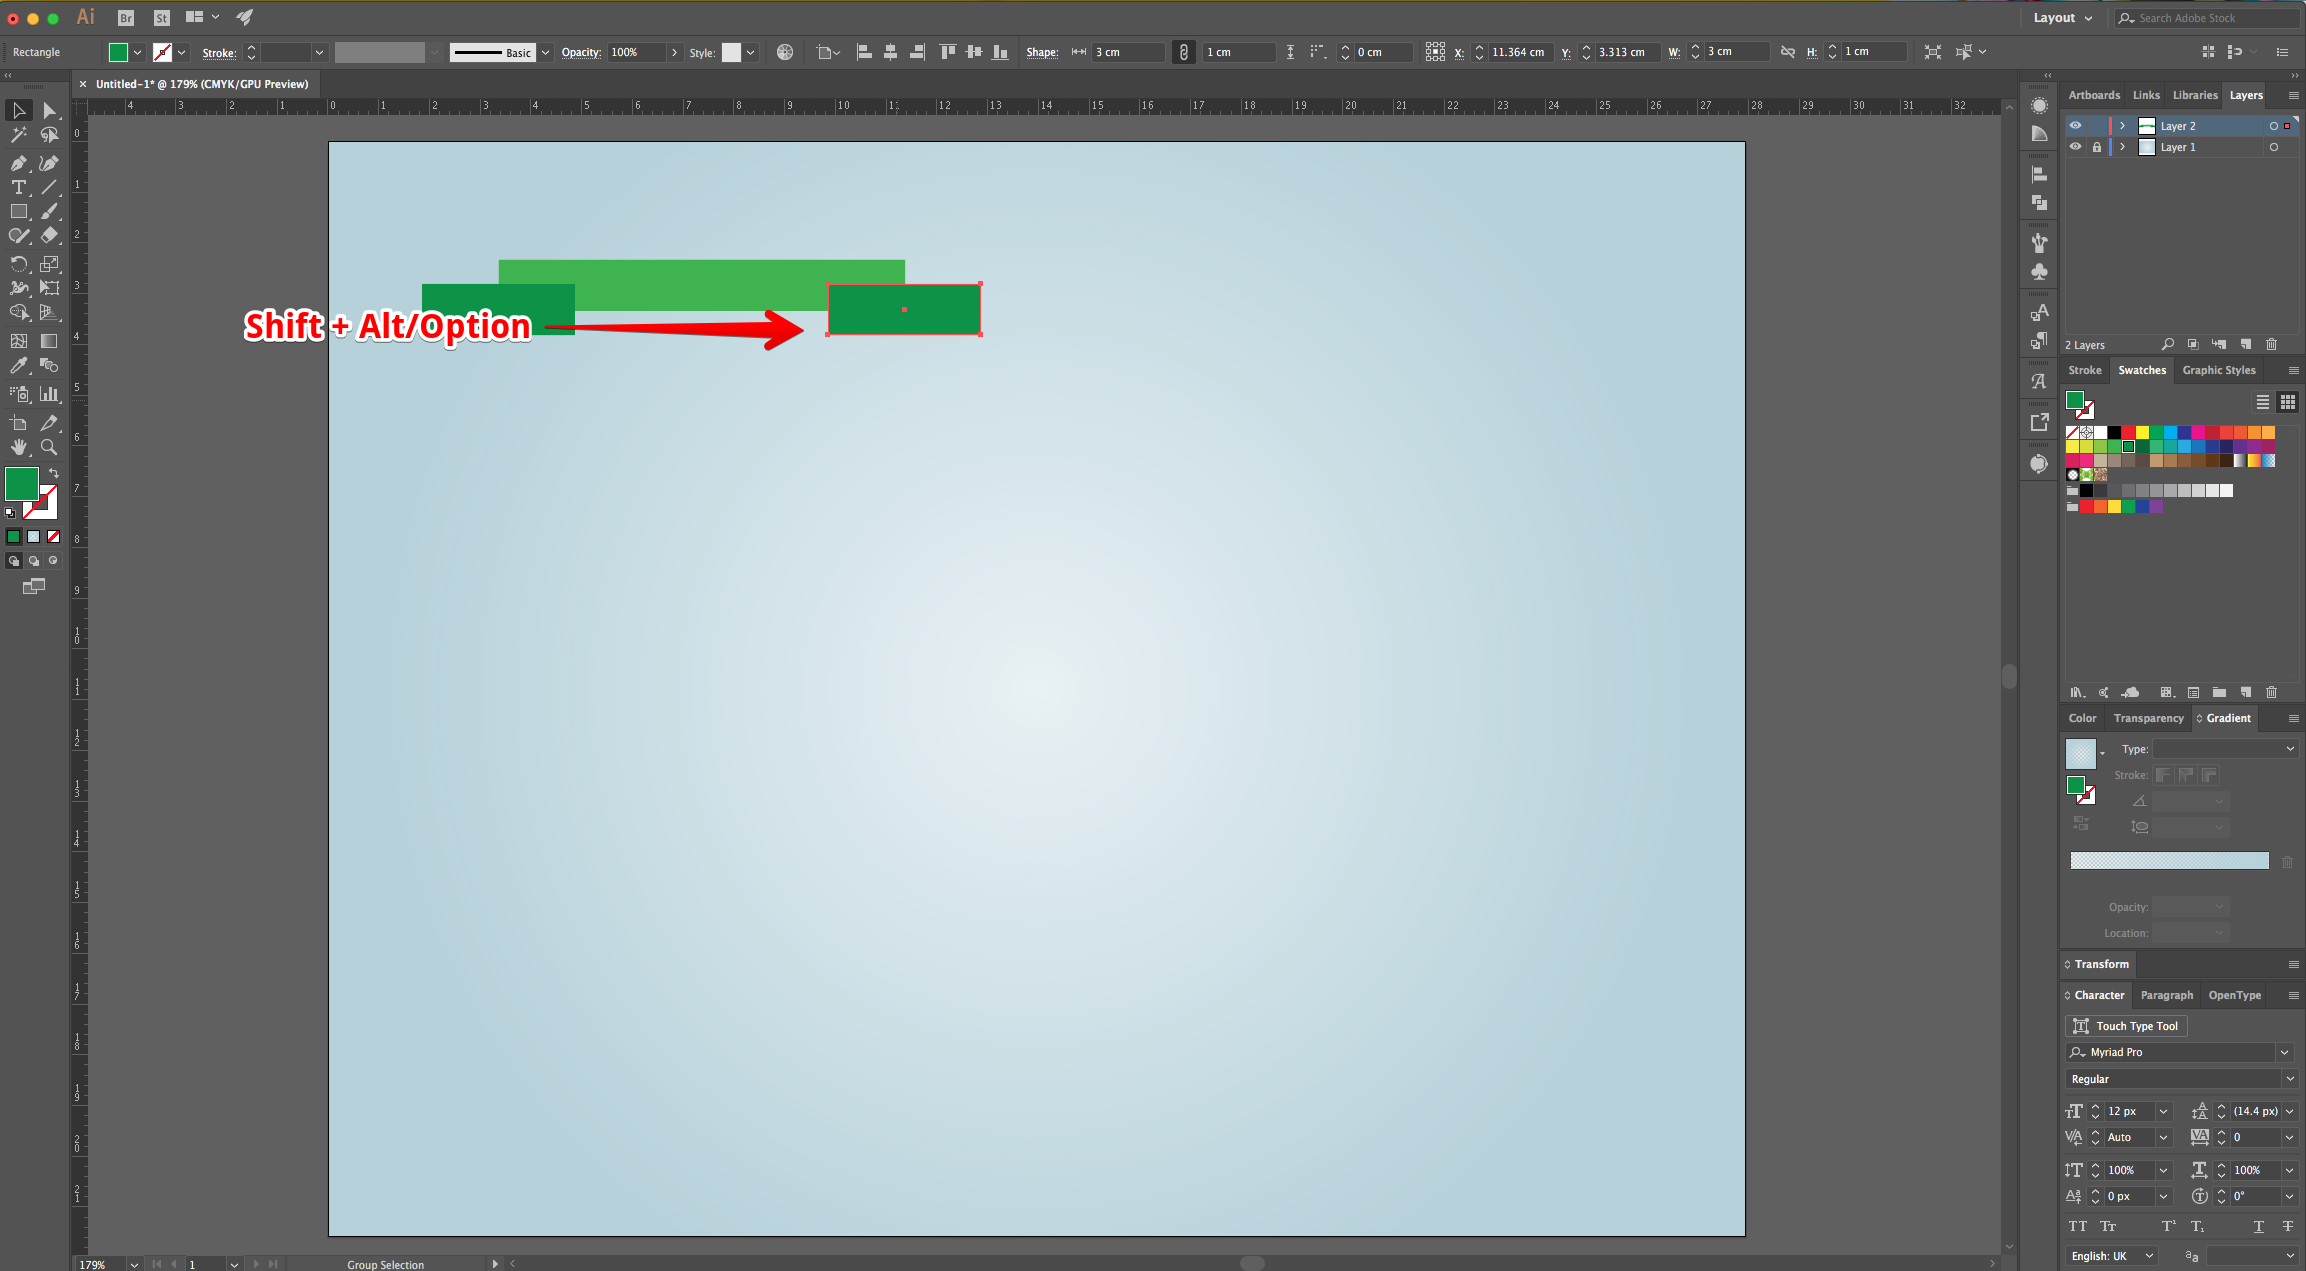
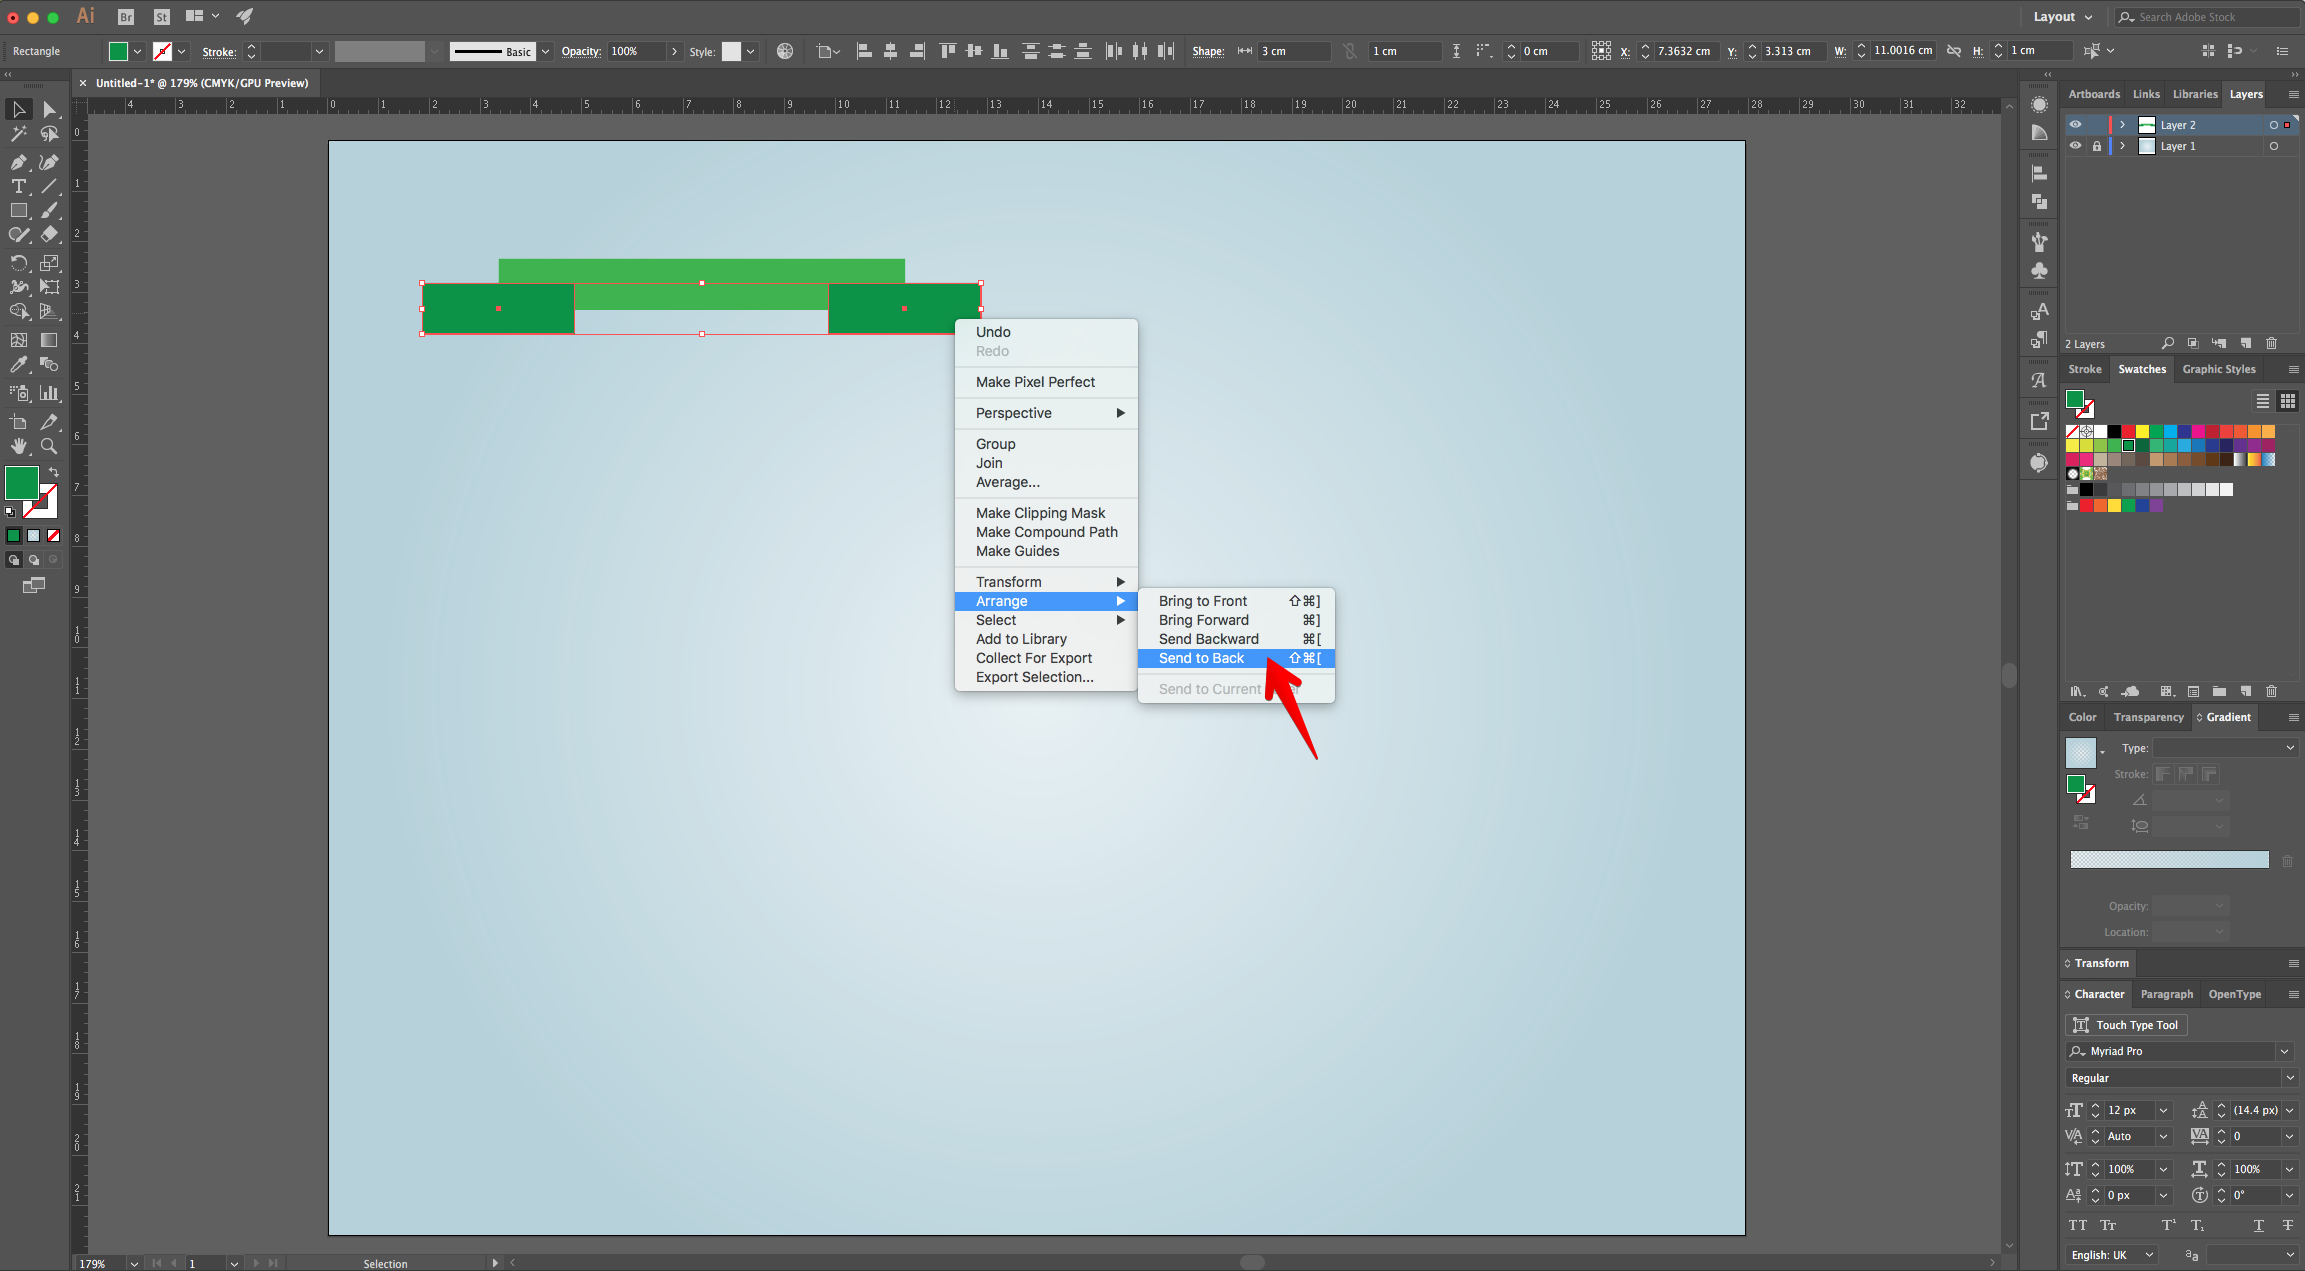
6 - Shift + Alt/Option click on the small “Rectangle” while dragging to the Right to “Duplicate” it and place it in the same position but on the Left side of the original “Rectangle”. With the two small ones selected, right-click on top and choose Arrange > Send to Back.
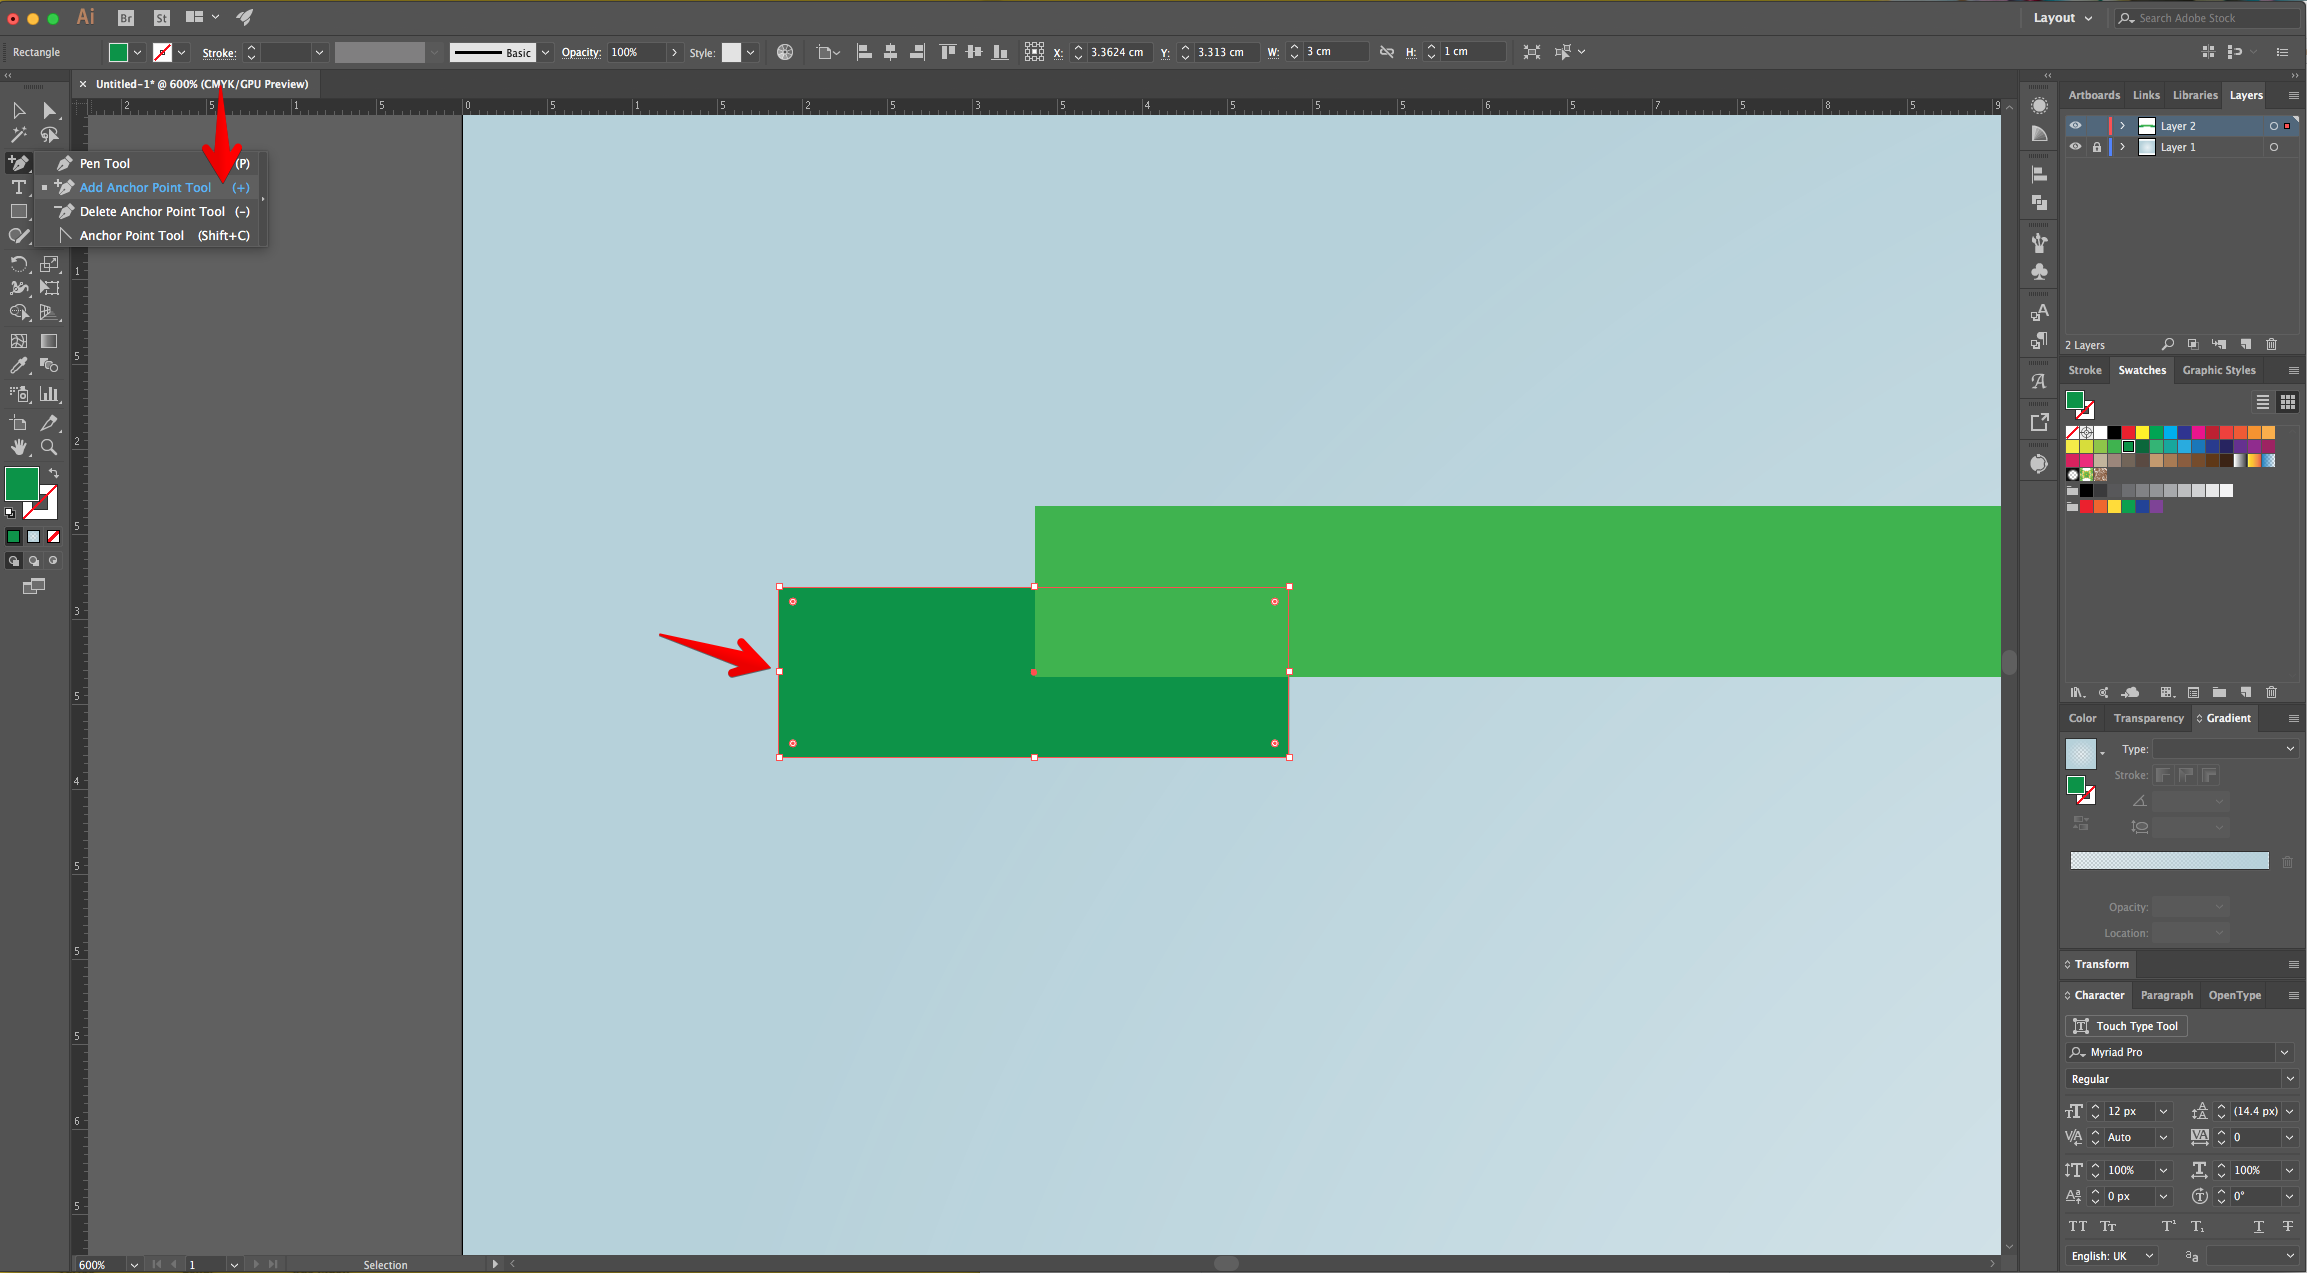
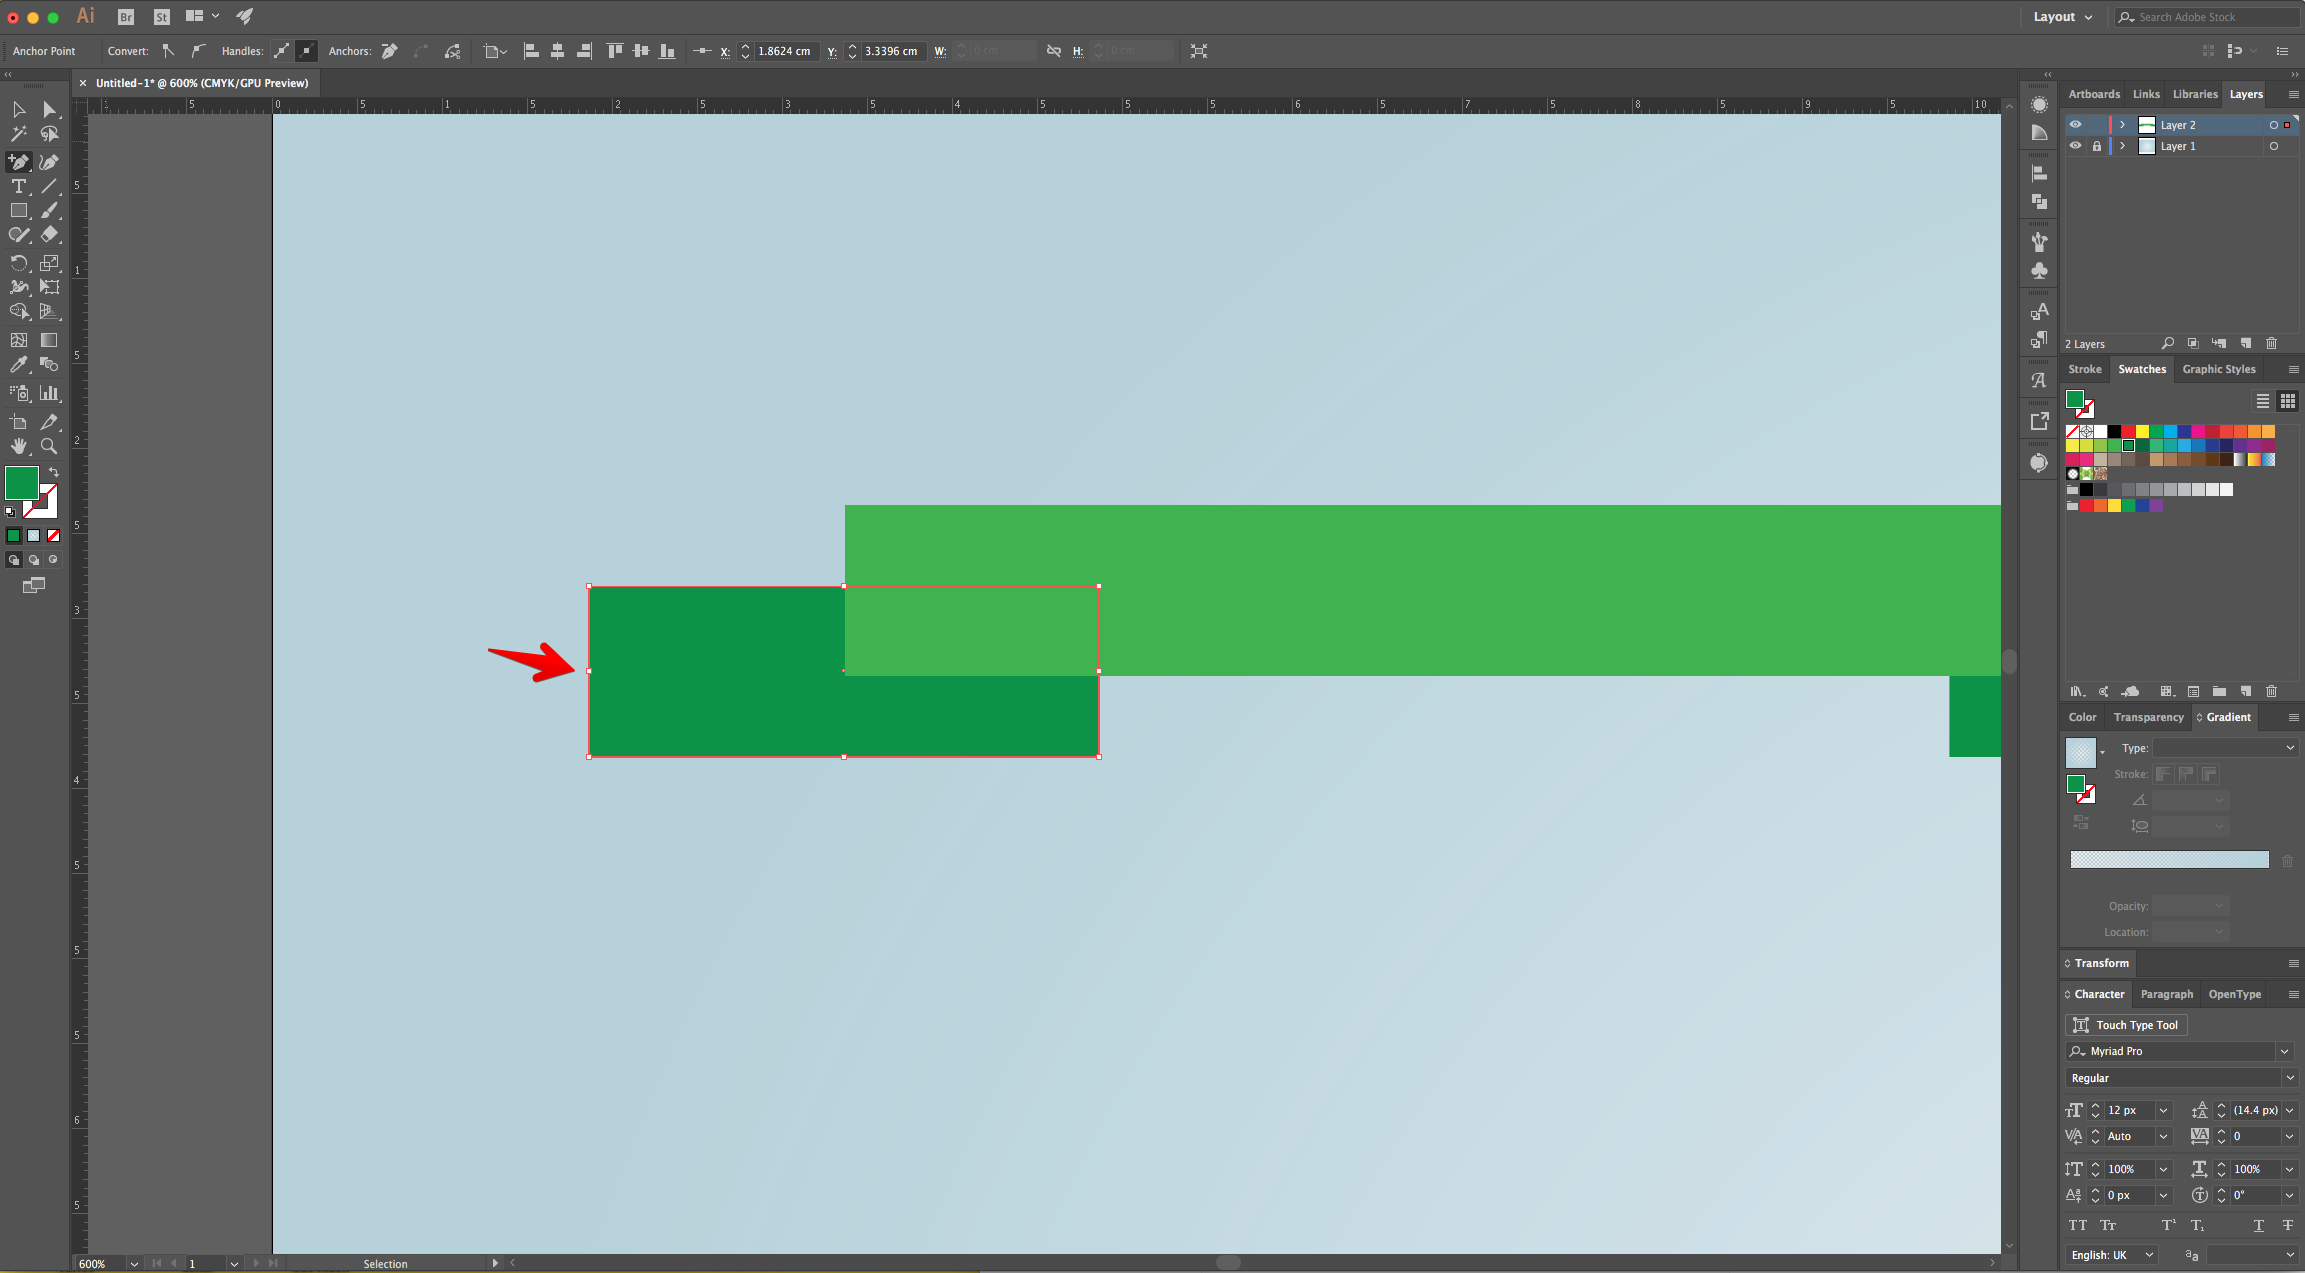
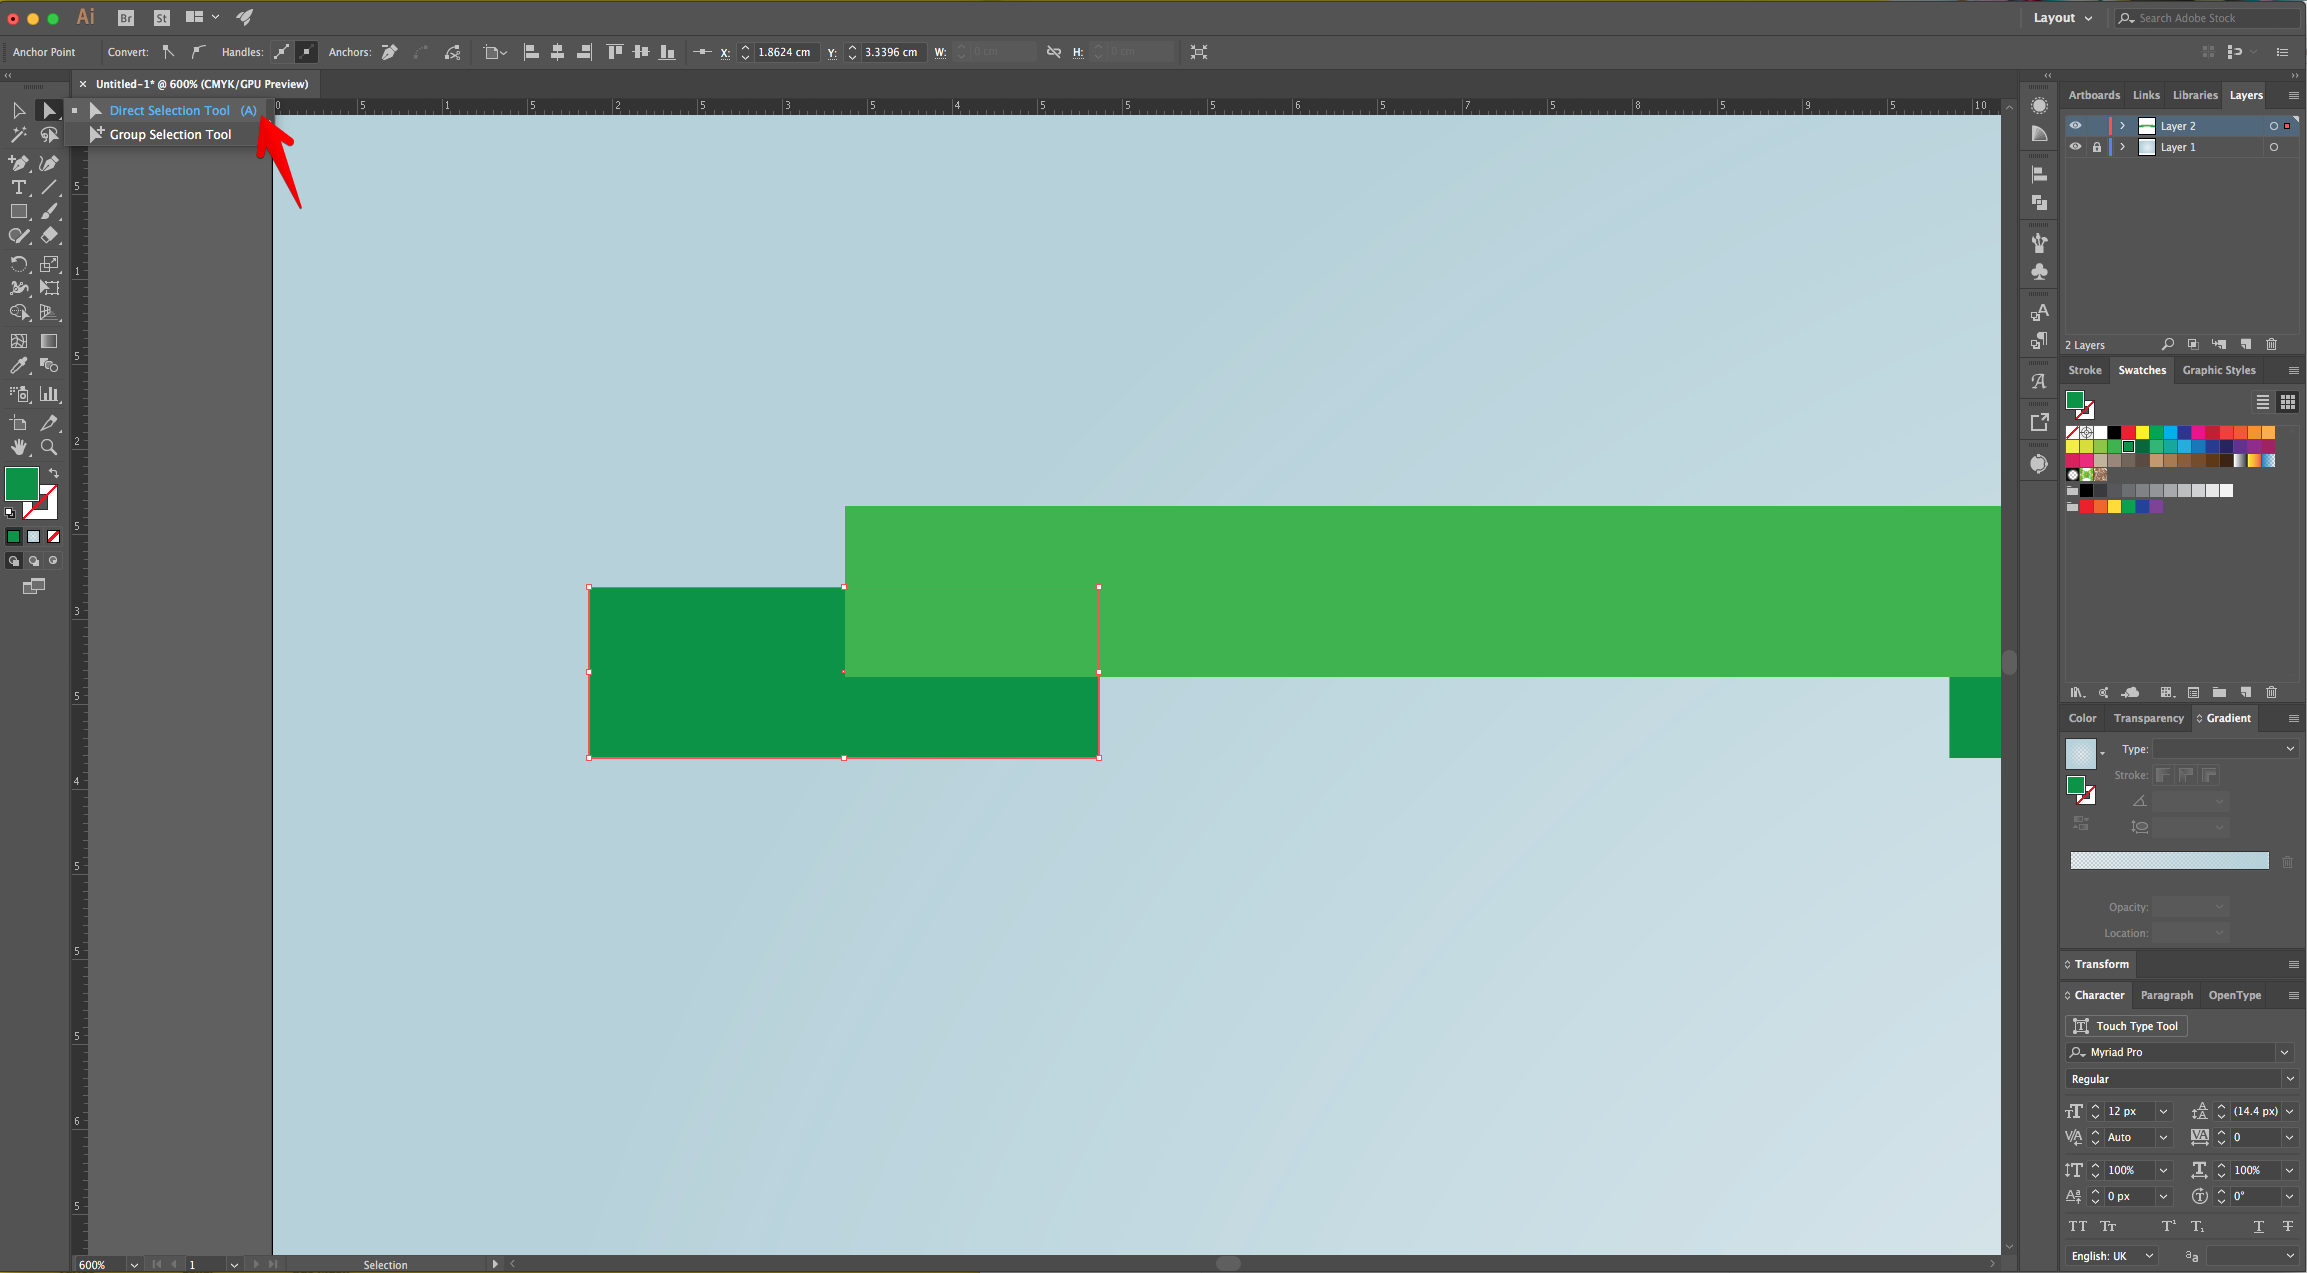
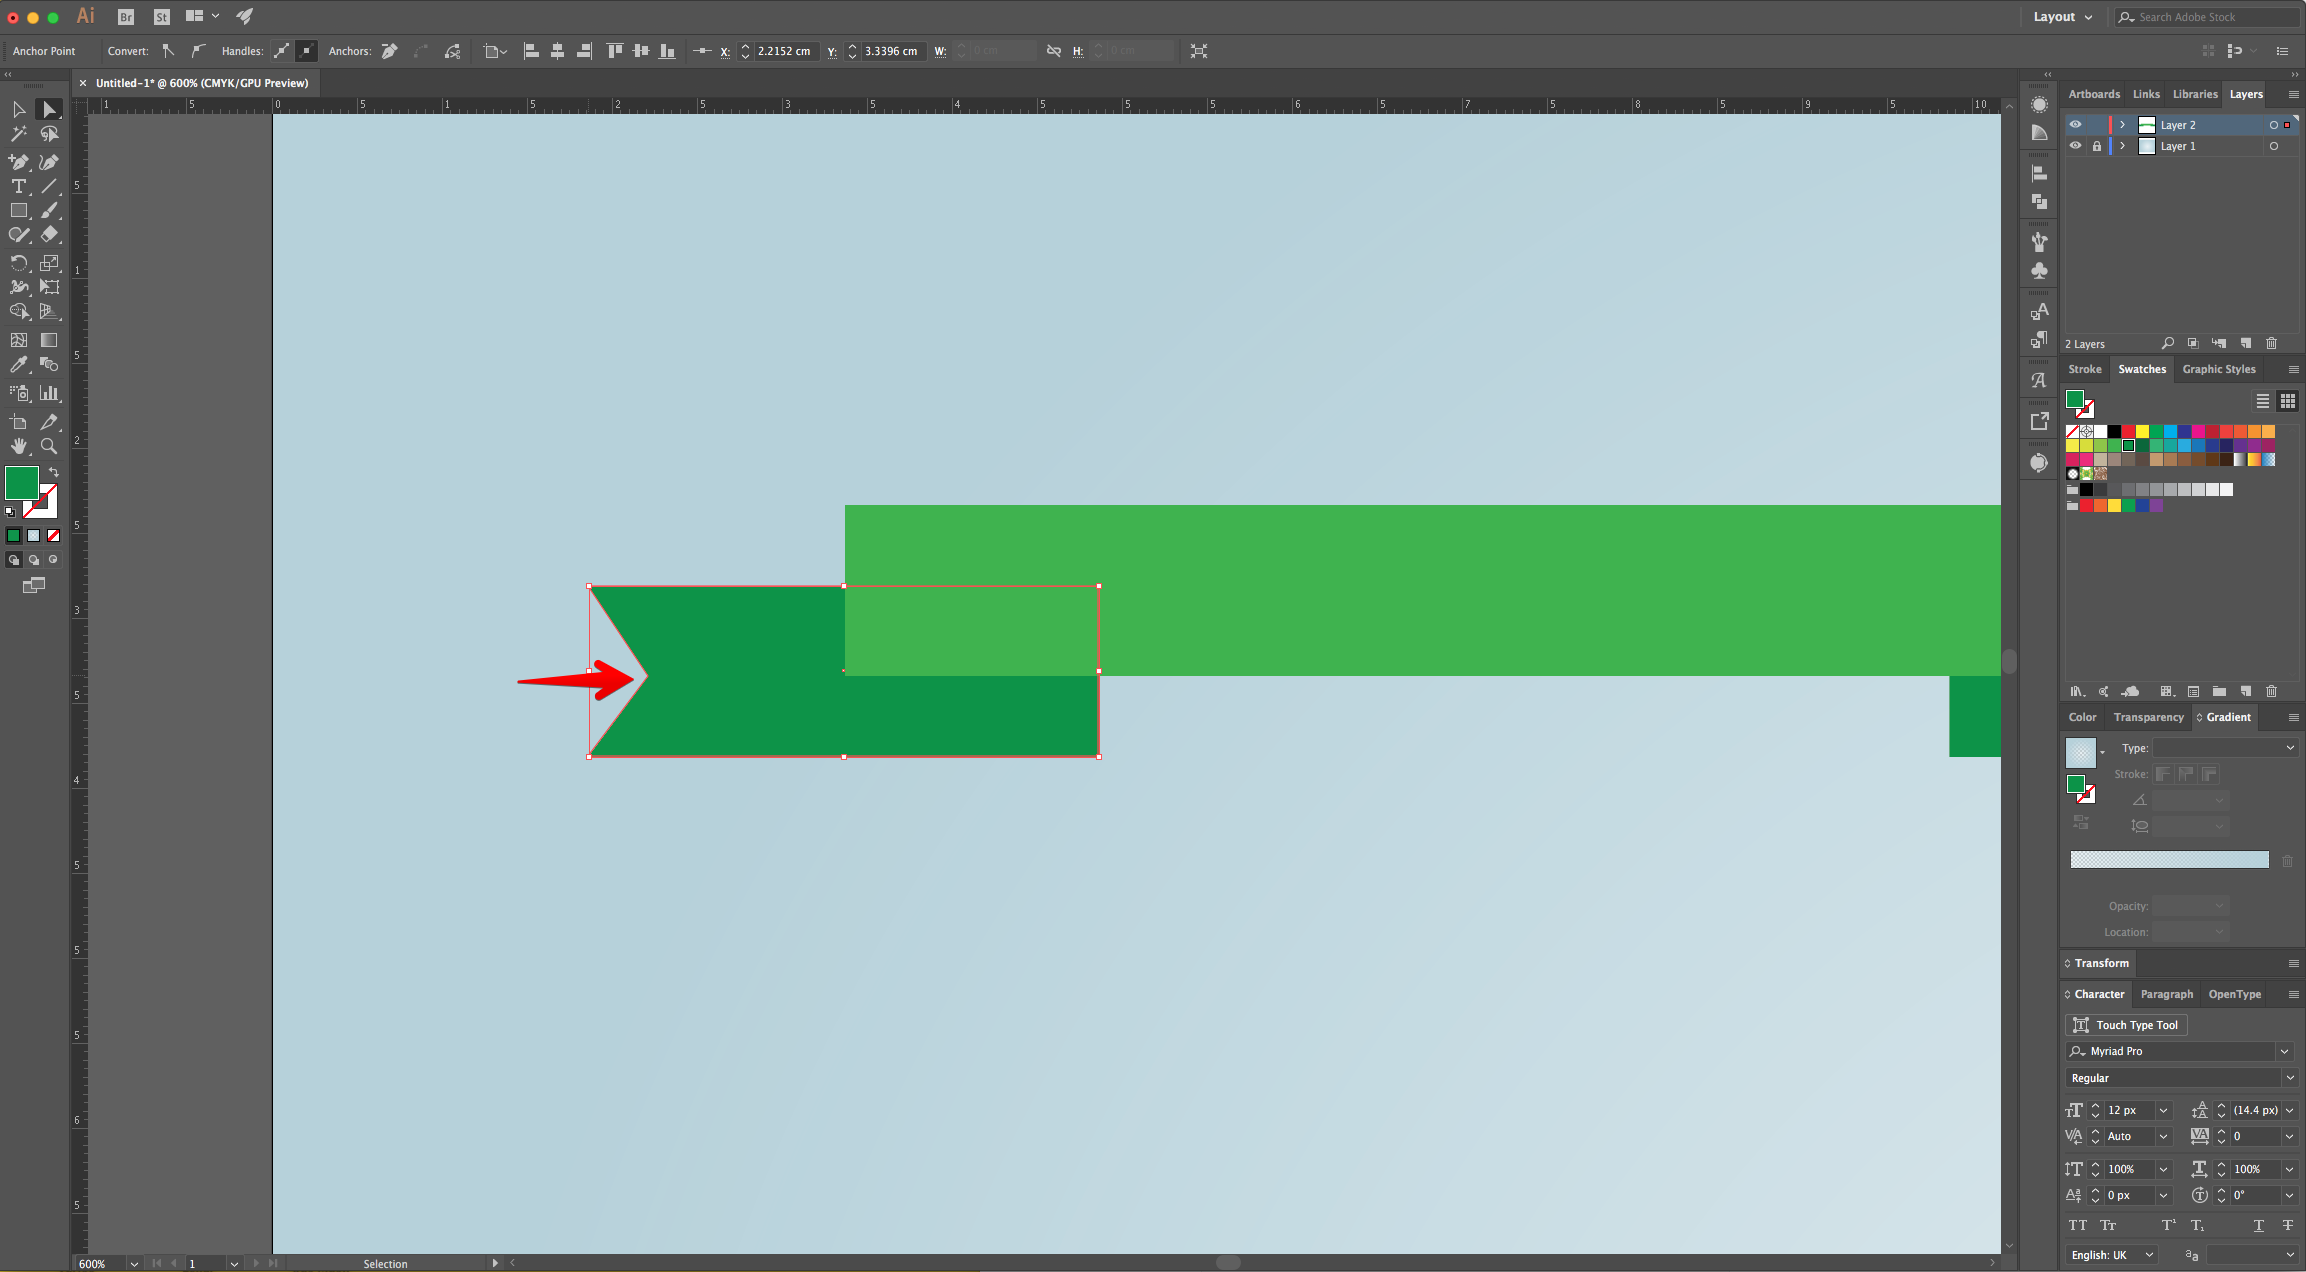
7 - Zoom in to the small “Rectangle” on the Left, select the “Add Anchor Point Tool” (+) and click in the Center-Left to create an “Anchor Point”. Use the “Direct Selection Tool” (A) to select the new “Anchor Point” and use the “Arrow” keys to move it a few click to the Right. Repeat with the small “Rectangle” on the Right (add the new “Anchor Point” on the Center-Right and move it to the Left).

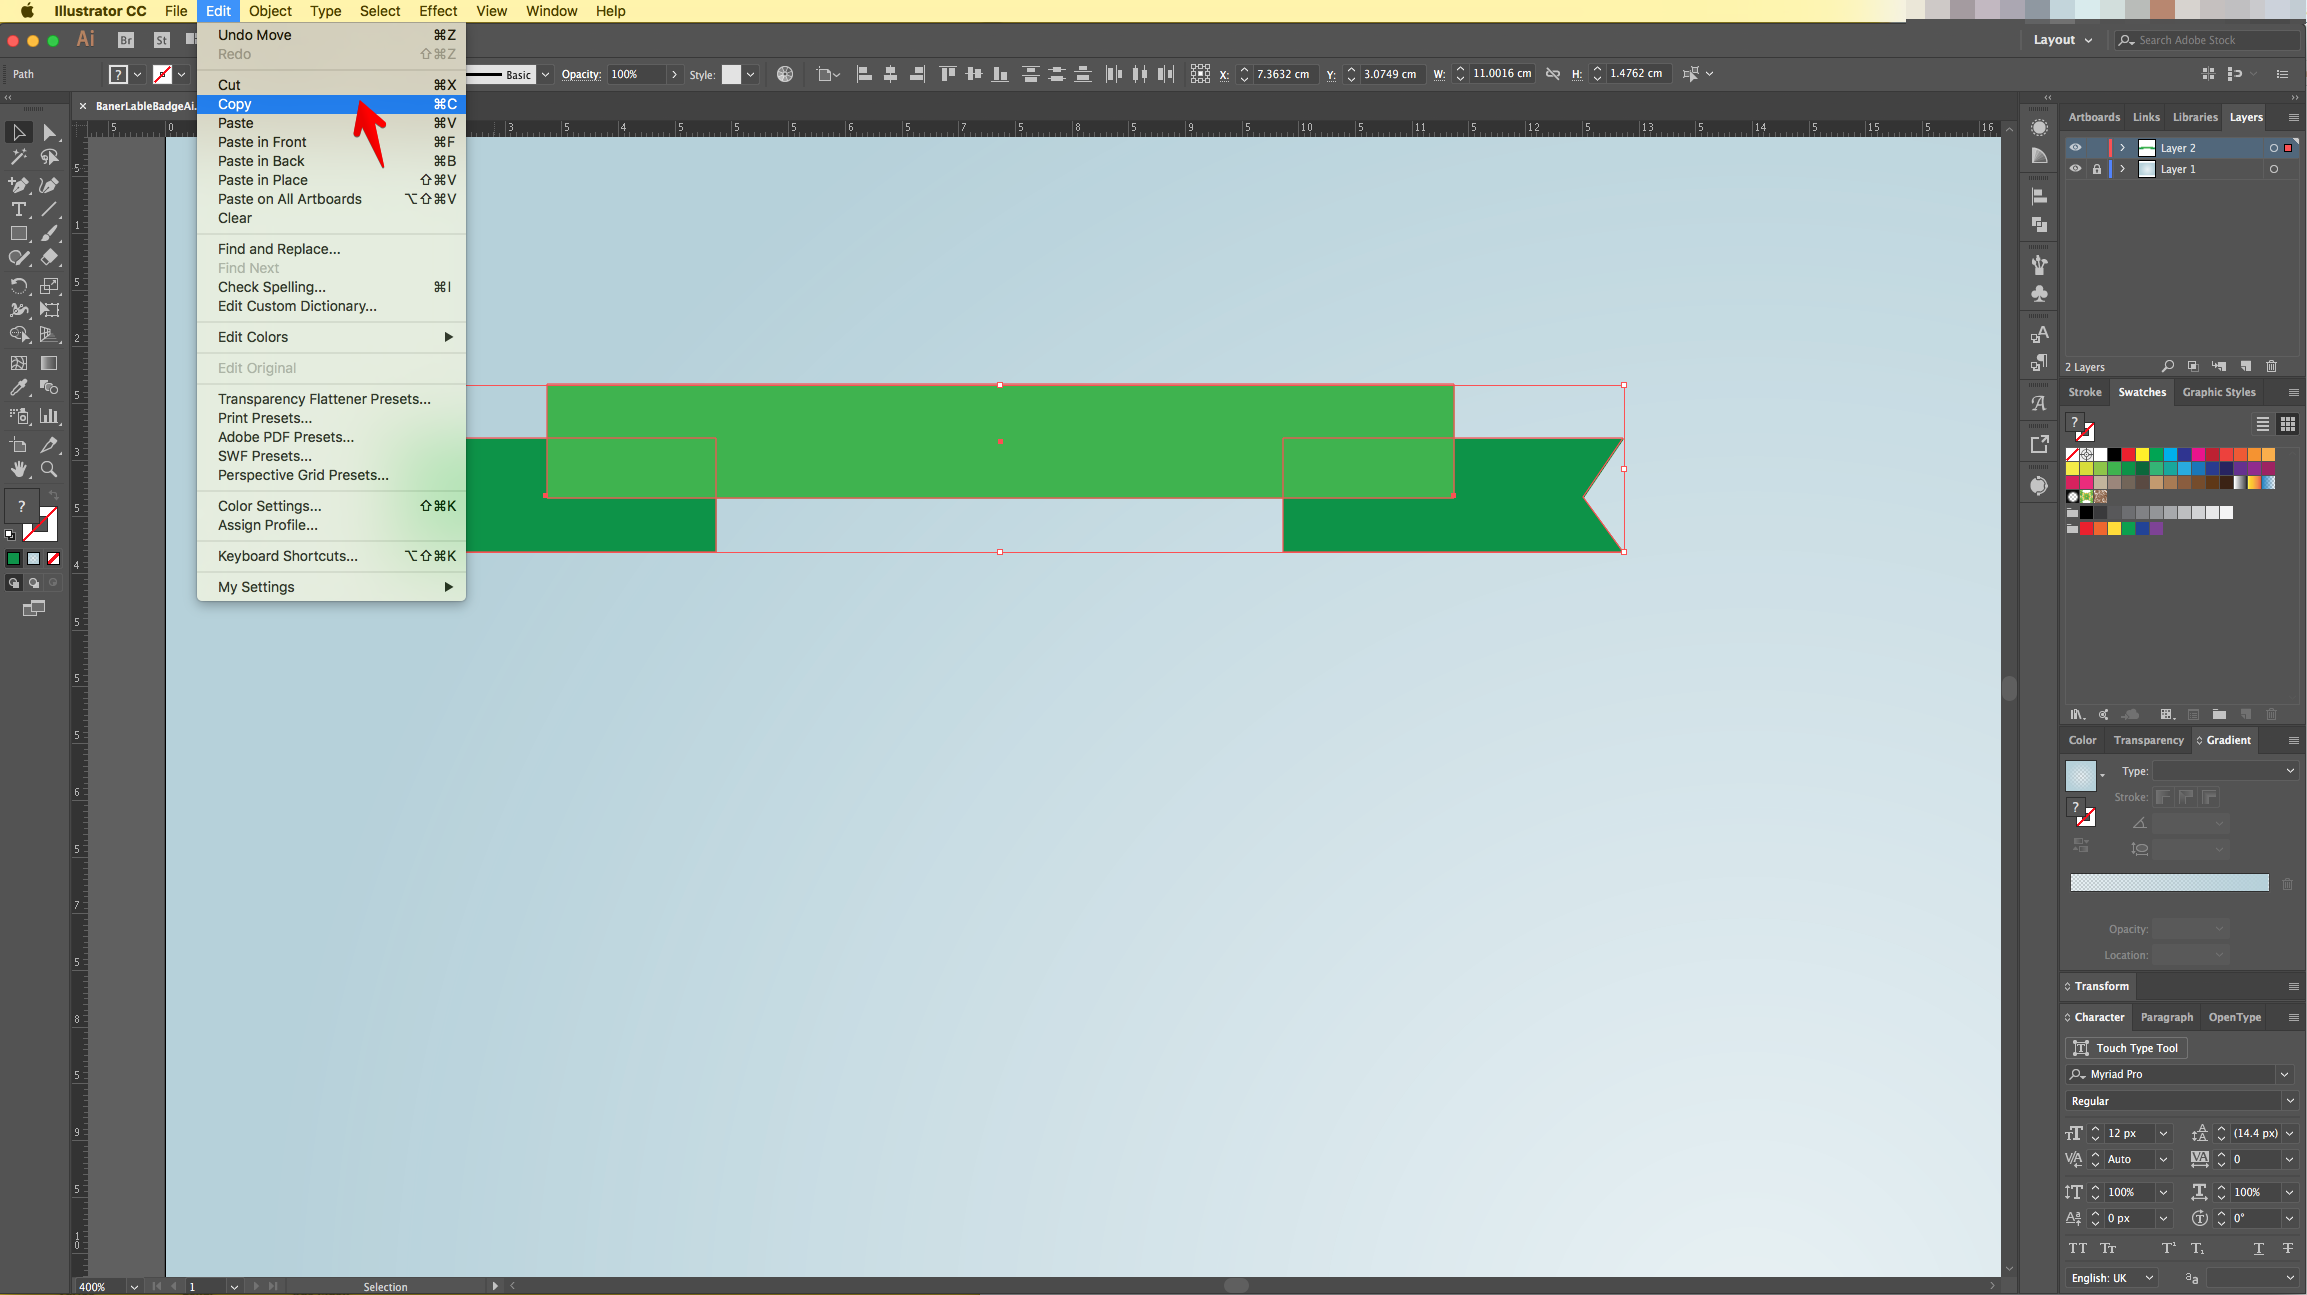
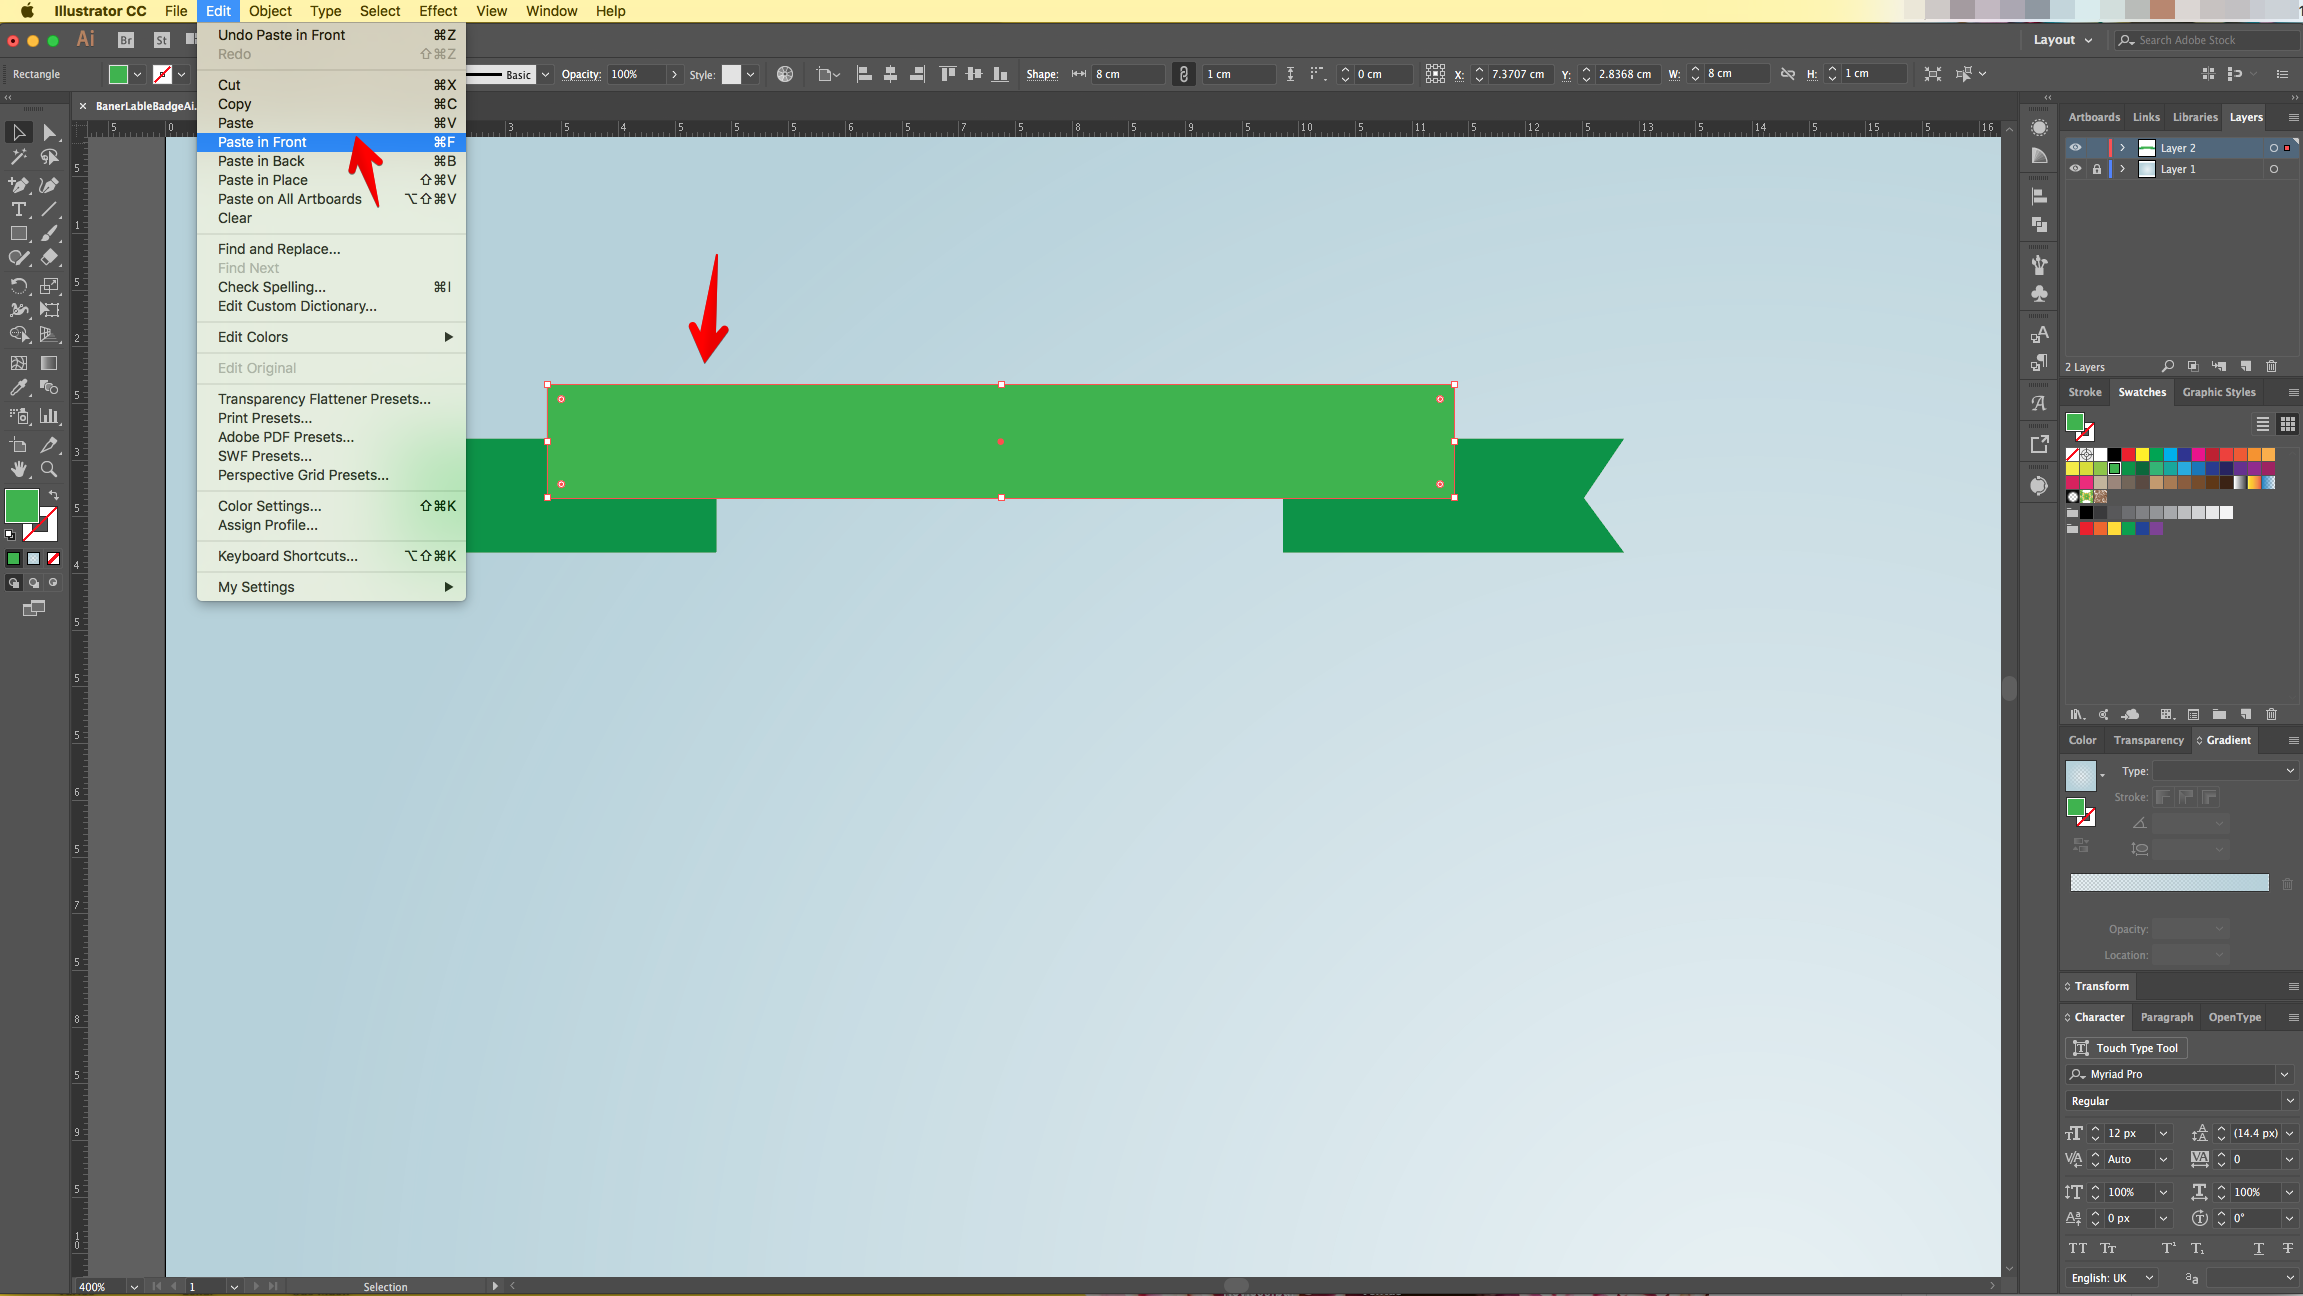
8 - Select everything “Copy” it (Command/Control + C) and “Paste it in Front” (Command/Control + F).

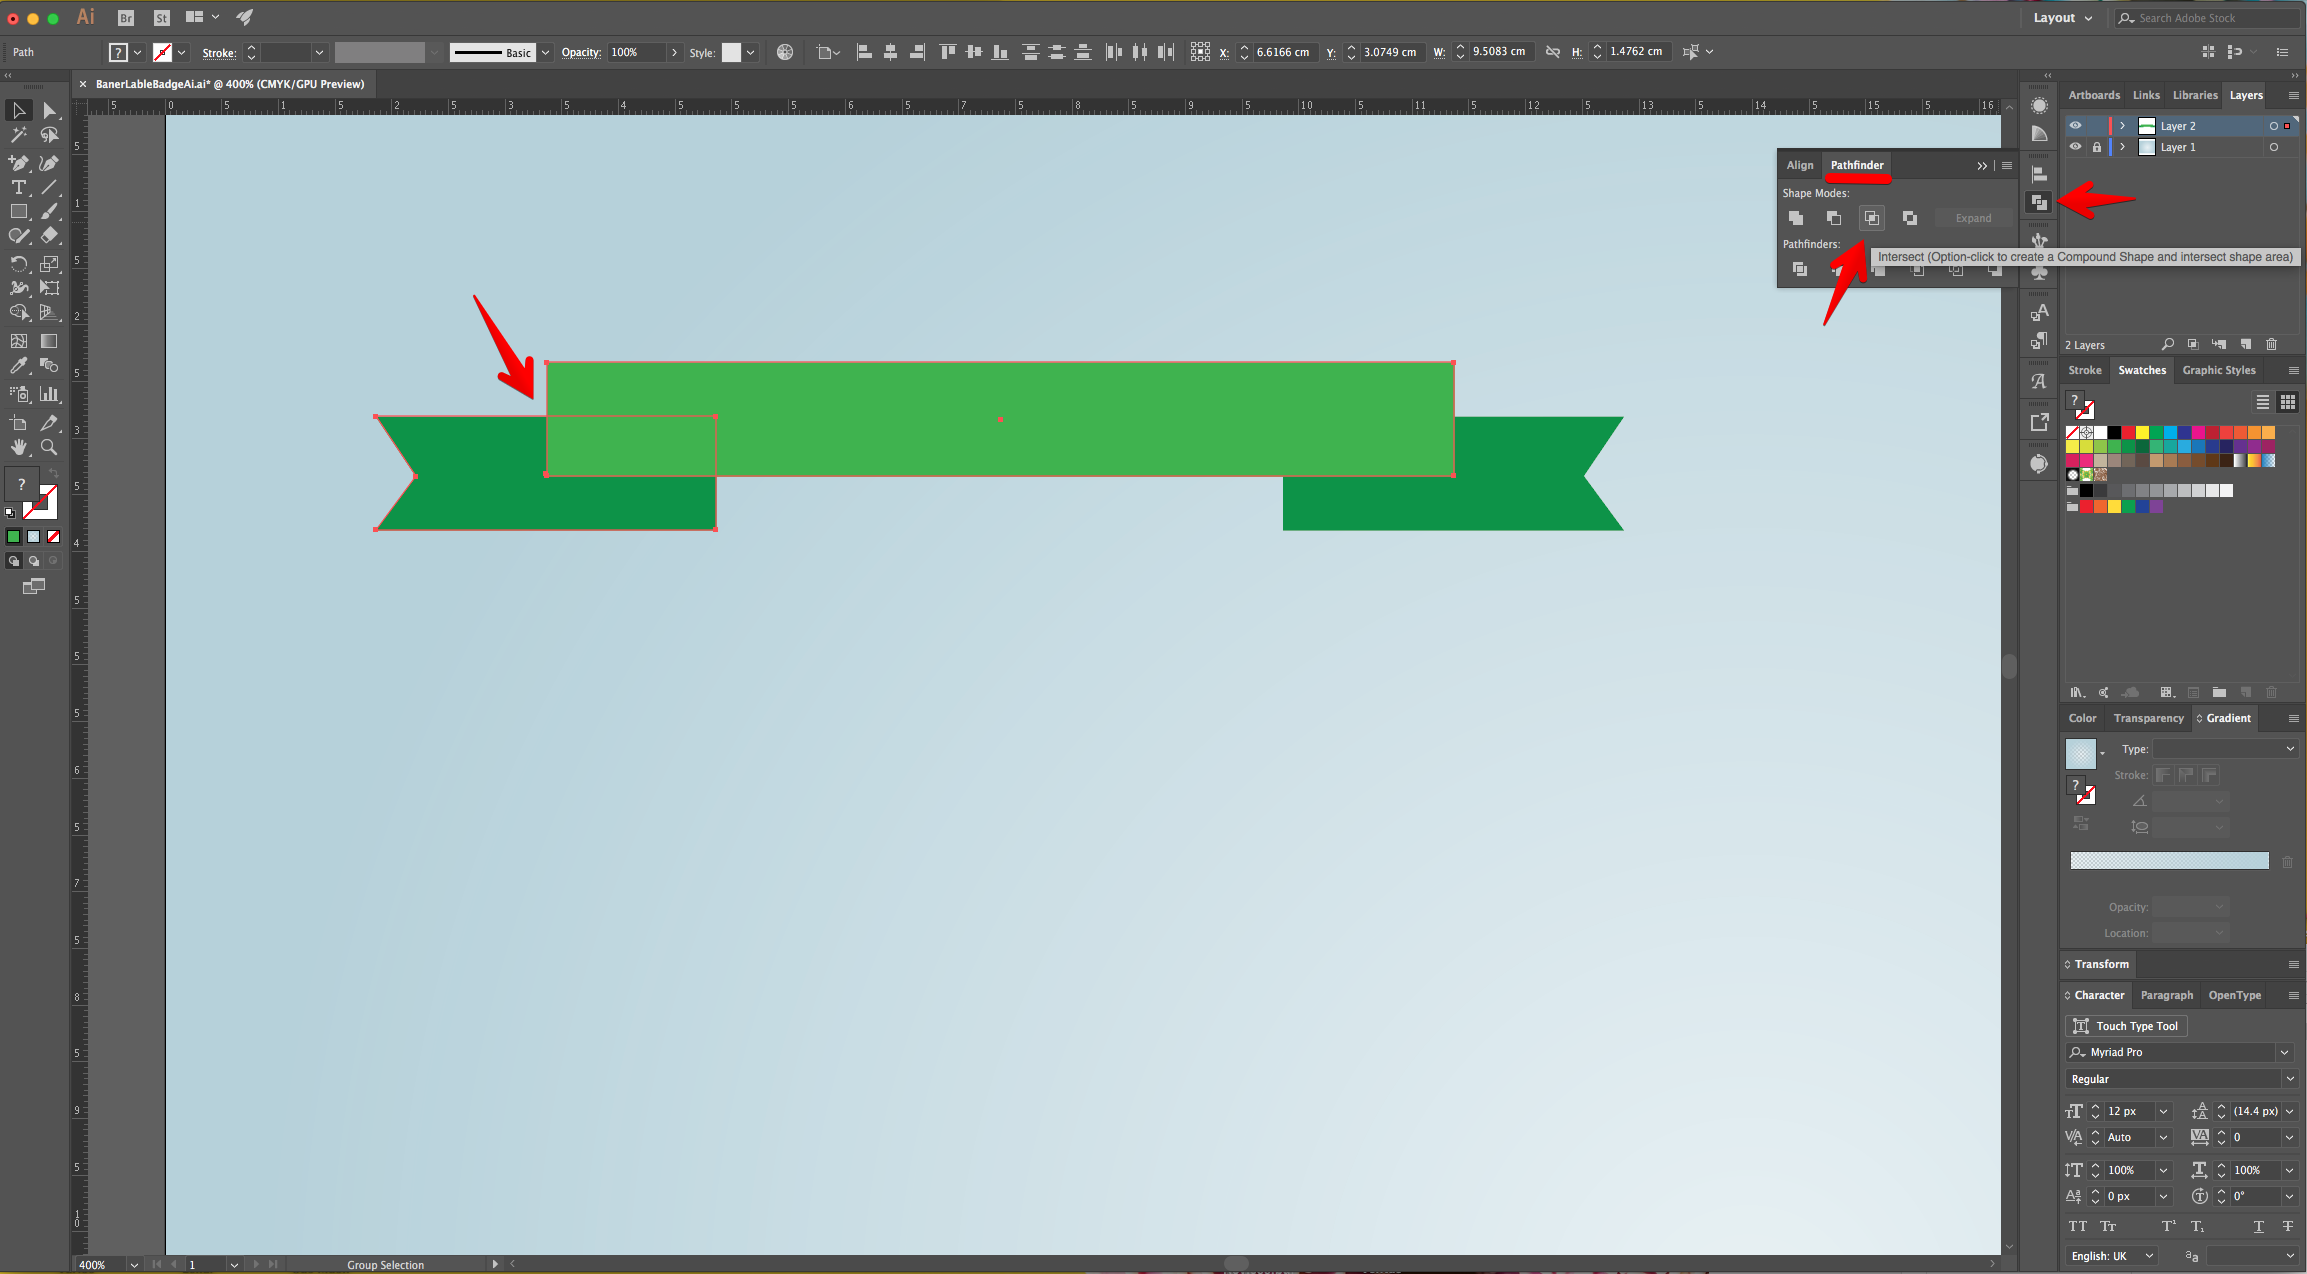
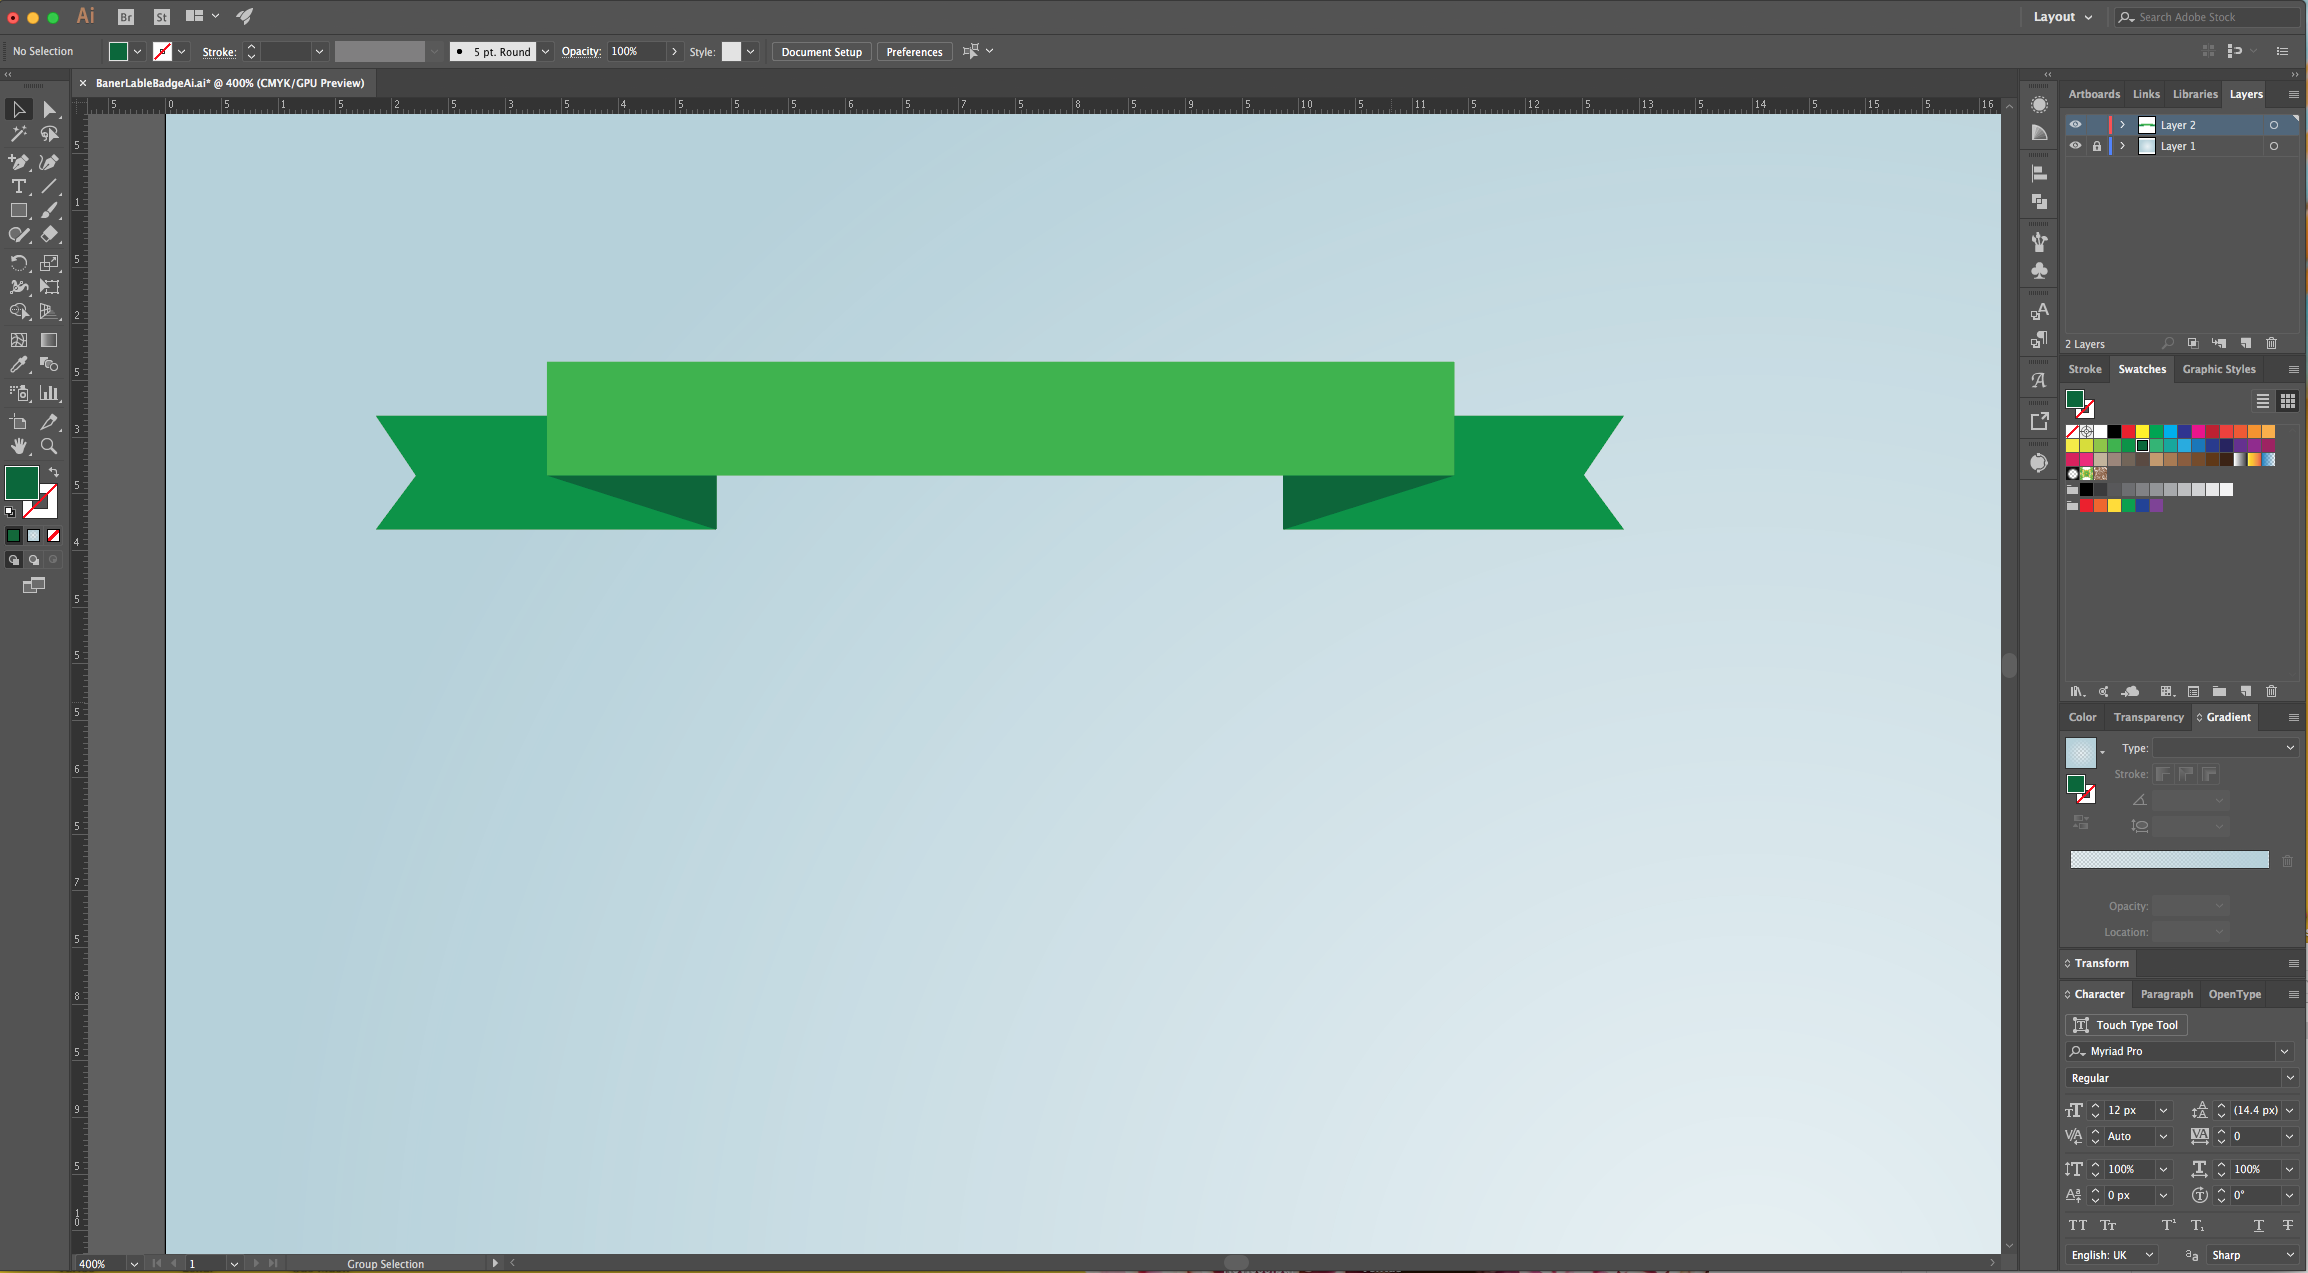
9 - Select the new “Top Rectangle” and the “Left Rectangle”, go to the “Pathfinder Panel” and choose “Intersect”. Fill the resulting shape with a Darker shade of Green. Repeat with the Right side.


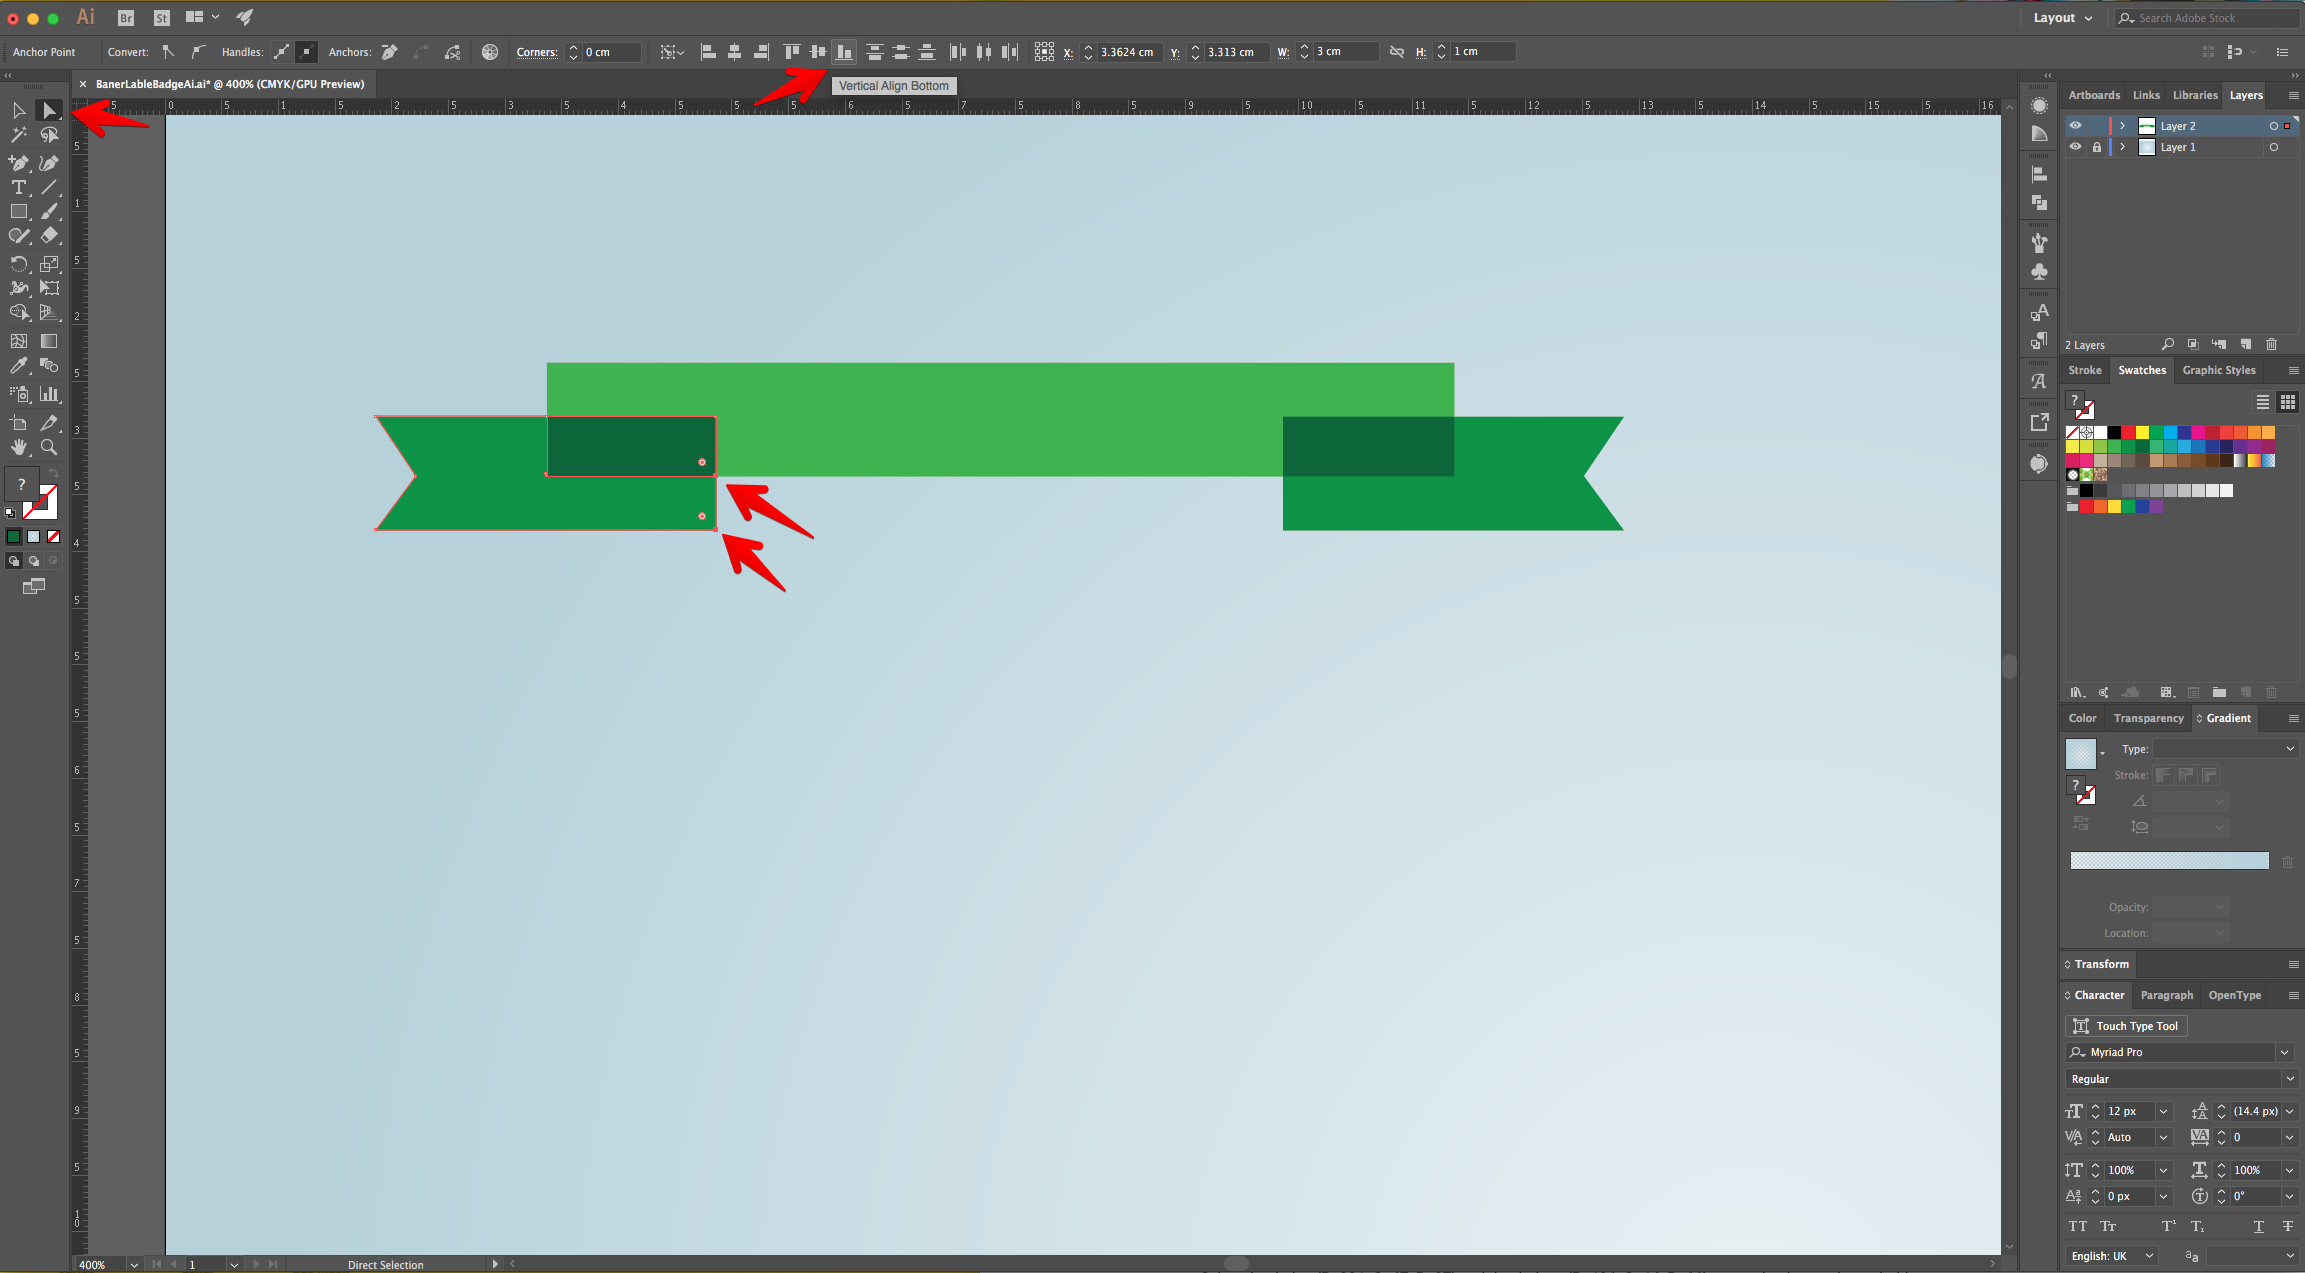
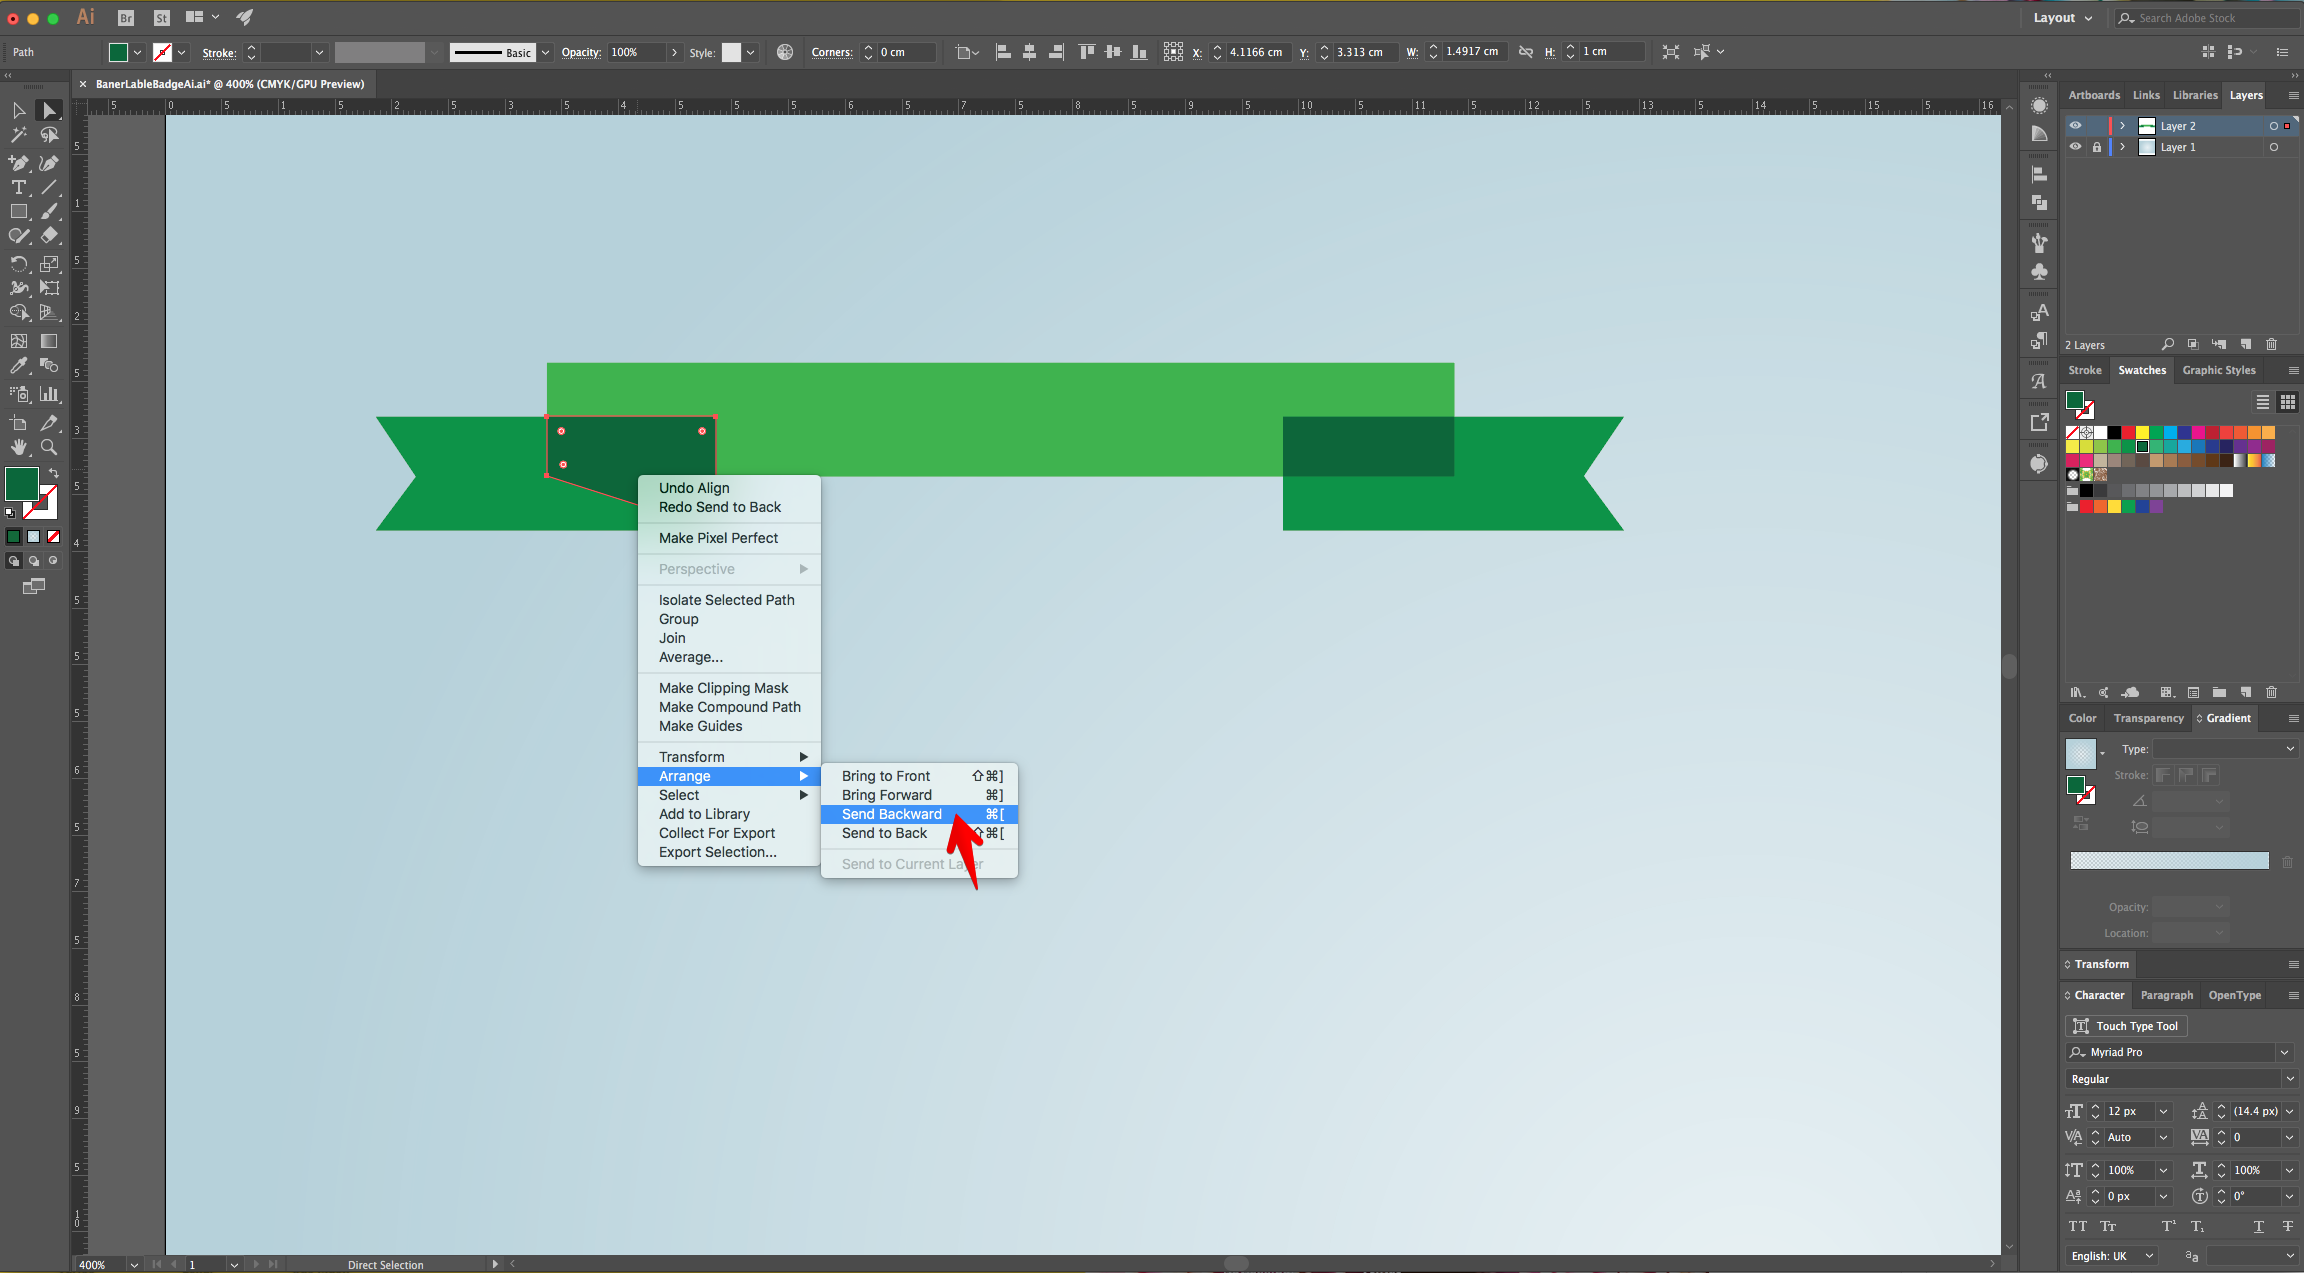
10 - Use the “Direct Selection Tool” (A) to select the Bottom-Right “Anchor Points” of the “New Shape” (very dark green) and the one of the “Small Rectangle” and click “Vertical Align Bottom” from the “Align Panel” (or Top Menu) to make the corner of the “New Shape” reach the one of the “Small Rectangle” in the left. Right-click on top of the “New Shape” and choose “Send Backward”. Repeat with the Right side.

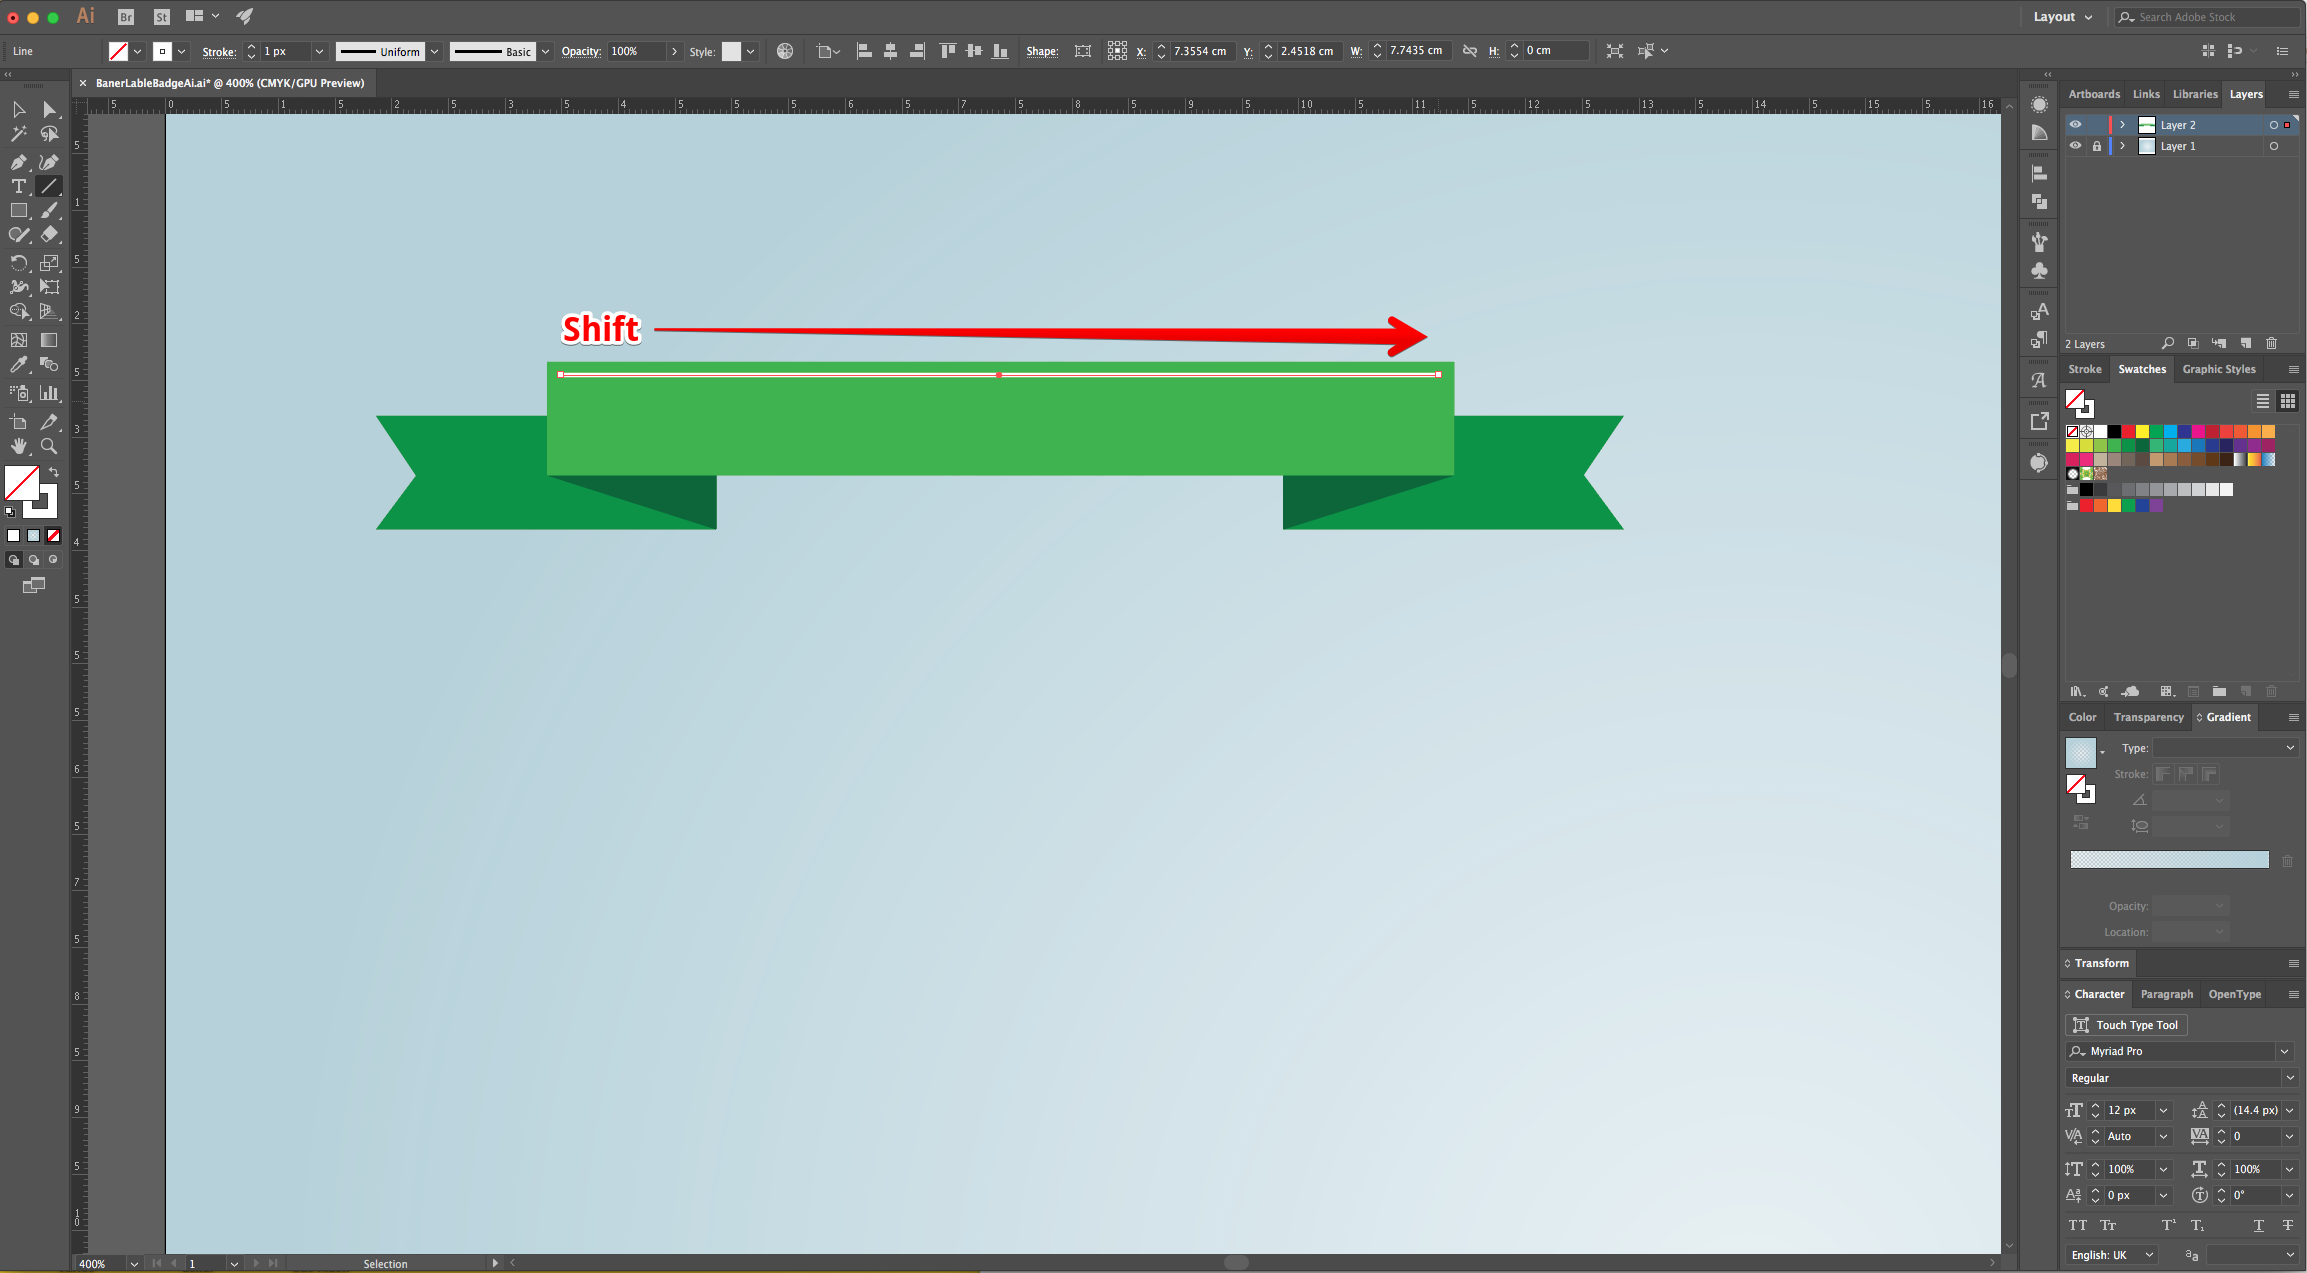
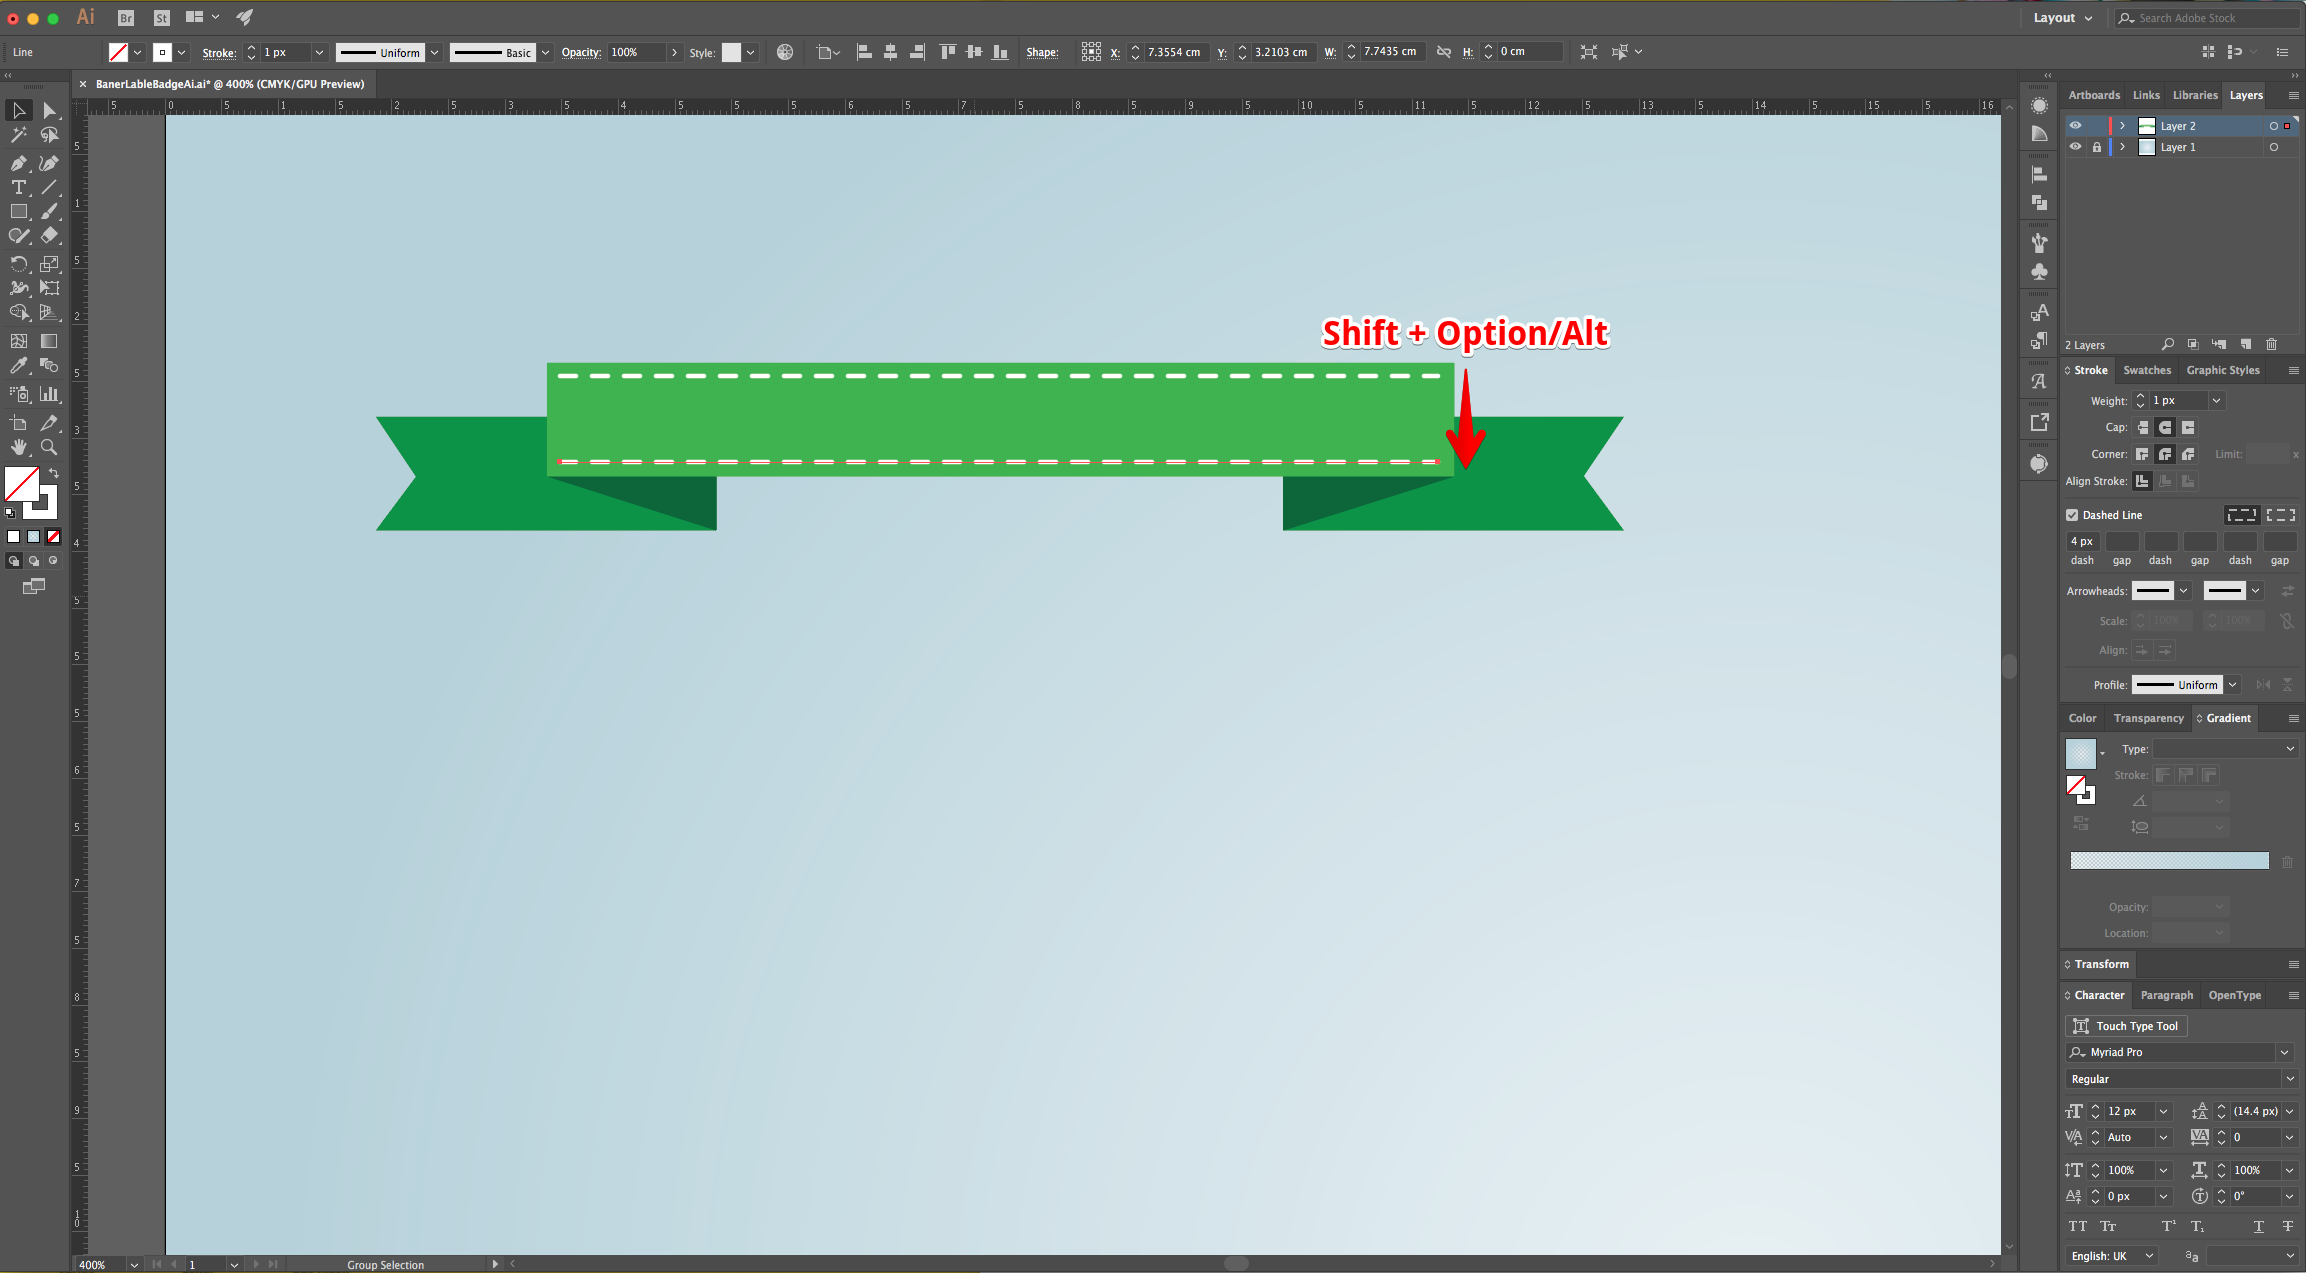
11 - Use the “Line Segment Tool” (/), choose a White, 1 pt “Stroke” and click on top of the Original “Rectangle” (about 2 mm in from the Top-Left corner). Hold the “Shift” key and drag the Line to about the same spot on the Right.

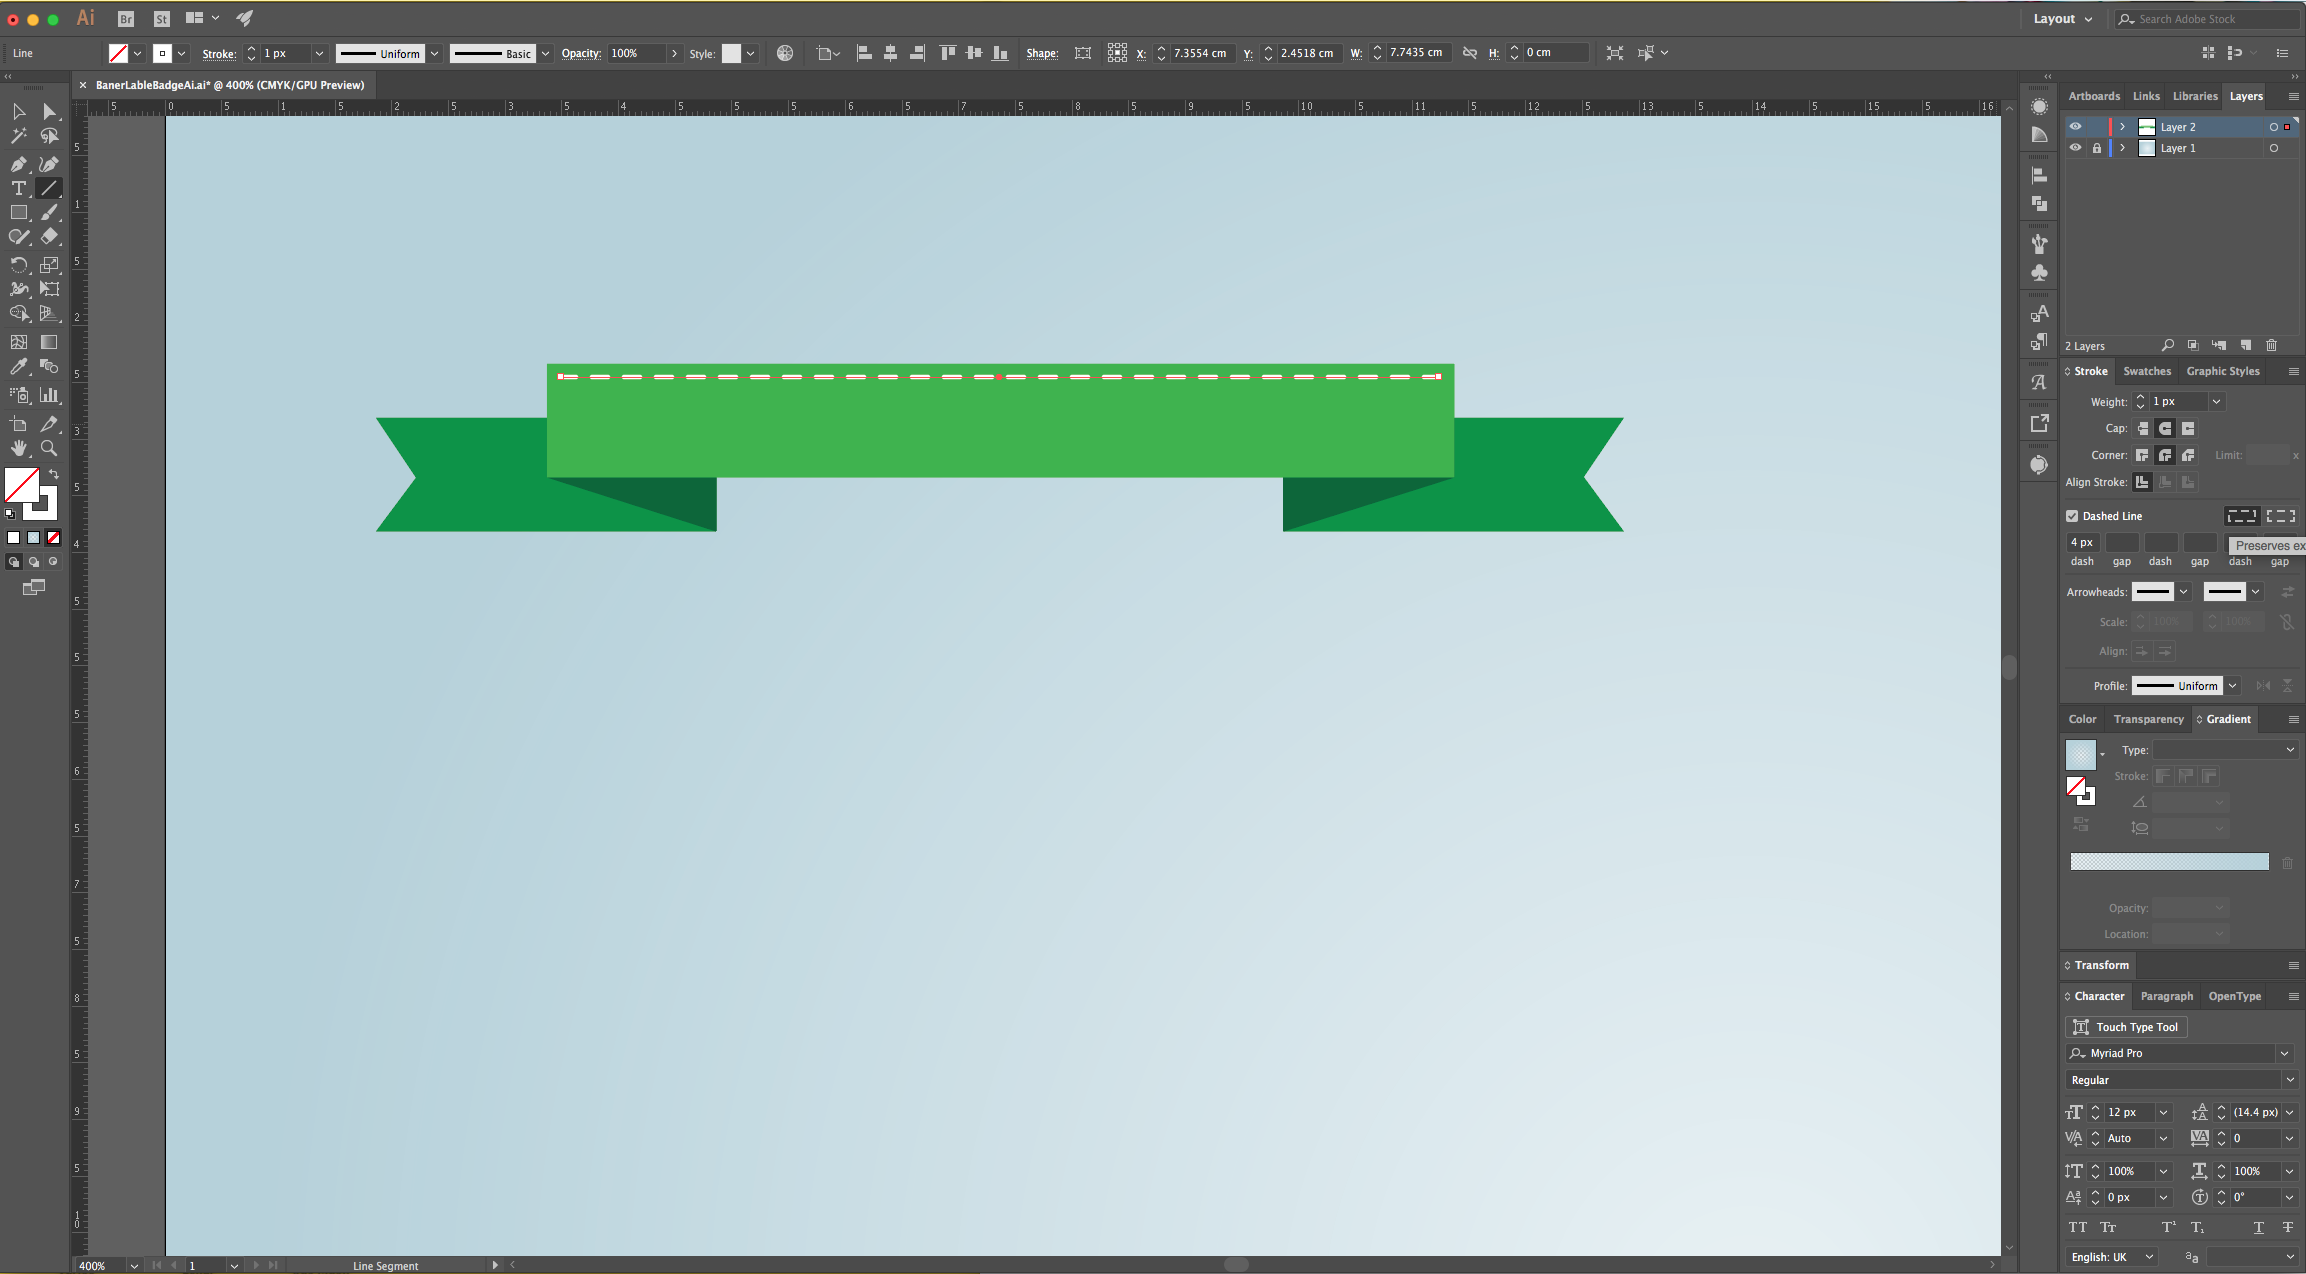
12 - In the “Stroke Panel”, change the “Cap” and “Corner” to “Rounded”, check the “Dashed Line” box and add a 4 px “Dash”. Shift + Alt/Option click on the “Line” while dragging down to “Duplicate” it and place it in the same position but on the bottom of the original “Rectangle”. Add “Dashed Lines” to the Tops and Bottoms of the “Side Rectangle” and “Group” (Command/Control + G) everything together.

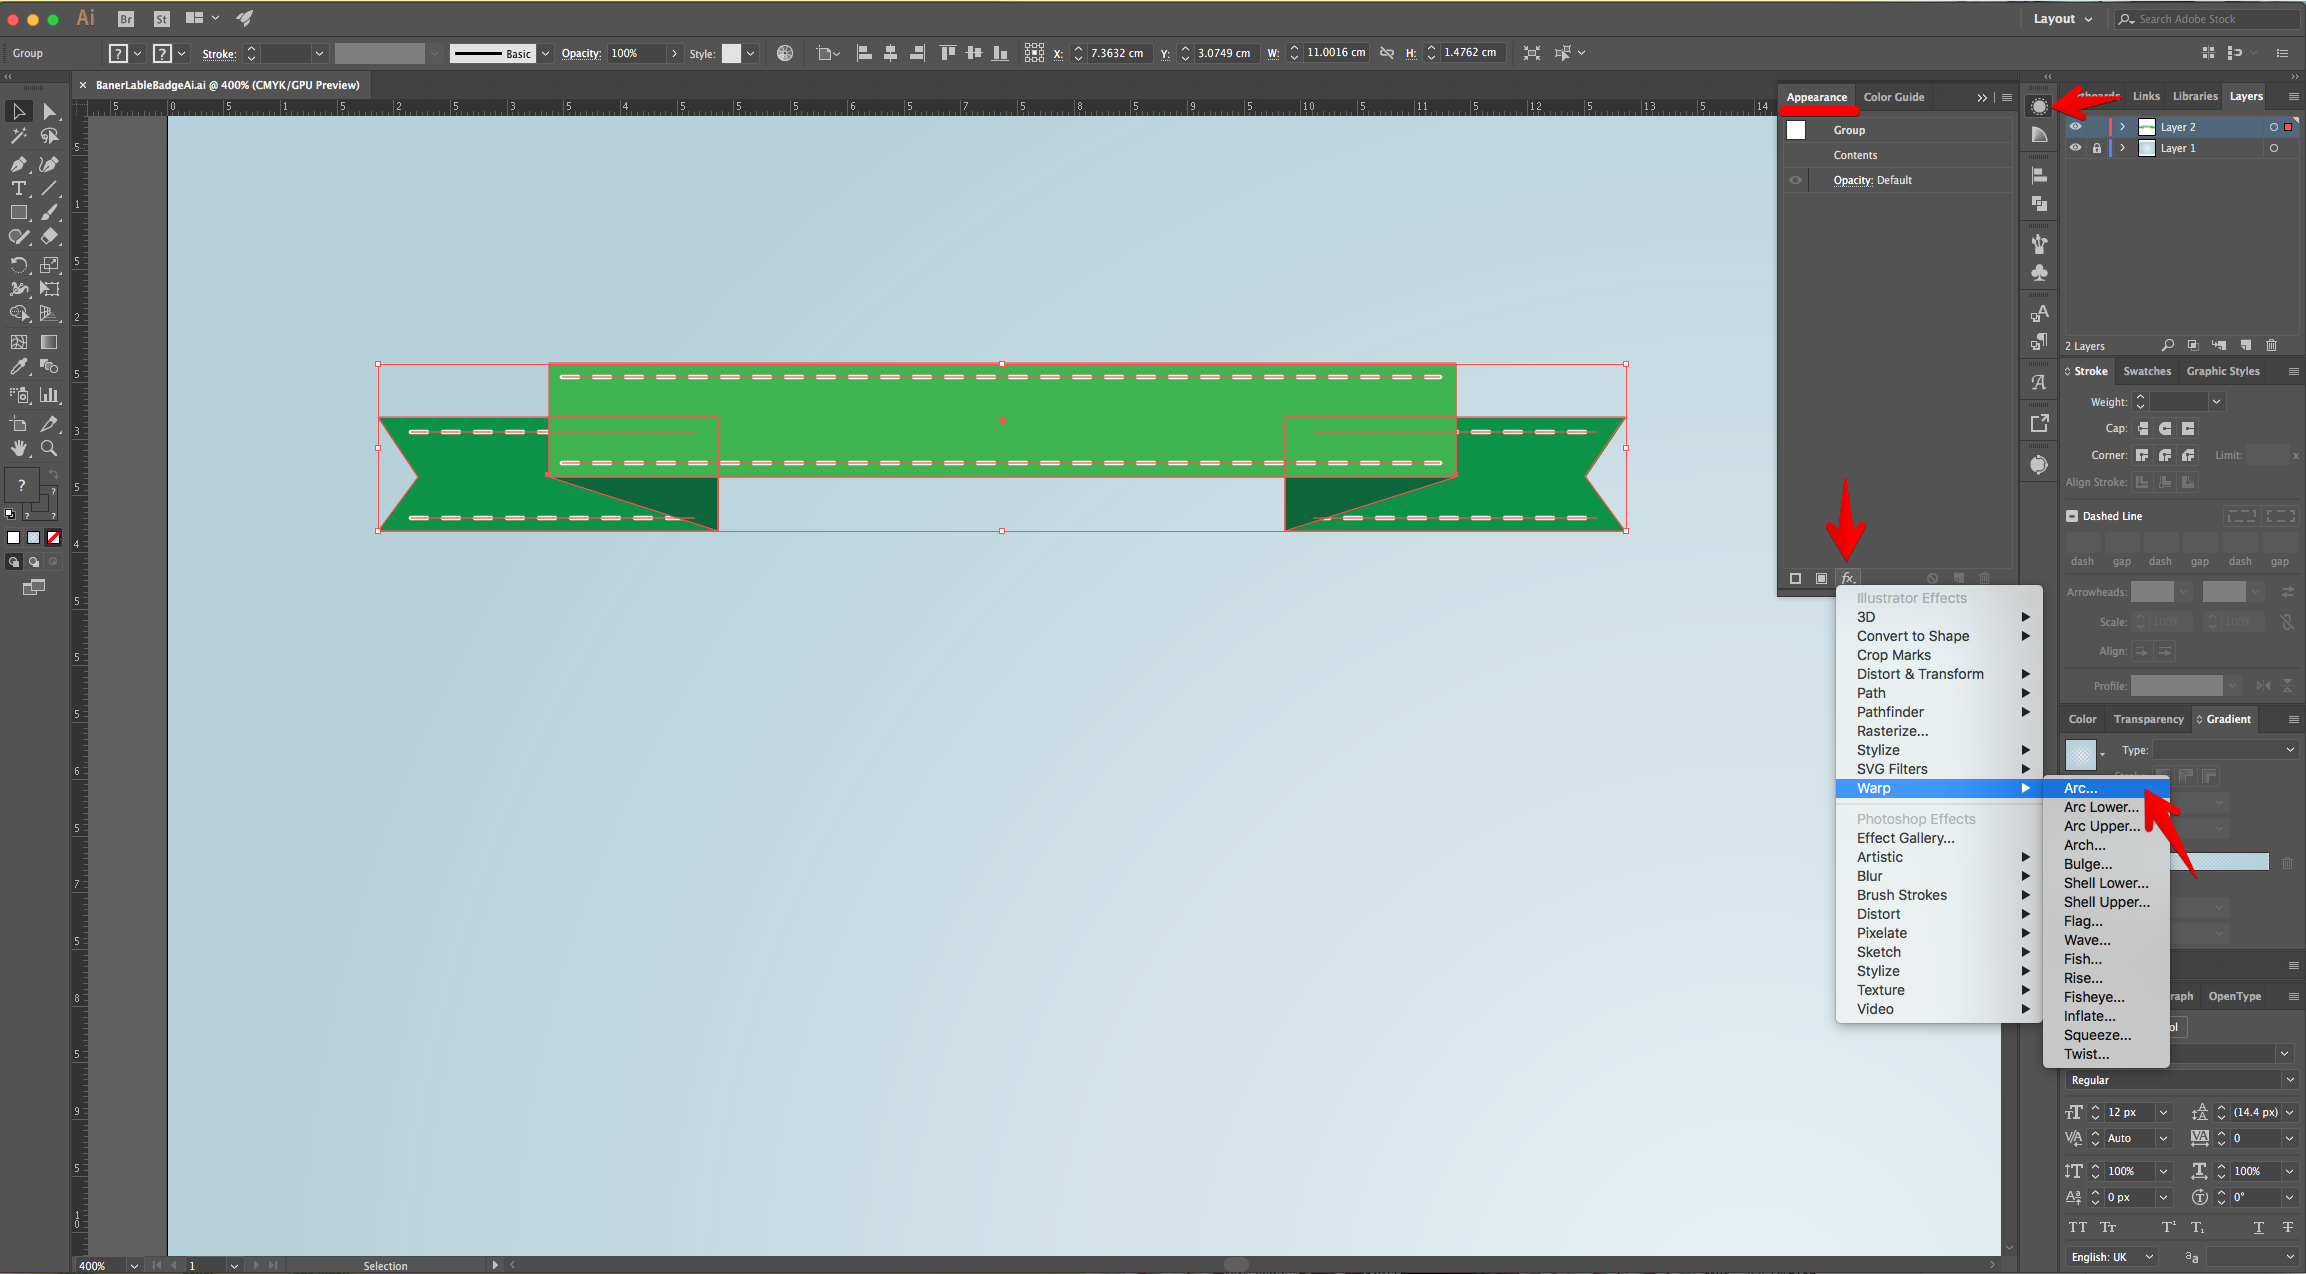
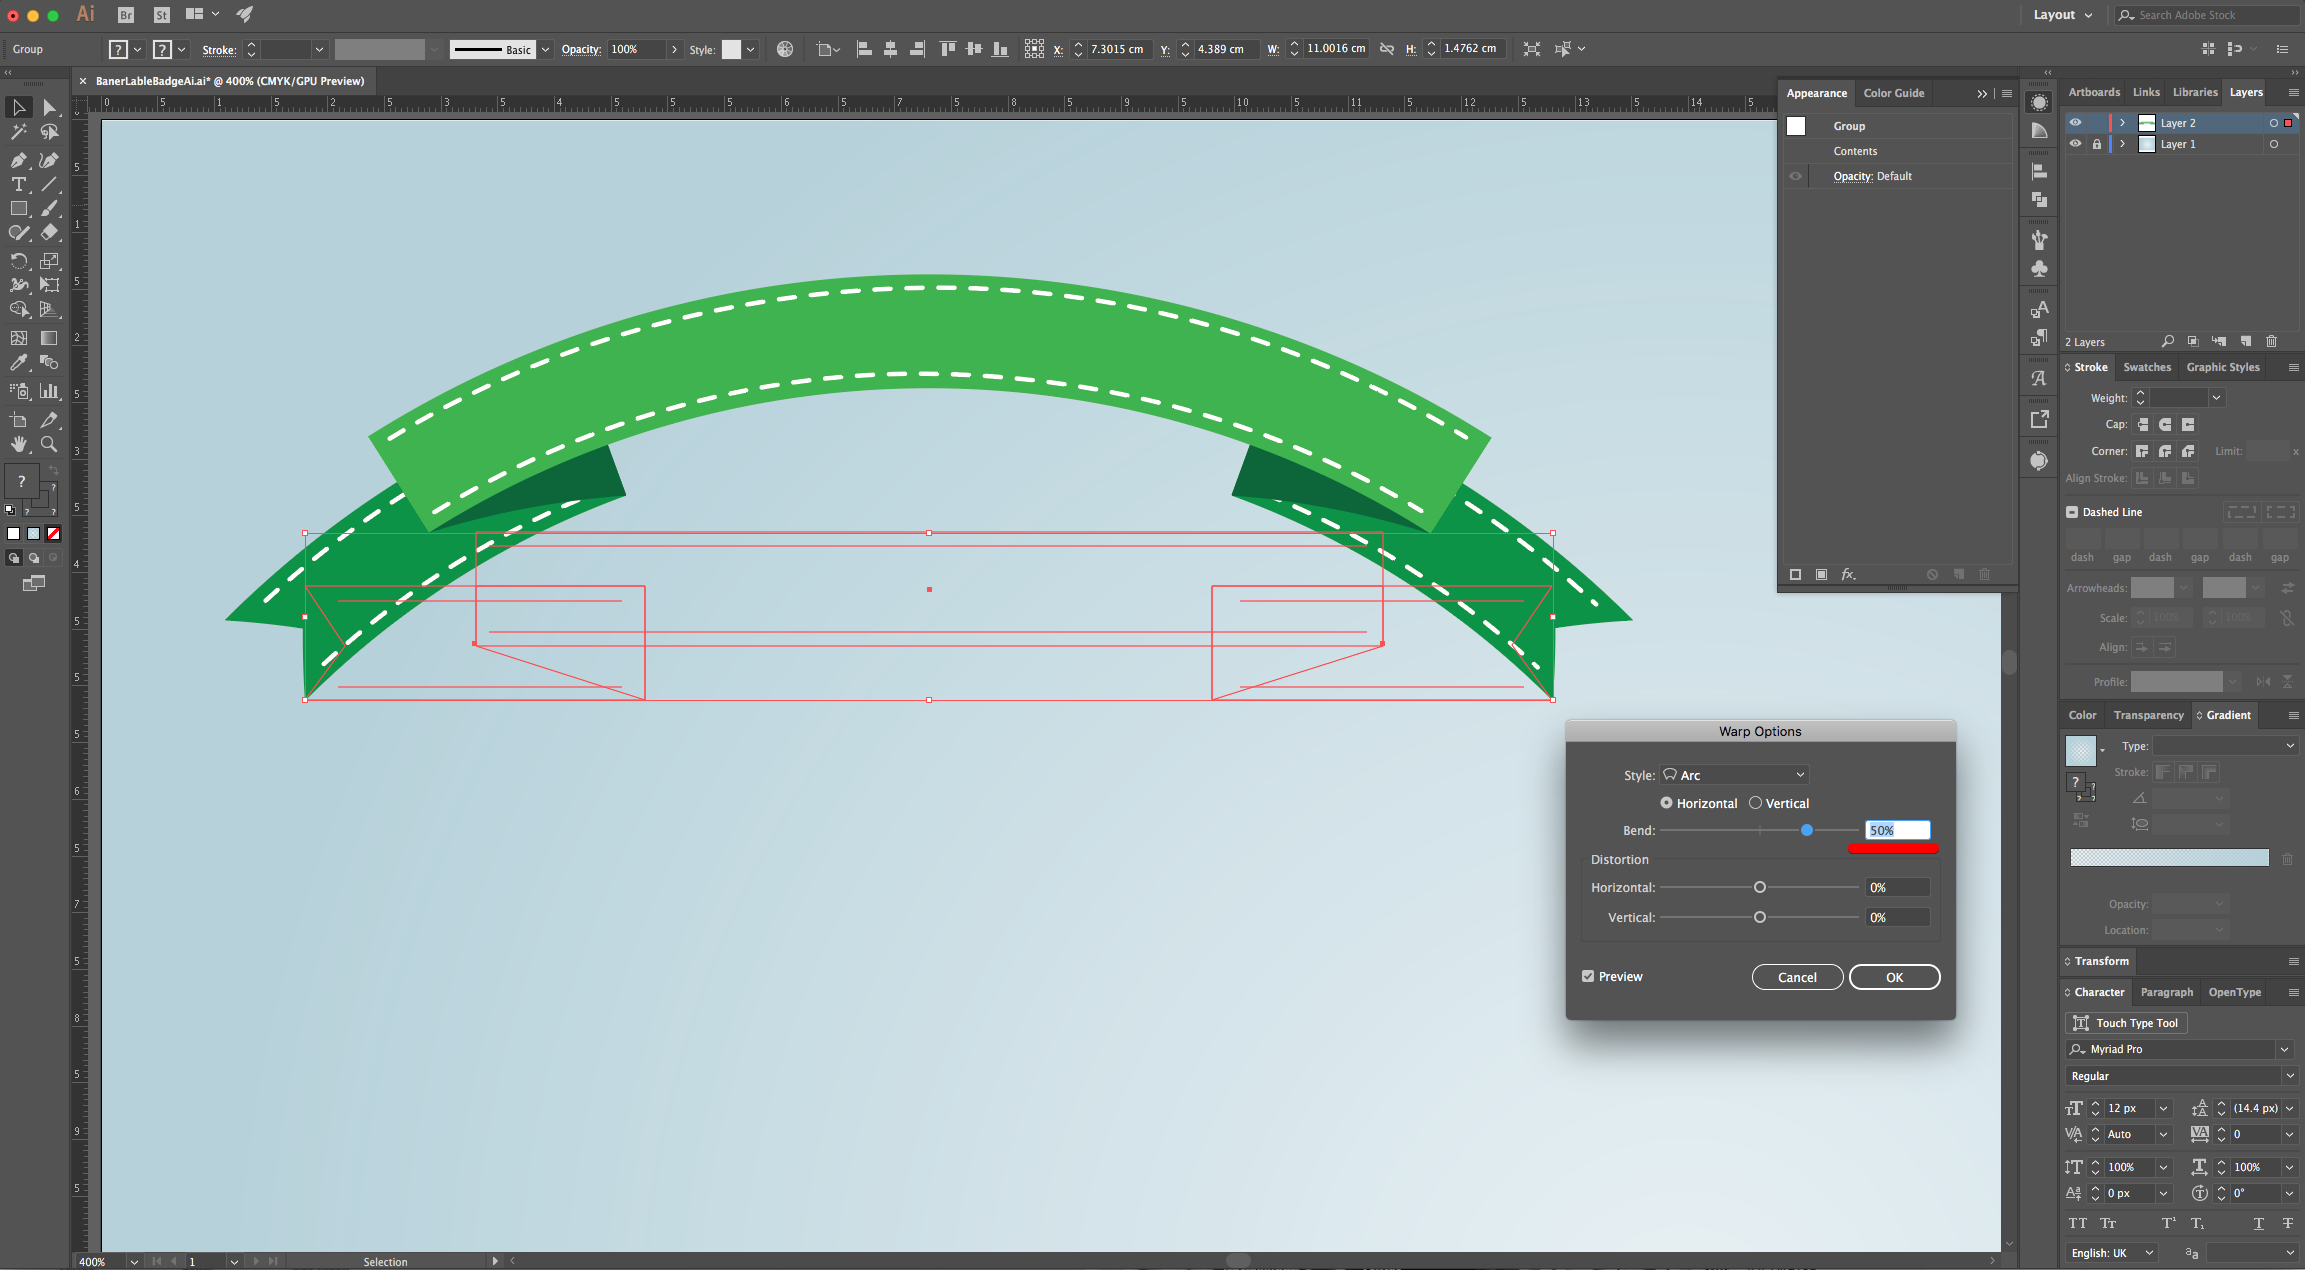
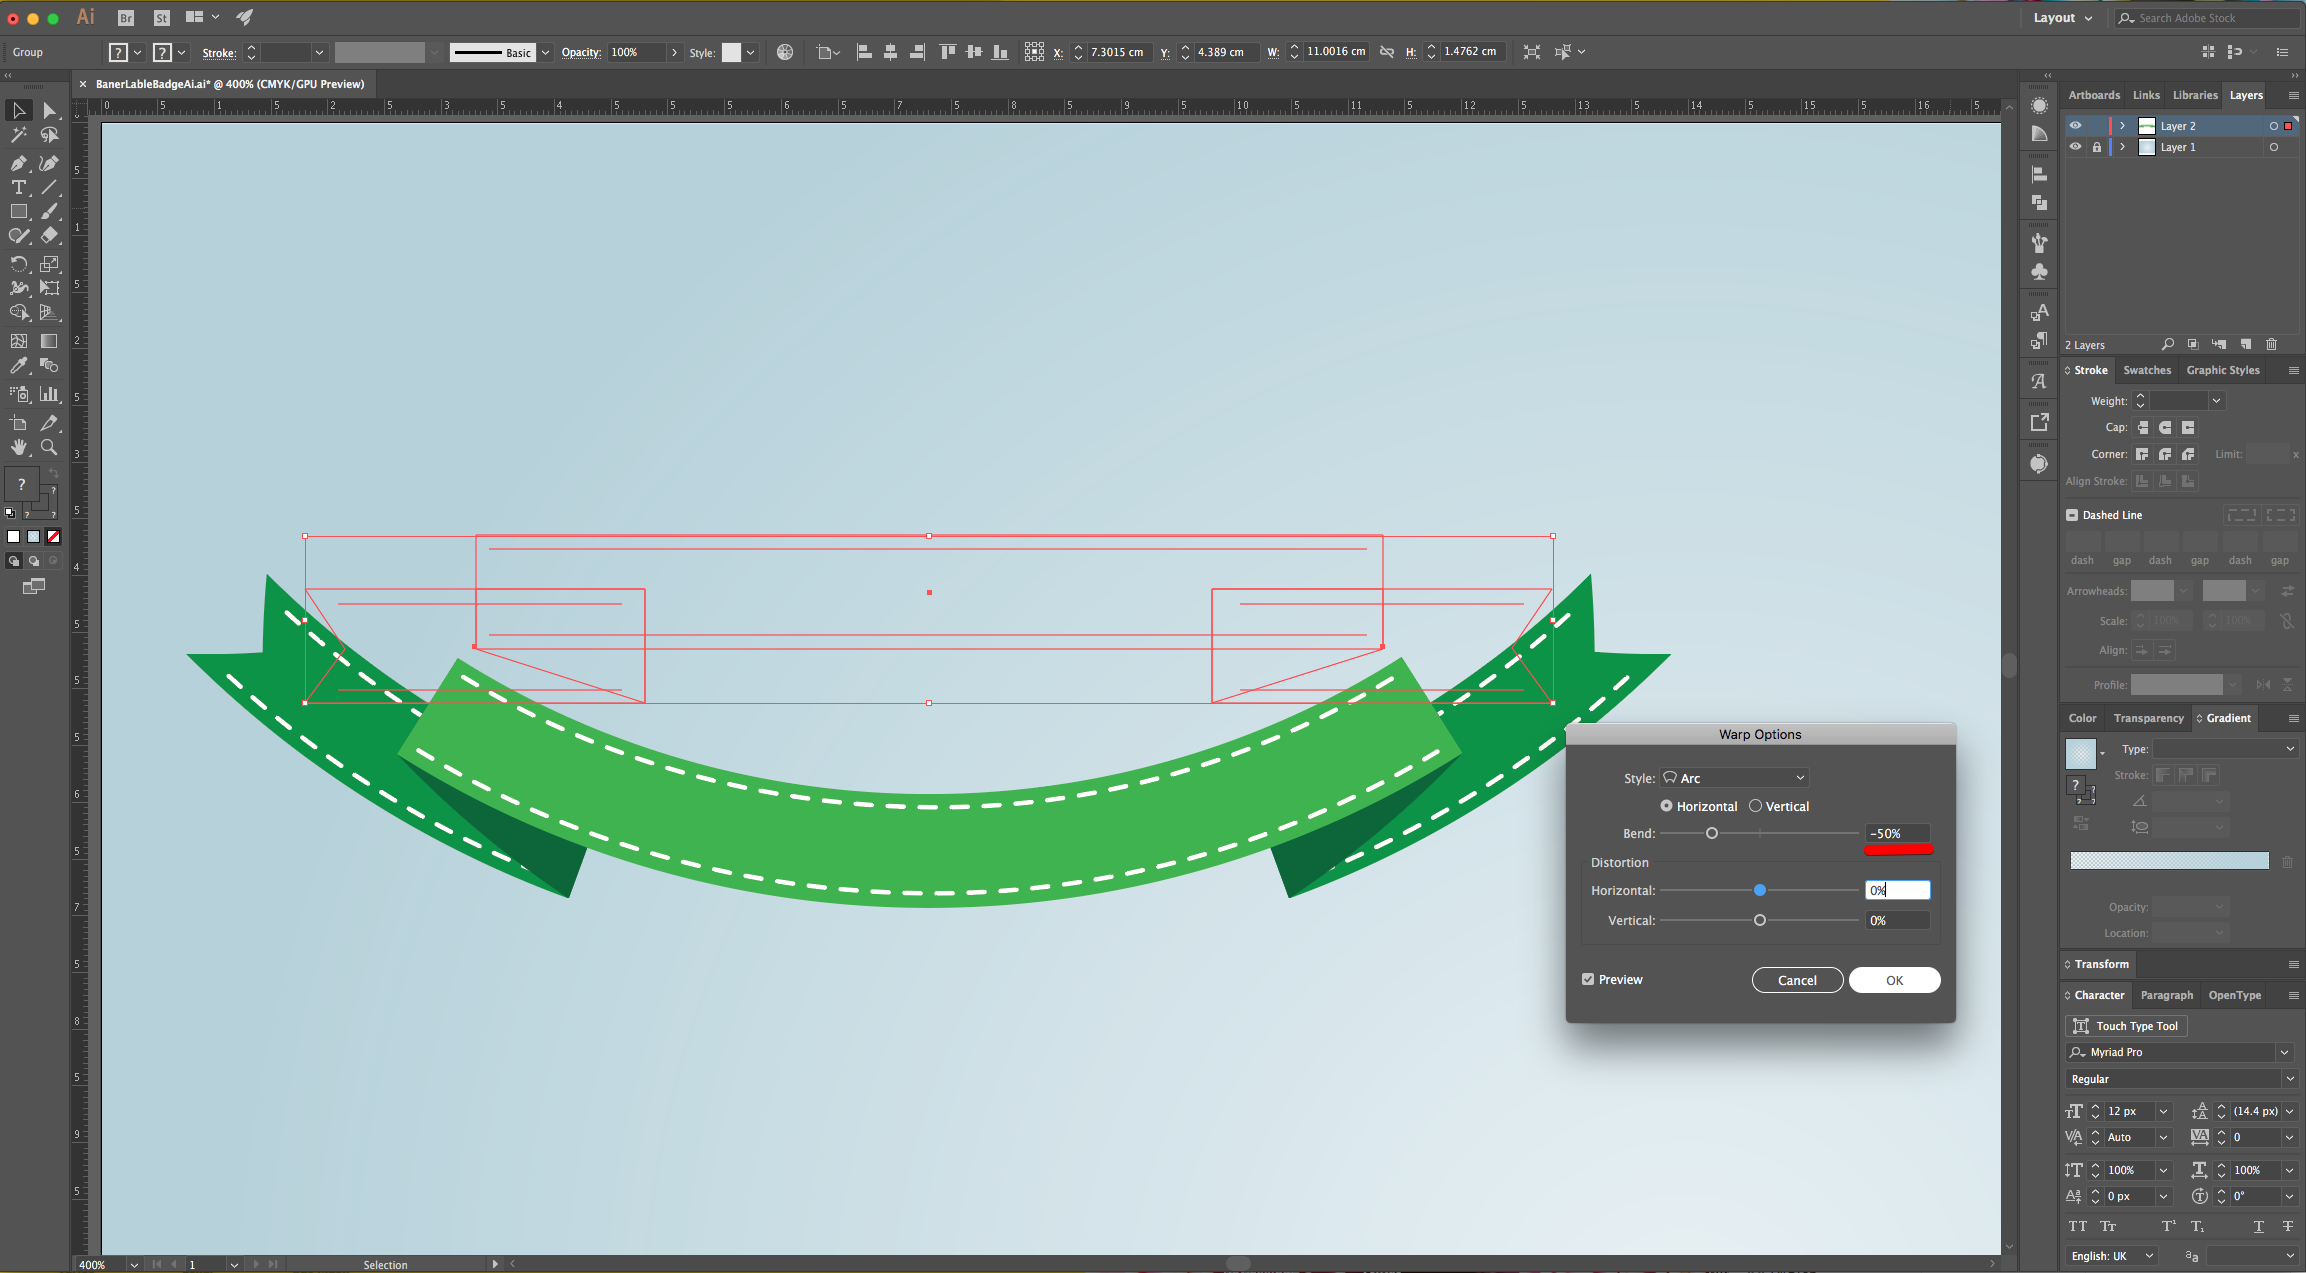
13 - To make a Bended “Ribbon”, select the “Group” and head to the “Pathfinder Panel”, click on the “Effects” button at the bottom of the Panel and choose Warp > Arc. Use a 50% “Horizontal Bend” and click “OK”. Or you can use a -50% Bend if you want.
Check out Part Two where we make a badge in Illustrator.
2 - Select the “Rectangle Tool” (M) and create a “Rectangle” that covers the entire Document. Fill it with a “Radial Gradient” going from a light blue (#b5d0da) at 30% “Opacity” to 100% “Opacity”.
3 - “Lock” your Layer using the small “Padlock” icon on the left side of its Thumbnail and then create a “New Layer” by clicking on the small button at the bottom of the “Layers Panel”.
4 - Select the “Rectangle Tool” (M) again, click inside you Canvas and create a 8 cm (Width) by 1 cm (Height) “Rectangle”. Fill it with the color of your choice (we used a Medium Green from the “Swatches Panel”).
5 - Create another “Rectangle”. Make it the same “Height” (1 cm) but change the “Width” to 3 cm and fill it with a darker Green. Place it on top of the first “Rectangle” on the Bottom-Left. The Top-Center of the new one should coincide with the Center-Left of the bottom one.
6 - Shift + Alt/Option click on the small “Rectangle” while dragging to the Right to “Duplicate” it and place it in the same position but on the Left side of the original “Rectangle”. With the two small ones selected, right-click on top and choose Arrange > Send to Back.
7 - Zoom in to the small “Rectangle” on the Left, select the “Add Anchor Point Tool” (+) and click in the Center-Left to create an “Anchor Point”. Use the “Direct Selection Tool” (A) to select the new “Anchor Point” and use the “Arrow” keys to move it a few click to the Right. Repeat with the small “Rectangle” on the Right (add the new “Anchor Point” on the Center-Right and move it to the Left).
8 - Select everything “Copy” it (Command/Control + C) and “Paste it in Front” (Command/Control + F).
9 - Select the new “Top Rectangle” and the “Left Rectangle”, go to the “Pathfinder Panel” and choose “Intersect”. Fill the resulting shape with a Darker shade of Green. Repeat with the Right side.
10 - Use the “Direct Selection Tool” (A) to select the Bottom-Right “Anchor Points” of the “New Shape” (very dark green) and the one of the “Small Rectangle” and click “Vertical Align Bottom” from the “Align Panel” (or Top Menu) to make the corner of the “New Shape” reach the one of the “Small Rectangle” in the left. Right-click on top of the “New Shape” and choose “Send Backward”. Repeat with the Right side.
11 - Use the “Line Segment Tool” (/), choose a White, 1 pt “Stroke” and click on top of the Original “Rectangle” (about 2 mm in from the Top-Left corner). Hold the “Shift” key and drag the Line to about the same spot on the Right.
12 - In the “Stroke Panel”, change the “Cap” and “Corner” to “Rounded”, check the “Dashed Line” box and add a 4 px “Dash”. Shift + Alt/Option click on the “Line” while dragging down to “Duplicate” it and place it in the same position but on the bottom of the original “Rectangle”. Add “Dashed Lines” to the Tops and Bottoms of the “Side Rectangle” and “Group” (Command/Control + G) everything together.
13 - To make a Bended “Ribbon”, select the “Group” and head to the “Pathfinder Panel”, click on the “Effects” button at the bottom of the Panel and choose Warp > Arc. Use a 50% “Horizontal Bend” and click “OK”. Or you can use a -50% Bend if you want.
Check out Part Two where we make a badge in Illustrator.
by @lornacane


