
Brother scan and cut workspace process overlap functions
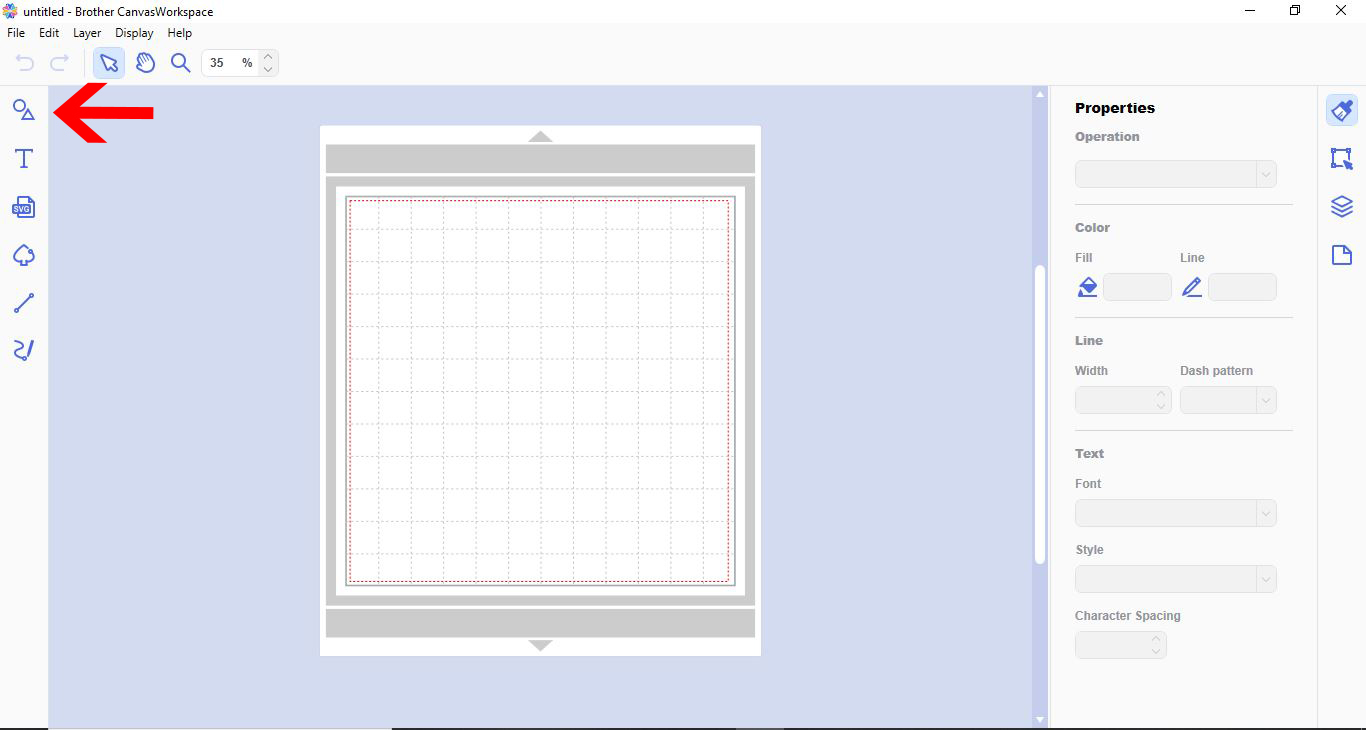
1- Open scan and cut canvas workspace. Click on the shape tool.
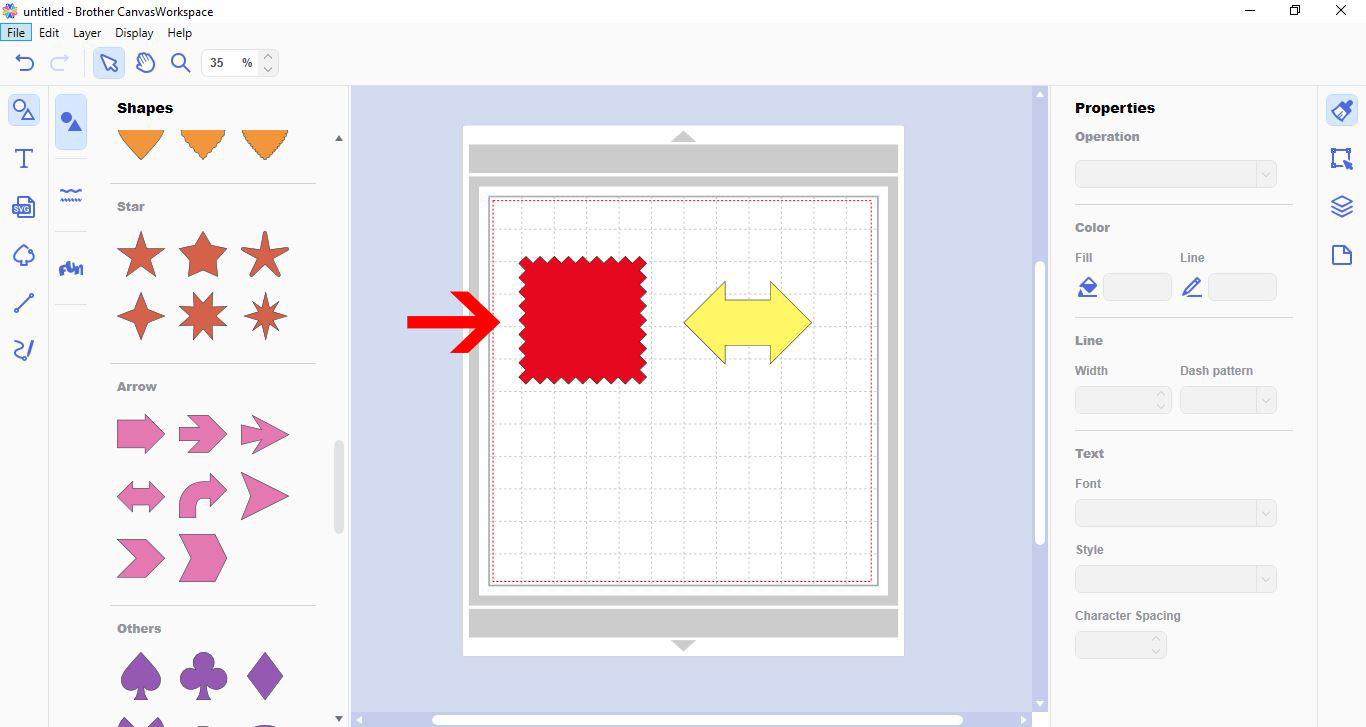
2- Create 2 different shapes.
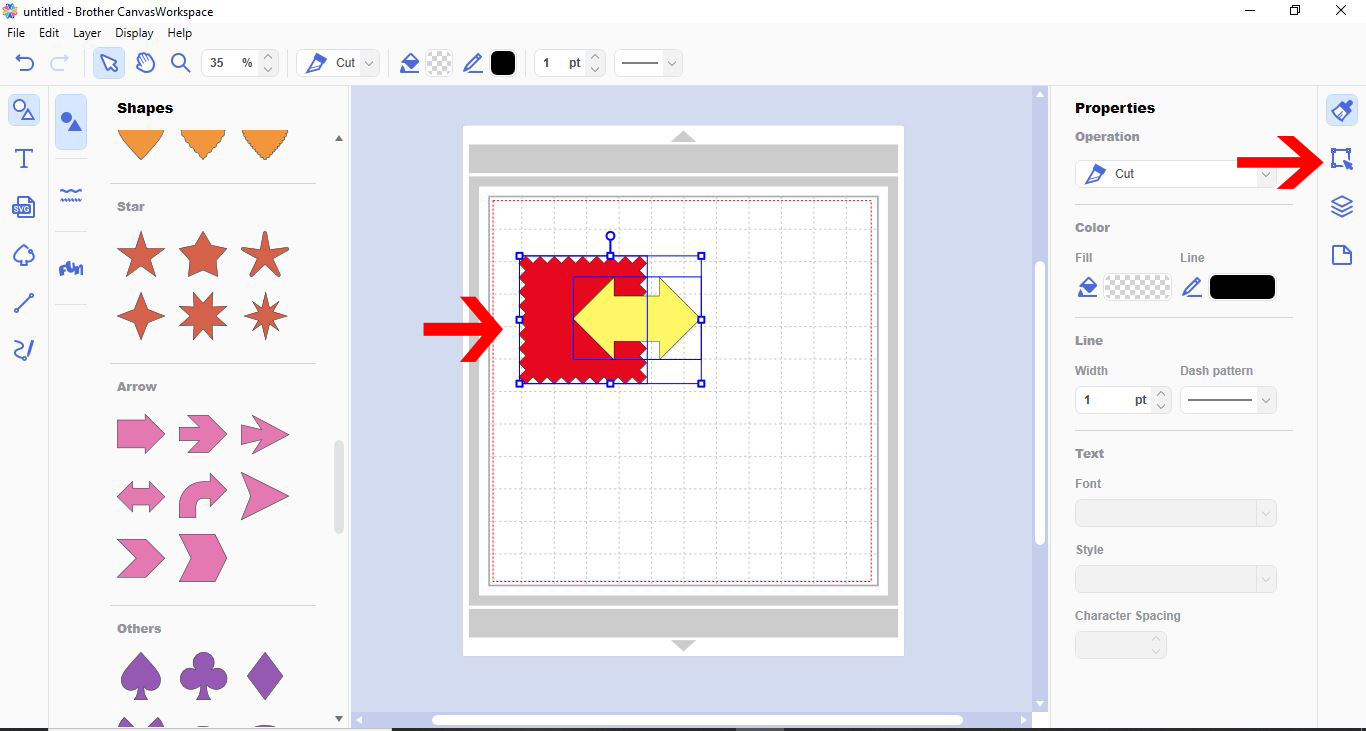
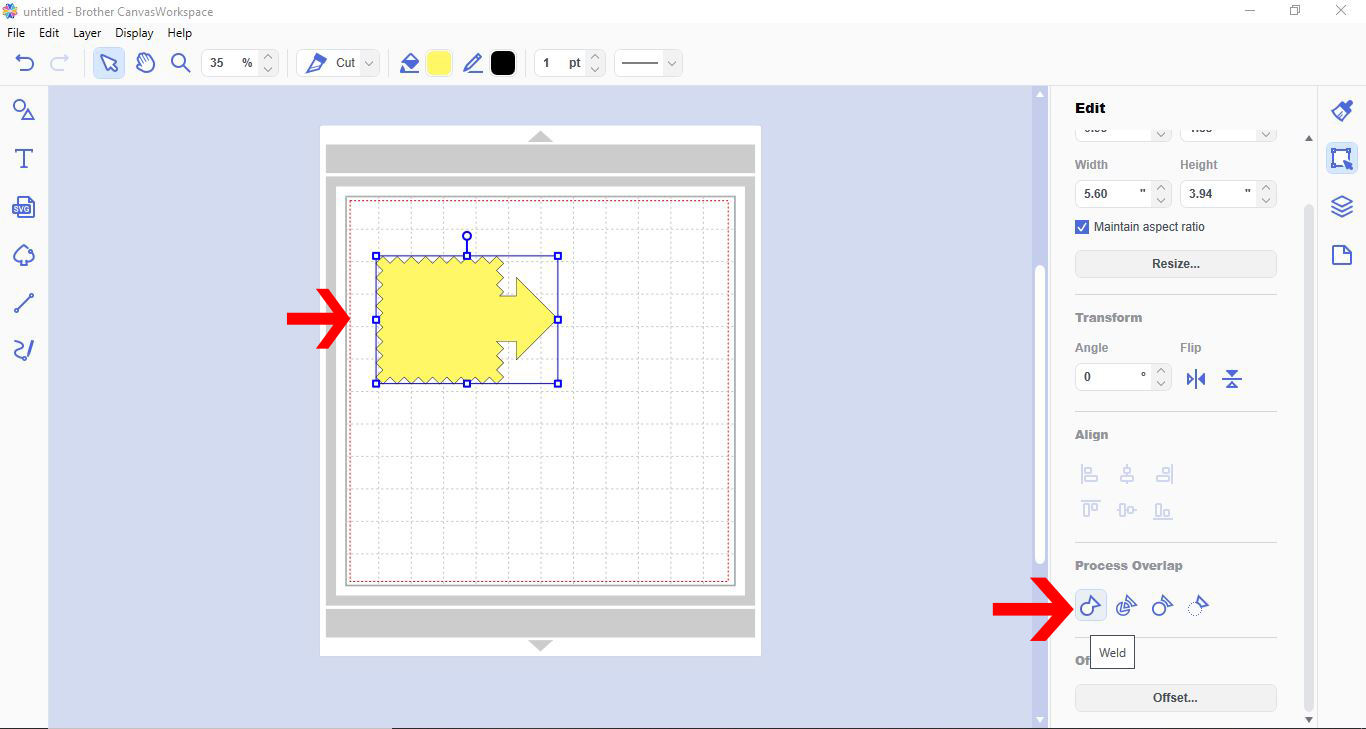
3- Over lap the two shapes.
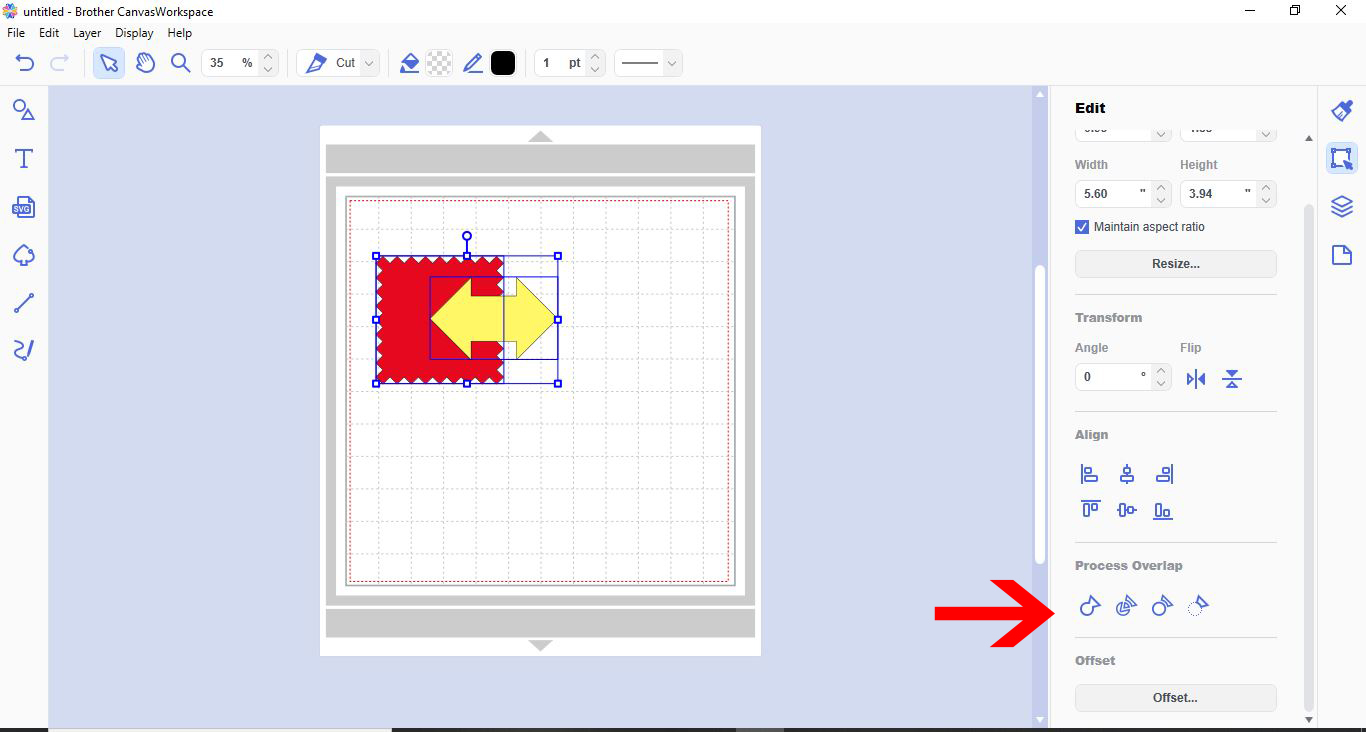
4- There are four process overlap functions. 1- Weld 2- divide 3- remove overlapped 4- subtract
5- With both shapes selected,click on the weld process overlap. This will join both together to create one solid area.
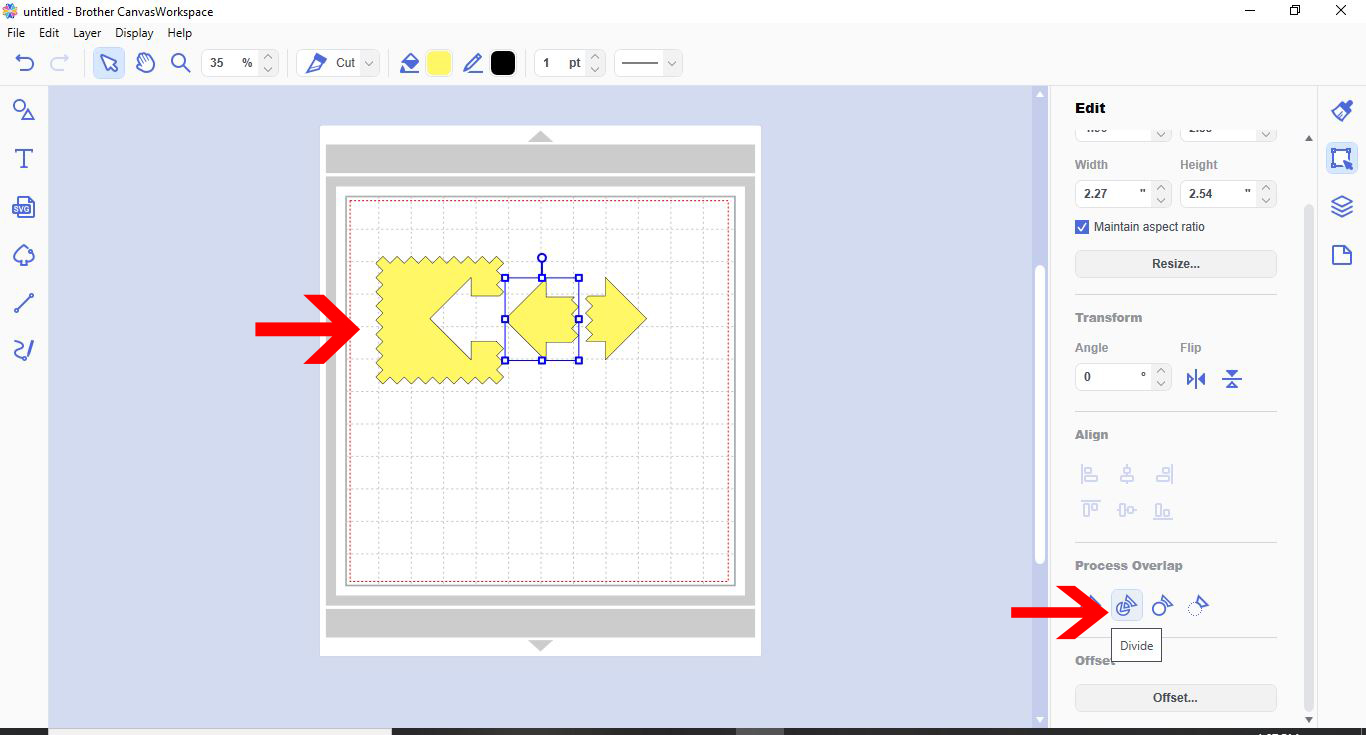
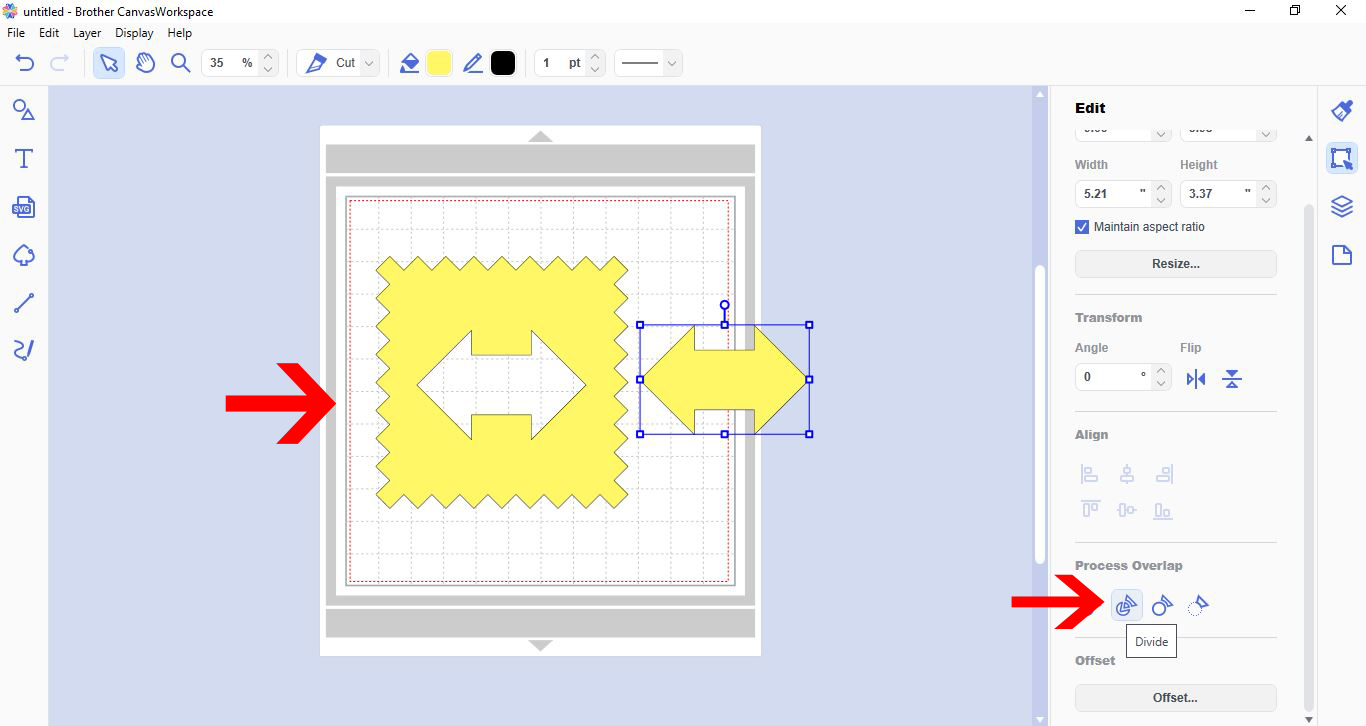
6- With both shapes selected click on divide. This will divide all parts of the shapes that overlap. Each section will become its own shape like pieces of a jigsaw.
7- Divide is also great to create apertures in shapes. Useful also for apertures in cards. Just place one shape over the second shape and ensure no edge is touching and the divide will "cookie cutter" the shape out.
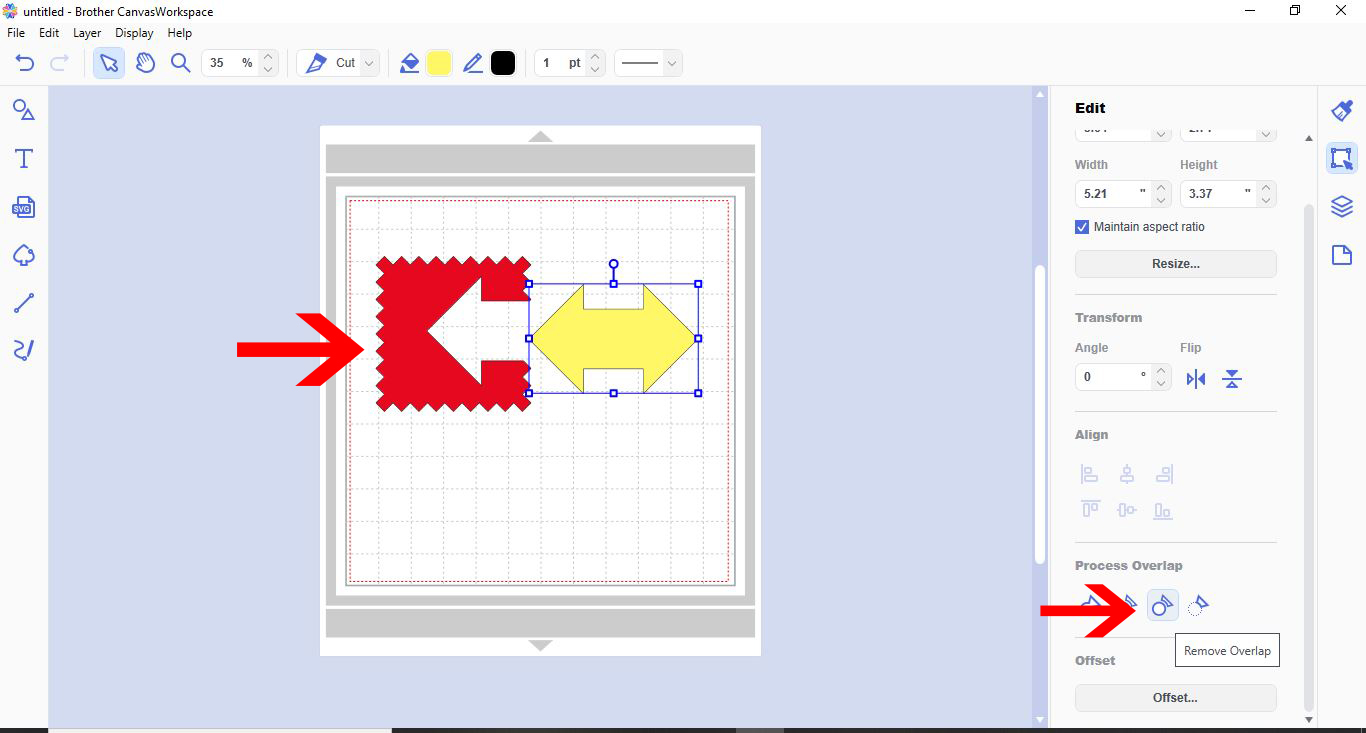
8- Remove overlapped will cut one shape out of another shape. Depending on what shape is layered on top of the other will determine what will be cut out of the other. foe eg. If you have a square and a star like below the square was placed on the work space first and the star on top. the star will cut its shape out of the square where it overlapped. If you wanted the square to cut out of the star you would need to ensure the square was the top layer.
9- The subtract function will remover and cut out the top shape from the bottom shape. Again it is important to know what layer is on top before using this function as this will affect what gets subtracted from what shape.
2- Create 2 different shapes.
3- Over lap the two shapes.
4- There are four process overlap functions. 1- Weld 2- divide 3- remove overlapped 4- subtract
5- With both shapes selected,click on the weld process overlap. This will join both together to create one solid area.
6- With both shapes selected click on divide. This will divide all parts of the shapes that overlap. Each section will become its own shape like pieces of a jigsaw.
7- Divide is also great to create apertures in shapes. Useful also for apertures in cards. Just place one shape over the second shape and ensure no edge is touching and the divide will "cookie cutter" the shape out.
8- Remove overlapped will cut one shape out of another shape. Depending on what shape is layered on top of the other will determine what will be cut out of the other. foe eg. If you have a square and a star like below the square was placed on the work space first and the star on top. the star will cut its shape out of the square where it overlapped. If you wanted the square to cut out of the star you would need to ensure the square was the top layer.
9- The subtract function will remover and cut out the top shape from the bottom shape. Again it is important to know what layer is on top before using this function as this will affect what gets subtracted from what shape.


