- By Design Bundles
- 5 Mins
- Photoshop Tutorials
How to Change Hair Color in Photoshop
Step 1: Select the hair
Open the image you’ve chosen to work with. Then use the magnetic lasso tool (W) and start by clicking just outside the hair to create a selection around it.
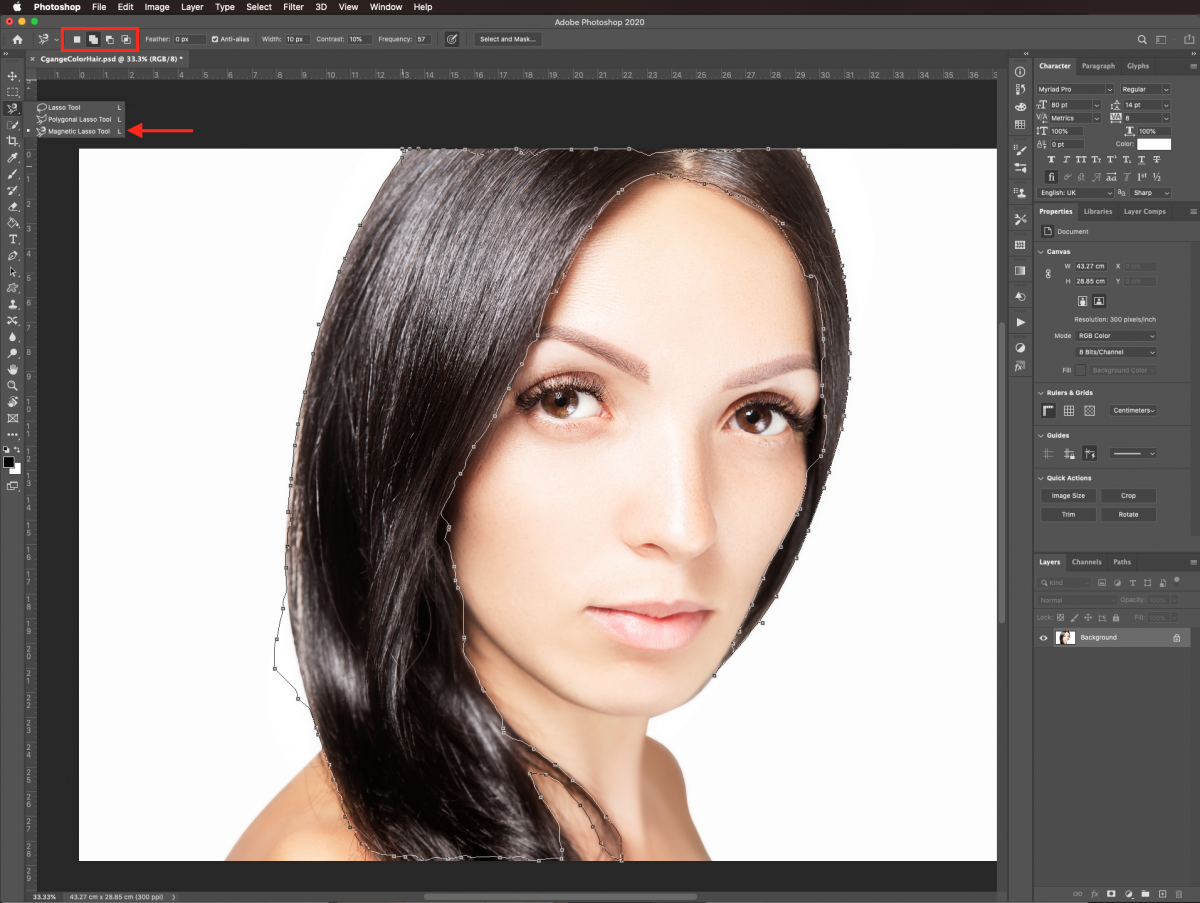
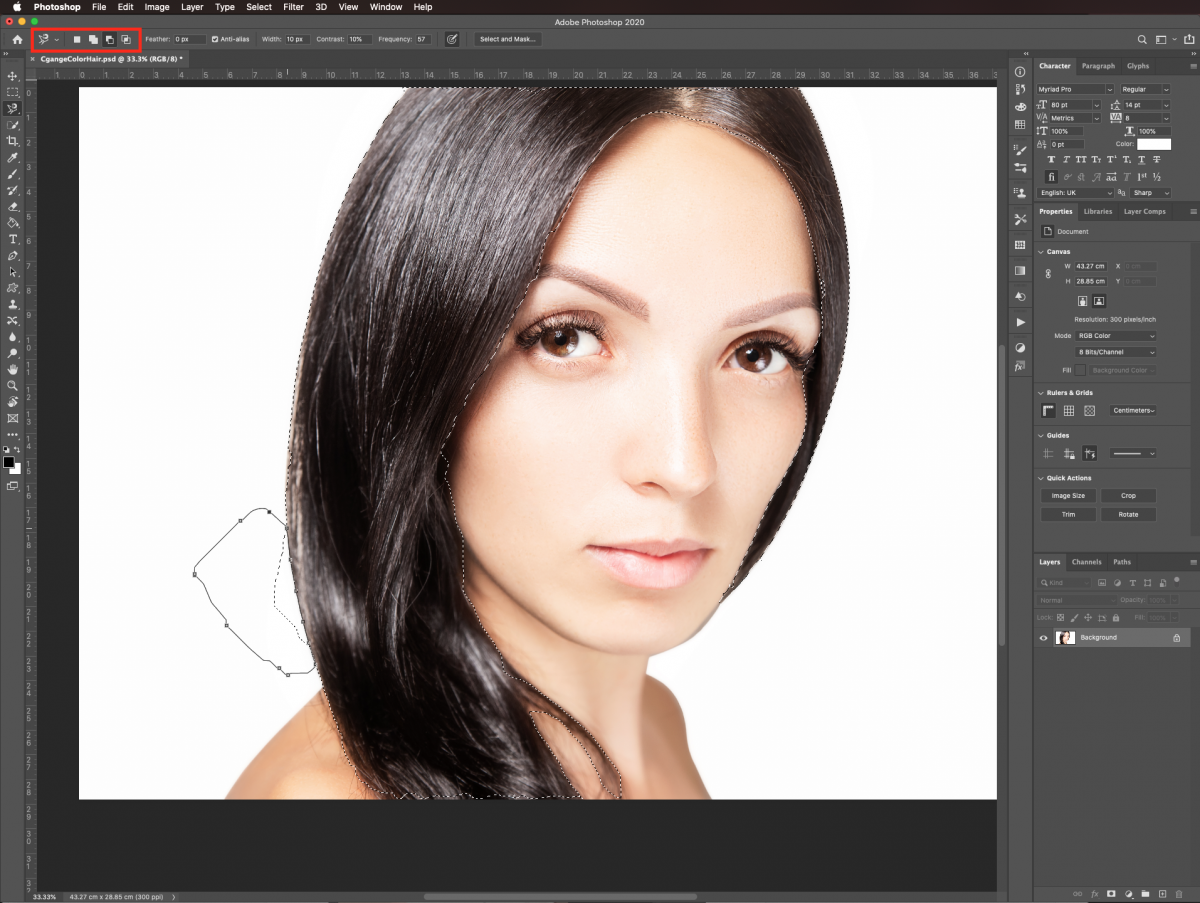
Change the size of the brush and use the add and/or subtract from selection options if needed. The selection does not need to be perfect.
Step 3: Mask your selection
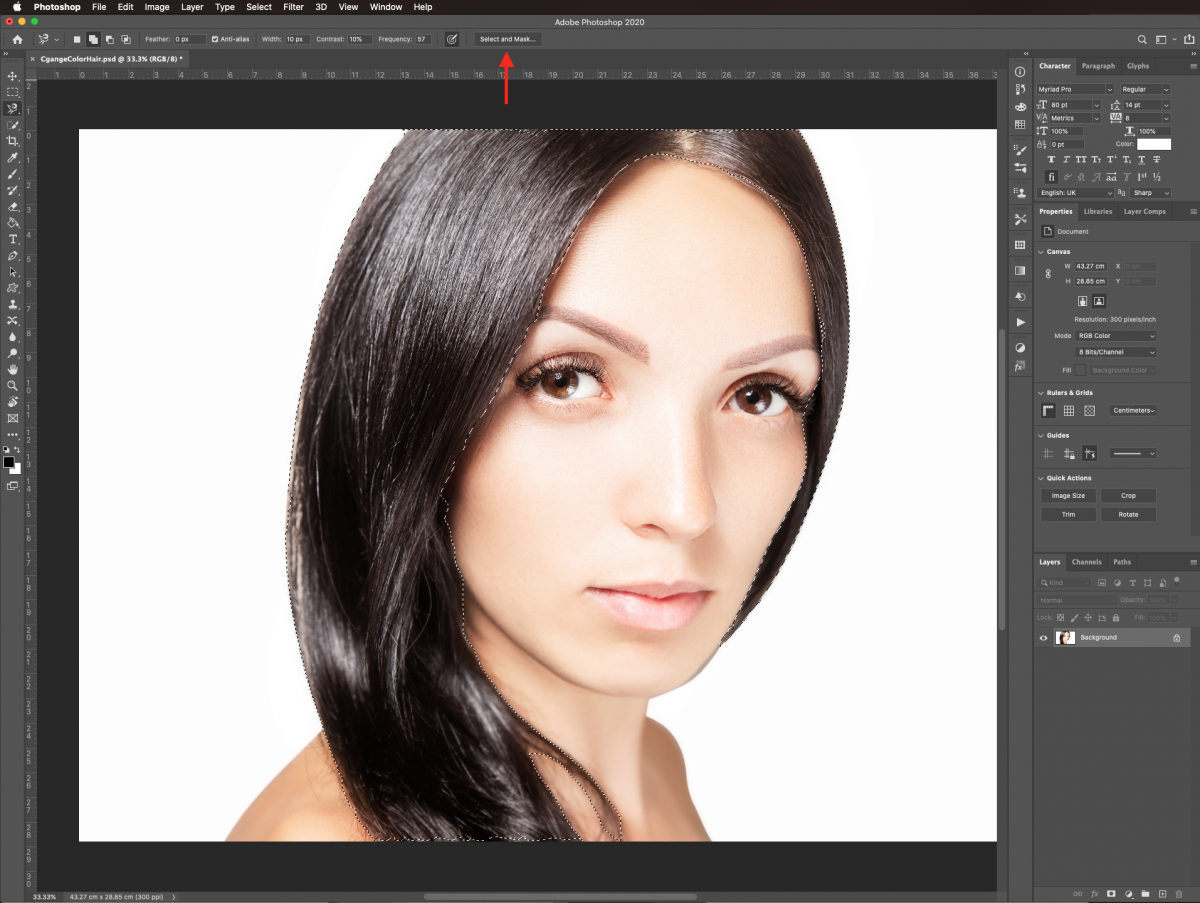
Click on the select and mask button on the top menu. For a more detailed explanation on how to create and refine the selection with the mask check our tutorial on how to smooth the mask edges.
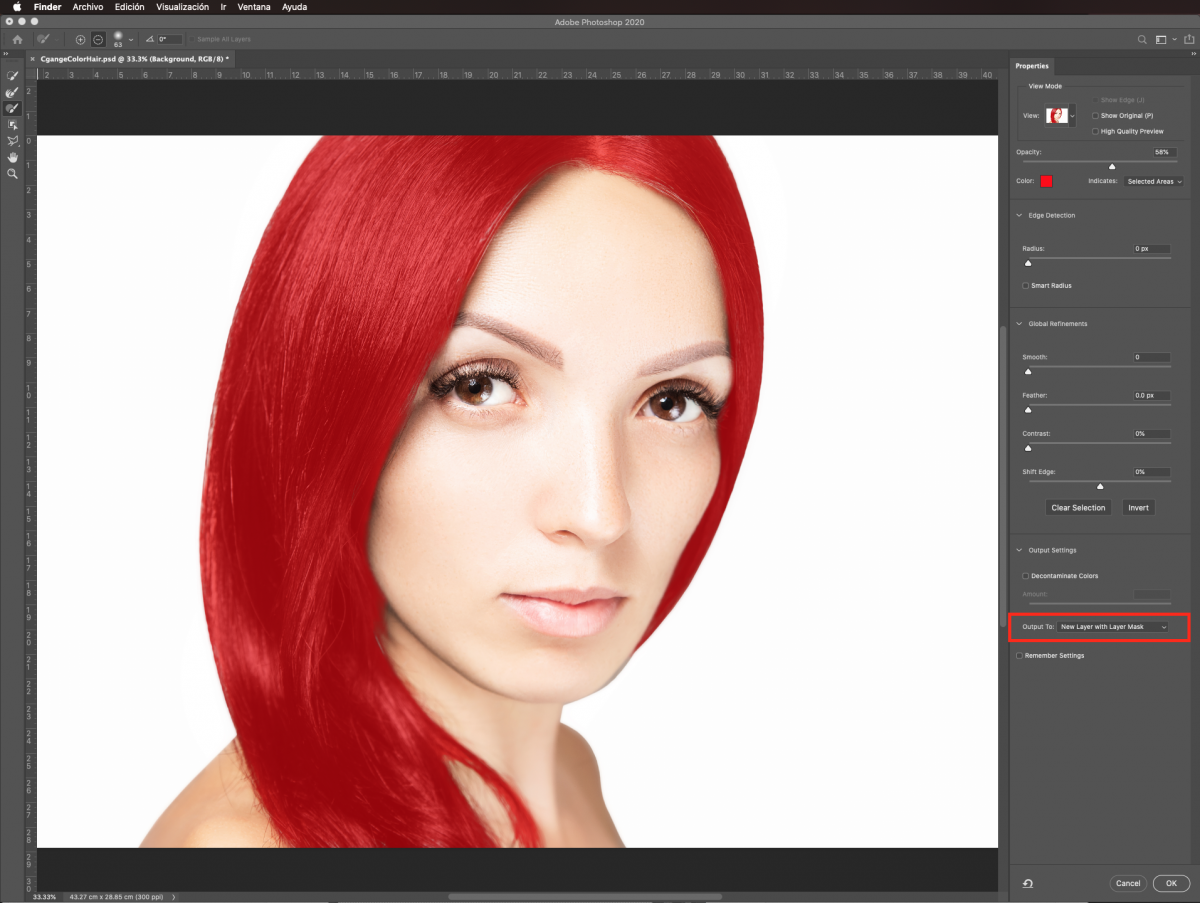
Once you are finished creating the mask, select output to new layer with mask once you are done and click ok.
Step 4: Create a contrast layer
Select the bottom layer and then create a new layer on top by clicking on the small button at the bottom of the layers panel.
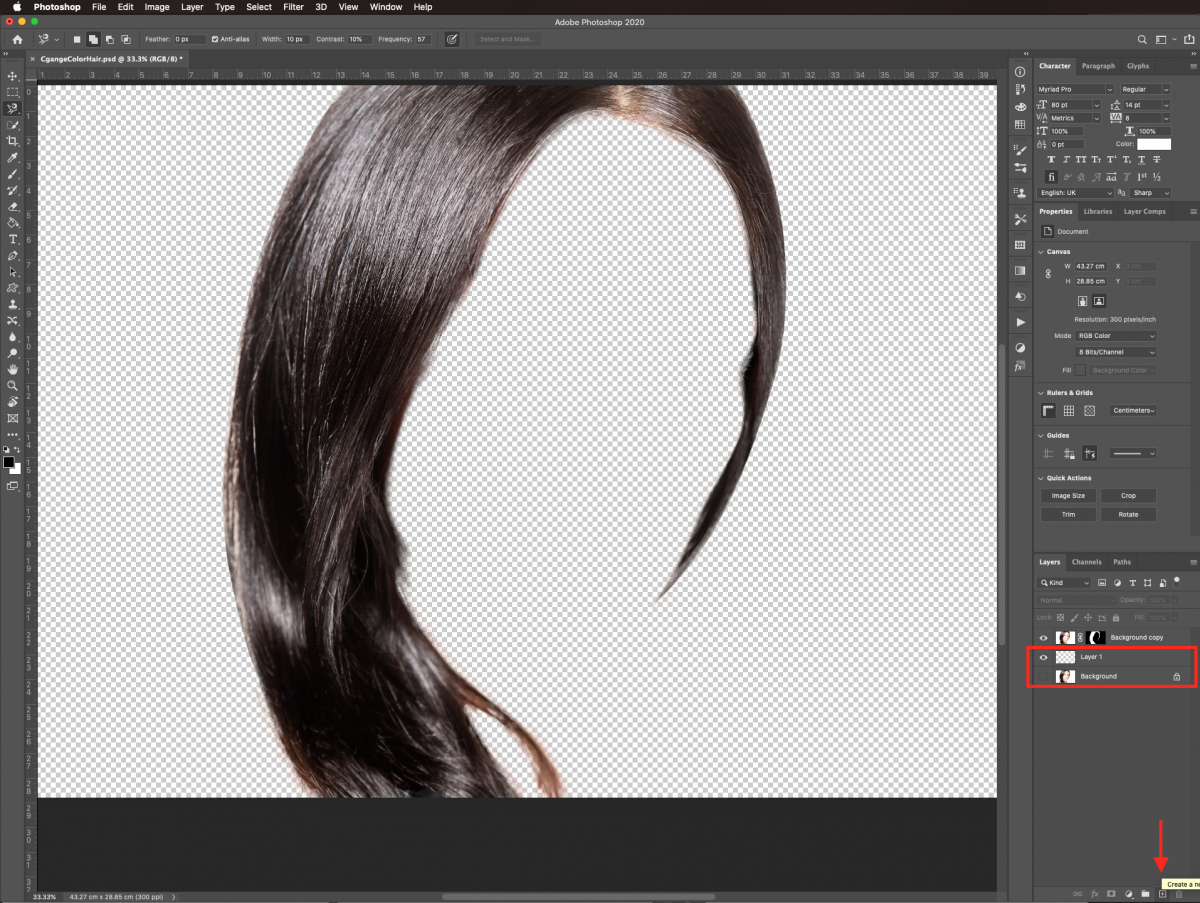
Fill it with black using the paint bucket tool (B) and make sure black is your foreground color before clicking on it.
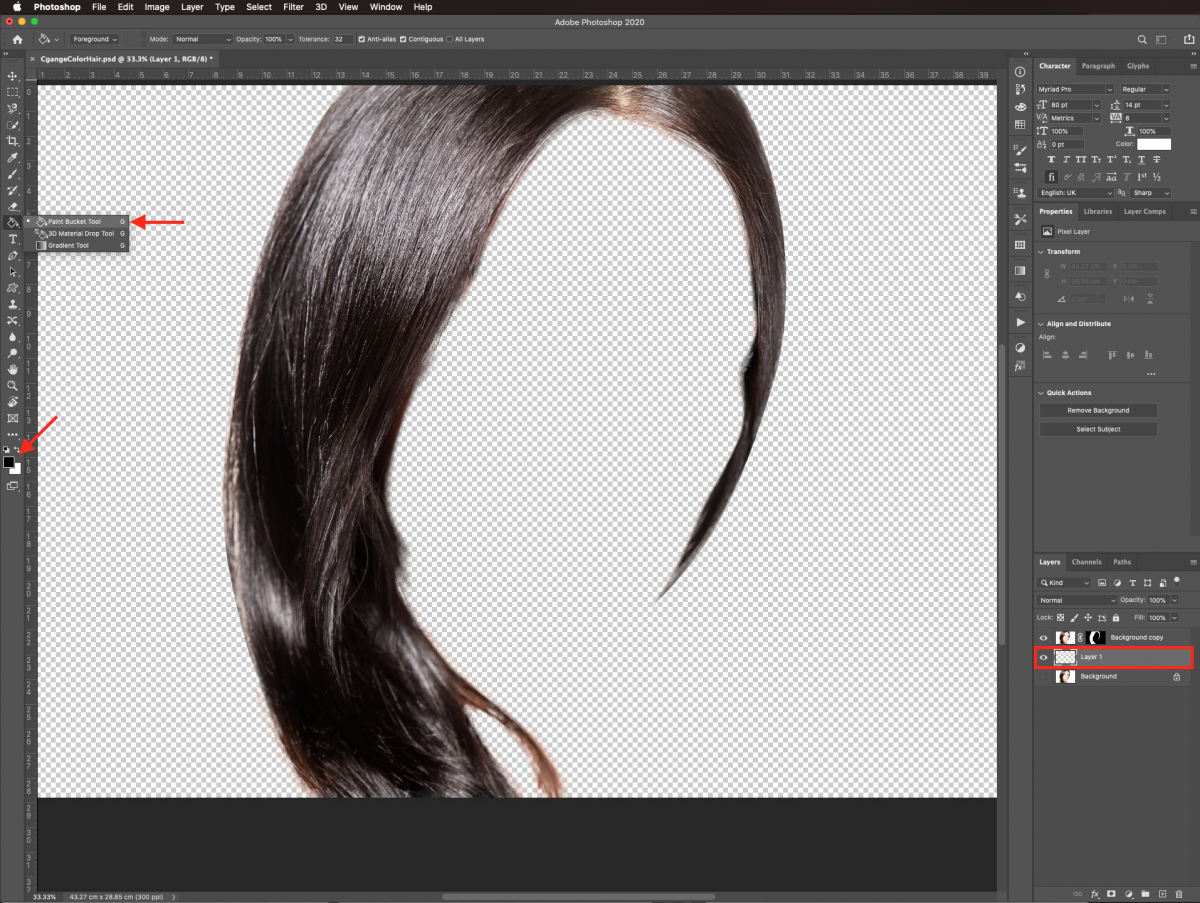
Step 5: Refine the hair edges
Make the background layer visible and lower the opacity of the black layer so you can see through a bit.
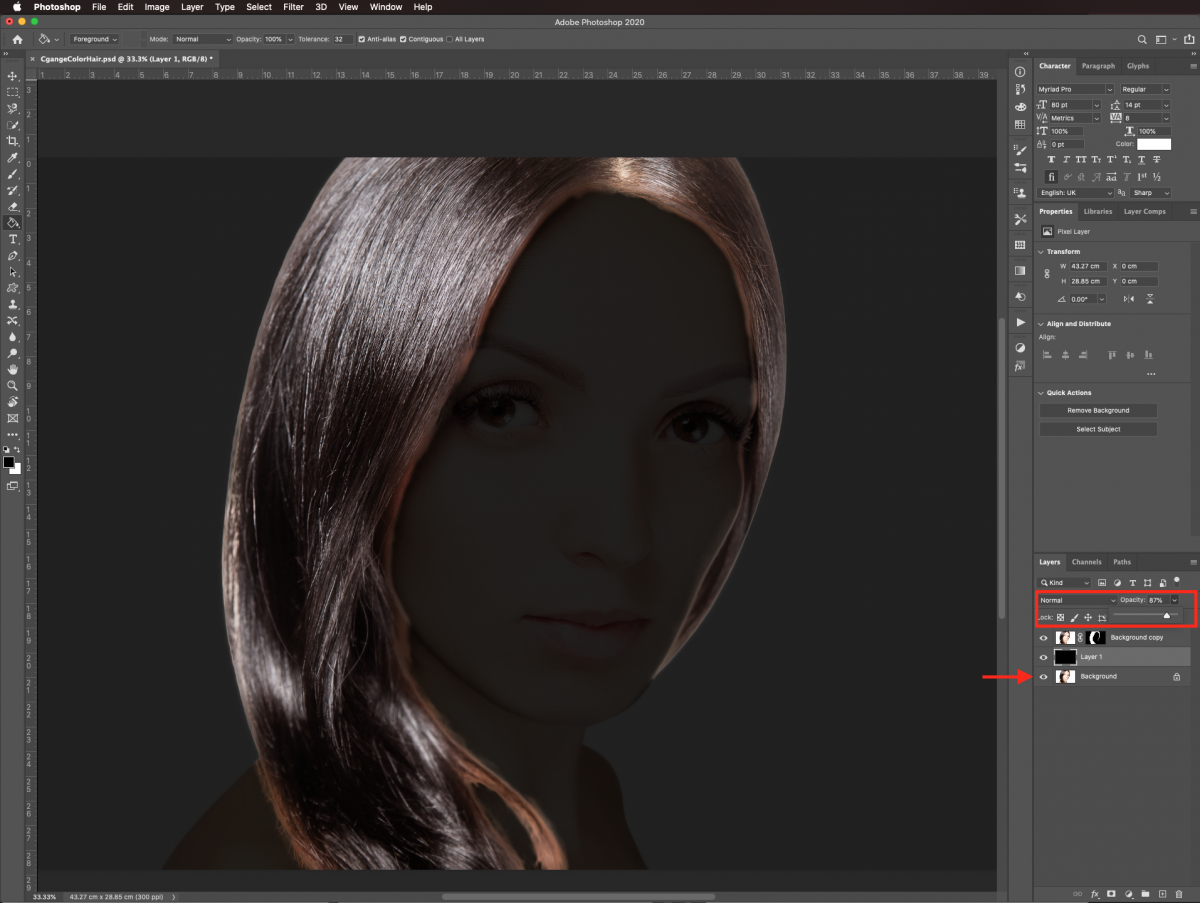
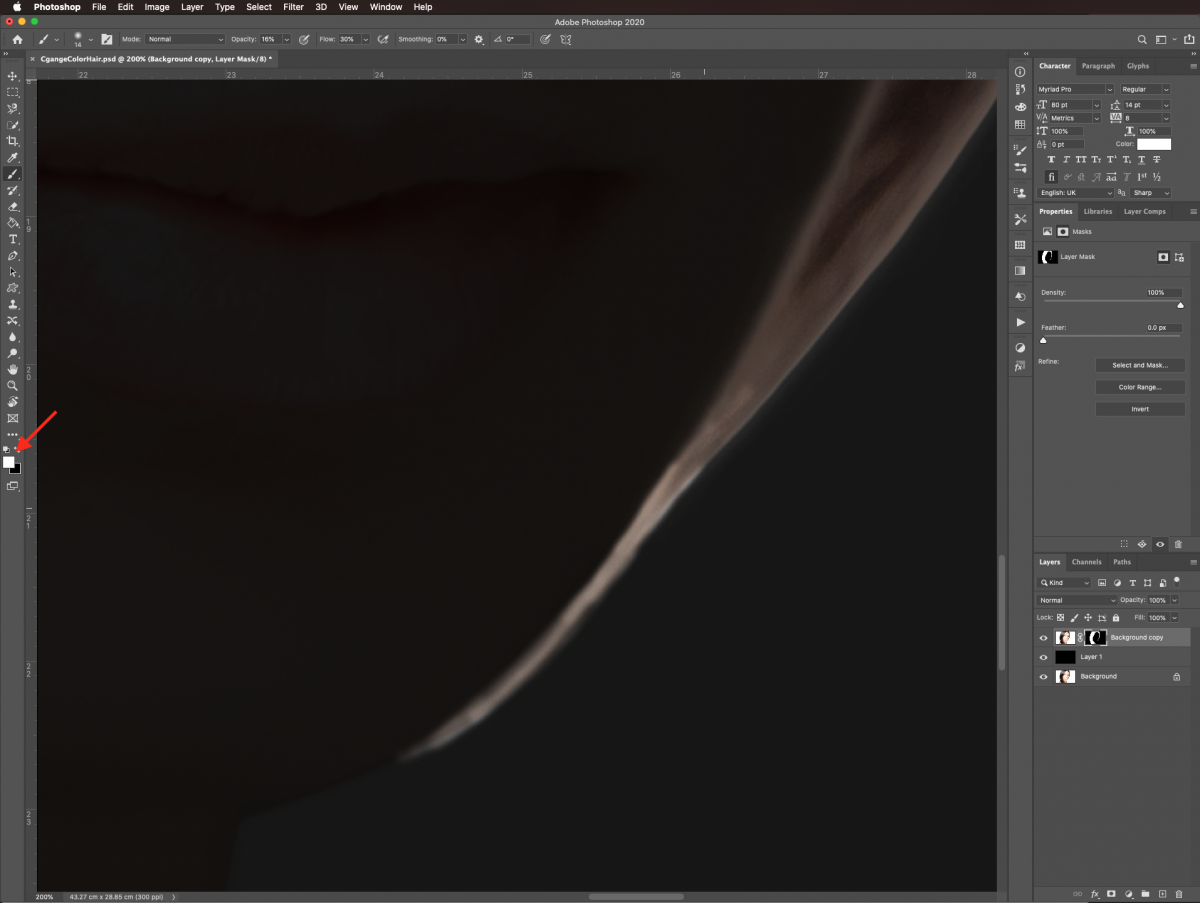
Make sure the mask thumbnail is selected and then, with the brush tool (B) and using a smooth brush with a very low flow (30%), smooth the edges of the hair.
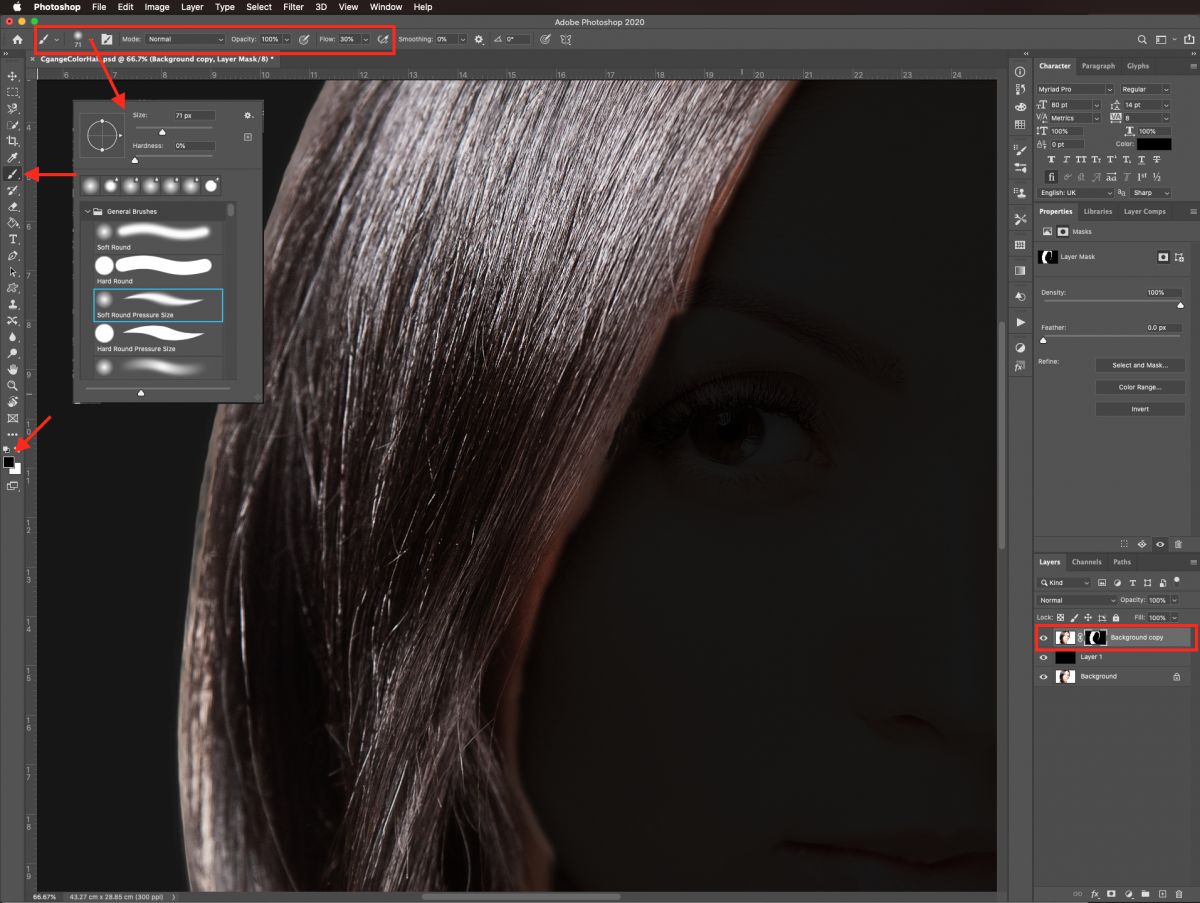
Use white to add to the selection and black to subtract from it.
Step 6: Change the hair color
Turn off the black layer and create a new hue/saturation adjustment layer on top of everything.
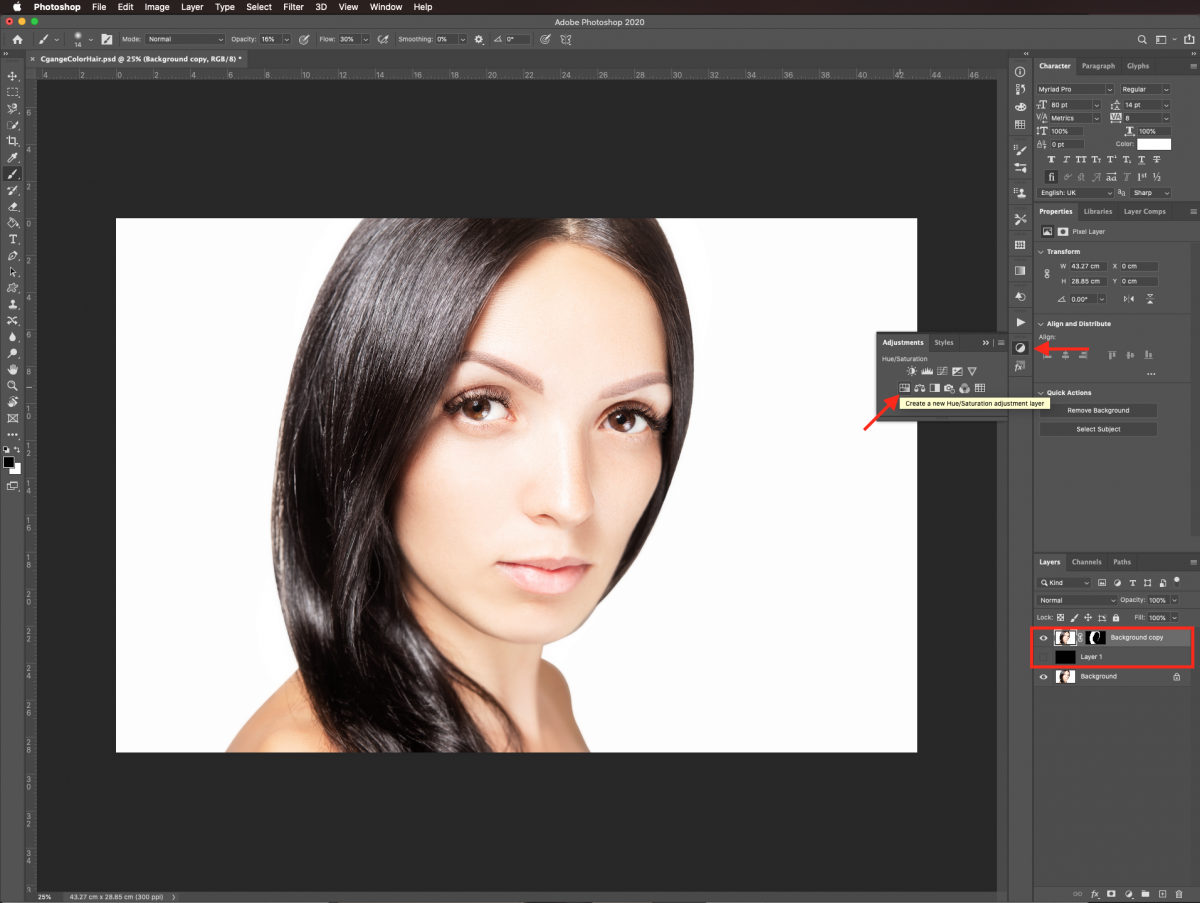
Clip it to the hair layer by clicking on the small button at the bottom of the adjustments panel, check the colorize box and move the hue, saturation, and lightness levers until you get the desired color.
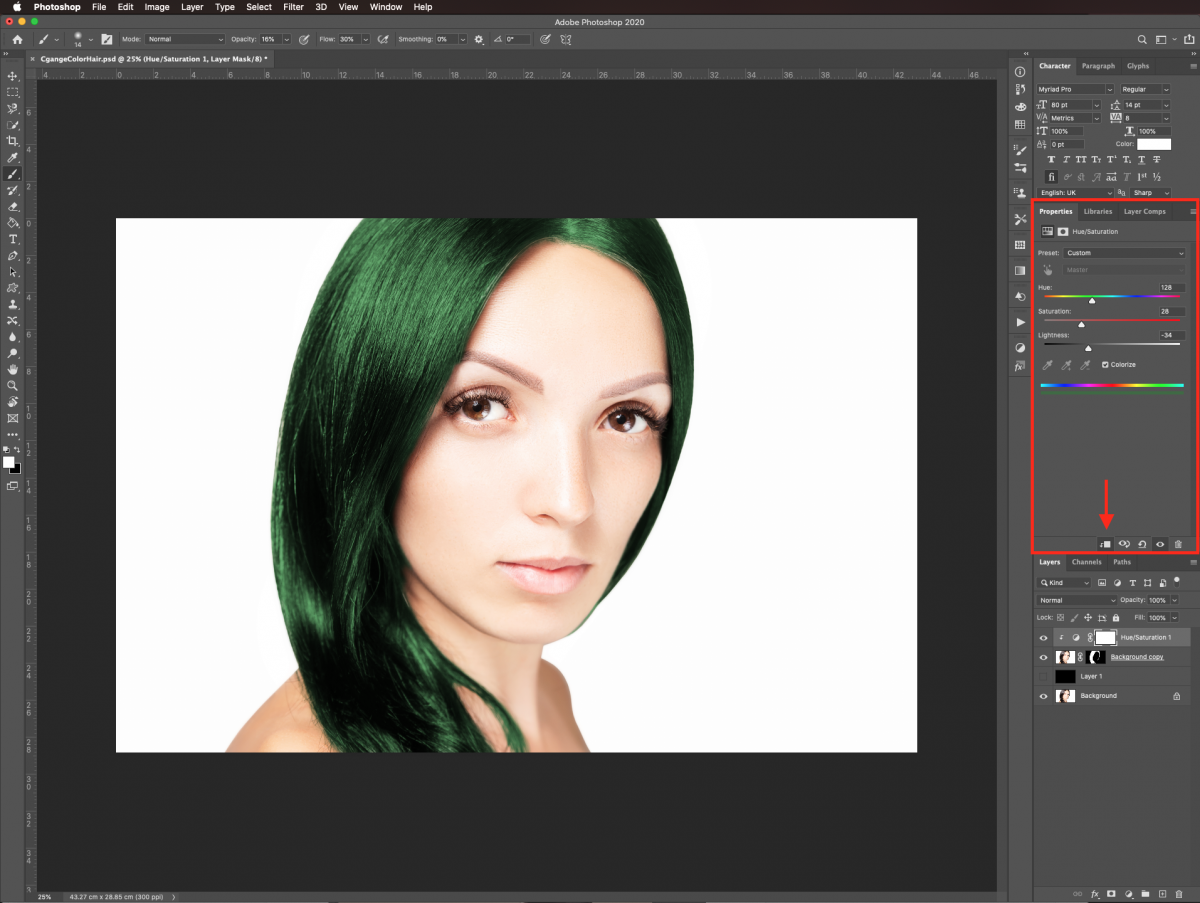
Step 7: Adjust the color using blending modes
Double-click in the hue/saturation layer thumbnail to open the layer style window and, in the blending options tab head to the blend if gray section and move the black lever slightly to the right.
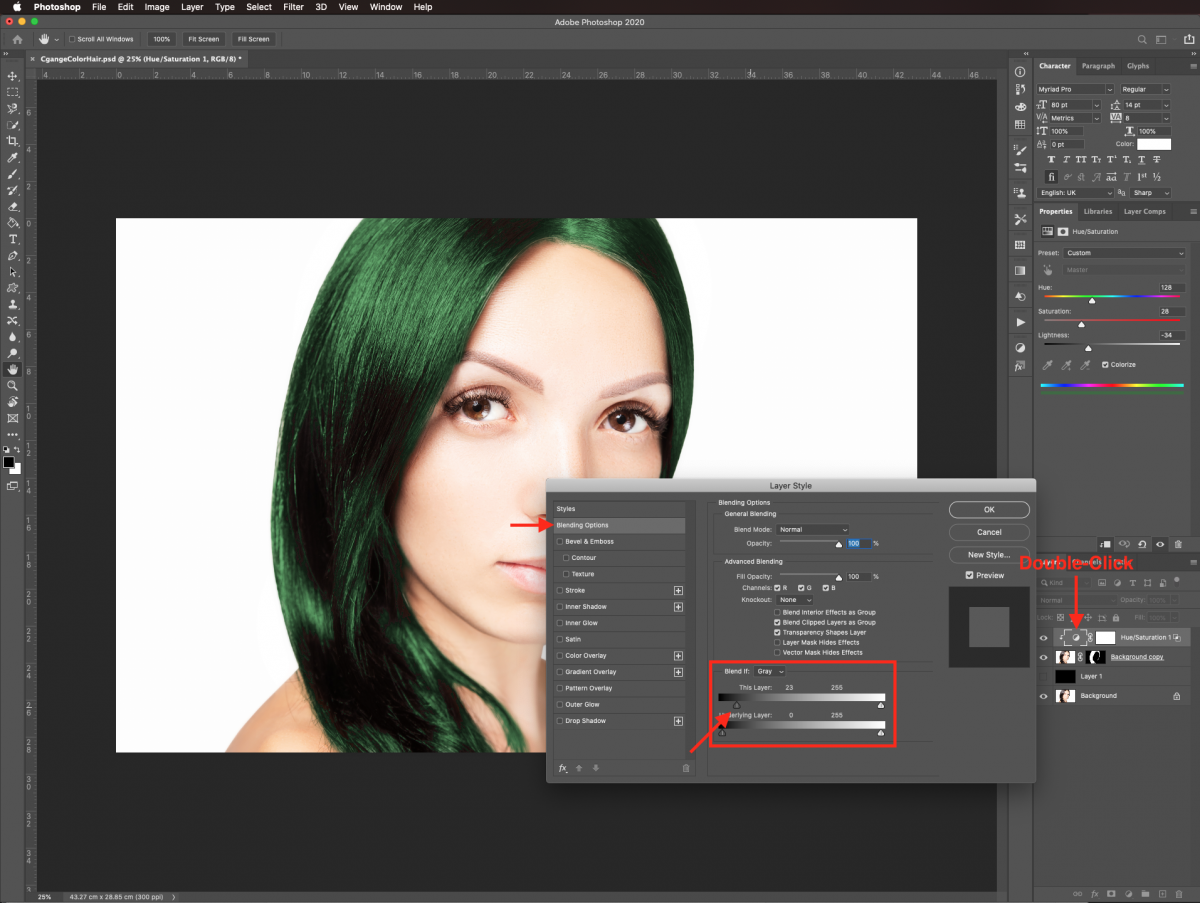
Option/alt-click on top of the lever to divide it and play around with it to achieve a smoother transition.
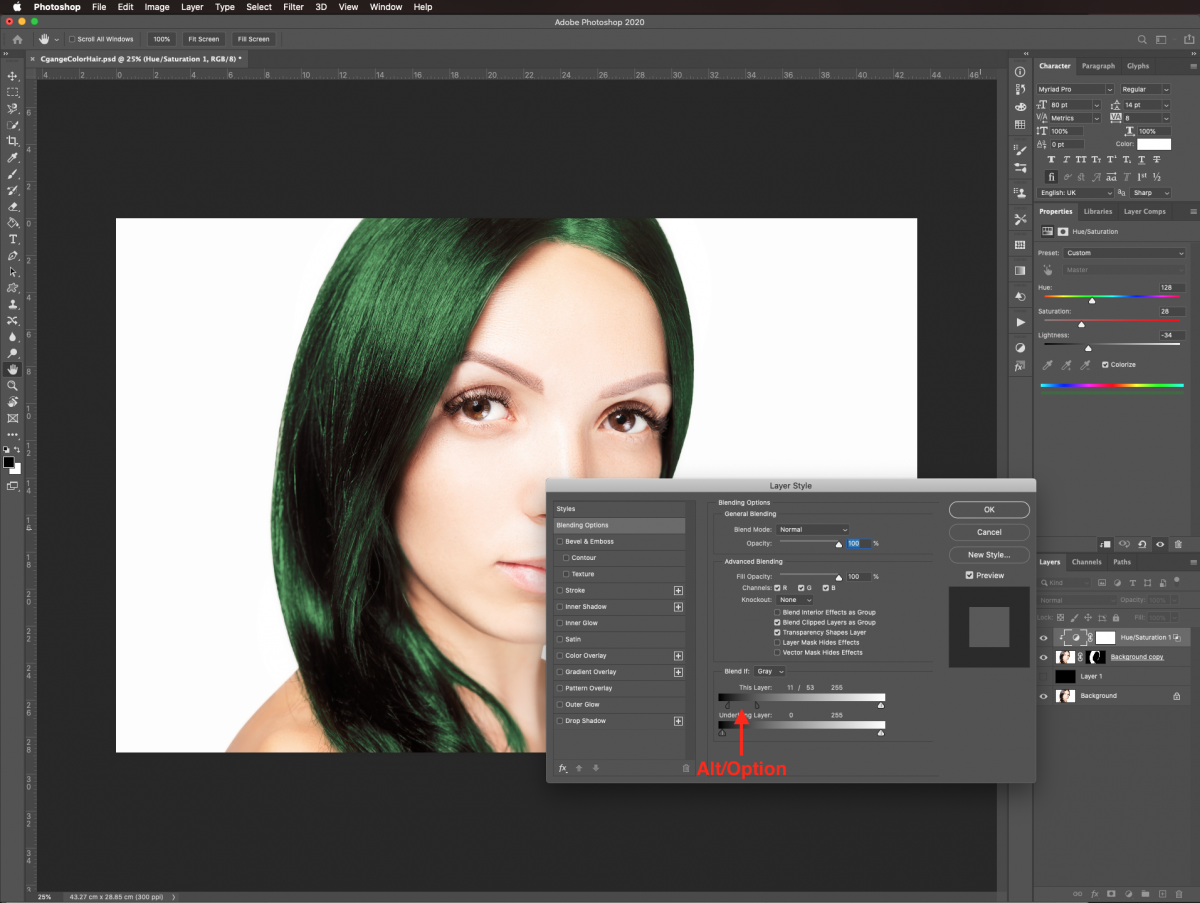
Check it out!
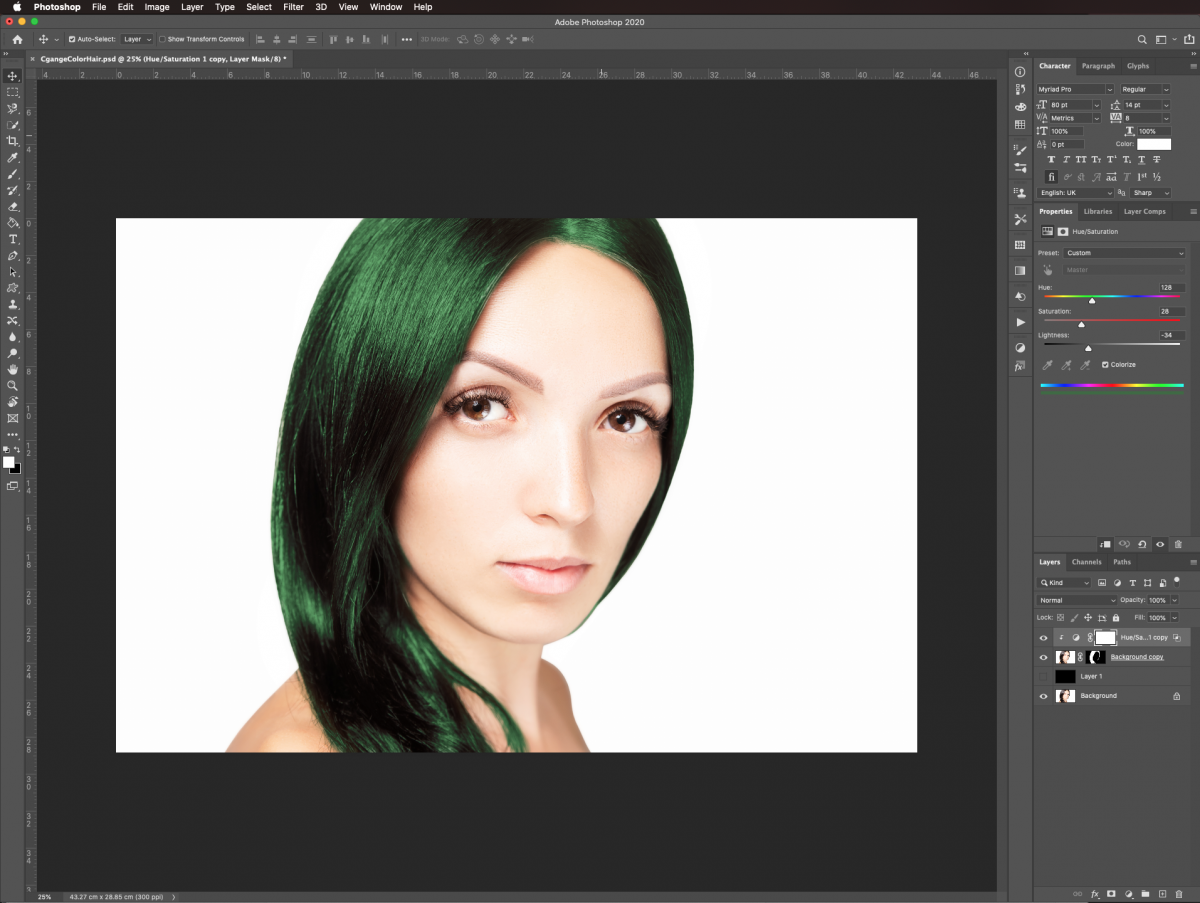
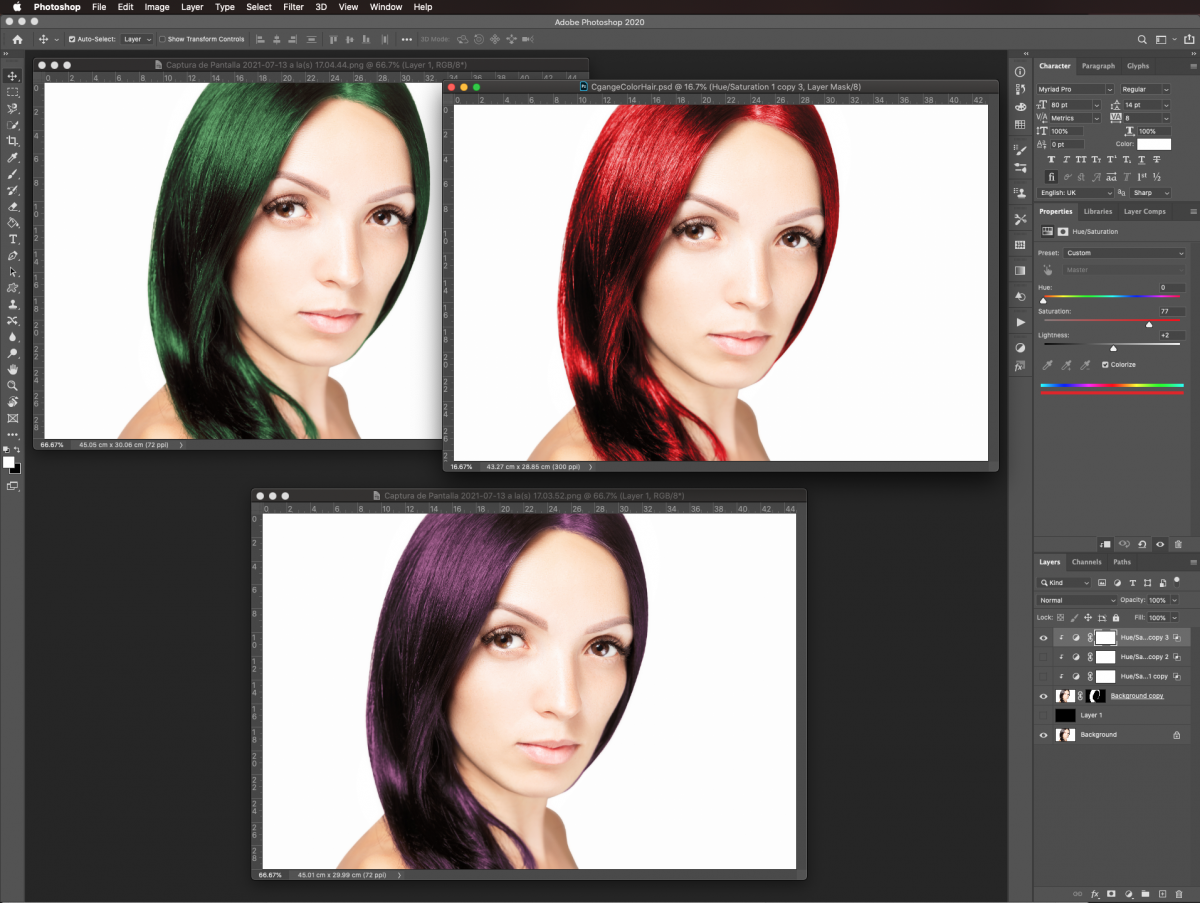
You can adjust the values of the hue/saturation layer to change the color. Or maybe create some duplicates with different colors.
If you liked this tutorial make sure to check out our guide on retouching skin in Photoshop.
6 Related Photoshop Tutorials
One of the really cool image manipulation effects you can do in Photoshop is changing the eye color of your subjects. Today, we will learn how to realistically change the color of eyes in a non-destructive way by grouping together some adjustment layers and using blending modes.For this tutorial, ...
1- Open Photoshop.2- Create a new document.3- Select the text tool and type your text. Adjust the font and size to your liking.4- With your text highlighted, select the small colored box on the top toolbar. Here you can select your color.5- When you are happy ...
Do you want to know how to change the color of a logo in Canva? Whether updating your brand or targeting a new, trendier market, we’ll show you step-by-step how to edit the colors. Canva is a great online design tool used to create social media content, presentations, blog ...
You can change your design color in DesignScape with just a few clicks. Available online to Gold Plus Members, DesignScape is a great alternative to Photoshop and Illustrator. DesignScape supports various file formats so you can color customize your designs however you want.If you are not a Gold Plus ...
Did you know that you can change the background color of your photo in Pixascape? In this super easy tutorial we will show you exactly how to do that. You will learn how to change the color of a solid and textured background in Pixascape.Pixascape is available to Silver ...
For this tutorial we are using a canvas or paper background and Titin Script from Font Bundles.1 – Create a new “Gradient Layer” under your “Texture” layer. Use a “Transparent to Fill Color” gradient with #d3d1d1 and #918f8f as colors, the Style as Radial and a 250% Scale. Hit ...

 All your Font Needs


