
Create a Mandala in Illustrator
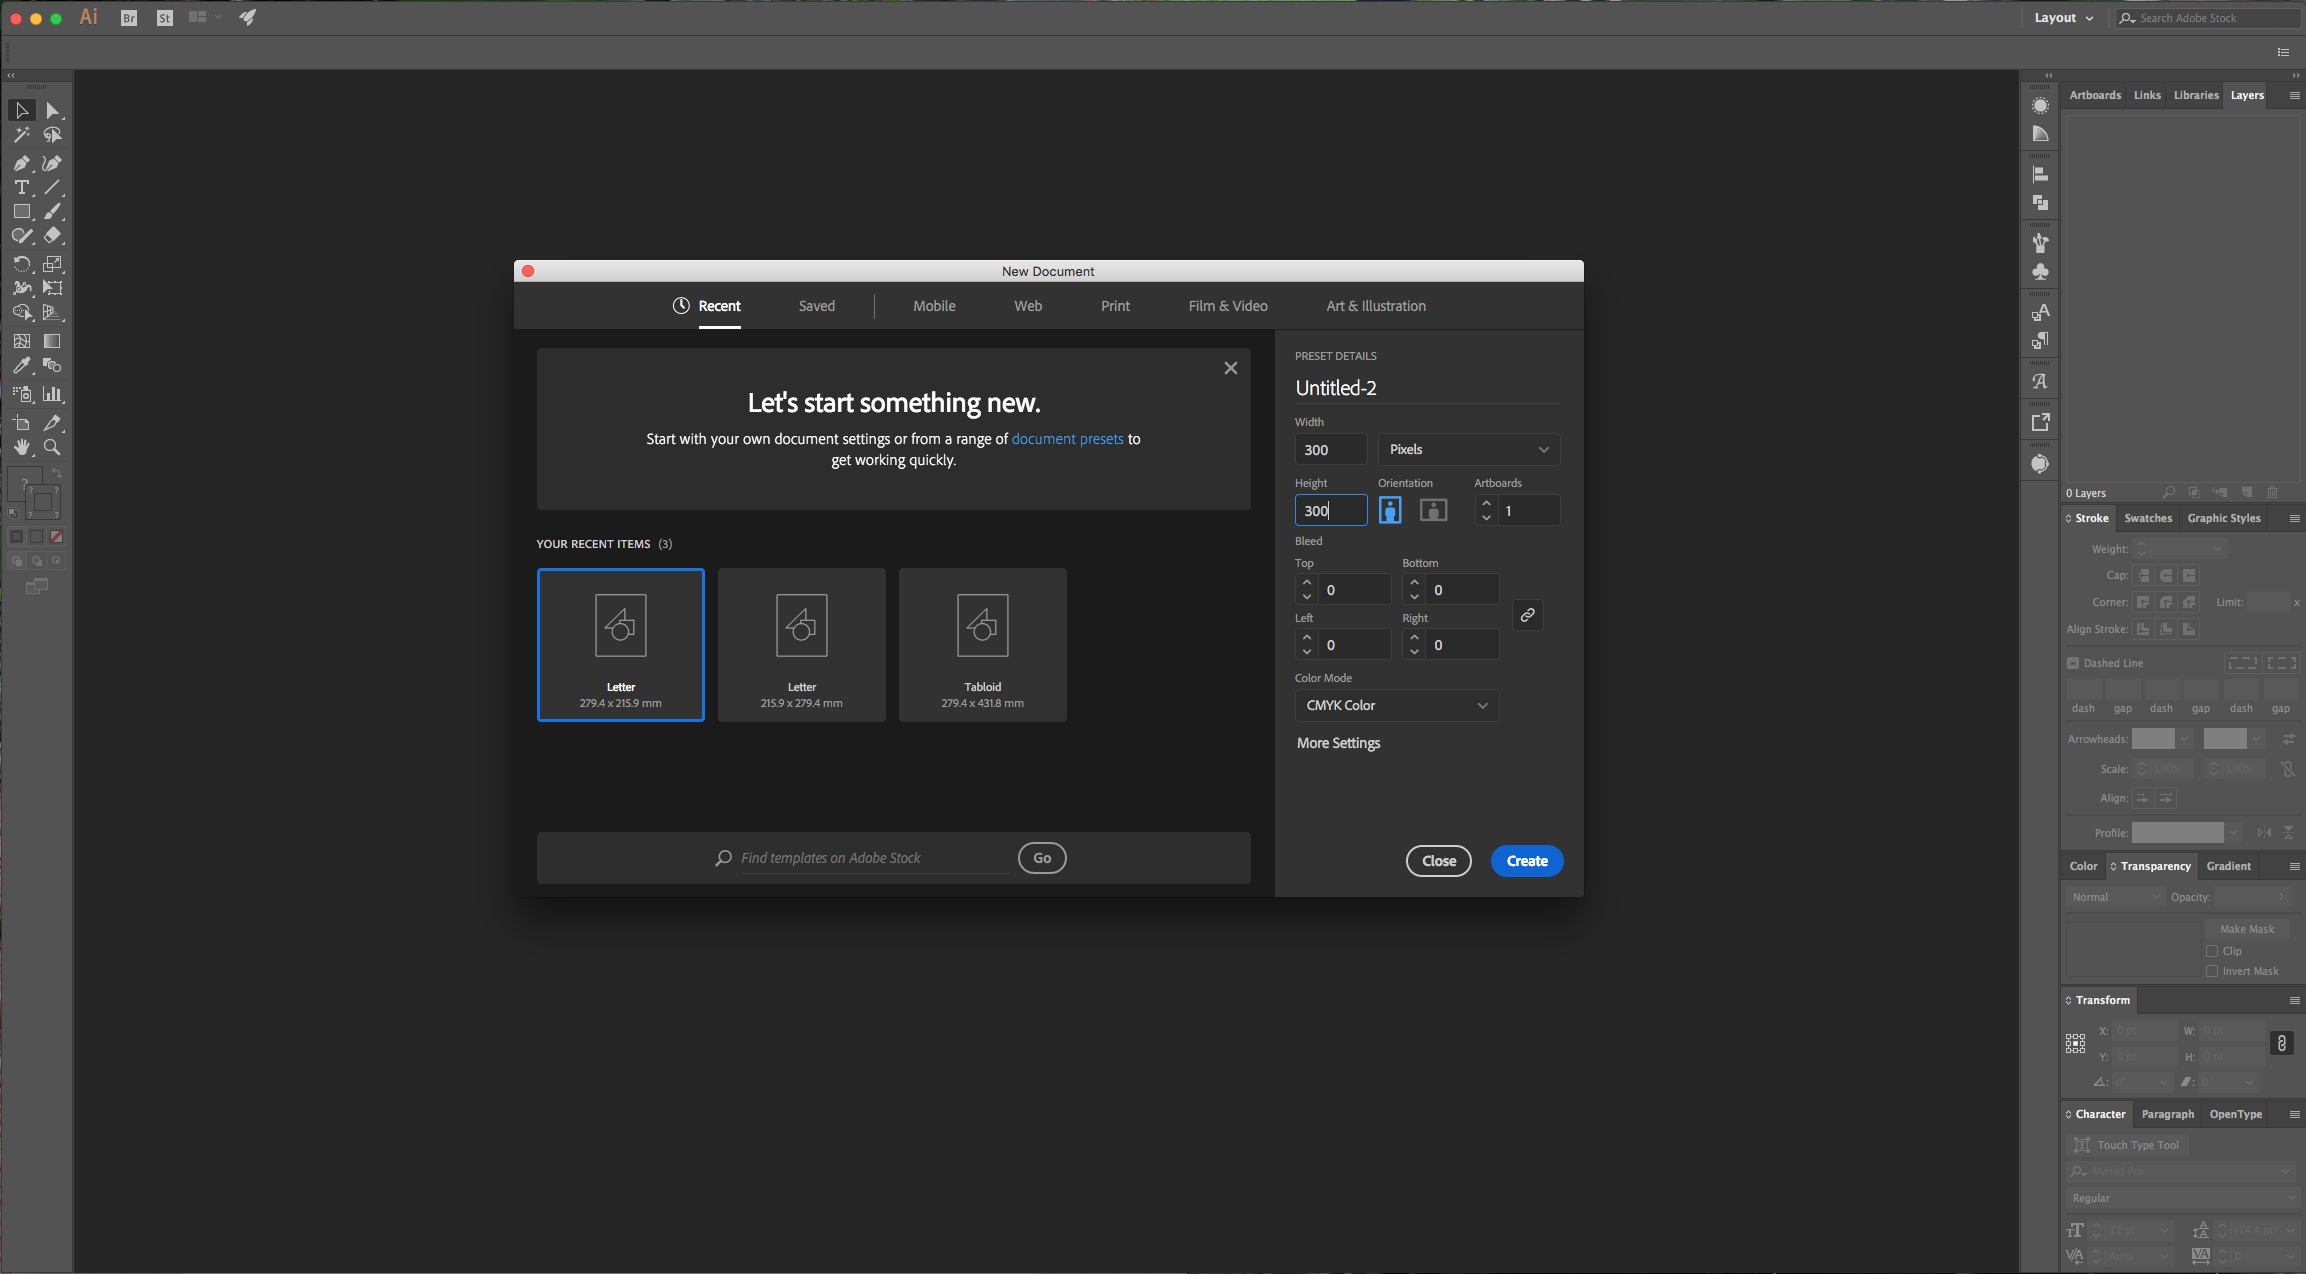
1 - In Illustrator, create a New Document (make its “With” and “Height” the same number of pixels).
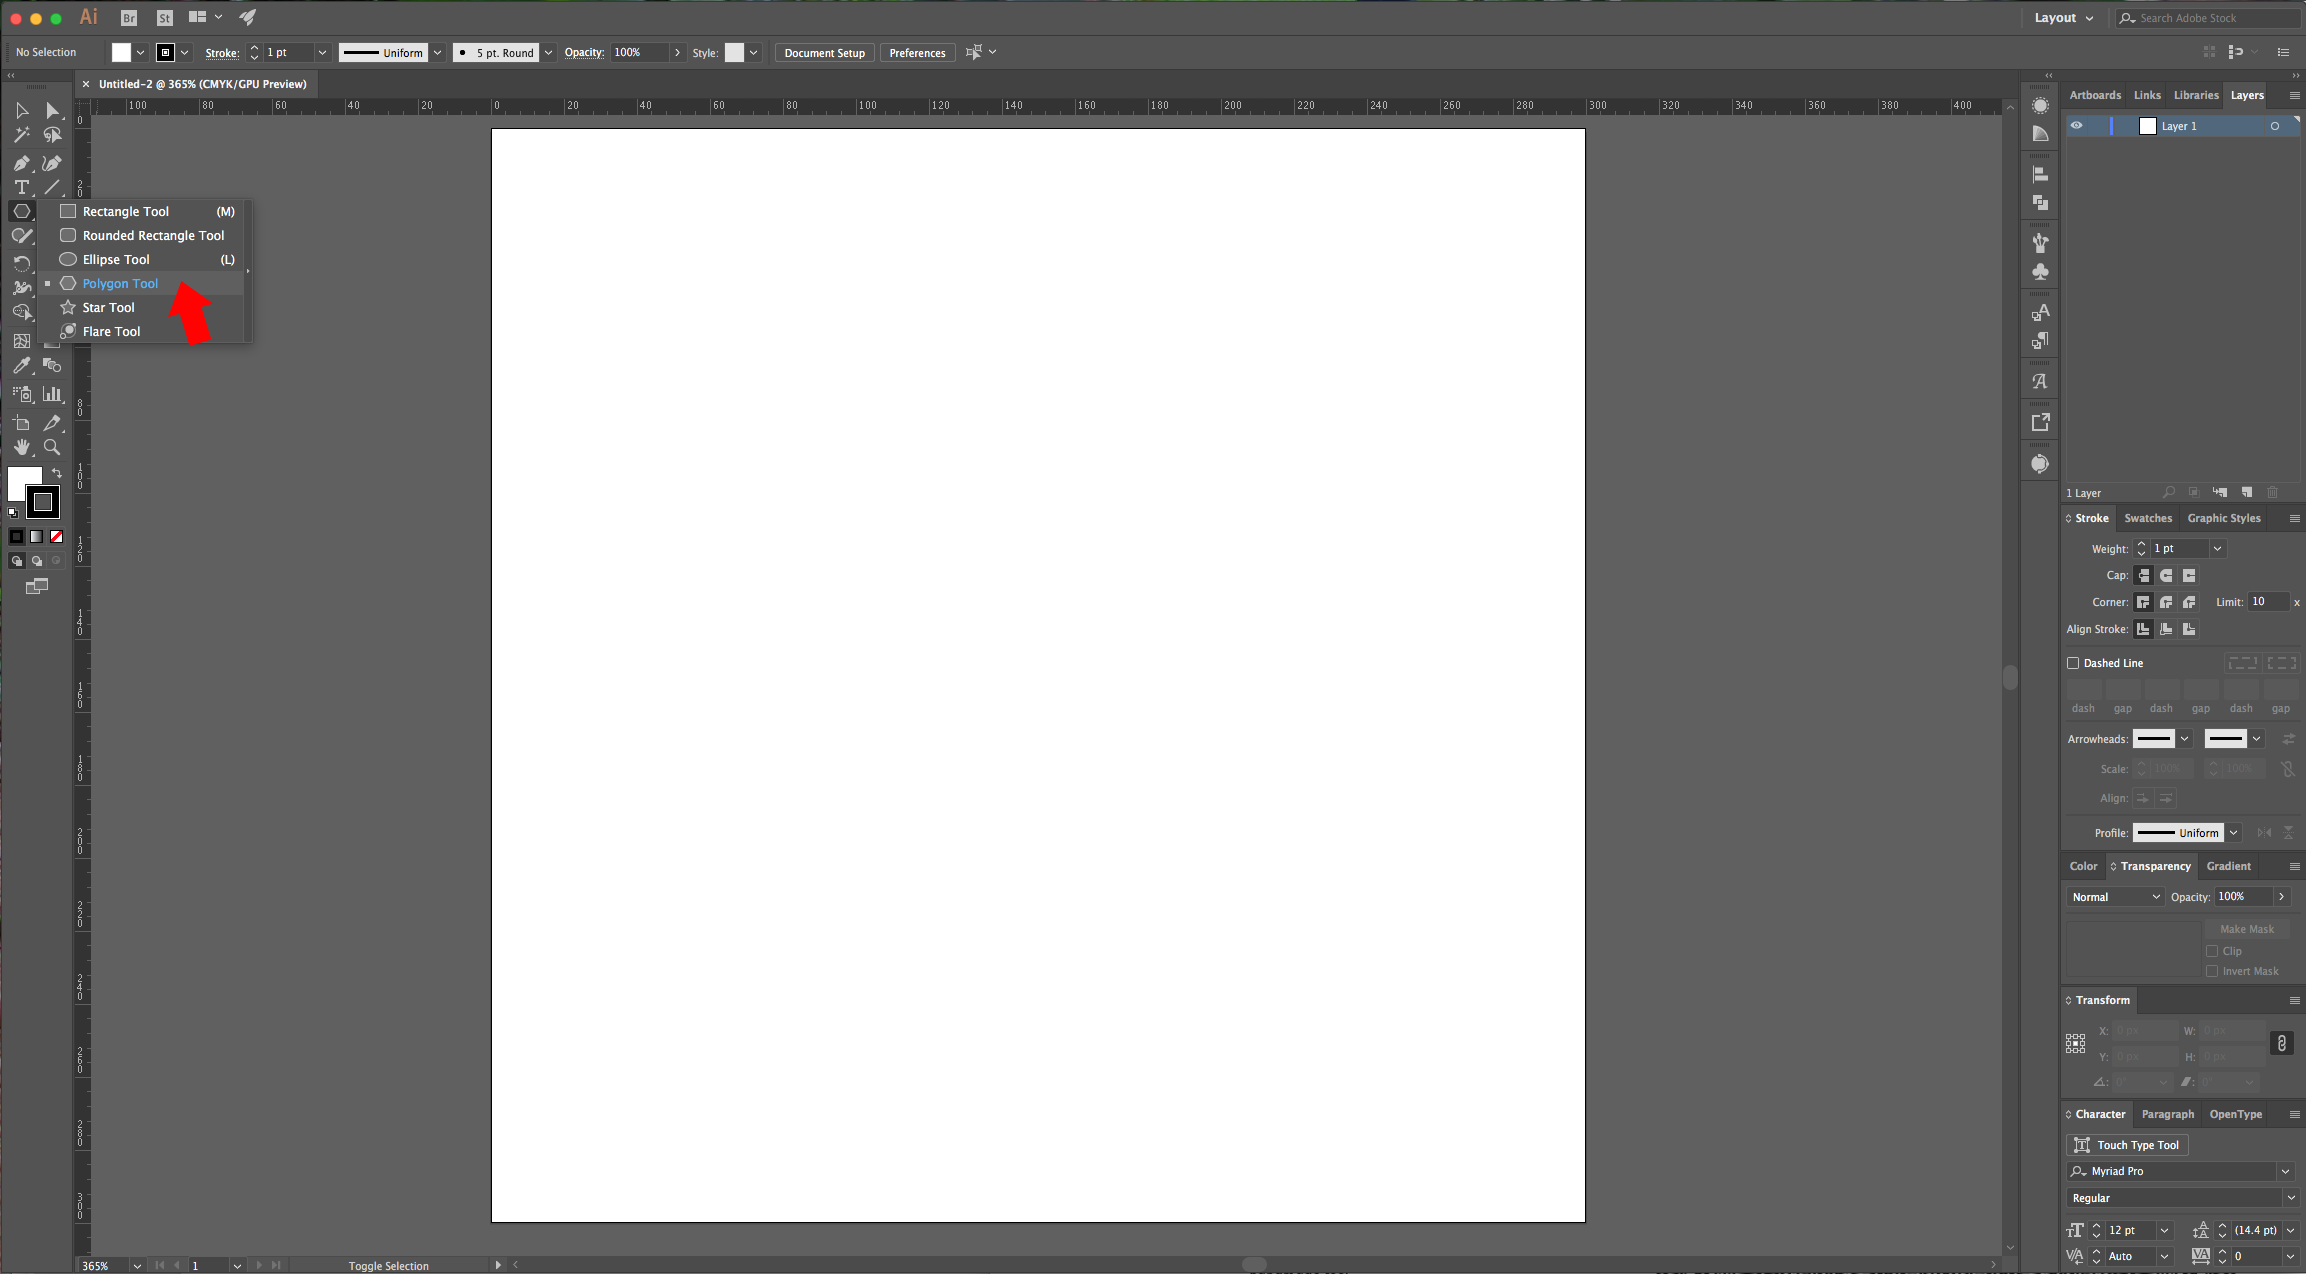
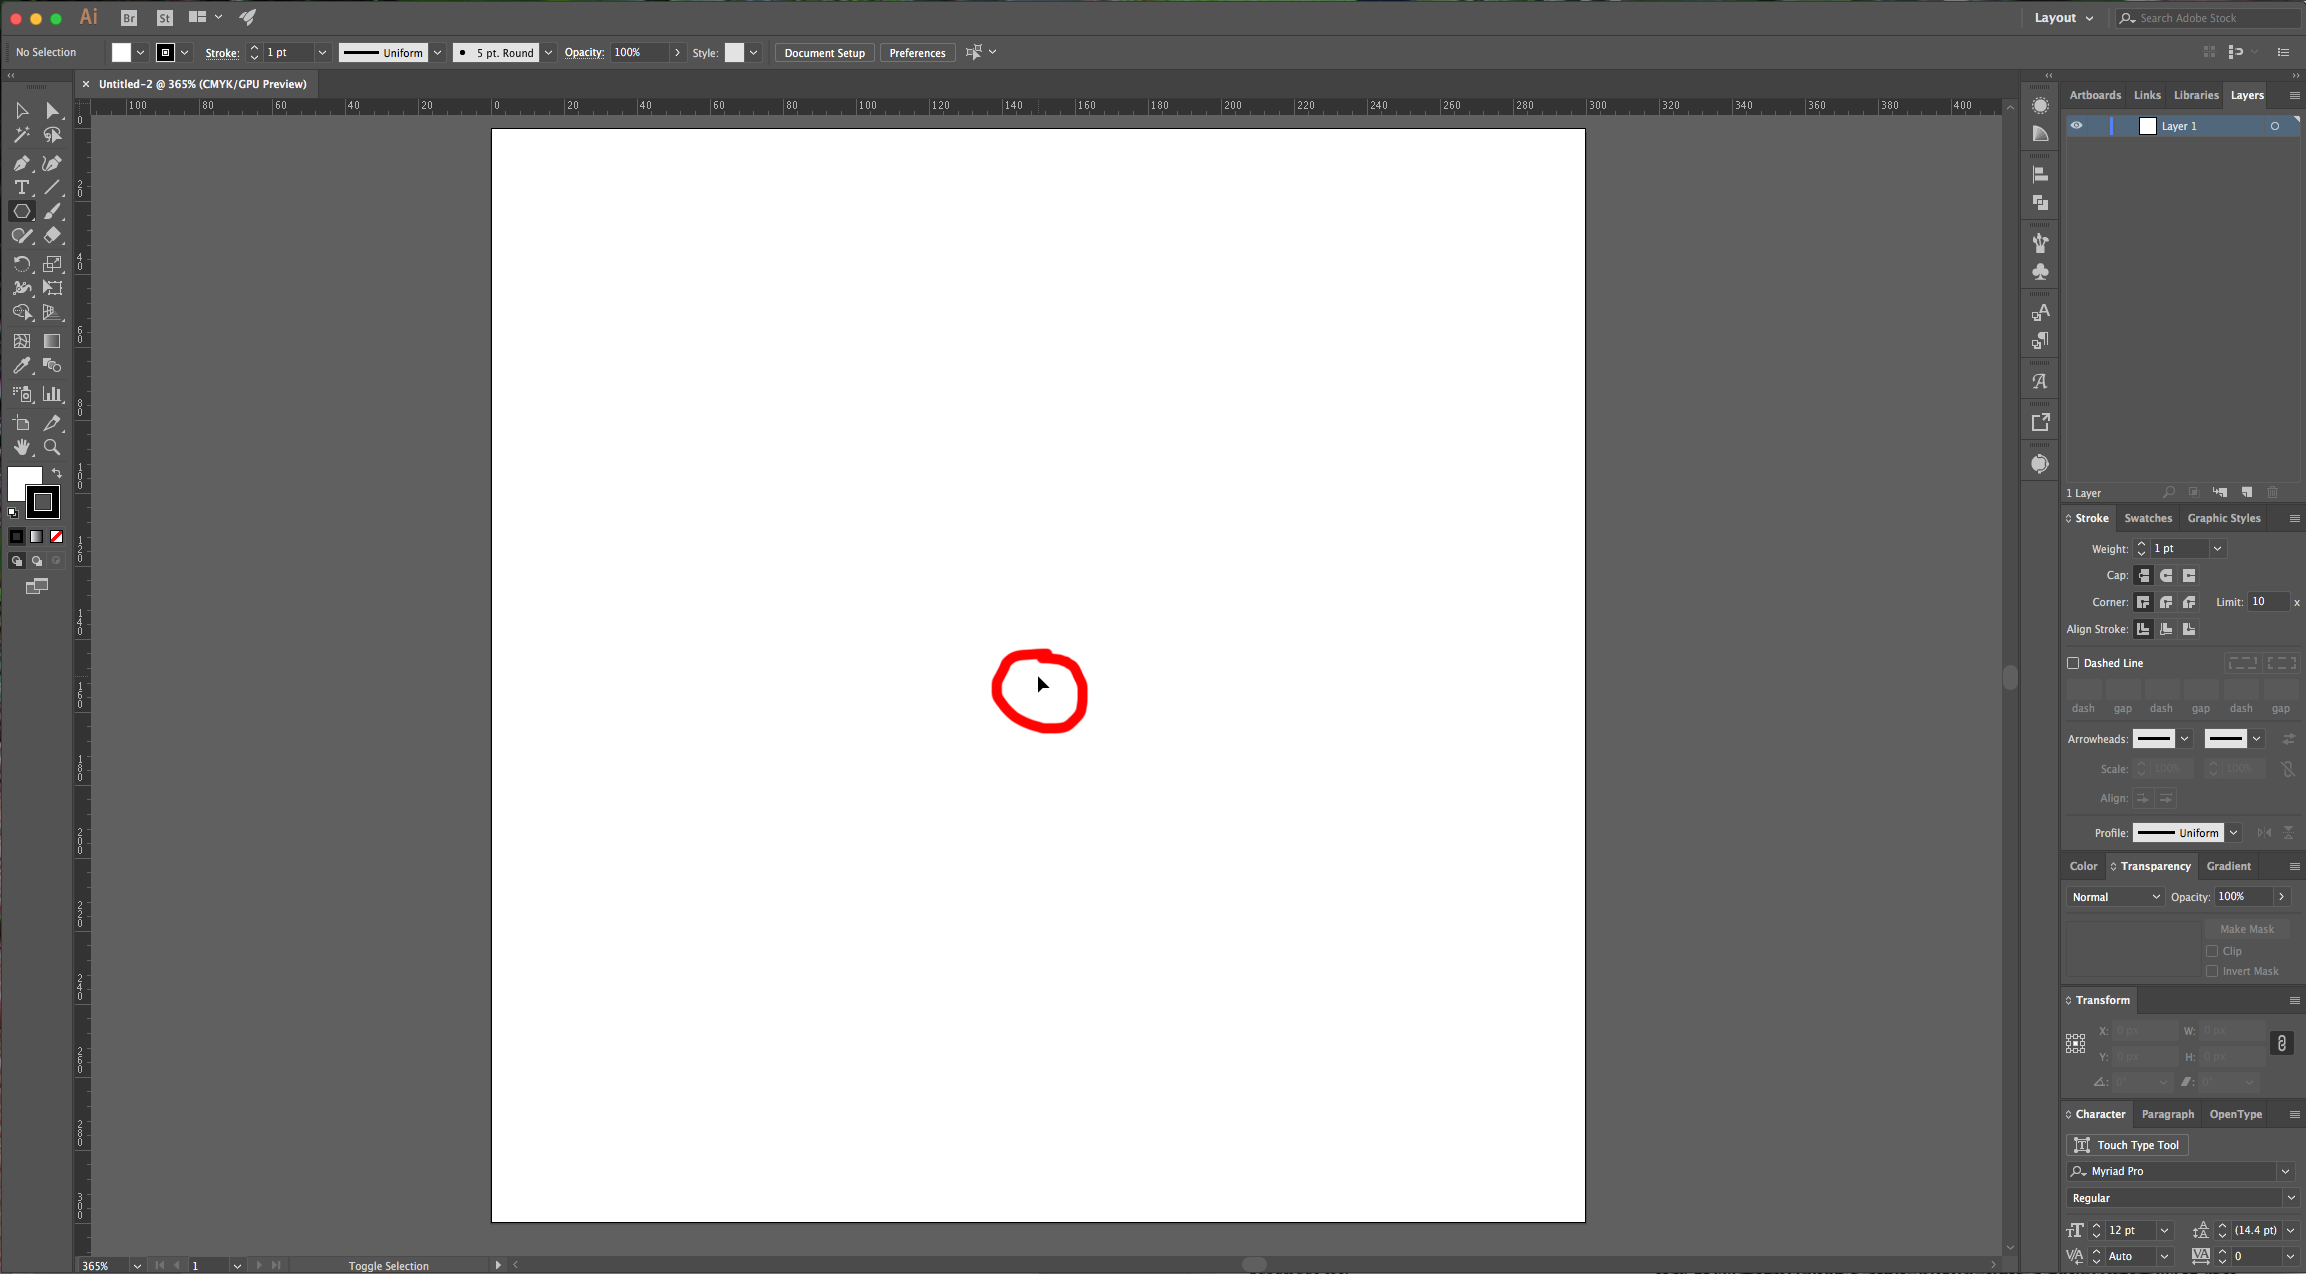
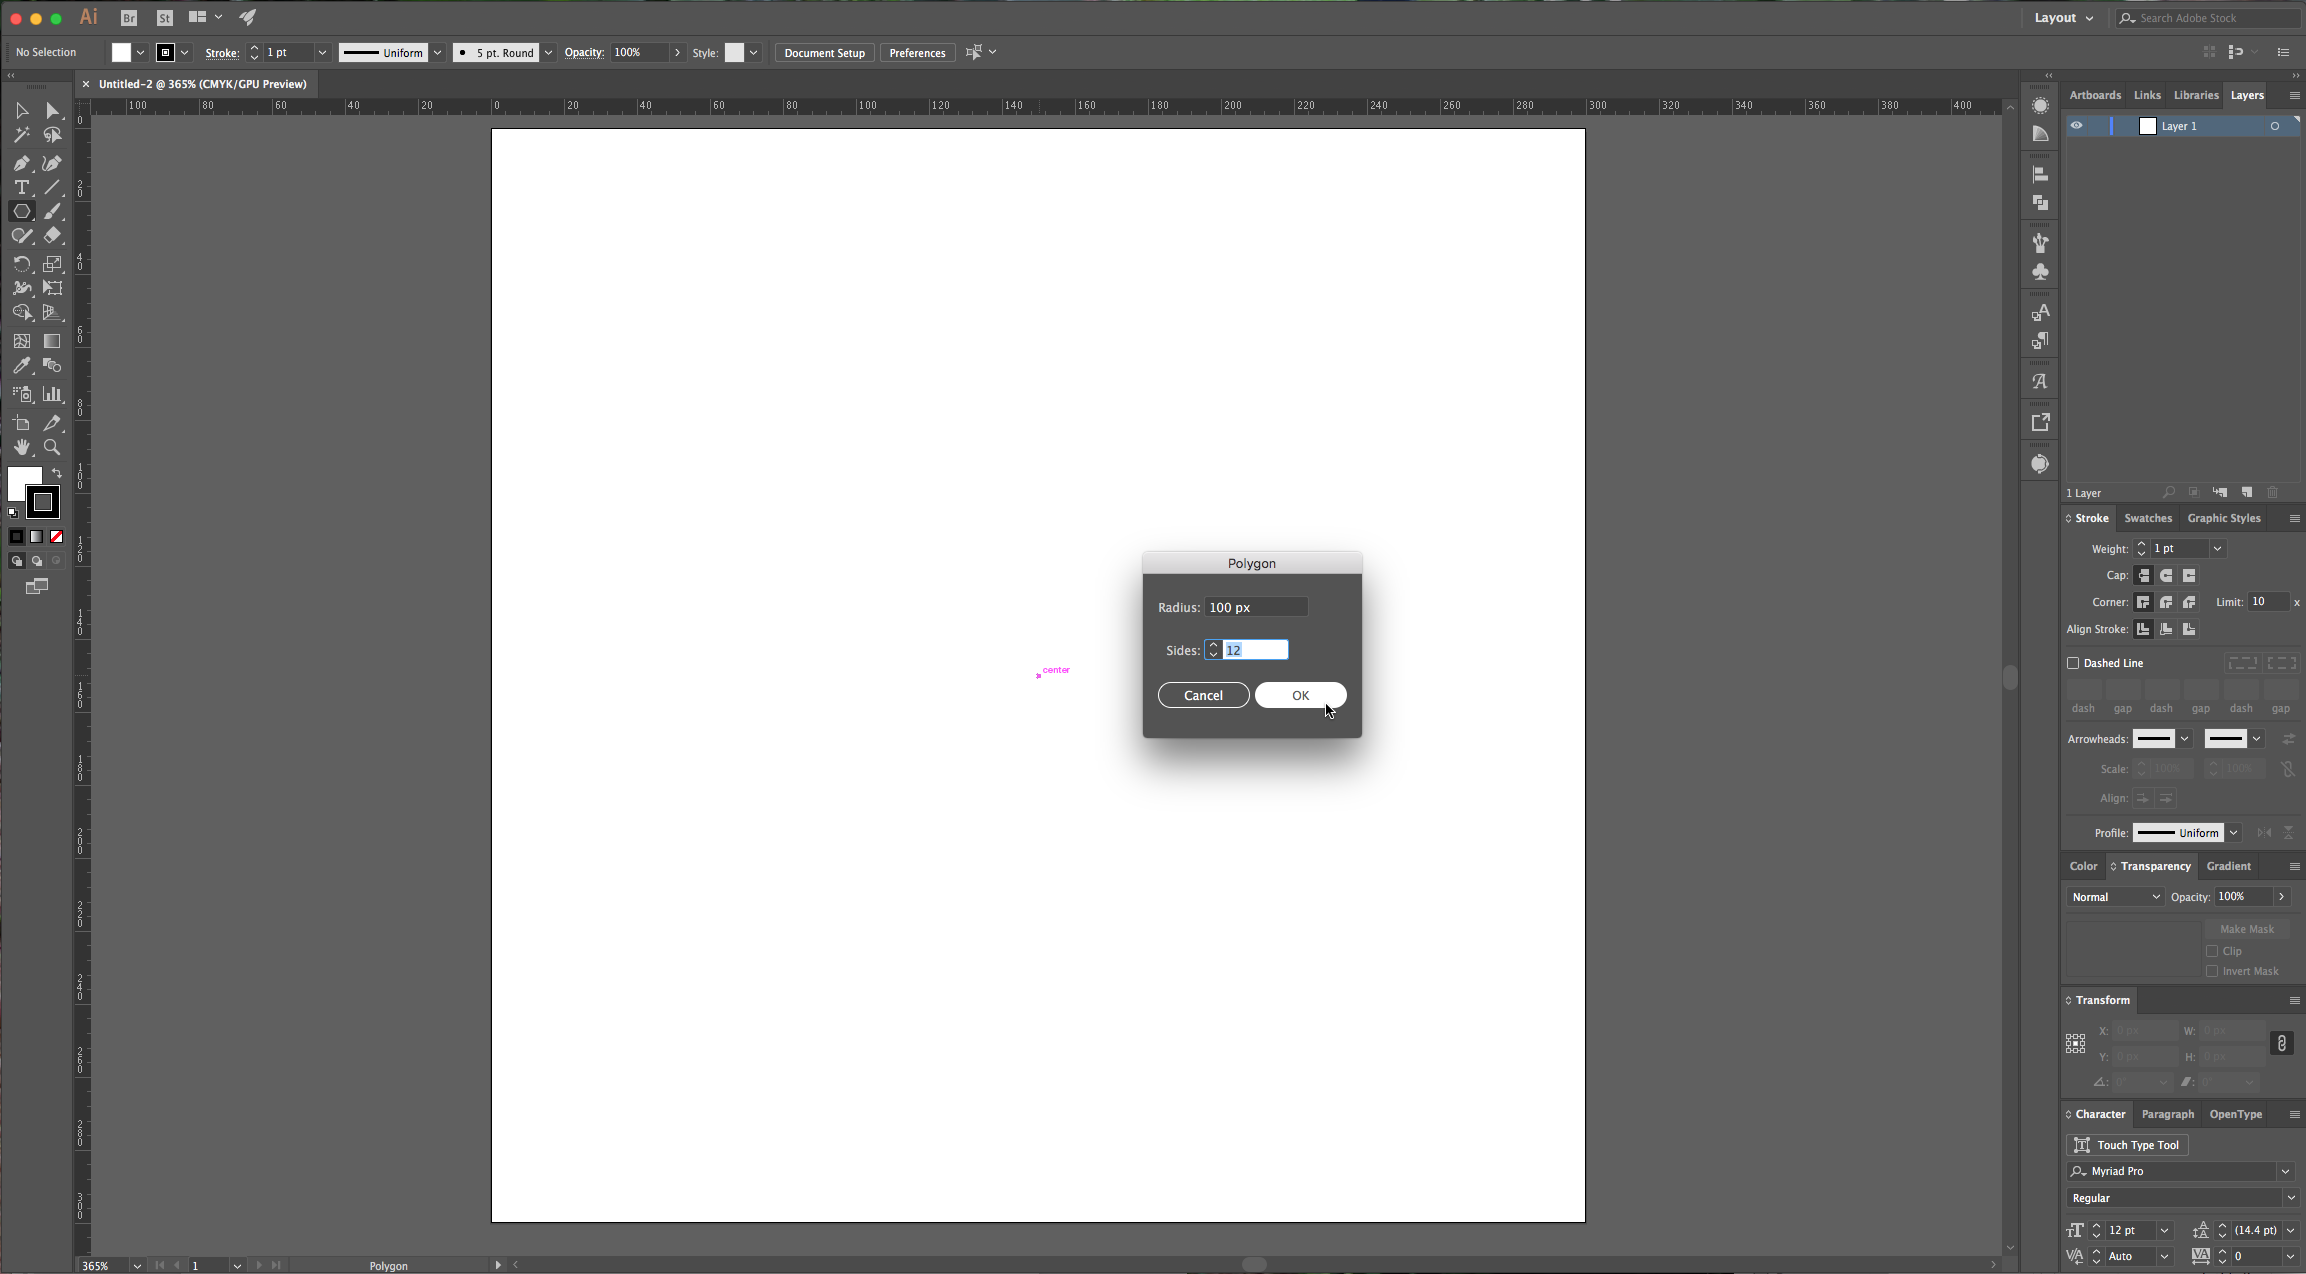
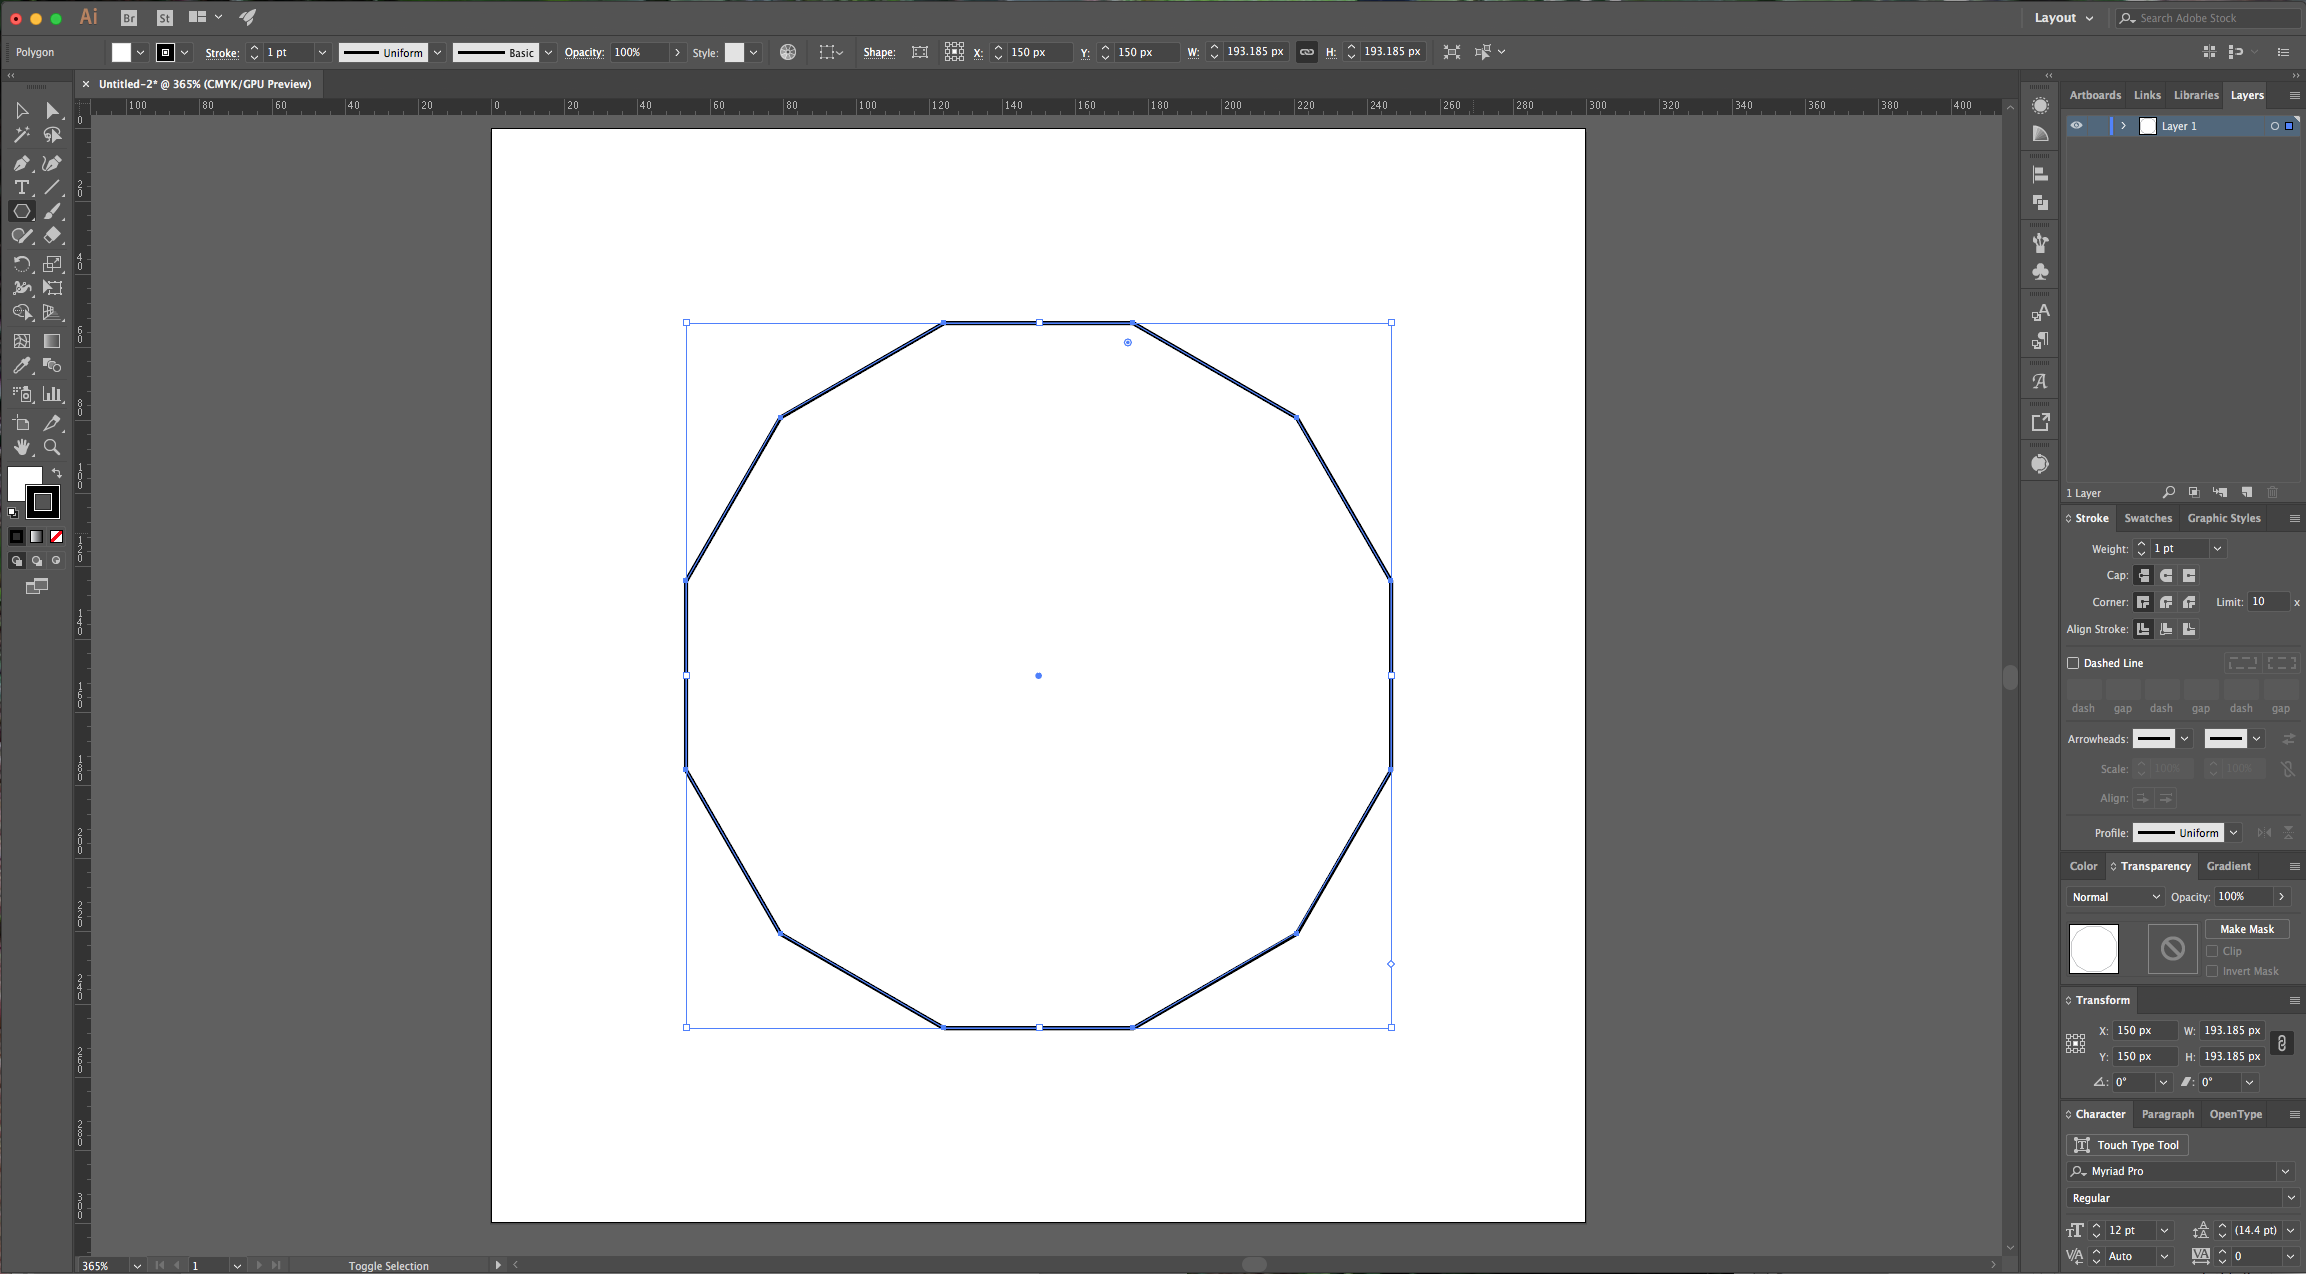
2 - Select The “Polygon Tool” and click inside the document. If your “Smart Guides” are Turned On (Command/Control + U) you should be able to see where the center is when you hover your cursor around it. In the dialog that opens select the “Radius” and the Number of “Sides”, in our case it was 100 “Pixels” and 12 “Sides” (Traditional Mandalas have 16 Sides).
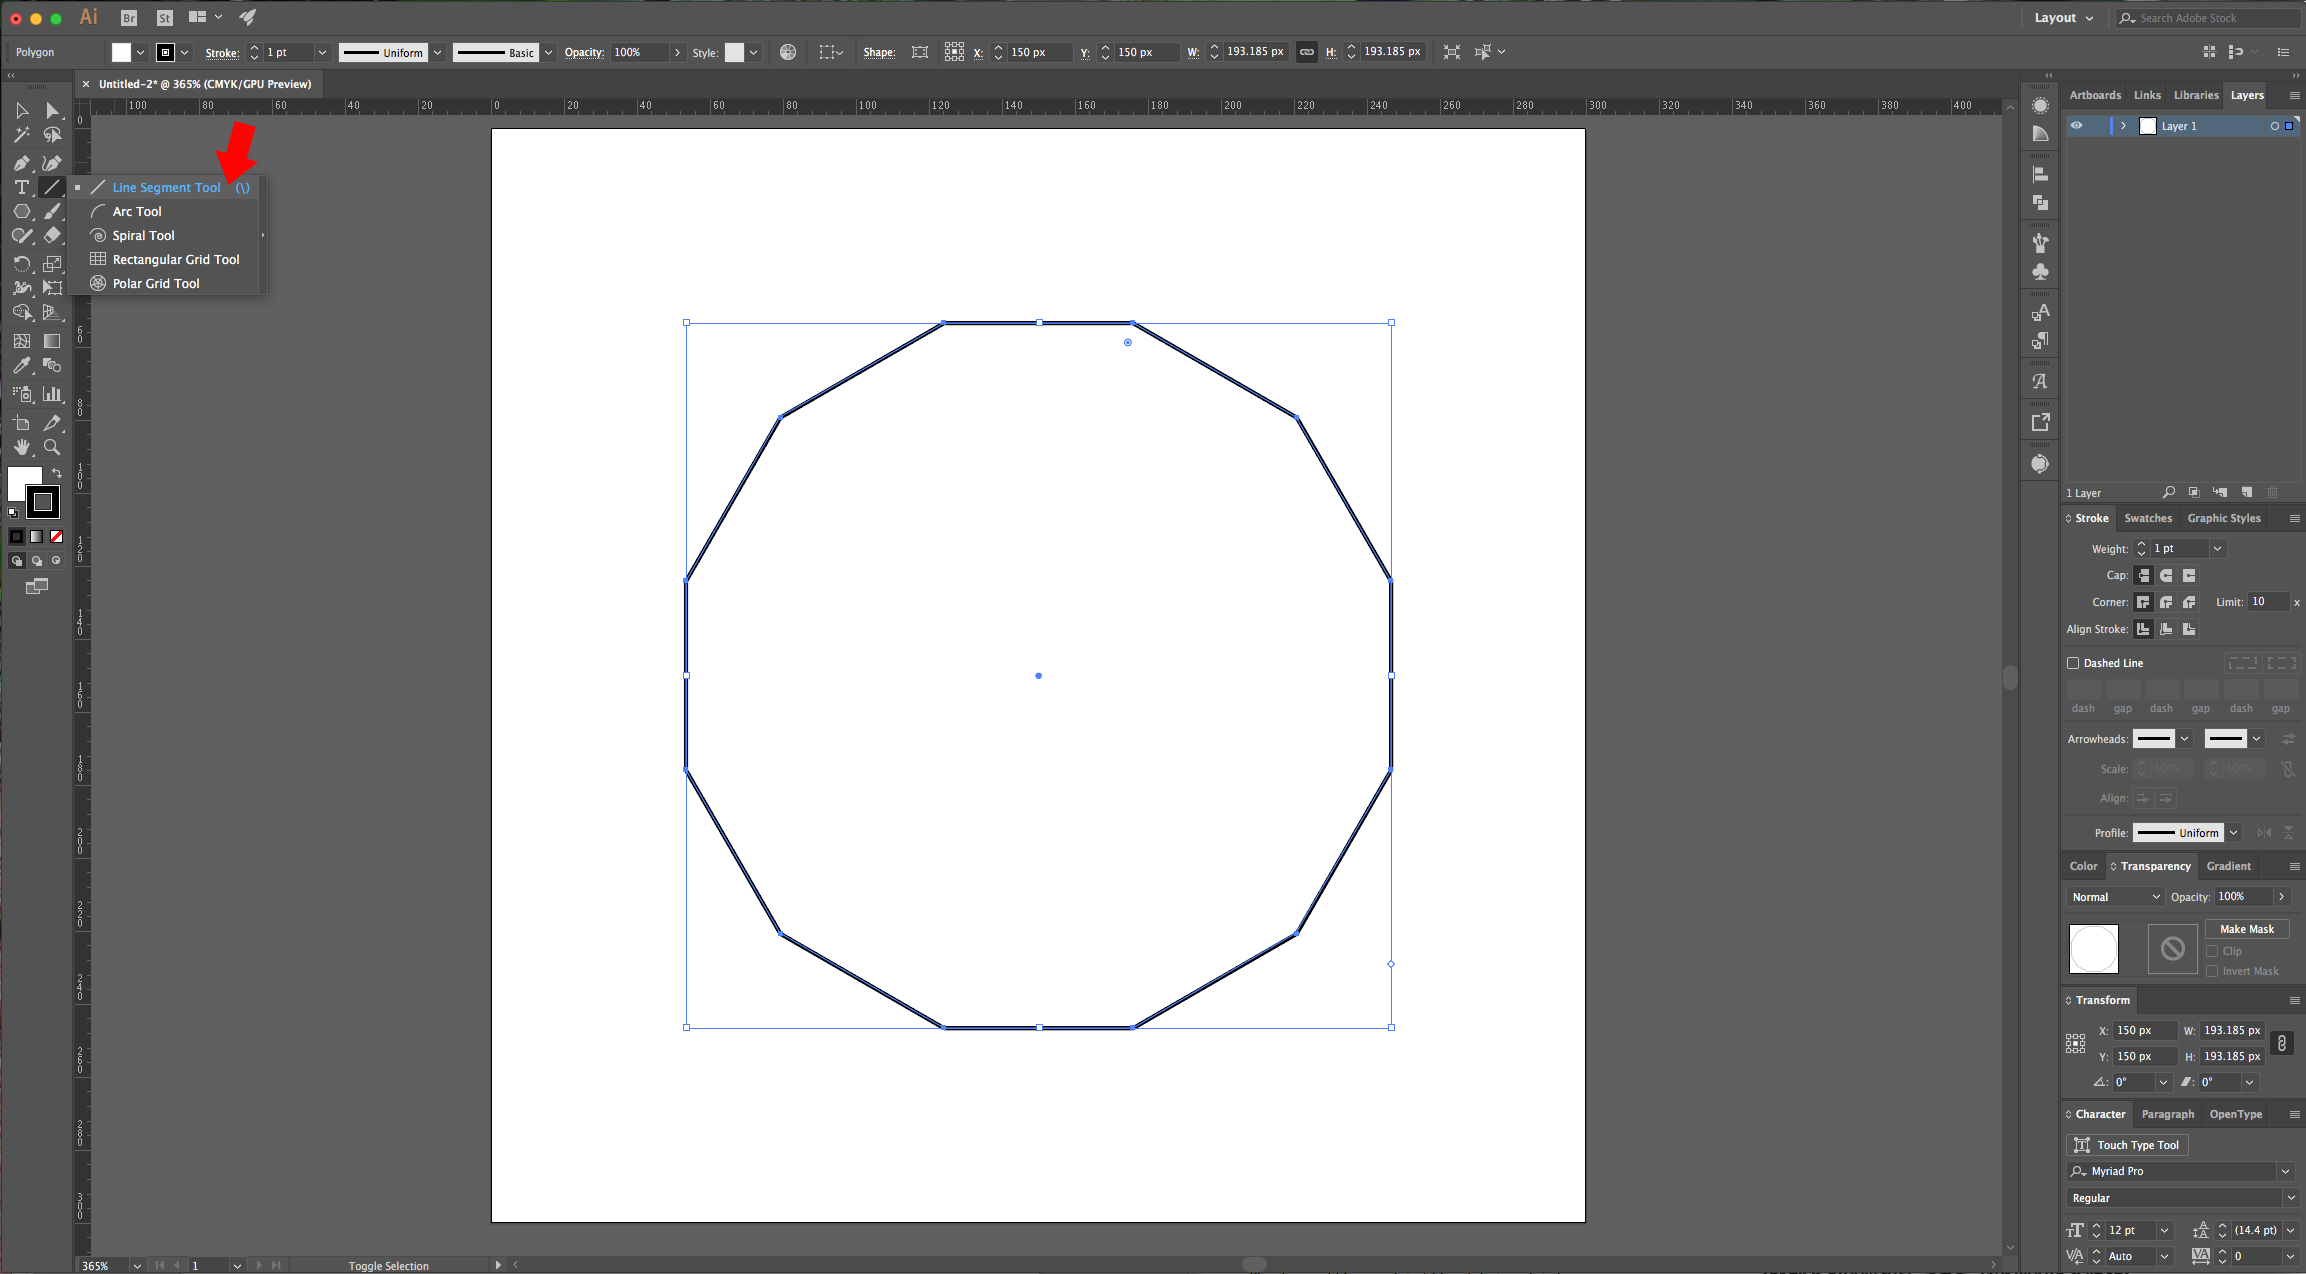
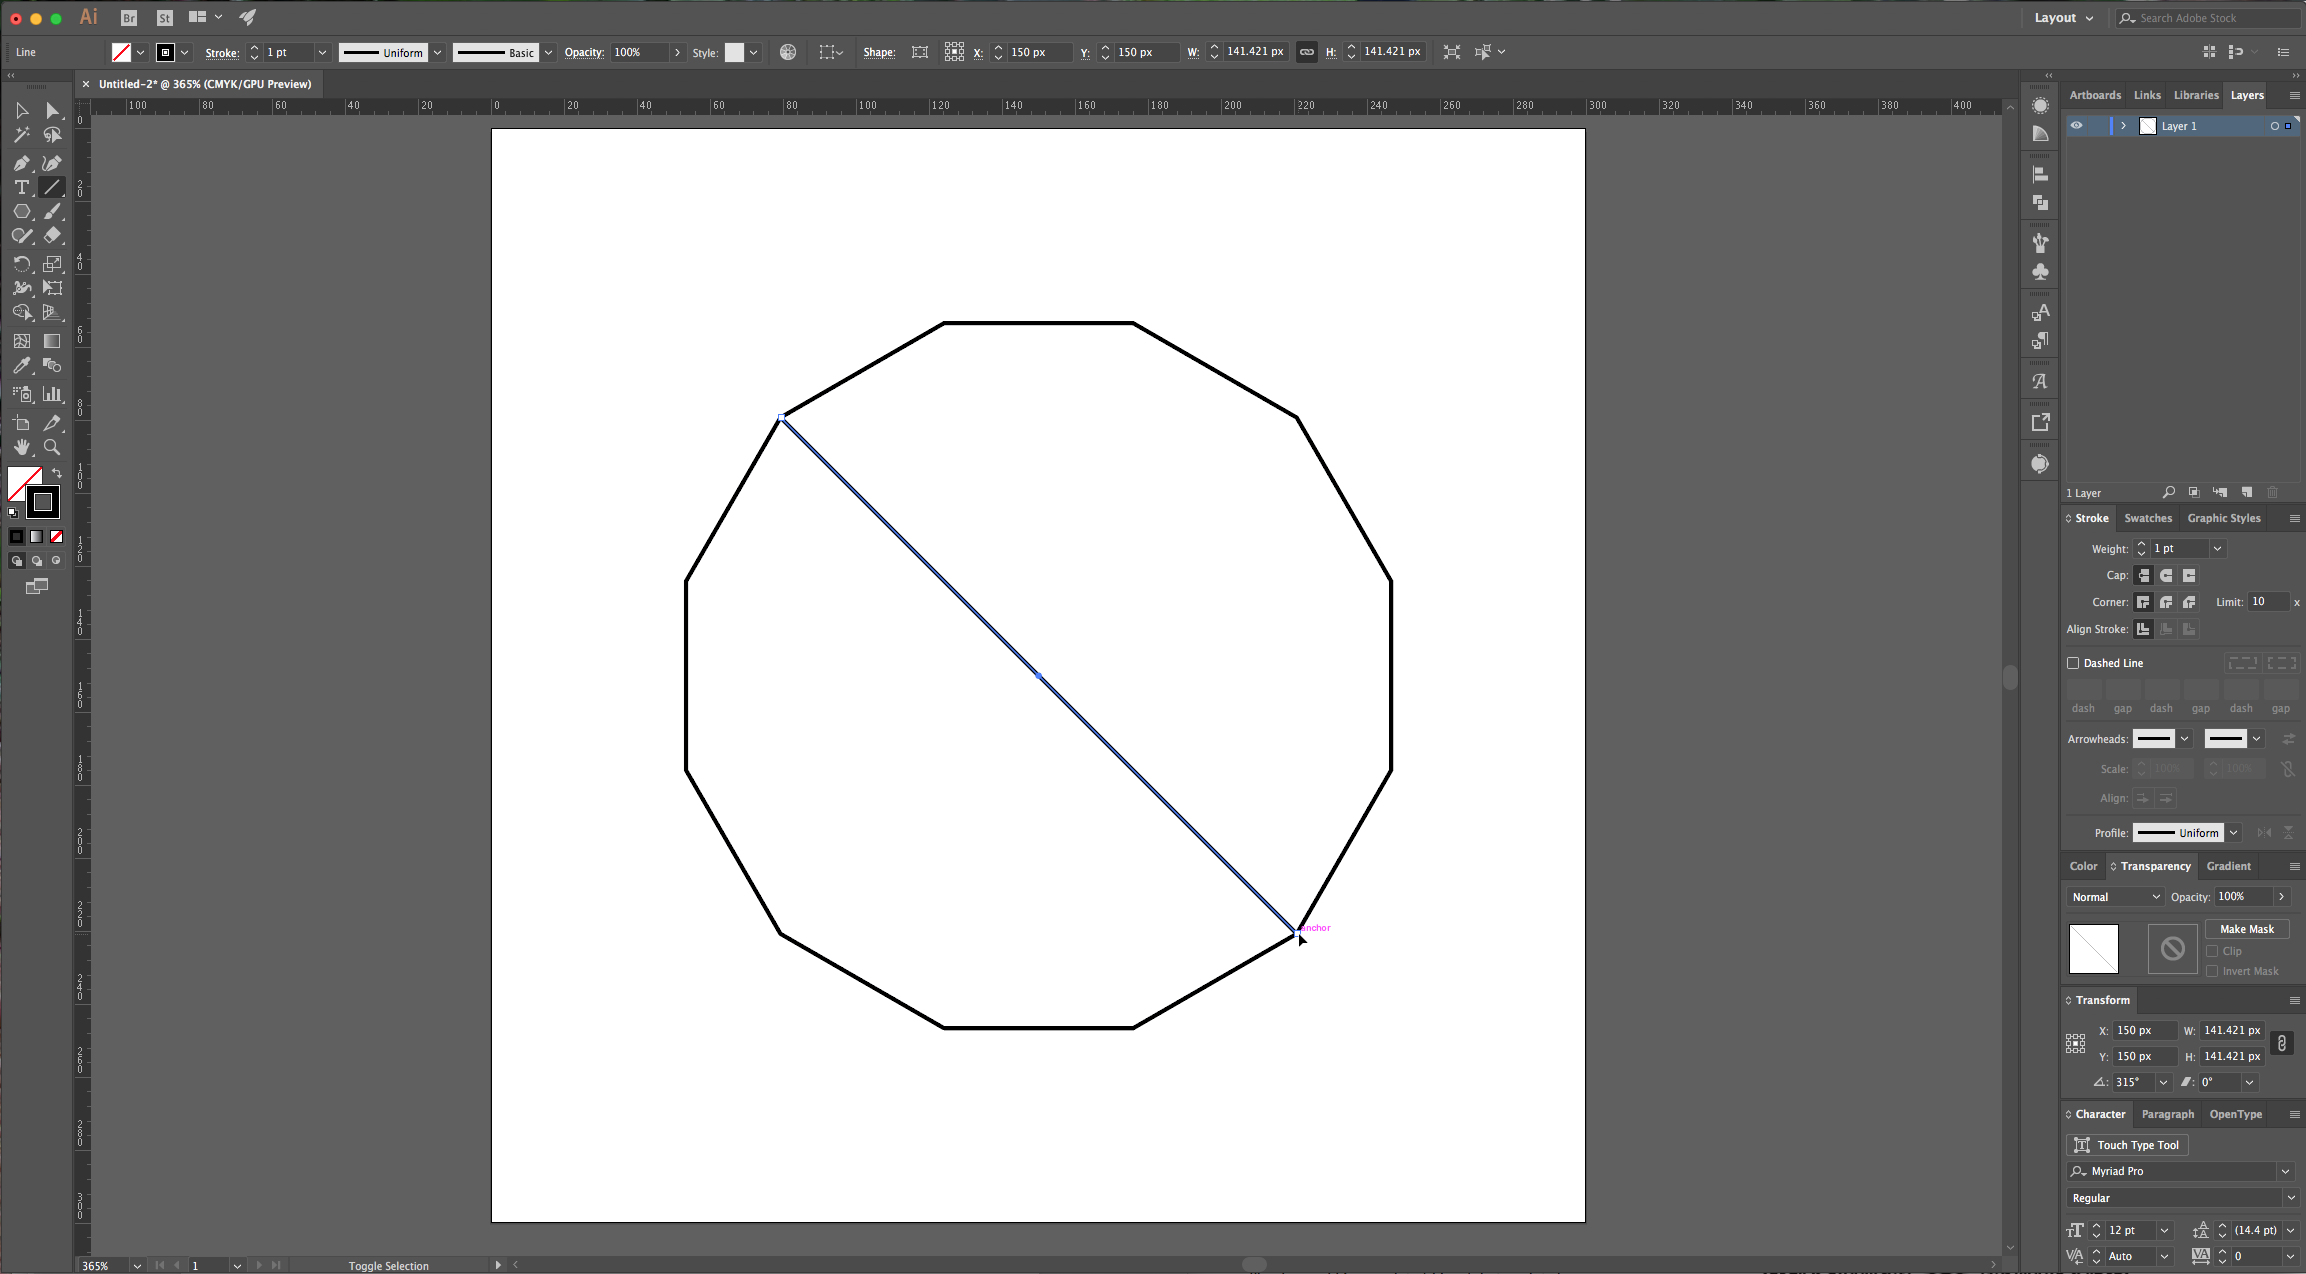
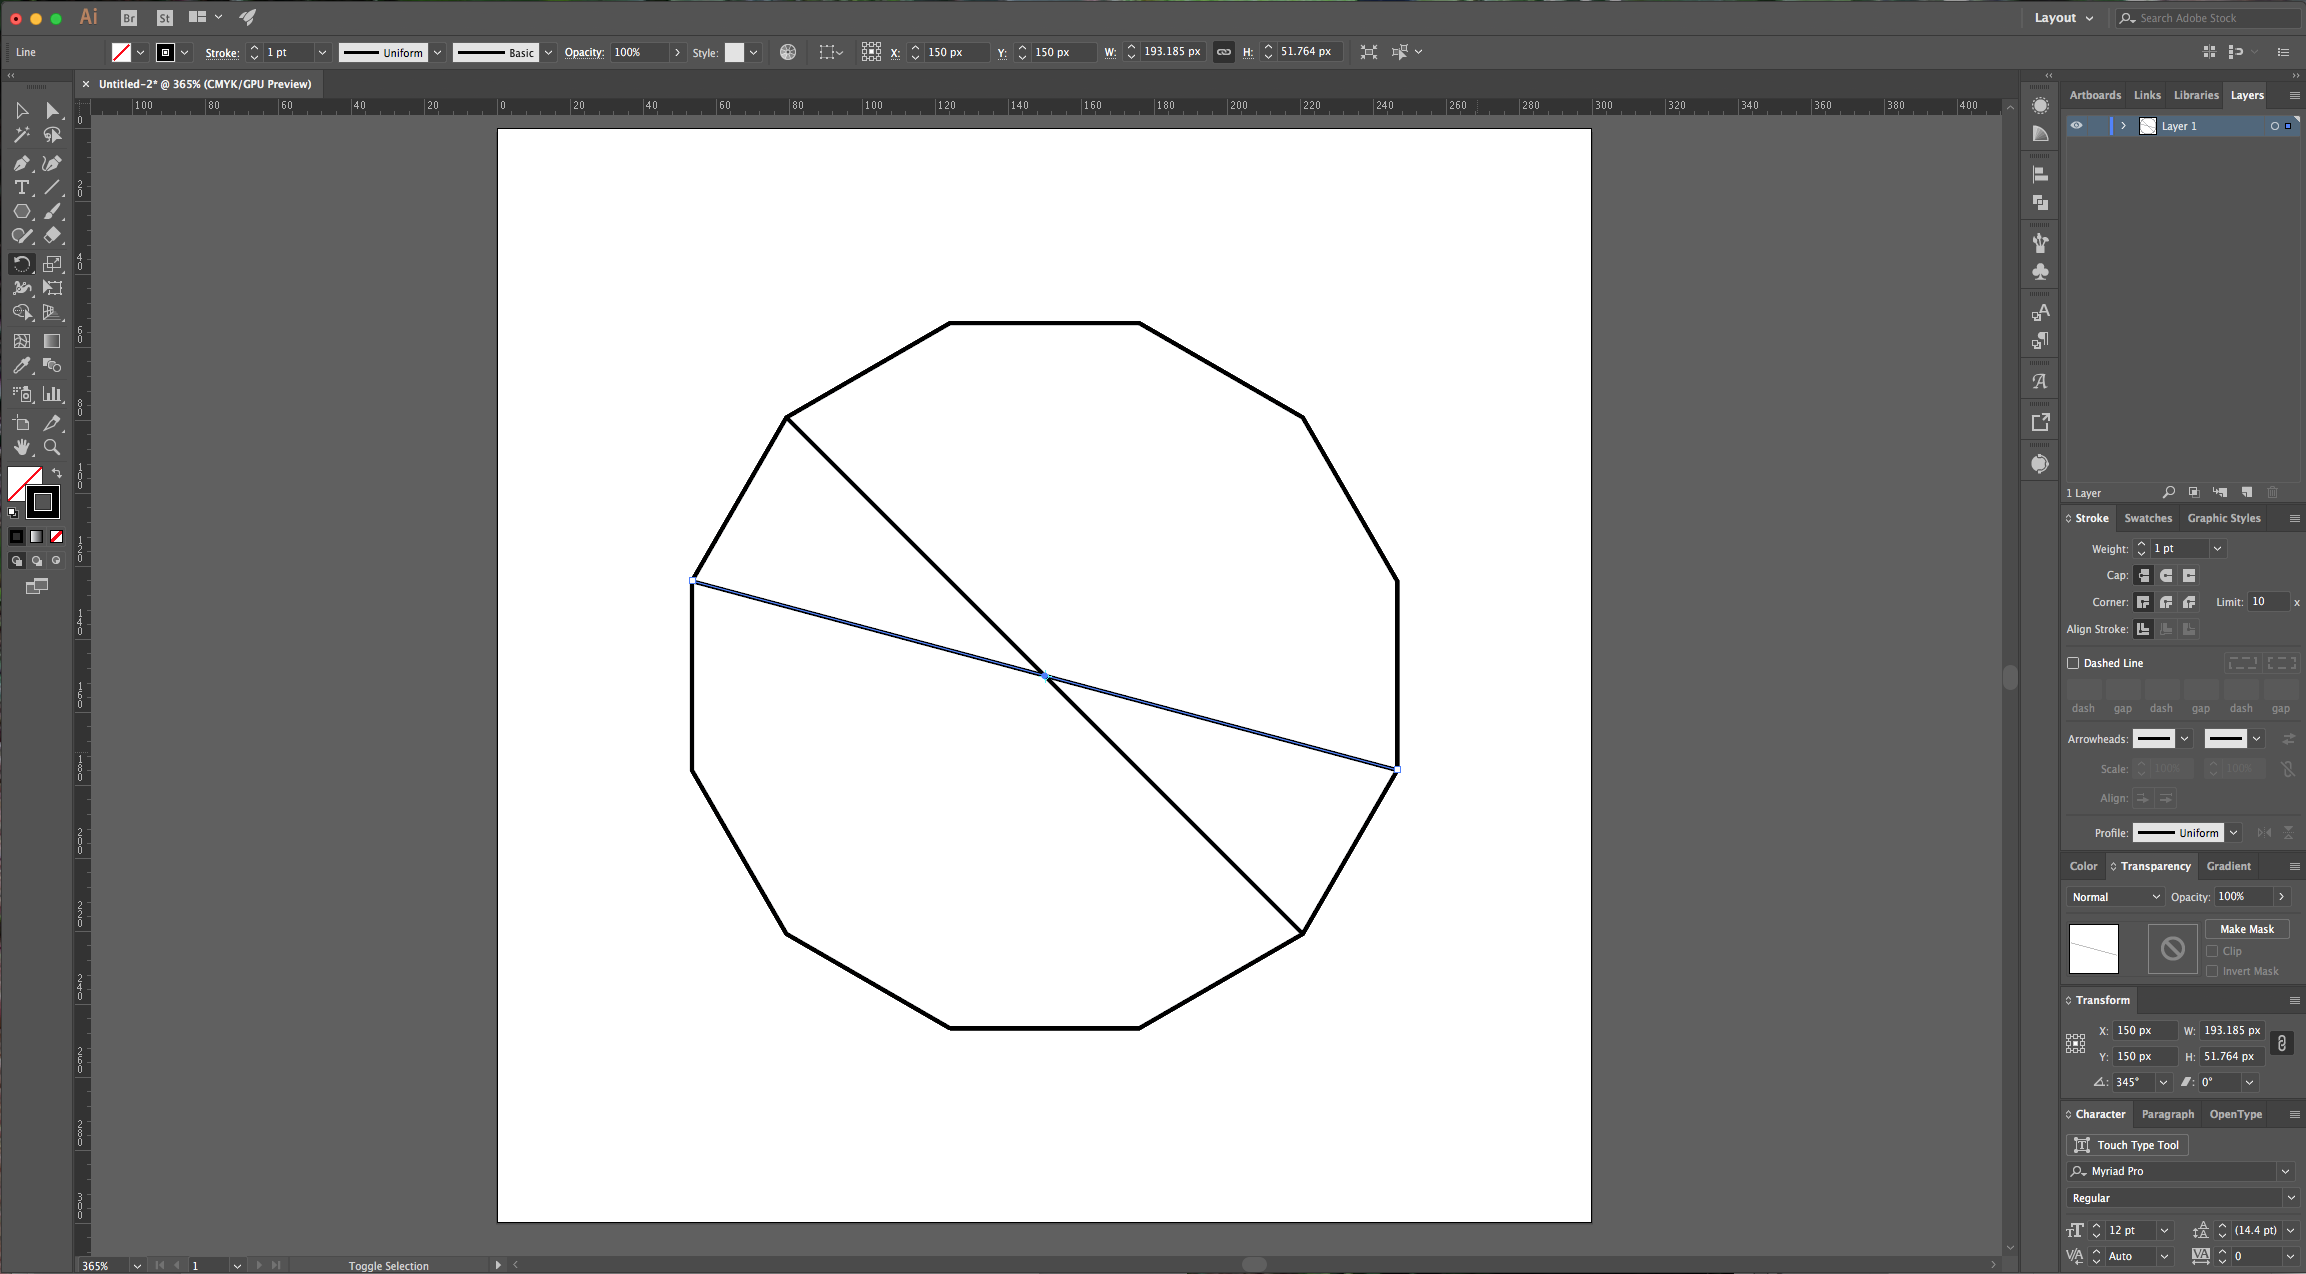
3 - Select the “Line Segment Tool” (\) and trace a line starting from one of the corner point all the way to the opposite side. (Hold the “Shift” key to do this at an angle).
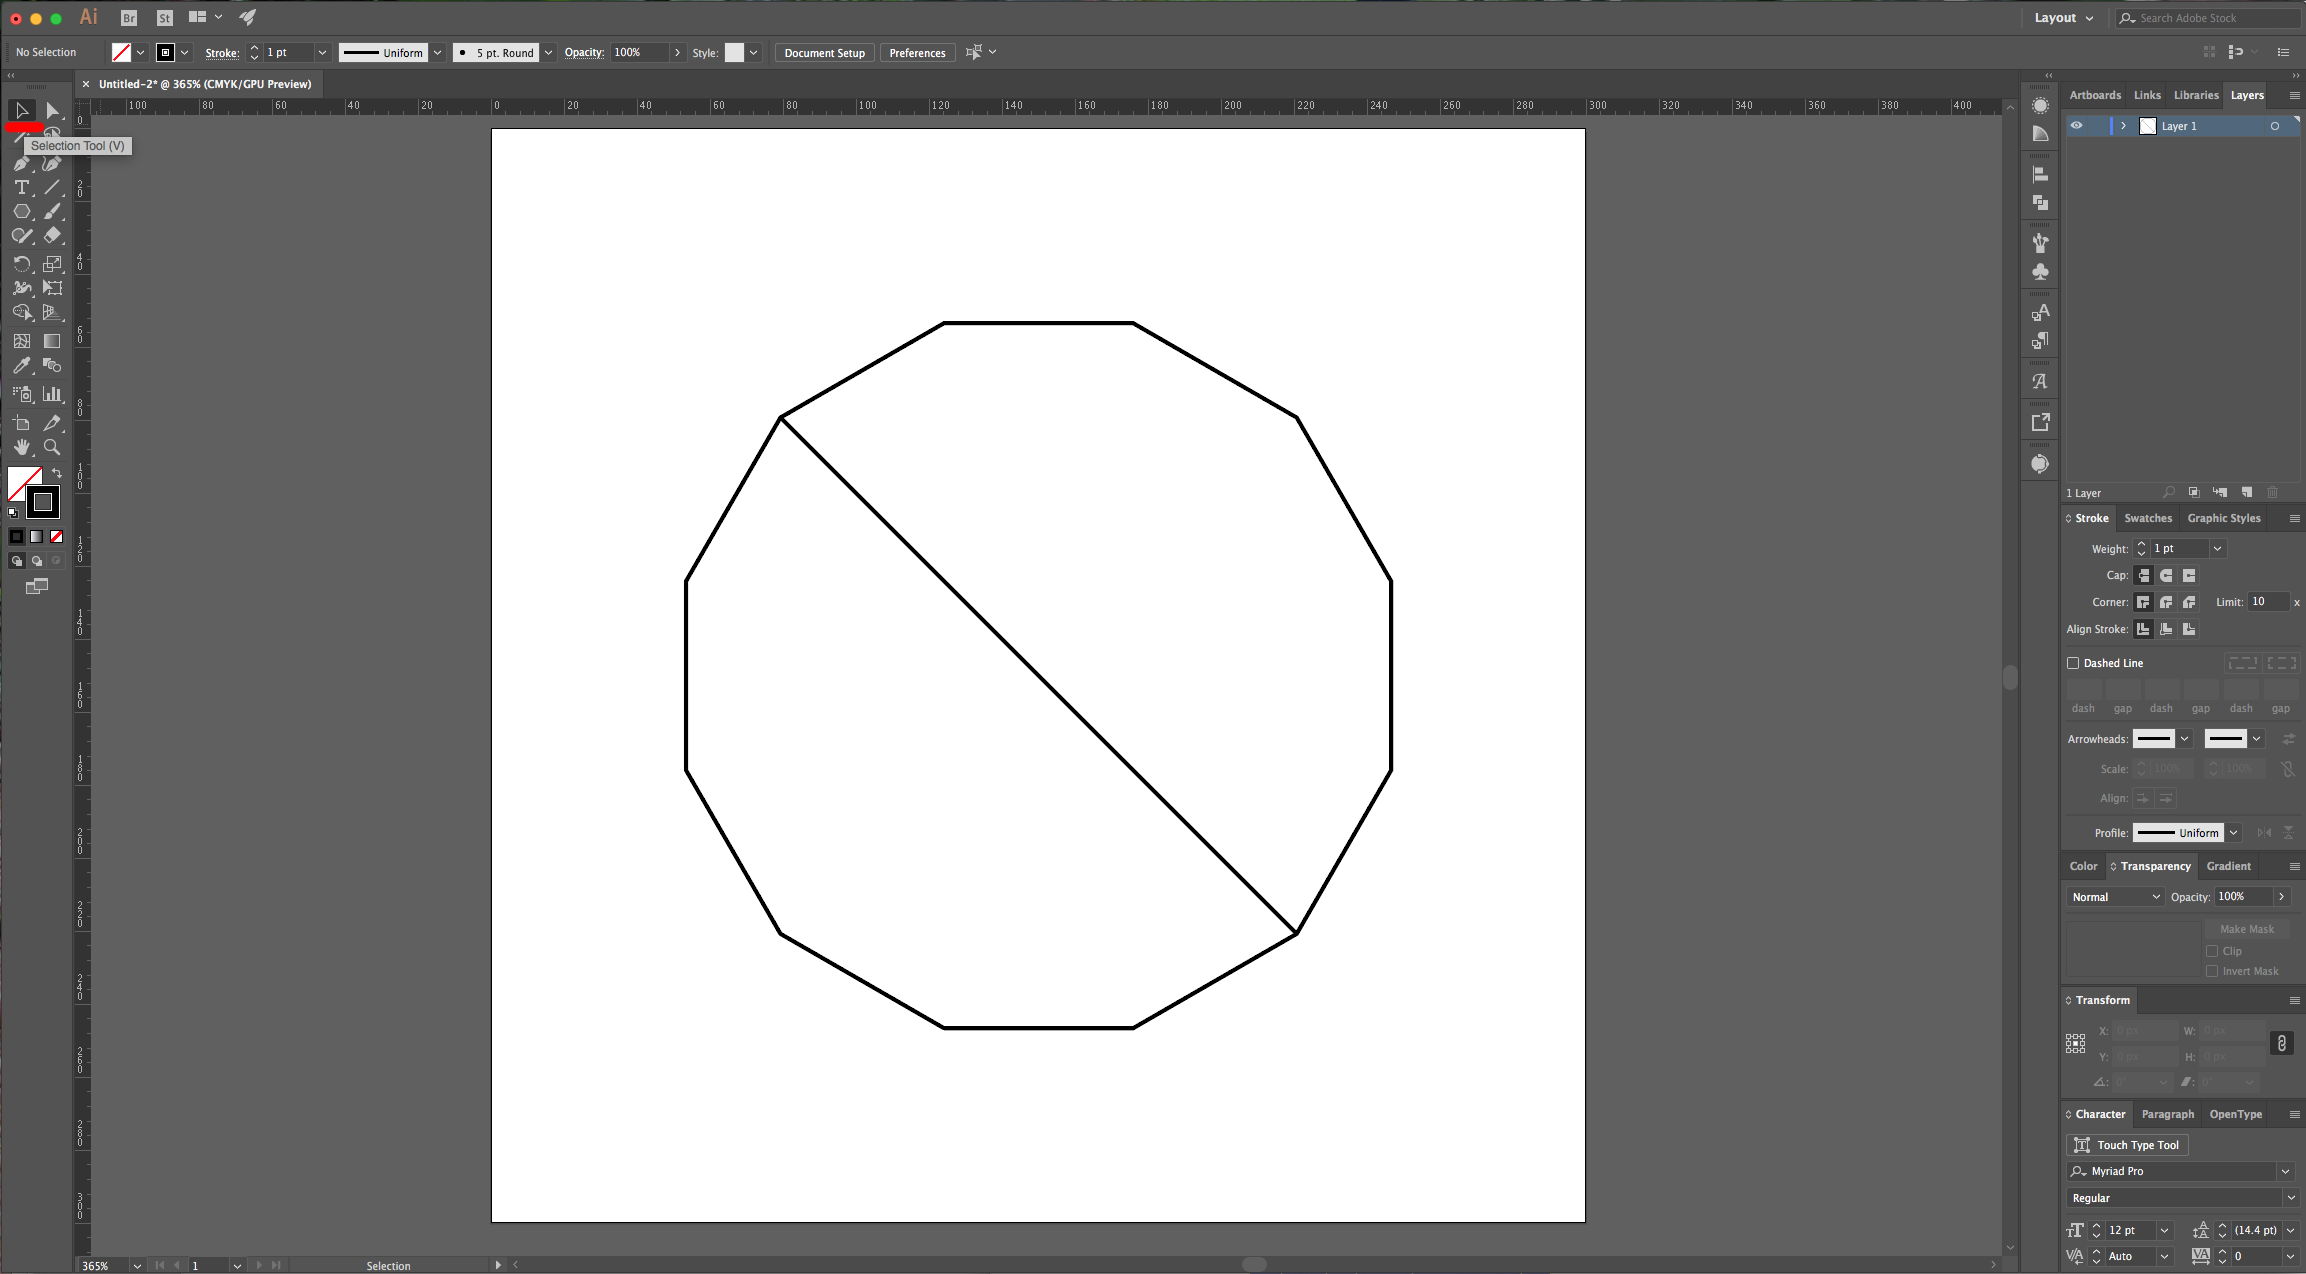
4 - With the “Selection Tool” (V), select your line and then double-click on the “Rotate Tool” (R) in the “Toolbar” to bring out the “Rotate” Options window. Choose an angle of 30 (divide 360 by the number of sides your Polygon has). Then click “Copy” to make another line with the chosen angle. Click “Enter” and then “Copy” (or use Command/Control + D to repeat your last action) as many times as needed to finish your Polygon.

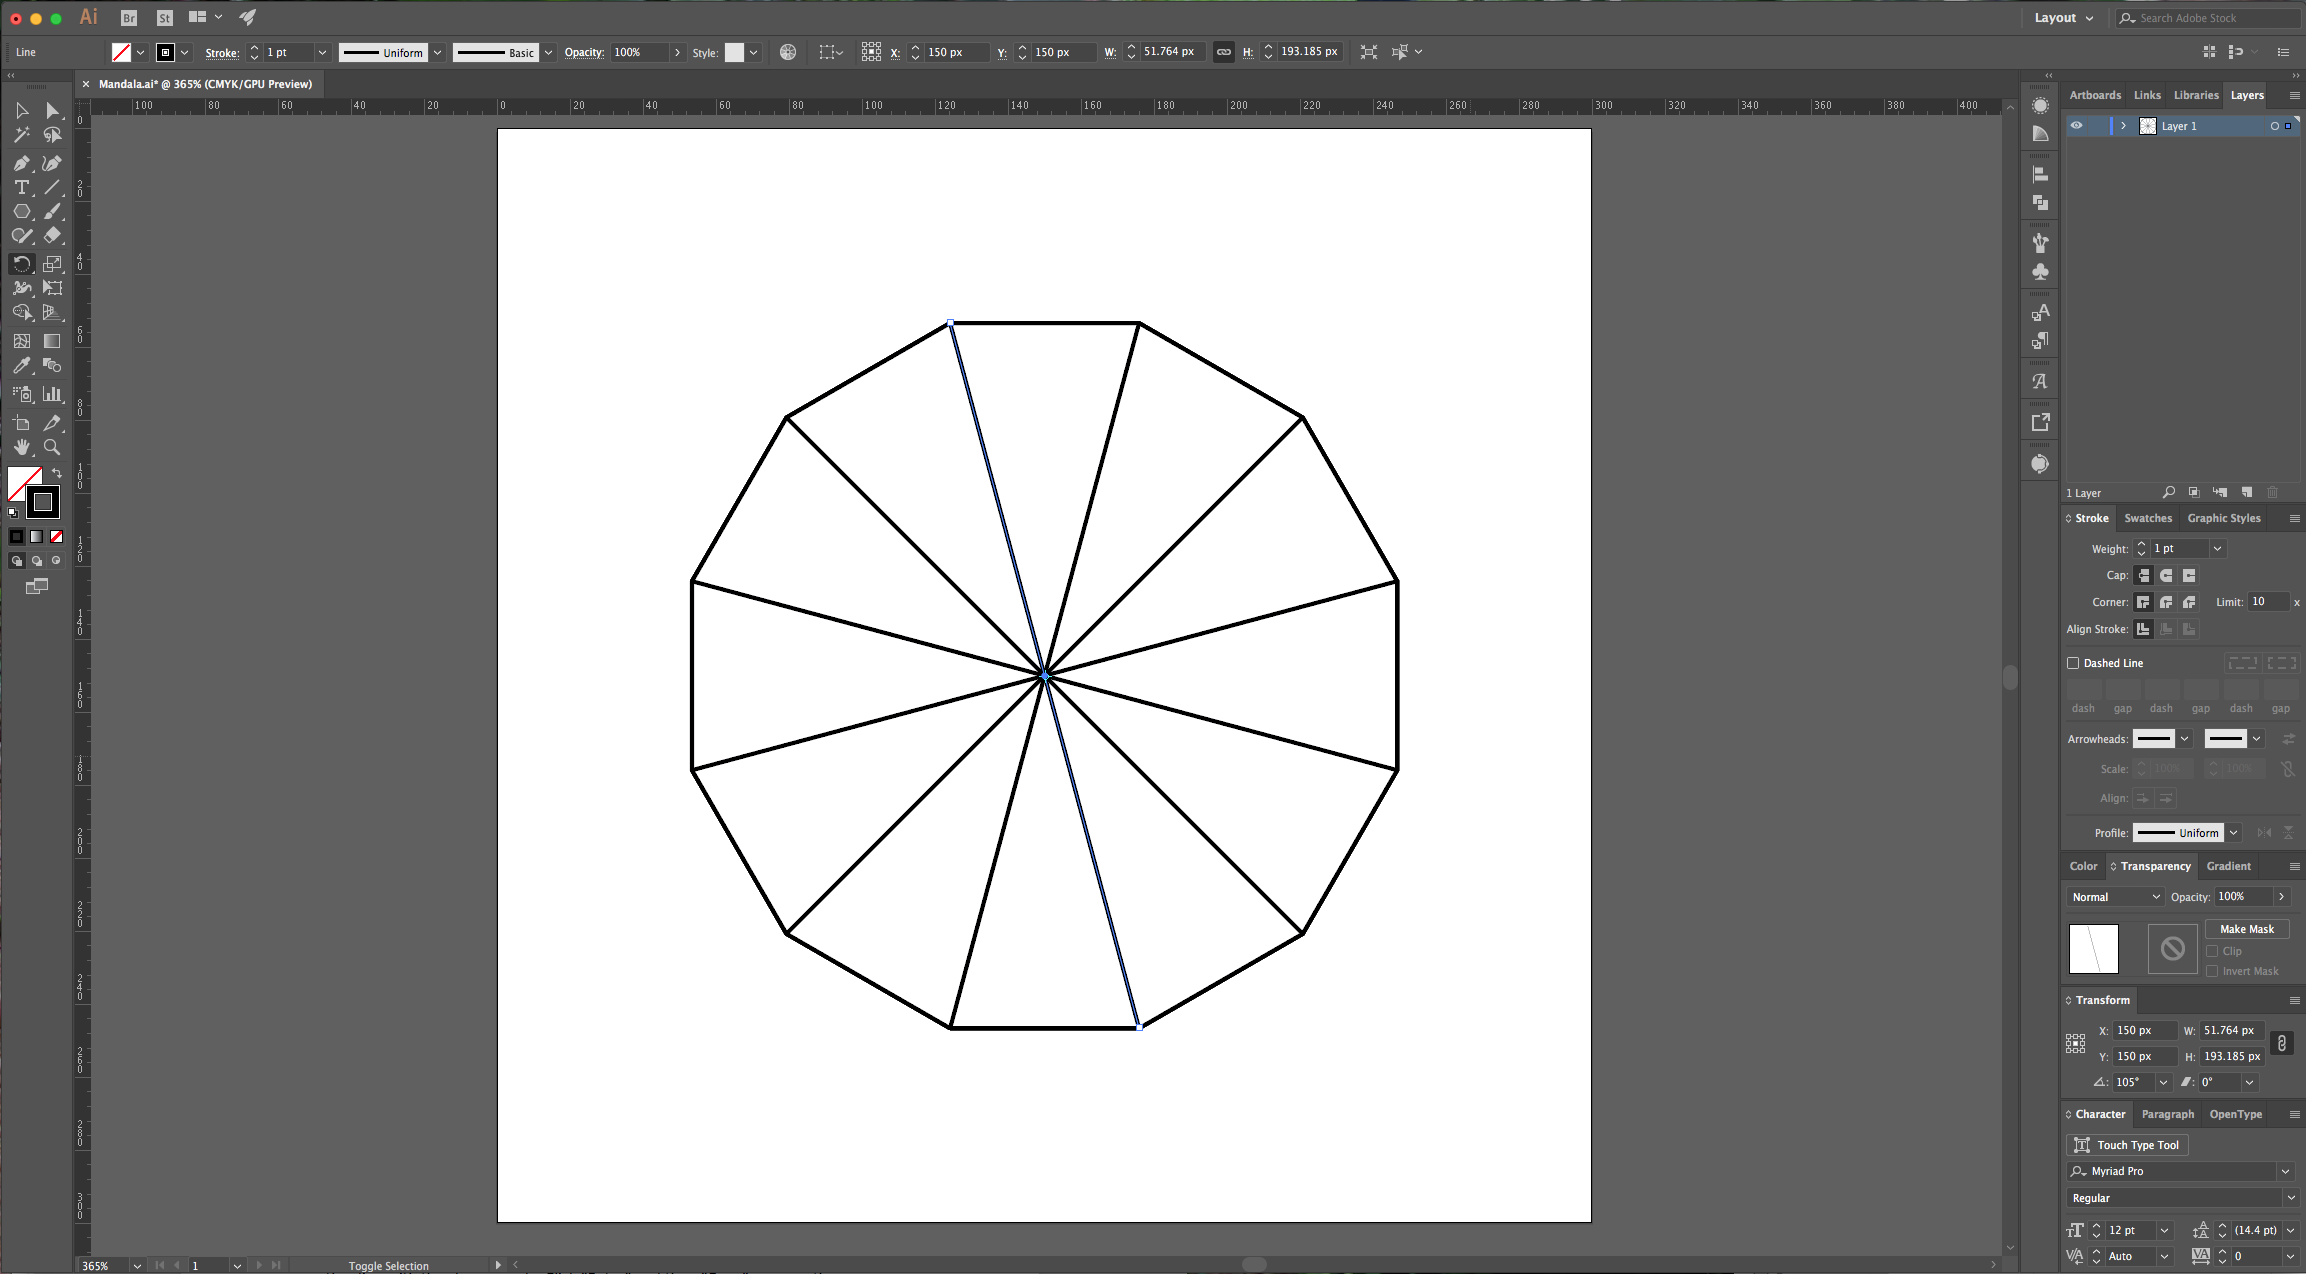
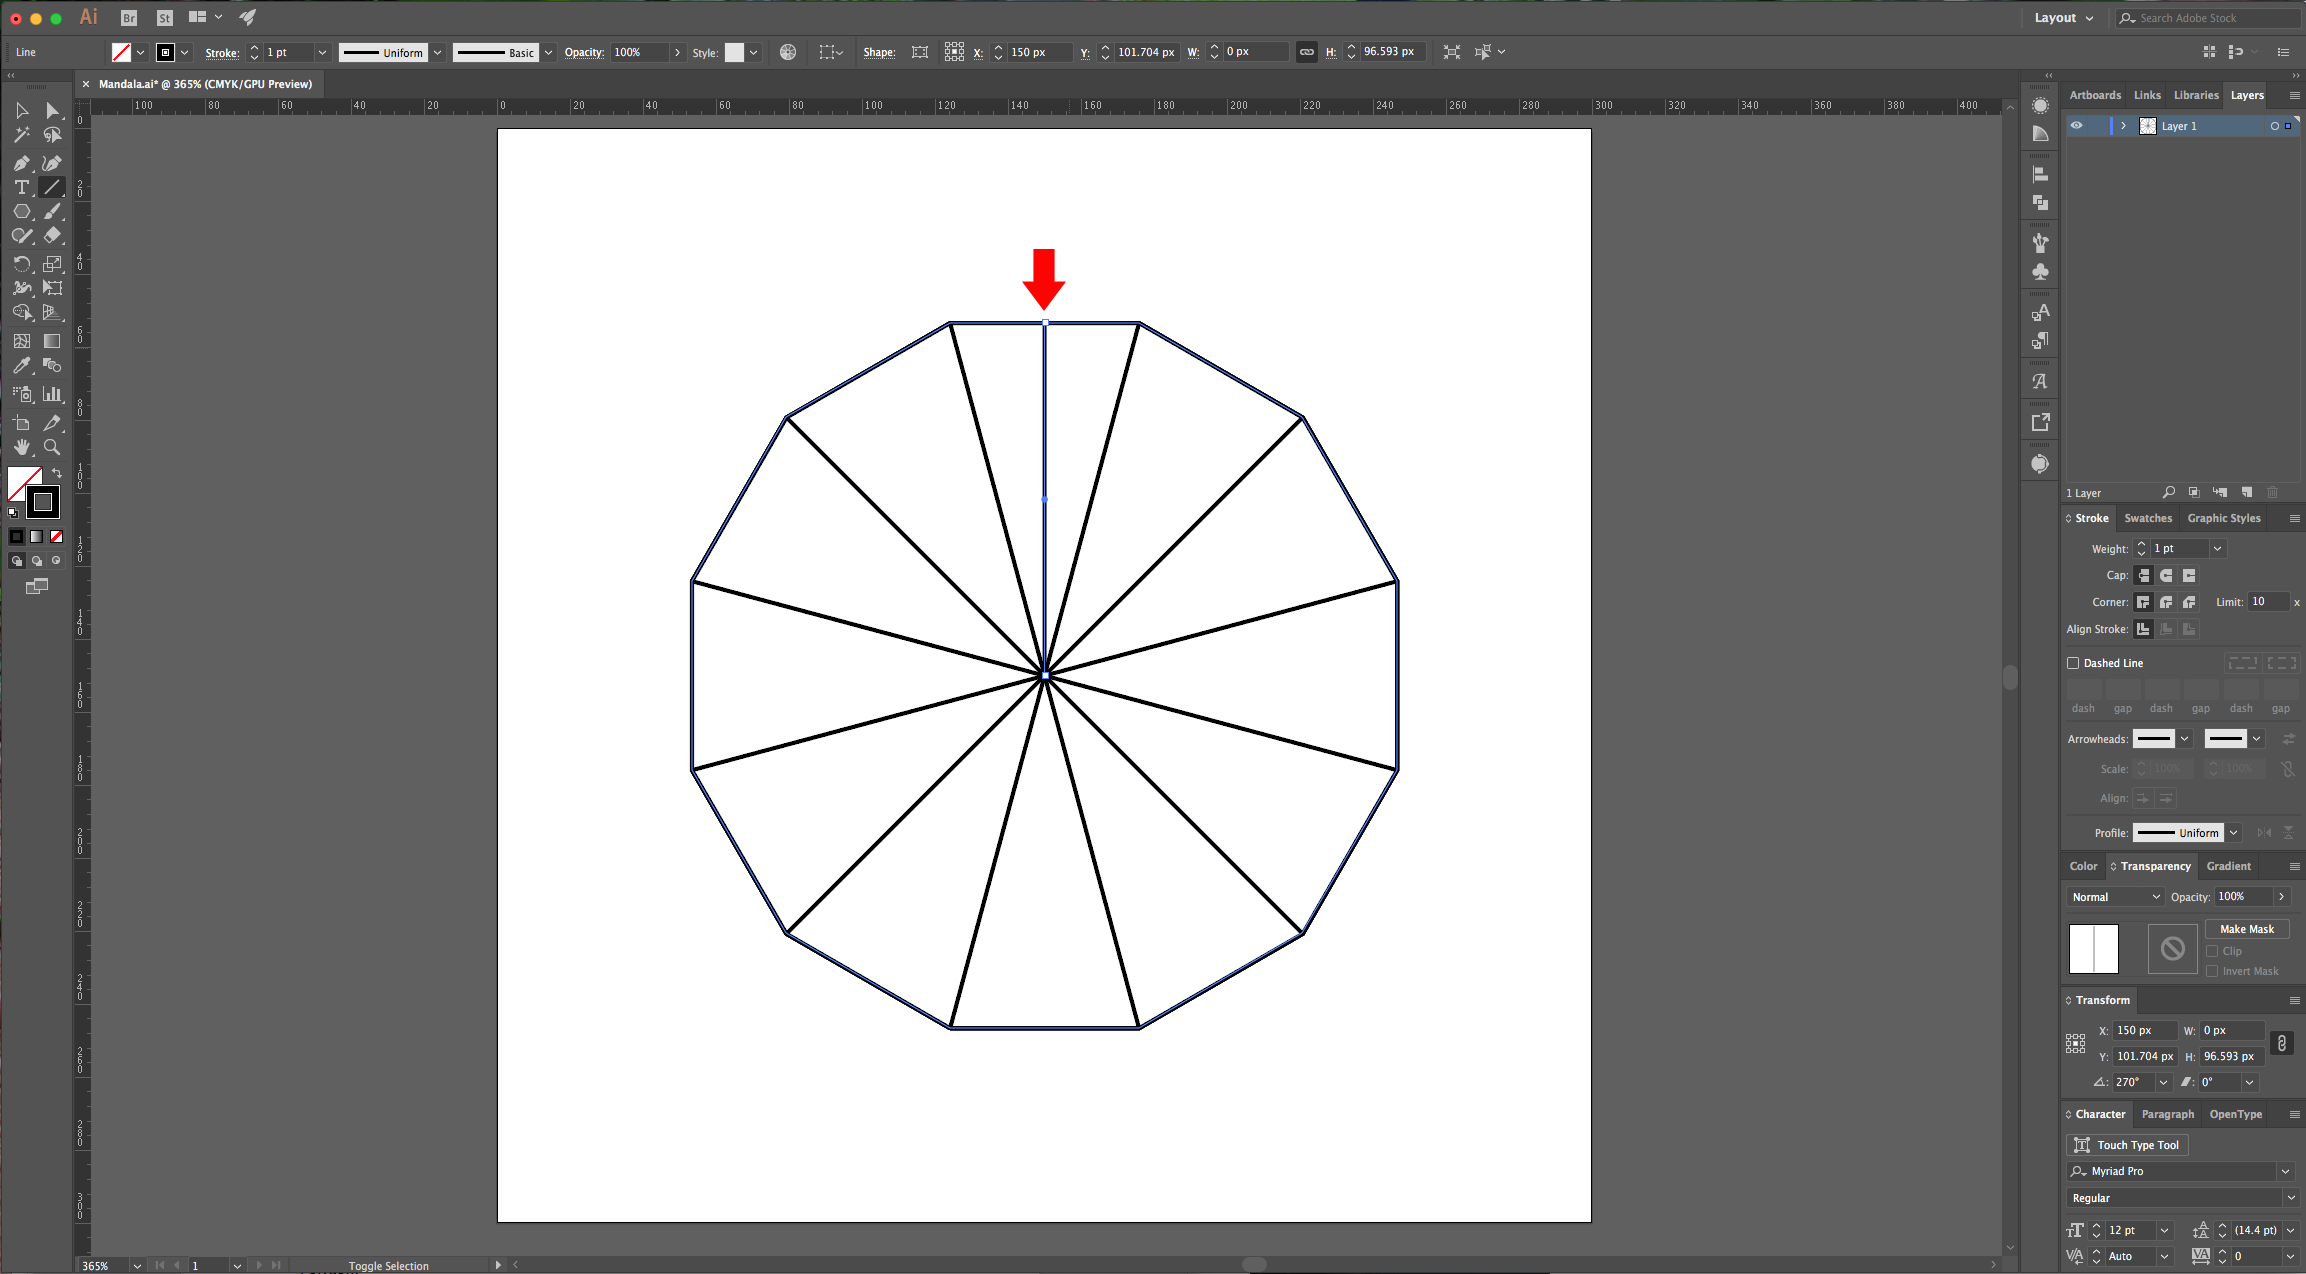
5 - Select the “Line Segment Tool” (\) again, and while holding the “Shift” Key, draw a line from the top of your Polygon to the center.
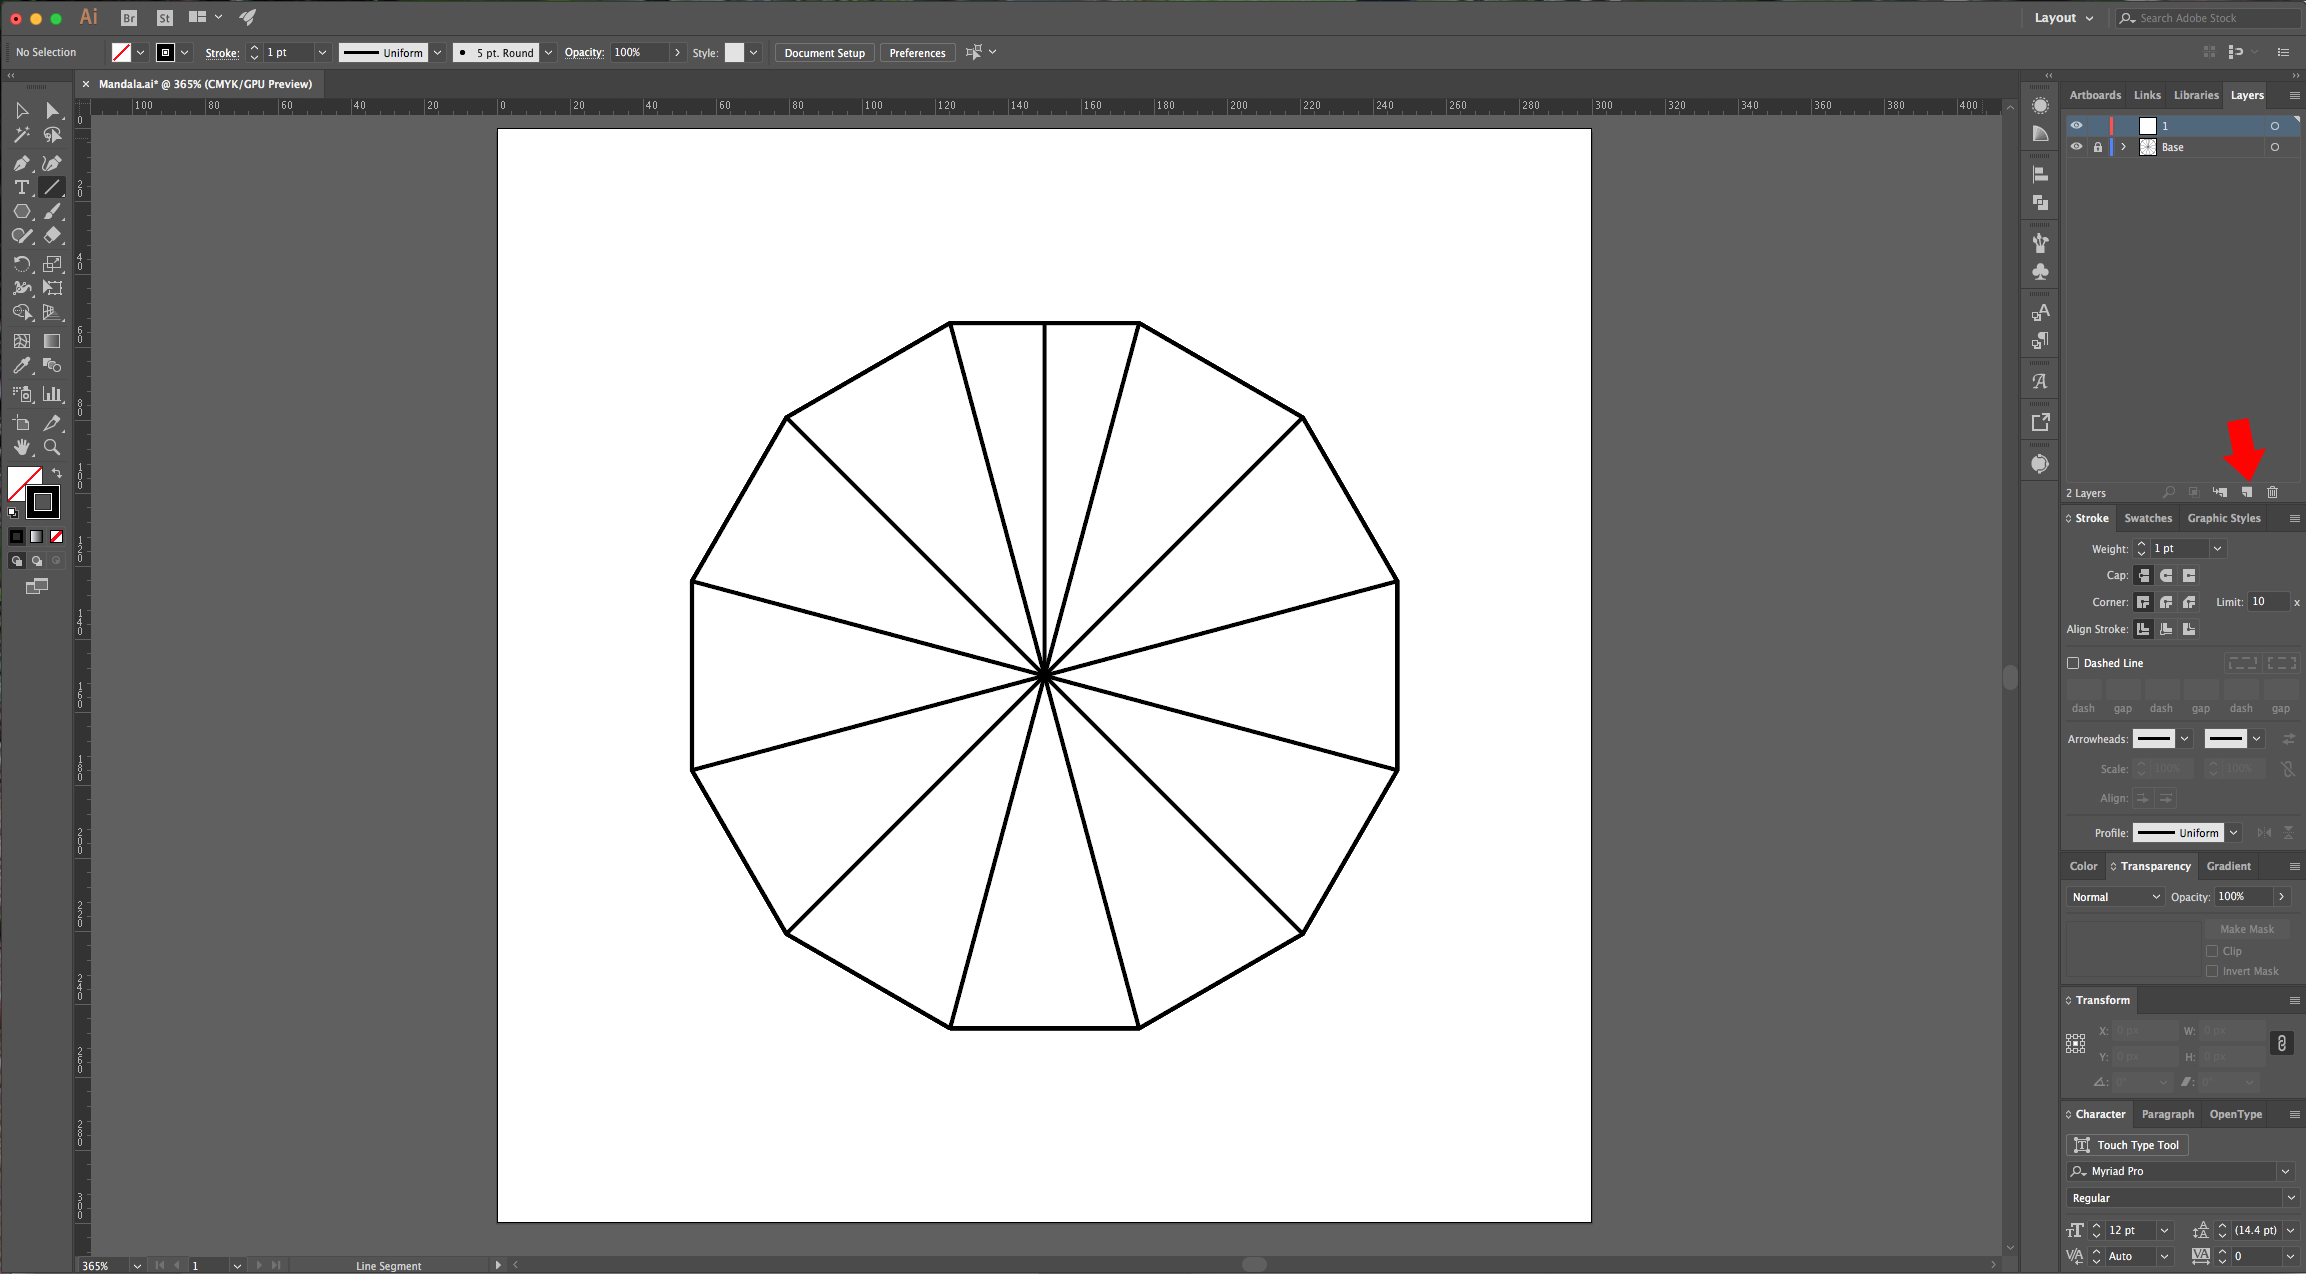
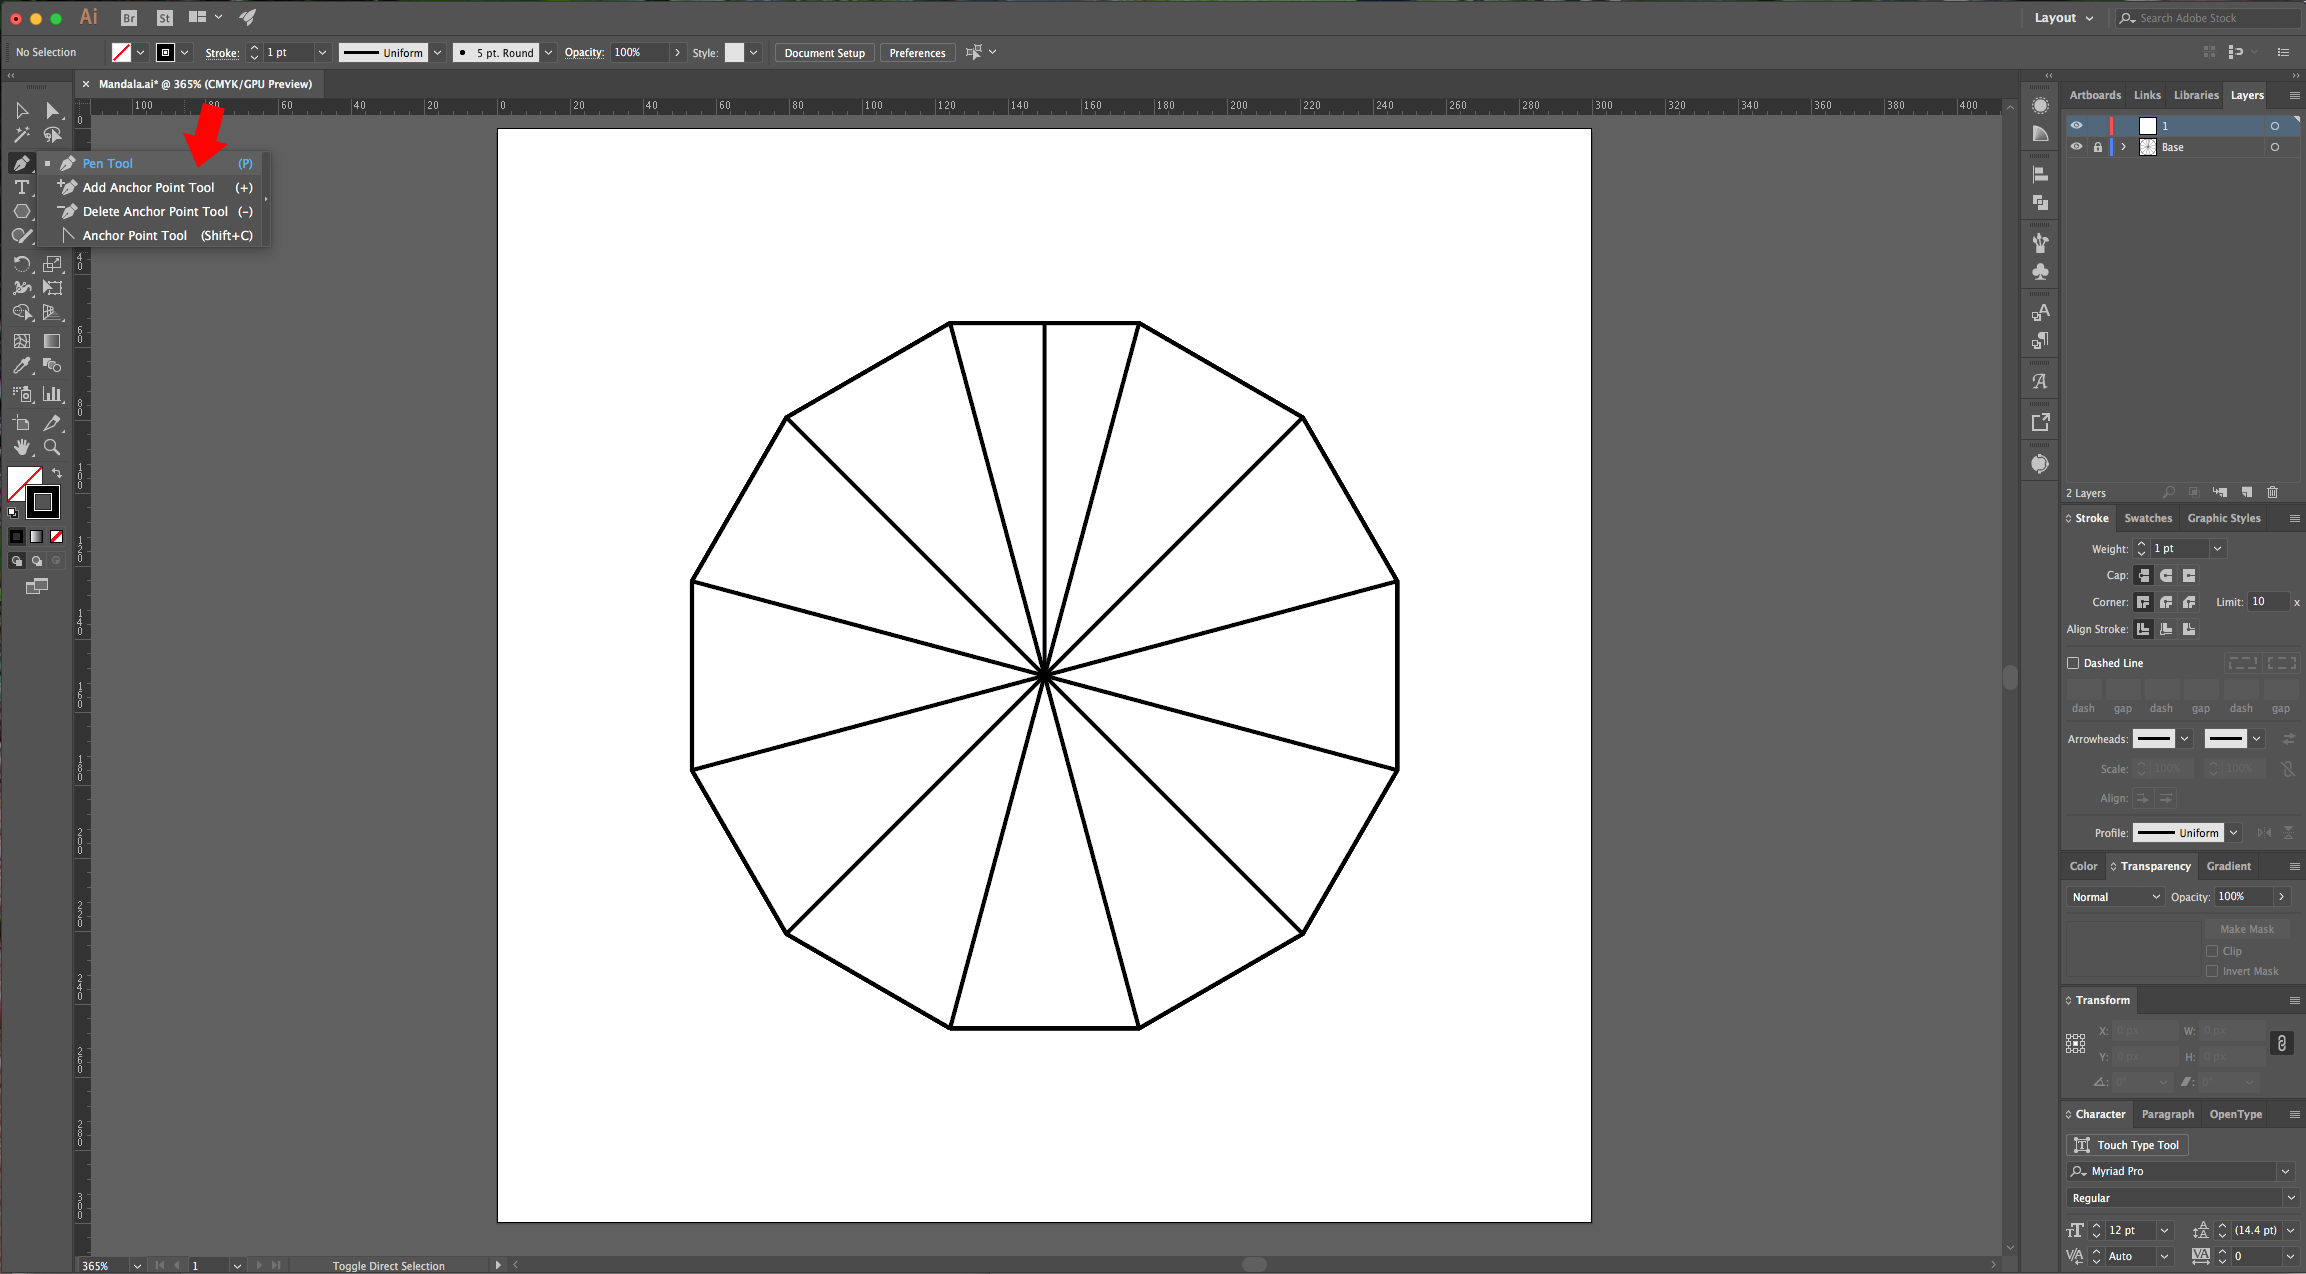
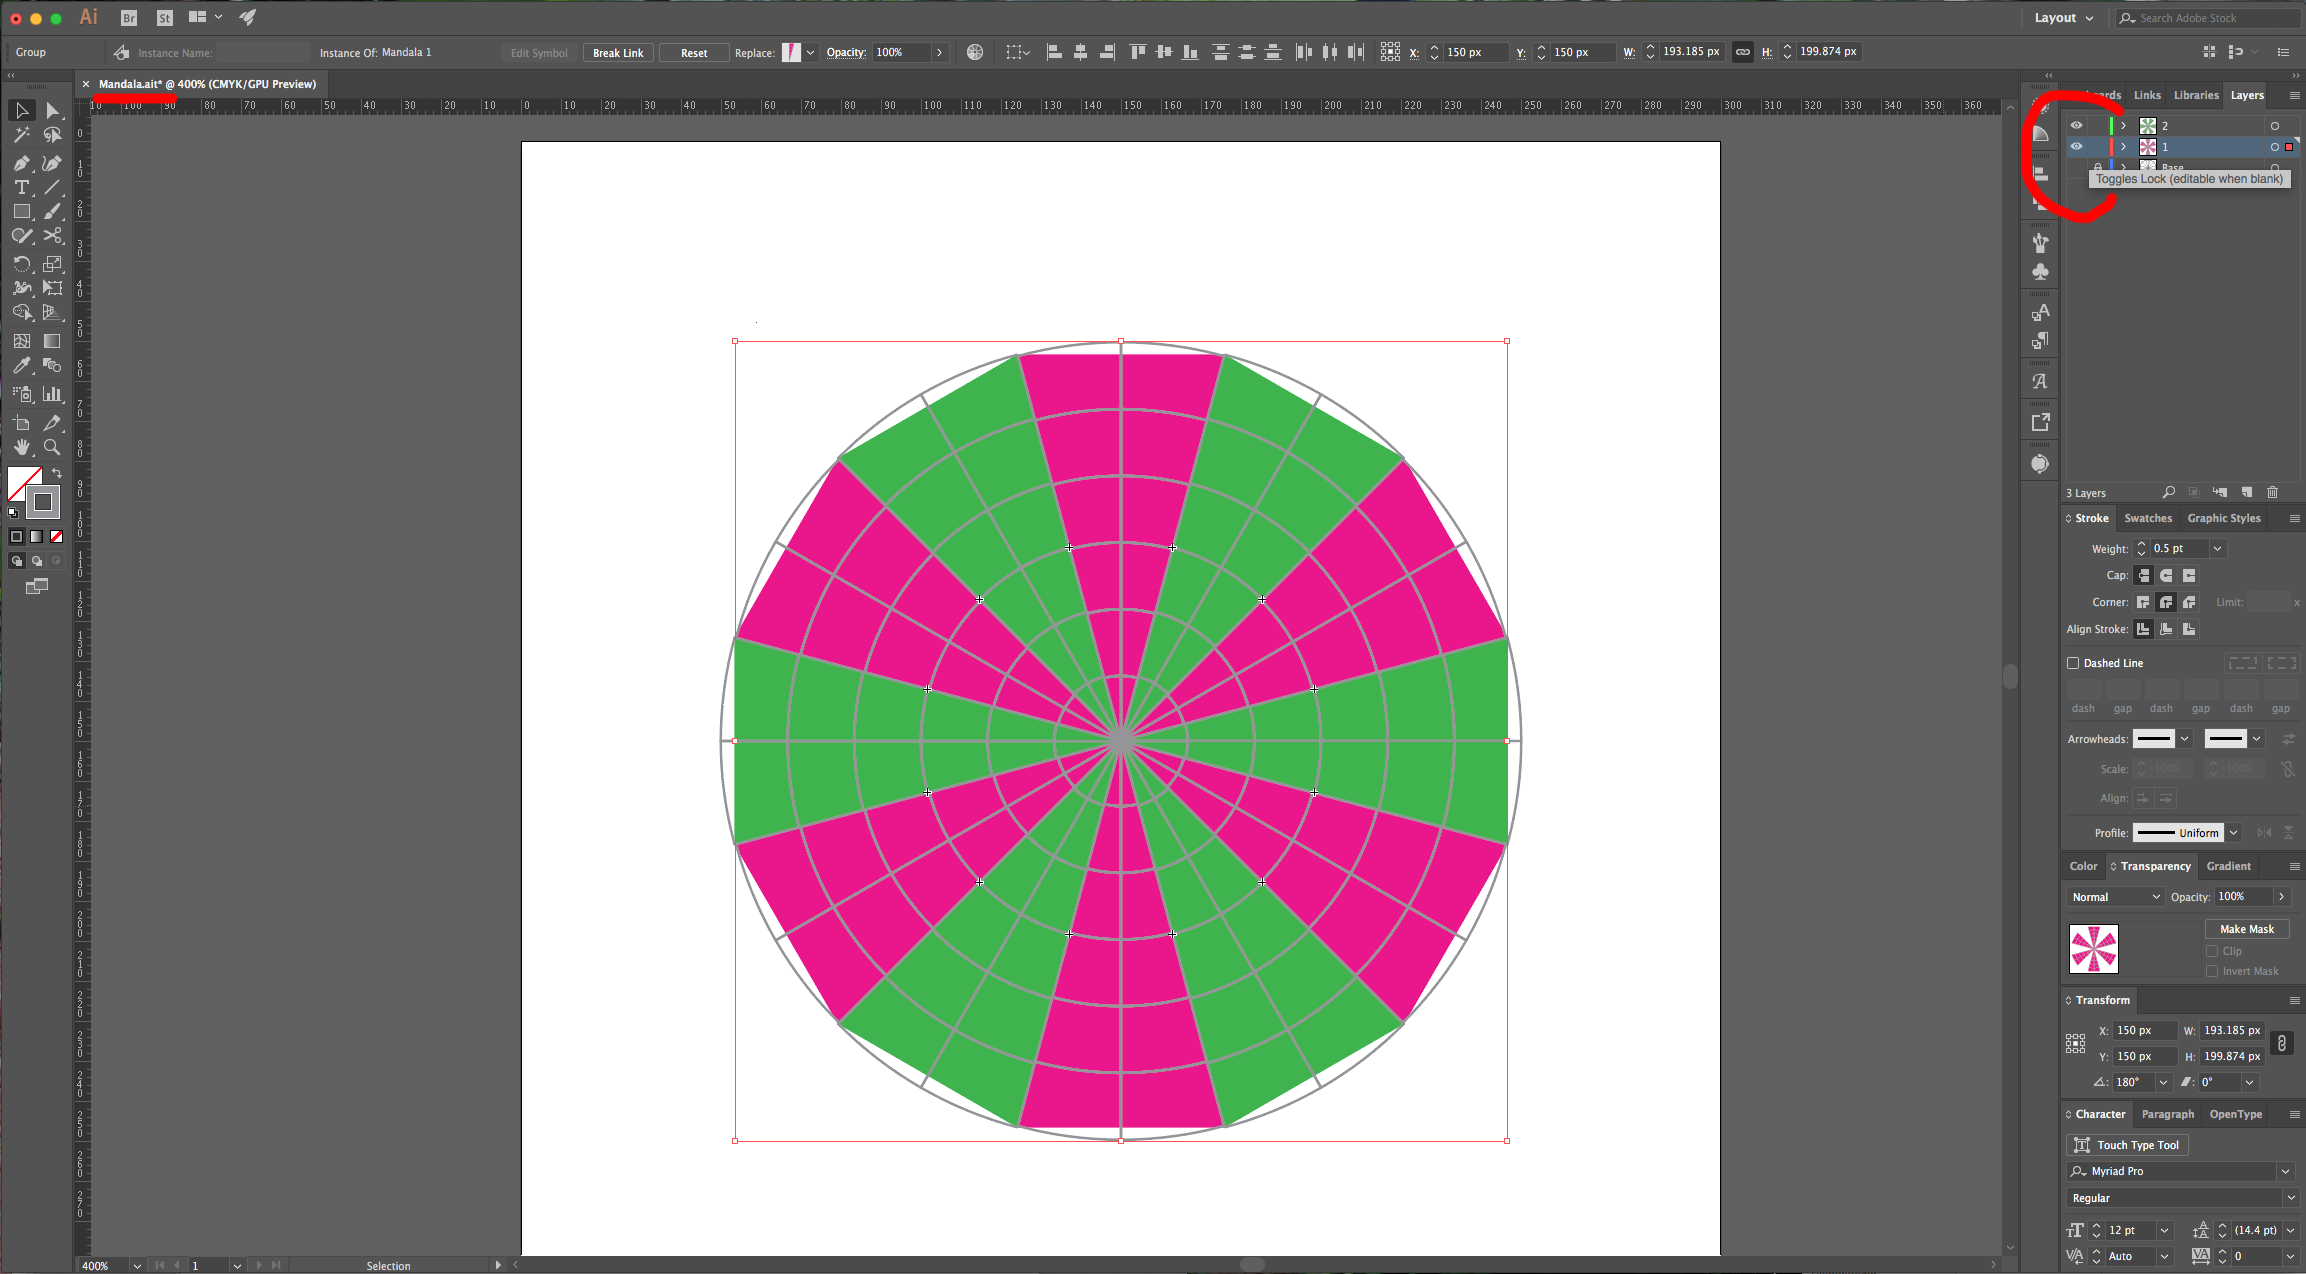
6 - Go to the “Layers” Panel and lock your current layer by clicking on the small space to the left of the thumbnail and invoke the small lock icon. Then create a “New Layer” (Command/Control + L) or click the small button at the bottom of the Panel.

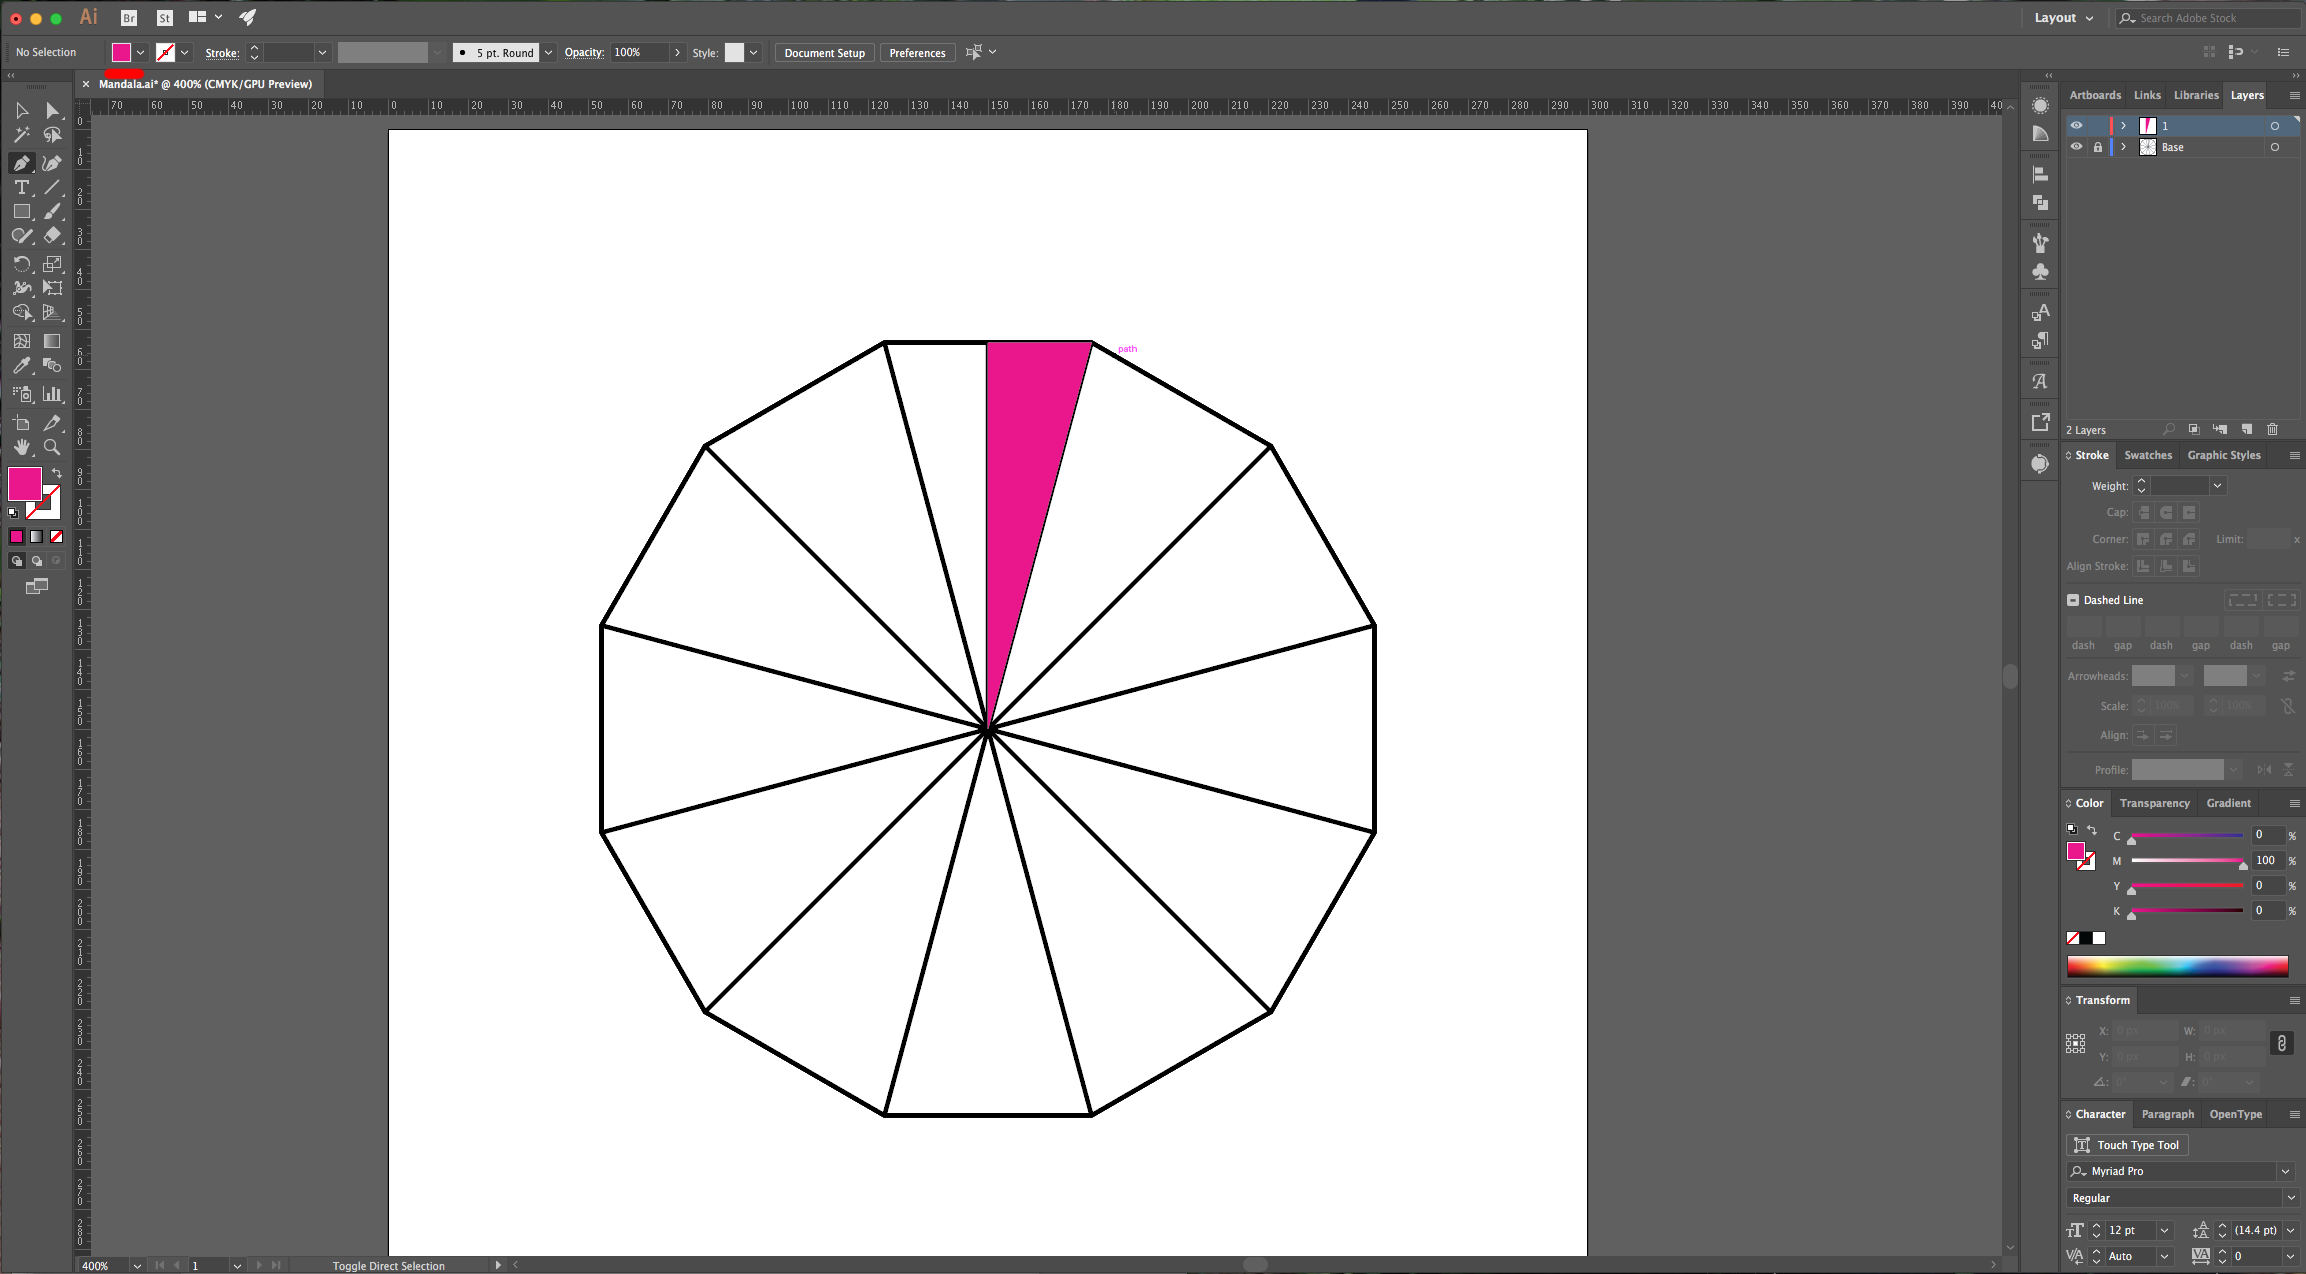
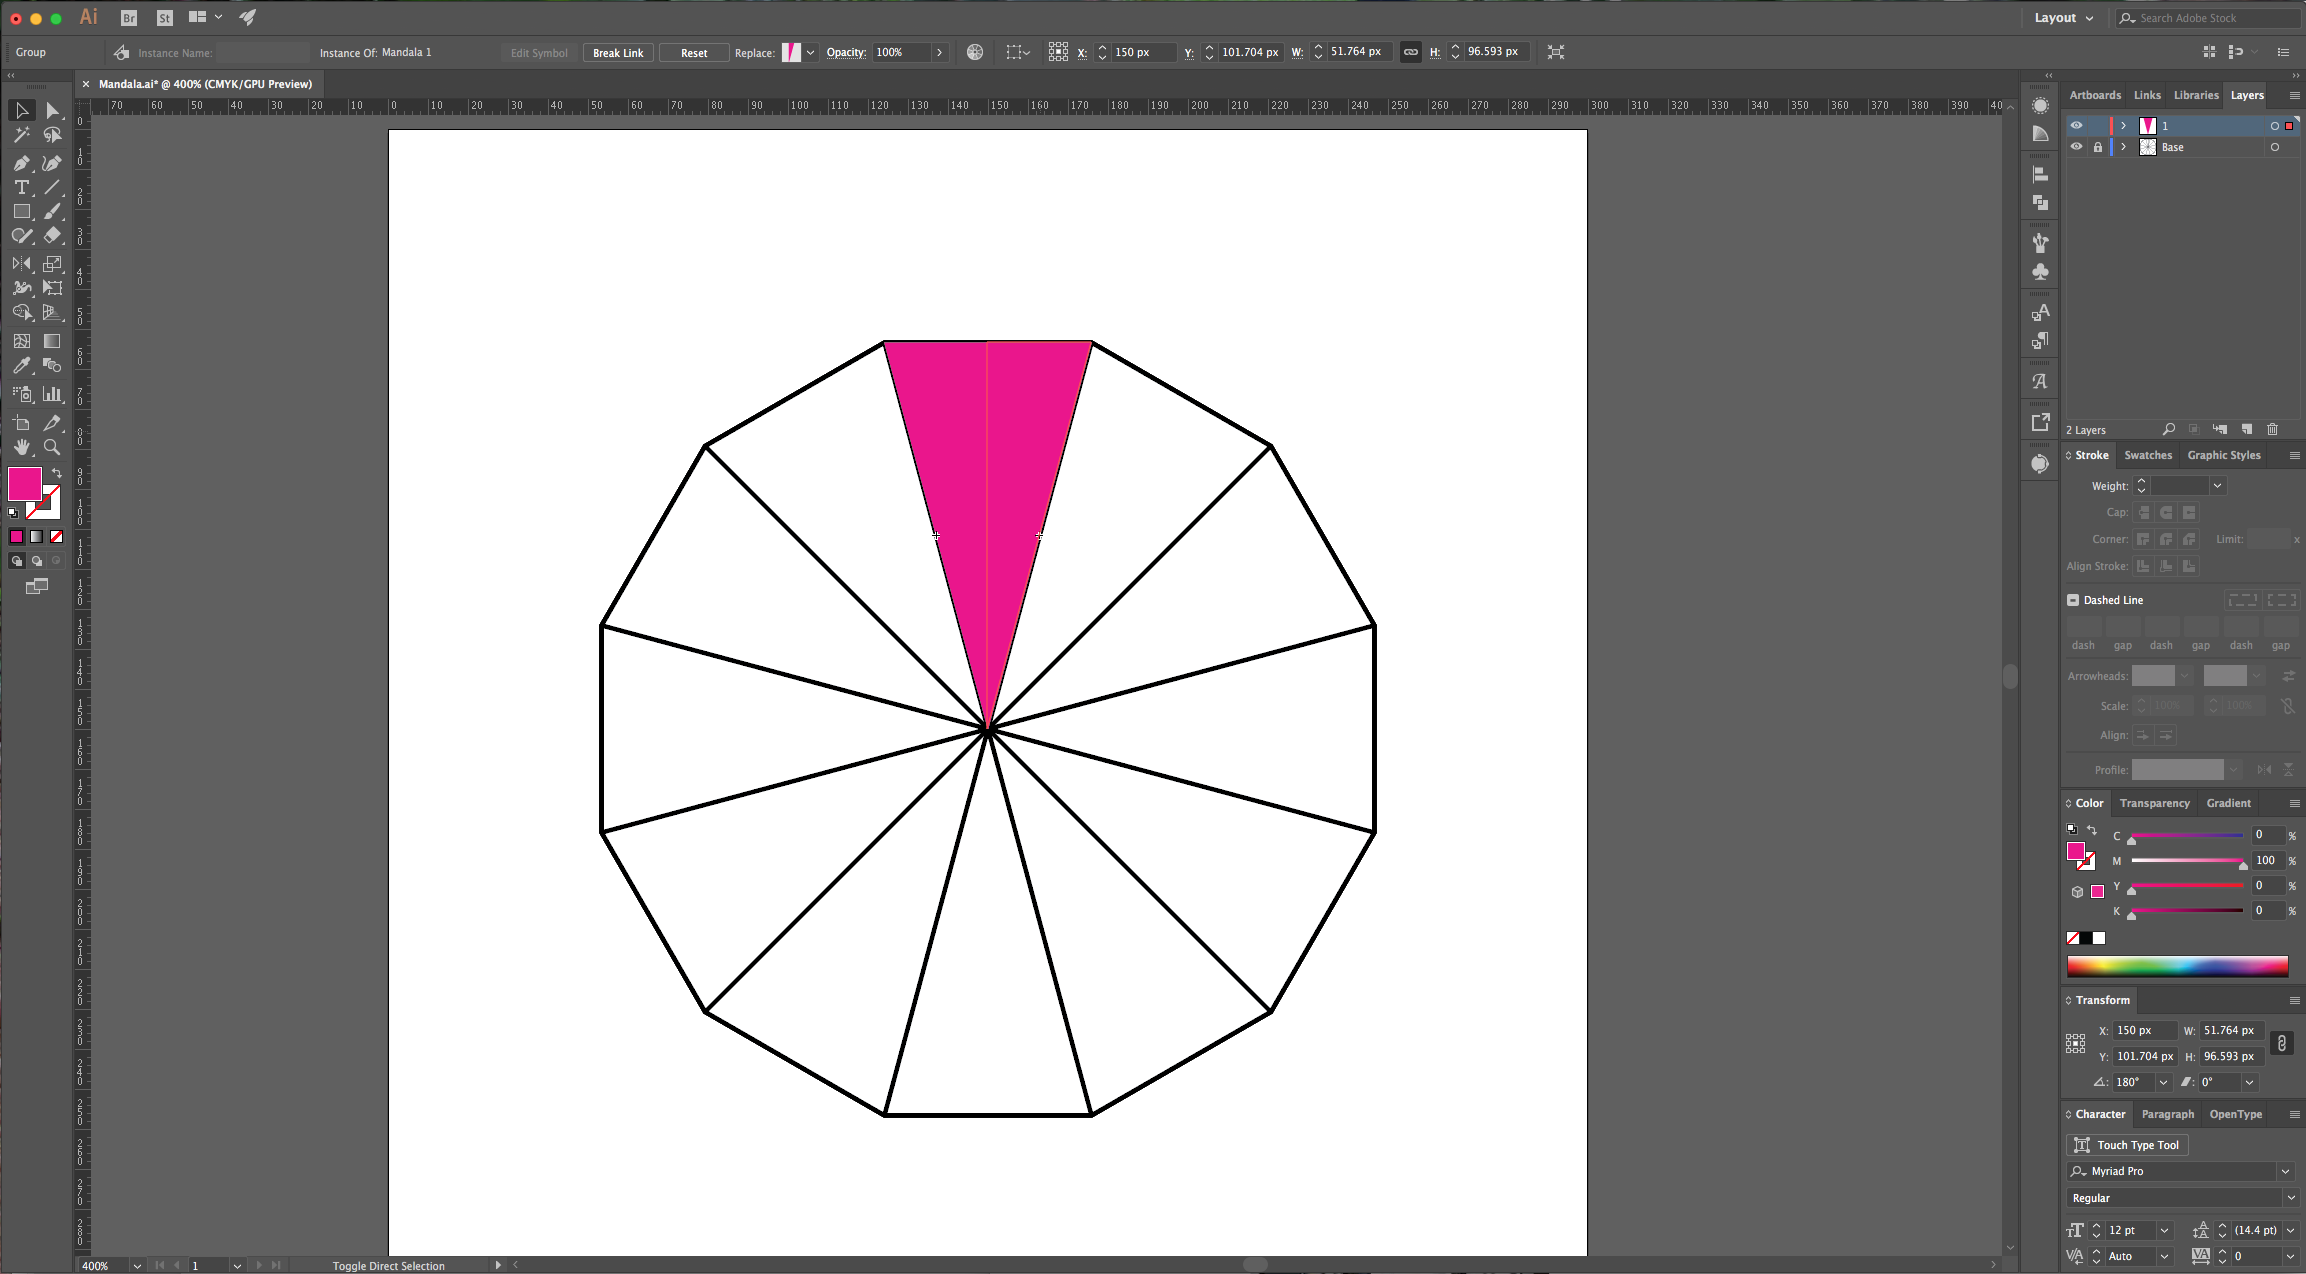
7 - Select the “Pen Tool” (P), then draw a triangle that covers one half of the upper segment (from the right corner to the middle line you just draw). Use a bright “Fill” (we used magenta) color and no “Stroke”.
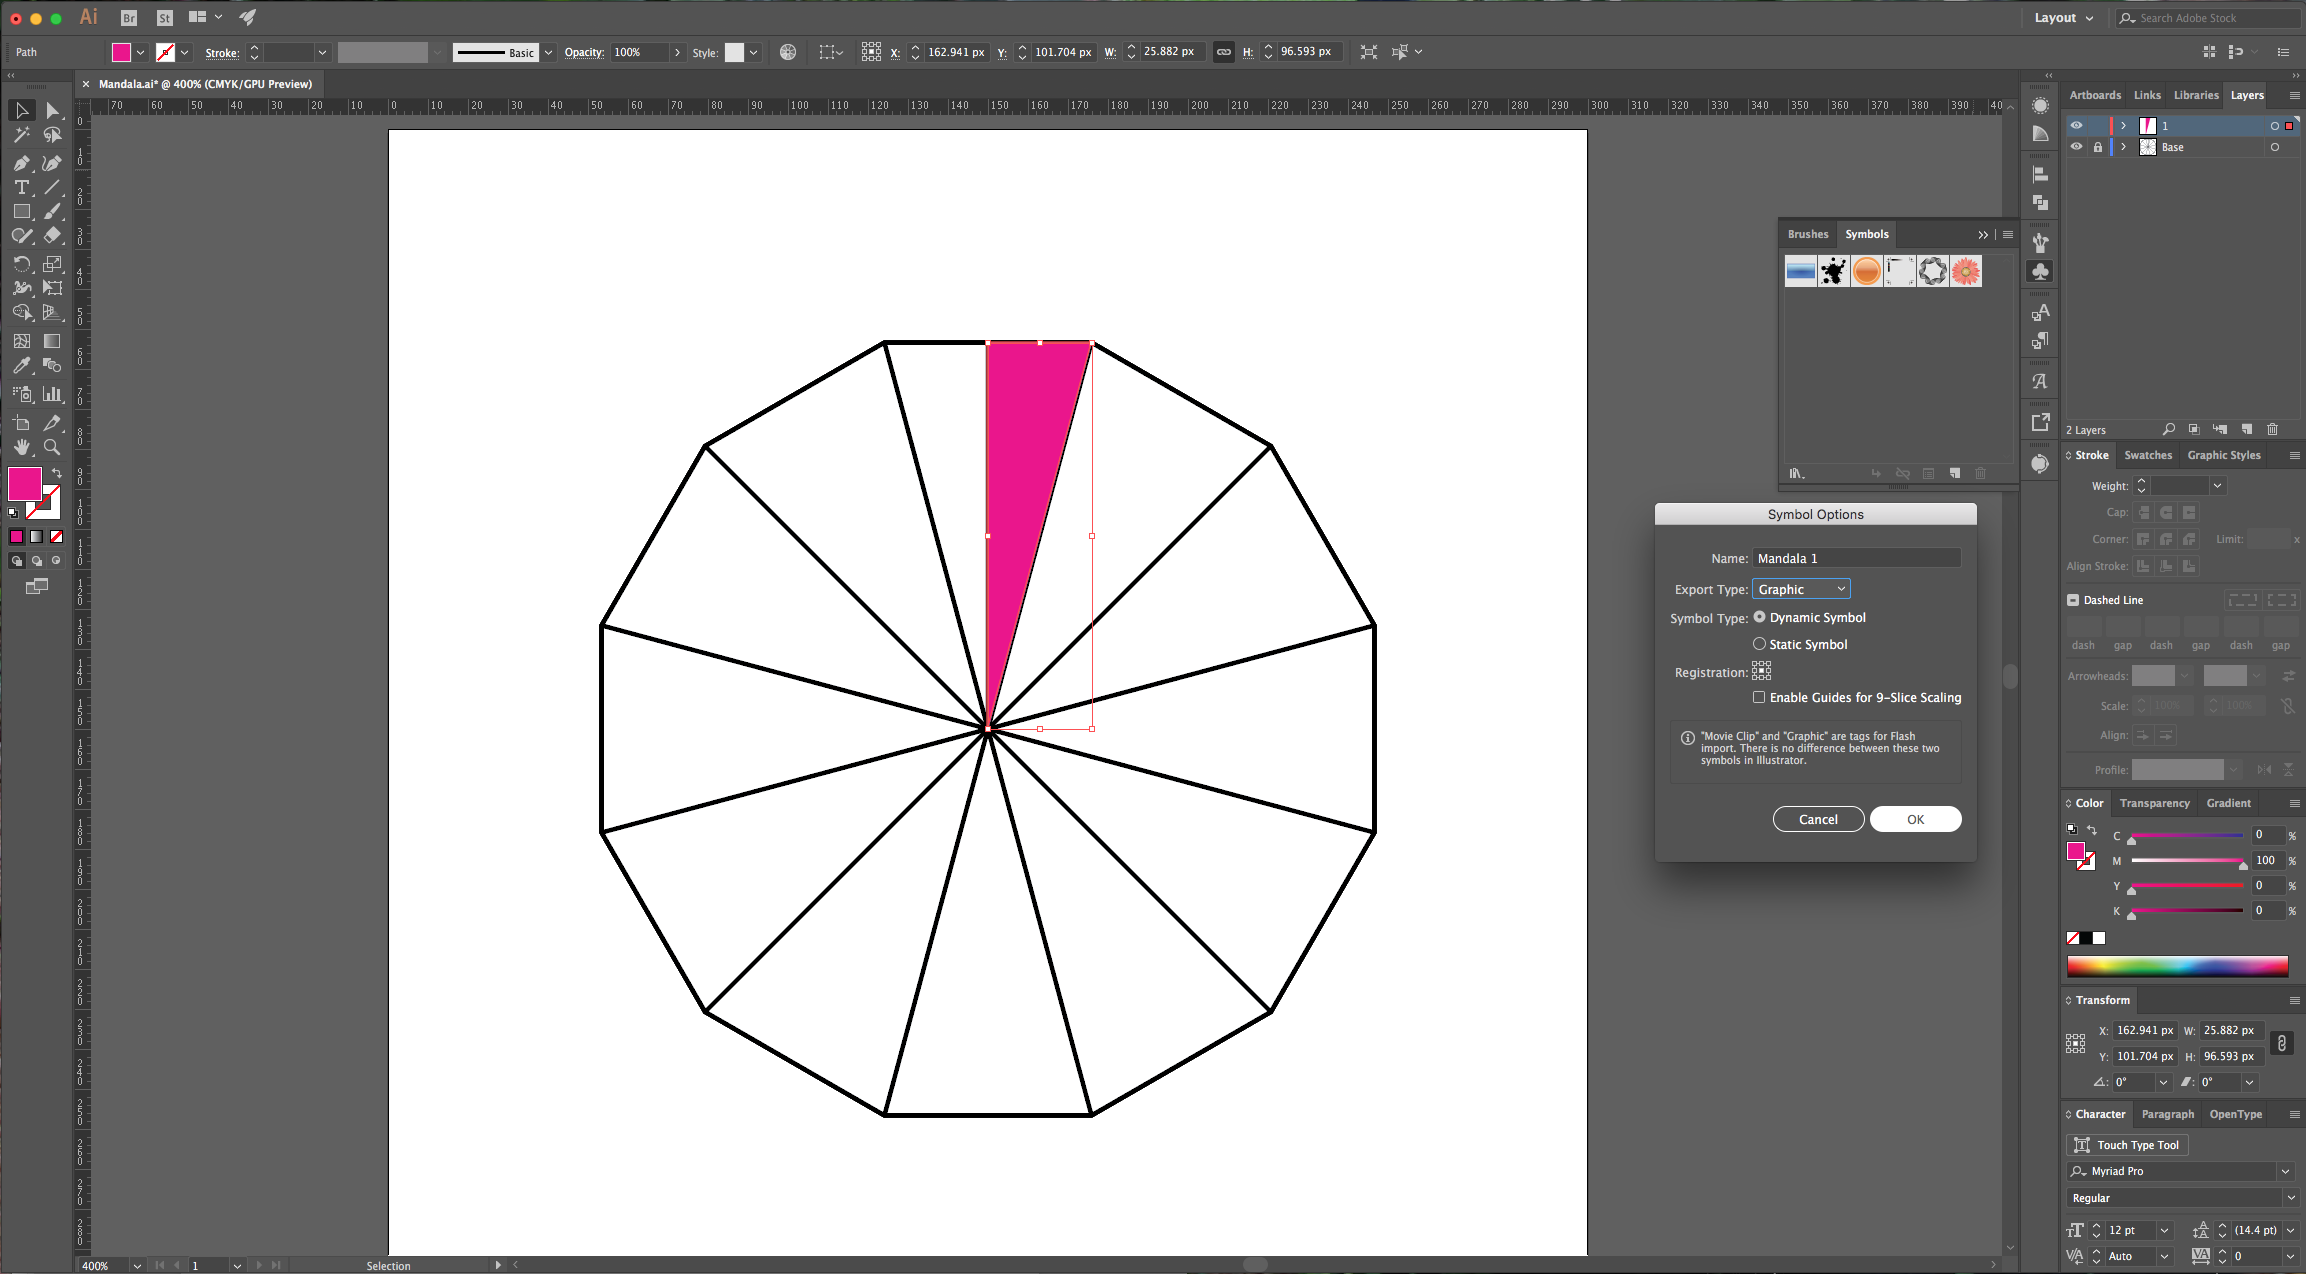
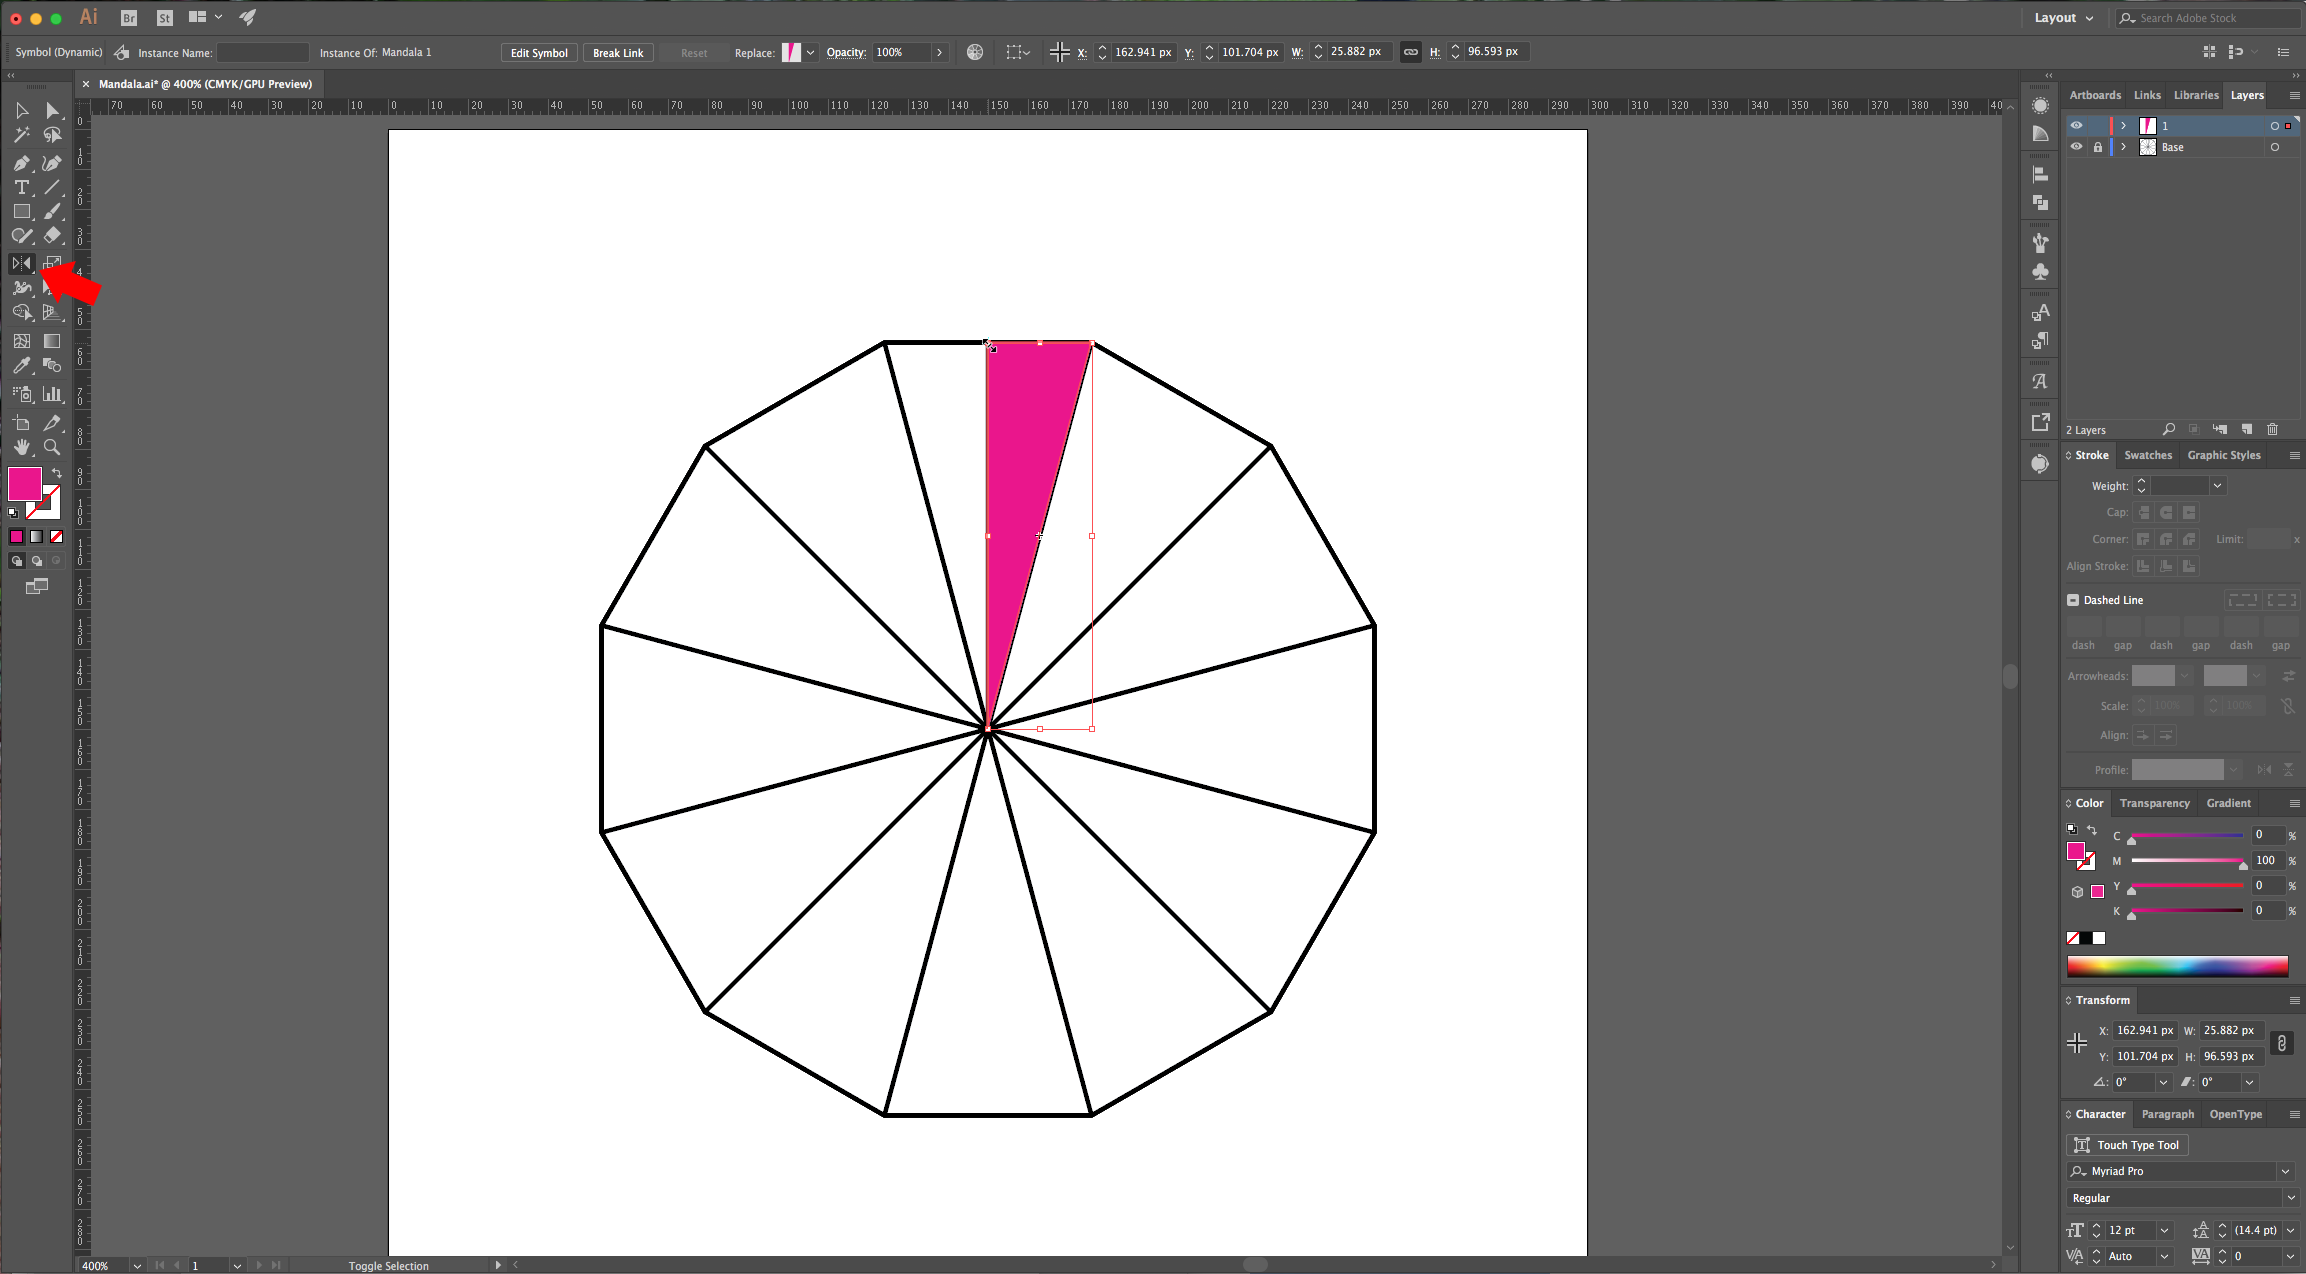
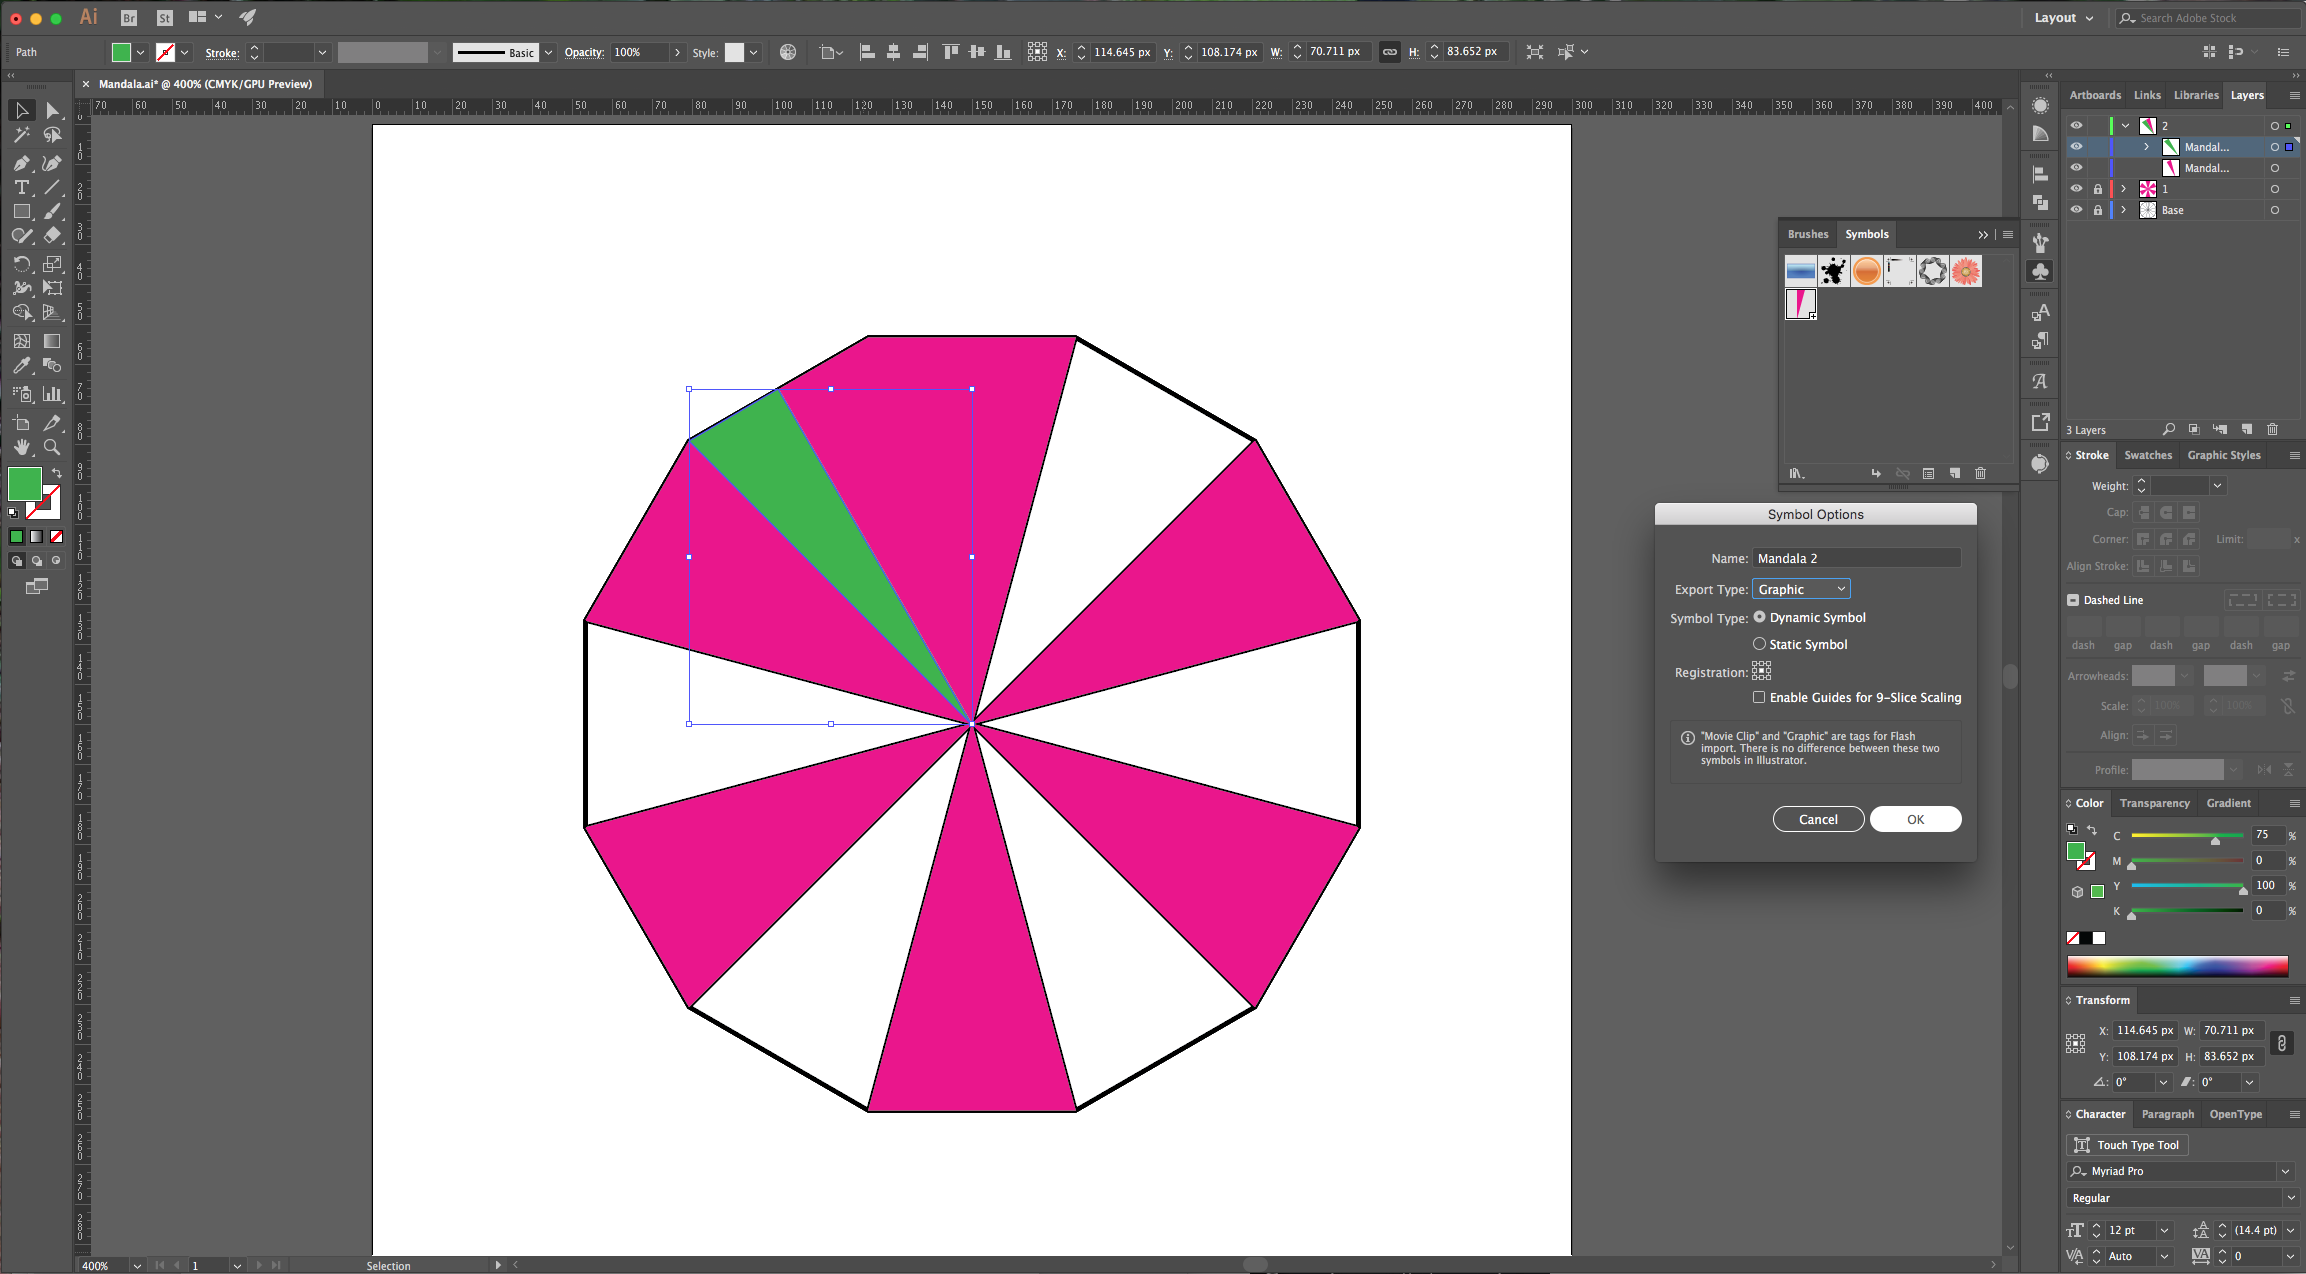
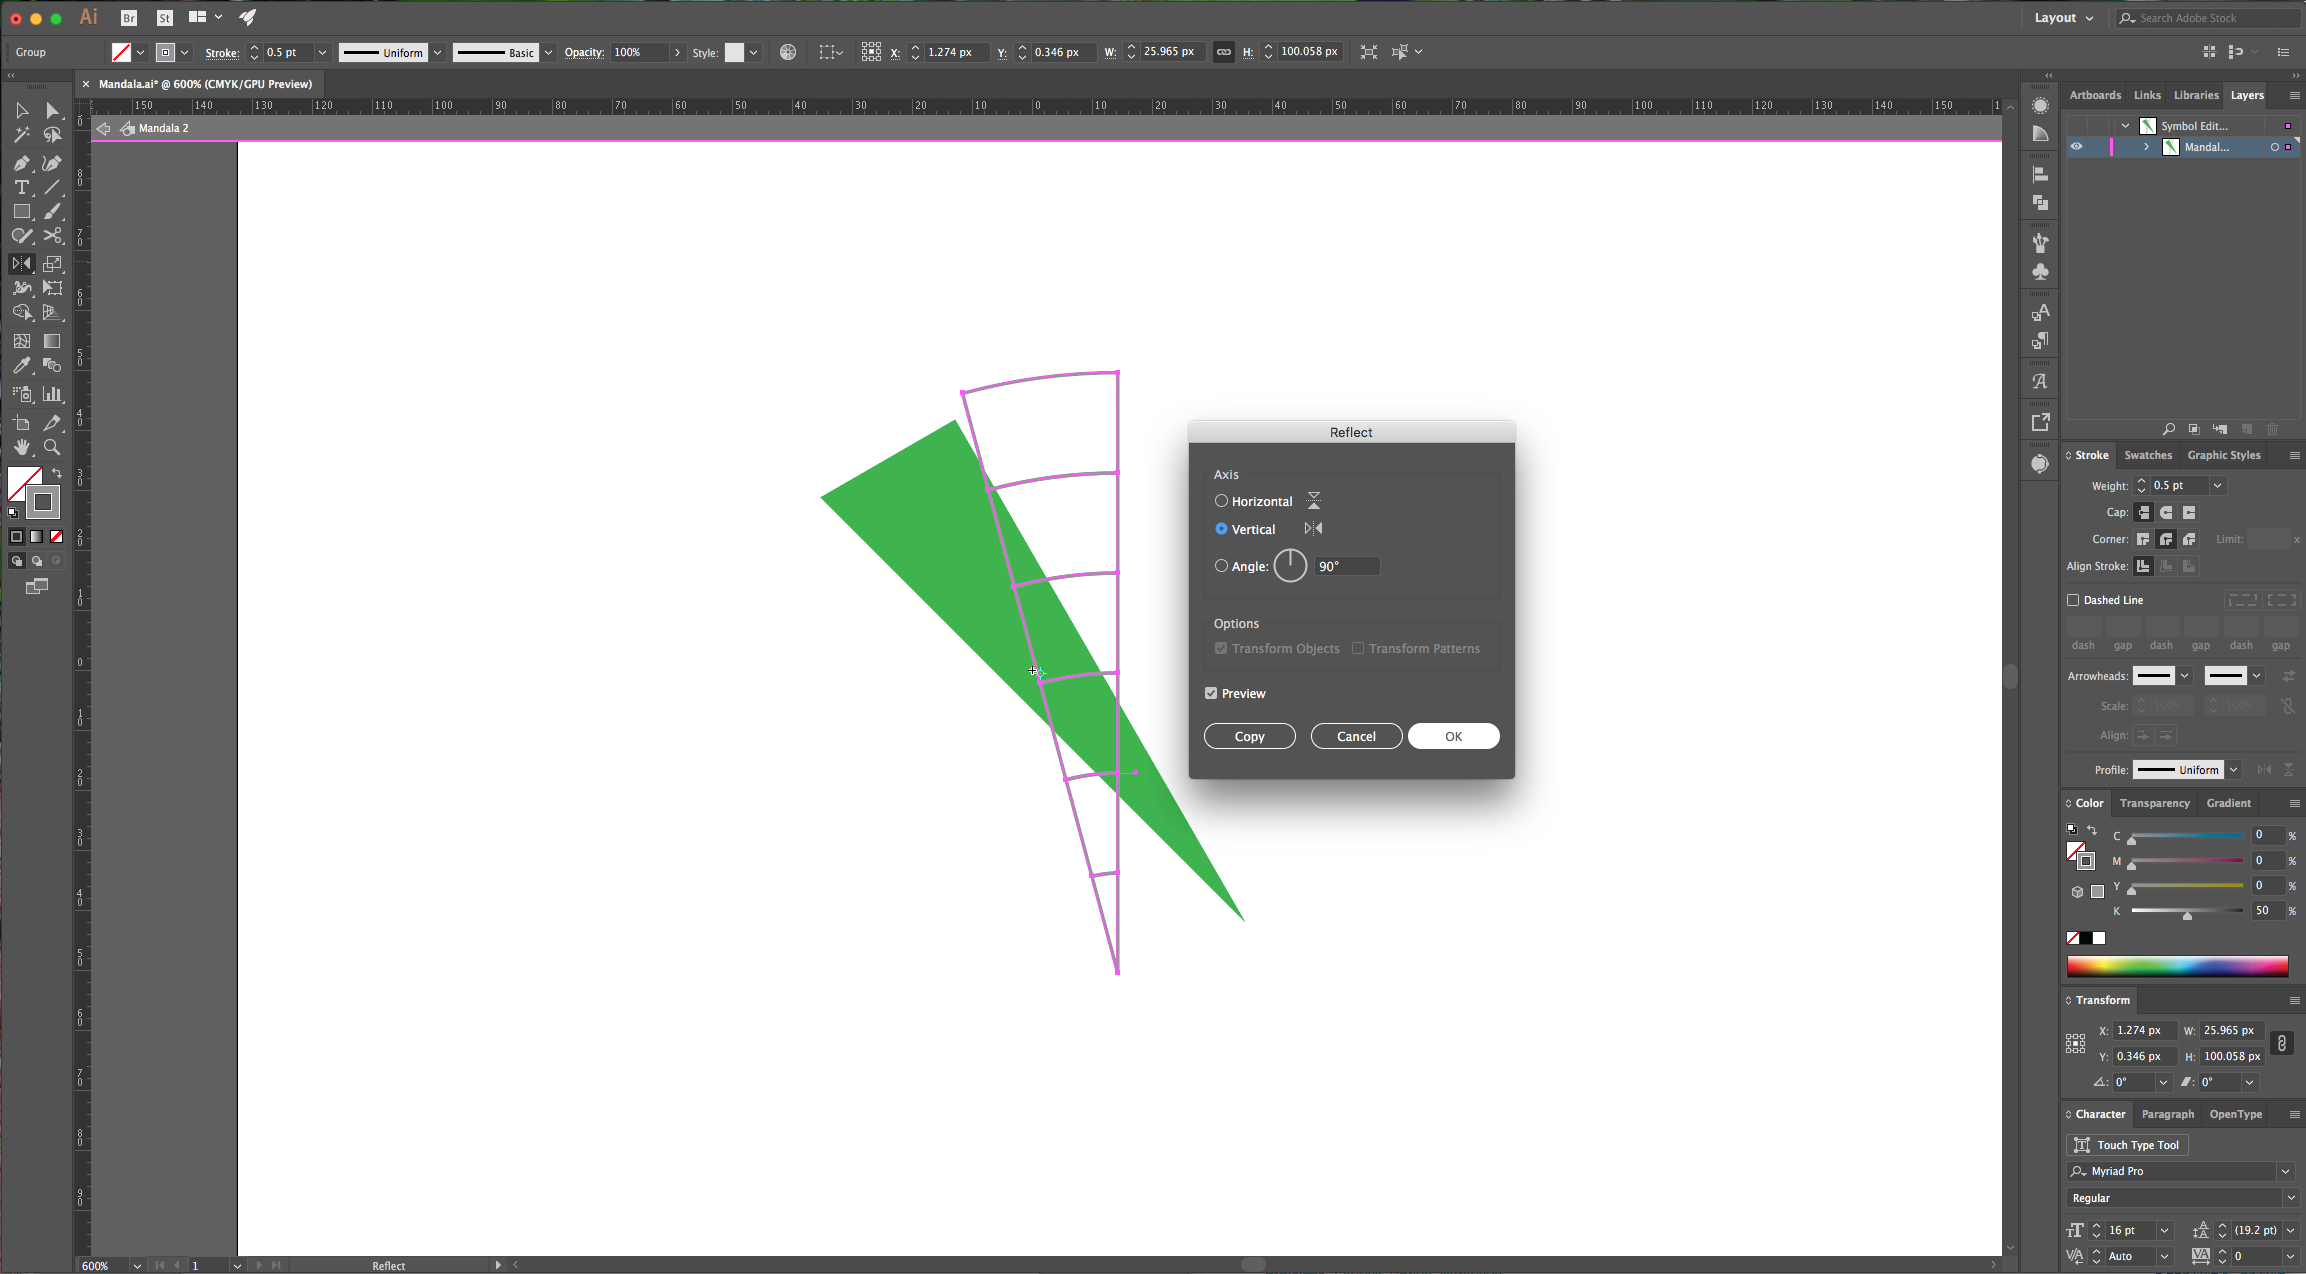
8 - Select the triangle and go to the “Symbols” Panel (Shift + Command/Control + F11) and click on the “New Symbol” button at the bottom of the Panel. Name it “Mandala 1” and use “Graphic” as “Export Type”. “Copy” (Command/Control + C) and “Paste in Front” (Command/Control + F) your half triangle and then, select the copy and using the “Reflection Tool” (O). Click on the top left corner and then, while holding the “Shift” key drag your path to the left to reflect it. Select both paths and group them together (Command/Control + G).


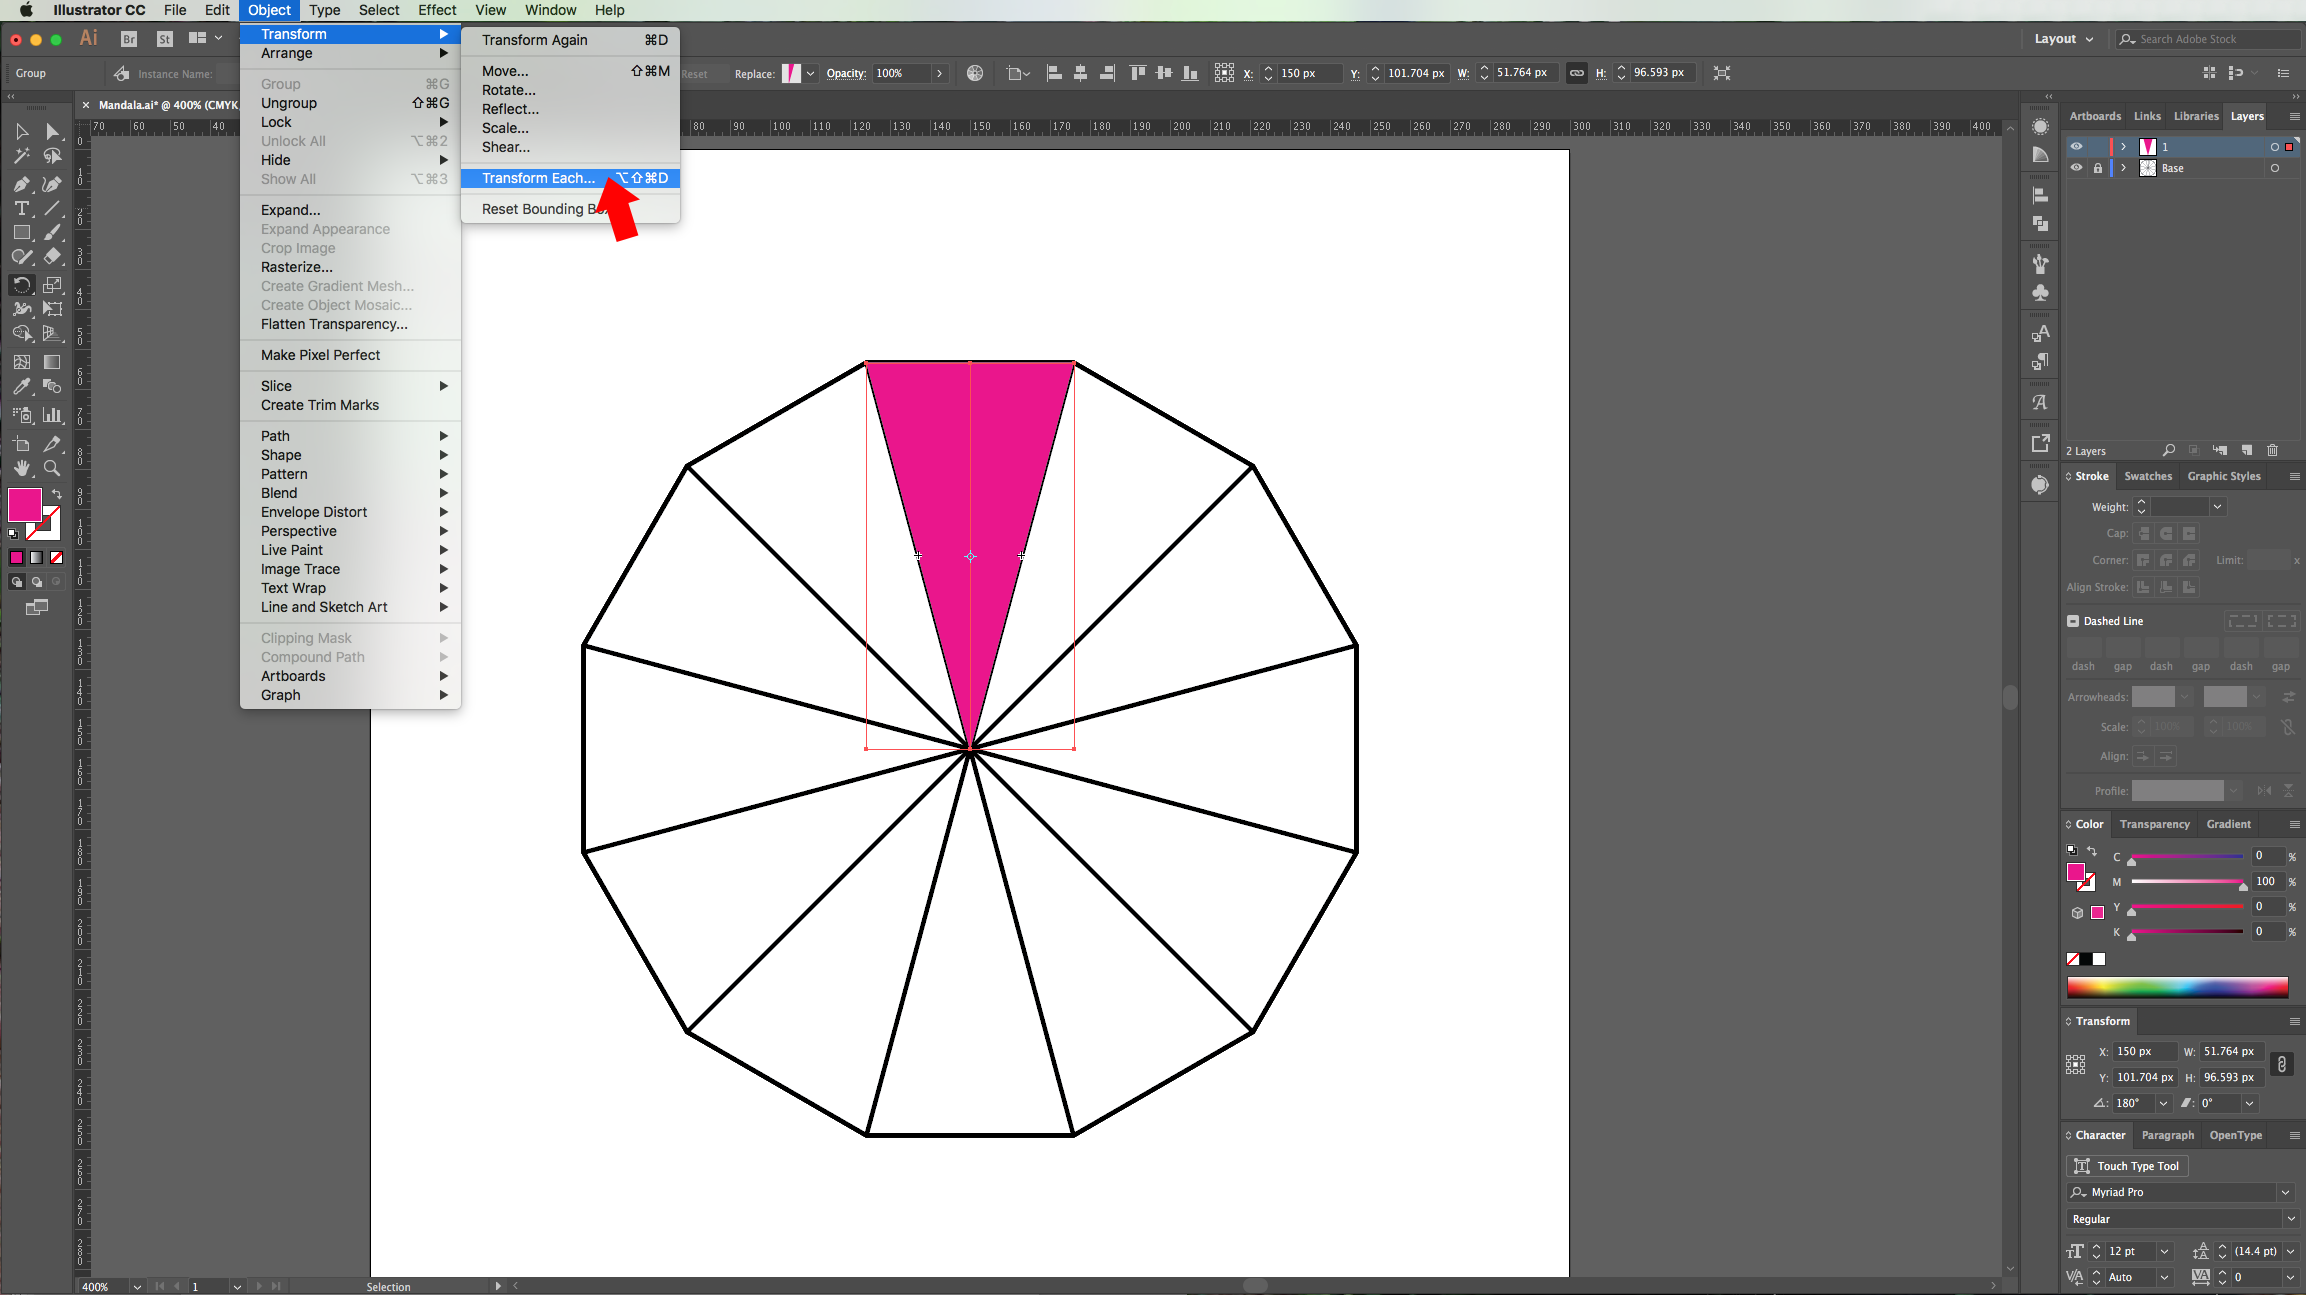
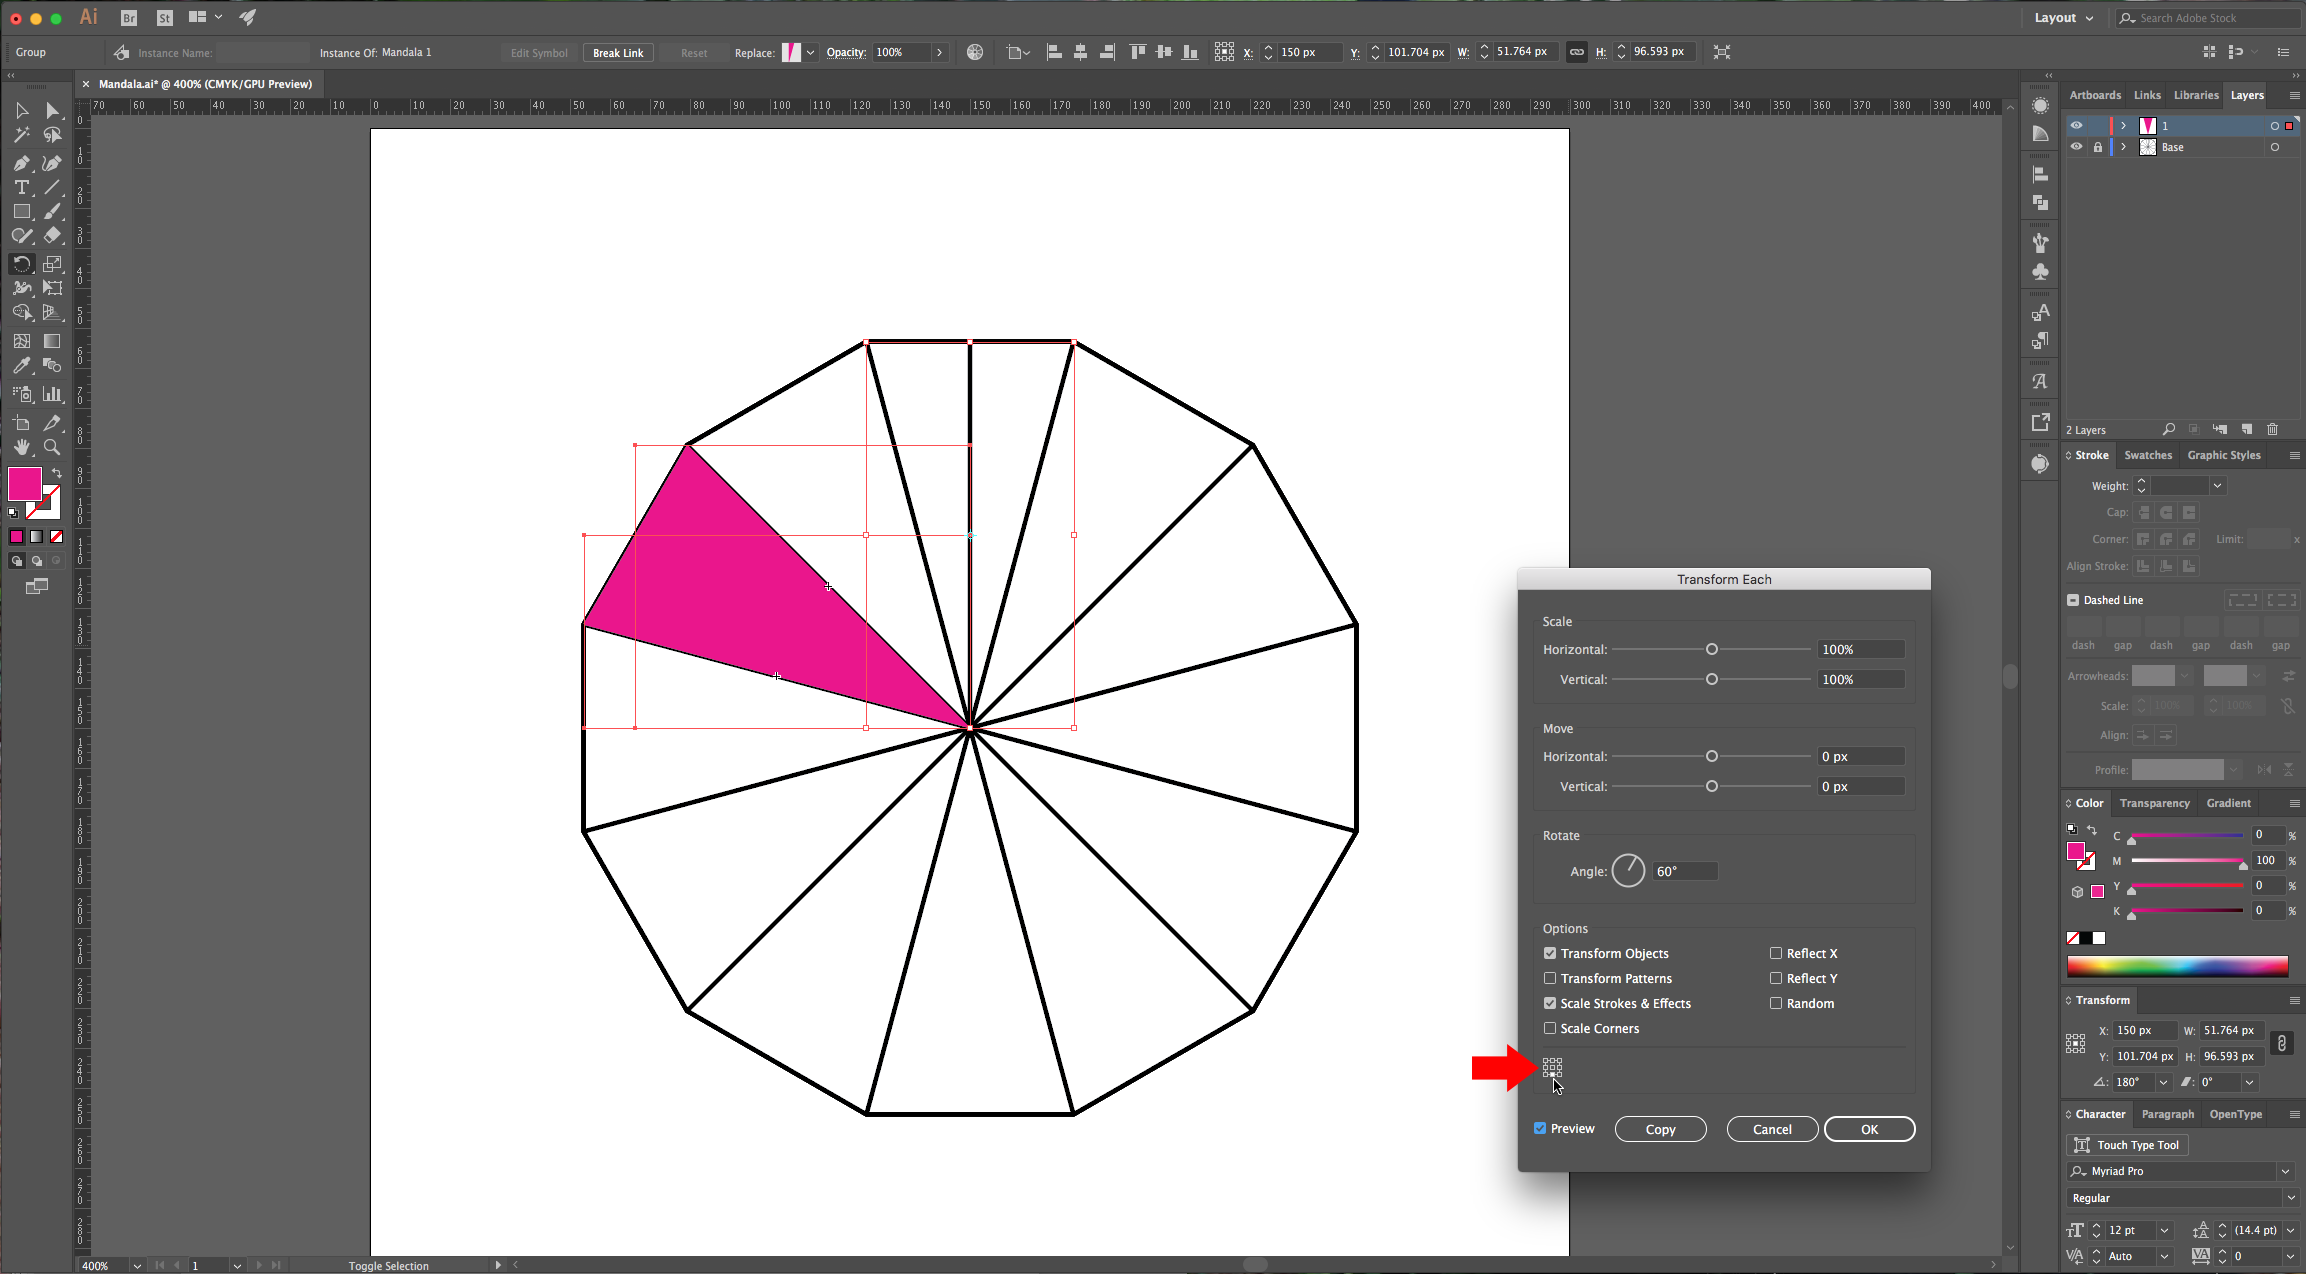
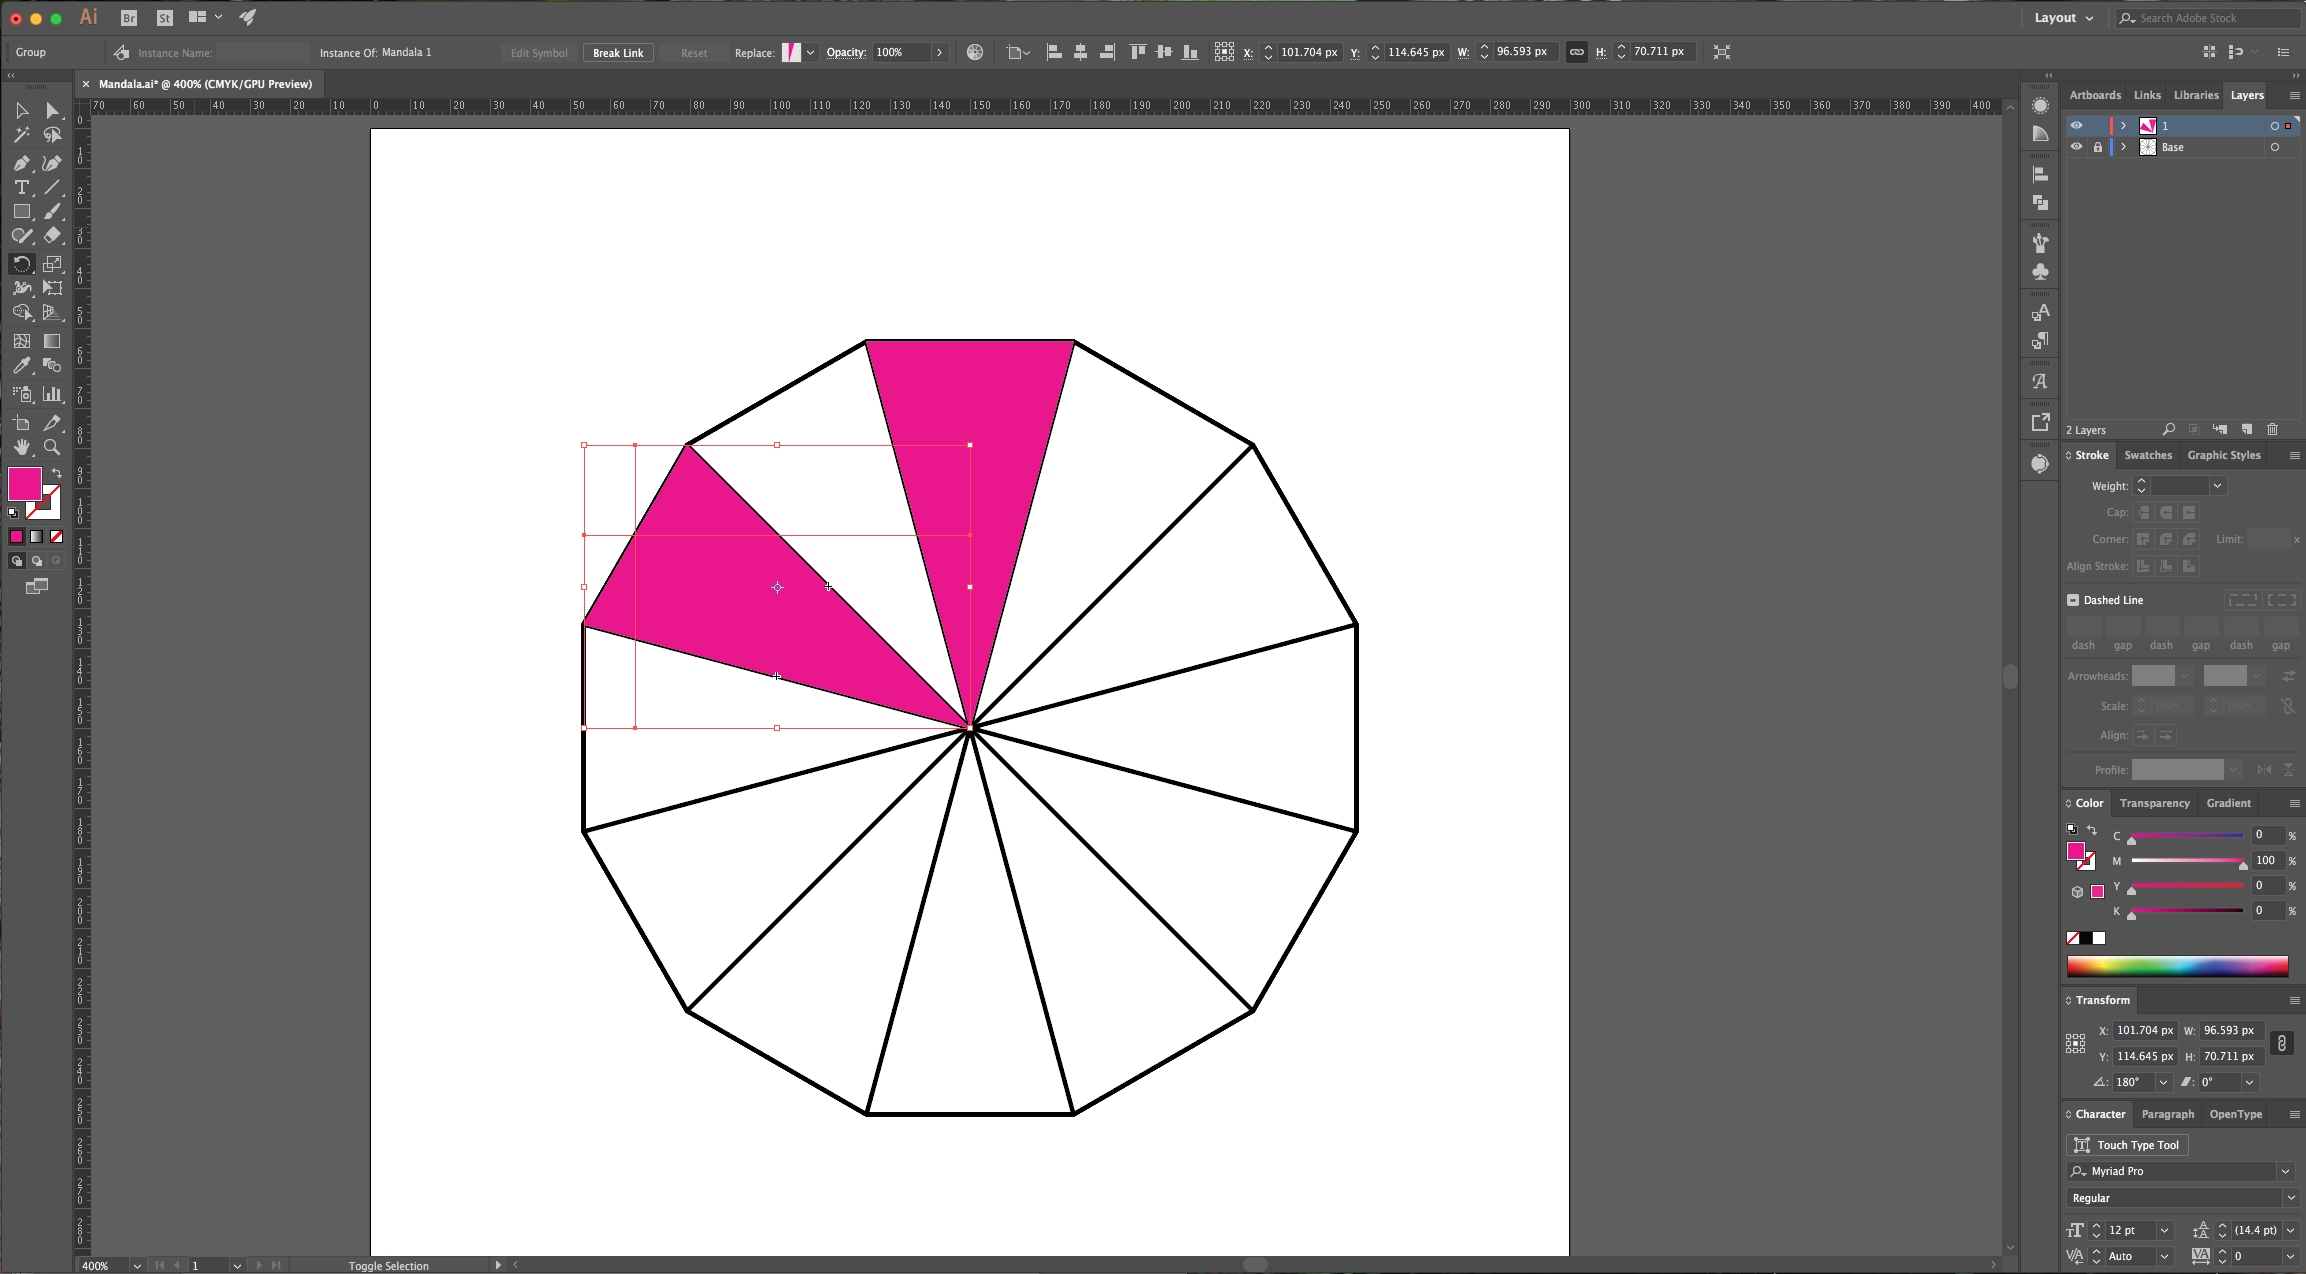
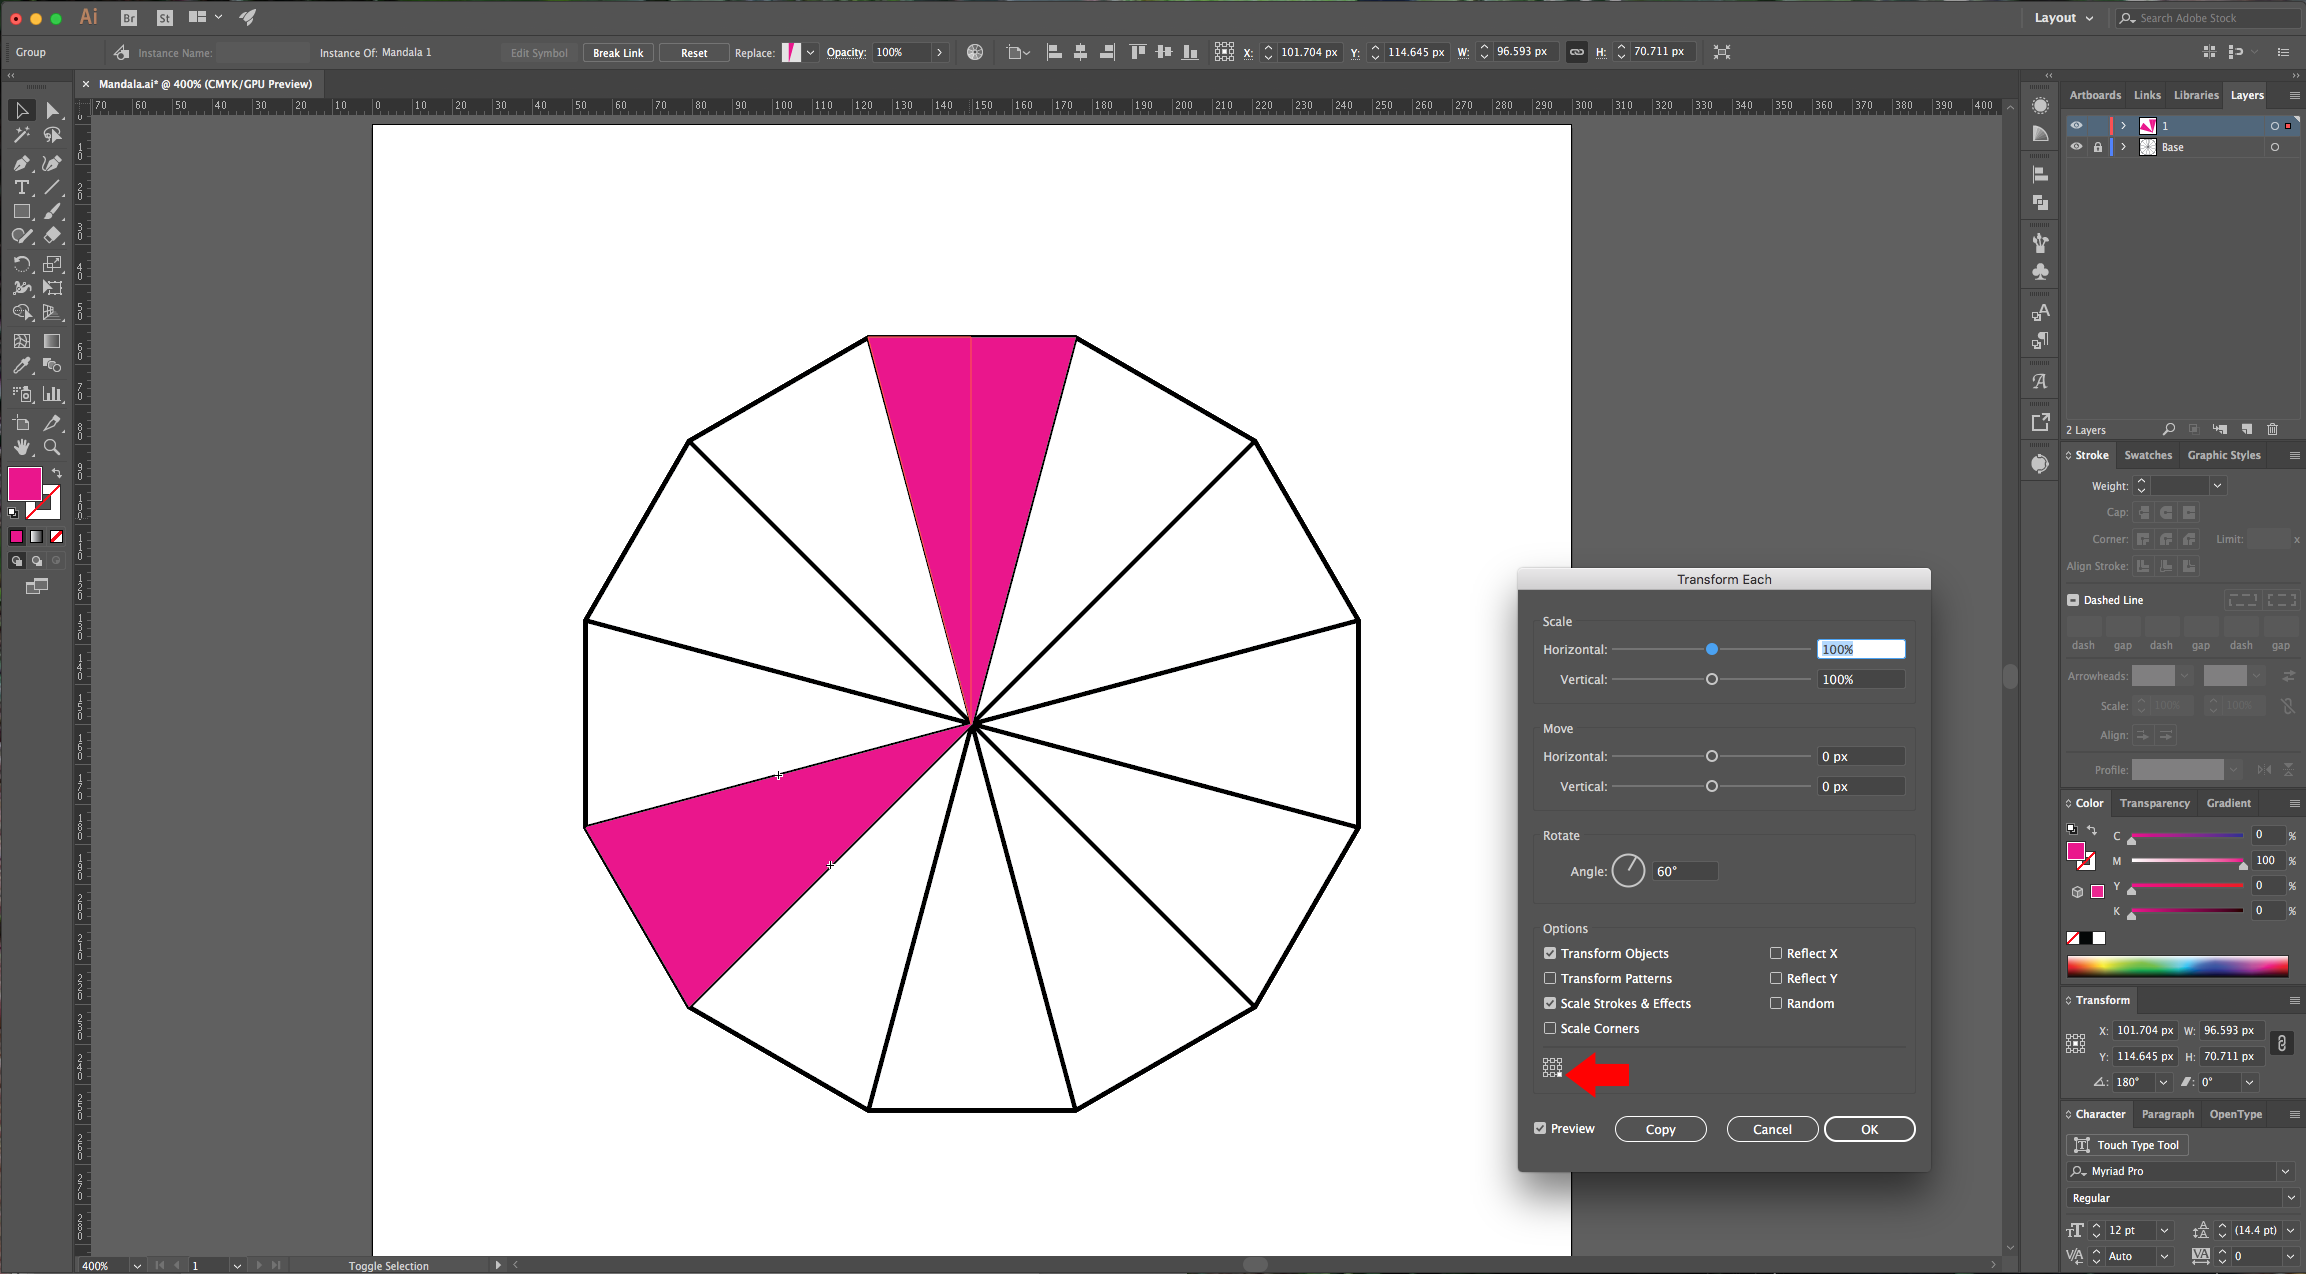
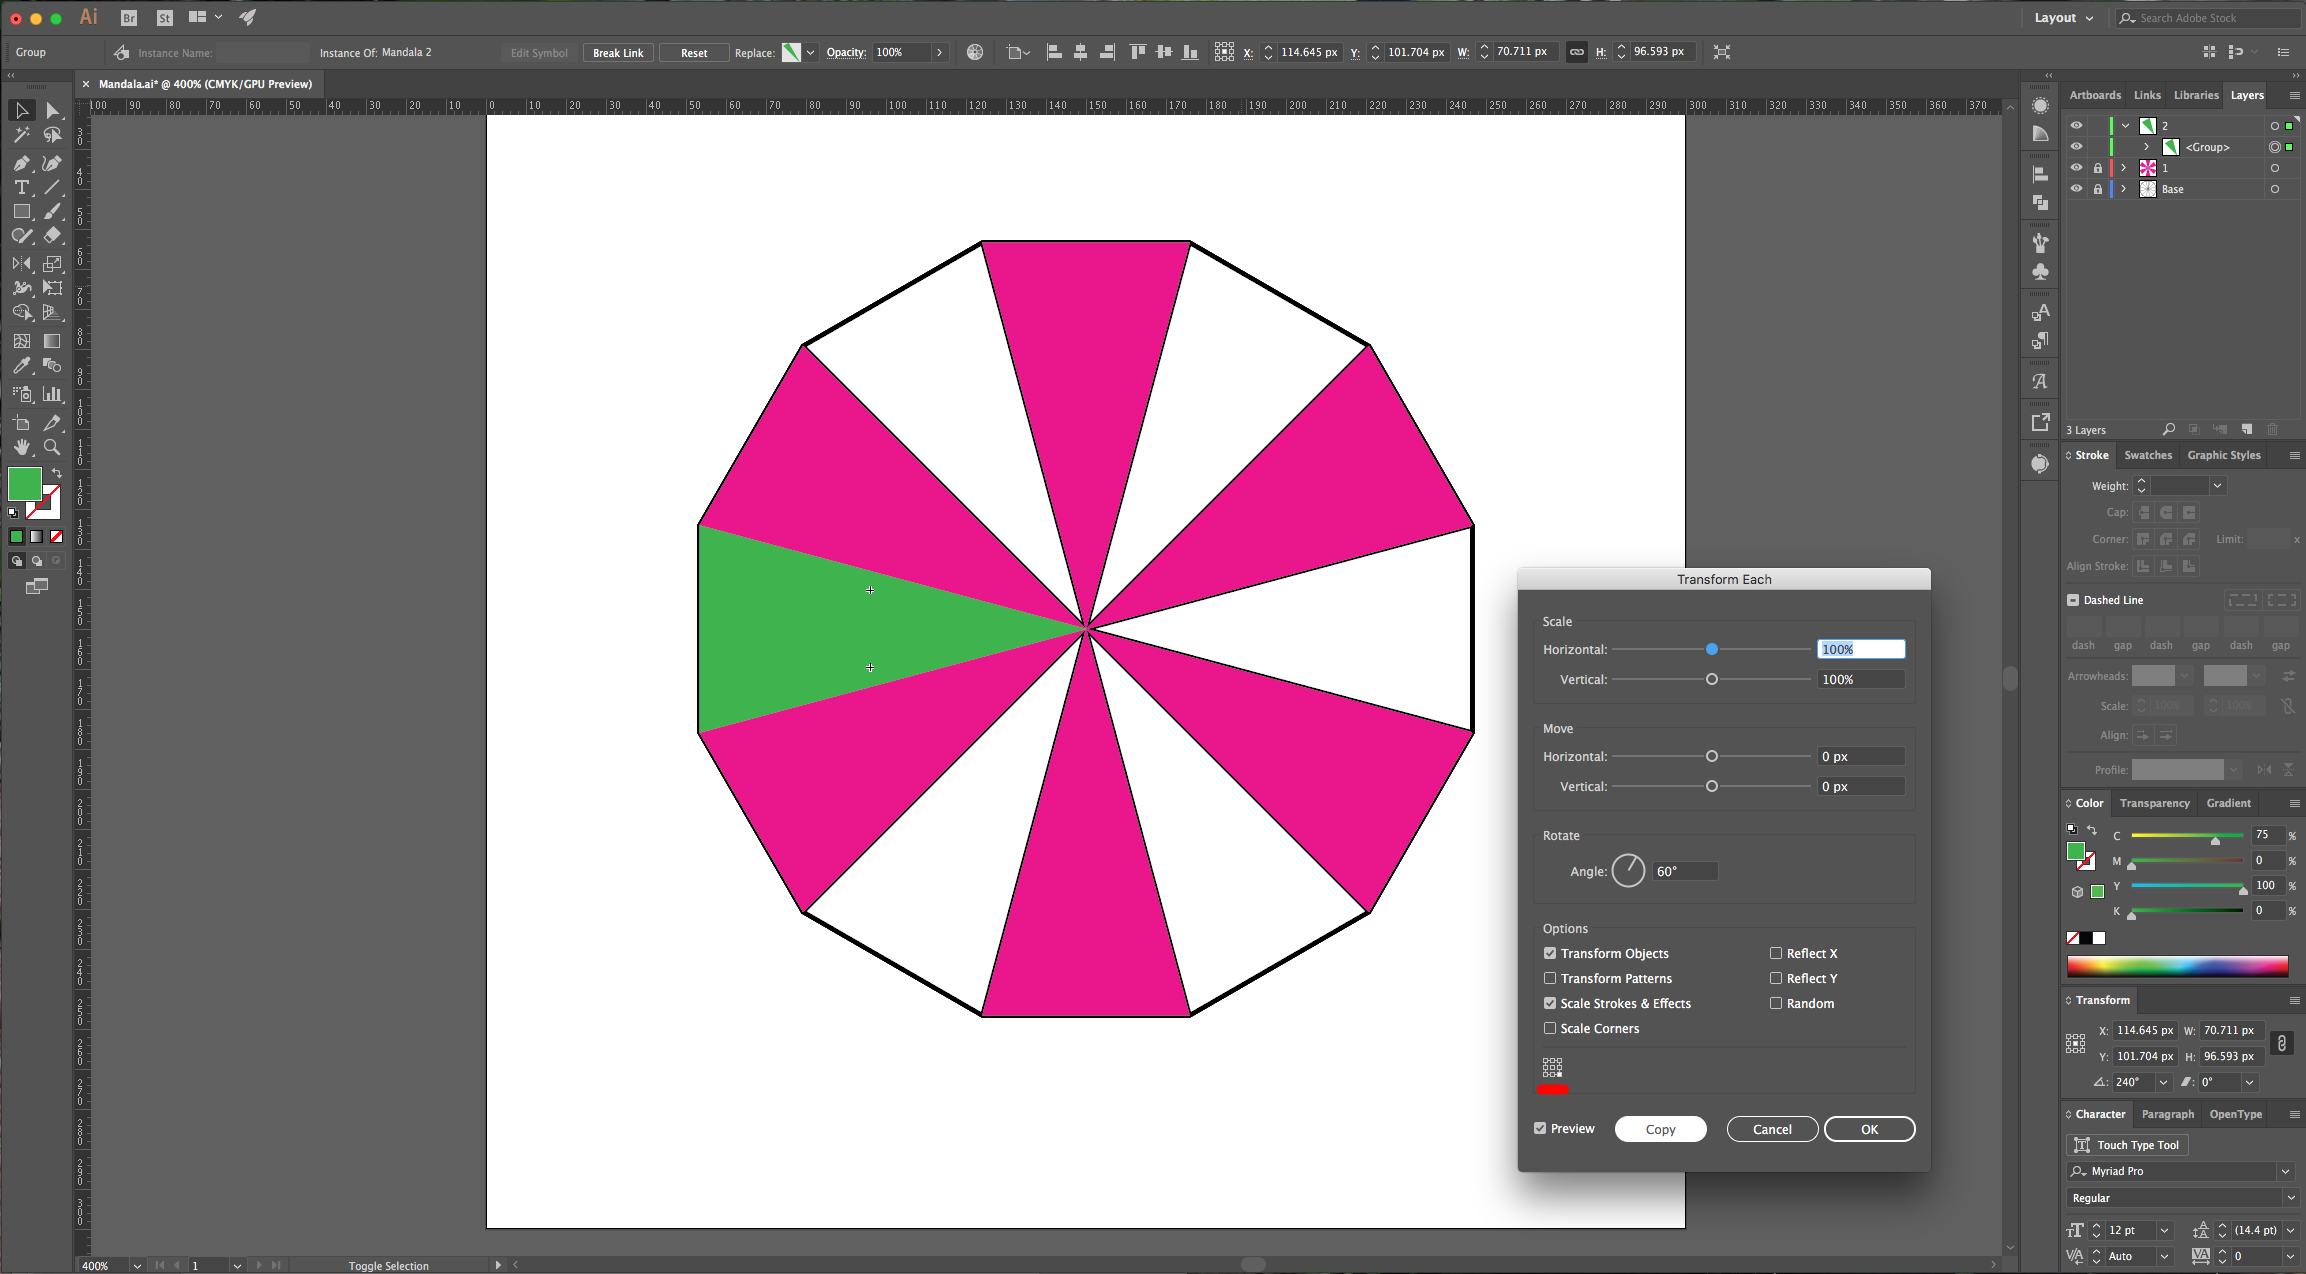
9 - With your object selected, go to Object > Transform > Transform Each (Option/Alt + Shift + Command/Control + D), use a 60° Angle, make sure to select the bottom point of the little square at the bottom of the dialog, so the “Rotation Axis” of your path is at the bottom. Click “Copy” to retain your original path. Repeat this step (changing the “Rotation Axis”) until you cover your image making sure that you skip one segment.

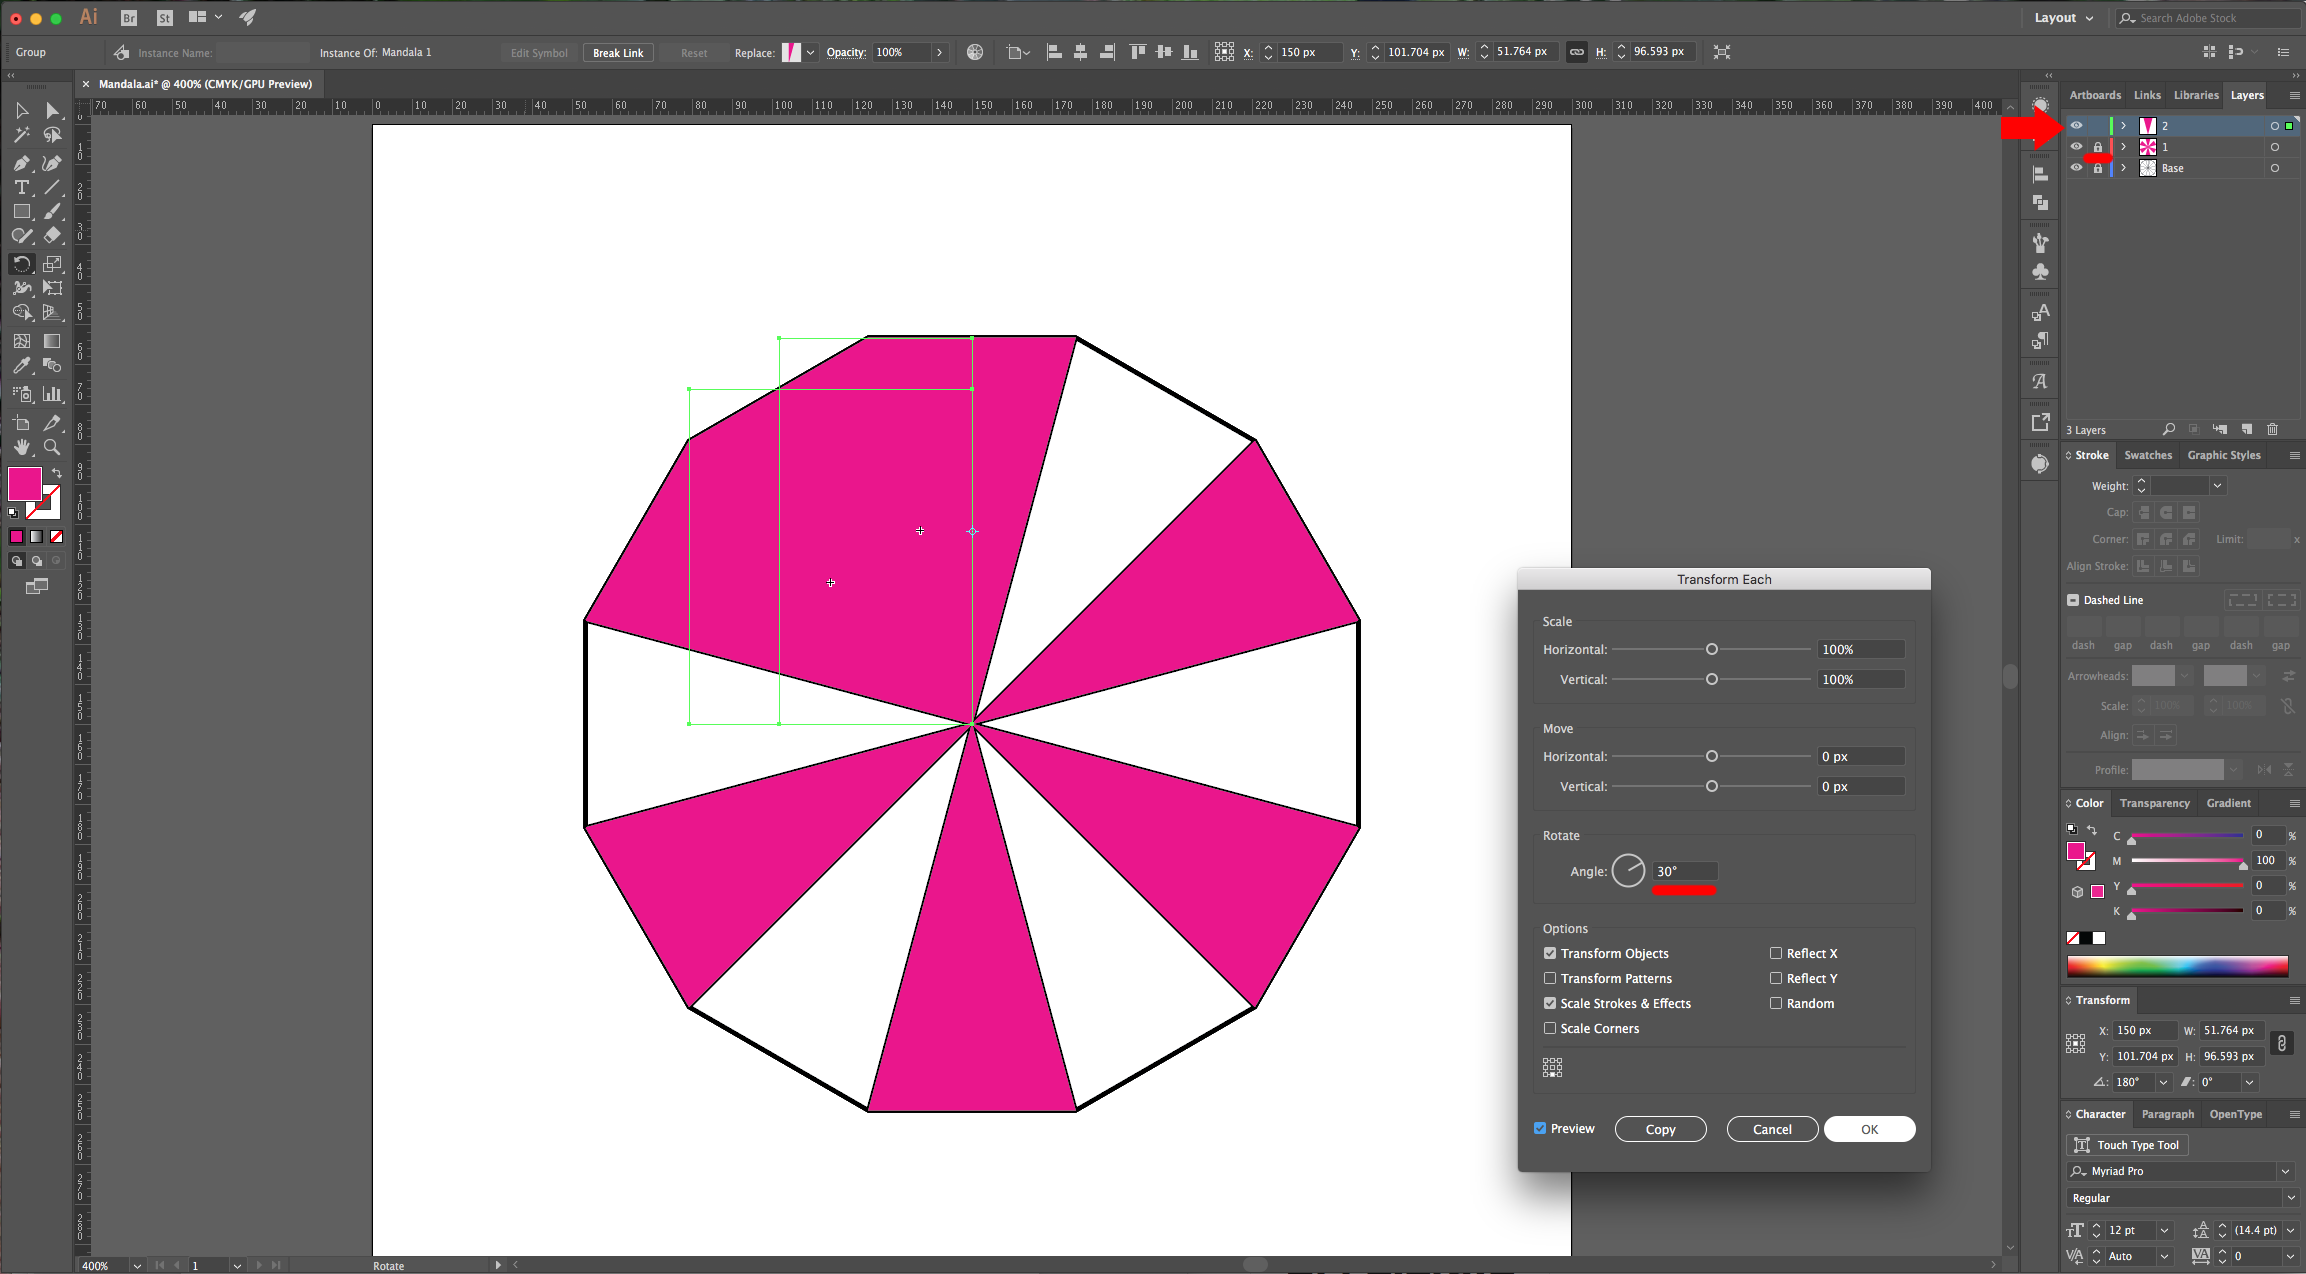
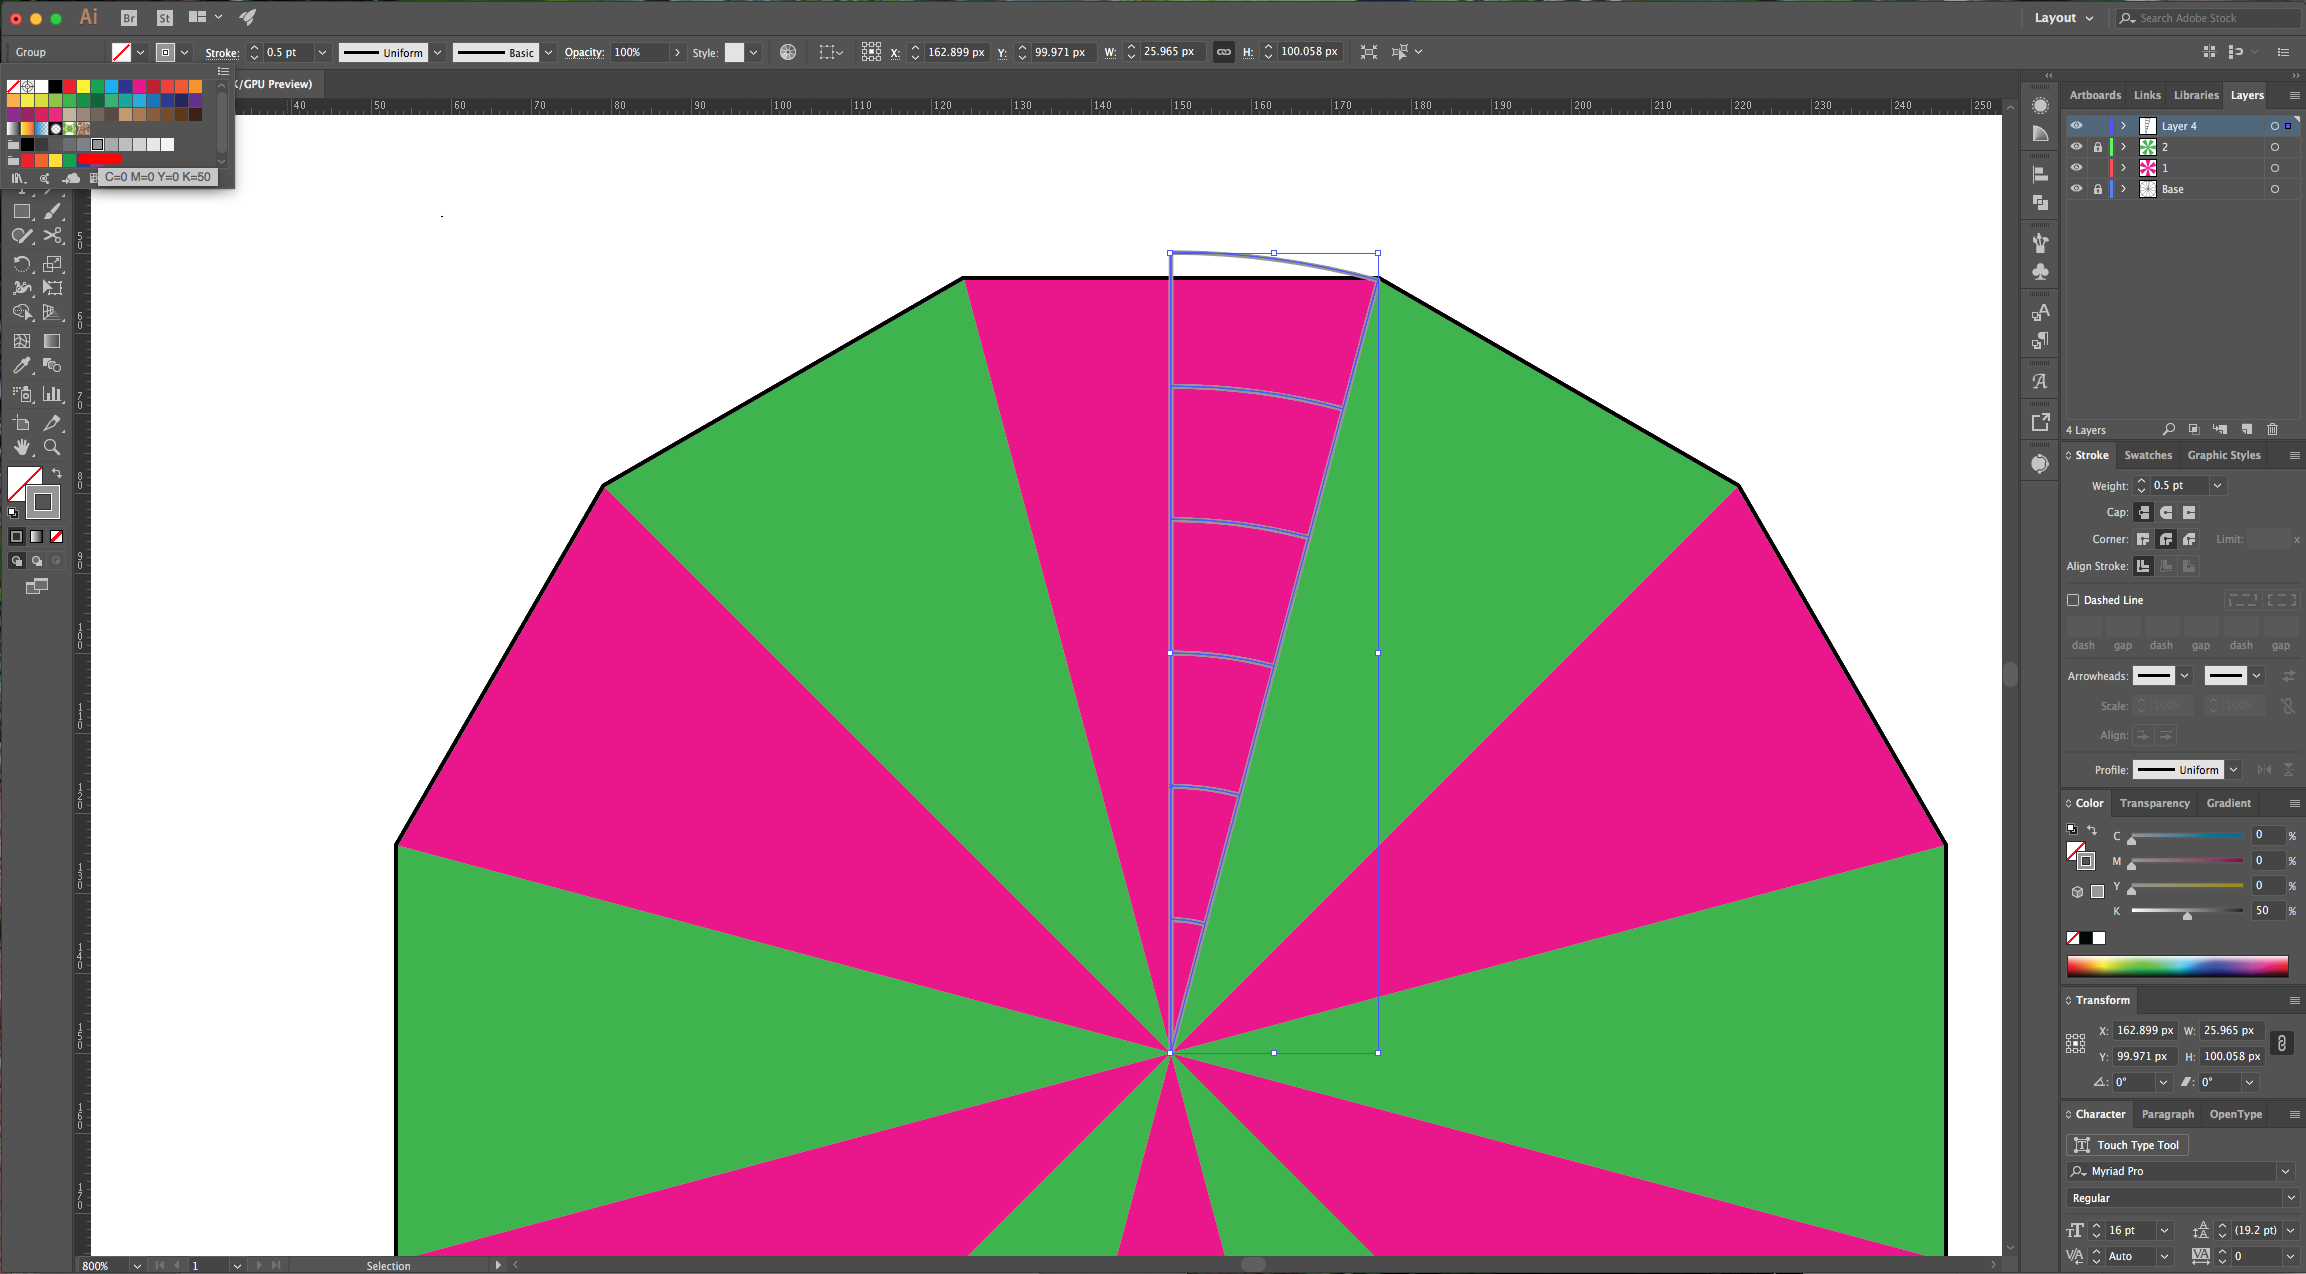
10 - Copy (Command/Control + C) your main path (the one on top), then lock your “Layer”. Create a “New Layer” and name it “2”. Paste the path in your new layer using the “Paste in Front” command (Command/Control + F). Open the “Transform Each” window, and this time use a 30° Angle and reposition the “Rotation Axis” at the bottom center of the little box. Click “OK”.
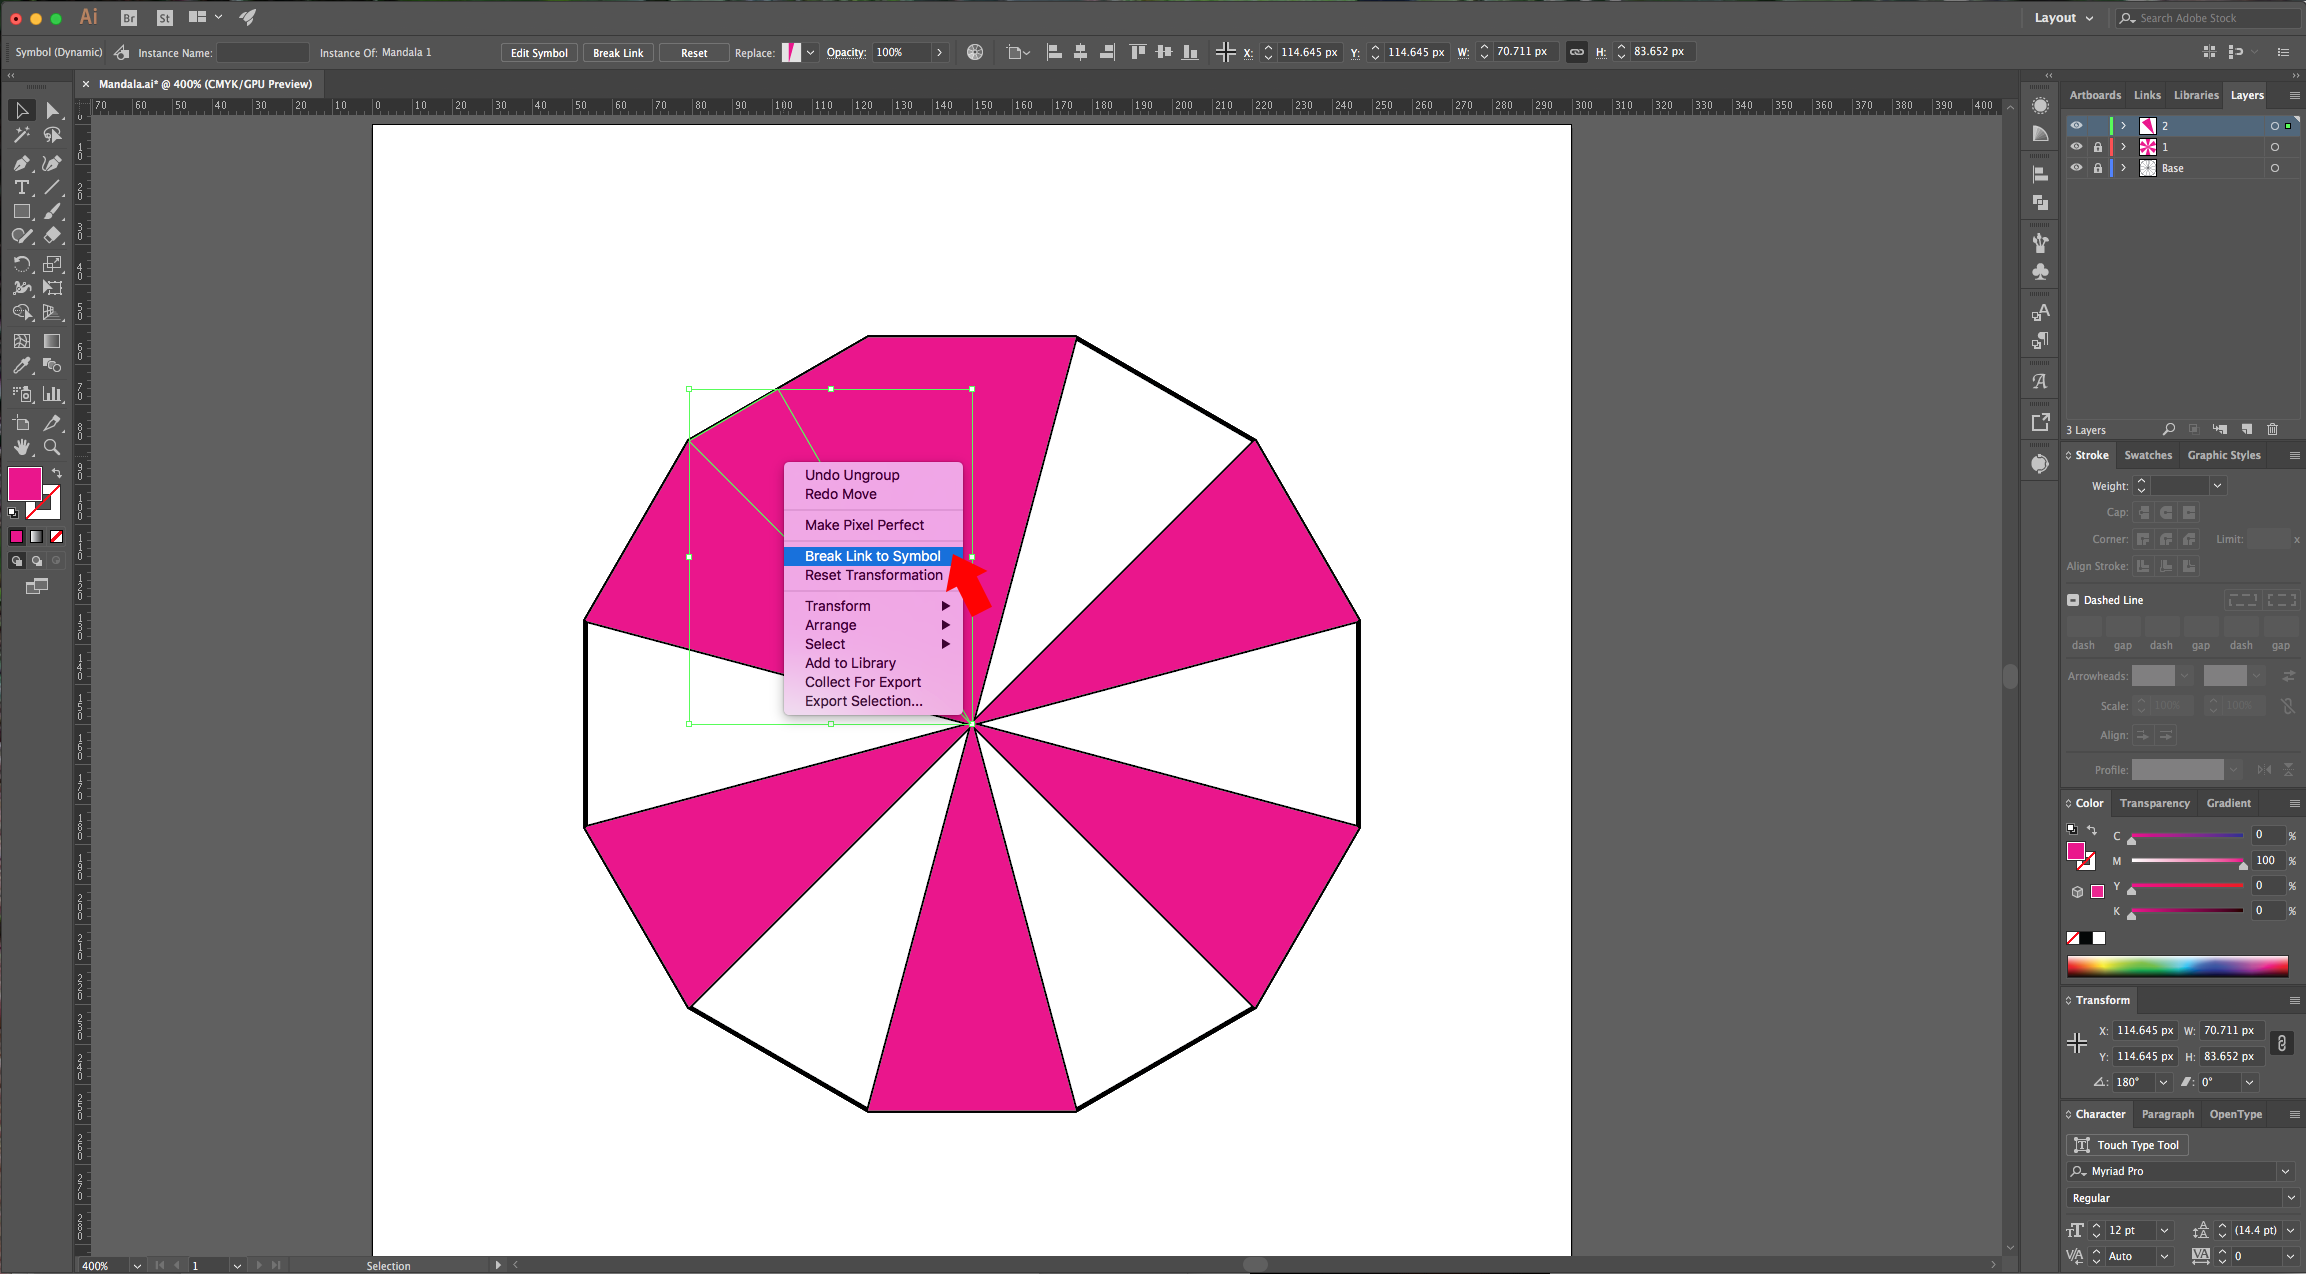
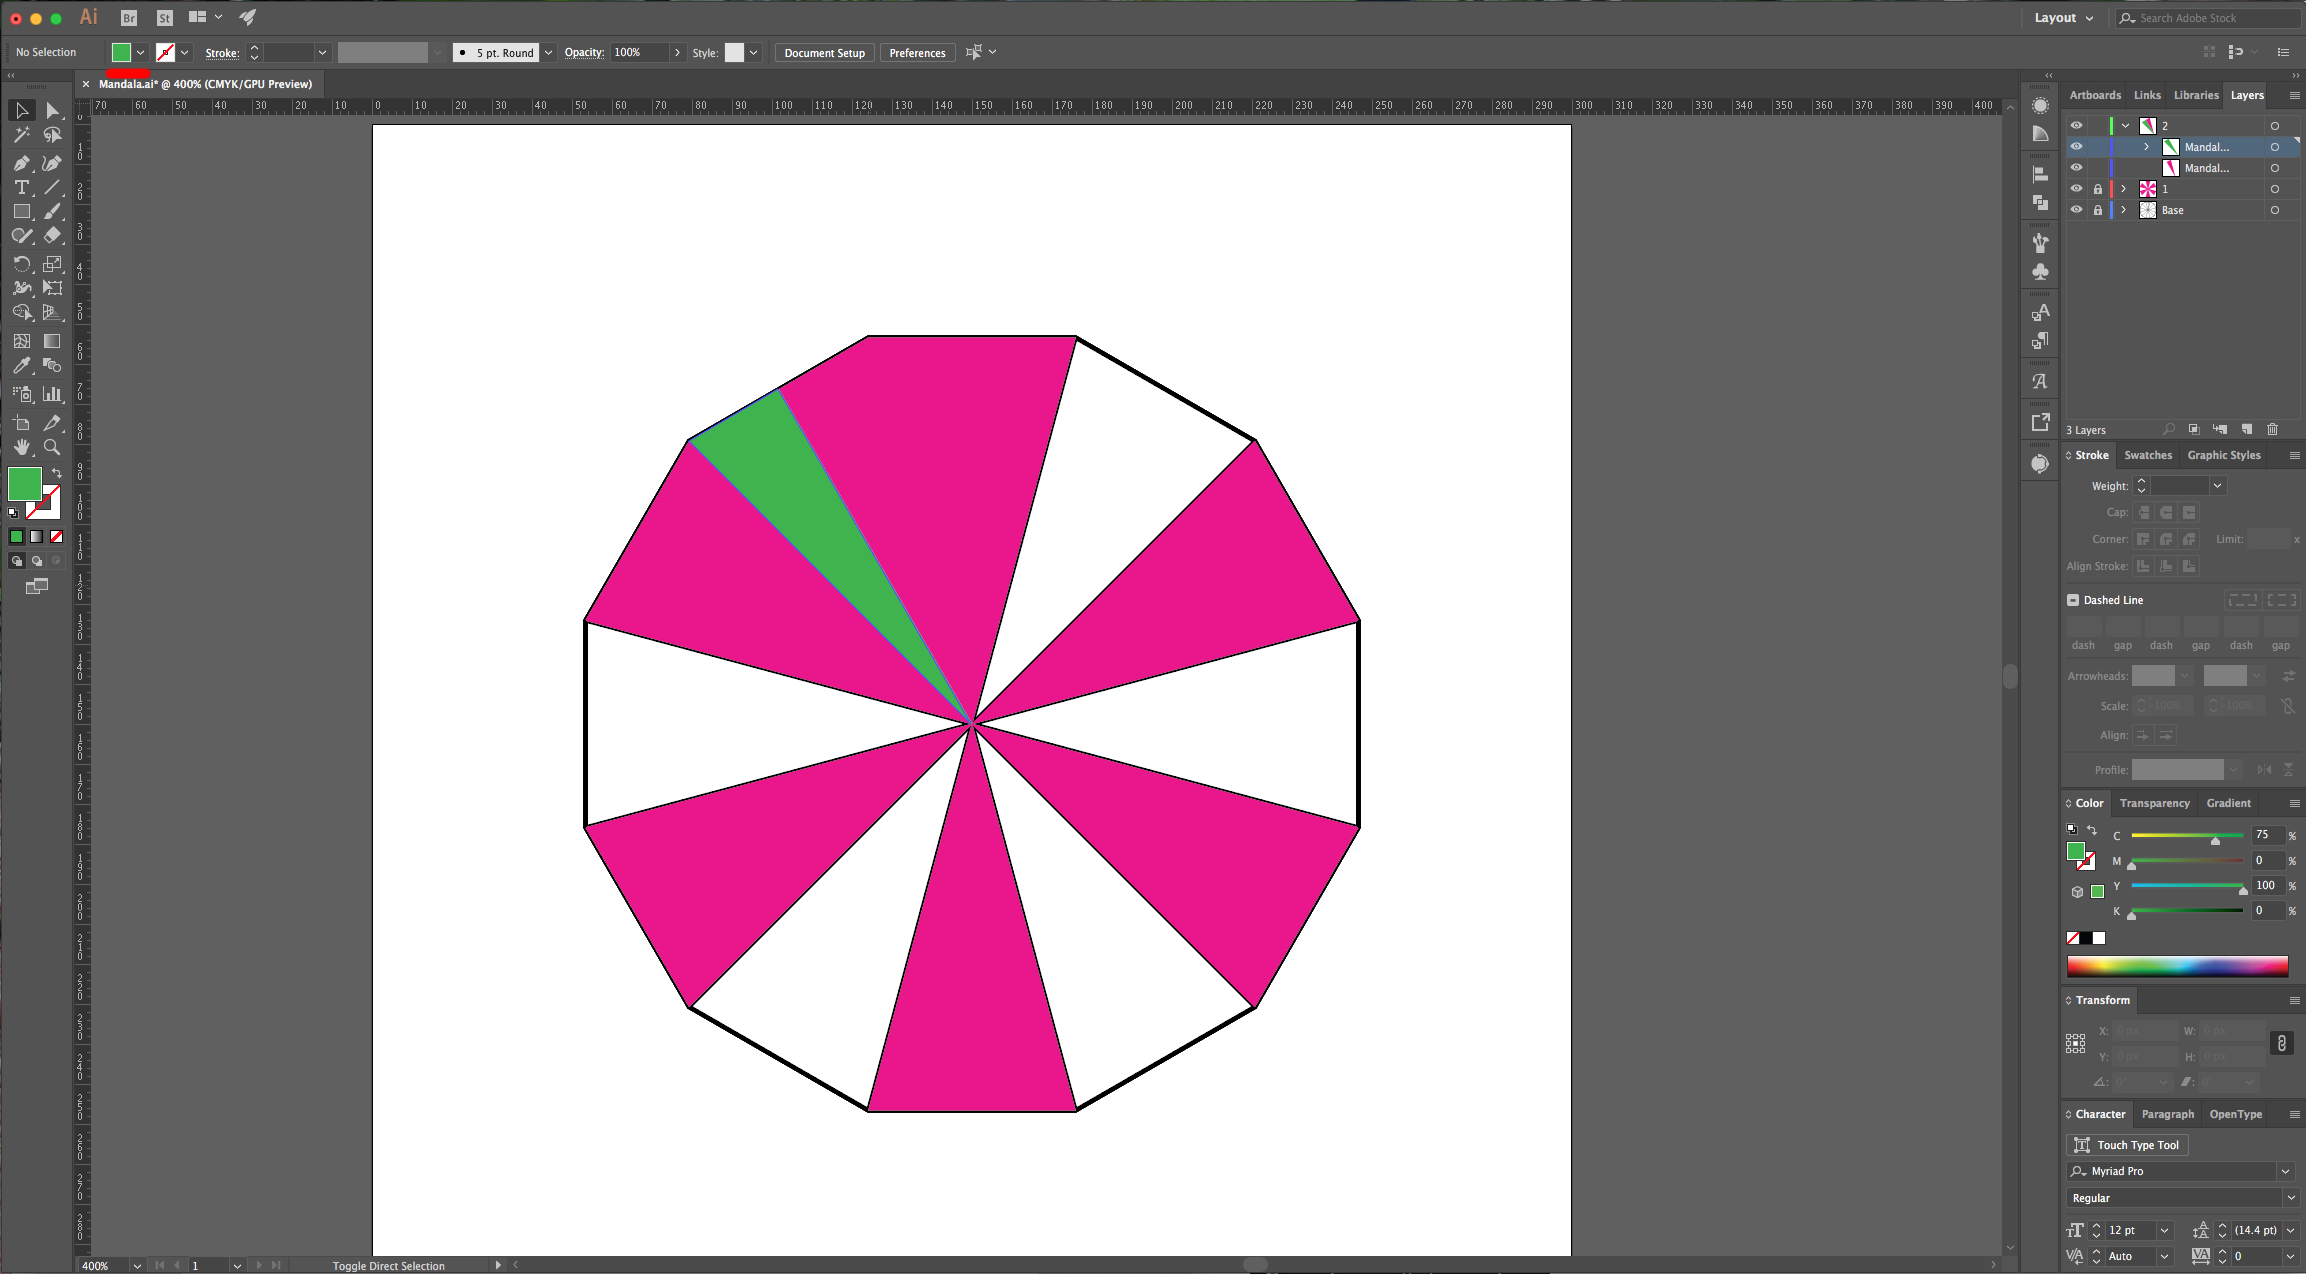
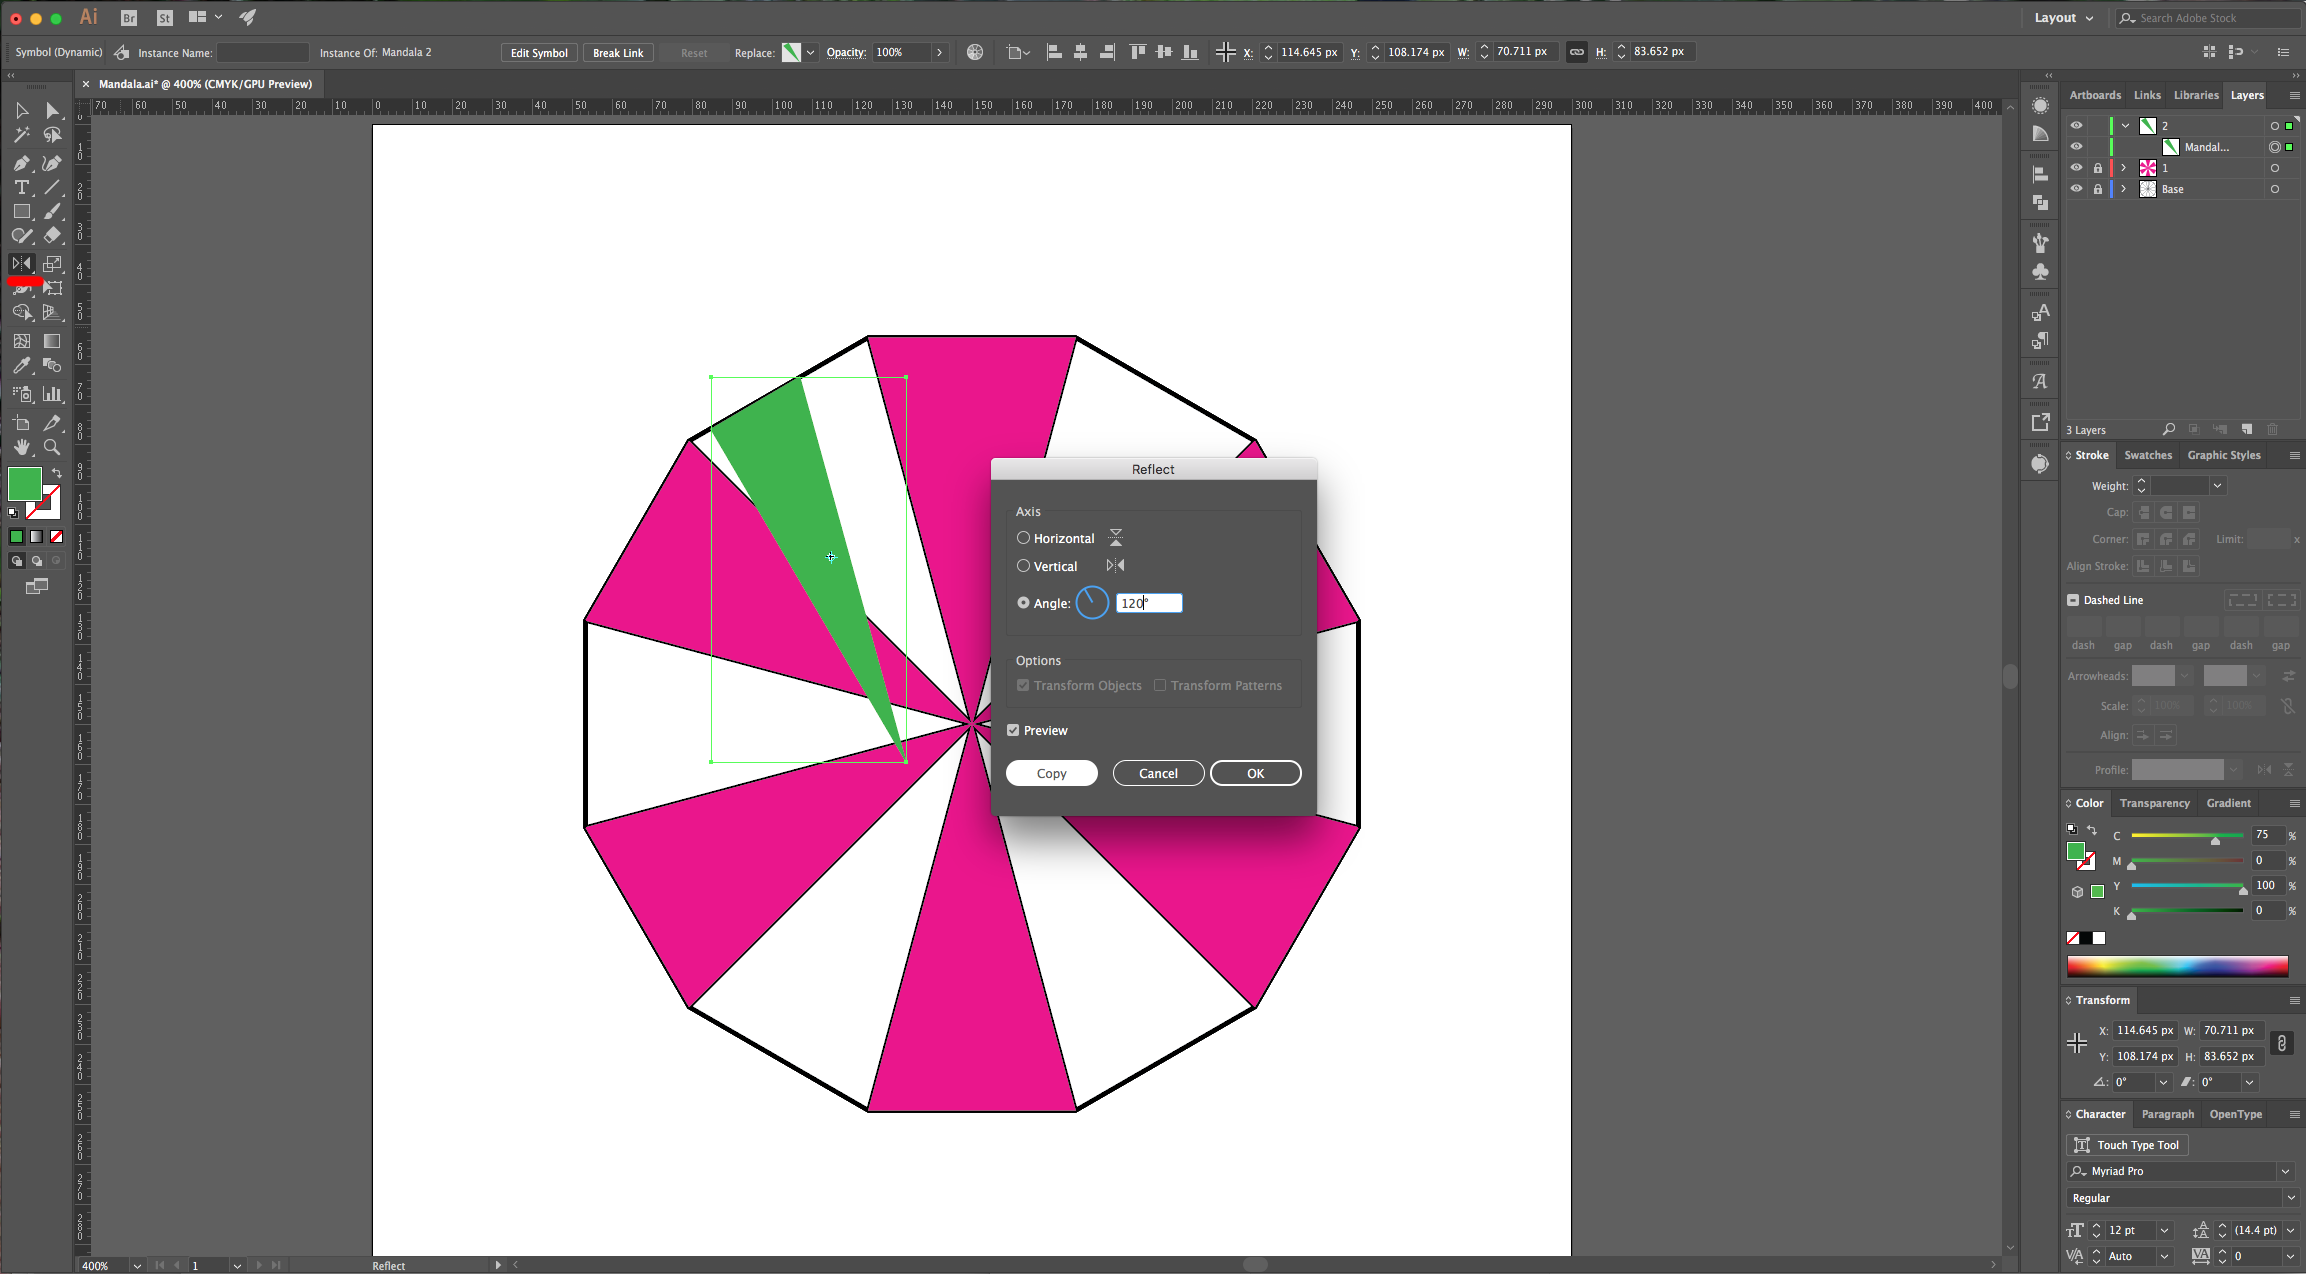
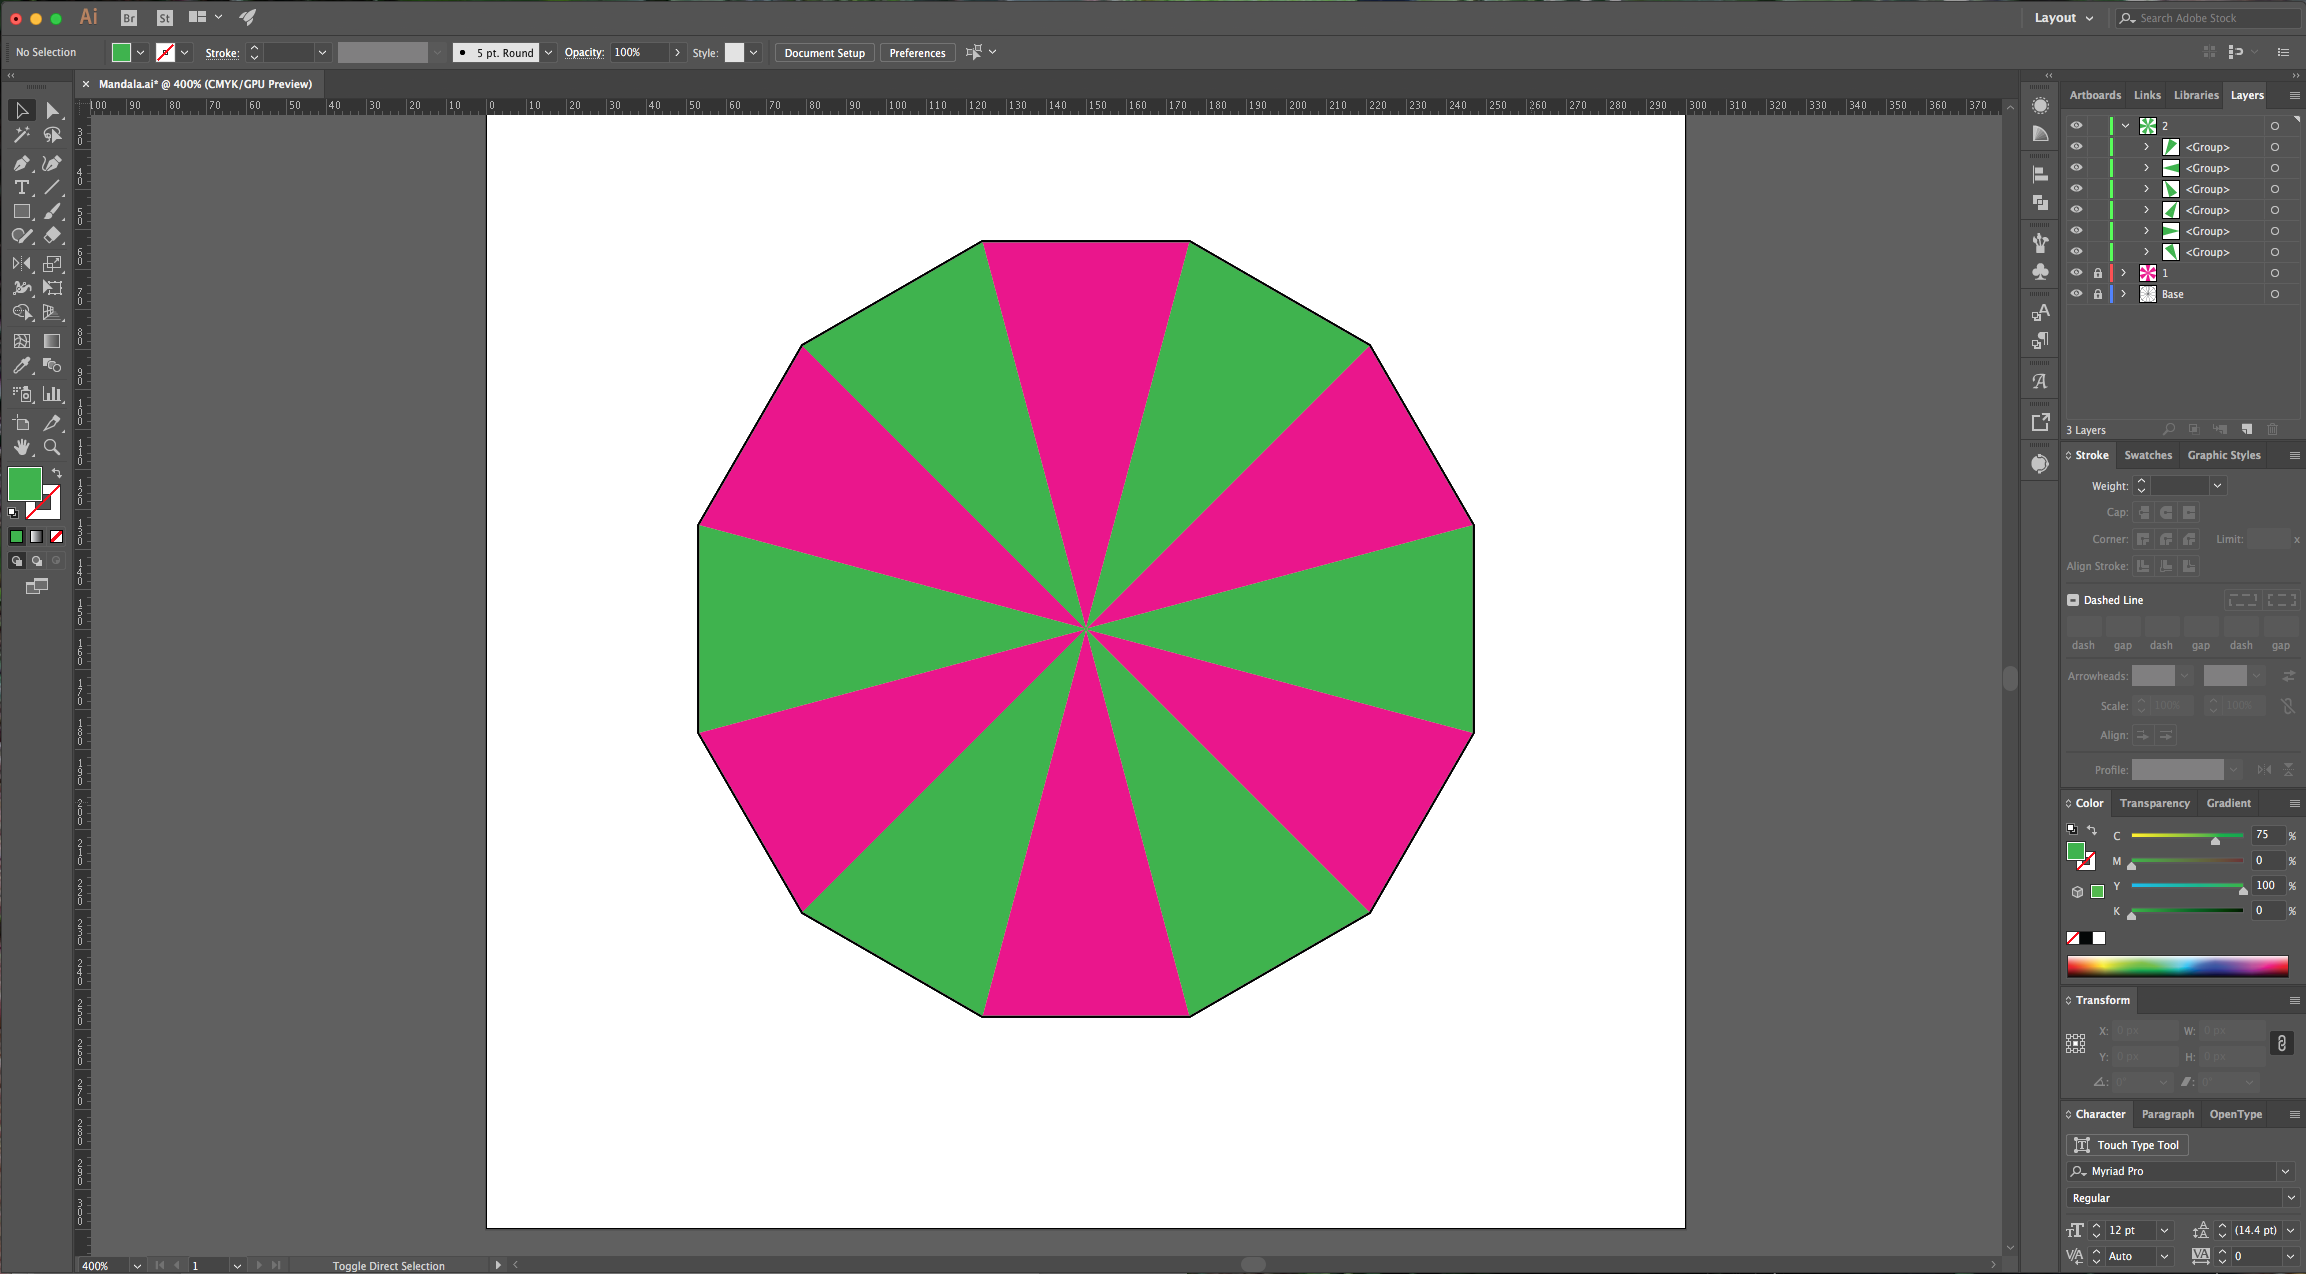
11 - Select your path and ungroup it (Command/Control + G). Right-click on top of one of the sides and click “Break Link to Symbol”. Change the “Fill” color for this side (we used a green from the “Swatches” window), then create a “New Symbol”, name it “Mandala 2” and delete the other half triangle. Remember to create the other half of the Green triangle like in “Step 8” but use a 120° Angle with the “Reflection Tool” (O) and then move that half a bit to place it properly, then group them both together. Repeat “Steps 9 to 10” to cover the missing portions of your image. (Remember that the “Rotation Points” will have to change).
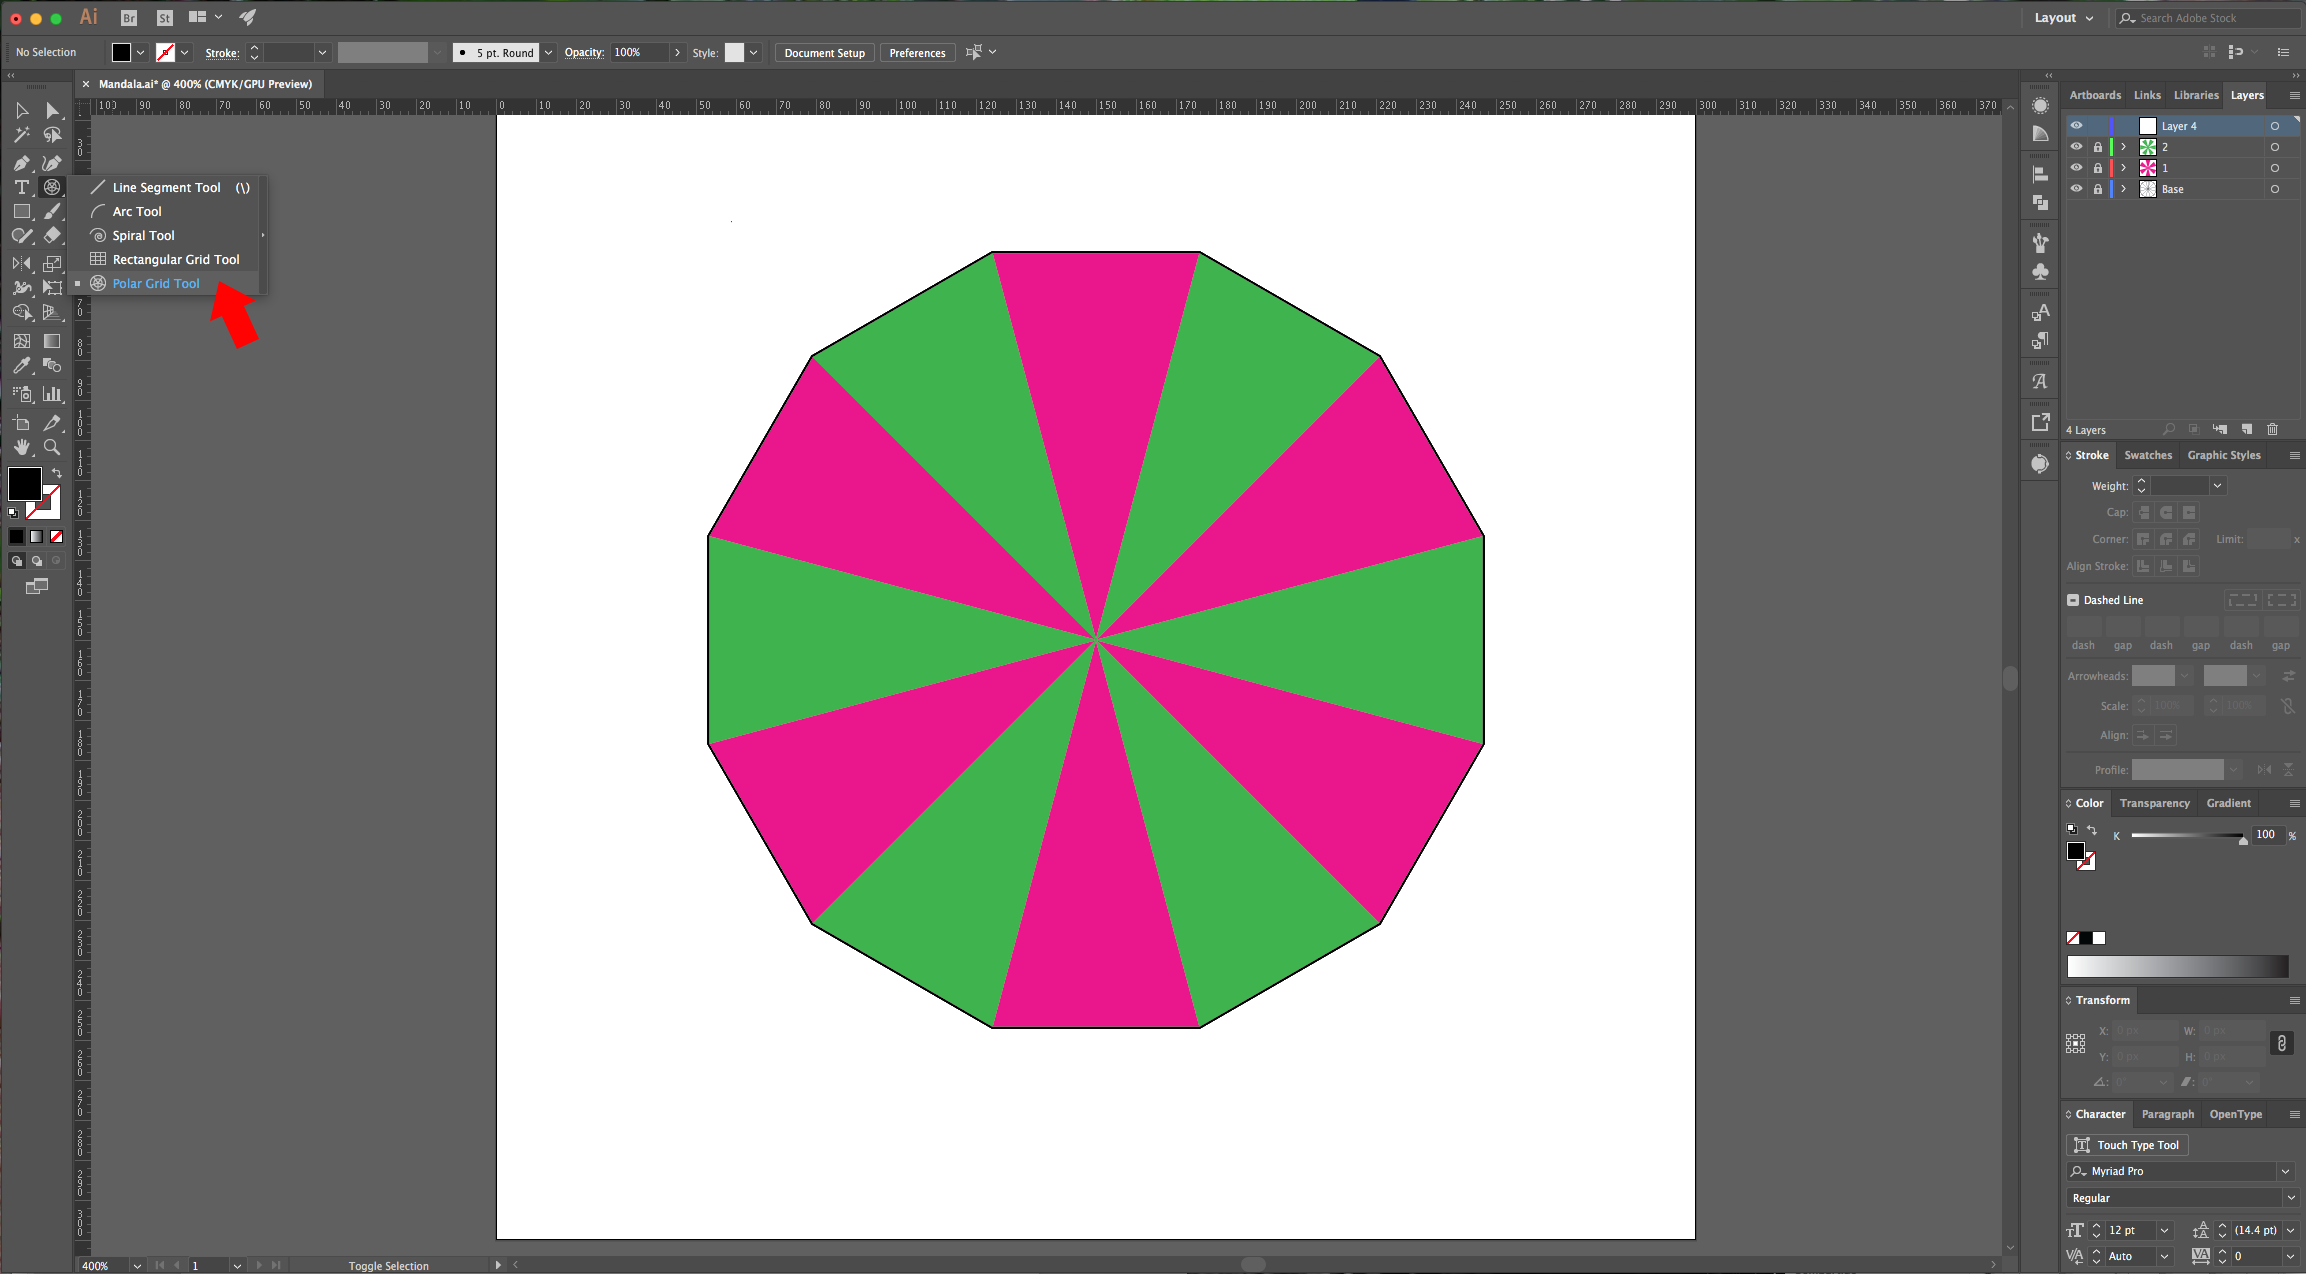
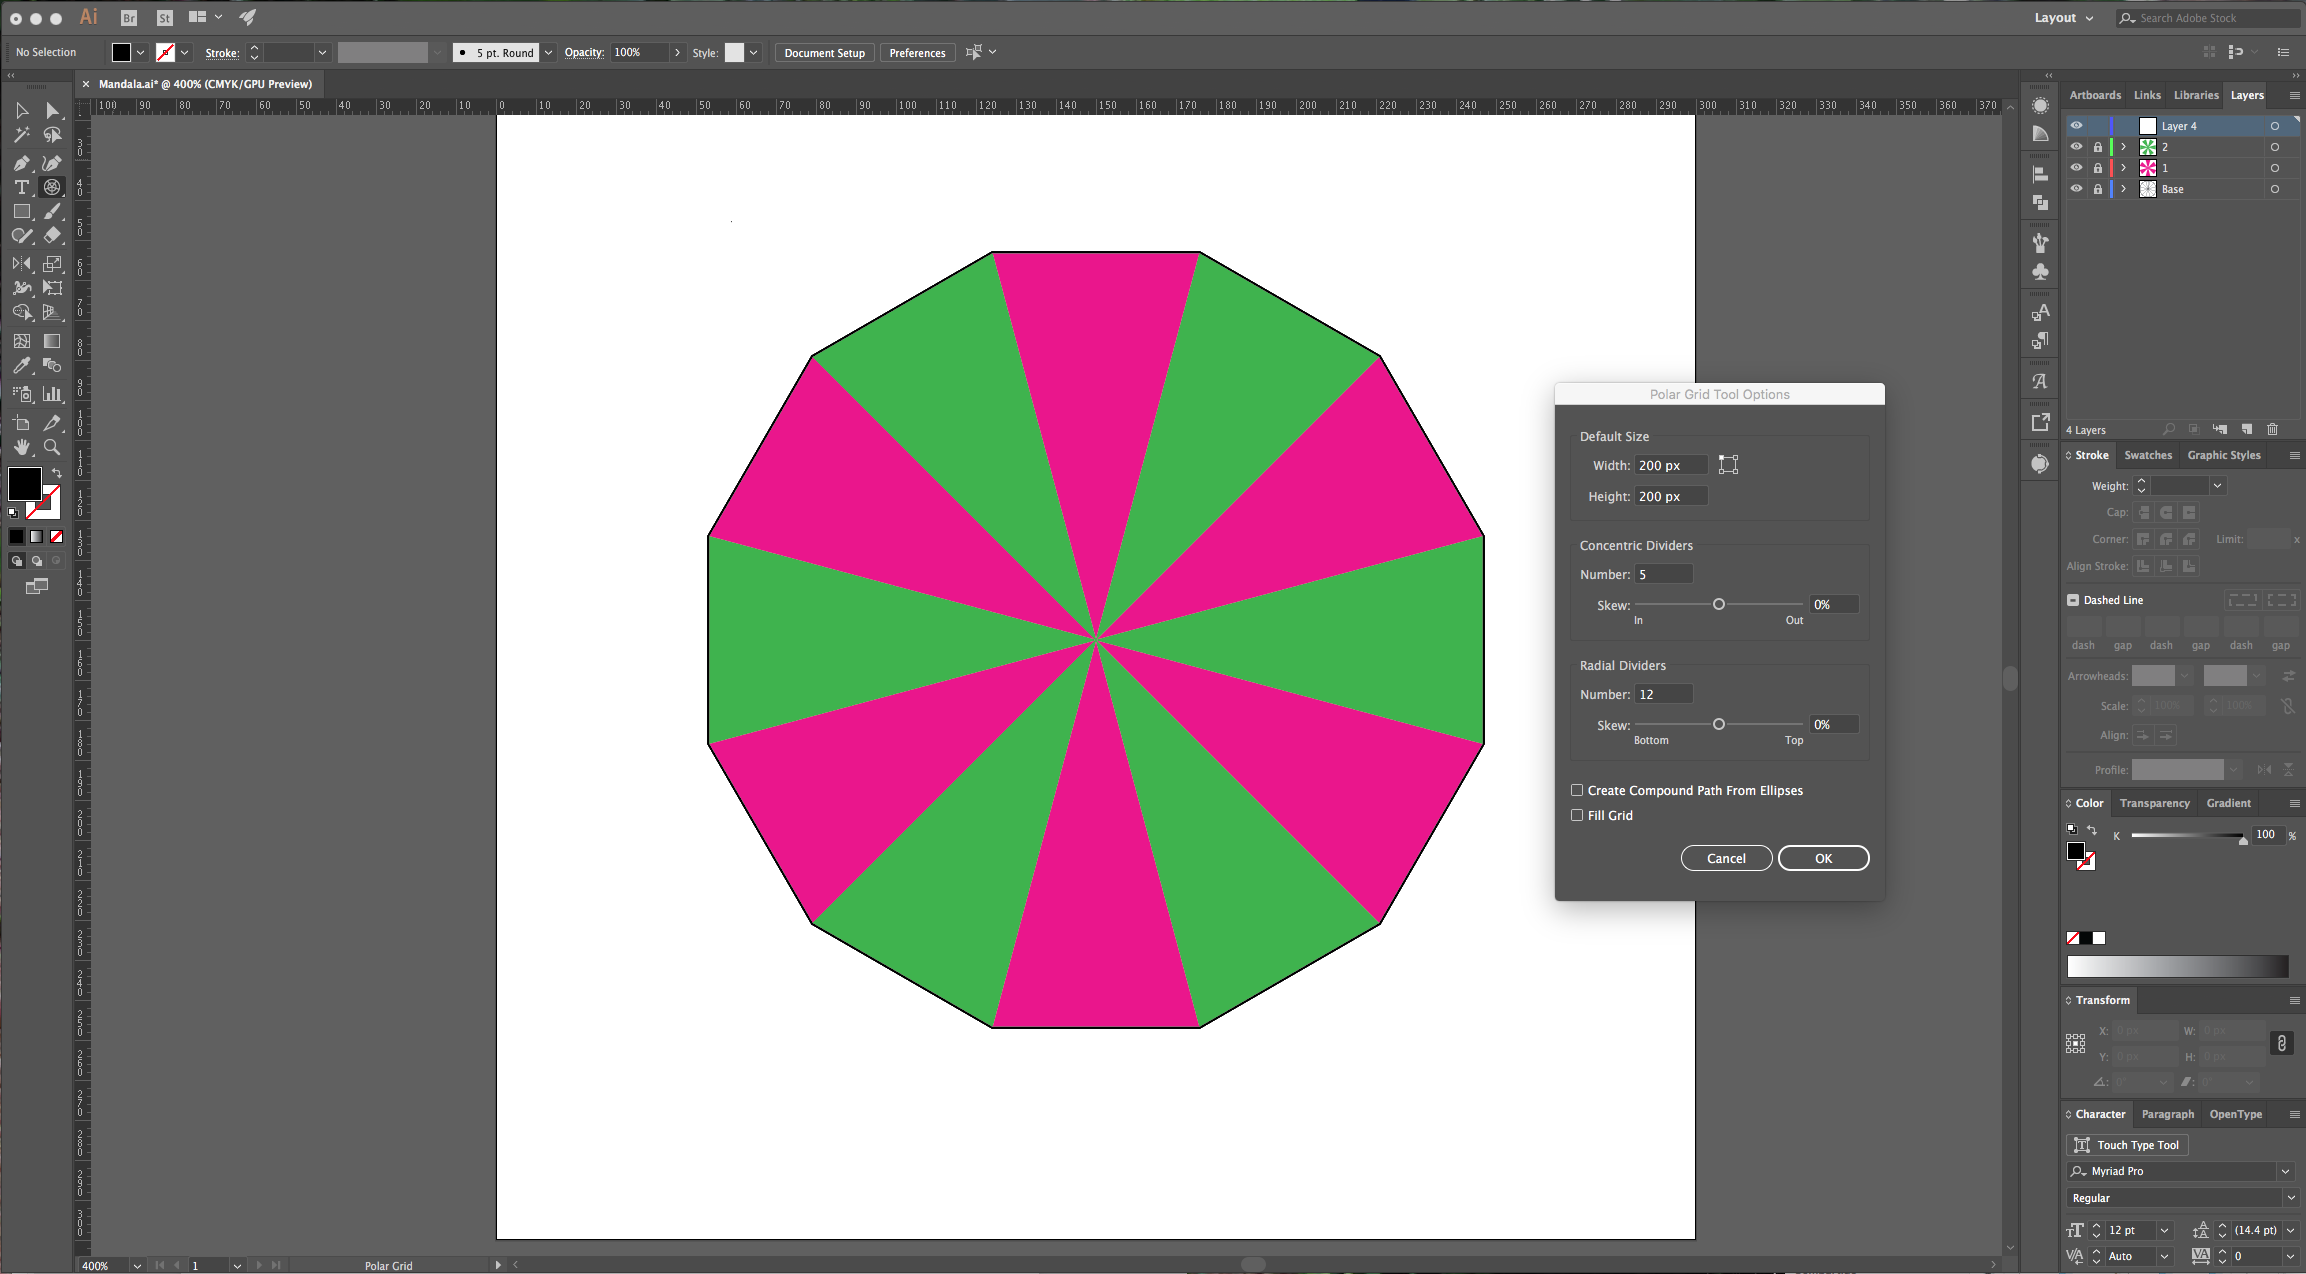
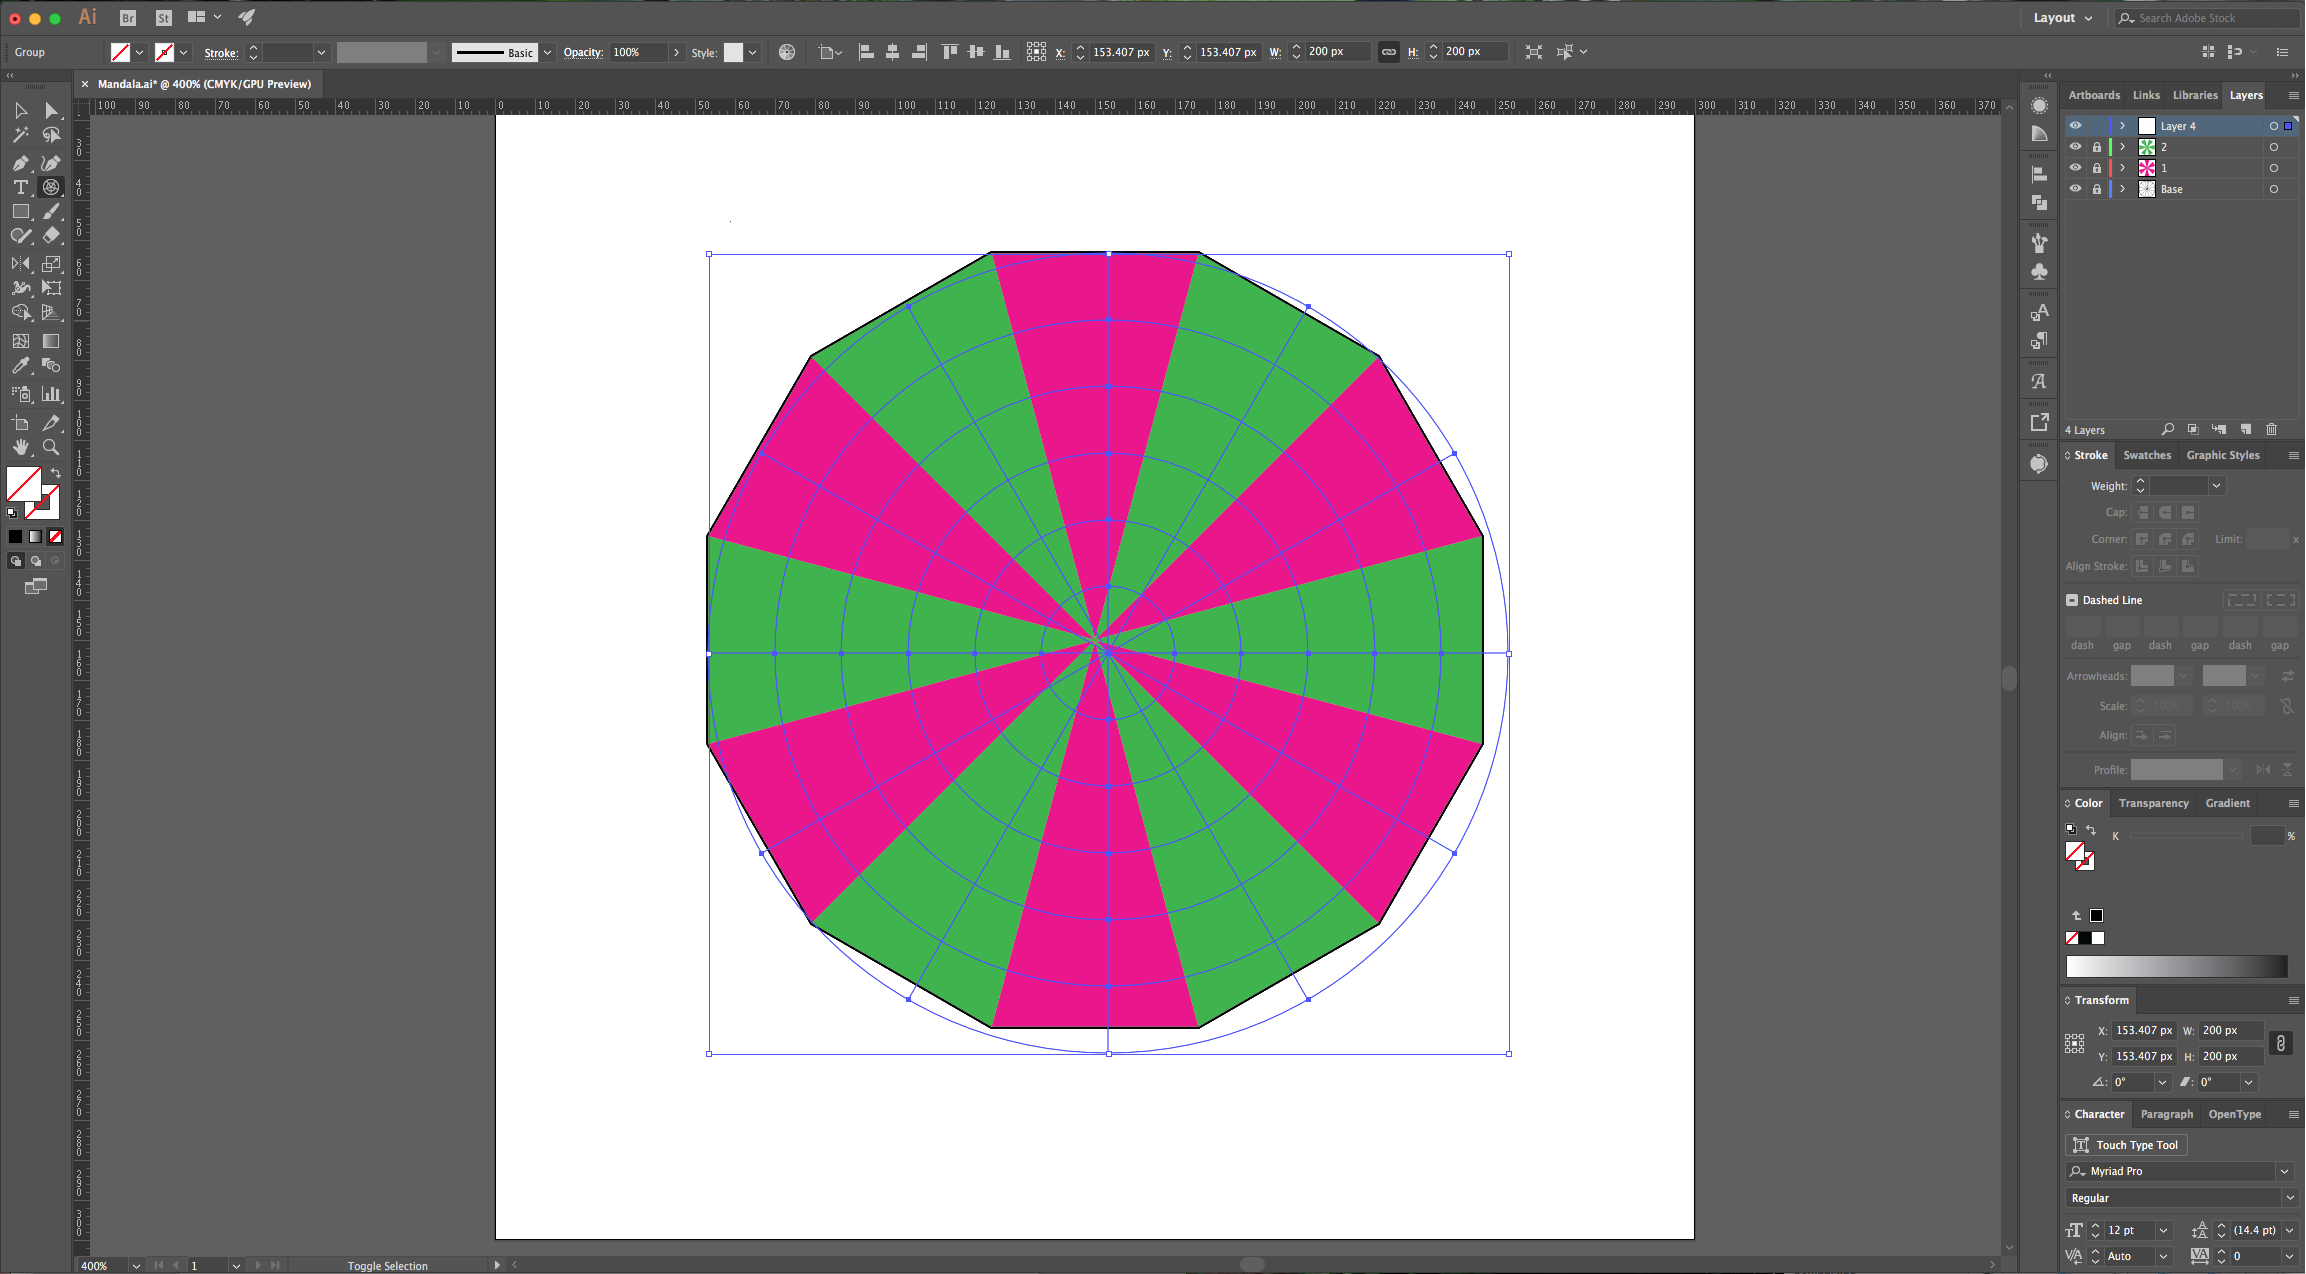
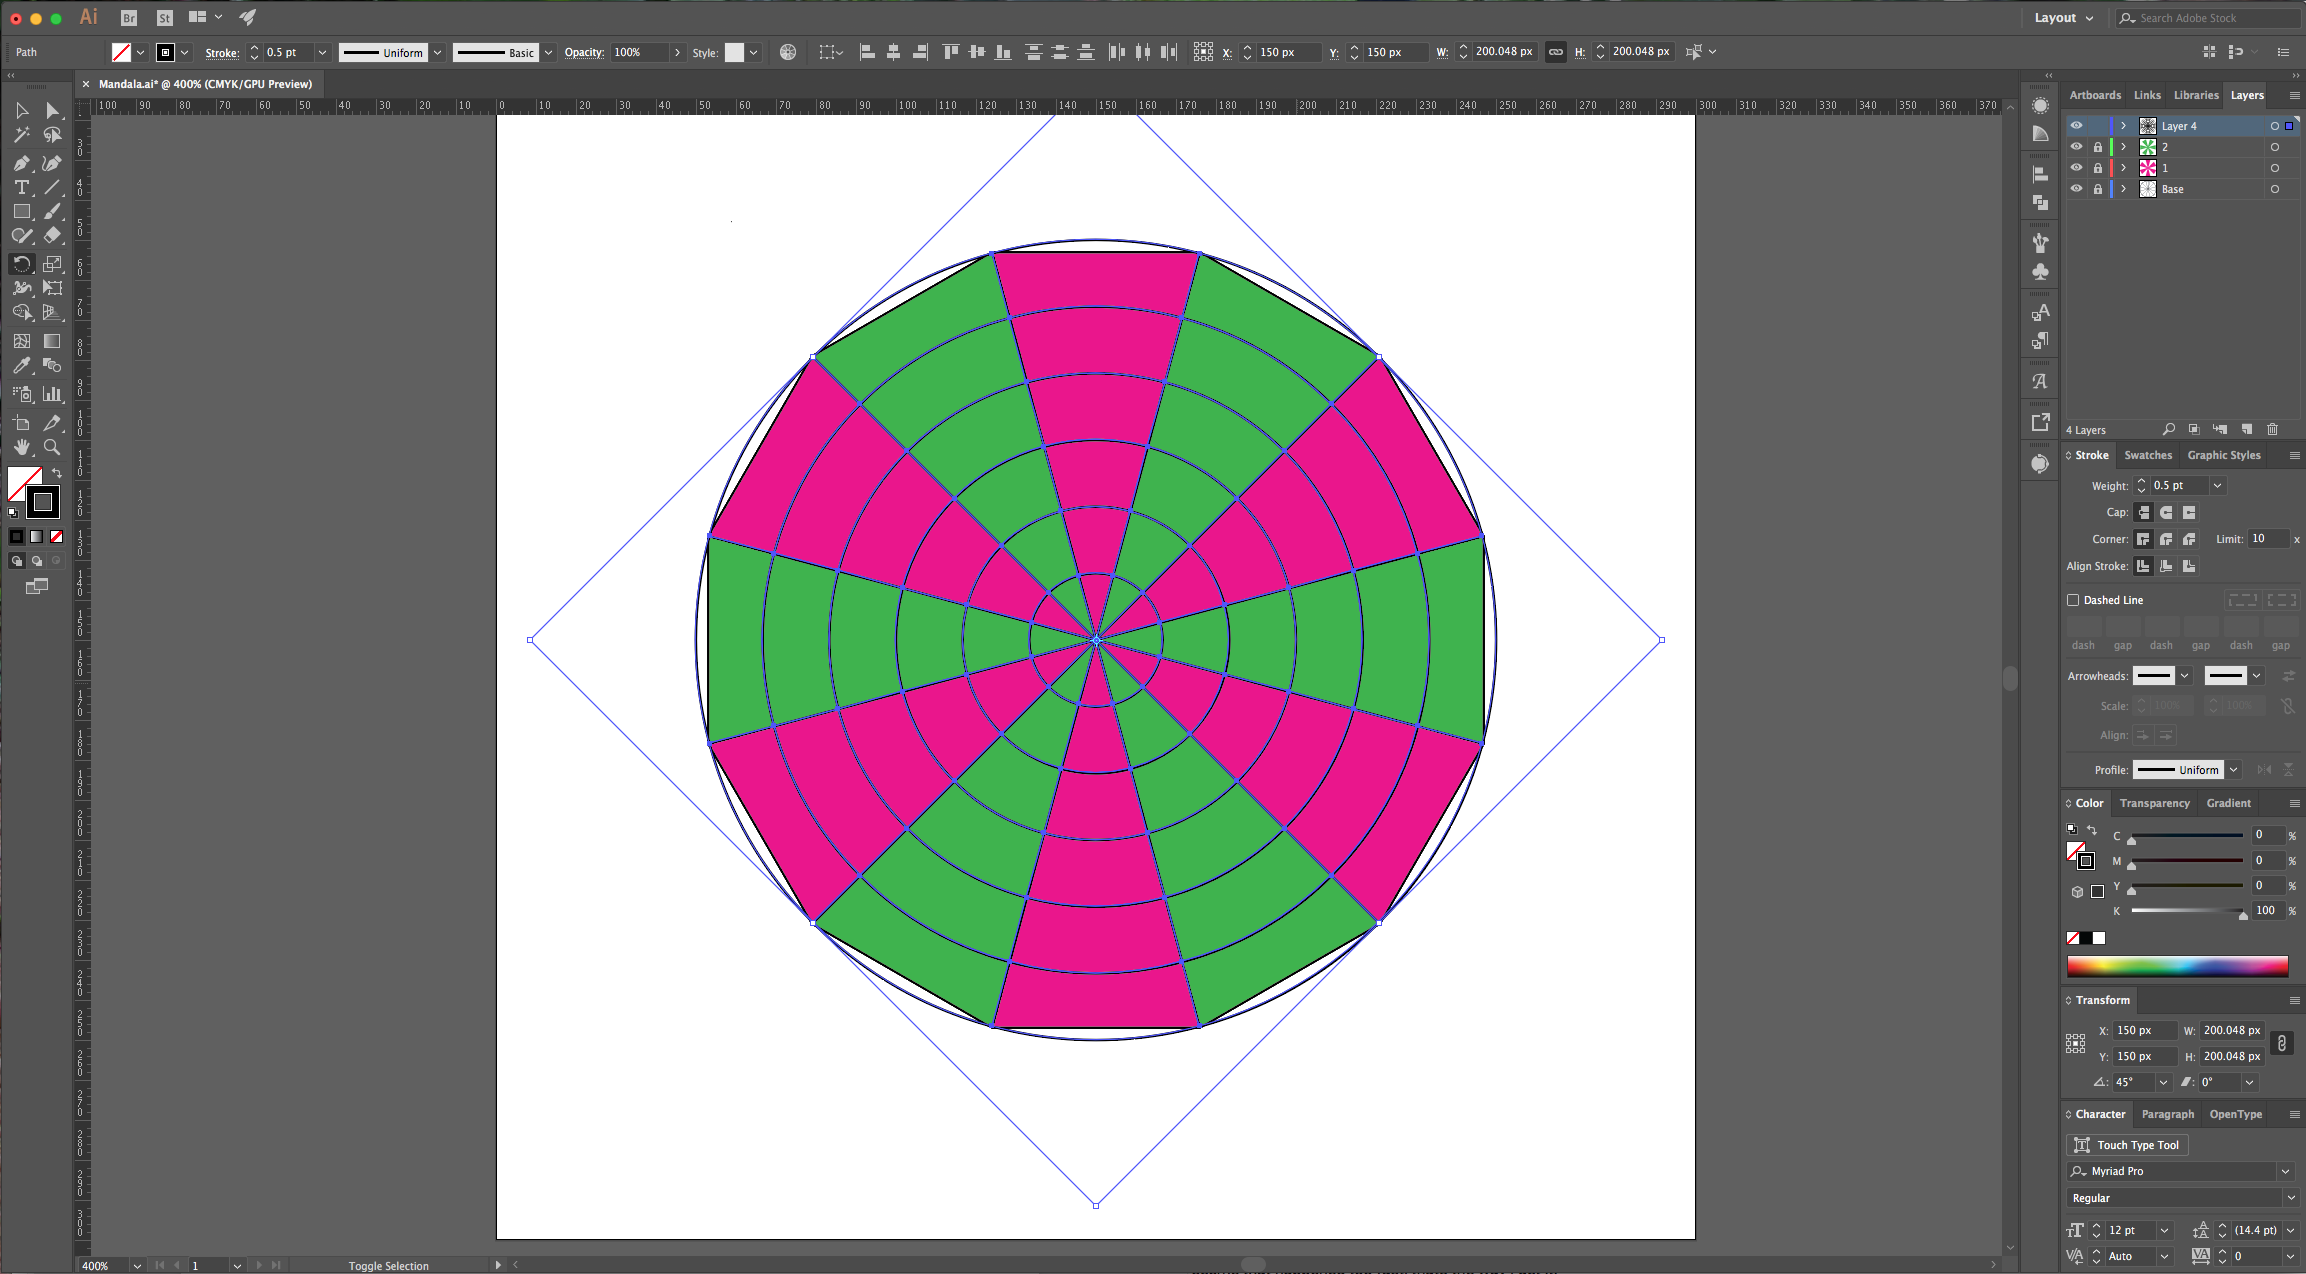
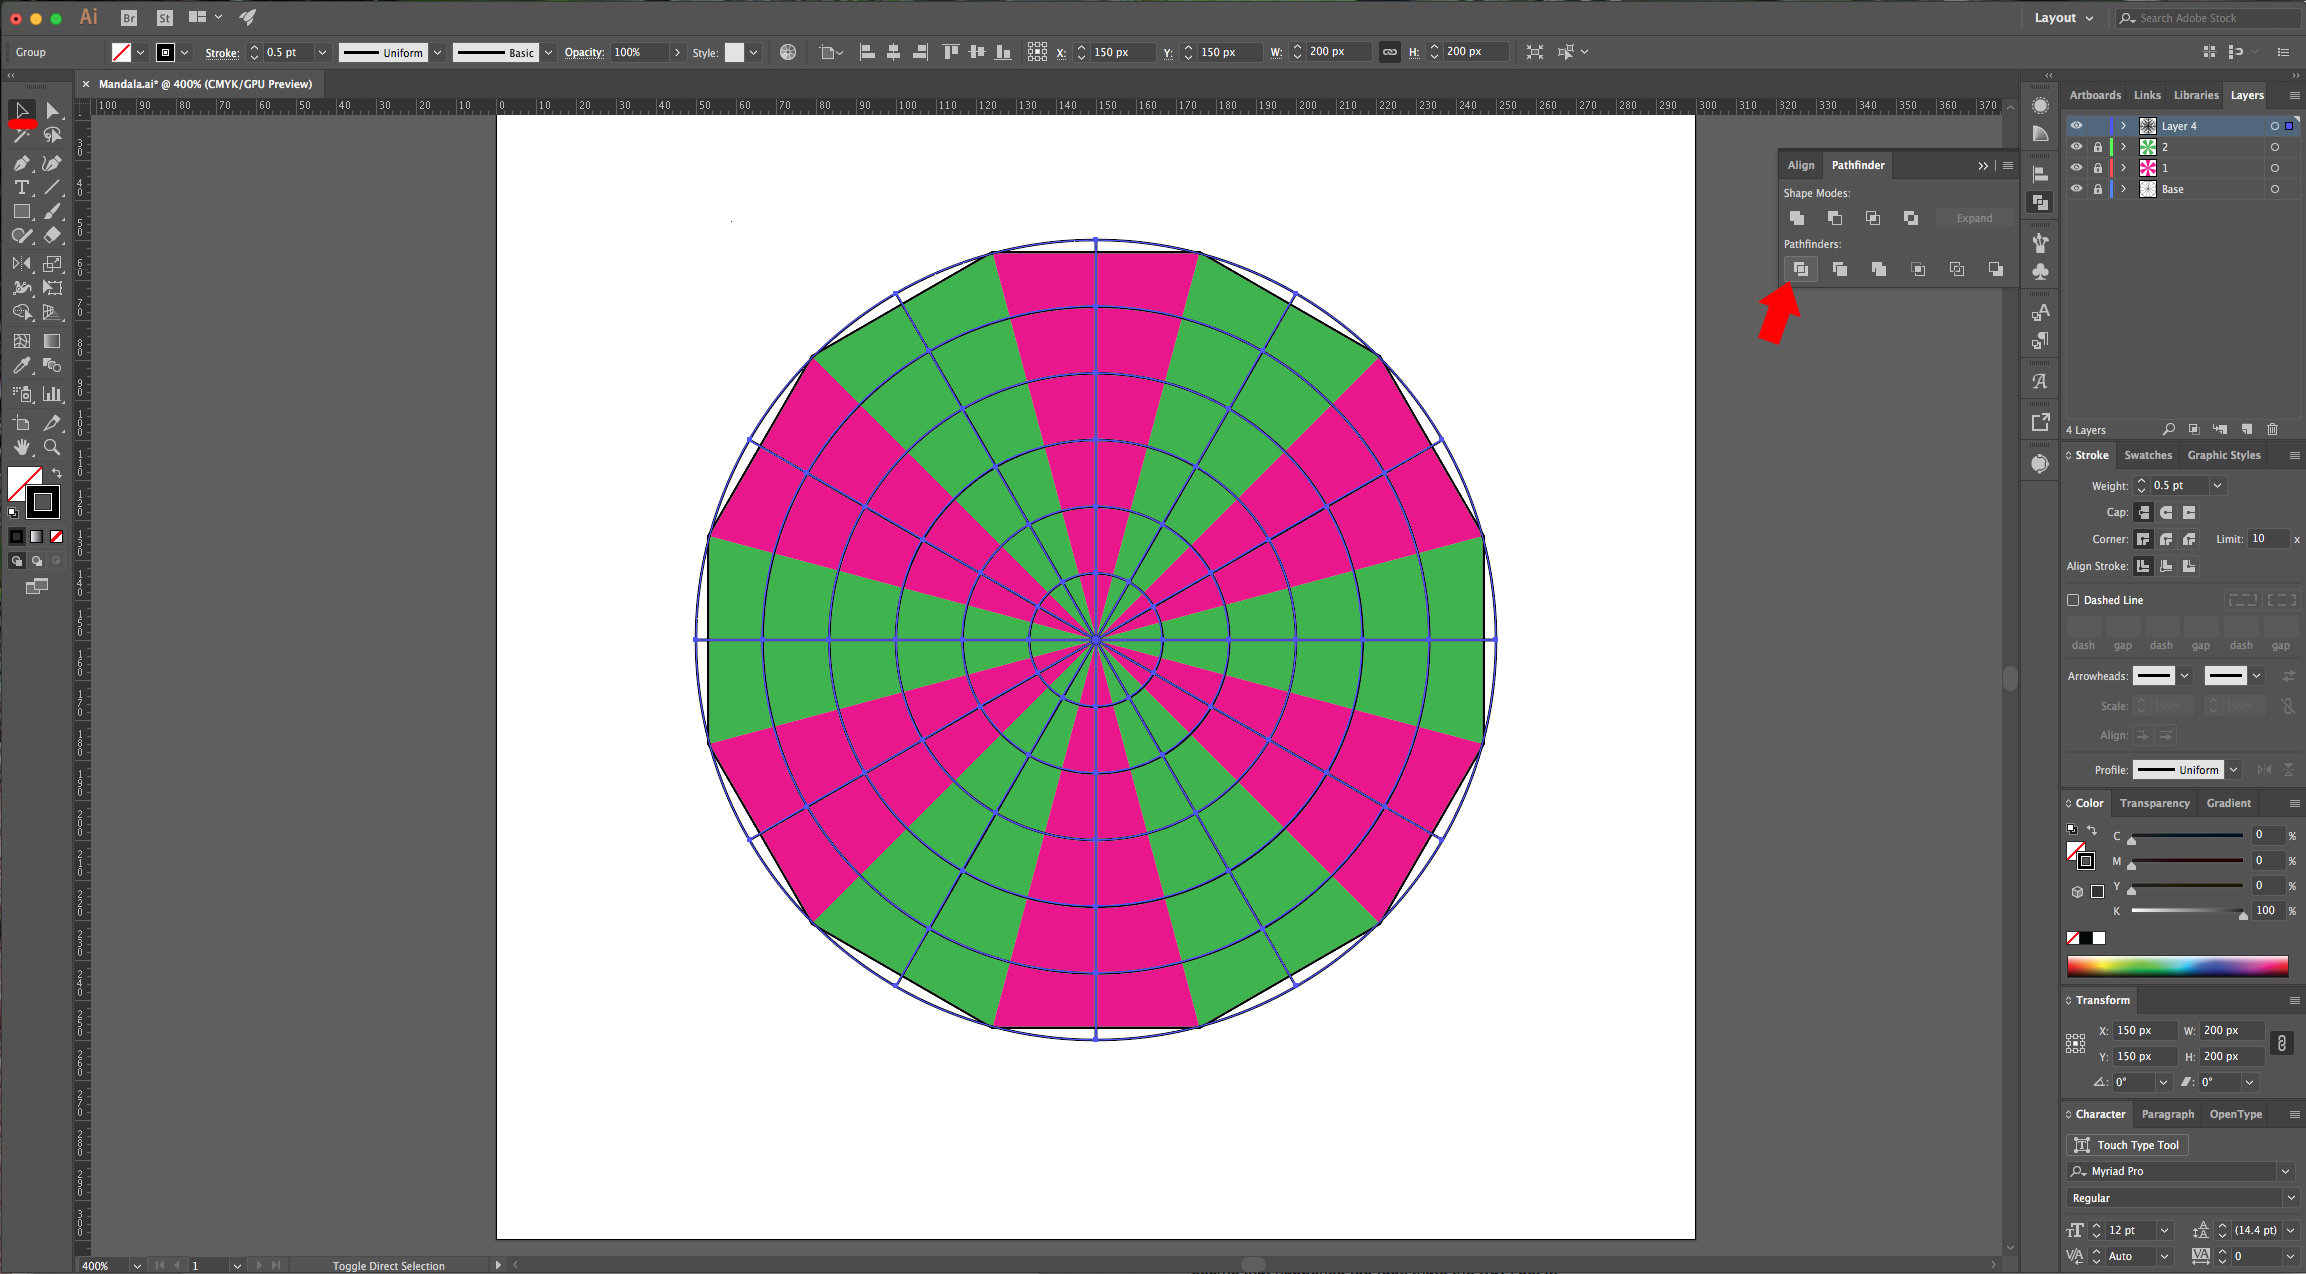
12 - You need to remember the location of your original half triangles since those will be the spots where you will draw the Mandala elements that will be duplicated in the copies. (In our case the top right magenta and the top left green, placed to the left of the magenta). We will need a grid to divide the triangles into sectors, so lock your “2” layer, create a new one and select the “Polar Grid Tool”. Click on any spot on your document use the following values, then click “OK”. Select the grid and making sure that “Align to Artboard” is selected click “Horizontal Align Center” and then “Vertical Align Center” in your upper menu. Click “R” and rotate your grid using a 45° Angle to align the lines with the ones in the triangles.


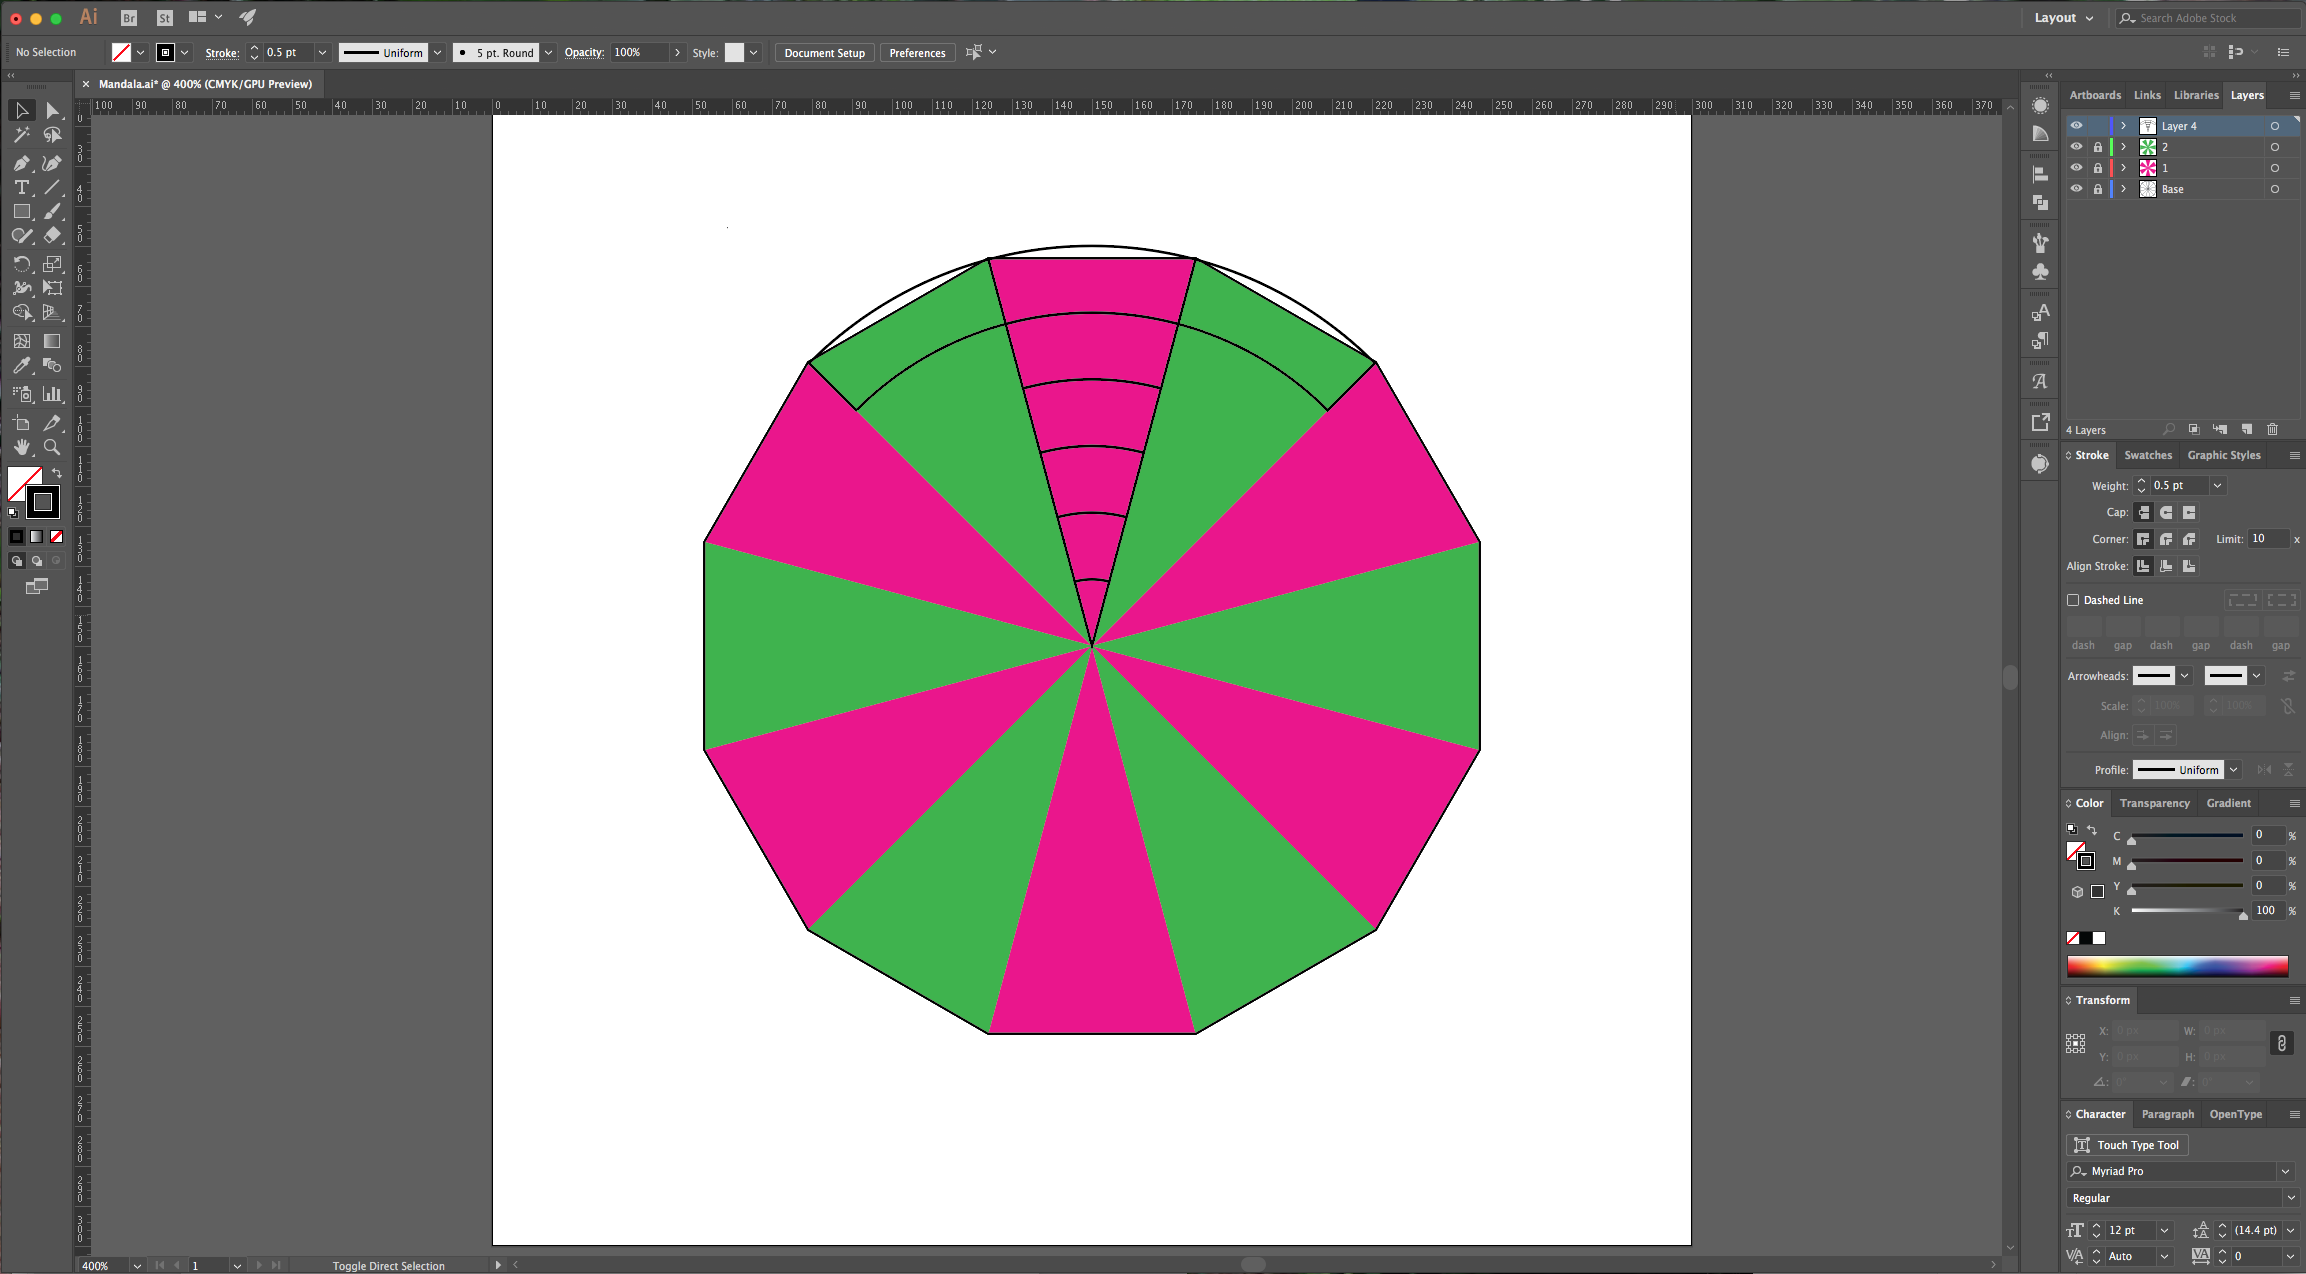
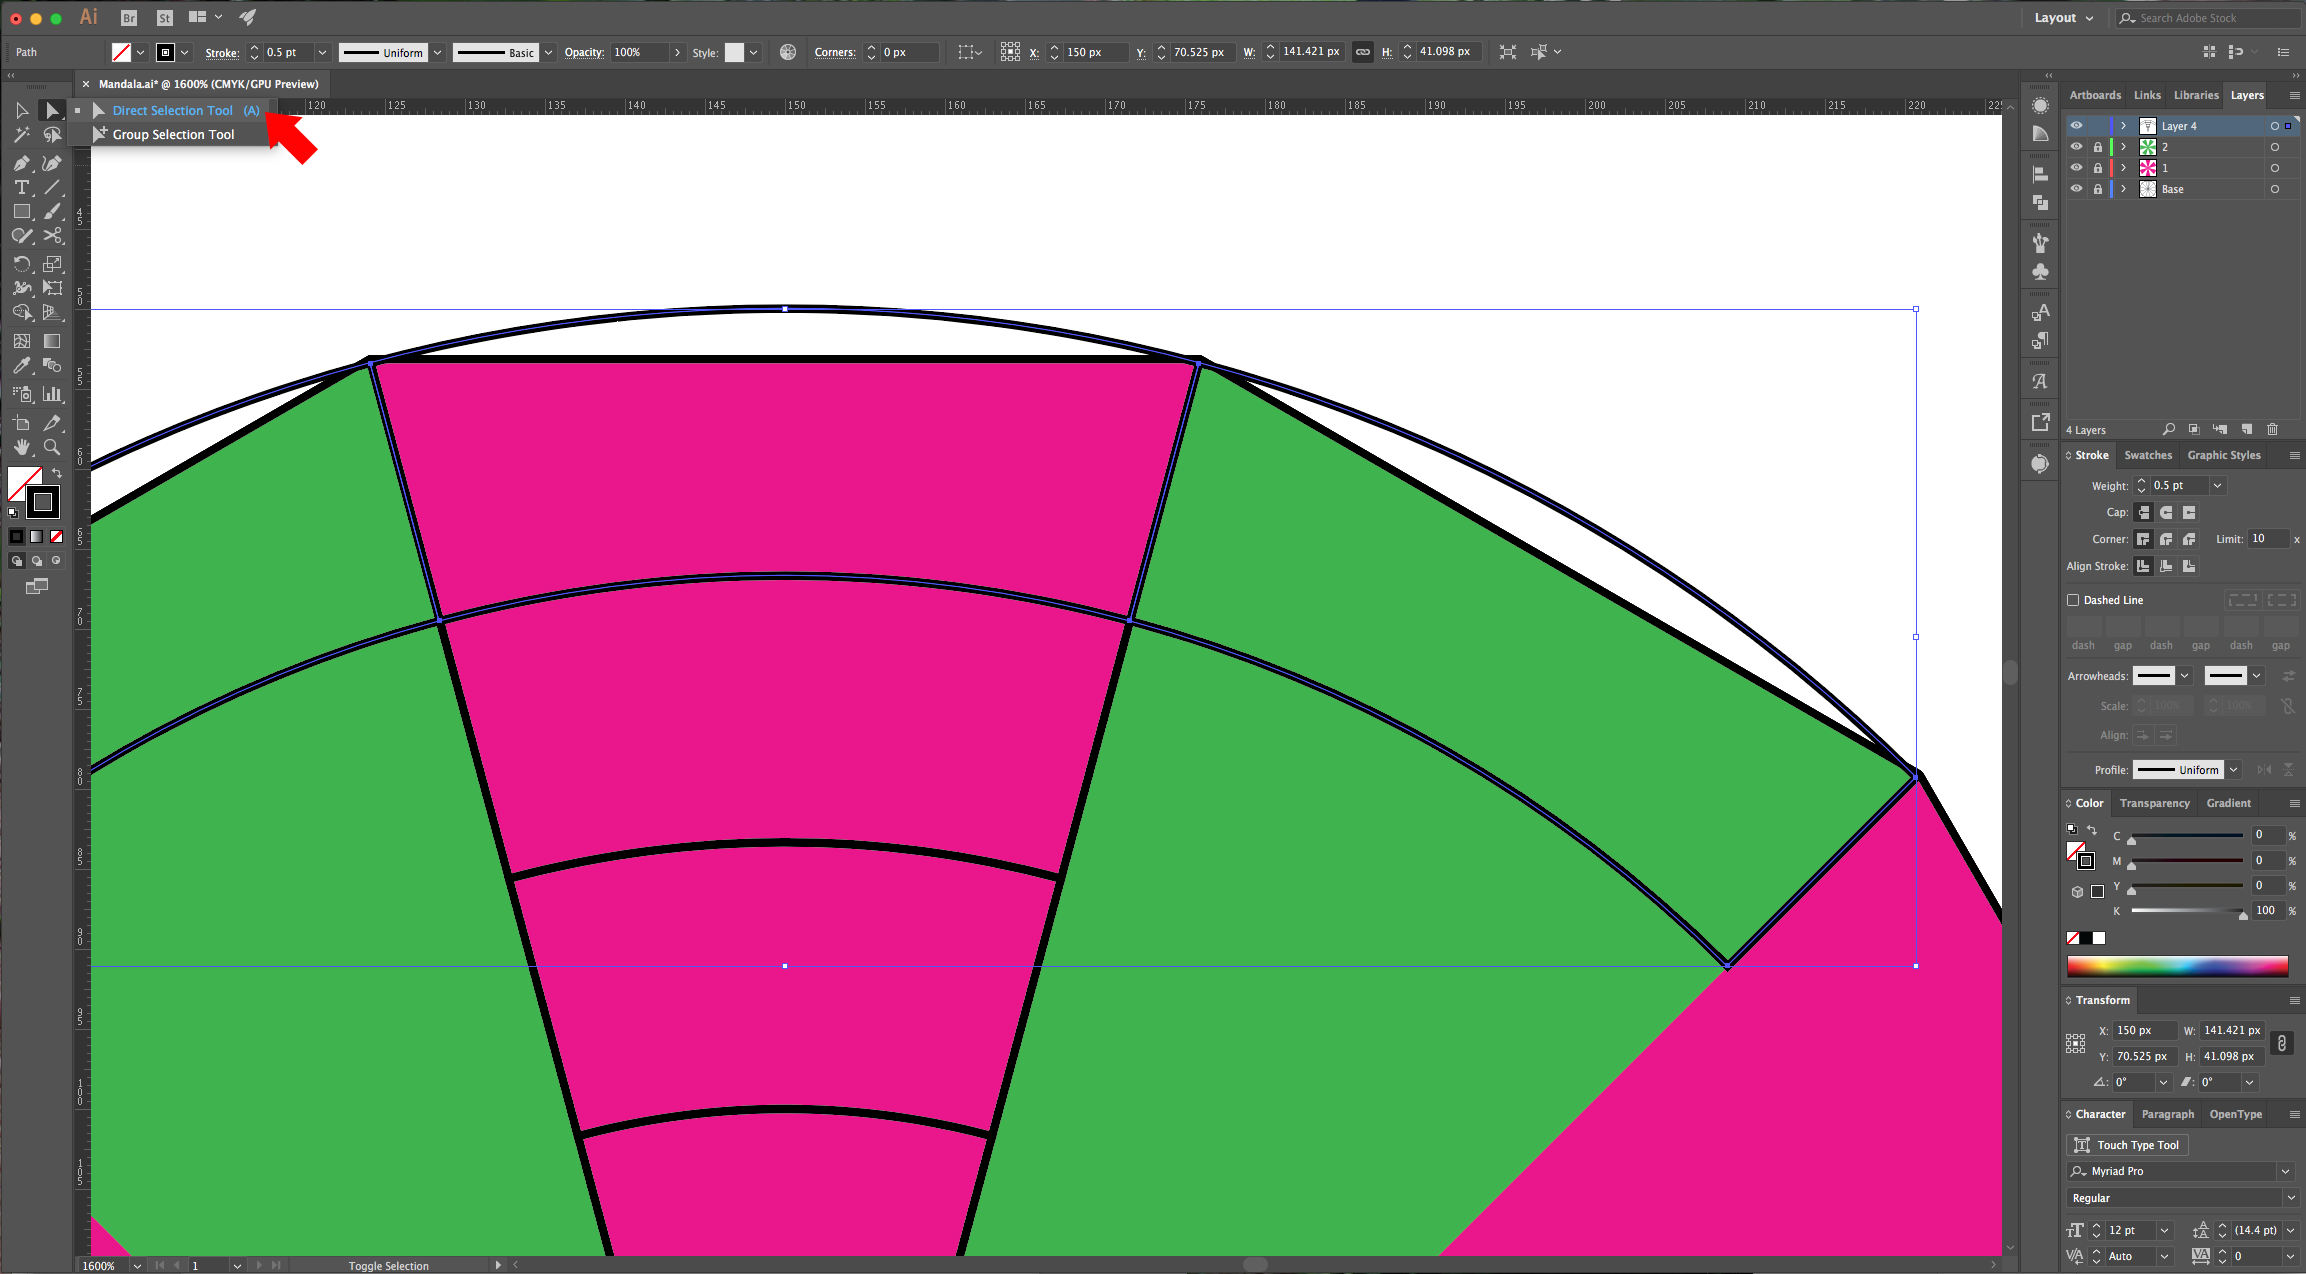
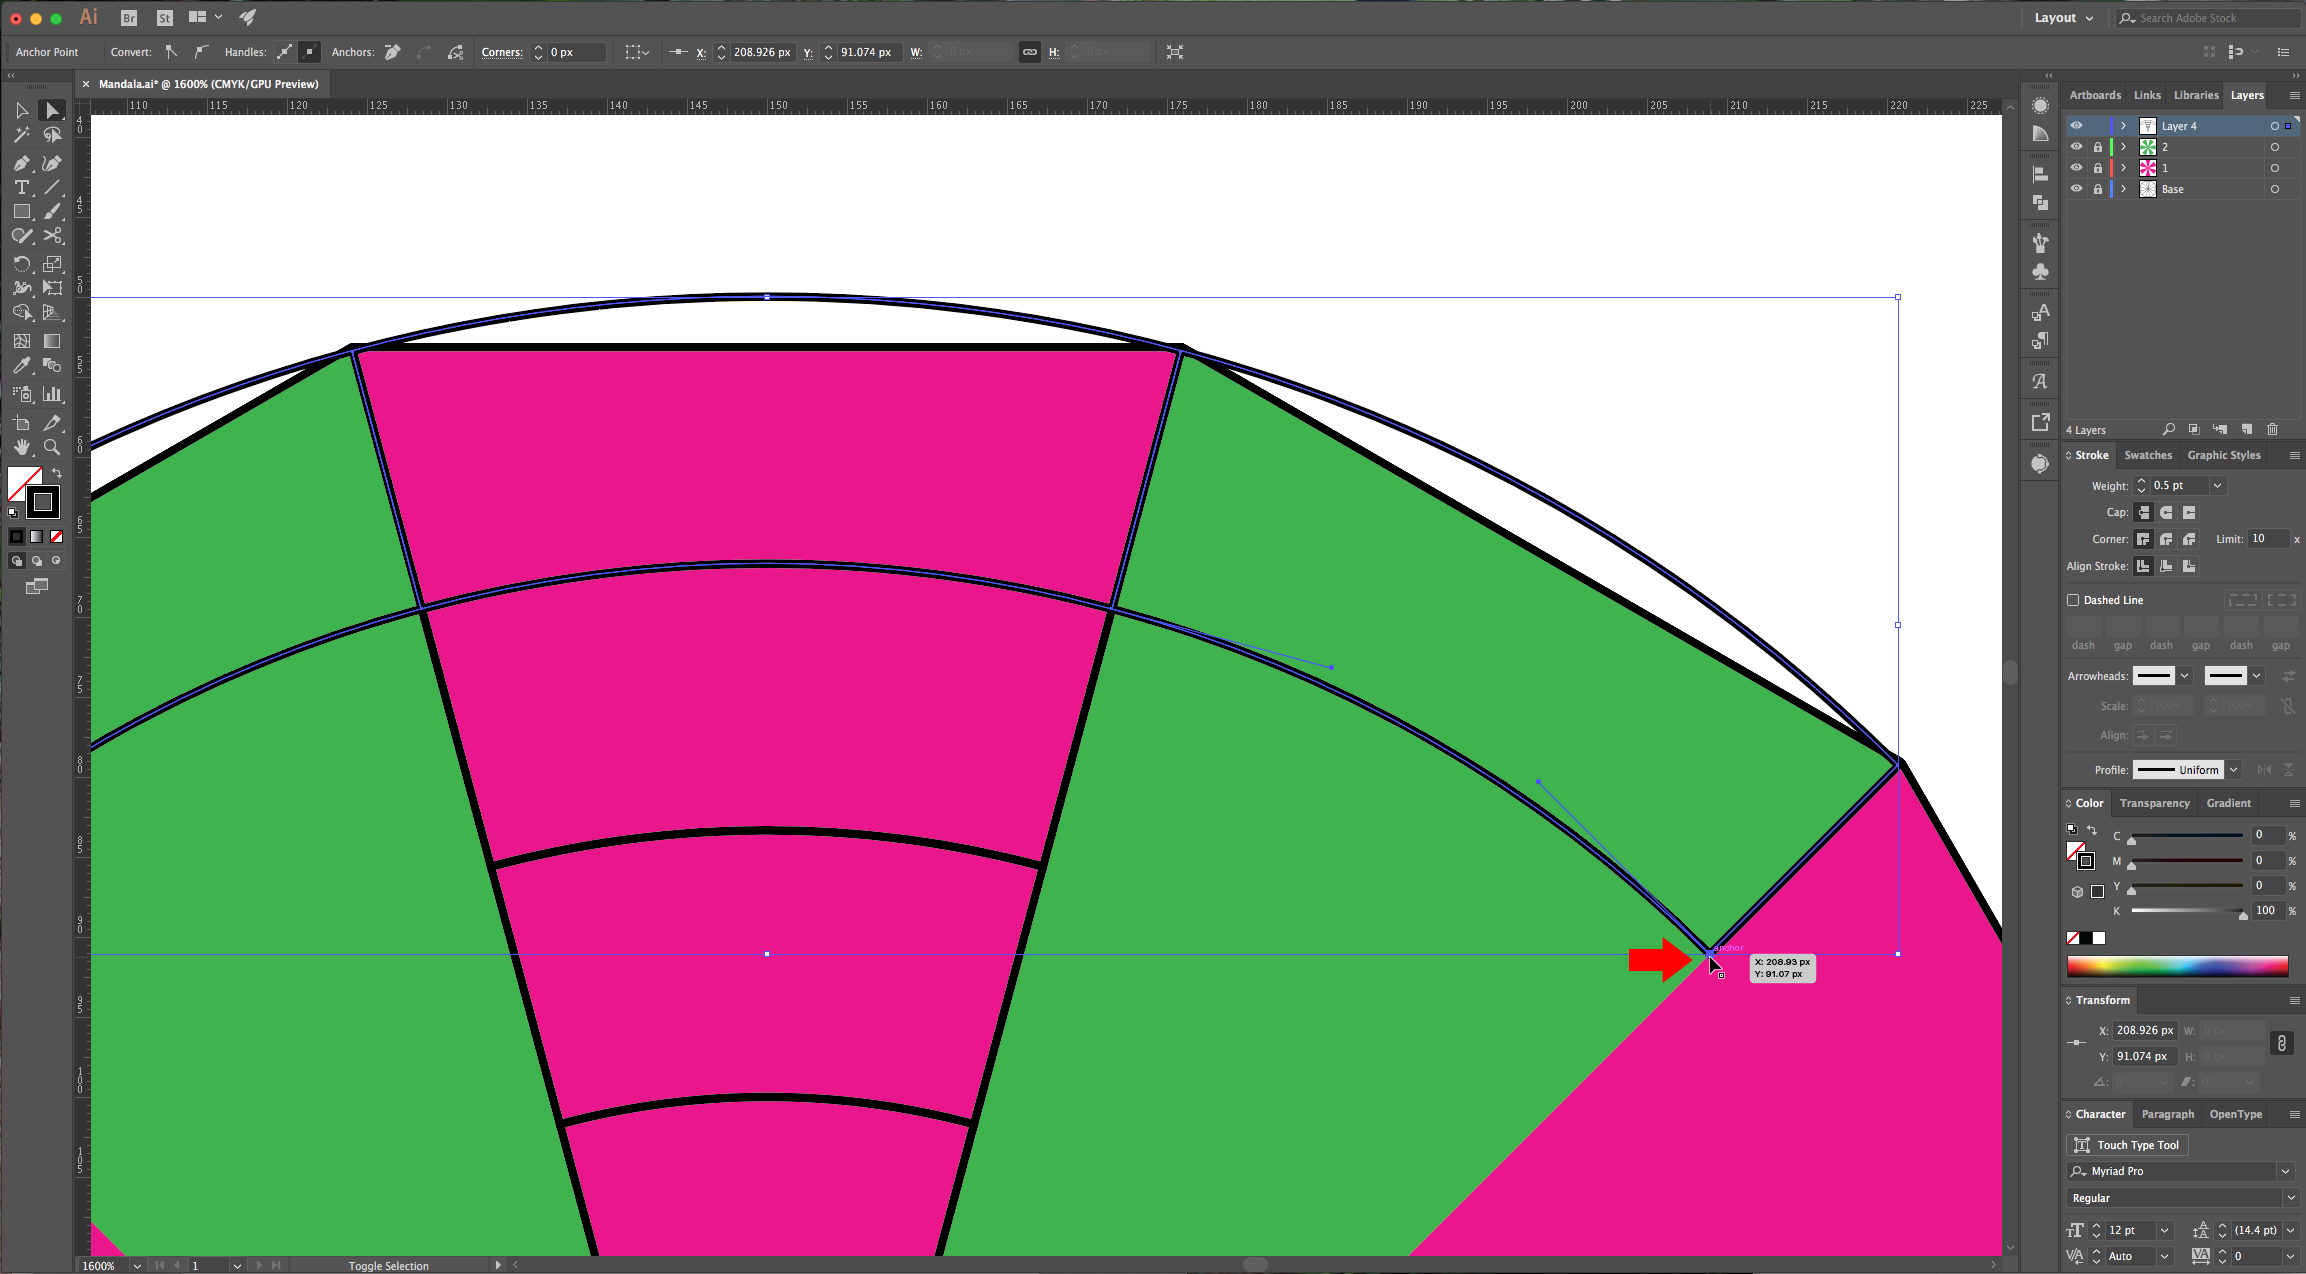
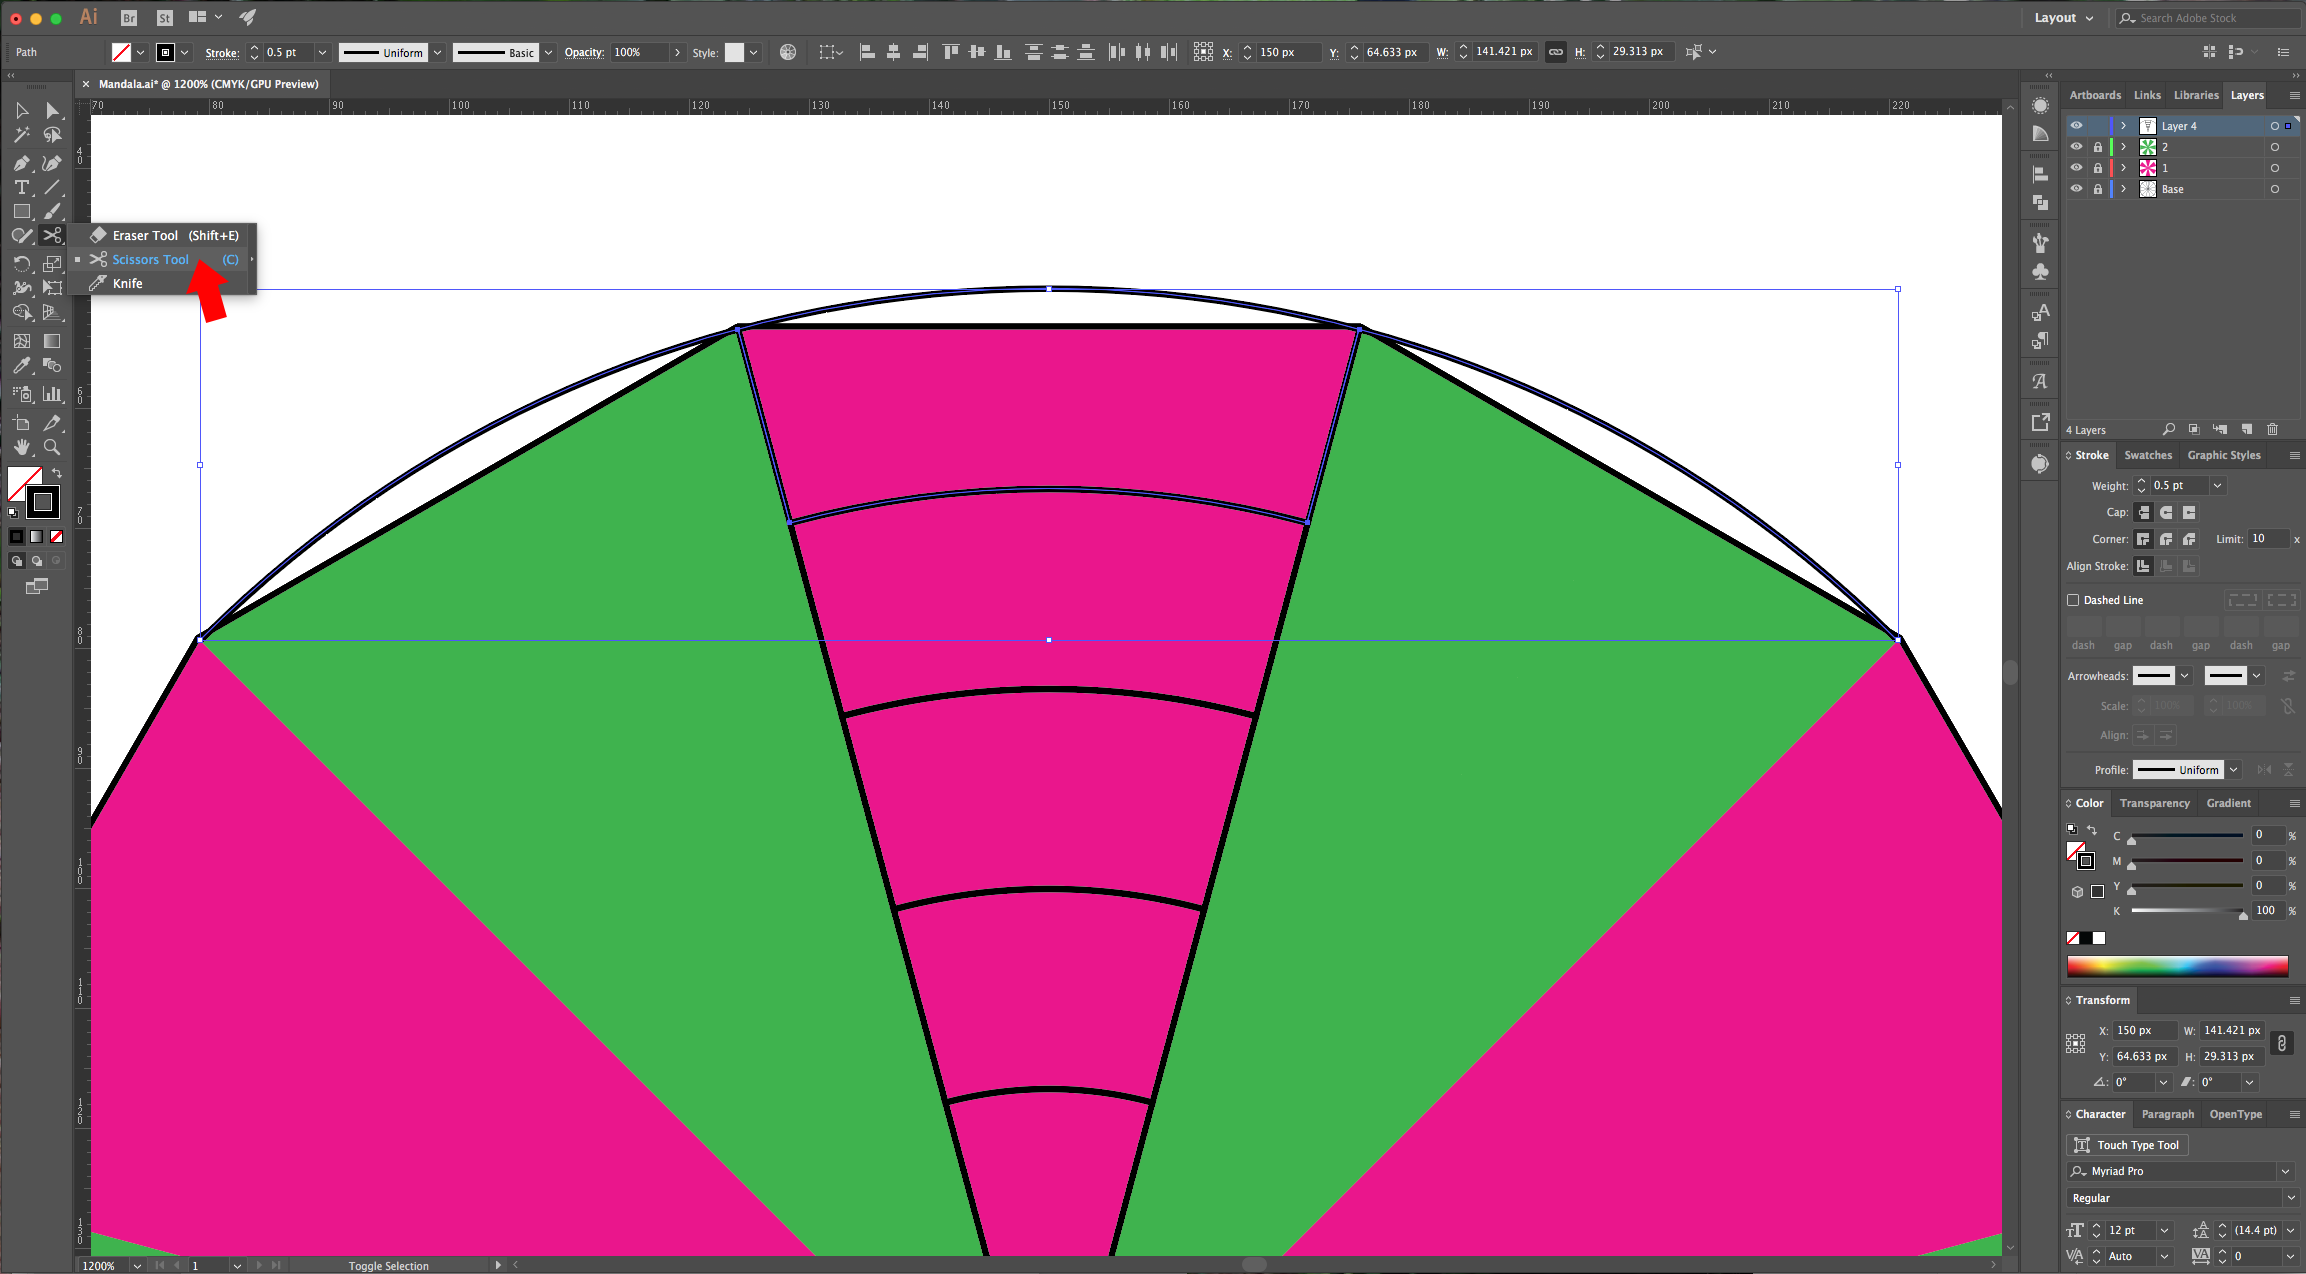
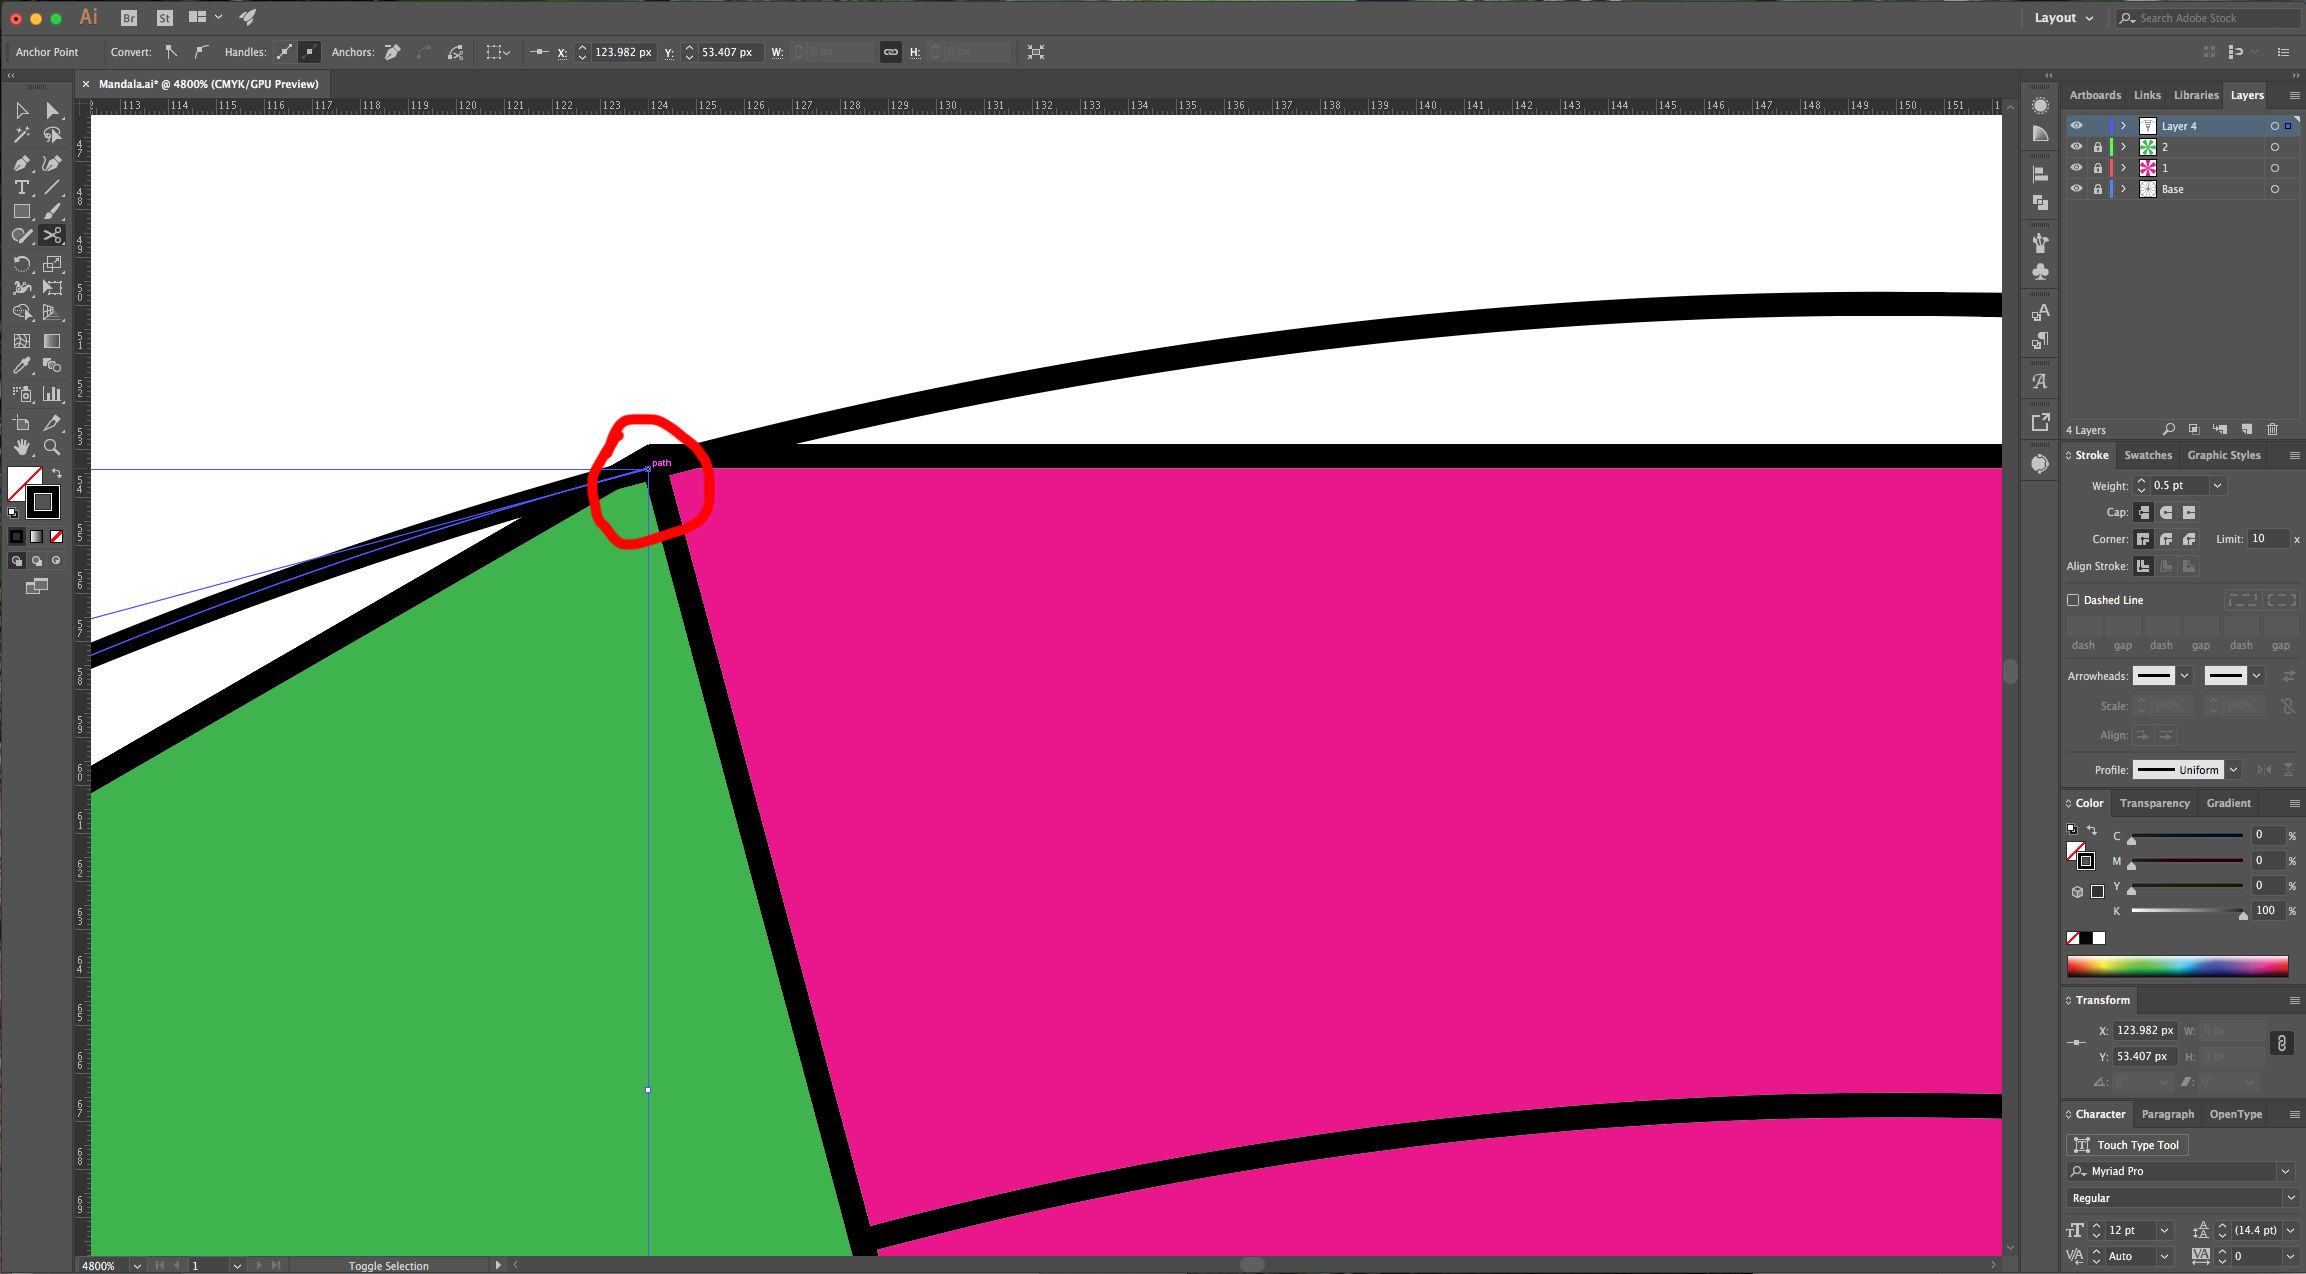
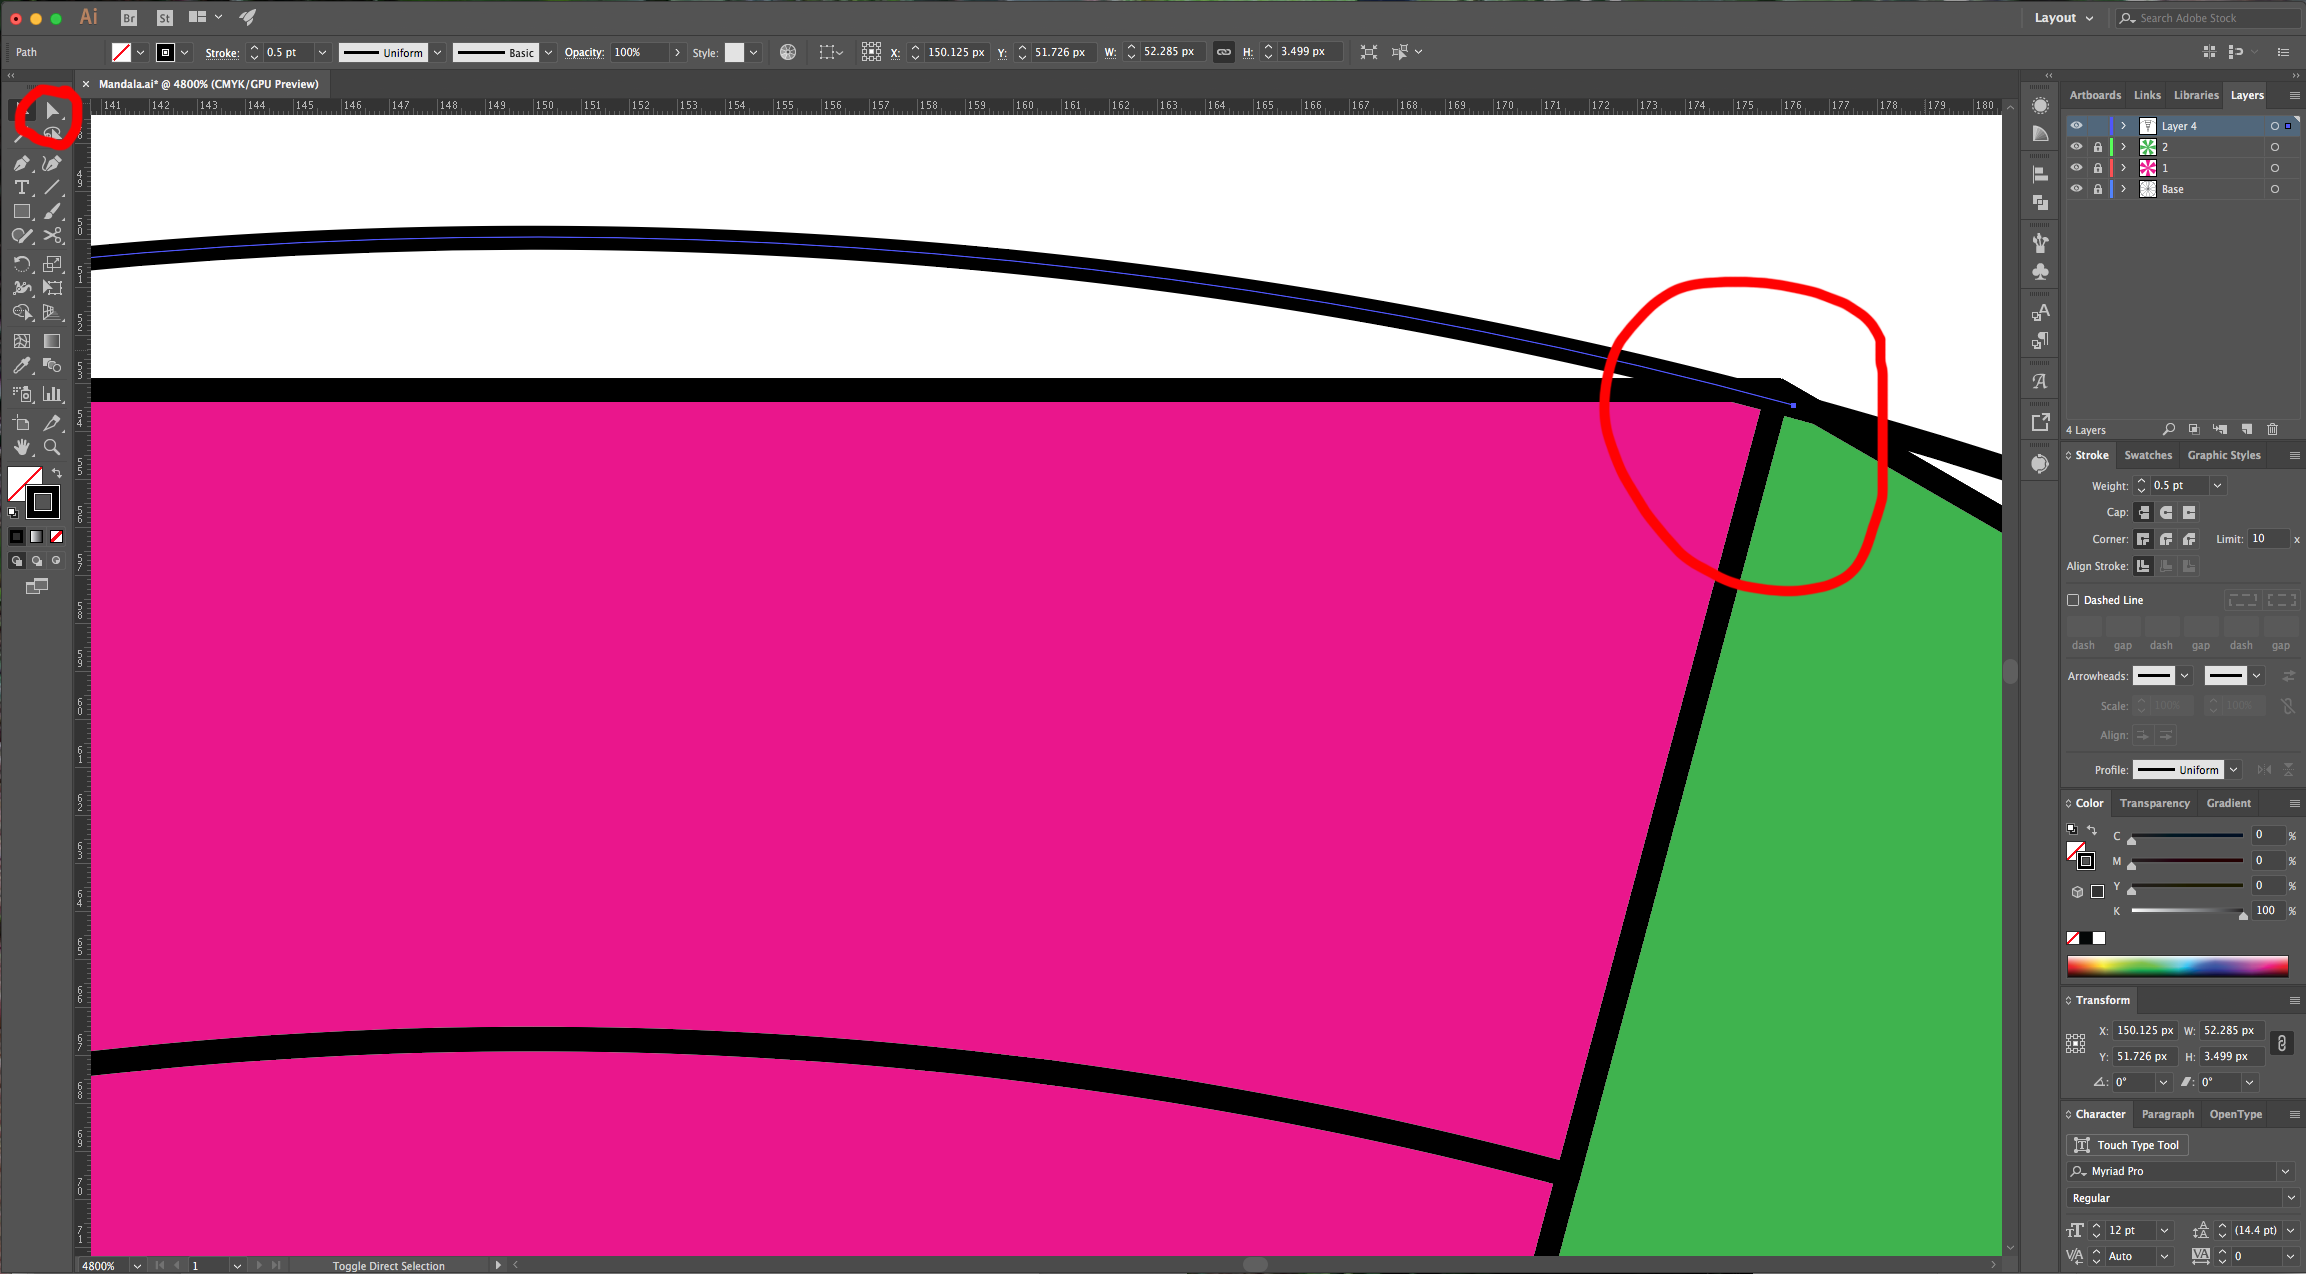
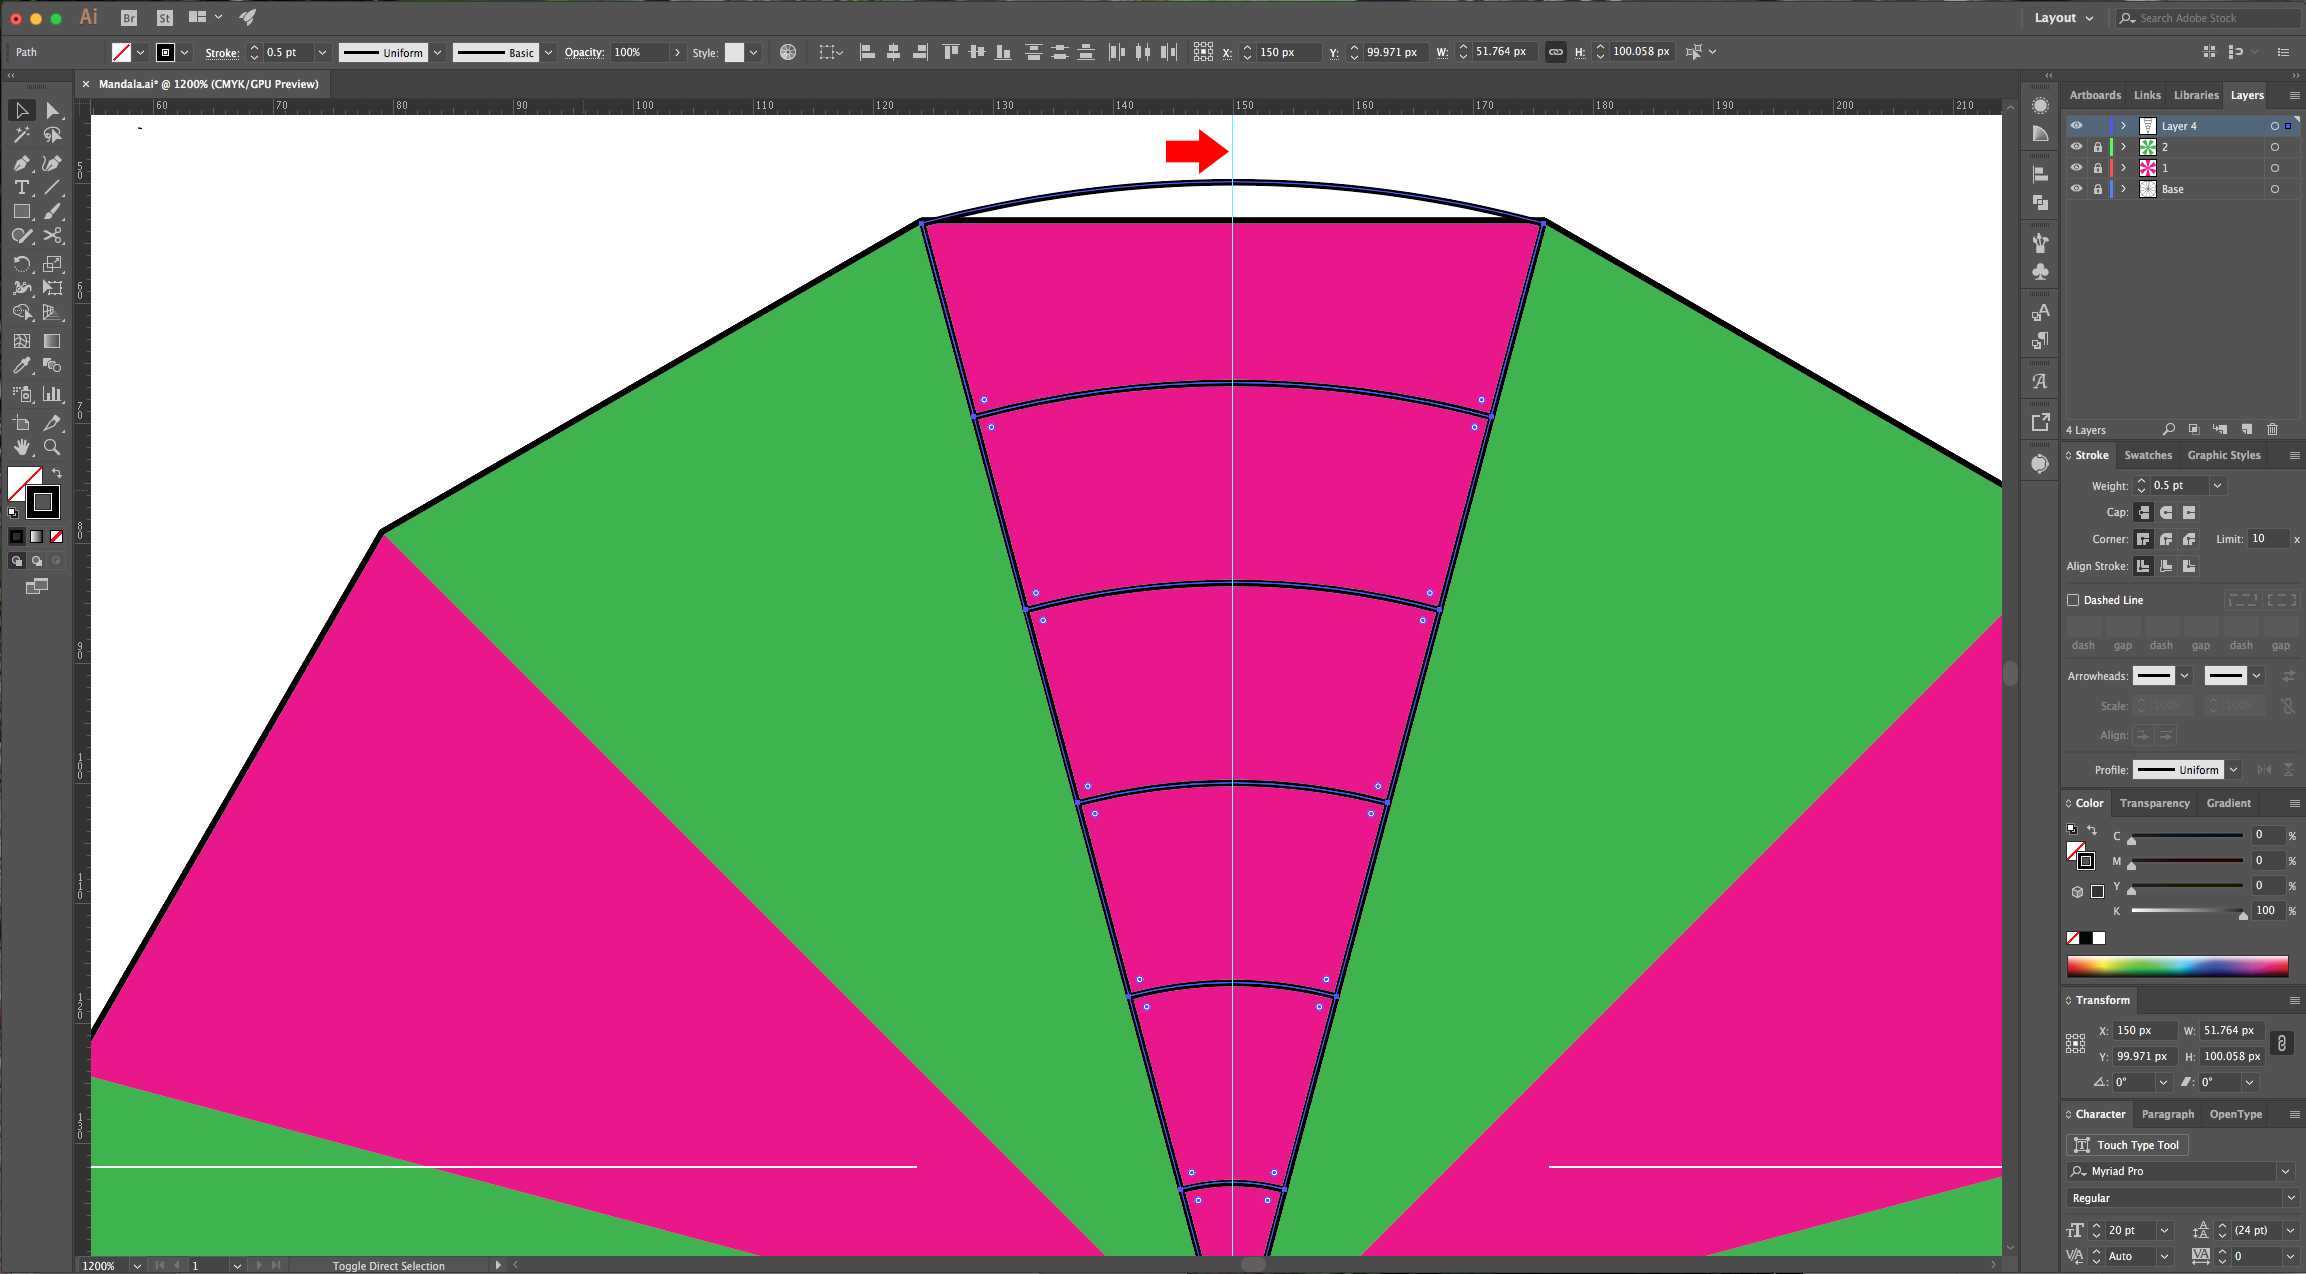
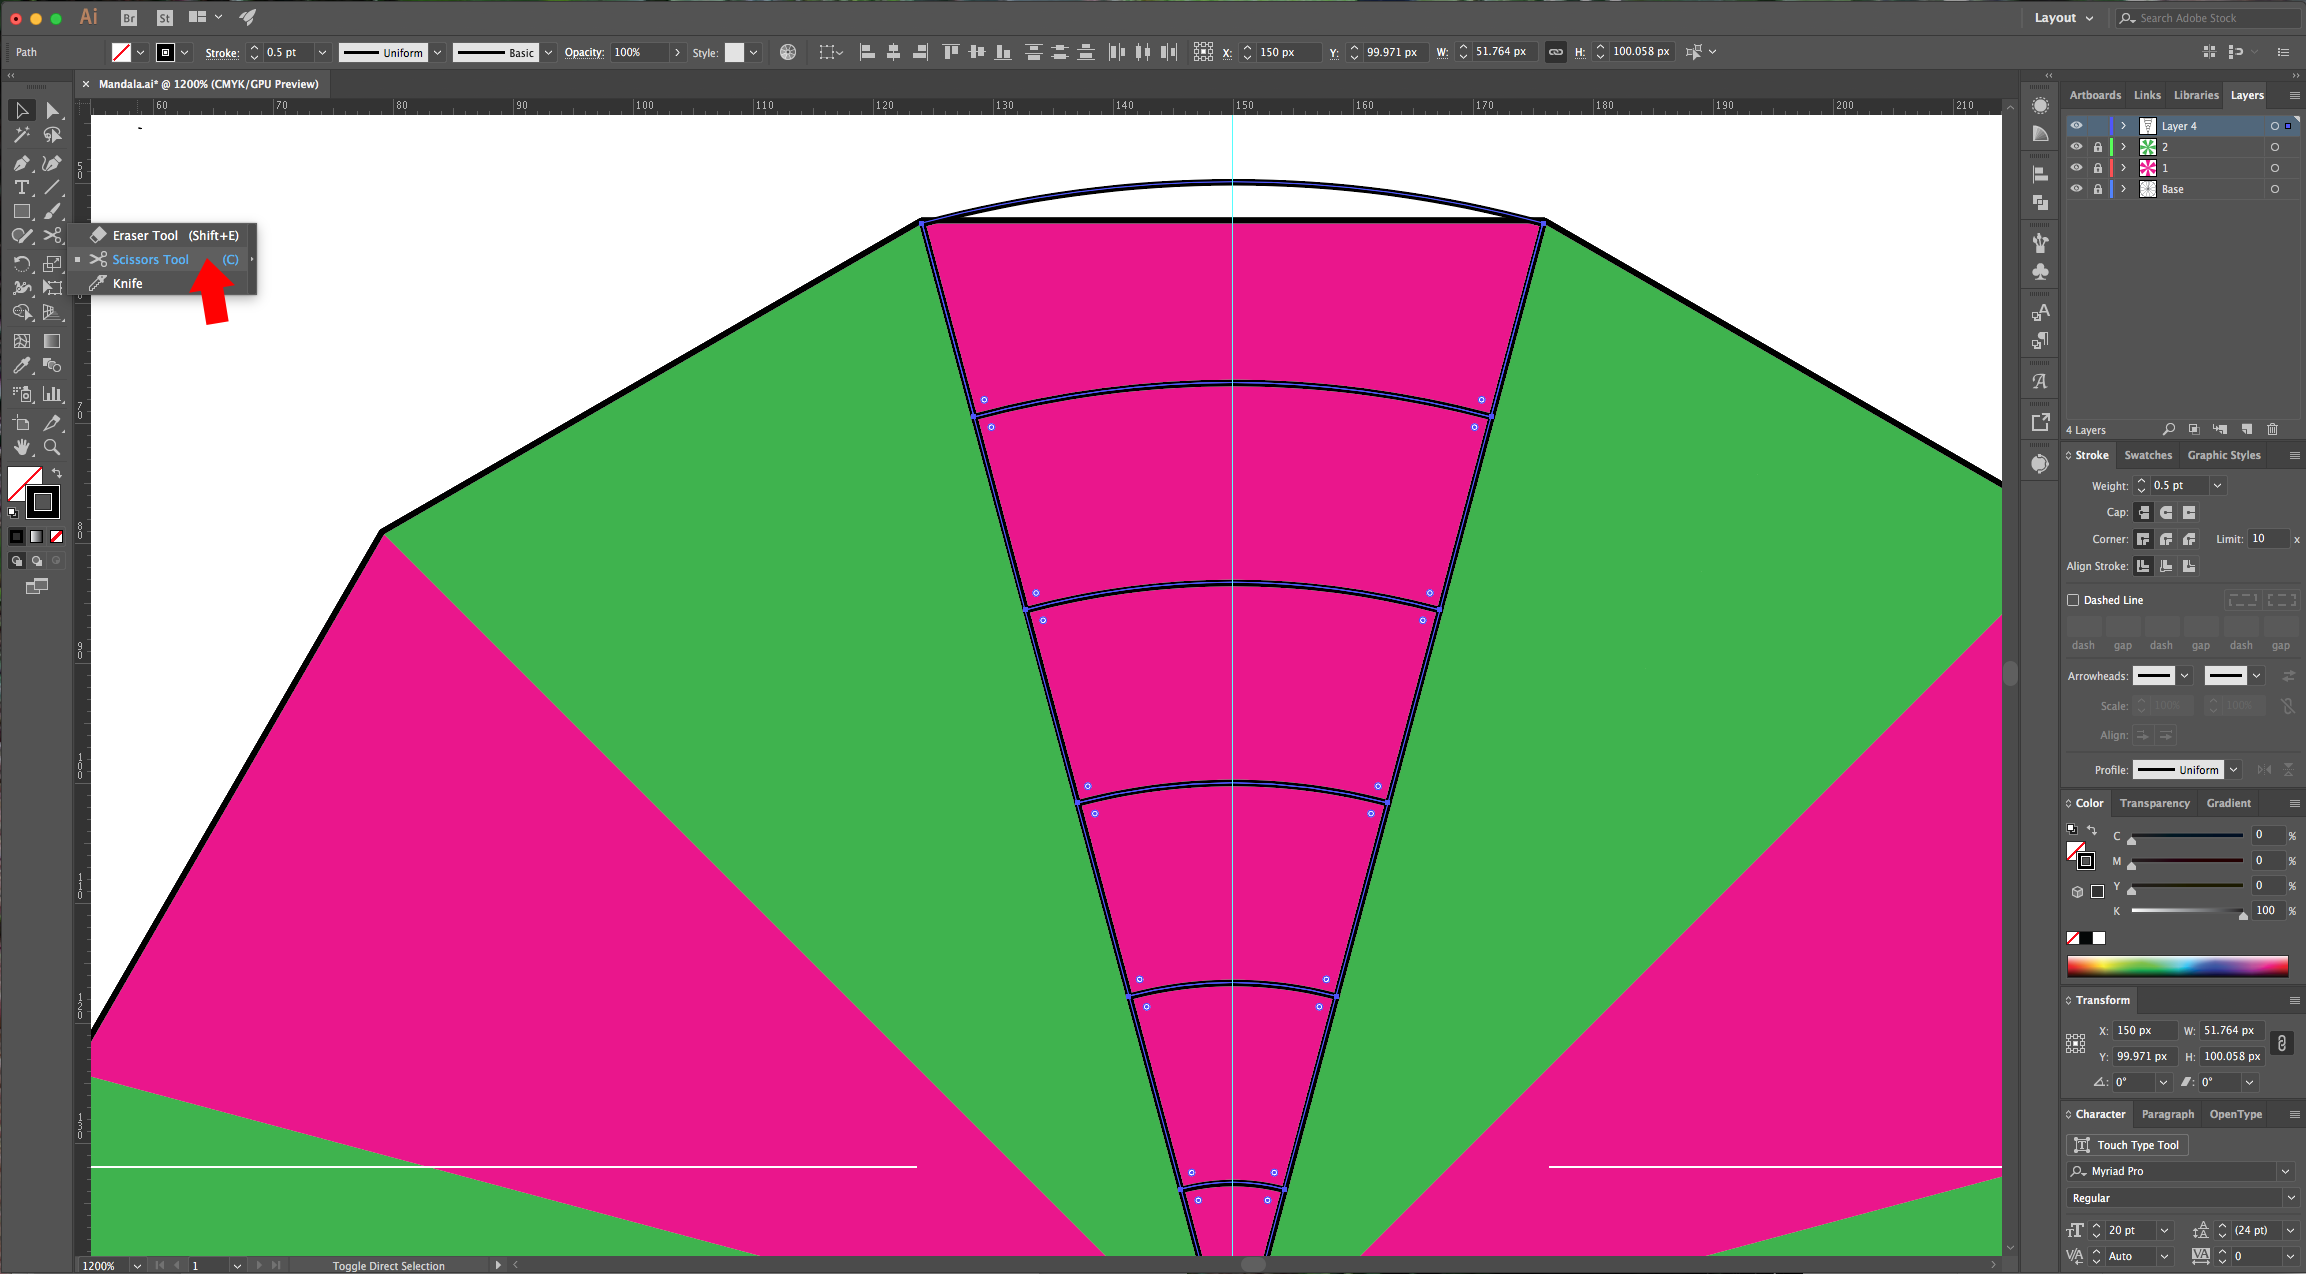
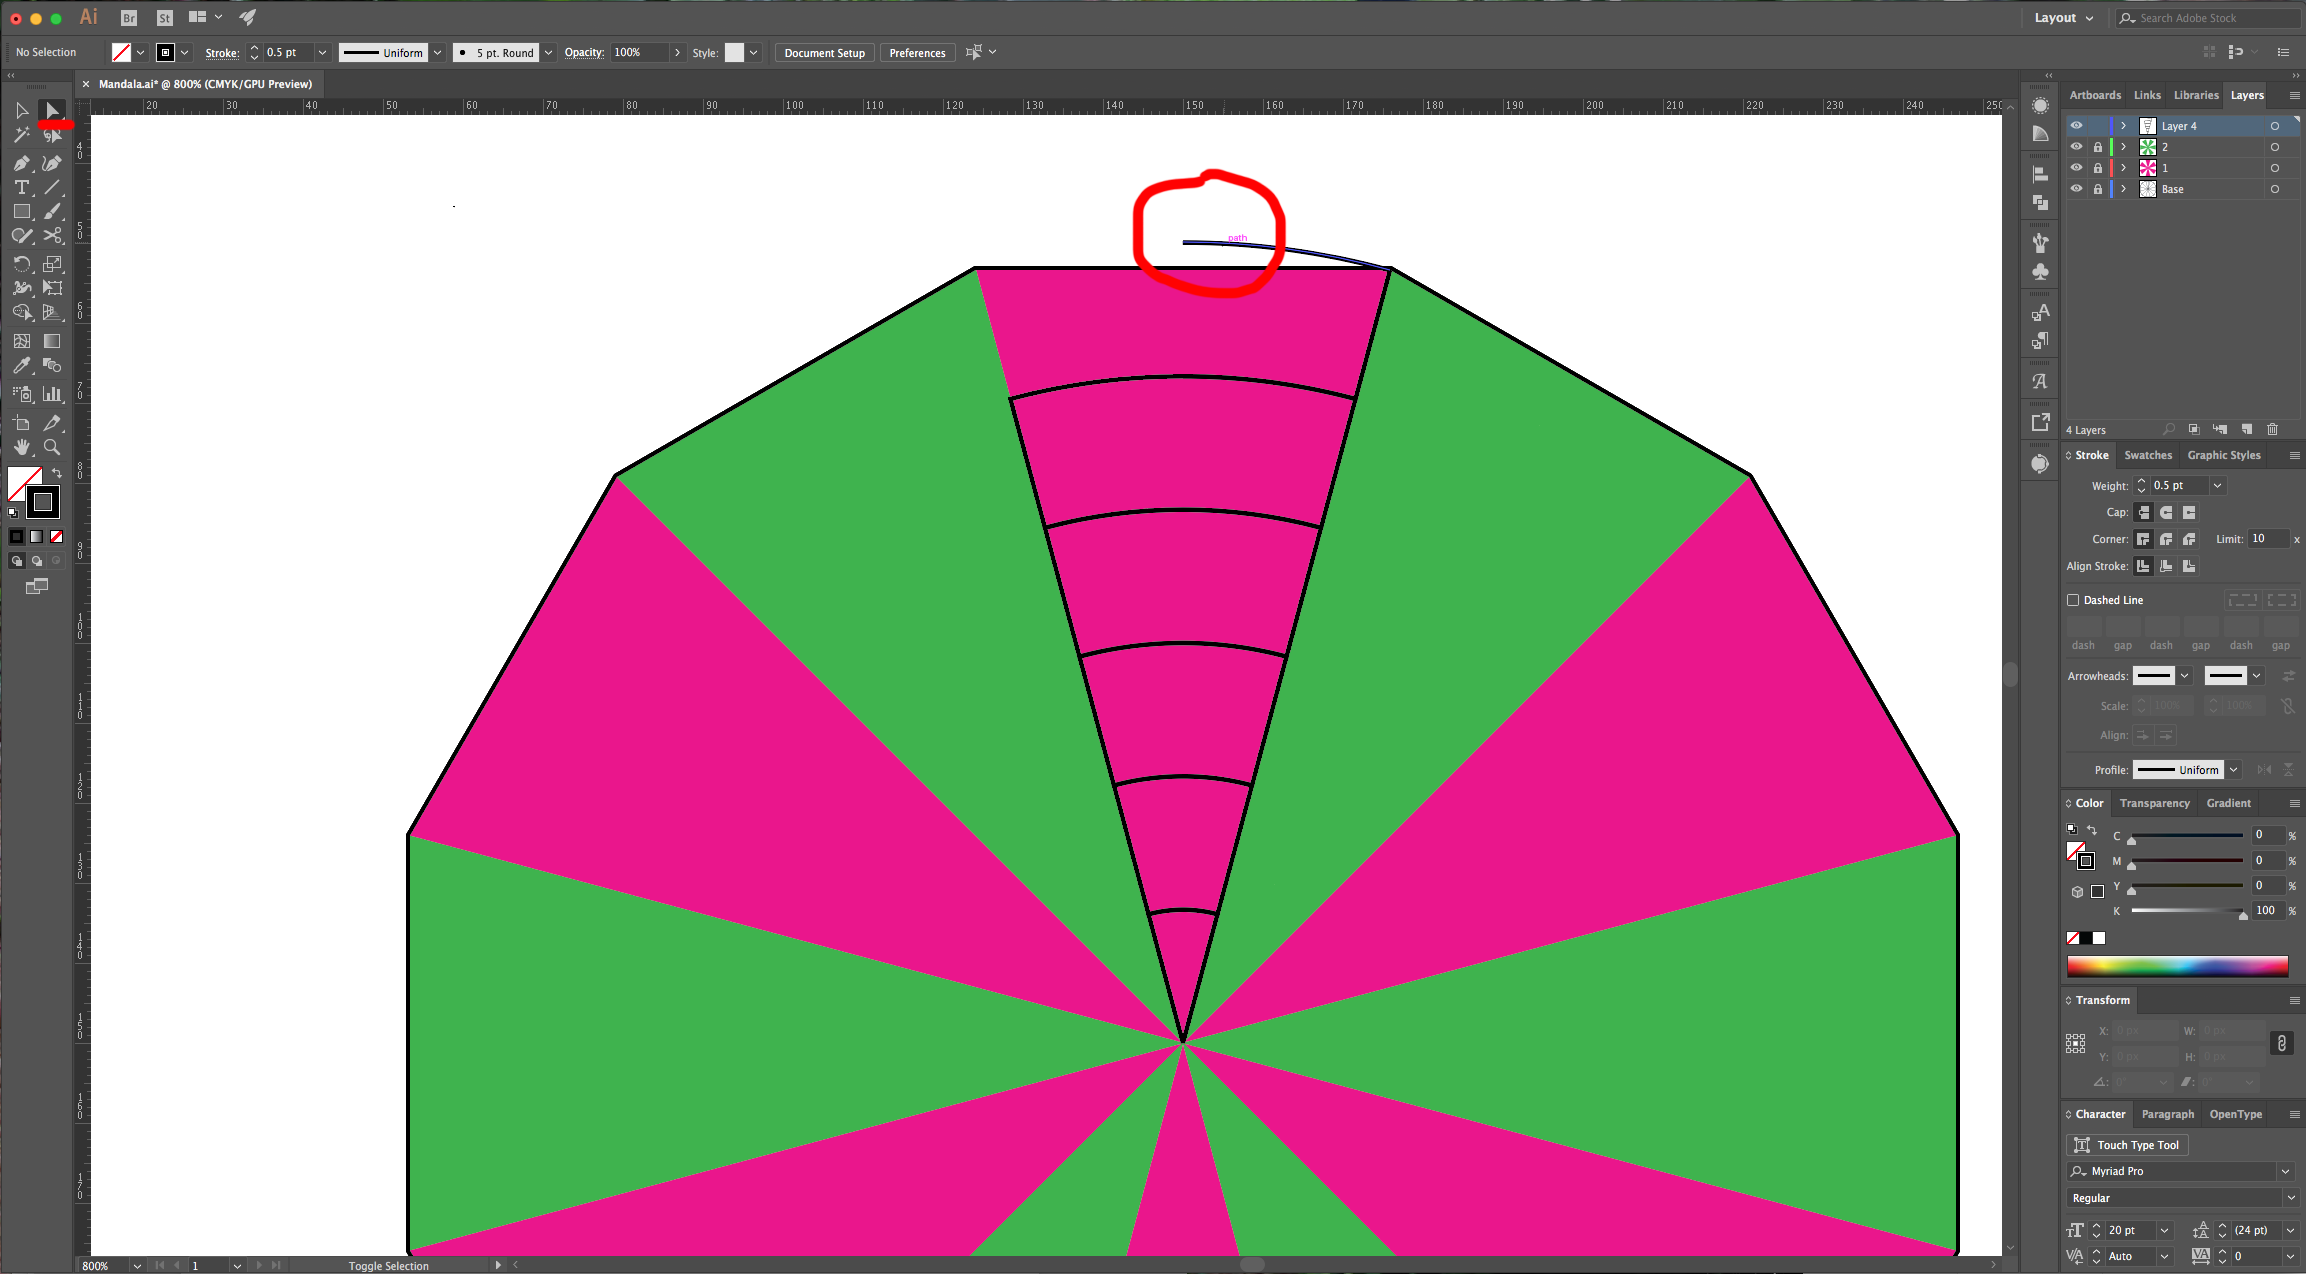
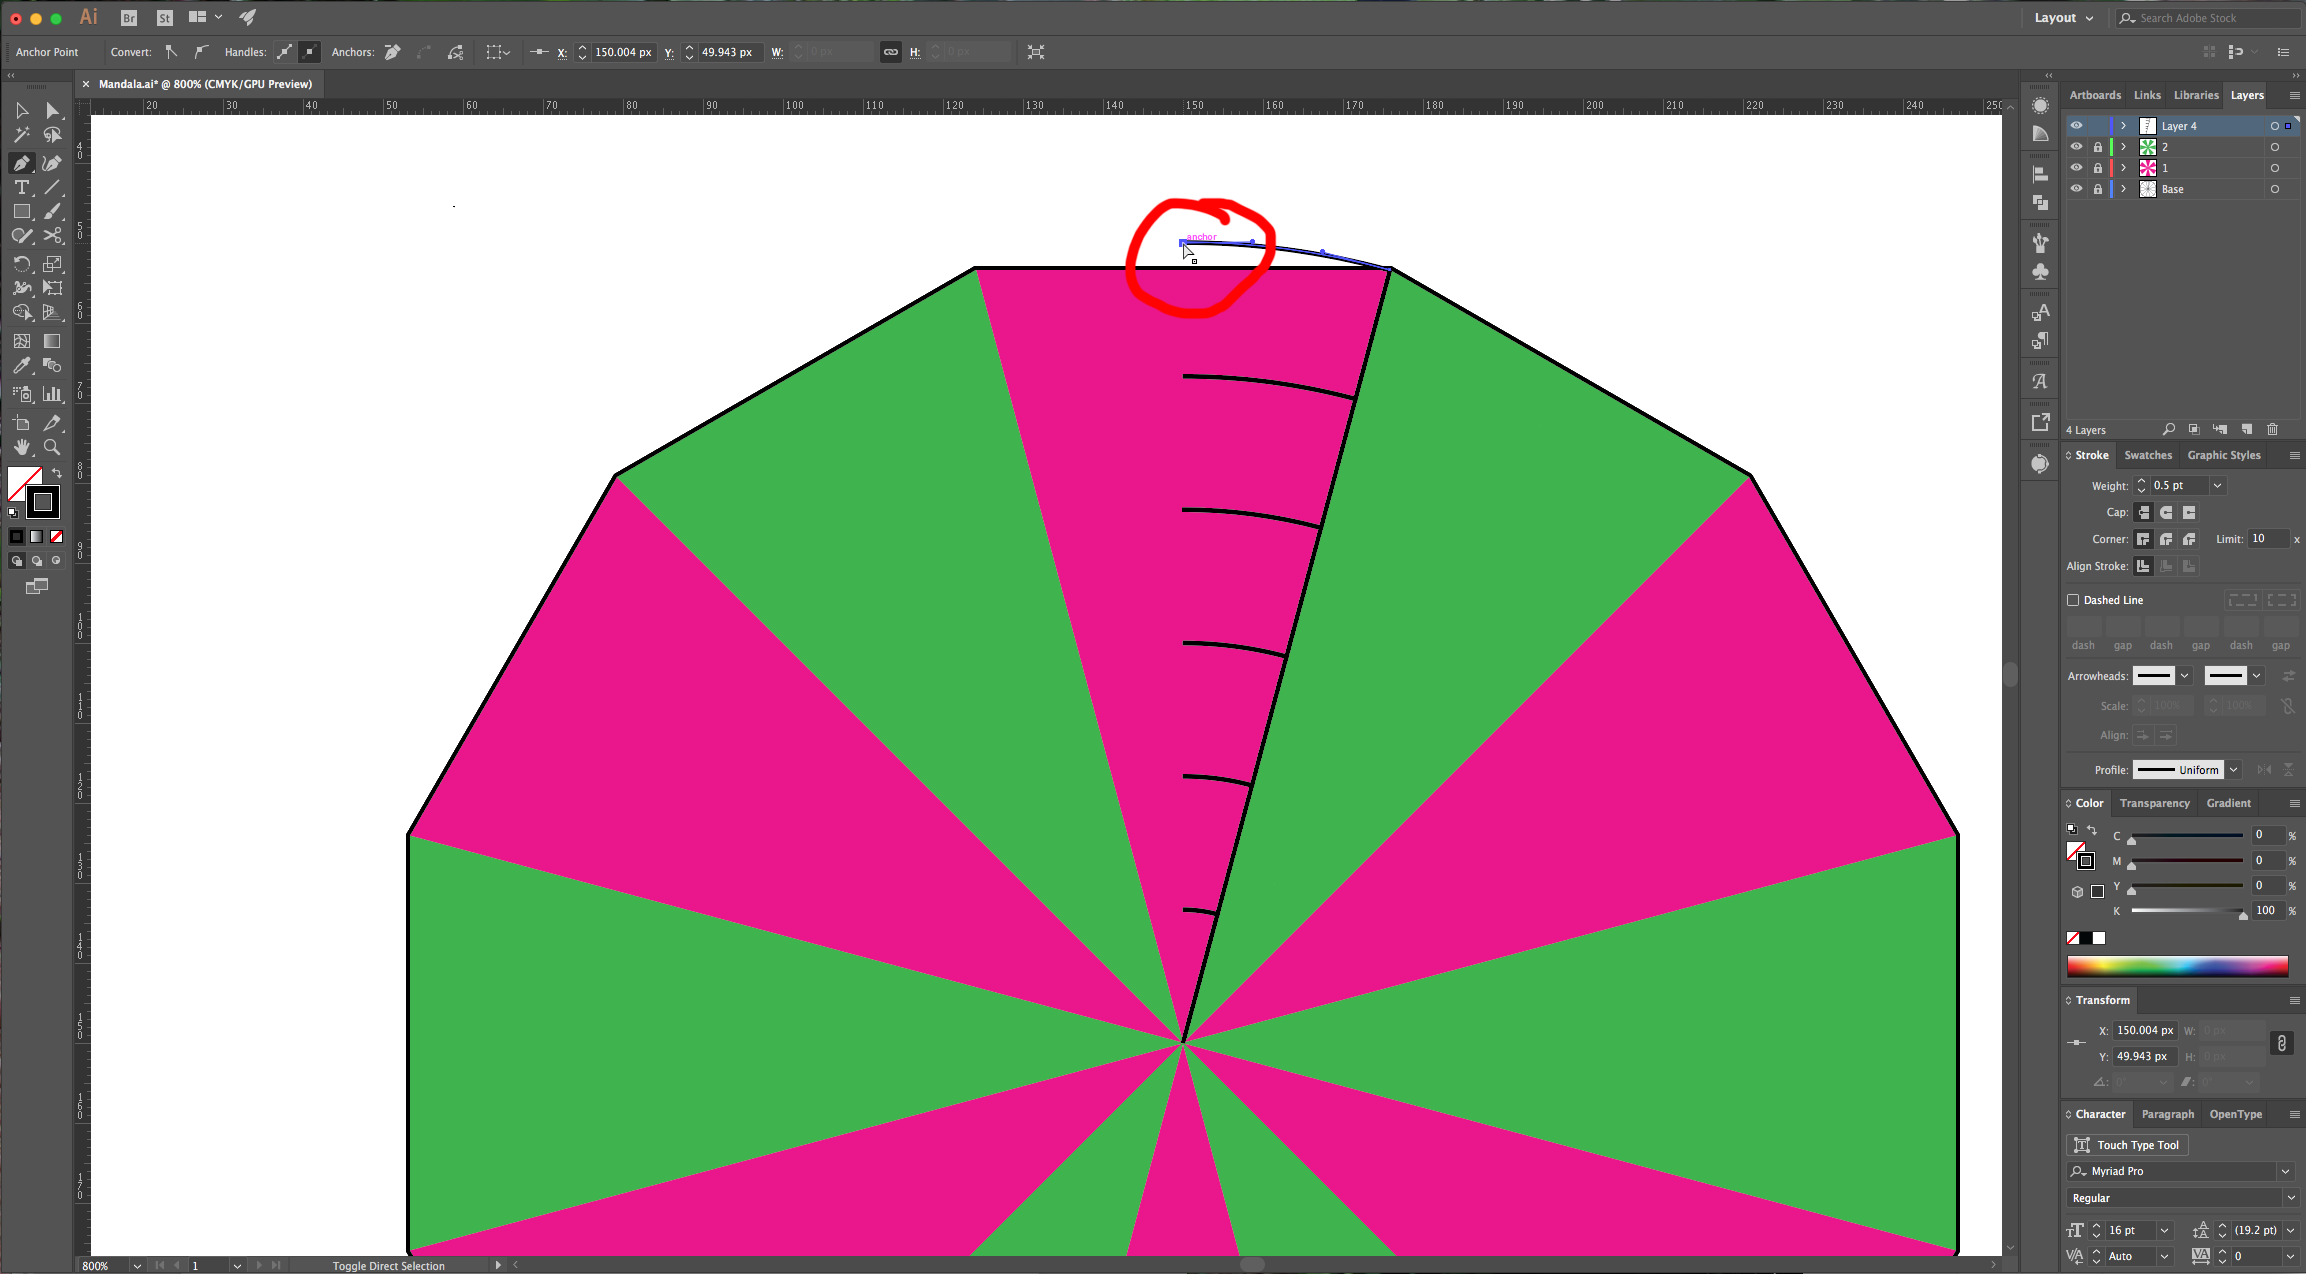
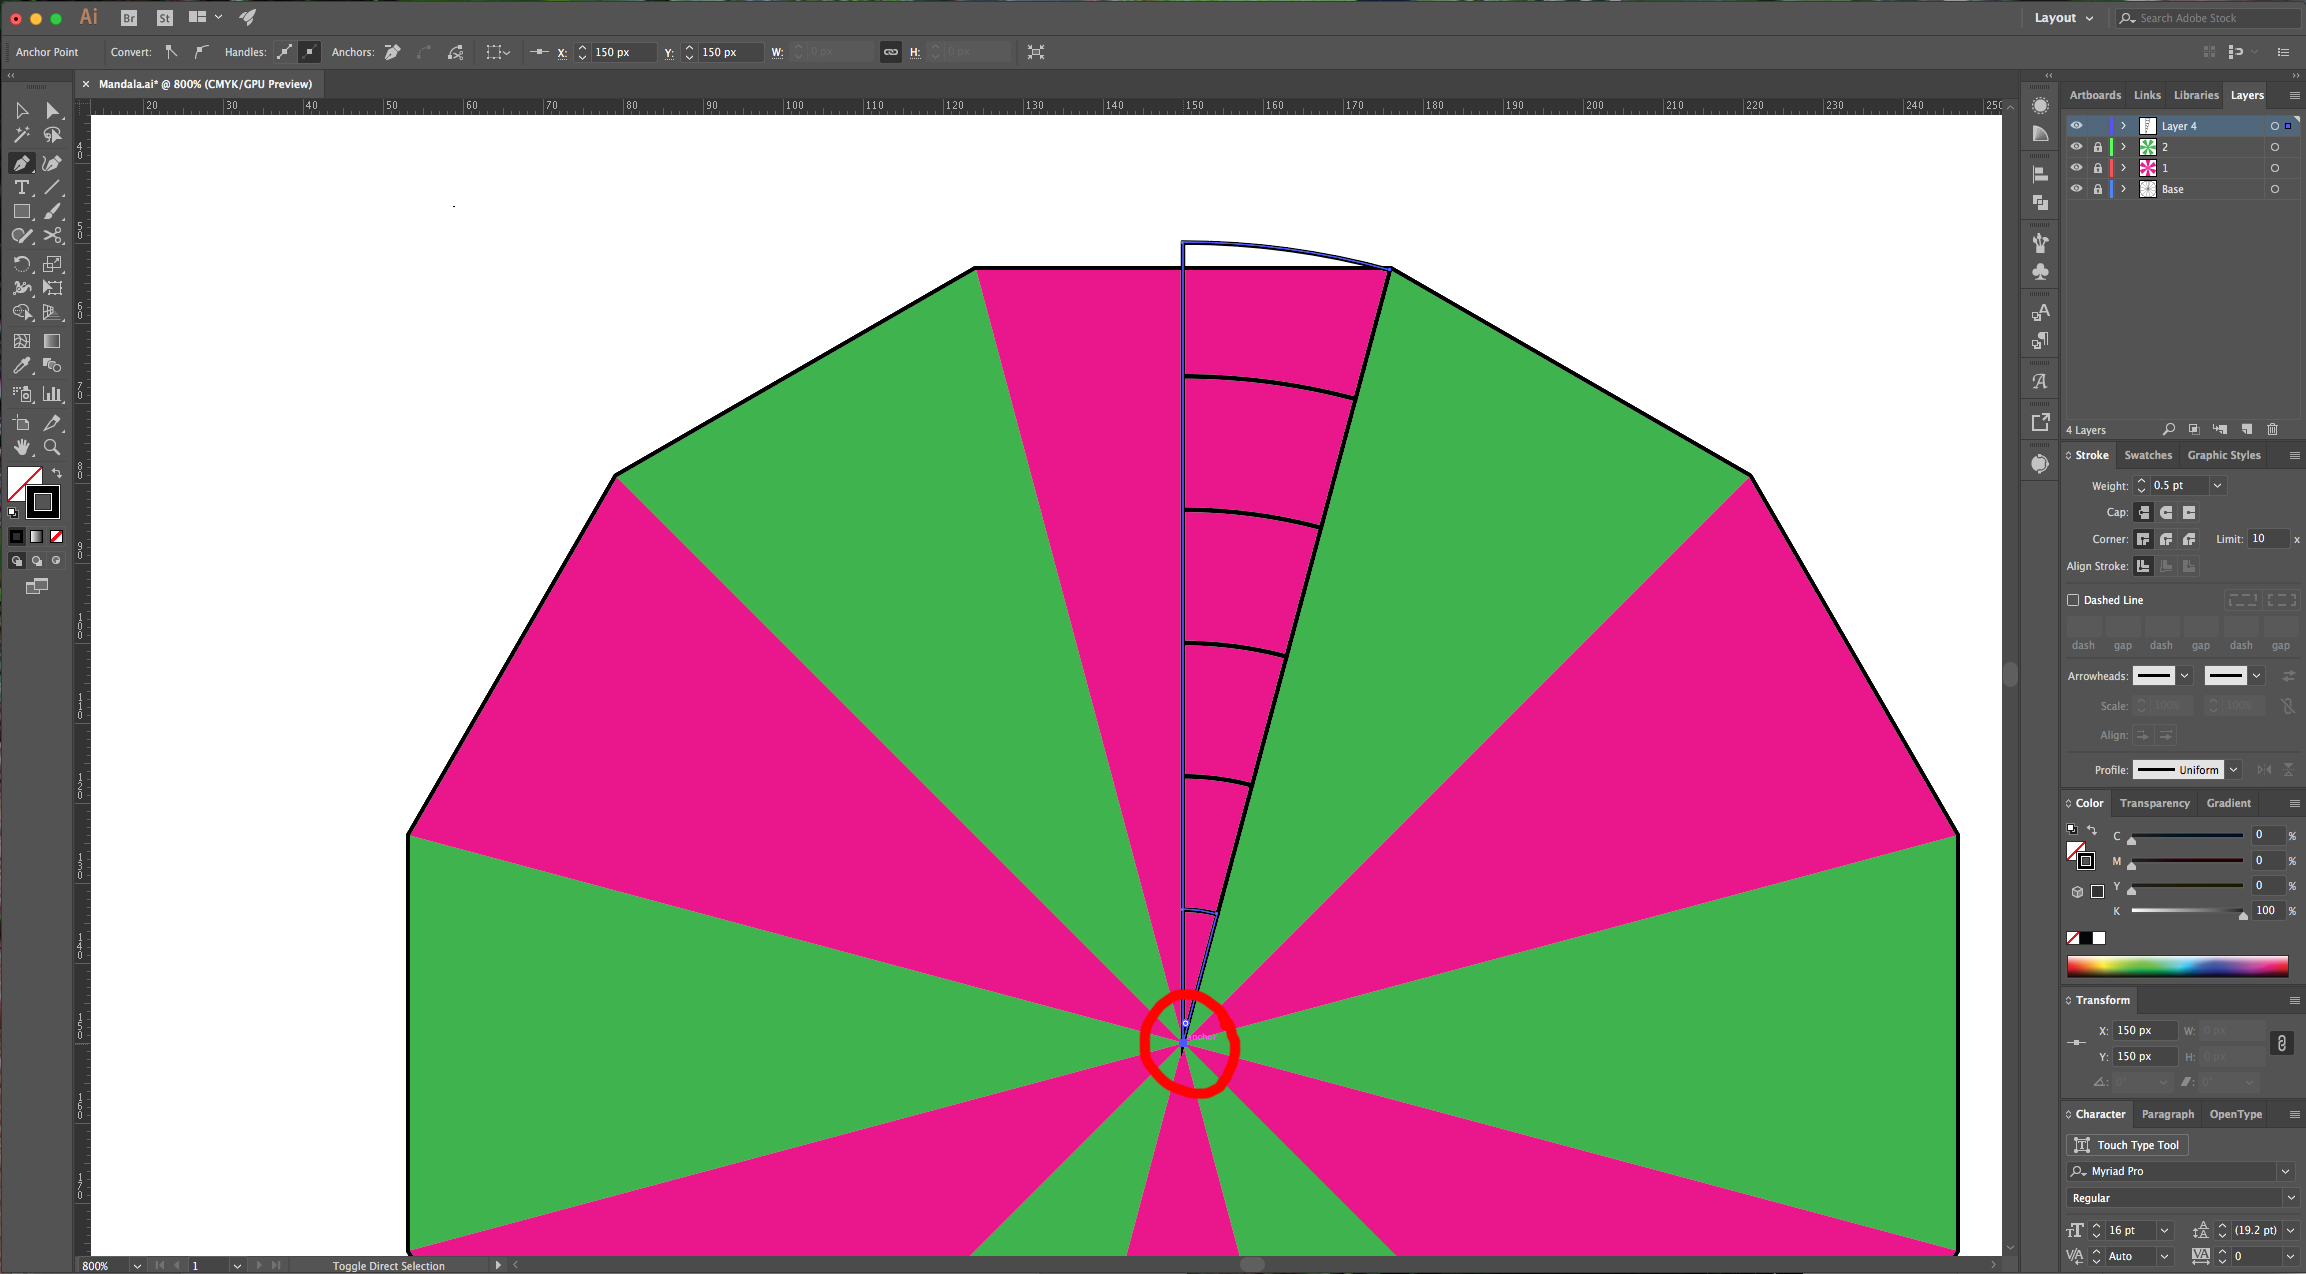
13 - Select your grid, go to the “Pathfinder” window and click “Divide”. Ungroup it (Command/Control + U) and delete some parts until you have just one wedge. The upper part has the pieces of three wedges so we will need to fix this. Use the “Direct Selection Tool” (A) and click on the bottom right anchor point and make sure it’s the only one selected, then click “Delete”. Do the same with the bottom left one, then select the long curve that remains on top and using the “Scissors Tool” (C) cut close to the spot where it intersects with the line (zoom in as much as possible), repeat in the other side and delete the remaining segments of the curve. Then, with the “Direct Selection Tool” (A) move the ends to the intersection.
14 - Drag a “Guide” to mark the center of your main triangle, then, with the “Scissors Tool” (C) click on the spots where the “Guide” intersects with the paths (don’t forget to select all the pieces of the grid). Remember that some of the curved paths are overlapped, so you may need to repeat the cut. Then, select the points you don’t need with the “Direct Selection Tool” (A) and delete them. (The left side portions). Remember that you can turn your guides On and Off with “Command/Control + ;” or in View > Guides > Show/Hide Guides.
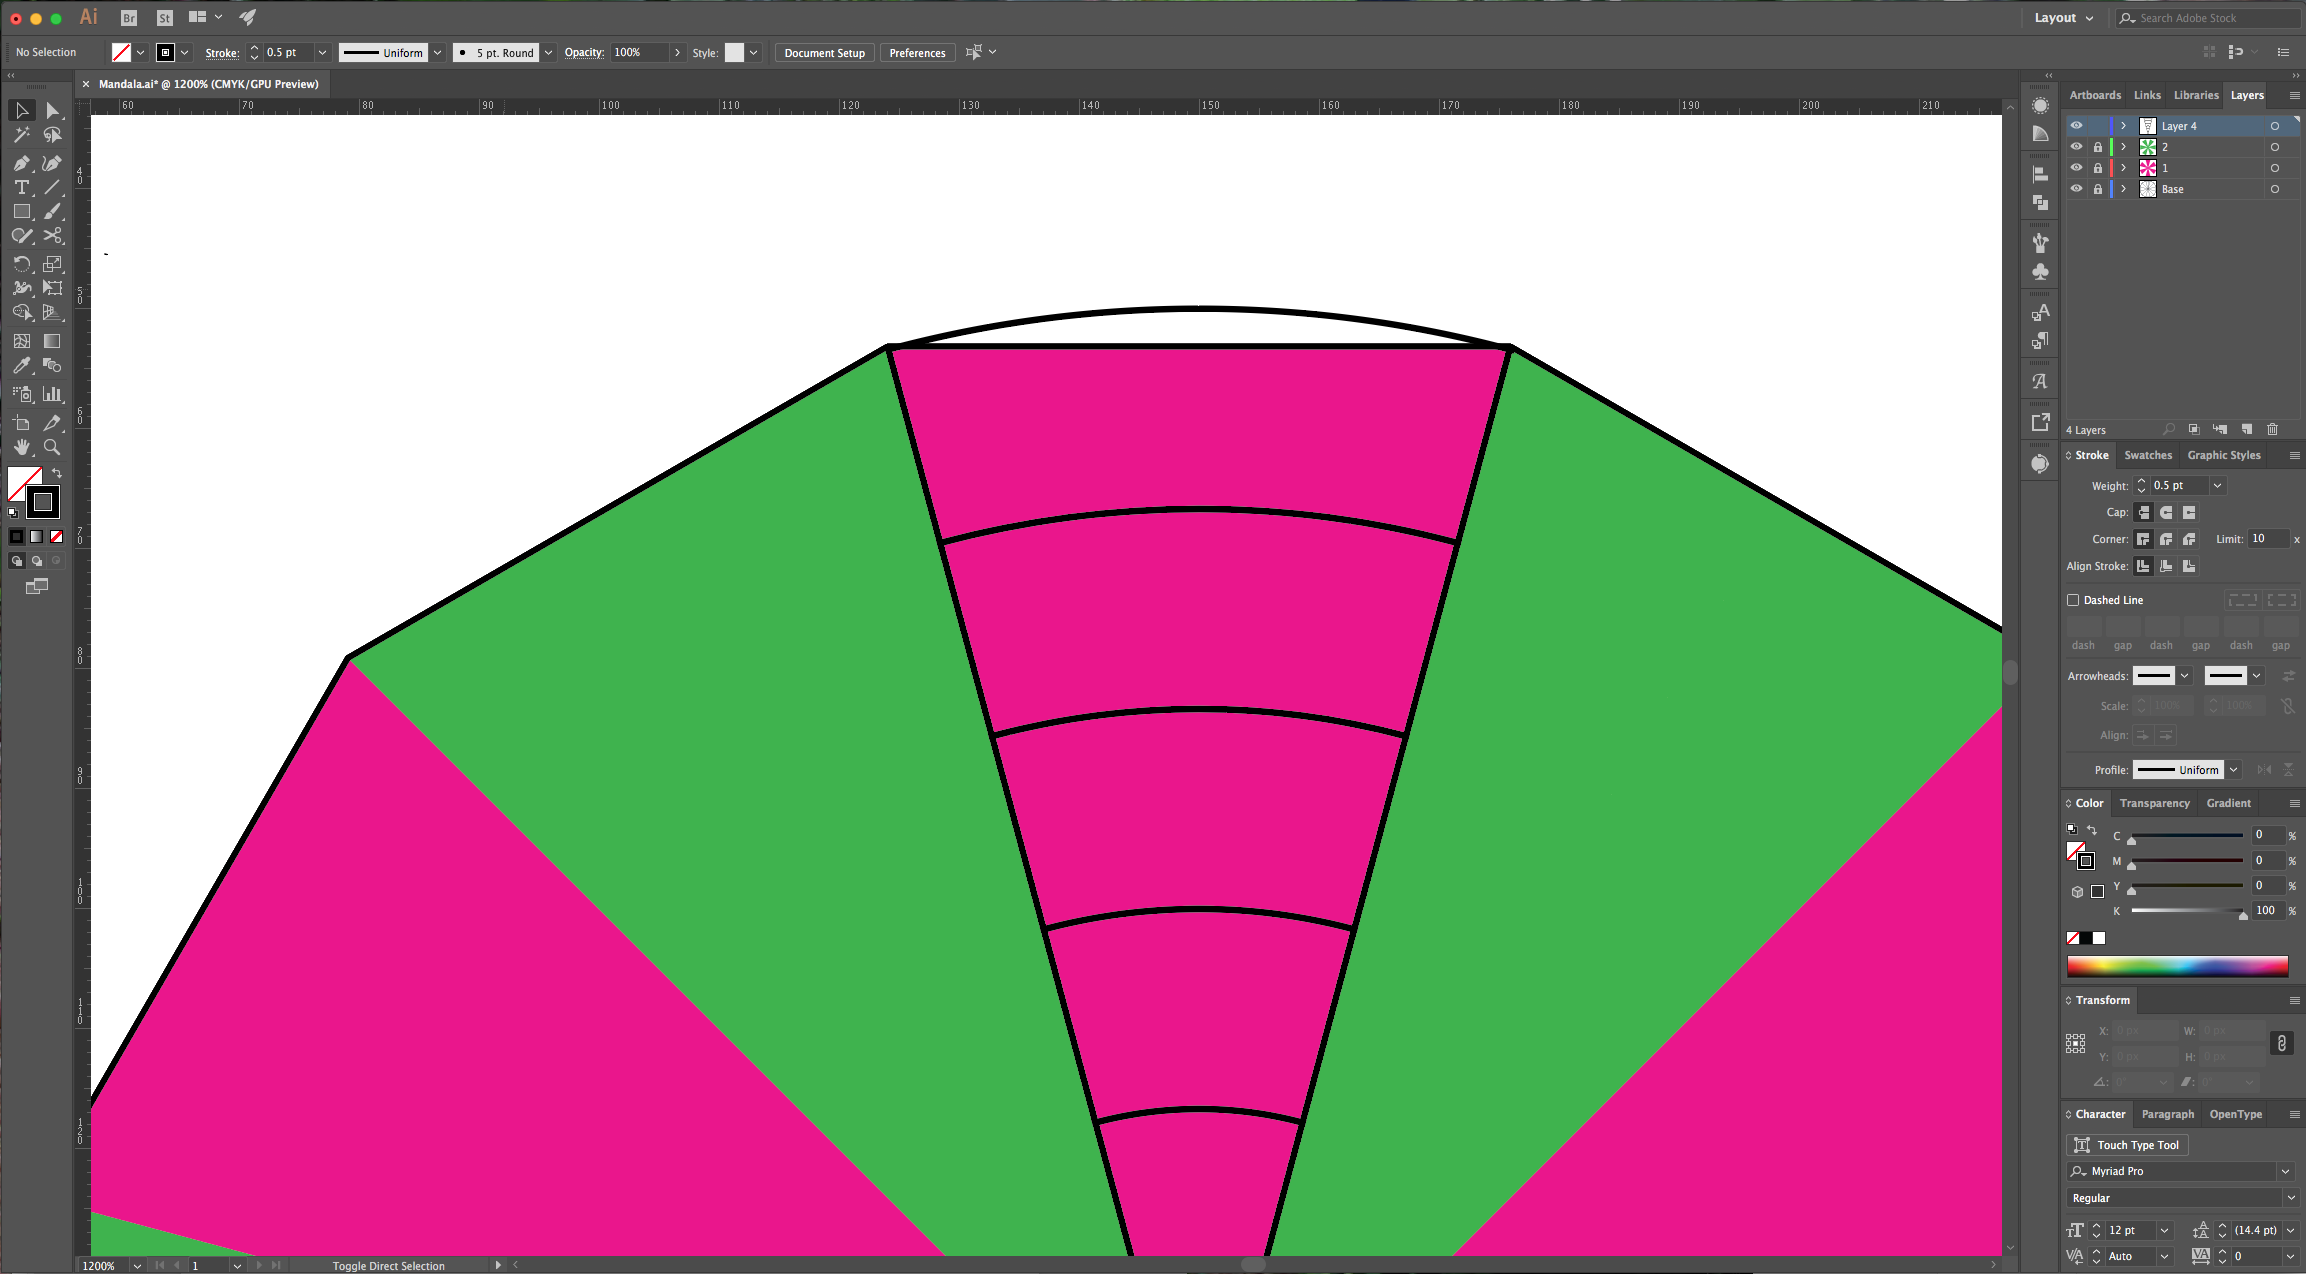
15 - Using the “Pen Tool” (P), draw a line that unites the top and bottom of the remaining half rectangle of the grid, just where the “Guide” was/is. Select all your paths, give them the “Weight” you like in the “Stroke” window and use a “Rounded Corner”. Then group them together (Command/Control + G).


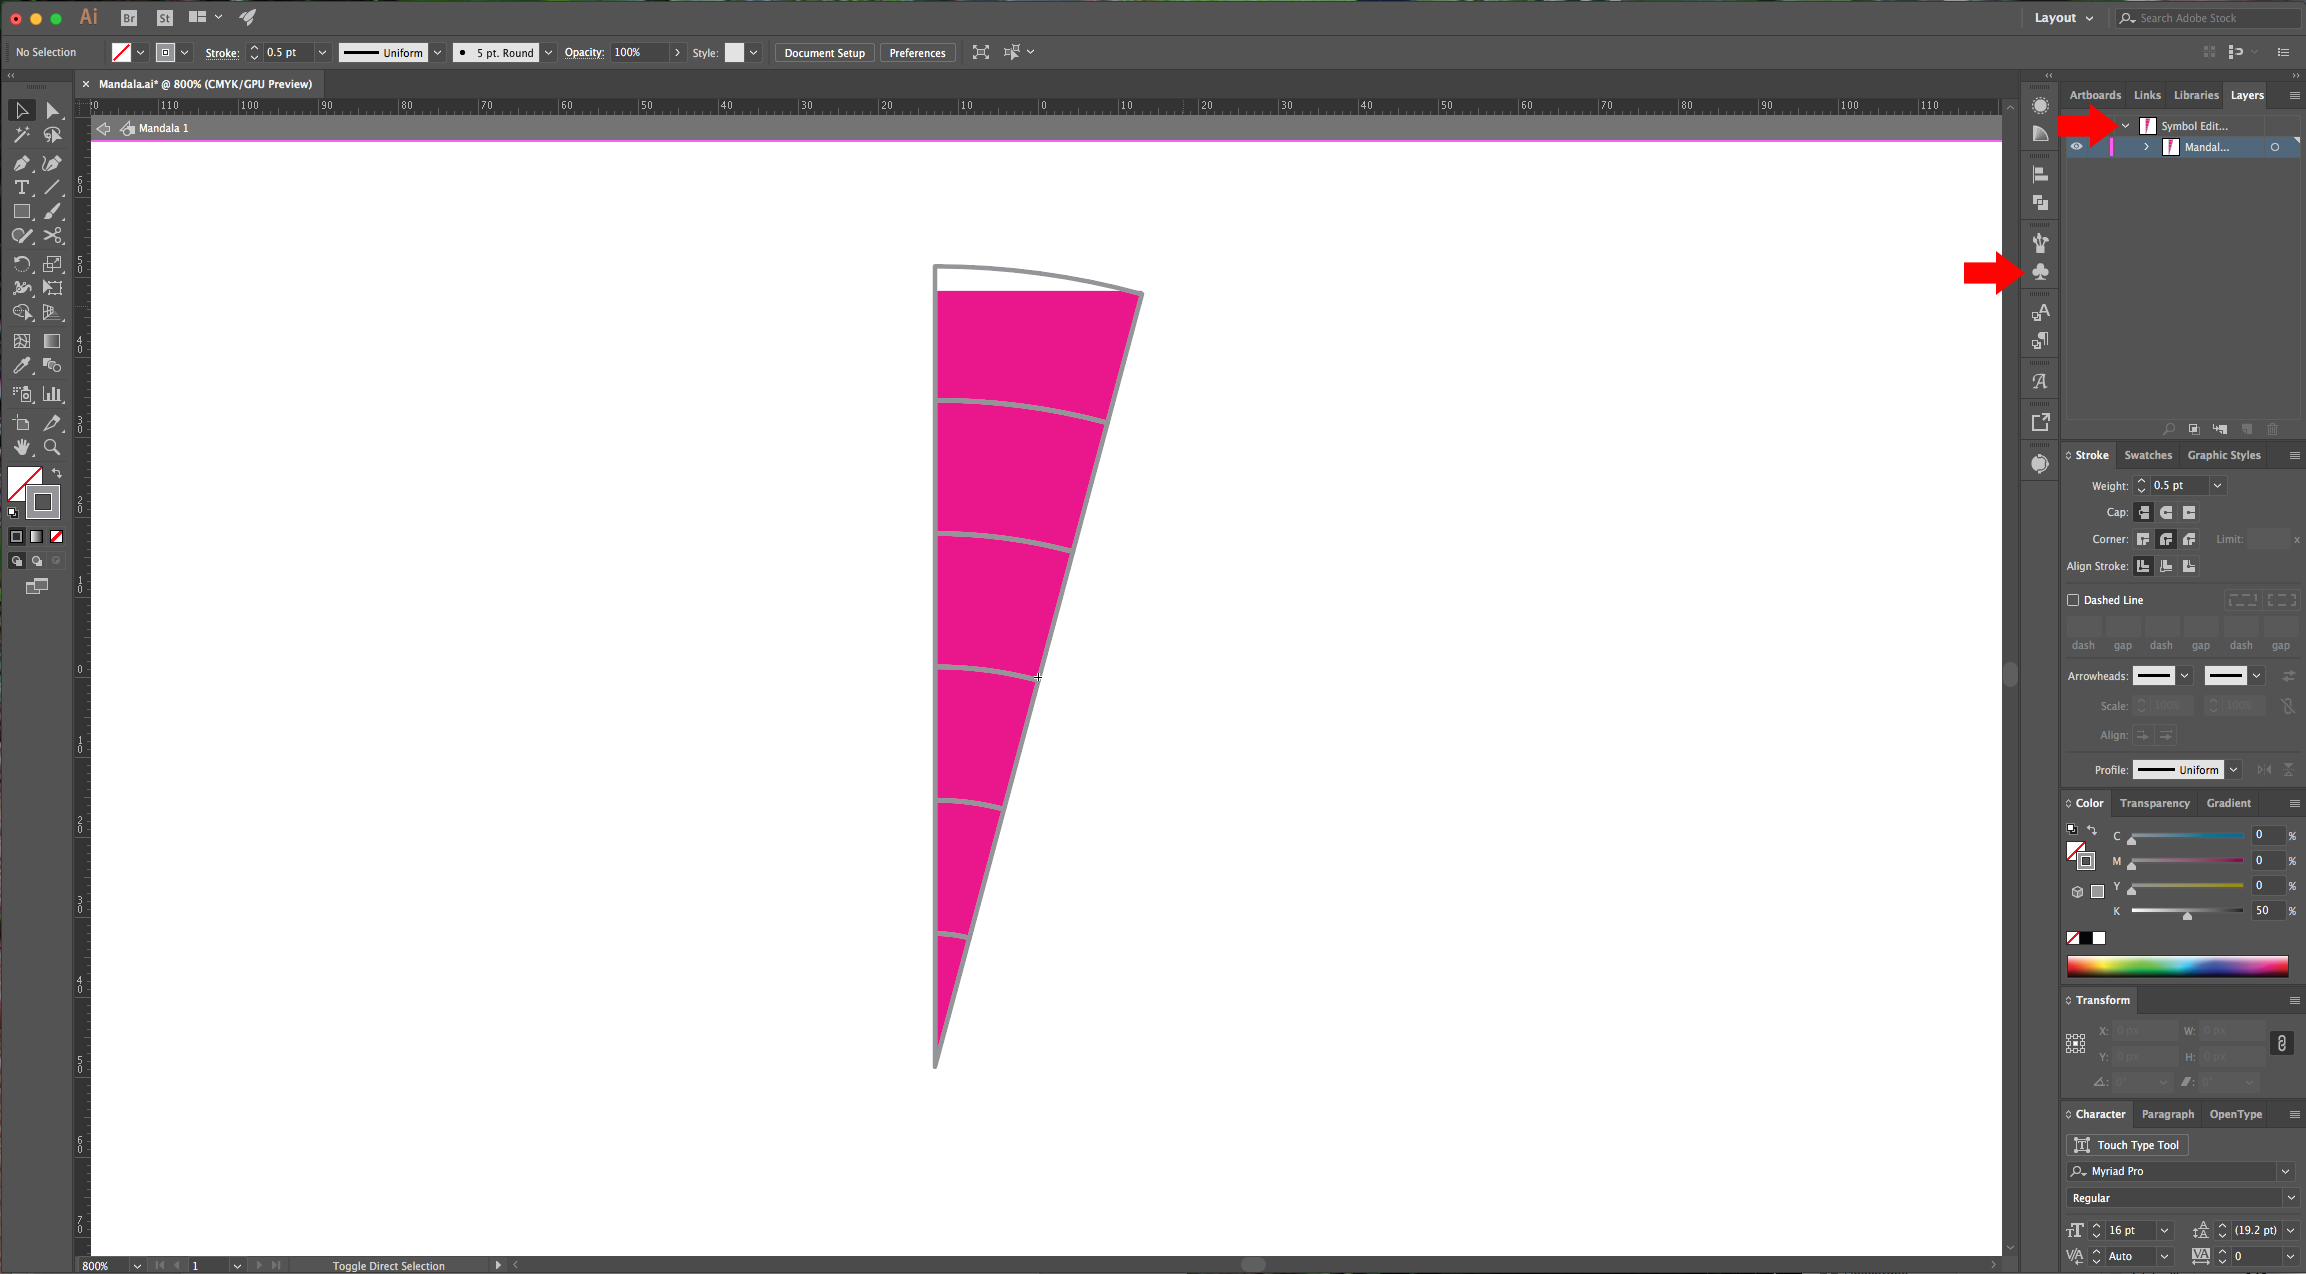
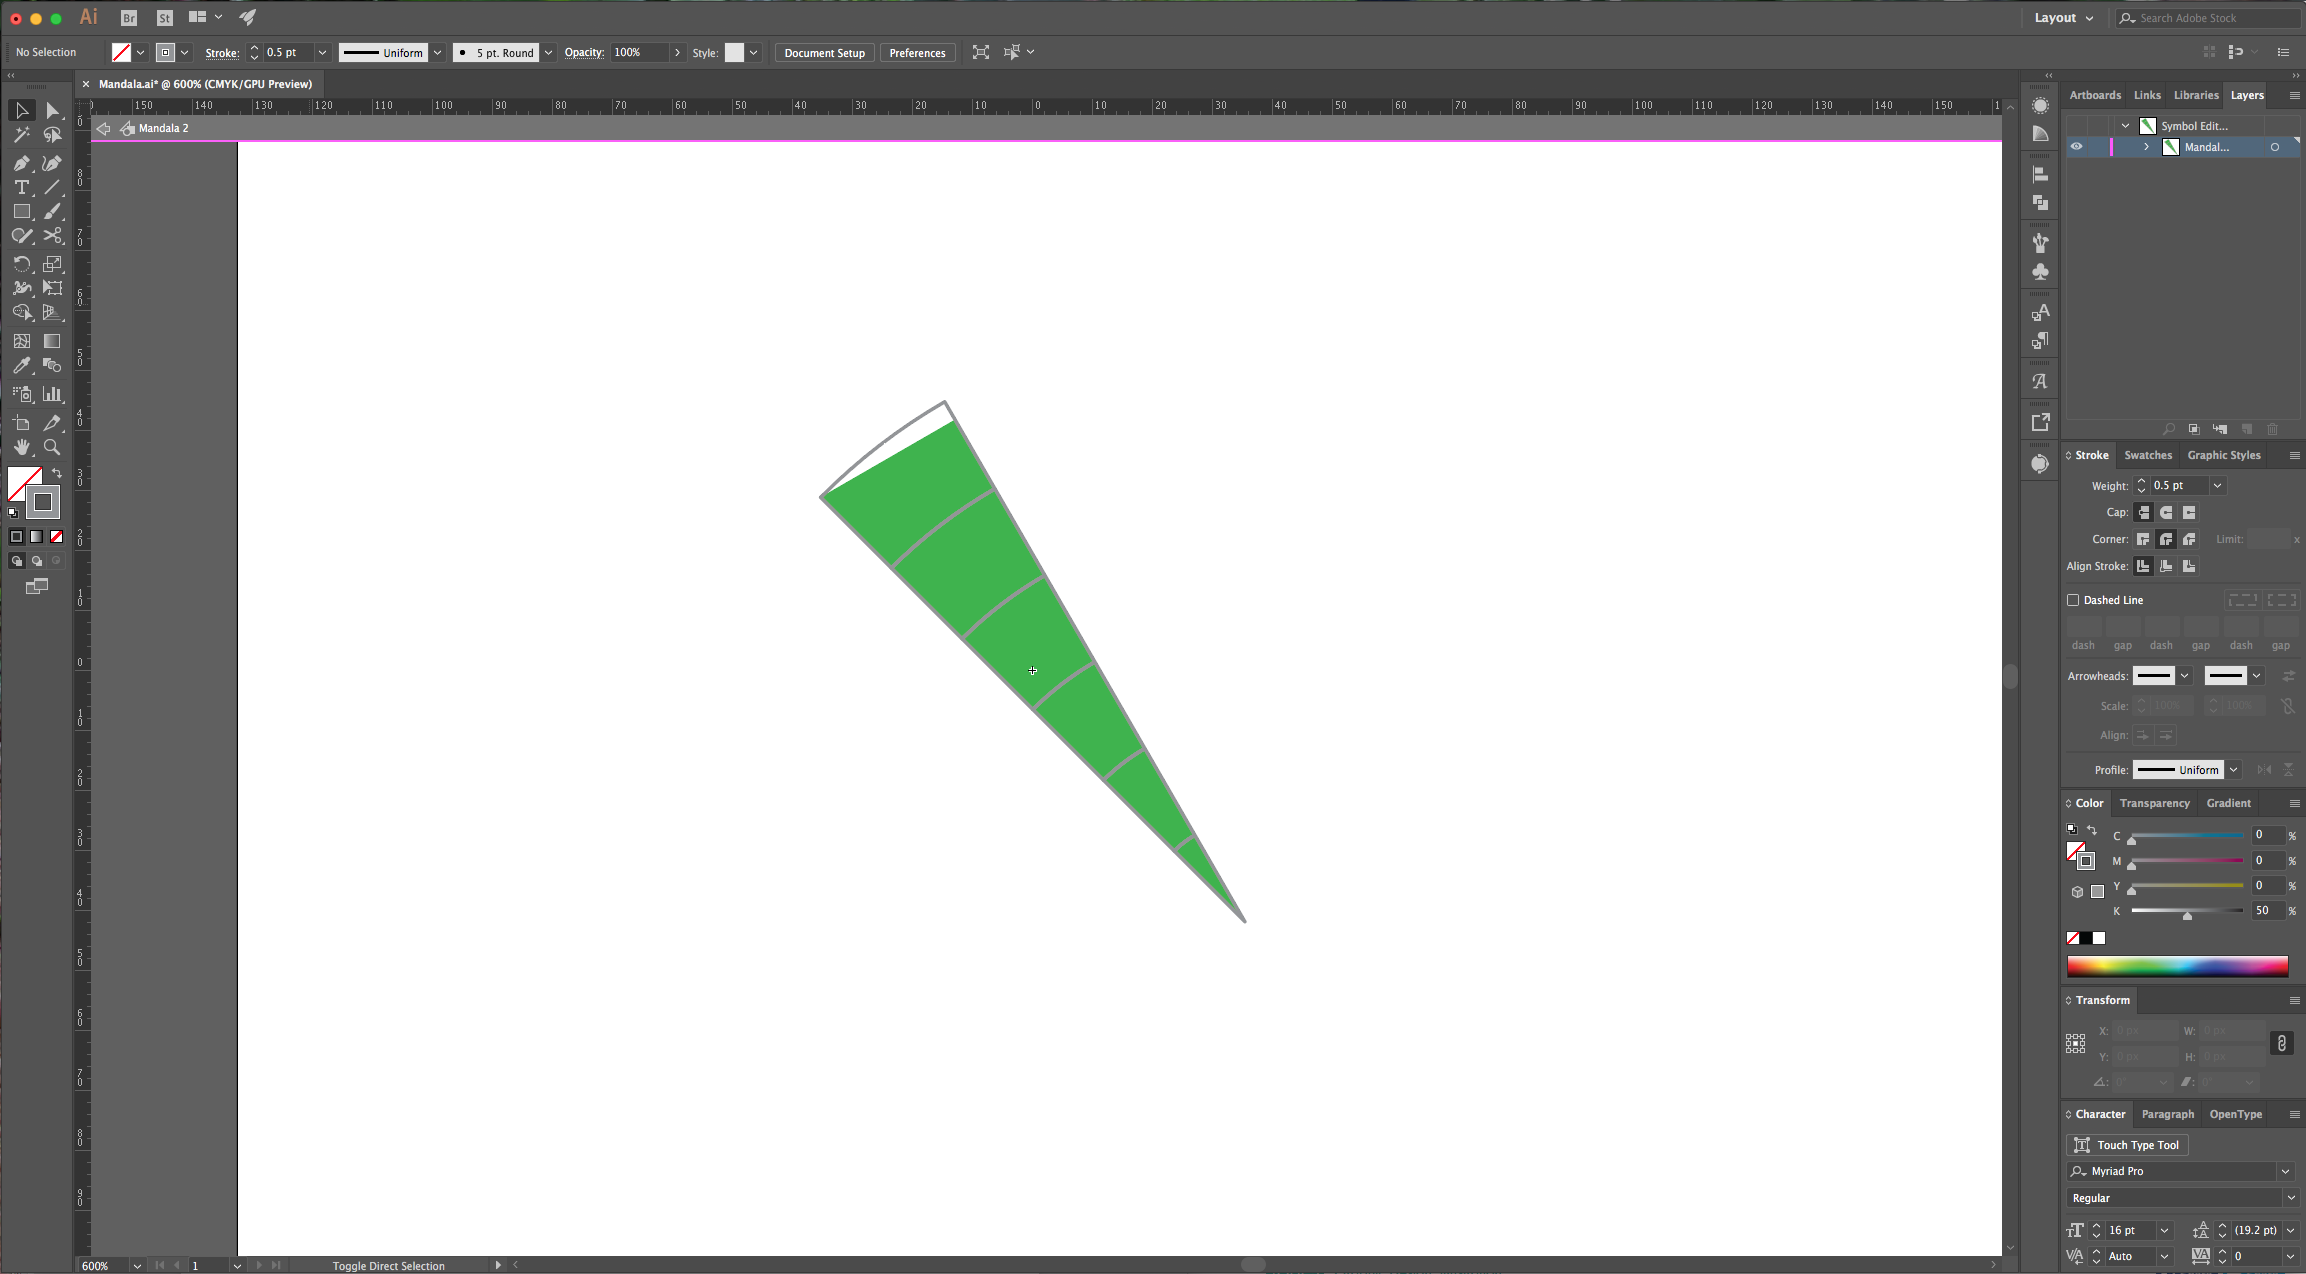
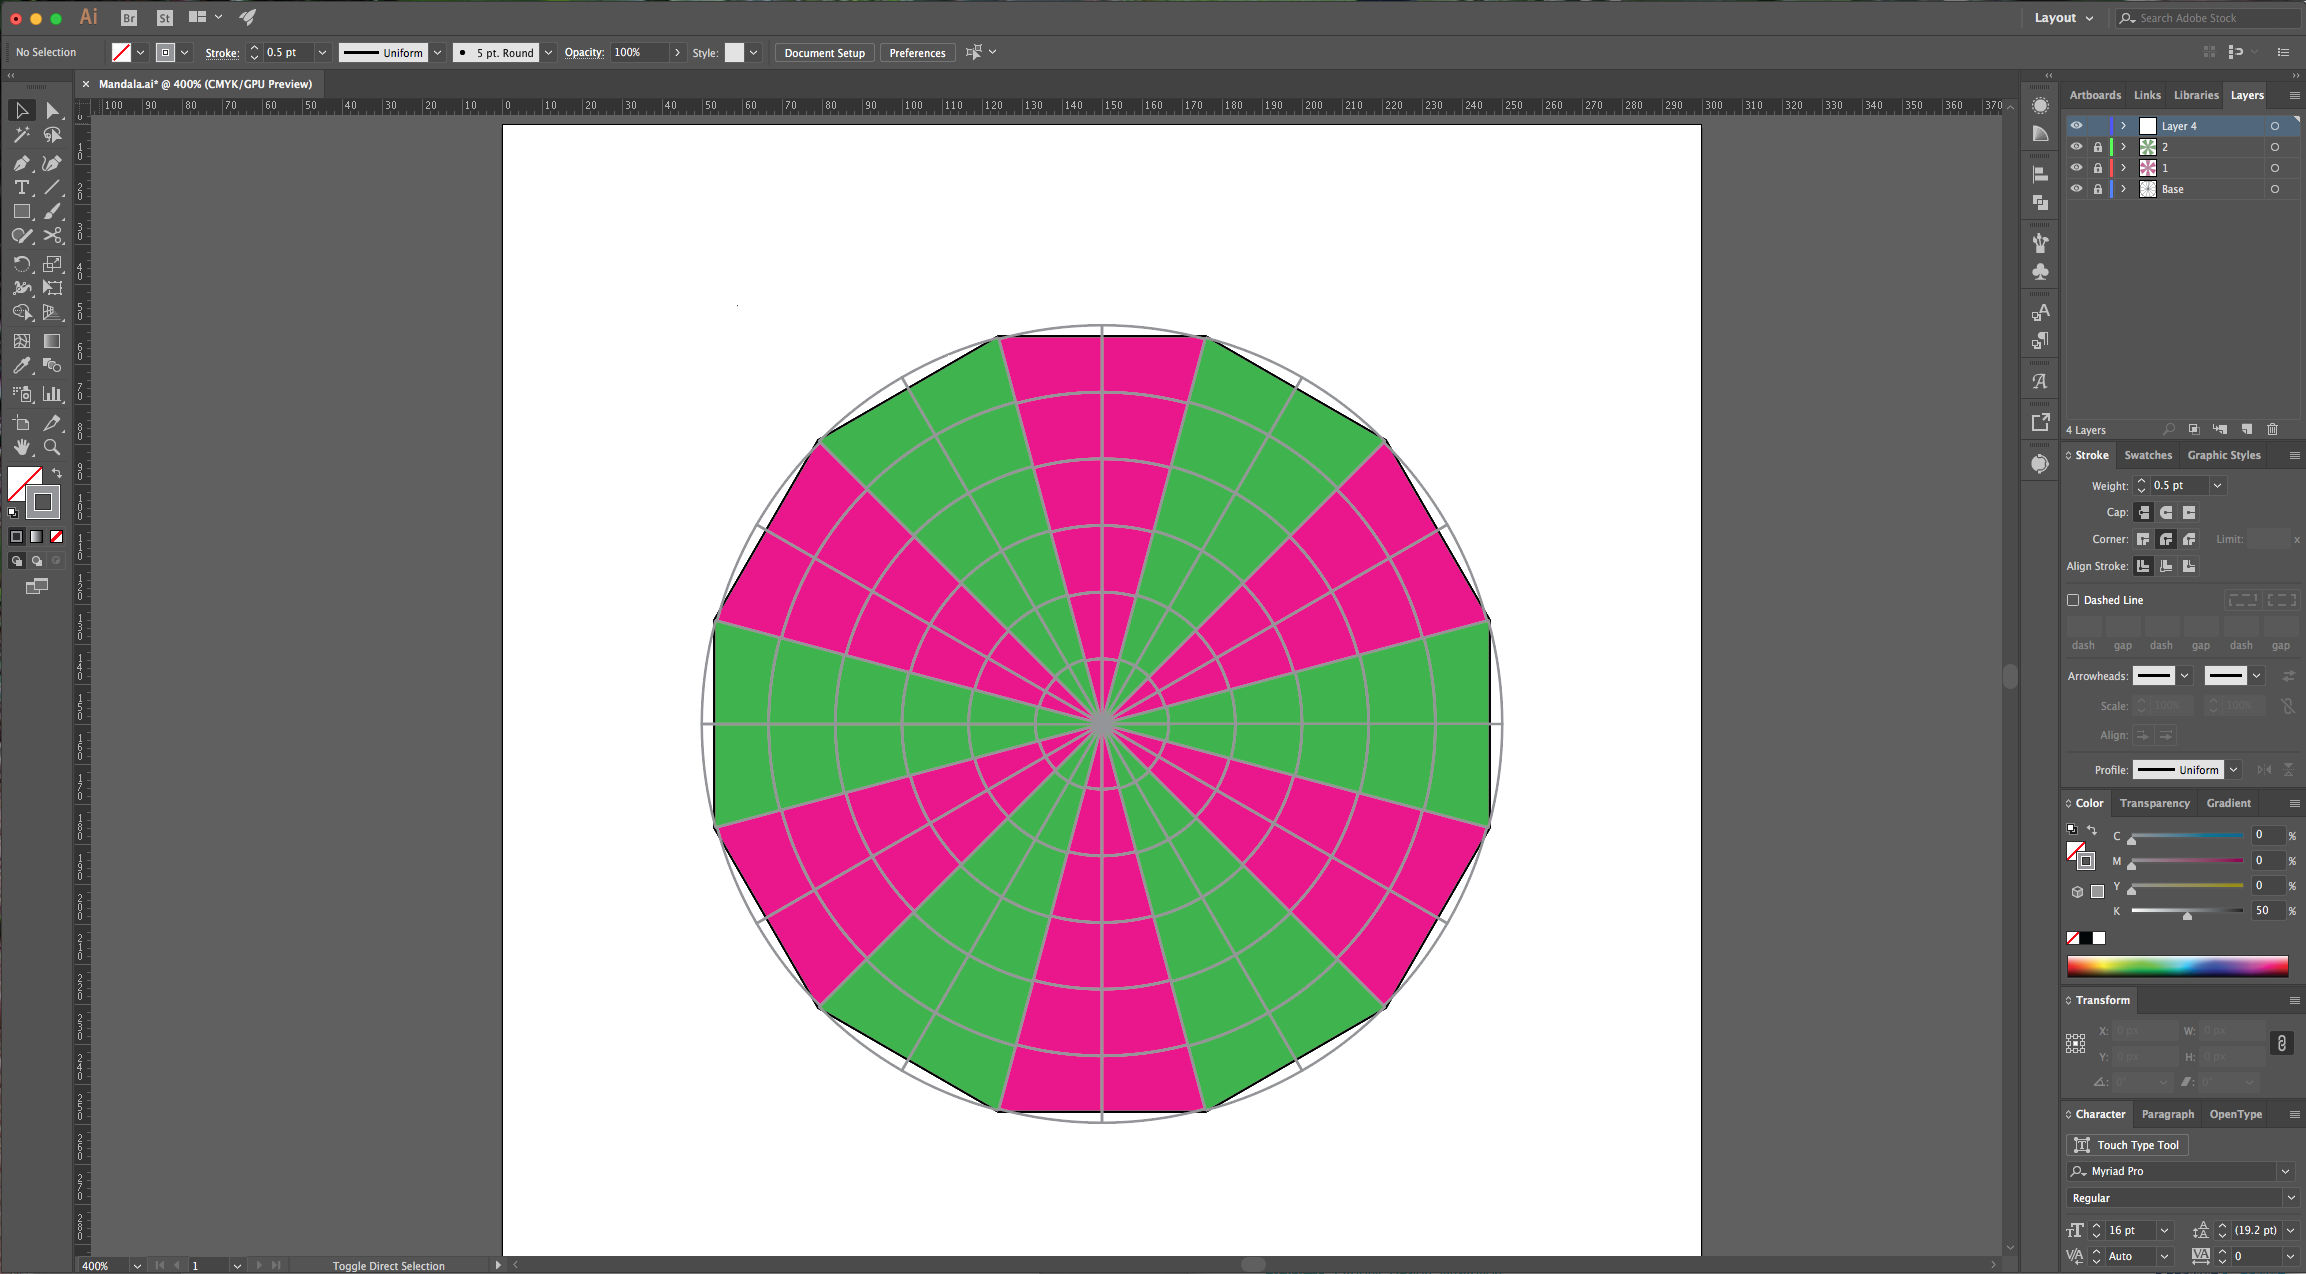
16 - Select your grid, change the “Stroke” color to a medium grey and click Command/Control + X to “Cut” it. Then, go to the “Symbols” Panel and “Paste” it (Command/Control + V). Fix the grid’s position so it is perfectly aligned with the half magenta triangle. Click on the arrow at the top of your document window to “Exit Symbol Mode”. You will notice that the grid is now on every instance of the “Mandala 1” symbol. Repeat this with the “Mandala 2” symbol, just remember to “Reflect” and “Rotate” the grid. (You can delete the layer used for the “Grid” now if you want).


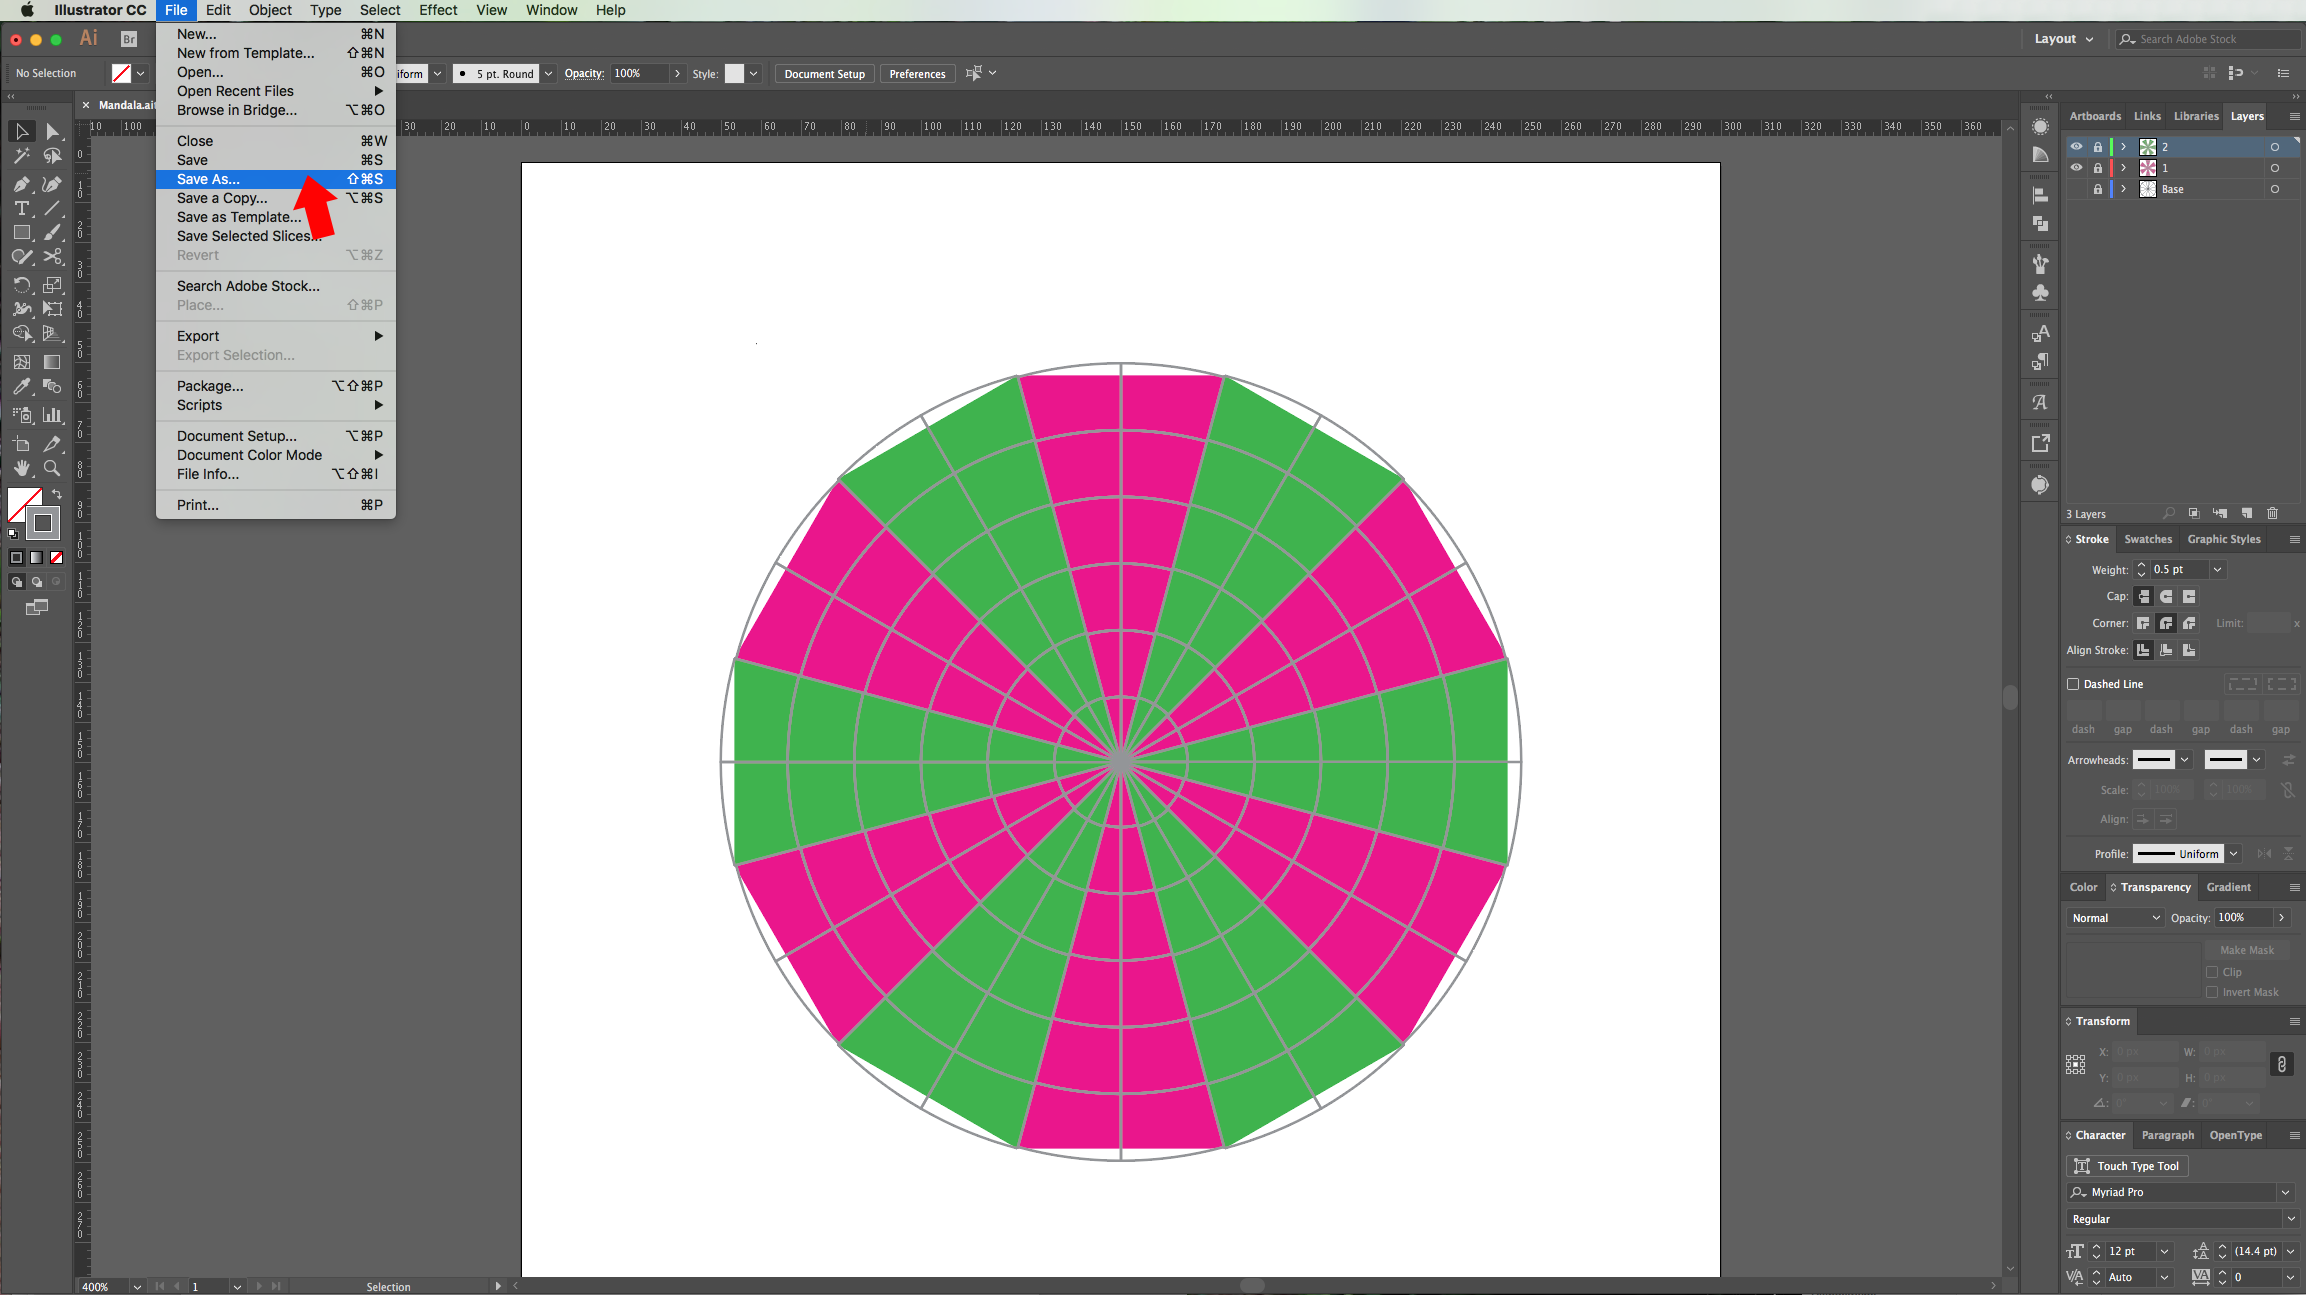
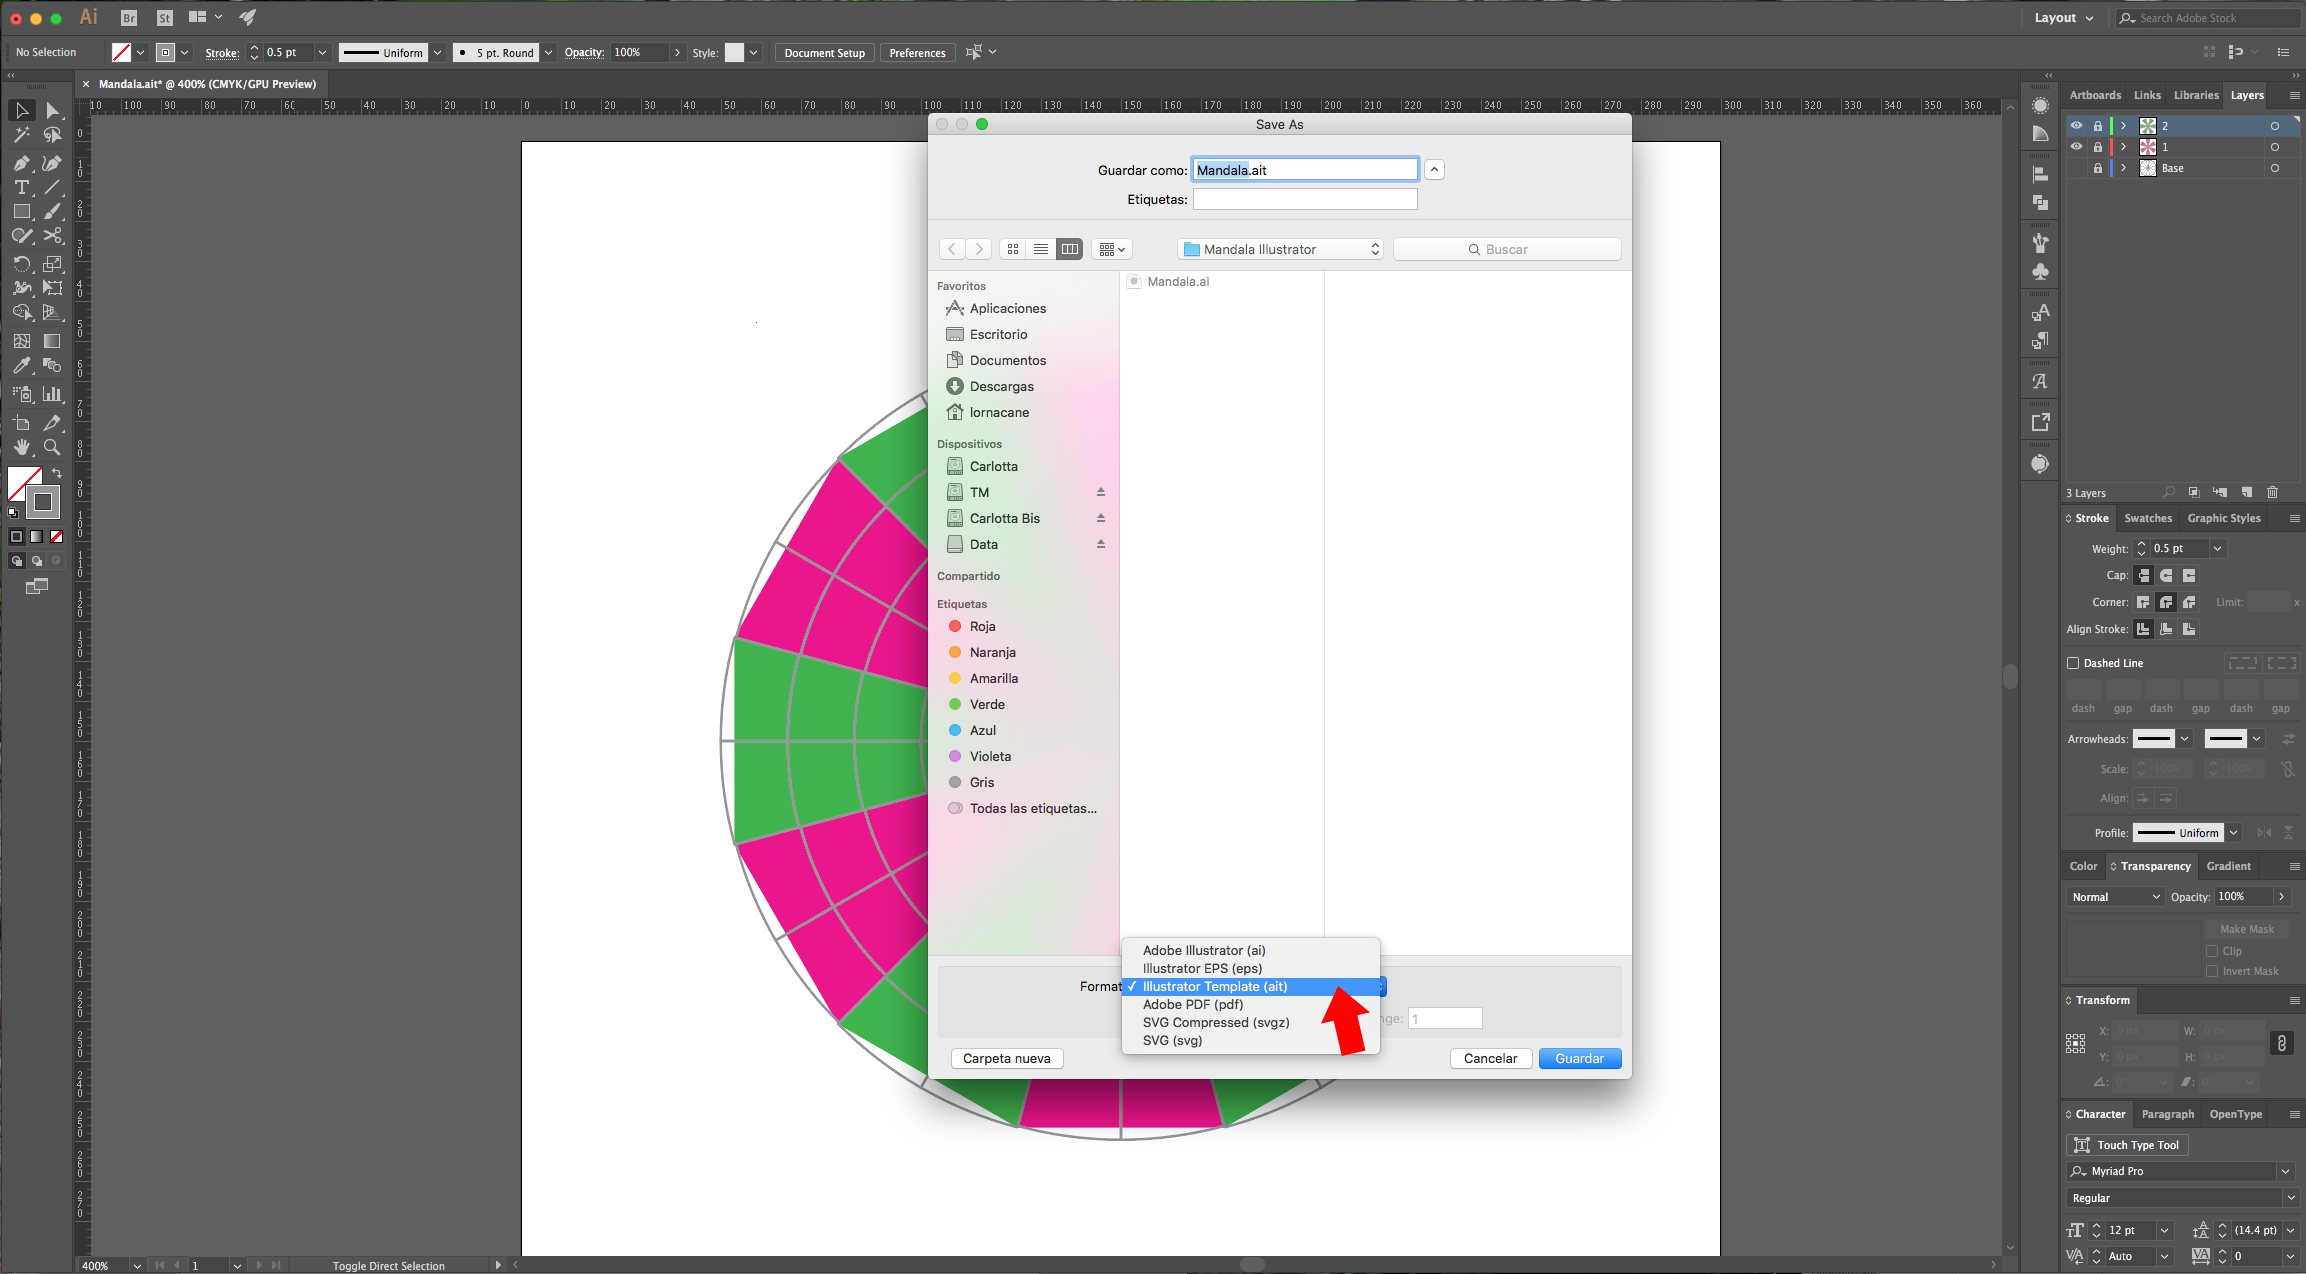
17 - Turn Off or delete your “Base” Layer and then Save your file as a “Template” (Shift + Command/Control + S) so you can use it in the future.

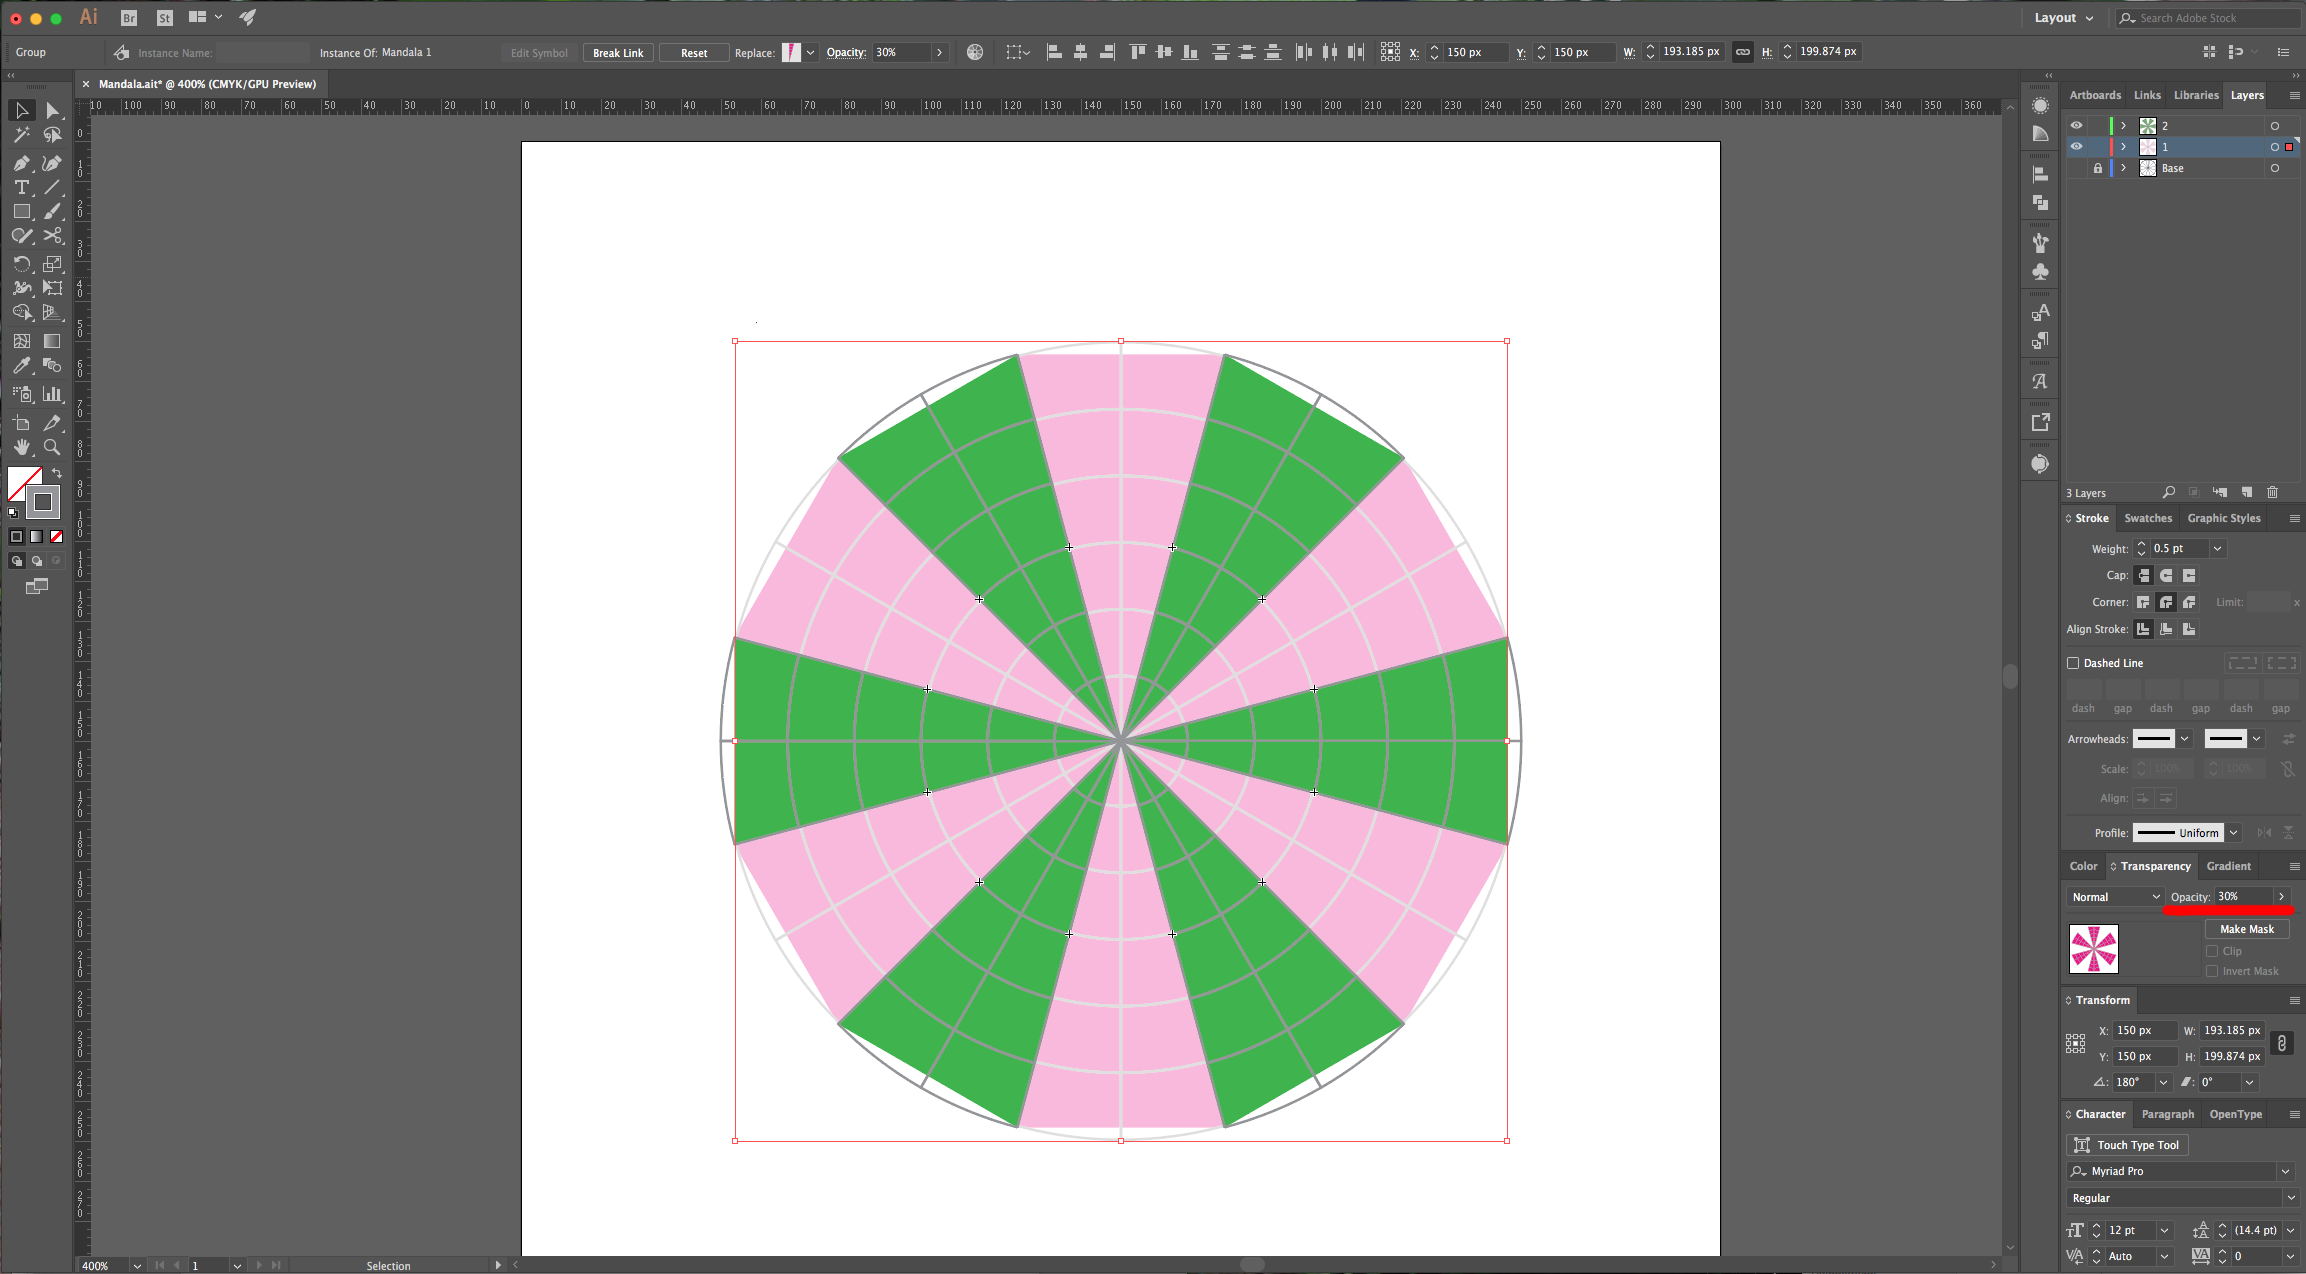
18 - If you “Unlock” your “1” and/or “2” Layers, you can lower the “Opacity” in the “Transparency” Panel and in the future as you become more confident you can change or delete the color portions so you can work more freely.
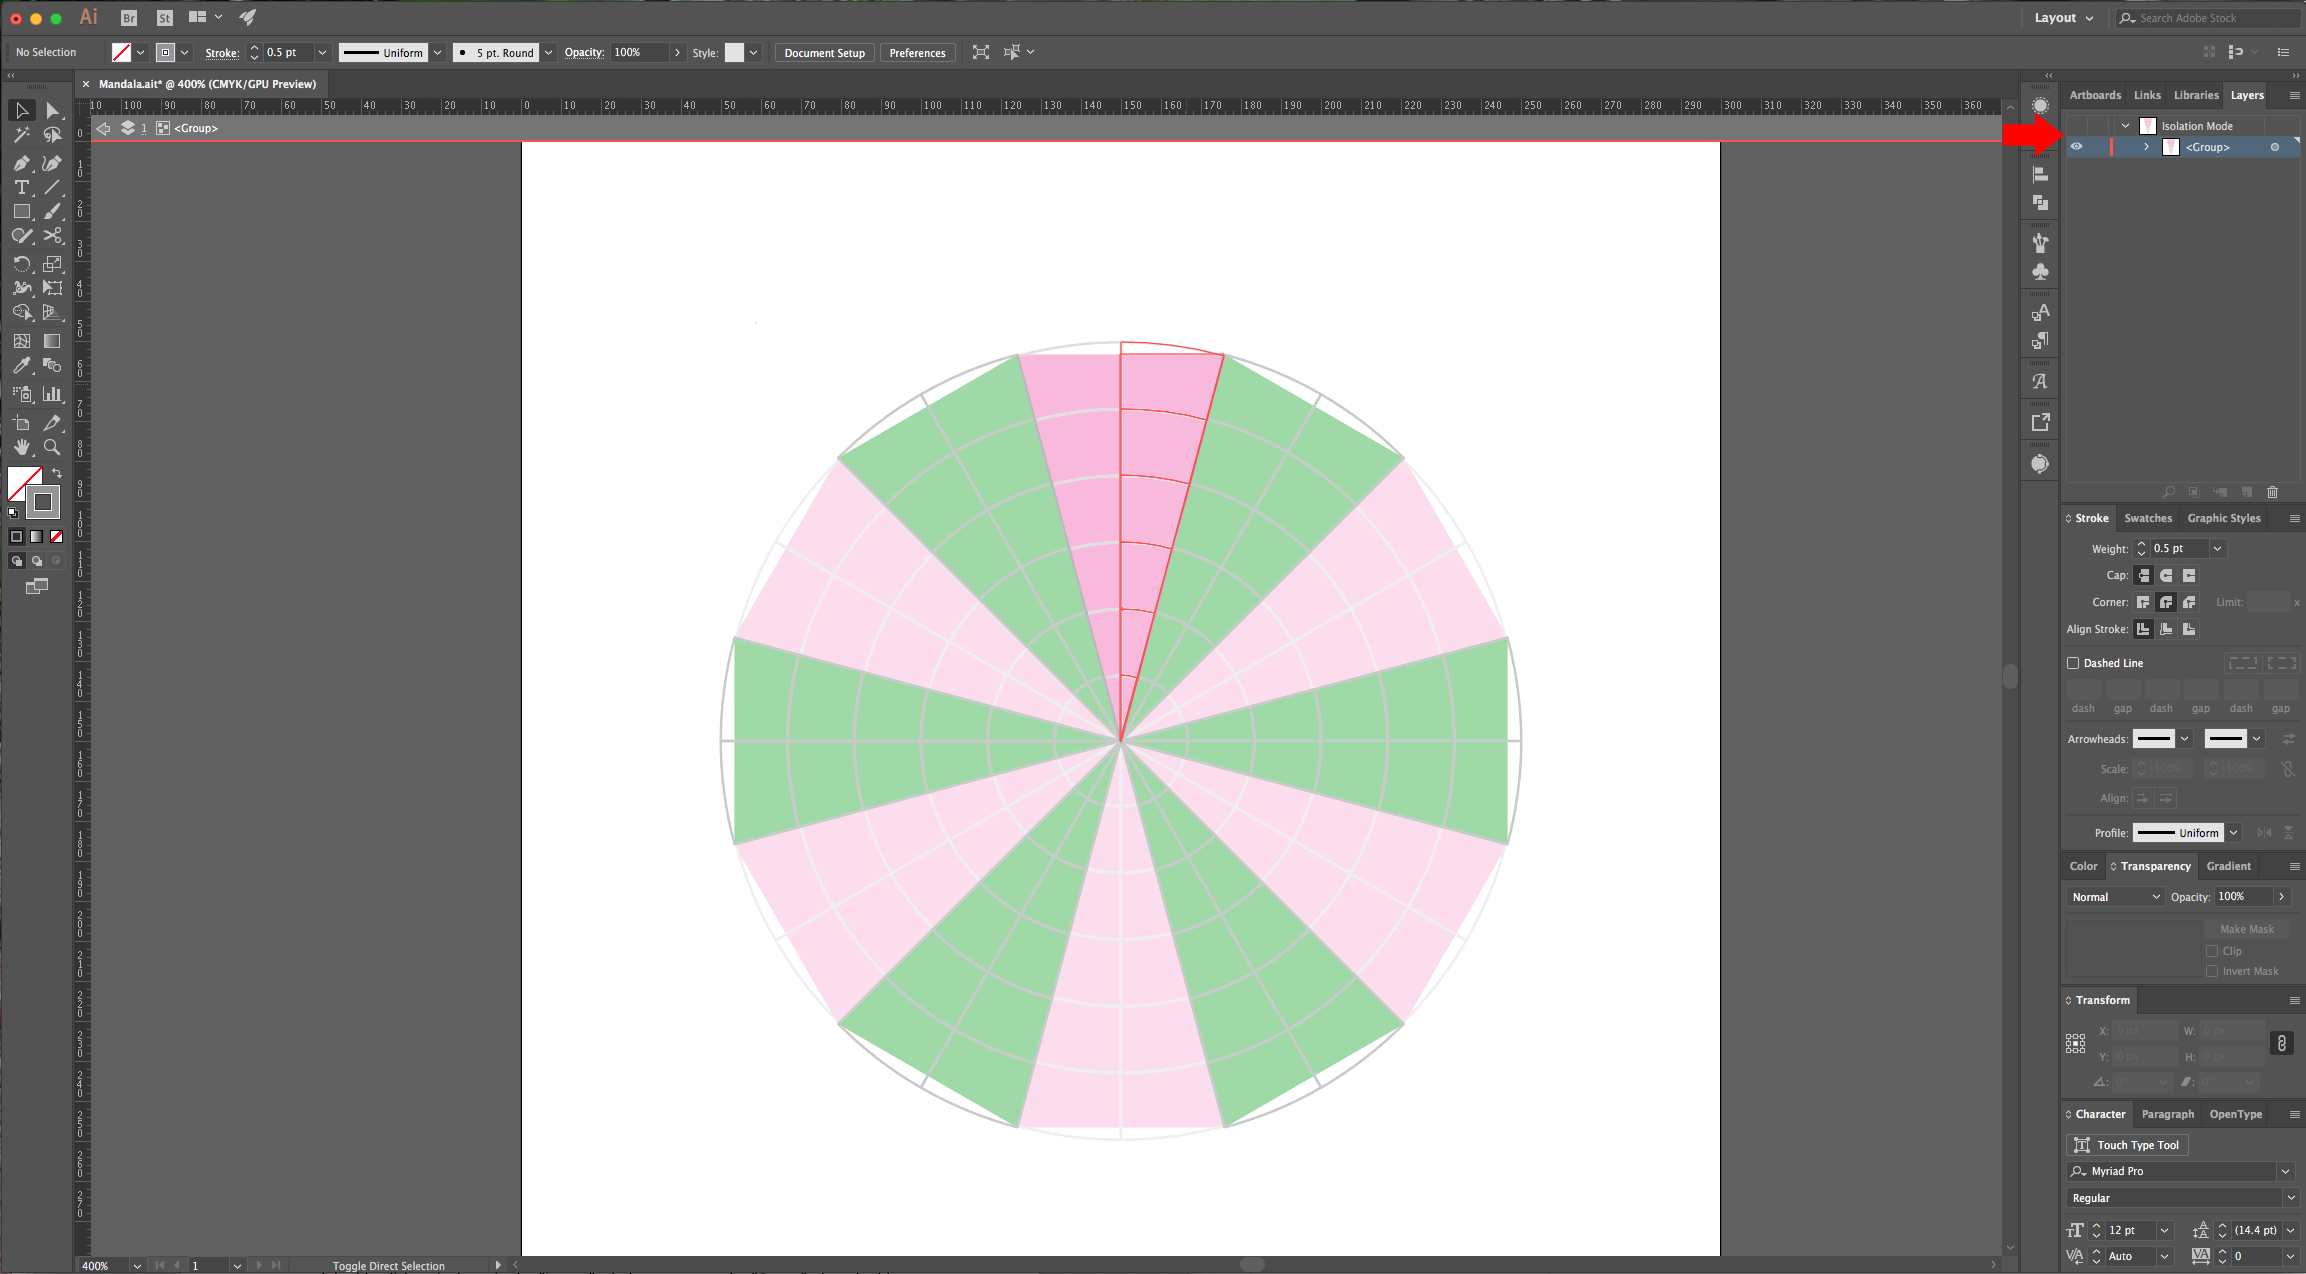
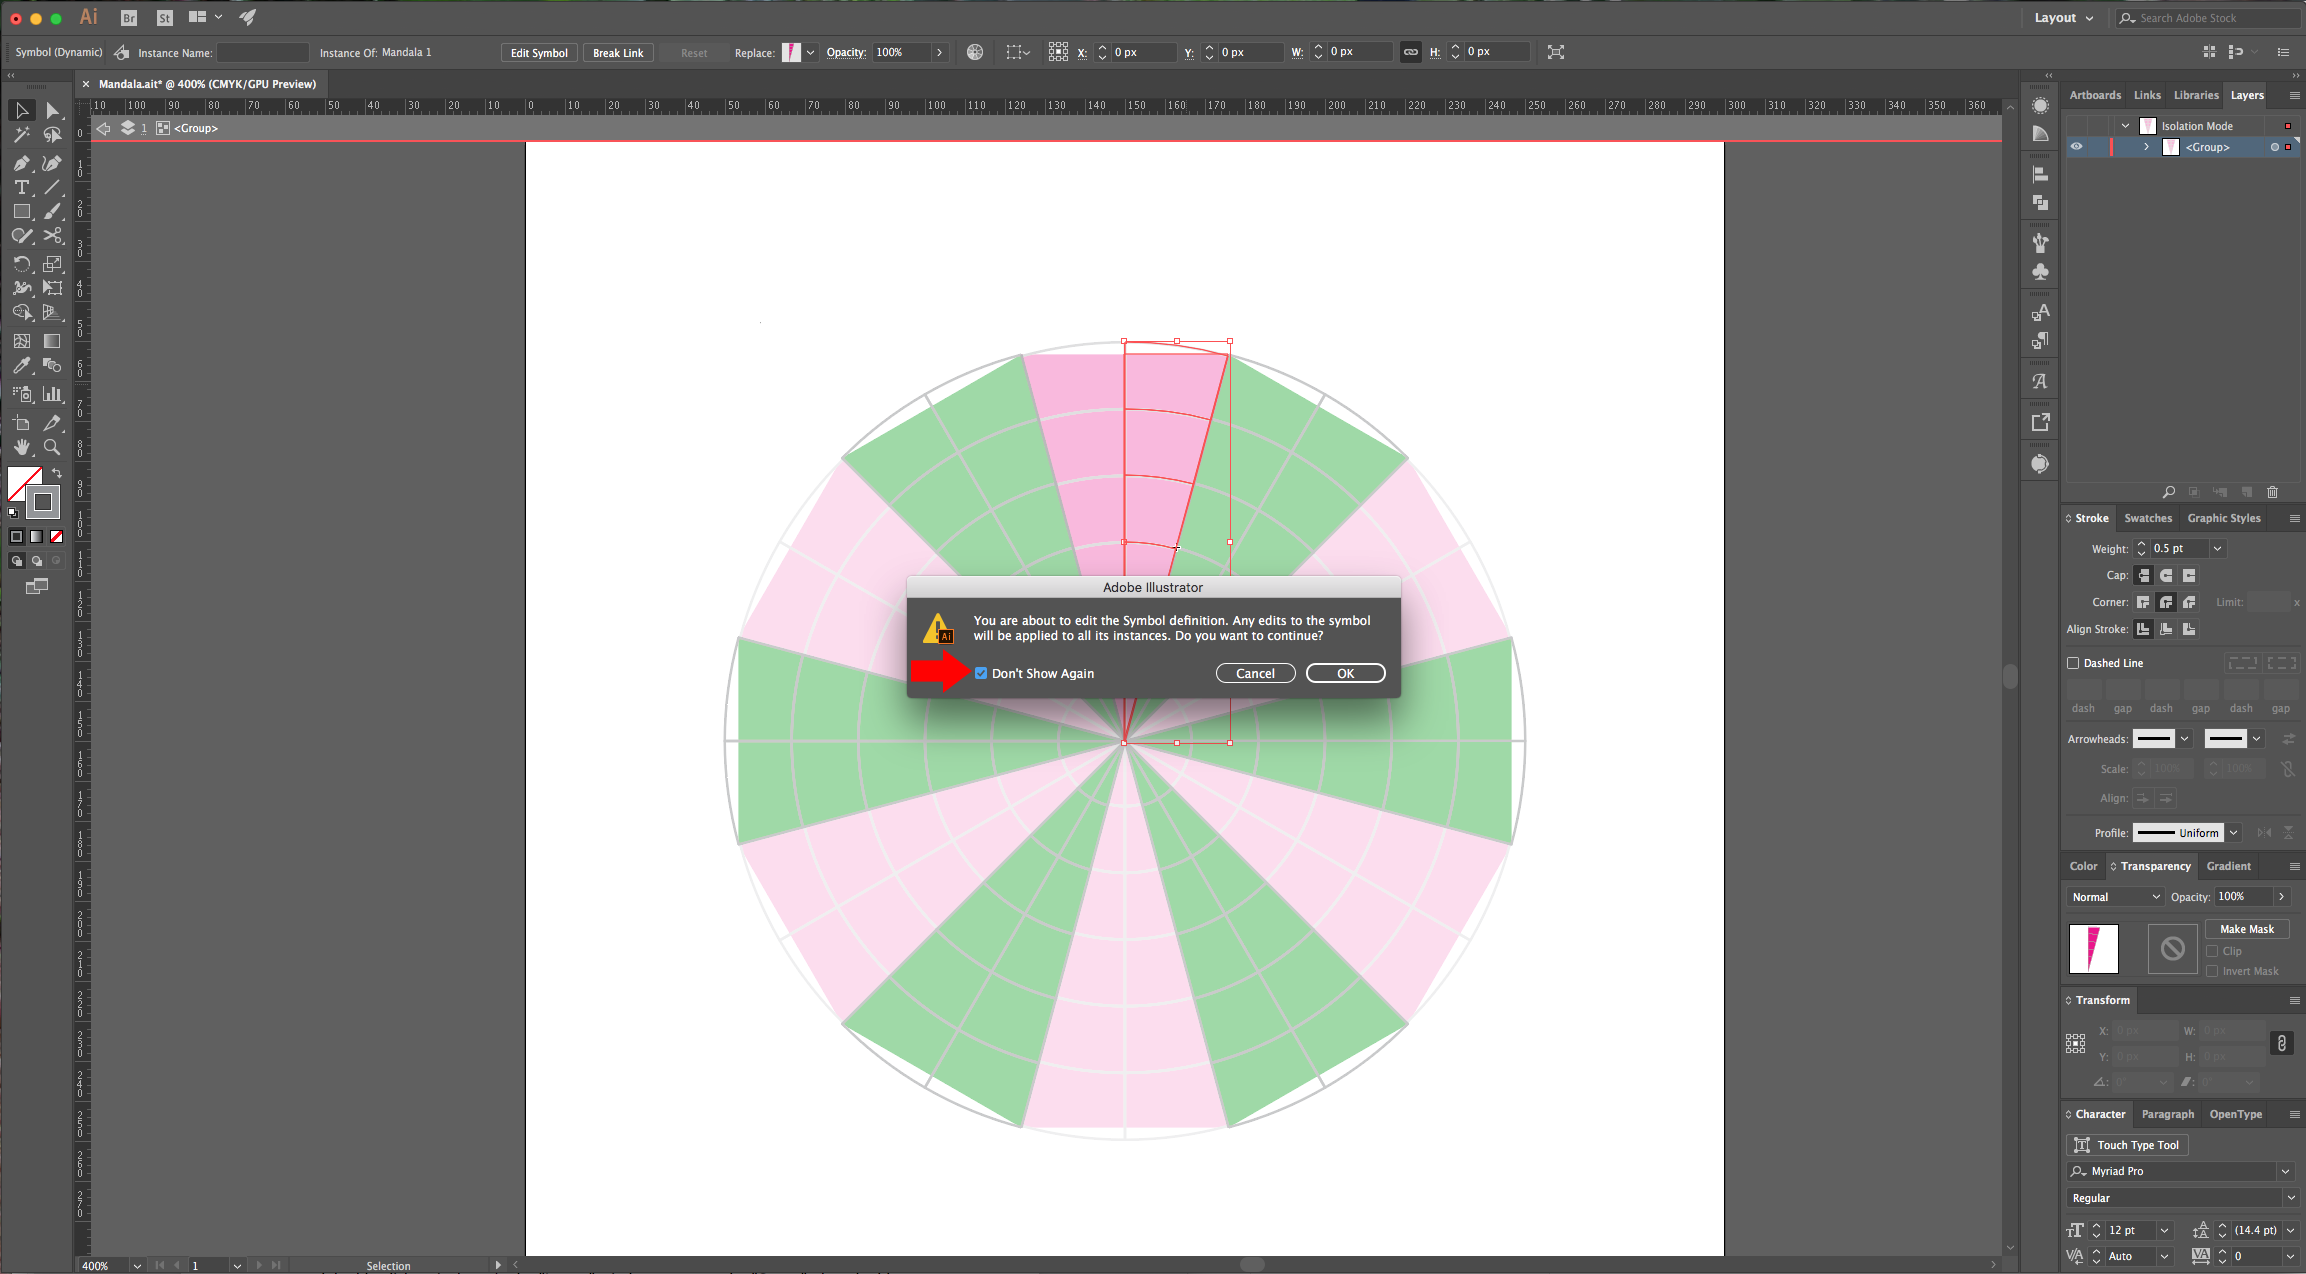
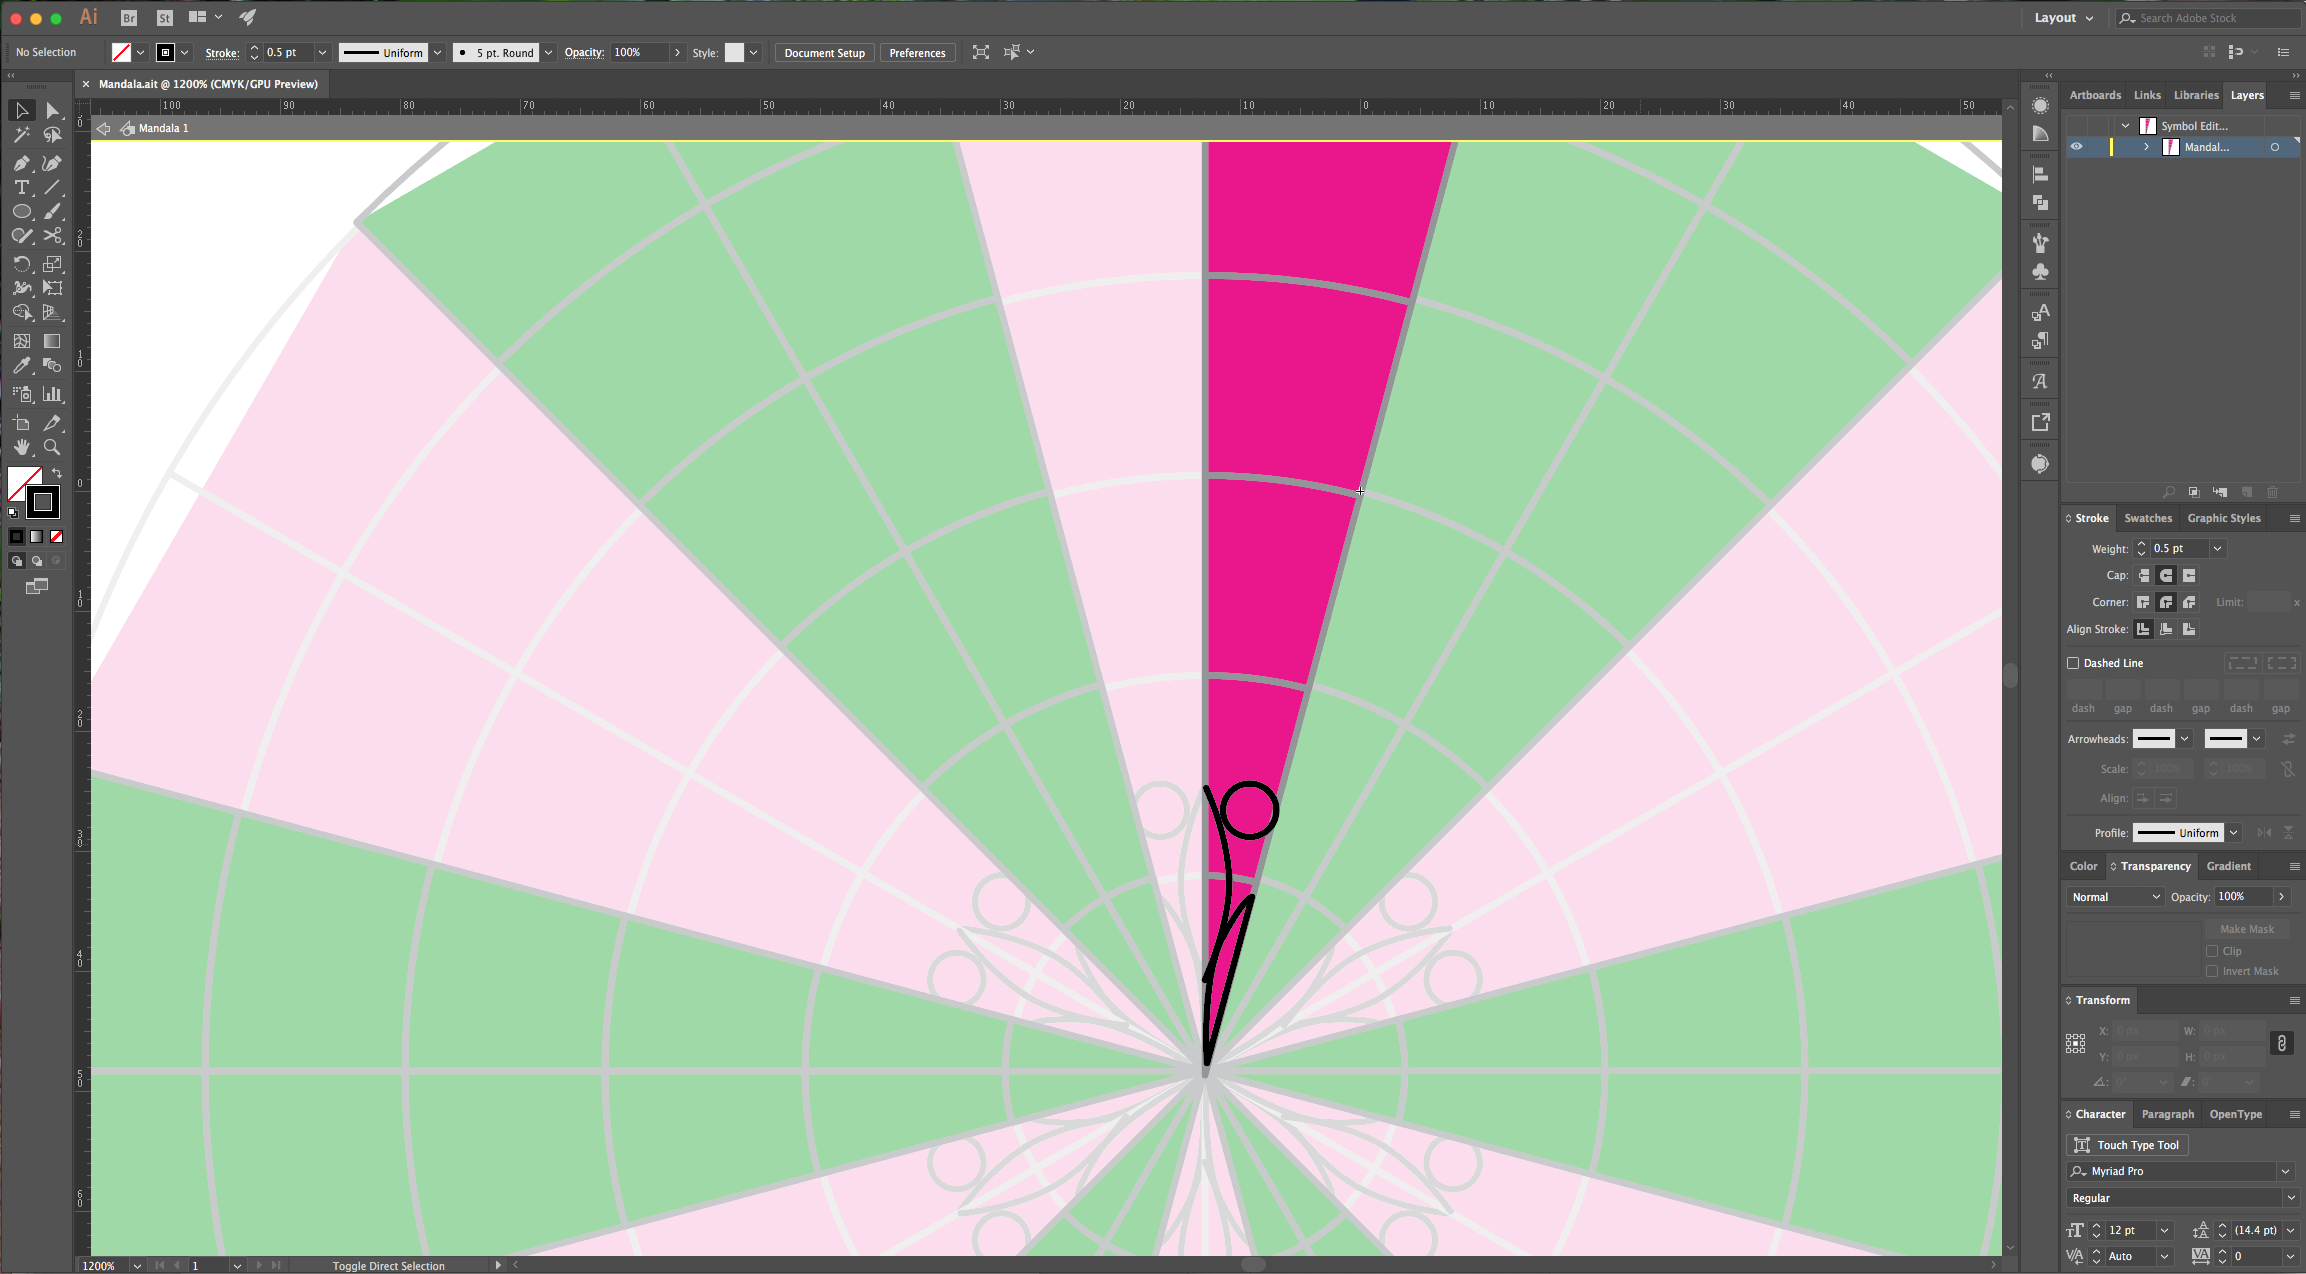
19 - Now, to create a “Mandala”. Remember the position of the original triangle pieces and double-click on its layer in the “Layers” window to access the “Group”, then double-click again to enter “Symbol Mode”. A window will appear warning you that you are about to edit the original symbol, check the “Don’t Show Again” box and click “Ok”.
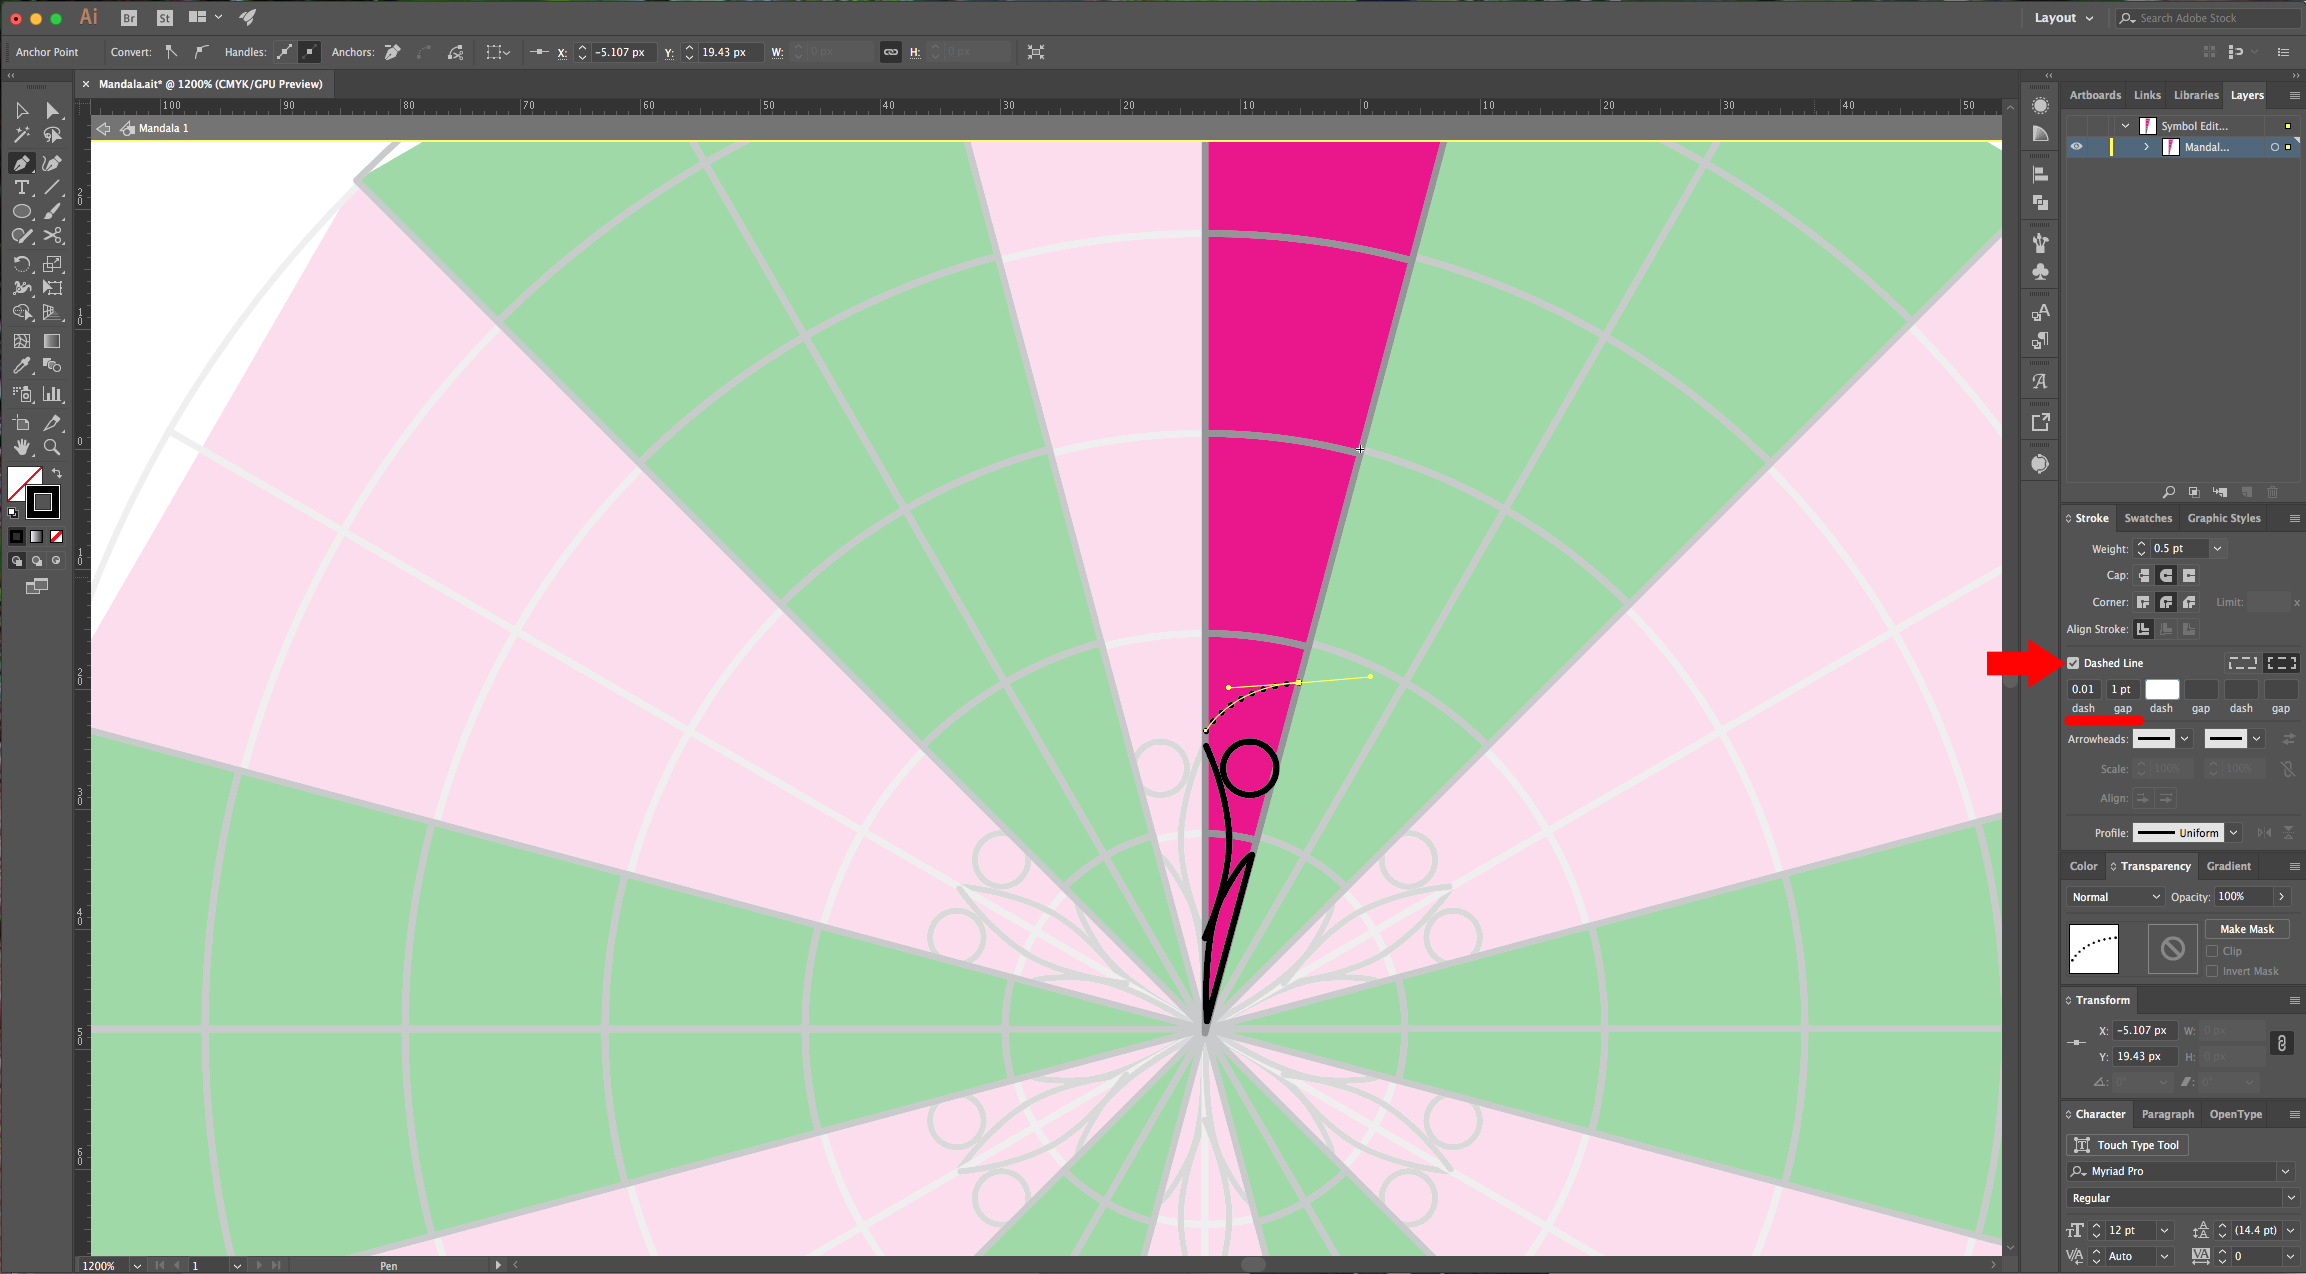
20 - You can use the “Pen Tool” (P) if you want to be more precise, or the “Brush Tool” (B) to draw in the two main half triangles and when you are finished what you did will be applied to all instances of the symbol you edited. With the “Pen Tool” (P) is better to use a “Stroke Weight” of 0.5 Points at first and make the “Cap” and “Corner” “Round”. Remember that if you don’t want a “Path” to close you need to hit “Enter”. You can also use the “Shape” Tools (Rectangle, Ellipse, etc.) to make some details. If you need to draw a series of dots, use “Dashed Line” with a “Dash” value of about 0.01 and 1 pt for the gap.


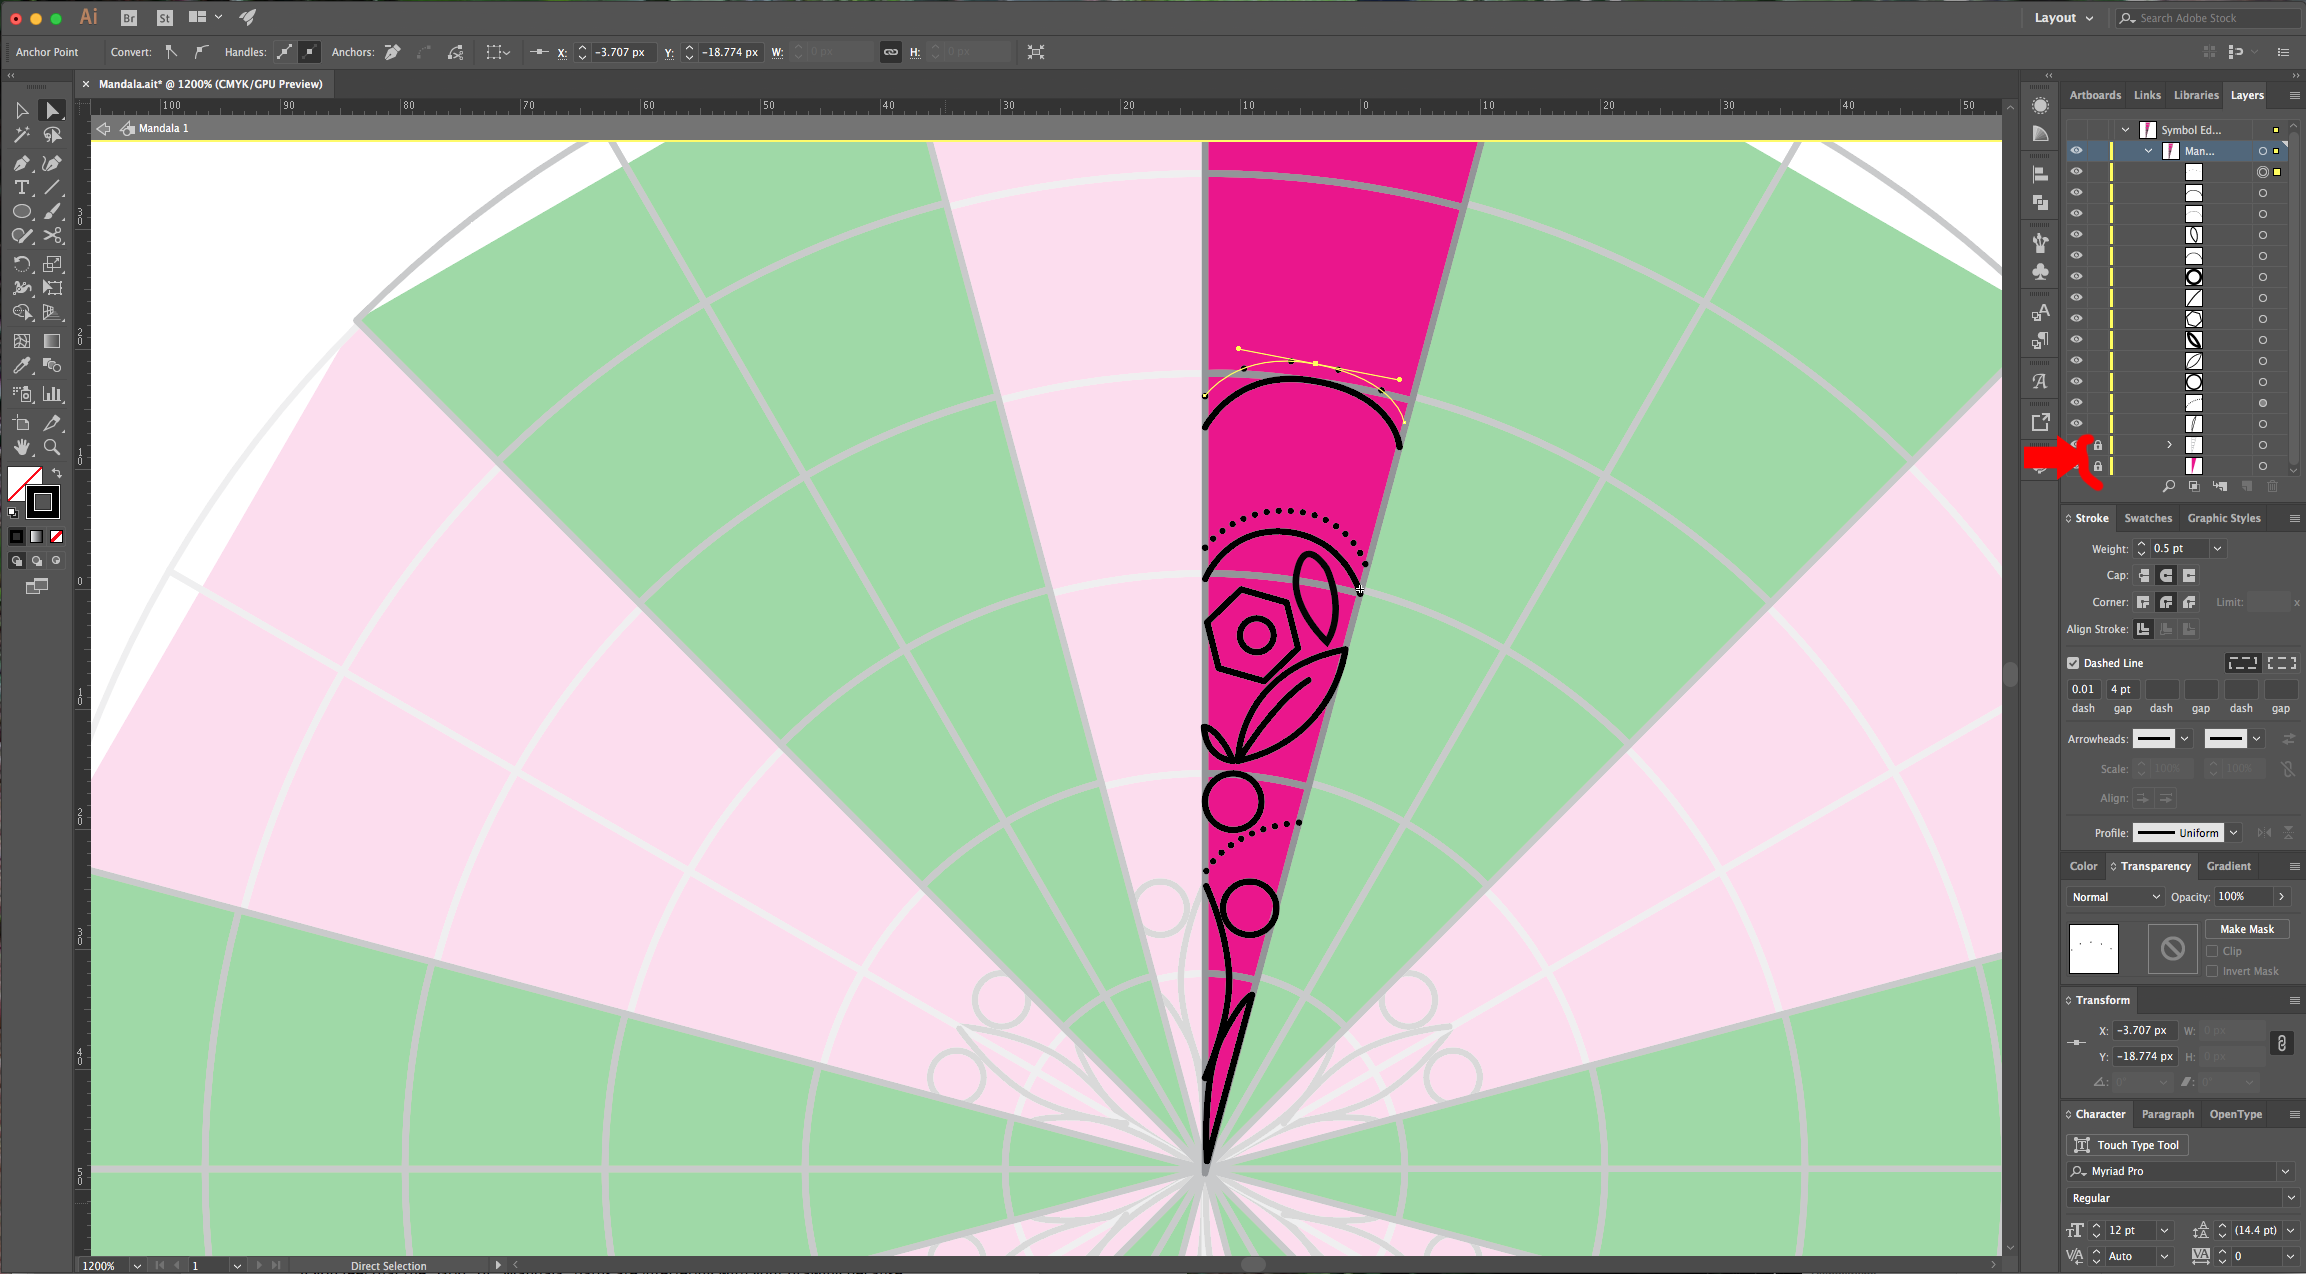
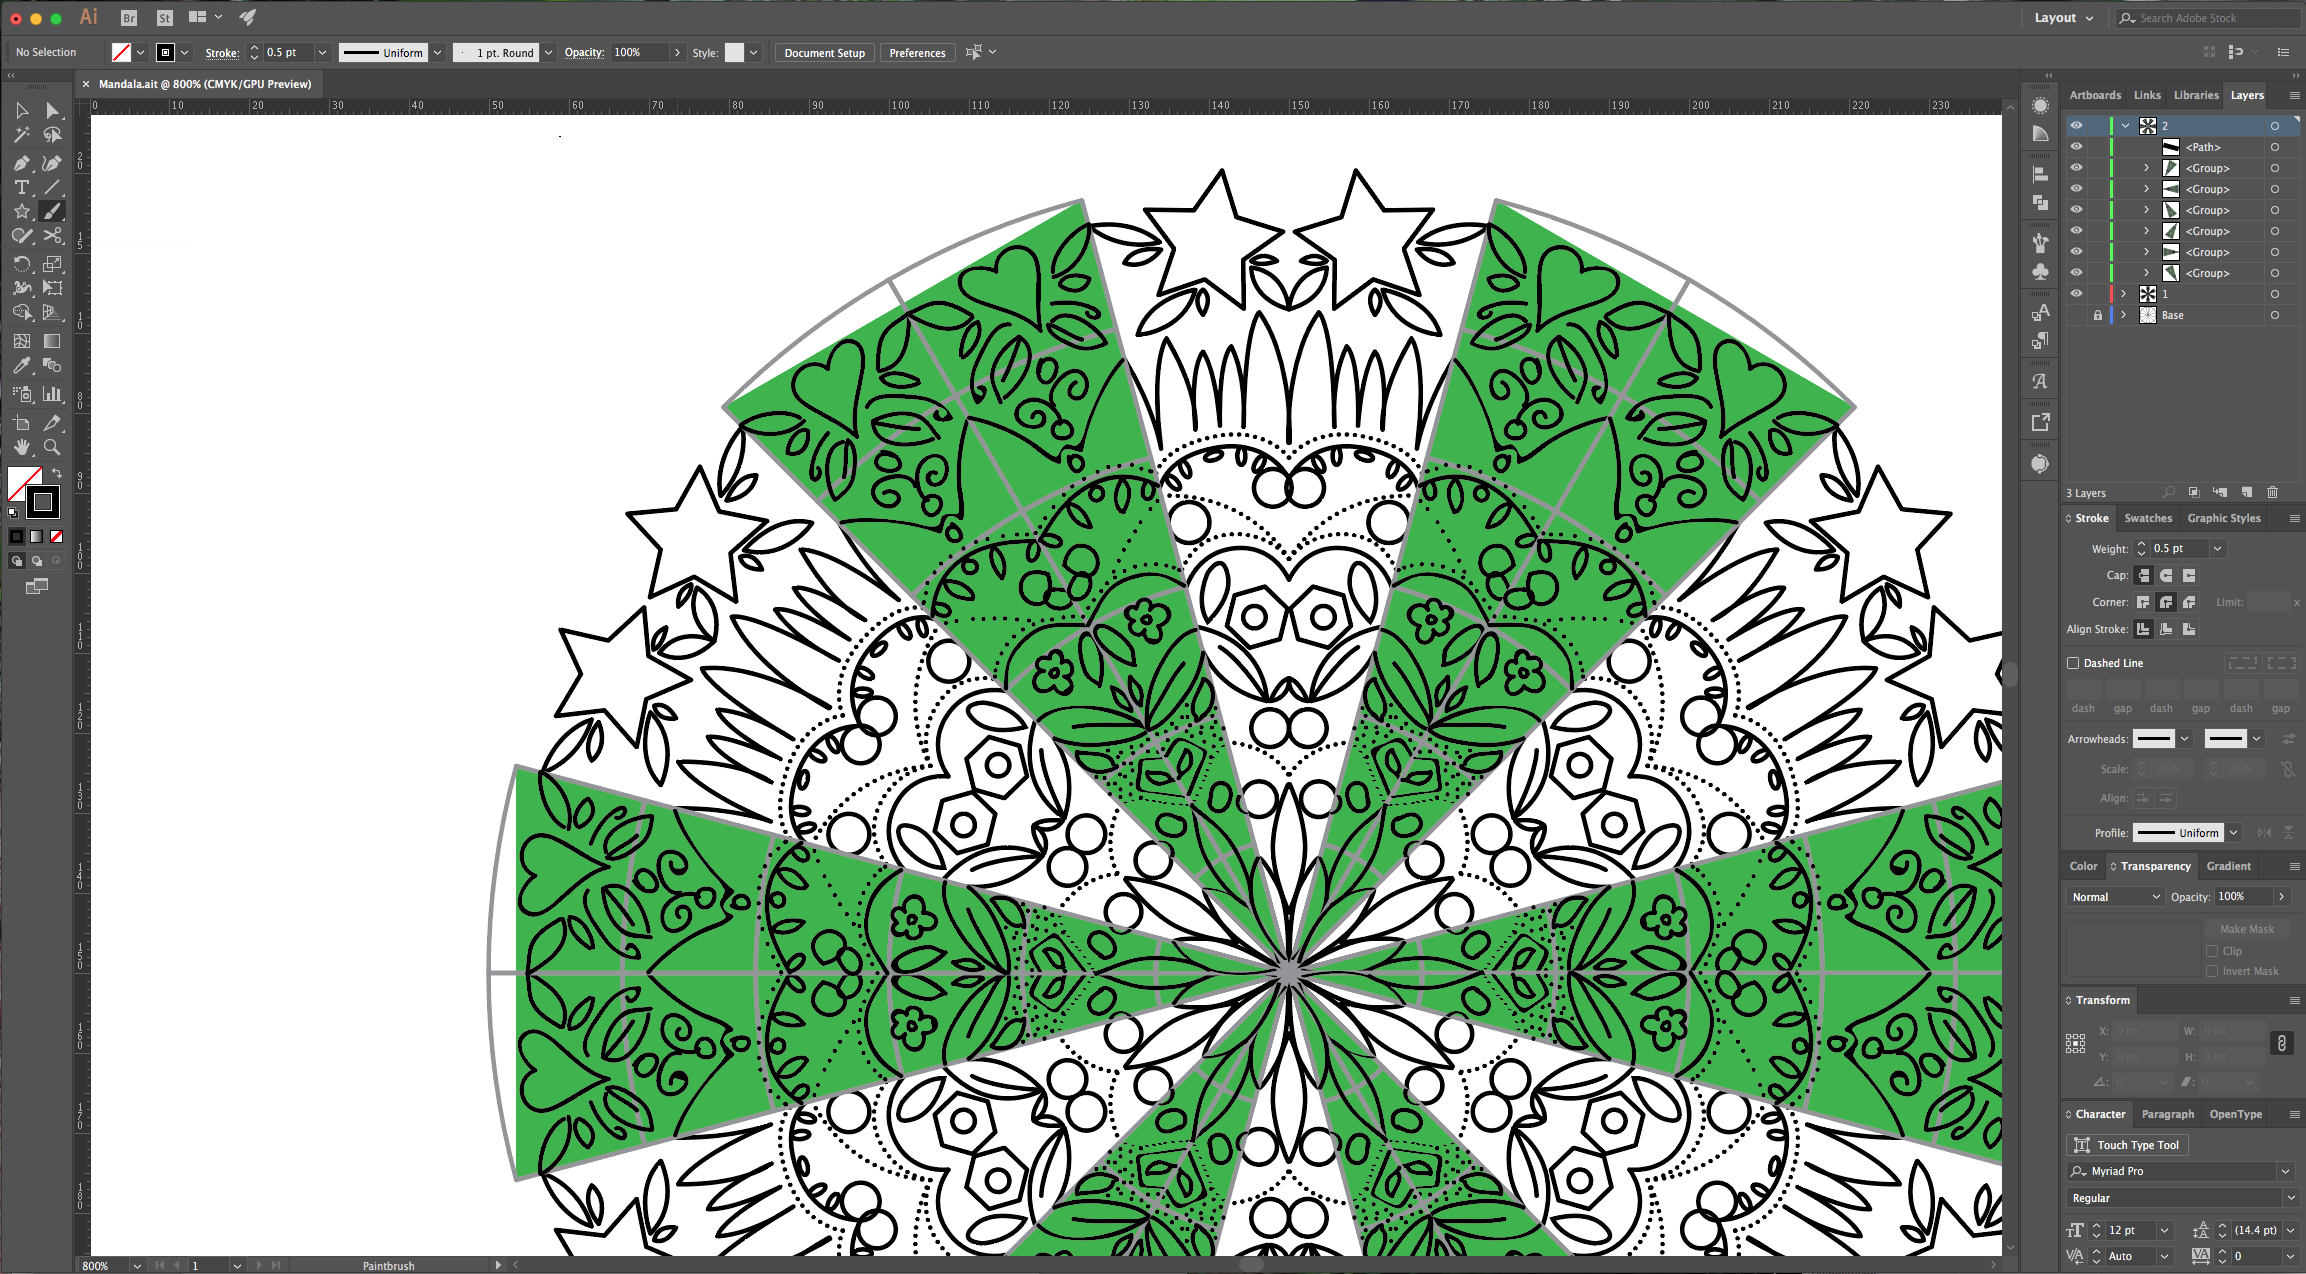
21 - Save once in a while so you can check you design. It is a good idea to switch between your two “Symbols” so you can get a better idea of how the design is progressing. Use Command/Control + Y to toggle between “Outline” and “Preview” to get a better idea too. If you feel that the “Grid” or “Mandala” paths are interfering with your drawing because you keep selecting them instead, you can “Lock” them, just click the little arrow to the left of the thumbnail in the “Layers” window and click on the little lock to do it. Just remember that until you unlock them again you will have to double-click on the paths that you are drawing to enter “Symbol Mode”. While creating your artwork it may be a good idea to disable the “Snap” options in the “View” menu. And disable “Scale Stroke and Effects” in the “Scale” Panel.
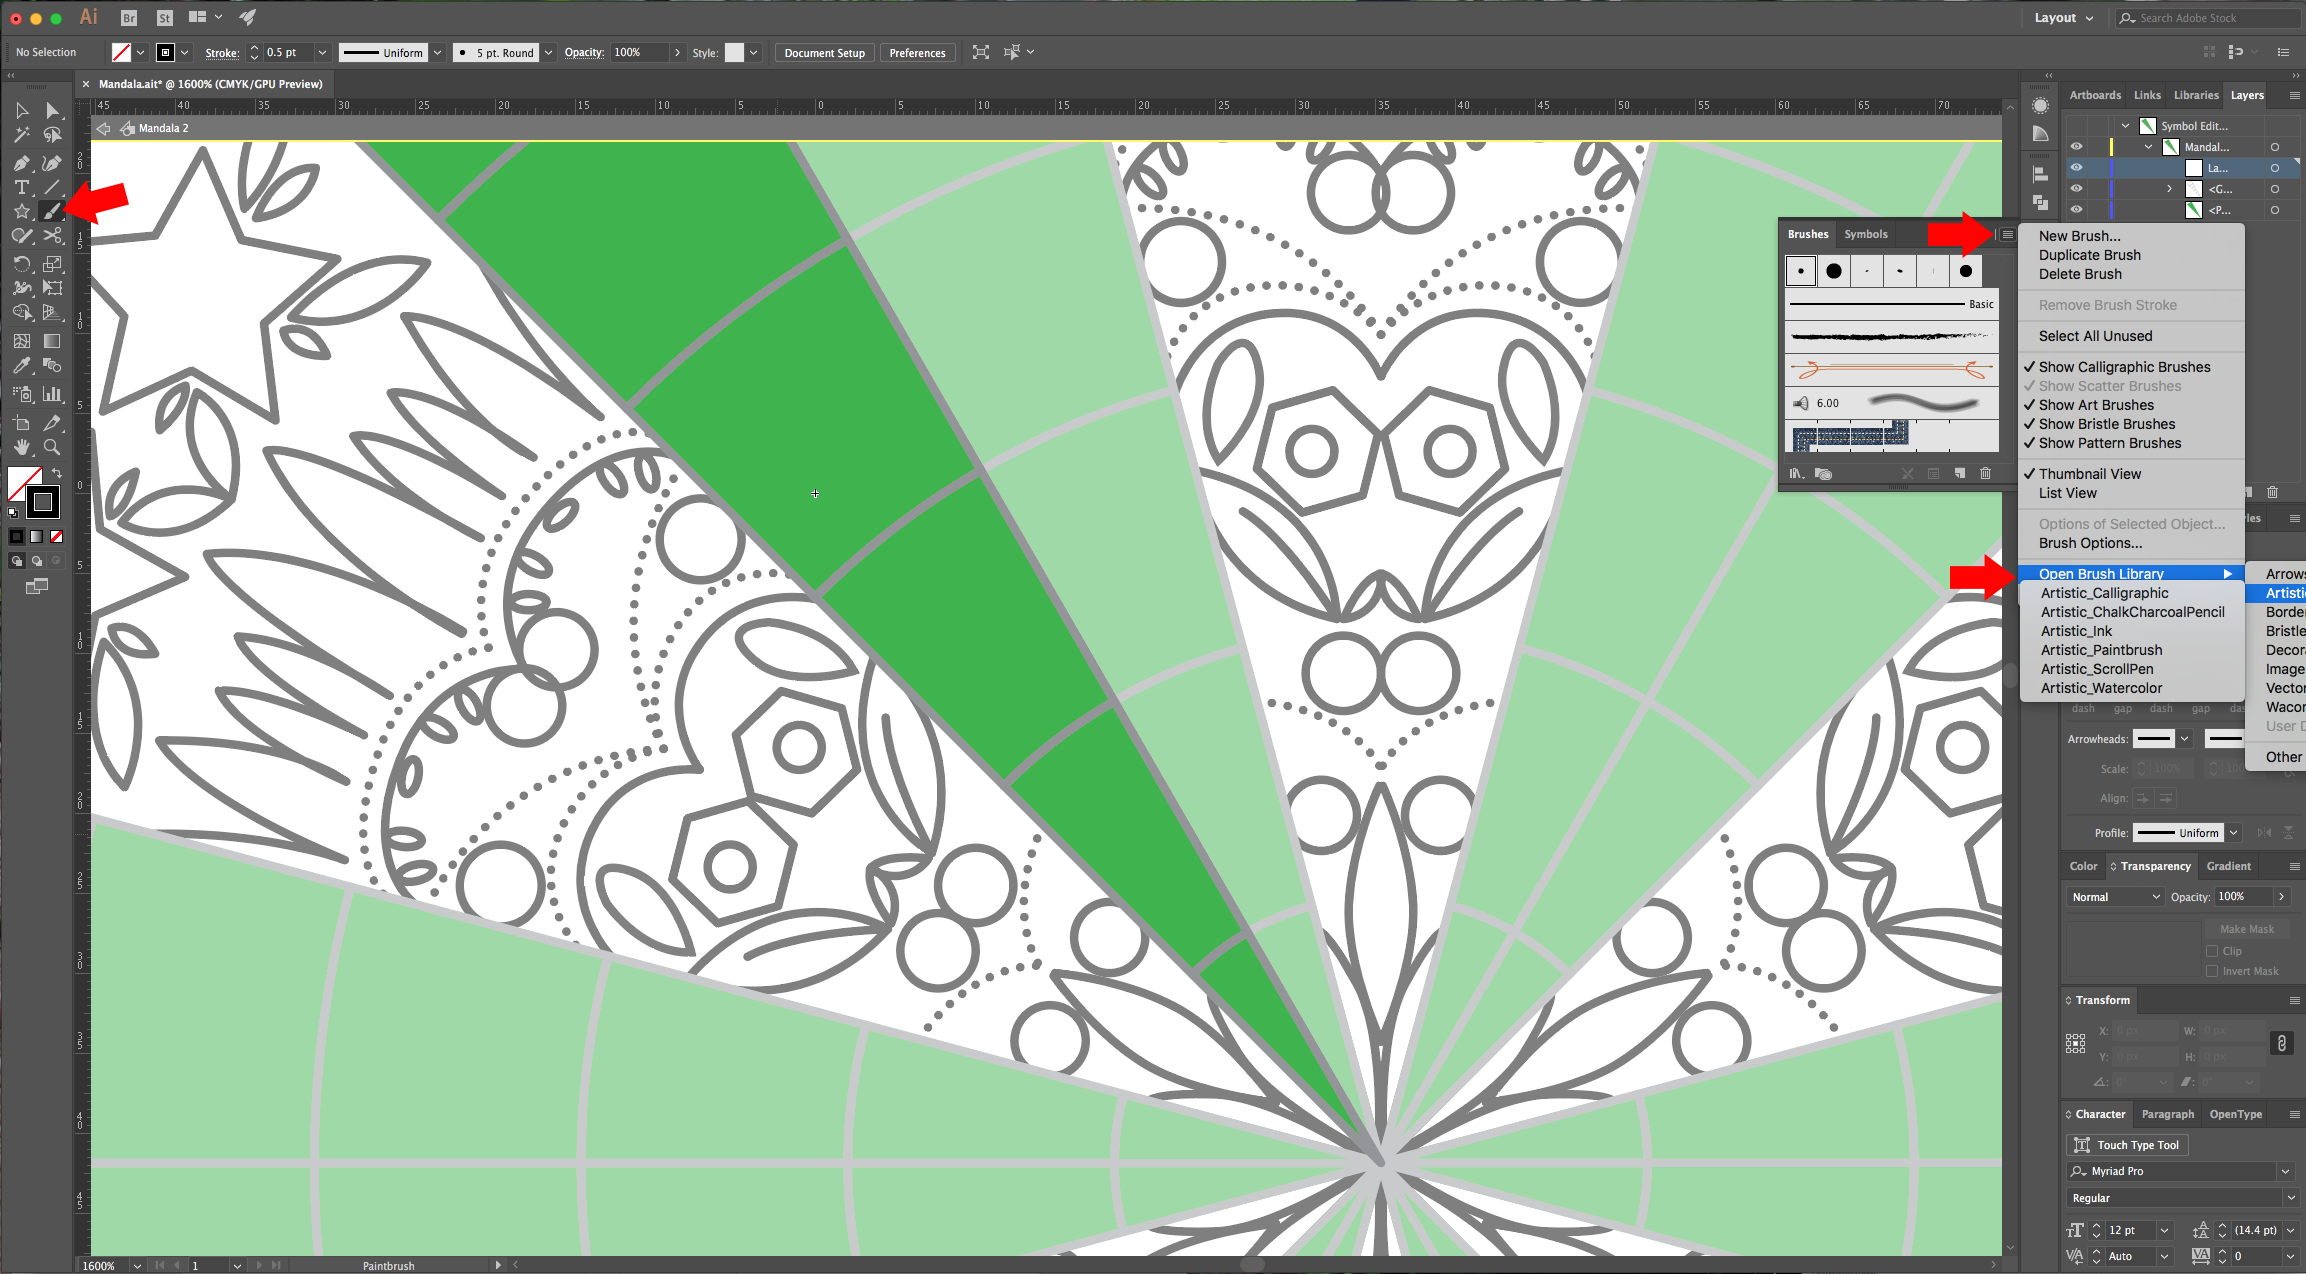
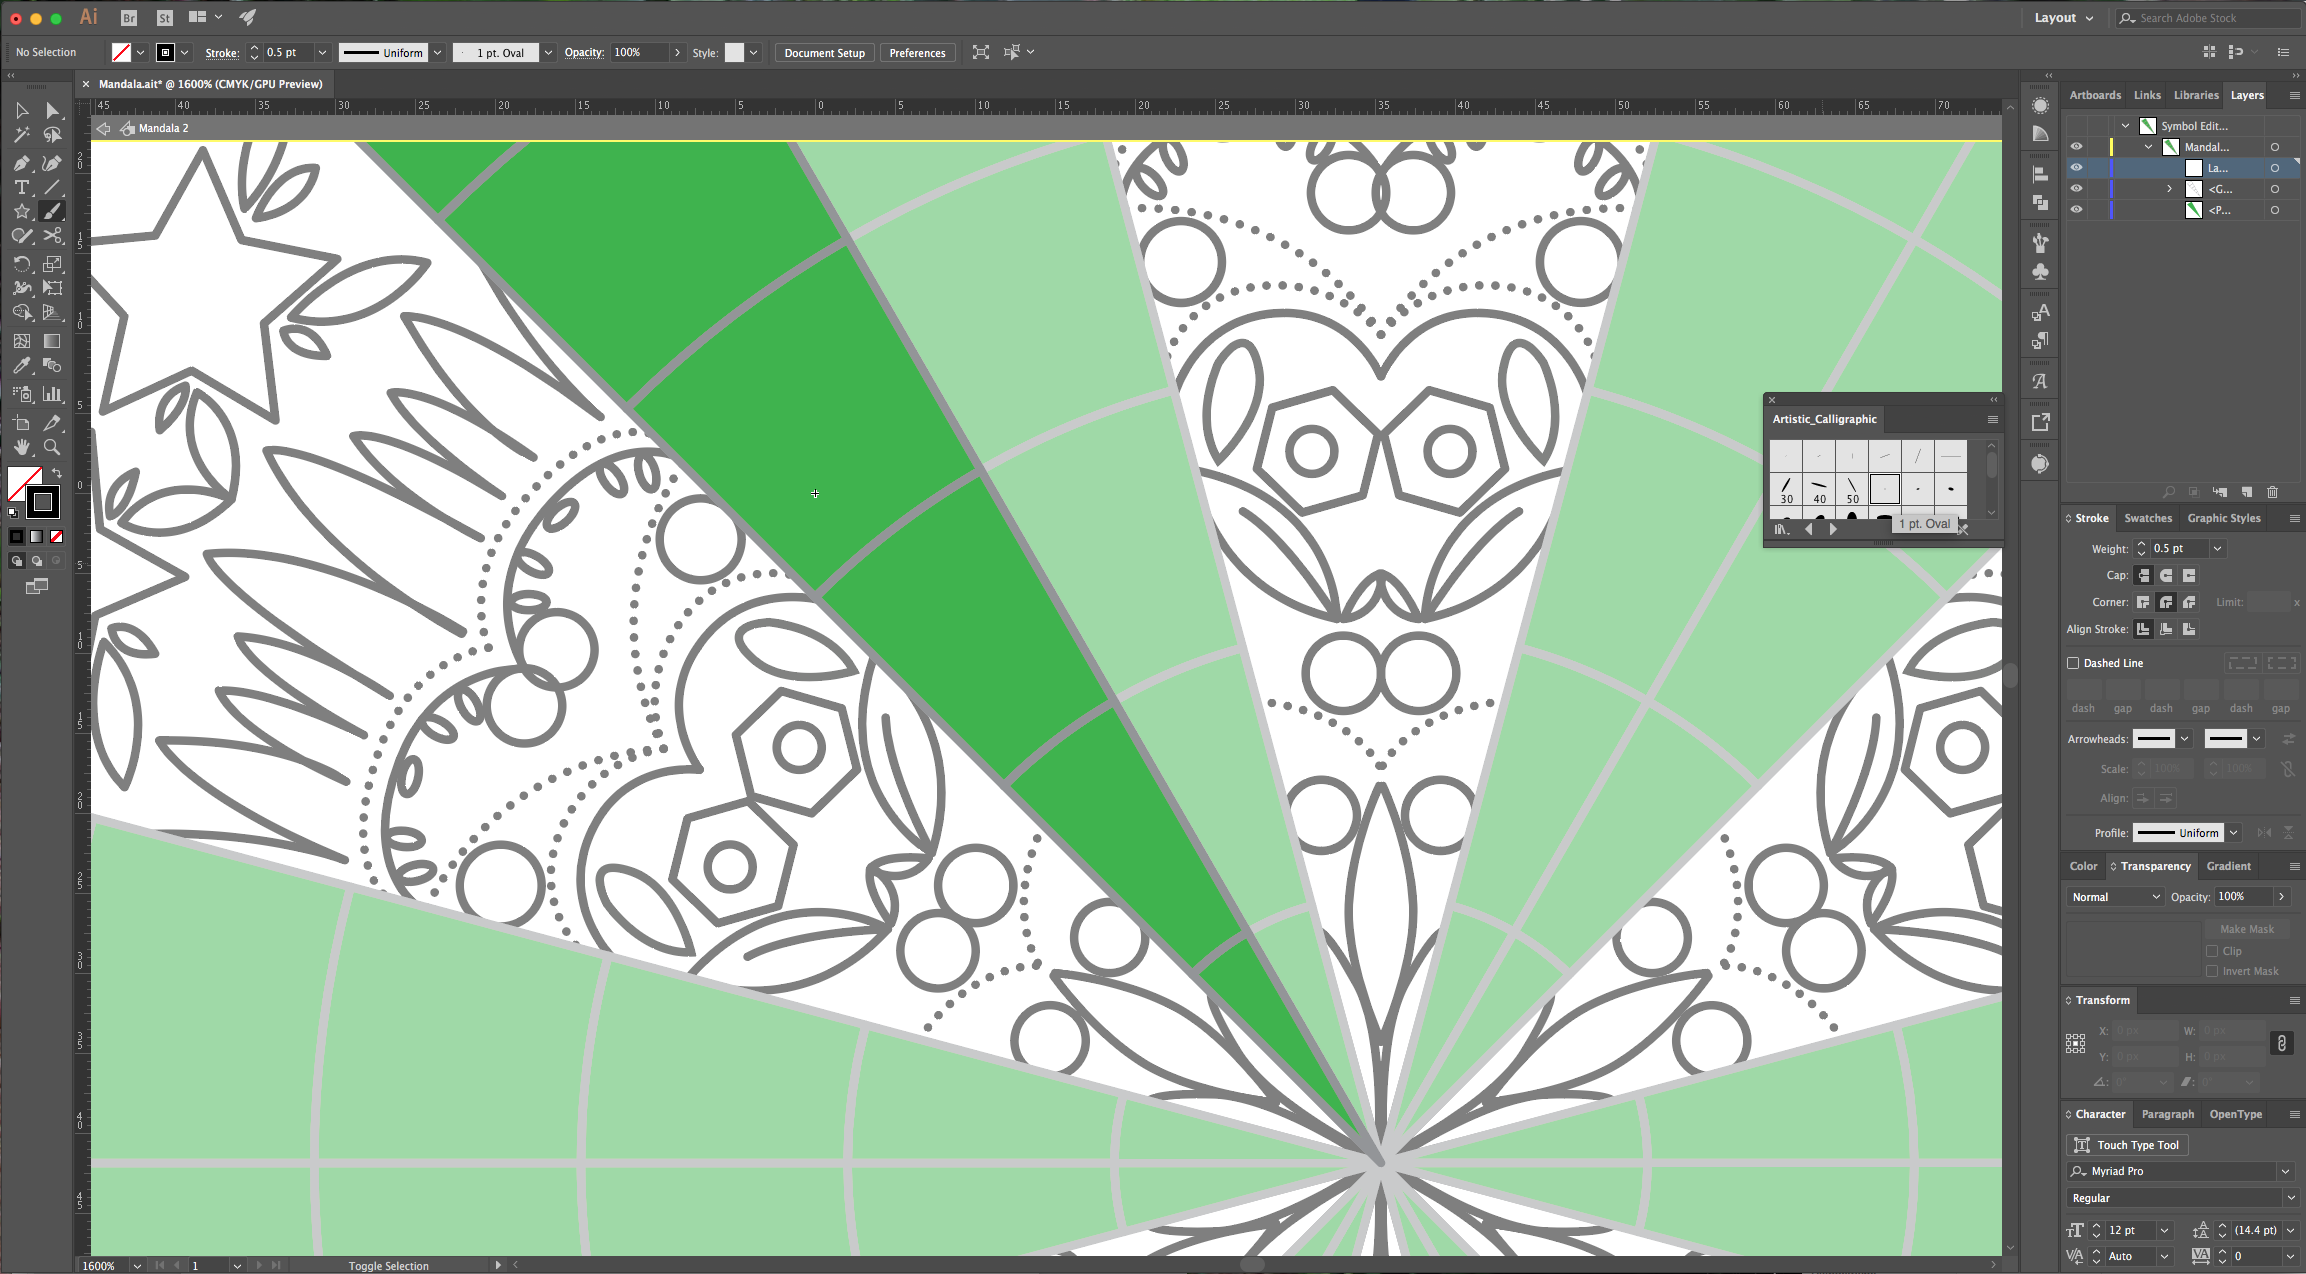
22 - If you are using the “Brush Tool” remember to change your brush size, etc. You can load different brushes from the “Brushes” Panel. You can search the web for some already made mandala style brushes too. You can use colors in your strokes, or add another cool effects with “Layers” and “Blending Modes”.
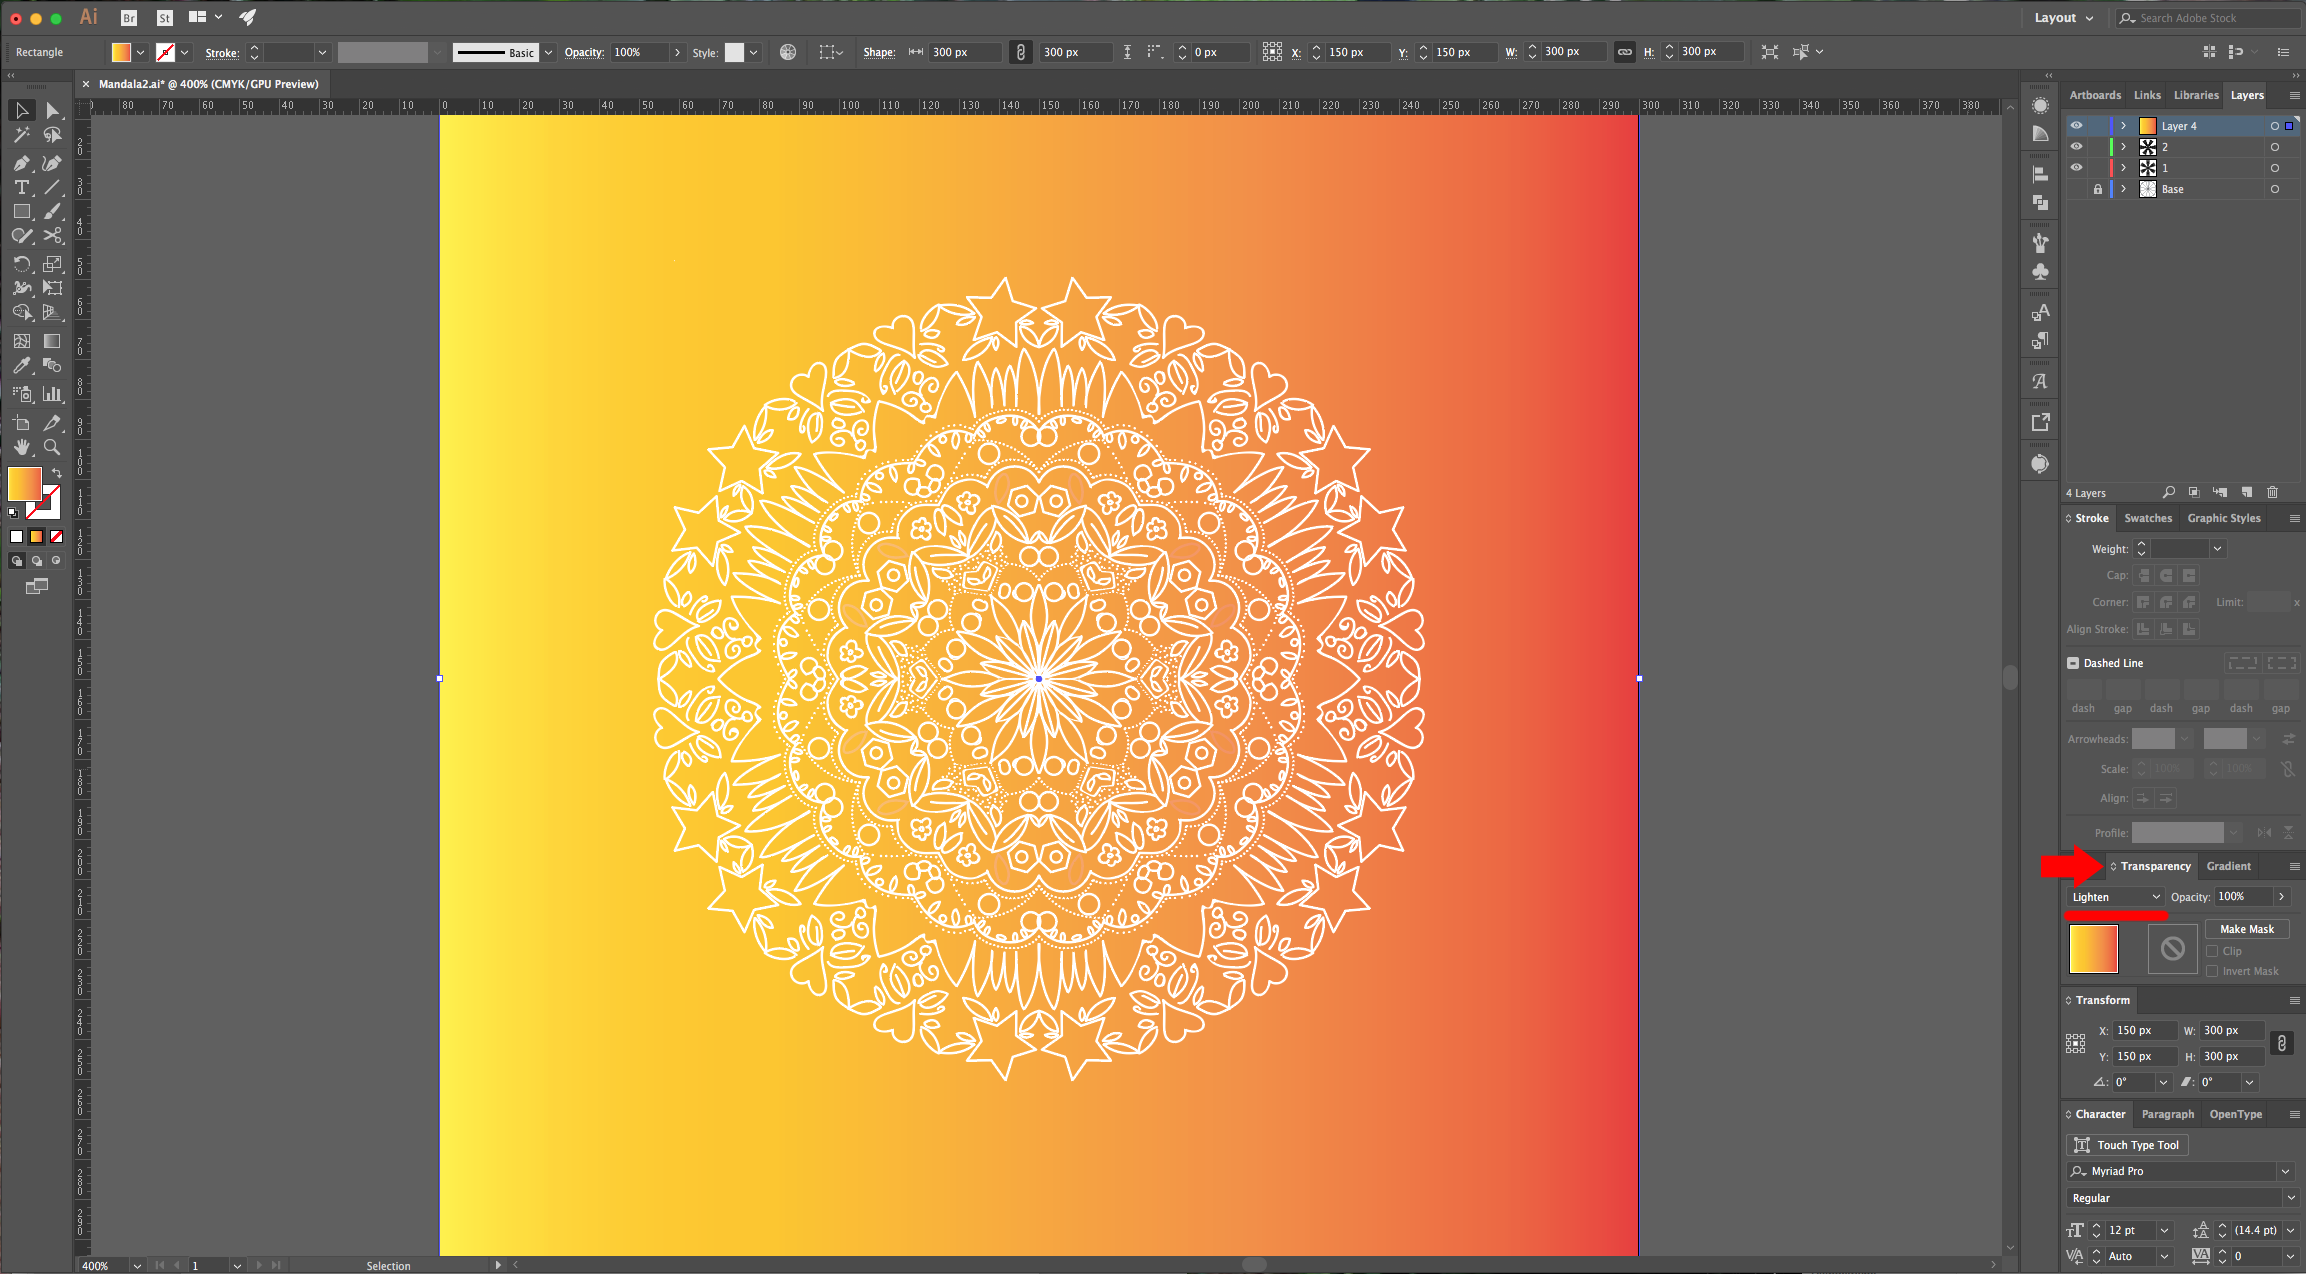
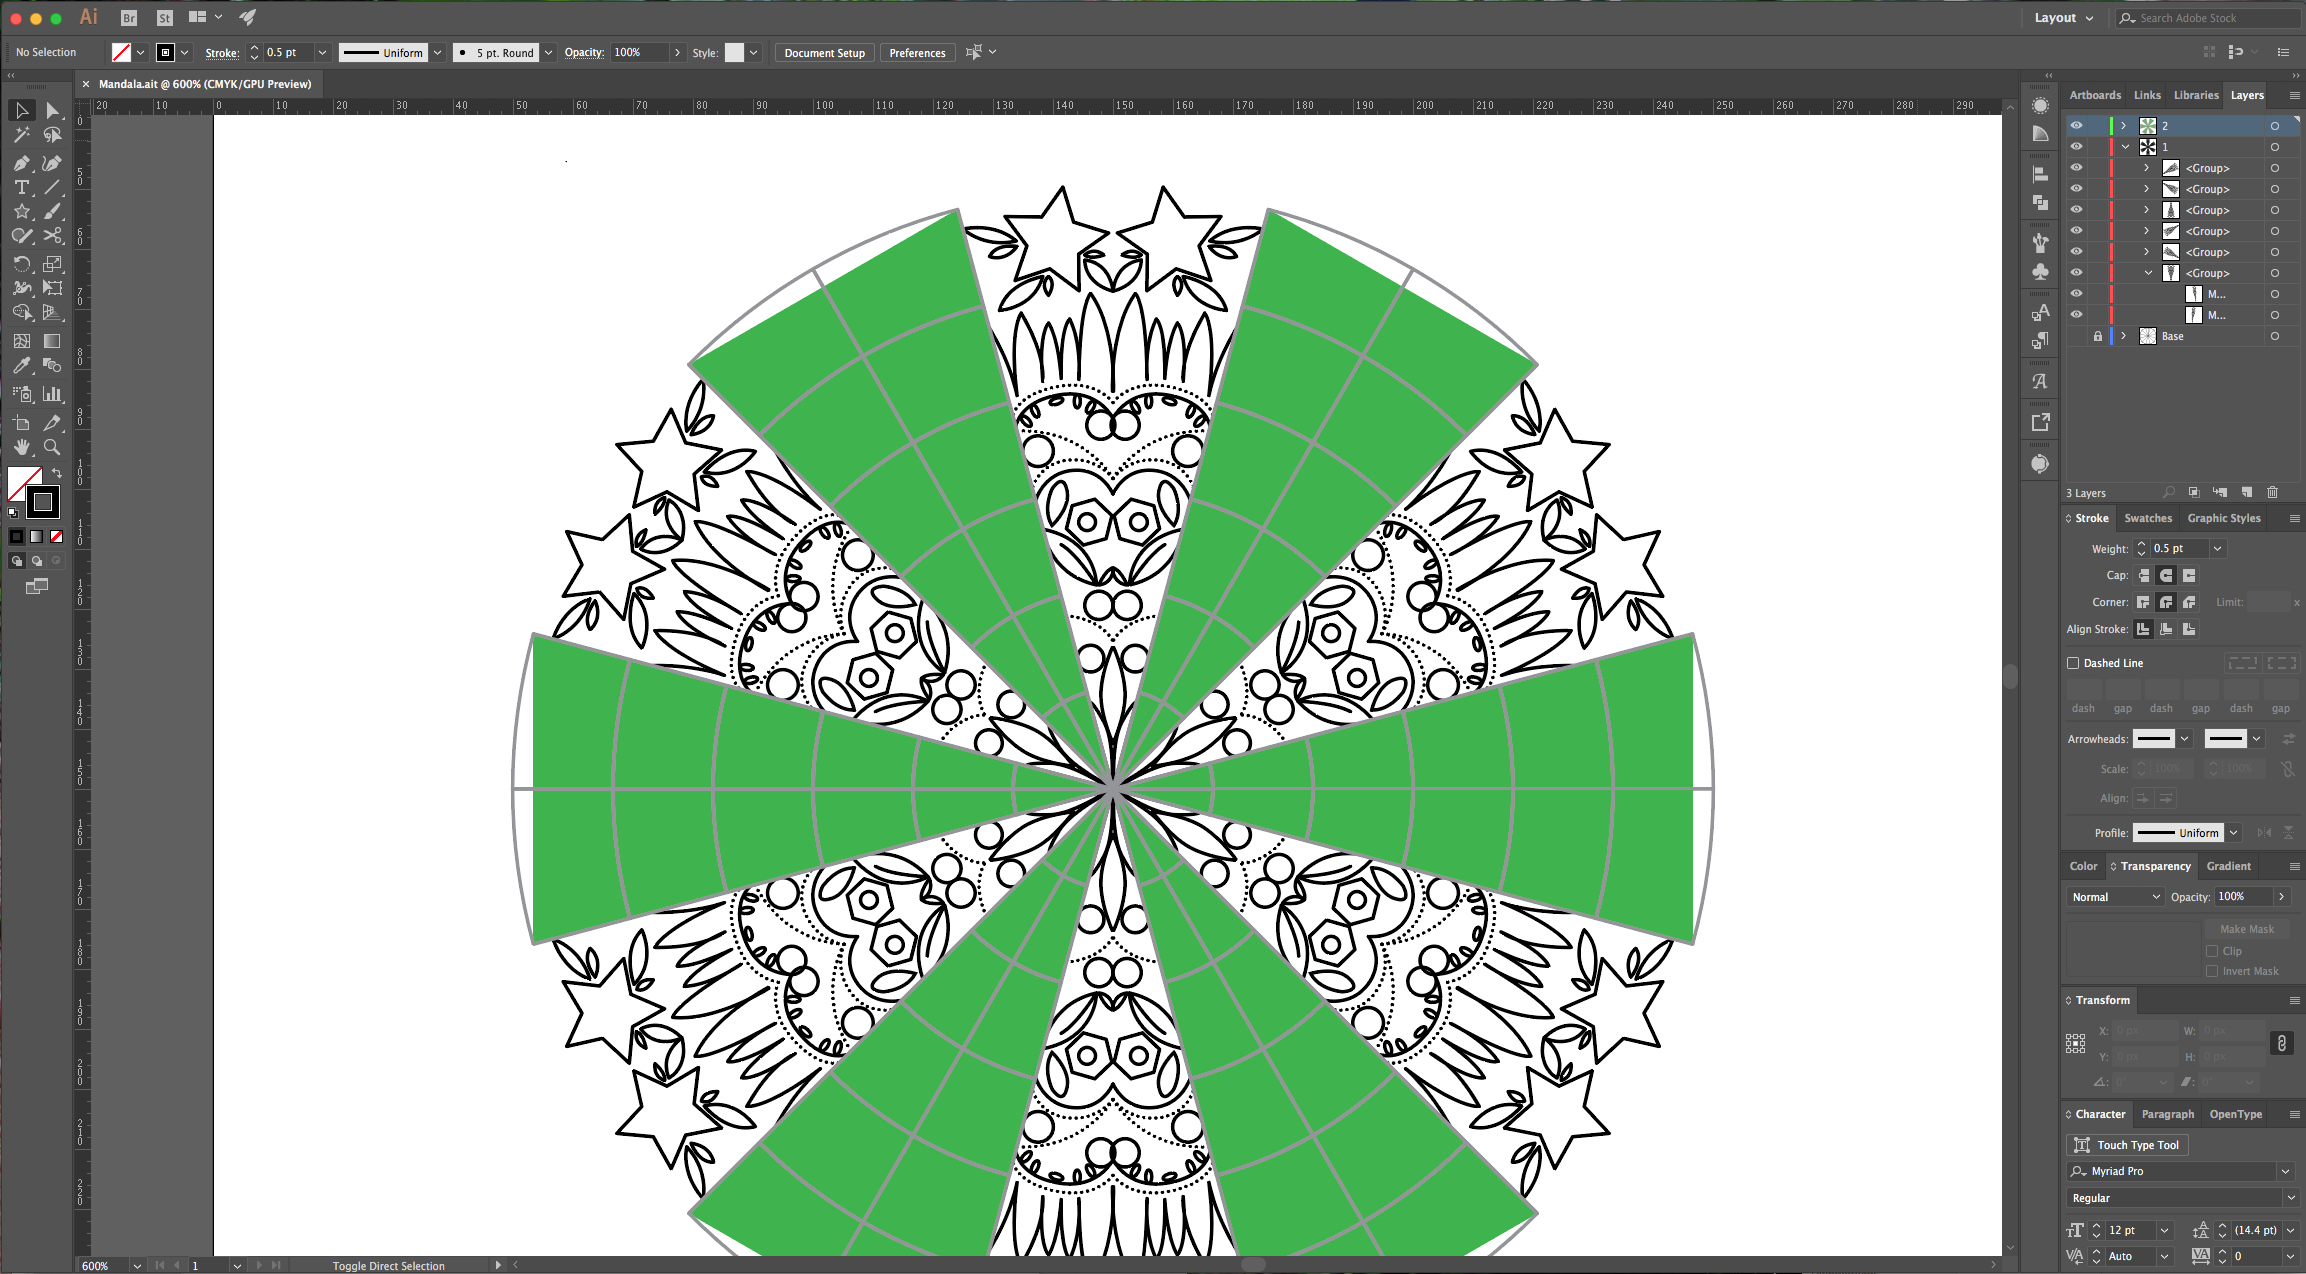
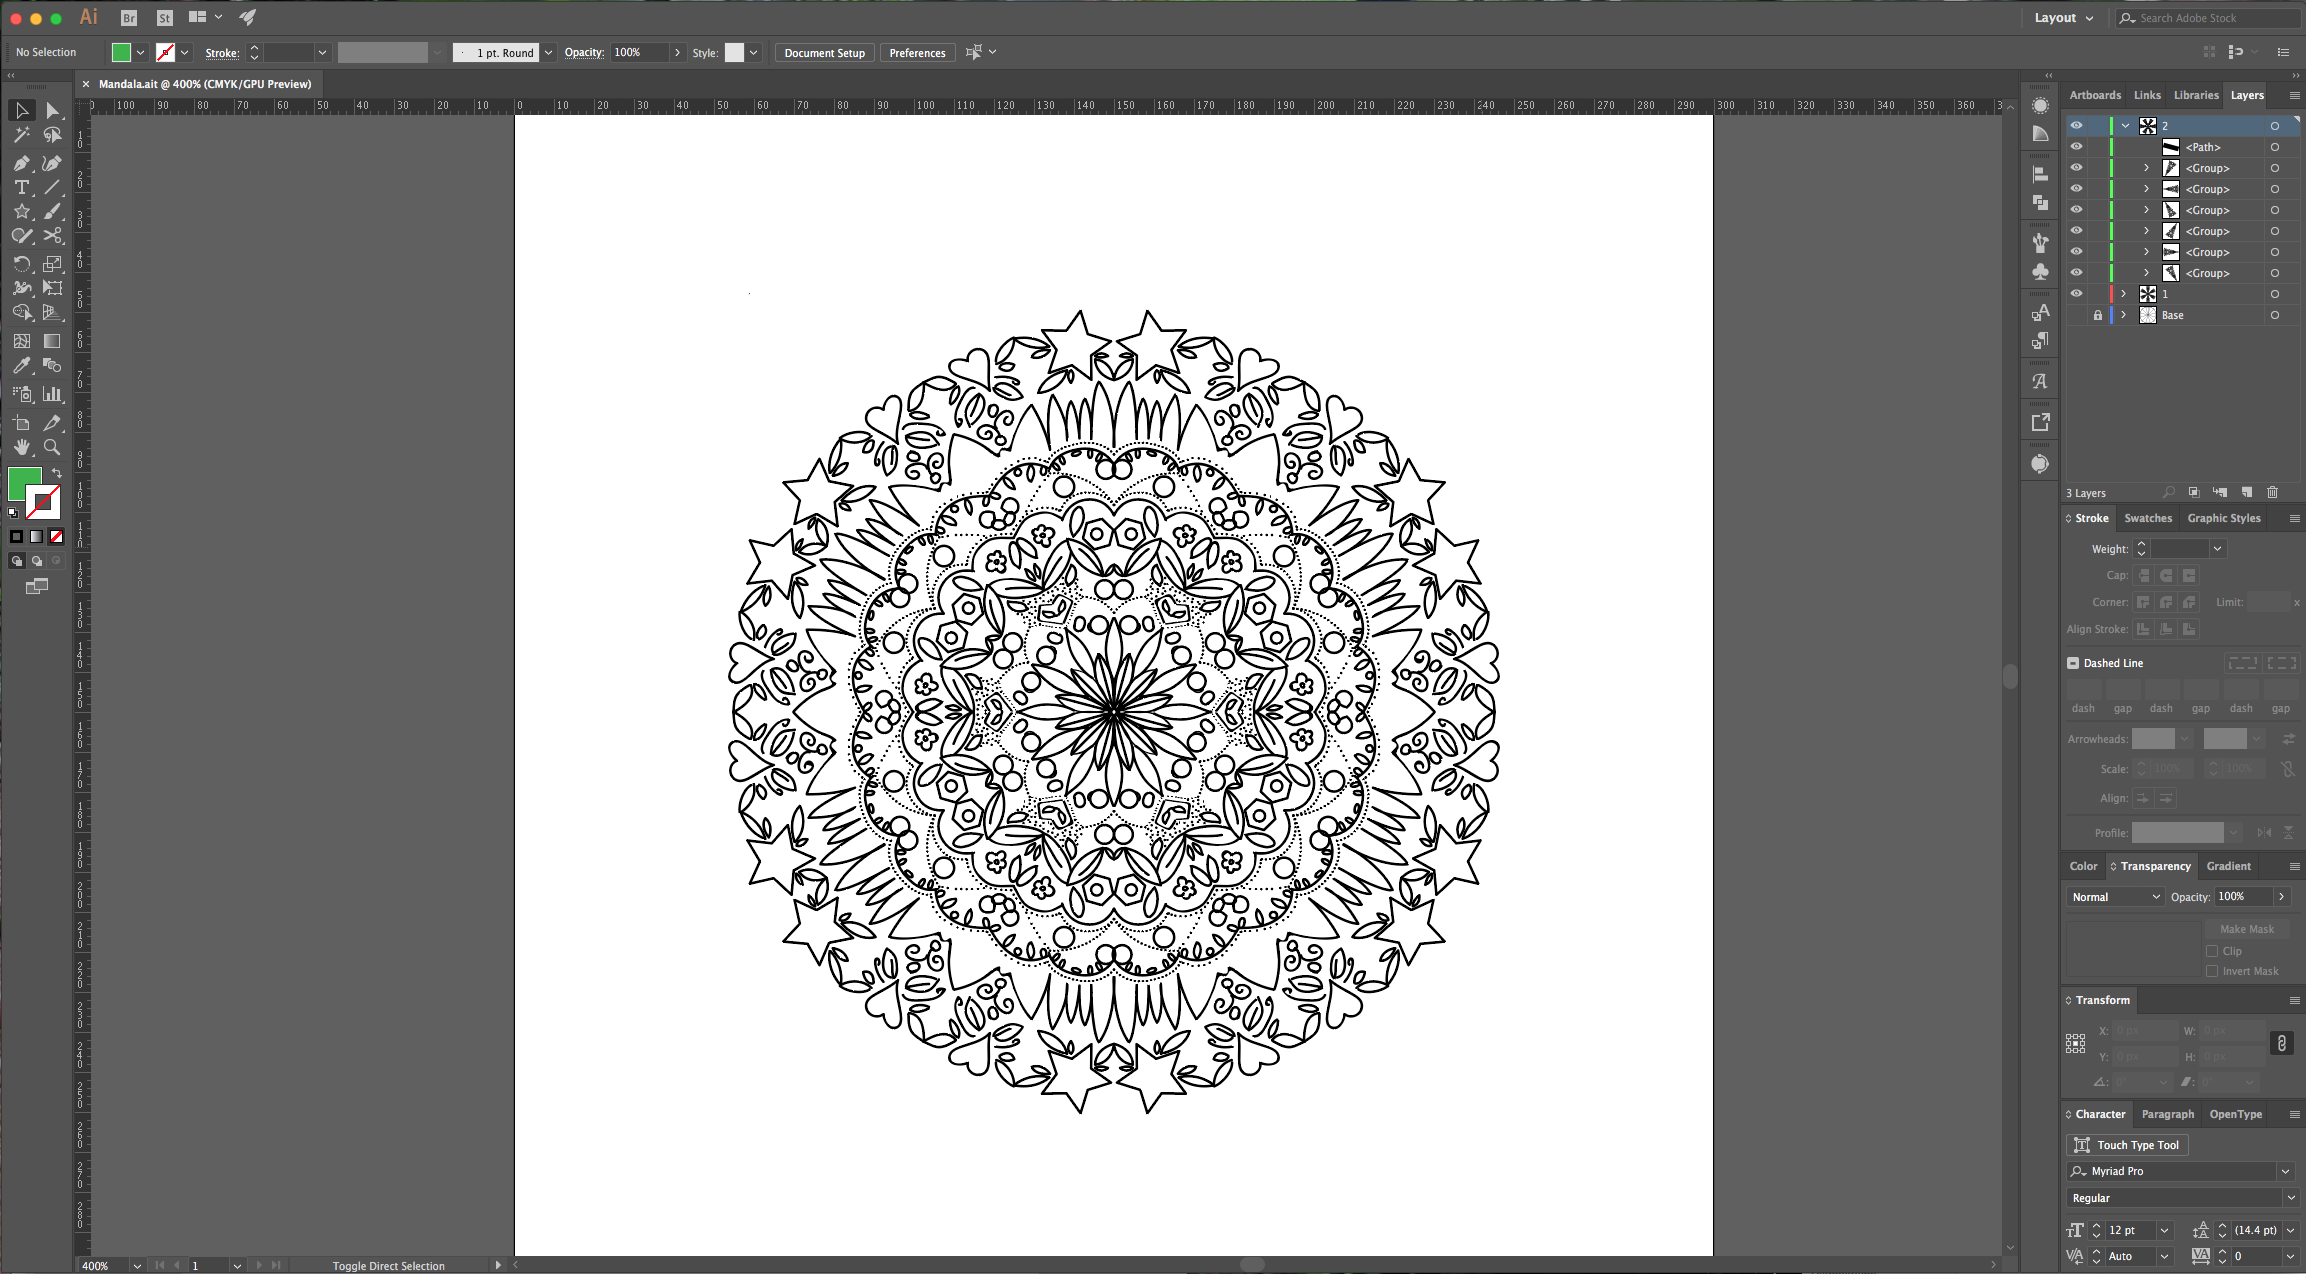
23 - When you are done, you can “Turn Off” or “Delete” the color triangles and the grid and just leave the paths. Then, save your artwork as a new Illustrator document.
2 - Select The “Polygon Tool” and click inside the document. If your “Smart Guides” are Turned On (Command/Control + U) you should be able to see where the center is when you hover your cursor around it. In the dialog that opens select the “Radius” and the Number of “Sides”, in our case it was 100 “Pixels” and 12 “Sides” (Traditional Mandalas have 16 Sides).
3 - Select the “Line Segment Tool” (\) and trace a line starting from one of the corner point all the way to the opposite side. (Hold the “Shift” key to do this at an angle).
4 - With the “Selection Tool” (V), select your line and then double-click on the “Rotate Tool” (R) in the “Toolbar” to bring out the “Rotate” Options window. Choose an angle of 30 (divide 360 by the number of sides your Polygon has). Then click “Copy” to make another line with the chosen angle. Click “Enter” and then “Copy” (or use Command/Control + D to repeat your last action) as many times as needed to finish your Polygon.
5 - Select the “Line Segment Tool” (\) again, and while holding the “Shift” Key, draw a line from the top of your Polygon to the center.
6 - Go to the “Layers” Panel and lock your current layer by clicking on the small space to the left of the thumbnail and invoke the small lock icon. Then create a “New Layer” (Command/Control + L) or click the small button at the bottom of the Panel.
7 - Select the “Pen Tool” (P), then draw a triangle that covers one half of the upper segment (from the right corner to the middle line you just draw). Use a bright “Fill” (we used magenta) color and no “Stroke”.
8 - Select the triangle and go to the “Symbols” Panel (Shift + Command/Control + F11) and click on the “New Symbol” button at the bottom of the Panel. Name it “Mandala 1” and use “Graphic” as “Export Type”. “Copy” (Command/Control + C) and “Paste in Front” (Command/Control + F) your half triangle and then, select the copy and using the “Reflection Tool” (O). Click on the top left corner and then, while holding the “Shift” key drag your path to the left to reflect it. Select both paths and group them together (Command/Control + G).
9 - With your object selected, go to Object > Transform > Transform Each (Option/Alt + Shift + Command/Control + D), use a 60° Angle, make sure to select the bottom point of the little square at the bottom of the dialog, so the “Rotation Axis” of your path is at the bottom. Click “Copy” to retain your original path. Repeat this step (changing the “Rotation Axis”) until you cover your image making sure that you skip one segment.
10 - Copy (Command/Control + C) your main path (the one on top), then lock your “Layer”. Create a “New Layer” and name it “2”. Paste the path in your new layer using the “Paste in Front” command (Command/Control + F). Open the “Transform Each” window, and this time use a 30° Angle and reposition the “Rotation Axis” at the bottom center of the little box. Click “OK”.
11 - Select your path and ungroup it (Command/Control + G). Right-click on top of one of the sides and click “Break Link to Symbol”. Change the “Fill” color for this side (we used a green from the “Swatches” window), then create a “New Symbol”, name it “Mandala 2” and delete the other half triangle. Remember to create the other half of the Green triangle like in “Step 8” but use a 120° Angle with the “Reflection Tool” (O) and then move that half a bit to place it properly, then group them both together. Repeat “Steps 9 to 10” to cover the missing portions of your image. (Remember that the “Rotation Points” will have to change).
12 - You need to remember the location of your original half triangles since those will be the spots where you will draw the Mandala elements that will be duplicated in the copies. (In our case the top right magenta and the top left green, placed to the left of the magenta). We will need a grid to divide the triangles into sectors, so lock your “2” layer, create a new one and select the “Polar Grid Tool”. Click on any spot on your document use the following values, then click “OK”. Select the grid and making sure that “Align to Artboard” is selected click “Horizontal Align Center” and then “Vertical Align Center” in your upper menu. Click “R” and rotate your grid using a 45° Angle to align the lines with the ones in the triangles.
13 - Select your grid, go to the “Pathfinder” window and click “Divide”. Ungroup it (Command/Control + U) and delete some parts until you have just one wedge. The upper part has the pieces of three wedges so we will need to fix this. Use the “Direct Selection Tool” (A) and click on the bottom right anchor point and make sure it’s the only one selected, then click “Delete”. Do the same with the bottom left one, then select the long curve that remains on top and using the “Scissors Tool” (C) cut close to the spot where it intersects with the line (zoom in as much as possible), repeat in the other side and delete the remaining segments of the curve. Then, with the “Direct Selection Tool” (A) move the ends to the intersection.
14 - Drag a “Guide” to mark the center of your main triangle, then, with the “Scissors Tool” (C) click on the spots where the “Guide” intersects with the paths (don’t forget to select all the pieces of the grid). Remember that some of the curved paths are overlapped, so you may need to repeat the cut. Then, select the points you don’t need with the “Direct Selection Tool” (A) and delete them. (The left side portions). Remember that you can turn your guides On and Off with “Command/Control + ;” or in View > Guides > Show/Hide Guides.
15 - Using the “Pen Tool” (P), draw a line that unites the top and bottom of the remaining half rectangle of the grid, just where the “Guide” was/is. Select all your paths, give them the “Weight” you like in the “Stroke” window and use a “Rounded Corner”. Then group them together (Command/Control + G).
16 - Select your grid, change the “Stroke” color to a medium grey and click Command/Control + X to “Cut” it. Then, go to the “Symbols” Panel and “Paste” it (Command/Control + V). Fix the grid’s position so it is perfectly aligned with the half magenta triangle. Click on the arrow at the top of your document window to “Exit Symbol Mode”. You will notice that the grid is now on every instance of the “Mandala 1” symbol. Repeat this with the “Mandala 2” symbol, just remember to “Reflect” and “Rotate” the grid. (You can delete the layer used for the “Grid” now if you want).
17 - Turn Off or delete your “Base” Layer and then Save your file as a “Template” (Shift + Command/Control + S) so you can use it in the future.
18 - If you “Unlock” your “1” and/or “2” Layers, you can lower the “Opacity” in the “Transparency” Panel and in the future as you become more confident you can change or delete the color portions so you can work more freely.
19 - Now, to create a “Mandala”. Remember the position of the original triangle pieces and double-click on its layer in the “Layers” window to access the “Group”, then double-click again to enter “Symbol Mode”. A window will appear warning you that you are about to edit the original symbol, check the “Don’t Show Again” box and click “Ok”.
20 - You can use the “Pen Tool” (P) if you want to be more precise, or the “Brush Tool” (B) to draw in the two main half triangles and when you are finished what you did will be applied to all instances of the symbol you edited. With the “Pen Tool” (P) is better to use a “Stroke Weight” of 0.5 Points at first and make the “Cap” and “Corner” “Round”. Remember that if you don’t want a “Path” to close you need to hit “Enter”. You can also use the “Shape” Tools (Rectangle, Ellipse, etc.) to make some details. If you need to draw a series of dots, use “Dashed Line” with a “Dash” value of about 0.01 and 1 pt for the gap.
21 - Save once in a while so you can check you design. It is a good idea to switch between your two “Symbols” so you can get a better idea of how the design is progressing. Use Command/Control + Y to toggle between “Outline” and “Preview” to get a better idea too. If you feel that the “Grid” or “Mandala” paths are interfering with your drawing because you keep selecting them instead, you can “Lock” them, just click the little arrow to the left of the thumbnail in the “Layers” window and click on the little lock to do it. Just remember that until you unlock them again you will have to double-click on the paths that you are drawing to enter “Symbol Mode”. While creating your artwork it may be a good idea to disable the “Snap” options in the “View” menu. And disable “Scale Stroke and Effects” in the “Scale” Panel.
22 - If you are using the “Brush Tool” remember to change your brush size, etc. You can load different brushes from the “Brushes” Panel. You can search the web for some already made mandala style brushes too. You can use colors in your strokes, or add another cool effects with “Layers” and “Blending Modes”.
23 - When you are done, you can “Turn Off” or “Delete” the color triangles and the grid and just leave the paths. Then, save your artwork as a new Illustrator document.
by @lornacane


