
How to Create a Paisley Pattern in Illustrator
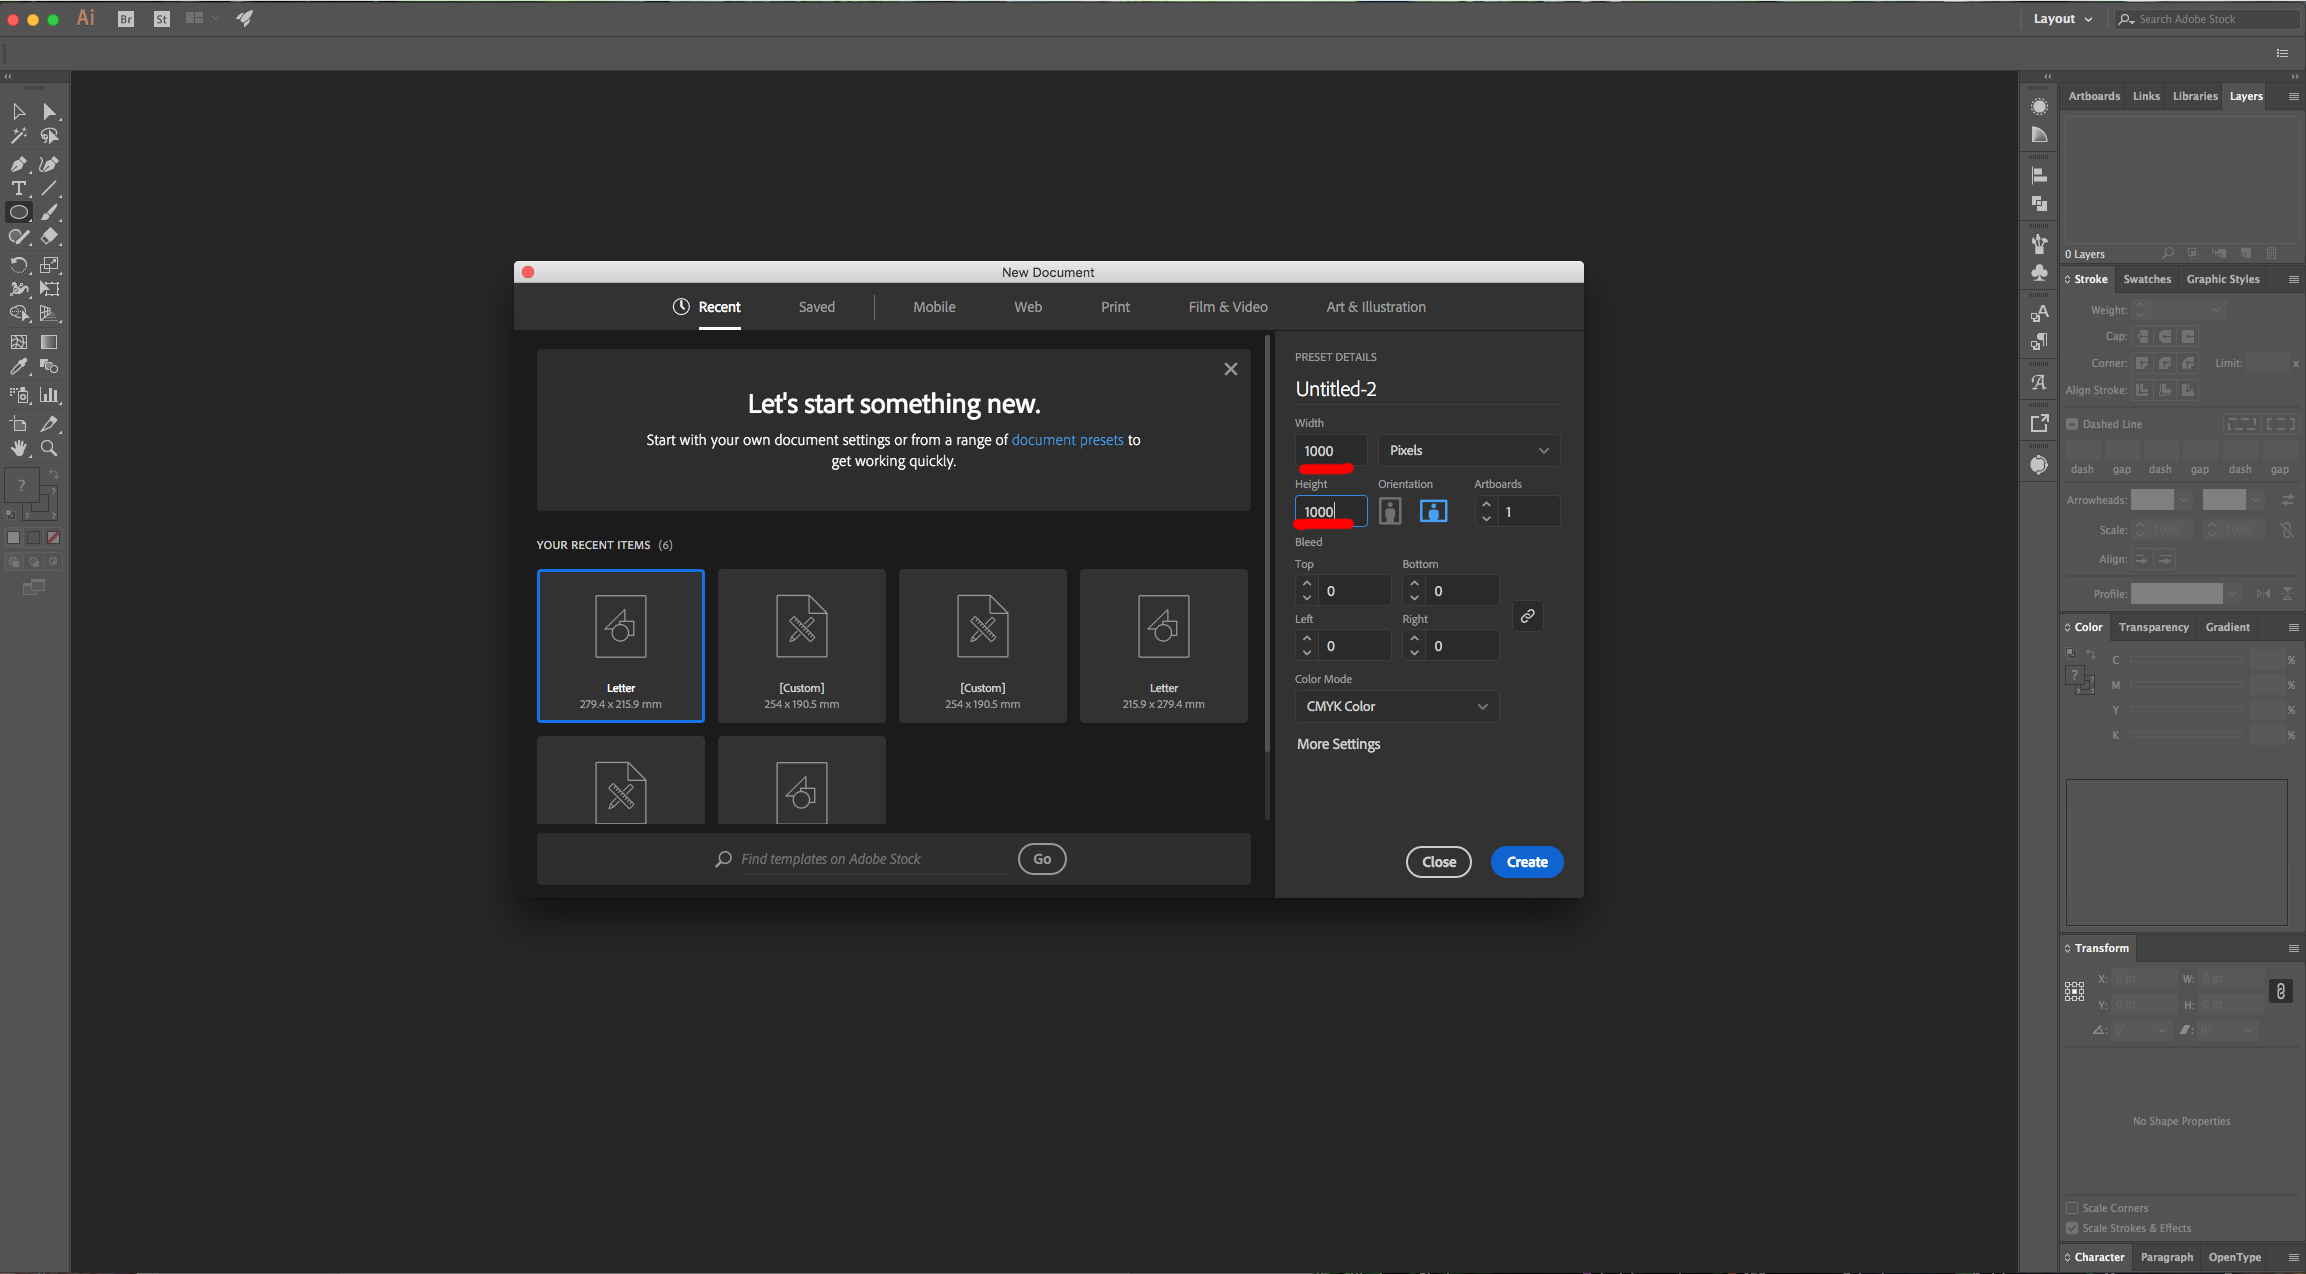
1 - In Illustrator, create a “New Document” measuring 1000 x 1000 Pixels.
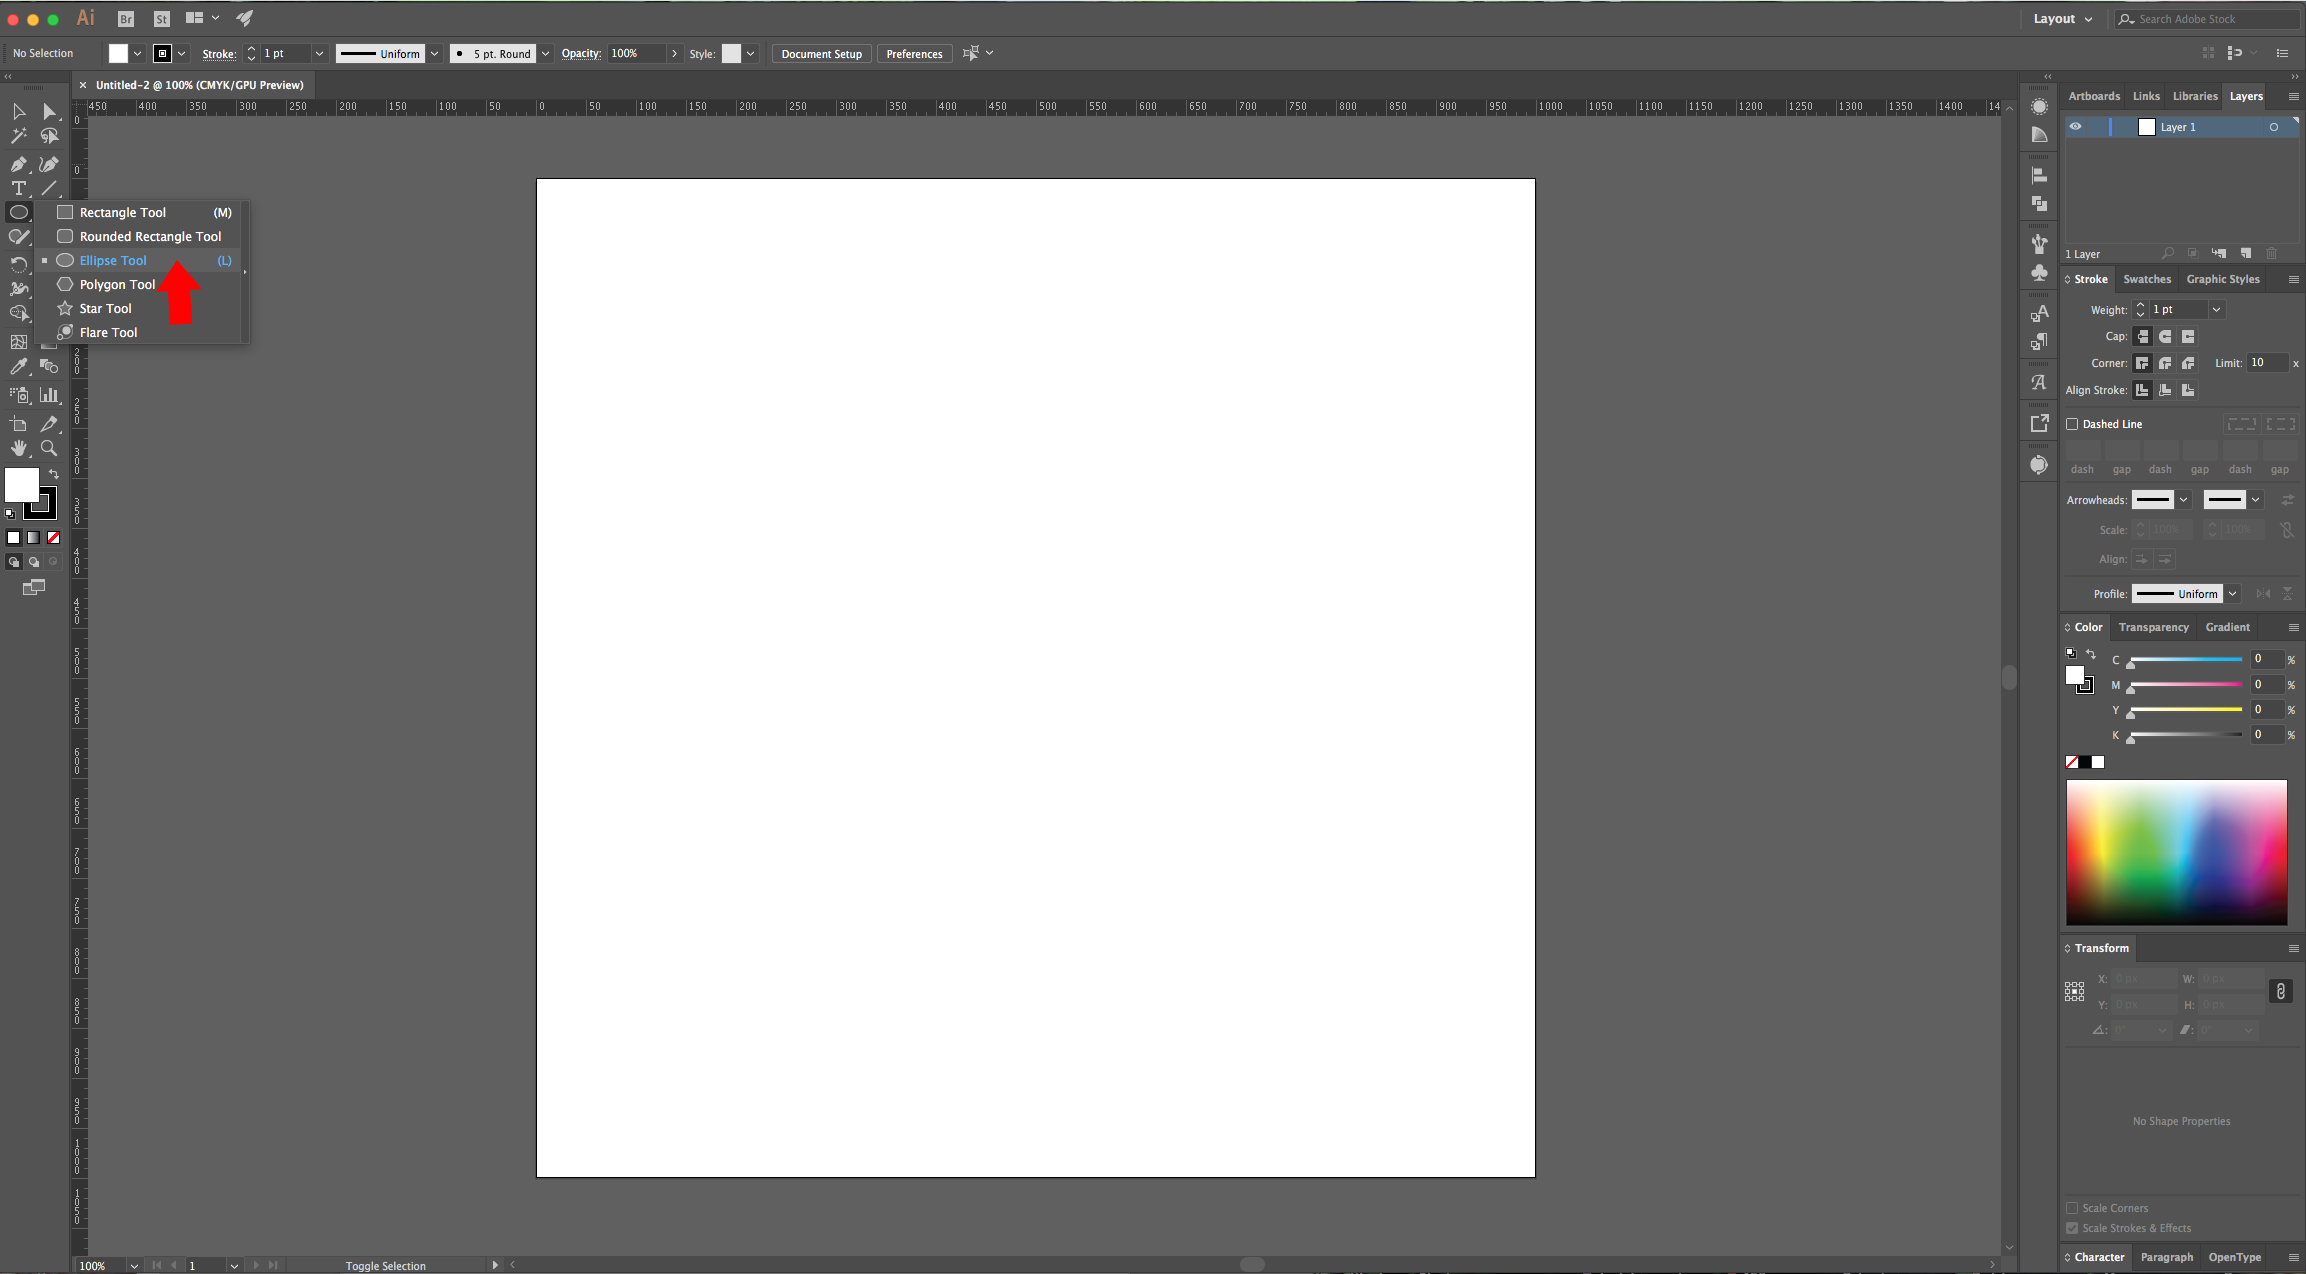
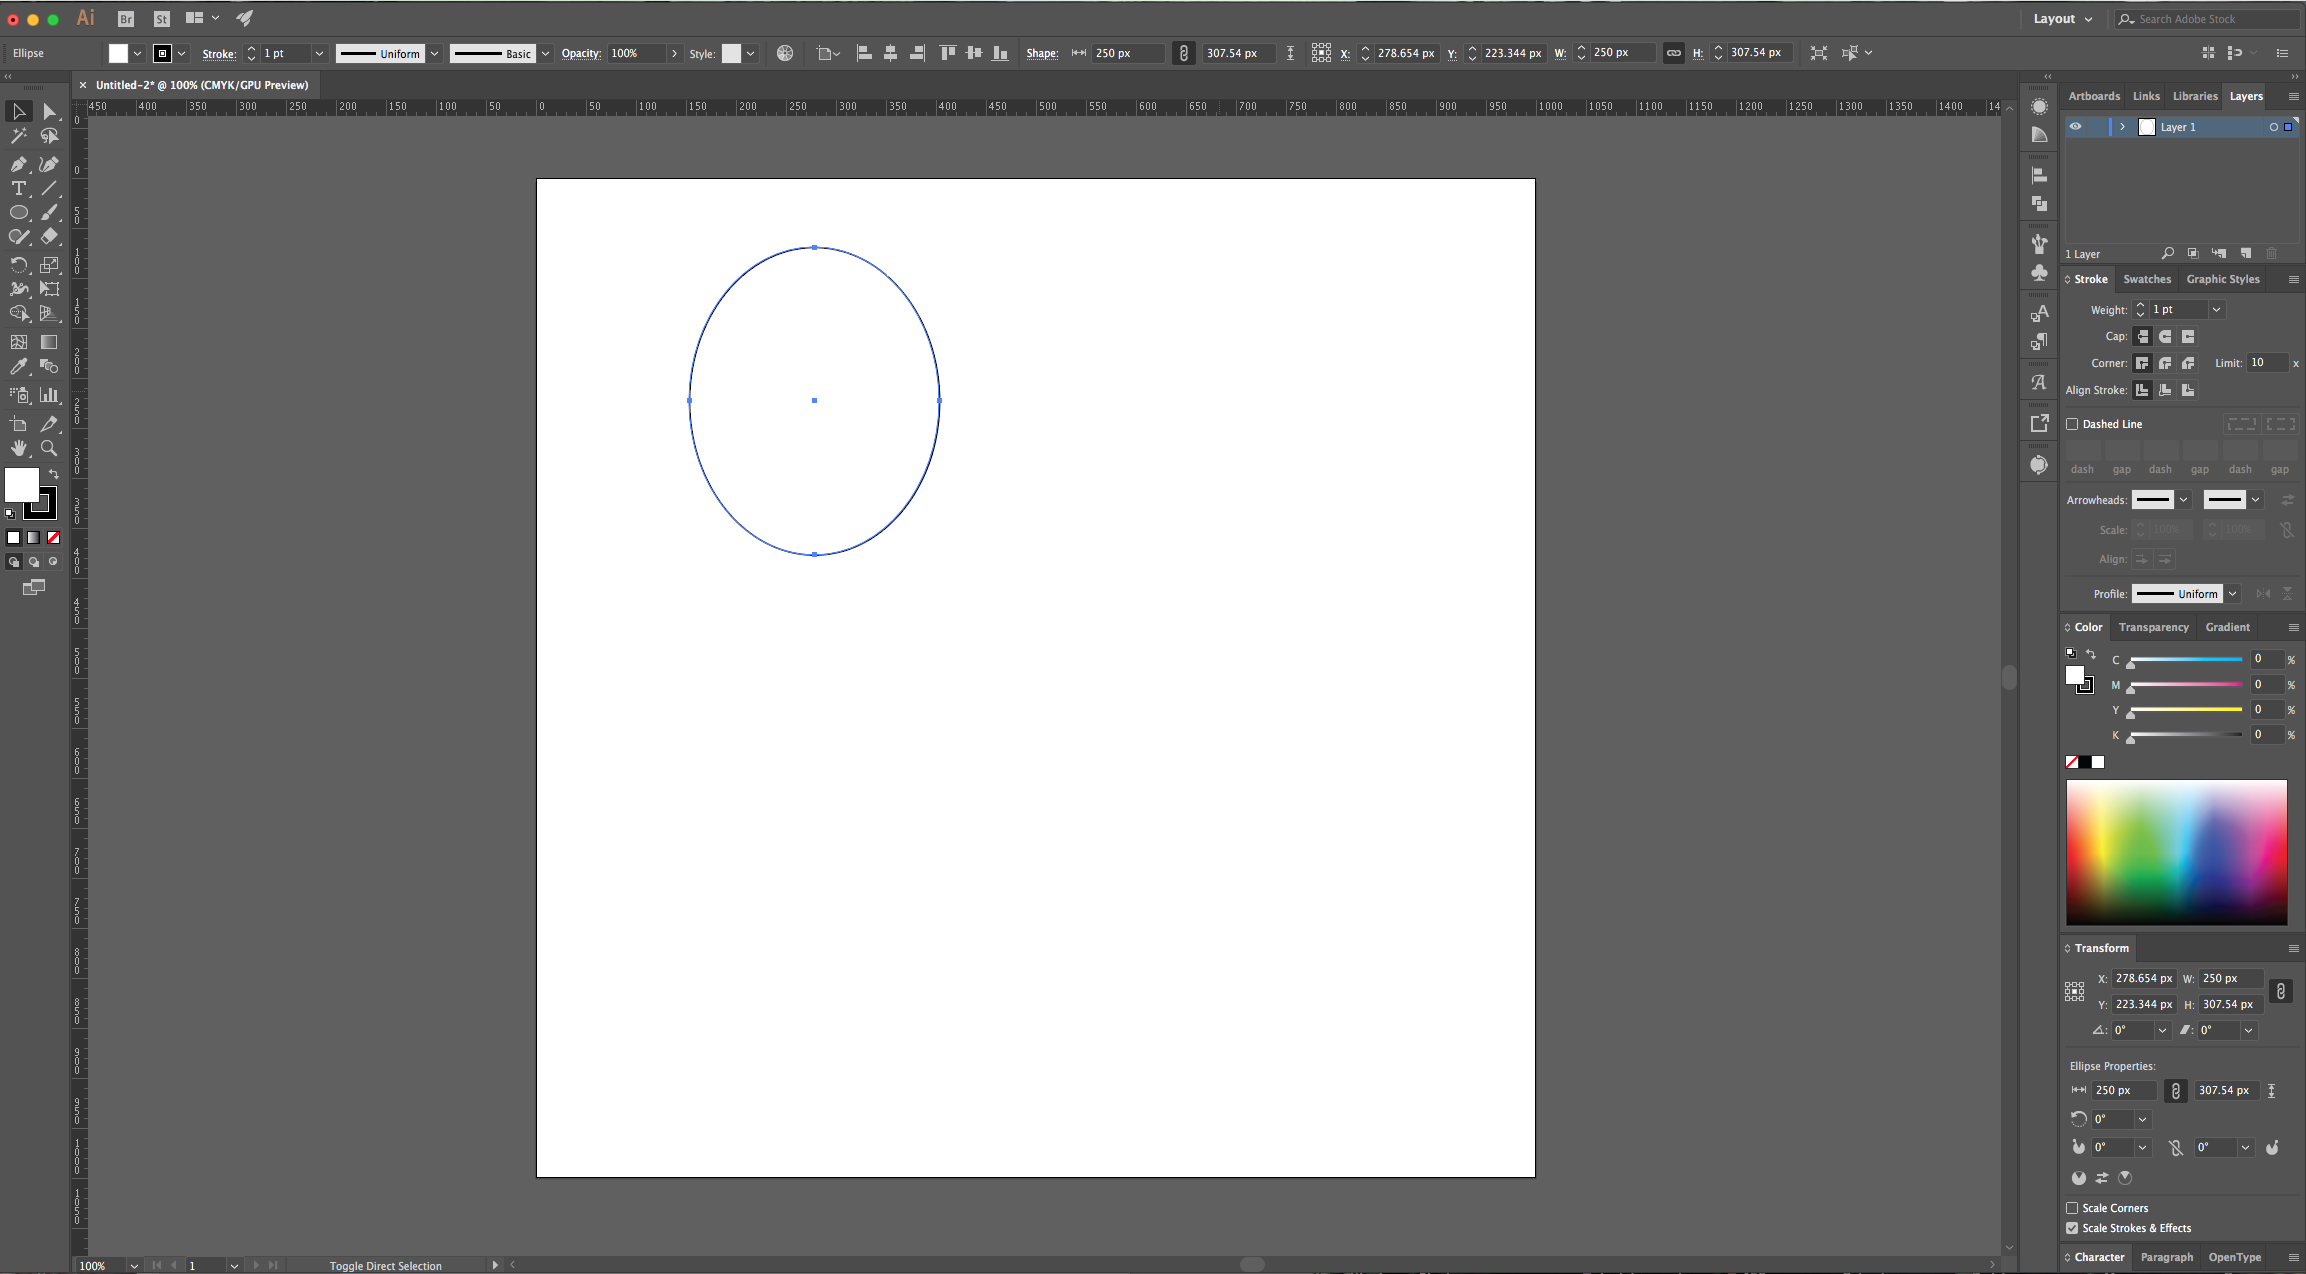
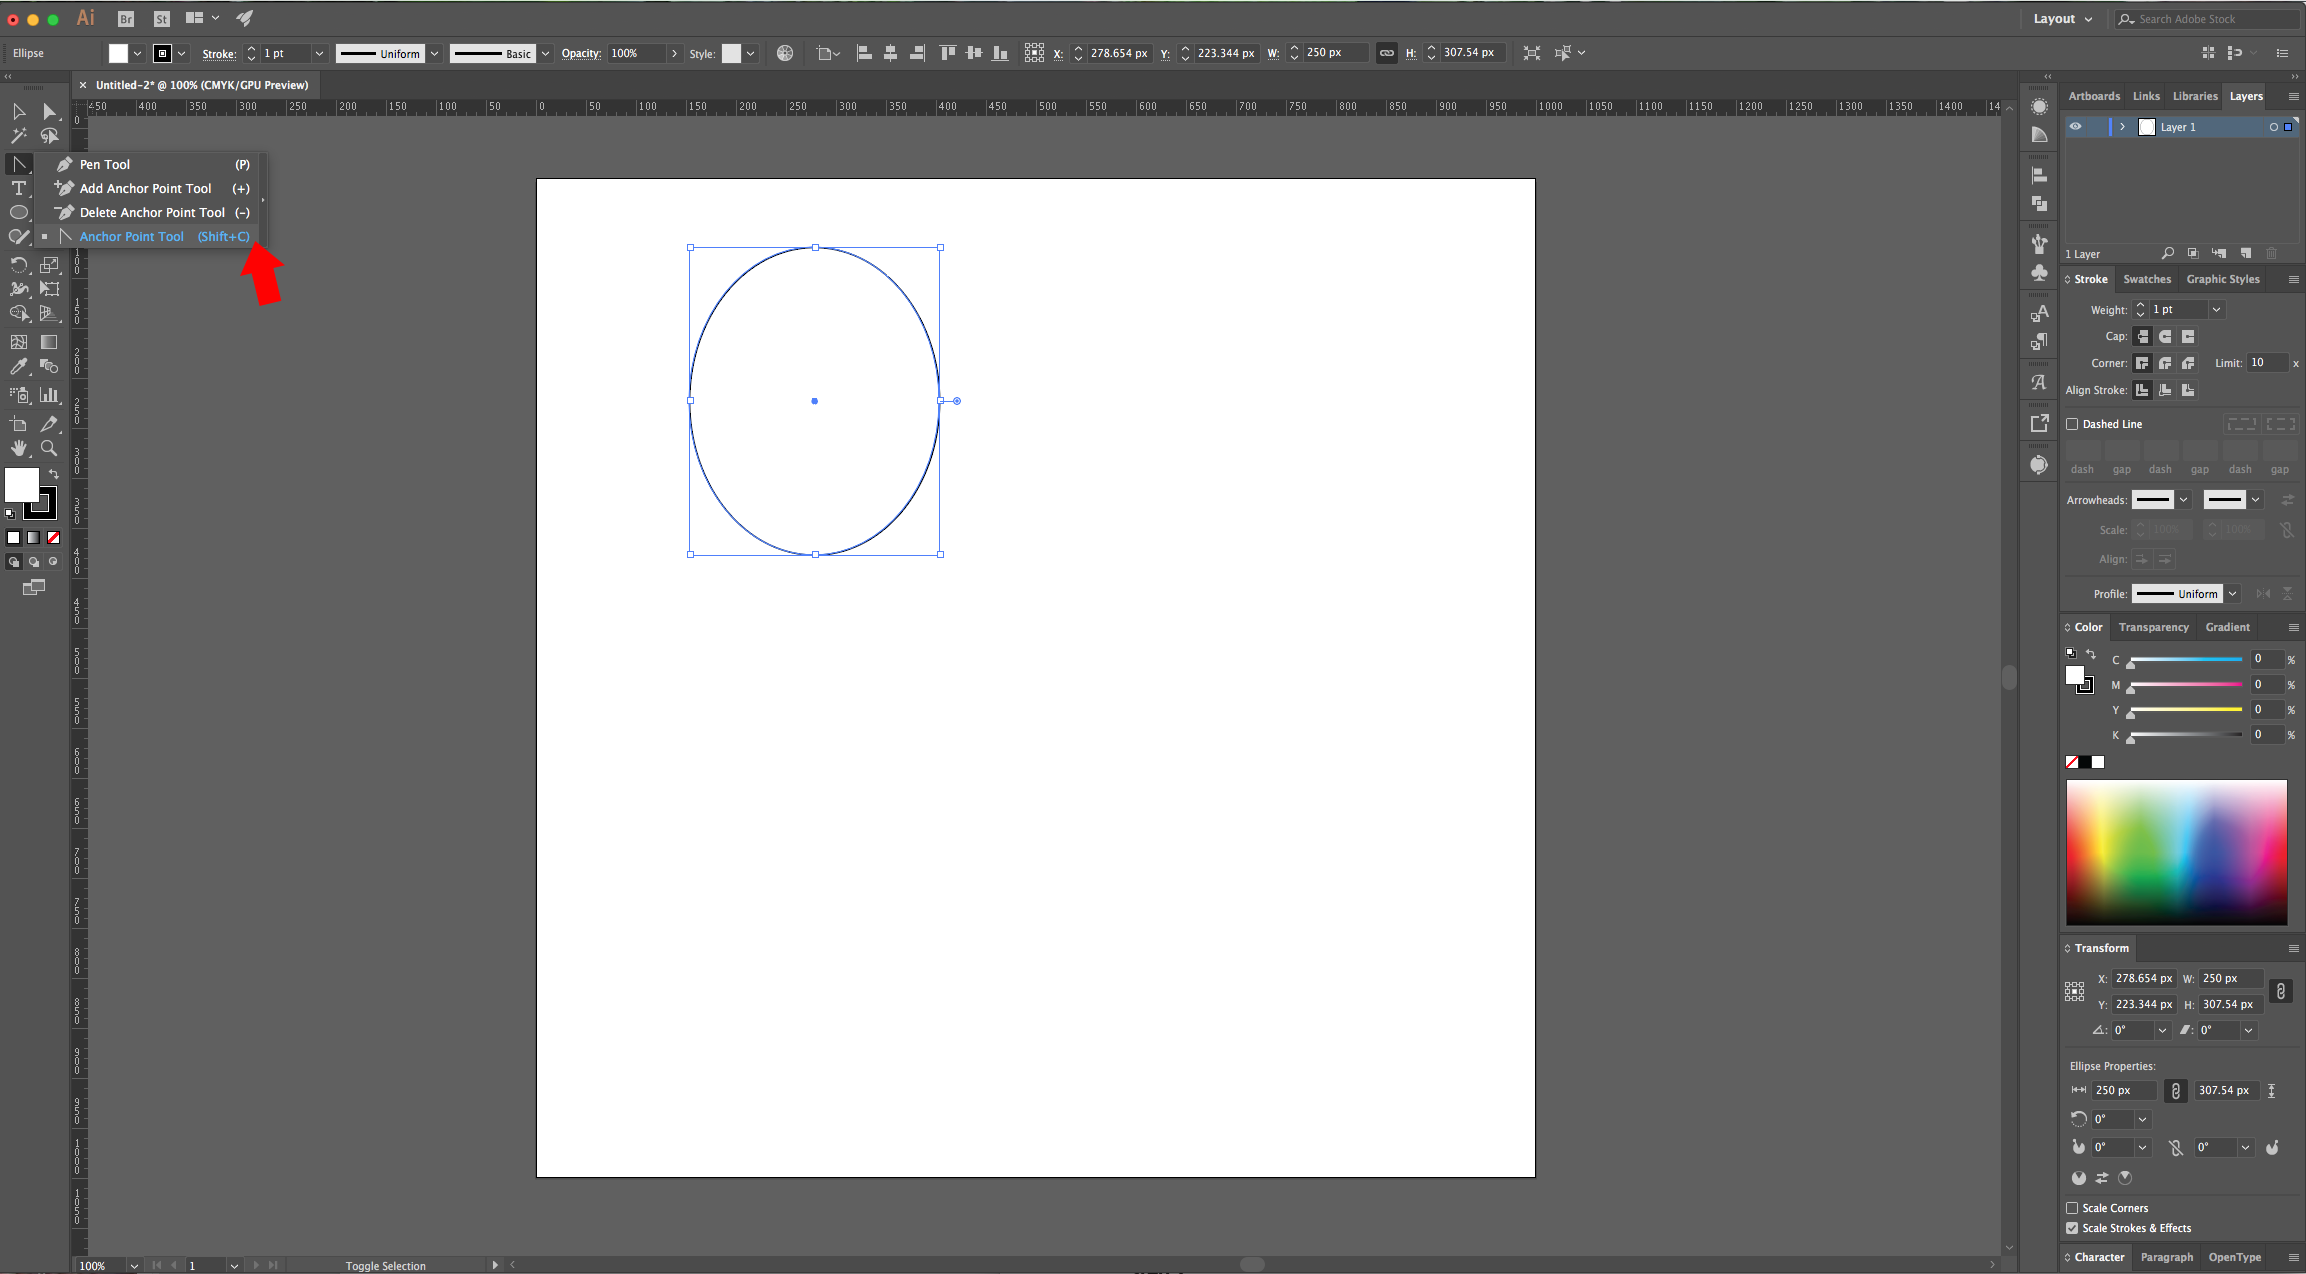
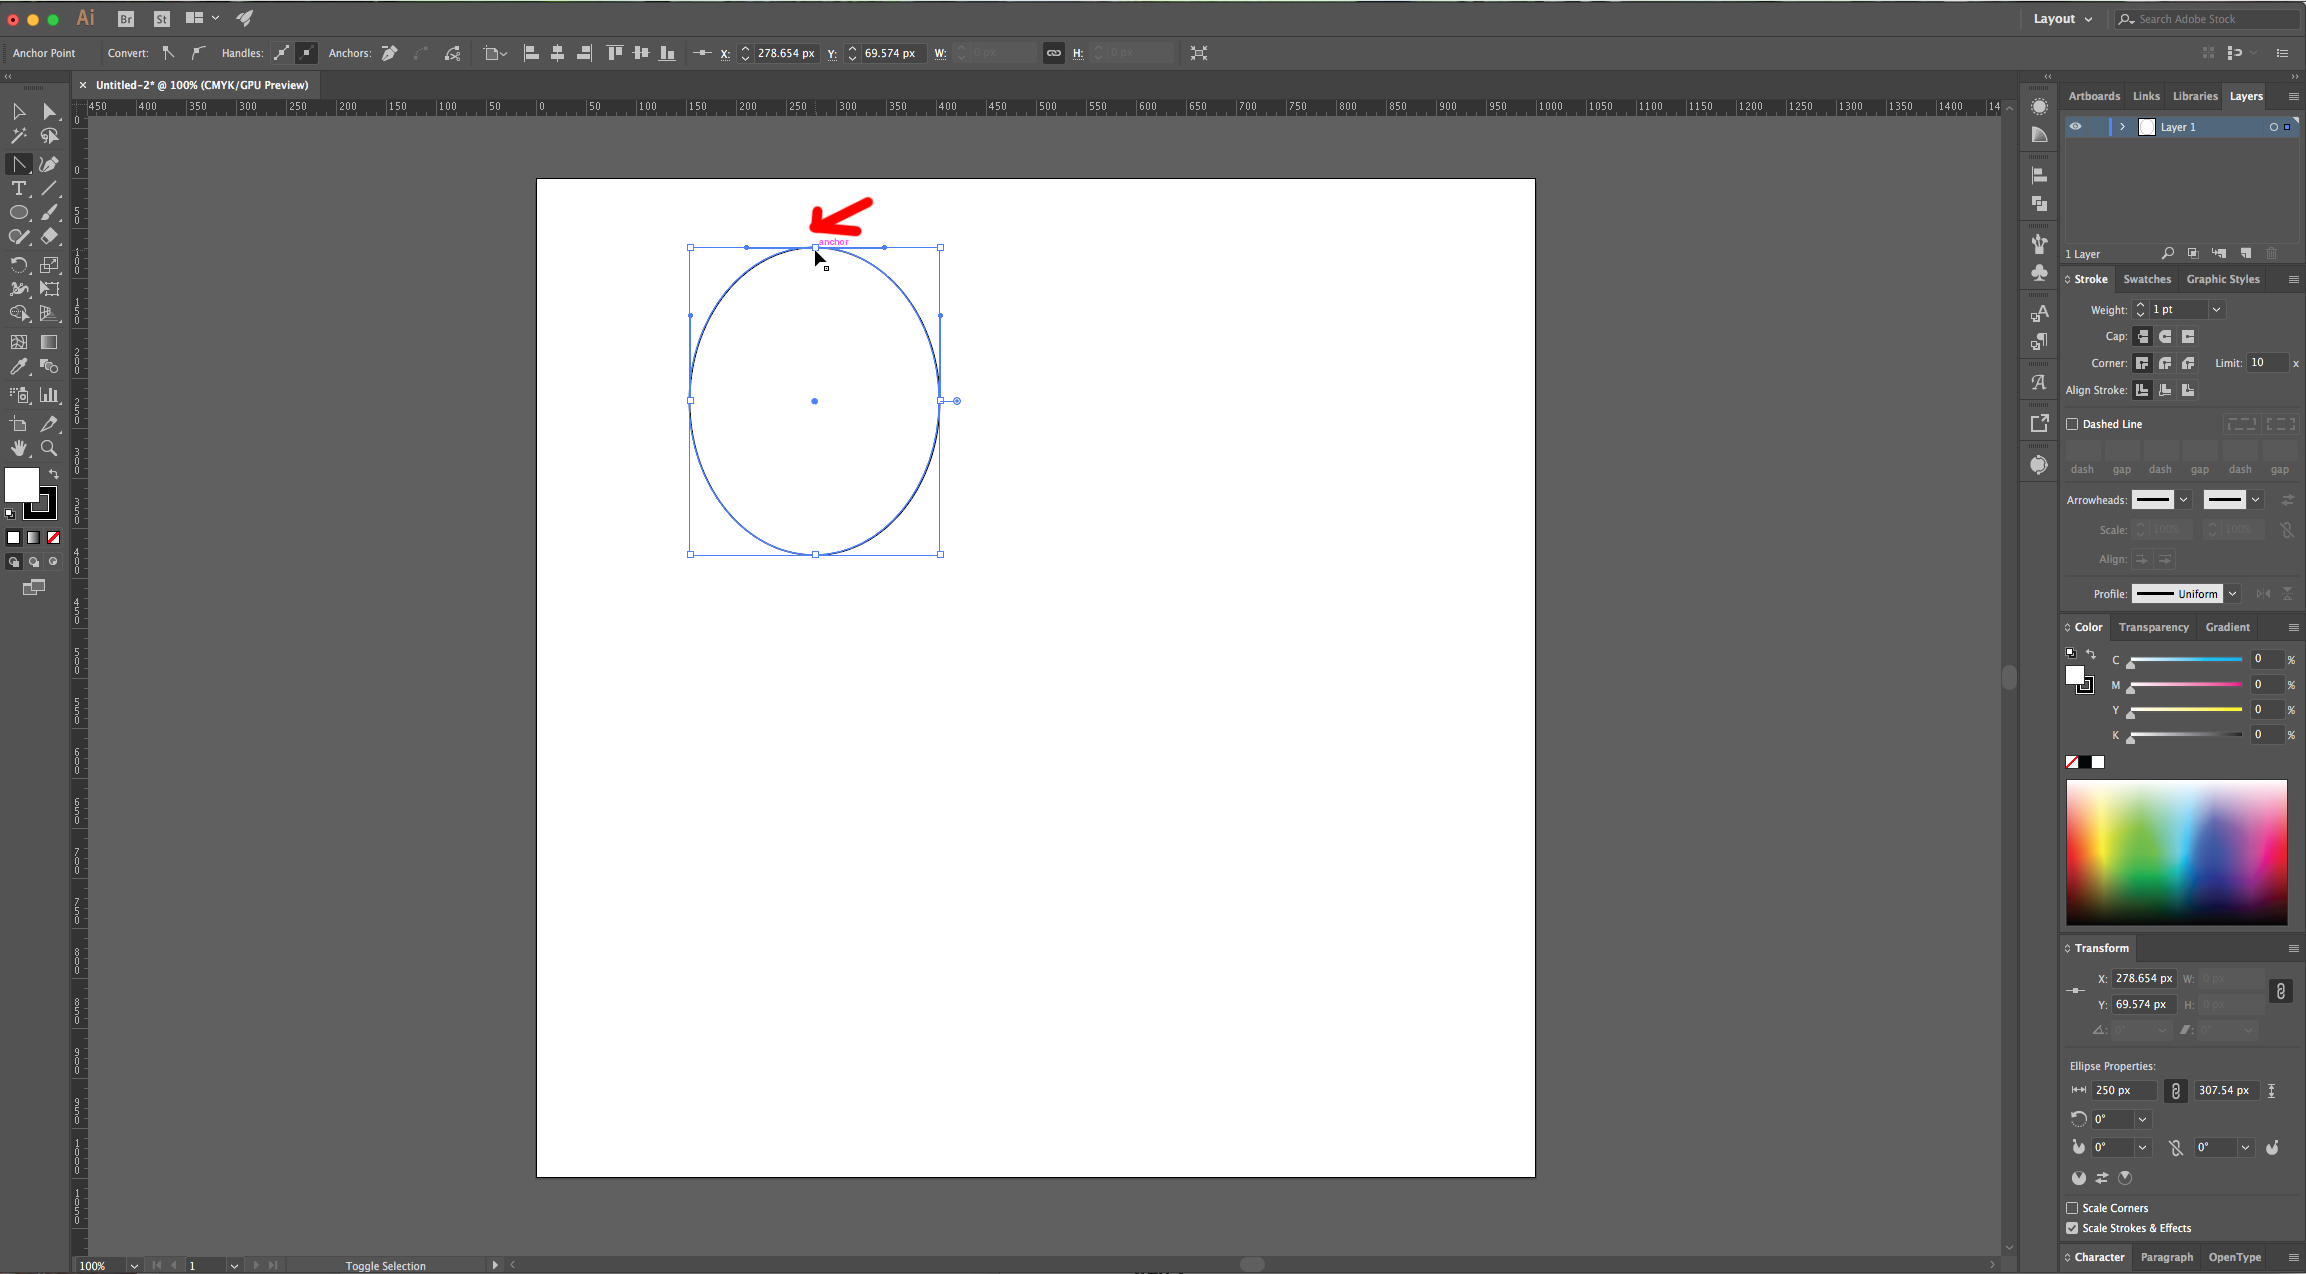
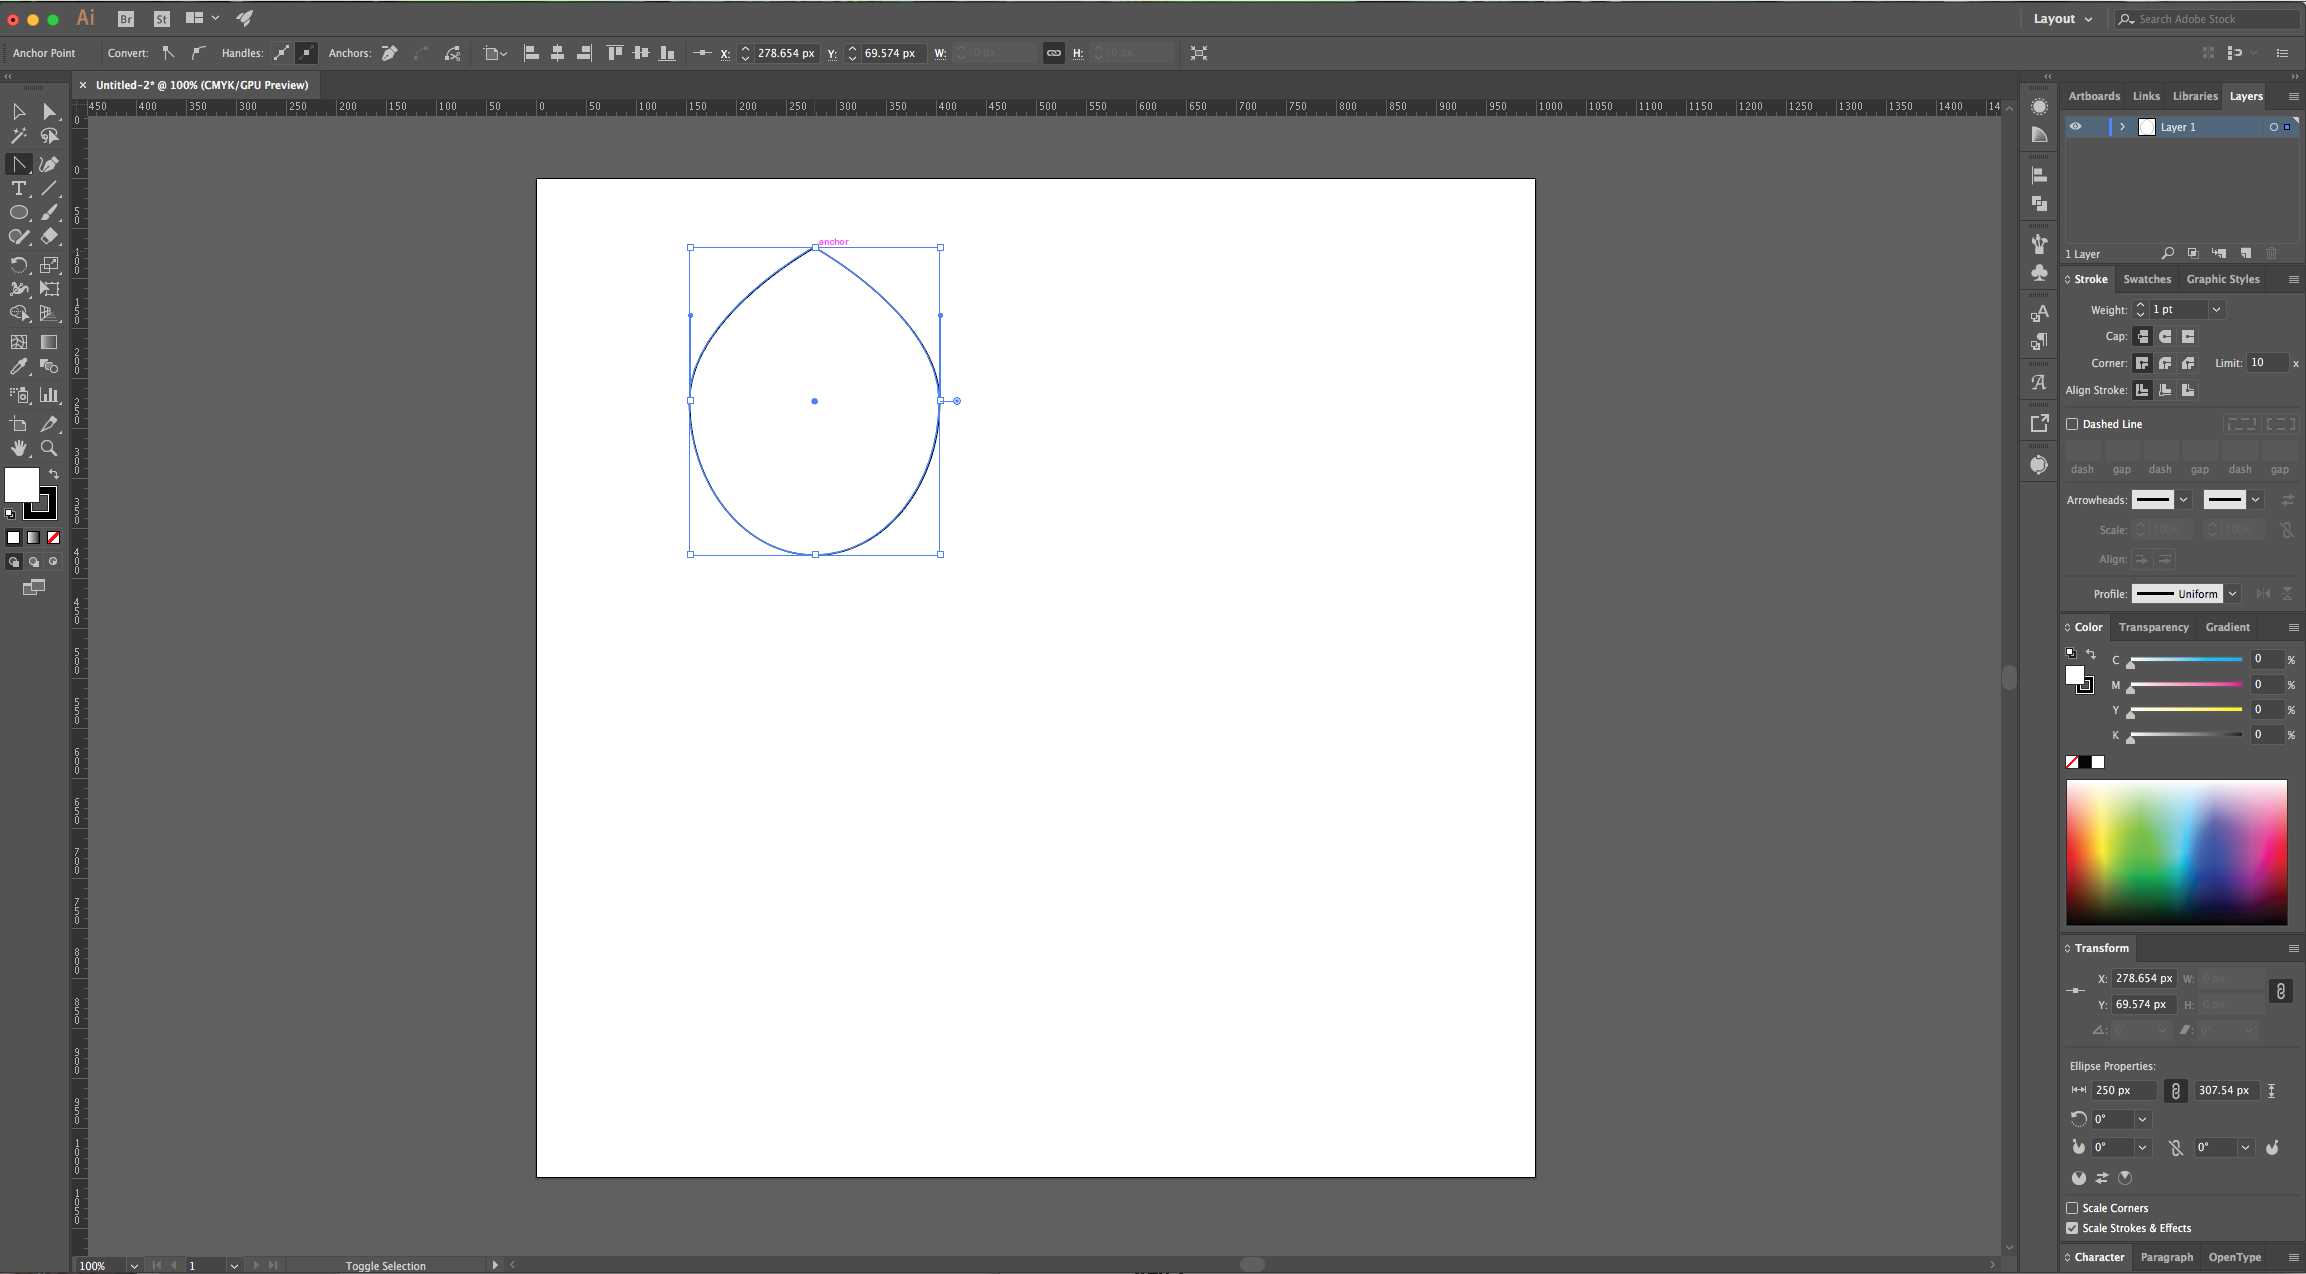
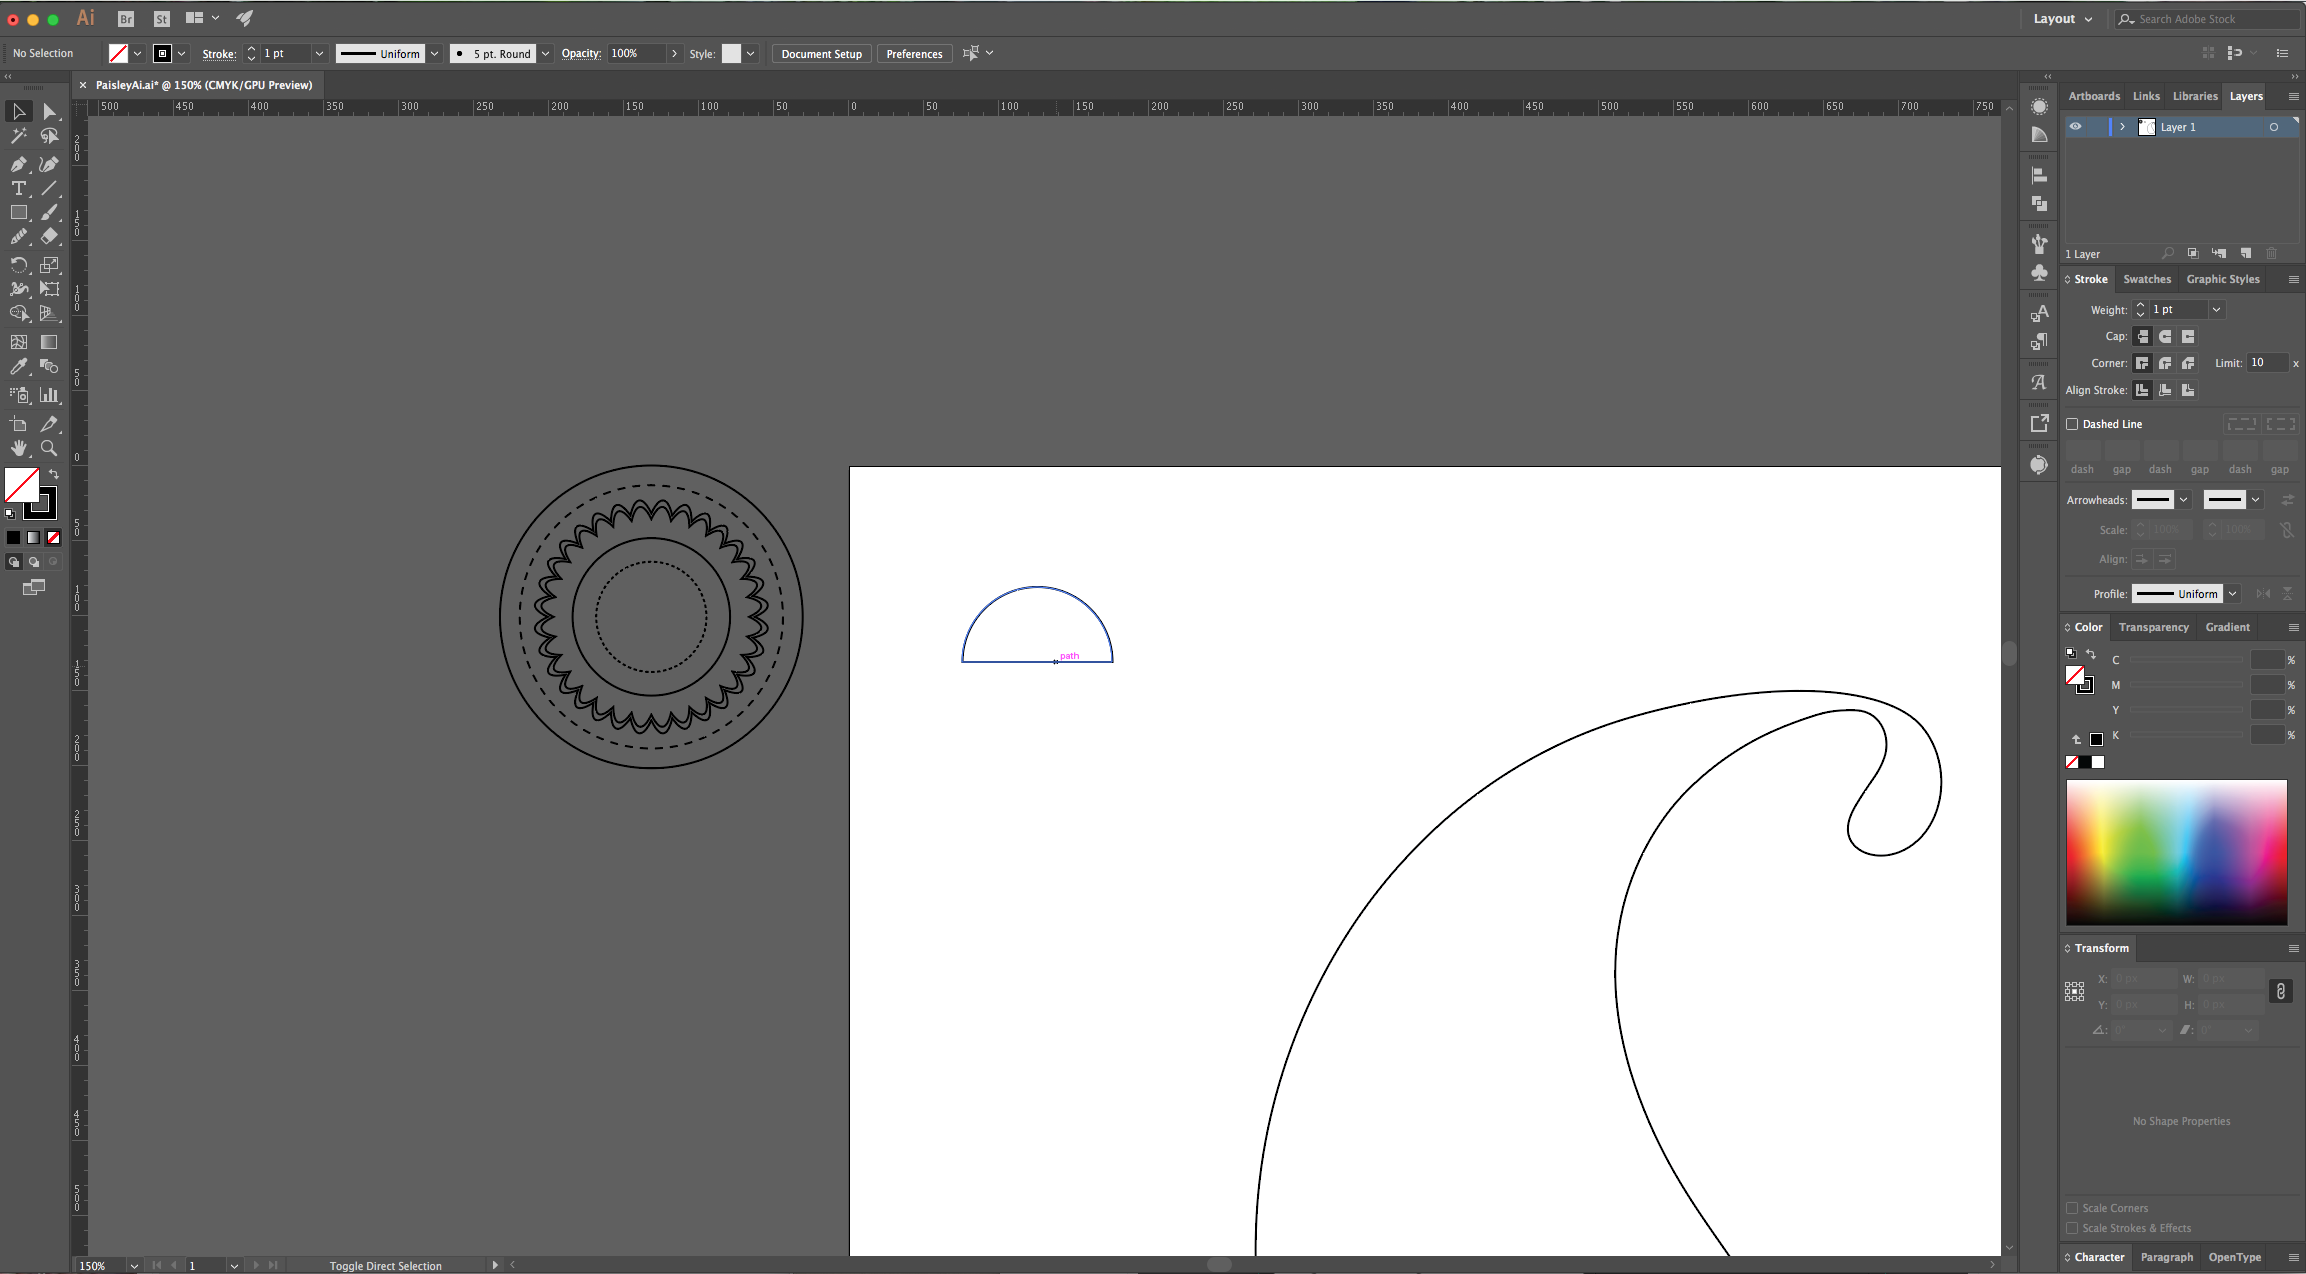
2 – Select the “Ellipse Tool” (L) and draw an “Ellipse” inside your document. Select the “Anchor Point Tool” (Shift + C) and click on the top Anchor Point to make the lines straight.
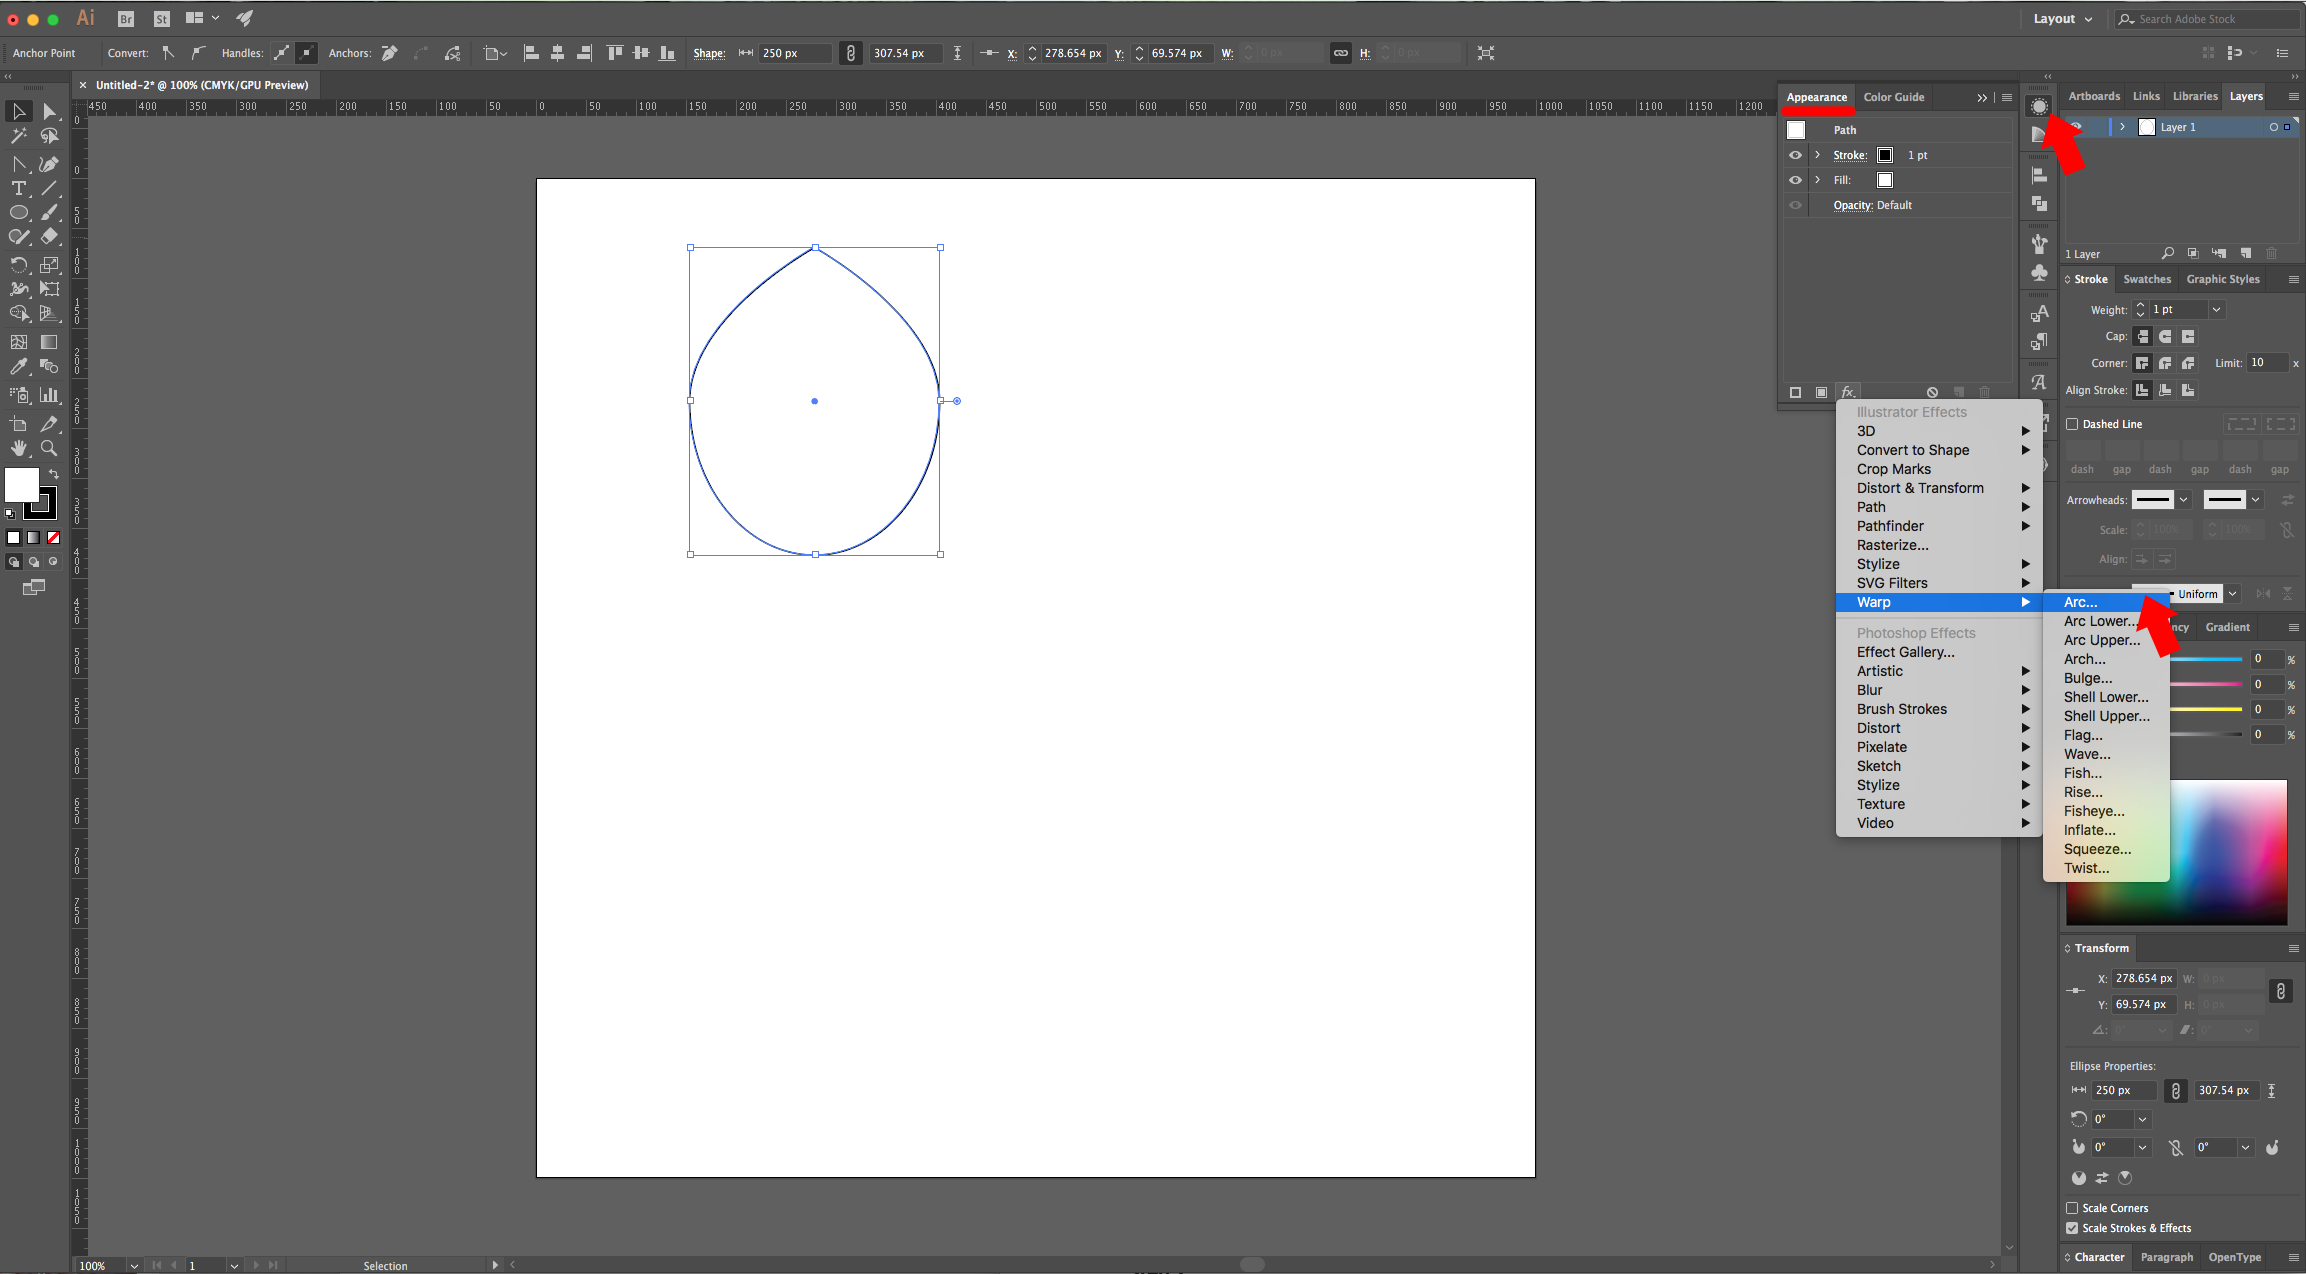
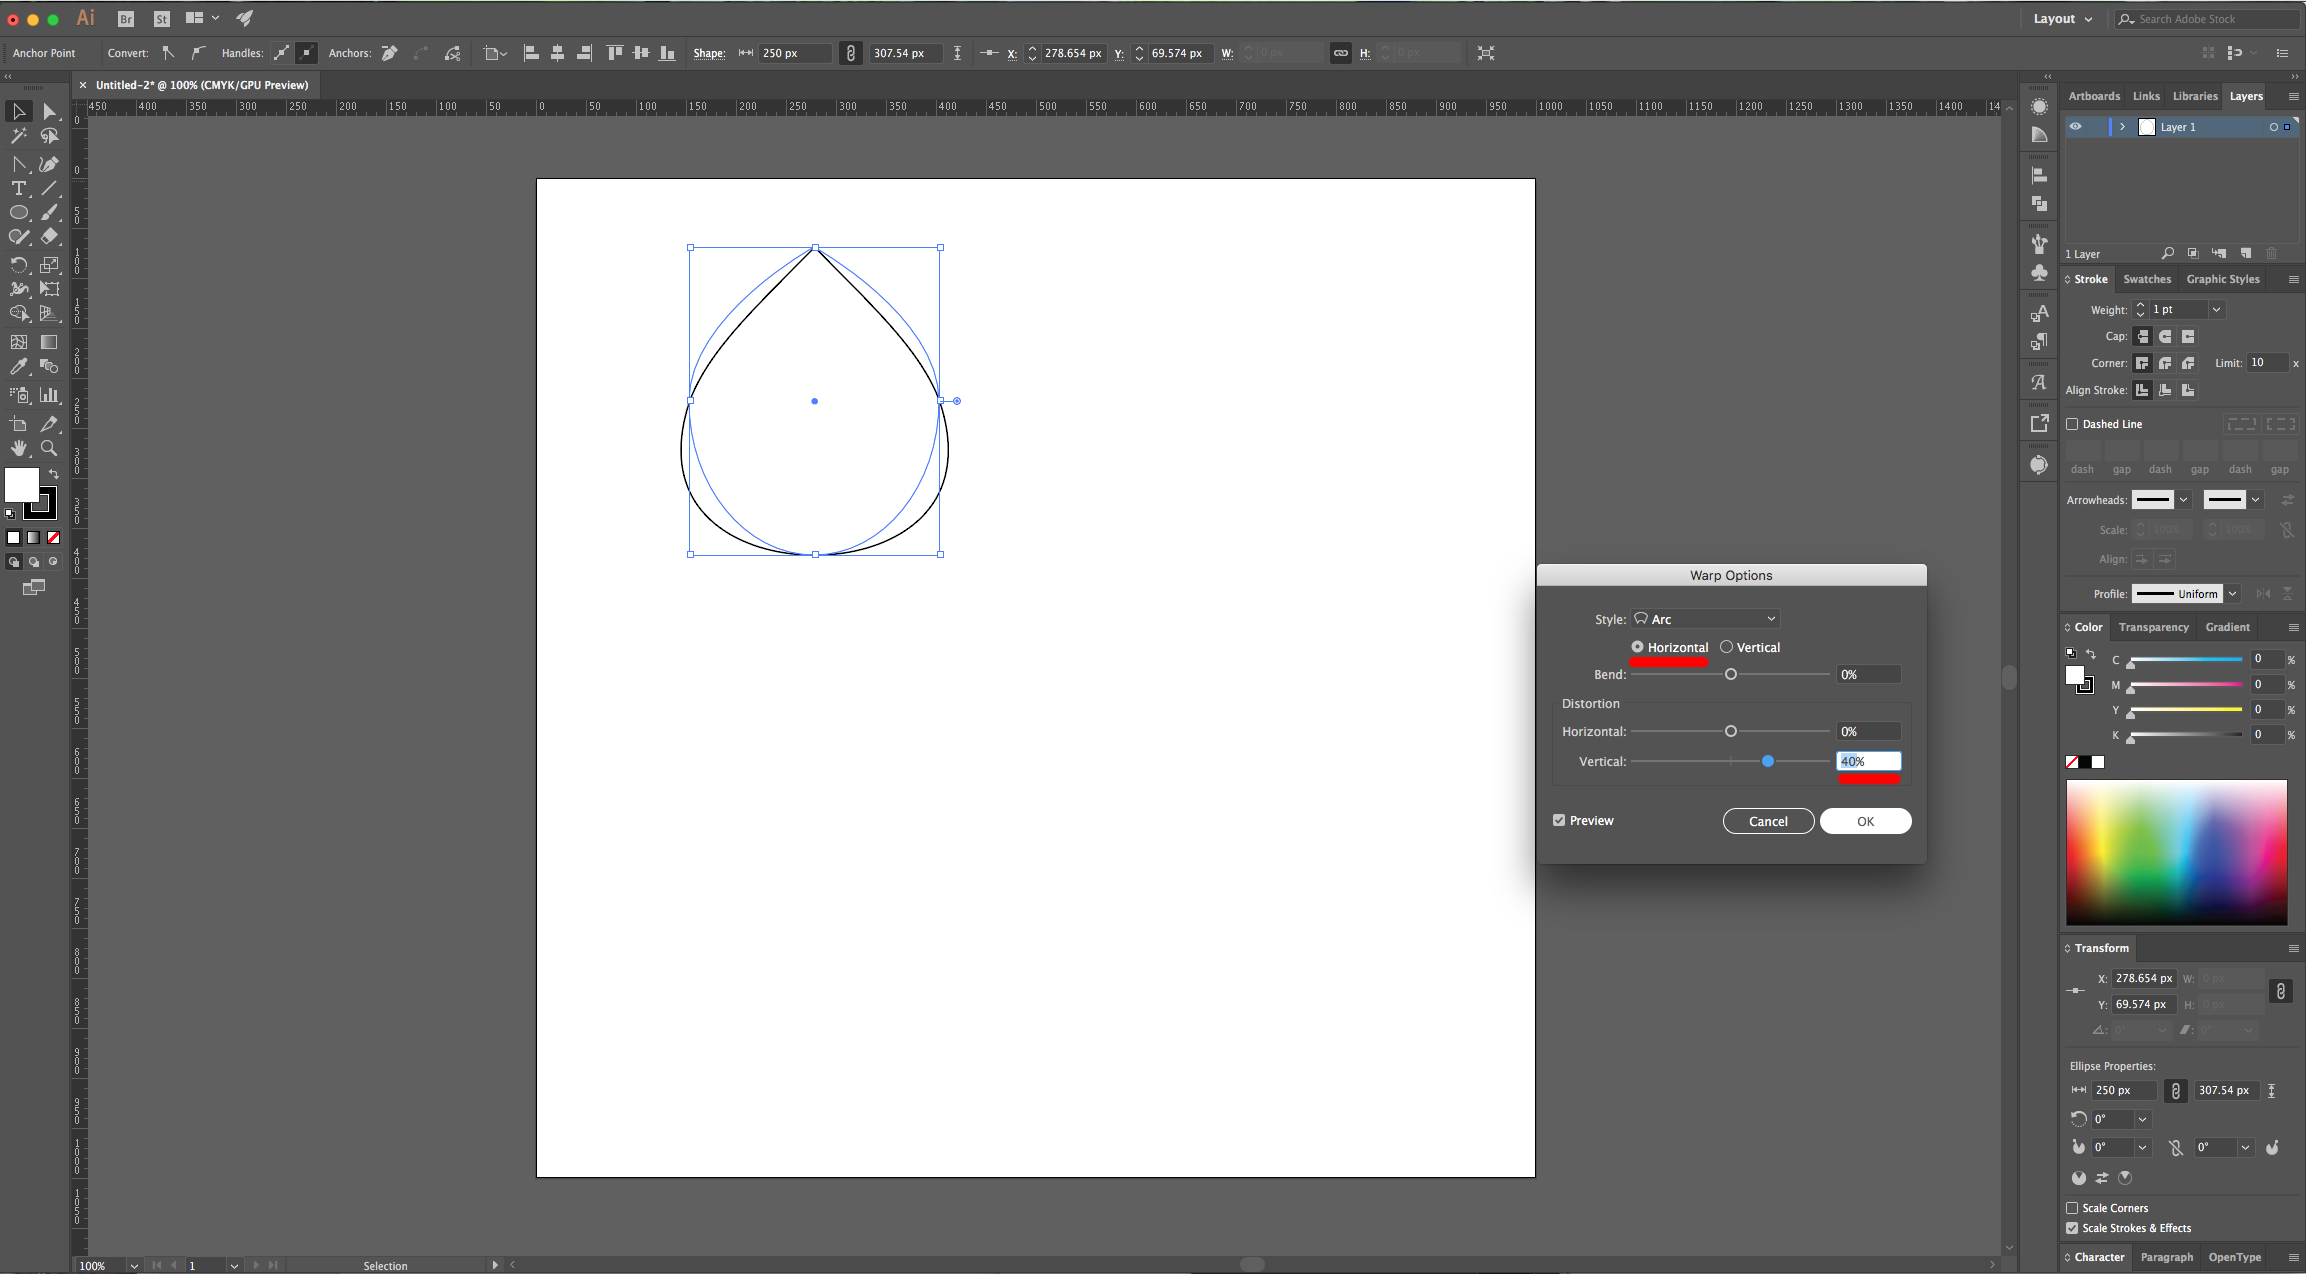
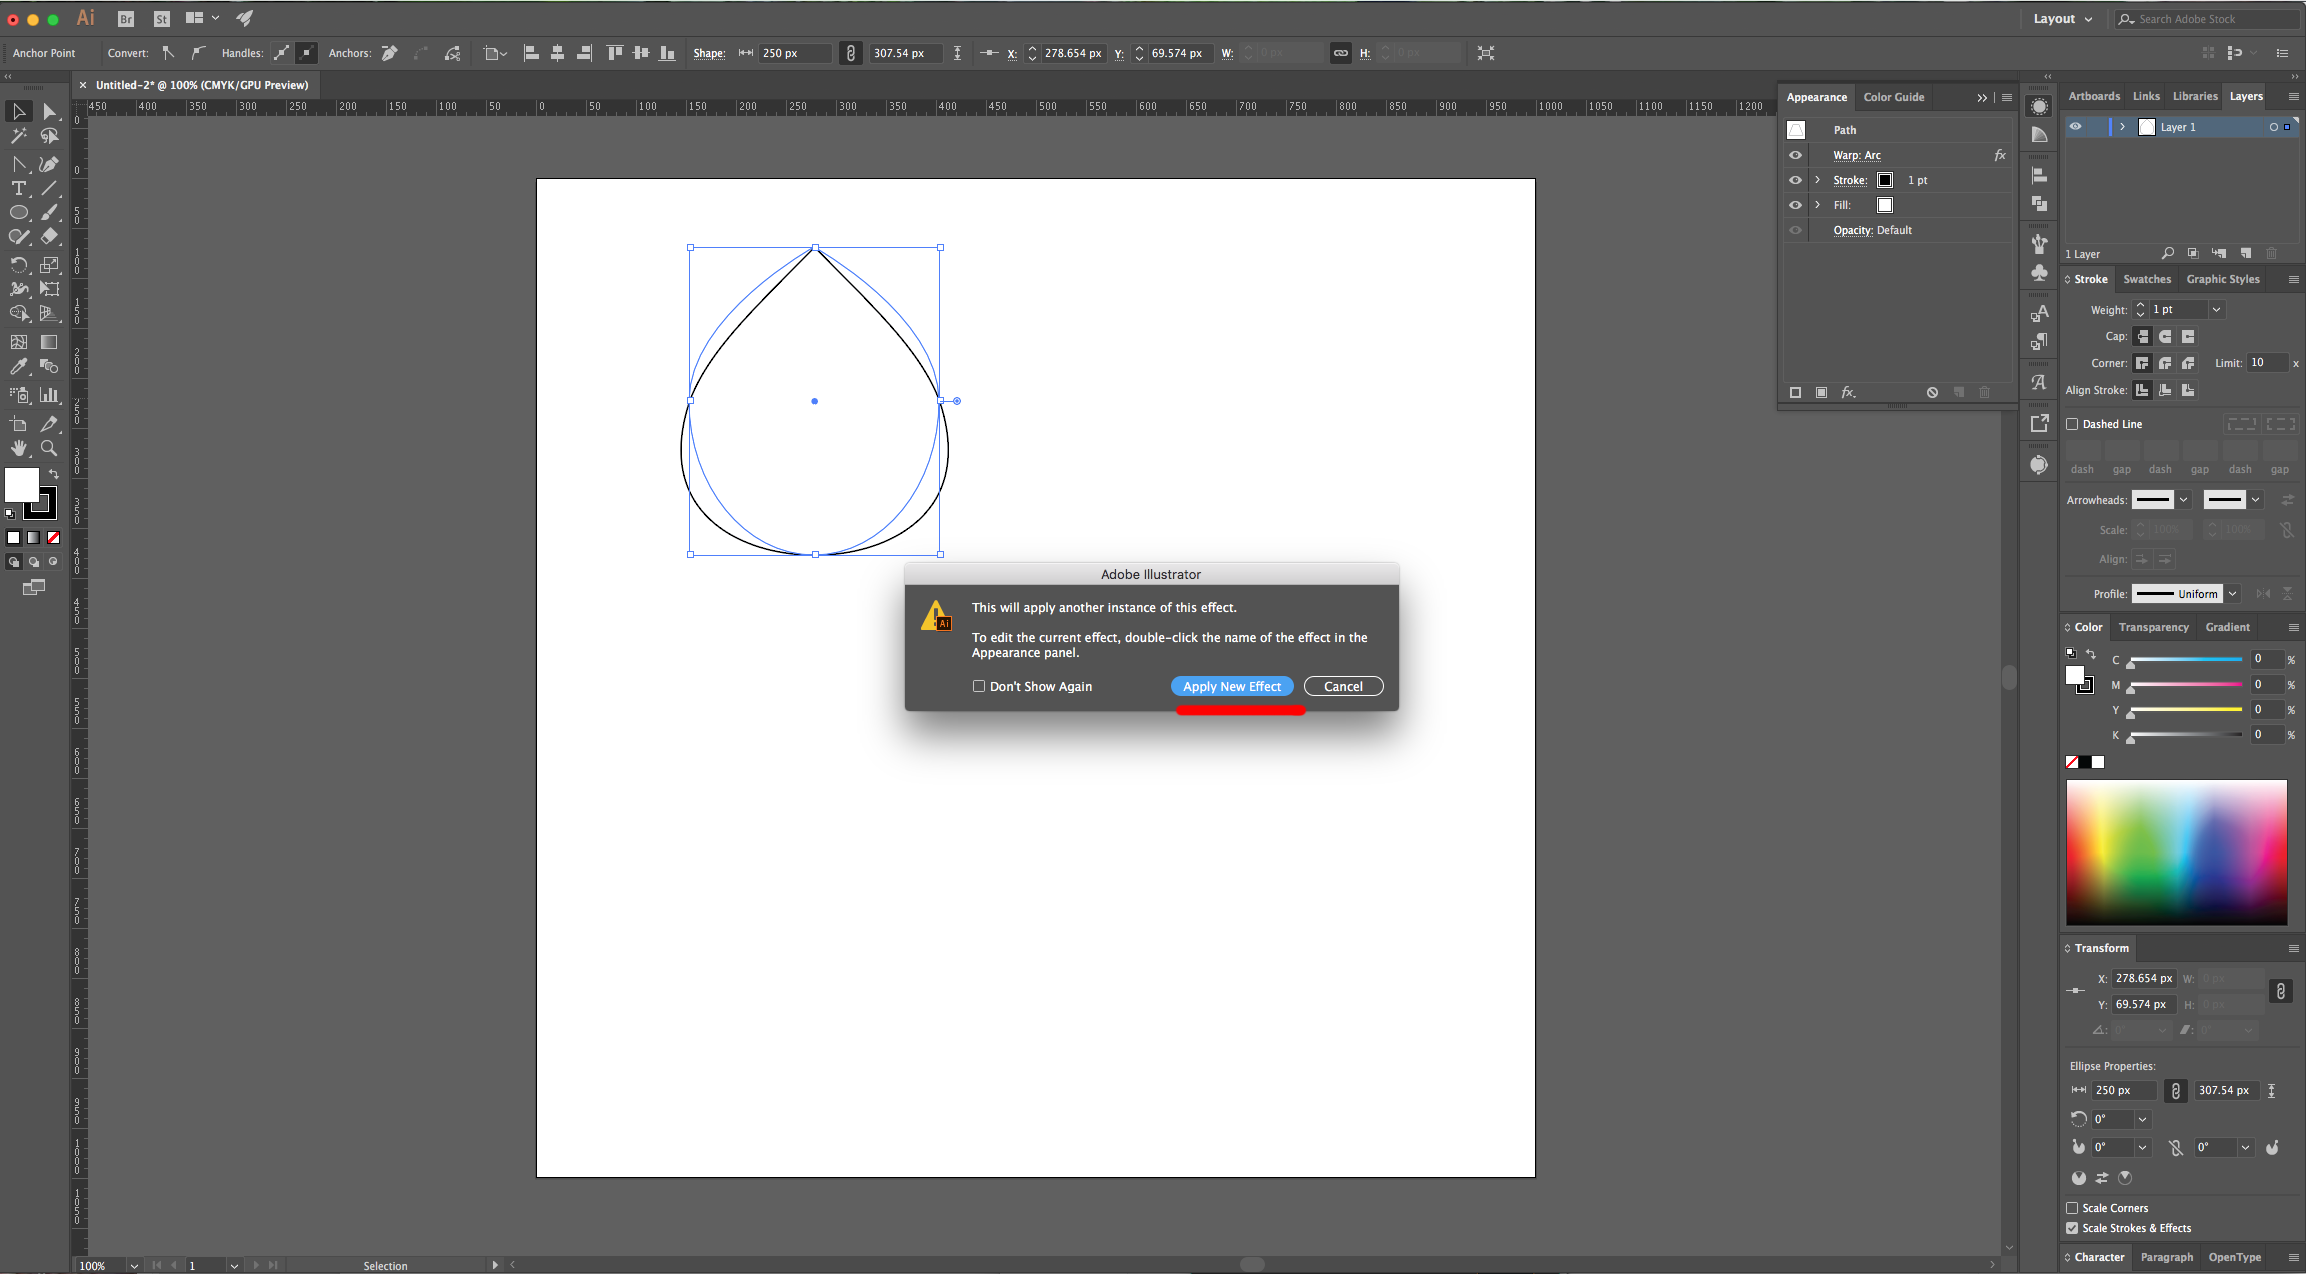
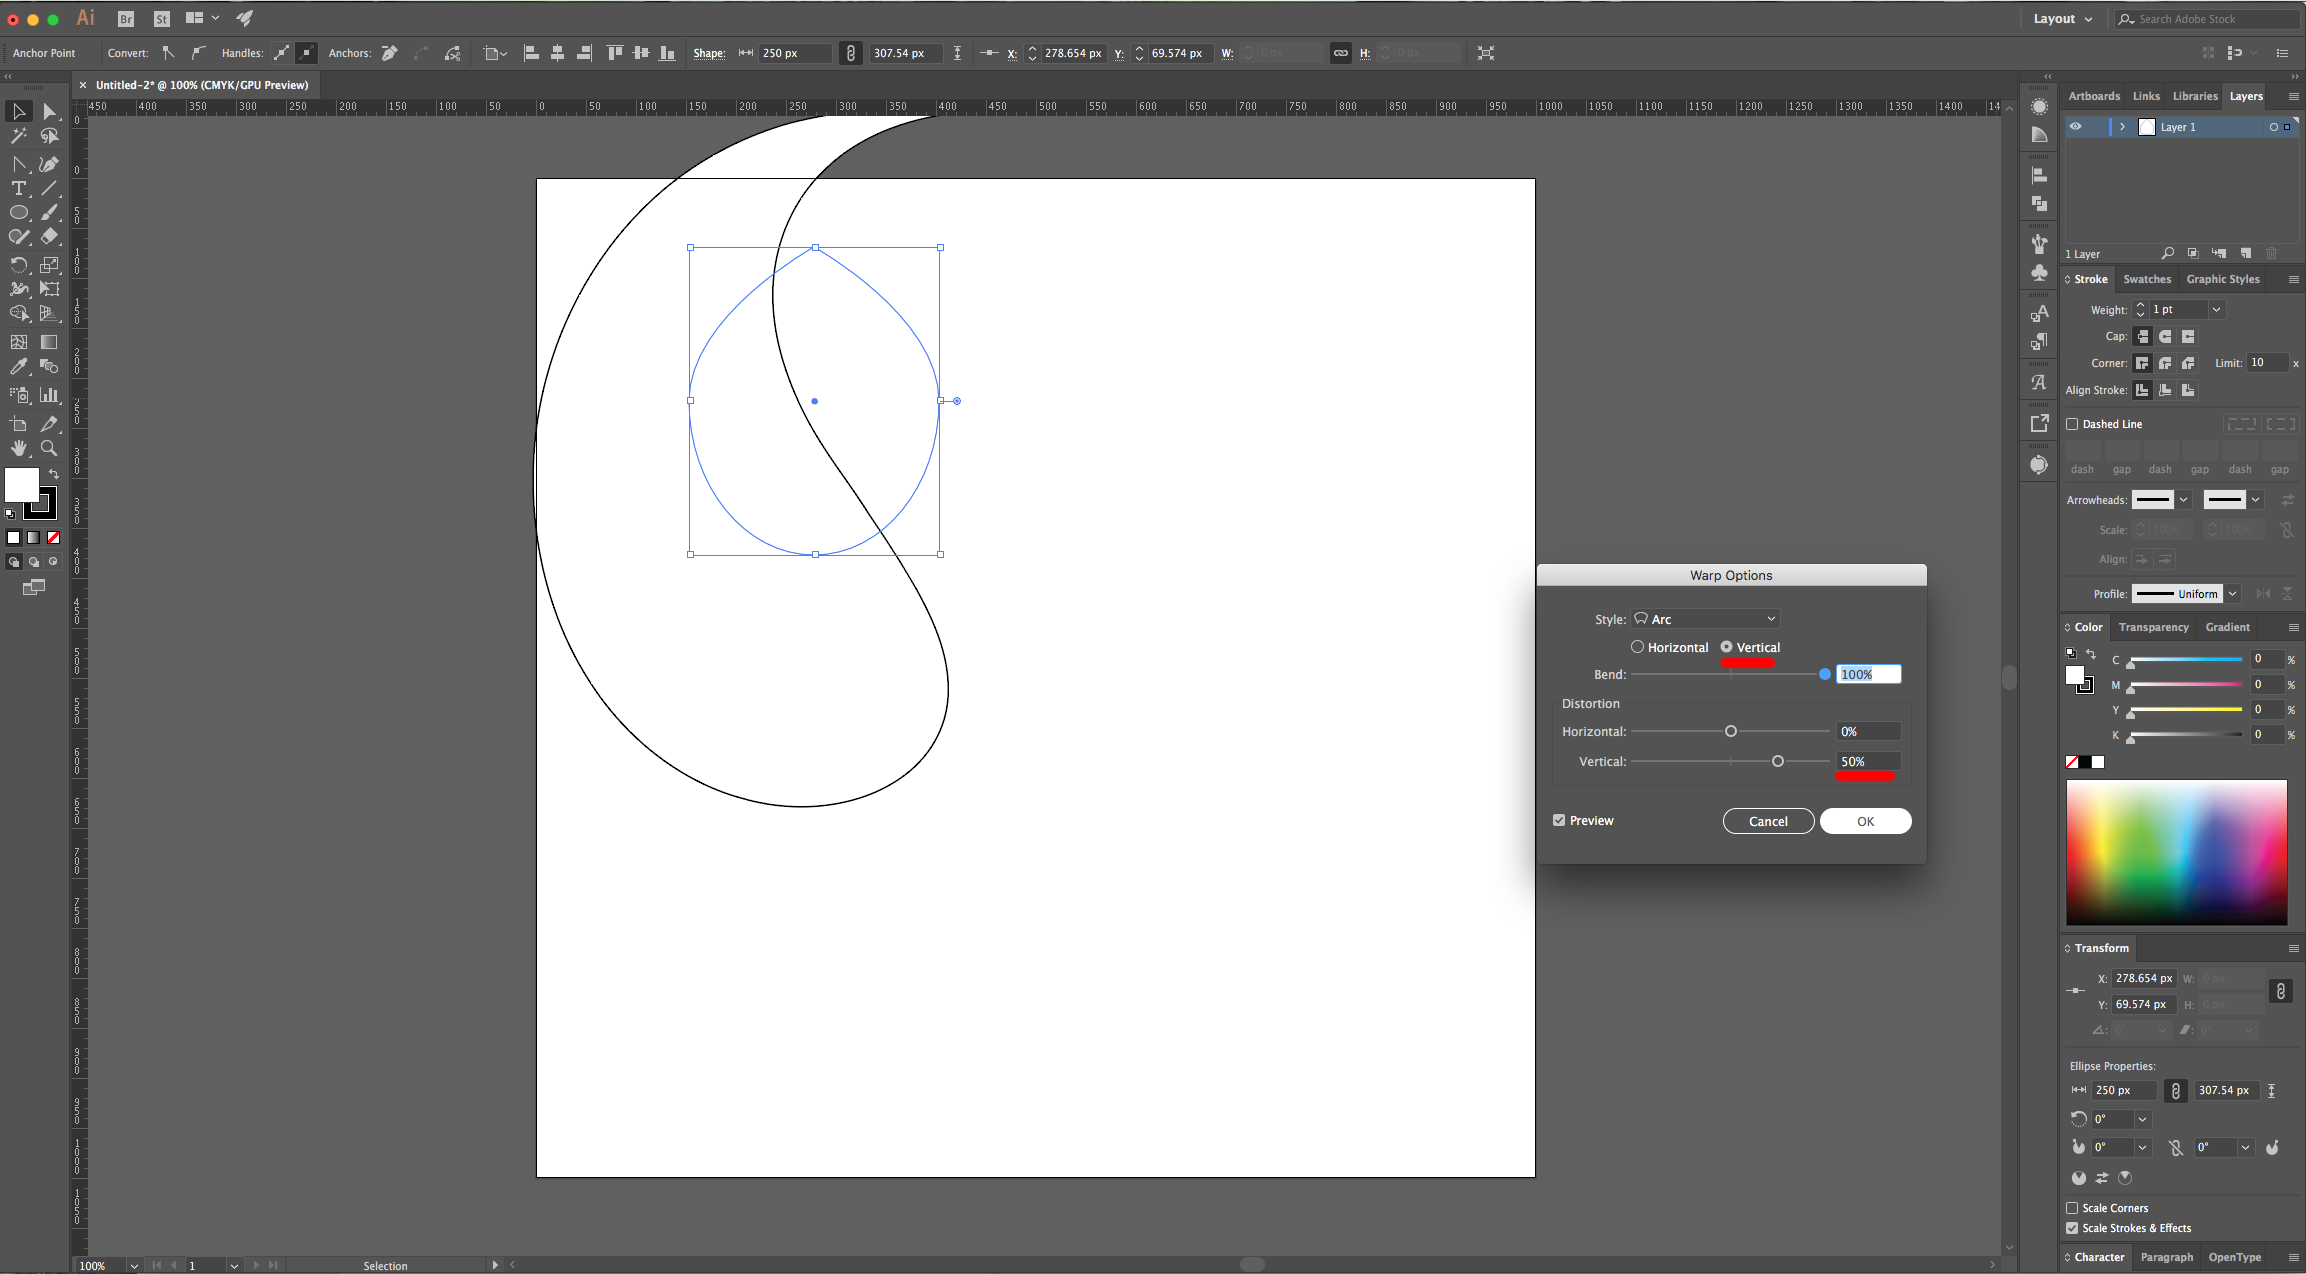
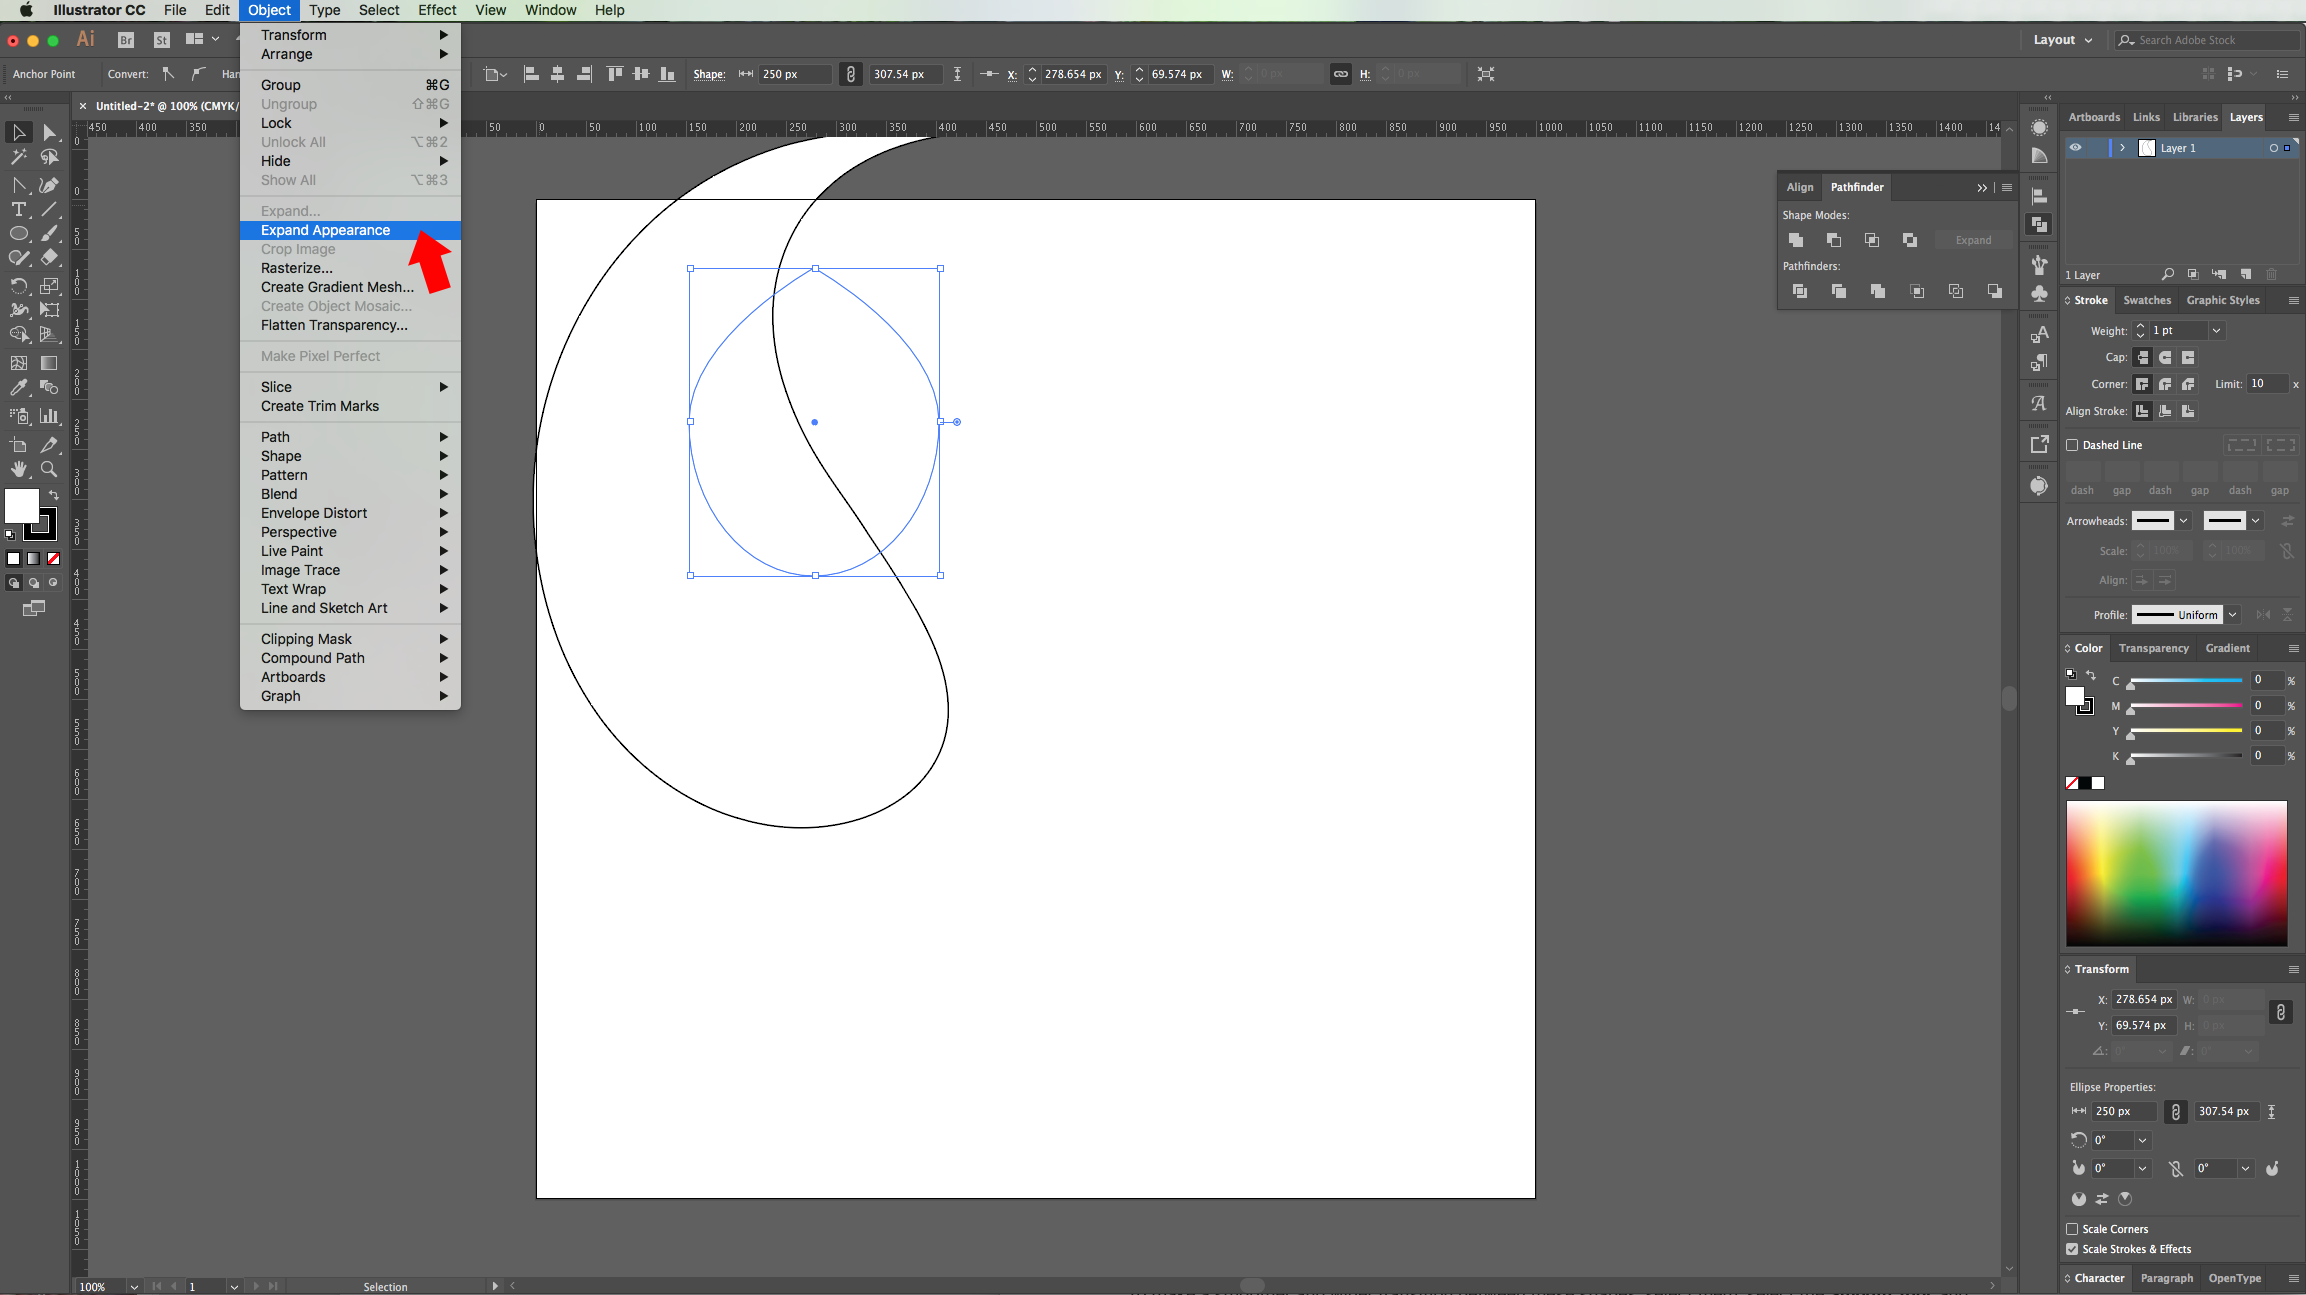
3 – In the “Appearance Panel” click on the “Effects Menu” at the bottom and navigate to Warp > Arc. Use an “Horizontal” Arc with a “Vertical Bend” of 40%. Click “Ok” and go back to the “Arc” Effect, choose “Apply New Effect” in the “Pop Up Window”, and this time use a “Vertical” Arc with a “Vertical Bend” of 50%. Finally, go to Object > Expand Appearance.
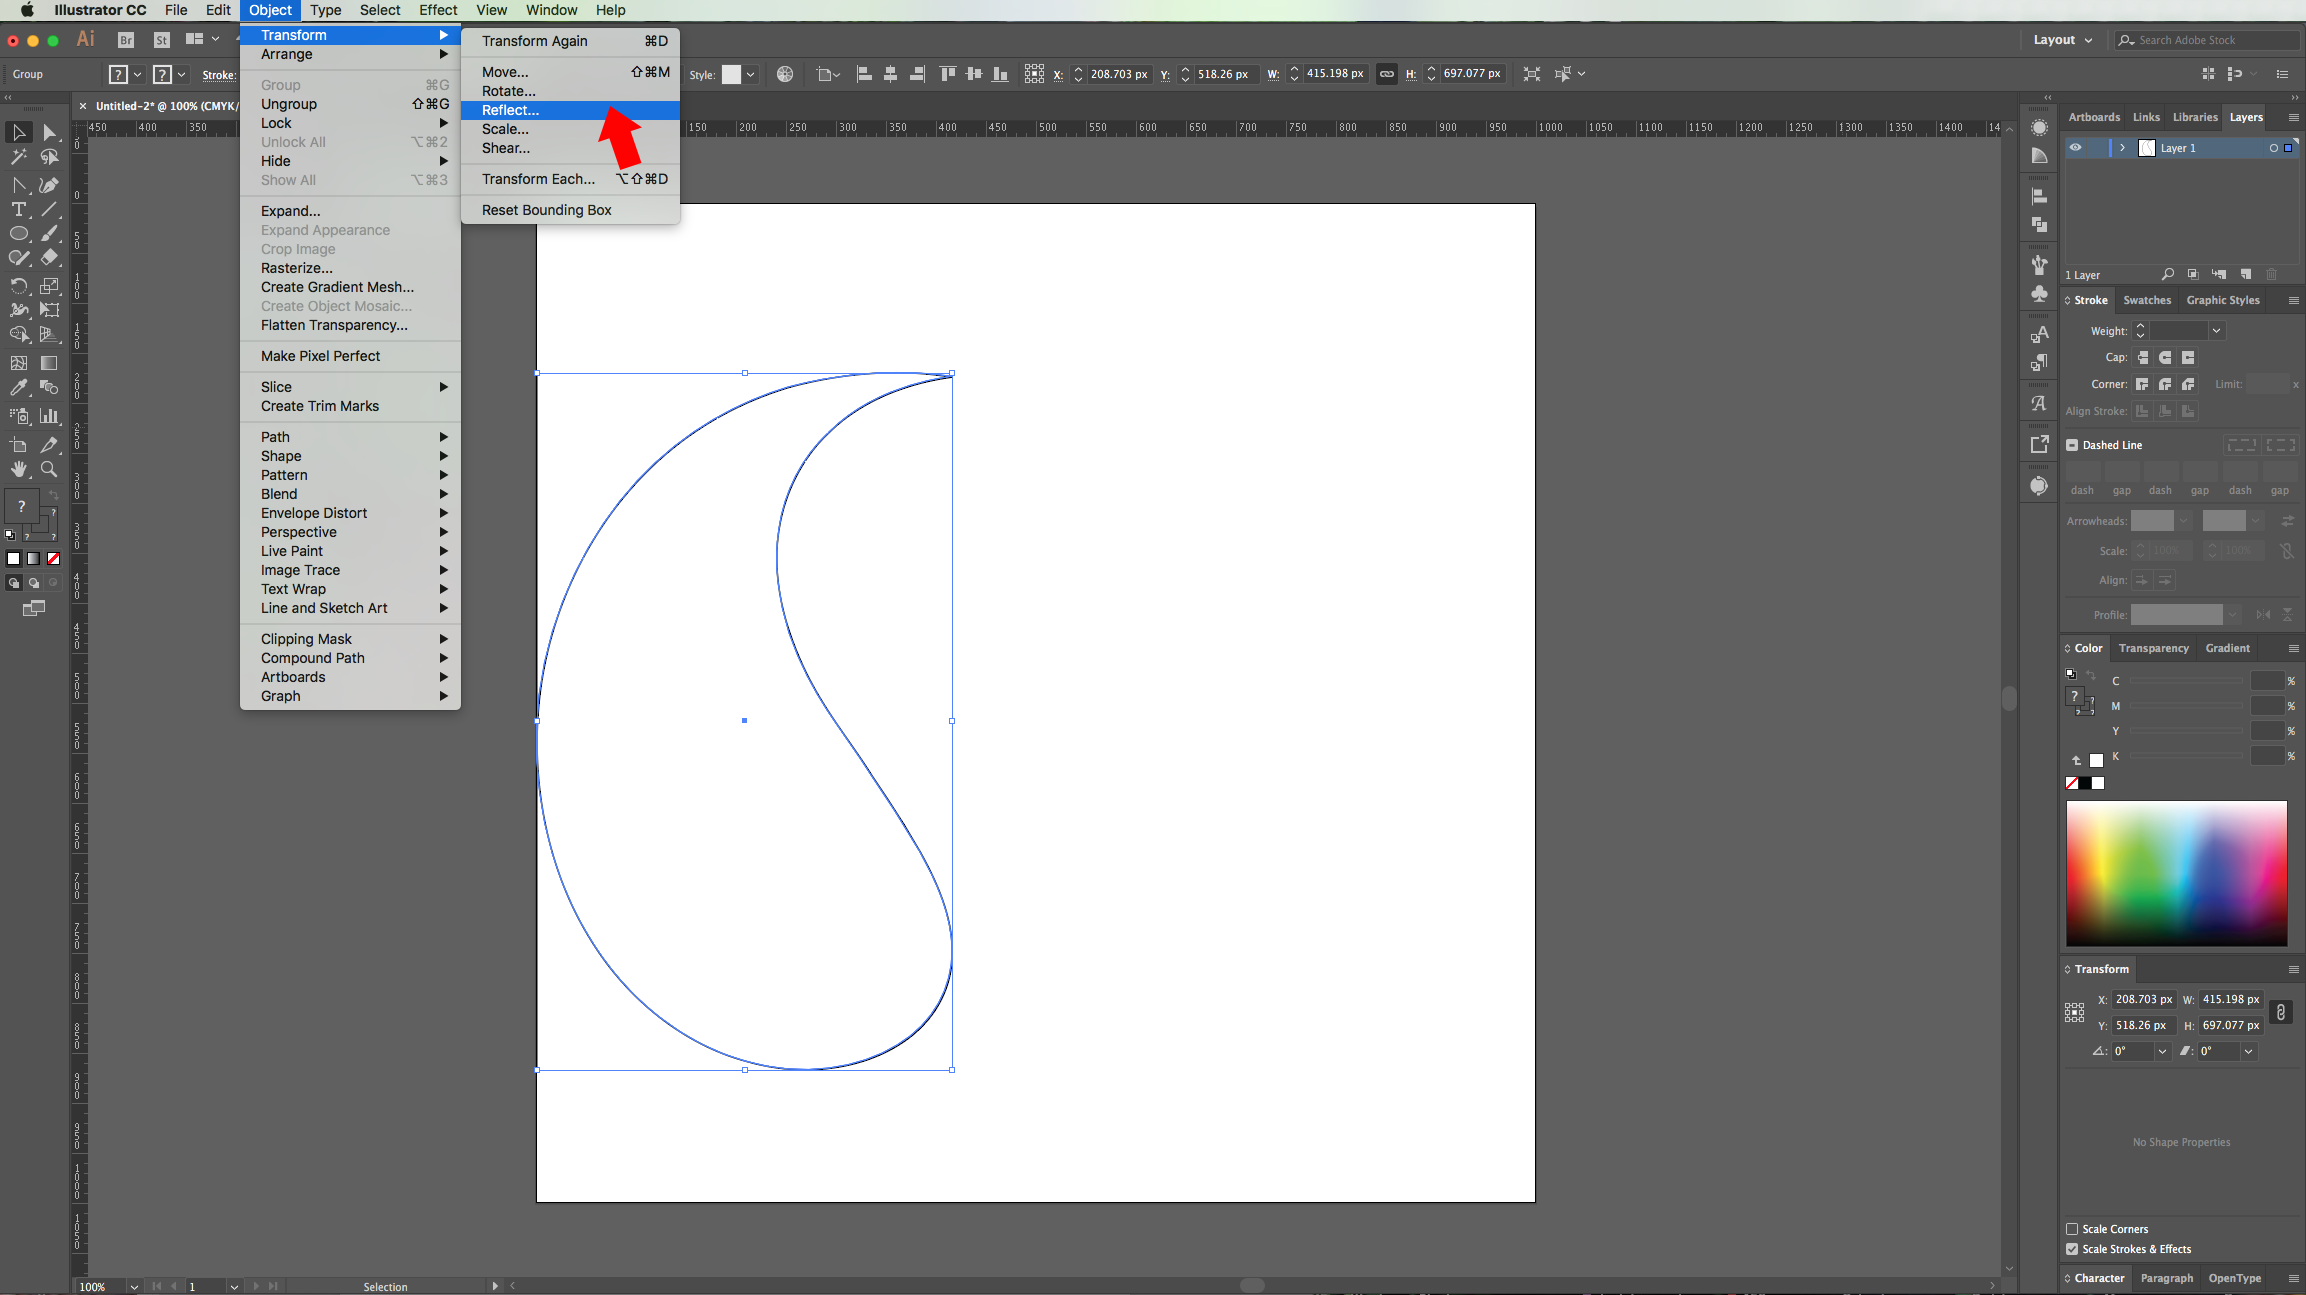
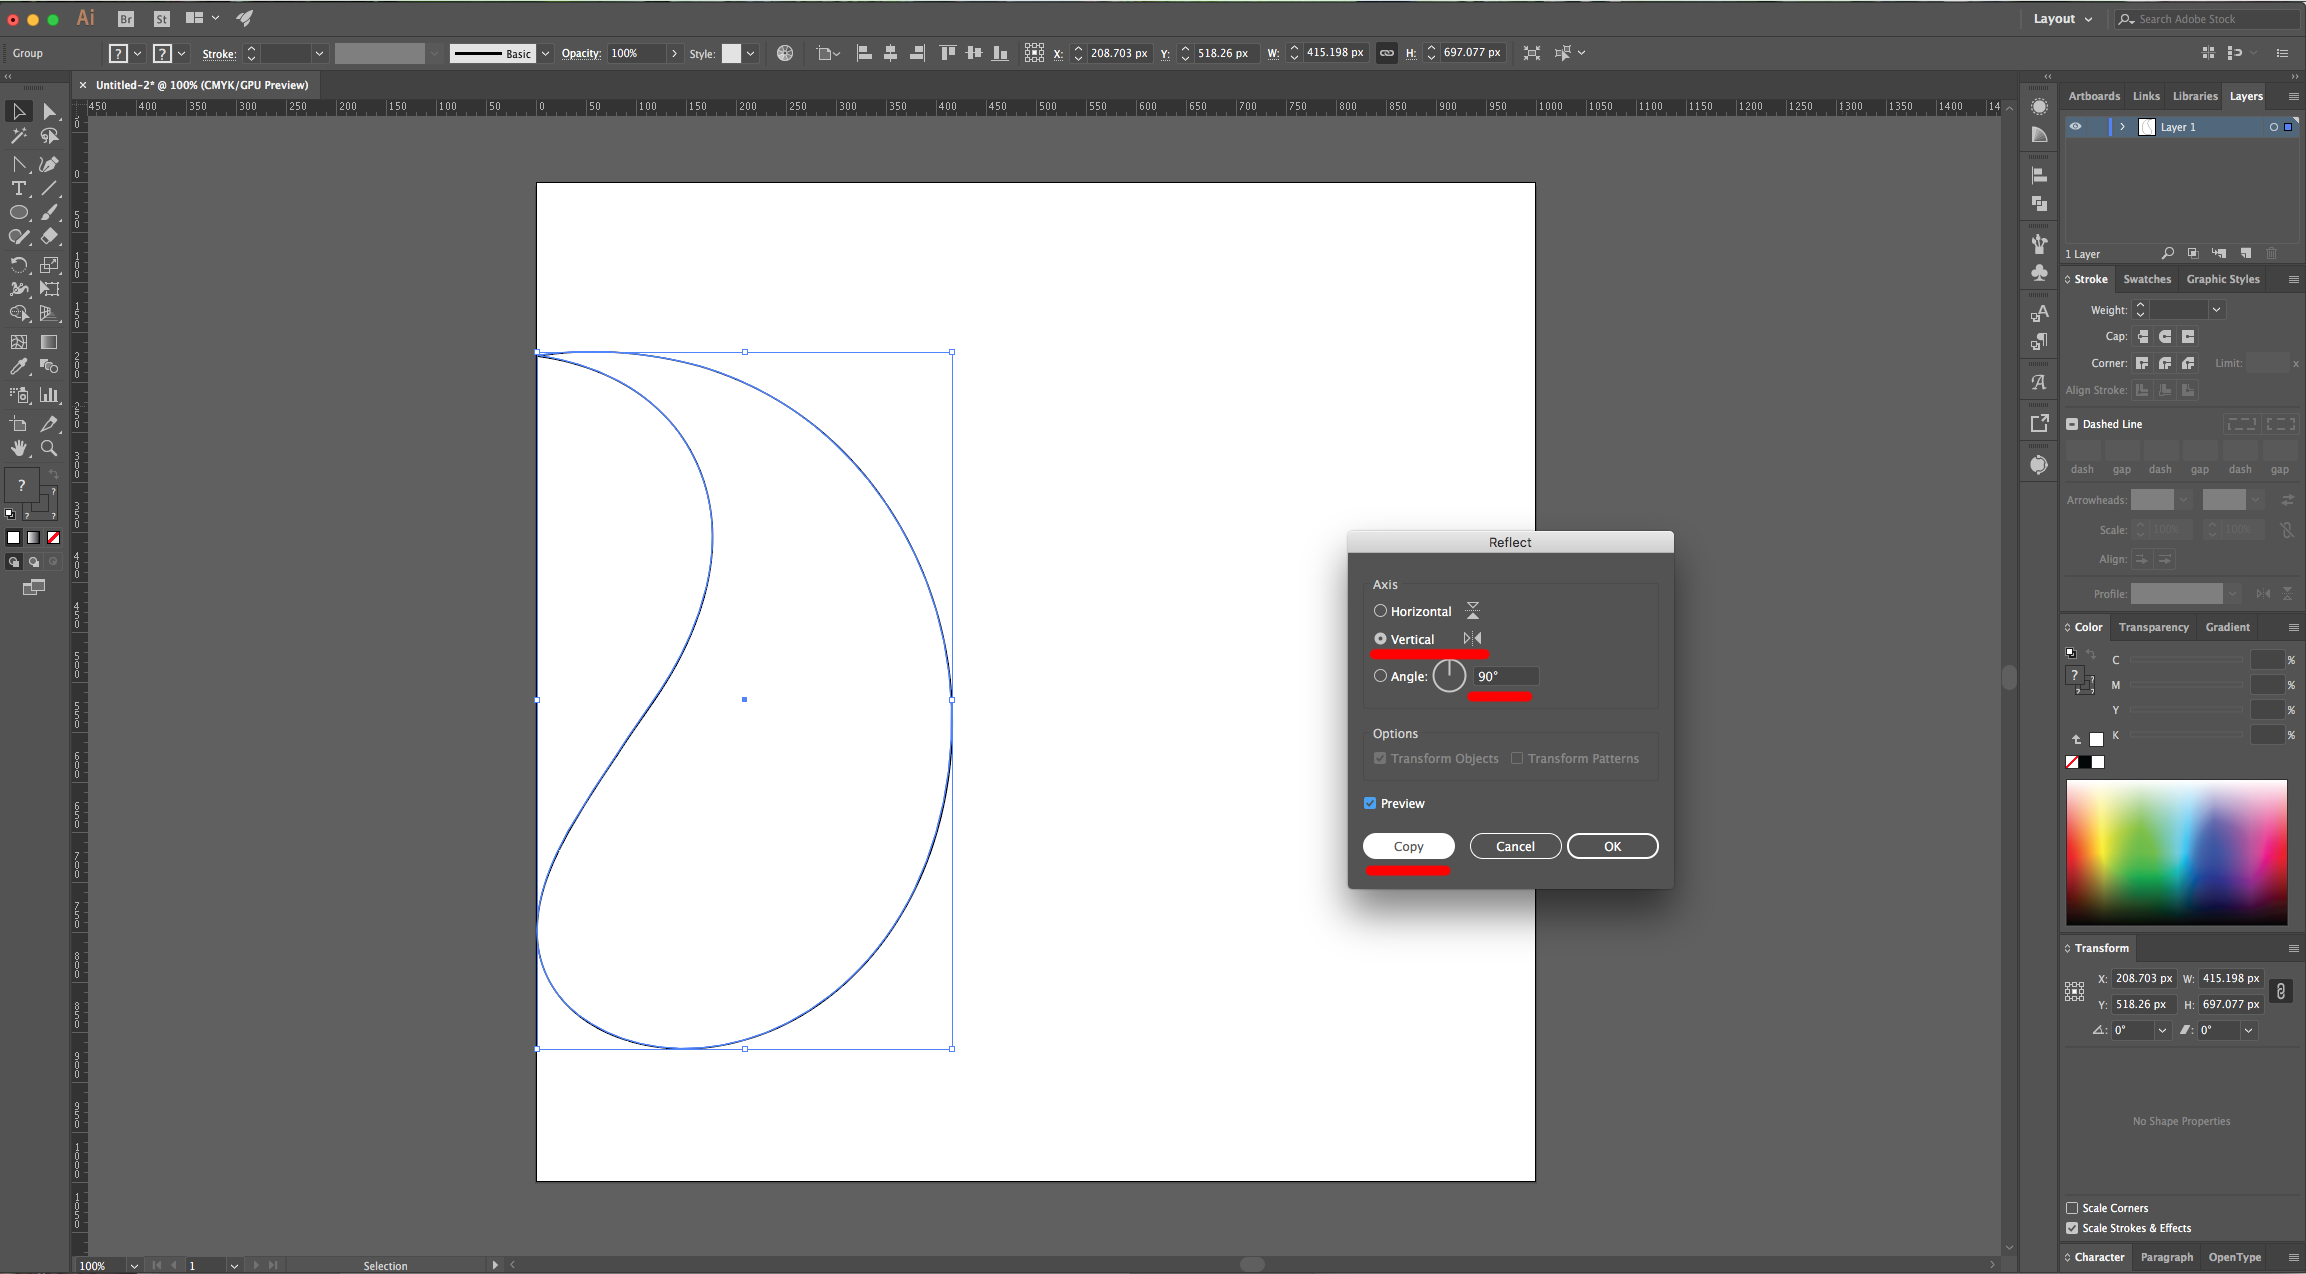
4 – Go to Object > Transform > Reflect, use a “Vertical” Axis and a 90° Angle. Click “Copy” instead of “OK”.
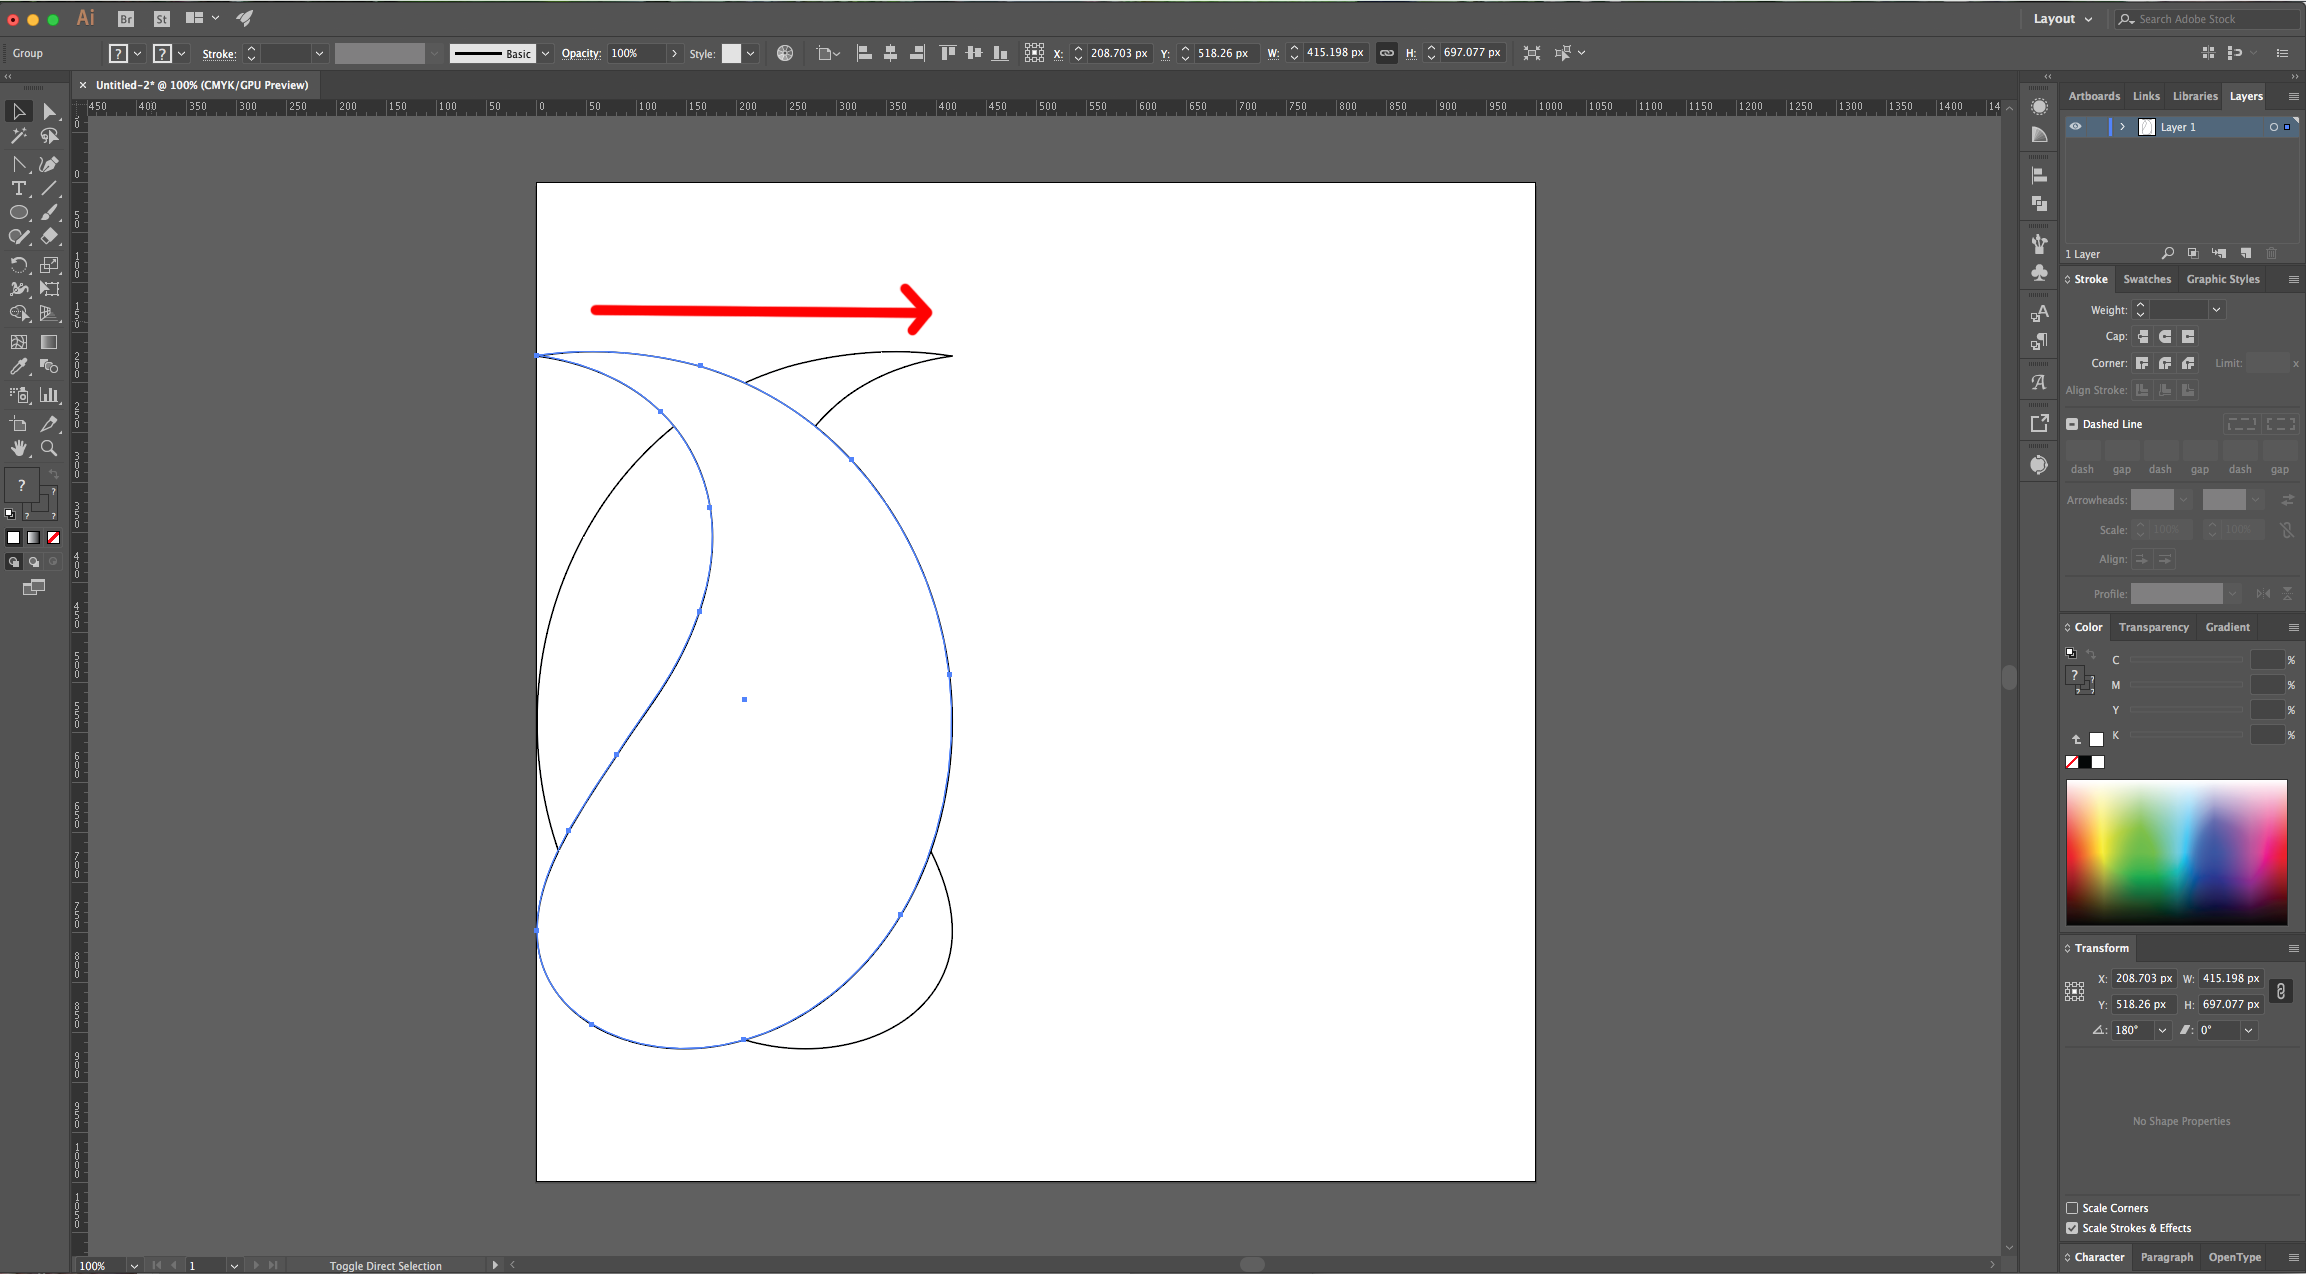
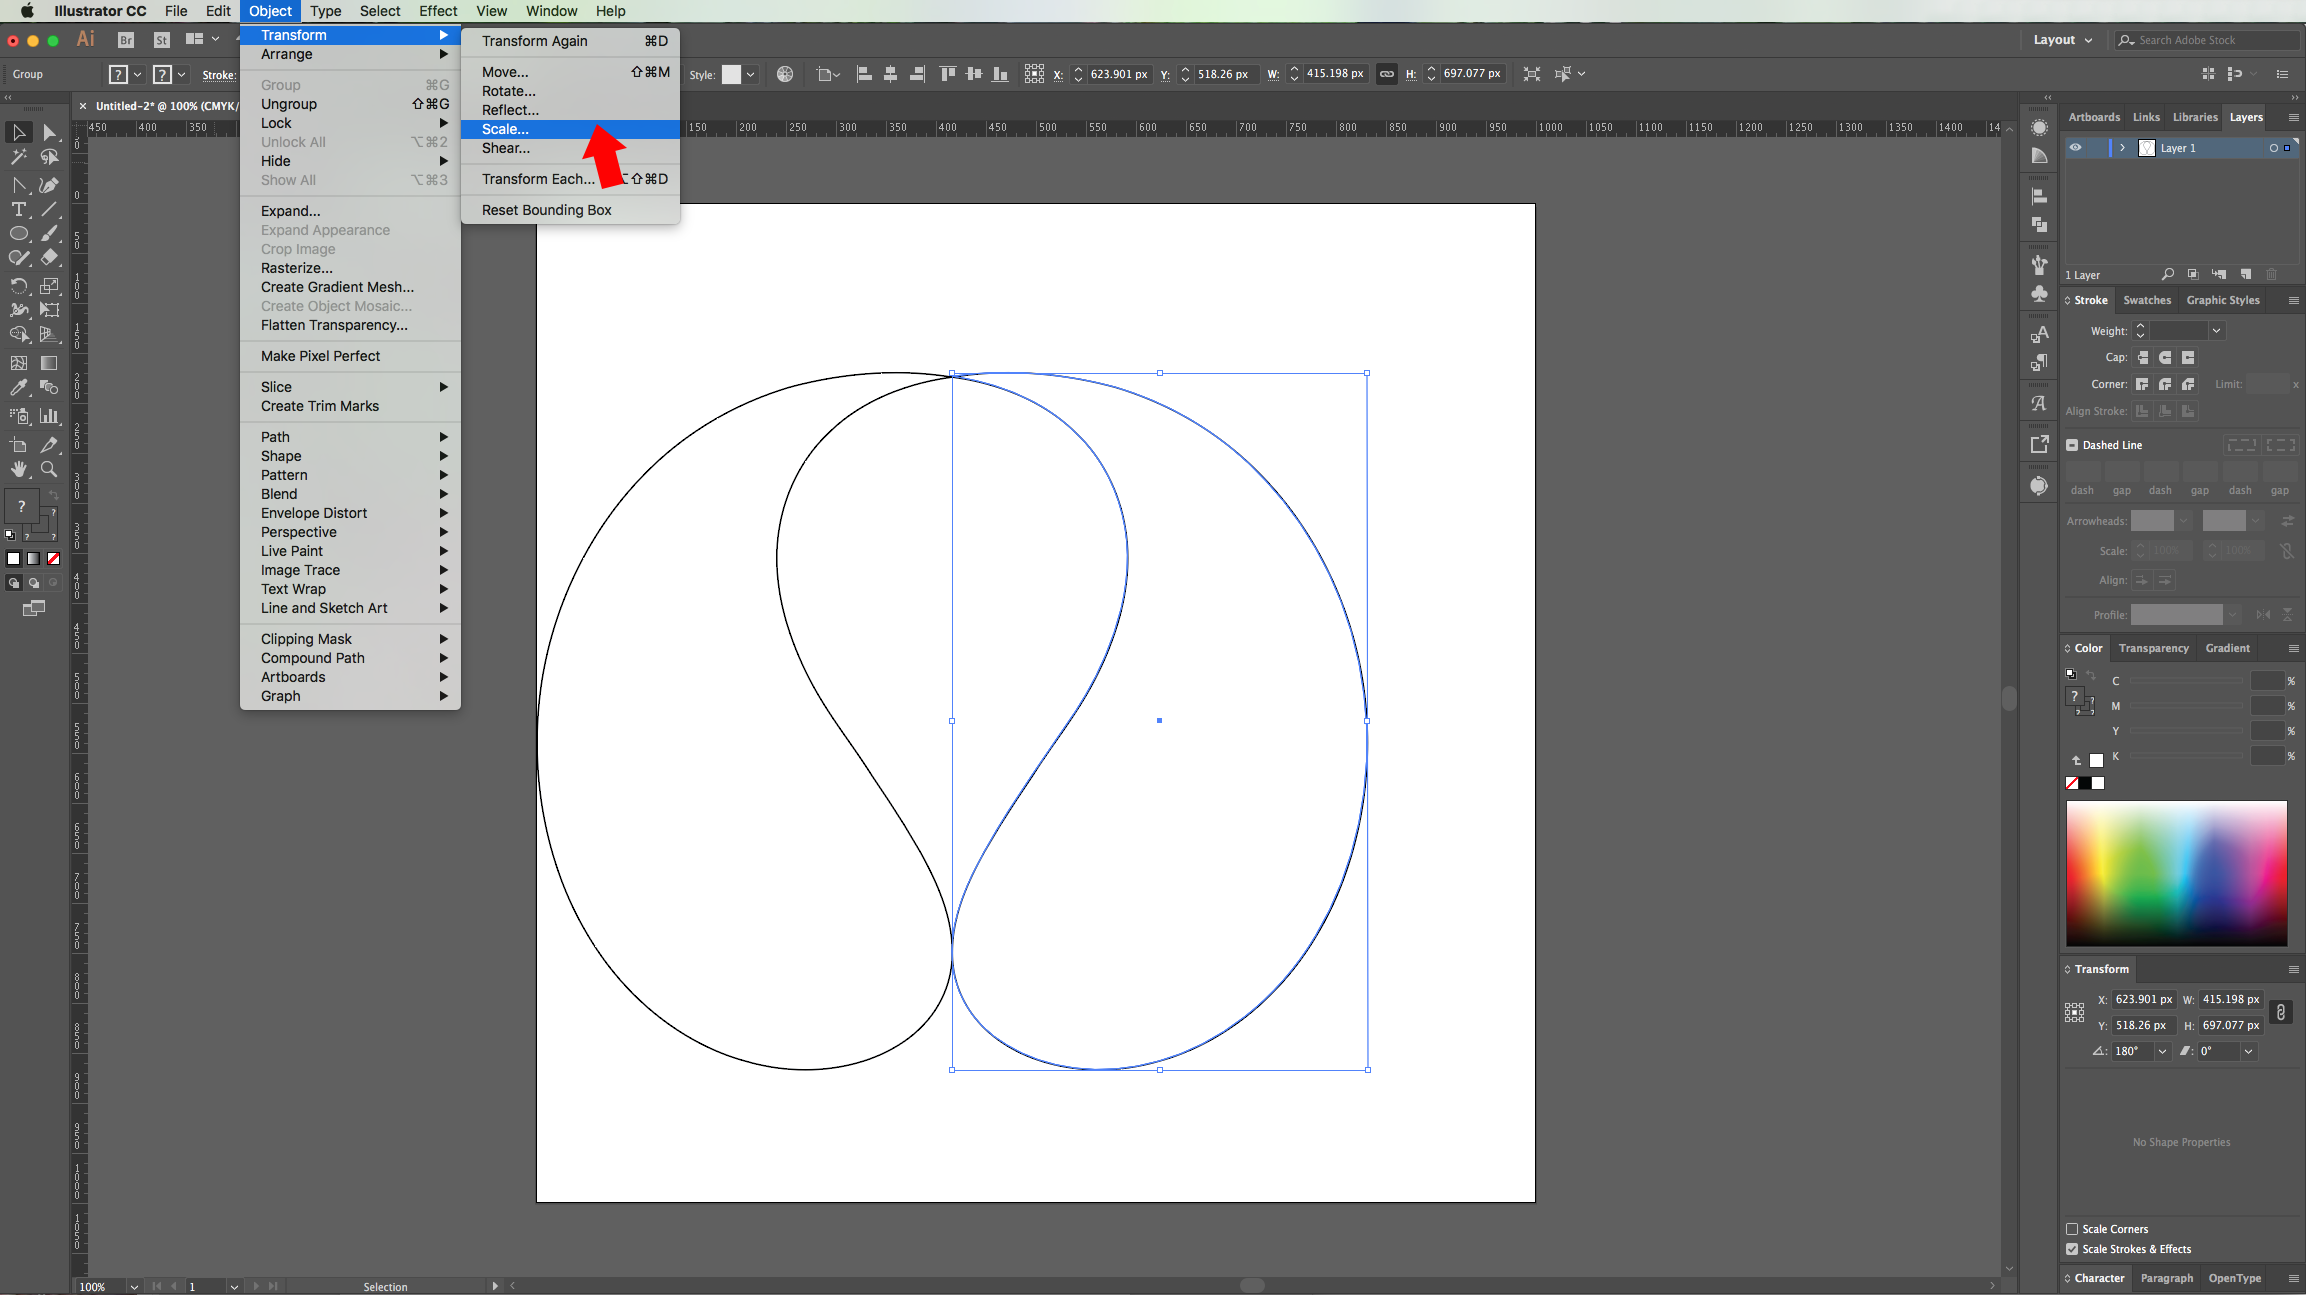
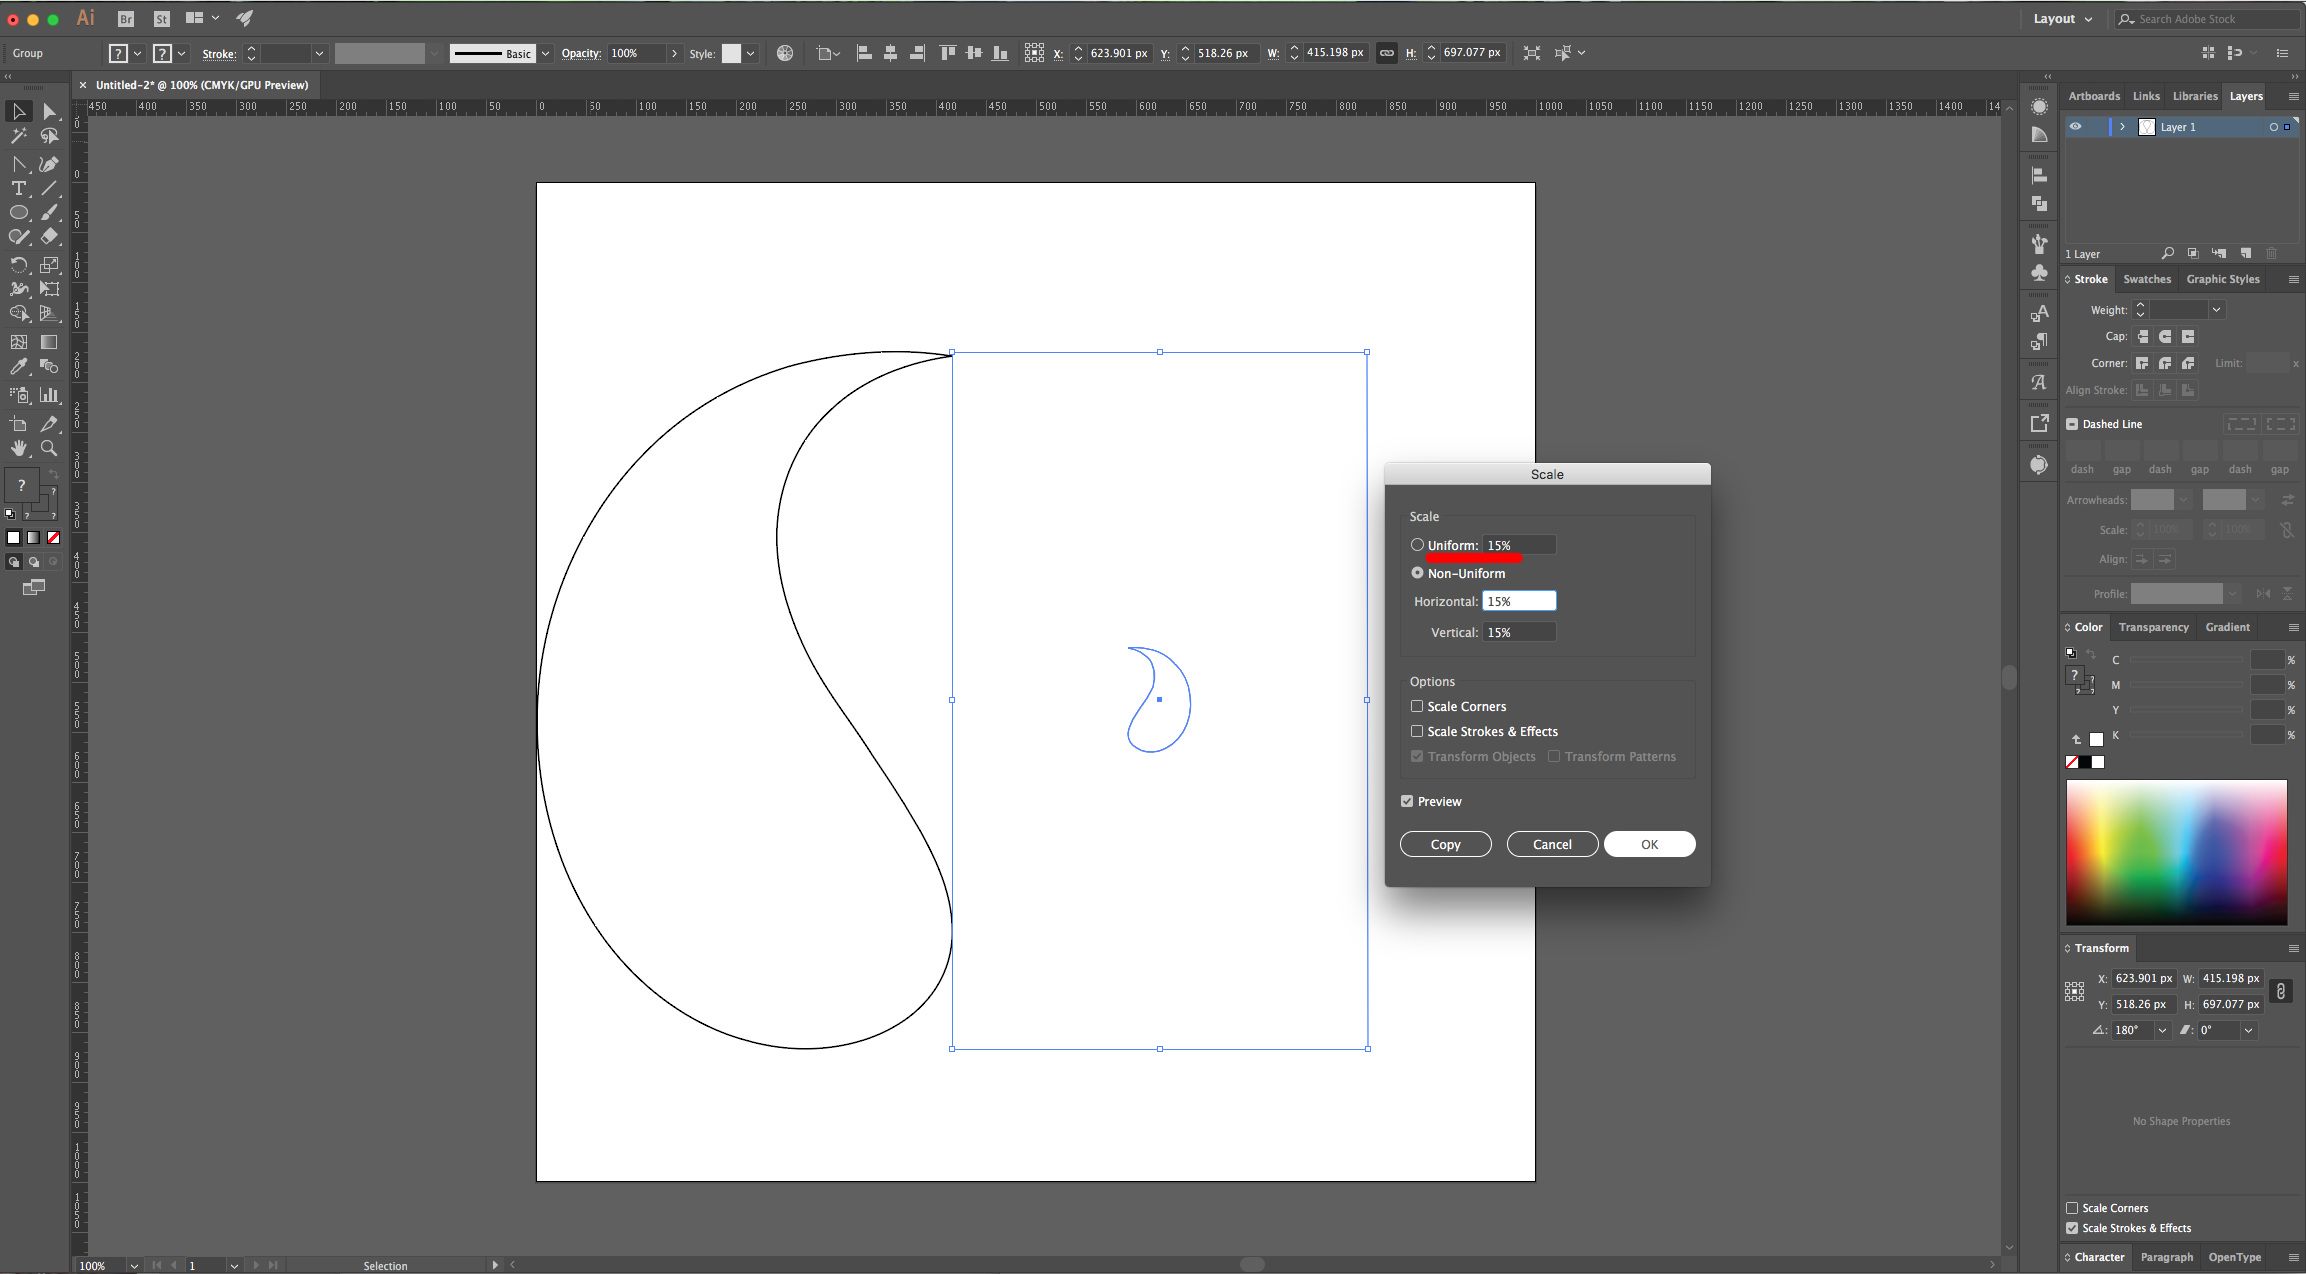
5 – Drag your duplicated path to the right while holding the “Shift” key and place it right where your original path ends. Go to Object > Transform > Scale, use a “Uniform” 15% Scale and uncheck the “Scale Strokes & Effects” Box. Position it on top and overlap the two paths a bit.
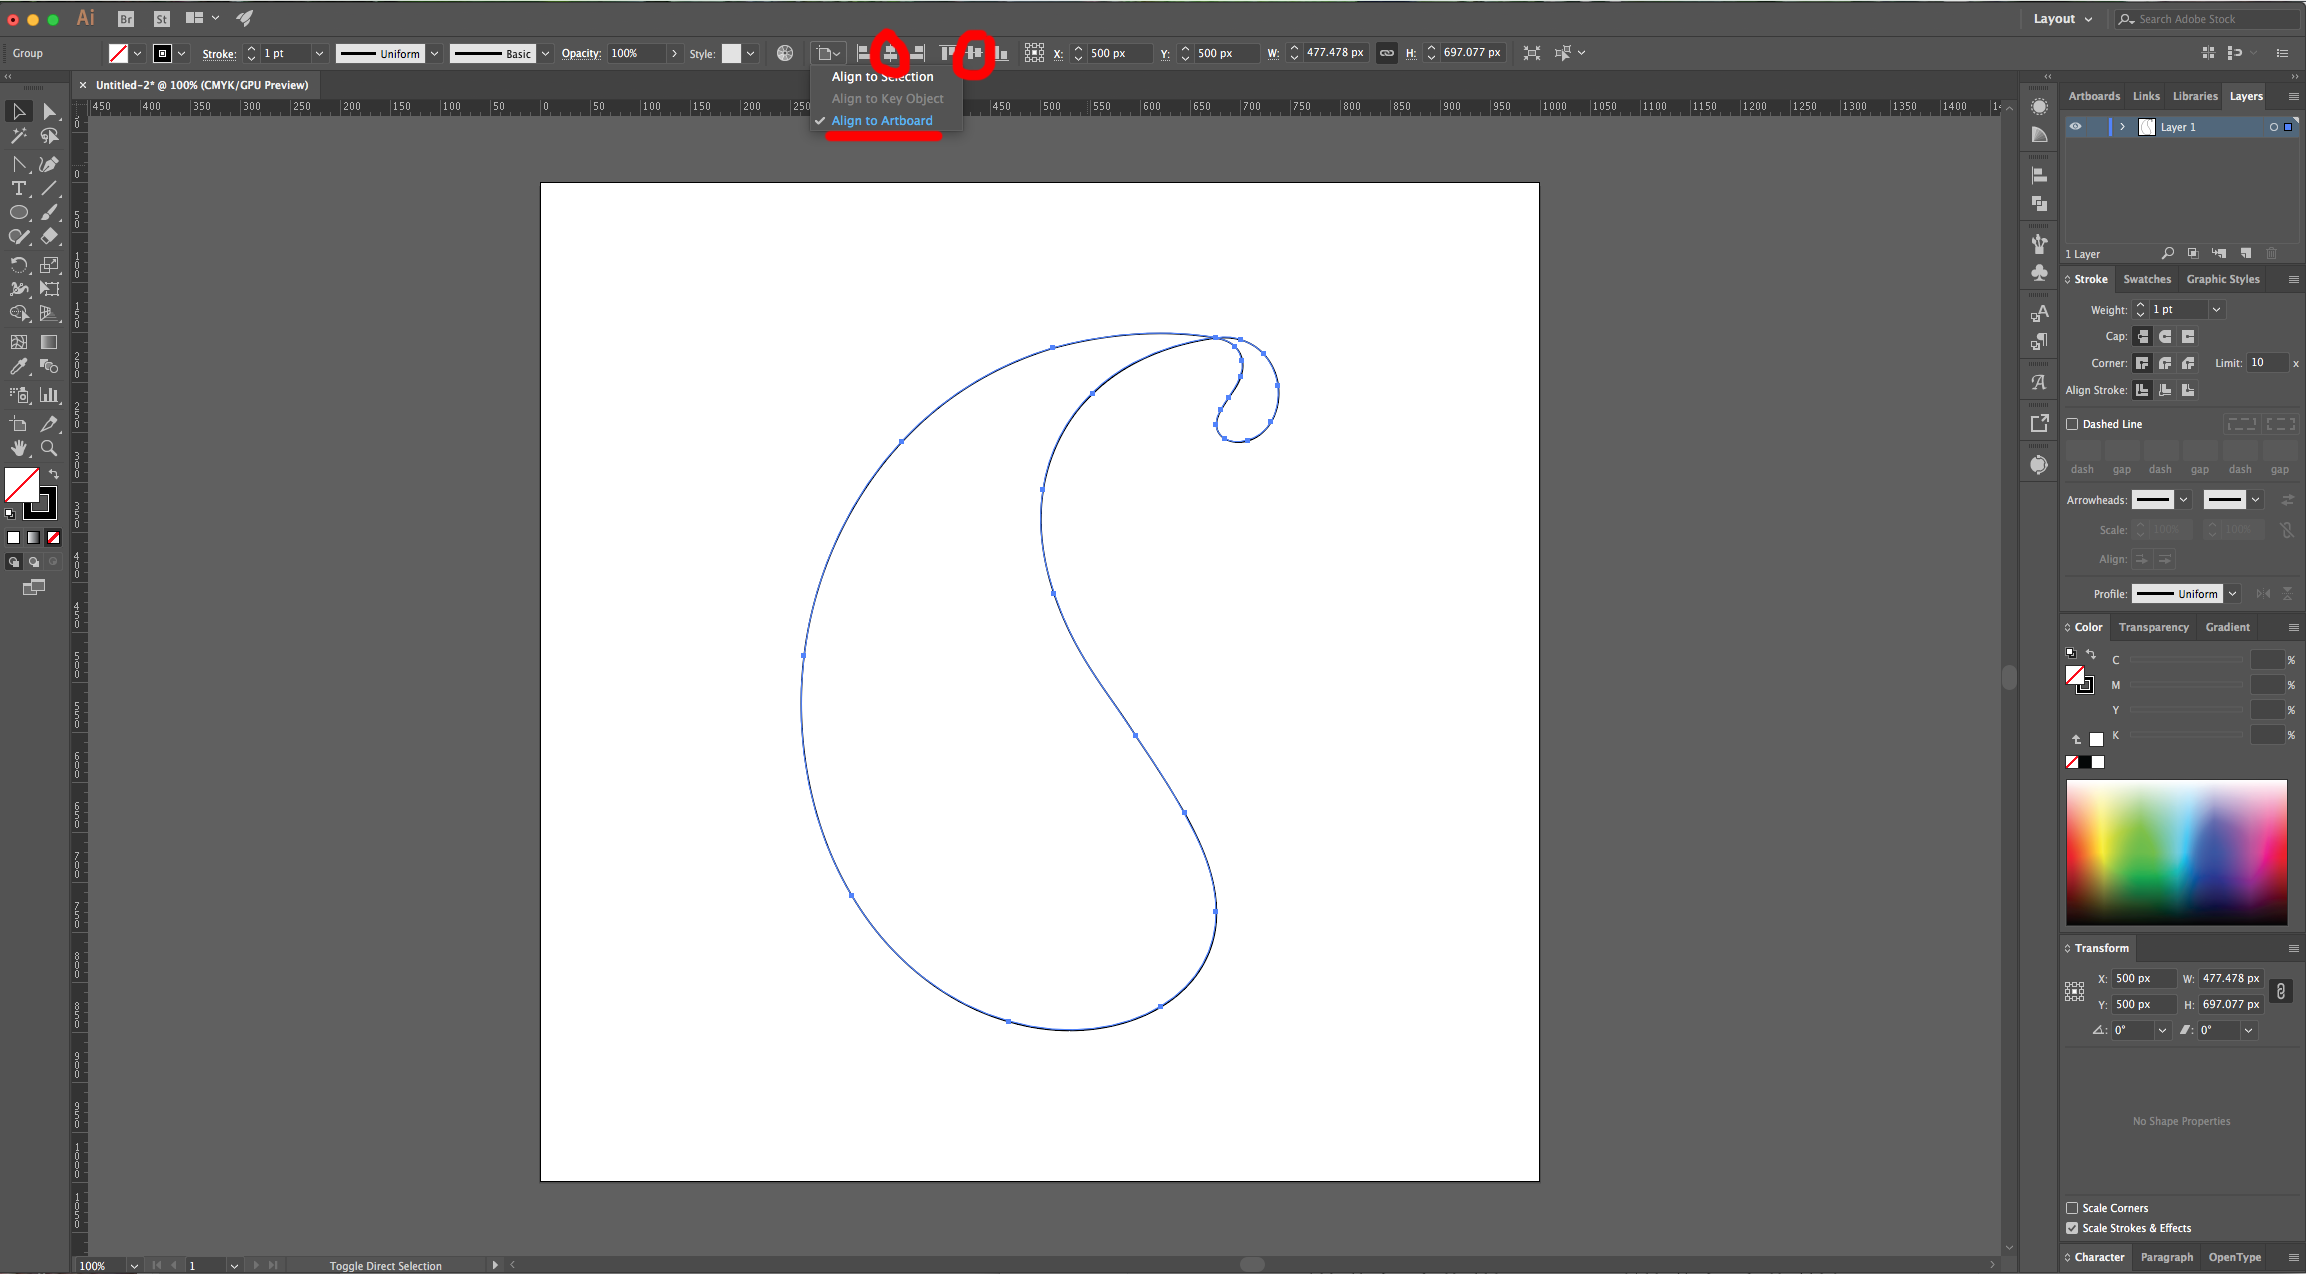
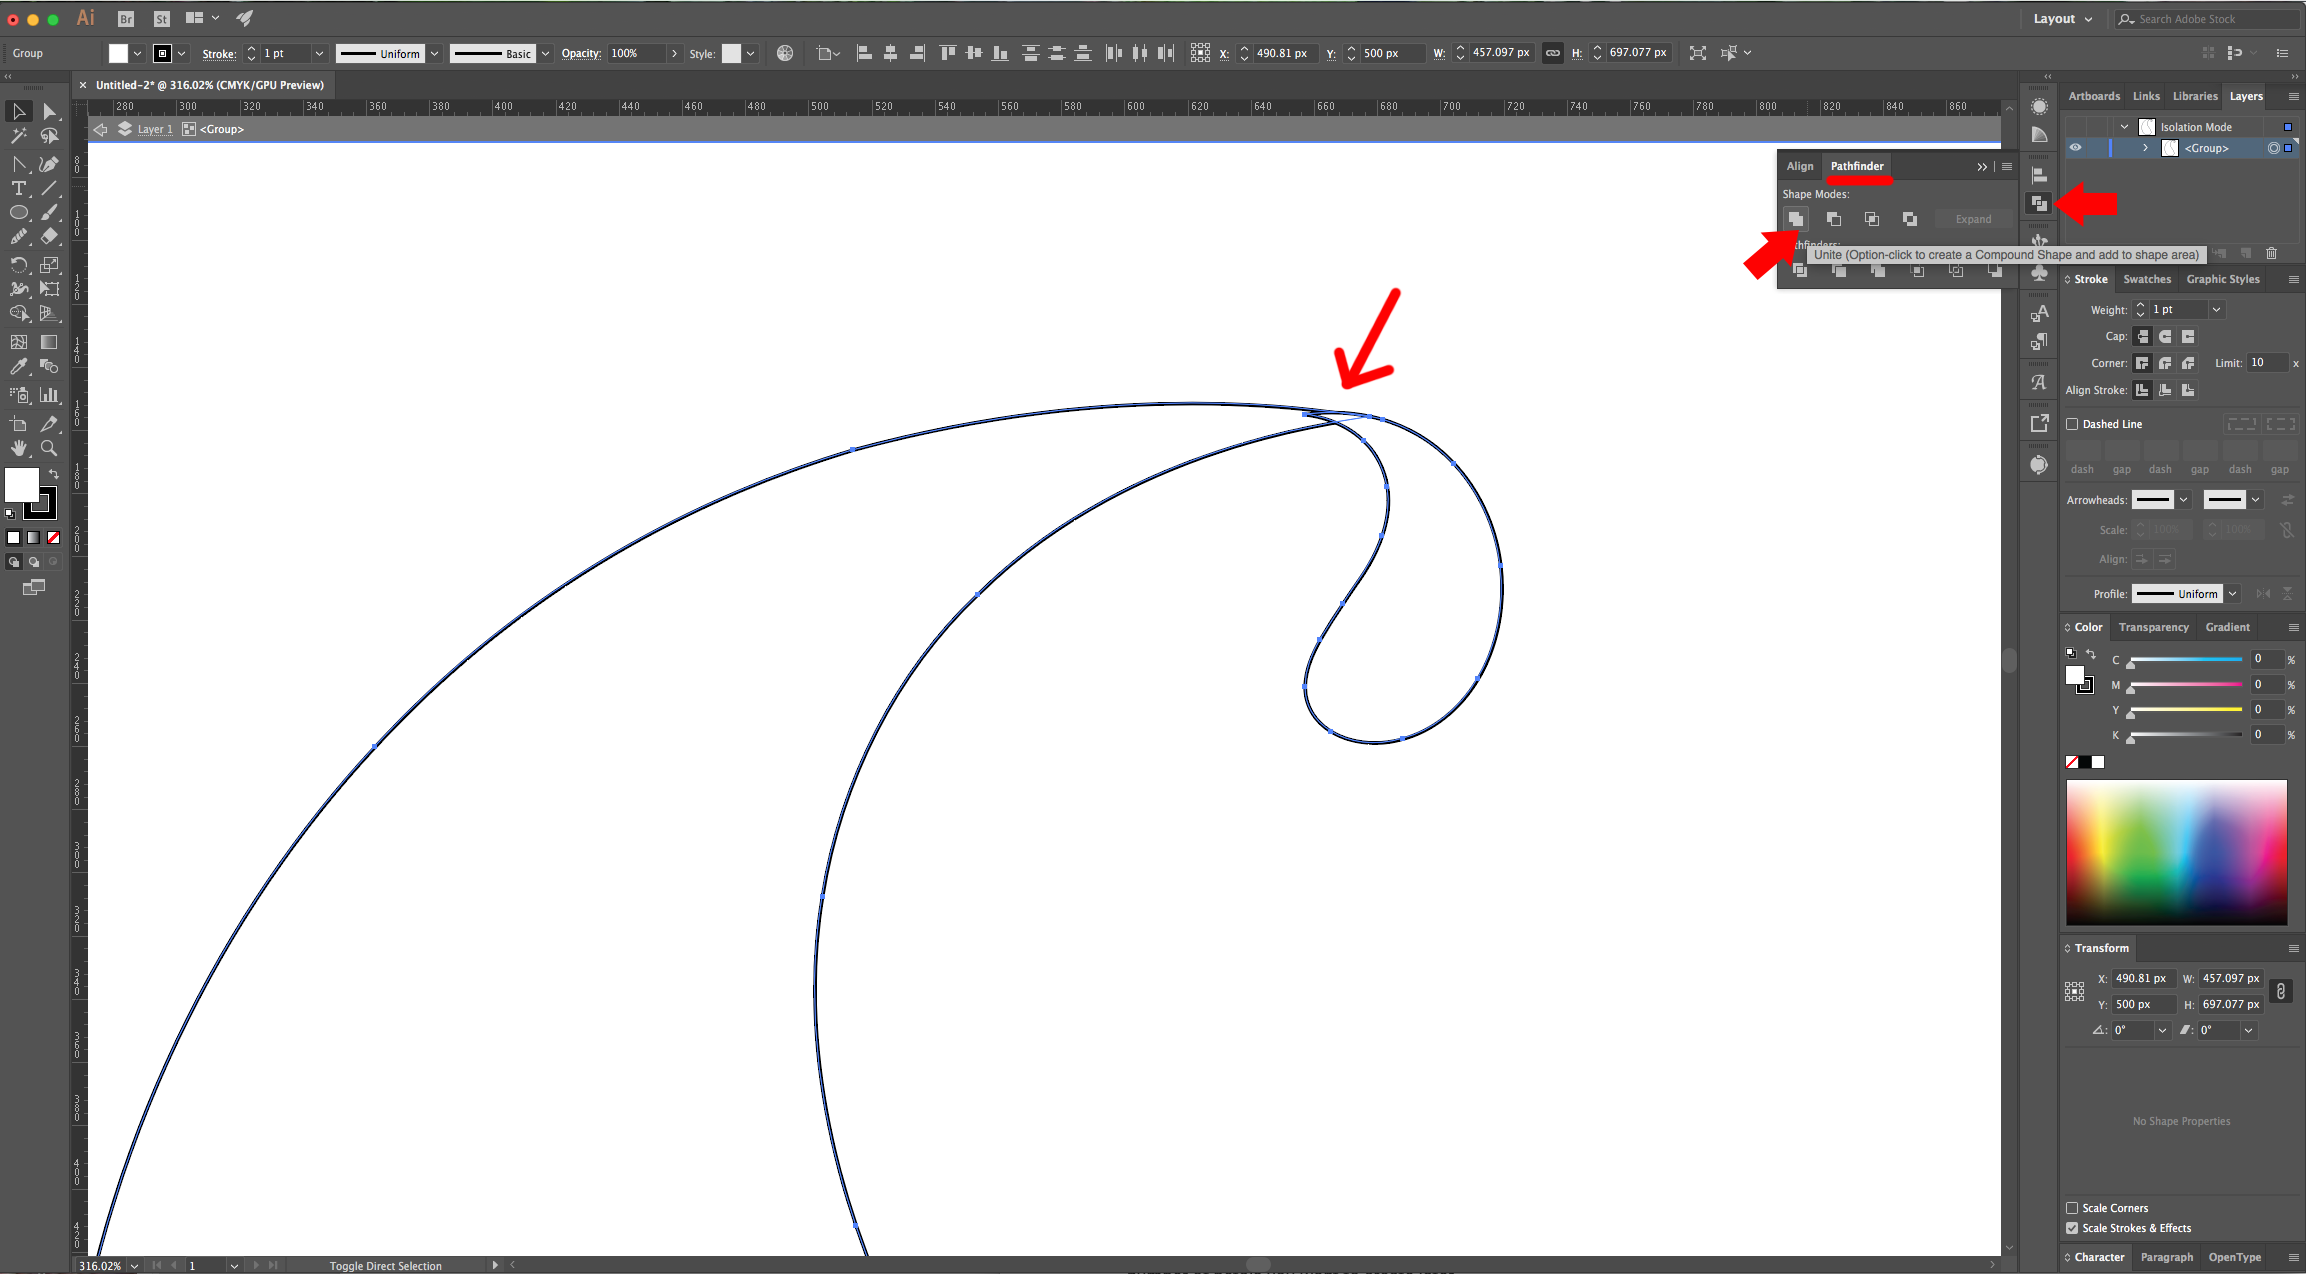
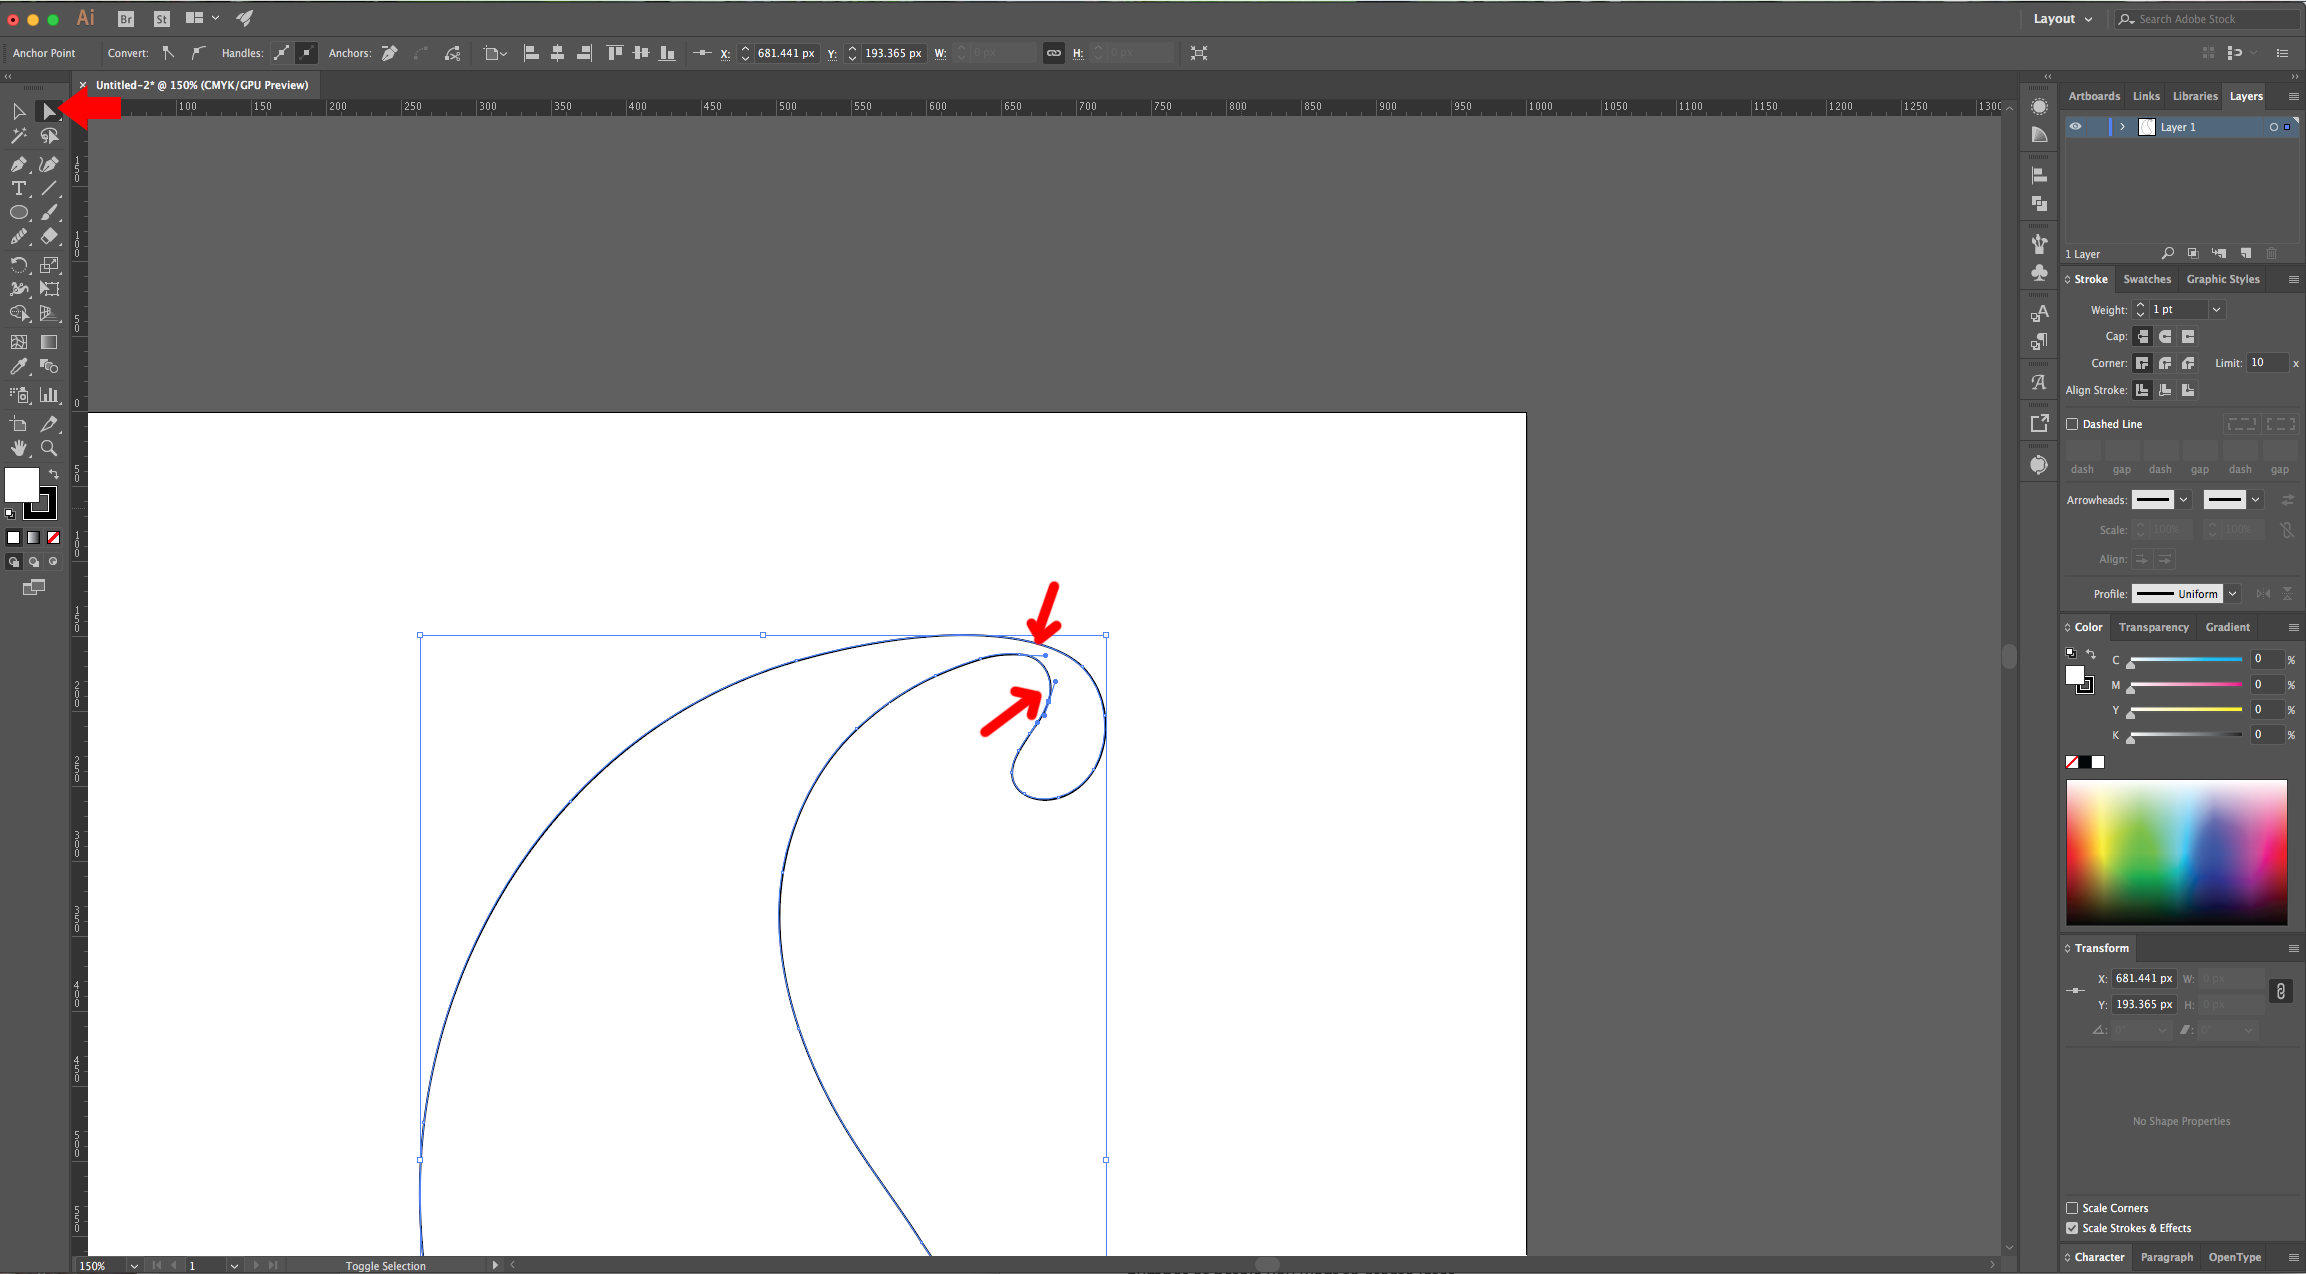
6 - “Group” them together (Command/Control + G) and center them in your document making sure that “Align to Artboard” is selected. Go to the “Pathfinder Panel” and choose “Unite” to merge the two paths together.
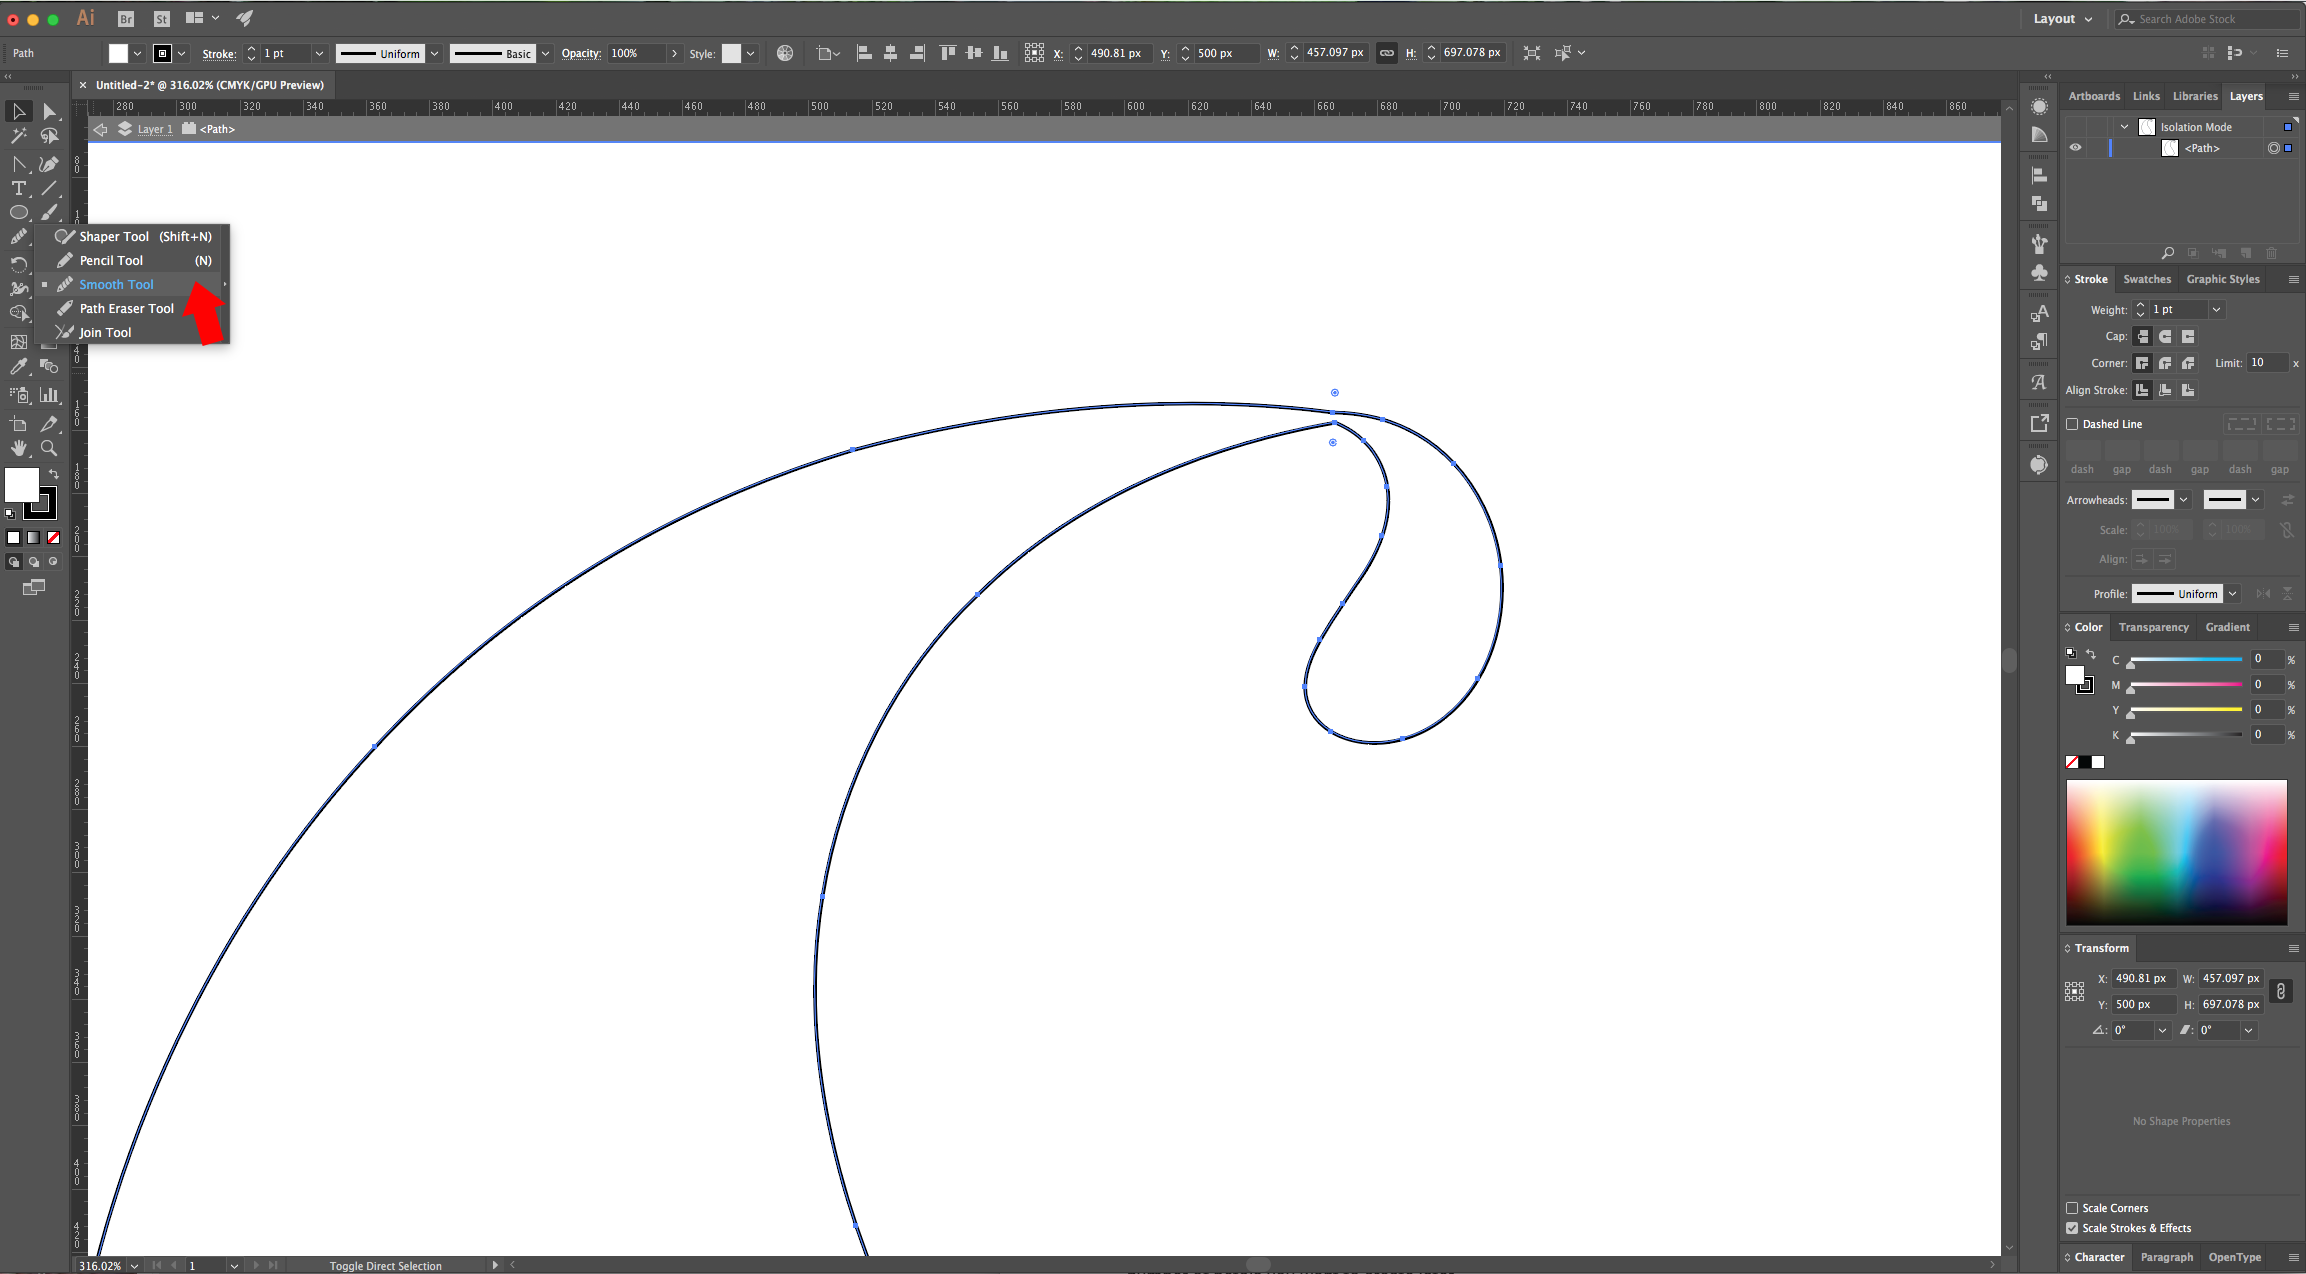
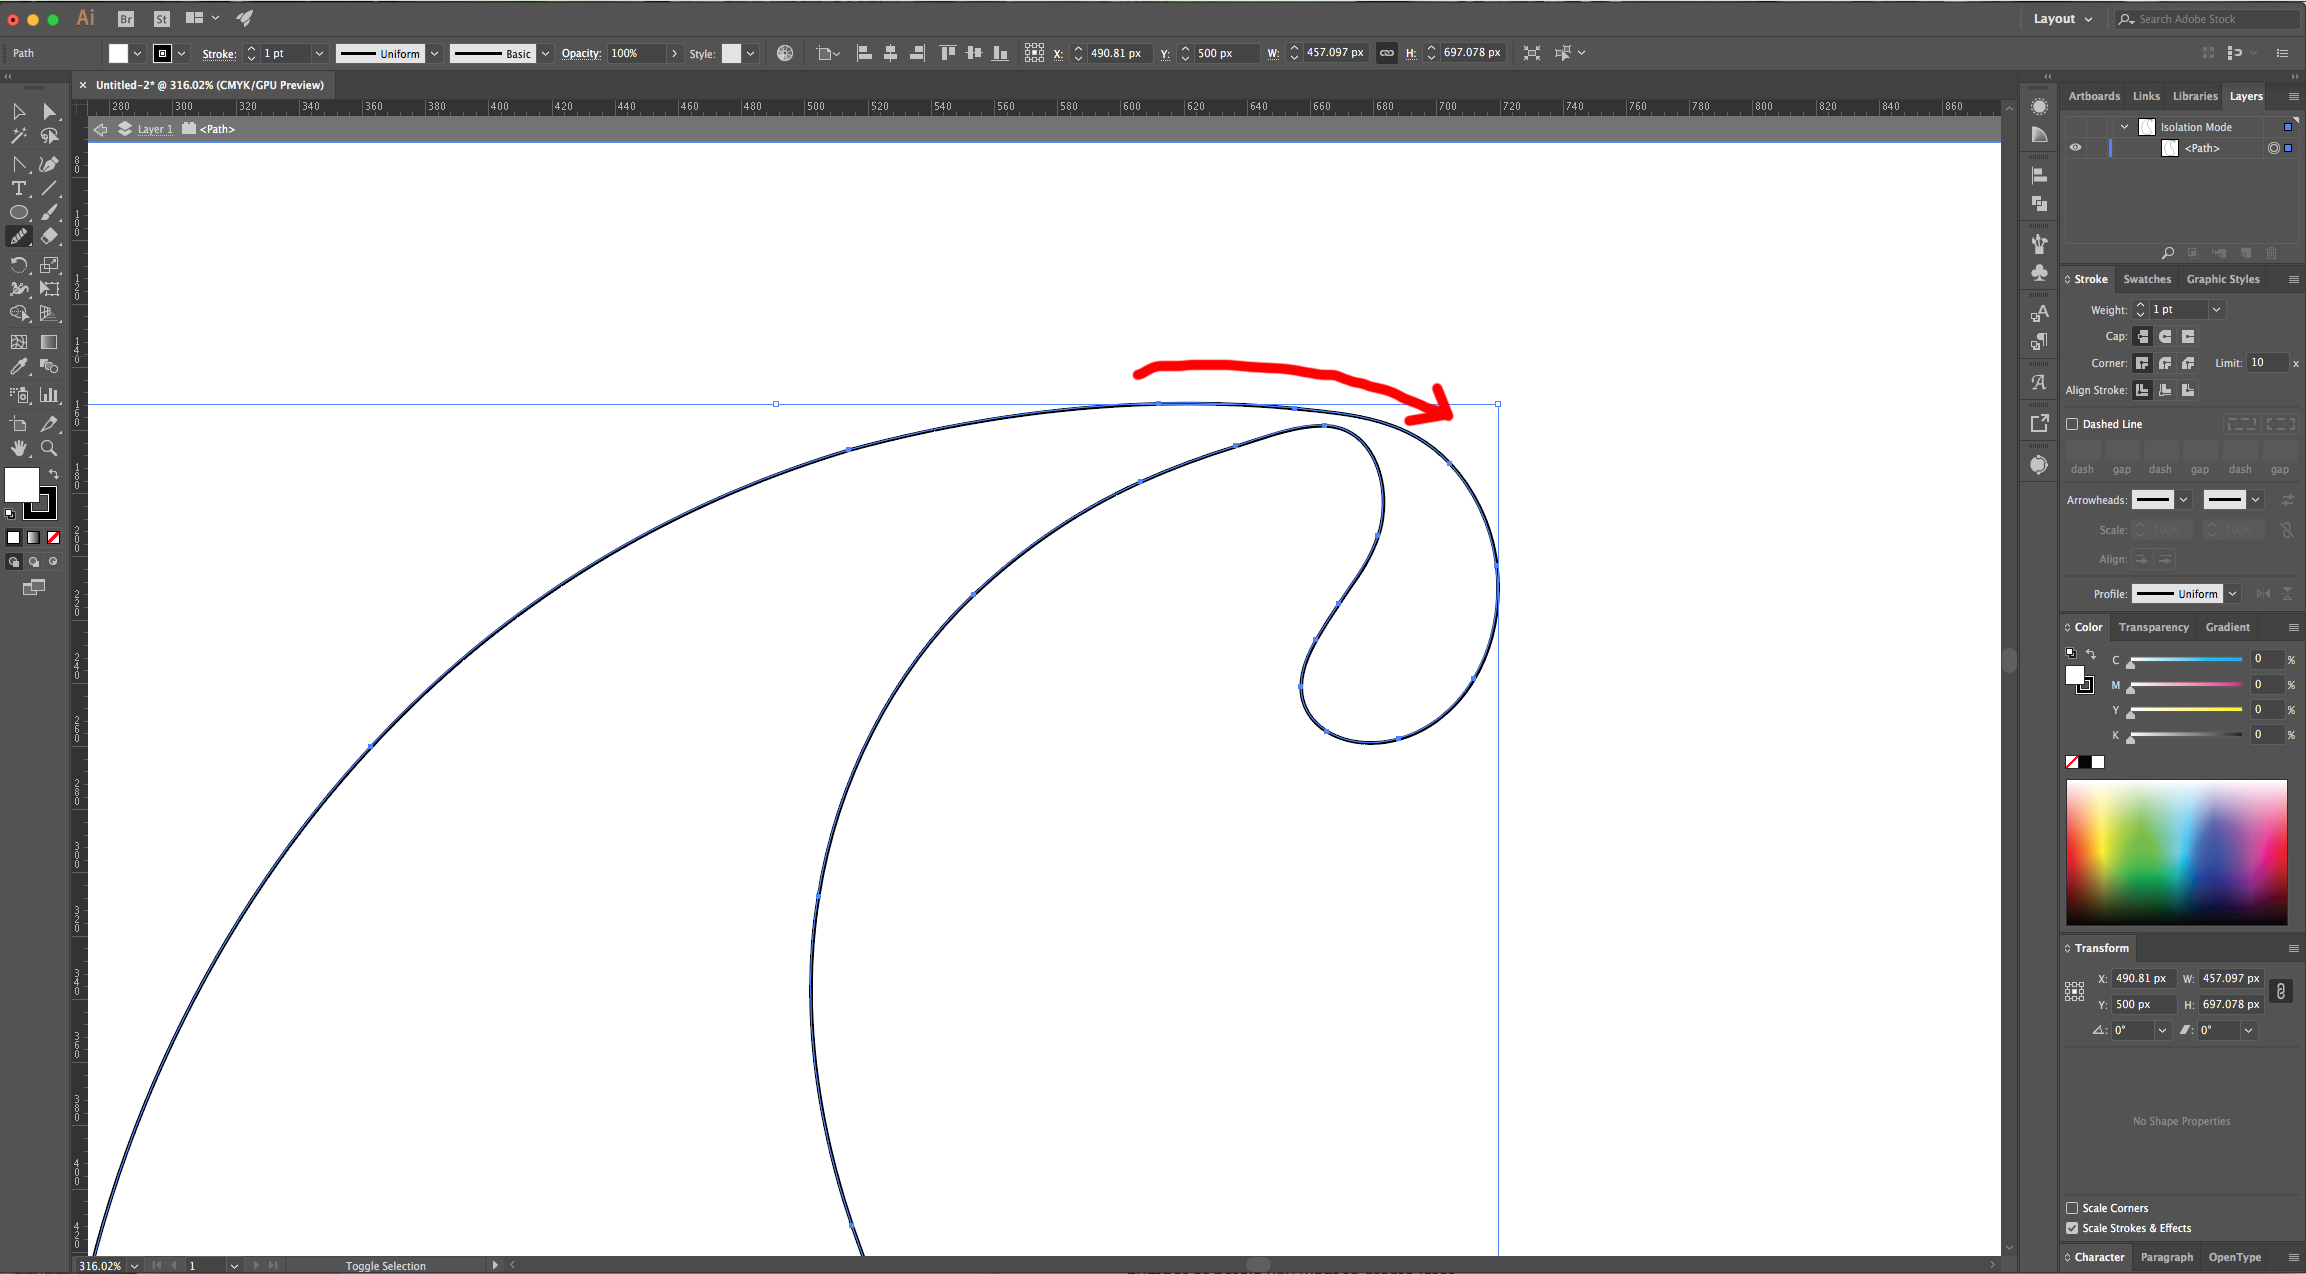
7 – Select the “Smooth Tool” and drag your cursor around the area where the two shapes merged to smooth it out a bit. Then, use the “Direct Selection Tool” (A) to clean up the curves a little more.
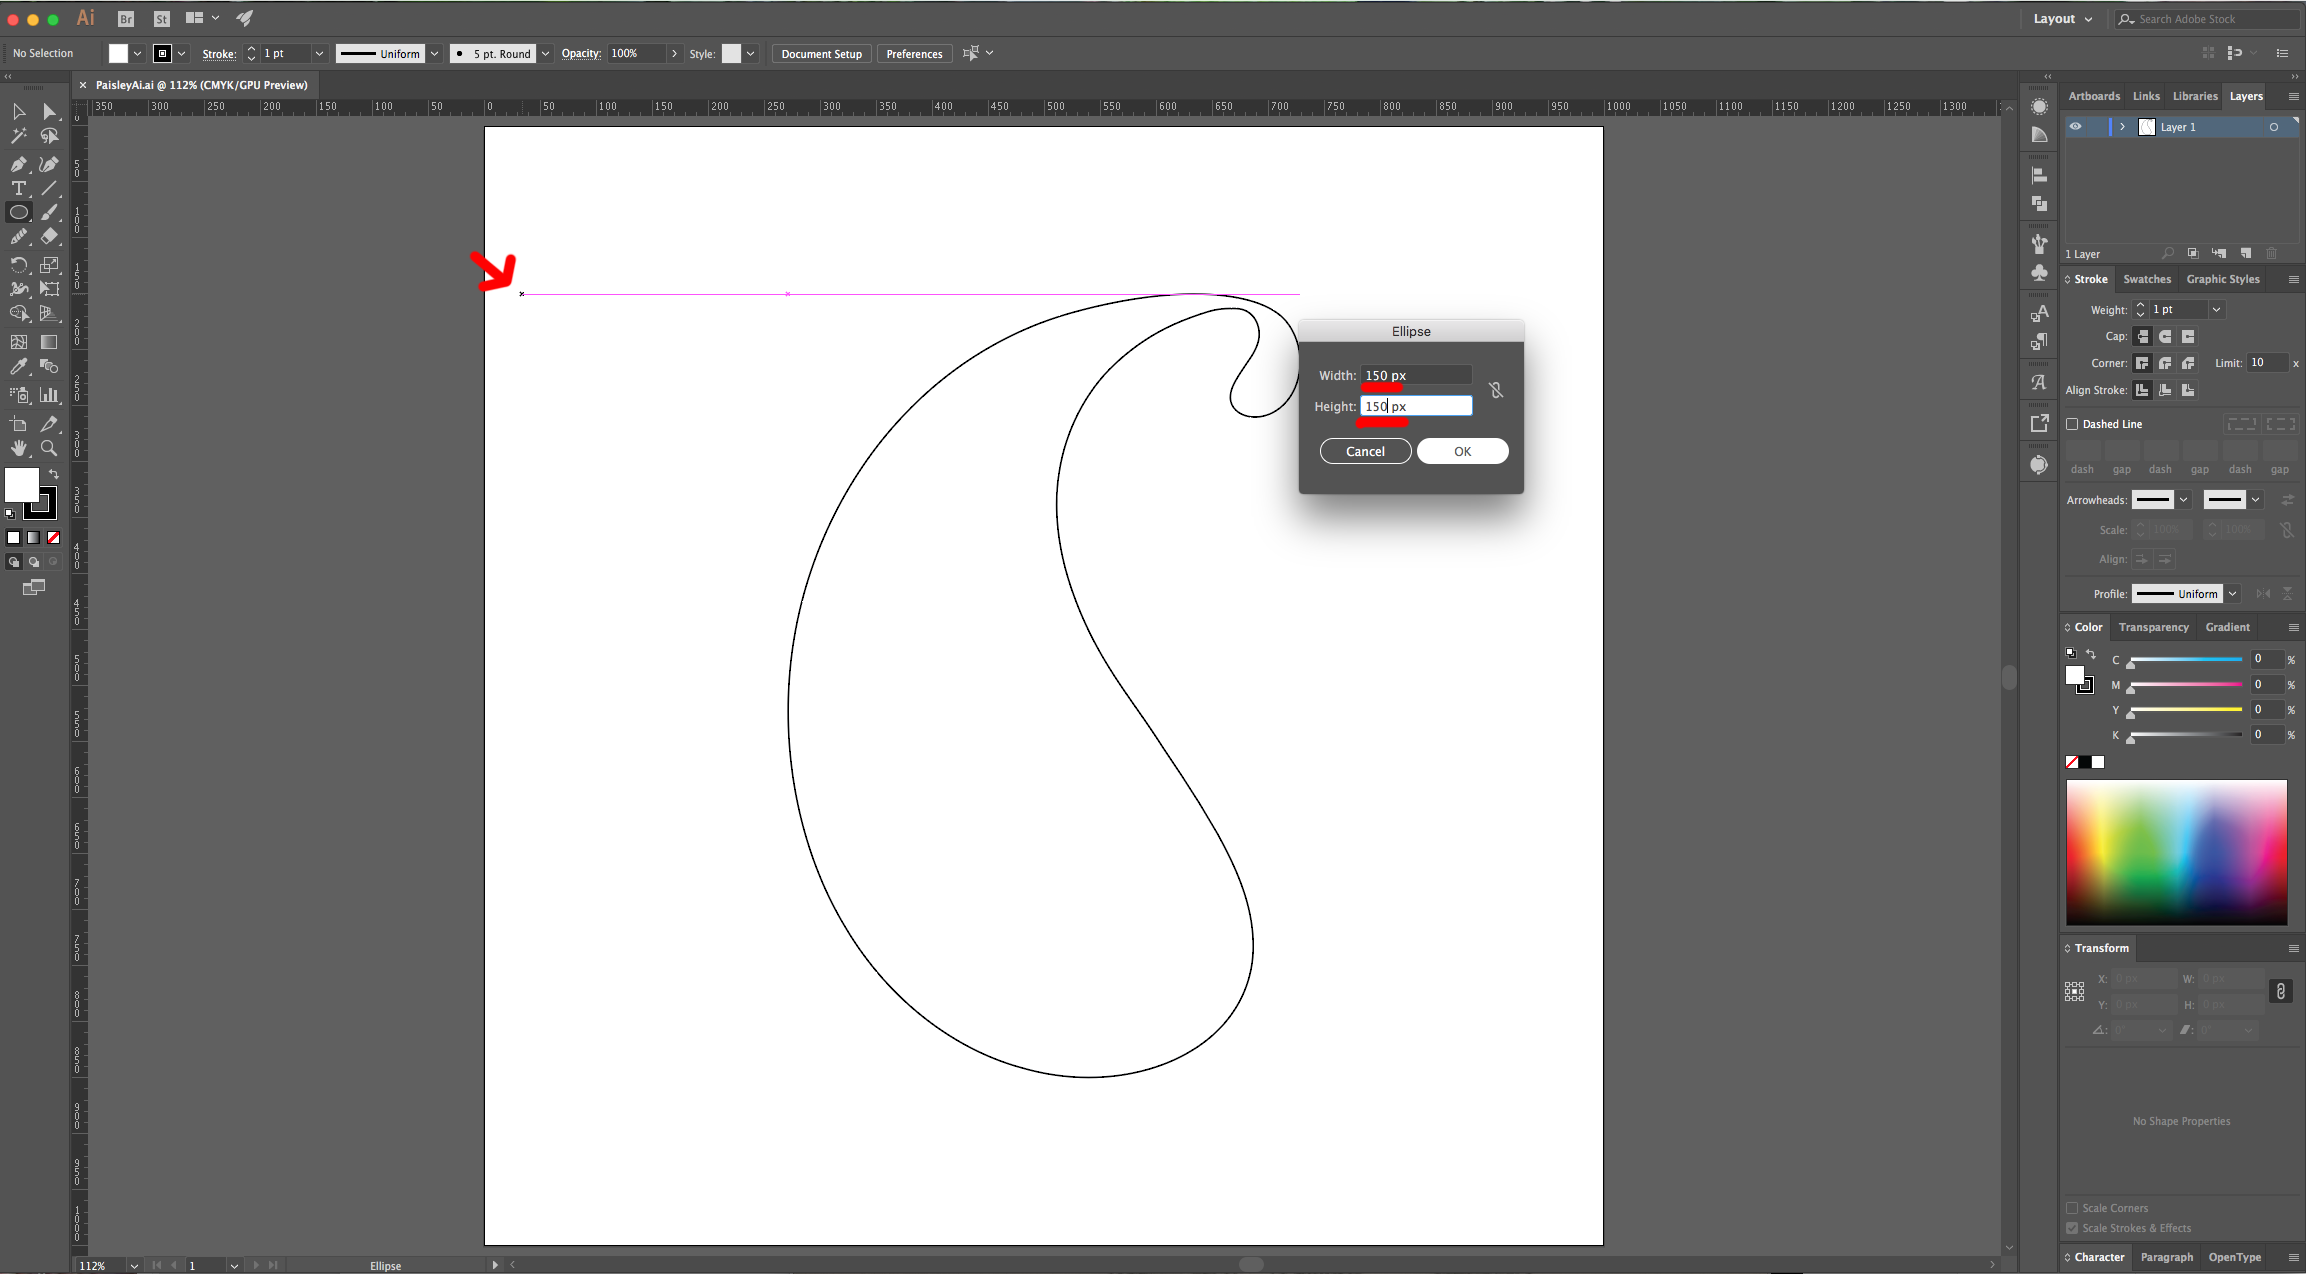
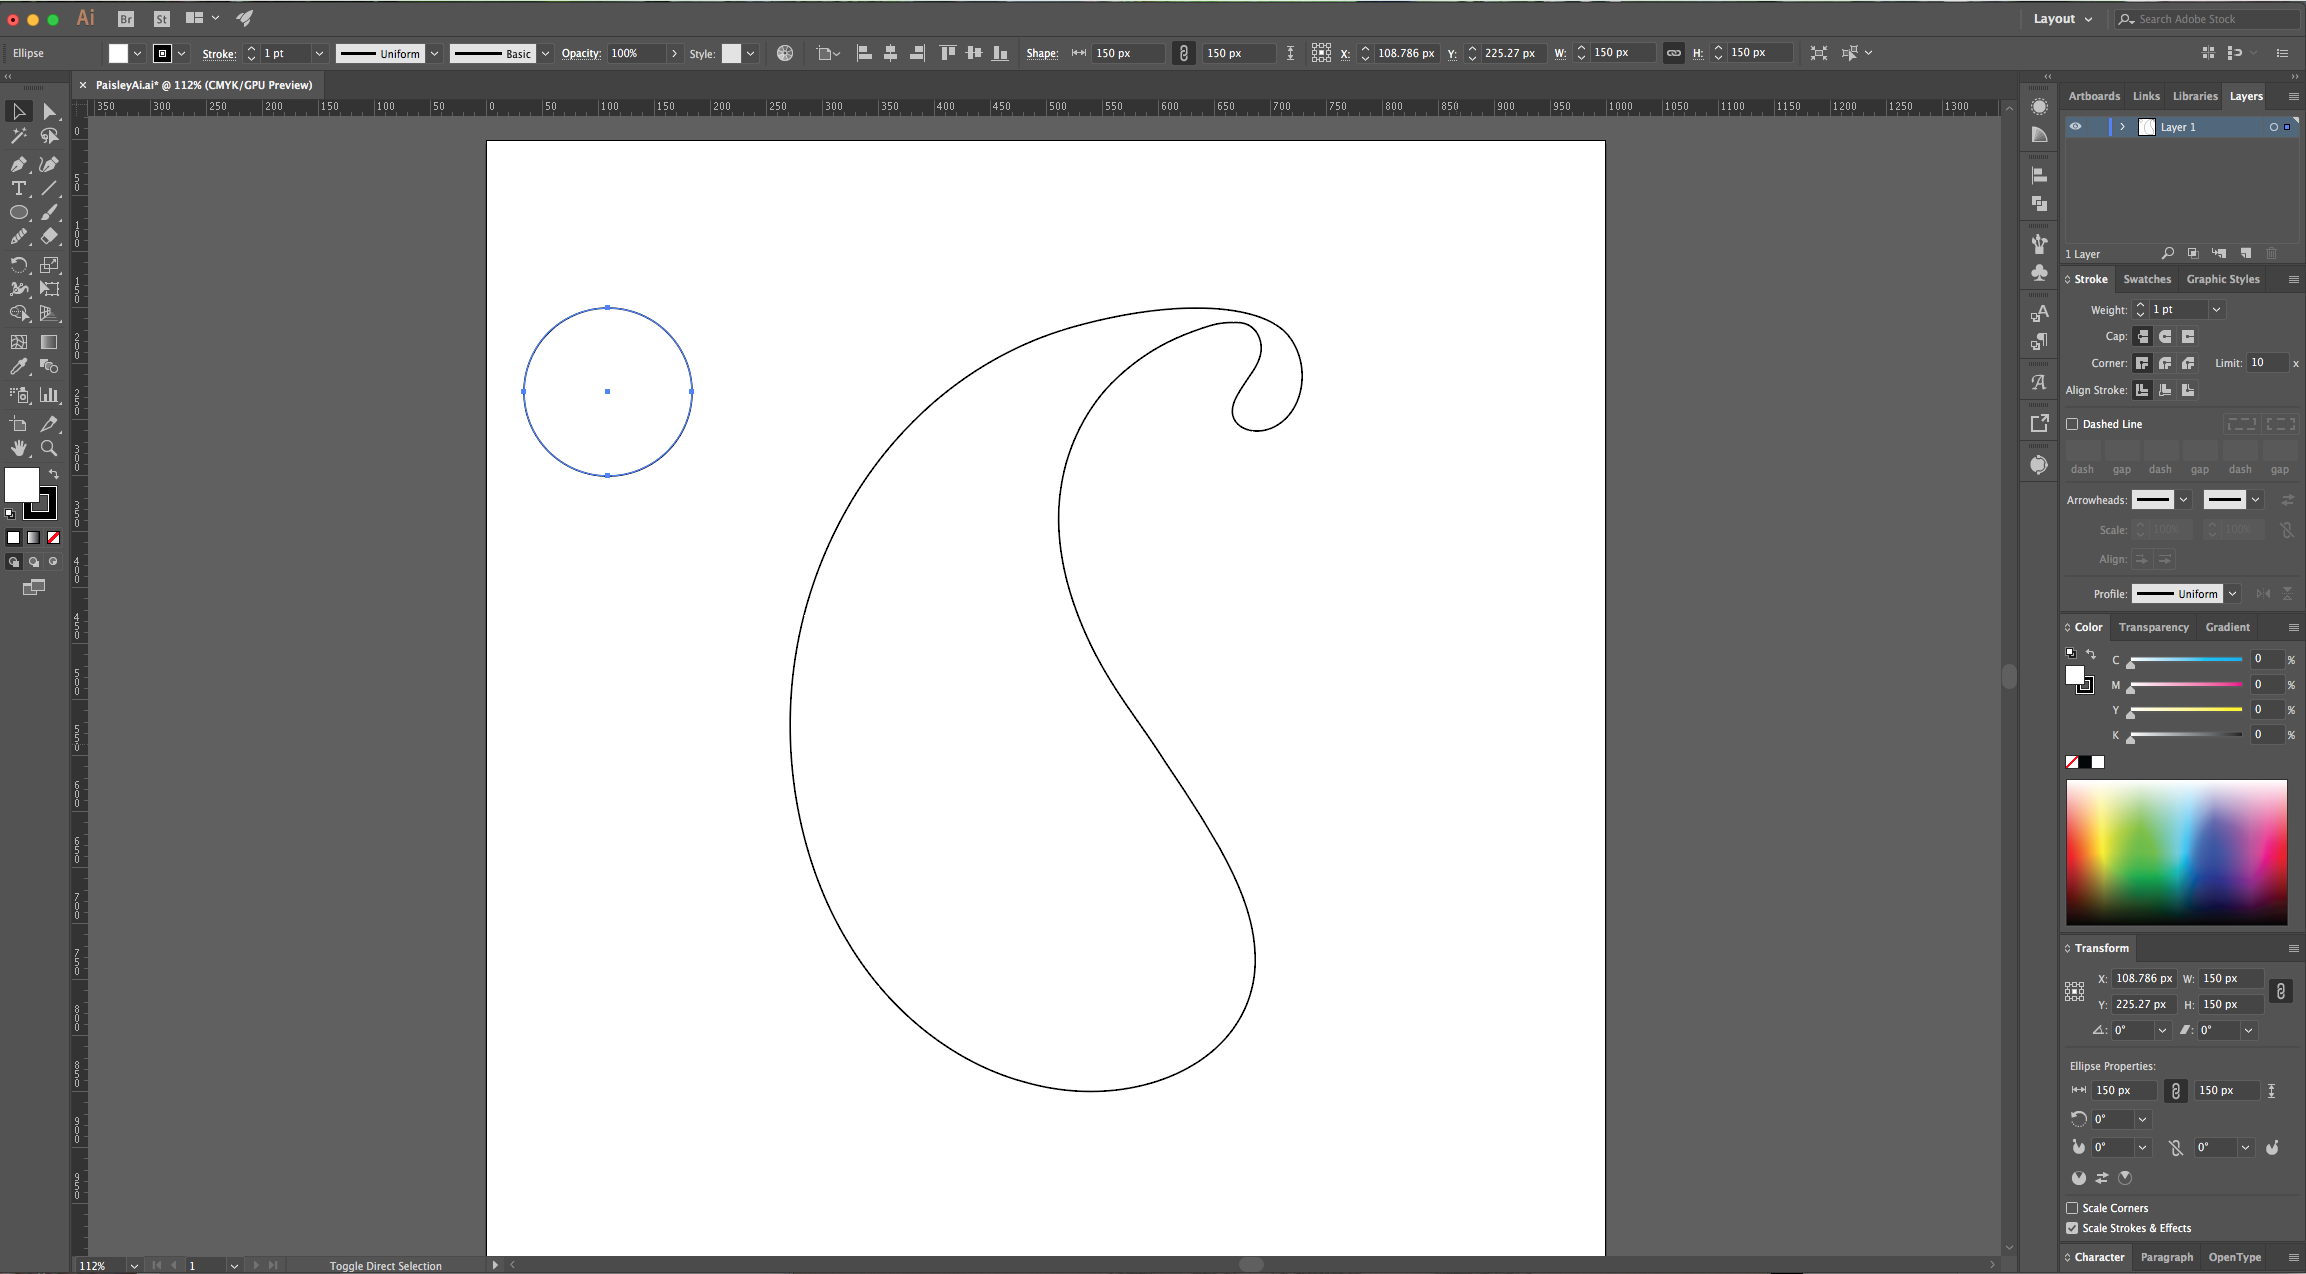
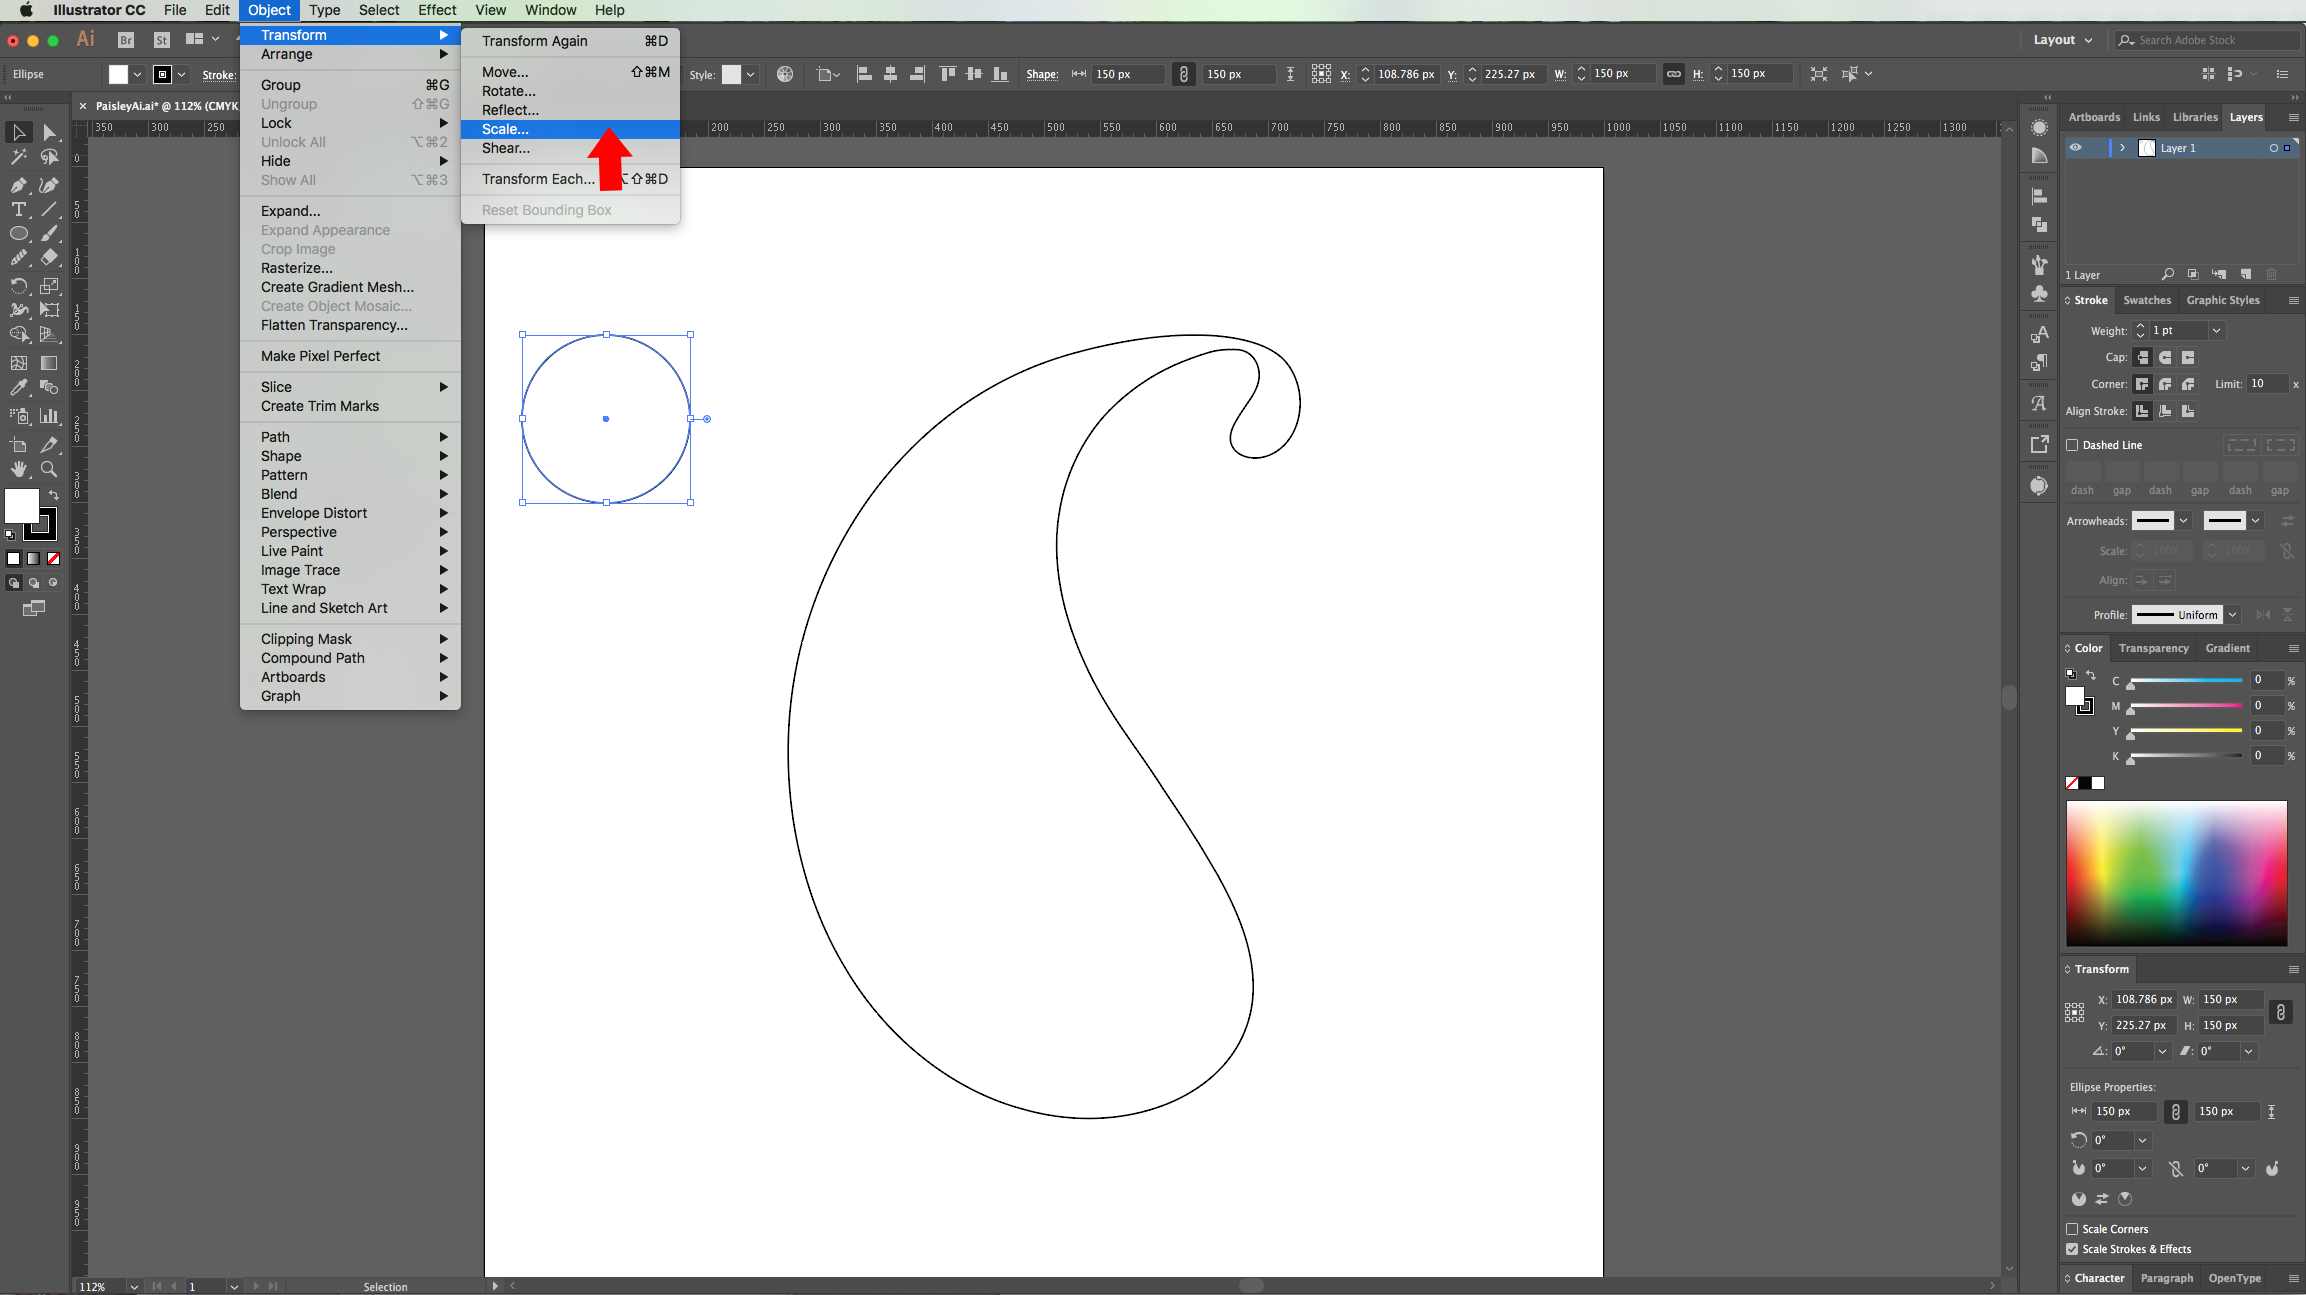
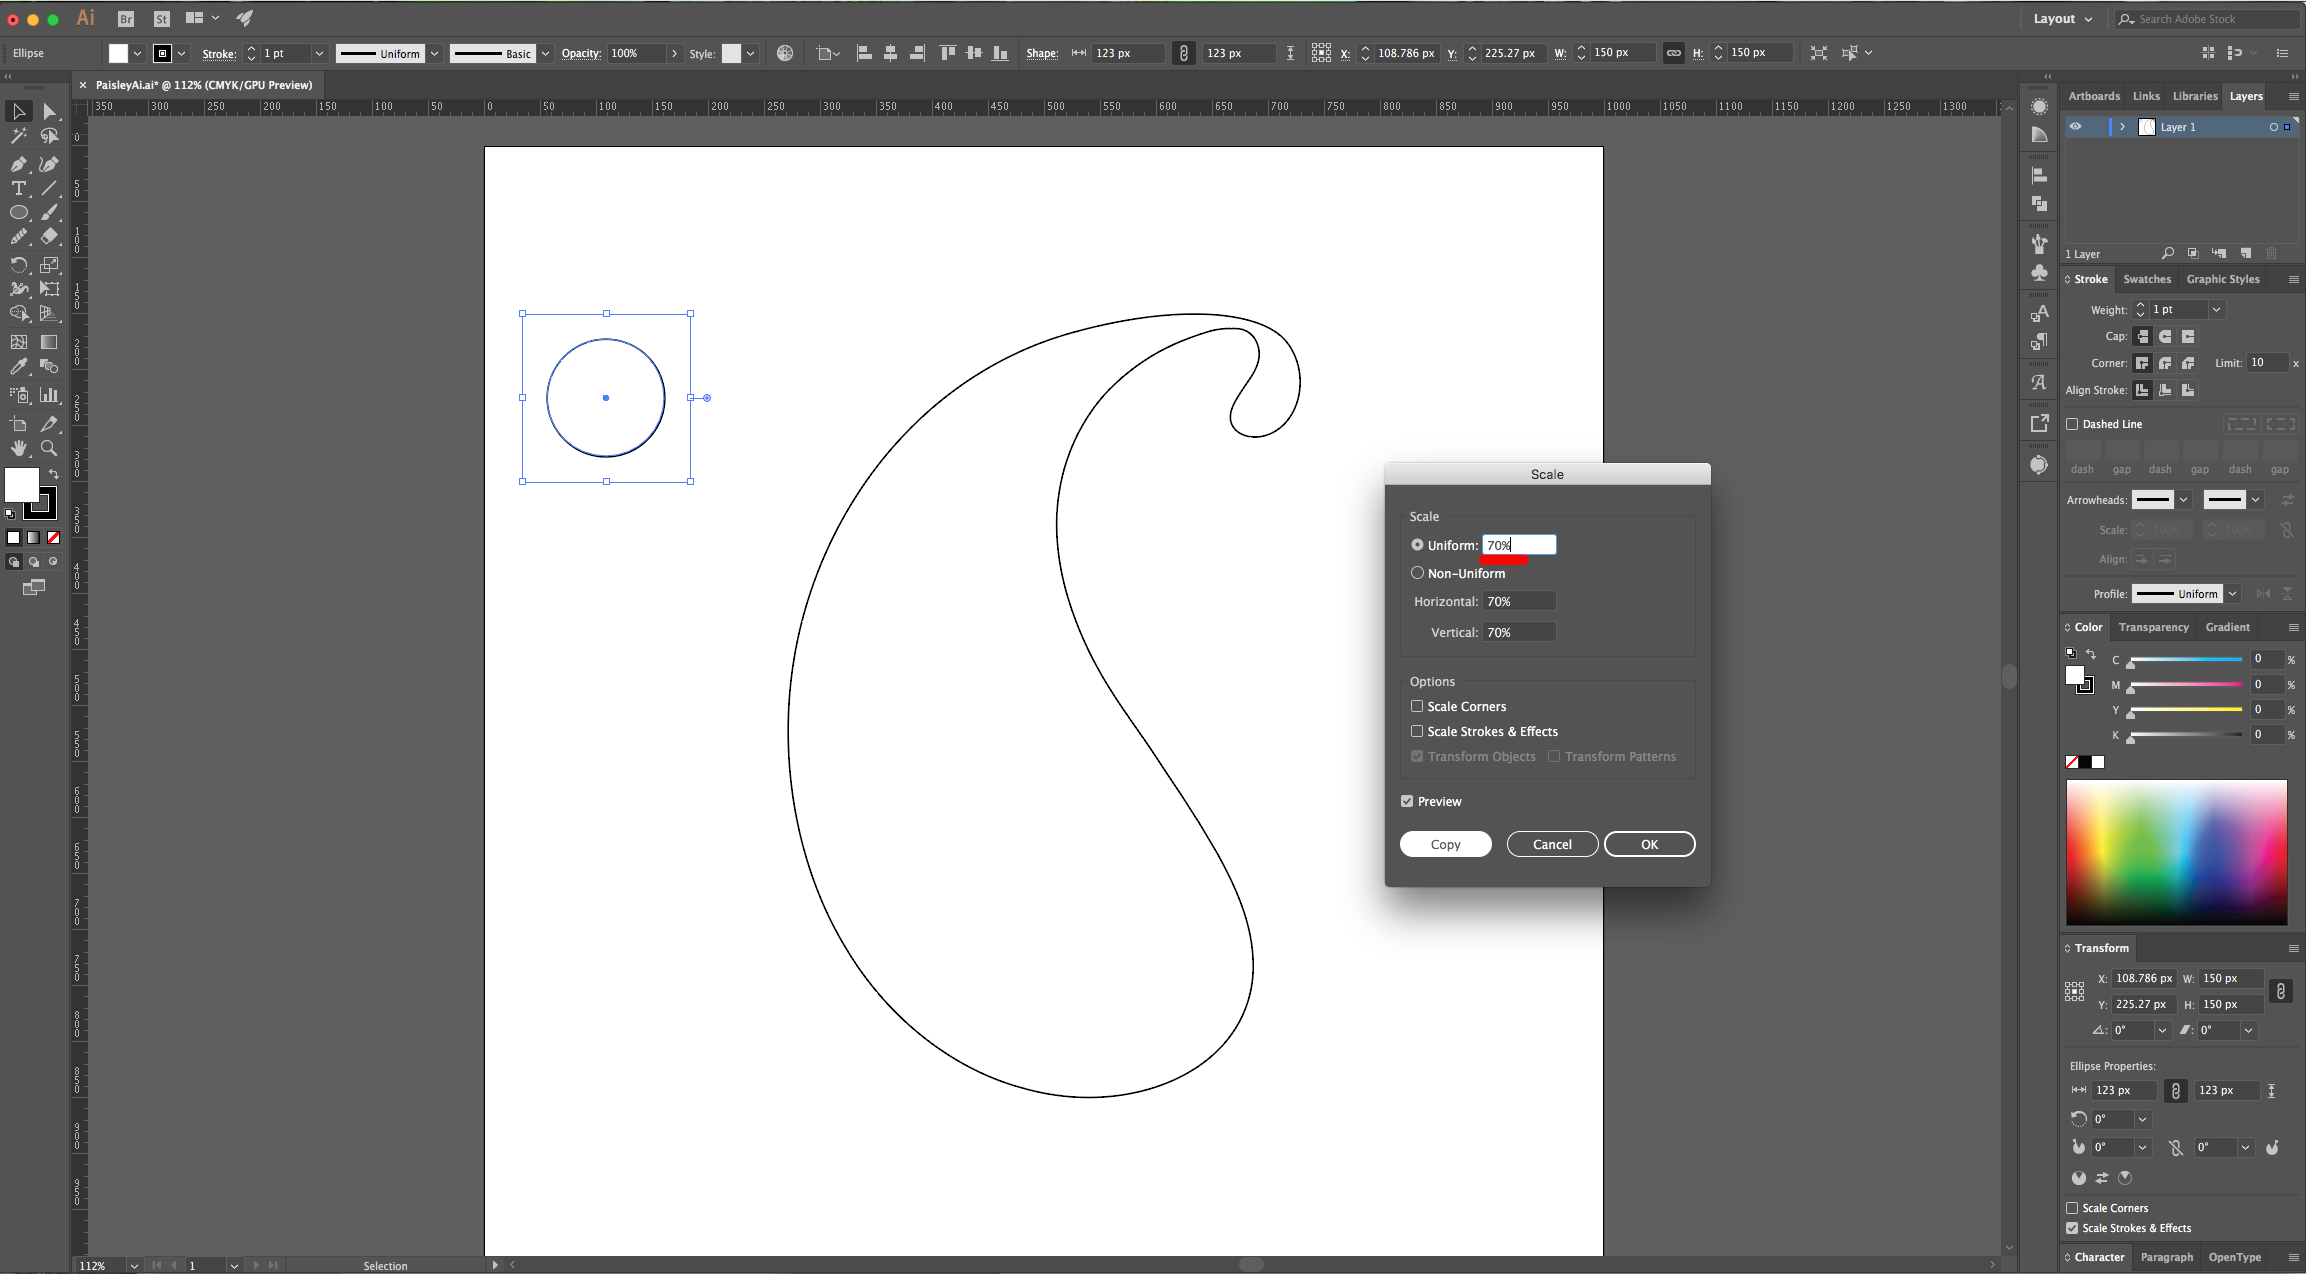
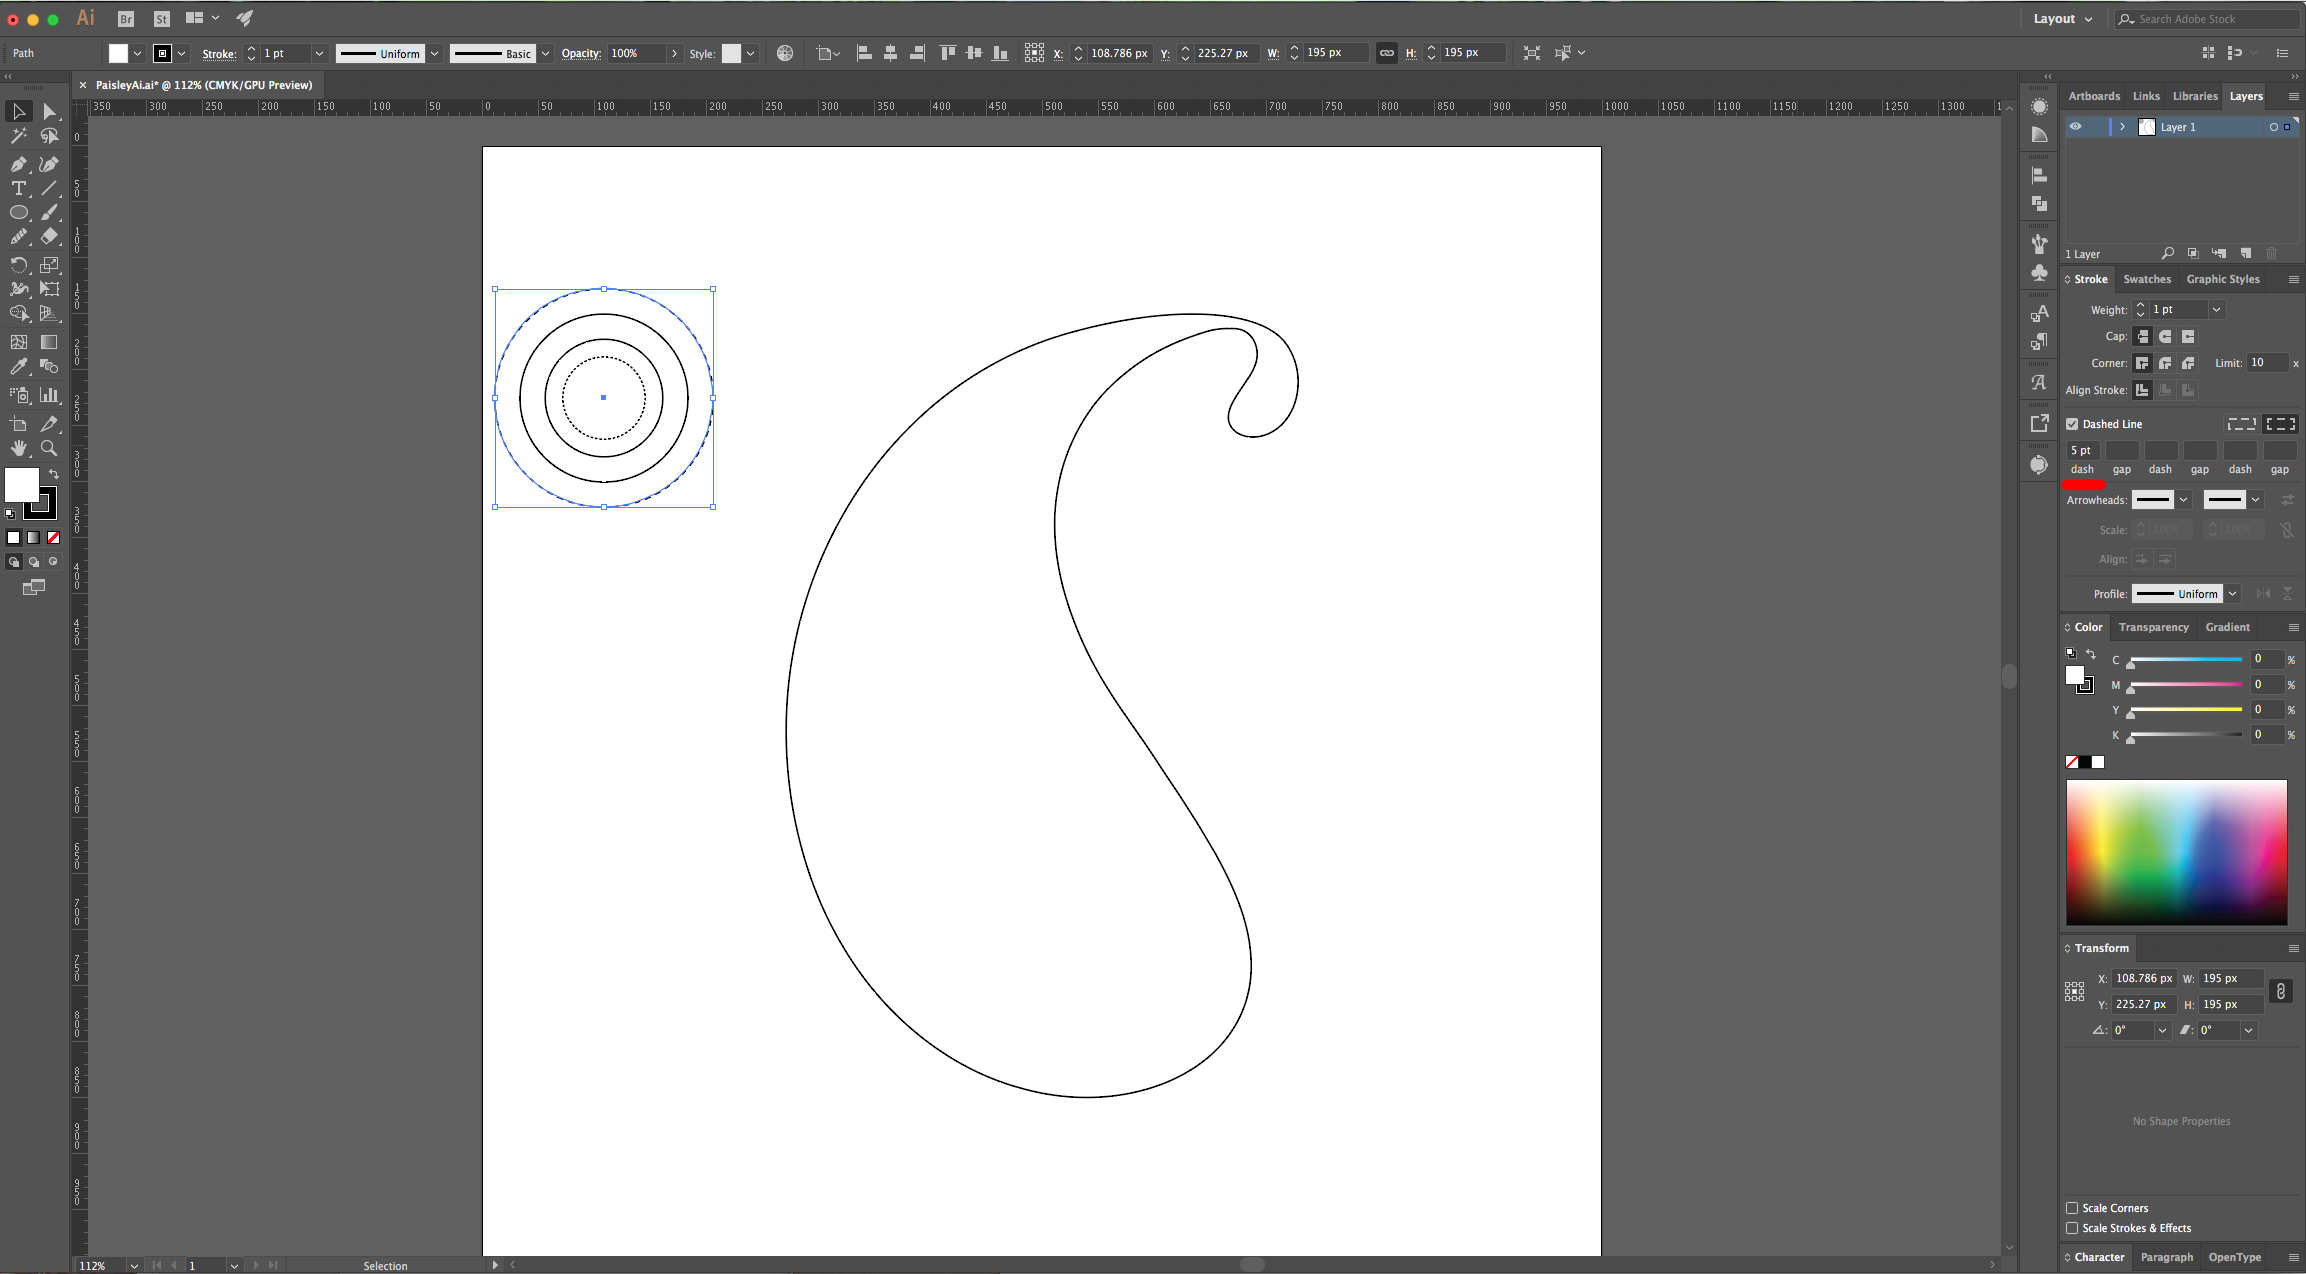
8 - Select the “Ellipse Tool” (L), click inside your canvas and choose 150 px for “With” and “Height”, then click “OK”. Go to Object > Transform > Scale and use a “Uniform” 70% Scale, uncheck the “Scale Strokes & Effects” Box and click “Copy” instead of “OK”.
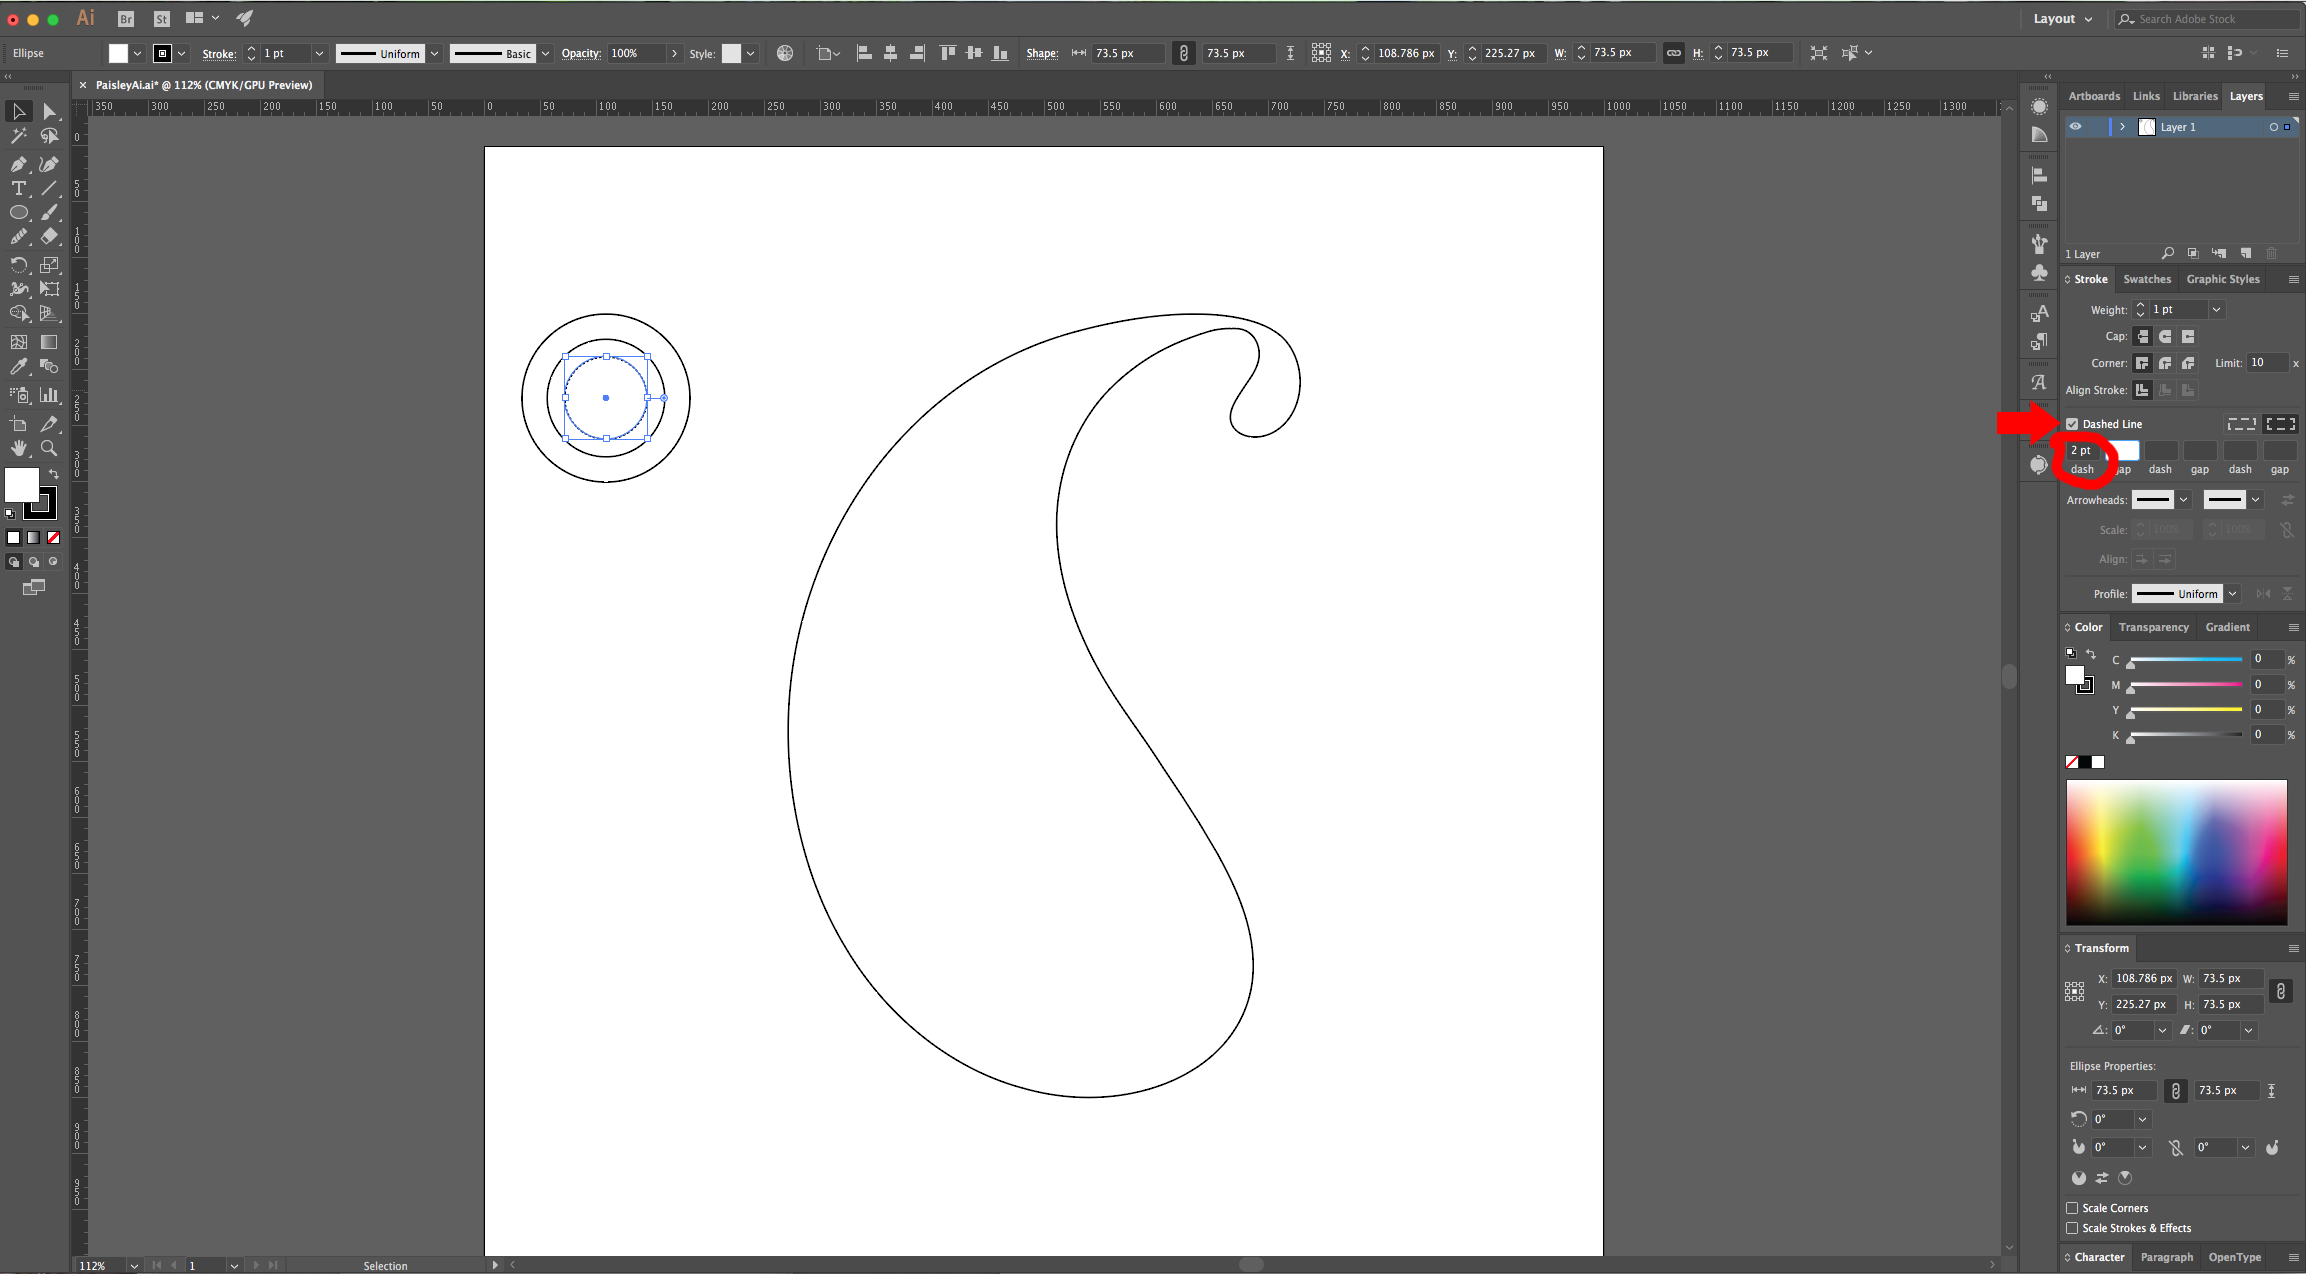
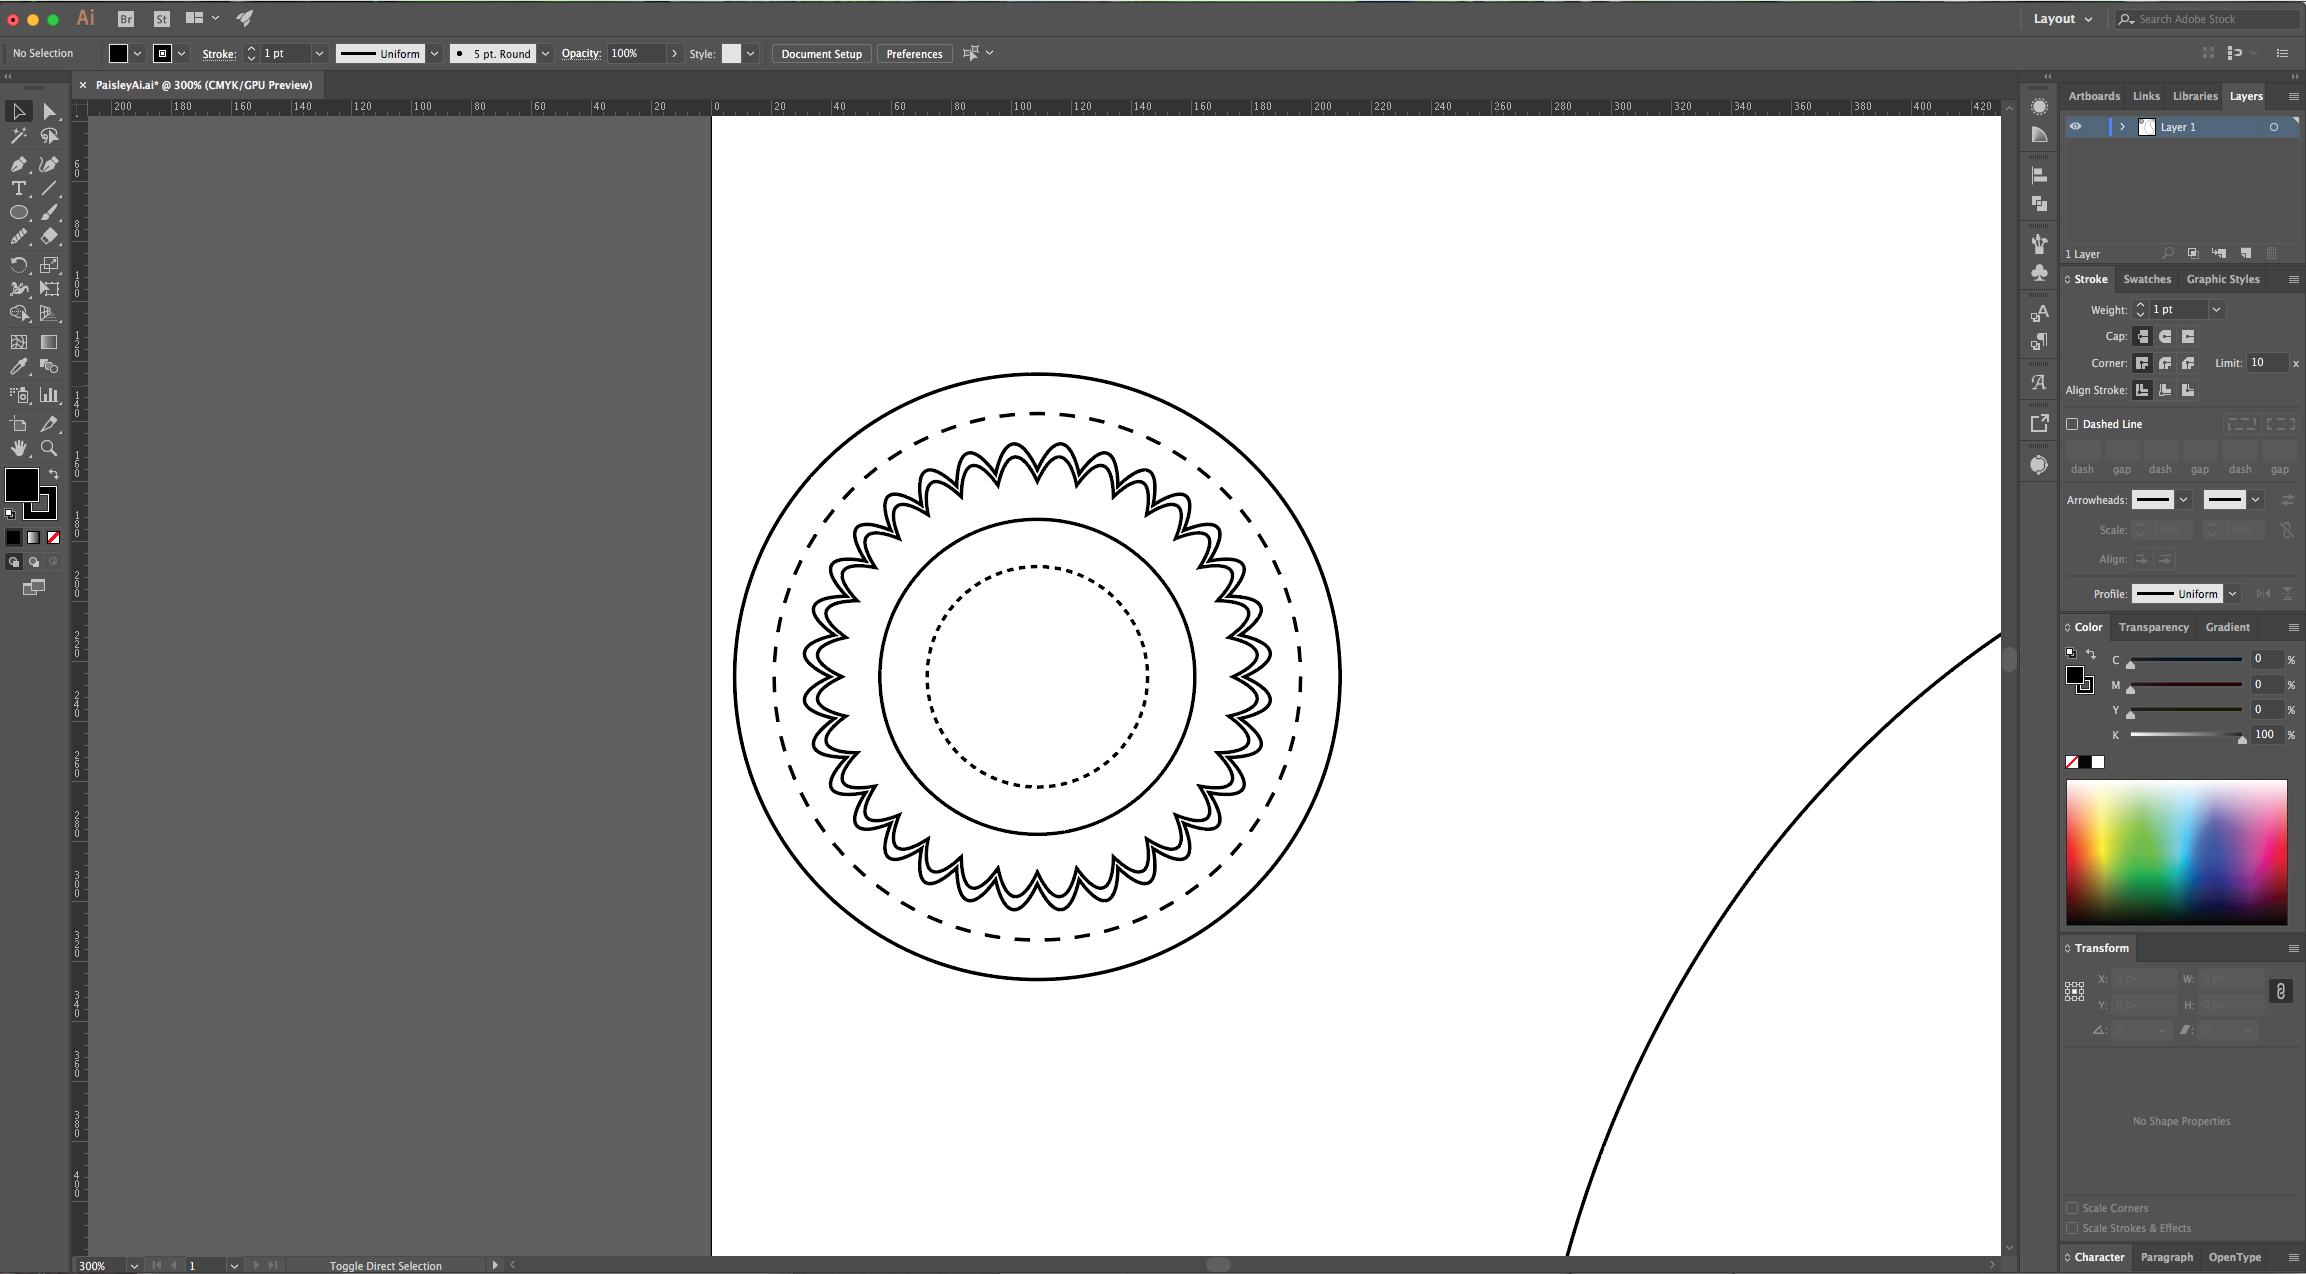
9 - Repeat this as many times as you want and with different “Scale” percentages and for certain circles, go to the “Stoke Panel” and check the “Dashed Line” box, then use a 2 pt dash.
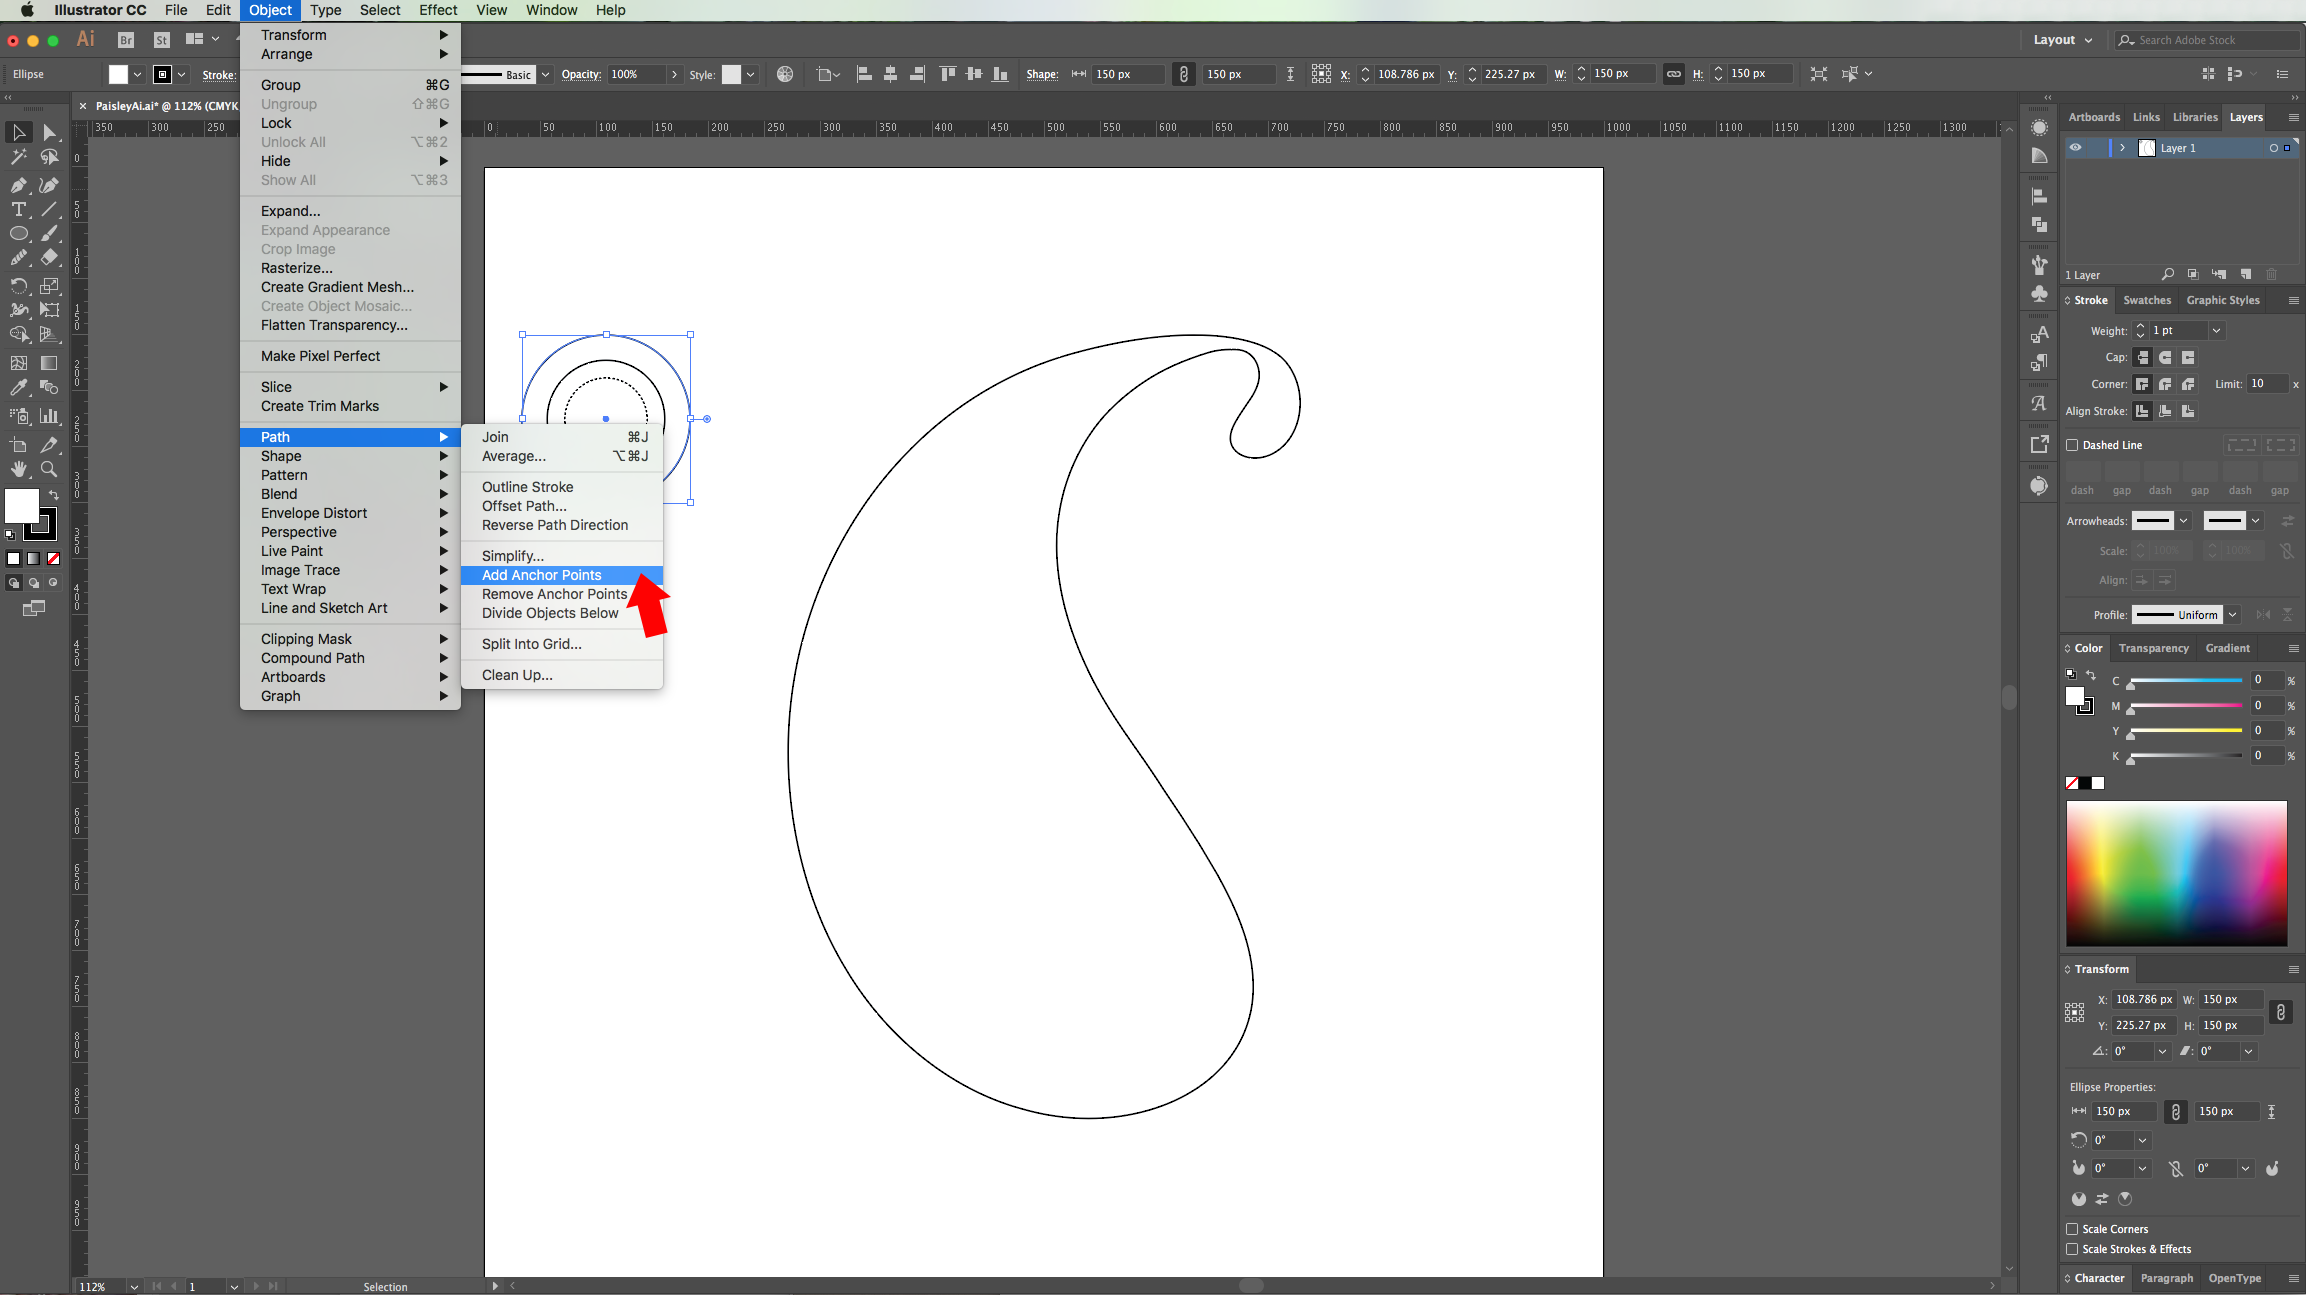
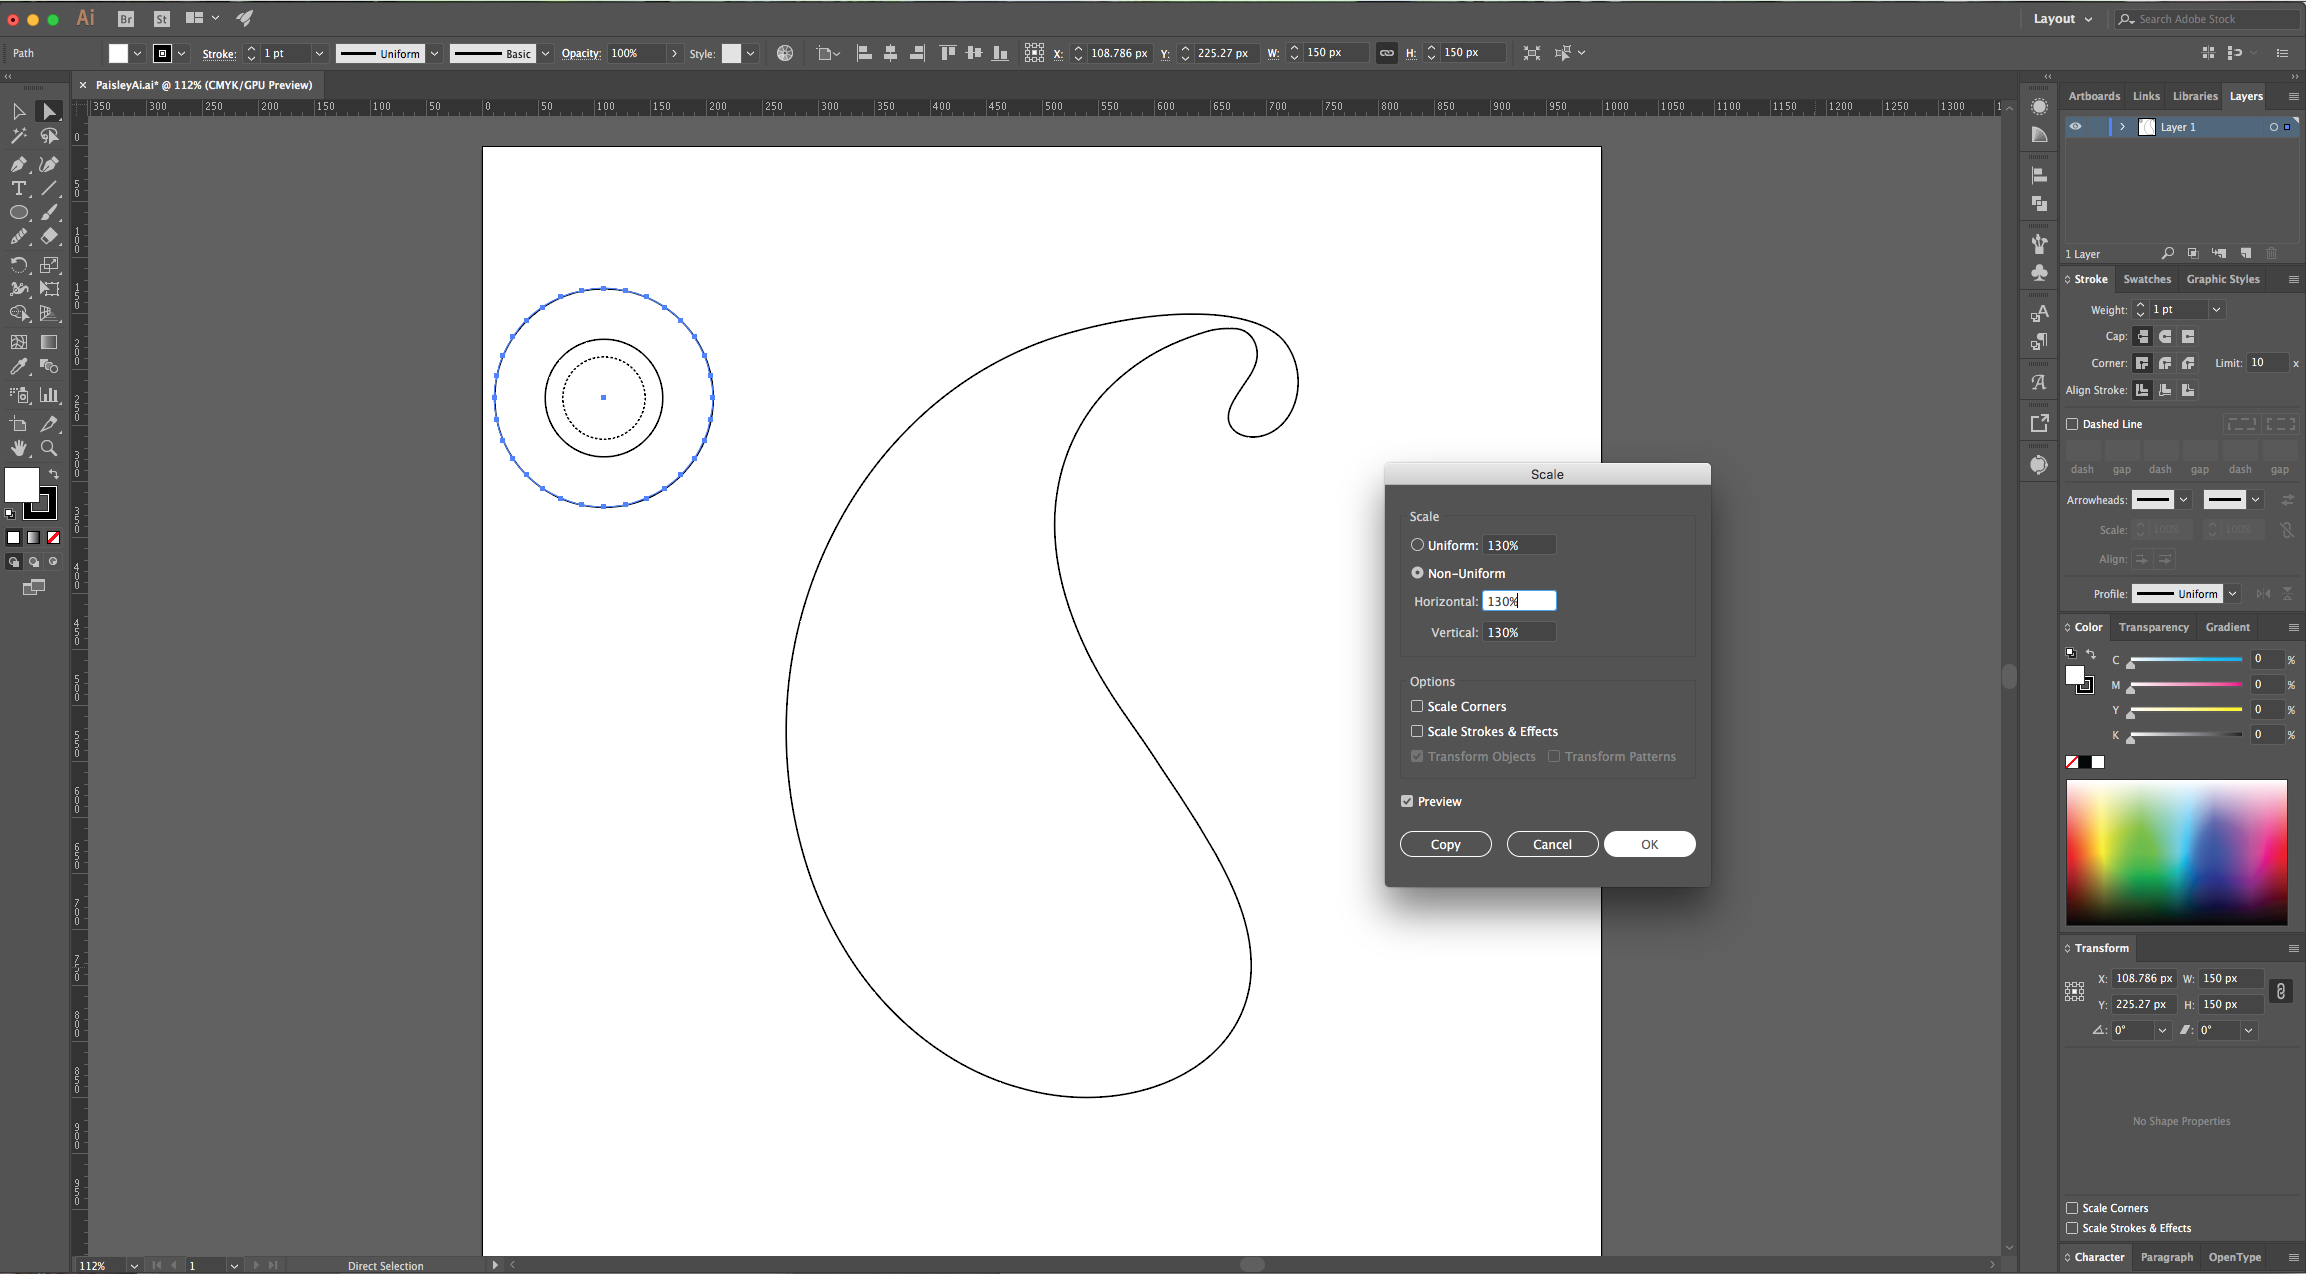
10 – Select the outer circle and go to Object > Path > Add Anchor Points to add a couple of “Anchor Points” to your Path. Repeat a few more times to add more Points, then make another scaled copy (130%) of your circle and give it a 5 pt dash.

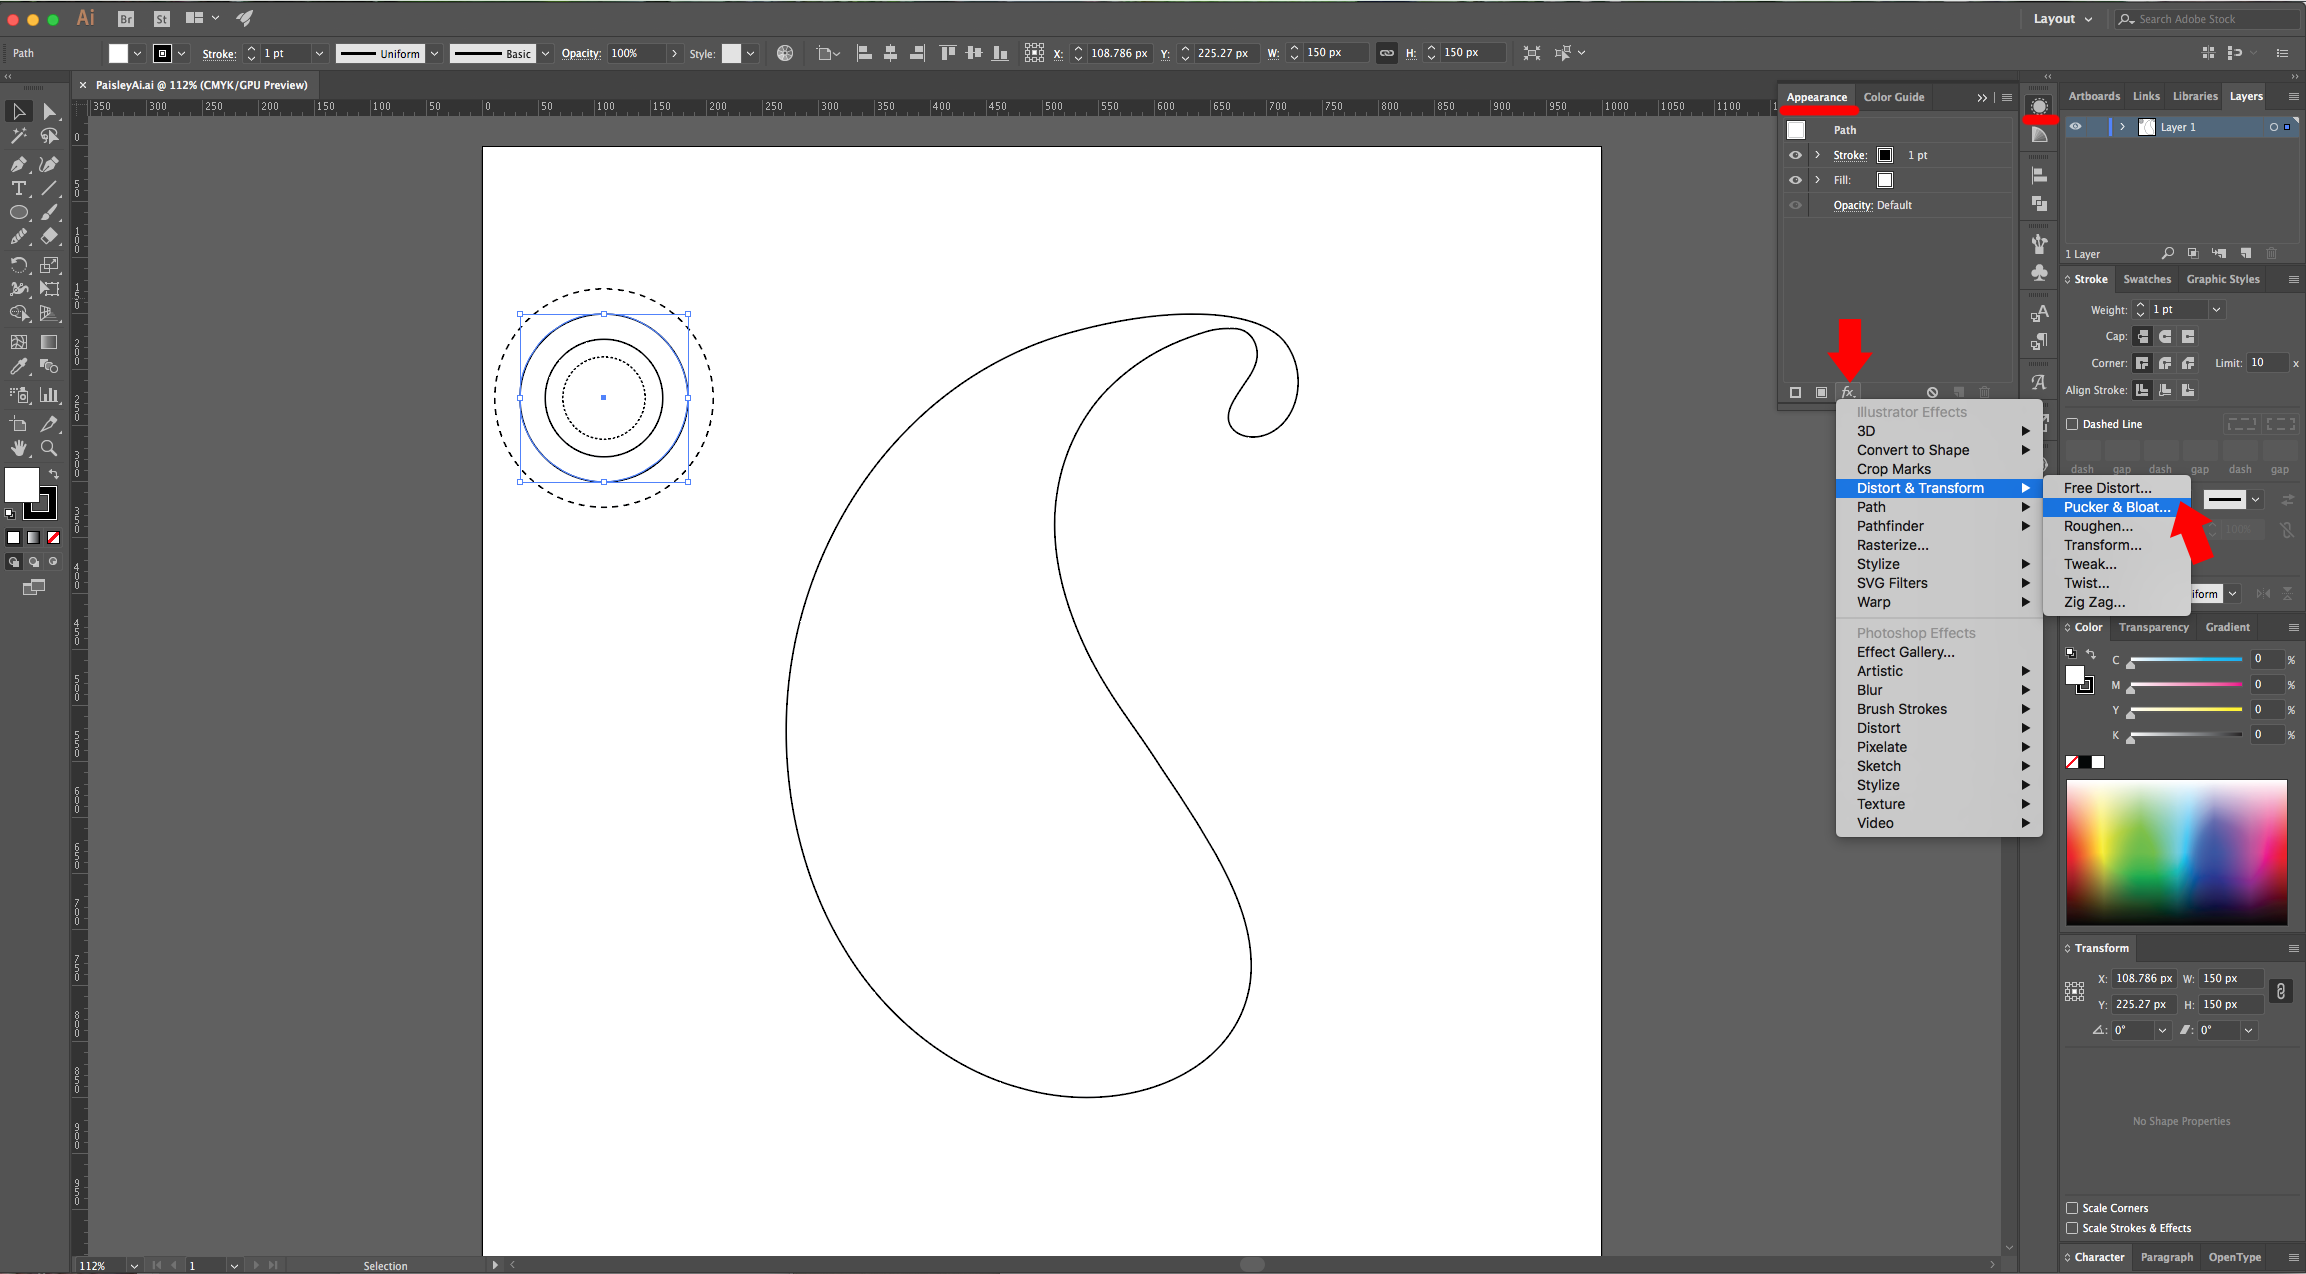
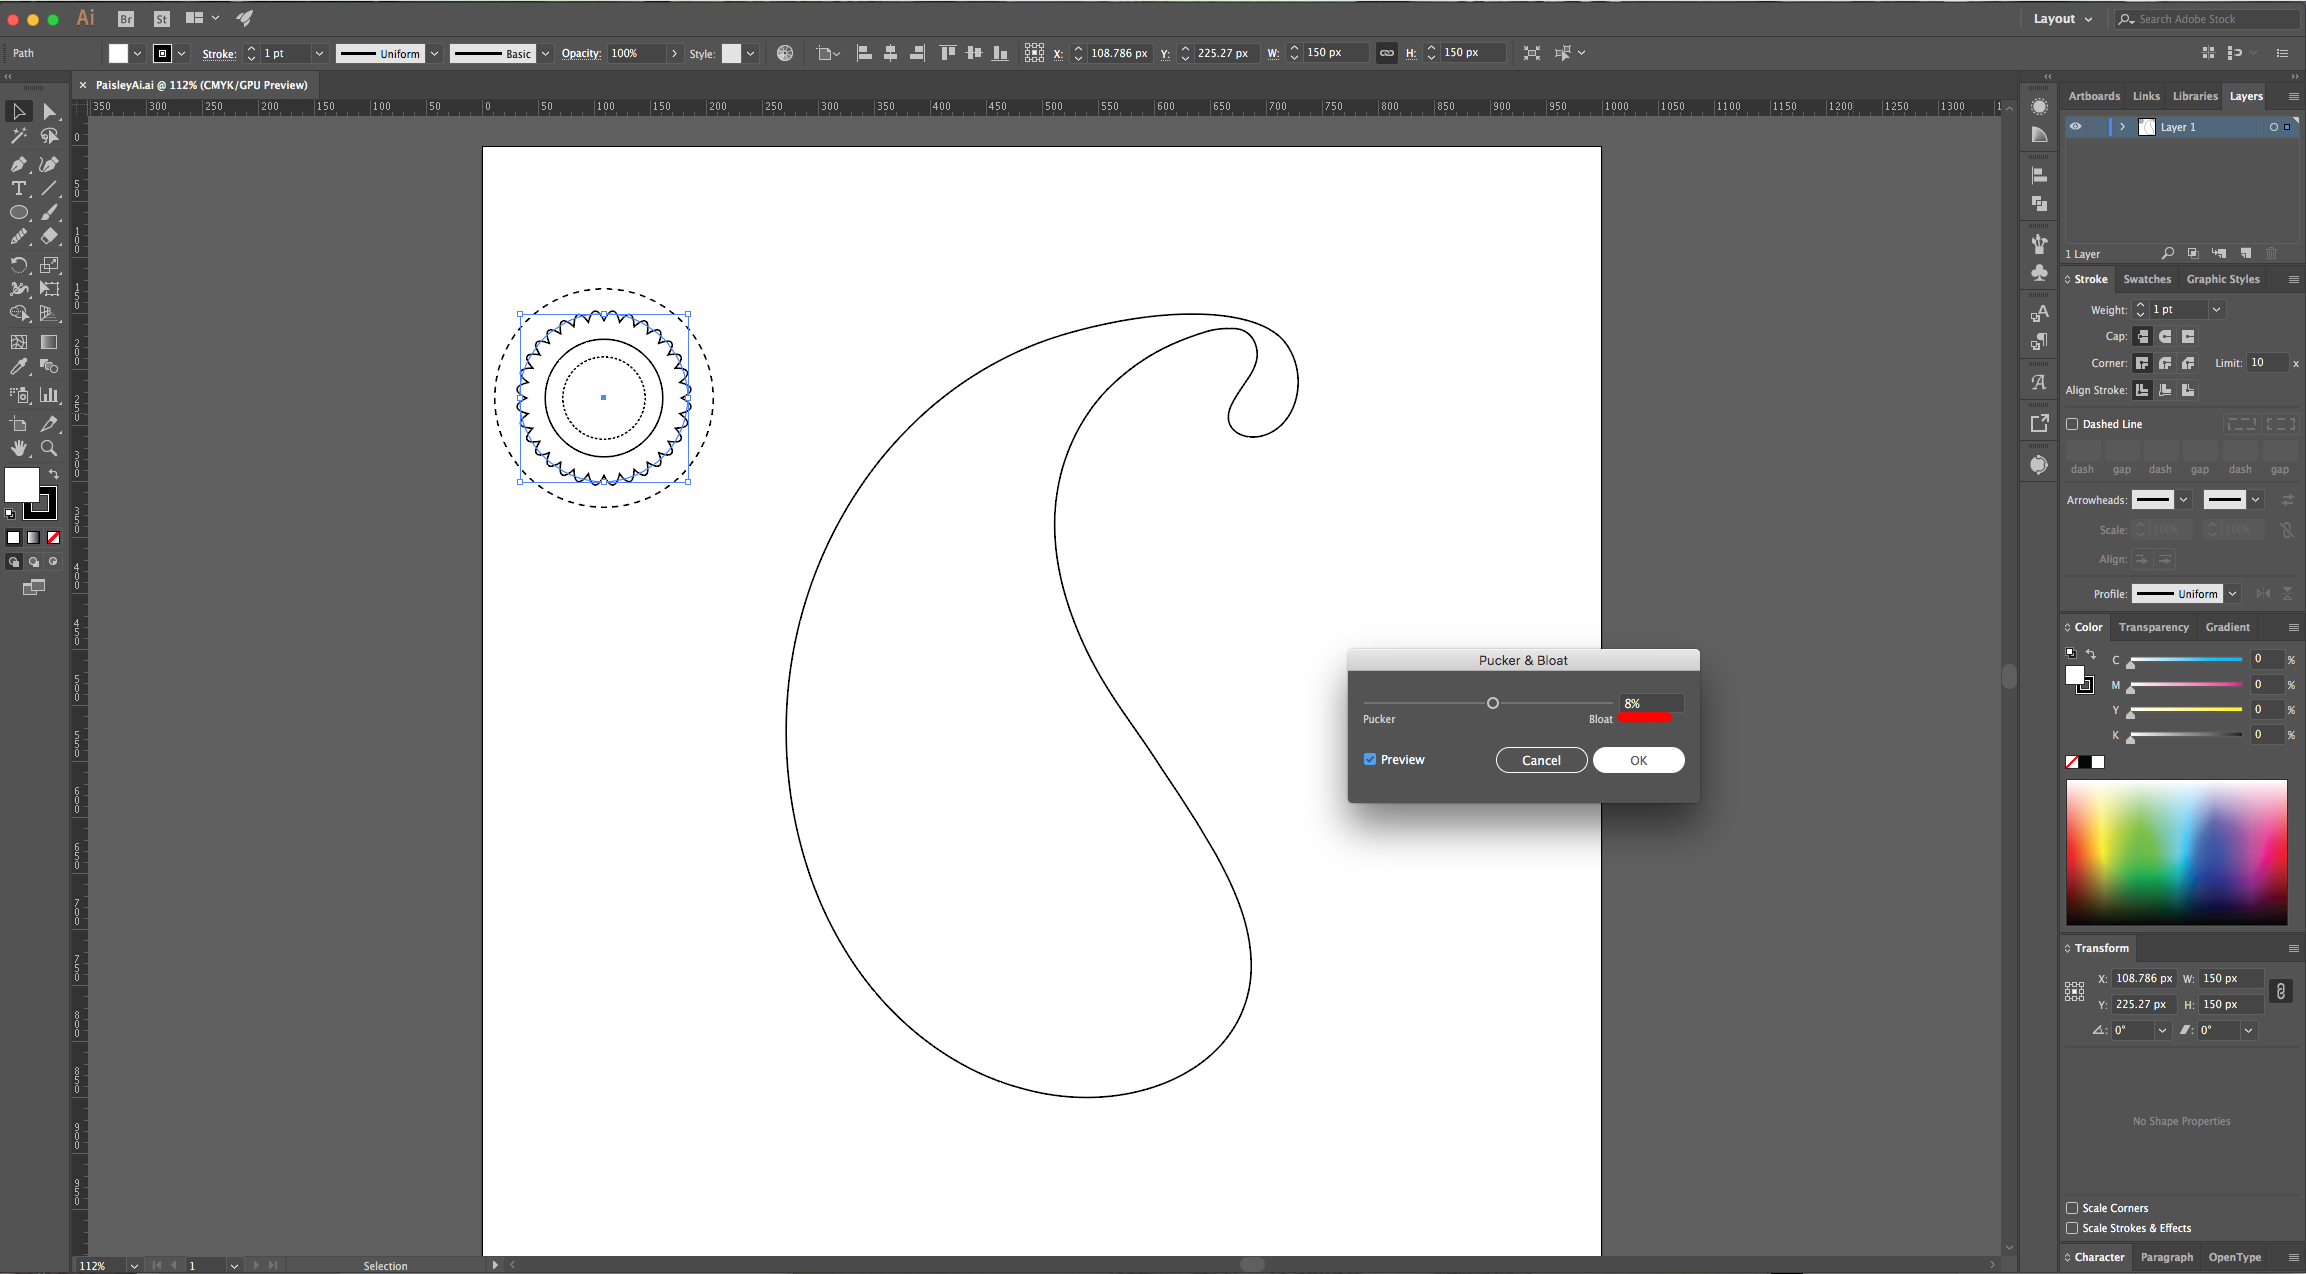
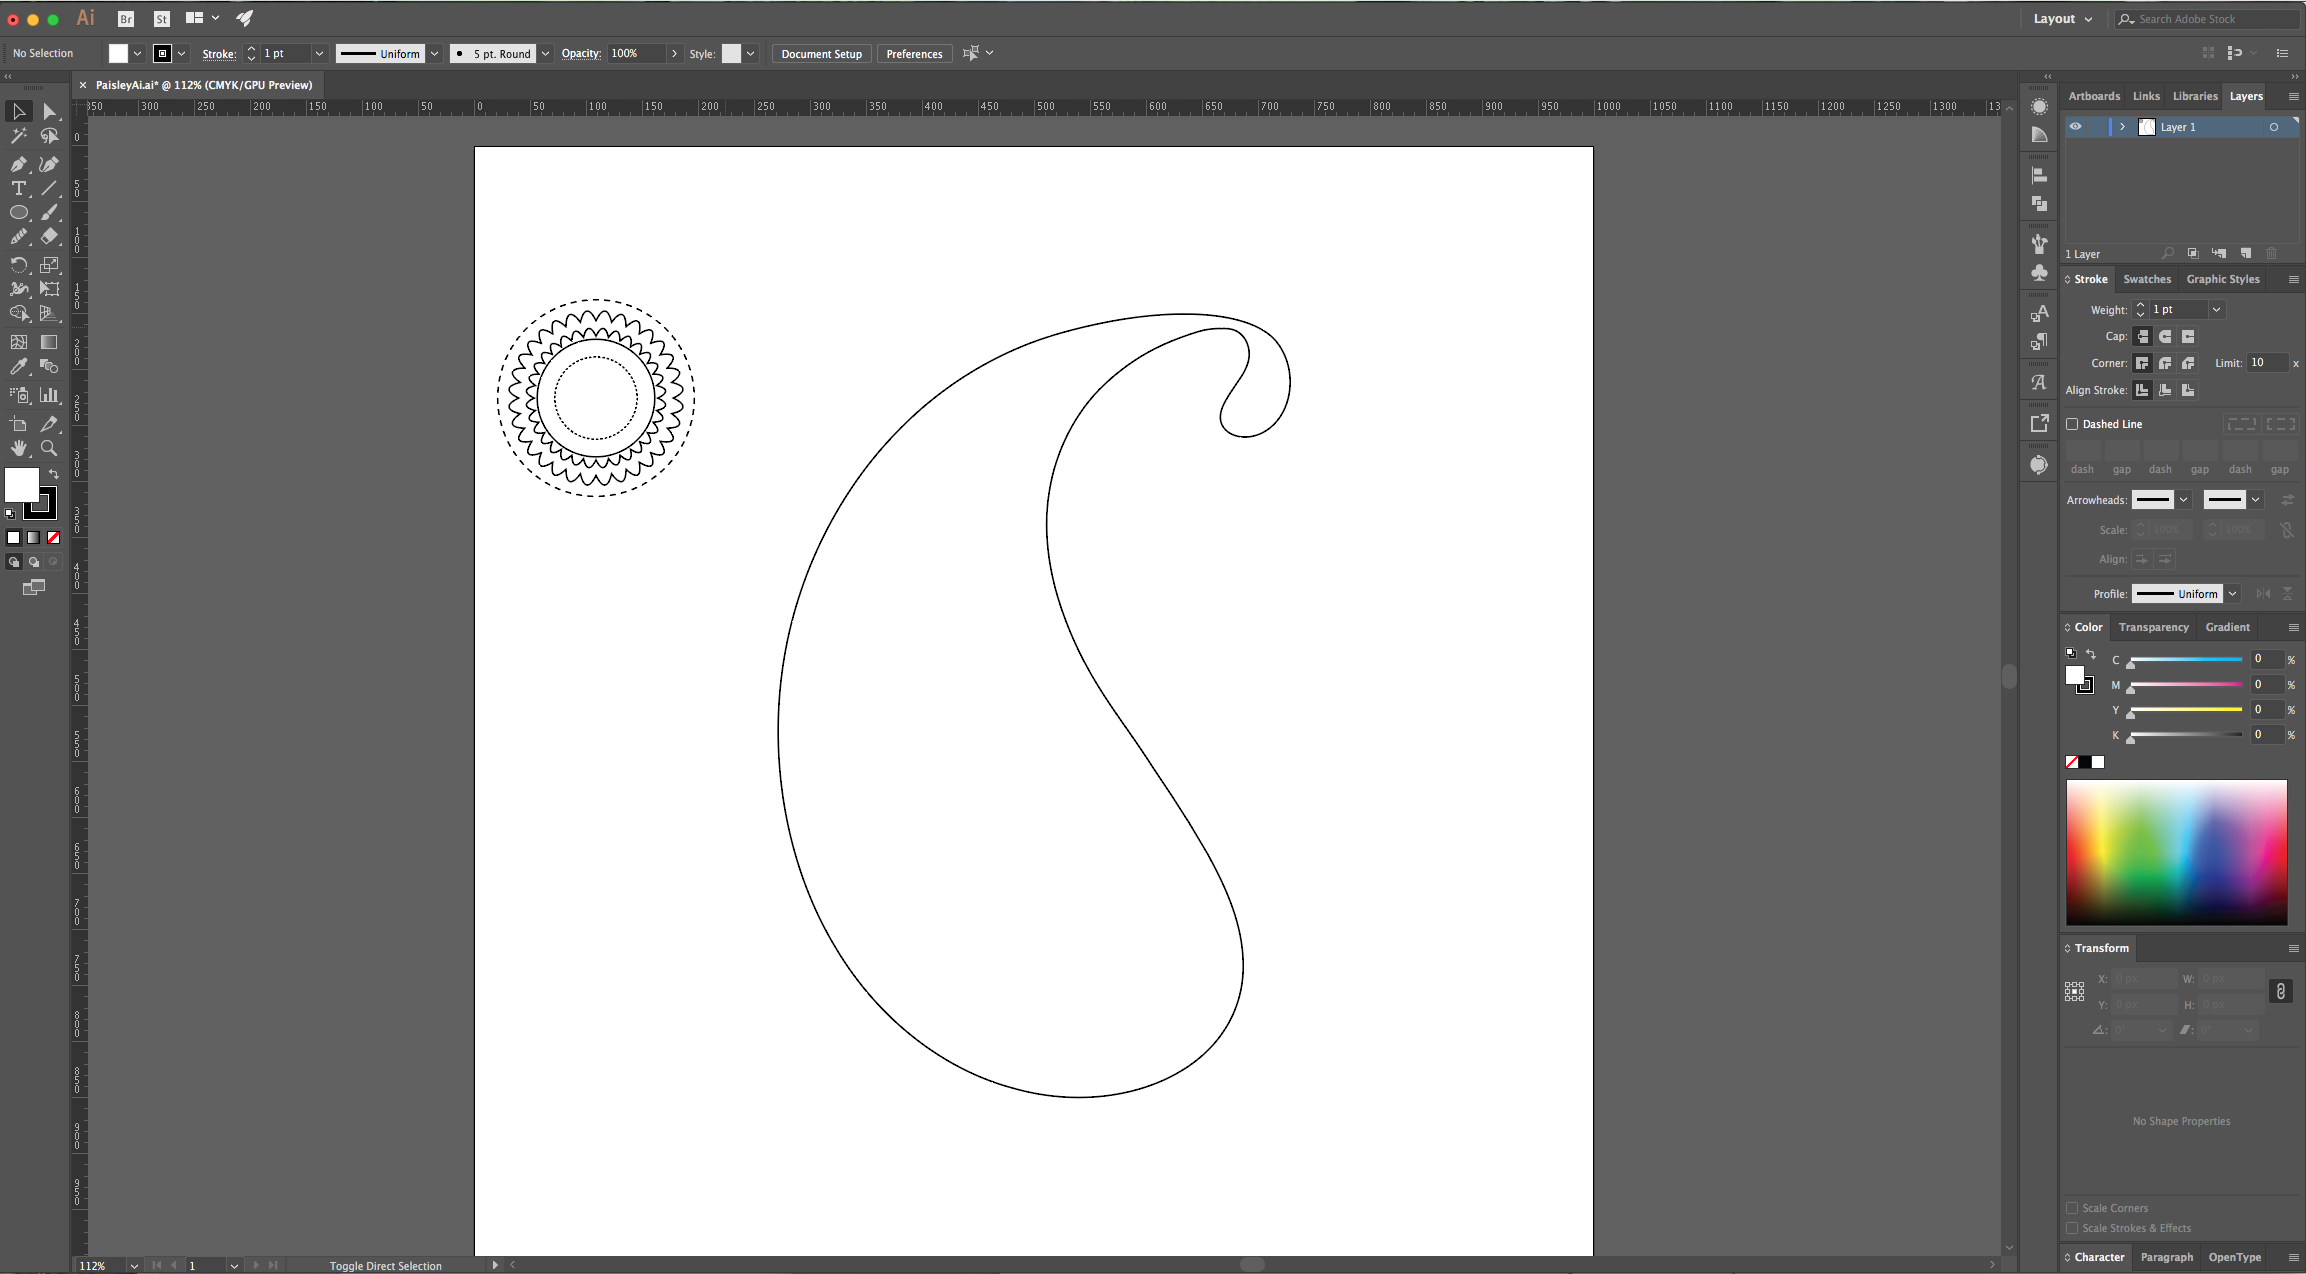
11 – Select the second circle counting from the outside going in and in the “Appearance Panel” go to Distort & Transform > Pucker & Bloat. Use a value of 8%.
12 - Make a “Scaled” Copy of this path and make it closer to the next inner circle. You can also add another circle to the outside, feel free to create your own design.

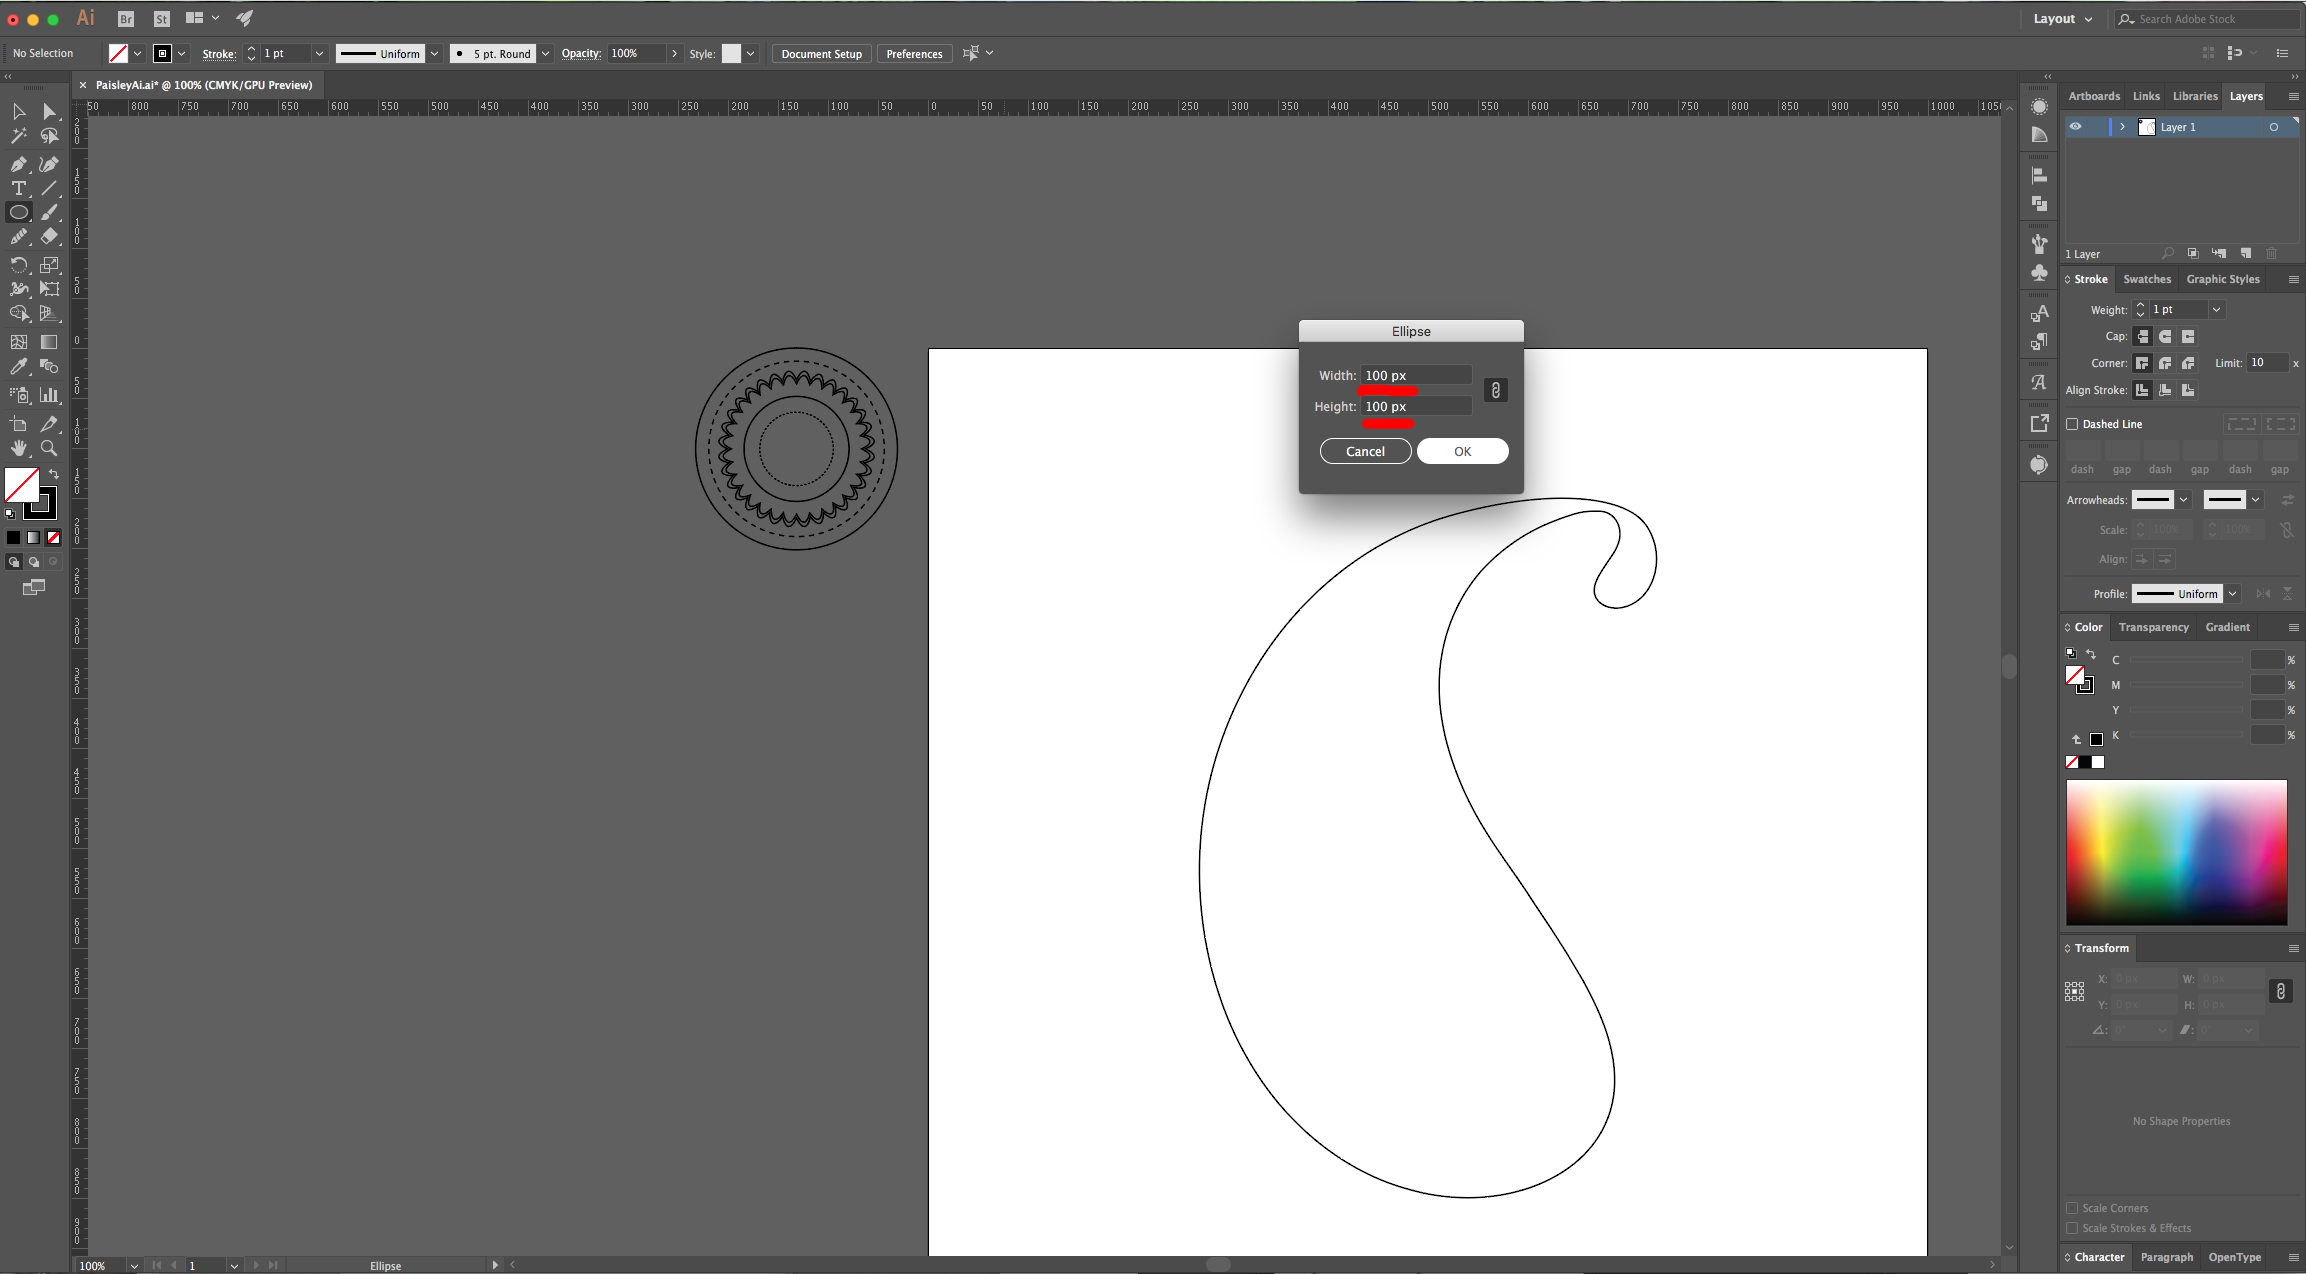
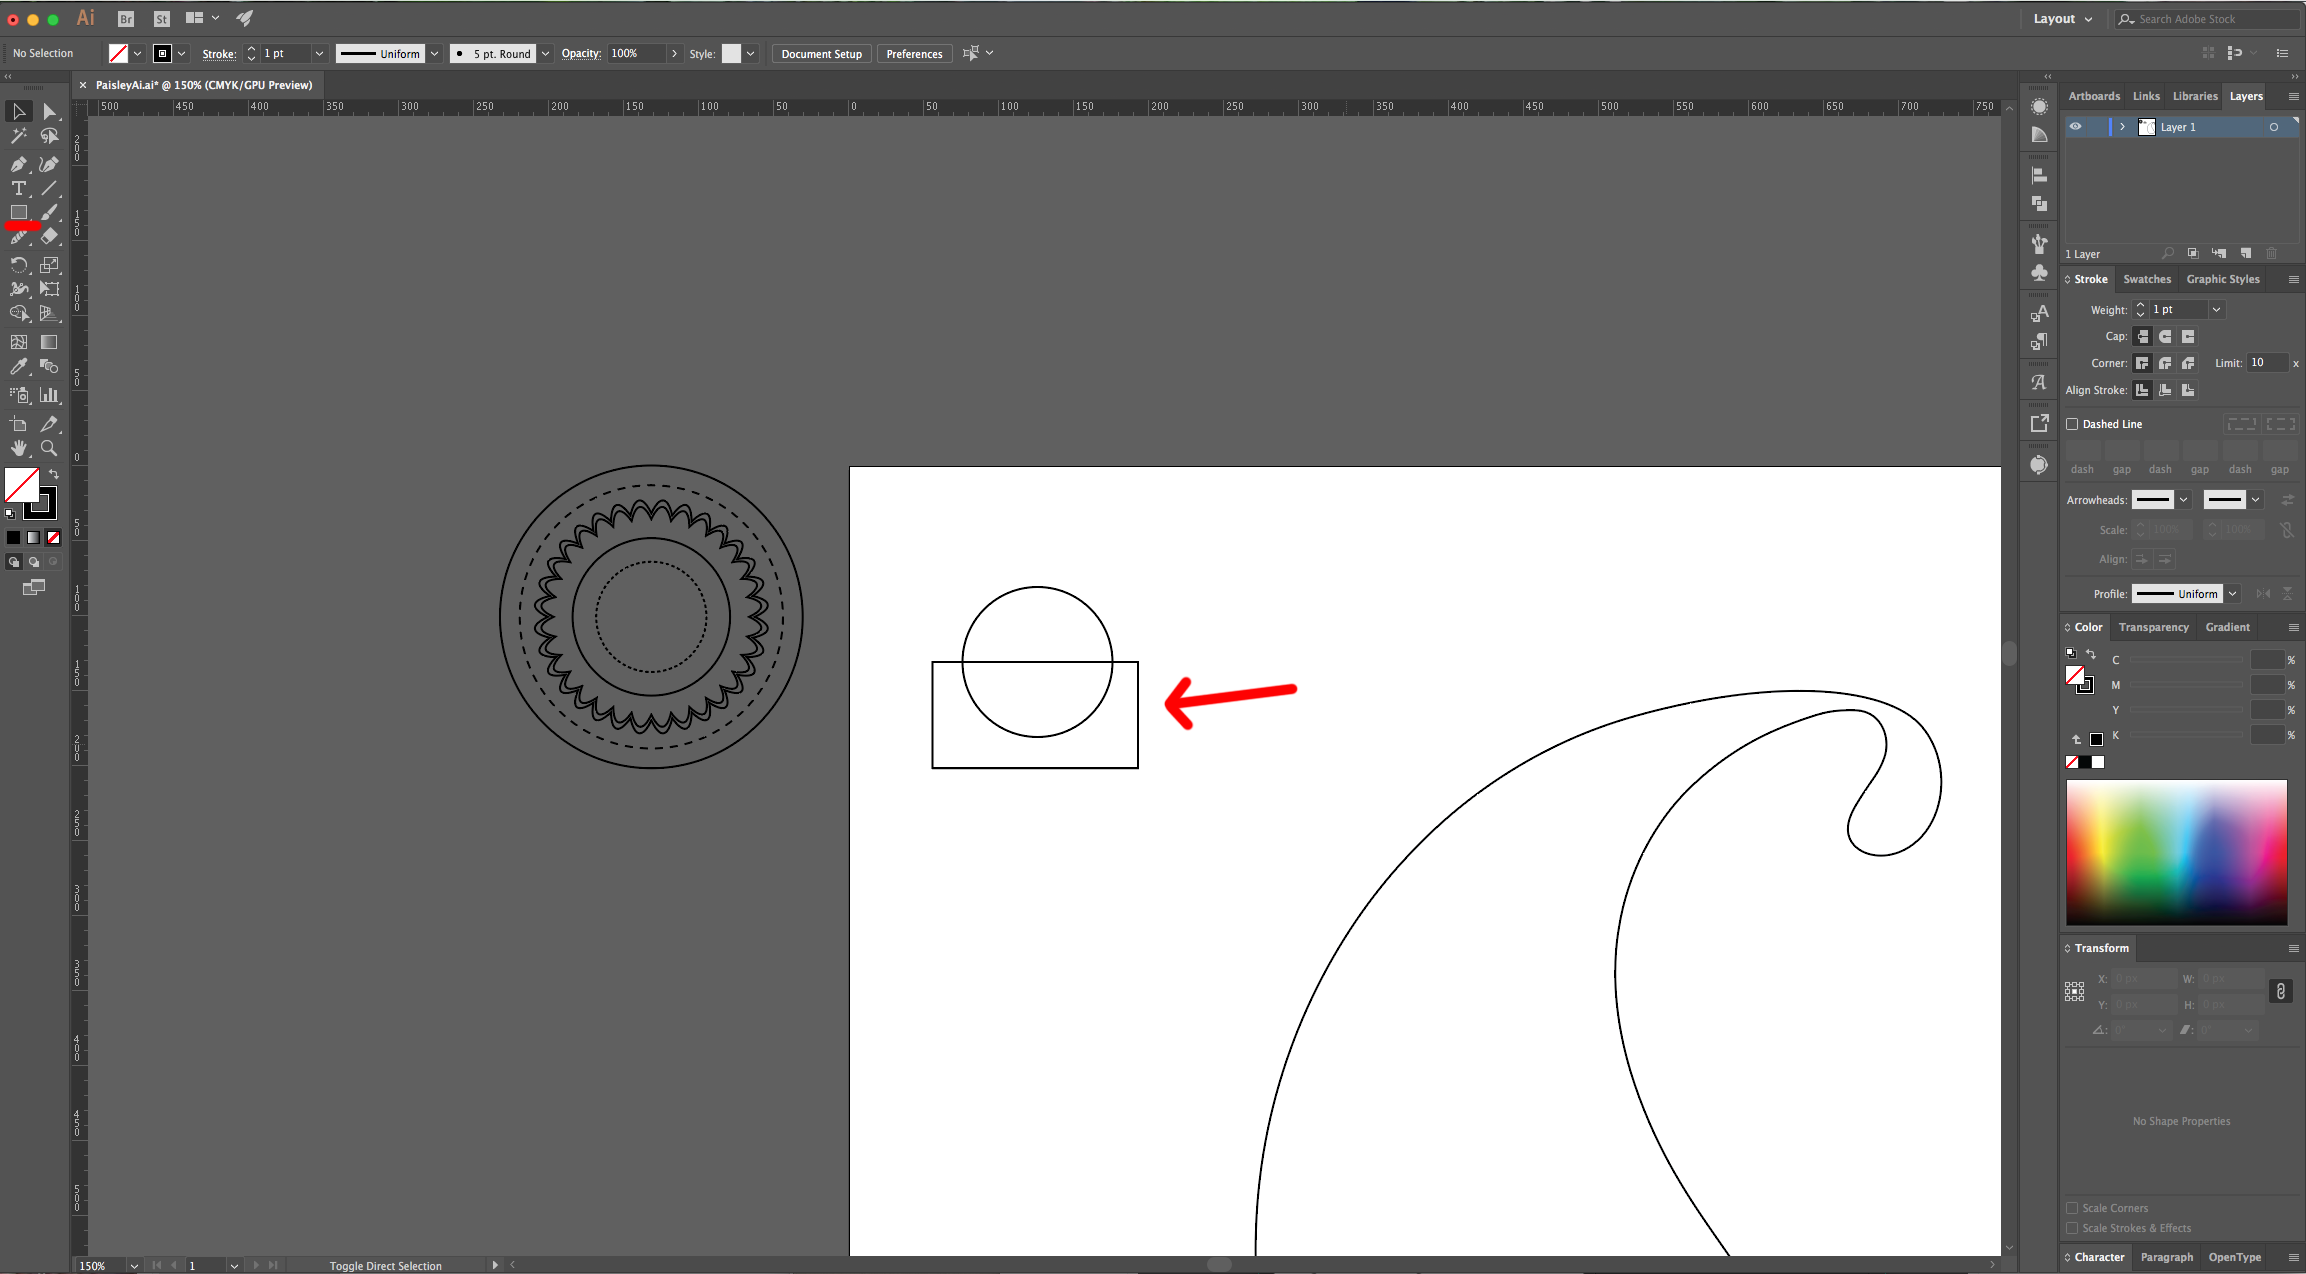
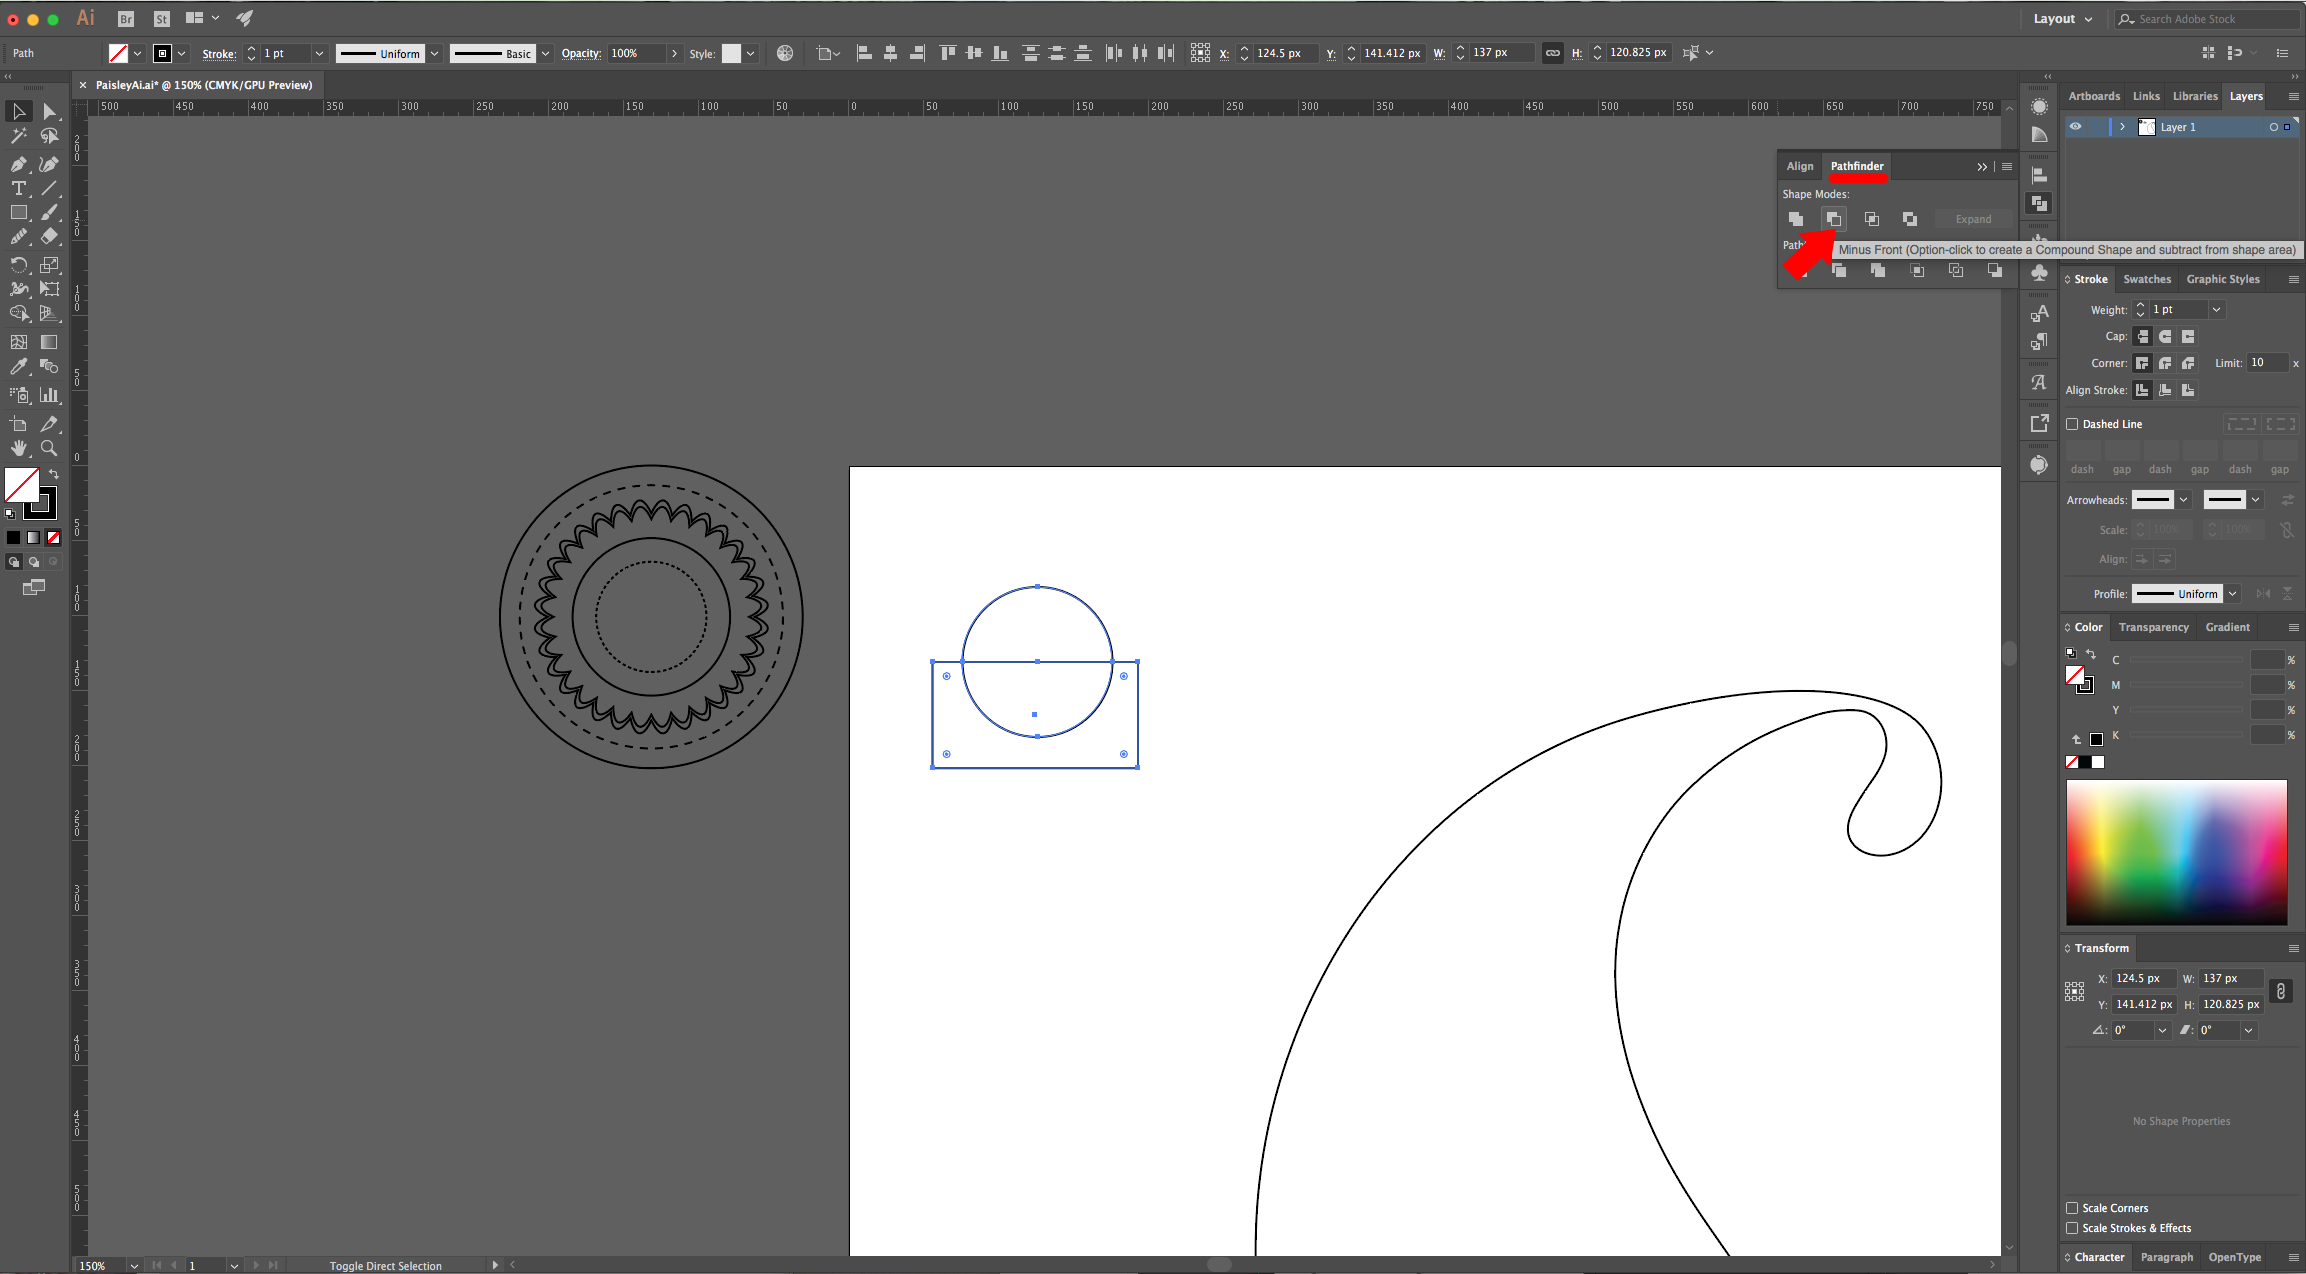
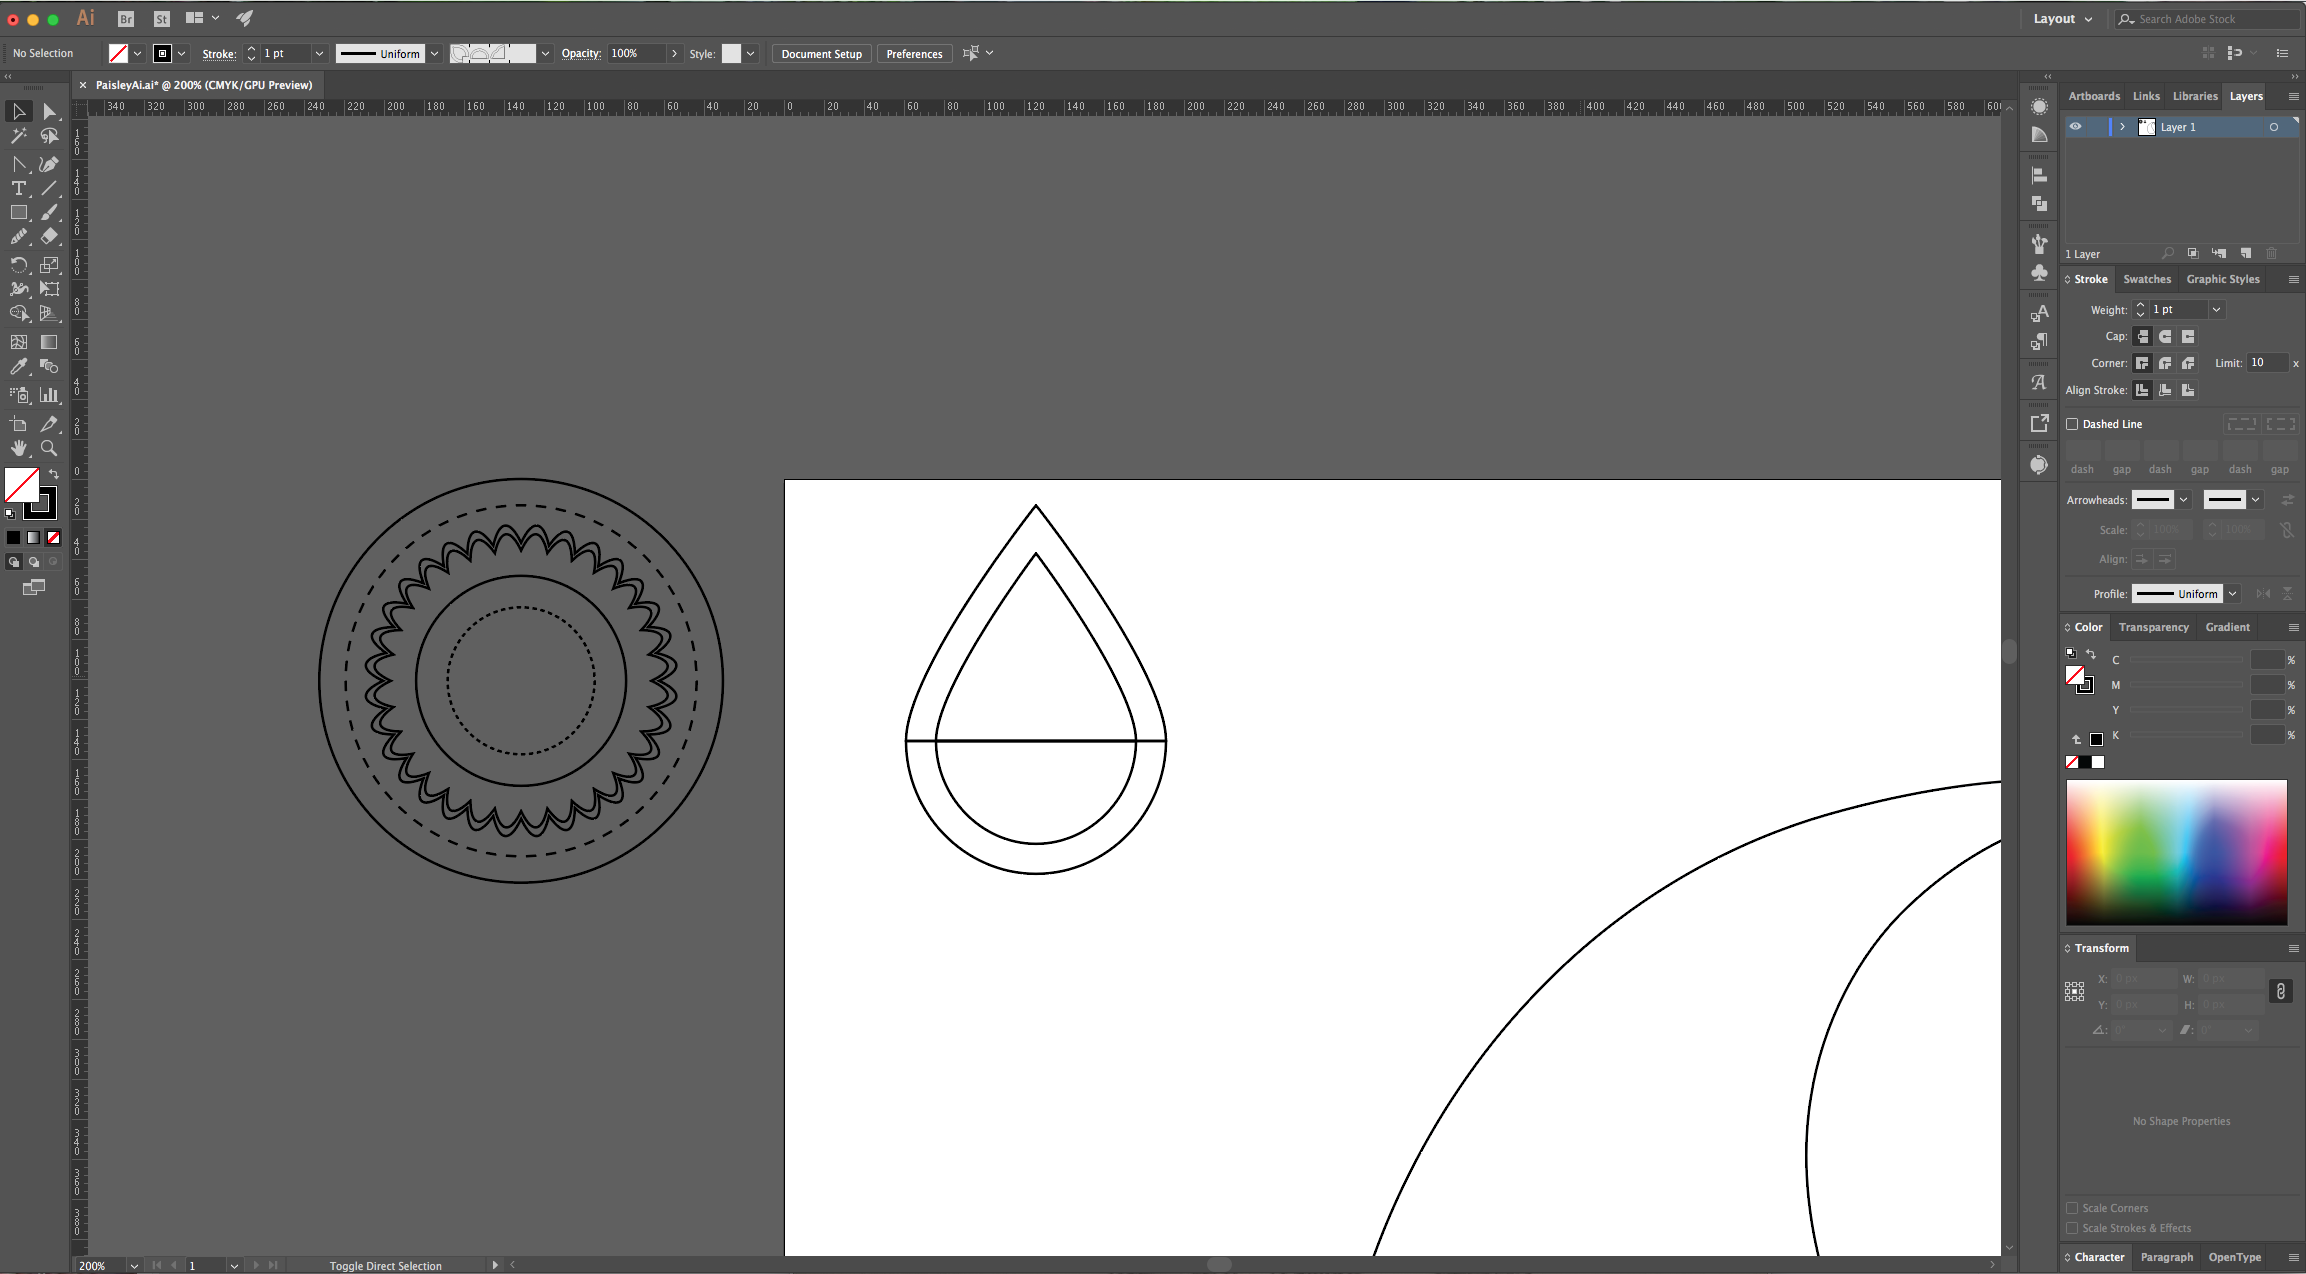
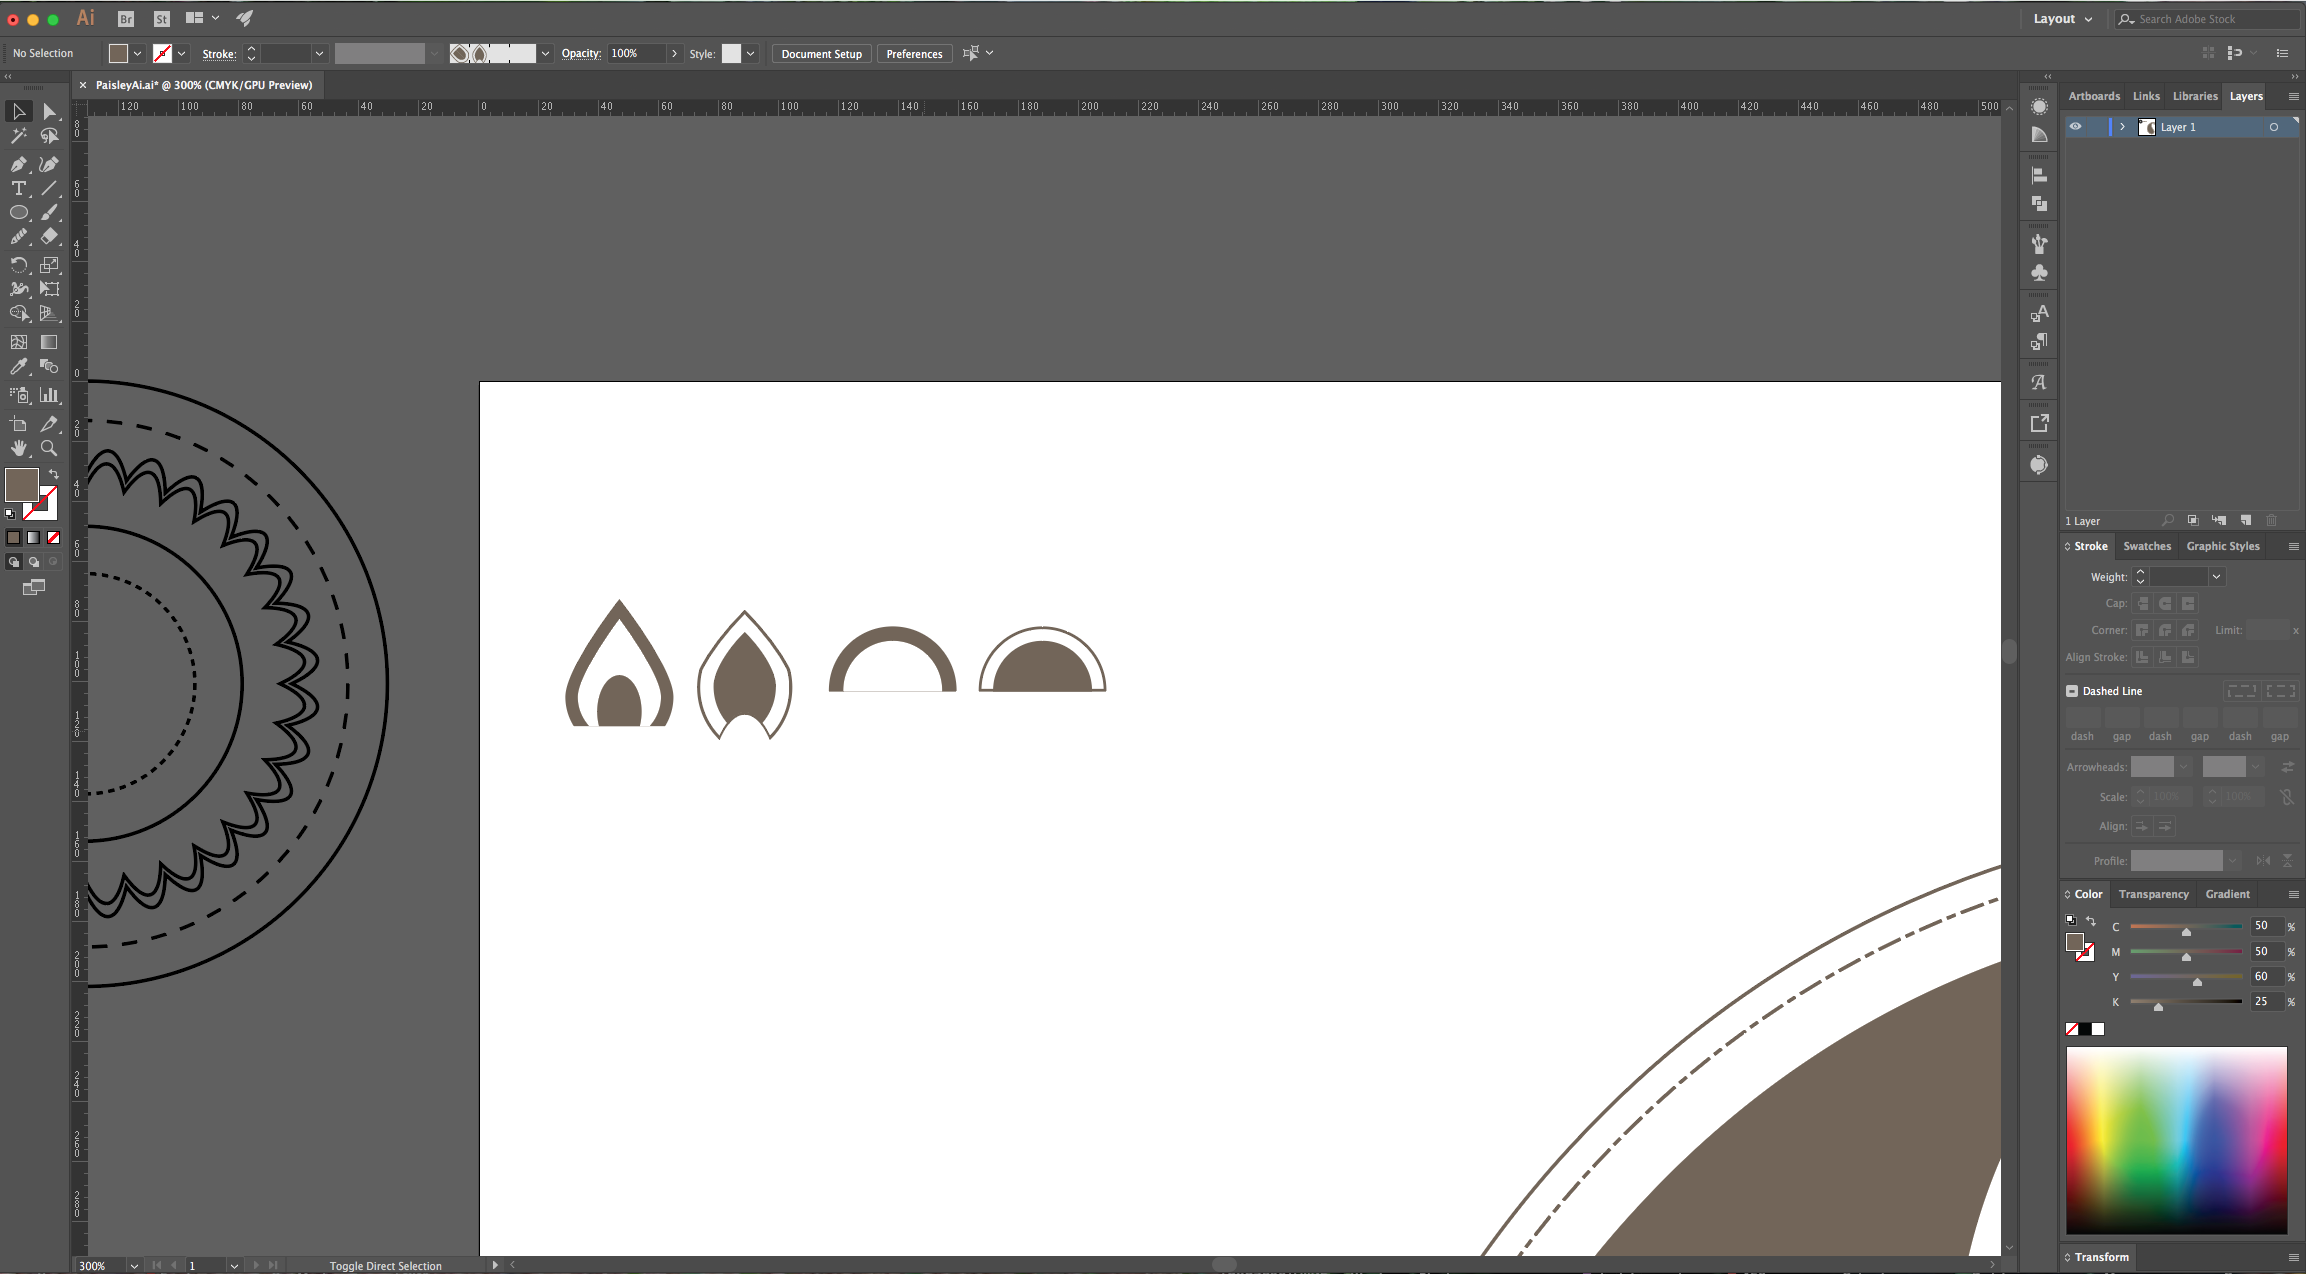
13 - Select the “Ellipse Tool” (L) again, click inside your canvas and choose 100 px for “With” and “Height”, then use the “Rectangle Tool” (M) to create one that covers the lower half of your circle. Select both and in the “Pathfinder Panel” choose “Minus Front” to cut your circle in half.
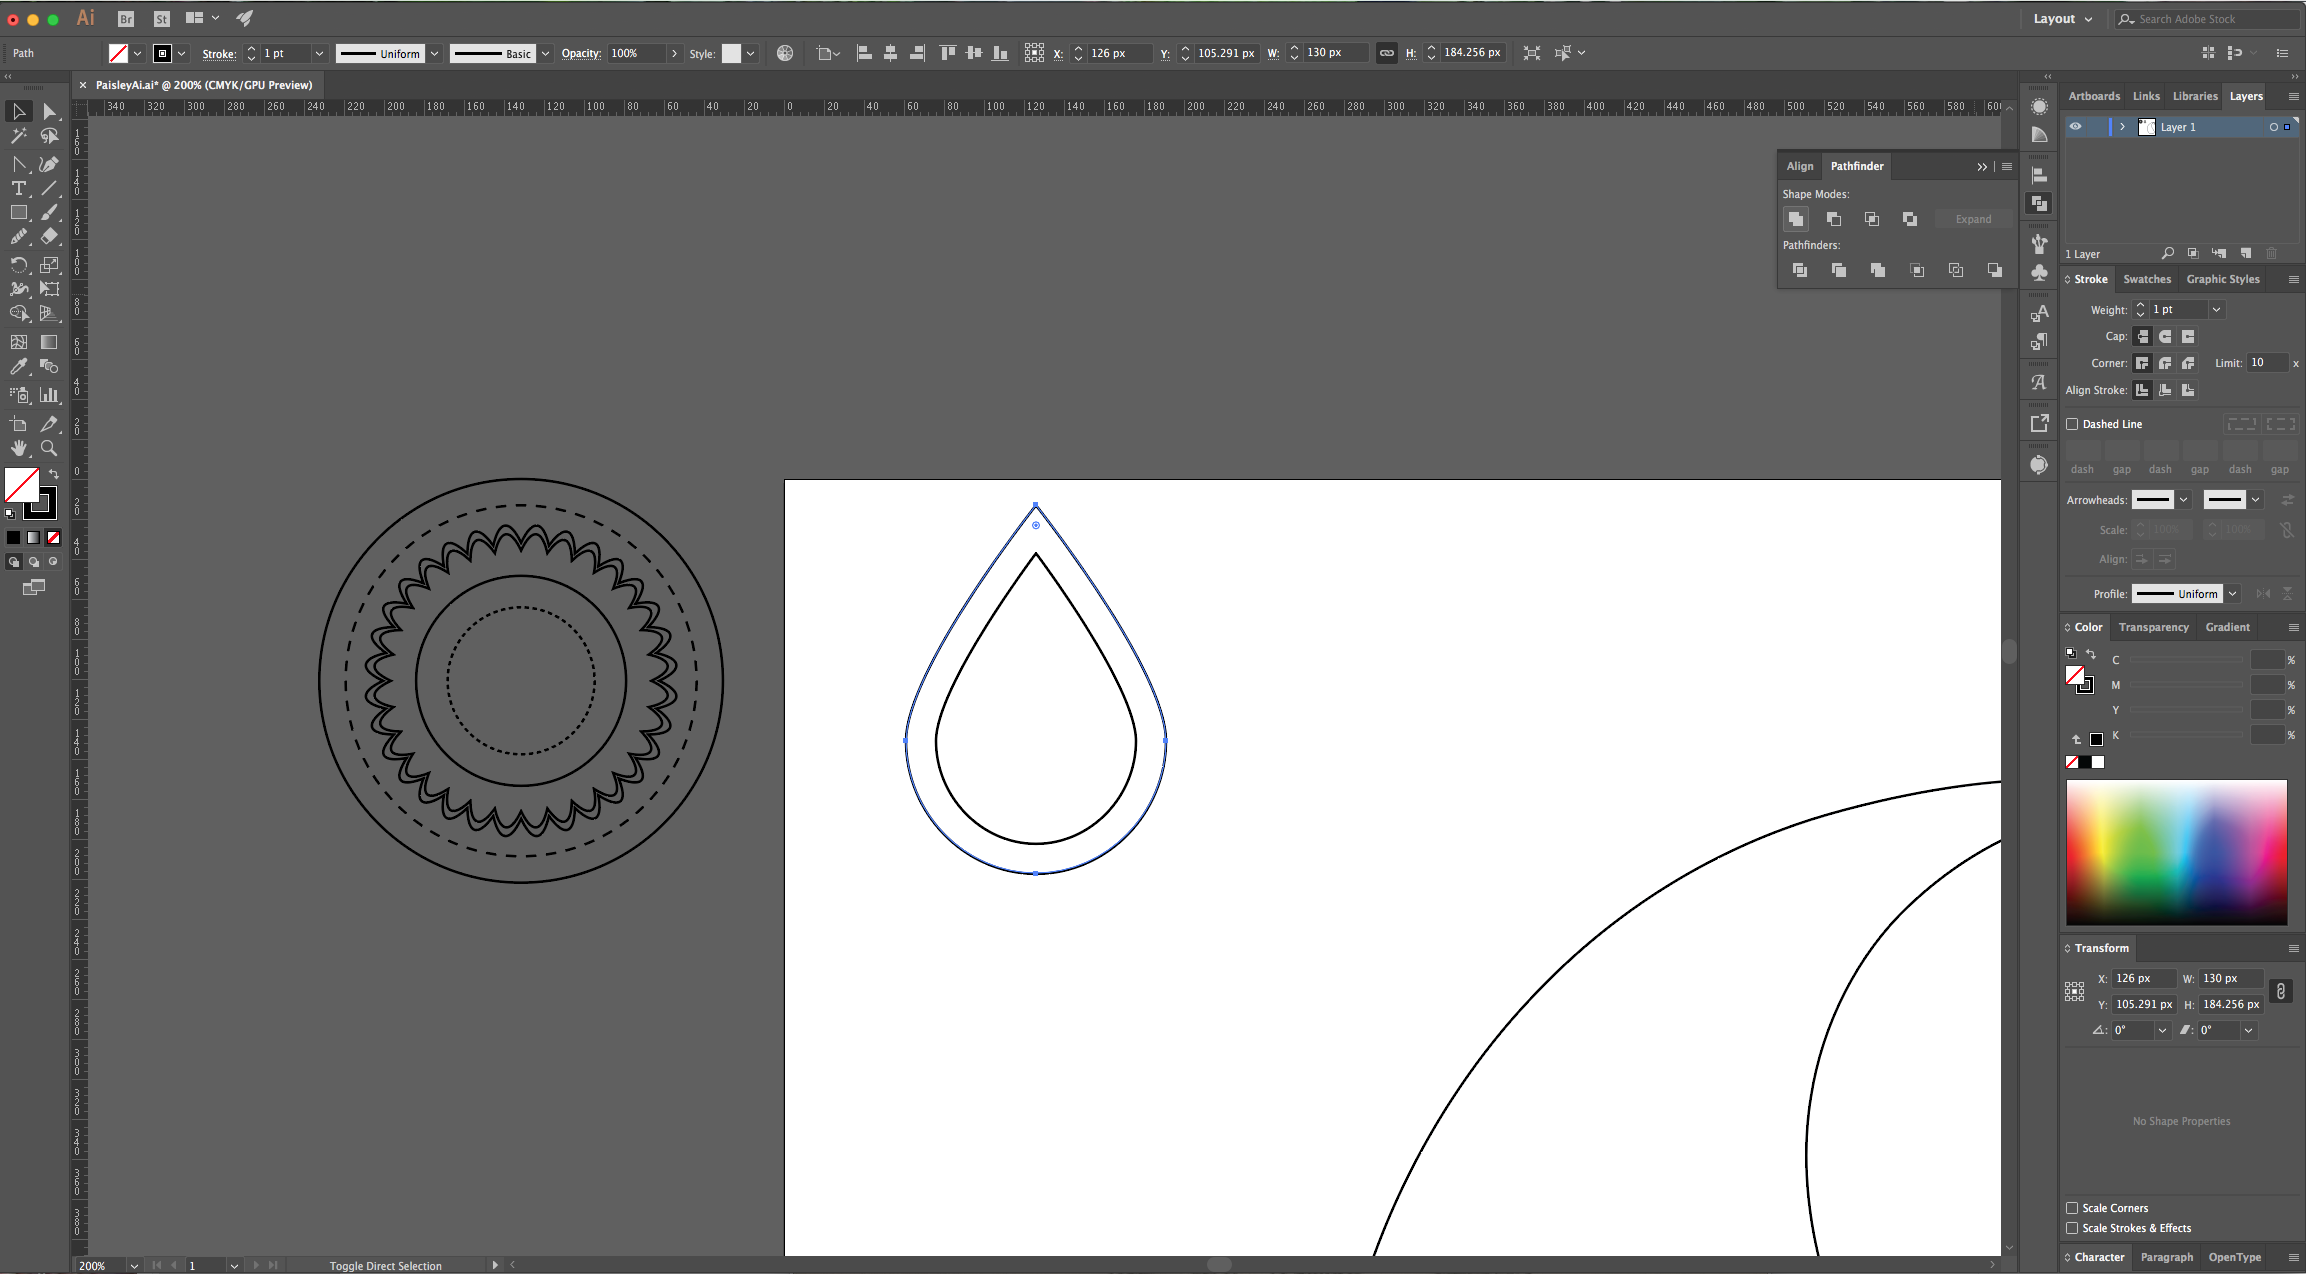
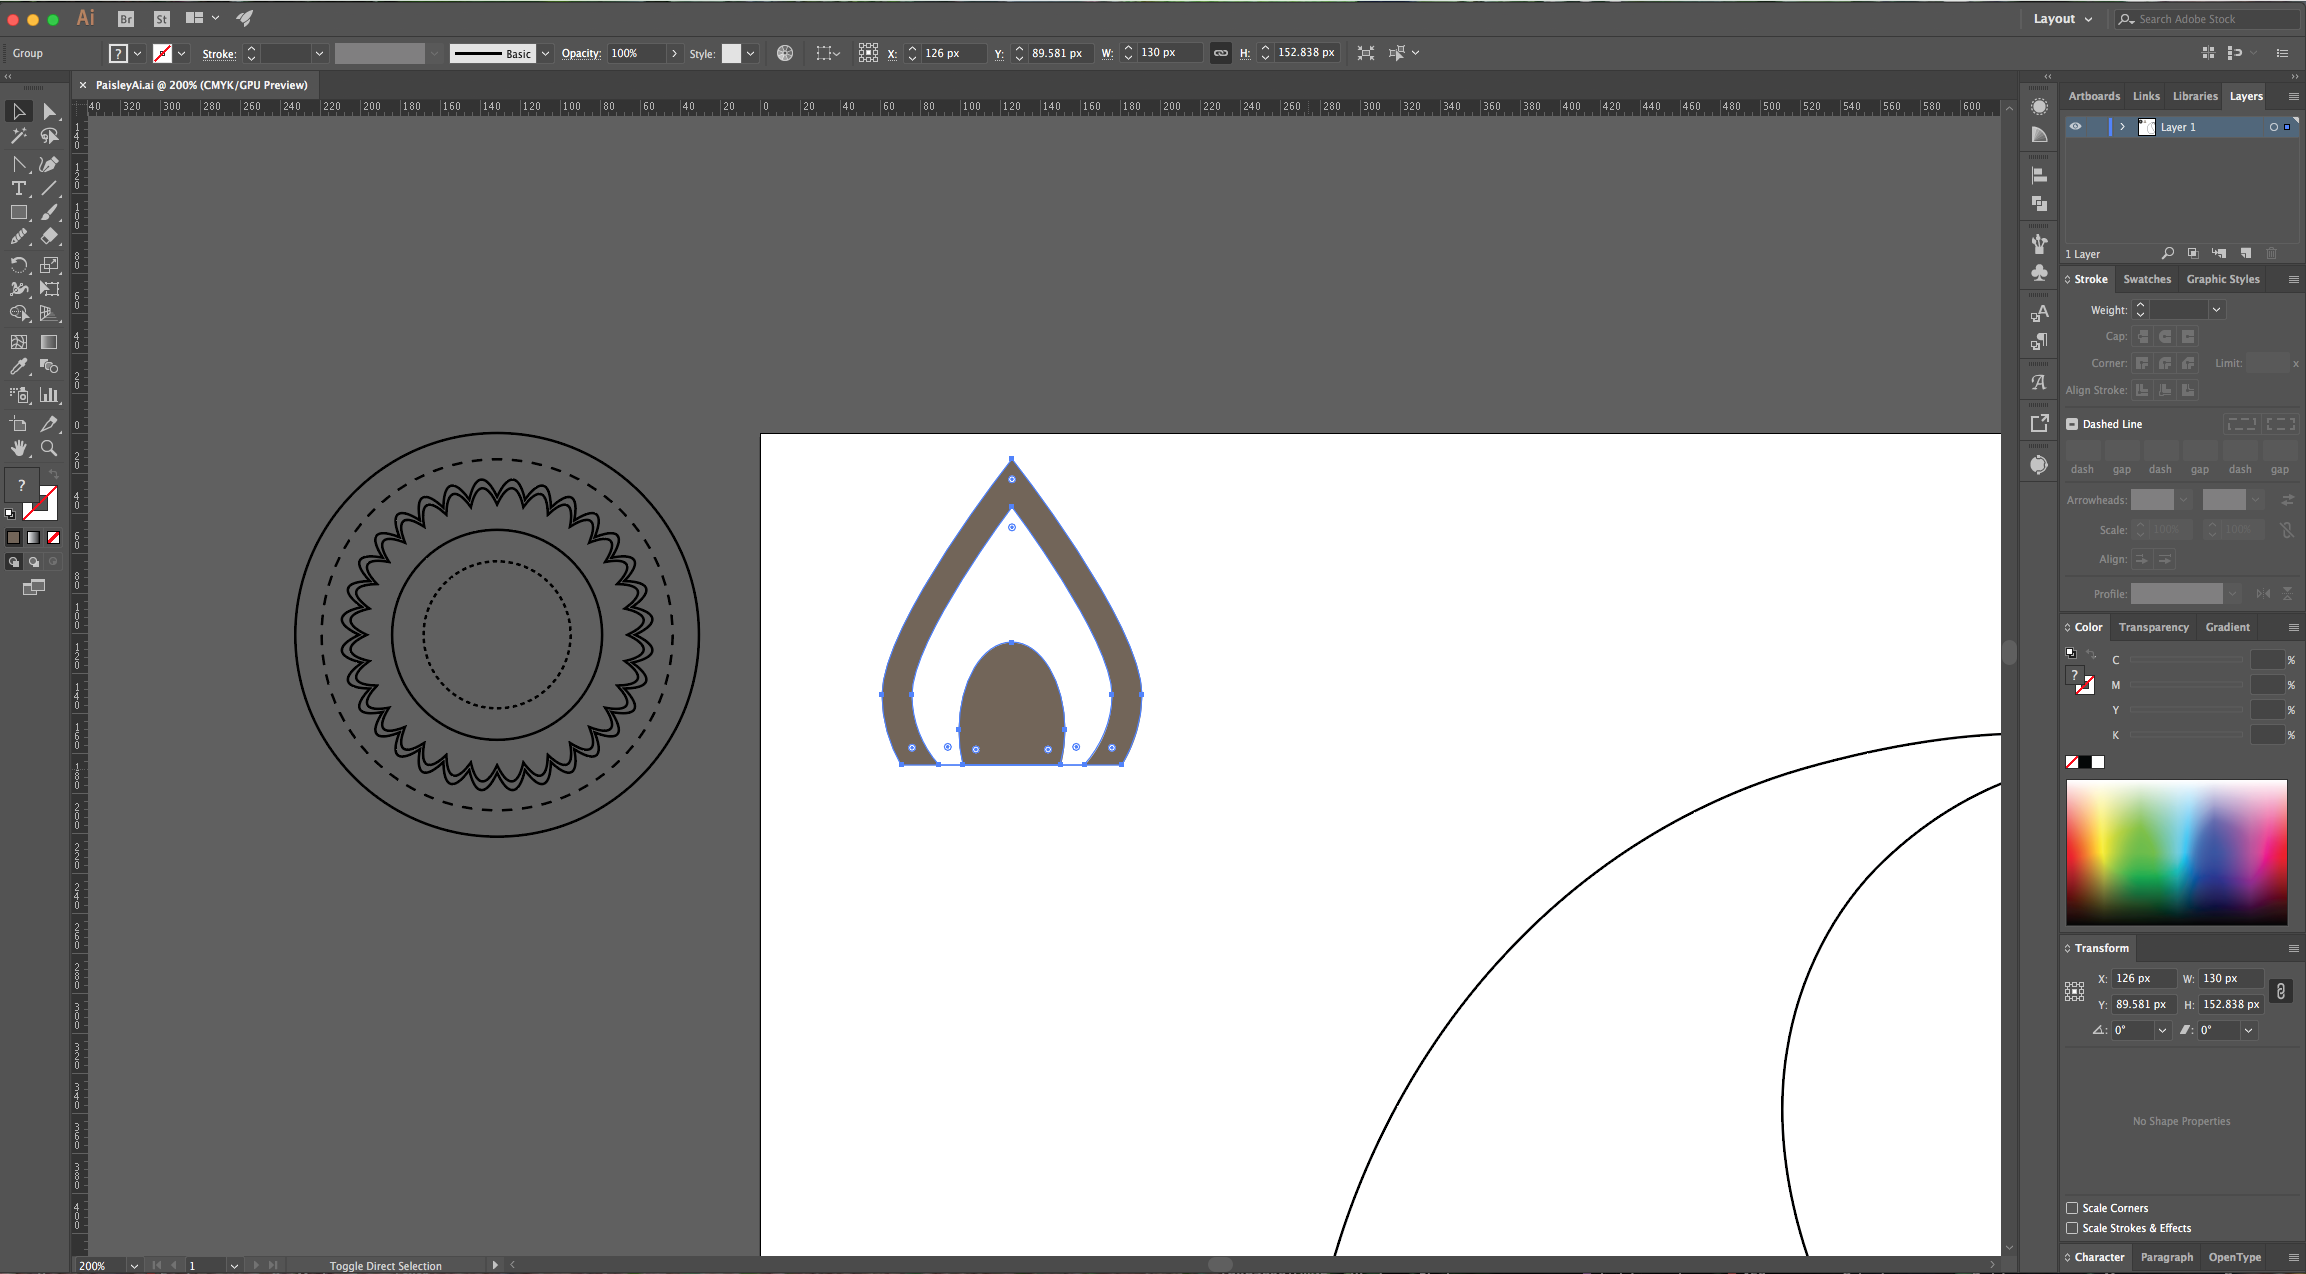
14 - Create a larger duplicate of this semi-circle but make sure that the bottom line in both is in the same spot, then, “Group” them together (Command/Control + G).

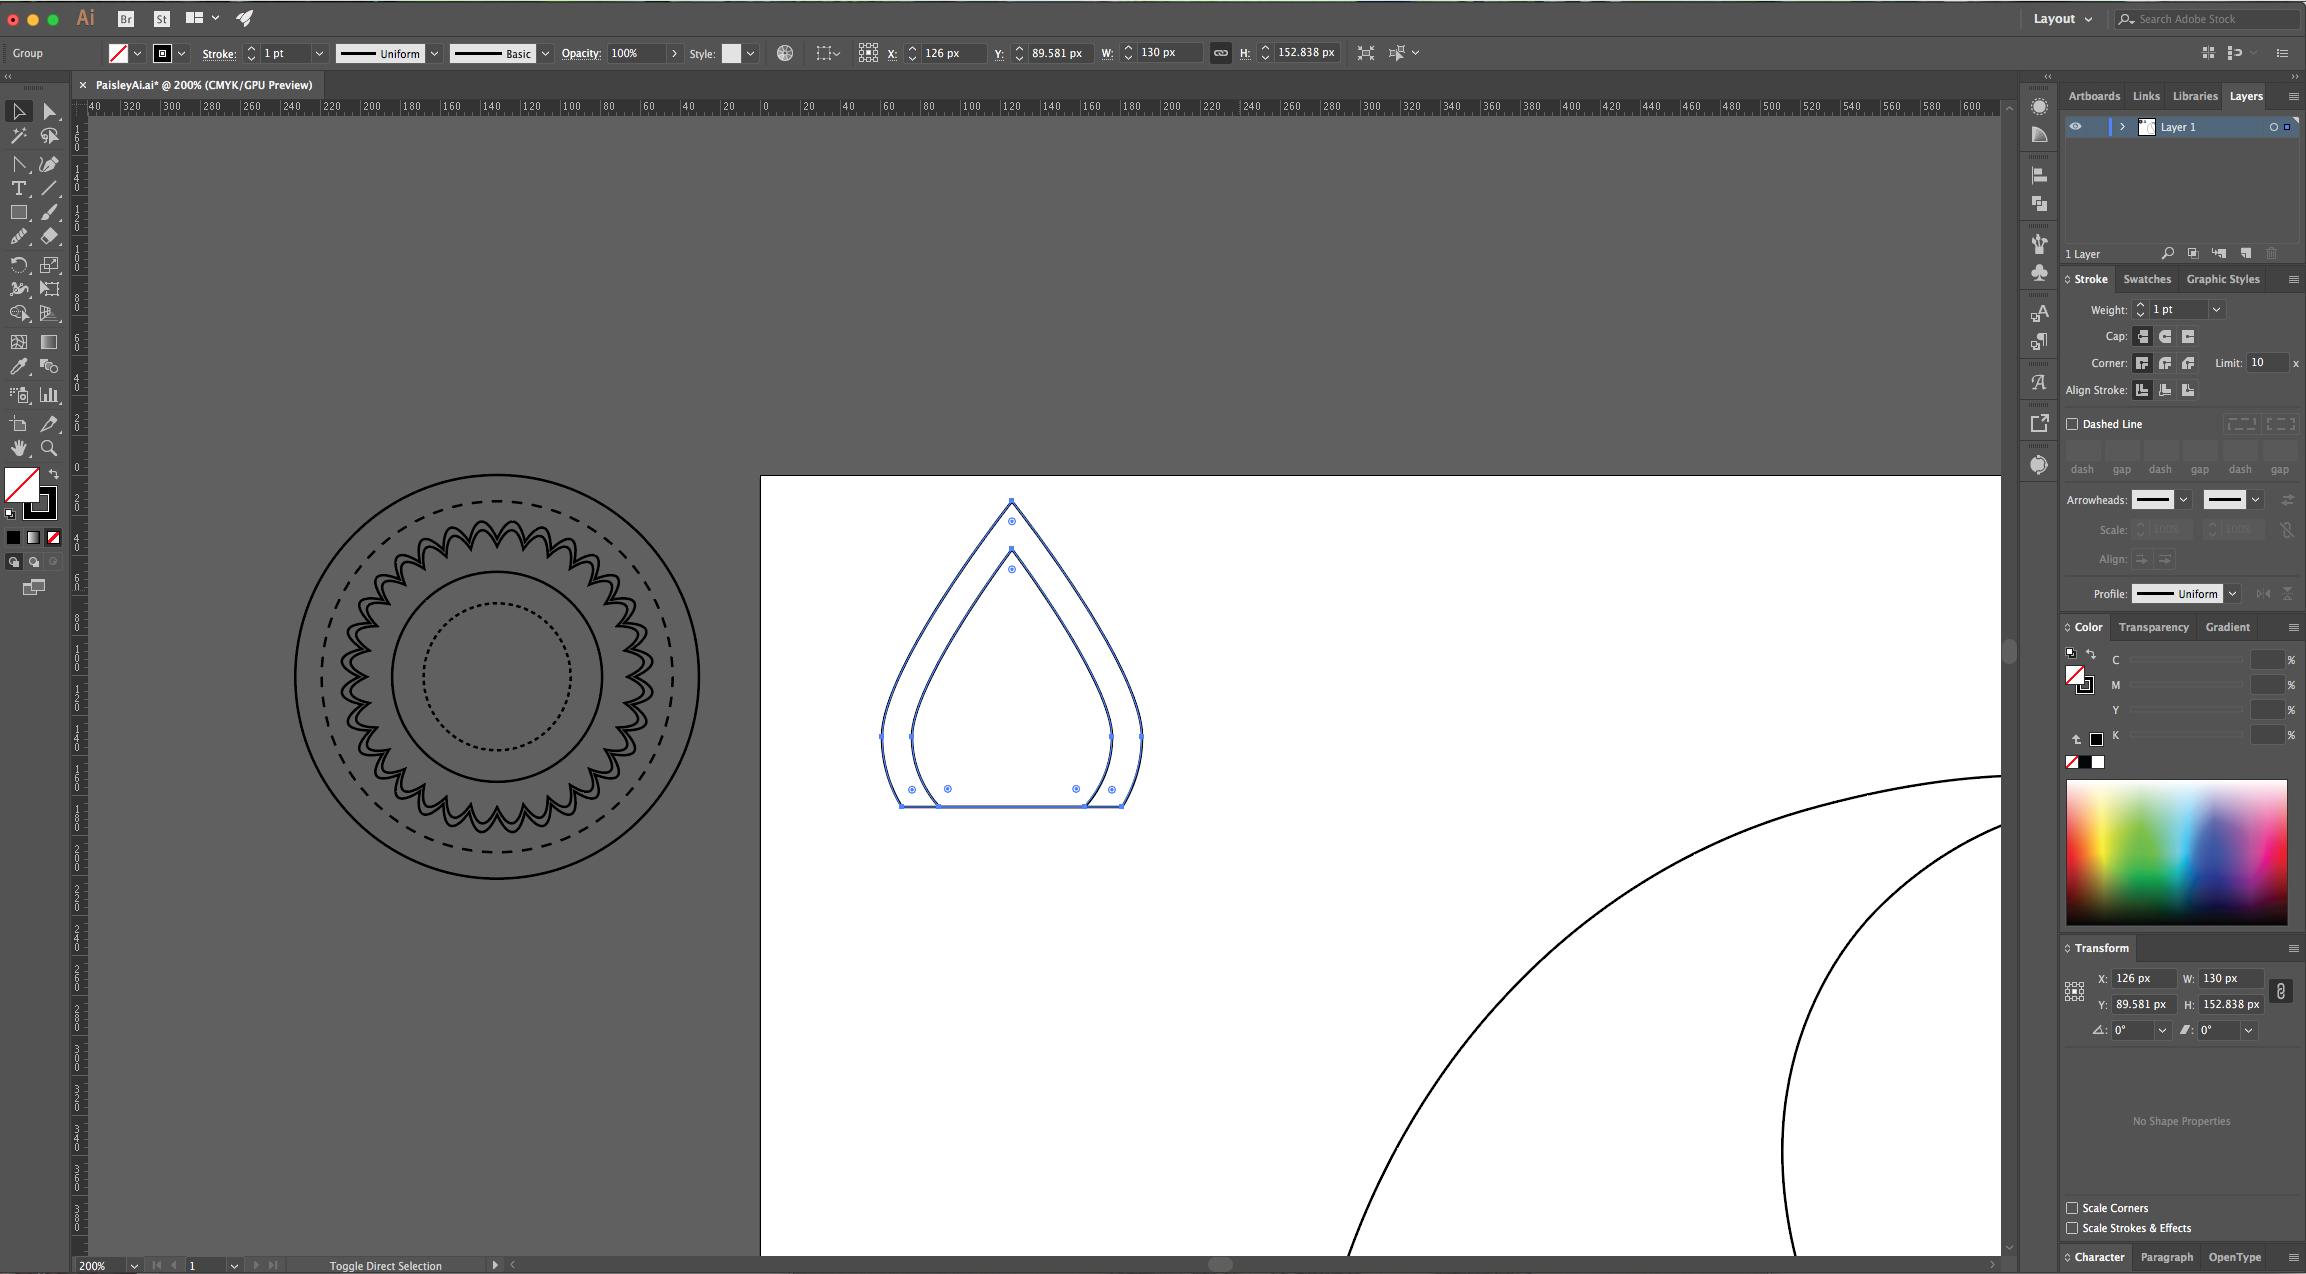
15 – Make another shape by duplicating the last one twice, rotating one of the copies to create a circle and using the “Anchor Point Tool” (Shift + C) in the same way we used it before to create a drop-like path. Then “Merge” both sides to erase the middle line and “Erase” about one quarter of the bottom. You can add other shapes to create a “Petal”. Fill it with the color of your choice.
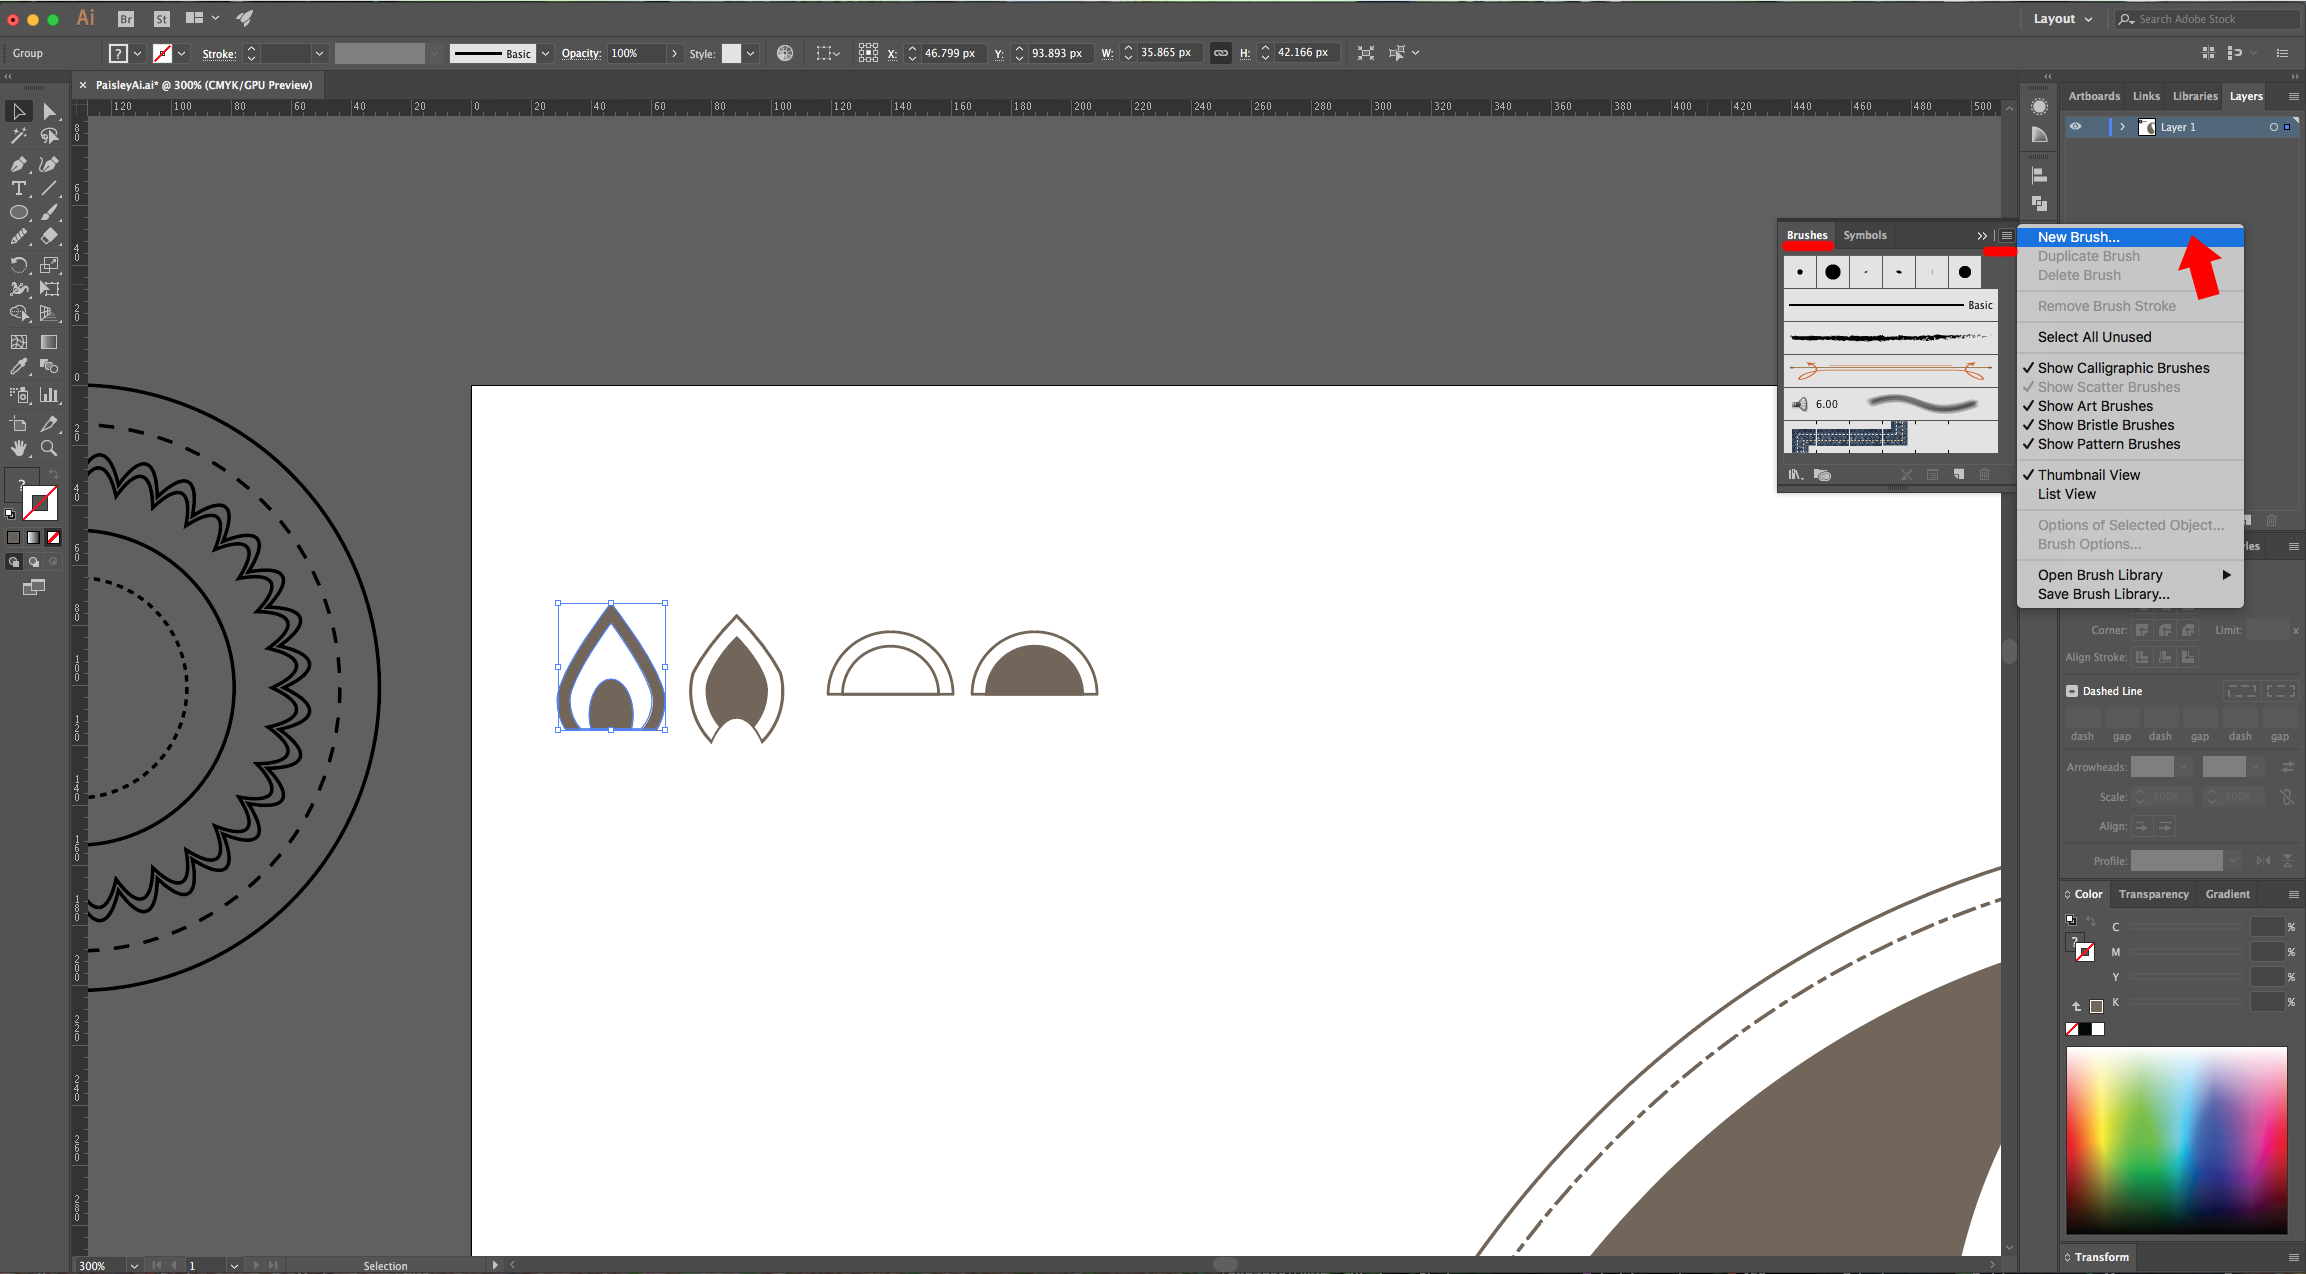
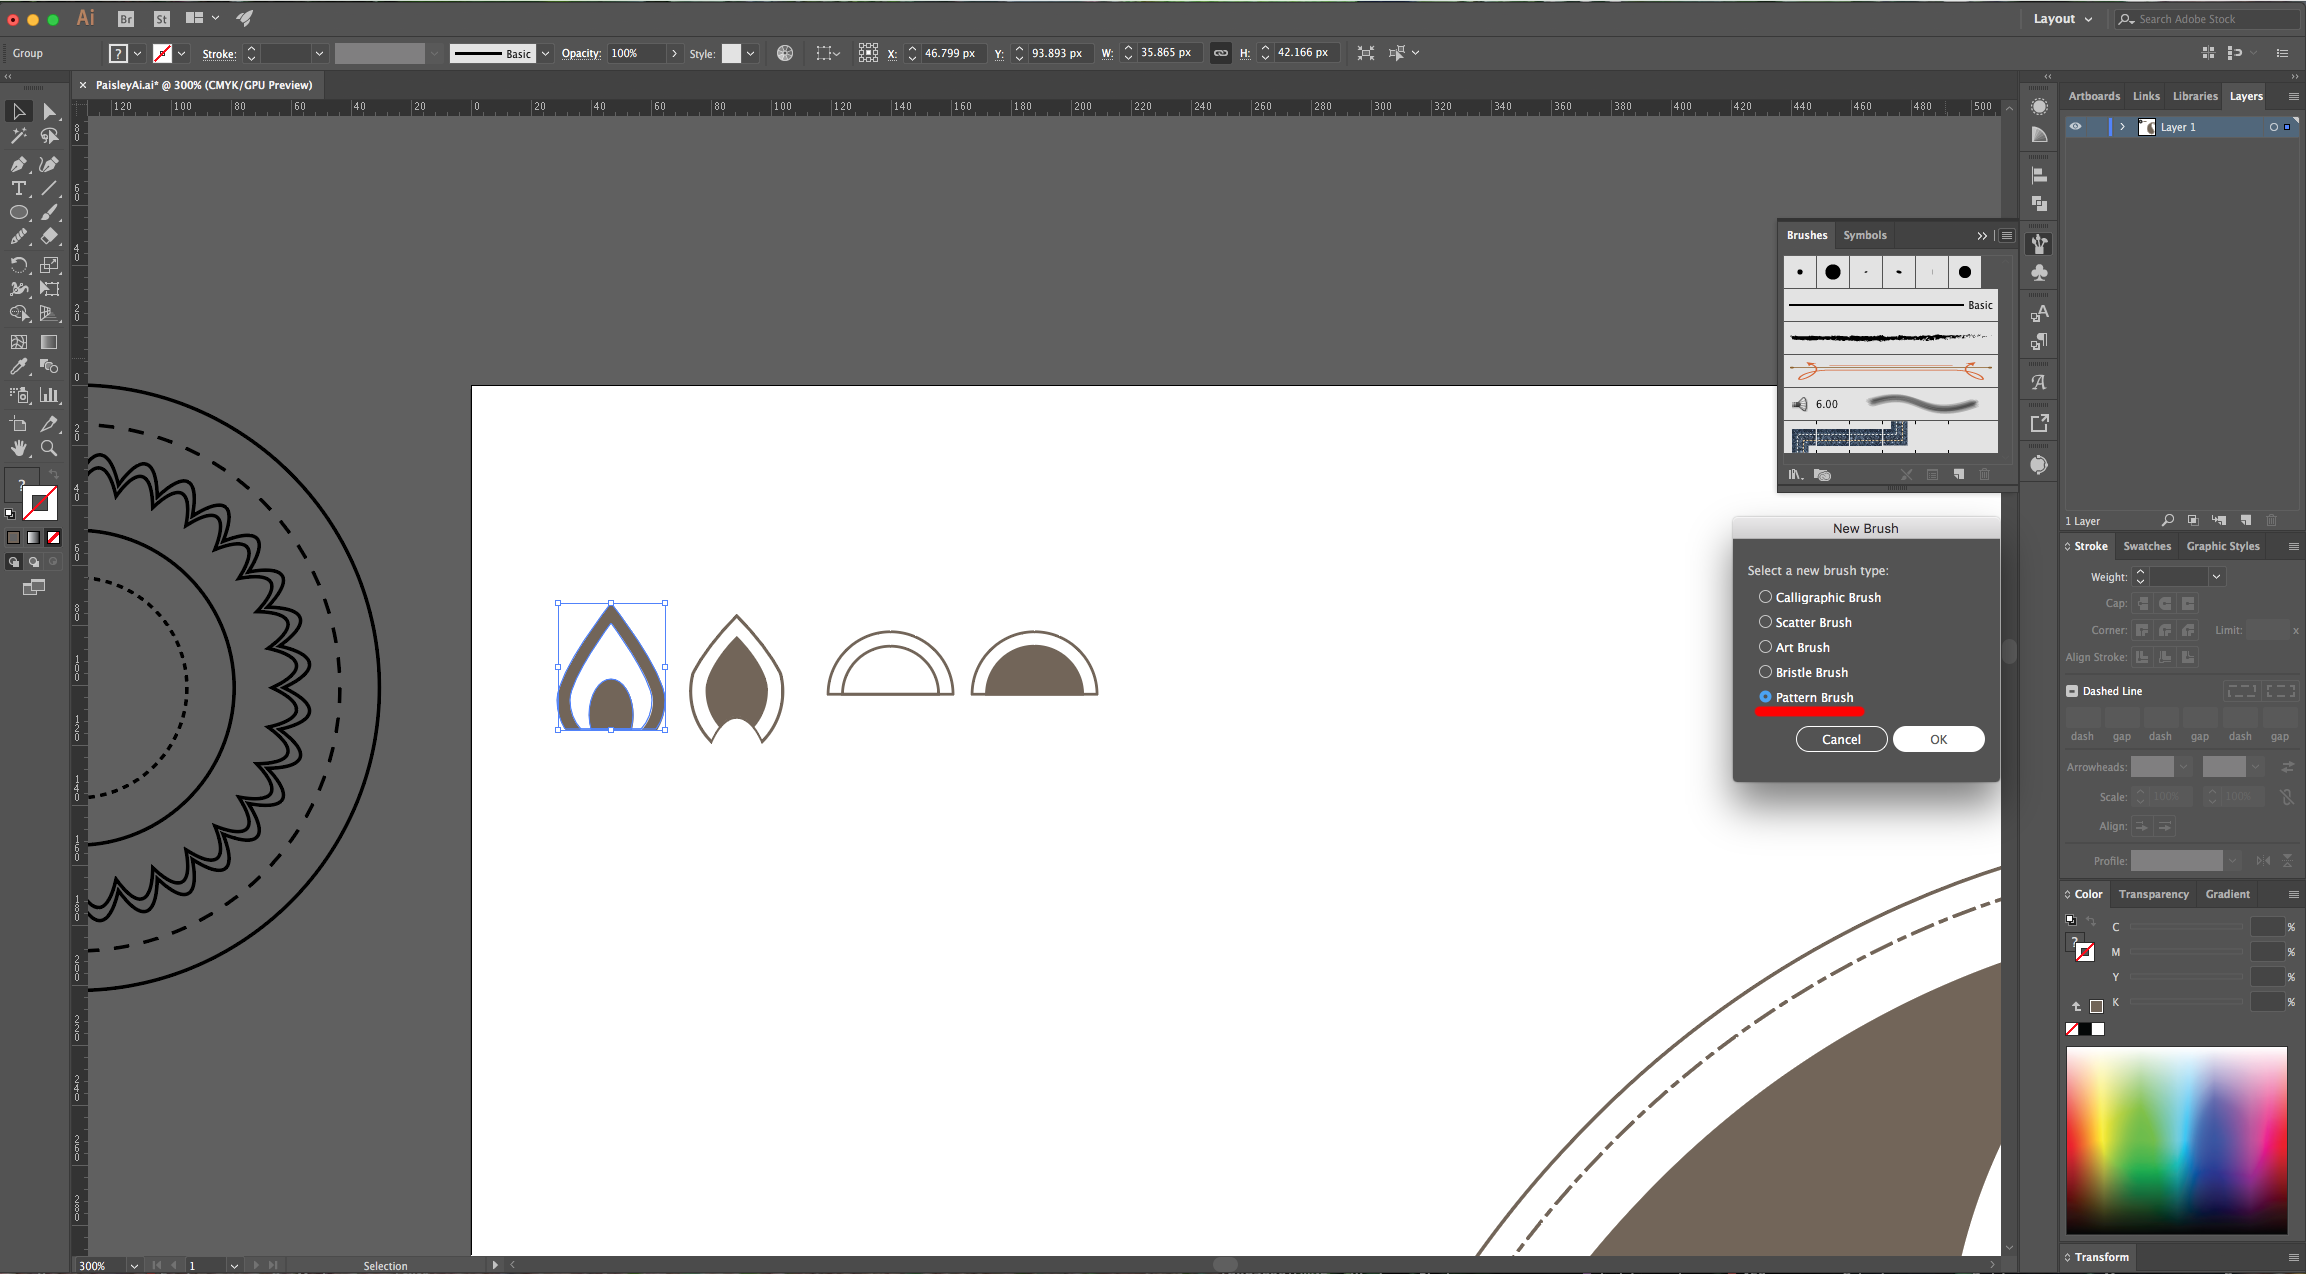
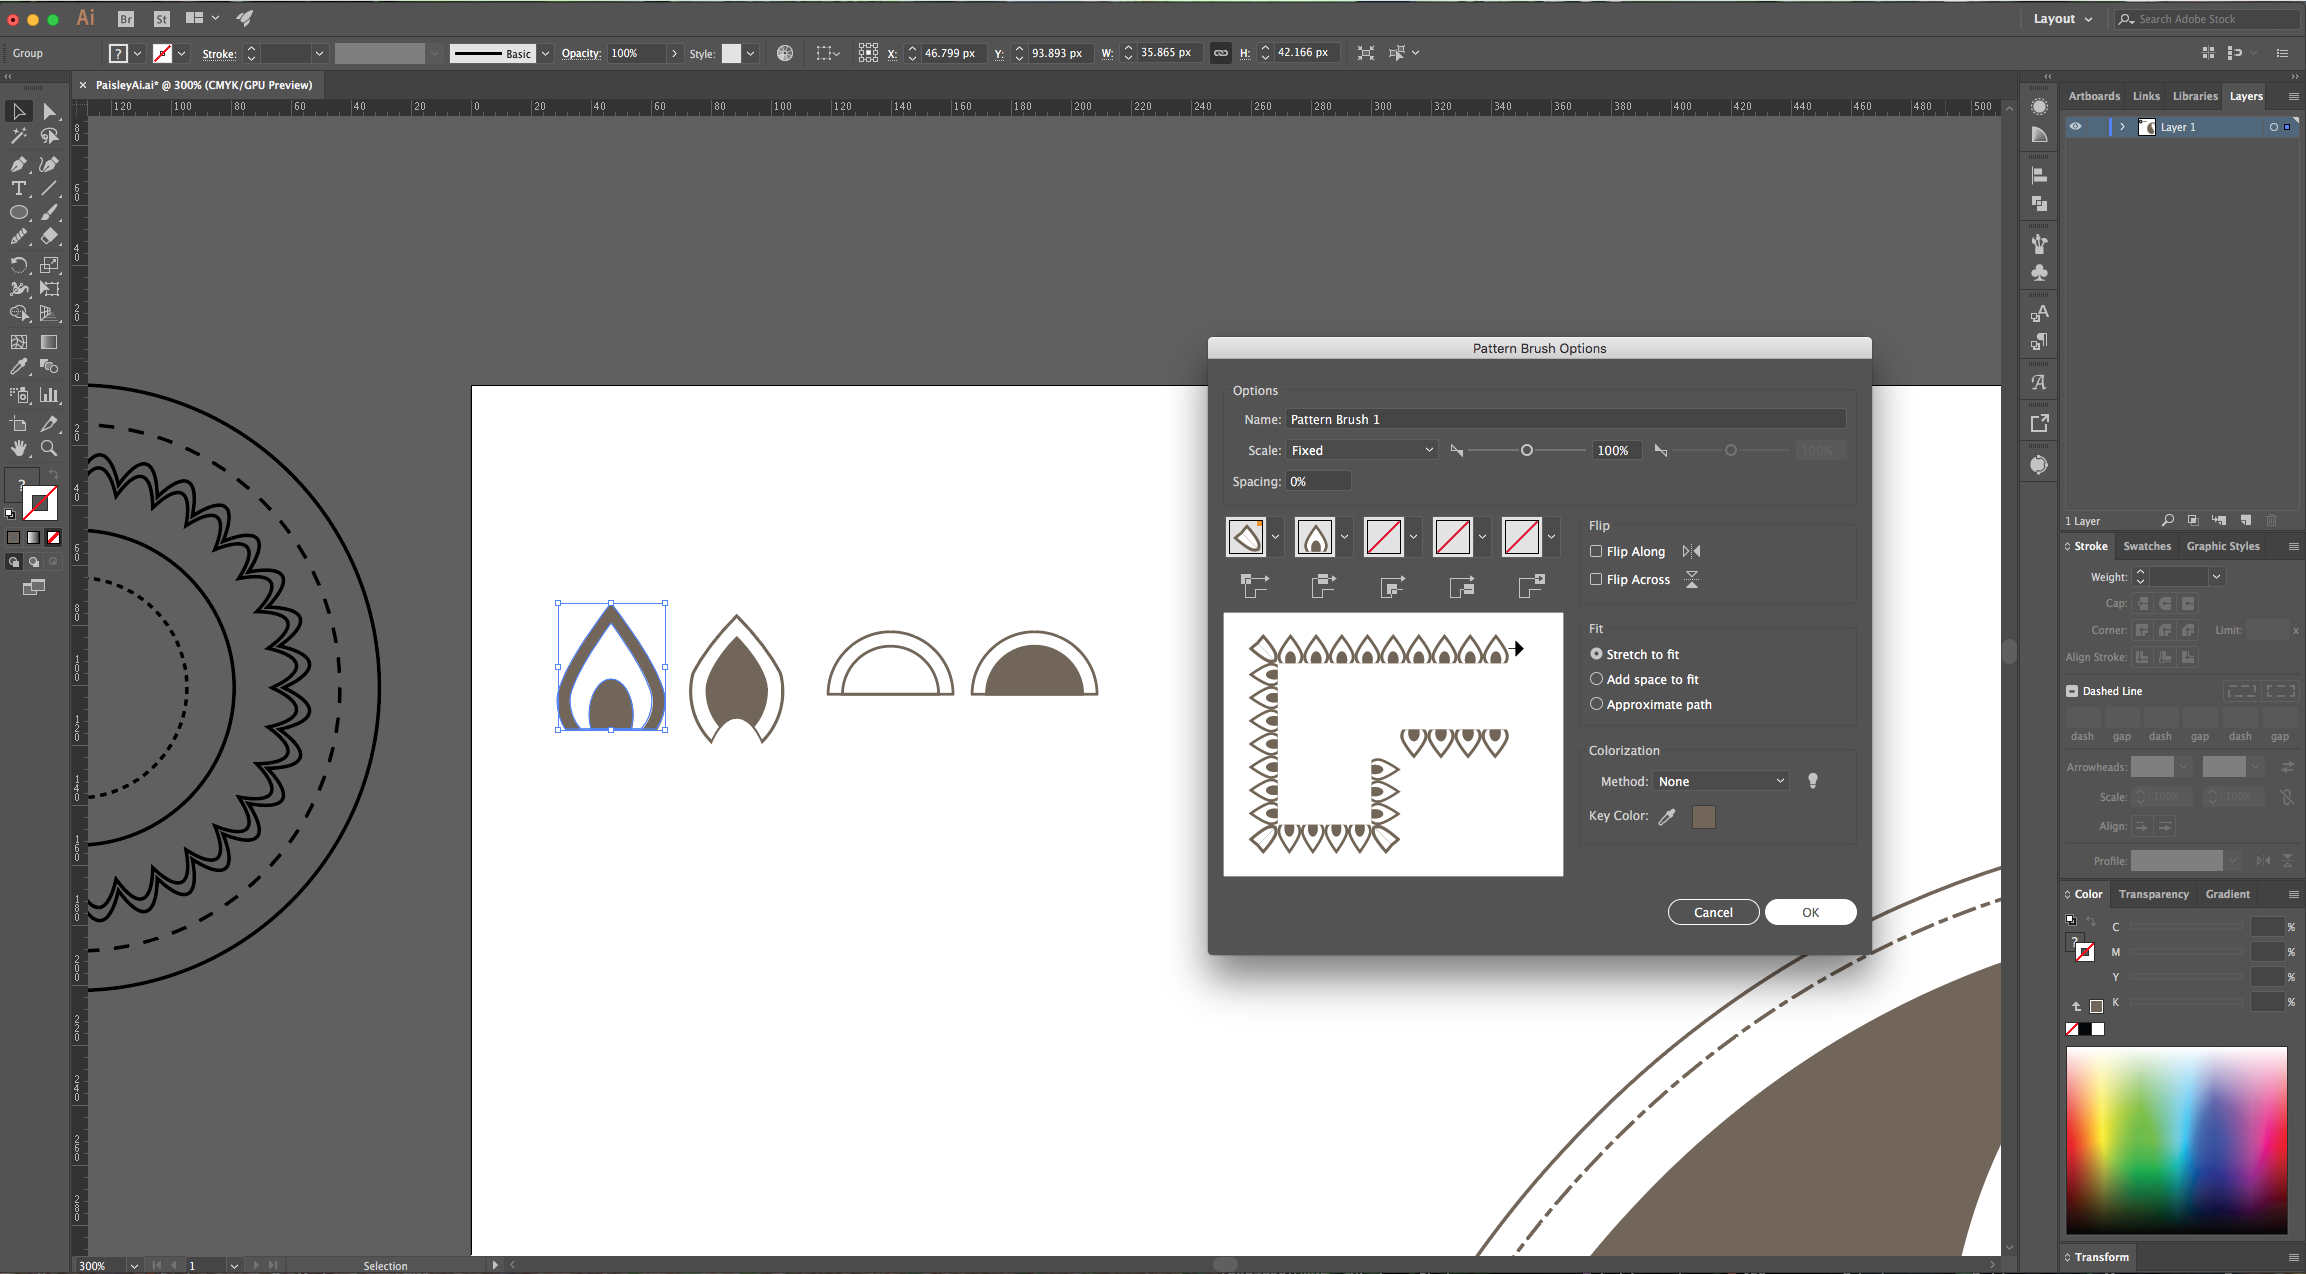
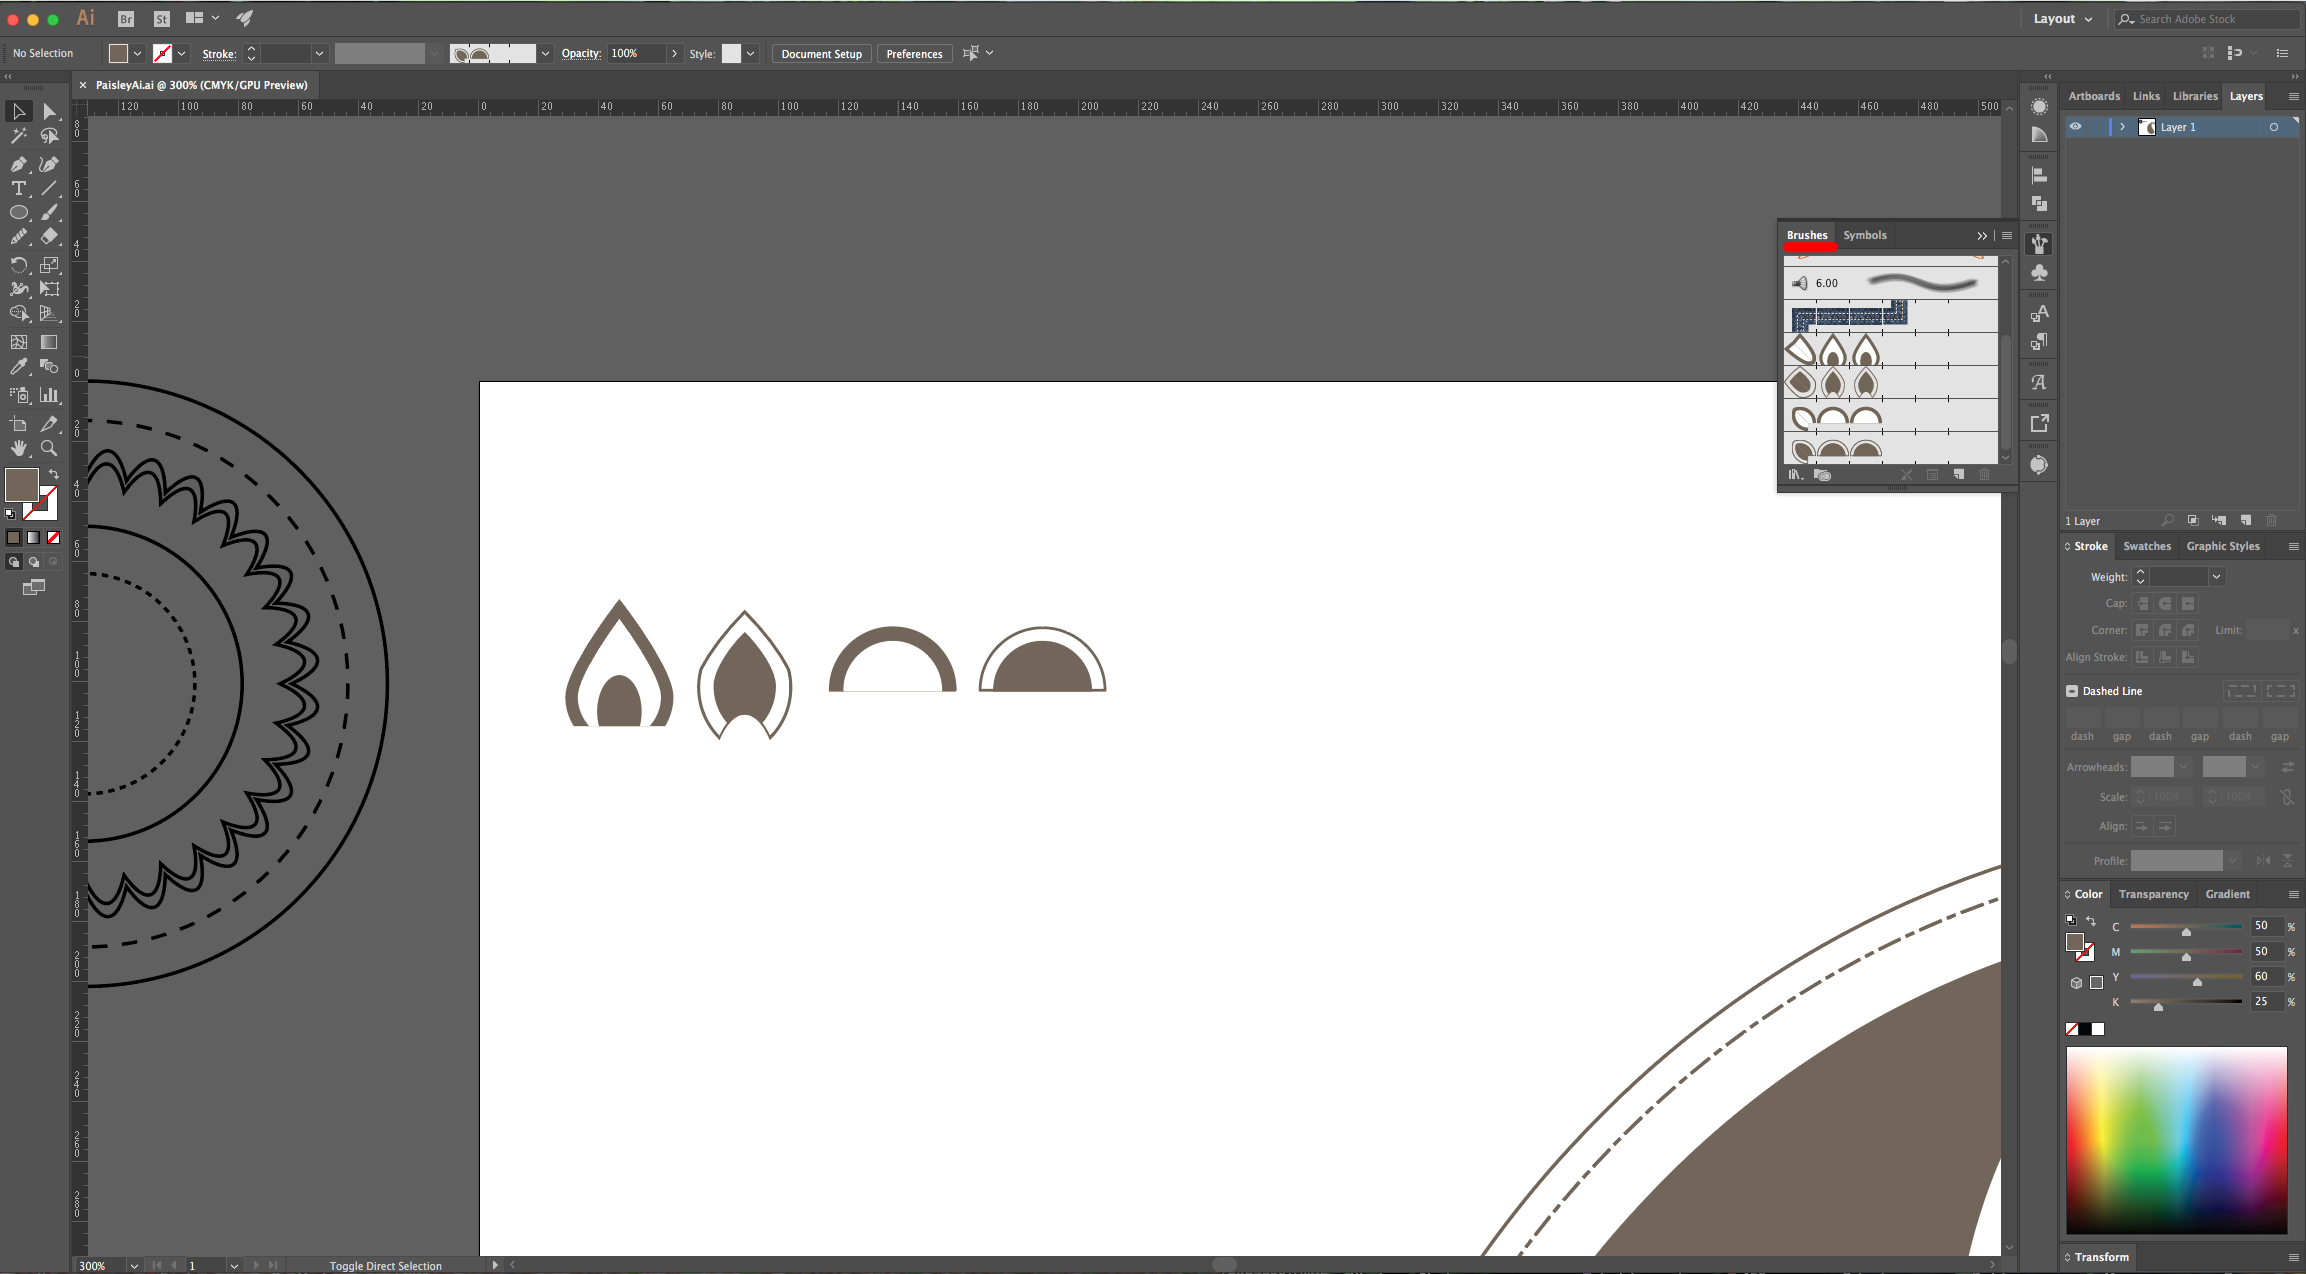
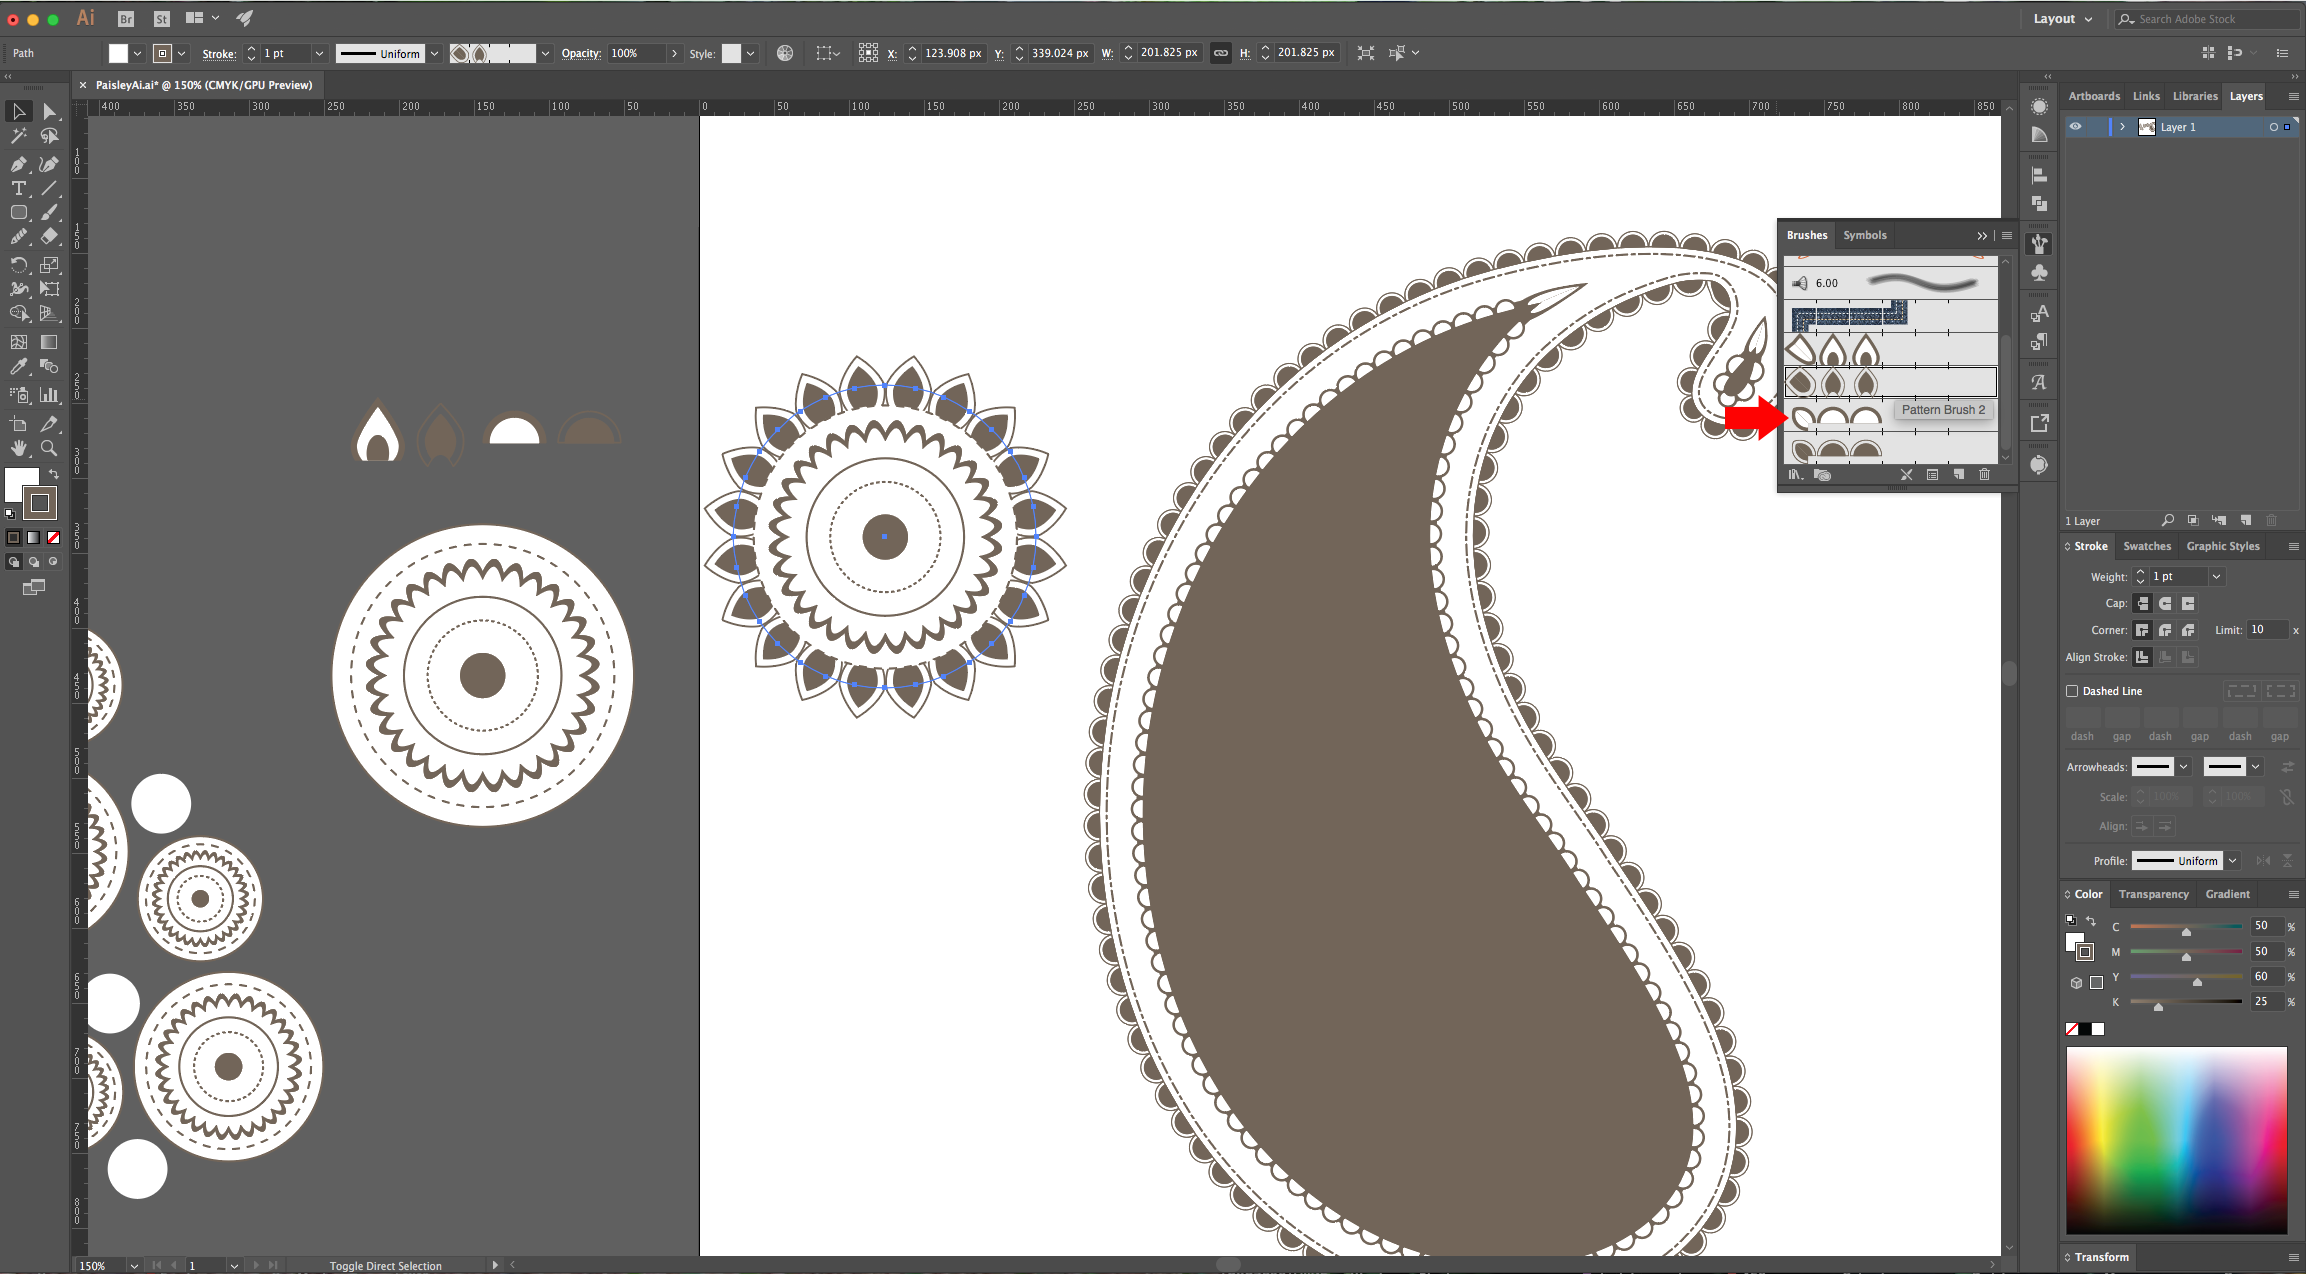
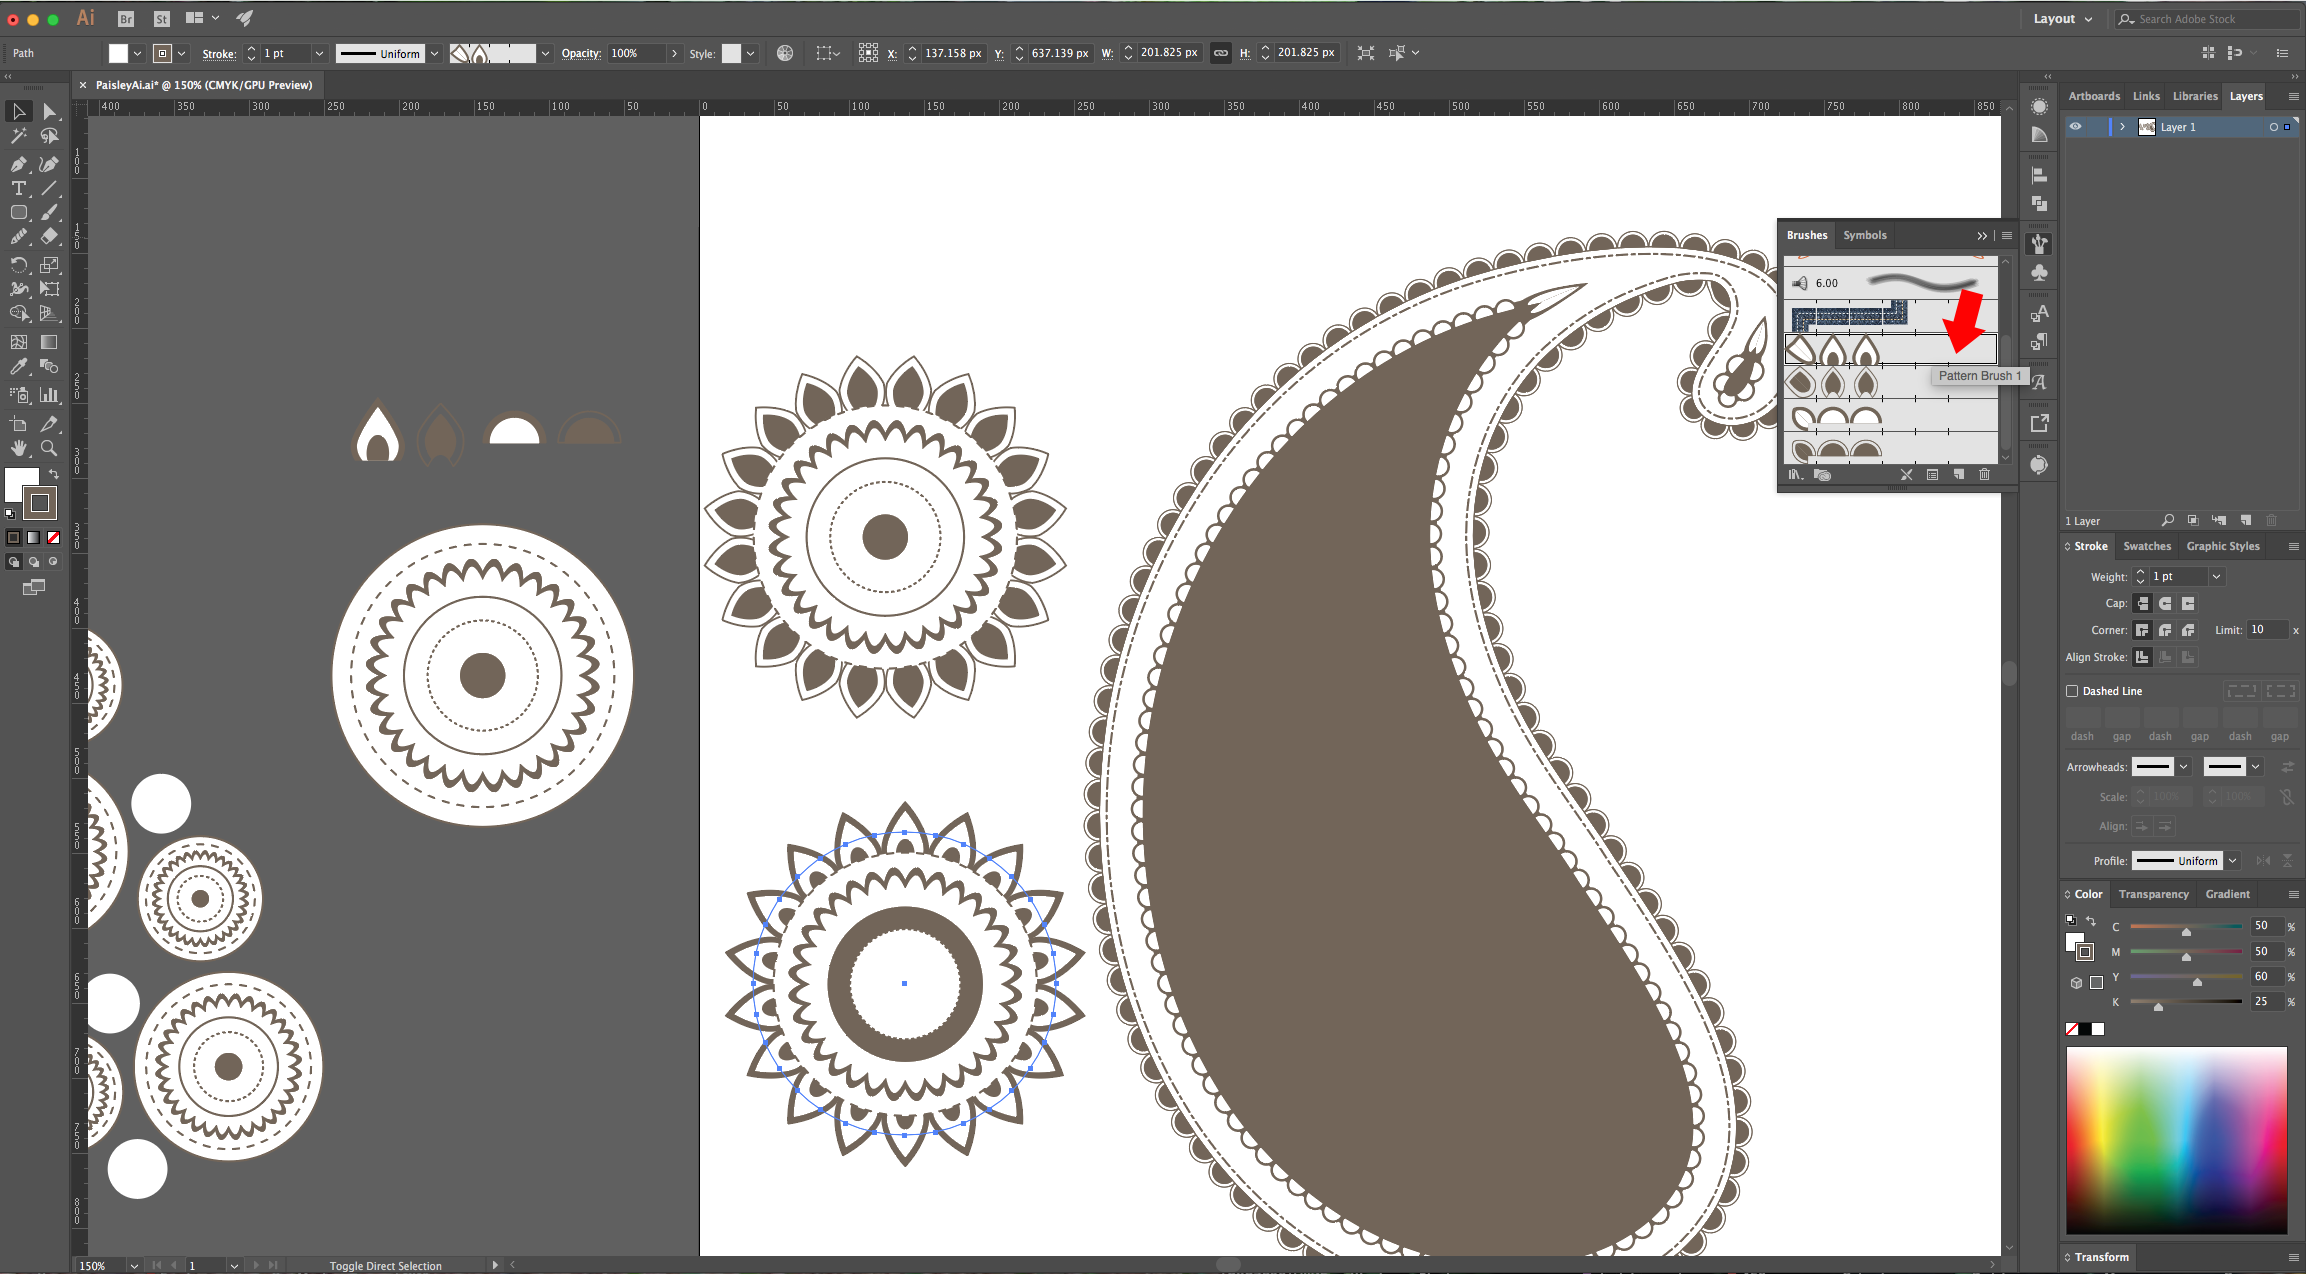
16 – Create other “Shapes” to be used as decoration. Resize them into a big enough size. Select the first one, go to the “Brushes Panel” and click in the Top-Right corner to open the Menu. Choose “New Brush”, then check the “Pattern Brush” button and use the following values, then click “OK”. Repeat for each shape.
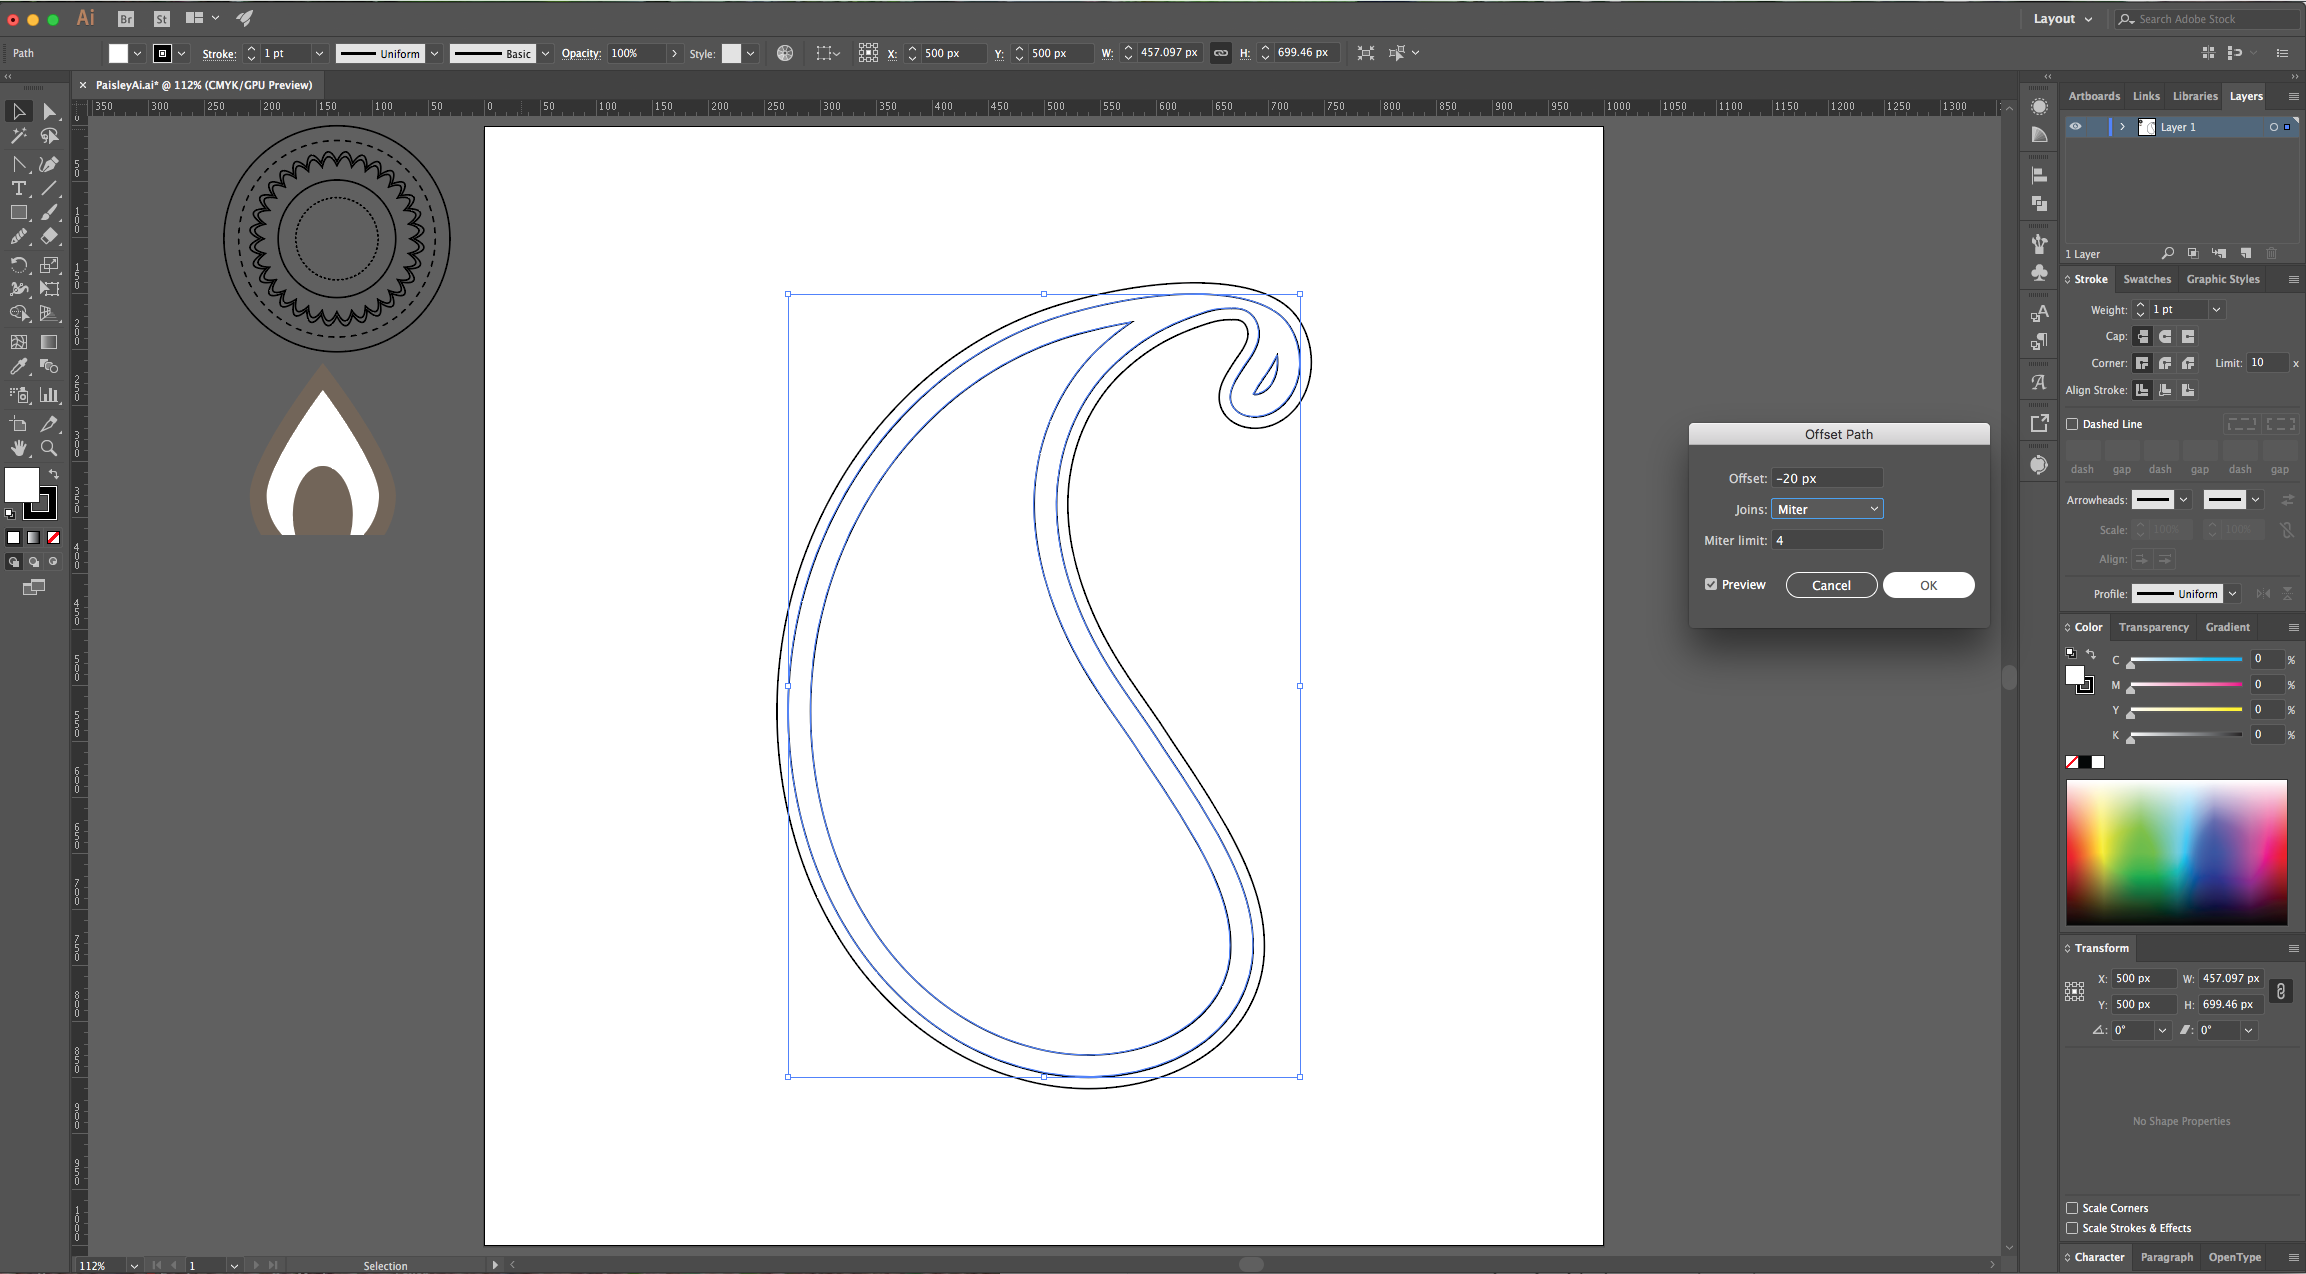
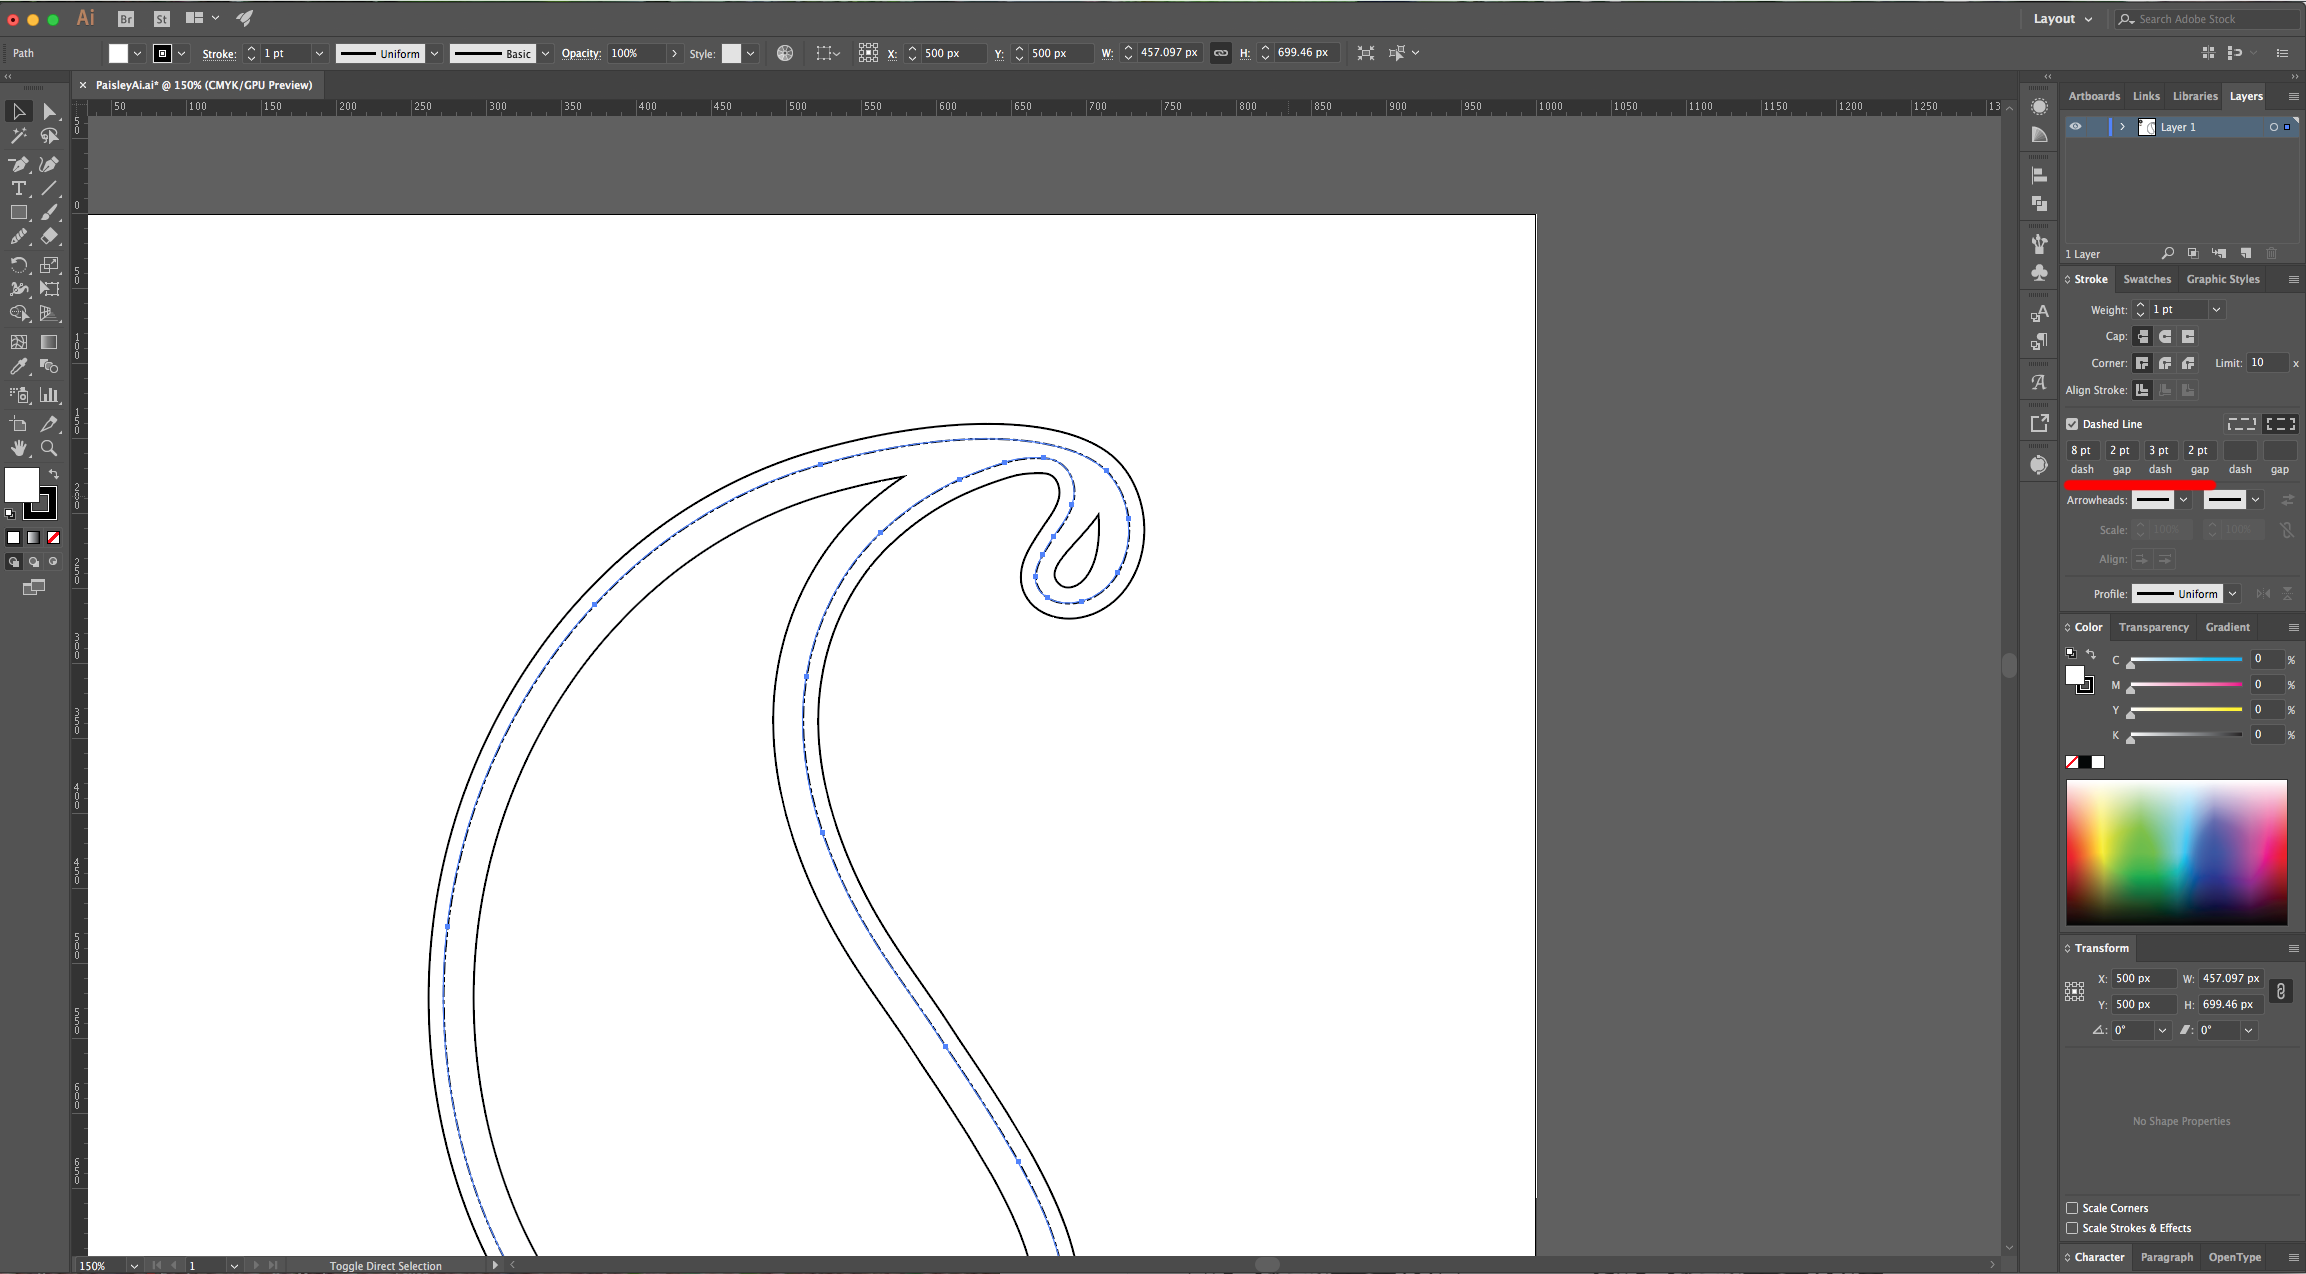
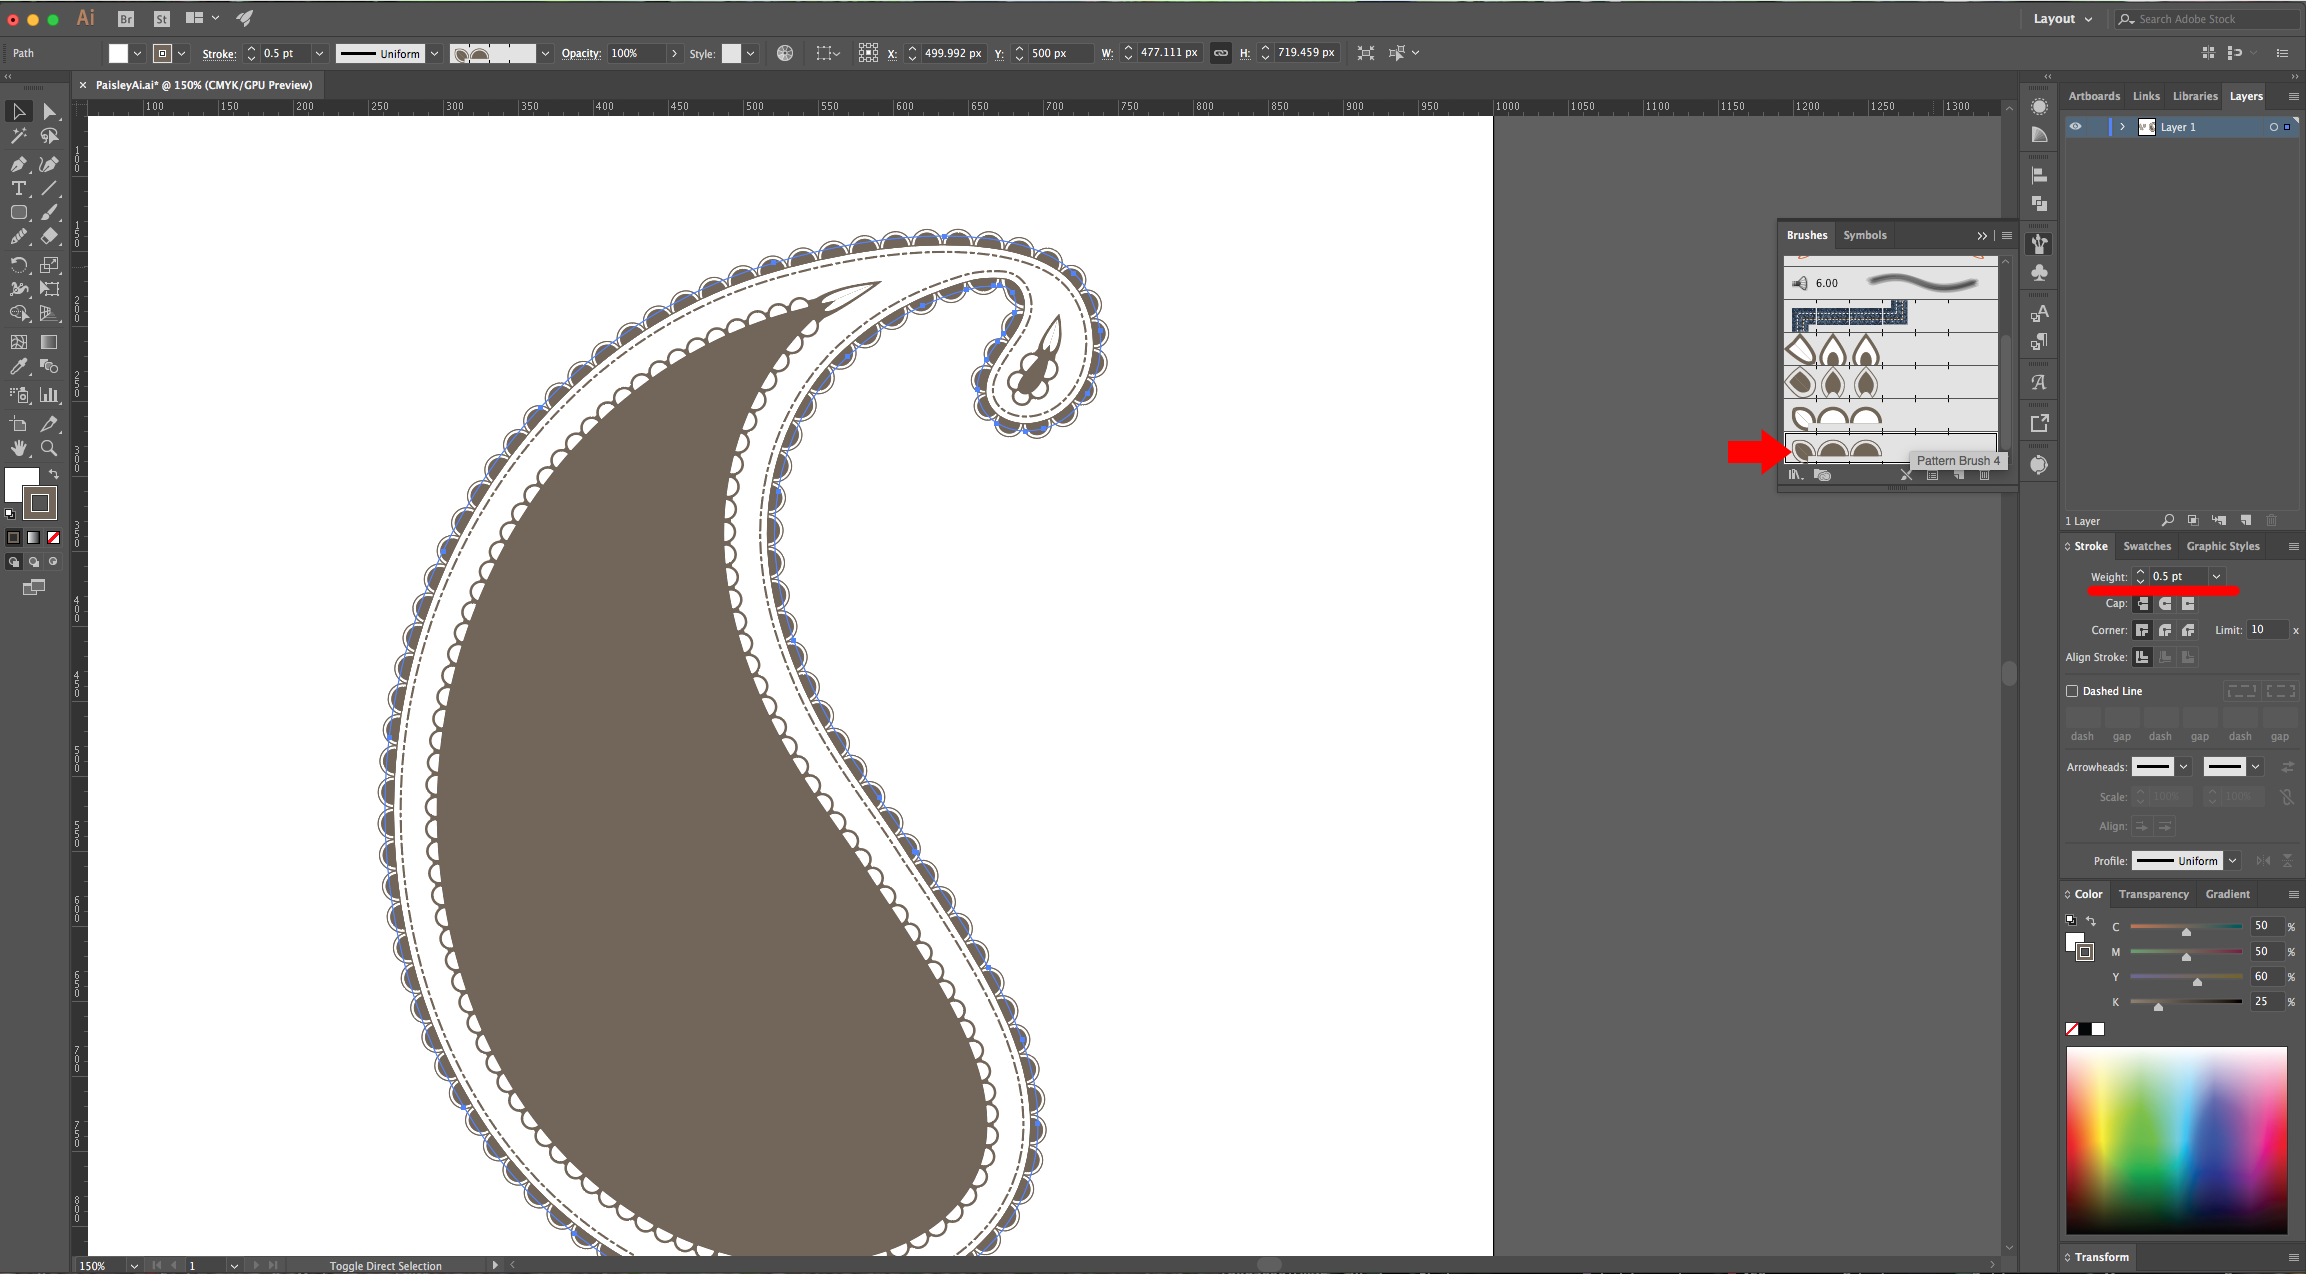
17 – Select your first shape, go to Object > Path > Offset Path and use a 10 Pixel value. Then, create a second one with a -20 Pixel value. Give the middle “Path” a “Dashed Line” with the following values: dash: 8 pt, gap: 2 pt, dash: 3 pt, gap: 2 pt.

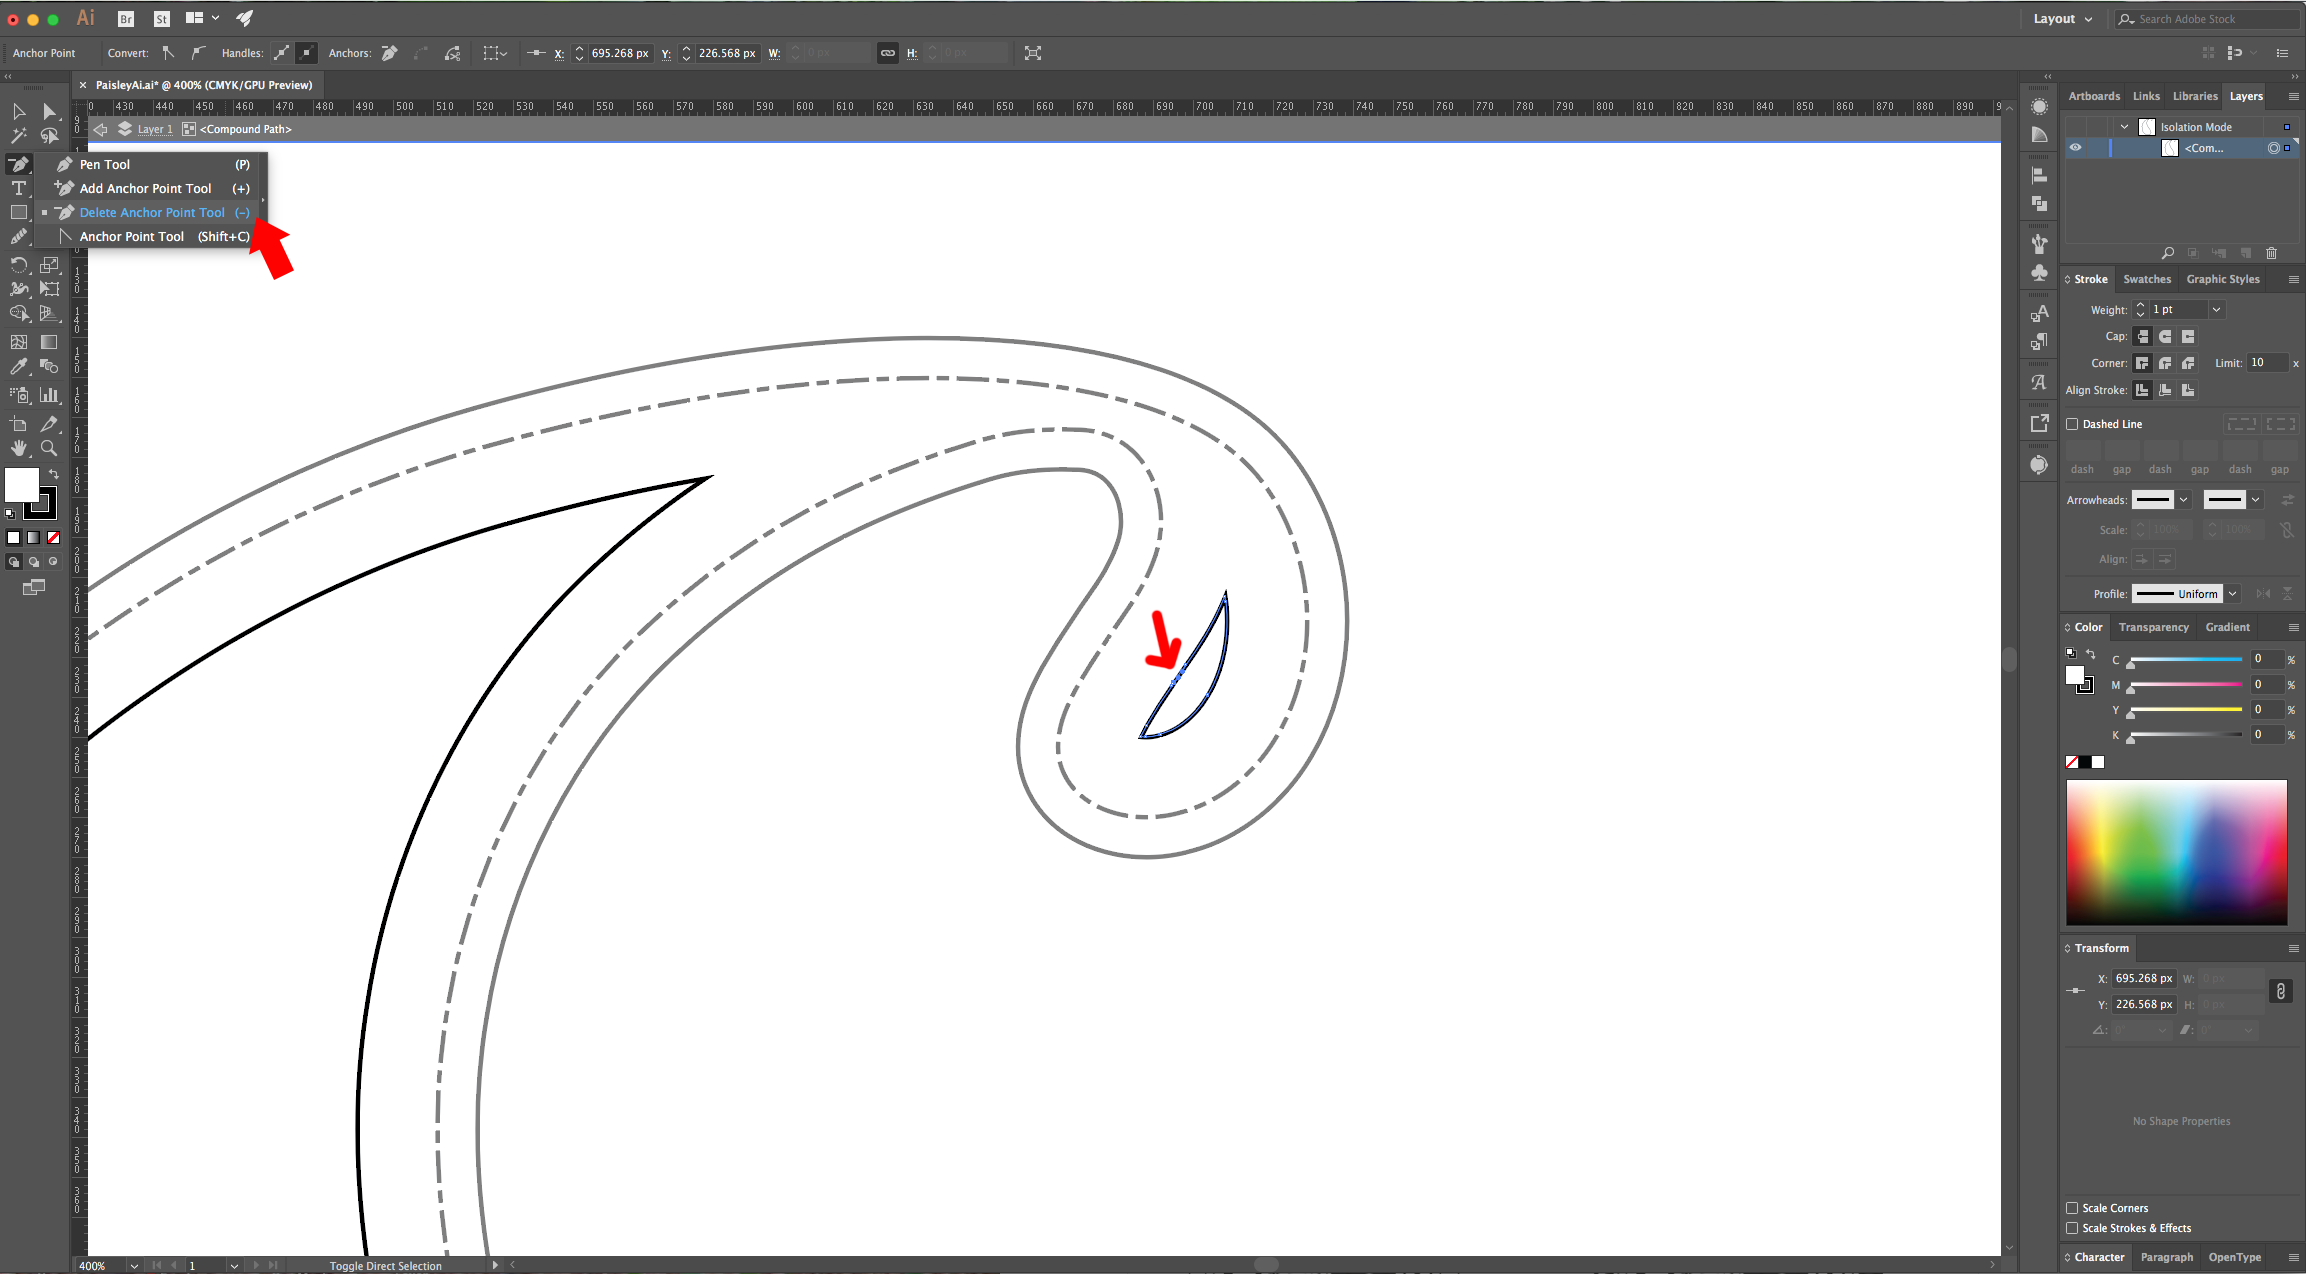
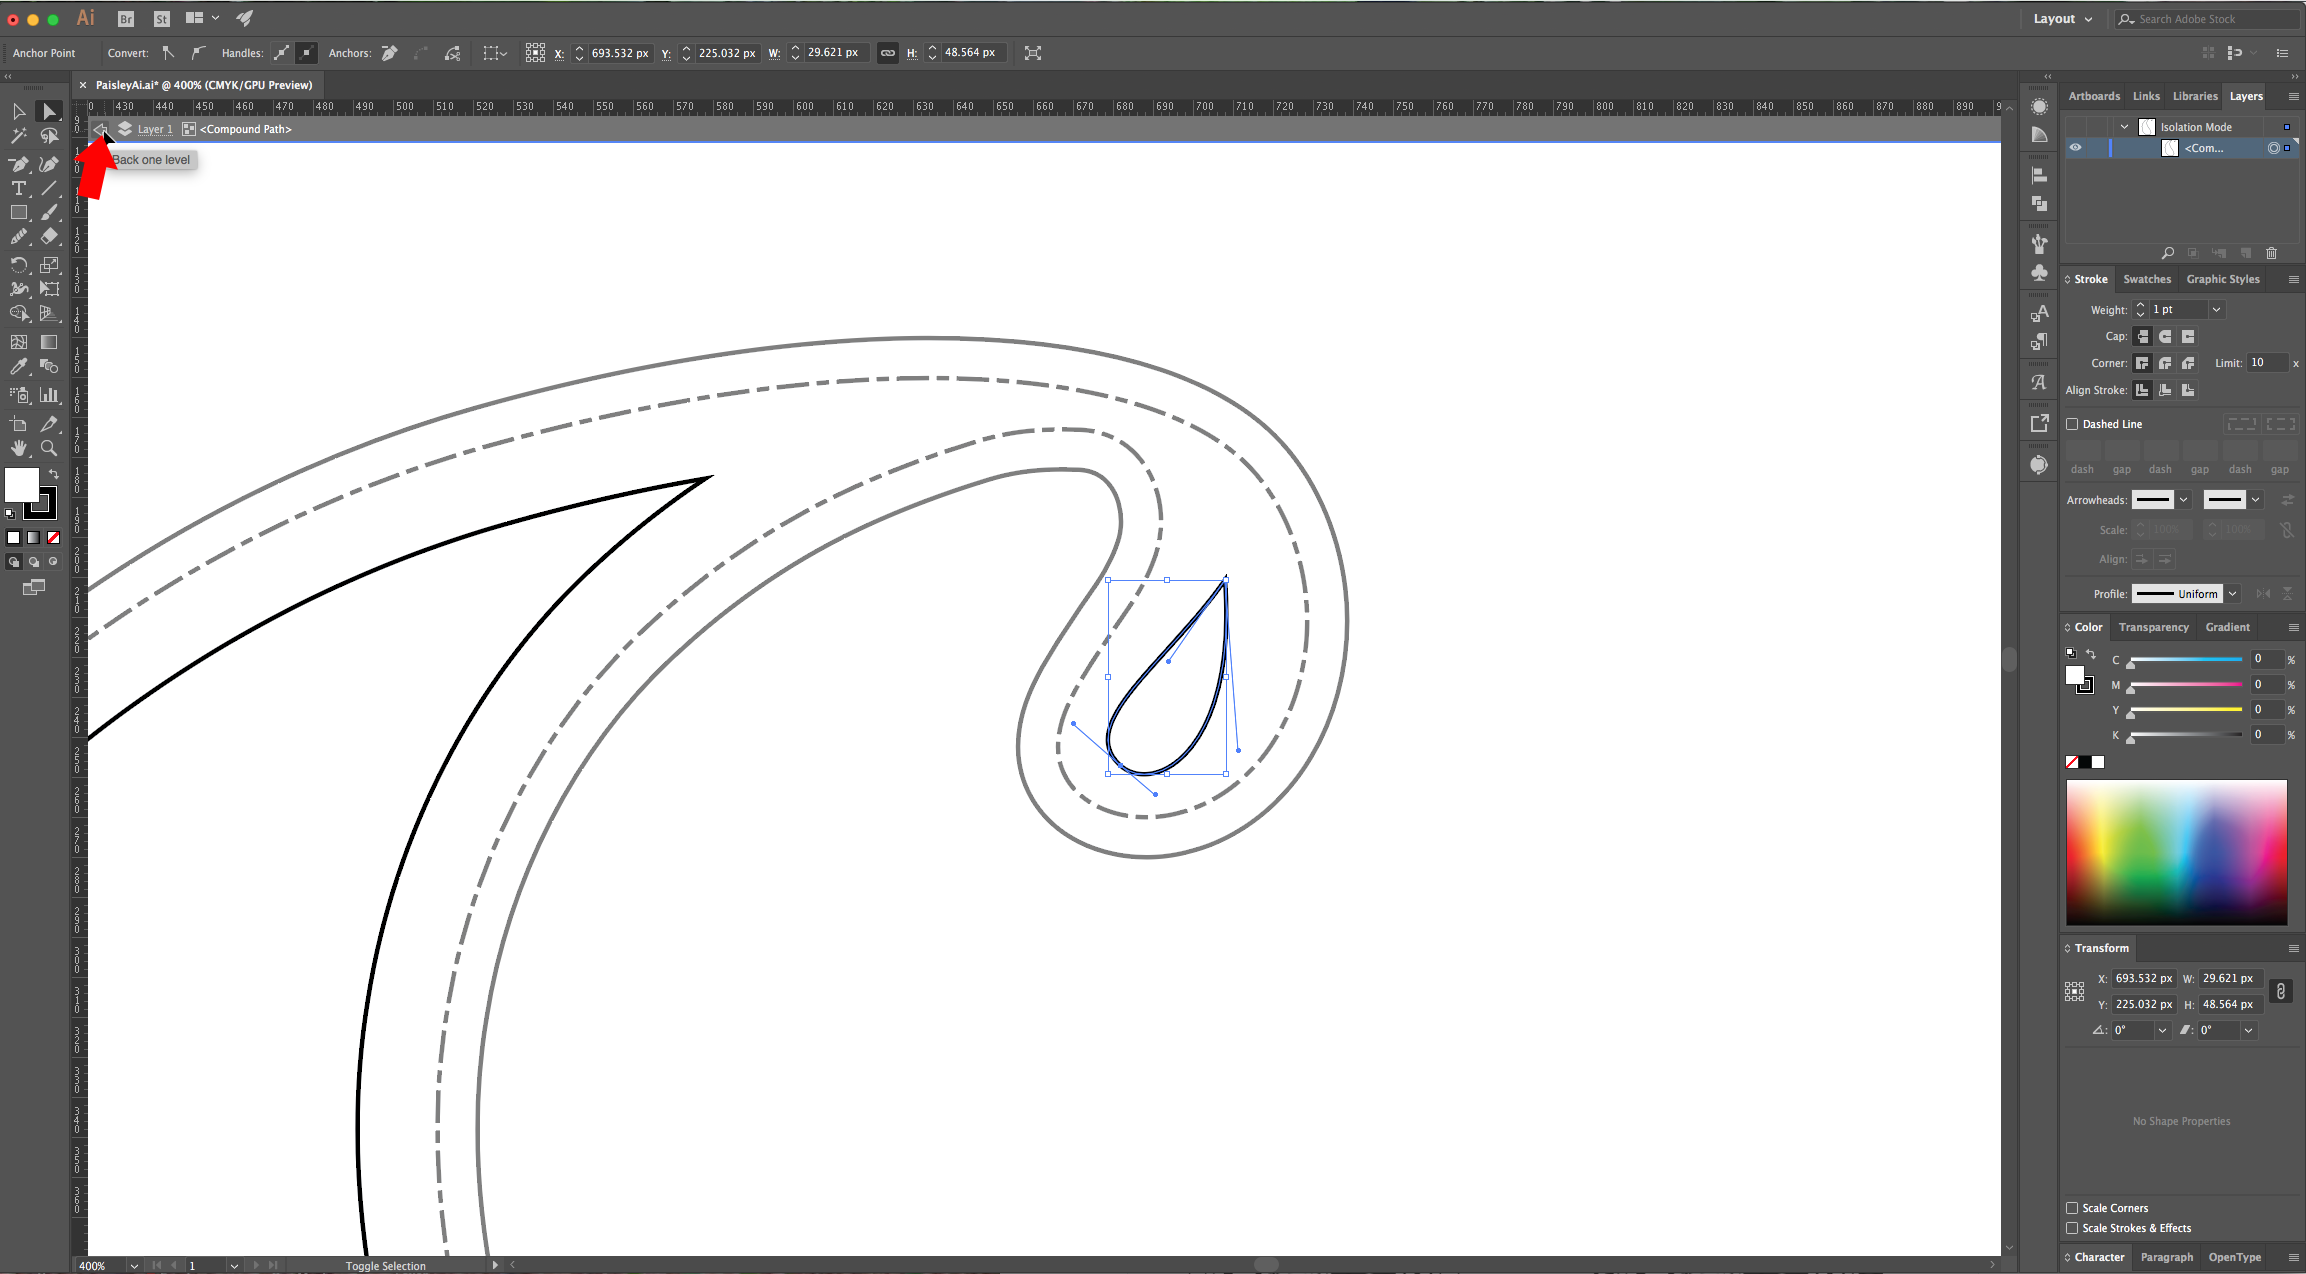
18 - You will notice that the inner path in the mall curved shape in the right side is cut in half. To fix it, use the “Delete Anchor Point Tool” (-) in some of the point, then use the “Direct Selection Tool” (A) to fix the shape. You may need to click the small arrow icon on the Top Menu to exit the editing mode.

19 – Fill some of your shapes with the color of your choice and change the “Stroke” color too if you like. Use the different “Brushes” you created before as “Stroke” to give your shapes some cool effects. Remember that you can change the “Stroke Weight” (we used 0.5 pt in one and 0.35 in another).

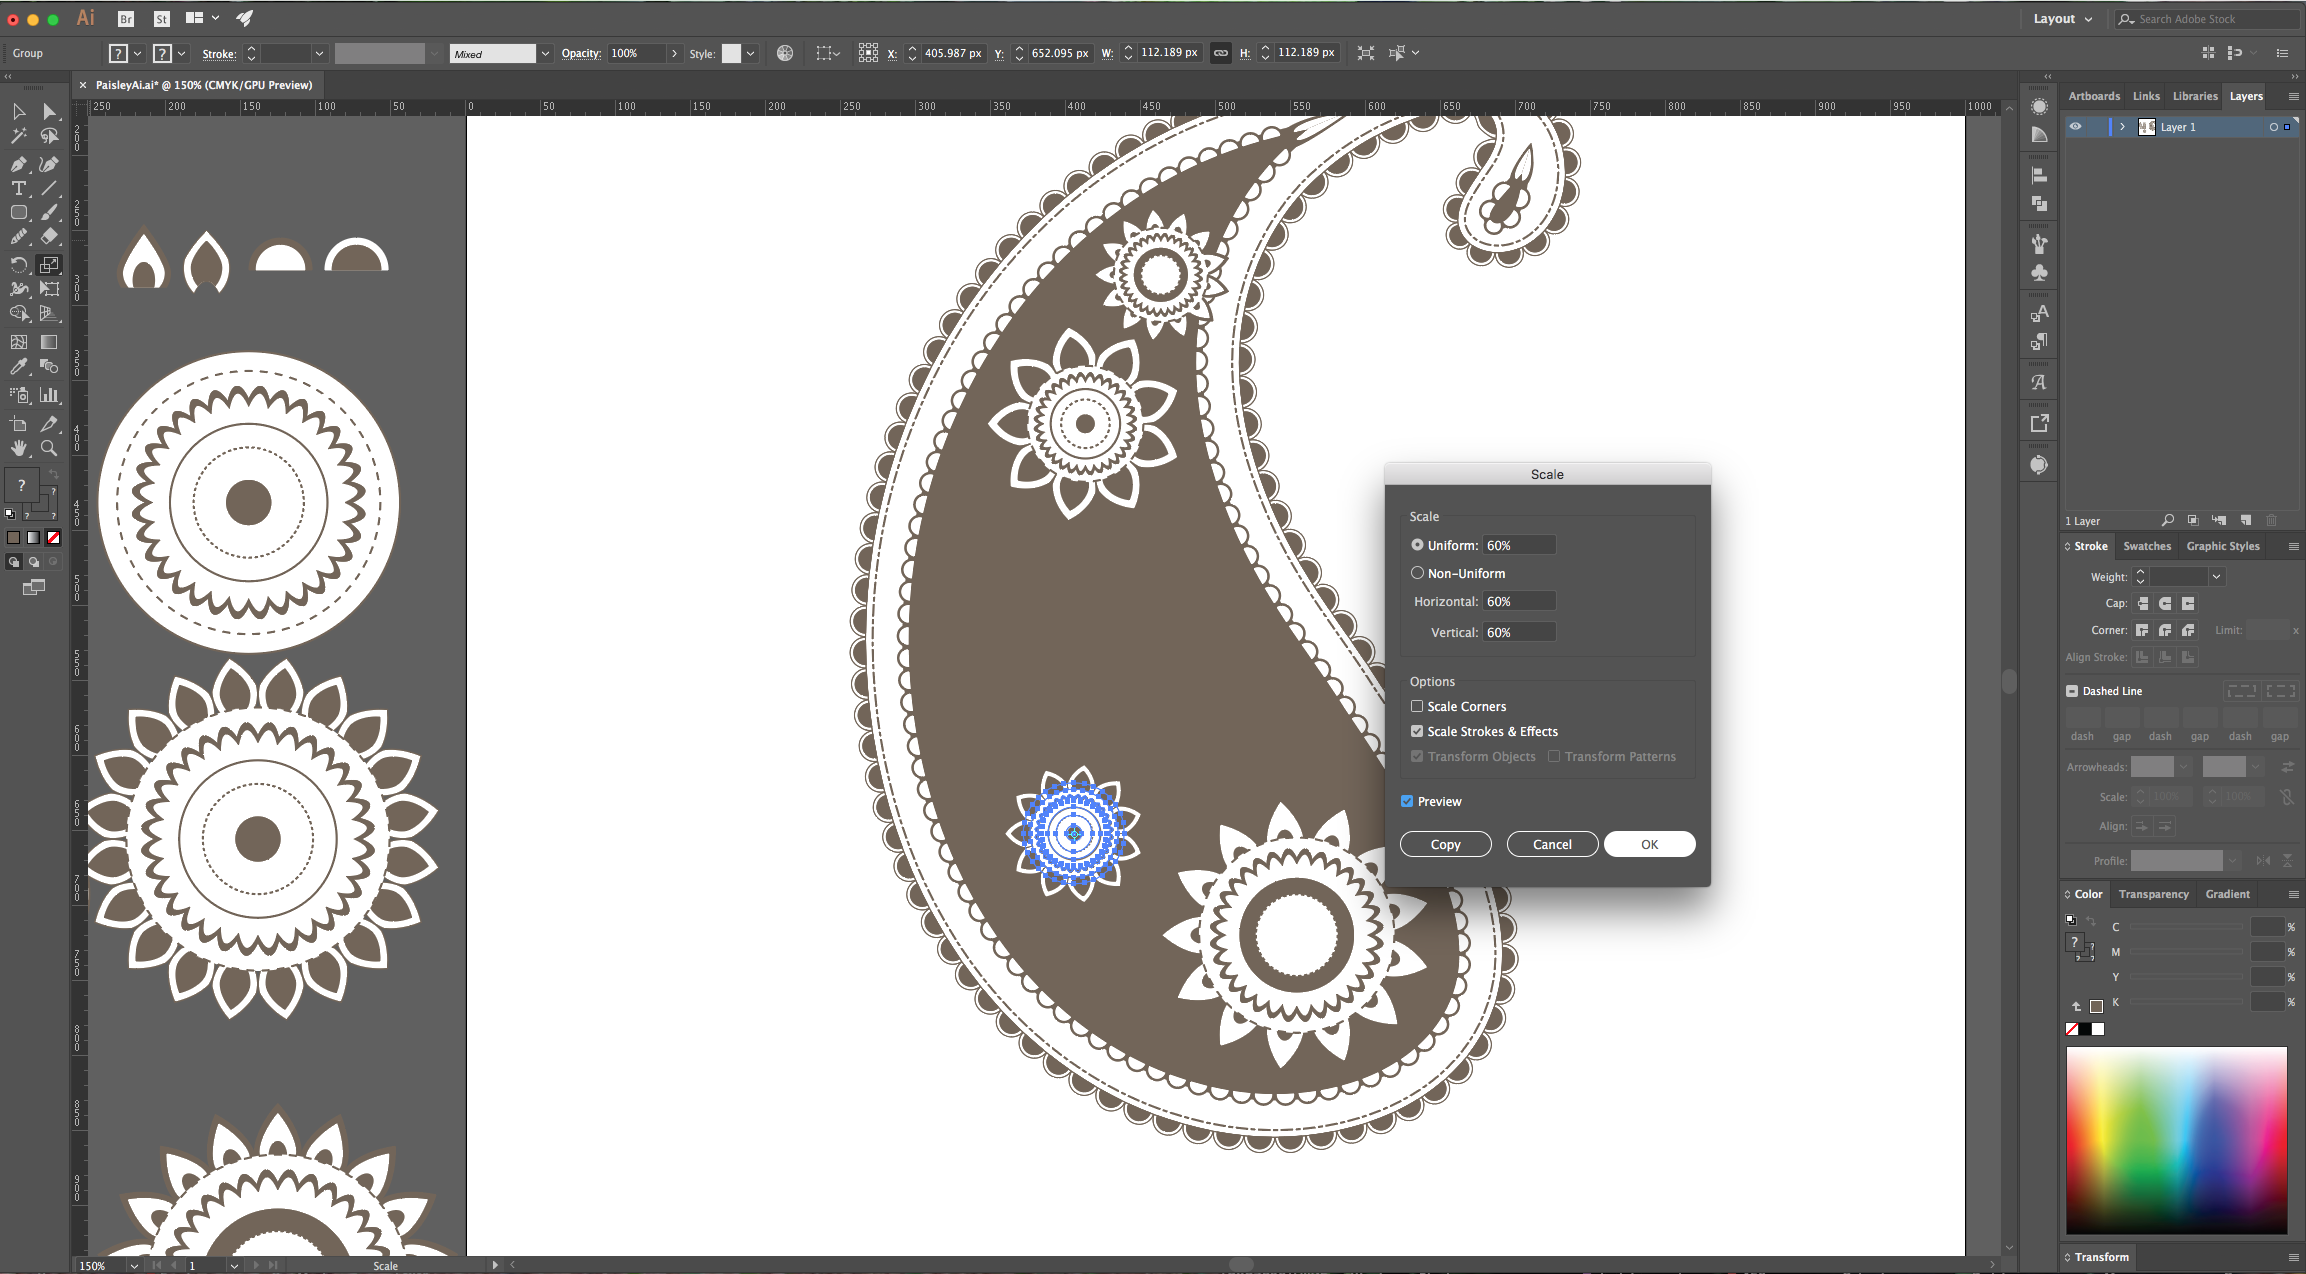
20 - Add the “Petal” brushes to the “Circles” to create Flowers. Then, “Scale” the flowers making sure that “Scale Strokes & Effects” is selected this time.
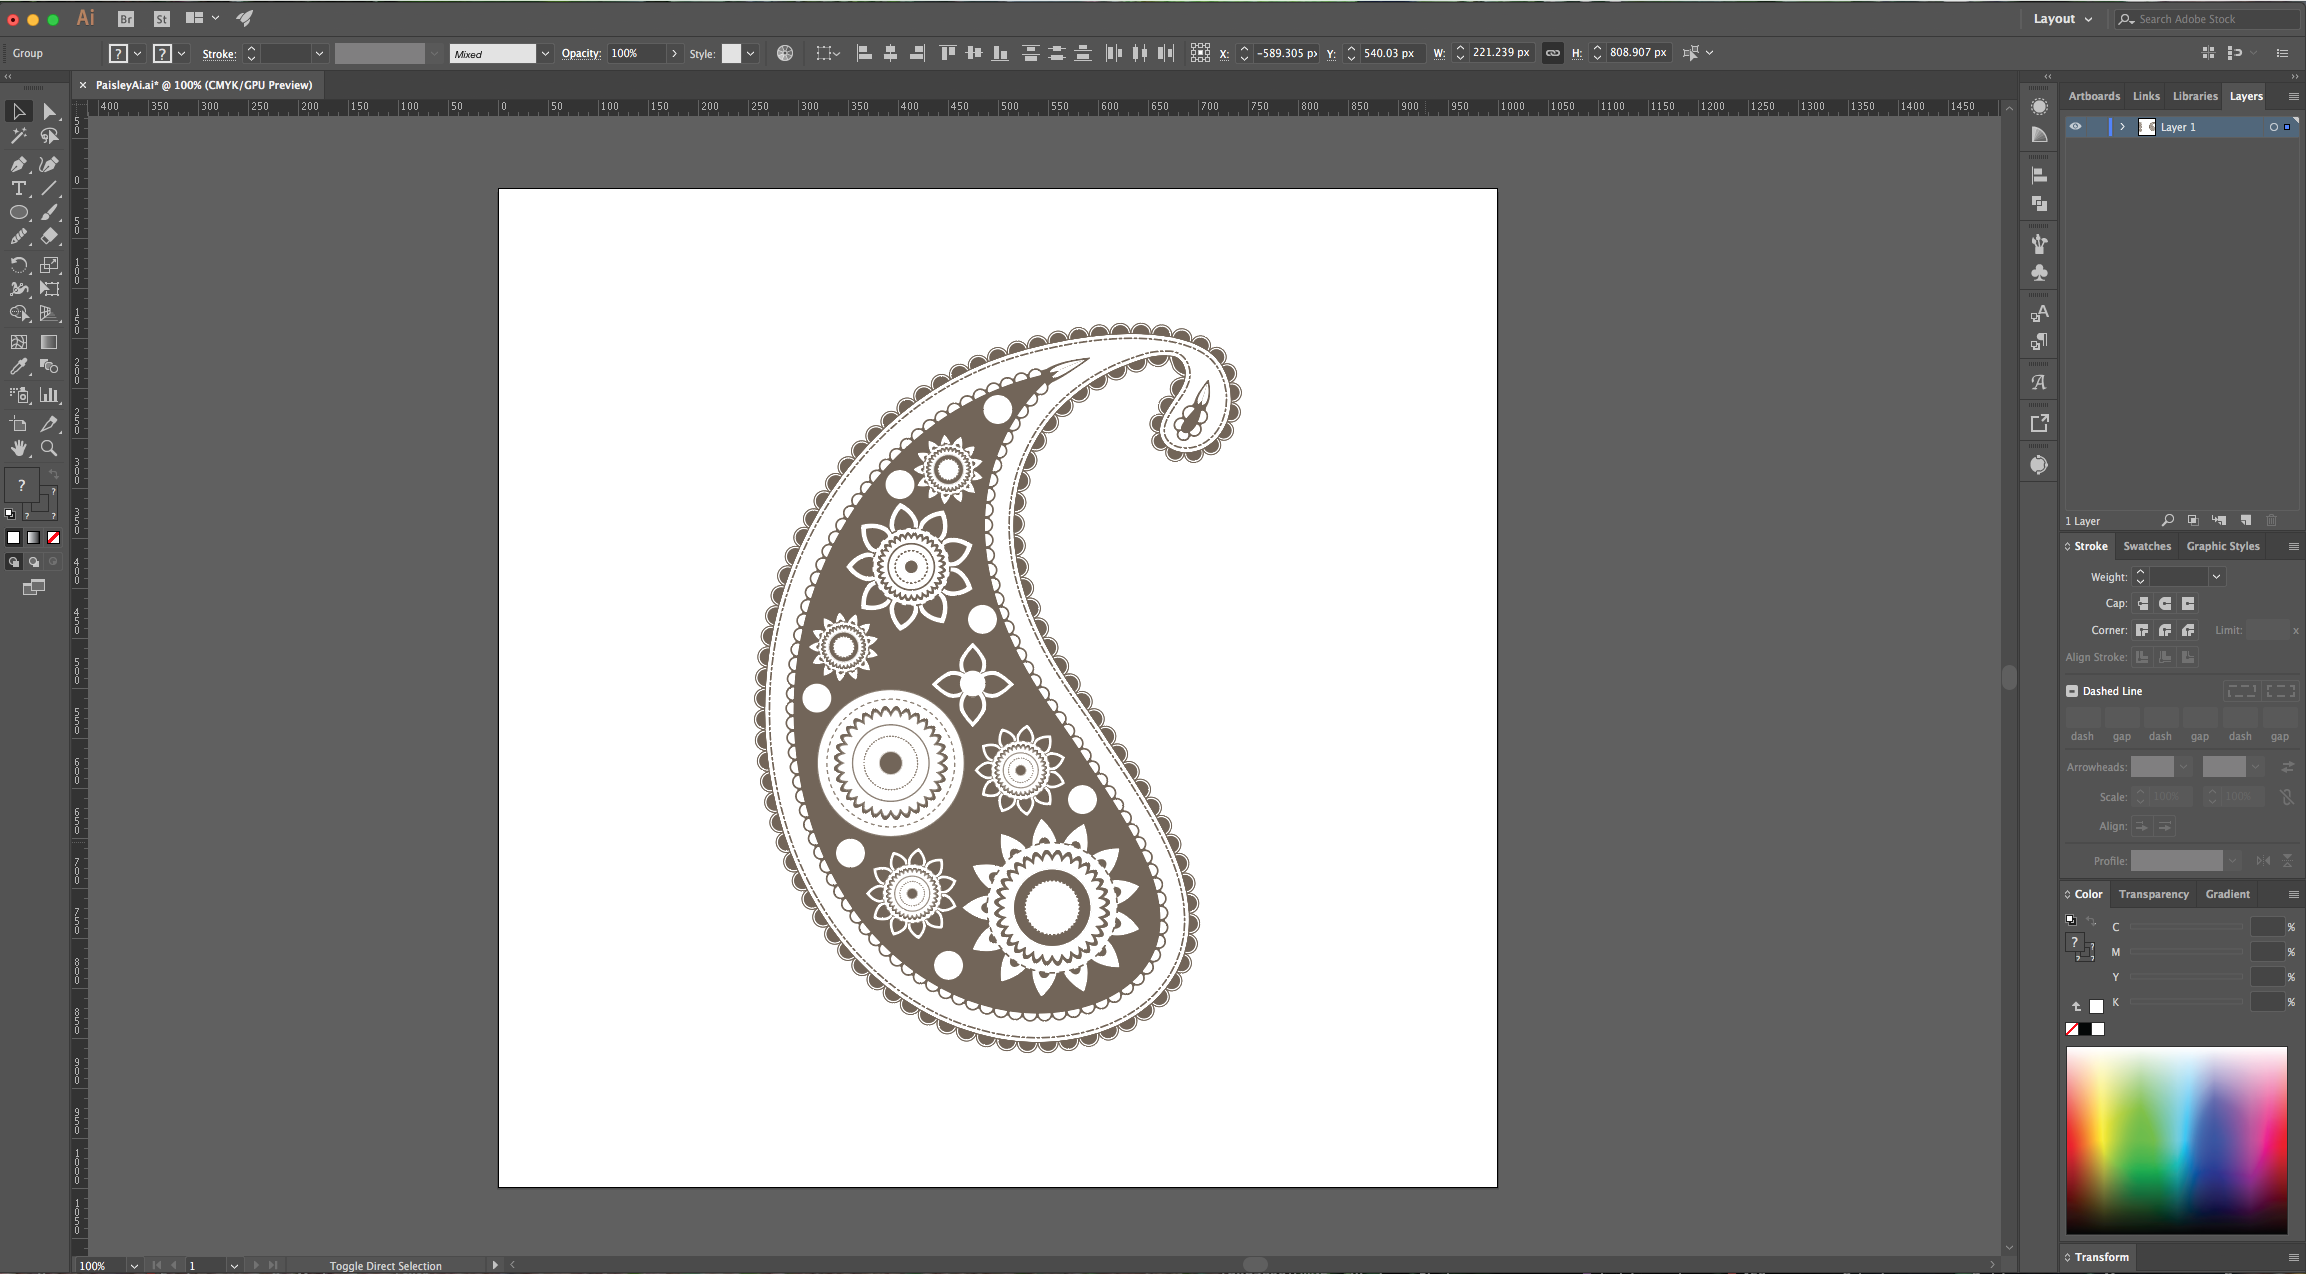
21 – Add “Flowers” in different sizes and other shapes too, “Group” everything together once you are done and reproduce the “Paisley” in several sizes and rotations to create a “Pattern”. Place a “Reflected” copy of everything in the other to make sure that if you use your design as a “Pattern” it will work perfectly.
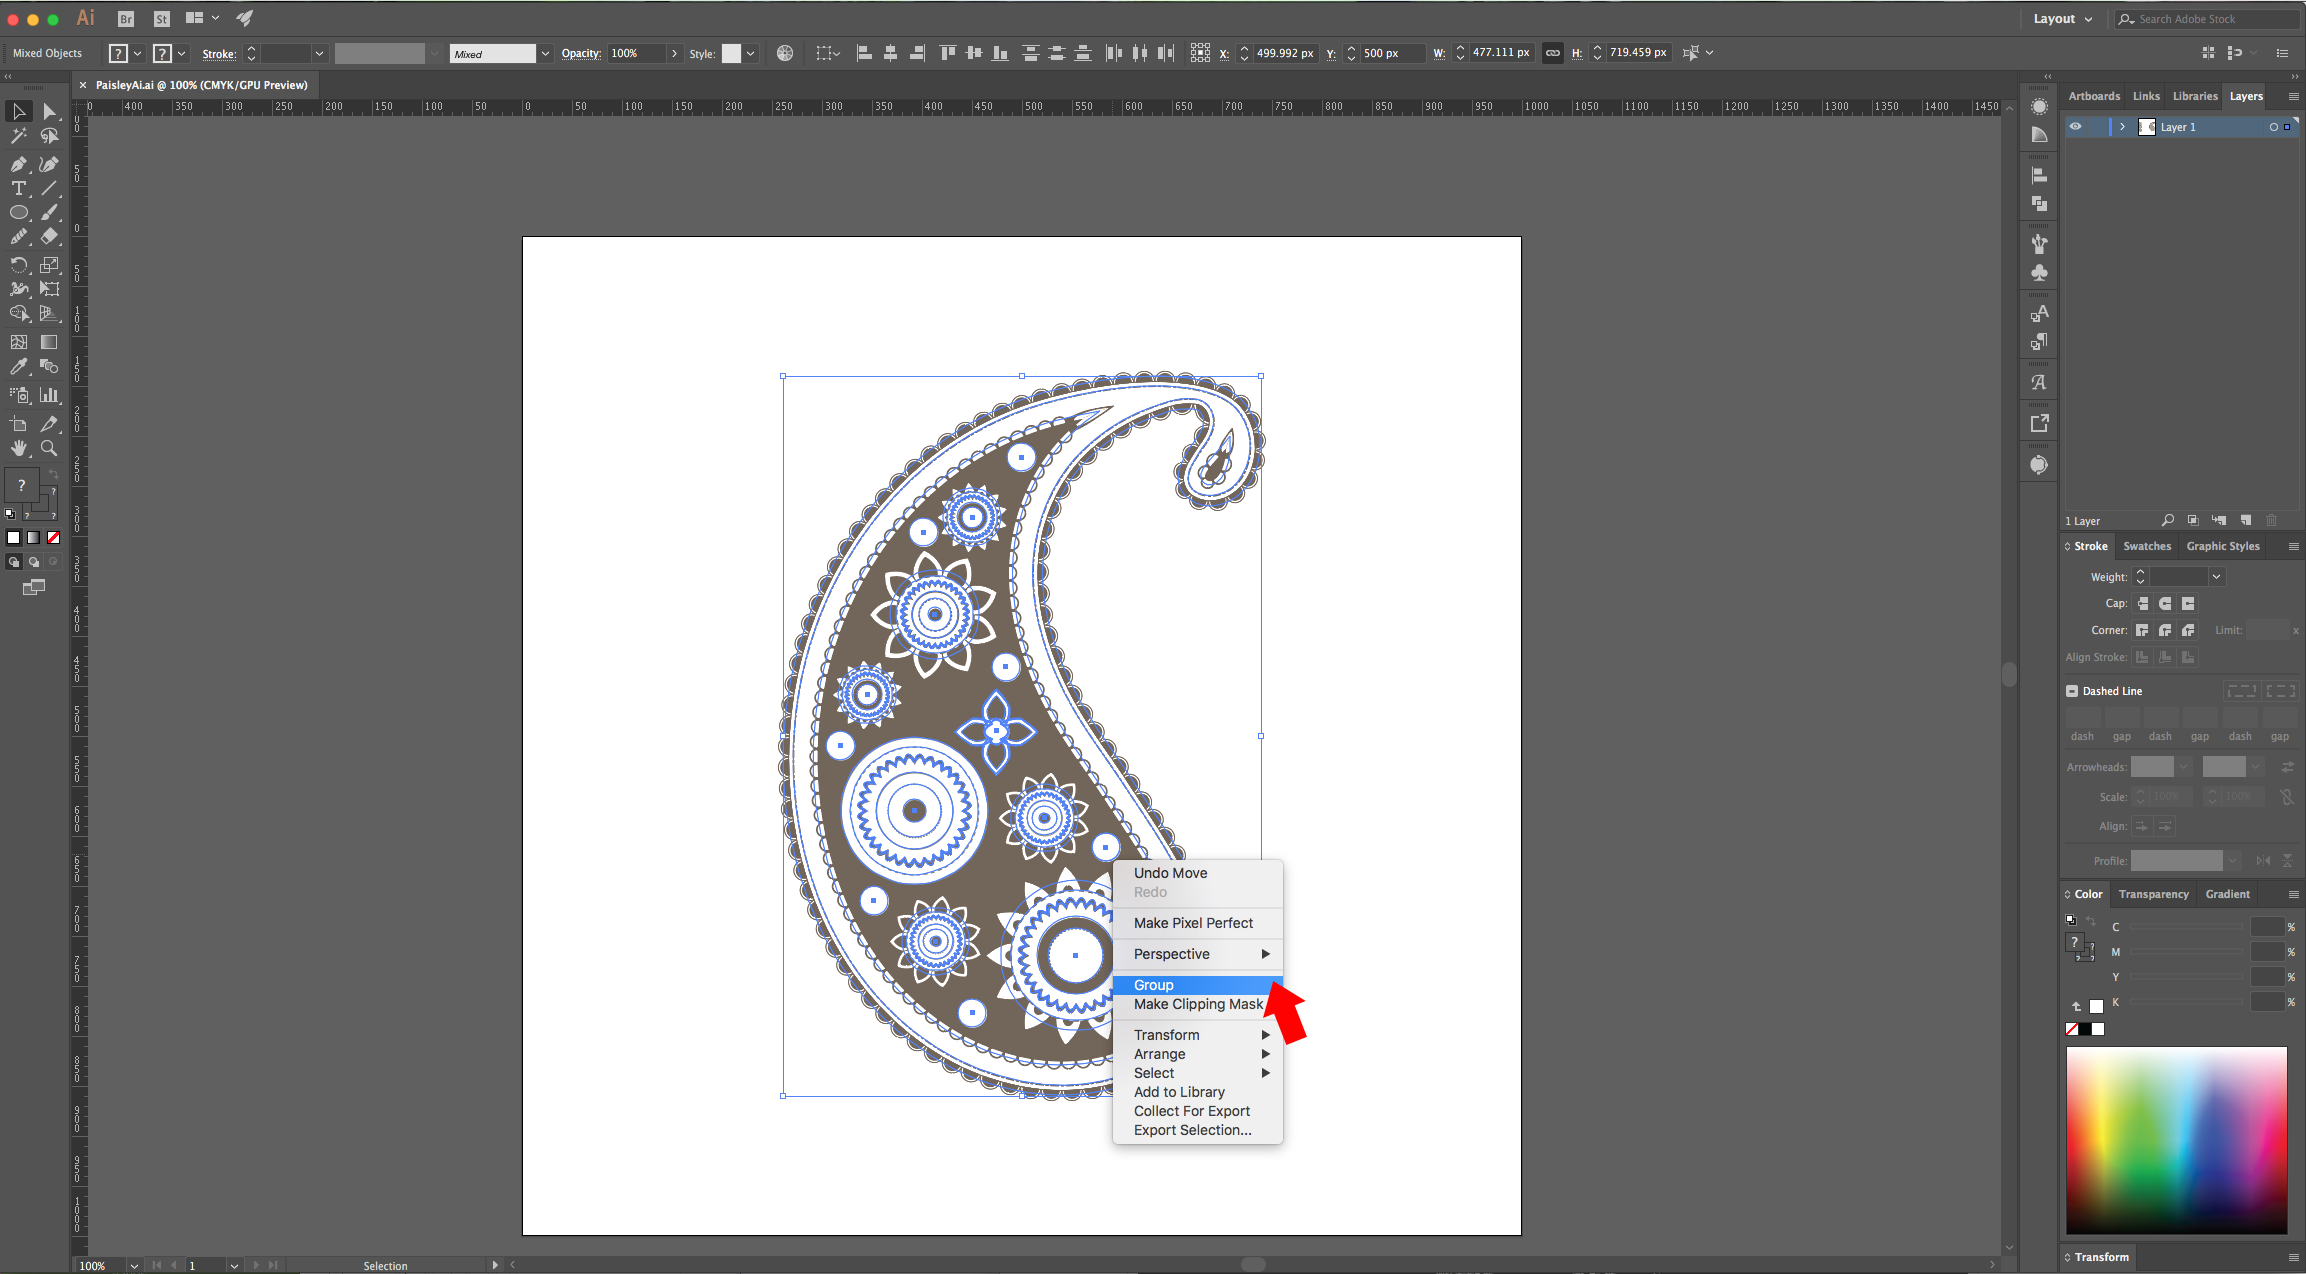
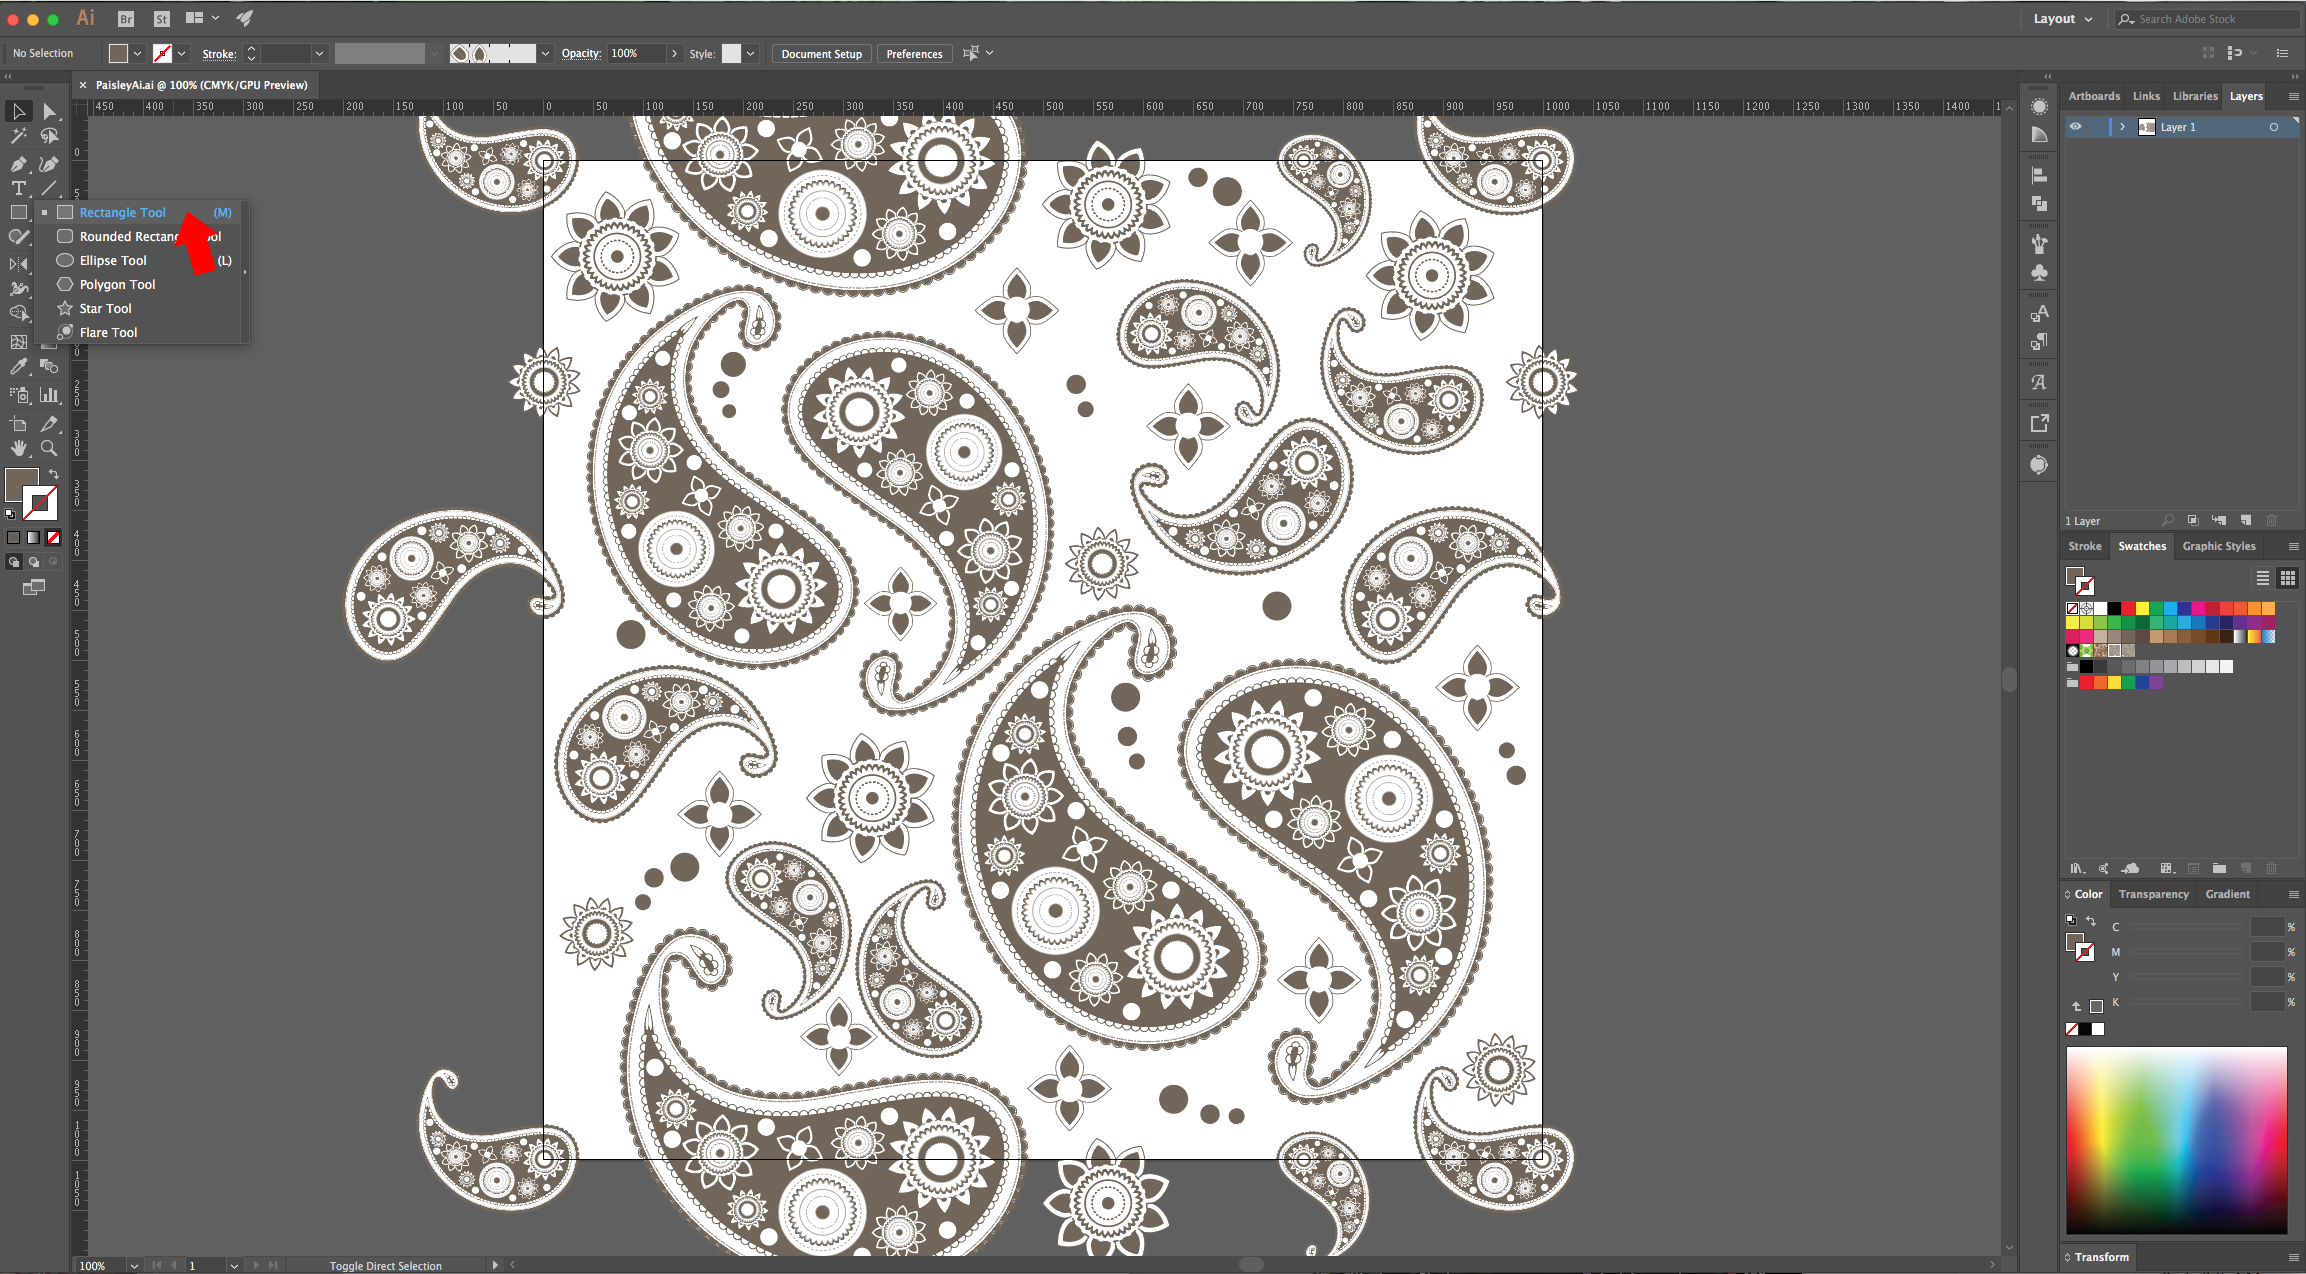
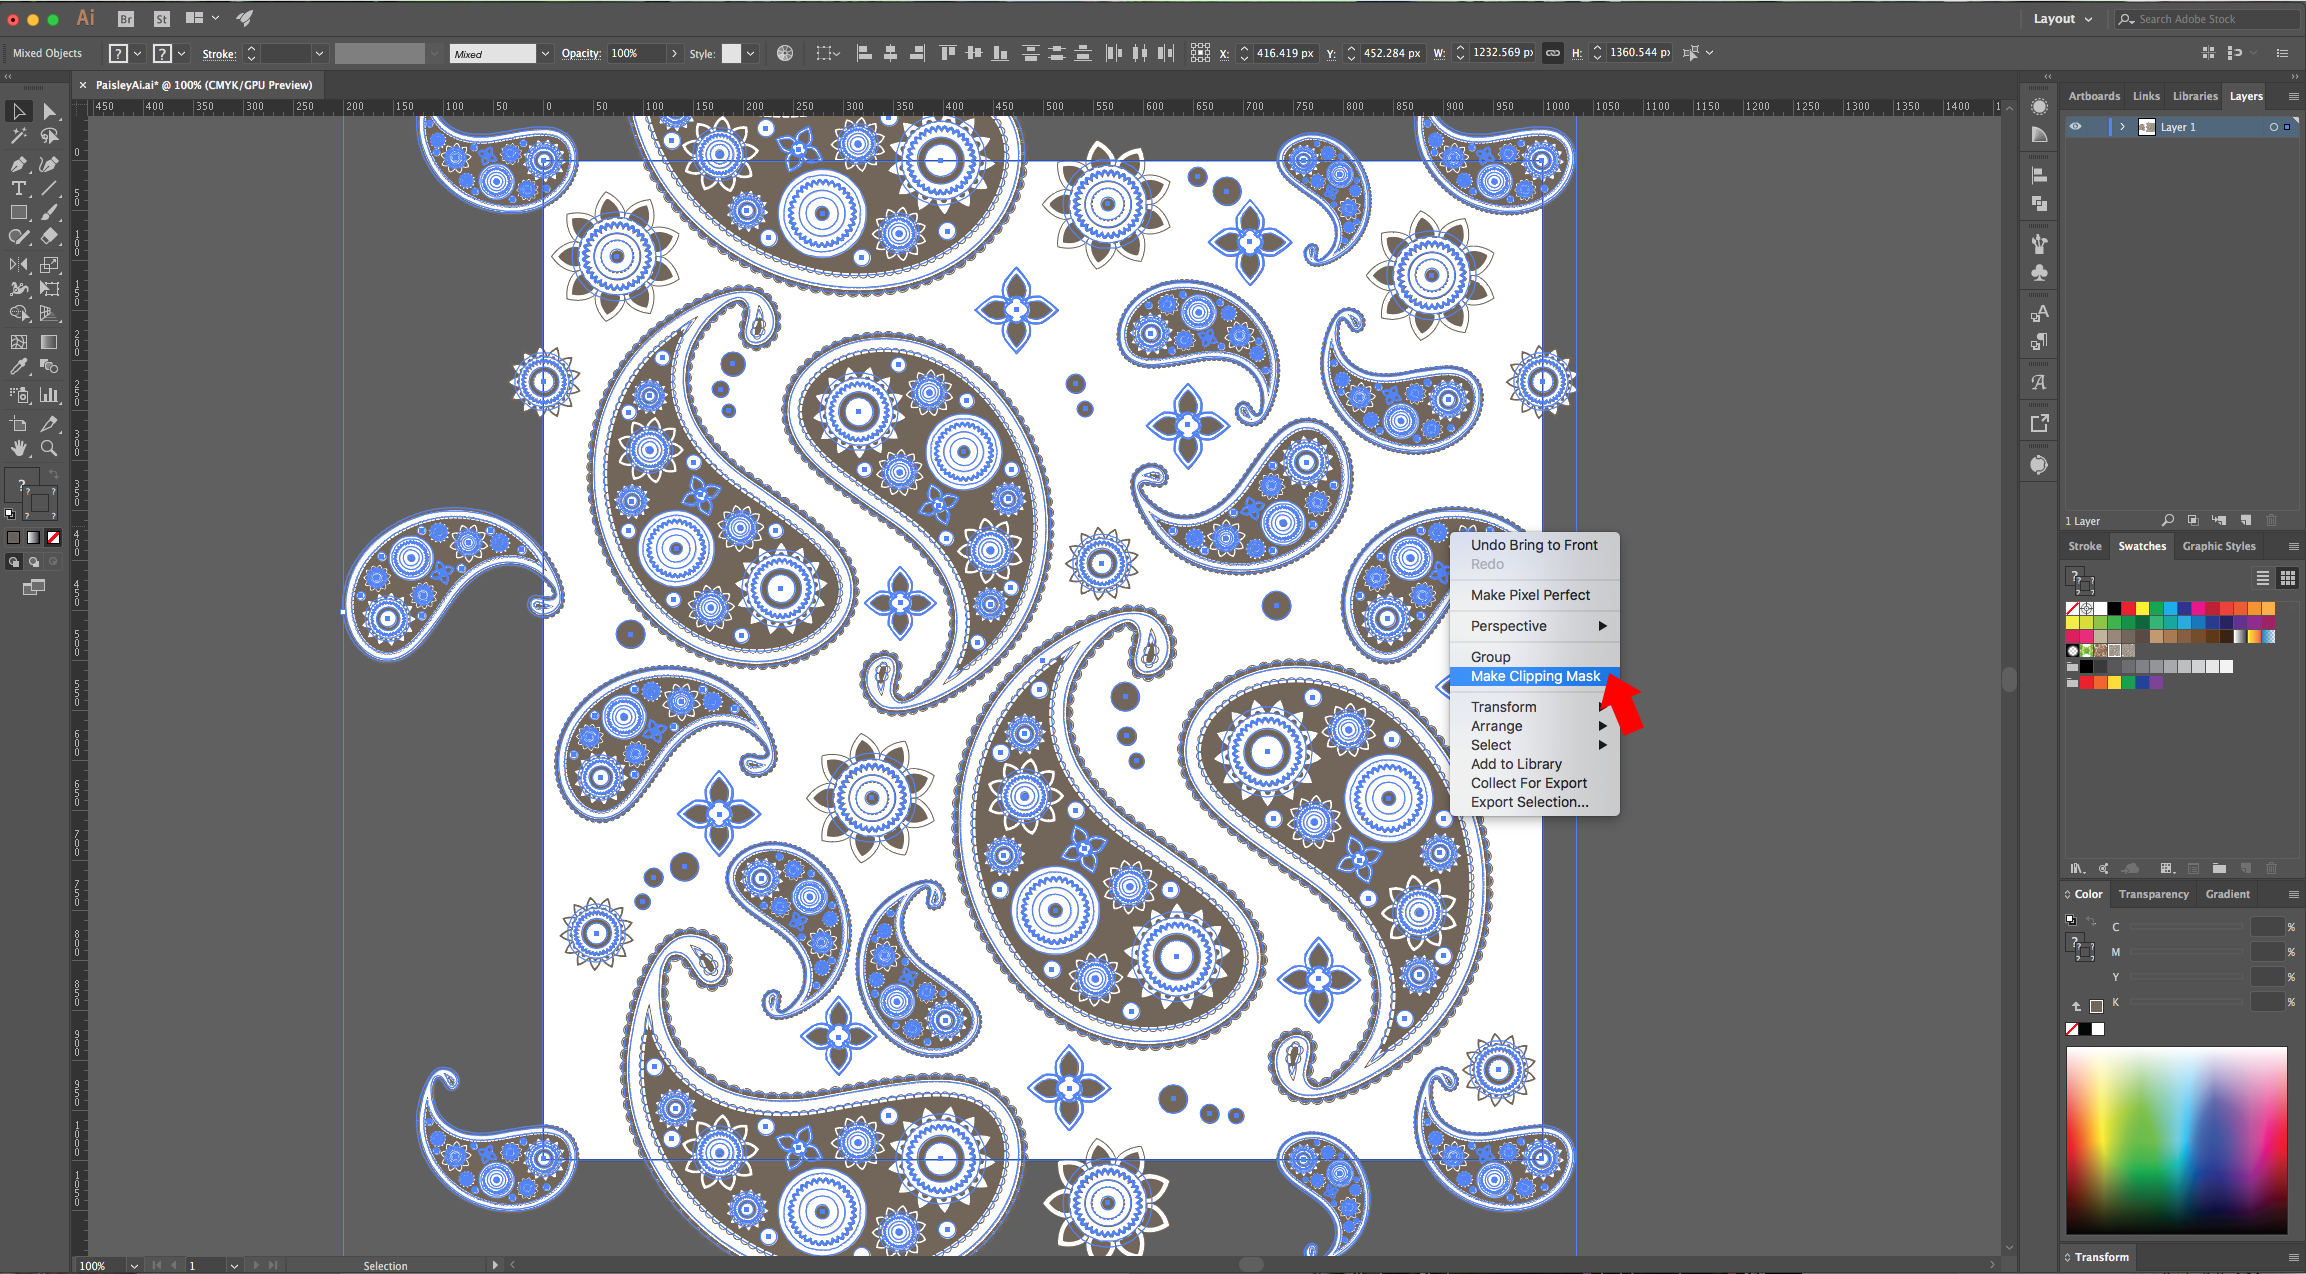
22 - Once you are done, select the “Rectangle Tool” (M), make sure you are using “None” as “Fill” and “Stroke” color and click on the Top-left corner of your document create a rectangle covering the entire canvas (1000 x 1000 Pixels). Select everything, right-click on top and choose “Make Clipping Mask”.

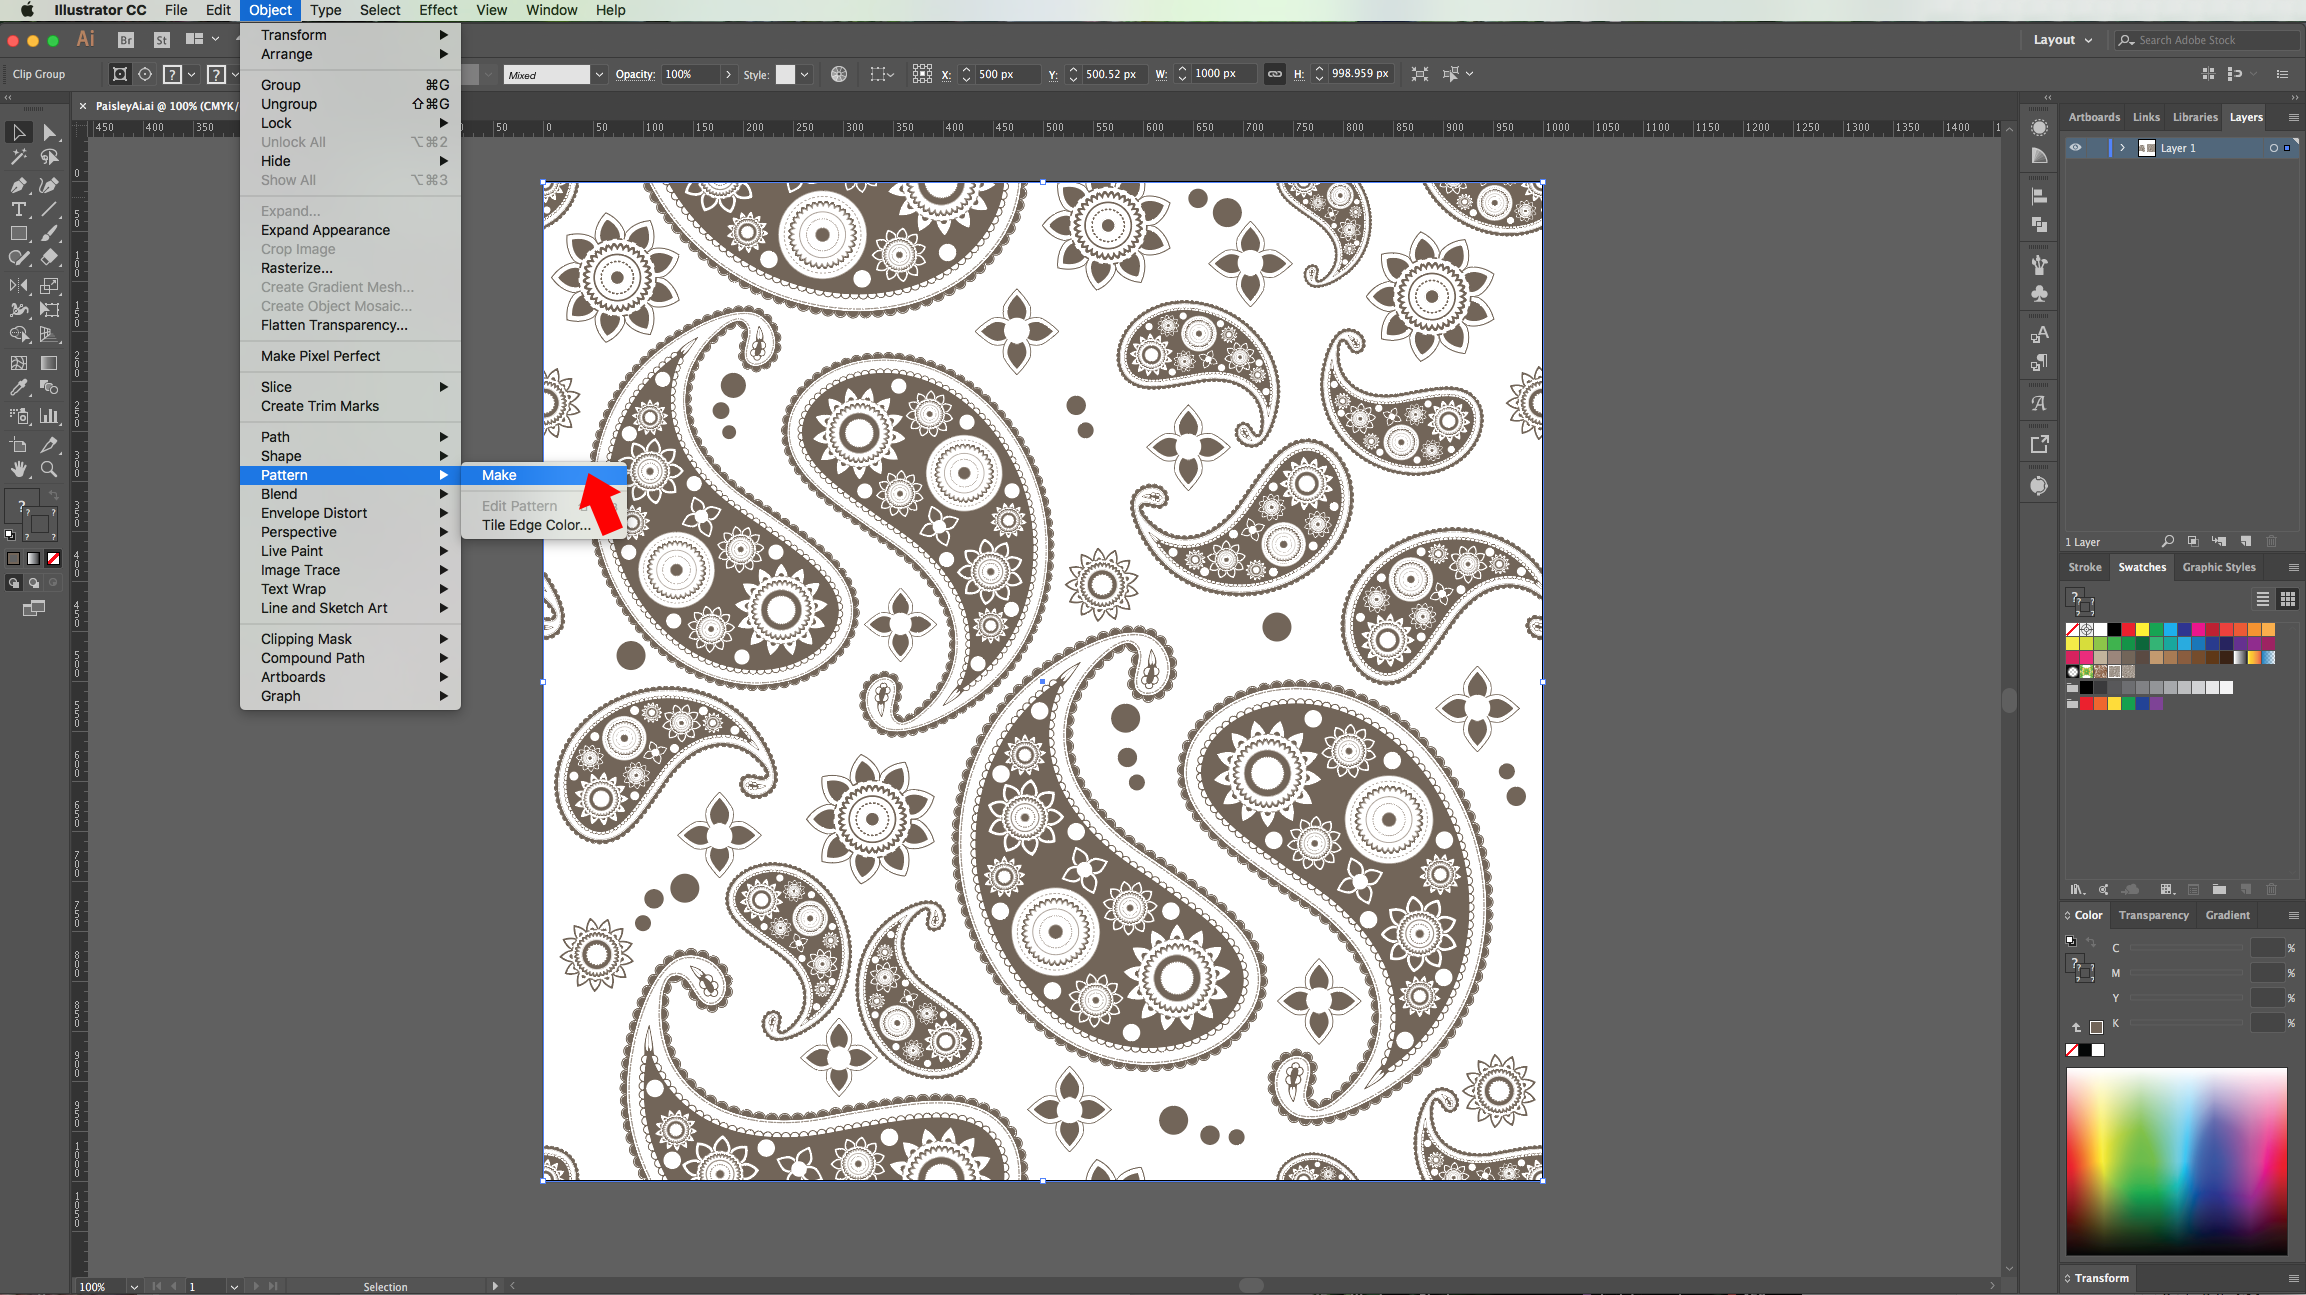
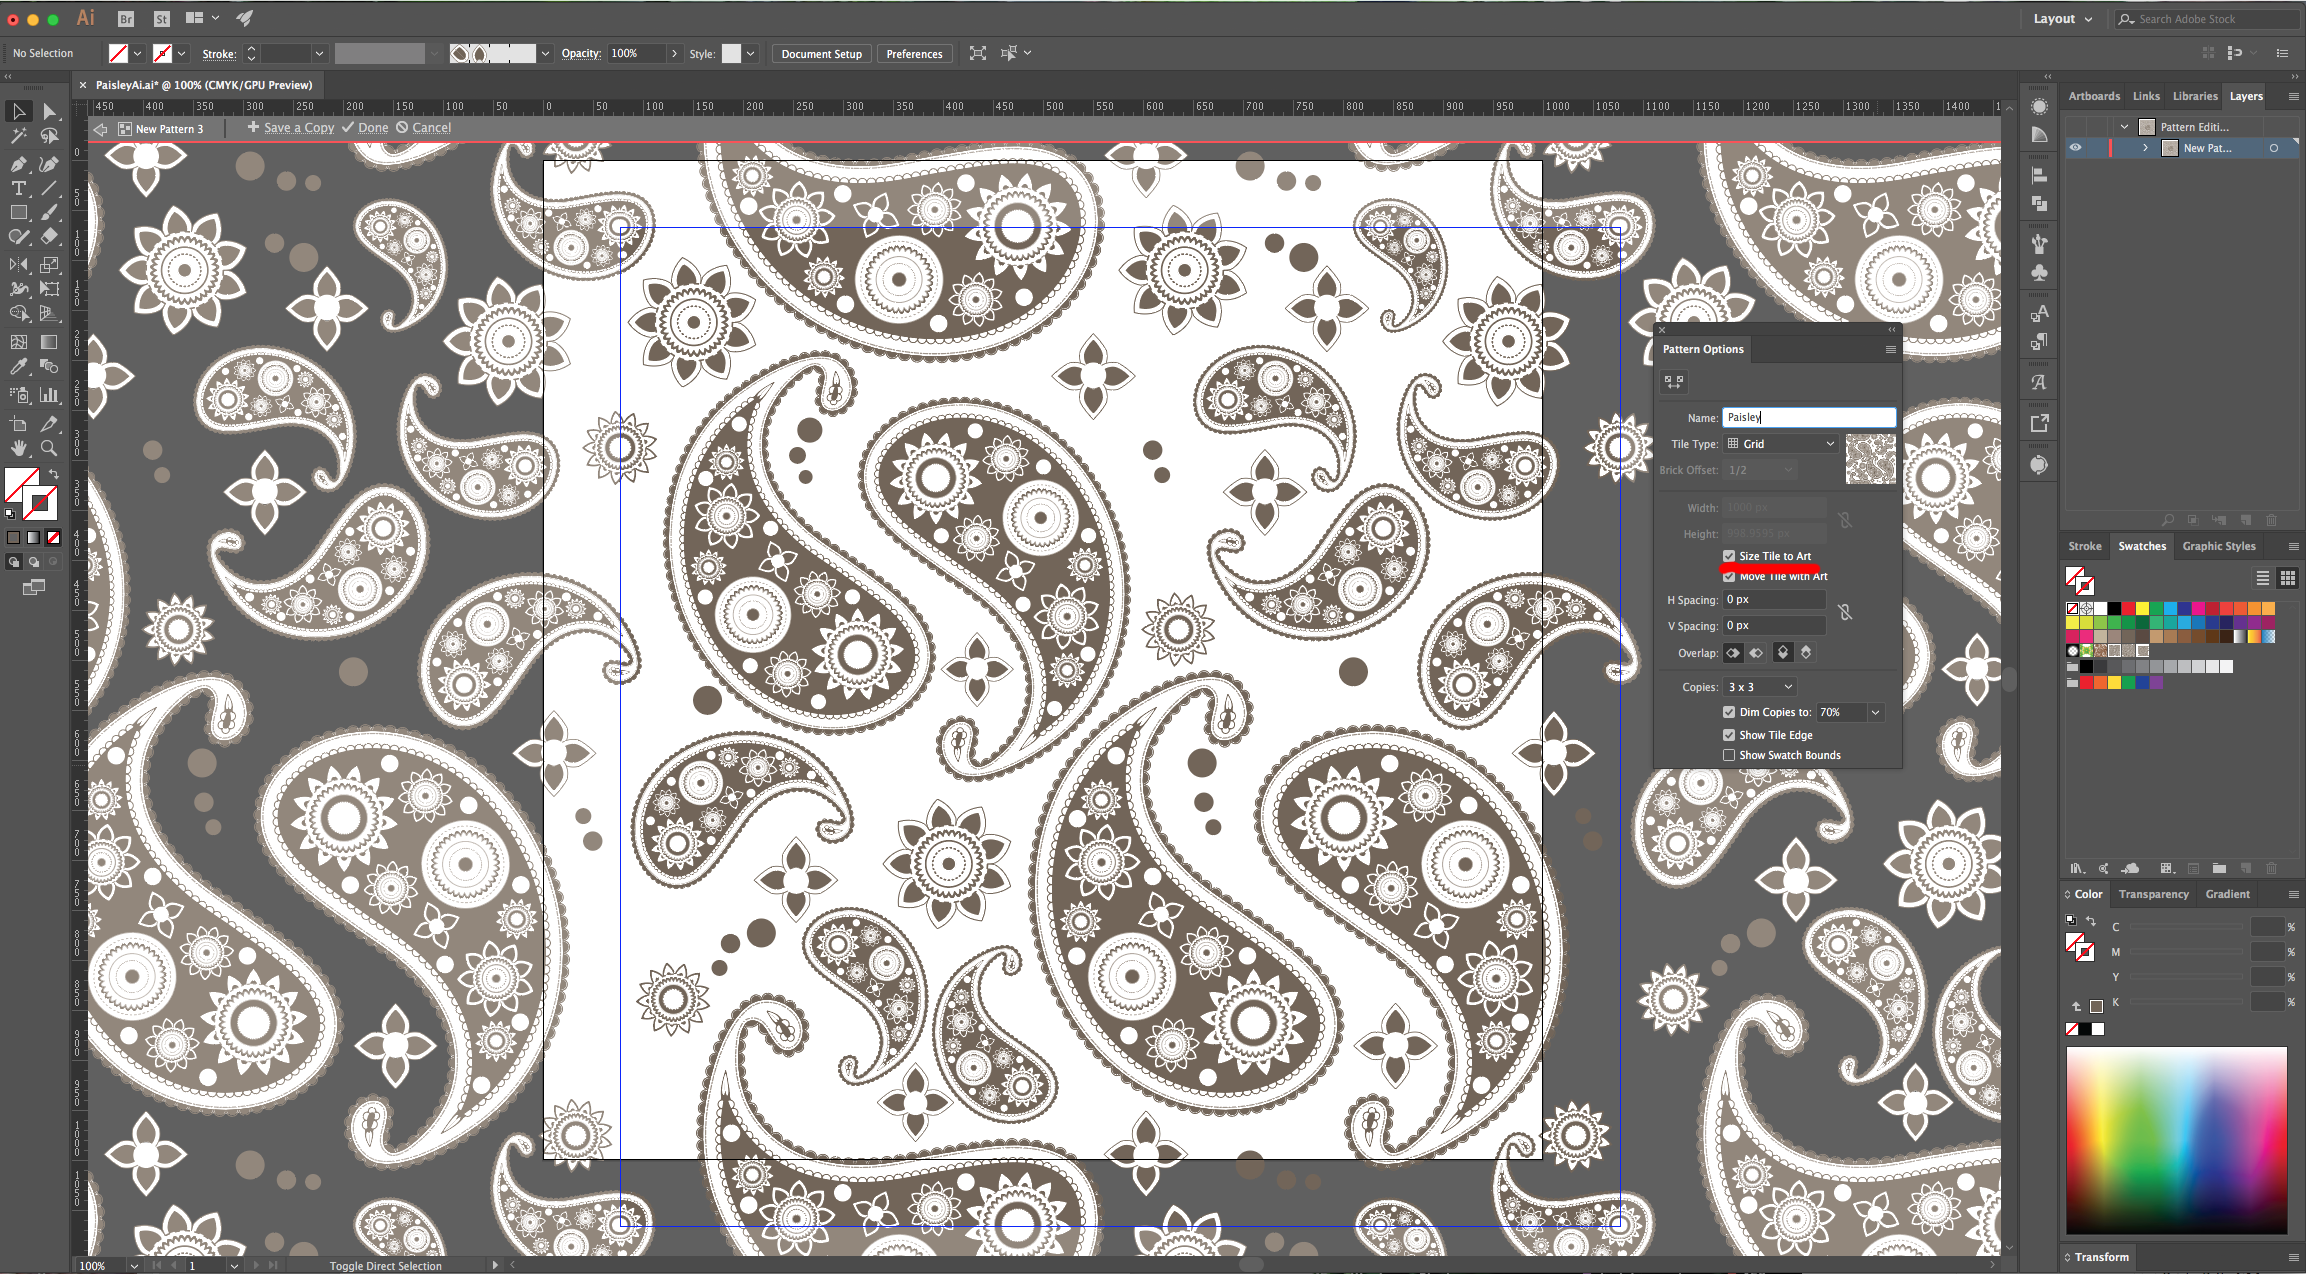
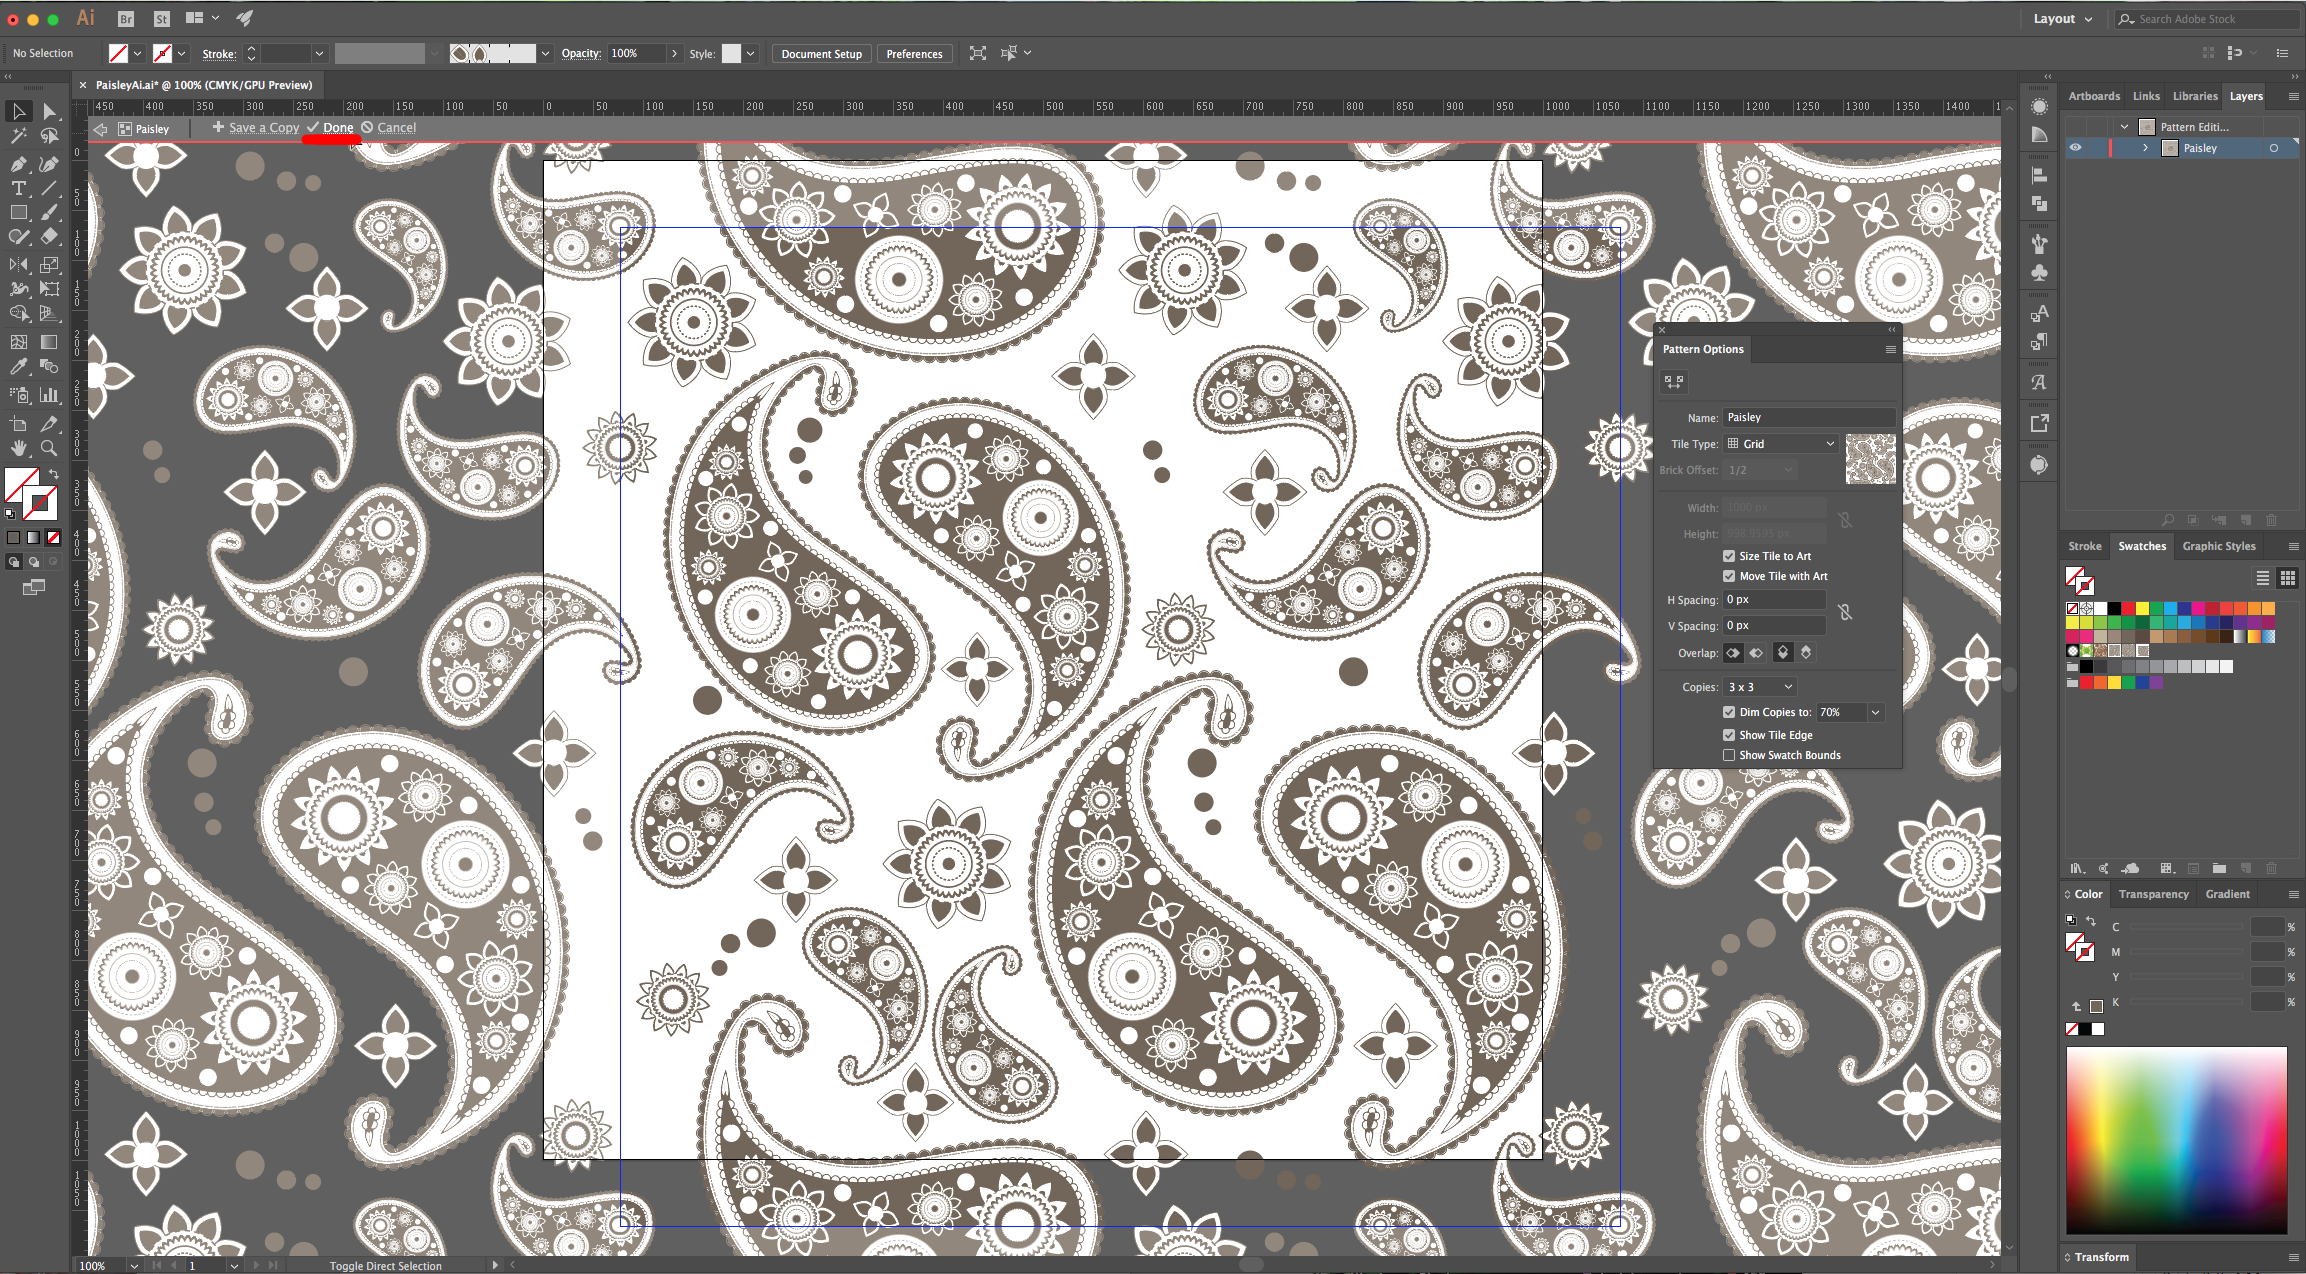
23 – With your Path selected, go to Object > Pattern > Make, click “Ok” in the following Window and check the “Size Tile to Art” box. Name your “Pattern” and check if there are any corrections you need to make. Once you are happy, click on “Done” in the upper Menu. Your Pattern should be saved in the “Swatches Panel”.

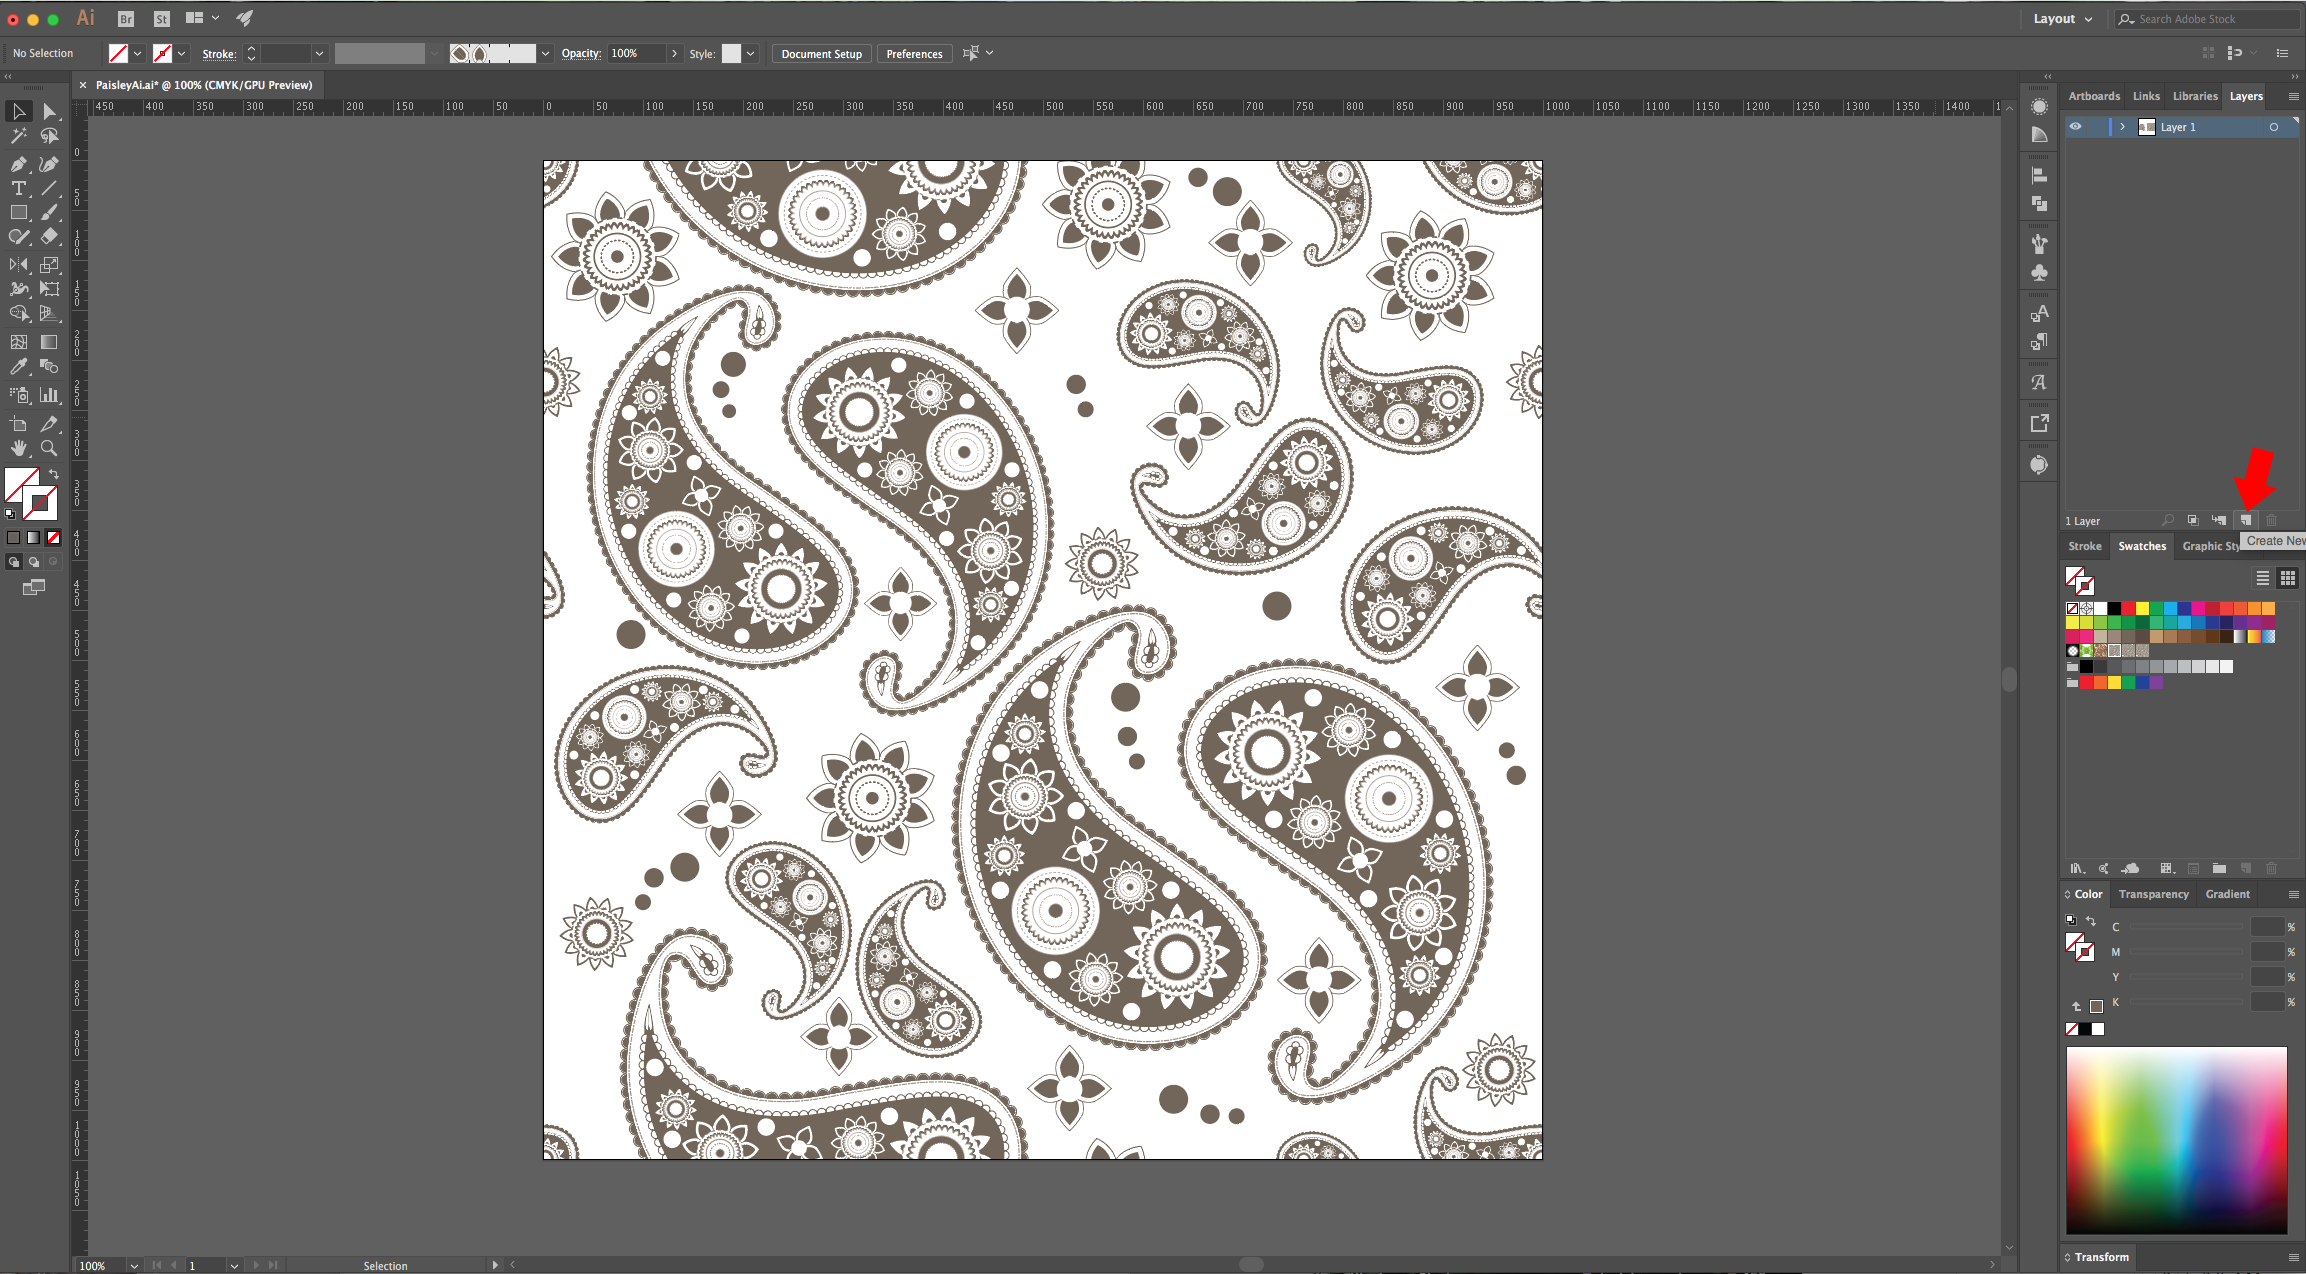
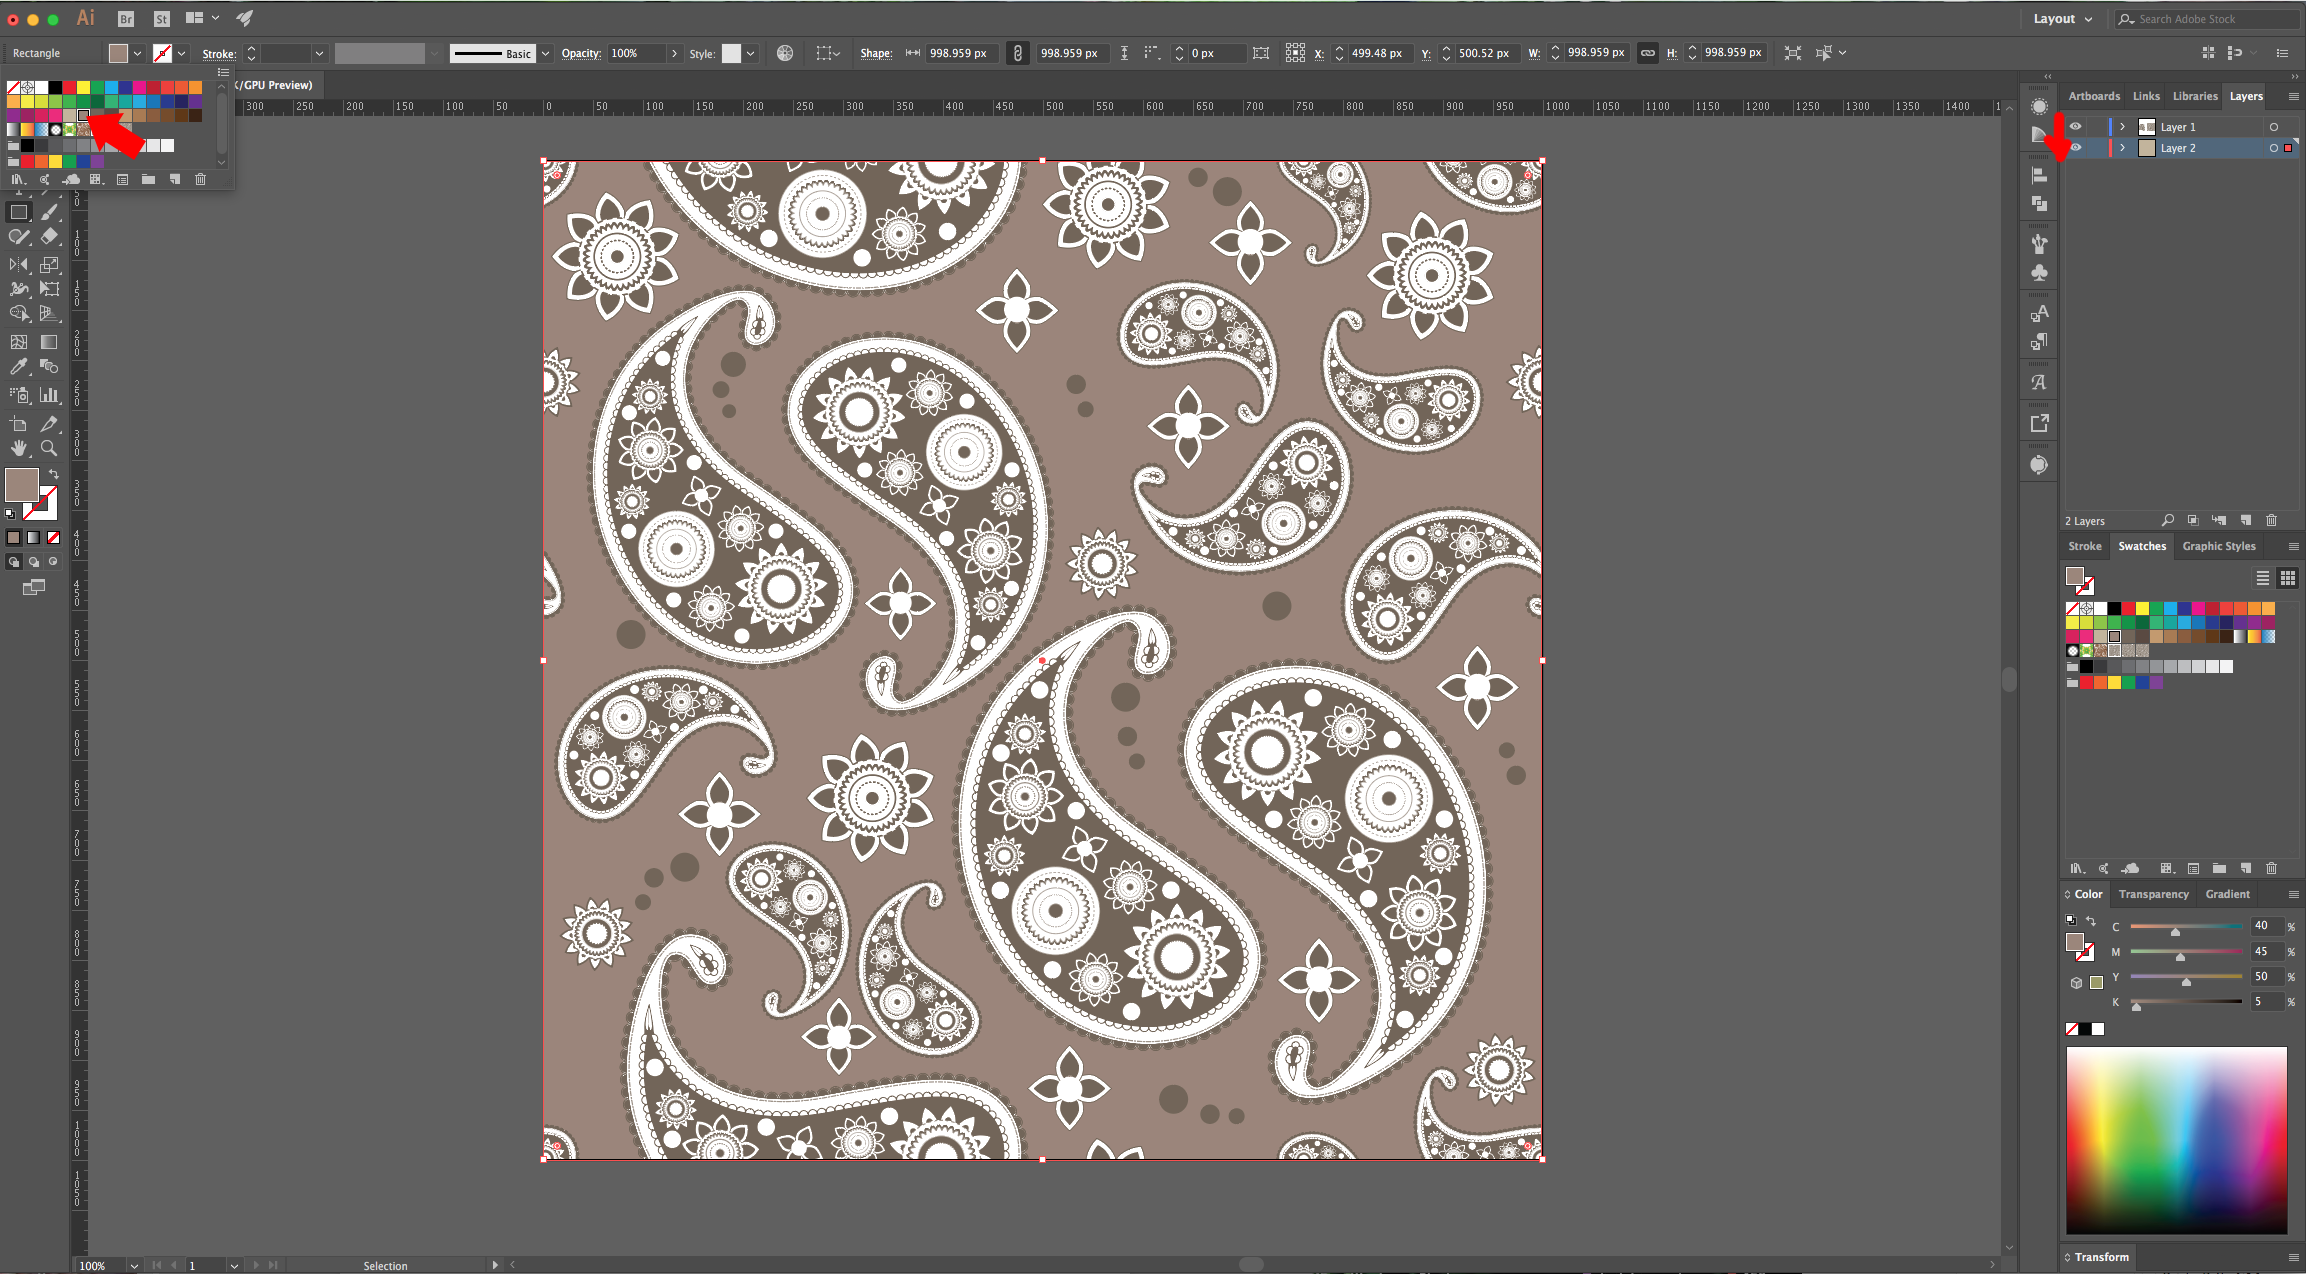
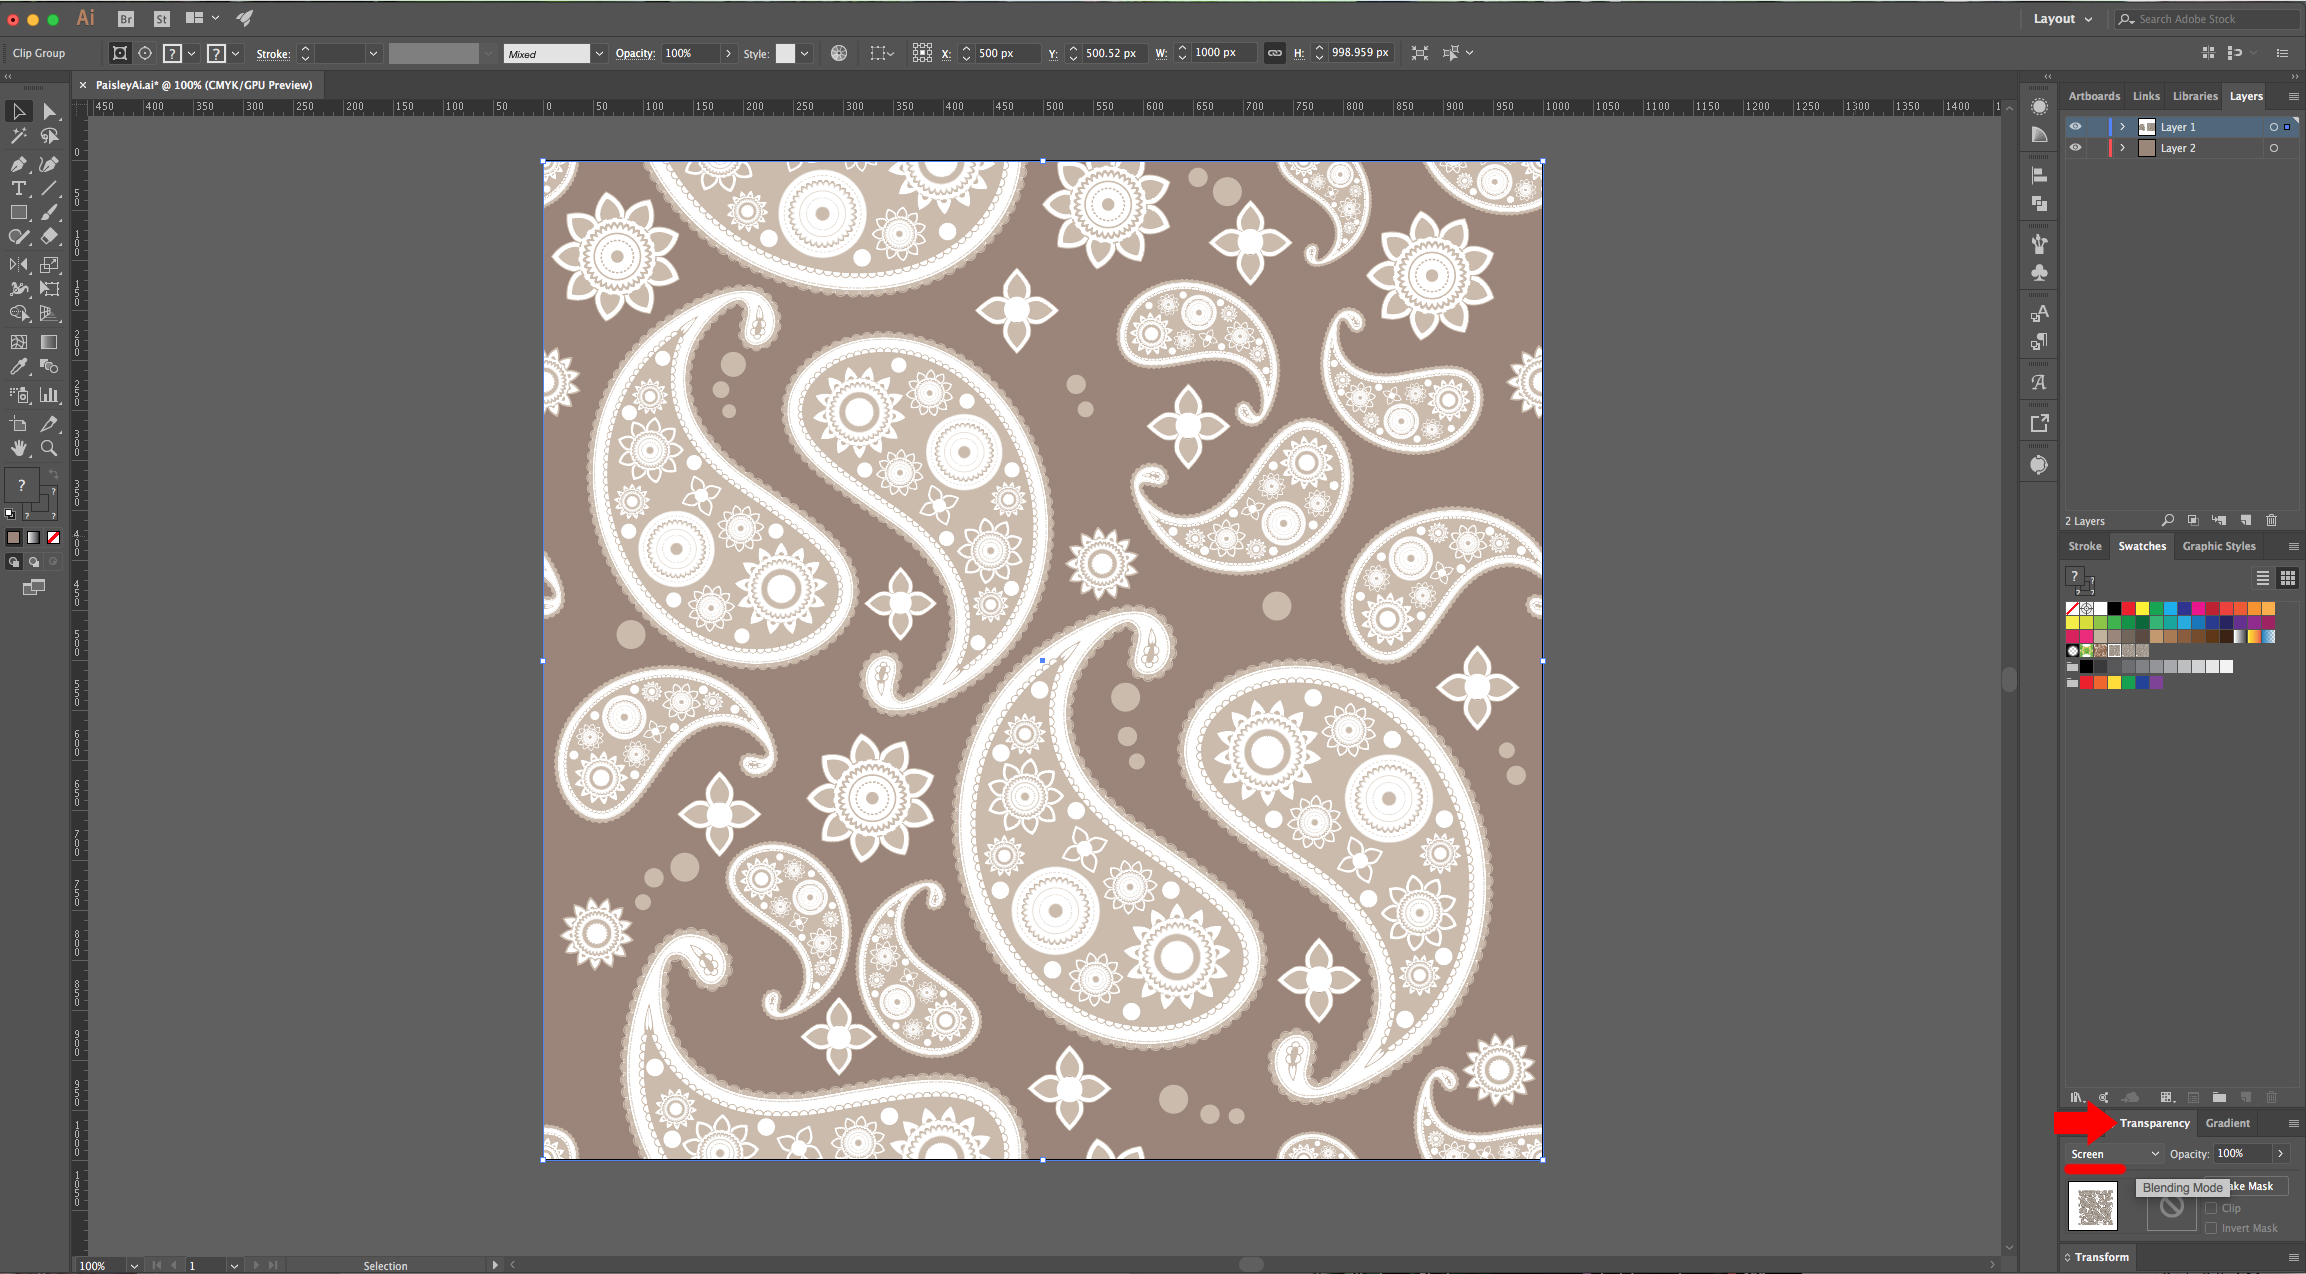
24 - Create a “New Layer” by clicking on the small button at the bottom of the “Layers Panel”, drag your new layer to the bottom, make another rectangle that covers the entire canvas and fill it with the color of your choice. You can also change the “Blending Mode” of your Pattern in the “Transparency Panel”.
2 – Select the “Ellipse Tool” (L) and draw an “Ellipse” inside your document. Select the “Anchor Point Tool” (Shift + C) and click on the top Anchor Point to make the lines straight.
3 – In the “Appearance Panel” click on the “Effects Menu” at the bottom and navigate to Warp > Arc. Use an “Horizontal” Arc with a “Vertical Bend” of 40%. Click “Ok” and go back to the “Arc” Effect, choose “Apply New Effect” in the “Pop Up Window”, and this time use a “Vertical” Arc with a “Vertical Bend” of 50%. Finally, go to Object > Expand Appearance.
4 – Go to Object > Transform > Reflect, use a “Vertical” Axis and a 90° Angle. Click “Copy” instead of “OK”.
5 – Drag your duplicated path to the right while holding the “Shift” key and place it right where your original path ends. Go to Object > Transform > Scale, use a “Uniform” 15% Scale and uncheck the “Scale Strokes & Effects” Box. Position it on top and overlap the two paths a bit.
6 - “Group” them together (Command/Control + G) and center them in your document making sure that “Align to Artboard” is selected. Go to the “Pathfinder Panel” and choose “Unite” to merge the two paths together.
7 – Select the “Smooth Tool” and drag your cursor around the area where the two shapes merged to smooth it out a bit. Then, use the “Direct Selection Tool” (A) to clean up the curves a little more.
8 - Select the “Ellipse Tool” (L), click inside your canvas and choose 150 px for “With” and “Height”, then click “OK”. Go to Object > Transform > Scale and use a “Uniform” 70% Scale, uncheck the “Scale Strokes & Effects” Box and click “Copy” instead of “OK”.
9 - Repeat this as many times as you want and with different “Scale” percentages and for certain circles, go to the “Stoke Panel” and check the “Dashed Line” box, then use a 2 pt dash.
10 – Select the outer circle and go to Object > Path > Add Anchor Points to add a couple of “Anchor Points” to your Path. Repeat a few more times to add more Points, then make another scaled copy (130%) of your circle and give it a 5 pt dash.
11 – Select the second circle counting from the outside going in and in the “Appearance Panel” go to Distort & Transform > Pucker & Bloat. Use a value of 8%.
12 - Make a “Scaled” Copy of this path and make it closer to the next inner circle. You can also add another circle to the outside, feel free to create your own design.
13 - Select the “Ellipse Tool” (L) again, click inside your canvas and choose 100 px for “With” and “Height”, then use the “Rectangle Tool” (M) to create one that covers the lower half of your circle. Select both and in the “Pathfinder Panel” choose “Minus Front” to cut your circle in half.
14 - Create a larger duplicate of this semi-circle but make sure that the bottom line in both is in the same spot, then, “Group” them together (Command/Control + G).
15 – Make another shape by duplicating the last one twice, rotating one of the copies to create a circle and using the “Anchor Point Tool” (Shift + C) in the same way we used it before to create a drop-like path. Then “Merge” both sides to erase the middle line and “Erase” about one quarter of the bottom. You can add other shapes to create a “Petal”. Fill it with the color of your choice.
16 – Create other “Shapes” to be used as decoration. Resize them into a big enough size. Select the first one, go to the “Brushes Panel” and click in the Top-Right corner to open the Menu. Choose “New Brush”, then check the “Pattern Brush” button and use the following values, then click “OK”. Repeat for each shape.
17 – Select your first shape, go to Object > Path > Offset Path and use a 10 Pixel value. Then, create a second one with a -20 Pixel value. Give the middle “Path” a “Dashed Line” with the following values: dash: 8 pt, gap: 2 pt, dash: 3 pt, gap: 2 pt.
18 - You will notice that the inner path in the mall curved shape in the right side is cut in half. To fix it, use the “Delete Anchor Point Tool” (-) in some of the point, then use the “Direct Selection Tool” (A) to fix the shape. You may need to click the small arrow icon on the Top Menu to exit the editing mode.
19 – Fill some of your shapes with the color of your choice and change the “Stroke” color too if you like. Use the different “Brushes” you created before as “Stroke” to give your shapes some cool effects. Remember that you can change the “Stroke Weight” (we used 0.5 pt in one and 0.35 in another).
20 - Add the “Petal” brushes to the “Circles” to create Flowers. Then, “Scale” the flowers making sure that “Scale Strokes & Effects” is selected this time.
21 – Add “Flowers” in different sizes and other shapes too, “Group” everything together once you are done and reproduce the “Paisley” in several sizes and rotations to create a “Pattern”. Place a “Reflected” copy of everything in the other to make sure that if you use your design as a “Pattern” it will work perfectly.
22 - Once you are done, select the “Rectangle Tool” (M), make sure you are using “None” as “Fill” and “Stroke” color and click on the Top-left corner of your document create a rectangle covering the entire canvas (1000 x 1000 Pixels). Select everything, right-click on top and choose “Make Clipping Mask”.
23 – With your Path selected, go to Object > Pattern > Make, click “Ok” in the following Window and check the “Size Tile to Art” box. Name your “Pattern” and check if there are any corrections you need to make. Once you are happy, click on “Done” in the upper Menu. Your Pattern should be saved in the “Swatches Panel”.
24 - Create a “New Layer” by clicking on the small button at the bottom of the “Layers Panel”, drag your new layer to the bottom, make another rectangle that covers the entire canvas and fill it with the color of your choice. You can also change the “Blending Mode” of your Pattern in the “Transparency Panel”.
by @lornacane


