- By Design Bundles
- 5 Mins
- Cricut Tutorials
How to Use the Current Color Feature in Cricut Design
I will be using a beautiful chasing rainbow SVG as well as a rainbow unicorn clipart. To begin, open Cricut Design Space and upload the SVGs you will be using. We have an easy to follow guide on uploading SVGs to Cricut if needed.
Step 1- Ungroup and Select layer
To start, select the SVG file and click Ungroup on top of the layers panel. Your design will now be separated and each piece will be on its own layer.
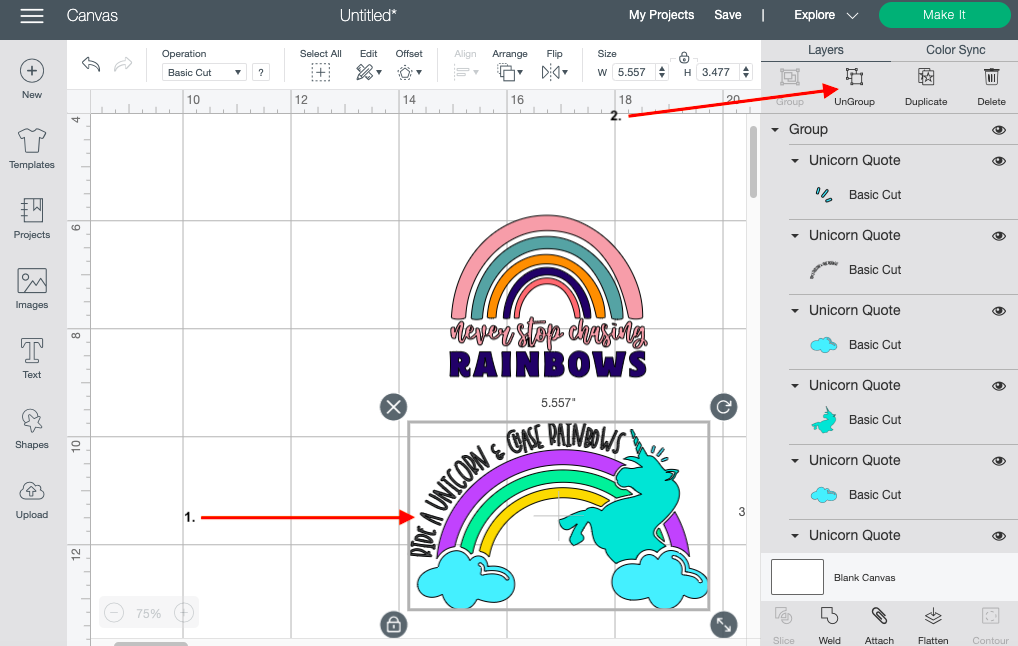
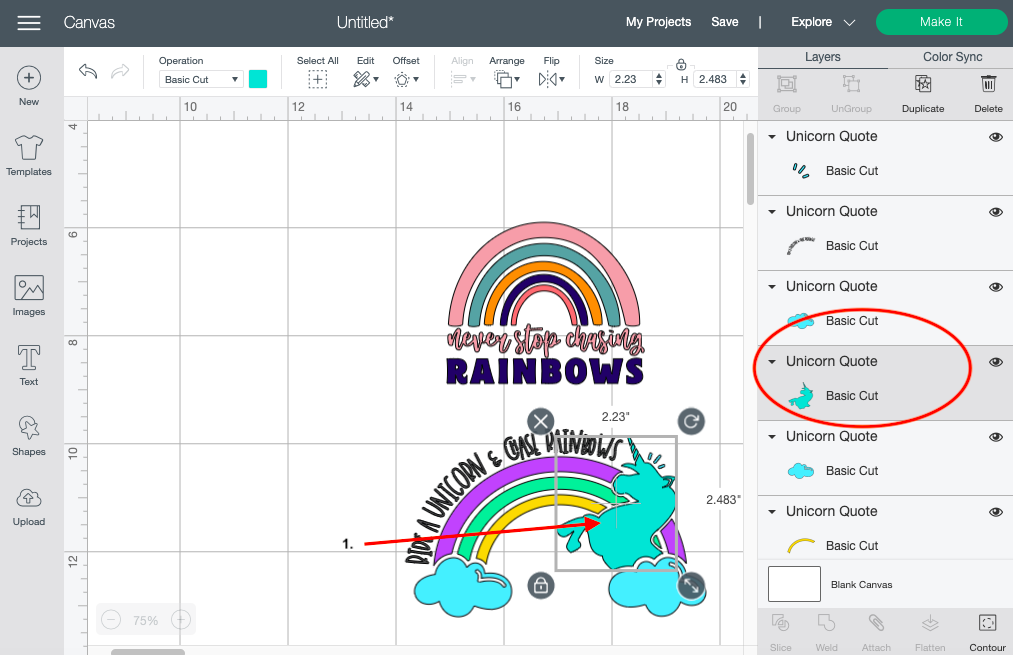
Next, select the layer you would like to recolor. You can do this by selecting the item right from the canvas or by clicking on the individual layer under the layers panel.
Step 2 - Use the Color Swatch Tool
You can recolor your artwork by using the swatch tool or the color sync icon. We’ll go over both of them today.
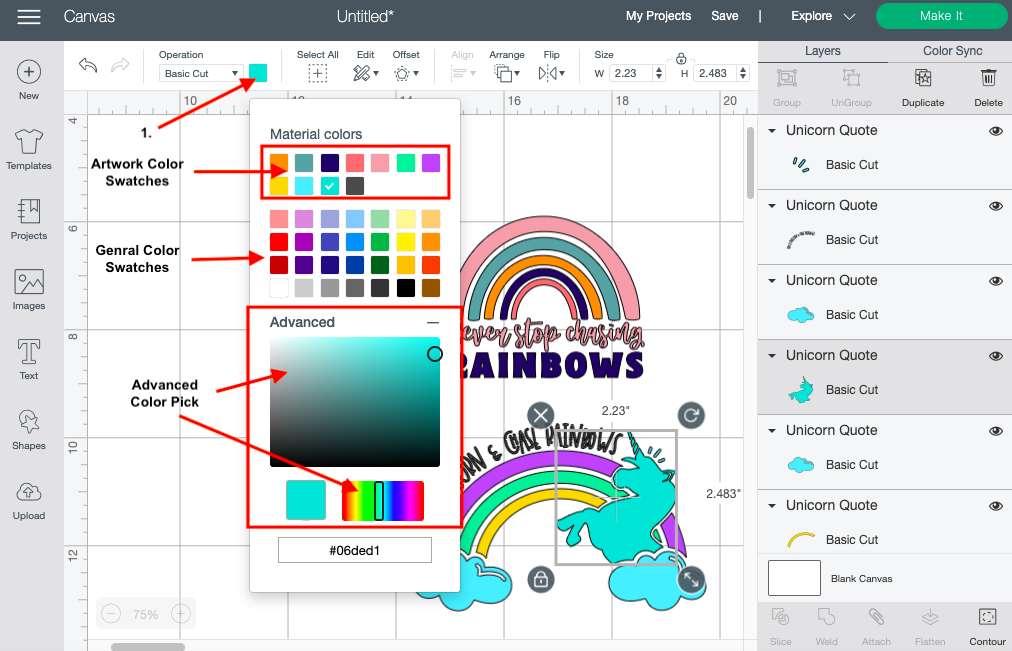
Open the color swatch tool in the upper toolbar. A small window will appear containing your color swatches. The first set of swatches under Material Colors are colors pulled directly from designs on the canvas page. This will include the color palettes from each artwork. The swatches beneath it are your general colors, including black, white, blues, greens, and more.
You can click on these swatches anytime to change the color of your object. Below the general color swatches are the Advanced color settings. Open the settings by clicking the plus symbol across from it. Once you do so, you can click within both boxes under the advance option to change the colors.
Step 3 - Use the Color Sync tool
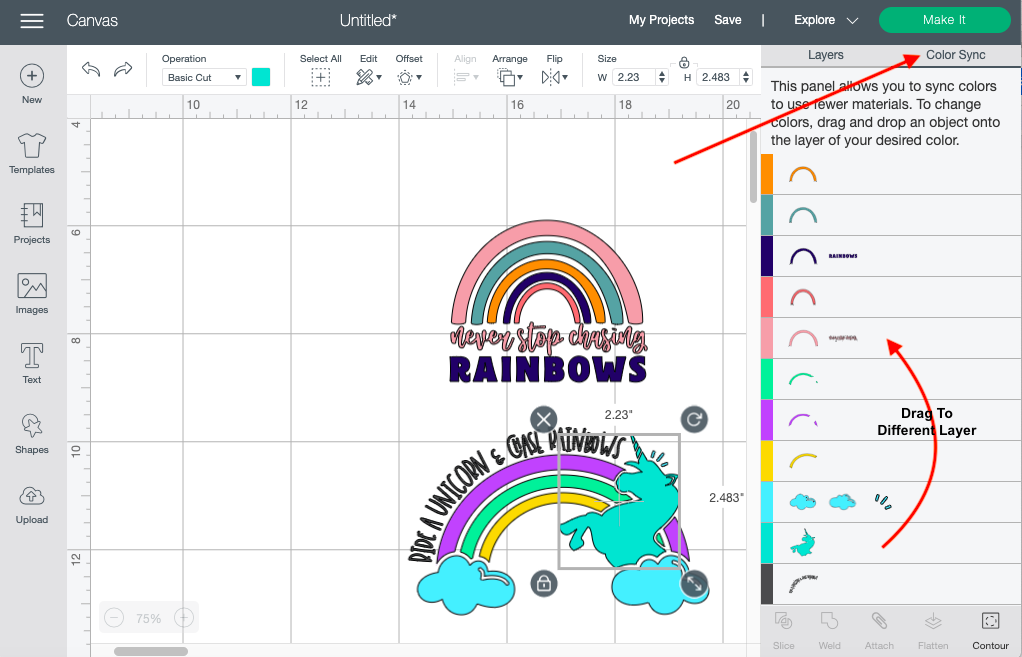
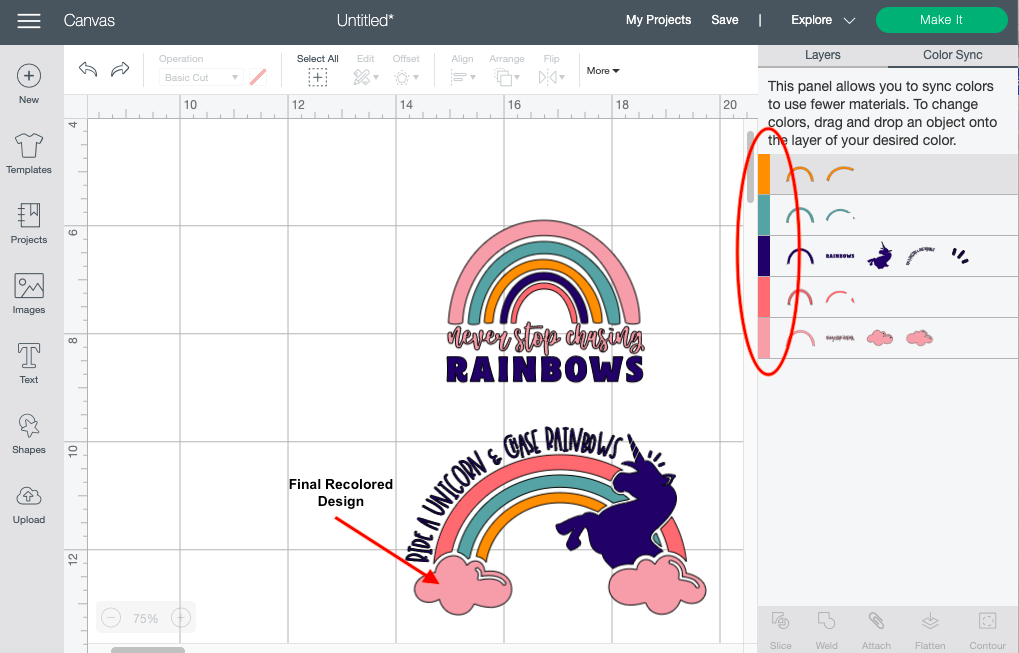
Next, we will learn how to use the color sync tool. This is an easy way to recolor individual layers using your artwork color palette. Click on the Color sync icon near the top of your screen. You will notice that the color sync panel looks similar to your layers panel. The only difference is that each layer is now organized by color.
You can easily change the object's color by selecting it and dragging it to another color layer. Using the color sync tool is an easy way to change the colors quickly when working with multiple designs and layers.
Recoloring your design in Cricut Design Space is really that easy and quick.
If you liked this tutorial make sure to check out our guides on creating a shadow, using the score tool and creating a layered image in Design Space.
6 Related Cricut Tutorials
In today's tutorial we will learn how to use the Group hiding feature in Cricut Design Space. This feature is a great tool to use when you are working with multiple projects at one time. It will allow you to quickly remove items off the canvas screen without actually deleting ...
1- Open SCAL4. Click on the Trace icon.2- The Trace Image window will appear. Click on Choose an image.3- Select your file. I am using pineapple SVG monograms from Design Bundles.4- Your file will appear in the preview window.5- In the drop-down box, select Color layers. ...
1- Log into Cricut Design Space. Click on new project. 2- Click on Upload. 3- Click on upload photo. 4- Click on Browse. 5- Select your mock up. I am using Business Card Mockup from Design Bundles. 6- Click the simple image type. Click continue. 7- Select the ...
Follow our easy to use tutorial for using Font Glyphs on the iPad with the Cricut Design Space app.
1- Open Cricut Design Space. Click on new project.2- Select the text icon.3- Type your text.4- When you type your text and select it, the text edit panel will automatically appear.Click on the font drop down box.5- In the font drop down box there is ...
Cricut Design features a rotation function that is a great tool for creating designs. The feature can rotate objects every 22.5 degrees with precise positioning each time. This can be essential when you want to keep your design elements consistent. In this tutorial we will show you how to use the ...

 All your Font Needs


