
Decorated Egg in Illustrator 3D and Flat
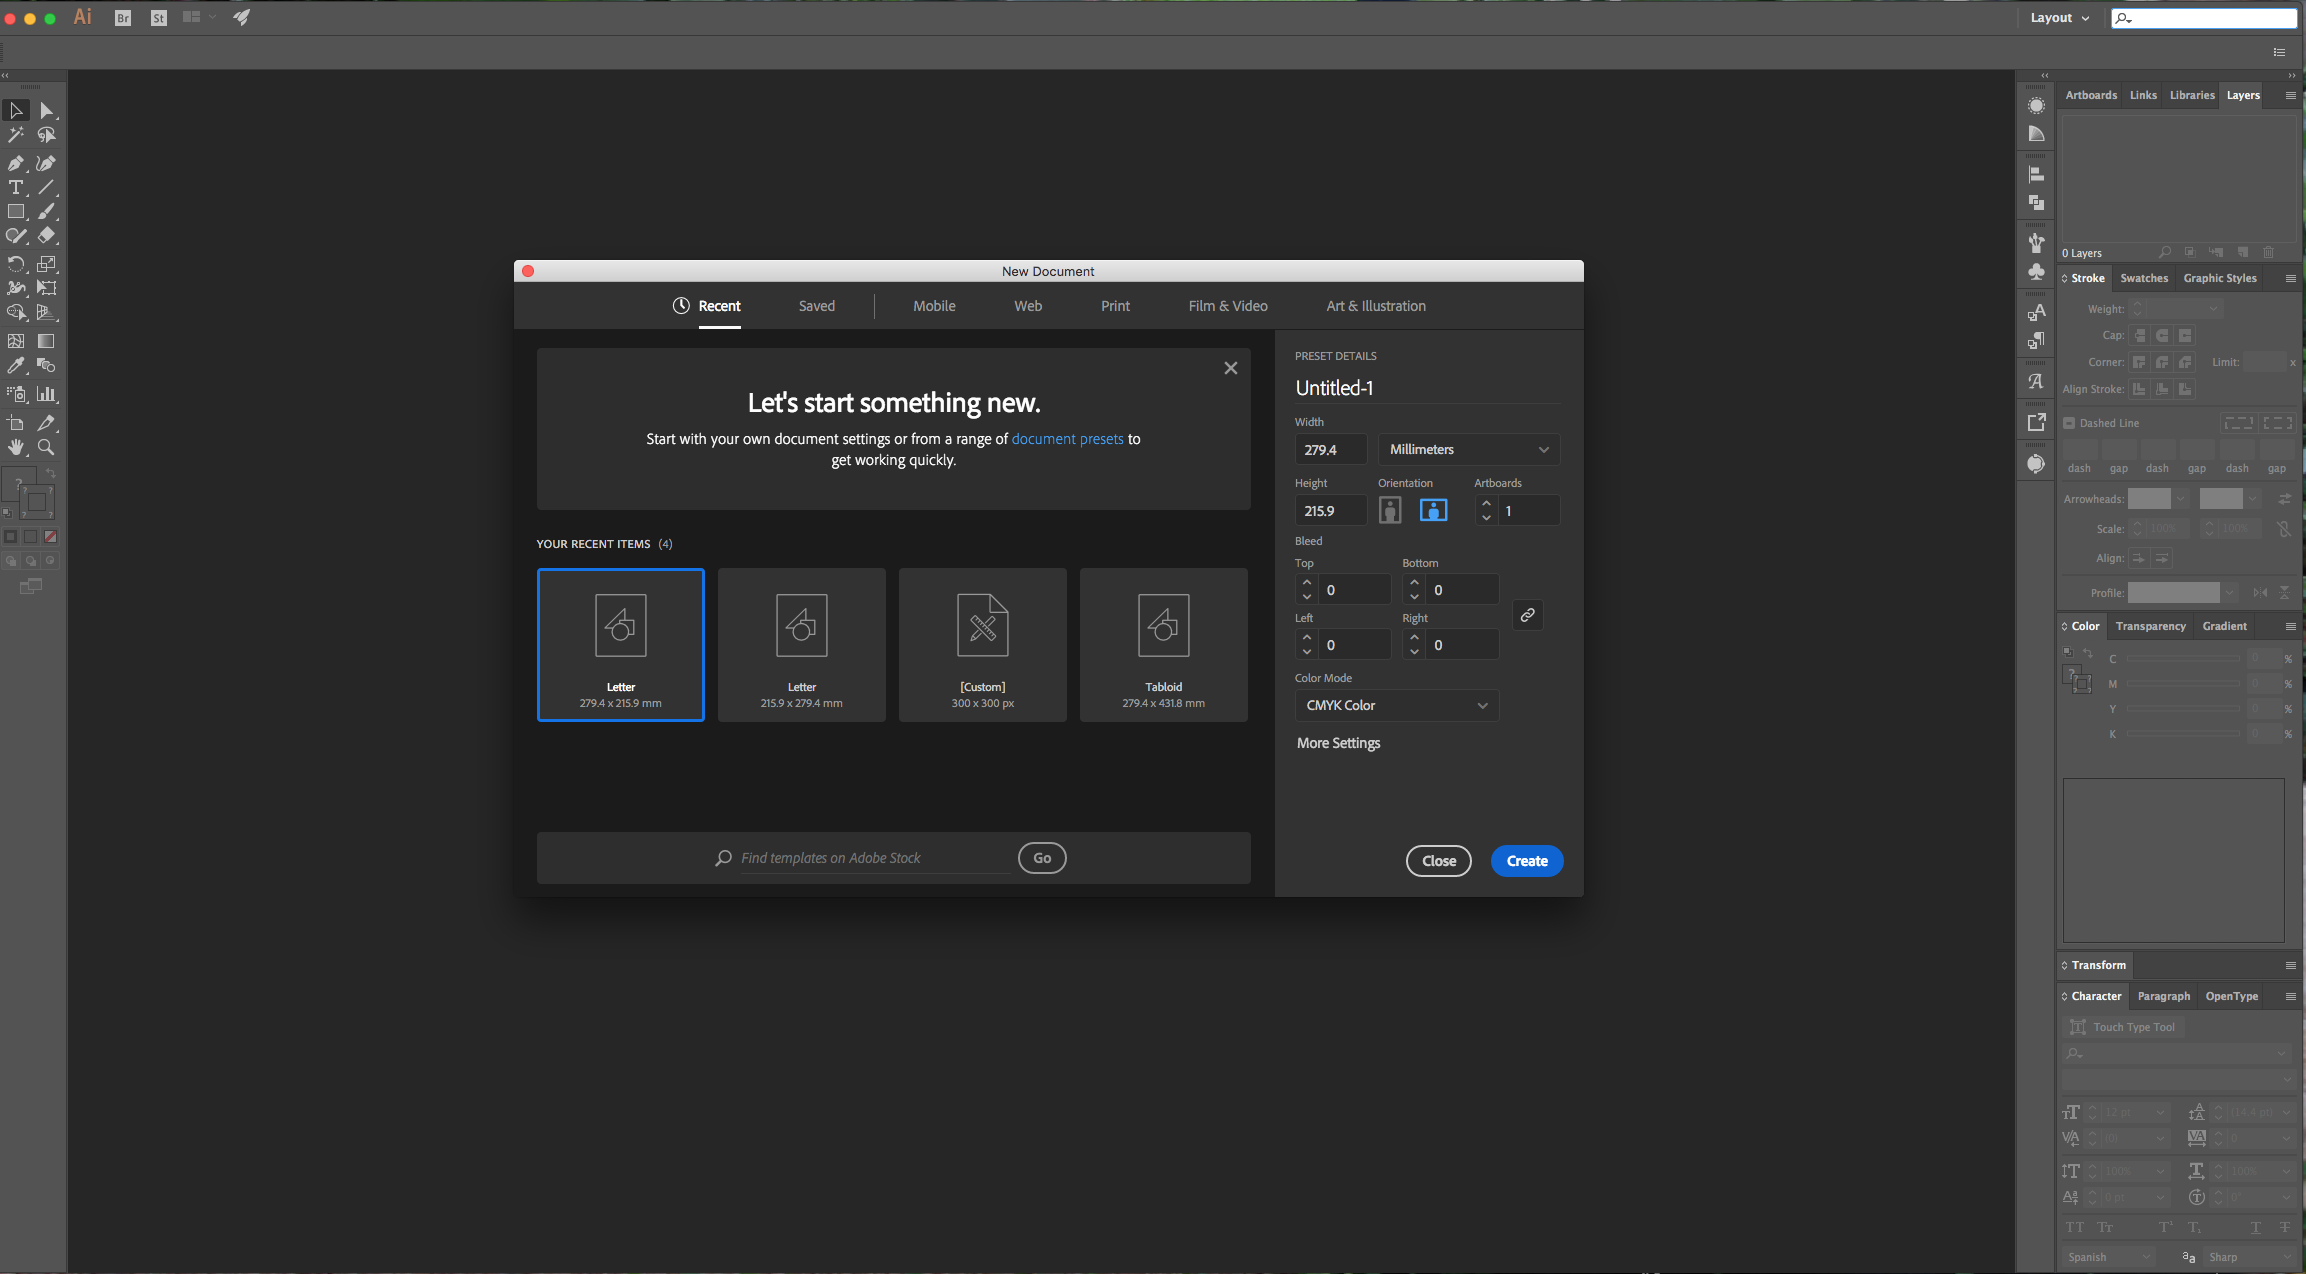
1 - In Illustrator, create a “New Document”.
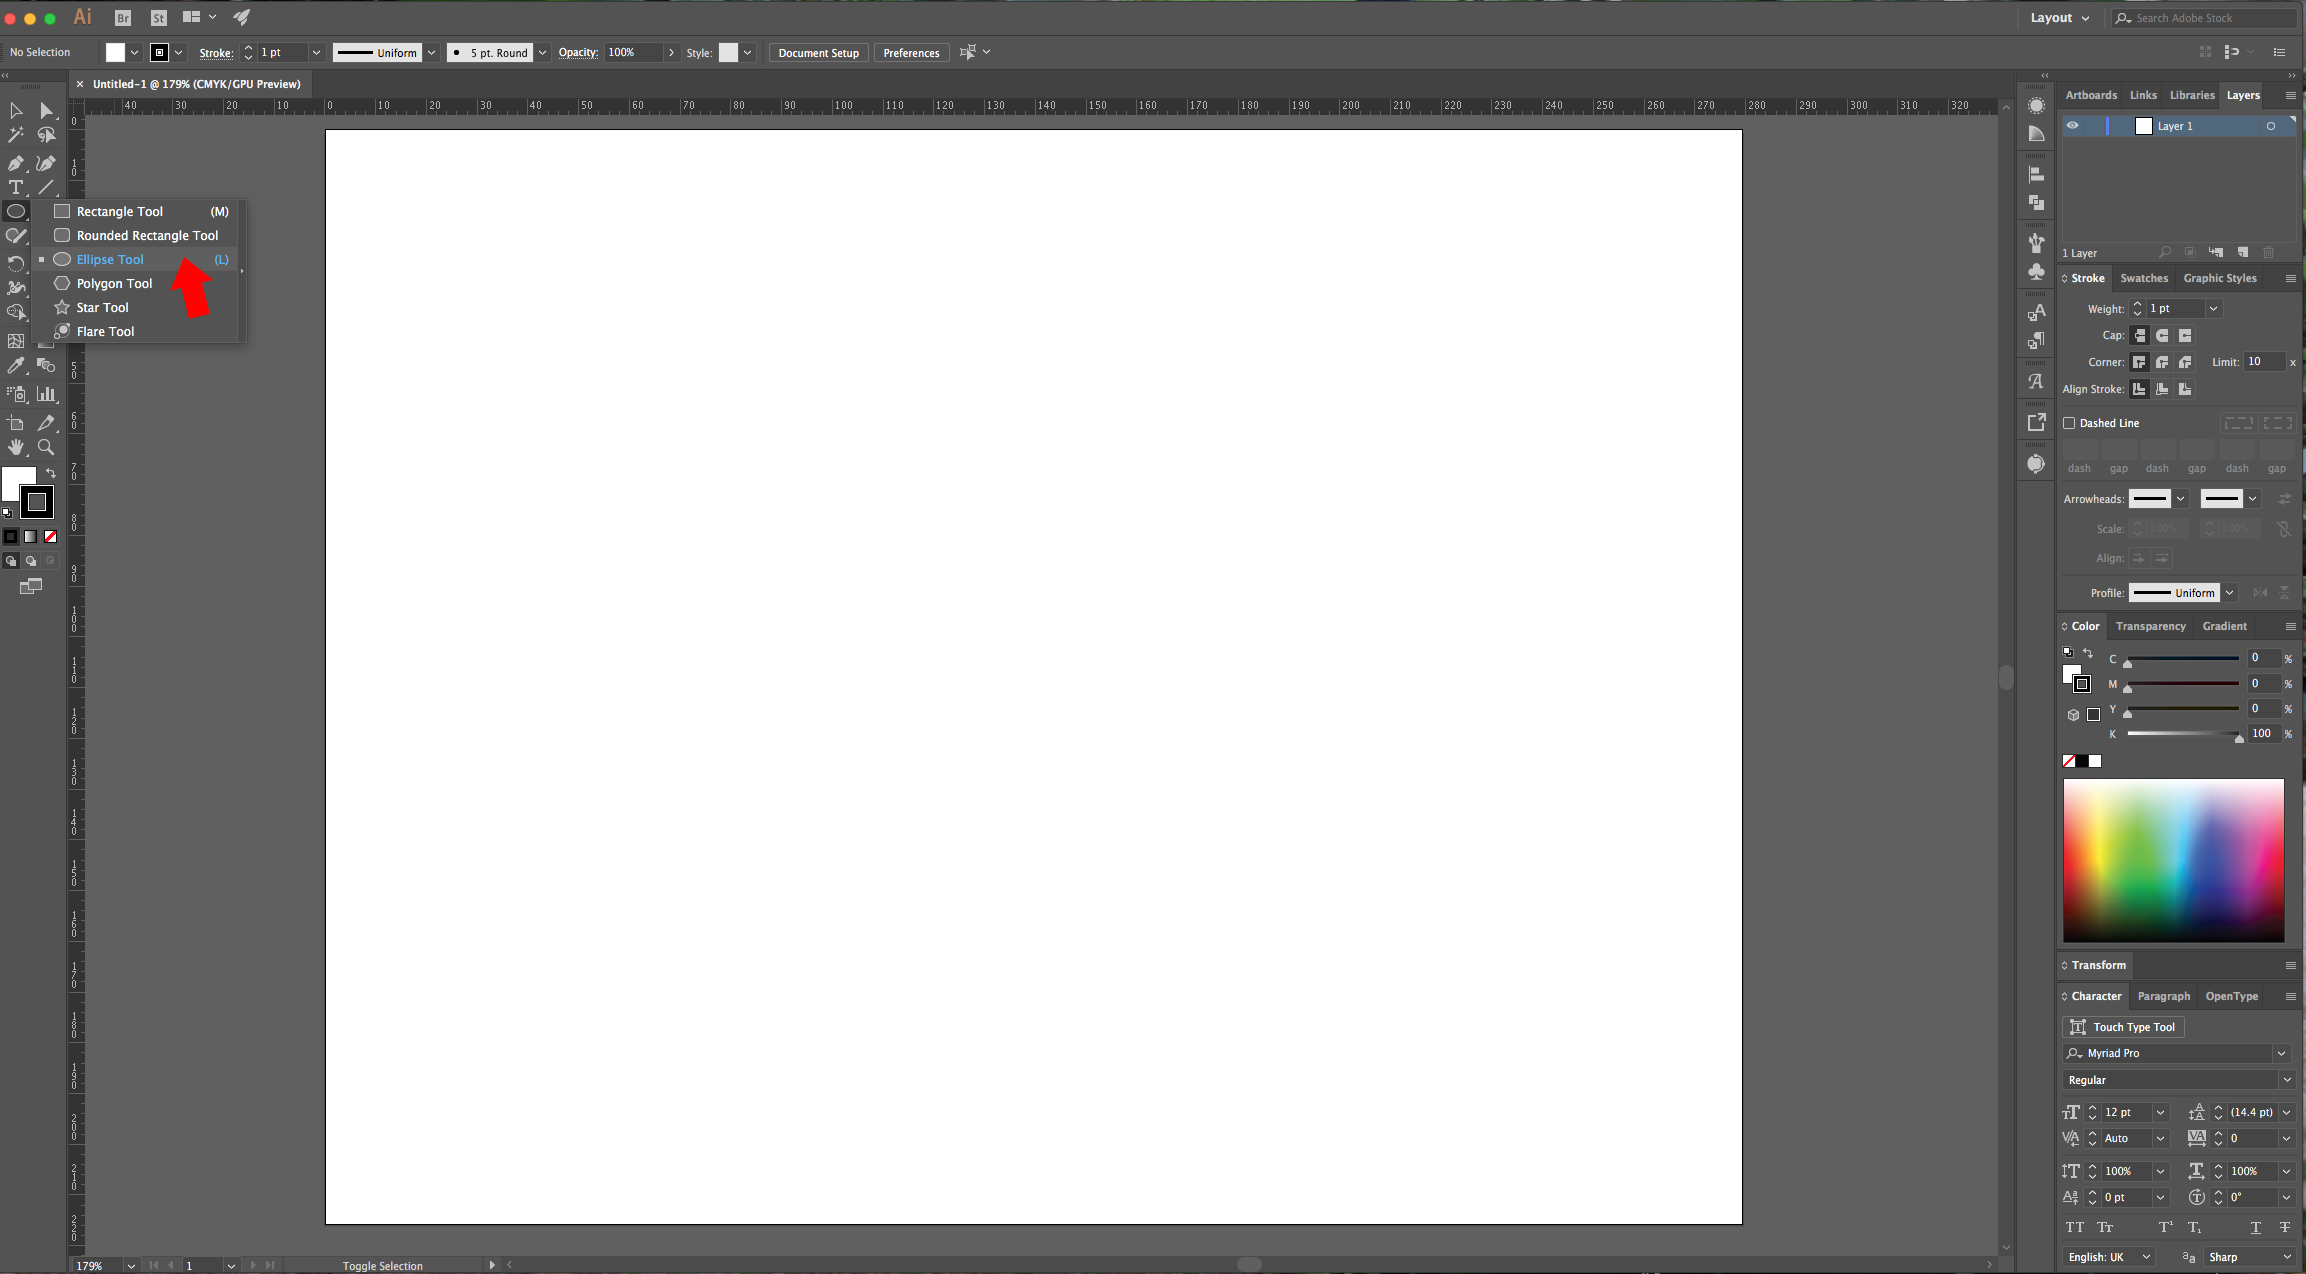
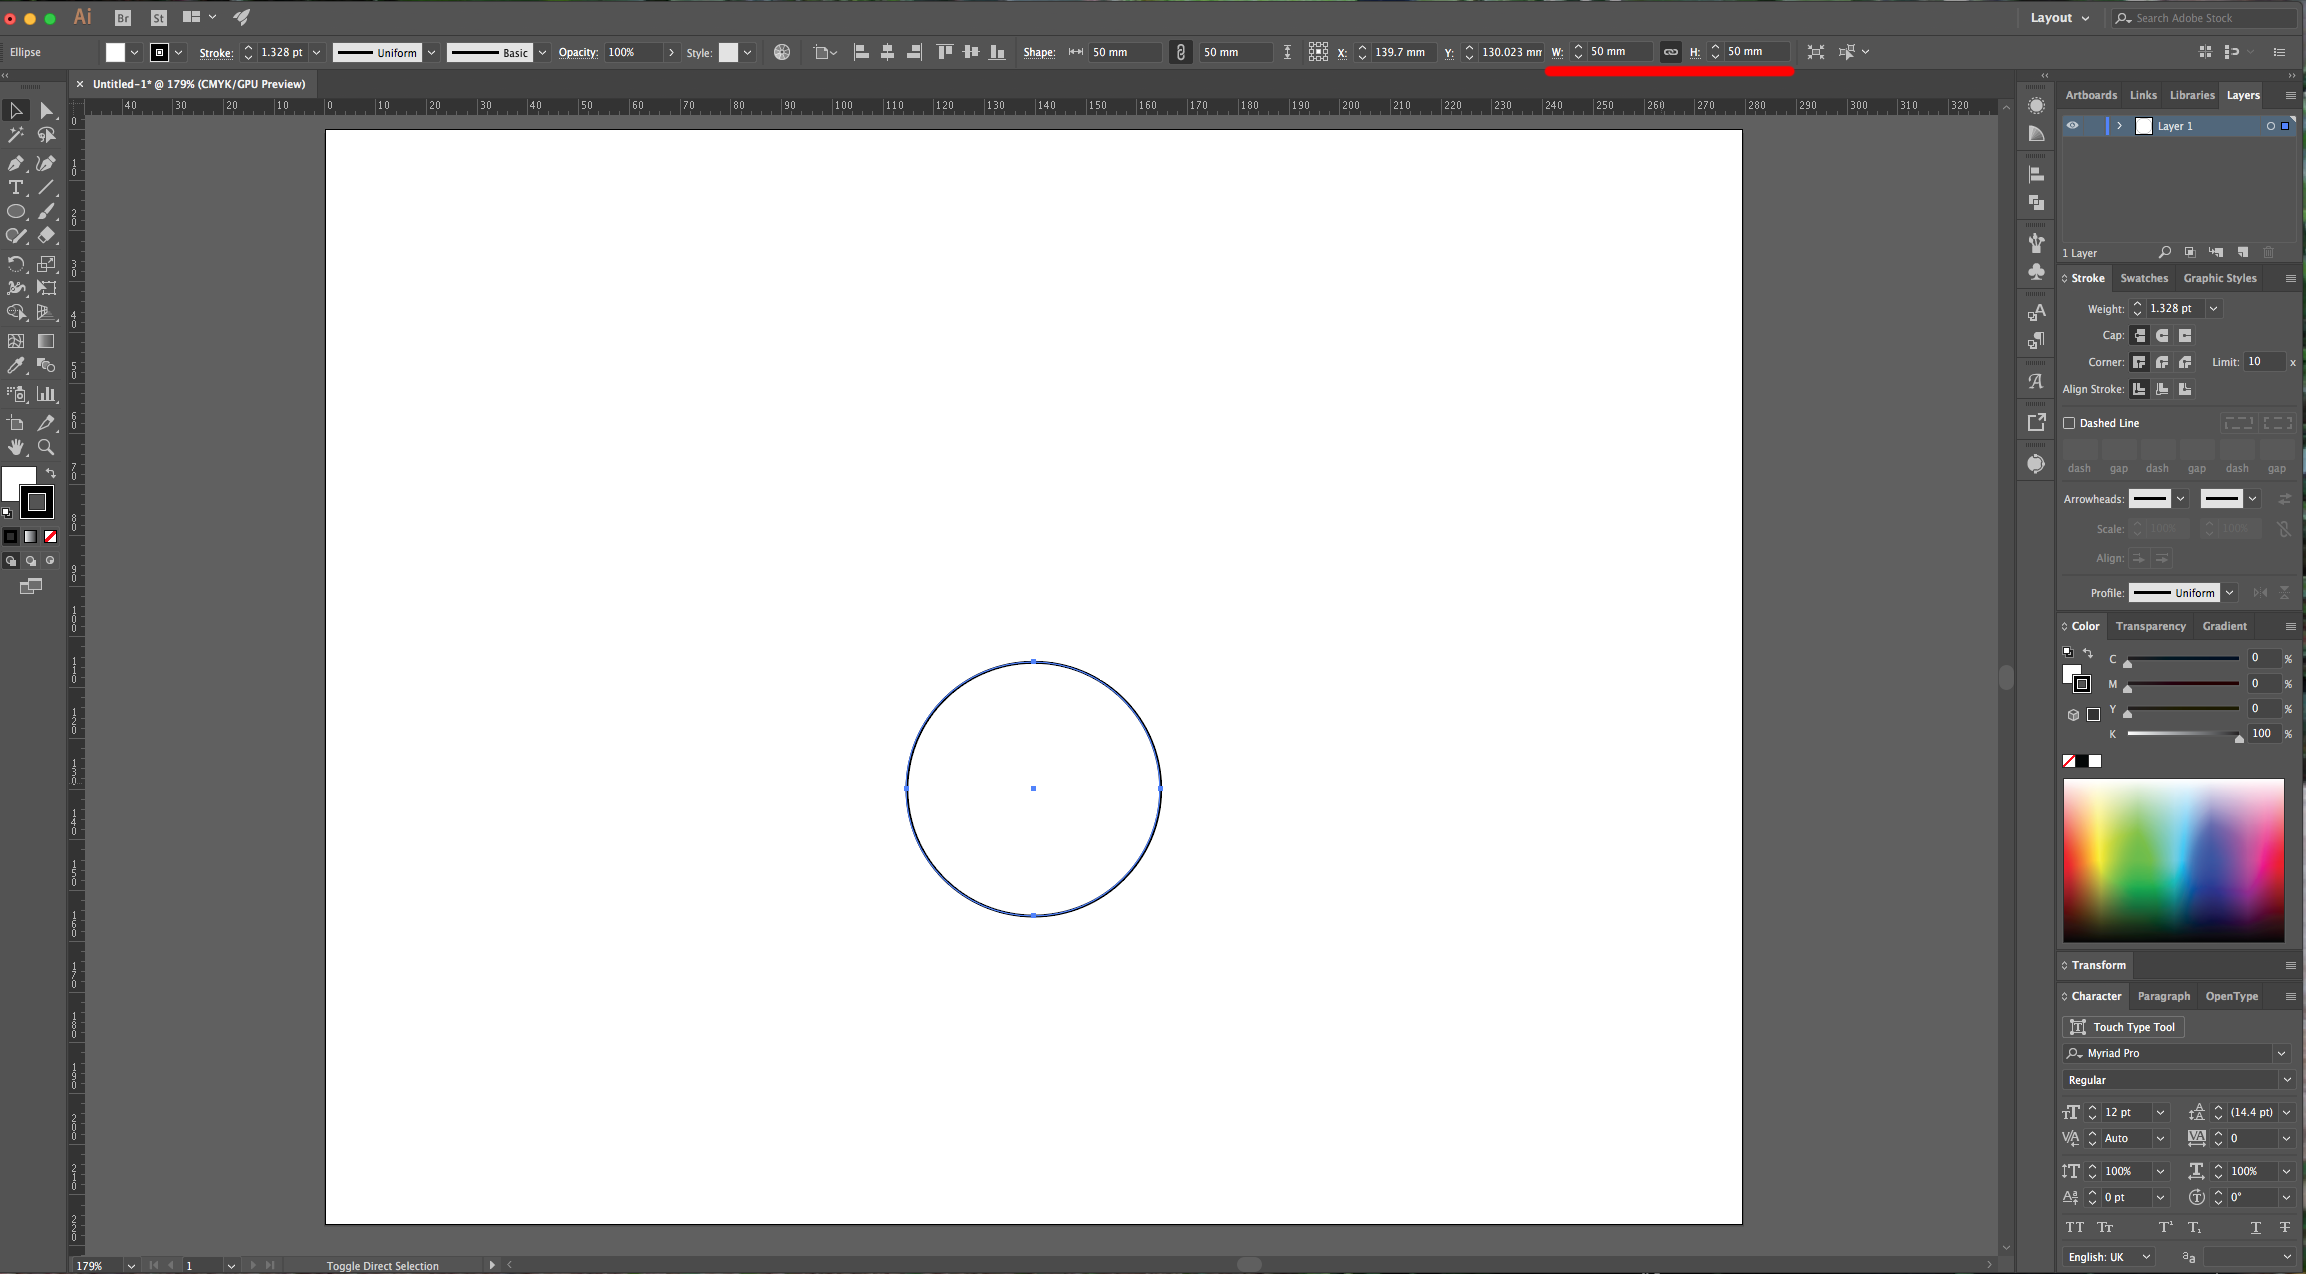
2 - Select the “Ellipse Tool” (L) and to draw a circle with a 5mm circumference approximately.
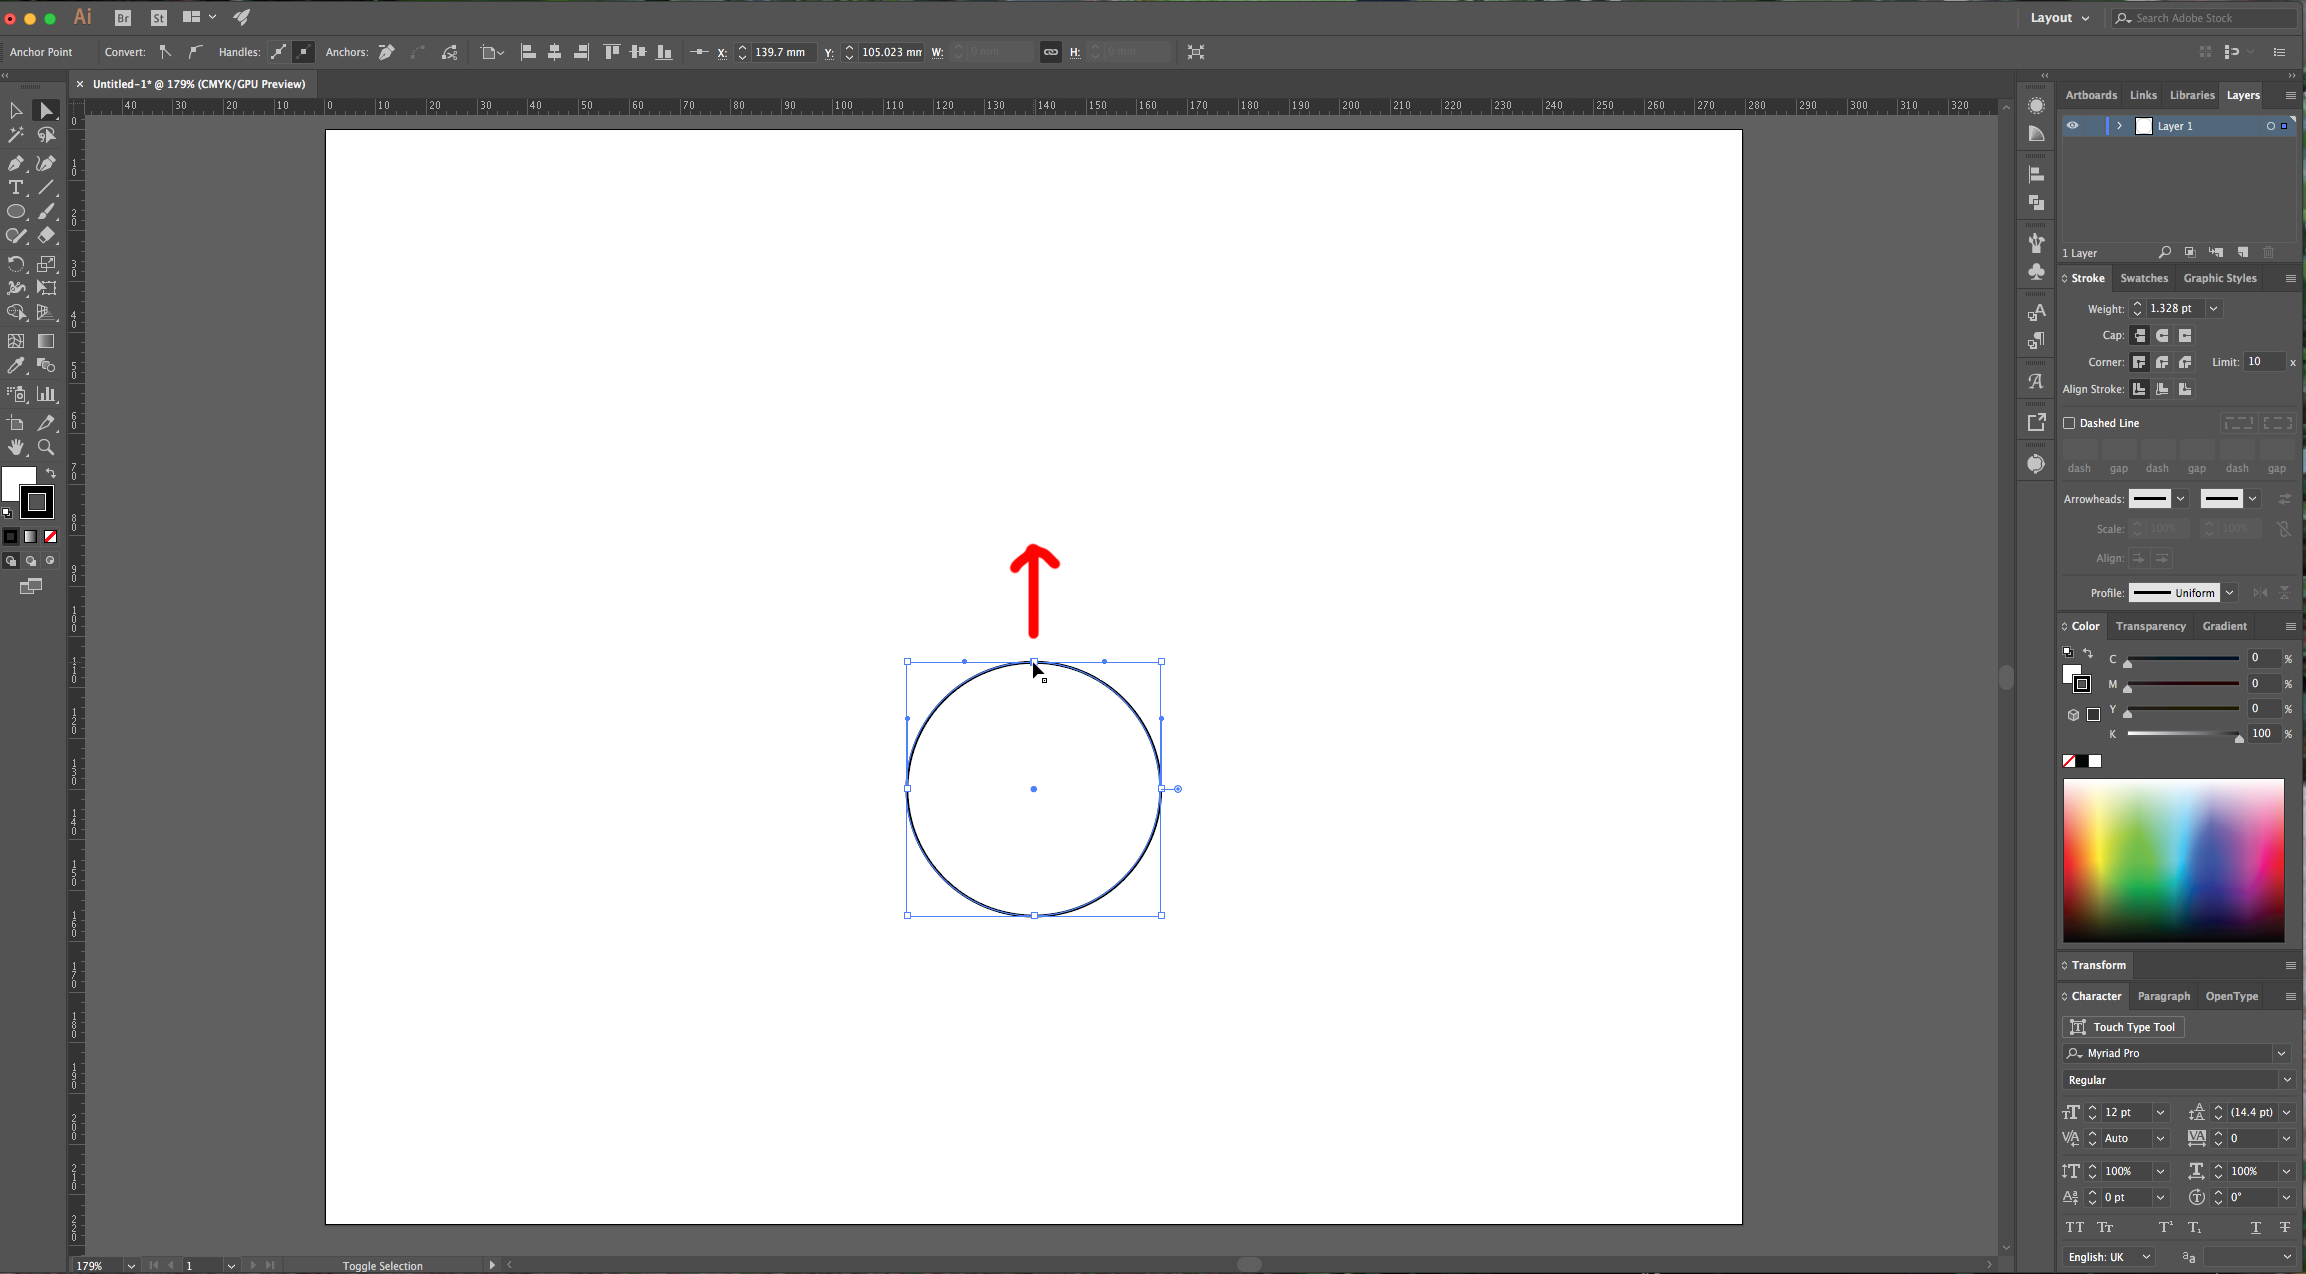
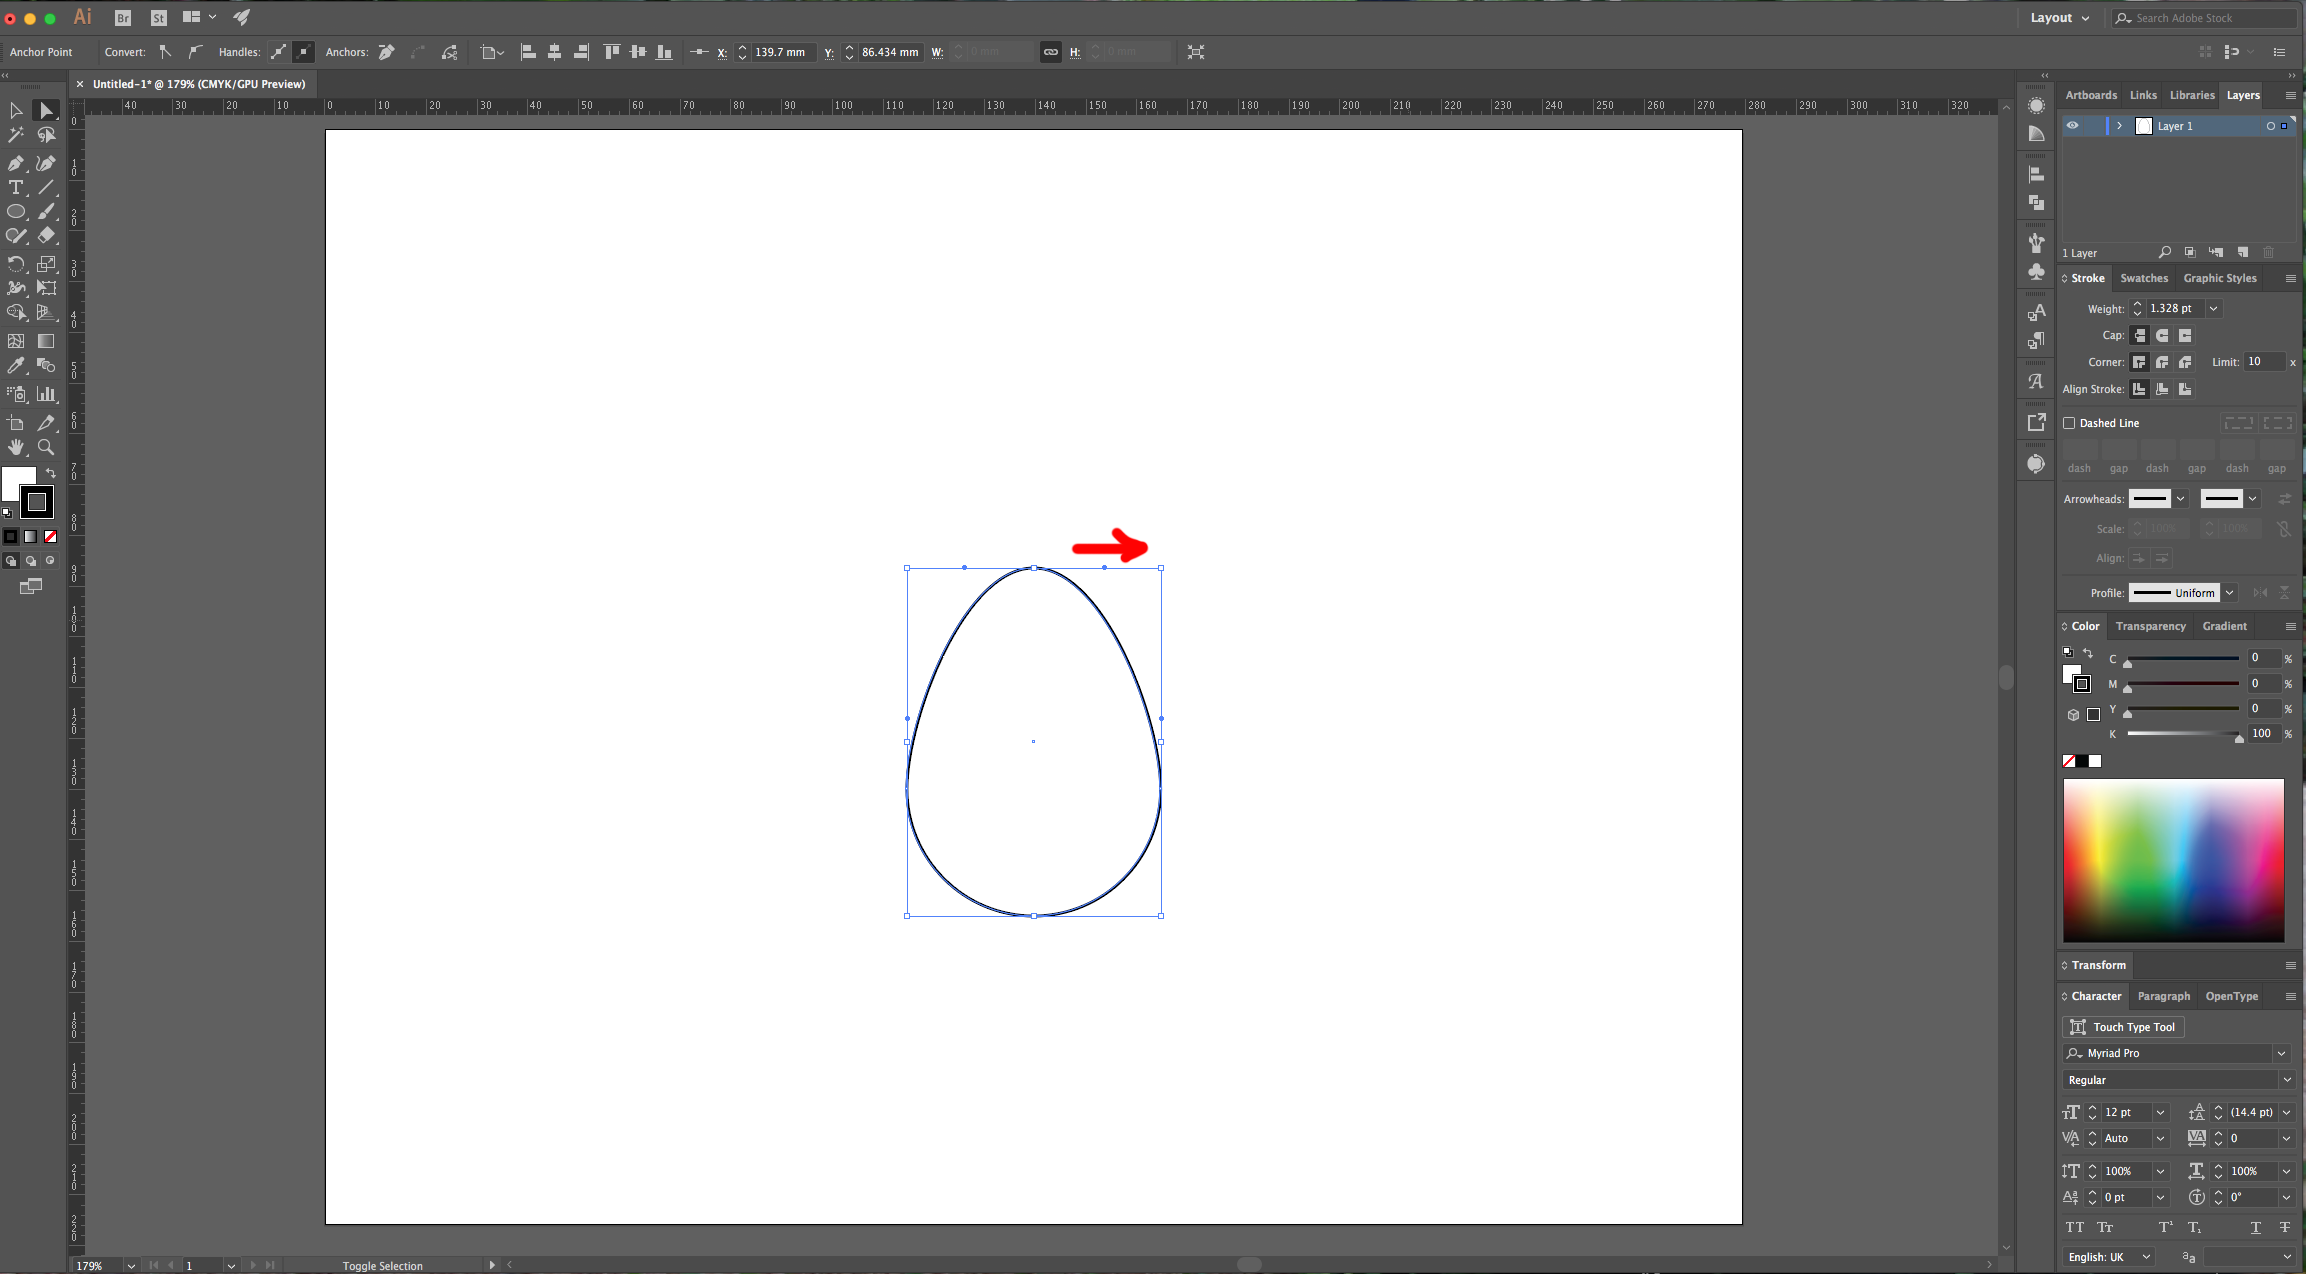
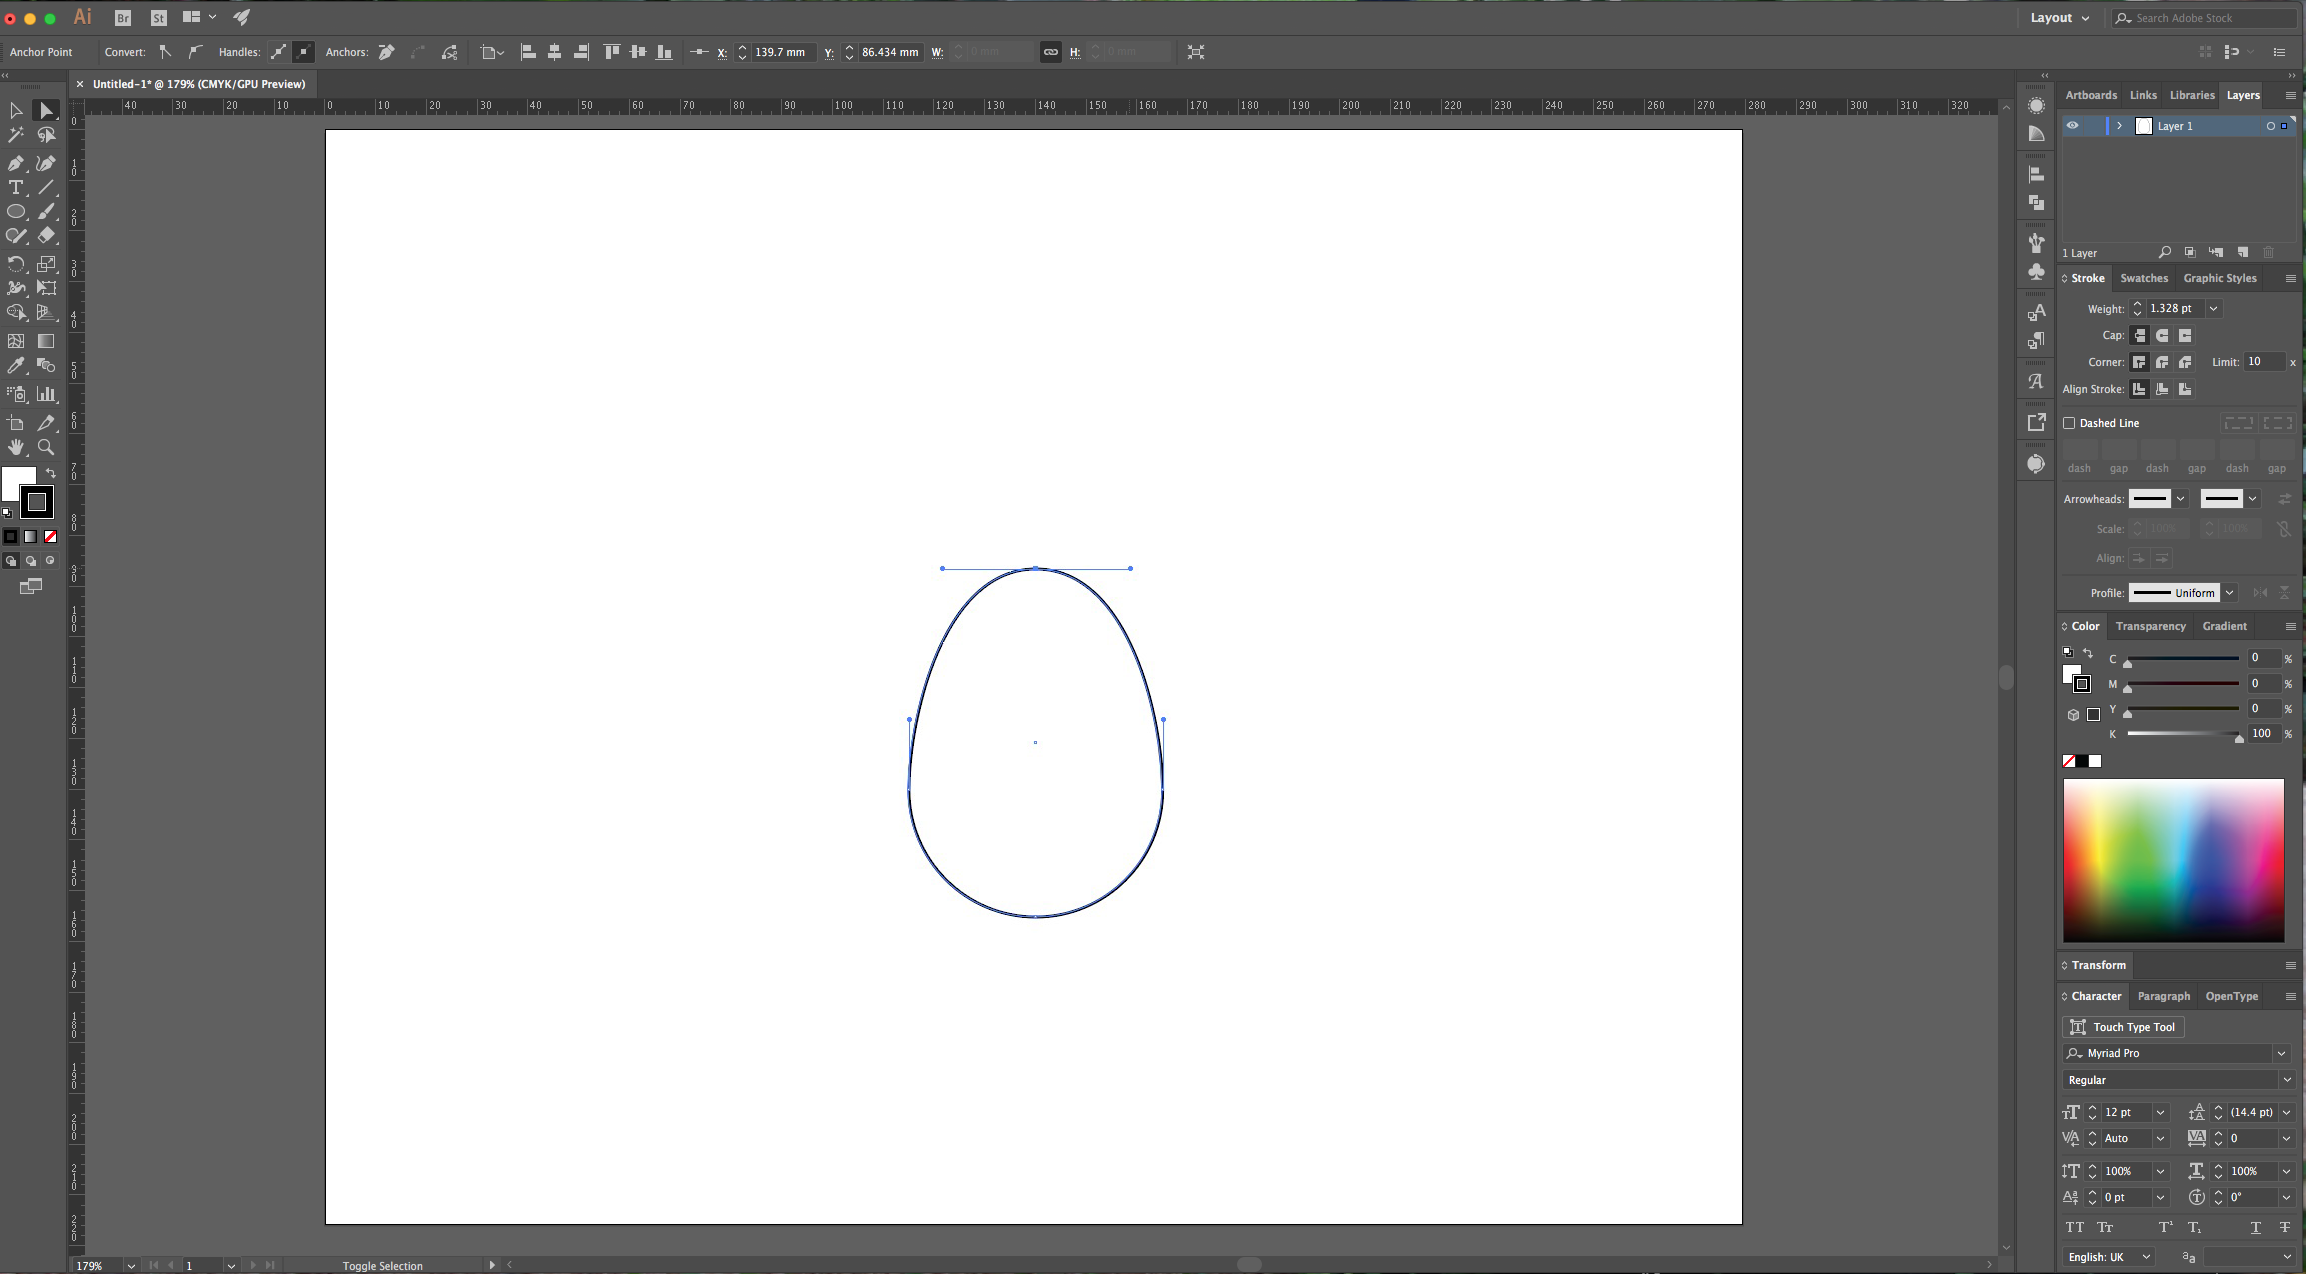
3 - With the “Direct Selection Tool” (A) click on the Top “Anchor Point” and hit the “Up” key until you are satisfied with its position. If you want to fix the shape a bit, select the “Handles” on the sides of the “Anchor Point” and pull them (Holding the “Shift” key) to modify the curves and make a more realistic “Egg” shape.

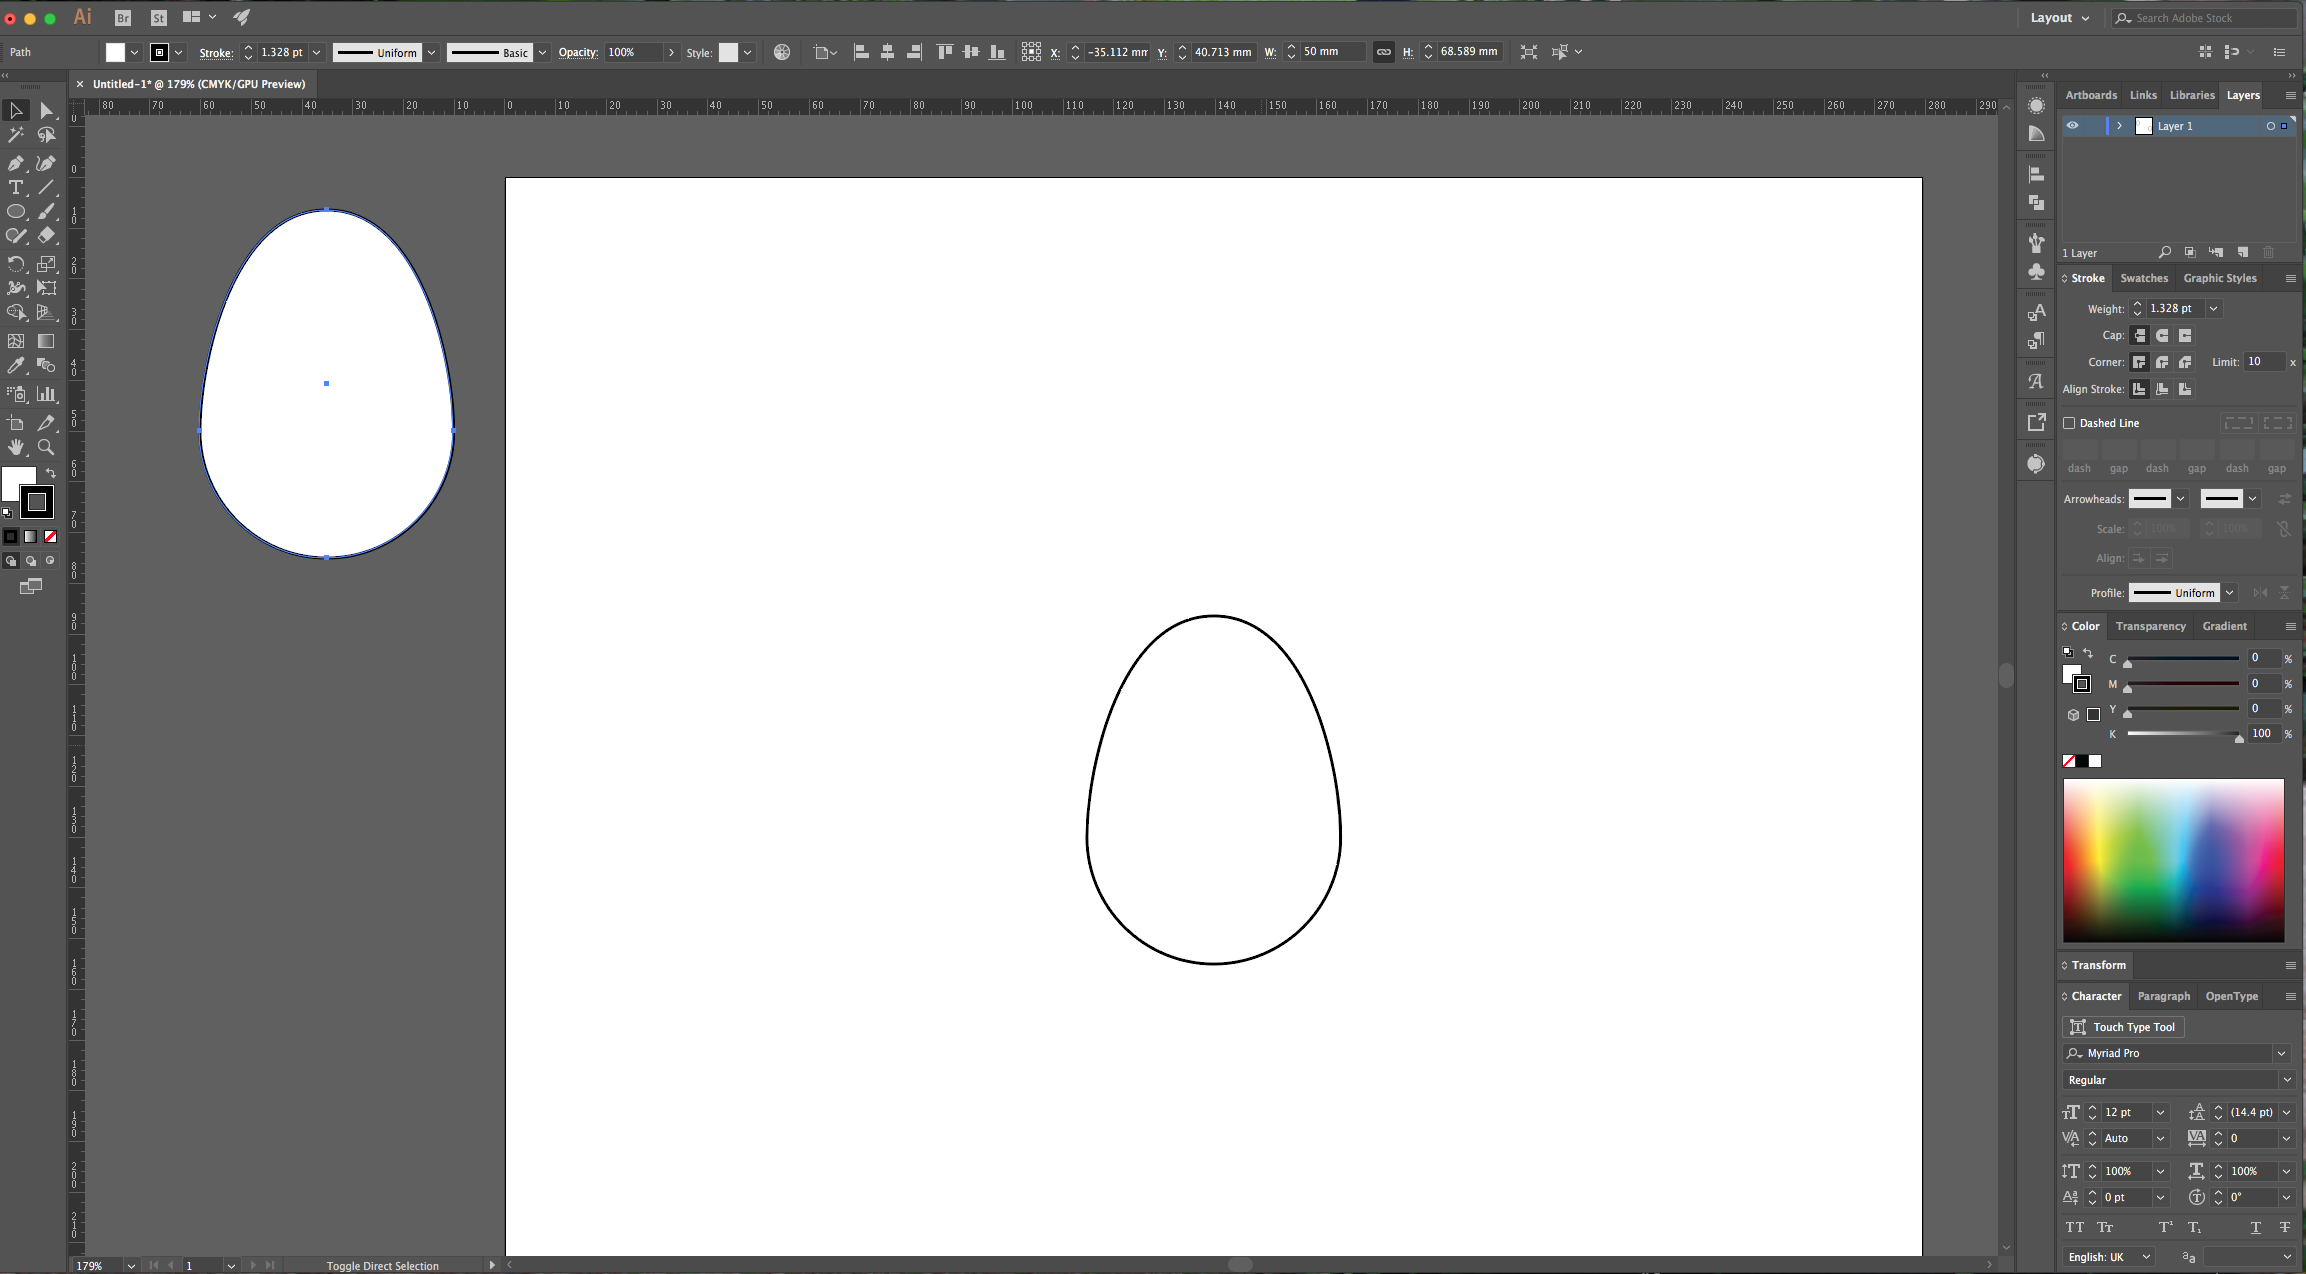
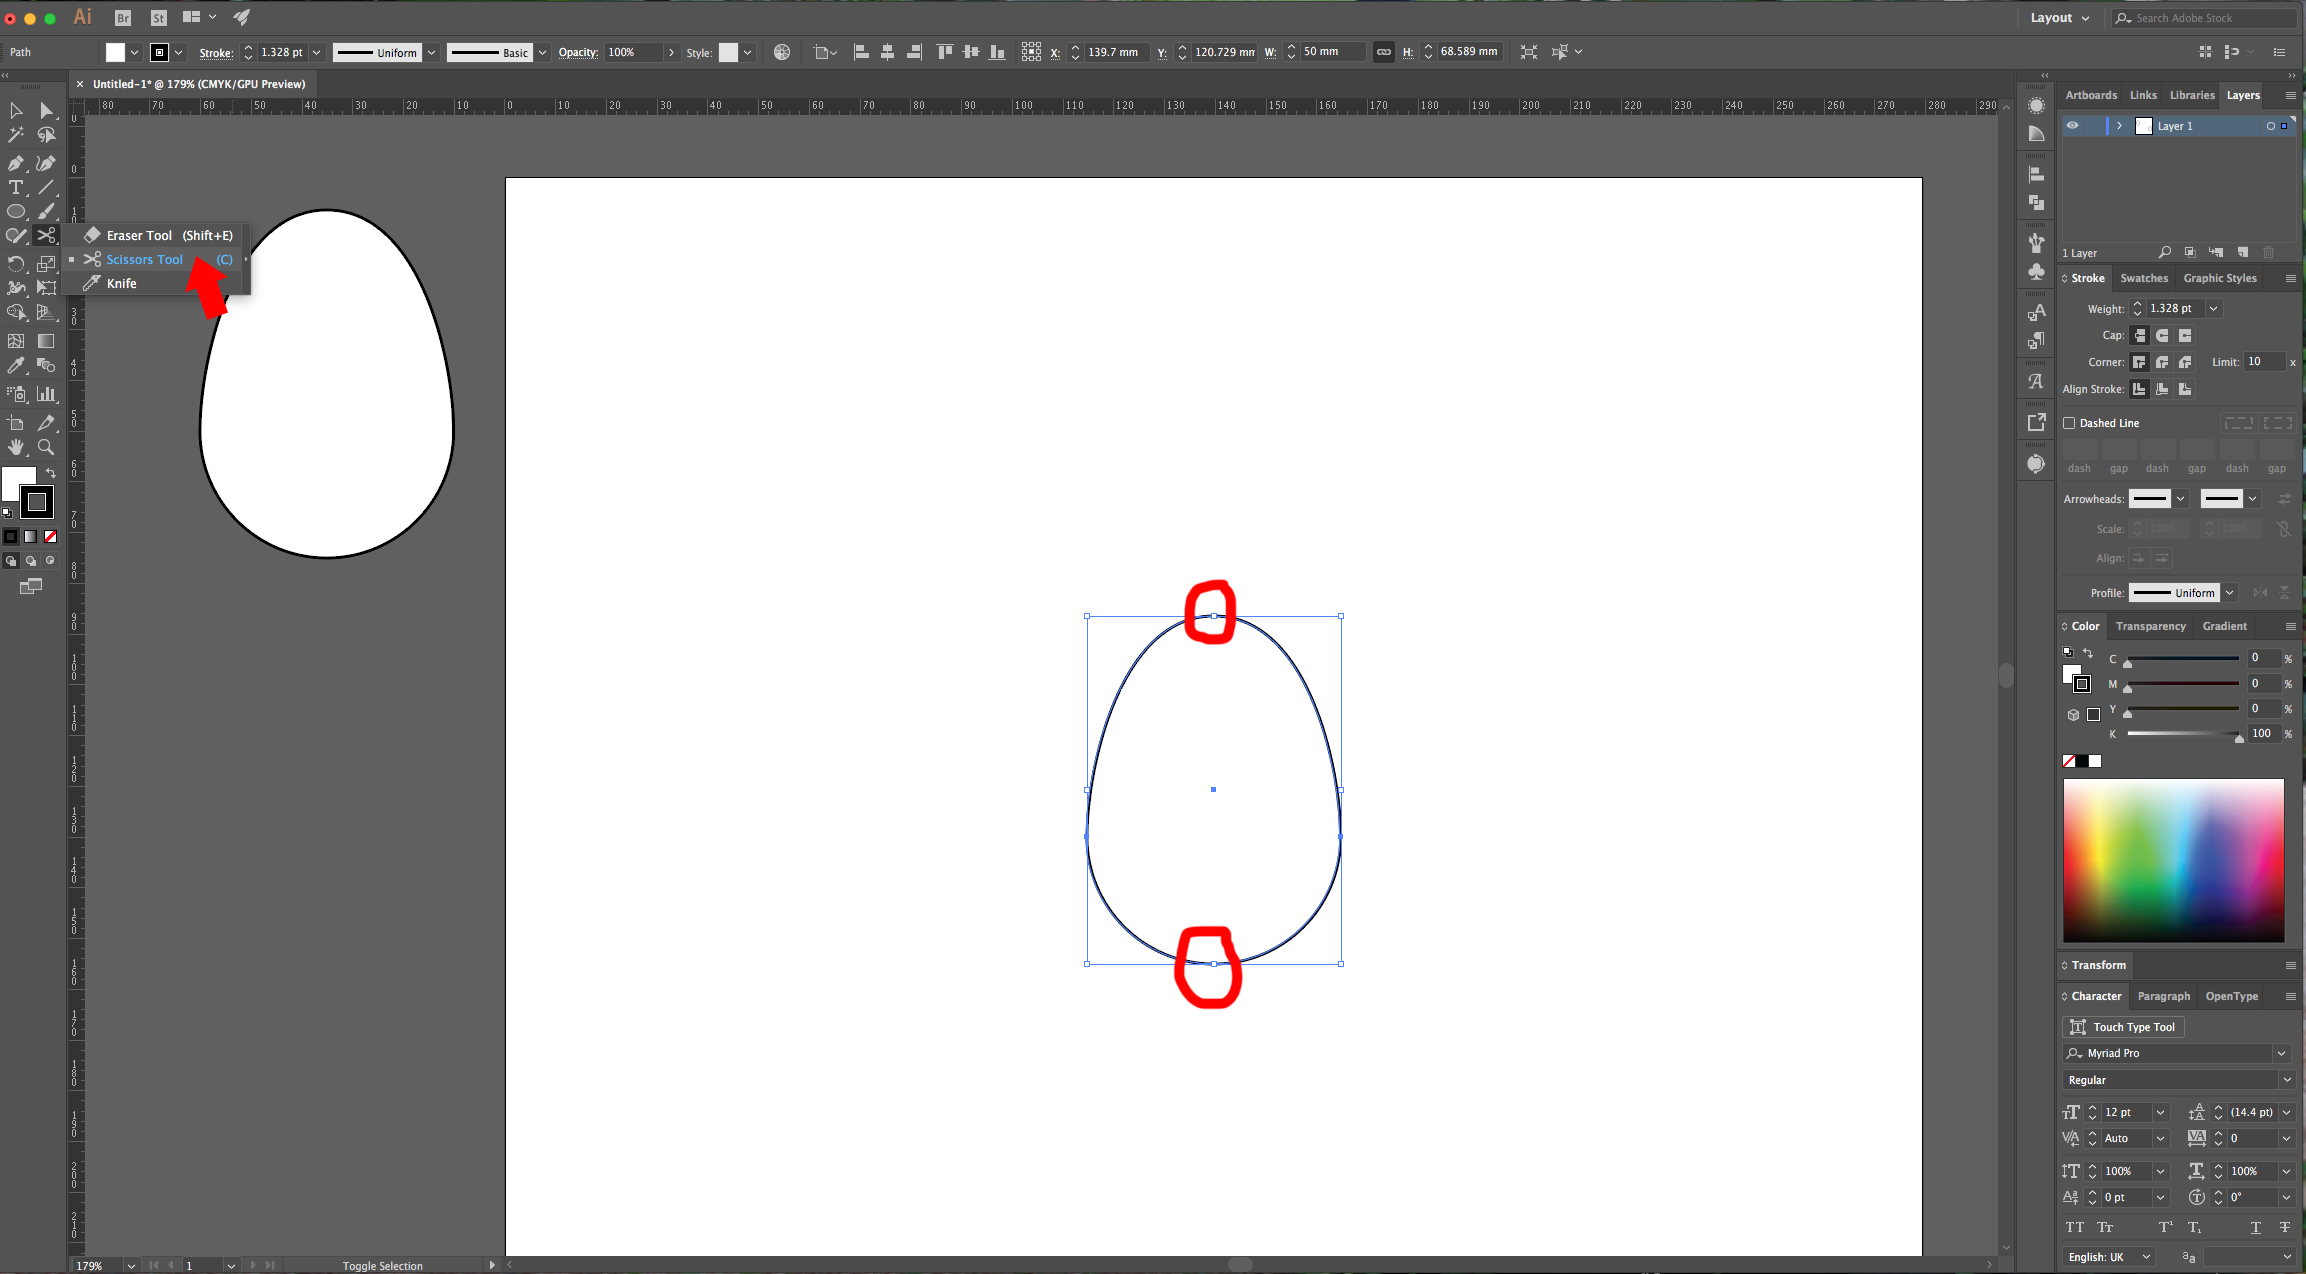
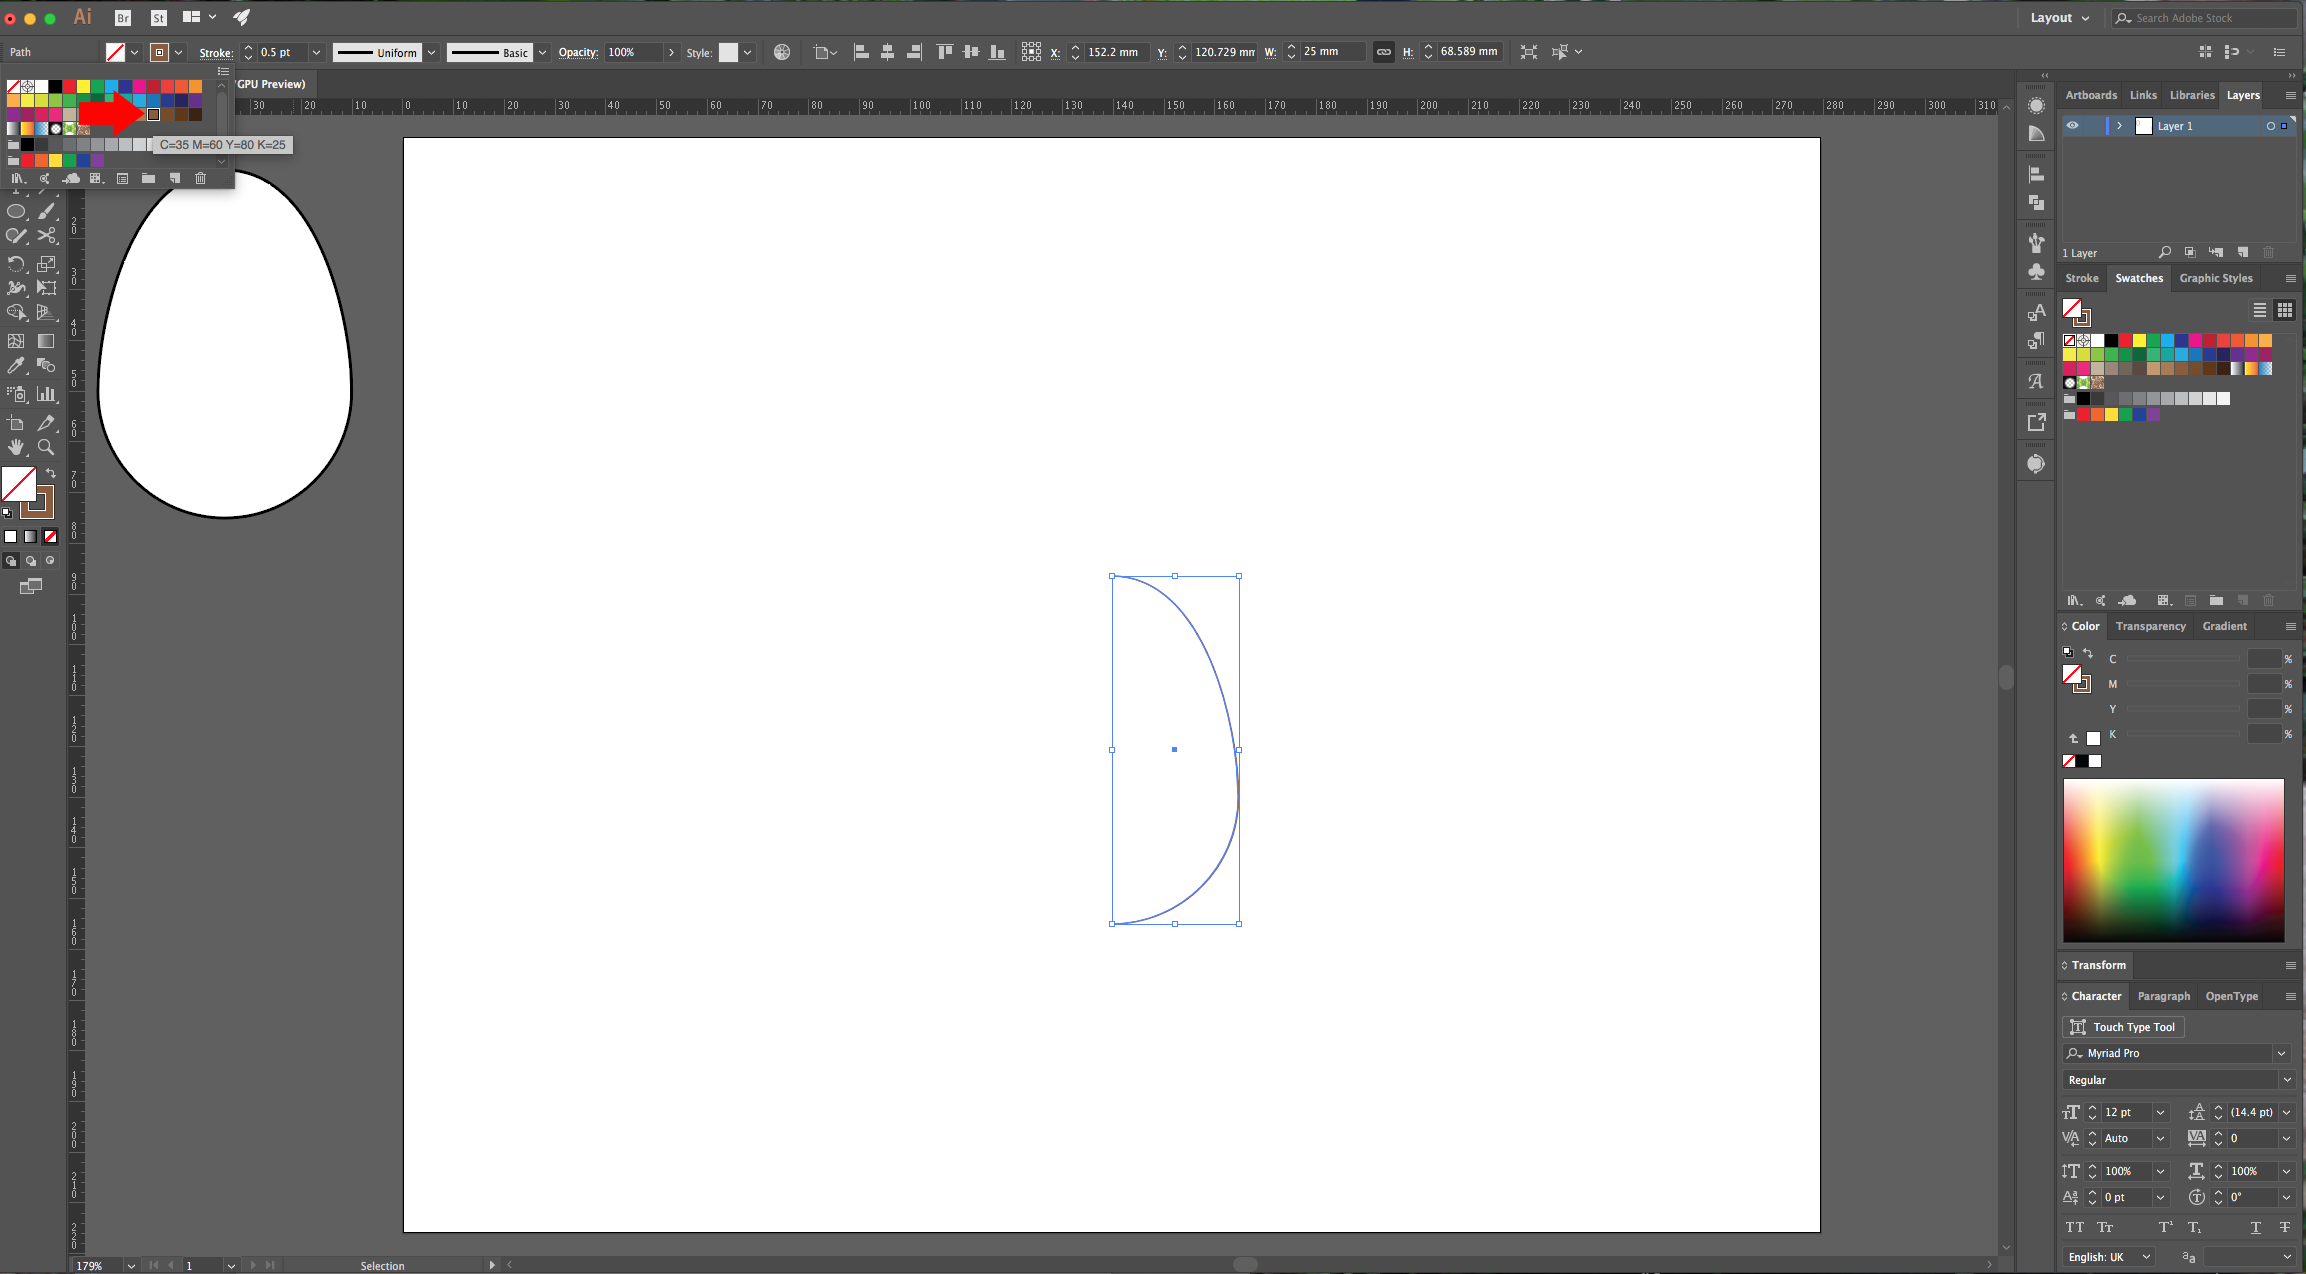
4 - Hold the “Alt” key and drag your “Egg” out of your document to Duplicate it. Select the “Scissors Tool” (S), click on the Top and Bottom “Anchor Points” to cut your “Egg” in half and delete the left portion. Make the “Stroke” color a medium brown and no “Fill”.
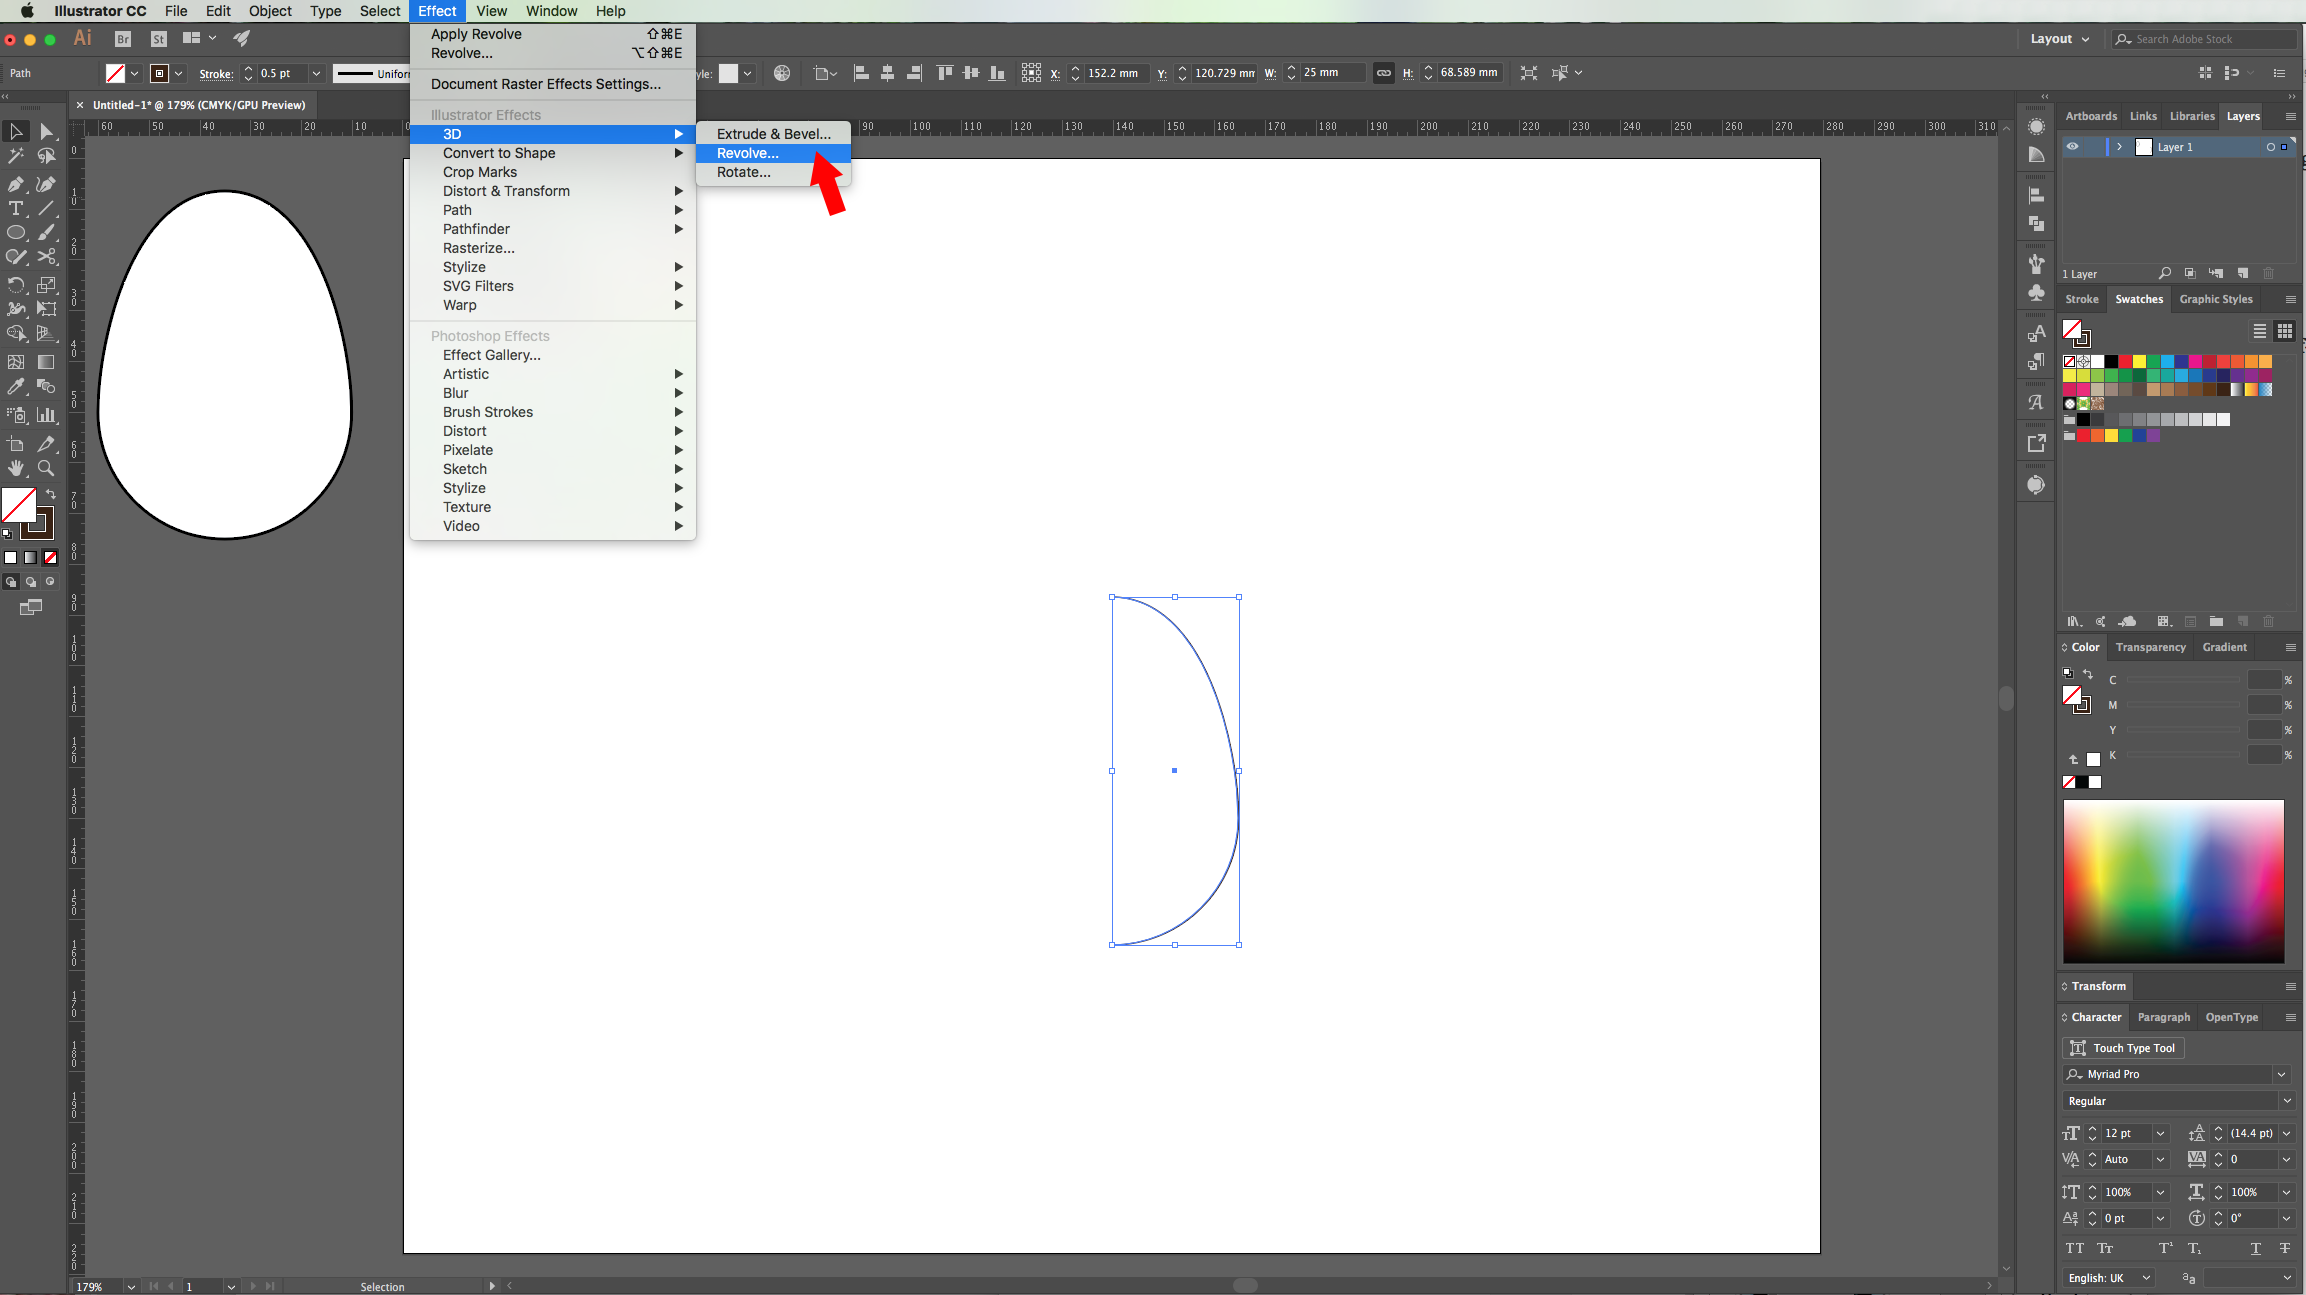
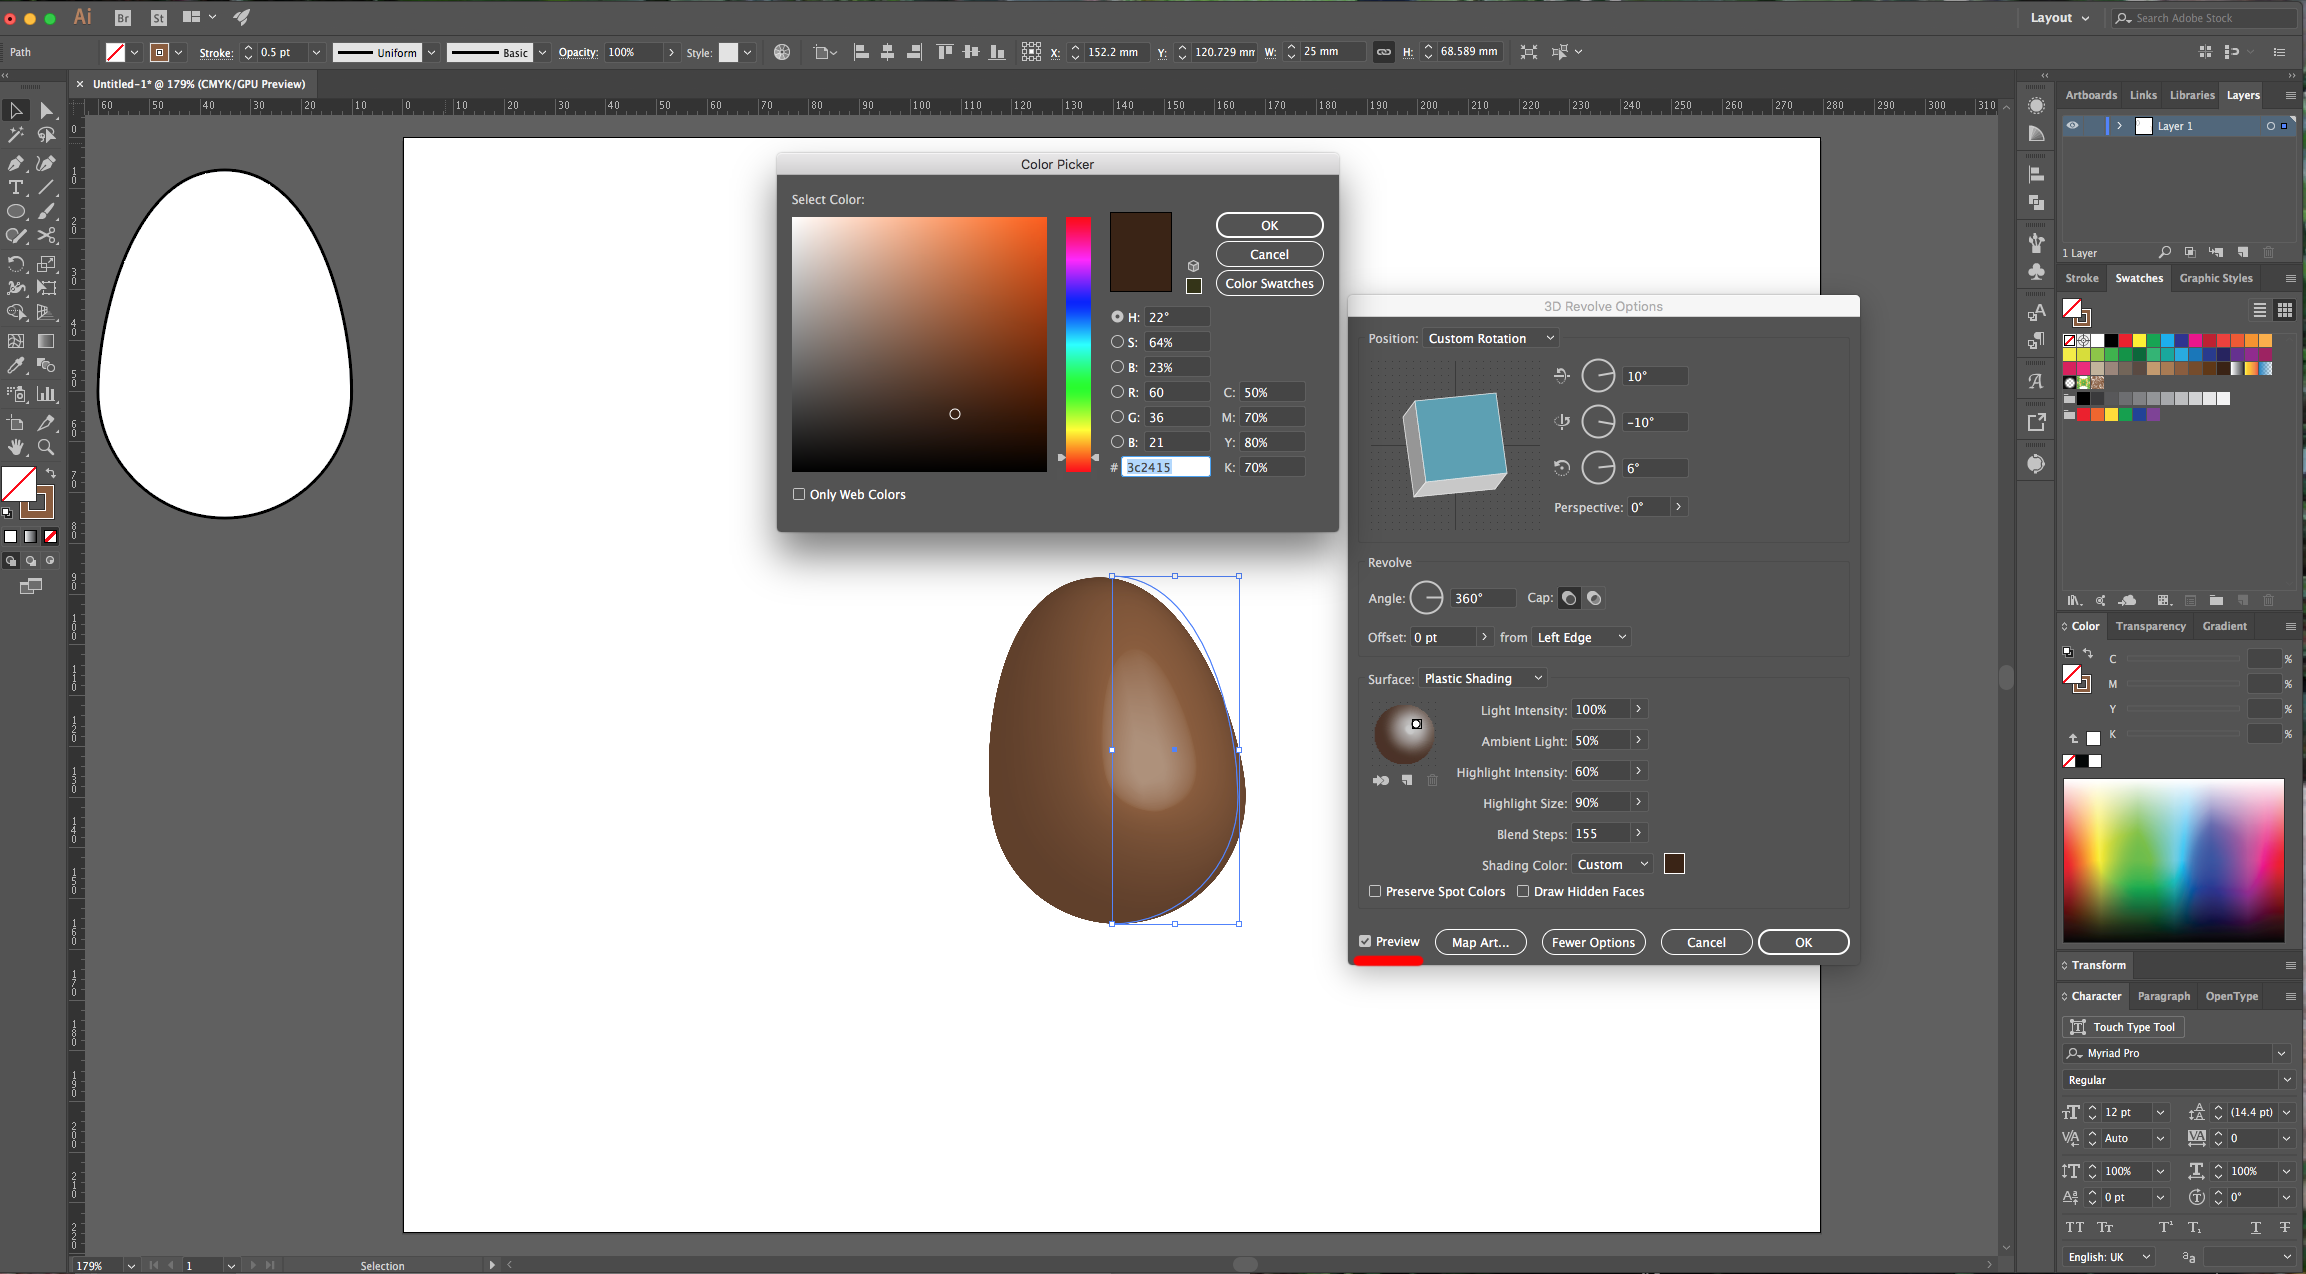
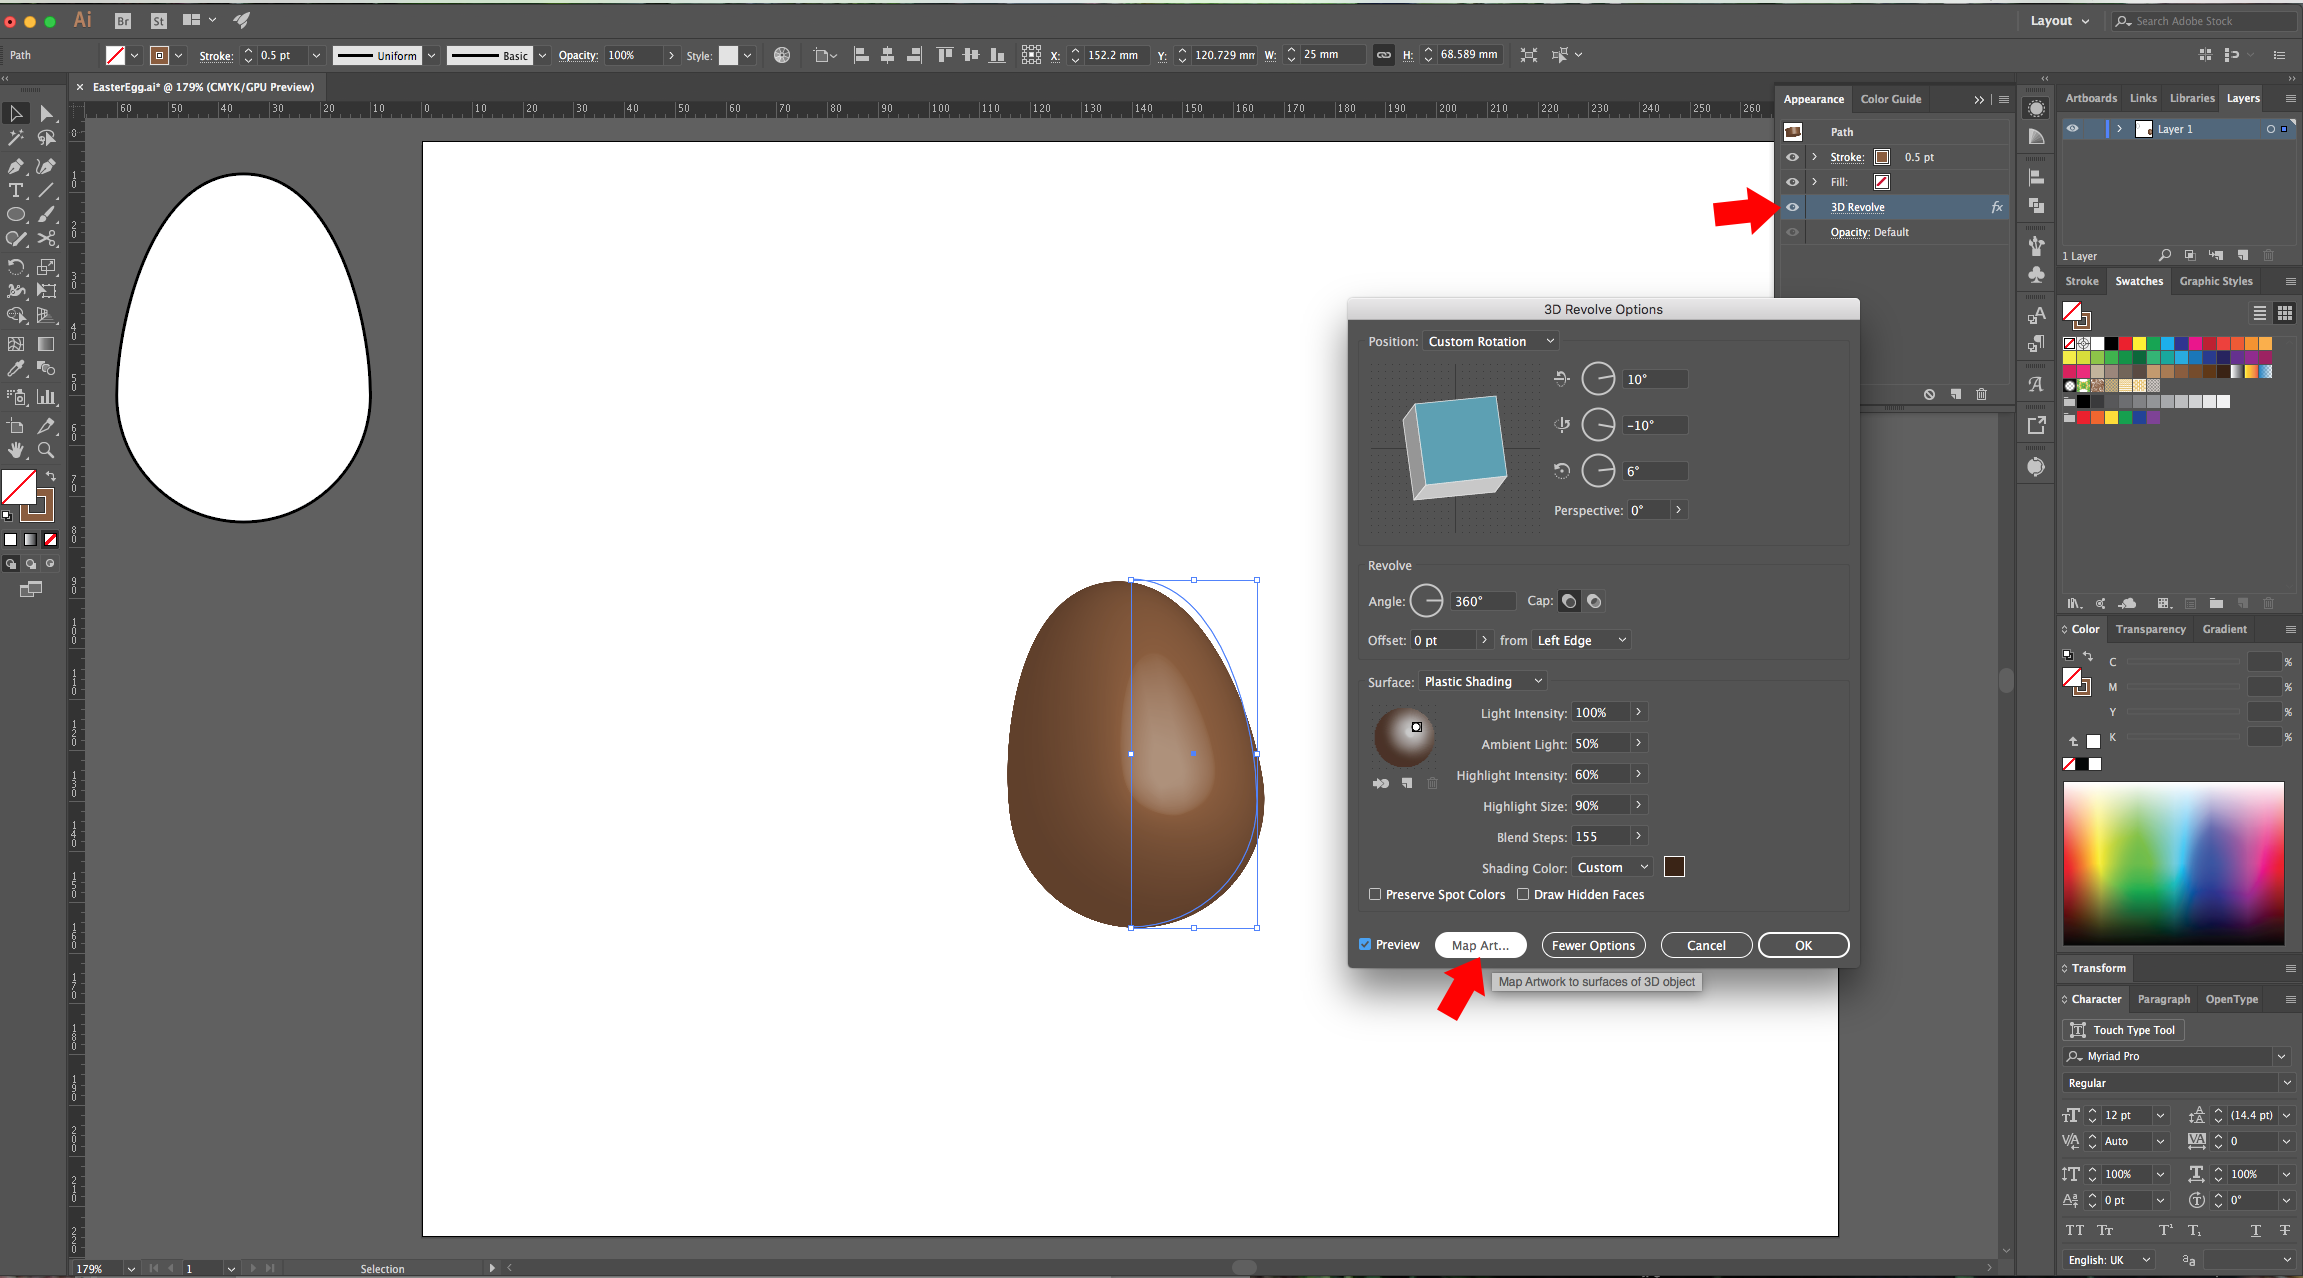
5 - Go to Effects > 3D > Revolve and use the following values:
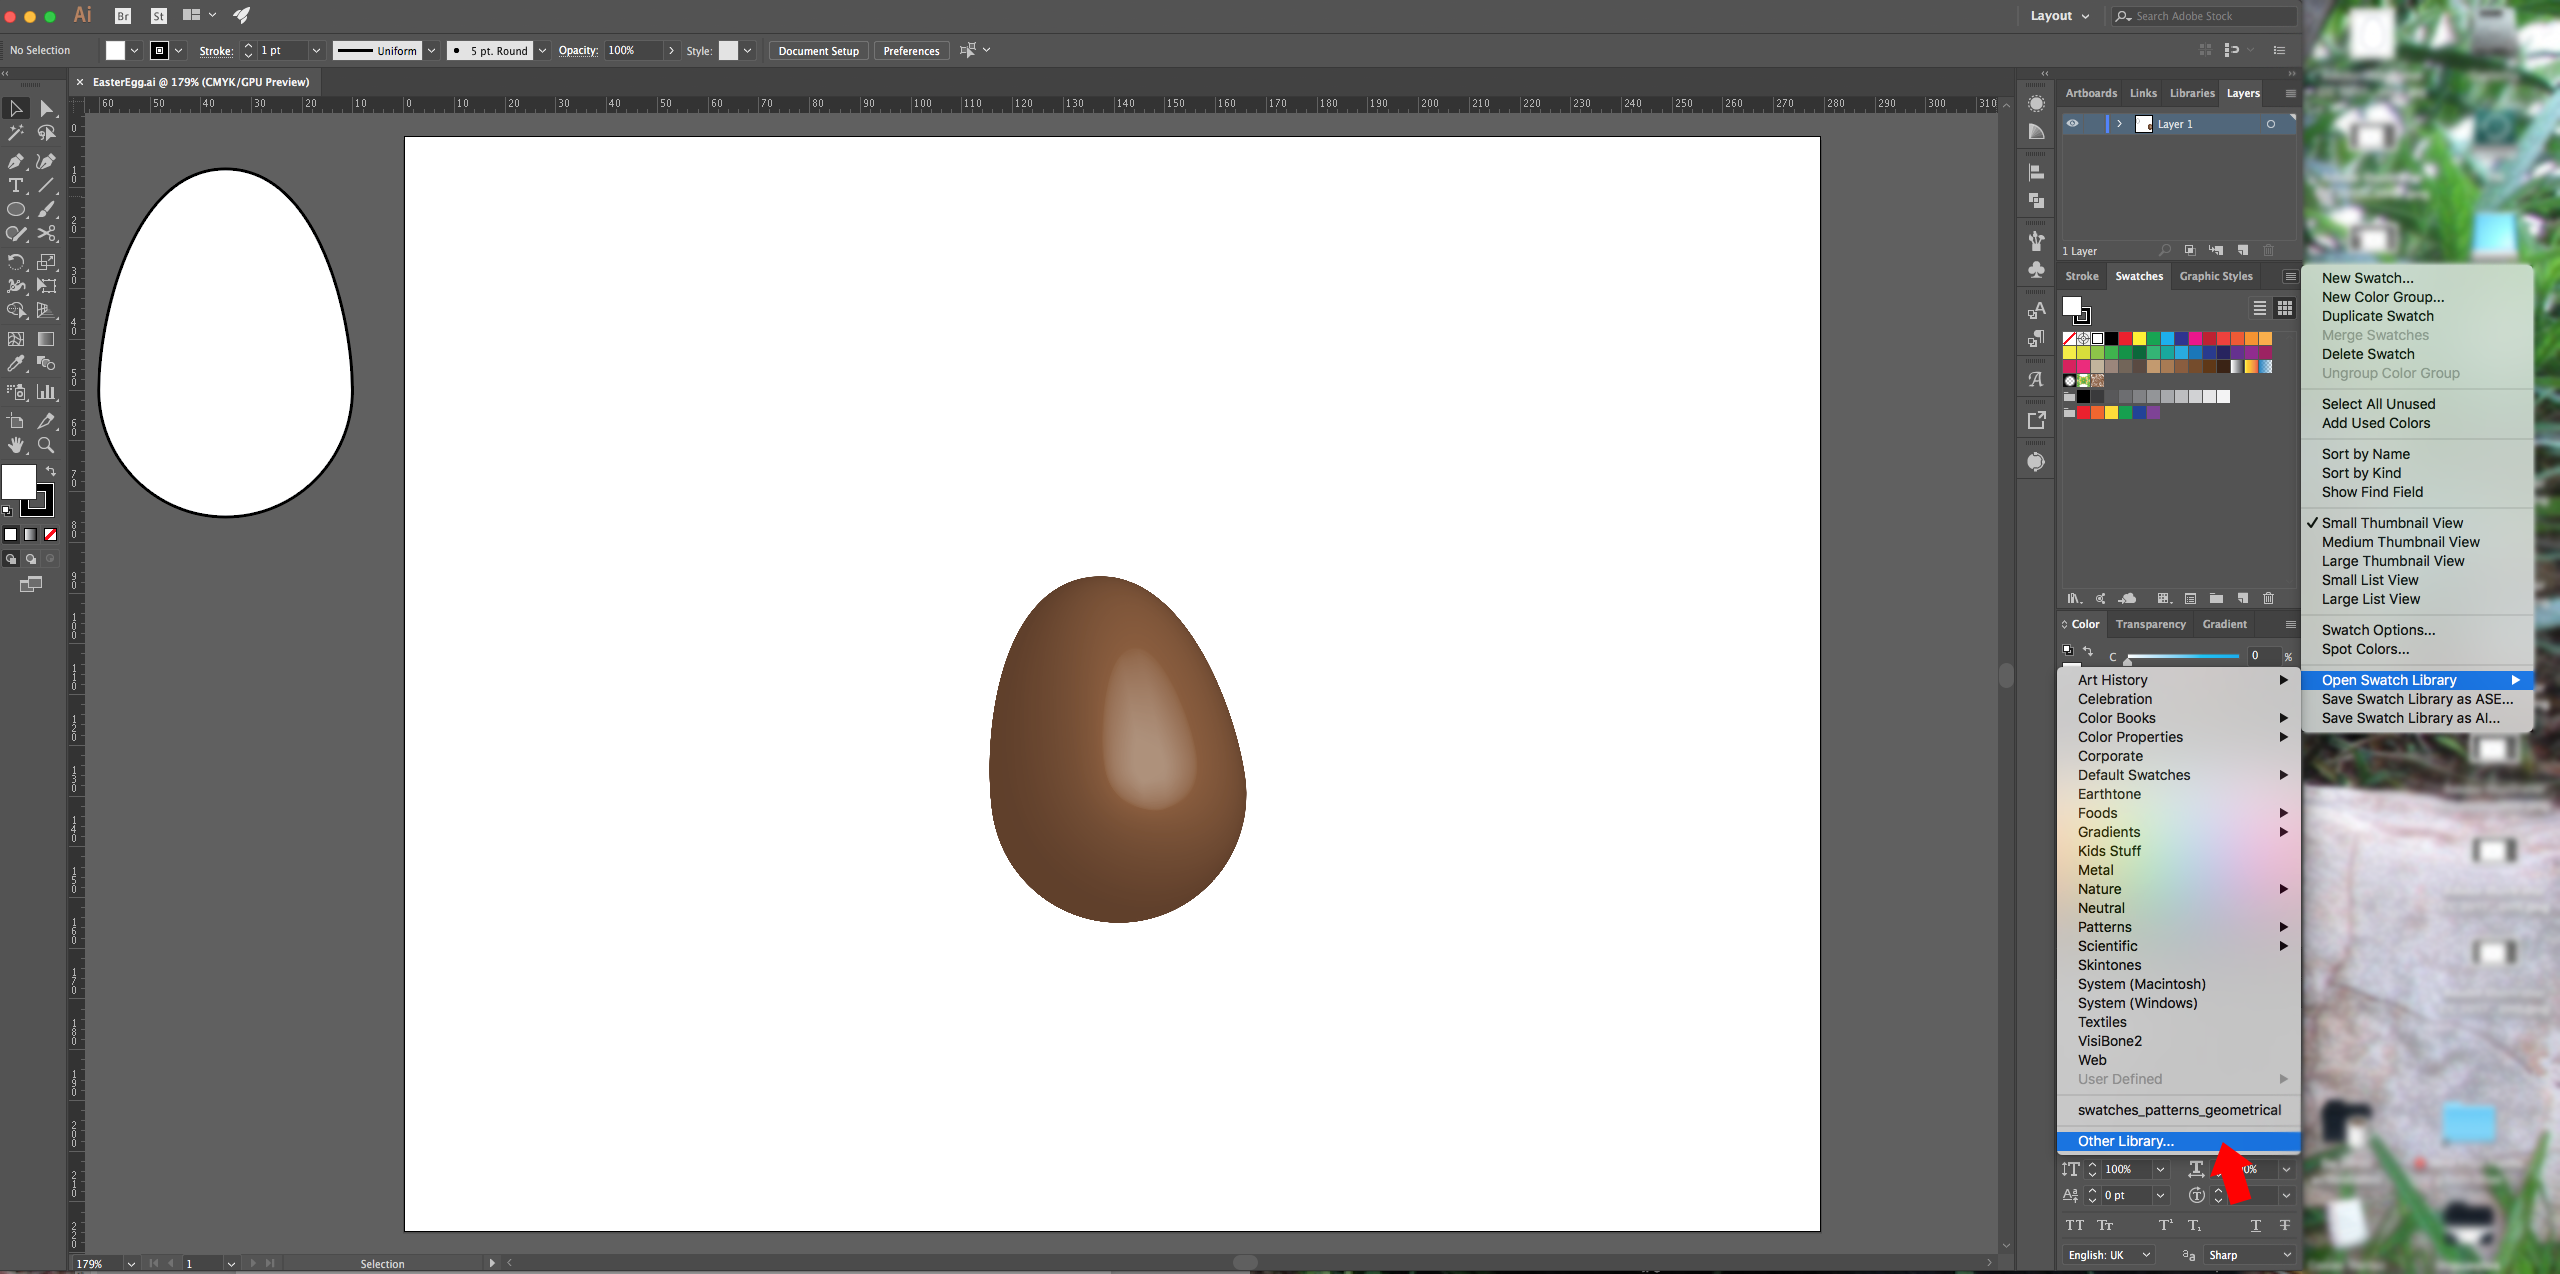
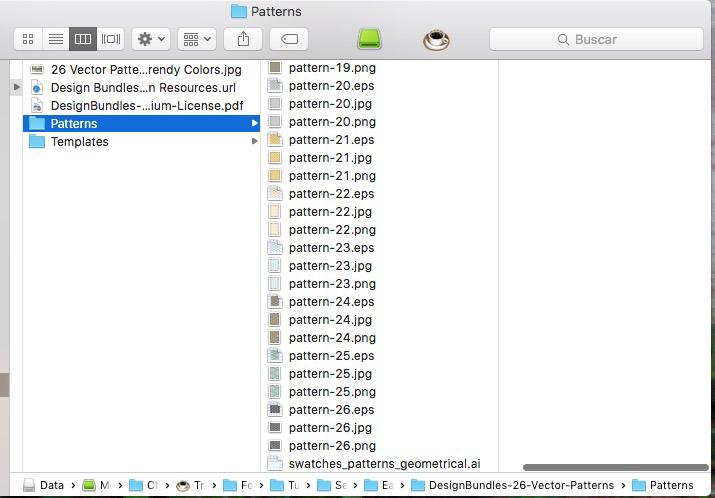
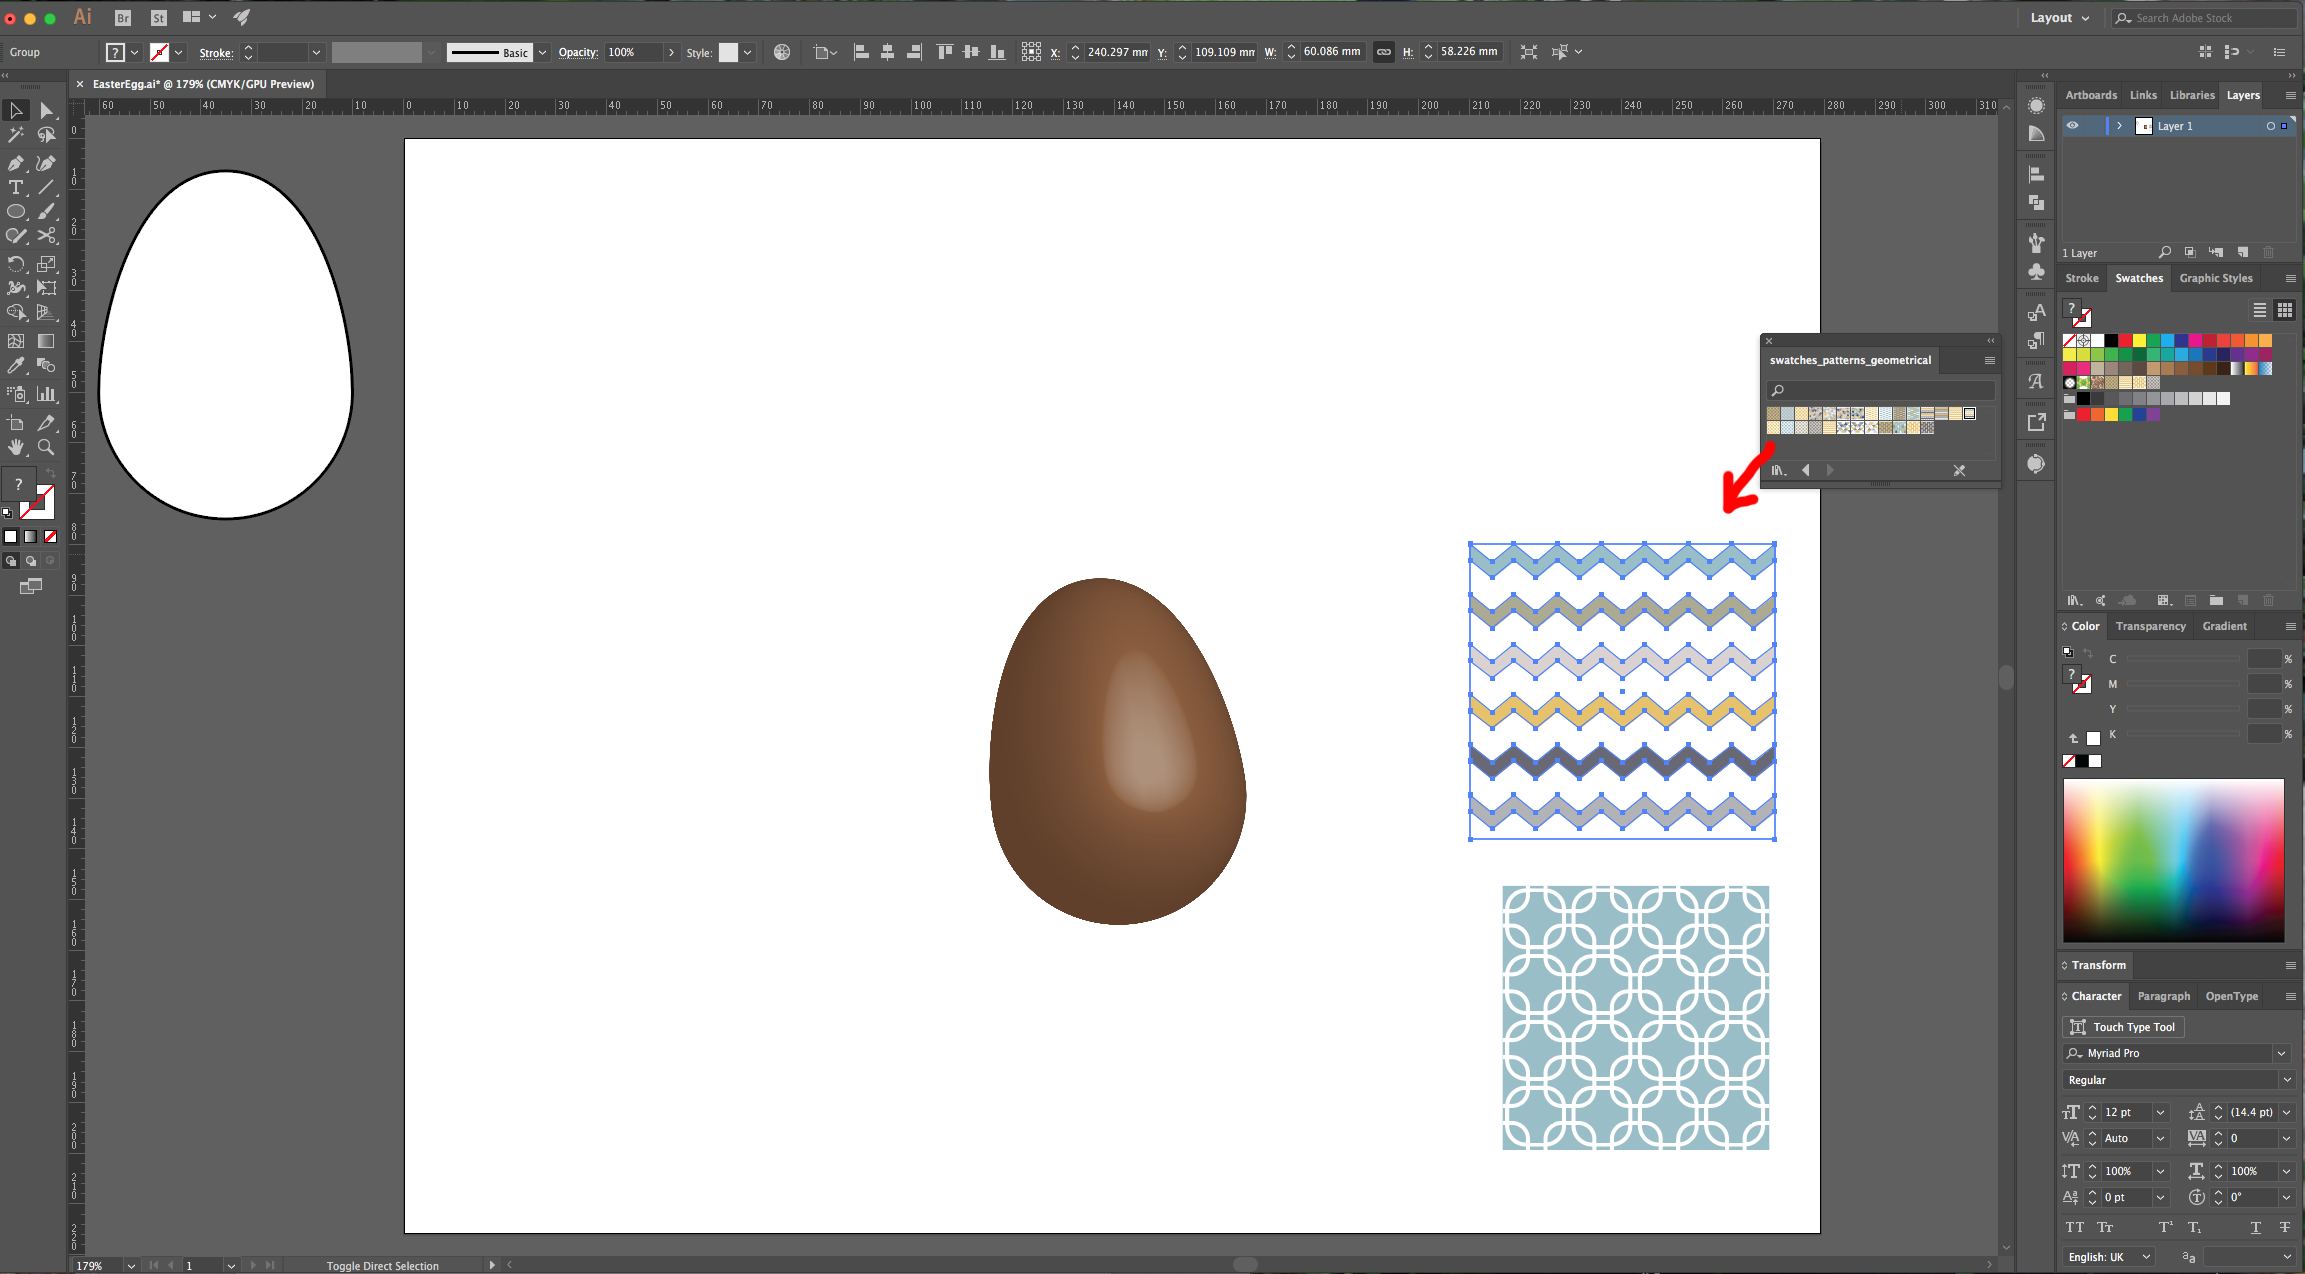
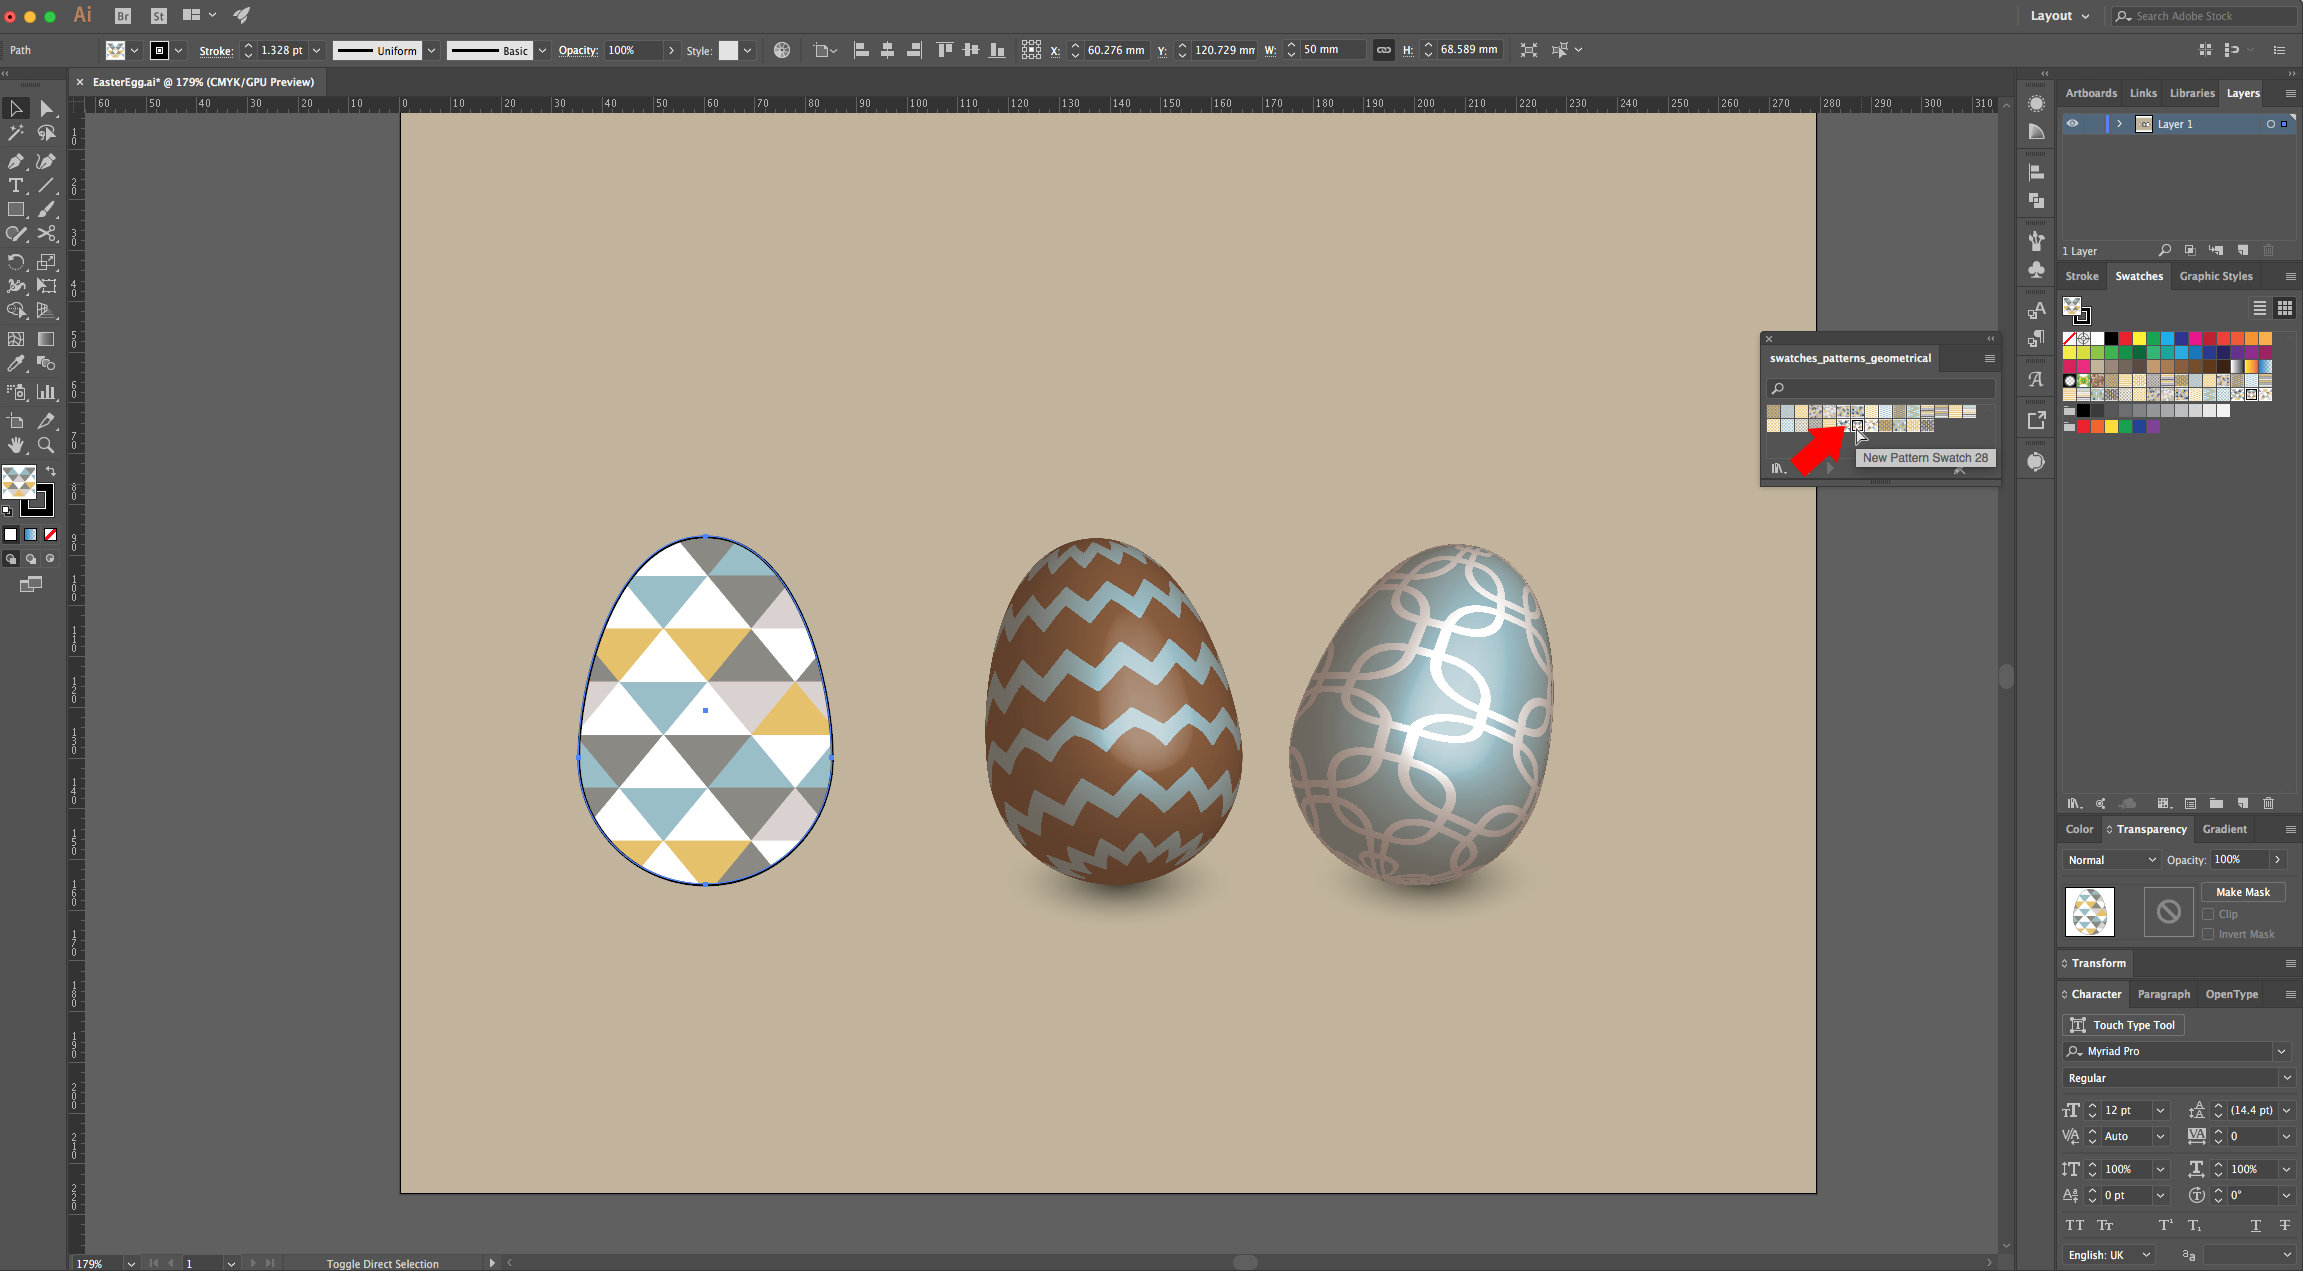
6 - In the “Swatches Panel” click on the small menu button on the top-right and go to Other Library… > Open Swatch Library, then navigate to the location where you saved your pattern files and open the file that has a “.ai” after the name. Select the “Pattern” of your choice and drag it into your document. If you want to modify the patter you chose, just double-click on it and tweak it to your liking.
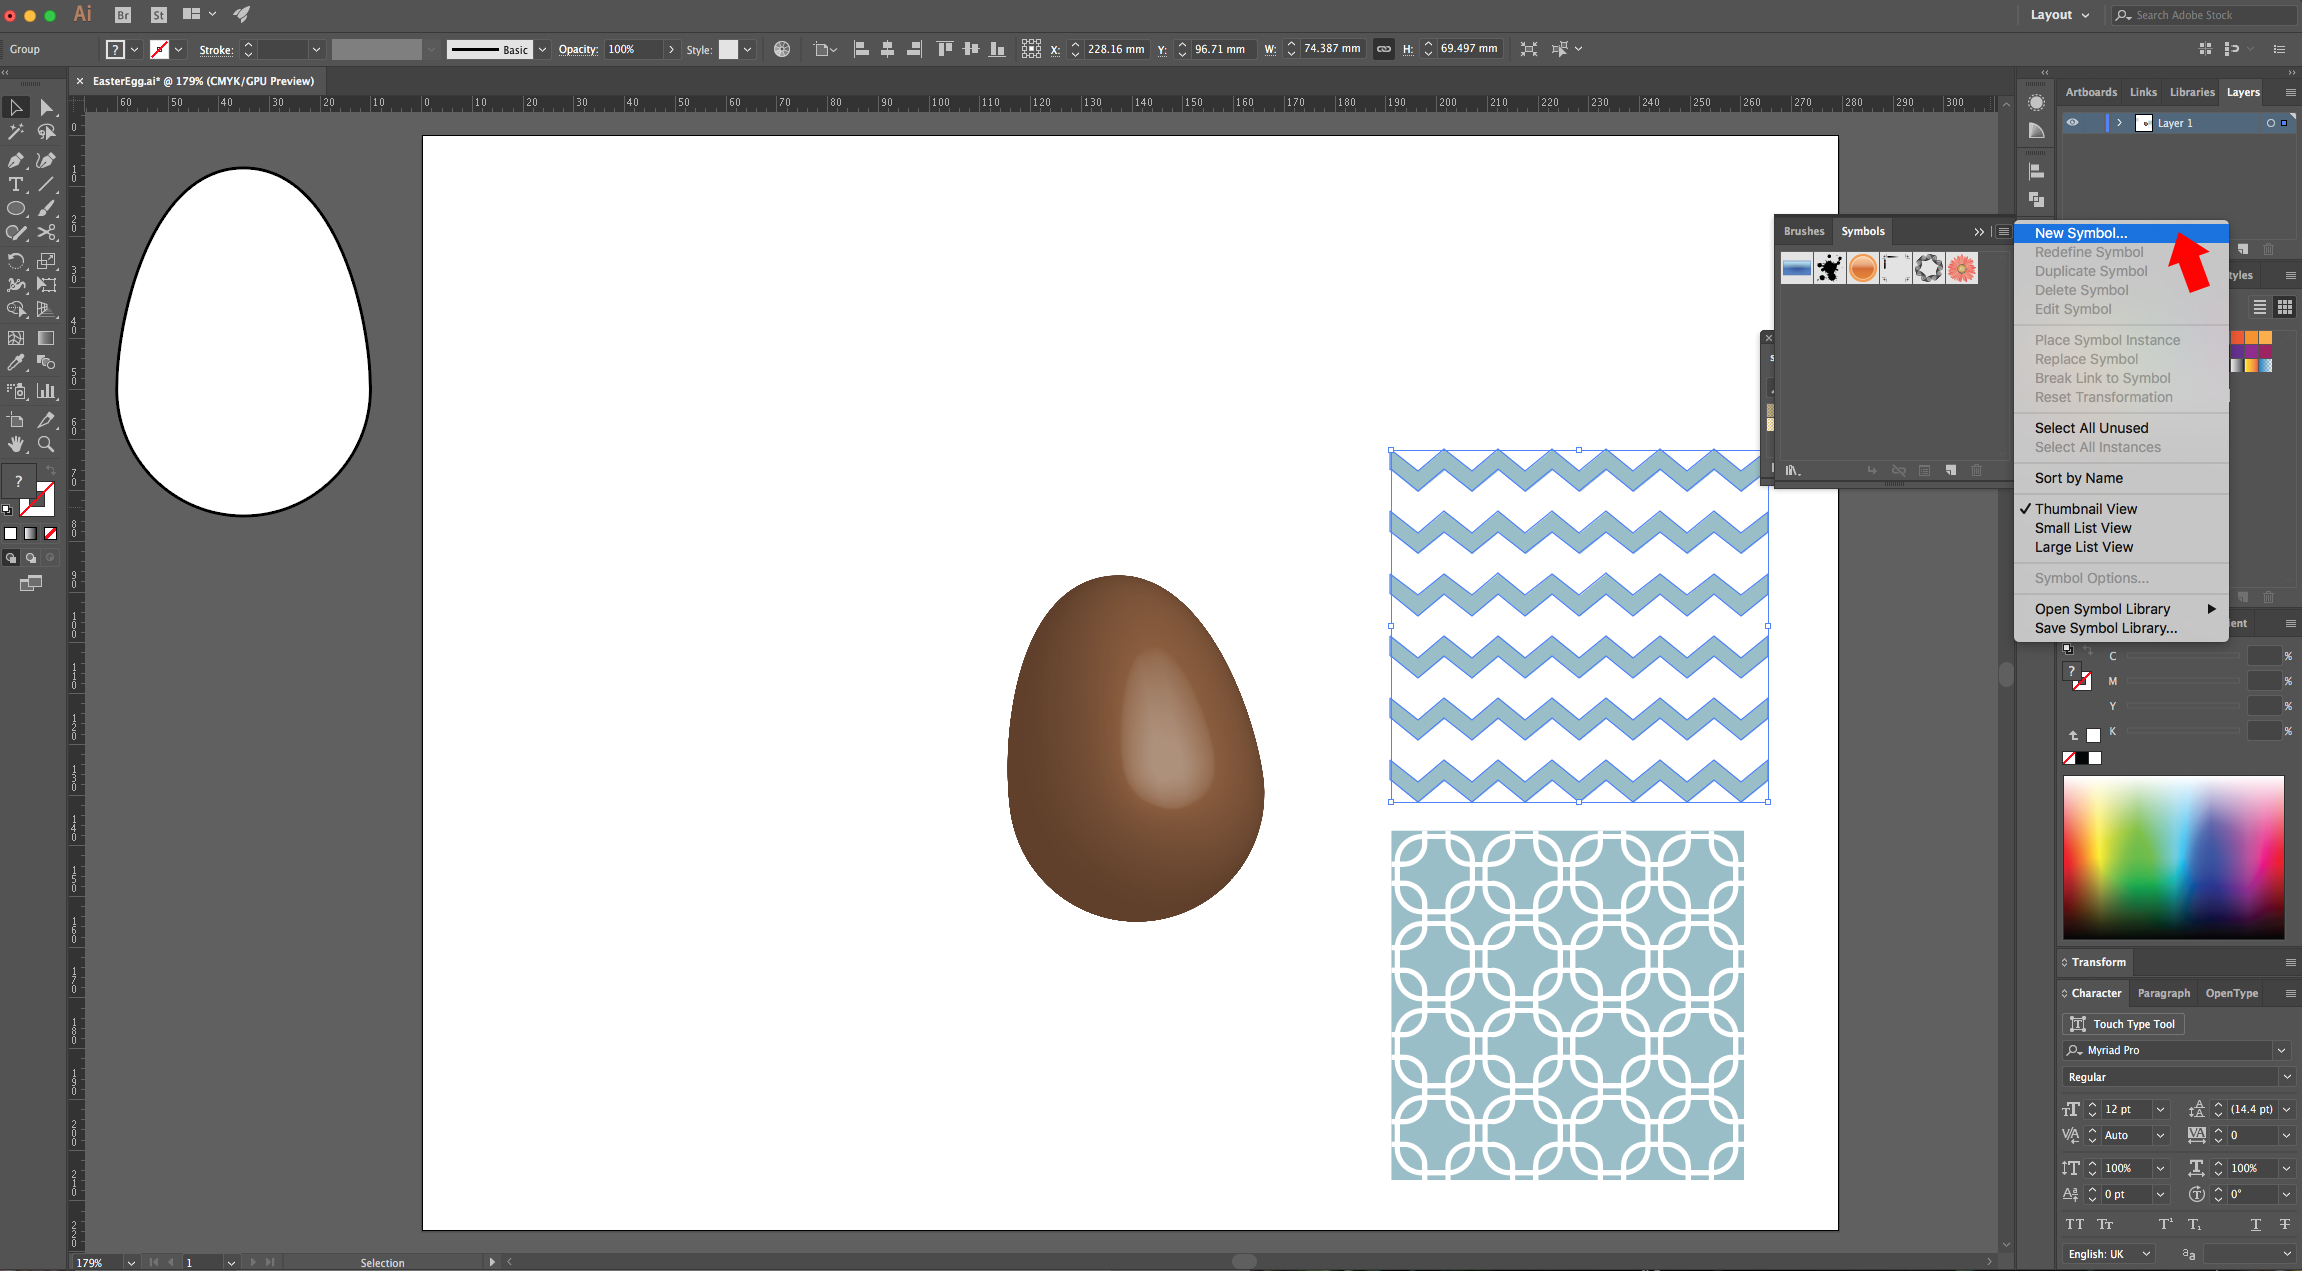
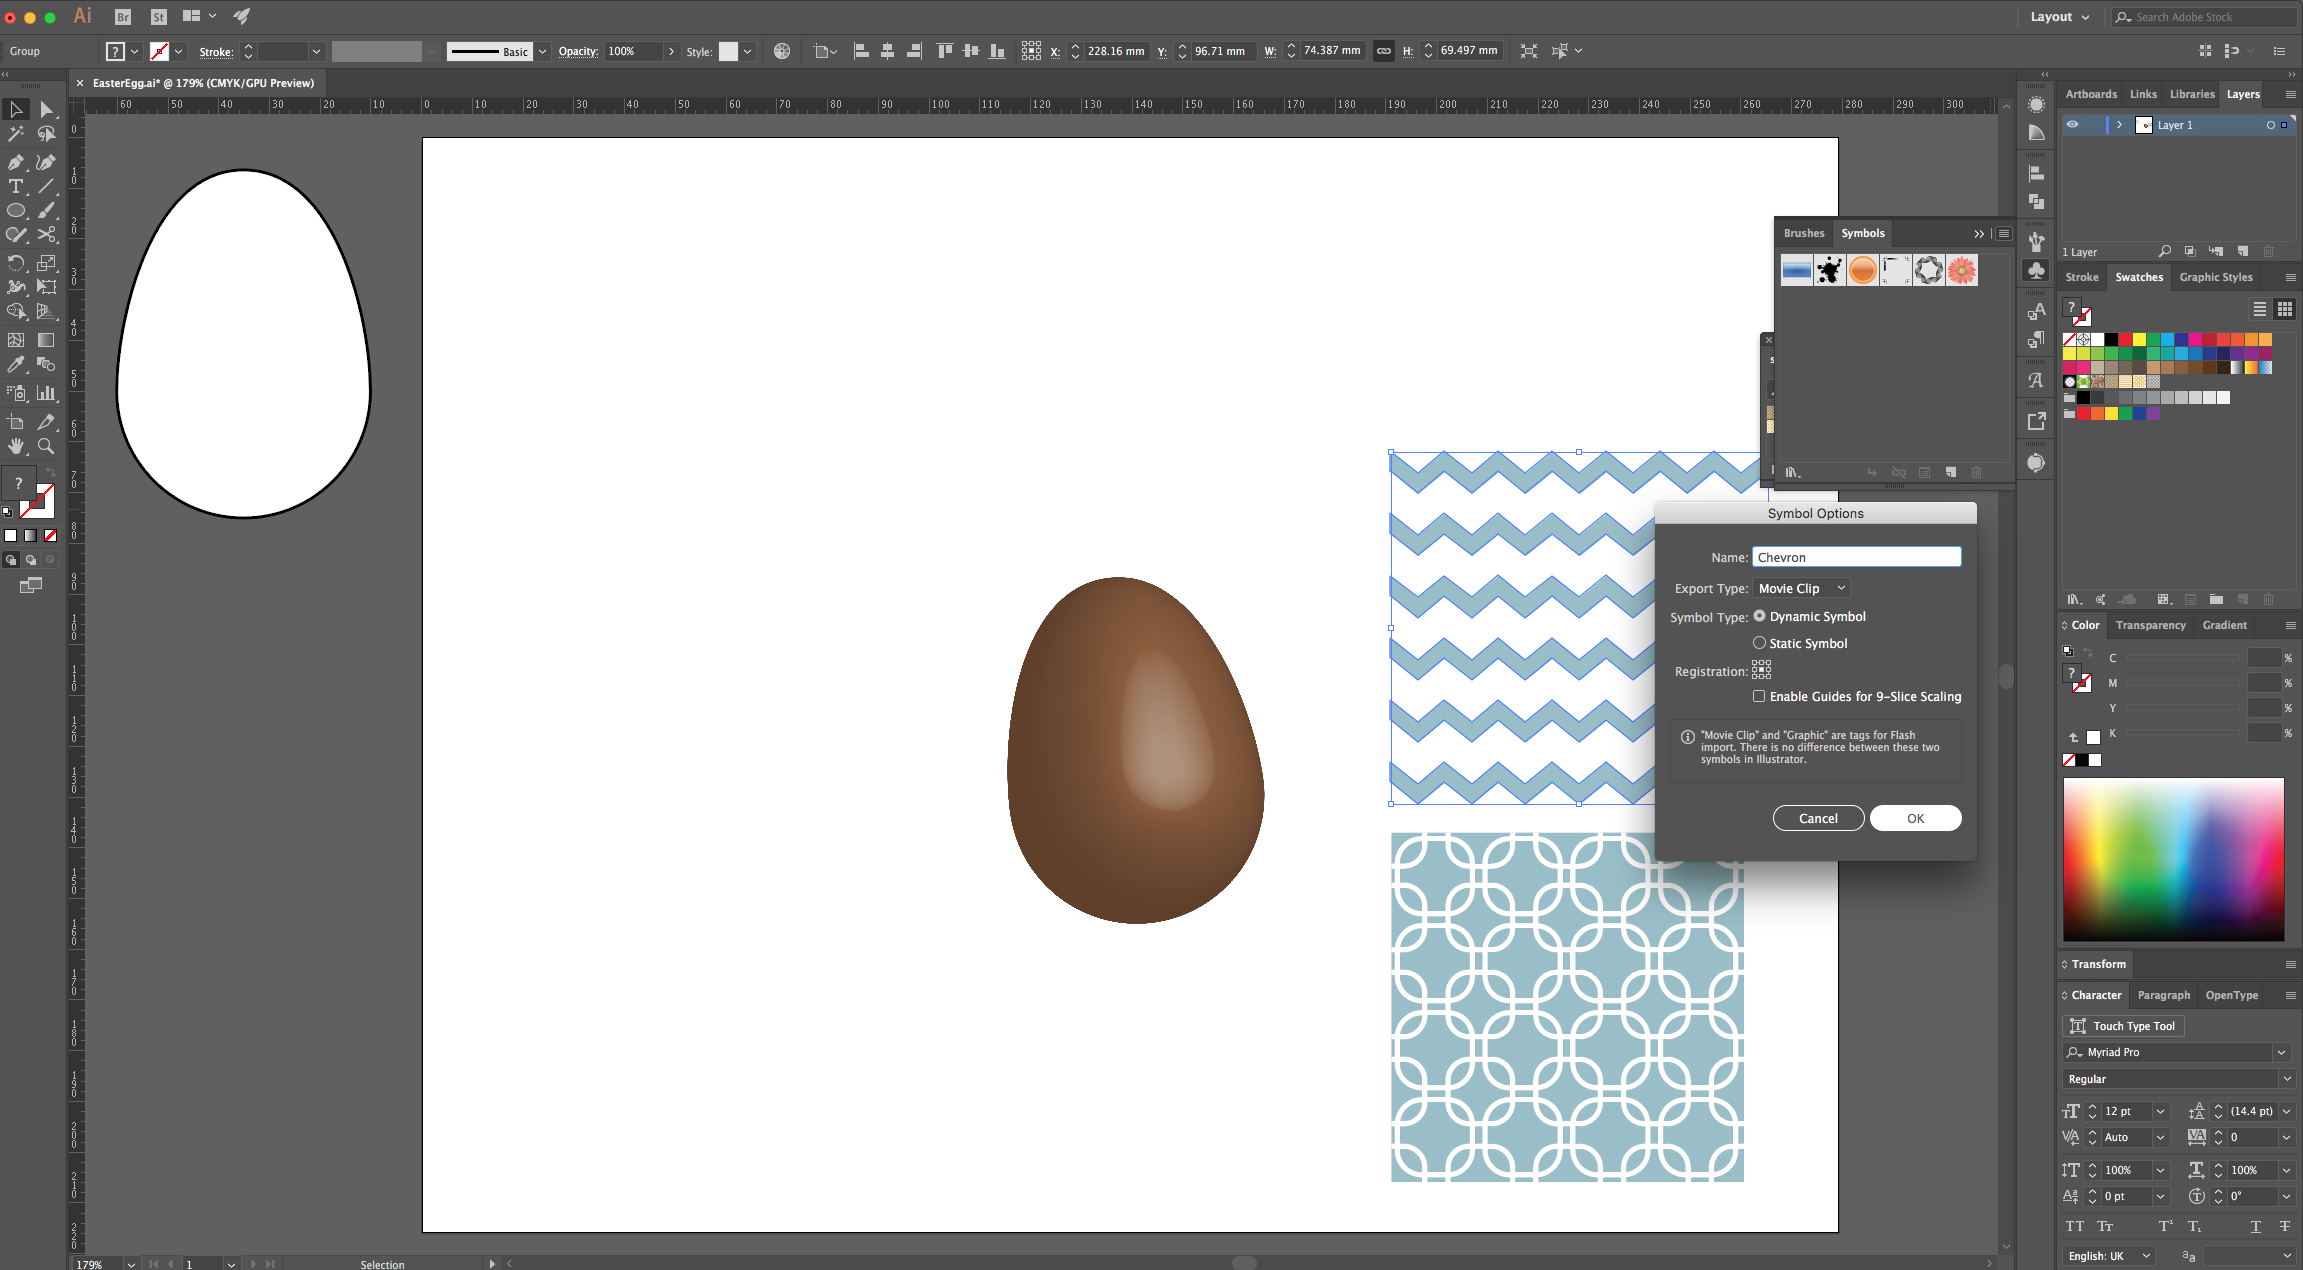
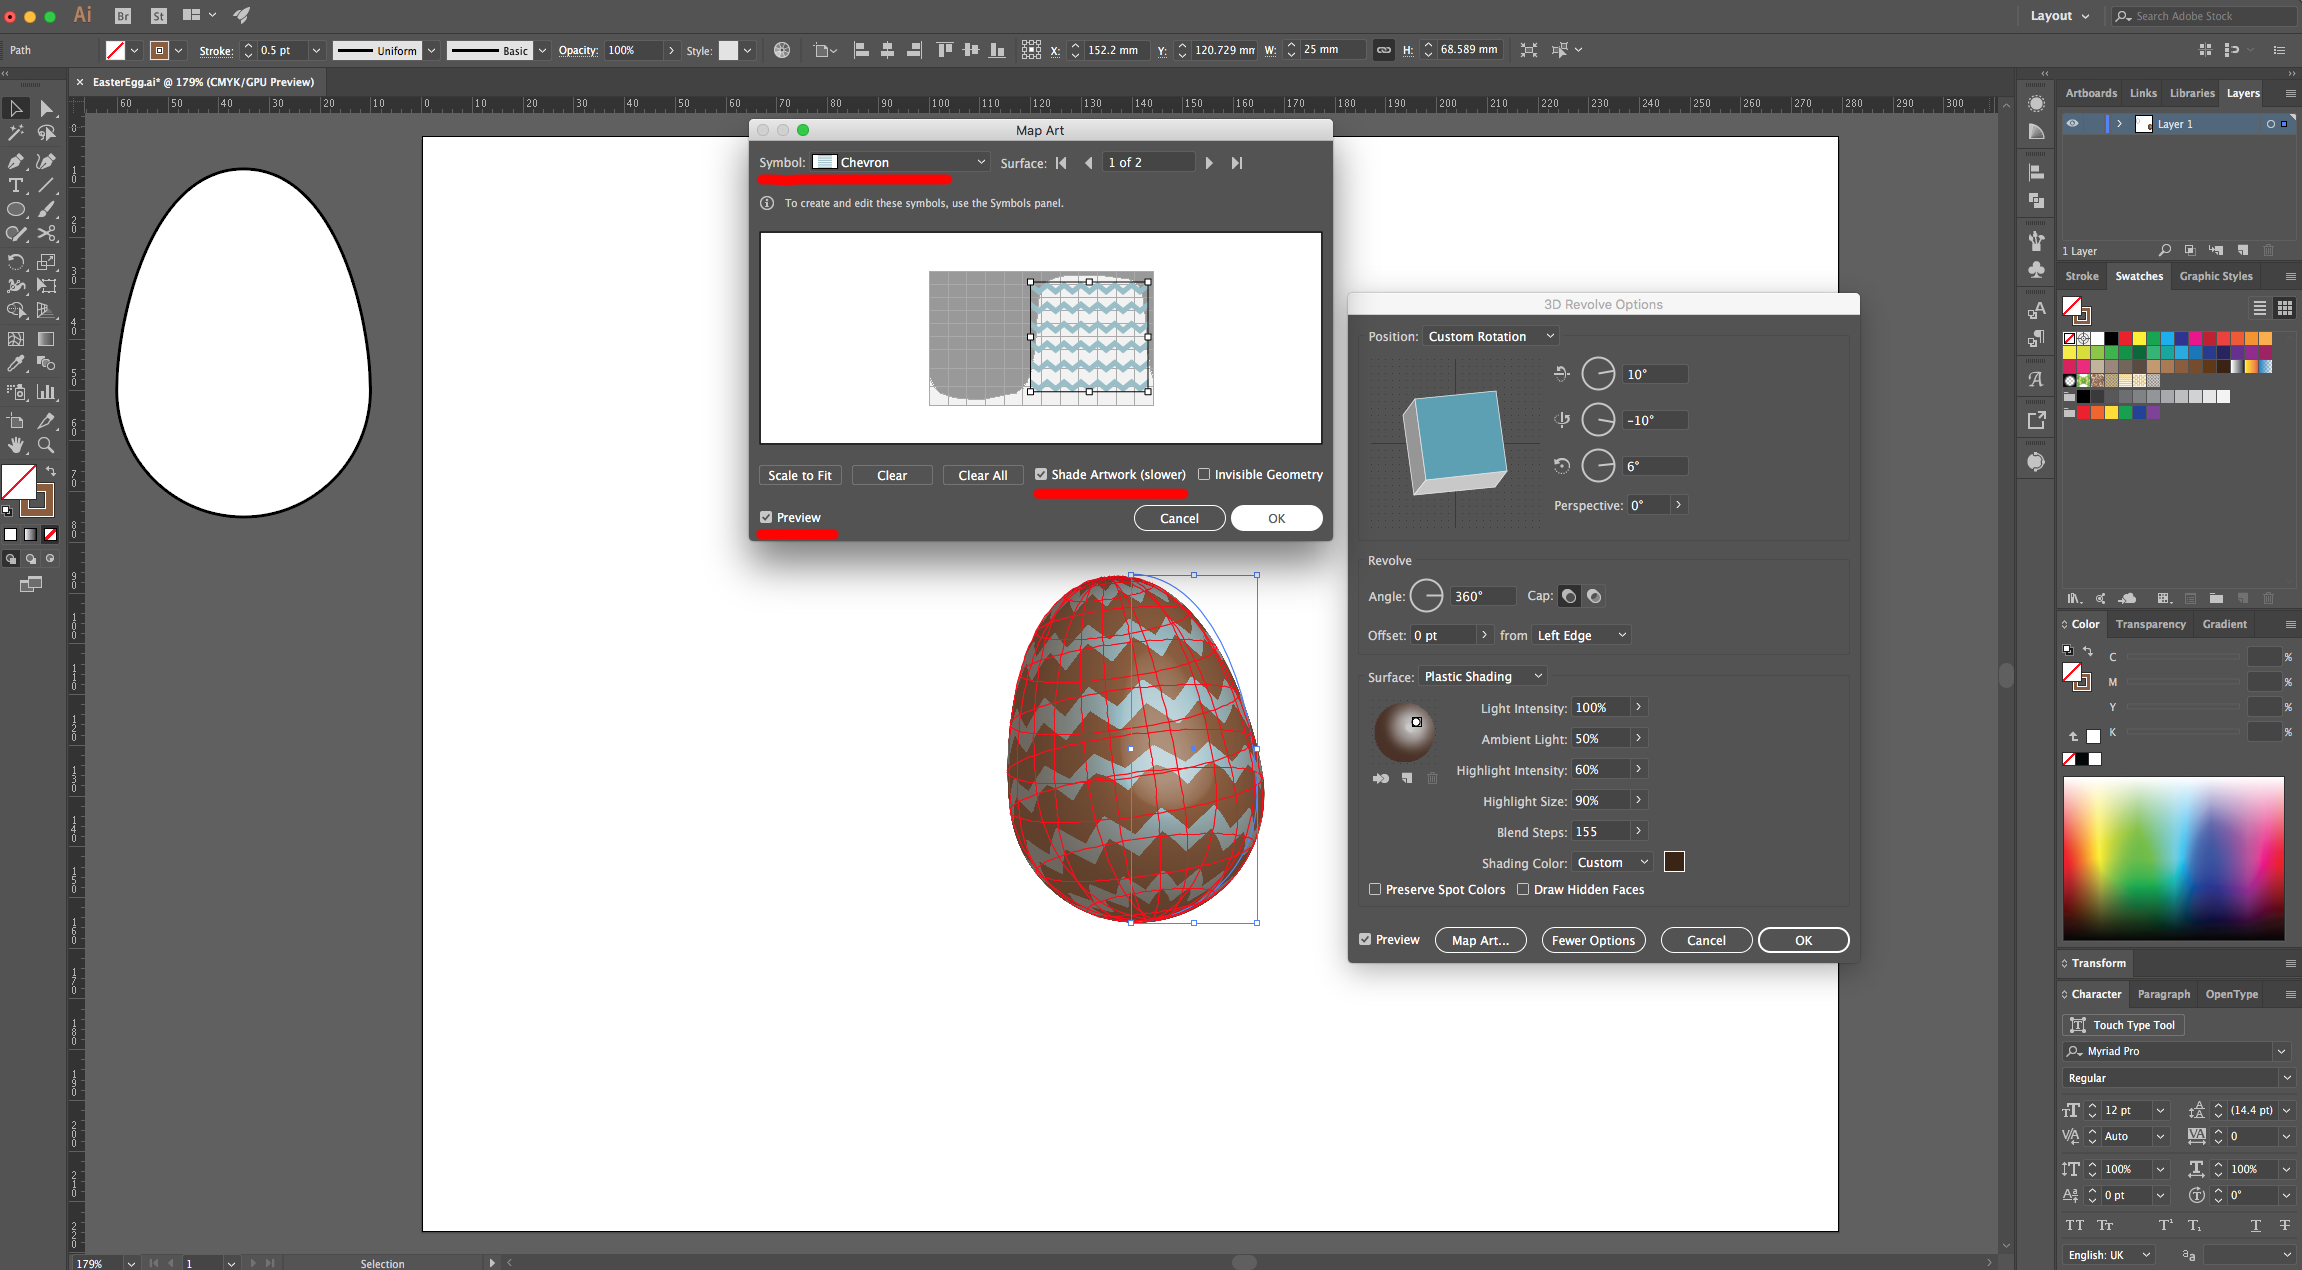
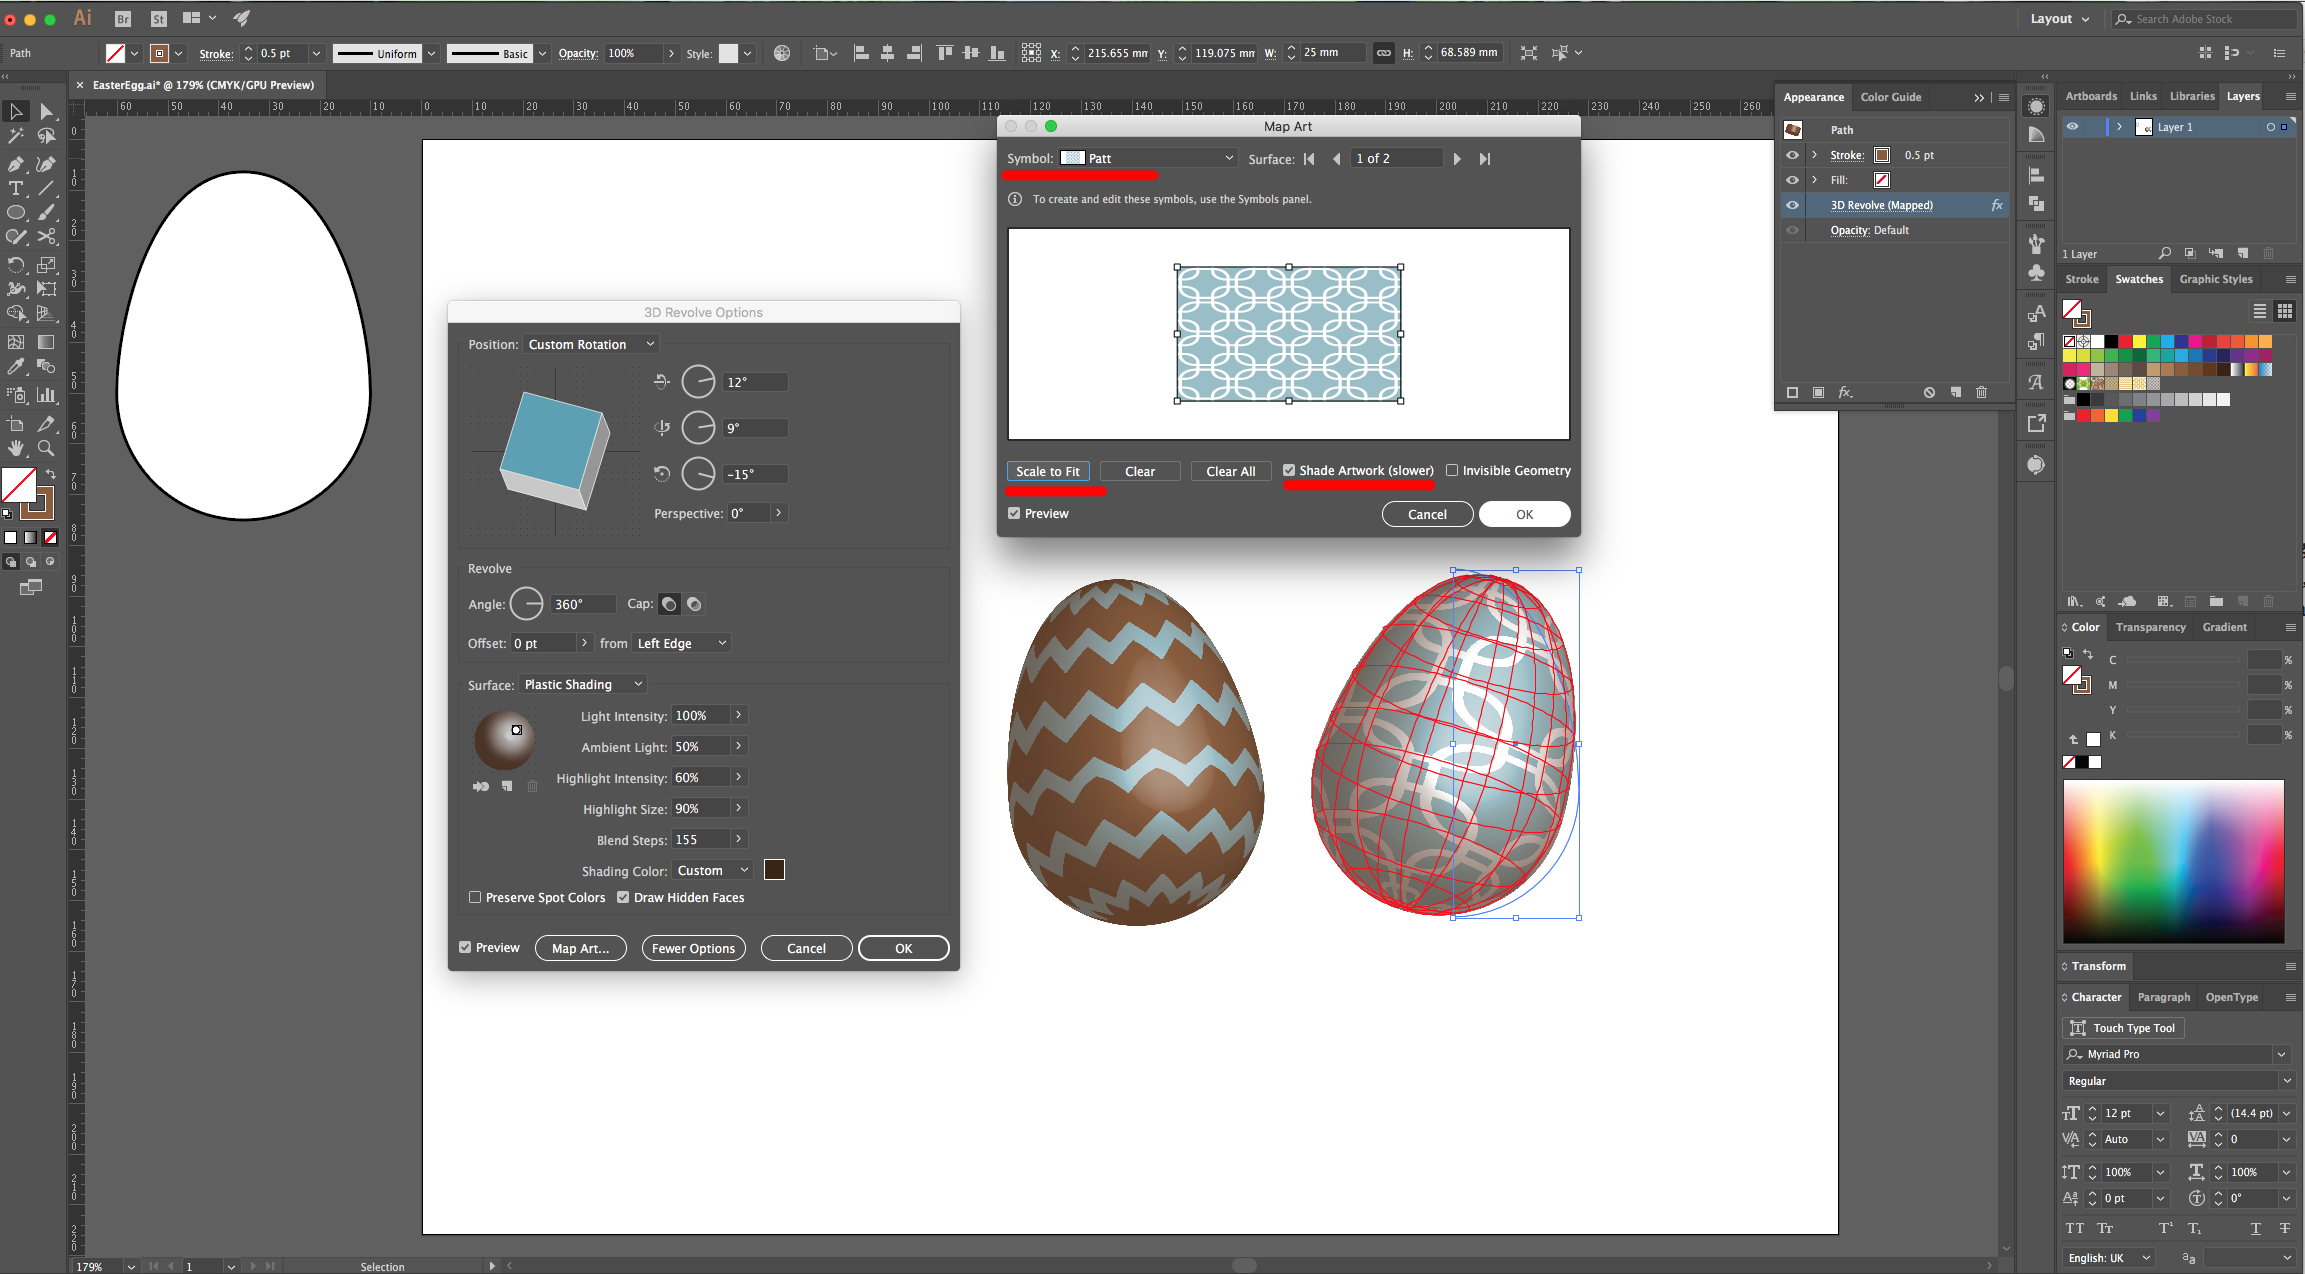
7 - Go to the “Symbols Panel”, select one of the Patterns from your document and choose “New Symbol” from the top-right menu. Name it and click “OK”.
8 - In the “Appearance Panel” double-click on the “Revolve Effect” to edit it (Make sure your “Egg” shape is selected). Click on the “Map Art” button and choose the “Symbol” you created from the drop-down menu options. Check the “Shade Artwork (slower)” box and click “OK” twice. Duplicate your “Egg” and change some of the “Revolve” settings on your duplicate.
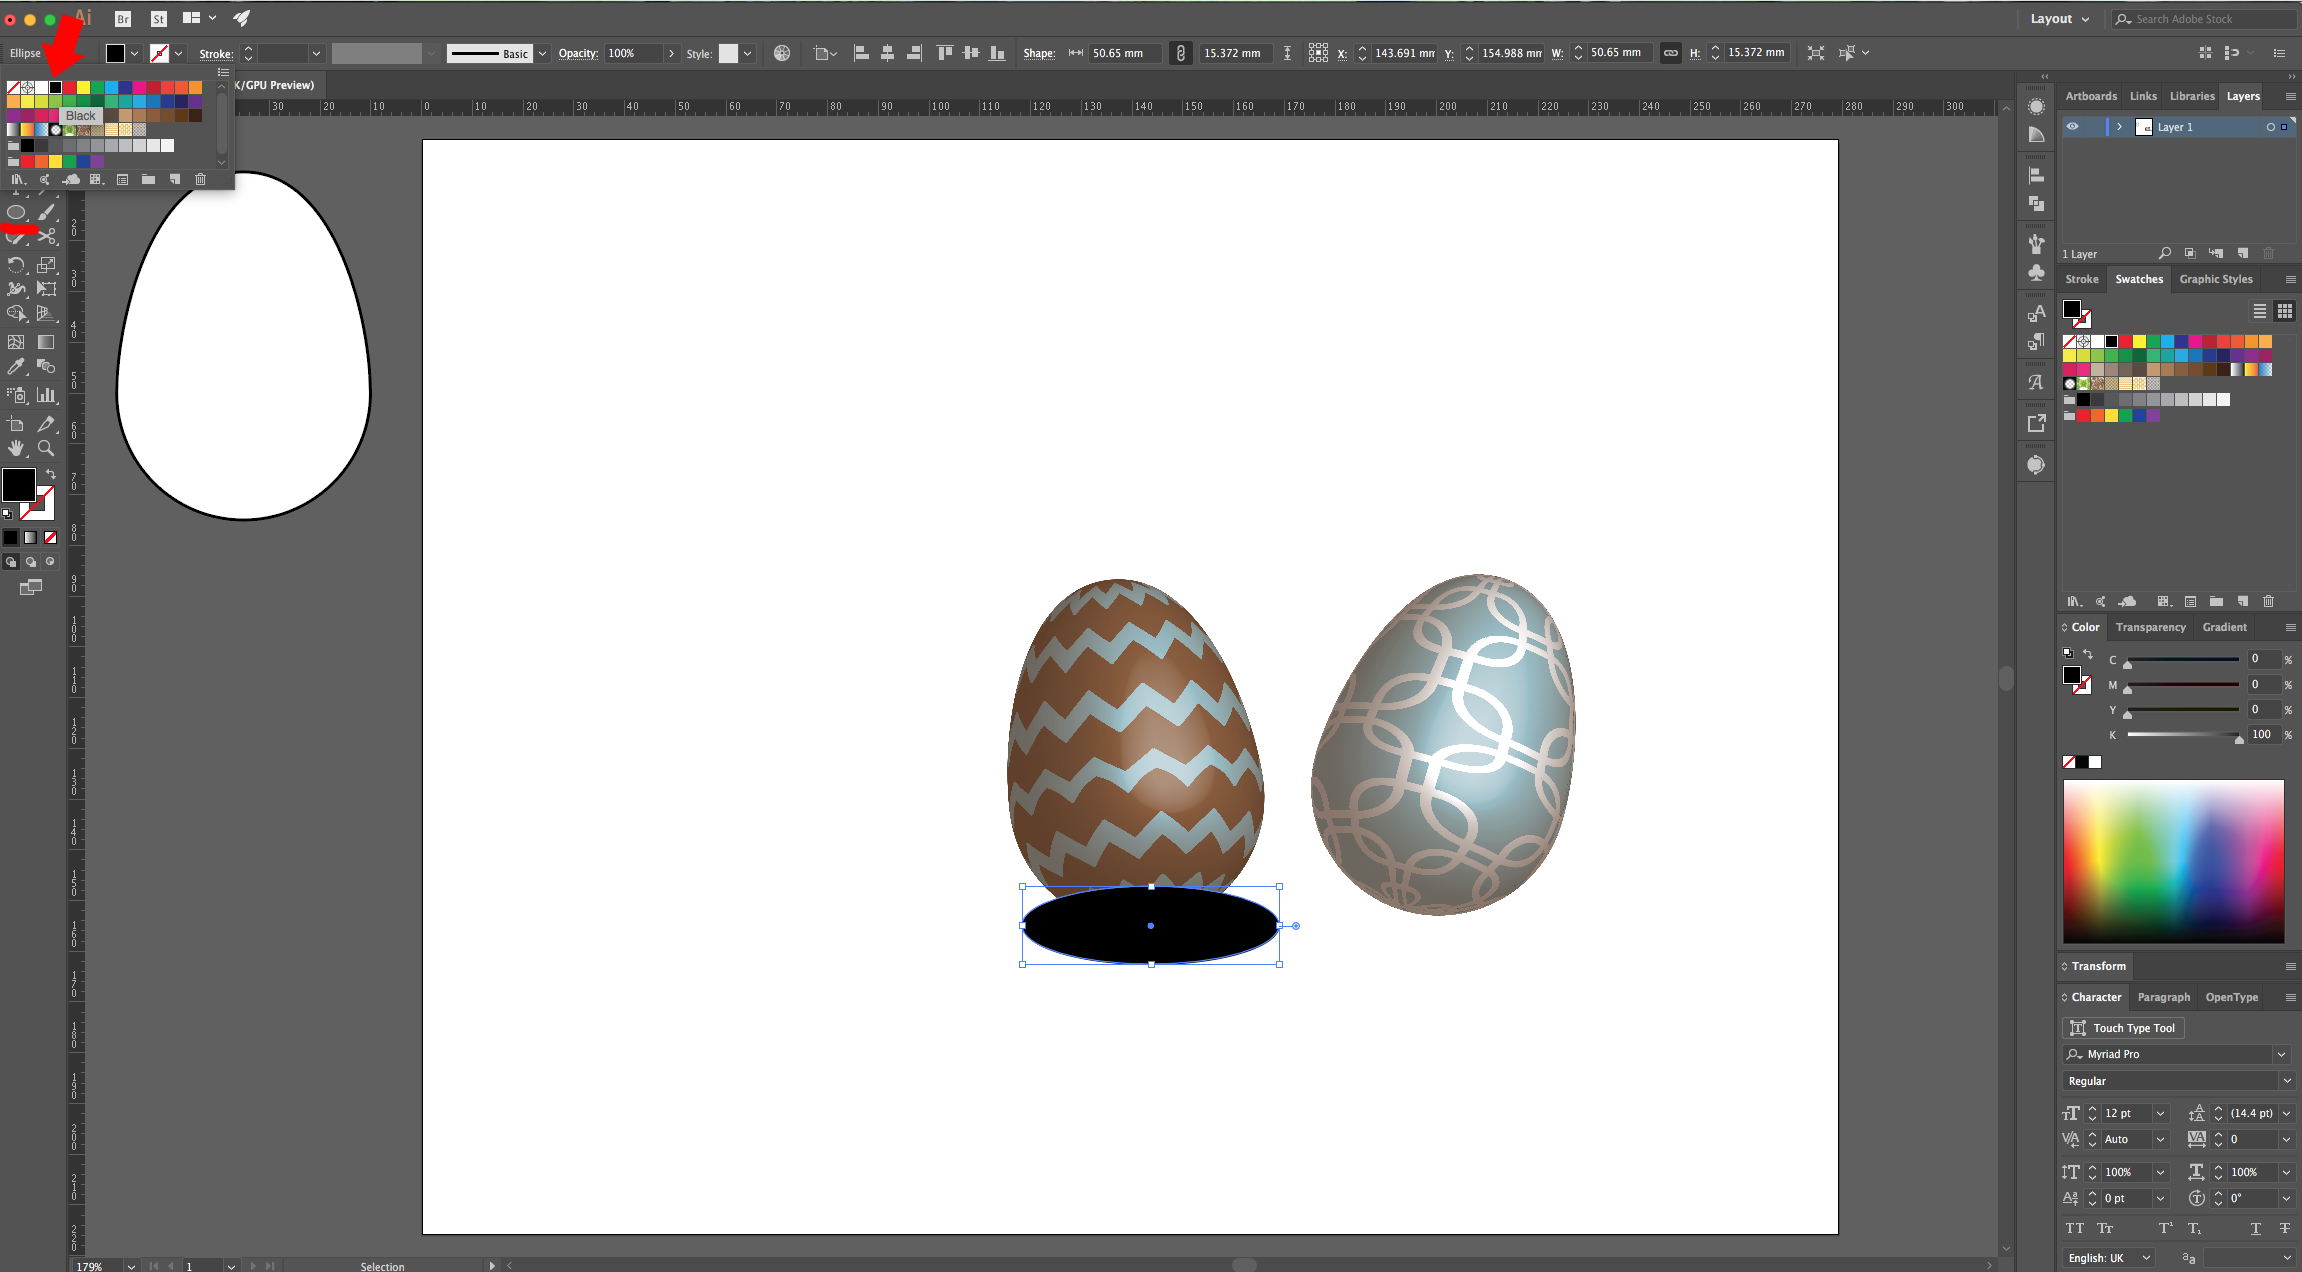
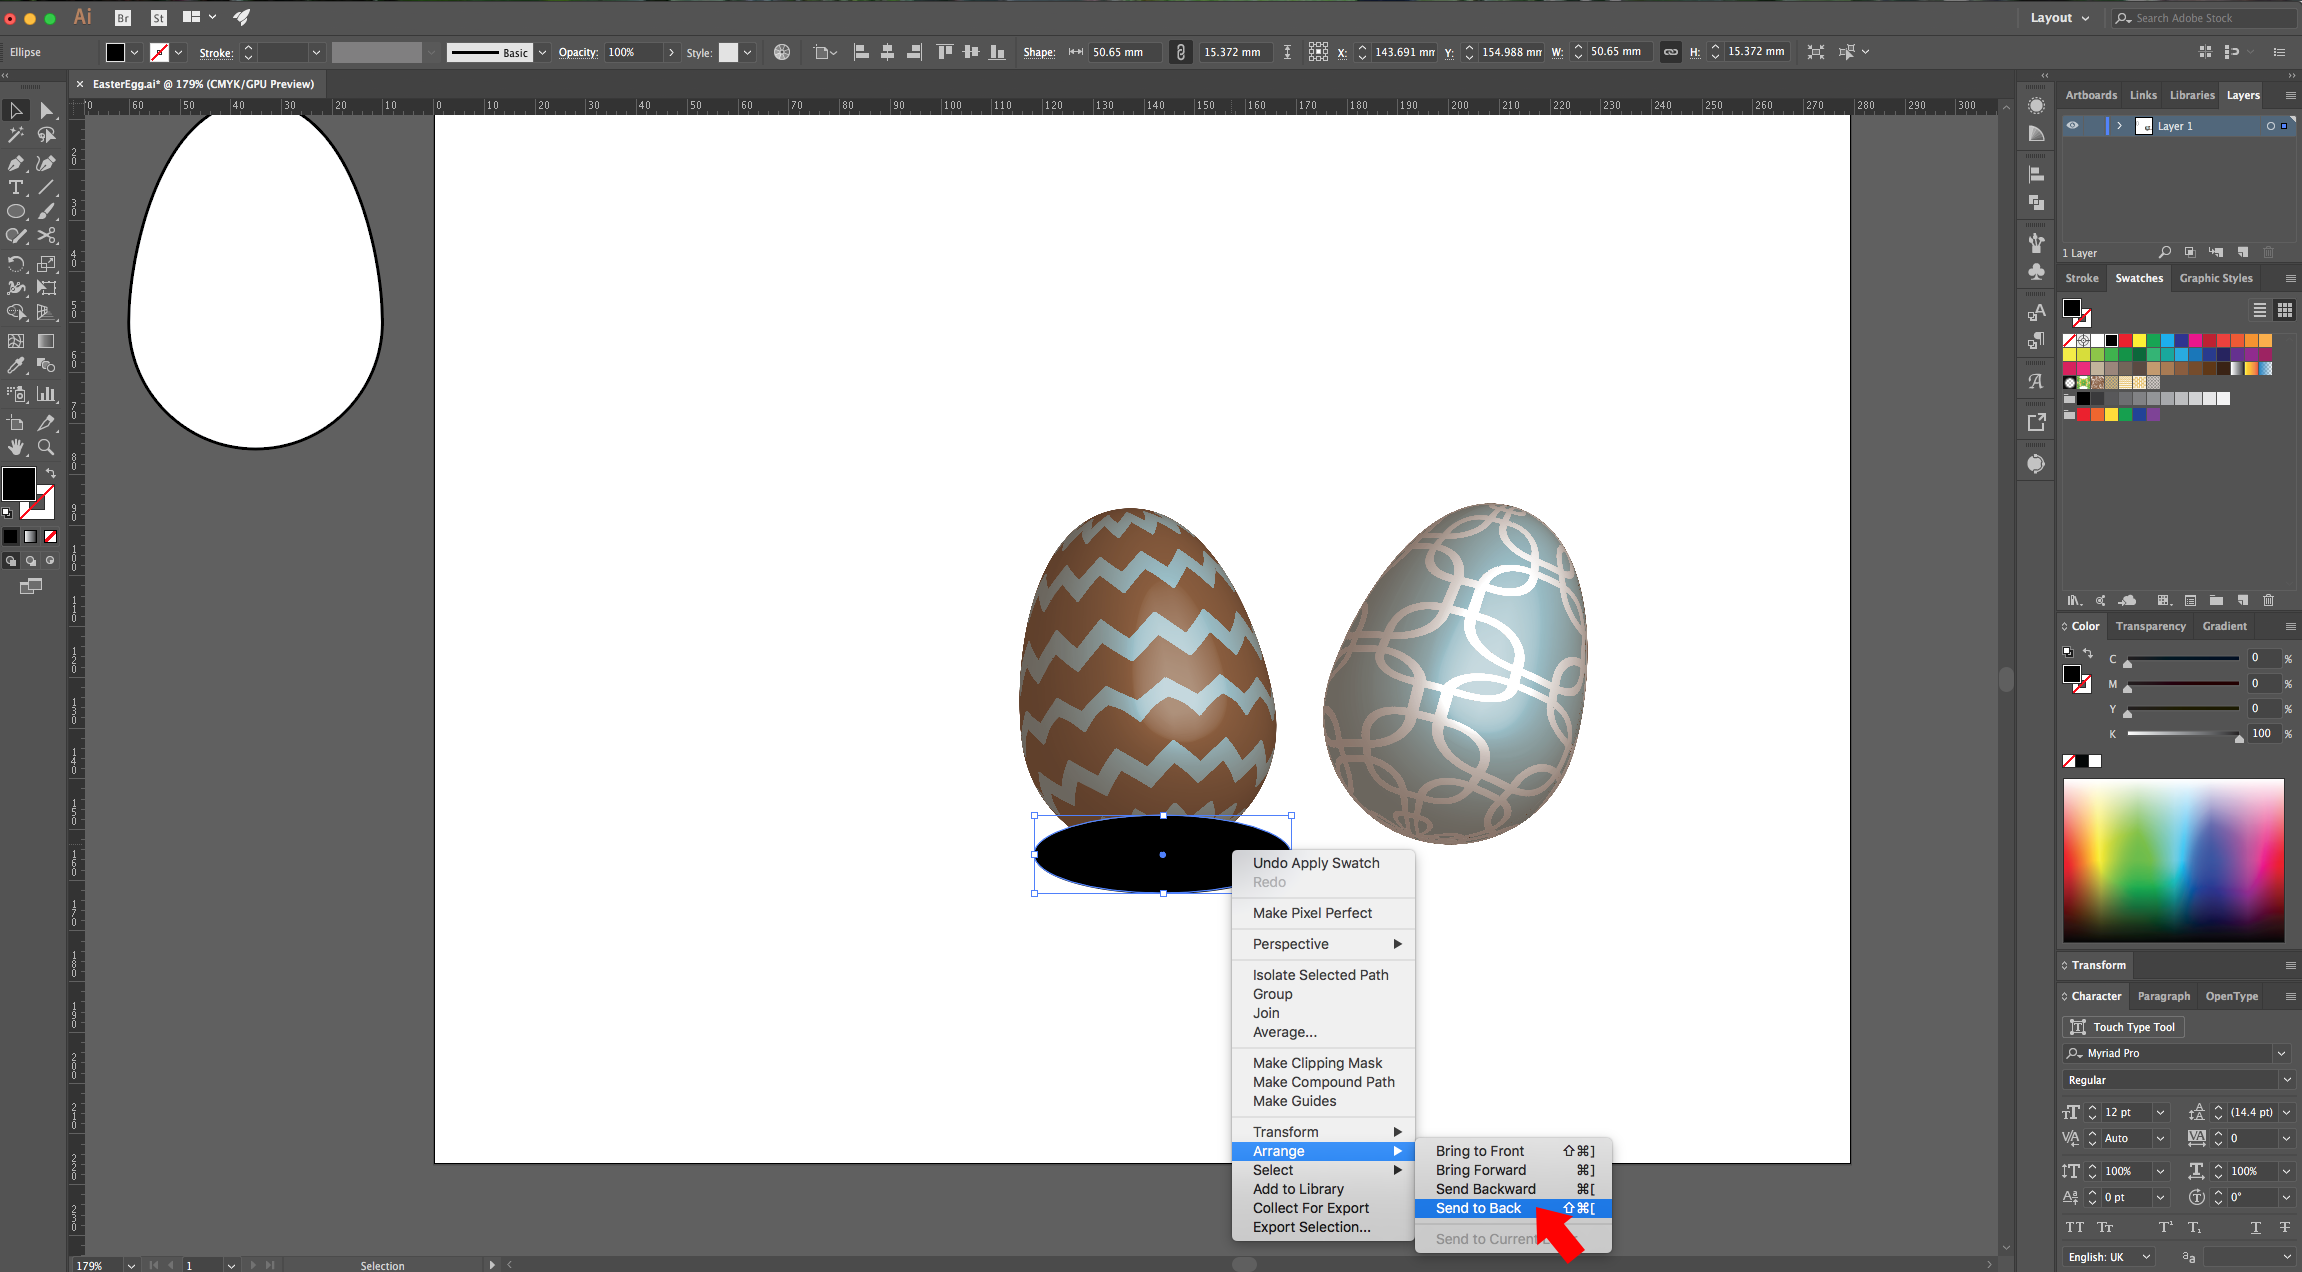
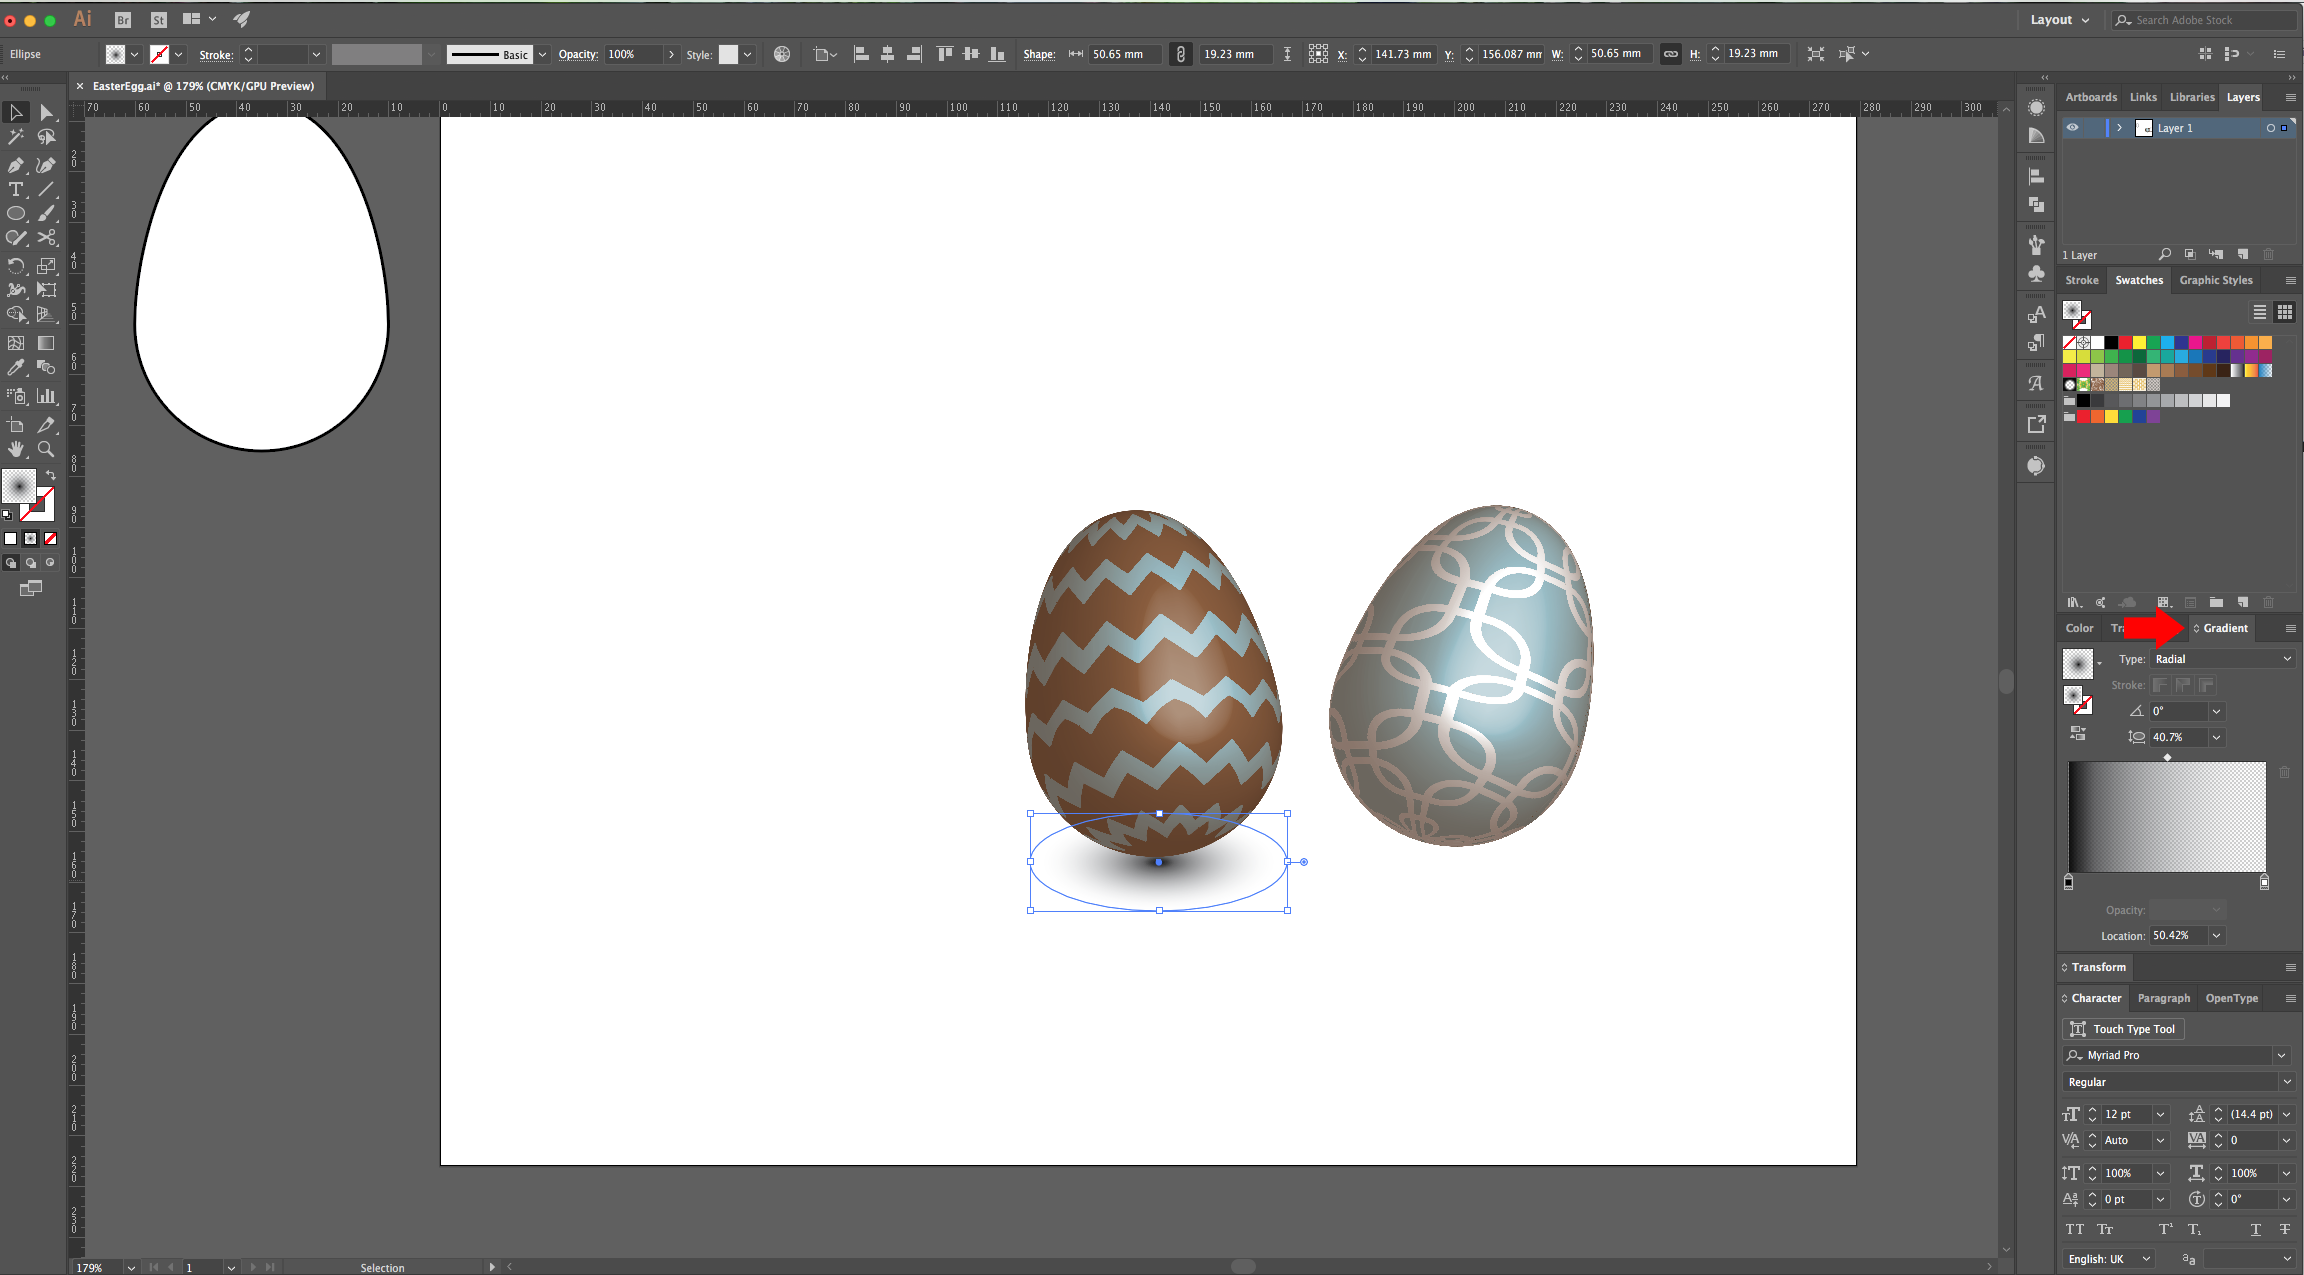
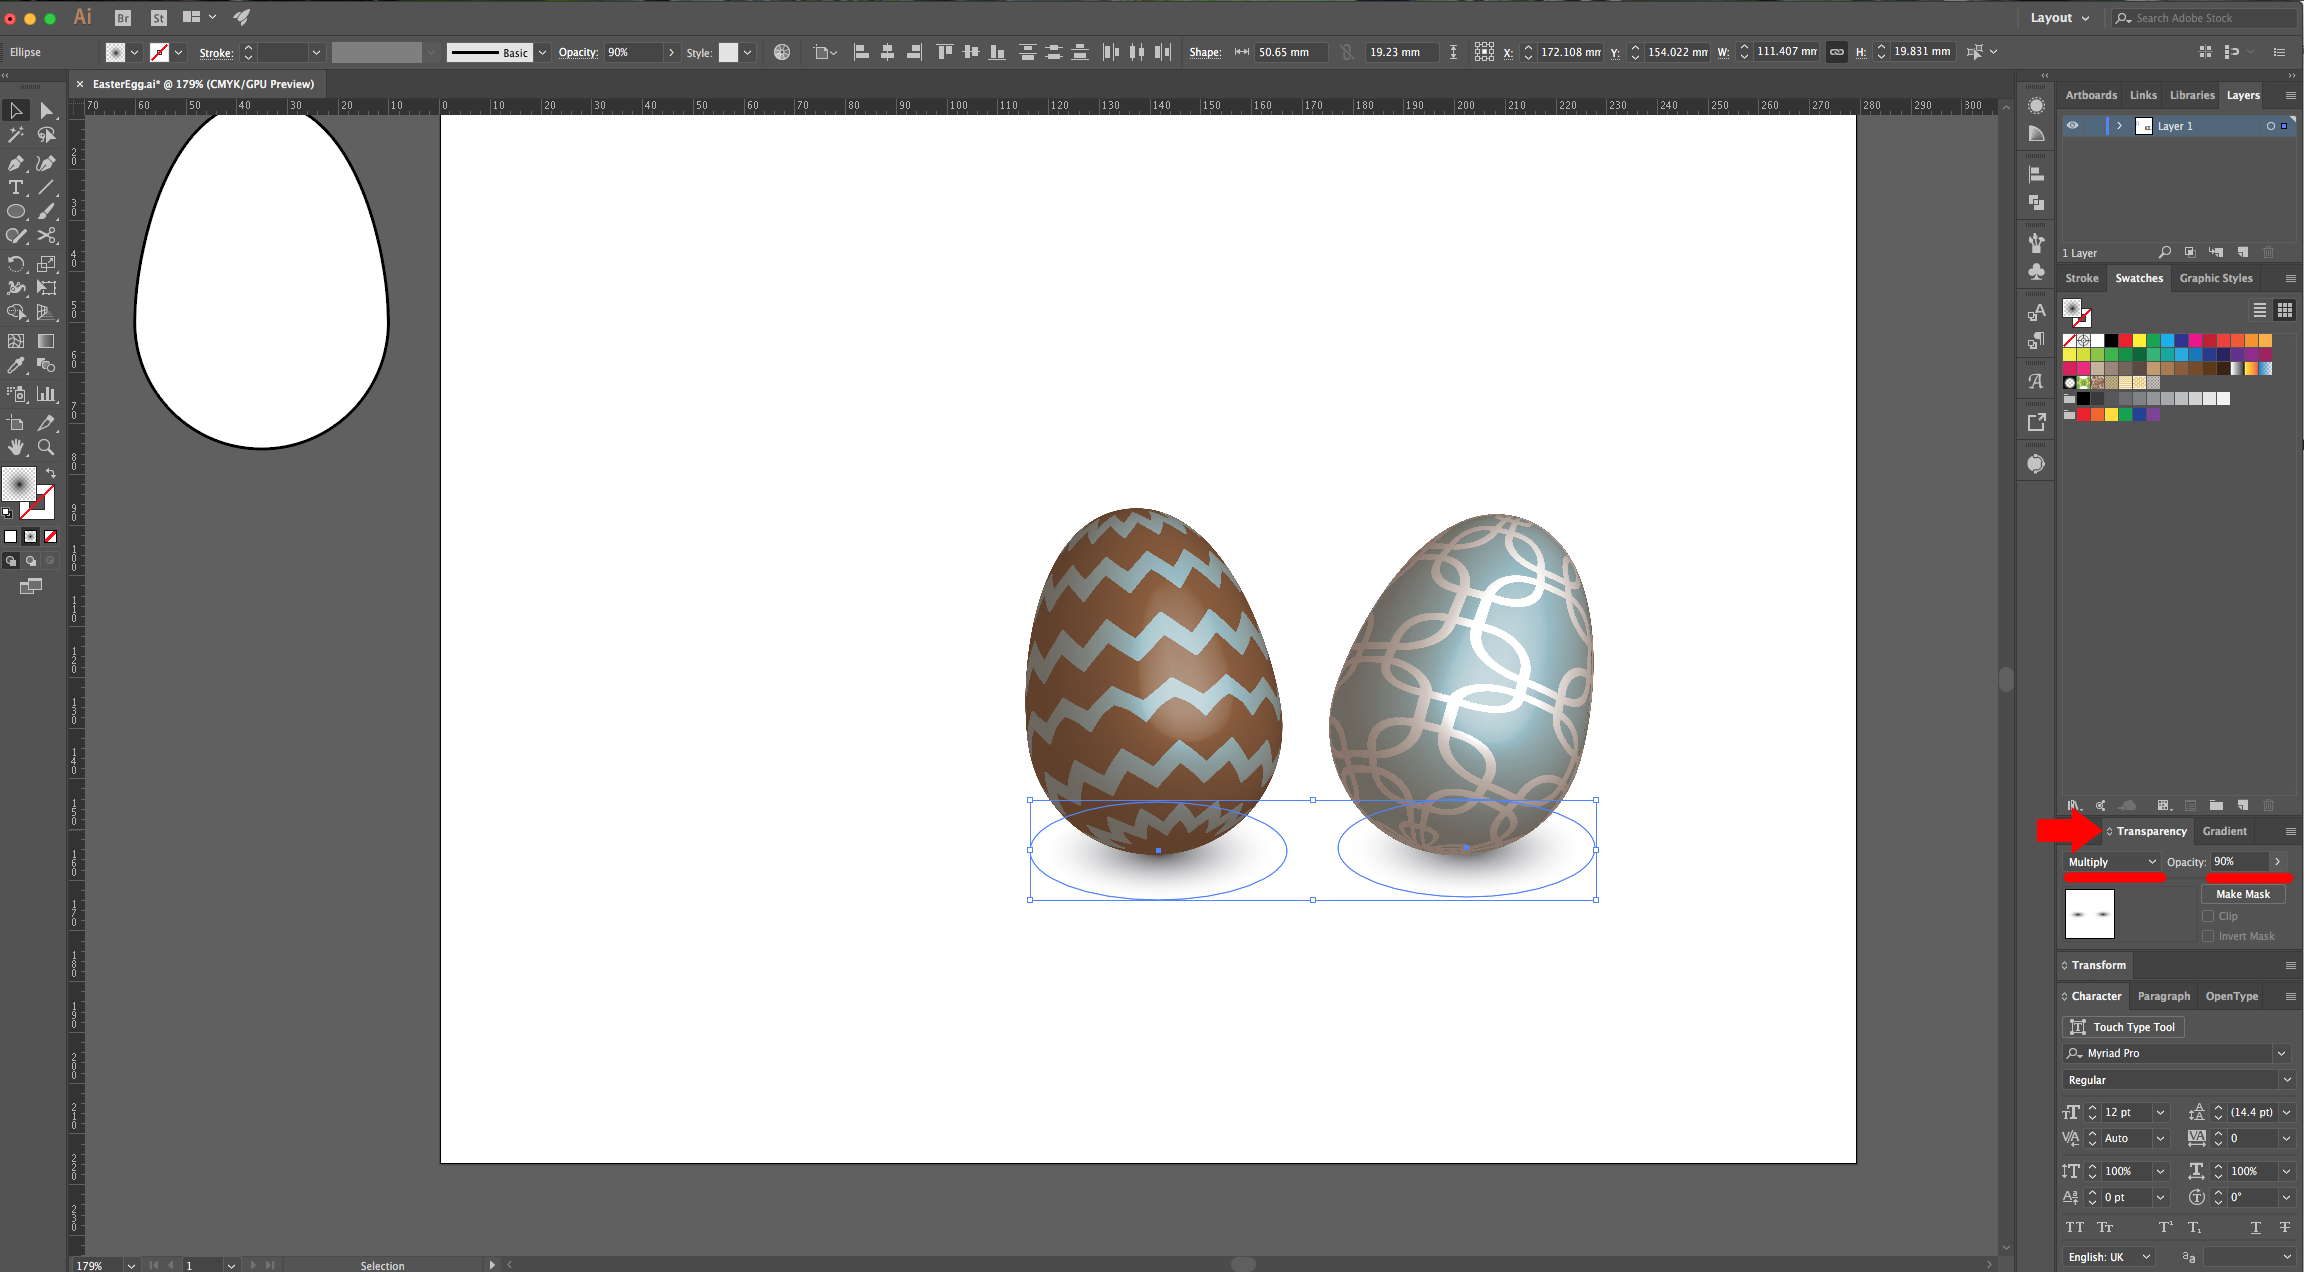
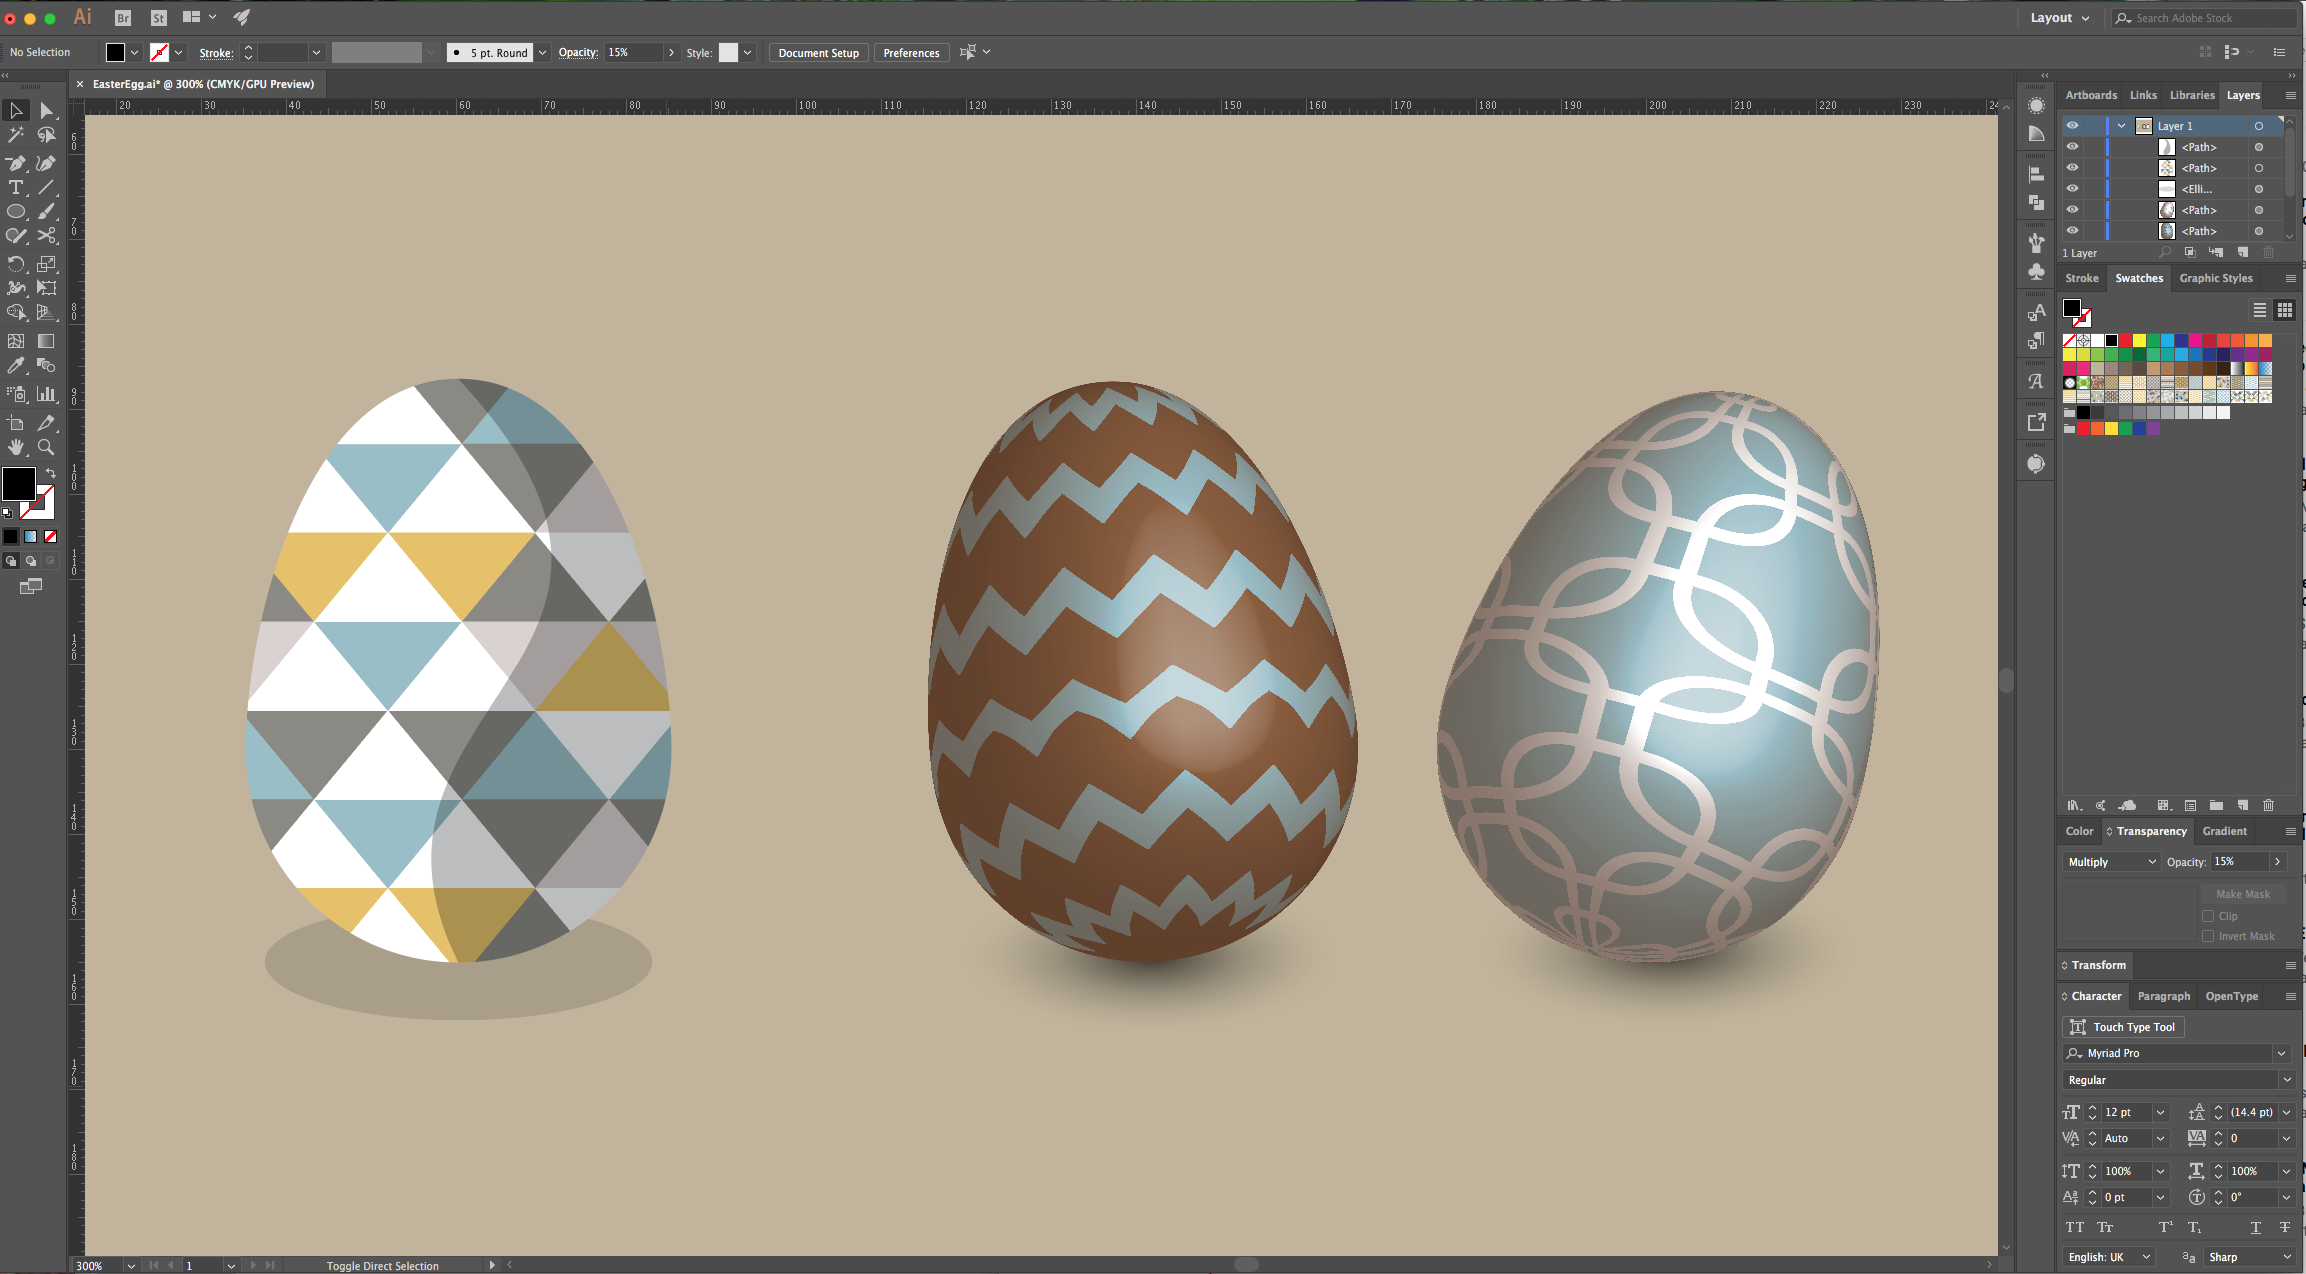
9 - Draw a small Ellipse shape at the bottom of one of your “Eggs”, right-click on it and choose Arrange > Send to Back, then fill it with a “Radial” Black to Transparent “Gradient”. Do the same with your other “Egg”.
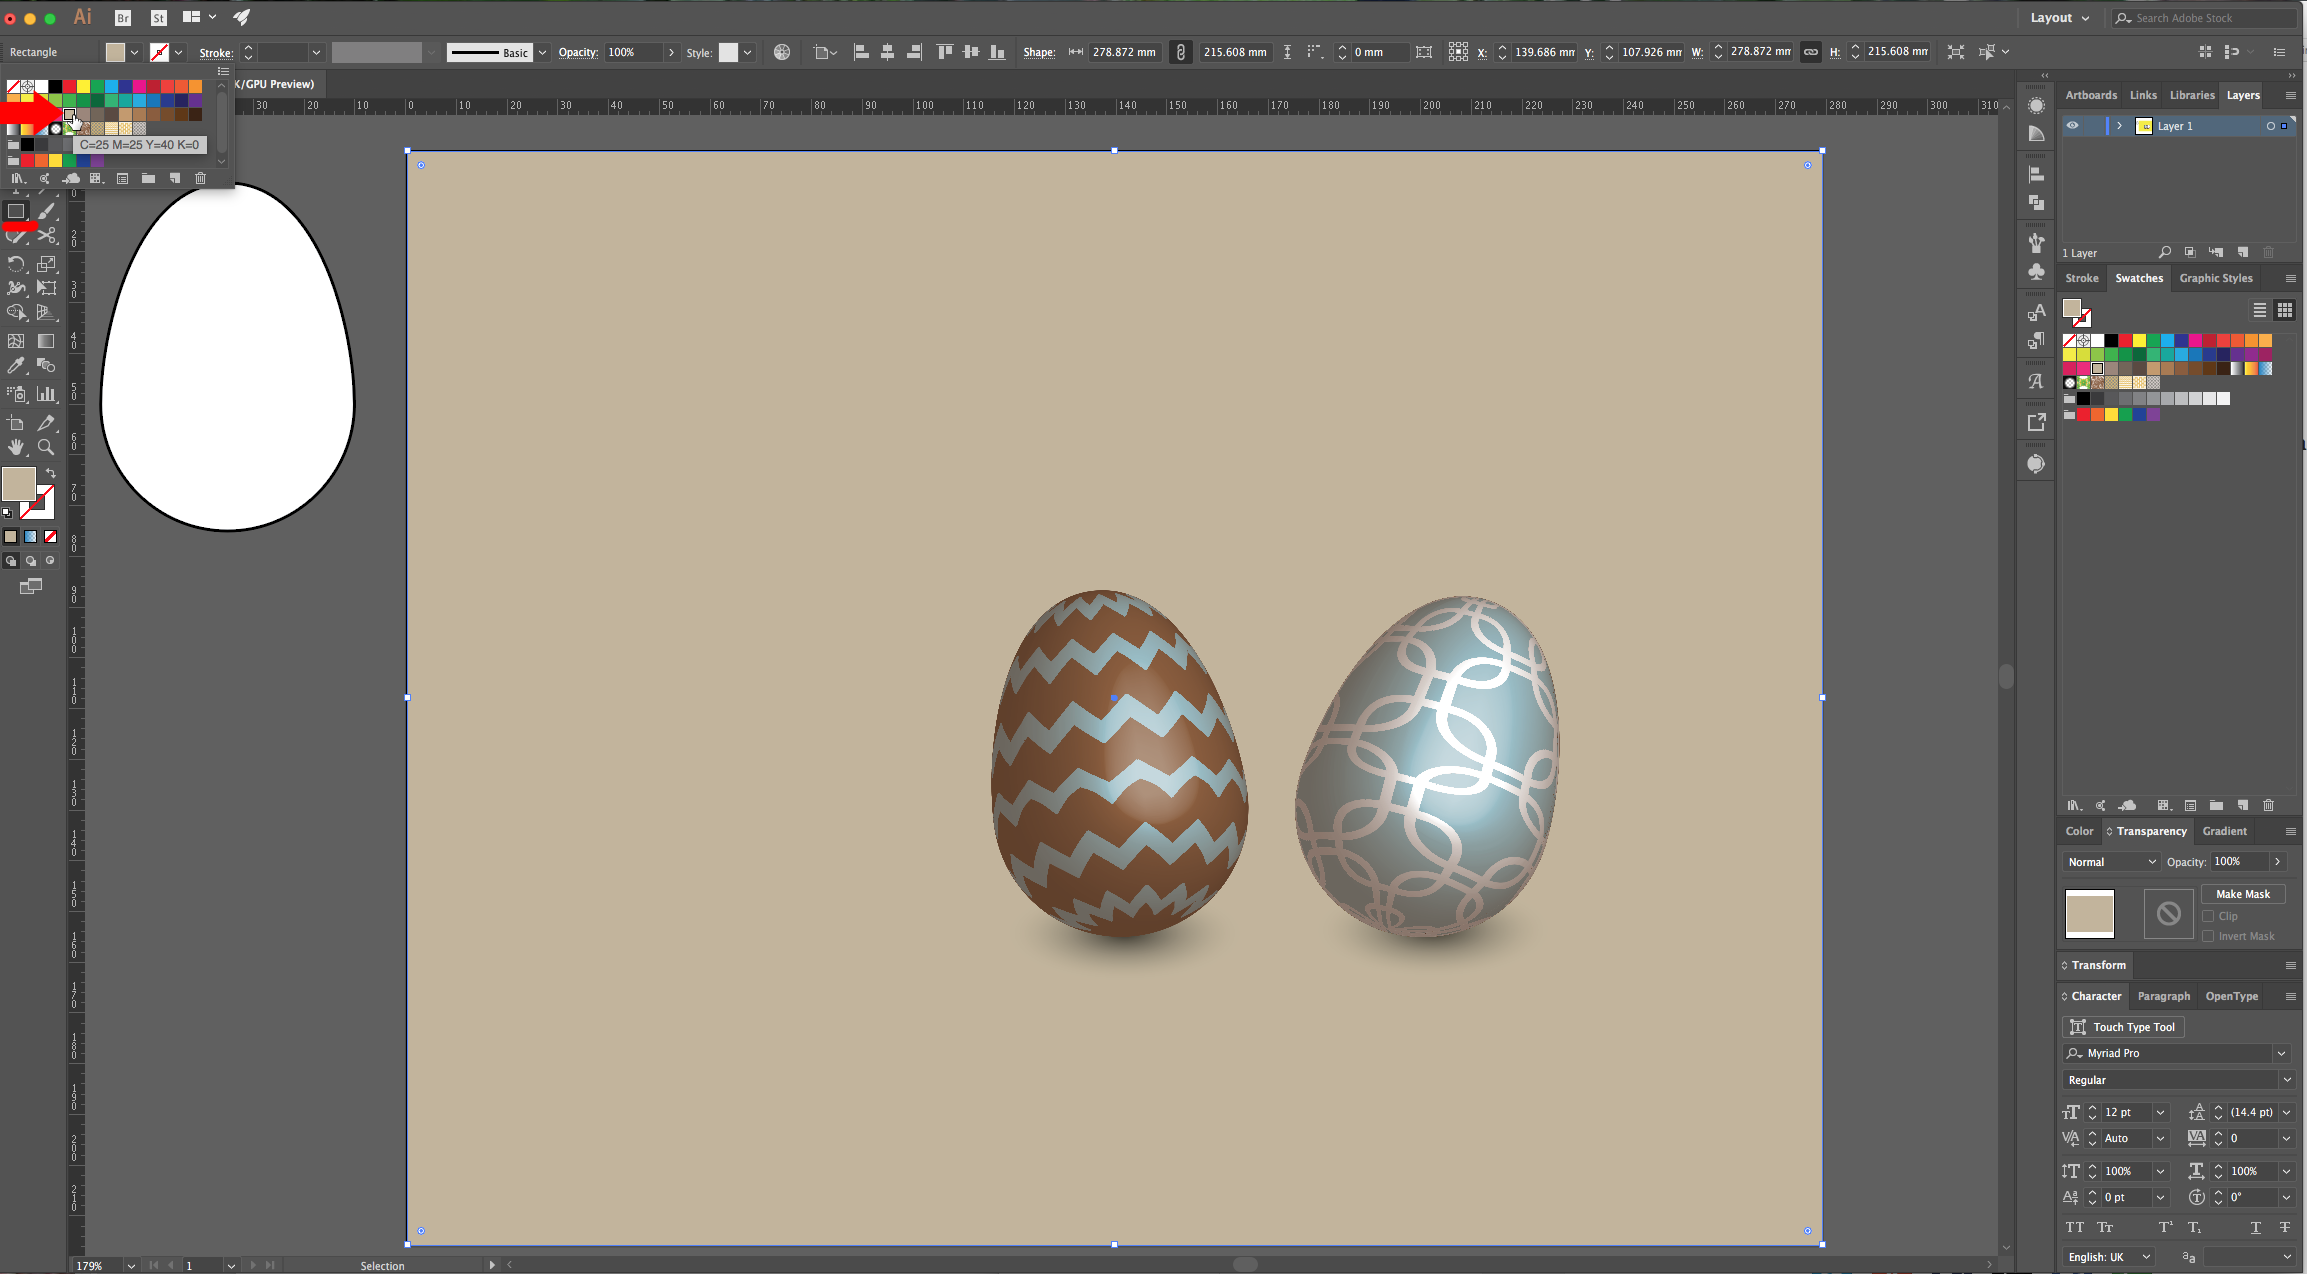
10 - Now use the “Rectangle Tool” (R) to create a rectangular shape that covers all your document, send it to the back and fill it with the color of your choice. Then, drag the “Egg” duplicate you left outside into your document and use one of the “Patterns” you imported as “Fill” with No “Stroke”.
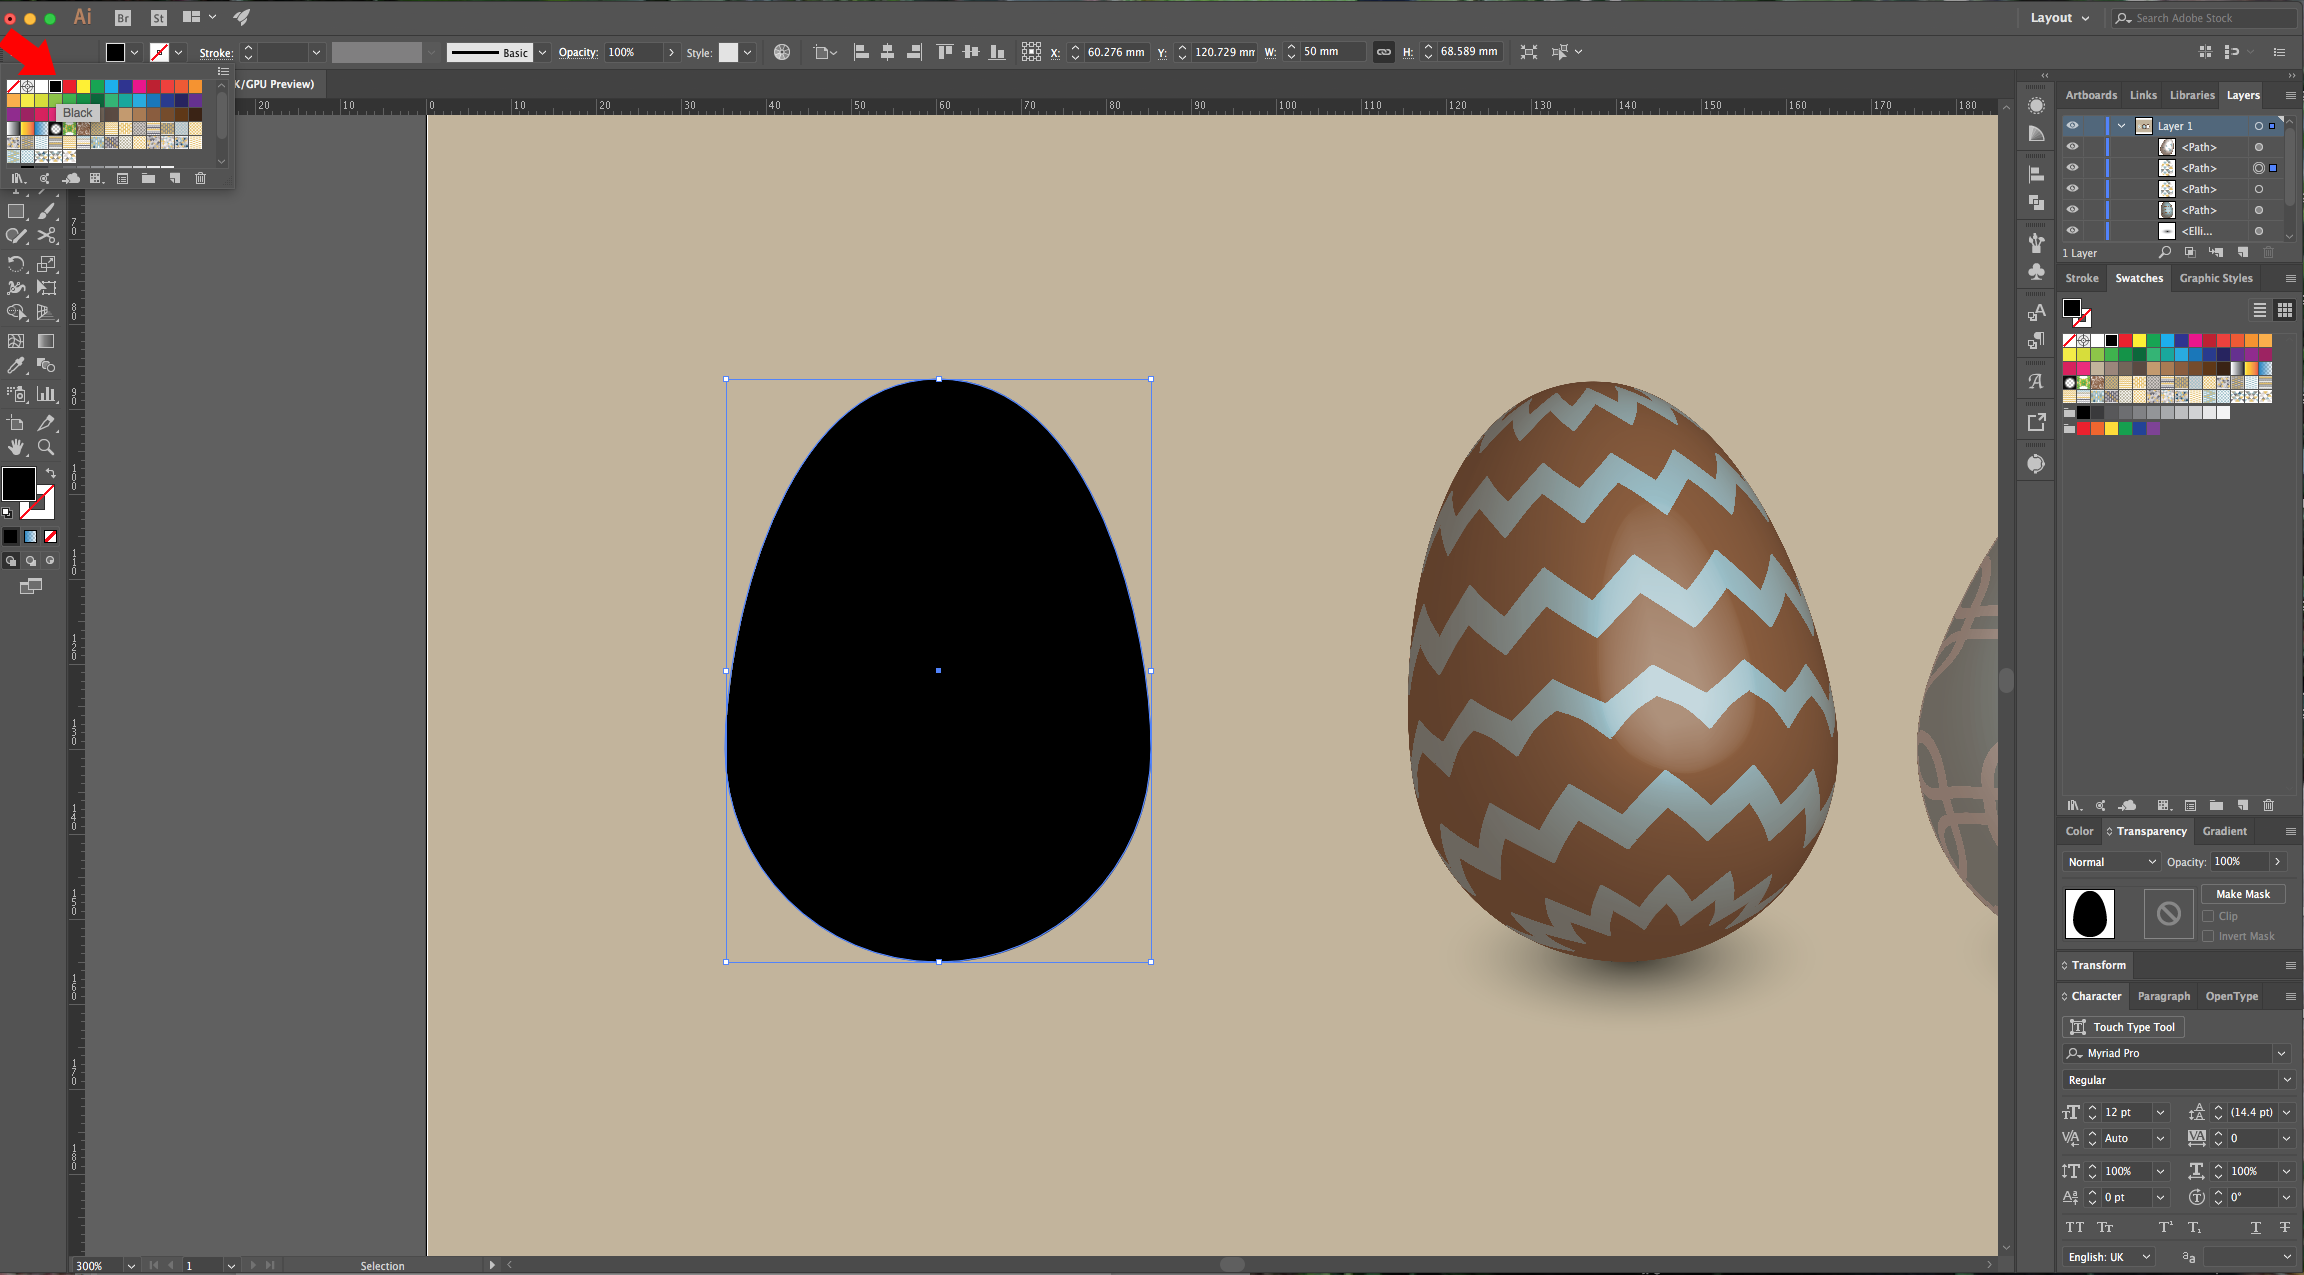
11 - “Copy” (Command/Control + C) and “Paste in Front” (Command/Control + F) your “Egg” and change the “Fill” to black.
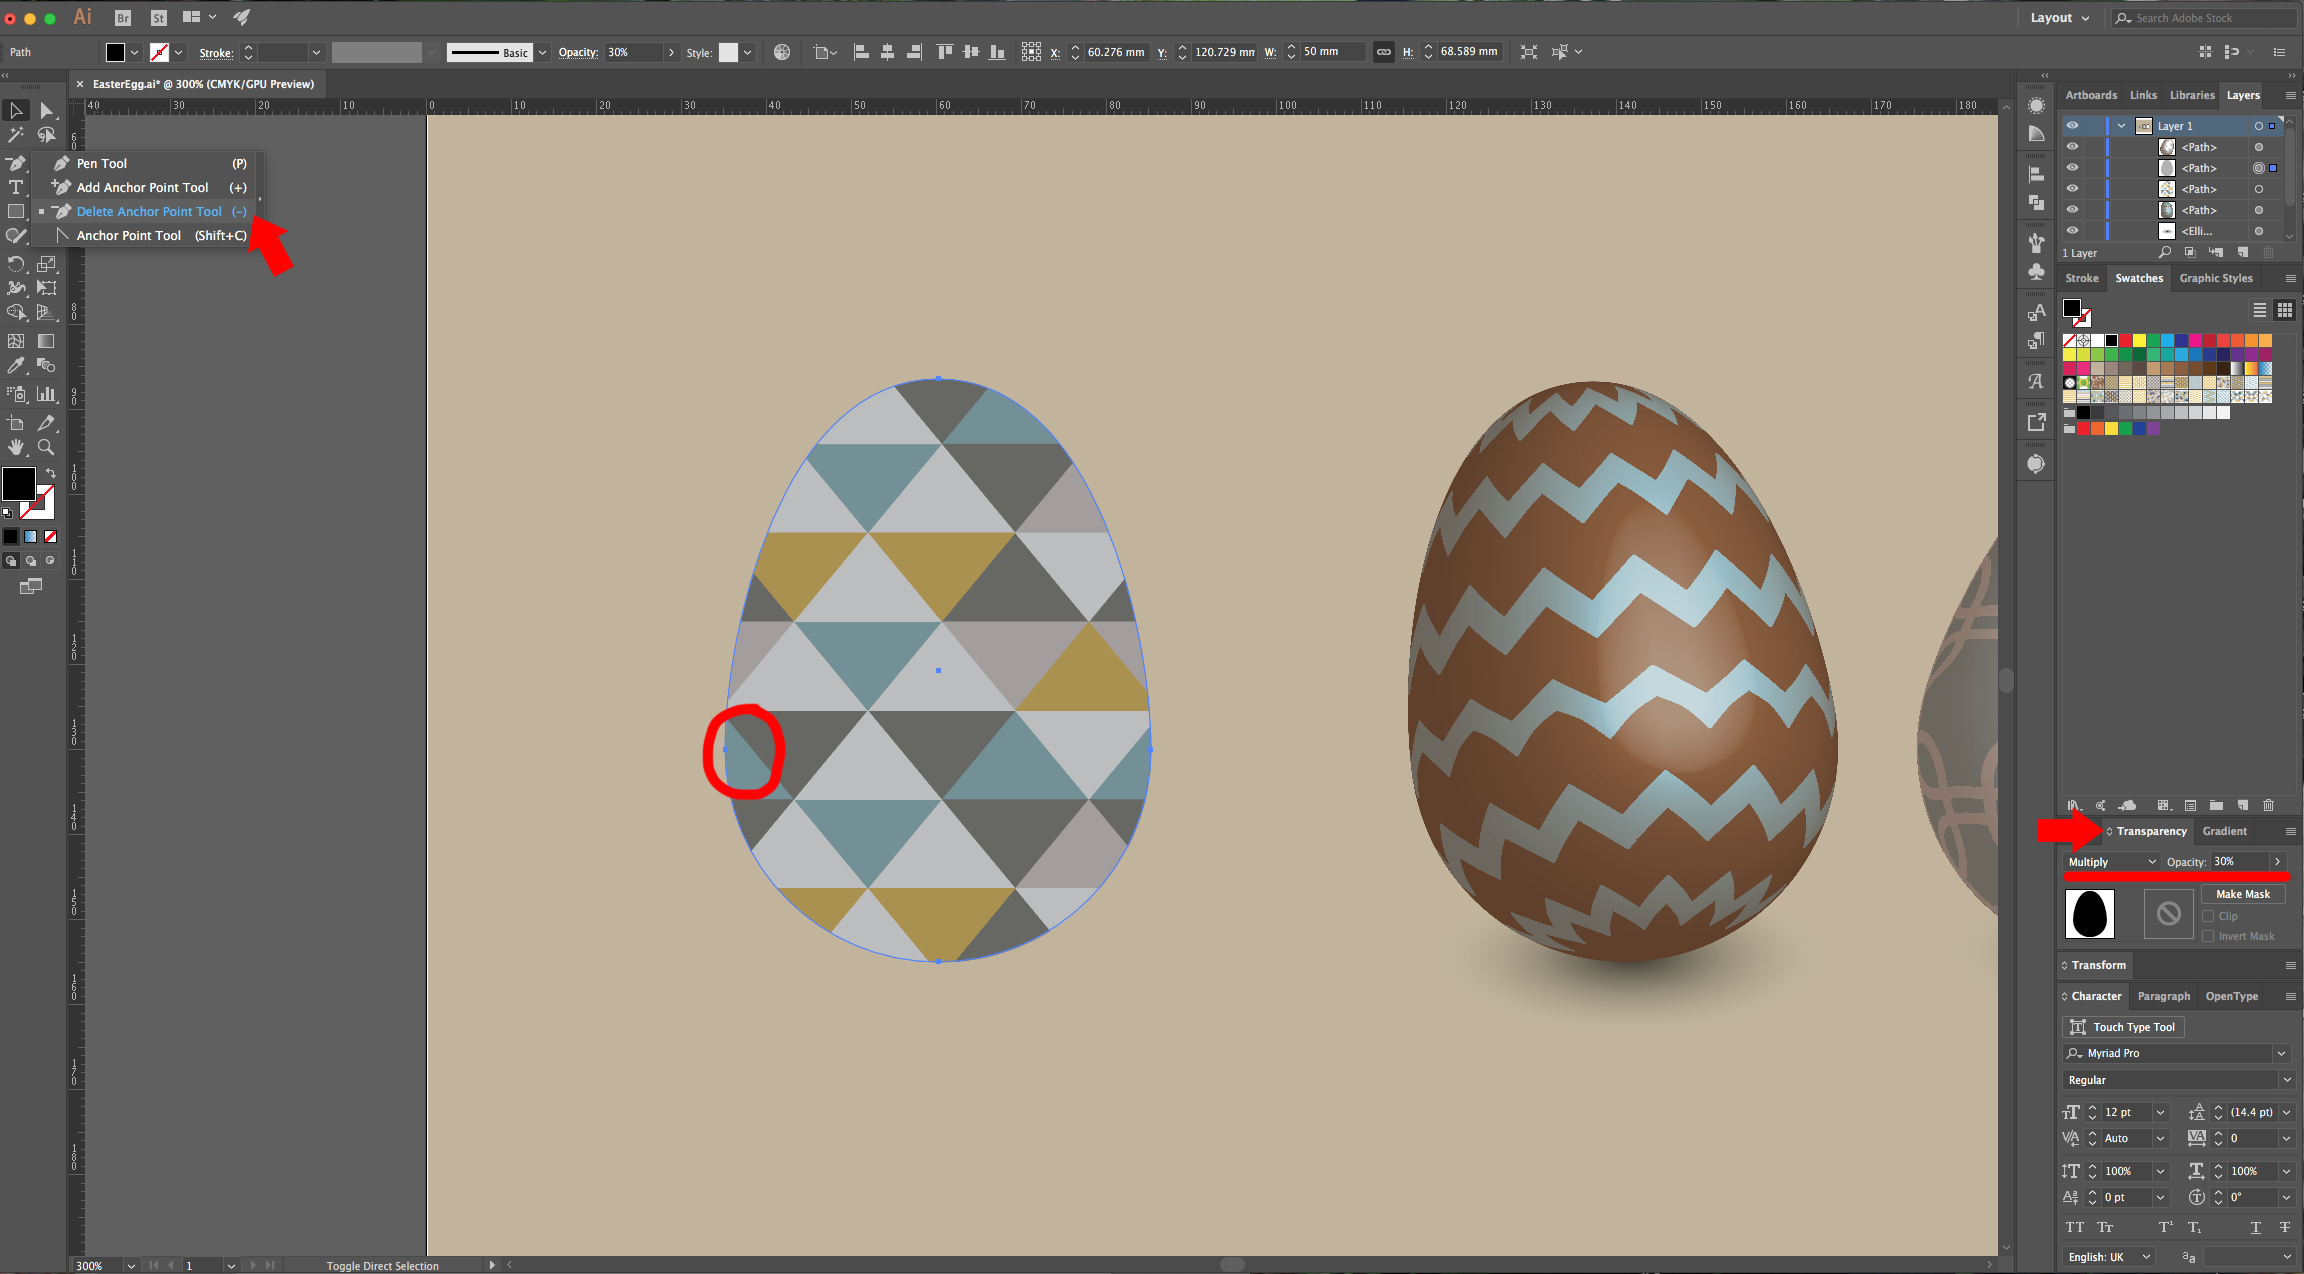
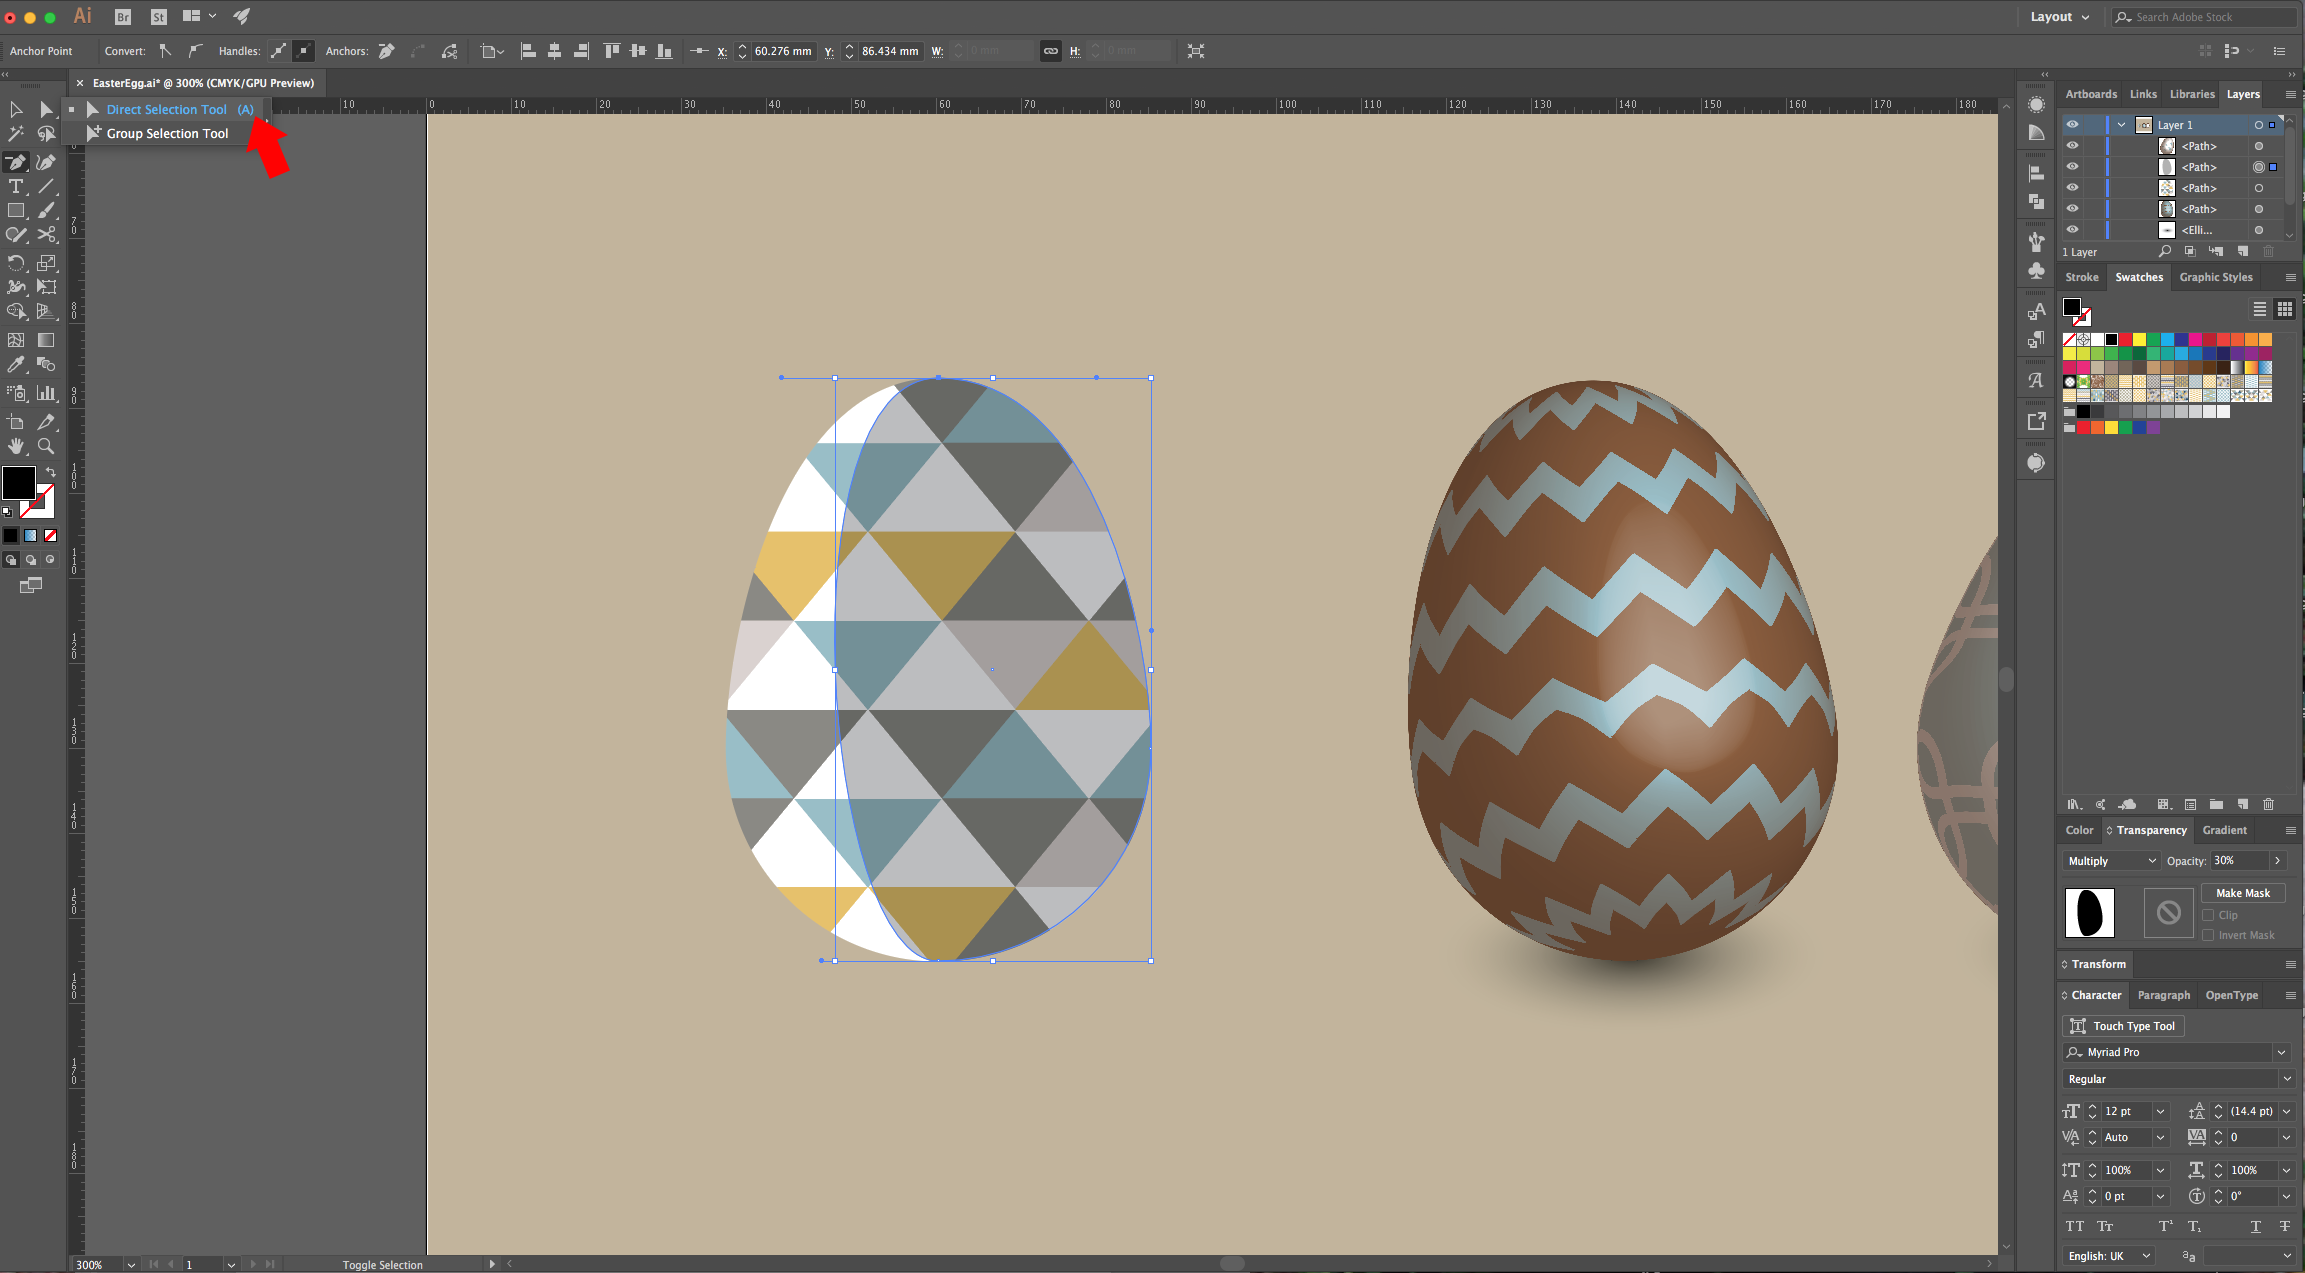
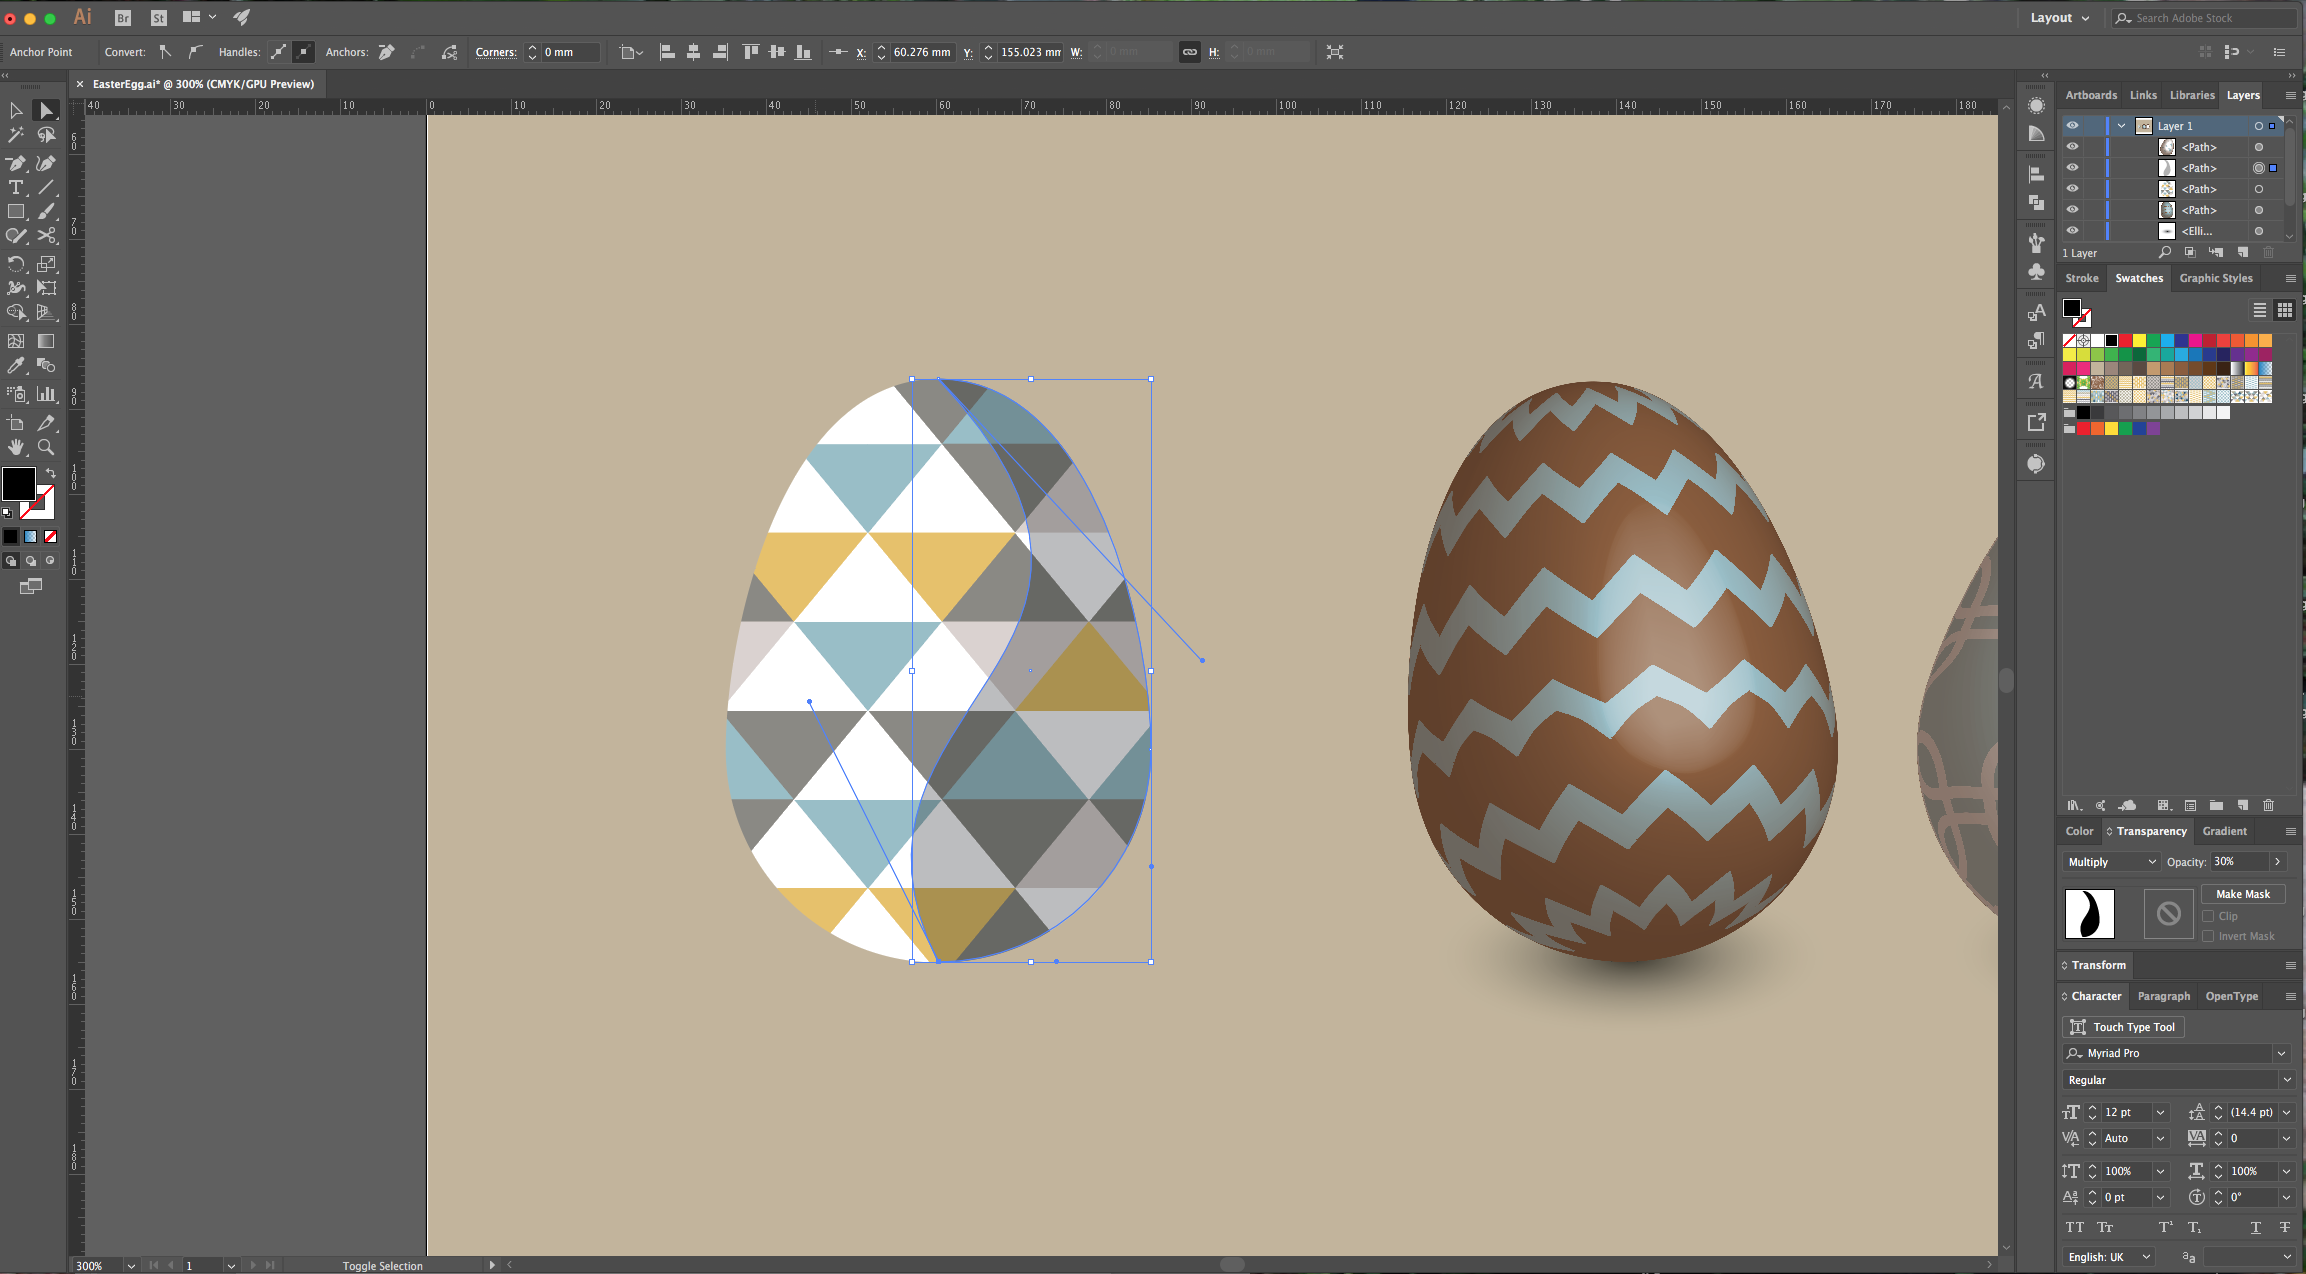
12 - Go to the “Transparency Panel” and change the “Blending Mode” to “Multiply” and the “Opacity” to 30%. Select the “Delete Anchor Point Tool” (-) and click on the Left “Anchor Point”, then with the “Direct Selection Tool” (A) click on Upper one to select it and while holding the “Alt/Option” key move the left-side handle to modify your shape. Repeat with the one in the Bottom.
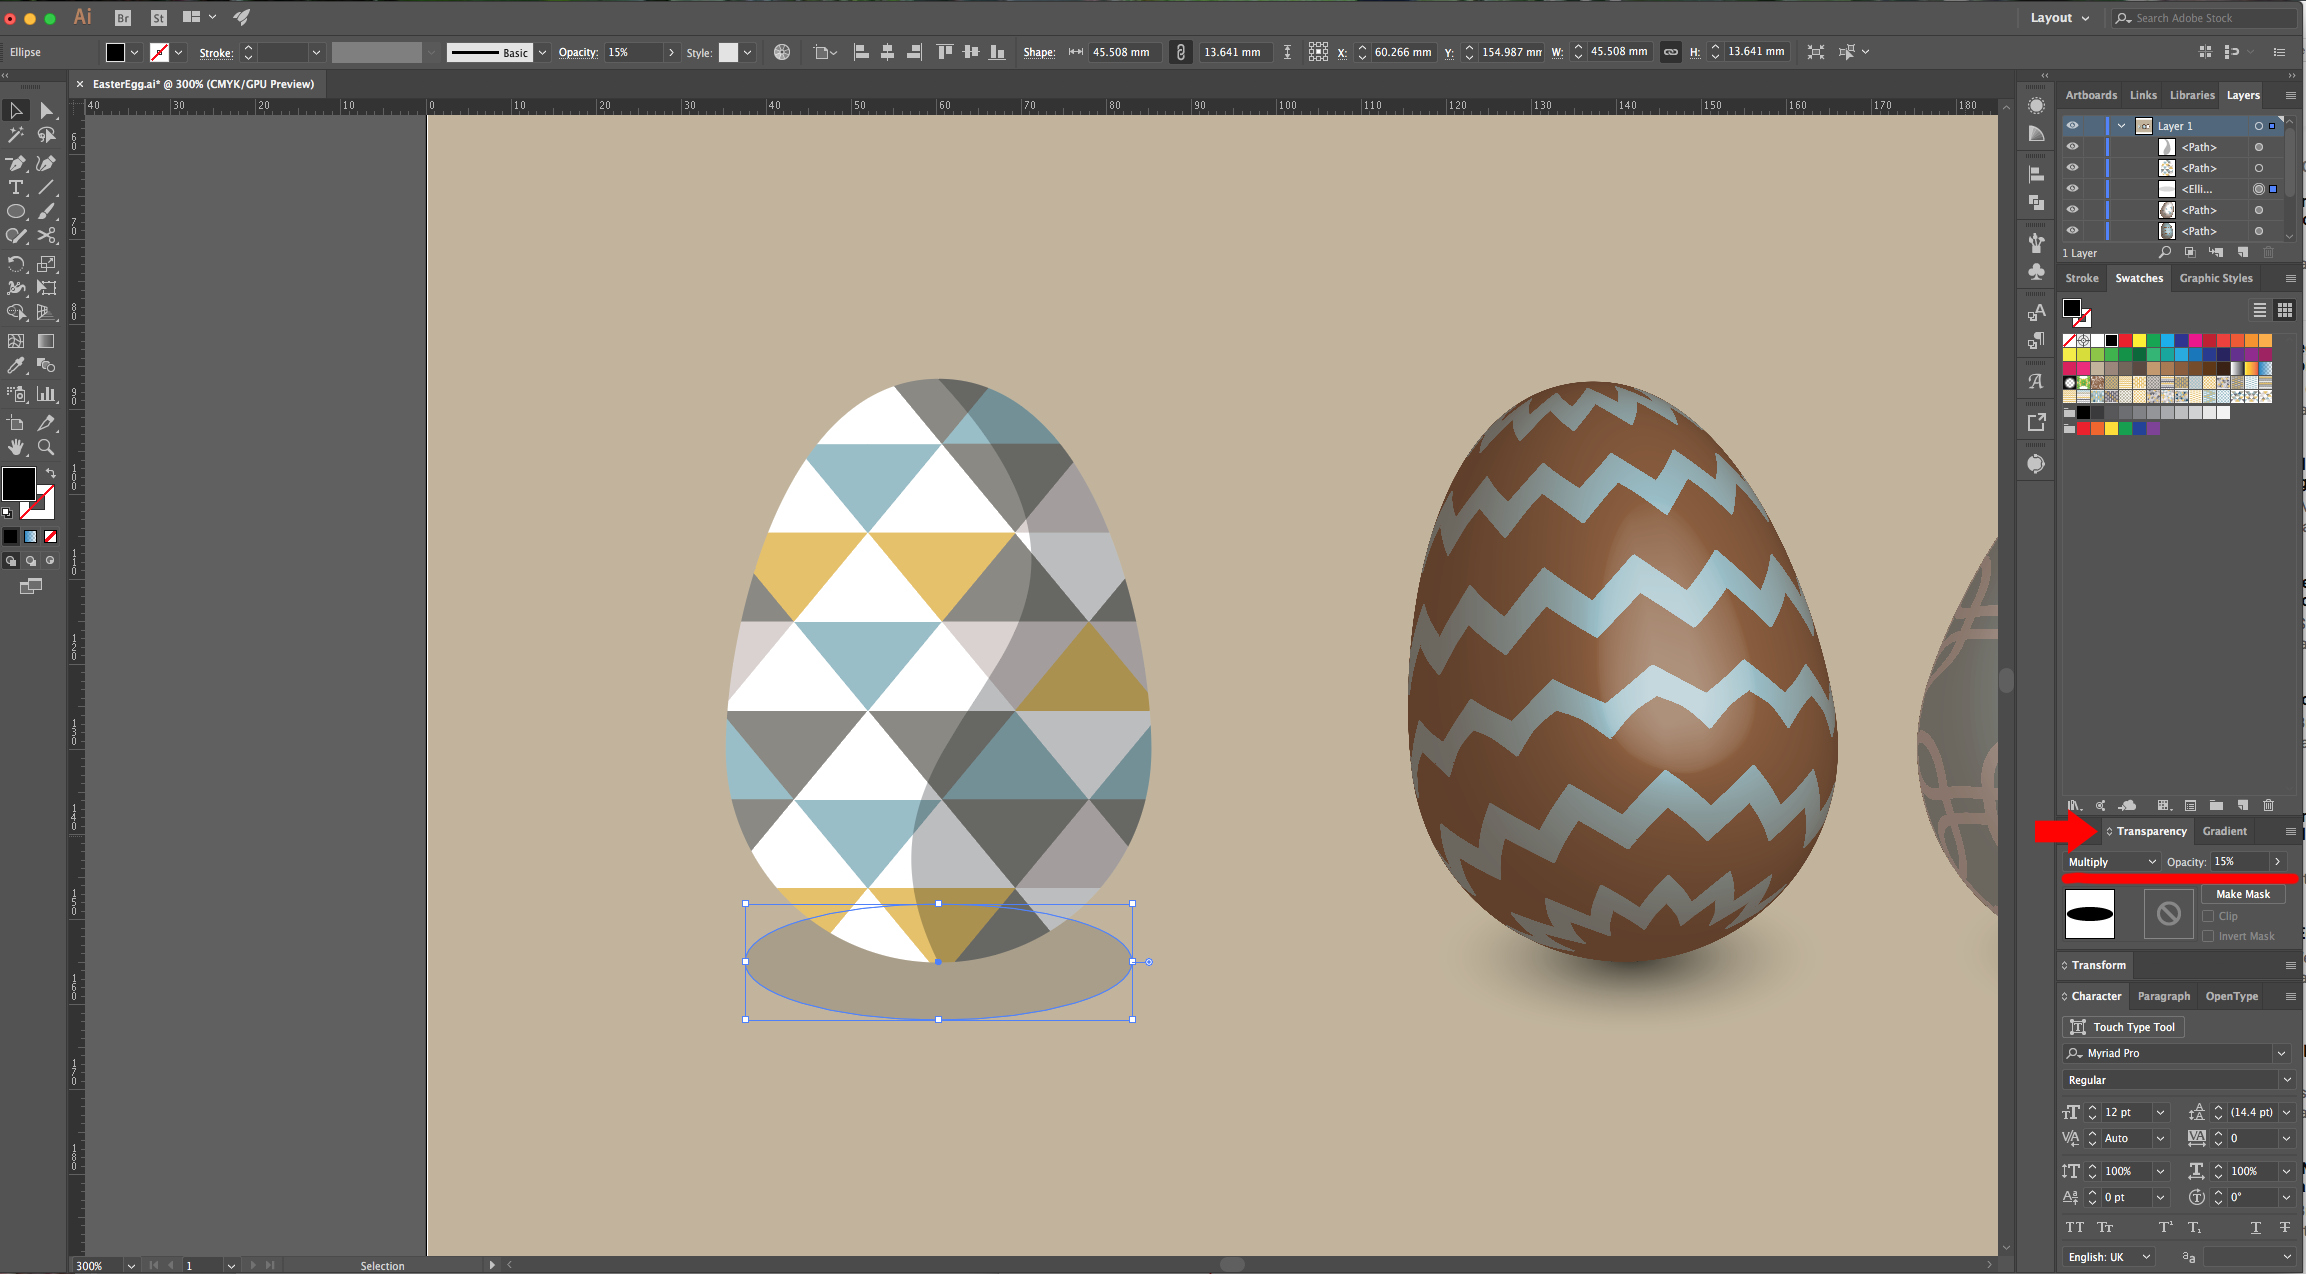
13 - Draw a small Ellipse shape at the bottom of this “Egg”, place it under it and change its “Blending Mode” to “Multiply” and the “Opacity” to 15%.

14 - Now you know two ways to create an Easter Egg in Illustrator. Enjoy!
2 - Select the “Ellipse Tool” (L) and to draw a circle with a 5mm circumference approximately.
3 - With the “Direct Selection Tool” (A) click on the Top “Anchor Point” and hit the “Up” key until you are satisfied with its position. If you want to fix the shape a bit, select the “Handles” on the sides of the “Anchor Point” and pull them (Holding the “Shift” key) to modify the curves and make a more realistic “Egg” shape.
4 - Hold the “Alt” key and drag your “Egg” out of your document to Duplicate it. Select the “Scissors Tool” (S), click on the Top and Bottom “Anchor Points” to cut your “Egg” in half and delete the left portion. Make the “Stroke” color a medium brown and no “Fill”.
5 - Go to Effects > 3D > Revolve and use the following values:
6 - In the “Swatches Panel” click on the small menu button on the top-right and go to Other Library… > Open Swatch Library, then navigate to the location where you saved your pattern files and open the file that has a “.ai” after the name. Select the “Pattern” of your choice and drag it into your document. If you want to modify the patter you chose, just double-click on it and tweak it to your liking.
7 - Go to the “Symbols Panel”, select one of the Patterns from your document and choose “New Symbol” from the top-right menu. Name it and click “OK”.
8 - In the “Appearance Panel” double-click on the “Revolve Effect” to edit it (Make sure your “Egg” shape is selected). Click on the “Map Art” button and choose the “Symbol” you created from the drop-down menu options. Check the “Shade Artwork (slower)” box and click “OK” twice. Duplicate your “Egg” and change some of the “Revolve” settings on your duplicate.
9 - Draw a small Ellipse shape at the bottom of one of your “Eggs”, right-click on it and choose Arrange > Send to Back, then fill it with a “Radial” Black to Transparent “Gradient”. Do the same with your other “Egg”.
10 - Now use the “Rectangle Tool” (R) to create a rectangular shape that covers all your document, send it to the back and fill it with the color of your choice. Then, drag the “Egg” duplicate you left outside into your document and use one of the “Patterns” you imported as “Fill” with No “Stroke”.
11 - “Copy” (Command/Control + C) and “Paste in Front” (Command/Control + F) your “Egg” and change the “Fill” to black.
12 - Go to the “Transparency Panel” and change the “Blending Mode” to “Multiply” and the “Opacity” to 30%. Select the “Delete Anchor Point Tool” (-) and click on the Left “Anchor Point”, then with the “Direct Selection Tool” (A) click on Upper one to select it and while holding the “Alt/Option” key move the left-side handle to modify your shape. Repeat with the one in the Bottom.
13 - Draw a small Ellipse shape at the bottom of this “Egg”, place it under it and change its “Blending Mode” to “Multiply” and the “Opacity” to 15%.
14 - Now you know two ways to create an Easter Egg in Illustrator. Enjoy!


