
Enamel and Gold Text in Photoshop
For this tutorial, you will use the free Font “GENUINE” from Ari Riadi and some free “Gold” gradients.
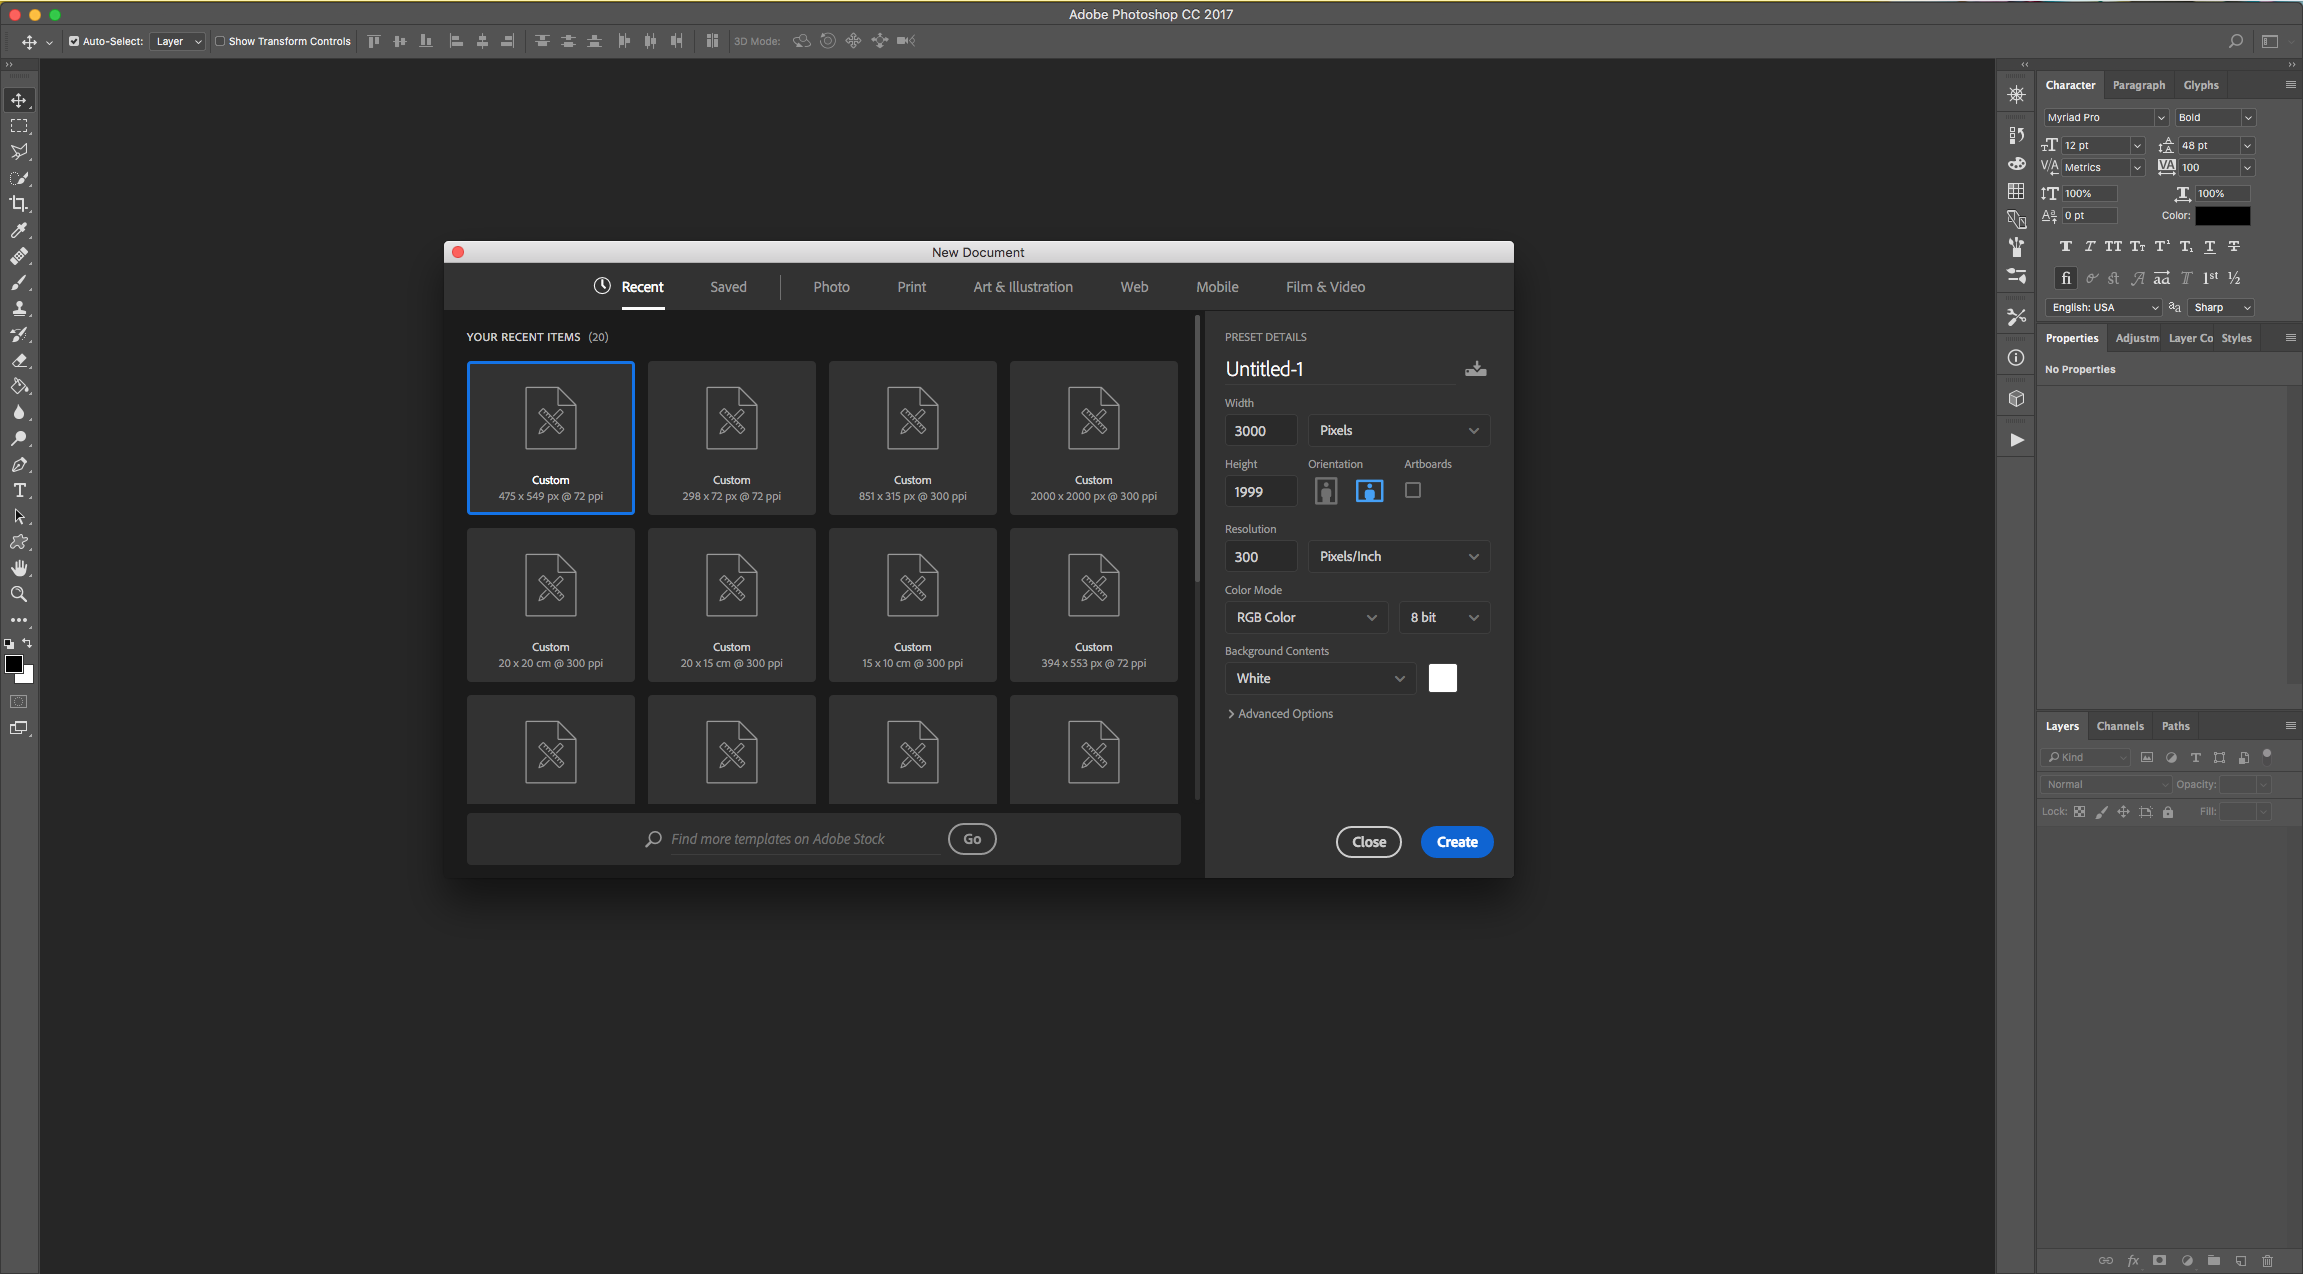
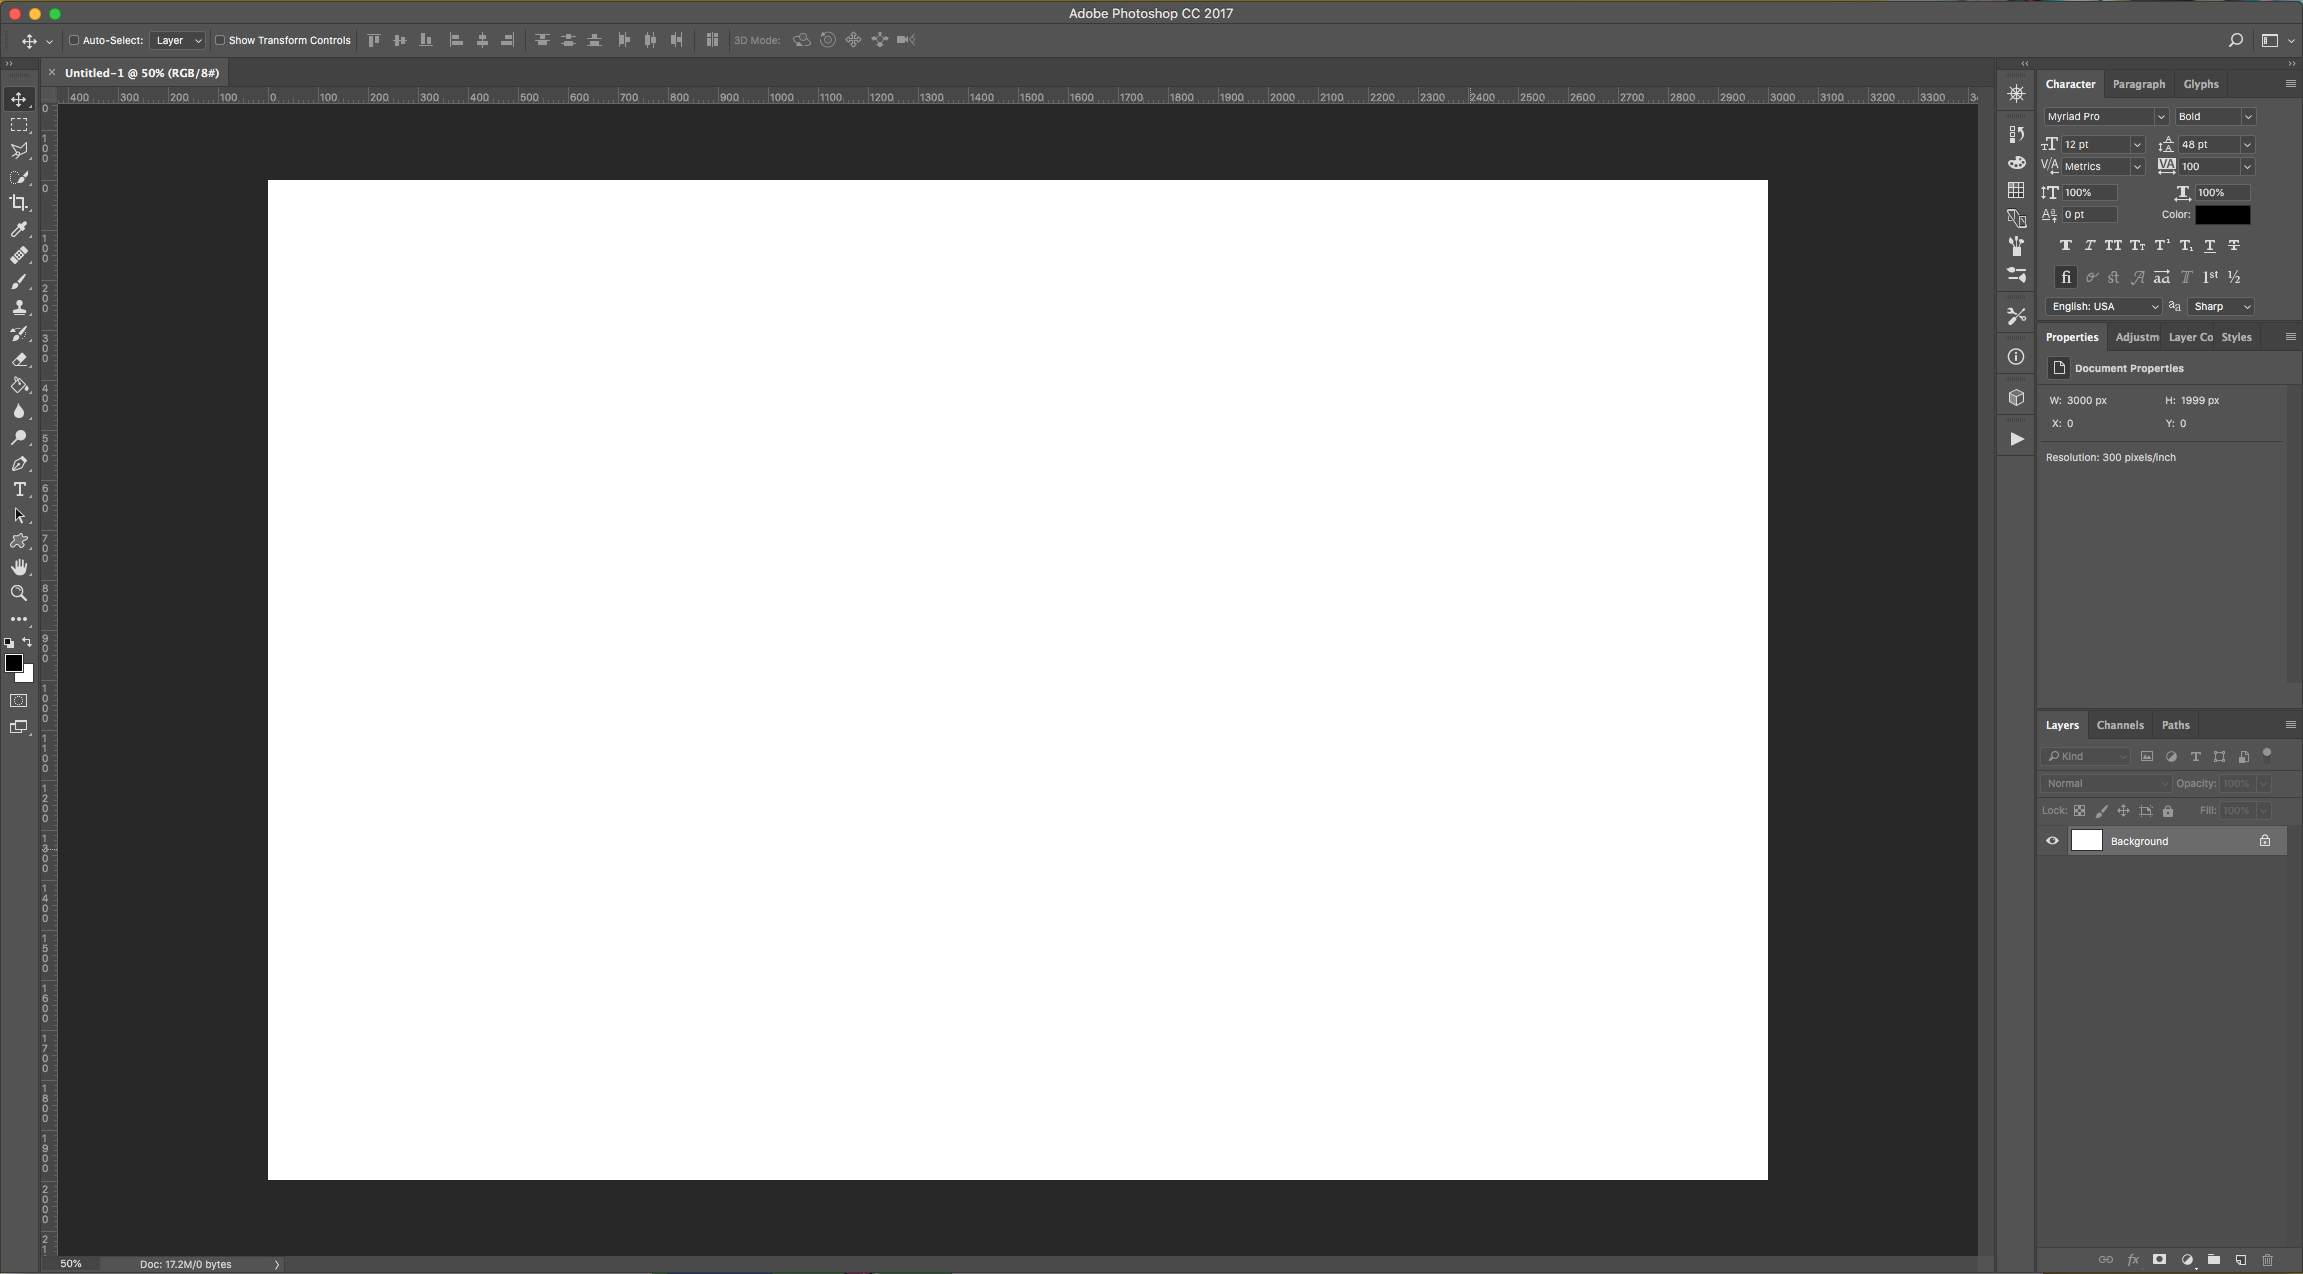
1 - In Photoshop, create a “New” 3000 by 1999 Pixels @300 dpi document.
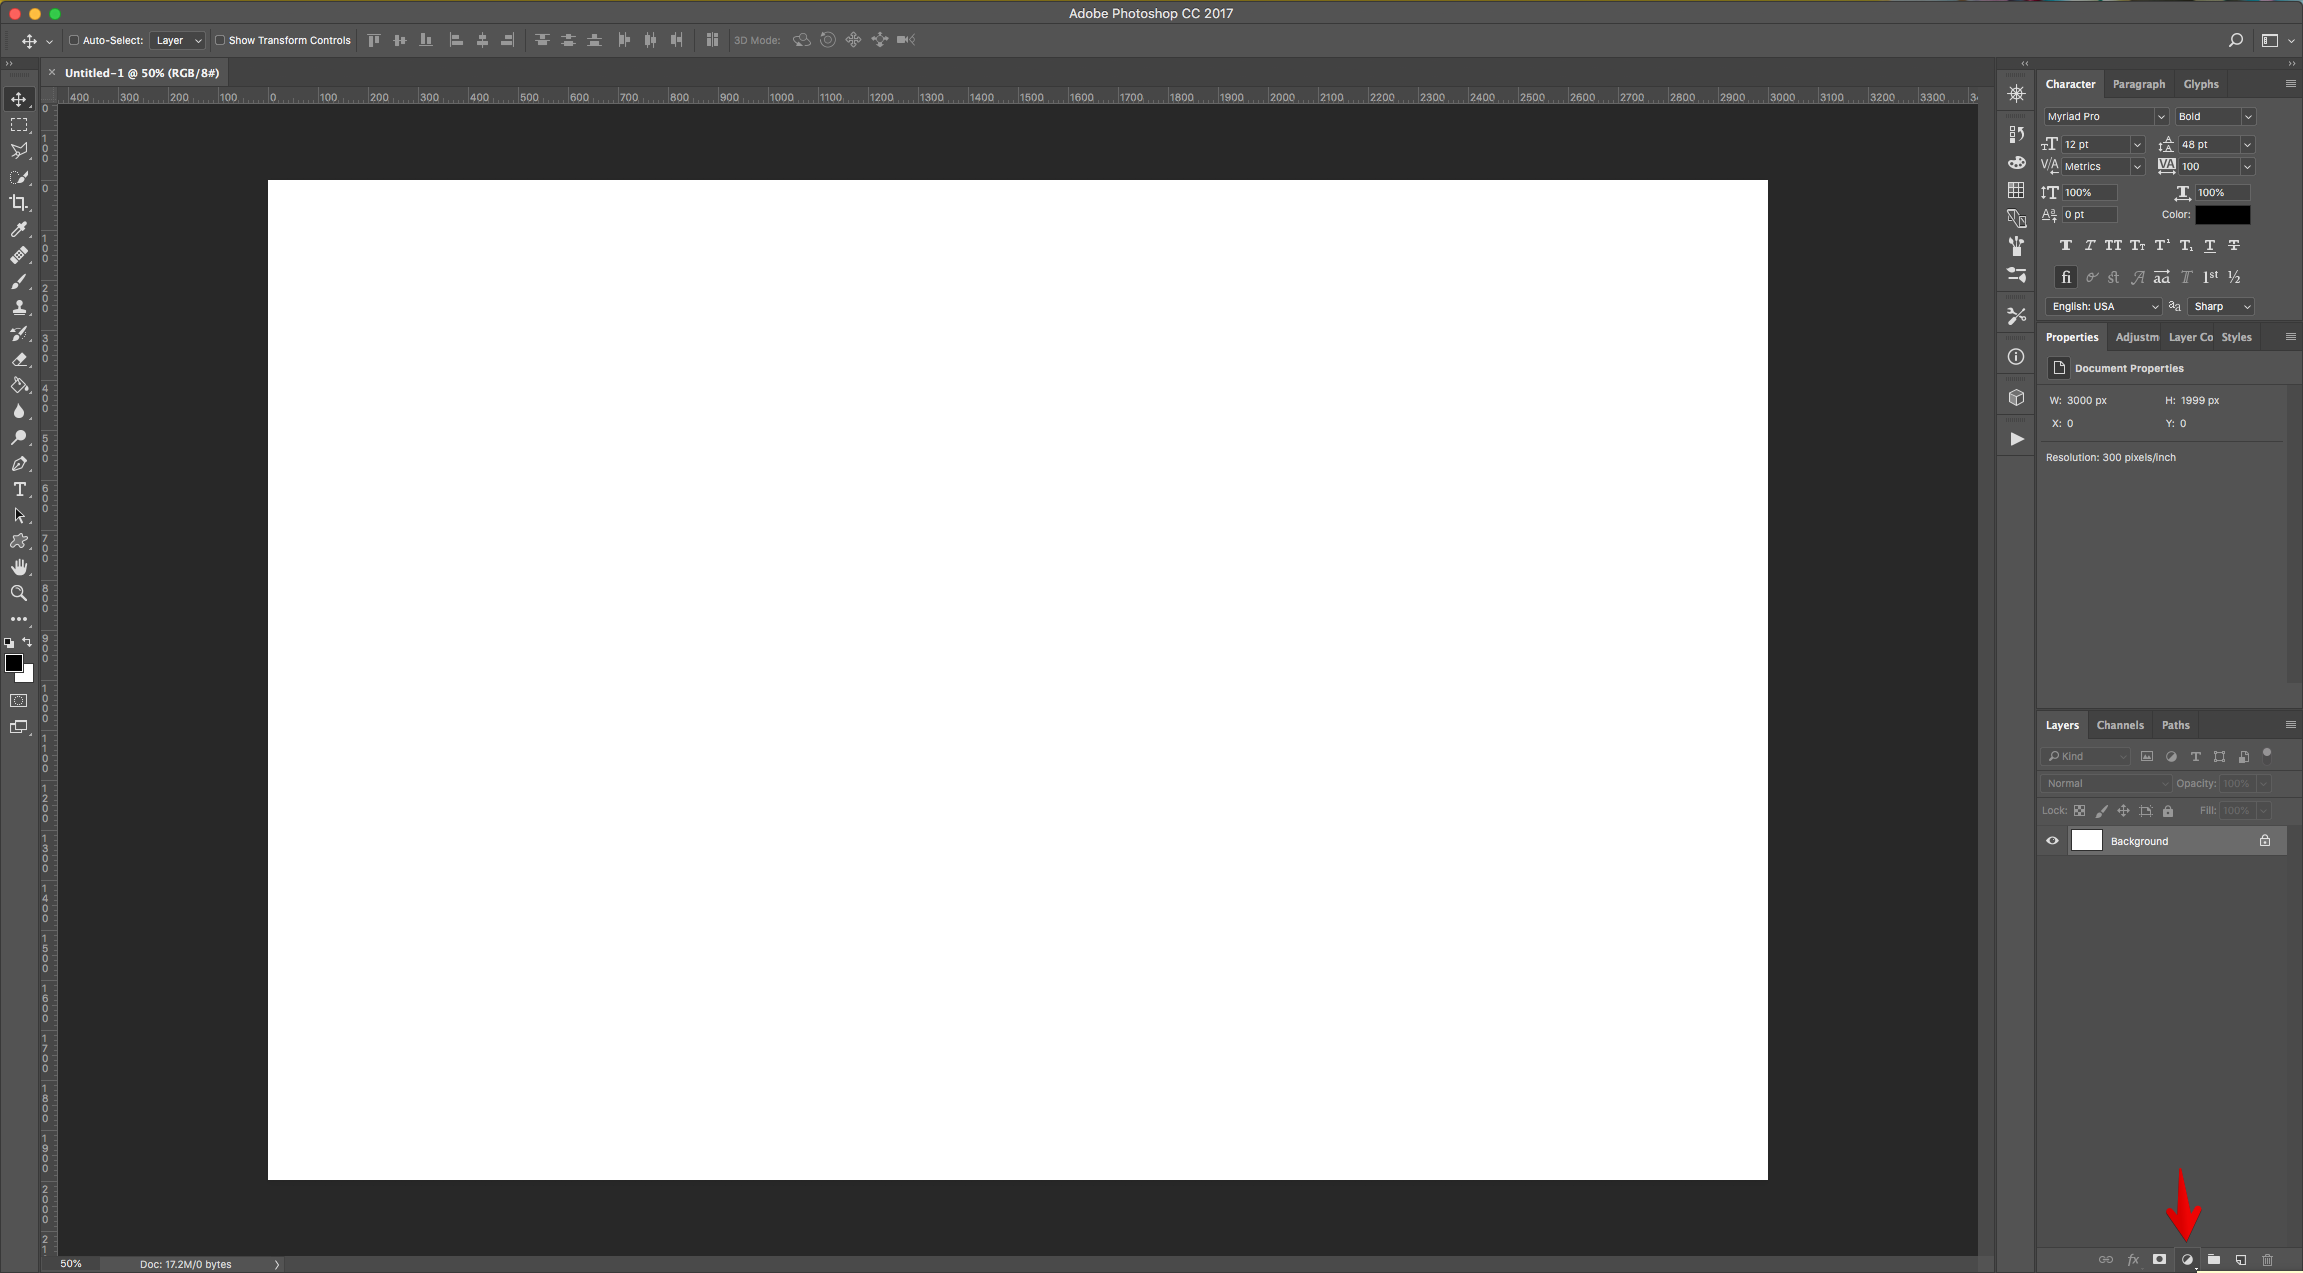
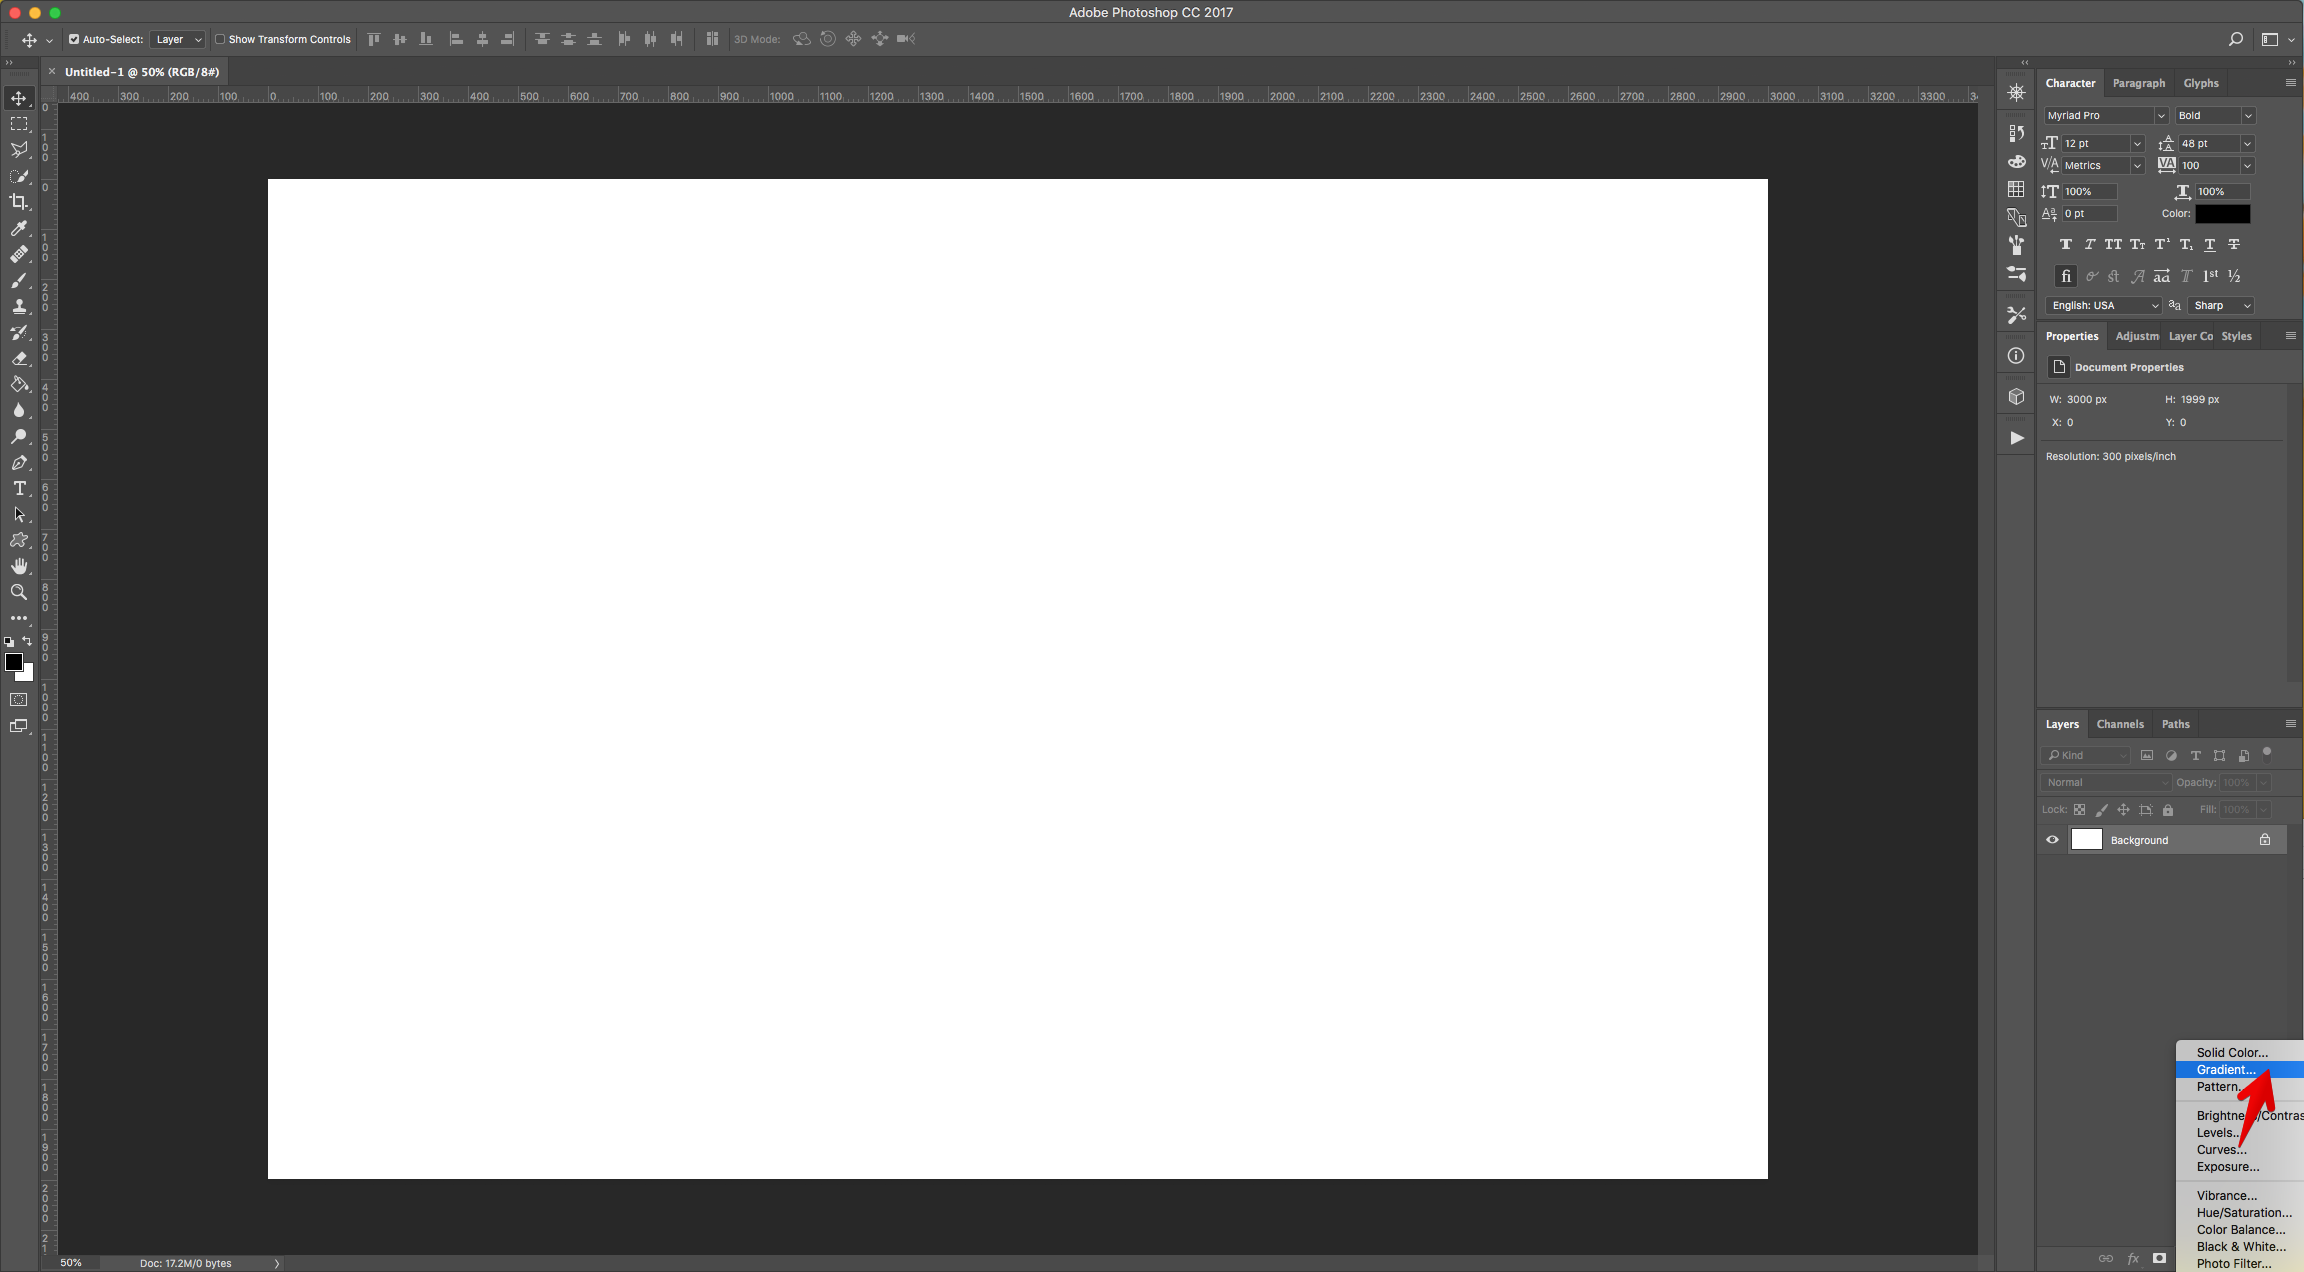
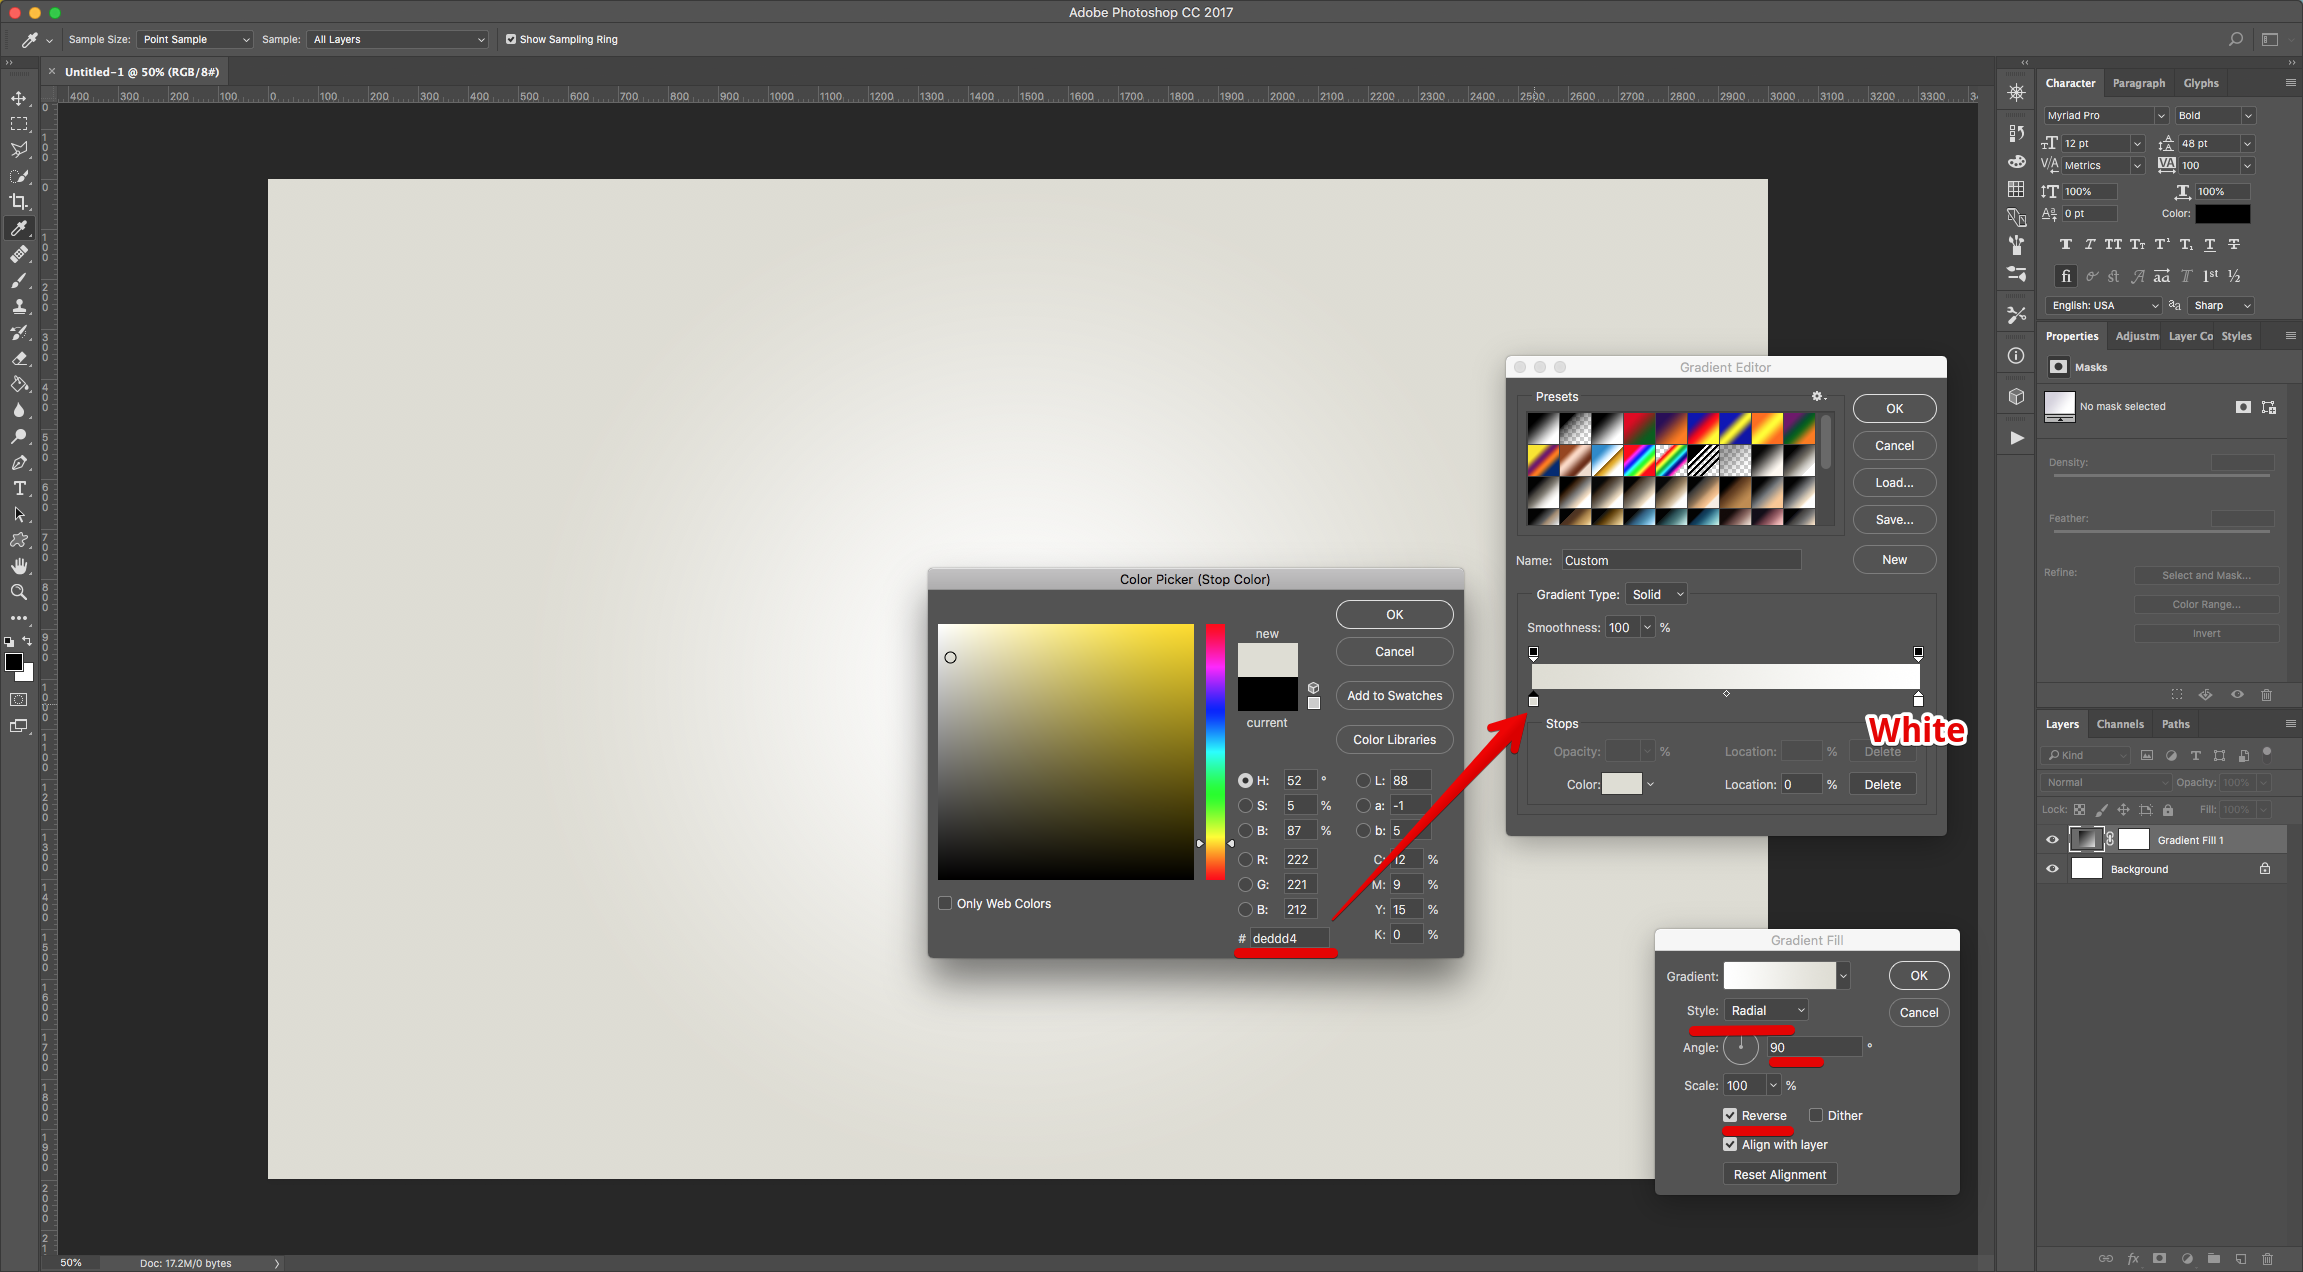
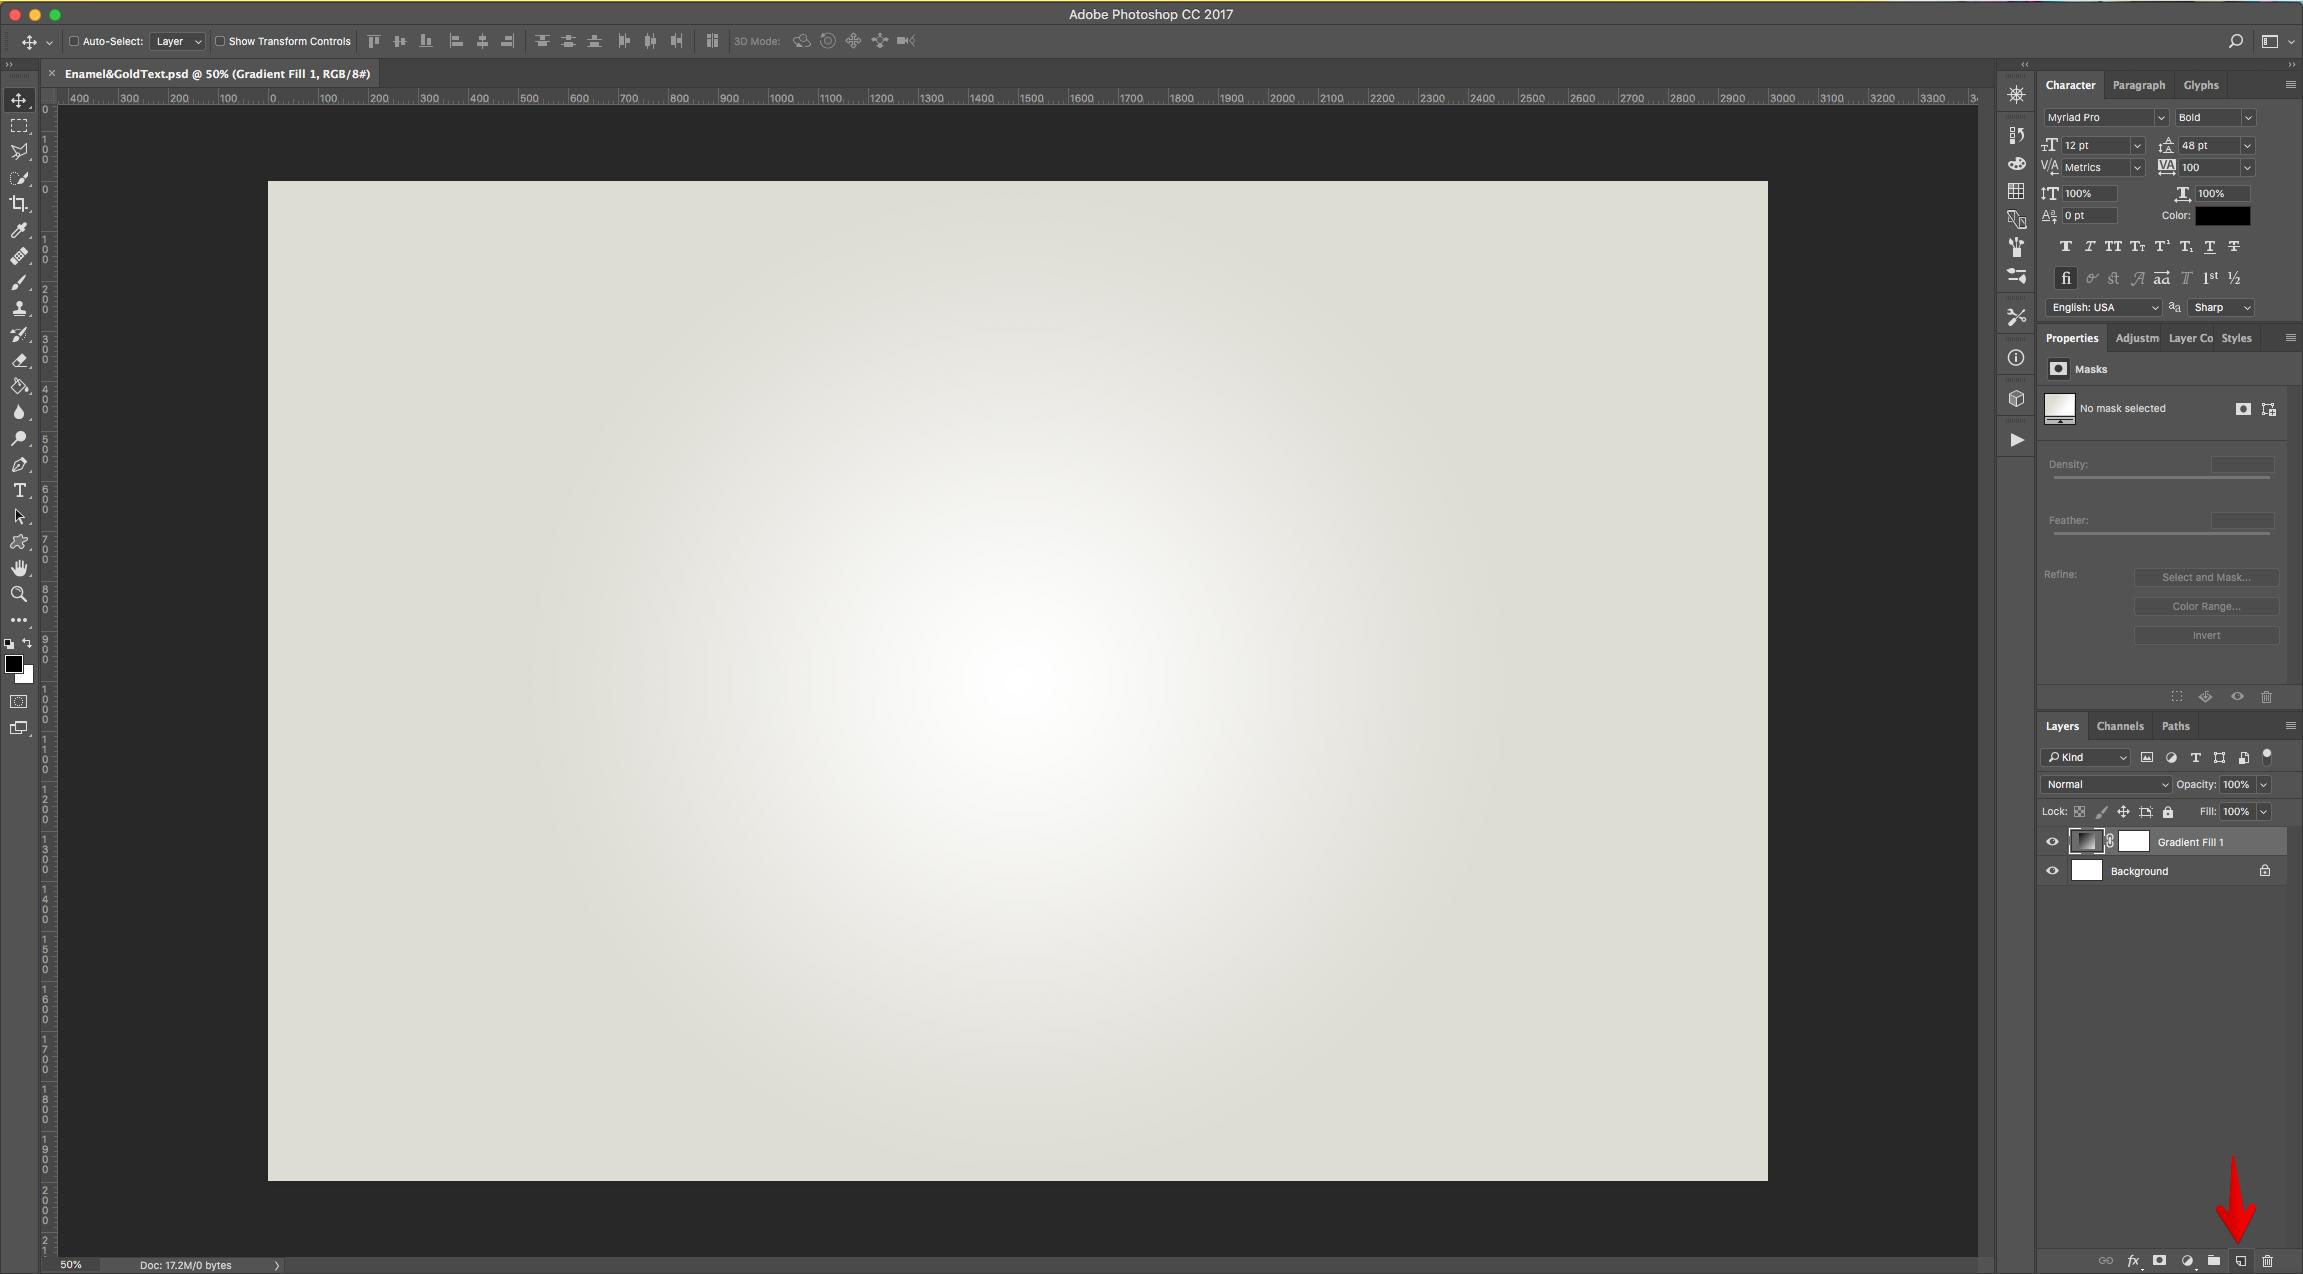
2 - Create a “New Gradient Fill Layer” by clicking on the small Black and White icon at the bottom of the “Layers Panel” and choosing “Gradient” from the options. Make it a “Radial Gradient” with a 90° Angle, 100 % Scale from #deddd4 @ 0% to (white) #ffffff @ 100%. Make sure that the “Reverse” and “Align with Layer” boxes are checked.
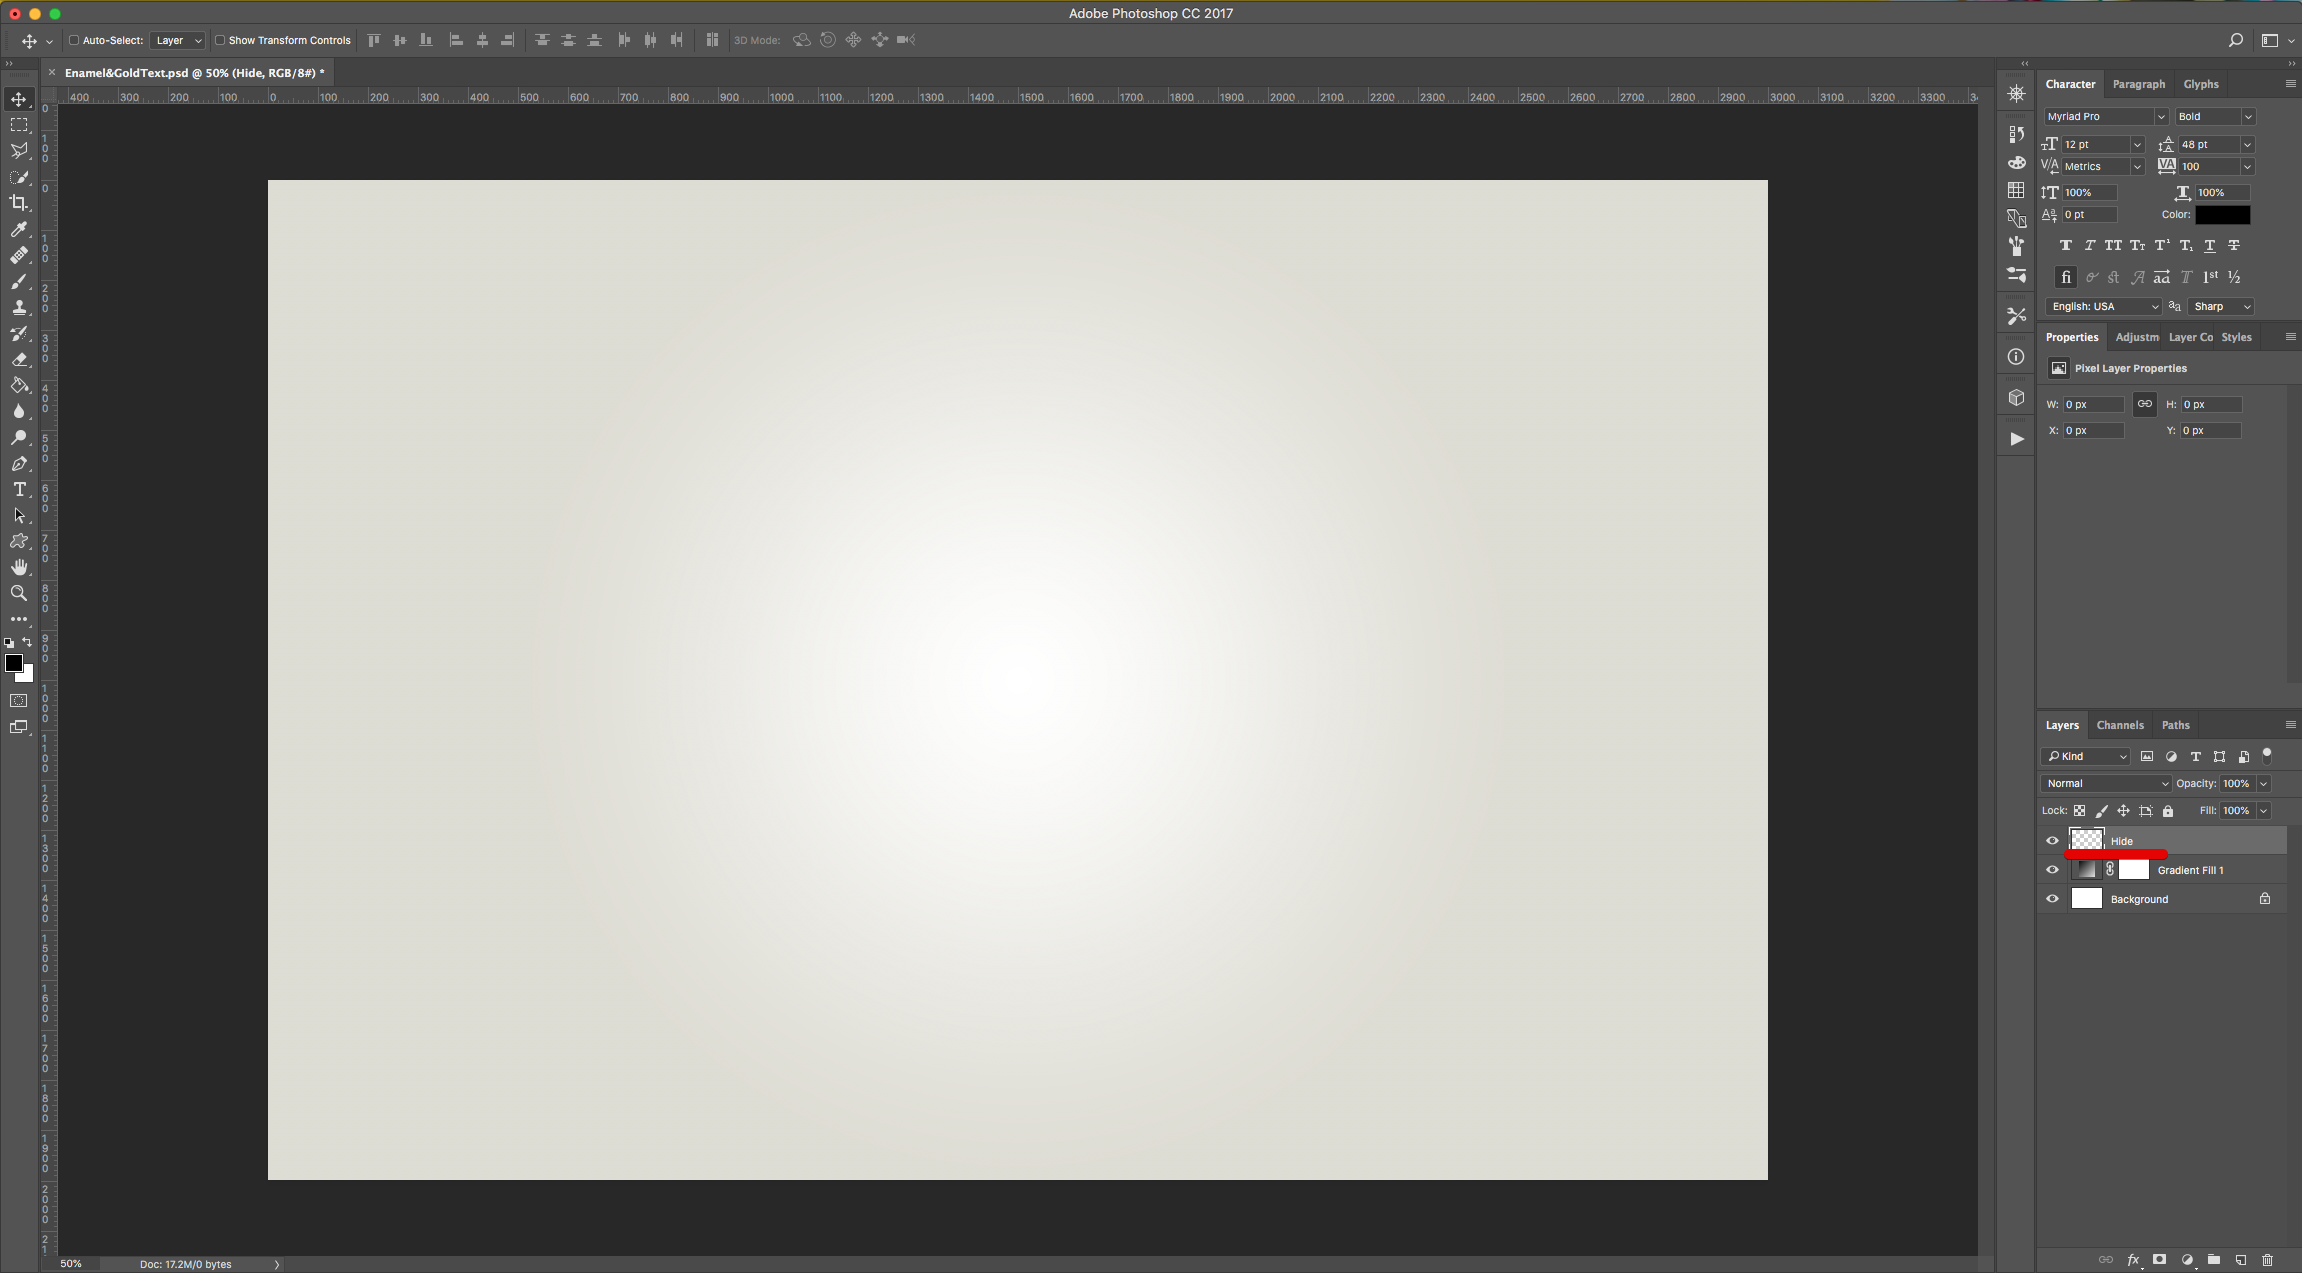
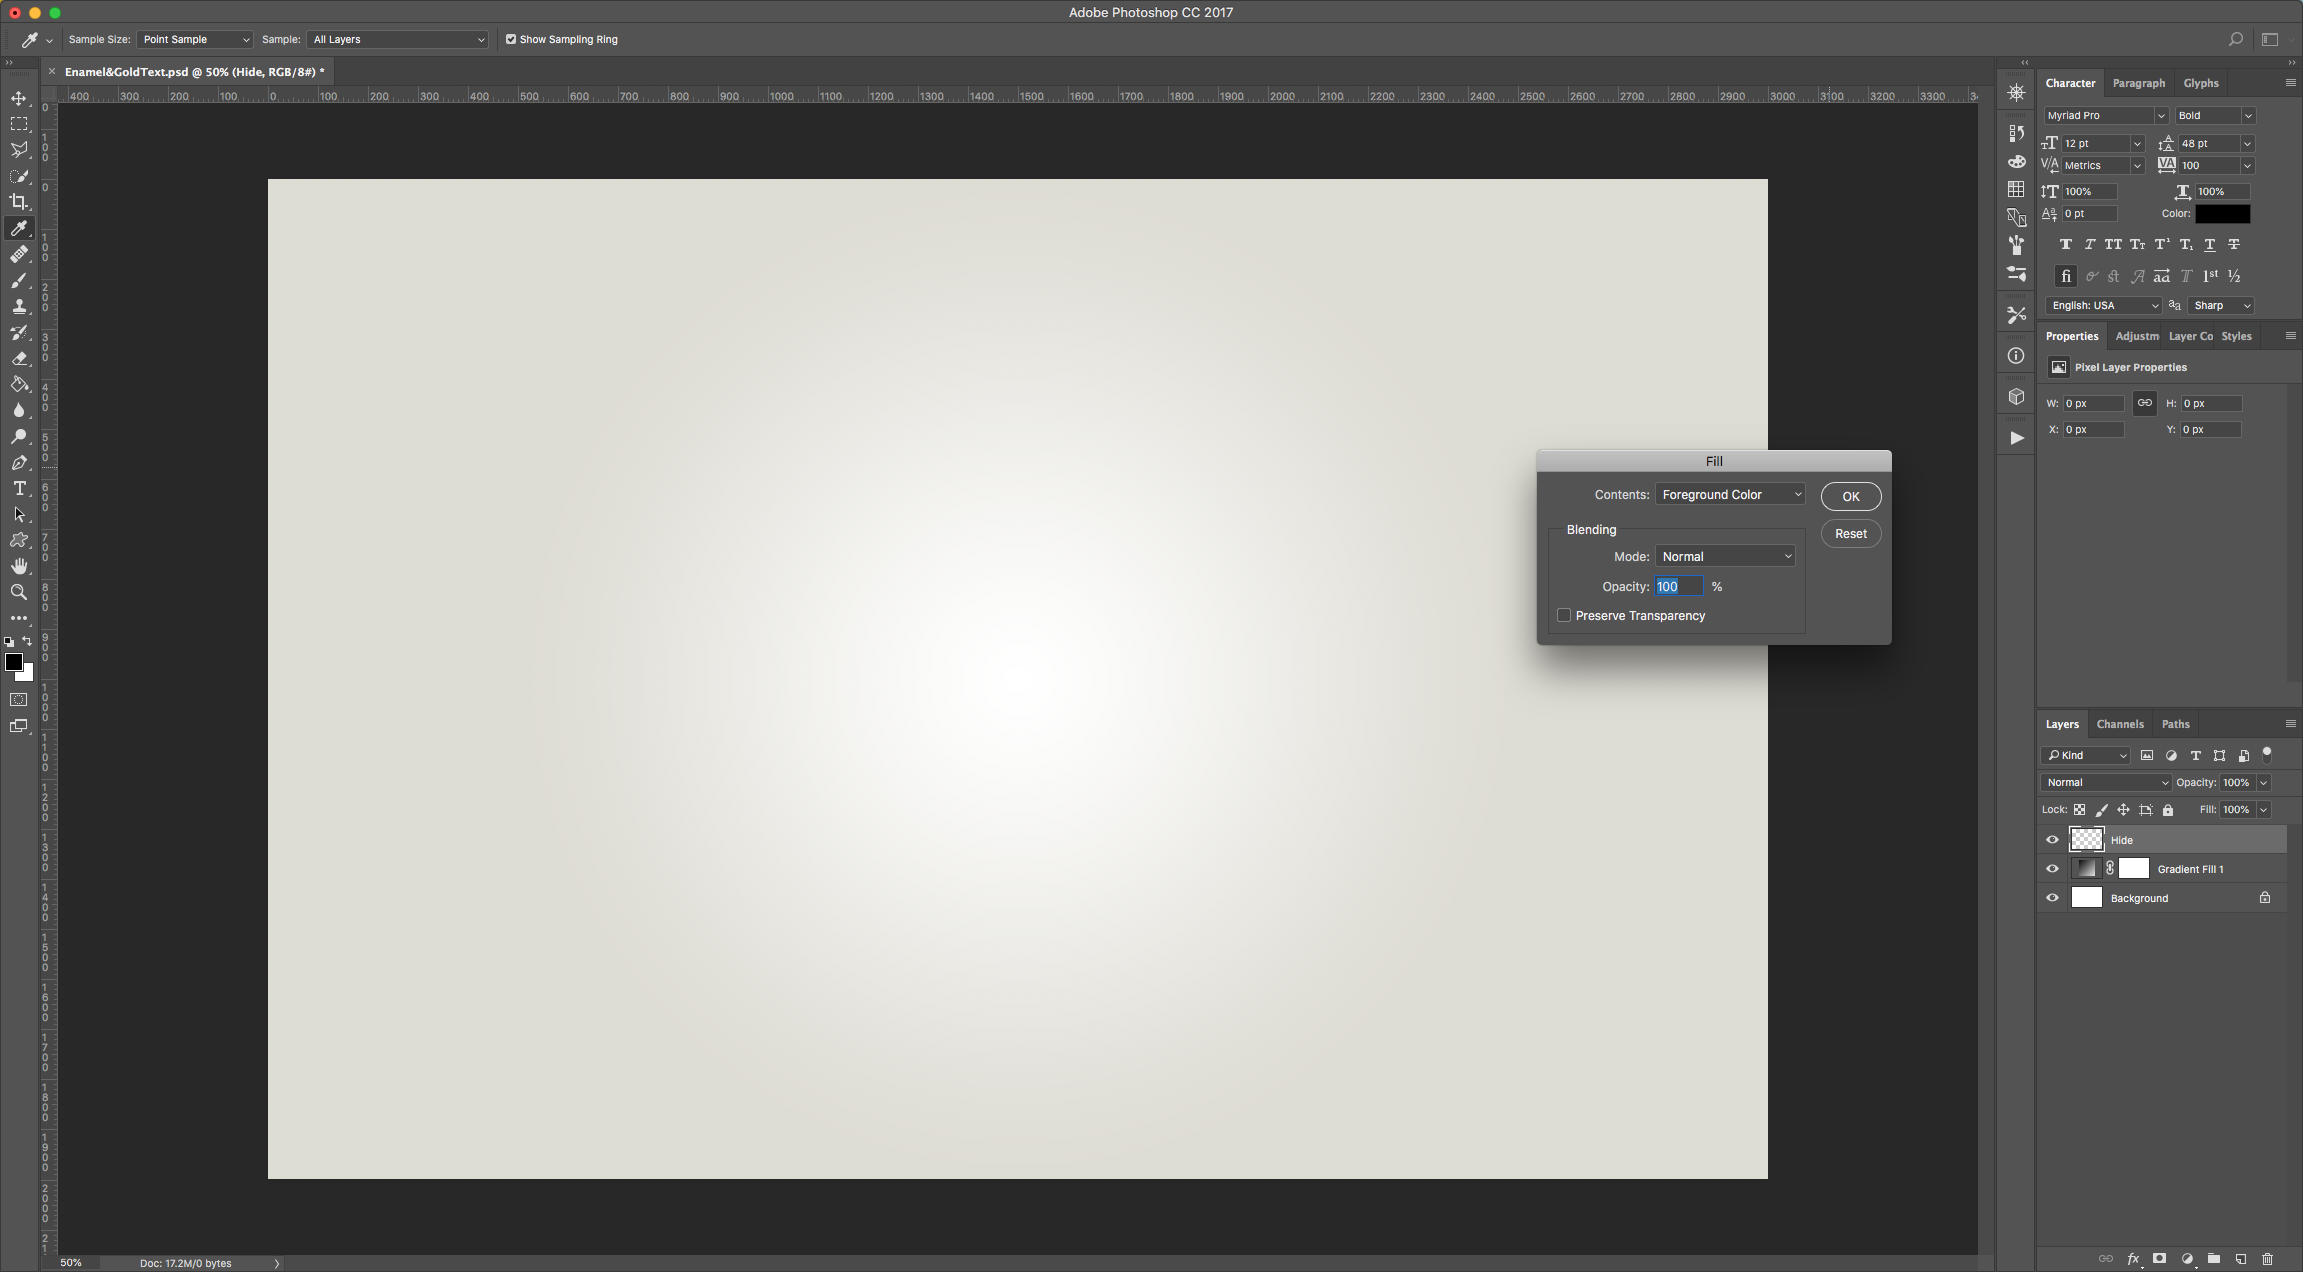
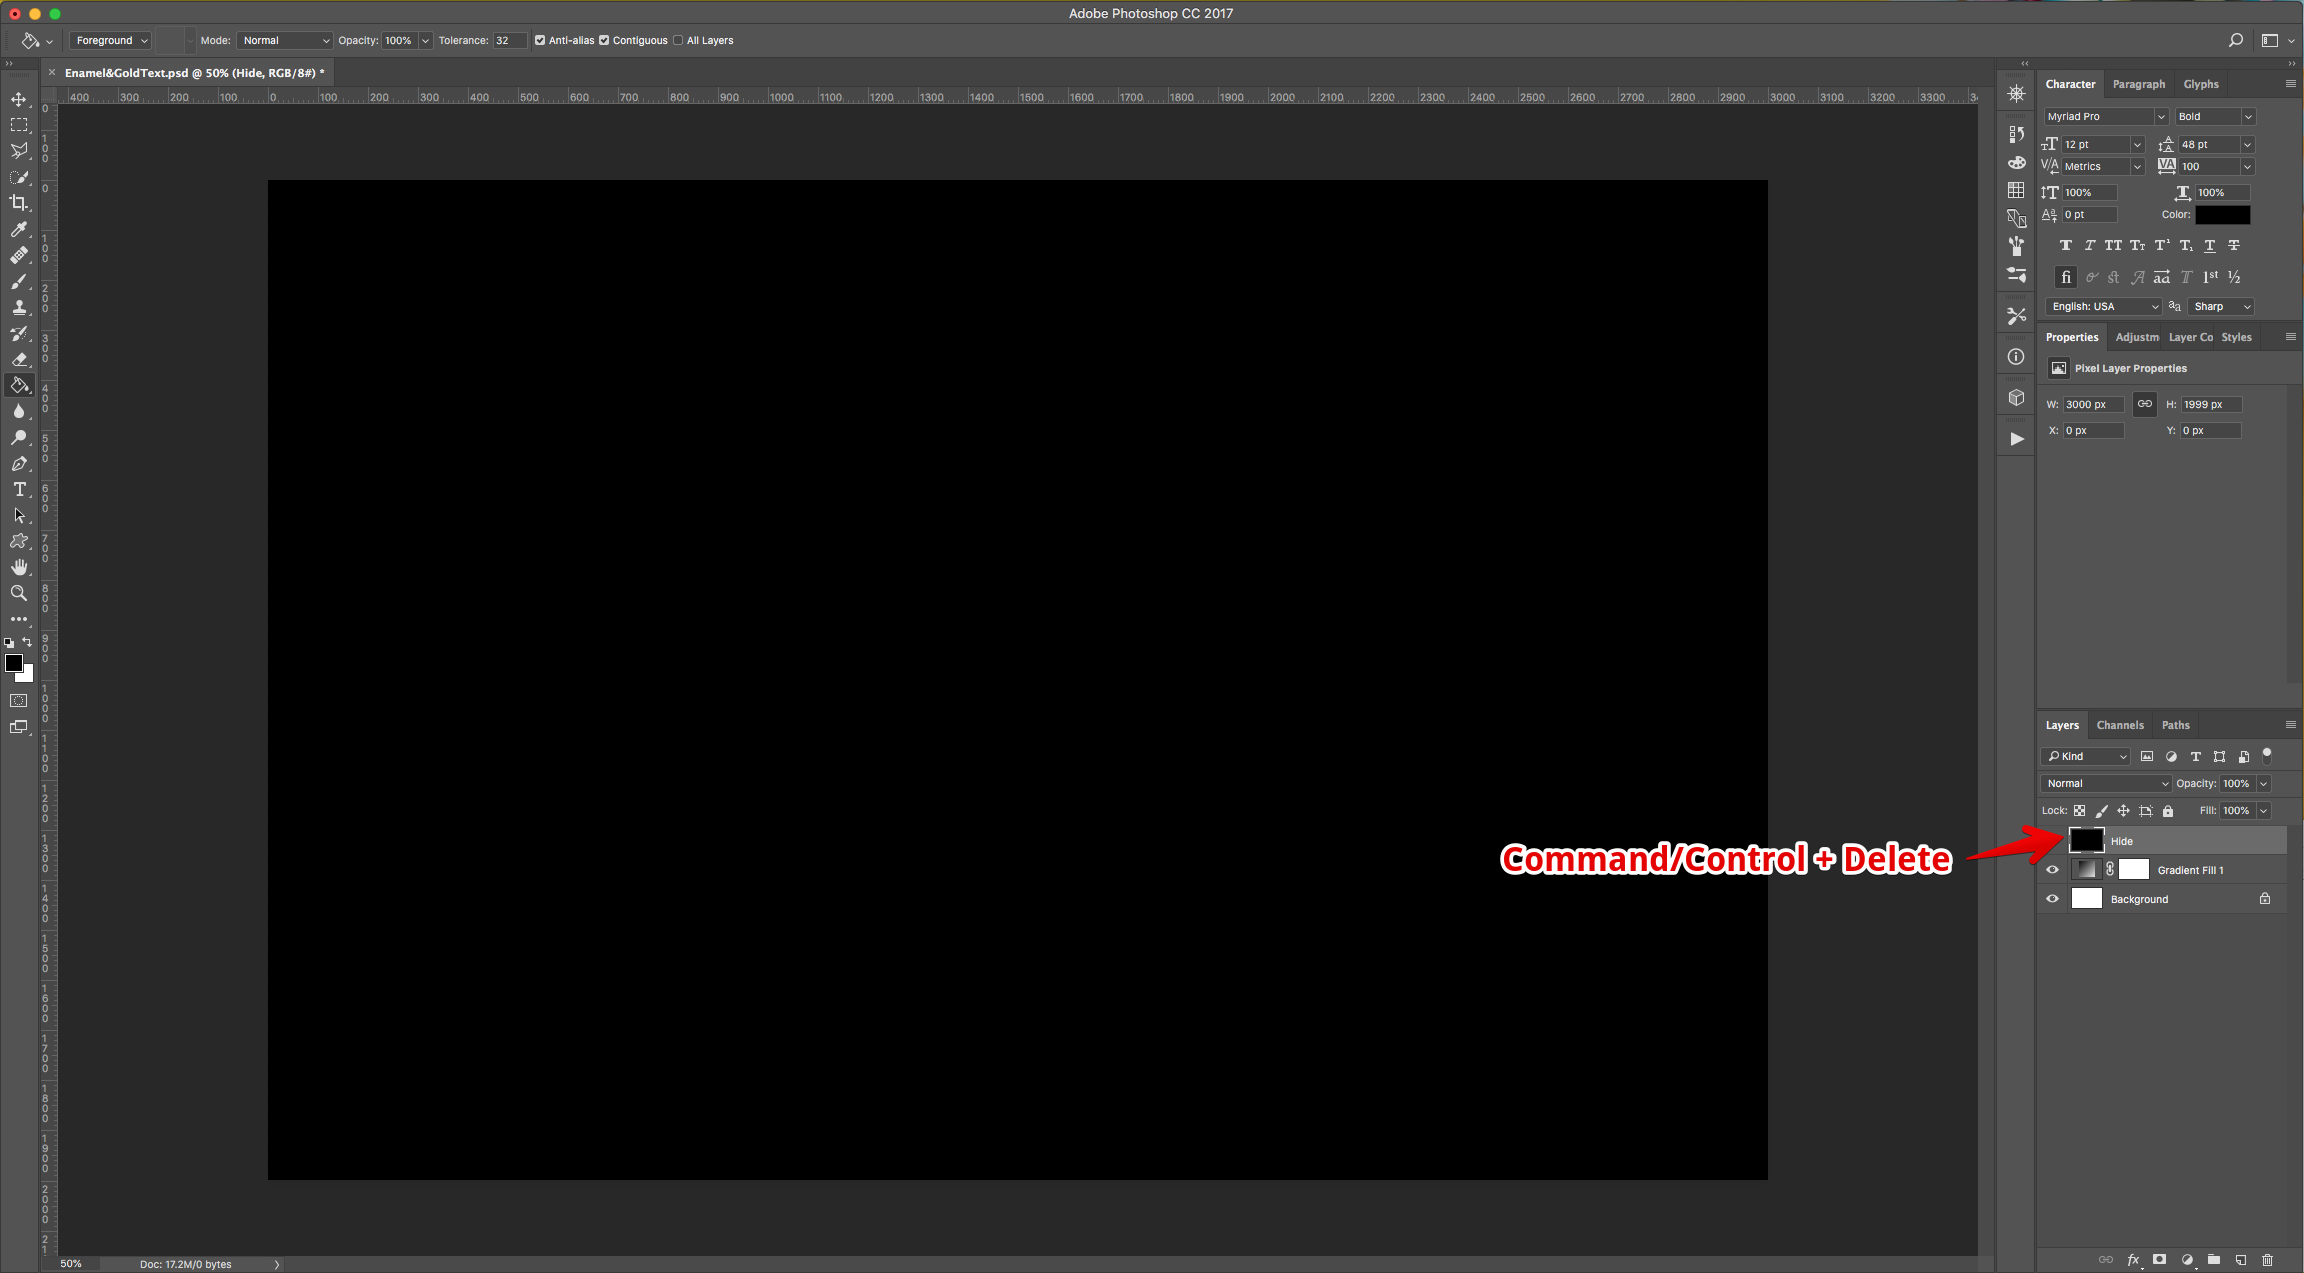
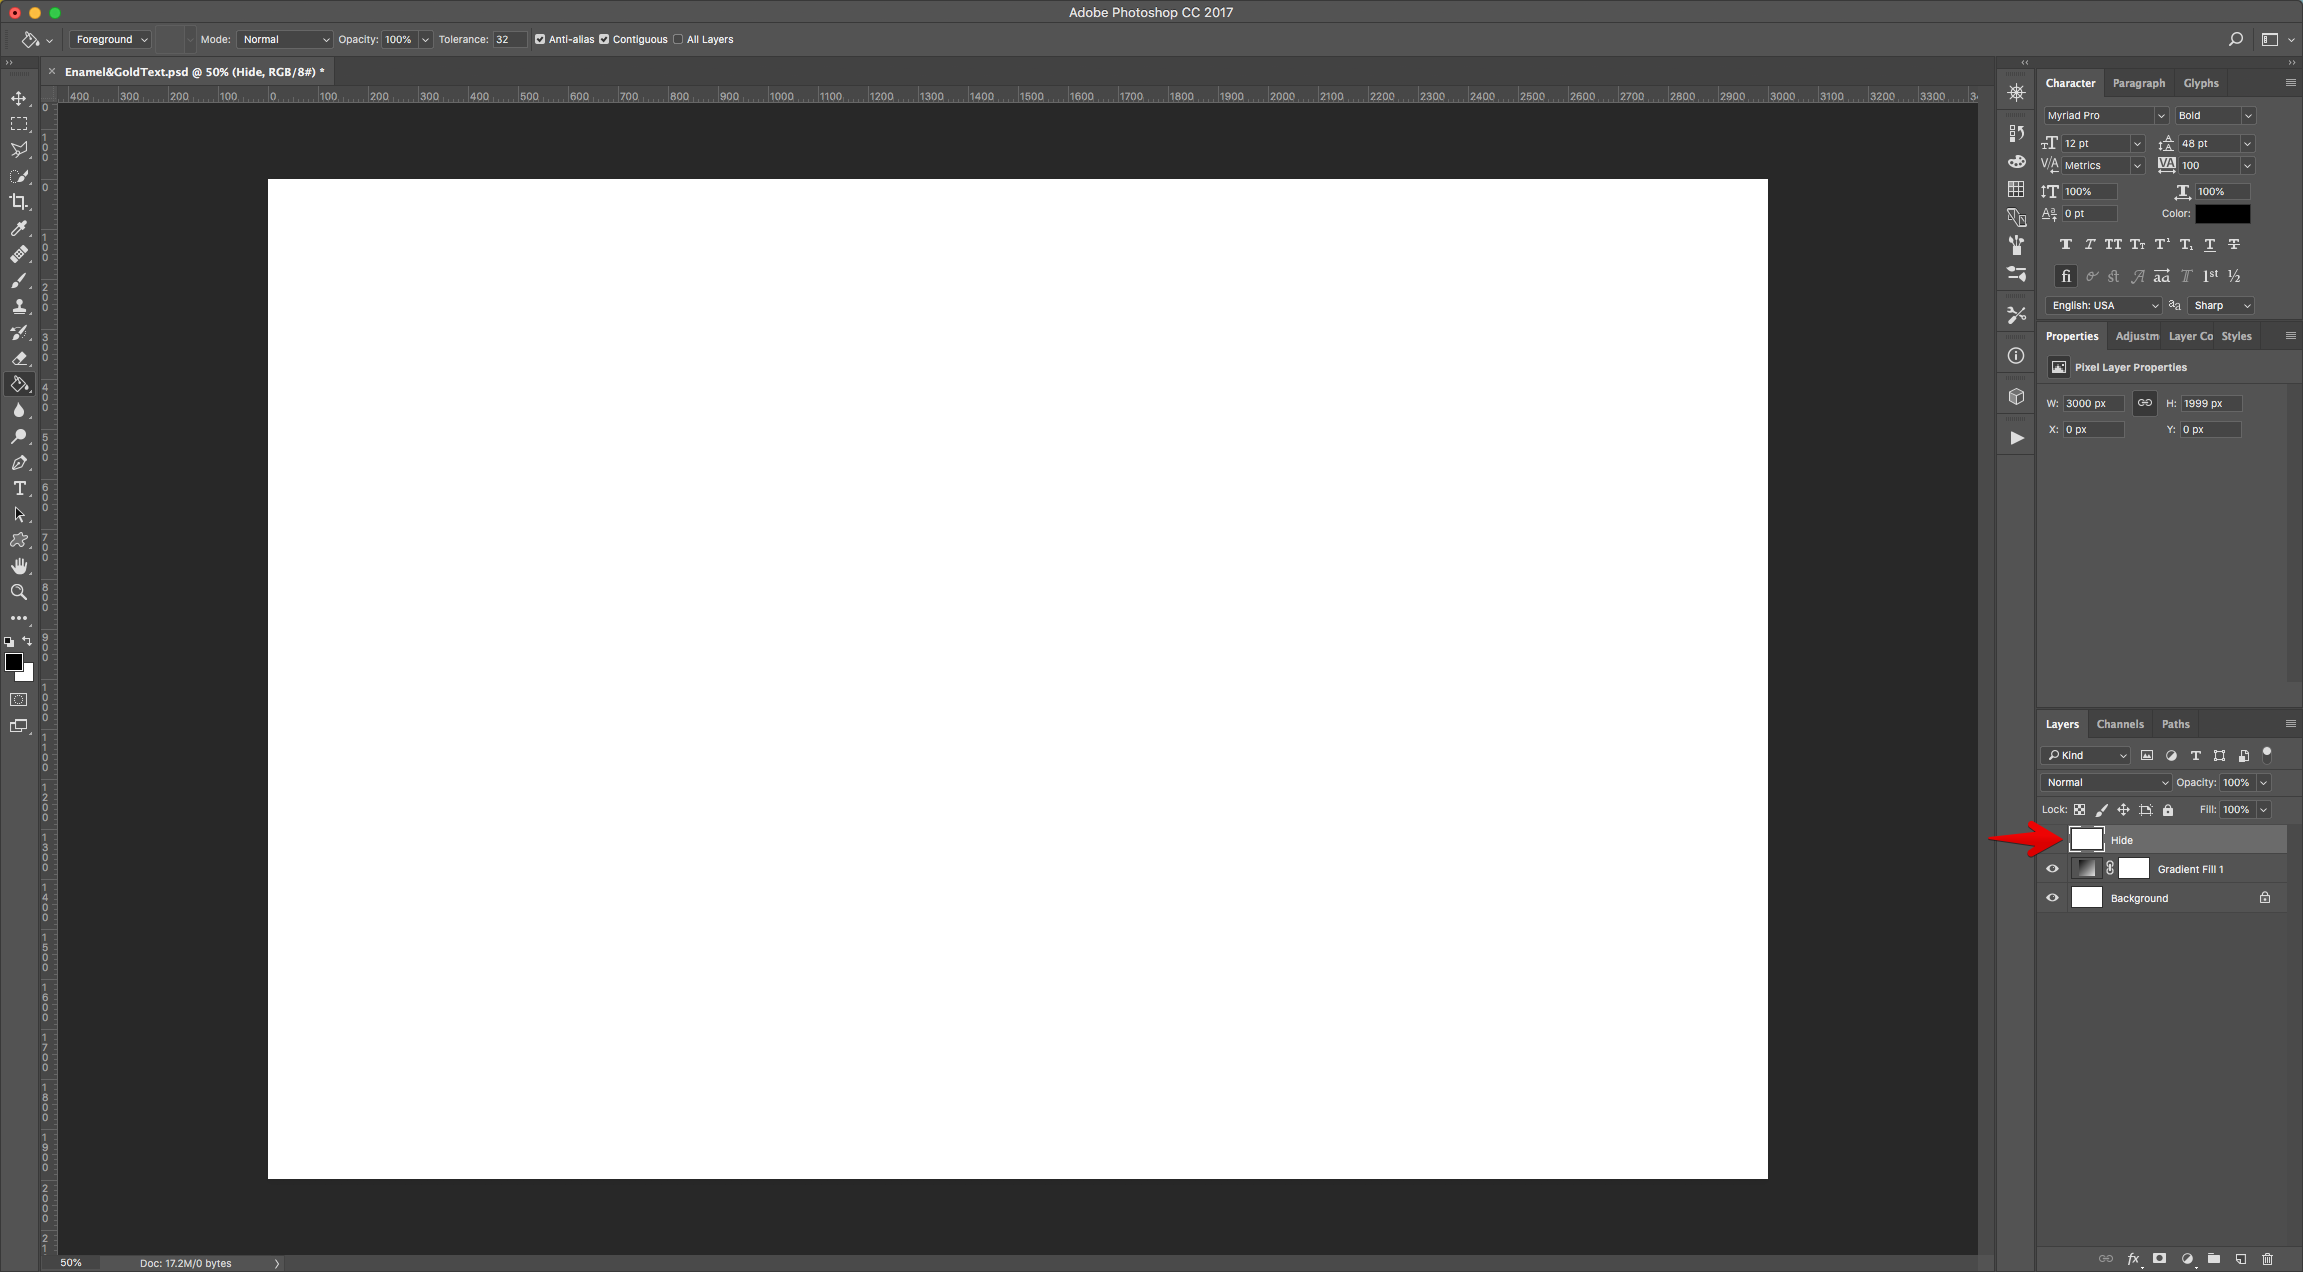
3 - Create a “New Layer” on top of everything by clicking on the small button at the bottom of the “Layers Panel”. Name it “Hide”.
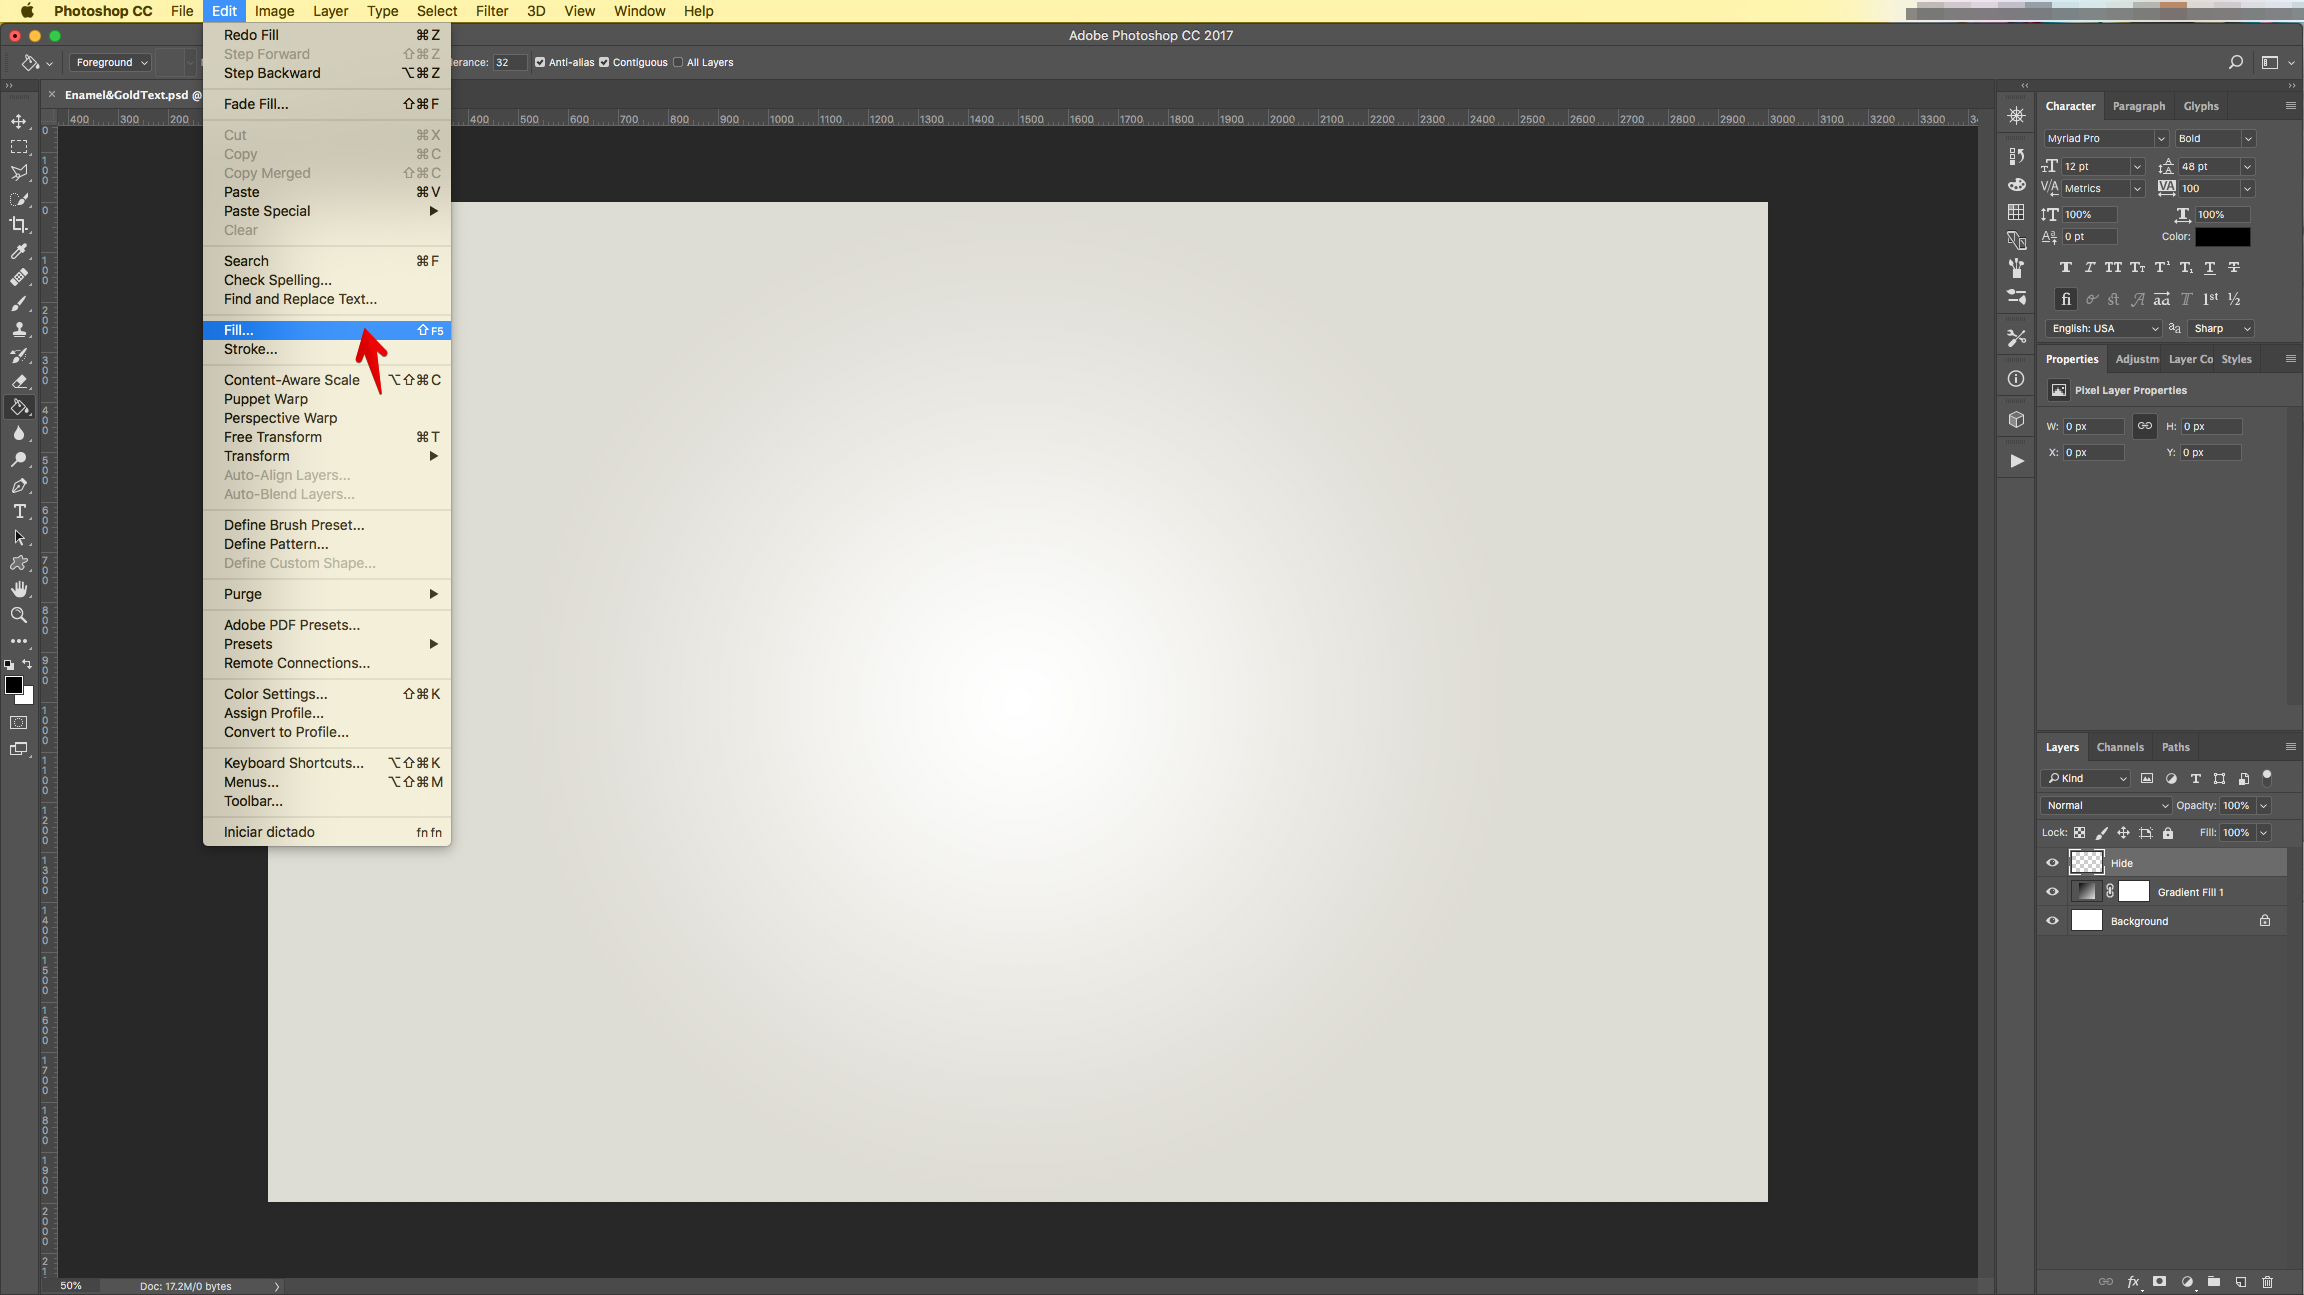
4 - To fill it, go to Edit > Fill… (Shift + F5) and select the color you want (we used “Foreground Color”). Or click “Command/Control + Delete) to fill it with the “Background Color”.
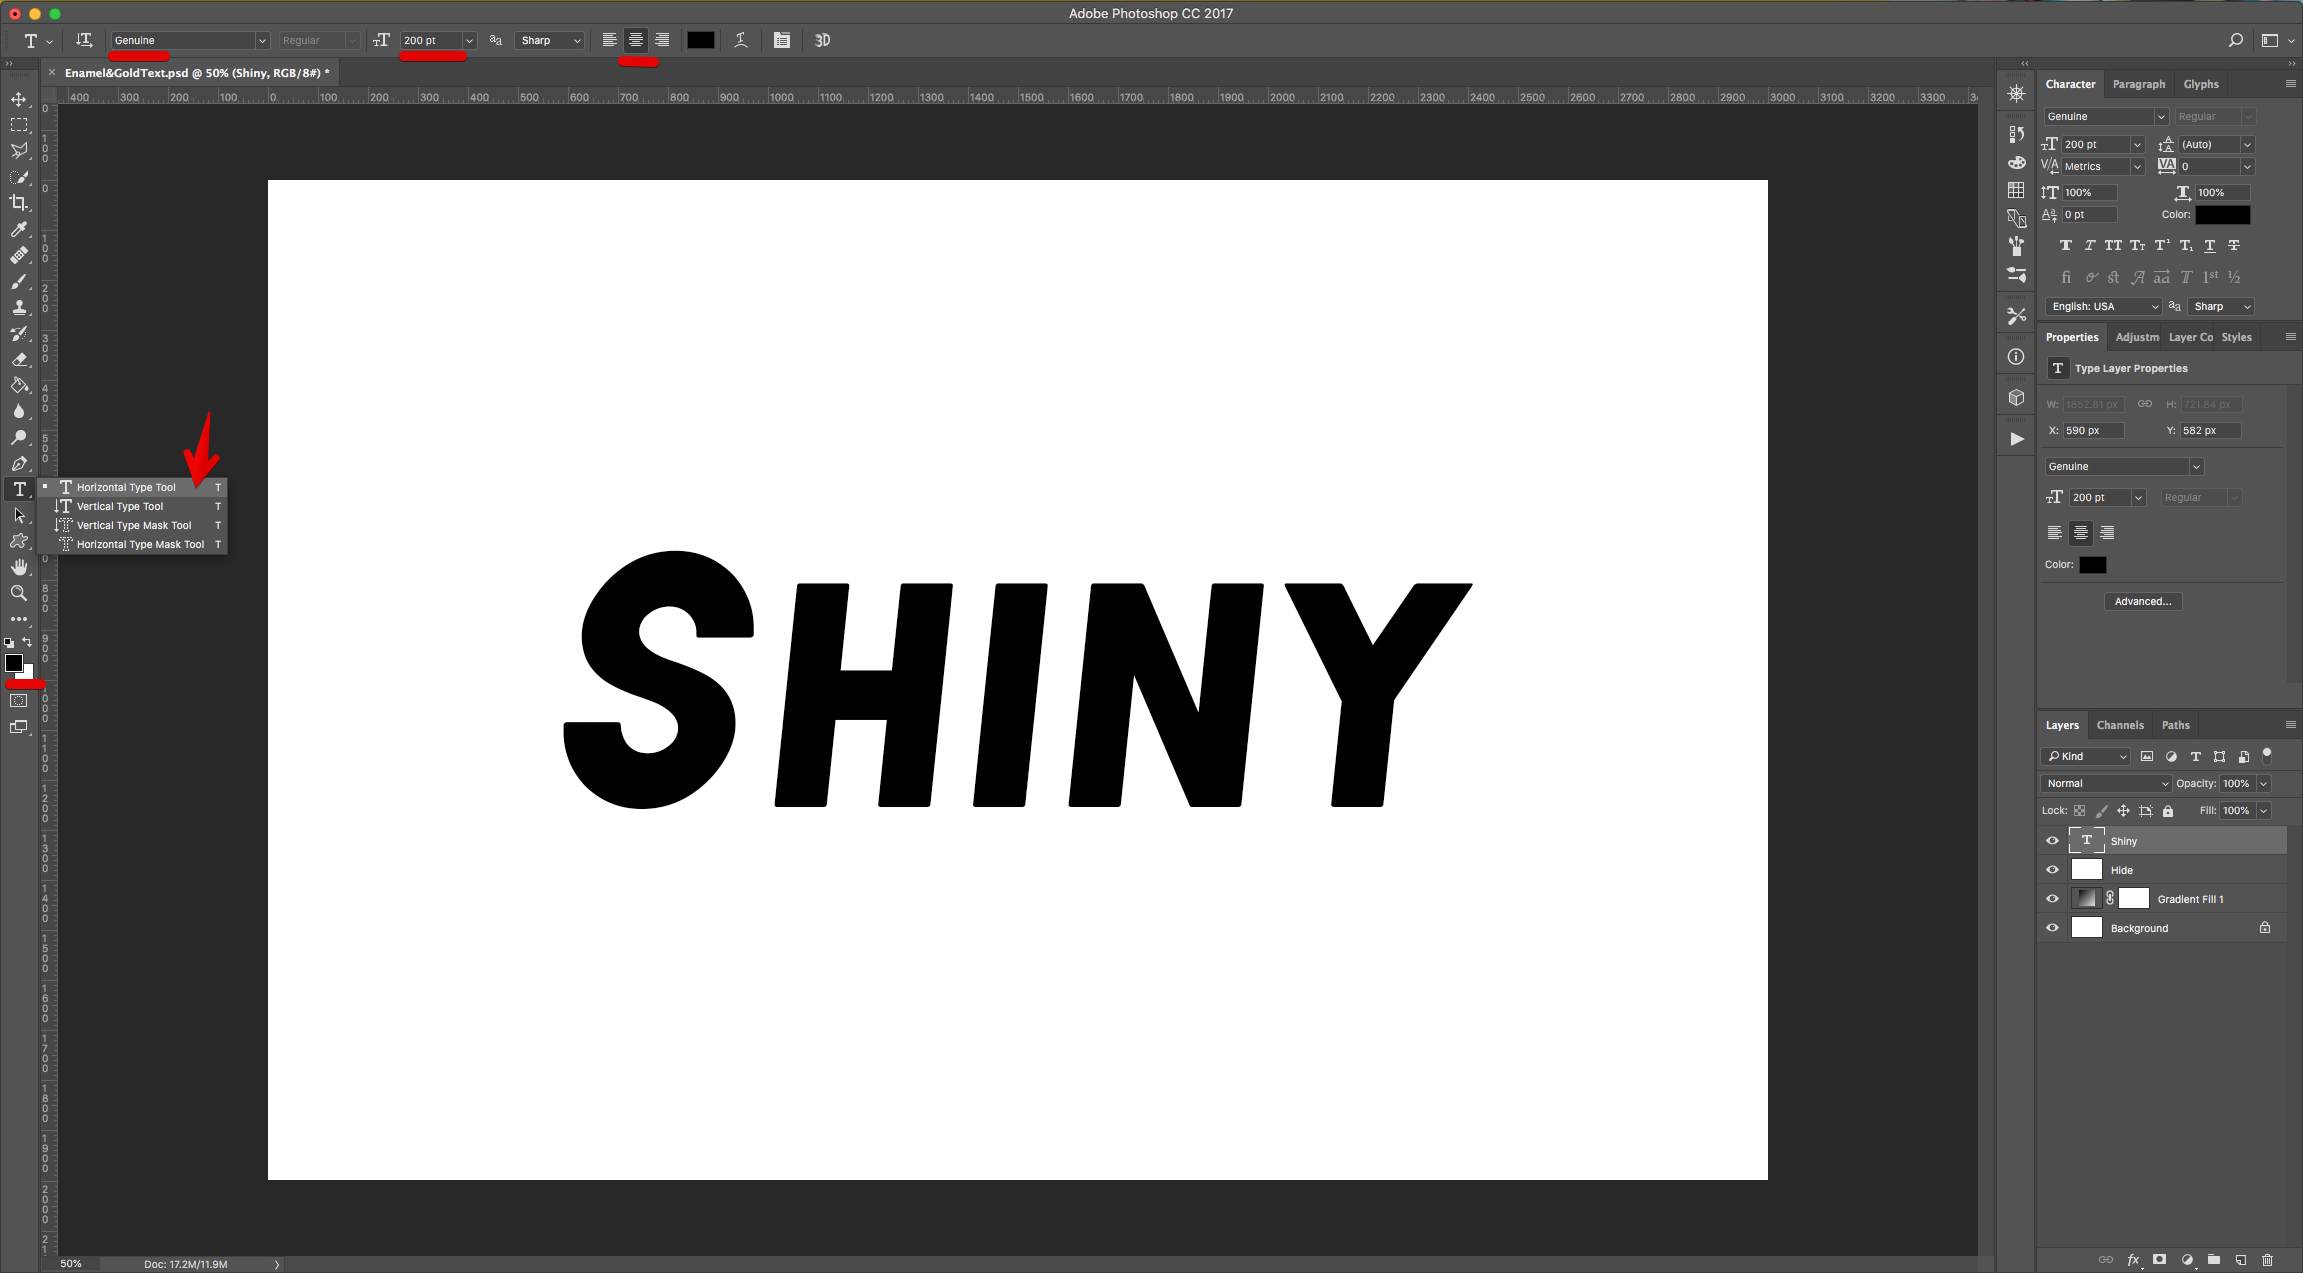
5 - Select the “Type Tool” (T), choose your Font (we used “Genuine”) and type your text. Make it as big as needed, center it and fill it with Black.
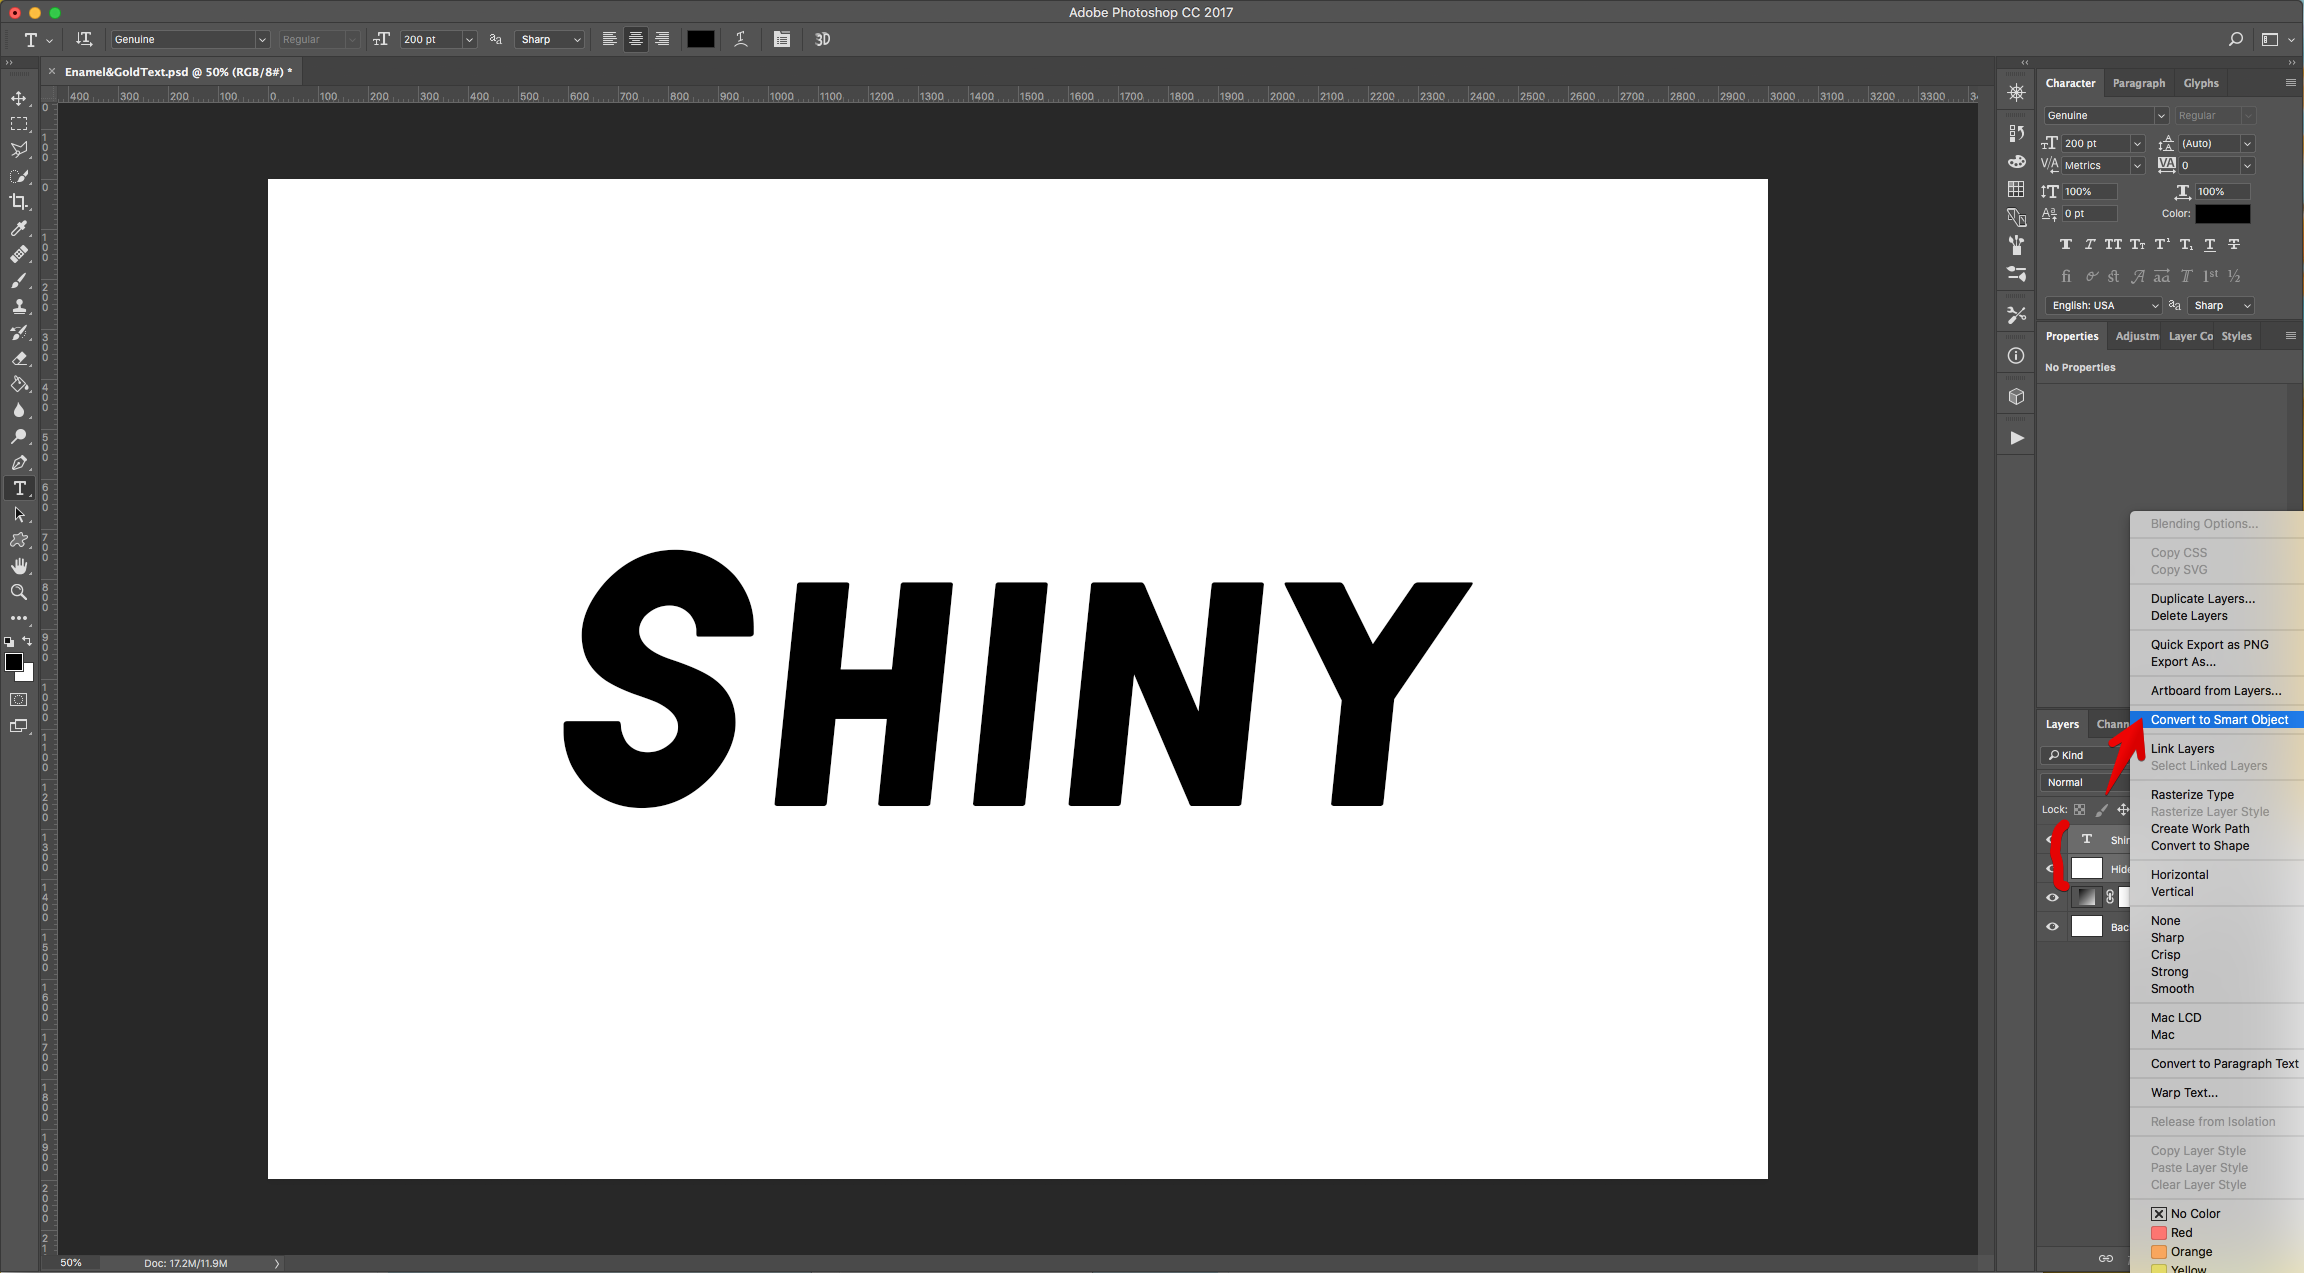
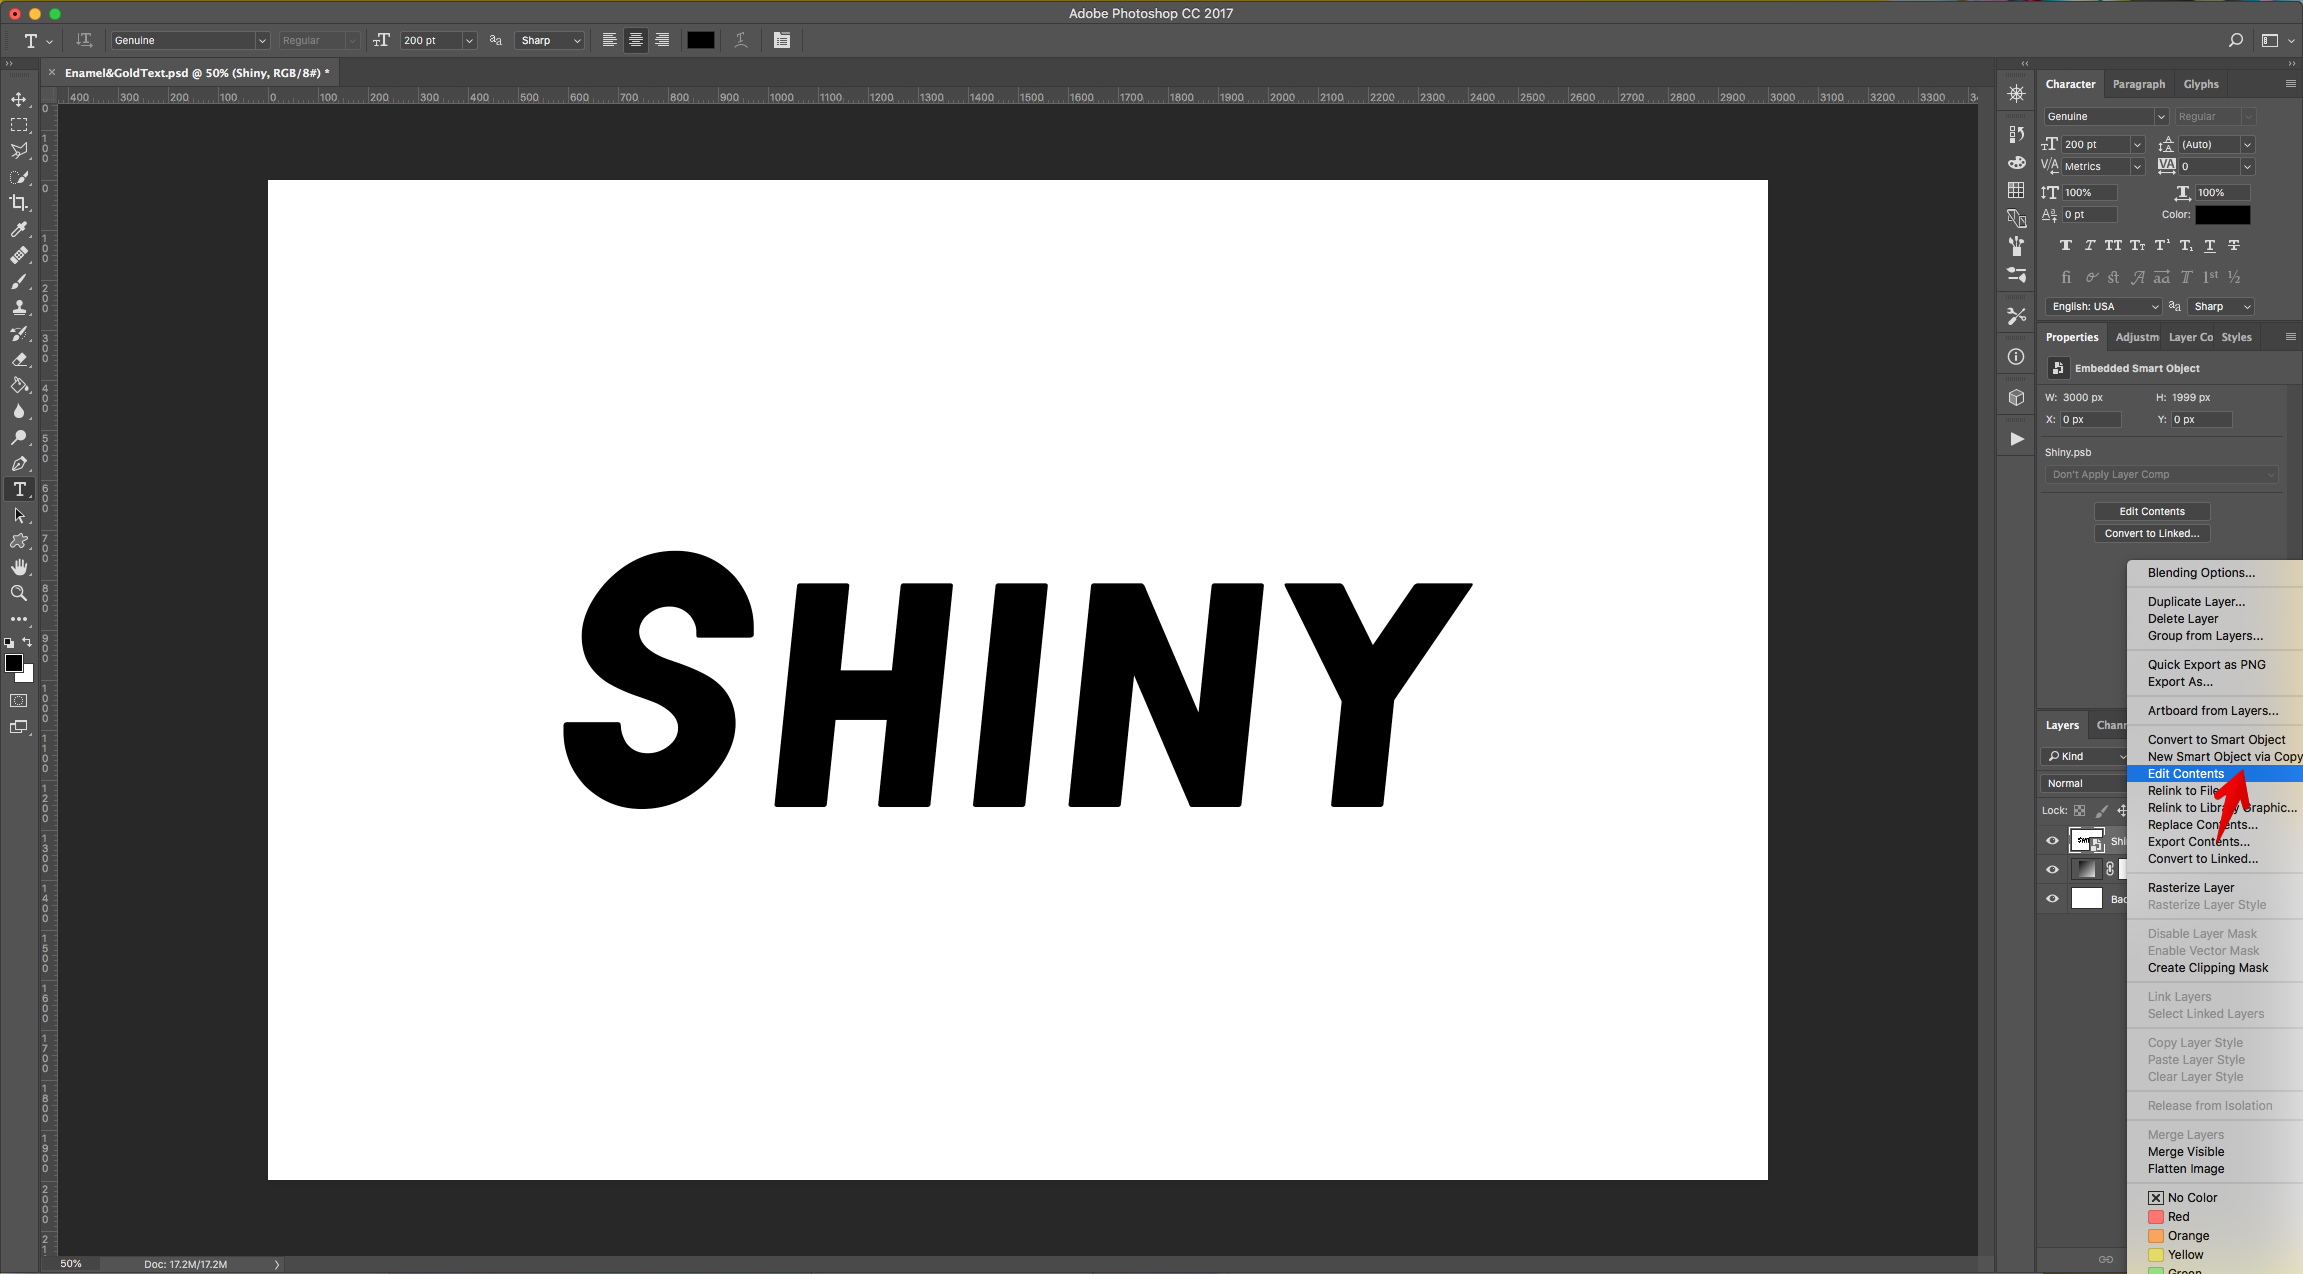
6 - Select the “Text” and “Hide” layers using the “Shift” key, right-click on top and choose “Convert to Smart Object”. Then right-click again on top of the “Smart Object” and choose “Edit Contents”. This should open the “Smart Object” in another window.
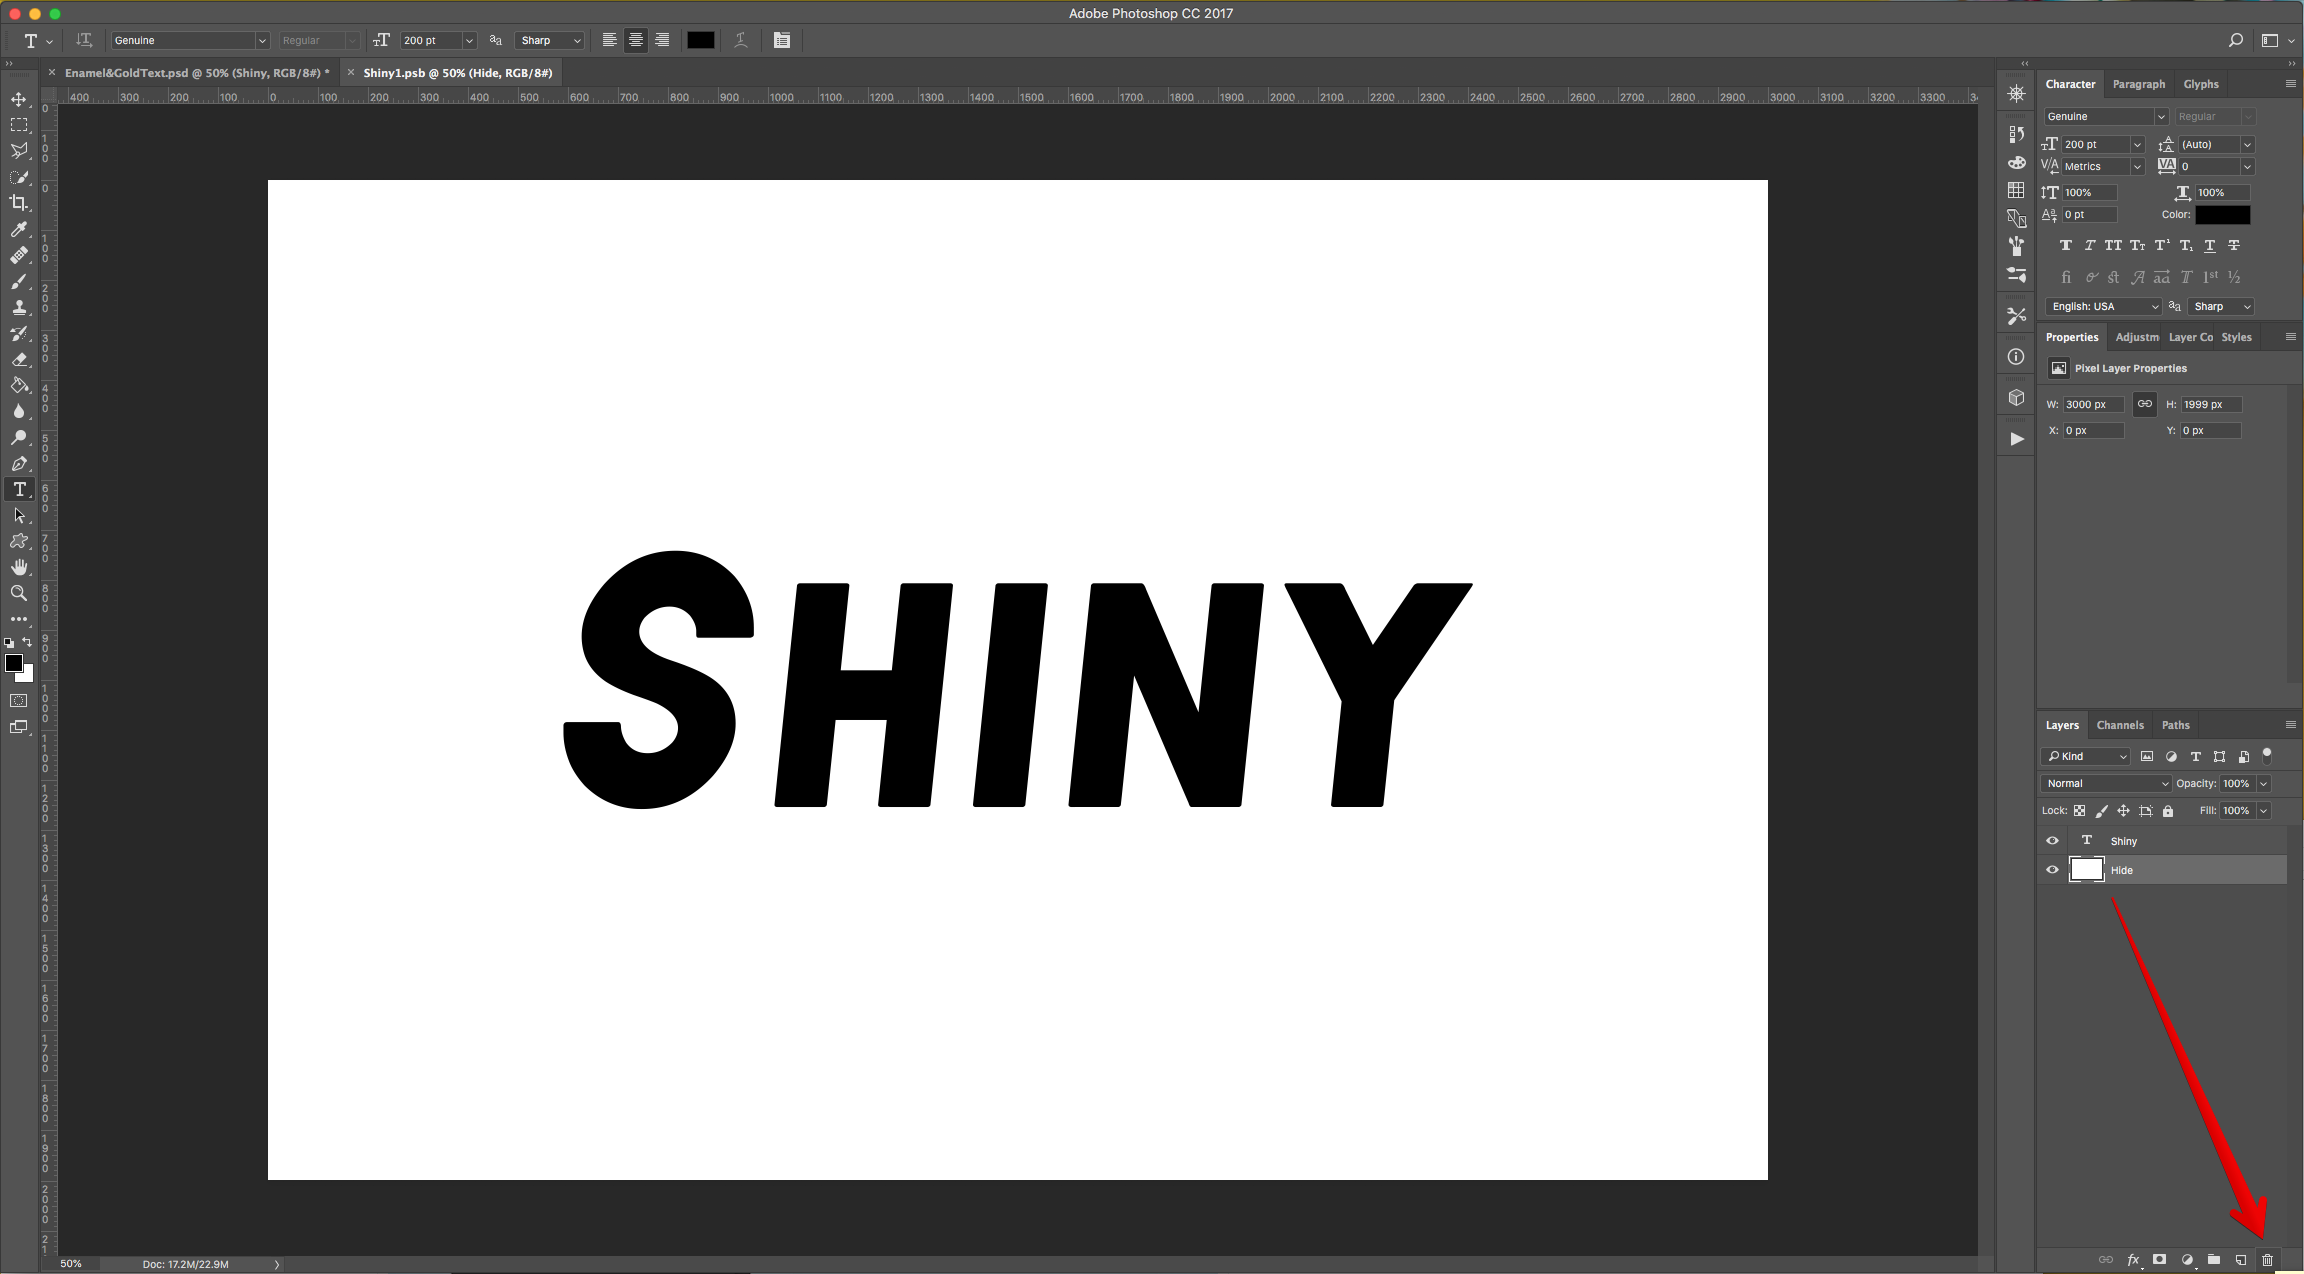
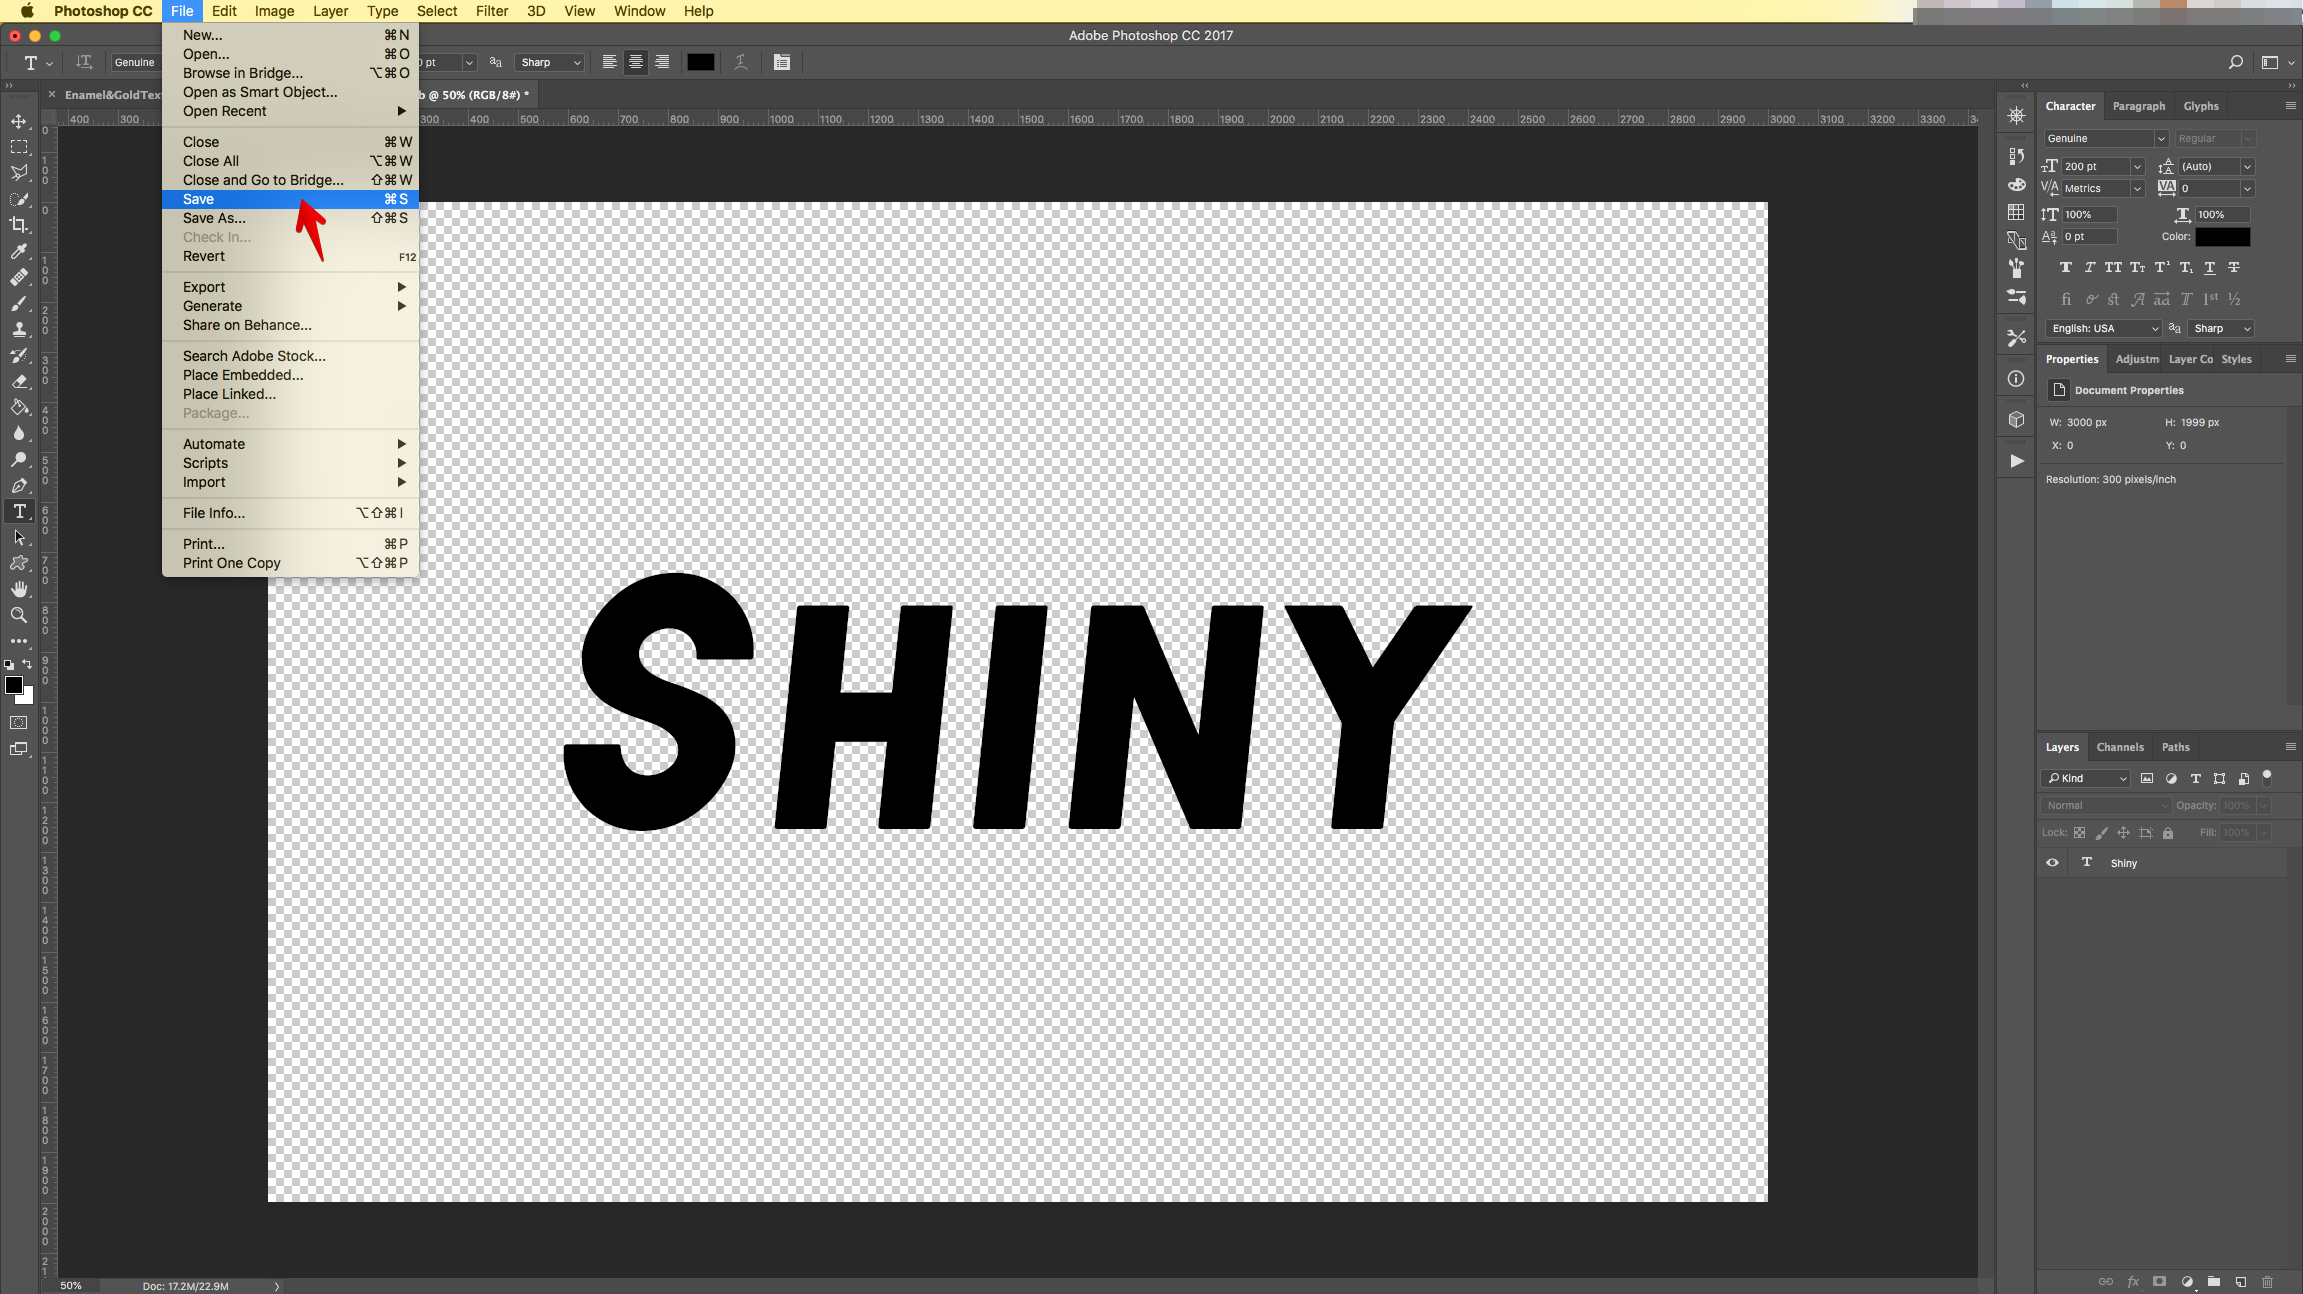
7 - Drag the “Hide” Layer to the “Trash Can” at the bottom of the “Layers Panel” to delete it. “Save” the Document and close it to return to the original one. The changes should show.
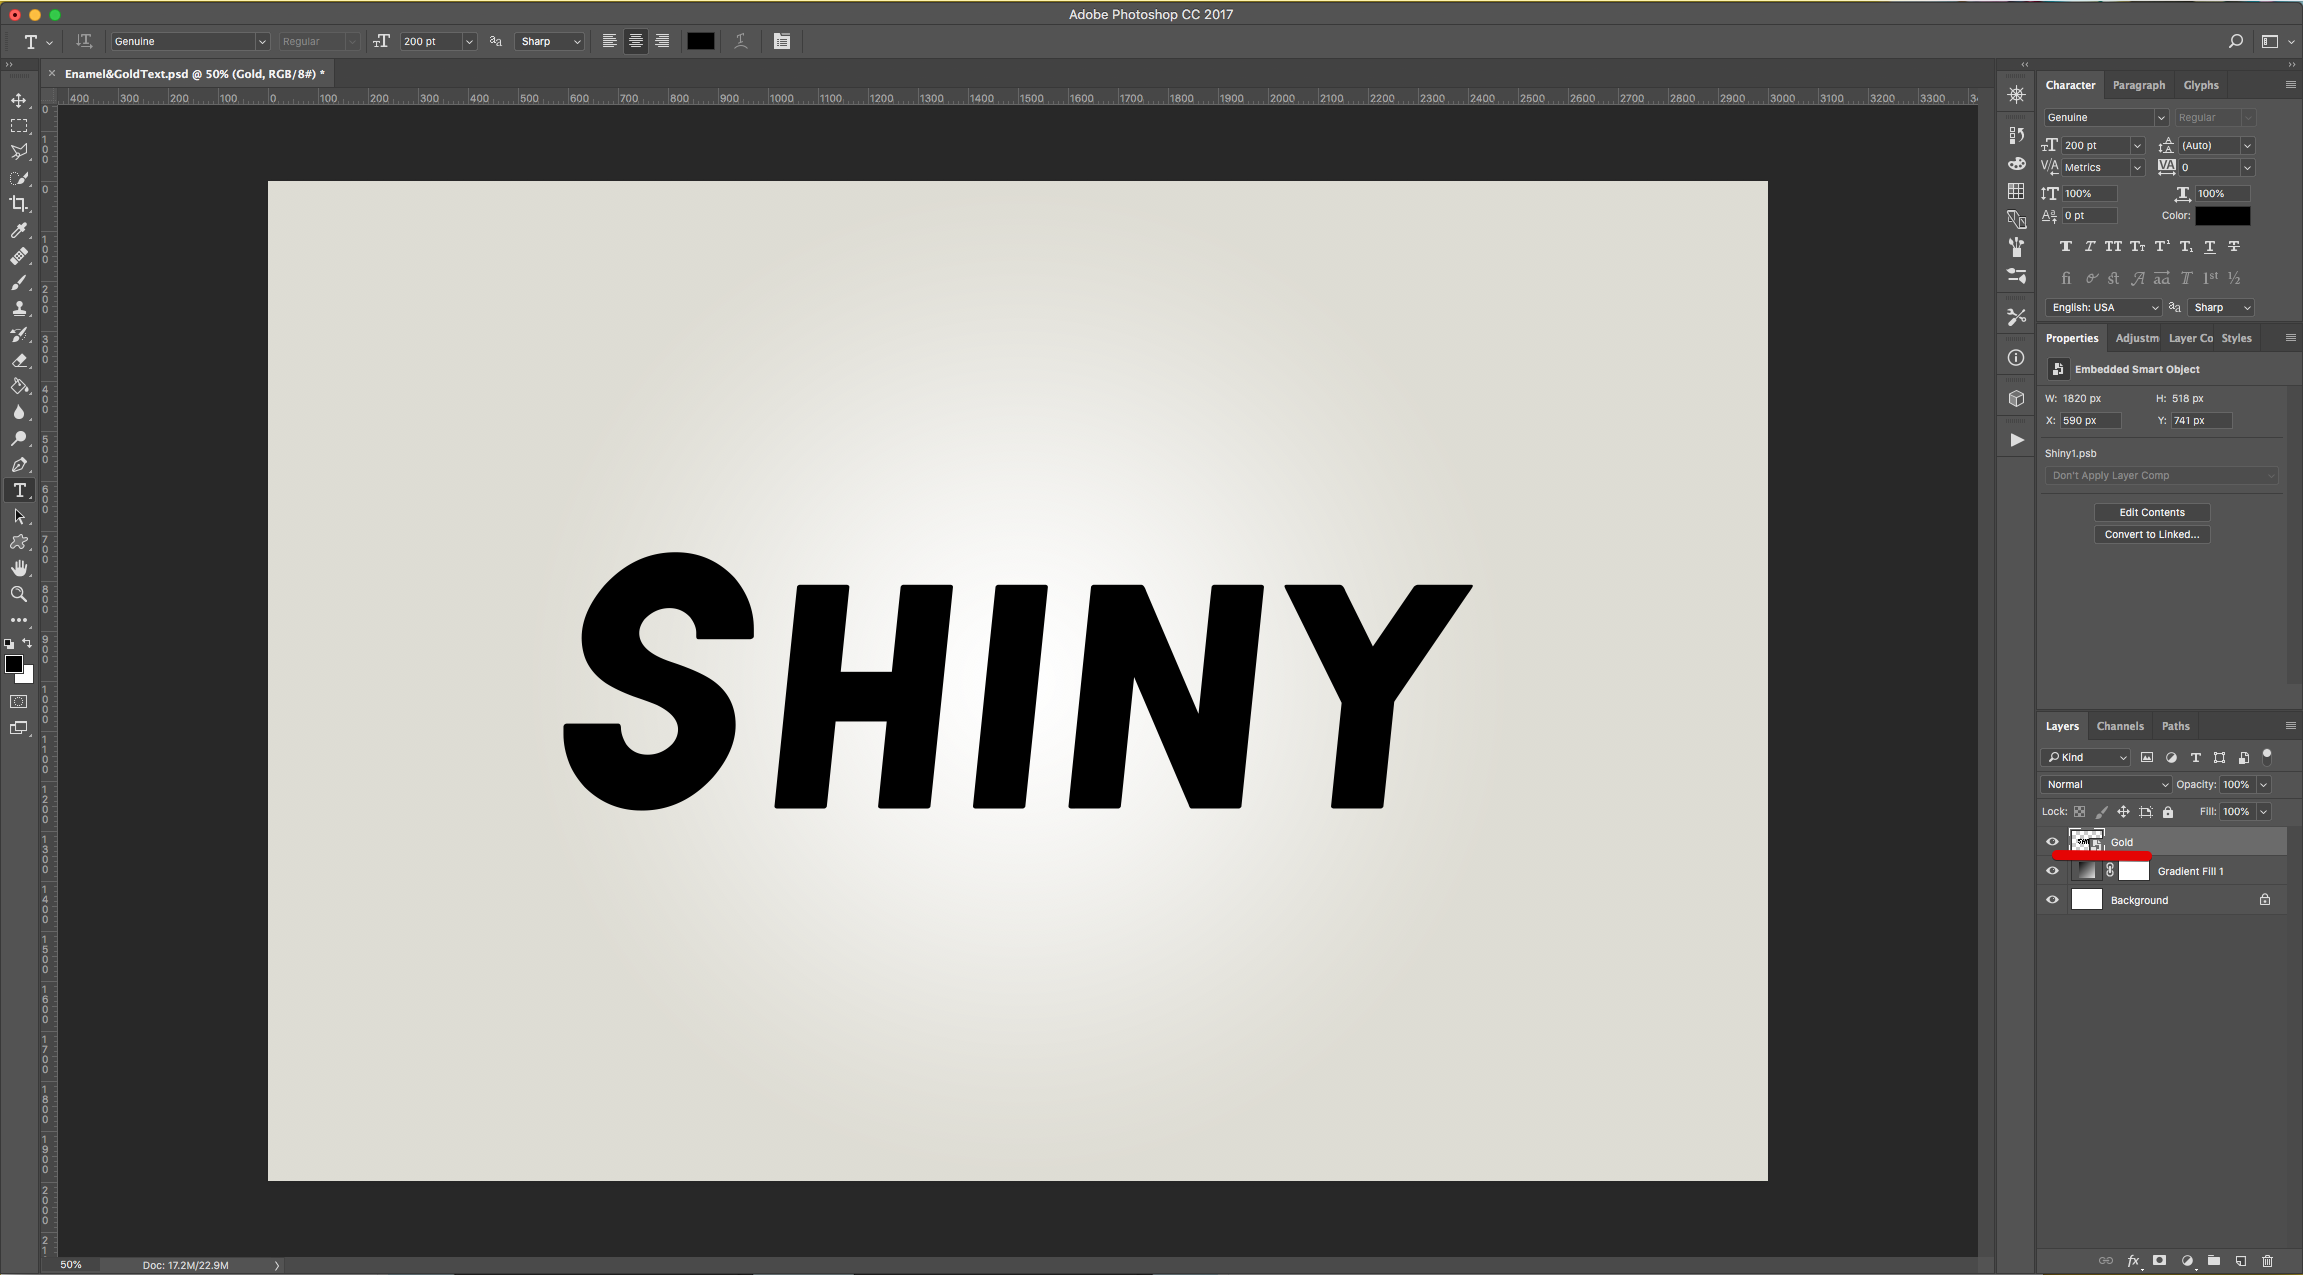
8 - Change the name of the “Smart Object” Layer to “Gold”.
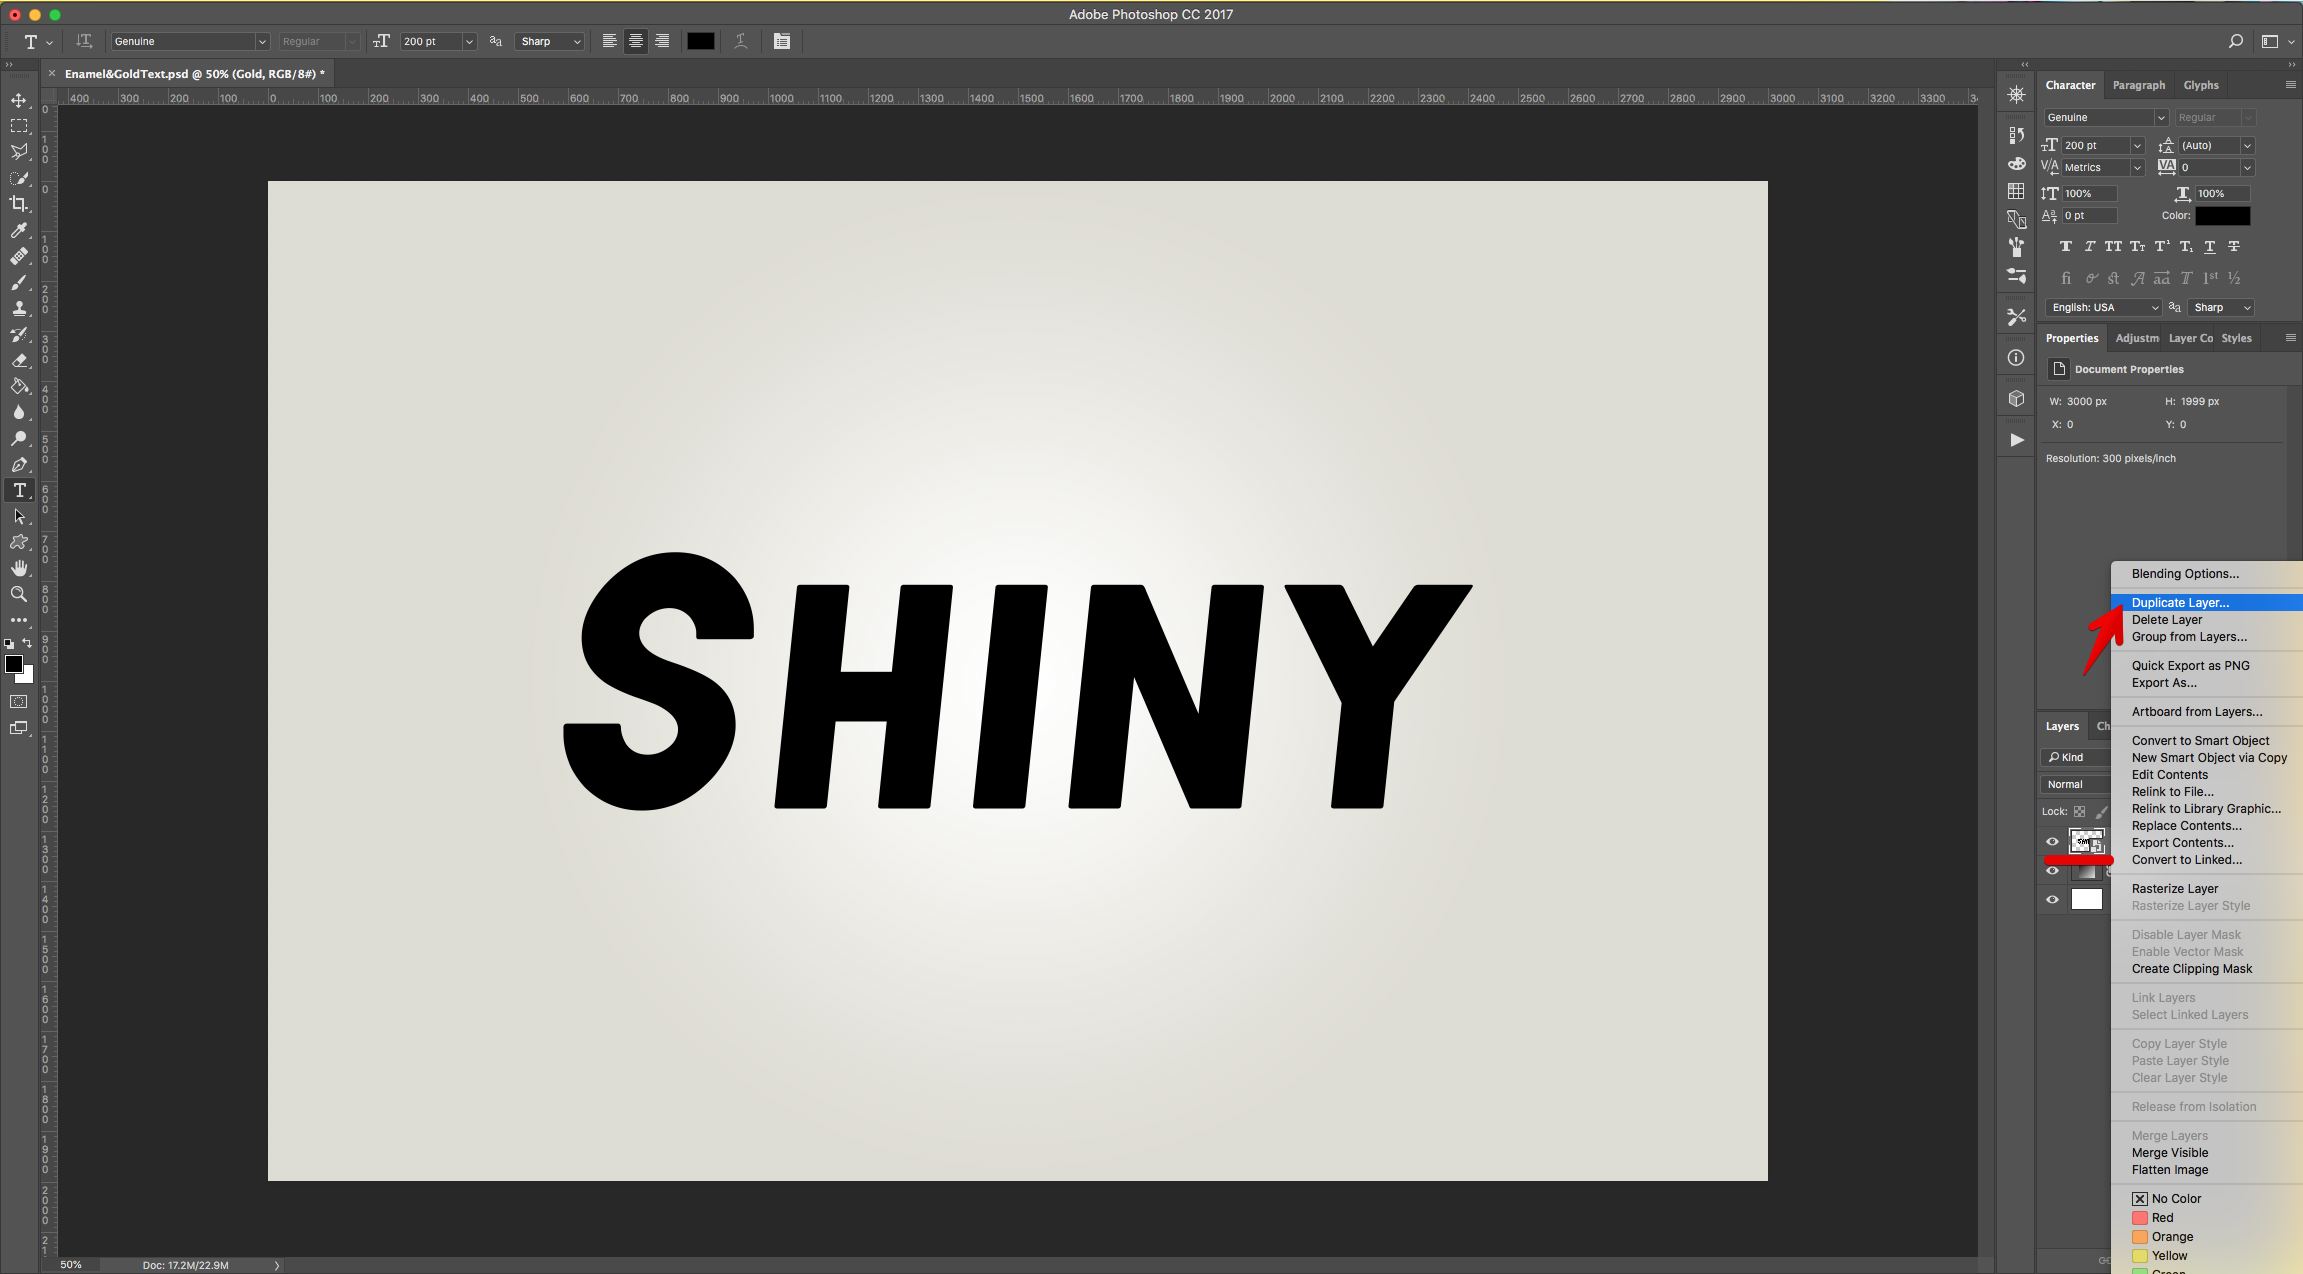
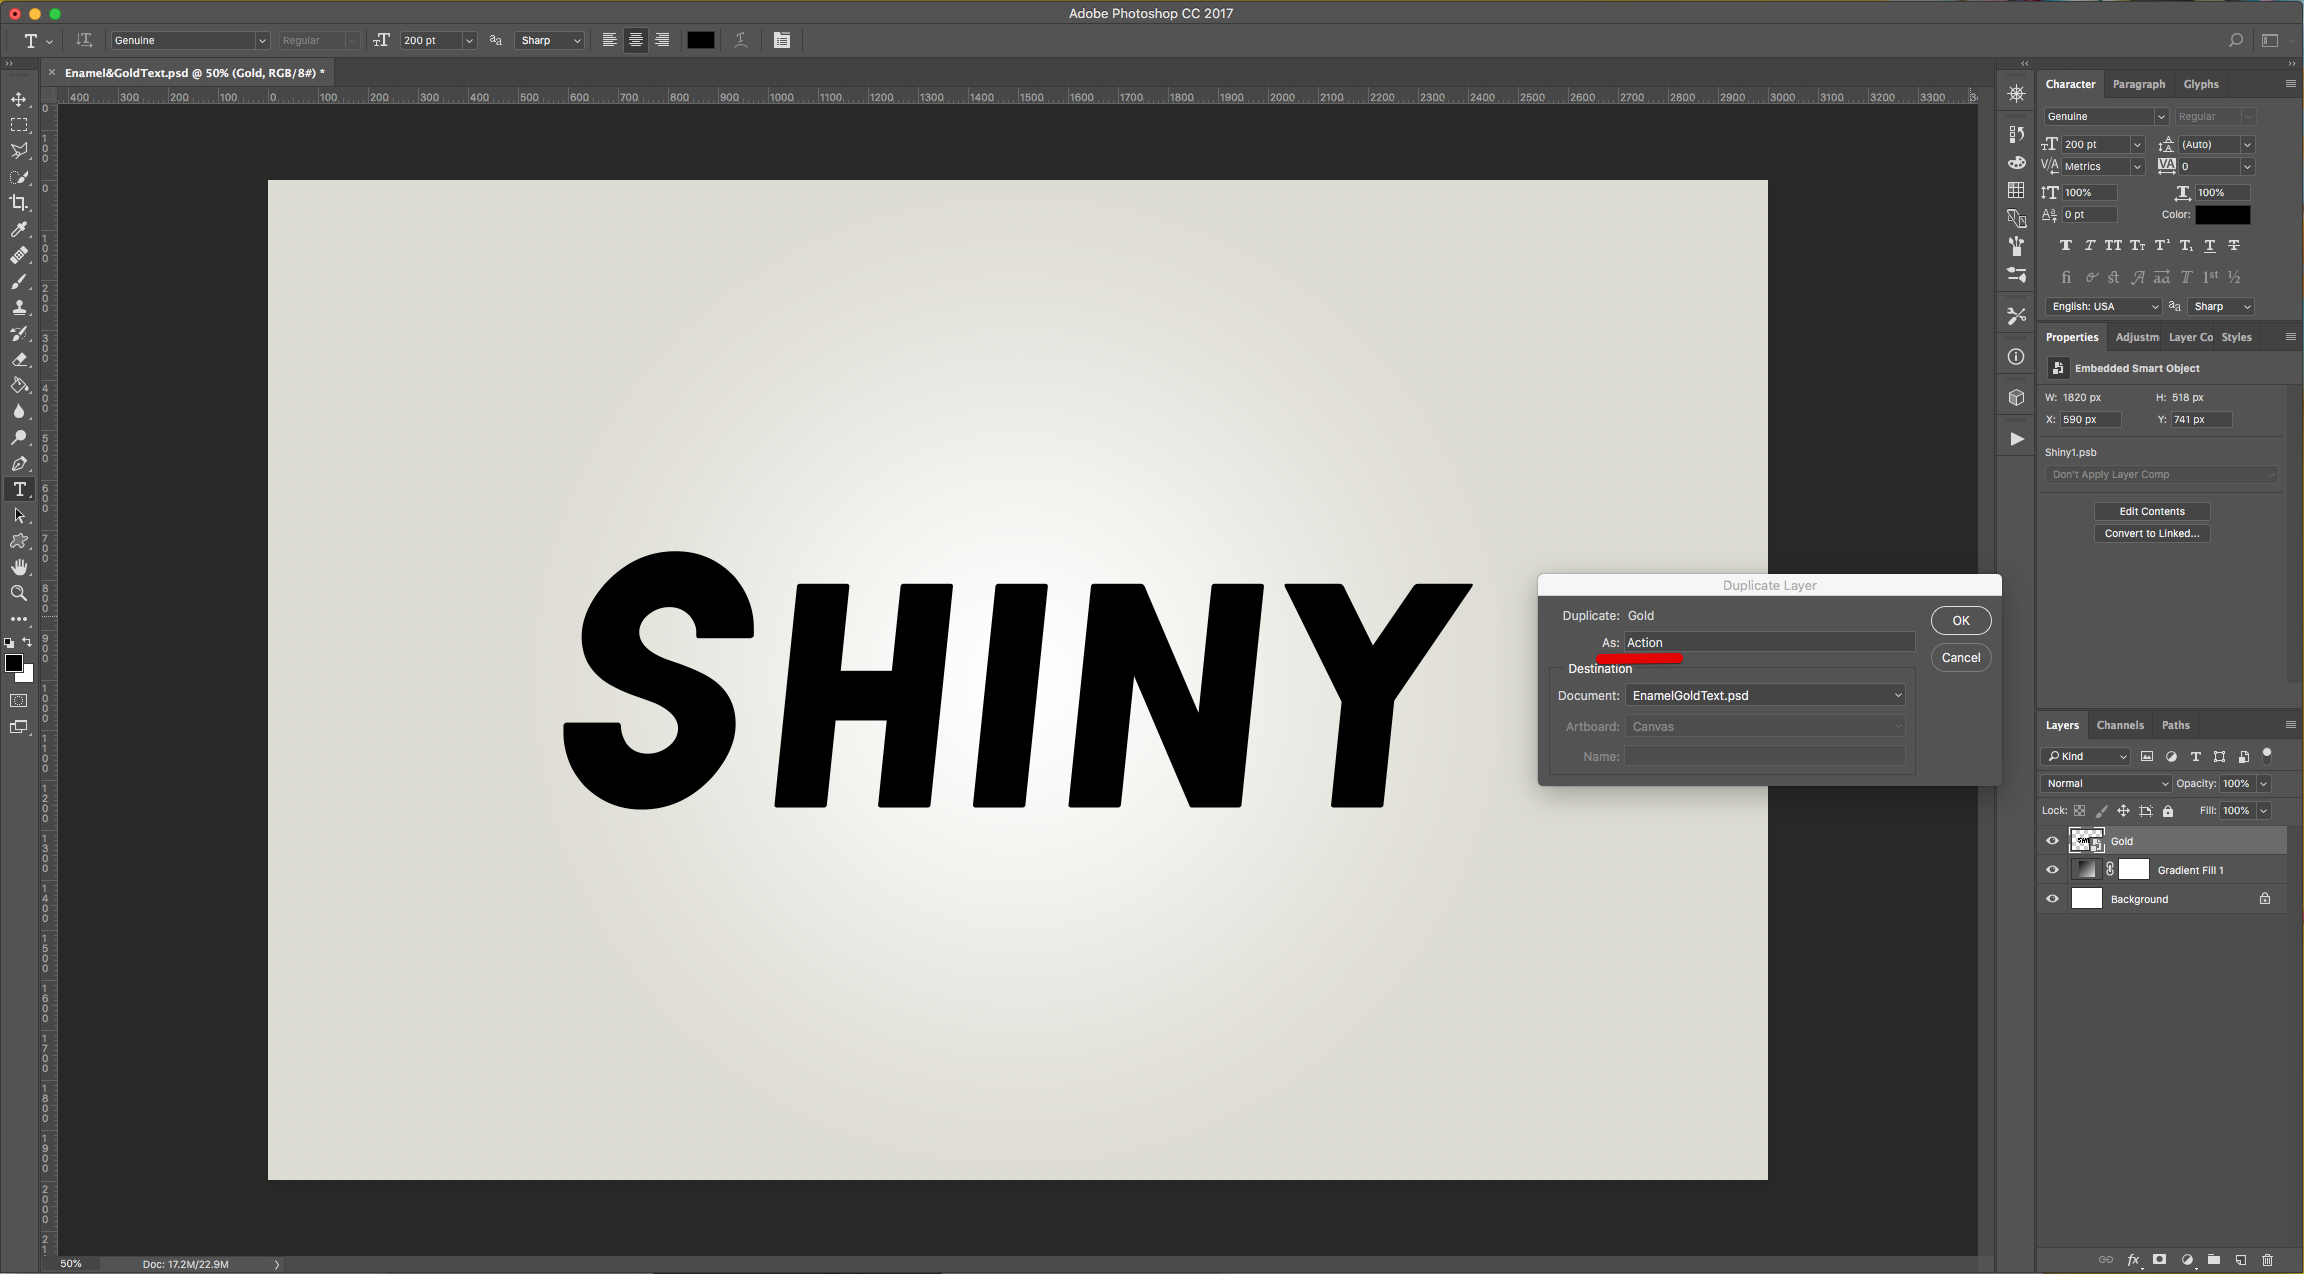
9 - Right-click on top of it and choose “Duplicate Layer”, choose As “Action” on the dialog window and hit “OK”
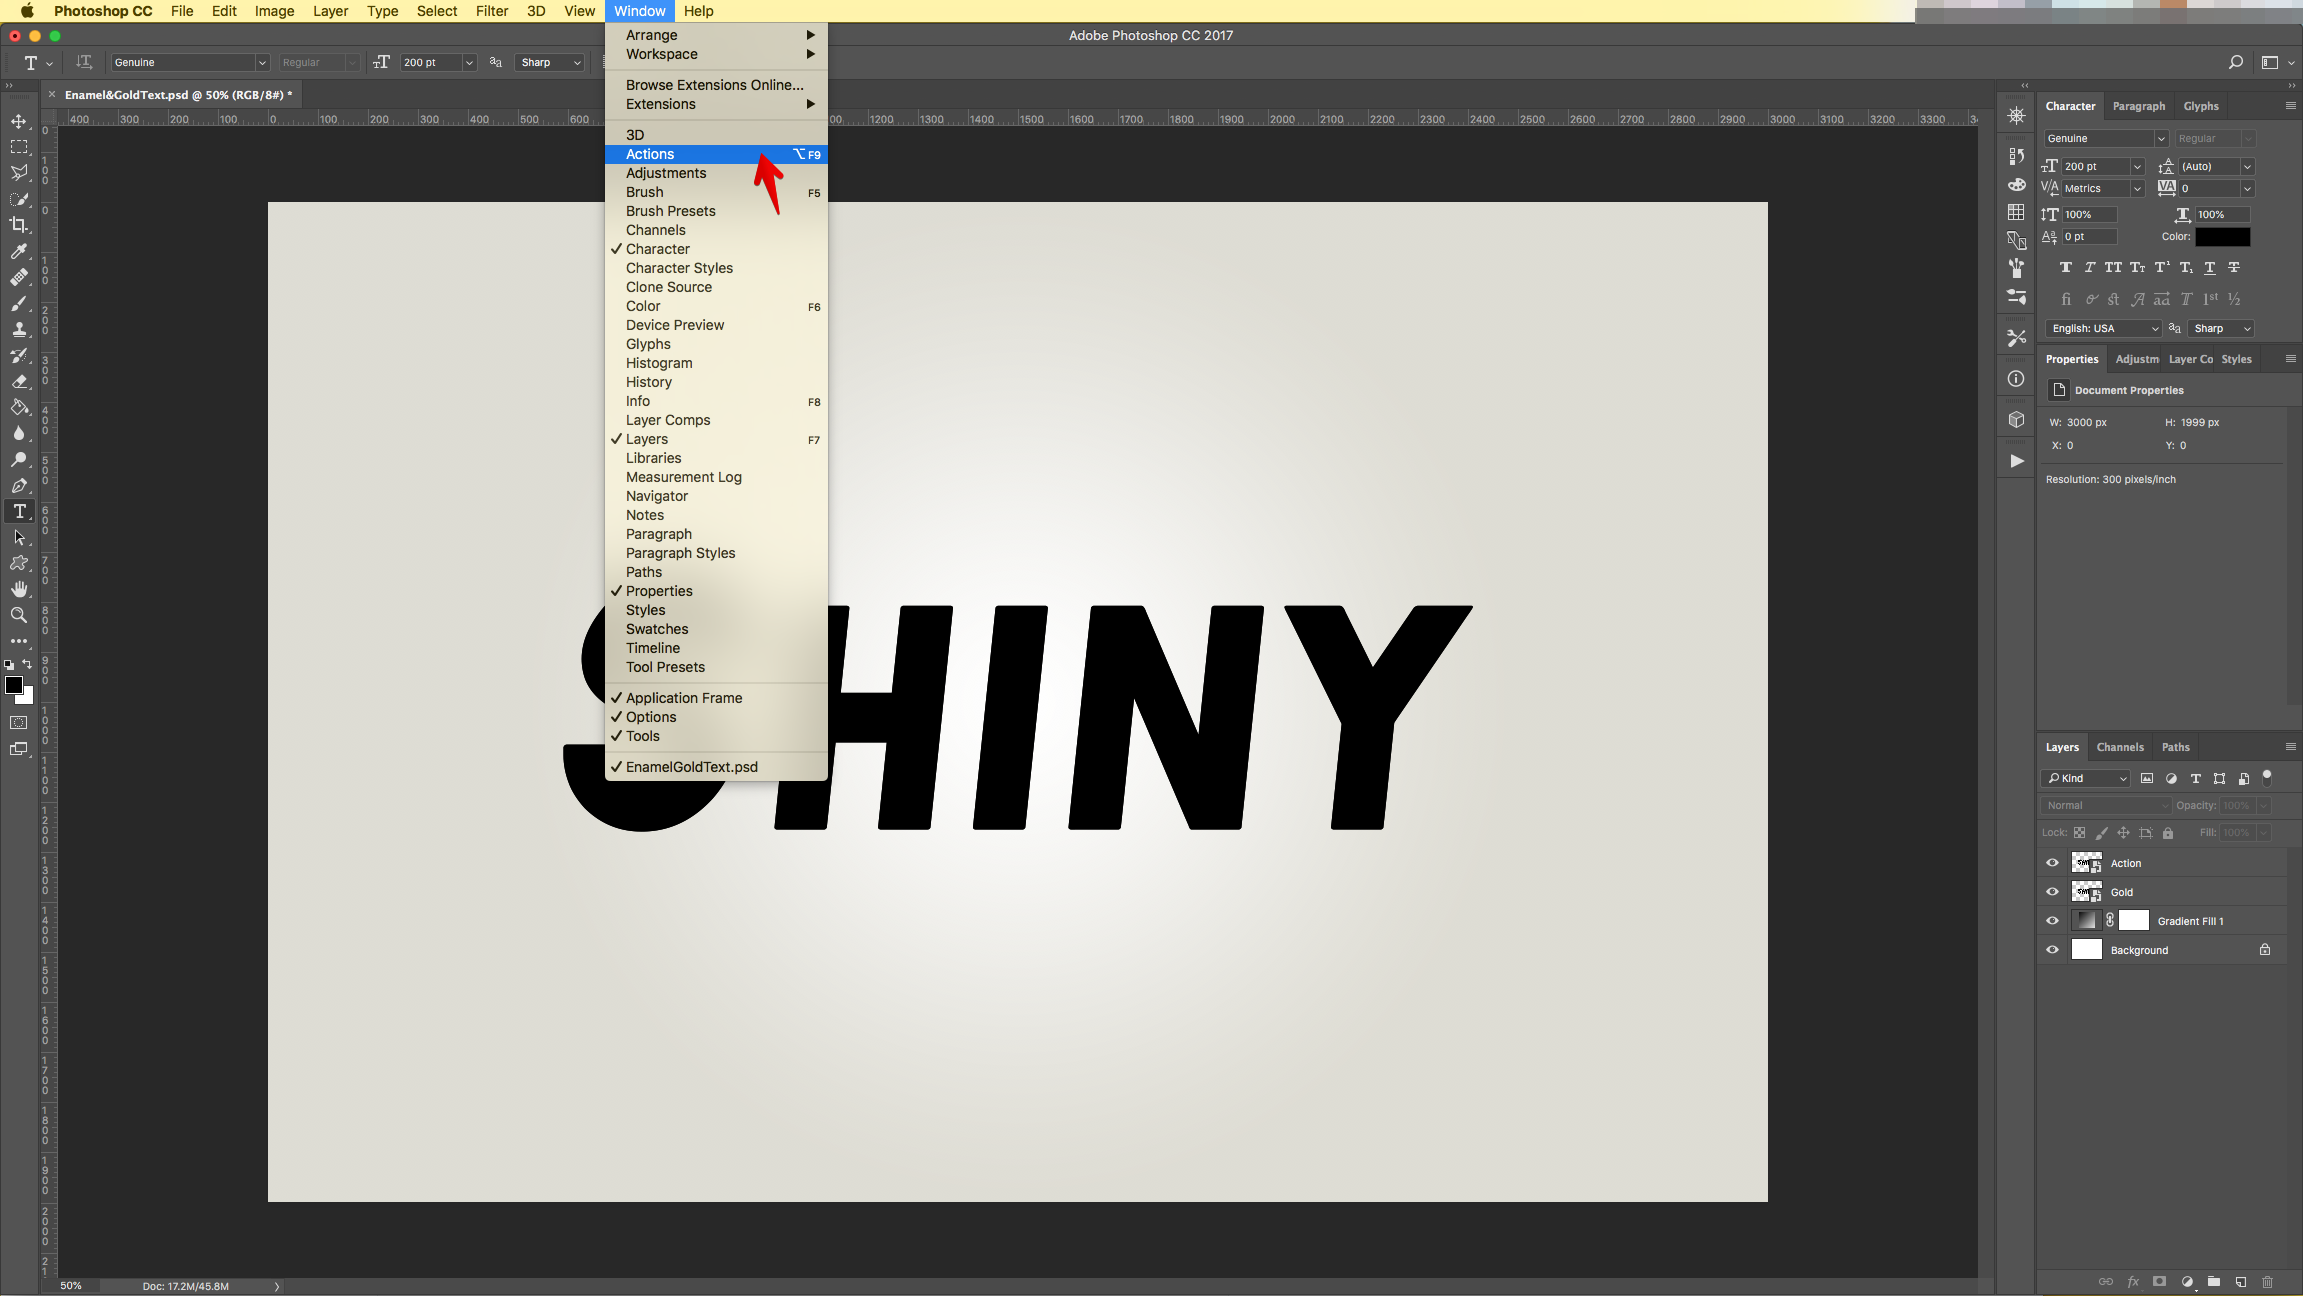
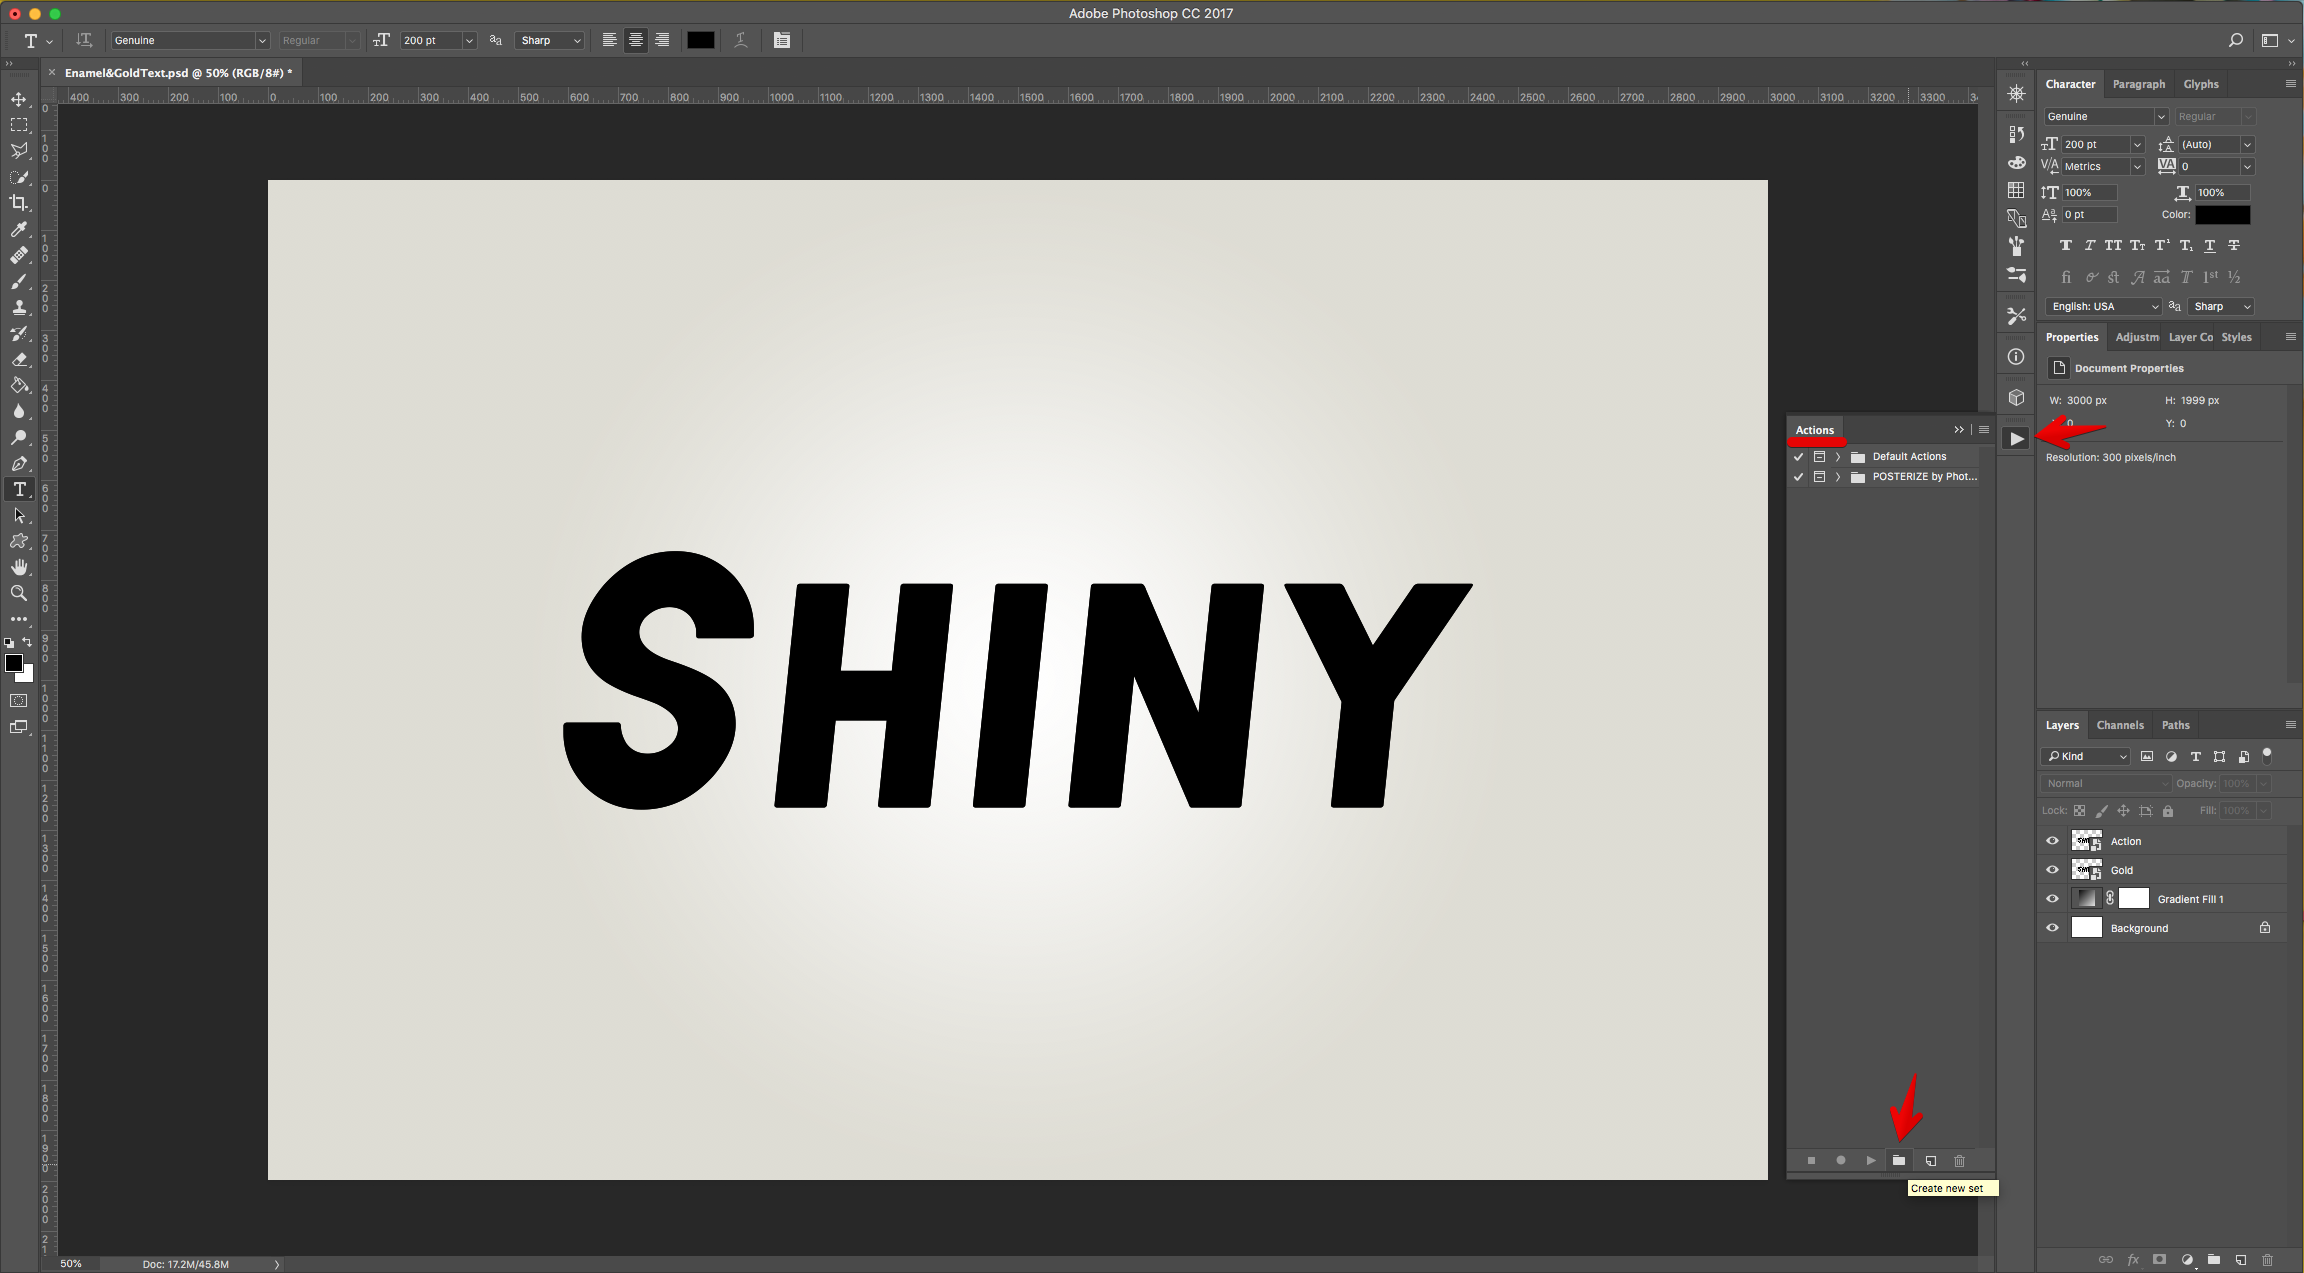
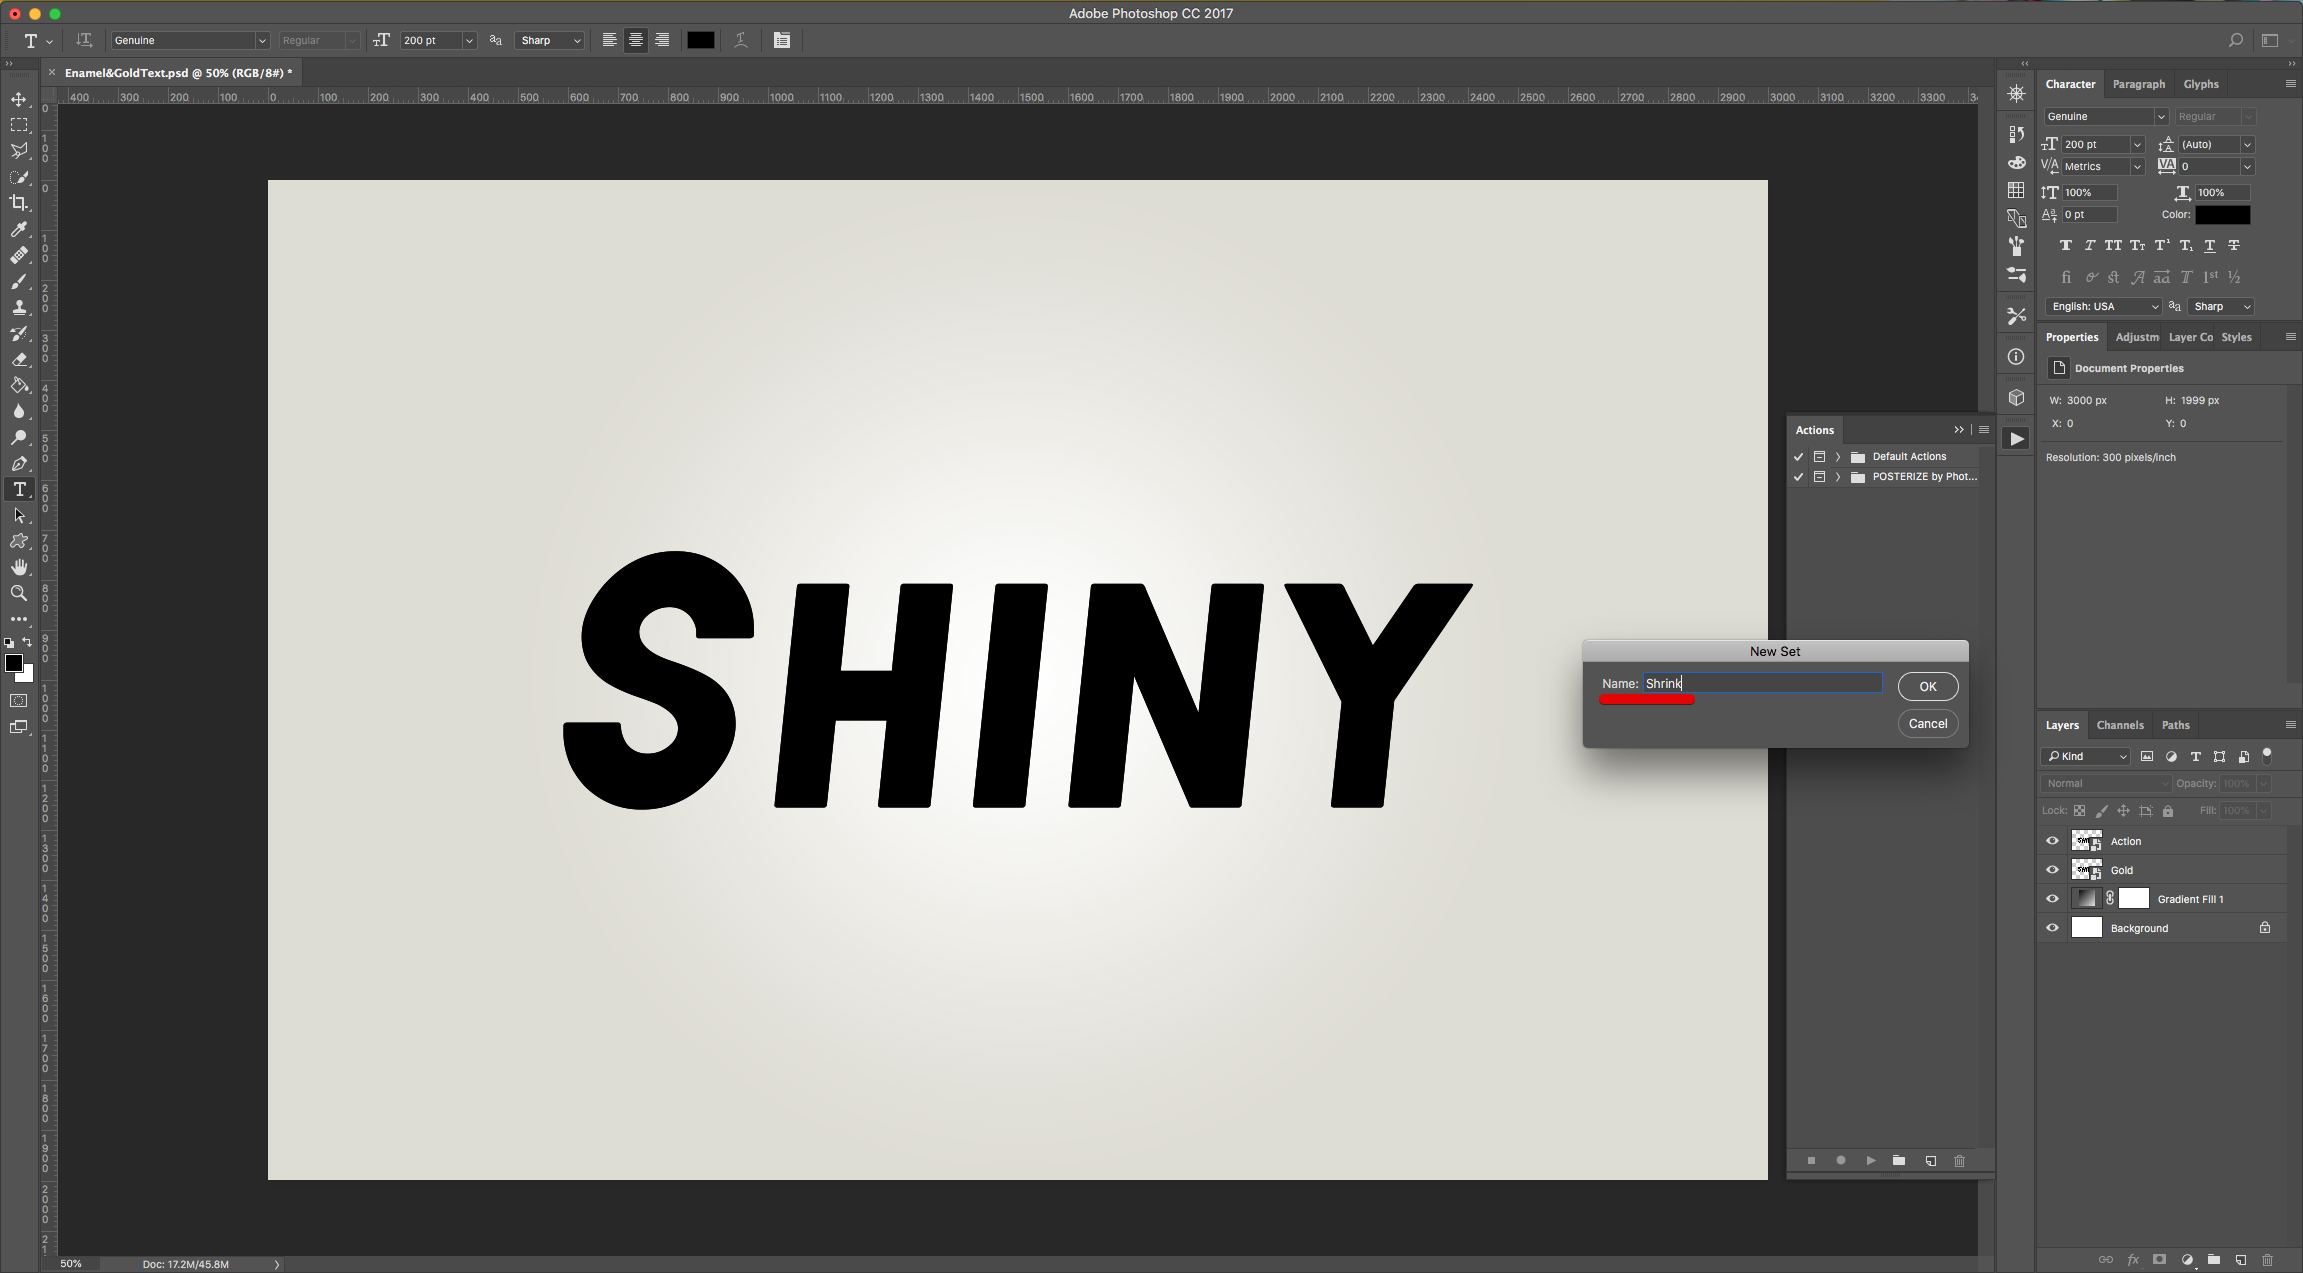
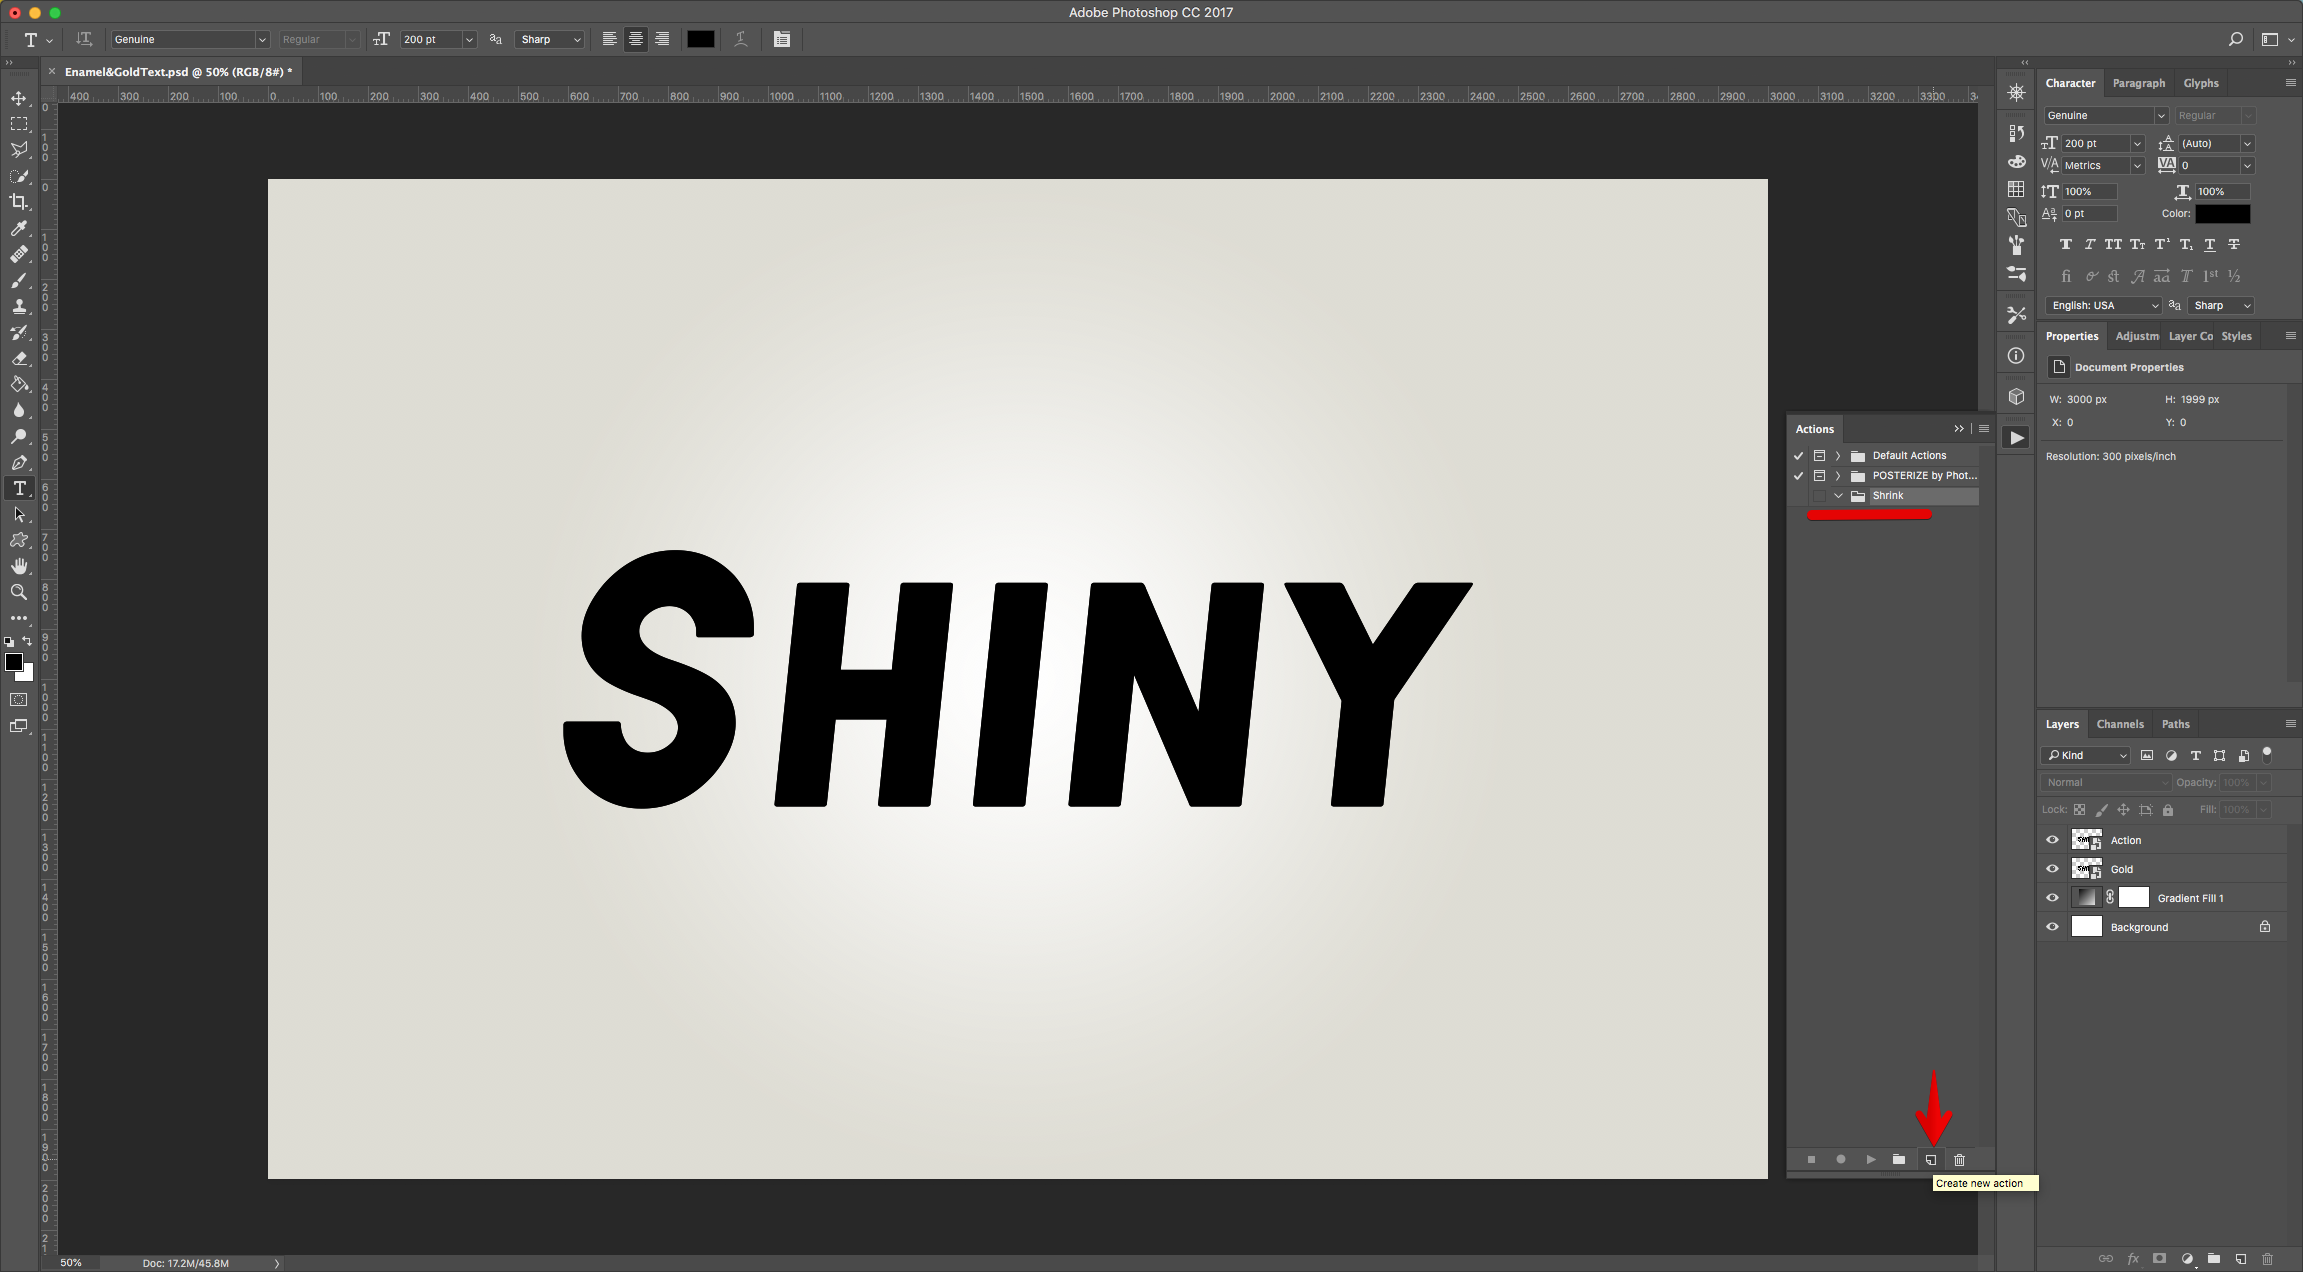
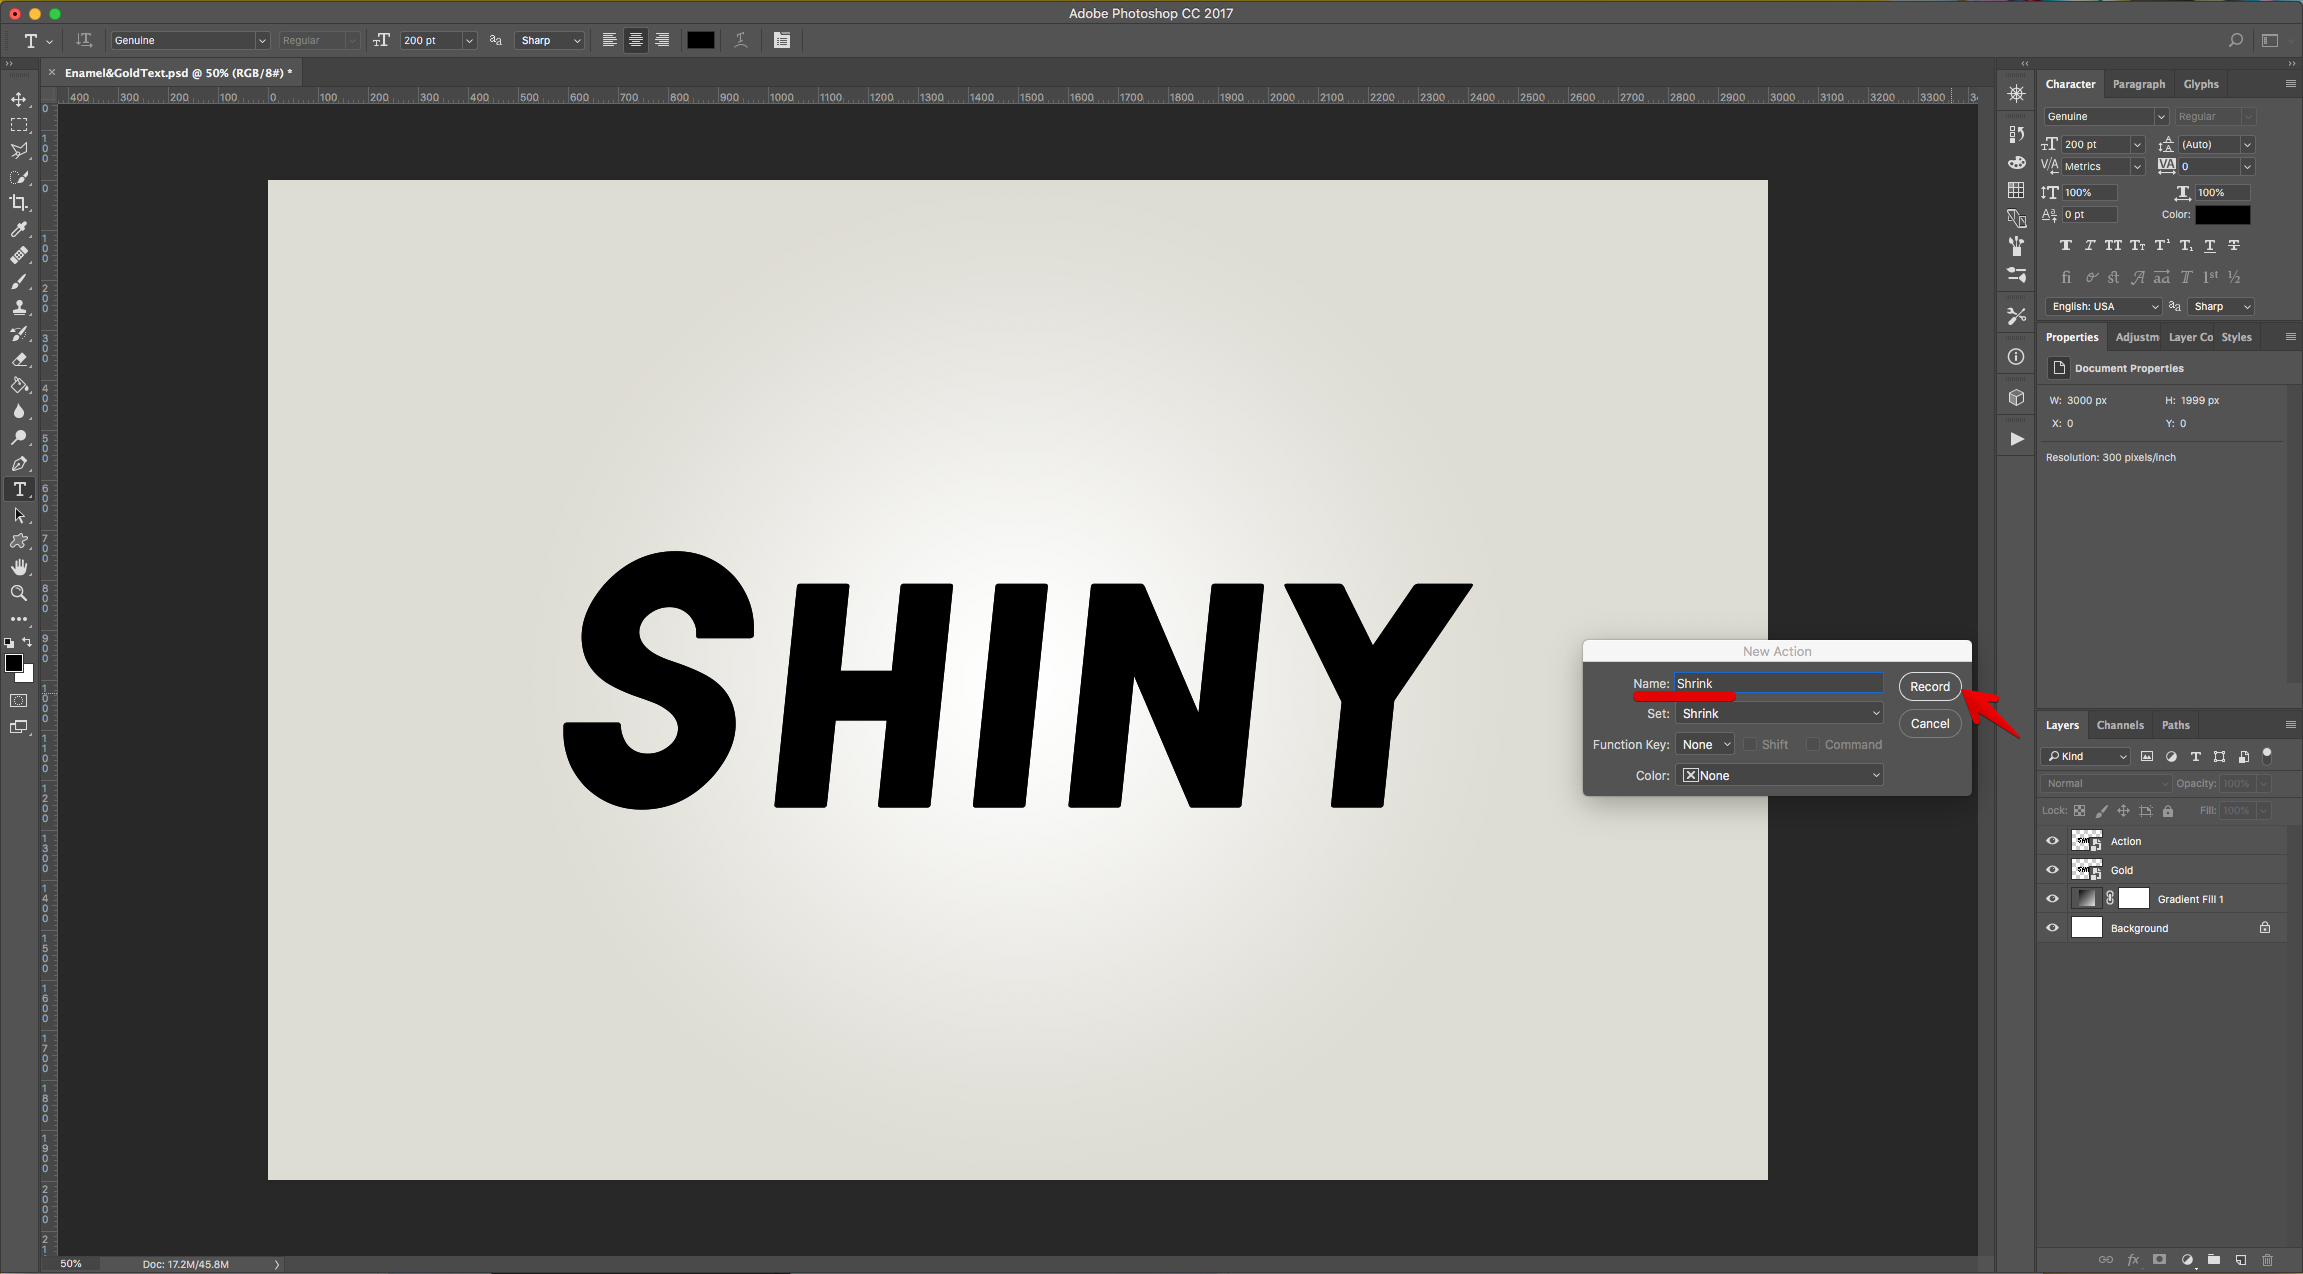
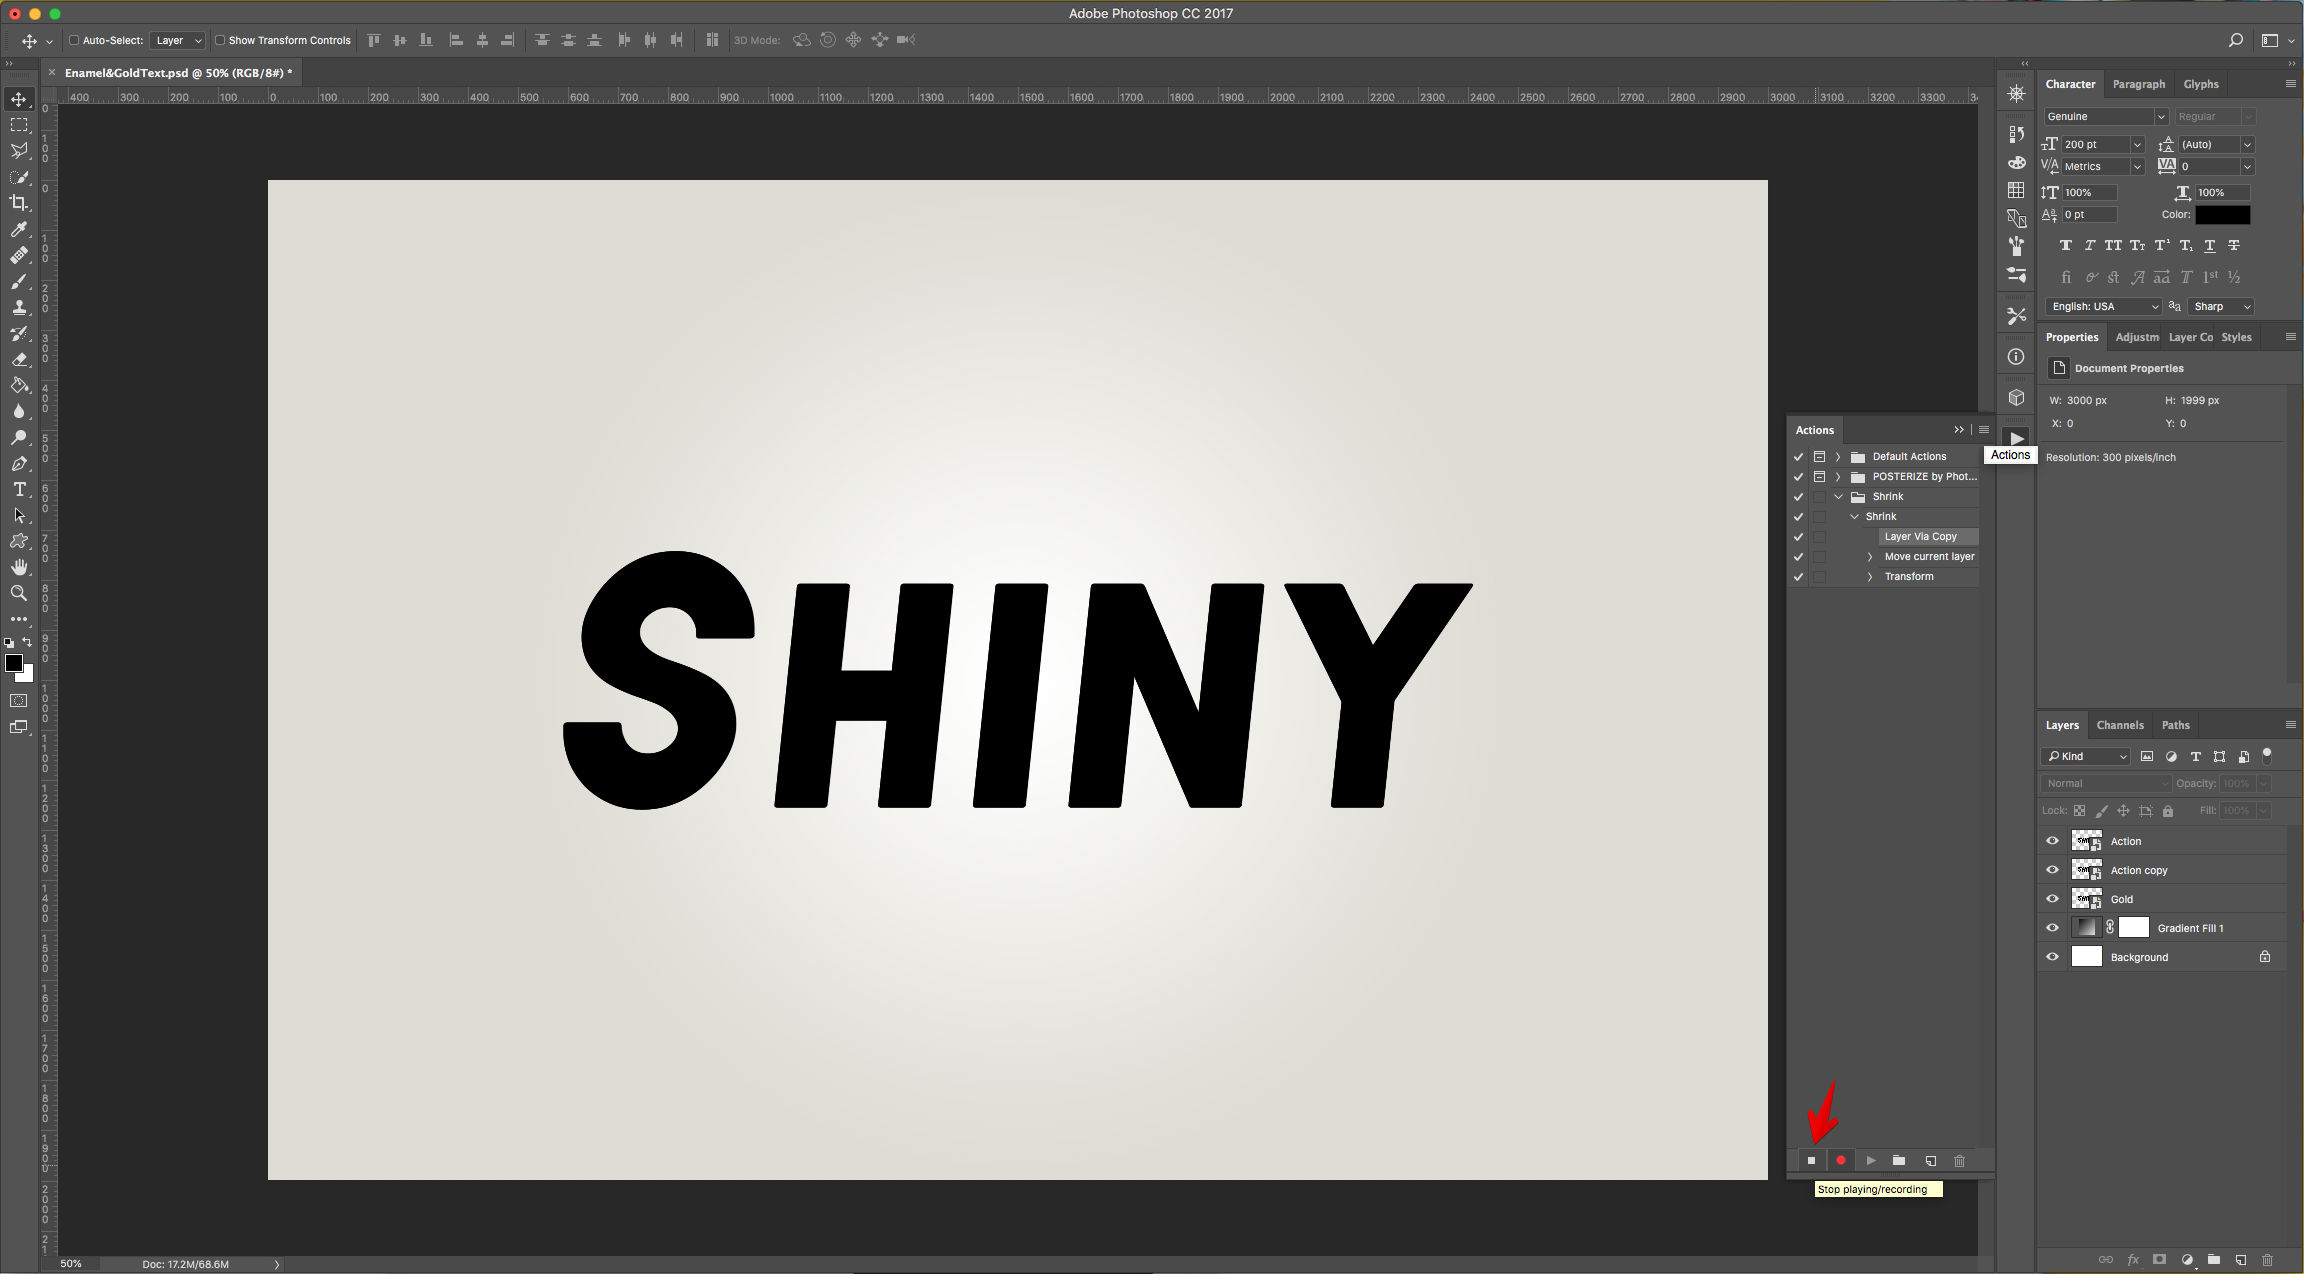
10 - Make sure the “Actions Panel” is open by going to Window > Actions. Then, in the Panel click the Small Folder icon to “Create a New Set”. Name it “Shrink” and “Create a New Action” named “Shrink” inside the folder. Click “Record” to start creating your “Action”.
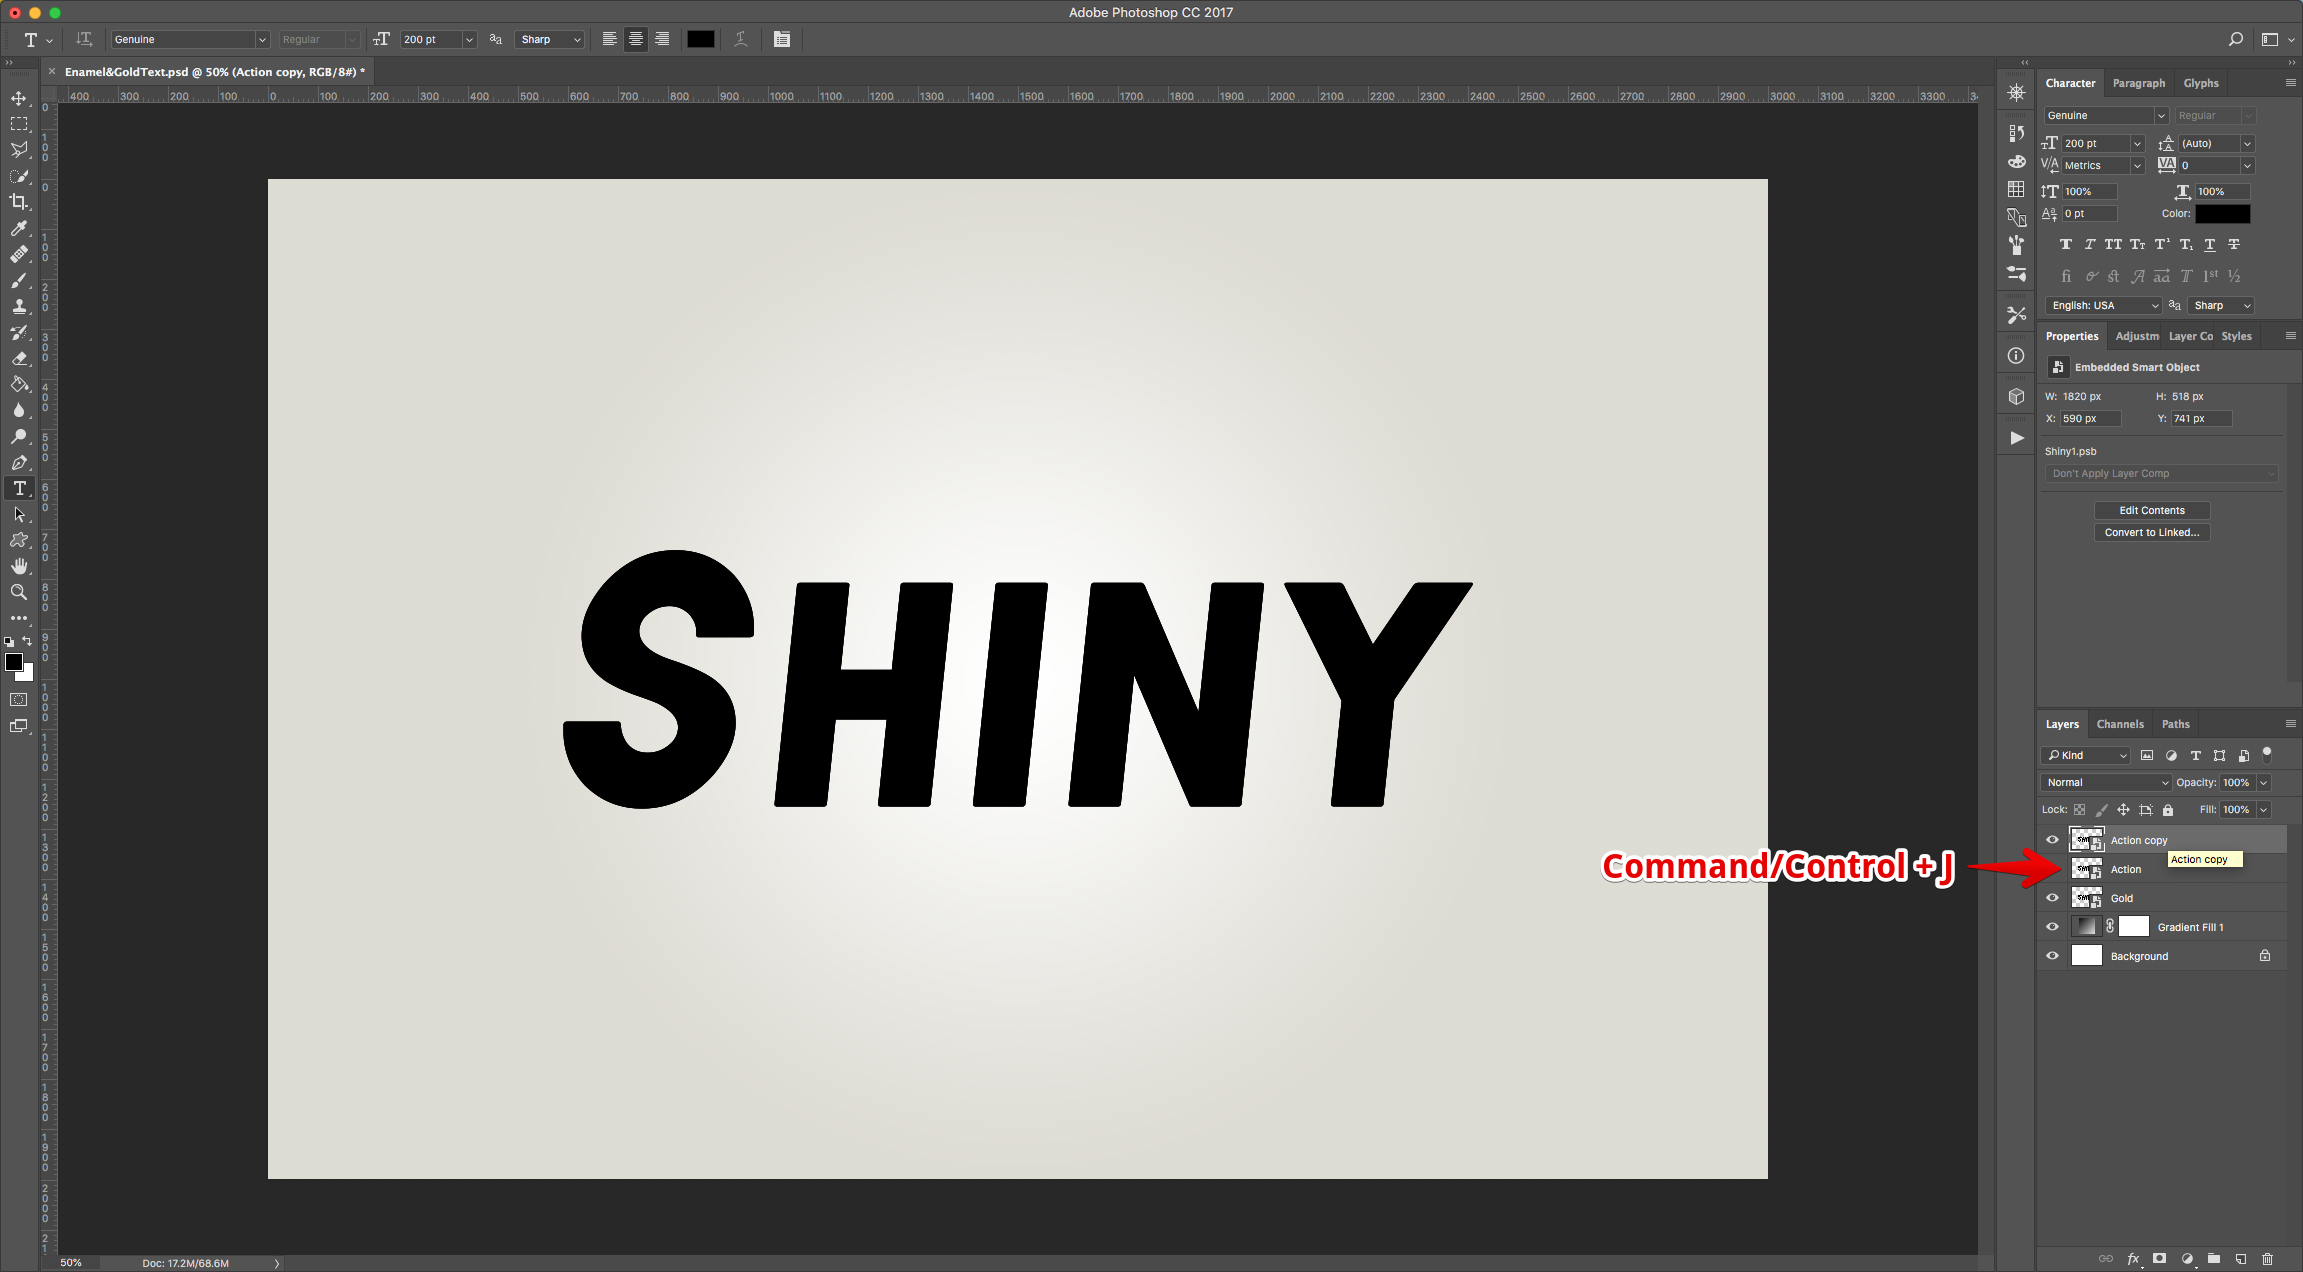
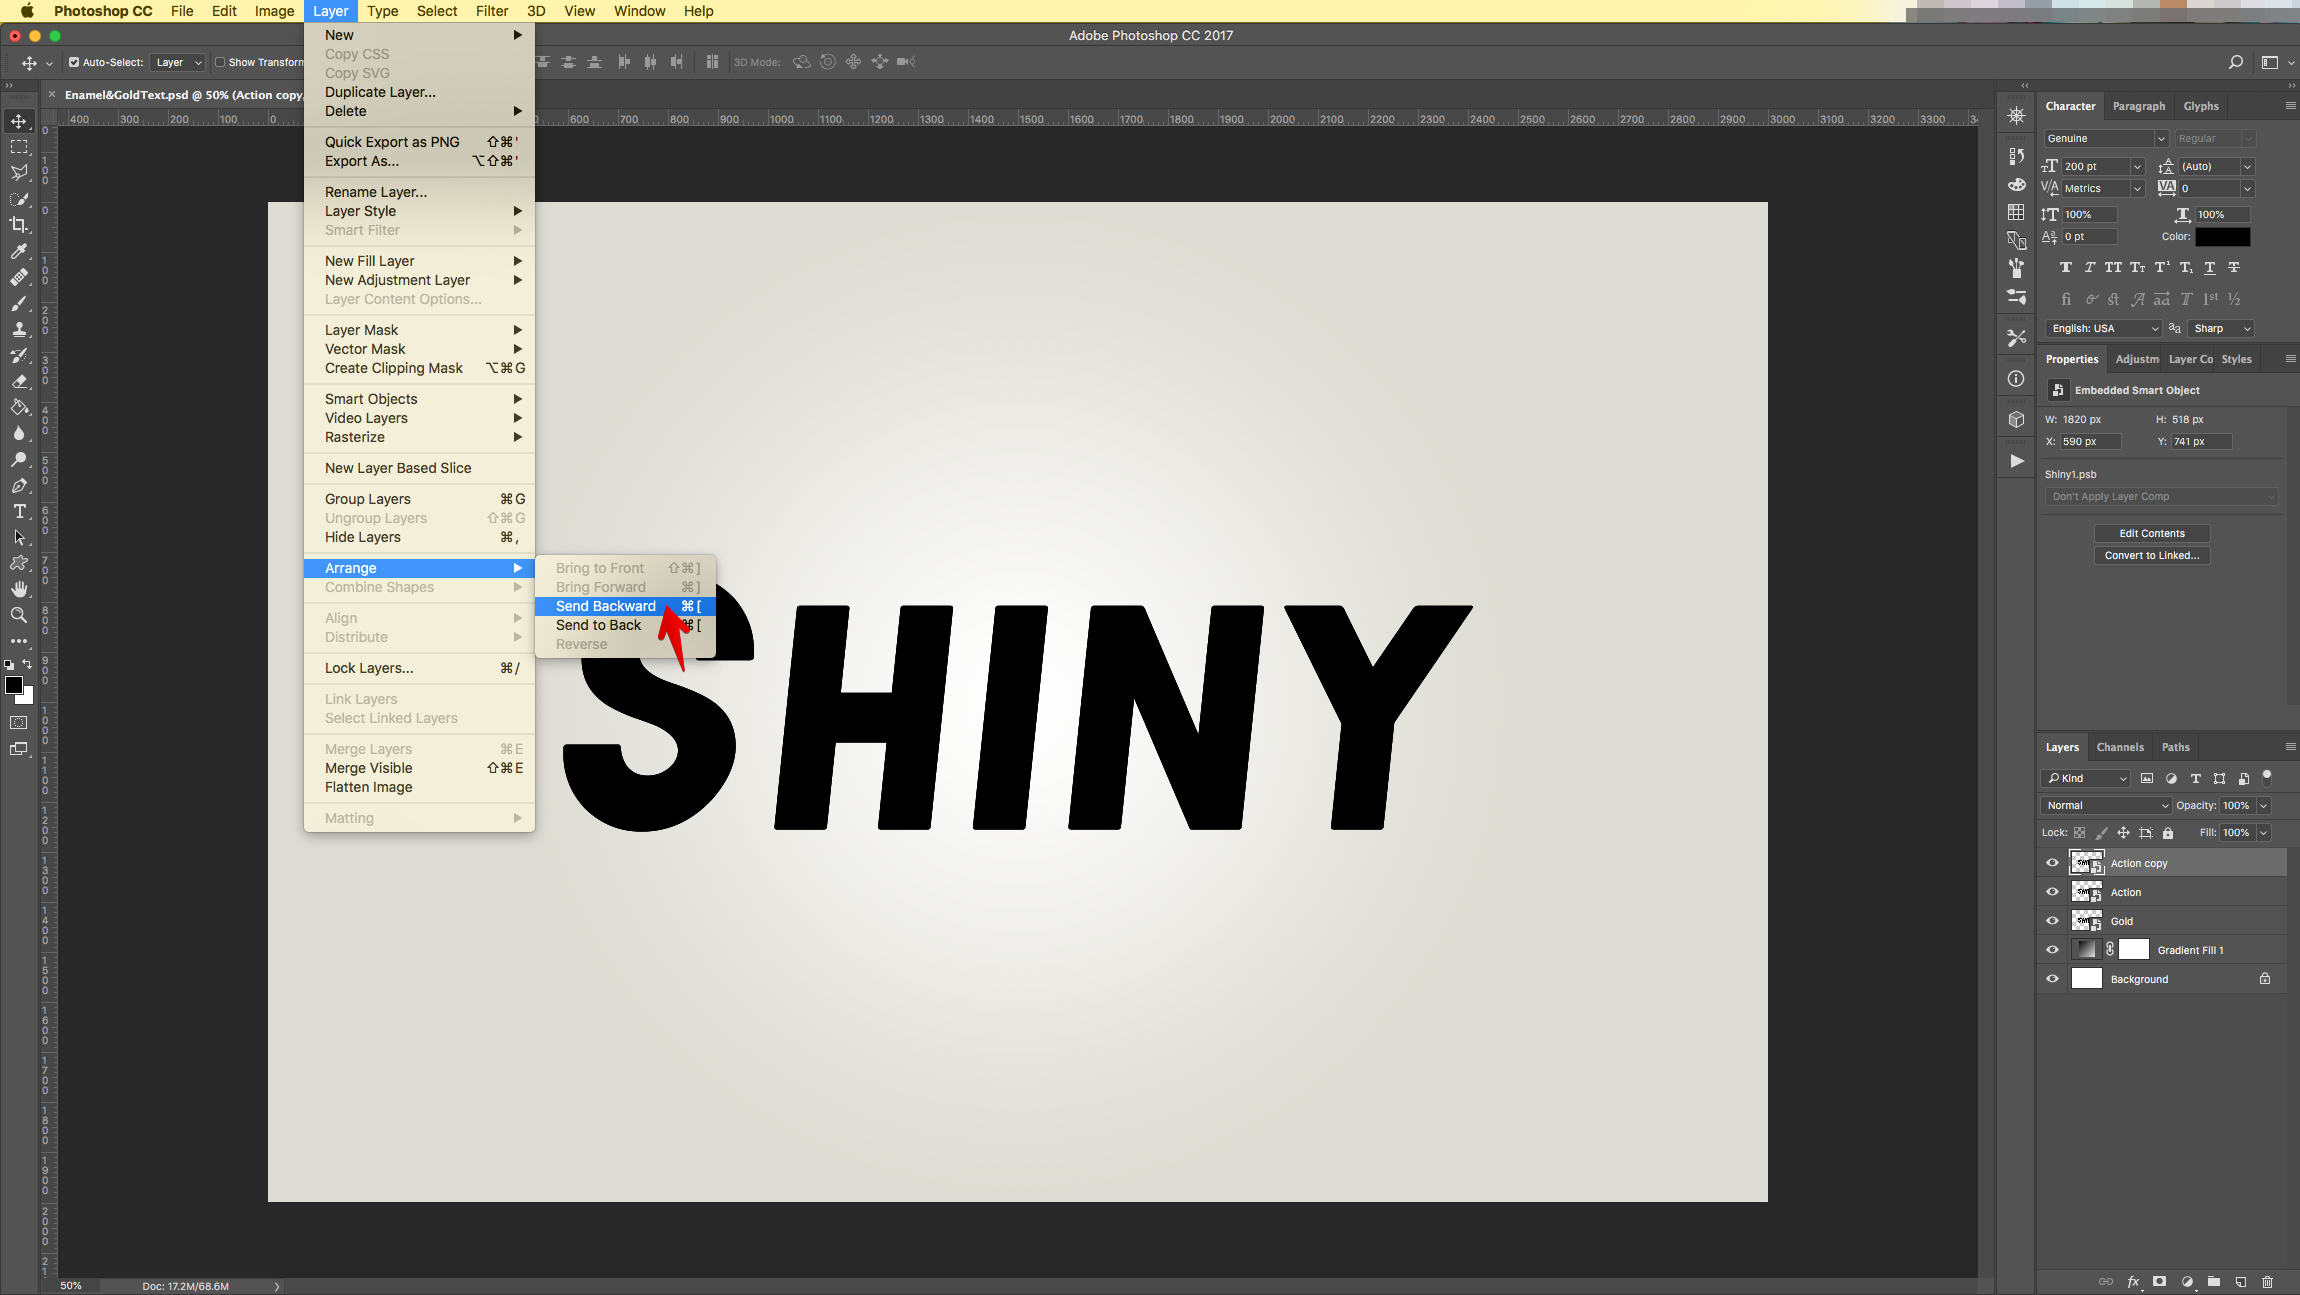
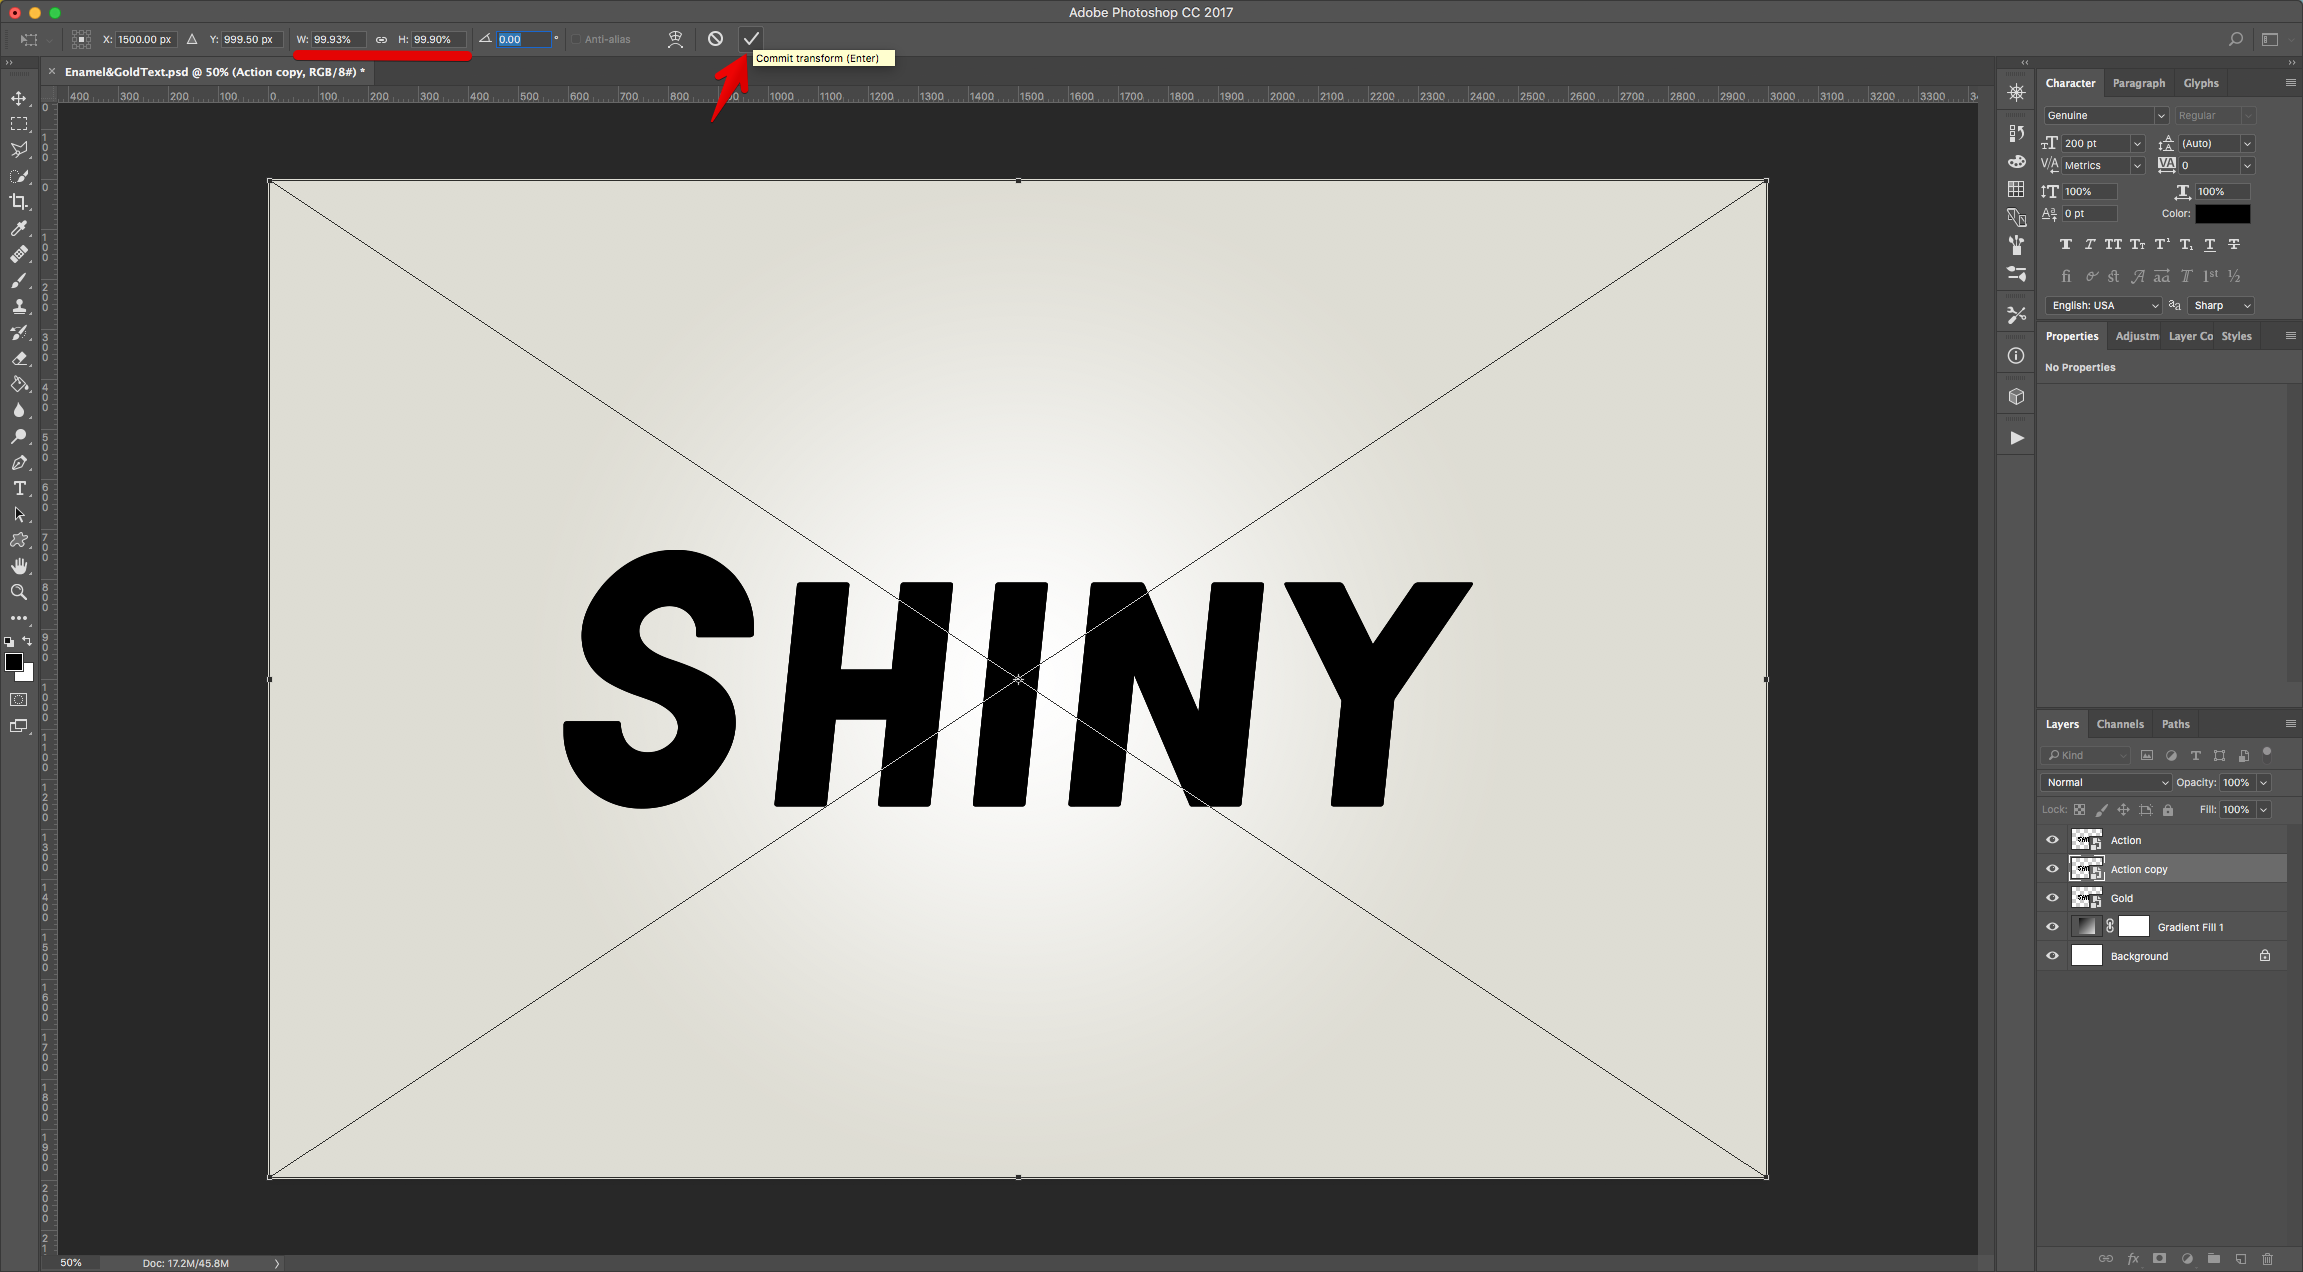
11 - Make sure that the “Action” Layer is selected and click “Command/Control + J” to create a “Duplicate”. Go to Layer > Arrange > Send Backward. Enter “Free Transform” (Command/Control + T) and set the “W” value to 99,93% and “H” value to 99,90%. Hit “Enter” to “Commit Changes”. In the “Actions Panel” click the “Stop Recording” button at the bottom of the panel and drag the “Action” and “Action Copy” Layers to the Trash.

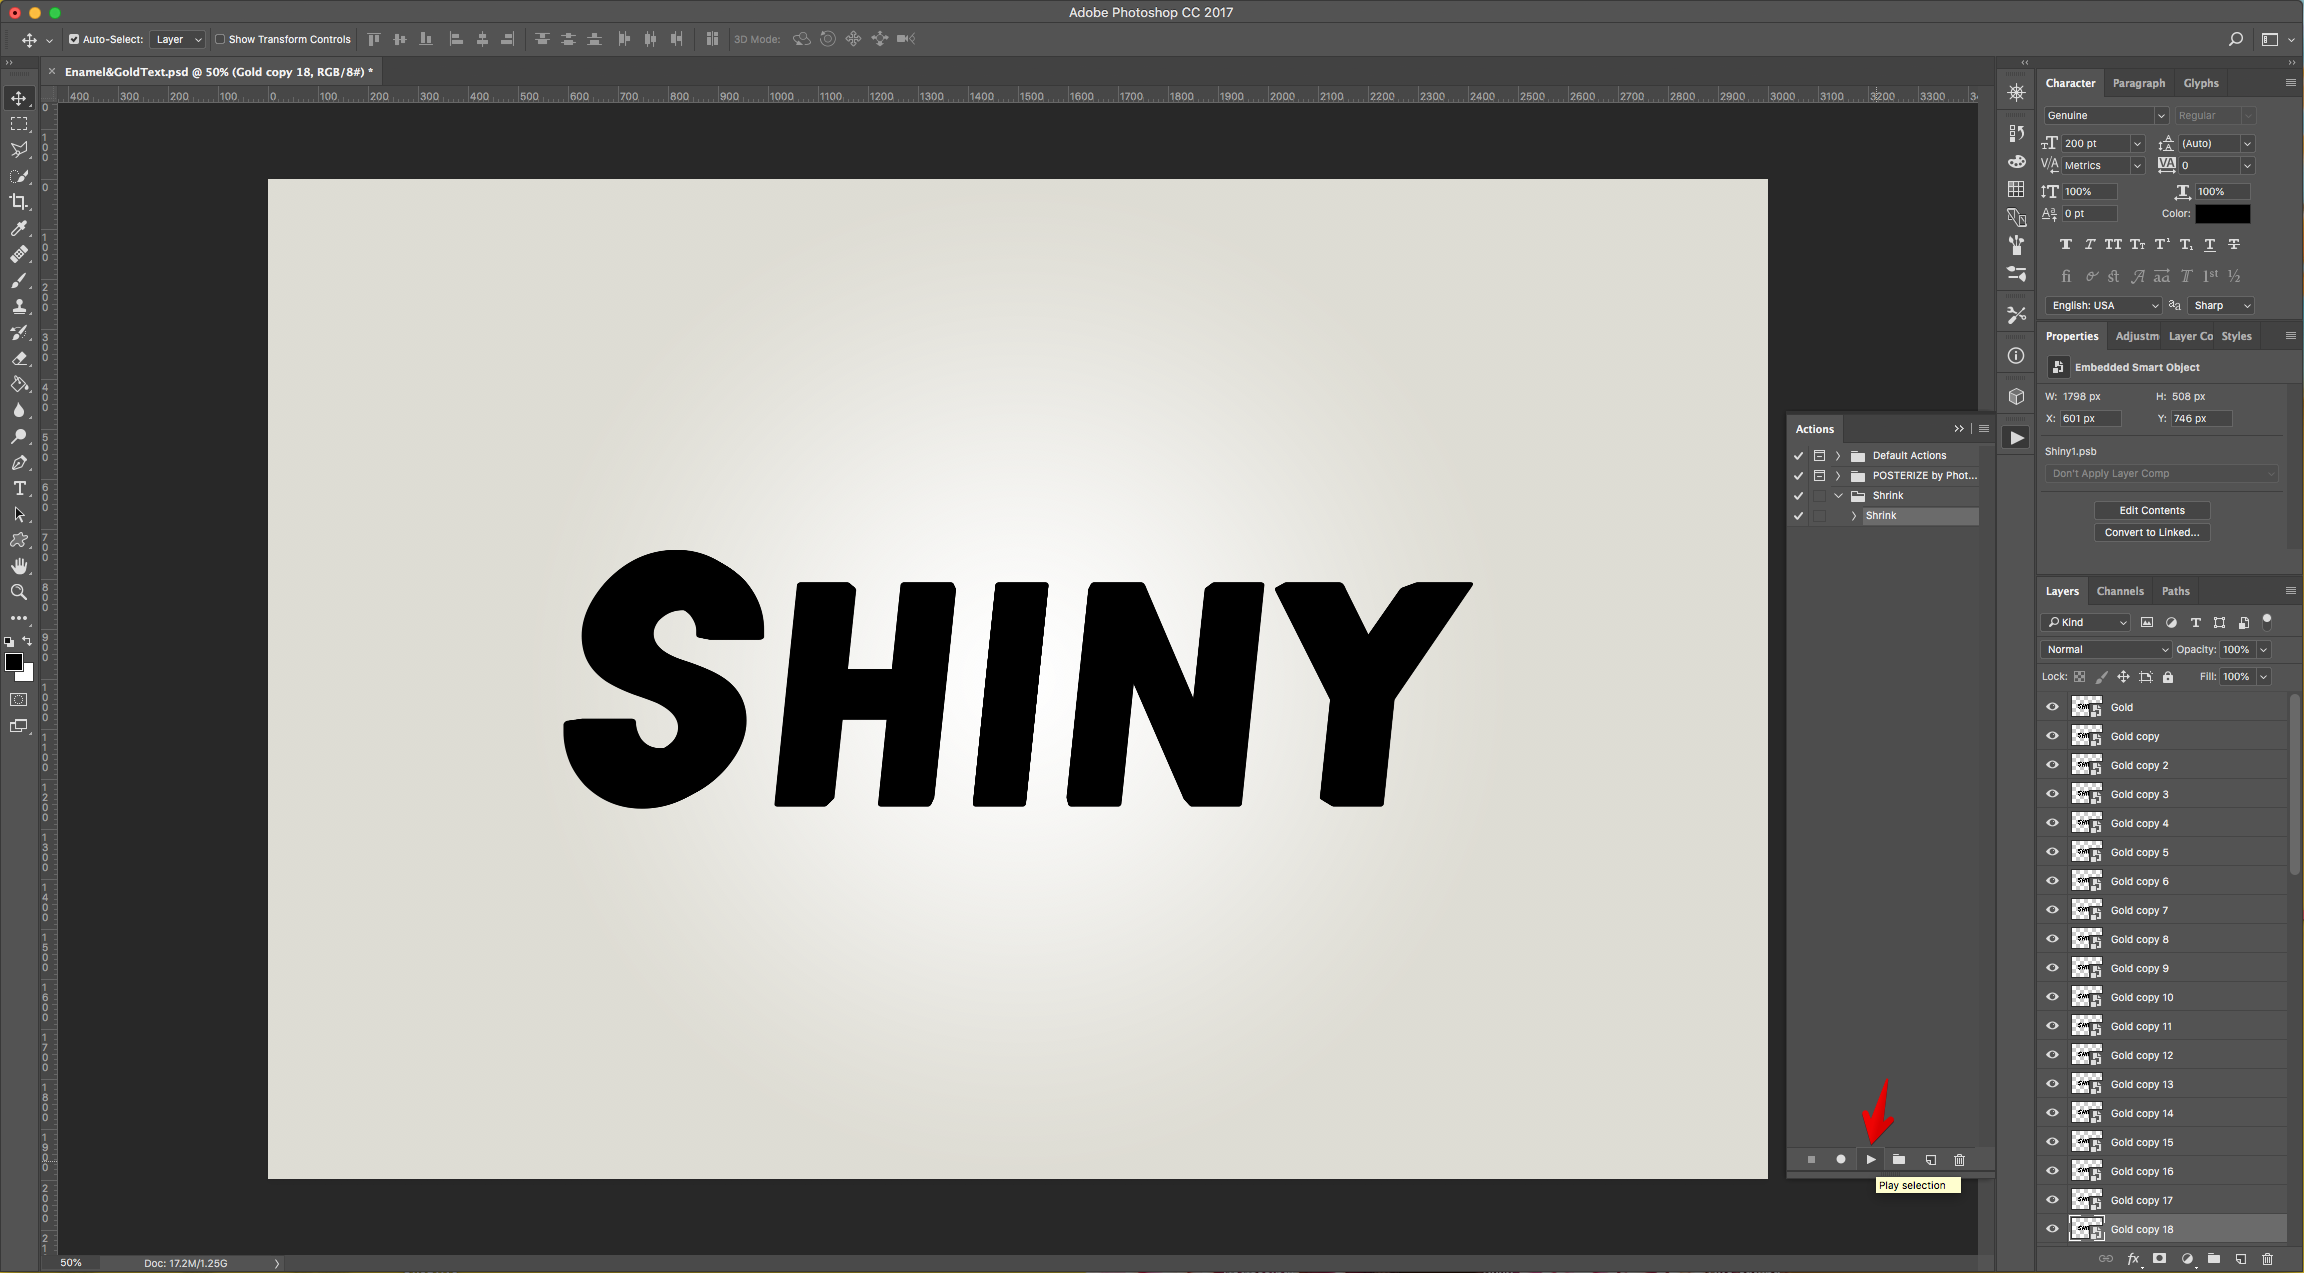
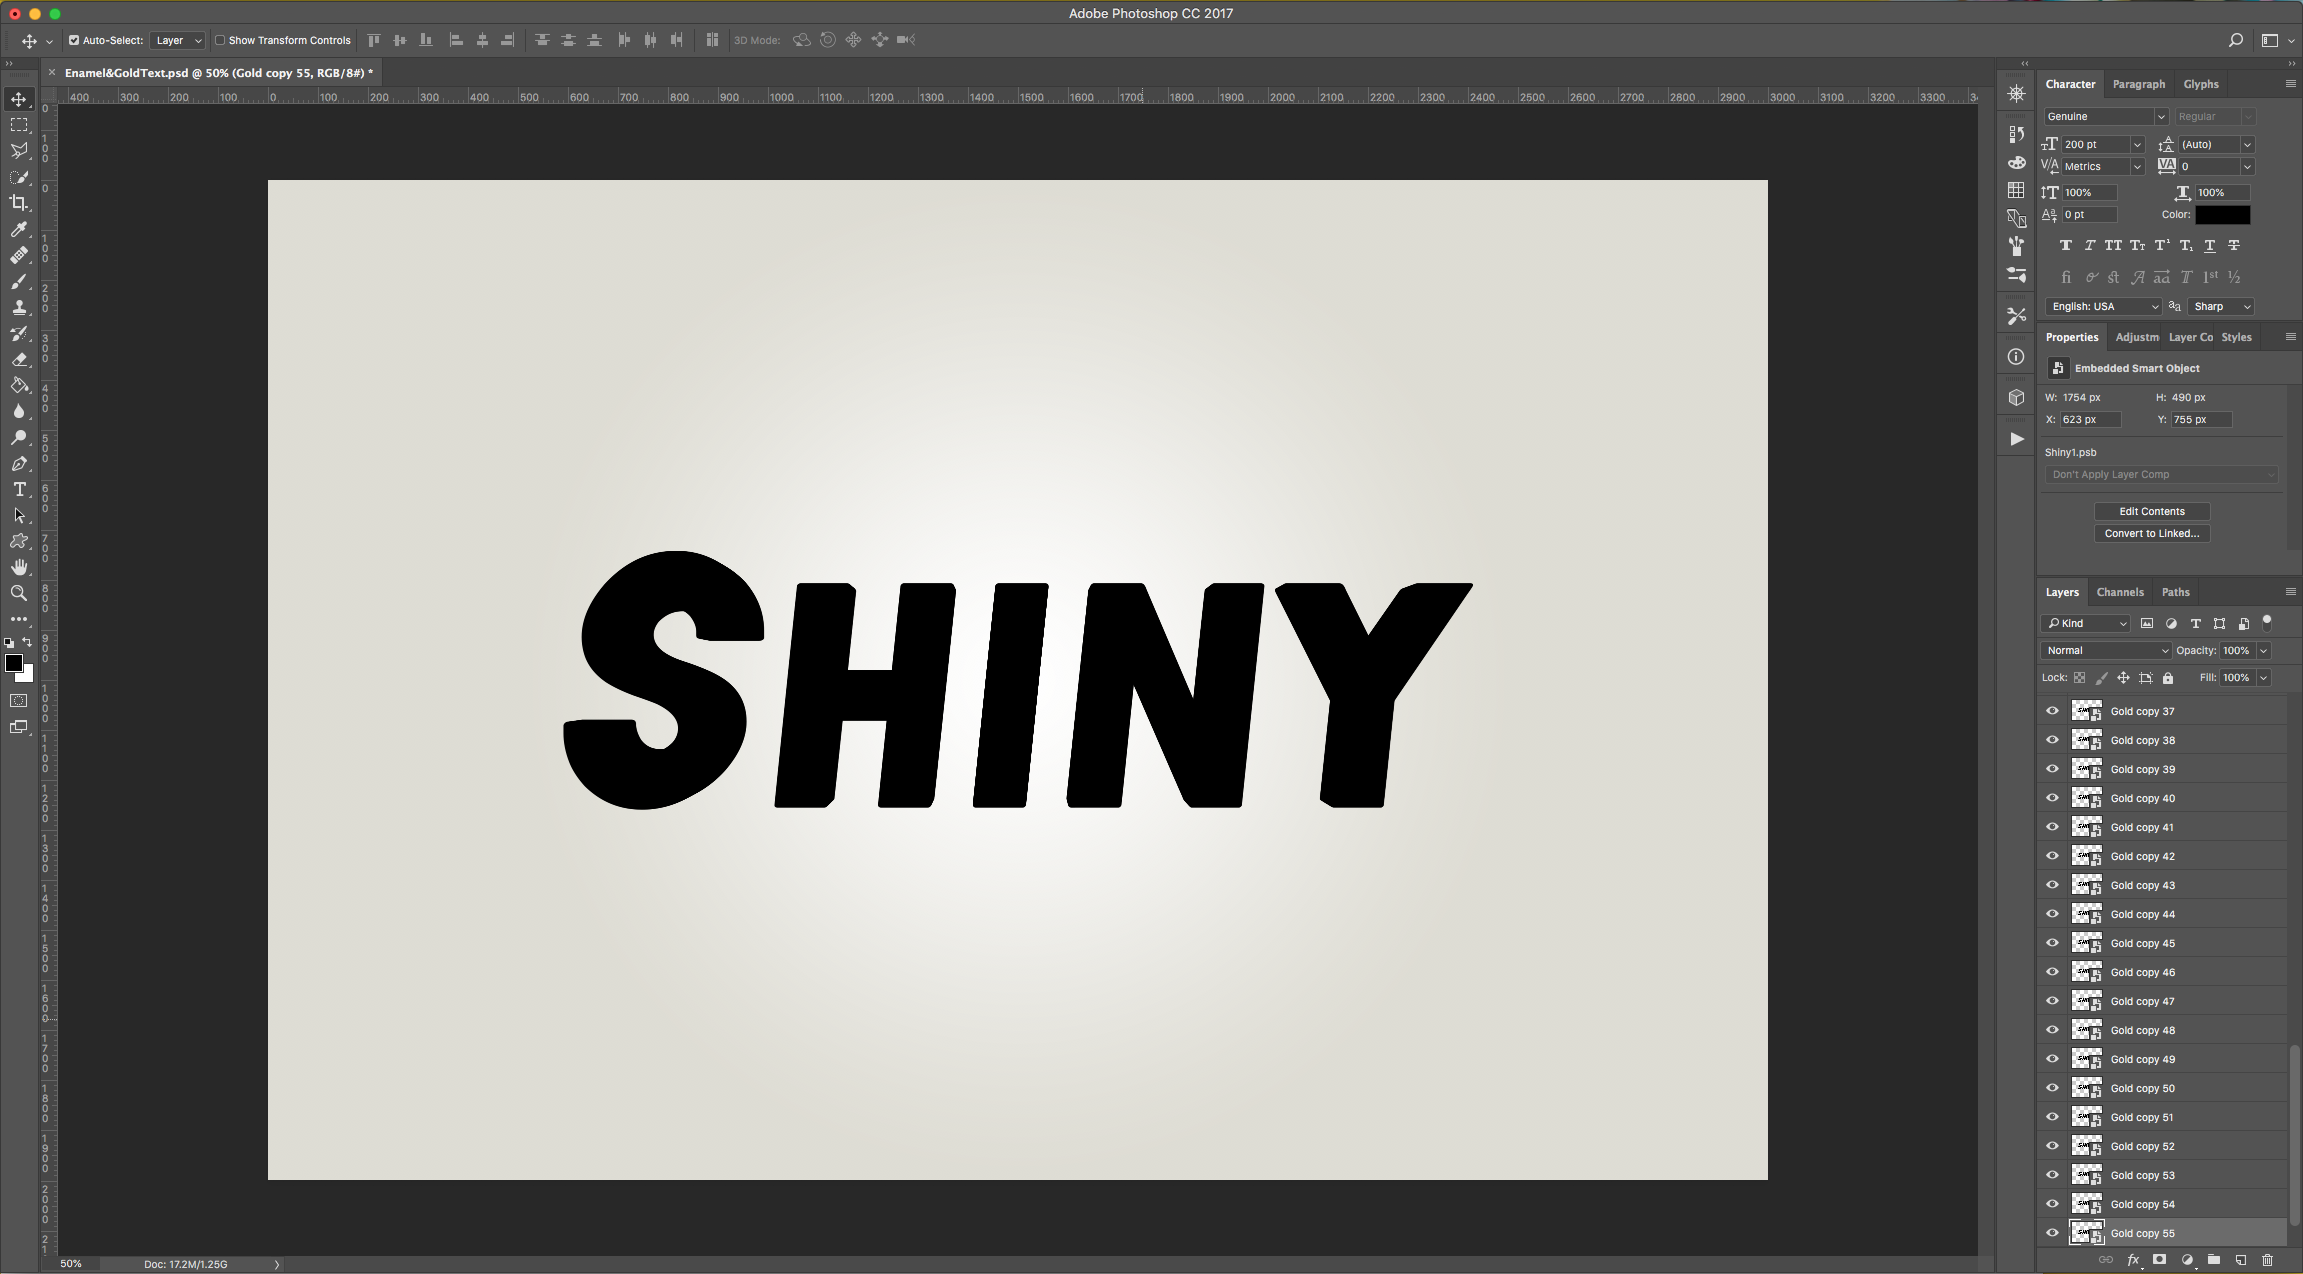
12 - Now, click the “Play Action” button until you create 55 copies of the “Gold” layer with the “Shrink Action”.
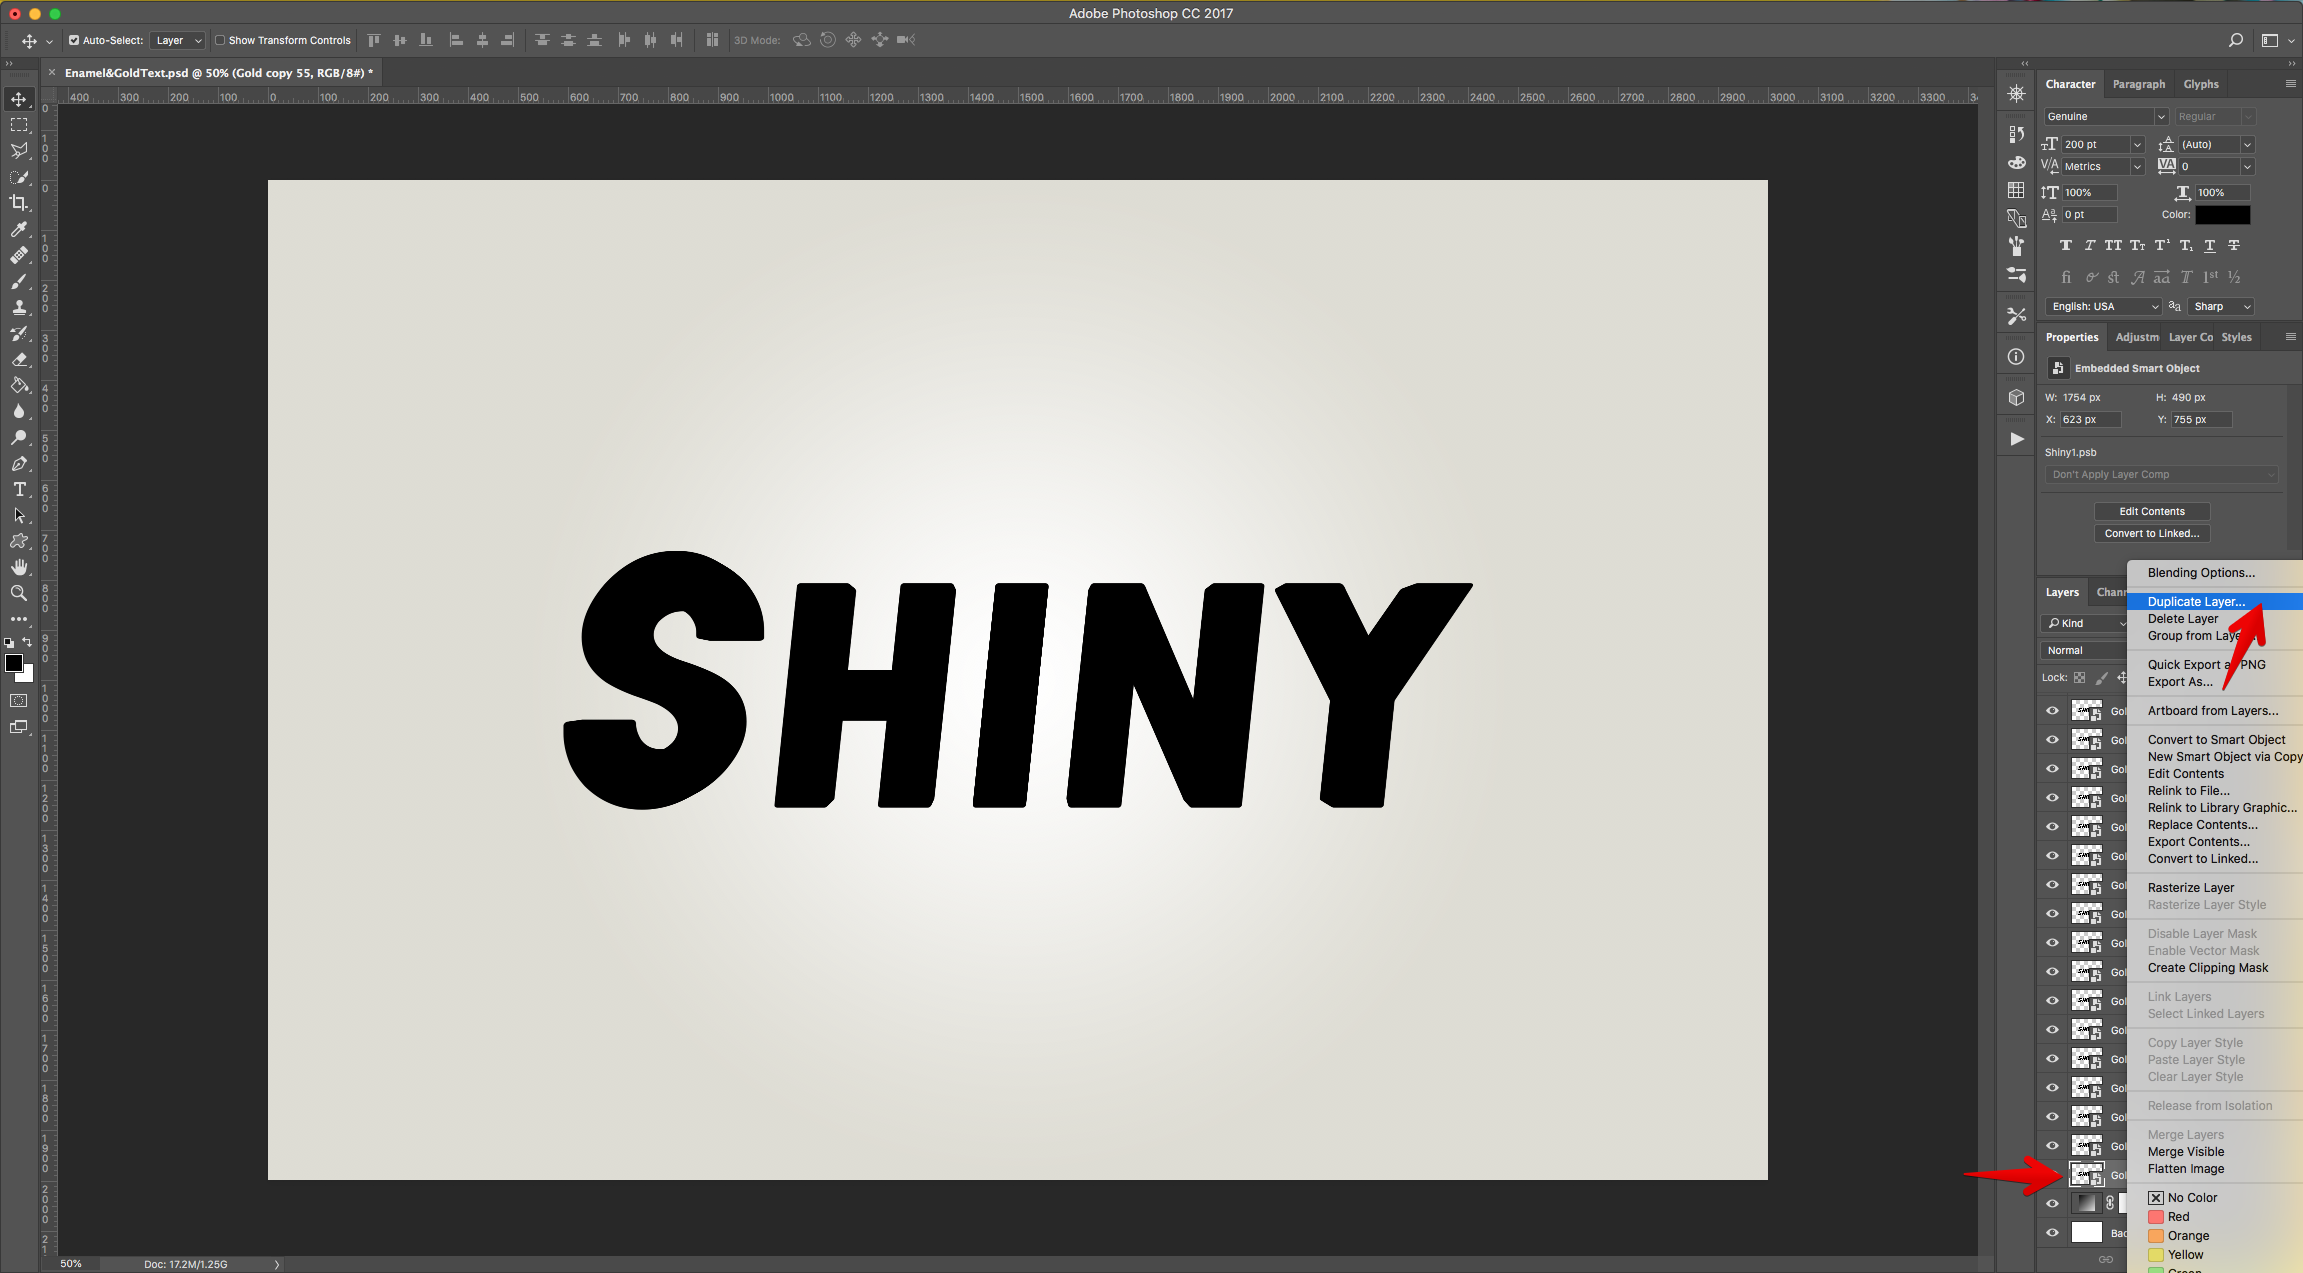
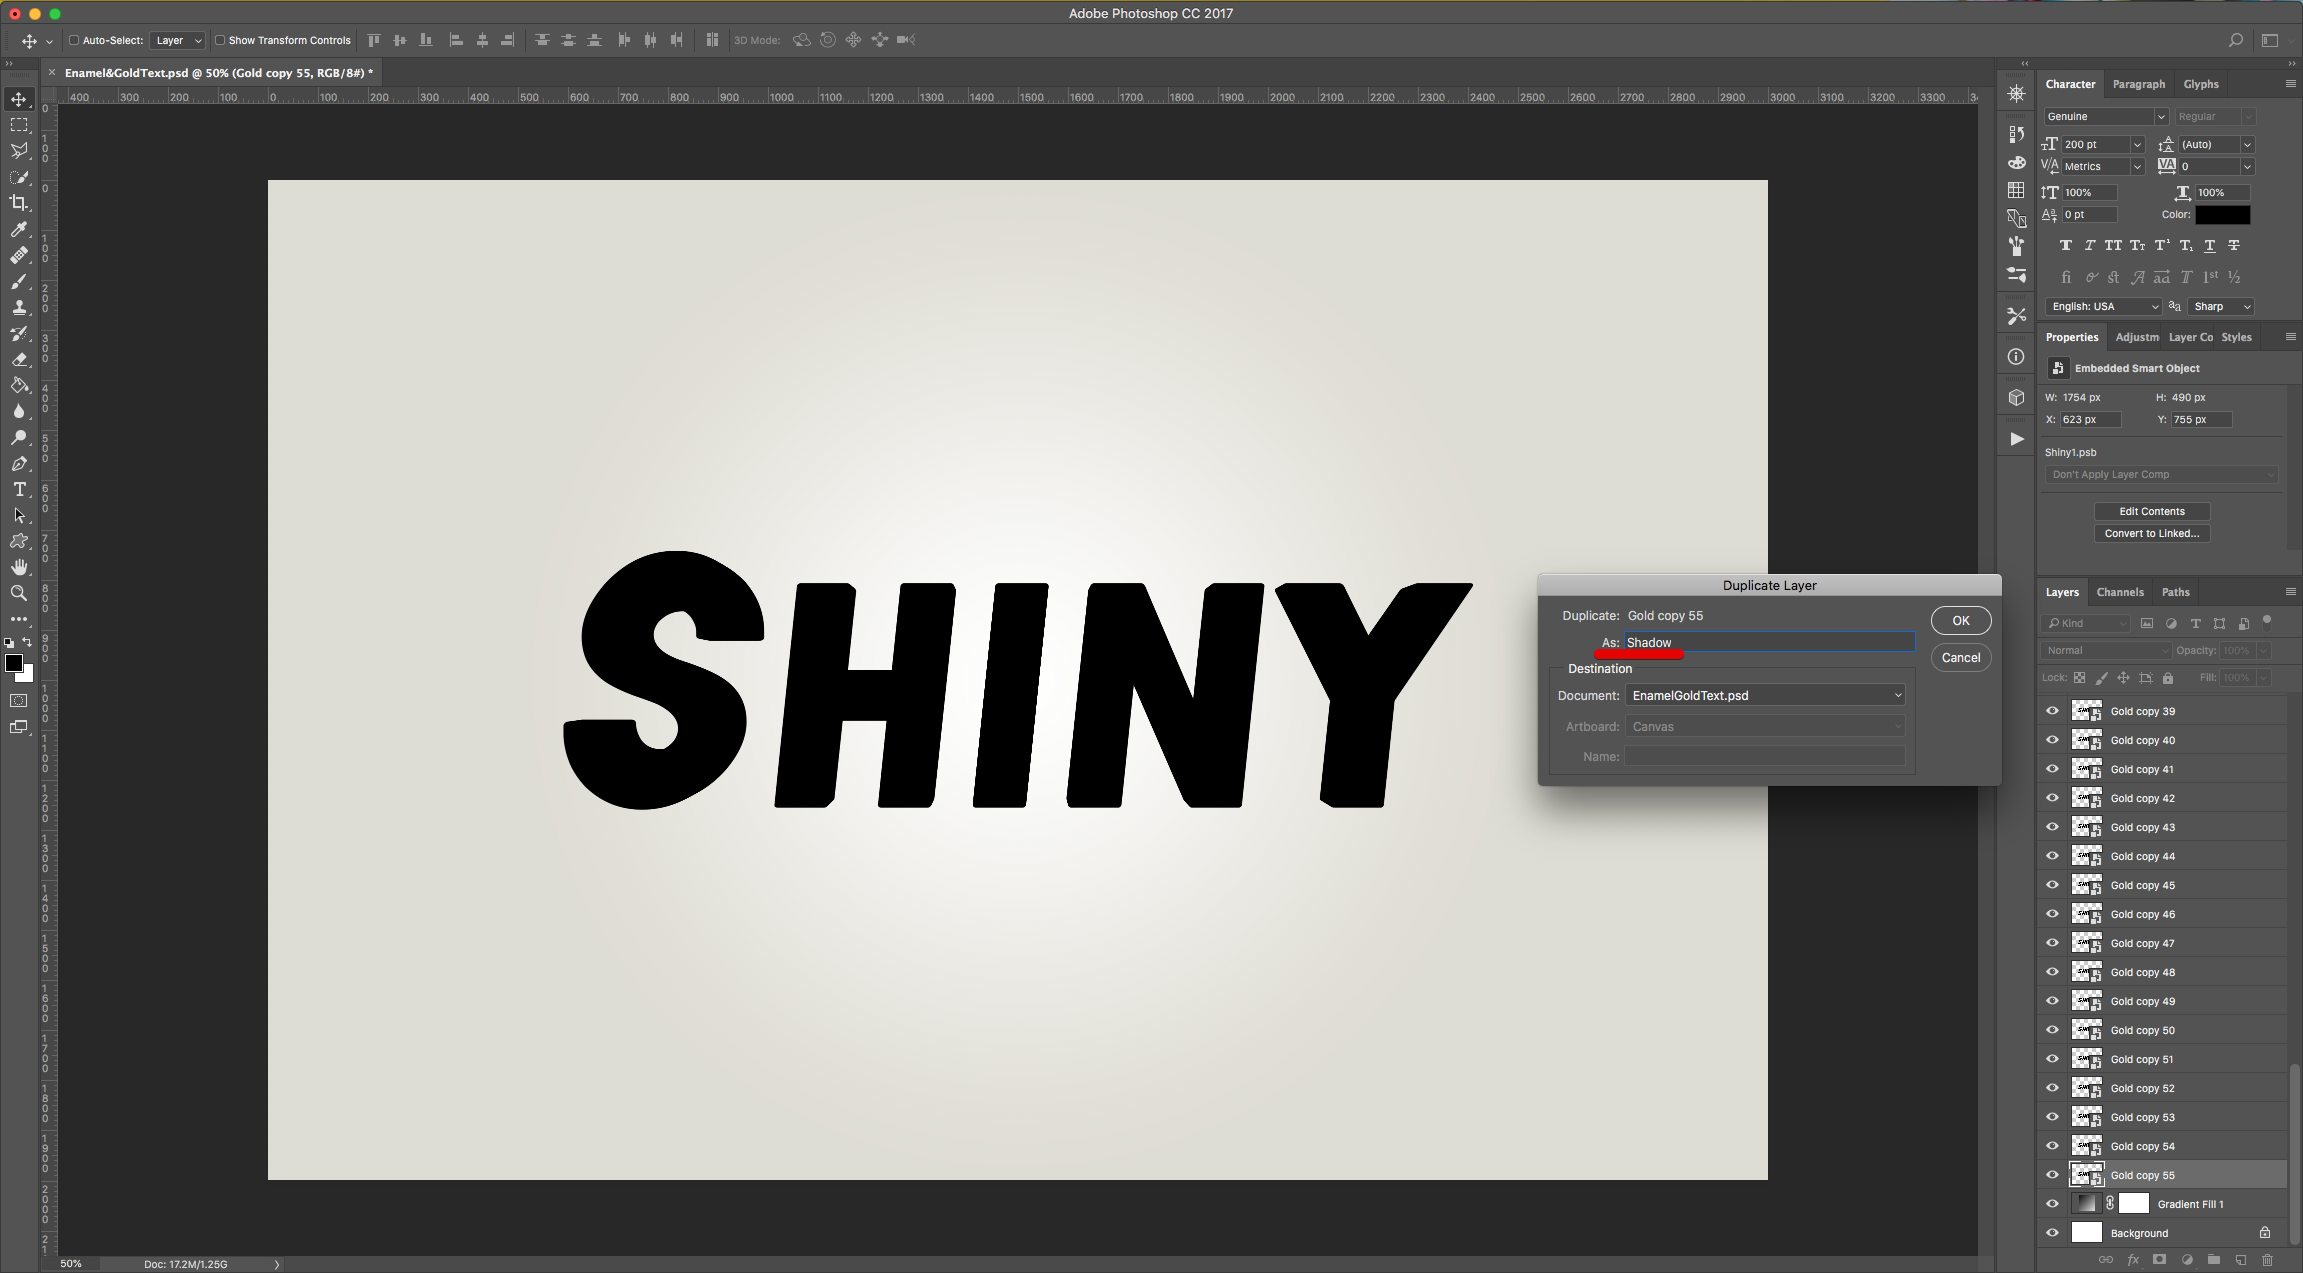
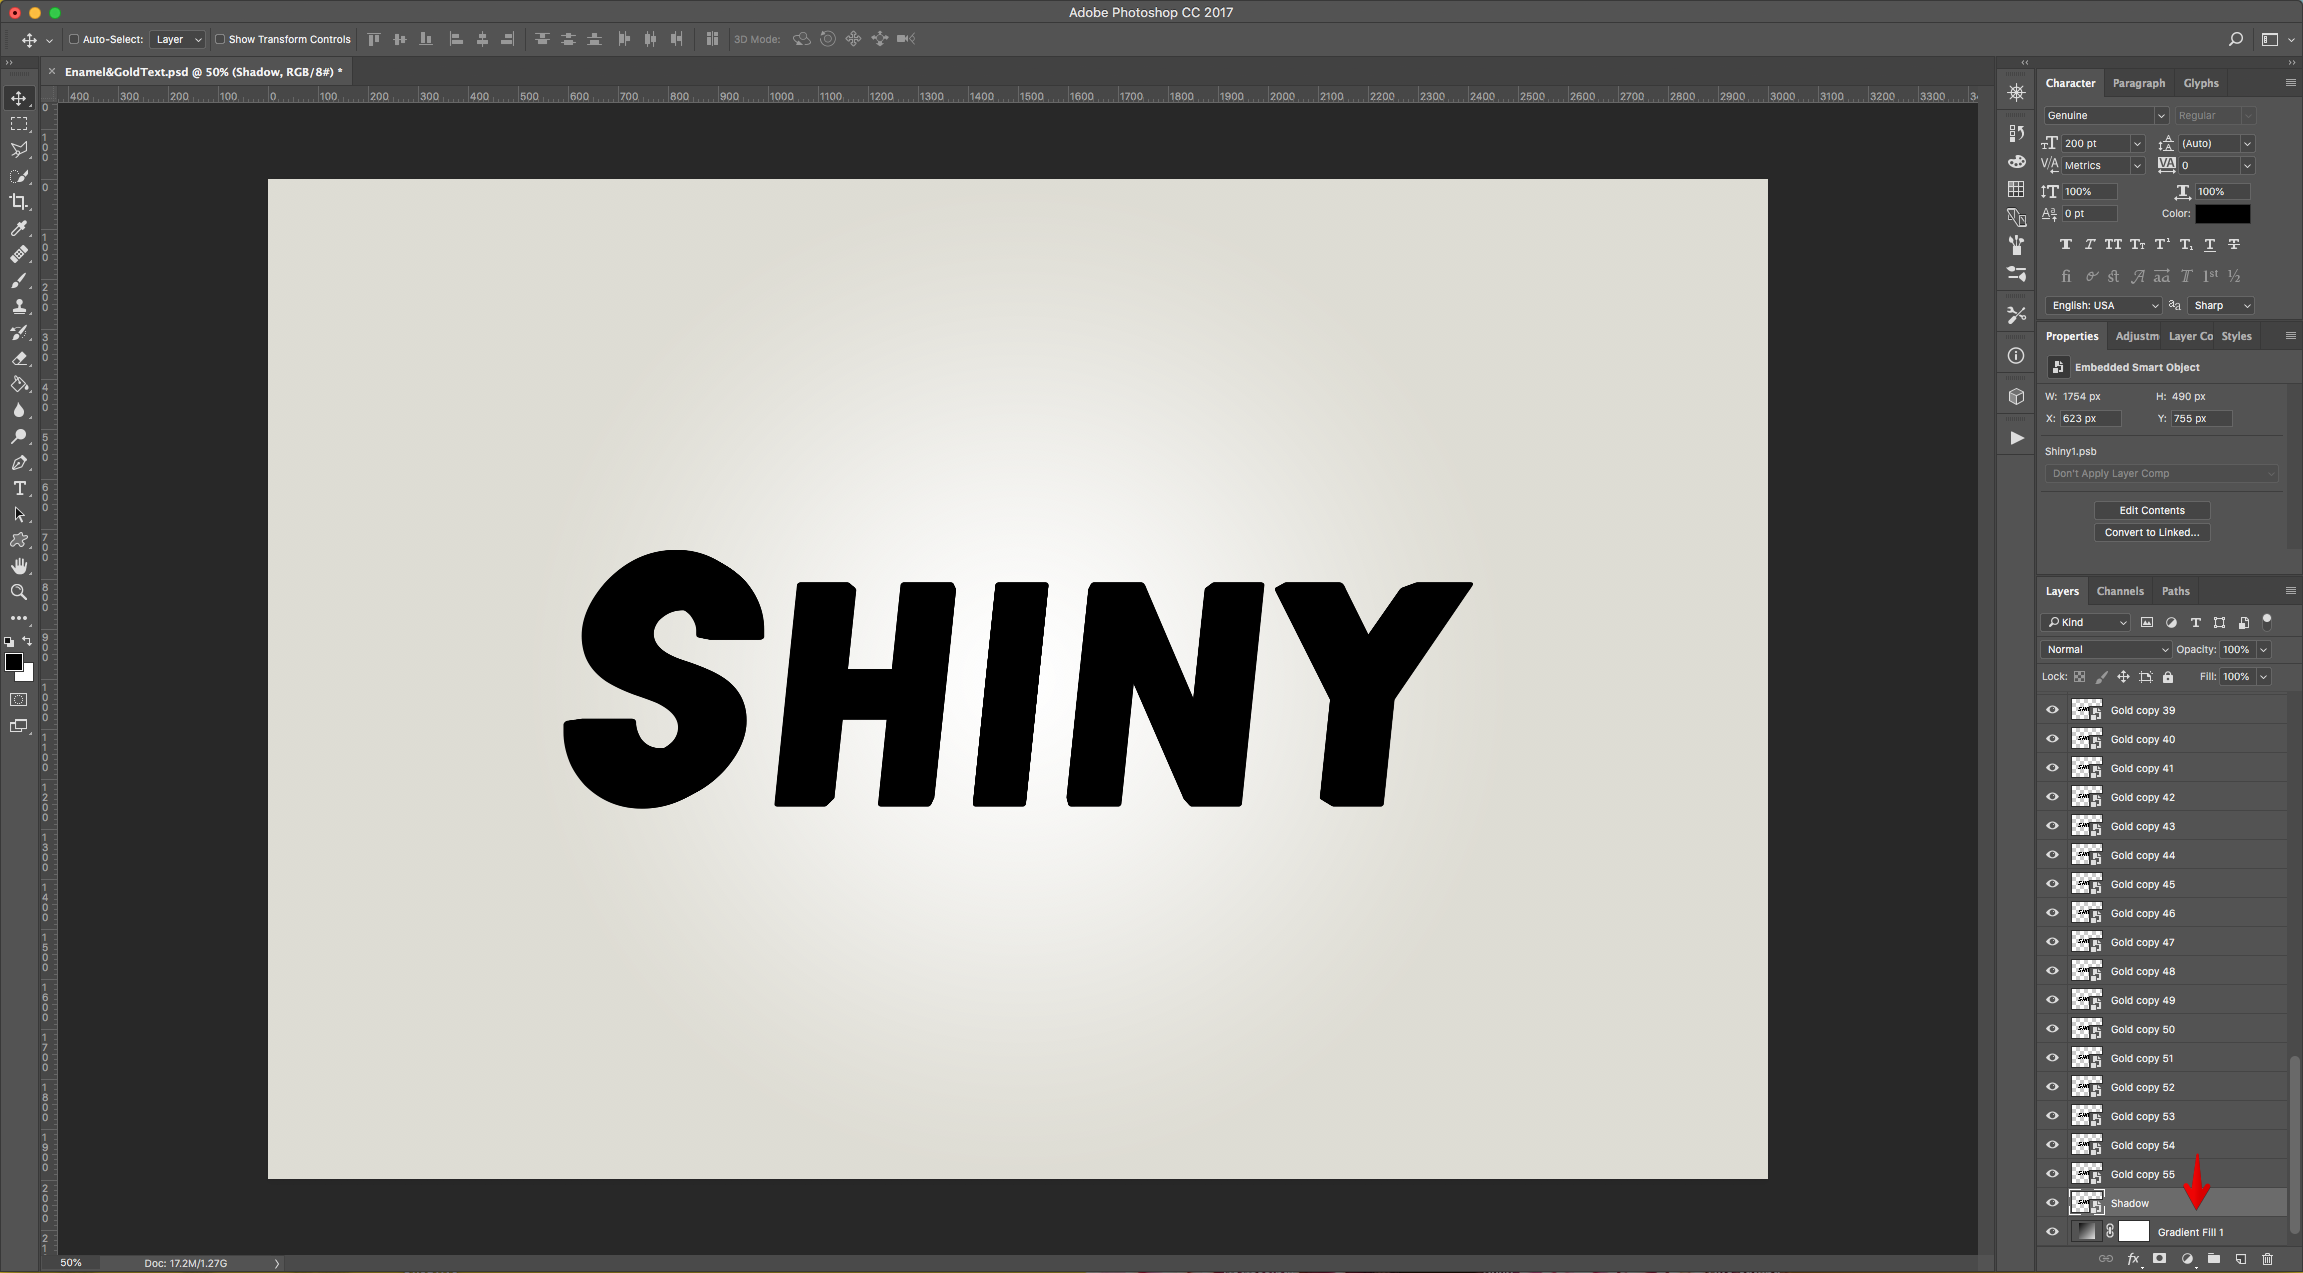
13 - Select the “Gold copy 55” layer, “Duplicate” it, name it “Shadow” and place it under all the “Gold” copies.
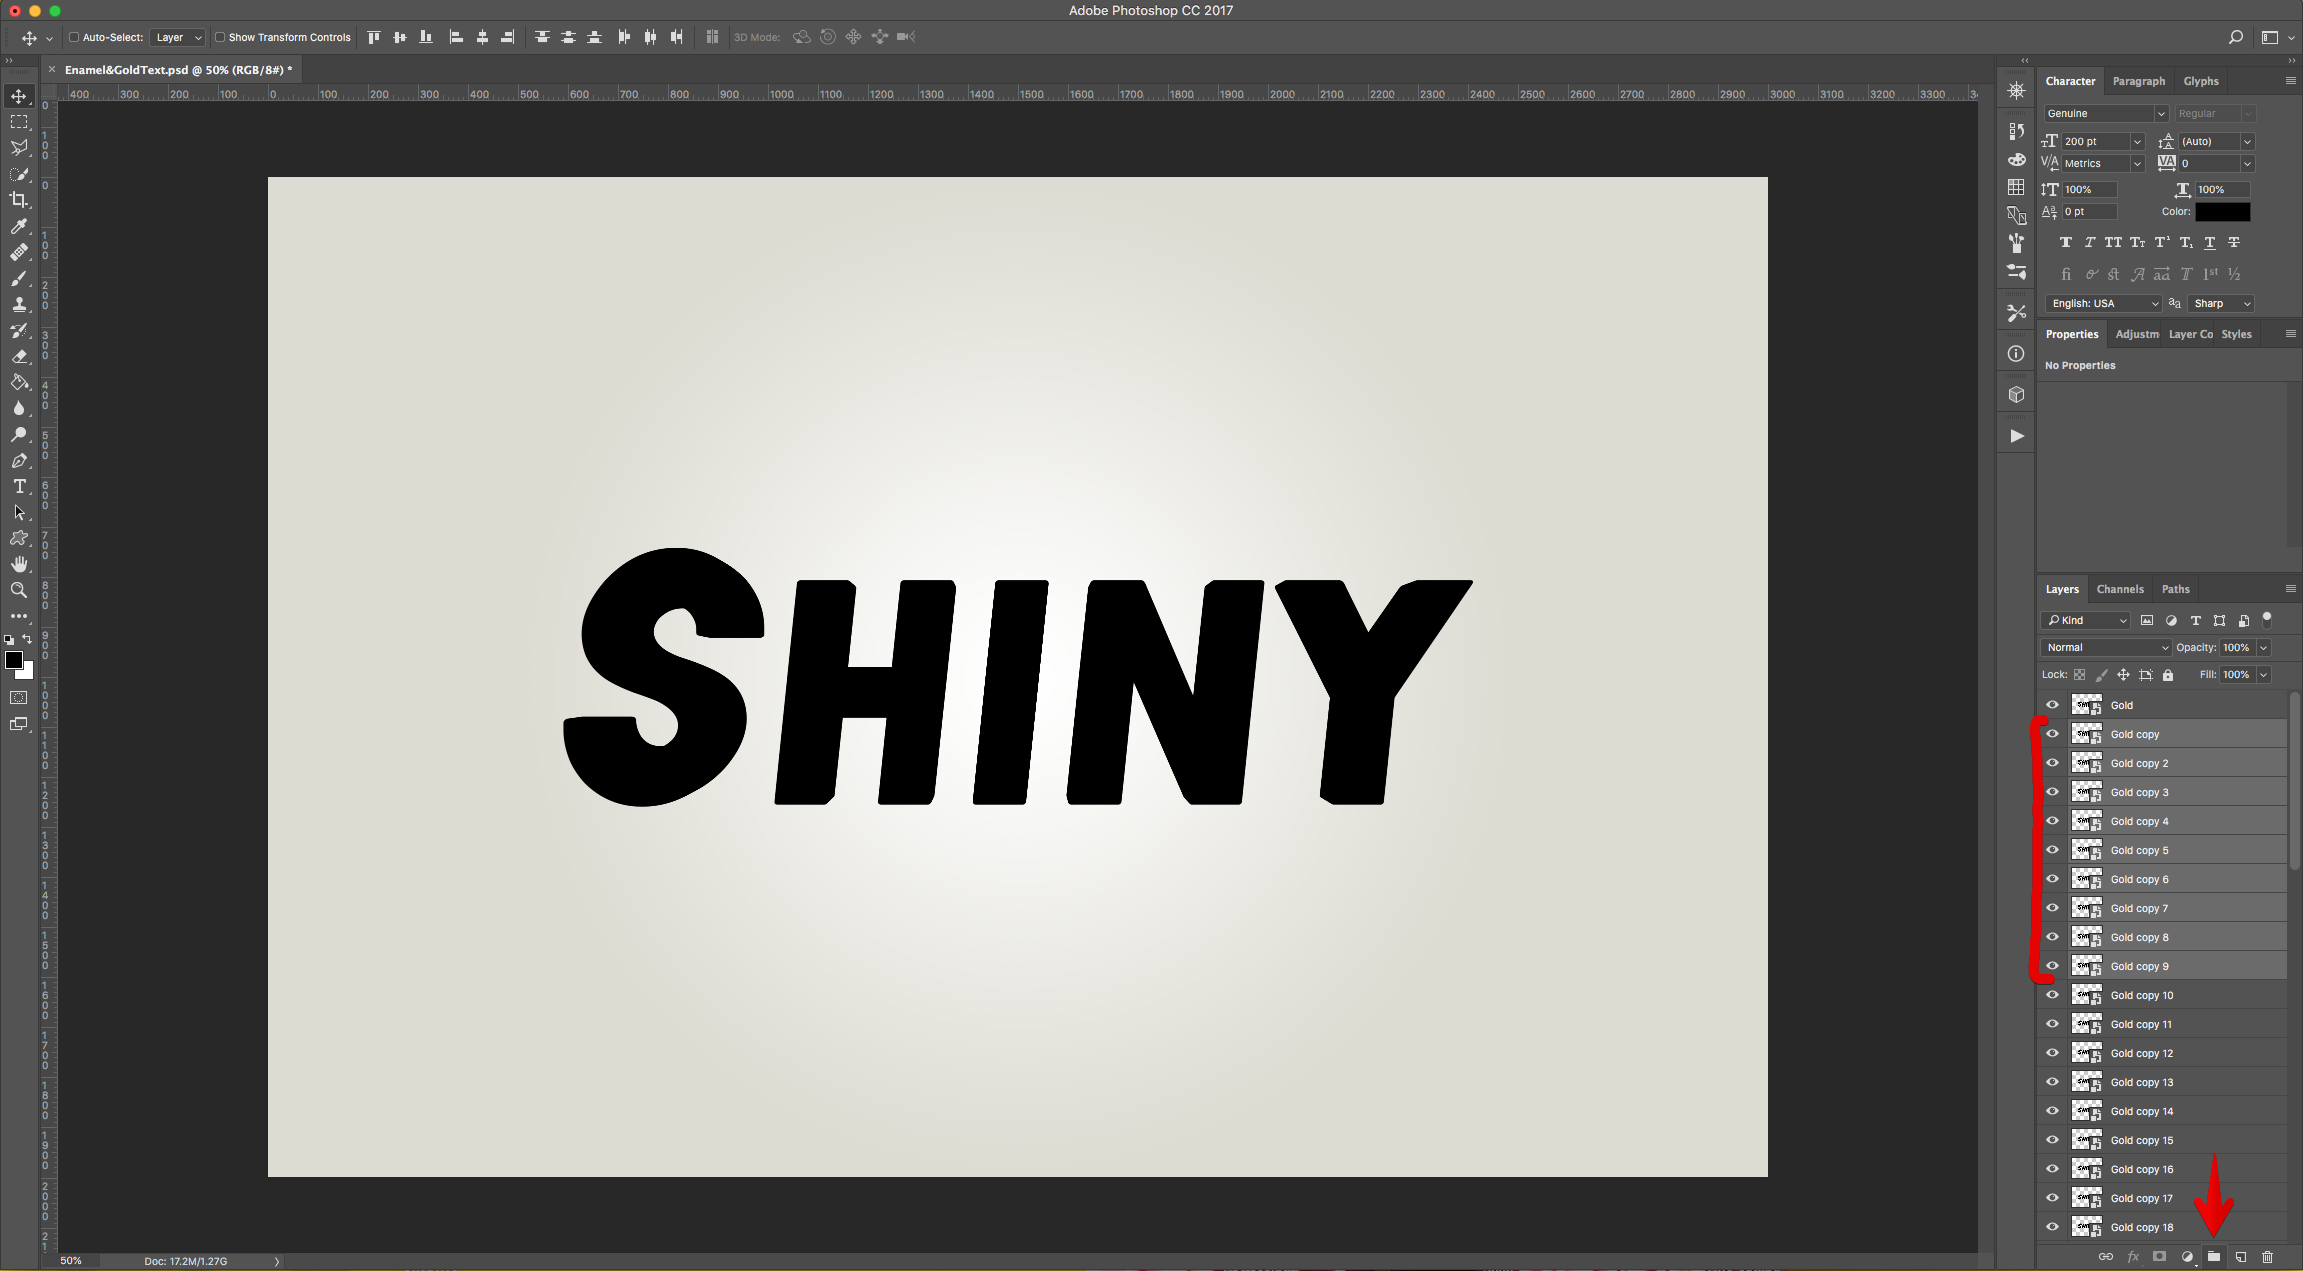
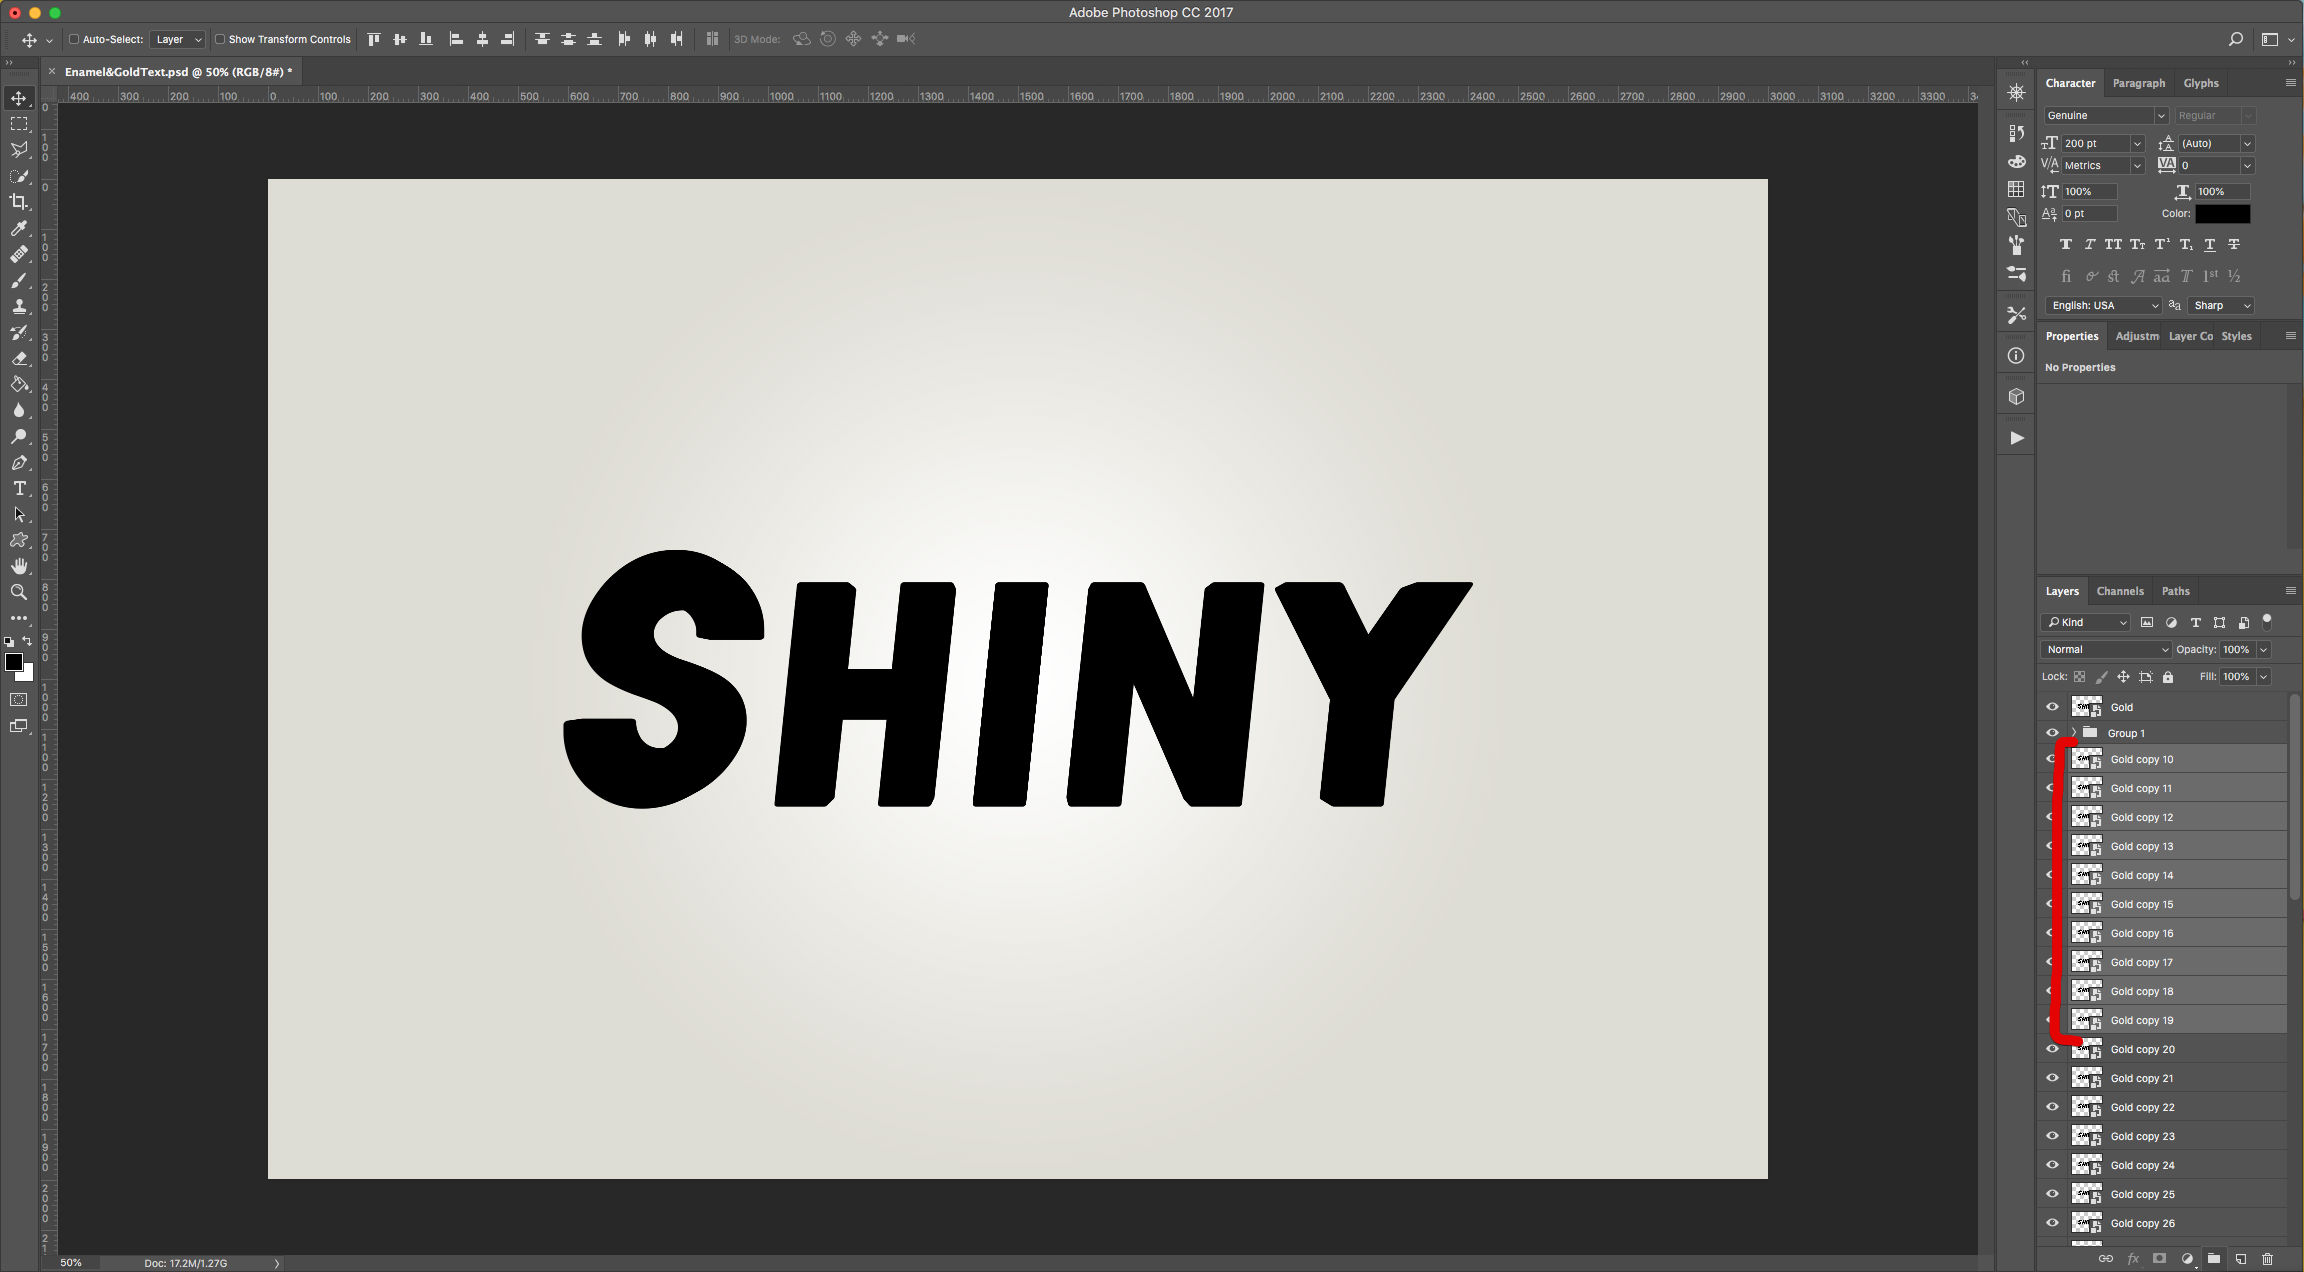
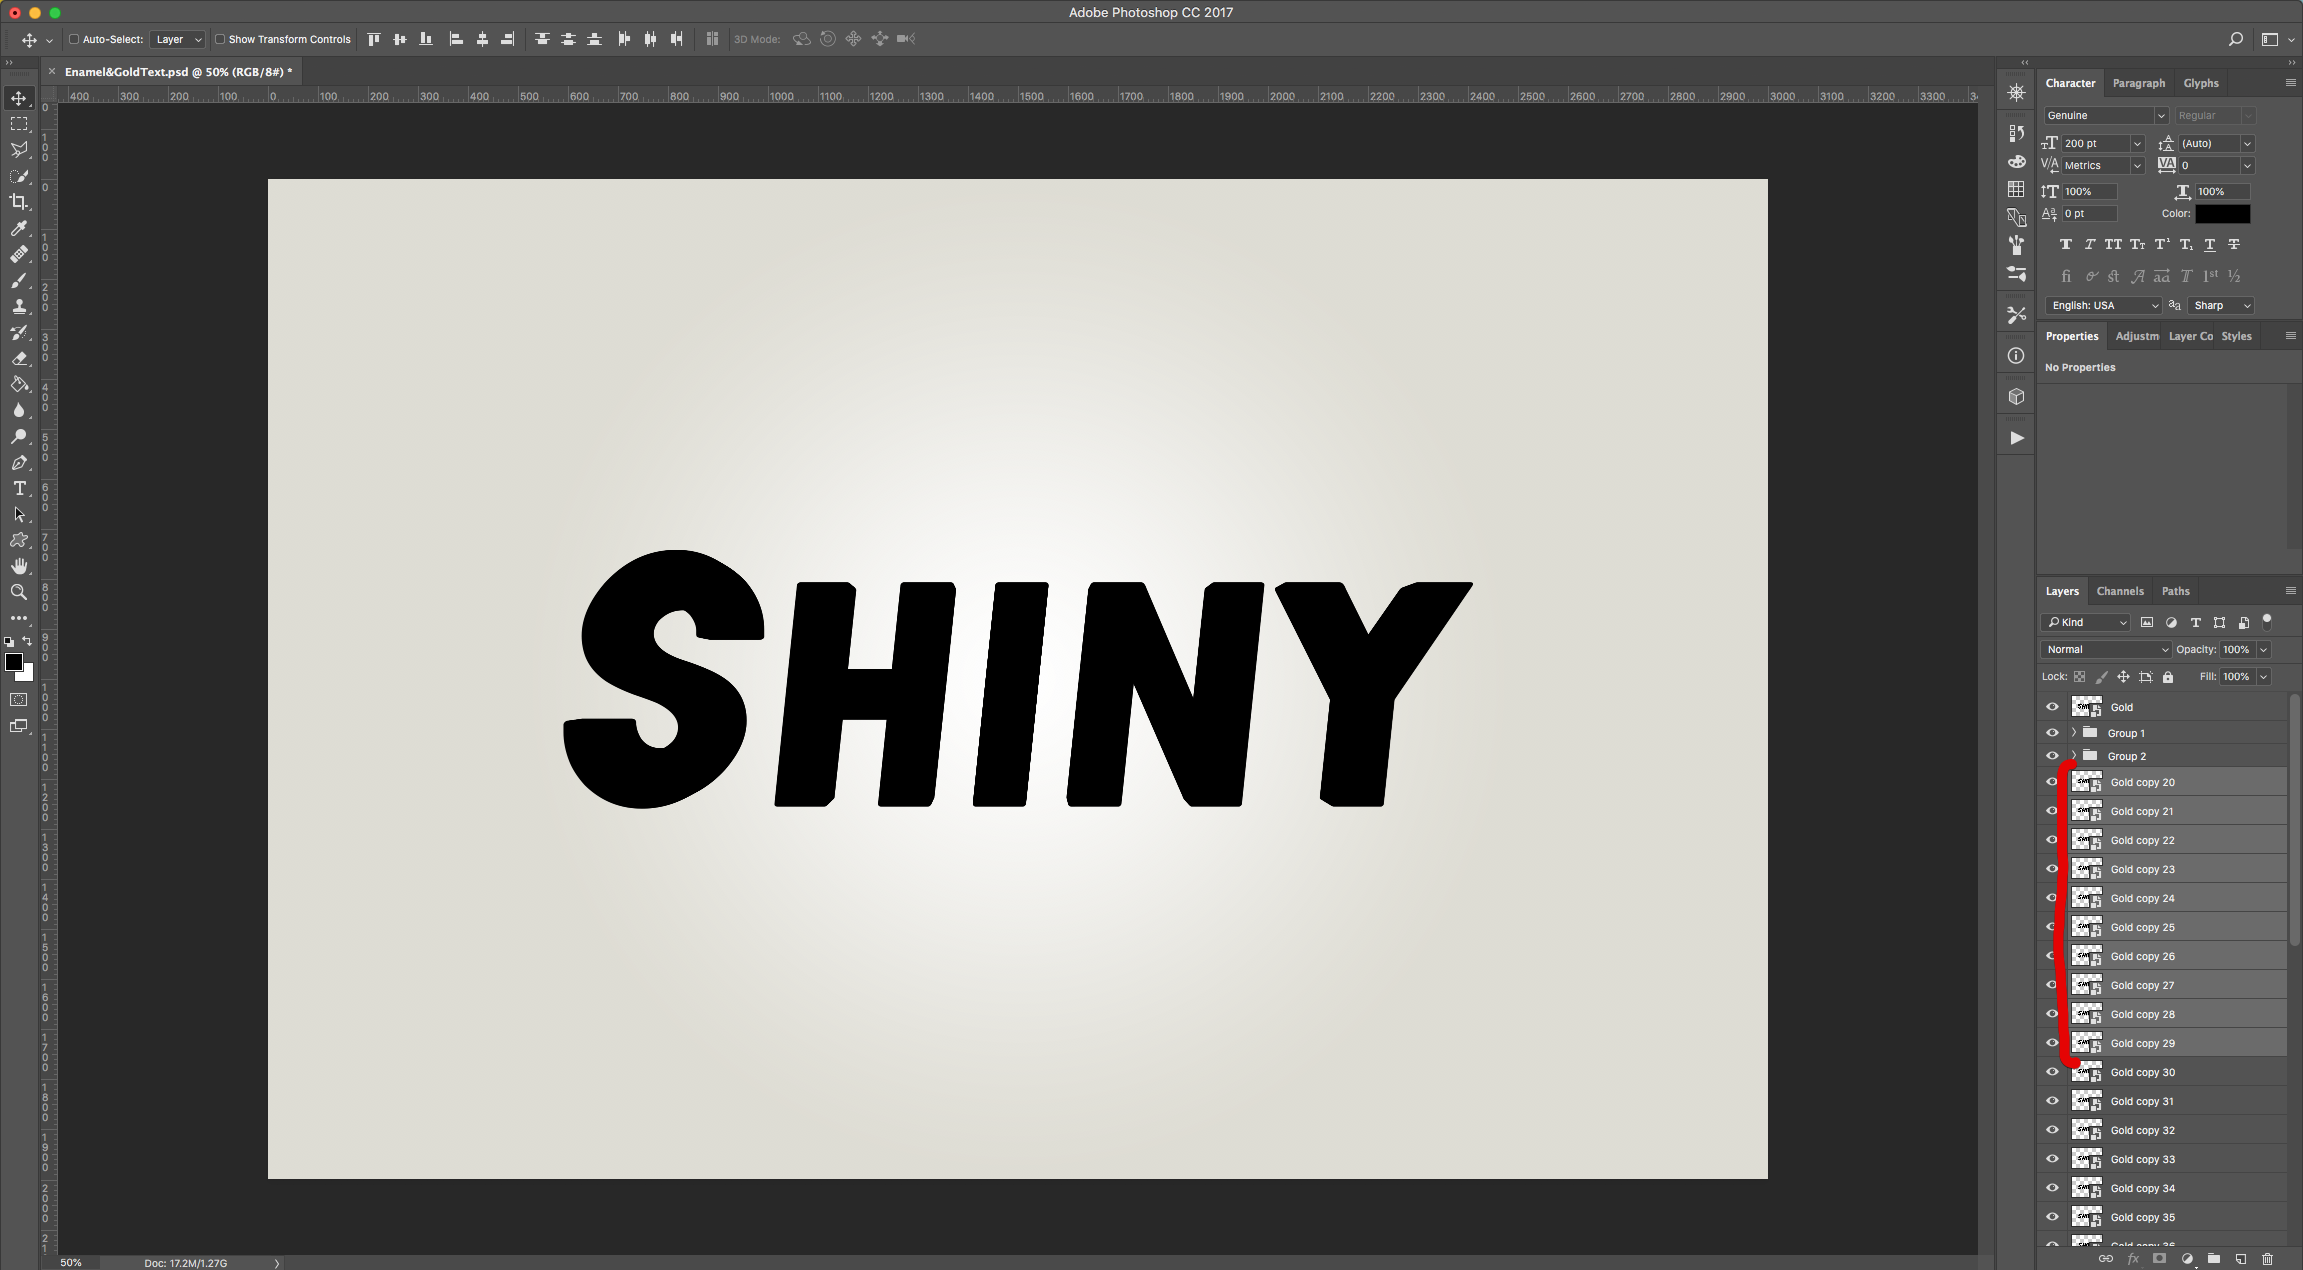
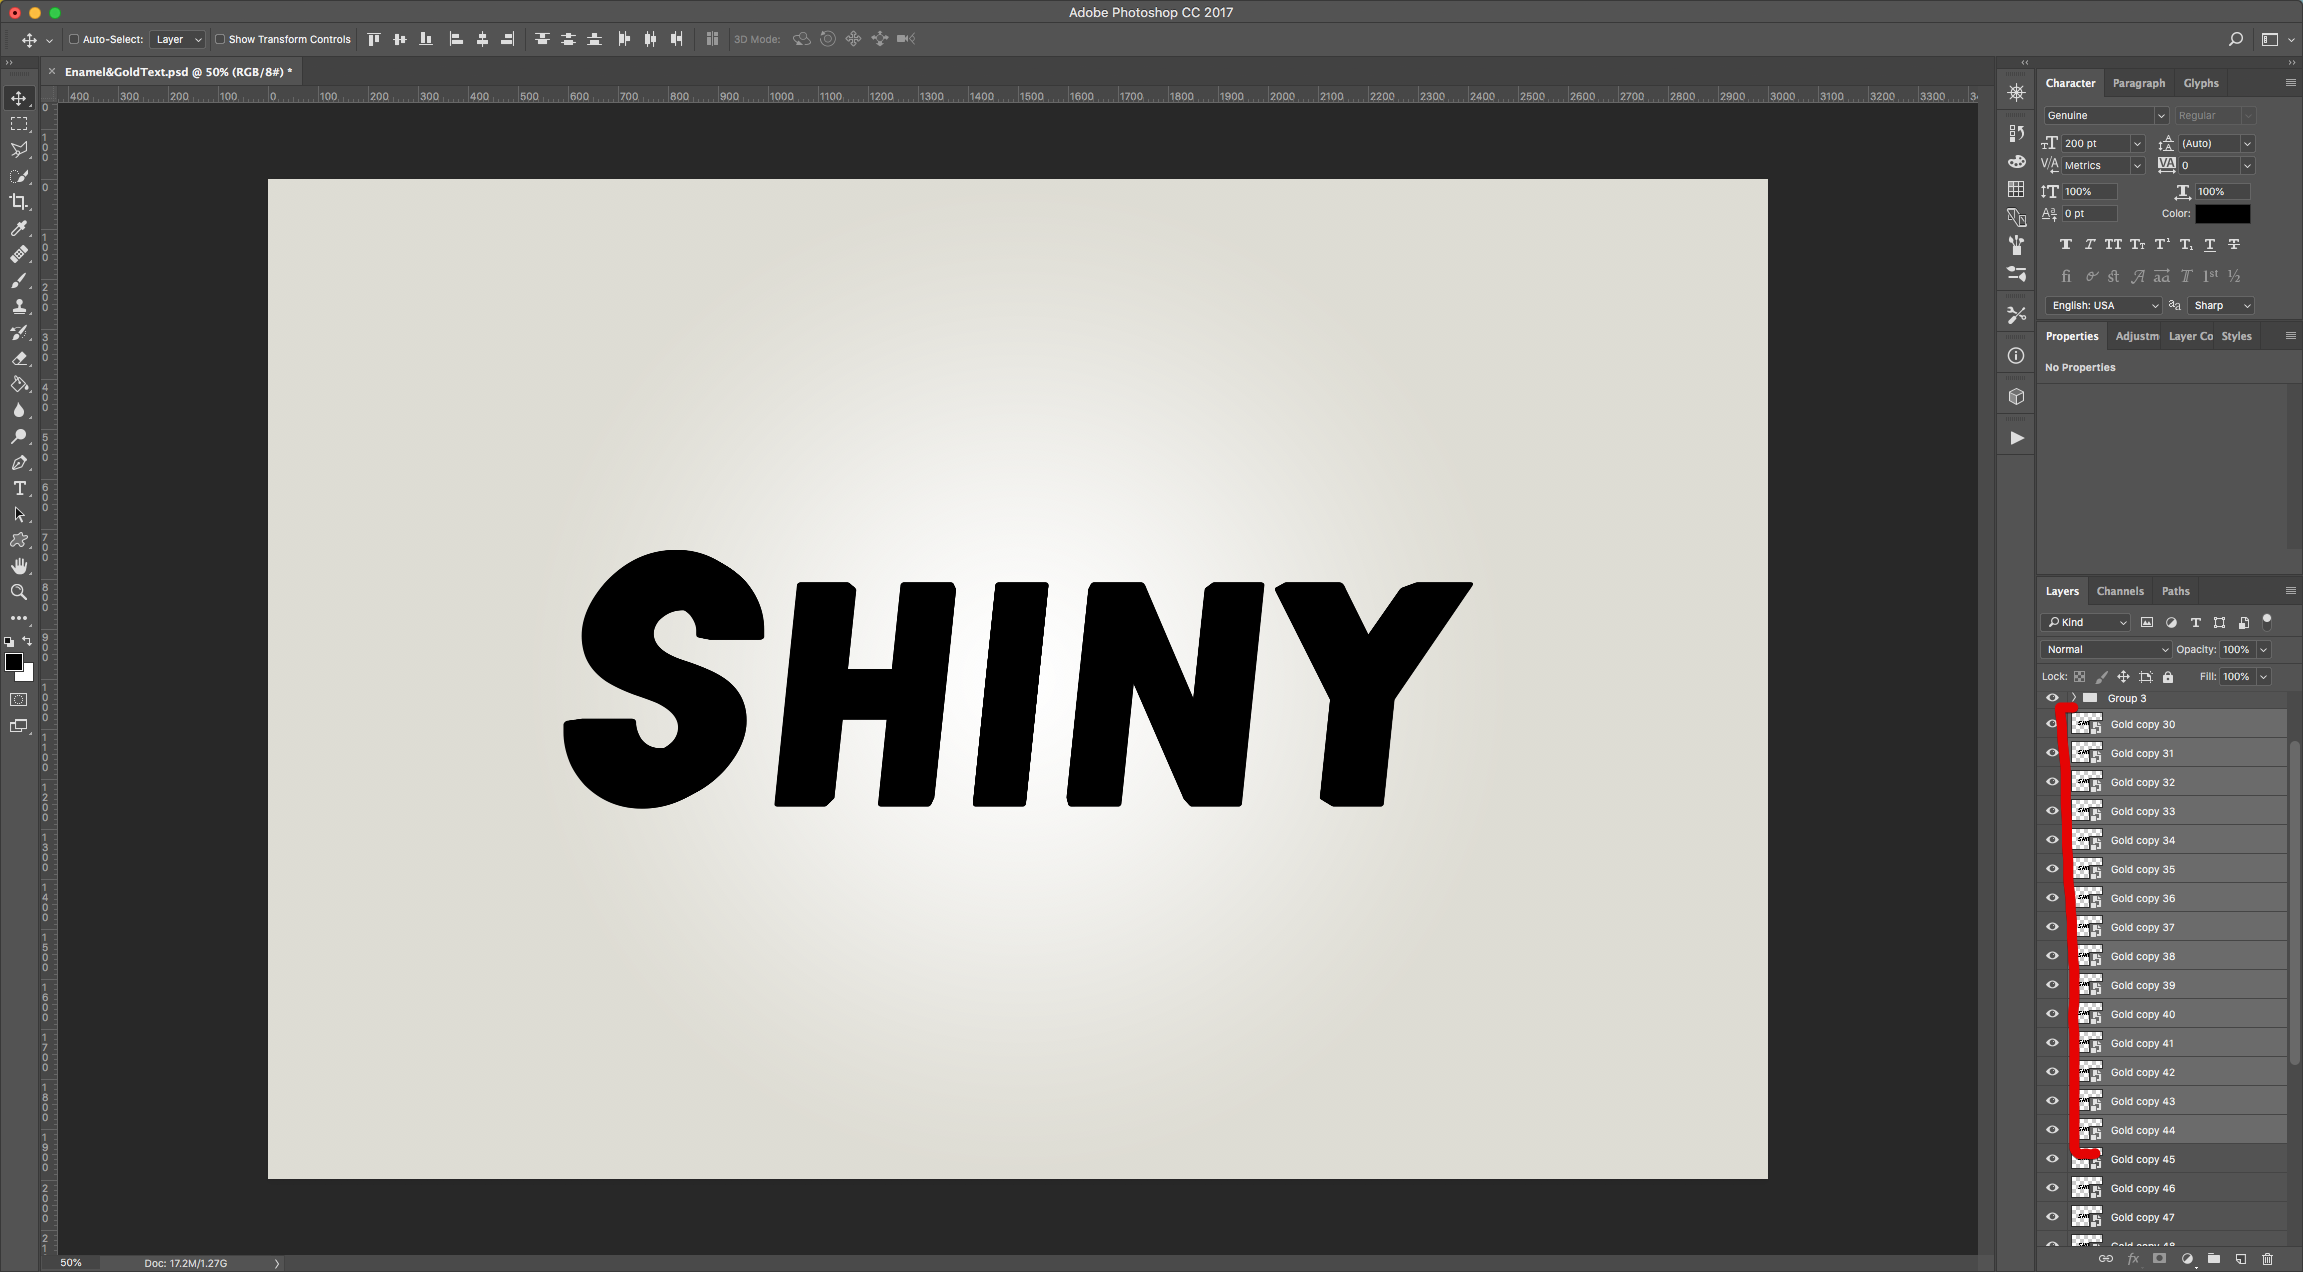
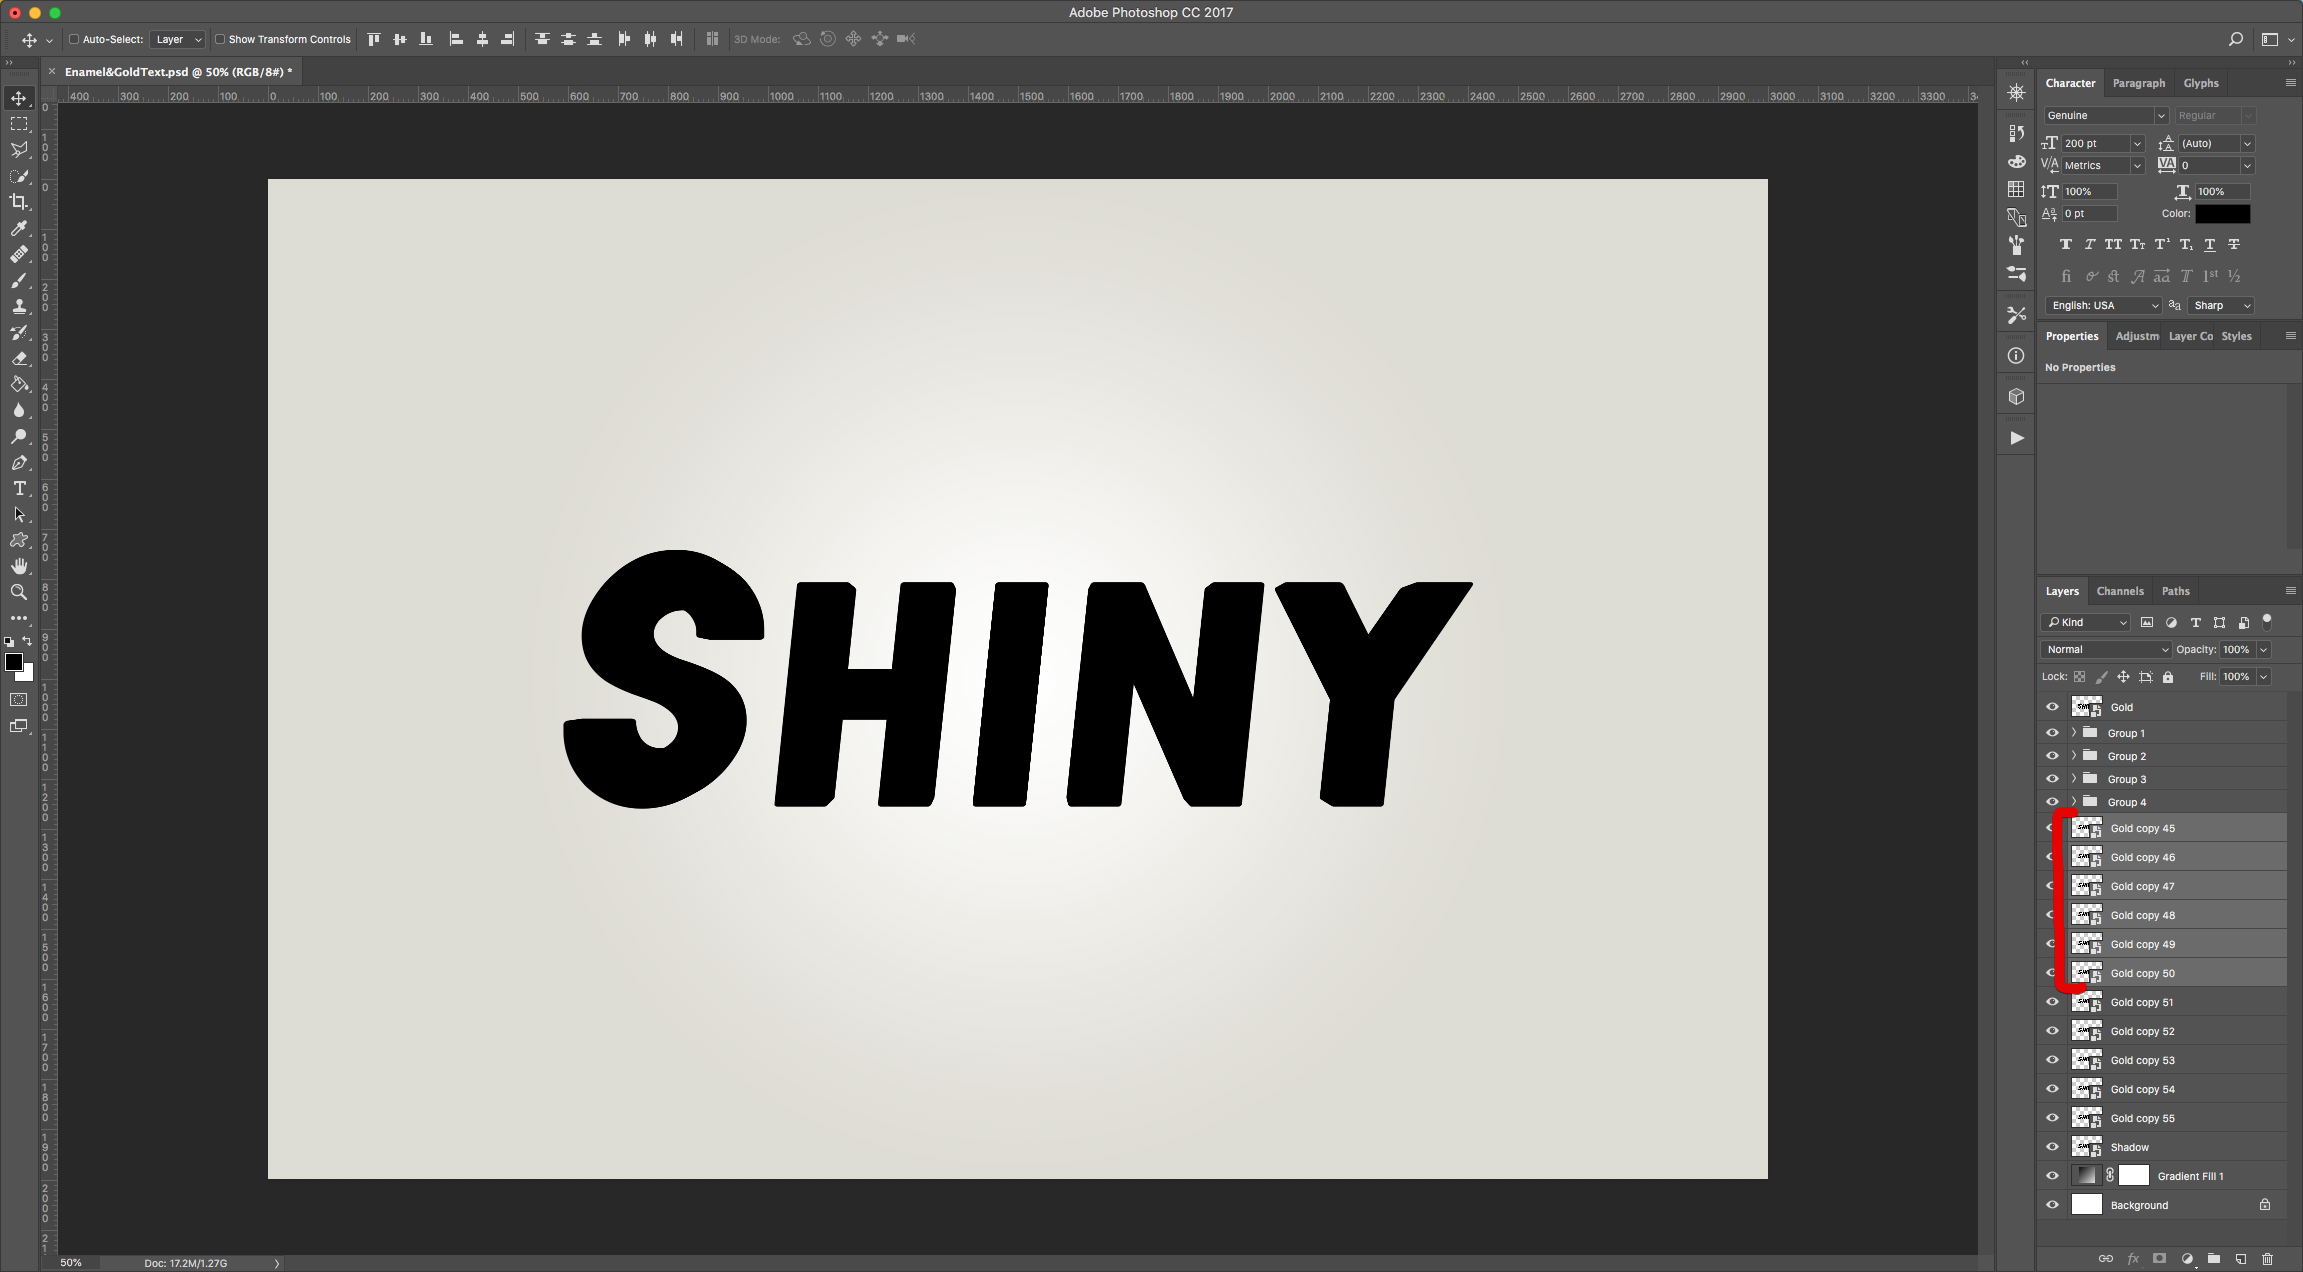
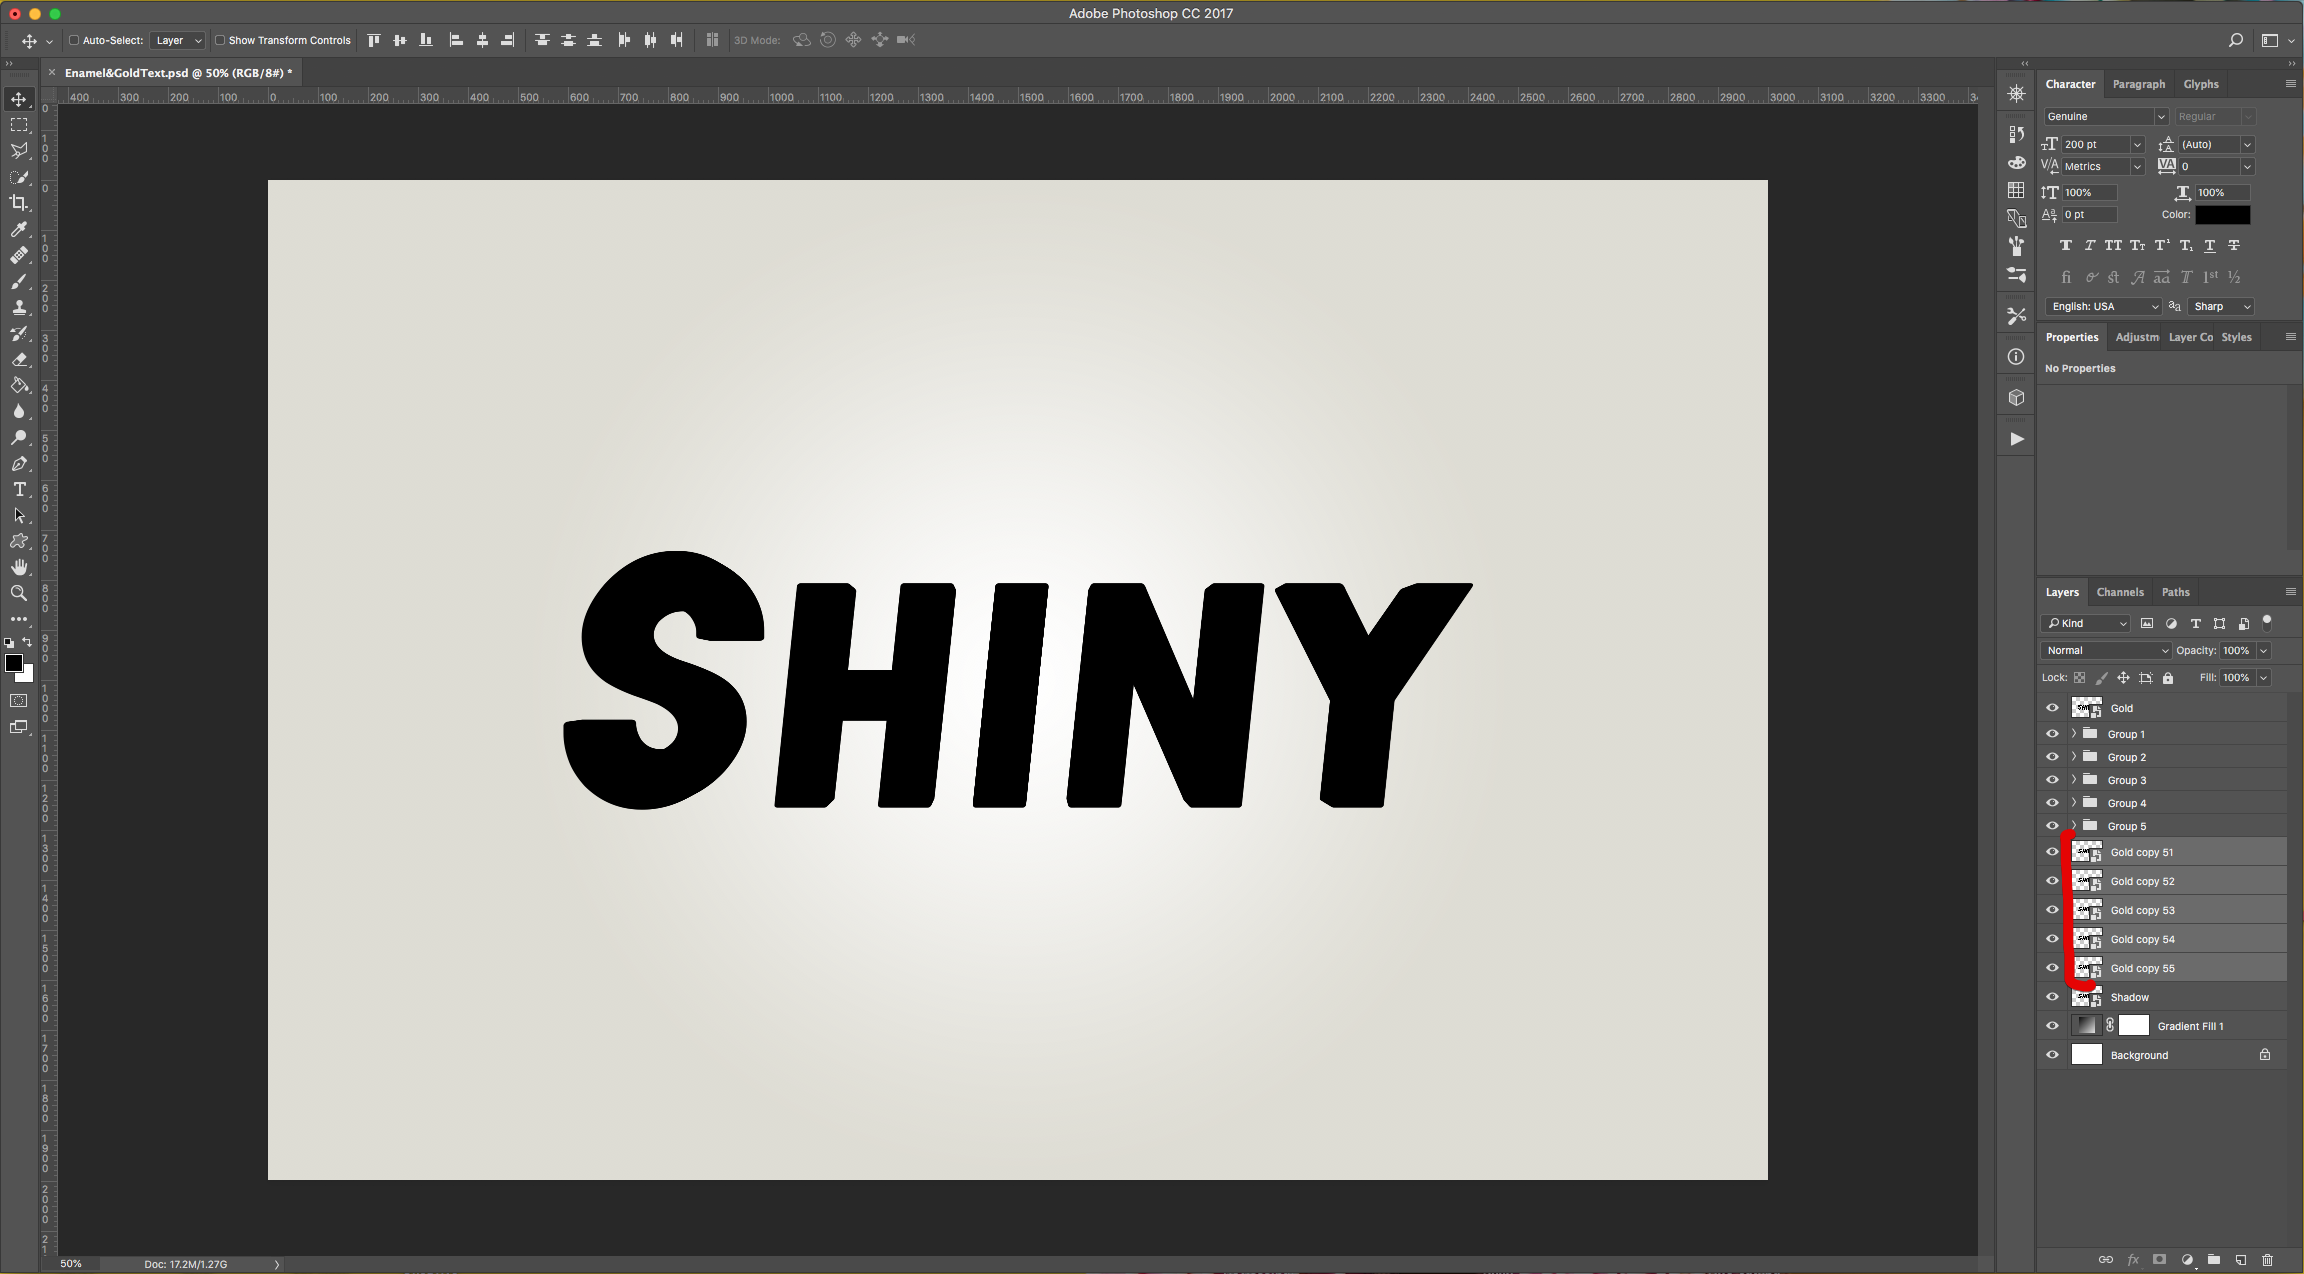
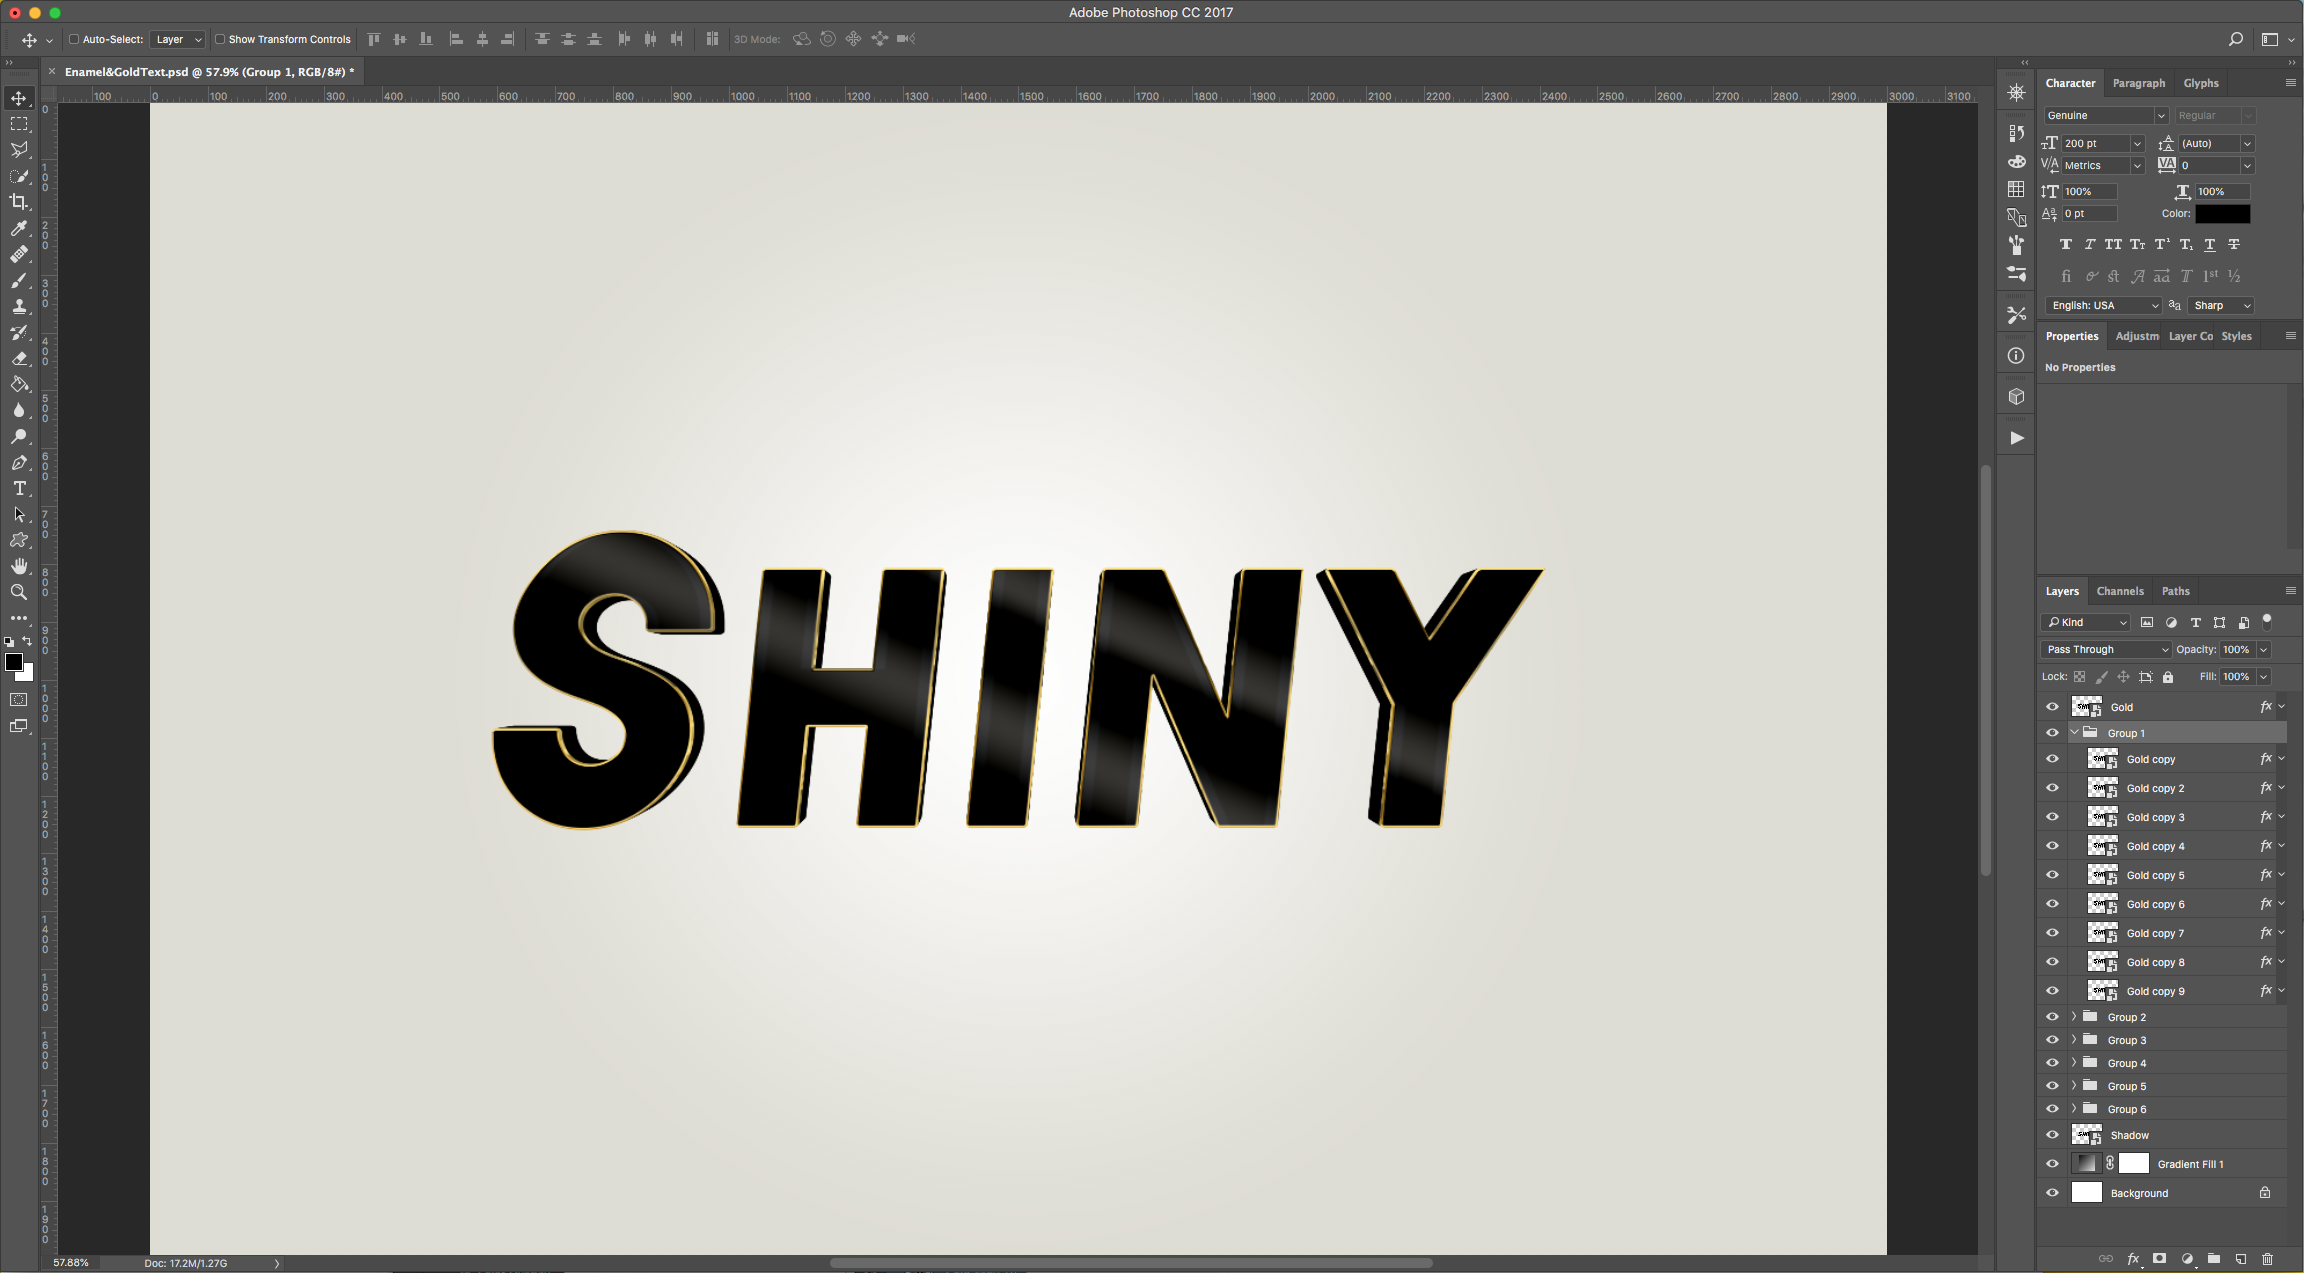
14 - Select (“Shift” key) from “Gold copy” to “Gold copy 9” and “Group” them together by clicking the Small Folder icon at the bottom of the “Layers Panel”. Repeat with “Gold copy 10” to “Gold copy 19” and create another Group. Then with “Gold copy 20” to “Gold copy 29”, with “Gold copy 30” to “Gold copy 44”, with “Gold copy 45” to “Gold copy 50” and finally with “Gold copy 51” to “Gold copy 55”. You should have 6 “Group” Folders.
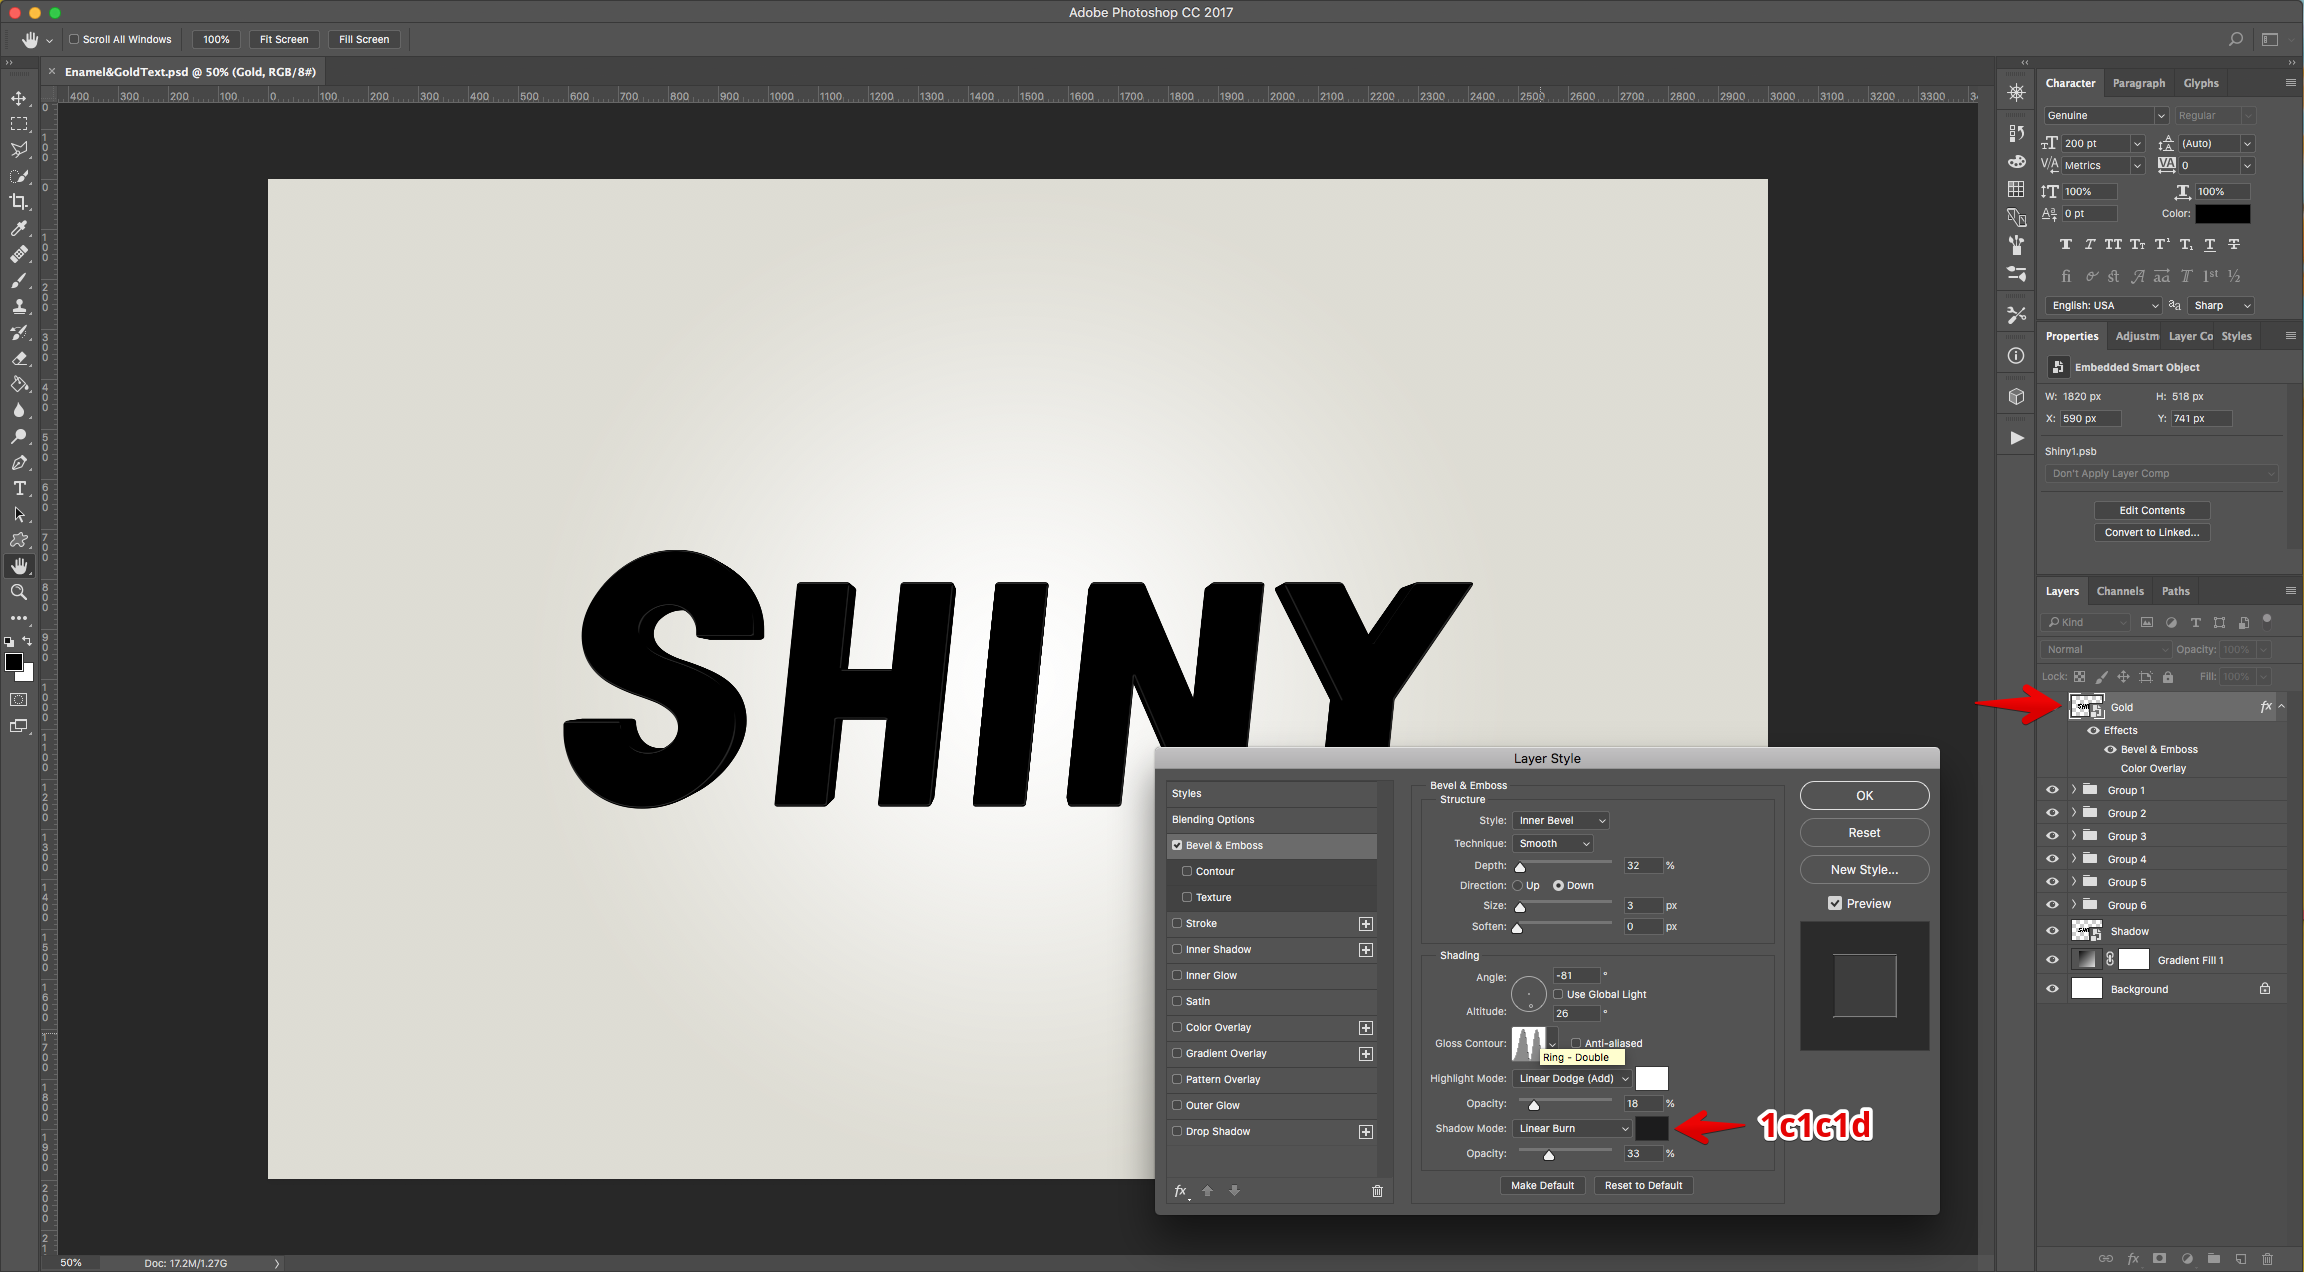
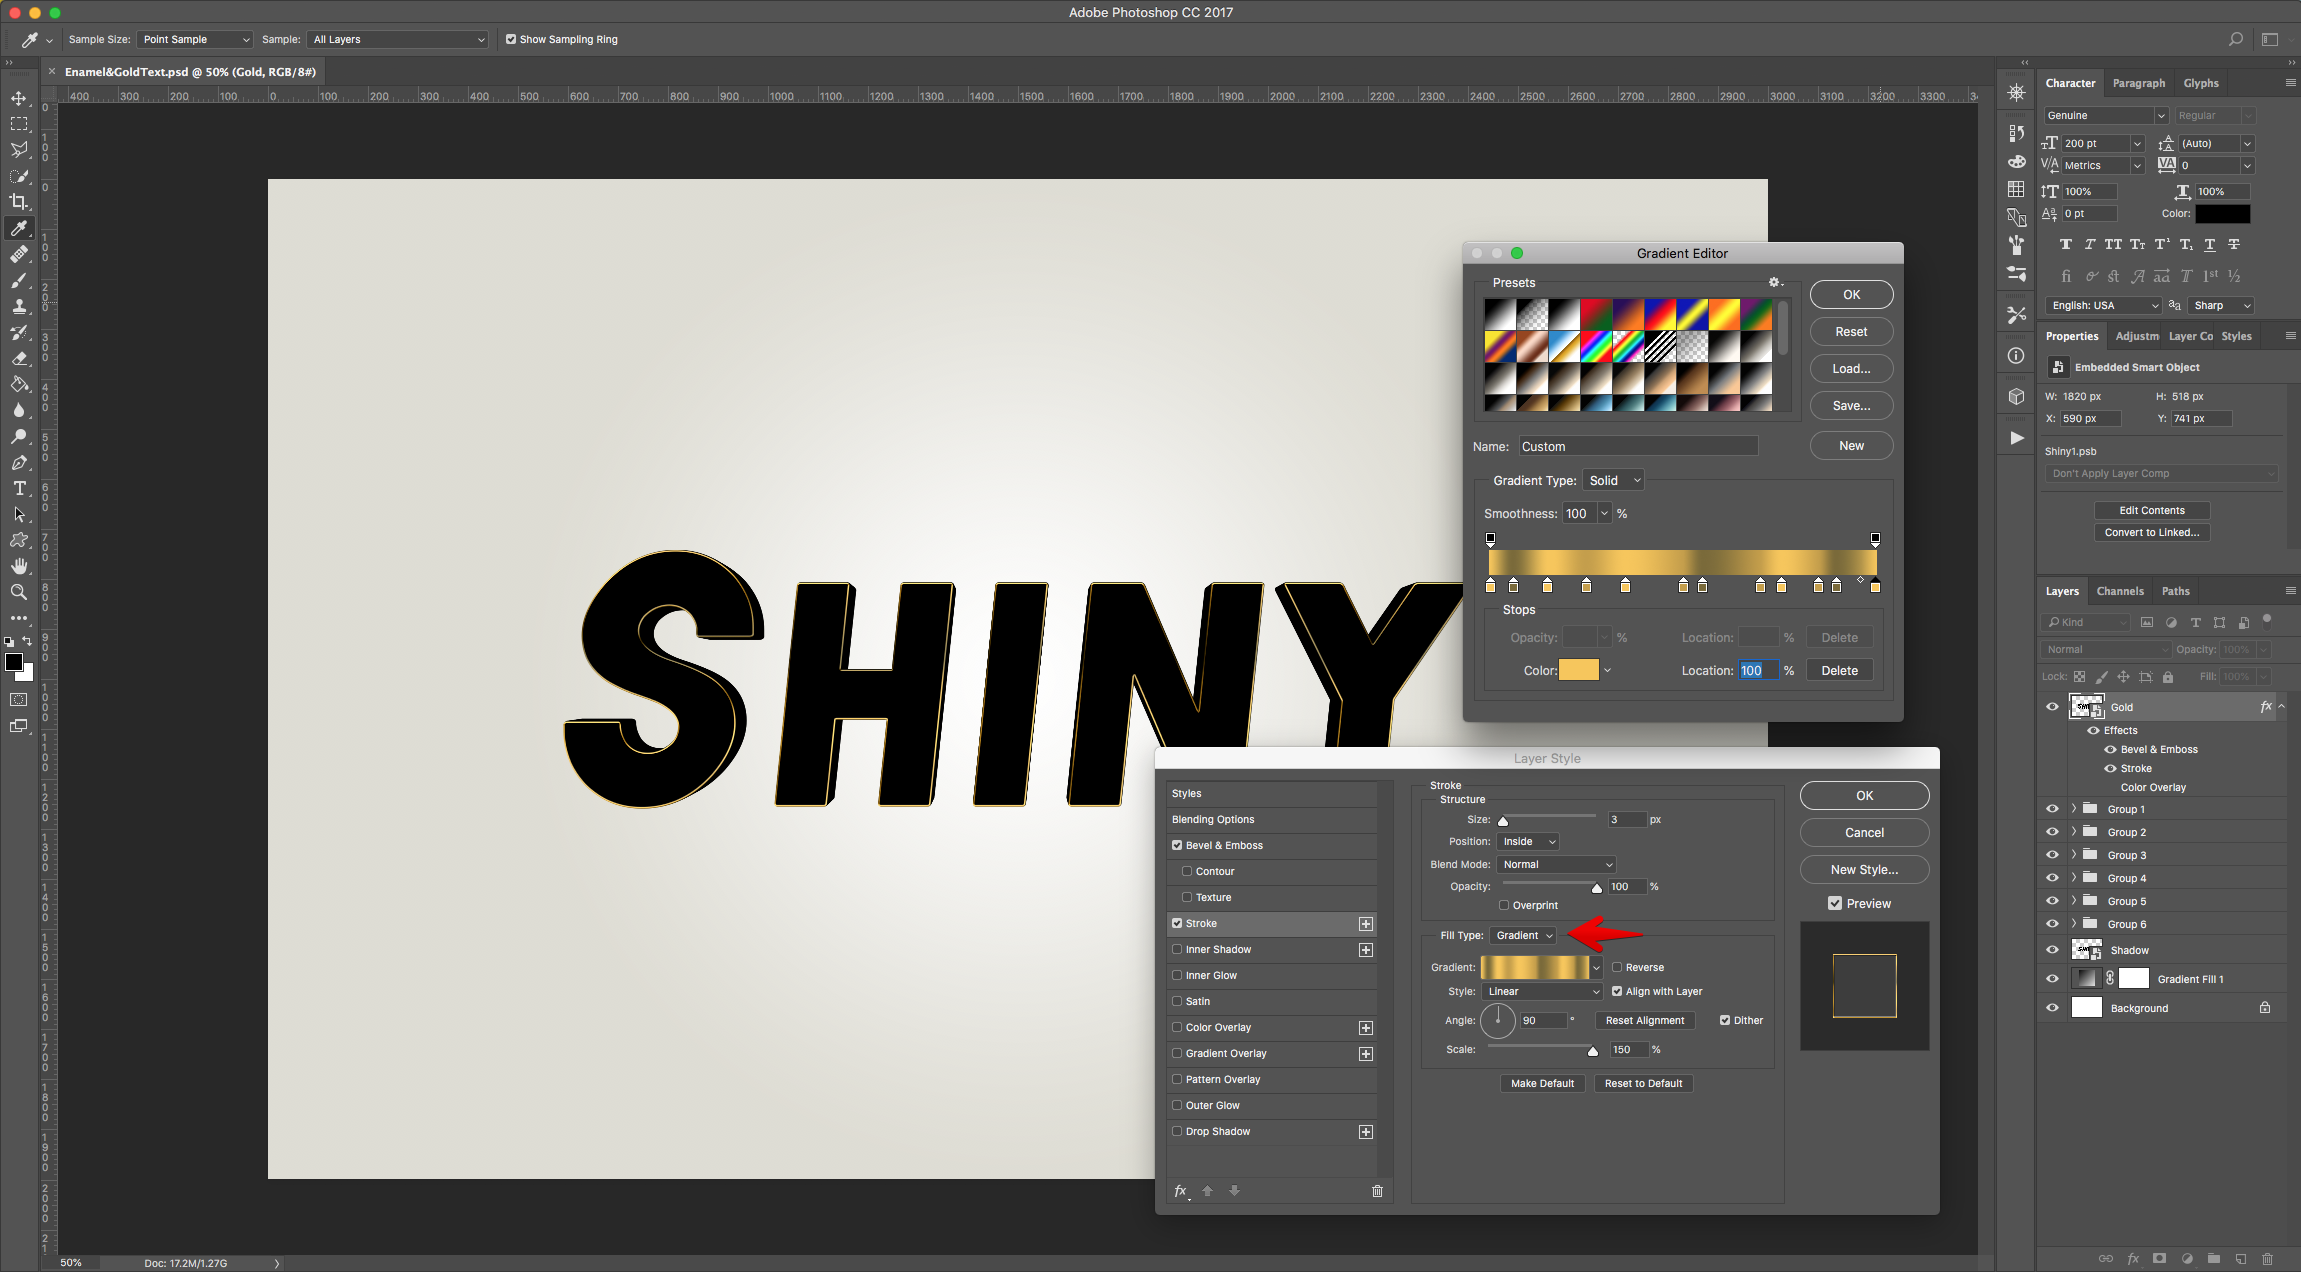
15 - Double-click on the “Gold” layer thumbnail to apply the following “Layer Styles”:
Bevel & Emboss: (Gloss Contour: Ring - Double)
Stroke: (Fill with Gradient with the following colors: Location 0% - Color #f7c753, Location 6% - Color #f76b37, Location 15% - Color #f7c753, Location 25% - Color #c59f44, Location 35% - Color #f7c753, Location 50% - Color #c59f44, Location 55% - Color #7a6637, Location 70% - Color #c59f44, Location 75% - Color #f7c753, Location 85% - Color #c59f44, Location 90% - Color #7a6b37 and Location 100% - Color #f7c753).
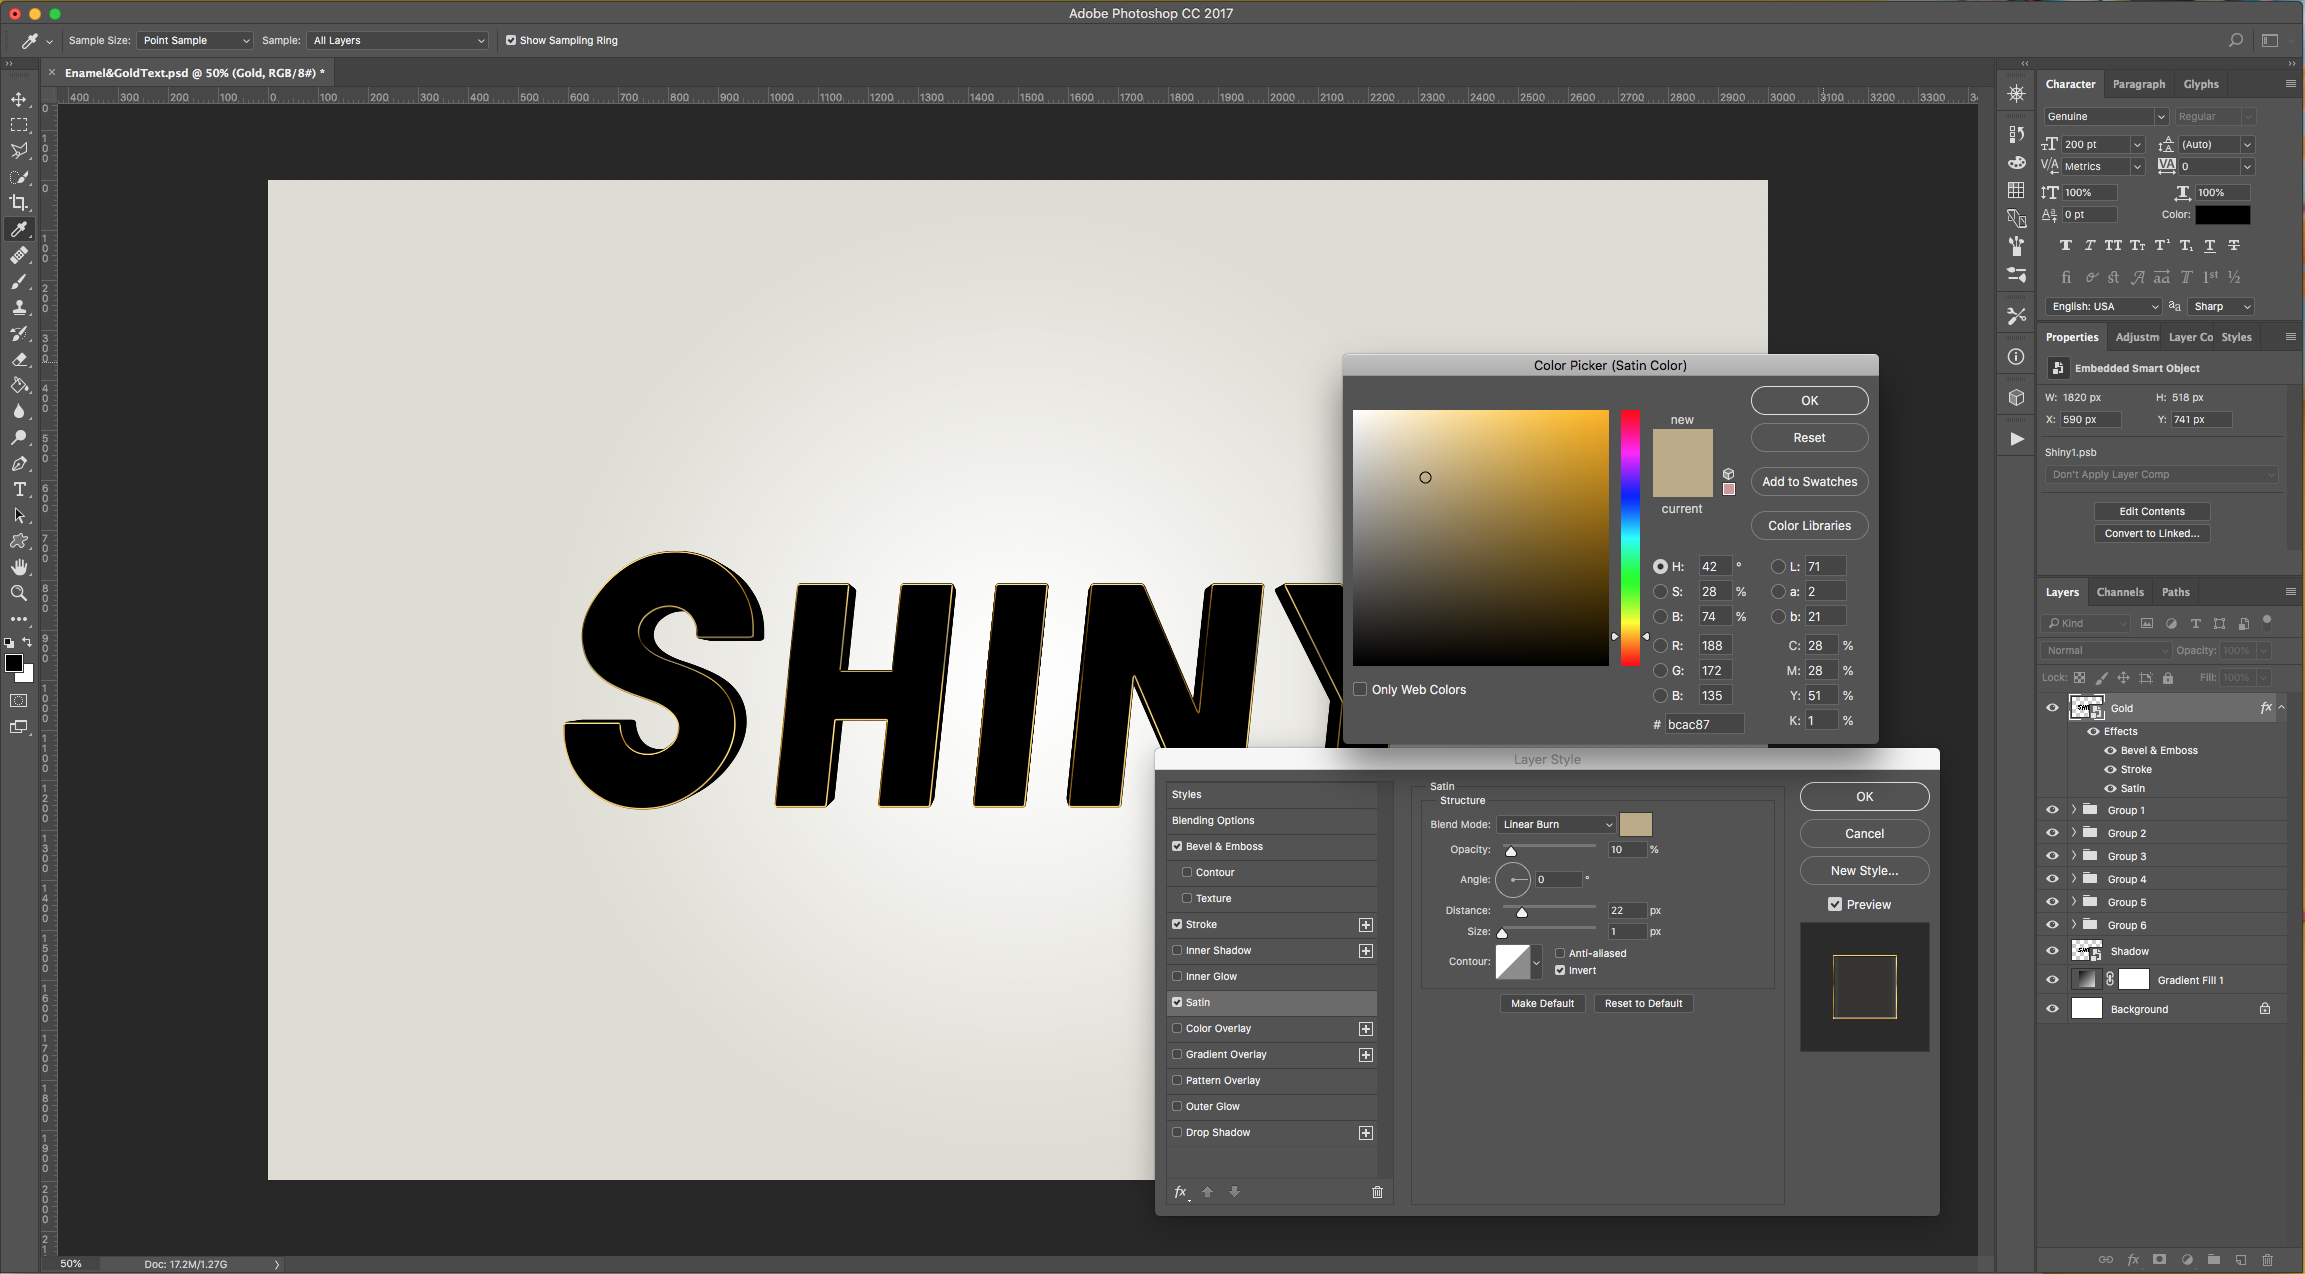
Satin:
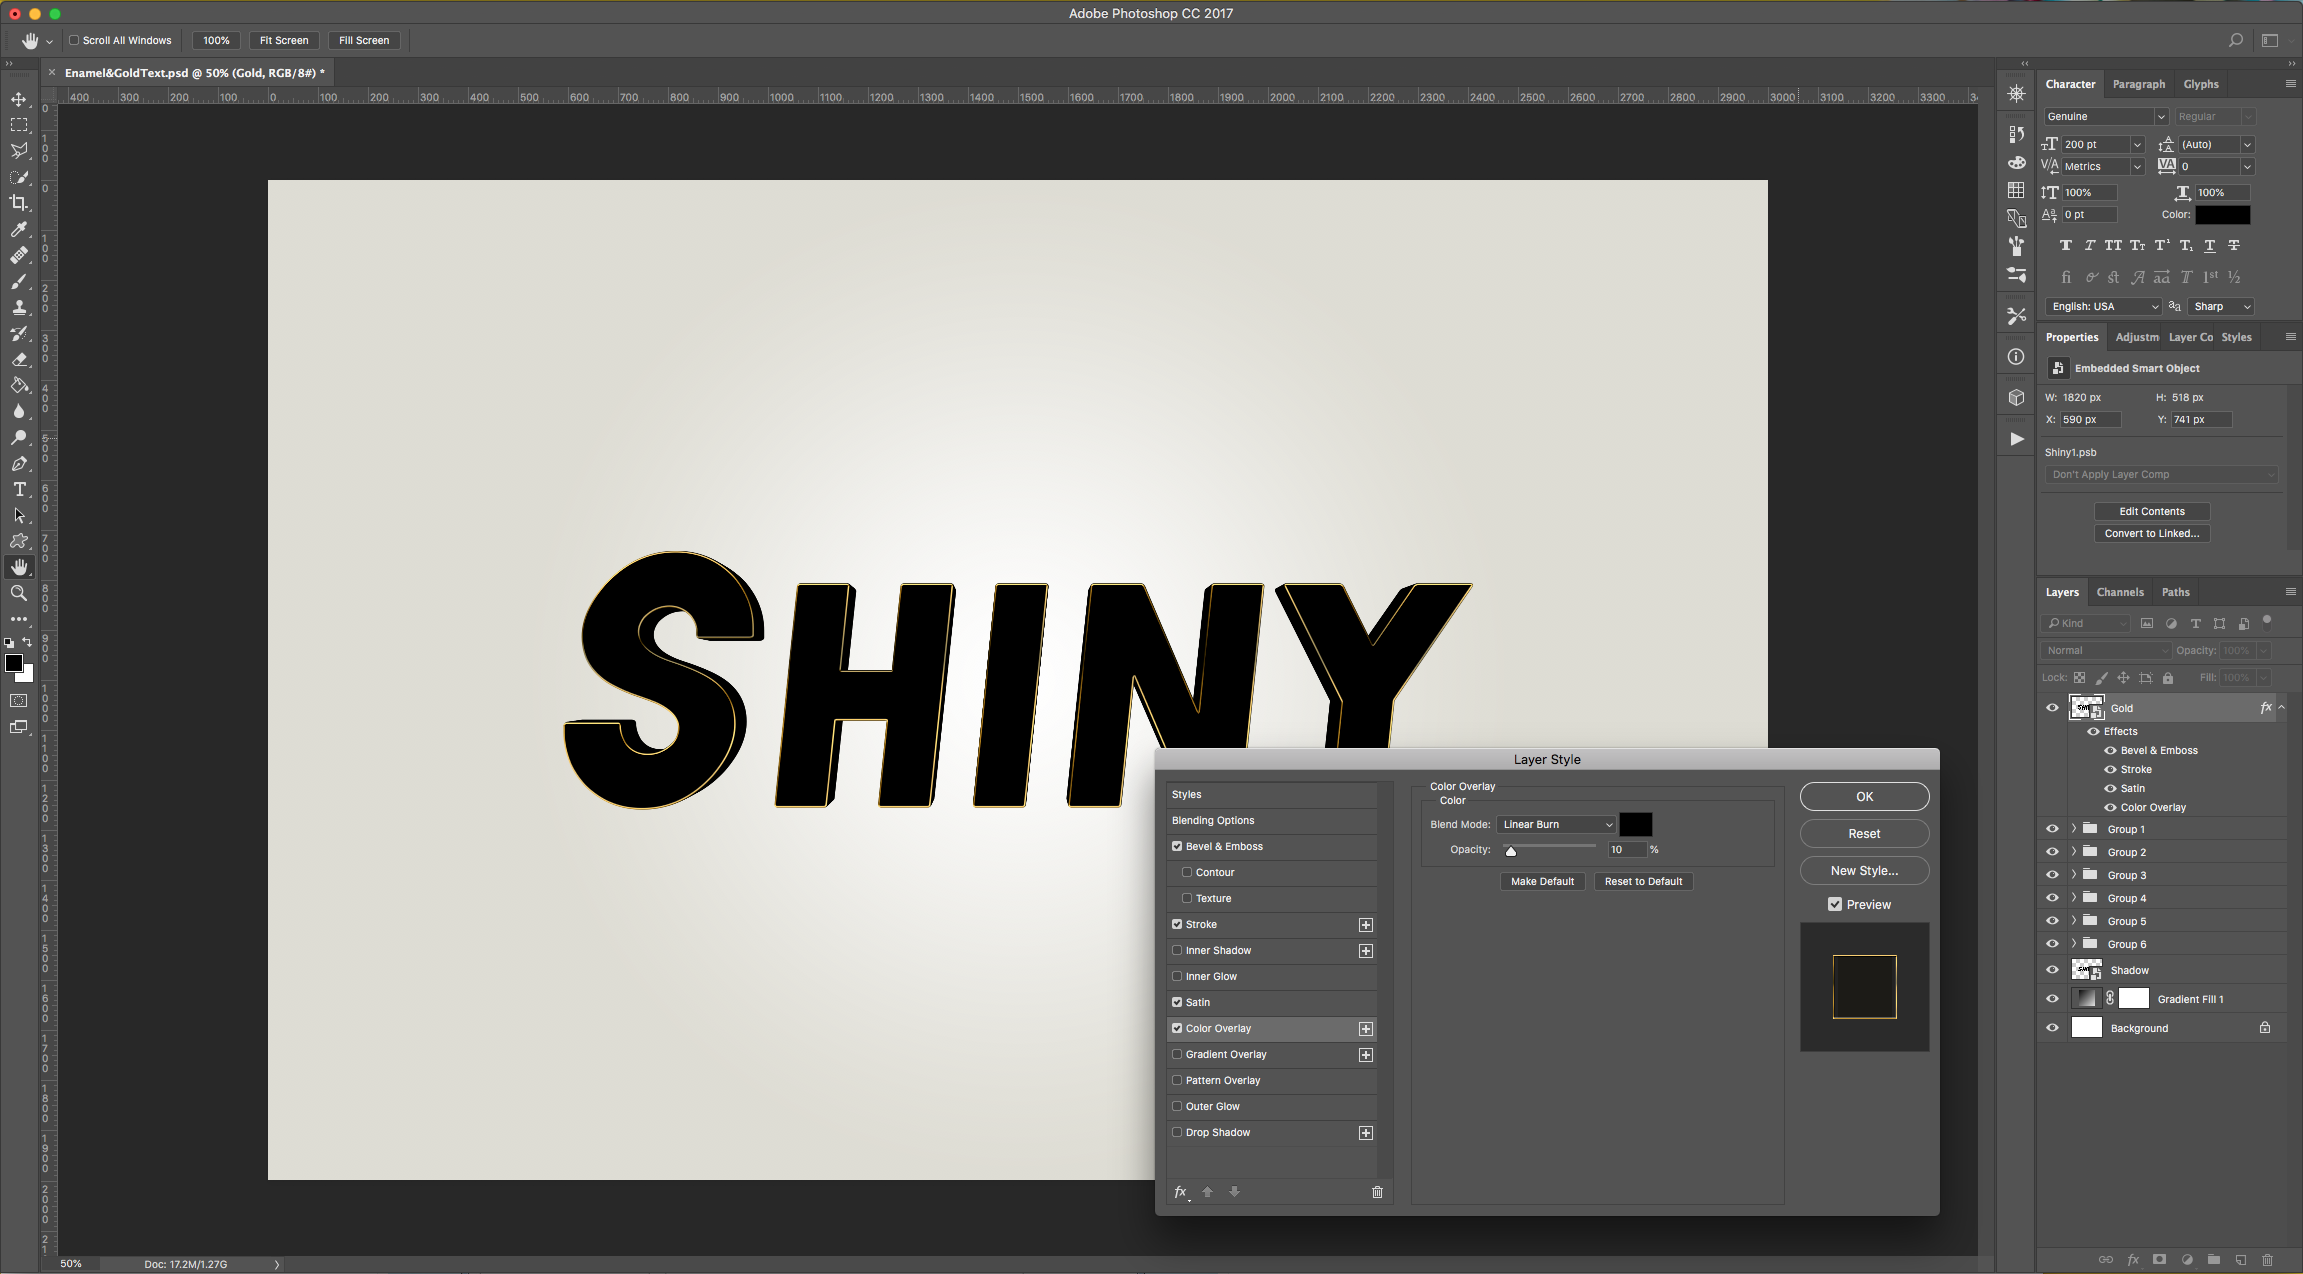
Color Overlay:
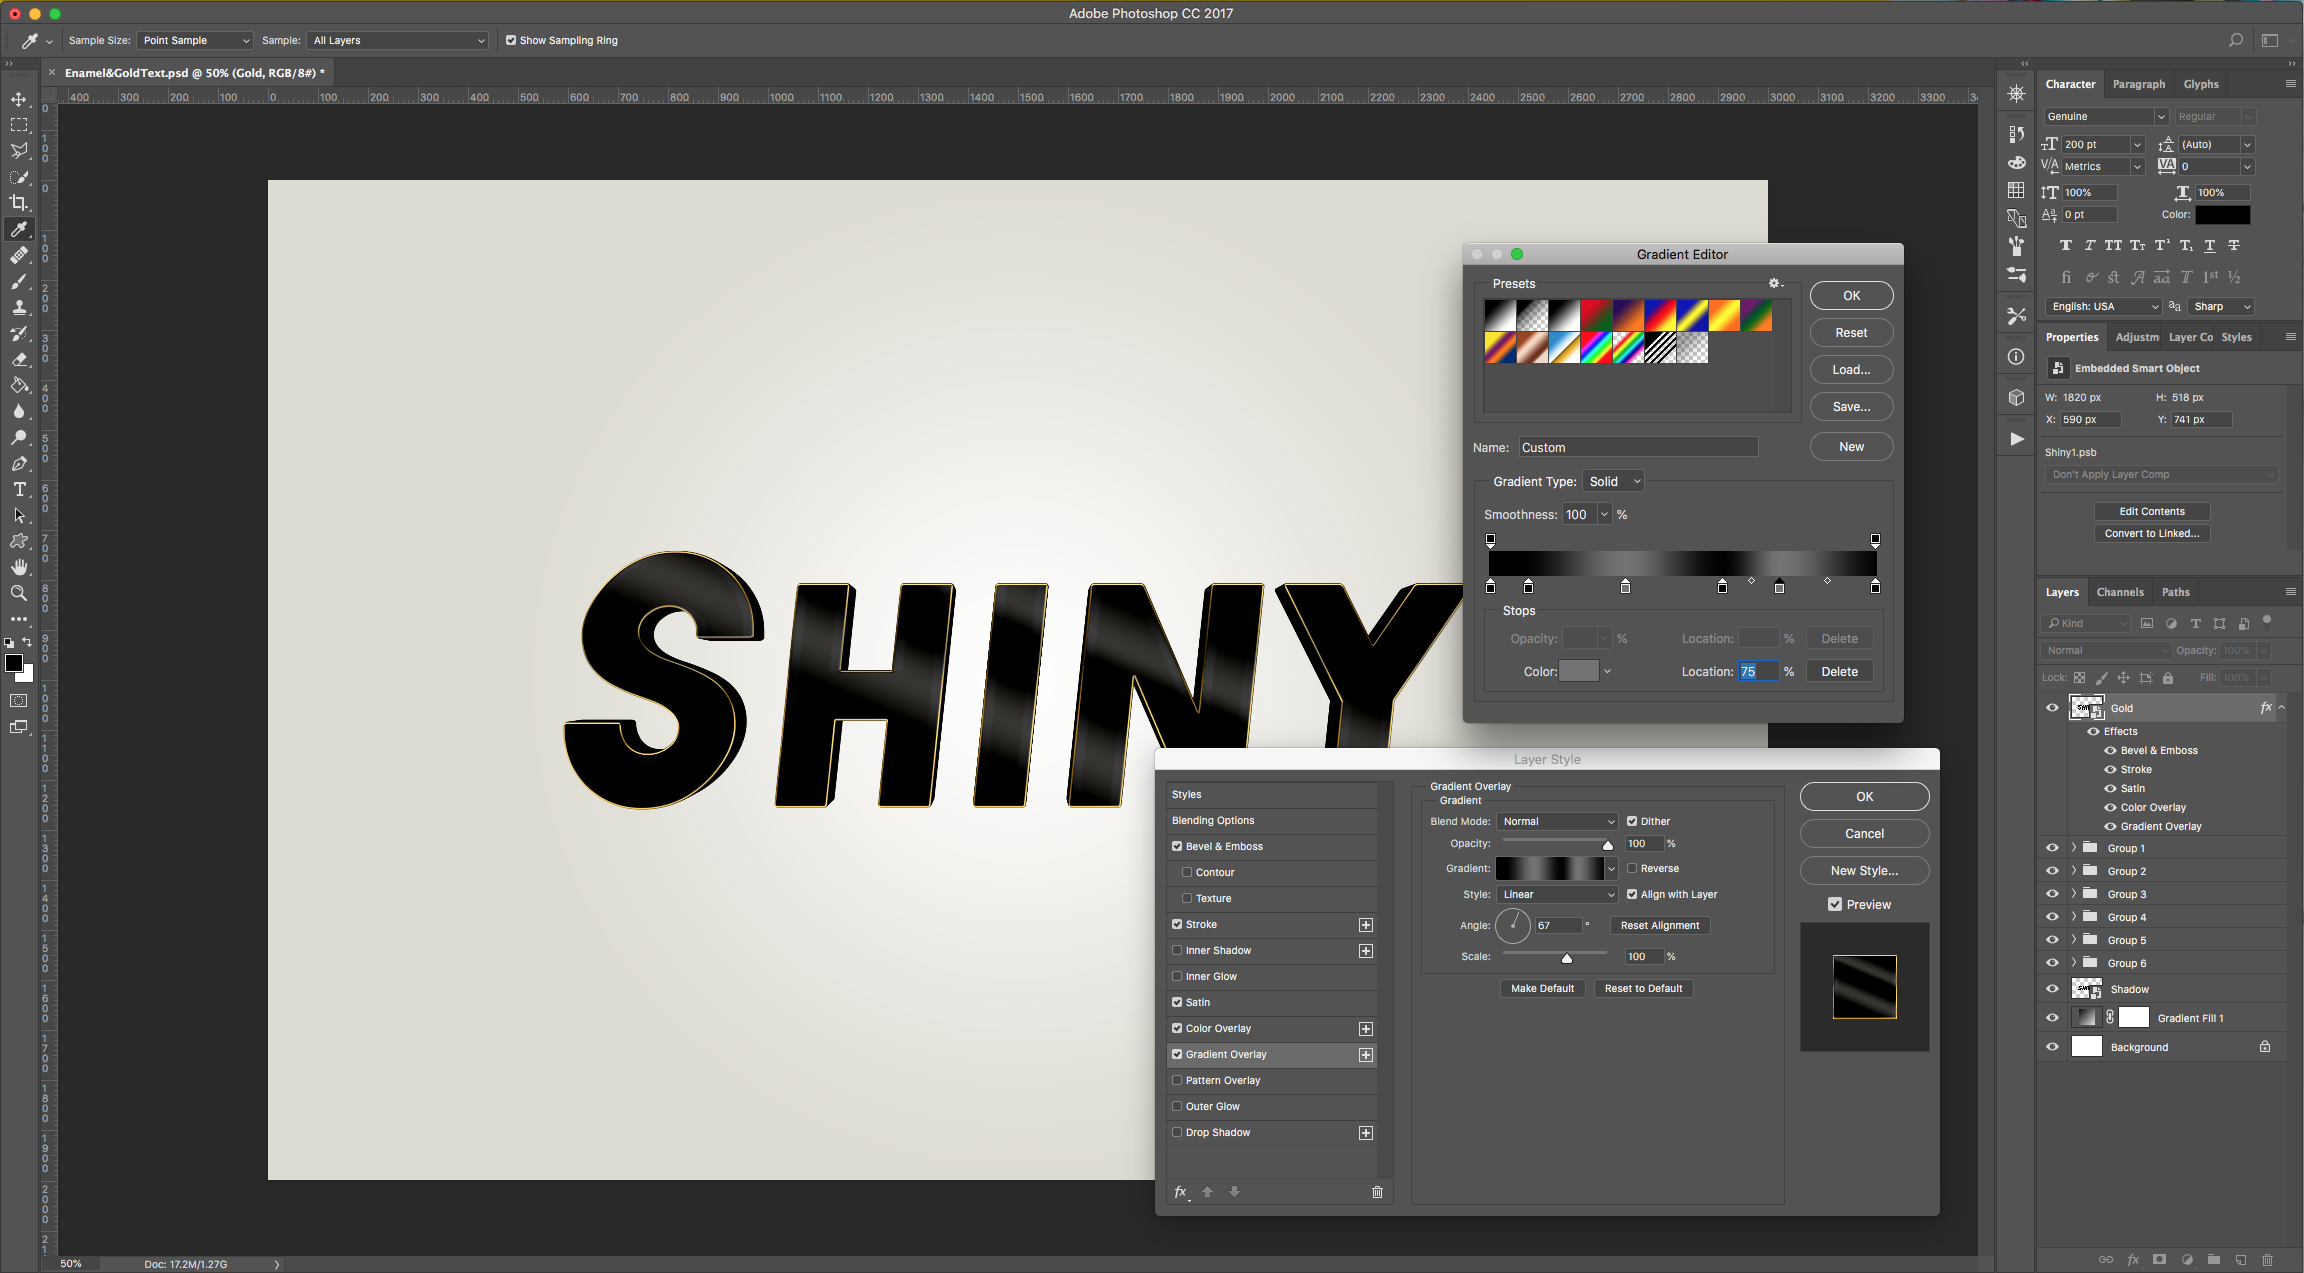
Gradient Overlay: (Location 0% - Color #000000, Location 10% - Color #010202, Location 35% - Color #737373, Location 60% - Color #010202, Location 75% - Color #737373, Location 100% - Color #010202).
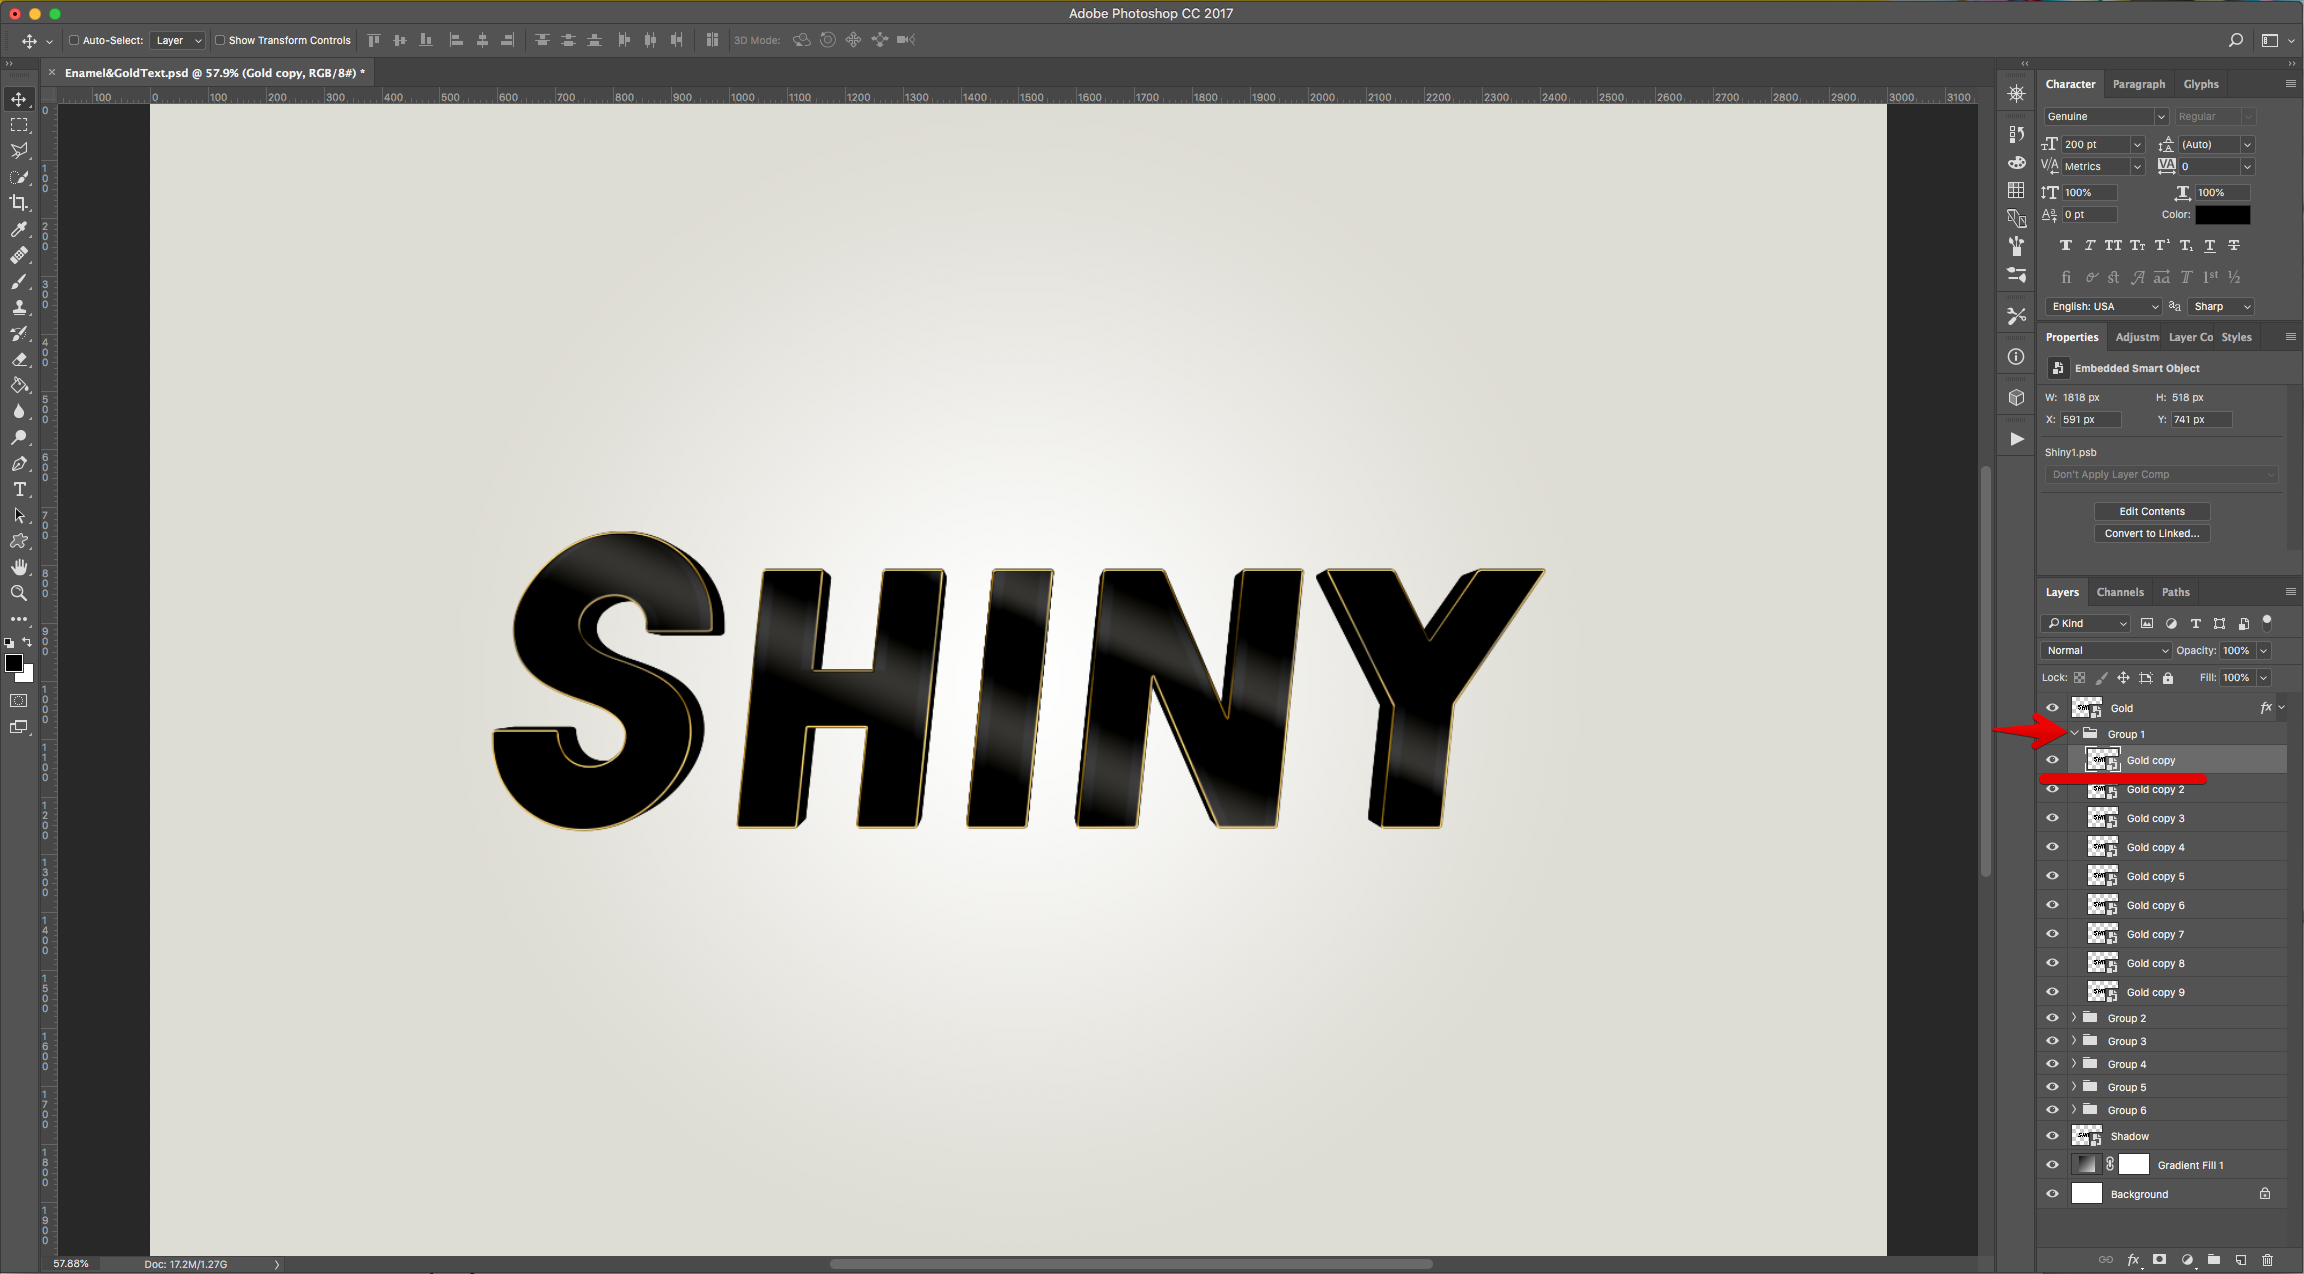
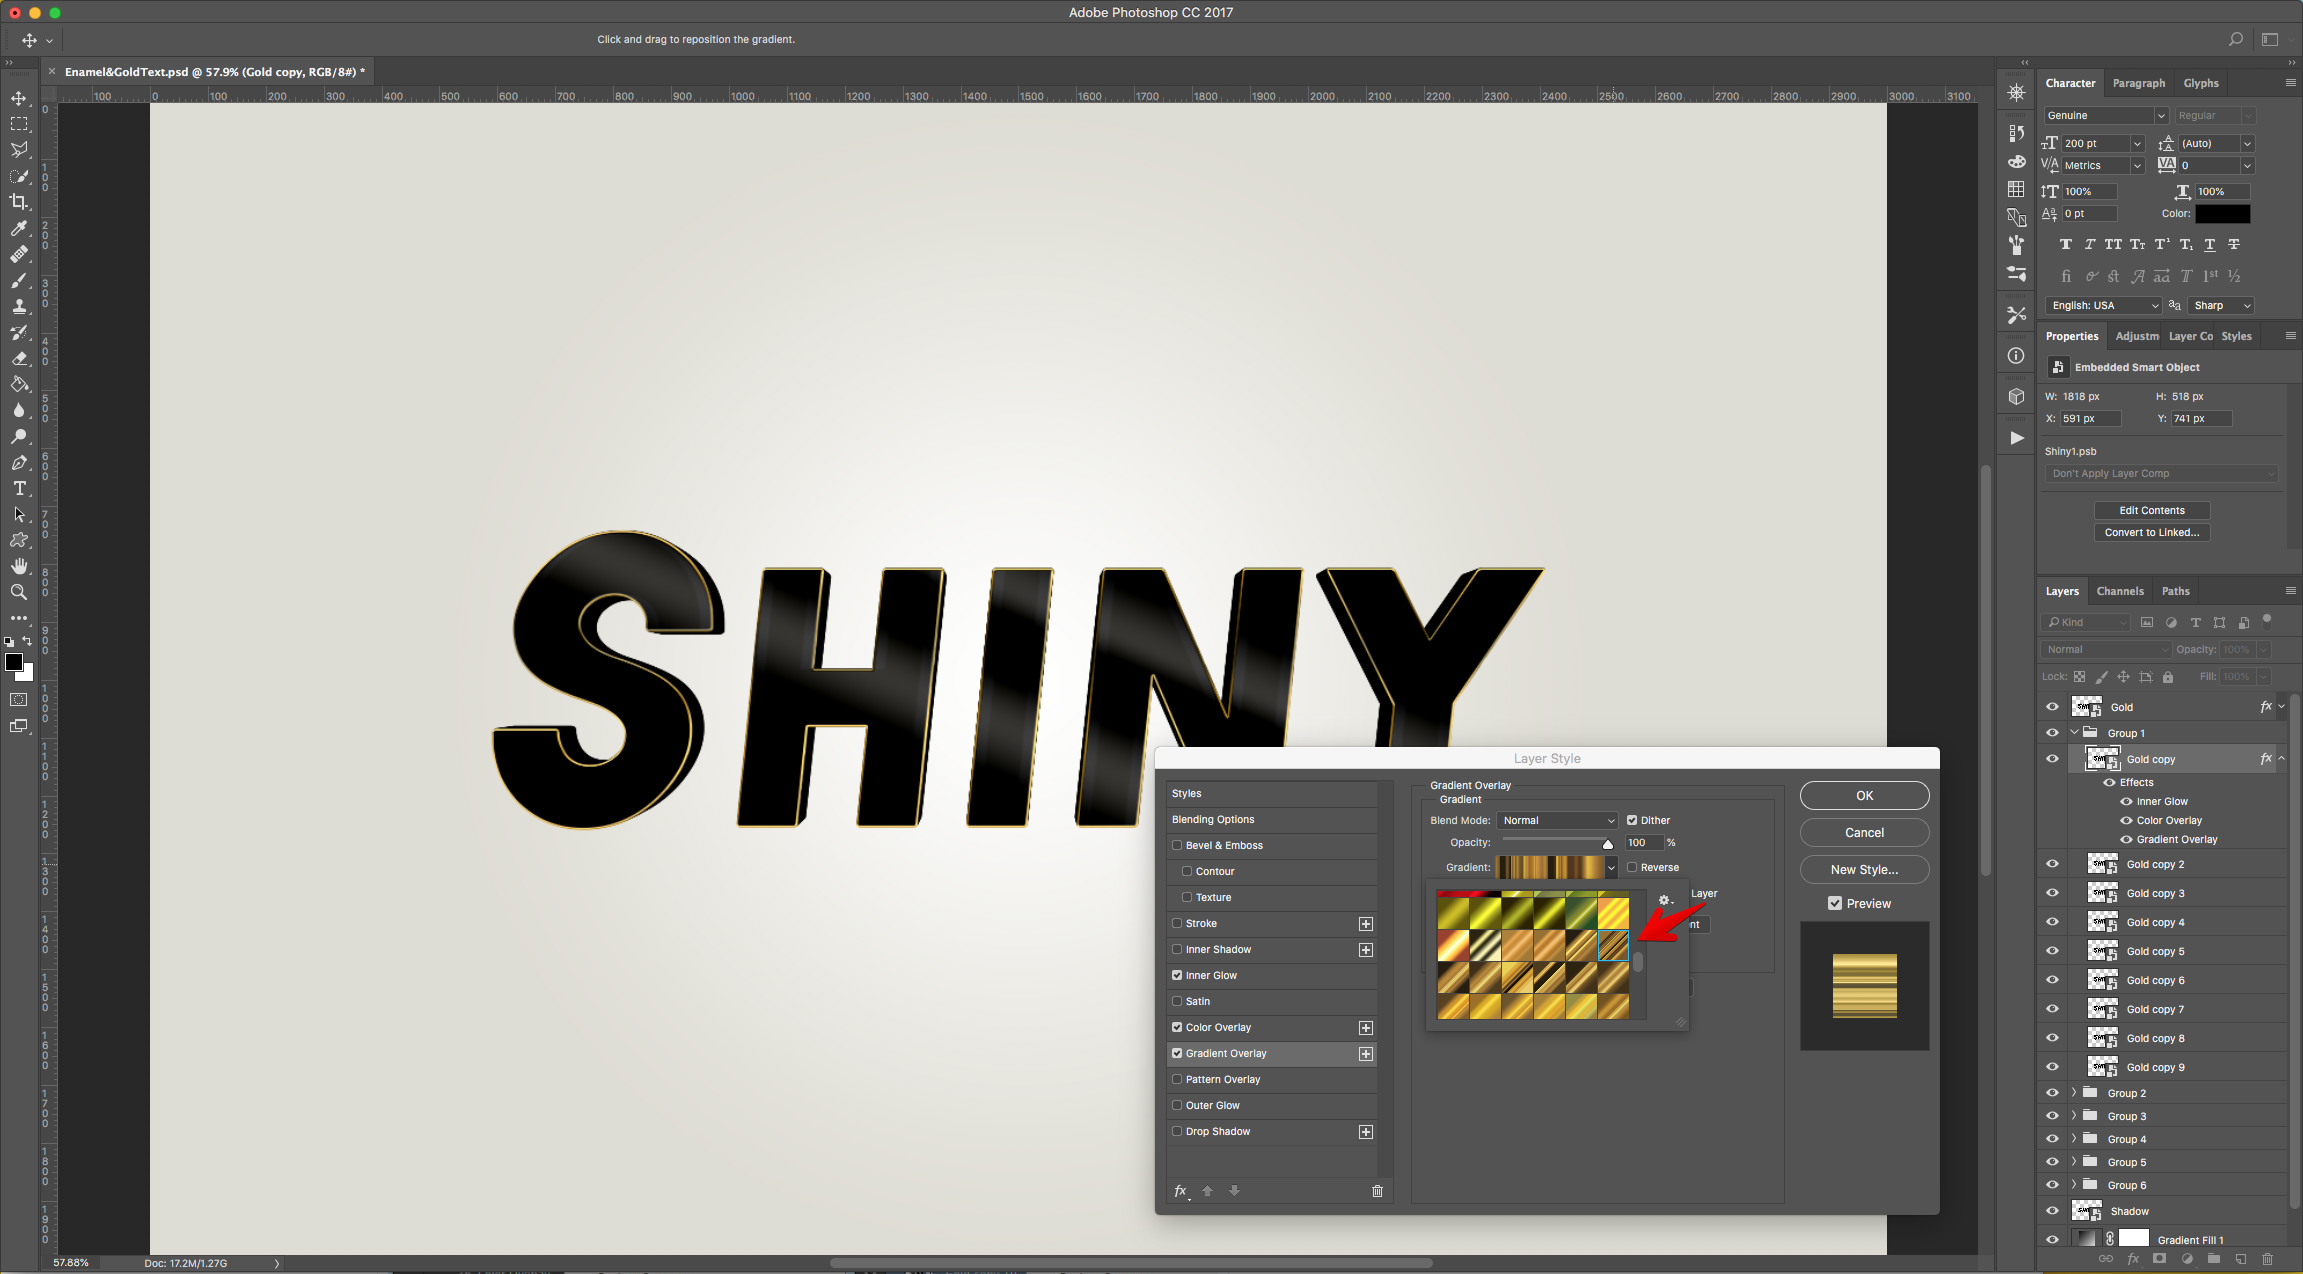
16 - Show the contents of the “Group 1” Folder by clicking the small arrow on its left side and select the “Gold copy” layer and double-click on its thumbnail to apply the following “Layer Styles”:
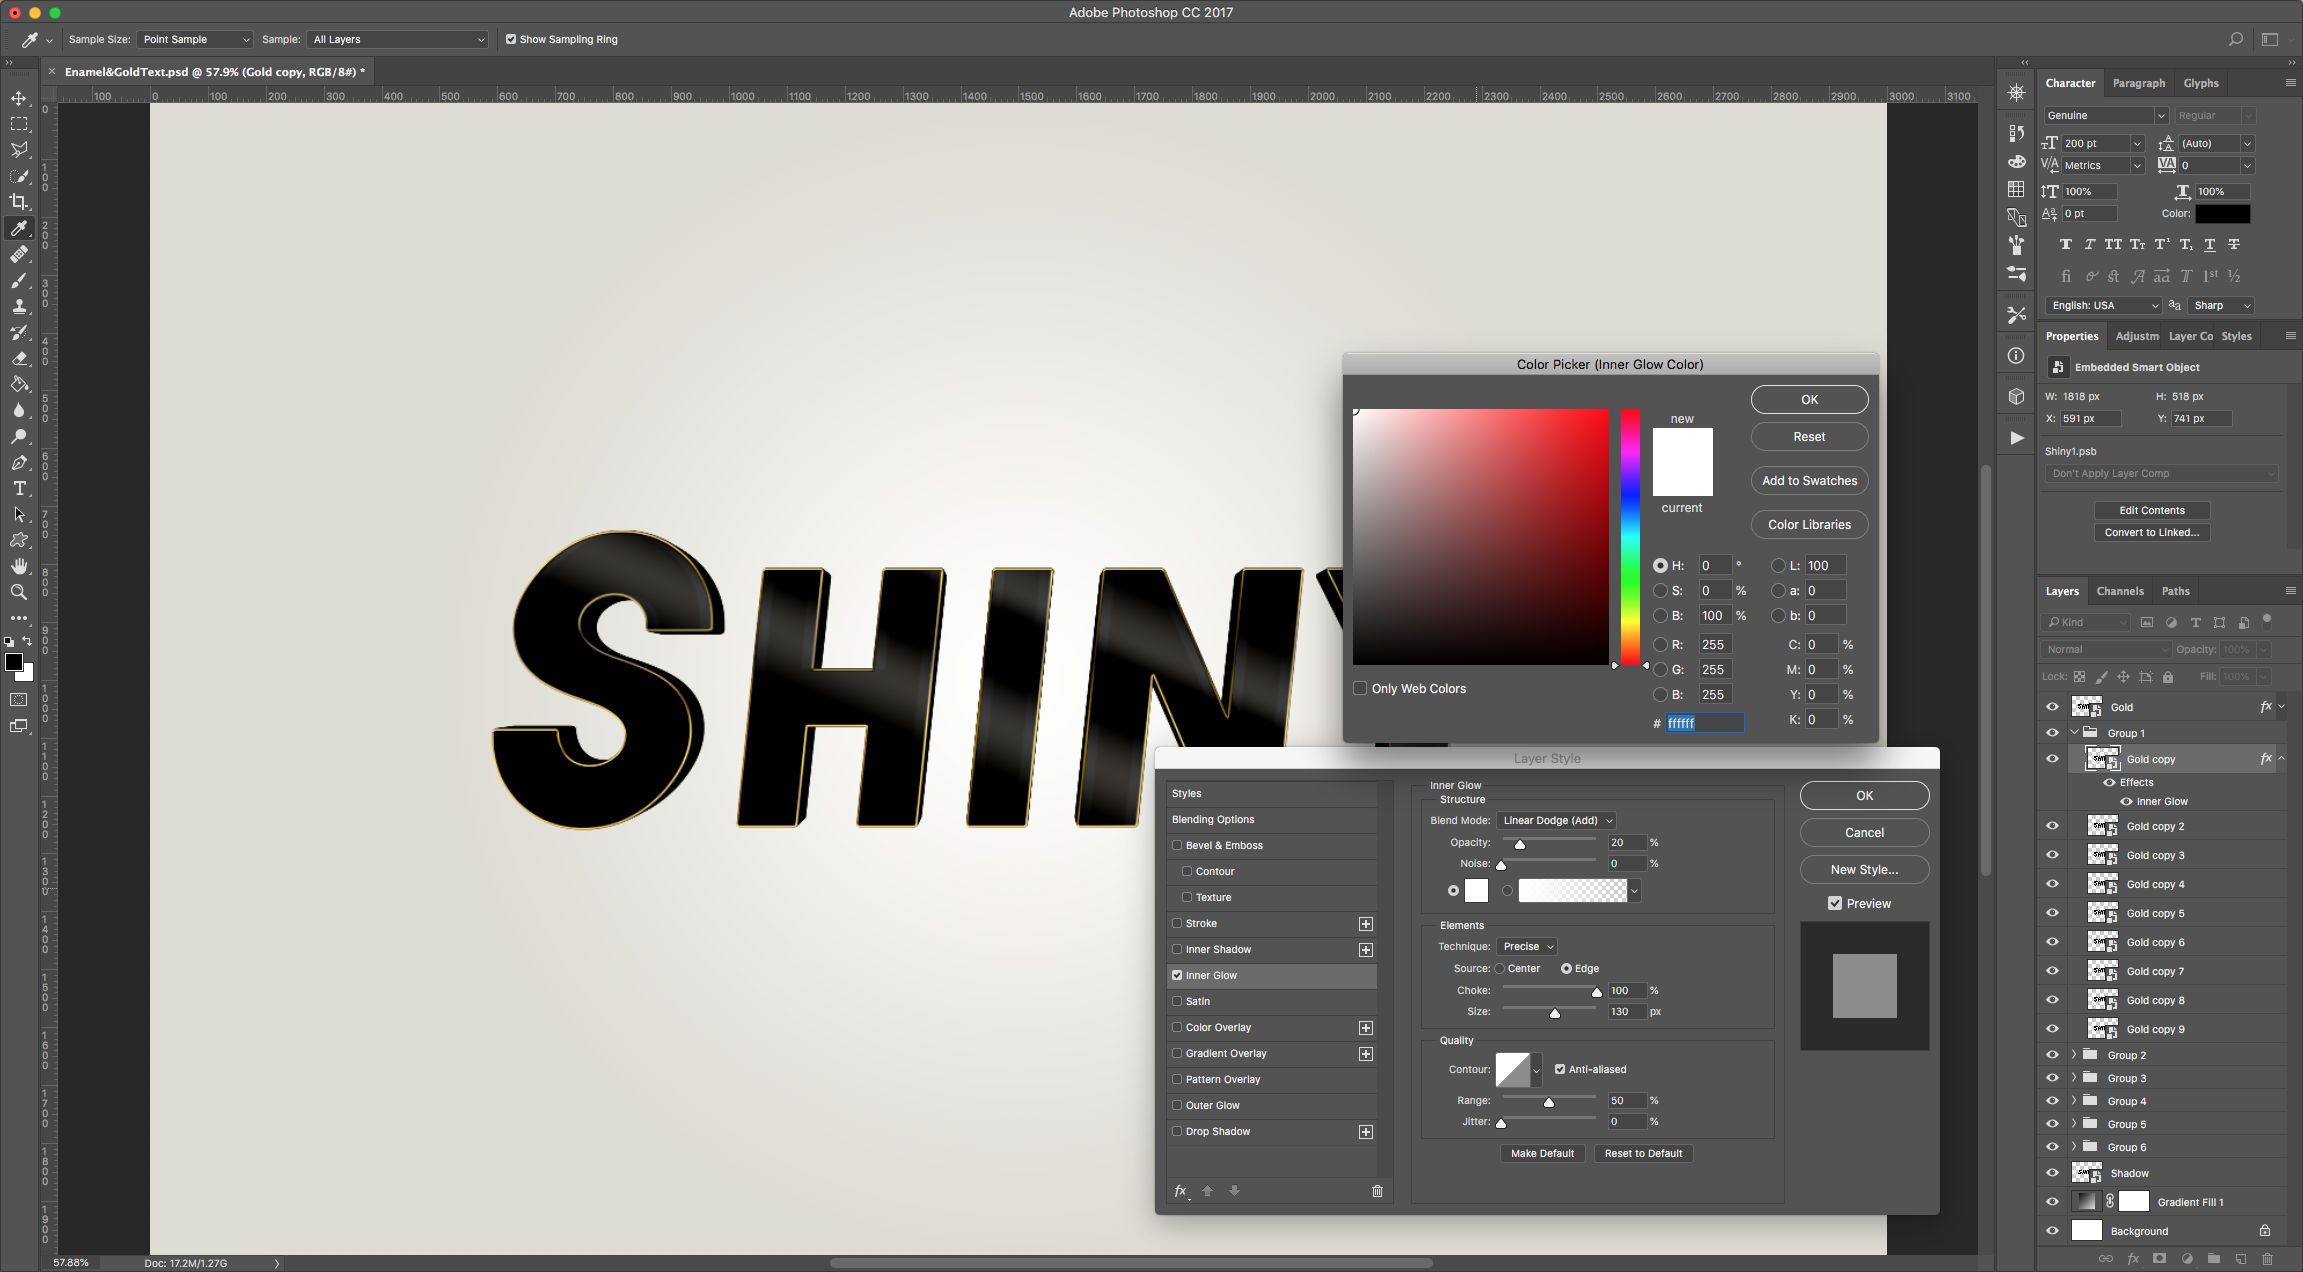
Inner Glow: (#ffffff)
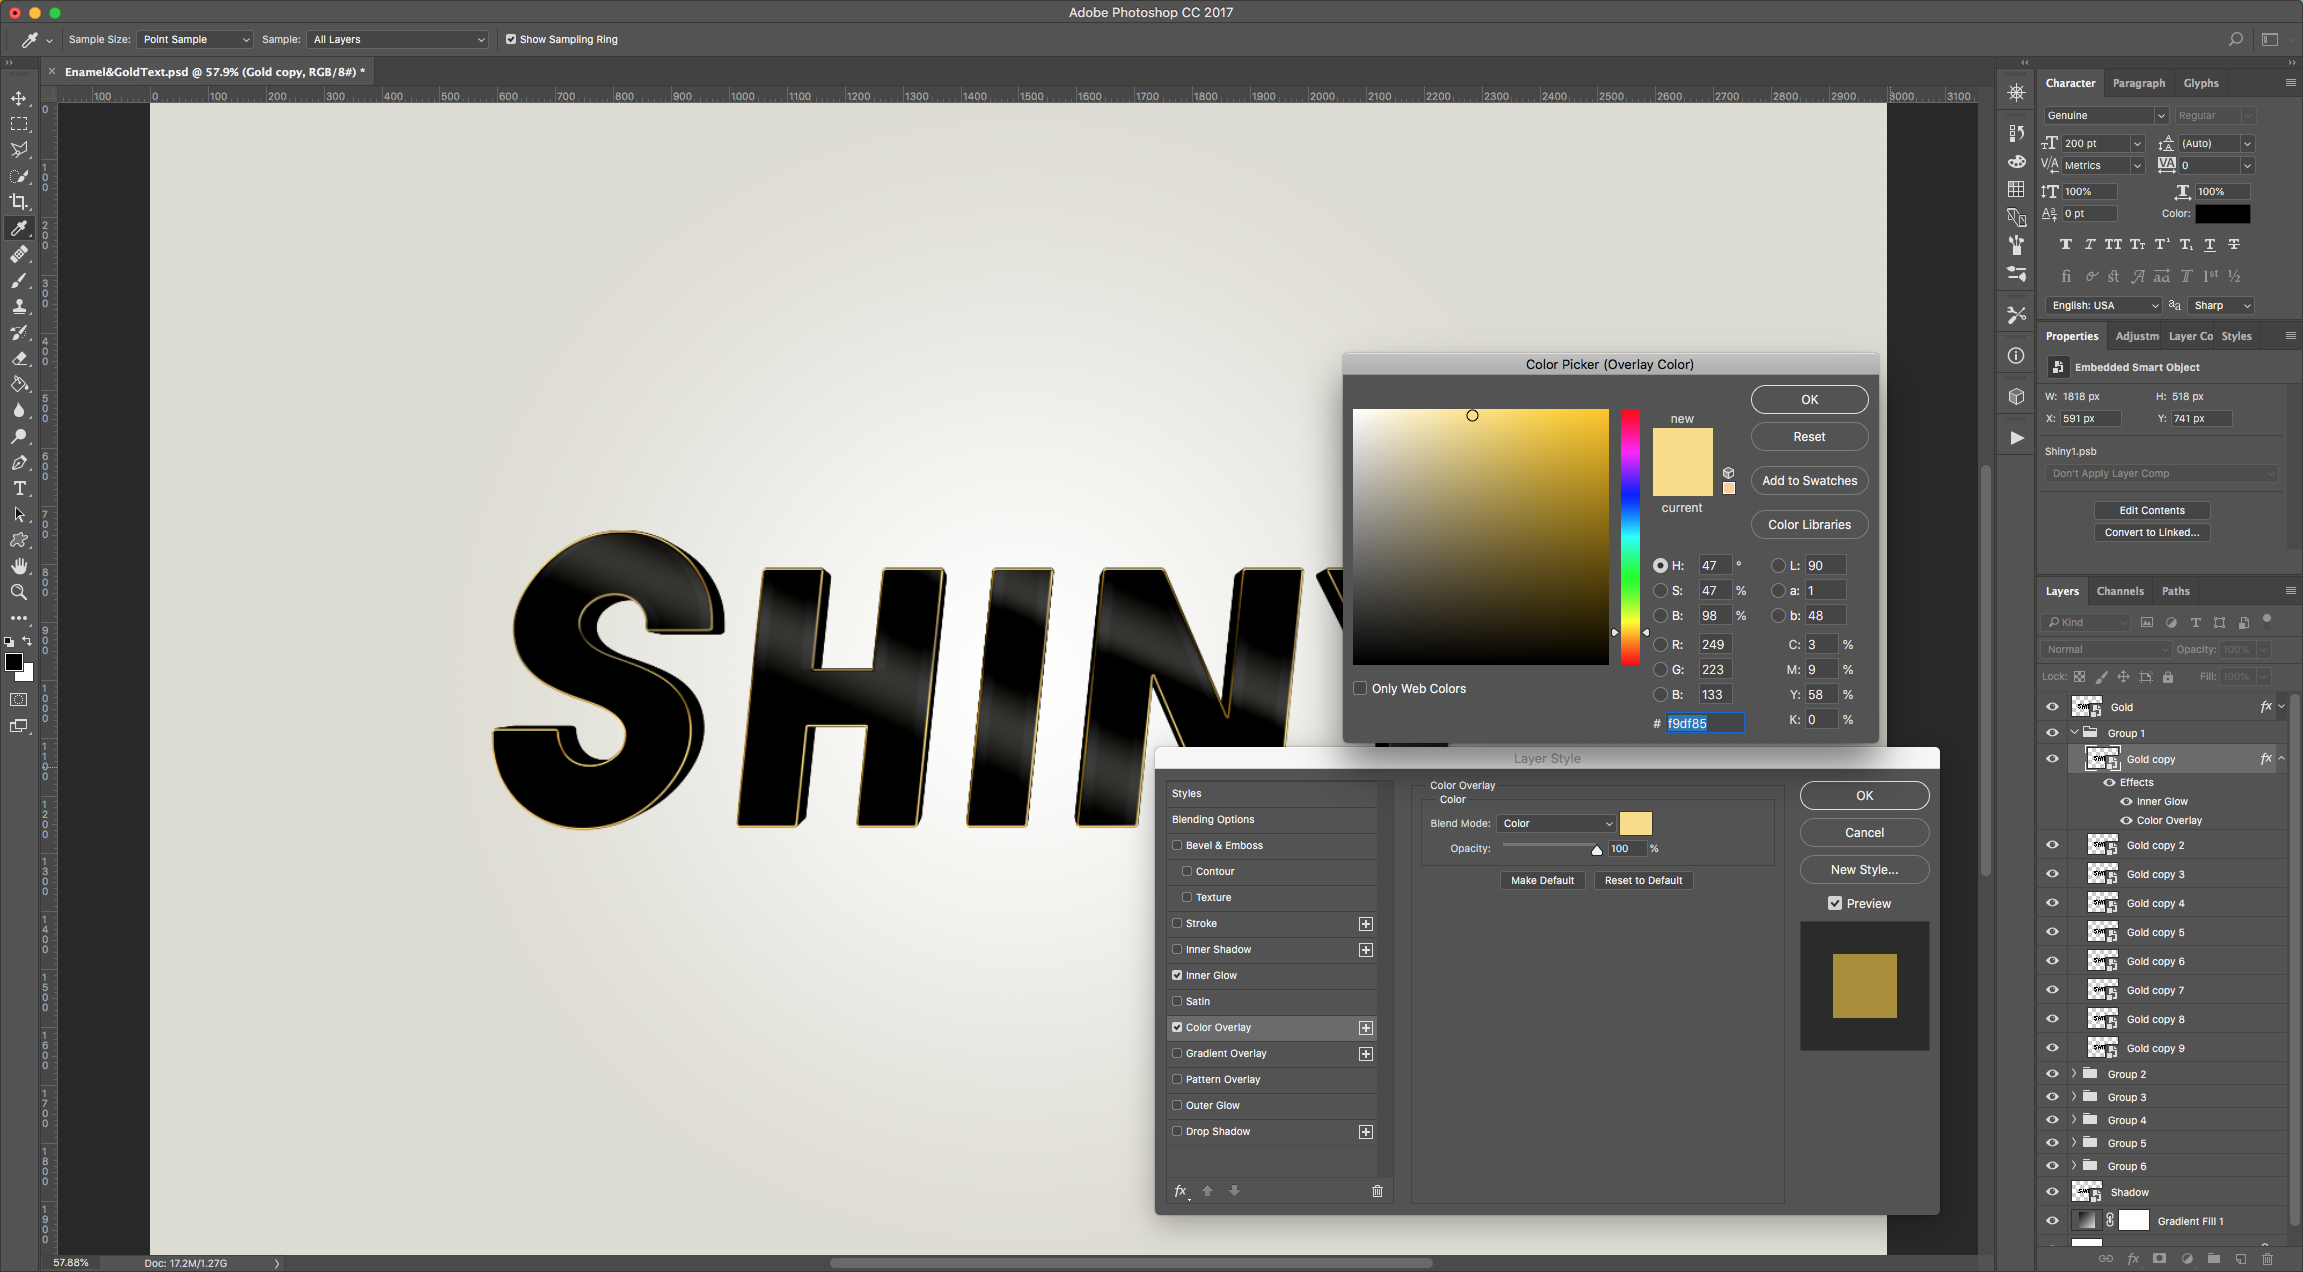
Color Overlay: (#f9df85)
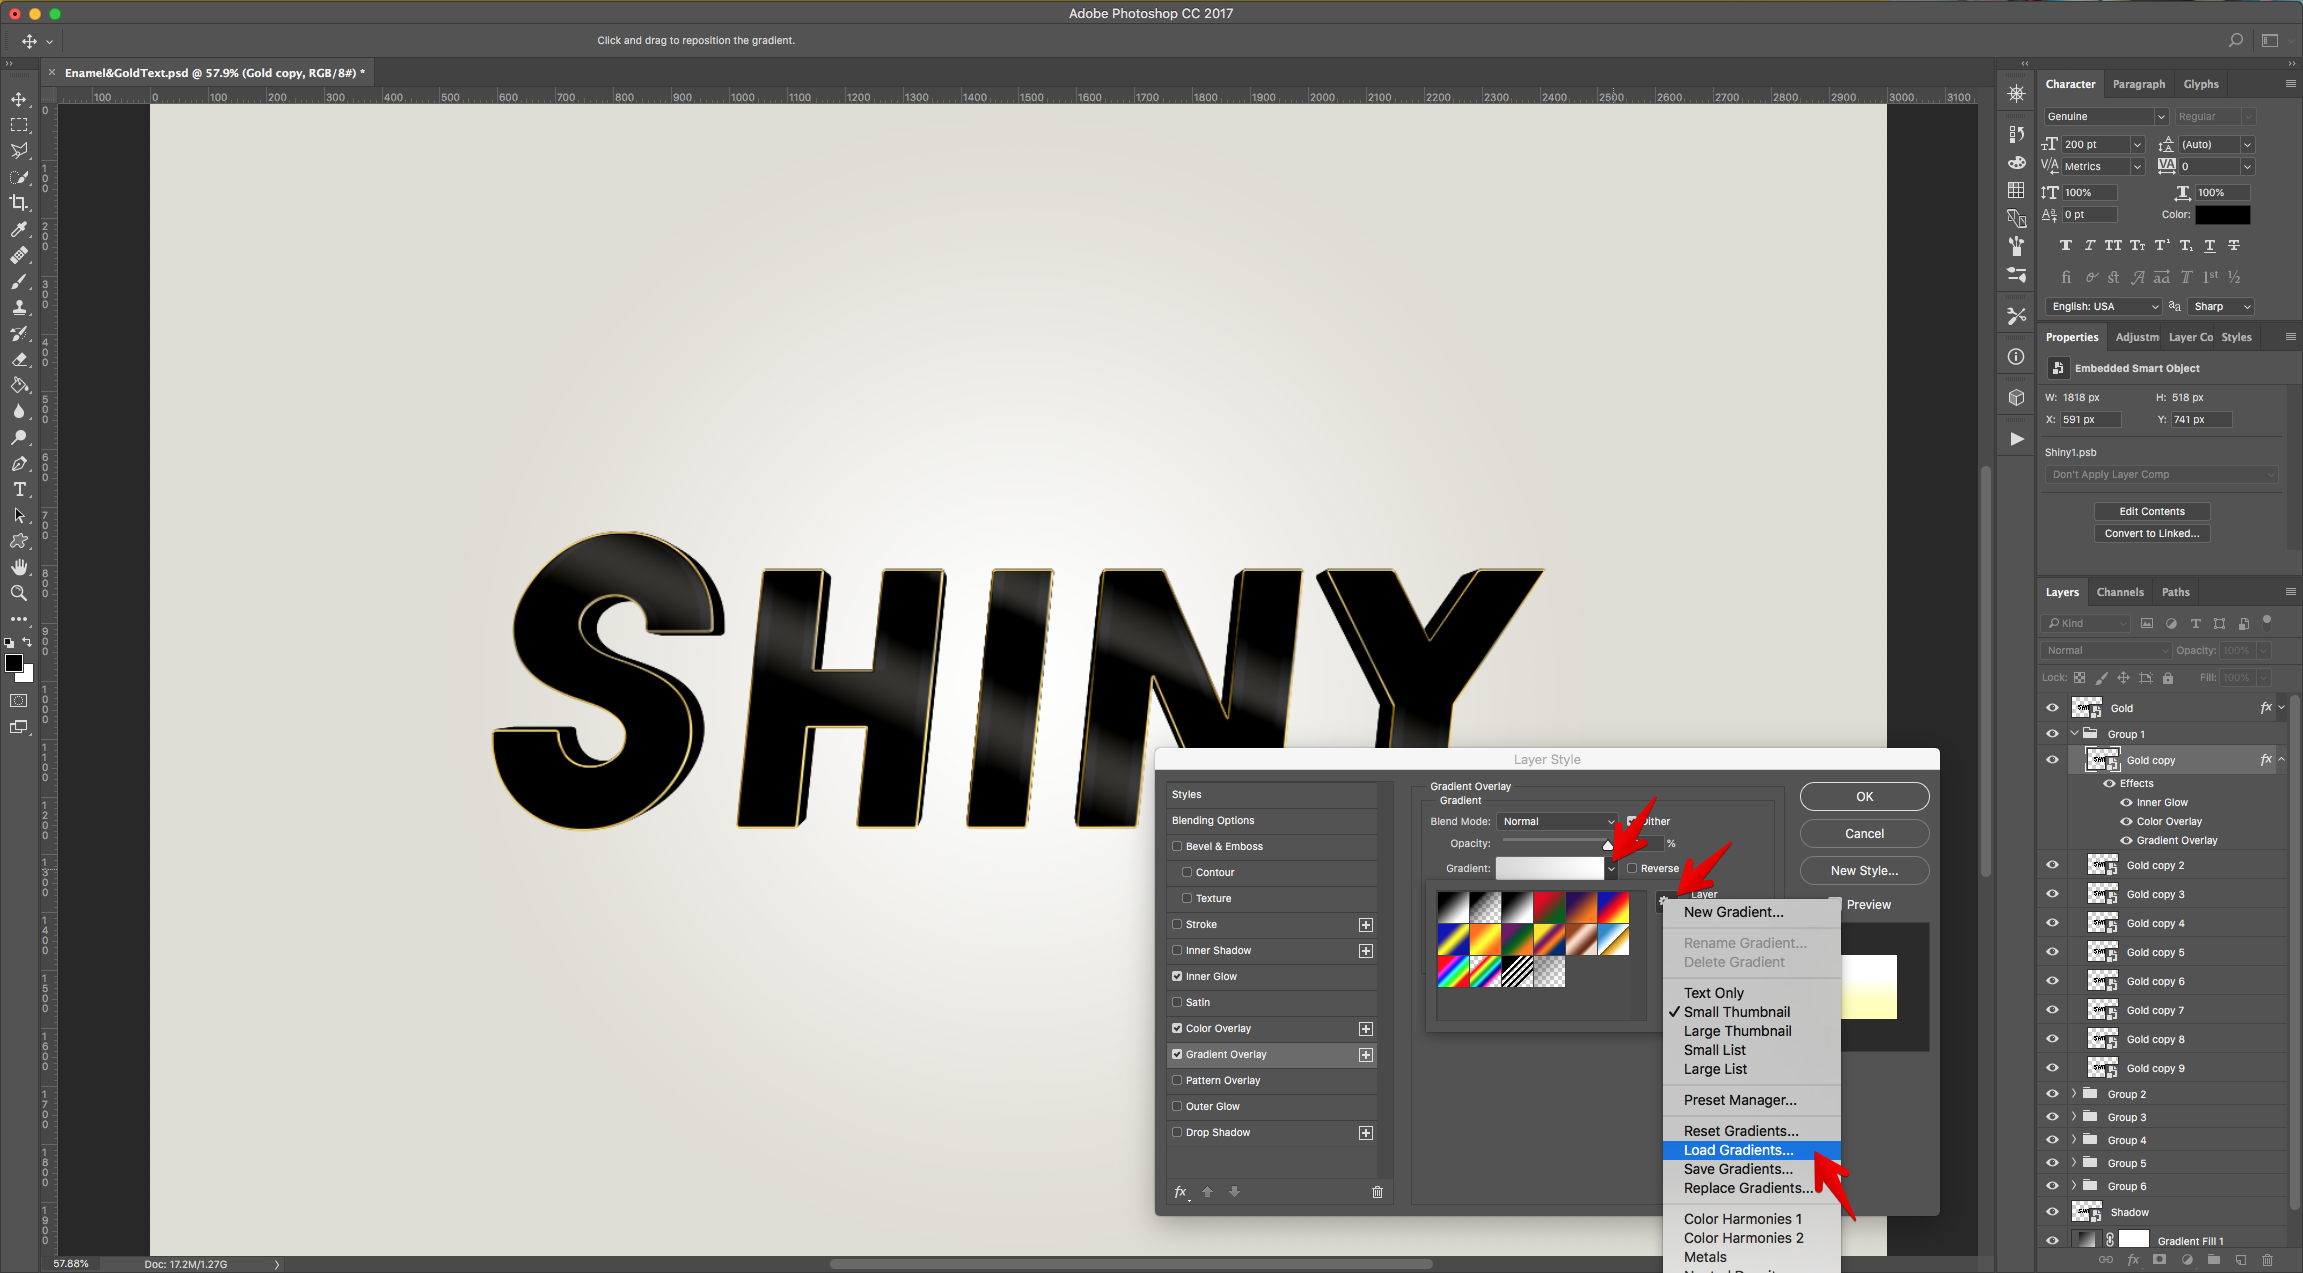
Gradient Overlay: (*)
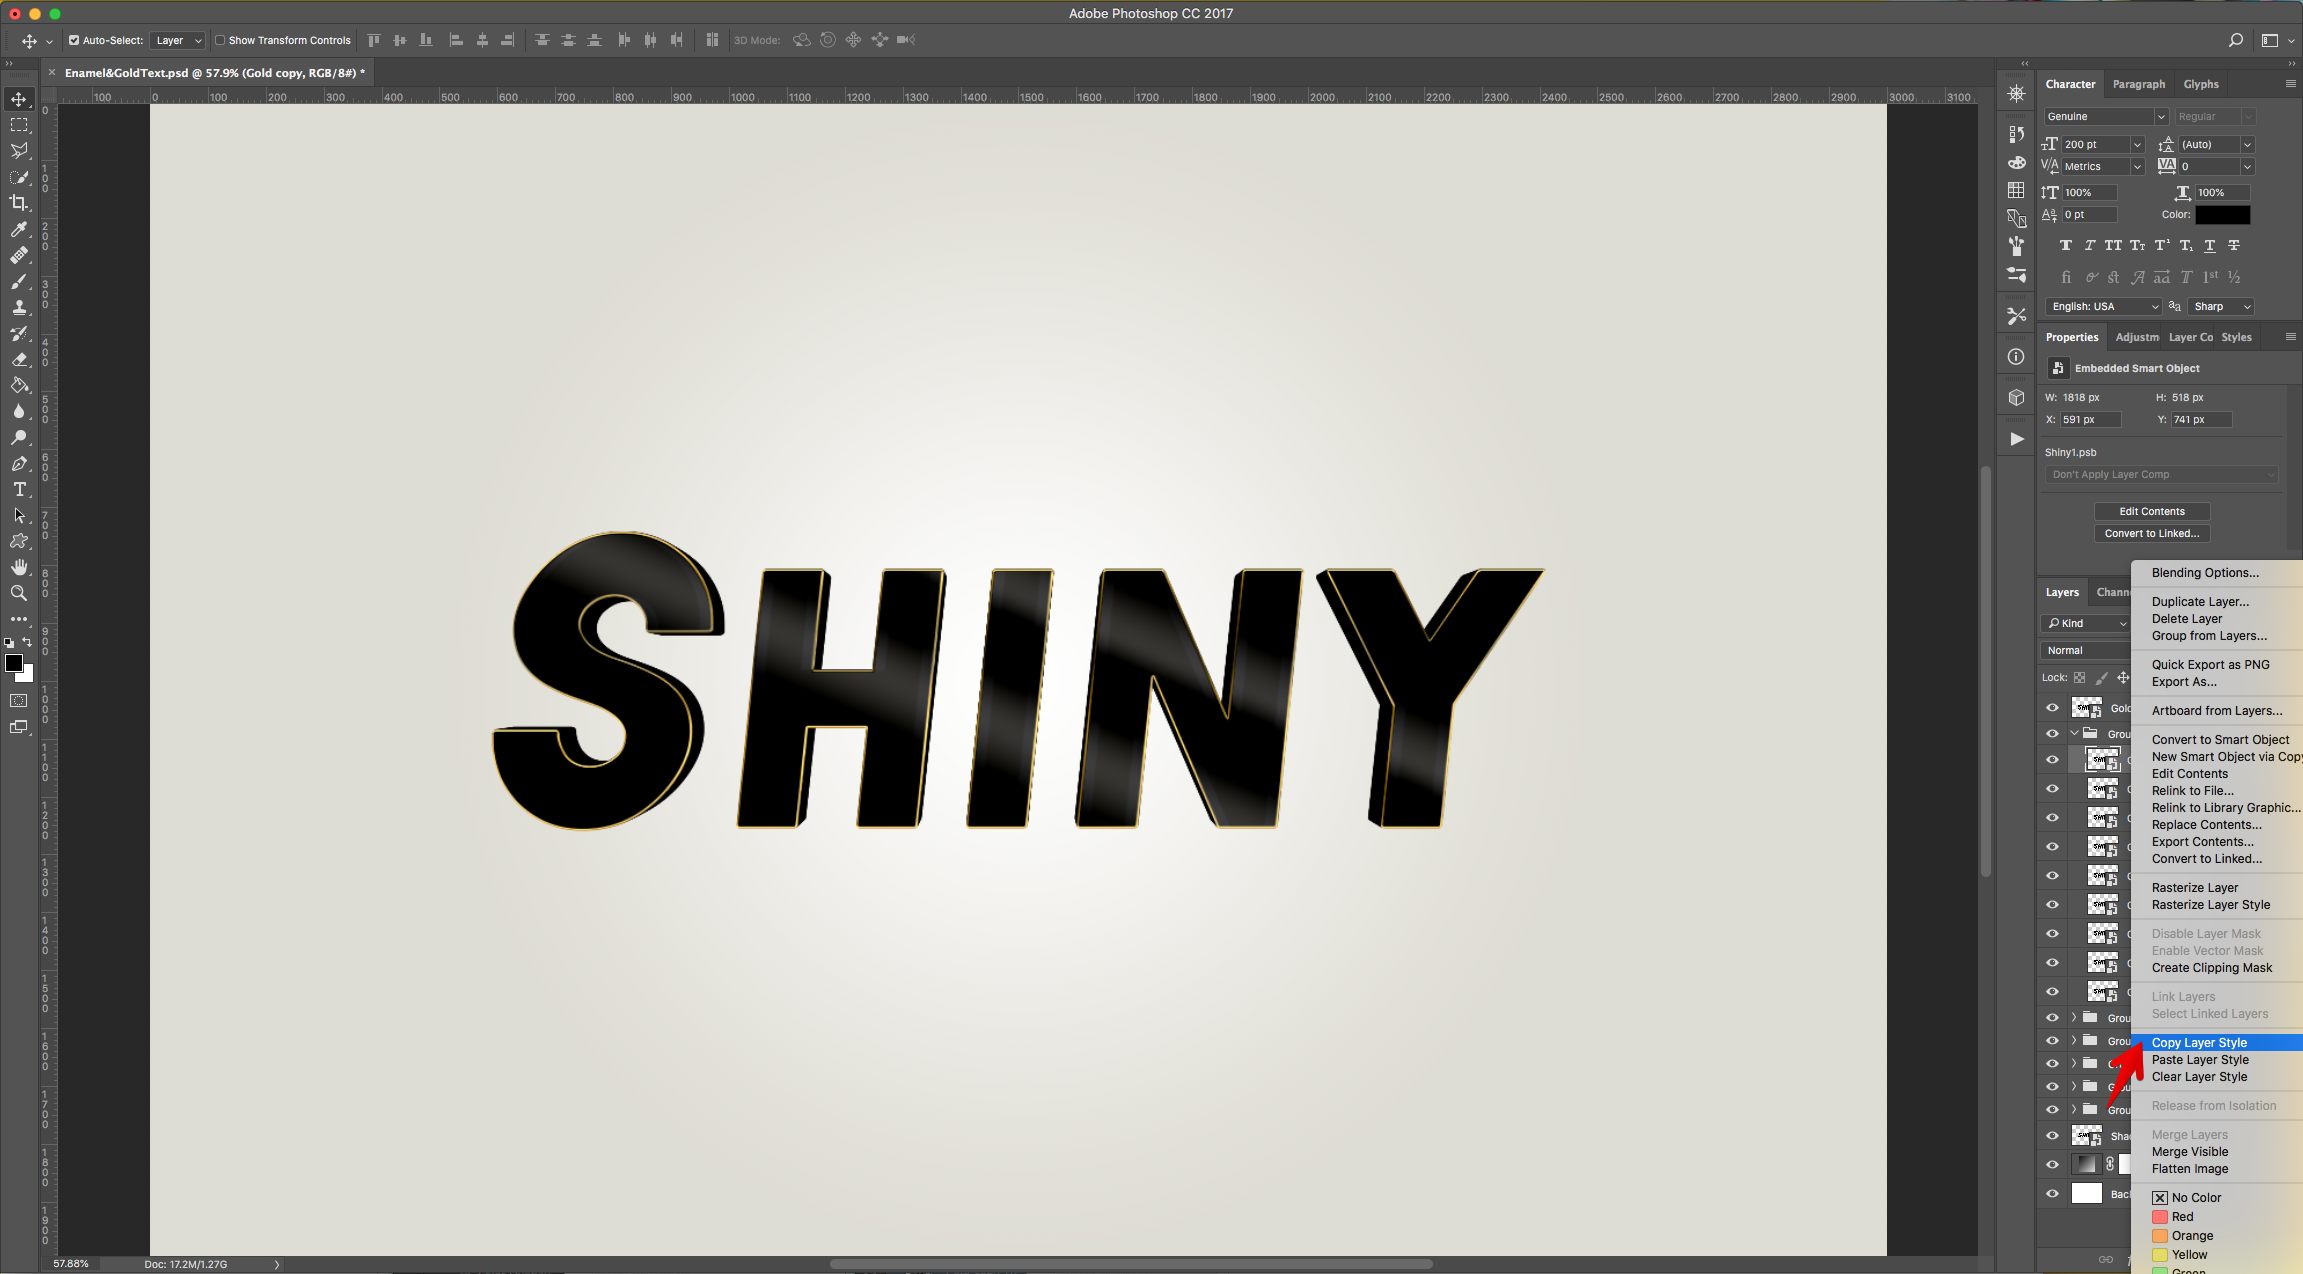
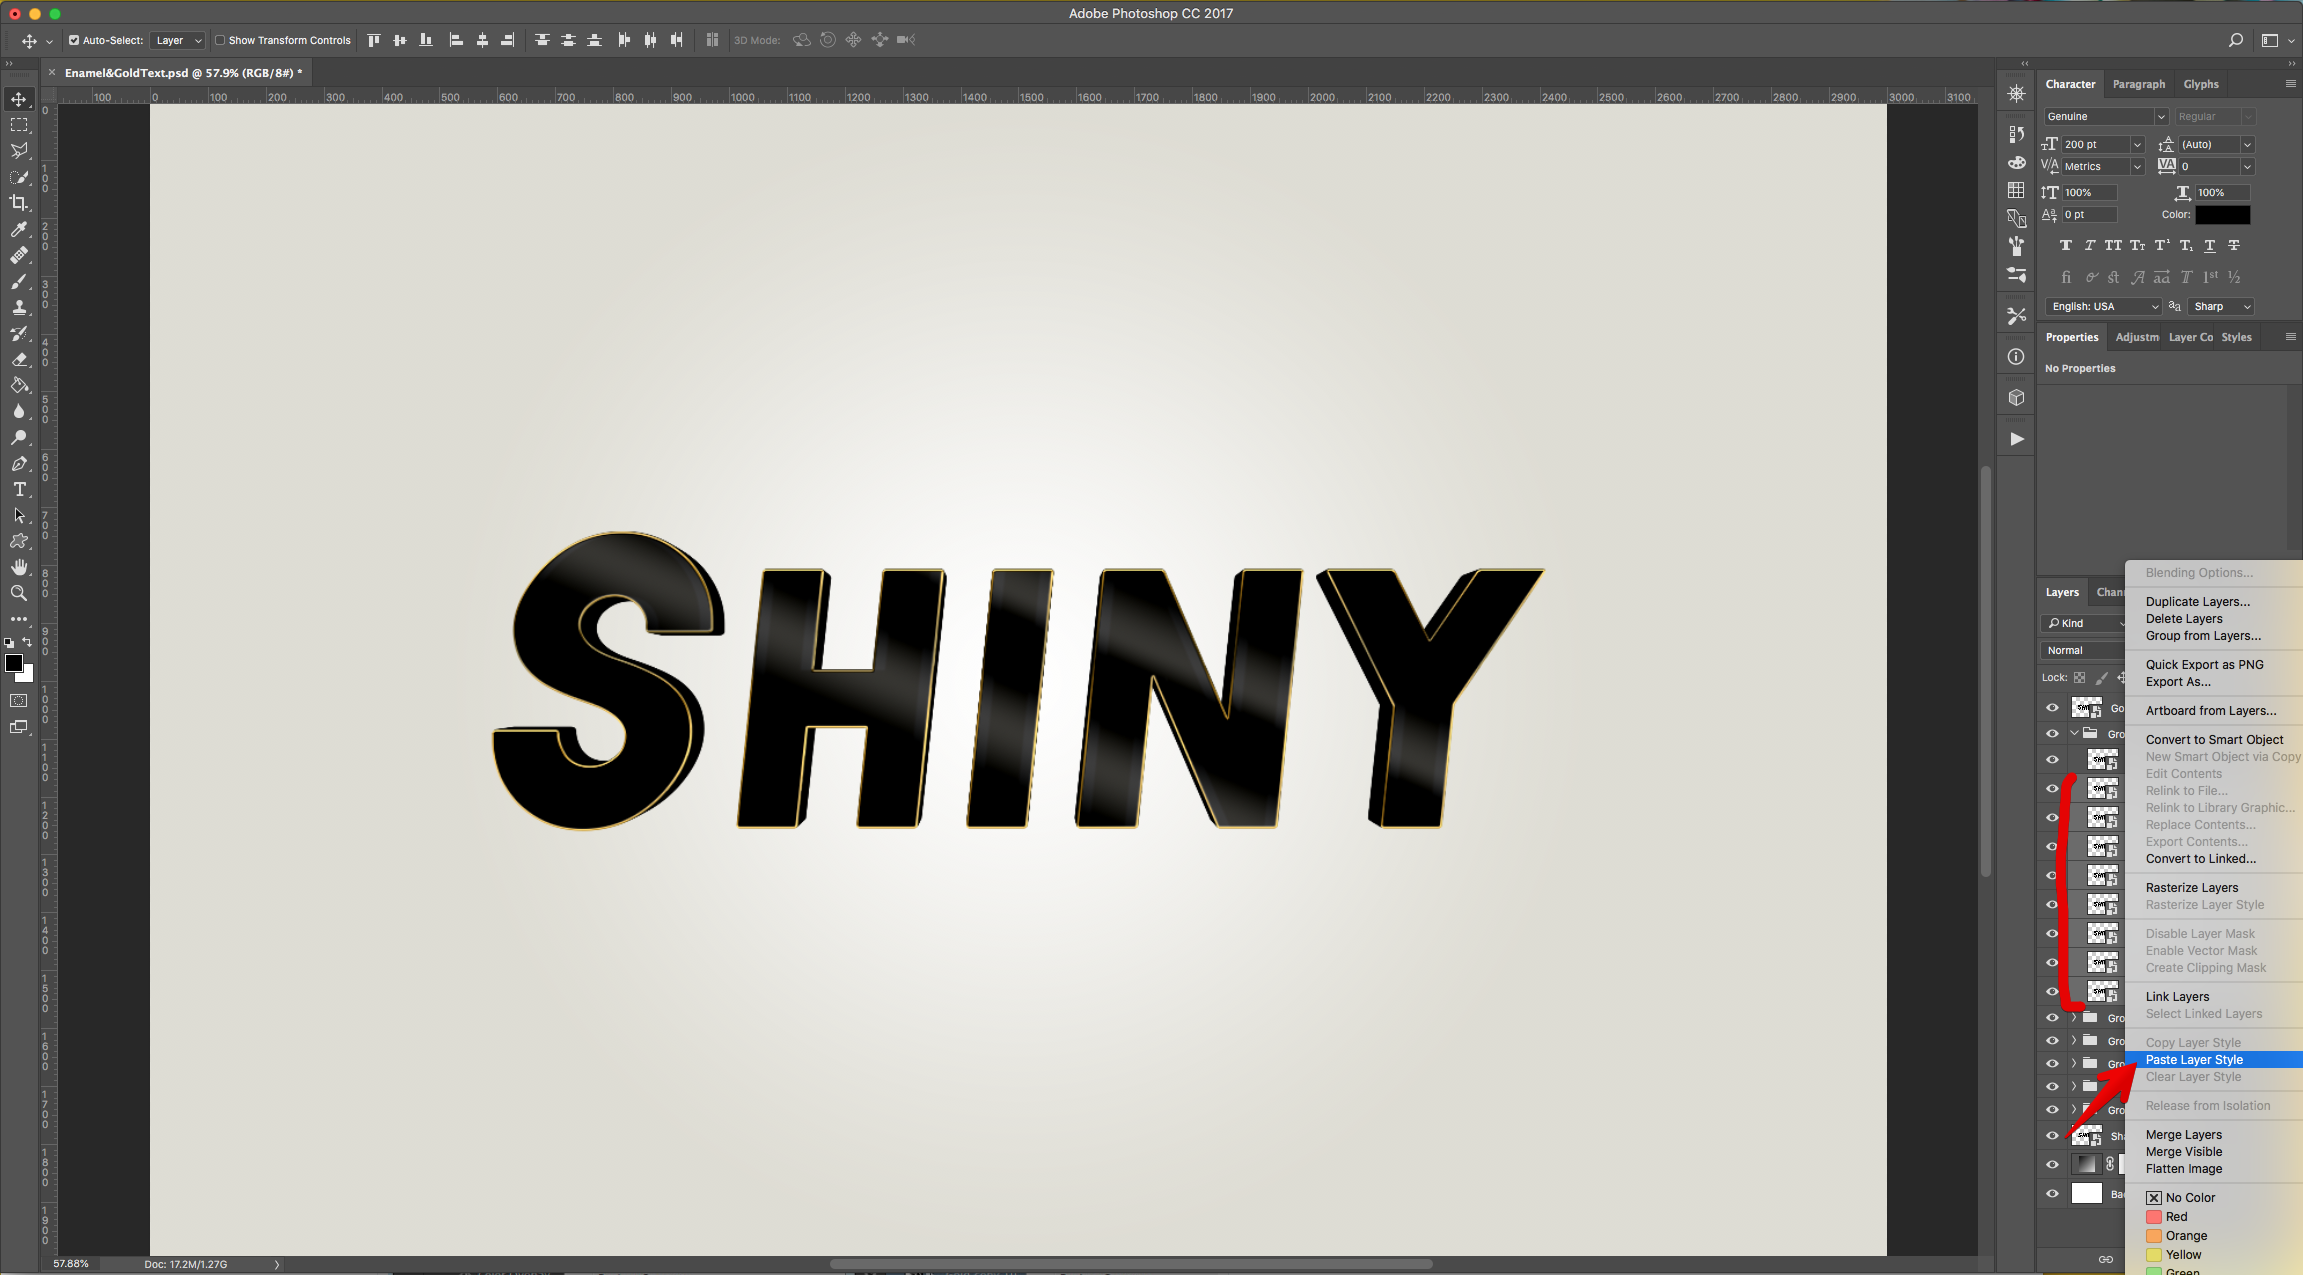
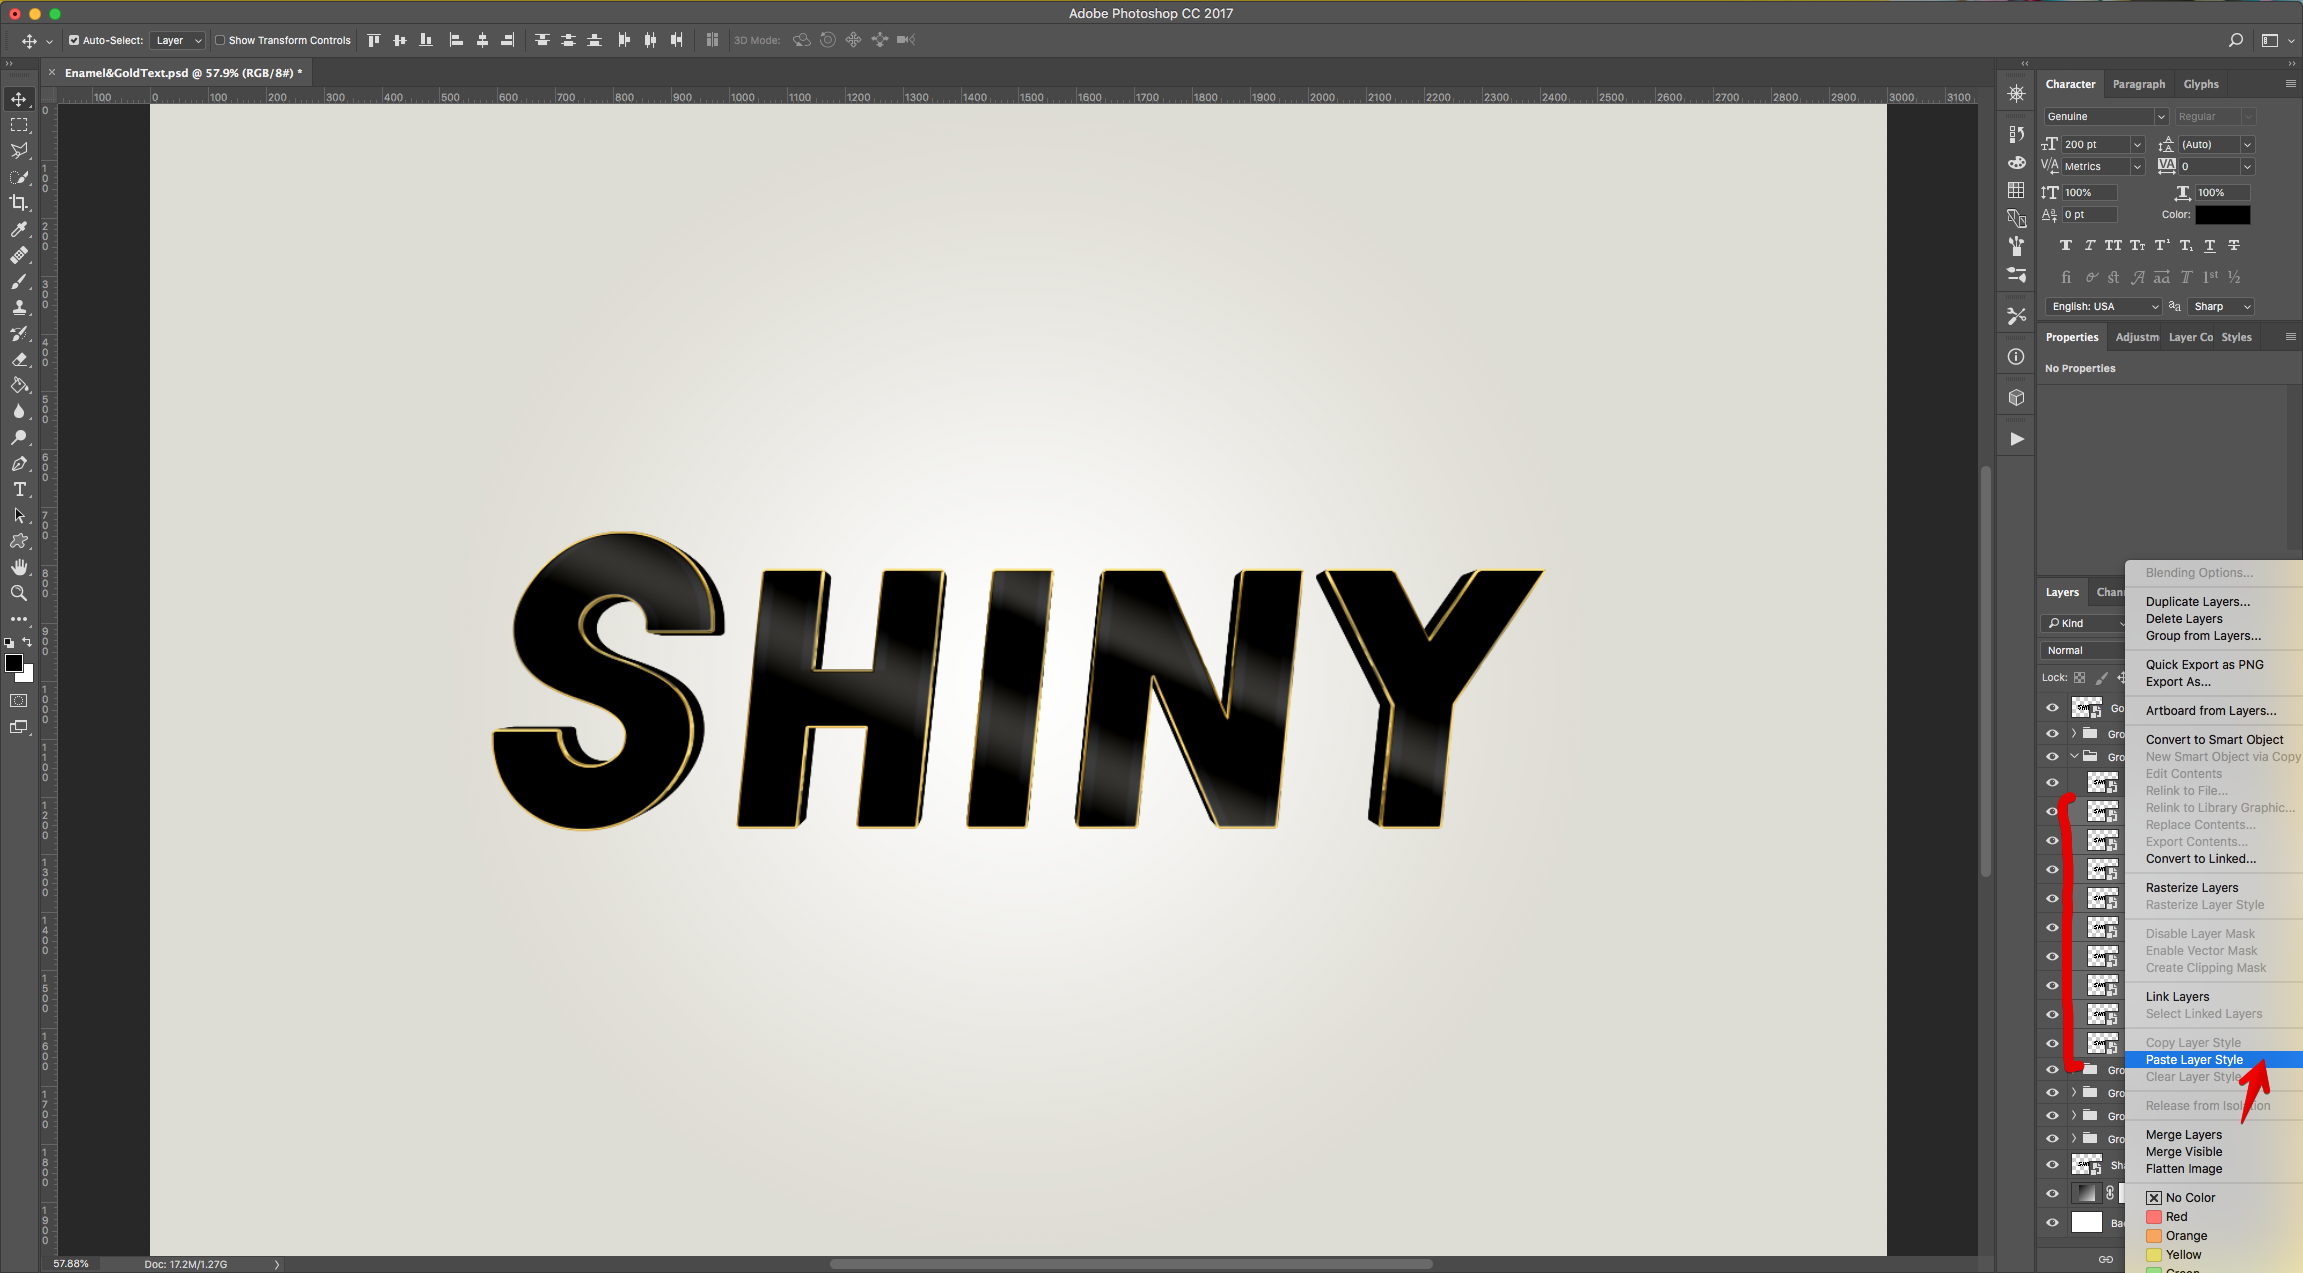
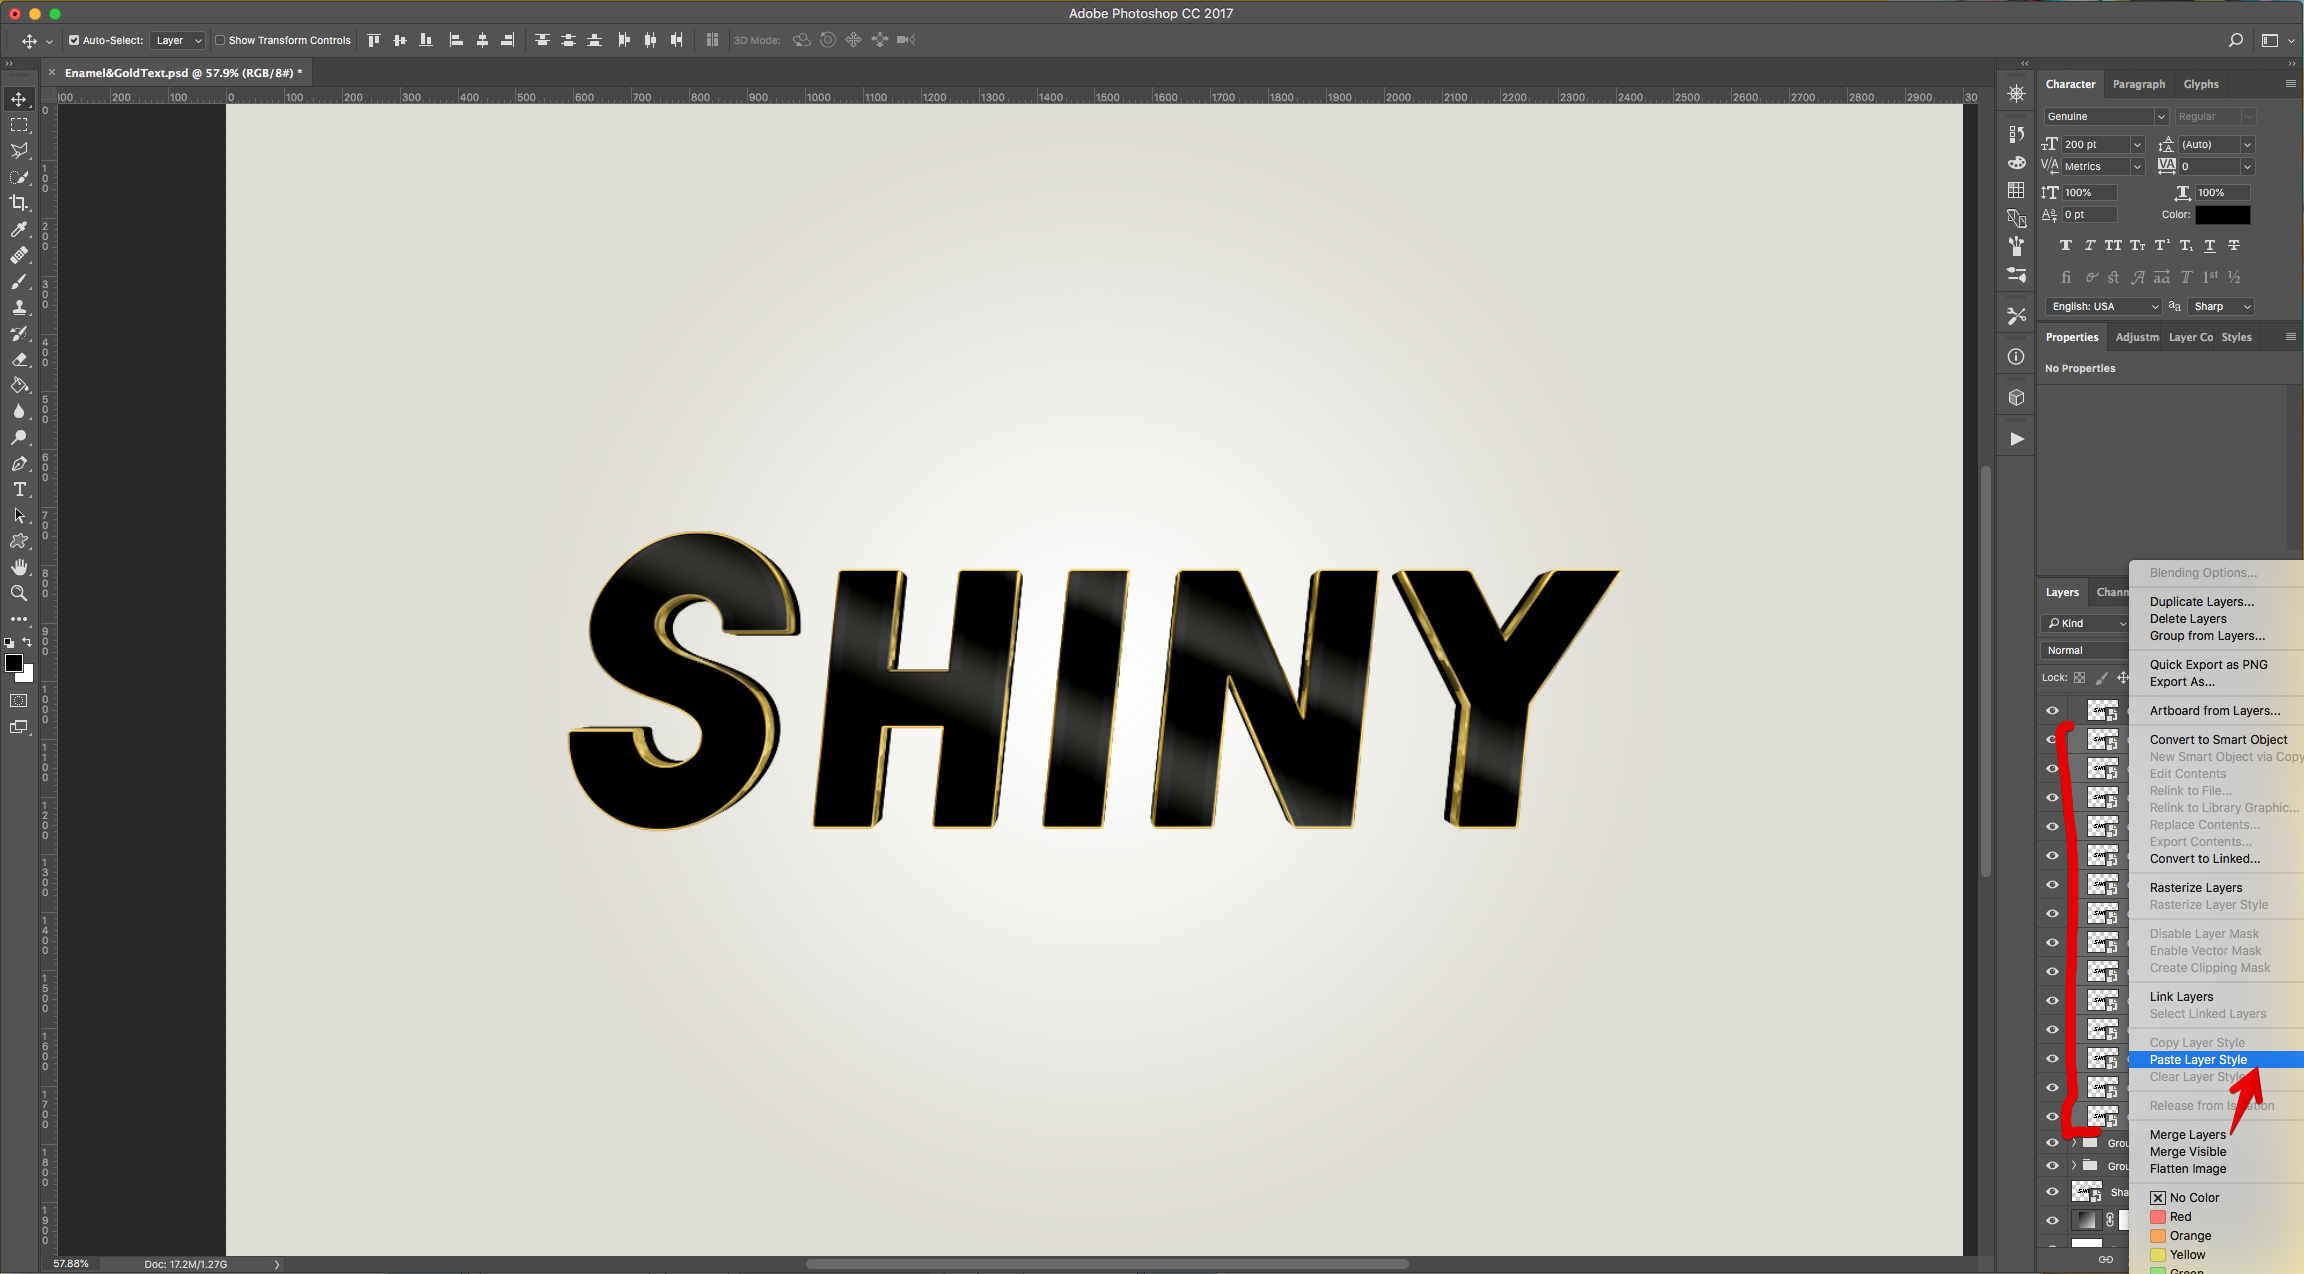
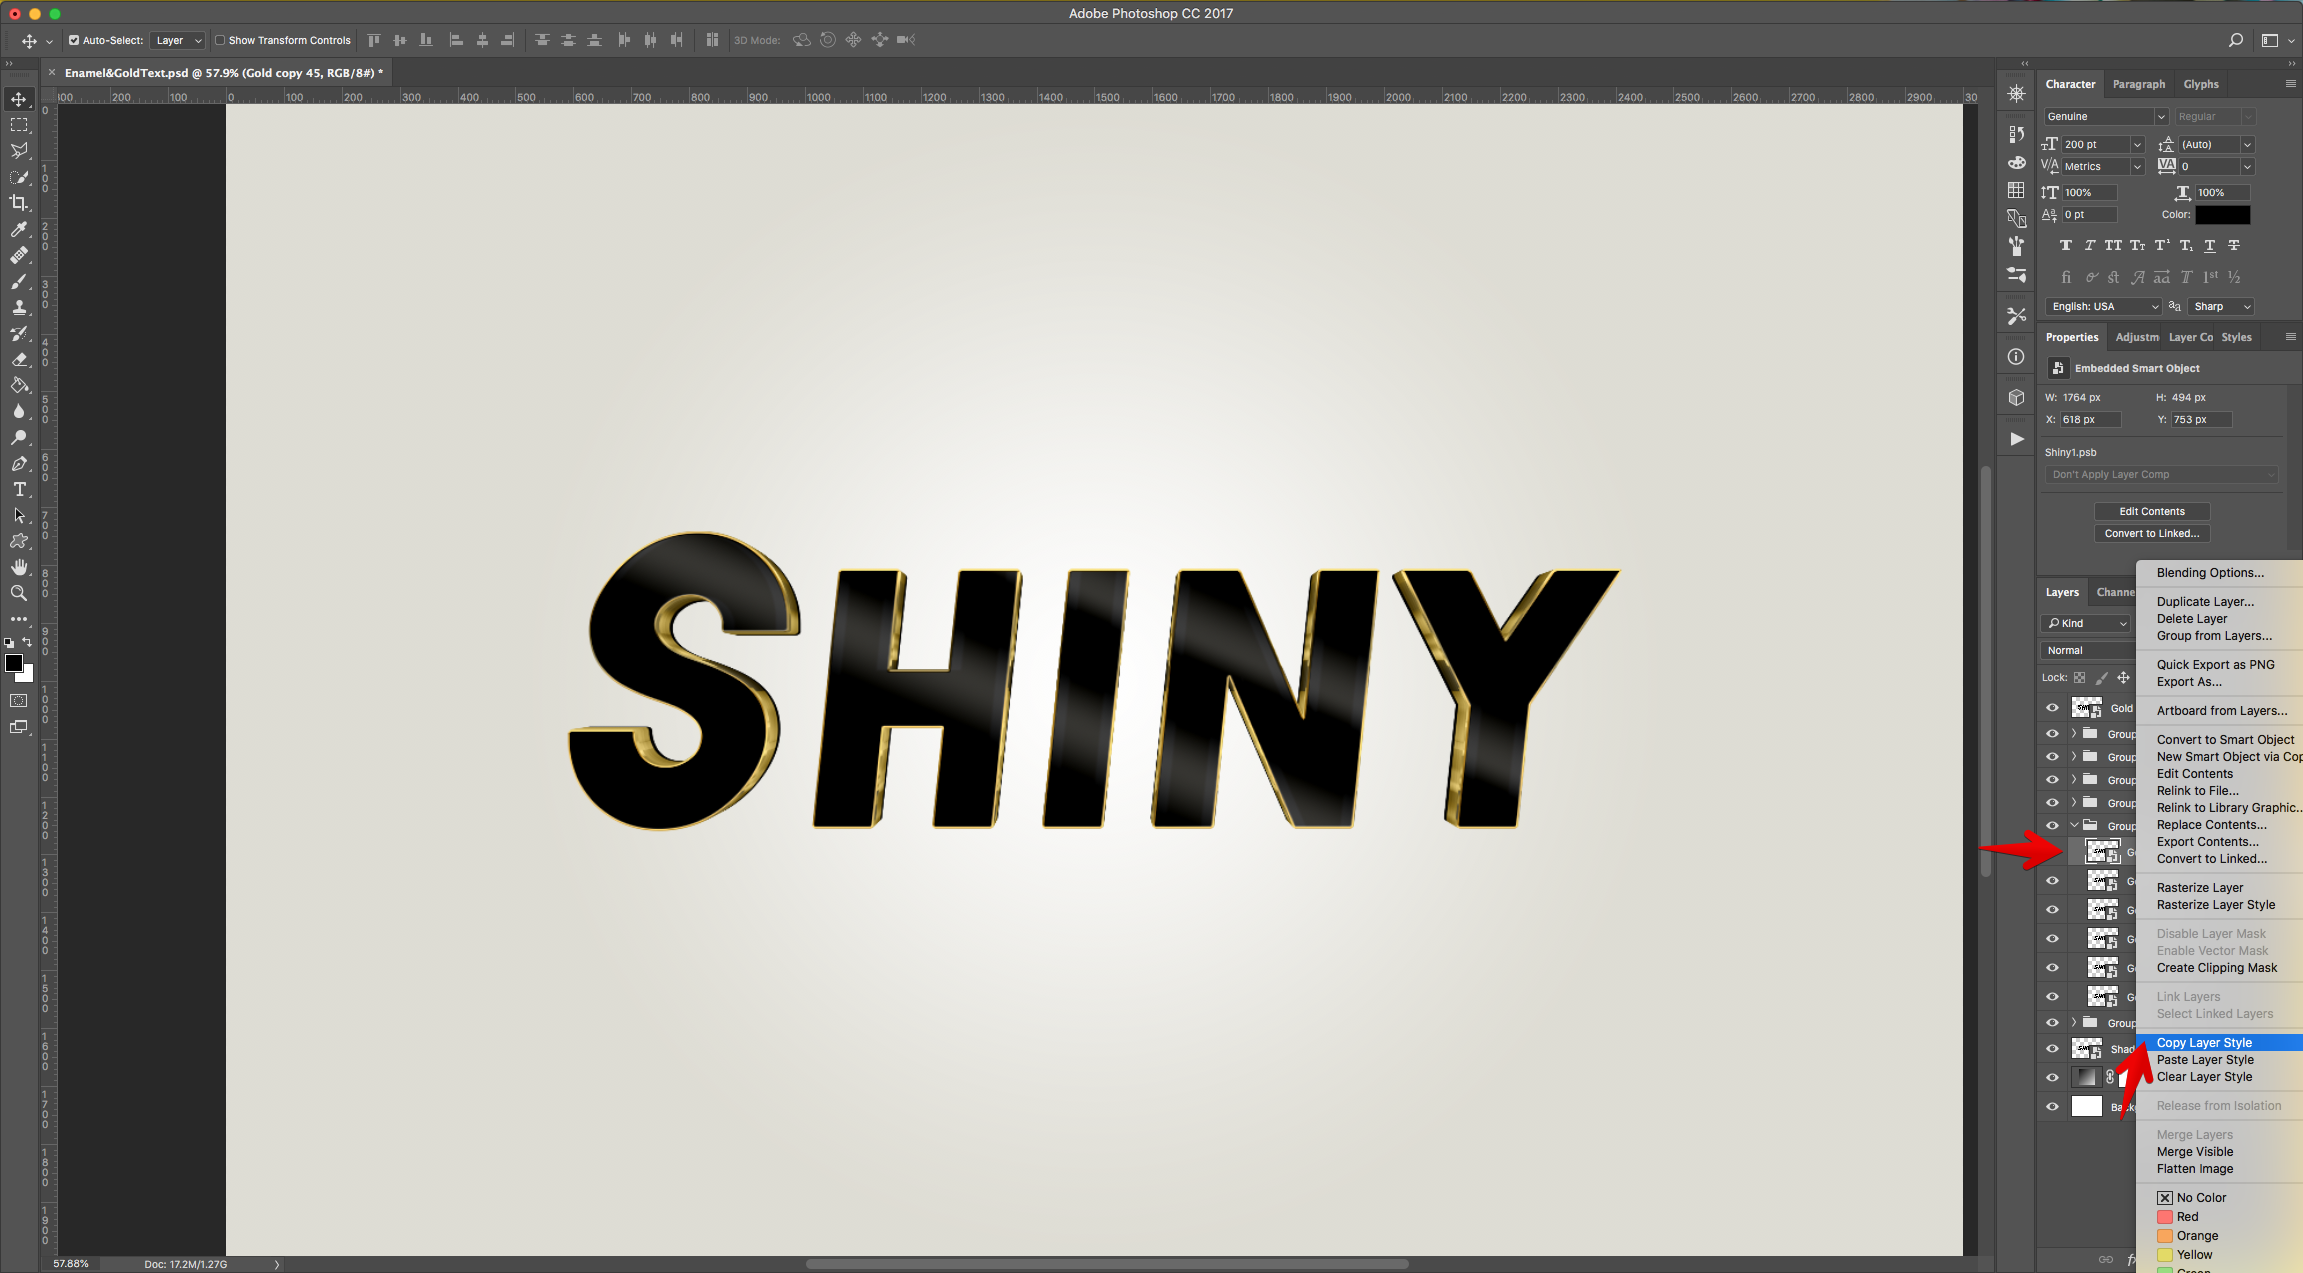
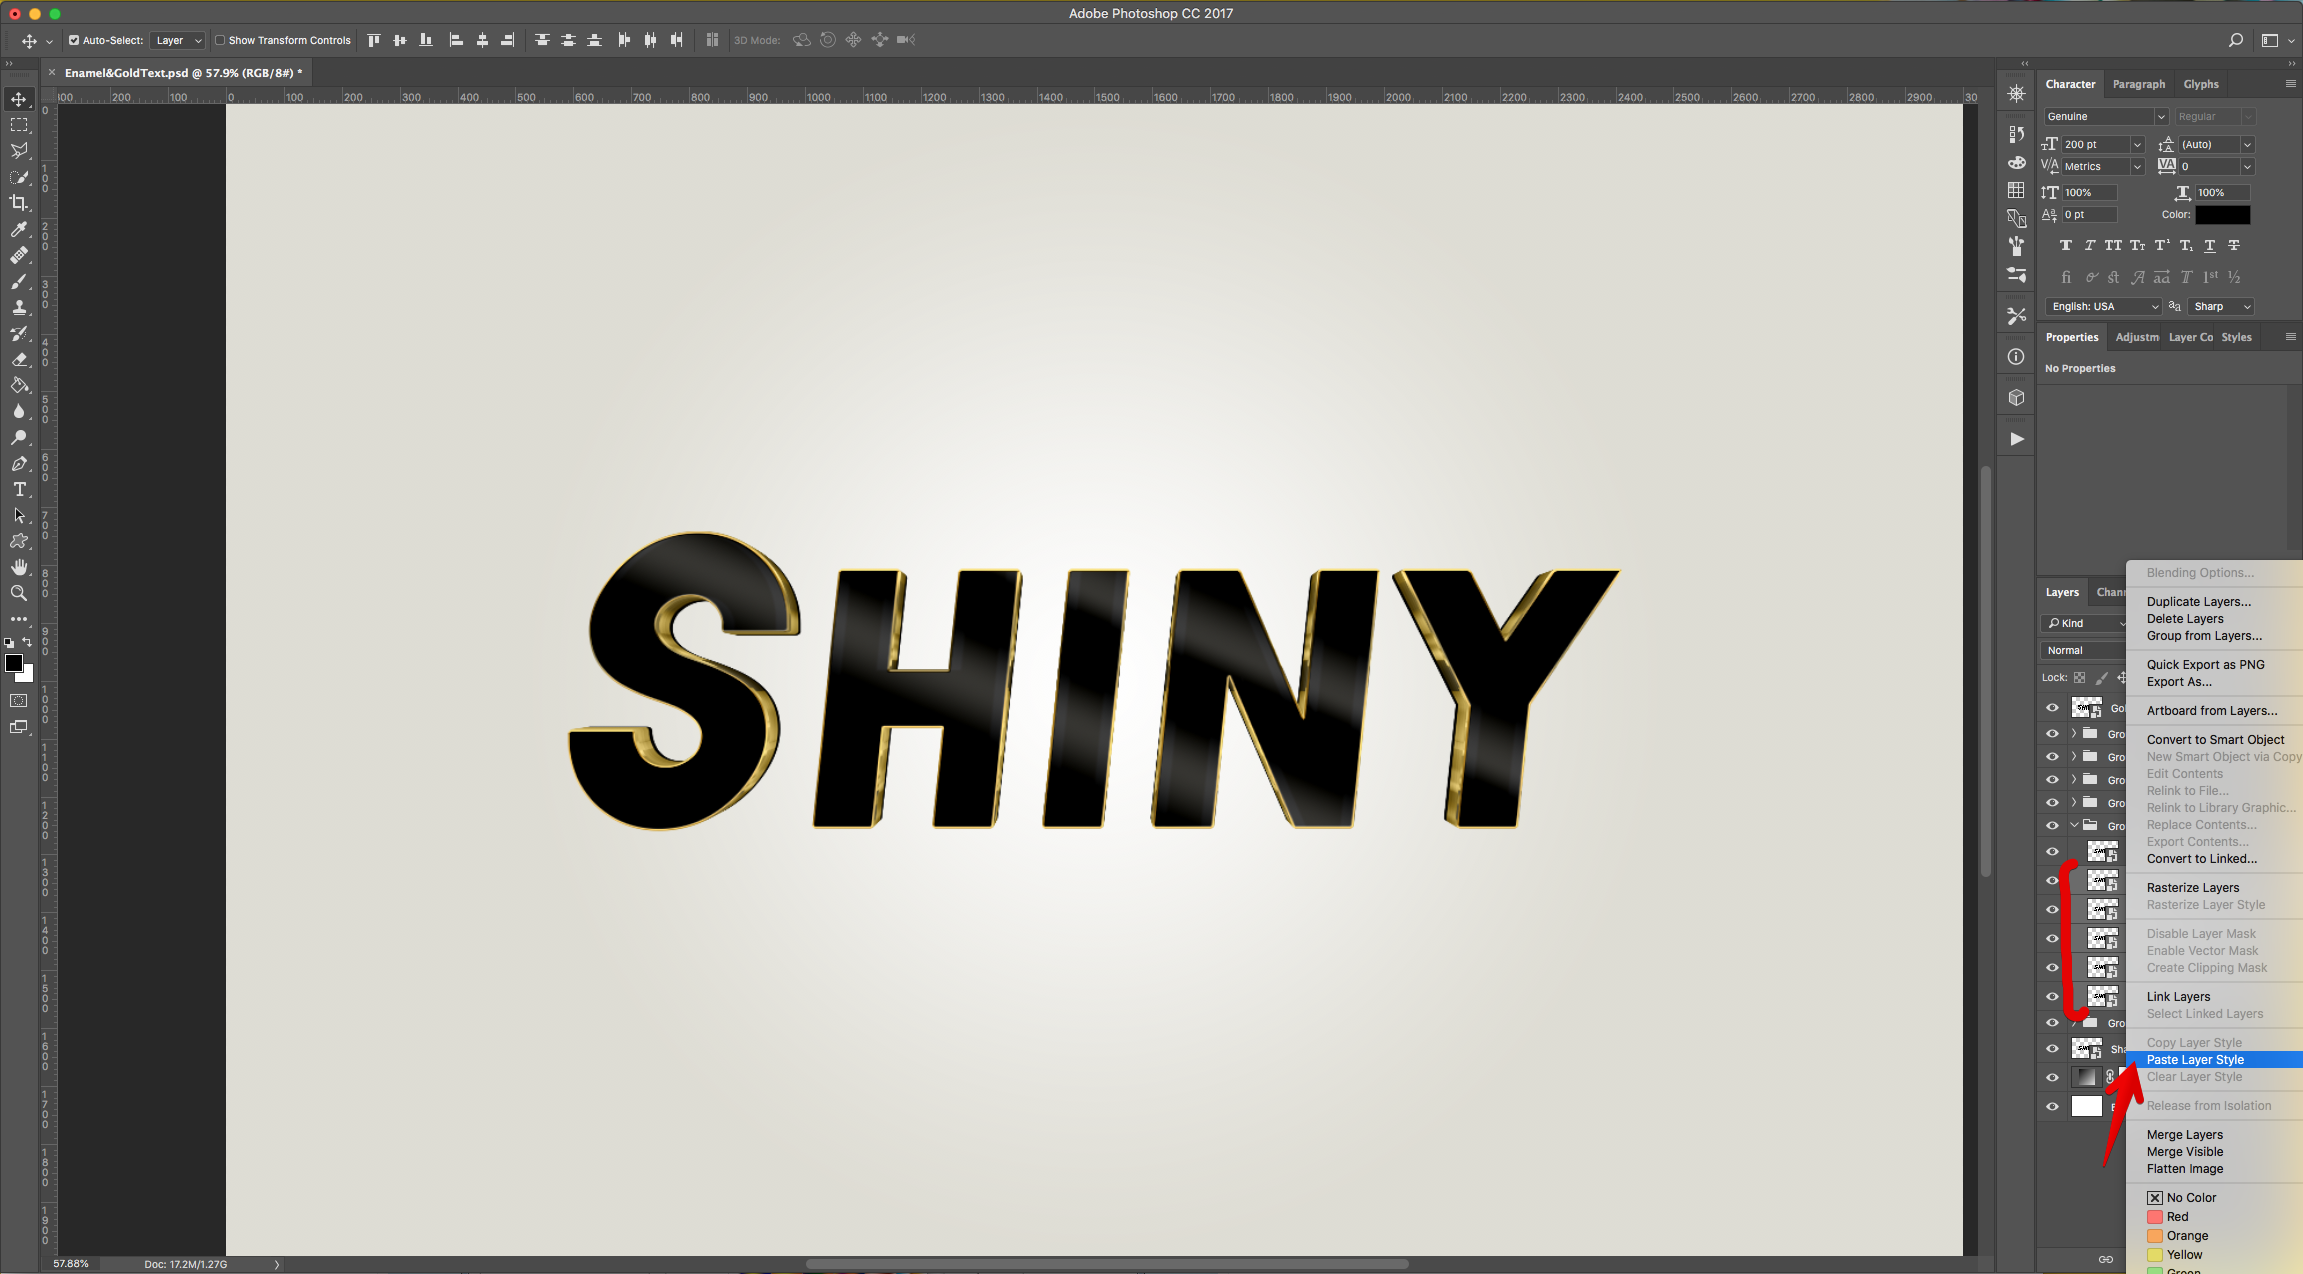
17 - Right-click on top of the thumbnail of the layer you just worked with and choose “Copy Layer Style”. Select the rest of the layers in the “Group” Folder using the “Shift” key, right-click on top and choose “Paste Layer Style”. You can close the Folder now.
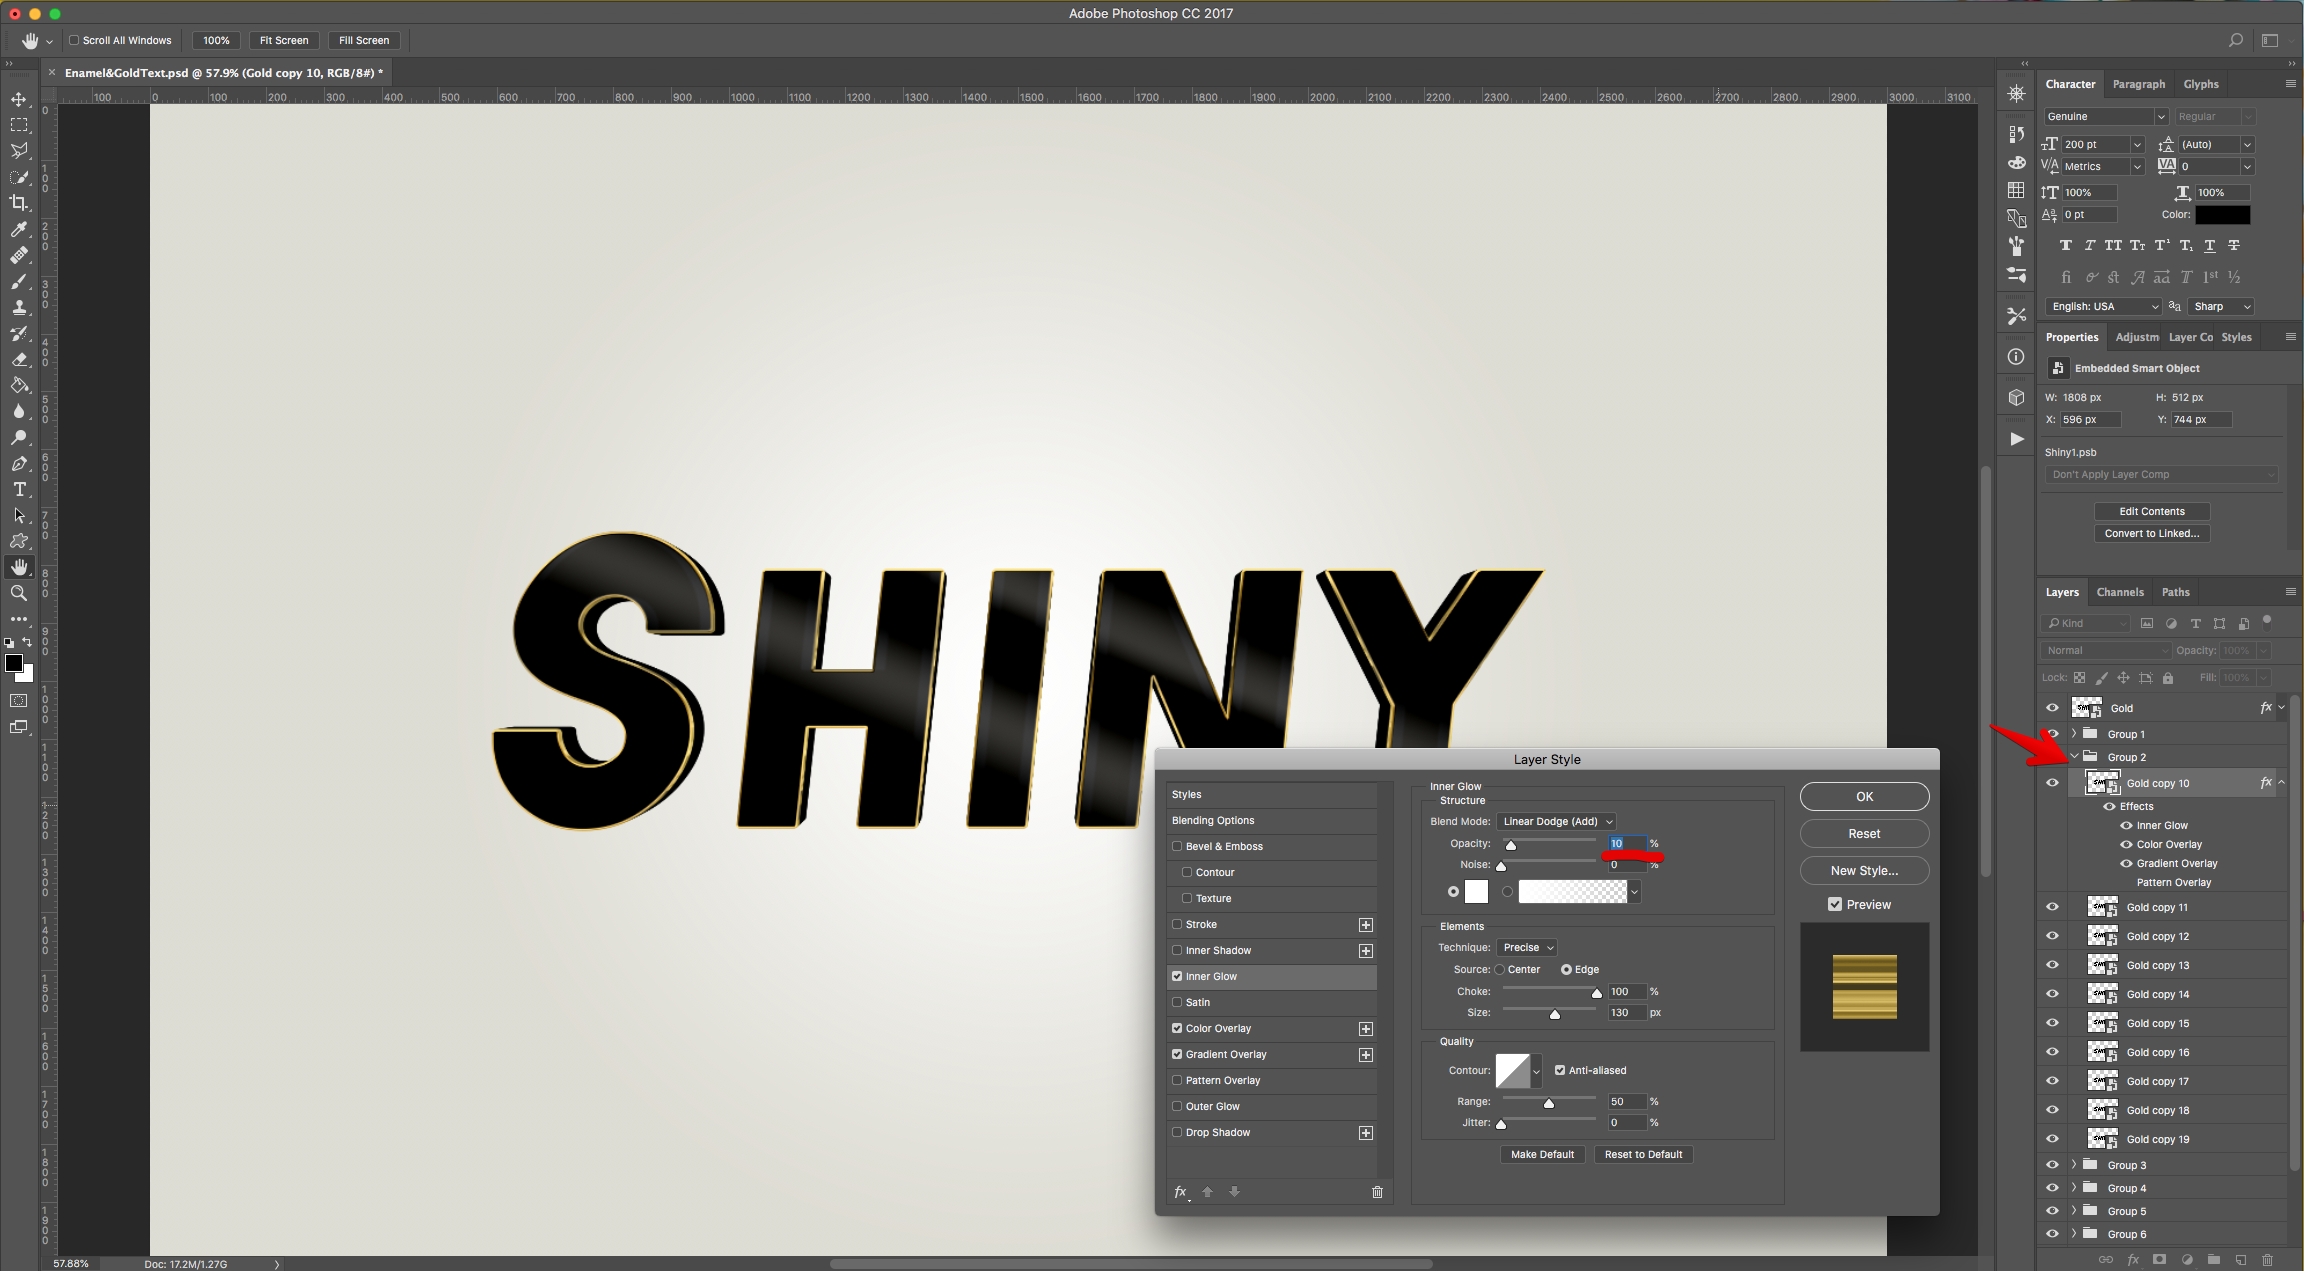
18 - Show the contents of the “Group 2” Folder and select the “Gold copy 10” layer . Double-click on its thumbnail to apply the following “Layer Styles”: (You may need to “Paste Layer Style” to start with the ones used in the previous “Group”)
Inner Glow: (#ffffff) Change the “Opacity” to 10%
Color Overlay: (#f9df85) Remains the same.
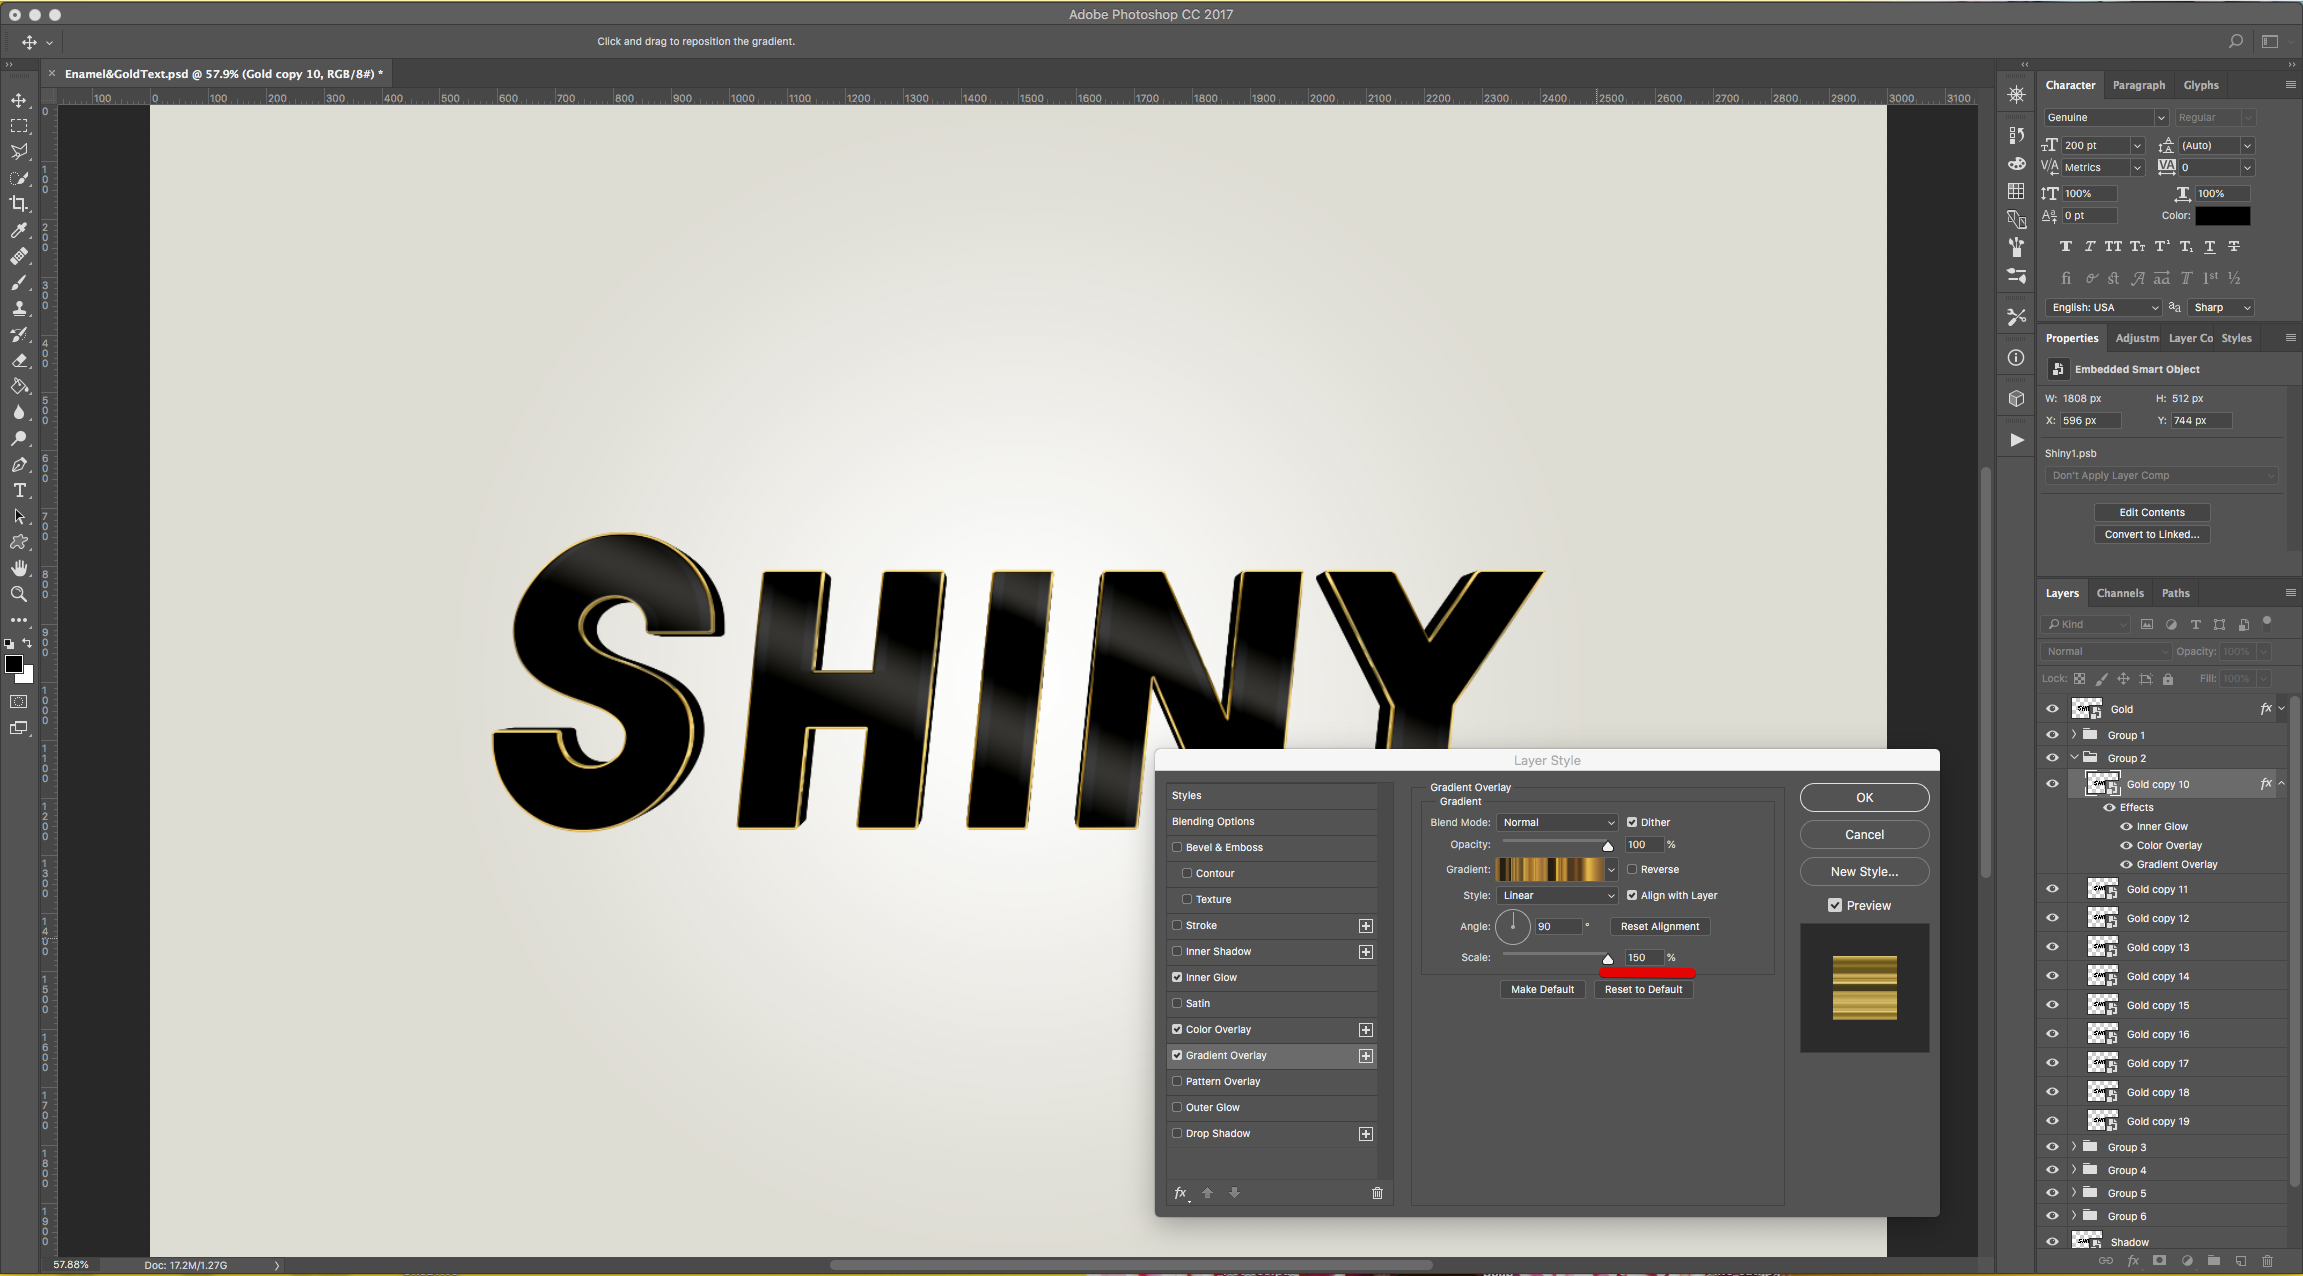
Gradient Overlay: Use the same “Gradient” but change the “Scale” to 150%
“Copy Layer Style”. Select the rest of the layers in the “Group” Folder using the “Shift” key, right-click on top and choose “Paste Layer Style”. You can close the Folder now.
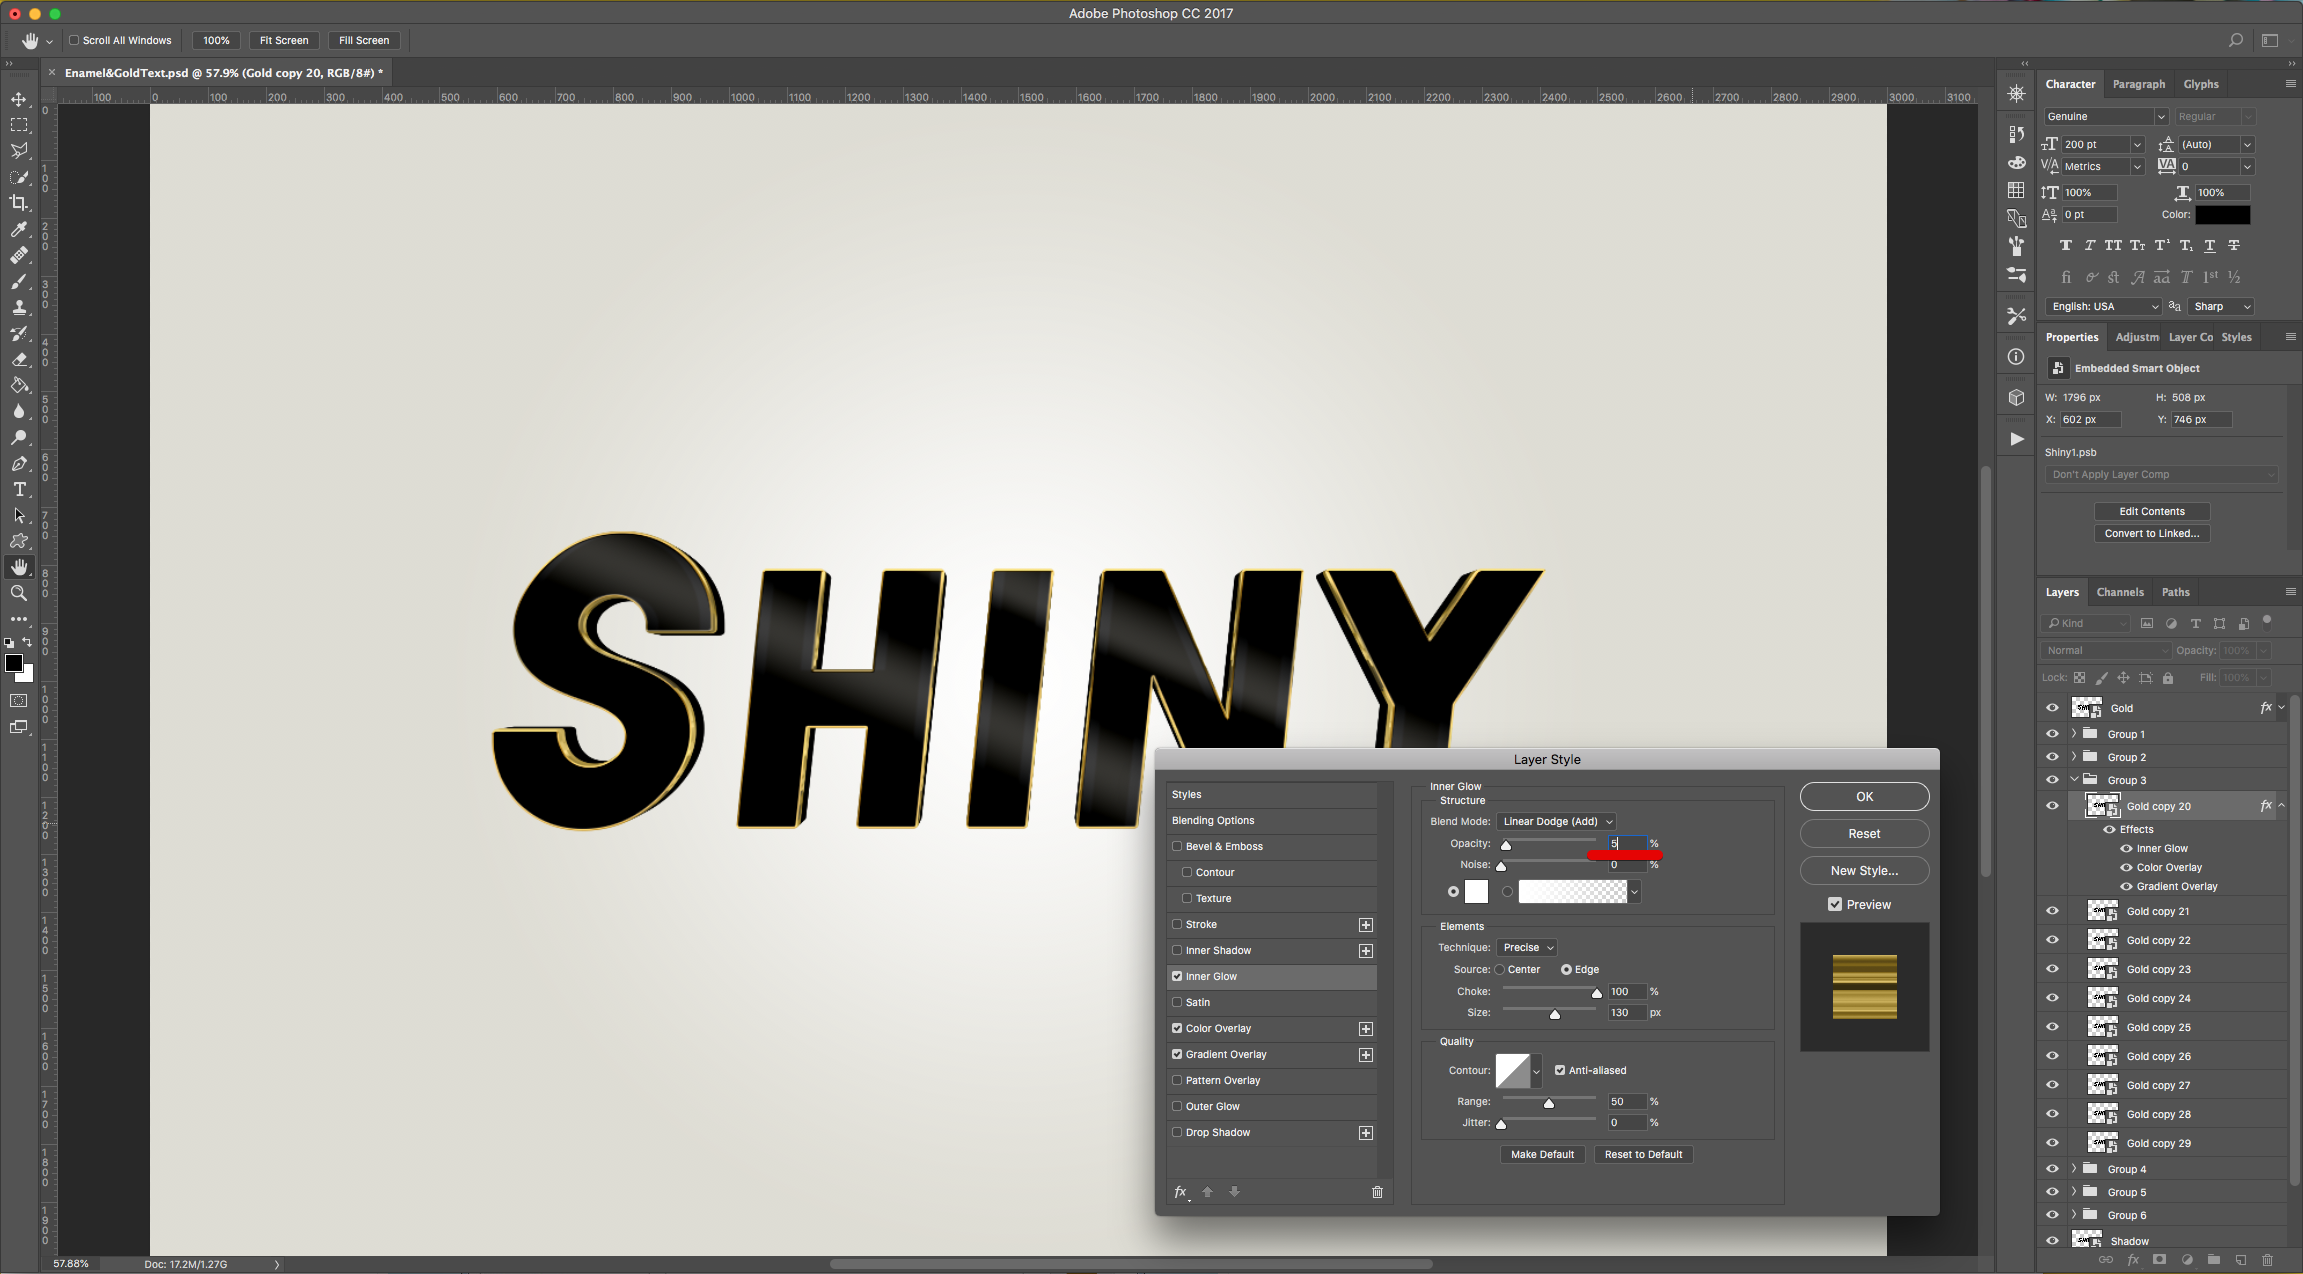
Open the “Group 3” Folder, select the “Gold copy 20” layers and “Paste Layer Style”. Double-click on top of its thumbnail and change the “Inner Glow” Opacity value to 5%. “Copy Layer Style”. Select the rest of the layers in the “Group” Folder using the “Shift” key, right-click on top and choose “Paste Layer Style”. You can close the Folder now.

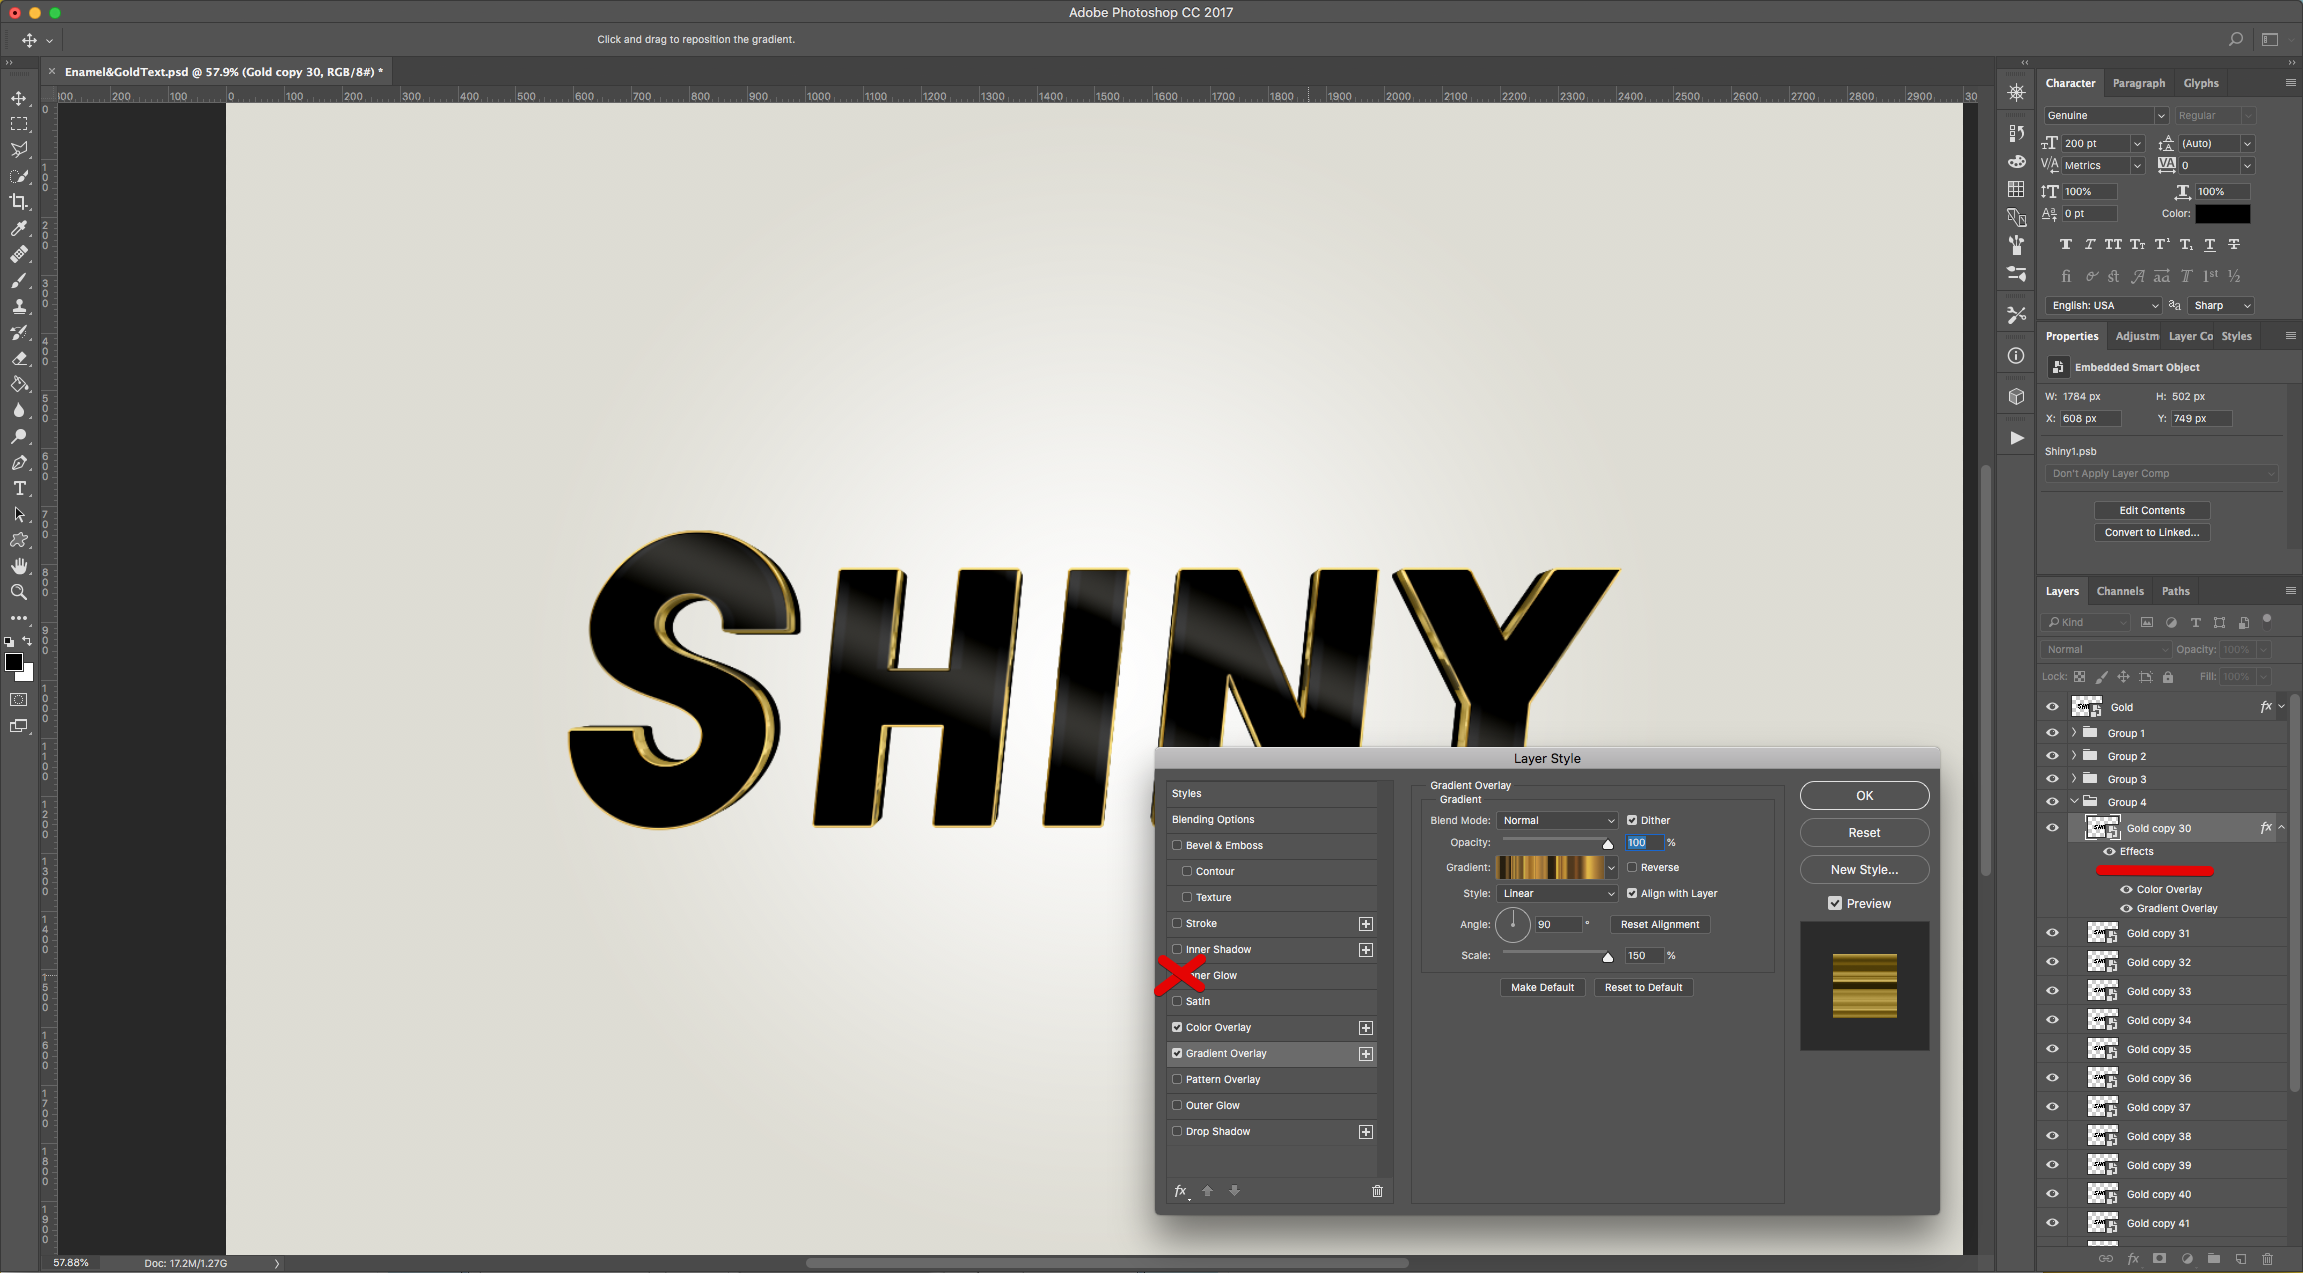
19 - Open the “Group 4” Folder, select the “Gold copy 30” layers and “Paste Layer Style”. Double-click on top of its thumbnail, delete or close the “Inner Glow” Style leaving the rest unchanged. “Copy Layer Style”. Select the rest of the layers in the “Group” Folder using the “Shift” key, right-click on top and choose “Paste Layer Style”. You can close the Folder now.
Open the “Group 5” Folder, select the “Gold copy 45” layers and “Paste Layer Style”. Double-click on top of its thumbnail, to apply the following “Layer Styles”:
Inner Glow: (#000000)

Leave “Color Overlay” and “Gradient Overlay” unchanged.
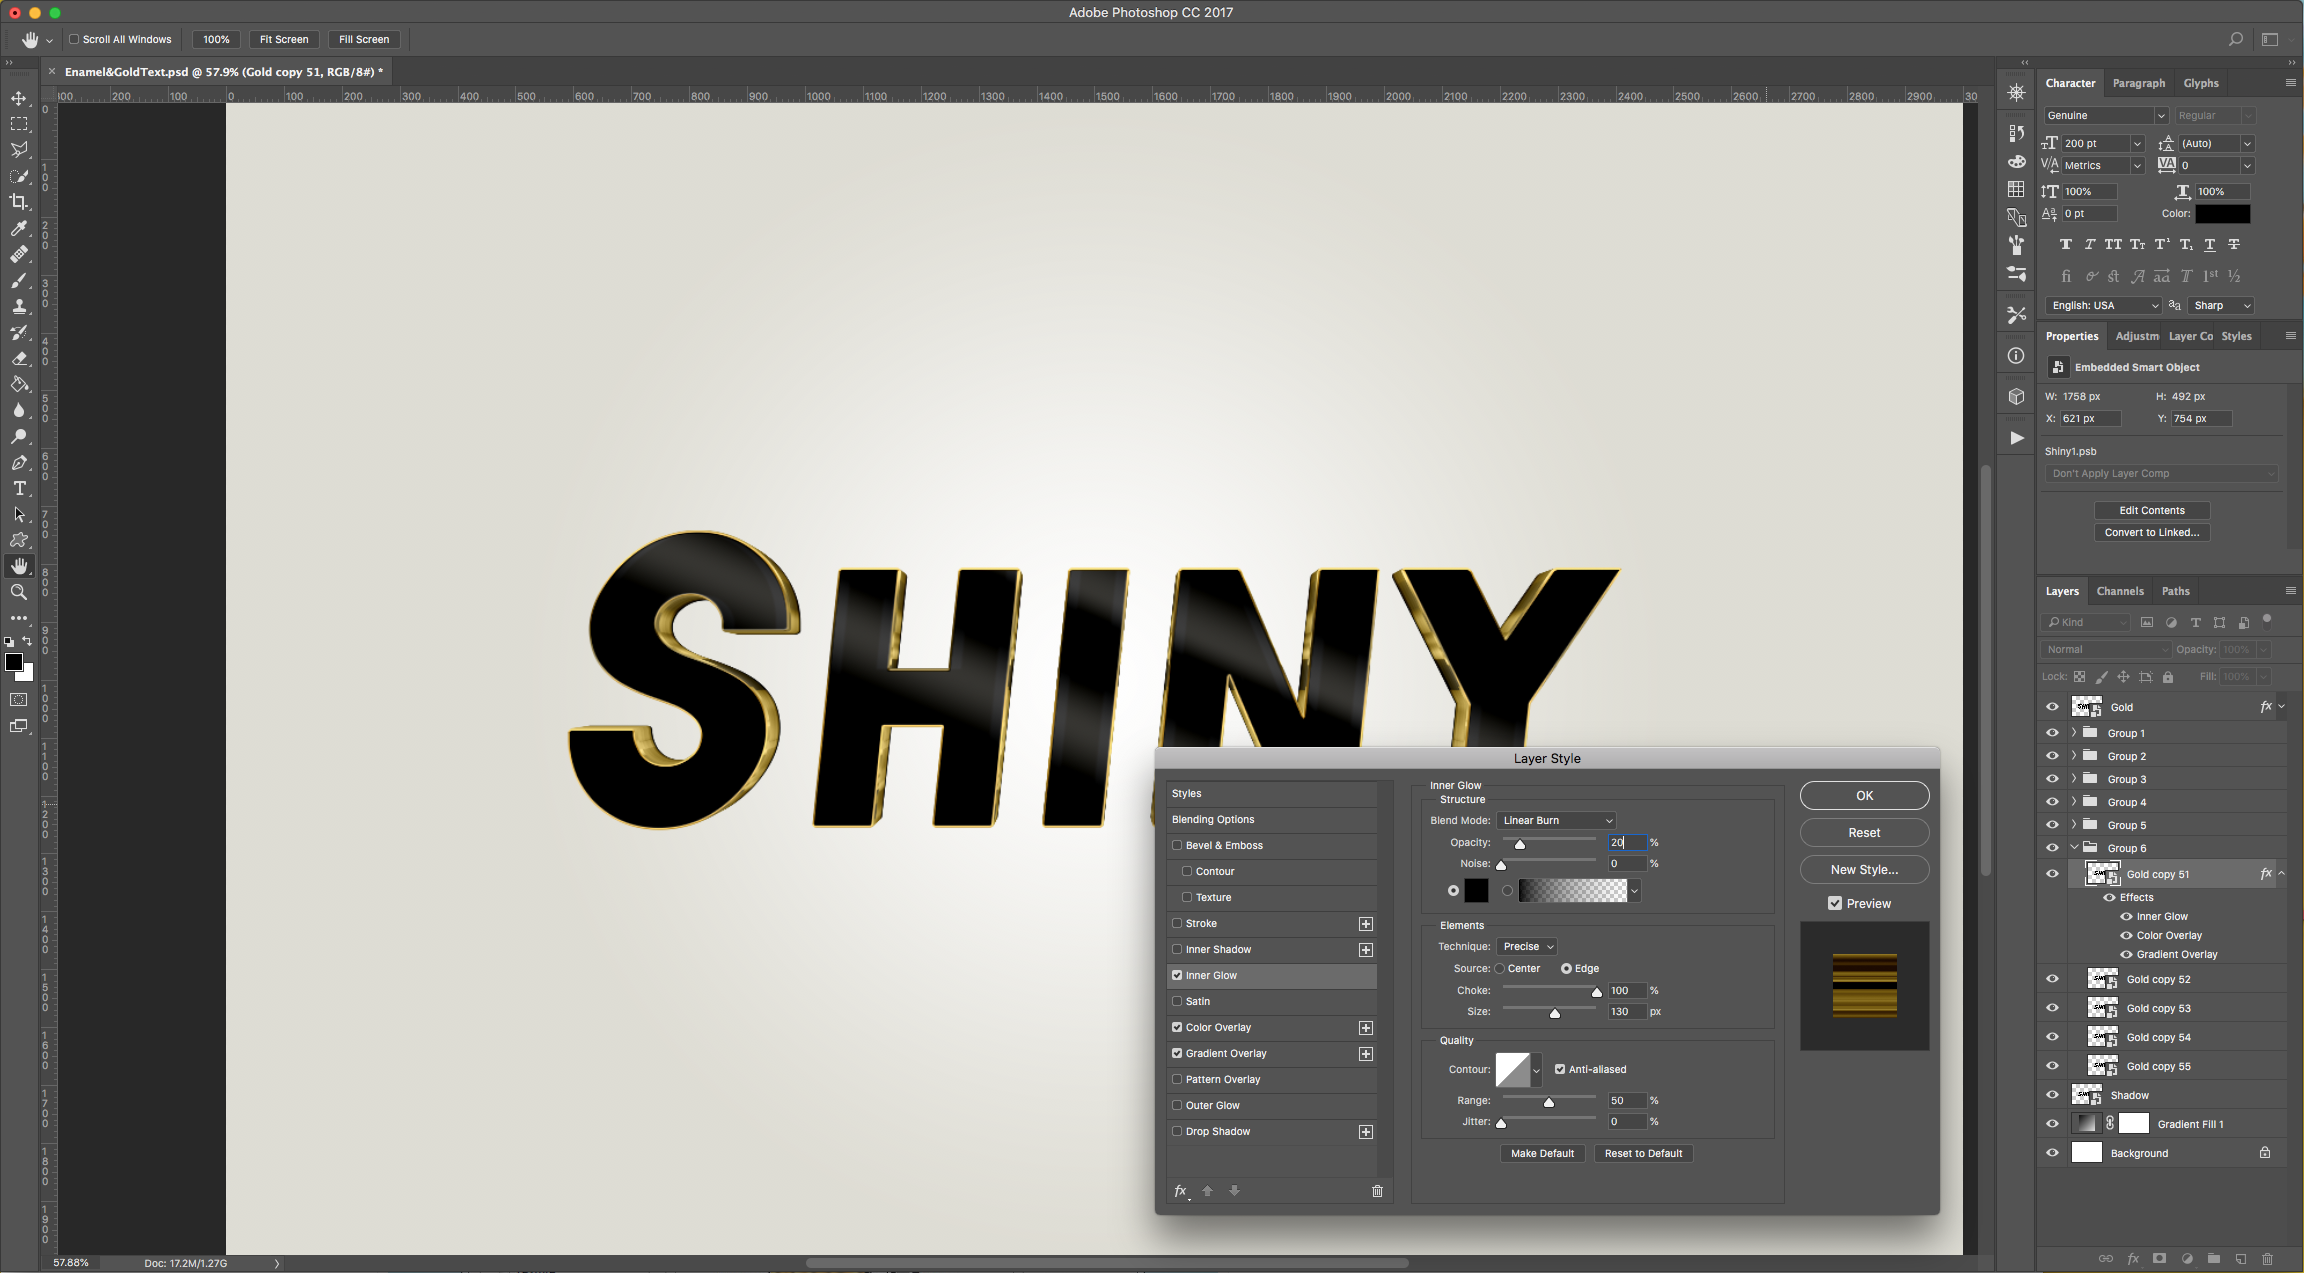
20 - Open the “Group 6” Folder, select the “Gold copy 51” layers and “Paste Layer Style”.
Change the “Inner Glow” Opacity value to 20% leaving the rest unchanged. “Copy Layer Style”. Select the rest of the layers in the “Group” Folder using the “Shift” key, right-click on top and choose “Paste Layer Style”. You can close the Folder now.

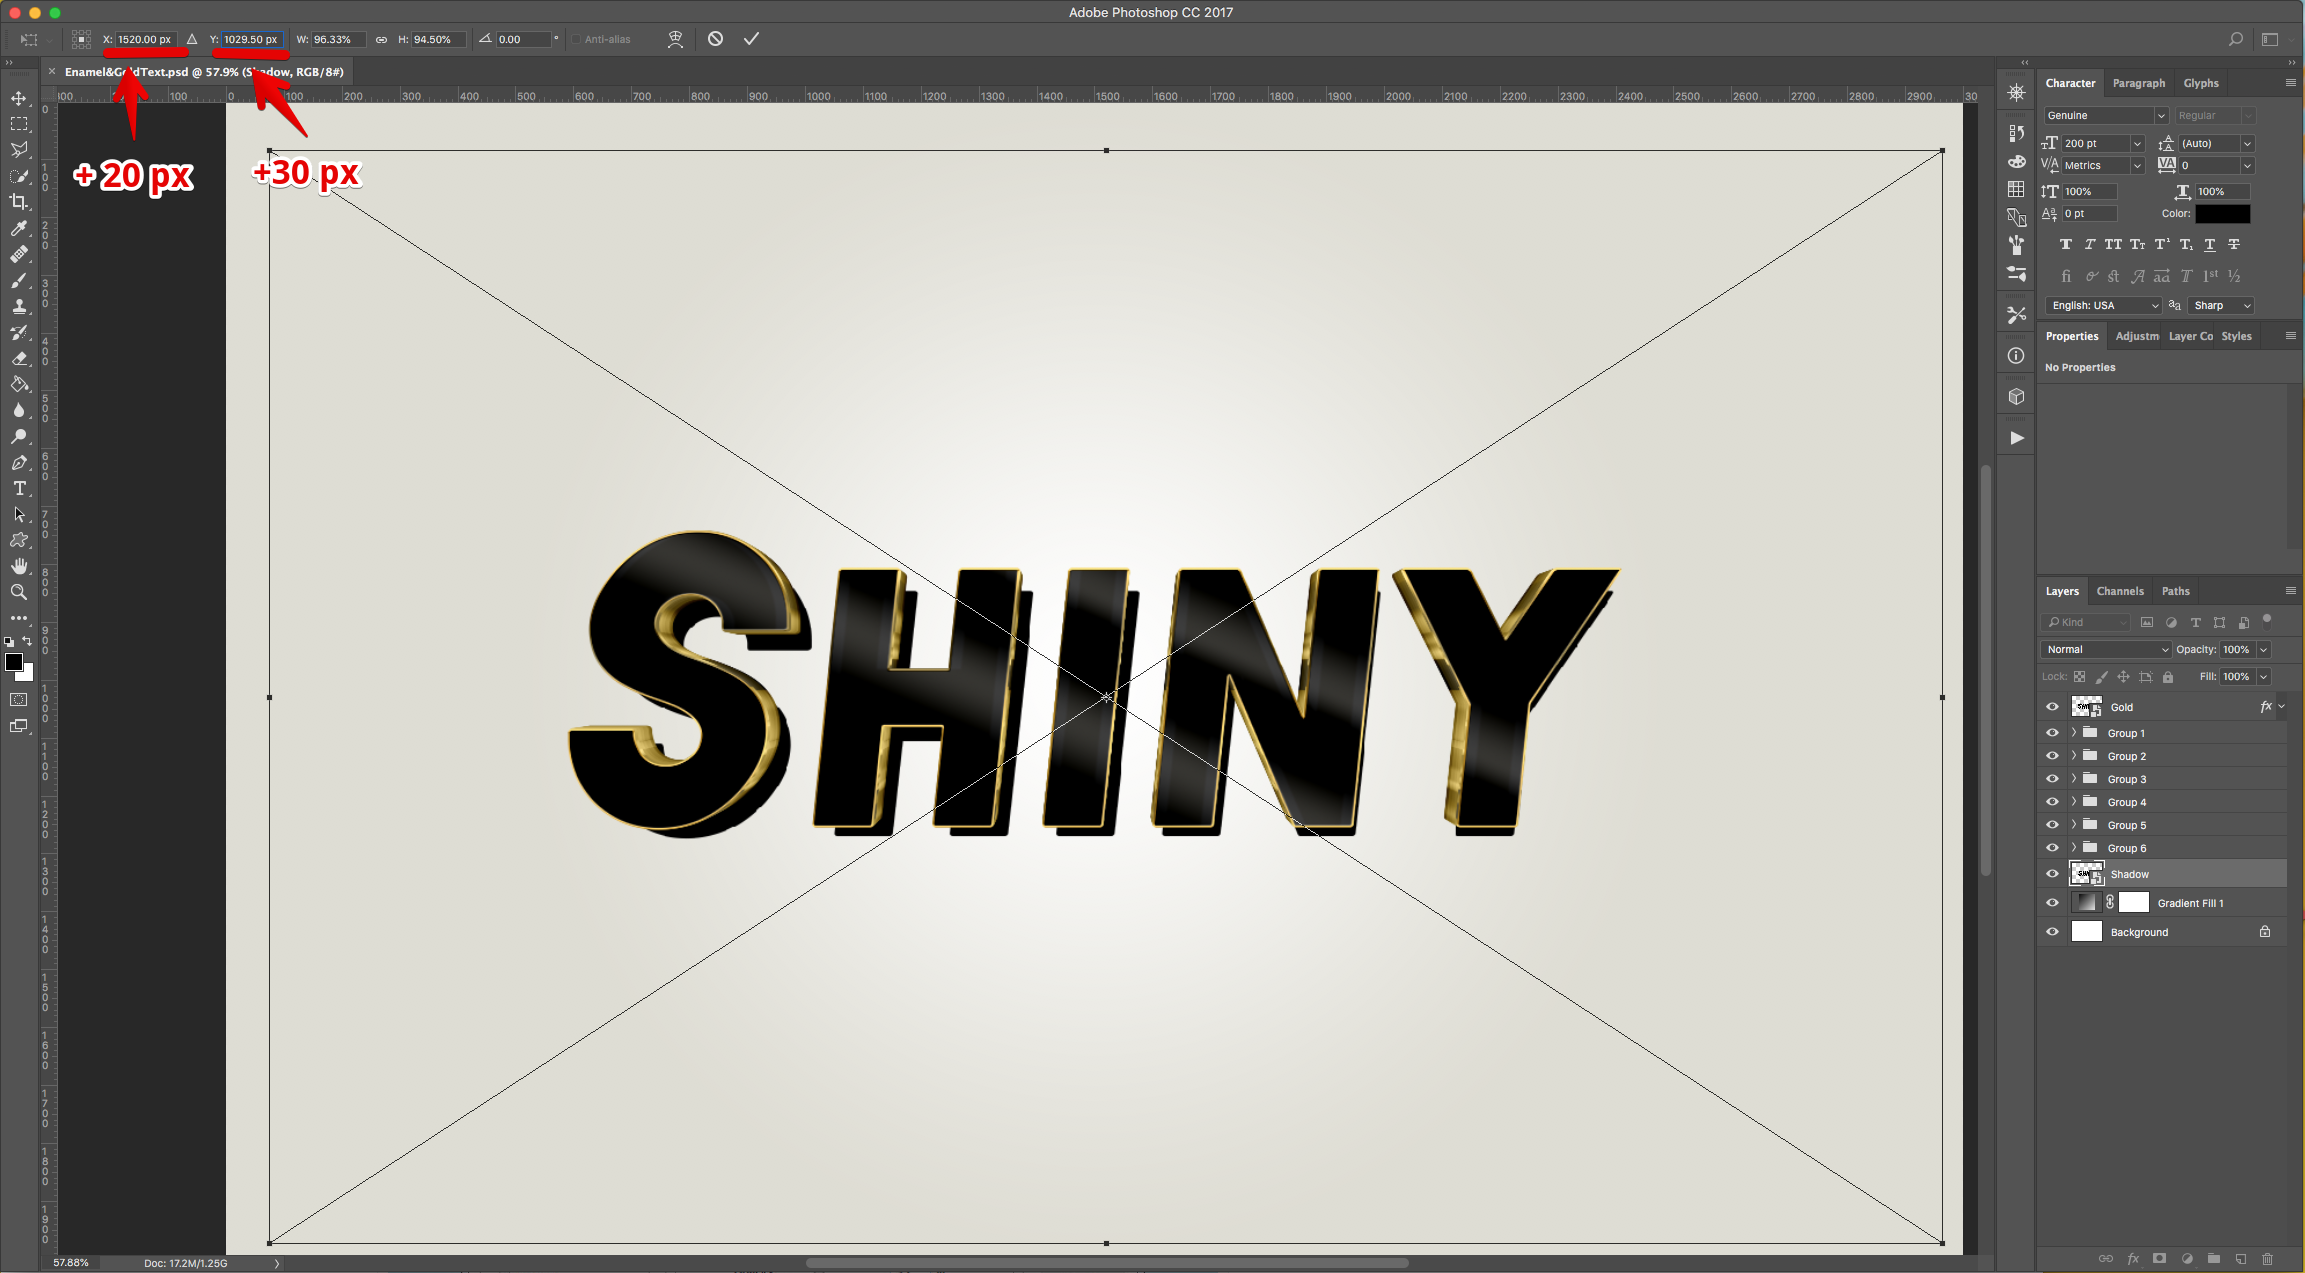
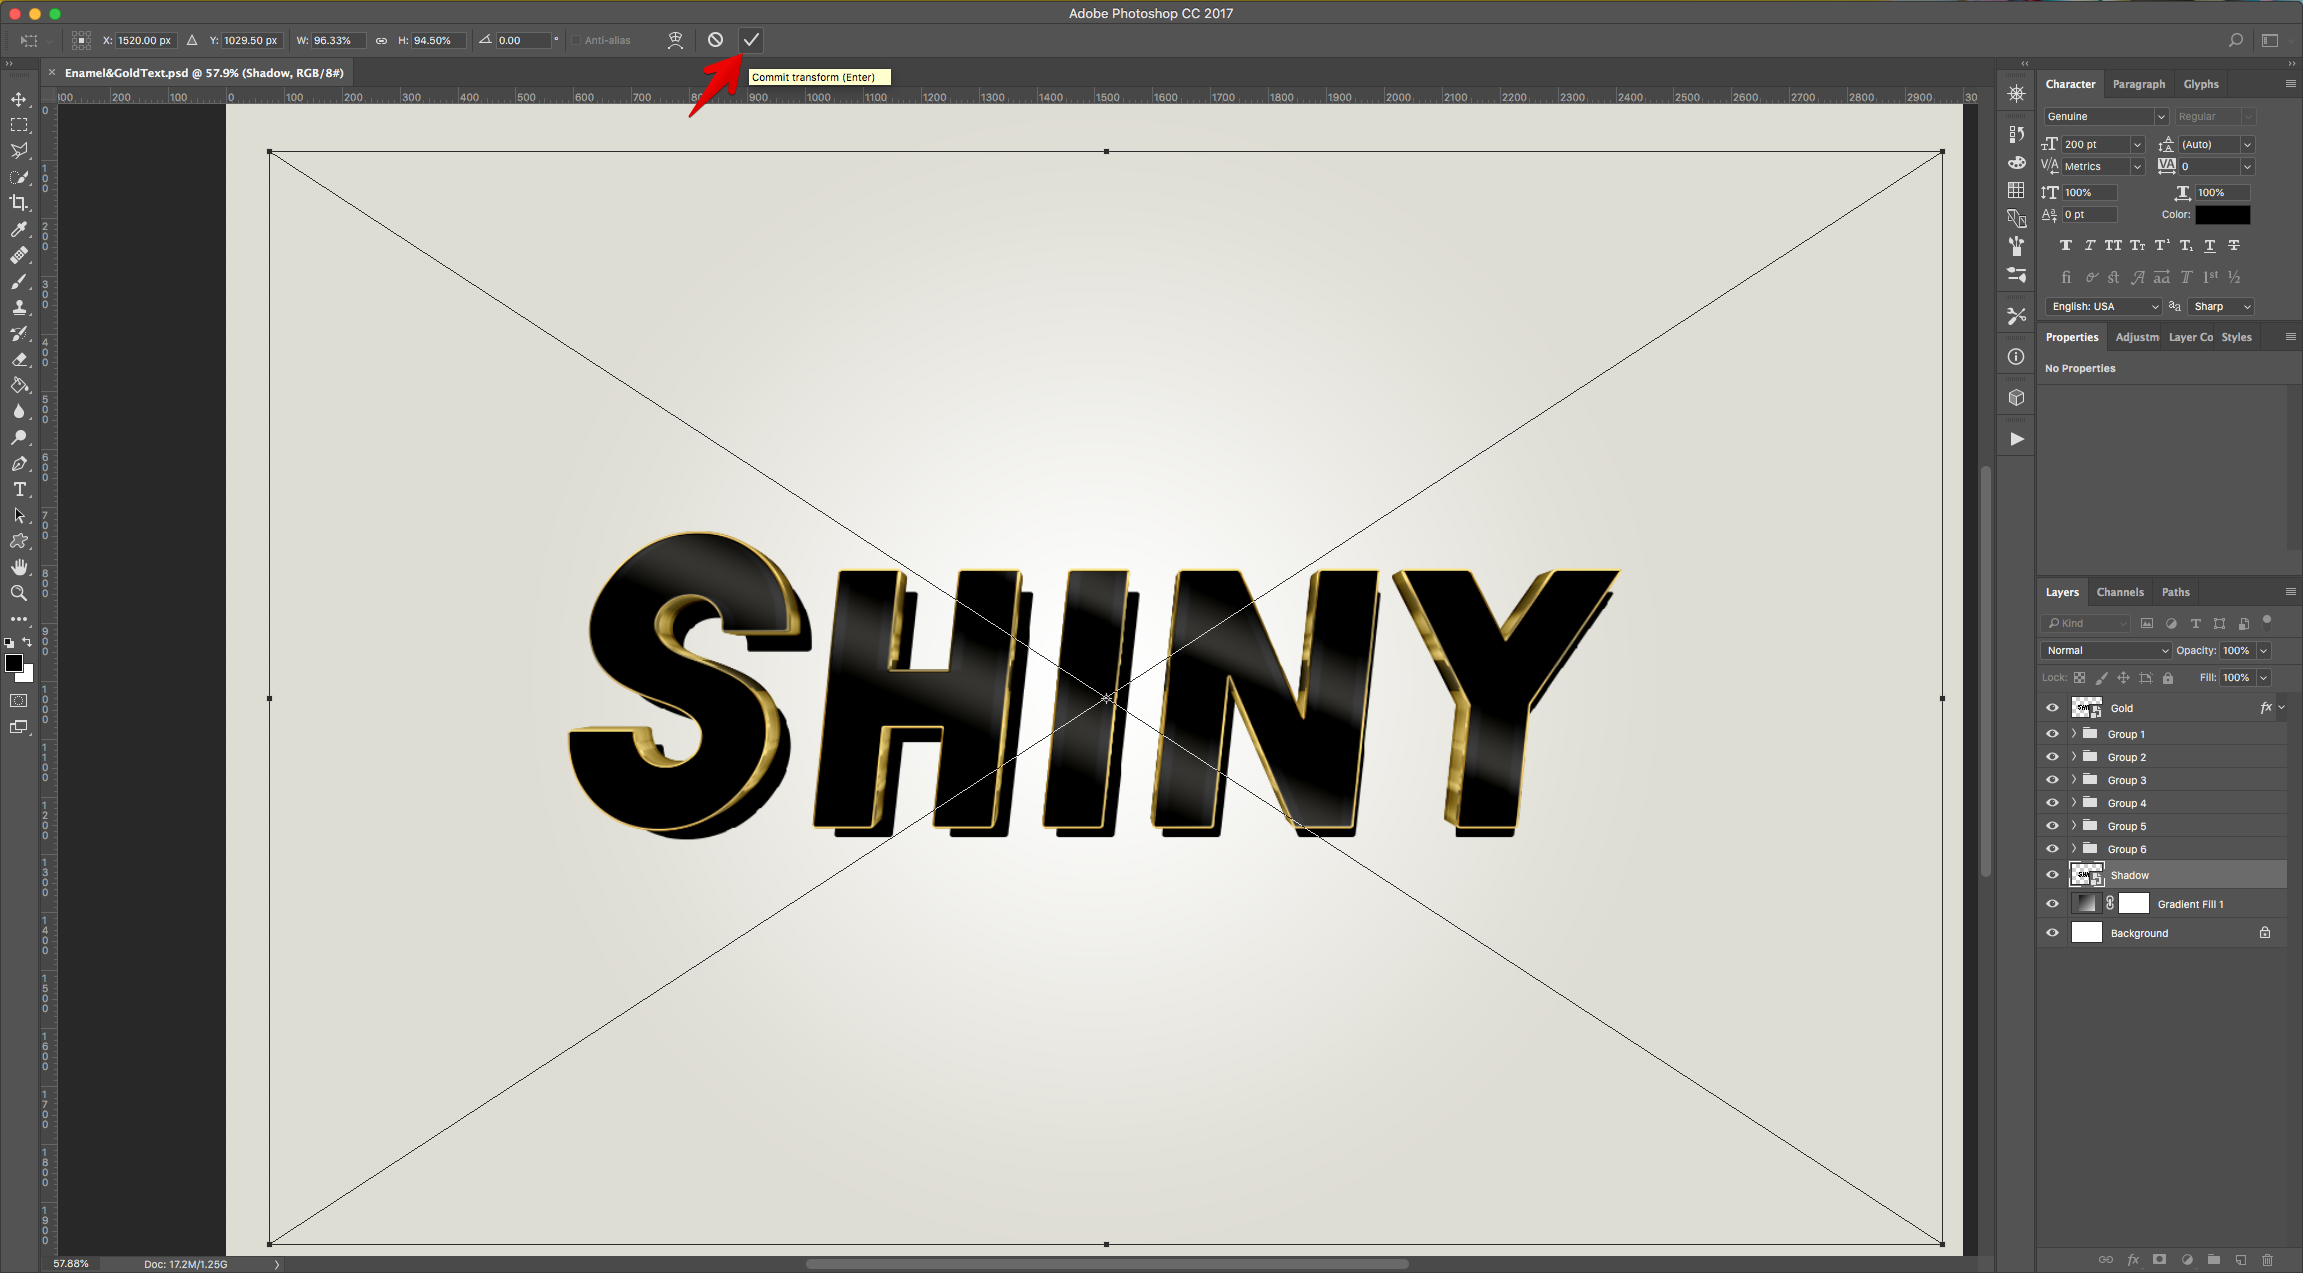
21 - Select the “Shadow” layer, enter “Free Transform” (Command/Control + T) and increase the “X” value by 20 px and “Y” value by 30 px. Hit “Enter” to “Commit Changes”.

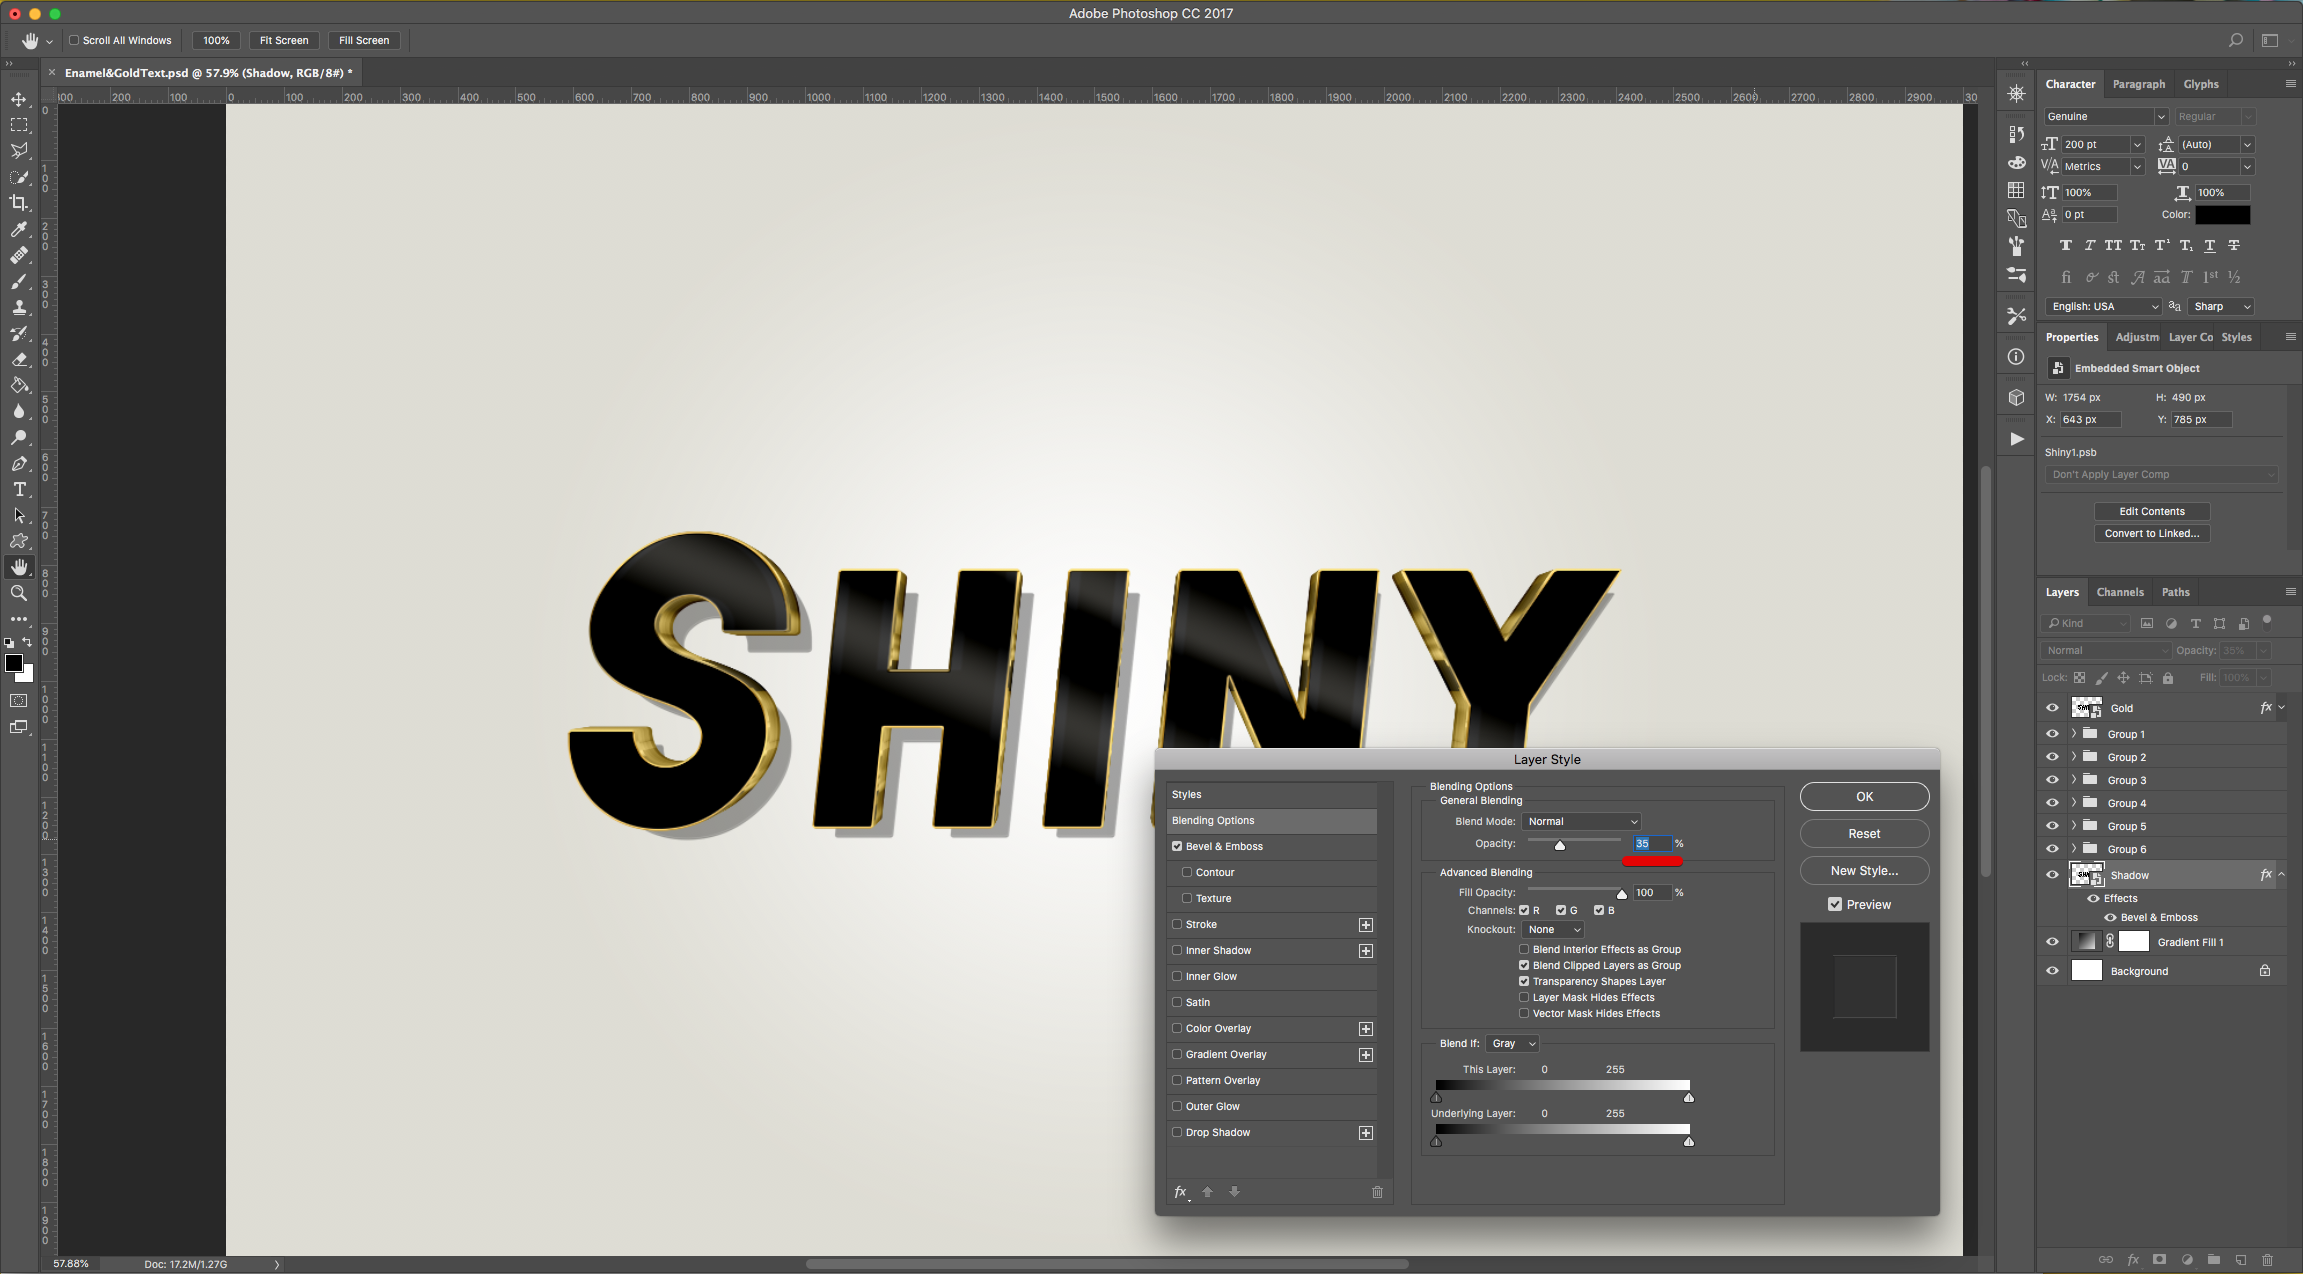
22 - Double-click on its thumbnail to apply the following “Layer Styles”:
Blending Options:
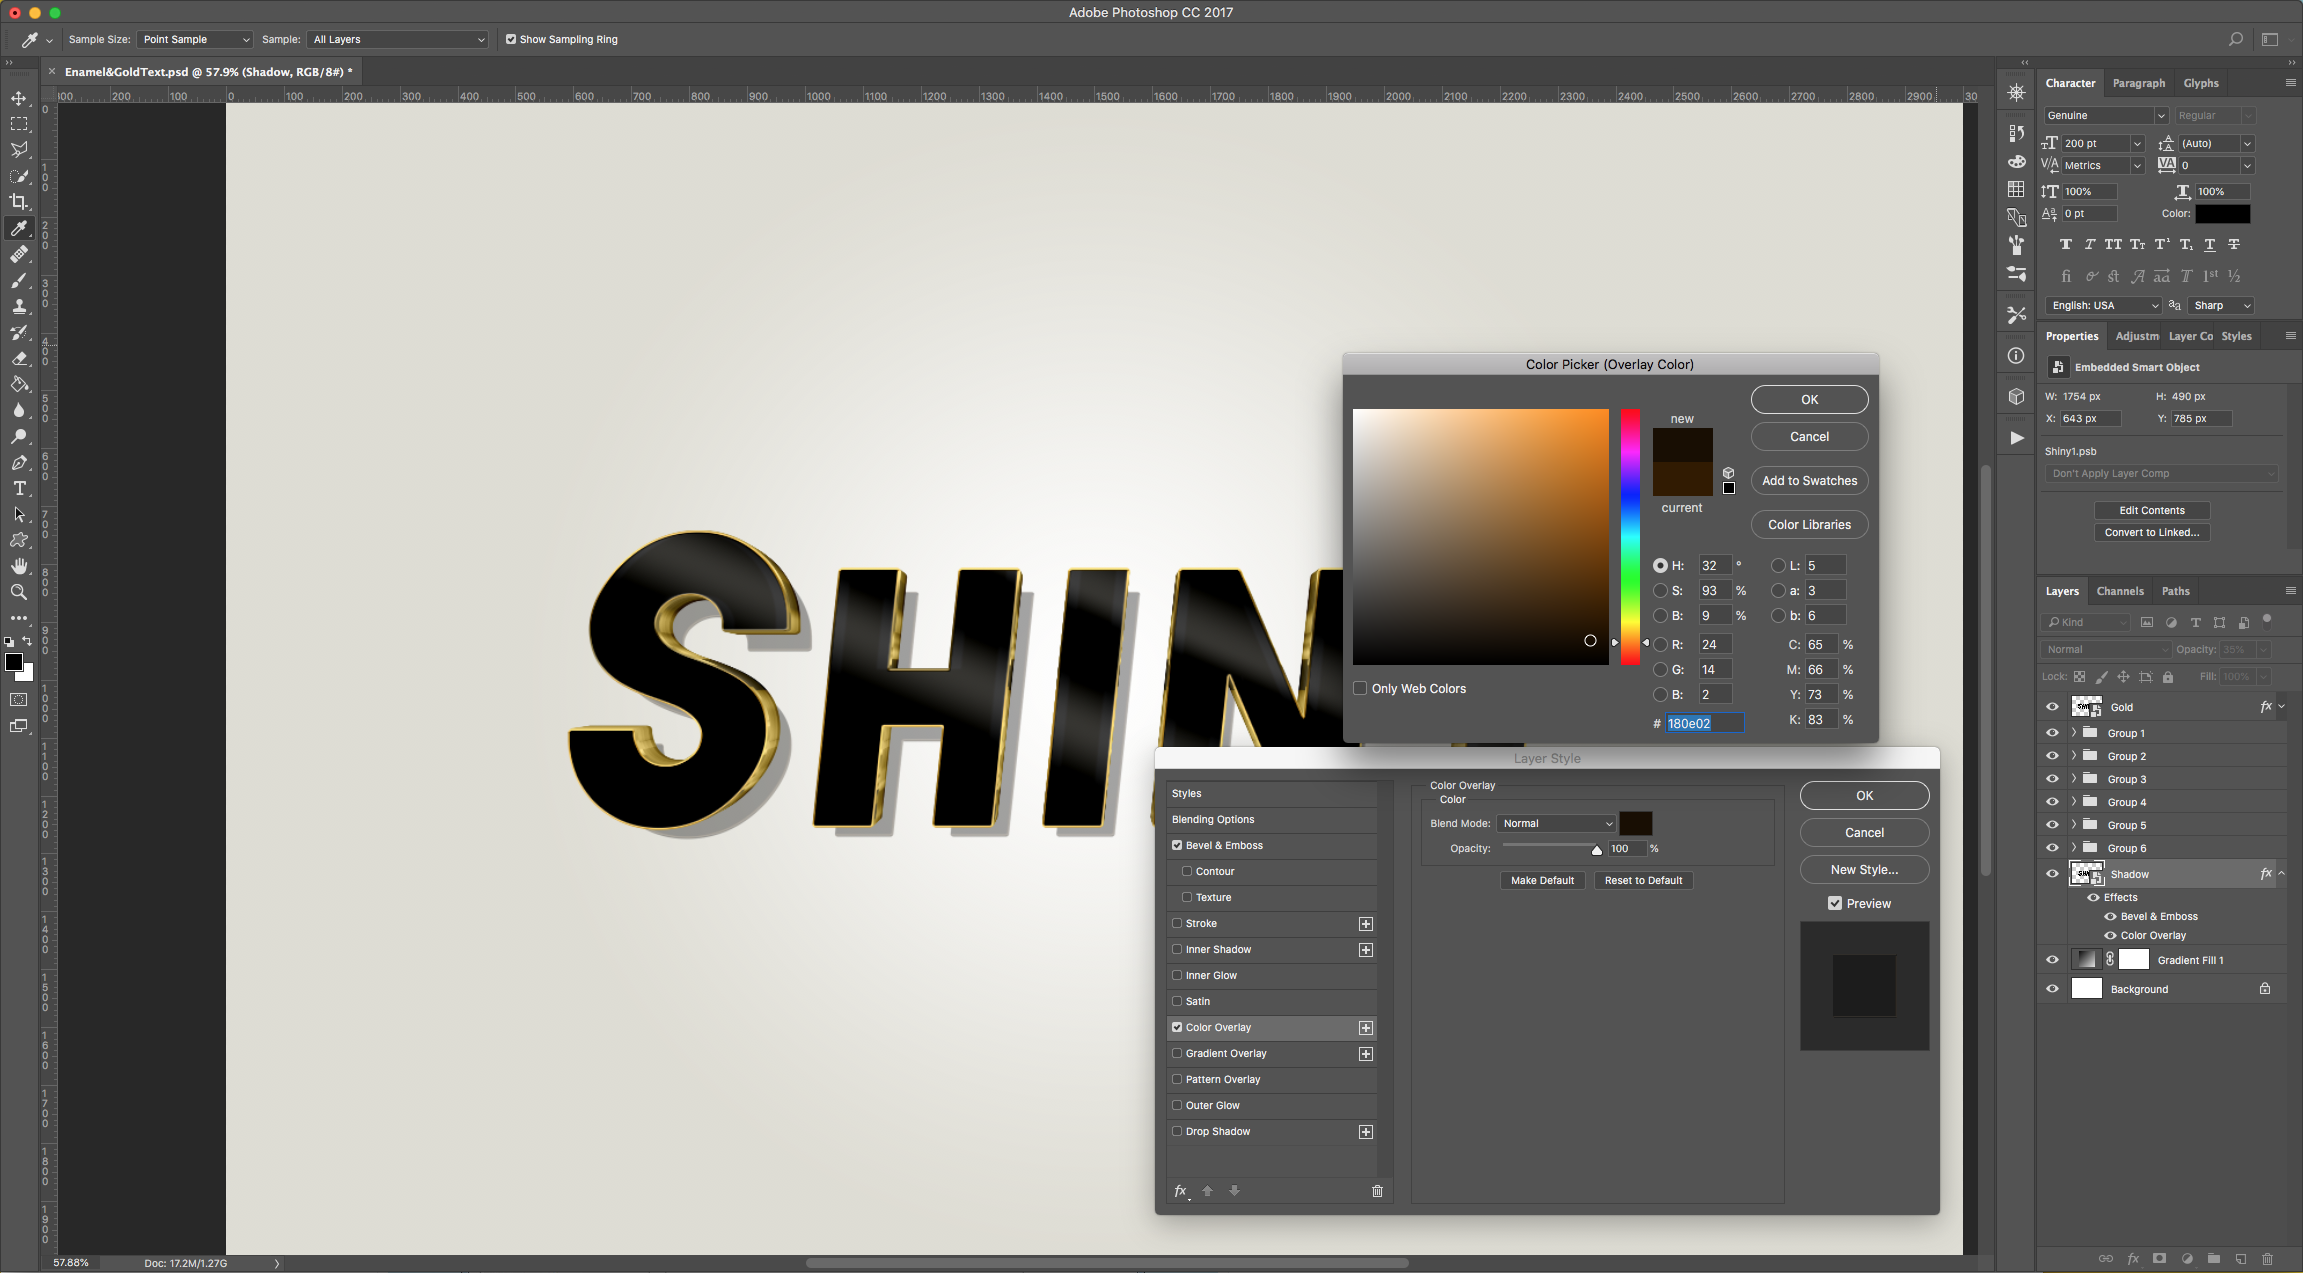
Color Overlay: (#180e02)
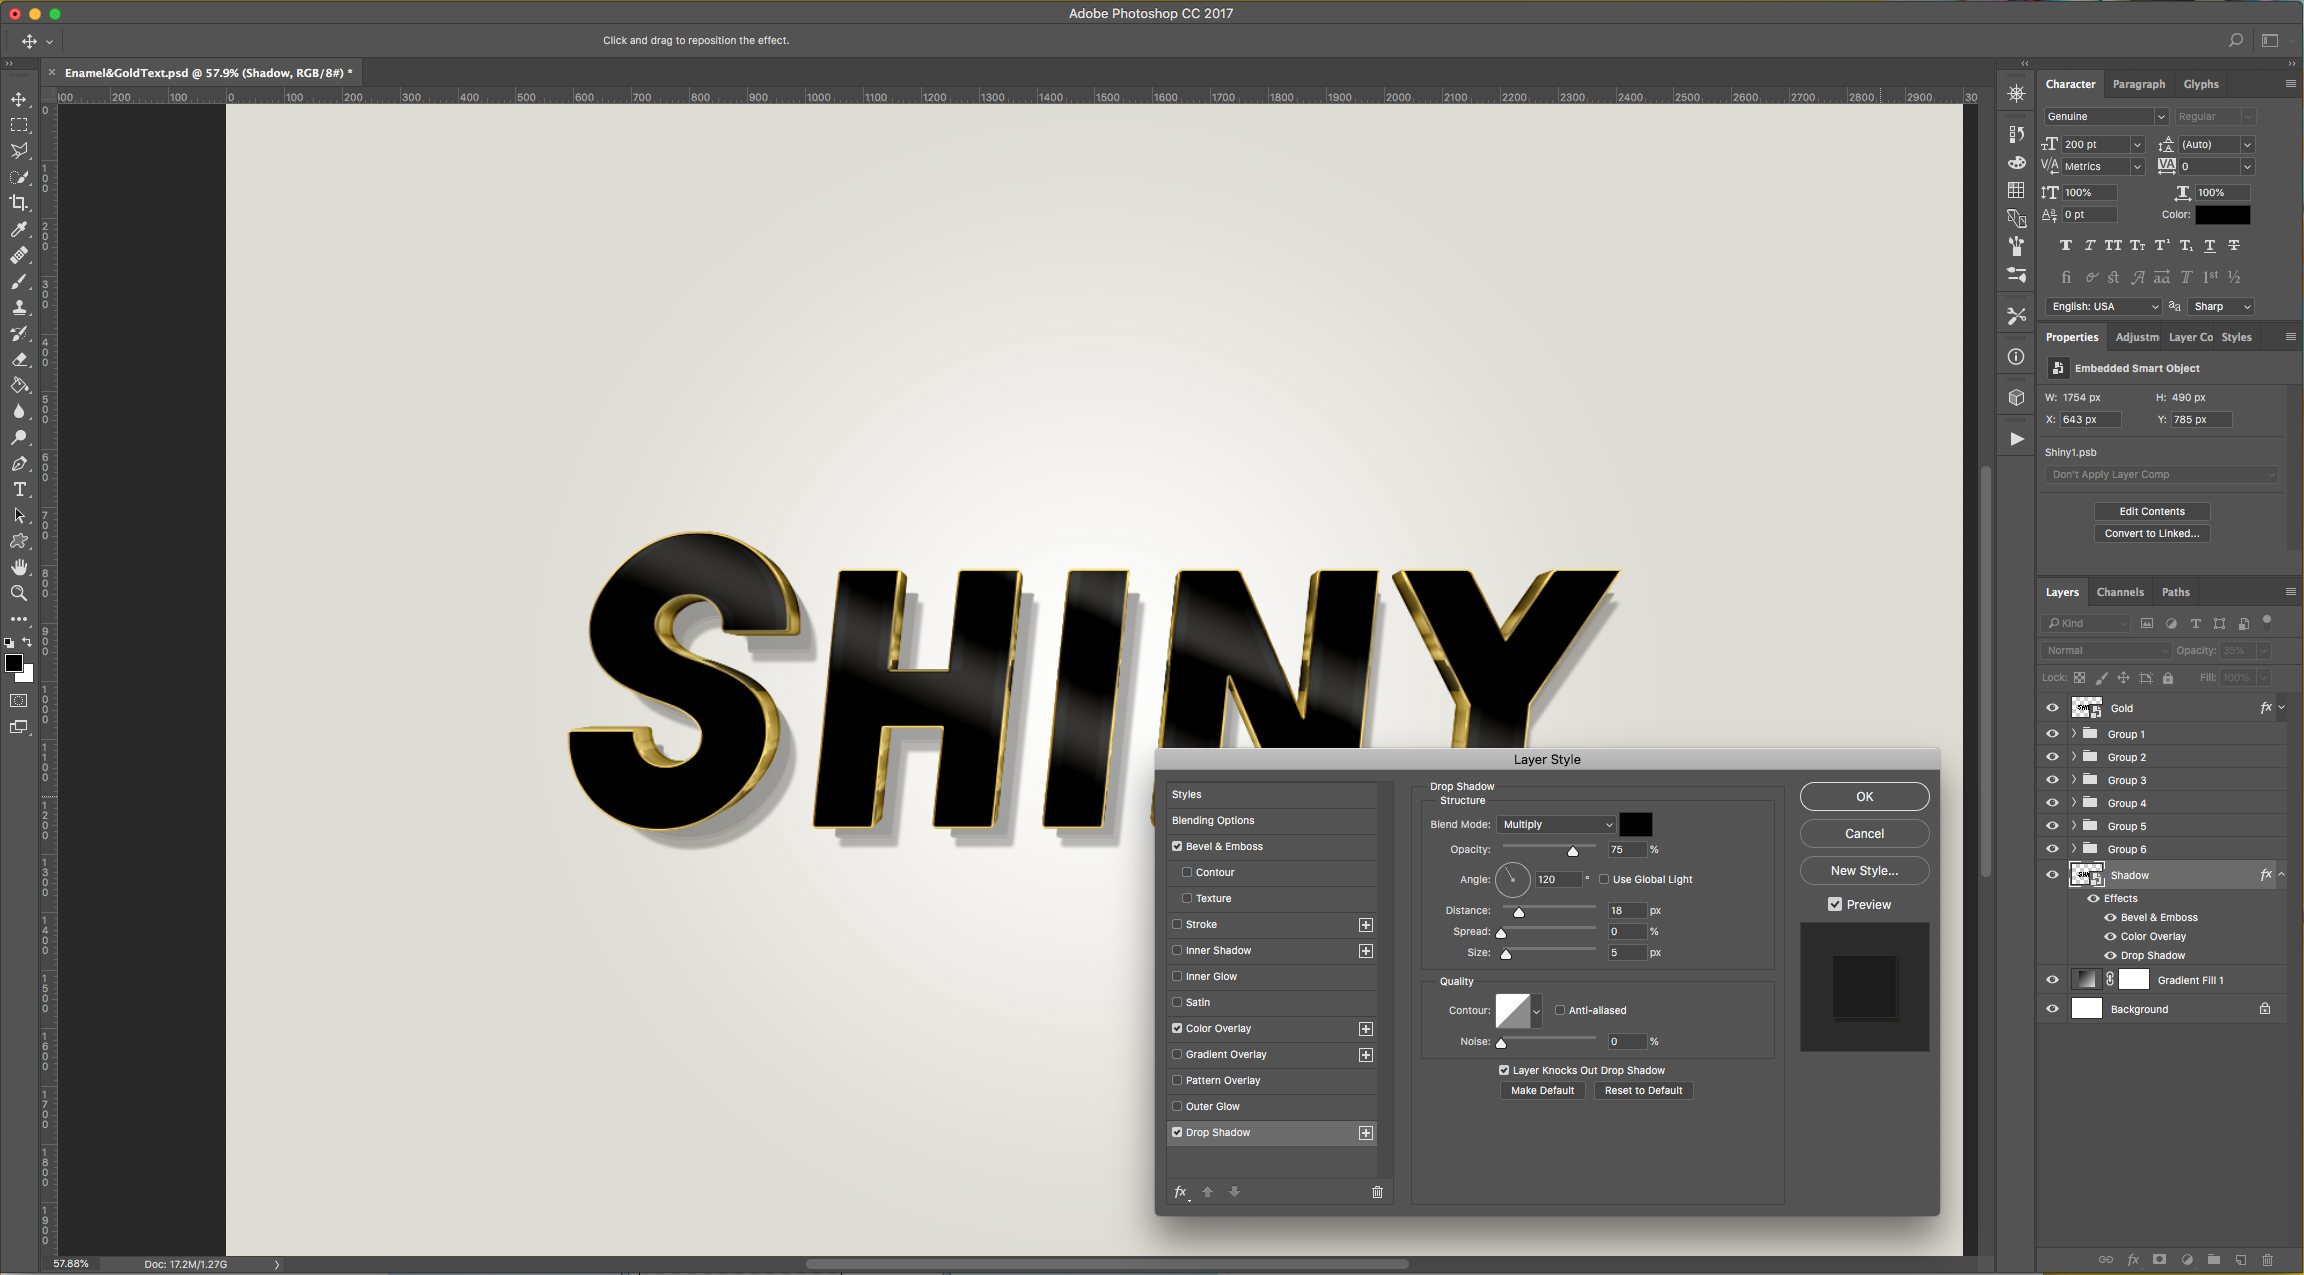
Drop Shadow:
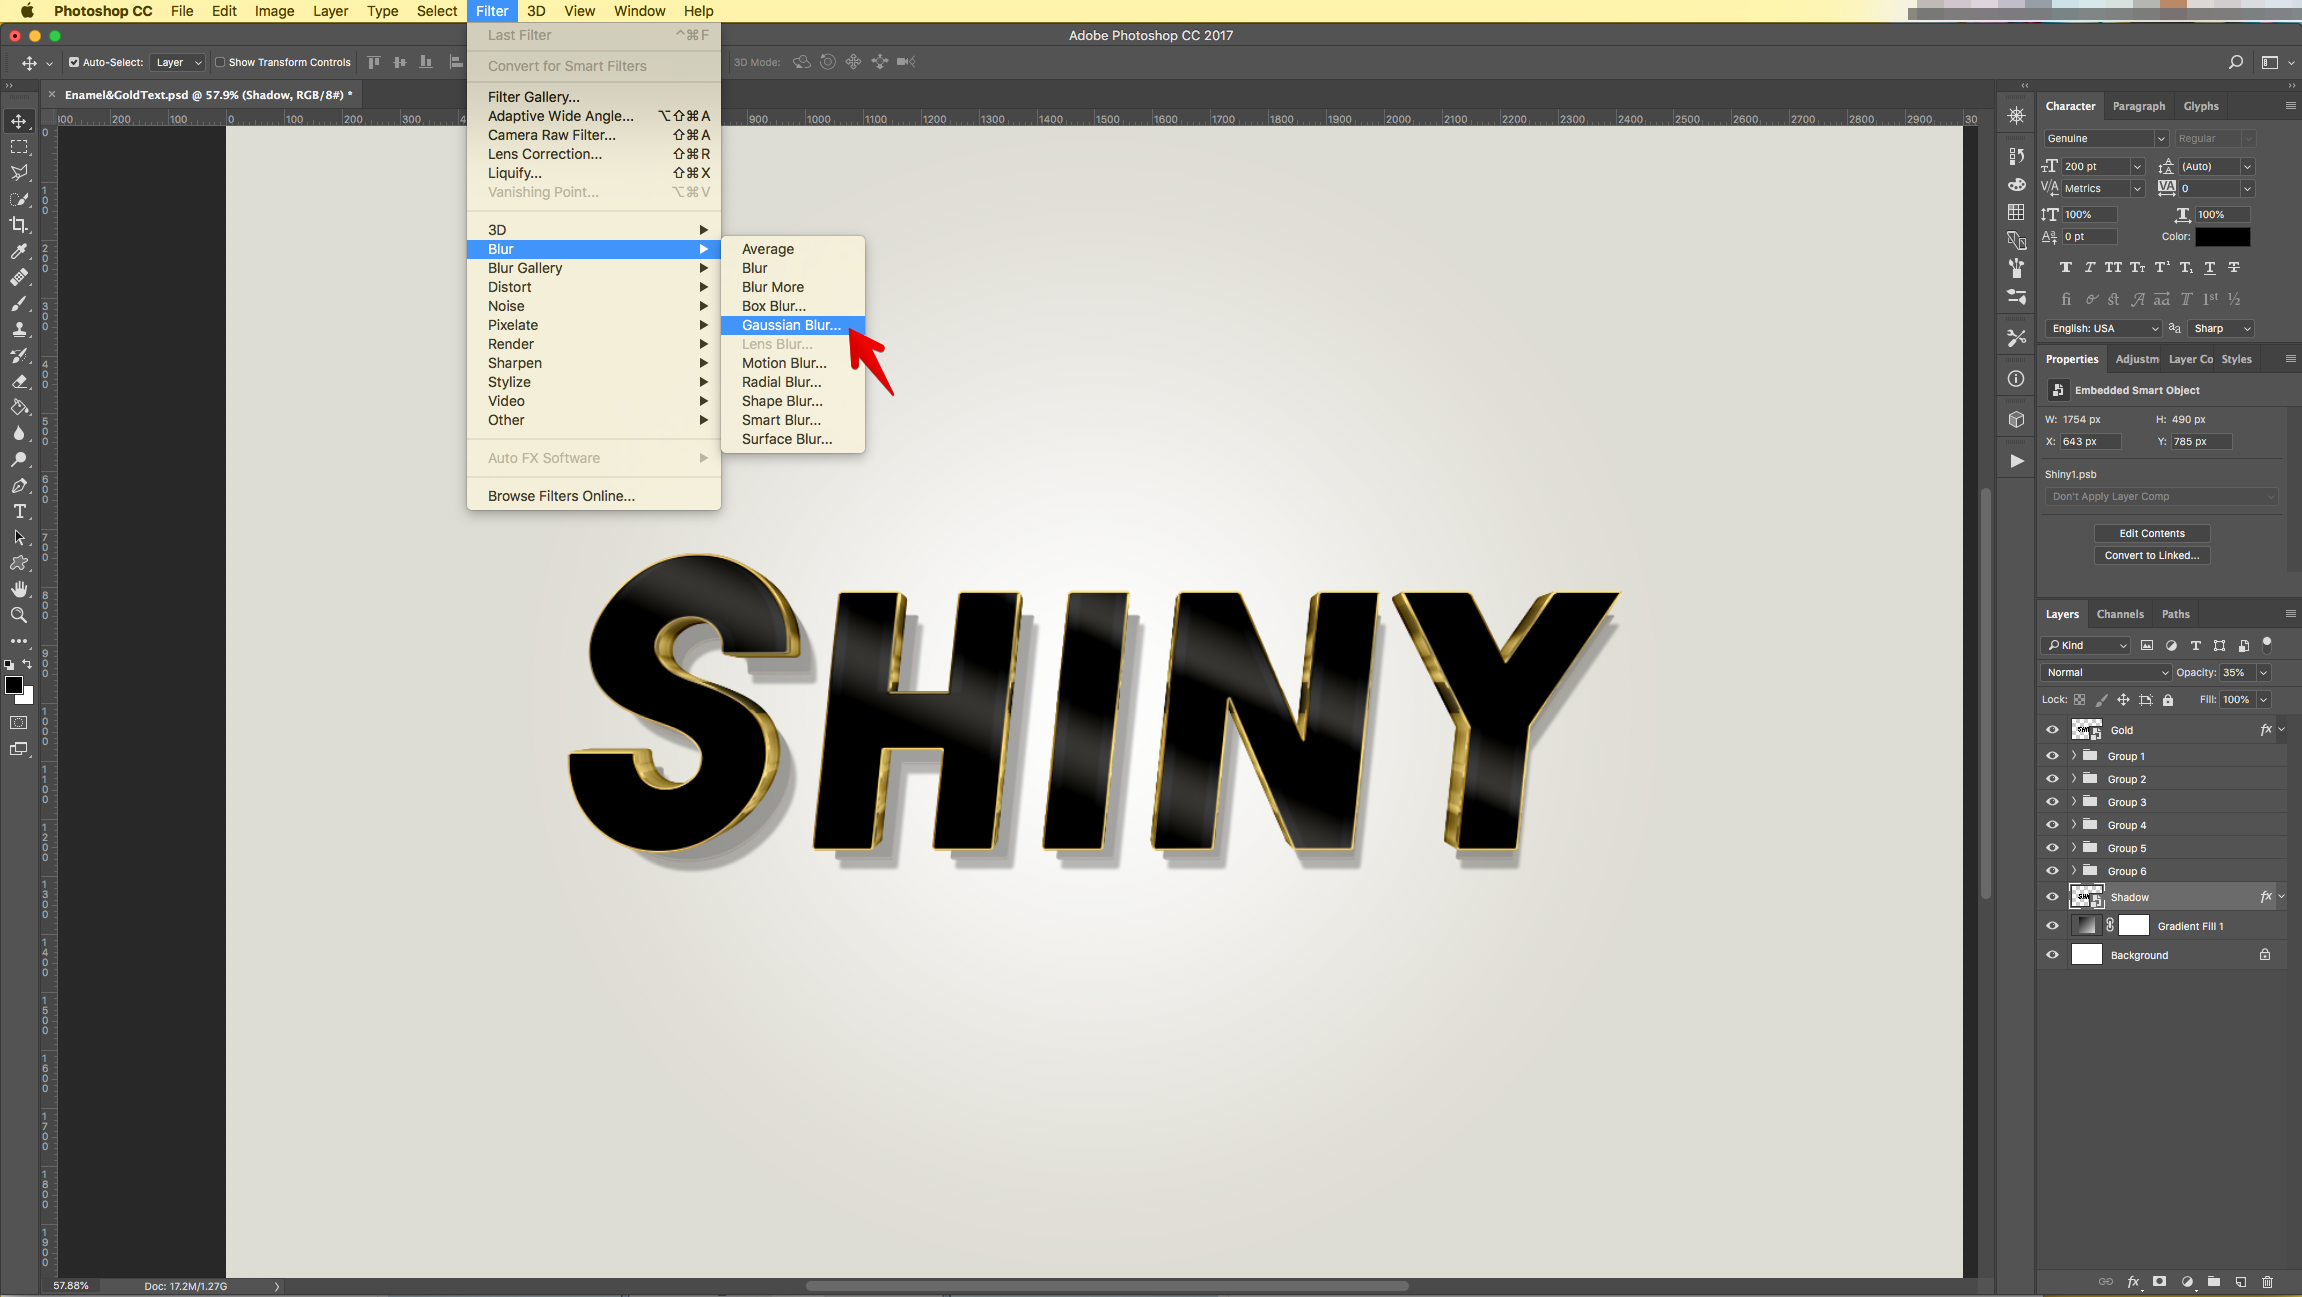
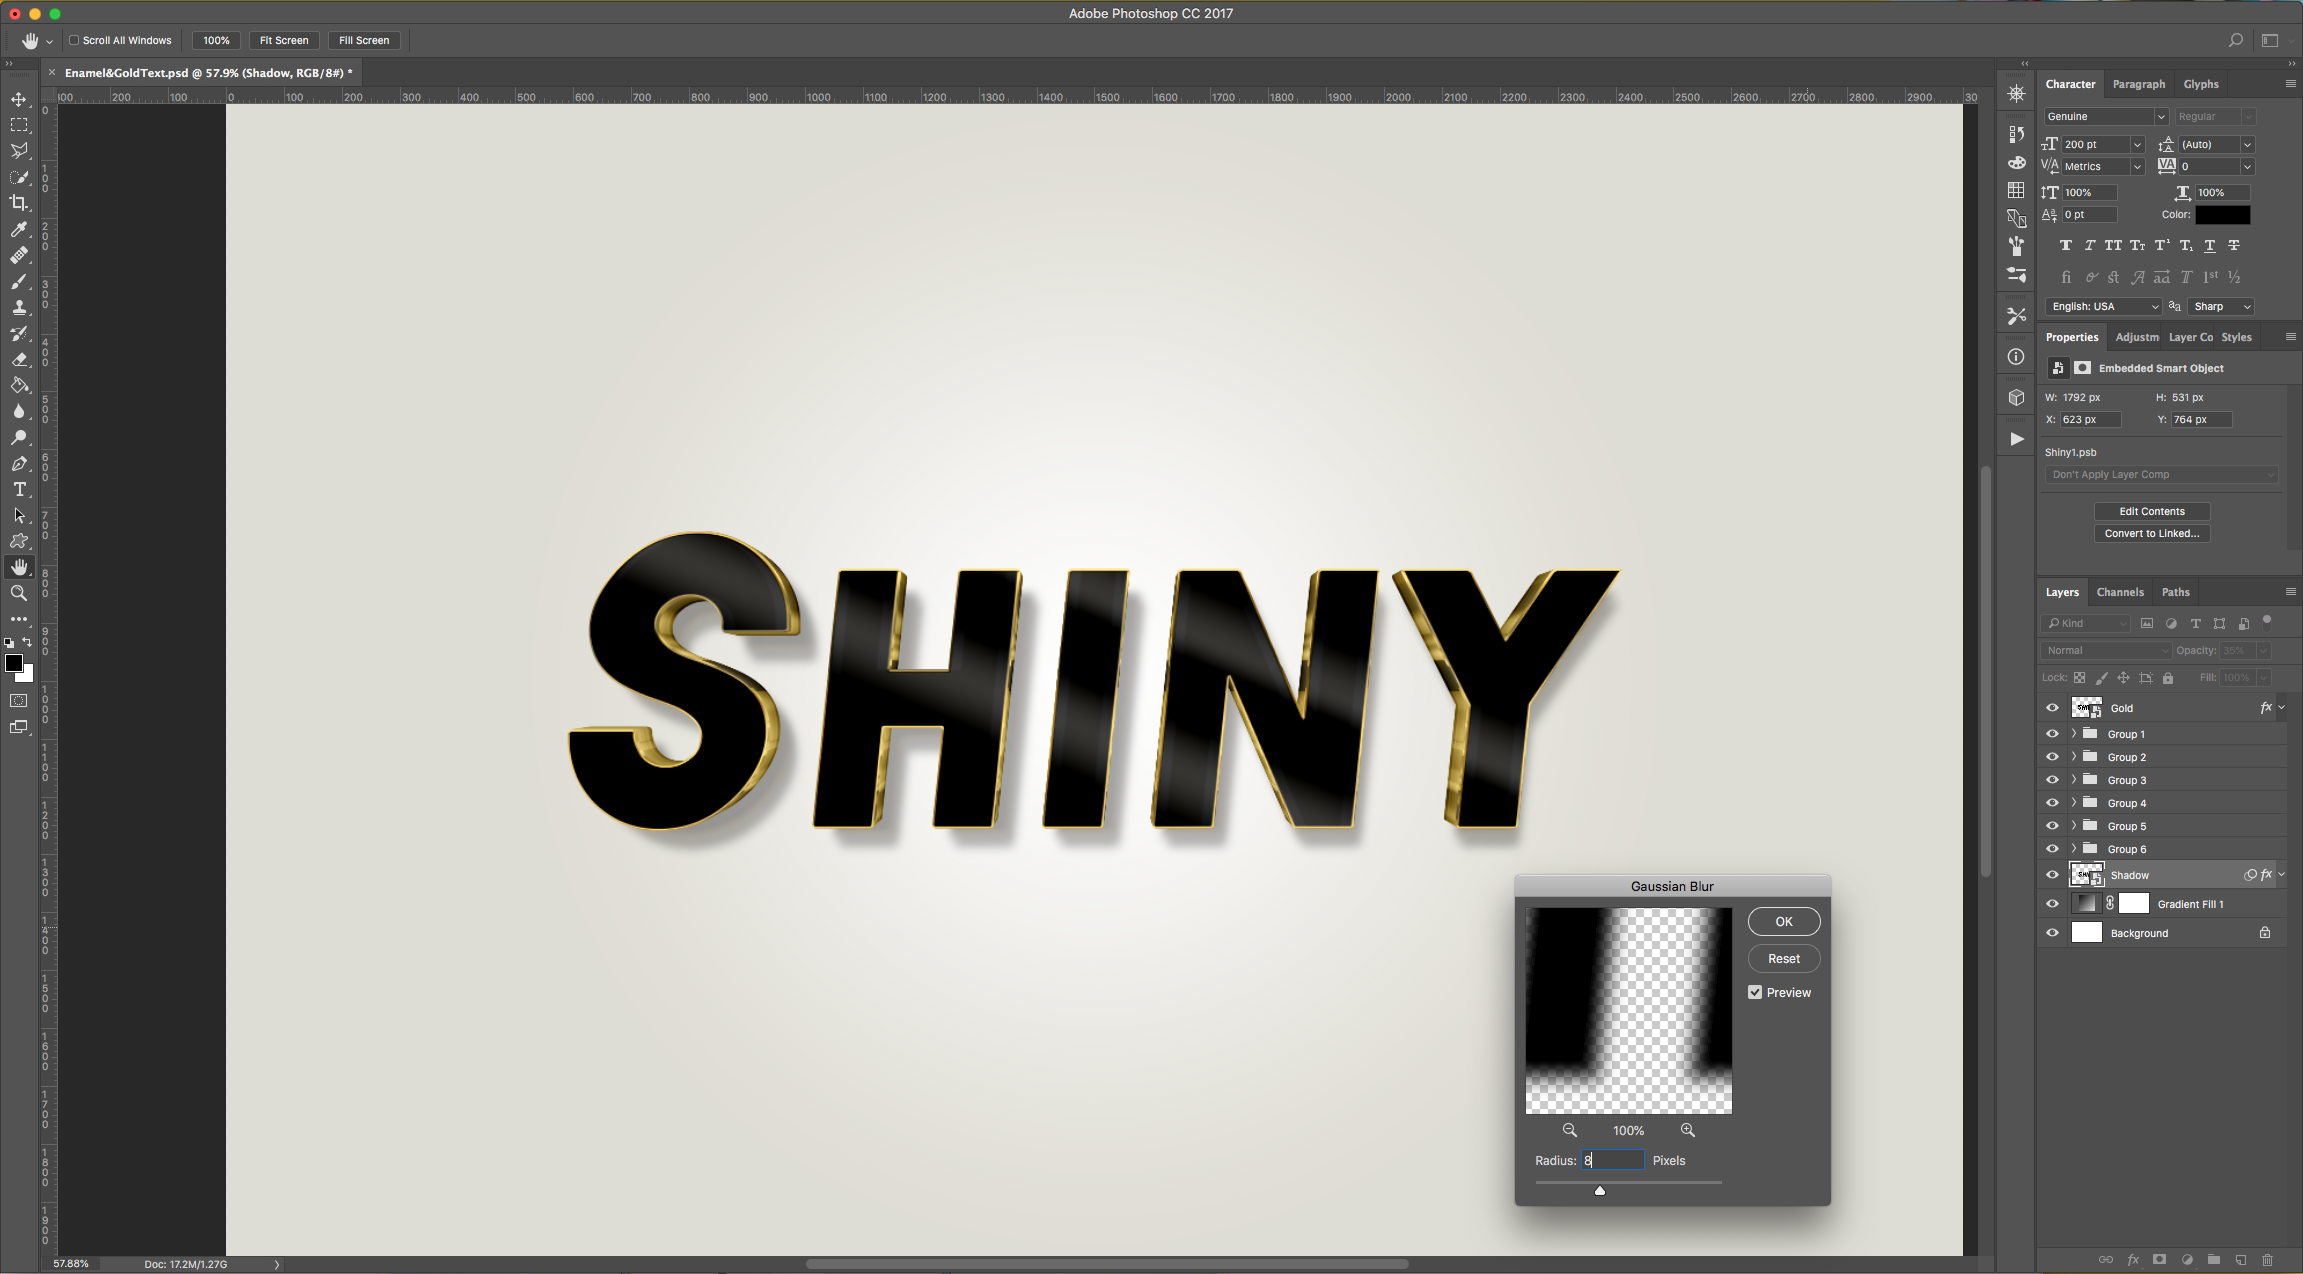
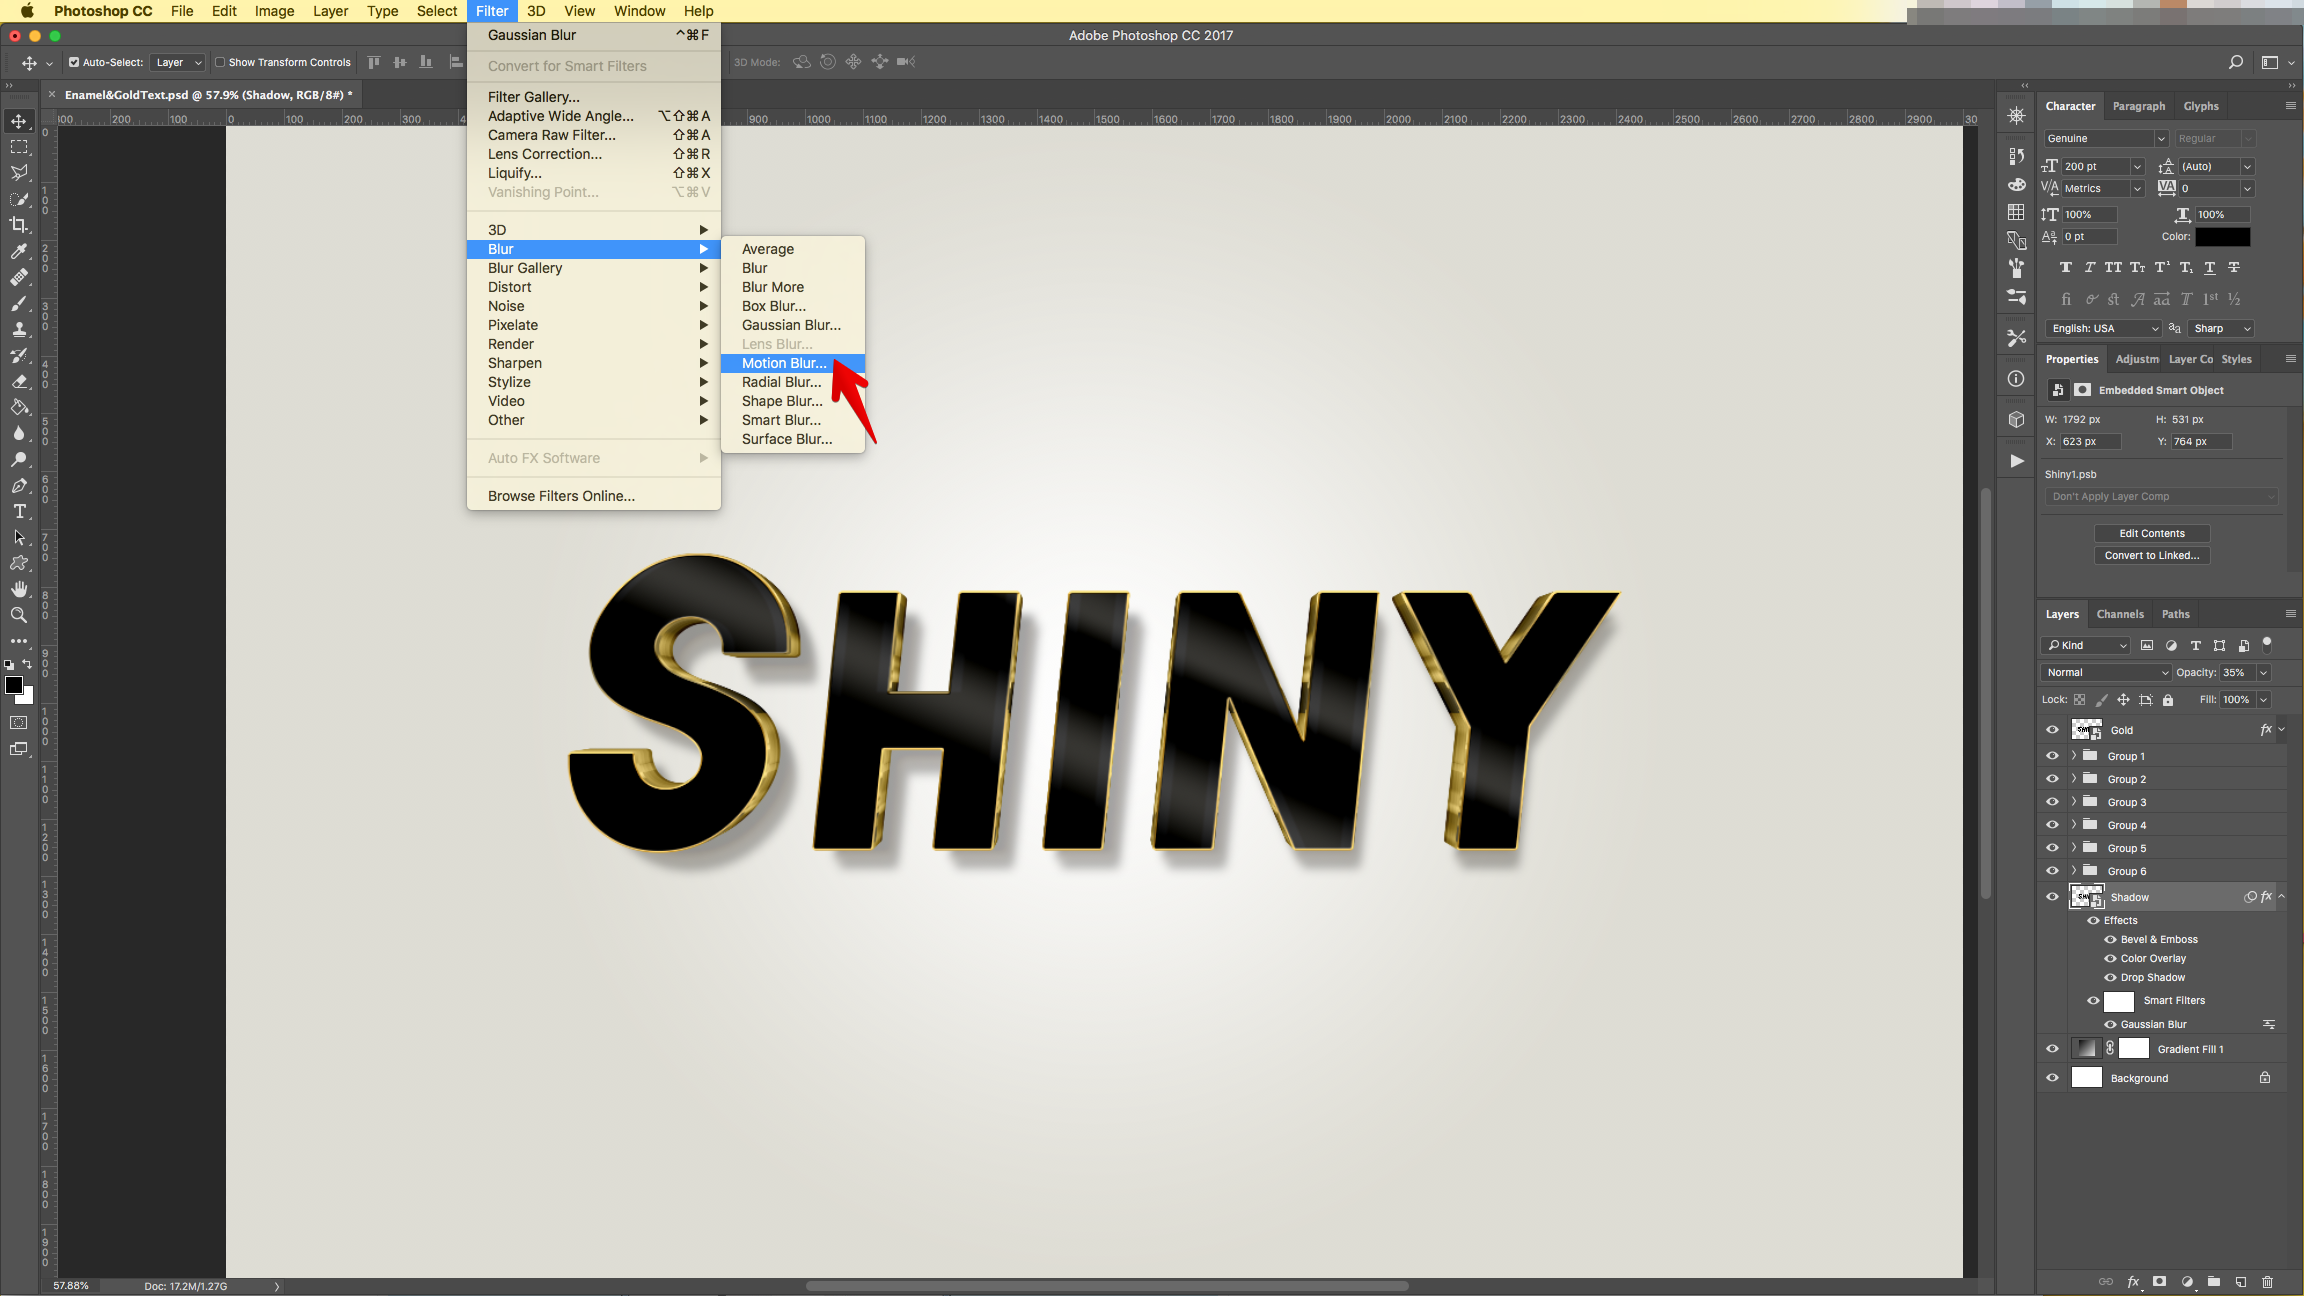
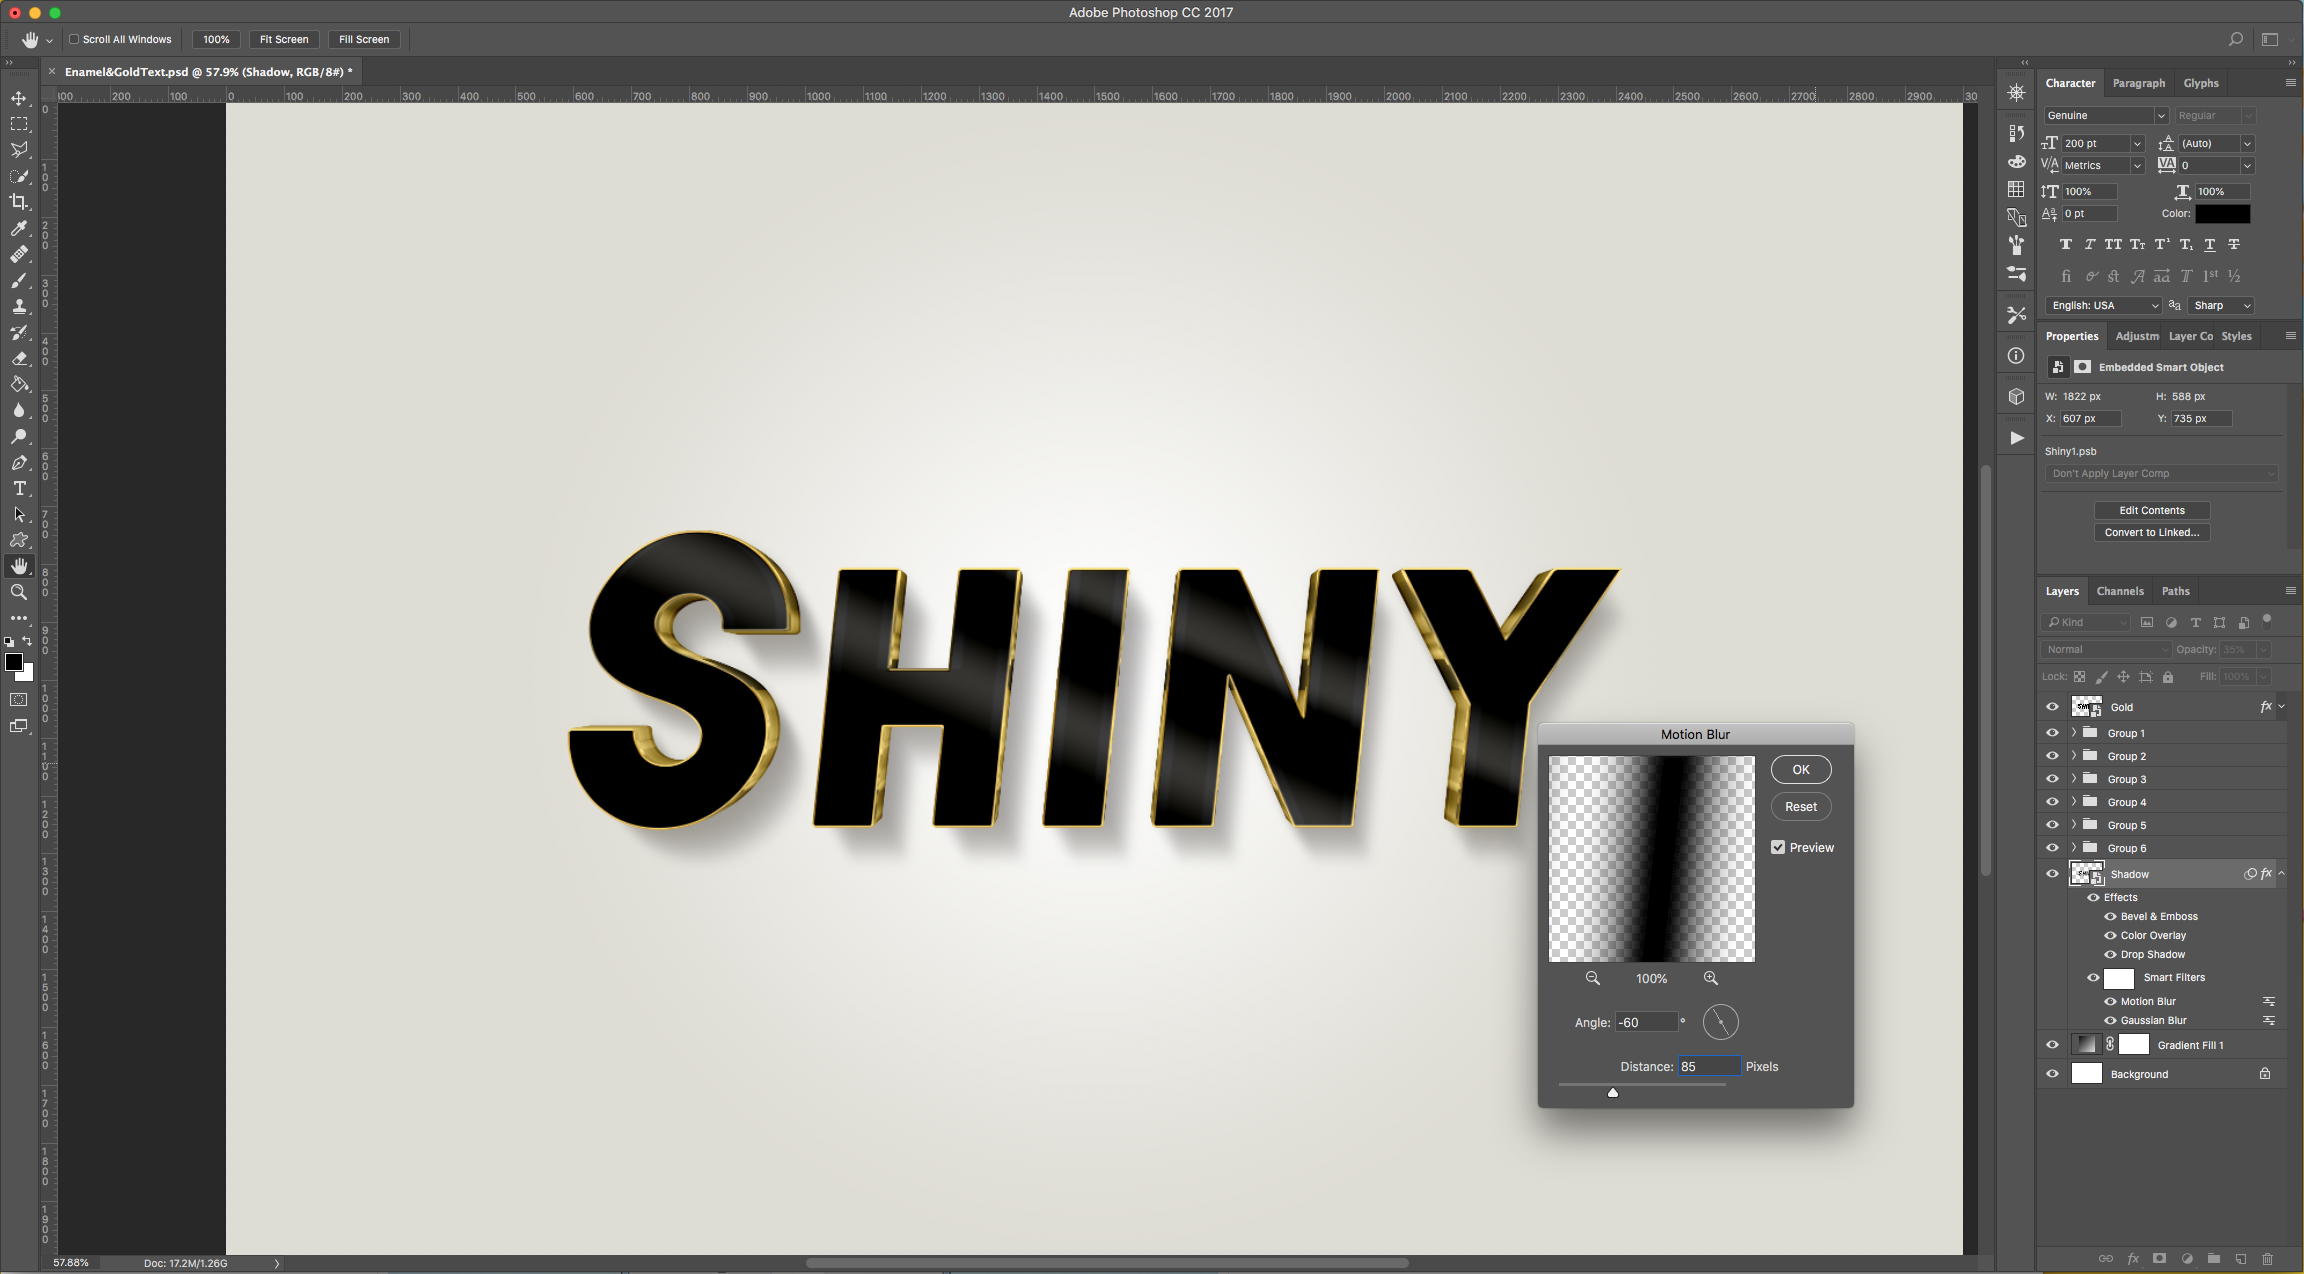
23 - Go to Filter > Blur > Gaussian Blur… and use an 8 Pixel “Radius”. Then, go to Filter > Blur > Motion Blur and use a -60° Angle and a “Distance” of 85 pixels.
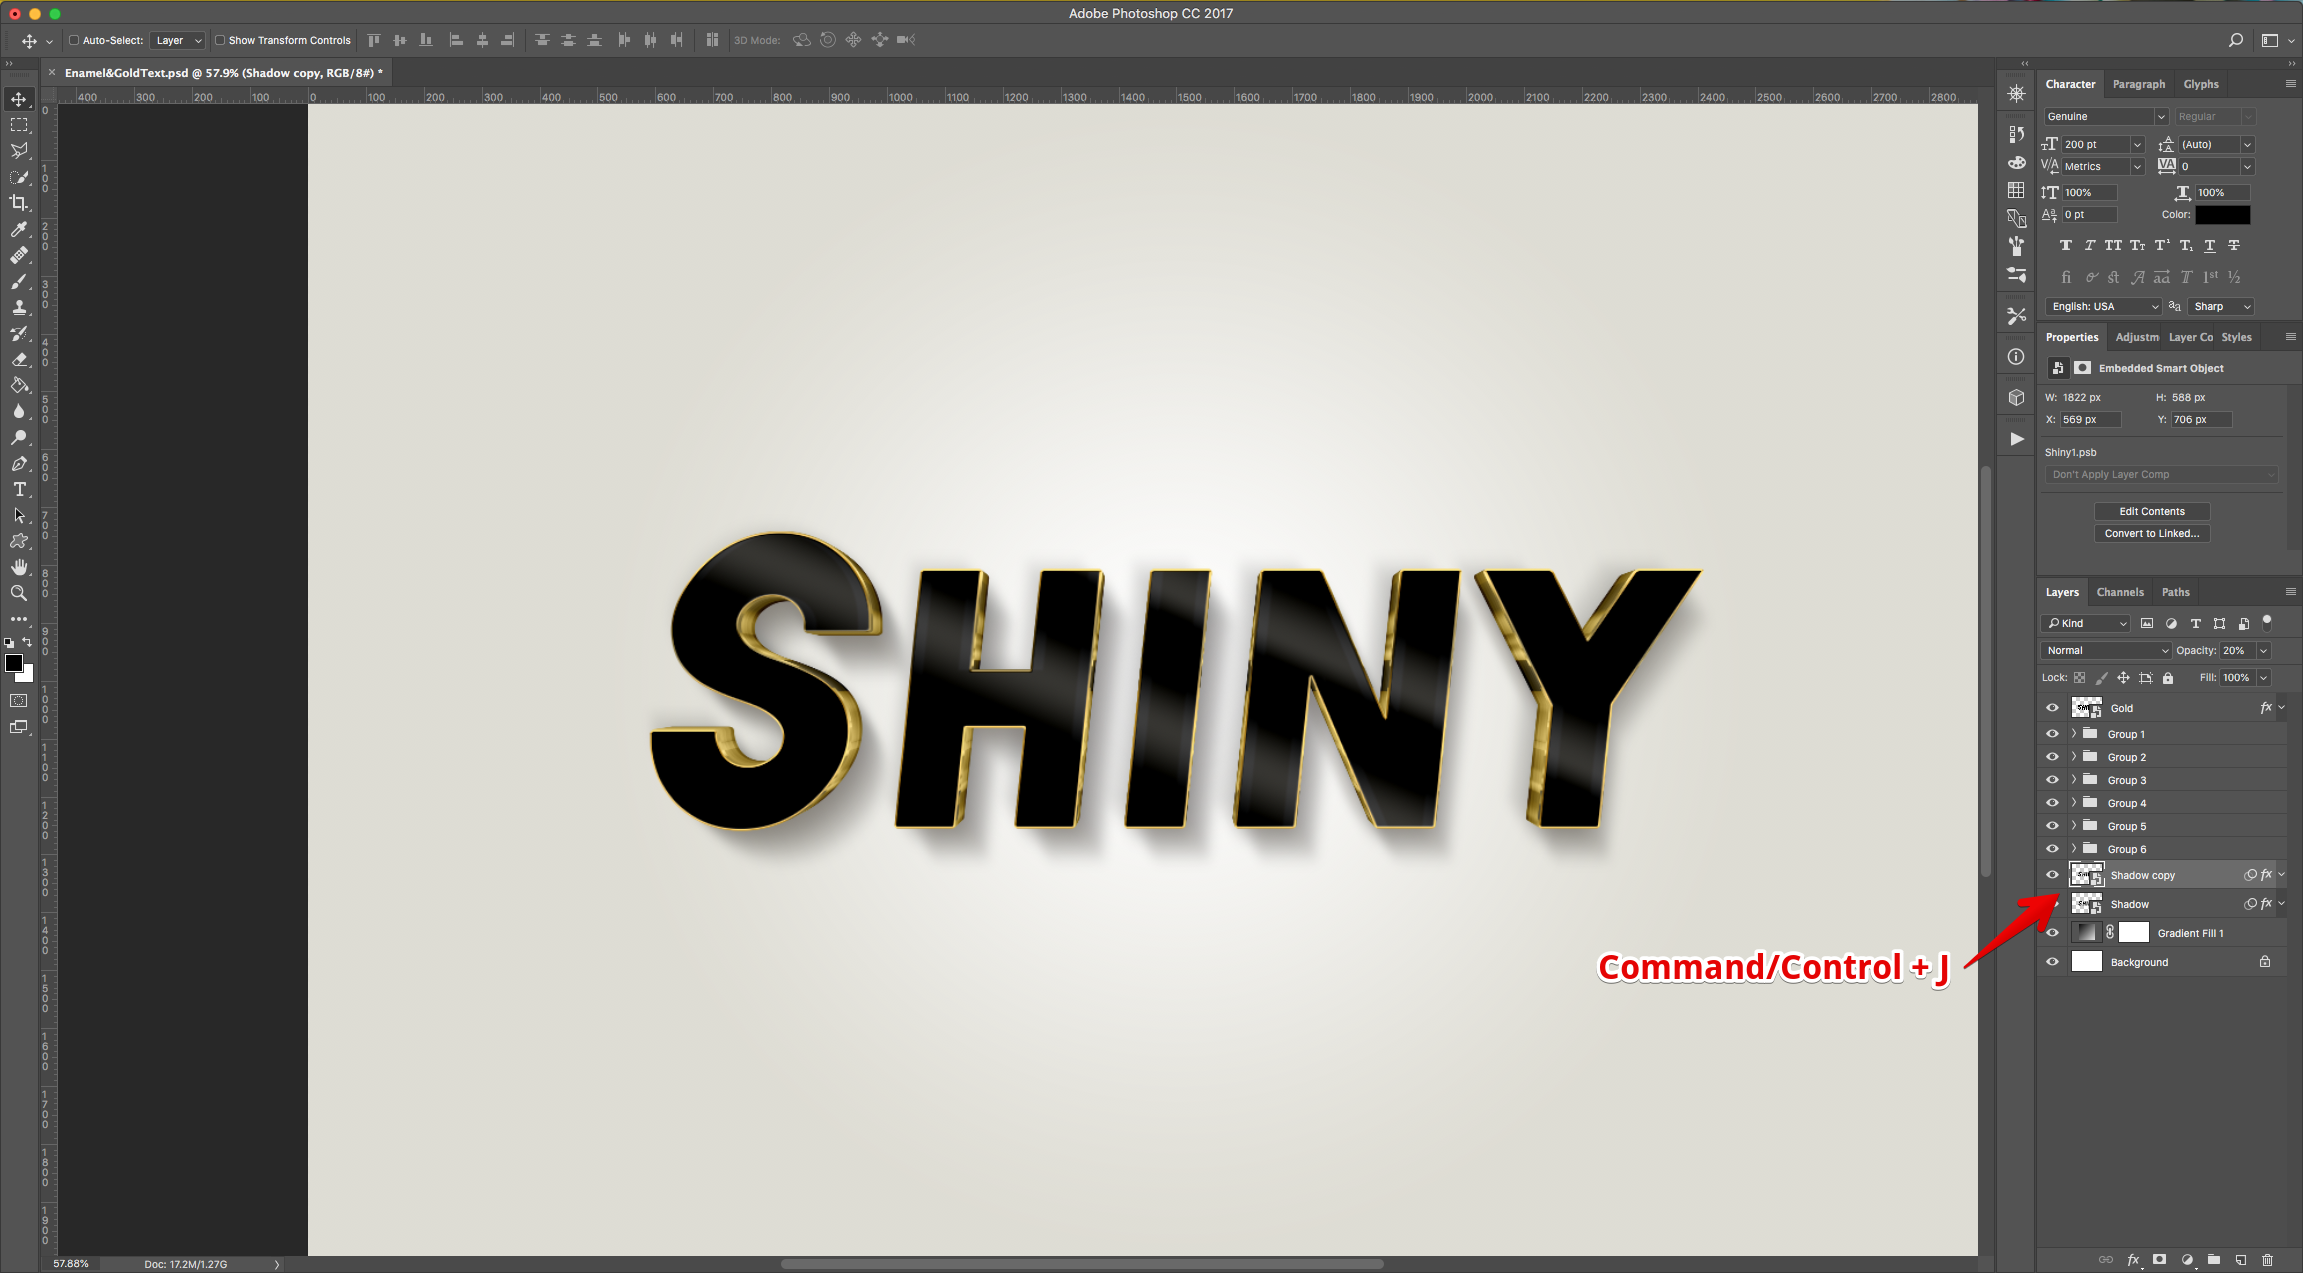
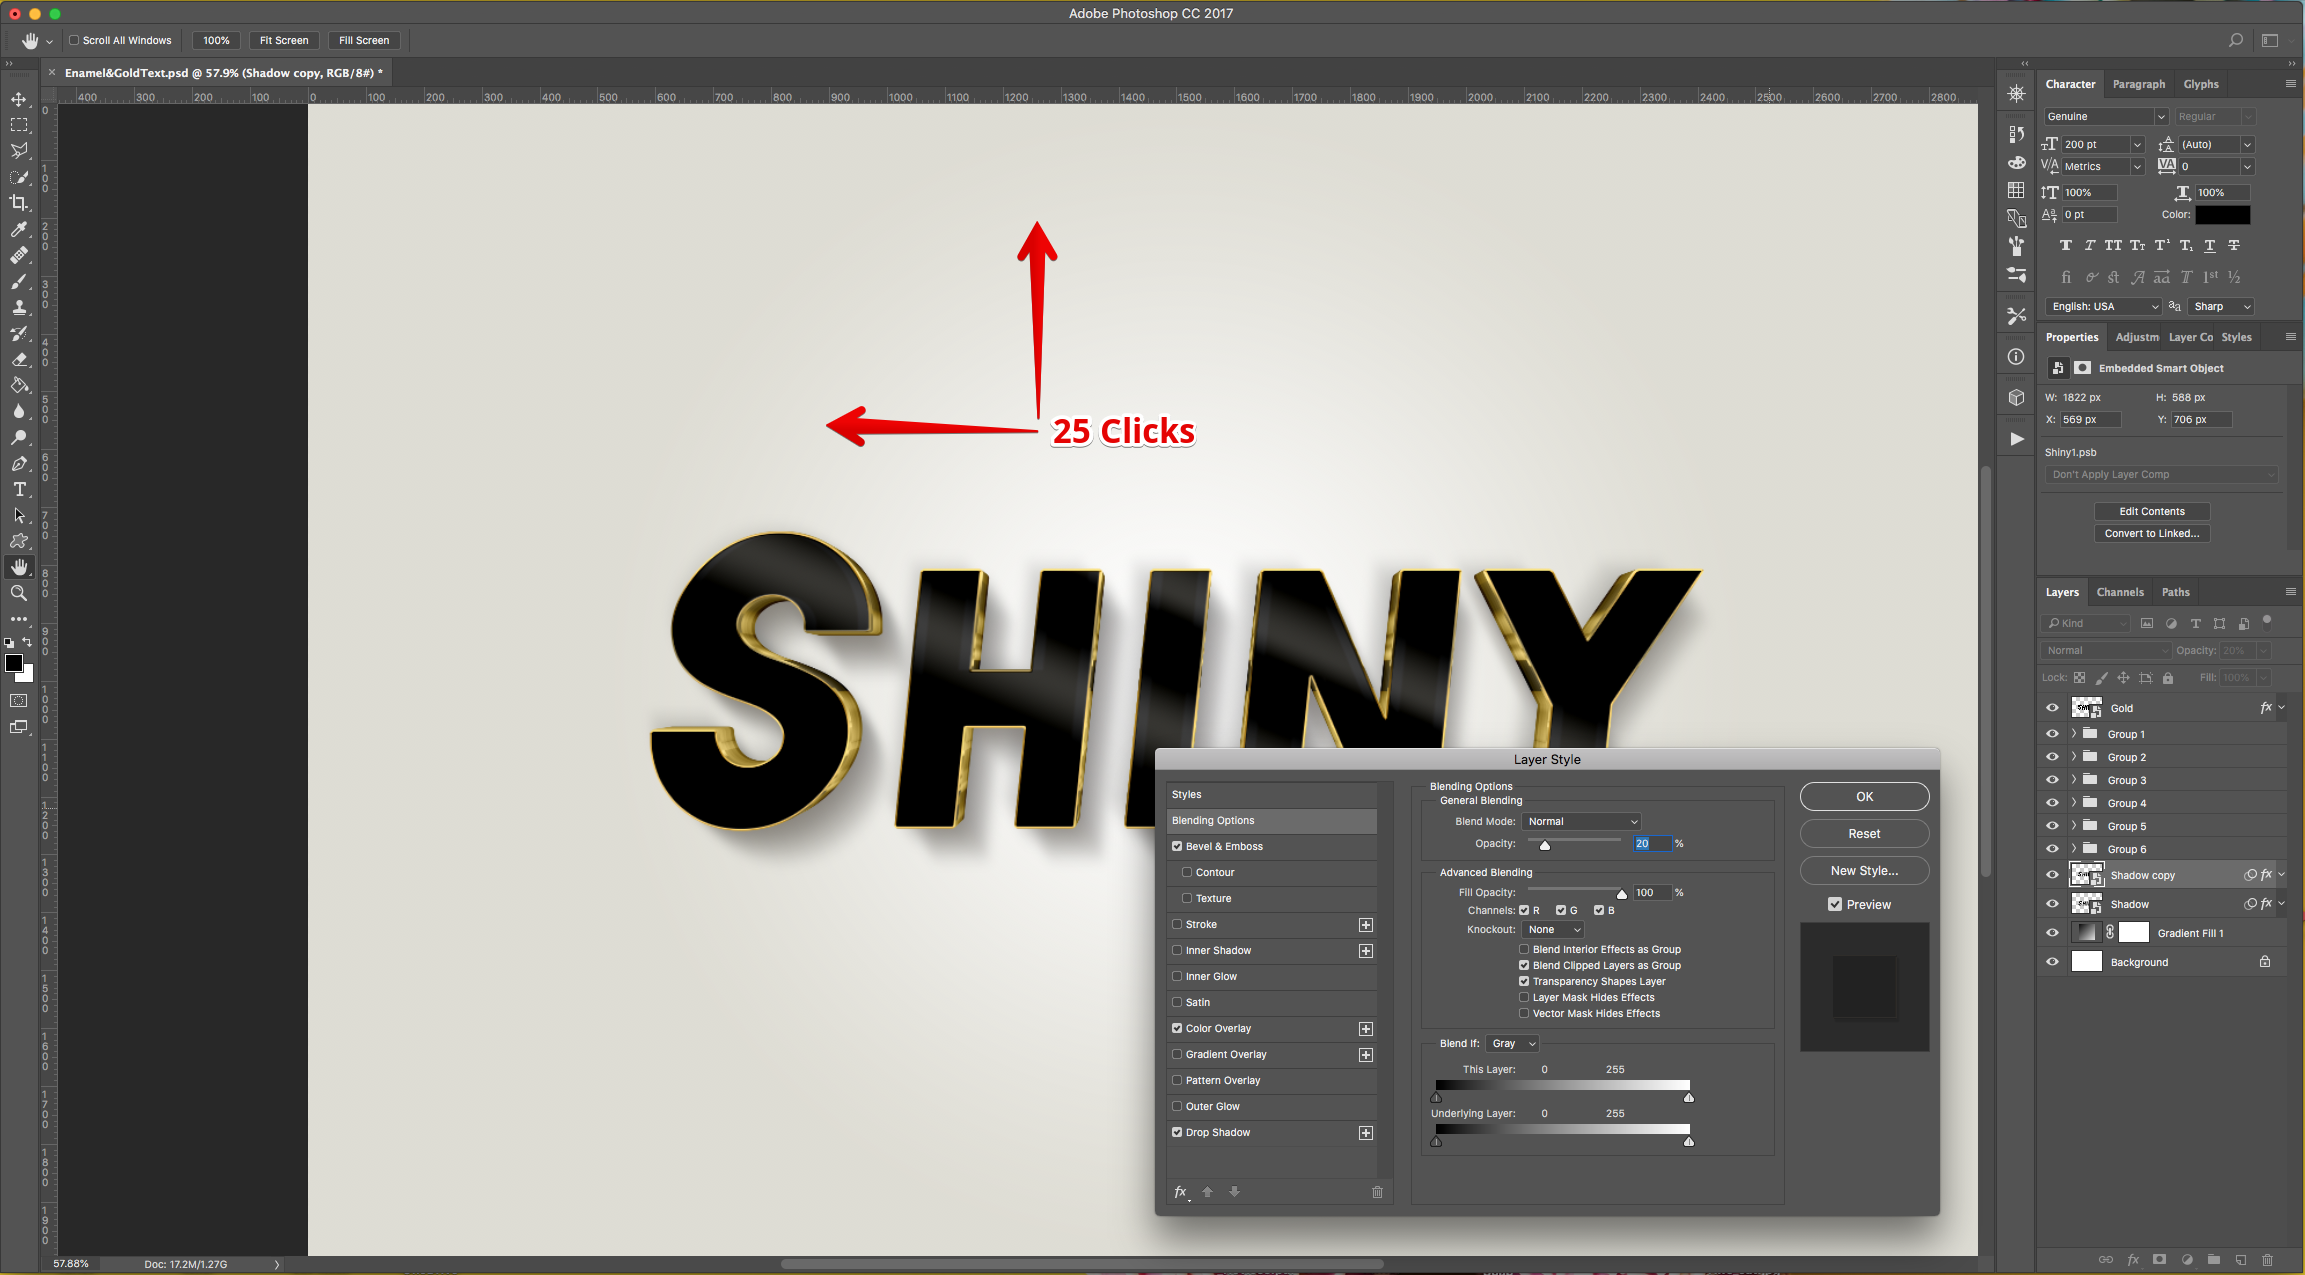
24 - Duplicate the Layer (Command/Control + J), move it about 25 clicks Up and 25 clicks Left. Double-click on its thumbnail and change “Blending Mode” Opacity value to 20%.
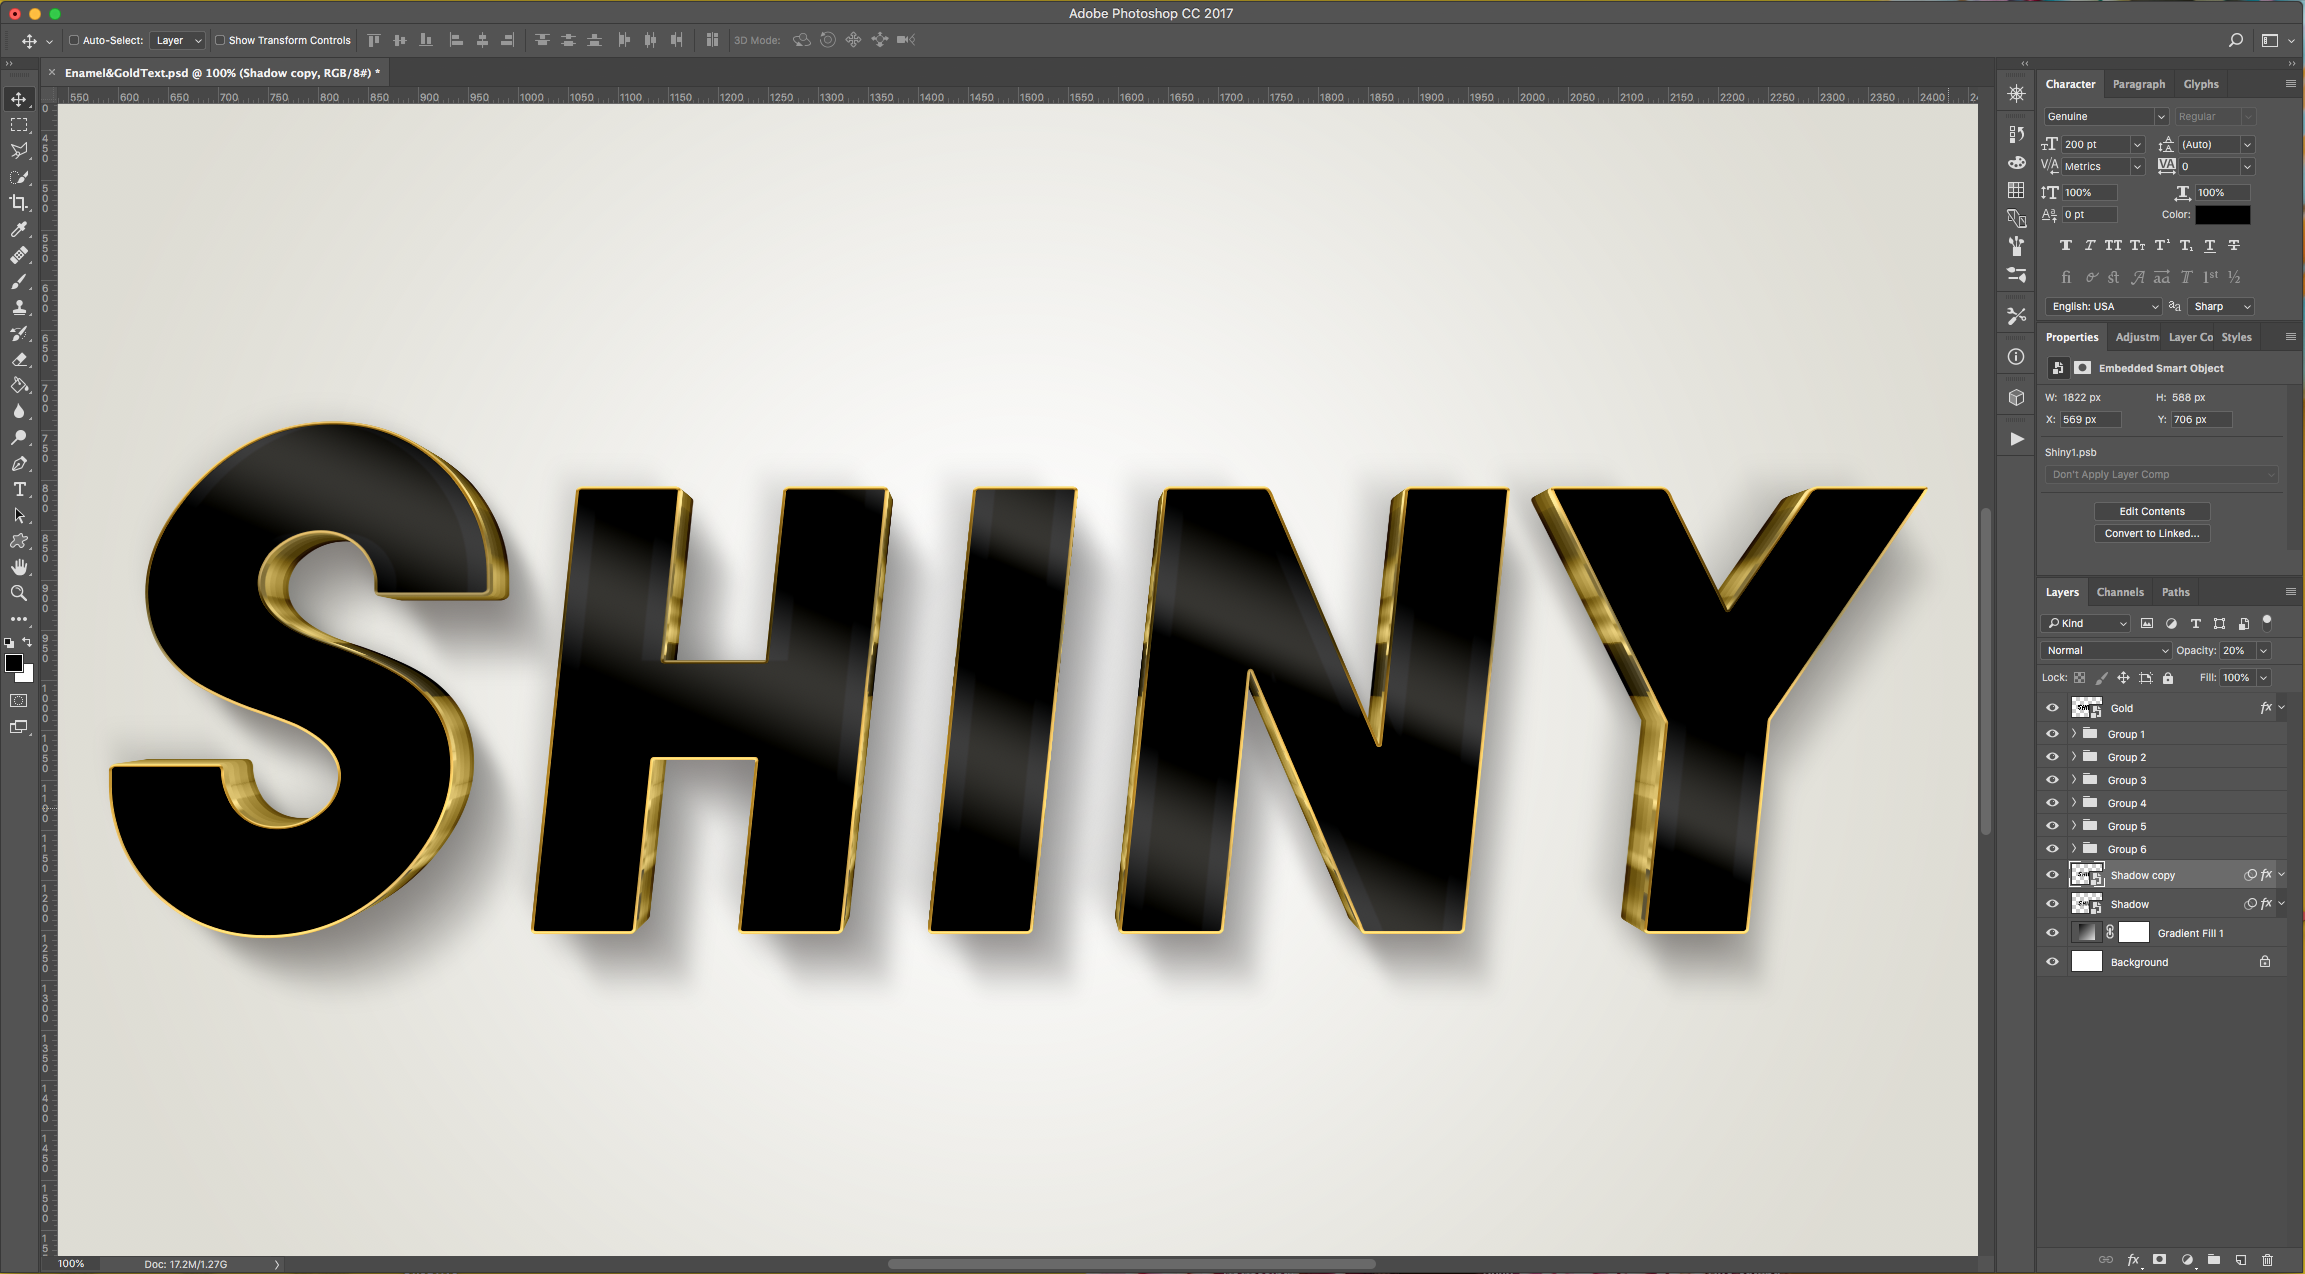
25 - Check out your Artwork! You can change the text by double-clicking on the “Gold” layer and may add a Logo too.
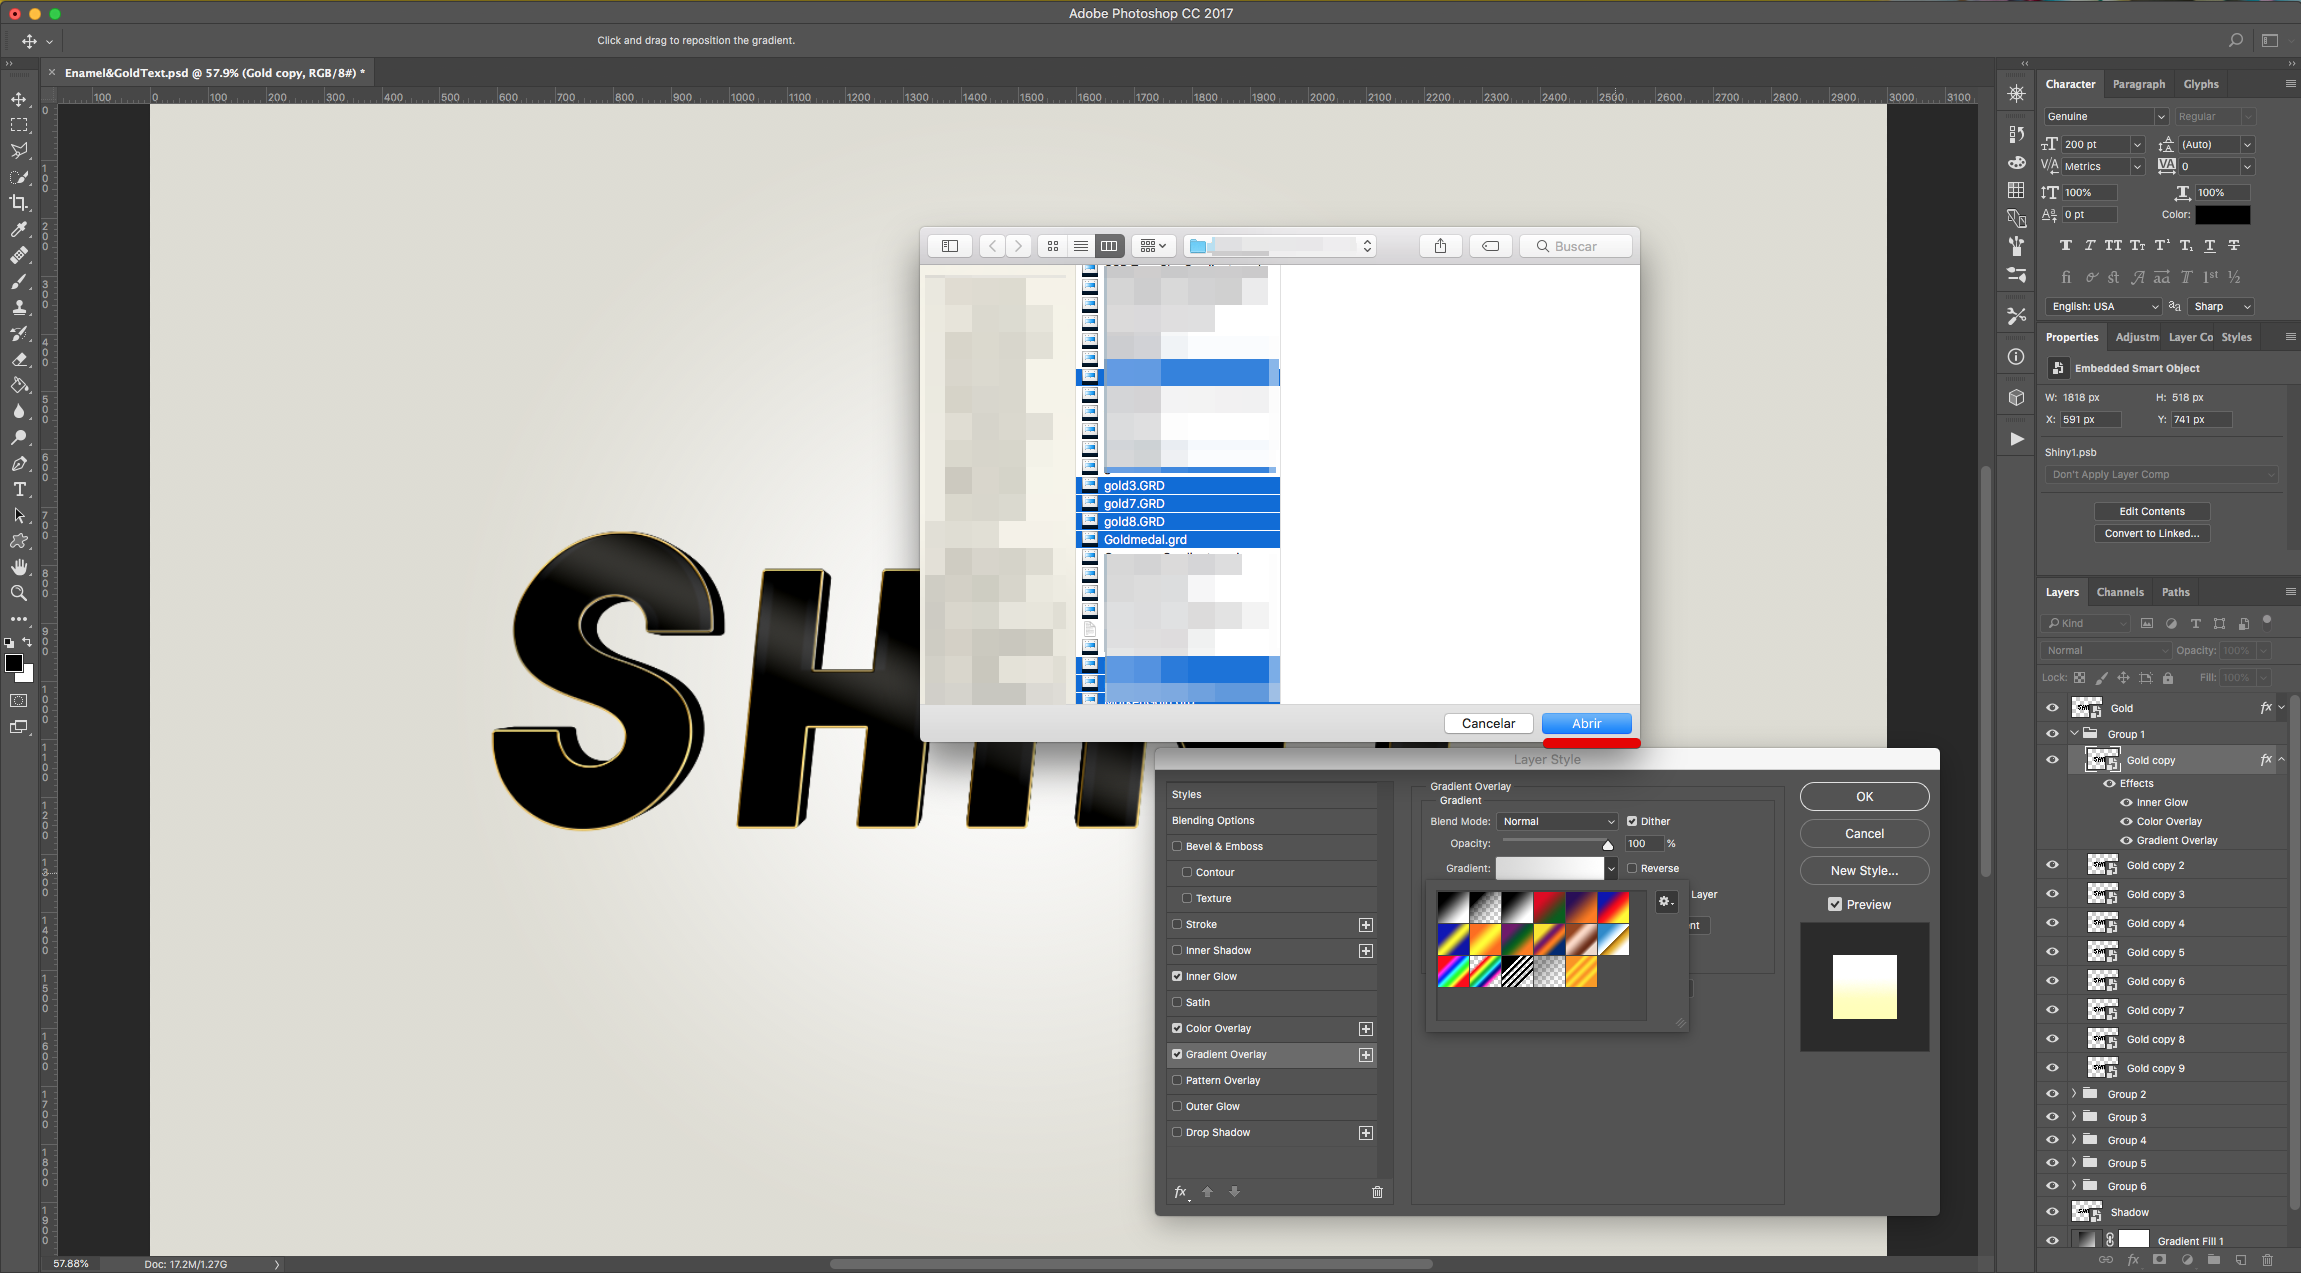
* To load your “Gold Gradients” click on the Small Gear icon on the right side of the “Gradients” and choose “Load Gradients…” Navigate to where you saved the ones you want to use, select the file/files and click “Open”.
1 - In Photoshop, create a “New” 3000 by 1999 Pixels @300 dpi document.
2 - Create a “New Gradient Fill Layer” by clicking on the small Black and White icon at the bottom of the “Layers Panel” and choosing “Gradient” from the options. Make it a “Radial Gradient” with a 90° Angle, 100 % Scale from #deddd4 @ 0% to (white) #ffffff @ 100%. Make sure that the “Reverse” and “Align with Layer” boxes are checked.
3 - Create a “New Layer” on top of everything by clicking on the small button at the bottom of the “Layers Panel”. Name it “Hide”.
4 - To fill it, go to Edit > Fill… (Shift + F5) and select the color you want (we used “Foreground Color”). Or click “Command/Control + Delete) to fill it with the “Background Color”.
5 - Select the “Type Tool” (T), choose your Font (we used “Genuine”) and type your text. Make it as big as needed, center it and fill it with Black.
6 - Select the “Text” and “Hide” layers using the “Shift” key, right-click on top and choose “Convert to Smart Object”. Then right-click again on top of the “Smart Object” and choose “Edit Contents”. This should open the “Smart Object” in another window.
7 - Drag the “Hide” Layer to the “Trash Can” at the bottom of the “Layers Panel” to delete it. “Save” the Document and close it to return to the original one. The changes should show.
8 - Change the name of the “Smart Object” Layer to “Gold”.
9 - Right-click on top of it and choose “Duplicate Layer”, choose As “Action” on the dialog window and hit “OK”
10 - Make sure the “Actions Panel” is open by going to Window > Actions. Then, in the Panel click the Small Folder icon to “Create a New Set”. Name it “Shrink” and “Create a New Action” named “Shrink” inside the folder. Click “Record” to start creating your “Action”.
11 - Make sure that the “Action” Layer is selected and click “Command/Control + J” to create a “Duplicate”. Go to Layer > Arrange > Send Backward. Enter “Free Transform” (Command/Control + T) and set the “W” value to 99,93% and “H” value to 99,90%. Hit “Enter” to “Commit Changes”. In the “Actions Panel” click the “Stop Recording” button at the bottom of the panel and drag the “Action” and “Action Copy” Layers to the Trash.
12 - Now, click the “Play Action” button until you create 55 copies of the “Gold” layer with the “Shrink Action”.
13 - Select the “Gold copy 55” layer, “Duplicate” it, name it “Shadow” and place it under all the “Gold” copies.
14 - Select (“Shift” key) from “Gold copy” to “Gold copy 9” and “Group” them together by clicking the Small Folder icon at the bottom of the “Layers Panel”. Repeat with “Gold copy 10” to “Gold copy 19” and create another Group. Then with “Gold copy 20” to “Gold copy 29”, with “Gold copy 30” to “Gold copy 44”, with “Gold copy 45” to “Gold copy 50” and finally with “Gold copy 51” to “Gold copy 55”. You should have 6 “Group” Folders.
15 - Double-click on the “Gold” layer thumbnail to apply the following “Layer Styles”:
Bevel & Emboss: (Gloss Contour: Ring - Double)
Stroke: (Fill with Gradient with the following colors: Location 0% - Color #f7c753, Location 6% - Color #f76b37, Location 15% - Color #f7c753, Location 25% - Color #c59f44, Location 35% - Color #f7c753, Location 50% - Color #c59f44, Location 55% - Color #7a6637, Location 70% - Color #c59f44, Location 75% - Color #f7c753, Location 85% - Color #c59f44, Location 90% - Color #7a6b37 and Location 100% - Color #f7c753).
Satin:
Color Overlay:
Gradient Overlay: (Location 0% - Color #000000, Location 10% - Color #010202, Location 35% - Color #737373, Location 60% - Color #010202, Location 75% - Color #737373, Location 100% - Color #010202).
16 - Show the contents of the “Group 1” Folder by clicking the small arrow on its left side and select the “Gold copy” layer and double-click on its thumbnail to apply the following “Layer Styles”:
Inner Glow: (#ffffff)
Color Overlay: (#f9df85)
Gradient Overlay: (*)
17 - Right-click on top of the thumbnail of the layer you just worked with and choose “Copy Layer Style”. Select the rest of the layers in the “Group” Folder using the “Shift” key, right-click on top and choose “Paste Layer Style”. You can close the Folder now.
18 - Show the contents of the “Group 2” Folder and select the “Gold copy 10” layer . Double-click on its thumbnail to apply the following “Layer Styles”: (You may need to “Paste Layer Style” to start with the ones used in the previous “Group”)
Inner Glow: (#ffffff) Change the “Opacity” to 10%
Color Overlay: (#f9df85) Remains the same.
Gradient Overlay: Use the same “Gradient” but change the “Scale” to 150%
“Copy Layer Style”. Select the rest of the layers in the “Group” Folder using the “Shift” key, right-click on top and choose “Paste Layer Style”. You can close the Folder now.
Open the “Group 3” Folder, select the “Gold copy 20” layers and “Paste Layer Style”. Double-click on top of its thumbnail and change the “Inner Glow” Opacity value to 5%. “Copy Layer Style”. Select the rest of the layers in the “Group” Folder using the “Shift” key, right-click on top and choose “Paste Layer Style”. You can close the Folder now.
19 - Open the “Group 4” Folder, select the “Gold copy 30” layers and “Paste Layer Style”. Double-click on top of its thumbnail, delete or close the “Inner Glow” Style leaving the rest unchanged. “Copy Layer Style”. Select the rest of the layers in the “Group” Folder using the “Shift” key, right-click on top and choose “Paste Layer Style”. You can close the Folder now.
Open the “Group 5” Folder, select the “Gold copy 45” layers and “Paste Layer Style”. Double-click on top of its thumbnail, to apply the following “Layer Styles”:
Inner Glow: (#000000)
Leave “Color Overlay” and “Gradient Overlay” unchanged.
20 - Open the “Group 6” Folder, select the “Gold copy 51” layers and “Paste Layer Style”.
Change the “Inner Glow” Opacity value to 20% leaving the rest unchanged. “Copy Layer Style”. Select the rest of the layers in the “Group” Folder using the “Shift” key, right-click on top and choose “Paste Layer Style”. You can close the Folder now.
21 - Select the “Shadow” layer, enter “Free Transform” (Command/Control + T) and increase the “X” value by 20 px and “Y” value by 30 px. Hit “Enter” to “Commit Changes”.
22 - Double-click on its thumbnail to apply the following “Layer Styles”:
Blending Options:
Color Overlay: (#180e02)
Drop Shadow:
23 - Go to Filter > Blur > Gaussian Blur… and use an 8 Pixel “Radius”. Then, go to Filter > Blur > Motion Blur and use a -60° Angle and a “Distance” of 85 pixels.
24 - Duplicate the Layer (Command/Control + J), move it about 25 clicks Up and 25 clicks Left. Double-click on its thumbnail and change “Blending Mode” Opacity value to 20%.
25 - Check out your Artwork! You can change the text by double-clicking on the “Gold” layer and may add a Logo too.
* To load your “Gold Gradients” click on the Small Gear icon on the right side of the “Gradients” and choose “Load Gradients…” Navigate to where you saved the ones you want to use, select the file/files and click “Open”.
by @lornacane


